


Topics Last Week
Showing topics, images, events and files posted in for the last 7 days.
- Today
-
 Sedan racing
-
 Sticky pistons on 4-screw round tops. Not ideal. About the only things that would account for that would be a) severely misaligned nozzles underneath or b) mismatched domes/pistons. You can check for the mismatching between the domes and pistons by taking the domes off, pulling the pistons out of the carbs and then sliding the pistons into the domes and see if they move smooth and free (while the dome and piston are in your hand, not mounted to the carb body). And you can check for misaligned nozzles/needles by either removing the needles out of the pistons, or by loosening up the nozzle alignment nuts on the under sides the carbs and seeing if the pistons move free while the nozzles are way loose.
 -
 I have also used a plumb laser to do frame measurements on my Z. I began by taping together a bunch of poster board sheets to form a single big rectangular sheet that was long enough to go from bumper to bumper and wide enough to just fit between the inner sidewalls of the tires. Once I had it in position under the car, I taped it to the garage floor so that it wouldn't shift while I was lying on top of it taking sightings on the various targets. Once I got the laser aligned with a target, I used a Sharpee to make an 'X' mark on the sheet (along with a little note to record what target it was for). After I had marks for all of the targets, I pulled the sheet from under the car and laid it out on my workshop floor so that I could make the various target-to-target measurements with a tape measure. This system works pretty well for most the undercar measurements. The car can be sitting on its tires, but it needs to be elevated a bit (I used wheel dollies) so that you'll have enough room to slide underneath. However, it won't help you with the fore-aft locations of the shock towers unless you remove the struts and sight the laser down through the hole in the centre of each shock tower cap (the procedure for this is to put a piece of wide masking tape across the hole, trace the hole outline with a pencil, mark two intersecting centrelines, and then poke a small hole at the centre point for the laser to shine through). You'll also need to set up some kind of the platform above the shock towers (I used a length of 1 x 6 lumber) to give you a perch for the laser to sit on. Additional requirements: You'll need to get the car up on axle stands. Don't do any of your measurements until the car is up on the axle stands. You'll need to get the lower control arms out of the way b/c they'll block the laser beam from reaching the floor. This isn't too hard to do at the front (the LCA's can be folded up to a near-vertical position after the struts have been removed). I'm not sure whether this can be accomplished quite so conveniently at the rear (I didn't try). It might be necessary to actually remove the lower control arm from the car ☹️.
 - Yesterday
-
 Hi cgsheen1! Thanks for the recommendations. I am running the latest version of Microsquirt, 440cc Bosch injectors, Spartan 3 v2, crank 36-1 wheel with HALL sensor, LM7 truck coils with batch firing, AZC oil pan. I will try making Microsquirt work with the turbo (no sequential ignition). I have only one output left (relay) which I can use for an electric fan, for ex. I was aiming for 8-10 lbs of boost to play it safe and keeping my stock rear diff/half-shafts alive. I looked up some parts from rockauto and here is a list if it works? EXEDY 06030 clutch kit, 1975 2+2 Flywheel: AMS AUTOMOTIVE / RHINOPAC 167304, for 2+2 model Throwout bearing, WJB / INMOTION PARTS WRDNE01576C (any manufacturer preference?) Hopefully, if the car parts are for 2+2 model, I am not going to run into any issues with the fitment/clutch fork throw. I just installed a brand new master and slave clutch cylinders (for my 280z 1976 model). Will this create a problem? (I checked the part numbers, they are the same for 76 and 75, I think I should be good here). I started a thread here on hybridz dealing with my project: https://forums.hybridz.org/topic/136053-76-280z-microsquirt-project/ Thanks! Den
 -
 I have no idea if I did or not, but feel free to copy it over there, or maybe @Mike can duplicate the post there.
 -
Even though you put a ton of work into fixing up your old garage, I guess it wasn't too difficult to leave it behind in return for a clean, modern garage already equipped with a good floor, good lighting and three bays (not to mention a separate, two-level barn for storing panels and parts. 👍
-
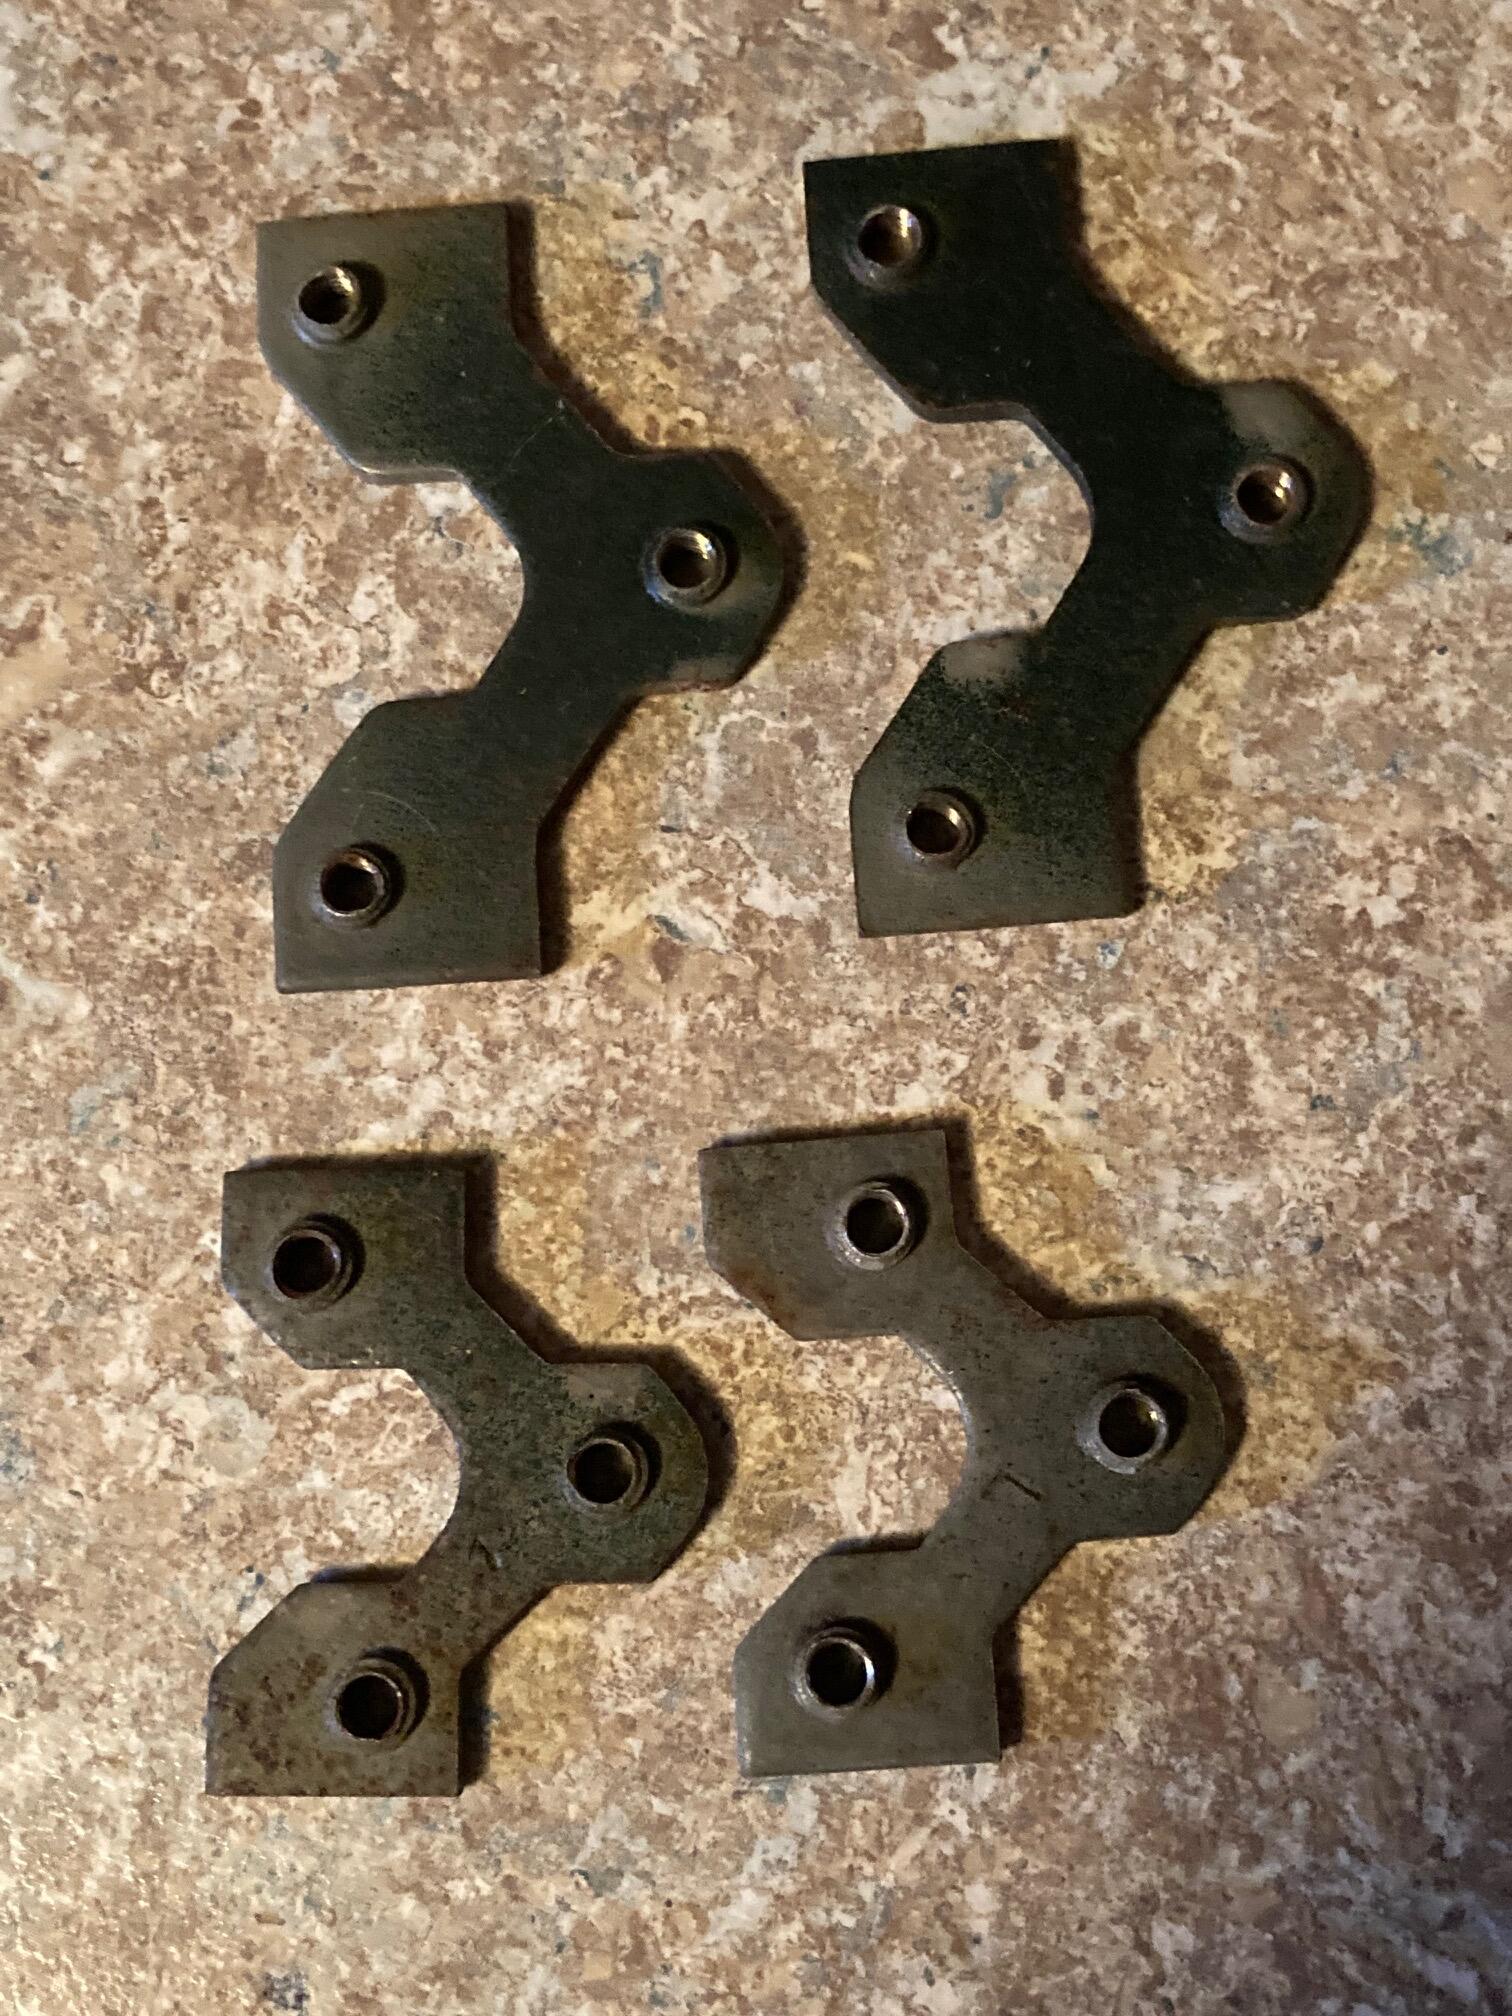
 They have a hinge mount plate on the inside that will fall when the bolts are removed.
-
Actually, because of safety, some organizing bodies forbid chest straps without something to hold the shoulder belts from slipping out.
-
 I appreciate the explanation and truly feel your pain doing this in the vehicle.
 - Last week
-
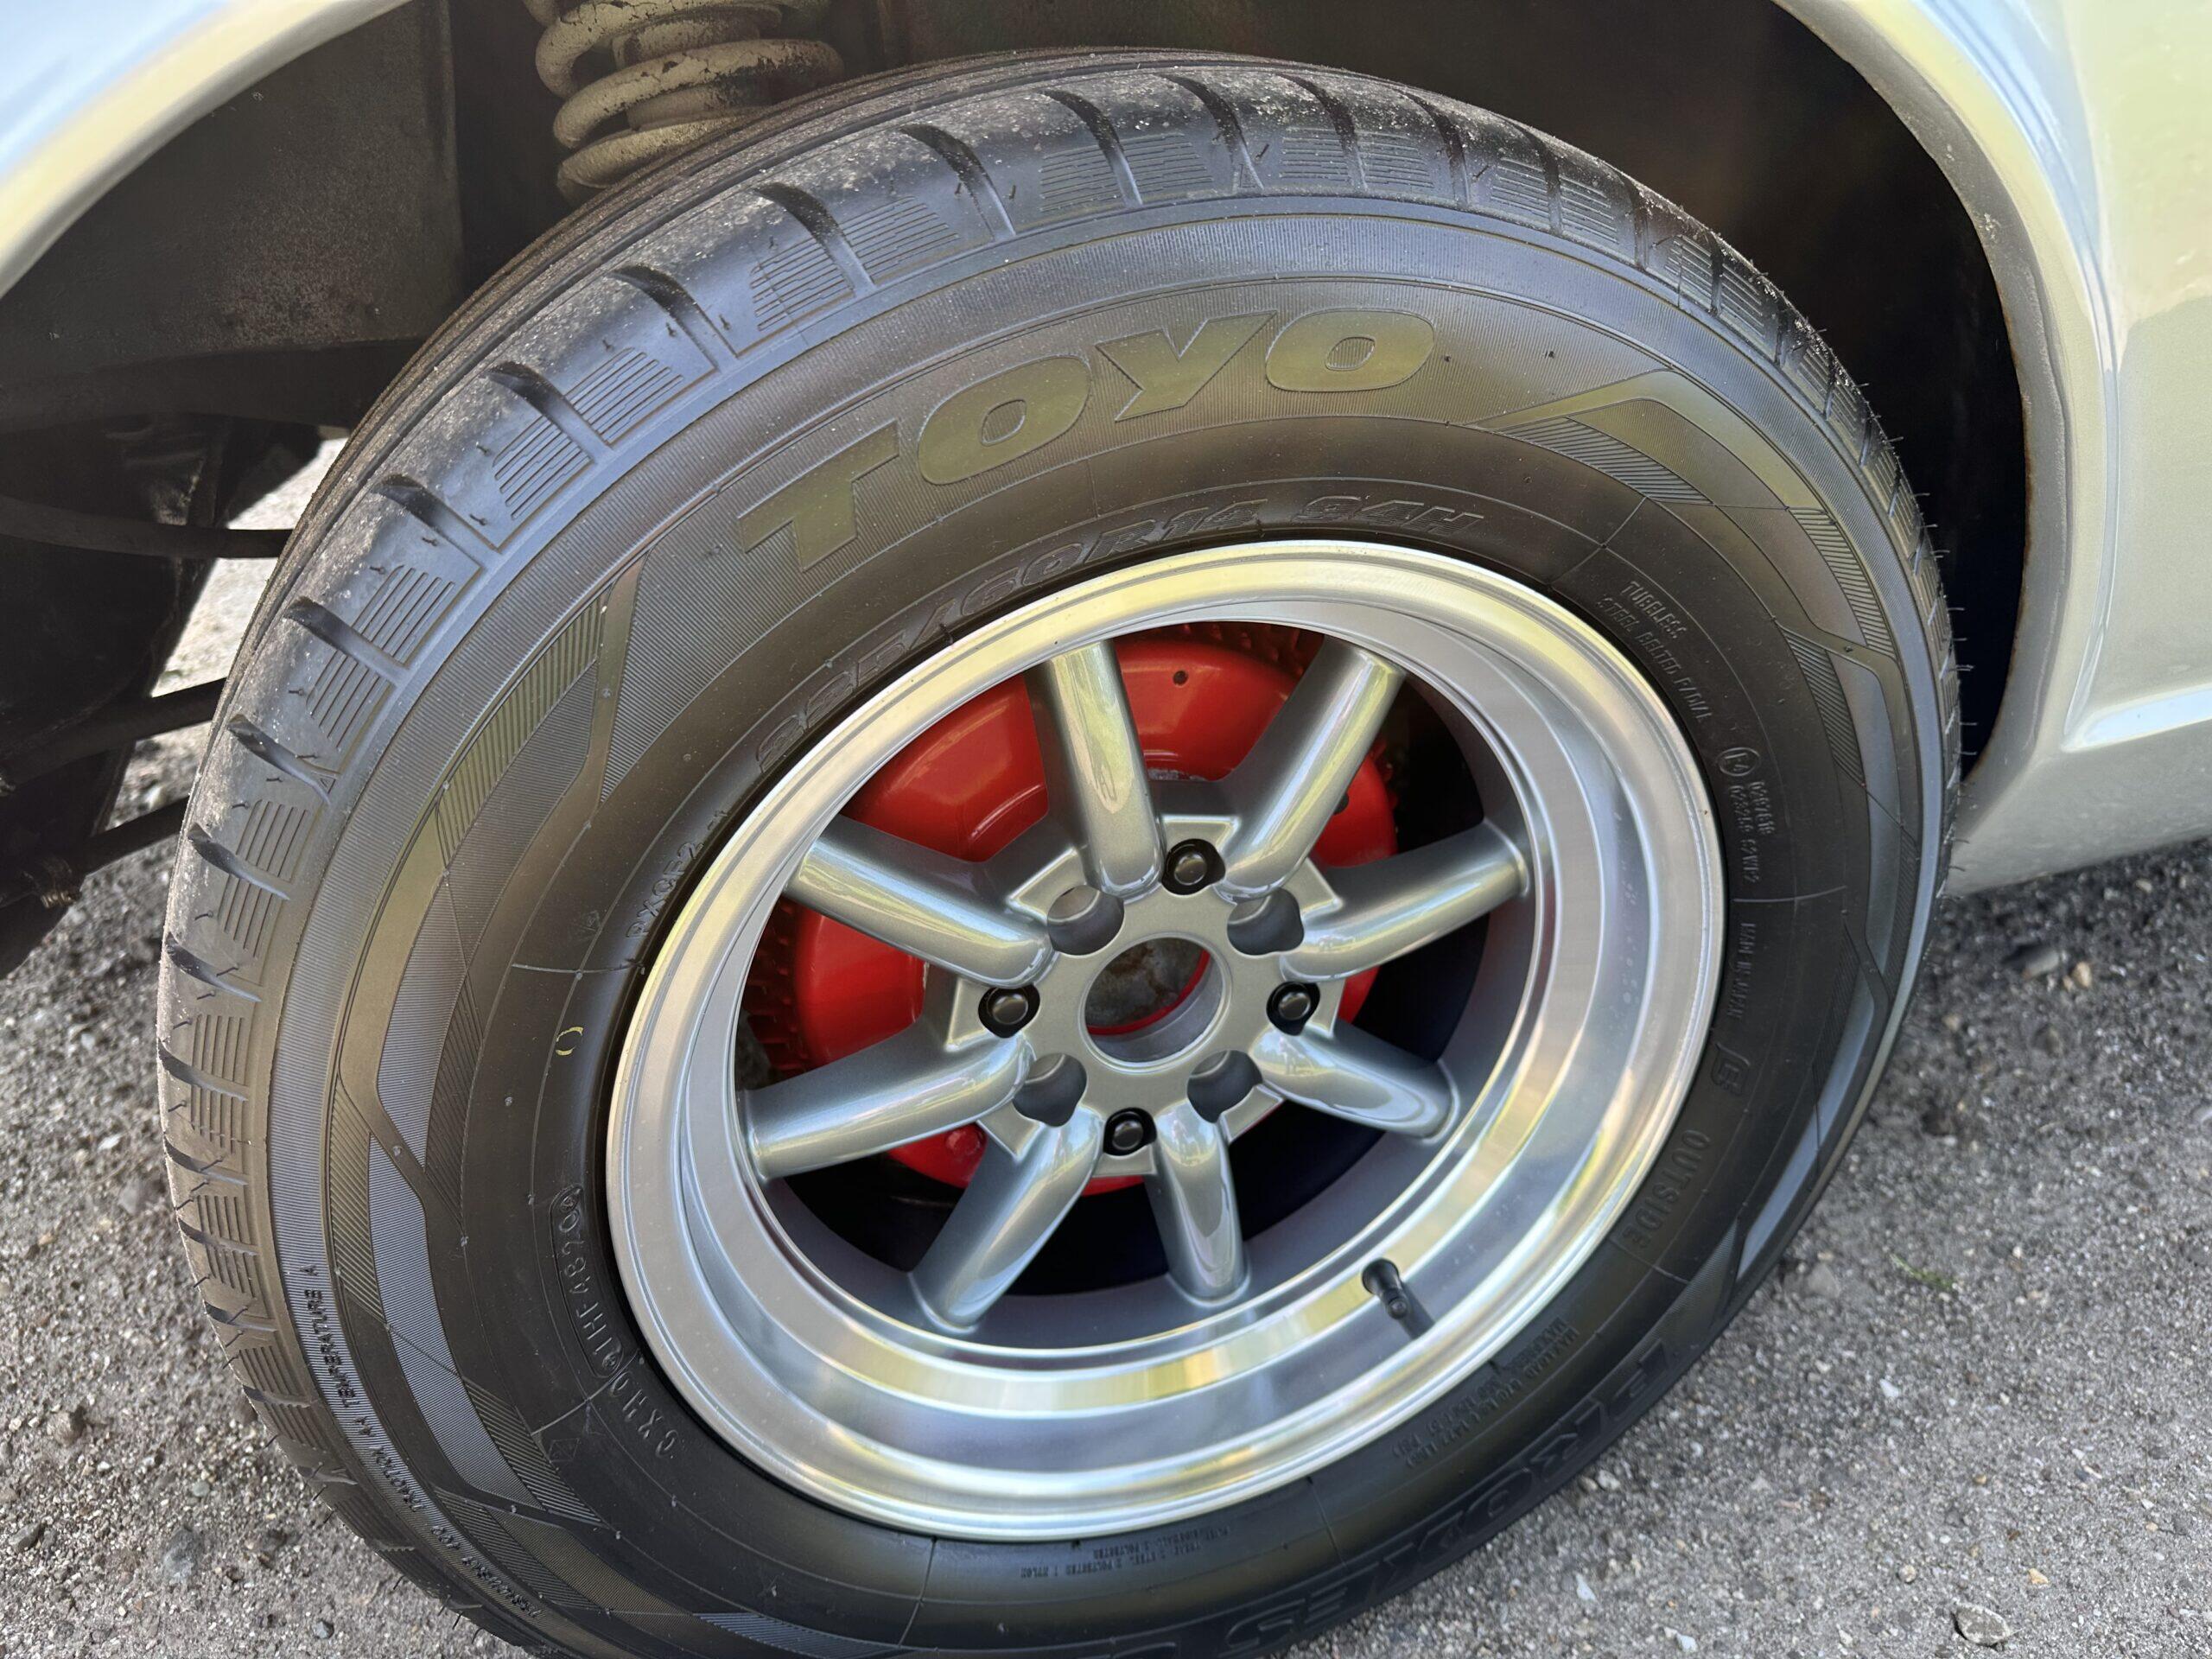
 Bit late to the party but I believe my 280z came with the same or allmost the same wheels. Don’t know if they are modified as I haven’t taken the wheels off yet but I must say they look pretty good under my silver Z. Attached is one of the pictures from the auction I bought the car from. The seller also included the original set of wheels but I prefer these. Tire size is 225/60R14 in the rear and 195/70R14 in the front.
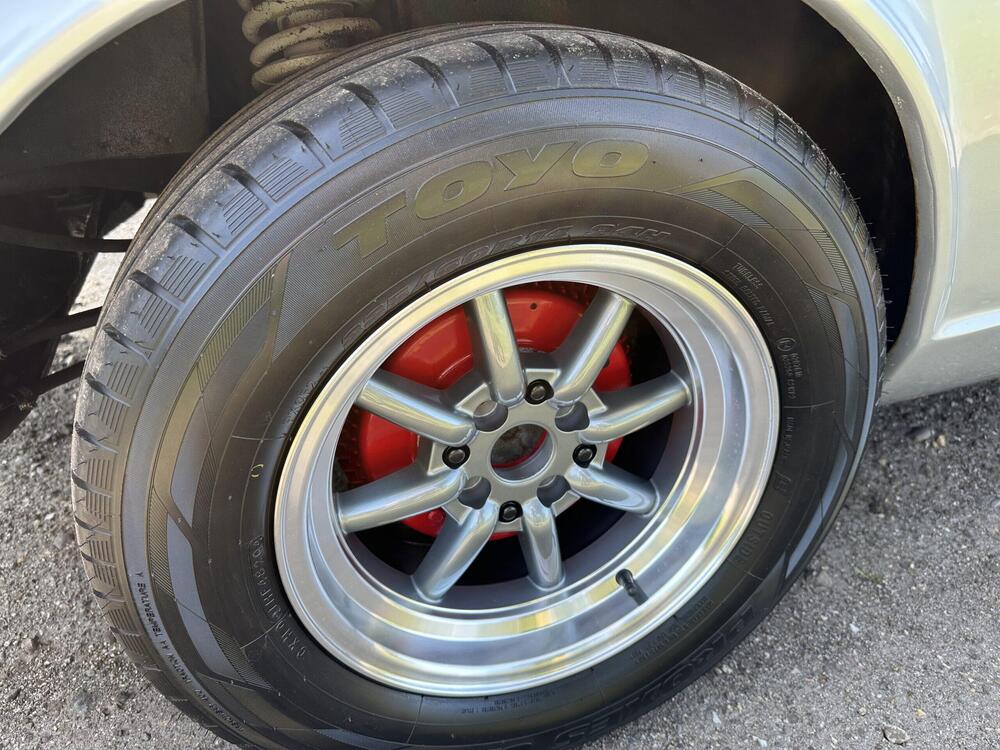
-
 @Patcon Having said that, I just looked through the excellently-researched 'Vintage Z Restoration Program Historical Compendium' put together by Chris Wenzel @26th-Z and he too specifically quotes powder coating as having been used. From the Compendium: "Nissan literature talks briefly about updating some aspects of the 240Z. A 3-row radiator was used and the tire specification was updated. In an effort to provide more durability to suspension components they were powder coated "to factory colors" so as to "ensure that you will enjoy your 240Z's performance for years to come"." Obviously it's a quote from NMC USA's VZ Program sales literature, so I don't know if that was the reality or not, but the fact that the independent Japanese journalist who visited Pierre'Z in person reported the same thing might suggest something. Of course he could simply have been quoting the literature, I don't know. I've always found powder coating to be much too thick on such parts, and there's always an issue where the powder coating transitions to a wear/bearing/mounting surface. I've seen it peel away in those places, so I much prefer paint (as per original manufacturing). Inspection of a few VZ Program cars would probably settle the question as to what was actually applied on them.
 -

-
 Well done Ken. Perseverance par excellence! Dashboards are not fund to work on.
 -
 Understood Darom! If you decide you don’t need them and want to get rid of them, just shoot me a message. Thanks!
 -
 Hi, I don't think he will respond, but you can get your parts from: Z-Services.eu | Shop for Datsun 240Z, 260Z & 280Z I also have a lot of parts for Z's not specific for the 280z as this was never a euro car.. Oh and yes as my name says i'm from the Netherlands too.
 -
 Horror House on Highway Five (1985)
-
 Back to normal programming. This 240Z auction is ending today but it's already up to $23,000. Kind of surprising considering its unusual appearance. It does look clean though. https://bringatrailer.com/listing/1973-datsun-240z-293/
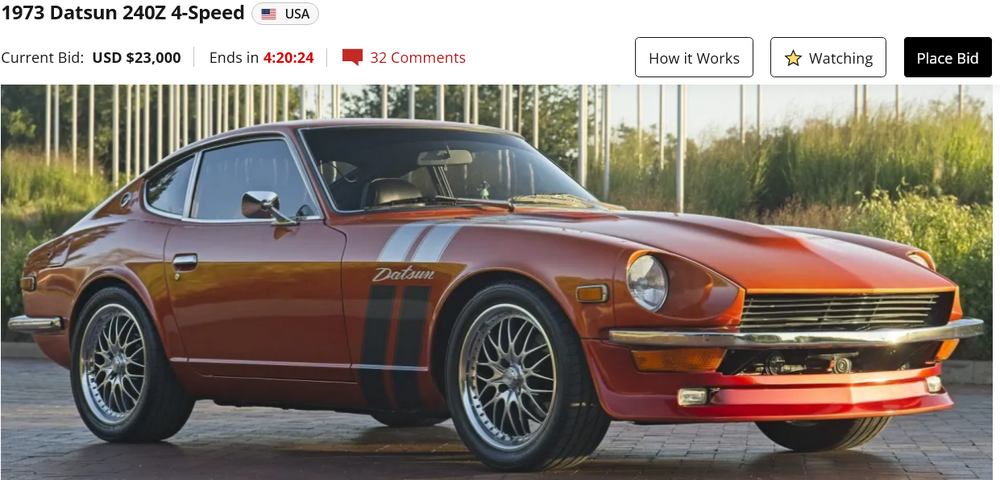
-

-
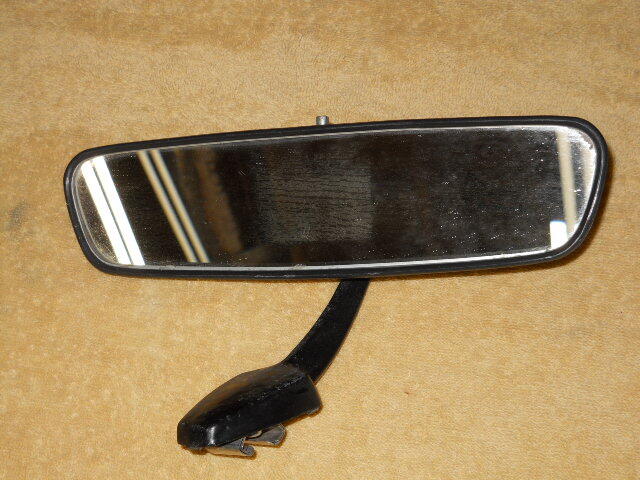
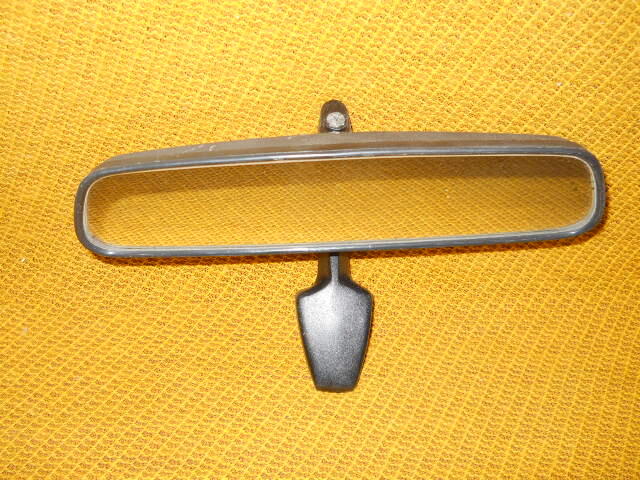
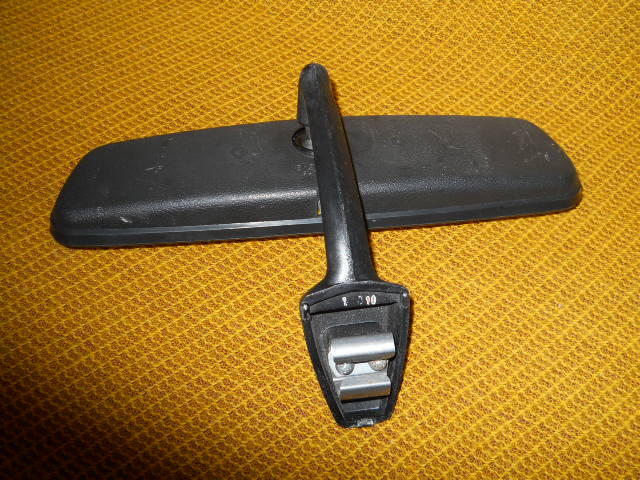
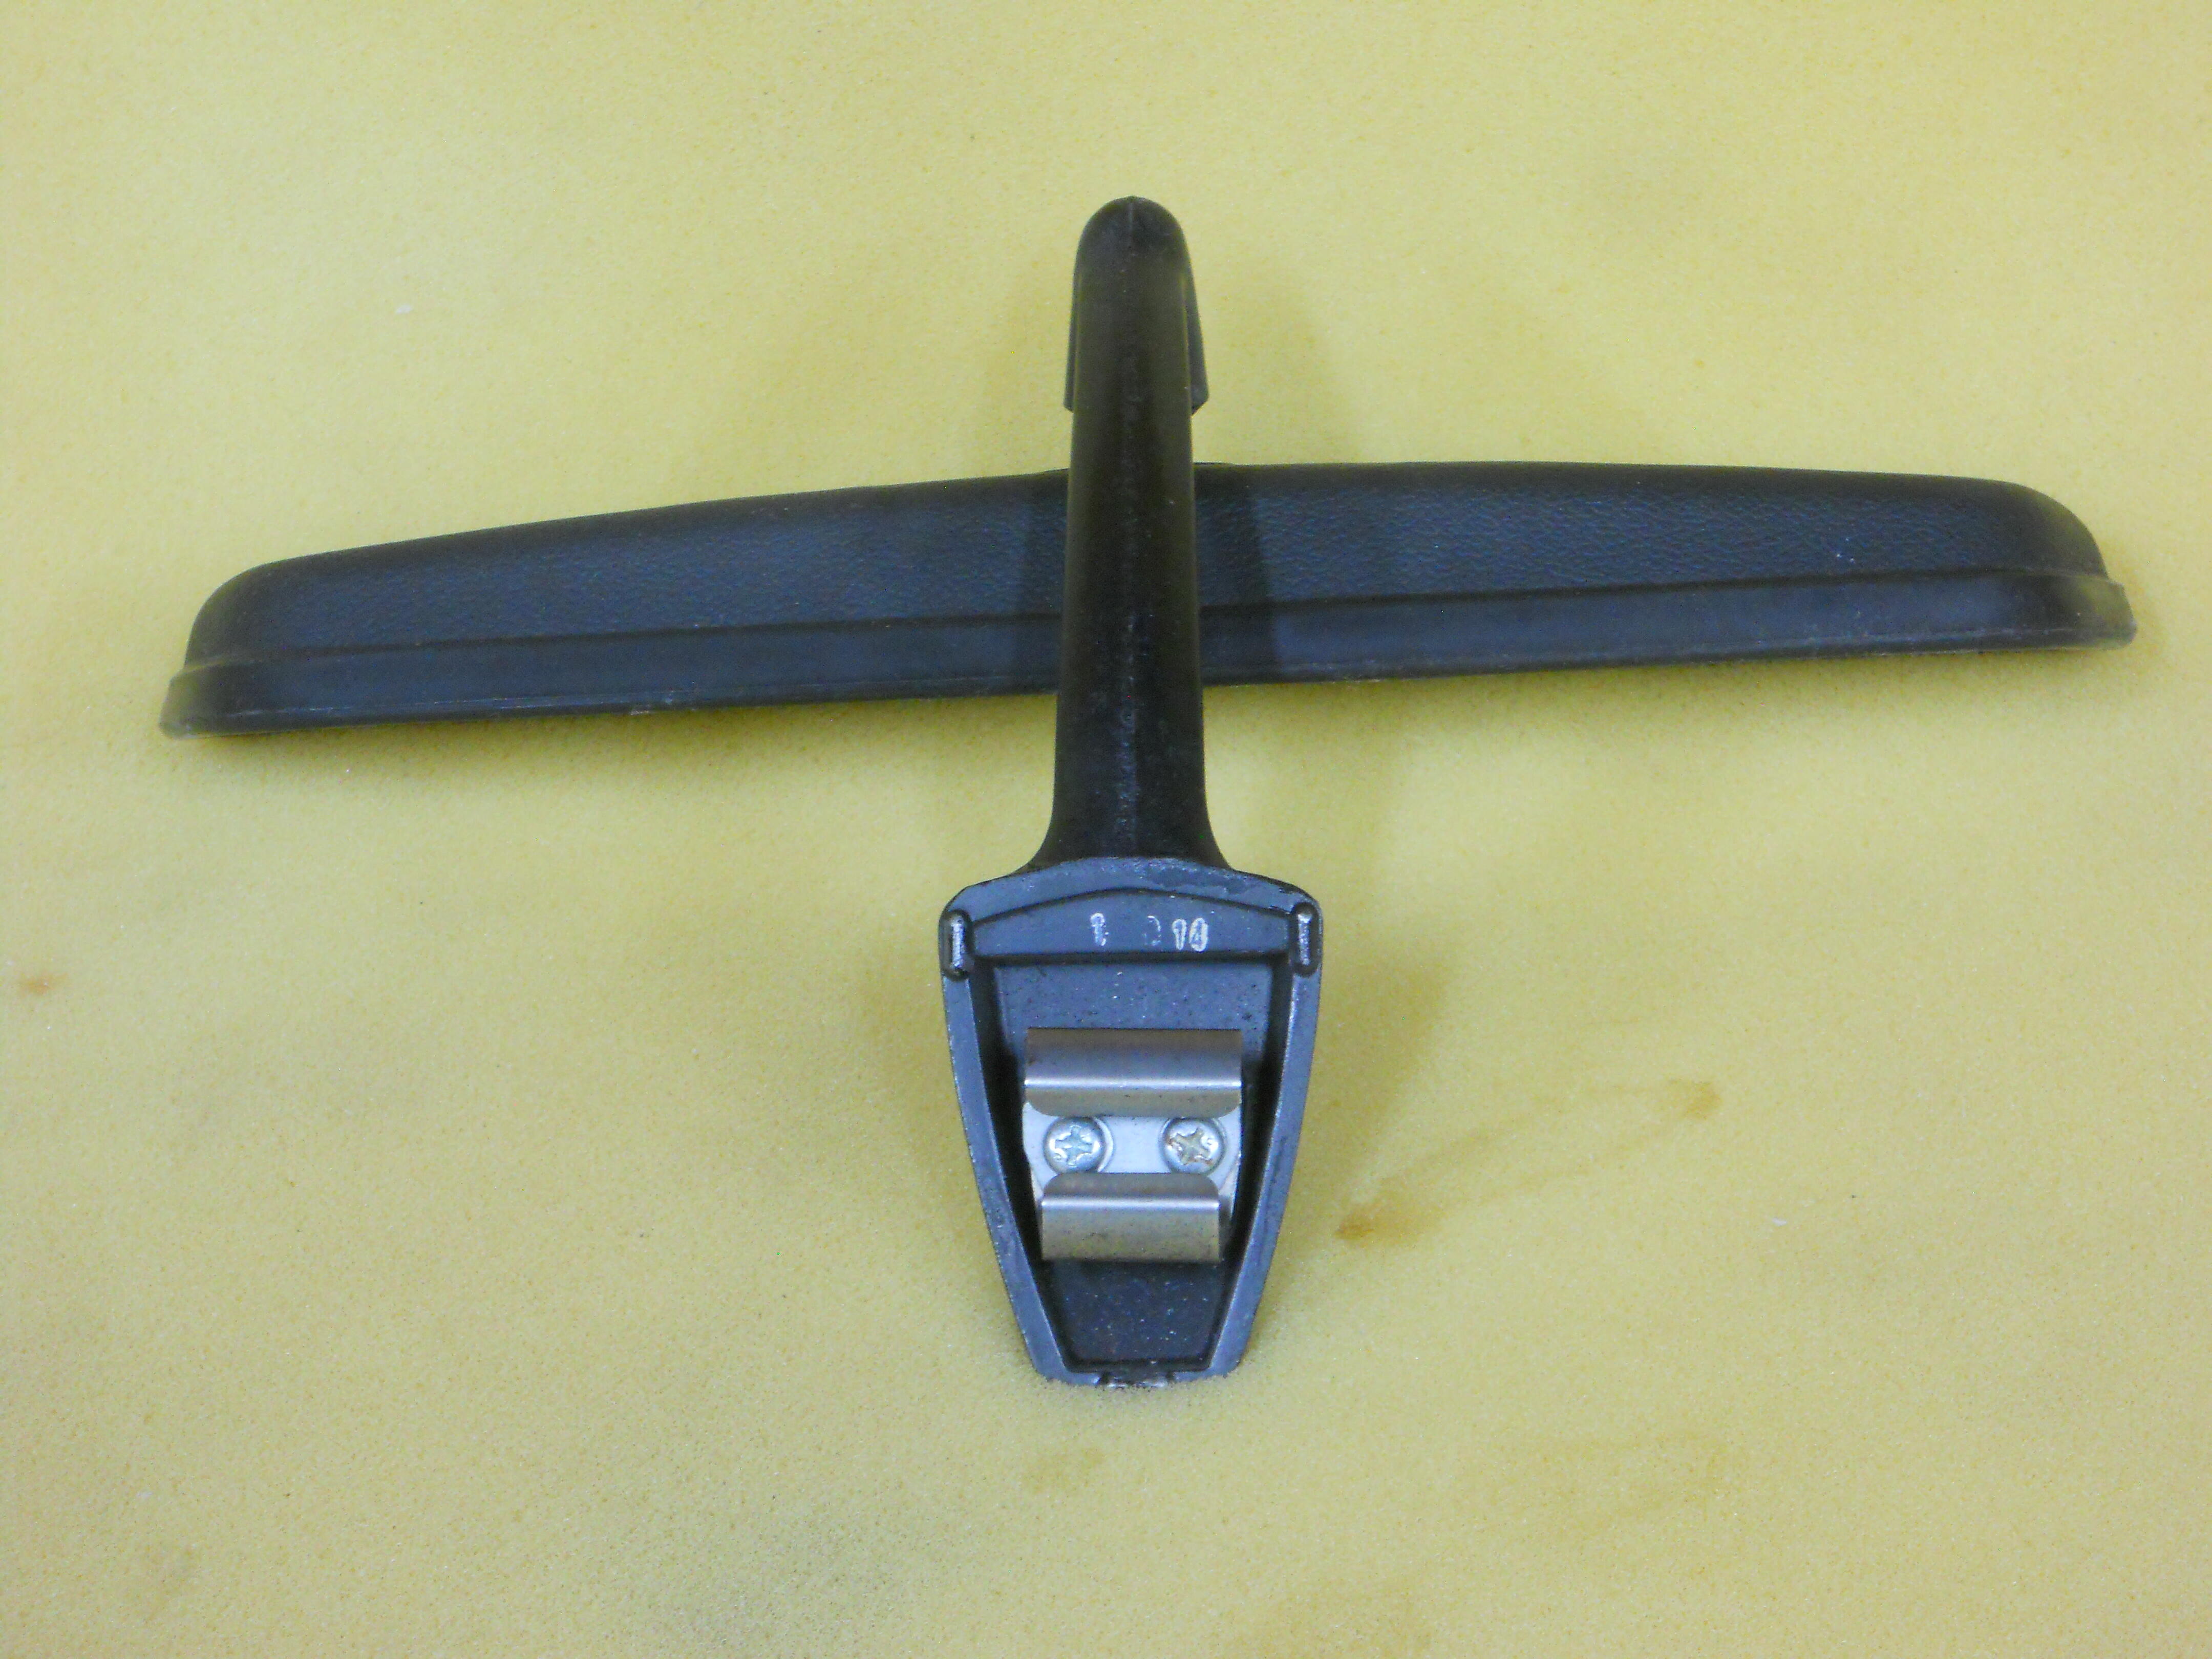
 Rear view mirror, with attach brackets and sun visor support pads, including screws. Missing knob to adjust mirror.
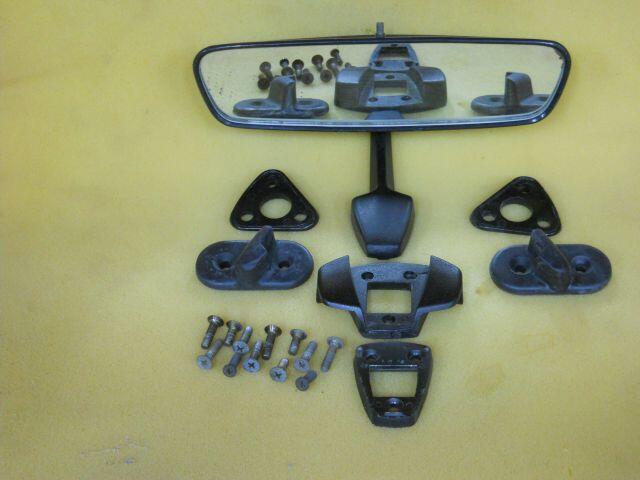


-
 For sale is a rebuilt circuit board for the 75-78 280z OEM clock. The circuit boad is usually what fails. Cost is $80 (includes shipping). For questions contact me at: ron@zclocks.com. Thanks for looking....
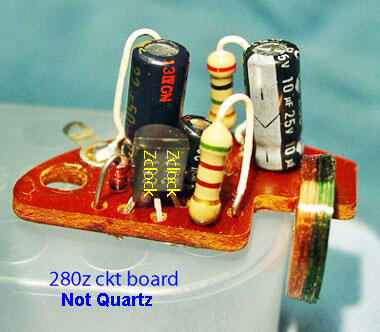
-

 I remember my older brother and Dad were swapping a clutch. I jumped in the car, pushed the clutch to the floor, blowing out the slave cylinder. I got out of the car and started running! Fun times. My Dad is now 87 and loves to brag on my mechanic ability. He's my biggest fan.....now. Lots of great memories.
 Inspection document and checklist for build of Nissan Vintage 240Z program.Free


Important Information
By using this site, you agree to our Privacy Policy and Guidelines. We have placed cookies on your device to help make this website better. You can adjust your cookie settings, otherwise we'll assume you're okay to continue.