


Leaderboard
-
conedodger
Free Member78Points12,624Posts -

siteunseen
Free Member68Points15,167Posts -

Zed Head
Free Member57Points19,305Posts -
Patcon
 Subscriber
 38Points11,178Posts


Popular Content
Showing content with the highest reputation since 11/11/2025 in all areas
-
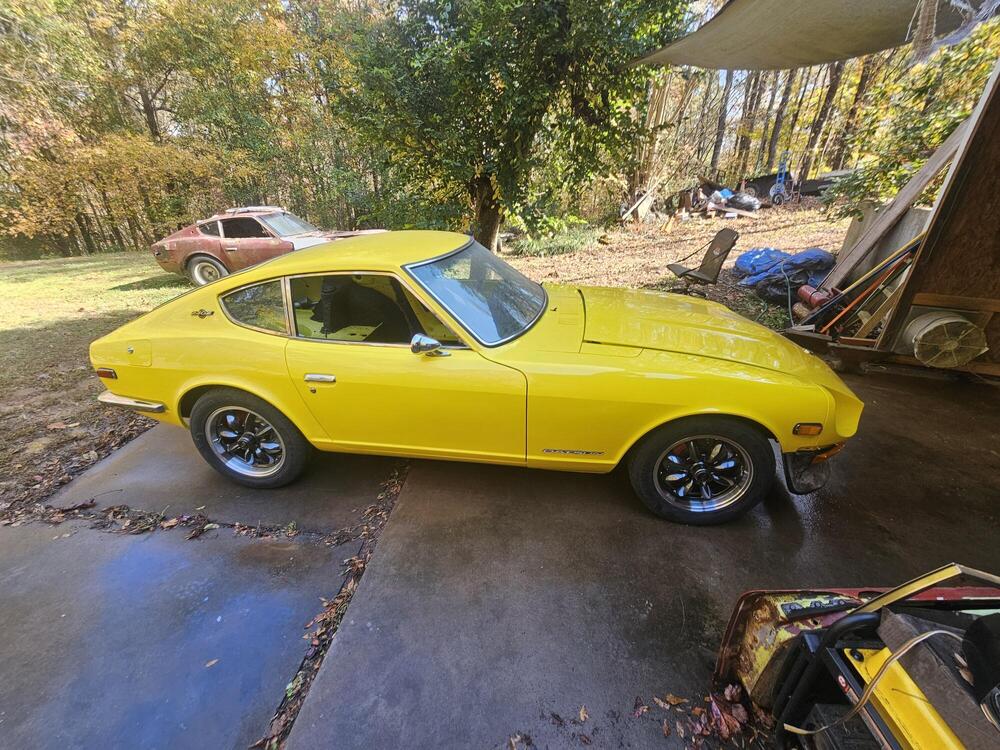
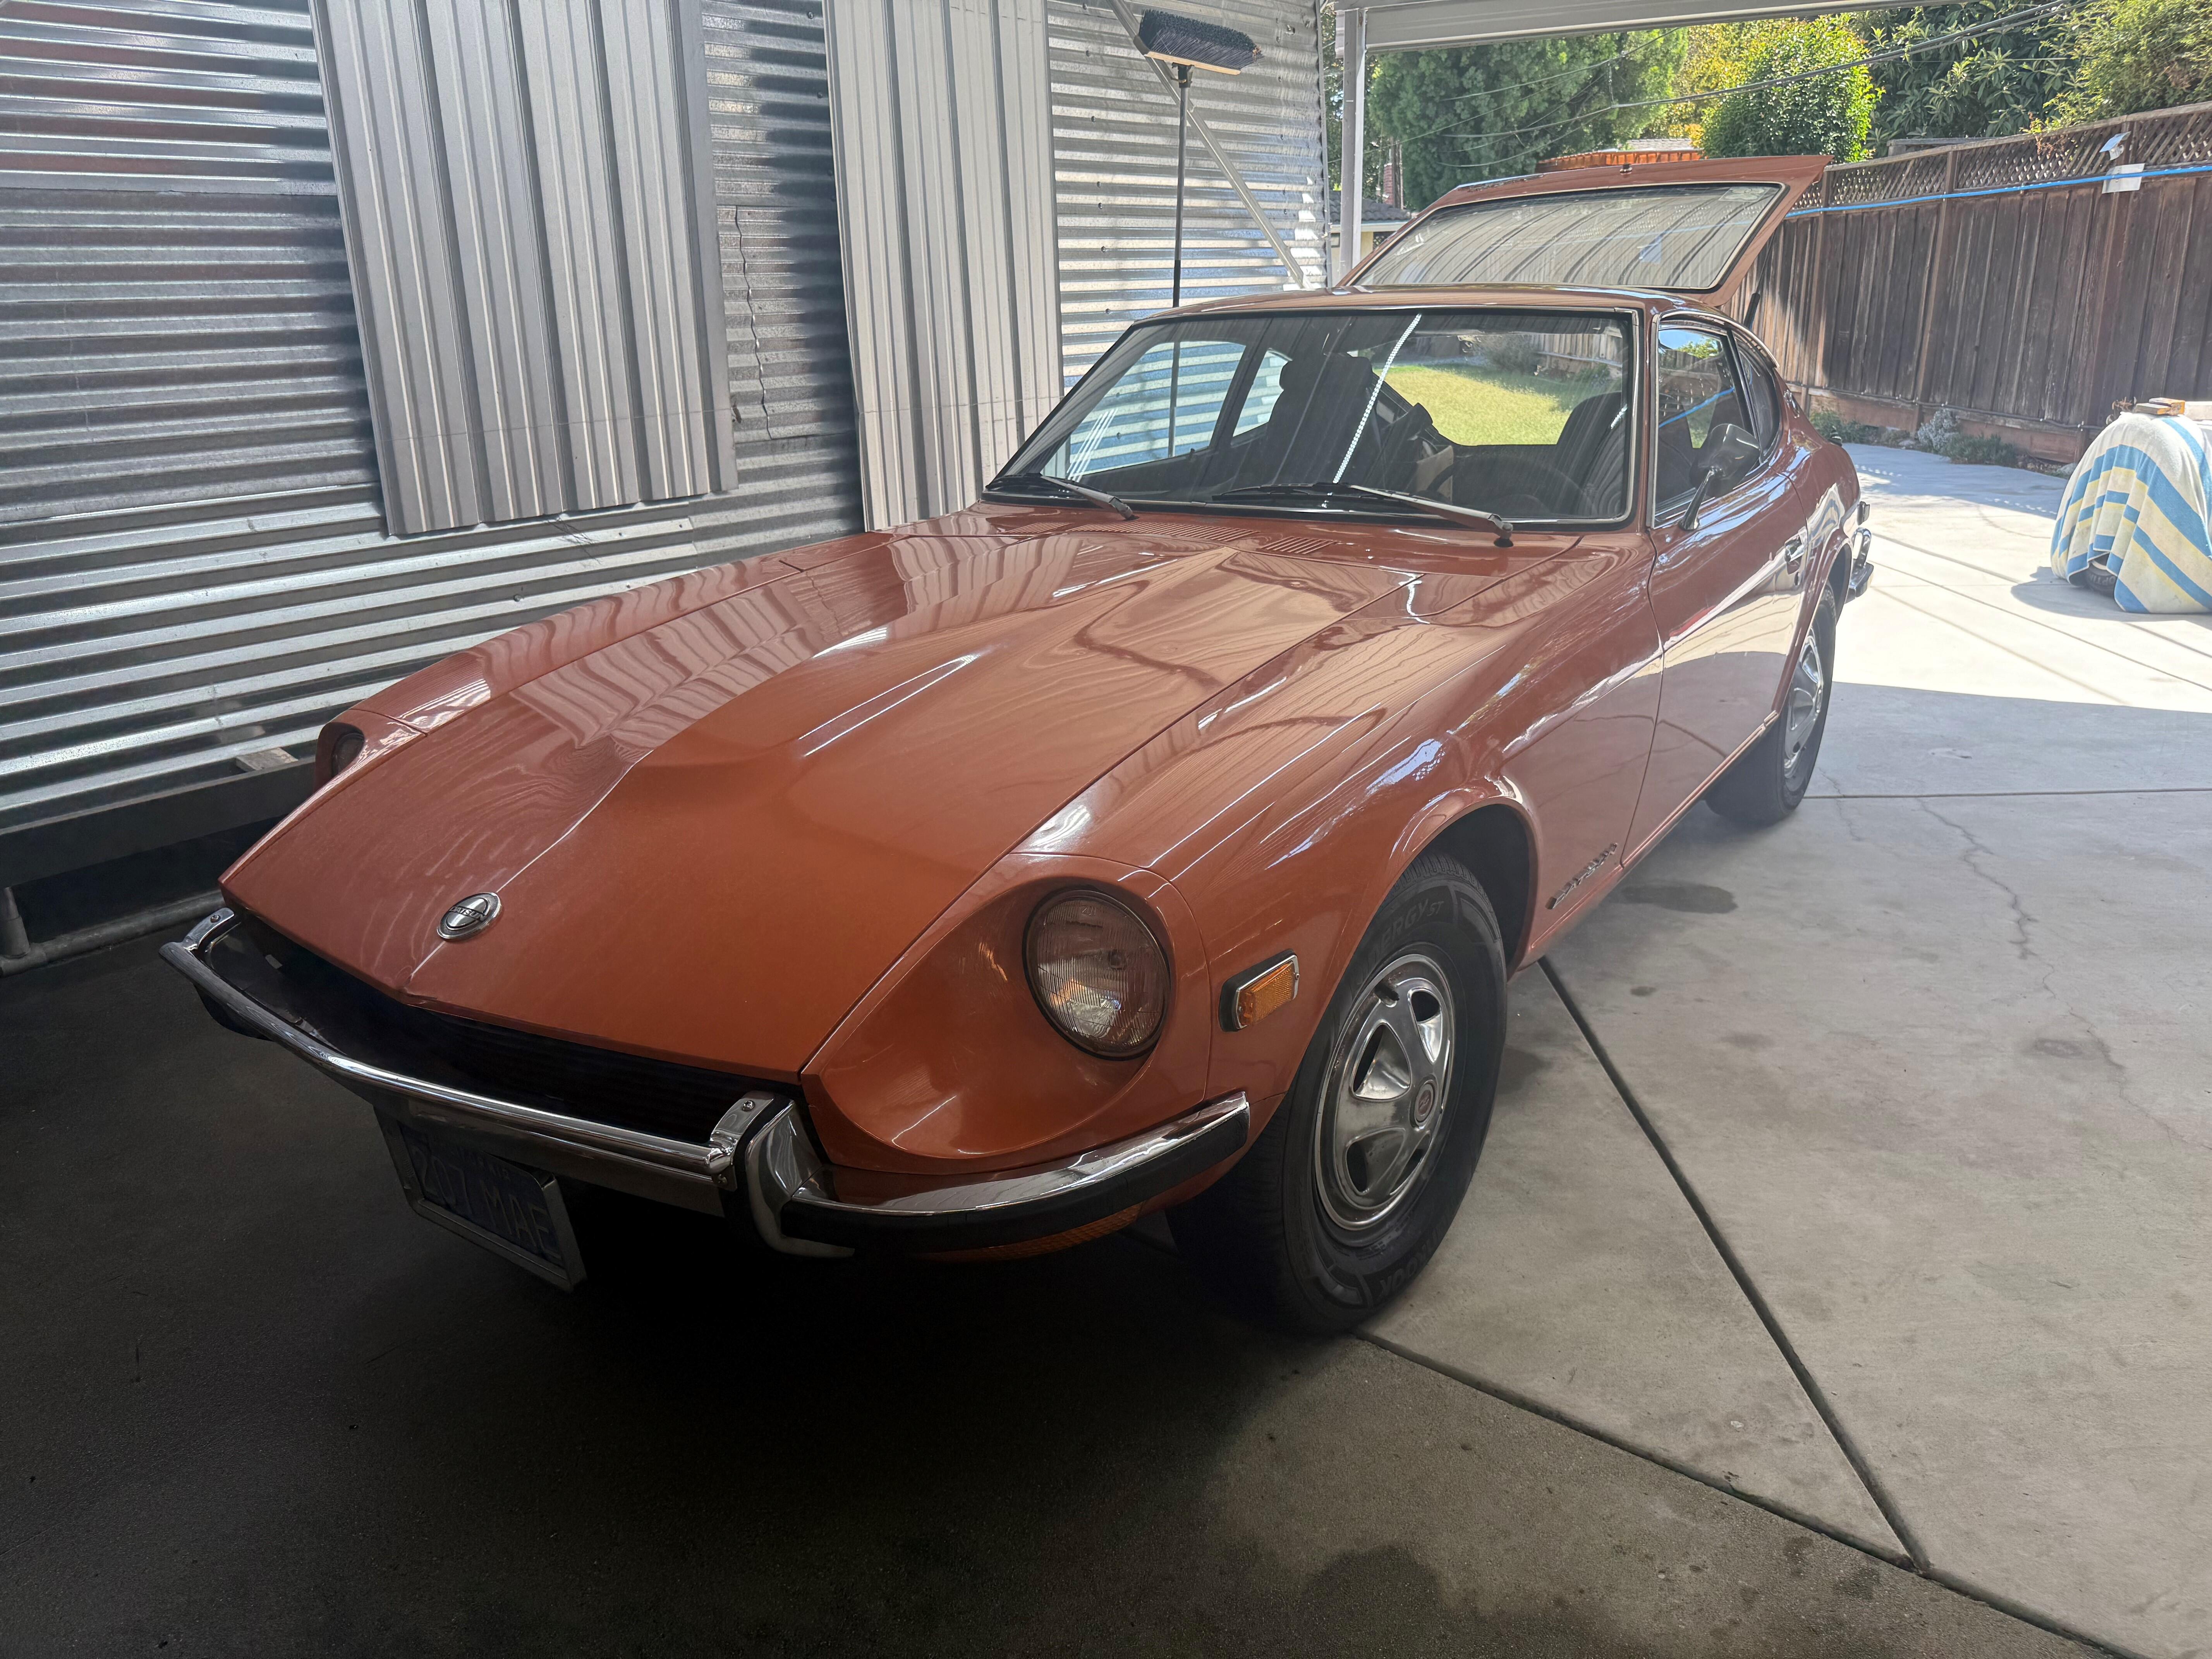
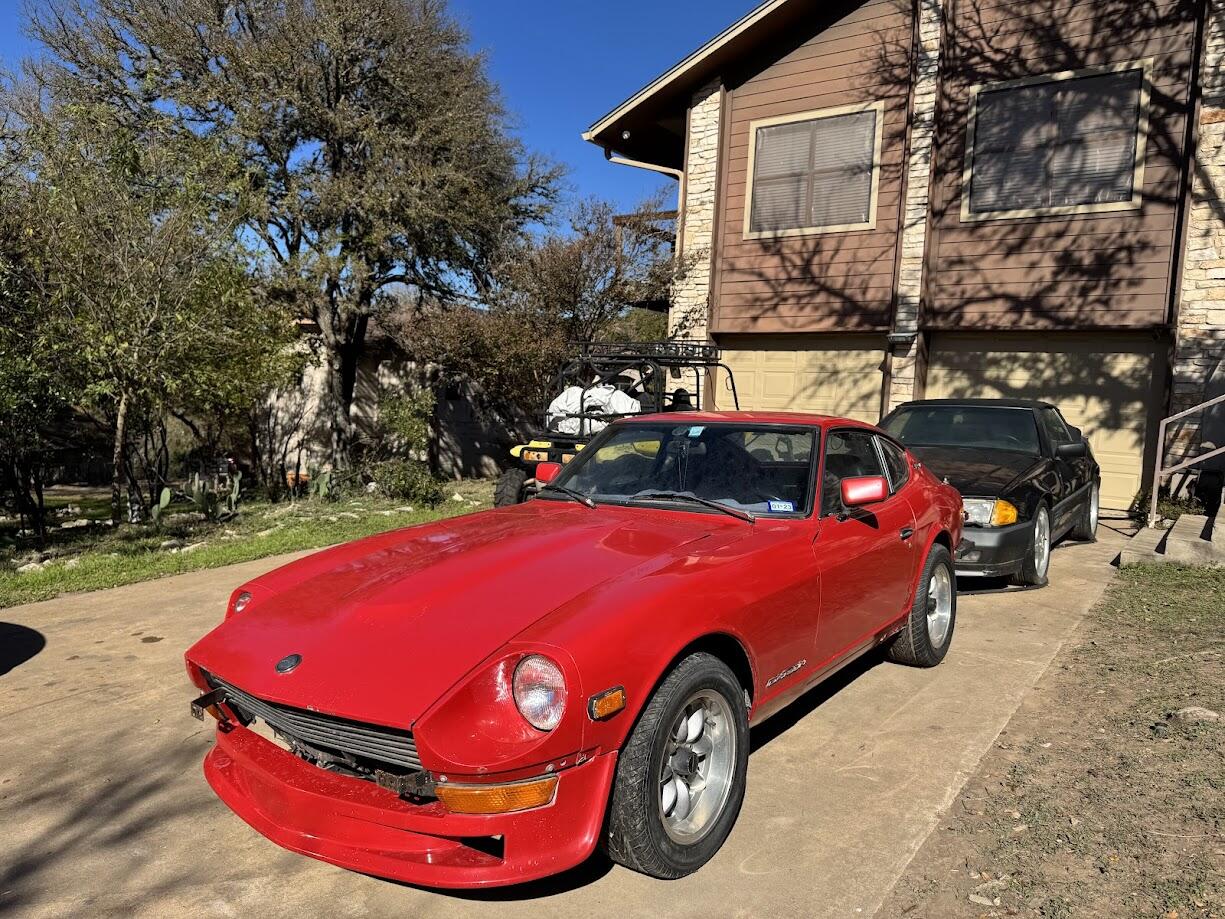
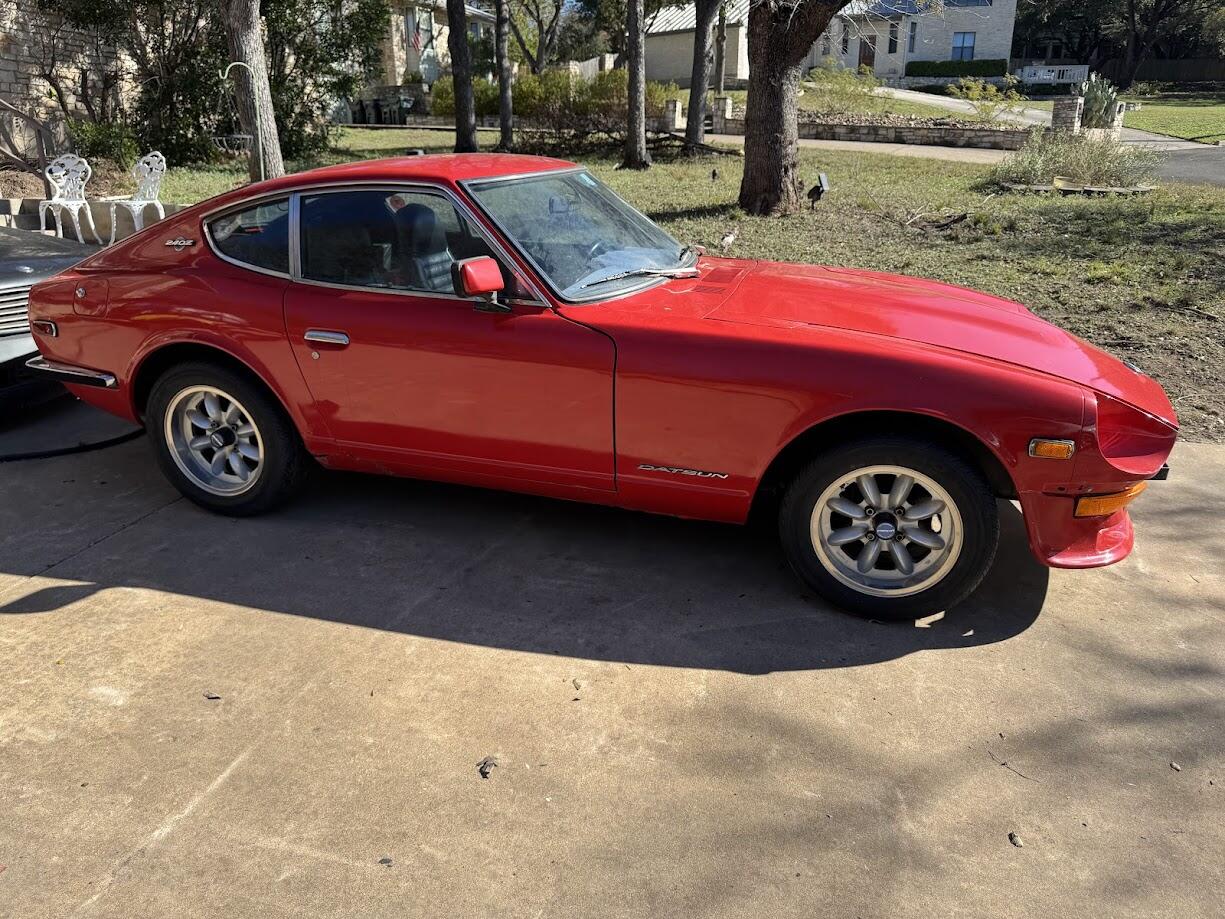
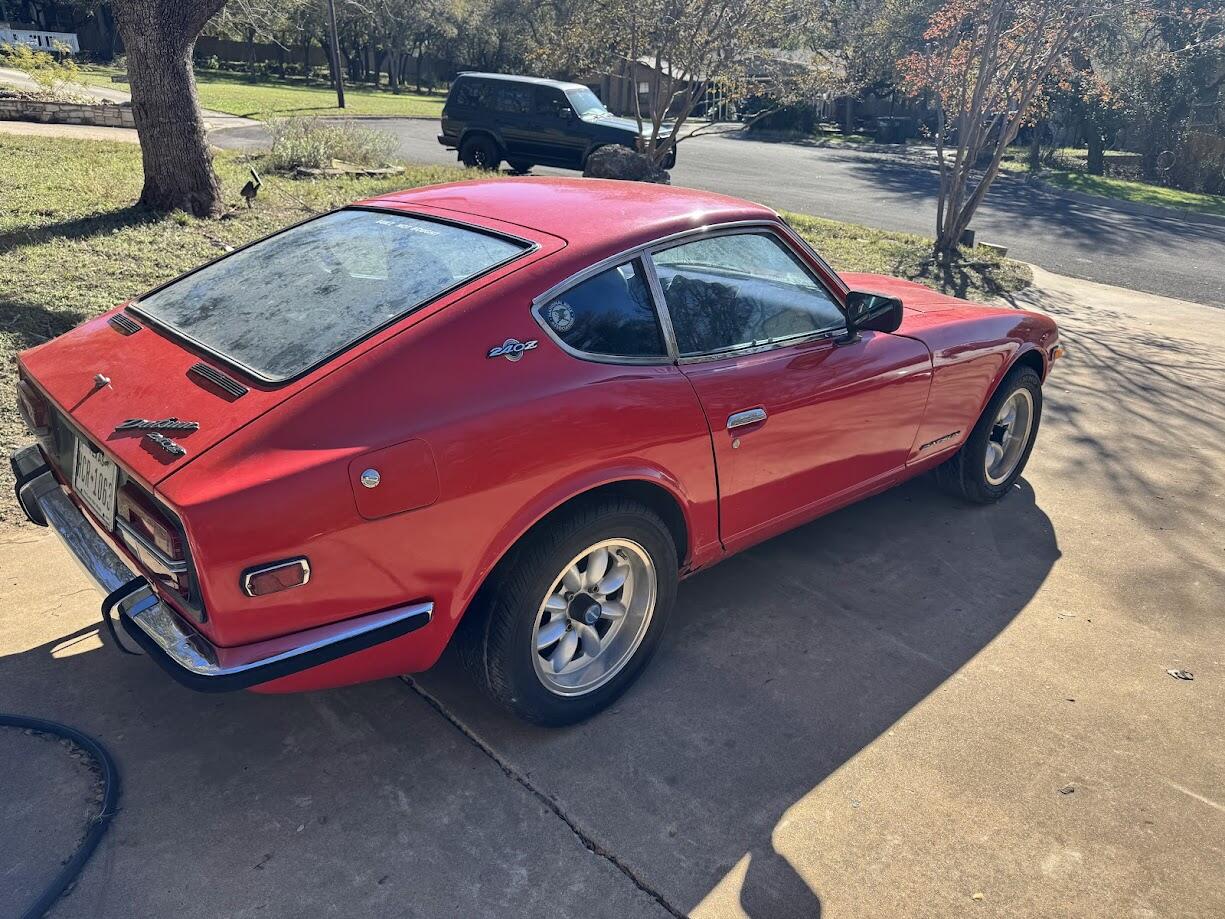
8 pointsPut on your party hats and toot your horns. Join me in celebrating the 54th Anniversary of the day I bought my 1971 240Z. Today, it sits in my driveway proudly showing its age. Unfortunately, I'm also showing my age and have a little more trouble getting in and out of it and working the pedals than I did in 1971. Great car, great fun, 54 years of great road adventures!8 points
-
I've been very lucky on many fronts in my life. My luck started with being born in this country and continued through being born into my family. However, for this screed I'll stick to the Z world. I started getting paid, $125.00/week, to be a mechanic at a dealer in 1970, talk about luck. I very quickly realized that paying close attention/noticing things were important aspects to becoming successful at my craft. When I opened my now closed shop in 1980 a trickle of unmodified original owner Z cars started to flow through, talk about luck. It didn't take me long to understand the importance of documenting as many details as possible. The results of my appreciation are a large stack of photos of the many fine details of 240/260/280 construction. I also have many sloppy pages of notes describing the fine points of construction and differences between model years. My goodness, I even have several pages of notes describing, in detail, the fasteners used to secure a 240 timing chain cover for production date X. Every time a serious customer approached me for a restoration I would ask, in detail, exactly what he/she wanted the finished product to look like. Before they had a chance to answer I would describe what an original Z looked like from the factory and I'd often show them a few pictures from my collection. The answer was always not just no but HELL NO! They wanted pretty. What does pretty mean? Modern, often 2 stage, paint that has been wet sanded and buffed to near perfection. Powder coated suspension and all the other bits and pieces of modern restoration required to satisfy a customer. To see 2 of my last 3 Z car restorations visit my site and click on Customer Profiles. When a 240 left the factory there was orange peel in the paint in random places. Have to mention that this particular problem improved markedly in about 1975 or so. However, there was often a serious problem with the clear coat discoloring when 2 stage paint was used starting about the same time. The paint on the bottom was applied very unevenly and often contained dirt in random places. Most of the grommets that were glued in place had glue running down from the grommet. The suspension pieces were painted a sloppy and uneven satin black. There was overspray on some of the exterior engine components that were in proximity to the engine block. The list goes on from there. Please don't misunderstand me, I'm not criticizing Datsun, that was the way cars were often manufactured back in the Olden Days. I can all but guarantee that if a real factory-like restored Z showed up at a convention a trophy would not be forth coming. Now to address the hyperbole that has crept into the world of Z restoration. "Frame -off Restoration", "Rotisserie Restoration", "Factory Restoration", etc., etc., etc. There are some new ones now like "Magnificent" and so forth. The situation is often made worse with fancy photography and lighting. This is what happens when marketing geniuses get involved. Remember the Z Store Program? H@#$, now I'm often confused and don't understand what they're talking about. ALWAYS look at the car you're considering or send someone like me to have a look before making that offer. I understand that I've only lightly covered this subject but there you have it for better or worse.
.thumb.JPG.3a76a0e2aef43a0d683e01556ae9d81e.JPG) 8 points
8 points -
7 pointsA work colleague of mine and I spent about an hour yesterday getting some video of the 240z I restored (got it on the road on Dec 31 last year). Unlike me, he has skills and talent for editing and creating videos. Have a look! https://www.youtube.com/watch?v=nQ3ieeuqjwI7 points
-
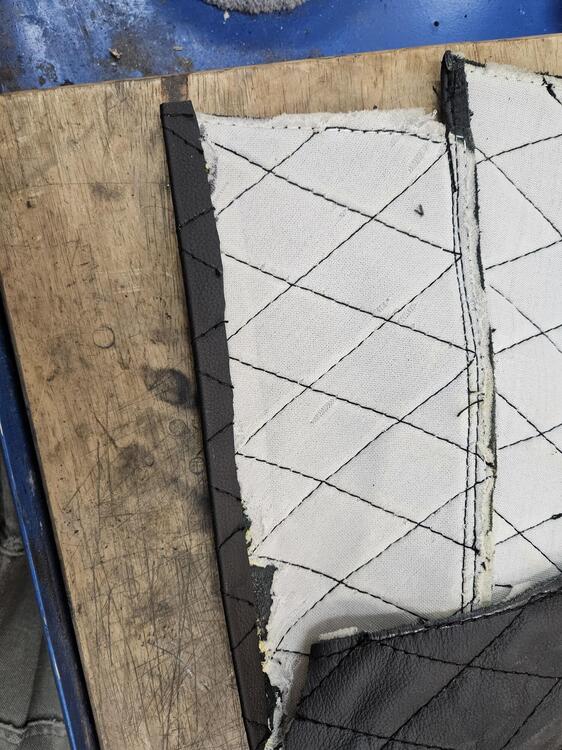
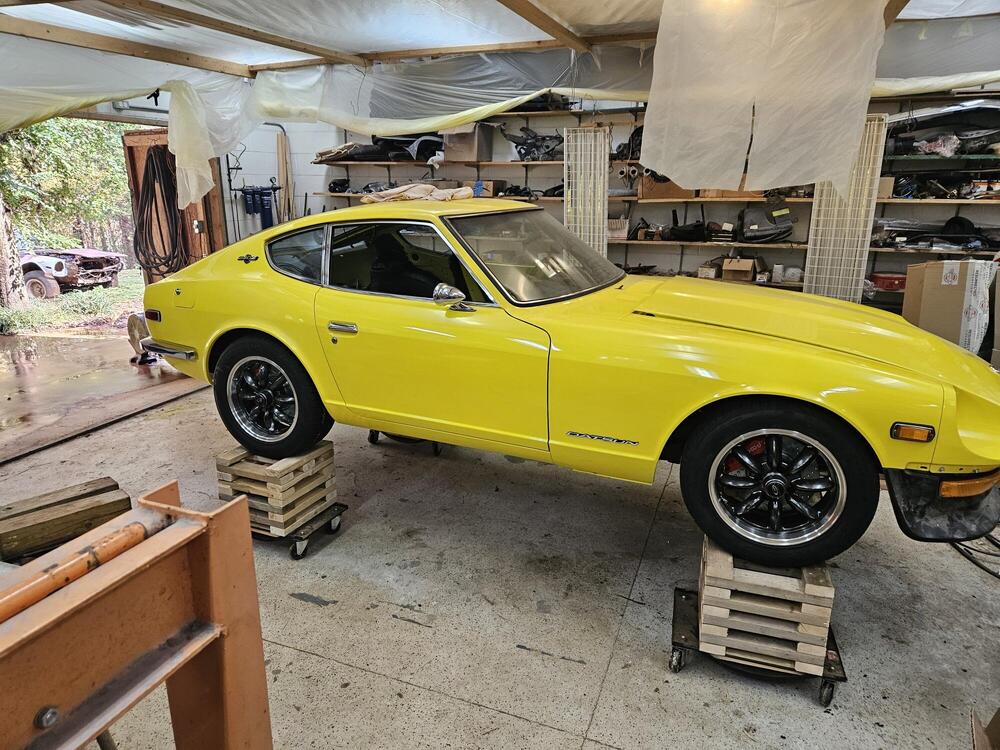
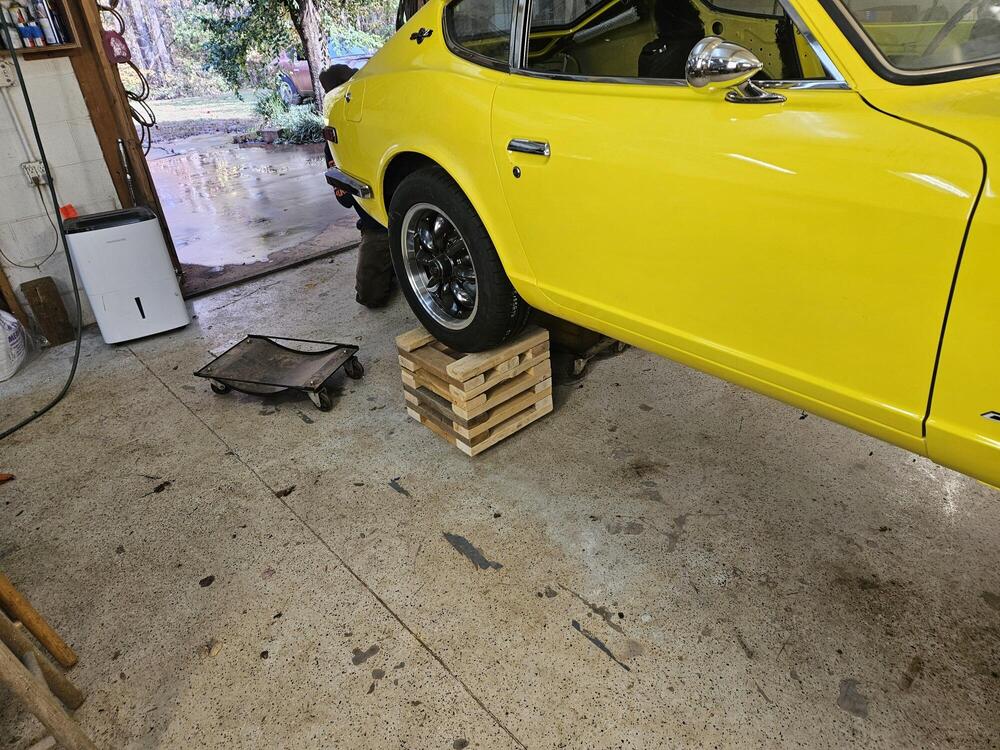
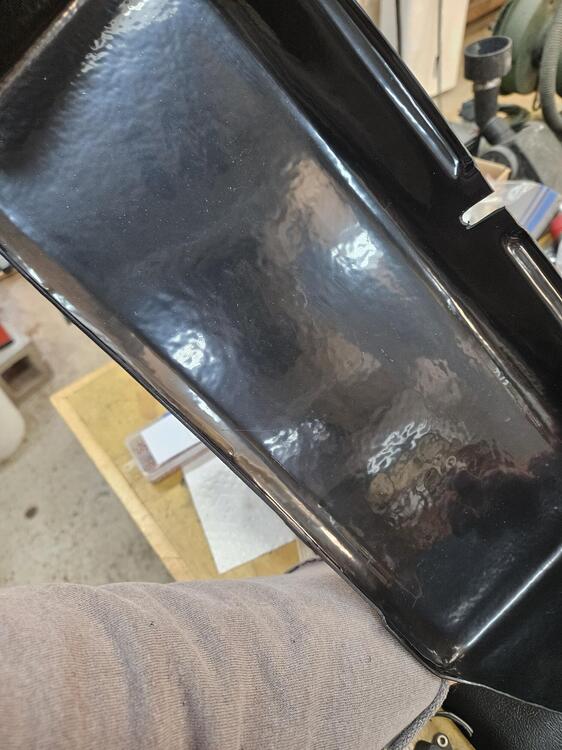
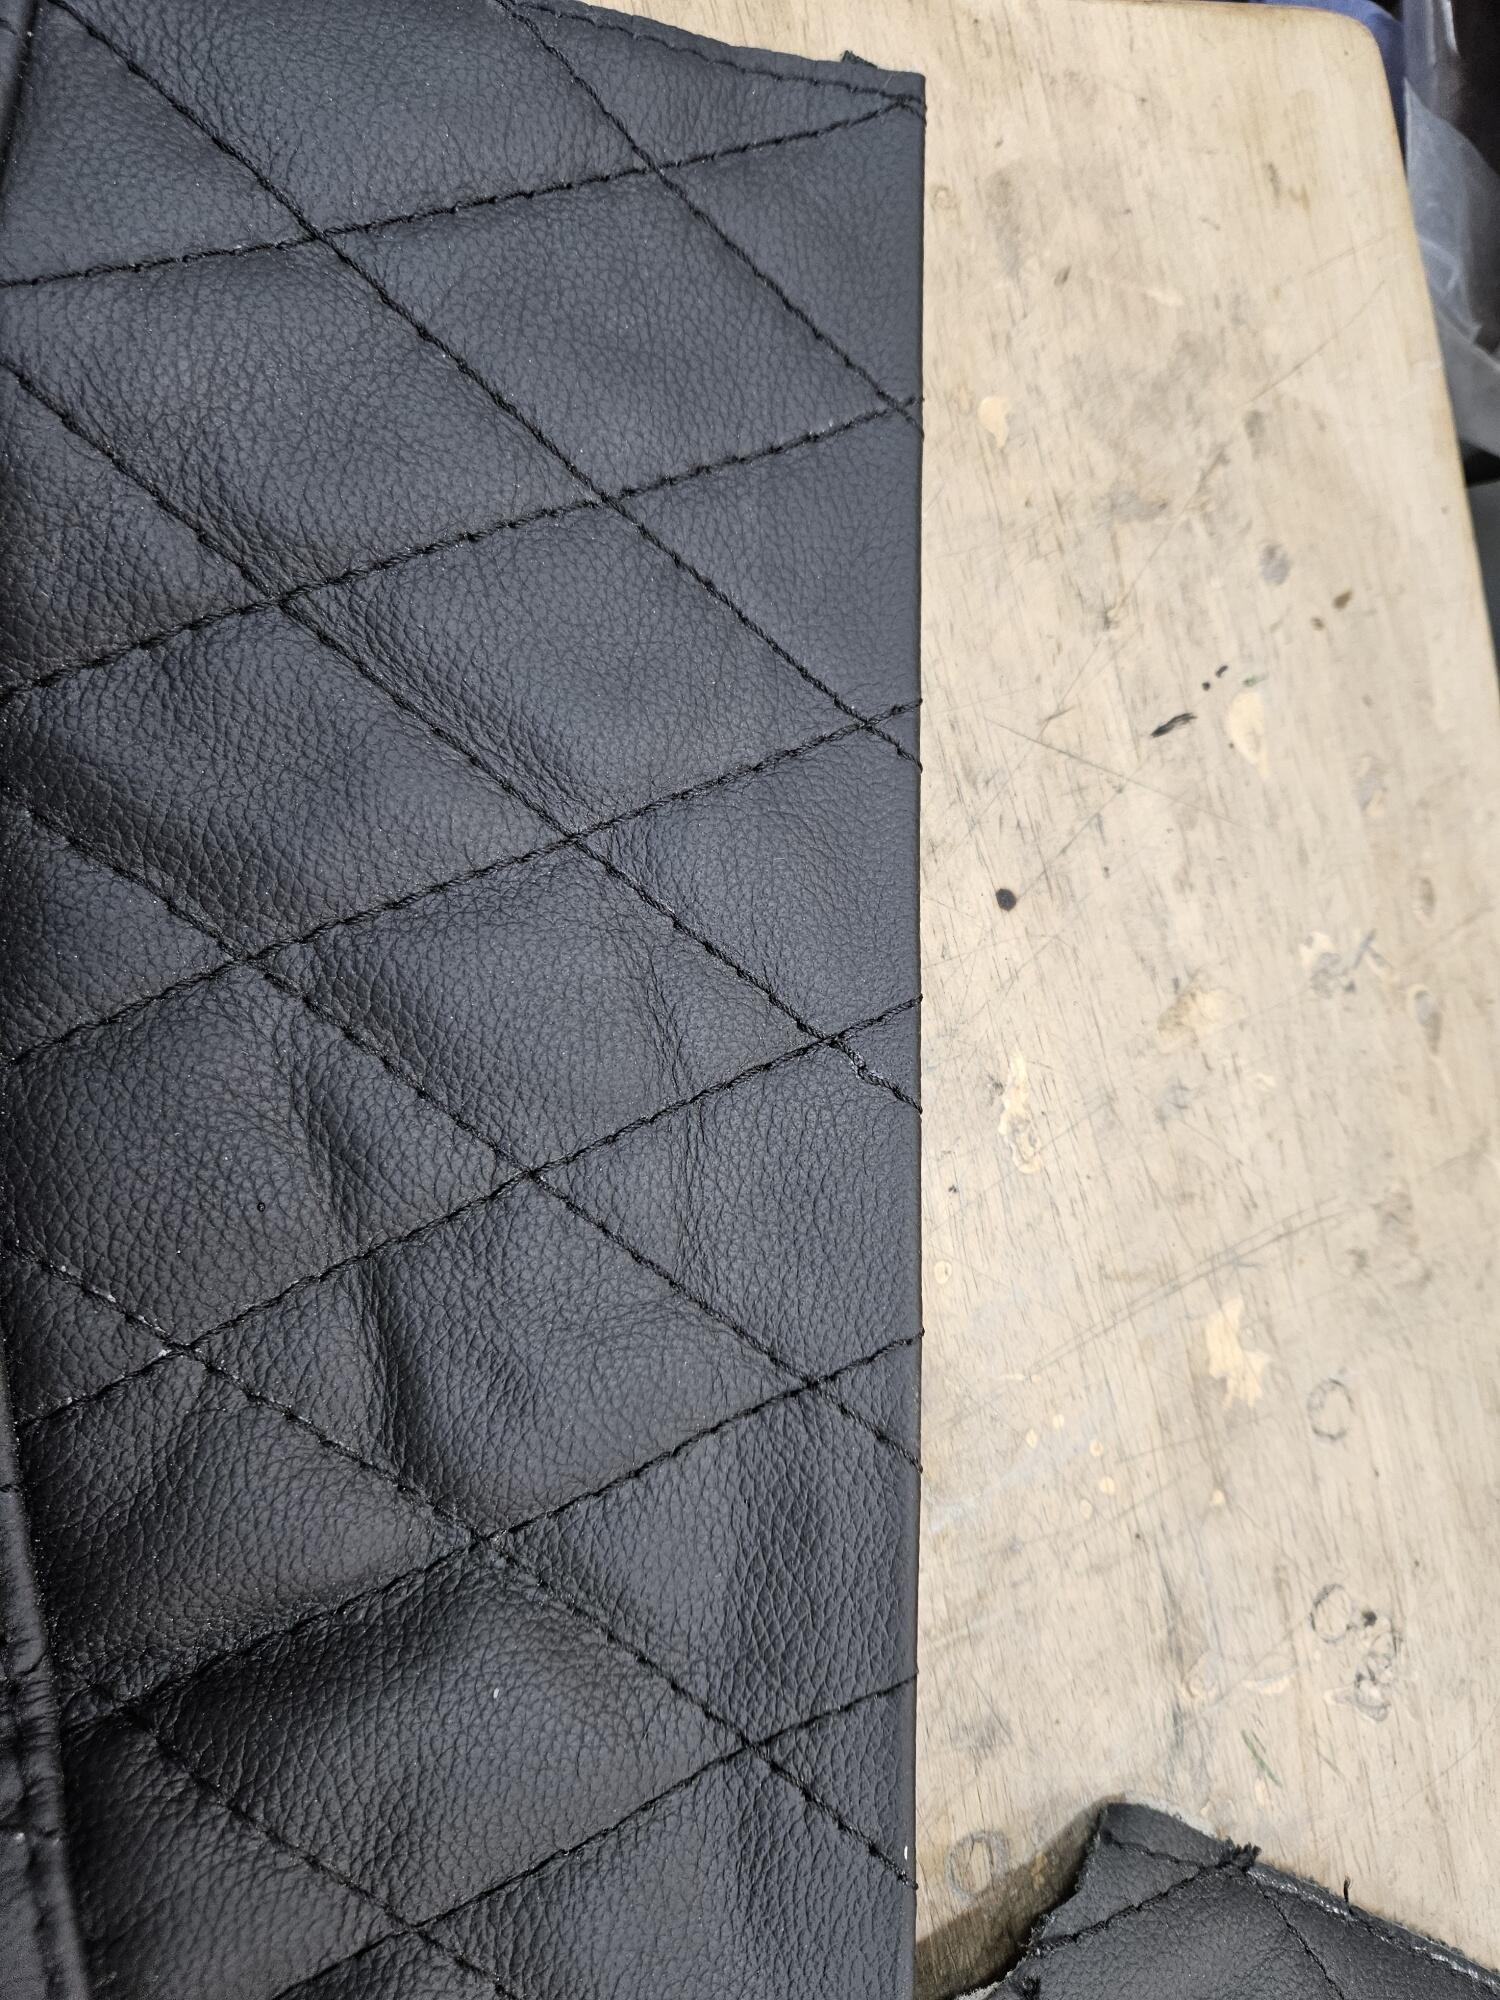
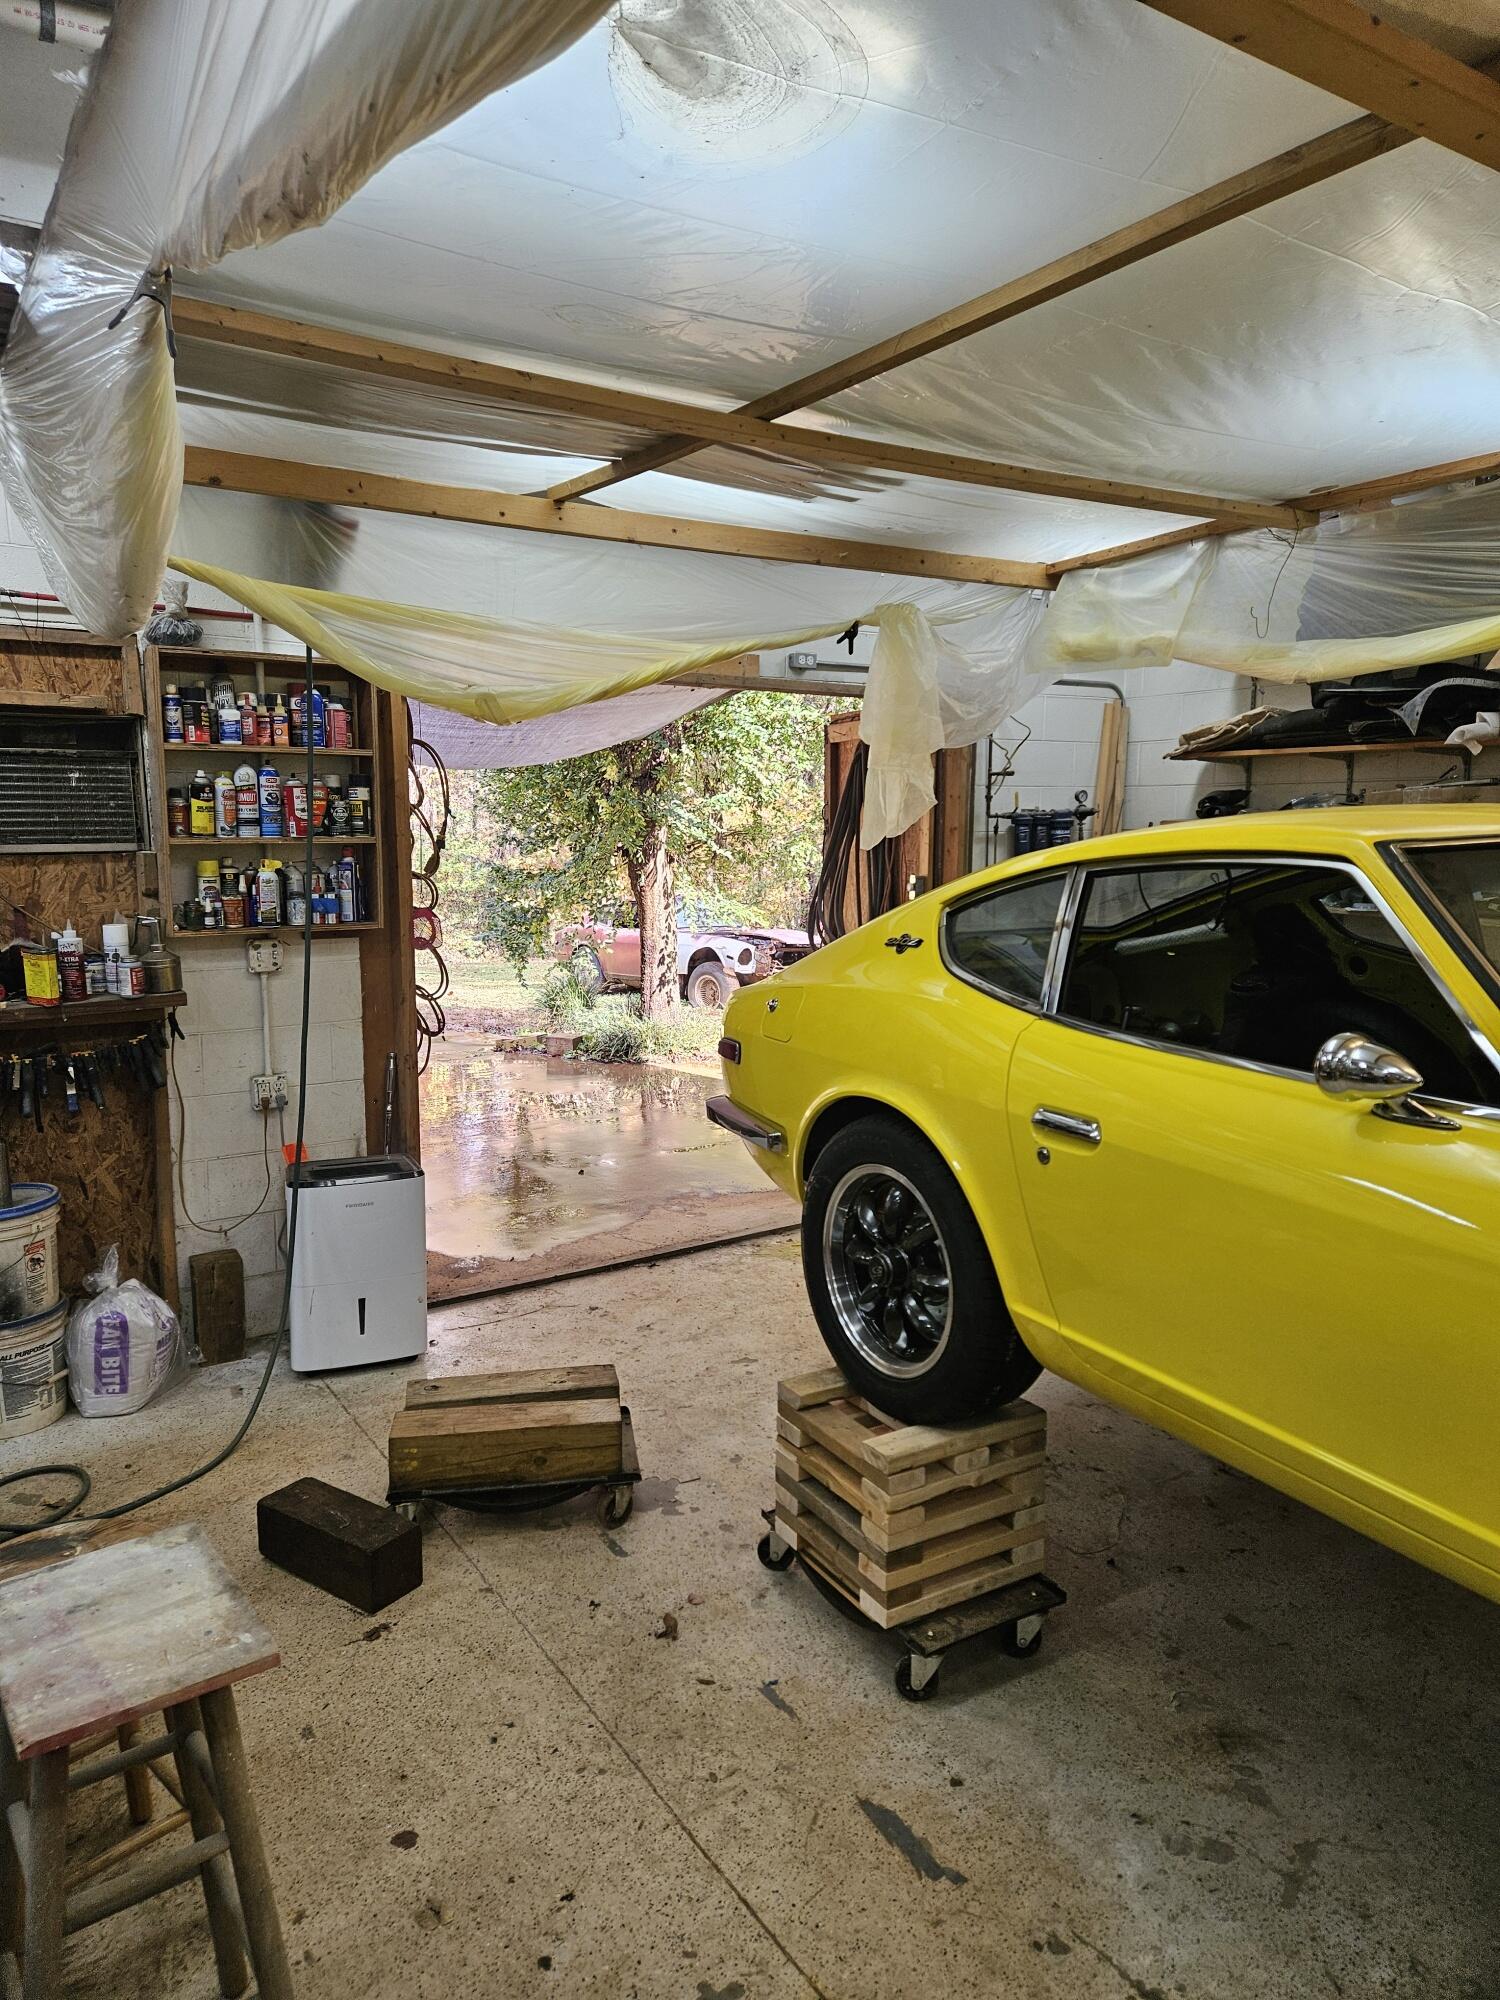
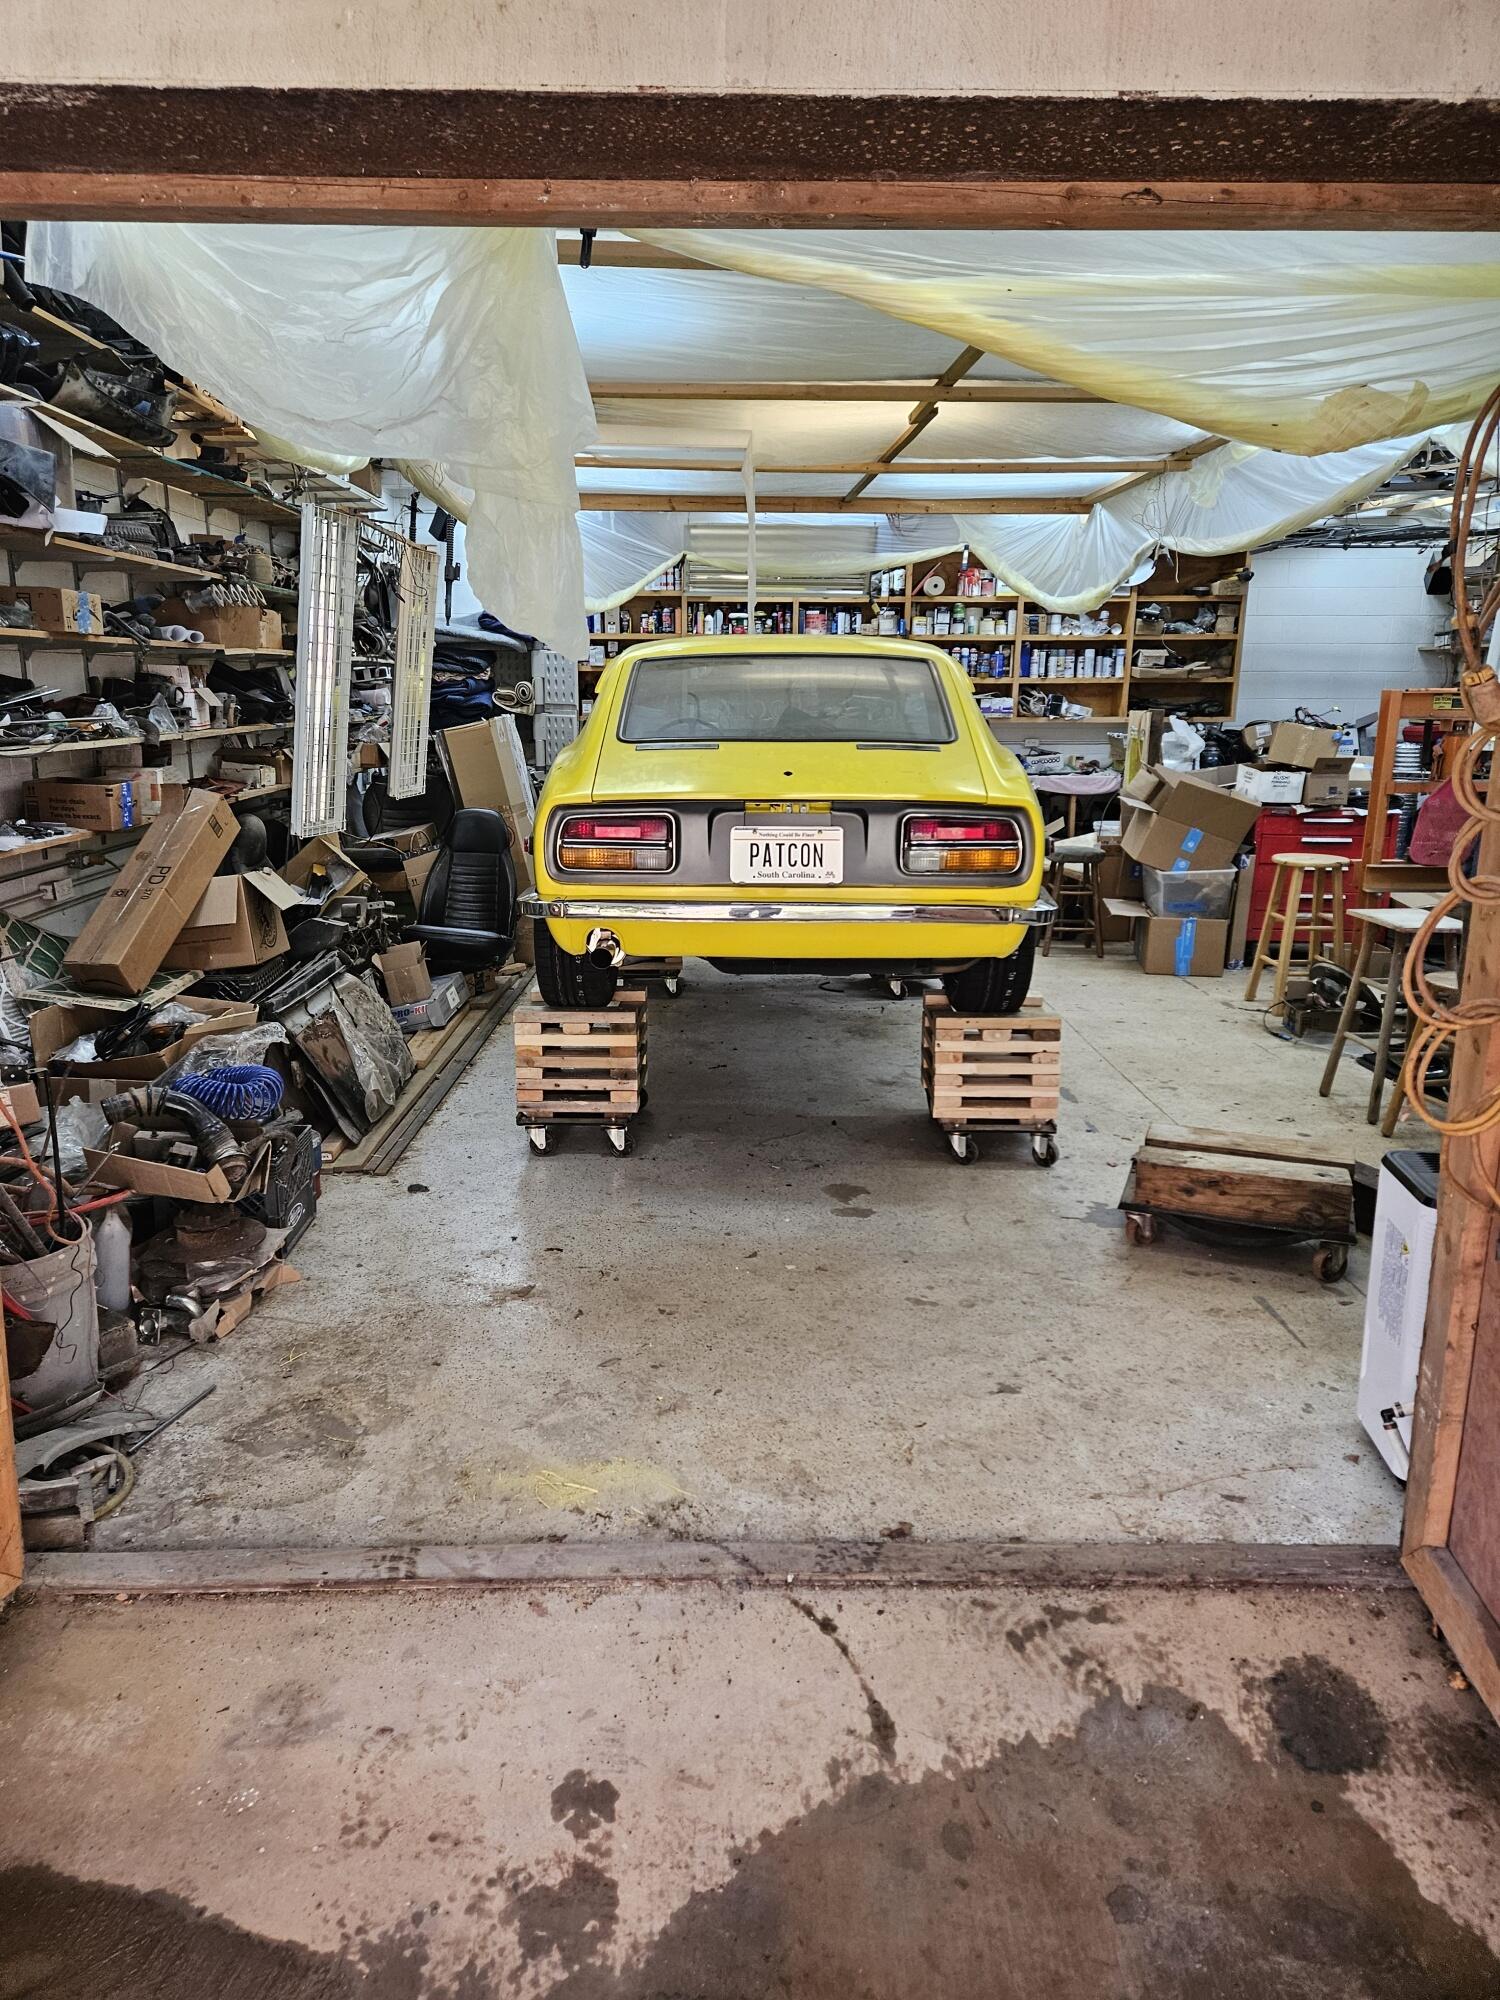
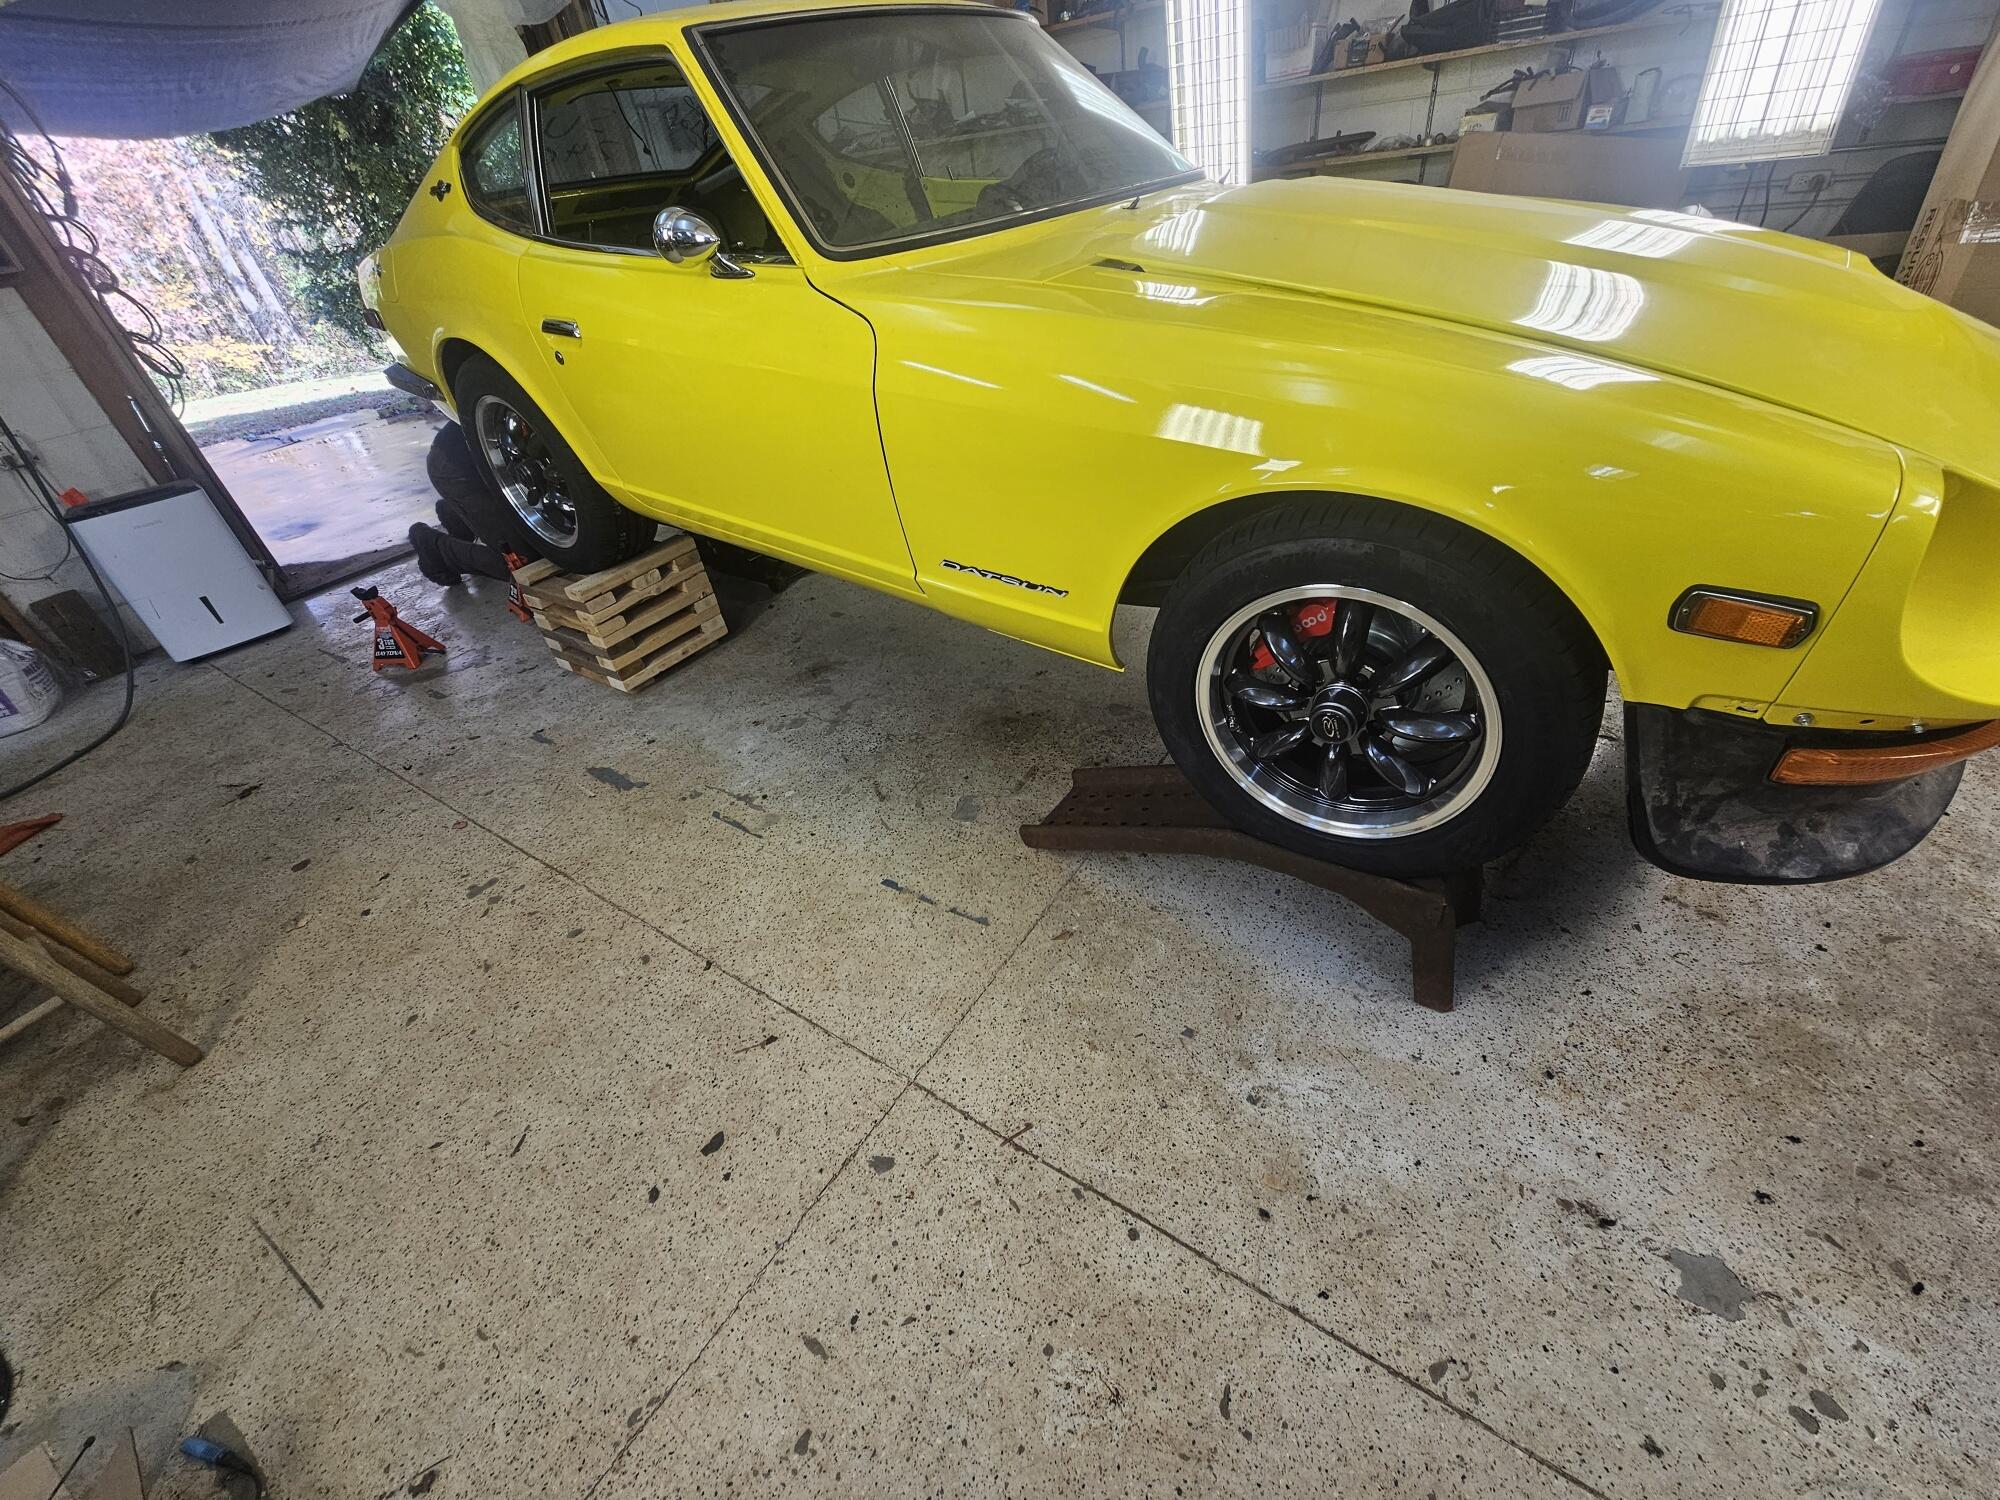
6 points6 pointsLast weekend we worked in the shop some Here is a seam in the leather fender covers. I made this with contact adhesive and clamps. I picked the padding out in the seam area so it was just leather to leather. We took Lily down off the cubes. A lot less sketchy than the way I put her up there. Still had to have a 6x6 on the jack saddle at this point Rolled her outside and it promptly rained... My windshield leaks and I will add some sealant under the weatherstripping soon. I also ordered tool covers for behind the seats from Zcardepot. They don't have the hinges. So they may not work for me... Since I don't have the old covers


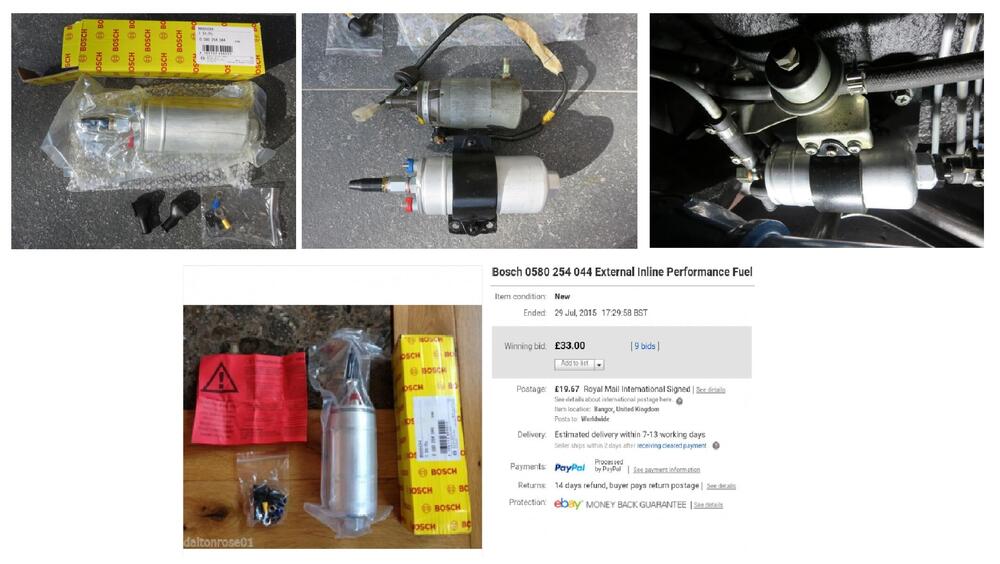
 6 points4 points4 points4 pointsThe original pump includes an inlet strainer, but I don’t think the O’Reilly’s E16078 has one. In principle it’s the same style as the Bosch 0580 254 044 that replaced the factory unit. If you want to add a pre-filter, you can install two 5/16" filters in parallel to avoid fuel starvation and prevent cavitation in the pump. Their only purpose is to protect the pump, the filter up front will protect the injectors. 280 Series Fuel pump Alternatives Rev 1.pdf
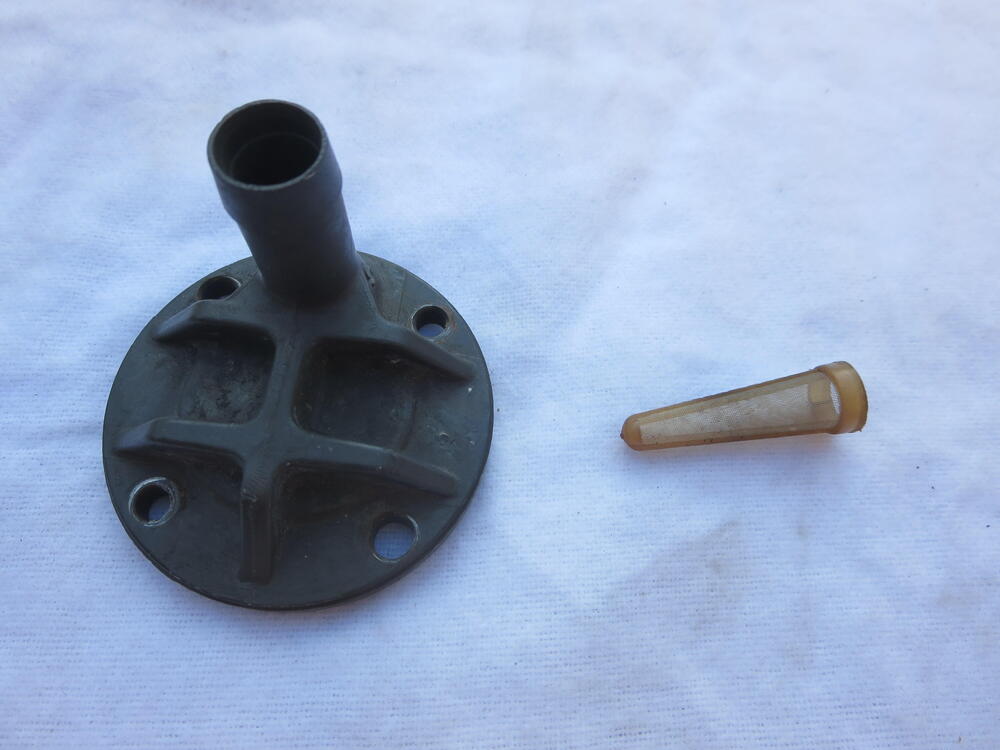
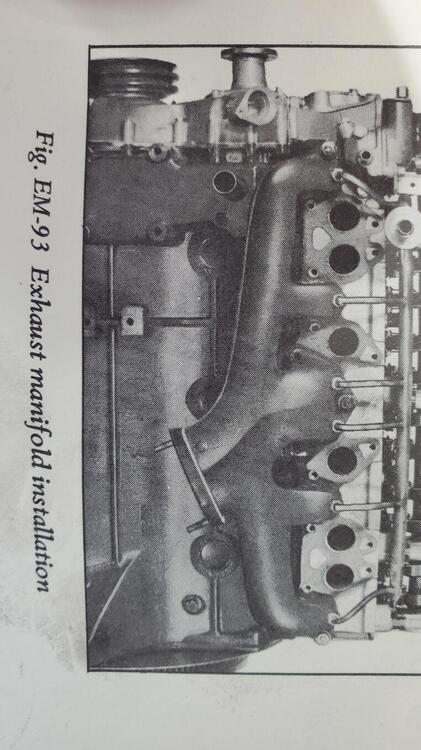
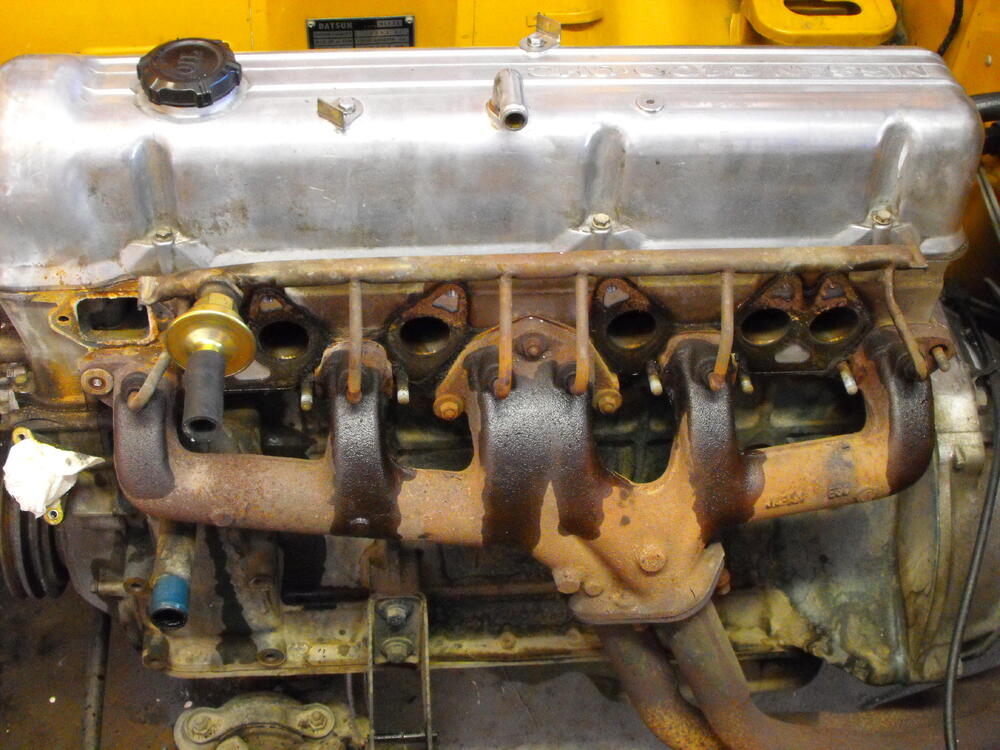
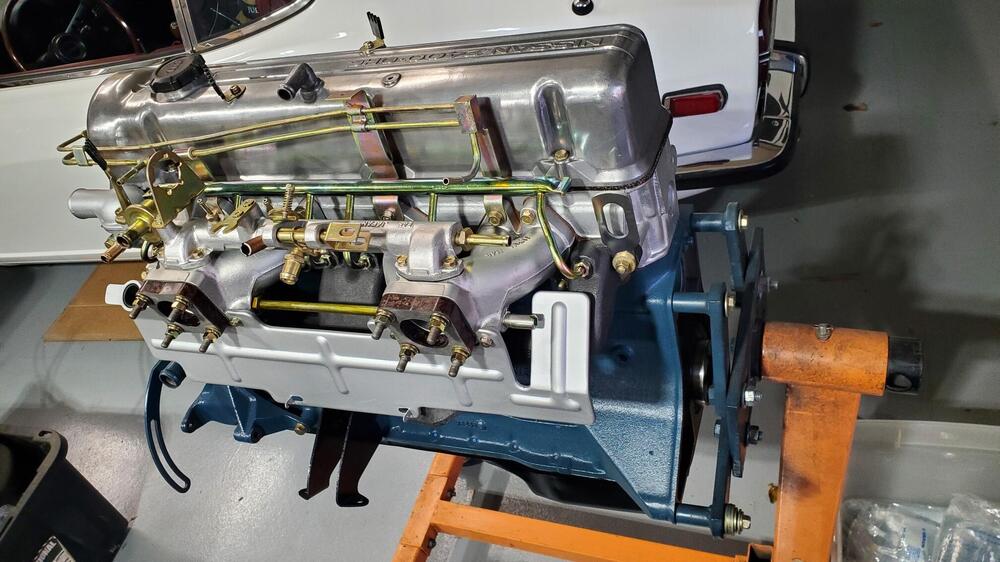
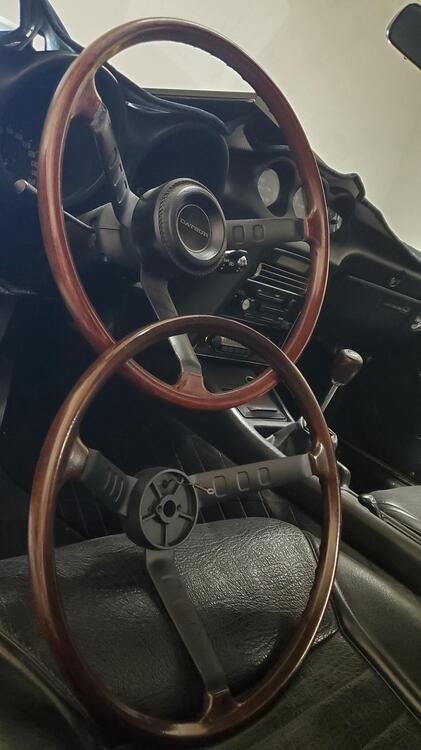
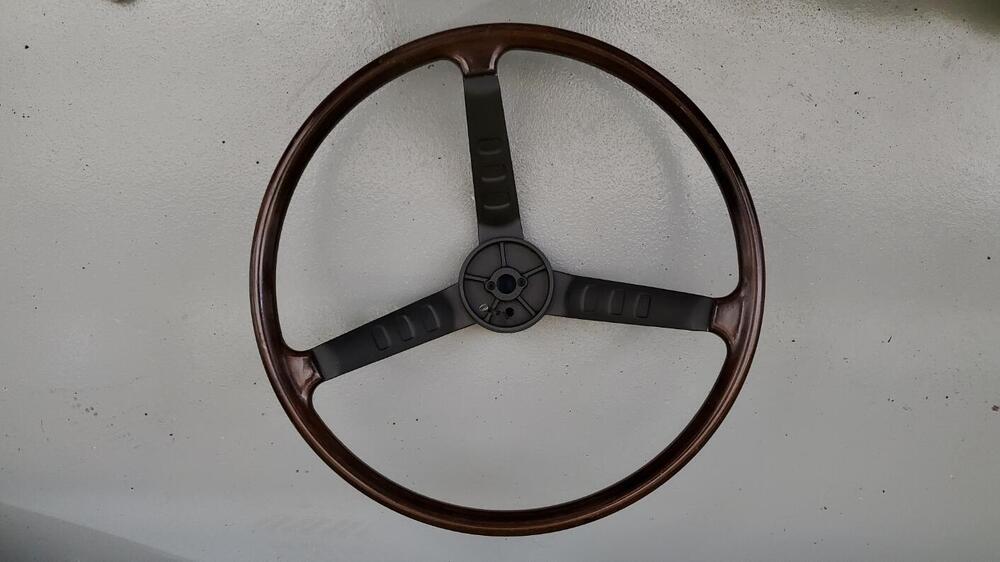
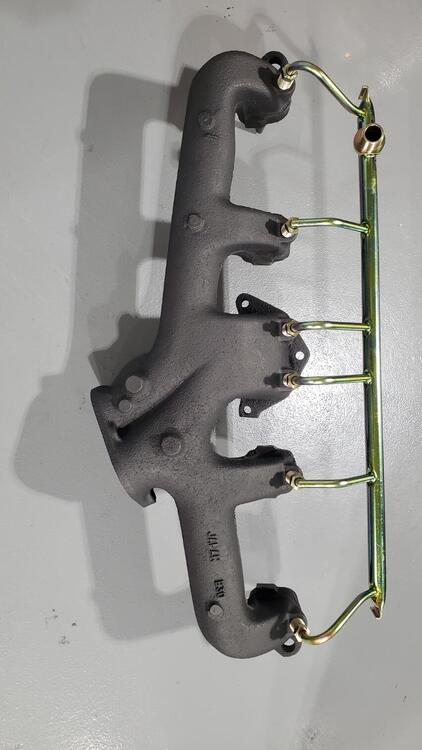
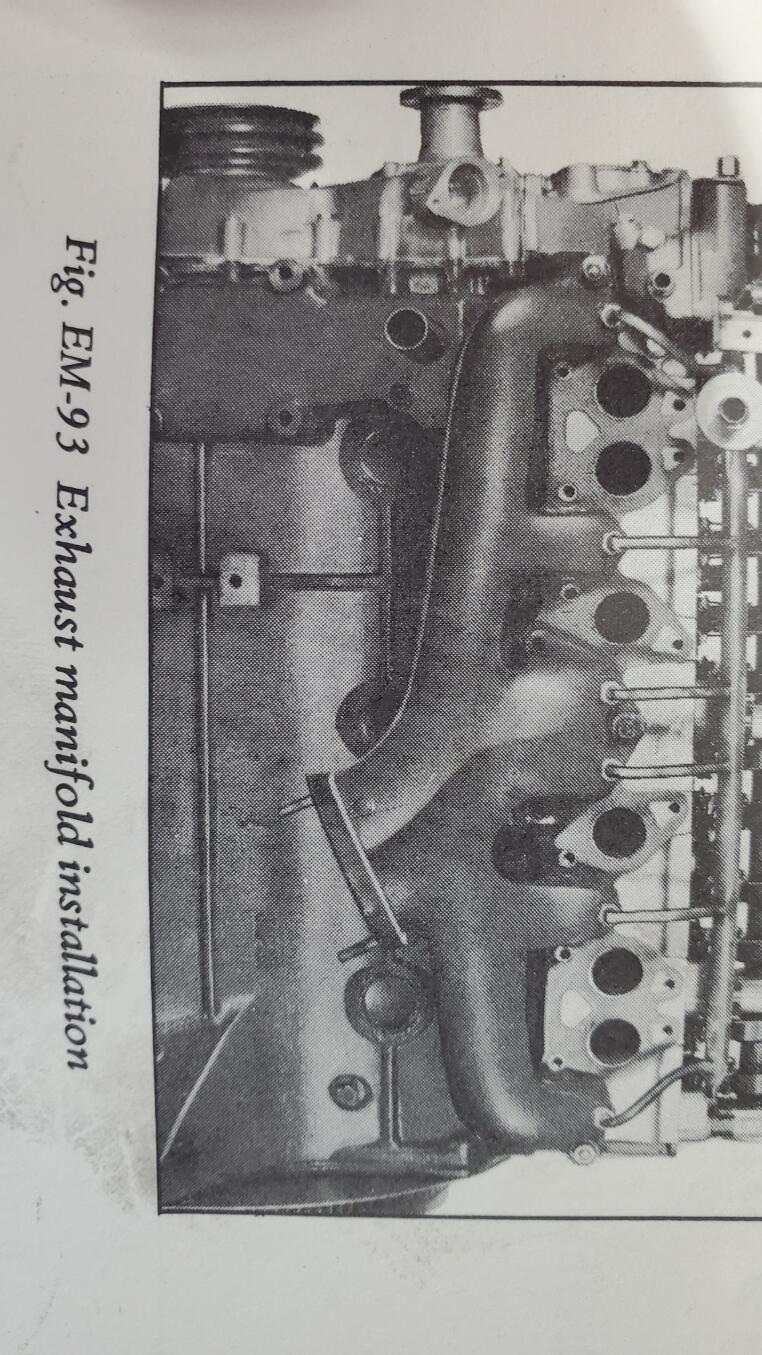
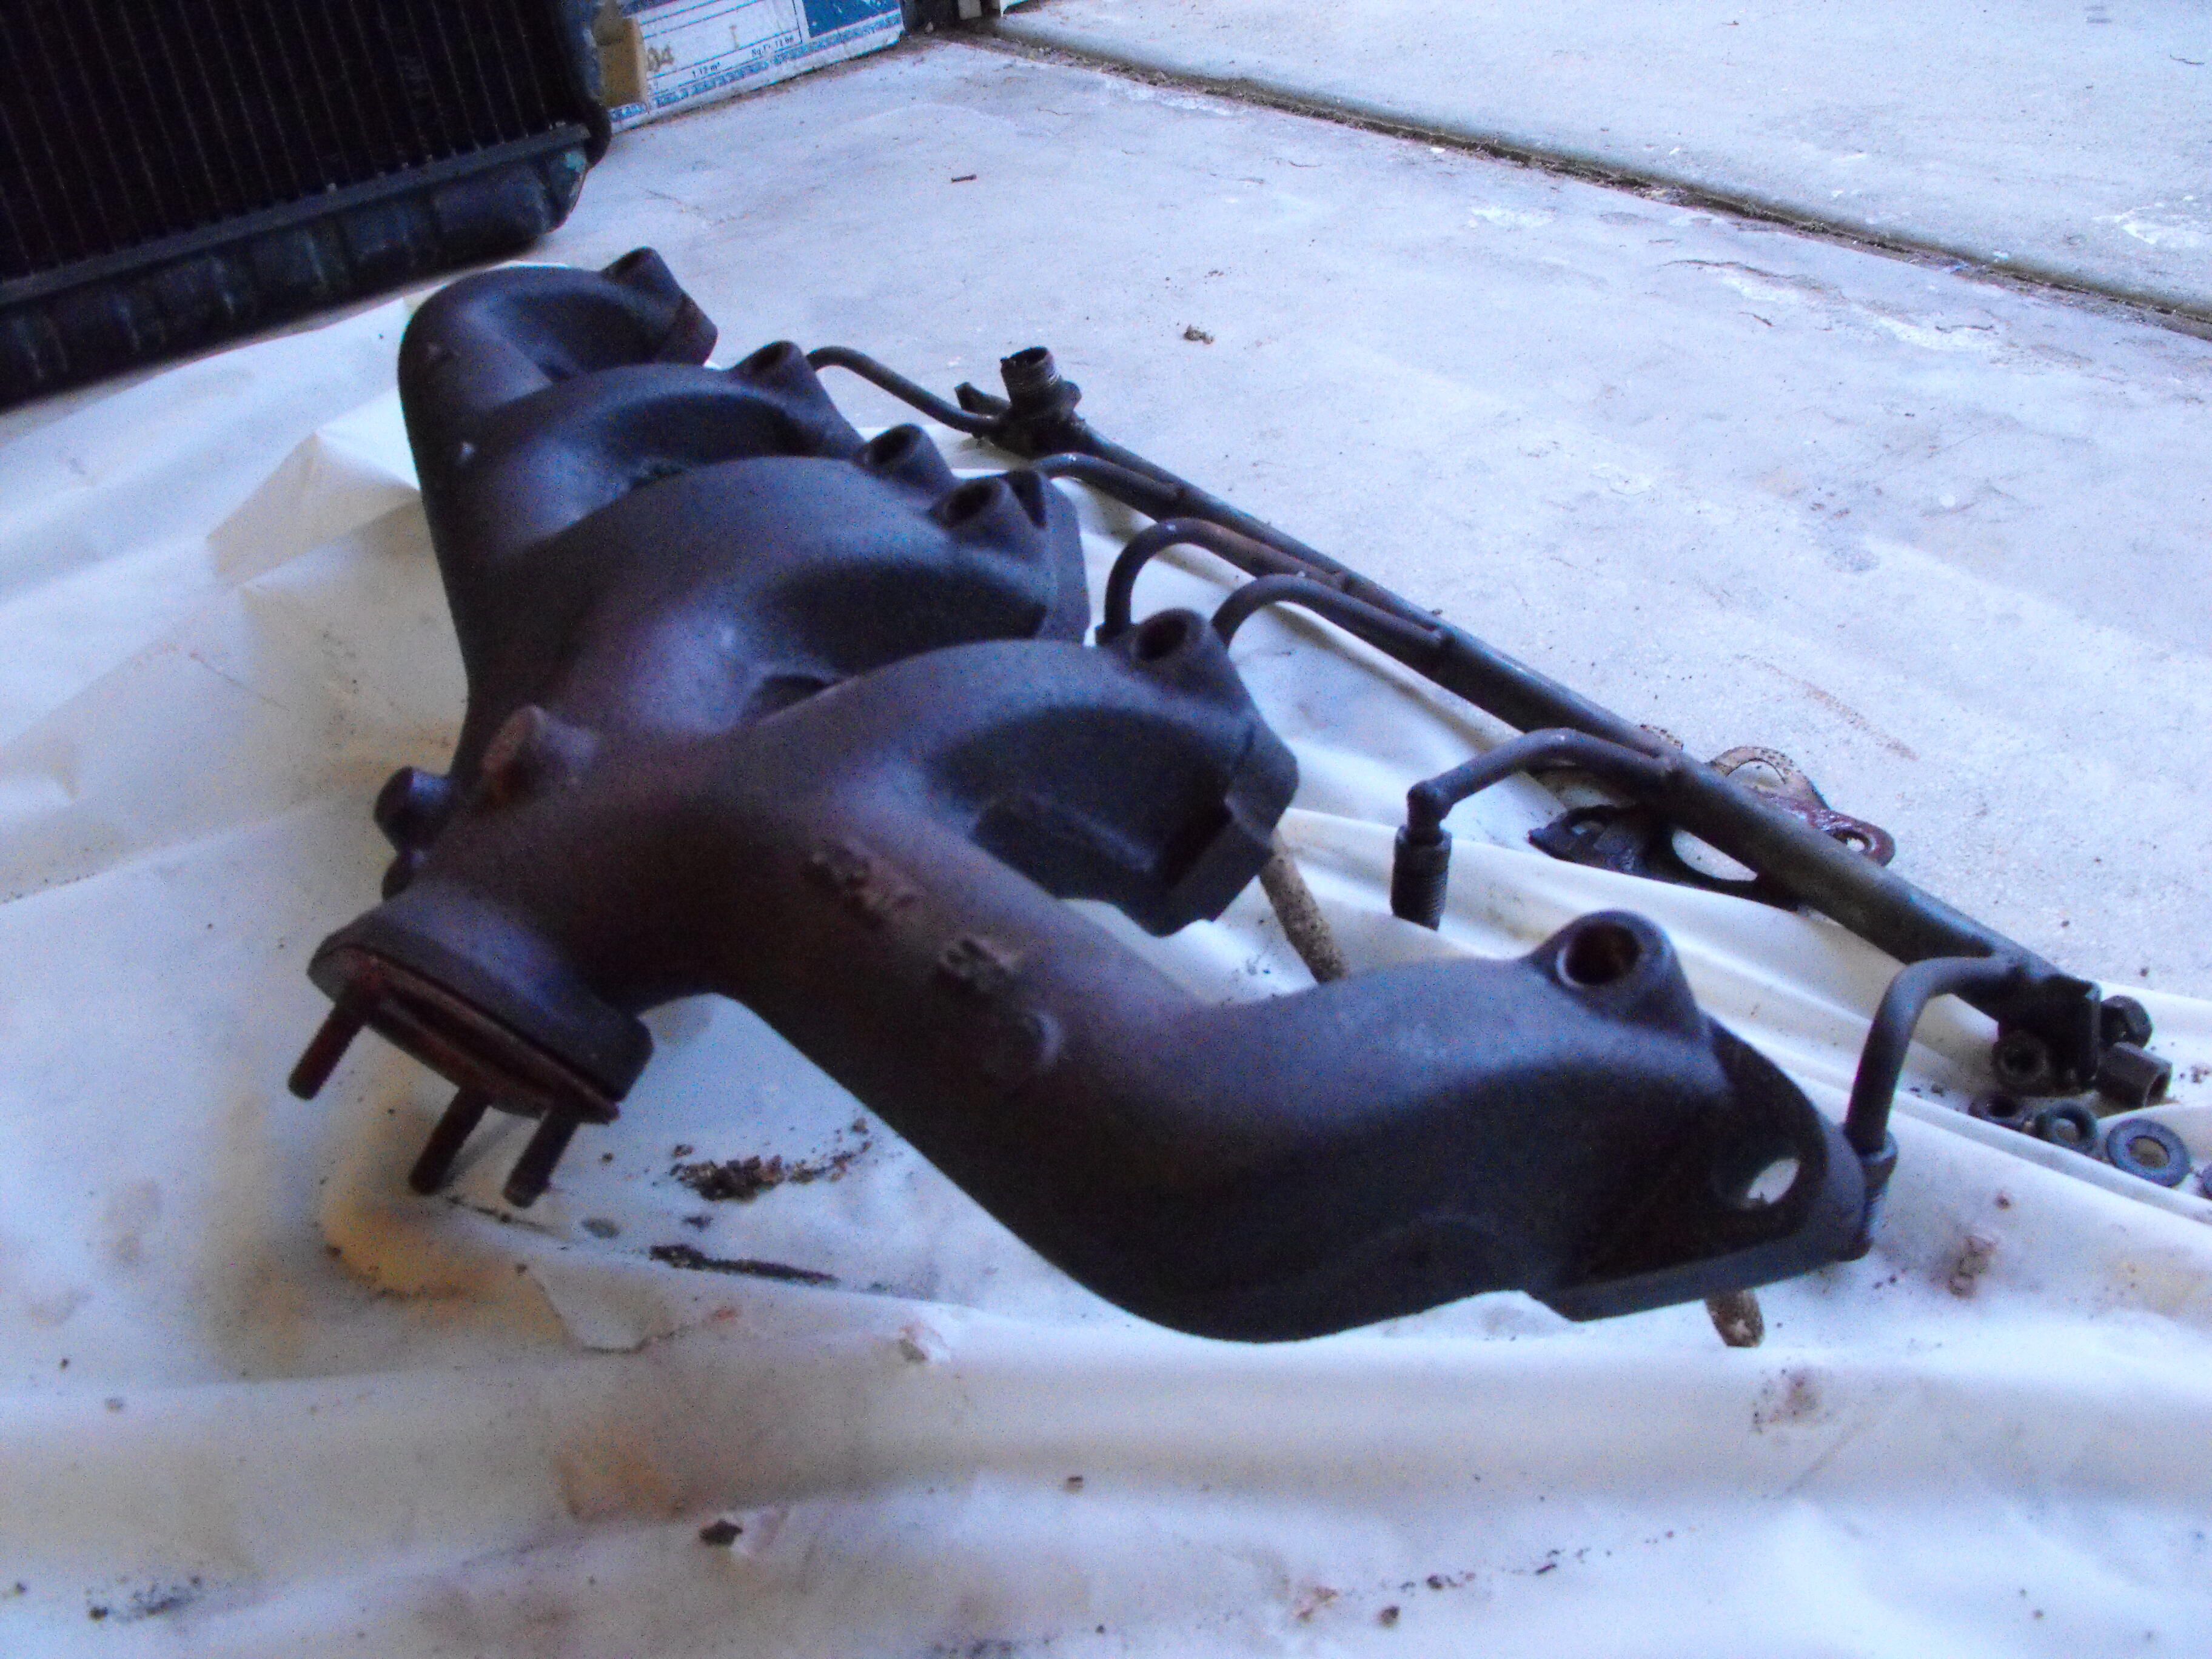
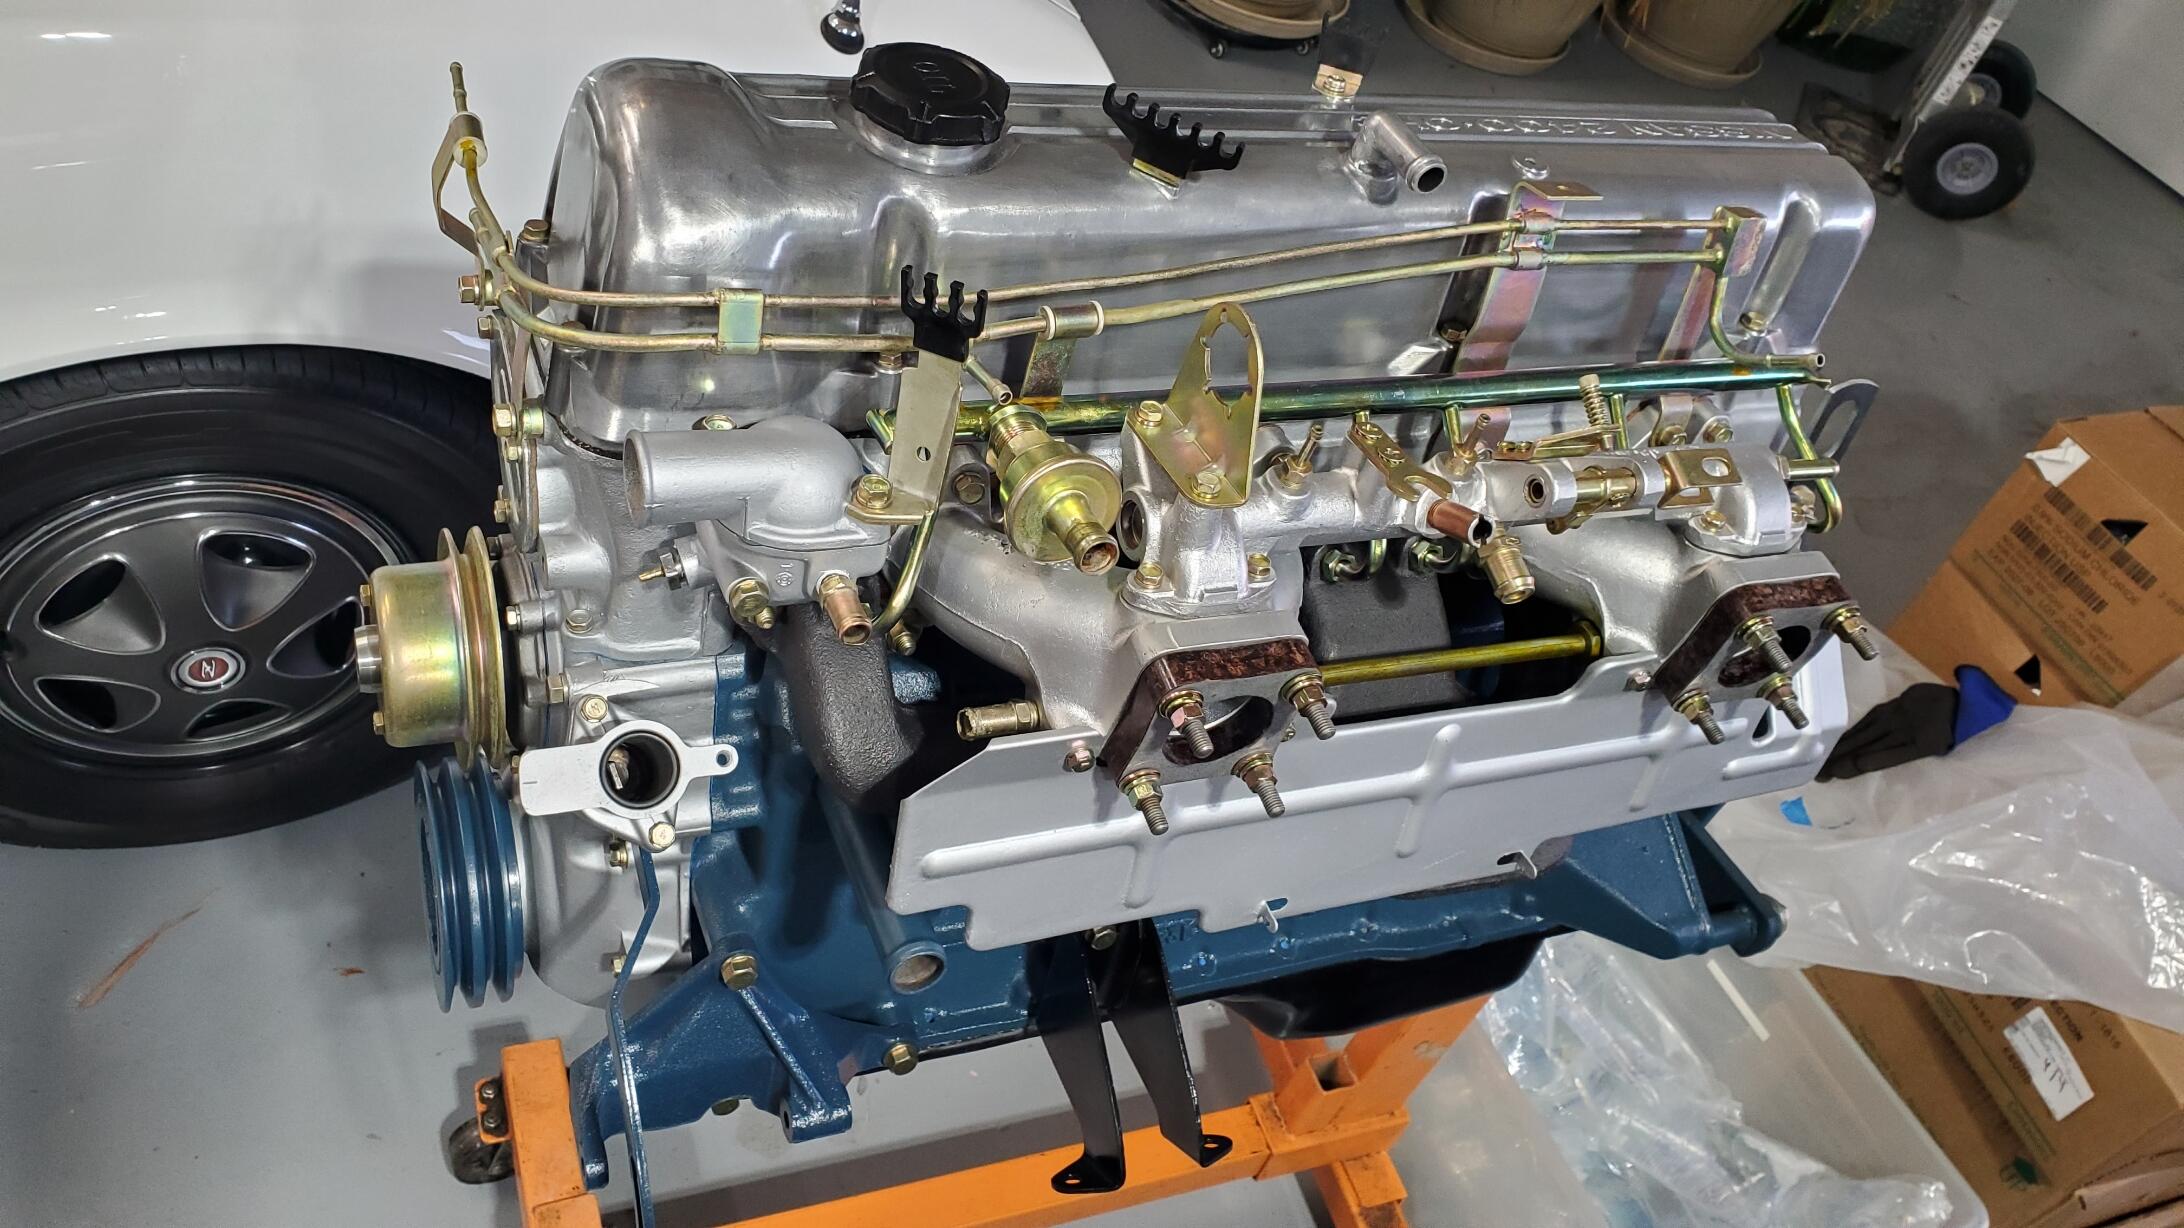
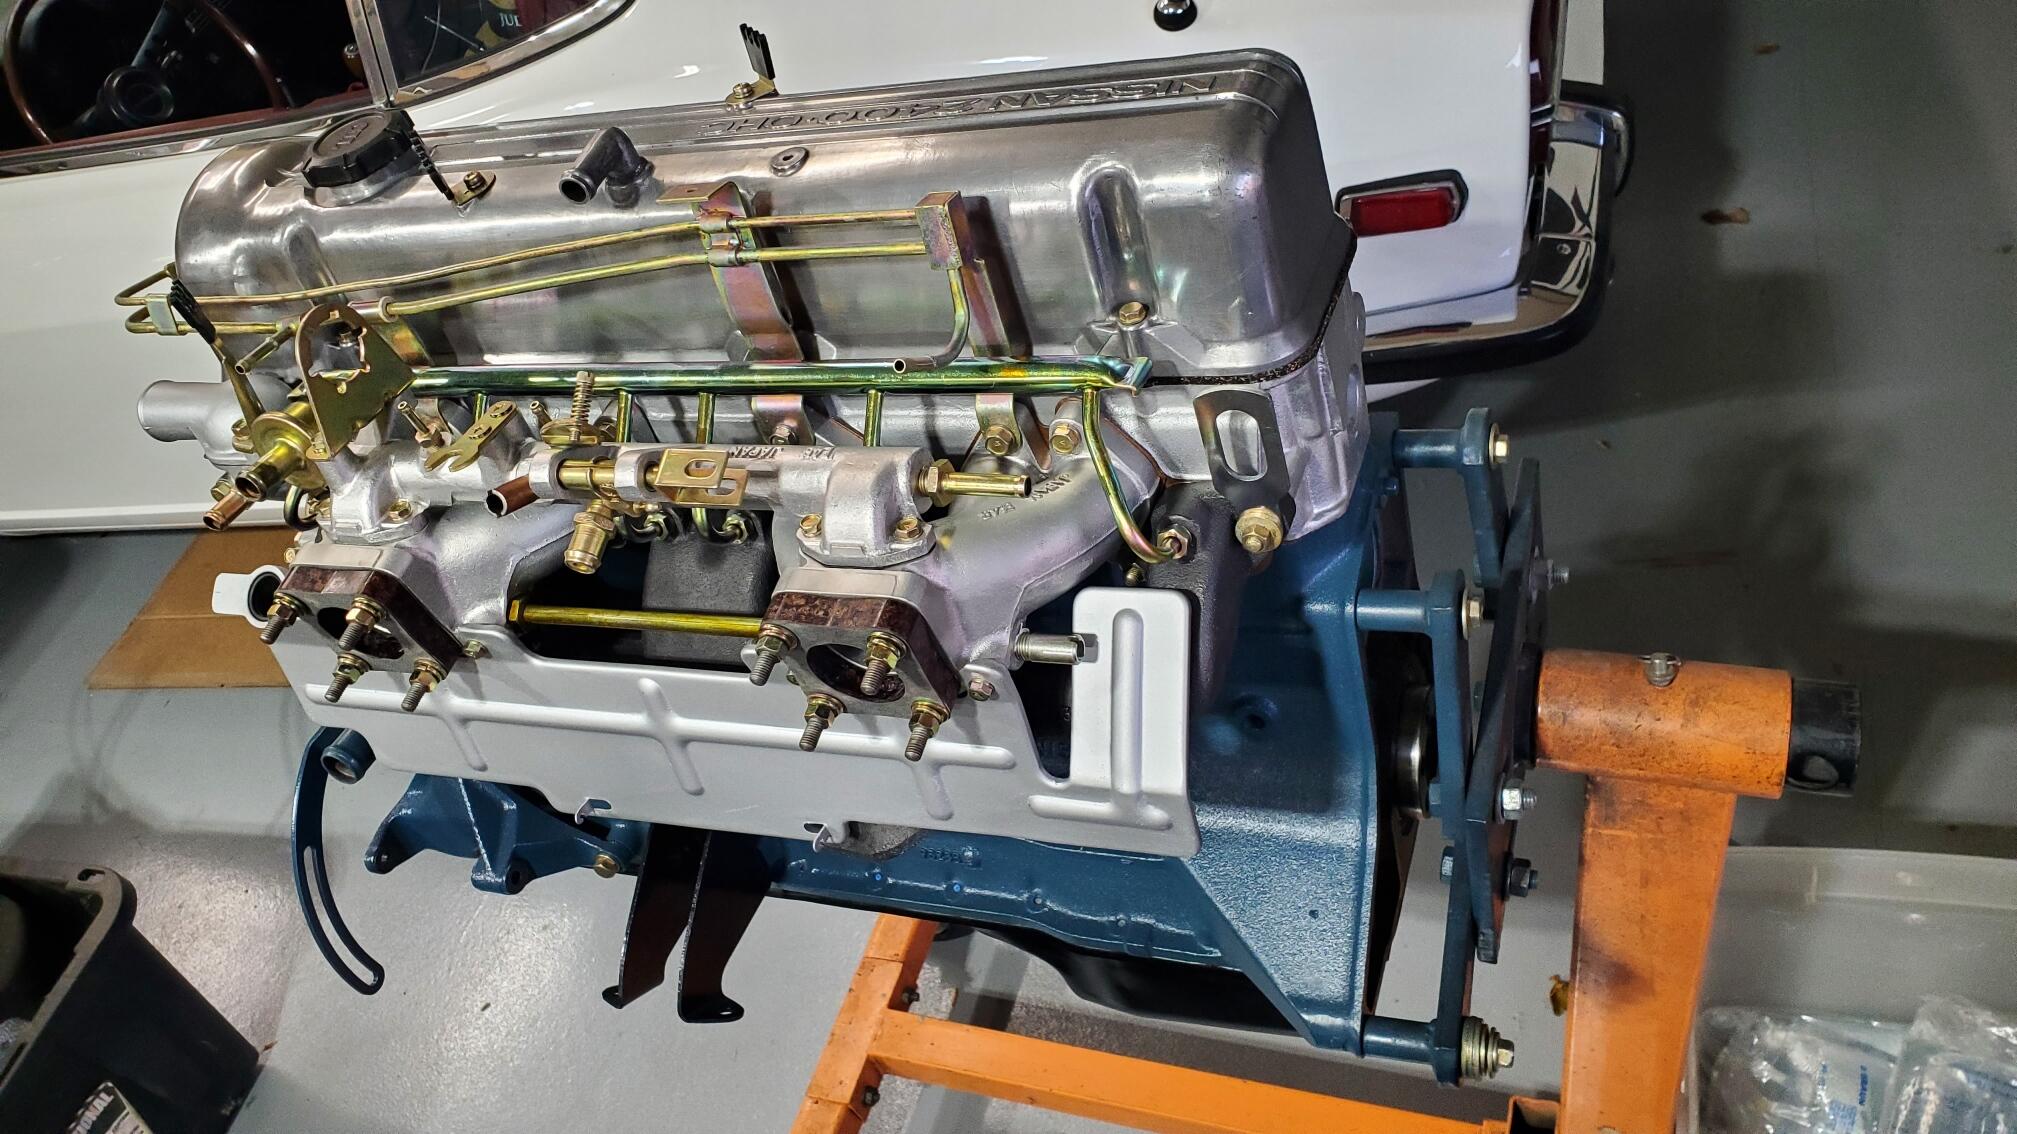
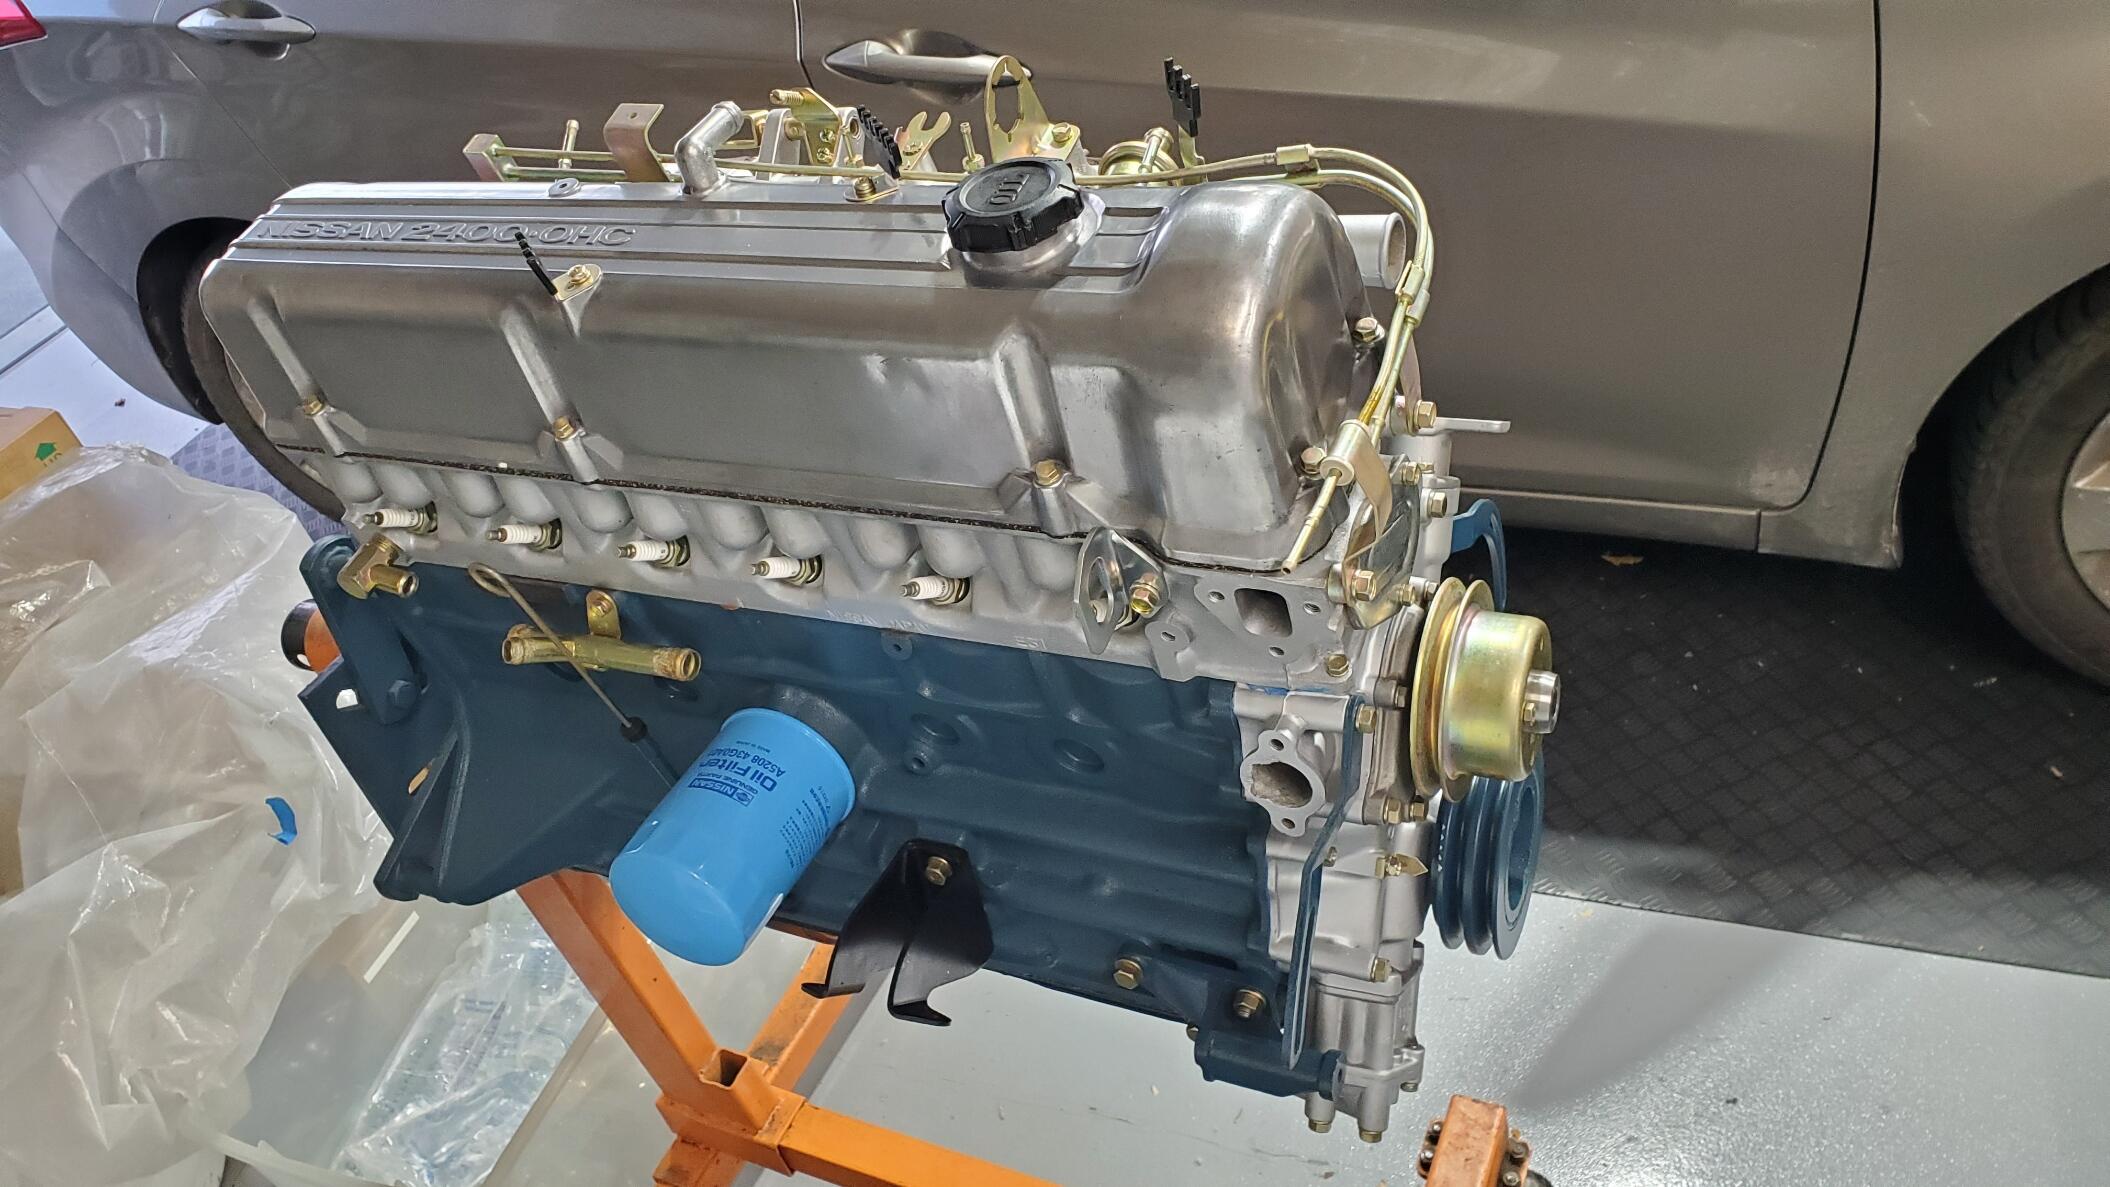
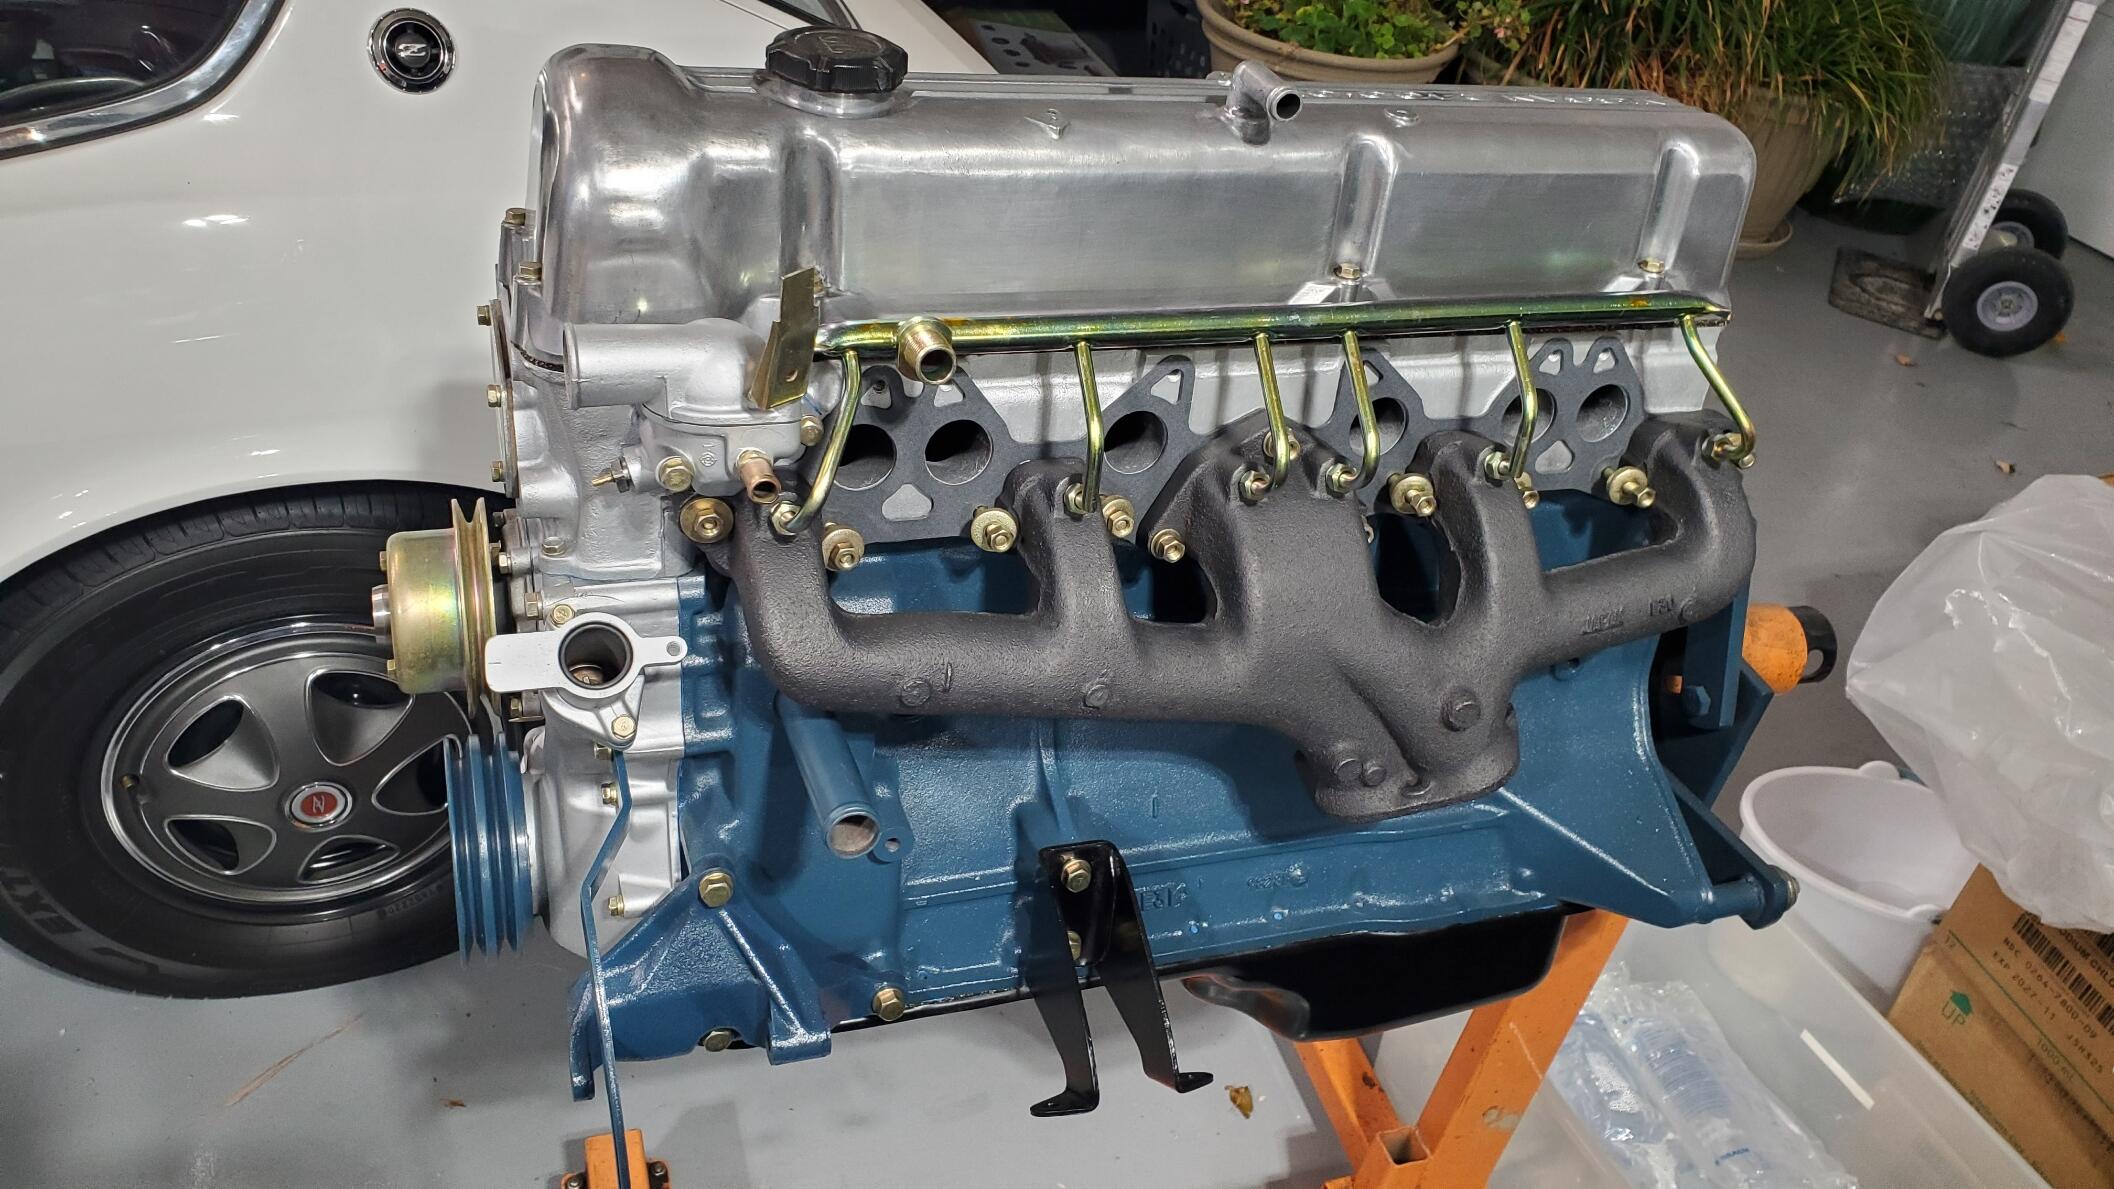
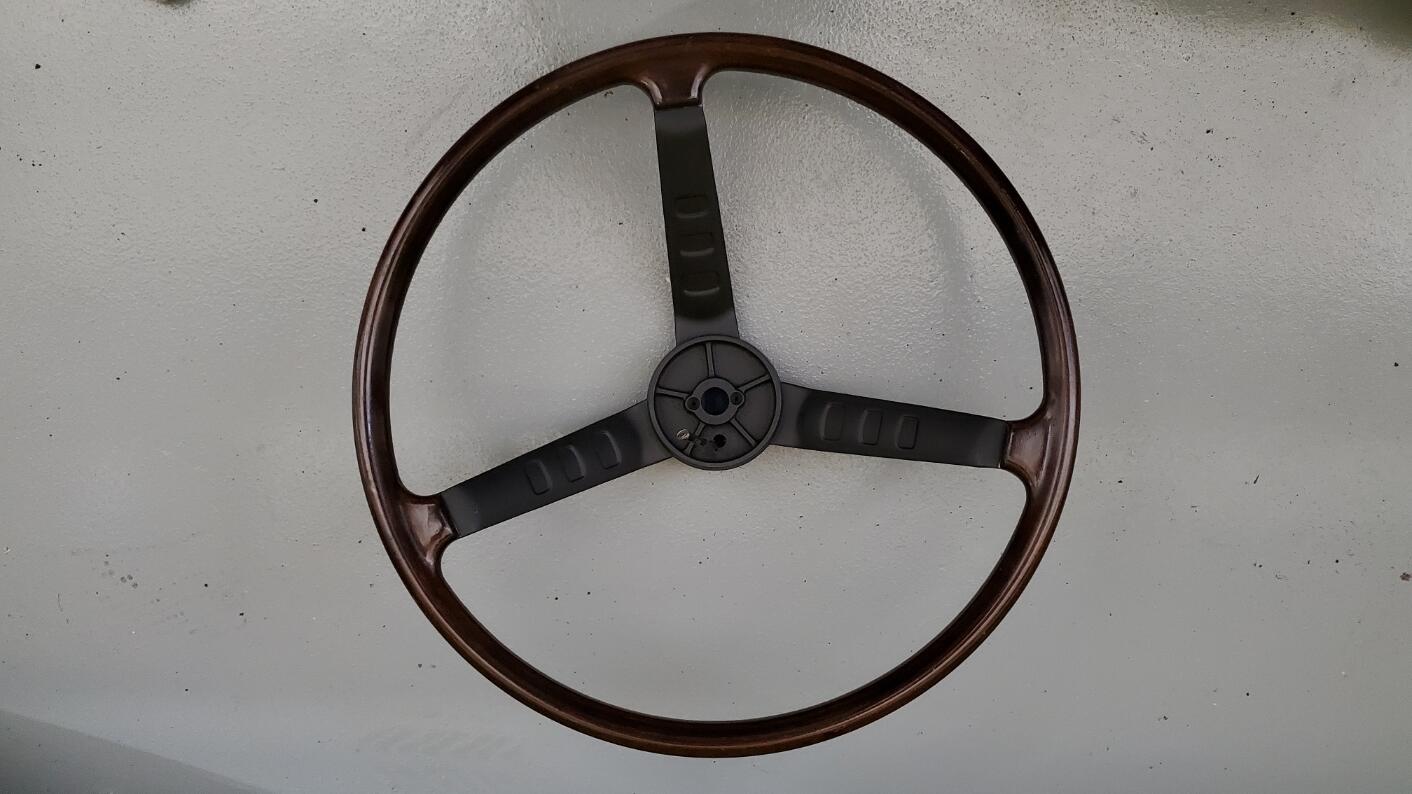
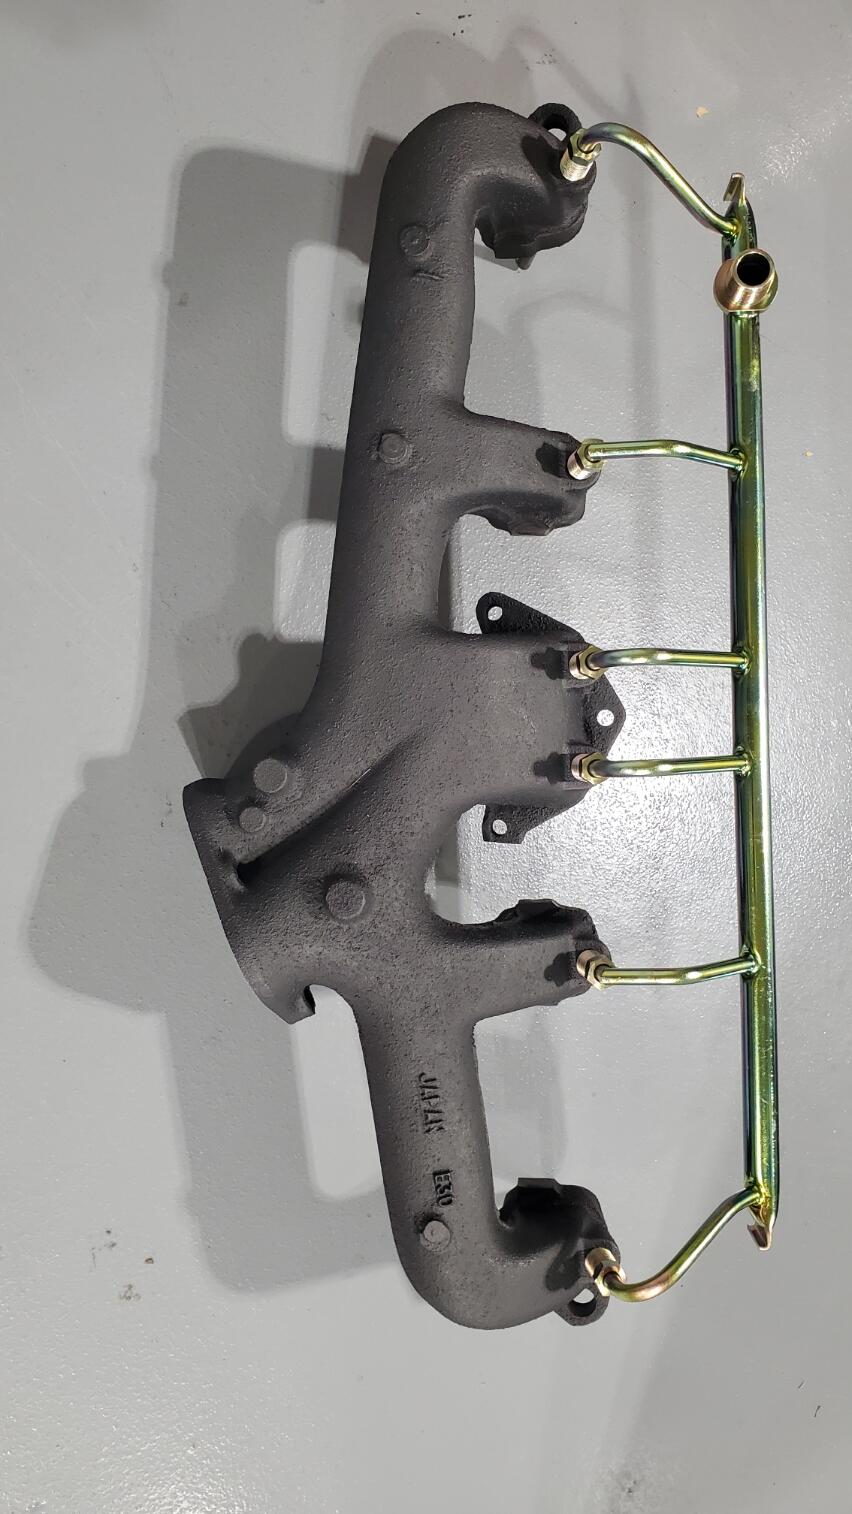
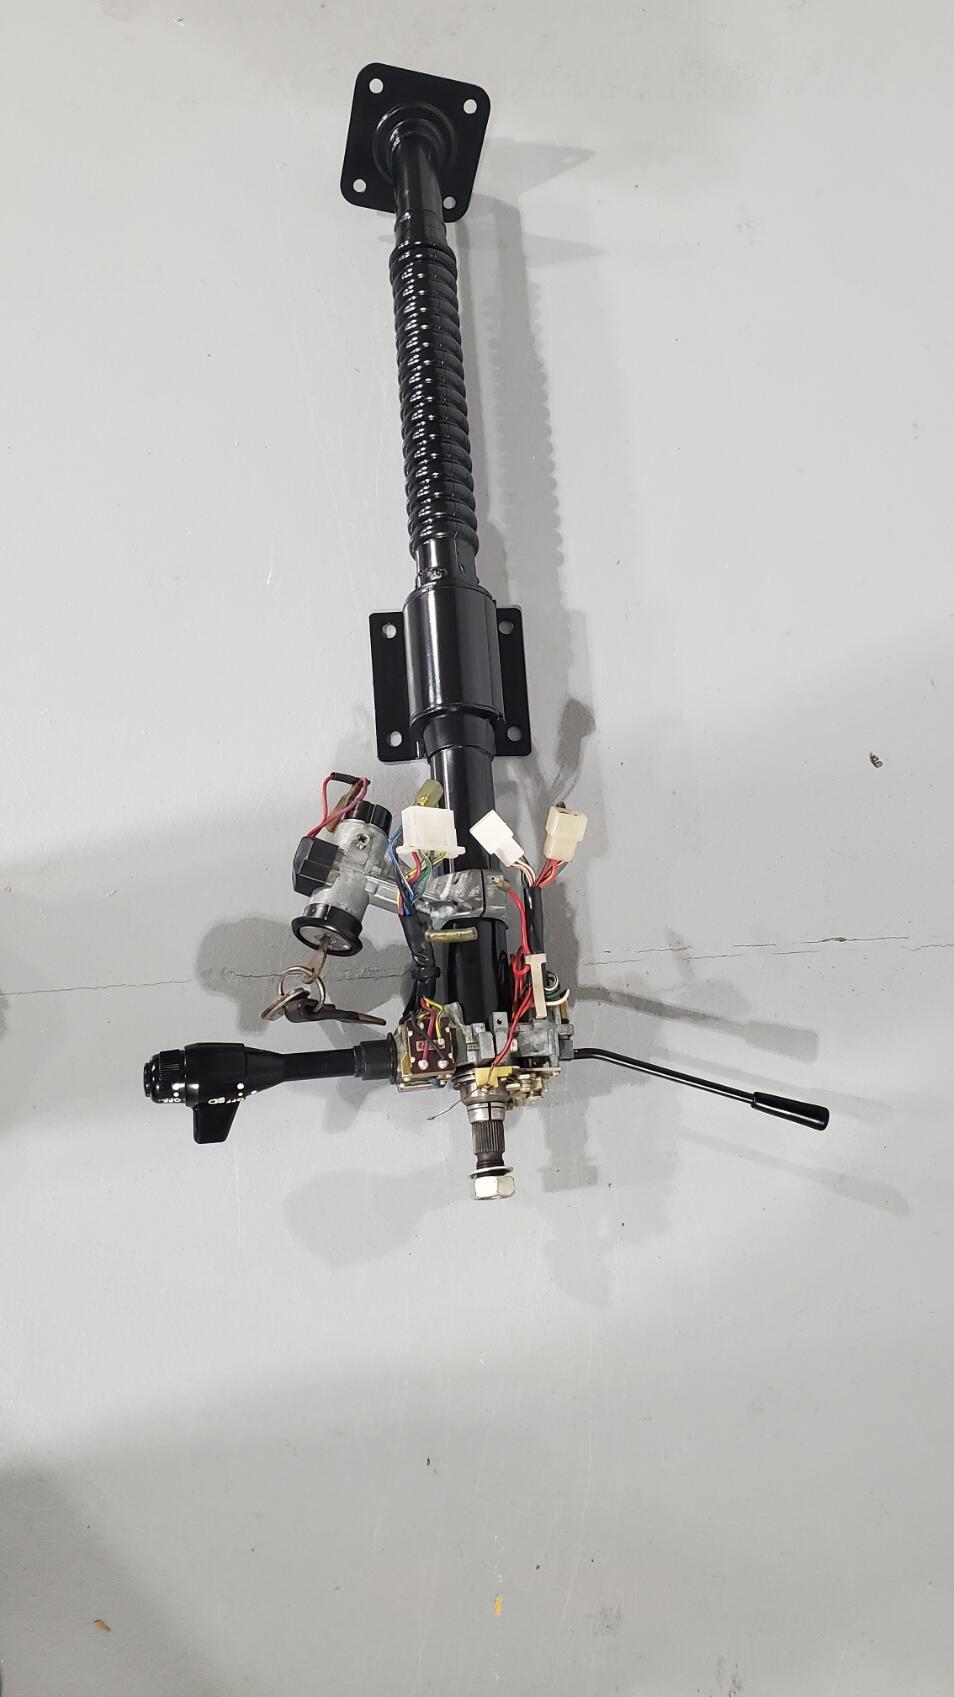
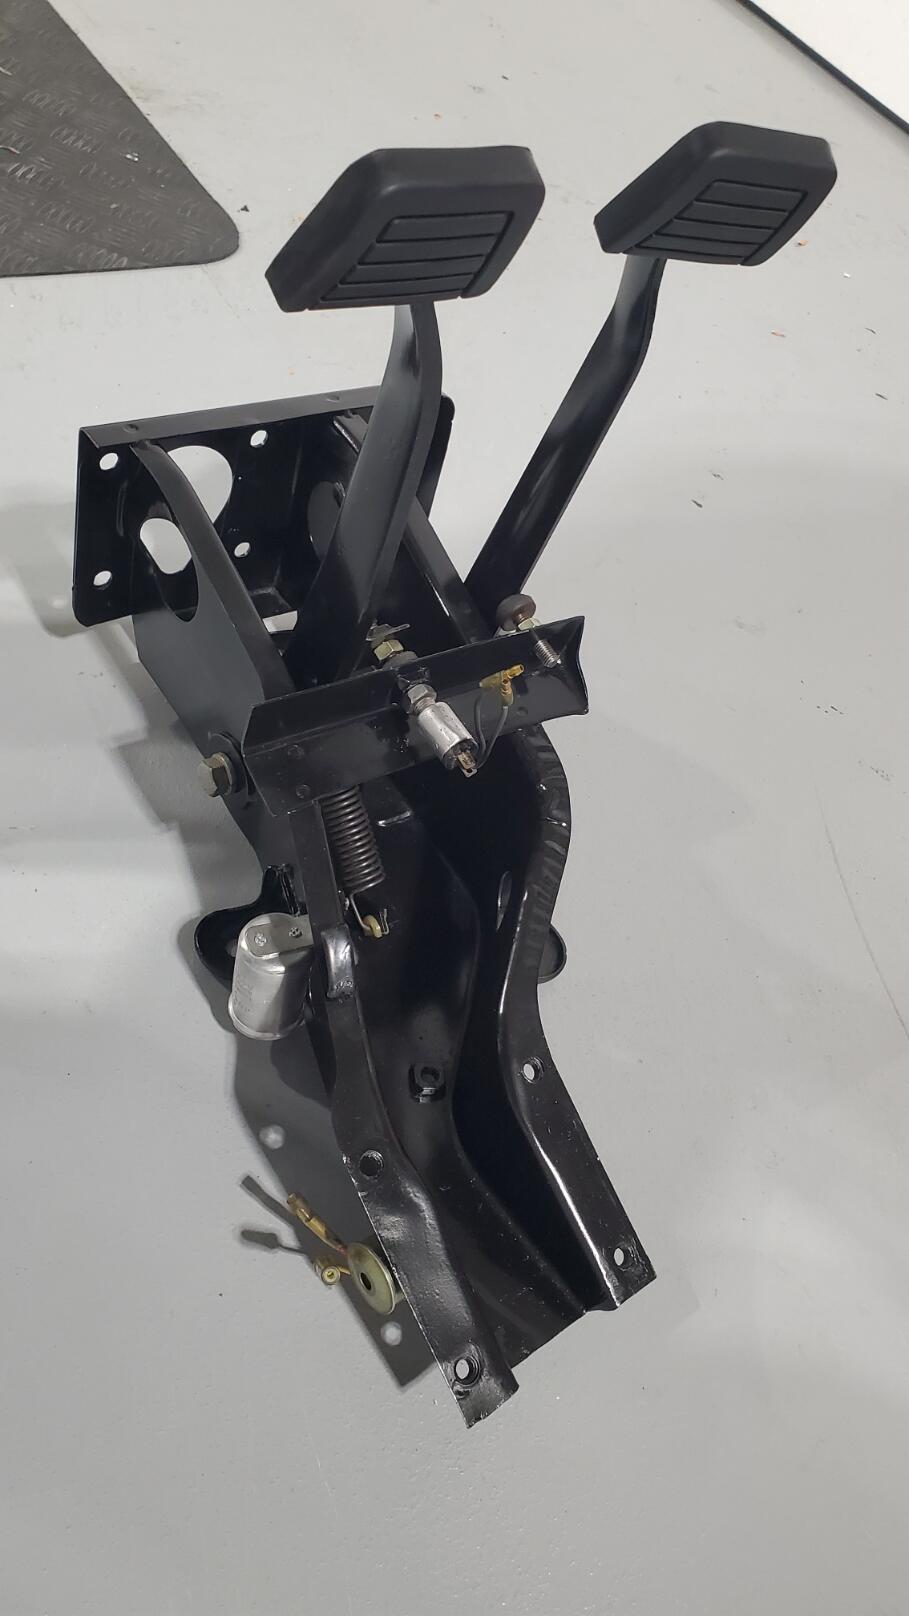
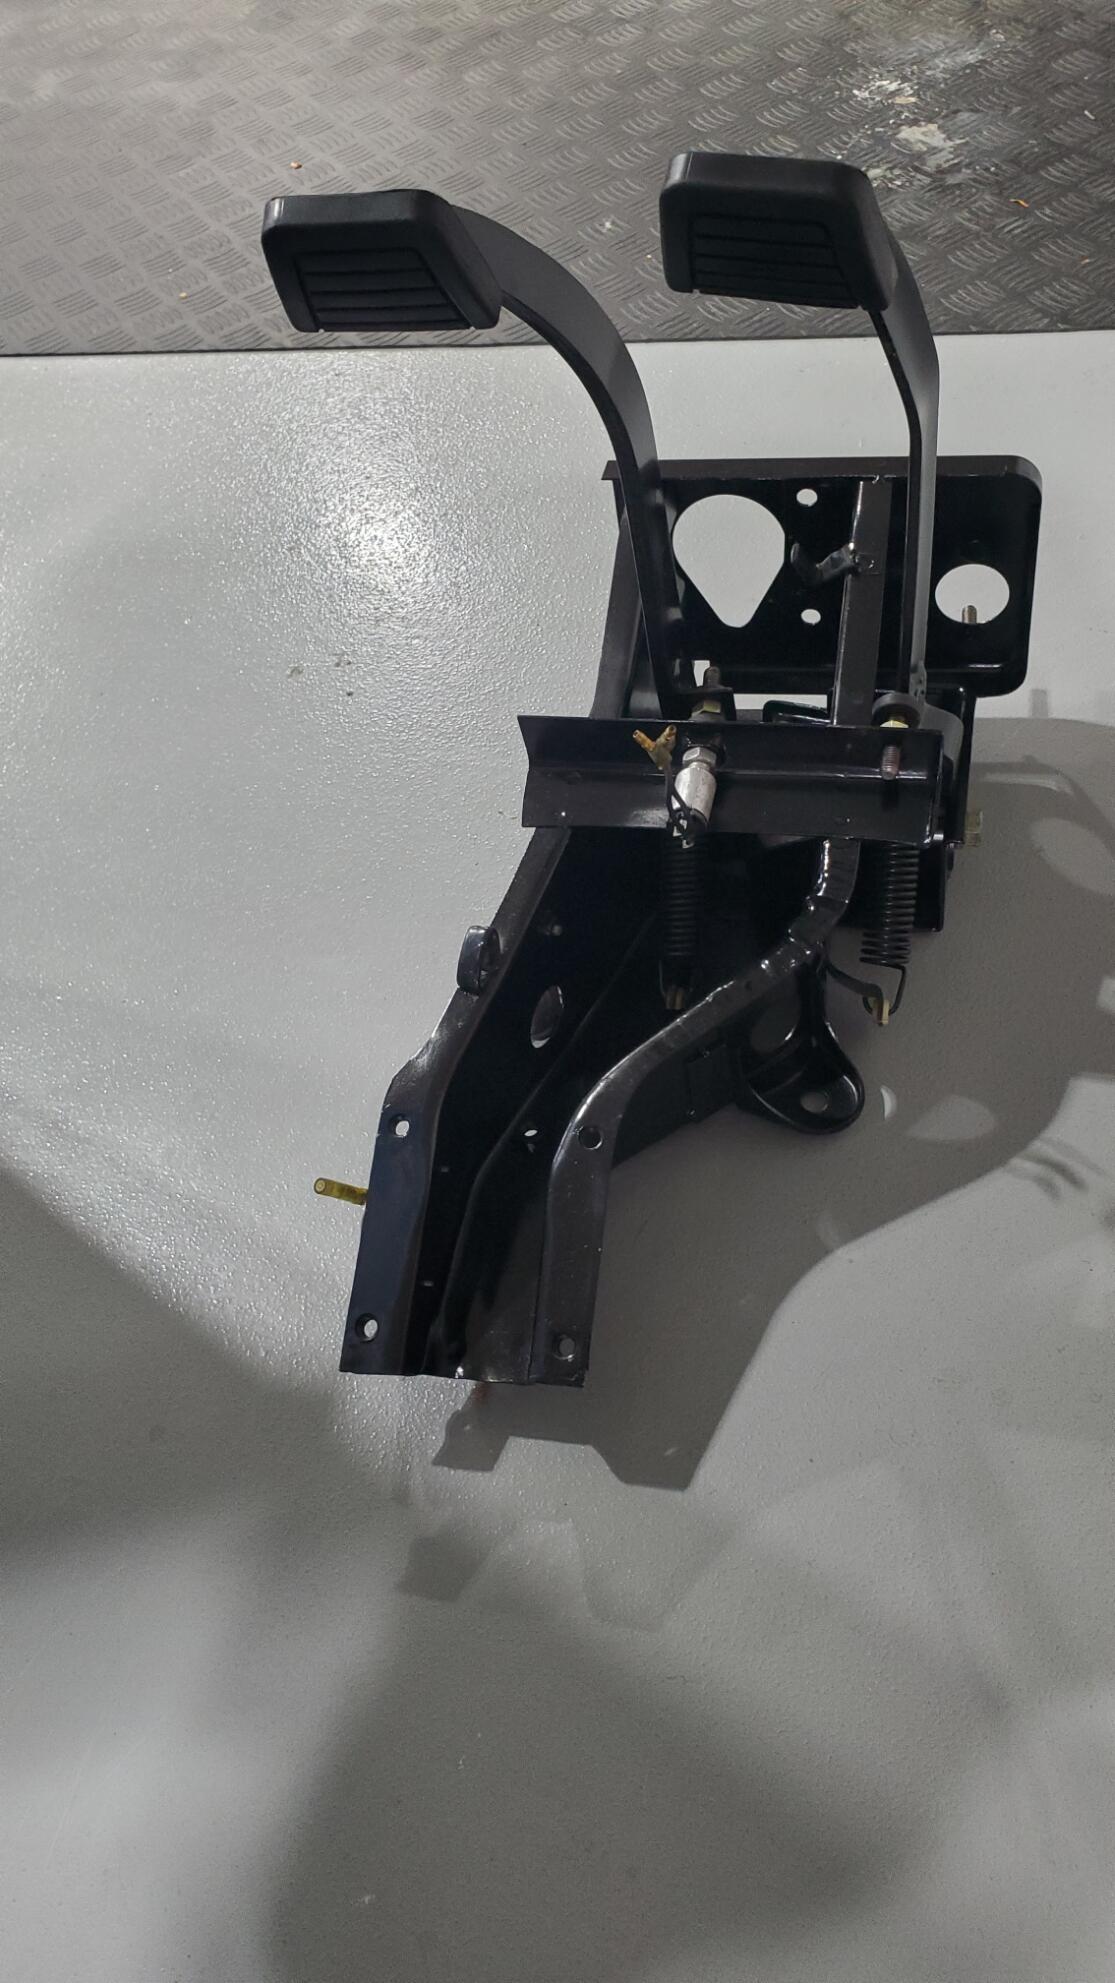
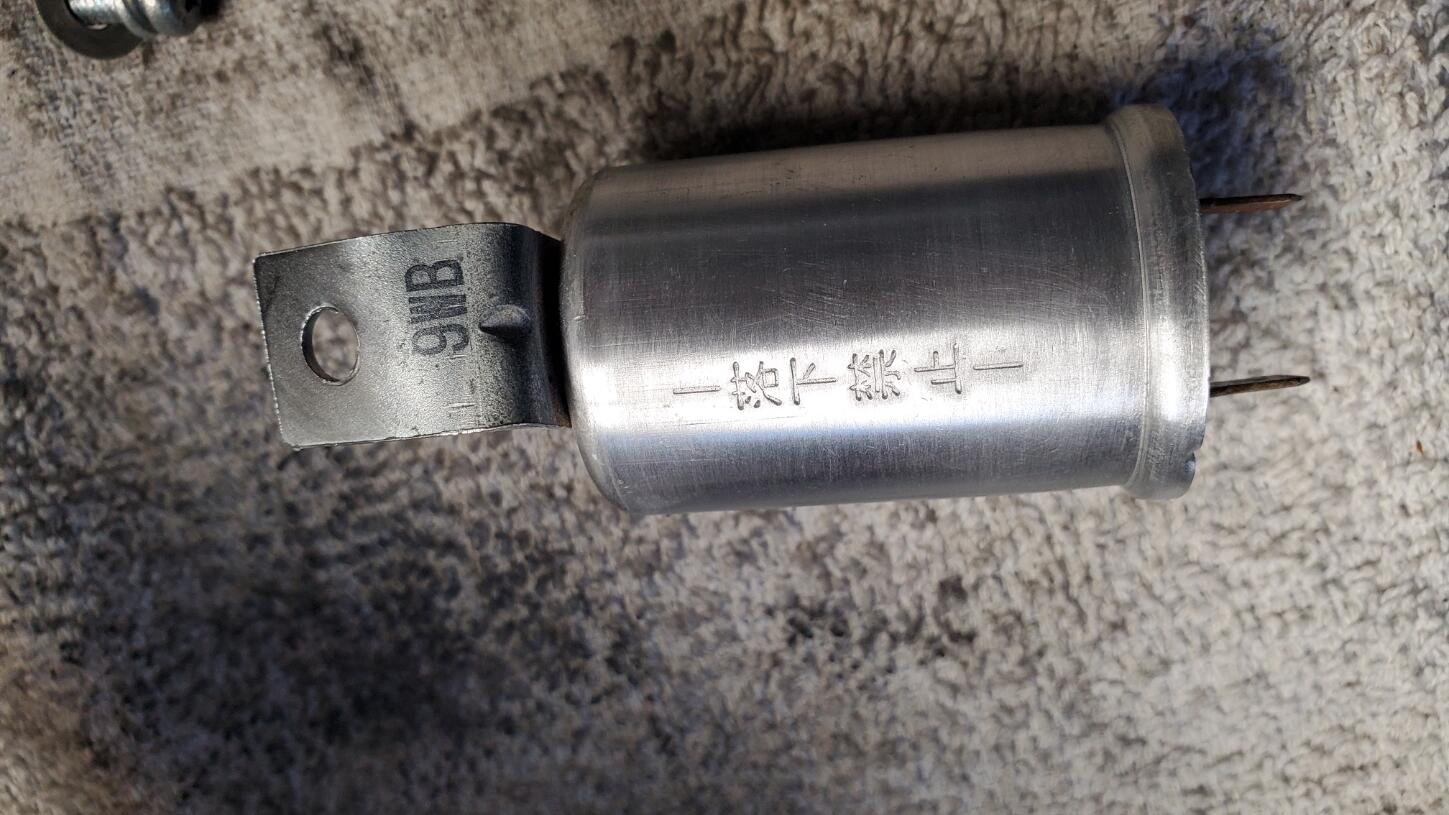
 4 points4 pointsMy new neighbors are smoking turkey legs today. I'm about to go introduce myself.4 points4 pointsMine were more crud from leaving old gas in them for too long. The tanks were good and solid after I pressure washed the outside of them. That muriatic acid made the inside like new but after sloshing around for 5 minutes I had to pour in about 3 gallons of mixed ahead of time baking soda and water to neutralize the acid then emptied that into an empty 5 and killed a lot of ant beds around my property. Then the acetone to remove the water, quick hit with the leaf blower and then the Red-Kote. Sloshed that around completely covering the tank and let that drain out into another 5 then direct sunlight for 30 minutes, then another round with the leaf blower. Then I put that bitch on a shelf and got drunk. It was very nerve wracking for this 'ol boy, but when all was said and done I was and still am proud of what I did. You see, I hate following directions.4 pointsBut the price of obesity drugs are much cheaper.4 points4 pointsI offer two different versions of my conversion bell housings to do the reverse tilt. One for the CD009 and one for the TL70. Most of the people that buy my head end up tilting them so I offer the bell housings to assist in that.4 points4 pointsI should have a lot more updates and pics here as I have finished my summer home projects. Also, I am hoping the body and paint will be finished in the next month or two, so we should see some good progress. I appreciate all of the input here. I am always open to advice and the knowledge of those that have seen and worked on these cars in the past. Personally, I will listen to the panel of experts and then move forward with what seems to be the best direction. Also, as most of you know, I own a pretty much un-restored early 240Z that I grew up with since I was 9 years old (in the family for 55 years) , so I have a nice reference vehicle. That being said, I find it interesting that there seems to be a tendency to hold the ZCON judging in high regard. Personally, I do not have a very high regard for ZCON judges. In reality, many of them have never owned an original Z car or examined one closely. As a result, they make a number of mistakes in their judging, none of which can be contested because you do not receive the judging sheets until several months after the show. One of these days I will start a thread here titled "ZCON Judging Errors" and see who weighs in, in addition to the items I would list. A few examples are the deductions on my early Z for the weld lines on my oil pan. (FYI 0042 has the same weld lines so they will probably mark this off too). Another good example is the Franklin mint car losing points for having the 'Silver zinc' coil holder instead of 'Yellow zinc' holder. I have heard of judges insisting the original brake lines were stainless steel, the rear diff cover was bare aluminum and fuel hoses were not the 'cloth wrap' style. I am sure that I am just hitting a very small portion of the errors as I am only familiar with the cars that I have been involved with and what I can remember off the top of my head. Anyway, just had to rant a bit about the judging issue. Don't even get me started on the non-Z show judging. Regarding the Exhaust manifold finish, that is an interesting discussion. For most of my restorations, I have always consulted Les Cannady at Classic Datsun Motorsports and never questioned his advice (He was just 10 miles down the road) . If I am not mistaken, I think only his shop and Pierre Z were the only shops approved to build the Restoration Z's. Because of that, I have always used the gray powdercoat that he recommended as the default finish. However, given the current discussion and comments, sounds like there are several other options out there that might be more true to form. After looking at a number of different options and comments regarding the color, I am happy with the graphite finish option. Two of the items that lead me in that direction are pics from the Nissan engine service manual and pics of my own motor disassembly that are pictured below. Both pics show a dark cast iron finish, not a light gray finish. So, I am sticking with the graphite and will probably go with that in the future as well. I installed the exhaust manifold and intake assembly to the engine. Pics below. (Also looking for a correct rear engine hoist bracket) I finished up the steering column, and replaced the connector on the turn signal assembly. The main shaft was sanded and re-painted and all the electronics cleaned up. I re-finished the steering wheel that now looks much better, but not sure I will stick with this. The wood finish should be more redish. Problem is that the wood veneer is very thin and I am not sure how much was removed in the restoration attempt from the previous owner. Previously, the nubs on the opposite side were sanded through unfortunately. I will let it be for now, but may revisit it. The center metal portion looks good though. I cleaned up the brake and cluth pedal box. Ready for install. I have no idea what is written on that silver can below.
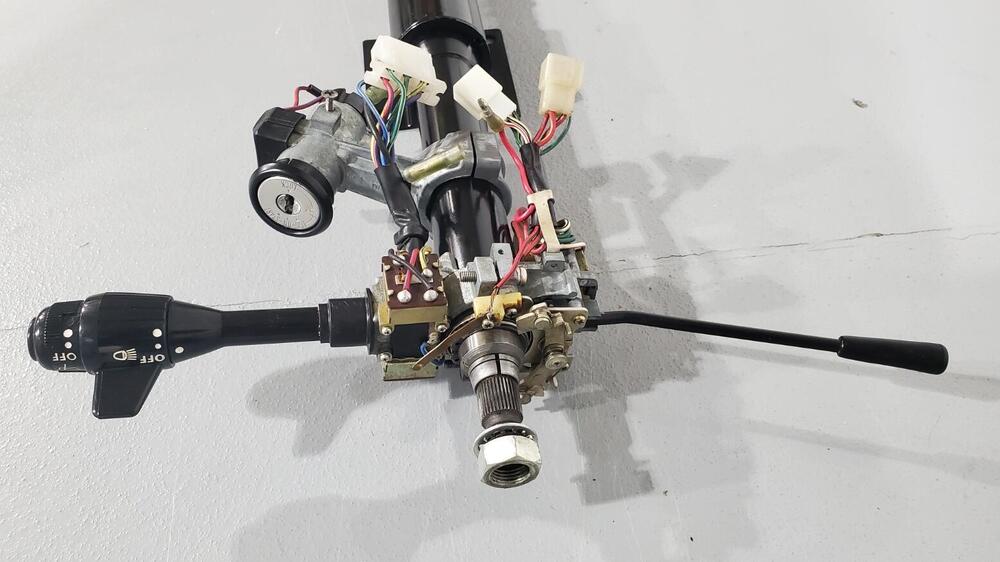
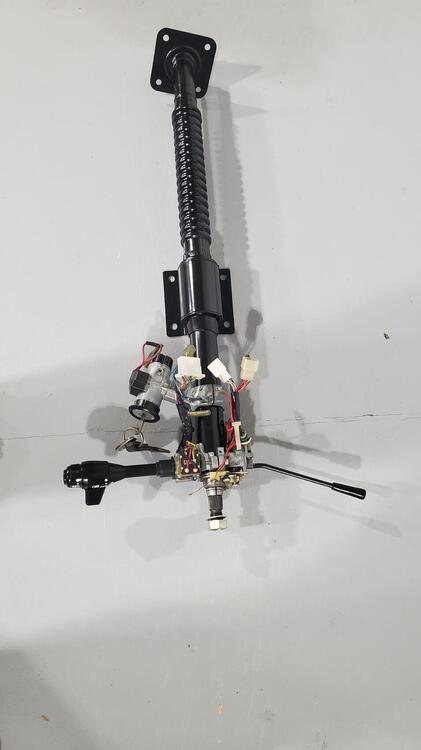


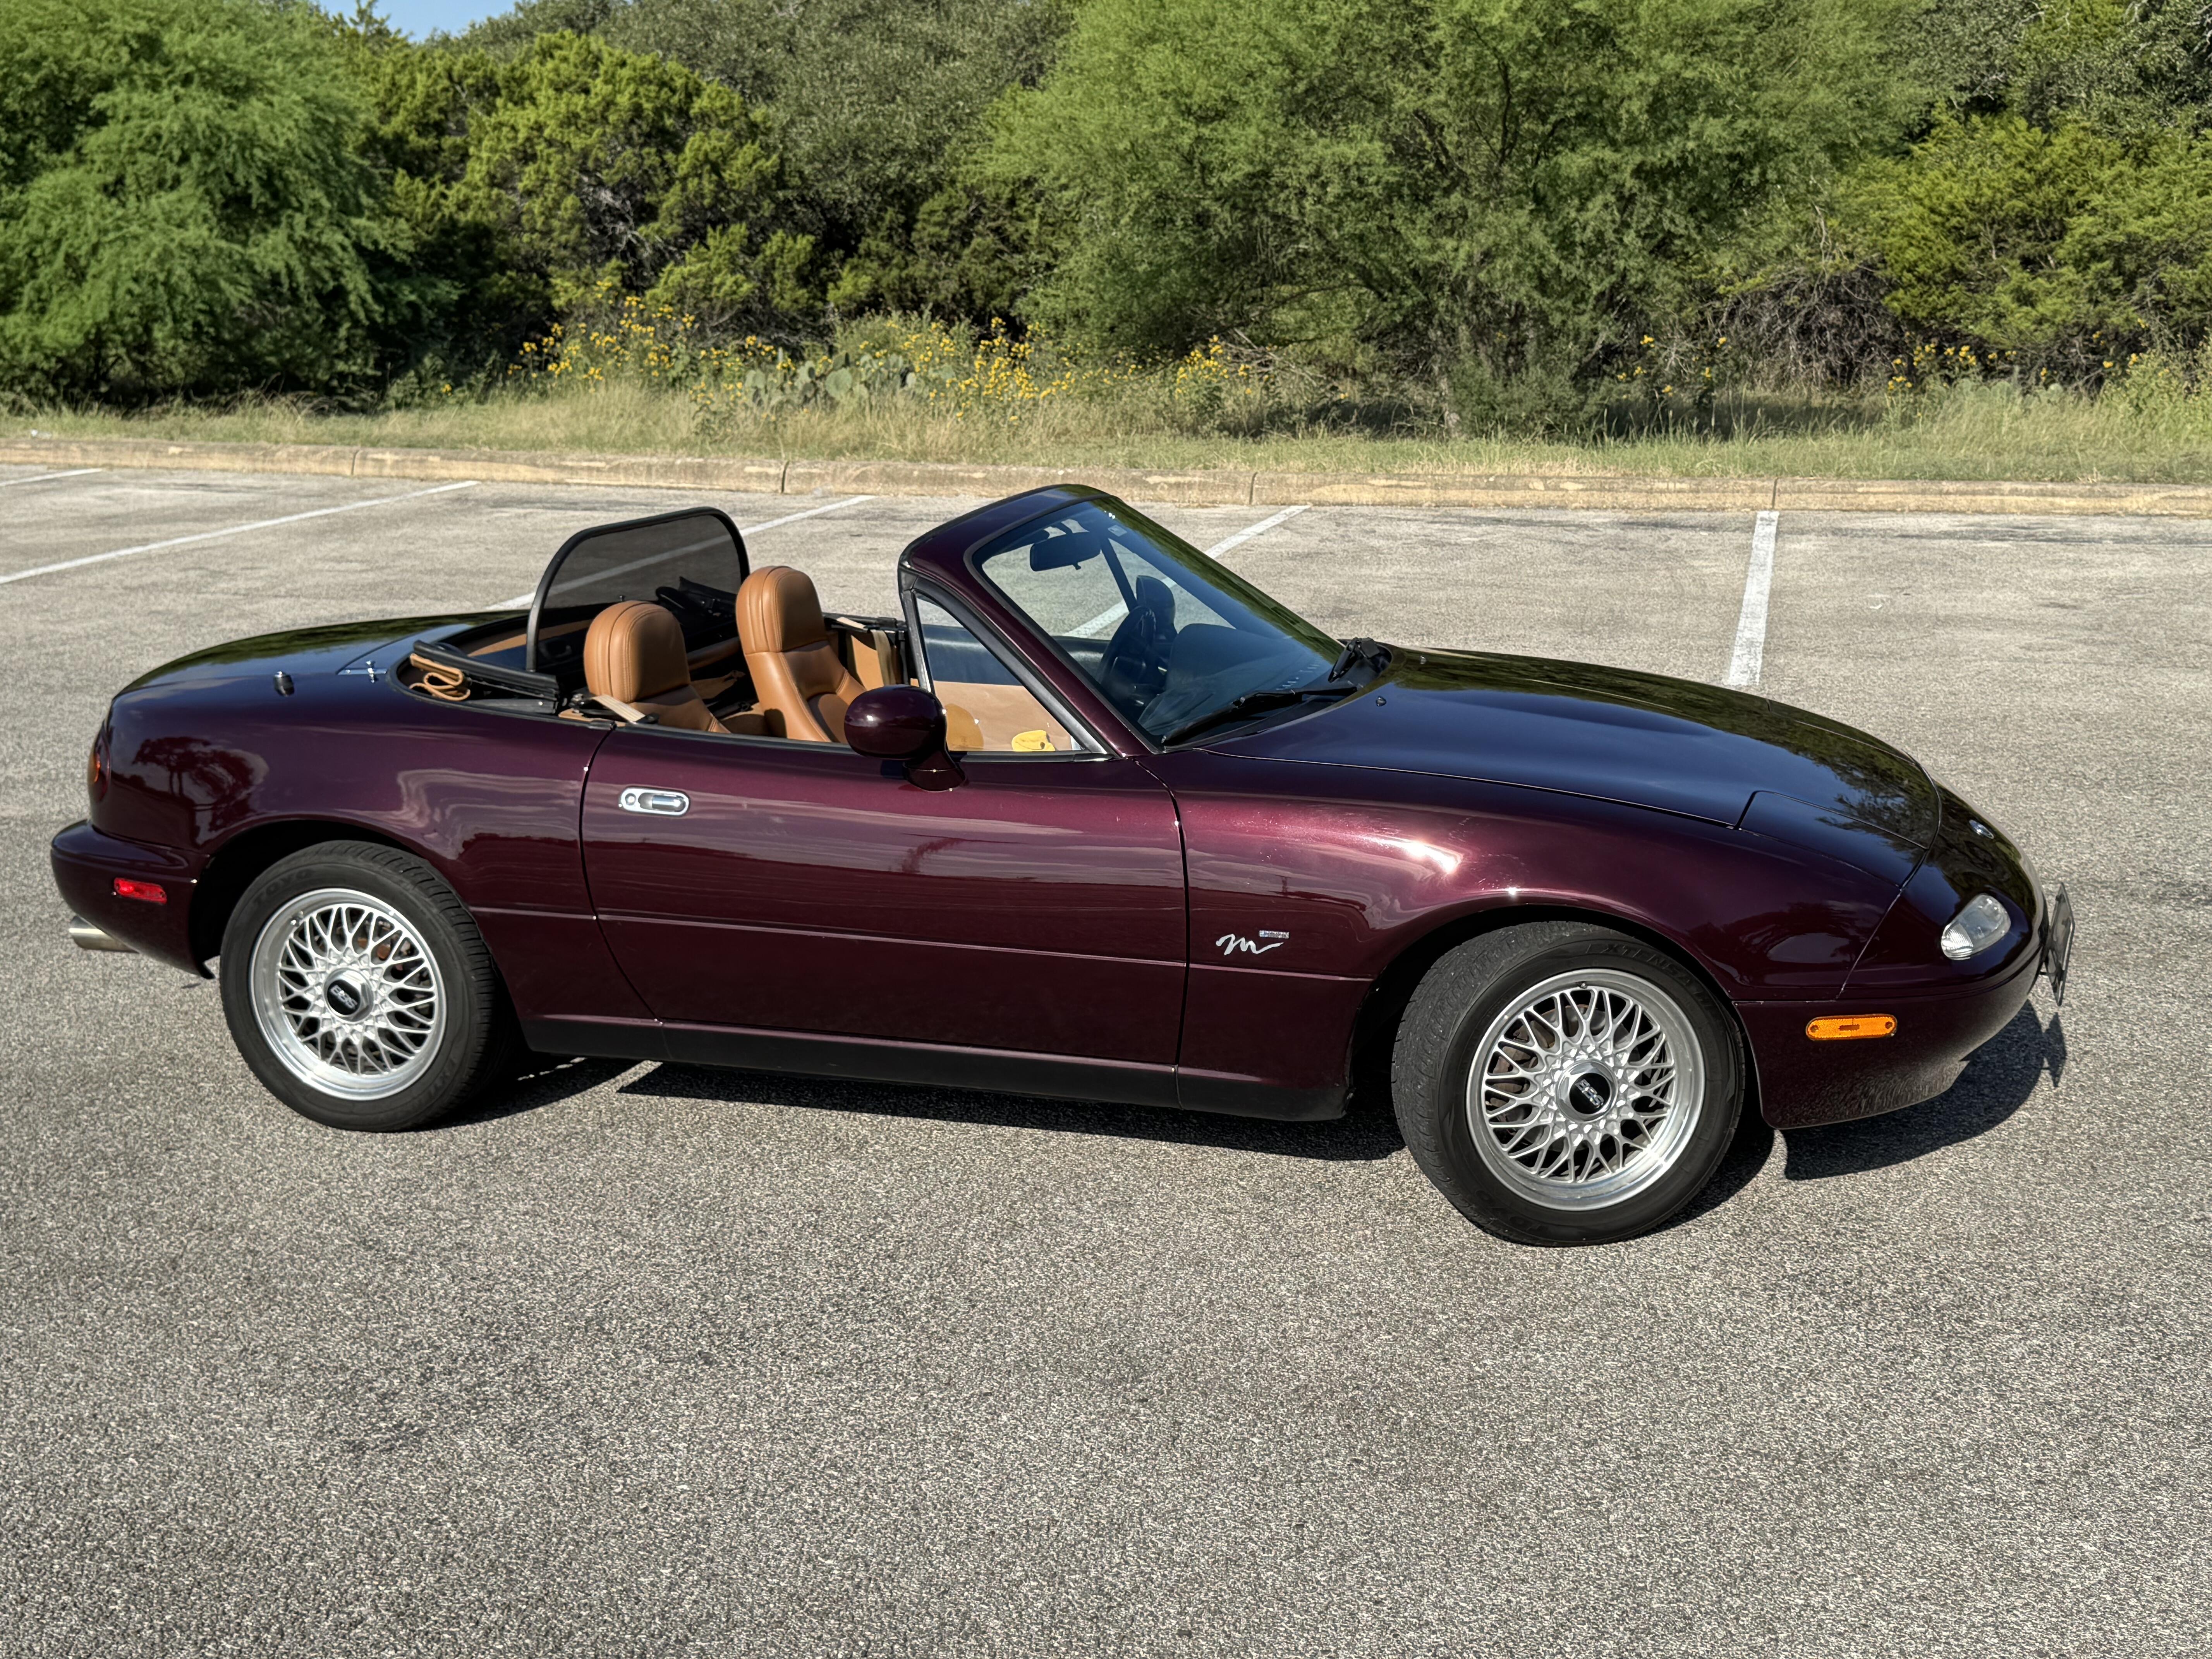
 4 points3 pointsPoppin' back in for a bit, although @conedodger and @Yarb see me quite a bit in The Rusted Zed Pub section. 😎 🍻 It's been a few years since I've spoken with Gary Moisant but I'm pretty sure he's still around up in Oregon. Can't get him away from the race cars! The last time I spoke with Keith @2ManyZs (many, many years ago) he was having some health issues. I reached out once by email a few years ago but never heard back. So, I popped back in here because I ran across something the other day that made me think of this thread. I saw my old Z for sale on Marketplace!!! She's about an hour's drive away and actually less than a mile from my mother-in-law's place! Paint still looks good (which I'm pretty proud of!) but that four-letter "R" word has started coming back with a vengeance! The guy who is currently selling, bought her not too long ago from the guy I sold her to. I stopped by yesterday on my way home from Austin, TX to see her, talk to her, and wish her well in the next part of her life. Still has good bones, but the level of repair is far more than I'm willing to tackle at this age and stage of my life. It was cool to see her again and I can't say I didn't shed a tear or two... We did go down the roadster route for a few years but not anything from Datsun. We did the Miata thing. Cool, fun little car that was a blast to drive. Helped that it was already set up for autocross which made street driving an absolute blast! Top down every single drive, even if we got caught in the rain (as long as you stay moving...)! But alas, as the wife and I both start looking toward retirement all of the toys have been traded up for a large center console boat for fishing down on the TX Coast! Grandkids are on the way and life's focus has just changed. The Z will always be a part of my life and I will die loving the sleek lines of the S30s, but I don't think there will ever be another one in our garage. Add it to the list of cars that "We should have never sold!" 😉 Y'all keep the rubber down and the RPMs up!


 3 pointsI've been traveling a lot recently, and been dealing with life, but I still managed to collect some cool stuff: I got hands on this cool vintage NISMO enamel sign from Japan: And this cool Poster, which shows a works GTS-II race car. The seller says he got it from a racing shop called Iwashita racing in Shizuoka, many years ago. According to Alan, it shows SCCN works car from the first round of 1972 Fuji Grand champion series on the 20th of March, with driver Kazuyoshi Hoshino. I also found this Dutch 1971 Datsun Advertising magazine. Usually I don't collect documents from other countries (there's just too many), but this one is special, because it shows an EU-spec prototype car. If you look closely, you will see the Fender-top mounted blinker / turn signals and the Rob Janssen homemade front spoiler, which led to the development of the OEM front spoiler for European cars by Nissan. Then I got a reproduction of the MK-1520 ZC car radio manual and a correct Swiss 1972 service / Warranty booklet for my car. After a bit of a search, I also managed to get this cool Nissan Oil Can: With the Elephant oil logo from the 240Z oil filler cap: I also got gifted a Center cap from a friend. Not the correct one for my car, but who am I to turn down freebies? I also found a set of NOS OEM FS5C71A transmission "monkey motion" shifter bushings. The original ones of mine were worn out, and I had them replaced with some red aftermarket ones, but these will definitely look better. Then I'm constantly on the hunt for the missing tools of the Datsun / Nissan tool boards, which I acquired recently. Luckily they pop up sometimes, and recently I got a bunch of missing ones: There are still quite a few missing, but 2/5 tool boards are complete now, and the remaining ones are filling up quickly. I'm currently awaiting more deliveries, so expect another update soon. Oh, You may have noticed that I've also reorganized my workshop and garage a bit for better usage of space.3 pointsWell... it started life at Pierre's Z... saw it in 2001 at the Motorsports Auto Show. The best looking Z Convt. conversion I had seen. The body lines were beautiful..
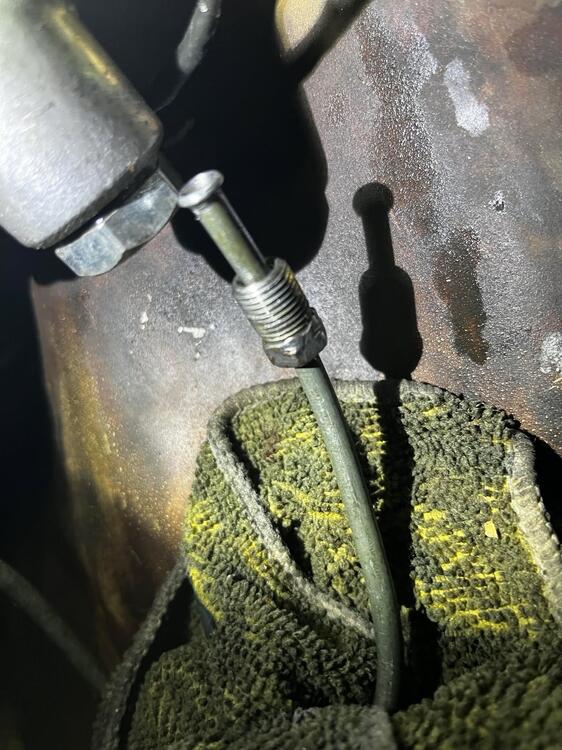
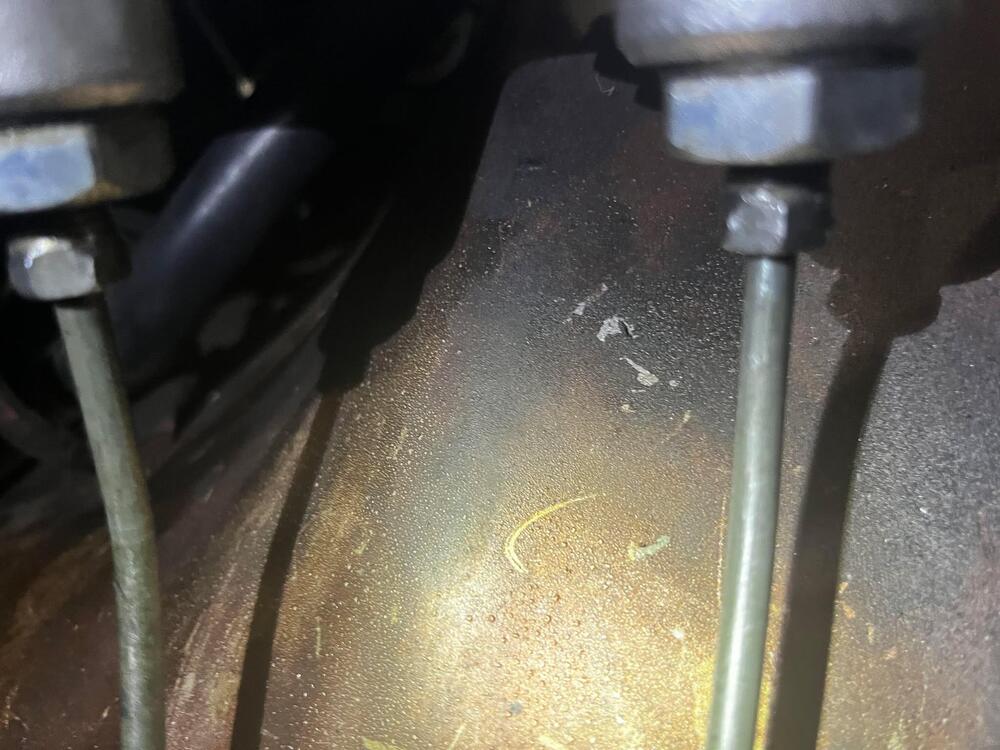
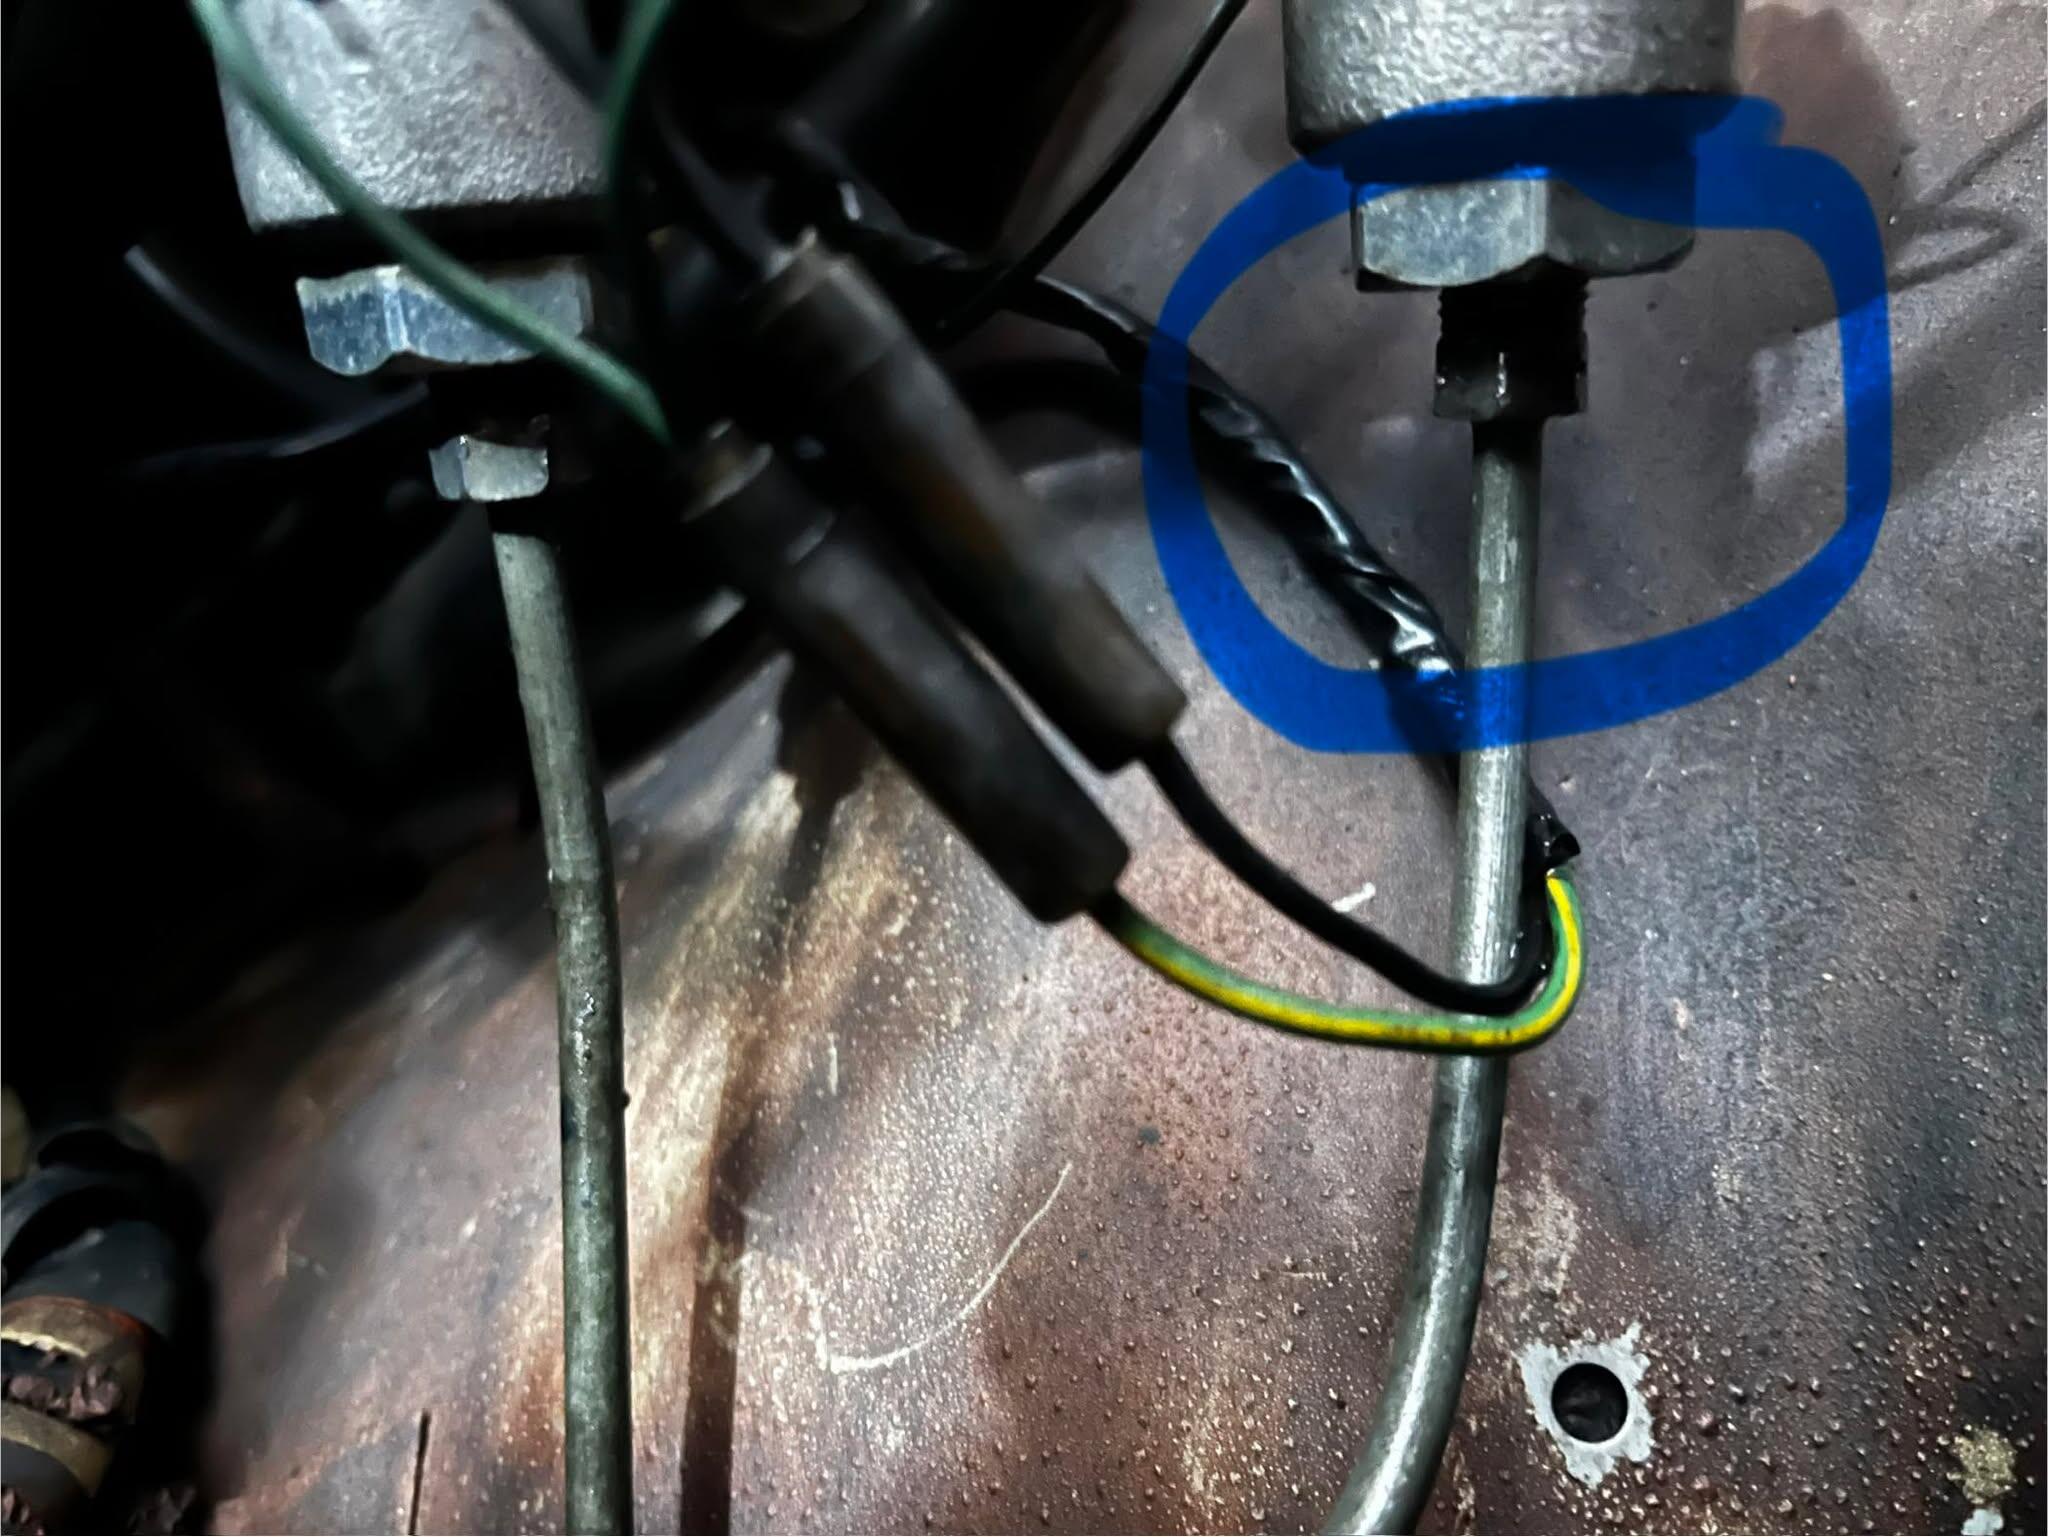
 3 points3 points3 points3 pointsUpdate for all of you. We very may be in business here and you were all right - the hydraulic line was crooked/not fully seated and once I took it out and reseated it, the leak was gone. Again, I still don't understand how it didn't leak over the course of 6 years and thousands of miles, but I guess that was a good thing. I am going to bleed the brakes tomorrow just to be safe but I did bleed the master after all of this and the pedal feels good. Here are pictures of the line screwed in before, the flange/nut's condition when I took it out this evening, and how the cylinder looks now with the line in straight.
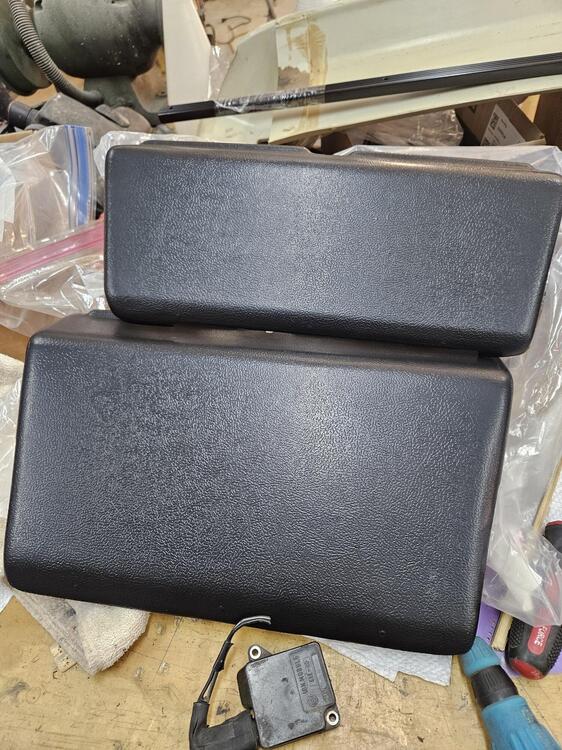
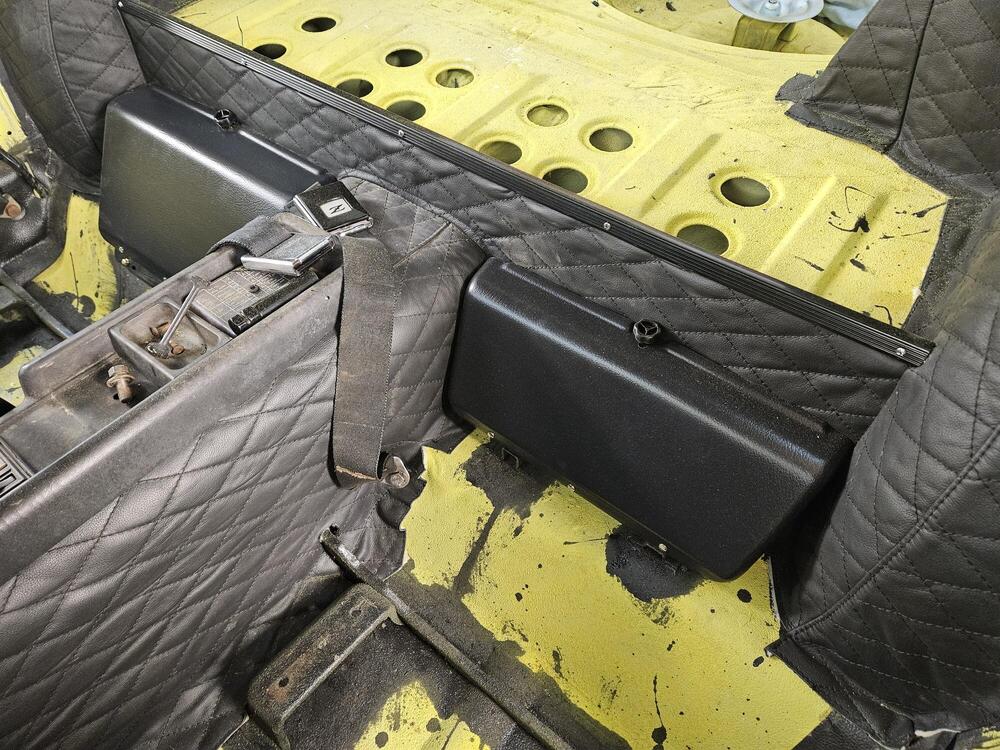
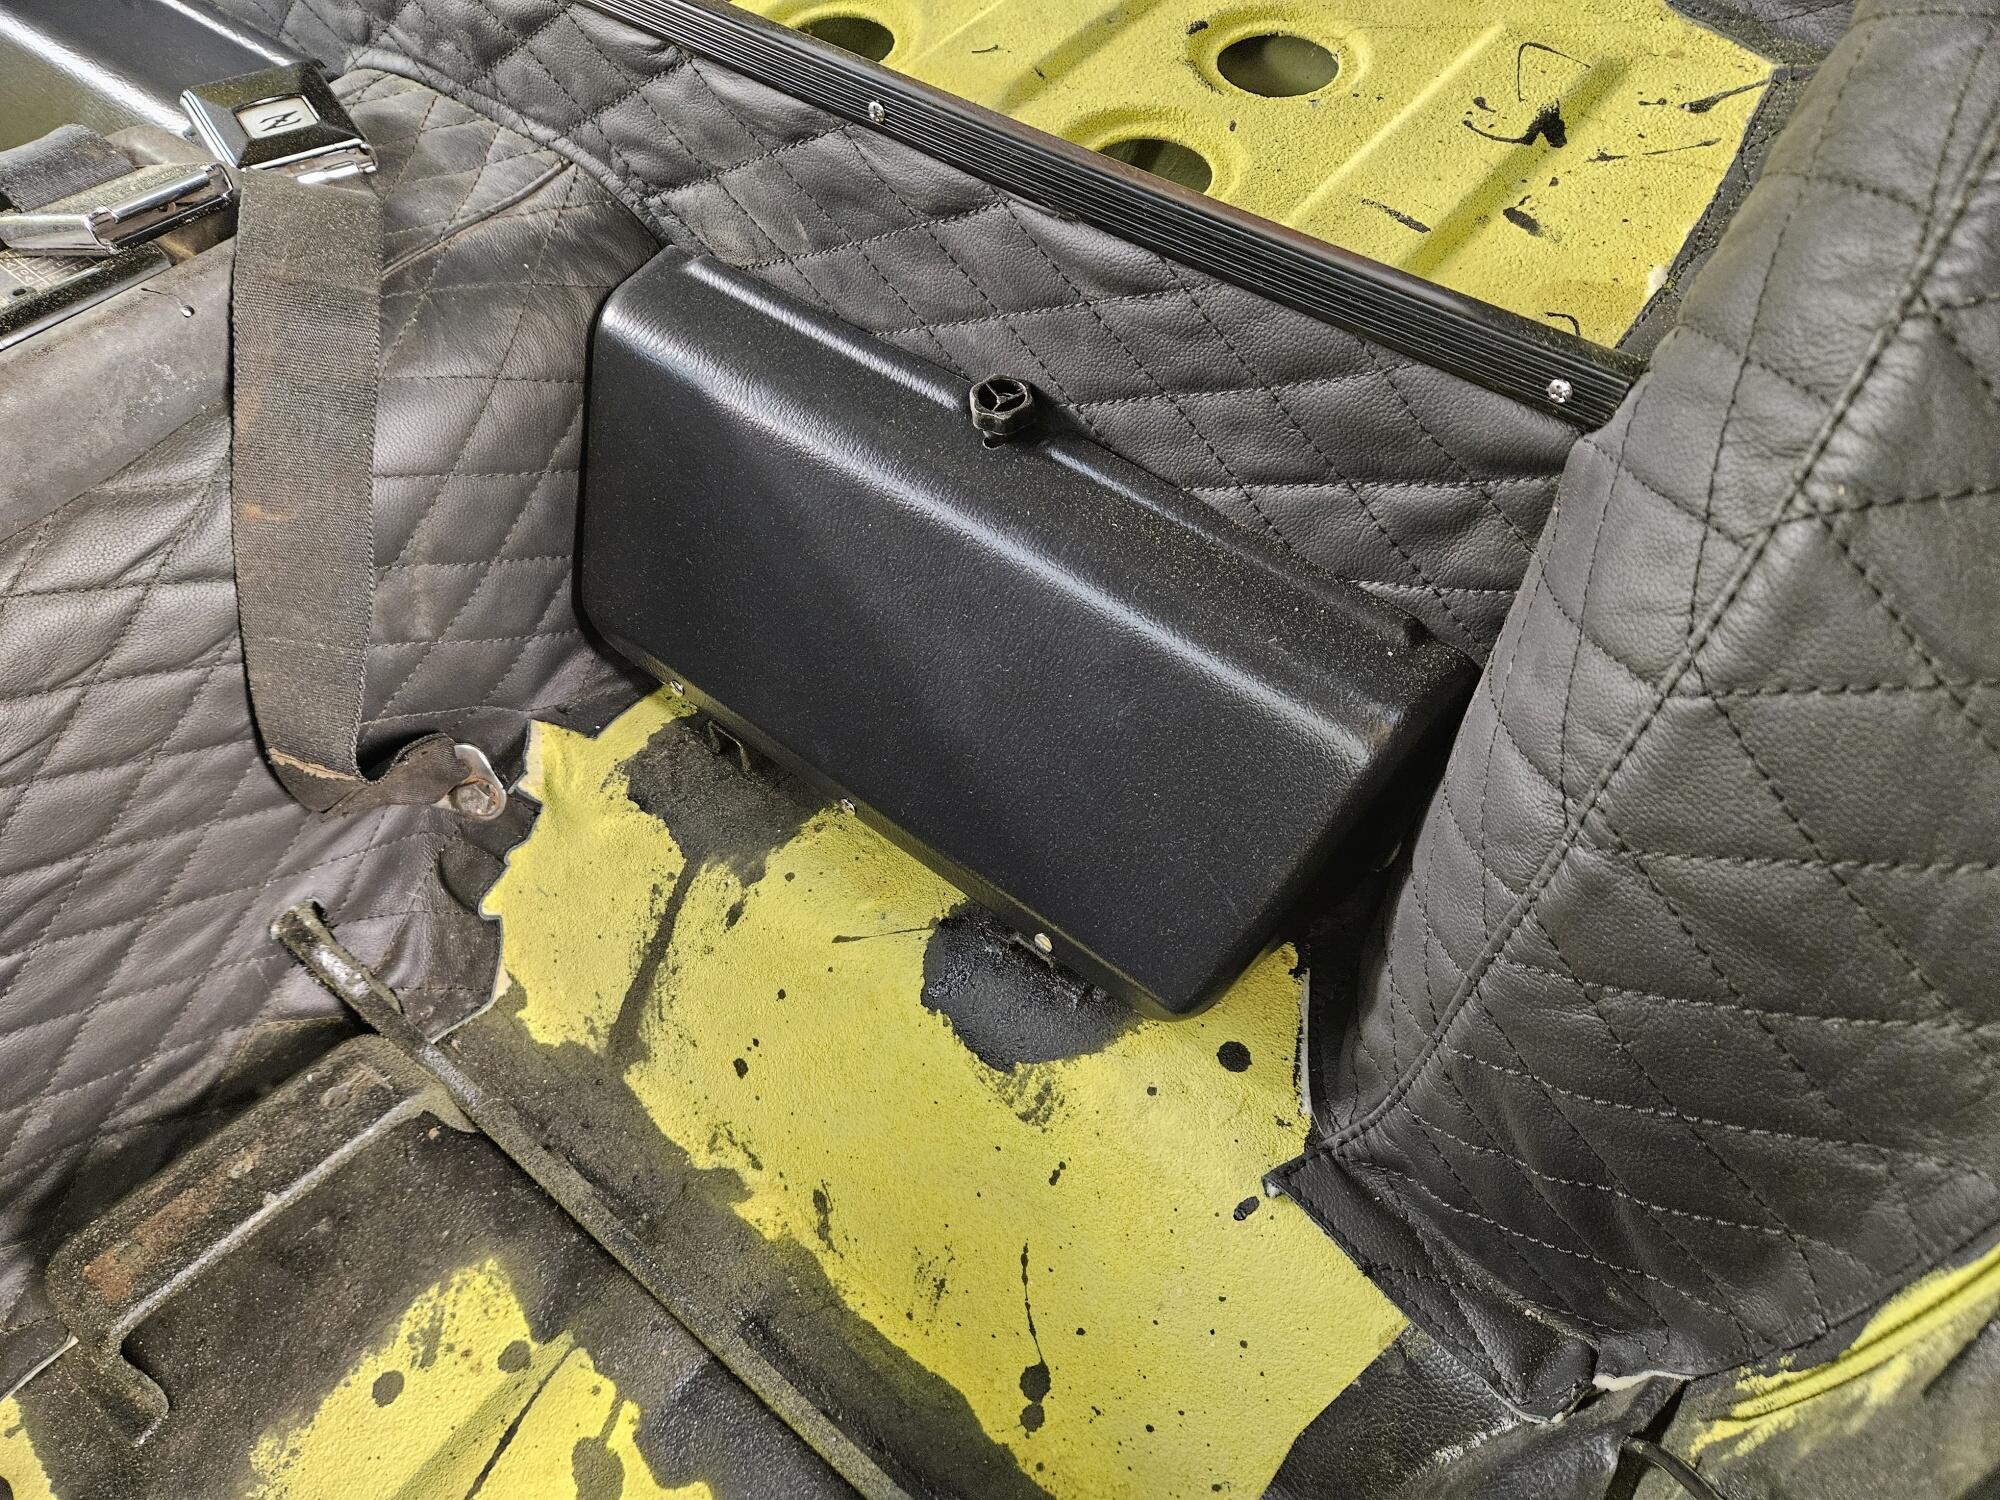
 3 points3 pointsI also got the tool covers from resurrected classics and got them installed A little nerve racking to bend the plastic hinges to mount them
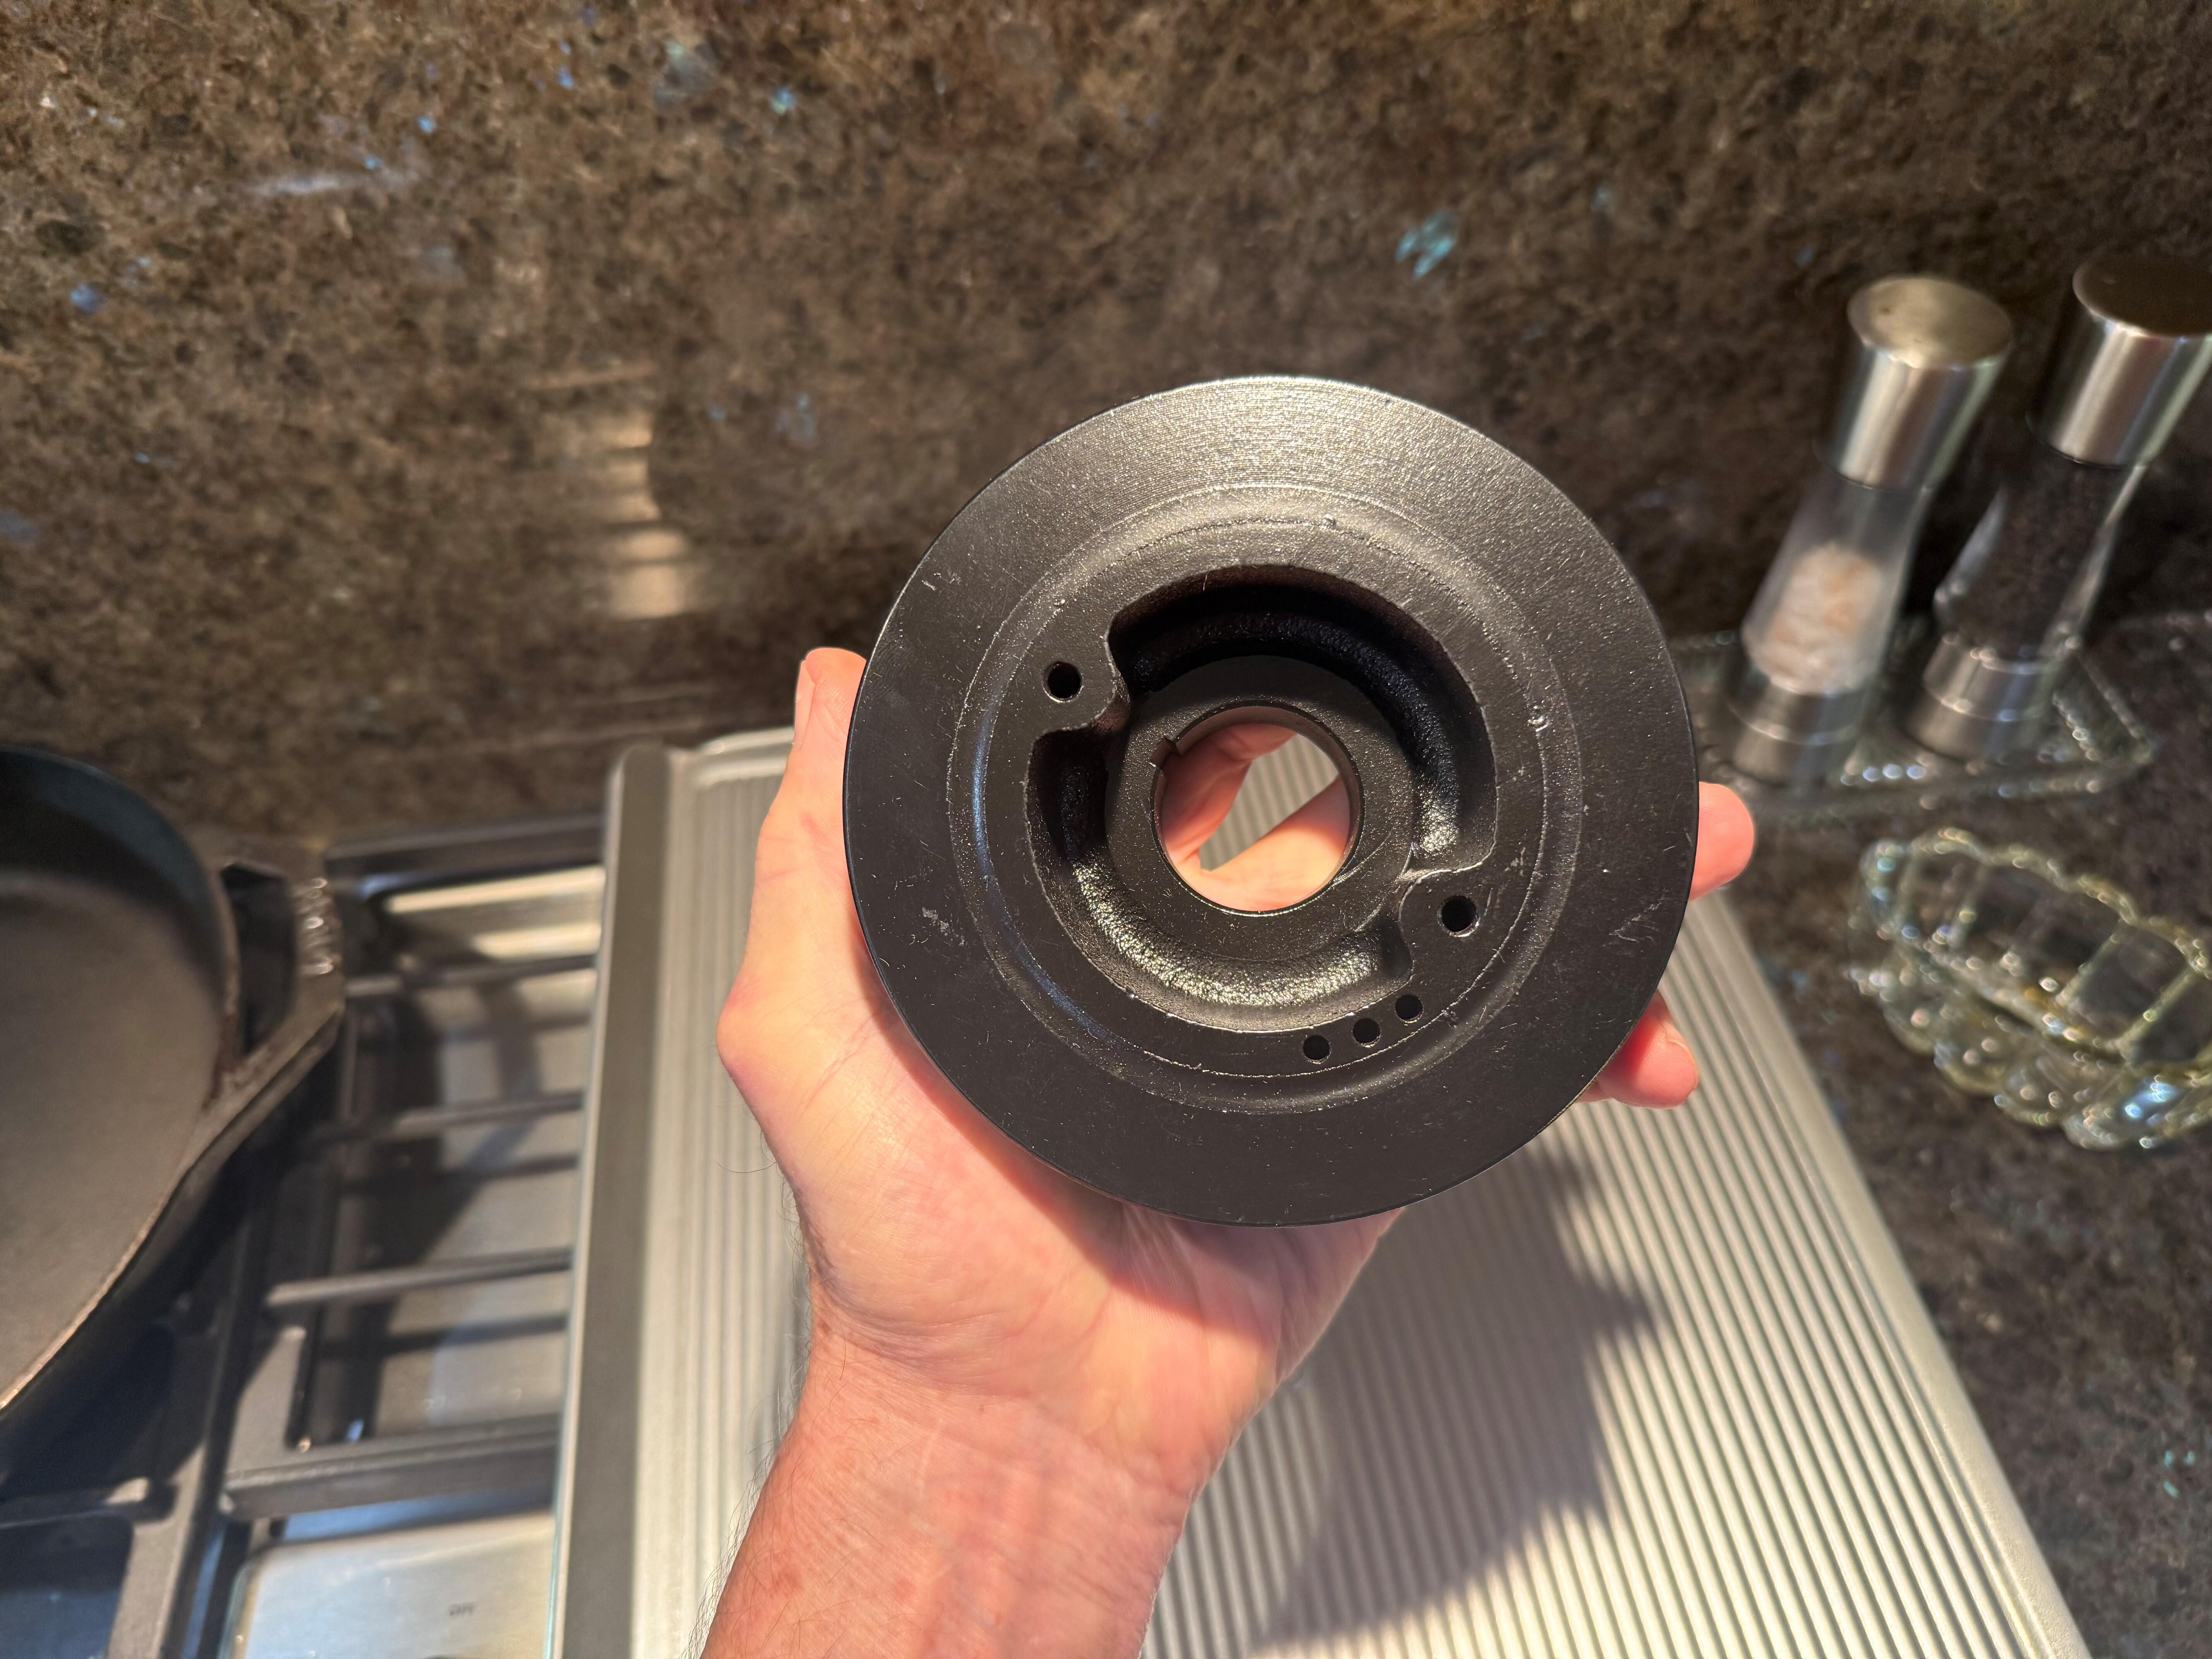
 3 points3 pointsS30 parts are rare and expensive. Not enough competition or volume of sales to keep the price down.3 points3 points3 pointsUse the wheel to get close and the brake lever for final adjustment. Tighten the wheel until the drum barely goes on, then pump the brake lever a few times. If the self-adjustment is working the lever will only come up about half-way. As you drive the car occasionally you'll notice that parking brake lever got tighter as the wheel moves a notch.3 points3 points🤣 OMG... I used to do that... Thank goodness I haven't seen a phone cord in decades!3 pointsJust got the harmonic balancer Back. Looks really good. Namerow asked for pictures.
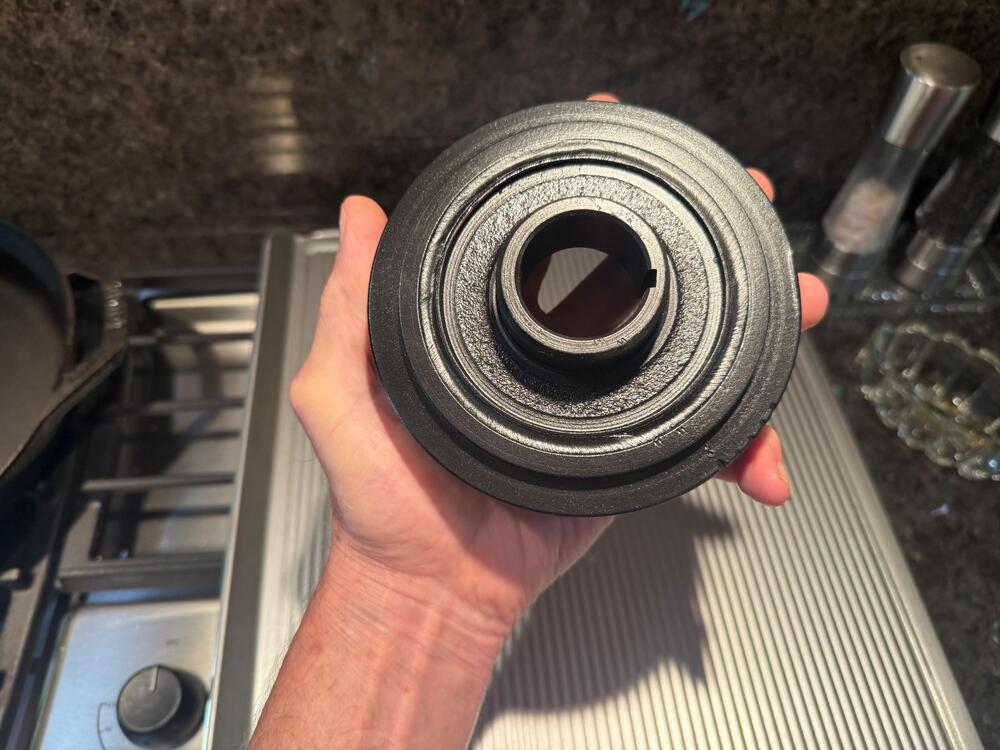
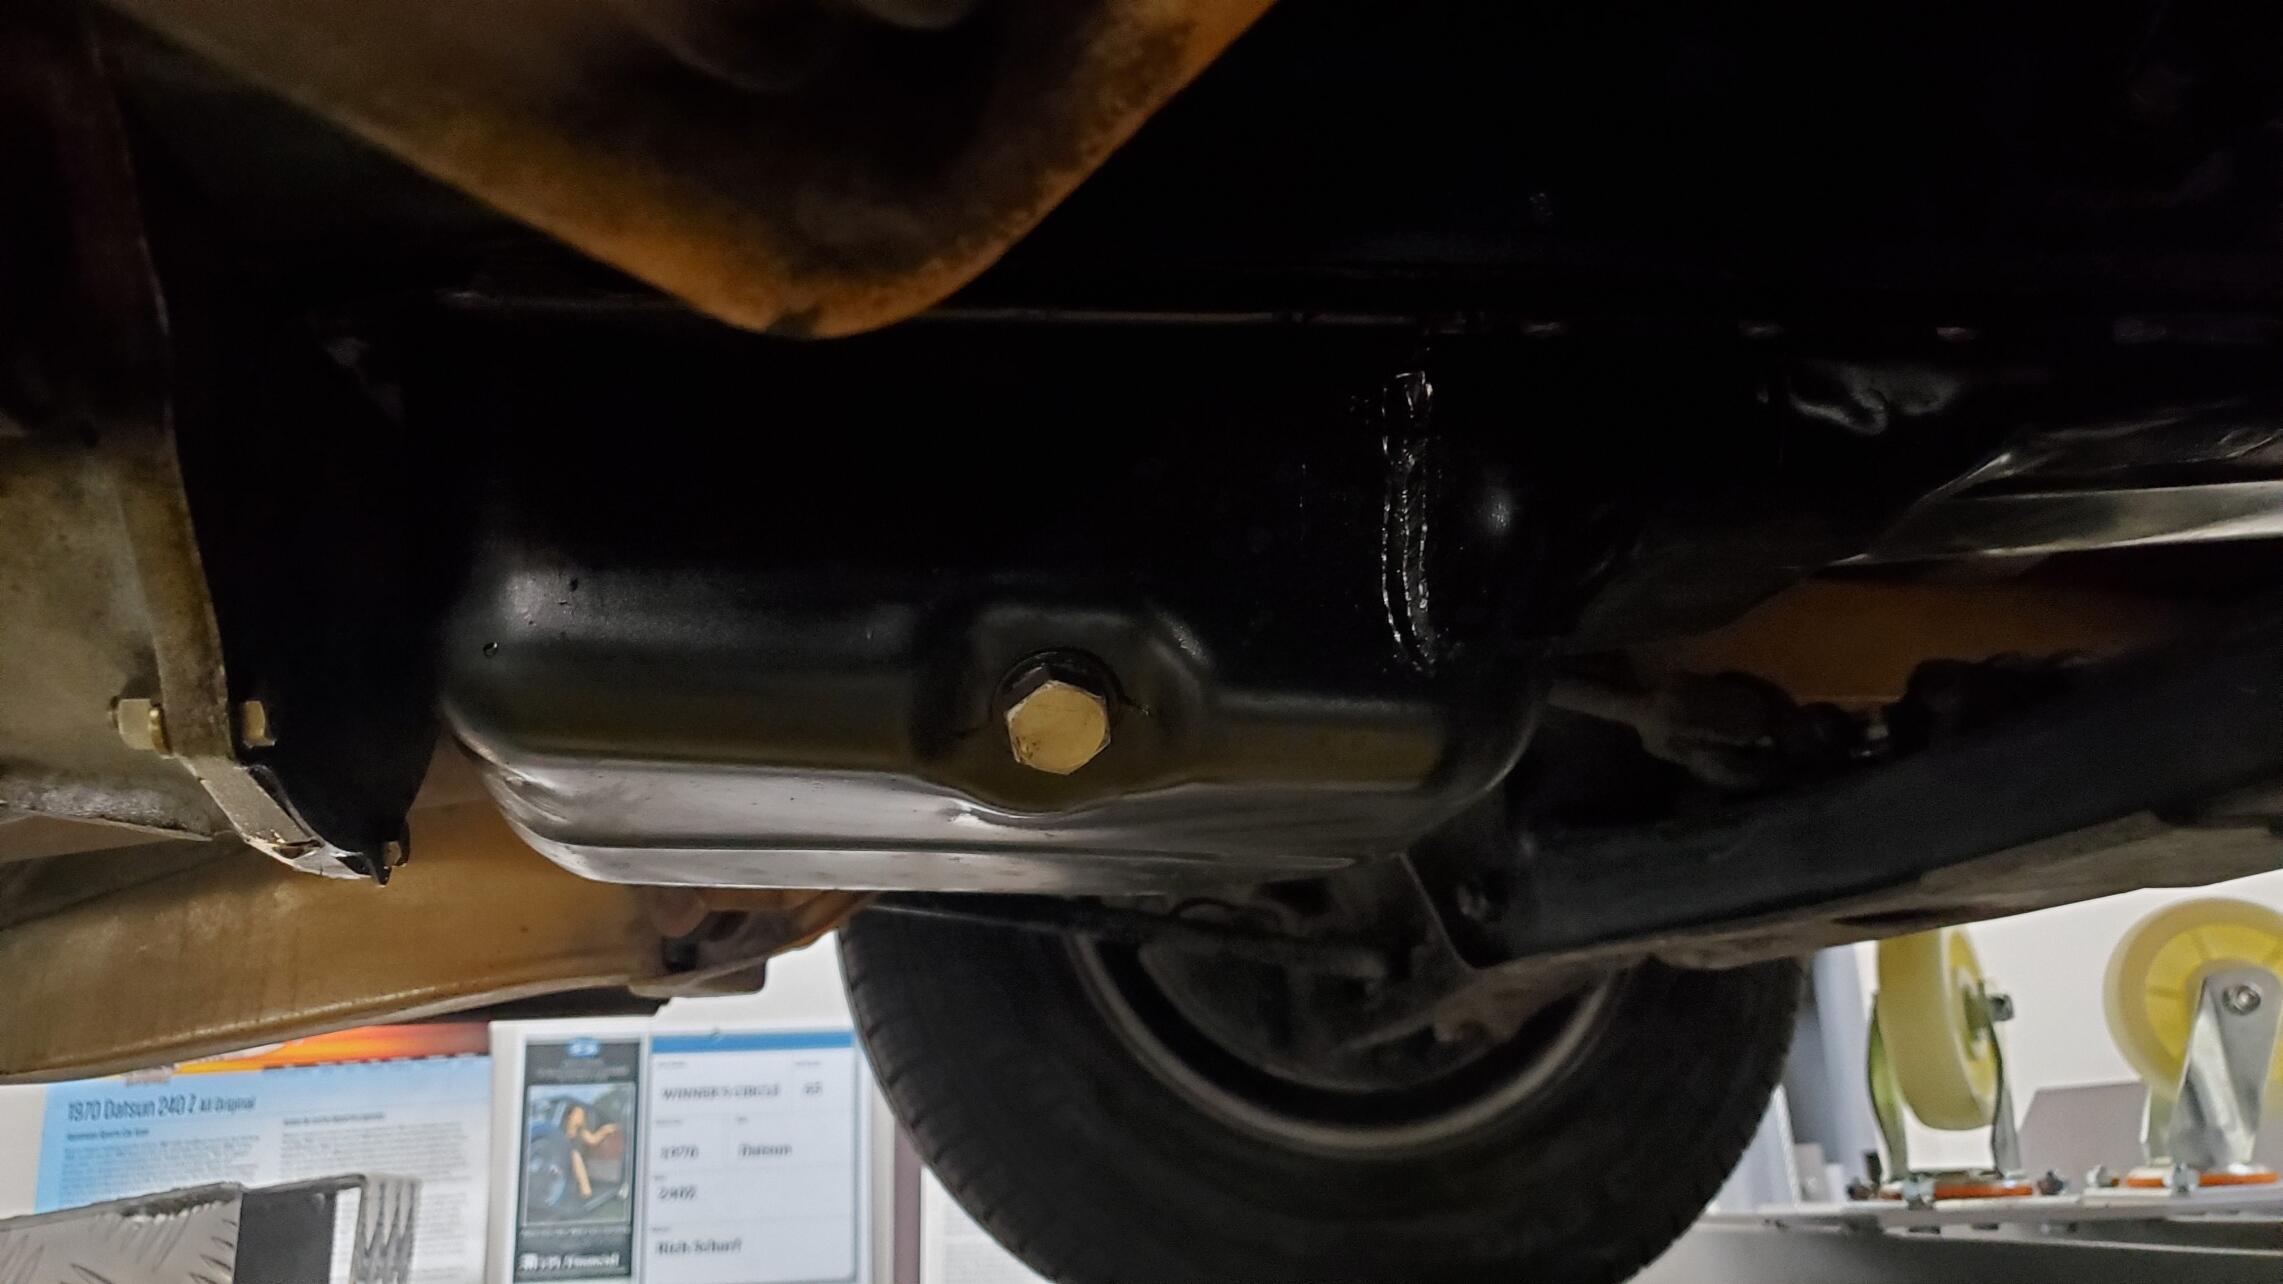
 3 points3 pointsHave you seen this? Inside a stranger's house with my parents and I was unwinding their phone cords.😇3 points3 pointsAlso check the vent hose seals from the fuel tank where they come through the floor. The grommet at the license plate light where the wires pass through the rear pan. The seal around the filler neck and the grommet at the drain for the radio antennae3 points3 pointsThe aftermarket hardware kit at O'Reilly's has 8 of those retainer washers rather than 4 retainers and 4 cup washers. One on each side of the spring to keep it centered and in place - would work.3 points3 pointsHappy Thanksgiving!!! Fire up those ovens... I'm smoking some turkey this year... ;)
 3 points3 pointsSubmerge the sending unit in CLR (calcium, lime, and rust) for 24 - 48 hrs. It will come out clean and usable.3 pointsGood thread! I get to pick my DD based on need... 2000 Lexus LX470 (Landcruiser) But mostly drive this daily: 2014 BMW Z4 (E89) Manual
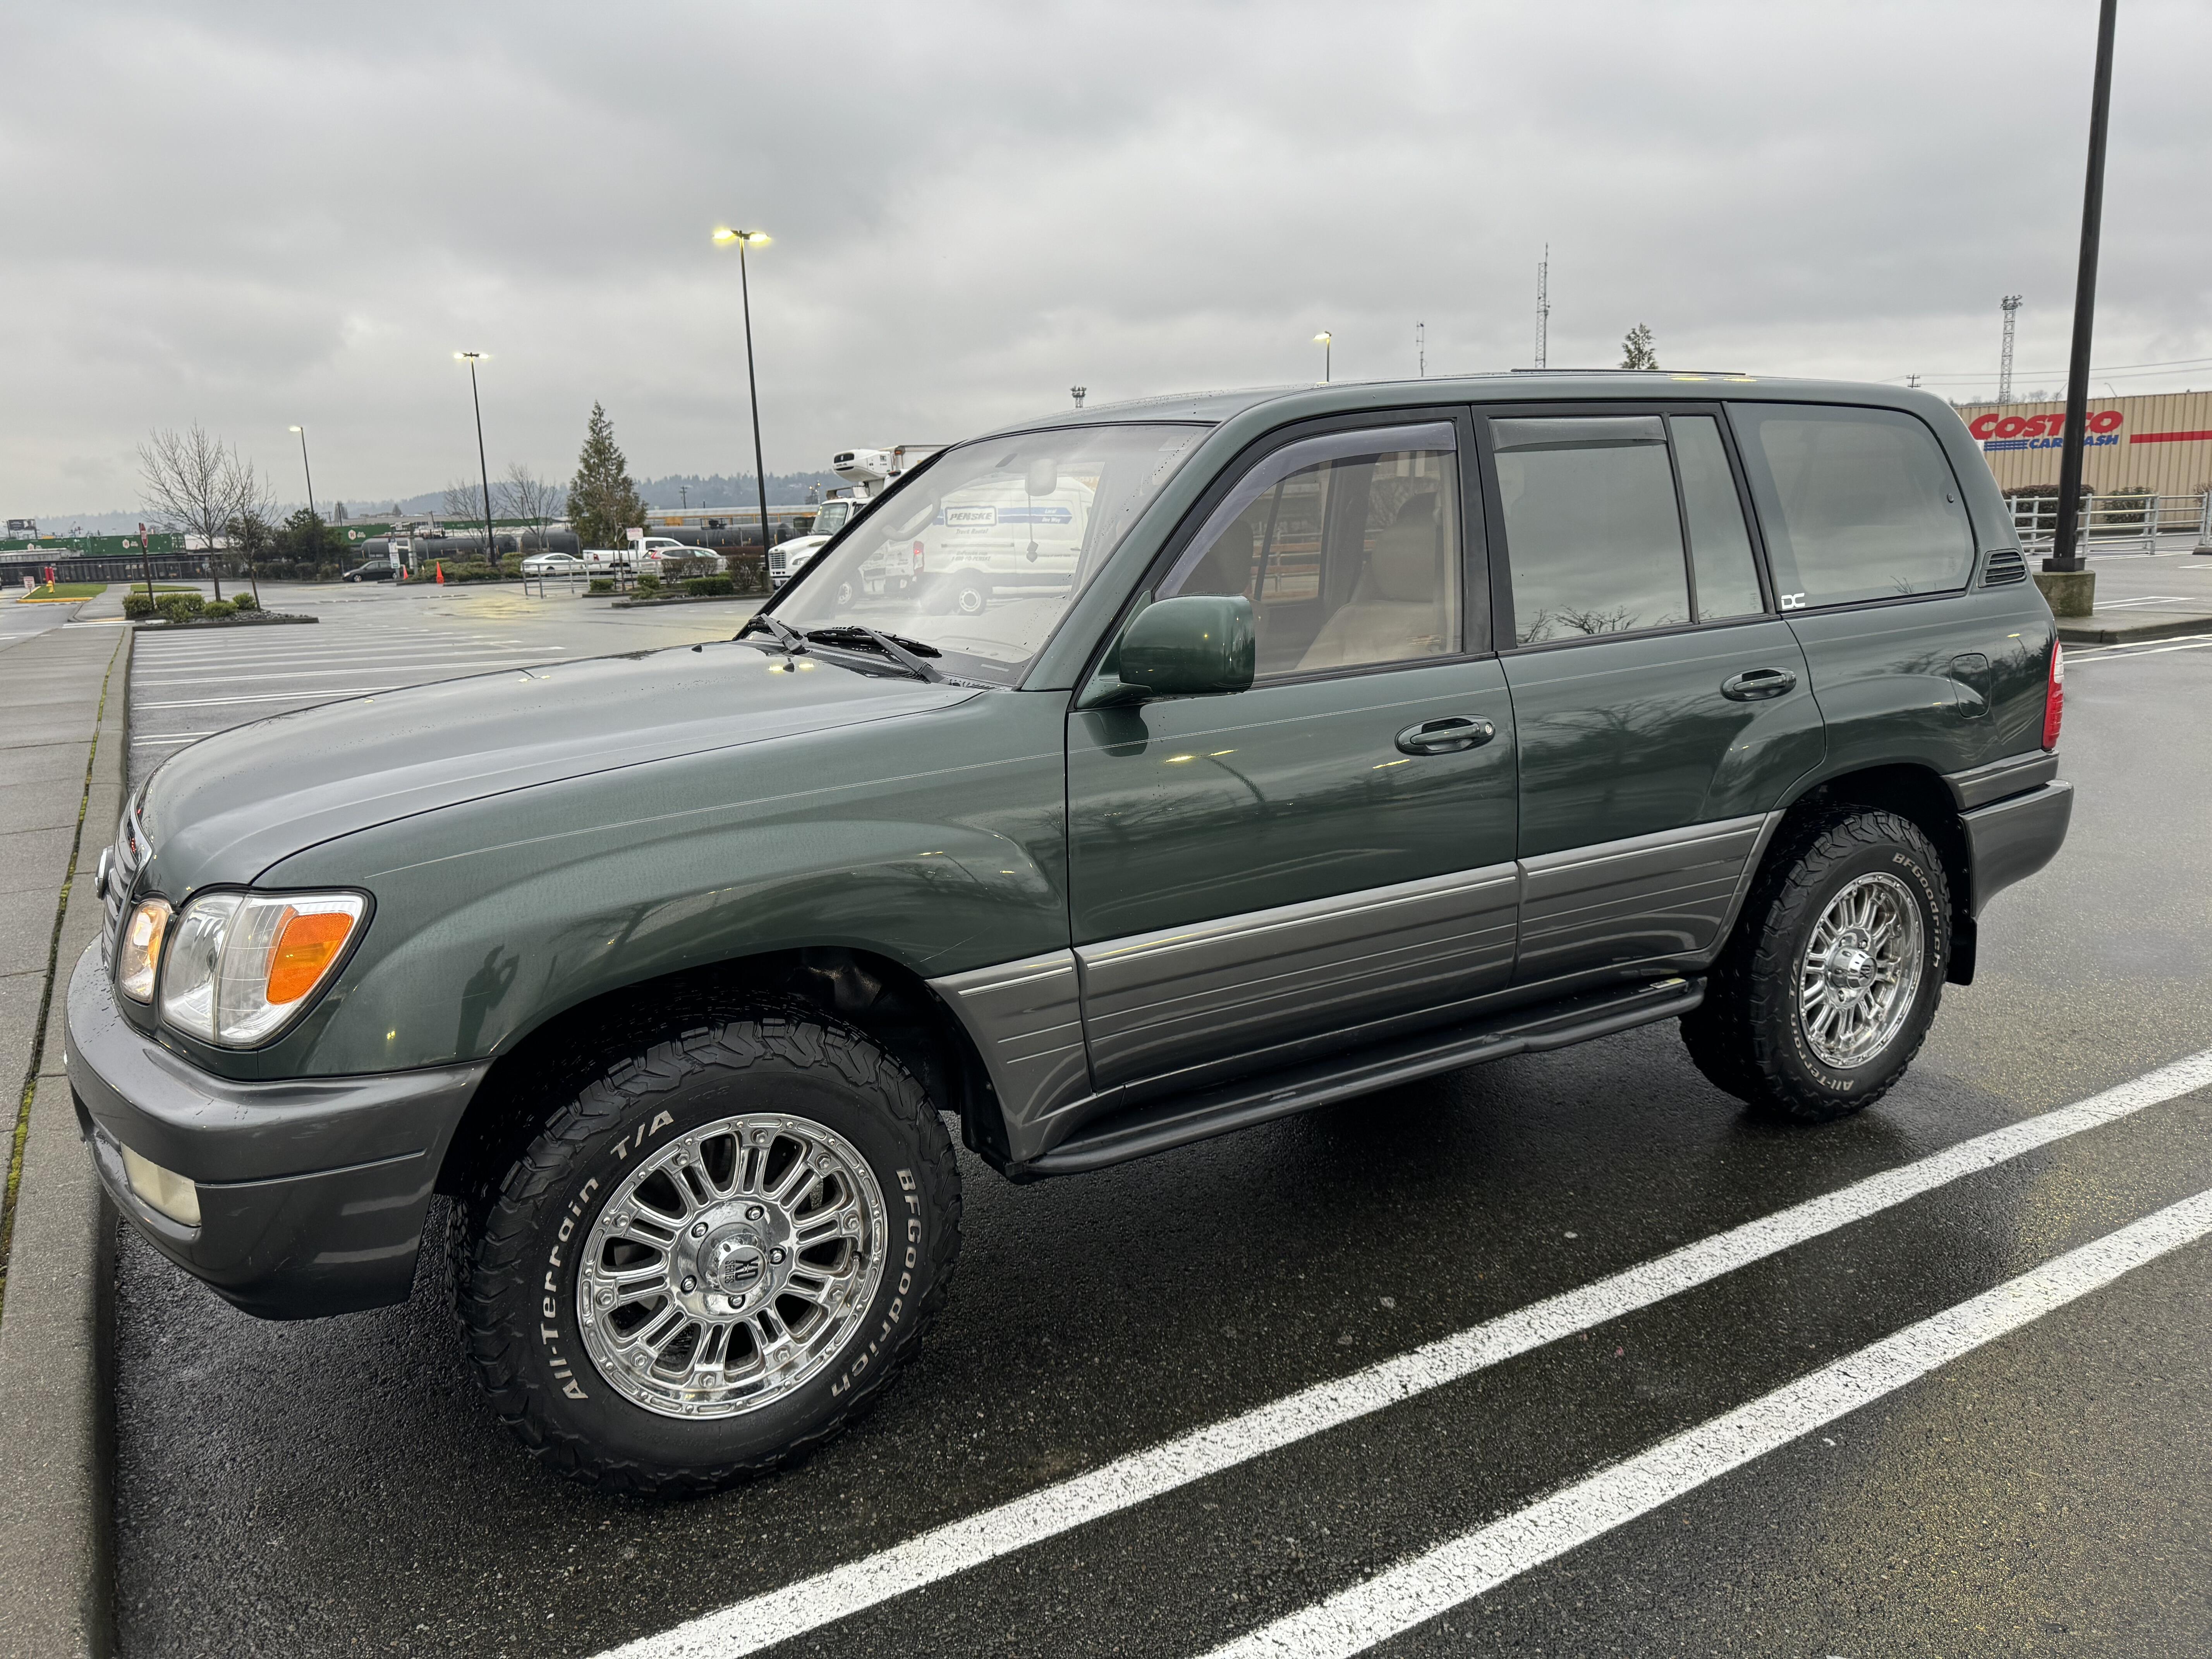
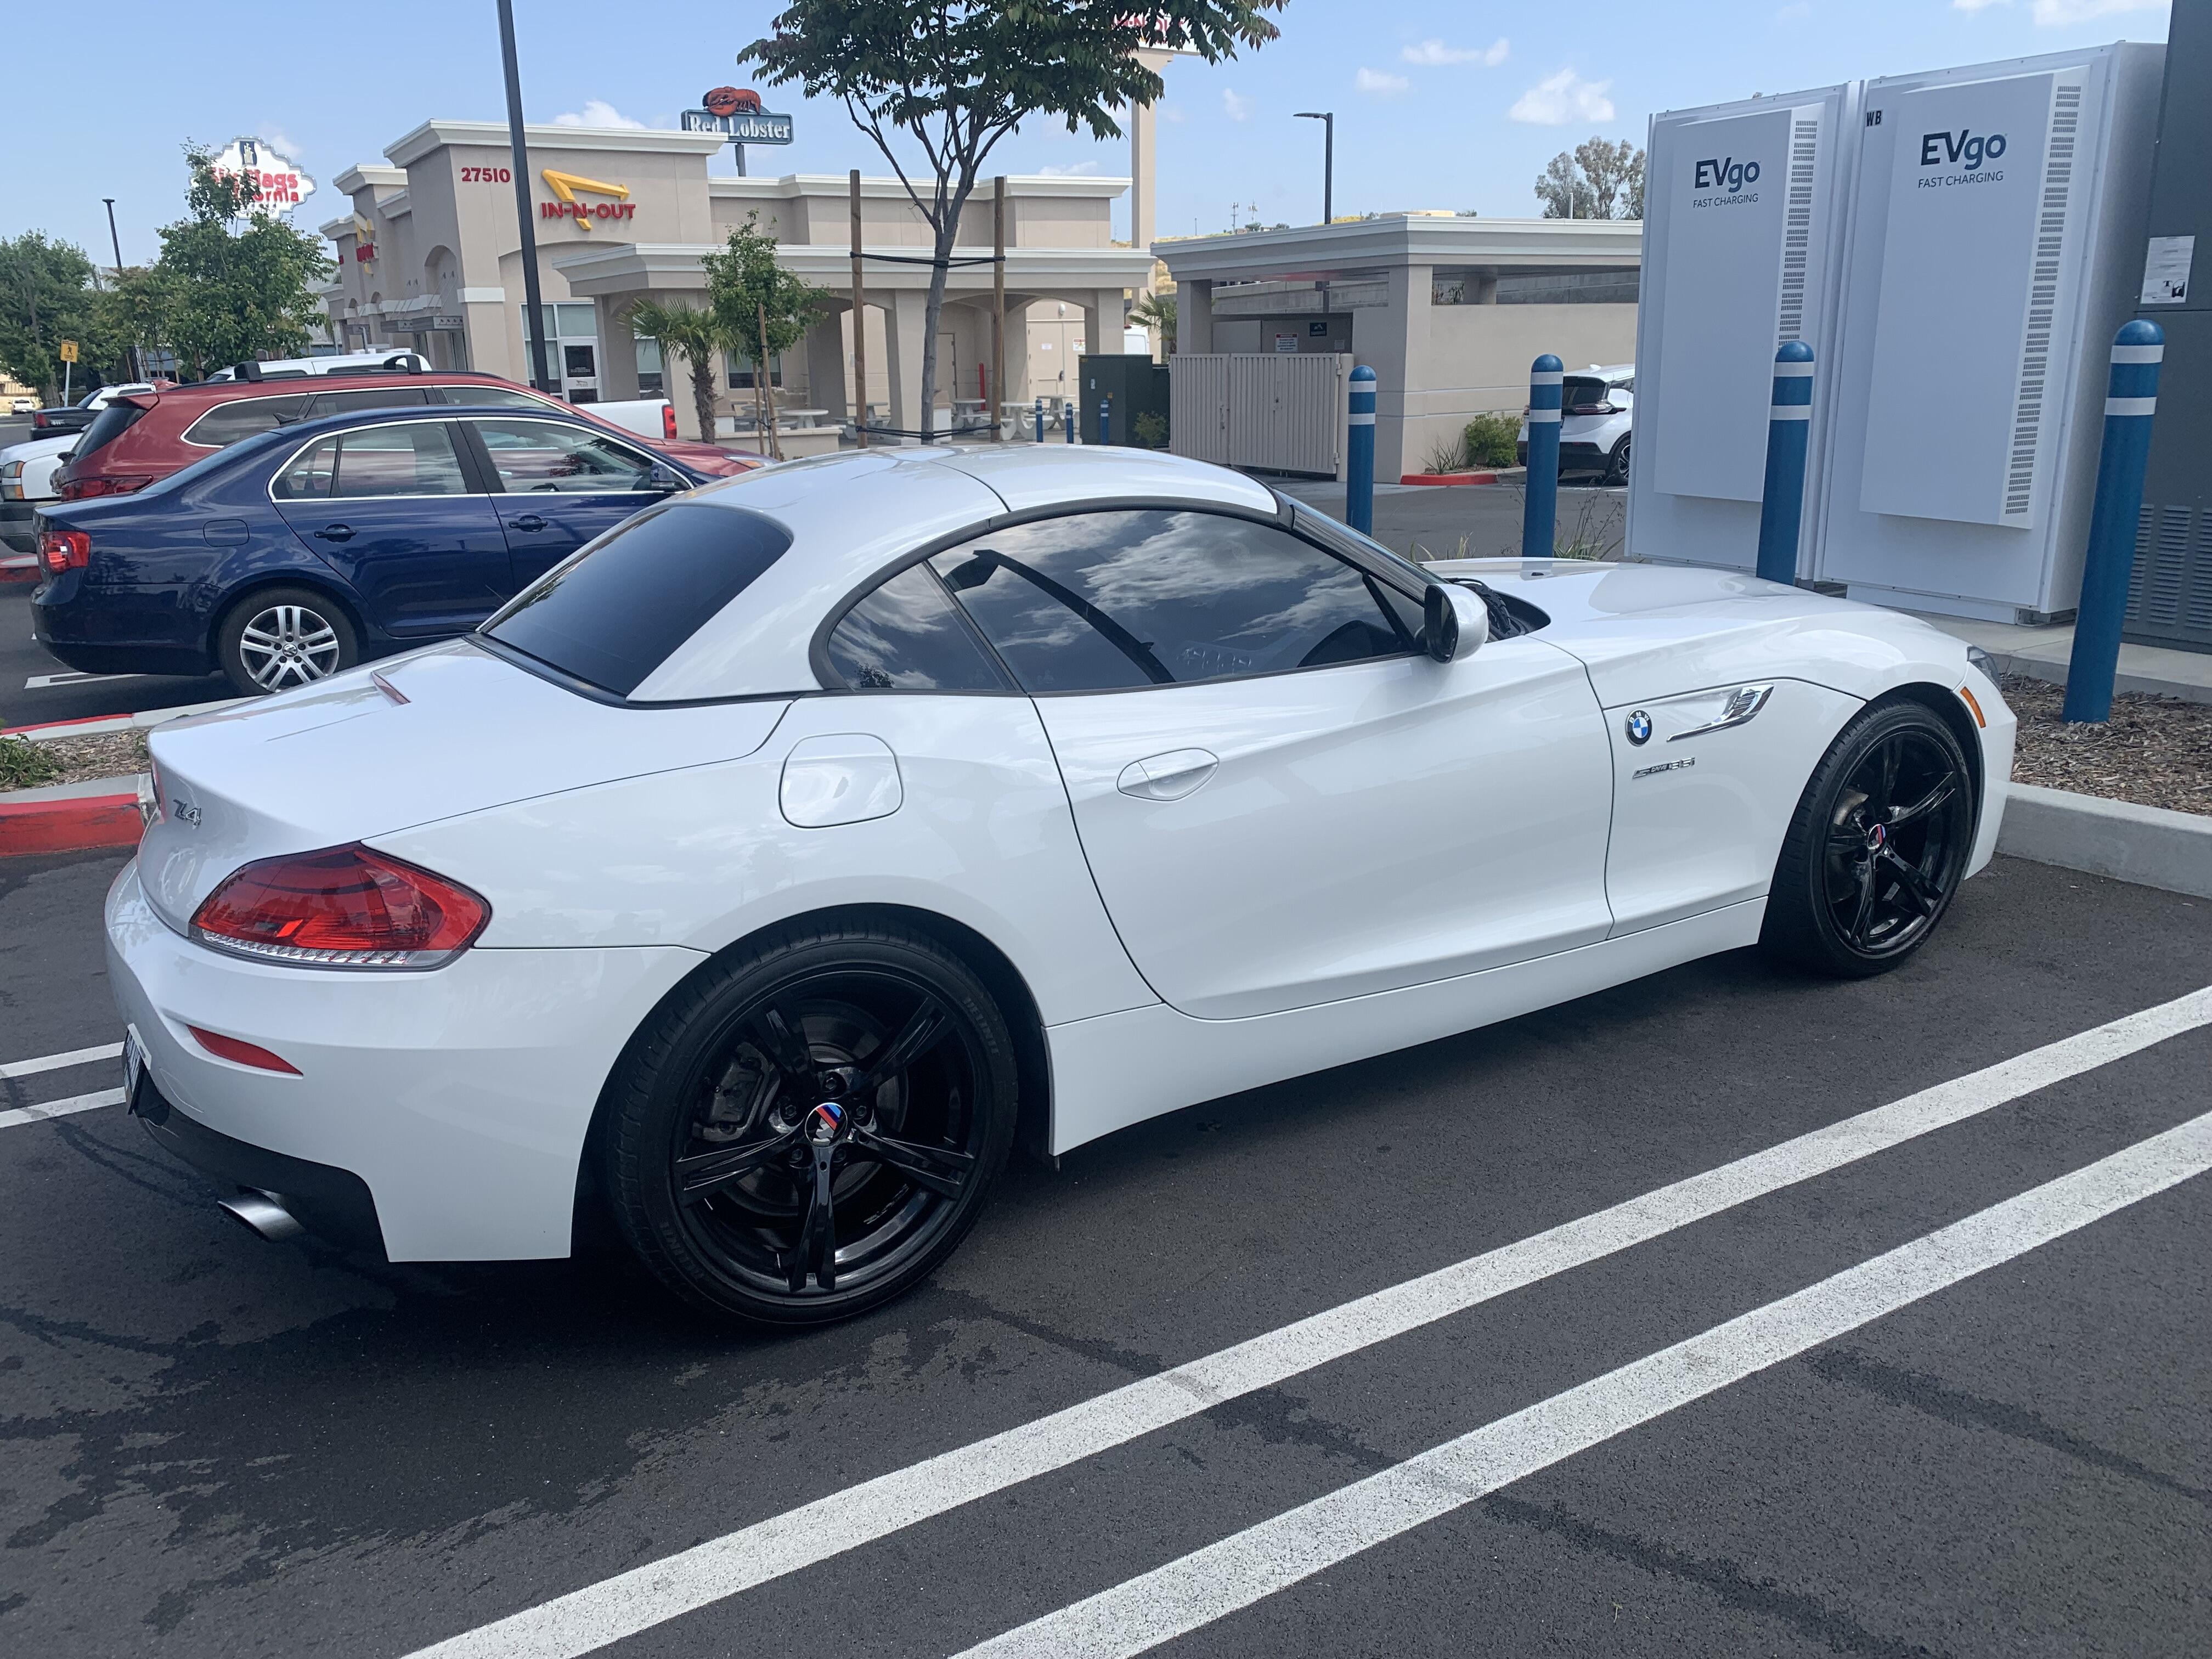
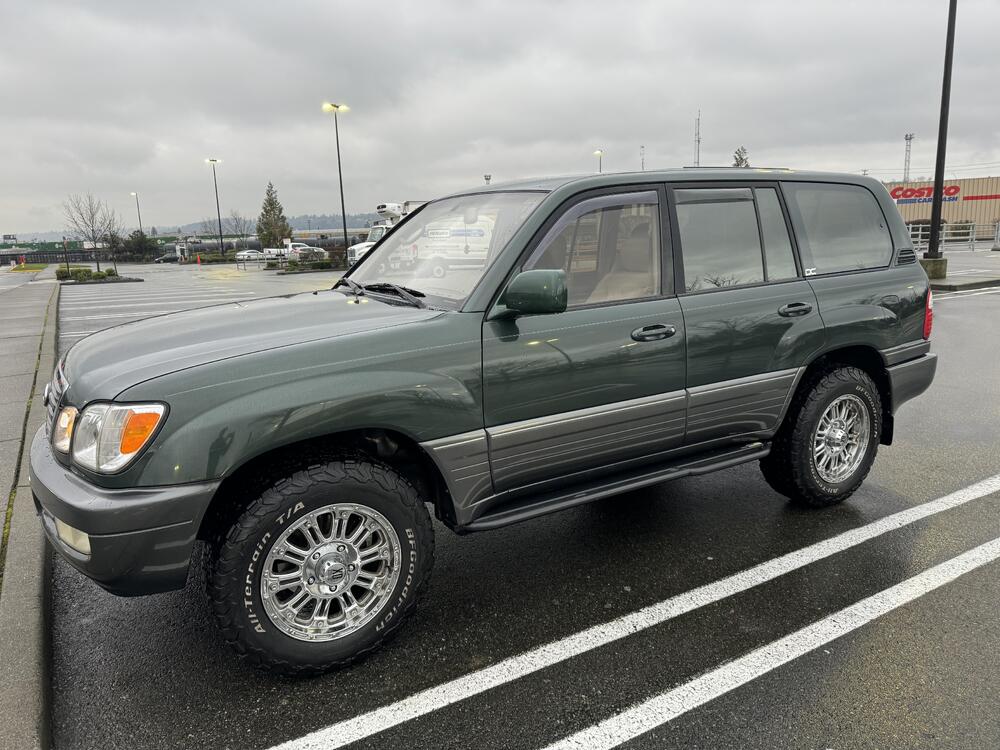
 3 points3 pointsYears ago I sacrificed this Craftsman screwdriver to make a Z brake adjustment tool, it has worked very well.
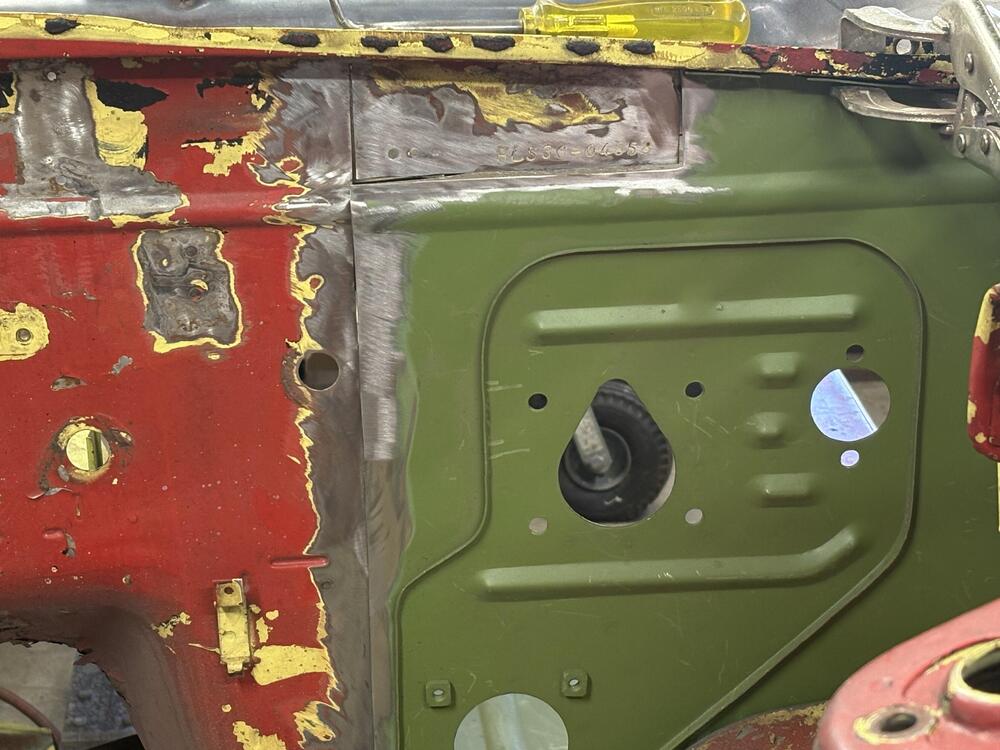
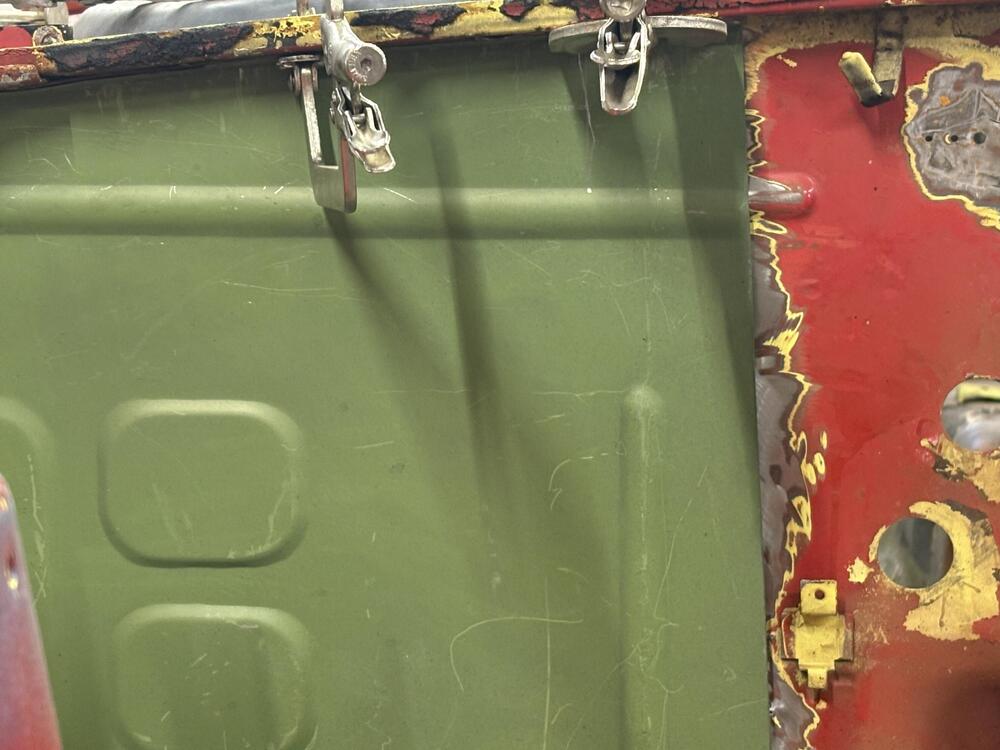
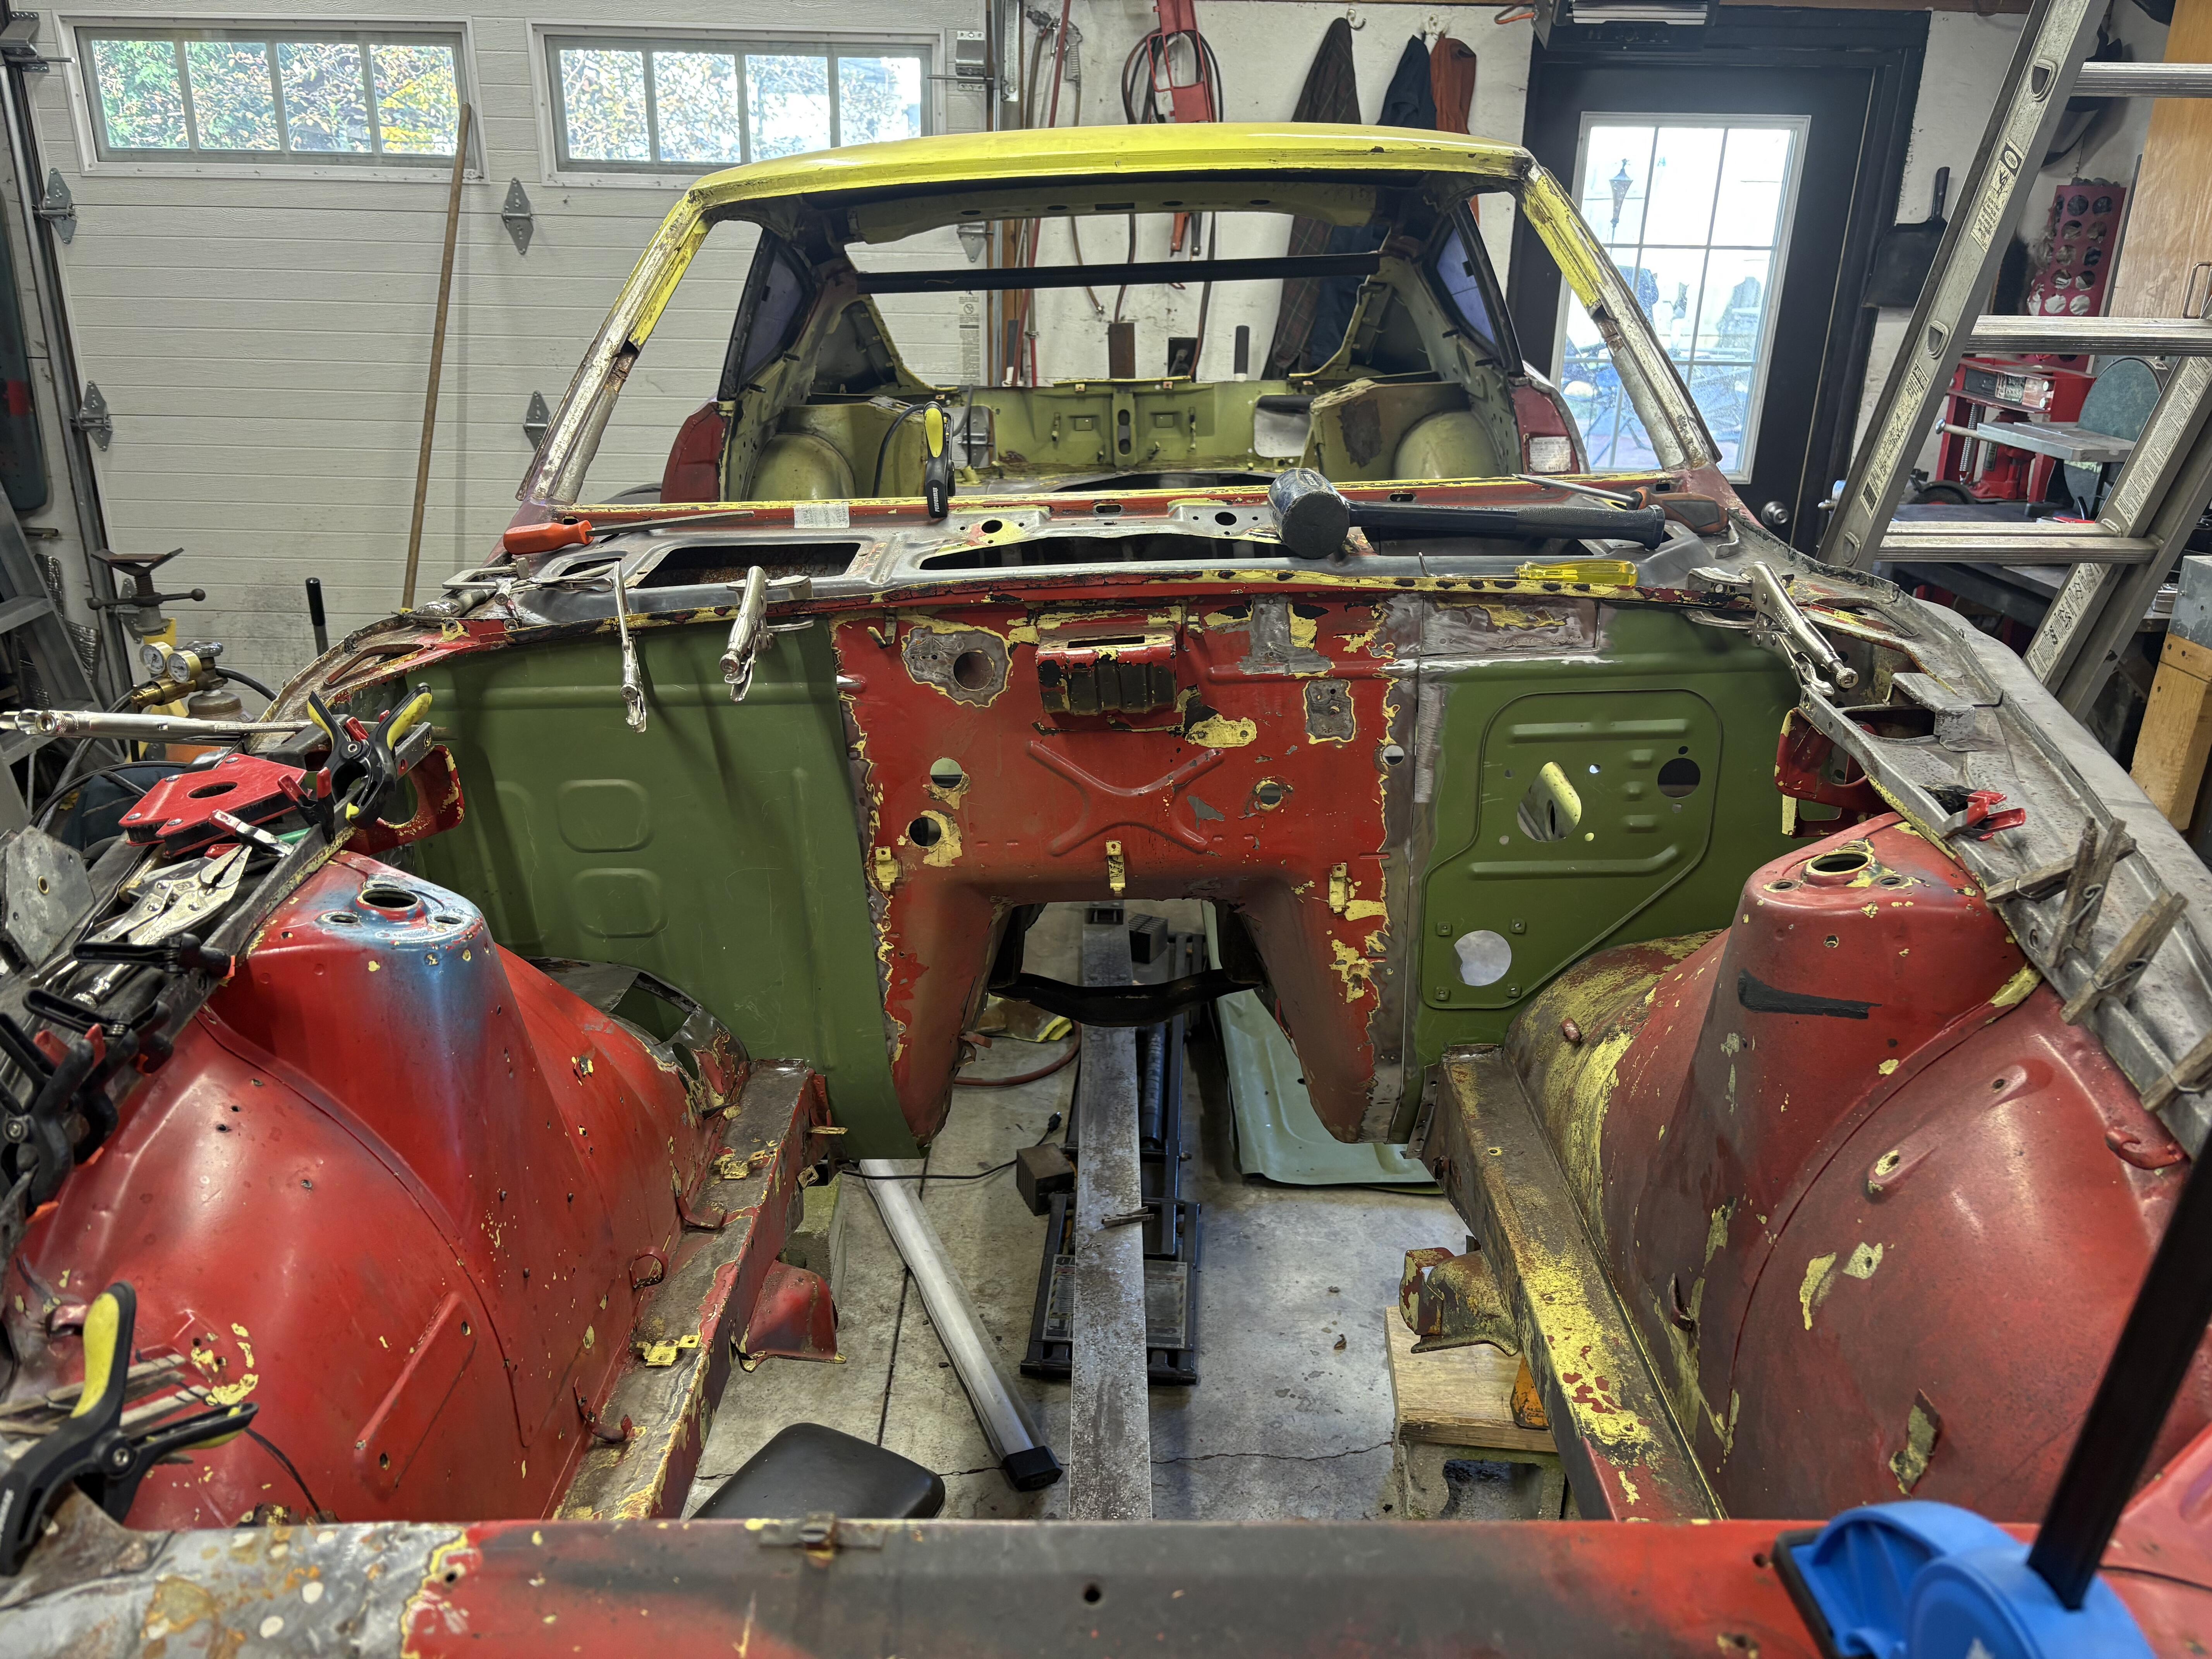
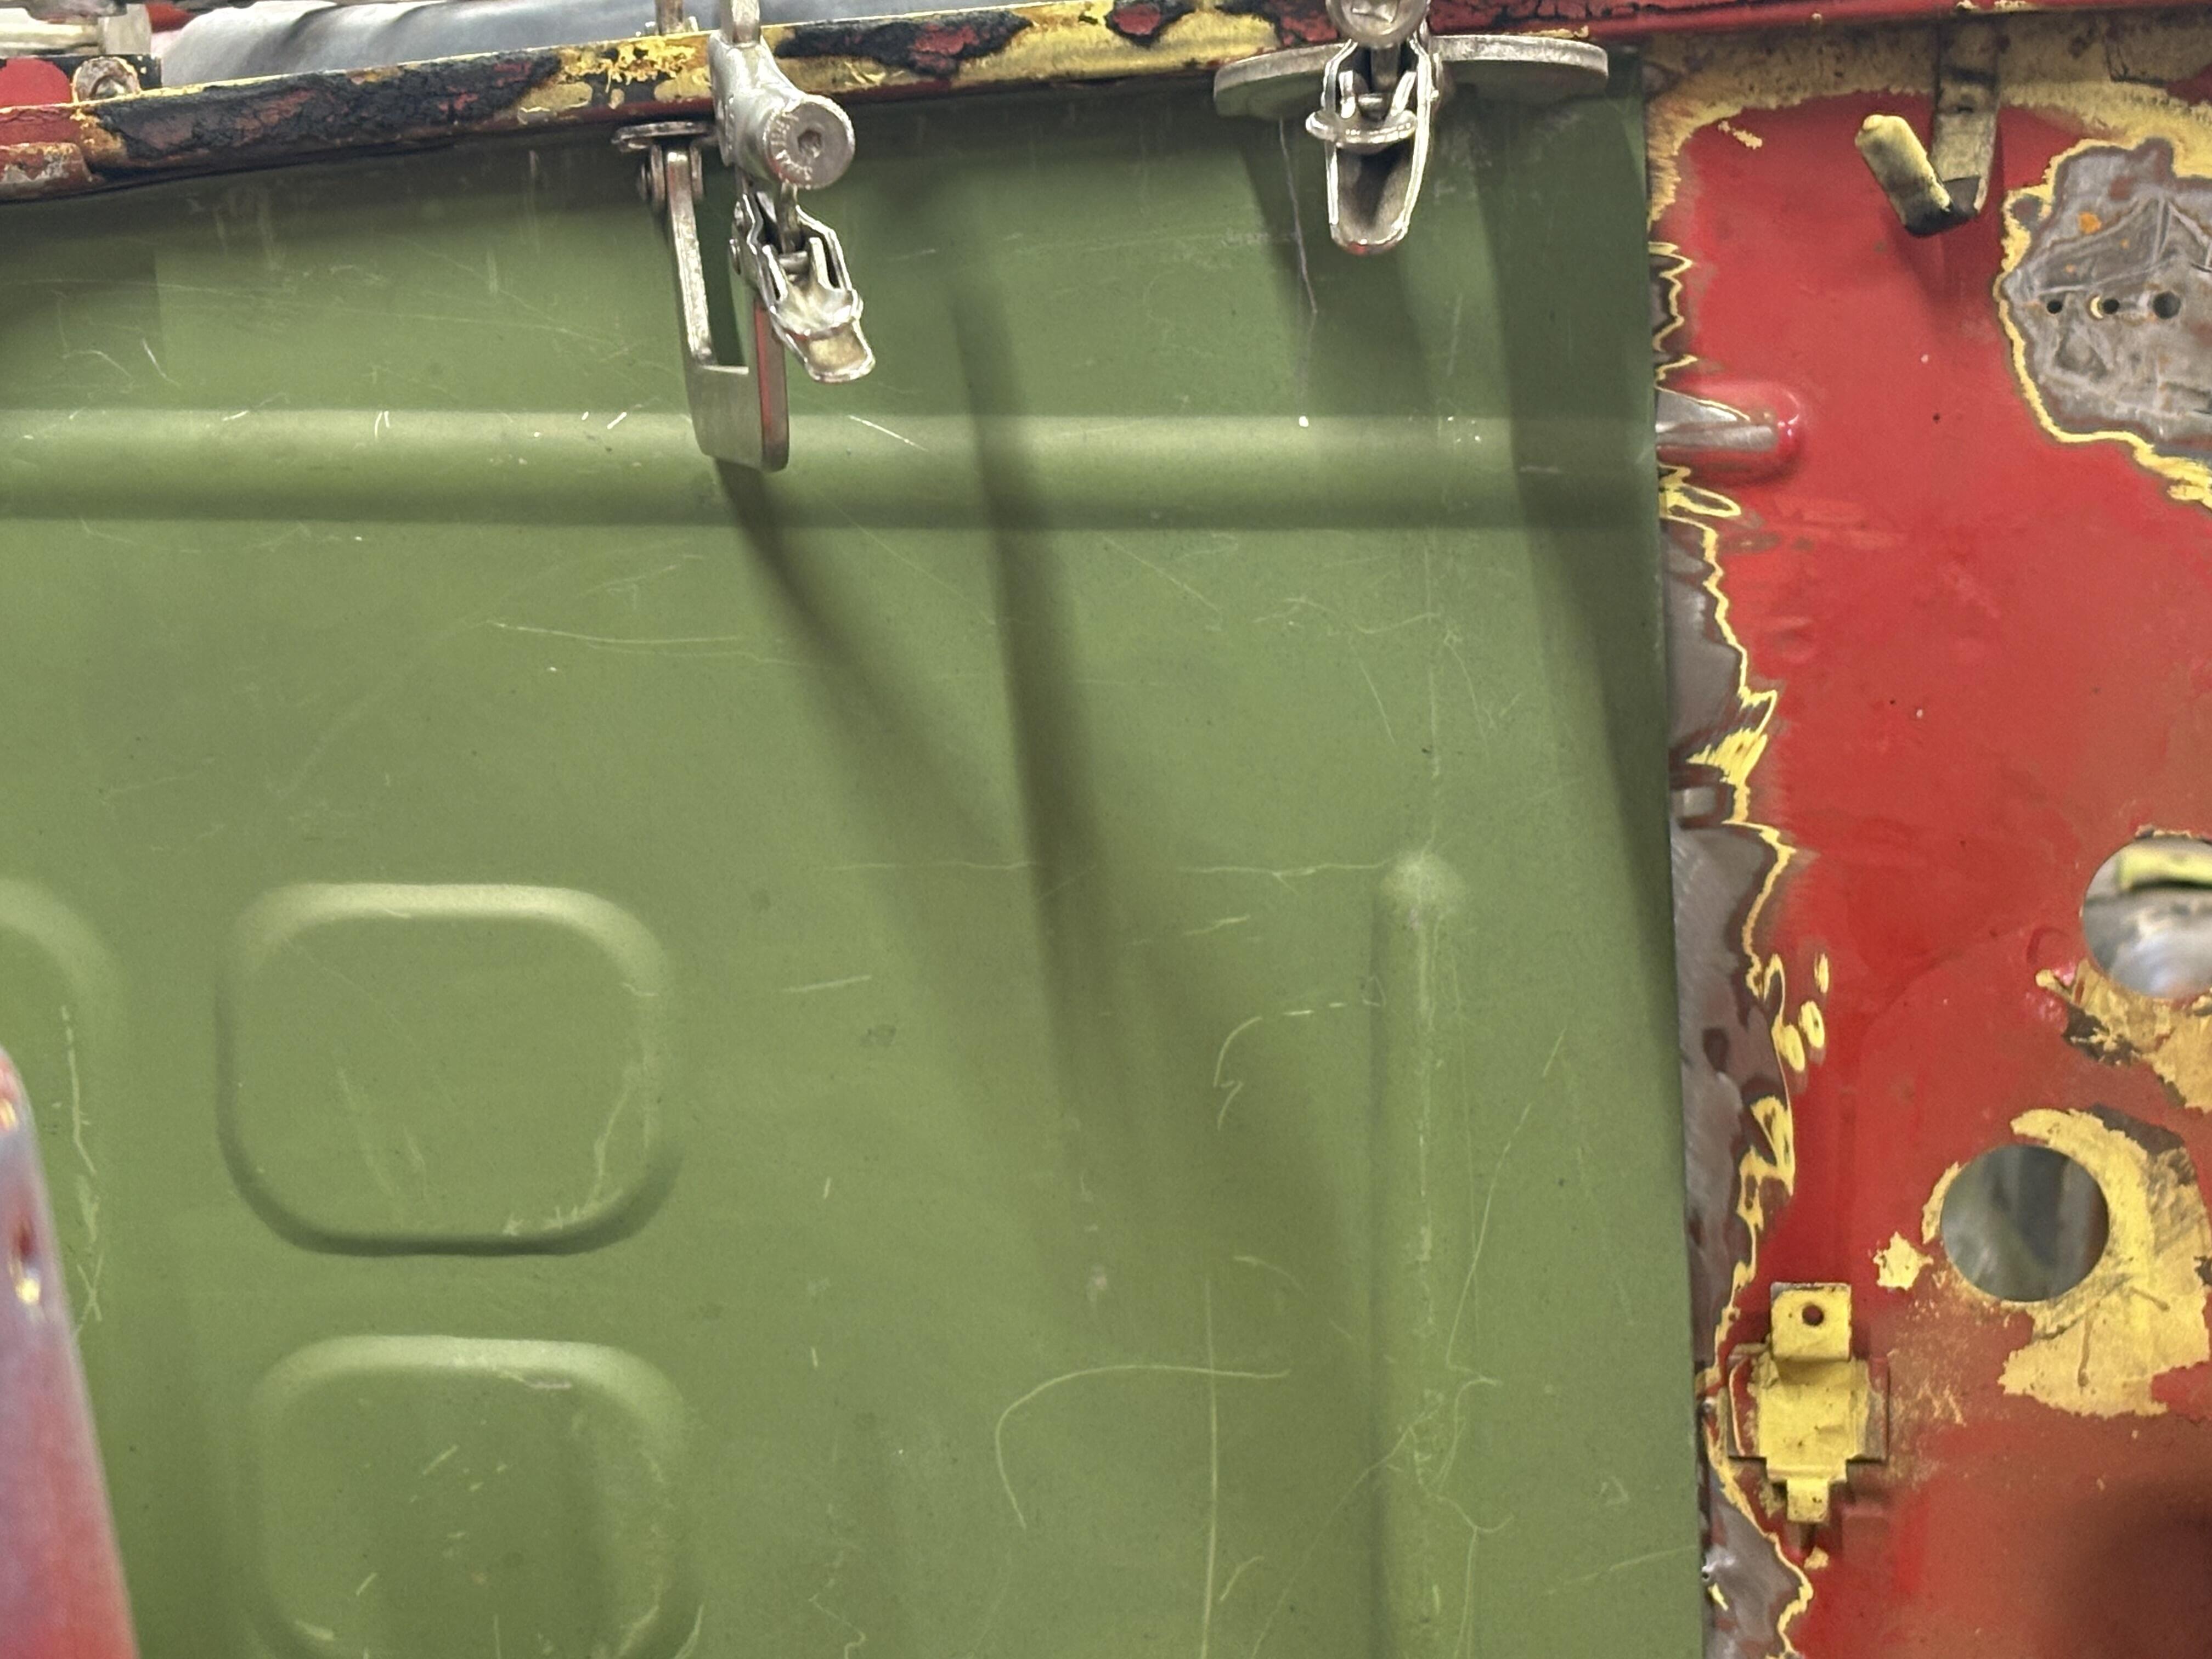
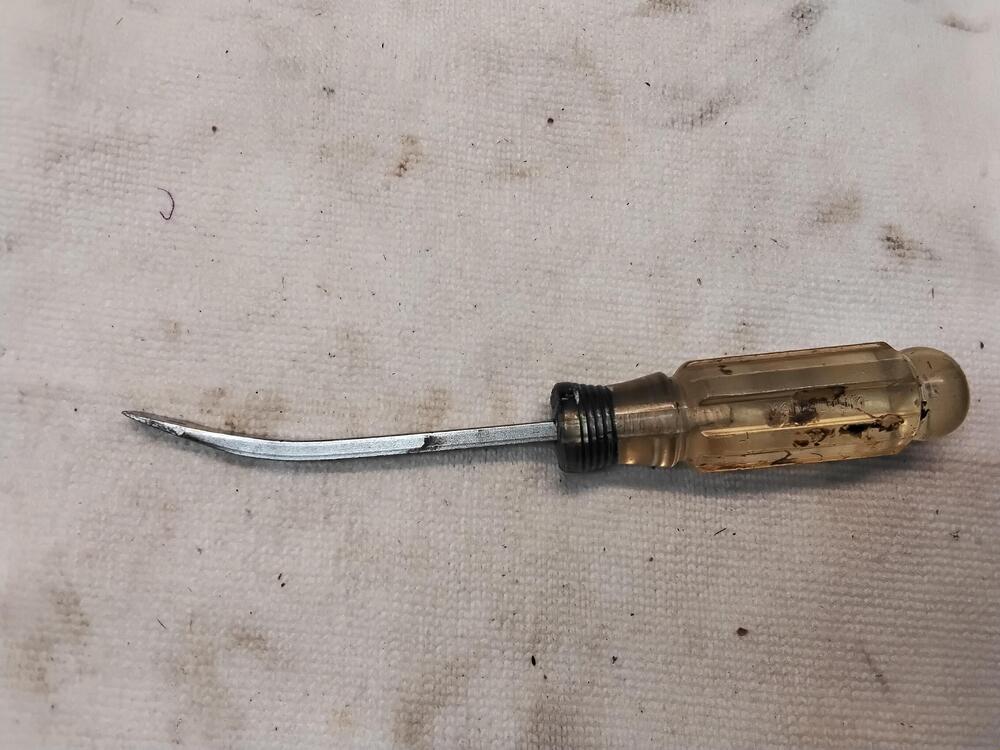 3 points3 pointsWell, I gave up trying to find it and just yanked it off with a puller lol3 points3 pointsThe next thing to attack is the firewalls . I can’t finish the passenger upper frame because I need access to spot weld the firewall panel . The firewall is sandwiched between the inner fender wall and outer . I also have an issue with the passenger side firewall panel from KF . The drivers side worked out pretty sweet and I should be able to do a decent job welding it in . The biggest obstacle is that I wanted to preserve the vin# that’s stamped on the wall so I had to cut around it . The passenger side doesn’t line up right as you can see but the pics . They said they will send me a new one . I think the panel wasn’t square on their stamping machine . KF has been really good supporting their products . I’ll also add that their drivers firewall panel does not include the doubler for the inside
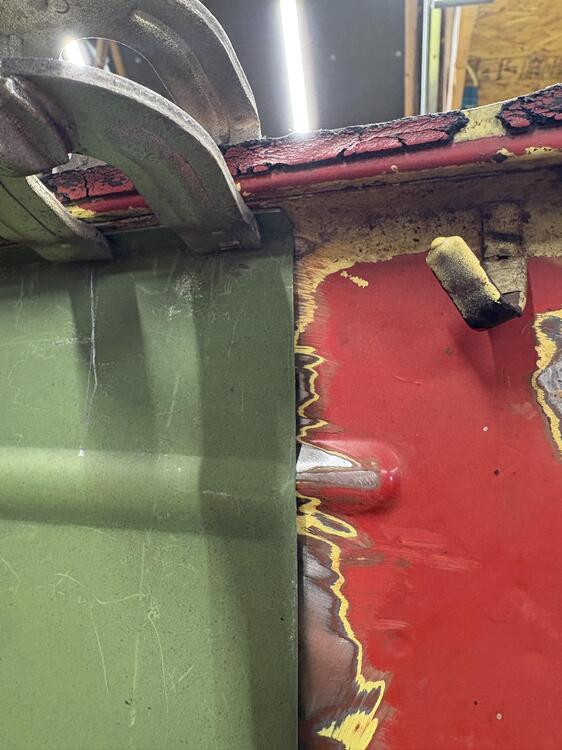
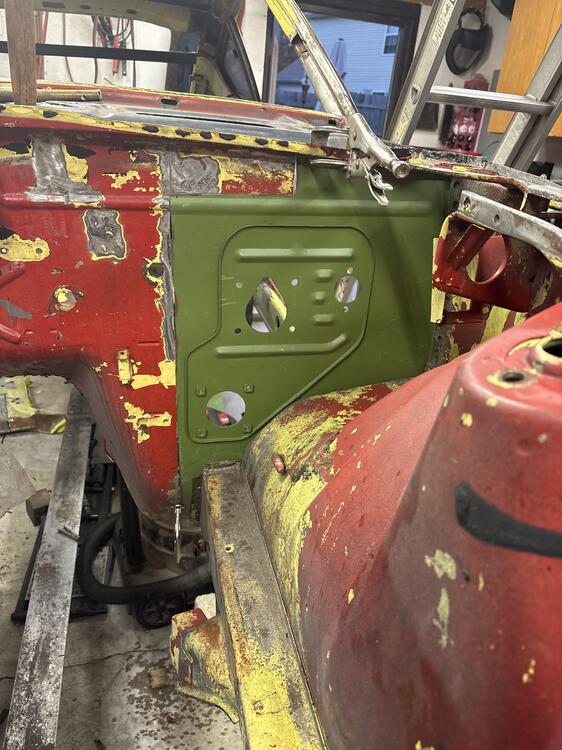
 3 points3 pointsIt's been a whole year since the surgery! Can hardly believe it, time flies when you're on the better end of healing. Thanks for all the prayers and well wishes, they worked. Next is a mid-foot fusion that I'm dreading but the docs said after a year with the knee replacement they could do it. I had planned a day of relaxing in the driver's seat of the 240 but it has rained like a cow pissing on a flat rock. Maybe tomorrow?3 points3 pointsThere was a post around that had someone replacing the guts of the old module with the new HEI but I cant find it. I might do that, but mount the box on the firewall or something. I like that it would appear more period correct. @EuroDat did that to his '773 pointsAs I've been saying for some time now; the upper middle class collector car market has been depressed for at least the past 10 months. Yes, should have taken the 90K.3 points3 pointsToo many projects are IMG_2691.movIMG_2691.movdelaying this RHD hs30… Heading to the wetblasting area to determine if anything is left to work with……
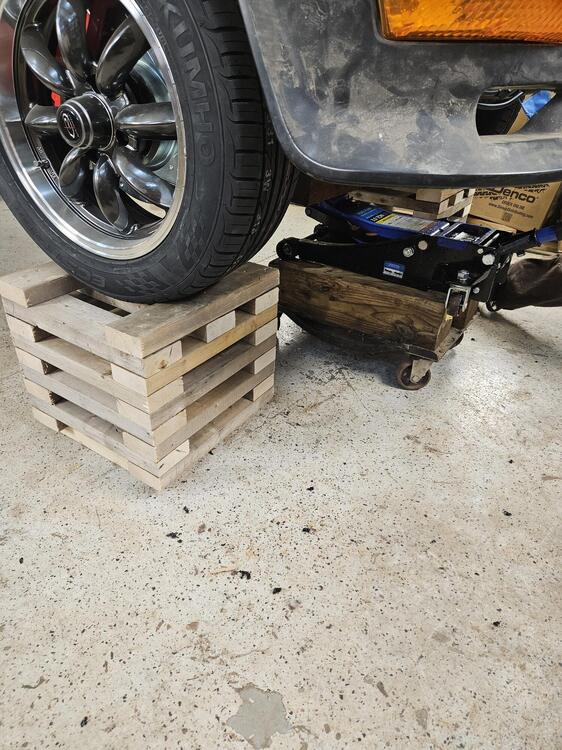
 3 points3 pointsI had her up on jack stands and stood about a 12" piece of 6x6 up on the jack and lifted her up. But the block and jack wanted to slide out once she was up high enough. I had to hold the jack in place while someone put the cubes under the tires3 points3 pointsI stole this cassette from my step-a s s hole when I was a kid. When cassettes where still off white colored, before the clear ones. I listened to it so much I still know every word to all the songs but this was my favorite.3 points3 pointsI had their greatest hits album when I was a kid. In retro my parents were probably concerned.3 points3 pointsThat rubber glue may be the least of your problems! I've done a Z dash pad restoration, starting with something that had only 25% of the deterioration that yours has. Even at that, it was a time-consuming job. Not only does the pad surface need to be levelled (not easy to get right, given the multiple contours), it's also necessary to 'V' and then feather-edge all of the cracks so that the filler won't crack along the seams. I'll bet it would take you 20 man-hours of effort (or more) to level, edge-treat, fill, sand, and paint a dash pad like yours to a decent level of final finish. But before you even get started down that road, you'll need to convince yourself that what's left of your original pad has enough structural integrity to prevent the pieces from moving around independently when the cabin temperature goes up or down. With its many full-depth cracks, I don't think I would trust your badly broken-up dash pad to meet that requirement. As a litmus test, it would be interesting to know whether a professional dash restorer like Just Dashes would accept your dash for restoration. Maybe you should send a picture and ask them. IMO, your best path forward will be to either: 1) buy a used dash that offers a better starting point for a DIY restoration (as Siteunseen suggests), or; 2) buy one of the replacement dash pads that have recently become available. In the latter case, you unbolt the old pad from the underlying steel structure (known as the 'armature') and then bolt on the replacement pad. There are a couple of threads on this site that discuss these replacement pads. As a third, lowest-cost/effort alternative, you could just replace your old plastic dash cap with a new one.3 points3 points3 pointsUpdate. It's been several months when I posted questions about a soft feeling brake pedal in my 79 zx. I checked the vacuun check valve and found it to be defective. I didn't even use my vacuum test equipment but instead just removed it and blew and sucked through it and knew it wasn't holding vacuum. I replaced it and now have very good, stock brakes again.3 points3 points3 pointsI plugged mine off but it doesn't get very cold down here. Less chances off leaking, losing coolant was my main reason. Lots of info in these threads... https://www.google.com/search?q=plugging+water+to+carbs+240z+classiczcars.com&sca_esv=77dc914585b7f4b2&rlz=1C1VDKB_enUS1121US1121&ei=1oETafjINaKHp84P-LudoAw&ved=0ahUKEwj4i8S_3uqQAxWiw8kDHfhdB8QQ4dUDCBM&oq=plugging+water+to+carbs+240z+classiczcars.com&gs_lp=Egxnd3Mtd2l6LXNlcnAiLXBsdWdnaW5nIHdhdGVyIHRvIGNhcmJzIDI0MHogY2xhc3NpY3pjYXJzLmNvbTIFEAAY7wUyCBAAGKIEGIkFMgUQABjvBTIIEAAYgAQYogQyBRAAGO8FSJZBUOkFWKcfcAF4AJABAJgBlgGgAcYIqgEDMC45uAEMyAEA-AEBmAIKoALsCMICDhAAGIAEGLADGIYDGIoFwgILEAAYsAMYogQYiQXCAggQABiwAxjvBcICCxAAGIAEGLADGKIEwgIKECEYoAEYwwQYCsICCBAhGKABGMMEmAMAiAYBkAYIkgcDMS45oAfSHLIHAzAuObgH5wjCBwUwLjguMsgHFA&sclient=gws-wiz-serp3 pointsShould have put it on BaT so we could pick it apart!3 points2 pointsdzcg might be having seller's regret. 🤢 Everyone knows about ad blockers. They work. Good luck.2 points2 pointsFWIW.. subscribing to a VPN like Surfshark or Nord, etc... eliminates at least 90% of the ads.2 pointsRESTORATION Customer excitedly bursts into my now closed shop "Mike, you've gotta check out my 240 - I just had it restored". This is the same chap that wasted a fair amount of my time a few months ago when I explained the restoration process. At that time his only question was "why does it cost so much". That was followed, almost without taking time to breathe, "I don't wanna do all that"! Anyway, I go outside to check out his beauty only to find that it had recently suffered a rather cheap, glass-in, paint job, a new set of incorrect seat covers complimented with mags that are too wide sporting new tires - clearly not a restoration. The industry recognized definition of a restoration is to first reduce the car to a shell with just enough suspension to roll the car around as required. Next it goes to a stripper who removes all of the paint, undercoating, sound deadener and rust to expose what I call the "sins". Sins are the holes in the body that resulted from the rust being removed by the stripping process and or repairs done to the body in the past that, in most cases, were poorly executed. Yes, one may strip the body by applying paint stripper and scraping the layers of old paint off but this takes way too much time and doesn't expose all of the sins. Of course, the chap doing the stripping MUST know his craft and apply the correct media otherwise there could be problems no one wants or needs. The pictured 510 wagon went through the stripping process using 2 different types of media. The fellow who did the job is very experienced and knows his craft. Many, many years ago I restored a 74.5 260 and an 82 ZX which were both stripped using plastic media. I was very happy with the results but plastic seems to have fallen out of favor as I couldn't find anyone to do the 510 with plastic. The next step is body and paint. The body shell may be mounted on a a rotisserie which could make working on the body shell easier - each case is different. All of the unacceptable sheet metal is replaced with new metal which is carefully, and hopefully, done in a way to replicate the original process. Major ripples, dents and or unevenness are treated with hammers/dollies or rivets and pullers. Bondo or plastic filler is used to smooth out minor imperfections. Now we're ready for the paint booth. Interesting to note - about 90% of the dirt that finds its way onto new paint jobs comes off of the painter. Most painters now use a one time use suit and hood. While the car is making its way through the body and paint shop is when all of the stuff you removed to reduce the car to a shell gets the business. Engine and trans rebuild, heater restoration, gauge restoration/repair, fastener replating, suspension powder coating, seat rebuilding, etc. Yes, the list is much longer than I've outlined but each system needs to be addressed and now is the best time to do it. Now is NOT the time to say "well it just costs too much to address X. NO, now is the time. Just got a VERY important call so I'll finish later.2 points


.JPG.fde440b23421fddf2ca272ac4fb4fd36.JPG)


Important Information
By using this site, you agree to our Privacy Policy and Guidelines. We have placed cookies on your device to help make this website better. You can adjust your cookie settings, otherwise we'll assume you're okay to continue.