


Leaderboard
-

240260280
Free Member8Points4,442Posts -
Mike W
Free Member6Points453Posts -
Captain Obvious
Free Member6Points10,111Posts -
.JPG.cfcada9cf1c1b502df3f5f2f2ca3ff36.JPG)
SteveJ
Free Member5Points9,683Posts


Popular Content
Showing content with the highest reputation on 06/08/2019 in all areas
-
One must accept: price is set by the whim of the purchasing population. prices increase with time and the value of some older items increases more than the values of others. price increases do not occur homogeneously across the full population of products. price increases do not occur homogeneously across geographical distributions. price increases do not always linearly scale with time. Pricing is bursty, price-growth is bursty, buyers are complex and independent entities who are wise, suckers, or carefree.5 points
-
Fred here, Head Stock Judge for ZCCA. Although the "from the factory" is the way we judge, I was not aware we were taking off for this TSB issue. I will discuss with Todd and Chris. Also, I will look at the car in Branson for the double points for heat shields. As far as the delay in judging sheets, Todd took them home and I did not get them back for quite a while, sorry. Fred4 points
-
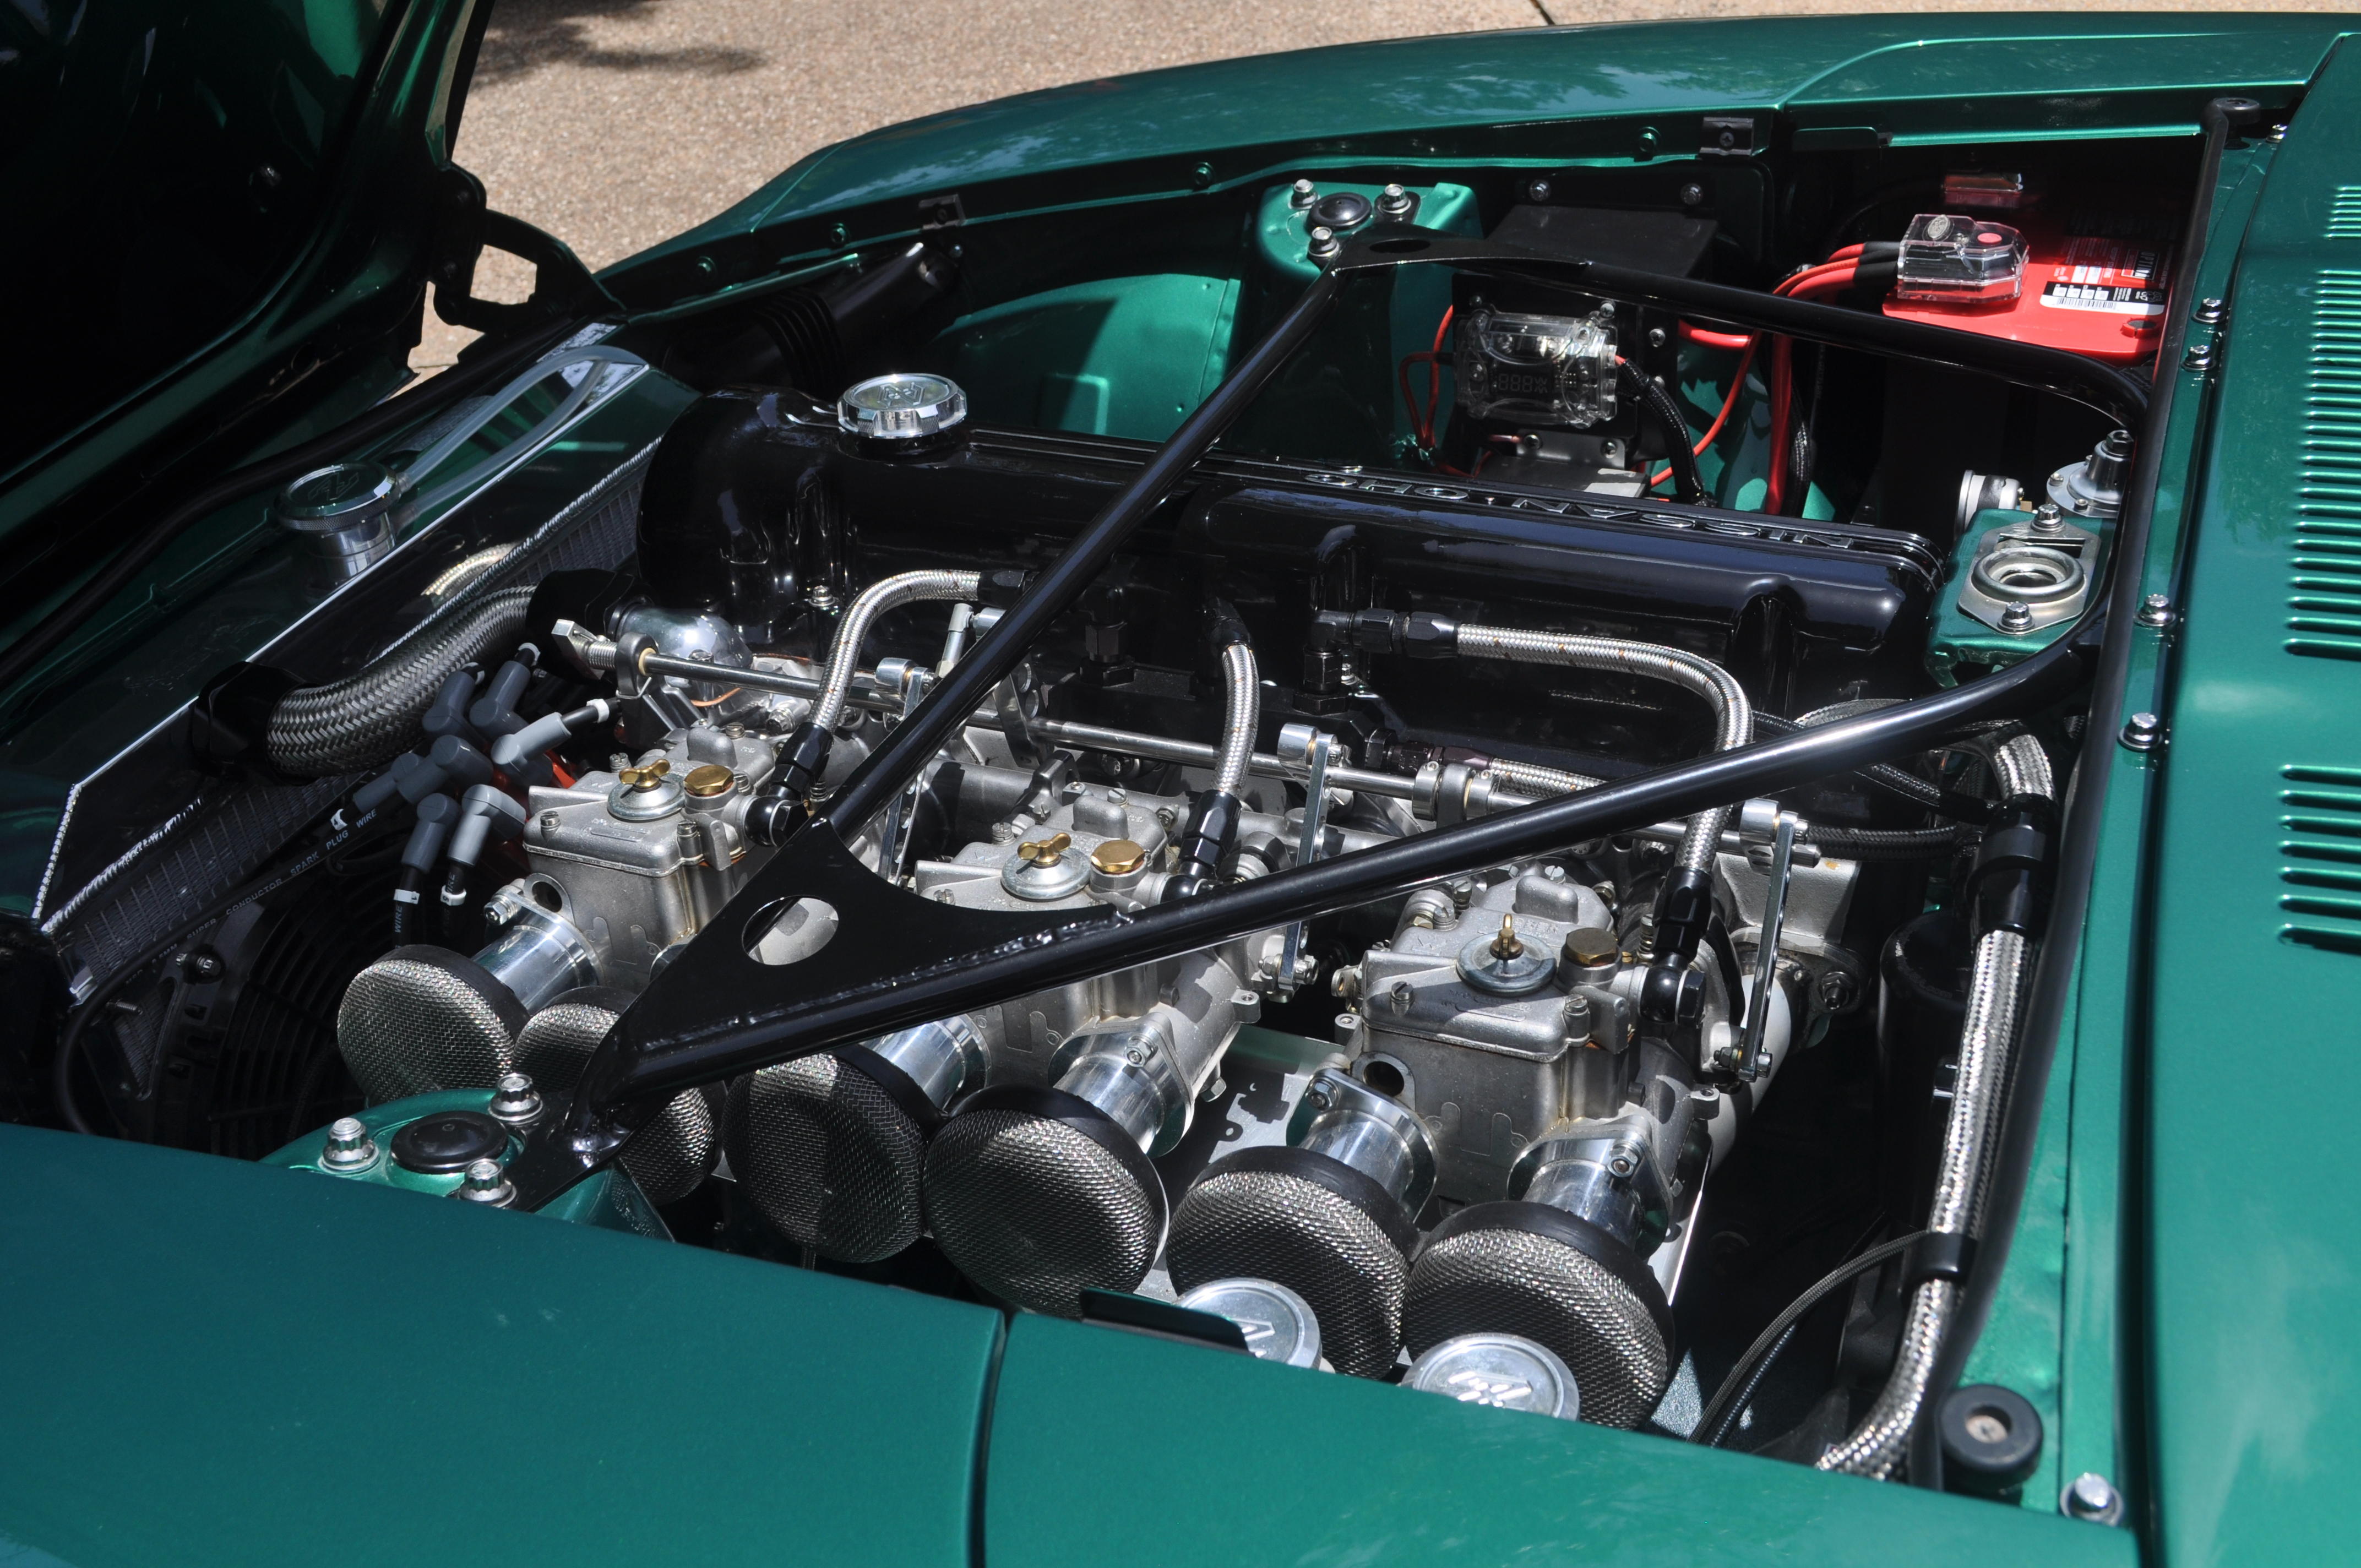
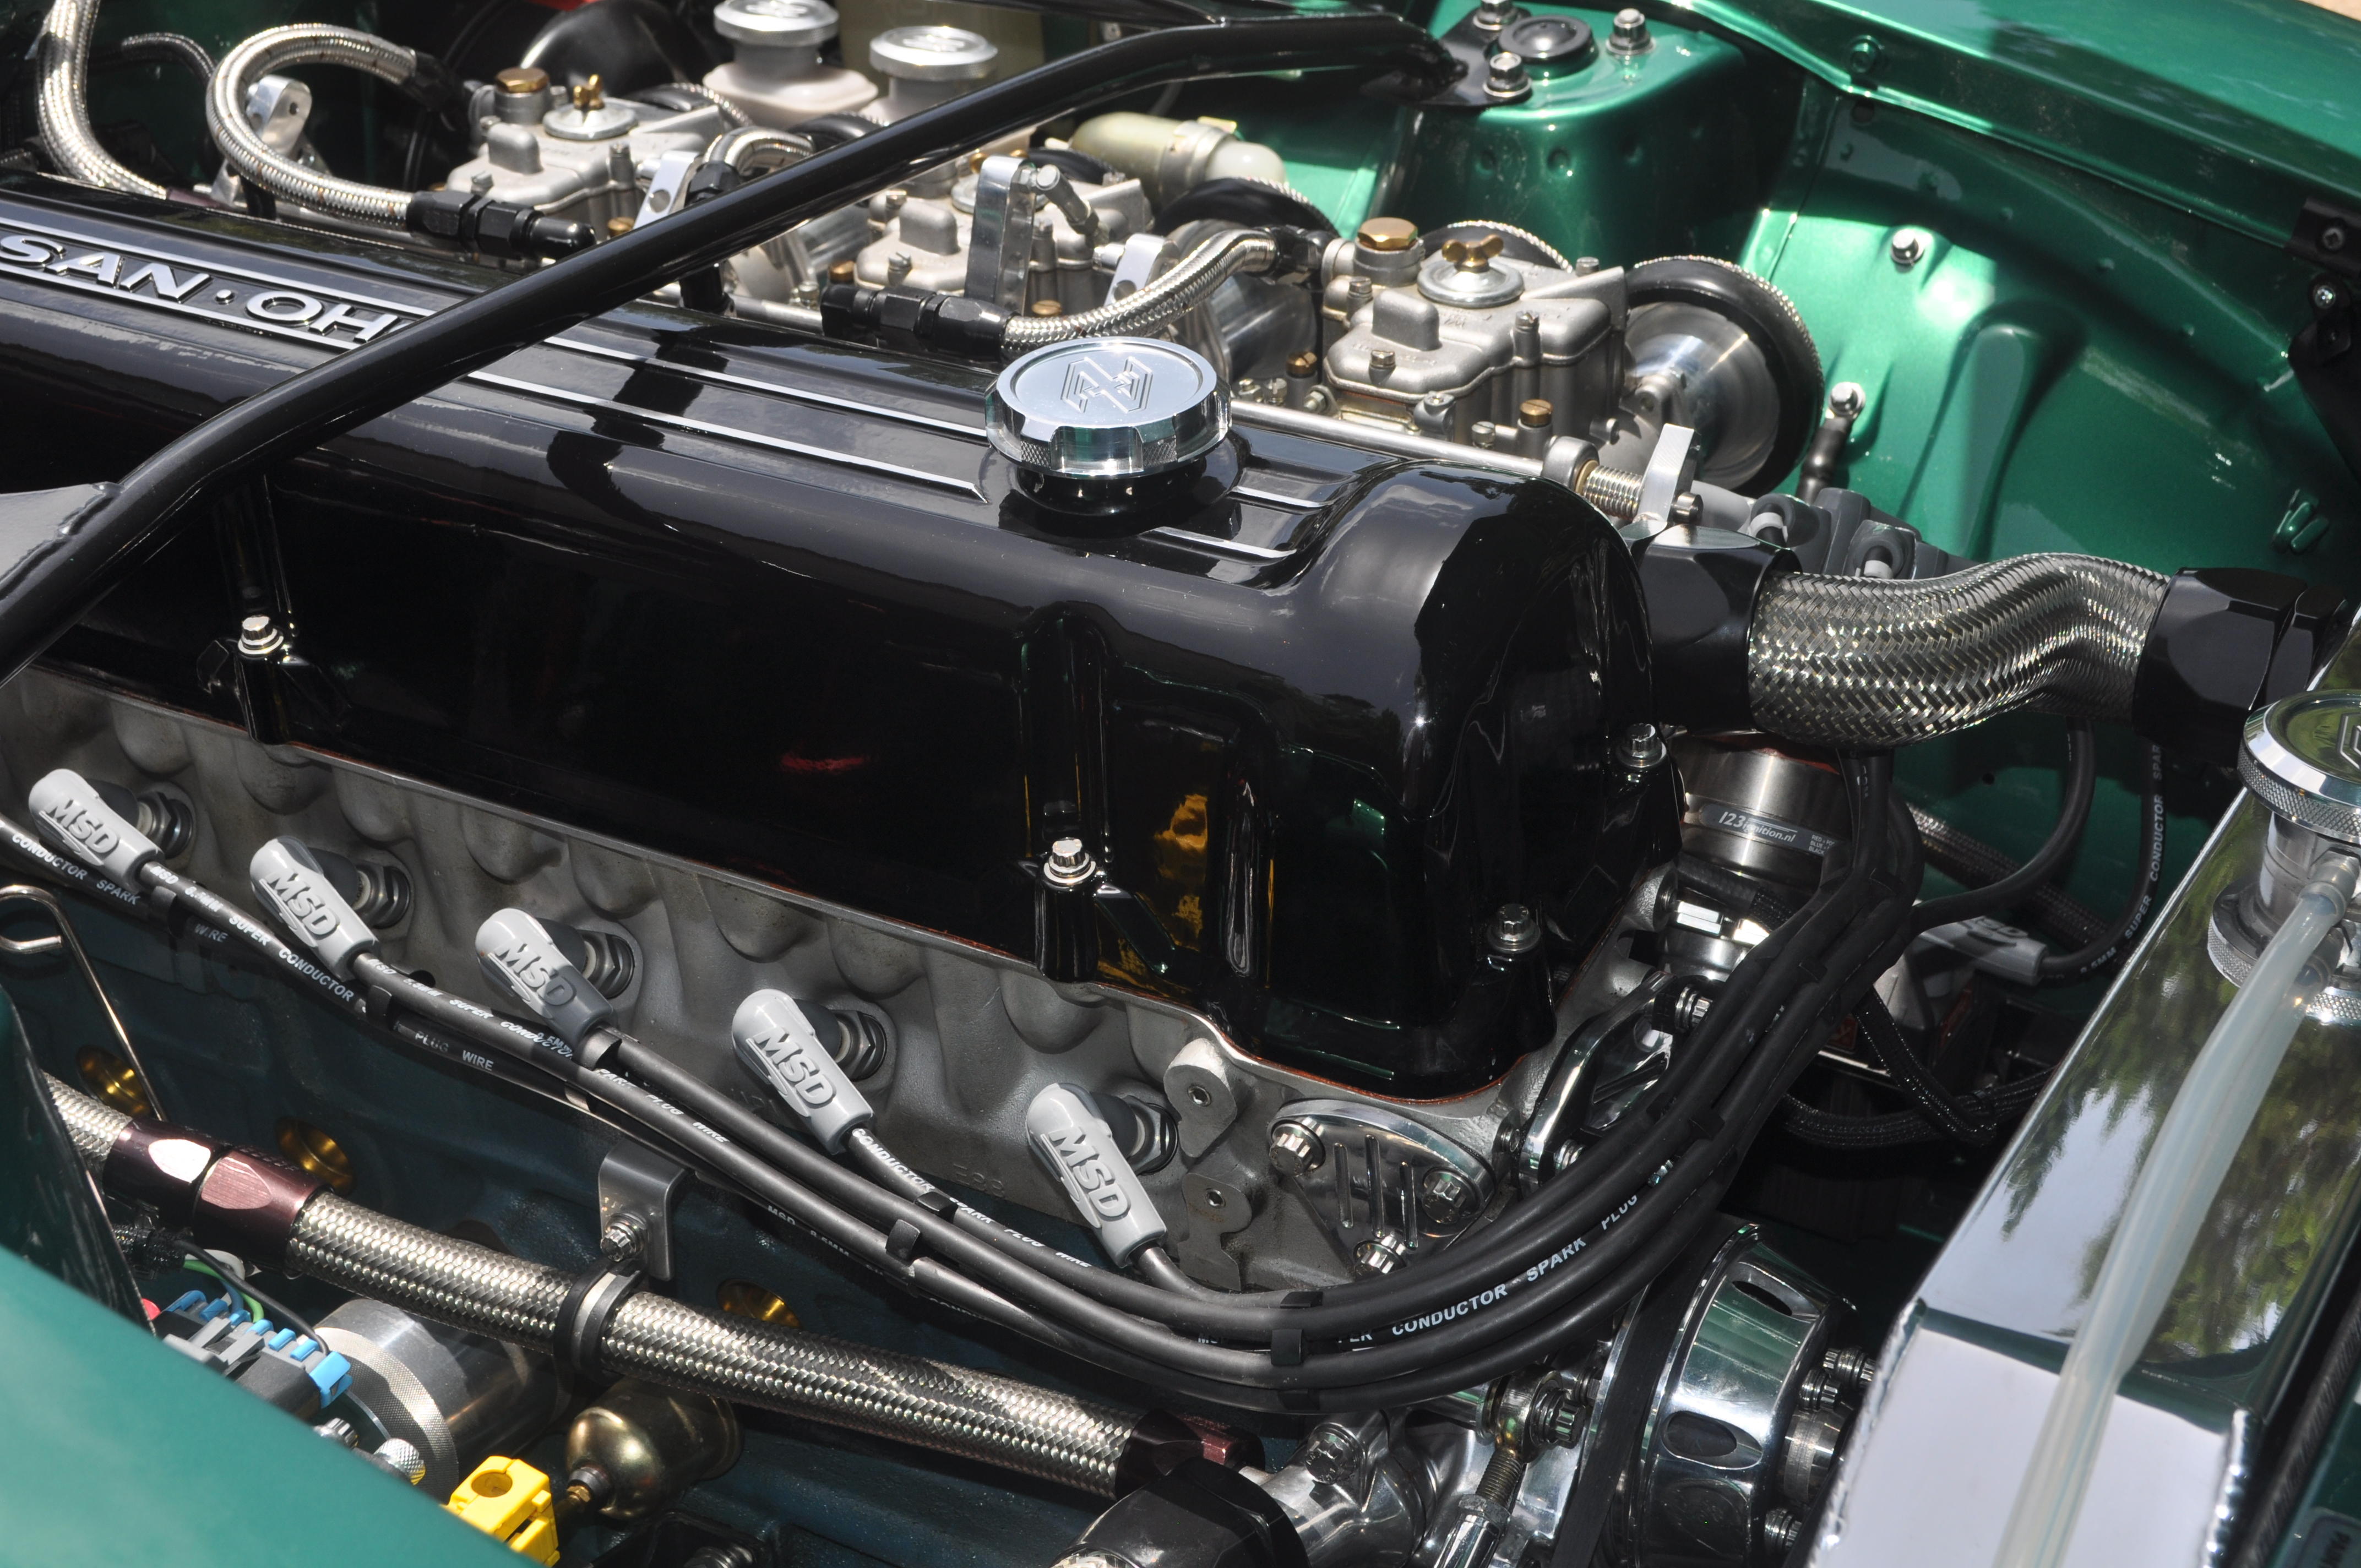
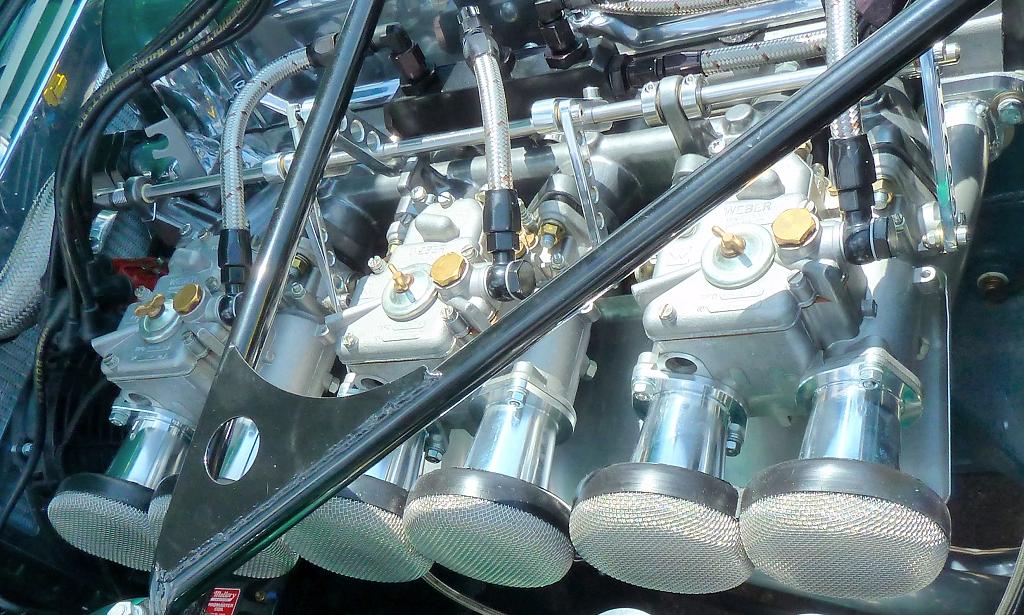
Thanks Blue for the compliments!! My engine bay is actually toned down a little now from the way it was in Memphis. I've replaced my valve cover with one that is powder coated black, moved the breather to the back of the cover, and routed my wires around the front of the cover rather than over it. You see more of the engine that way and given that its black its easier on the eyes!! Haha! Here's an update picture.

 3 points
 -
I was one of the first people to use the 123 ignition on a Z and I have been running this setup since 2015. I concur that the setup and install instructions are lacking and I too experienced an advanced timing situation after the initial "LED Install" procedure but unfortunately did not realize this for quite some time so I was running more advanced that I originally thought. Fortunately nothing catastrophic happened to my engine and I was able to correct this by checking the initial settings with a timing light. Although the 123 people indicated in their emails to the OP that timing should always be checked with a light, I have not seen that written in any of their instructions although it is possible that I might have missed it. One other issue that I have had with the 123 ignition is that periodically my car will refuse to start or it does start but does not run correctly (misfires) and the only thing that solves the issue is to replace the rotor. I was never able to completely figure out the cause of this or why the rotor just seemed to randomly "go bad" until I read through this thread and subsequently did some additional research. As it turns out, I also run an MSD with my ignition and when I was first considering the 123 distributor, I found a warning on their website that said not to use the 123 system with an MSD ignition. I did not understand the engineering reasoning behind this so I contacted the company directly to find out a little more. Their engineers told me that they already had customers using their product with an MSD with no issues being reported and so they really didn't seem to know why that warning was there. They basically told me that it should work without issues. Well fast forward to today and after a little more research I found the root cause of the problem. I happened to stumble on a Triumph TR site where the OP had a similar problem on a 123 ignition although in this case the rotor was actually burned. This led me to another thread on a forum called Pelican Parts and they apparently specialize in parts for older European cars. Well as it turns out, the engineers at 123 chose a readily available, off the shelf distributor where they could house their electronics and just change the drive mechanism to work with numerous different cars. So the cap and rotor, and I suspect even the dizzy body itself was very widely used in VW's, BMW's, Volvo's, etc of the late 60's going through the early 80's. Well during this time, the EU apparently was focused on RFI suppression in newer cars and mandated that auto electronics include RFI suppression hardware. I do not know exactly when this was mandated but I believe it was sometime in the 70's. Well believe it or not this mandate resulted in the inclusion of a resistor in the distributor rotor that sits between the center contact and the end contact. What I learned from the Pelican Parts forum (where a lot of these guys use this same cap and rotor setup as the 123 ignition as that's what the car originally came with) but they have also upgraded to MSD. Unfortunately these rotors with the internal resistors were designed and used at a time when ignition systems were not as powerful as today's systems, including MSD, and so the higher output power of the MSD essentially burns out the resistors over time. I must admit that I thought this seemed rather absurd as I had never heard of such a thing, but I happened to have a number of rotors that had "gone bad" so I decided to do my own checking. Well sure enough when I checked continuity between the center and end conductors, it was a total open! I really couldn't believe what I was seeing so I used a Dremel to cut away at the epoxy and sure enough buried under the epoxy and between the 2 conductors was a burned out resistor. The solution that I also found on the Pelican Parts forum was the Dremel out the epoxy and resistor and simply solder in a 12 gauge piece of wire to replace the resistor, and then simply use JB weld or some other suitable epoxy to seal it back up. You can find more info about this here: http://forums.pelicanparts.com/porsche-911-technical-forum/596559-msd-rotor-modification-detail.html Ironically, 123 Ignition now also sells a modified rotor that replaces the resistor with a wire: https://123ignitionusa.com/oem-rotor-modified-no-resistor-for-all-4-and-6-cyl-123-applications/ $45 for a rotor seemed a little excessive to me so I purchased a couple of Bosch rotors (p/n 04008) and did the mod myself. A little tedious but definitely better than paying $45. So after 4+ years of dealing with this random problem I believe it is finally solved. I will also say that despite some of the startup issues that I and others have had with the 123 system, I am very satisfied with the end result and would not hesitate to use this again. Fortunately my experience with the company and the product was a little more positive than the OP. I hope this helps others that may have experienced the same issue and that I've saved you from pulling your hair out as well. Mike.3 points
-
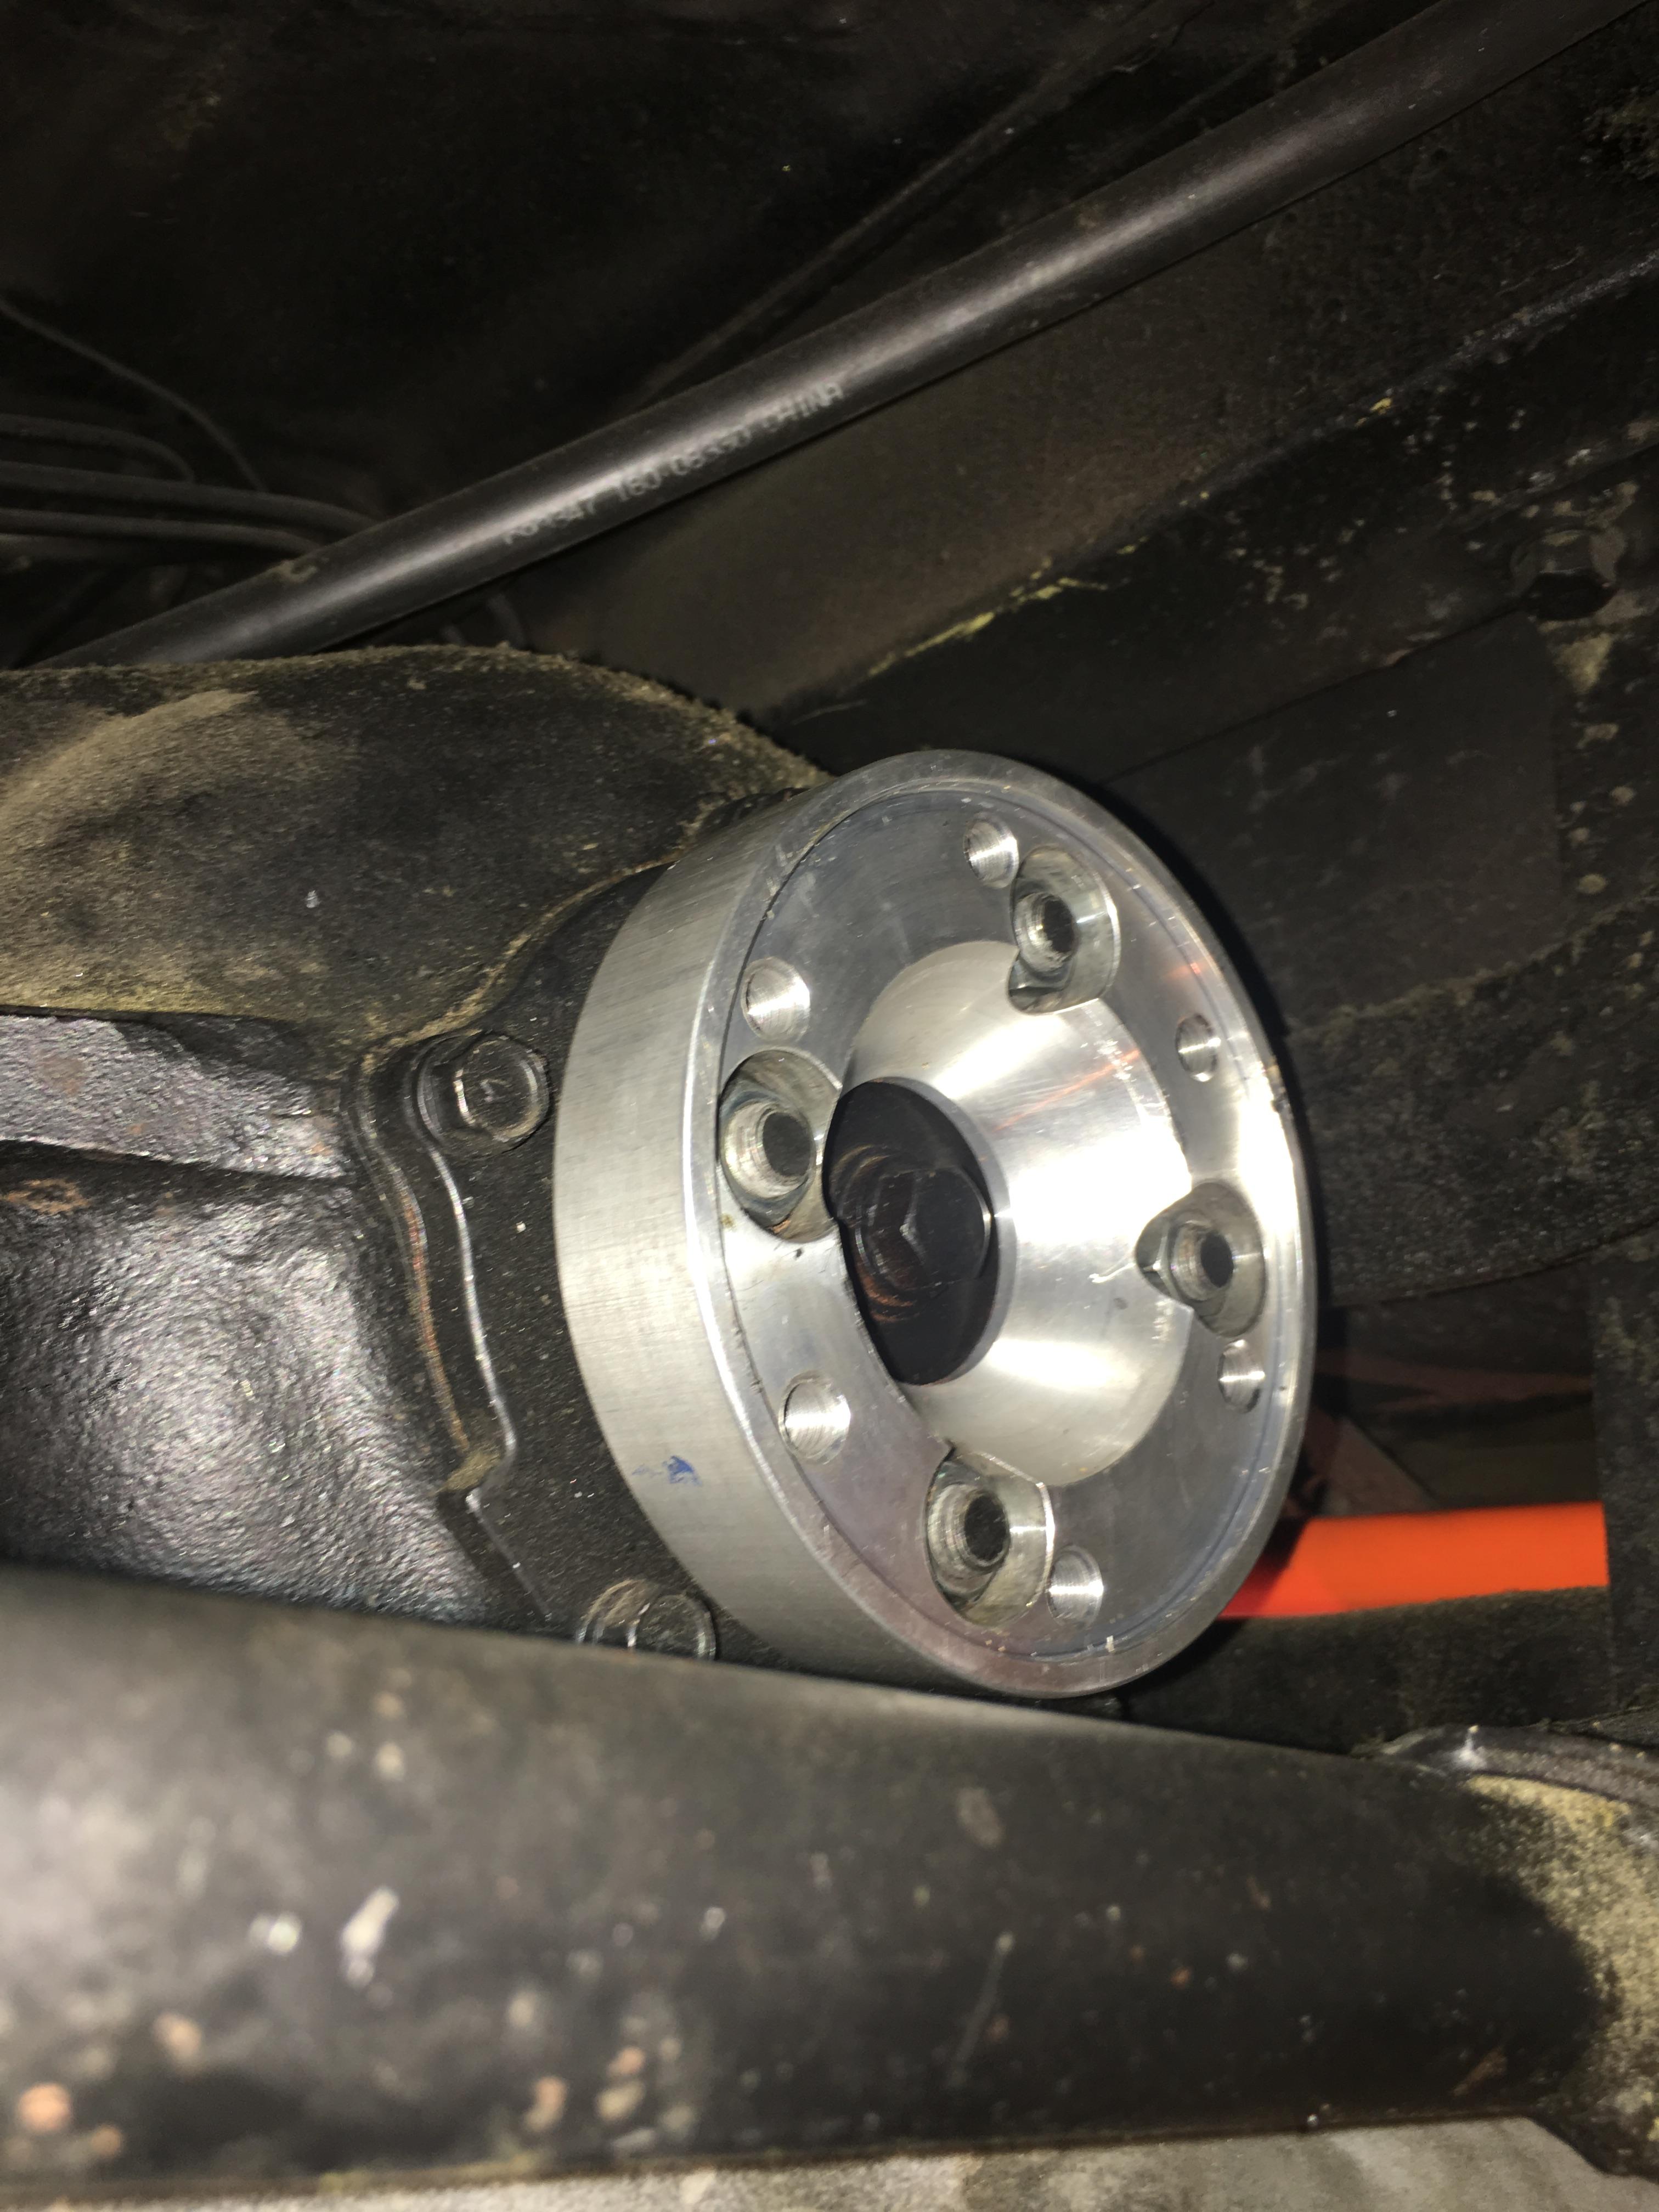
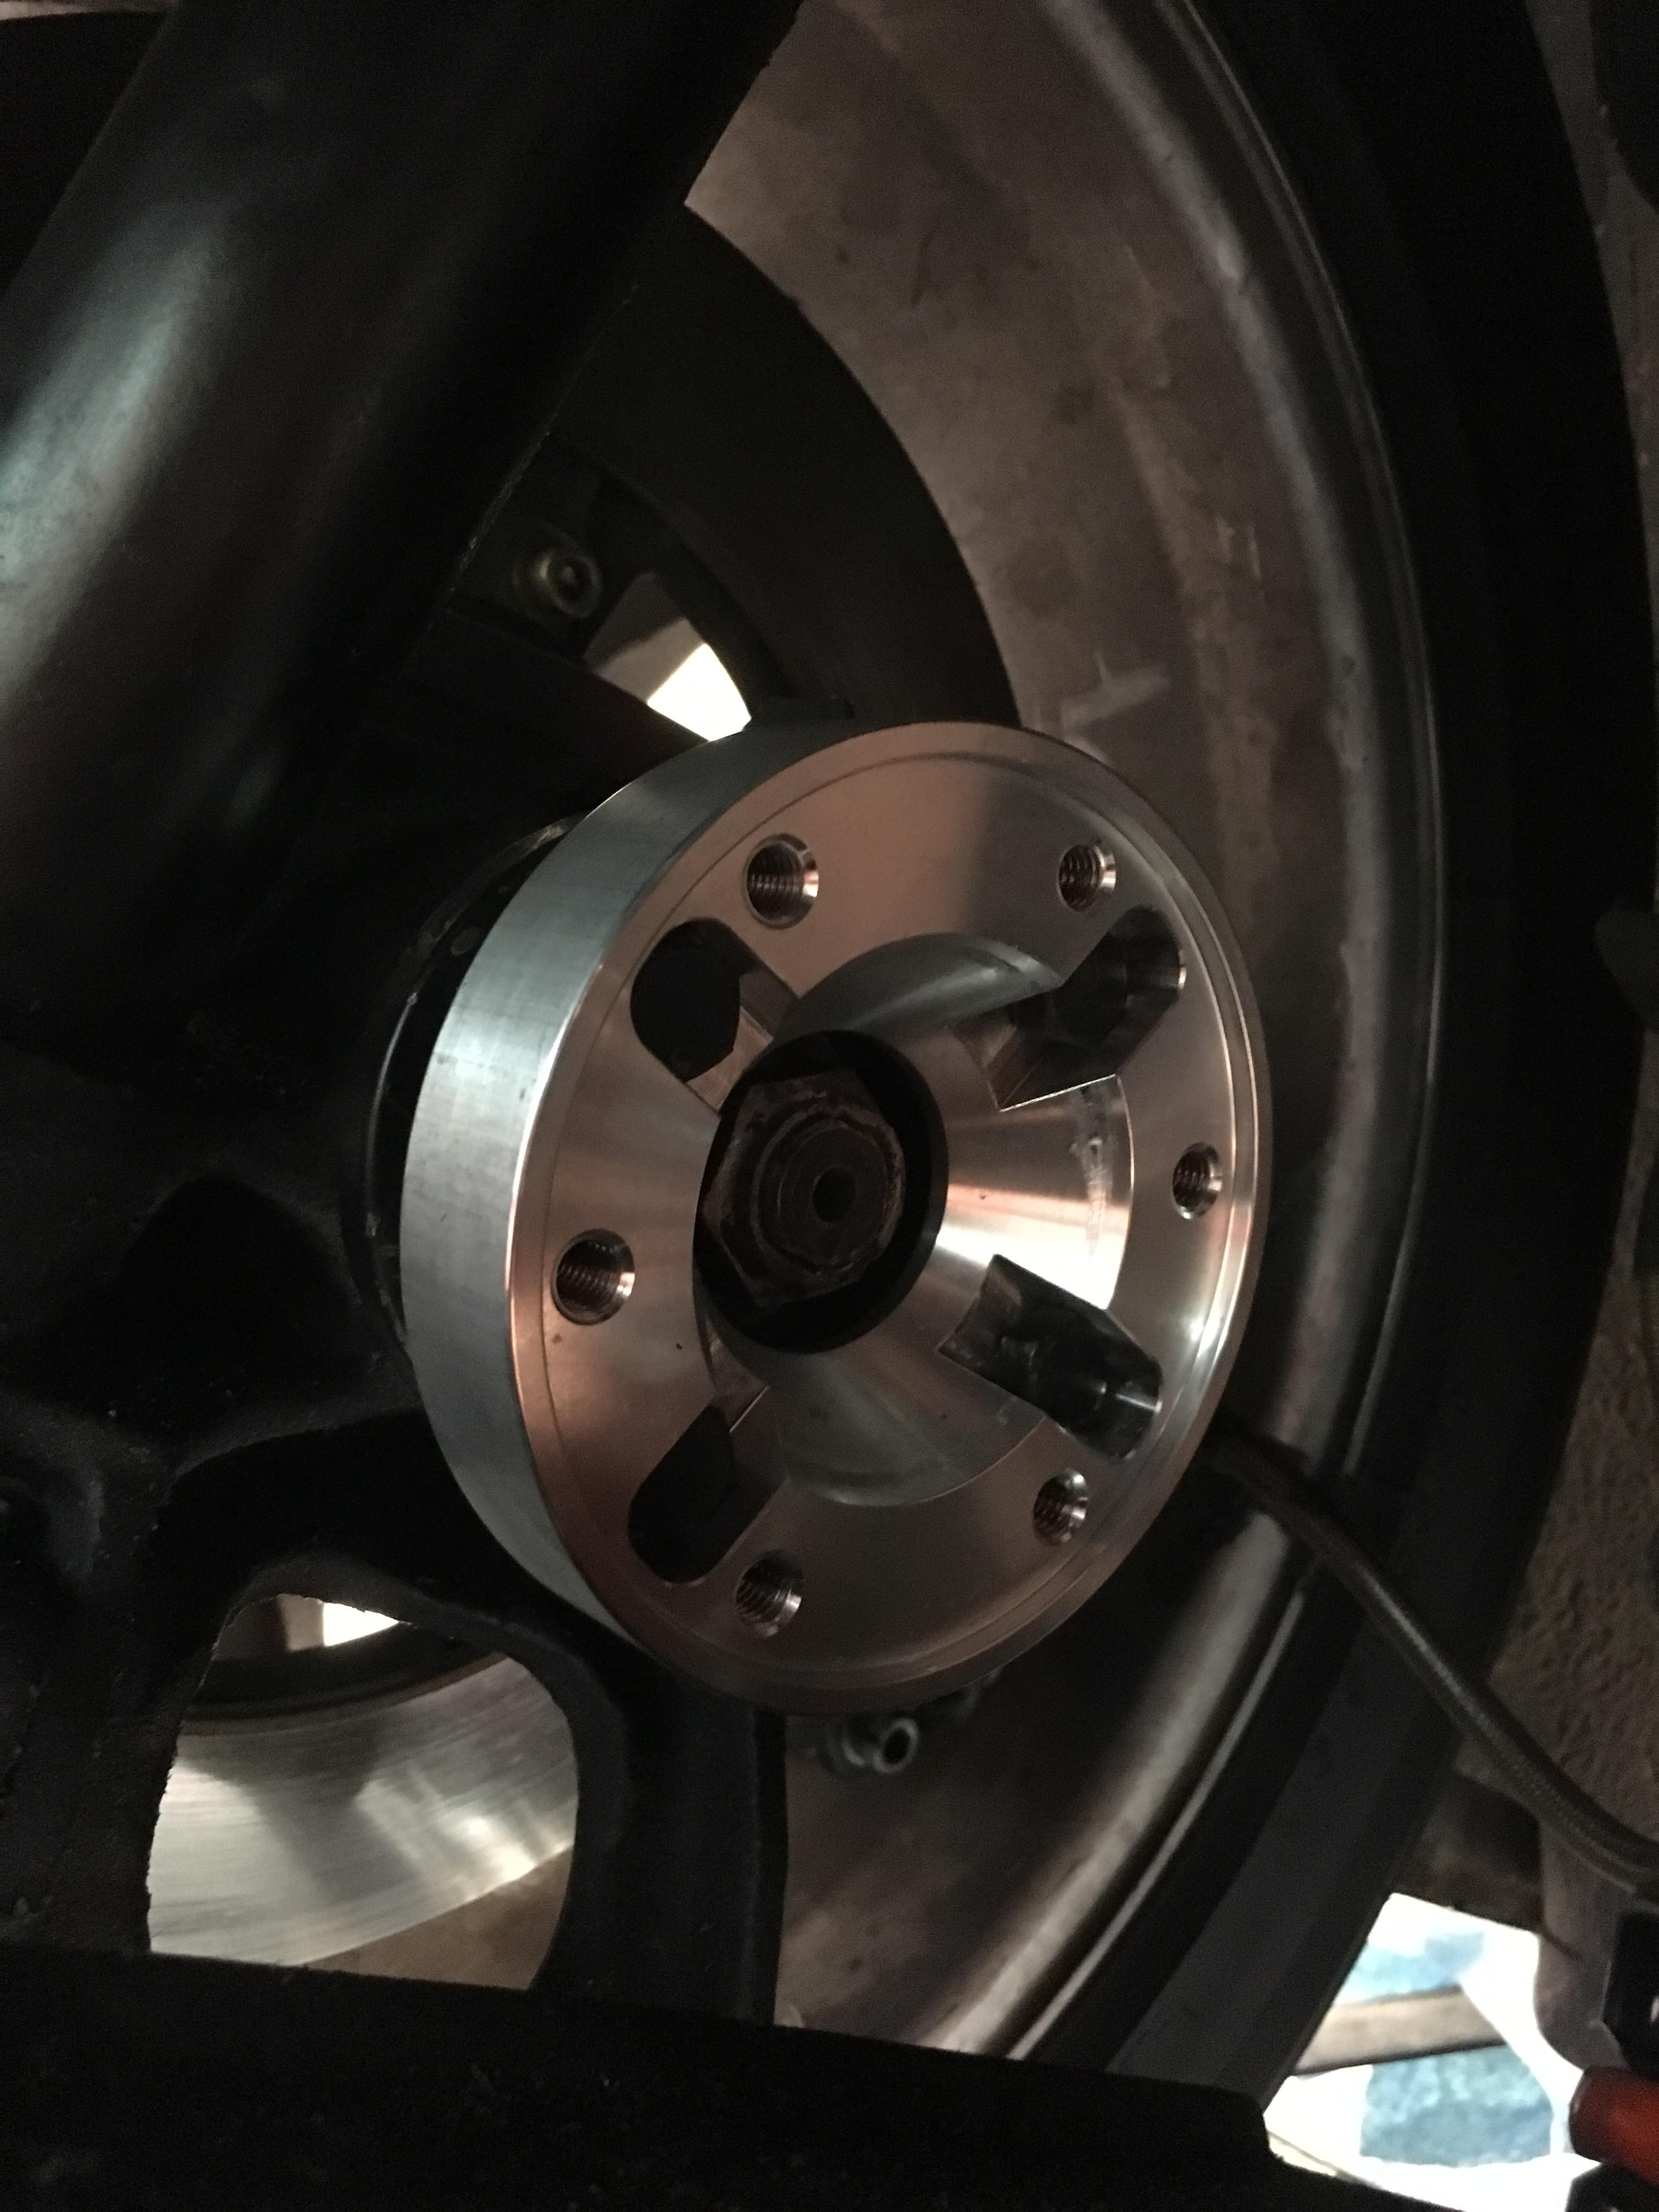
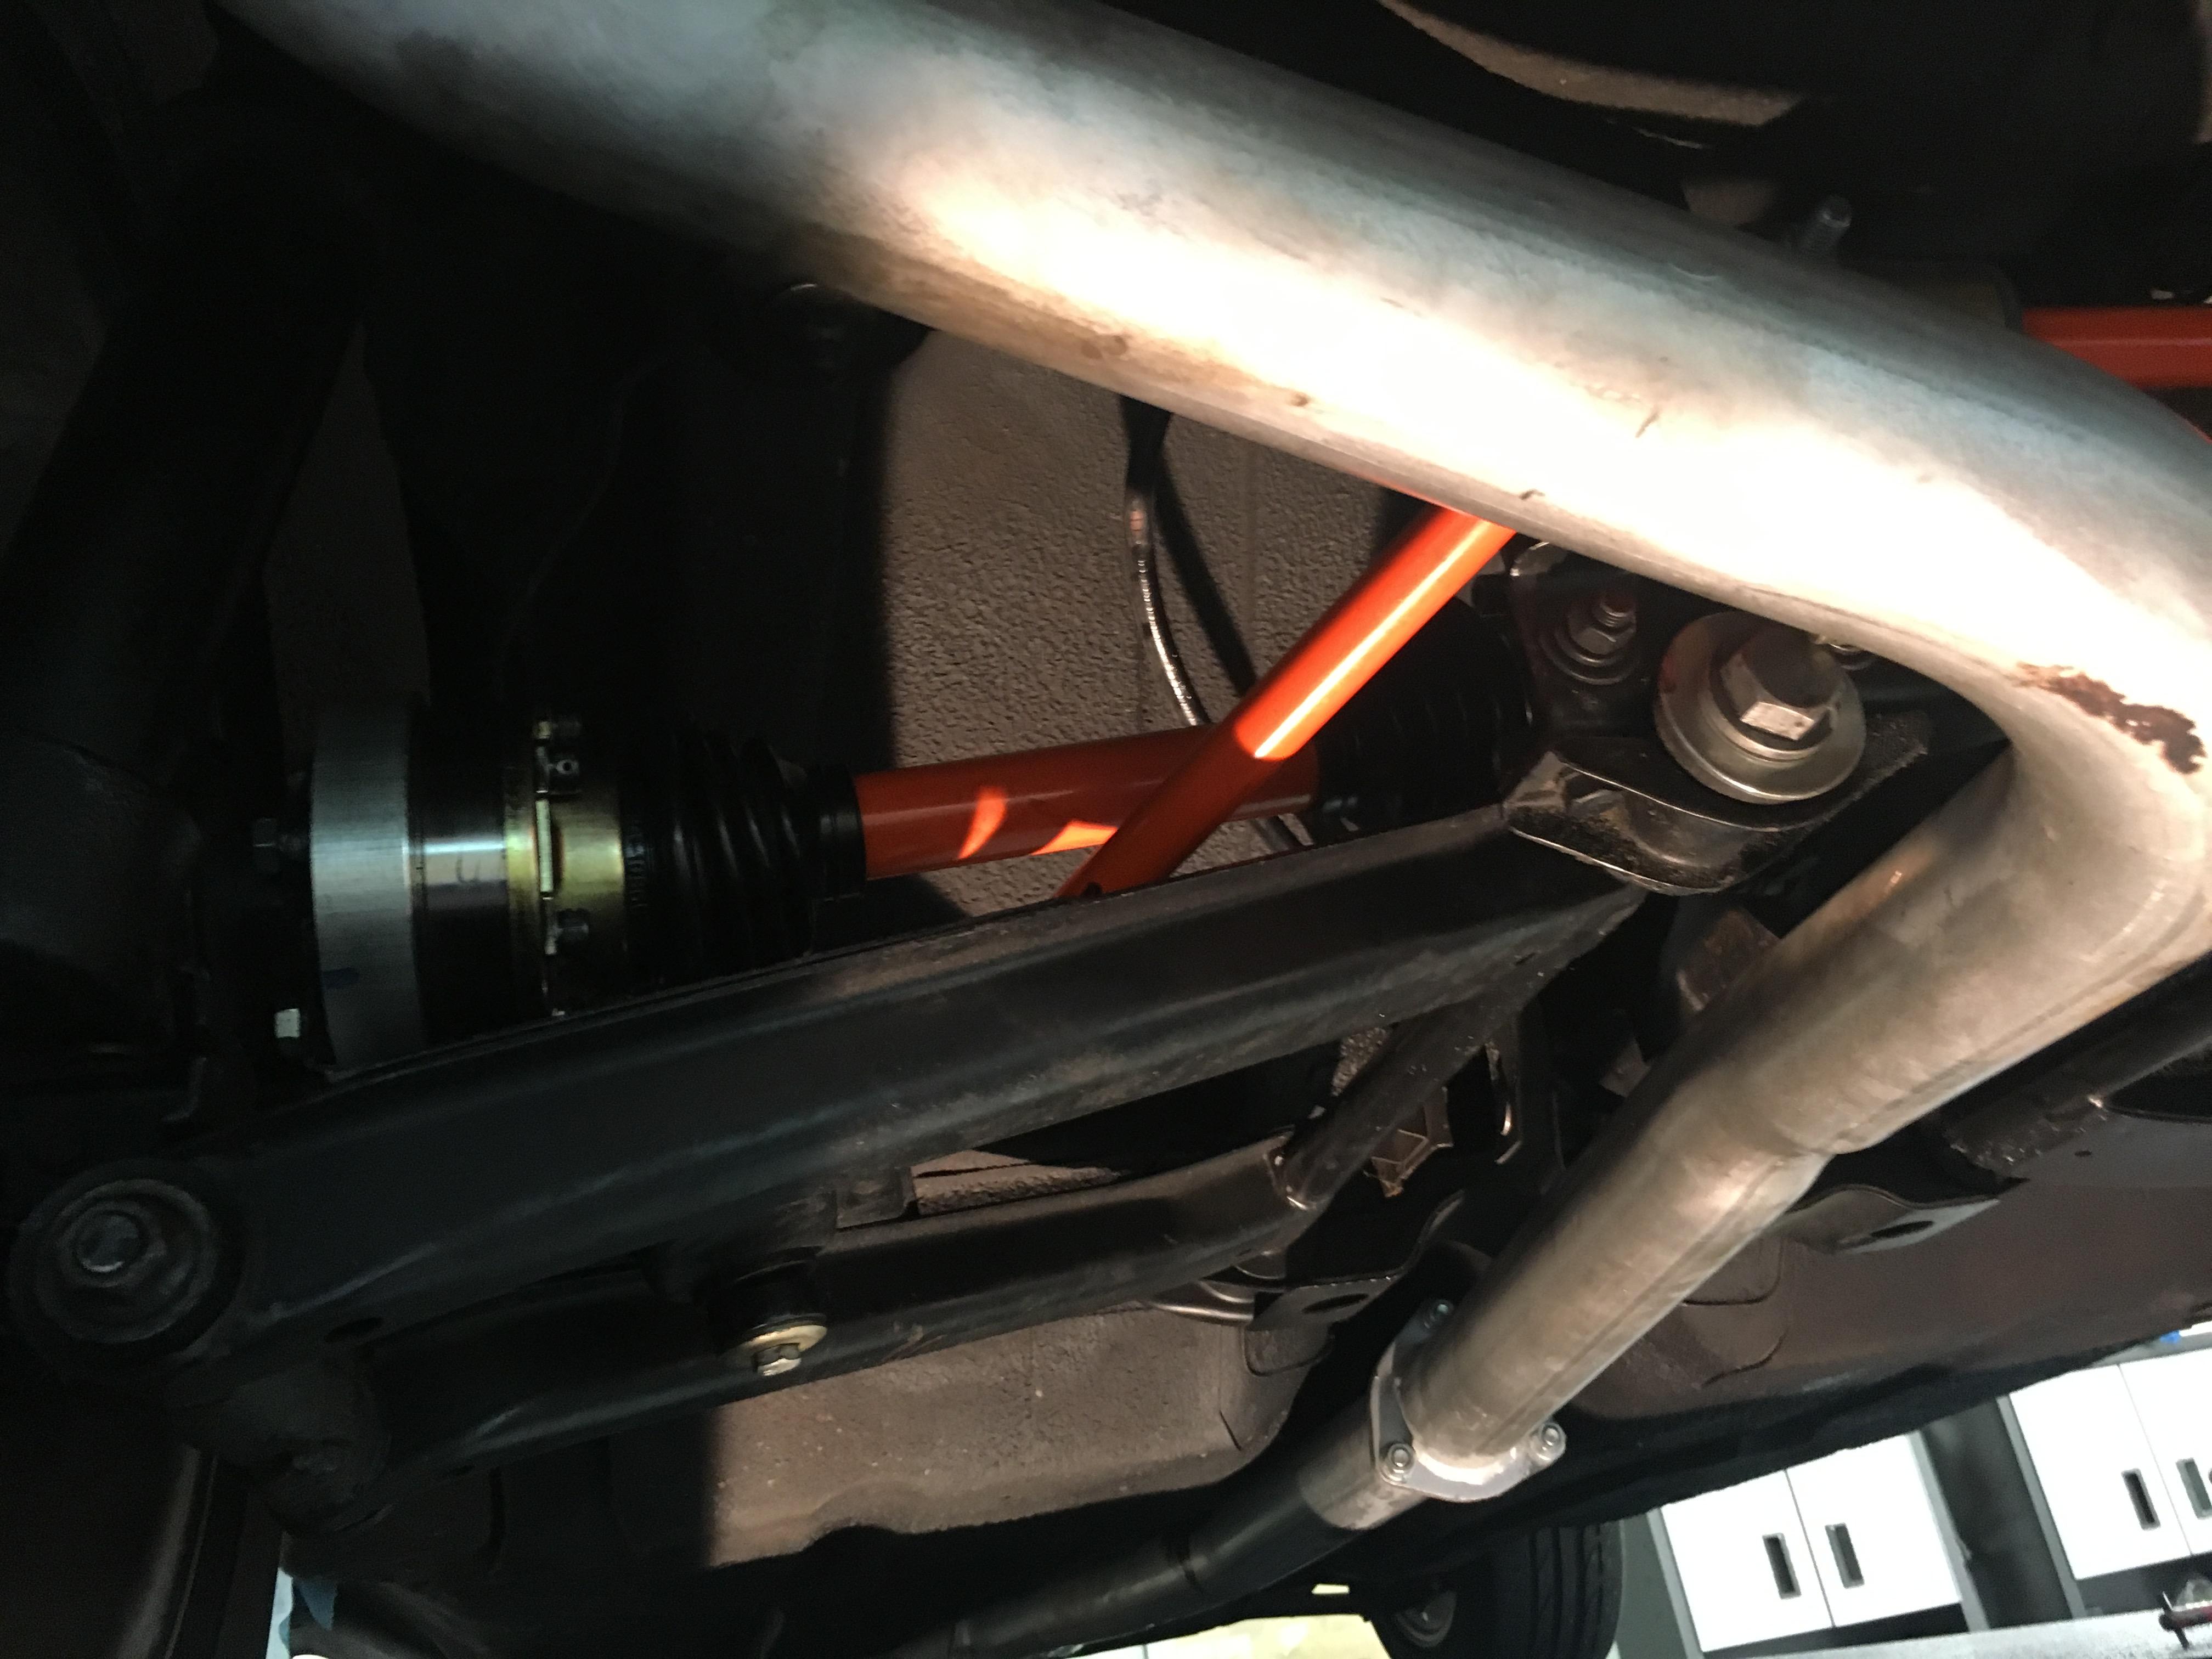
2 pointsAll finished. Took it for a test drive and it works perfect. No noise, no slack.....solid. Even when I let off and nail it, no play......I’m happy with Futofab CV shafts!
 2 points
 -
Please allow me to add one more bullet: •. A rising tide lifts all boats. Dennis2 points
-
For the 1973 Model Year - - several different versions came from the factory. You will notice that the 73 240Z's - mostly have a inverted V shaped piece of metal on the radiator core support - which has a rubber seal attached to it. They were put on at the Dealerships as part of the trial and error solutions to help remediate the vapor locking and percolating fuel issues. The fist one's were bolted on at the Dealerships, then later they were put on at the factory - spot welded on the radiator core supports. Likewise many of the items created / tried at the Dealerships, while Nissan's Service and Engineering departments were working with the Dealerships to solve the operational problems, were added at the factory on later examples. IMHO the best thing the ZCCA could do in this case - is note in the Judging Rules, that items specified by Nissan Field Service for installation at the Dealerships are to be considered "factory". The earliest Core Support Lip that I've see was on HLS30 137967... 12/72... FWIW Carl B.2 points
-
I sent an email to Todd Wagner and Chris Karl from the ZCCA to look at this thread and maybe provide comments.2 points
-
2 pointsGlad to help. Thanks to you, I'm much obliged for such a pleasant stay. But now it's time for me to go.2 points
-
Thanks for that, so this car wouldn't have been marked down for the bits that aren't 'correct' or missing? I must point out, I think that this is a great car, just not 125k great!2 points
-
I agree with Bruce ... and I regard his opinion highly! Be it beer or automotive engineering. The judging rules need an update (I know the judges are mostly unpaid volunteers) for instance, there is no "survivor" class. A true unmolested 40k miles 240 / 280z gets to compete with a full on restoration where everything is refreshed or brought up to as new standards. Not exactly a fair playing field. I know that Zup got dinged for his replacement of the fuel line insulation with a modern equivalent vs the original asbestos stuff.2 points
-
2 pointsNaaaa. I would have said it like this. Remember to stop after the first 10 miles and re-torque the lug nuts when replacing studs. Completely different.2 points
-
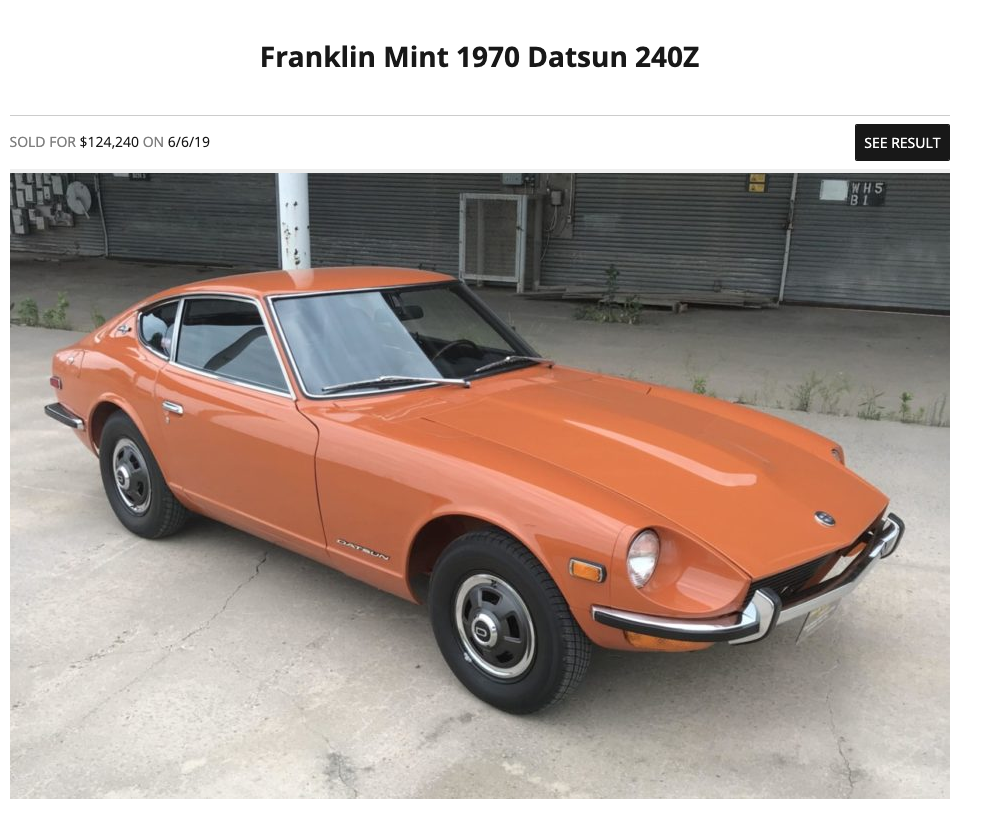
rturbo 930, Well, it IS a big deal. Its a Gold Medallion car, the car used for Mr. K's induction into the Hall of Fame, restored by the guy who wrote the book, detailed by a leading authority, and campaigned heavily. It will forever be the Franklin Mint car and will draw a crowd at car shows. Its called provenance. I personally share your thoughts, but the provenance thing is ruling (like the idea of value for a car Steve McQueen once drove).2 points
-
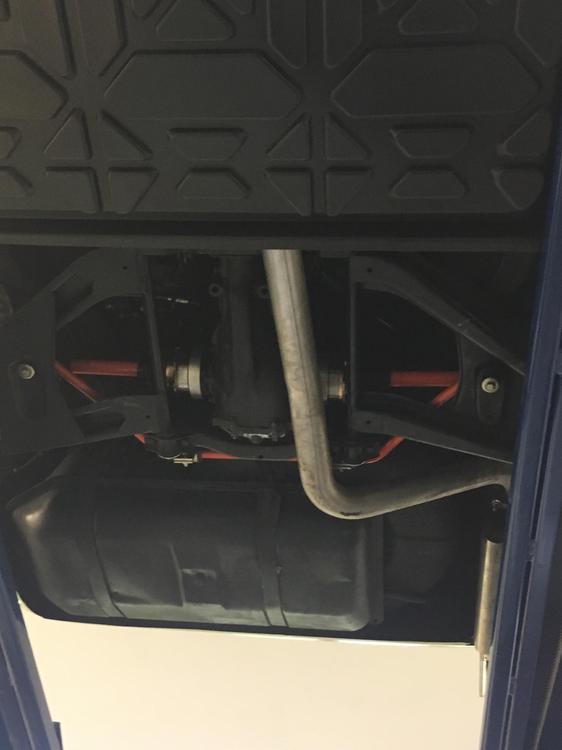
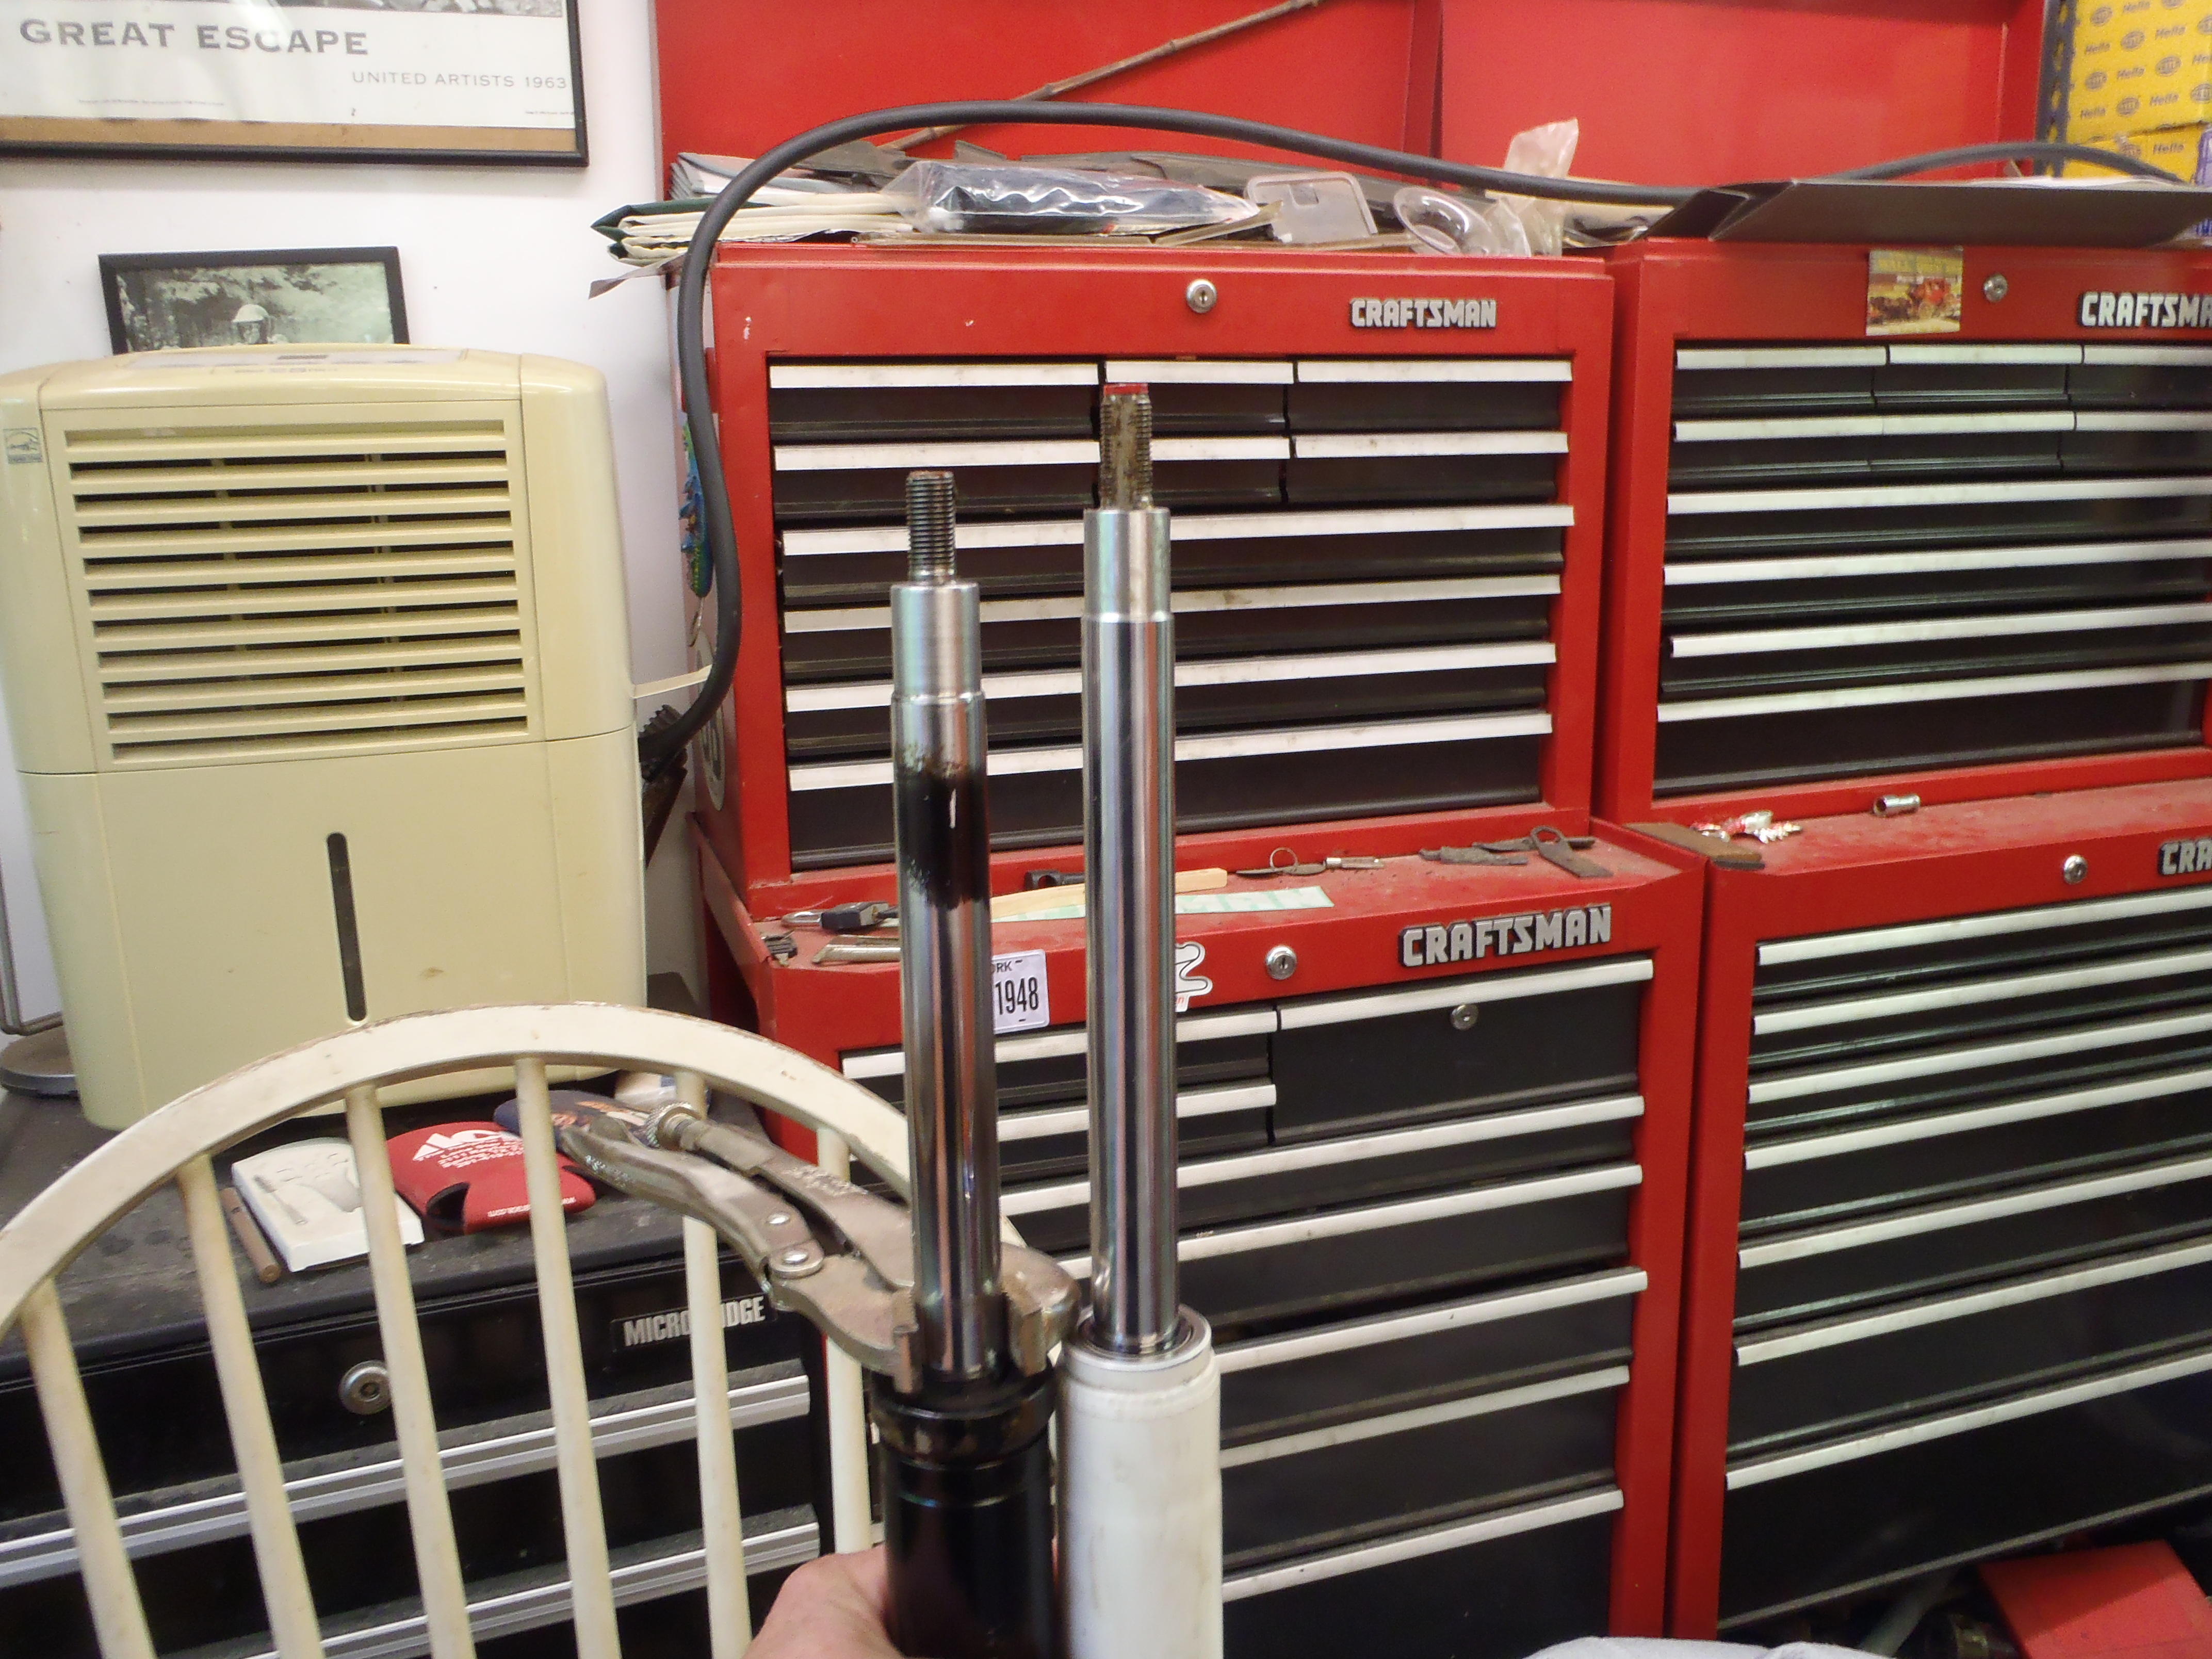
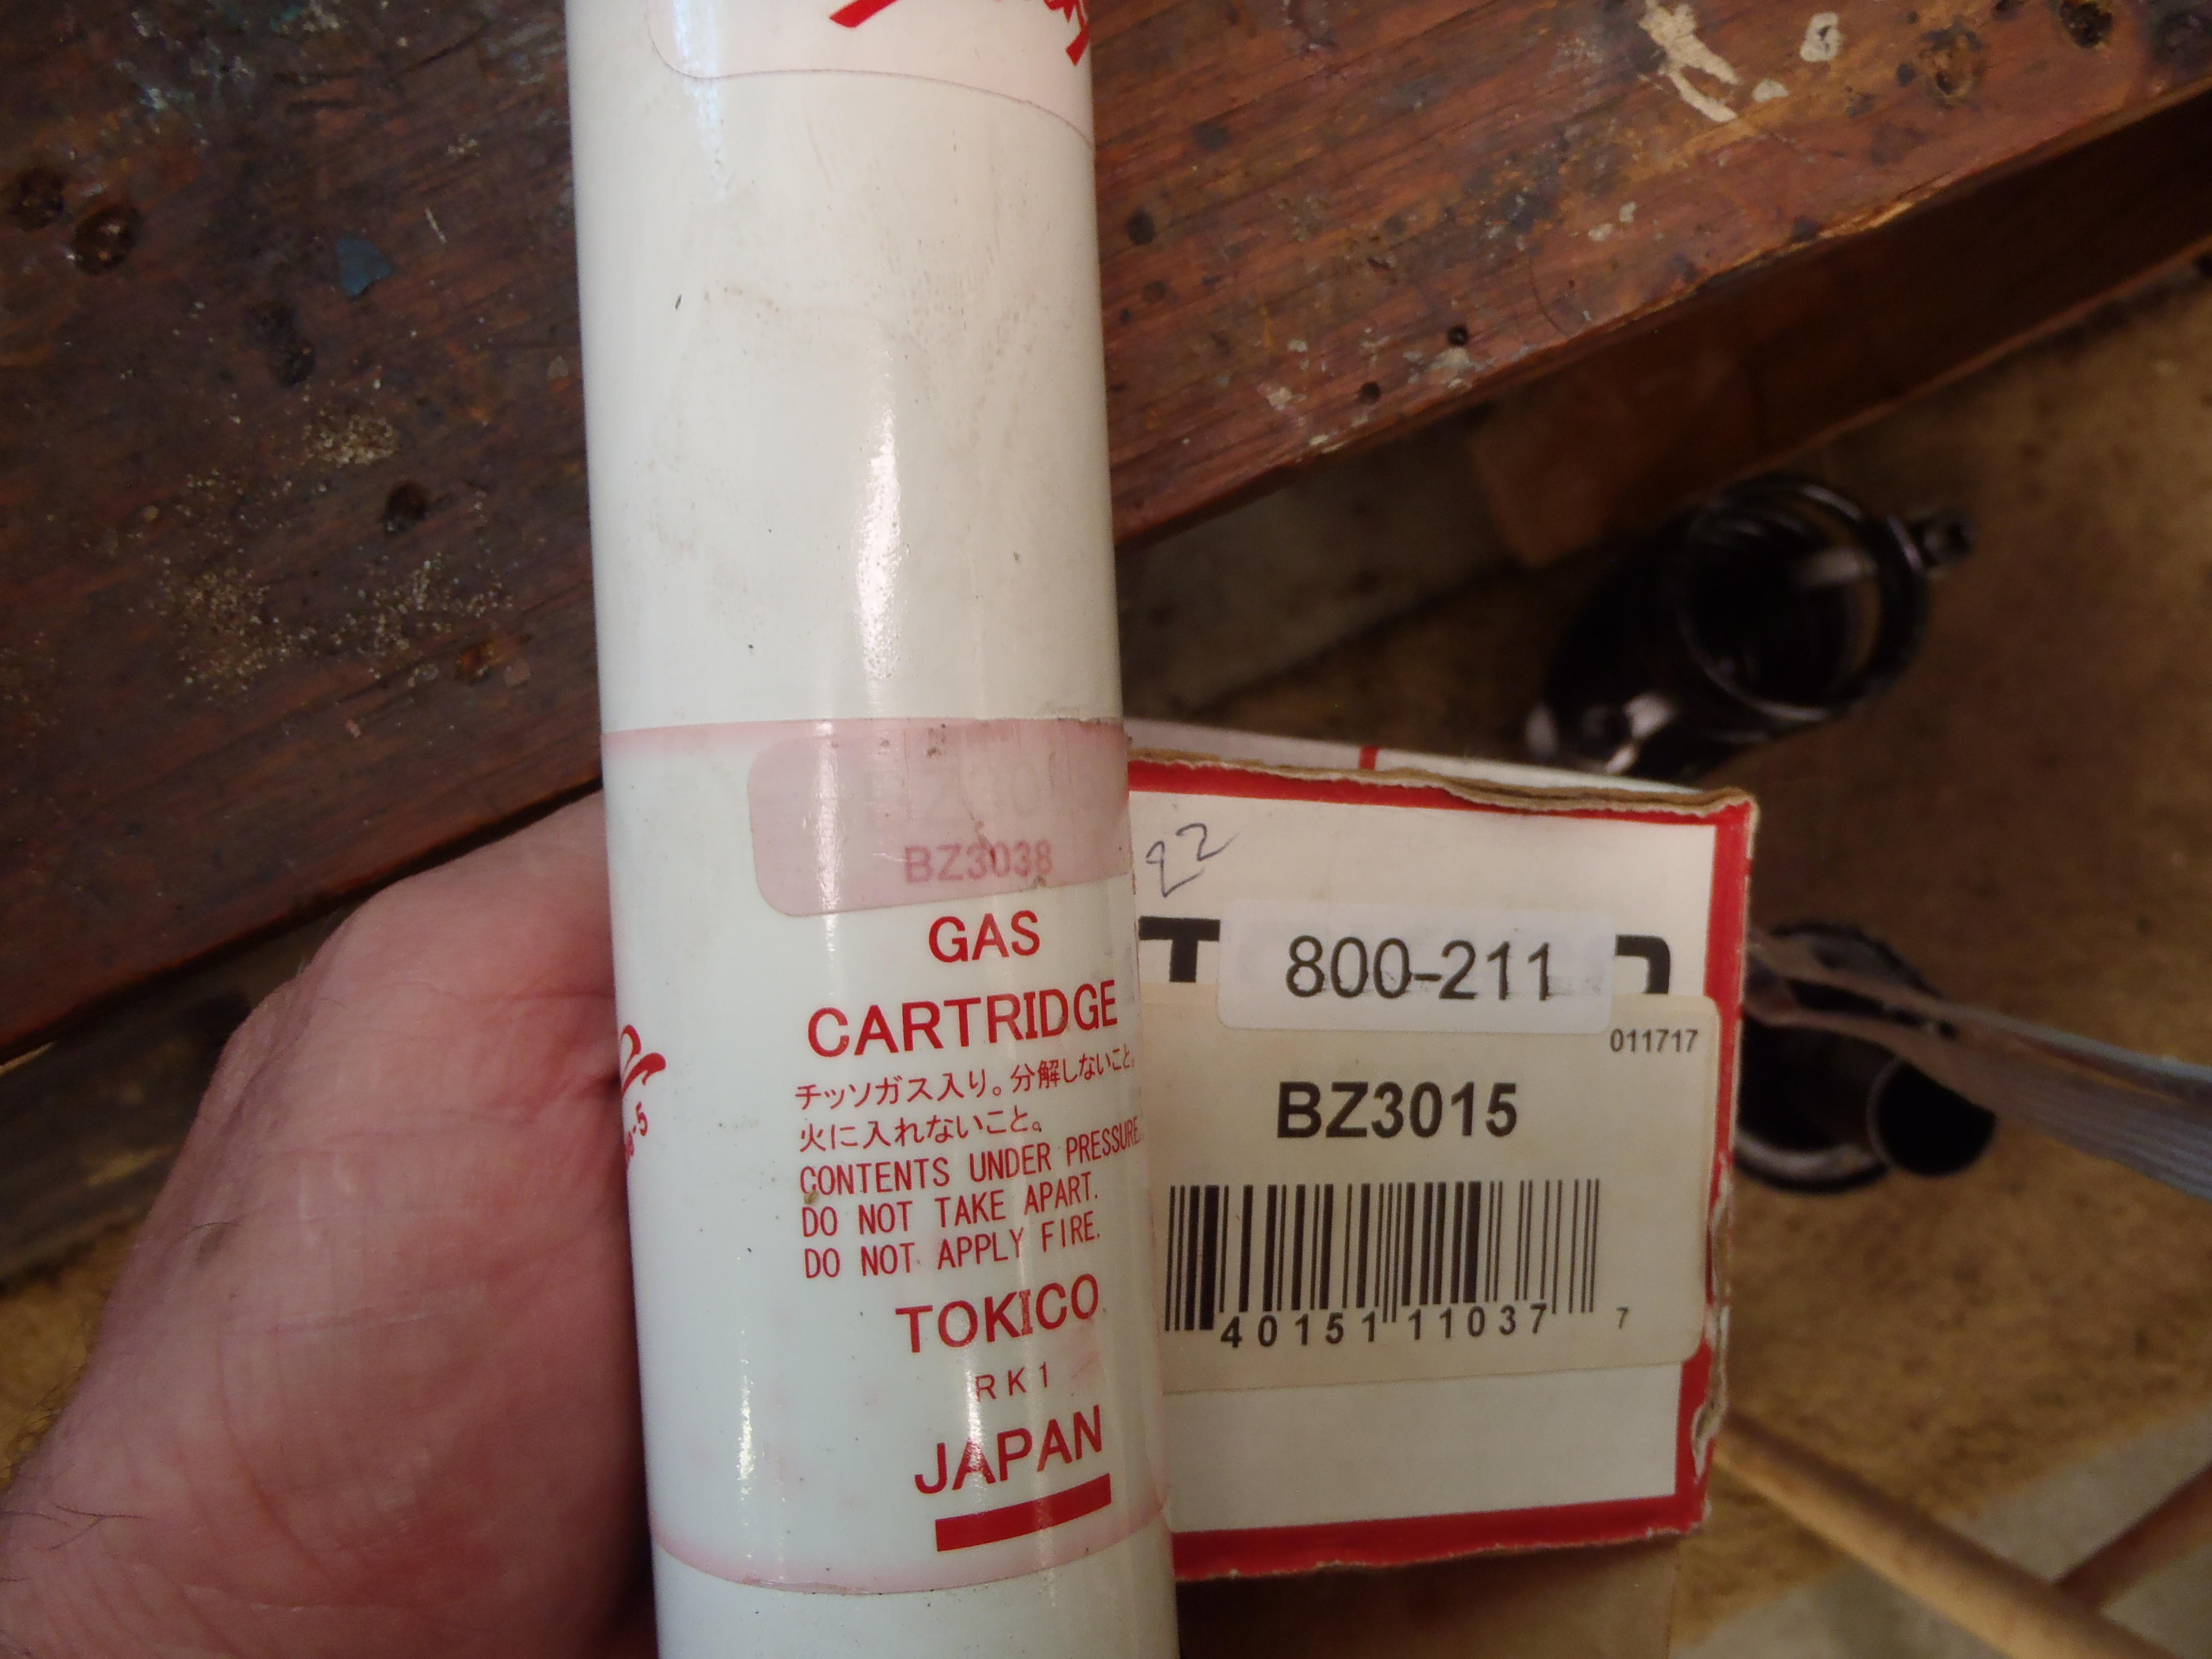
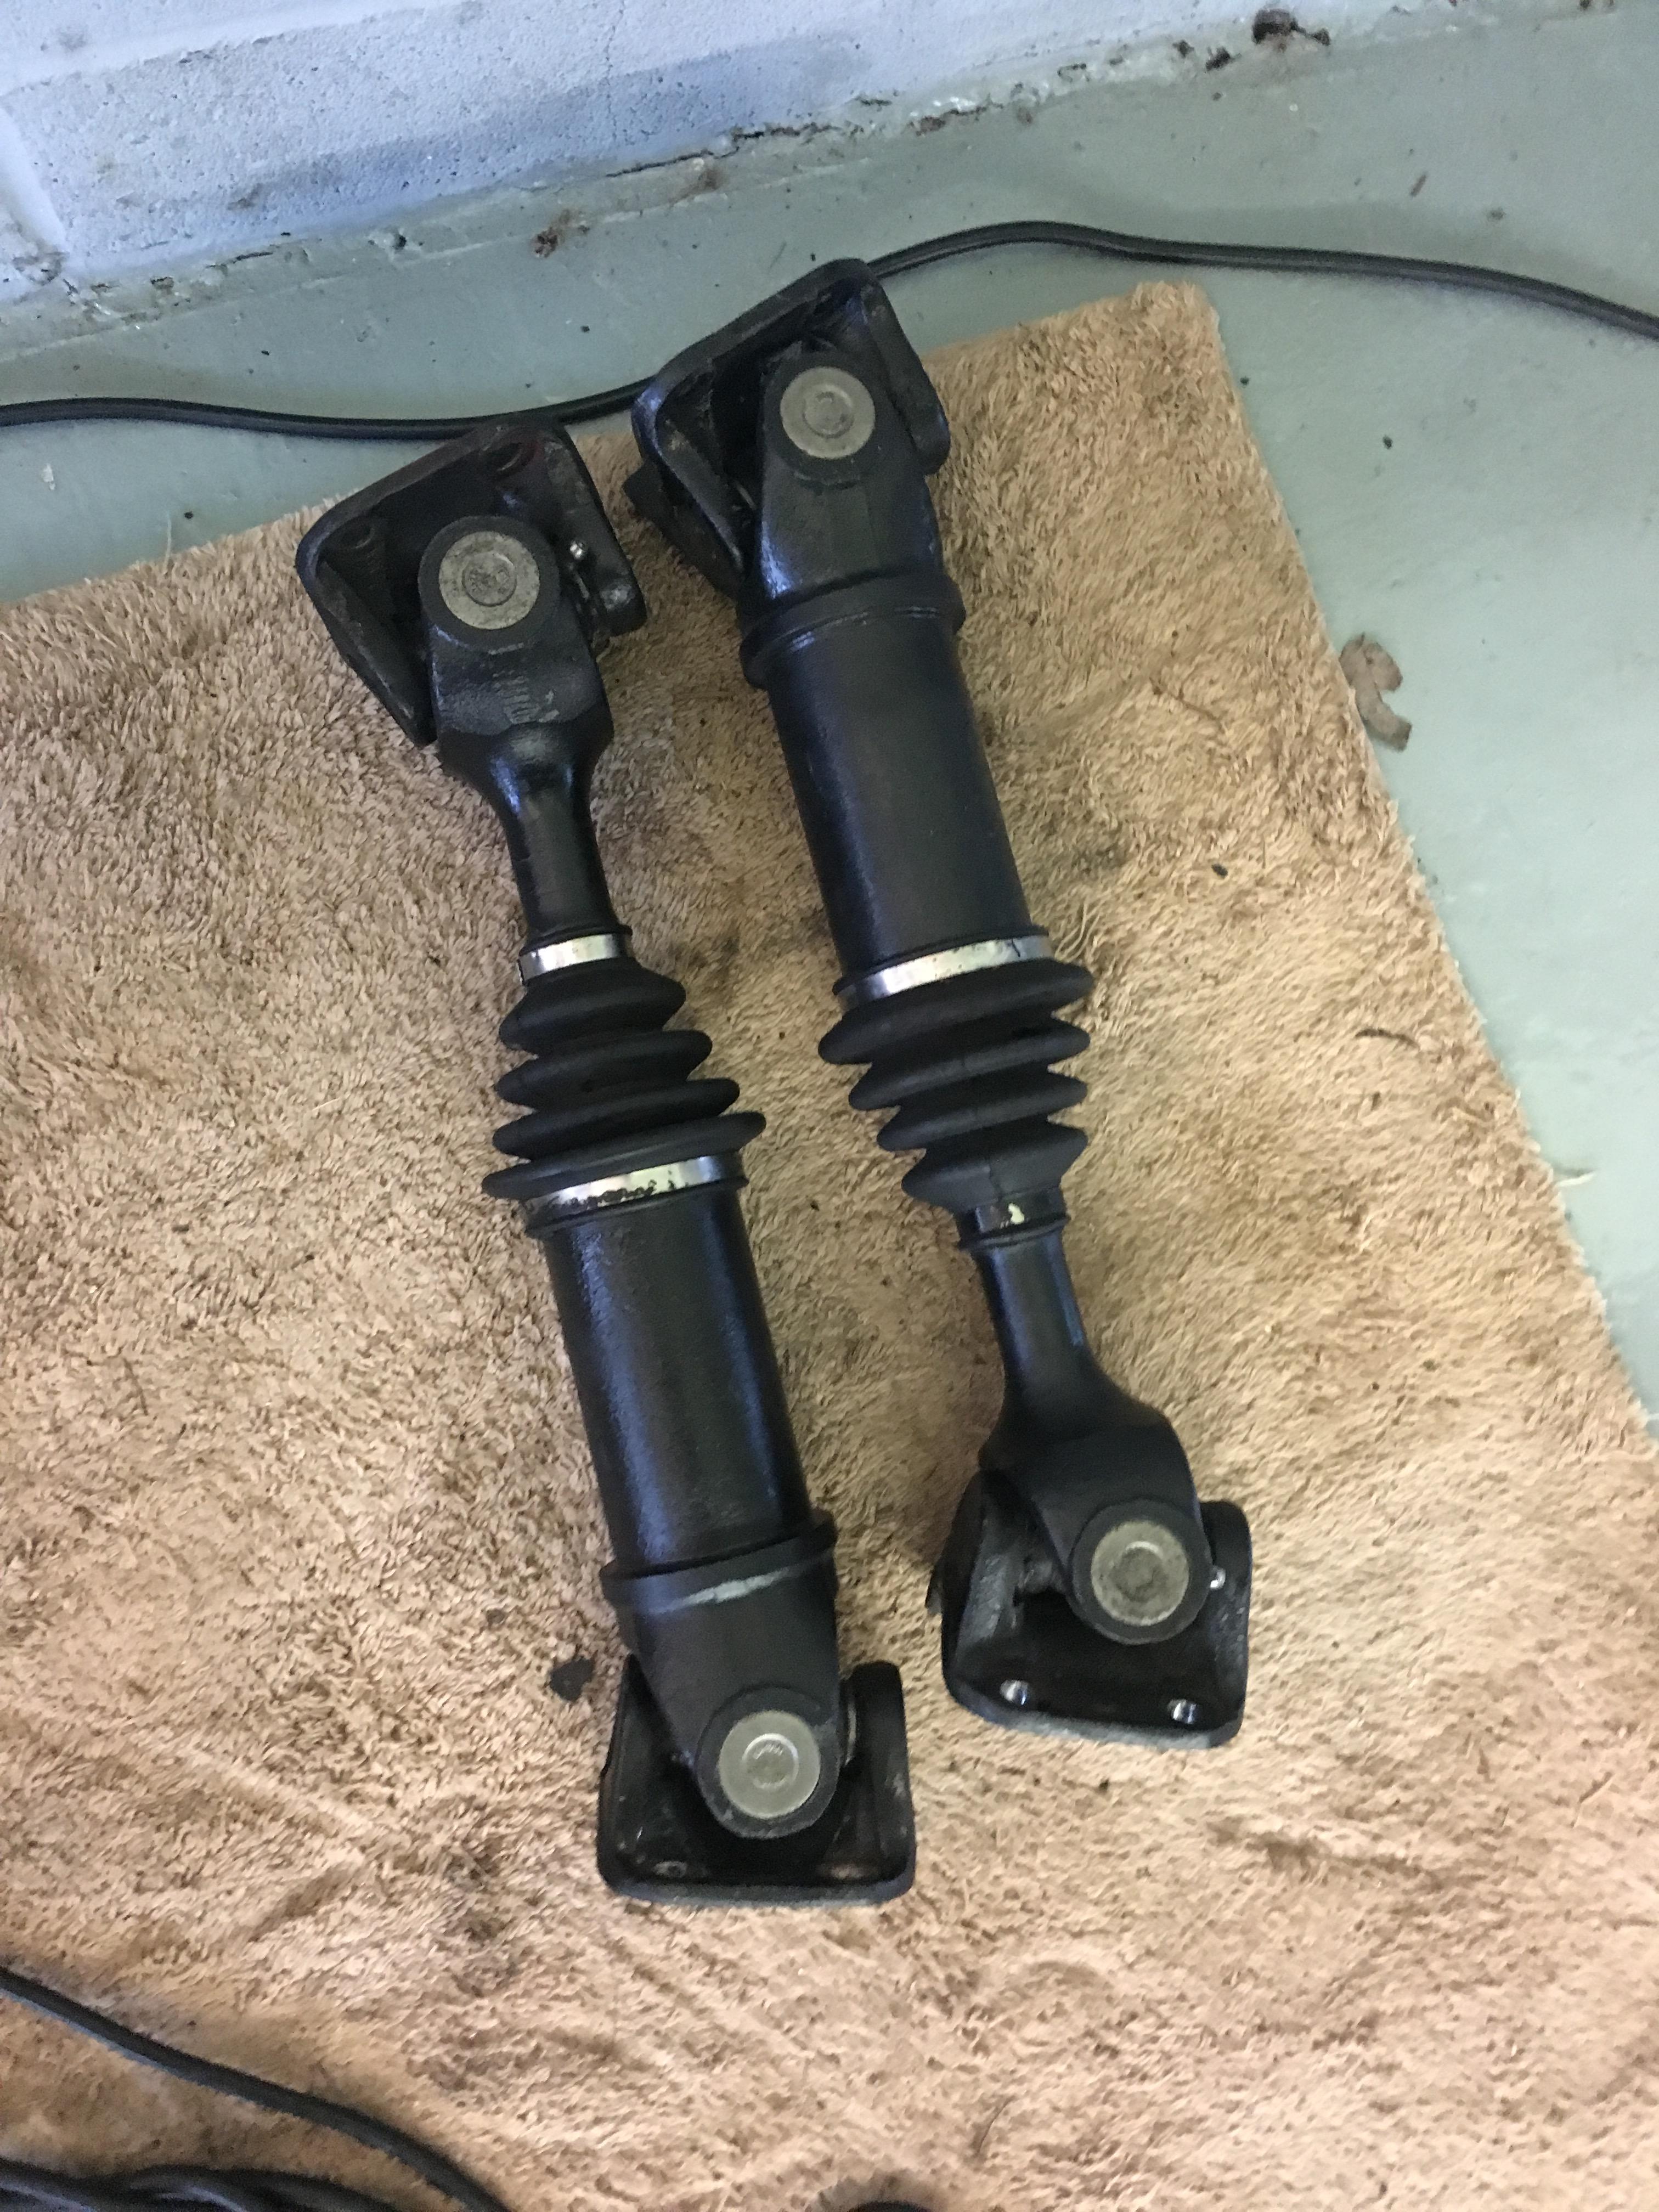
1 pointThis is becoming a real saga, sorry! In the previous episode, you can see the two struts looked very similar but I was comparing the old one to the new one while it was still in the strut housing. I finally took the new strut out of the housing and compared them side by side on the bench! And look! They're different, further investigation shows I got a different shock than what was listed on the box. It's just long enough to make a difference. Is this a rear strut? It's a BZ3038 where the box shows it as a BZ3015. Just found it, looks like what I have is for a 280Z front.

 1 point1 point@240260280, yes I remember seeing them. I did a search and the link was broken. Here is a link on the510Realm where they are. I think they were first posted on Ratsun. http://www.the510realm.com/viewtopic.php?t=13223 Here are some ads from Chilliwack Datsun that I posted a few years back. On 510 day1 point1 pointWow, thanks Mike, Patcon, and Zed Head - super helpful posts. Now to find the wire that goes there.1 point1 pointYes Charles, there was excessive play in the driver side half shaft outside u joint.1 point1 pointThe fluid passes right through it. Front and back are separated. The piston in the middle moves if there's a pressure differential.
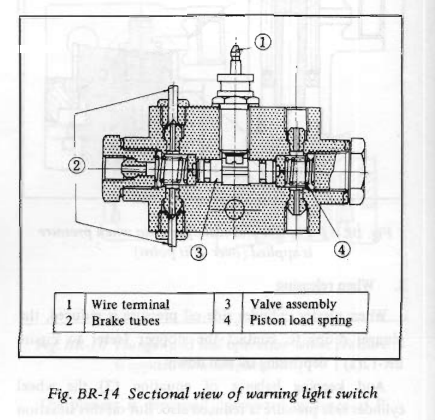 1 point1 pointWOW MIKE! I AM THOROUGHLY IMPRESSED! GREAT WORK AND GREAT POST!!! Btw I still suffer eye damage from looking at your engine in the Memphis sun!!!
 1 pointAnd the email to Fred bounced. @bpilati - Do you have a club meeting coming up soon where you could direct Fred to this thread?1 pointI also sent an email to Fred Buoni. I hope that at least one of them will look. However, this close to ZCON, they are all probably pretty busy.1 pointIt has been a long series of battles but the end of your war is coming!
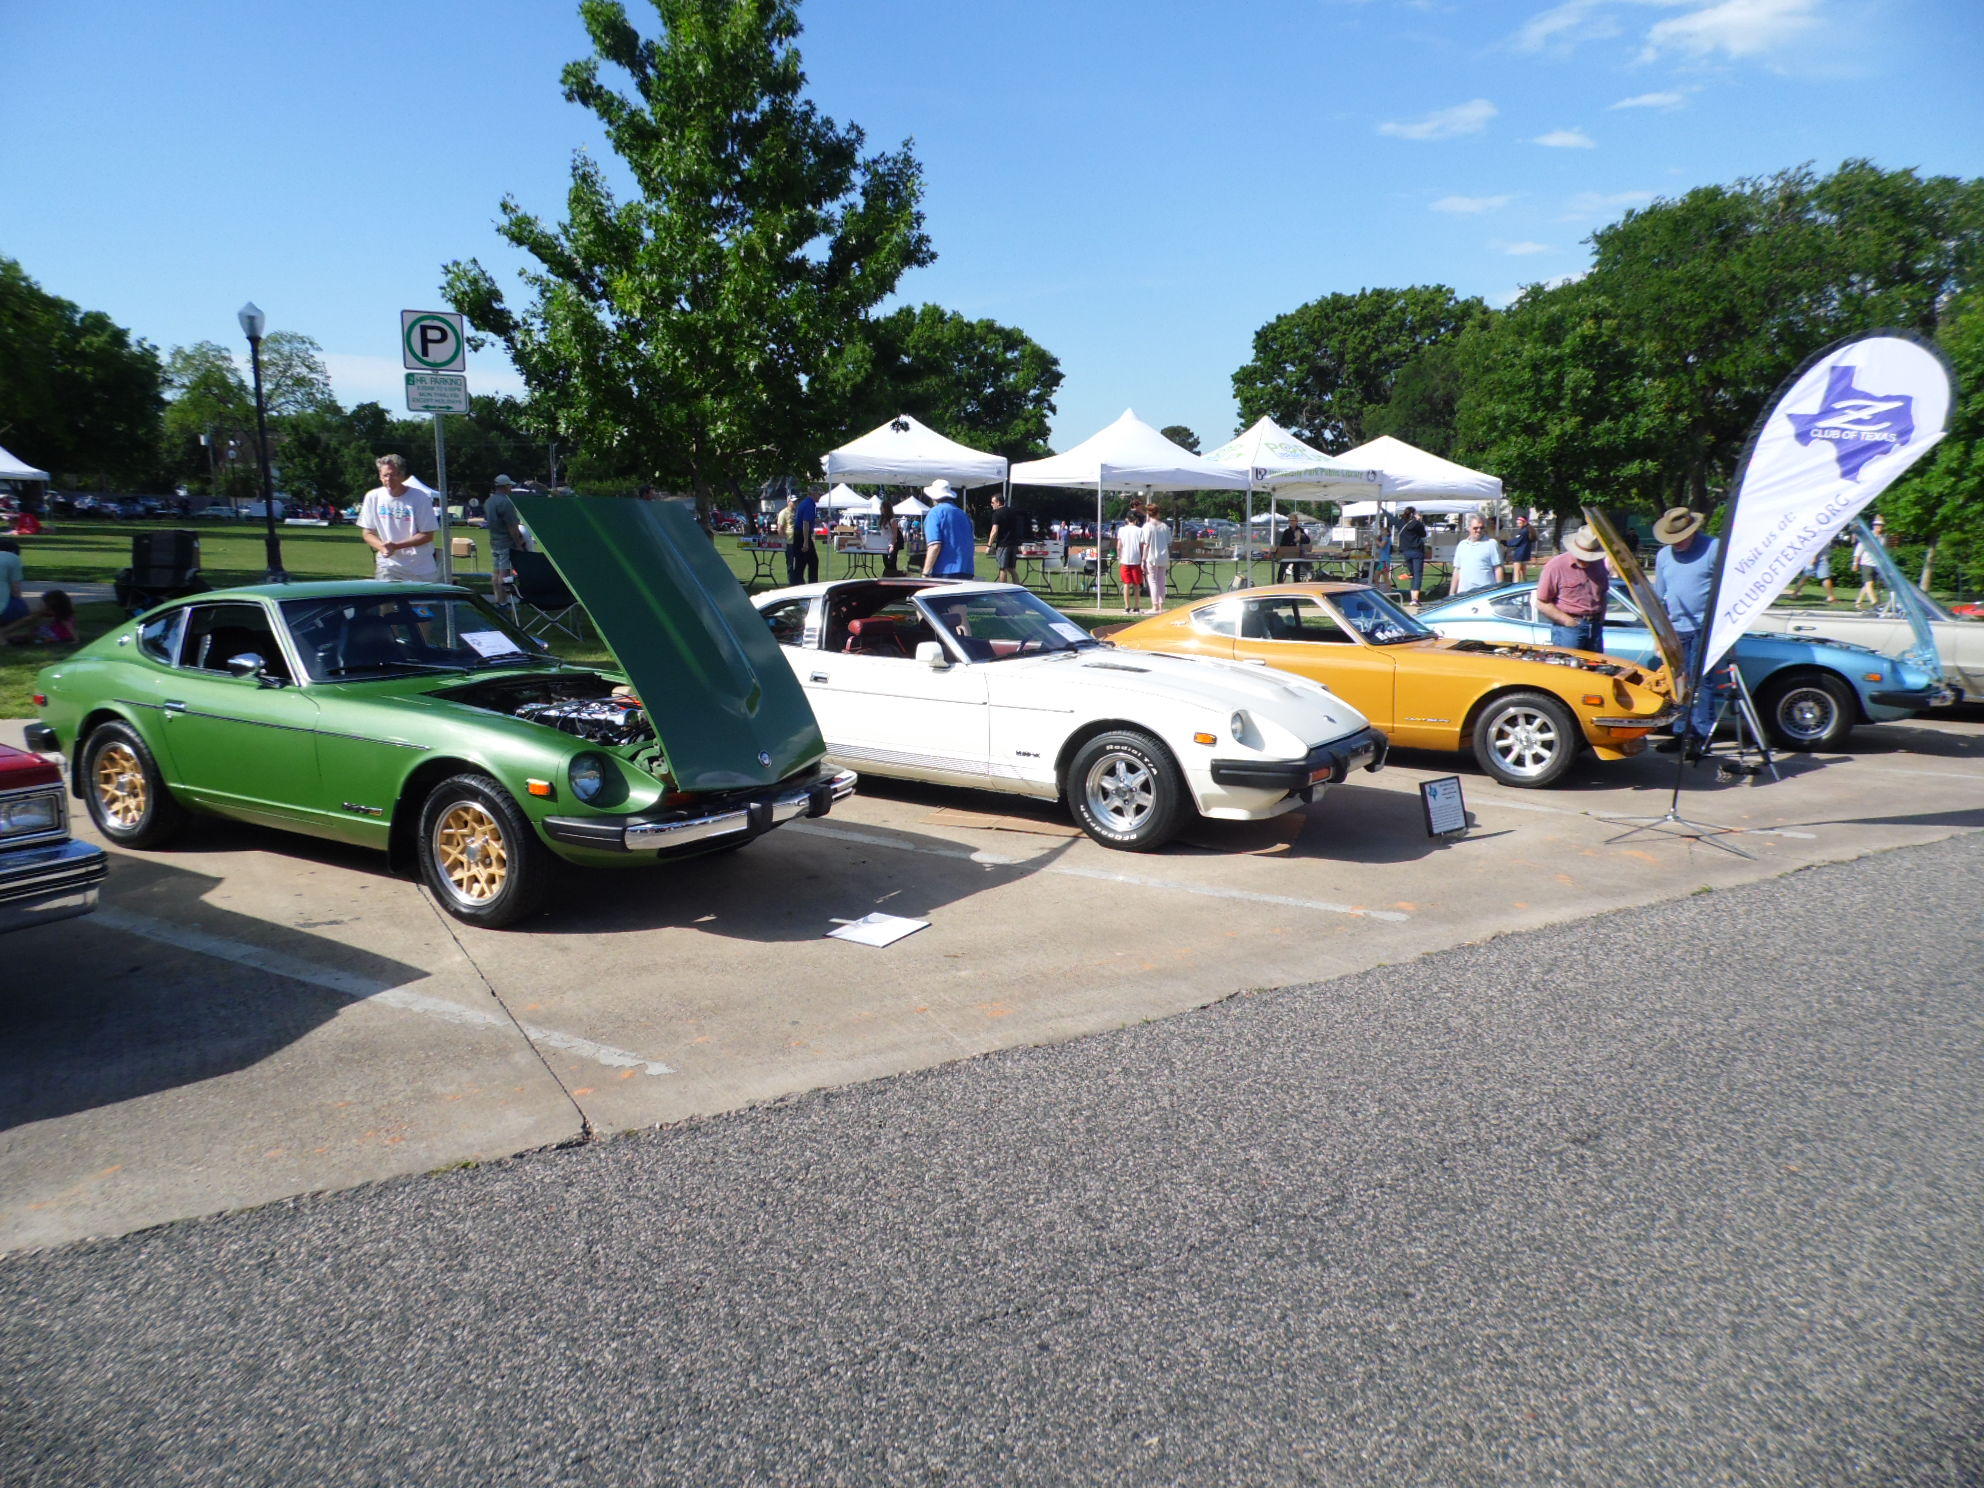
 1 pointNo 240Zs in the US came from the factory with stereo radios, only mono, so that was why they only had a single speaker. (but 72 and ‘73s did get AM AND FM mono radios - whoopee!). As best as I can determine, 1978 280Zs were the first to get a stereo radio from the factory (In the US anyway) However, according to a UK poster in this thread, some other countries had a factory option for stereo radios in their 240Zs, which would explain the unused speaker mount and perforations in our US spec 240Zs .1 pointAgreed. $1,700.00 with reserve not met seems high. However, if this car has an early hood, how much are they worth? And the clear rear hatch glass an other rare early Z parts?1 pointYeah---I learned a lesson from him. His name on your glove box lid inner panel WILL cost you points! Ask me how I know. You'd think you could get a +1 for schmoozing--------not so.1 point@gnosez @HLS30 @26th-Z Hi Rich, You know my thoughts on this particular subject, but it would be great to hear from experienced ZCCA judges. I have shown my car at ZCCA judged events both with and without the fuel line insulation (which was a part of the V kit----- a factory authorized modification for the 73 model year 240z cars). At Memphis and Austin----No insulation = no point deduction At Atlanta---Insulation = 3 point deduction, but the deduction was taken twice = 6 point deduction Engine & Engine Compartment Item #1. Radiator/ Fan, Fan Clutch/ Belts/ Hoses/ Clamps (the 3 point deduction comment was "not stock, heat shields on hoses") Engine & Engine Compartment Item #5. Emissions System (air pump, tubes, hoses) (the 3 point deduction comment was "heat shields") Of course I knew nothing of this until I received the judging sheets about 5 months after the show! (Judging sheets attached below) Nevertheless, I reviewed the TSB "Modification Plus" describing the parts and procedures which did not get published in their entirety until August of 1975. (attached below) It is apparent that as ongoing problems were experienced by owners, there were a series of modifications and adjustments that were endeavoring to fix the issues---not just one but many. (orifice restrictors, power valve changes, electric fuel pump installation and heat shield insulation wraps, etc.) Even the Hitachi carburetors were significantly redesigned/ improved, as over the time period there were at least 2 versions (with a middle version that was sort of a mix of both the earlier and the later) The insulating heat shield wraps were of 2 types, as described on page 14 of the TSB. At first it was a black "tar like" tape wrapped with bright adhesive foil, and then the more commonly seen asbestos glass fiber insulative material covered by an aluminum coated asbestos cloth. I've come full circle and will be removing the insulation from Zilver in preparation for the show in Branson this July. 1973 240z 1974 260z fuel system modifications.pdf Jim Daniels 2018 Atlanta Judging sheets Stock (1).pdf1 pointWow! That picture of all those Z's is incredible. Amazing...I am in awe. Wow. PS: yes, had good conversation with @Zup. Makes me think I will not put on insulation till after ZCON. Its safer I think1 pointYou mean the hub caps are off and in cardboard boxes on the rear deack?
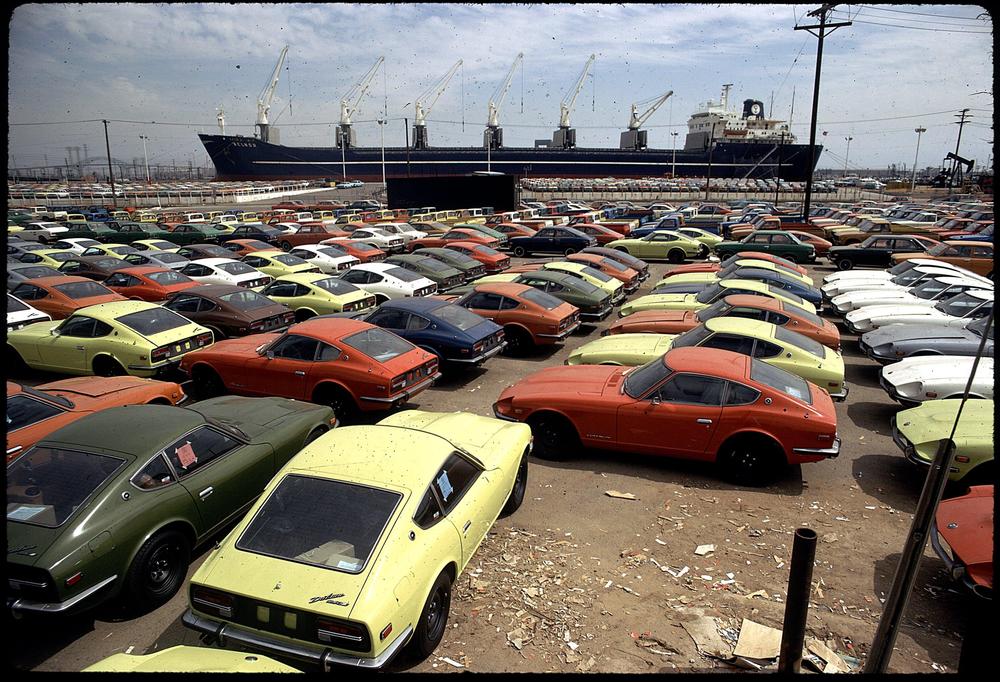 1 pointSteveJ, THANK YOU again for that link which confirmed my understanding. When i measured the voltage on the back side of the actual combo switch itself (not the pins), sure enough the right rear was 0 which confirmed the issue was in the switch. When I disassembled the switch, the right rear contact was black with carbon scoring and the rear rocker arm was not in contact while the front was. Some quick scrubs with emery paper and bending the contact fixed it.1 pointI'm not a ZCCA judge, but that does not sound right to me. Since that was a documented dealer modification (not quite a "recall"), I would expect that to be accepted as "normal" when being evaluated. I would hope that cars that had those mods would be considered totally equal to cars which had not. But, of course... My opinion doesn't mean squat.1 point1 pointThe holes at the bottom of the 72 carbs are for hot coolant to be pumped through the carbs to warm up the nozzles. You can put 72 carbs on earlier manifolds without having to do anything else special to accommodate those holes. Just slap 'em on. Plug the holes on the carbs if you don't want wasps to build nests in there, but other than that, nothing. Putting earlier carbs on the 72 manifolds are a little more involved, but I don't think that's what you're asking, right? And in the pic with the 72 manifolds, I can see that the heating water lines aren't hooked up either, so it wouldn't really matter. Yes, I'm rambling. Did I answer your question?1 point1 pointWhen I was judging for the ZCCA, there was a well-defined judging manual and description for the stock classes. I recall that batteries were overlooked for authenticity. Normally, judging evaluates the car on everything you can see from one knee on the ground and up. It was a 300 point system broken down into areas of the car - engine bay, interior, body, etc. Points were deducted for cleanliness, originality, and condition. I usually dinked a car one point for cleanliness, five points for an incorrect part, but hardly ever ten points unless the item was junk. I recall that a minimum score of 280 got into the "medallion round" when the car was re-judged by a selected team, pretty knowledgable guys. Anything over 290 (ten point deduct) got the ZCCA's highest award, the Gold Cup or the Gold Medallion. Frankie, I heard, scored a 295. As I said in the BaT comments section, I can think of several equitable cars. Most of them are Gold Medallion 'stock' cars and some are Gold Cup 'modified' cars. All the Vintage Zs fall into this category. And I think the low VIN cars do too. In all cases though, the car has to really sparkle. I agree as gogriz91 pointed out, that green car looked tired and dirty.1 point1 point1 pointAfter a bit of a delay it's time to get my project back on track. I have been in discussions with a very talented and respected auto restorer near me, and he is willing to take on my project. If all goes right my car will be on his rotisserie in the fall. Lots to follow soon. Cheers, Mike1 point1 pointExcept that UV effect would be stronger on exposed surfaces vs shaded surfaces, leading to marked differences in shade. I don't buy it.1 pointjfa, really nice looking car and group, really like the green one though, kinda partial to green.?1 pointSimilarly, made it to a local show yesterday - about 125 entries. Four members of our club attended, I managed to snag a Best in Class award in the Post-War Import class. Voting was a People's Choice process by the entrants, a nice recognition for my car from peers. Quite a few rare and unique cars entered in addition to domestic restorations and rods. Check out the FB link below for pics of some very interesting cars. https://www.facebook.com/media/set/?set=oa.2425401730816296&type=3
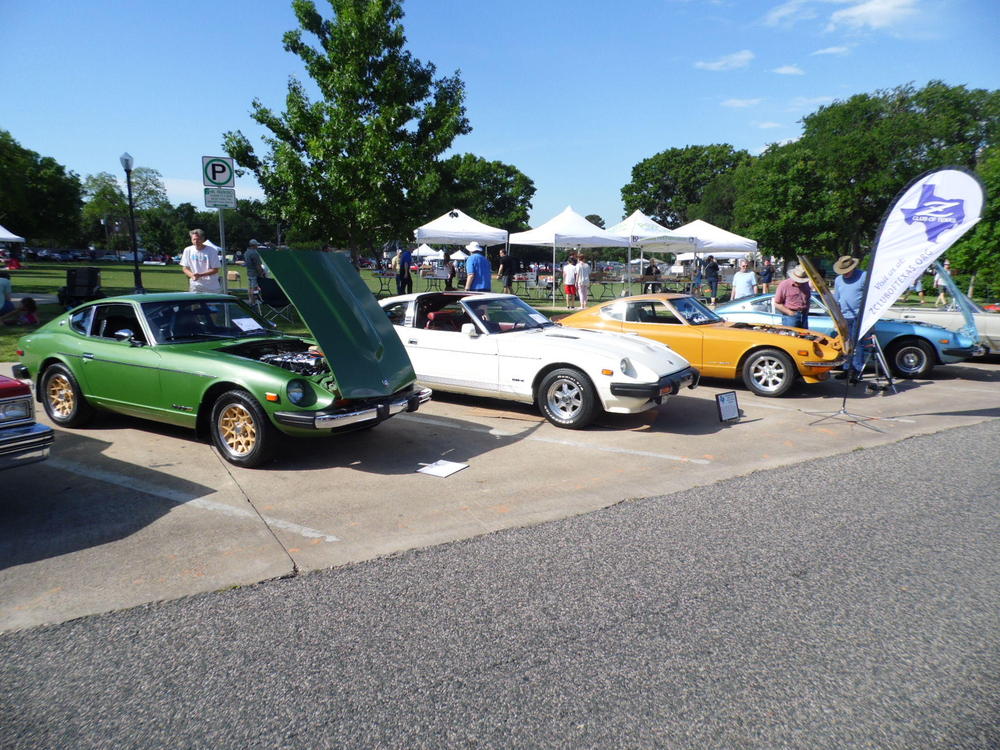
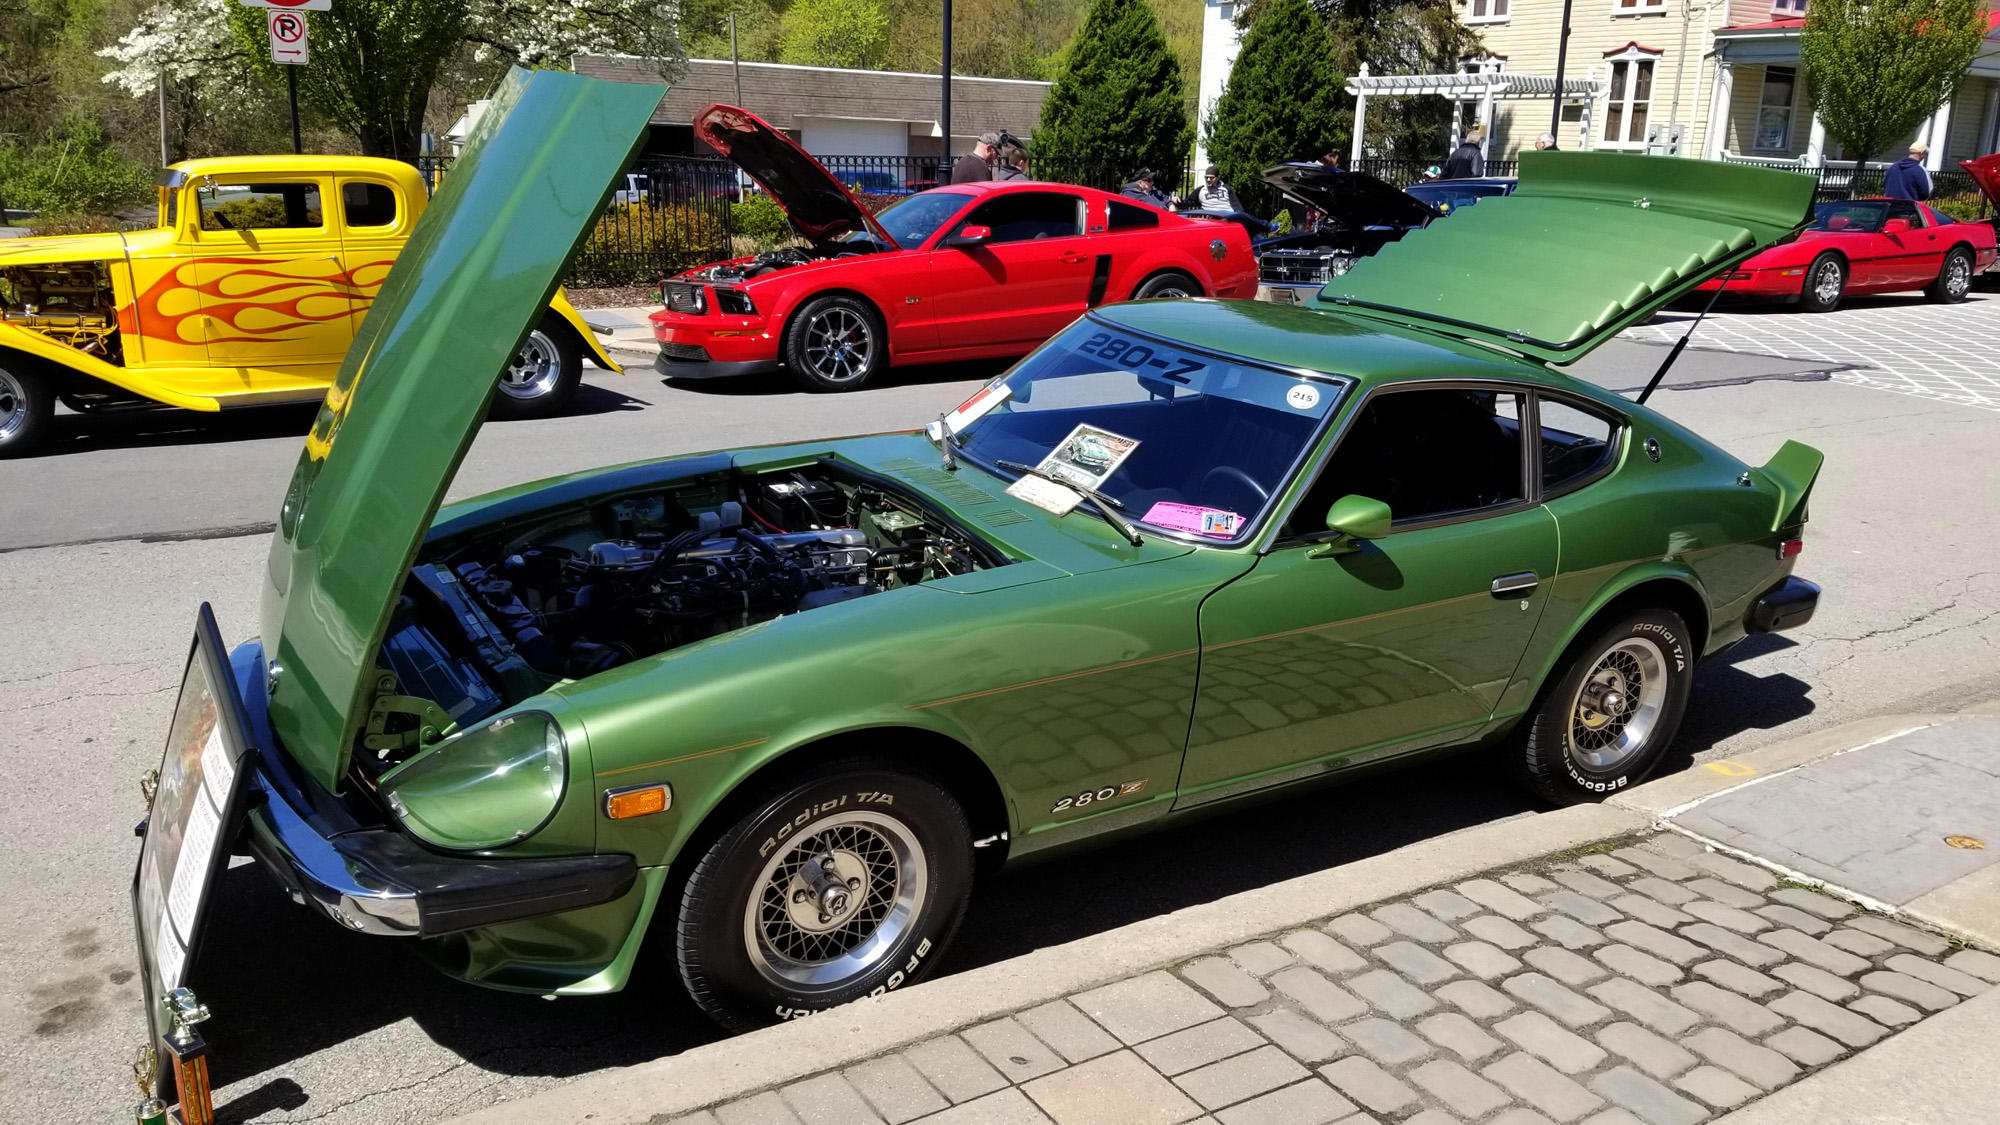
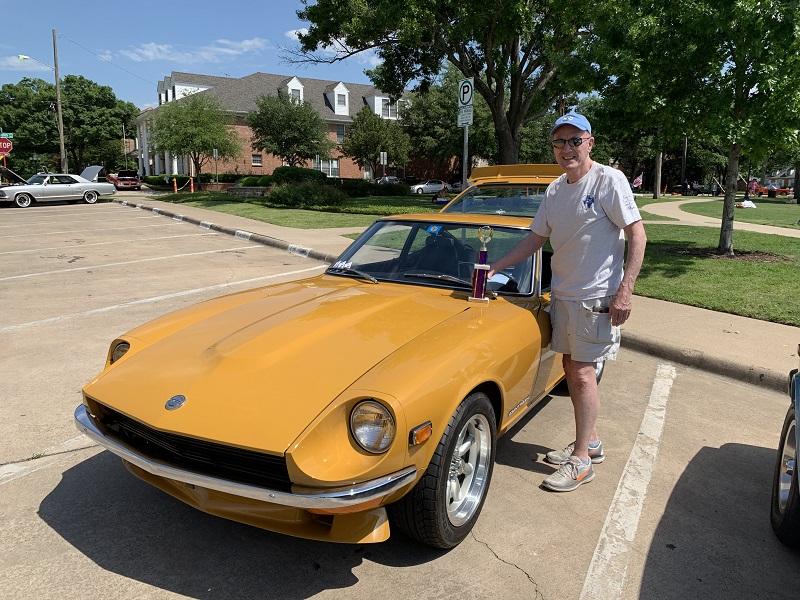 1 pointFirst car show of the year for me. 55 degrees sunny and windy but a nice day with over 400 cars on the main street of the little town of Irwin just east of Pittsburgh. I was the only Z car of the bunch. I usually am, not many of the early Z around the Pittsburgh area. I did talk to a couple of gents that owned Z's but did not bring them, they both said there cars were not worthy to show at the time.
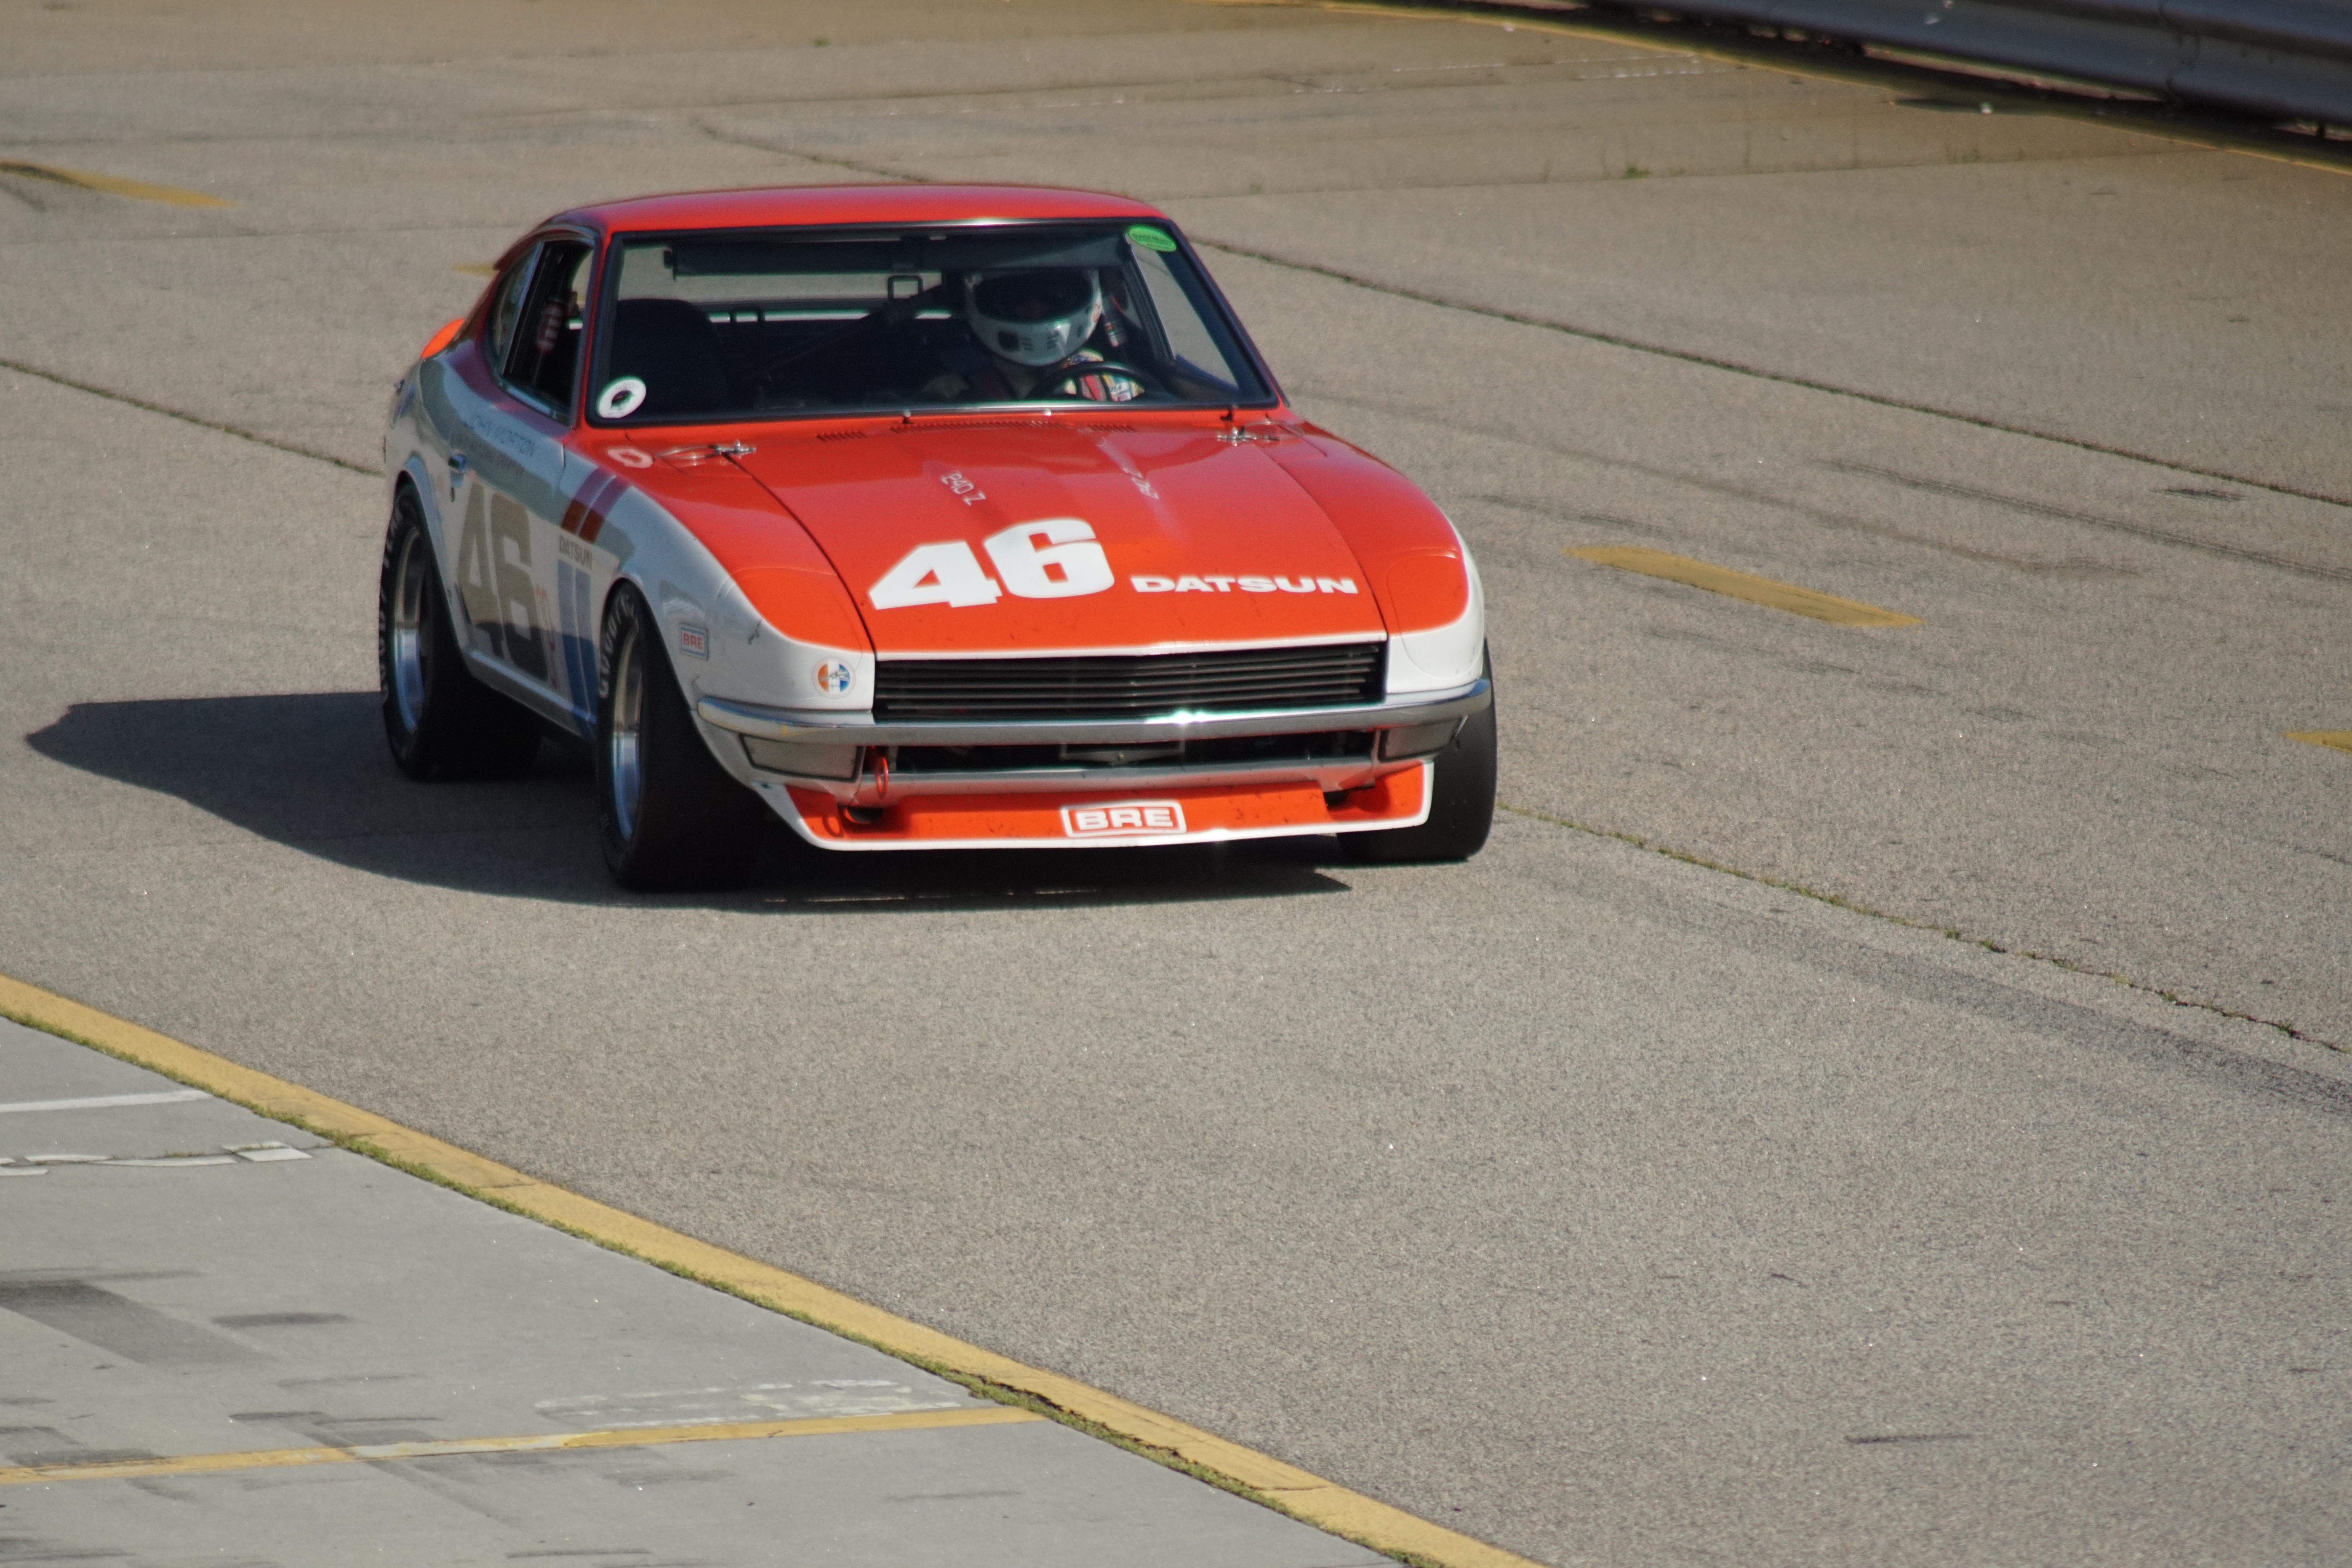
 1 pointI drove the Z to Road Atlanta today to watch testing for the Mitty. Here's a link to my favorite photos from today: https://photos.app.goo.gl/xZnwaKkdb6aKxSFq7
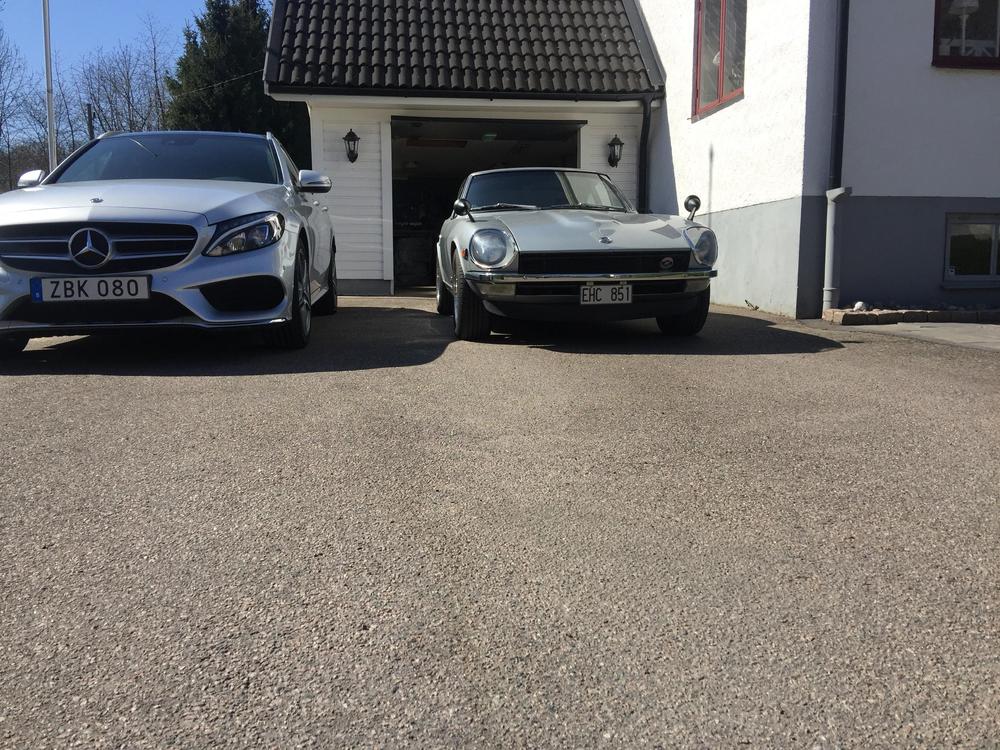
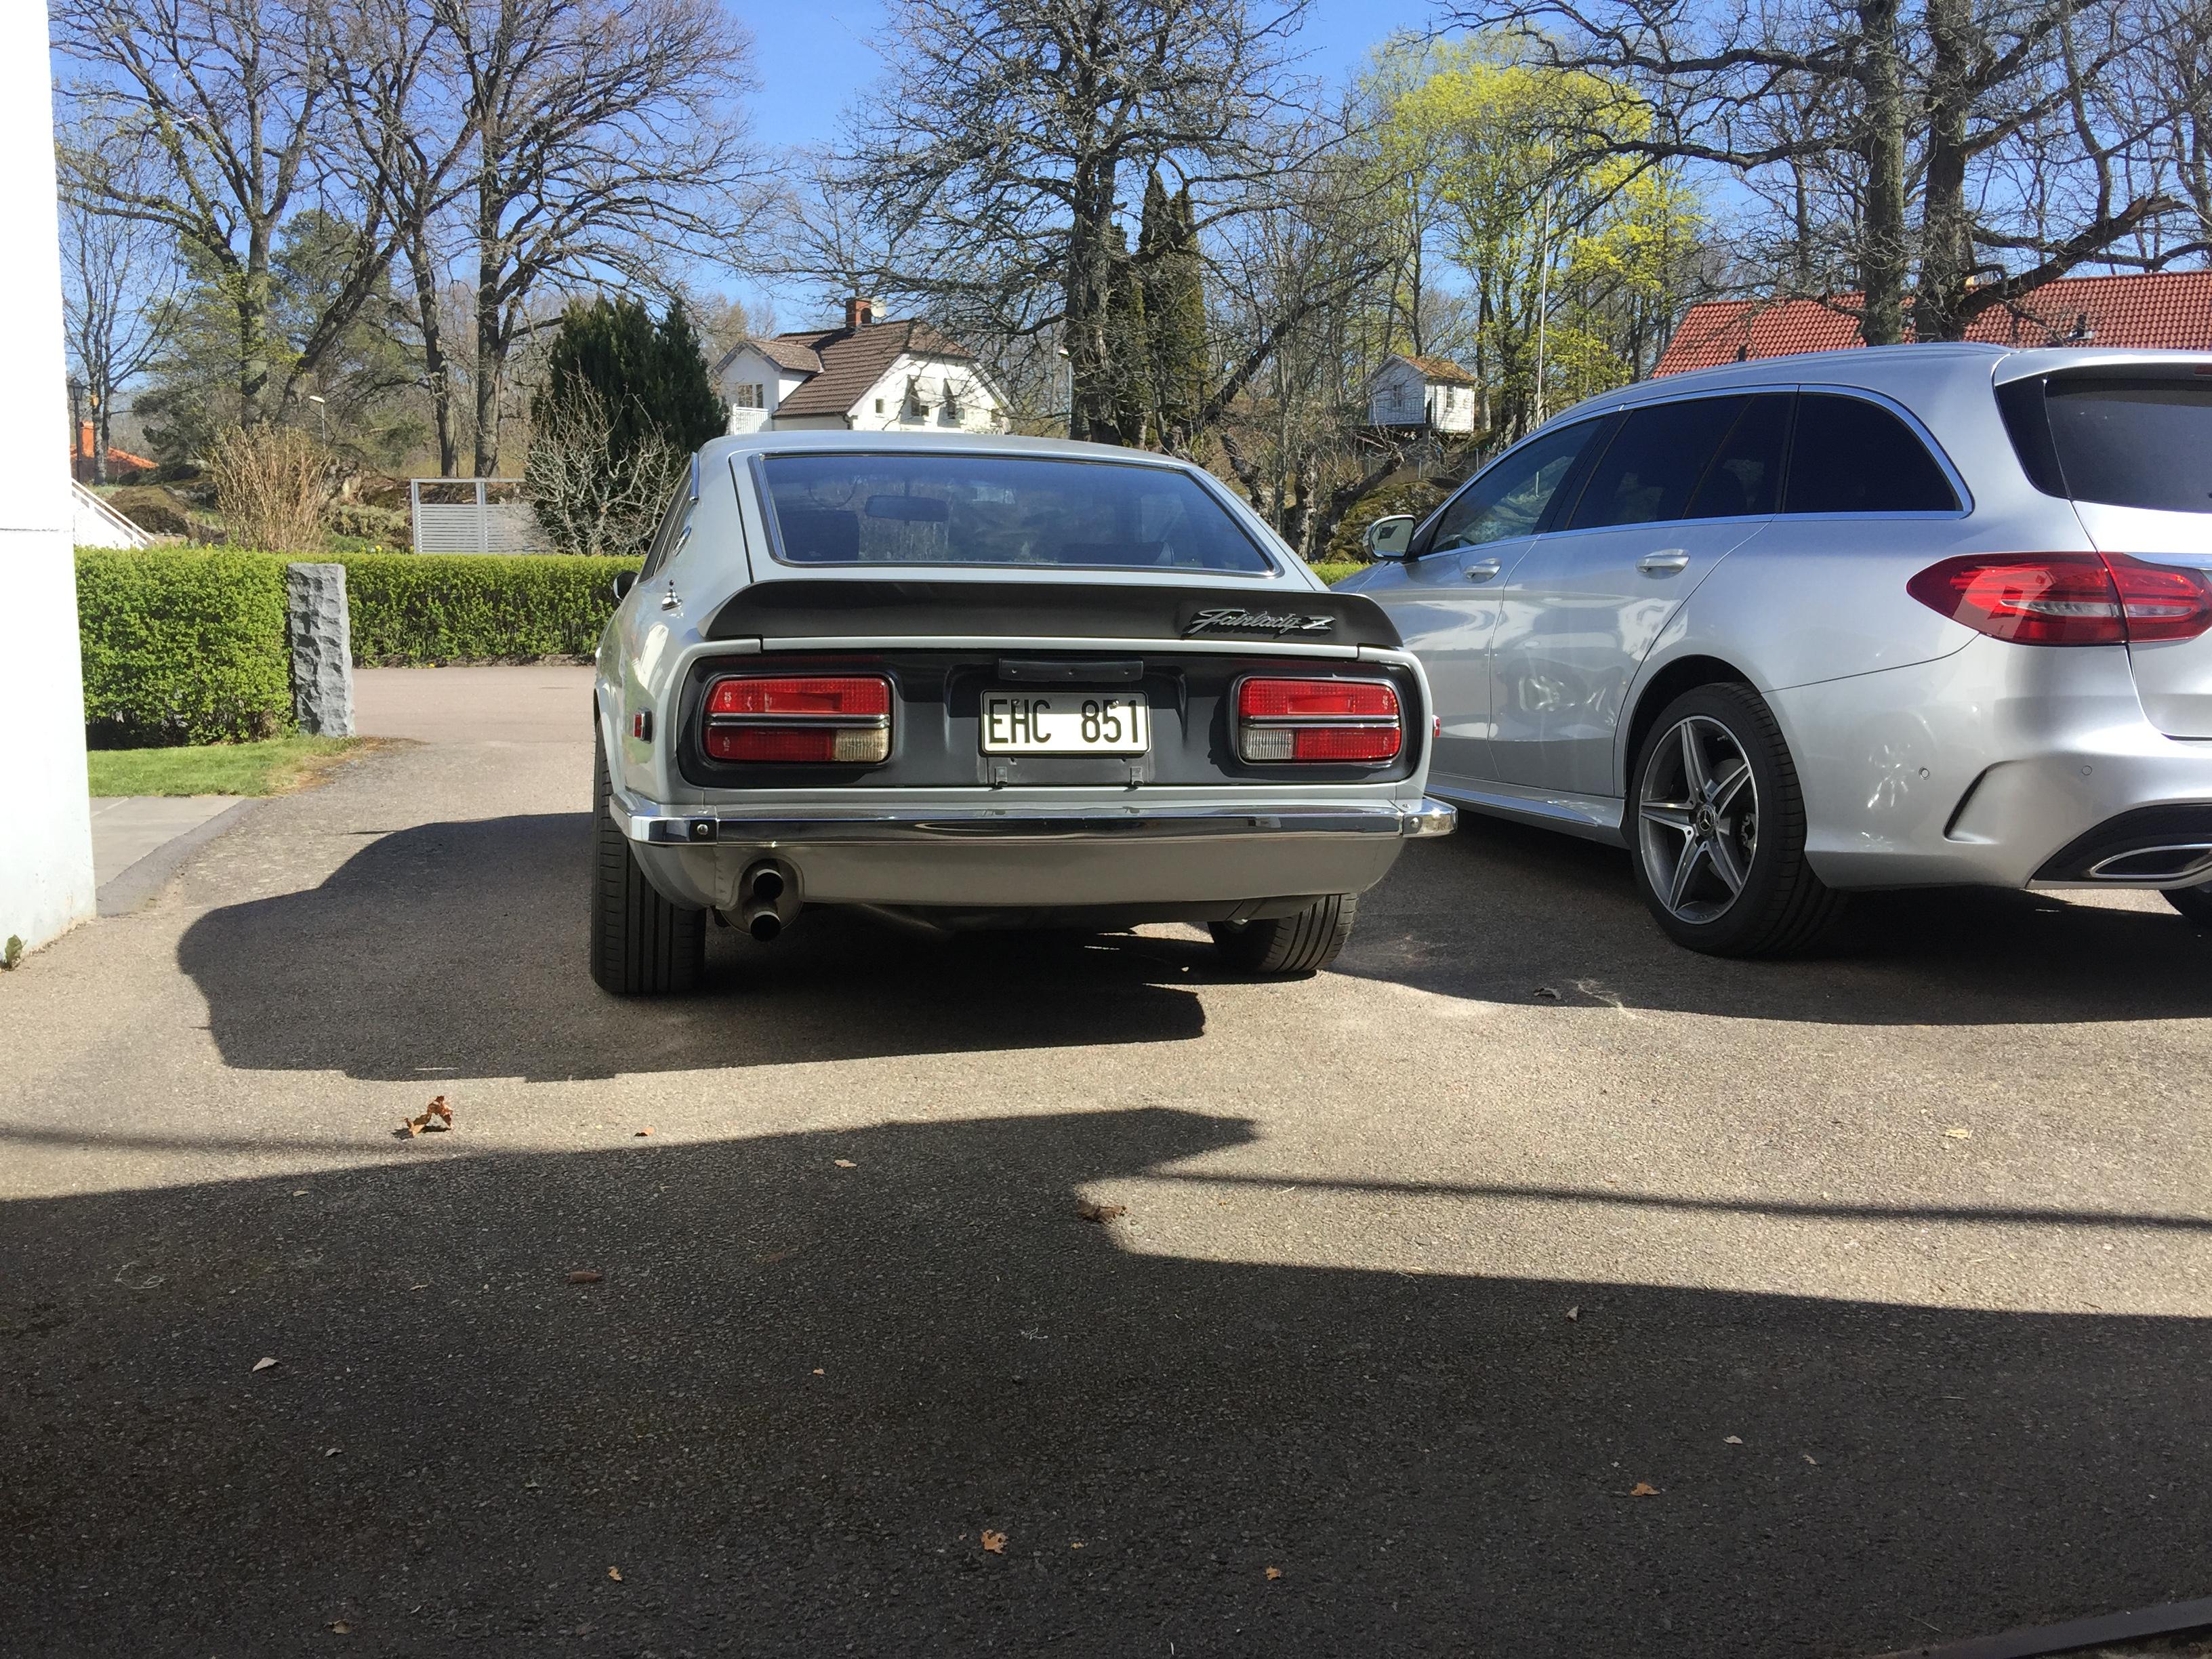
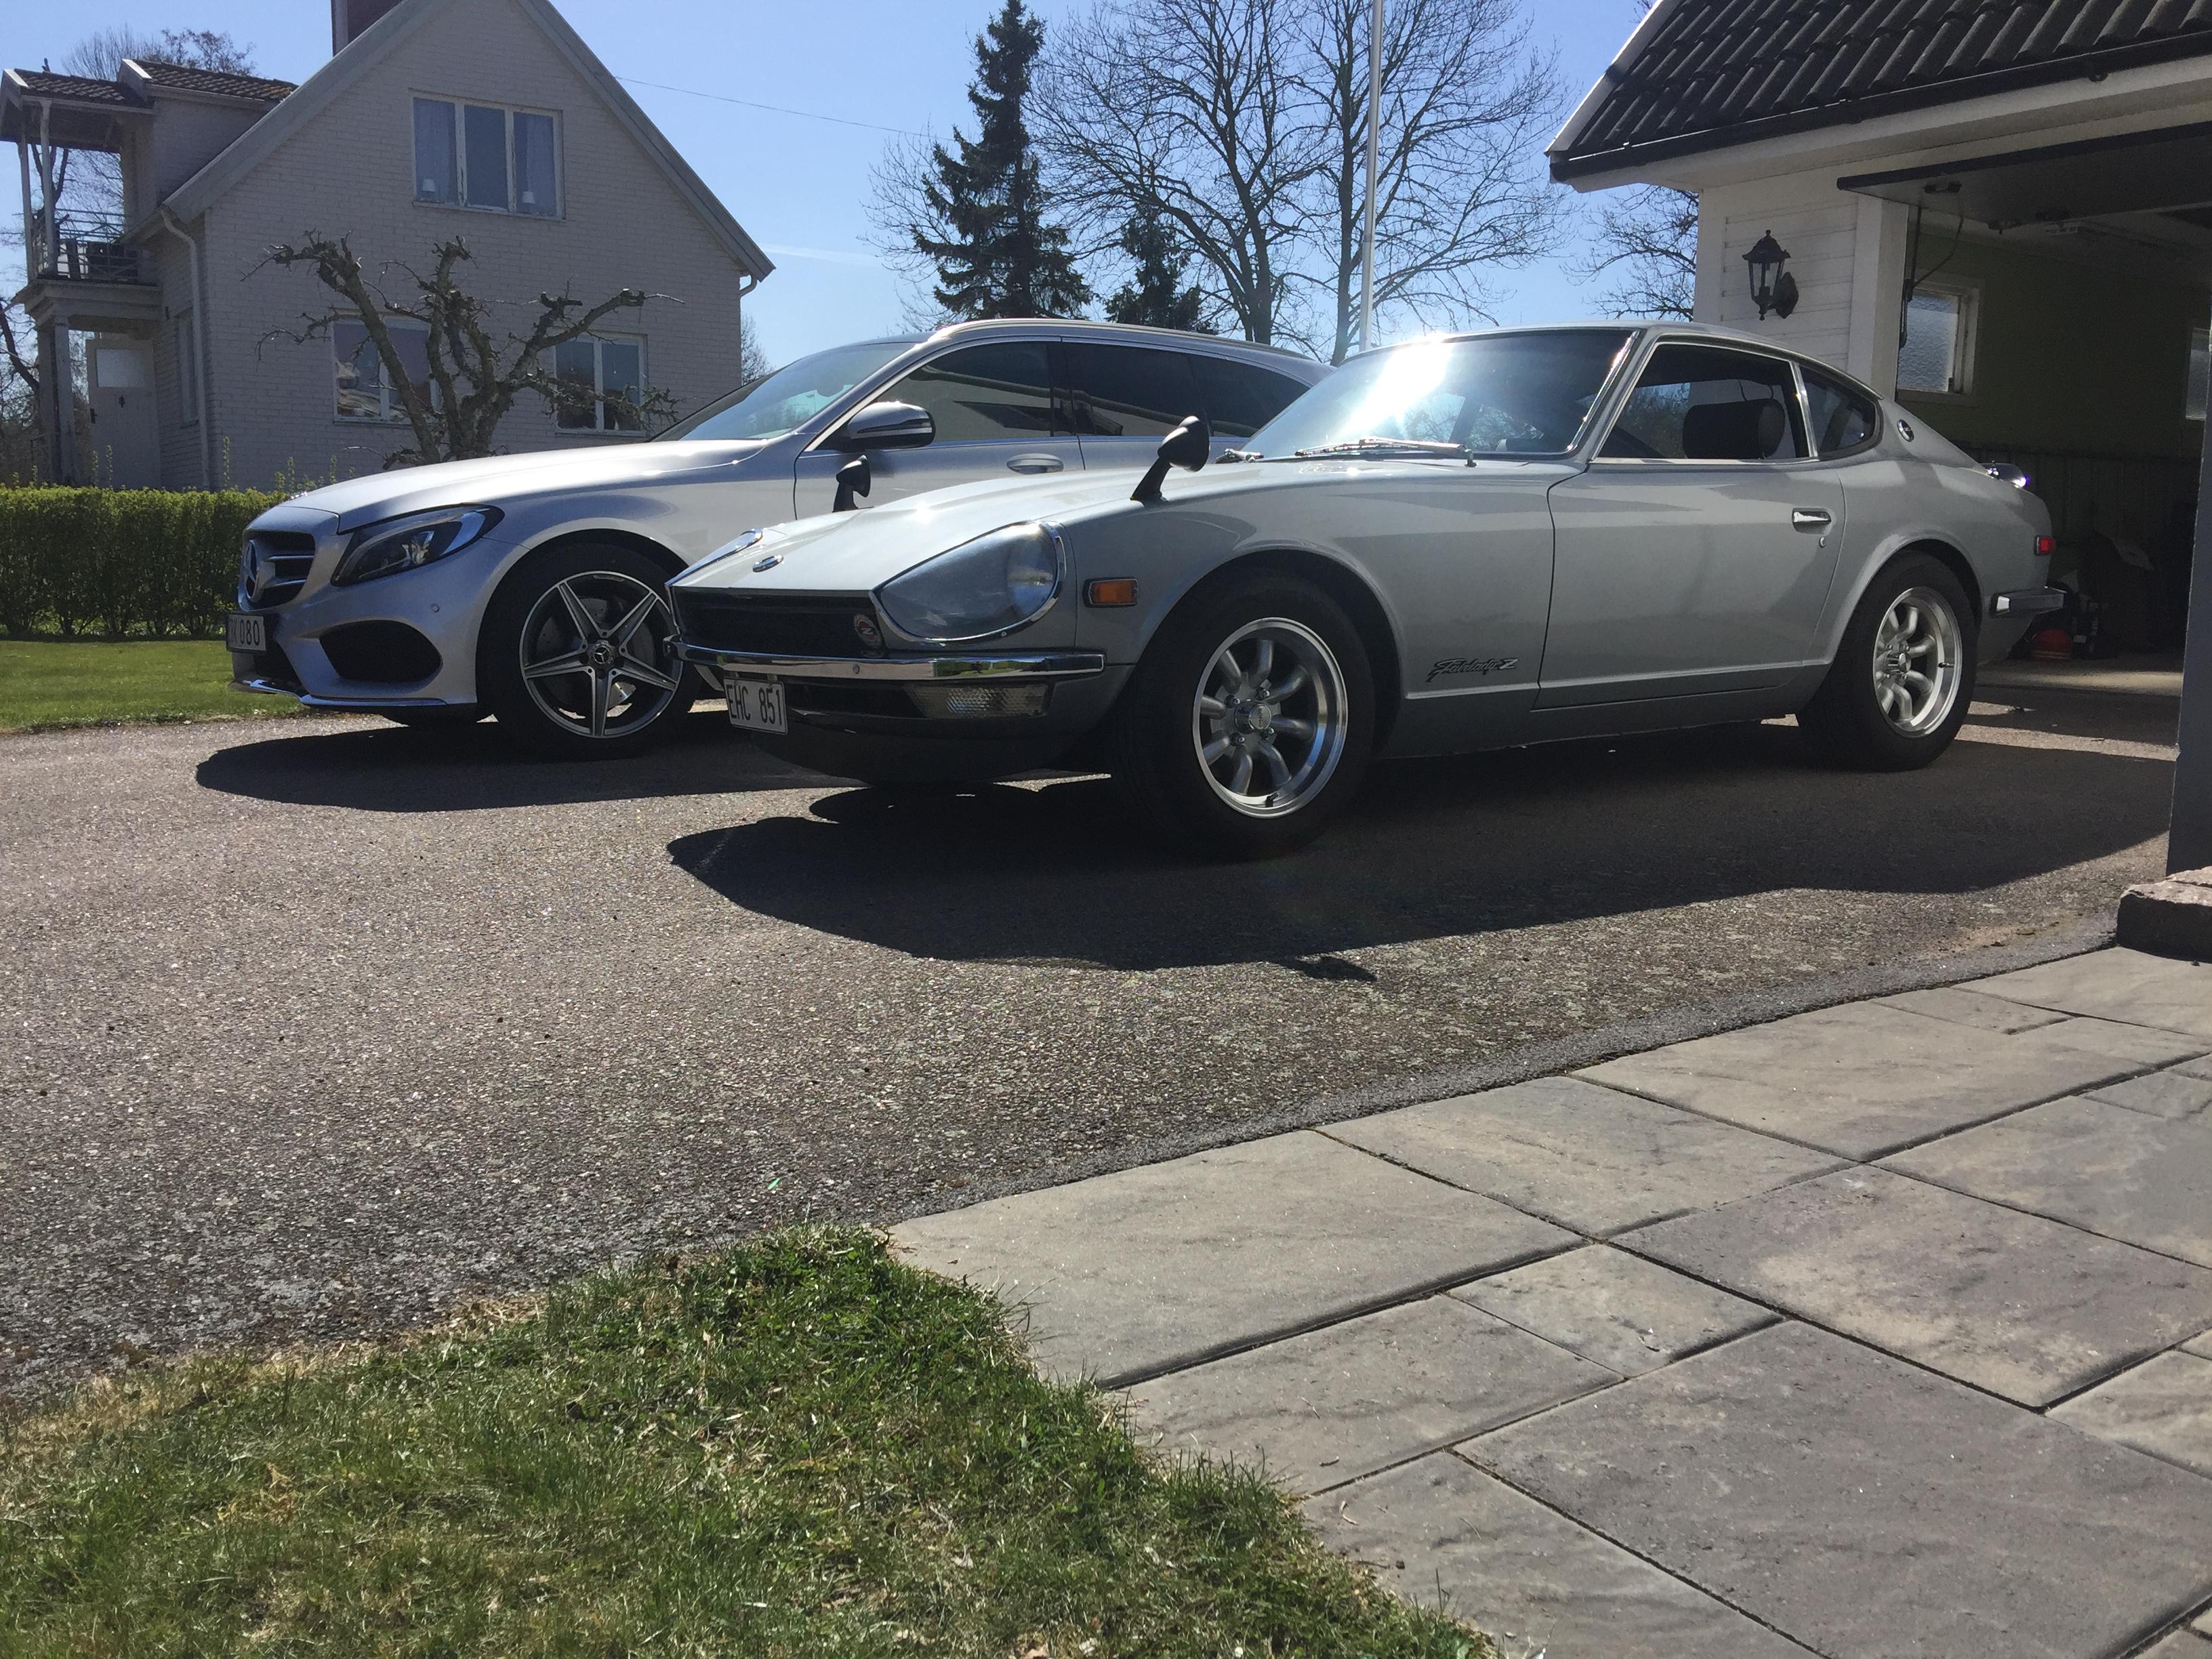
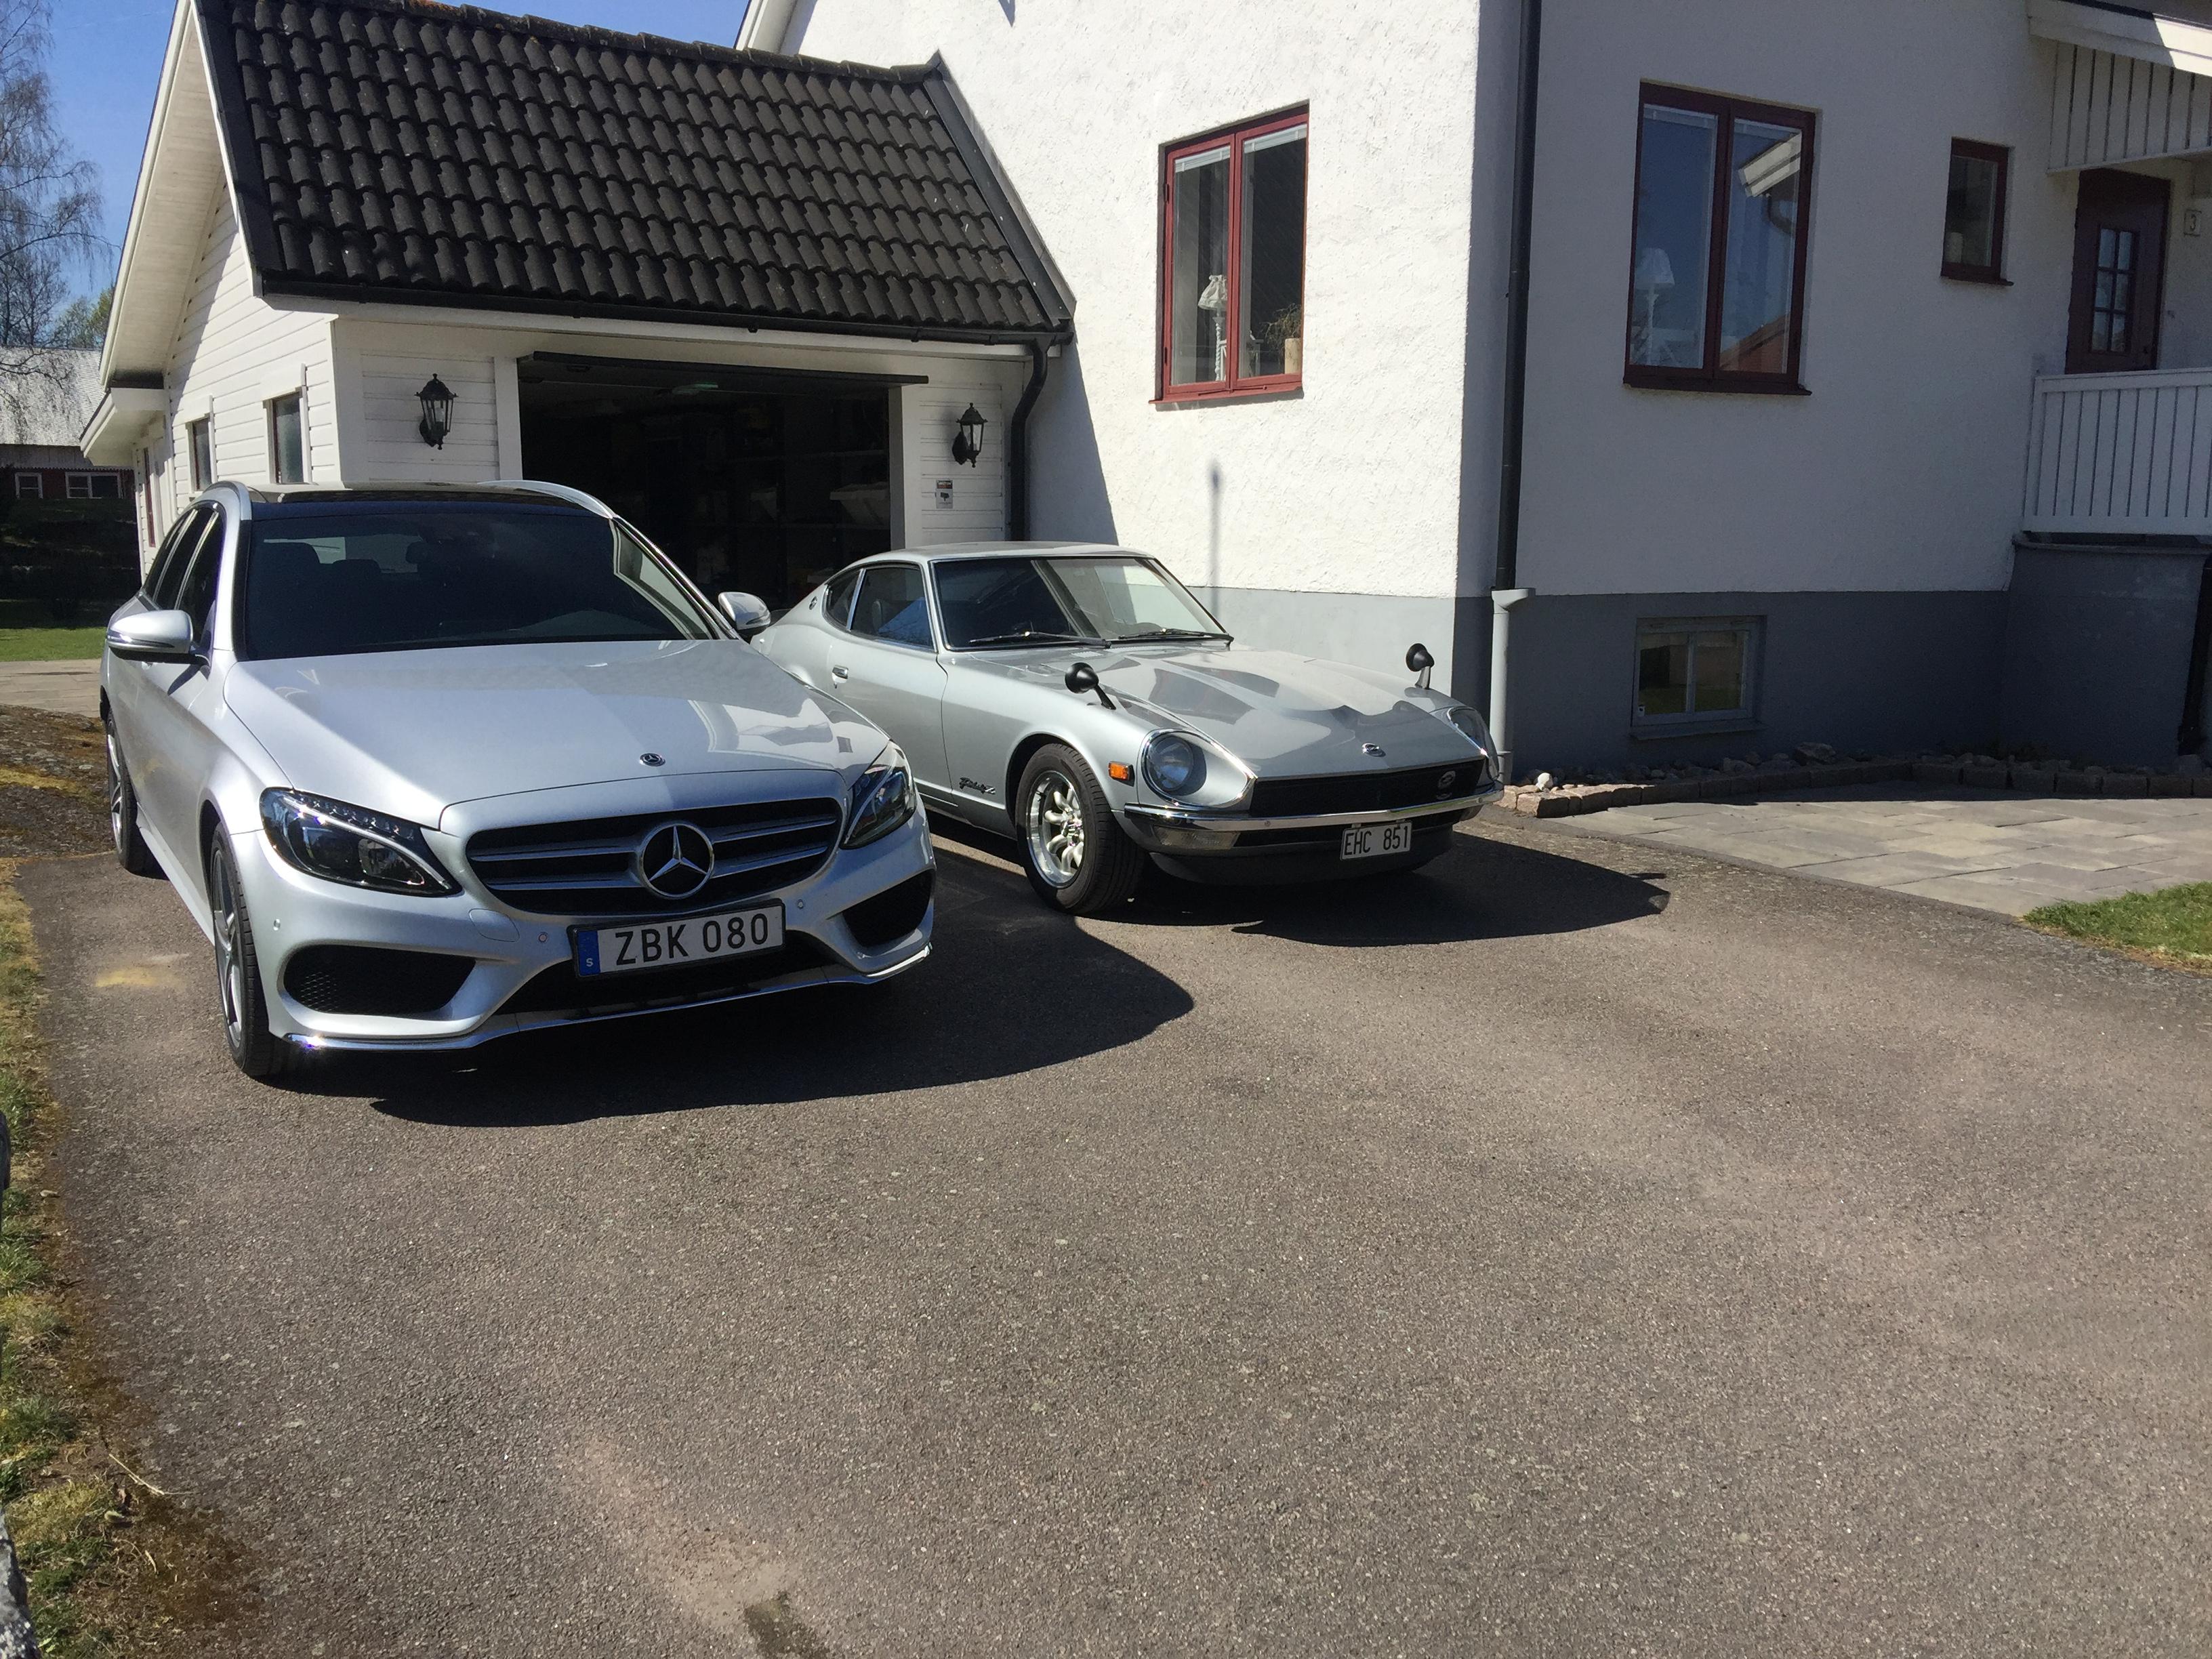
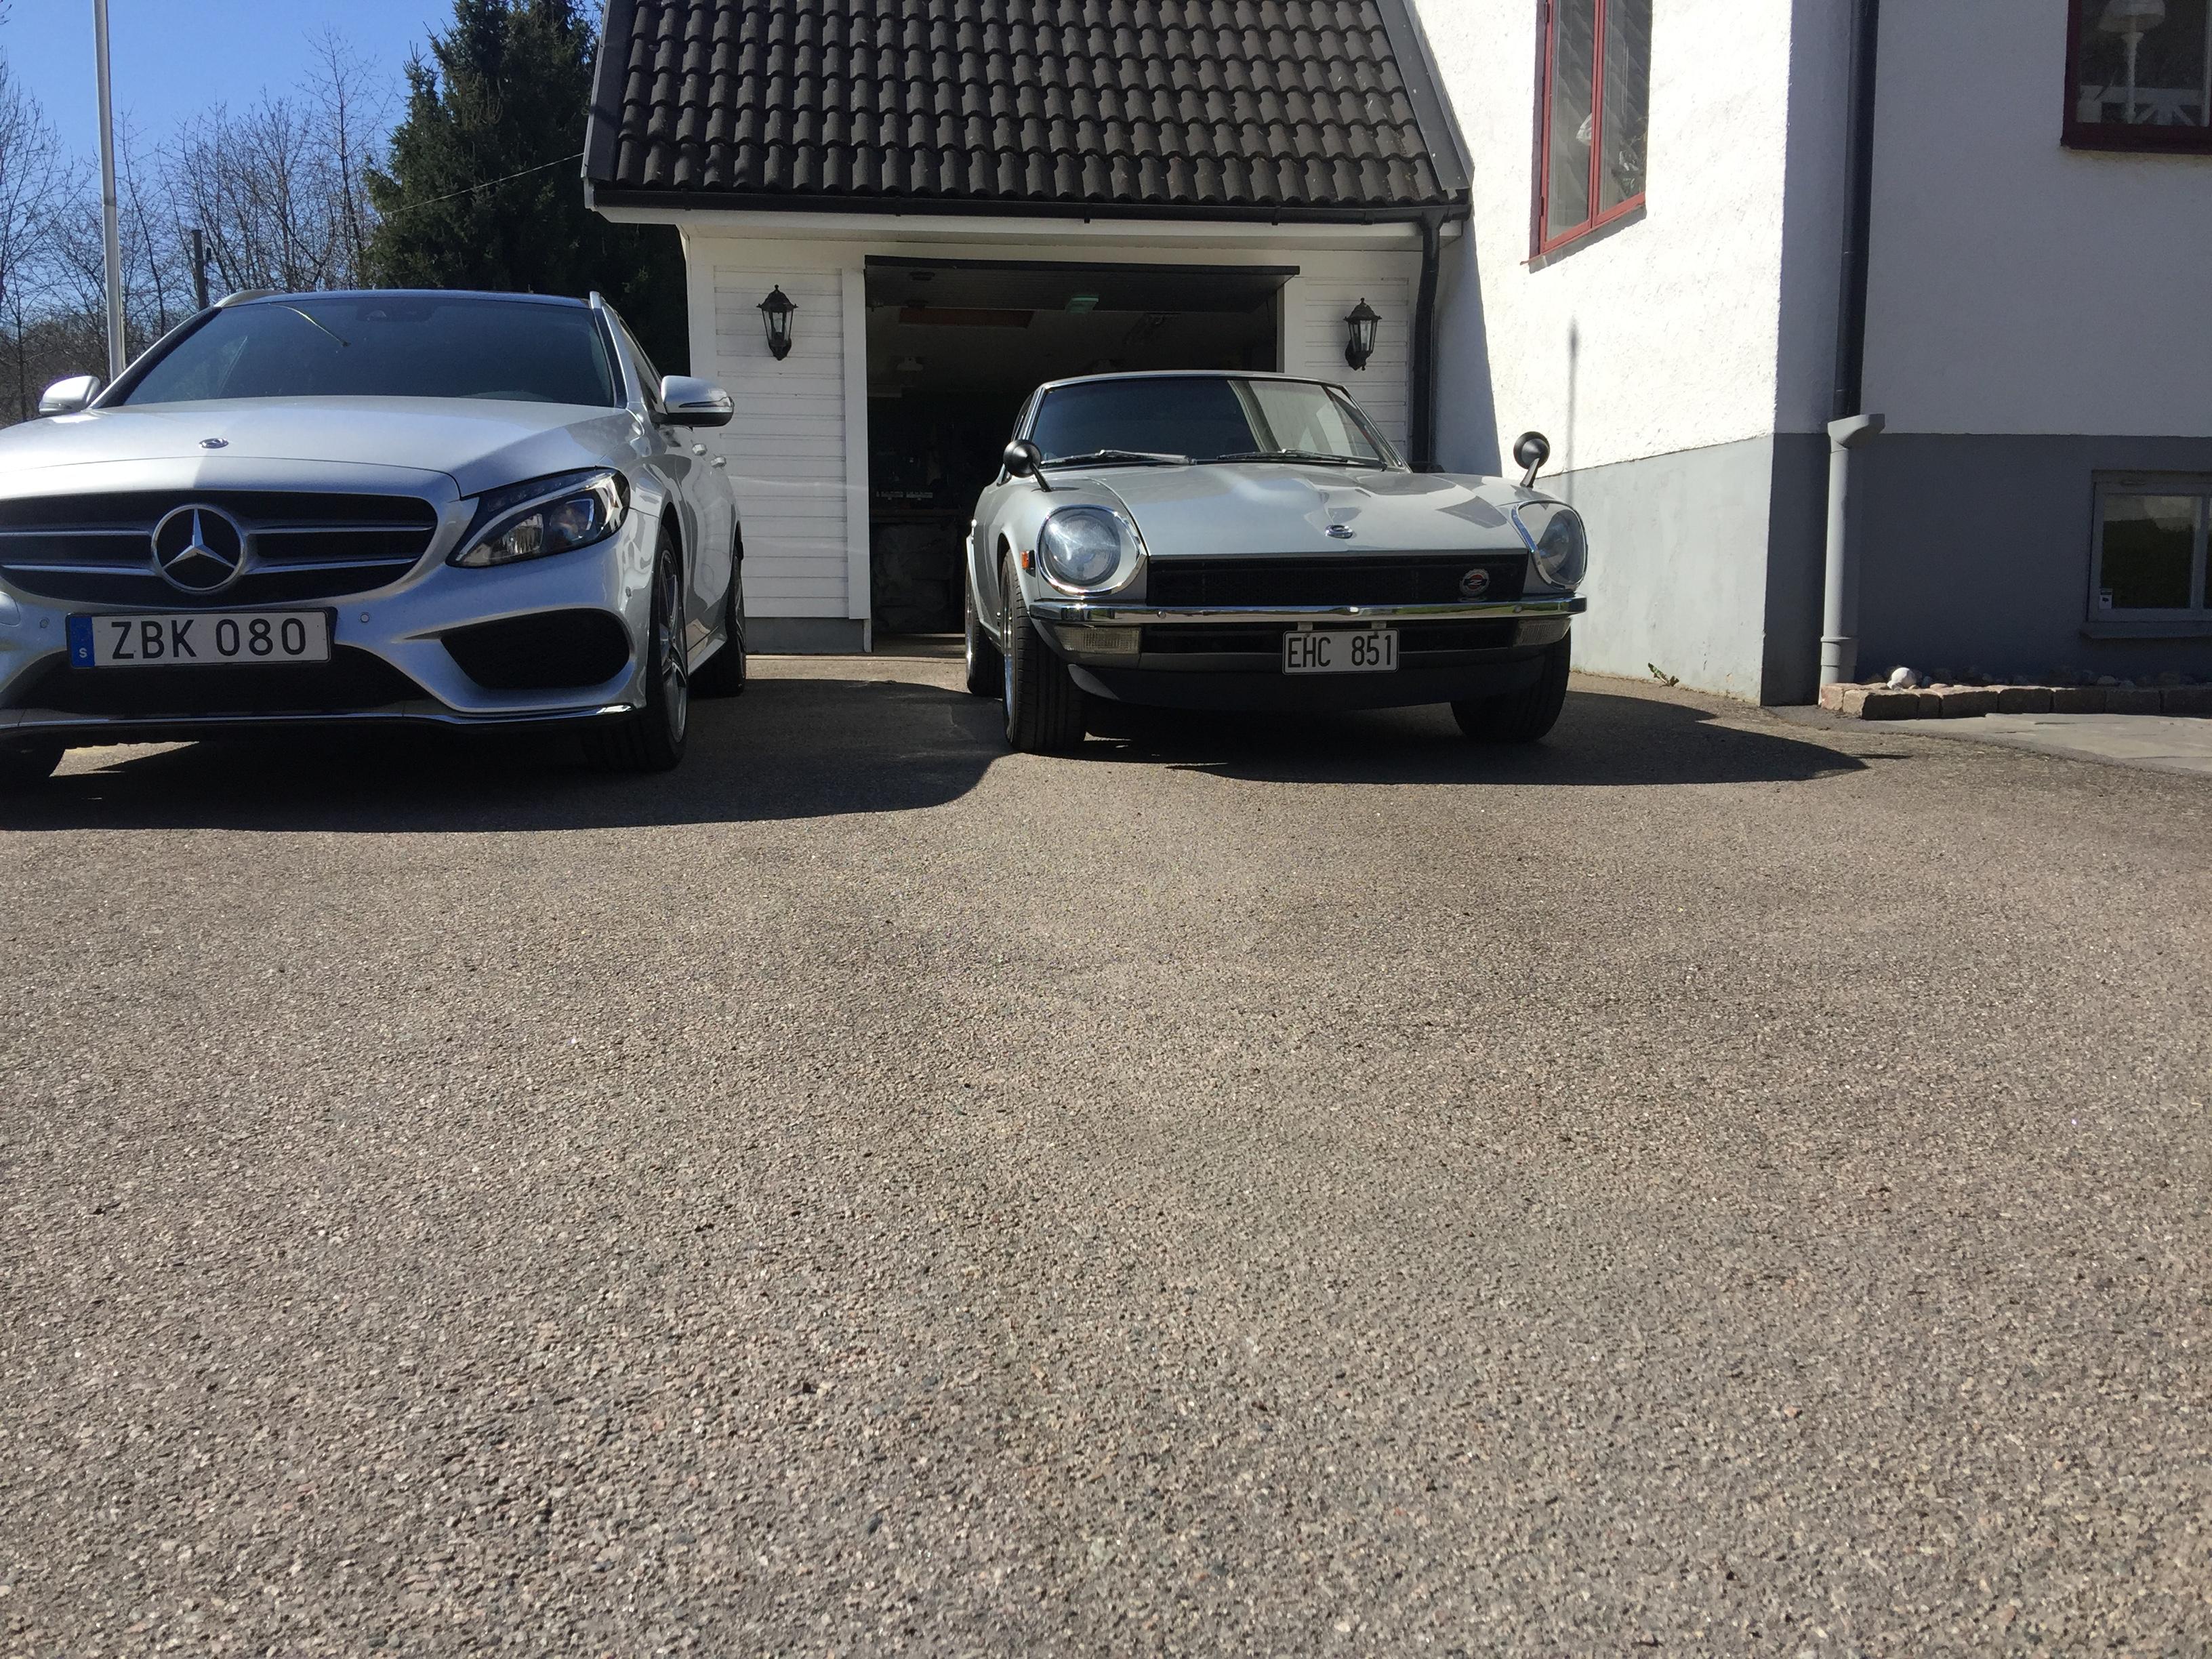
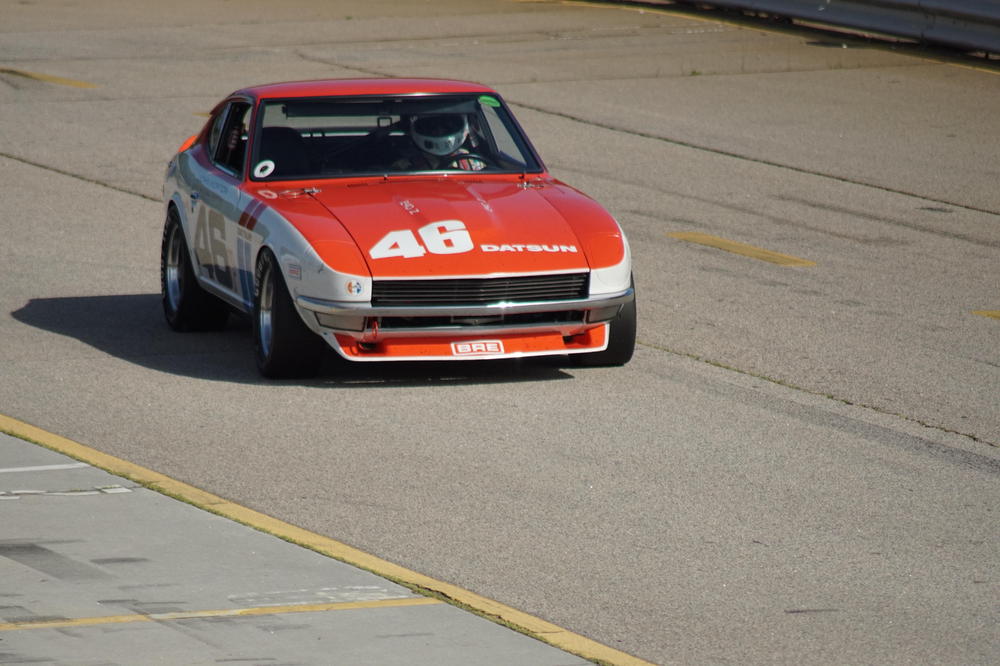 1 pointTook the Z out for its first run this year, haven’t done anything to the car this winter except swapping the battery. Car runs great but still have a small oil leak, need to take care of that soon. Still amazed how small these cars look besides a normal sized modern car : ) //Andreas


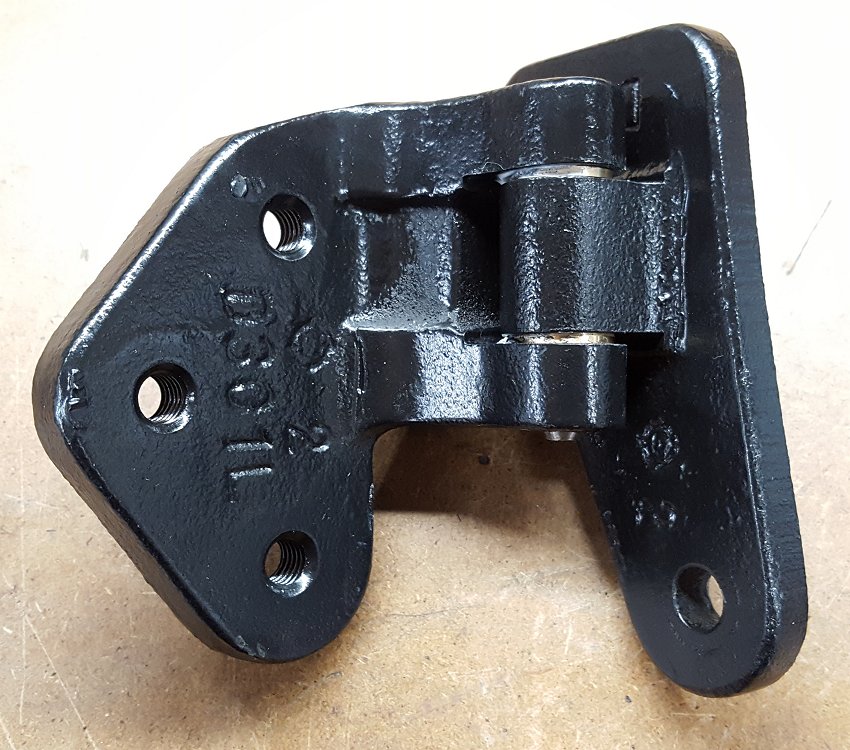
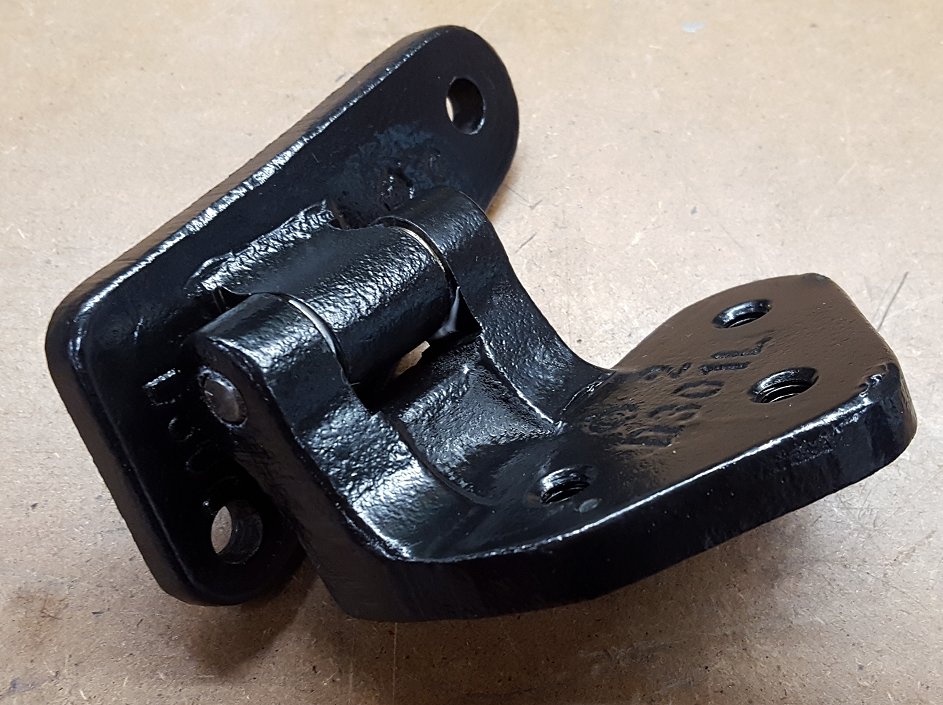
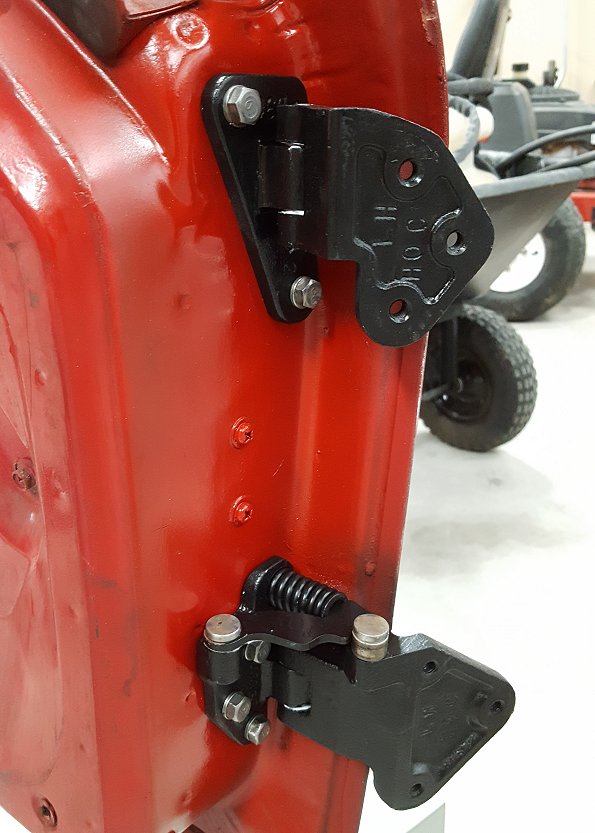
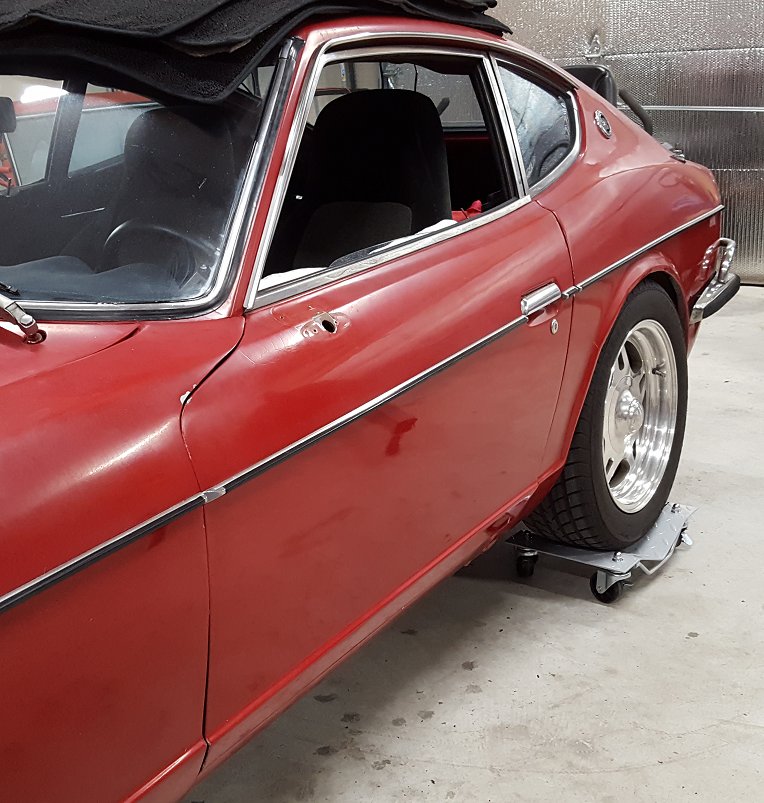
 1 point1 pointWith all the parts wire wheeled I covered them in some Rustoleum satin black. The car is red but I didn't want to paint them red as the car may not be red all of its life so black it is. With everything cured after 7 days I started the reassembly process. The upper hinge was first. Using my bench vise I pressed in the brass bushings. They went in perfectly. Since the brass bushings were thicker than the originals I had to use the metal lips of bench vise to spread the side of the hinge a part just a little. I lubed all of the contact surfaces with lithium grease. Once I got the hinge halves together I used my 20 ton press to install the new hinge pin. The end result is nice and tight upper door hinge. The reassembly of the lower hinge was the reverse of the disassembly. The bushings in the lower hinge looked good and felt really good with the new pin so I opted to leave them. Just like the upper hinge, everything lubed up with some lithium grease. The inside of the door received some clean up and fresh red paint. The fasteners were treated to some wire wheel action to clean them up as well. With the help of my wife we got the door with minimal damage to the paint. I had taped a thick towel to the top of the door but still managed to pull some paint off. The end result is a door that functions like new again. Seeing that there are no new hinges to be had and there is a service on eBay charging $100 - $150 to rebuild each hinge, the is a lot of value to be gained by doing this yourself. It does take an investment in some specialty tools like the HF press but it will pay for itself over and over just as mine has over the course of many projects. I welcome any questions or feedback.
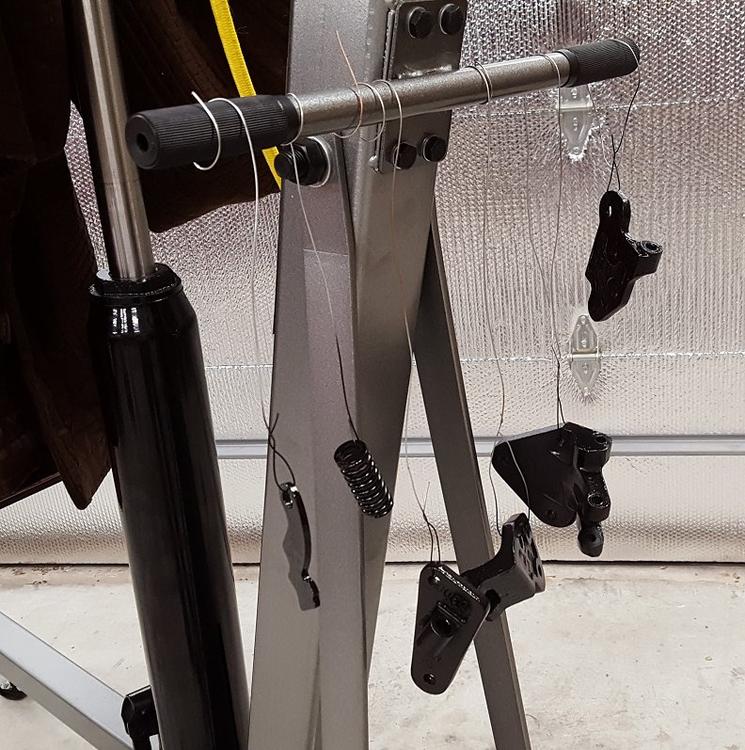
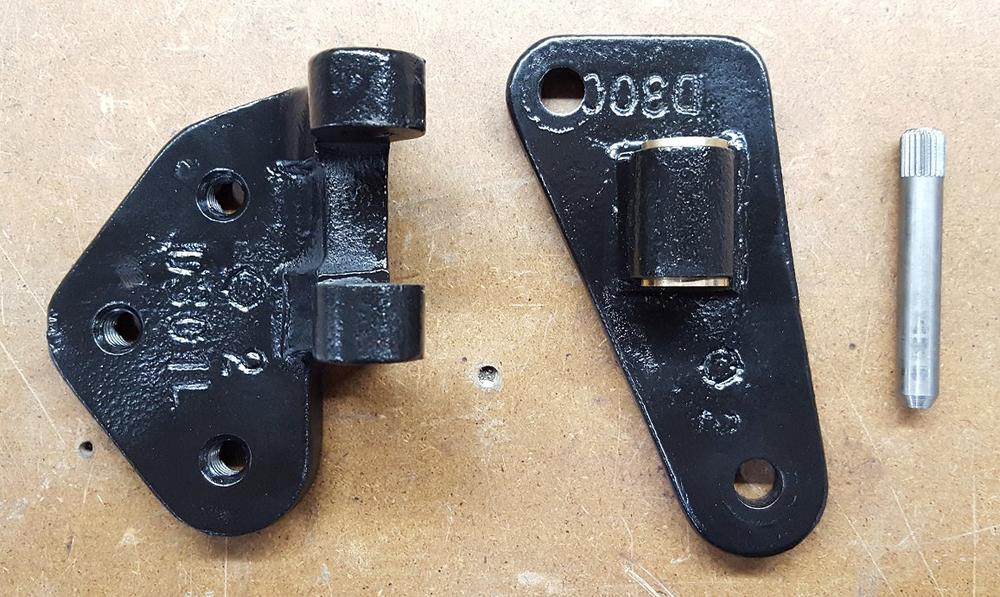
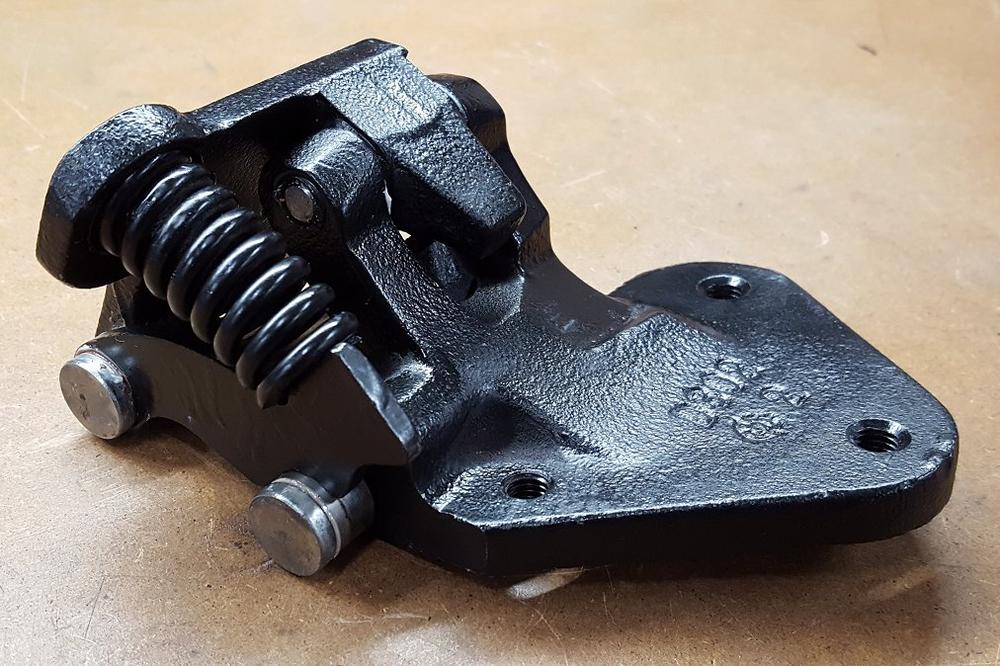
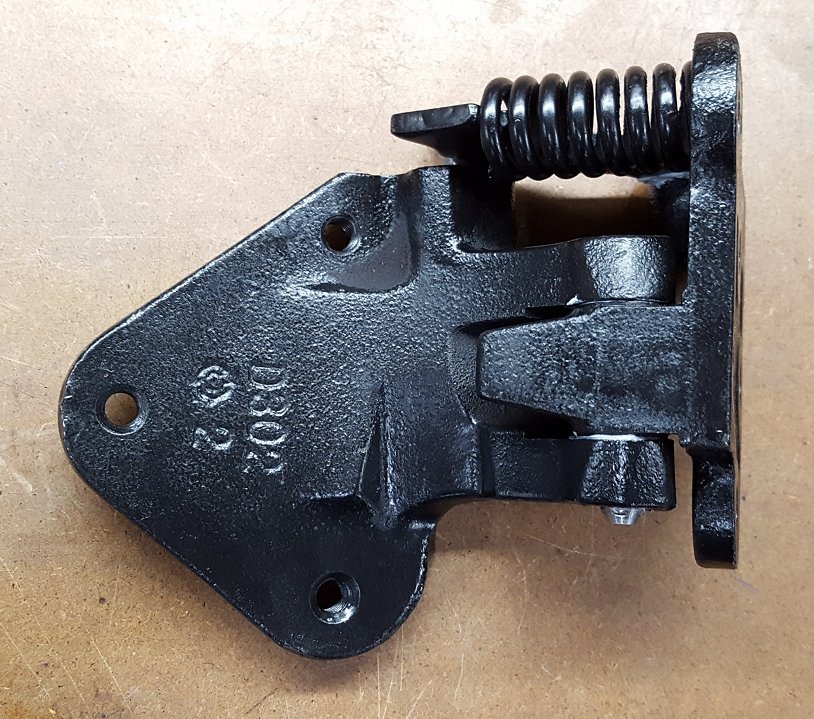

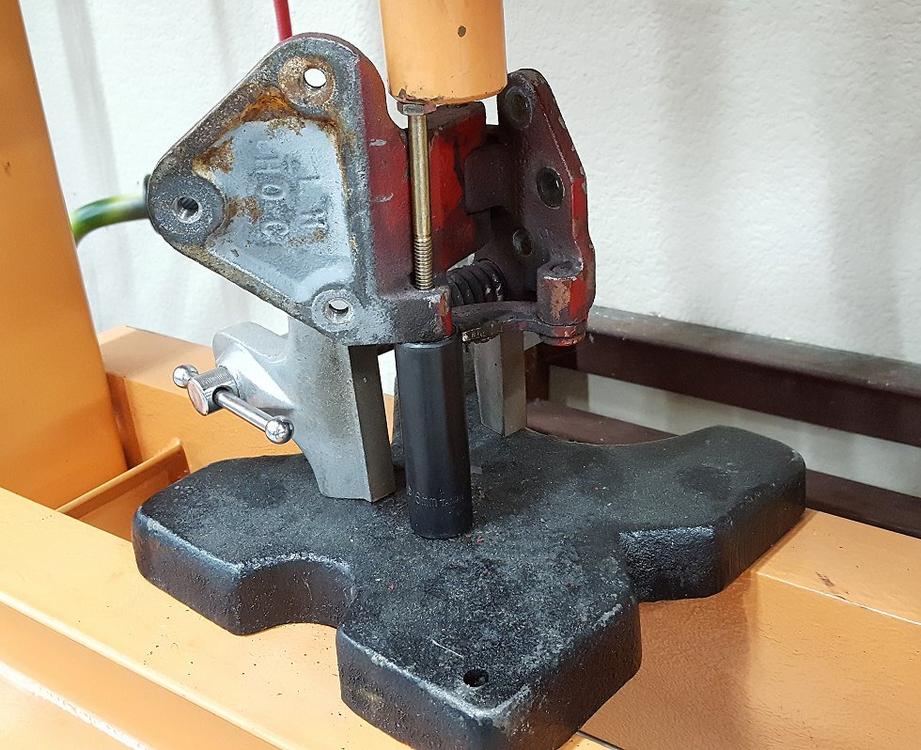
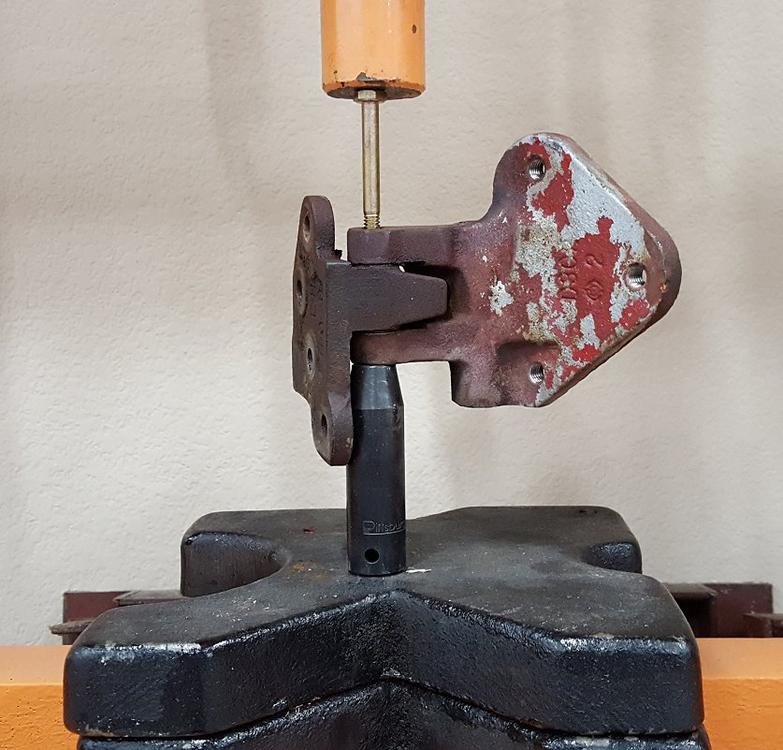
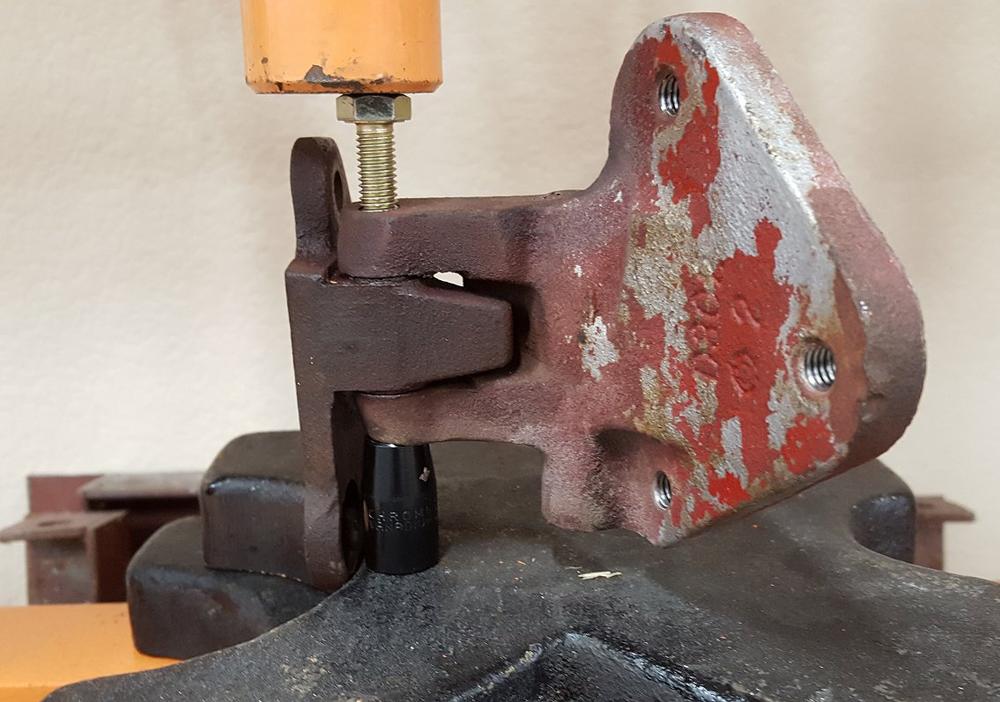
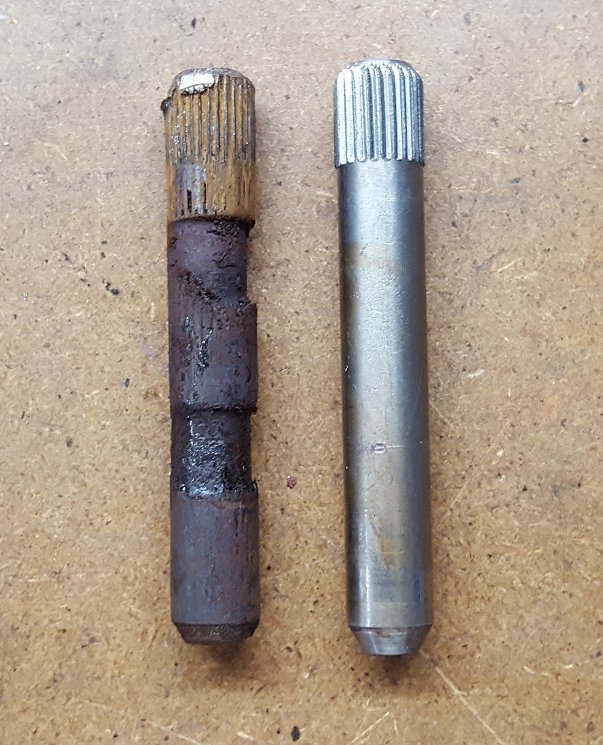
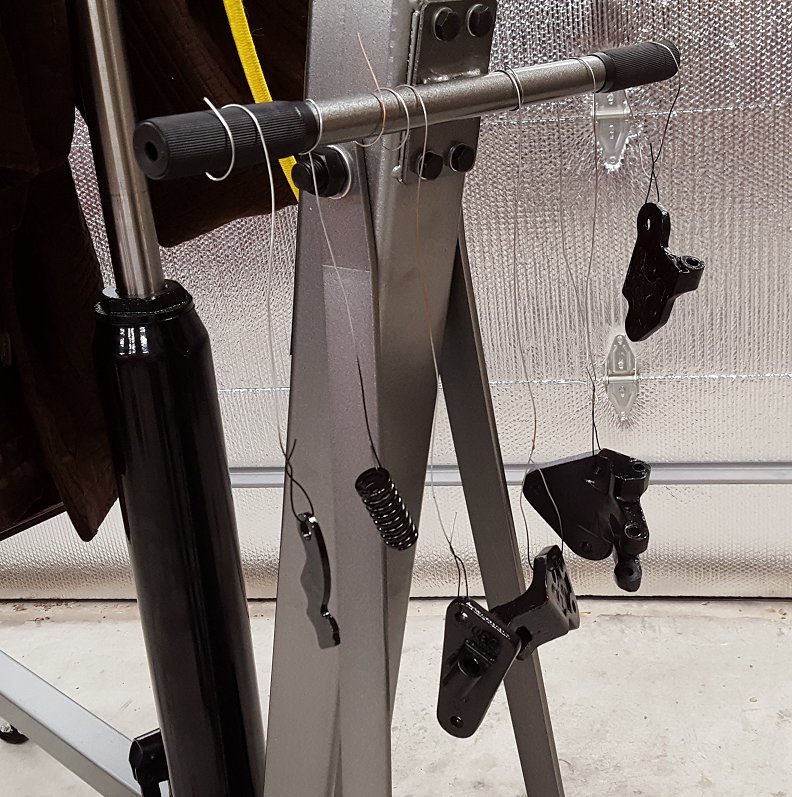
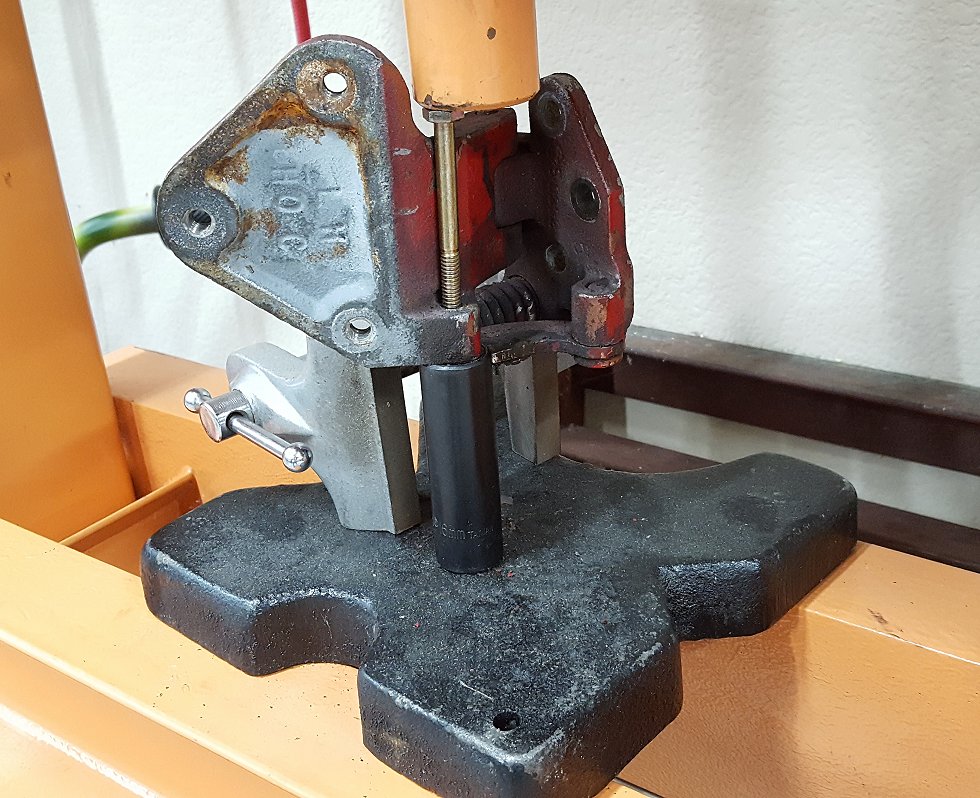
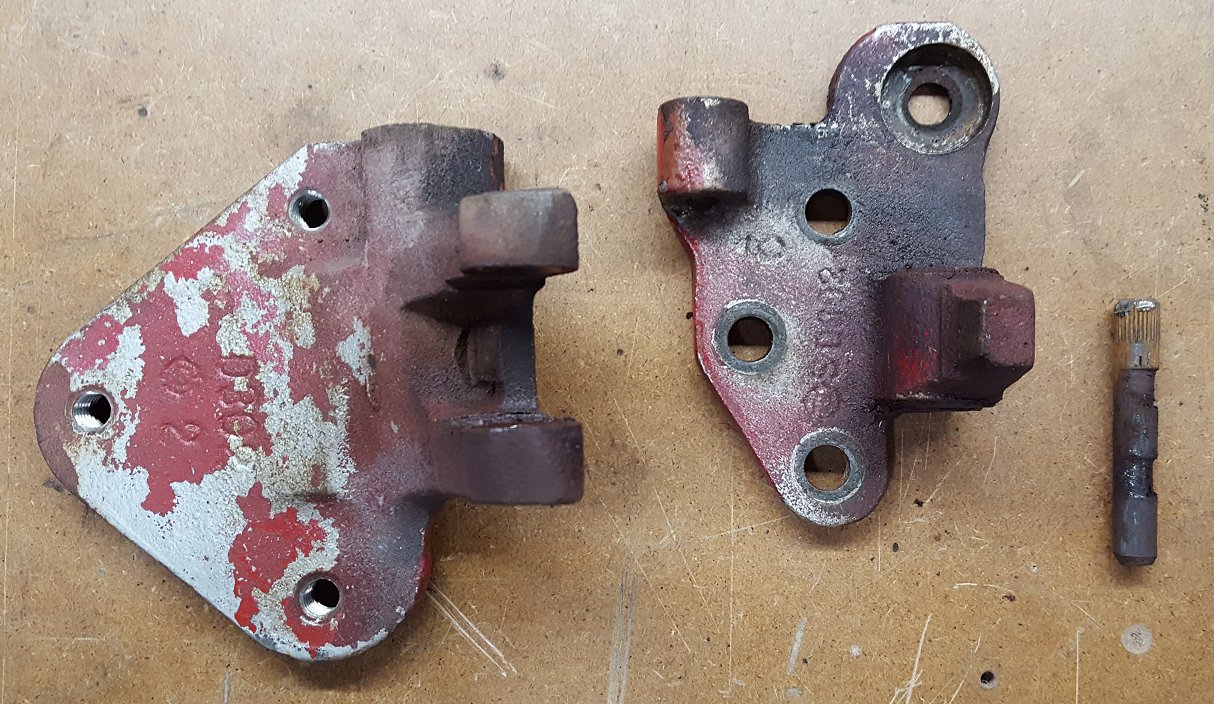
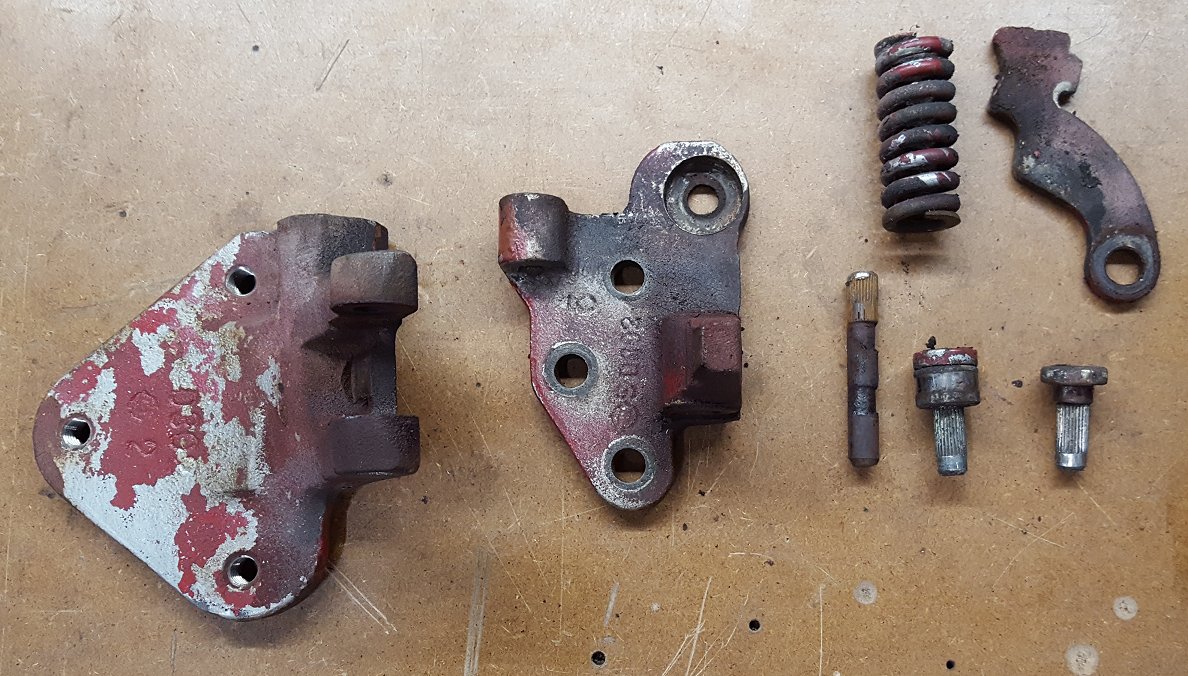
 1 point1 pointNext up was the lower hinge. The first hurdle is to safely compress the spring so the detent roller pin can be pressed out. My hinge spring compressor was too big to fit in to the coils of the spring so I used a small bench vise. I must add this disclaimer, SAFETY is paramount here so proceed at your own risk! This is really when you need a second set of hands to help hold everything in place while you work the press handle. The detent pin itself was straight forward in removal. Removing the main hinge pin took some creativity to get the press setup. There is not much material around the pin so you have to use a small socket or other component that will not allow the edge of the hinge to sink while you are pressing on the pin. People that do this kind of work for a living have built a jig to quickly and safely position the hinge. After a few tries I got it figured out. Checking my progress as the pin bottomed out in the shallow socket. On to the deep socket. The pin tells the tale. To be honest, the hinge had very little play in it. I was shocked by how bad the pin looked. A comparison of the old and new pin. Night and day! Ready for the wire wheel.
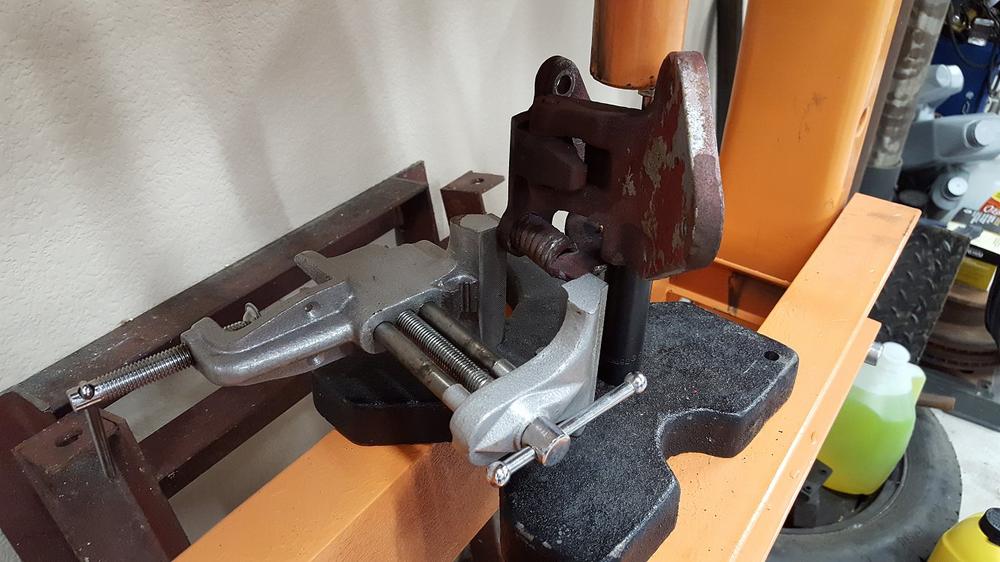


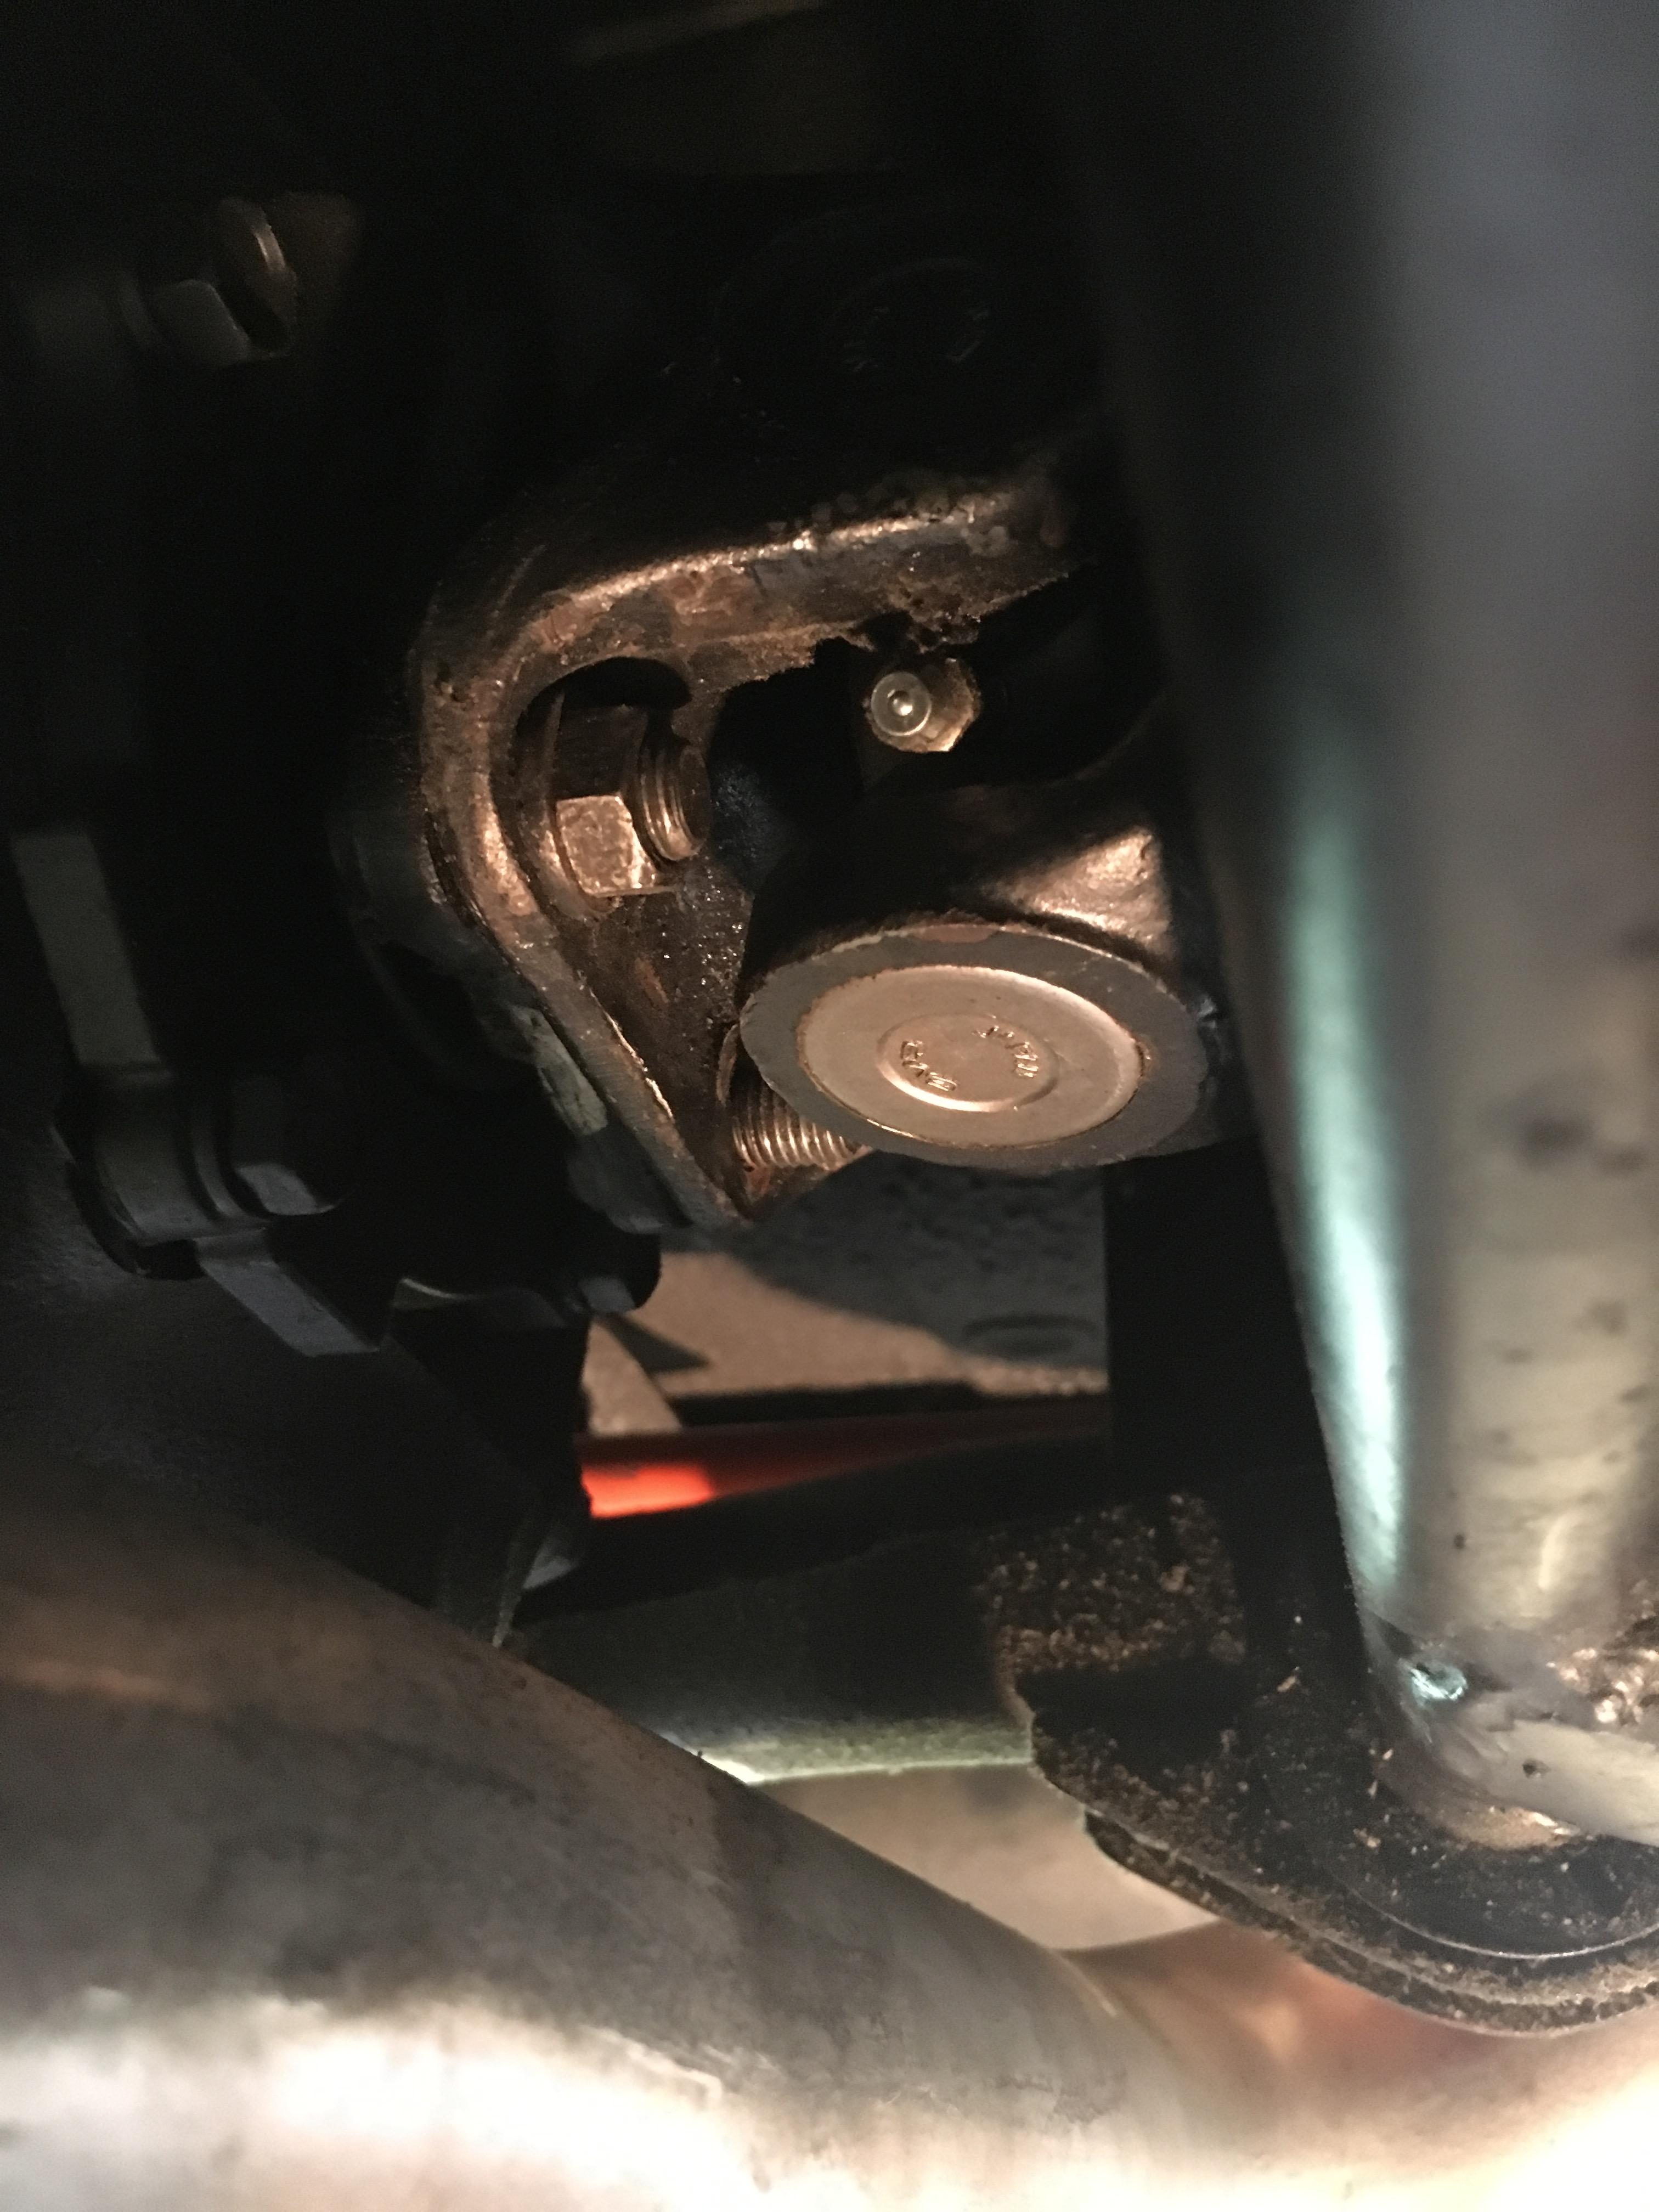
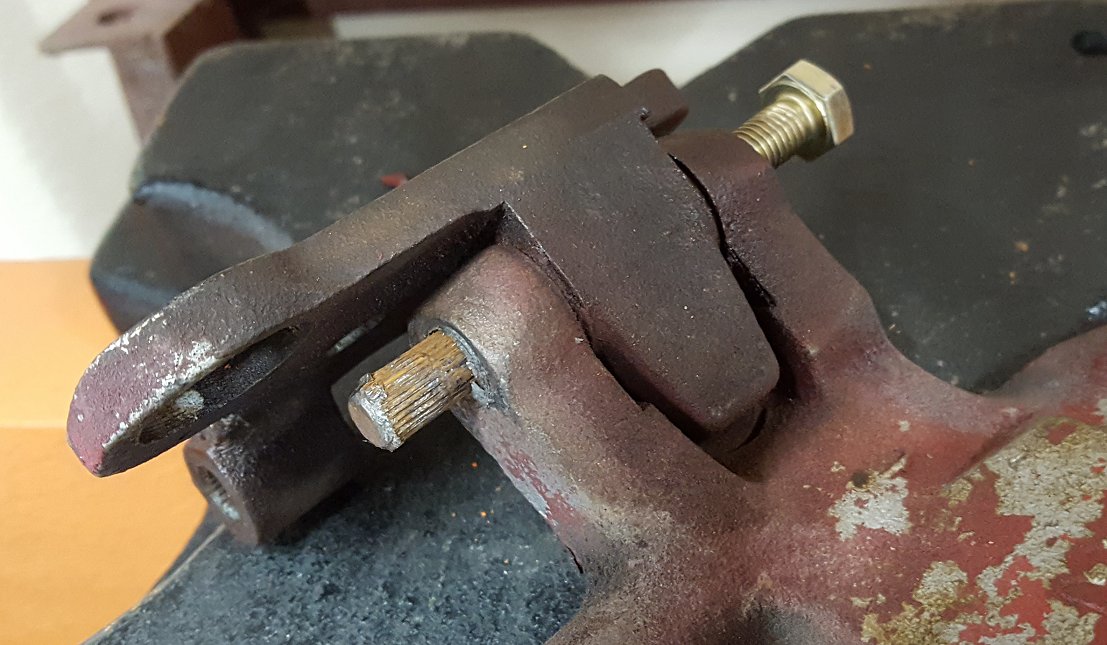
 1 point0 pointsthis is what I spotted.... Which is this Looks like the bronze bearing had moved Which would have been caused by this hairline crack I cut the end off to press the bearing out once the crack was found.0 points


Important Information
By using this site, you agree to our Privacy Policy and Guidelines. We have placed cookies on your device to help make this website better. You can adjust your cookie settings, otherwise we'll assume you're okay to continue.