


Leaderboard
-

brunodoggy
Free Member11Points67Posts -

motorman7
 Subscriber
 11Points2,220Posts
 -


240260280
Free Member11Points4,441Posts -


siteunseen
Free Member10Points14,975Posts
Popular Content
Showing content with the highest reputation on 07/21/2019 in all areas
-
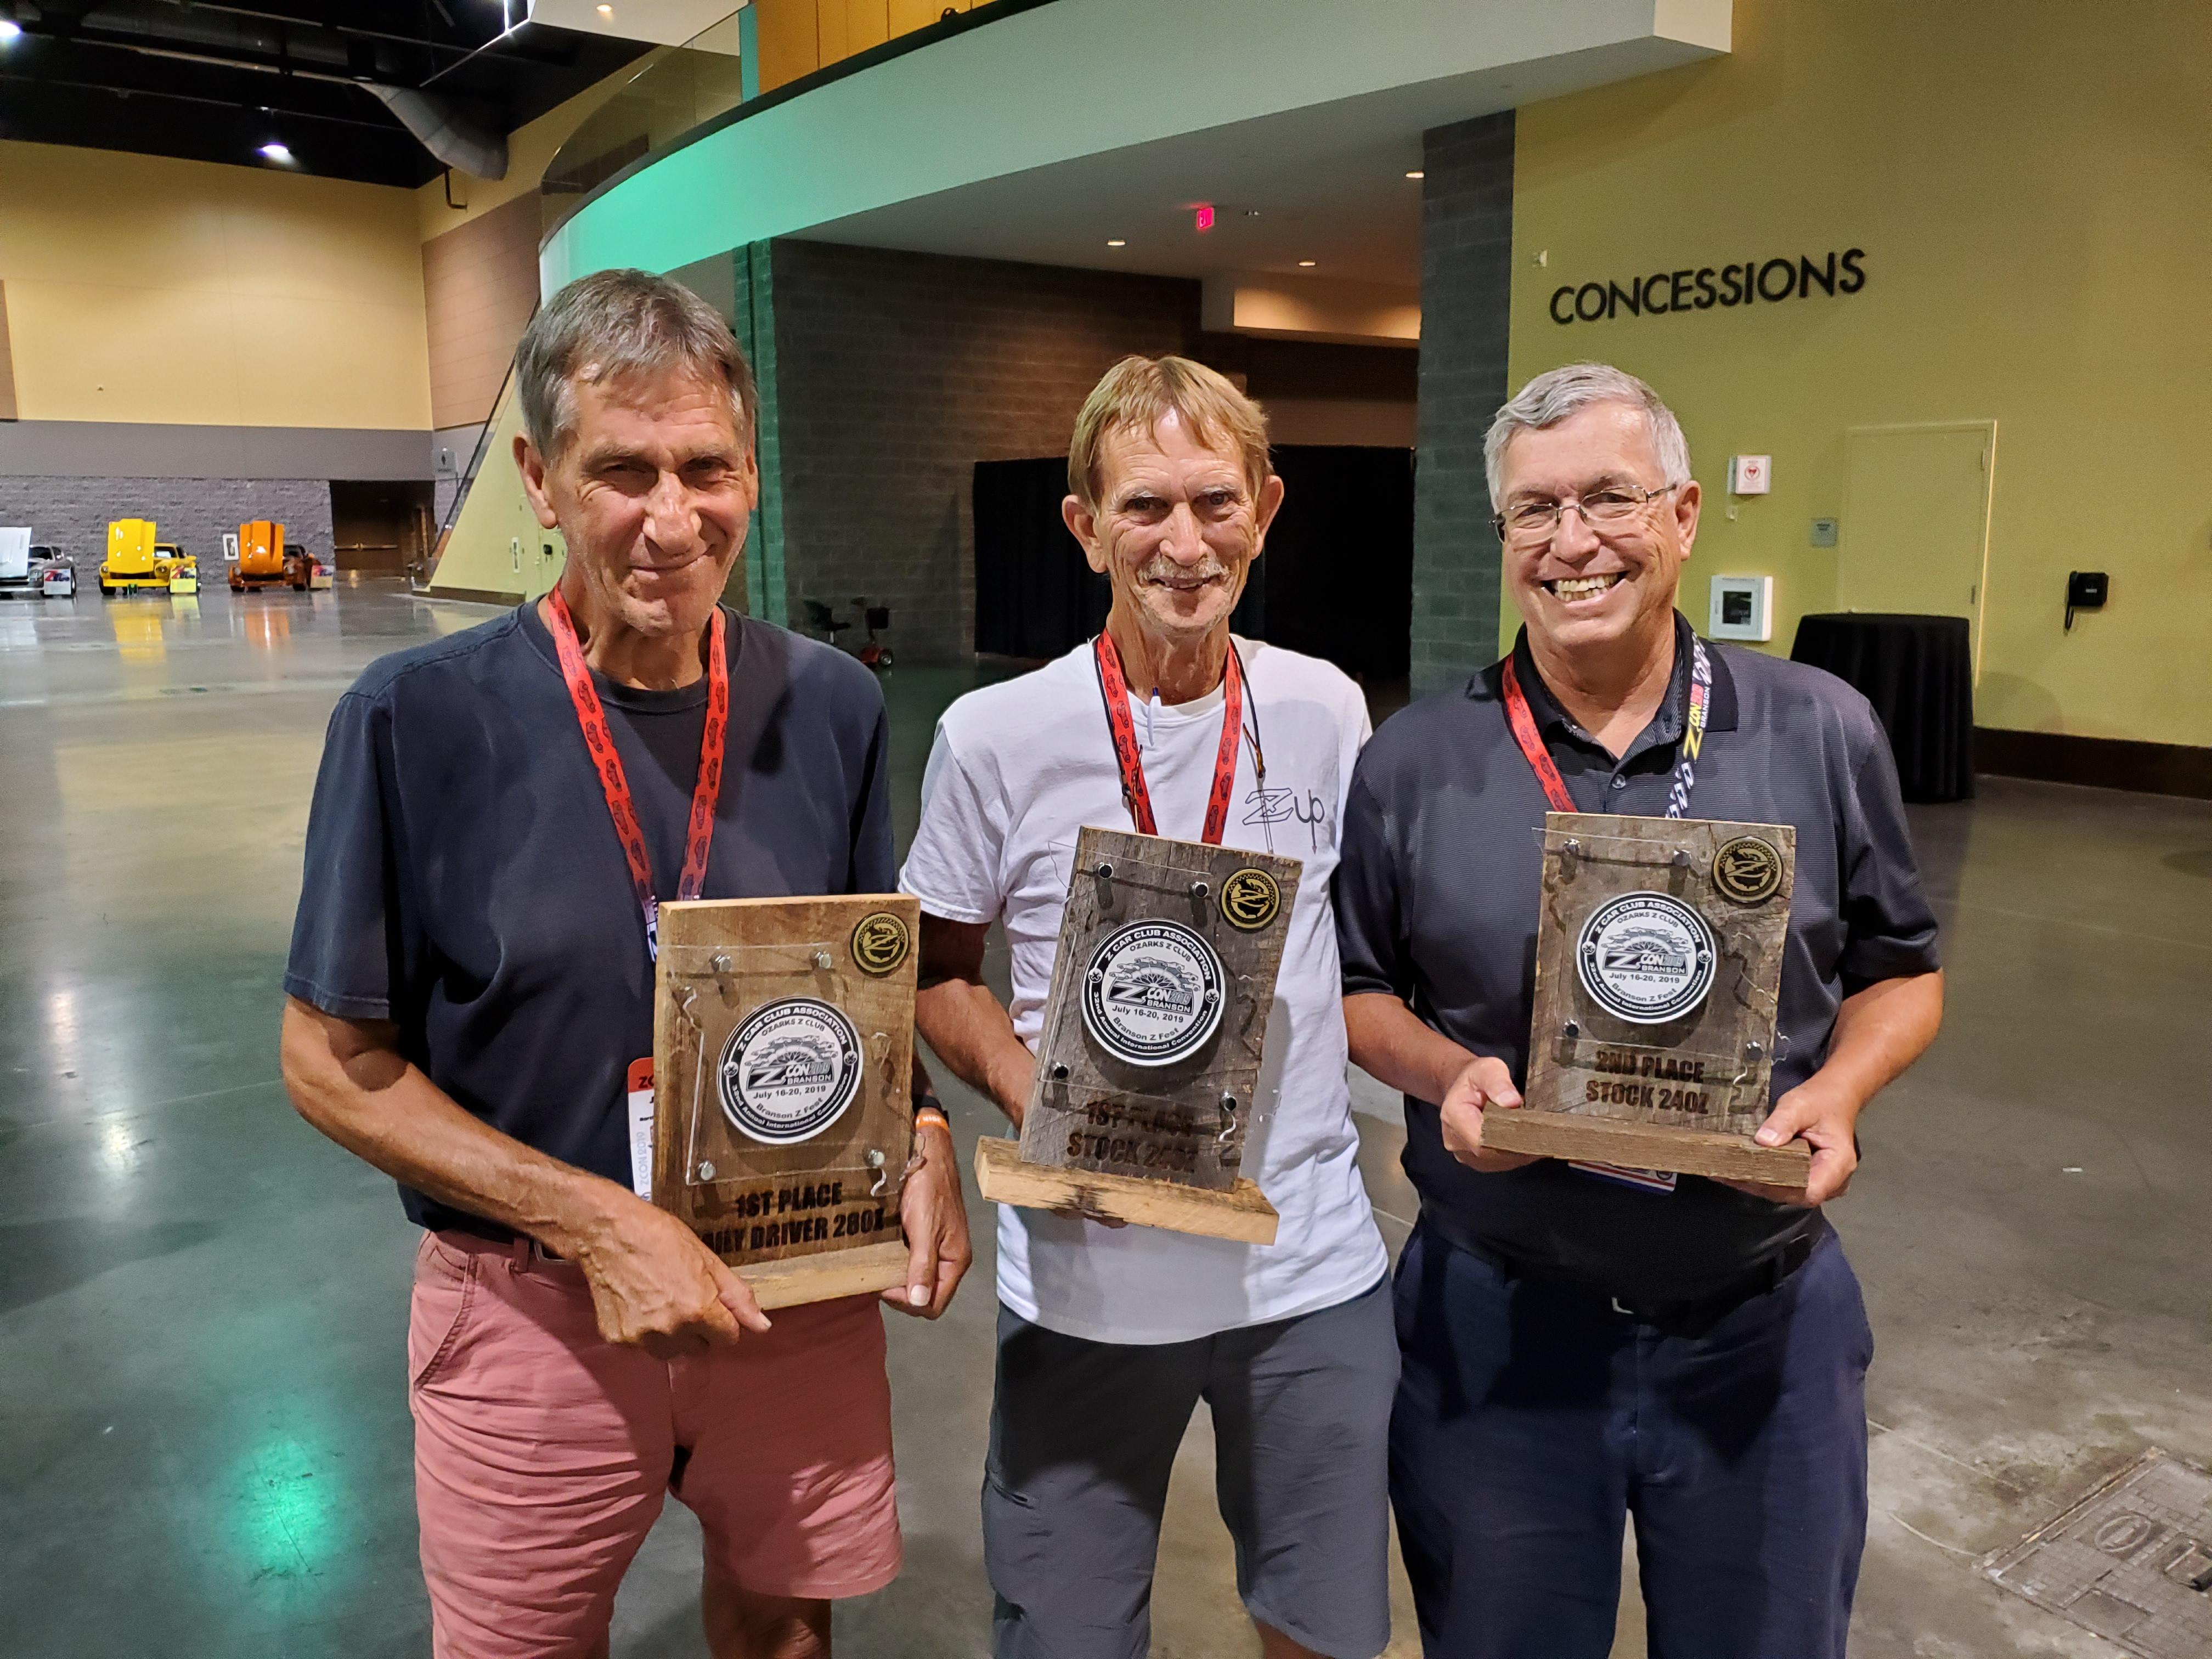
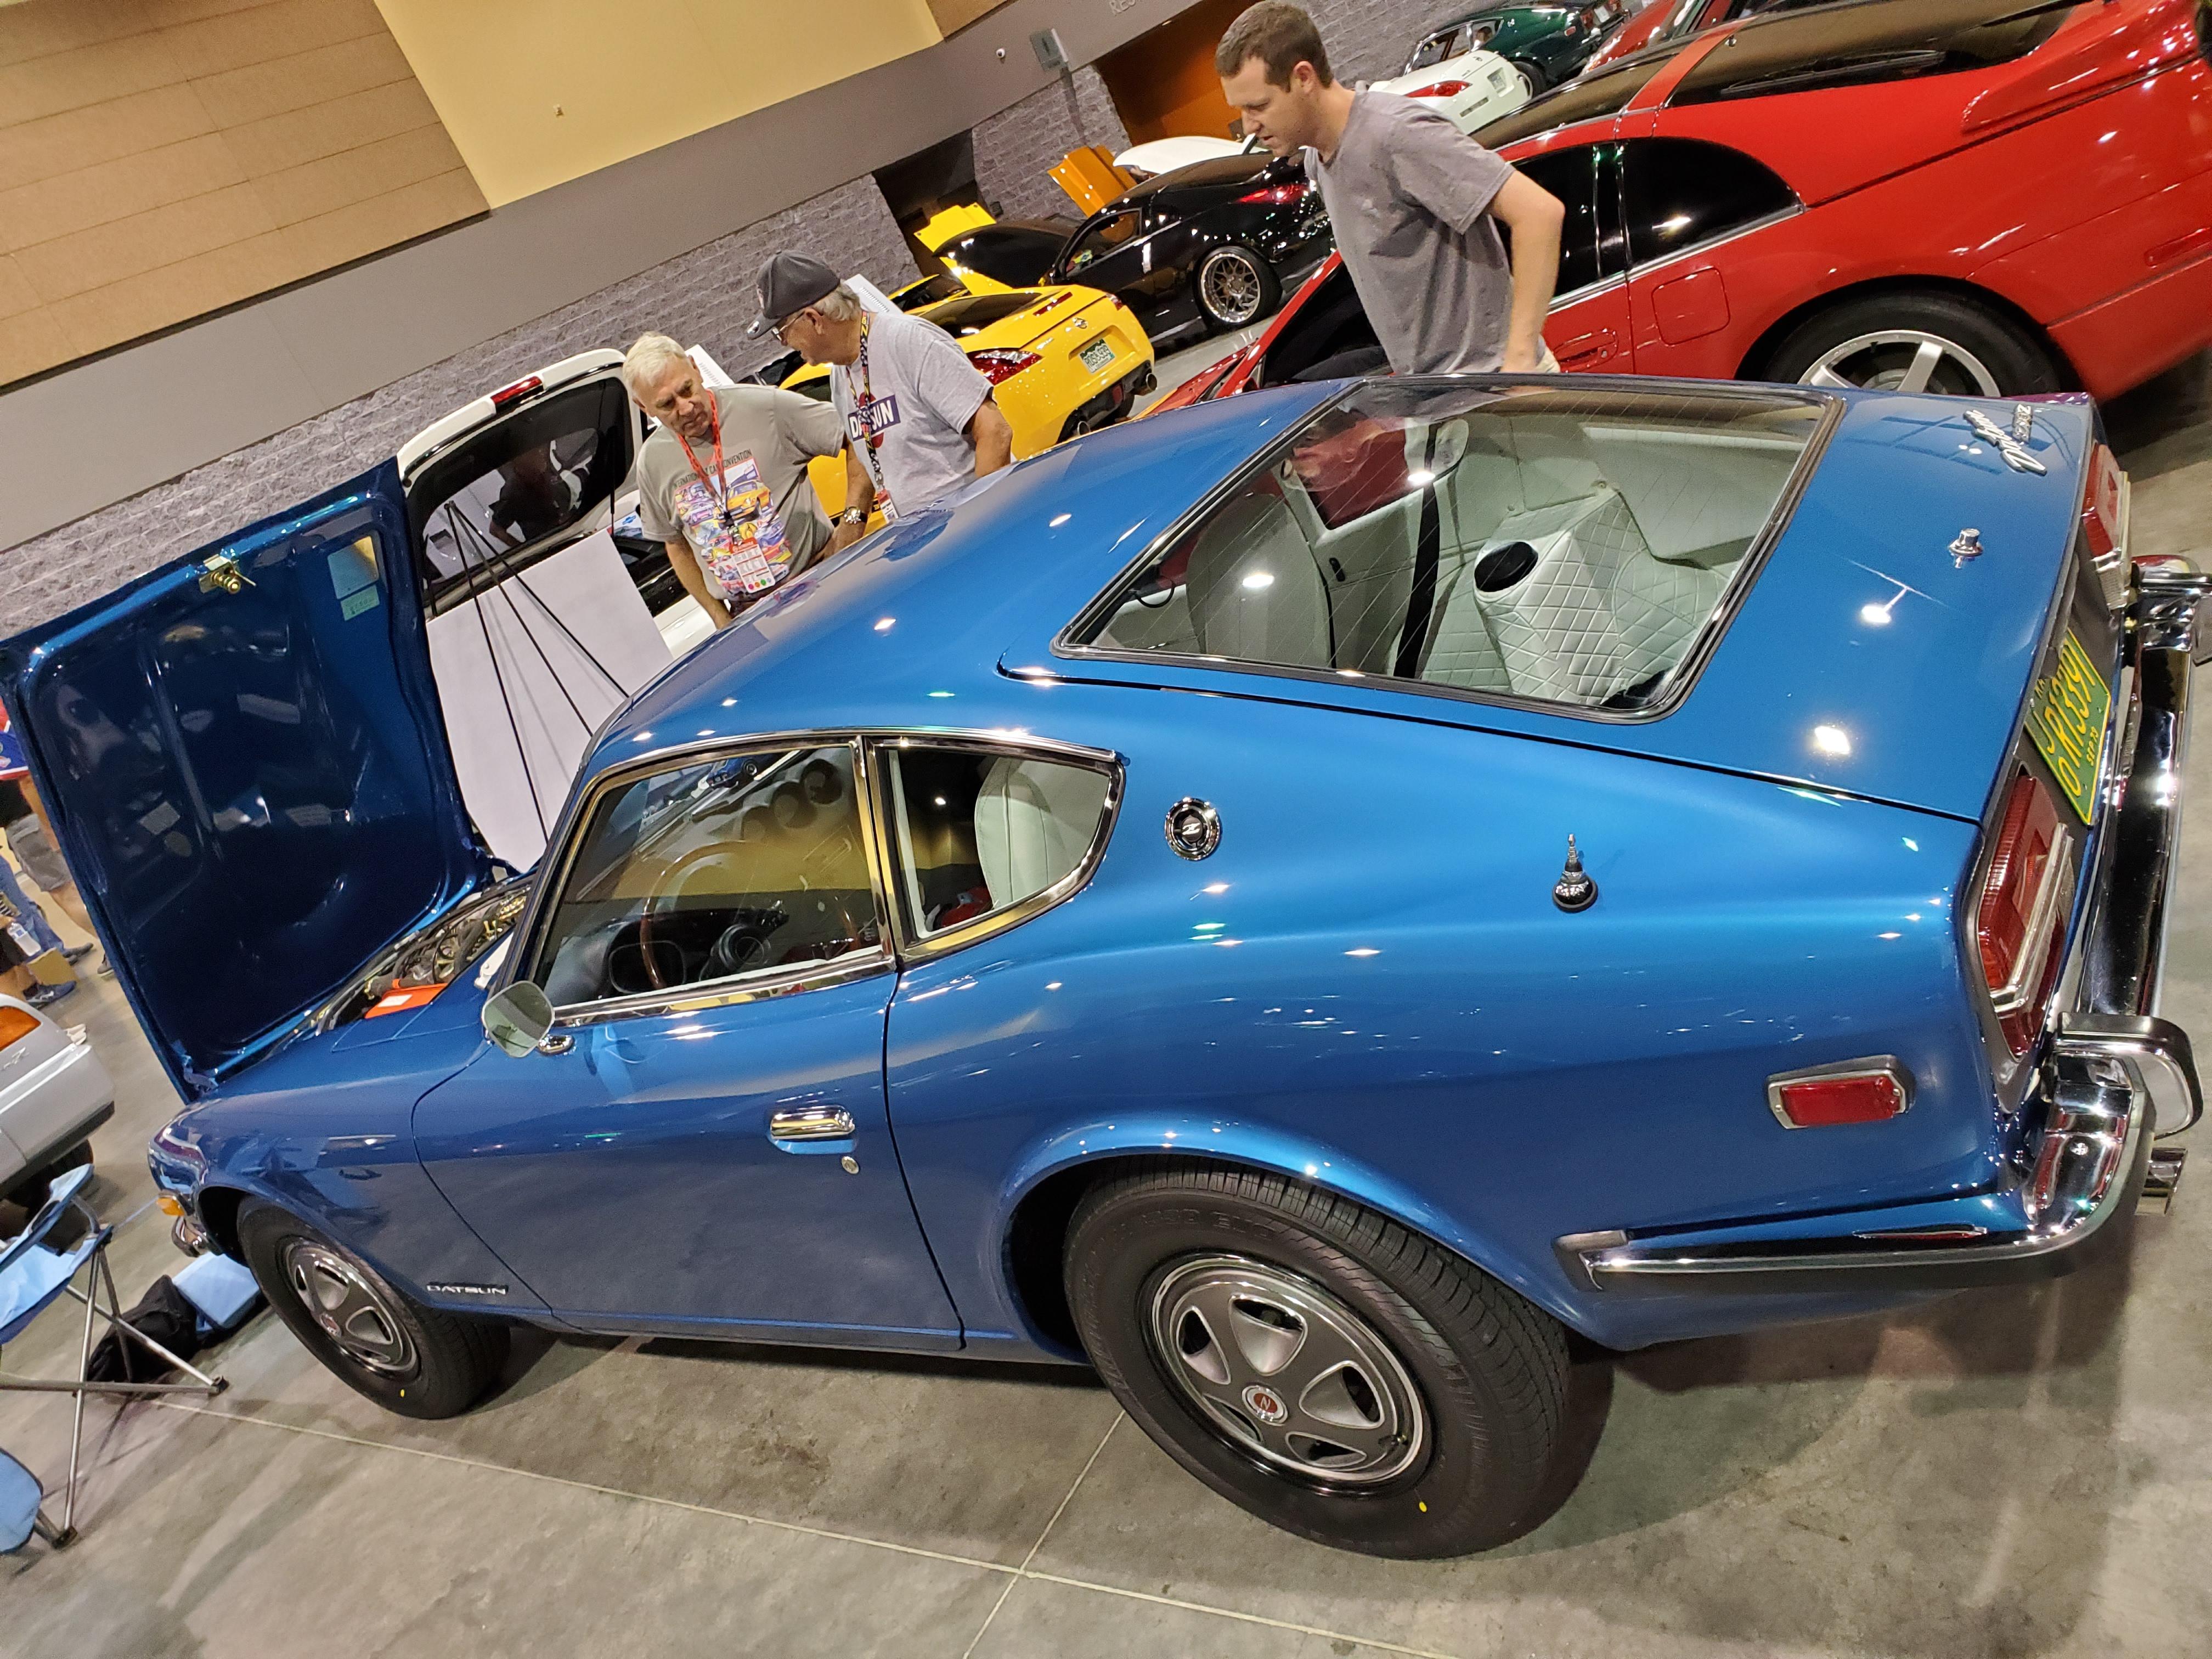
8 pointsThe flat top contingent takes the top two spots placing 1st and 2nd in the stock 240Z category. The outclassed round tops just can't compete.
 8 points
 -
 5 pointsAdded to the calendar! This time, let's plan ahead and get everyone together.5 points
 -
4 points
-
 3 pointsAvoiding the summer heat (hopefully)! Note there is no host club shown - looks like this will be on ZCCA to organize, as they did for Memphis 2015.
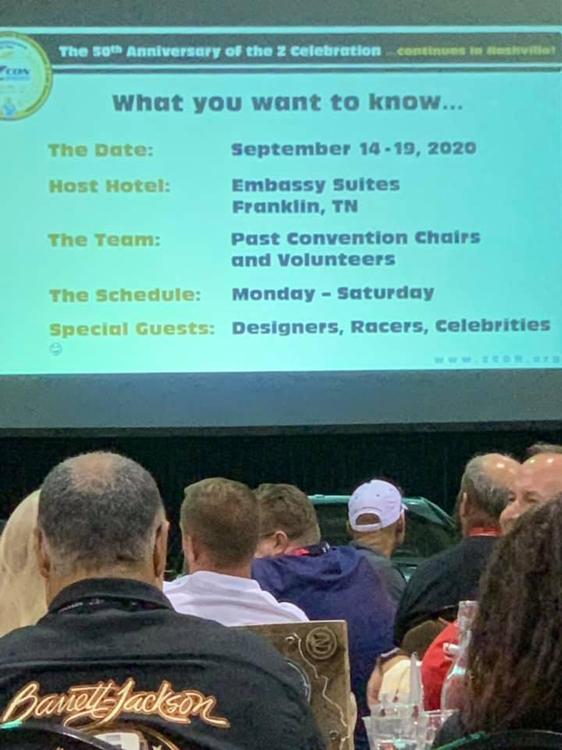 3 points
 -
 3 pointsA mear 3400 km from here. 5 days 4 hours 7 minutes travel time. Easy Peasy.3 points
 -
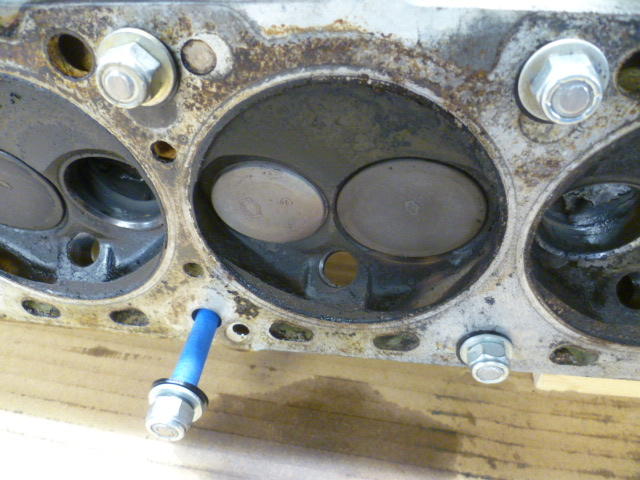
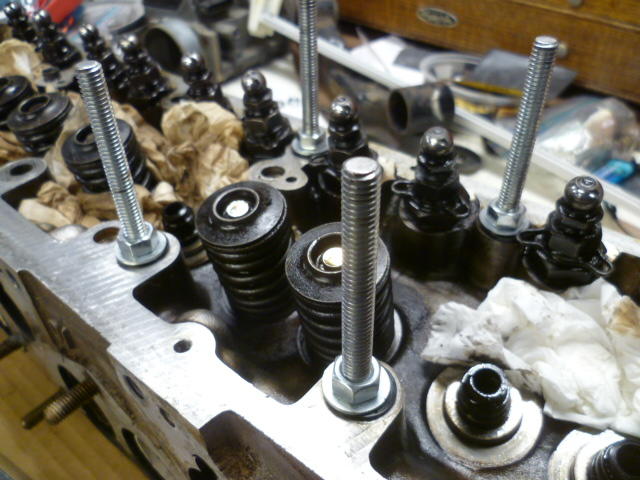
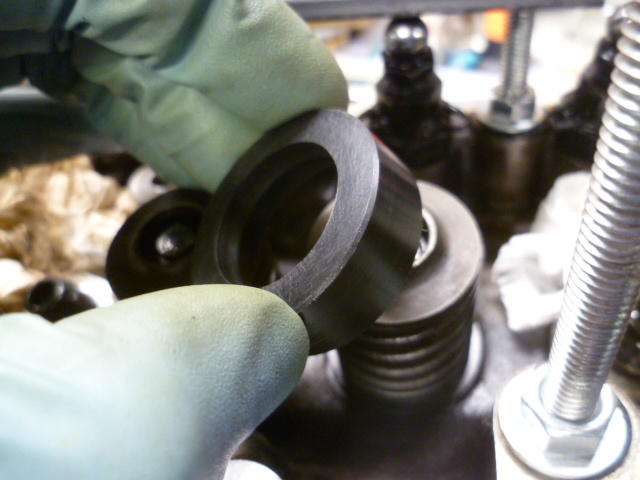
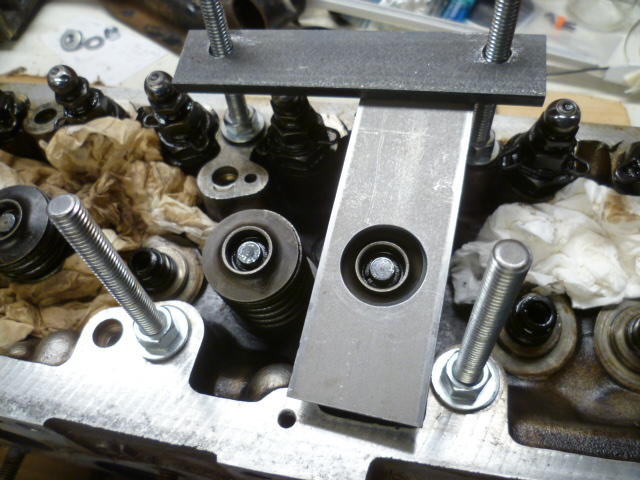
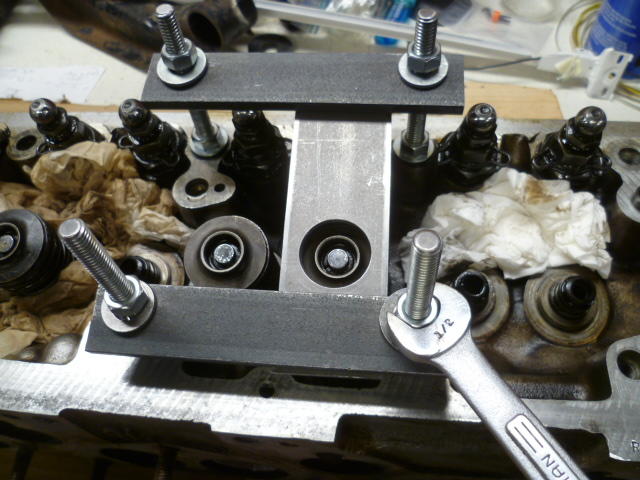
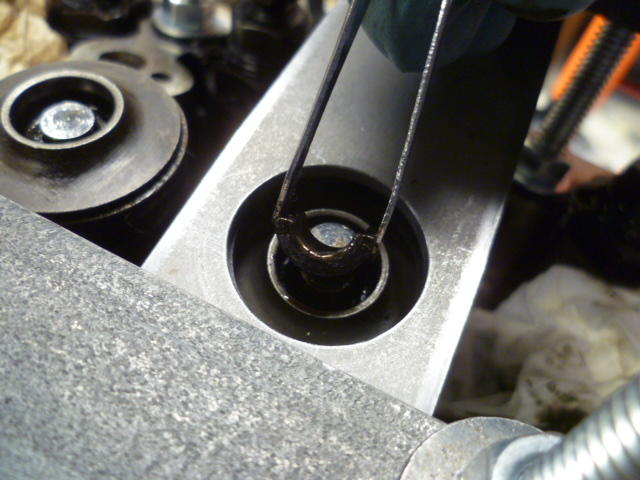
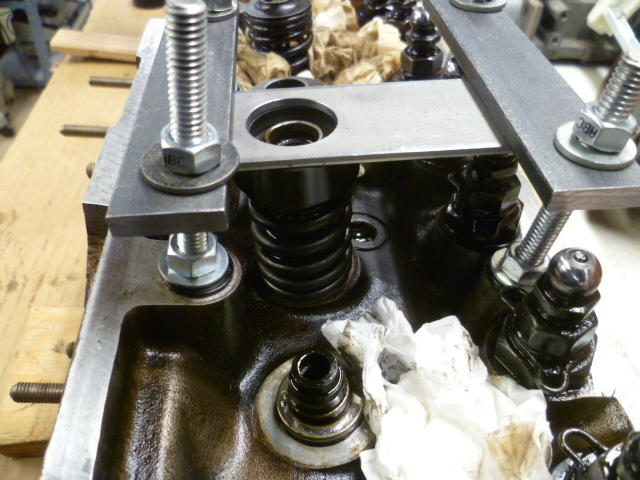
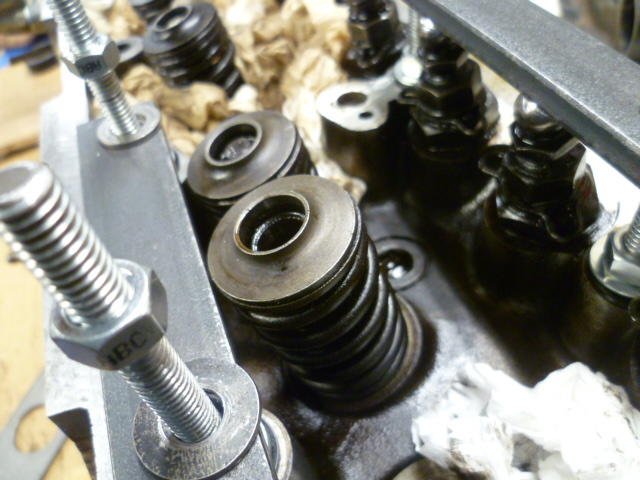
 3 pointsI had mentioned my homebrew valve removal / installation fixture before, but didn't post any pics. Not sure I'll be ridiculed for the contraption, but here's what I made. Here's all the bits and pieces. Some all--thread that I feed through the holes in the head where the head bolts go. The blue stuff is just masking tape on the threads so they don't cut into the soft aluminum of the head. And the black washers are nylon so I don't take the chance that I'll mar the surface where the head gasket seats: Feed the all-thread through the head with a nylon washer, metal washer, and nut on each side: Then I place a Delrin cup (that I made on the lathe) over the valve spring retainer: And then I use the pieces of steel plate in a configuration like this: Put on the other place and once everything is in place, I just tighten down the nuts until the spring is compressed enough to remove the retainers: I used tweezers: Once the retainers are out, just loosen up the nuts to decompress the spring and everything comes out: Yes, it's slow, but there's pretty much zero risk of springing a retainer across the shop. It's very low mental stress and I'm happy with that trade off for speed. Re-assembly will be reverse of dis-assembly.
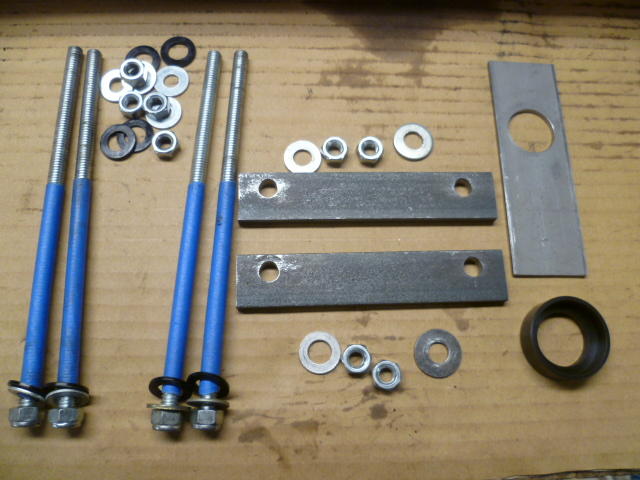

 3 points
 -
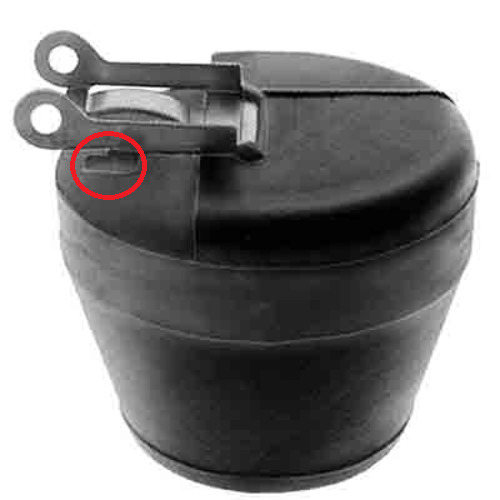
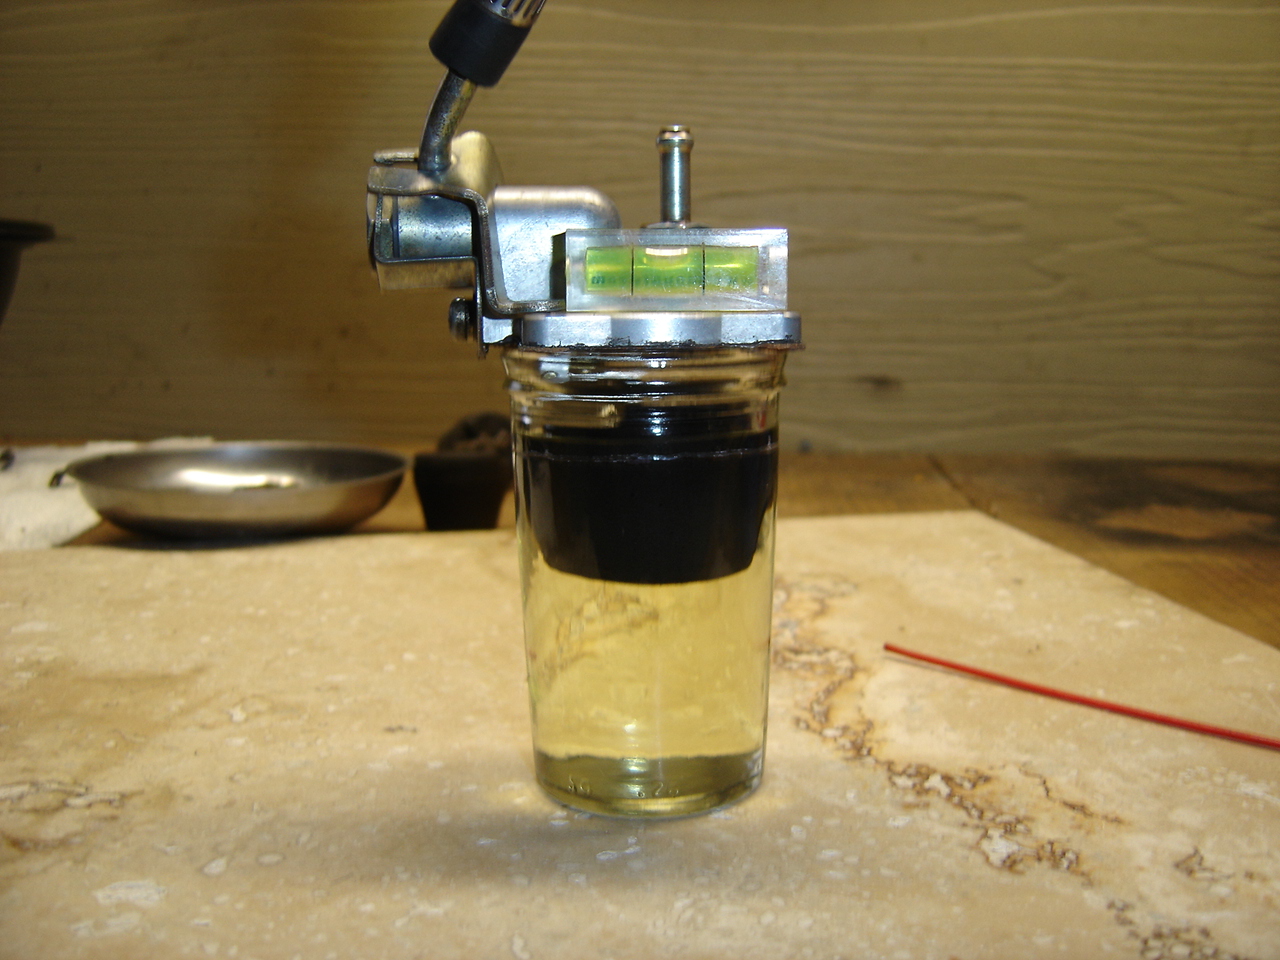
3 pointsYou cannot set the newer style needles like the dvd with Grose jets. You have to hang them upside down from your picture above, actually right side up. I fooled with mine for many months before I realized this. A lot of other guys have run into it too. The newer needle jets are so sensitive they won't hold the weight of the floats like the dvd shows. First off I would straighten the float tabs back into shape. Disregard the red circle. The tangs should look like an upside down slice of cantaloupe not like a ramp. Then hold them right side up and blow through fuel bung while pushing the float upwards. Have something that is .55" wide and hold it against the bottom of the lid. When you are at .55" you should not be able blow any air. Valve is closed. That worked for me. I got bored last winter and did this to make sure they were right. The 10mm down seems to be the easiest and most frequently used way now. I've never done it but here's @jonathanrussell method, sounds simple huh? Regarding adjusting floats....personally I think it is the most important and tedious step in getting the carbs working right. Bending the little tabs one way and then the other in an effort to get the float set just right is insanely frustrating but worth the effort. My personal preference for setting the floats is to remove the bowls, turn down the mixture screws 10 turns, and set the fuel level so that the convex meniscus fuel bubble sits perfectly even with the top of the nozzle. Once you get this accomplished, in my experience, you are able to freely adjust the mixture down to 2.5 turns and then detail adjust using Color Tune or similar. This technique has been documented multiple times on this site and others, fyi.

 3 points
 -
 3 pointsI might know a thing or two about the electrical system if you need help sometime...3 points
 -
3 pointsAn update to the project... I've got all the valves sorted out and cleaned up waiting to be reinstalled. I cleaned up all the burrs and distorted metal in the holes on the head and cam towers where the alignment dowel rings go. This allowed me to test fit the cam towers and my "new" cam. So far so good!!! Spins easy with two fingers! And that was even without a whole bunch of fiddling with the towers and the bolts. @jonathanrussell This. Just. Might. Work!!!! Some of the alignment rings for the towers were bent and mangled beyond use, so I need to get some of them on order. That and a head gasket.3 points
-
3 points
-
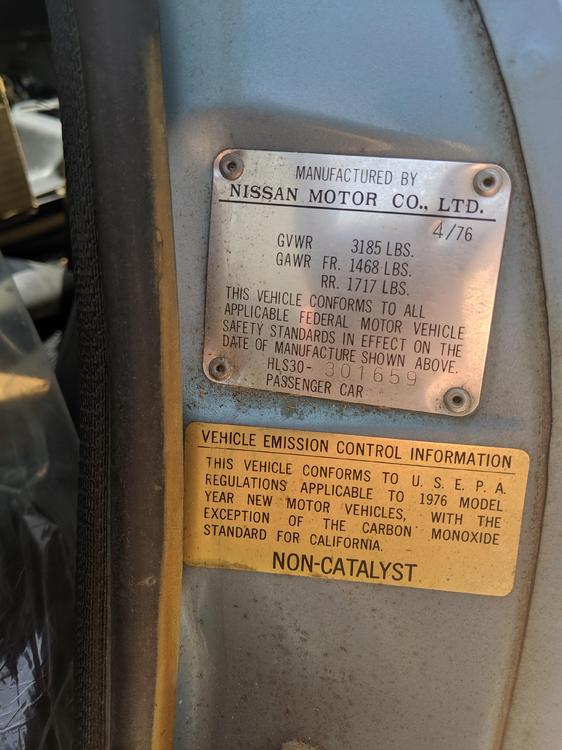
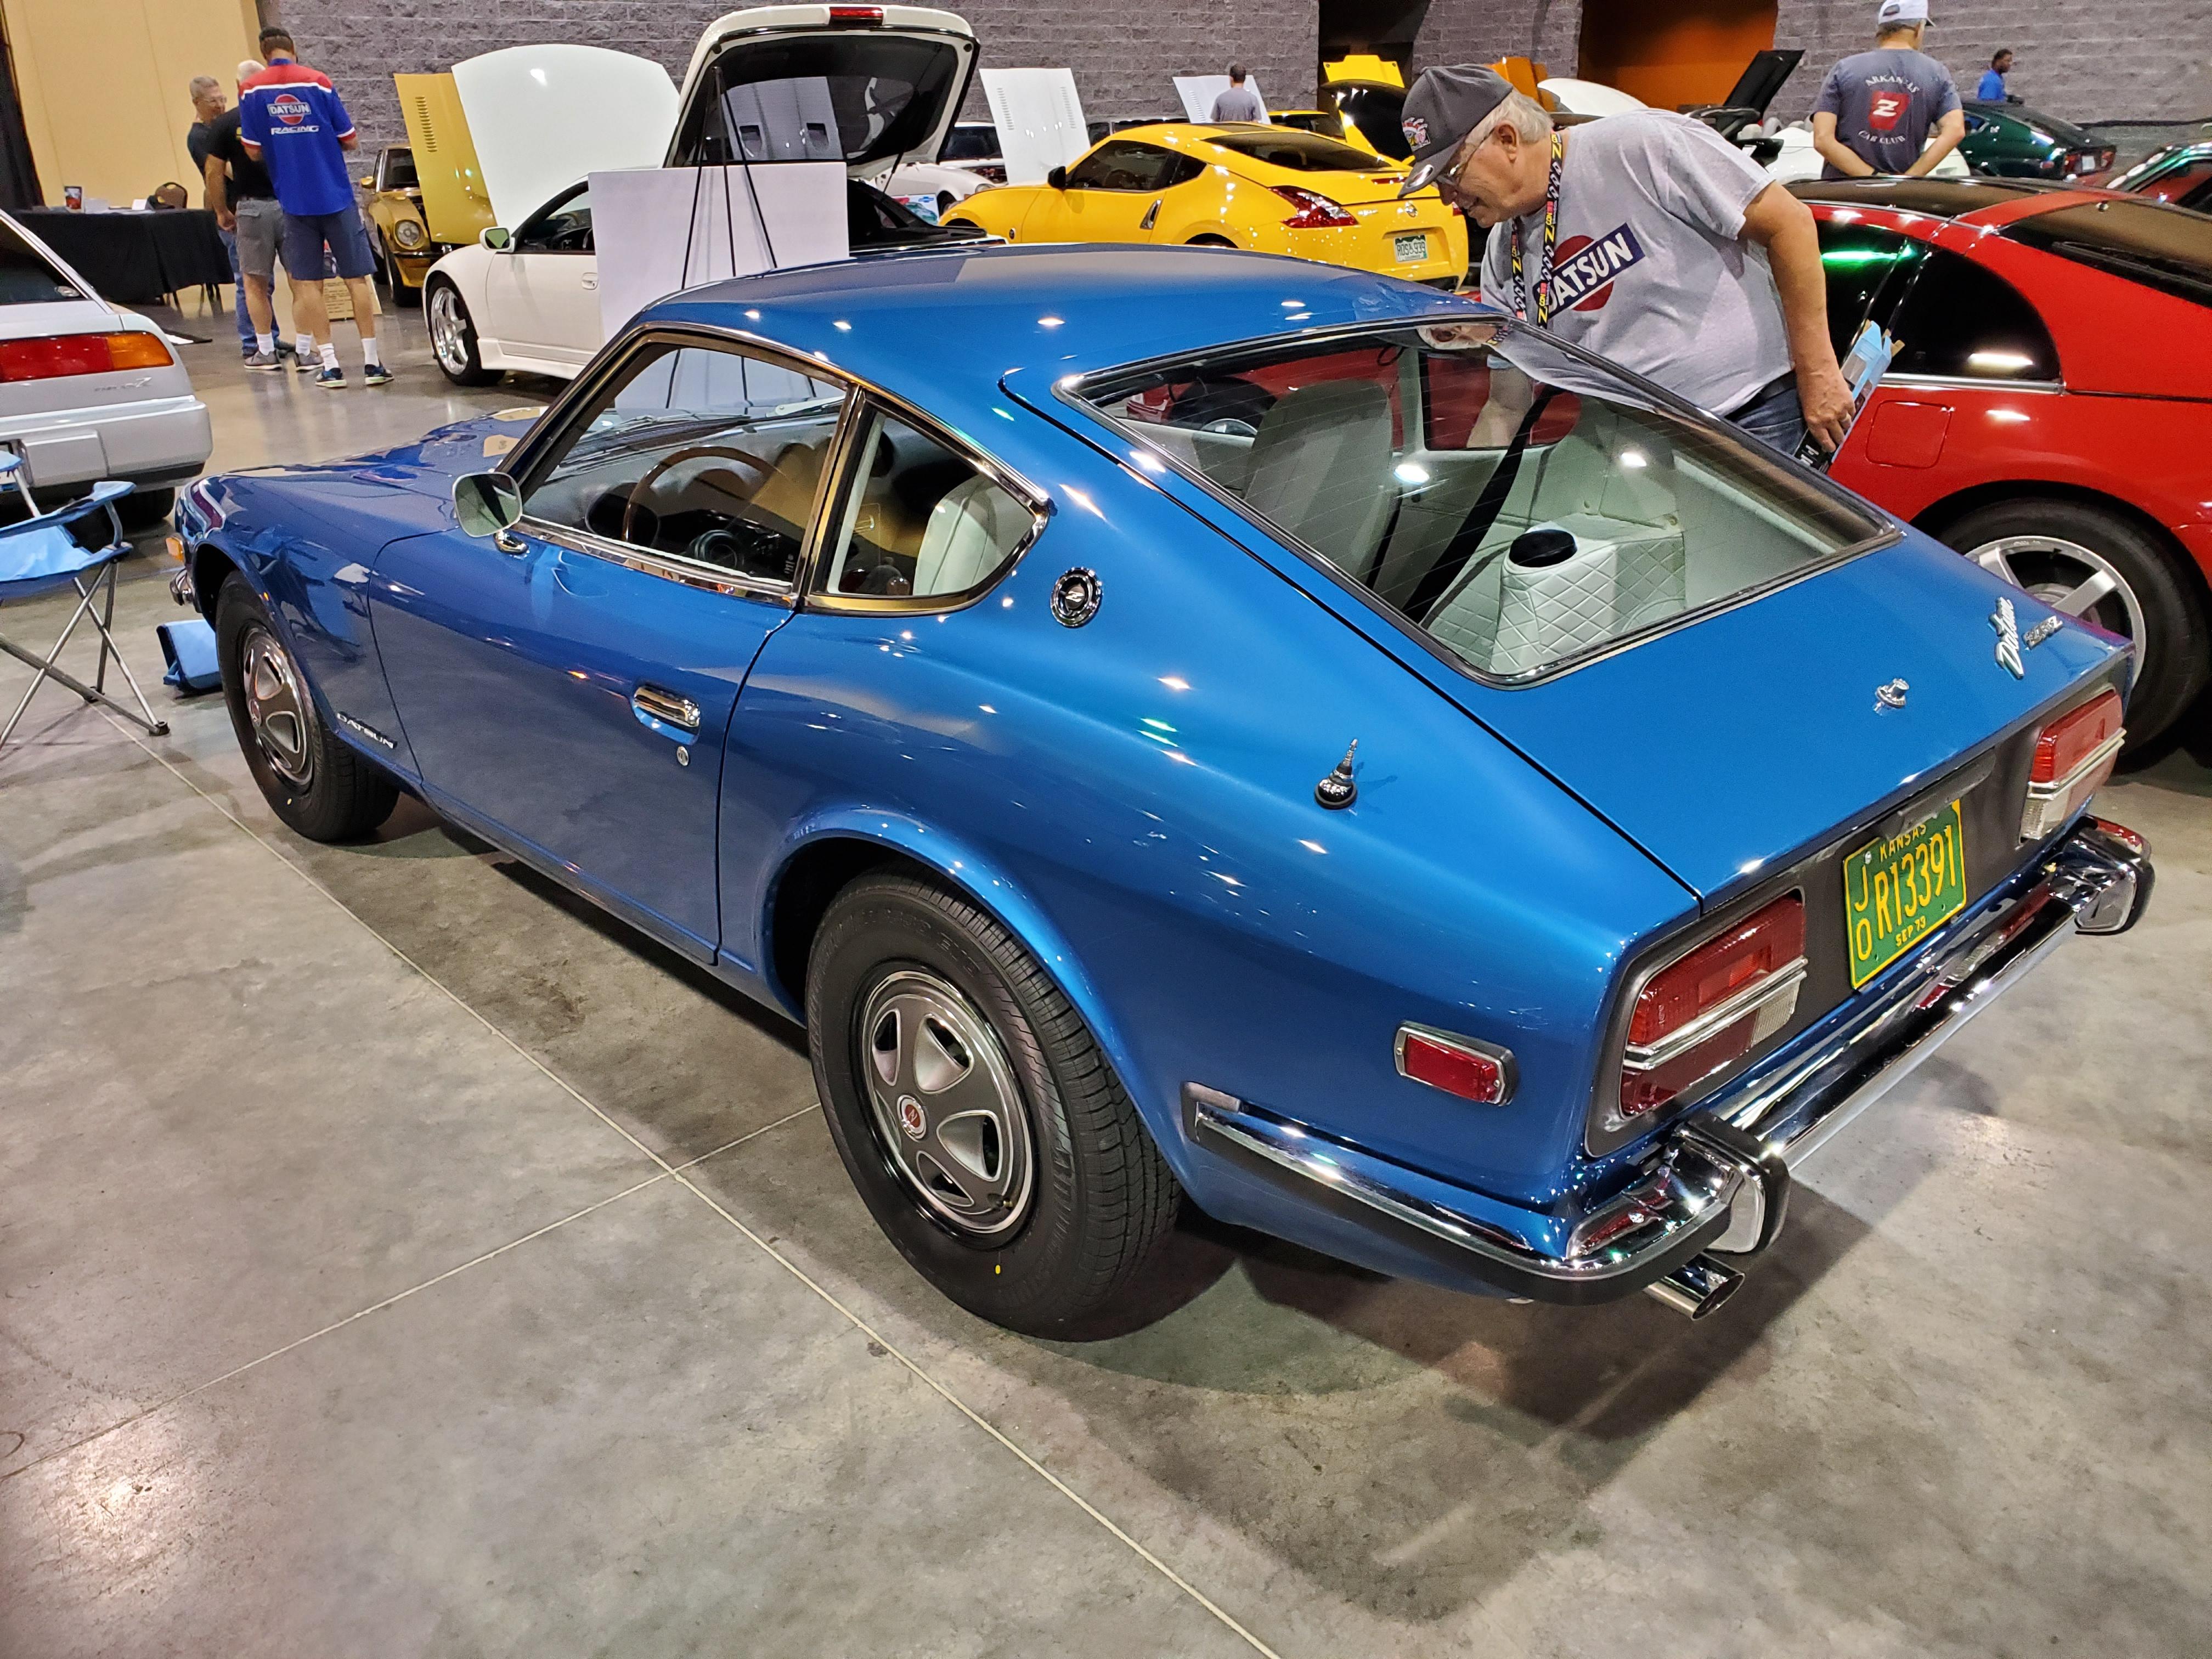
3 pointsBeautiful car. Museum piece. Sell it in a couple of years after the 240z priices plateau. Until then get it as original as possible and enter in a Zcon event to get Gold Medallion!.3 points
-
3 points
-
2 points13 months to sort out the new system, 1 month to put all back to OE if you don't.2 points
-
 I agree whole heartedly......in the 70’s, these cars were driven off the show room floor and immediately began the transition to being personalized to become a car to be driven. Stock restored Z’s are cool to look at, but if you have one beside it with some goodies to bring it up to snuff, you are going to climb in the modified Z every time. In the 70’s, you noticed the lowered, spoilered, wider wheels and tuned exhaust Z’s with a lot more respect than the stock cars. John Morton and Pete Brock and Bob Sharp were responsible......these cars are easy to modify and a blast to drive hard.......they are all cool cars, just some cooler than others!2 points
 -
 A few point mr HS30-H 1) Please never sell the 432r 'recreation' 2) Can I go on the list, even if its just to say "I can't afford it' 3)That 'vz' car is in my top 5 all time fav's!!2 points
 -
 2 pointsOne thing to consider before assembly is the condition of the original bolts and screws. Some will be great, others will be poor. These aren't zinc plated but I found these to be useful to have on hand for replacements when needed. Different lengths of course. https://www.ebay.com/sch/sis.html?_nkw=M6+M8+M10+304+Stainless+Phillips+Hex+Bolts+SEMS+Screws+Group+Flat+Sping+Washer&_id=142002895203&&_trksid=p2057872.m2749.l462512 points
 -
 Hi Alan , I am now dreaming about to own a VZ , then install a S20 . I am wondering how I can draw attention from people in the US . ( not in Japan . People always give higher Regards to RHD Z s ) . When I get old soon , I will have to let my cars go to someone. Finally I will have one car , and A VZ with a S20 would be a single fireworks ball for my graduation of Z life ? Chris , I have a question. A VZ is never eligible to attend the ZCCA judged car show , is it true ? If it is true , Where would I set off a fireworks? On BAT ? I see recent results on BAT is telling that provenance and / or clearness bring a huge demand of enthusiasts. Not so important about originals details. So If I put a S20 on a VZ doesn’t hurt the value of the car , does it ? ( of course all the components which came with the car are included for the buyer ) . I am just drea?ming about . I have a particular VZ car in my mind. Kats
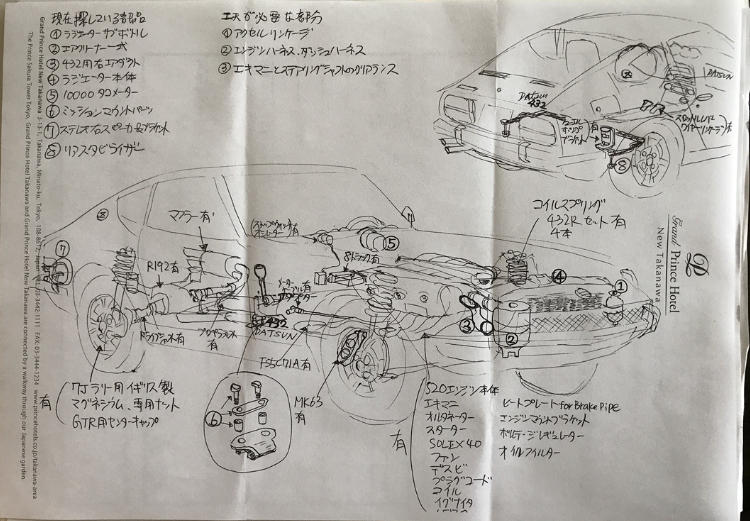 2 points
 -
2 pointsmy FIL had a 300ZX AE that had been parked since 1992. About 3 years ago I pulled it out and got it running. Seeing it, my friend said "I have a neighbor that has a Z with no miles but he's not interested in selling". Last week my friend was talking to his neighbor who said he was ready to sell his car. The rest is history2 points
-
2 pointsensys, I totally appreciate your critical take on this car. This car should not exist. I almost don't believe it and I can see the car in person!2 points
-
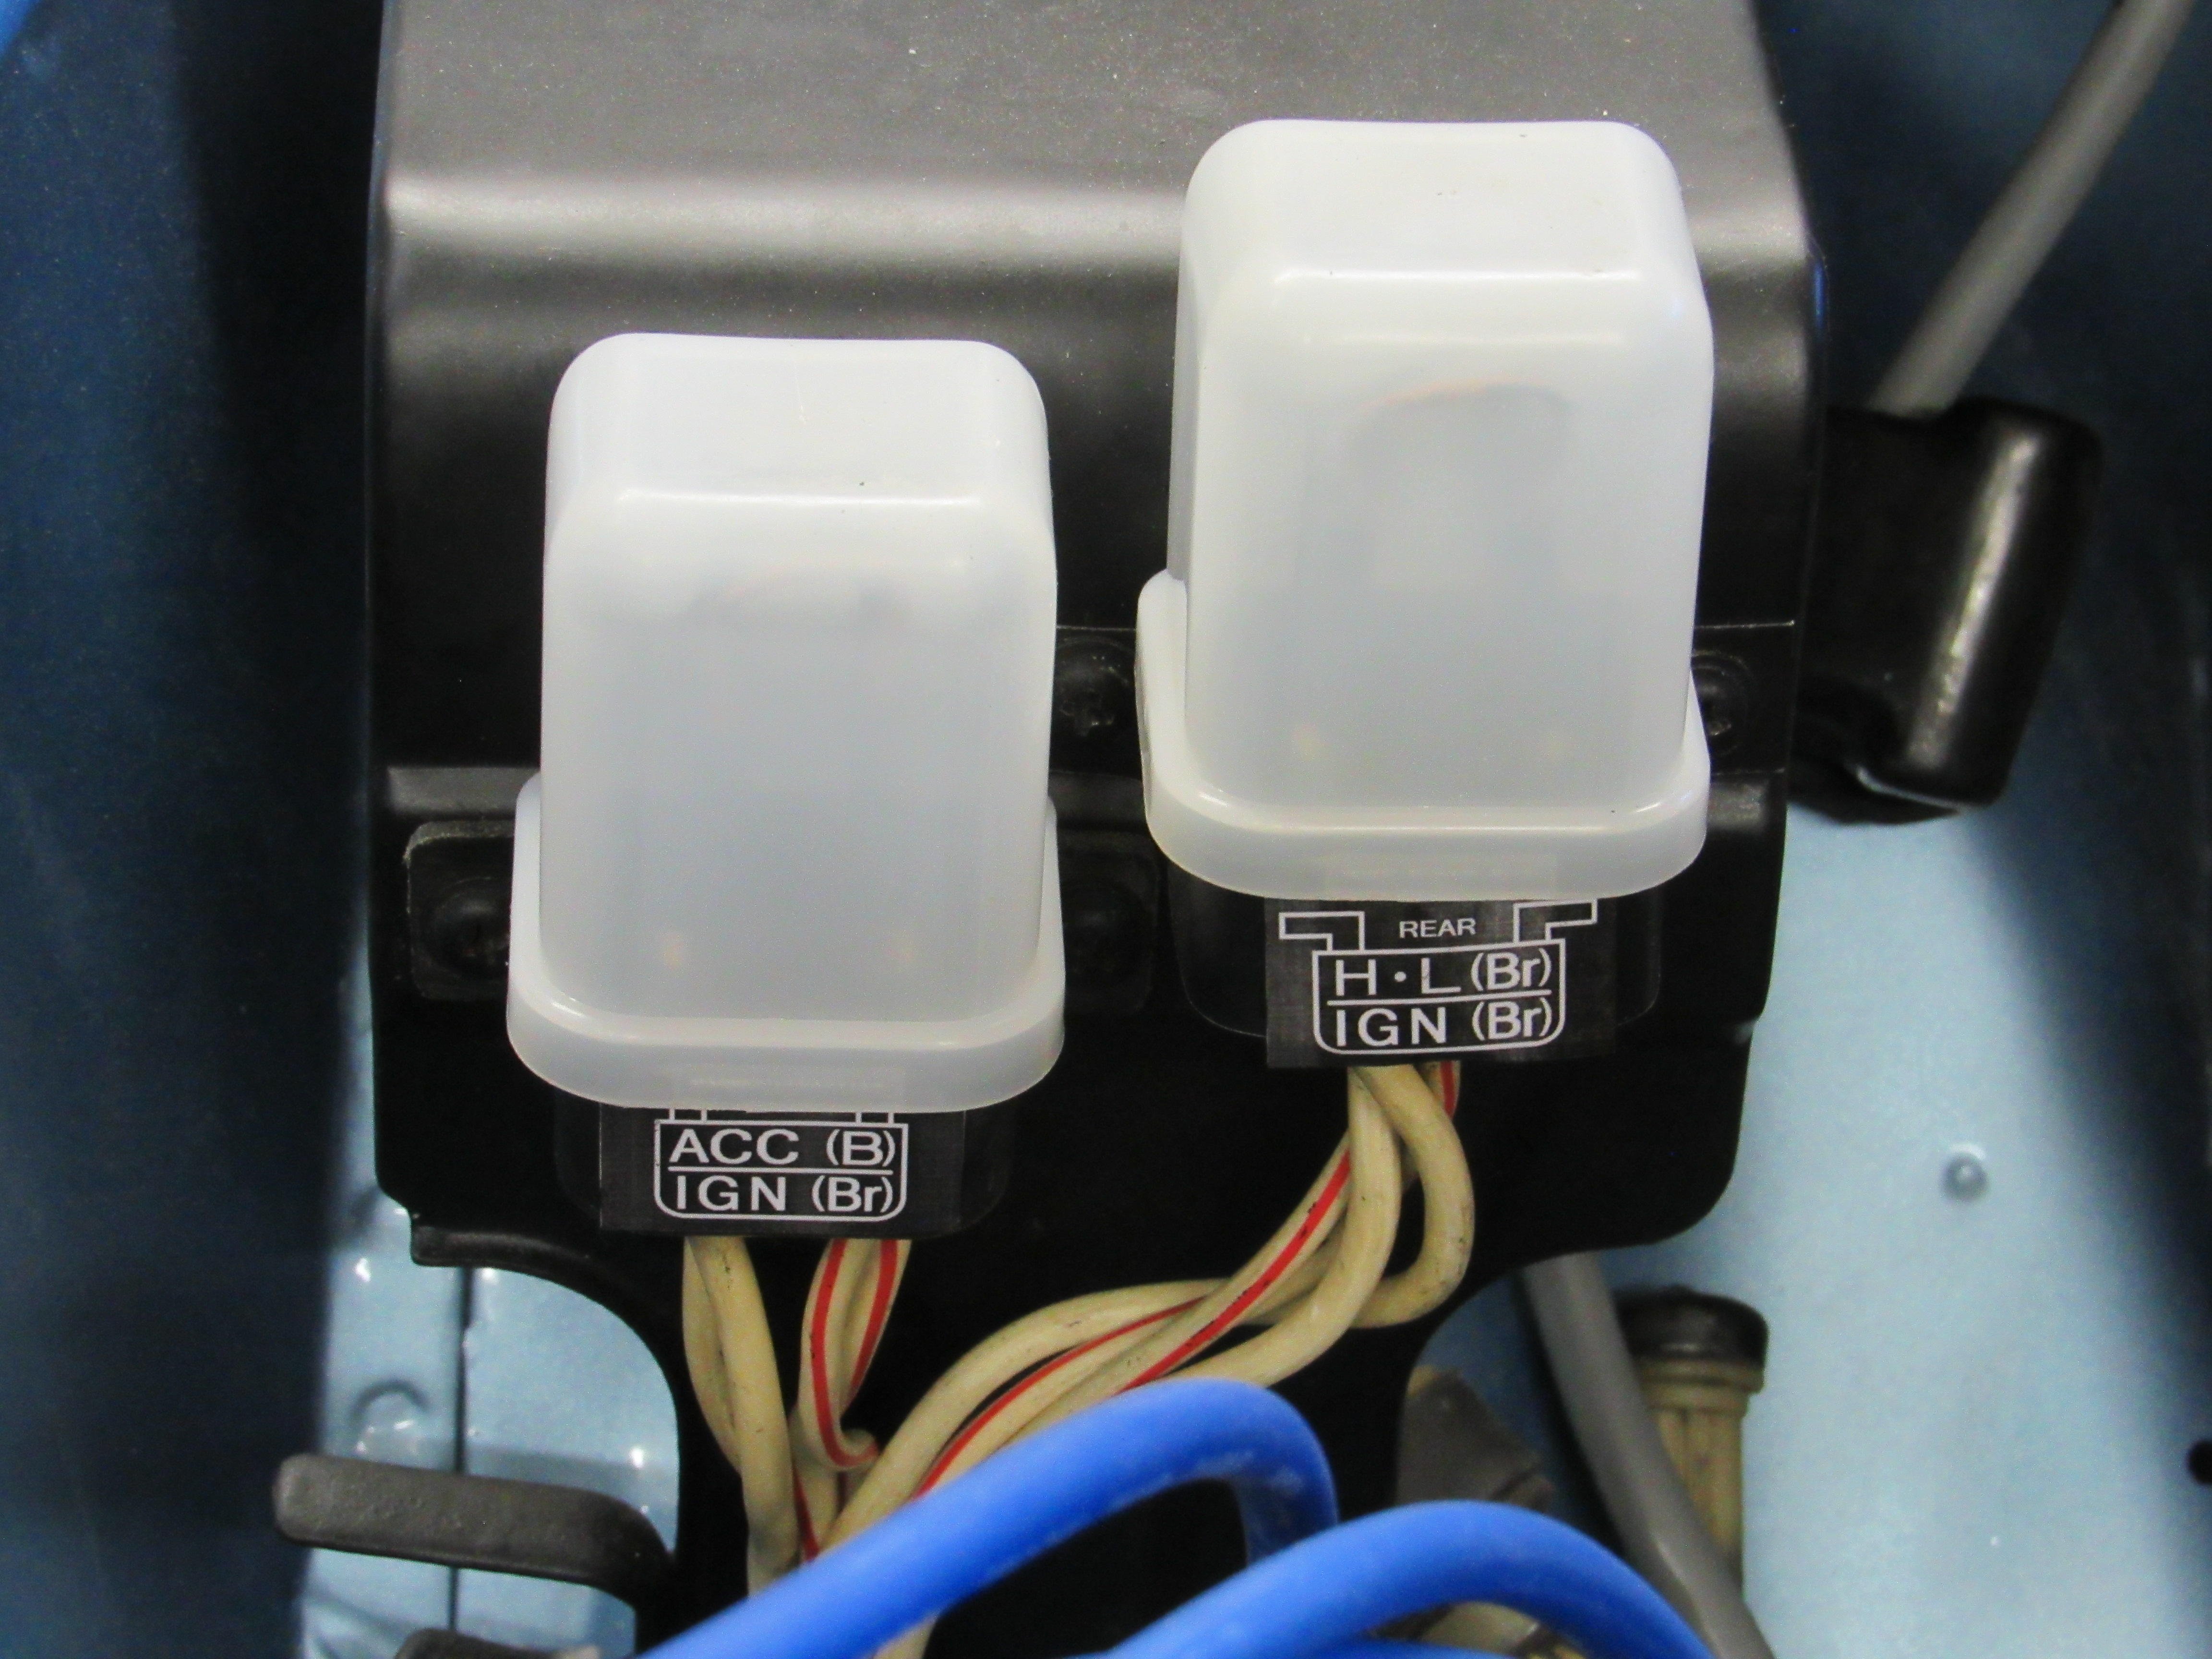
 2 pointsI got a notification from @gwri8 for this post. I'm in Cleveland but I don't have my car mobile right now. I have a lot of things off of it doing a bunch of installs. I have another rough stock '73 sitting covered up if you want to look at it and compare anything. There will be a few differences from '72 to '73. As suggested load the FSM and there's also great wiring diagrams that can be downloaded. I also bought a laminated full color wiring diagram a few years ago and I think it's 11x17. And it was priced decently. Just message me if you need and if I can help I'll try my best. Thanks for tagging me Greg. Good to hear from you. I'm still around slowly working on two car projects and moving soooo slow it's pathetic, lol.2 points
 -
2 points
-
 2 pointsHahaha Well it won't be fun if I install the dash and then forget a connector or 3 and have to remove it... That's what I'm trying to avoid! My dad will keep it in NC once it's done. I'm just providing the extra time and hands...2 points
 -
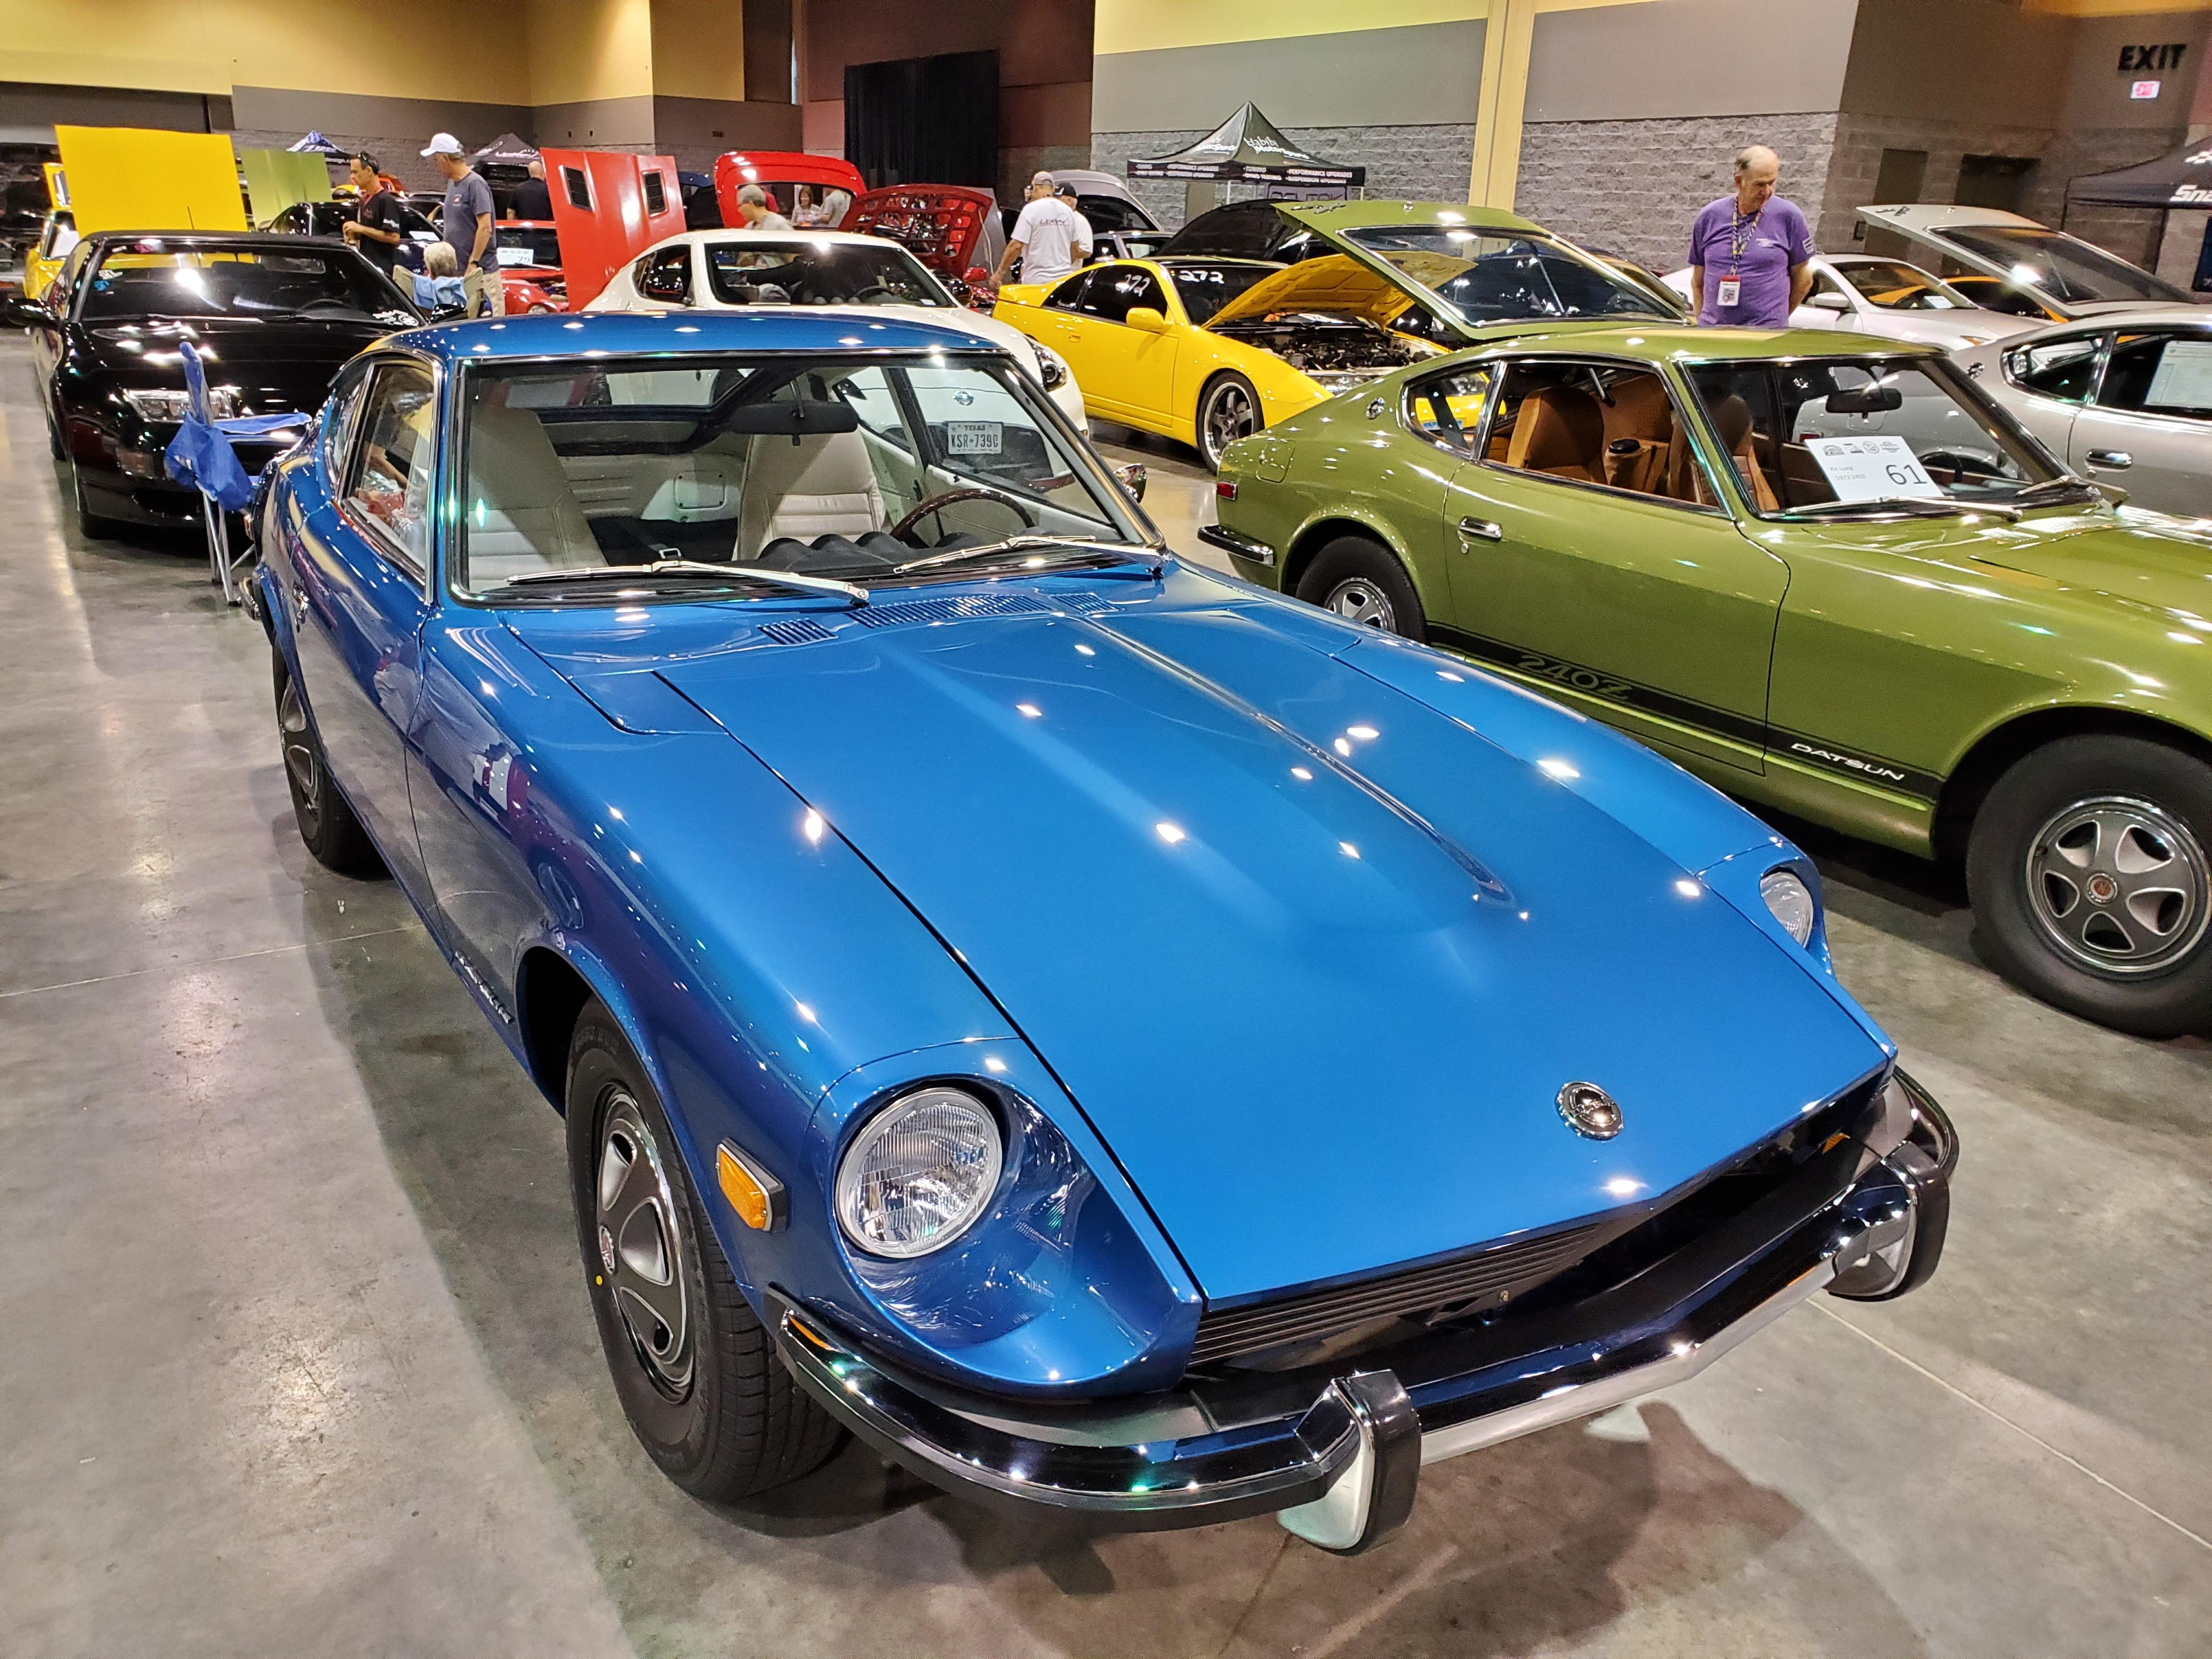
 2 pointsI posted the pic of my #305 code roof to illustrate how easily this colour can change it's appearance depending on the available light level when the pic was taken, from my experience the colour of the OP's exterior and ash tray cup could easily match. Now that the OP has posted a pic of the trans tunnel we can all see that they do match. To me it shows no such thing, what I see is virtually no miles but 43 years sitting. @brunodoggy, I don't know what you paid but you got a great deal regardless, take lots of pics.2 points
 -
 2 points
 -
 2 points2 points
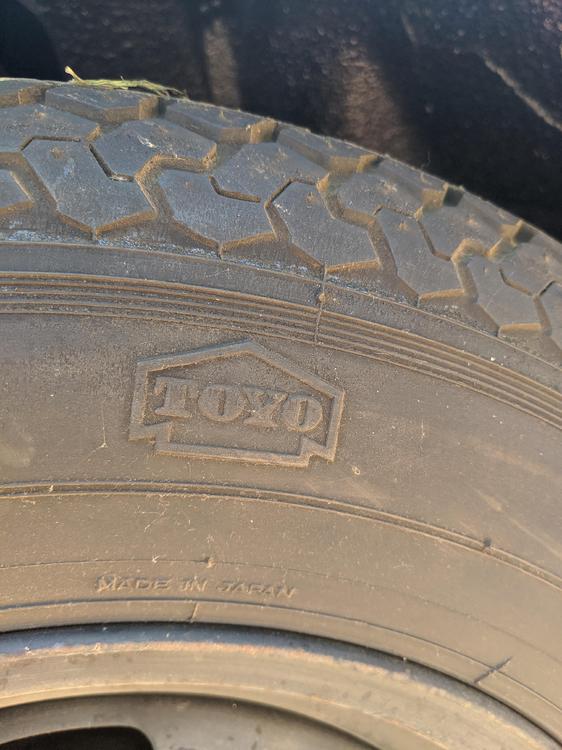
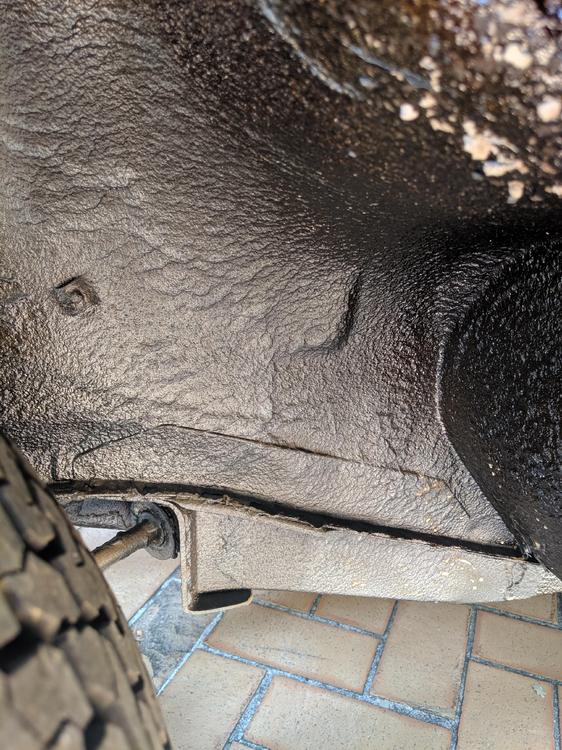
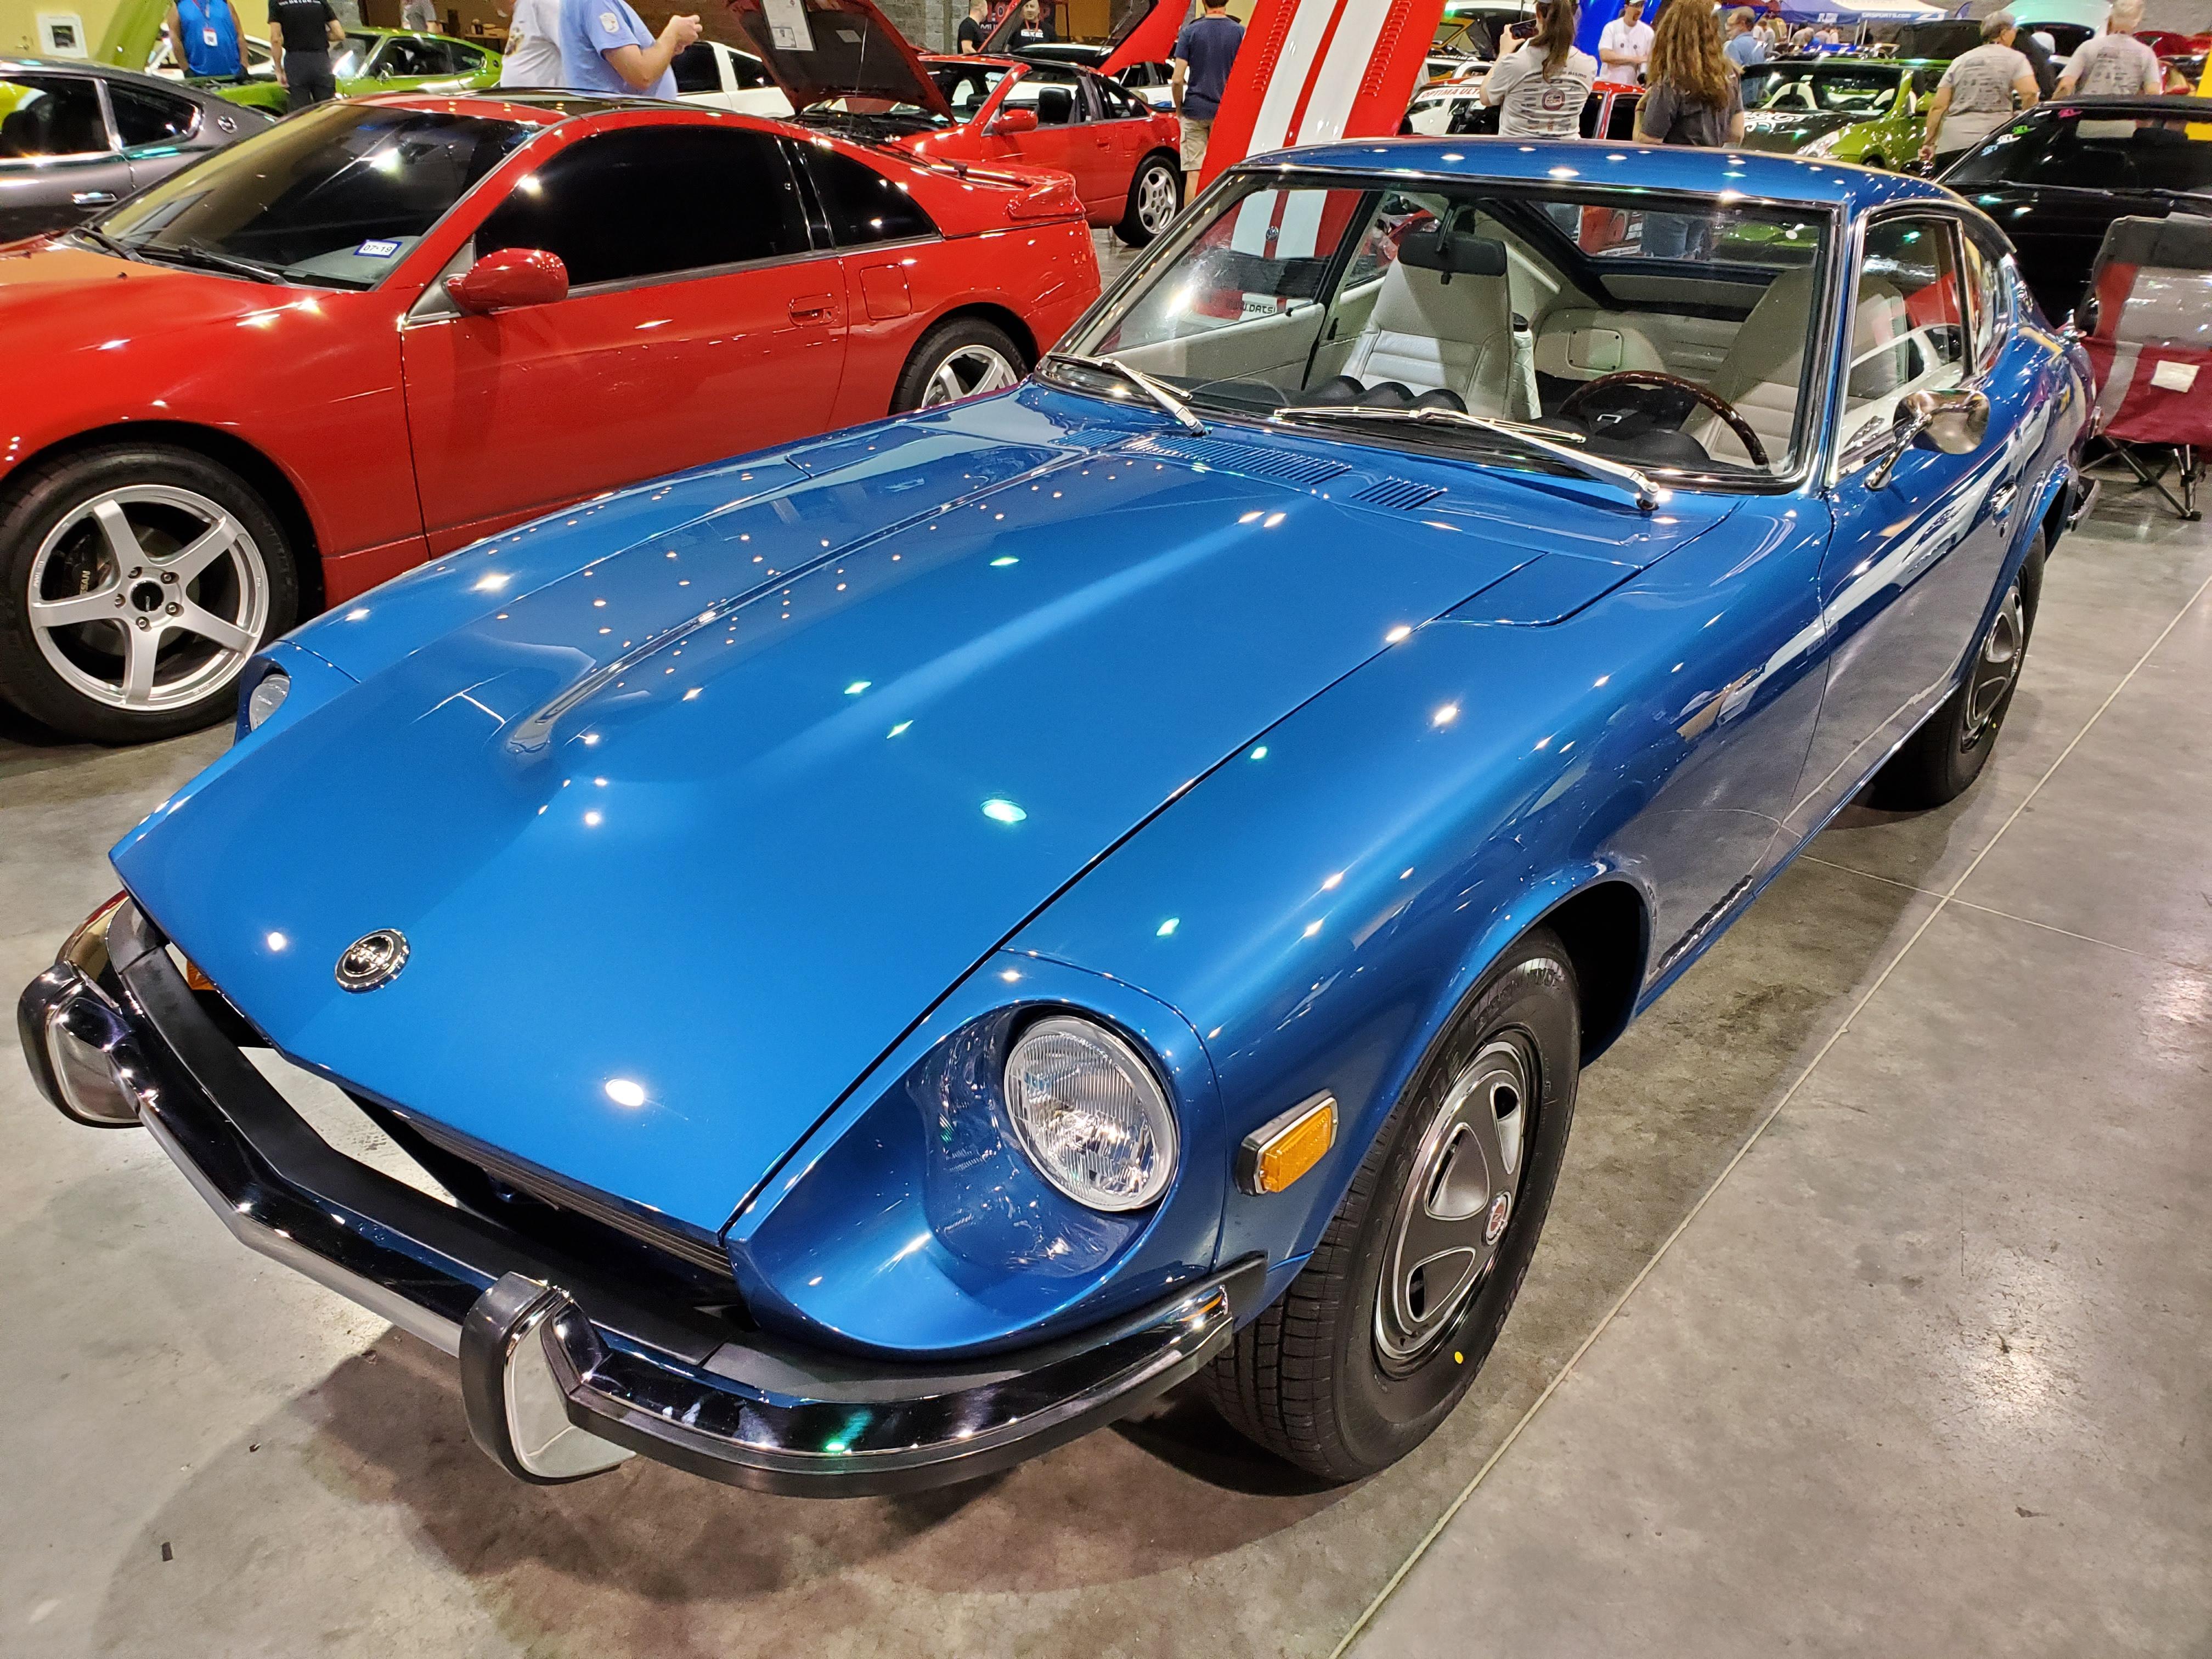
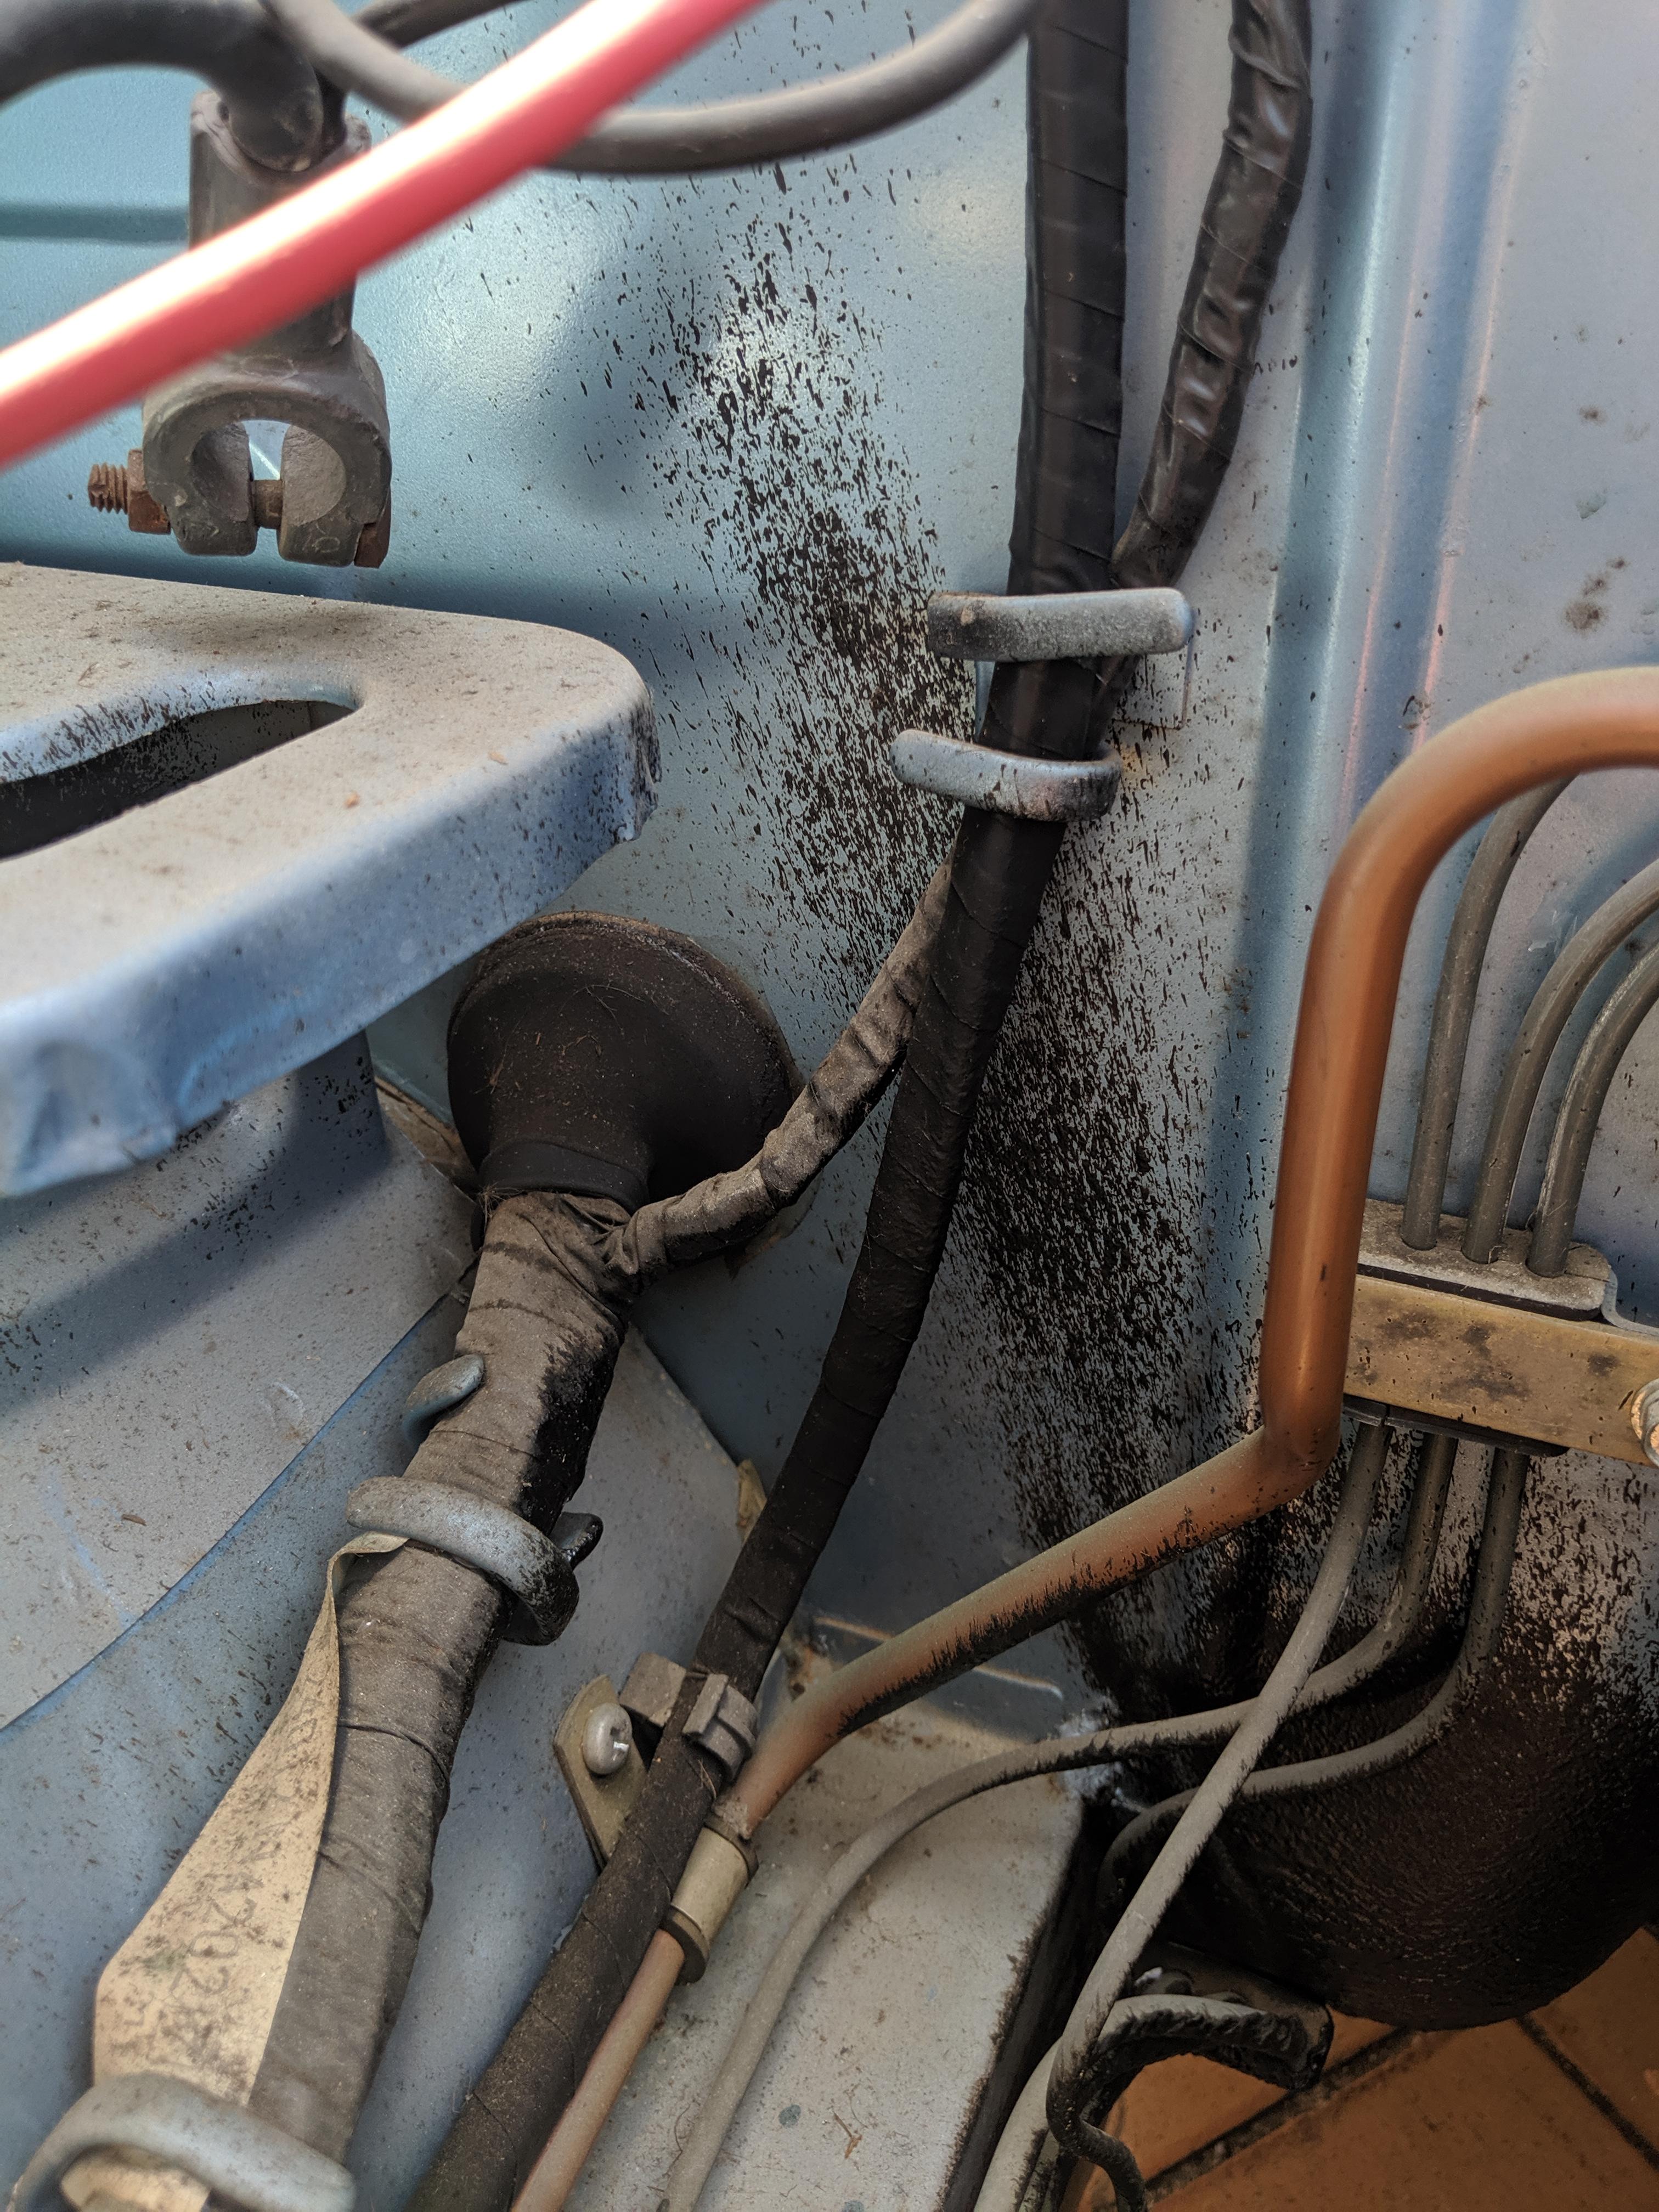
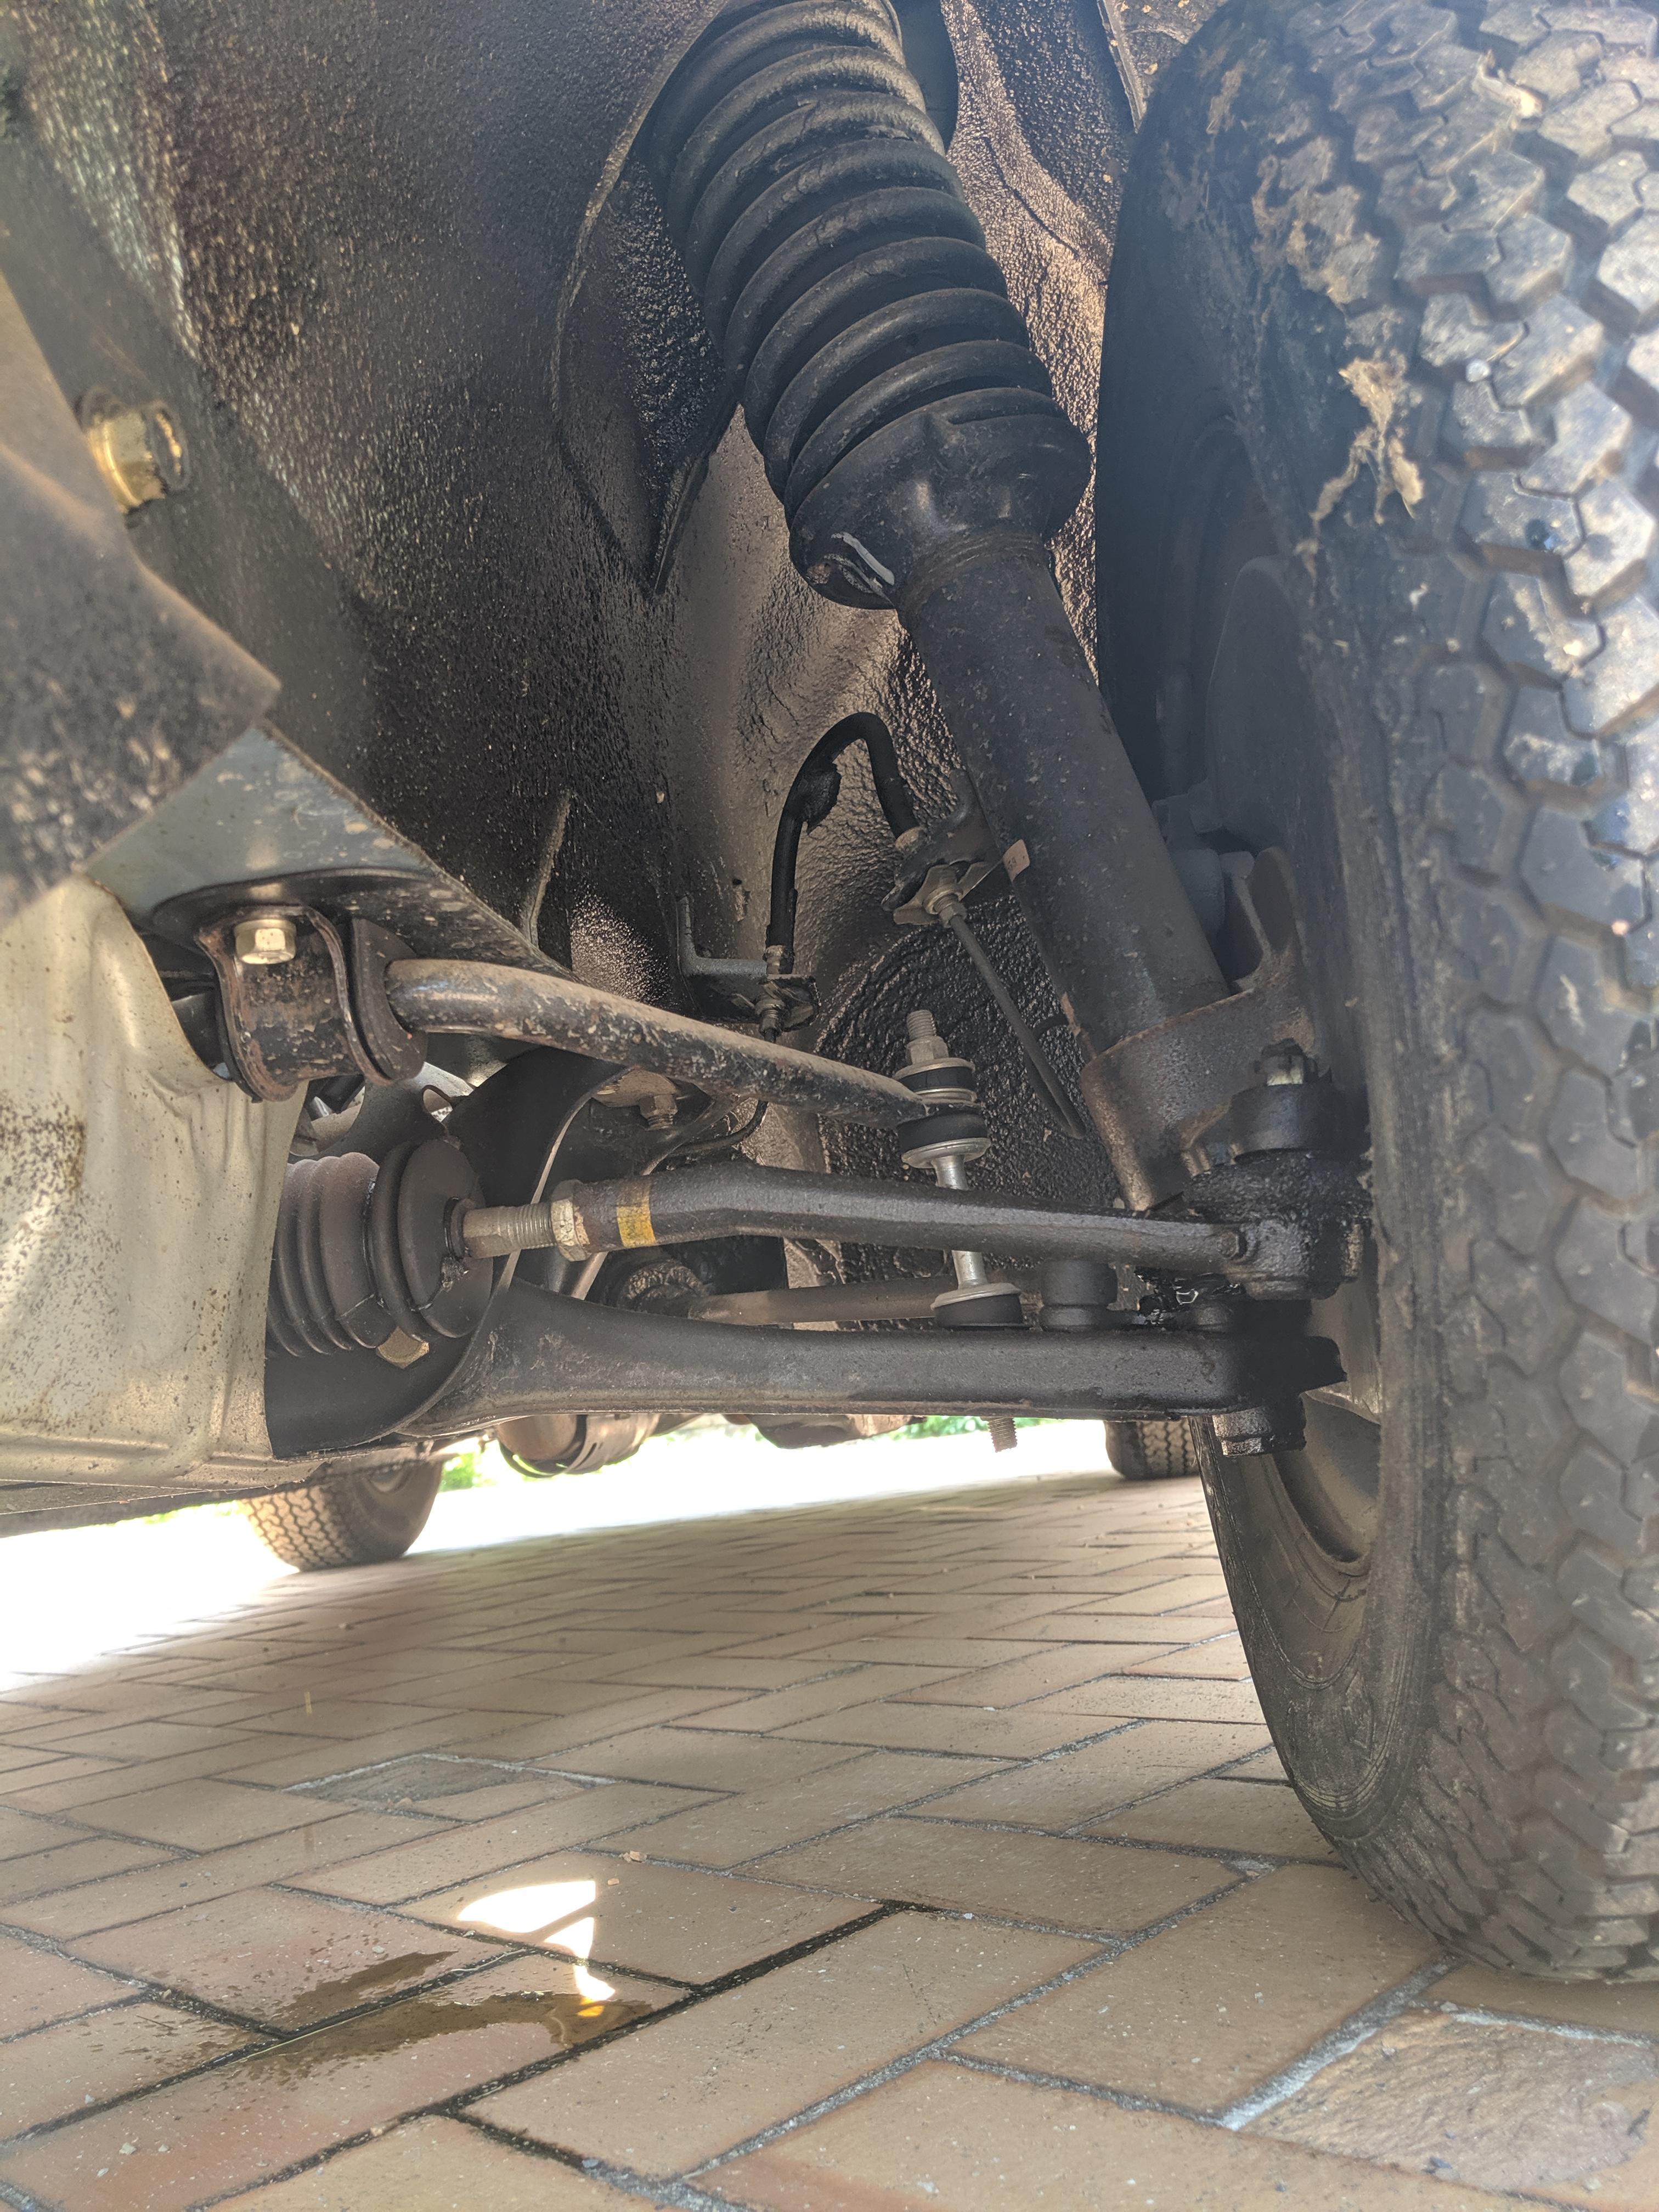
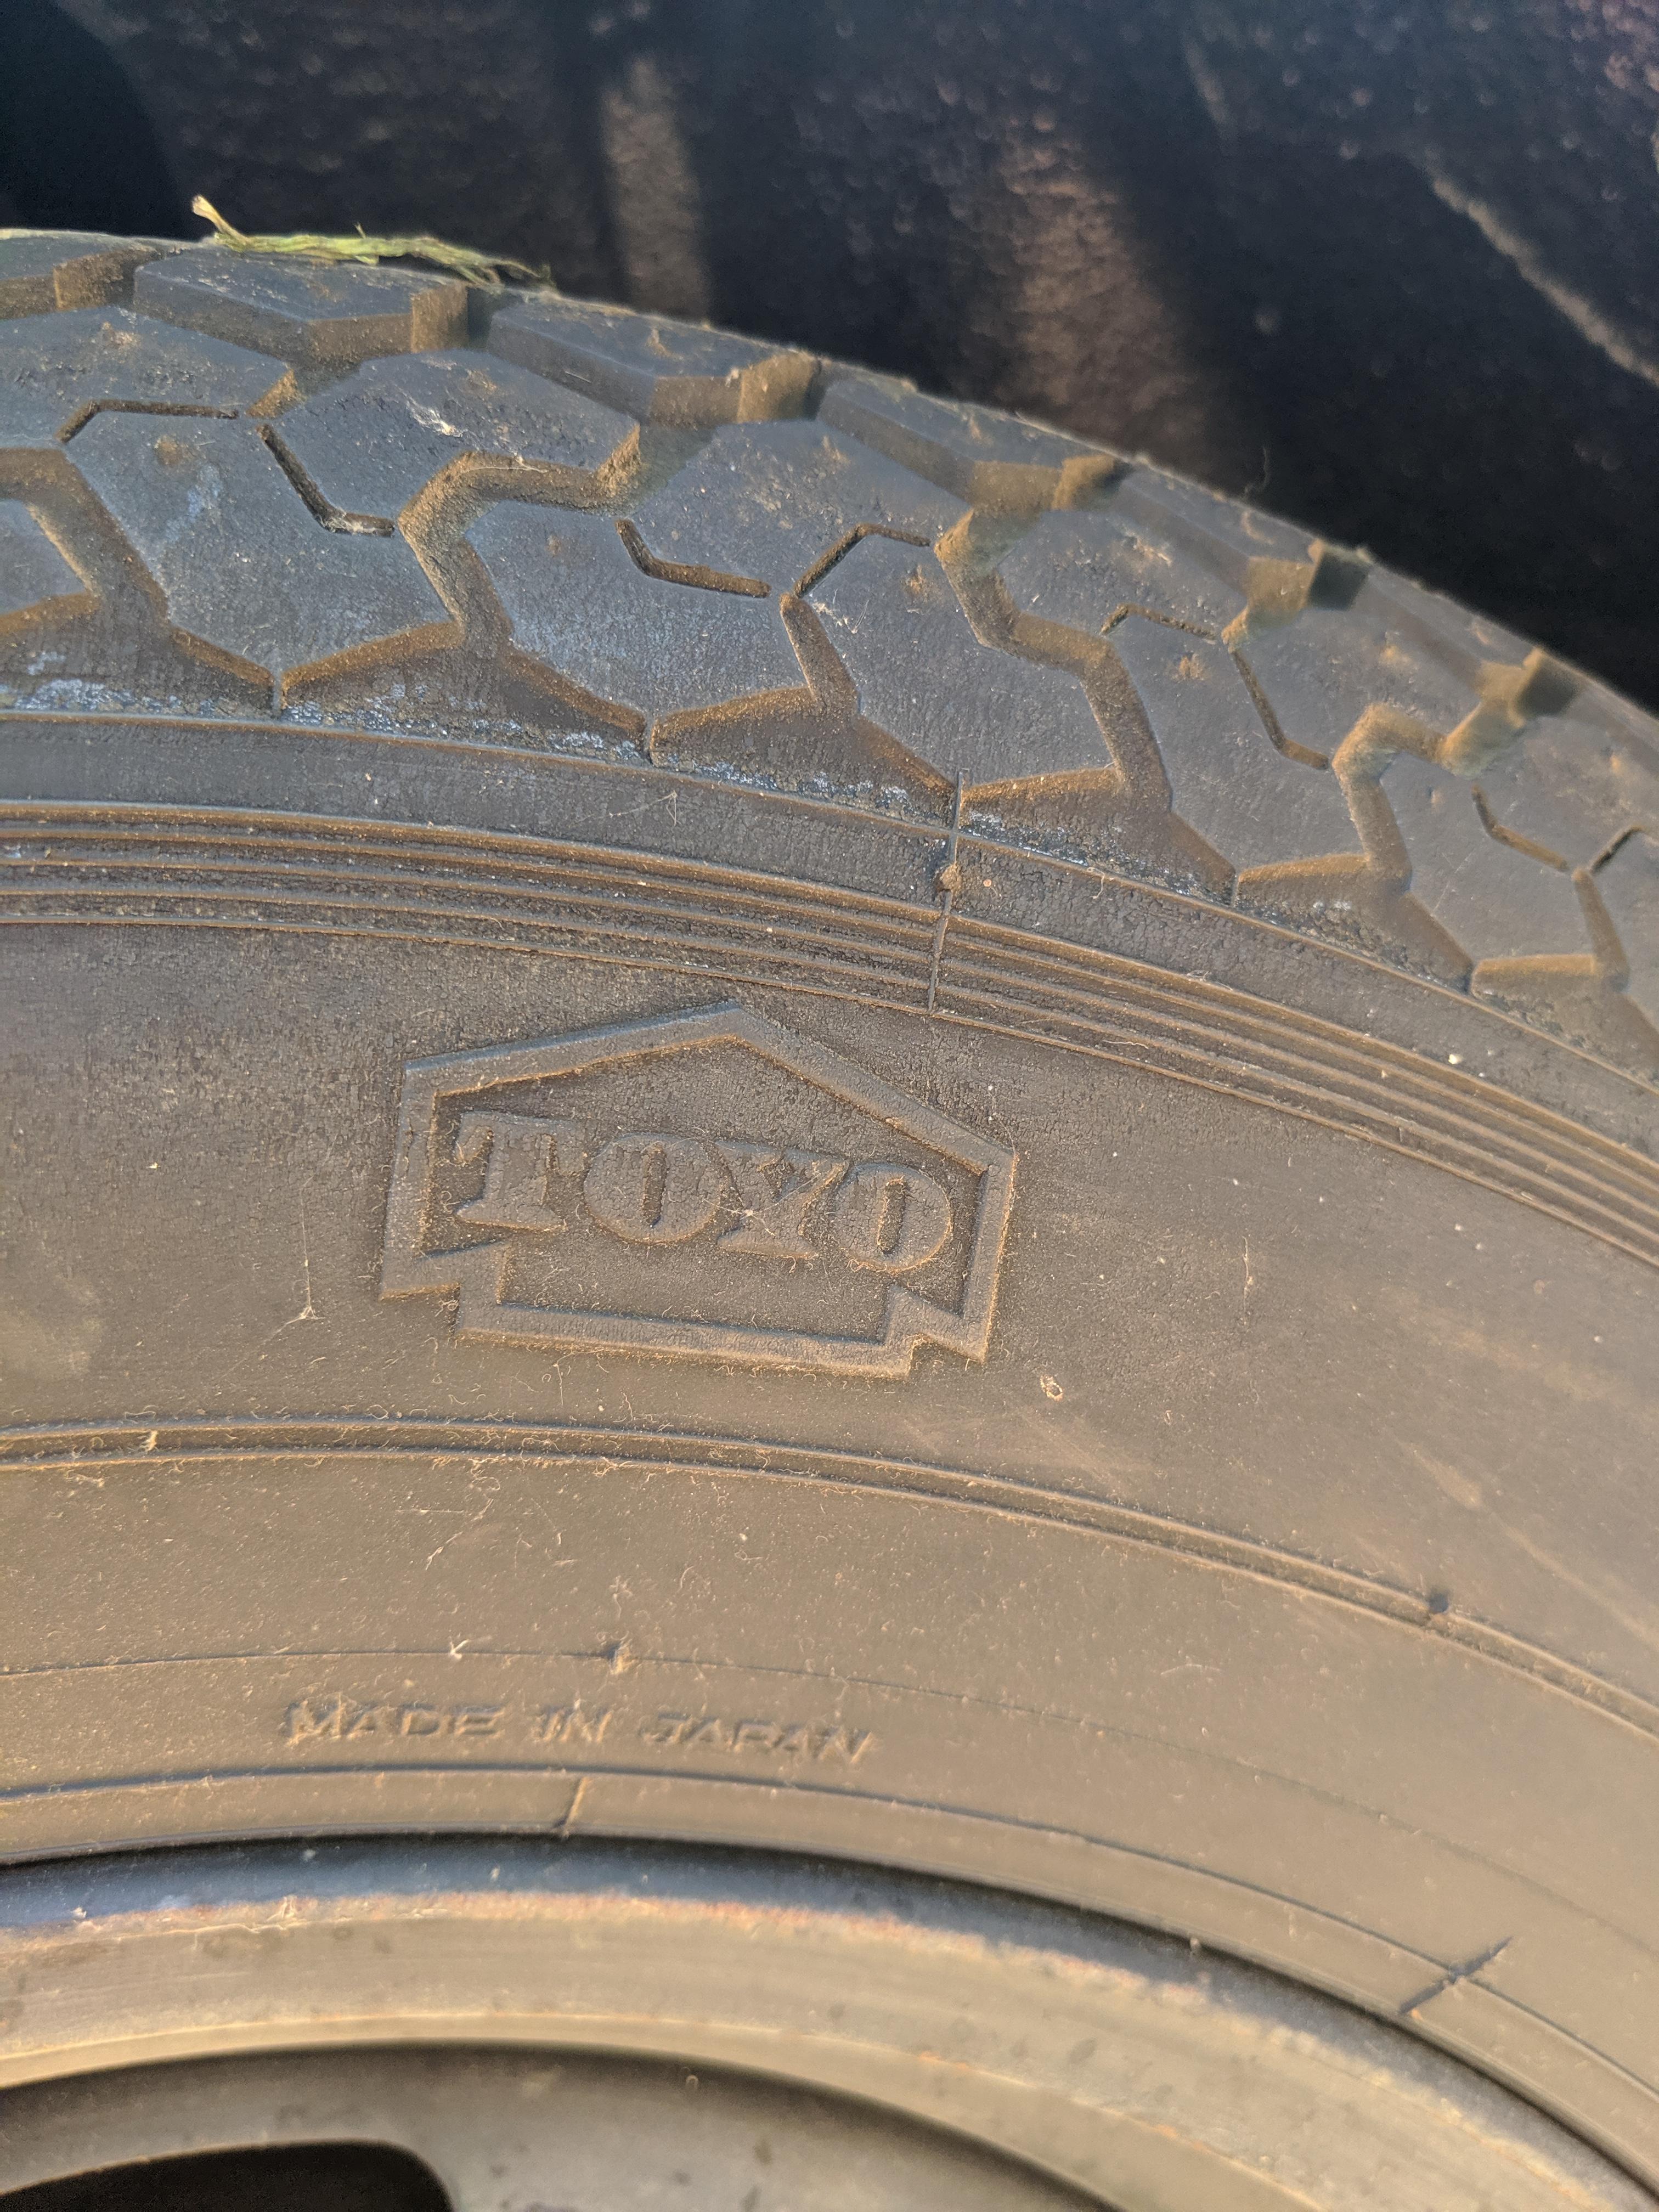
2 pointsOk. Here are some more pictures. I am comfortable stating that the 350 miles are true. I pumped up the original tires and they held air! Released the brake and was able to push the car by hand. I was not expecting that!.
2 points2 points
2 pointsOk. Here are some more pictures. I am comfortable stating that the 350 miles are true. I pumped up the original tires and they held air! Released the brake and was able to push the car by hand. I was not expecting that!.


 2 points
 I concur, the BaT conversation was entertaining; something along the sit-com style. I did notice one of your posts deleted, Alan, and I don't understand how that happened other than my previous clown-show comment. I read it and then saw it deleted later. The VZ program was indeed a unique event in automotive history, on many different points of argument, and ranks right up there in the mentionables category. Alan, I think your point is on an intellectual platform, far different than the sensationalistic cries of passion we saw on BaT. The Dream Garage ad campaign and the Z Store were a two million dollar event at Nissan USA in the late 90s. They signaled the end of the Z-car for a period of time. That was a big deal. Considering the scale at which Nissan USA approached the restoration program, it was pretty damned unique. Were they the first, the only; did Nissan "conceive" of this outrageous idea? No. Of course not. Factory reconditioning and resale goes back to before the war. Read your automotive history. We don't need to quibble about Aston Martin. The sensationalists ruled the day, however, and some poor bastard took home a car that needed work for a price five times what that car would have cost ten years ago. Personally, I'm encouraged.2 points
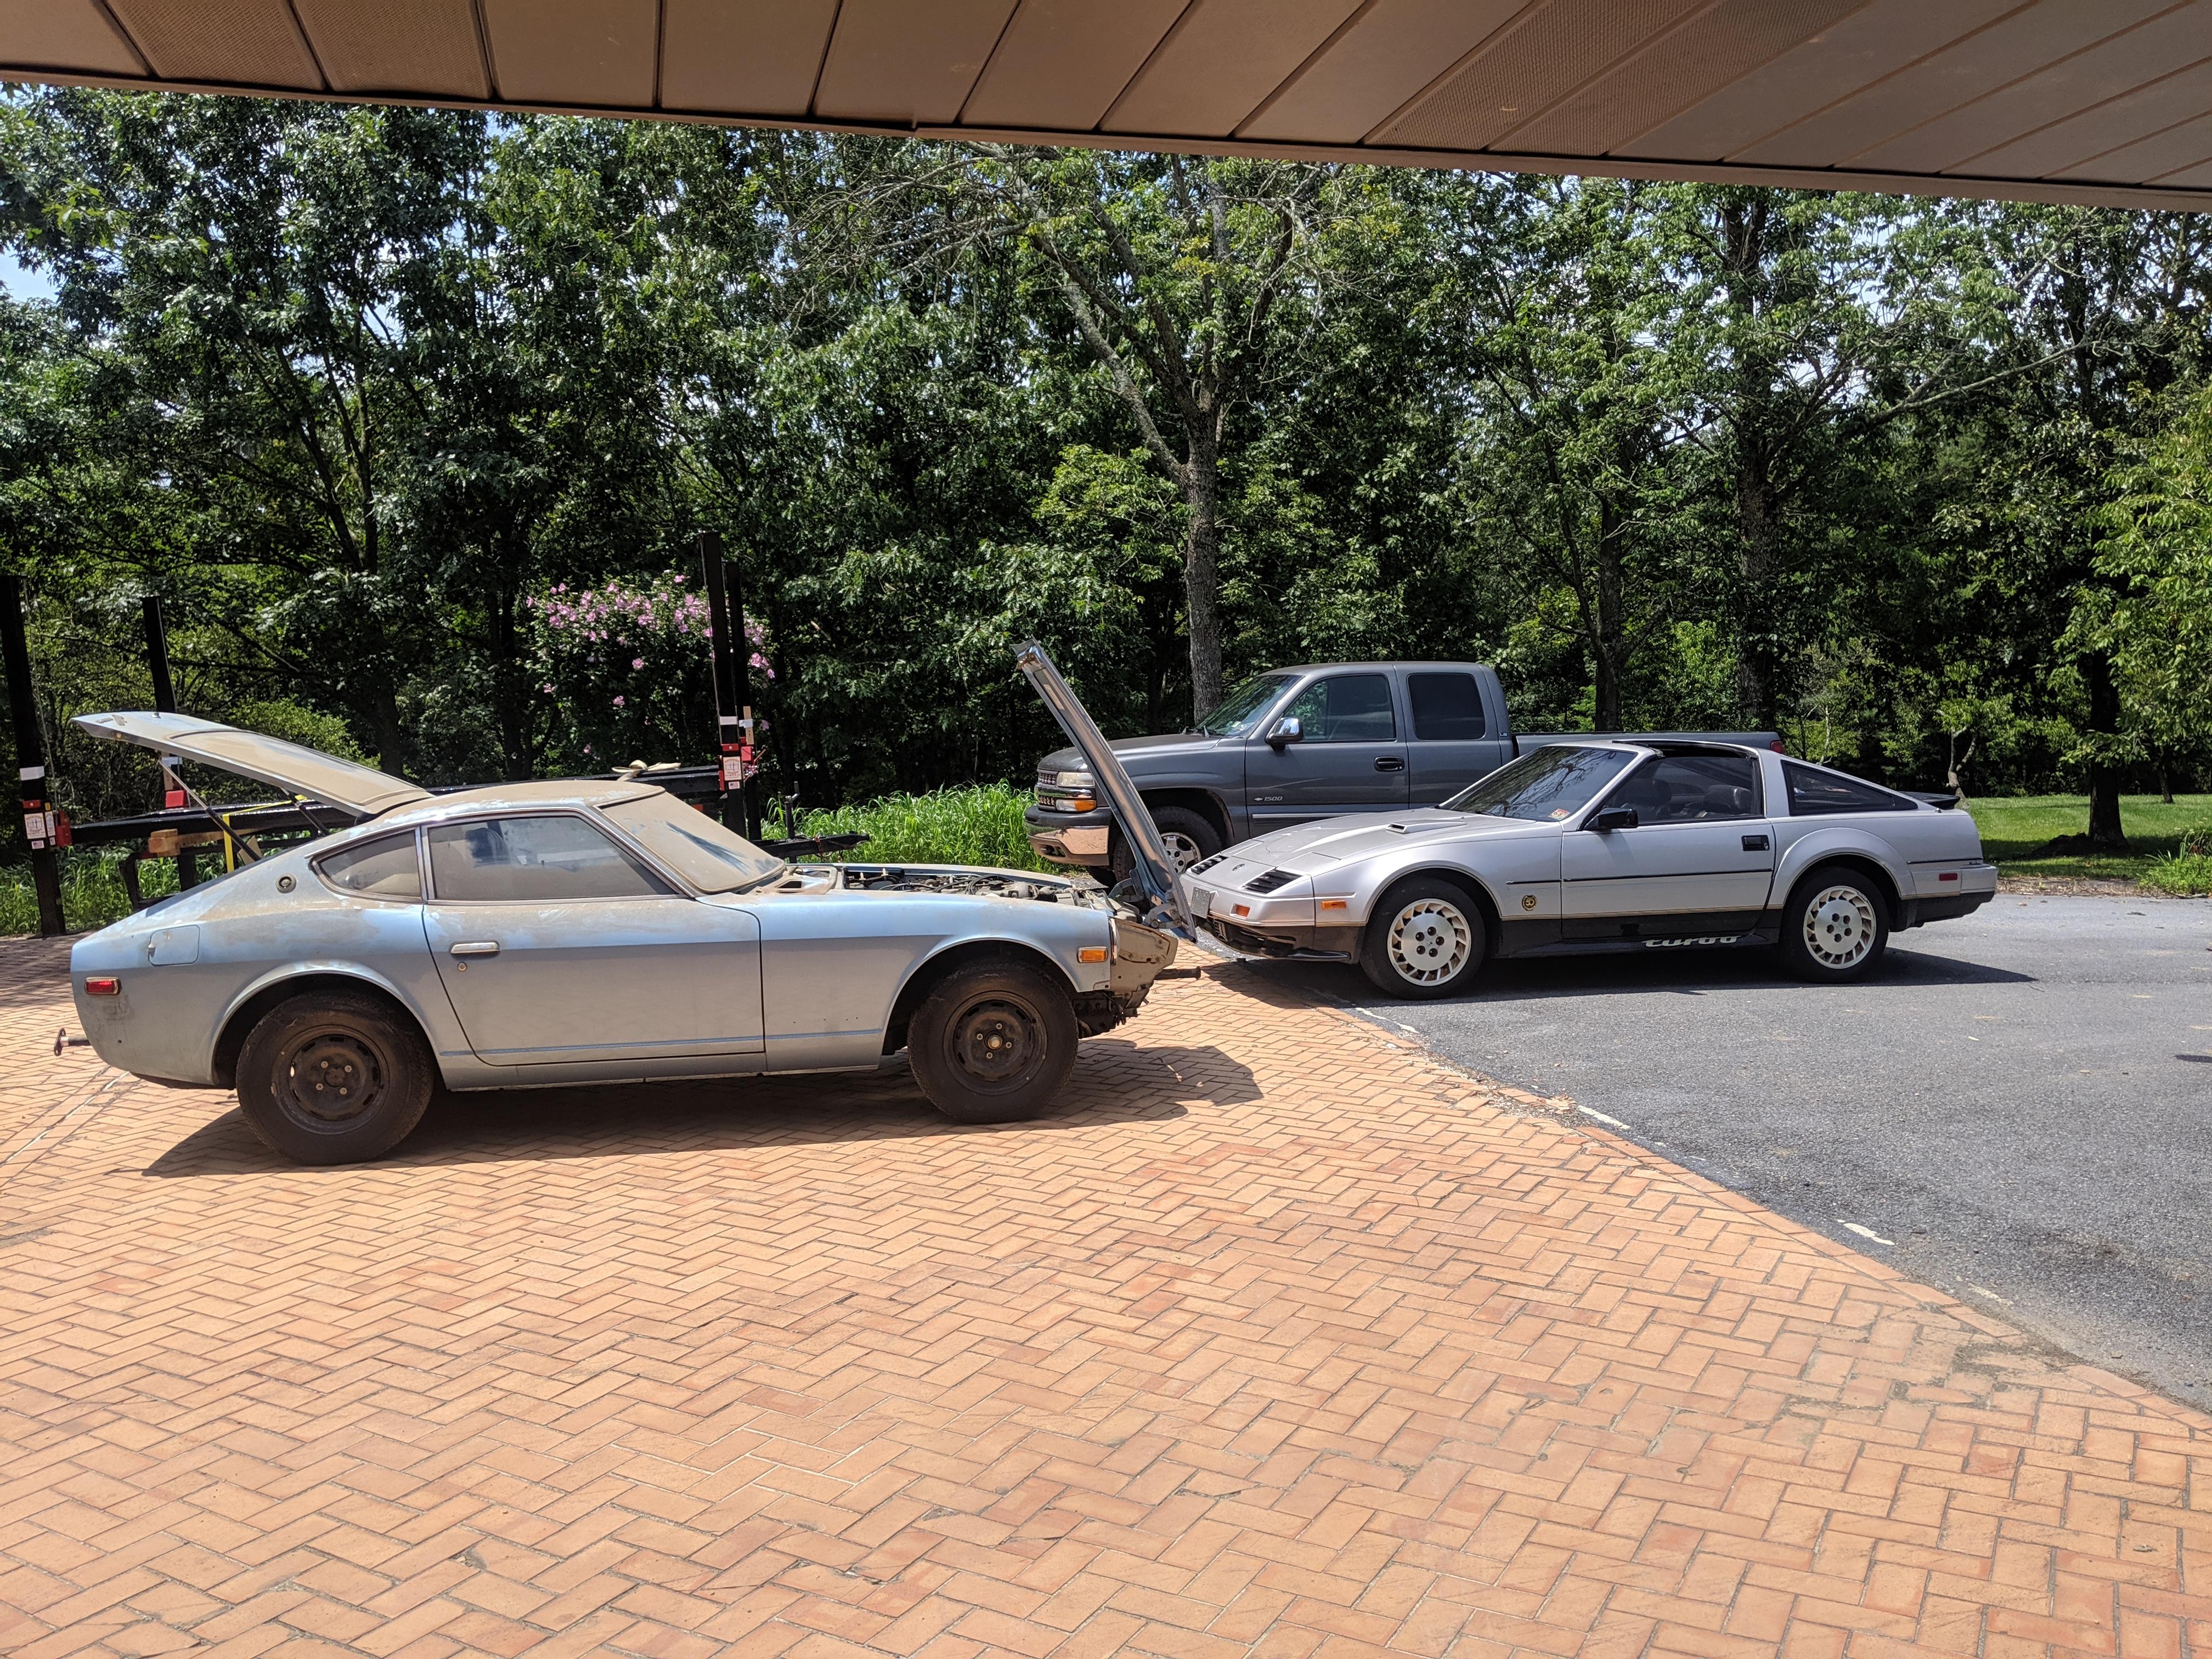
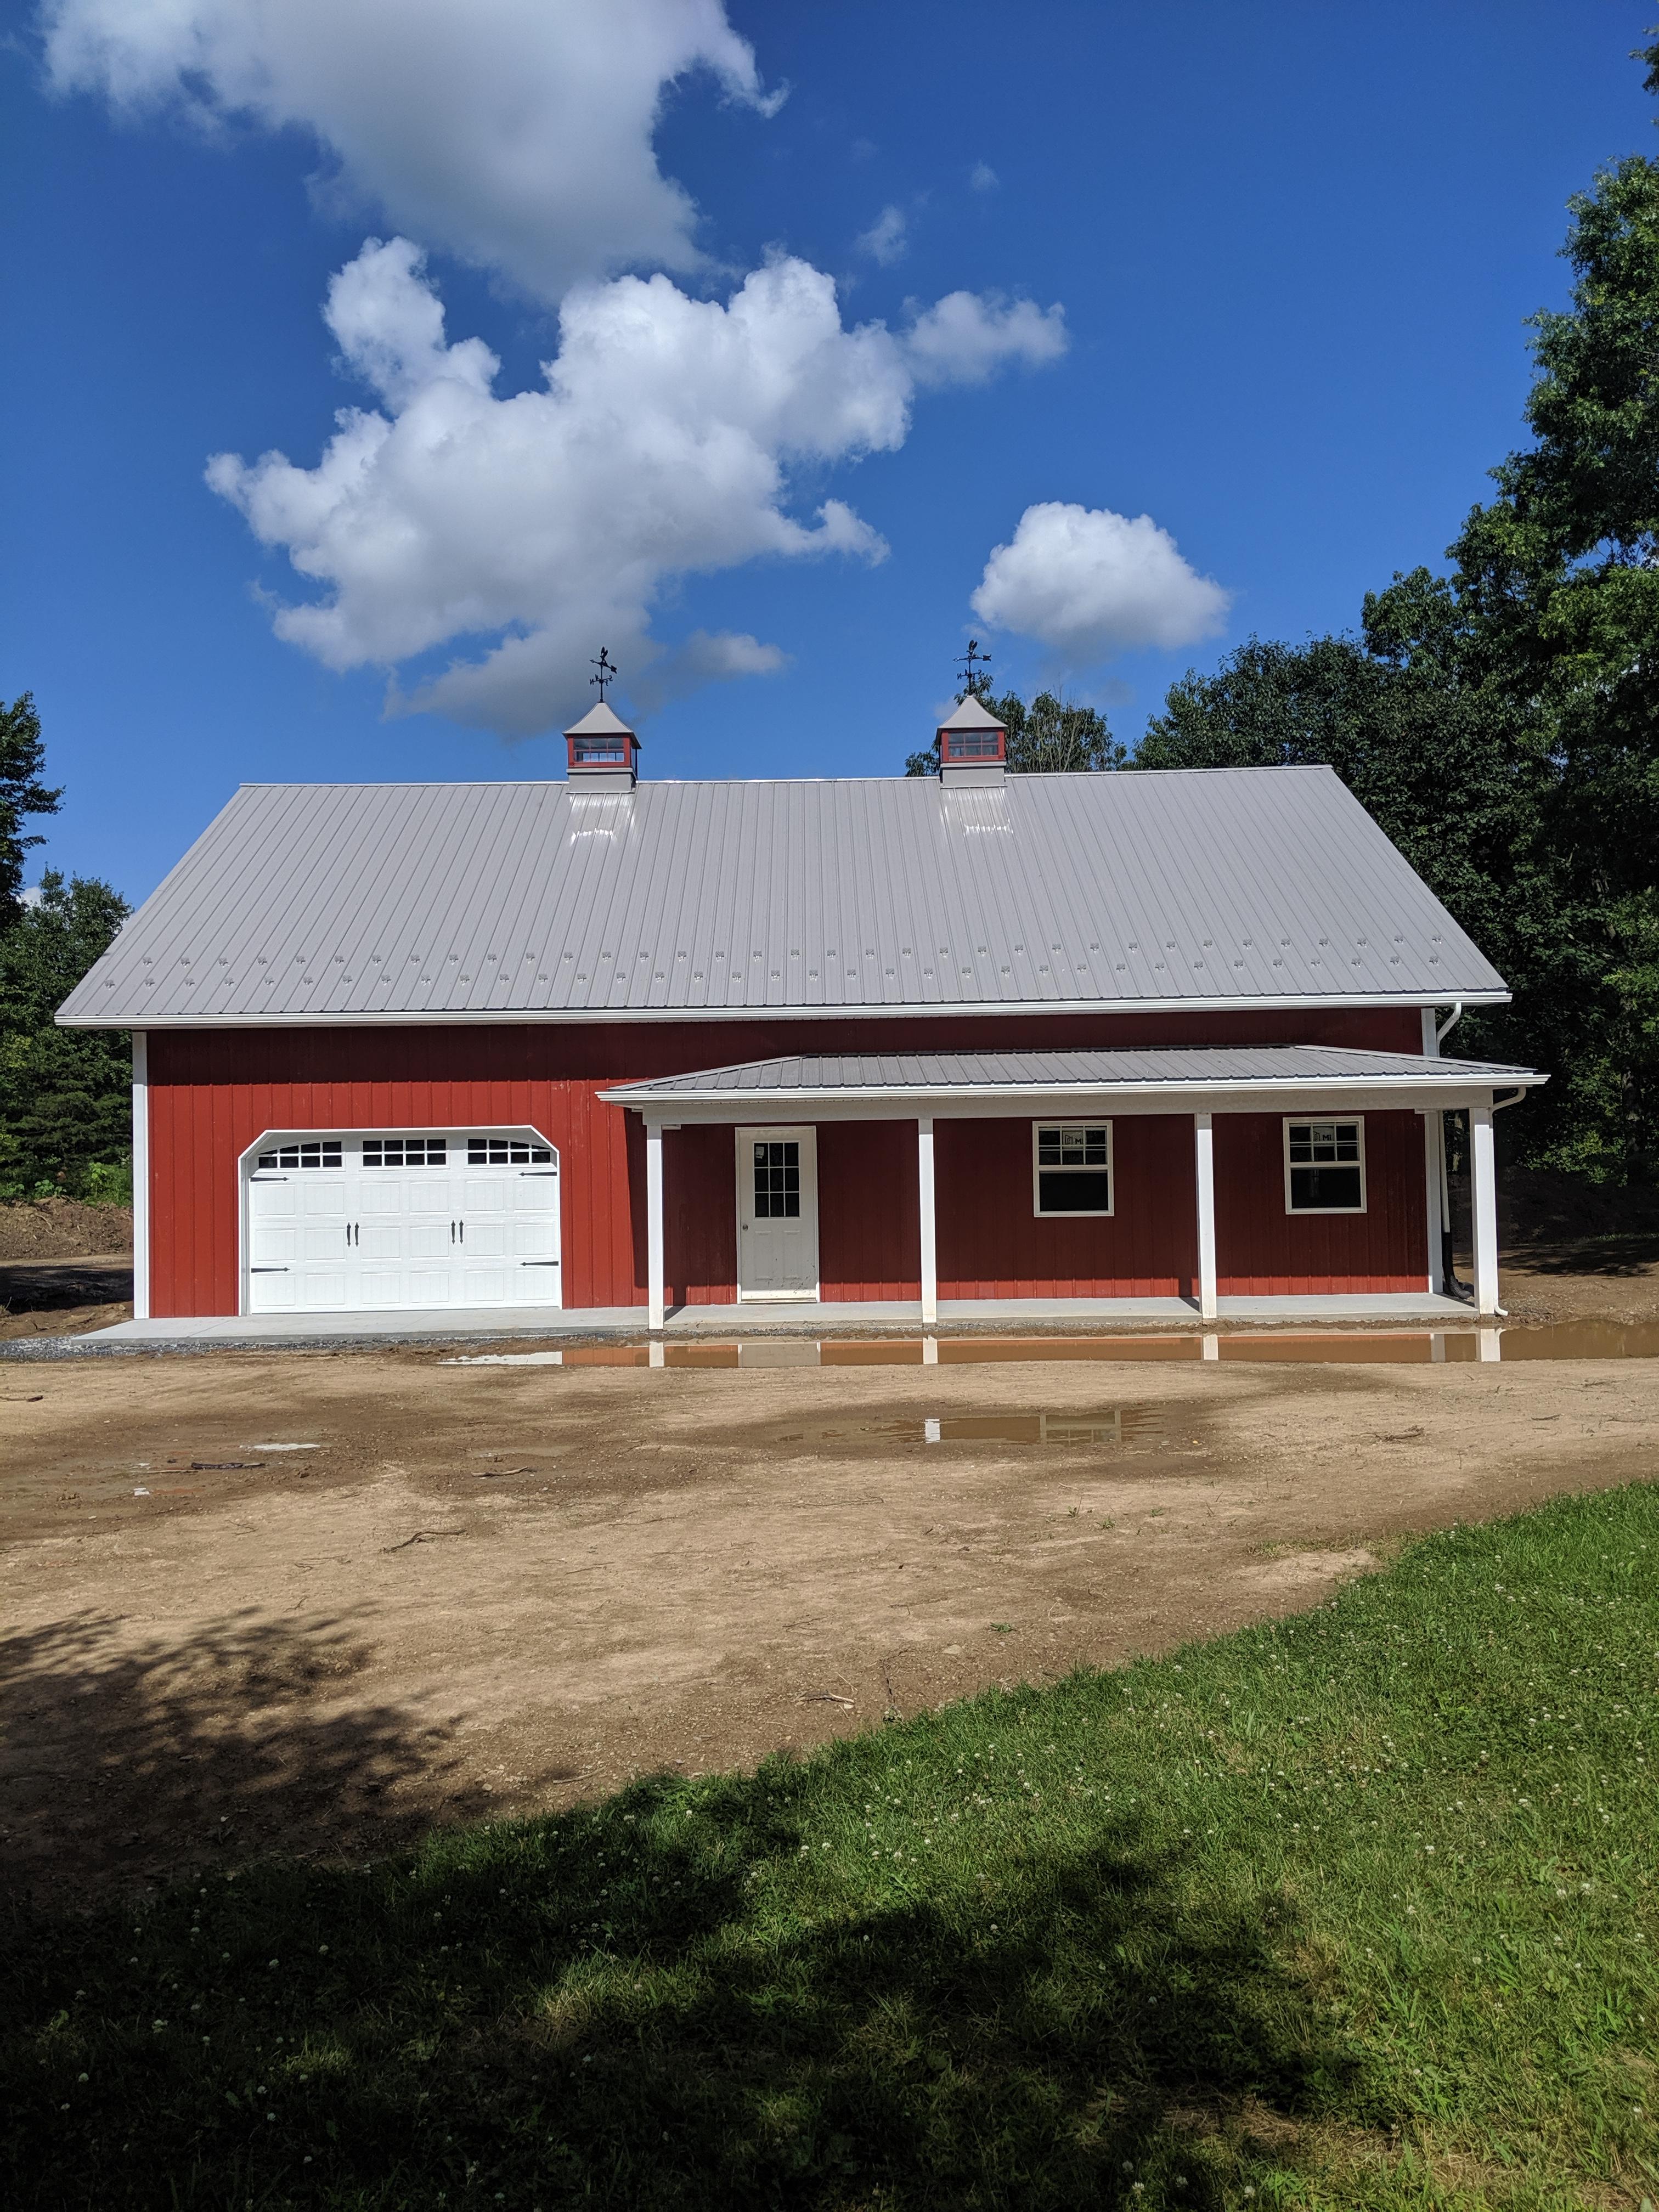
2 pointsBetter pictures later today. I'm leaving in an hour to pick up the car. Good undercarriage shots will have to wait a week. I just had a new garage built (before knowing anything about this car) and the concrete was just poured on Monday. Can't put in the lift till next Saturday.
I concur, the BaT conversation was entertaining; something along the sit-com style. I did notice one of your posts deleted, Alan, and I don't understand how that happened other than my previous clown-show comment. I read it and then saw it deleted later. The VZ program was indeed a unique event in automotive history, on many different points of argument, and ranks right up there in the mentionables category. Alan, I think your point is on an intellectual platform, far different than the sensationalistic cries of passion we saw on BaT. The Dream Garage ad campaign and the Z Store were a two million dollar event at Nissan USA in the late 90s. They signaled the end of the Z-car for a period of time. That was a big deal. Considering the scale at which Nissan USA approached the restoration program, it was pretty damned unique. Were they the first, the only; did Nissan "conceive" of this outrageous idea? No. Of course not. Factory reconditioning and resale goes back to before the war. Read your automotive history. We don't need to quibble about Aston Martin. The sensationalists ruled the day, however, and some poor bastard took home a car that needed work for a price five times what that car would have cost ten years ago. Personally, I'm encouraged.2 points
2 pointsBetter pictures later today. I'm leaving in an hour to pick up the car. Good undercarriage shots will have to wait a week. I just had a new garage built (before knowing anything about this car) and the concrete was just poured on Monday. Can't put in the lift till next Saturday. 2 points
1 point
It won't hurt, depending on the car sometimes a bit of that area is visible. Besides, if you don't paint, it will show and you'll be kicking yourself.1 point
1 point
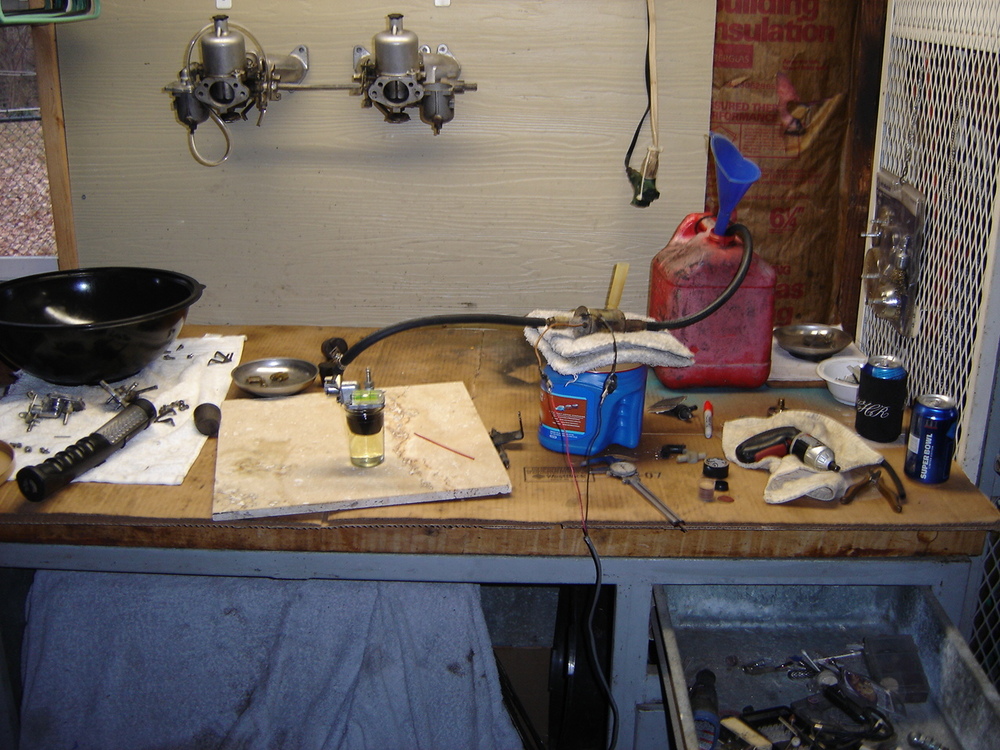
Finally cleared off the Z work bench after 2 years of "catch all junk bench'. Now to use it for a Z.
2 points
1 point
It won't hurt, depending on the car sometimes a bit of that area is visible. Besides, if you don't paint, it will show and you'll be kicking yourself.1 point
1 point
Finally cleared off the Z work bench after 2 years of "catch all junk bench'. Now to use it for a Z.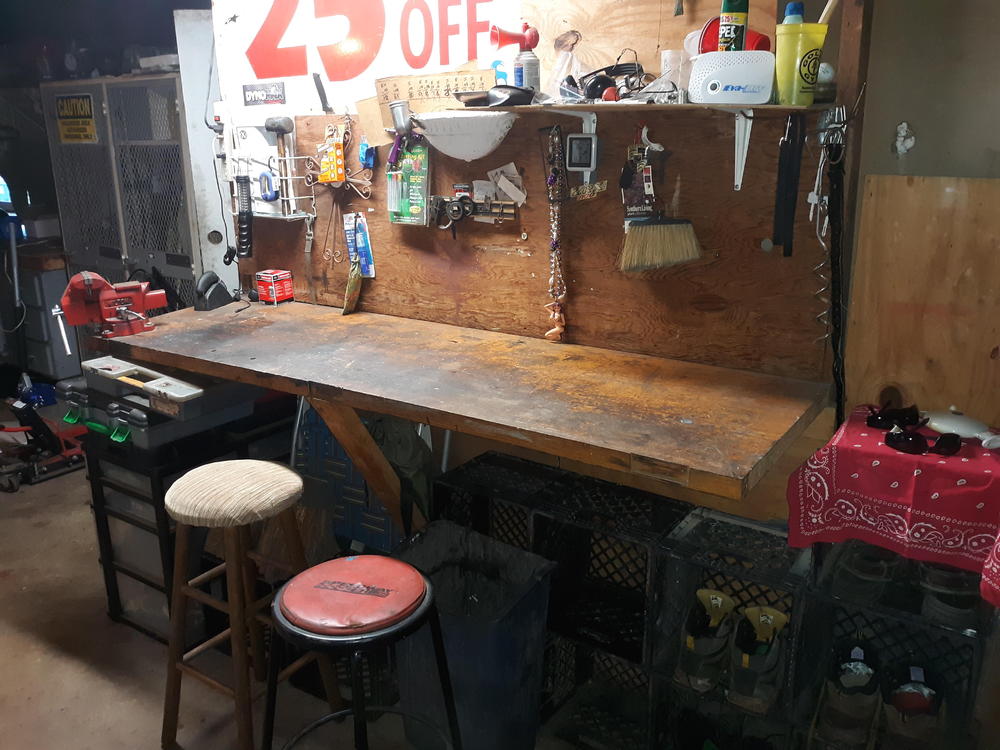 1 point
LOL. I want to wash that dirt off so bad! I just have to wait. It's only "Barn Find Dirty" once. Well probably only one.1 point
1 point
1 pointLOL. I want to wash that dirt off so bad! I just have to wait. It's only "Barn Find Dirty" once. Well probably only one.1 point 1 pointThe method of setting float levels where you turn the mixture screws 10 turns down, remove the domes, and set the fuel level so it is even with the top of the nozzle tops has been written about many times on many sites. The site / article where I was first introduced to the method is at the link below. https://zcarguide.com/tuning-adjusting-datsun-240z-su-carburetors/ I learned a lot from the article but 4 key things in particular. First, adjusting SU carbs really hinges on getting the floats set right first. If you don't have that right, then I find that everything else ends up being a compromise. BTW, some disagree that setting the floats is super important but I am a believer and kool-aid drinker on the theory. If you don't get the fuel level set right in the floats then you end up setting the mixture level significantly different than 2.5 (plus or minus .5). When you do this you end up shifting the needle zones up or down and outside of the intended range in the power band. Worse, if the float adjustment is off by enough, you can't even get the mixture adjustment screw to cause any change. Again, this is all my opinion...and is shared by some and disagreed with by others...which is fine. You will figure out what works for you. Second, the 10 turn down method was the only method that, for me, was exact and repeatable. I just could never get the .55 hanging down while sucking (no comments Site) or clear tube set to 23mm or whatever to work for me. No doubt, it works for some. To me though all of the other methods, at the end of the day, are trying to get the fuel to a certain level in the nozzle (10 turns down), so why not measure using the goal? Third, once you have the floats set, using a Color Tune to set the mixture works really well for me. A couple of Color Tune tips though. 1) use the Color Tune in the dark...or low light. This will let you see the colors better. 2) Clean the Color Tune often. Once the engine has been running with the Color Tune for 1 minute or so, I find that I cease to be able to see the distinctions between Red (rich), Blue (ideal), and White (lean). So, I pull the Color Tune plug and clean with carb cleaner spray often. It is a kind of tedious process but it is accurate and repeatable. Fourth, I use the Color Tune at two rpm levels- Idle and about 3k rpms. I let idle run a little rich (red)...which makes 3k end up being about right (blue). Also worth checking if you are having fuel delivery issues is the little flexible hoses that connect the float bowls and the nozzles. Make sure you use ZTherapy or similar hoses that are super flexible. And, make sure the hose is not creased...impeding flow. I assume that your nozzles are moving up and down correctly and closing fully when choke is off and opening when choke is on. Stay with it. You will figure it out. EDIT: One more thing...and many may disagree with this too. I have never had any success getting the 3 screw carbs where one float bowl lid has longer ears and you use a longer needle jet to work. This arrangement causes the float to remain angled lower in the float bowl, which I think causes it to get hung against the float bowl wall. So, if you have a carb set where one has the lid with long ears and longer needle jet, and you can't get the float level set exactly and reliably, consider locating another short ear float lid. You can use any short ear float lid from any round top carbs. I had an extra set of 3 screw carbs sitting around and scavenged the short ear lid from that set of carbs.1 point
1 pointI'm planning on being there...provided I can sort out the fuel injection by then...1 point
1 pointThe method of setting float levels where you turn the mixture screws 10 turns down, remove the domes, and set the fuel level so it is even with the top of the nozzle tops has been written about many times on many sites. The site / article where I was first introduced to the method is at the link below. https://zcarguide.com/tuning-adjusting-datsun-240z-su-carburetors/ I learned a lot from the article but 4 key things in particular. First, adjusting SU carbs really hinges on getting the floats set right first. If you don't have that right, then I find that everything else ends up being a compromise. BTW, some disagree that setting the floats is super important but I am a believer and kool-aid drinker on the theory. If you don't get the fuel level set right in the floats then you end up setting the mixture level significantly different than 2.5 (plus or minus .5). When you do this you end up shifting the needle zones up or down and outside of the intended range in the power band. Worse, if the float adjustment is off by enough, you can't even get the mixture adjustment screw to cause any change. Again, this is all my opinion...and is shared by some and disagreed with by others...which is fine. You will figure out what works for you. Second, the 10 turn down method was the only method that, for me, was exact and repeatable. I just could never get the .55 hanging down while sucking (no comments Site) or clear tube set to 23mm or whatever to work for me. No doubt, it works for some. To me though all of the other methods, at the end of the day, are trying to get the fuel to a certain level in the nozzle (10 turns down), so why not measure using the goal? Third, once you have the floats set, using a Color Tune to set the mixture works really well for me. A couple of Color Tune tips though. 1) use the Color Tune in the dark...or low light. This will let you see the colors better. 2) Clean the Color Tune often. Once the engine has been running with the Color Tune for 1 minute or so, I find that I cease to be able to see the distinctions between Red (rich), Blue (ideal), and White (lean). So, I pull the Color Tune plug and clean with carb cleaner spray often. It is a kind of tedious process but it is accurate and repeatable. Fourth, I use the Color Tune at two rpm levels- Idle and about 3k rpms. I let idle run a little rich (red)...which makes 3k end up being about right (blue). Also worth checking if you are having fuel delivery issues is the little flexible hoses that connect the float bowls and the nozzles. Make sure you use ZTherapy or similar hoses that are super flexible. And, make sure the hose is not creased...impeding flow. I assume that your nozzles are moving up and down correctly and closing fully when choke is off and opening when choke is on. Stay with it. You will figure it out. EDIT: One more thing...and many may disagree with this too. I have never had any success getting the 3 screw carbs where one float bowl lid has longer ears and you use a longer needle jet to work. This arrangement causes the float to remain angled lower in the float bowl, which I think causes it to get hung against the float bowl wall. So, if you have a carb set where one has the lid with long ears and longer needle jet, and you can't get the float level set exactly and reliably, consider locating another short ear float lid. You can use any short ear float lid from any round top carbs. I had an extra set of 3 screw carbs sitting around and scavenged the short ear lid from that set of carbs.1 point
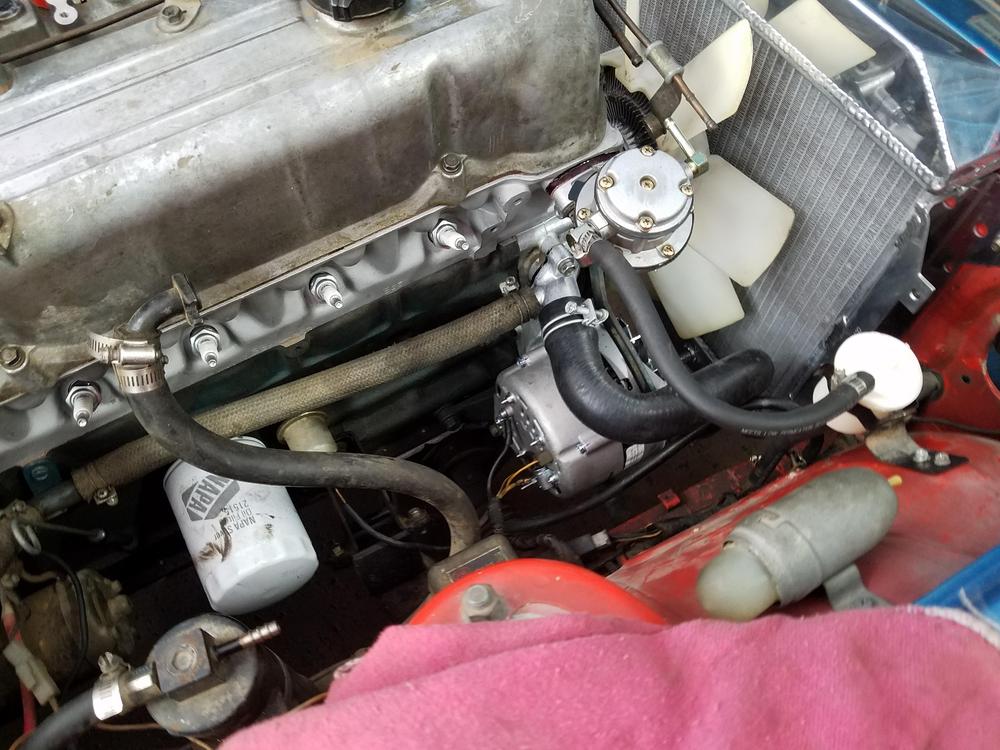
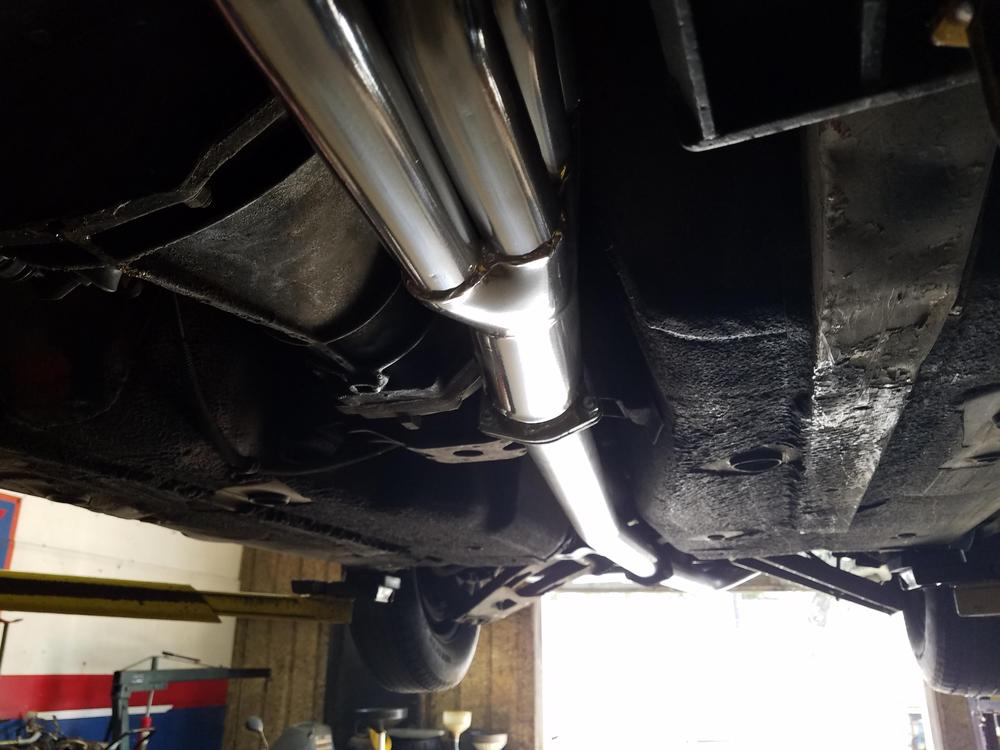
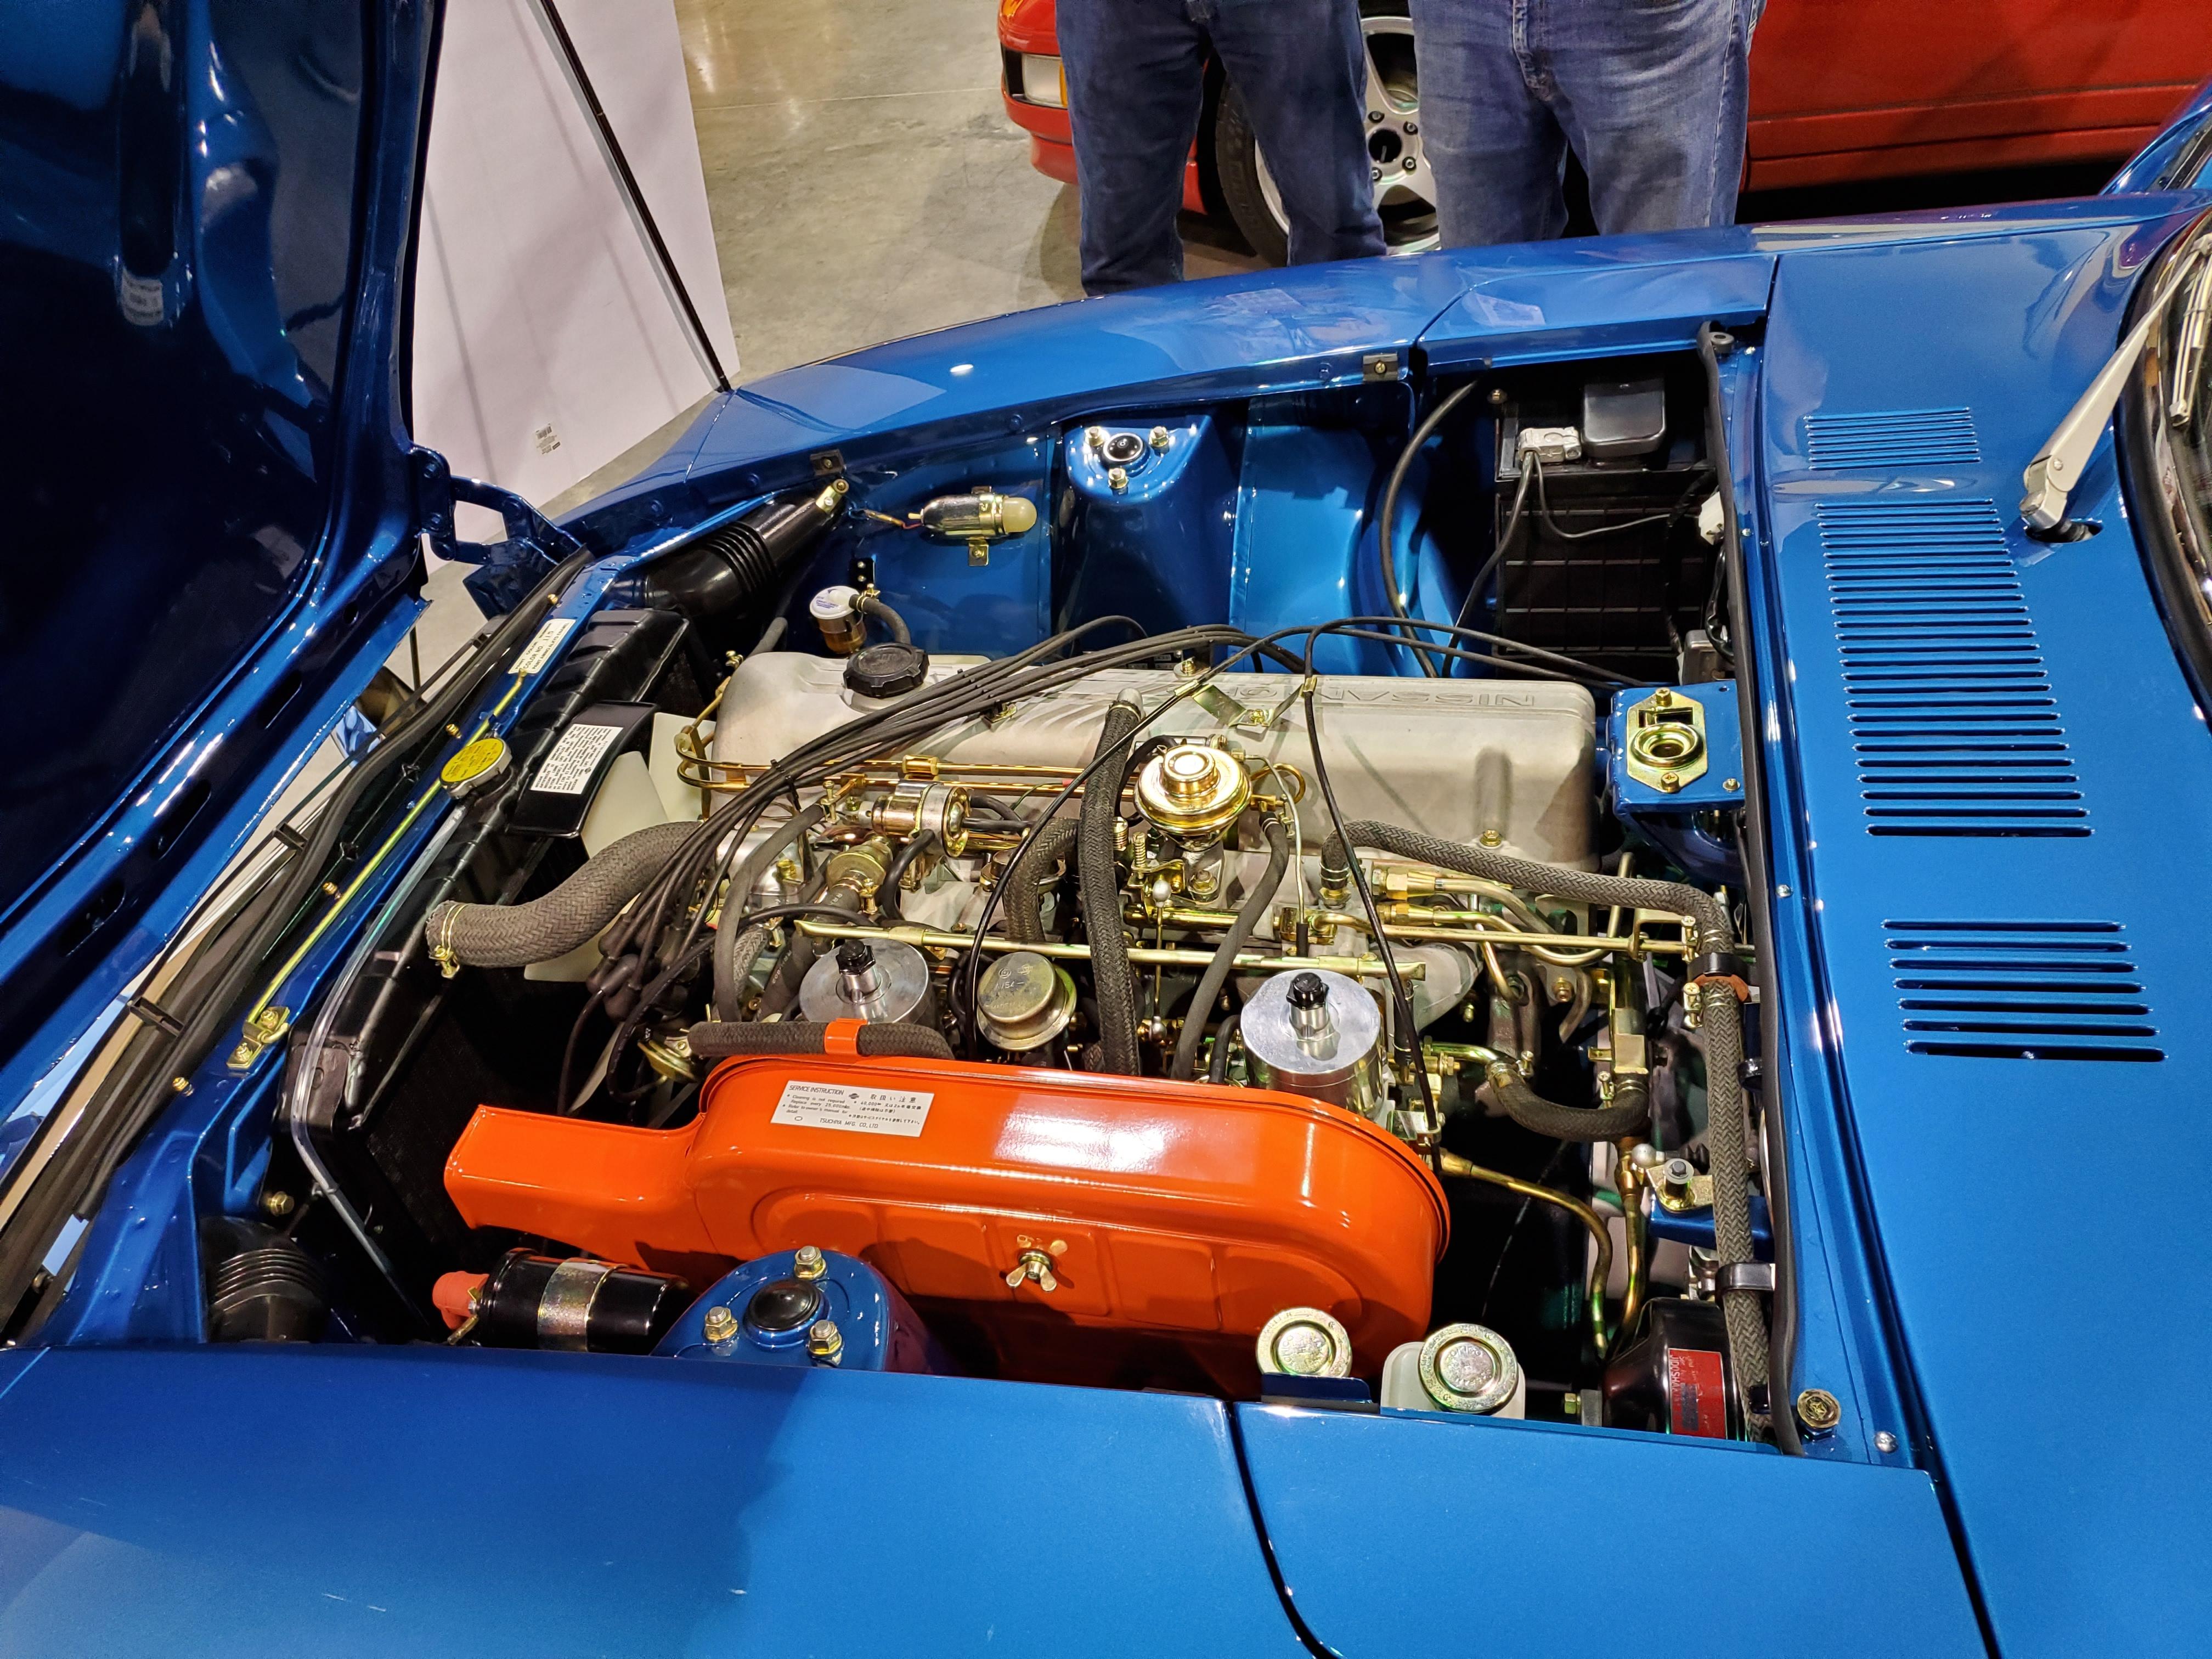
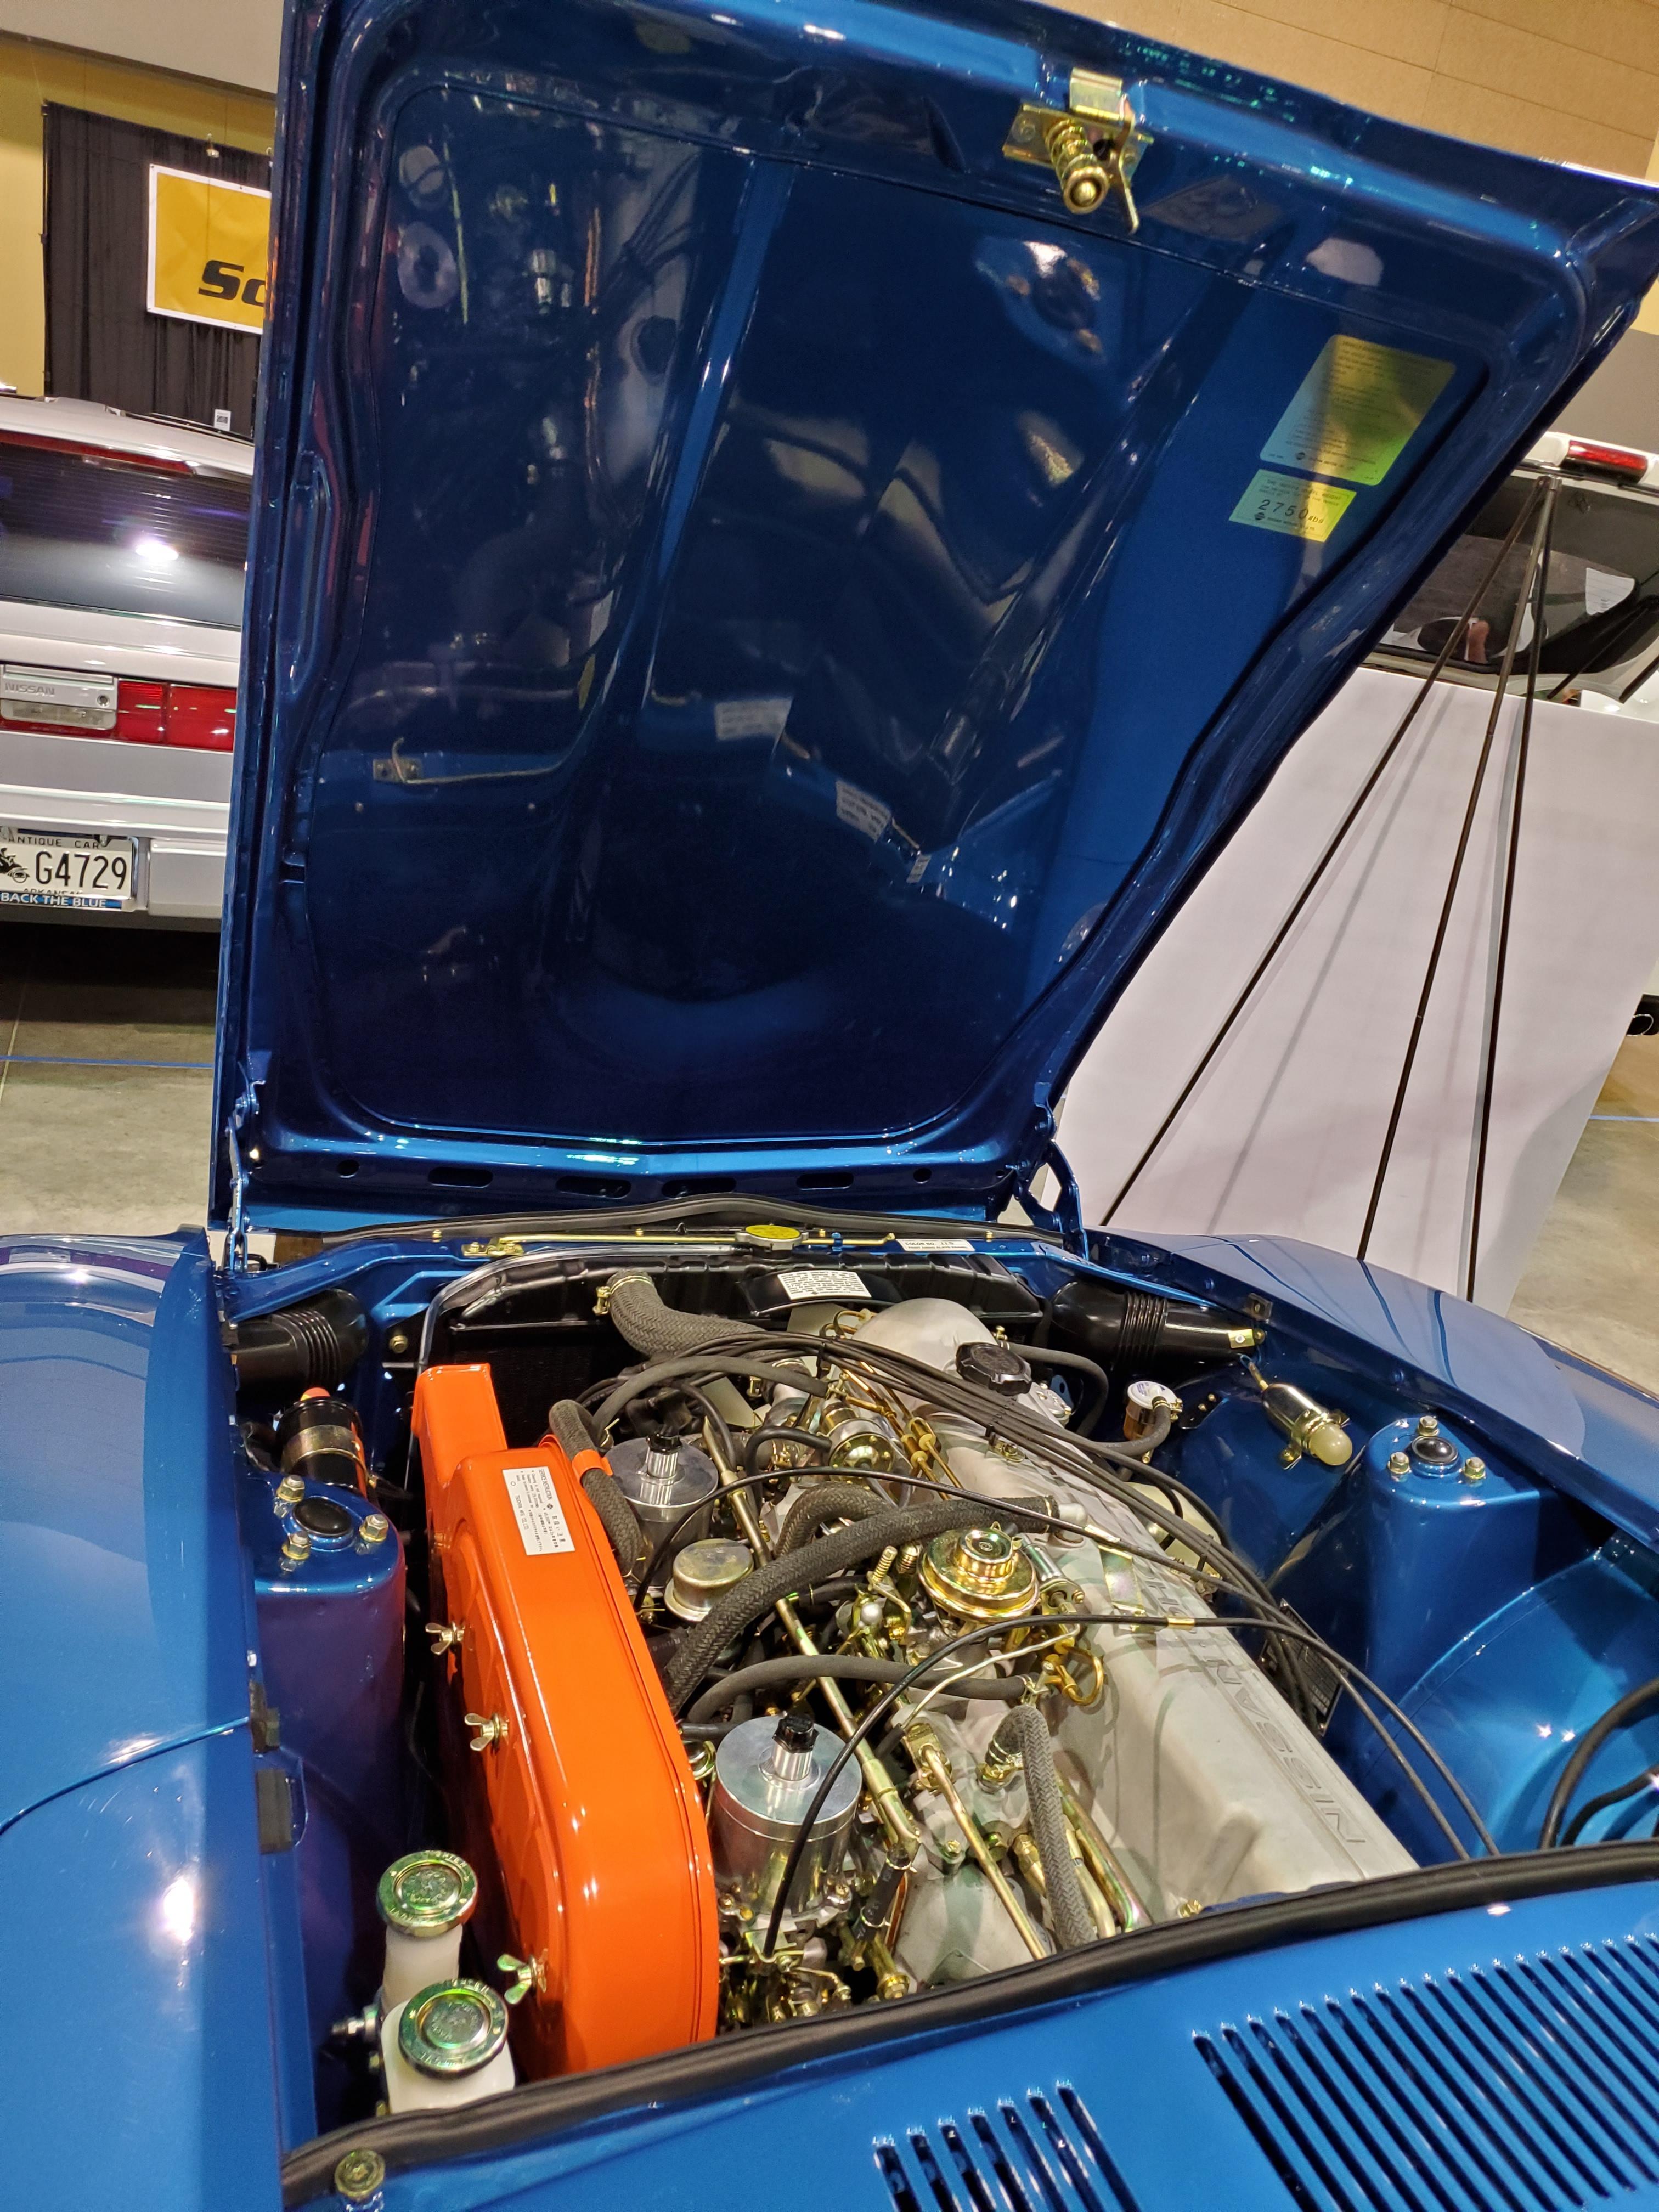
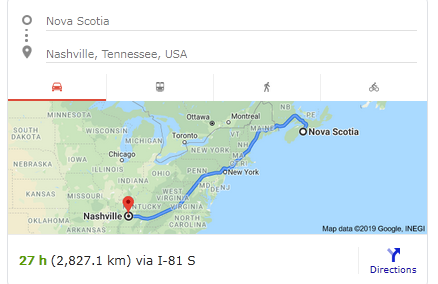
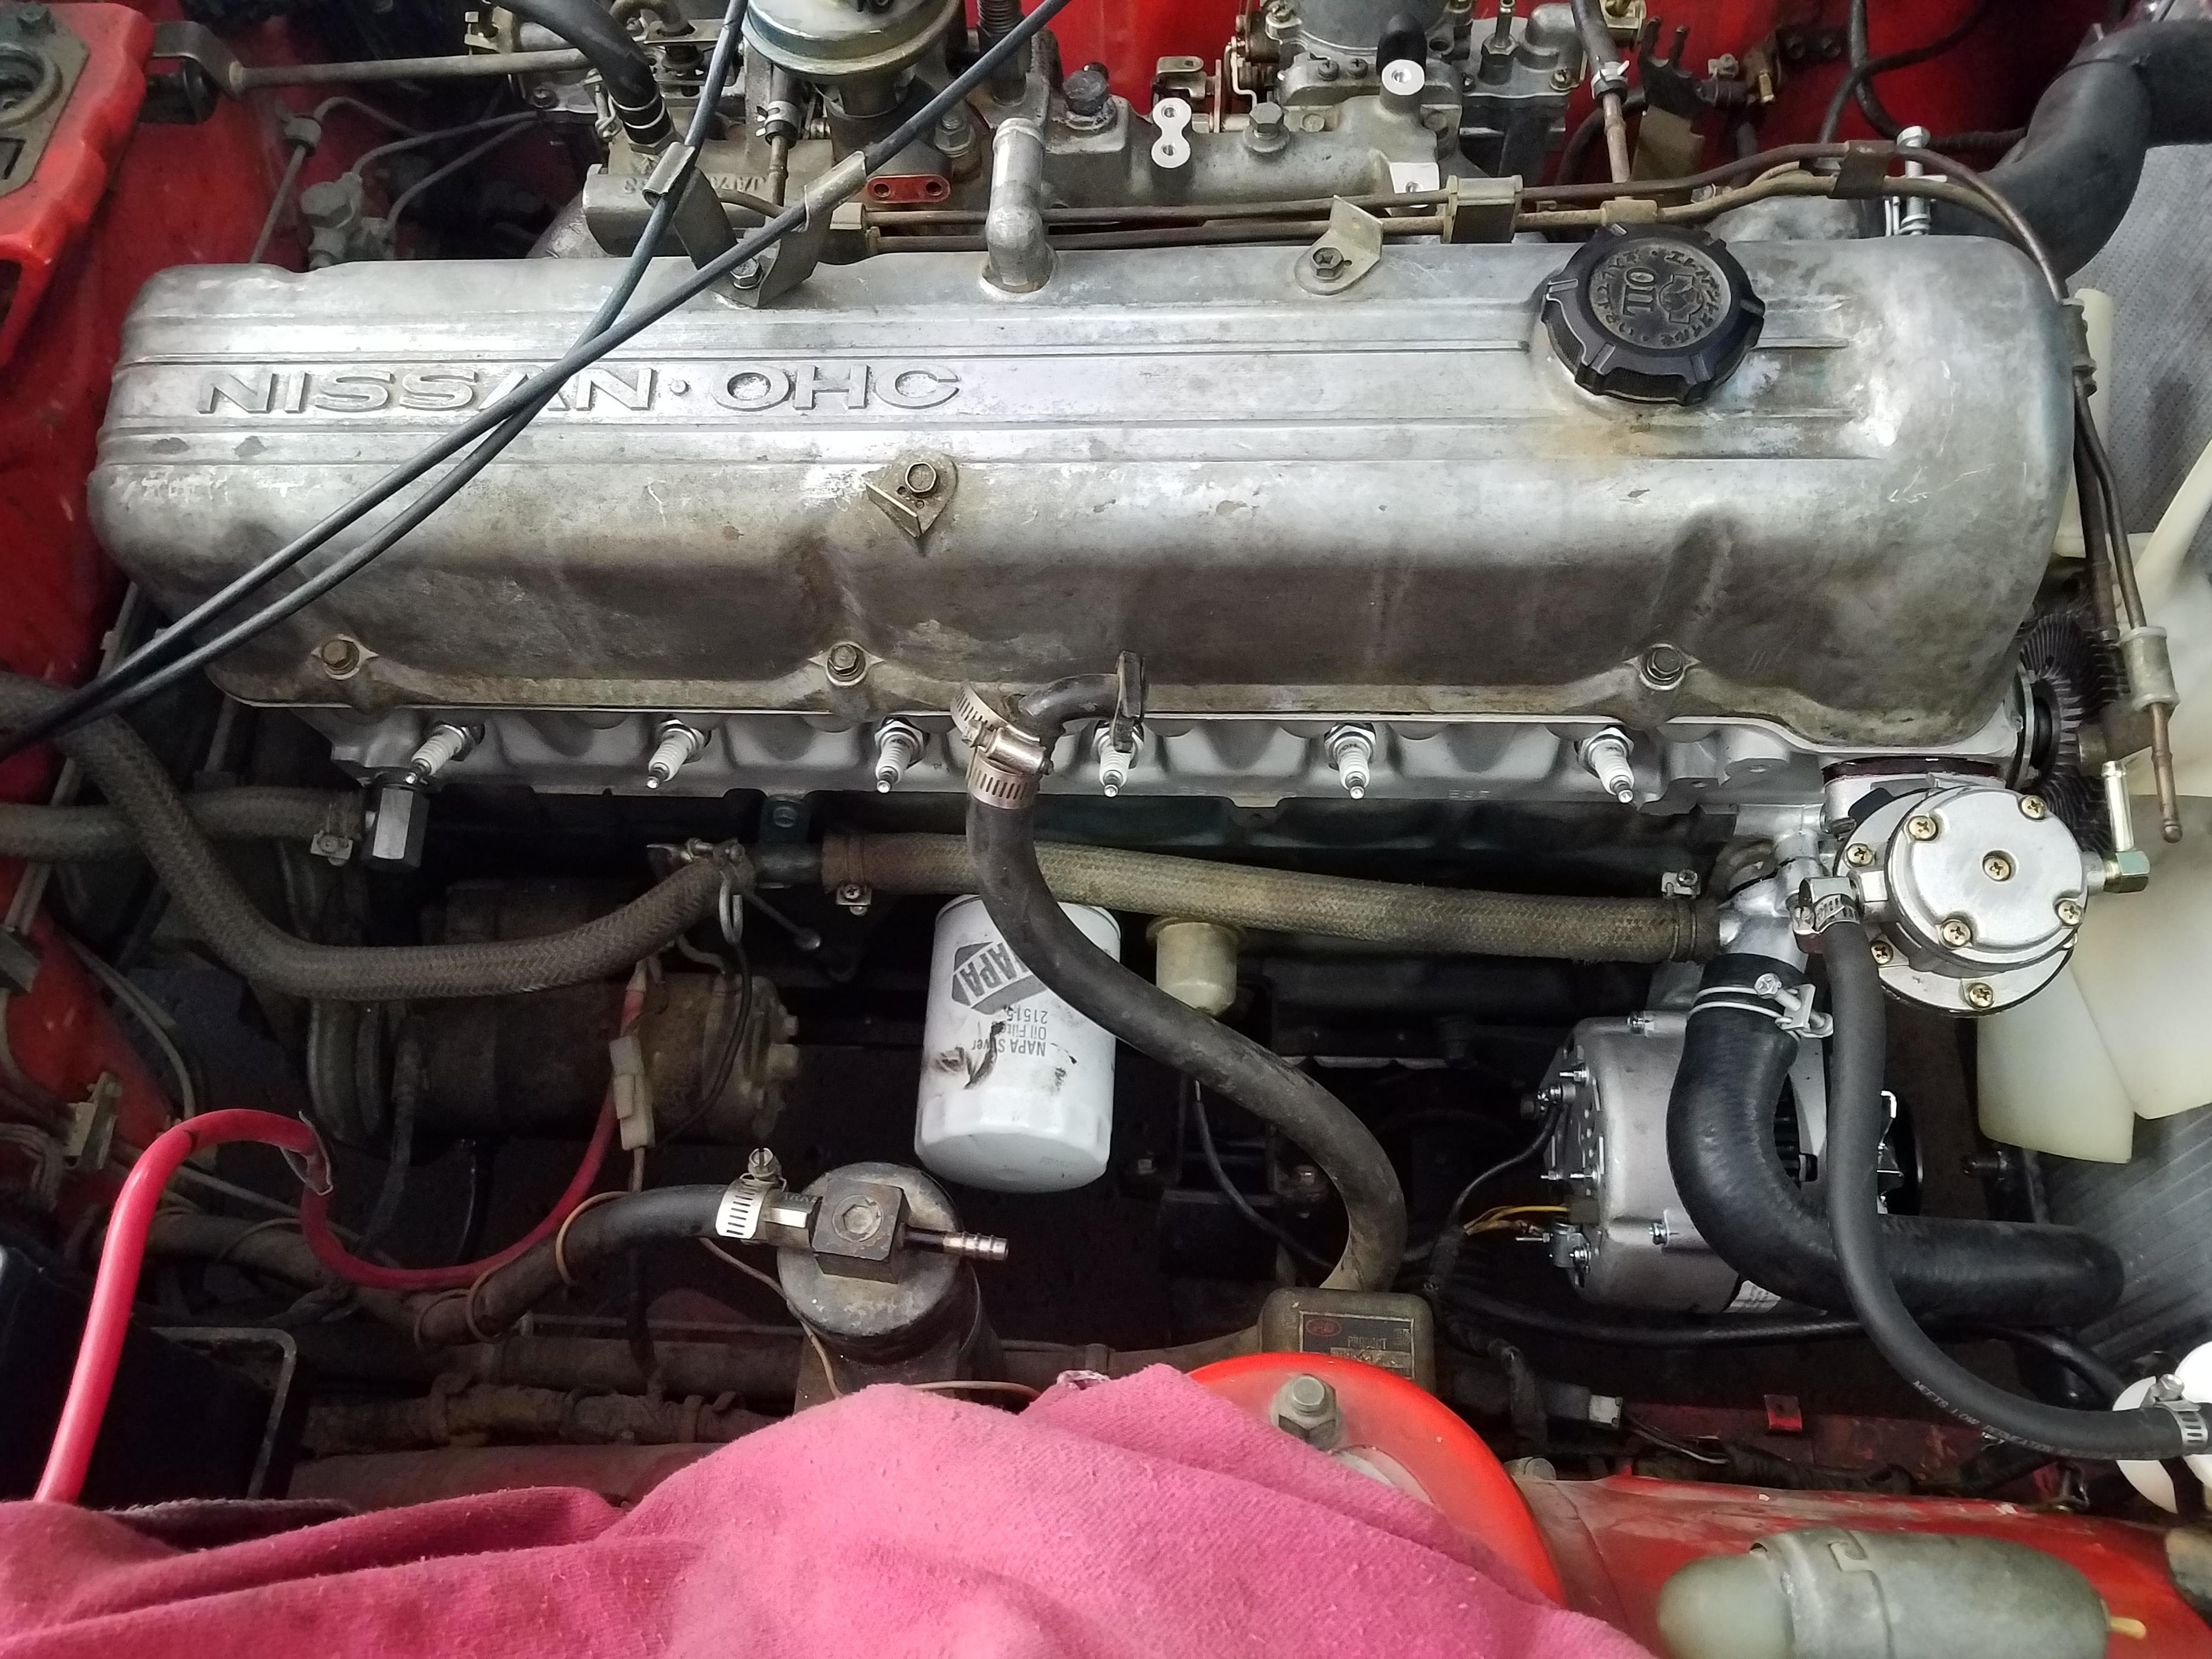
1 pointI'm planning on being there...provided I can sort out the fuel injection by then...1 point 1 pointThis weekend: Installed MSA exhaust system, 3 Core Radiator, new radiator hoses and new hoses all around, Slave Cylinder, Water Outlet housing, Rebuilt both carbs, still more to do next week.
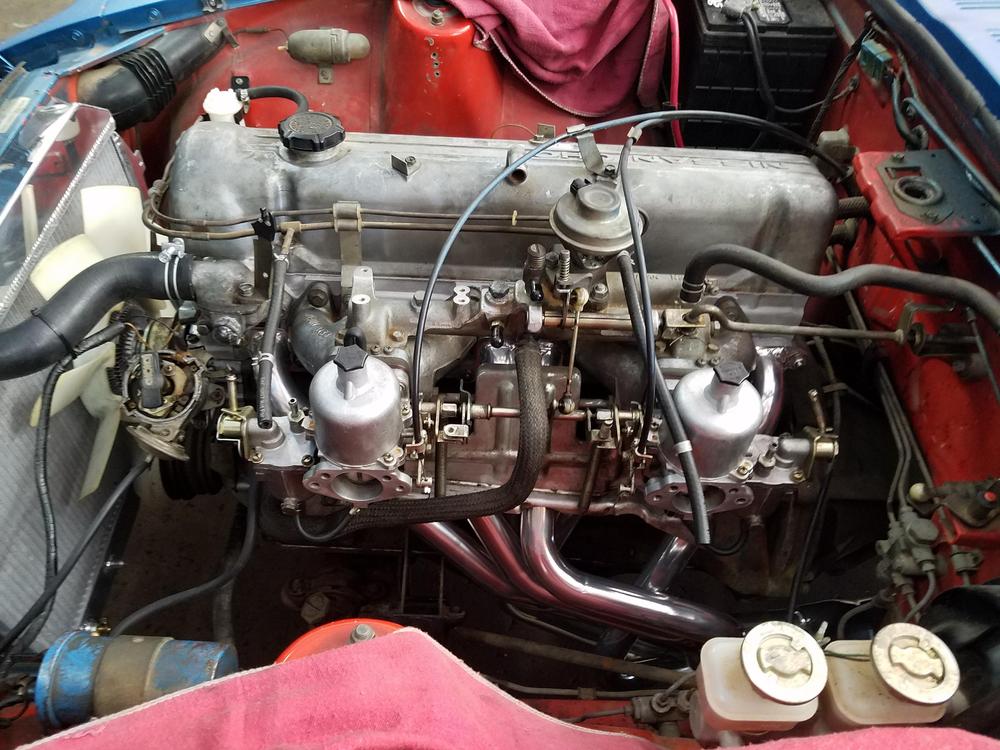


 1 point
until
The 2020 convention will be held in Franklin, TN -- September 14-19, 2020. Plan ahead and be there! Host hotel (at this time) is the Embassy Suites .. more to come as the event planning unfolds! Here's a pic of the presentation from the 2019 event.1 point Allow me to help you understand how it happens in the case of Porsche Factory Restored cars. https://www.porsche.com/international/accessoriesandservice/classic/factoryrestoration/ Let me know if you have questions. Dennis1 point
1 point
Well for Nashville,we expect you both to sport real flat tops if you are true to form and "the cause":
Allow me to help you understand how it happens in the case of Porsche Factory Restored cars. https://www.porsche.com/international/accessoriesandservice/classic/factoryrestoration/ Let me know if you have questions. Dennis1 point
1 point
Well for Nashville,we expect you both to sport real flat tops if you are true to form and "the cause": 1 point
WOW - Awesome results for our CZC representatives! Congrats to my Arkansas buds Jim1 and Jim2 with a pair of 1st's - well done. Jim31 point
WOW That is great guys. Congratulations! How close were the 73's in points? It looked like it would be a tough one to judge as you both put so much into your cars. JS way to go! Nice win!1 point
1 point
WOW - Awesome results for our CZC representatives! Congrats to my Arkansas buds Jim1 and Jim2 with a pair of 1st's - well done. Jim31 point
WOW That is great guys. Congratulations! How close were the 73's in points? It looked like it would be a tough one to judge as you both put so much into your cars. JS way to go! Nice win!1 point View Advert Restored 240Z steering wheels I've nearly finished one of my exhaust-parallel projects - 'new' 240Z steering wheels so time to share some photos. Once upon a time 50 years ago, all steering wheels were like new. Now they can be again and the perfect 50th anniversary gift for yourself and your car ! Completely stripped, spokes repainted and the the rim given several high-quality gloss coats, these will have new or refurbished horn mechanisms and centre pushes. They feel so lovely in ones' hands - a 'must' to finish your restorationand in a world where more and more people fit the black leather, competition replicas, be different and go old-school with the real thing ! Basic price will be US$675 (no horn push and your wheel in exchange). There are a lot of hours' work gone into these Advertiser Sean Dezart Date 07/21/2019 Price $675.00 Category Parts for Sale1 point
 1 pointAll: Well, this new first-hand evidence is certainly a compelling demonstration of the pitfalls of visuals over the web. The first fotos lead me astray regarding the actual hue of the blue, I reckon (tho the jury may still be out regarding the undercarriage...). So maybe it wasn't Col. Mustard in the Library with the lead pipe after all. However, I will reserve a final bark up this tree until after the car's first good wash, over and under. Still, spot on or off the mark, the exercise was an interesting diversion from the same old, same old.1 point
1 point
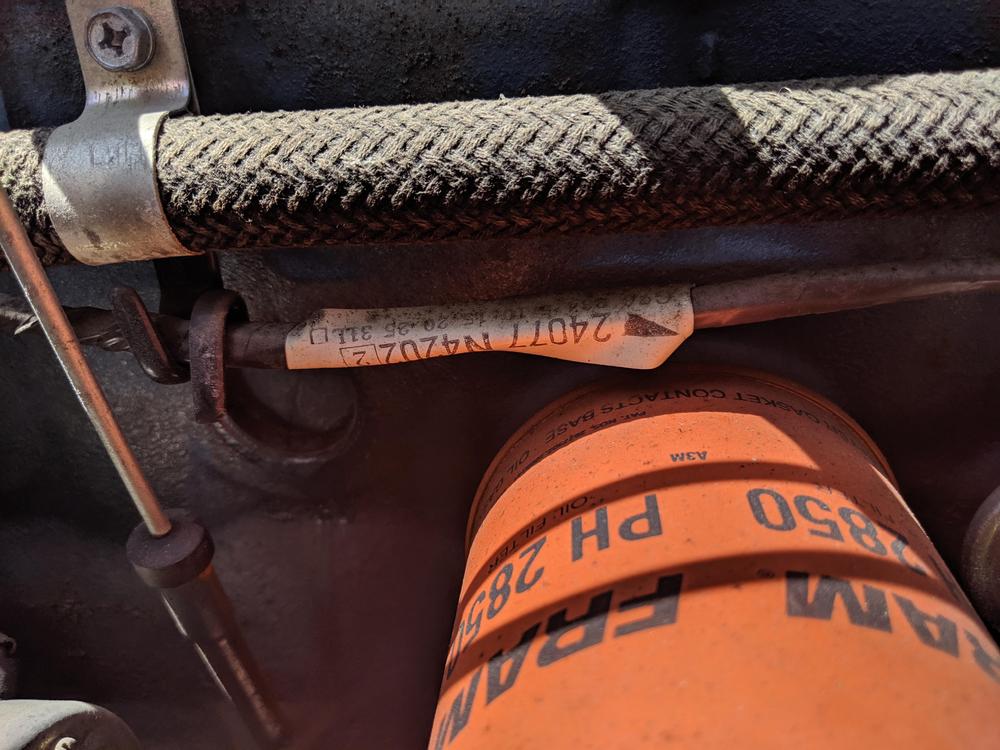
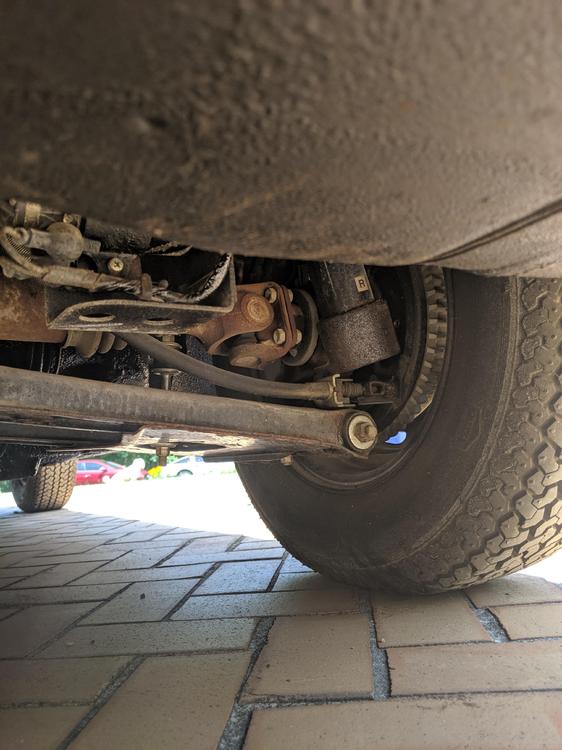
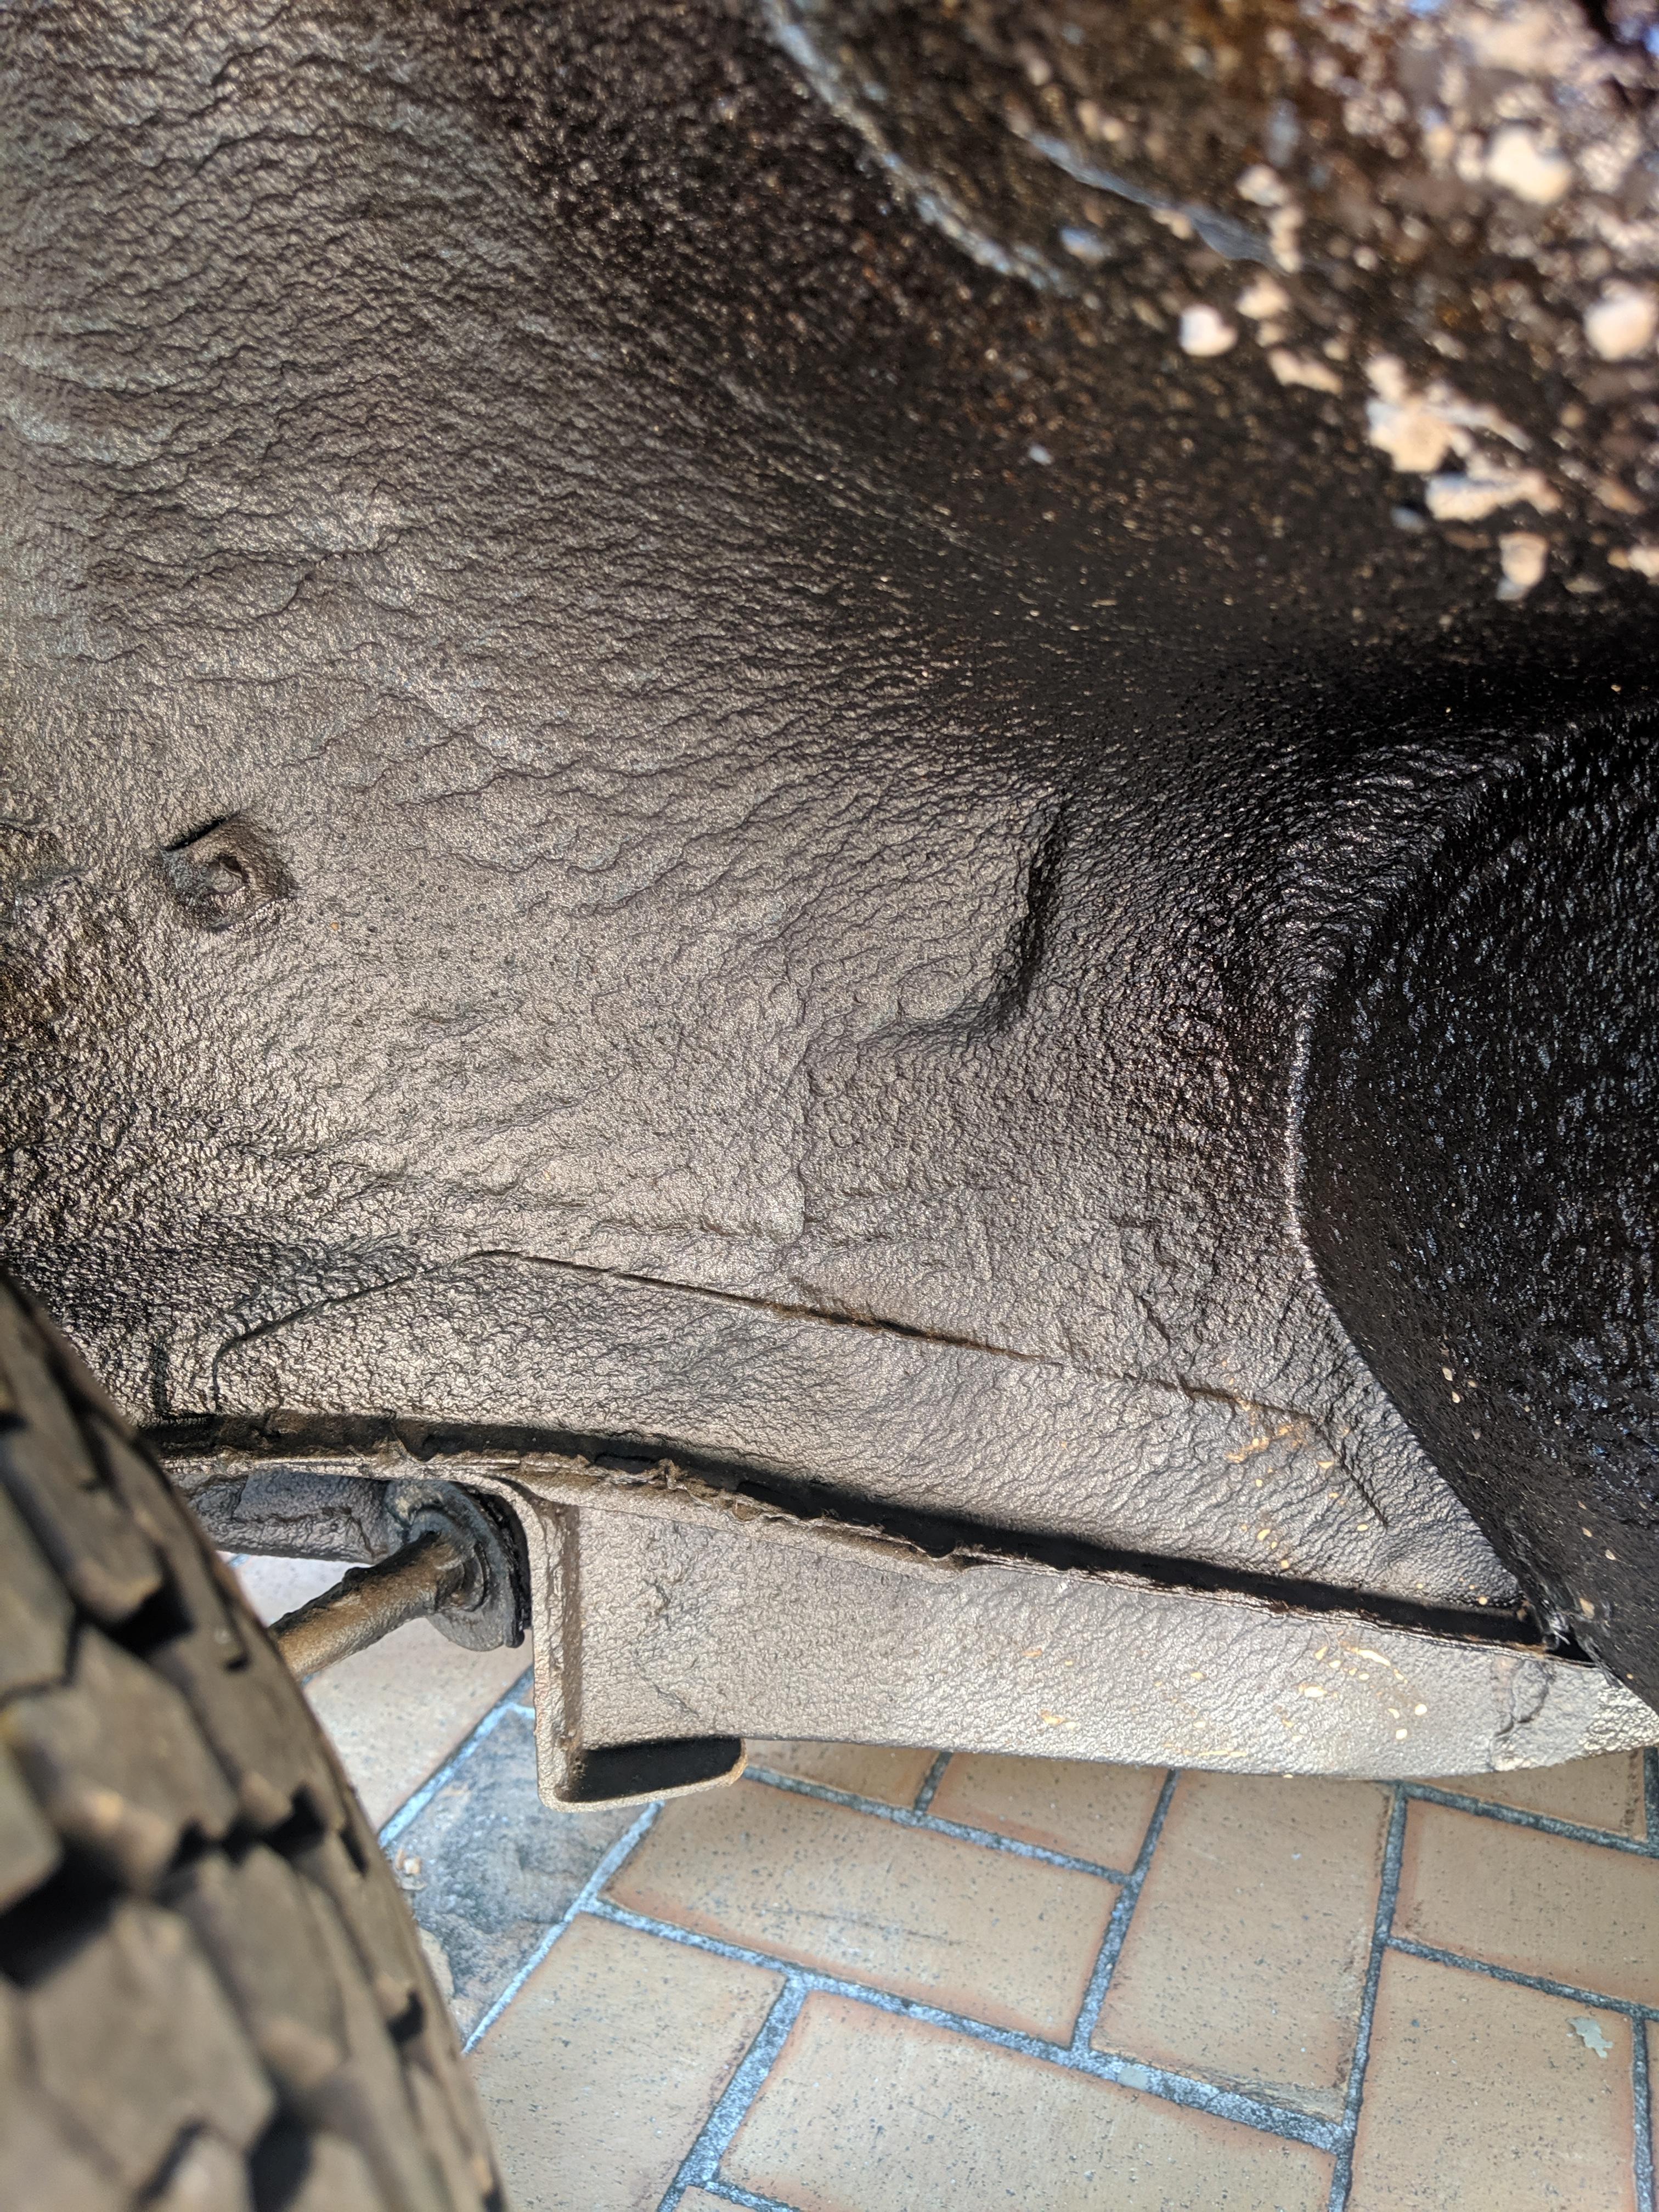
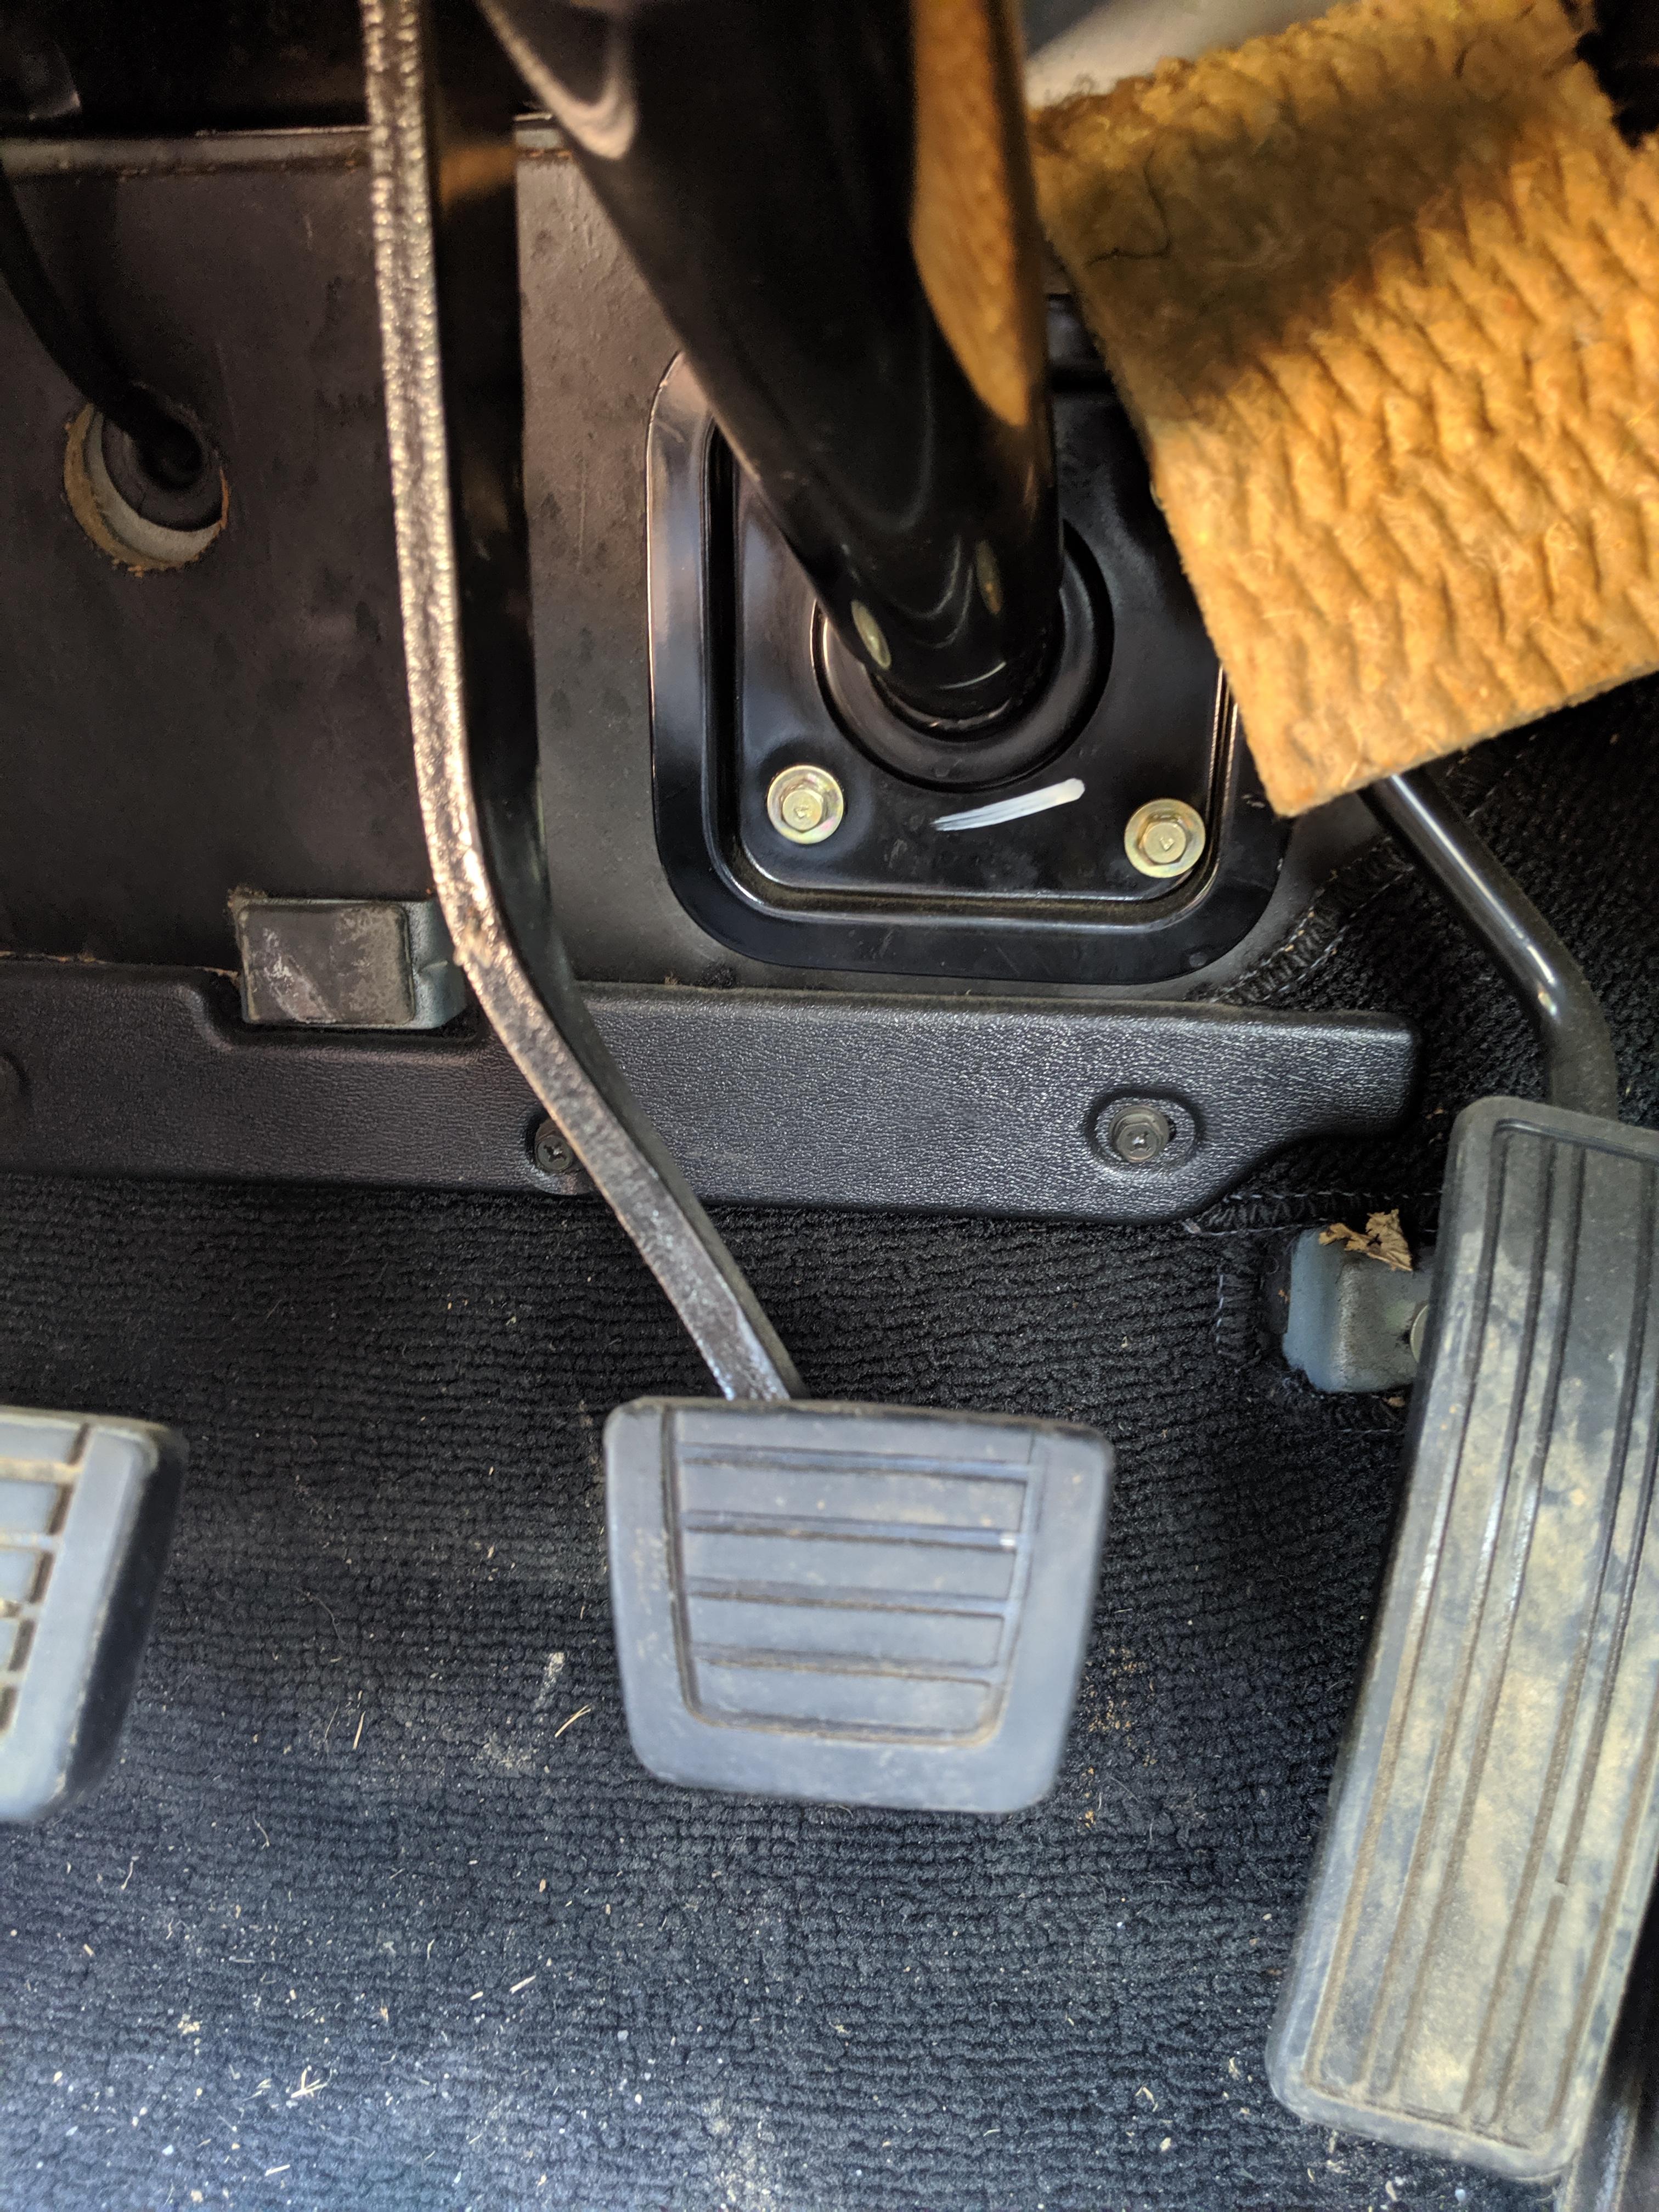
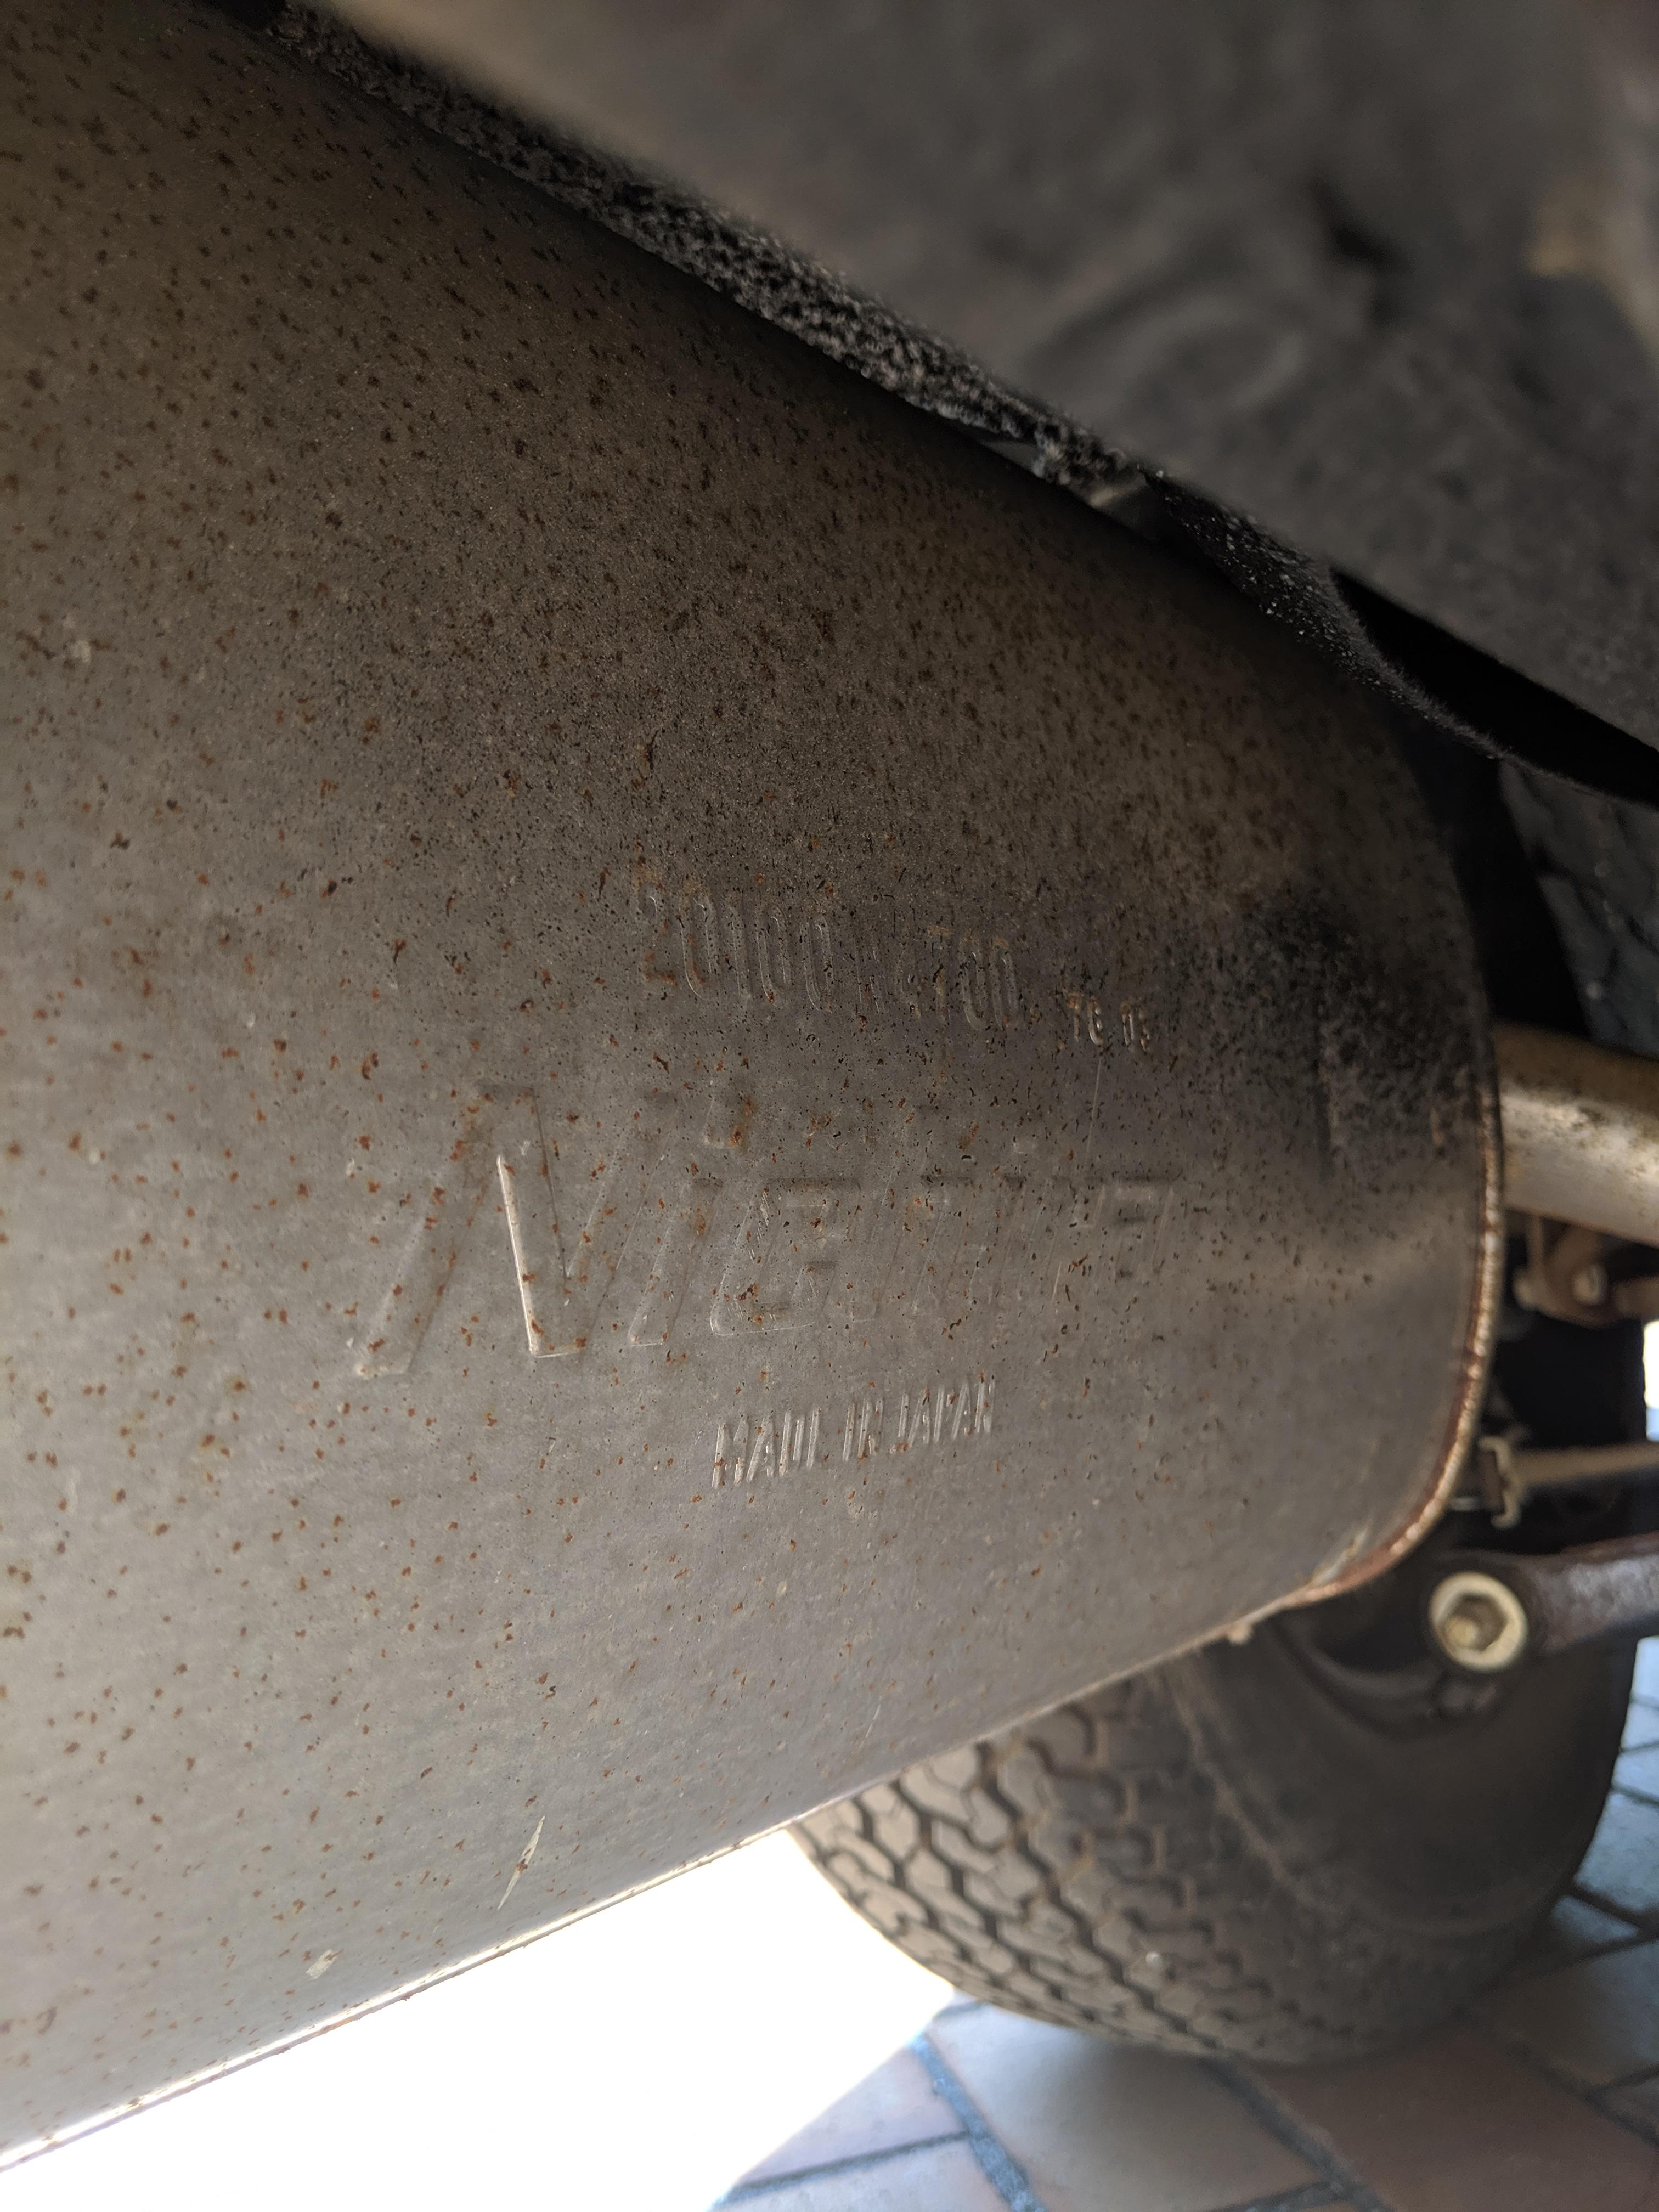
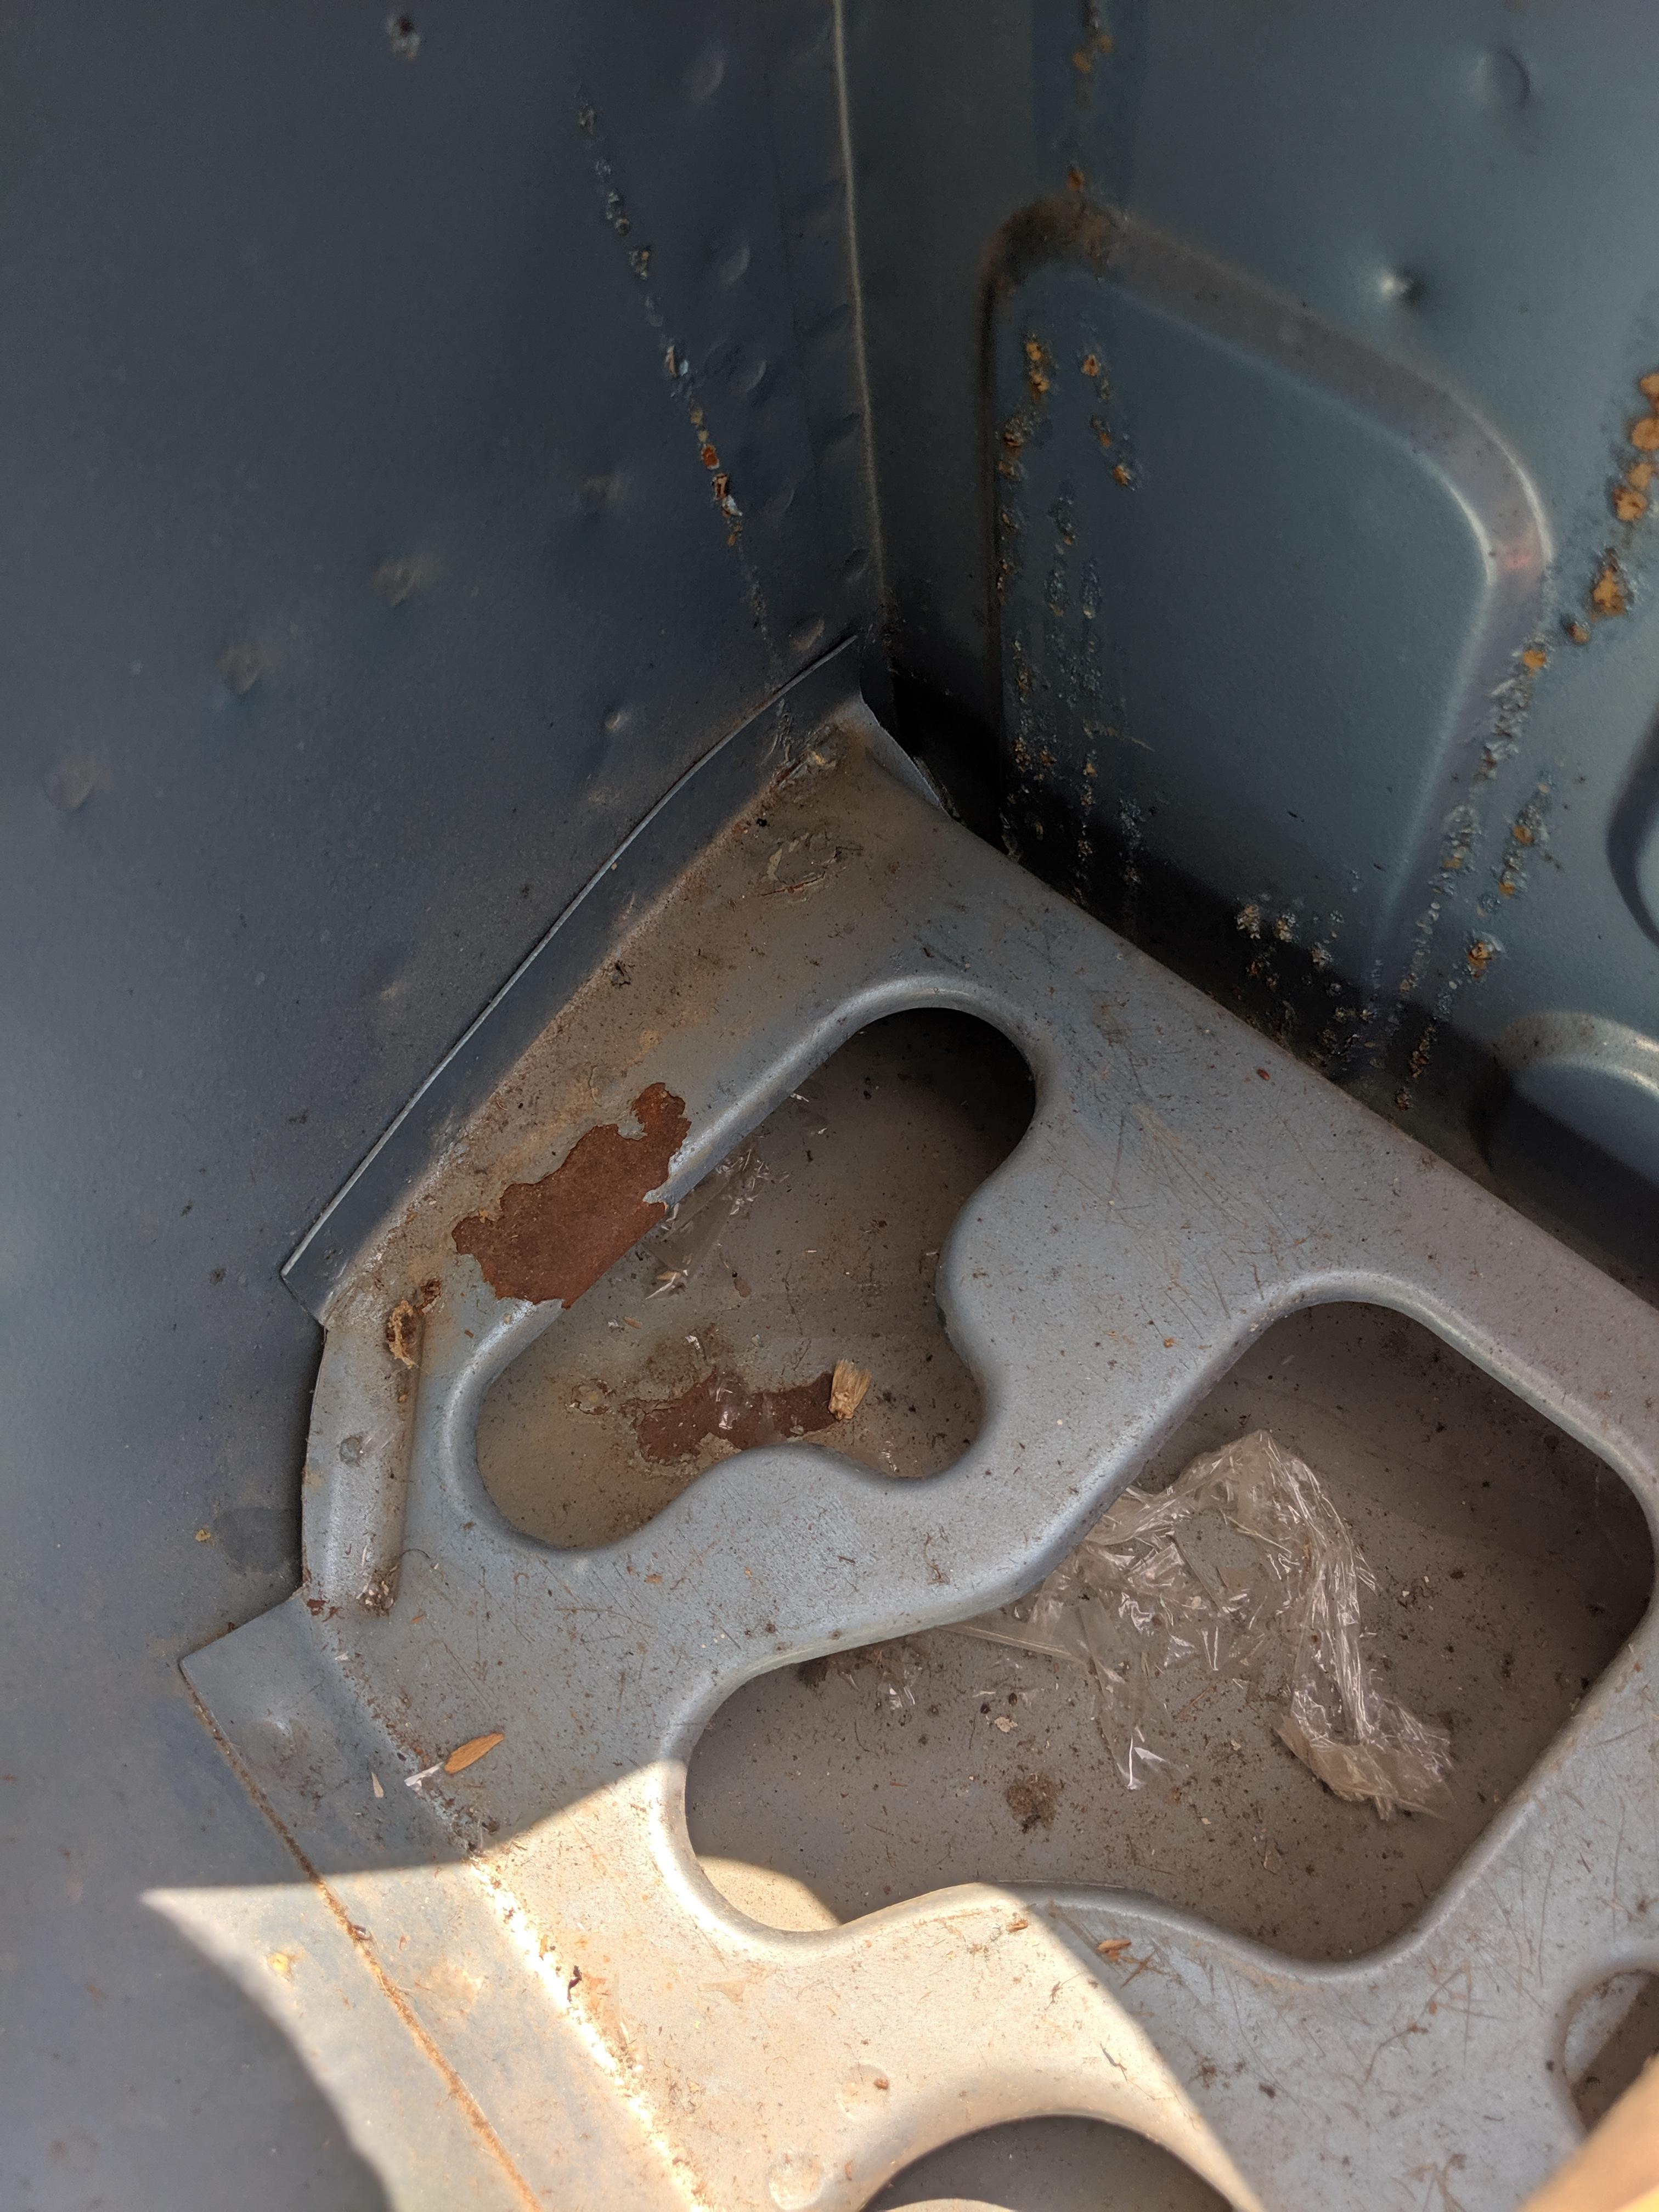
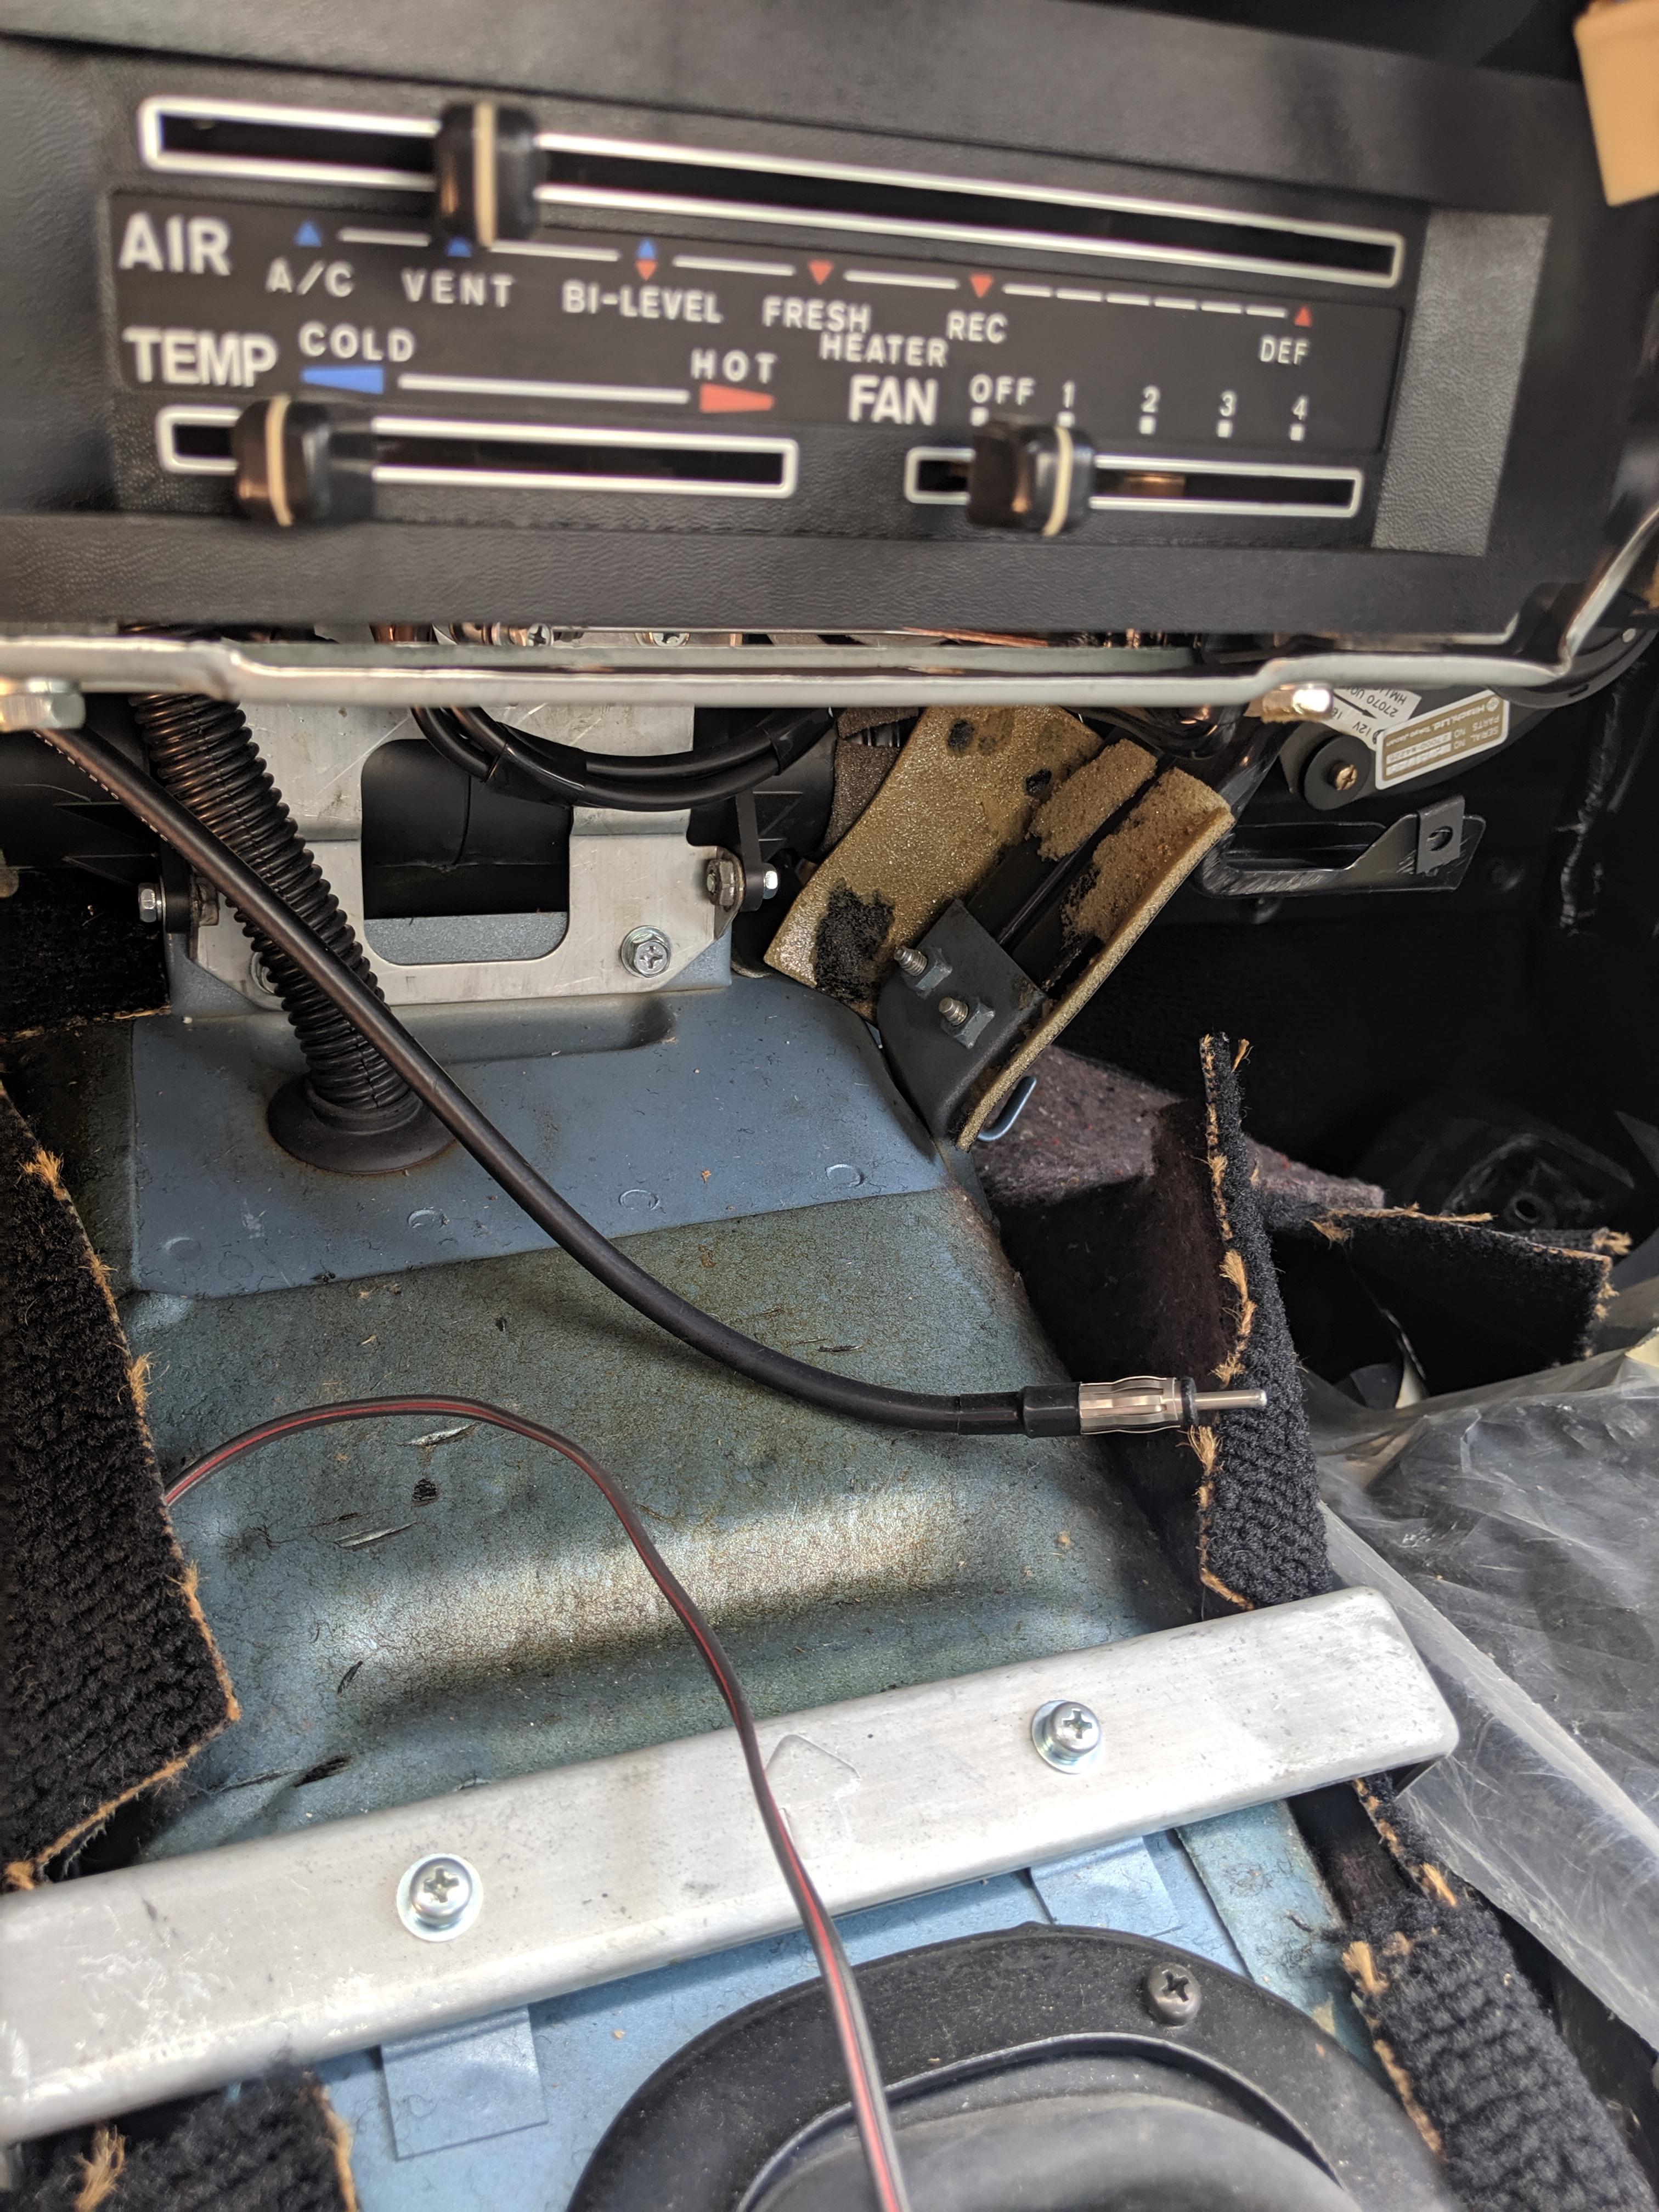
1 pointFirst, Clarification: I'm not trying to rain on anyone's parade. But there is a rather interesting conundrum here, and I never could resist a good mystery. Anyone ever play "Clue"? Now, I realize this is a lot like the blind men and the elephant, but somehow the limited clues make things all the more interesting. I checked and found I was wrong about the exhaust shielding thing; that was only on Cal. 280s like mine. However, the exhaust pipe looks awfully fresh in those surroundings, and with a finish that looks more aftermarket than Factory. On the other hand, I am confident in stating that all 280s were sprayed on the interior (including the tunnel) with the body color, and barring a misleading color rendition, the ash tray pocket seen at the top of the tunnel is not blue, nor is the flat area in front of the shifter. I am also confident that the undercarraige shots clearly indicate a fair number of miles on the chassis. The roll bar and its fixing bolt head, as well as the forward faces of the susp. arms are definitely not just muddy. Going to the interior again, the steering wheel, the seat covers, and the shift boot show the kind of dust consistent with that found on the engine and exterior, while the rear carpet and tower vinyl look very fresh. And so does the spotless, blemish-free dash and its very, very clean gauge lenses. Now, the fact is, that there is no reason to remove the center air grills to replace a radio. But one would have to do it to install that flawless dashboard. I'm inclined to propose that the 350mi probably came with the dashboard, that was not on this car when it left the Factory. The whole paint issue is fascinating. It will be interesting to see what the first good wash reveals. I can hardly wait for more clues1 point
1 pointAll: Well, this new first-hand evidence is certainly a compelling demonstration of the pitfalls of visuals over the web. The first fotos lead me astray regarding the actual hue of the blue, I reckon (tho the jury may still be out regarding the undercarriage...). So maybe it wasn't Col. Mustard in the Library with the lead pipe after all. However, I will reserve a final bark up this tree until after the car's first good wash, over and under. Still, spot on or off the mark, the exercise was an interesting diversion from the same old, same old.1 point
1 point
1 pointFirst, Clarification: I'm not trying to rain on anyone's parade. But there is a rather interesting conundrum here, and I never could resist a good mystery. Anyone ever play "Clue"? Now, I realize this is a lot like the blind men and the elephant, but somehow the limited clues make things all the more interesting. I checked and found I was wrong about the exhaust shielding thing; that was only on Cal. 280s like mine. However, the exhaust pipe looks awfully fresh in those surroundings, and with a finish that looks more aftermarket than Factory. On the other hand, I am confident in stating that all 280s were sprayed on the interior (including the tunnel) with the body color, and barring a misleading color rendition, the ash tray pocket seen at the top of the tunnel is not blue, nor is the flat area in front of the shifter. I am also confident that the undercarraige shots clearly indicate a fair number of miles on the chassis. The roll bar and its fixing bolt head, as well as the forward faces of the susp. arms are definitely not just muddy. Going to the interior again, the steering wheel, the seat covers, and the shift boot show the kind of dust consistent with that found on the engine and exterior, while the rear carpet and tower vinyl look very fresh. And so does the spotless, blemish-free dash and its very, very clean gauge lenses. Now, the fact is, that there is no reason to remove the center air grills to replace a radio. But one would have to do it to install that flawless dashboard. I'm inclined to propose that the 350mi probably came with the dashboard, that was not on this car when it left the Factory. The whole paint issue is fascinating. It will be interesting to see what the first good wash reveals. I can hardly wait for more clues1 point Installed some turbo wheels. Sent from my Coolpad 3310A using Tapatalk1 point
 1 point
 Pulled all (except roof liner) trim and carpets and sound proofed Z. Probably added 10-15kgs. With windows up it feels 3 times quieter. Quite amazing how noisy these panels were when knocked - spare wheel horizontal section, wheel houses, shock towers, trans tunnel, floor pans and body panels. I tried to only apply as much as required rather than covering the whole thing. Firewall was OK but got a couple of sheets for good measure especially next to trans tunnel next to where exhaust would reverberate. Floors already done by PO but quite thin MLV so I added more and covered with 3mm sticky backed closed cell foam on top, then carpets. Feels positively Audi like ;). You realise how loud it was inside before - when you wound windows down there was little difference before! Now it’s like someone whacked the volume knob up! Also bass from radio is now way deeper and audible over exhaust note! Very happy! Rear deck area will get 20mm closed cell foam under carpets for good measure soon!1 point
1 point
Pulled all (except roof liner) trim and carpets and sound proofed Z. Probably added 10-15kgs. With windows up it feels 3 times quieter. Quite amazing how noisy these panels were when knocked - spare wheel horizontal section, wheel houses, shock towers, trans tunnel, floor pans and body panels. I tried to only apply as much as required rather than covering the whole thing. Firewall was OK but got a couple of sheets for good measure especially next to trans tunnel next to where exhaust would reverberate. Floors already done by PO but quite thin MLV so I added more and covered with 3mm sticky backed closed cell foam on top, then carpets. Feels positively Audi like ;). You realise how loud it was inside before - when you wound windows down there was little difference before! Now it’s like someone whacked the volume knob up! Also bass from radio is now way deeper and audible over exhaust note! Very happy! Rear deck area will get 20mm closed cell foam under carpets for good measure soon!1 point
1 point


Important Information
By using this site, you agree to our Privacy Policy and Guidelines. We have placed cookies on your device to help make this website better. You can adjust your cookie settings, otherwise we'll assume you're okay to continue.