


Leaderboard


 Subscriber
.JPG.cfcada9cf1c1b502df3f5f2f2ca3ff36.JPG)

Popular Content
Showing content with the highest reputation on 02/14/2021 in all areas
-
From my notes on #556 For Sale 14 Jan. 2014 - Craigslist - Bad Rust - in Texas For Sale 25 Dec. 2017 - EBay - Beverly Hills, CA - looks like new floorboards&Frame Rails - bid to $20K - RNM FWIW, Carl B.4 points
-
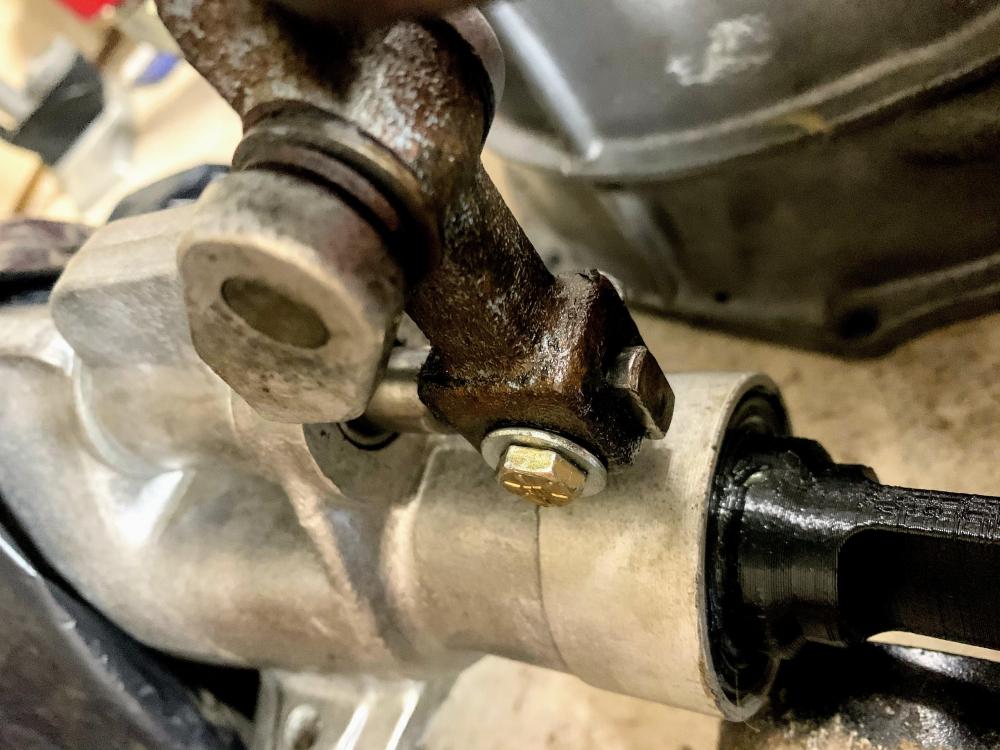
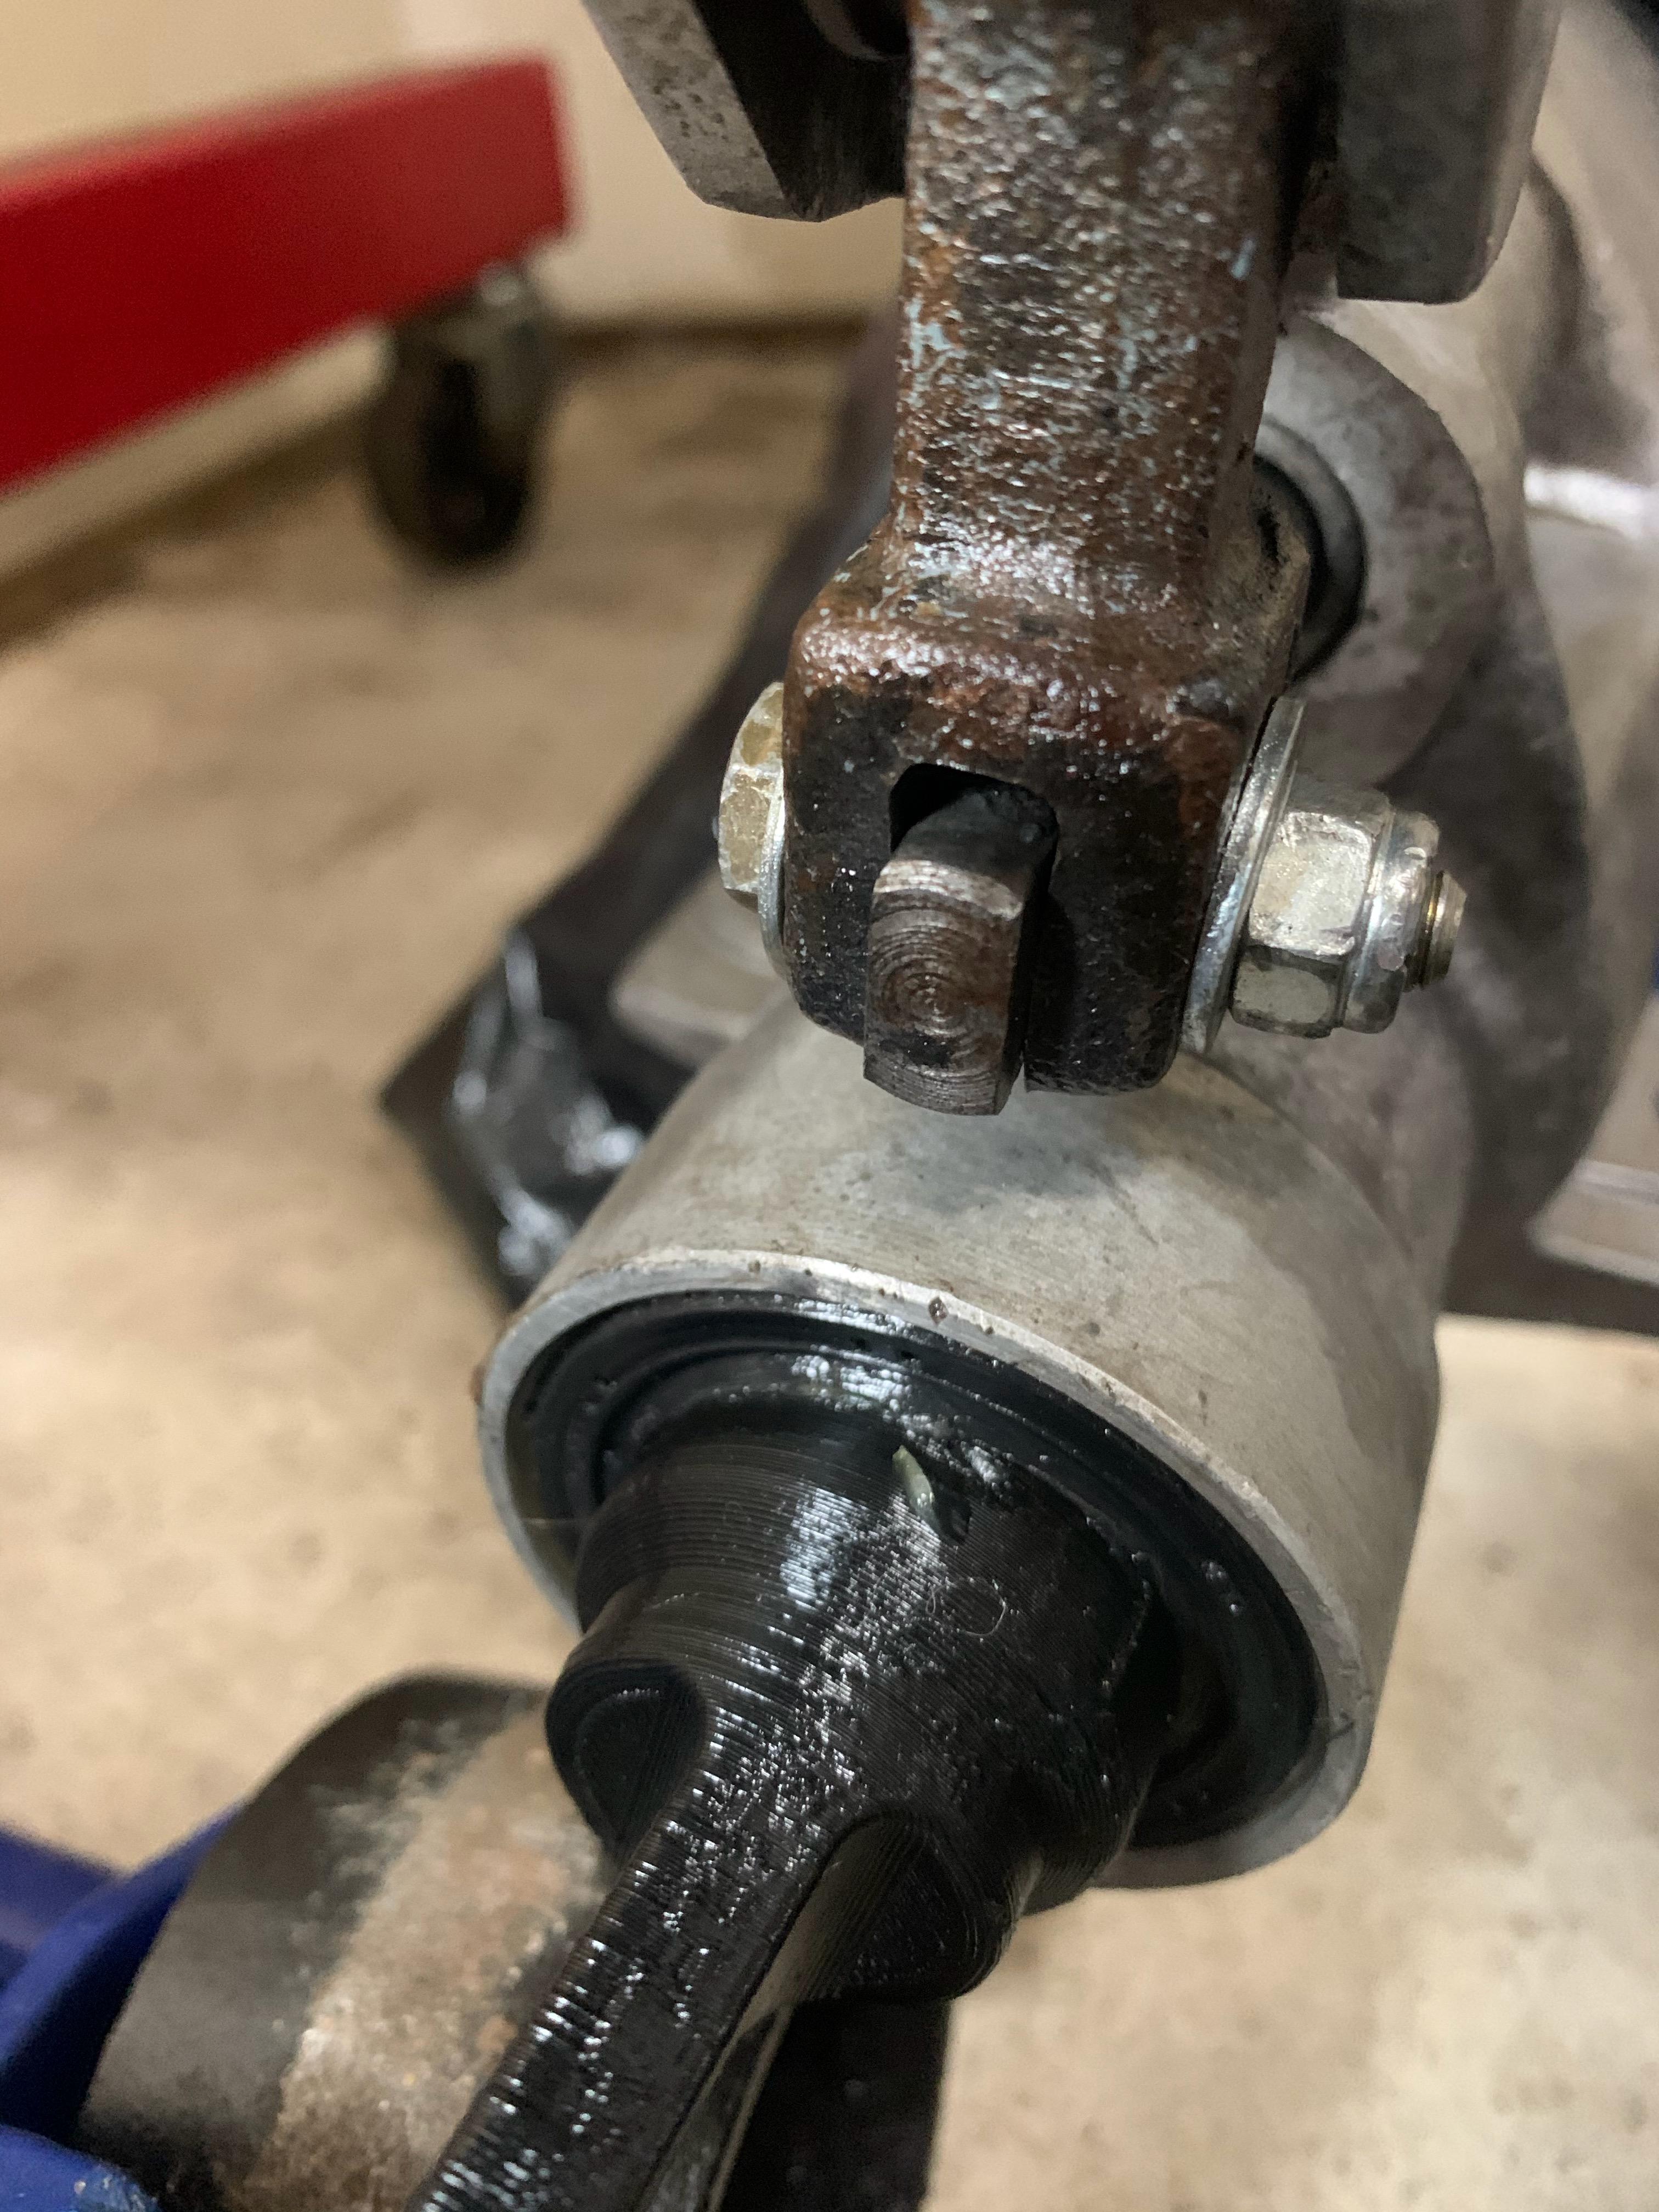
2 pointsHere are two pics of the bolt I used to replace the pin. It seems that the fork gets spread out from use causing the excessive slop in the shifter. I squeezed it back till the fork just slides over the rod (not too tight as it needs to be able to move freely) then installed the bolt, washers and Teflon nut. It took a little trial and error on finding the sweet spot where the slop is 99% gone but the shifter still moves easily. I did it in the car but it would be A LOT easier to do out. I hated the sloppy feel and this fix drastically improved the overall driving experience for me. When you order the bushings be sure to specify this transmission, I don’t know the production years off hand but I’m sure you can find it either here or a google search.

 2 points
 -
2 pointsI just got my friend's reply: "Fill the air inlet of the impact with air tool oil, connect the air and then blast away at the nut. The oil prevents air from going out of the vanes of the impact, and will produce significantly more torque than just air."2 points
-
1 pointWe've posted together on this before. Texas heat, Alabama heat. I cheated and put a 280Z radiator on my '72 with a full ZX shroud. I have the OE stuff but for driving around here it runs nice and cool.1 point
-
1 pointI installed one 4-5 years ago on my 1972 and it made a difference...but hey...I'm in Central Texas. 🙂1 point
-
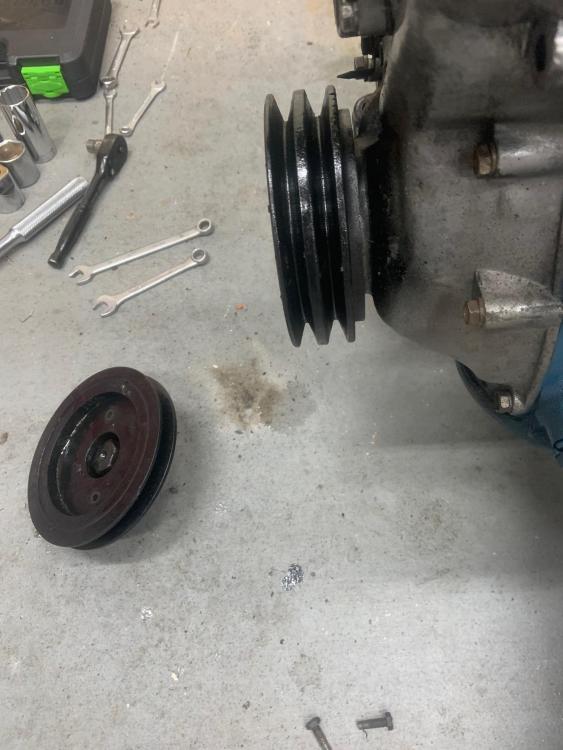
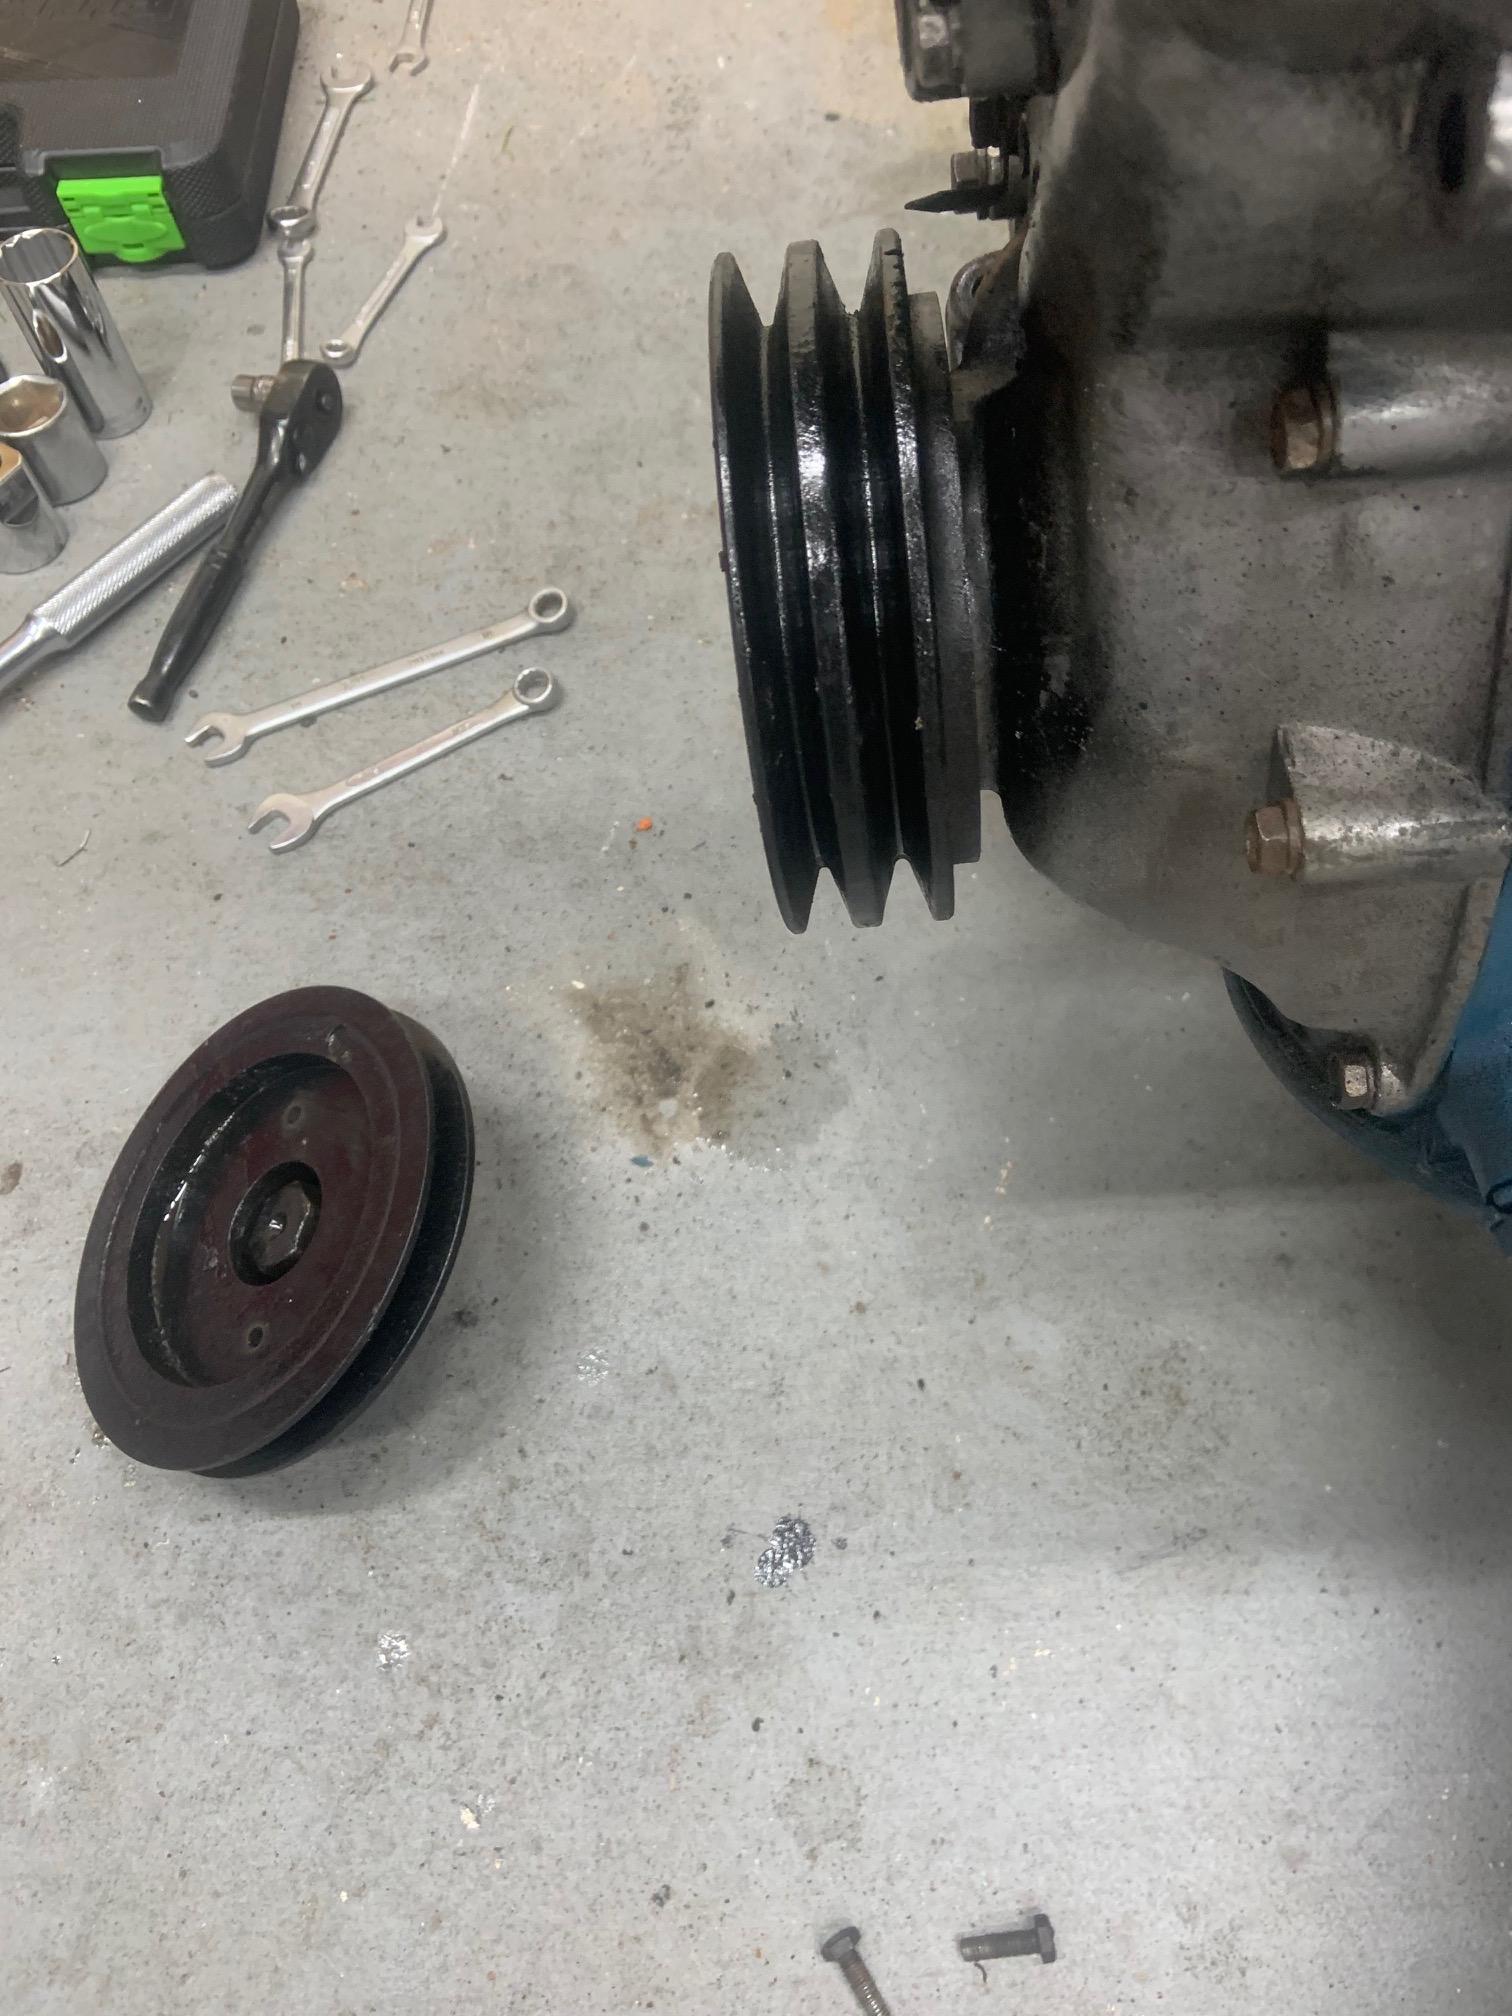
1 pointI think that the "remaining pulleys" are actually the damper itself. It's a slight interference fit on the crankshaft, with a key. You might need a damper puller to remove it. Don't pull on the outer metal pulleys, they're attached to the hub via rubber. The damping material. A damper puller threads in to the hub and pulls from there.1 point
-
California Datsun used to be Datsun Parts Limited. The guy that owns the business is named Al. He has a membership on this site as URGELIS. You can search the name on this site, and the former company name on the internet to learn more about him. His old business had a bad reputation for selling defective parts then refusing to make things right. Notice that he does not really address the major concerns with the headers. The port shape and the flange thickness. He does not show photos of either either, just s single photo of the view that doesn't tell much, with a universal shaped gasket. Get on to Rock Auto and compare things like distributors with the same parts on his site. Compare prices. https://www.californiadatsun.com/headers/datsun-nissan-z-240z-280z-n42-p90-e88-header.html1 point
-
Yes, Embee is the hold up. They've apparently had a batch of MSA's 2020 header orders held hostage for a while, so MSA is telling people they are in wait and see mode. I told MSA to consider Jet-Hot. They've done it a long, long time and are fast turnaround. Took them about 5-6 business days to get mine coated and back out the door. So, that's why I'm thinking just ordering the uncoated from MSA and then sending them off. Just tough to wait around another month or so with a car that is otherwise ready to roll. Problem is Embee is a drive across town for MSA and Jet-Hot is a shipment to Oklahoma. Looks like those Pacesetters are sold by ZCarDepot, Summit, and Holley, among others.1 point
-
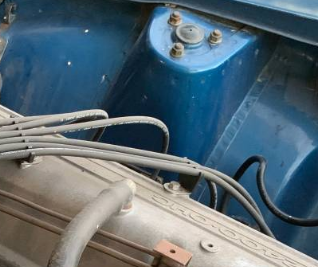
I sent the following eBay email to harmony01: Good morning, It's great to see such a low-number VIN! Please post pictures of the VIN on the firewall, the data plate in the engine bay, a picture of the engine number on the block and the VIN on the dashboard. If you reached the capacity for pictures, please email the pictures to me. Thanks, Steve harmony01 replied to my eBay email and sent me the pictures posted below. The only picture he didn't send me was the VIN on the dash. I sent him another email, asking for a picture of the VIN on the top of the dash.

.thumb.jpg.3be5e7fd1955fecbcdde45bbcd781008.jpg)
.thumb.jpg.79914afc48a7c252aa406e0a3cb7f0c7.jpg) 1 point
1 point -
Here I precariously setup my camera on a pail inside the car (thank you grand daughter for letting me borrow your plasticine), facing toward the bottom front edge of the trim. My “thing” tool is my favorite tire changing bar that is thick, tapered and tough as hell. I use it for many prying and beating operations, I sharpened the end to a flat crisp edge. It is about 1/8 thick. Have a look. 76101A06-62B6-4726-A121-0963A9D9DB93.MOV1 point
-
Thanks! I might take you up on the offer. I ordered the omega machine tools bushing and installed that right now. I put it in the freezer last night and it went in with only some effort. This bushing I have only ever mentioned when talking about 5 speeds, so I'm about to find out if there is a reason for that.1 point
-
1 pointYahtzee. its off. so you are right. it is 27mm. I got a 27mm "torque" style which apparently has thicker socket walls. Ran to Ace hardware and got a regular 27mm with the new impact wrench i just bought and it came off with no issue at all. Do the remaining pulley come off with the timing cover? or are they just compressed on and will come off now with some elbow grease. thanks guys
 1 point
 -
My connector pieces were built to match what was already there. Not perfect I’m sure, it is very close. The jack plates are my own design as far as I know. I don’t remember seeing them done before. But I’m sure someone else had the same idea. The TC bucket was removed by drilling out the spot welds and careful grinding. I just welded back through the spot welds to put it back on. And yes, my thread would benefit from “chapter markers” ....1 point
-
1 pointDon’t think you can go wrong with the MSA header - it’s been the same design forever . Thick flange . NOT equal length , but that doesn’t amount to much as far as performance . My MSA does a good job keeping heat in the header with the ceramic coat . I don’t like this mismatched port shapes either .1 point
-
1 pointIn Germany they say a 10 year old tire is not done.. i drove in the Netherlands with good 15-20 year old tires, no problem.. Of course you have to take into account the conditions but that is using common sense.. My 280zx is at the moment on old tires with lots of thread.. has no cracks at all but these tires are a dissaster on wet roads, very slippery... I like a bit of a slide haha..1 point
-
1 pointThe biggest problem with garage kept old tryes is with aging comes hardening. Mine are always garage kept on blocks placed under the suspension keeping the wheels 2 cm off the ground for most of the year. I know they are hard and will not have good grip in the wet, but my zed never goes out in the rain. I would like to buy new tyres, but finding anything suitable for this period in 14" is hard. If they are not showing any cracks, they should be ok for dry weather. They will under perform in the wet so be carefull in wet weather. Specially if your daily is a modern car, you can quickly forget the situation you are in amnd then it's too late.1 point
-
Just went through your TC reinstallation mark! Great job and I liked the addition of the jacking plate. Took me an hour of trawling to find it! (It was around page 40 if anyone else wants to check it out) But I think your installation was not to original? Or is the joiner from chassis rail to frame rail separate on the 280z? We didn't get the 280 in oz. I will be doing this job within in the next 6 months. I agree with the guys @Patcon and @grannyknot if you are trashing the frame rails and keeping the front section of the chassis rails keep the two together and cut the frame rail away slowly. Will be taking detailed measurements and notes before cutting anything on mine! Ryan1 point
-
You do kind of have to admire his persistence. He has his game, and he just keeps playing it. He didn't show the dash VIN plate either. I wonder if it's one of those Frankenstein Z's now.1 point
-
1 pointJust don't get into a situation where yours or someones else's life relies on those 4 little patches of rubber to be at their best. Tire compound has a lifespan and it continues to age whether you see cracks or not.1 point
-
1 pointAgreed - I wouldn't worry about them at all. I have ran 20 year old tires, that have been garage kept - showing no signs of side wall cracking - on Classic Cars driven only occasionally with no problems. The one exception - 1991 Thunderbird Super Coupe, with 10K original miles. Original Tires Goodyear's V Rated... At 21 years old, took it out for a drive and felt the tread separation take place... wobbled my way home - and replace them all the next day. (kept the tires as proof of the mileage on the T-Bird when I sold it in 2002). That said - I'm always keeping an eye open hoping to find any good 195/70R14's for my Z's.. (good looking/brand name/sports car style etc). FWiW, Carl B.1 point
-
1 point
-
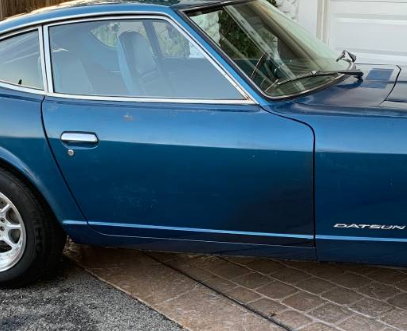
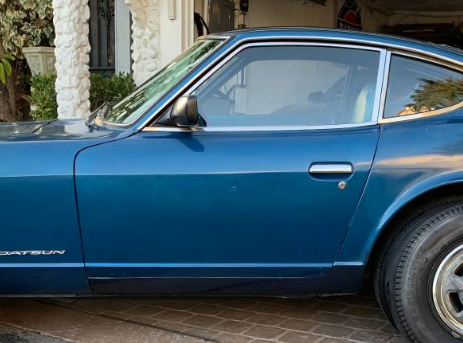
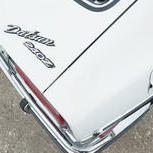
The driver's door is hanging a bit low, but the front gap looks close. Looks like somebody rattle-canned the front lower corner of the passenger door. Shouldn't you be able to see the engine bay ID tag in his picture of that shock tower? Blaster coil, fancy dual tipped exhaust, the rear end panel has been painted. Some kind of paper smuggling going on in the rear hatch lip area. Lots of not-quite-right. I'd want to see the firewall VIN. He must know about it, as a "Z collector". Interesting car. Of course, it won't be sold, per 01 usual.
 1 point
 -
1 pointI have the ratchet in M12. It works good but then you have 2 kinds of batteries. they make it in M18 too but it's a lot bulkier1 point
-
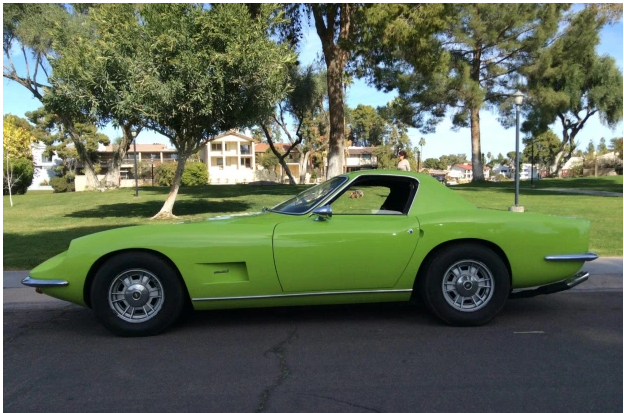
Never heard of this brand, but it looks like an Italian Pantera. 351 V8 Ford engine, Italian styling. Z car + Corvette = 1971 Intermeccanica Italia Coupe. https://bringatrailer.com/listing/1971-intermeccanica-italia/?utm_source=dm&utm_medium=email&utm_campaign=2021-02-13 Weird antenna. Looks like a light pole.

 1 point
 -
1 pointJust curious how others lock flywheel when tightening crank bolt. I usually pull the starter and get a friend to lodge a screw driver in a flywheel tooth to lock the crank. I don’t like to put a screw driver through the cam sprocket or a wrench on the cam as it could put pressure on the timing chain. If on an engine stand, I have a flat metal straight edge I bolt to crank end (2 bolts) until it rests against engine stand to lock the crank. How do others do this? Just curious. Guy1 point
-
1 pointYou can try to shock the threads loose. Place a large brass drift on the center of the bolt head, and smack it sharply with a 3 pound drill hammer. Sometimes two or three raps may be needed. Then hit it with the impact gun.1 point
-
1 pointYou could also use a planetary gear torque multiplier. Most can be used to tighten and loosen. Be sure not to exceed the rated input torque. Thirty years later I still remember the loud bang when I was helping to tighten a large taper hub fastener on a tire shredder to 2000 ft-lbs and we blew up the torque multiplier using a long handled breaker bar on the input.1 point
-
1 pointI think this is what my friend suggested. Otherwise, it's probably a matter of bolting the engine to something very solid and getting a four foot pipe to put over the end of a wrench (800 ft-lbs).1 point
-
1 pointMy point was what Zkars said, hose diameter is what matters for air tools, not PSI rating. A small diameter hose doesn't feed a sufficient volume of air for an impact wrench. Sort of like breathing through a straw. 250 Ft/Lbs is probably optimistic. Probably need a better impact. If the engines in the car try Zkars idea1 point
-
1 pointEngine still in the car? Put long handled socket handle with 27mm socket on said nut, and rest arm against left frame rail. Engage starter for 1.46 seconds. Nut will be loose. Air driven impact wrenches need sufficient air volume to reach their potential. 1000 psi doesn’t matter if it just wheezes out of a small 500 foot long hose...1 point
-
1 pointI sent an email to a friend who gave another friend some suggestions on this same topic about a year ago. I'll let you know what he says.1 point
-
1 pointWhat impact did you already try? What size hose? How much air pressure and volume?1 point
-
1 pointI have this one. It's removed L28 crank pulley bolts among others. The one you specified claims a breakaway torque spec of 1200 lbs. The one I have claims 1190 lbs so the one you are looking at should work going by those parameters. https://www.harborfreight.com/12-in-composite-xtreme-torque-air-impact-wrench-62891.html1 point
-
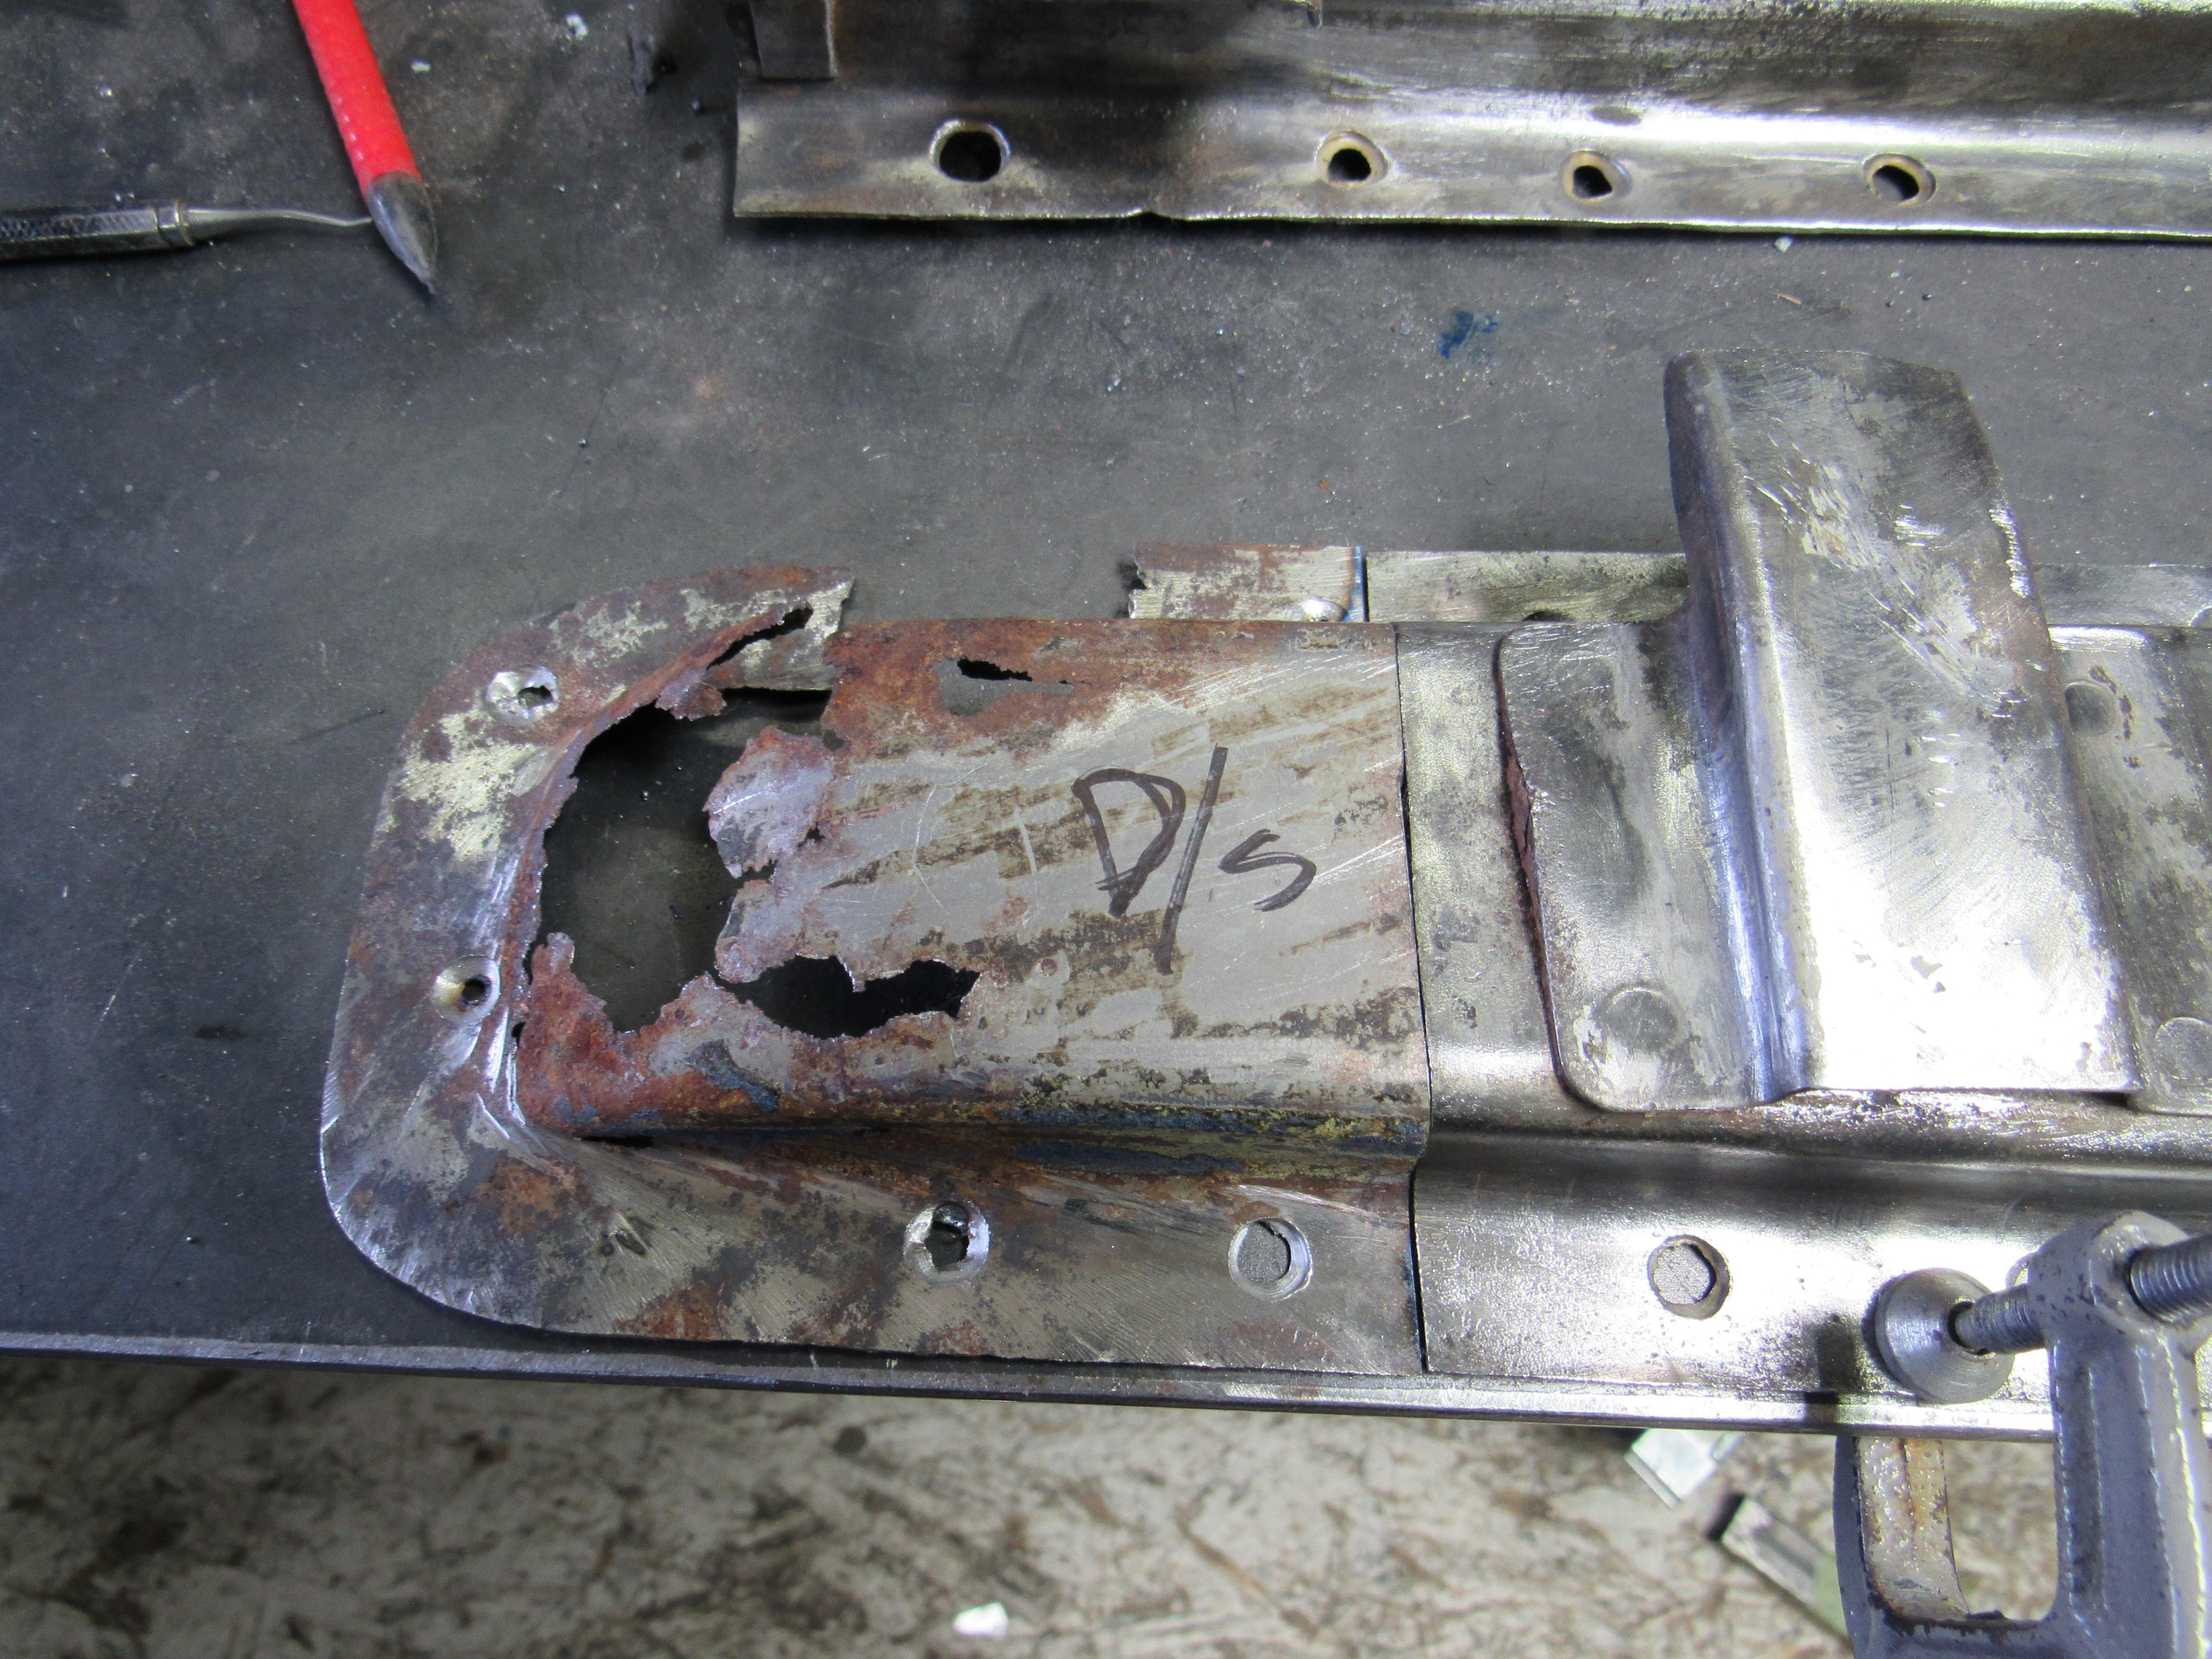
1 pointNot sure why the floor pan rails aren't being reproduced by anyone yet, they certainly take a lot of abuse. Fortunately mine were in pretty shape except for some rust at the tail end, I got those finished up today and welded on. There is also a big hole in the rails just in front of those end pieces, comes like that from the factory. Maybe there was a rubber plug in there at one point but uncovered it just acts like a scoop picking up rain water from the road, I think I might weld those shut.

.thumb.jpg.6a5185b7f05e99dd913cf039f541b880.jpg)
.thumb.jpg.2568d5c013a8acc88059a6ebb35aca0e.jpg) 1 point
1 point -
I'm assuming that you want to leave the T/C bracket attached to the lower floor pan rail? If so then cut the engine bay rail about a 1/2" above that seam weld holding the bracket and rail together, pull the bent rail out and then you have lots of access to the top of the T/C bracket to cut and grind off what is left on the bracket. It's nice to see you tackle this job John, you'll be driving her by next spring.1 point
-
If I were doing this, I would remove from the rail after the fact. Provided the rail is being trashed. I would grind the rail off the bracket so as not to lose any material off the bracket. Make good dimensions first, of course1 point


.jpg.f08102659f03d2ace4c9dbf2f5938841.jpg)
.jpg.dbaf1a19c87069776c72c63b27c028eb.jpg)


.jpg.633e66bbec3fd49385baadb7eaf605b7.jpg)
.jpg.15755812c63c76cf6c642882e840e0e6.jpg)