Leaderboard
-
conedodger
Free Member27Points12,493Posts -
siteunseen
Free Member12Points15,113Posts -
emptech
Free Member9Points33Posts -
dutchzcarguy
Free Member9Points2,672Posts
Popular Content
Showing content with the highest reputation since 10/26/2025 in all areas
-
240 with e12-80 plug gap
7 pointsI'm taking a year off from life. 99% of the bad ones are from pushing to fast to get back to work. Not me, I enjoy being at home.7 points
-
Float level advice, please.
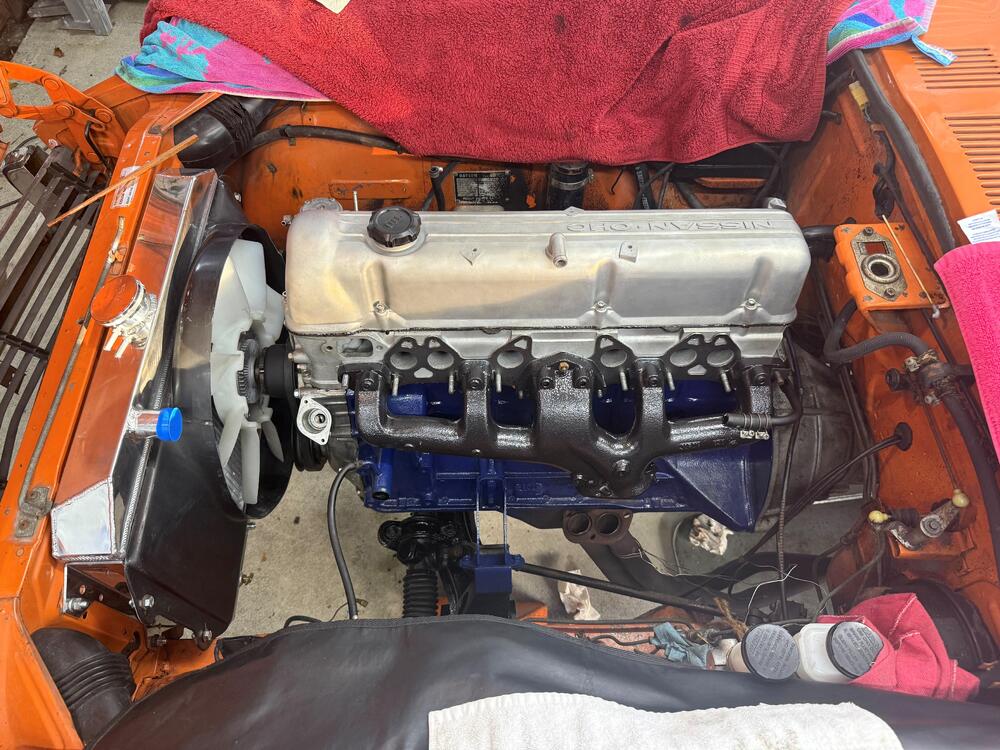
4 pointsStill waiting for the silicon rubber fuel lines, but in the meantime disconnected the fuel filter and took a container with new fuel, connected to the fuel rail. I made sure to purge the questionable fuel. Cranked the engine, coughed and sputtered and the engine actually started. It was running extremely rough, couldn't even tell if it was all cylinders. Once I cleaned up some spilled fuel on the ground, I'll try again. The fuel level is set to 10 turns (10mm) below the bridge. I then set the nuts on the nozzles to 2.5 turns out from the bridge. I should pull the plugs just to see what they look like, hasn't been running in probably 5-10 years. As the engine ran, I could even hear the electric fuel pump running, thus fuel on the ground. I'm going to connect the fuel system back to kind of normal, where it will suck clean fuel from a gas can, as the tank is dirty. I also need to put some 20 weight or atf in the carbs, think I've used too heavy oil. I didn't have the engine running long enough to experiment with mixtures yet. I'll keep you posted, not out of the woods yet. Jim4 points
-
SN 00042 Restoration; The Older Twin
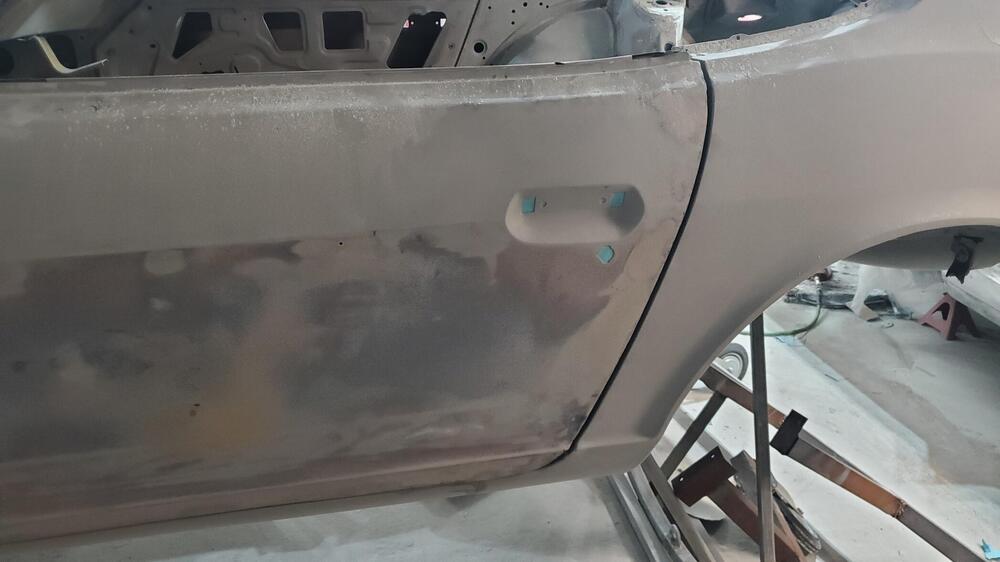
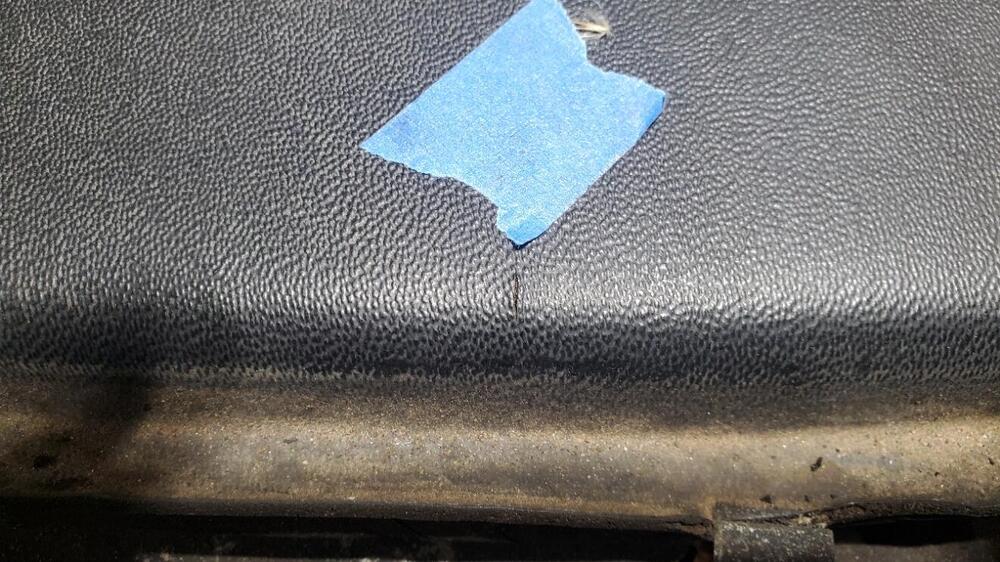
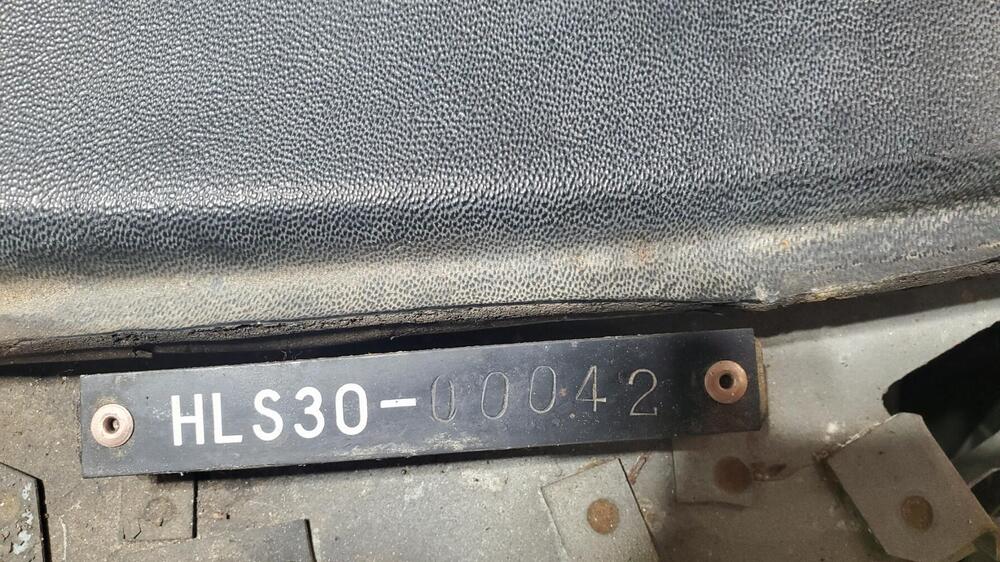
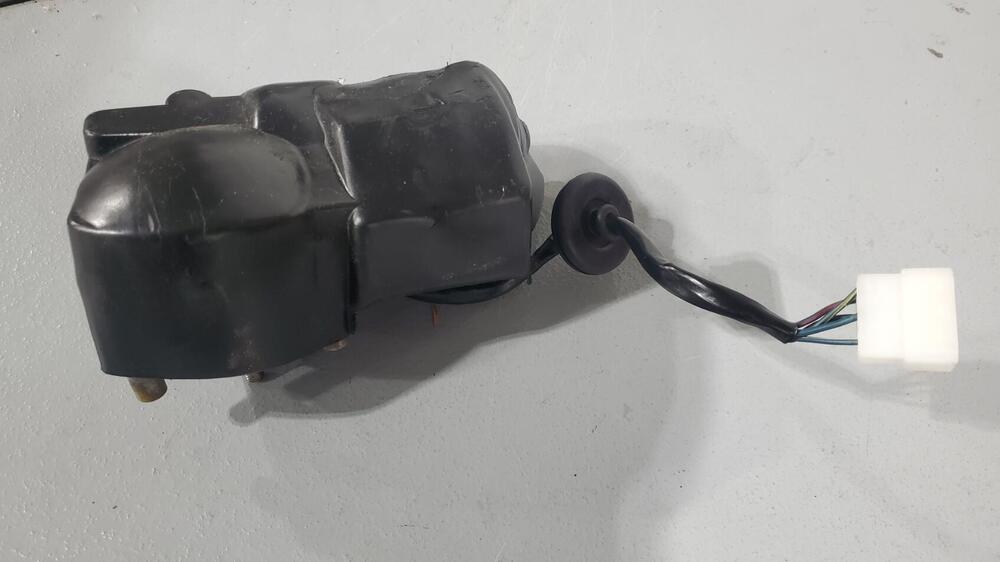
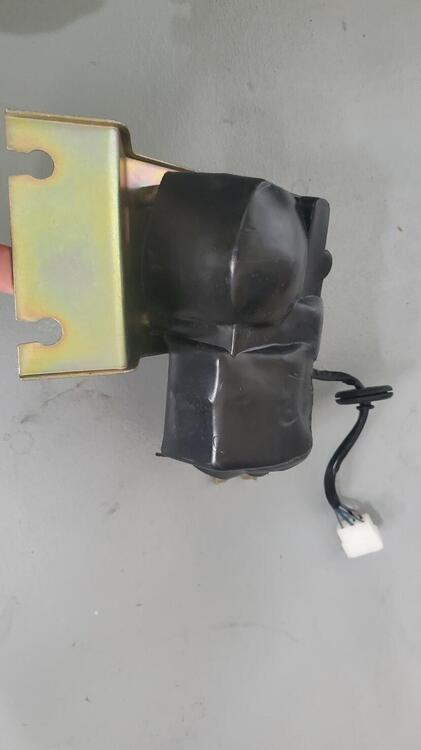
4 pointsThe body shop work continues and looks like things are moving along nicely. I am happy to see that they are being very thorough and even cleaning up areas that no one will ever see. I did check the seat mount locations. The rear inboard bracket on both the drivers and passengers side is off by about 2 inches (both are too far outboard). Carlos has a welder and will do the re-mounting of the bracket. I did contact Larry, the original metal work guy, to point out the error. Looks like we will get that re-mounted for no additional cost. I also sent pics of the dimesnions from the seat rails. The dimensions that I measure are 13.0" wide (330mm) and 12.75" deep (324mm). I removed the air galley from the exhaust manifold, but was not able to salvage it. After repeated heating, cooling and lube applications, I was only able to get 2 of the fittings out. By this time, the hex portion of the remaining fittings were starting to get pretty trashed, so I ended up cutting the tubes on the remaining 4. Fortunately, I did not have to do any re-tapping of the four difficult fittings. I was able to drill away most of the metal in the center of the fittings and sort of peel the threads off of the manifold. This made is easy to save the extension tubes that are secured by the fittings. On all of the previous cars that I have restored, I have always used a gray powder coat finish on the exhaust manifold that Les Cannady at Classic Datsun Motorsports always uses. Since we want to be very exact on the reproduction, I was considering a high temp cast iron paint which would be closer to the original color. However, it was noted that those typically peel even with the best prep and application. POR 15 was recommended, but again, this ends up being a colored paint and softens the texture of the original cast iron and doesn't really replicate the original color. I eventually phoned Rod Schmitt of Rod's Garage (Restorer of the 2025 JCCS Best of Show Red 240Z and John Morton's 1st place Green 240Z in the 240Z category) to find out what he uses for the final finish on the exhaust manifold. Rod says he cleans the manifold well with wire wheel and then uses a couple light coats of graphite spray for the final finish. He says this comes the closest to the original color and finish. It also handles the high temps well. So, this is the current plan for the exhaust manifold finish. I have started cleaning up some of the steering column parts. Some before and after pics are attached. It looks like these components have been accessed previously as the turn signal mechanism had a wire that was just twisted together with an extension on the horn circuit, so I removed the extension and soldered the wire in place. It has a broken connector which I thought I could replace with another signal mechanism that I have but that replacement was just as brittle as the broken coneector, so I just ordered a new one. Also, the headlight mechanism looks surprisingly good, so I am thinking that may have been replaced as it looks virtually brand new. Typically, these are pretty gummed up and the white parts are yellowed and/or dirty. This one looks untouched. I will re-restore the steering wheel as the previous restoration is poor. The black paint is thick and uneven and should be a satin finish, not gloss. The 'wood grain' portion has a heavy gloss finish, should be light satin or semi-gloss, and the back side with the 'nubs' was over sanded so the wood grain appearance is missing on the nubs.4 points
-
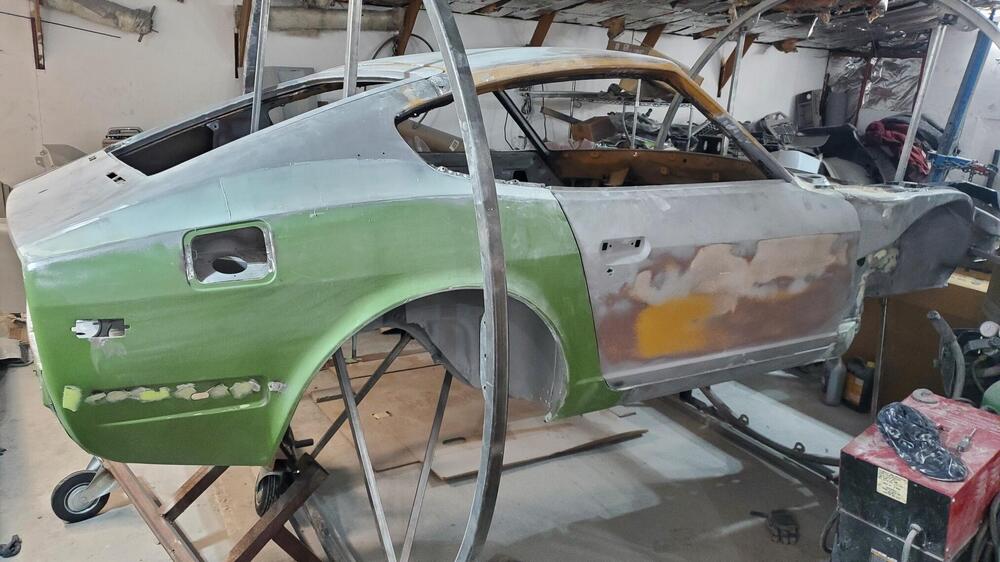
1971 HLS30-14938 "Lily" build
3 pointsI got back in the shop today. Rear bumper is on. I don't like the fit but it's on for now... License plate light and hatch badges and I think the rear end is done Also worked on installing the leather pieces over the wheel arches I trimmed one of the last pieces and hemmed it with glue3 points
-
1973 Rebuild
3 pointsOh.. Americans with theire abriviations... 🙃 LET'S FIND OUT.... ;-) I took a run after reading a few lines... do you too? 😄 (From acronymmap.com) When it comes to quirky acronyms, SWMBO is one of the more humorous and culturally loaded ones. Short for “She Who Must Be Obeyed,” it originated from the 1886 novel She by H. Rider Haggard and was later popularized in British pop culture, especially by the TV series Rumpole of the Bailey. In modern usage, SWMBO is often a tongue-in-cheek way to refer to a wife, partner, or authoritative woman—sometimes with affection, sometimes with sarcasm. It’s playful, but depending on the context, it can also carry undertones of reverence, exasperation, or humor. But what if you want a different way to express a similar dynamic—whether you’re writing fiction, creating dialogue, or just having fun with words? Here are 30 alternatives to the “SWMBO acronym,” each offering its own spin on authority, affection, or dominance in relationships, with tips on when to use them. 💬" src="https://s.w.org/images/core/emoji/16.0.1/svg/1f4ac.svg" style="box-sizing: border-box; vertical-align: -0.1em !important; border: none !important; max-width: 100%; height: 1em !important; display: inline !important; box-shadow: none !important; width: 1em !important; margin: 0px 0.07em !important; background: none !important; padding: 0px !important;"> 30 Alternatives to the “SWMBO Acronym”1. The BossMeaning: The one in charge—clearly or unofficially. Example: I’ll have to check with the boss before making plans. When to use: Light and common; works in everyday banter. 2. WifeyMeaning: Slang term for wife or partner, often affectionate. Example: Wifey said no more late-night snacks. When to use: Casual and endearing tone. 3. Her HighnessMeaning: A mock-royal title, playful yet deferential. Example: Her Highness demanded sushi tonight. When to use: Use humorously for high-maintenance behavior. 4. Queen BeeMeaning: The dominant female in a social setting. Example: At every family event, she’s the queen bee. When to use: Playful or slightly sassy tone. 5. The MissusMeaning: Informal British term for wife. Example: The missus wants the lawn mowed by noon. When to use: British-style humor or traditional tone. 6. Lady of the HouseMeaning: The woman in charge at home. Example: I’ll have to run it by the lady of the house. When to use: Respectful, classic tone. 7. My Better HalfMeaning: Affectionate term for a spouse. Example: My better half thinks I should eat more greens. When to use: Loving and respectful, ideal for couples. 8. She-Who-DecidesMeaning: Humorous variation of SWMBO. Example: She-Who-Decides has spoken—no takeout tonight. When to use: Playful and sarcastic tone. 9. Commander-in-ChiefMeaning: The ultimate authority, especially in decisions. Example: She’s the commander-in-chief of our calendar. When to use: Family, logistics, or decision-making jokes. 10. Madam PresidentMeaning: Feminine version of a powerful leader. Example: Madam President vetoed the weekend trip. When to use: Great for dramatic flair or political puns. 11. House CEOMeaning: The domestic leader. Example: The House CEO says we’re budgeting this month. When to use: Modern, corporate spin on household dynamics. 12. Home MinisterMeaning: Borrowed from political jargon; leader of domestic affairs. Example: The Home Minister says we’re painting the kitchen. When to use: Popular in South Asian or formal humor. 13. She-Who-Knows-AllMeaning: Exaggeratedly wise or all-knowing woman. Example: Let me check with She-Who-Knows-All about dinner. When to use: Good for light sarcasm and praise. 14. The Decision MakerMeaning: The one with the final say. Example: The Decision Maker chose Italian tonight. When to use: Straightforward and respectful tone. 15. Supreme RulerMeaning: Absolute authority figure. Example: Our Supreme Ruler has declared Sunday a rest day. When to use: Dramatic or theatrical humor. 16. The Real BossMeaning: Implies there’s a “fake” boss—you! Example: You know I’m just the assistant; she’s the real boss. When to use: Self-deprecating humor. 17. Lady SupremeMeaning: Formal and elegant version of a leader. Example: Lady Supreme prefers red wine, not white. When to use: Elevated, stylish tone. 18. Chief Home OfficerMeaning: A modern acronym-style twist. Example: The Chief Home Officer rejected my couch pick. When to use: Satirical or millennial context. 19. She-Who-ChoosesMeaning: Authority over all decisions. Example: She-Who-Chooses has picked the movie already. When to use: Fun for everyday decision contexts. 20. Life ManagerMeaning: Handles schedules, meals, and logistics. Example: My life manager says we’re booked Saturday. When to use: Modern, respectful tone. 21. She-in-ChargeMeaning: Simple, direct way to show authority. Example: She-in-Charge just changed the plans. When to use: Works in light banter or social media captions. 22. The OracleMeaning: Source of wisdom and prediction. Example: The Oracle says the weather’s too cold for shorts. When to use: When referencing judgment or intuition. 23. The GeneralMeaning: Authority with a military-like tone. Example: The General has scheduled laundry drills for Sunday. When to use: Humorous, structured or “bossy” tone. 24. The PlannerMeaning: Coordinates everything. Example: The Planner already booked the holiday tickets. When to use: Useful for lifestyle or family writing. 25. Queen of EverythingMeaning: All-encompassing authority. Example: As the Queen of Everything, she makes the rules. When to use: Sassy, confident characters or real-life queens. 26. Her Royal HighnessMeaning: Majestic and a bit dramatic. Example: Her Royal Highness refuses to eat leftovers. When to use: Fun and theatrical tone. 27. Operations ChiefMeaning: Runs the day-to-day. Example: The Operations Chief set curfew at 10 PM. When to use: Use for modern or workplace metaphors. 28. Lady LogicMeaning: Appeals to reasoning and planning. Example: Lady Logic said buying a third toaster isn’t smart. When to use: Clever, witty banter. 29. Mood ManagerMeaning: Controls the emotional climate. Example: When Mood Manager’s happy, we all win. When to use: Emotional tone regulation or family jokes. 30. She-Who-Must-Not-Be-IgnoredMeaning: A dramatic twist on the original SWMBO. Example: Trust me—you don’t ignore She-Who-Must-Not-Be-Ignored. When to use: Strong-willed or high-stakes situations, humorously. > How to Choose the Right WordWhen choosing your SWMBO-style alternative, ask yourself: Is the tone playful, romantic, or sarcastic? Go with Wifey or She-Who-Decides for affection, Supreme Ruler or Her Highness for sass. Are you in a professional, creative, or casual setting? Use House CEO or Home Minister in clever writing. Stick to The Boss in casual conversation. Do you want to sound respectful or silly? My Better Half and Lady of the House are gentler, while The General or Queen of Everything lean toward satire. Is it cultural? Home Minister resonates well in South Asian families; The Missus fits UK usage. > Final ThoughtsLanguage lets us show affection, sarcasm, and social dynamics all at once. Acronyms like SWMBO are fun because they capture complex relationships with humor and punch. But with the right alternatives, you can adapt the tone, show respect, or even poke fun—all while keeping it creative. So next time you’re writing a caption, penning dialogue, or teasing your partner, try out one of these 30 creative expressions. Let your vocabulary reflect the fun, fiery, or fabulous dynamics of the powerful women in your life.3 points
-
Float level advice, please.
3 pointsI just ordered a pair from Z, I've used silicon rubber hoses before for other gas-related things, they would eventually get soft, but I'm told their's is made for gasoline. I'll do a visual again, looking for vacuum leaks can be difficult, if the engine was running one can use propane that gets sucked up from the leaks and you can hear it in the engine, but this guy won't start yet, oh forgot, need to use new fuel to be supplied directly to the fuel bowls. I'll keep you posted, hopefully getting close. Jim3 points
-
Z's on BAT and other places collection
WOW! My 6 letter comment that could have meant a host of different things was almost immediately taken by our resident grouch as an insult or slight that I had directed towards another member of this forum. I've had a relationship with Chris for many years and have done business with him on numerous occasions. Before Covid I was to have traveled to The Netherlands on his dime to inspect his collection and offer suggestions. I've always found him to be a gentleman on all levels who is apparently having a problem with lost/missing paperwork. I wish him all the best. While I may be a greasy and now rather ancient mechanic who doesn't know his a@$ from a hole in the ground I've learned a bit about human nature after dealing with the public for the past 45+ years. There are some people who are just plain unhappy. This unhappiness is manifest through insults, cursing, almost consent contradiction, just plain difficulty/impossibility to deal with or all of the above. While my shop was open I had to deal with these types. Thank goodness they were few and far between. From this date and time I will no longer comment on or address ANY missives from the individual in question.3 points
-
240 with e12-80 plug gap
3 points
-
saturday night music thread
2 points2 points
- SN 00042 Restoration; The Older Twin
2 pointsMy now closed shop generated 4 Gold medallion stock 240 recipients. We tried 2 different finishes for exhaust manifolds. One was a finish like you're using and the others had Jet-Hot cast finishes. In EVERY case the judges (?) said the finish was incorrect and deducted points. Our last Gold Medallion car was judged (?) to have a steering wheel finish which was "too shiny". Go figure!!!2 points- SN 00042 Restoration; The Older Twin
2 points2 points- Just saying hello
2 points- Help ID early air filter assembly
2 points- [2025] What Did You Do To/with Your Z Today?
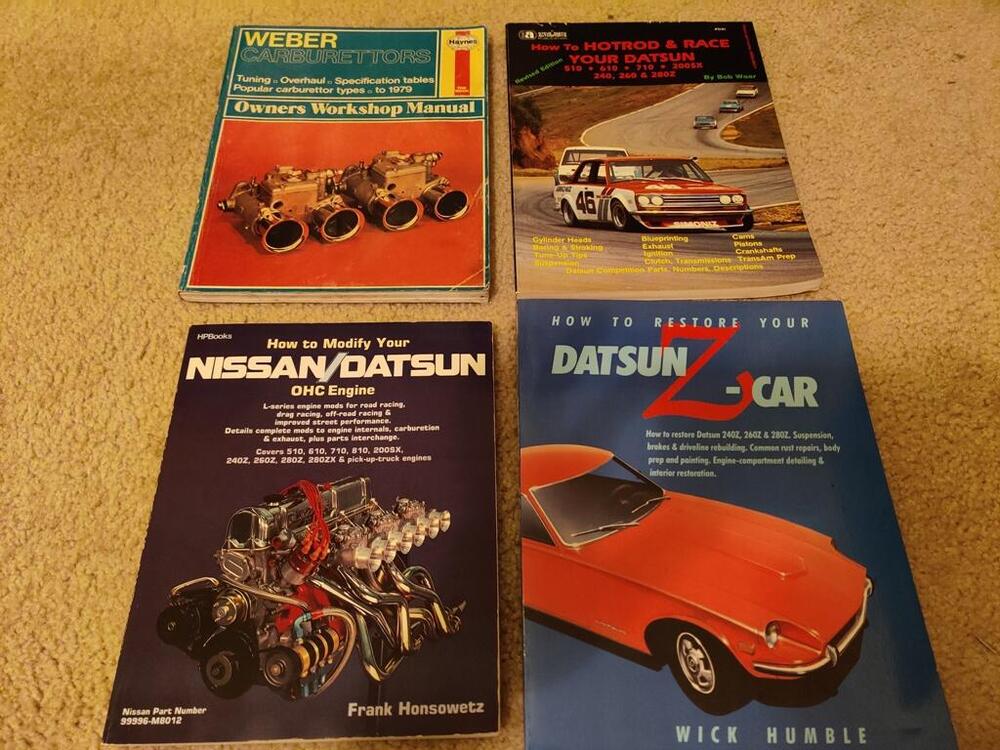
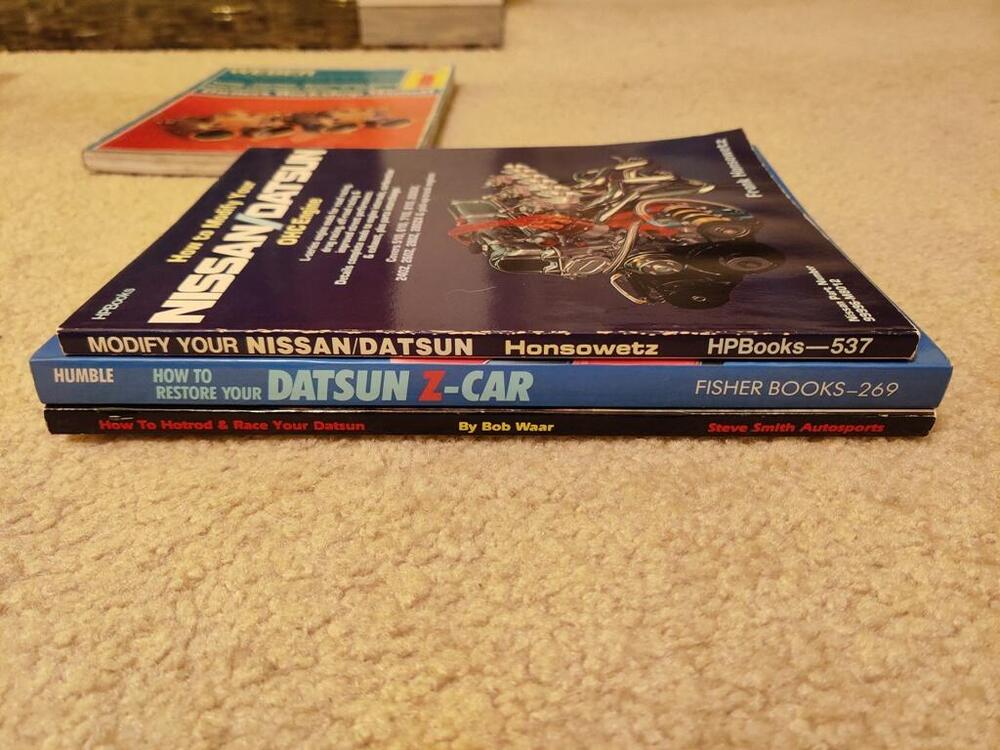
It did strike me as odd that Humble had you snug in the spline and then put a continuous bead of adhesive over it only to pull the spline out later. I can attest that this pulls out most of the adhesive as well. But, who am I to argue with a guy who did it this way and wrote the book on restoring a Z car? Attached photo of Page 130 shows exactly what he said to do. This was for the windshield but he later on says to do the hatch glass the same way. Then, at the bottom of the first column of Page 131 he says to do exactly as you say; i.e., put the sealant under the raised lip of the window. In fact, as I read it, he's saying to do this on all three channels: glass, exterior and interior. This makes eminent sense and really makes me wonder how that first bit of nonsense made it through editing. Oh well, live and learn. Frankly, it's stuff like what I've just been through that makes it all the more important that users of this site comb through all the old threads and extract useful info that can be condensed and put into technical articles for any and all to utilize. I'm trying to do that during my build. Final photo is of my pet Senegal parrot, Koki, eating the marrow out of a chicken bone; a favorite activity. He just loves attention.2 points- My two swiss S30Z Fairlady Restoration build thread
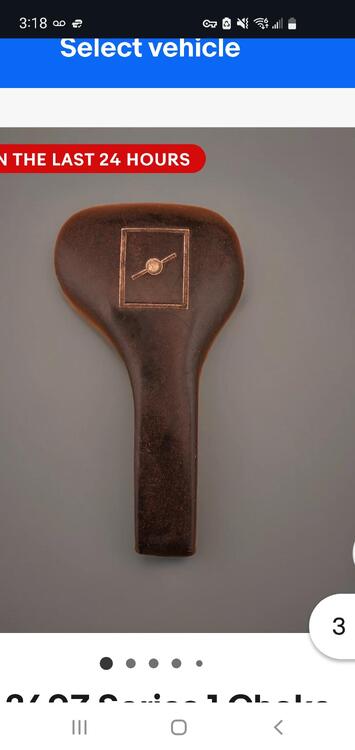
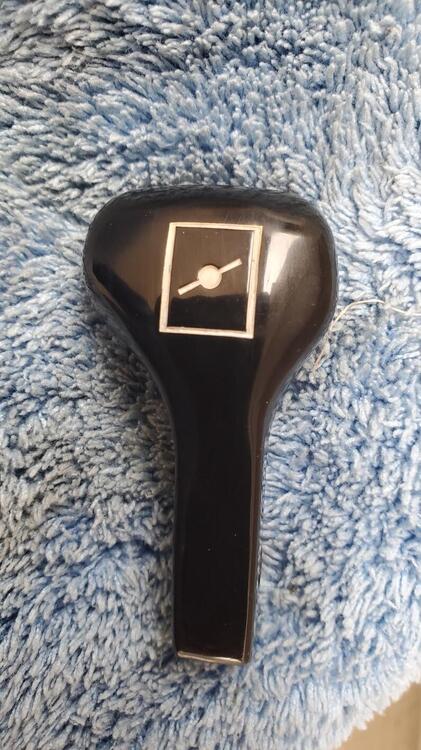
Recently I got two set of two of the missing Pieces from my 240Z toolbox. I had a set which fit the image, but had different part numbers. Funny enough, now i have three different sets, all have slightly different shape or surface. some have different numbers, but appear to be for the same purpose :-) Despite being a bit corroded, i have at least now another missing piece of the puzzle. Thanks a lot to @26th-Z for your support! I had some free time, so i decided to get some small stuff done on the car. First thing to check off was test-fitting the headlights. Luckily, I always have a range of NOS and used parts on hand. I usually try to use old parts for test-fitting, so I don't mess up new parts, but in this case the old ones weren't really usable. So here we go: NOS headlight buckets and chrome rings, with reproduction rubbers (I will use the NOS set for the final assembly). And installed. You got to love the factory stamps on shiny plated parts. As usual, all bolts are temporary only for the mock-up. For the final assembly, I will use original fasteners :-) I wasn't first sure if the order of the assembly was correct, but it appears it is. And the frog got some eyes, again :-) Next was this choke assembly reinforcement plat made out of hardened plastic: As the name suggests, it's there to reinforce the choke assembly, which is usually mounted on the inside of the center console, and can get a bit wobbly. With this plate, it's instead mounted on the transmission tunnel and way more stable. It's one of these (invisble) improvements of the car, which I think really give the car a better feel. It's quite tricky to place correctly, though. But luckily I had a few completely broken center consoles, so the easiest way was just to drill the holes through the console And then sandwich it all together for test fitting. I also installed an old ashtray just to see if it all still works correctly. Now with the holes on the transmission tunnel. I will not use the original sheet-metal screws but instead have nuts welded on the outside and use machine screws, so it looks like it's a factory thing, from the outside. And the interior mock-ups are coming along. Driver side seat rail, passenger side footrest and center console (With choke assembly) is installed and looks good. Ignore where the choke wires go. They're just there for easier installation.2 points- saturday night music thread
1 point- Help needed on starting problem
1 pointYou can add a relay as cgsheen suggests, which will take the current to the solenoid out of the switch, or you can bypass all of the inhibitors and other safety features. I would start by checking for voltage on the wire that comes from S on the ignition switch when you turn the key to Start. If there's none there then you need an ignition switch. If you have voltage then you can add a relay or by pass each safety on the path to the starter solenoid. It would be best to also test under load, using a test light that draws some current, like a taillight bulb. I have found that the staked pins (copper color) can get loose and lose contact with the terminal. I had a 78 switch that would grab the starter then let go as I turned the key. The pin was loose. I fixed it with a hammer and a chisel. The terminals are marked with molded in letters. Look closely if you remove yours.1 point- Resurrected Classics Exhaust
1 pointI am well pleased with the MSA Ceramic Coated Header and Premium Exhaust System I installed some 14 years ago. The fitment was spot on, the OE heat shield fit without bending or mods, no interference with the steering rod or frame rails. The supplied Turbo muffler was a bit loud and had some drone at 3k RPM, a 12" resonator I later installed cured that and softened the sound a bit. A local shop I use was very impressed with the overall design and exceptional quality of the entire system.1 point- Restoration of BringaTrailer 240z - HLS30-35883
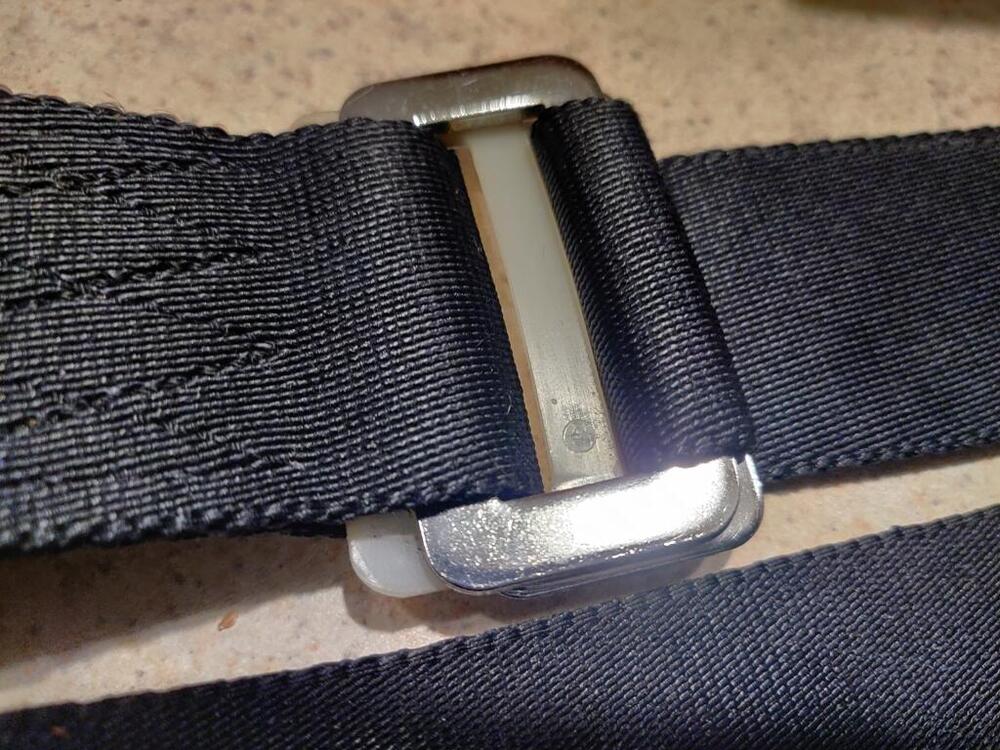
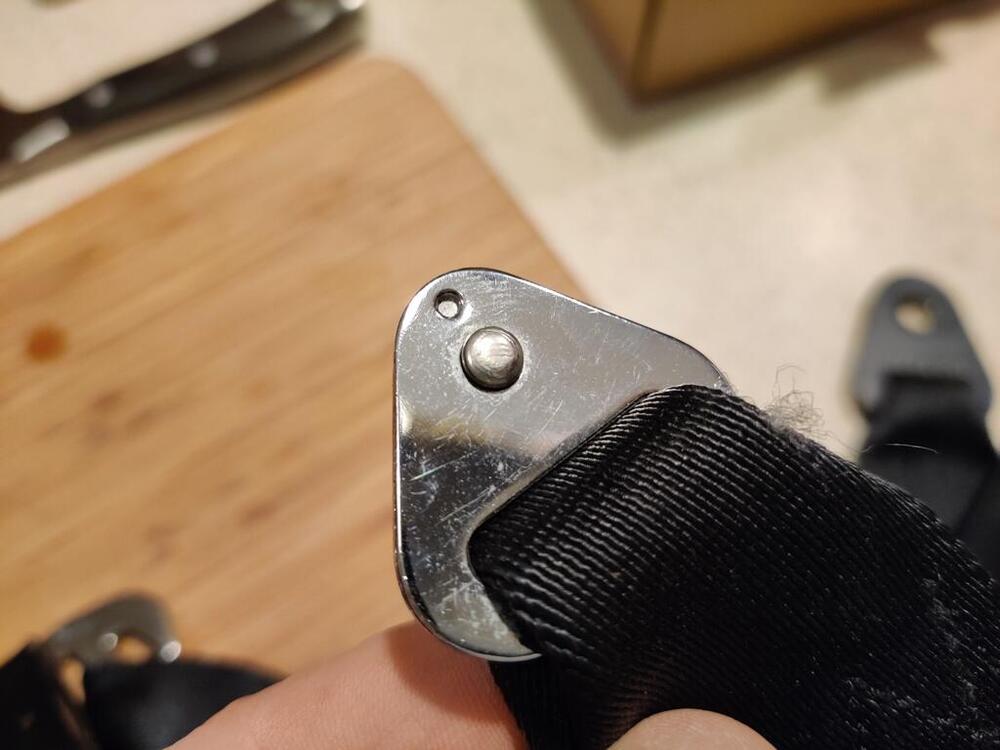
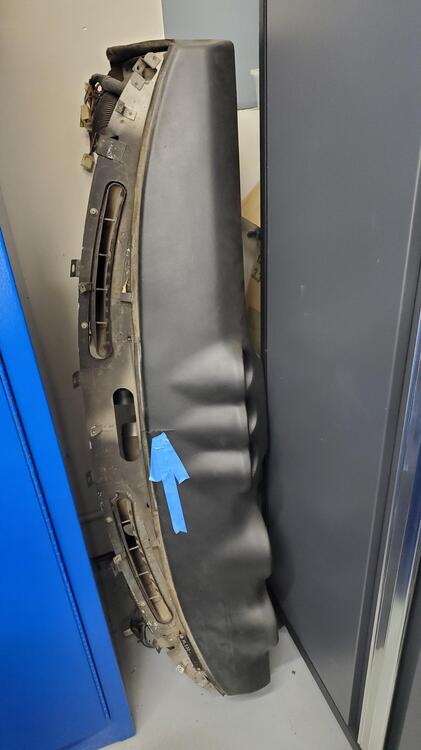
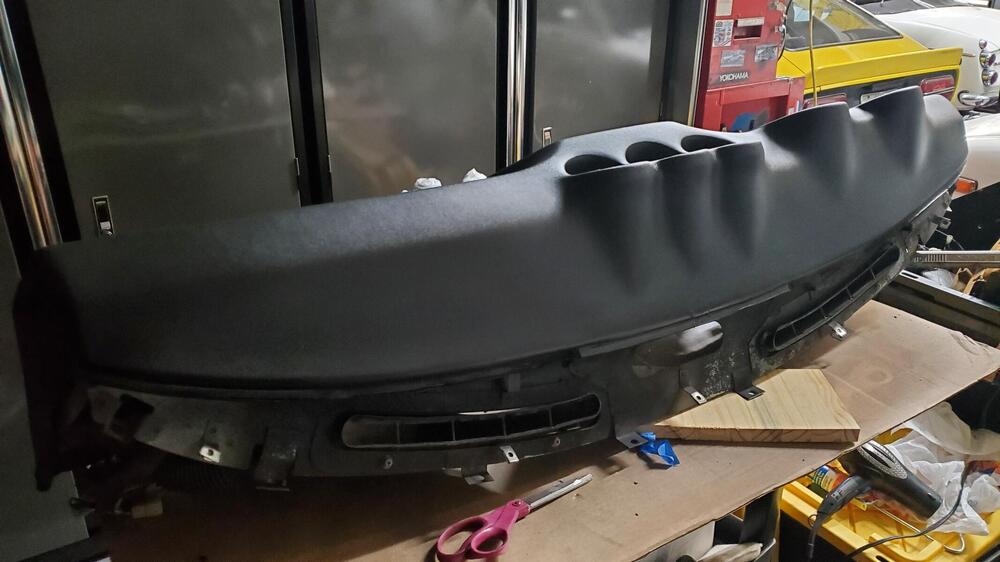
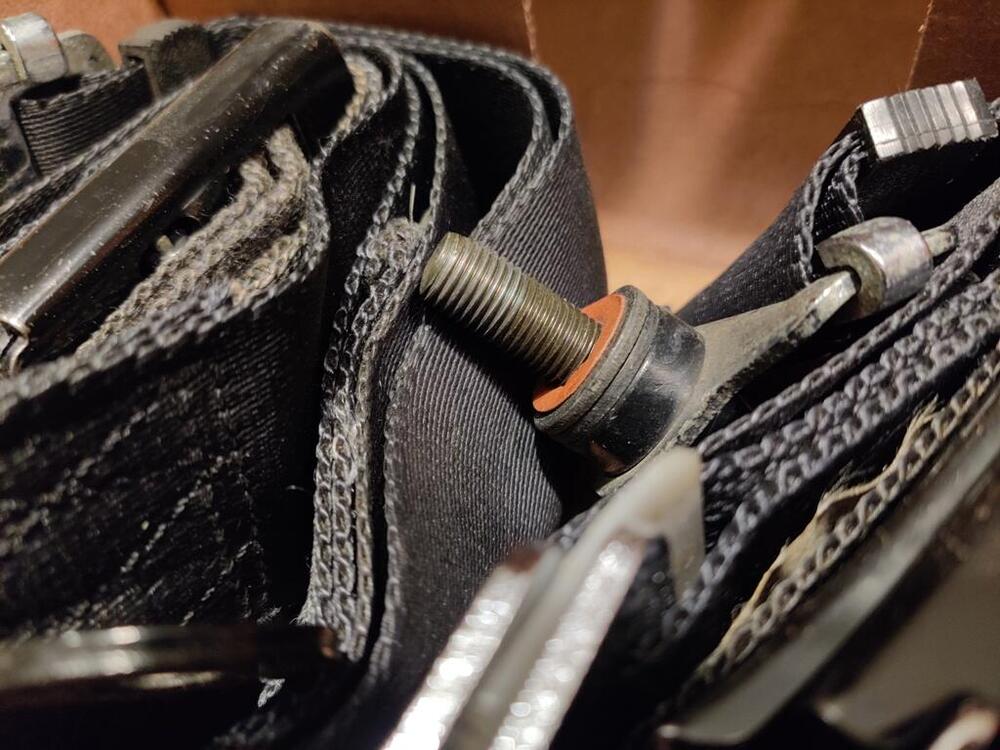
While I have turned much of my attention to my other 240Z recently, there are still quite a few things on the to do list for this car. One of them was replacing the glove box hinge/panel. My old one had broken at one of the three hinge areas. I was lucky enough to find a NOS one. Having recently replaced the decal on the original one with a new decal, I had to procure another new decal, and put in on this new panel. I still have some alignment issues to work out before the glove box will shut properly. The Vintage dash that is the car requires a bit of trimming of foam and vinyl on the lower edge of the glove box opening to allow the hinge to operate properly. Another small item on my list was to install these plastic seat belt buckle trim plates (old foam on the right, new on the left, which I glued to the center backside of the trim: These go here on the 1971 belts: I used a heat gun to warm them up quite a bit before snapping them into place, which went without issue thankfully. I still have a bunch of details like this that need to be completed. I would like to swap out the headlights bulbs for some other Koito H1 type ones that I found which look more like the originals. There are various other markings I'd like put in place to replicate factory ones (paint markings). I also would like to get the original wheels refinished and get some stock sized tires mounted on them. The original hub caps that I have are very nice, but if I can get better results with the paint color experimentation, matching the original much better than my efforts thus far, I will refinish them. I still haven't done anything to address the lean condition that I am experiencing. So, that is still on my list. After about 4 rounds of pulling the valve cover off to adjust the valves (the valve noise was much more than I can recall with my other L series engines), I figured out part of my problem. I have generally been adjusting valves with the engine cold, but sometimes when it was kind of warm as well. I was sure it would tighten up as the engine got warm. What I have found instead is the the lash clearance actually grows a bit when the engine warms up. The specification for my camshaft is .006" on the intake and .008" on the exhaust. I started off with setting the clearance at that spec with the engine completely cold. I then found that the lash was a bit larger with the engine lukewarm and a bit larger still with the engine hot. Seeing this, and after resetting lash a couple of times prior with no improvement, I decided to use .005" and .007" while the engine is cold instead. With that I achieve notable improvement.1 point- 1973 Rebuild
1 point- 1973 Rebuild
1 point- Help ID early air filter assembly
1 point- Bodywork Issues
1 pointI did clean it! First with alcohol, then the 2nd attempt I even roughed up the surface of the weatherstrip with sandpaper, then cleaned it. I even bought another small tube of the 3M super weatherstrip adhesive from Walmart and got the same results. The fact that the adhesive adhered to the paint so good, made me think that it was still good. The hatch weatherstrip I got from Australia had a totally different feel to it. The rubber was more "sticky". It required 100% talc powder to be applied to it after it was glued on, so the painted hatch surface would slide over it when you closed the hatch, until the seal bedded in.1 point- Float level advice, please.
1 point- Help ID early air filter assembly
Thanks for the link! The one I pictured appears to be the same as the one on the far right of the three pictured by 26th-z. It only has one "hose barb" connection. Thanks Again!1 point- 1973 Rebuild
1 point1 point- Bodywork Issues
1 pointI really like this stuff for all adhesive needs: 1 Gal. DAP Weldwood HHR Contact Cement You may have to clean some weatherstrip of its "mold release" before trying to glue it in. A little lacquer thinner on a rag and a few wipes on the surface to be glued is all that is needed. For door weather strips, I use an acid brush, start in the sharp corner at the top, back of the door. You can do it in sections about 18 inches long. Just apply adhesive to both surfaces, wait about 3 minutes, and then press and stick. It is going nowhere after that.1 point- Bodywork Issues
1 point- 1973 Rebuild
1 pointIn all seriousness, I alllllllmost flagged him earlier today before he even ever posted. I think there was about an hour between him joining the forum and his first post. I should have followed my gut and done it. Would have looked like a master bot—spotter. Bonus points for those who see what I did there. Hahaha!1 point- If it's good enough for a SEMA car then...
Excellent job reinvigorating a seven year old post!!! You're exactly right, things always come around again!!! Do you have bondo in your roof? How is Jan? Say hello to Dwight!!!1 point- Float level advice, please.
1 pointThe flat top fuel rail should be perfectly fine to use with round tops. It has a restrictor orifice in the return line just like the rail used with the round tops. Other than the relocation of the outlet nipples that lead to the carbs, they are interchangeable. The engine uses a small amount of fuel at idle. In fact, if the carbs are tuned properly, the engine should idle for about 30 seconds or so just consuming what is in the bowls. No fuel pump supplying fuel necessary. So you should be fine running off the bowls until the pump turns on. It'll run for a surprisingly long time. First thing I'd do is look for vacuum leaks. A hose you forgot to connect, or a nipple you forgot to block off? If no joy there and you're double dog sure you have no vacuum leaks, I'd drain the bowls (disconnect the tube on the bottom and let the fuel run into a cup) and then refill the carbs with known good fuel. You can easily do that by disconnecting the inlet fuel line and sticking a small funnel into the hose. Pour fresh fuel in from a little cup until the carbs won't take any more. At that point, your bowl levels should be good and you should have 30 seconds of fresh fuel. Maybe disconnect the fuel pump so it doesn't push any more questionable fuel back into the carbs.1 point- If it's good enough for a SEMA car then...
1 point- 1973 Rebuild
1 pointTime to play "Spot The Bot!" @siteunseen It's a two-fer. >> https://www.classiczcars.com/forums/topic/58853-if-its-good-enough-for-a-sema-car-then/#comment-680341 I'm totally winning this round! Hahahaha!!!1 point- Float level advice, please.
1 pointI'm the original owner of a 72 240z, it's on blocks now, I want to get the 260 out of my hair so I can get back to restoring the 240. I'm all ears, been working on cars for a long time but I've forgotten a lot of stuff, I listen to everyone's suggestions. I've known for a long time the hoses can't be too stiff and normal fuel line is too stiff, that's why I used the special plastic tubing made for model air planes, but as it got older, it got more stuff. I have some chores today, when I get back I'll look into the choke linkage and hoses. BTW, the choke lever broke many years ago and was replaced then, it is a weak point, ever since then I would never pull the lever by the end, always at the base of the lever, couldn't believe how much those levers are selling for. I need to step back and look over the mechanism. Keep up the suggestions - Jim1 point- Float level advice, please.
1 pointNow that I have confidence in the float levels, I'm still having a problem getting the engine started. Next step is brand new fuel. A reminder, I removed the 260z flat tops and replaced them with 249z carbs. I read the thread about the nail in the carb, I need to takea step back to see what I missed. Hate to say, the car ran fine with the flat tops, I have to remember, if it's not broke, don't fix it. When I run the engine with a puff of ether, it caughs and sputters, not getting fuel, sounds too lean. I was hoping the bowl level would have fixed it. Somebody had messed with the carbs before I got them. Ideas?1 point- [2025] What Did You Do To/with Your Z Today?
I would not use any adhesive on the hatch glass seal. If it needs sealing later you can lift the edge of the seal and add a thin bead there1 point- 240 with e12-80 plug gap
1 pointI ones had a neighbor and she had 2! and was up the next day, walking!! this was 15 years ago! 👌1 point- 240 with e12-80 plug gap
1 pointHow do i understand this? your recovering of the OP and in a few weeks your up and walking or do you already walk with it? Is it made of stainless with a nylon cup or is it some other metall? I hope it don't rust! 😄1 point- 240 with e12-80 plug gap
1 pointI'm with you on older is better but when my "newer" "fireball" coil goes to sh**...I'll be walking home on my brand new artificial knee. I ran the old one for 55 years and that SOB just quit.1 point- 240 with e12-80 plug gap
1 pointMaybe your cables are to old? They get little cracks inside (after you took them off) and the resistance changes to too high? Also use some fresh gasoline because todays fuel is really... sh*t.. I always now use 96 overhere.. my 240z runs 15! km/hr faster on the good stuff! And no problems with older fuel.. (Yeah i know you don't have 96 fuel but your country has different numbers, just use higher number in cars that don't drive daily. No ballast resistor... could make that new coil to hot? The old stuff gone, haha, i drive a 240z with a 54 year old coil, it's still running strong.. in the WINTER it's my daily driver! Lastly, i don't know the "newer" stuff like those "fireball" stuff but i don't ....... wouldn't want that sh** under MY bonnet.. oh sorry.. HOOD! ;-) 😆1 point- 240 with e12-80 plug gap
1 pointWalter Moore is the one that did the work. Distributor advance curves revision 1-2.xls1 point- 240 with e12-80 plug gap
1 pointHi, I always use the standard BPR6es-11 on my standard ignition with nos contact points. I think it will depend on what ignition coil your using i would go with the bpr6es-11 sparkplugs when you have a orig. coil. Btw, the 280zx i got has that orig dizzy, and uses also the same plugs runs great with -11 plugs. (1,1 mm Gap.) You could buy those 0,9mm plugs and if it does not run right open them up to 1 mm or so.. (If you have the 123 ignition coil.. my opinion? throw it in the BIN! and get yourself a orig. coil.. ;-) )1 point- Z's on BAT and other places collection
Yeah, i don't know about 40k or not. The extensive modifications are breaking my heart. He needs to put it on BaT to know the current value IMO.1 point- Z's on BAT and other places collection
It is buy it now for $40k. I told him to emphasize that the original mileage is 51k and to add some pics of his documentation... pics of the various VIN plates and VIN on the firewall, and pics of the engine number on the block and the E31 on the head. I see he has added the documentation and the engine compartment tag already. I know the market is a lot softer now for these than it was, but I think it will sell for the $40k.1 point- Restoration of BringaTrailer 240z - HLS30-35883
I've just re-visited this 2020 post. In hindsight, I think this may be the definitive photo essay on the design and construction of S30's 'dogleg' structure. I wish they all looked like this but, as Inline6 notes, the structure is completely missing on far too many Z's (replaced by bodge and newspaper, topped with a Tabco panel). If your Z isn't sound in this area, don't count on your lower seat belt mounts (yours and your passenger's) if you're involved in a collision.1 point- Bodywork Issues
1 pointI ordered and received one of these seals from Scott's as well. I can confirm that it's much better than the Precision version. With the Precision version there was a big gap all the way along the bottom of the hatch, which welcomed copious quantities of exhaust into the cabin. The hatch sat visibly higher than the edges of the quarter panels. The hatch was higher on the driver's side, and stuck out slightly at the back on that side. I removed all the weatherstripping (both inner and outer) and checked the fit. I was surprised to find that the hatch still sat slightly high and stuck out slightly at the back on the driver's side. I removed the support strut and that allowed everything to align. The strut is a replacement. I'll have to check the source. With the new hatch seal in place, but not glued, the hatch sits pretty nicely. It's very slightly high, but I suspect it will settle, and I haven't tried adjusting the hinges or latch yet. Once I connect the strut, though, it's noticeably higher again. It's lower than it was with the Precision seal and there's no gap along the bottom edge, so I don't think exhaust will be a problem, but it's higher than I'd like it. Has anyone noticed a strut causing the hatch to misalign? Any ideas about how to correct it? I'm a little surprised that the strut can move the hatch backwards. I would have thought the hinges would prevent that.1 point- 1973 Rebuild
1 pointOkay, it’s been a minute so this post will be all over the place… I’m going to start with baby steps that feel like giant steps. I was able to install the left side headlight bucket. It seems small, but I hadn’t been able to get to all of the weatherstripping that goes under the fender so I put it off. This was the first time I’d seen it together (on one side) since it came back from the painter. I found there was a sizable gap between the bucket and the fiberglass air dam and I didn’t know how far the dam was going to flex. It ended up working out when I got the blinkers on, but it’s not a crisp clean fit. More on that later. ••• I didn’t do a great job documenting this, but I did a complete refurb of my marker lights and turn signals, inside and out. Left side is before, right side is stage 2 of the 3 step polish. The left front TS and three of the marker lights were pretty beat up. The white plastic was nearly brown inside and the mirror of the fronts and metal housings of the marker lights were all rusted. I stripped these pieces and painted the metal parts with highly reflective silver spray paint. The plastic housing I sprayed white inside and left the outside raw, painting the mirror the same as the marker lights housings. The lenses were sanded with 400 grit wet/dry paper, then up through 5,000 grit, and finally polished with Novus plastic polish. Surprisingly, I was able to reuse all of the OEM rubber parts. They just needed scrubbing with a green scotch bright pad. I decided to replace all of the hardware with stainless bolts instead of sheet metal screws because the right rear screws are uncomfortably close to the fuel vapor hoses. I wasn’t able to get JIS screws quickly enough so I just went with generic M5 cap head bolts, with fender washers and lock nuts on the inside. The ones in back got rubber caps on the bolts, too, just to be safe. All of the wiring and connectors for these were replaced. The OEM sockets and rubber boots were refurbished. I ran out of bullet connectors so I used Yamaha sealed connectors for the front marker lights. I’m a bit bummed that the rubber covers from Vintage Connectors for the turn signals are so short. I’m wondering if I need to do something like wrap them in tape to keep the water out. The bulbs are color matched LEDs from Super Bright LEDs, which I think look nicer than using white ones under the colored lenses. The color is much richer while still being… uh, super bright. The gaps around the air dam closed up a bit after I got all of the hardware on, but the curves of each piece (headlight bucket, air dam, and blinker housing) don’t match, which is irritating. I’m hoping it will disappear once the bumper is on. ••• I FINALLY finished my throttle cable setup. I looked at a bunch of off the shelf options and a few specifically for Z cars, but the prices and not quite being what I wanted pushed me into making my own. The two challenging pieces were the bulkhead and the bracket. I made the bulkhead out of a stainless steel drain plug that a friend drilled out and tapped for me on his lathe. We broke a tap and probably dulled a second to the point of not being usable any more. If I did it again I would use aluminum. It’s held on with an M18 nut and has the cable adjuster for a triumph motorcycle brake lever screwed into it for the cable sleeve. That’s probably also unnecessary as I could have made the bulkhead so it acted as the cable sleeve seat on its own. The bracket was another Send Cut Send job. I had to wait until everything else was figured out to design and order it, but I made four versions with the hole for the throttle cable adjuster at various heights. I opted for the second tallest, but I’ll change it if this ends up feeling wrong. I’m definitely going to have to ad a bend along the long edge to reduce flexing. I went with a progressive cam from @duffymahoney and had to make sure there is no interference when all said and done. The shortest bracket looked the best but was uncomfortably close to the cam at full throttle. All of the cable bits and pieces I got from Venhill Engineering for a song. The reason there are two adjusters in the photo is so the bracket can also hold the choke cable, which I am repurposing to operate the starter valves on the Mikunis. I doubt I’ll ever use them but I don’t like having inoperable parts in the car. The cable is affixed to the ball socket by a m5 lamp bolt that was decapitated, crimped to the cable, rethreaded, and soldered. So yeah, the throttle half of this project is done for now. I just need to change the screw holding the cable to the cam to be a set crew, cut the excess cable, and cap it off so it won’t fray. The bracket will definitely need to be stiffer, but that’s for later. ••• Unfortunately I keep forgetting to take pictures, but I can show you how I ran the AC drain so it minimizes the size of the lump when I install the transmission hump upholstery. The Vintage Air evaporator came with a black hose, but I swapped it out for some hose with a thicker side wall, which should keep it from compressing under the upholstery and inhibiting the flow of condensation. A nozzle connects to the hose with a 1/2” barbed splice fitting. The black piece is from sun roof drains on GM and other vehicles and its X-shaped aperture should create a Venturi effect when mounted perpendicular to air flow to pull water out and prevent anything from traveling back up the hose. Pretty generic and available on Amazon for a few bucks. I cut the insulation to make a channel for the hose to rest in. A 5/8” hole and some RTV to make sure it doesn’t pop out and I’m good to go. I also finished the passenger side door window and the rest of the interior firewall work the same day. Now to check the refrigerant plumbing for air leaks. 👍🏻 ••• After I was finally able to get all of the firewall work done, I put the dash in and plugged it all together. Nothing major to report since I’ve discussed the details in previous posts. This time I took more care to tuck the wiring away nicely. The few loose ends are wire for a set of foot well lights that are switched at the doors, a feed for a USB plug I intend to put in the center console, and the power/ground and control wires for the evaporator. The biggest challenge was getting it back in with the air ducts installed. This corrugated tubing from Vintage Air is nice but it’s not flattened/ovular like the OEM stuff so it requires some persuading. I still think it’s better, though. It’s tough to see in the center but it’s really well fit to the evaporator without any clamps, which keeps it clean and free of things to chafe of the hose or wiring looms. I’m hoping a harness cover will clean up the mess around the relays, but I’m going to zip tie some of this up tight before any cowls or covers go on. ••• And here it’s starting to feel like a car! Or, at least I am staring to get some storage space back. 🤣 I’m really pleased with how the Vintage Dashes dashboard looks. The glove box door needs adjusting, but after hitting the finisher with some Landau Black SEM Color Coat it all came together. It seems the internet was correct about that being the right color. I’d heard these aftermarket windshield gaskets leave a bit to be desired compared to OEM, and it’s true, but I think you can finesse it into shape. The gaps in the corners were really bad until I put the steel trim in. That stretched them out a bit, but it’s not perfect. I’ll let it settle for a while and then might just pump the gaps full of weather strip adhesive until it’s filled in. Speaking of steel trim, that’s a fun chore. 🙄 ••• My spare tire cover was FILTHY. Luckily it cleaned up well and didn’t pucker or warp. The orange flecks in the fiber board are a nice touch. ••• Lights! No before pictures but here’s everything put together. I used the same process on the lenses as the blinkers. The housings were scrubbed and then wiped lightly with acetone to get the last of the adhesive off. Thankfully I didn’t need to recondition the mirrors. The center lug on the replacement chrome trim is too short to function as the only fastener holding everything together. I used a M5 threaded socket left over from installing the blinkers along with a rubber washer. It worked fabulously, but I think it would be really easy to screw up if over tightened. No wiring yet. I just wanted to close up the cabin for the next step. ••• Looking clean figuratively and literally. I picked up the basic carpet set from Newark Auto in black 80/20 loop. It’s really nicely made, but I don’t think it’s meant to go with an insulation kit like the one I have. There are a few places where it would have fit better if there was no insulation, and there are a few places where it is just straight up wrong. Overall give it a 89 or 91 out of 100. Worth it but could be improved. I’ll be using the vinyl kit from MSA on the sides. I’m going to cross my fingers and hope my original interior pieces clean up nicely. I just put them straight into storage without unpacking them when I bought the car, so who knows what shape their in. If they suck I’ll be new replacements. But yeah, the car is starting to feel like a car.1 point- Putting out the feelers
1 point- Putting out the feelers
1 point$25,500 For instance, Less fees. Not a chance IMHO. Sell it privately to someone that’s going to preserve it.1 point - SN 00042 Restoration; The Older Twin
Important Information
By using this site, you agree to our Privacy Policy and Guidelines. We have placed cookies on your device to help make this website better. You can adjust your cookie settings, otherwise we'll assume you're okay to continue.
Account
Navigation
Search
Configure browser push notifications
Chrome (Android)
- Tap the lock icon next to the address bar.
- Tap Permissions → Notifications.
- Adjust your preference.
Chrome (Desktop)
- Click the padlock icon in the address bar.
- Select Site settings.
- Find Notifications and adjust your preference.
Safari (iOS 16.4+)
- Ensure the site is installed via Add to Home Screen.
- Open Settings App → Notifications.
- Find your app name and adjust your preference.
Safari (macOS)
- Go to Safari → Preferences.
- Click the Websites tab.
- Select Notifications in the sidebar.
- Find this website and adjust your preference.
Edge (Android)
- Tap the lock icon next to the address bar.
- Tap Permissions.
- Find Notifications and adjust your preference.
Edge (Desktop)
- Click the padlock icon in the address bar.
- Click Permissions for this site.
- Find Notifications and adjust your preference.
Firefox (Android)
- Go to Settings → Site permissions.
- Tap Notifications.
- Find this site in the list and adjust your preference.
Firefox (Desktop)
- Open Firefox Settings.
- Search for Notifications.
- Find this site in the list and adjust your preference.