


Leaderboard
-

siteunseen
Free Member12Points15,115Posts -

Mike
Administrator9Points23,065Posts -
zKars
 Subscriber
 7Points3,770Posts
 -

Zed Head
Free Member5Points19,238Posts


Popular Content
Showing content with the highest reputation on 09/06/2021 in all areas
-
3 pointsI’m leaving for a work trip is a few hours but managed to complete all the paint touch up work in the engine bay. Hopefully when I get back my Eibach Springs will be here and I can move forward with suspension and then the engine. Battery tray came out “okay” I’d give it C at best but it serves the purpose to stop further rusting and be a little cleaner. In the end, it’s an engine bay, so I’m not going to be too bothered by some paint flaws. I know all the rust in there is properly addressed and I can move forward. I can live with this. Sent from my iPhone using Tapatalk3 points
-
3 pointsThank you all for the GREAT input. I think I'm going to try to tackle this myself. I really appreciate the links to the tools in particular. Re:the link to the full set for $300, I'd seen that (those guys are somewhat local to me and I follow them on Twitter), but I really don't have any inclination to re-run the whole braking system at this point. Maybe 1.5 years ago when the engine and trans were out and I didn't have to work around them... Will report back once I have some supplies.3 points
-
3 pointsAnd then I found this! https://resurrectedclassics.com/collections/brake-components/products/1970-1972-datsun-240z-complete-steel-brake-line-kit Might be worth the money. $300 bucks. It’s the early set too. And I’m loving what these guys are doing with reproduction body parts! Check them out!3 points
-
3 pointsThat hand flaring tool that Tweed linked to at summit is the best hand tool I’ve used. Works fantastic. Use the copper nickel tubing you can bend 90% with your hands. I love buying it and nuts from thestopshop though amazon. Tubing prep is the secret. Internal deburr and external chamfering. This https://www.eastwood.com/eastwood-tubing-deburring-tool.html?gclid=Cj0KCQjw-NaJBhDsARIsAAja6dMfxmxKJNlKjBV_RuyxduUX2yo3UbNMKMbgMFcZvW-Ir7V7sHT7Y_gaAjtFEALw_wcB&wickedid=345665394423&wickedsource=google&wv=3.1 Works very well. And blow the chips out of the tube before you use it!3 points
-
3 pointsIt depends on how much time and enthusiasm you have! I bought all the bits and did my own in lockdown. I did every single line except for one and it cost me less than £100 including tools. Copper (which is what was on the car) is an absolute no no as it “work hardens” and goes brittle / cracks over time. I believe it’s illegal to use on brake lines in many countries for that reason. You can use stainless steel tubing which is really tough to bend but I went with cupronickel which is also tough to bend but easier and doesn’t have the above issues.. There are cheaper flaring tools but the one below gives the cleanest finish / flares. AB Tools Brake Pipe Flaring Tool Professional In-situ 3/16" SAE Hand Held FL29 https://www.amazon.co.uk/dp/B01M4RC2YW/ref=cm_sw_r_cp_api_glt_fabc_1BN1QE78QNG5KNVBV53S?_encoding=UTF8&psc=1 Sealey CNP316 Brake Pipe Seamless Tube Cupro-Nickel 22 Gauge 3/16" x 25ft BS EN 12449 CW024A https://www.amazon.co.uk/dp/B01H0966GK/ref=cm_sw_r_cp_api_glt_fabc_0DVE4HSMJB88JKBNNCFZ?_encoding=UTF8&psc=1 Pearl PBU437 M10 Male Brake Pipe Union PP54 (50 Pieces) https://www.amazon.co.uk/dp/B006HFM5FK/ref=cm_sw_r_cp_api_glt_fabc_NQT8ZYZ3ZNMYFPK3GA5Z?_encoding=UTF8&psc=1 Pipe bender https://www.ebay.co.uk/itm/PLUMBERS-180-3-in-1-MINI-PIPE-BENDER-FOR-6mm-8mm-10mm-COPPER-TUBE-PLUMBING-/333710612614 Amazon prices are higher than other places but it gives you a sense of what you need. I used the pipe bender and various sockets / tins of paint to get the radii I needed. This is a very satisfying job to do.3 points
-
3 points3 points3 pointsIt’s mostly Maui Wowie but it has a little Labrador in it. Sent from my iPhone using Tapatalk3 pointsView Advert NEW Datsun 240z Rear taillight body panel, and other sheet metal parts! Hey guys I just wanted to share a new product our company came out with. Its been a long time in the making but its finally available and ready to ship! Our Rear 240z taillight panel is a Newly manufactured part that hasnt been made before (to our knowledge), we sourced a rare NOS Datsun taillight panel to serve as the template. This is a common rust spot and this panel makes for a clean installation, without cutting and splicing, you can install it the correct way with spot welds, as this is a correct datsun body panel and not a patch. We have already installed one of these as a test and it fits great, the curvature on the exhaust valance is accurate and the spot weld holes line up. We also have other parts available such as spare tire wells and floor pans, if you have any questions feel free to contact me here or at our website Resurrected Classics thanks! Also here is the link if you would like to checkout directly from our store with paypal Resurrected Classics price for the taillight panel is $600 In the future we plan on making every removable body panel for the 240z and some non removable. So far we have samples for Hoods, hatches (vented and non vented), doors, fenders, headlight buckets, bumpers and much more. If you would like to be notified of new production items please follow our newsletter our our instagram @datsunhunters Advertiser maximus35 Date 09/05/2021 Price $600 Category Parts for Sale2 points2 pointsI thought all of my screws were deep in my crawl space but I found one, length is 12mm and it is an M4 x 0.7 with a 7mm hex plus JIS phillips head as @jfa.series1 mentioned. Jim I think the screws you linked to are M6, not 6mm hex head. It does seem they are like SEMs but with a lockwasher only, at least it is that way on my 7/70. Just checked and Clips and Fasteners has them in 12mm long as well. https://www.clipsandfasteners.com/M4-0-7-x-12mm-Phillips-Hex-Head-SEMS-Screw-p/pm33211.htm
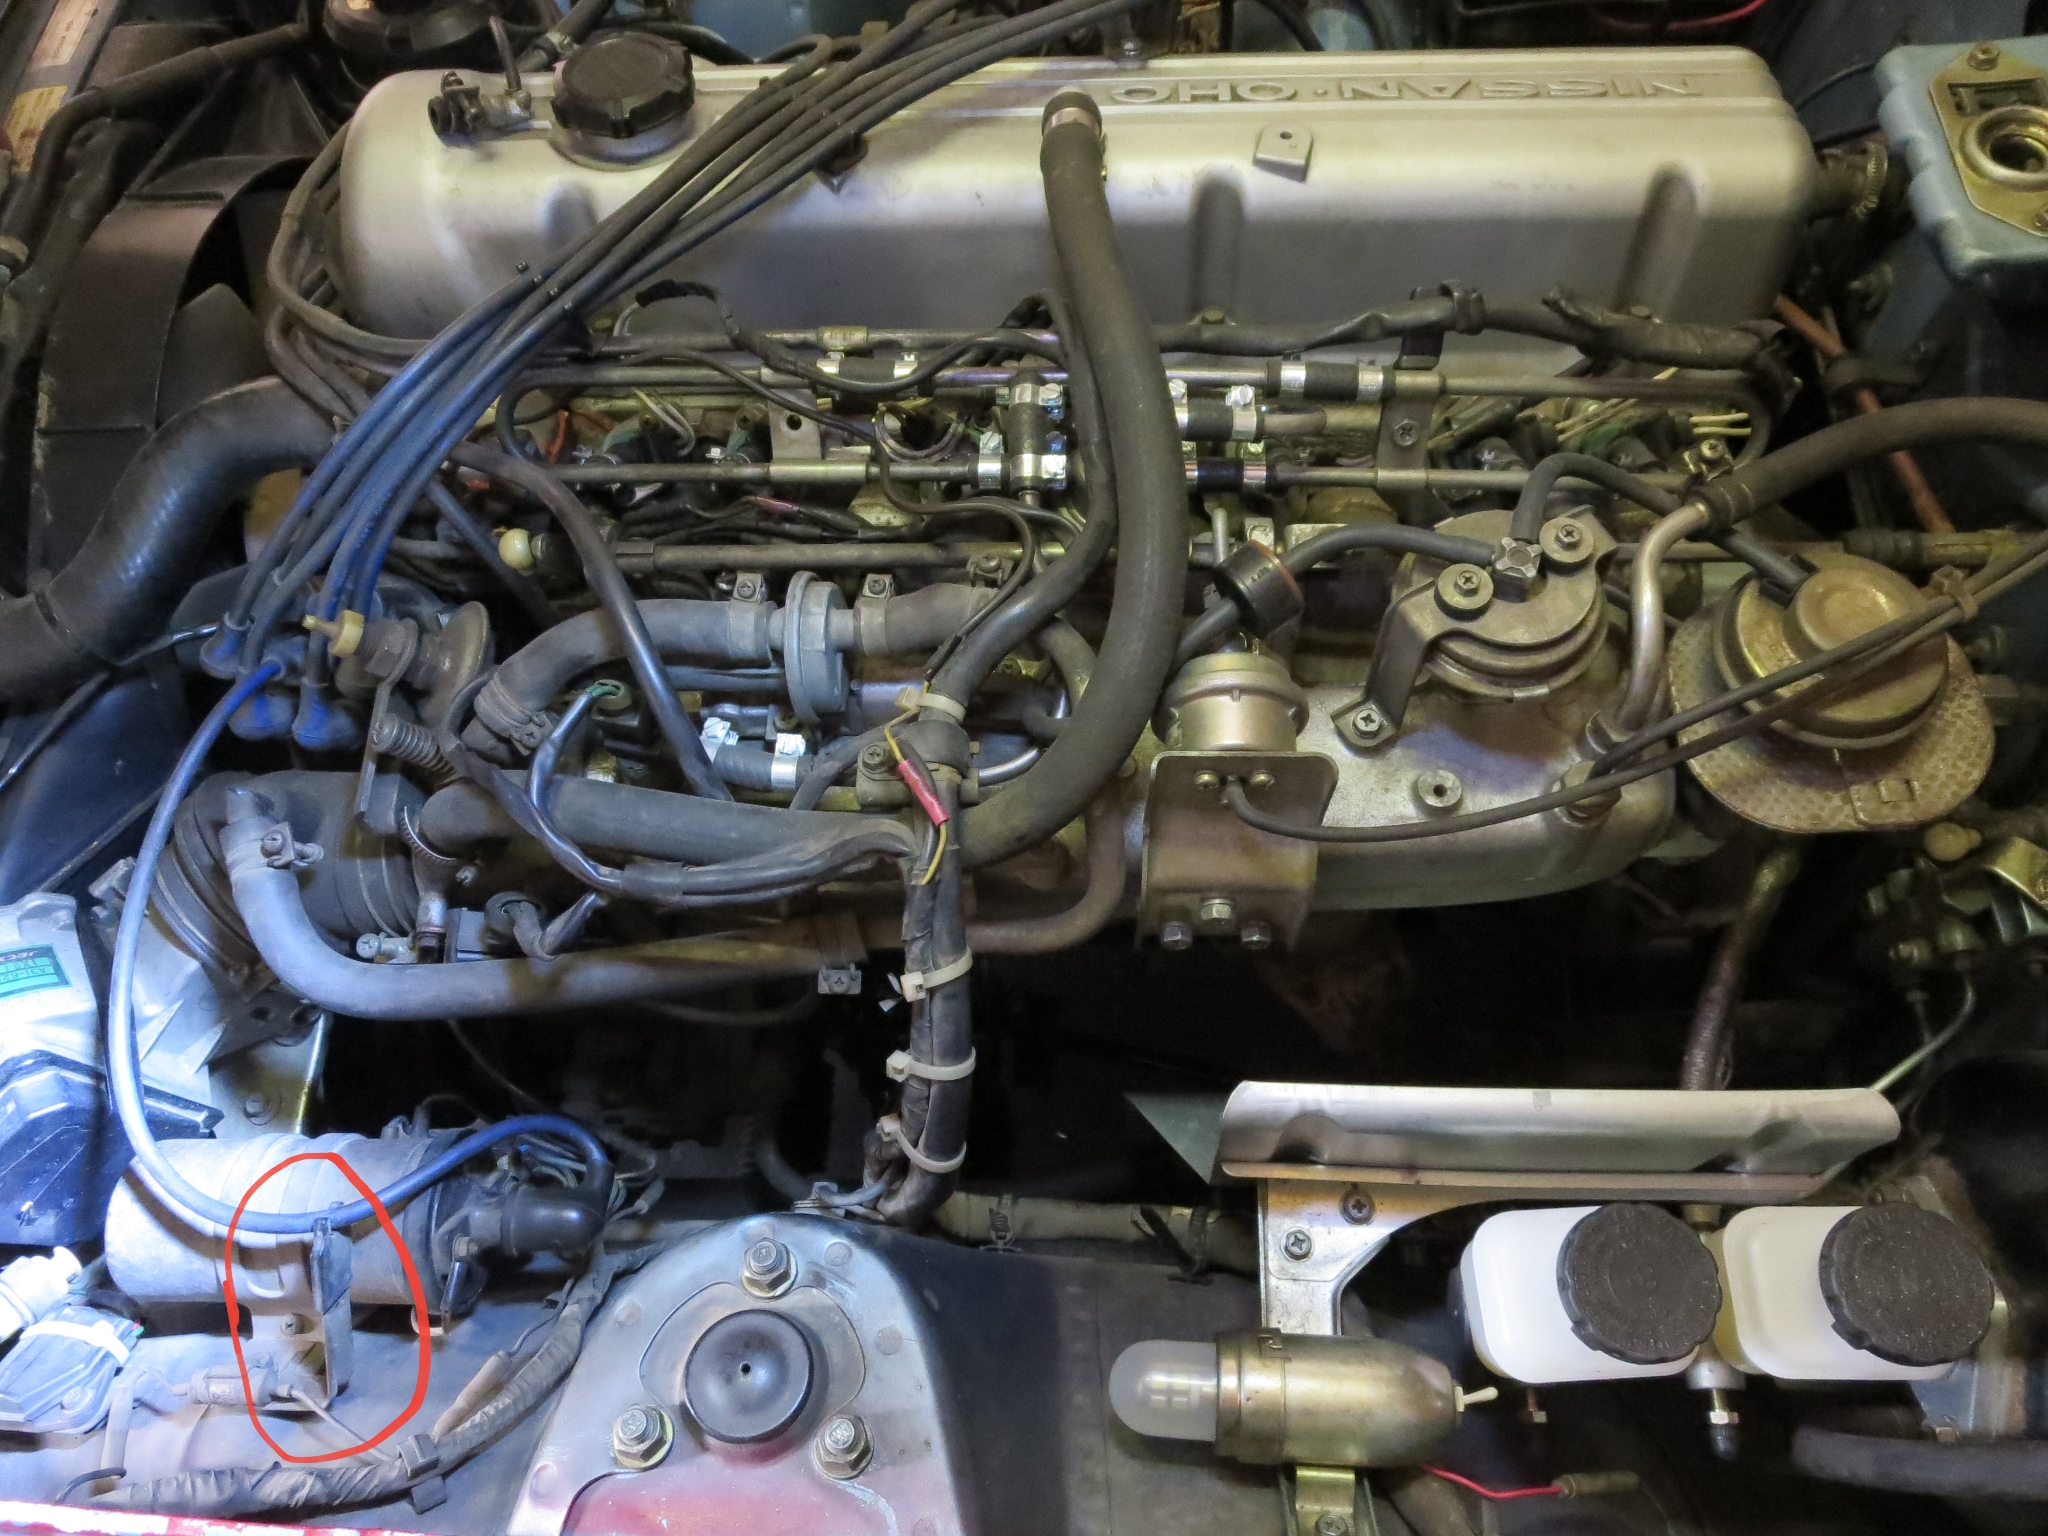
 2 points2 pointsI found this photo in my tablet. It might help locate other parts. I circled part 7. Mine is a 77 model so the engine bay will be a little different. If you need any detailed areas, let me know and Ill post them here.
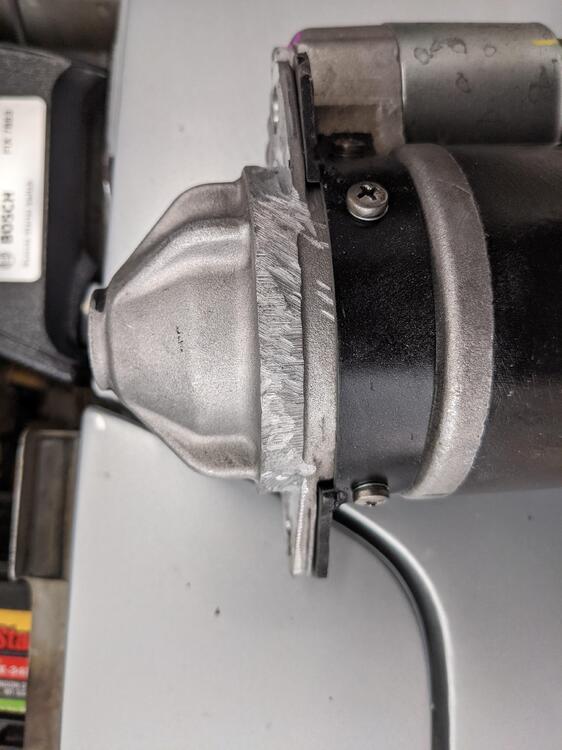
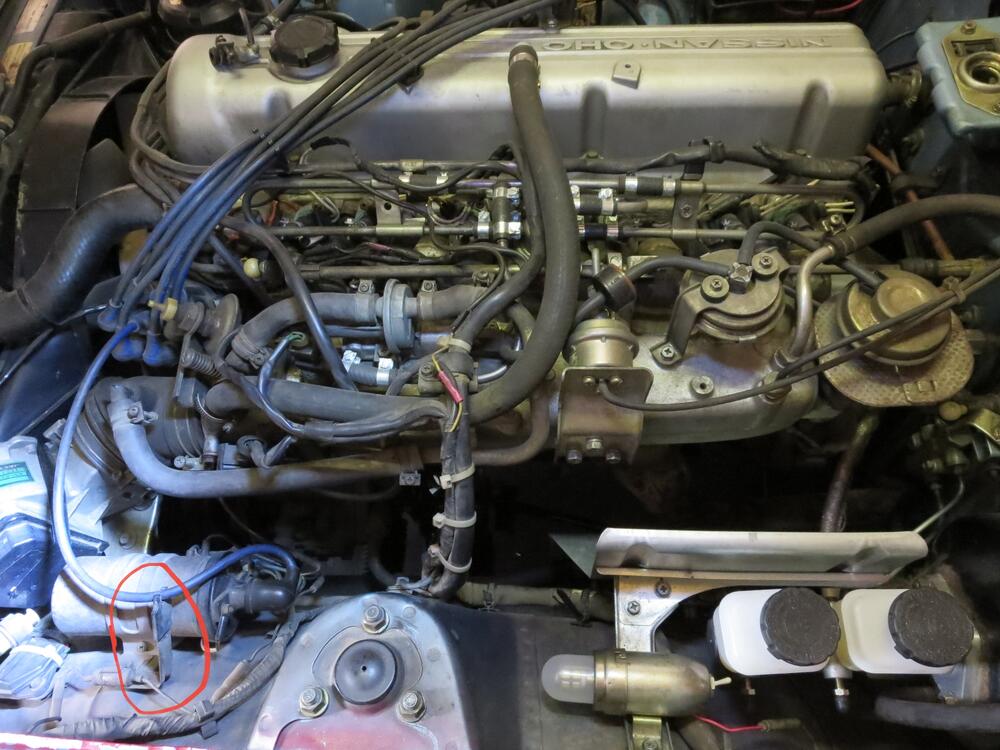 2 pointsIt’s fixed but I don’t know if what I did actually fix it or by accident… intraced red/black stripe, red/white stripe and green/black stripe to each connector such as C6 BLACK, C9 WHITE and to the headlamp terminals for continuity …. They all have continuity on those wires. I believe the ohms for the red stripes were 1.1 and 1.2 ohms respectively. While I was proving for connectivity test on C9, I accidentally touch other terminal and case a small spark. That is the only noticeable I made. Reconnect firmly and seem like both low and high are working as expected. Still, I have no clue how it is working now. Last time it wasn’t working because of a loose battery terminal. Perhaps somewhere, the connectors weren’t firmly connected and/or the ground/earth terminals not firmly secure… I did sand the engine terminal, firewall and one other connector at the AFM just to be sure. hopefully this the last issue with the headlight…. btw, I ordered the dapper lighting kit and hopefully they’ll ship in coupe of weeks so that I can upgrade the headlight to be brighter. So nervous driving at night with the stock headlights thanks for all the help, as always! regards2 points2 pointsI'd say you'd be better off making them yourself as it's not too hard if you've got the right tools and some old lines to copy, which you do. You'll save some money doing it yourself, too. From my understanding, there are prefabricated kits though if you wanted to go that route. Also the lines are 3/16 with 10x1.00 fittings, but it's a double flare - I don't know if inverted flare and double flare are the same. You can get a flaring and bending tool at your local autoparts store, but get good tools as they'll make your job a lot easier. For a flaring tool, I highly highly recommend this: https://www.summitracing.com/parts/ttn-51535 I used one of those generic kits when I first did some brakelines and wound up making a bunch of crumby flares after hours of cussing and frustration. Got that tool and made perfect flares in no time, every time. Plus, you can flare lines while under the car if something goes awry! For the price, it's far and away the best tool you'll find. But don't just take my word for it: https://www.classiczcars.com/forums/topic/65362-brakeline-question/?&page=2#comments I got mine at an O' Reilly I think, but you could get it online if nothing else.2 points2 pointsI think that the ring gear presses down to a seat on the flywheel. Found a video. Most likely somebody hacked the flywheel on over the spacer with some longer bolts or hanging by a few threads. Like Yarb said might not be good to run it for too long. It's not right.2 points2 pointsI spend about $75 a week. Some weeks I gotta stay straight to help out my Mom so I estimate $3,500 a year. Damn that is crazy. That's what I spend on food.2 points2 points2 points2 pointsI finished the modification and it's a success, pictures attached. There is definitely something screwy with the flywheel/bell housing configuration. As I was installing it I pulled the spark plugs and rotated the crank shaft to listen for interference. I heard a little scraping and I painted part of the motor housing. There is about 3mm where the ring gear was grinding on the enclosure. I suspect the engine and transmission are not stock for a '76 since it has a four speed transmission and the block/head stamps match those of a '77. Regardless, I'm happy it's working again, thanks for everyone's input.
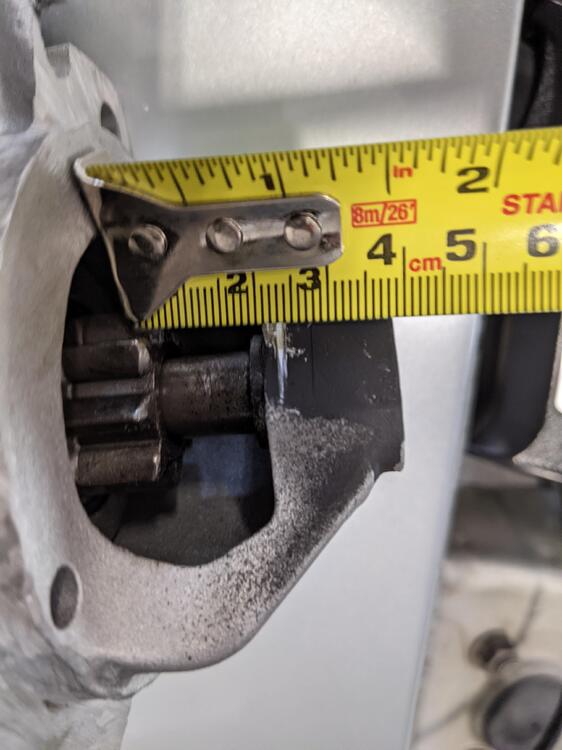
 2 points2 pointsGood for you Cliff, a week is a long time if it's your daily routine. I did the numbers, I was spending $6,500.00 per year to support my liquid recreation, now I just buy more car parts.2 points2 pointsIt's well documented Mike. Even that vaccinated people can carry the same viral load in their nasal cavities as unvaccinated people if they do get the virus. The point of being vaccinated, especially with the Delta variant, is to stay out of the hospital and get well sooner, and to improve the odds of not catching the virus in the first place. It's all about probability, the odds of bad things happening. Many people want things to be black and white, yes or no, but that's not how the world works. Just like avoiding bad foods, or wearing a seatbelt. Improve your chances. Masking is what protects those around you the best. It contains the virus to your own local environment if you have it.2 points1 pointIt seems that clear zinc is correct. At least that is what is on the 70 - #00869 in my driveway. JLP1 point1 pointYup, just grind off what you need to, it won't hurt the caliper any.1 point1 pointhttps://jdm-car-parts.com/collections/hardware-parts-nissan-datsun-fairlady-z-240z-260z-280z-280zx/products/brake-clutch-line-holder-bolts-x10-set-jdm?variant=6437698731 point1 pointI thought beer was a whole food! Water, grains, corn sugar, hops & a little yeast to convert the sugar.1 point1 pointBtw, my tires are 195/70/r14 with r200 diff. The tires probably made some different but I don’t know what was the stock tires. But 1 mph error margins is precise enough for me.1 point1 pointHi Jerry, I did a quick check on my car - the tiny bolts are a 7mm hex head with a phillips slot. Checking with Belmetric, it looks like they are called SEMS Hex Phillips altho these have a flat washer installed. They carry it in a 6mm head but not 7mm. https://www.belmetric.com/sems-hex-phillips-c-10_2345/?zenid=2tdb29vtv11hqsruk3uf0dsk12 Interesting that Nissan used a odd number mm head when everything else is even number. Jim1 pointThanks for the ideas. I'll tear it apart this winter and figure out what's going on.1 point1 point1 pointWelded that seam and even the two seams between the three valance panels. Absolutely no downside, fender comes off and on just fine, no issue other than handling length as mentioned. Same for the valance. The look is much cleaner and more modern.1 point1 pointI think that COVID is going to be running around the States for a long time. It's really turning into background noise in some places. This is Tennessee, for a World Cup Qualifier soccer game right now. The players might be fine, who knows about those fans. Crowd of 43,000. One of the players did get COVID though, had to miss today's game. It's in Davidson County. https://covidactnow.org/us/tennessee-tn/county/davidson_county/?s=22611184
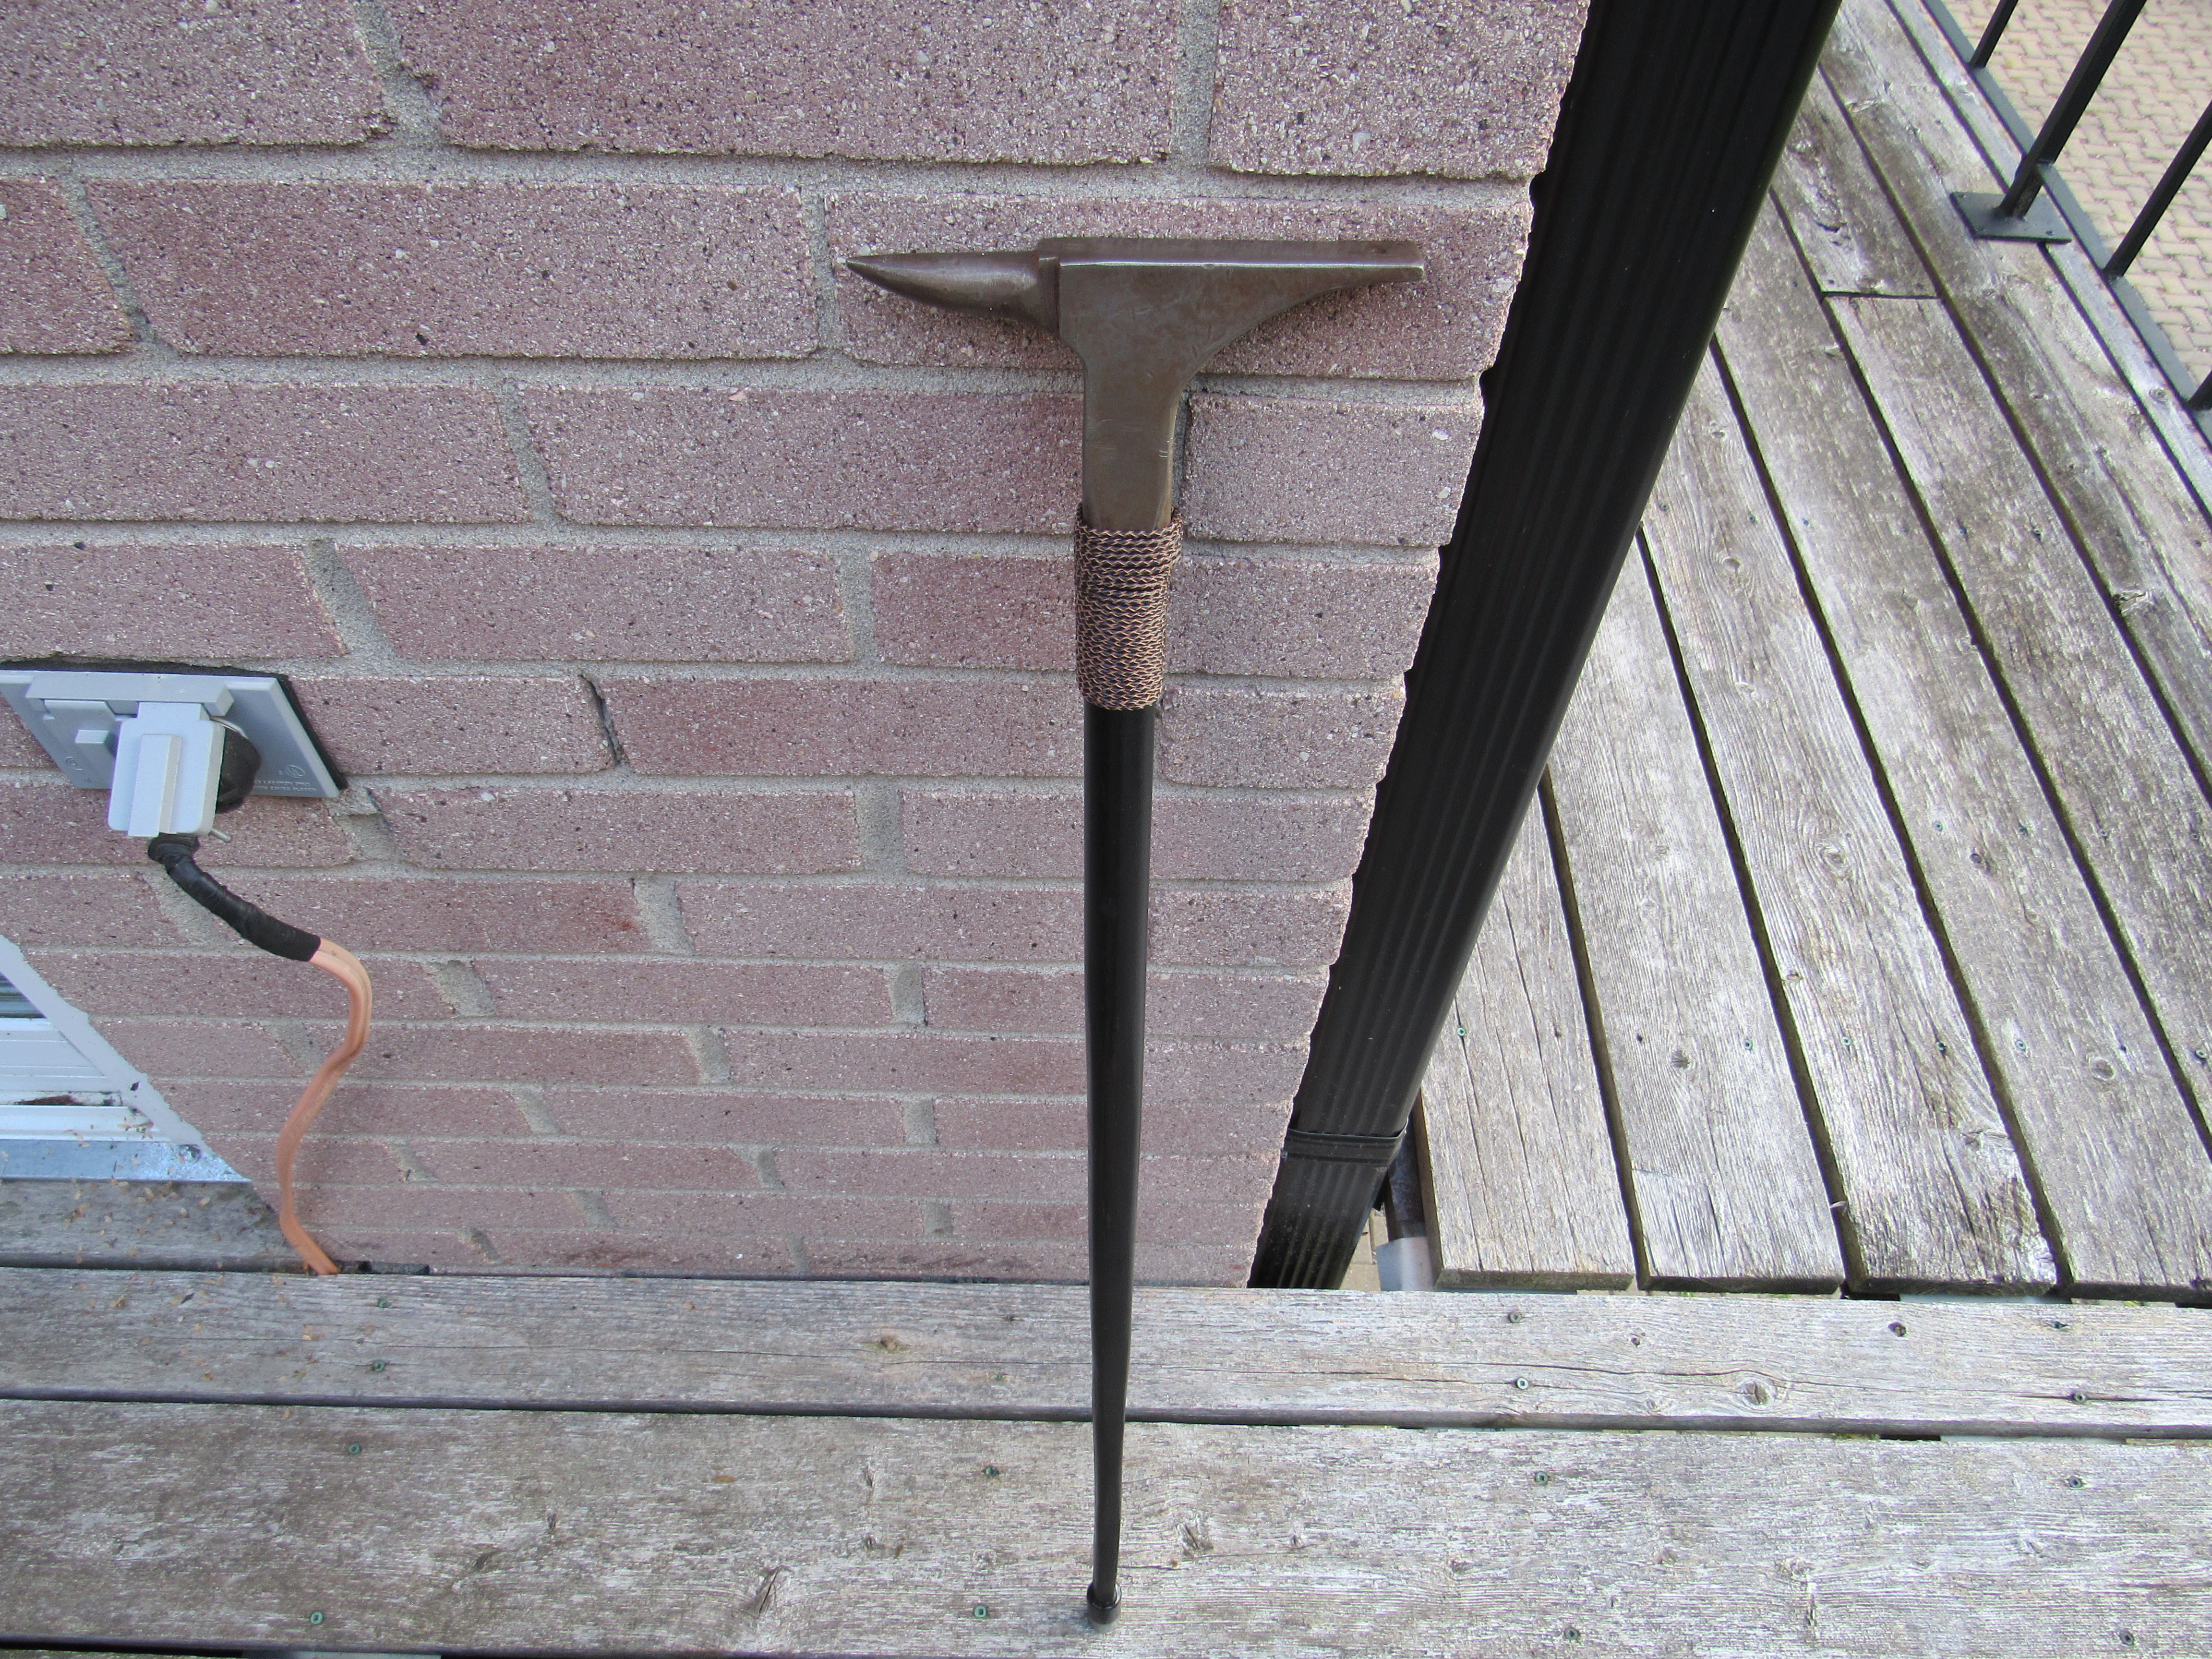
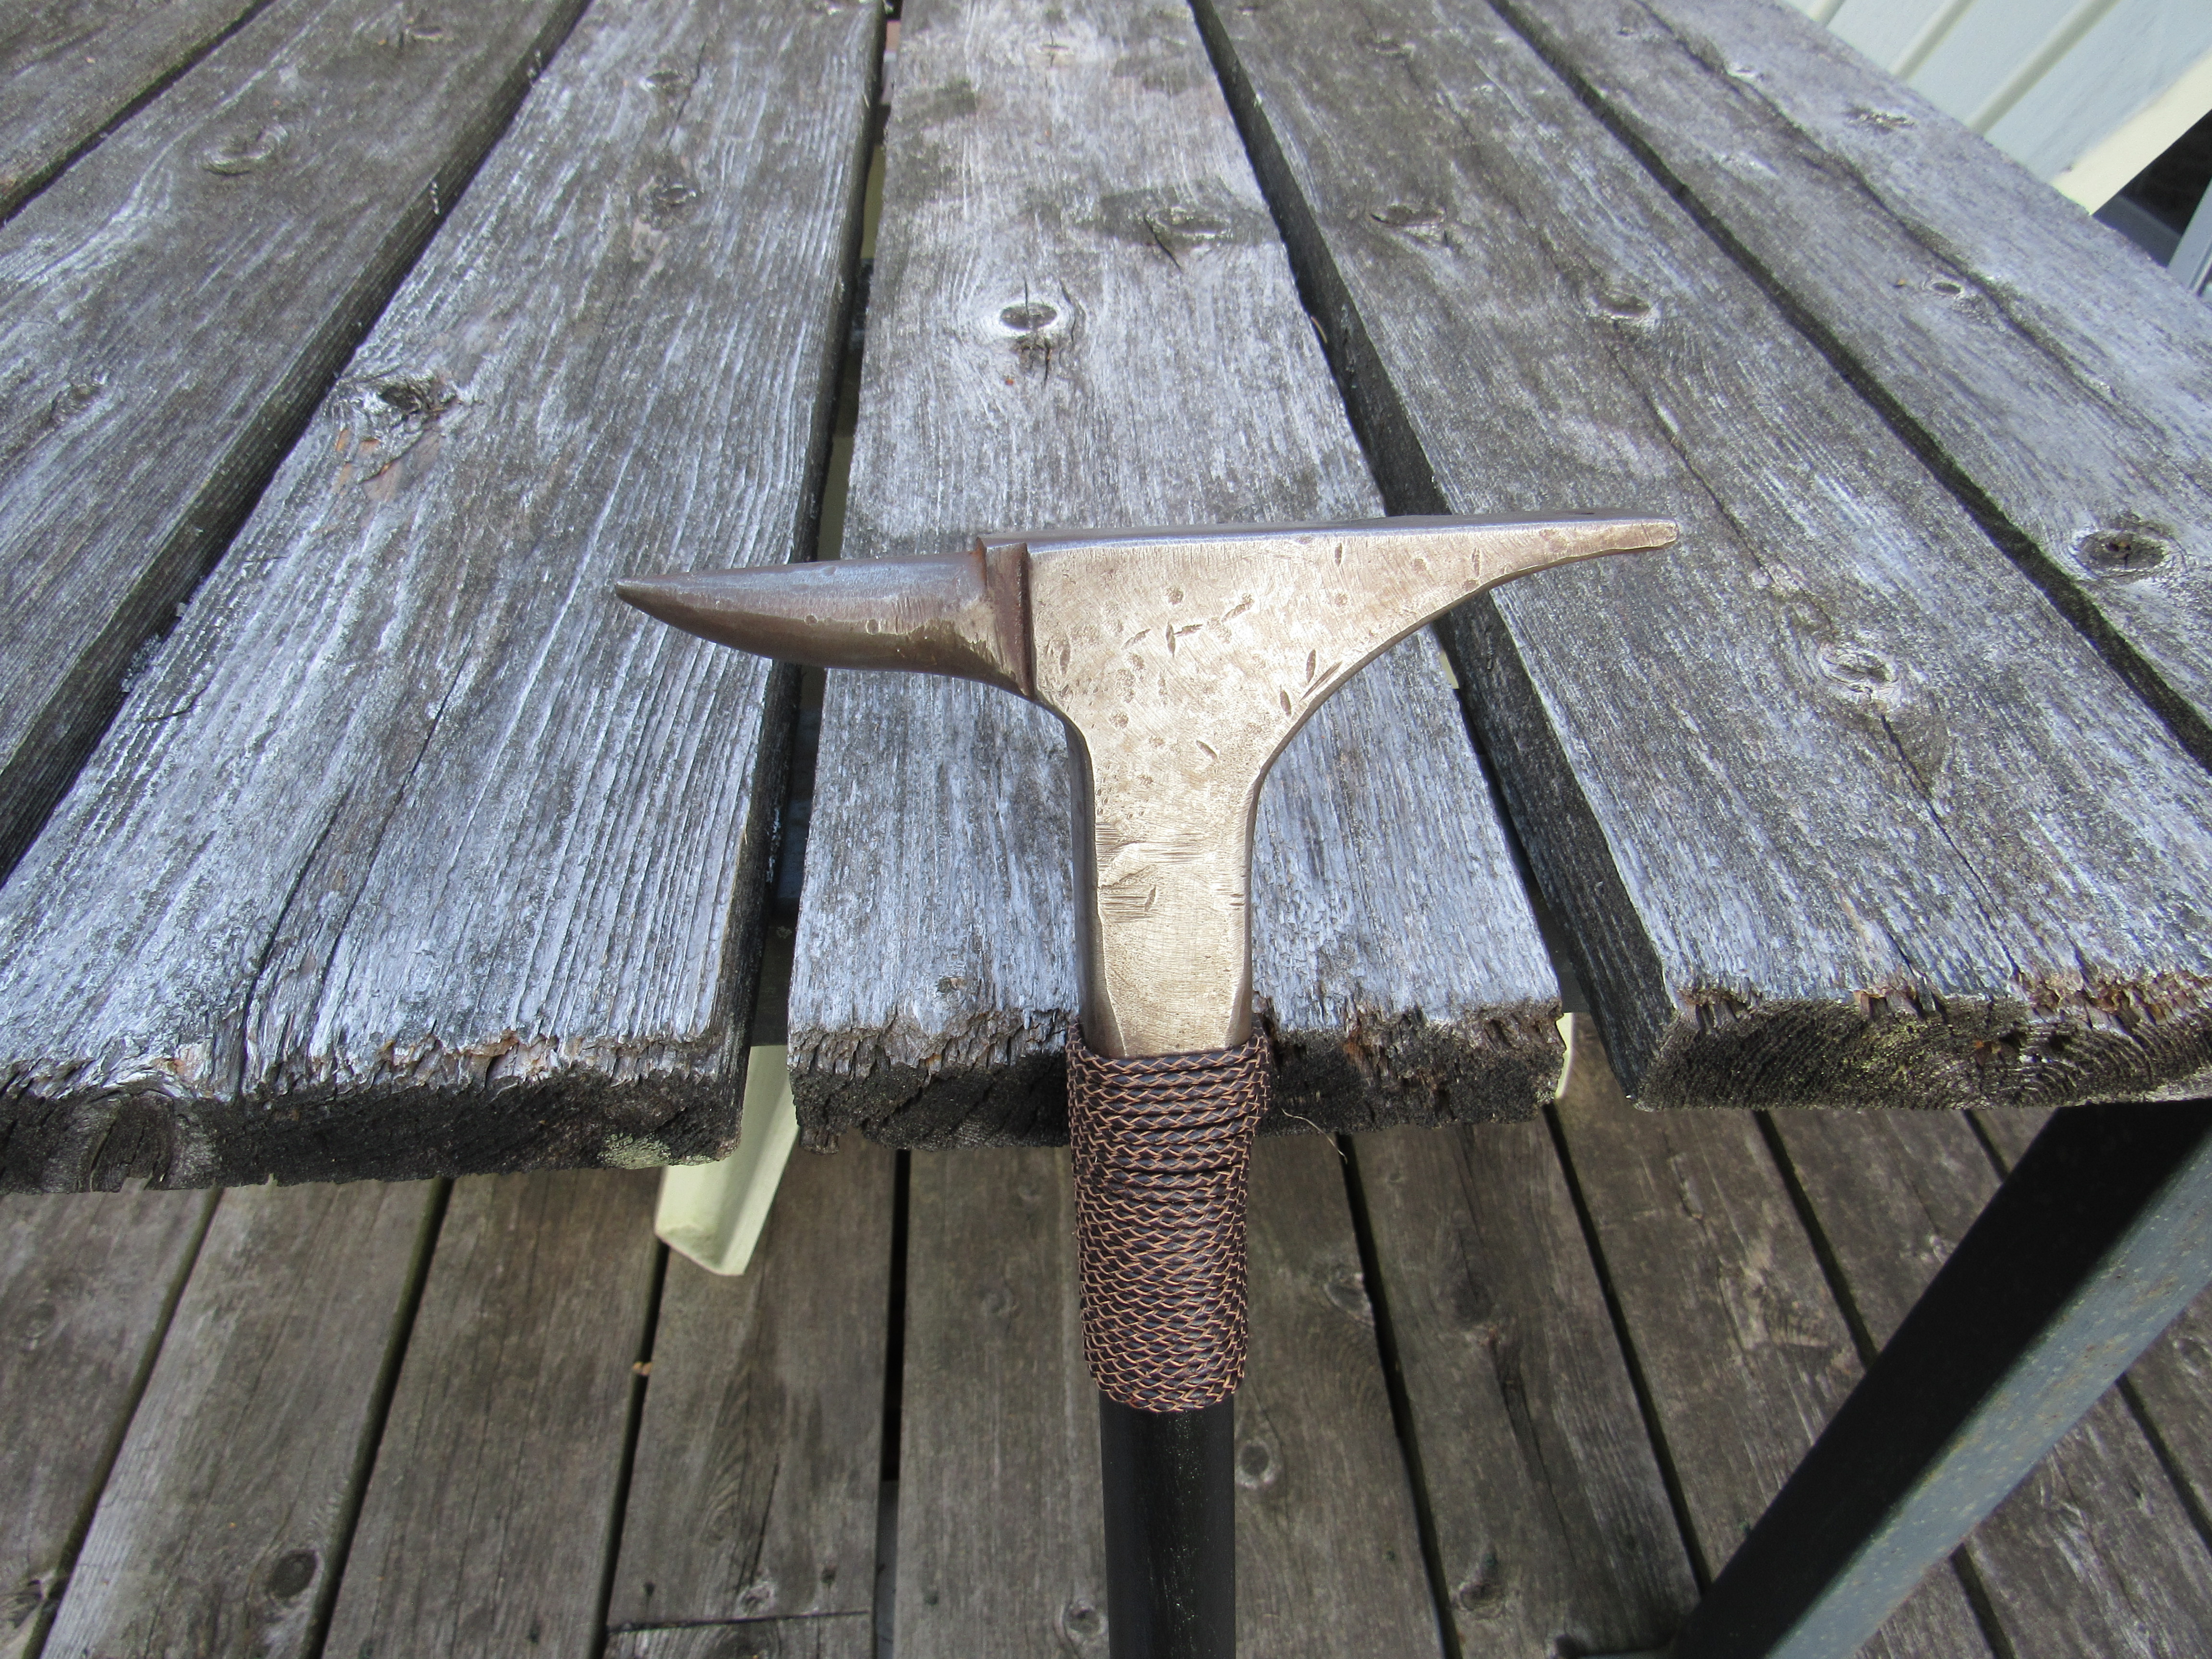
 1 point1 pointI had to buy a new refrigerator so the fancy distributor will have to wait. Hateful appliances taking away from car parts. I like to keep some money saved away for emergencies( :cough:: car parts), but it looks like I ought to be smart and dump some more into savings over the next month or so. Luckily, I added some stabilizer to the fuel and ran it before i took the distributor out. It'll be sitting around for about a month without running I'd say. My distributor is completely thrashed. The magnet and advance mechanism bearing cage or whatever, totally disintegrated.1 point1 pointHere's a tool I hope I won't need for a long time but when I do no one's going to f__k with this old man. The handle is 1/8th in. steel plate welded at the edges so it's not as heavy as it looks, the ferrule at the bottom is a spare 9/16" socket.
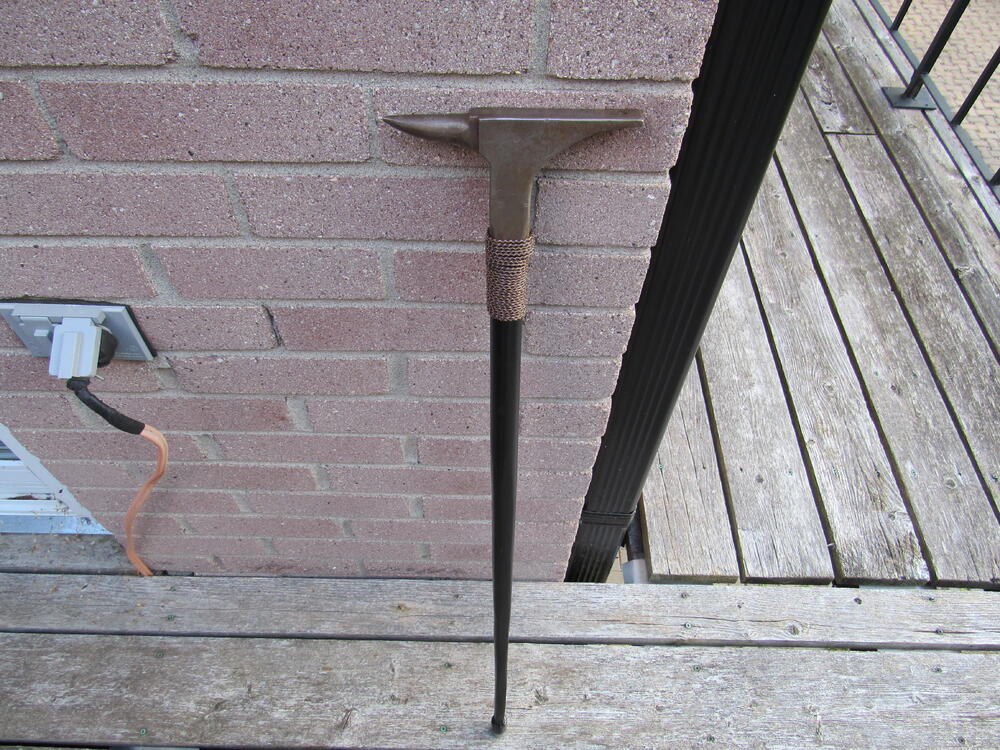


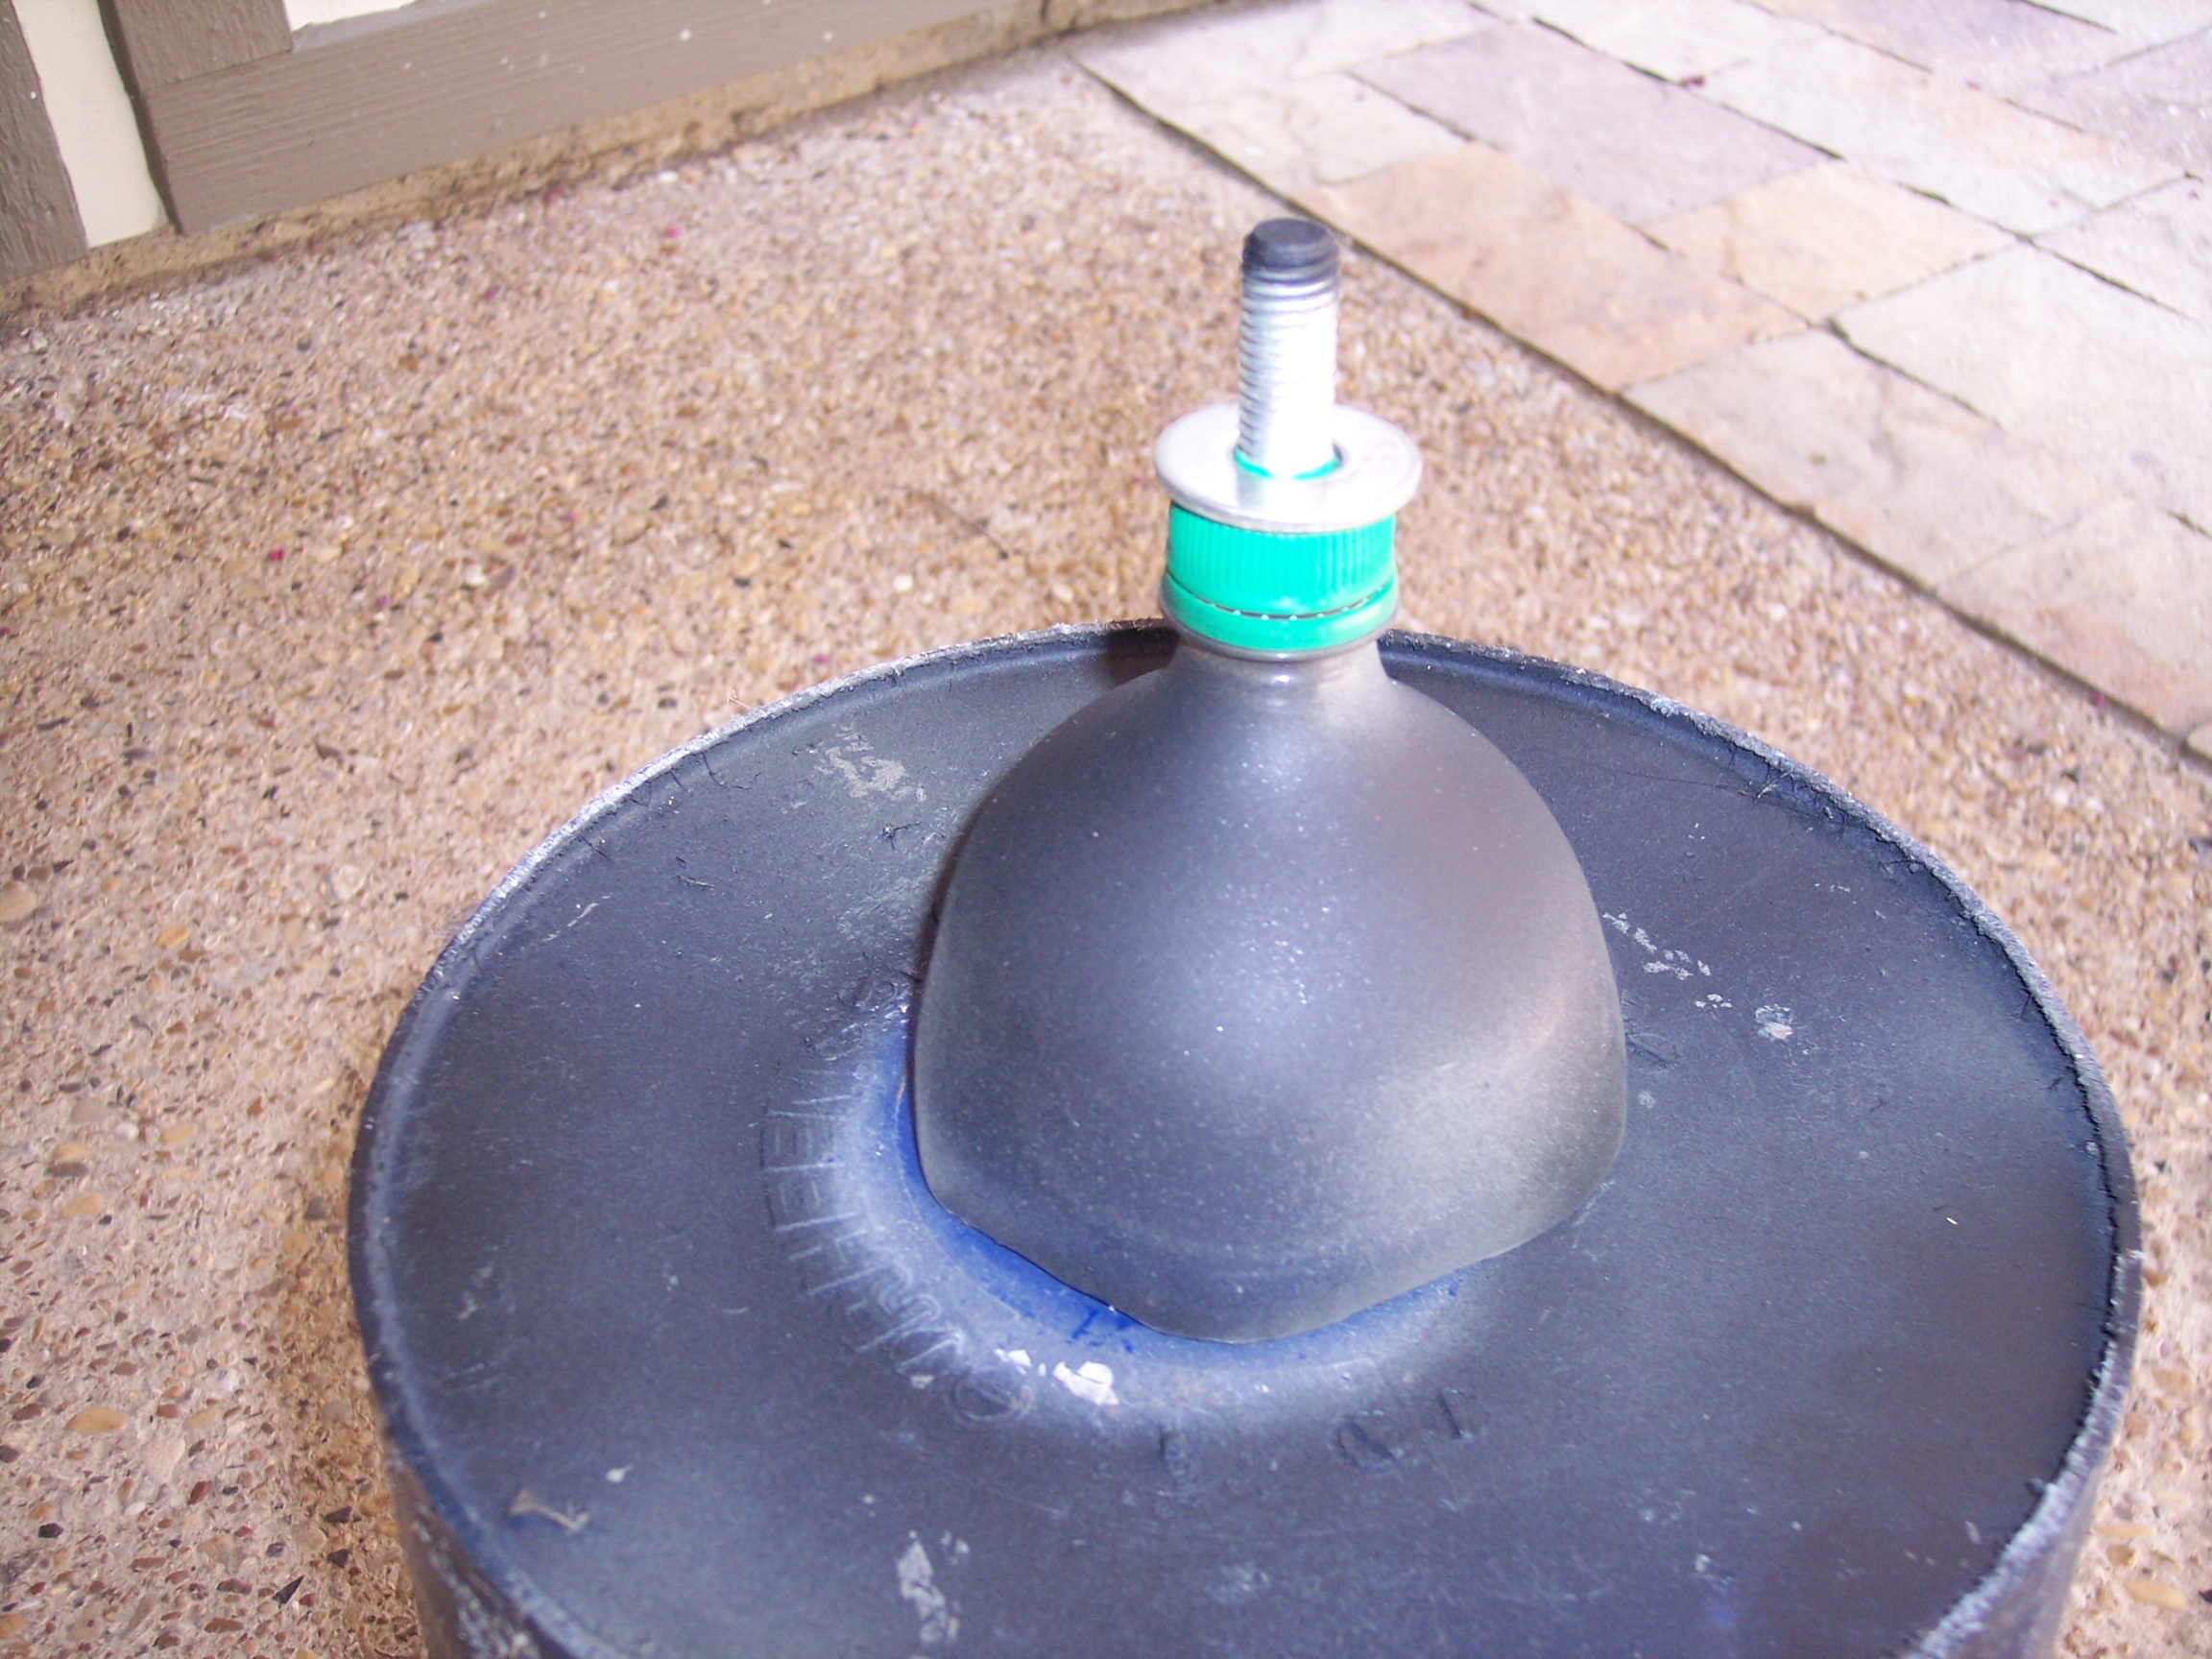
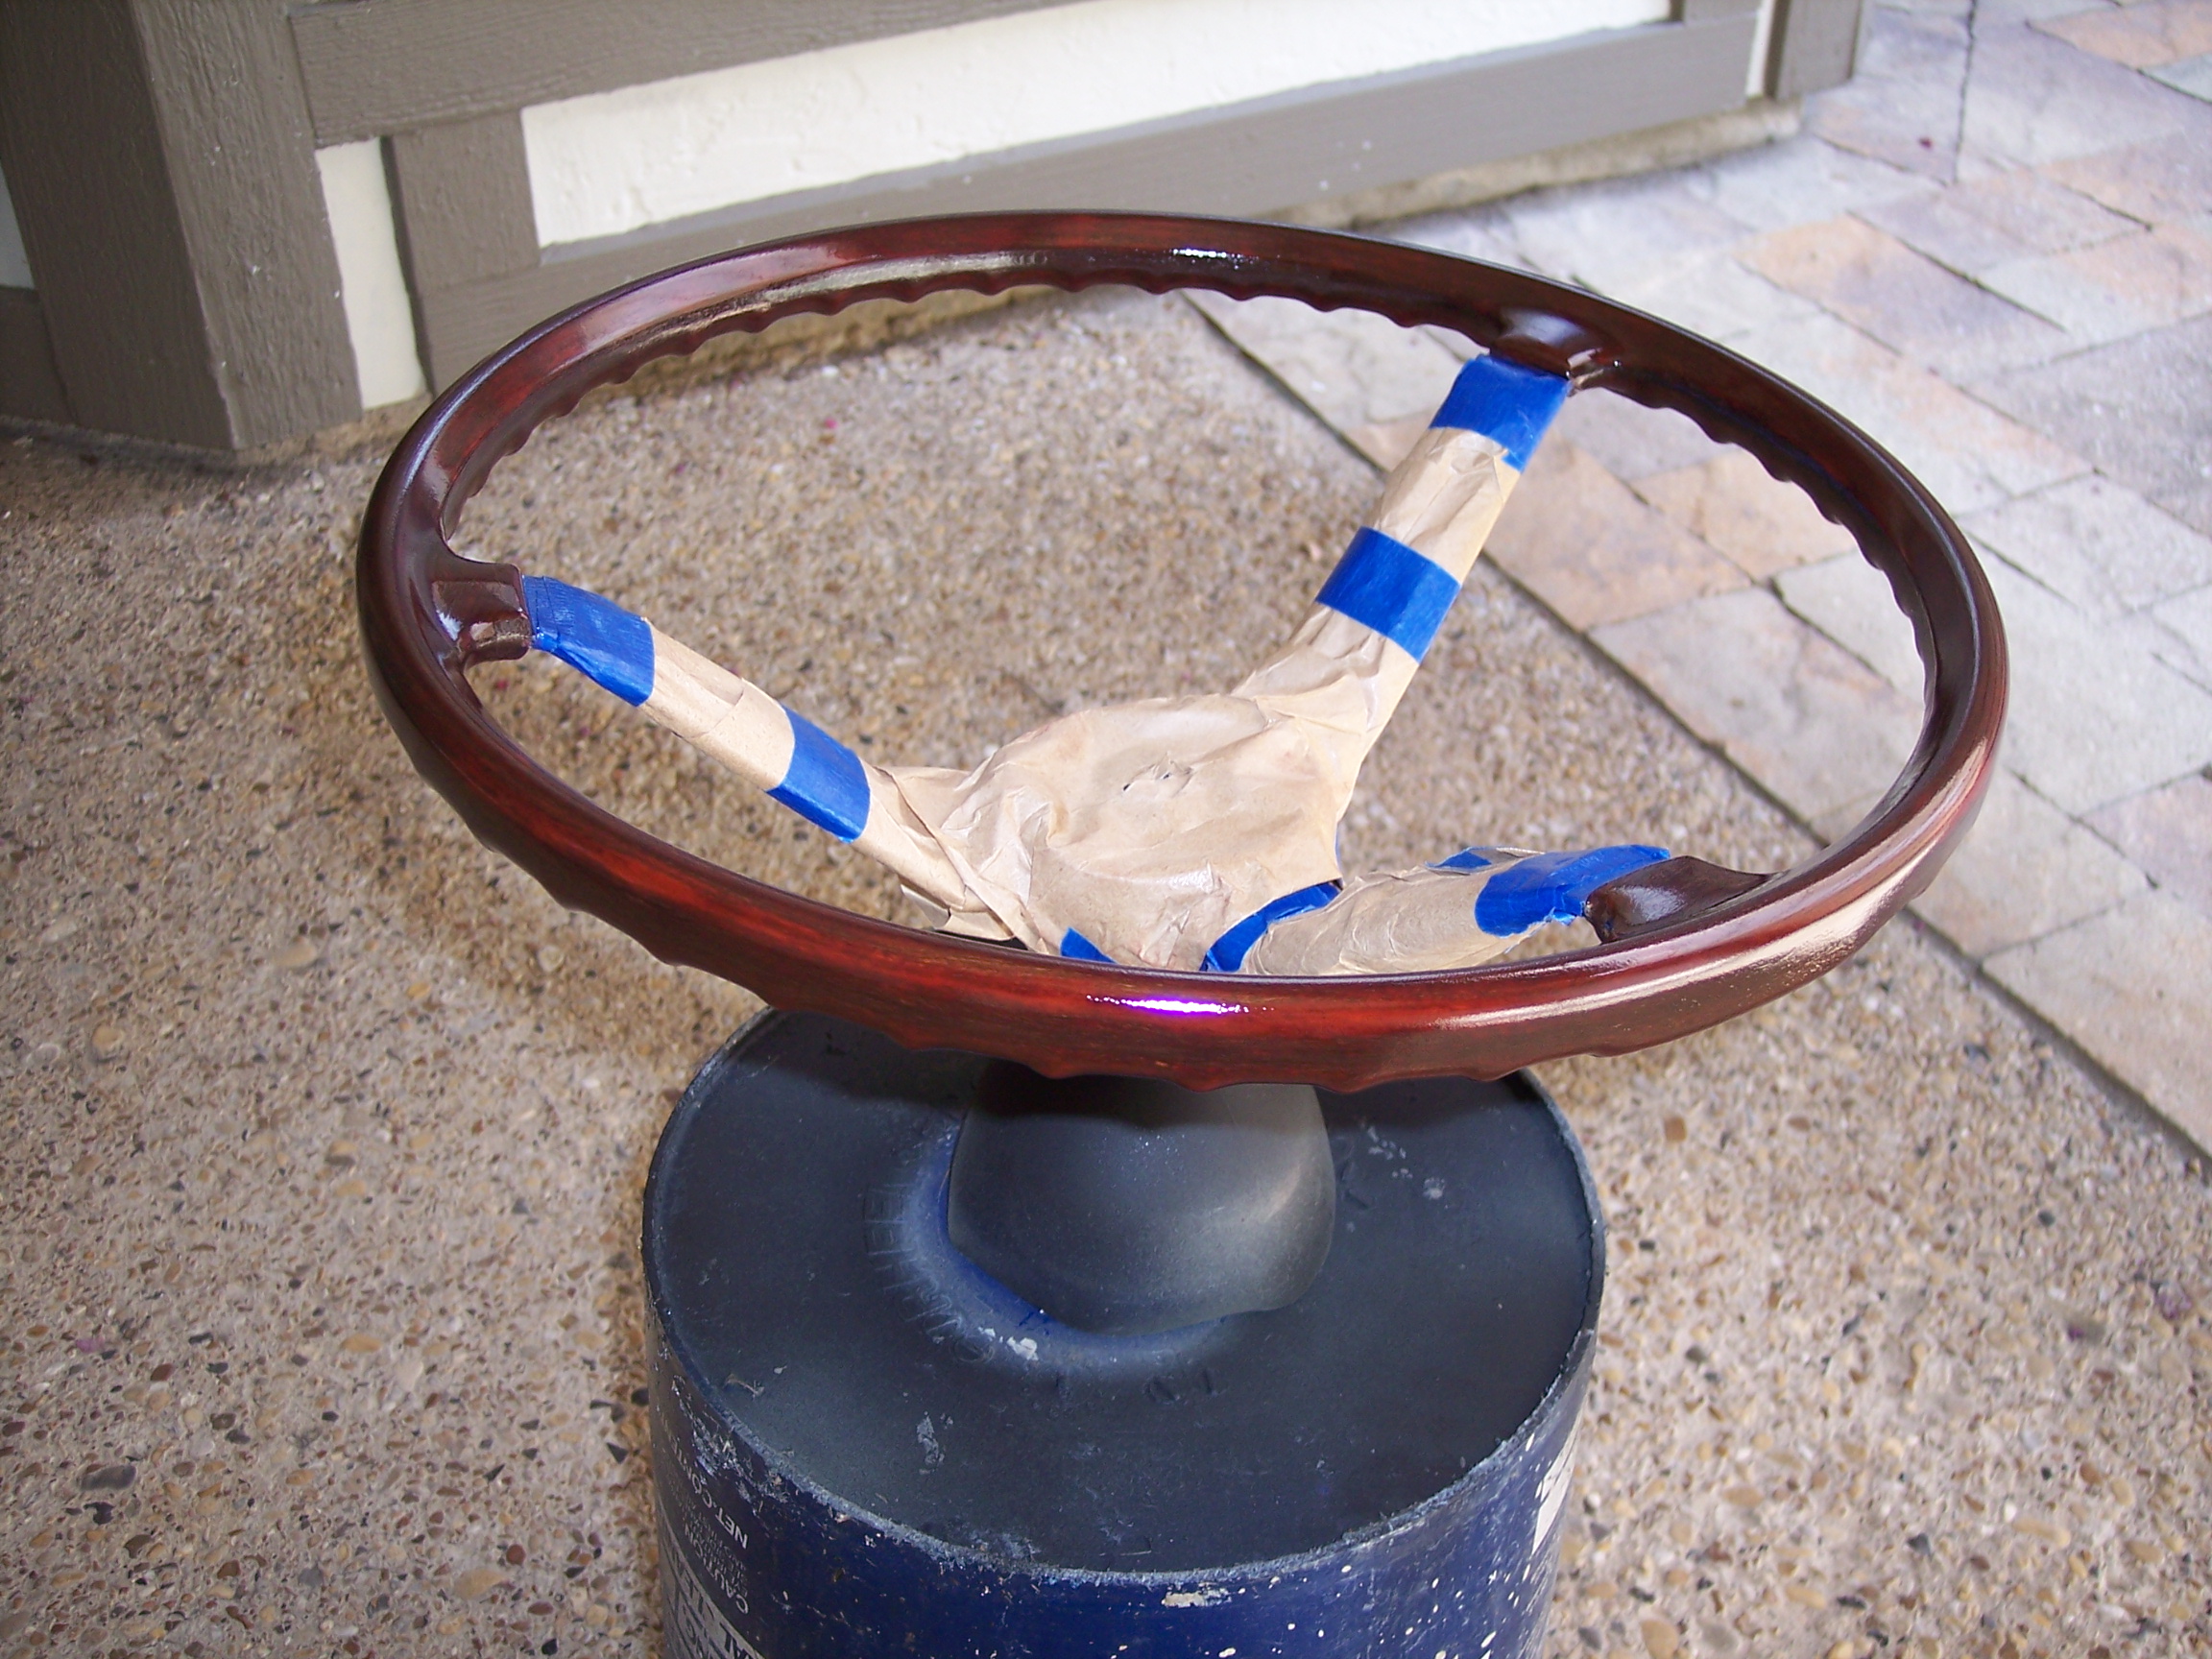
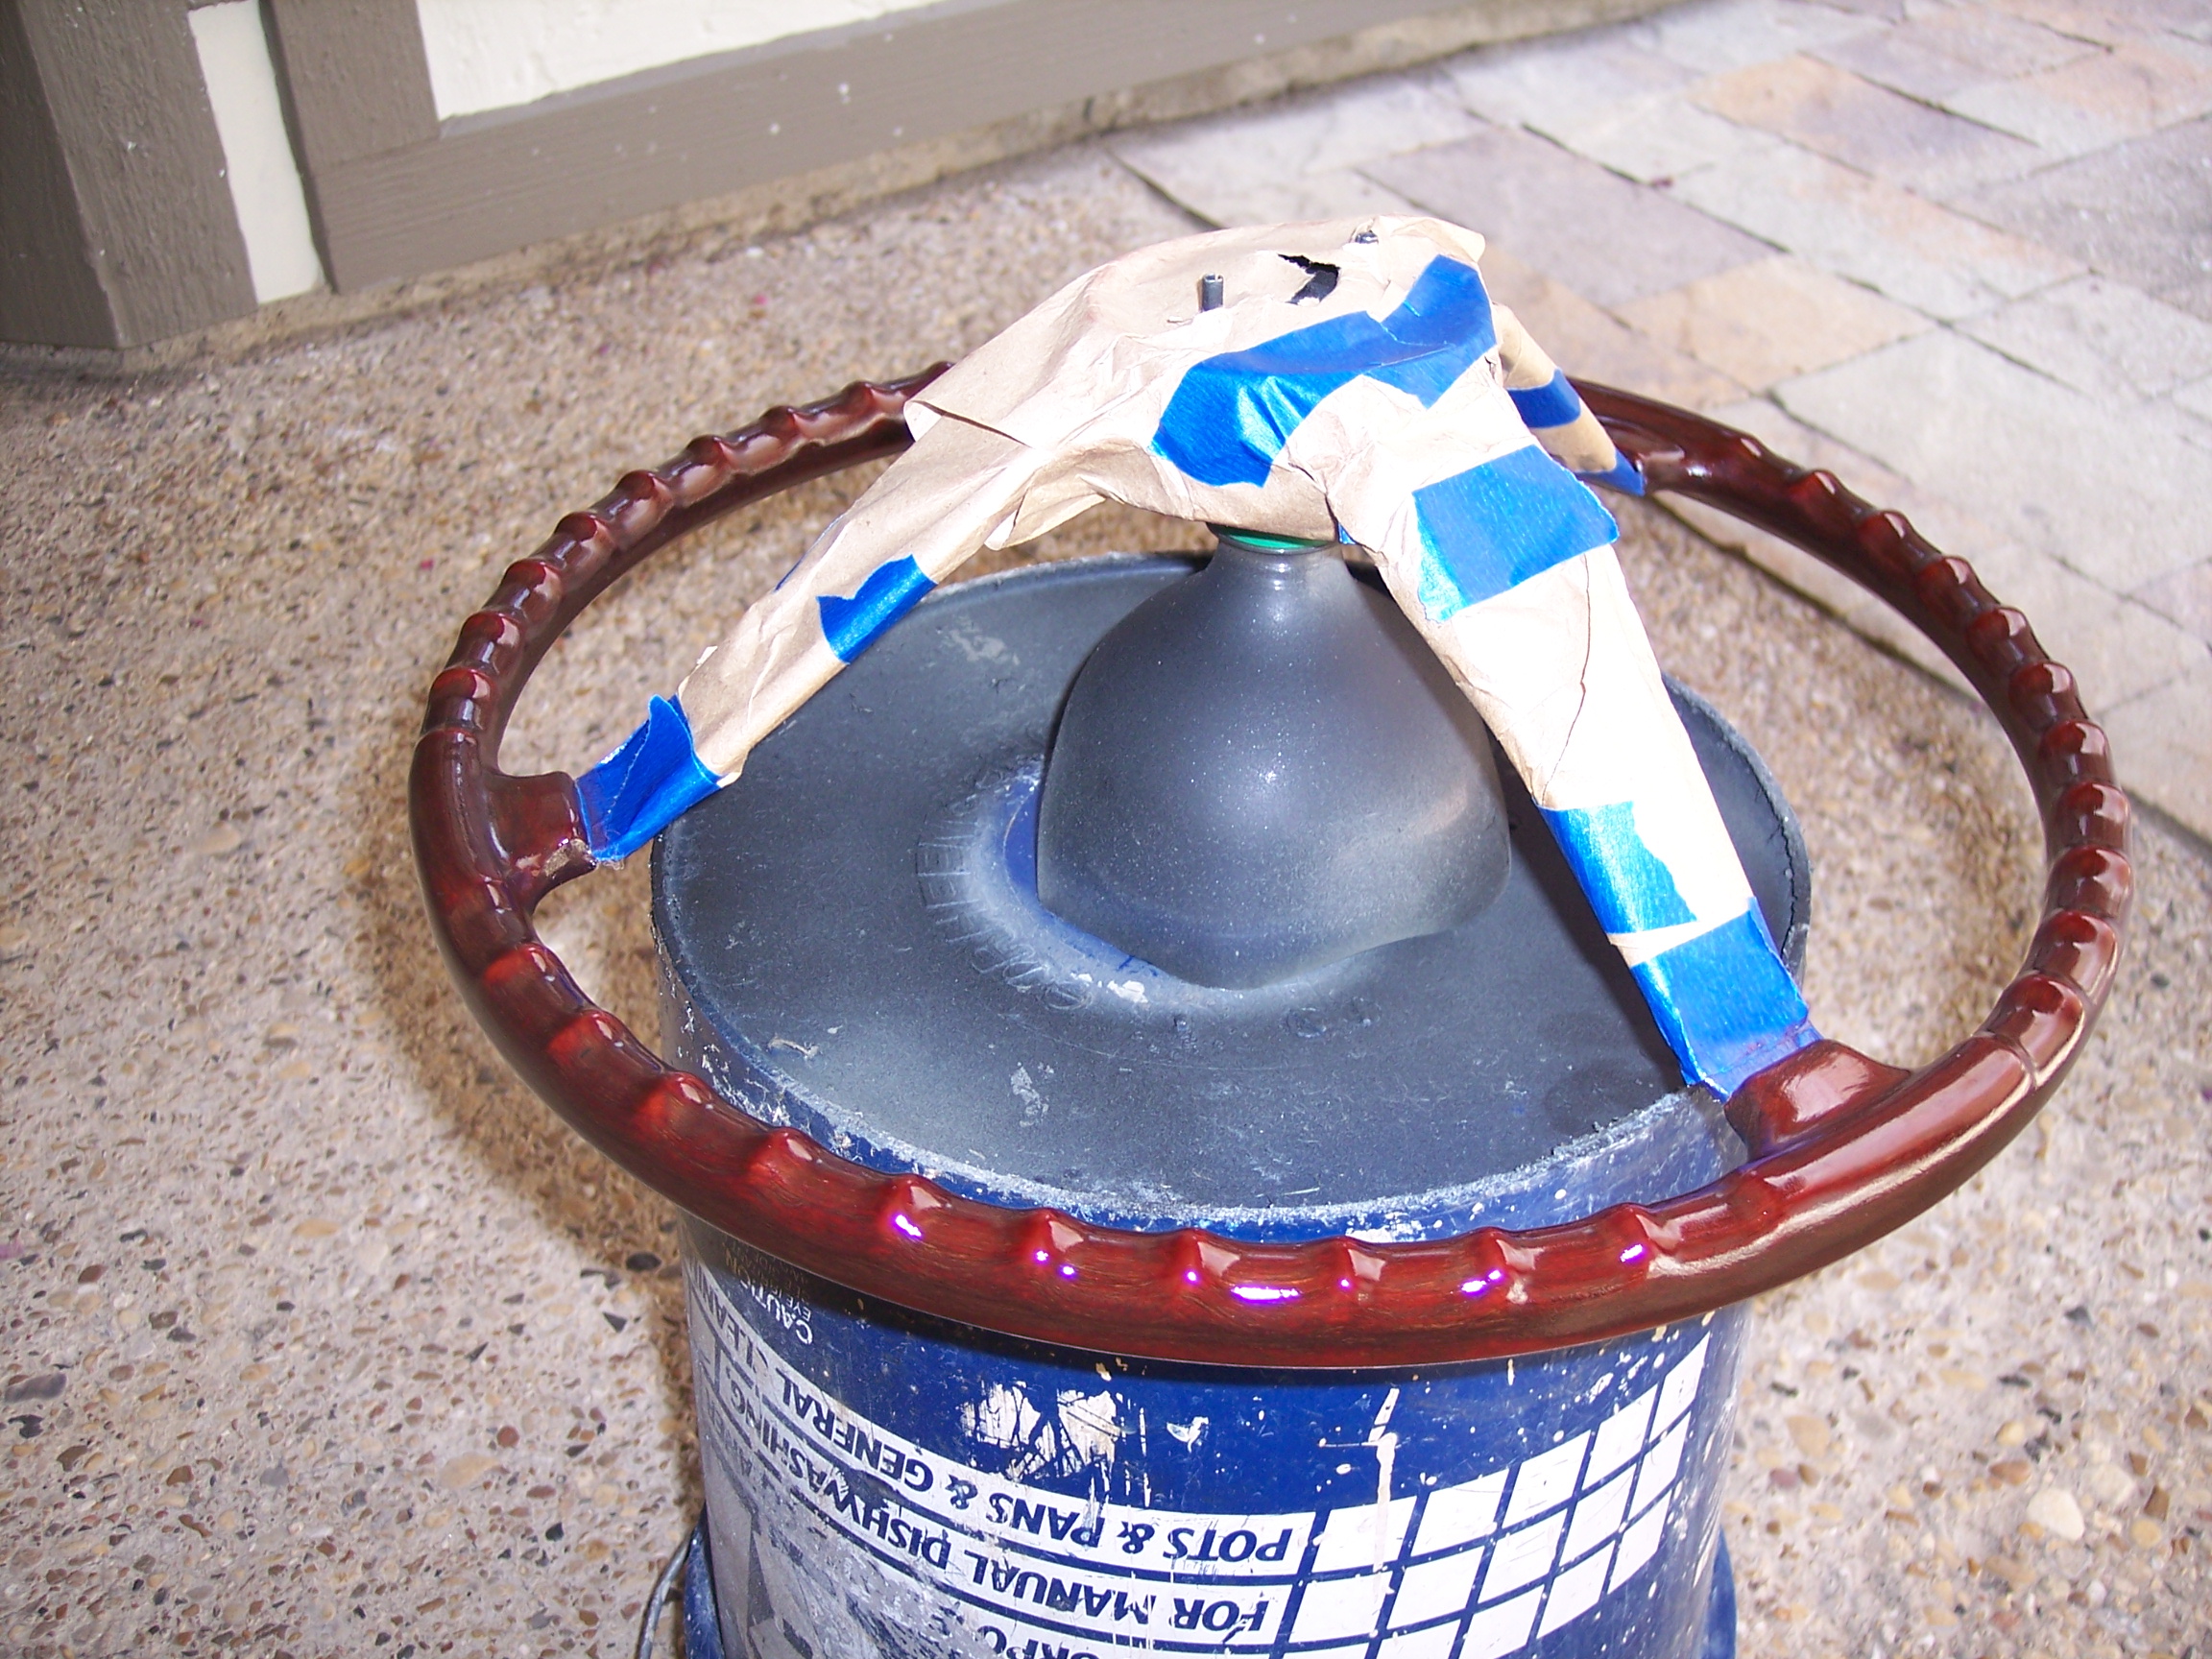
 1 point1 point1 pointI've gone a week with no alcohol, beer for me. I quit vodka about 9am New Year's morning 2006. Girls and drugs all over the place and I wanted to go to sleep, alone. Anyhow this past week I've gotten so much stuff done I may try this a little longer. It is football season and I'm an Alabama guy so maybe Saturday's only? Thank you both for ringing my bell.1 point1 pointNothing as exotic as most of the entries in this thread but here is a little paint accessory I made this week to help in refinishing my steering wheel. It is the top of a 2 liter bottle with a nice fat bolt installed in the cap. It served as a stand for painting the spokes and hub and then it provided a spinner base to rotate the wheel evenly while spraying the spar urethane.
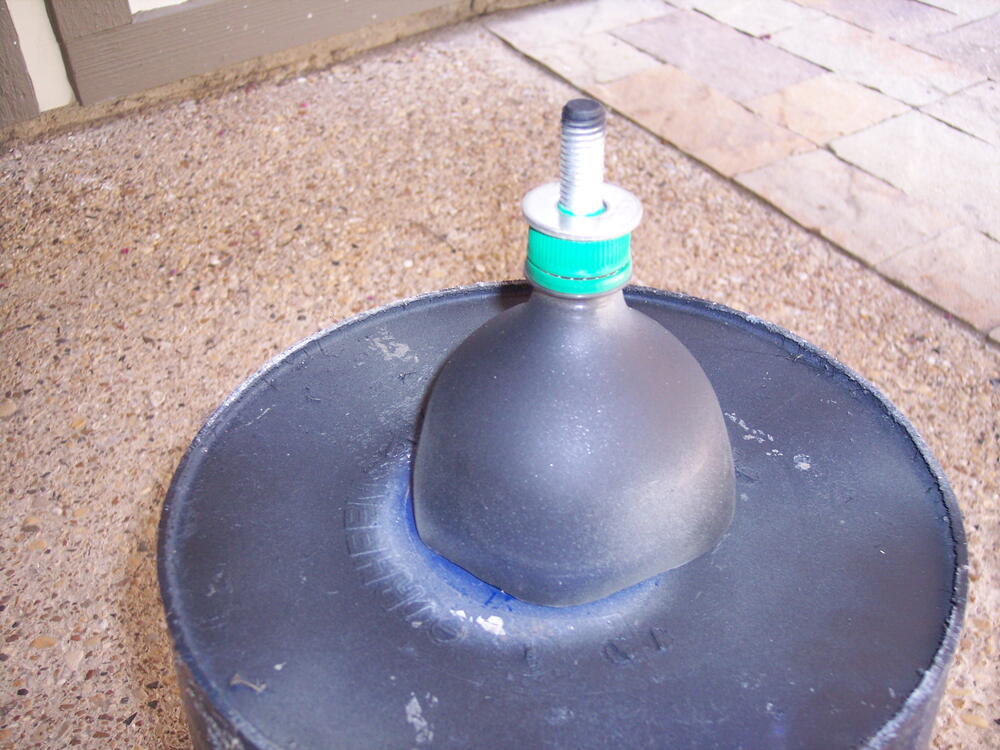

 1 point1 pointThis is how mine turned out. Not sure if satin clear would look better than the gloss clear. I painted the spokes same as the tail light panel. I like it and can always go back to black anytime.
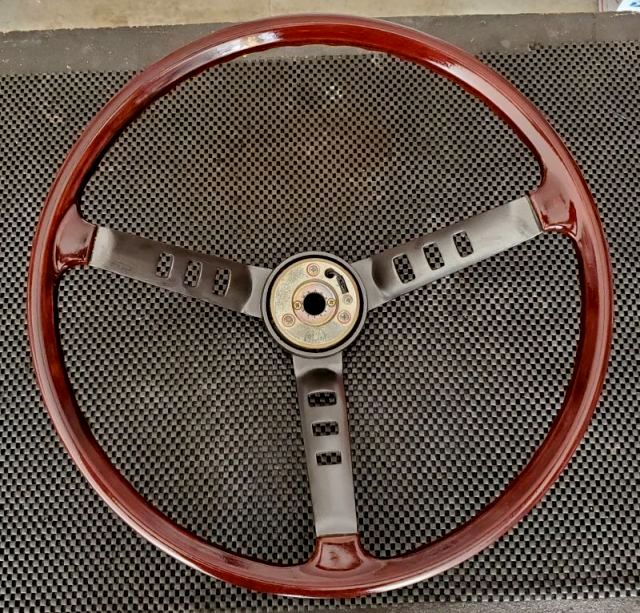 1 point1 pointThis got me straight. After doing it once it clicked for me too, like Tweeds says. You can print it out and keep fuel off your computer/phone.1 point1 pointTo me, the best way to restore the battery area is to drill out the spot welds and remove the tray. If you do this, buy a nice, properly sized spot weld drill bit and extender, and practice removing spot welds without drilling through the body. You will then need to weld up the holes in the battery frame...or buy a new one. I use rivet nuts to re-attach the tray to the body. Not saying you should do this though. It is a pretty big rabbit hole because you will probably want to clean up those passenger side frame rails too...which is difficult without removing the fuel / brake lines and harness that passes through the firewall. Nice car.1 point


Important Information
By using this site, you agree to our Privacy Policy and Guidelines. We have placed cookies on your device to help make this website better. You can adjust your cookie settings, otherwise we'll assume you're okay to continue.