Topics Last Week
Showing topics, images, events and files posted in for the last 7 days.
- Past hour
-
 The fuel stabilizer will probably be good enough for now. I'd suggest taking it out on the road for at least an hour to work out all the issues that gasahol creates. Maybe even pump in a few gallons of fresh fuel into the tank, depending on how much fuel is still in there. FYI, when any car or internal combustion engine sits for 4 weeks the fuel and alcohol separate and the alcohol attracts moisture (water) which goes to the bottom and sits. This happens in the fuel tank, in the pump, in the fuel lines, in the carbs or injectors and so on. I don't think that I have to explain what happens with the water in the fuel system. For a fuel stabilizer in the future, there is only one product to use and it's not Sta-bil. That's an ok product and it keeps the fuel stabilized for up to 1 year but there is a product that is waaaaay better and most of you have probably heard of it. It's called Seafoam and they guarantee it to keep fuel stabilized up to 2 years. I'll take that a step further by letting everyone know that I"ve got first hand experience with the product and I've seen it keep fuel stabilized for over 4 years without any problems. I haven't checked my 79 620 fuel for over 2 years now but it was ok 2 years ago and I parked the truck in 2018 after I seafoamed the gas. My 75 z sat for 4.5 years and I put Seafoam in the gas the day I bought it in April 2018 and didn't start the engine until August 2022. I checked the fuel first and it smelled fine. Two days after I got it started I took off for the Olympic peninsula with it and drove it all over the place without a problem. Still driving the car today. By the way, Z Specialties is alive and well, I never have closed for good, only the past locations were closed for good. I work out of my home now part time and I don't have any employees. Z man of Washington
 -
 Thanks, guys. The car is in reassembly after having been totally stripped down, all rust repaired, frame stiffened and lovely repaint in metal-flake clearcoat orange over epoxy primer. Wiring harnesses were re-wrapped and installed. Just finished seating area upholstery and installation of Vintage Air HVAC system. Put in a new 6-circuit fuse block for all the new accessories fed by 10 gauge wires directly from the battery terminals but no battery in place yet. Wiring run for quad speakers and power windows. Putting dashboard back in place is the next step. Just thinking ahead to what needs to be accounted for up front. Wiring directly to alternator sounds eminently reasonable and definitely ignition-activated..
 -
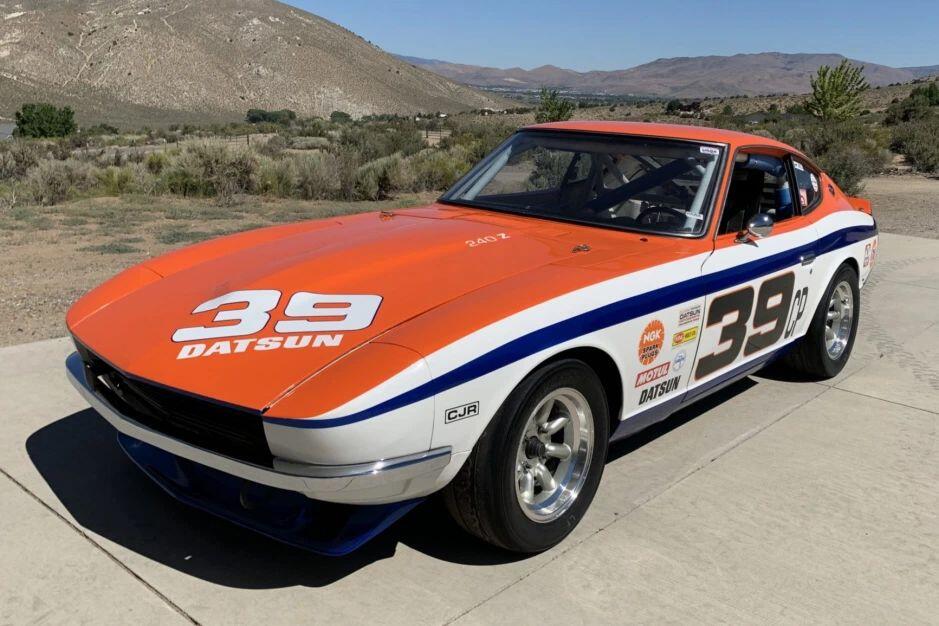
 Bring a Trailer1971 Nissan Fairlady Z 5-SpeedBid for the chance to own a 1971 Nissan Fairlady Z 5-Speed at auction with Bring a Trailer, the home of the best vintage and classic cars online. Lot #0.Jays car from JDM car parts.
 - Today
-
 Thank you for bringing this up and providing this detail. It reminded me to look at what I put on my car because I was wondering why my speedo was off. I have 185/65/14, and now I know why my speedo is inaccurate. :D
 -
 Is it for the 260 in your cars owned or is it a ZX as the TECH FORUM category you chose? Here's wiring for a 260. There's a lot of info in the RESOURCES category up top of the home page
 -
 Last time I messed with this, I tried to use off the shelf screws and I could not get enough mass packed into a small enough package. I've found that 4 grams is a good amount of mass to get the float to sit level at equilibrium, and the wood screw just didn't weigh enough. Here's a failed attempt to use a brass wood screw instead of making my own weights from scratch. Pic of a wood screw chucked up in the lathe, narrowing the head, The process of narrowing the head worked fine, but the amount of mass remaining wasn't enough. I ended up making another pair of weights from scratch. Here's a pic of what didn't work out:
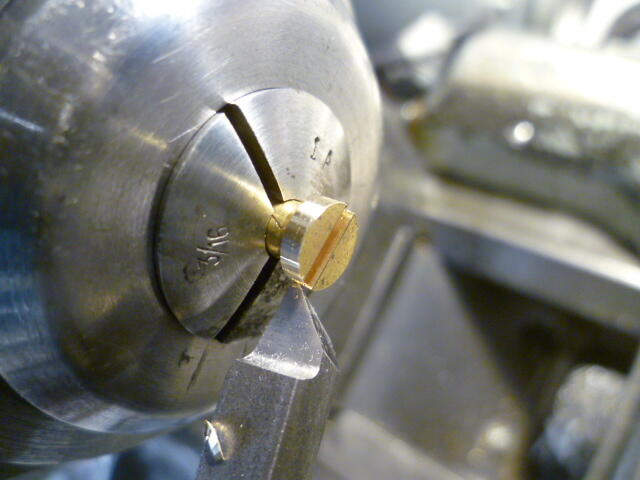
-
The RPMs should decease when lifting that piston, almost dying out. Lifting the piston disables that carb then you are running on the 3 cylinders the other carb feeds. That's what mine does anyhow. Try reaching in and lift the piston itself instead of pushing those pins down. Your needle height may be off from the rebuild with the needle height set screw? Remember raising and lowering is viewed from the bottom of the car. Turn the nuts towards the fender to lower the needles. Read the section on SETTING MIXTURE.
-
 Still in original packaging. $10.
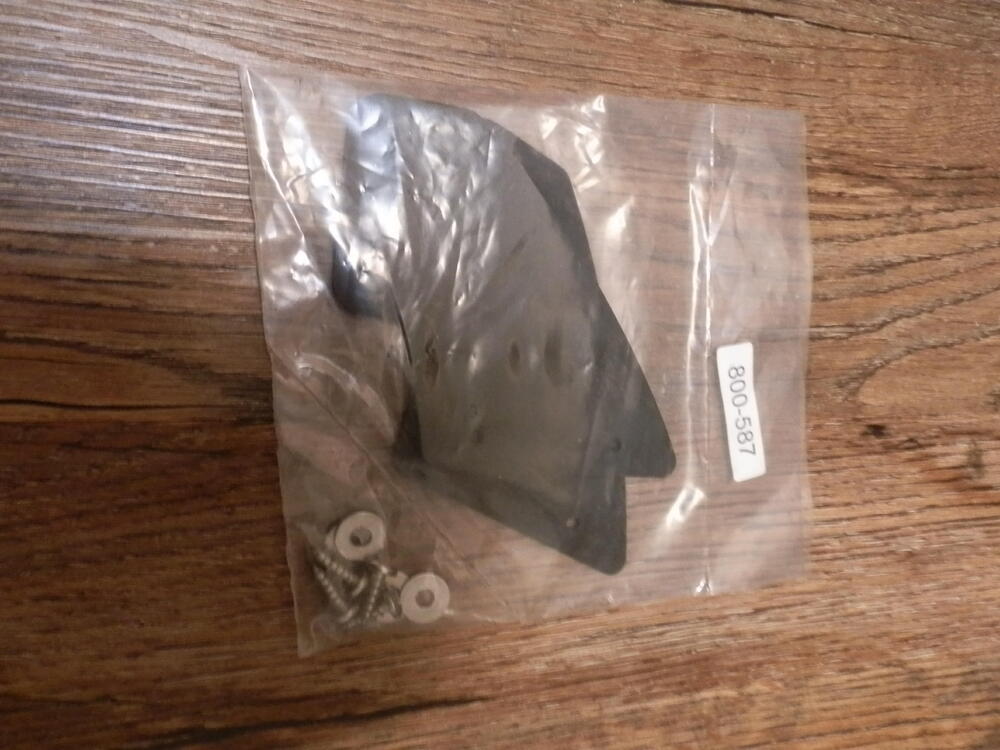
- Yesterday
-
Phot says it all. Sand, paint and ready-to-go $25

-
-
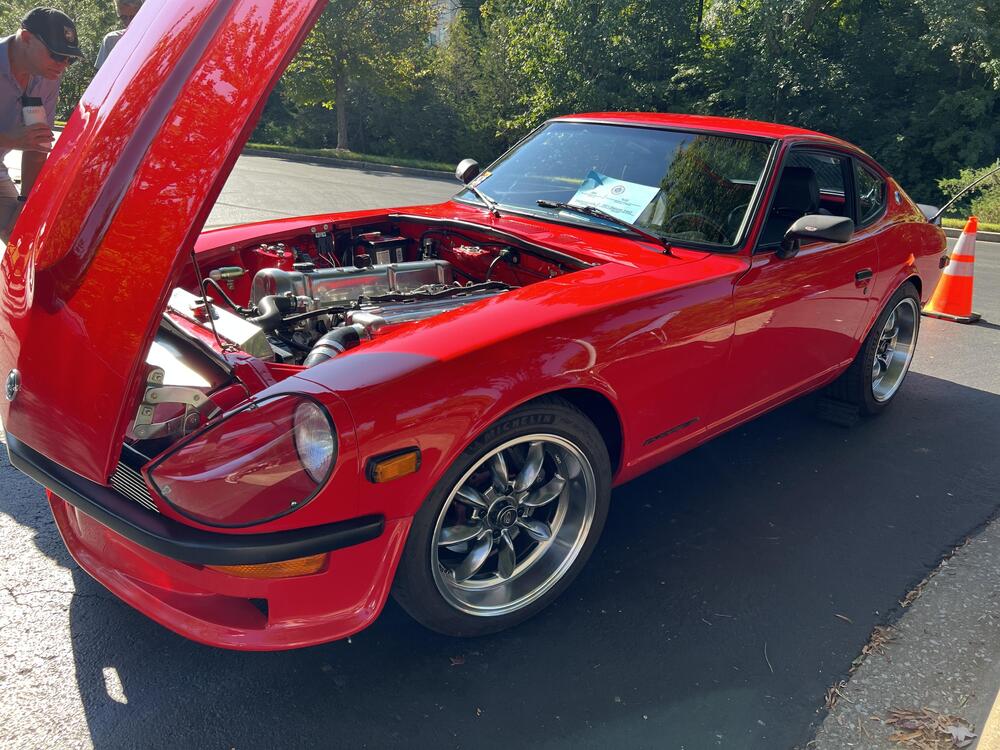
 Glad you came to ZCON and gave me some inspiration on my future engine! I got a pic of our cars together and one of yours at the show Saturday. Hope to see you again at a future event!
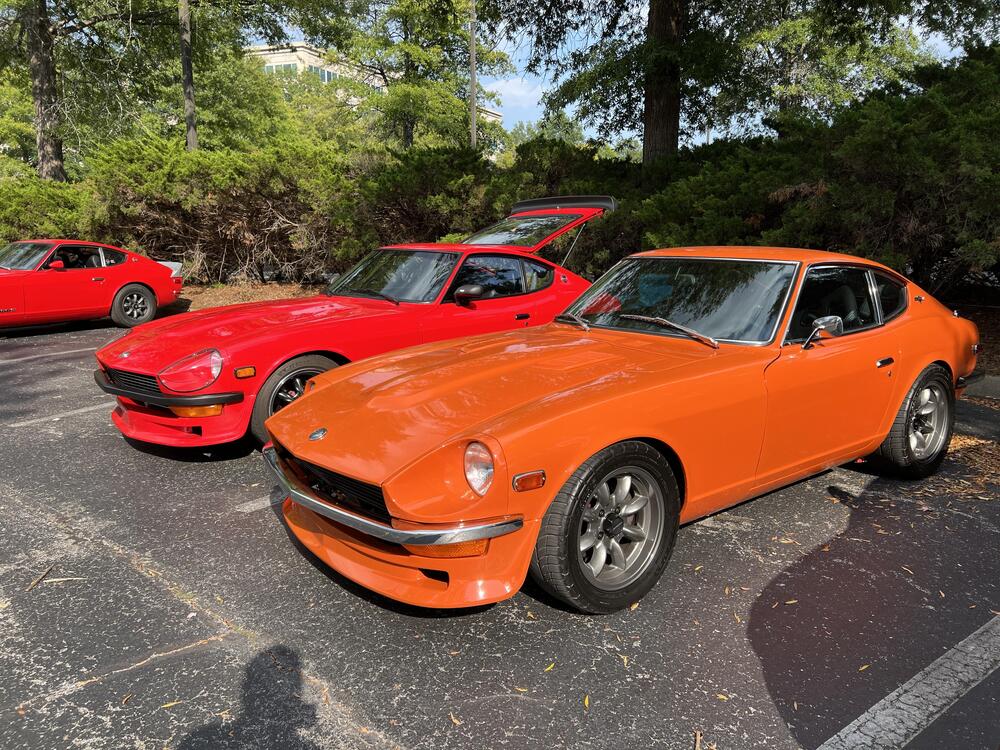
-
 😎
😎
-
 Glad to be alive . I’m a lucky guy for sure . It’s fancy but it’s all business too:)
 - Last week
-
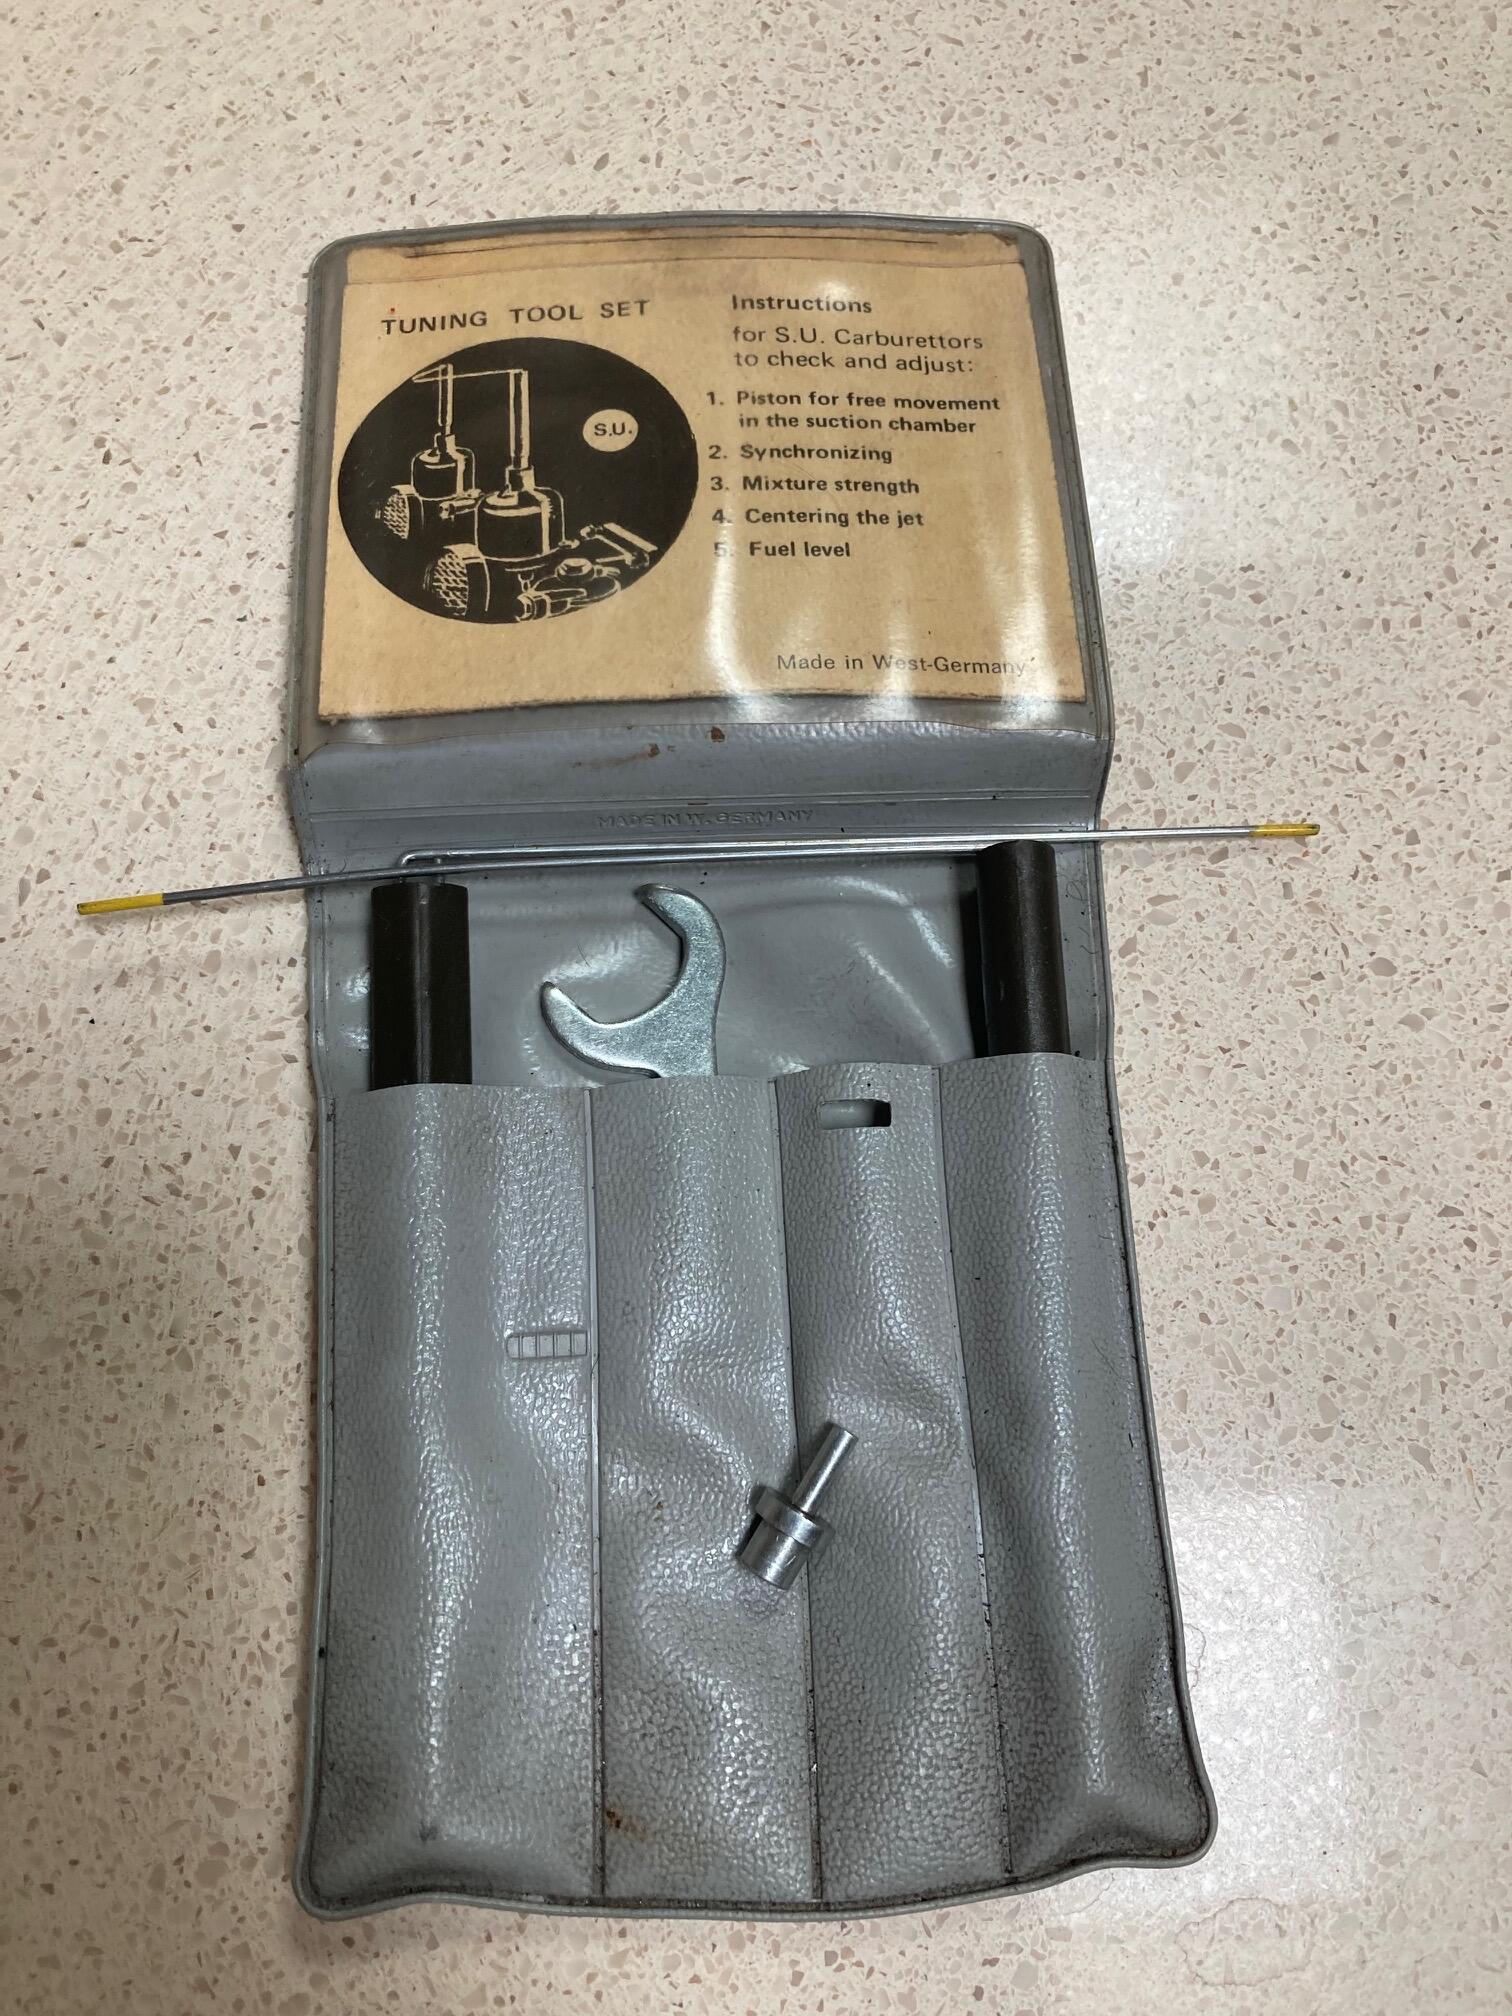
 Here is the SU tuning kit mentioned in post above. I just checked on eBay and they are available for $40. The small aluminum fitting laying on top of the gray package is the one I was referring to.
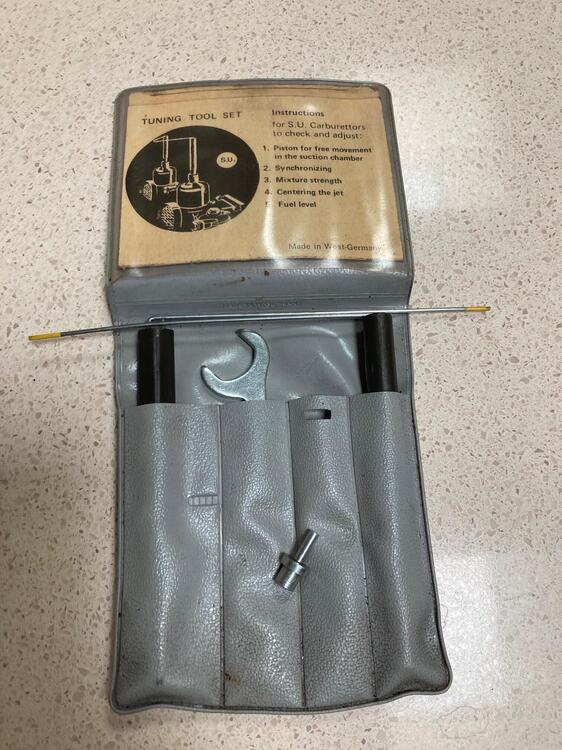
-
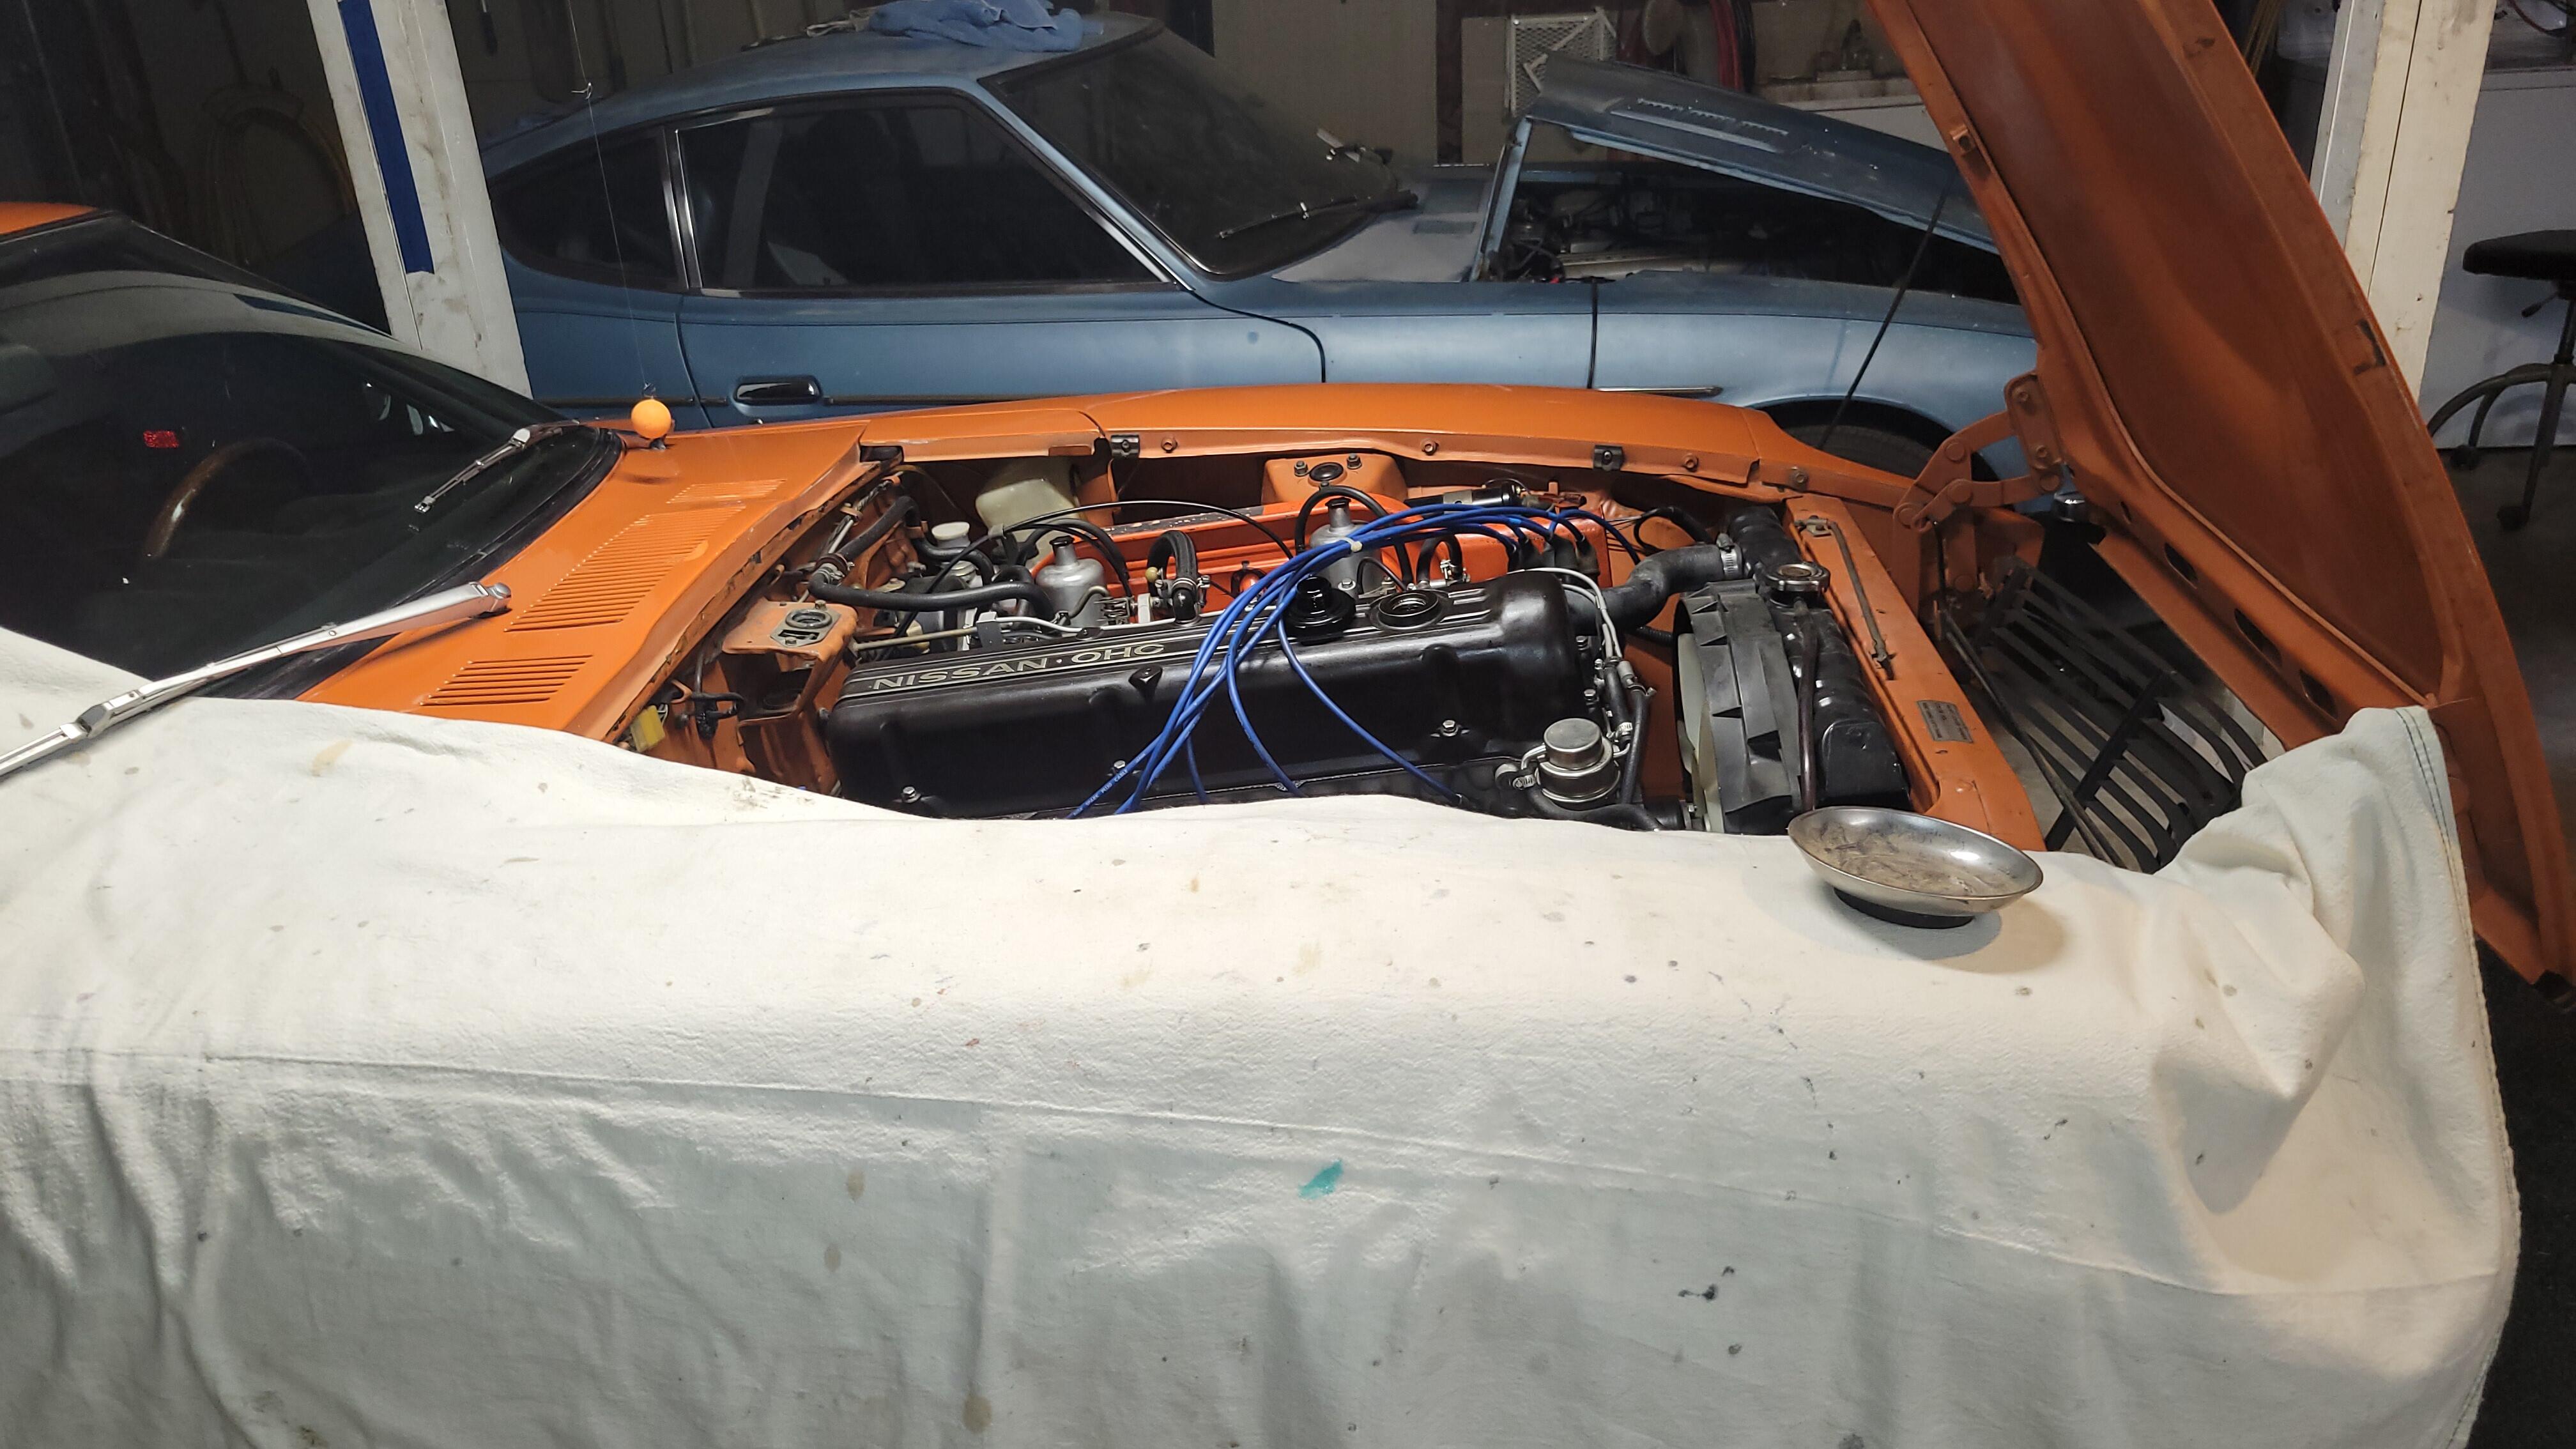
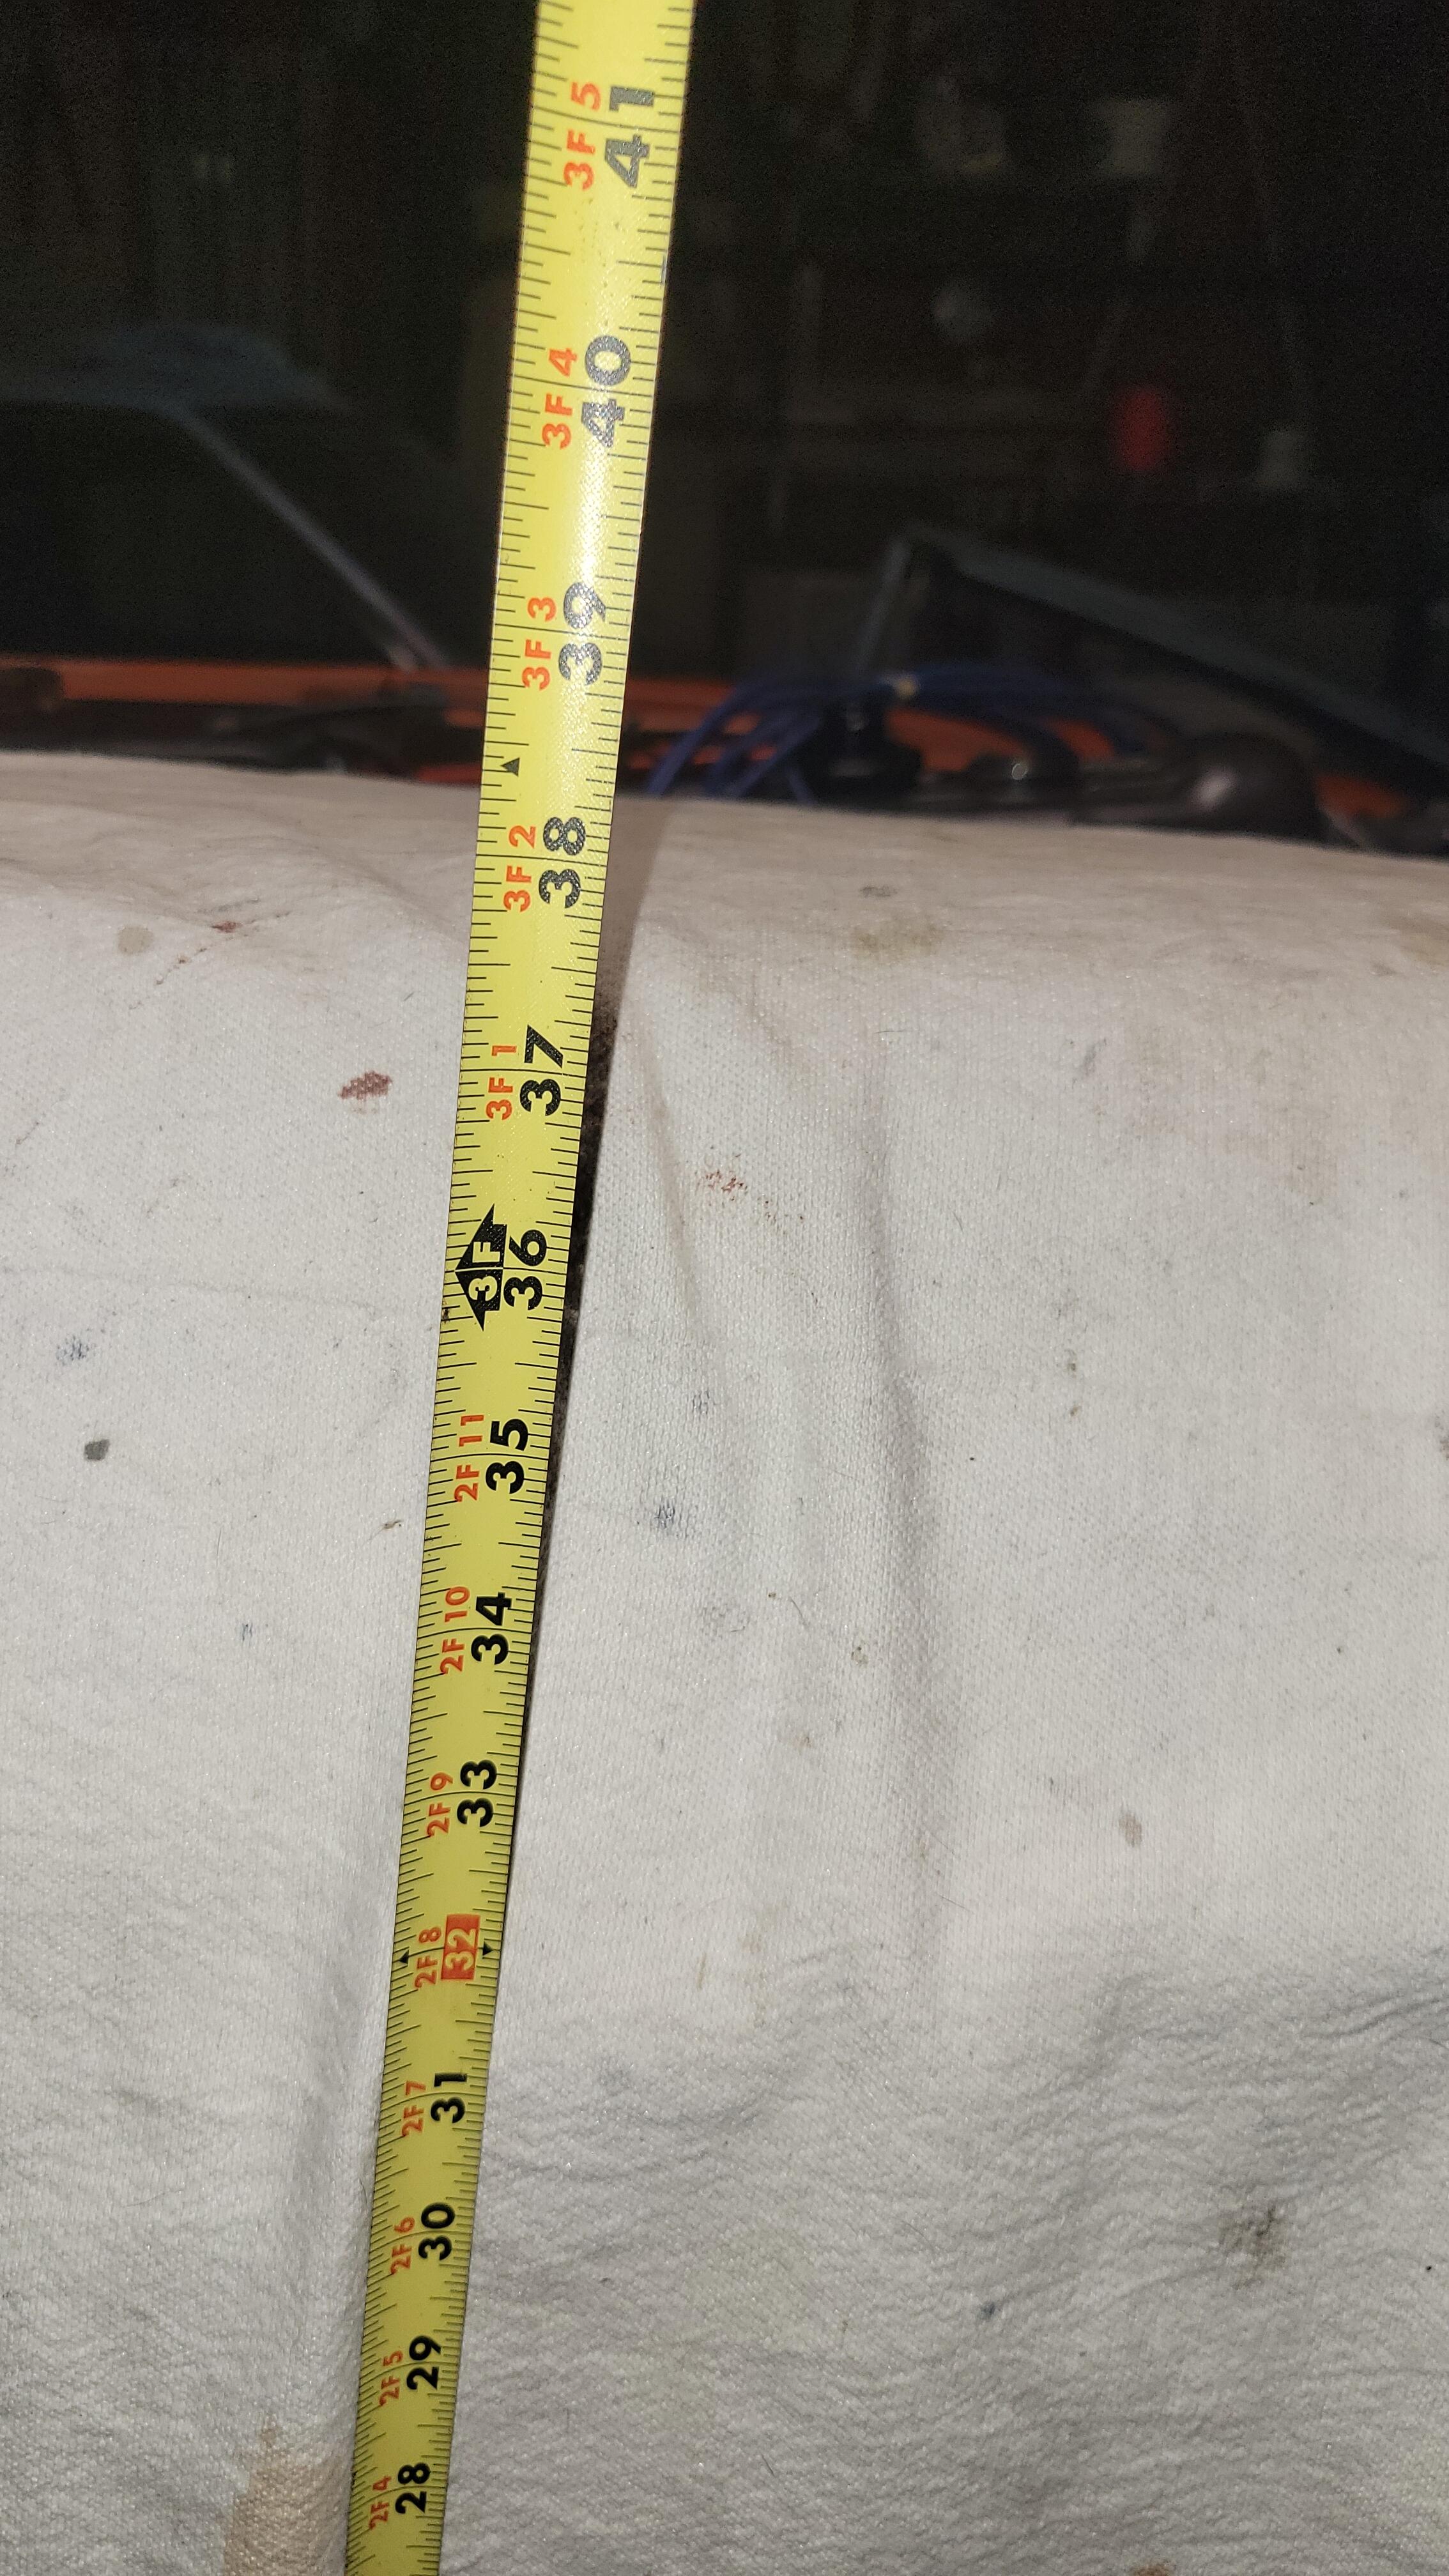
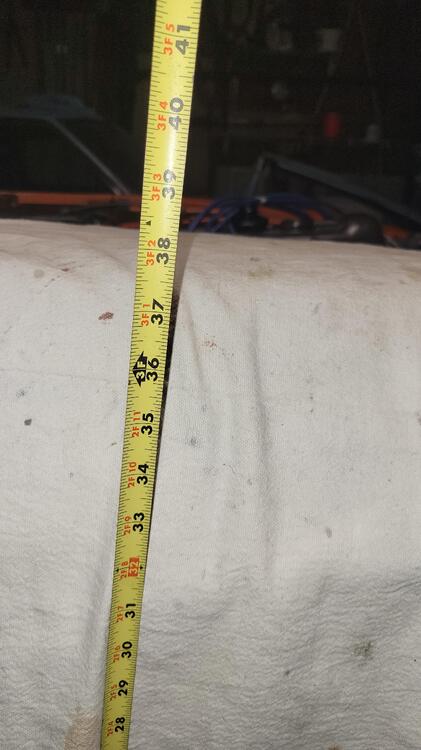
This is for you, not your car.🙂 Something I figured out after getting older and working on these cars. You can help your back when doing all that tedious engine bay stuff by simply running it up on a set of ramps or raising it up and using jack-stands to get the motor up so you're not bending over all day. Another thing I had learn the hard way was resting my elbows on the fenders would cause dents I ended popping out with a suction cup from HarborFreight. Cover the fenders with anything like towels or paint drop cloths using magnetic bowls that hold all the fasteners. I'm about to adjust the valves on mine. I use a set of Rhino ramps to get my lowered 240 up to, looks like about 38". Just a courtesy bit of advice you probably figured out way before I did and it really helps. Have fun!


-
 Very cool! I love my ZCG brake kit. The KW stuff is probably amazing, but I can't stand the purple and yellow:)
 -
 You are right! Mechanic should get this engine running with pertronix ignitor module 1761, 1.5 coil and 1.5 ohm ballast.
 -
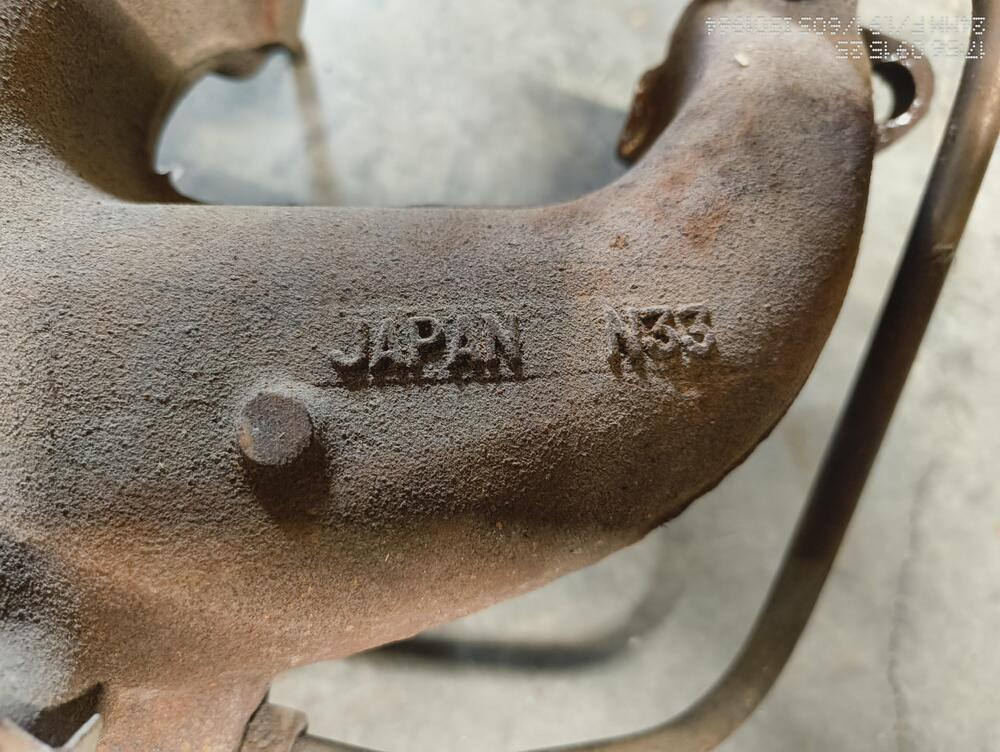
 Photos are of the original N33 exhaust manifold I removed from my 73. Replaced it with an earlier one when I went to round top carbs. I confirm you need a different downpipe. I was able to swap my 73 downpipe for an earlier one.
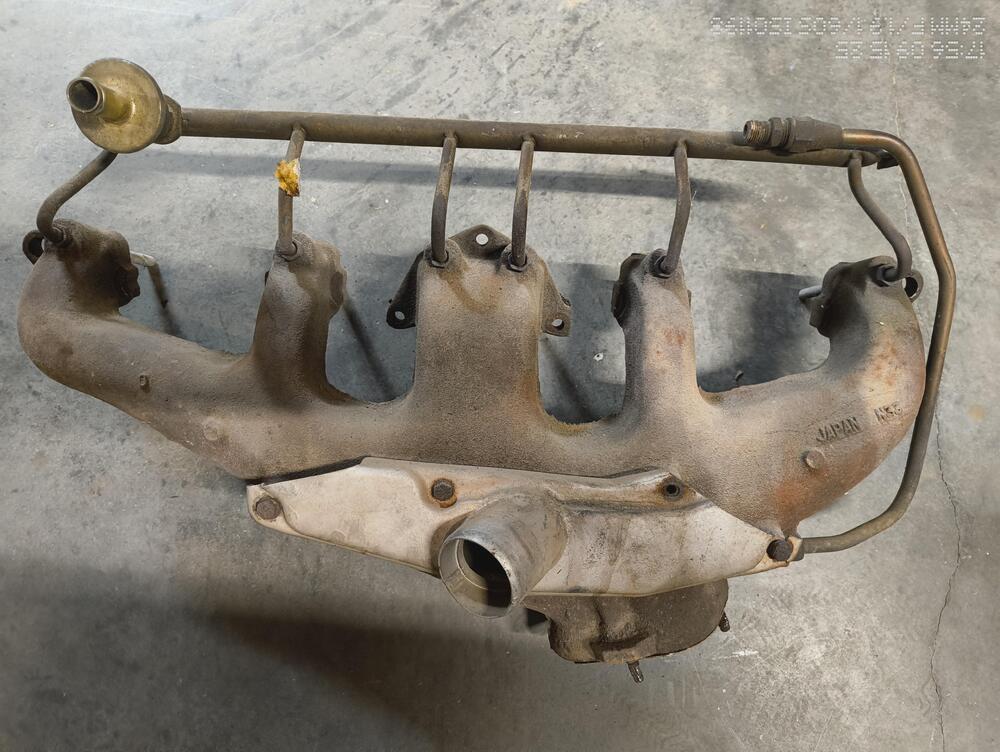
-
 Hi Site Been a while….not sure, but whatever adds .080 inches….if they are .040 inches, 2 would do. Don’t hesitate to call Eiji….tell him you’re my cousin and if wants to keep eating steak at our house, he needs to be nice! 🤪 He’ll sell you the right stuff.
 -
 Ok thanks but would you know the casting number on the OEM exhaust manifold please ?
 -
 I believe he mentioned 10 plus years.
 -
 I've been stuck on this album for a couple of weeks now. I'll put on something else and after that finishes I'll say to myself... Let's give John Hiatt - Walk On another play.
-
I do, I ordered another from Nissan to replace mine. When I get back in town from Boston, I’ll post the p/n. Can’t remember if it was superseded.
-
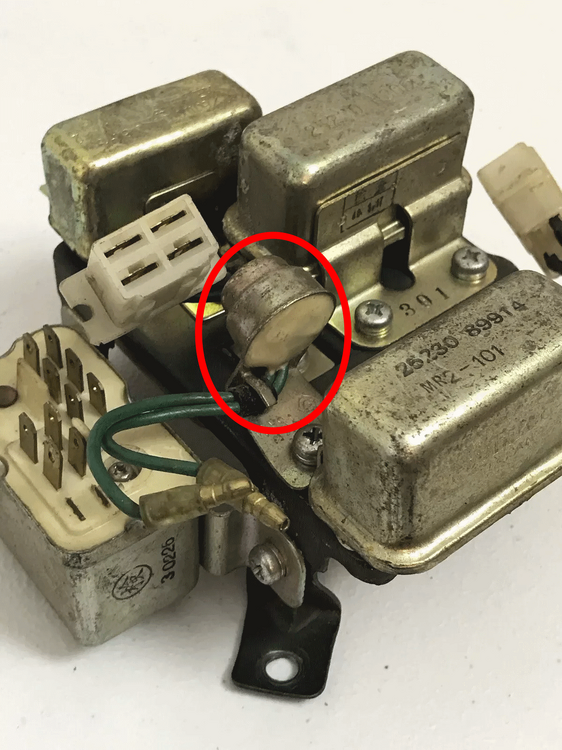
 I live in arizona... i bought it and it just arived in less than 24 hrs. fastest turn around for a relay i thought i would have to wait 1-2 months for.
 -
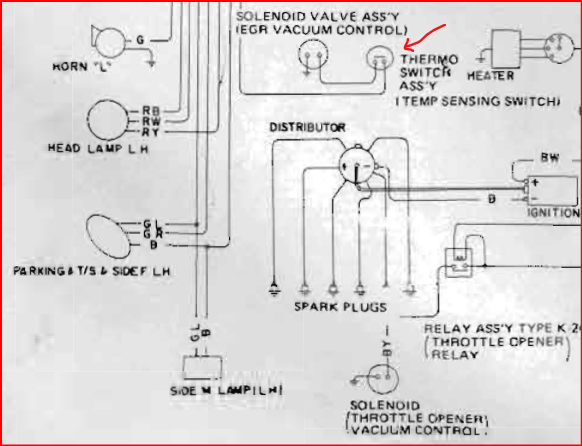
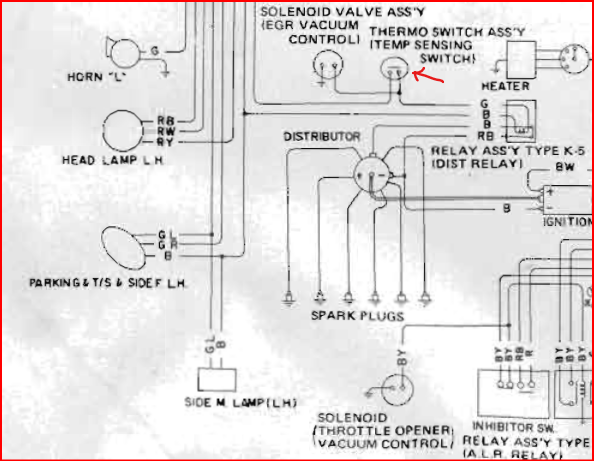
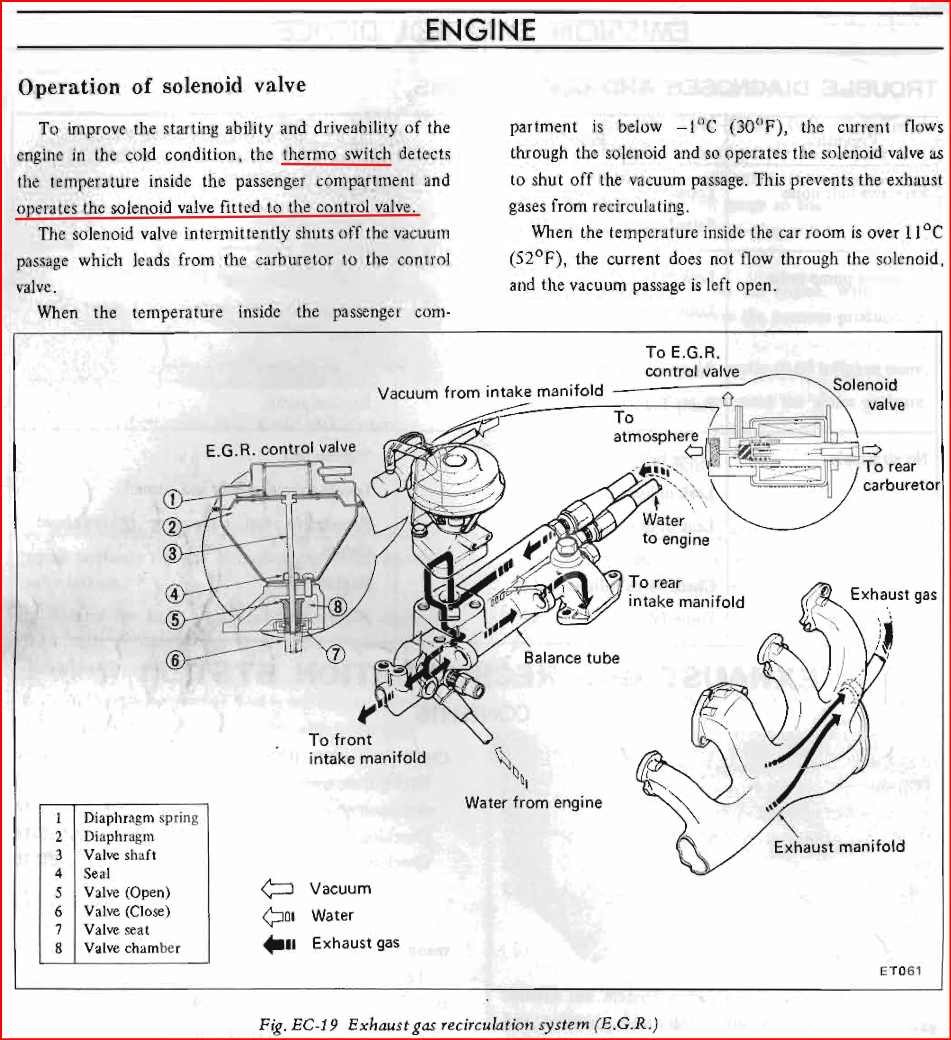
 Thanks Matthew for a great write-up =) Here is my tiny contribution to it: You were wondering about the Thermal switch 22110-E8000 and stating that it's probably for the automatic model only. I found information which connects it also with the manual model, with the emission control device (EGR) to be more precise. It can also be found from the -73 wiring diagrams (both manual/auto). Please see pictures below: Keep up the good work!