


Leaderboard
-

motorman7
 Subscriber
 19Points2,220Posts
 -

Captain Obvious
Free Member12Points9,928Posts -


240260280
Free Member9Points4,441Posts -

Richard McDonel
Free Member3Points366Posts
Popular Content
Showing content with the highest reputation on 07/17/2019 in all areas
-
5 points
-
5 points
-
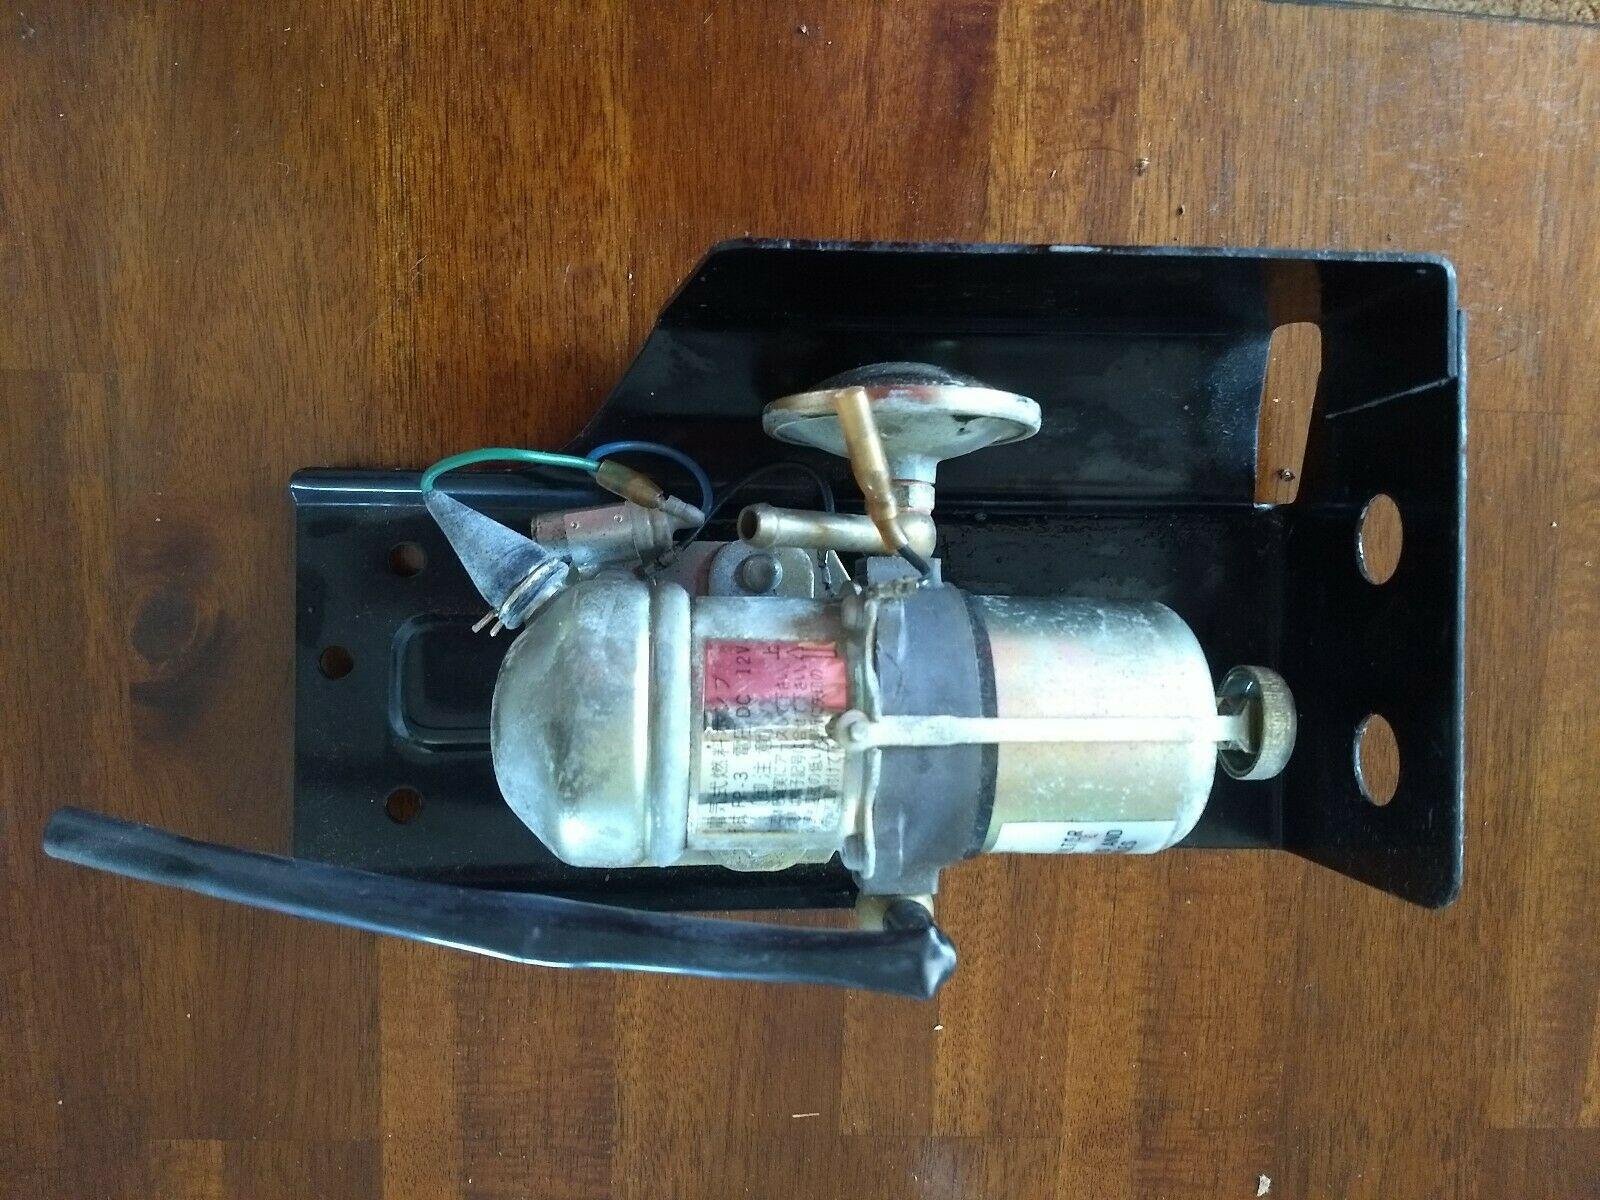
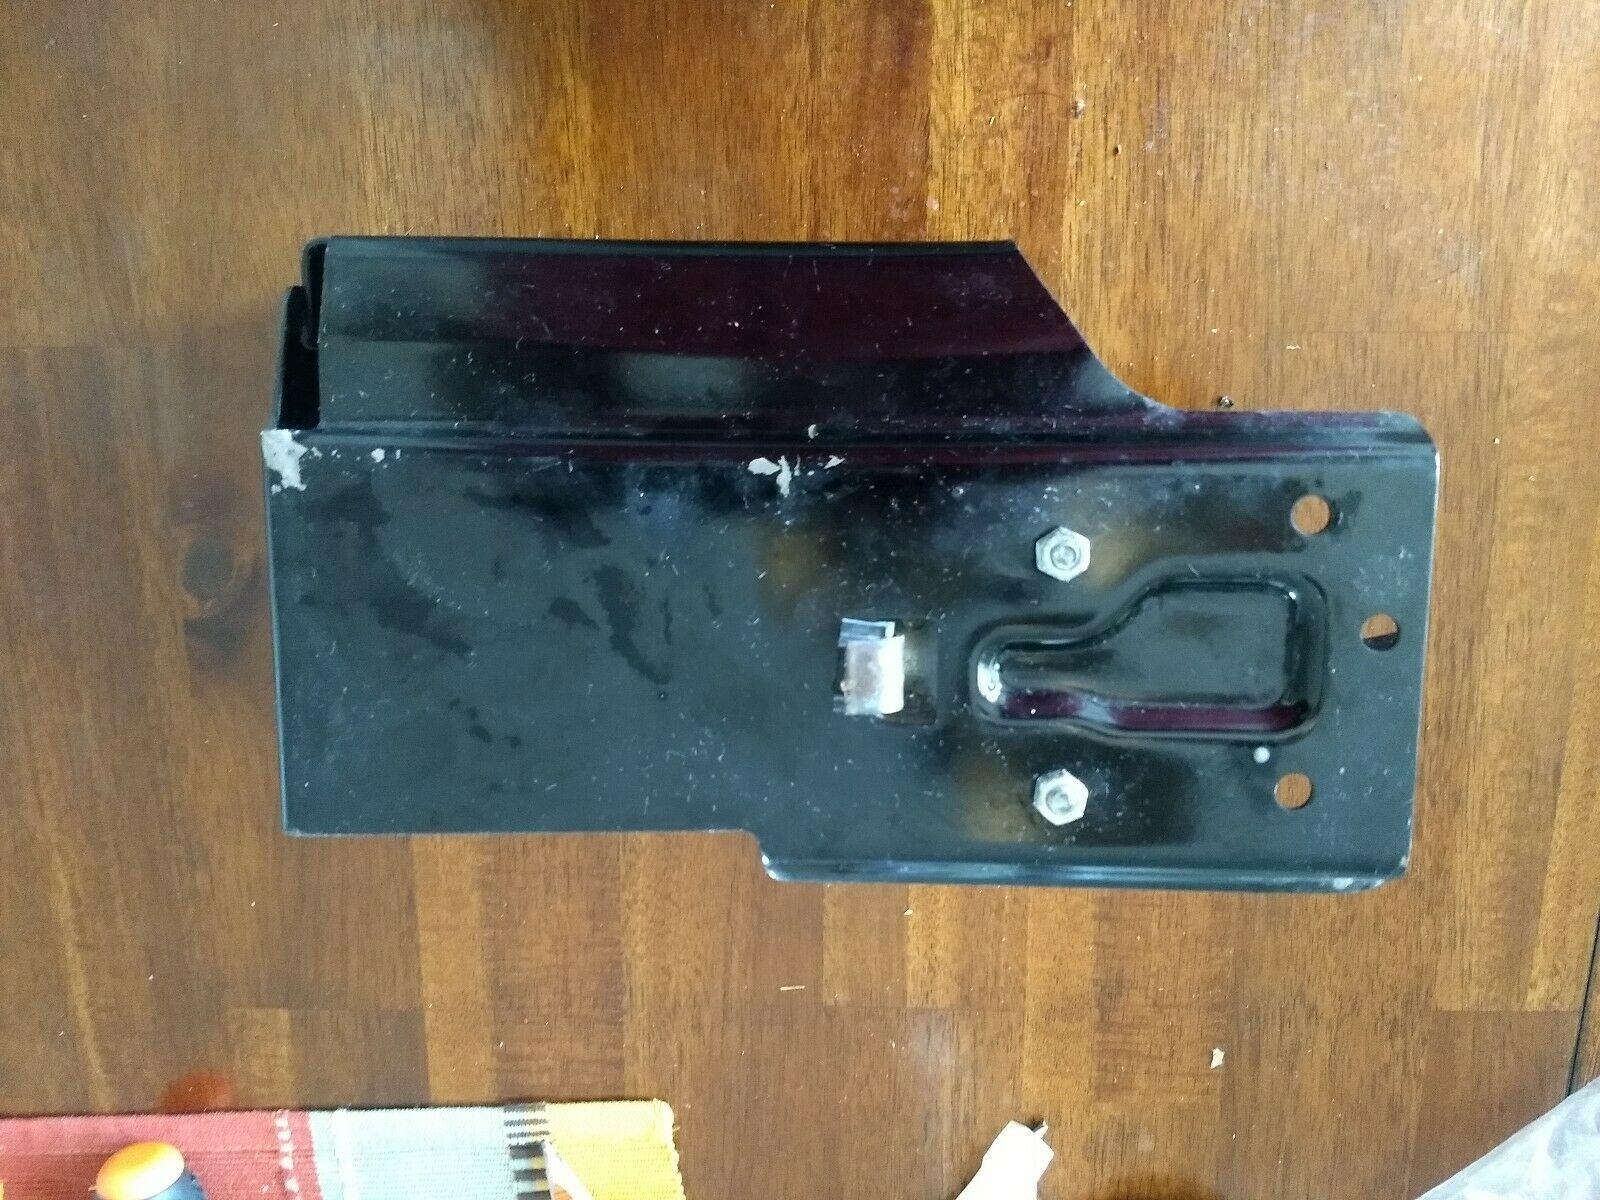
I just got lucky and picked up a 17020-N3326 kit. @jfa.series1 (Coming to a mail box near you... they do not ship to Canada) BIG THANKS!


 4 points
 -
4 points4 points
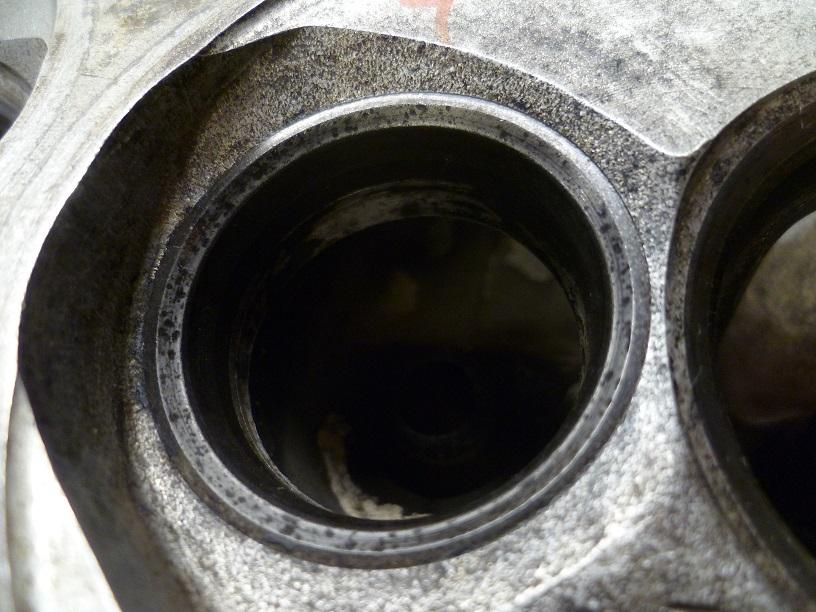
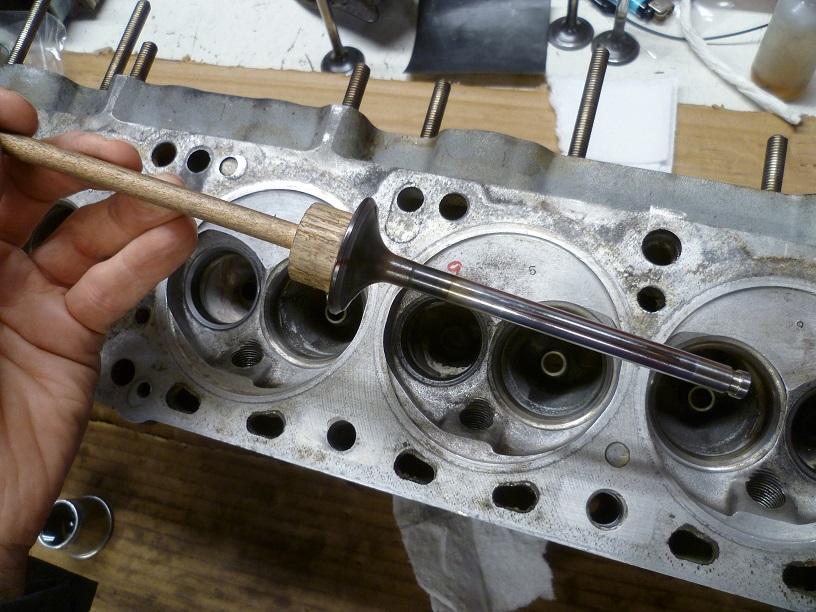
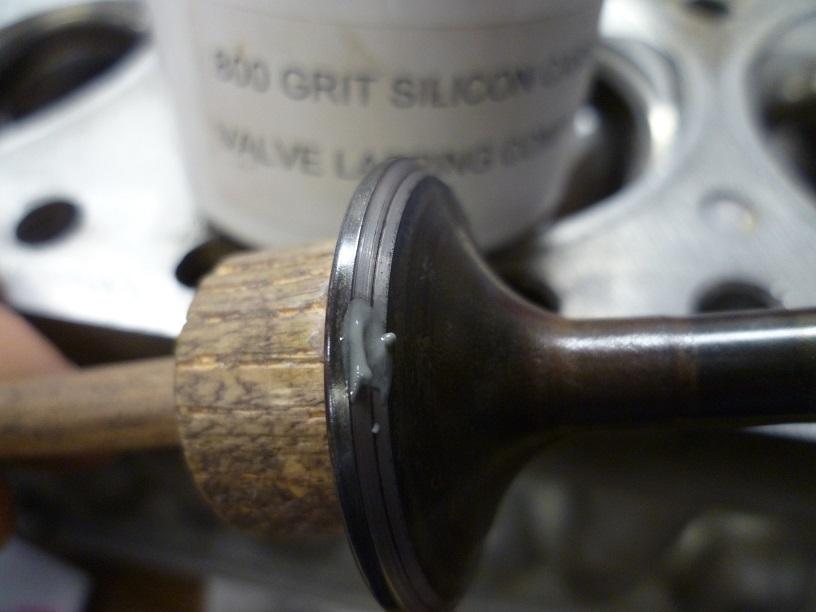
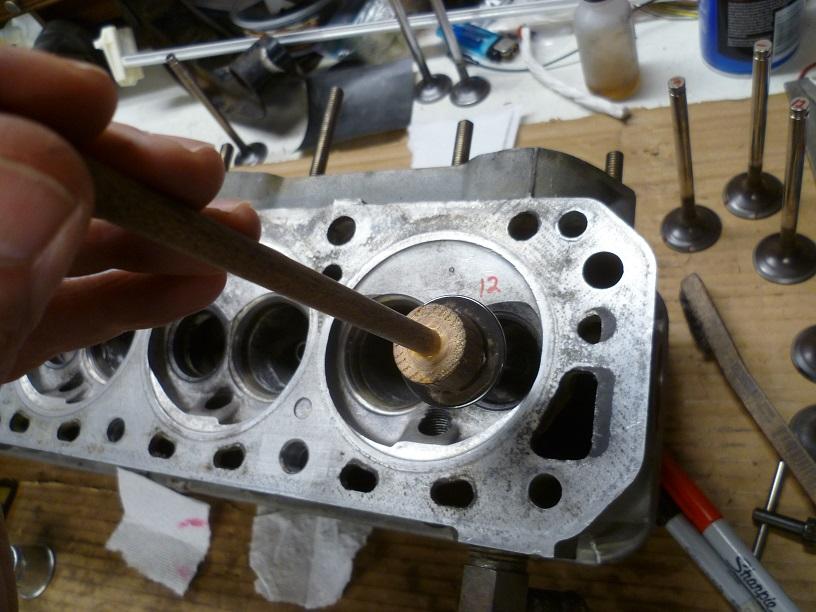
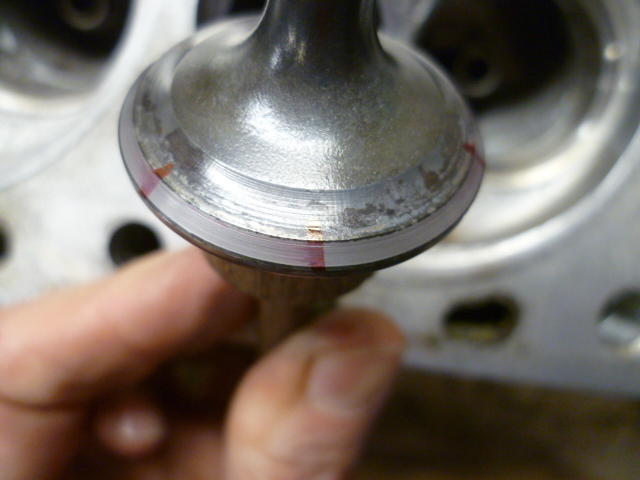
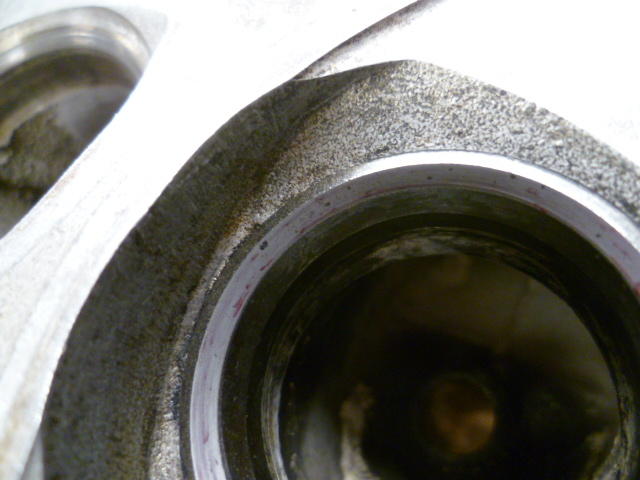
3 pointsNo. That's exactly what they would they expect me to do. What I'm doing instead kinda goes like this. Under magnification and with the use of some sharpie marks on the sealing surfaces, I've tried to match up the correct valve with the correct cylinder. And then after that, I'm lapping them to match the seats. For example... Here's one of the seats before I've done much of anything to it. The valve that WAS in this location wasn't even close to making contact on most of the seat. I managed to find one of the other exhaust valves that was pretty close. Here's what I'm starting with: Here's my handy-dandy valve lapping "tool". I use double back sticky tape to hold the valve to the "tool": Some 800 grit lapping compound: And I work the pair: until I have something like this. Smeared contact markings over the entire seal: Yes, there are still a few pits on the valve seat, but I'm not looking for perfection here. I'm just looking to be able to drive a little bit more on this engine until I finish the F54/P79. What I'm ending up with is 1000 times better than what I started with!!
 3 points
So my valves were indeed AFU. Based on the wear patterns, they were all mixed up, and most of them were not sealing properly. One of the exhausts (4E) was even bent a little and not sealing for squat!. And I can tell by looking at the wear patterns and carbon traces that it's been like that for quite some time. Probably since my PO messed with it. It definitely did NOT just happened when the cam snapped. Today's progress was I got all the exhaust valves sorted out. As best I could, I matched the correct valves to the correct cylinder and lapped them into place. Thankfully I have a set of set of valves at my disposal that I stripped out of an N47 years ago. I saved them, because that's what we do. They were sitting on the shelf, and thankfully I've got 24 valves from which to pull the best 12. So exhausts are done and (barring surprises) I think the intakes will be much easier since they are in way better shape.3 points
2 points2 points
2 pointsThanks! @Zup and @jayhawk cars both got a second review which is a good sign. They asked to see zup's storage bins but not mine, which makes me think he graded a bit higher.2 points
3 points
3 pointsSo my valves were indeed AFU. Based on the wear patterns, they were all mixed up, and most of them were not sealing properly. One of the exhausts (4E) was even bent a little and not sealing for squat!. And I can tell by looking at the wear patterns and carbon traces that it's been like that for quite some time. Probably since my PO messed with it. It definitely did NOT just happened when the cam snapped. Today's progress was I got all the exhaust valves sorted out. As best I could, I matched the correct valves to the correct cylinder and lapped them into place. Thankfully I have a set of set of valves at my disposal that I stripped out of an N47 years ago. I saved them, because that's what we do. They were sitting on the shelf, and thankfully I've got 24 valves from which to pull the best 12. So exhausts are done and (barring surprises) I think the intakes will be much easier since they are in way better shape.3 points
2 points2 points
2 pointsThanks! @Zup and @jayhawk cars both got a second review which is a good sign. They asked to see zup's storage bins but not mine, which makes me think he graded a bit higher.2 points @240260280 That's a great find - looks like the Hoover is working overtime! Will be watching for the pkg and let you know when it arrives.2 points
 2 pointsThis is my 3rd attempt at repairing my dash and hopefully the last. This time I have a go at flocking.2 points
2 pointsGood restoration project. A weekend or two and she'll be as good as new.2 points
2 points
2 pointsThis is my 3rd attempt at repairing my dash and hopefully the last. This time I have a go at flocking.2 points
2 pointsGood restoration project. A weekend or two and she'll be as good as new.2 points
2 points 2 pointsDo not clean it, put the original pieces back on. Store as is in a carcoon and never drive it. It will only be a barn find once and that will add to the value. Wait a few years and put it in an auction as is. In the meantime go buy a nice 240Z to drive around.2 points
 I don't think 'Lstepp4re' should be too high on your list of Experten... You have world-class 'Z Store'/'Vintage Z Program' knowledge at your service right here on the classiczcars forum, and indeed already on this thread, in the form of our fellow member '26th-Z'. He compiled and privately published what most consider to be the definitive written work on the subject, and I'm sure he would be happy to answer any questions you put to him. If he doesn't have the answer - and he usually will - then he will know who to ask.2 points
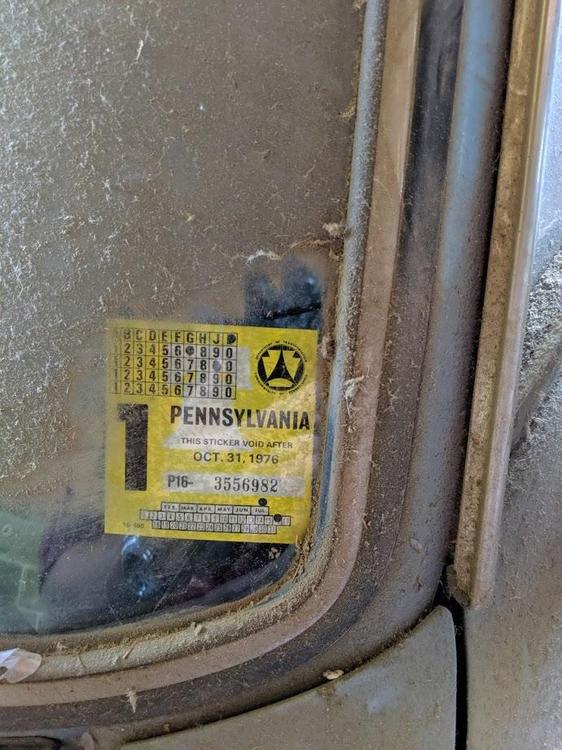
 1 pointHello everyone. I'm new to this group. This is because I just purchased a VERY Unique 1976 280Z. The thing that makes it unique is that it only has 350 miles. I purchased it from the original owner. it is in Fantastic condition. Now I have to decide what to do with this amazing find. It has been in clean storage since 1976. The car still has the original PA Inspection sticker, which expired in October of 1976. I'm looking for advice on how to properly restore and honor this car.
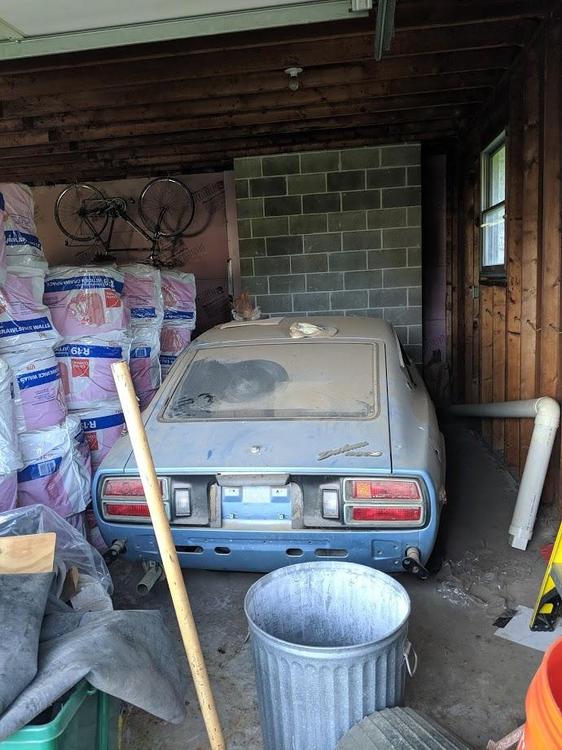
 1 point
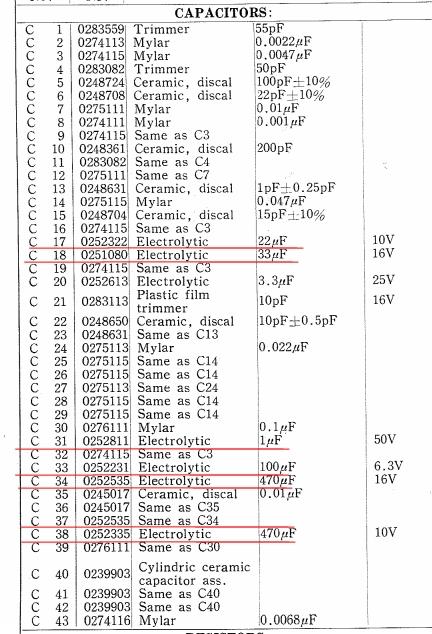
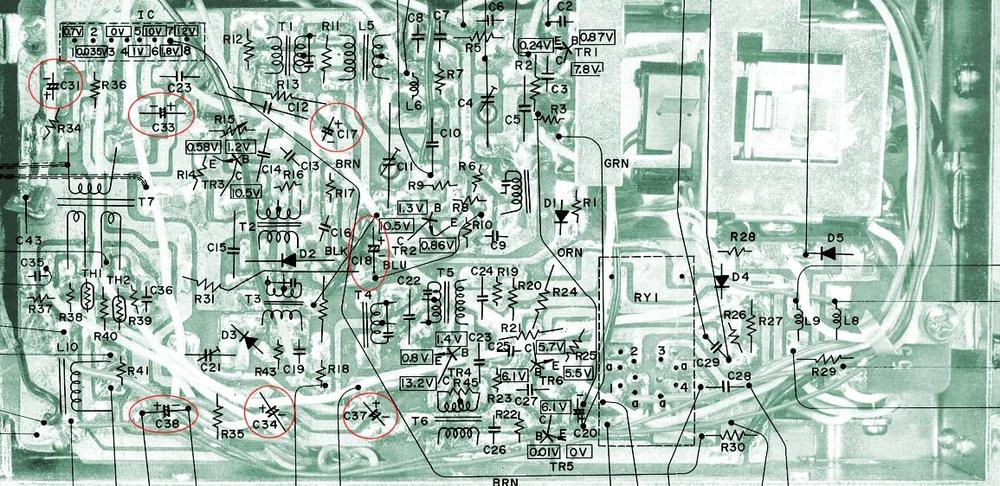
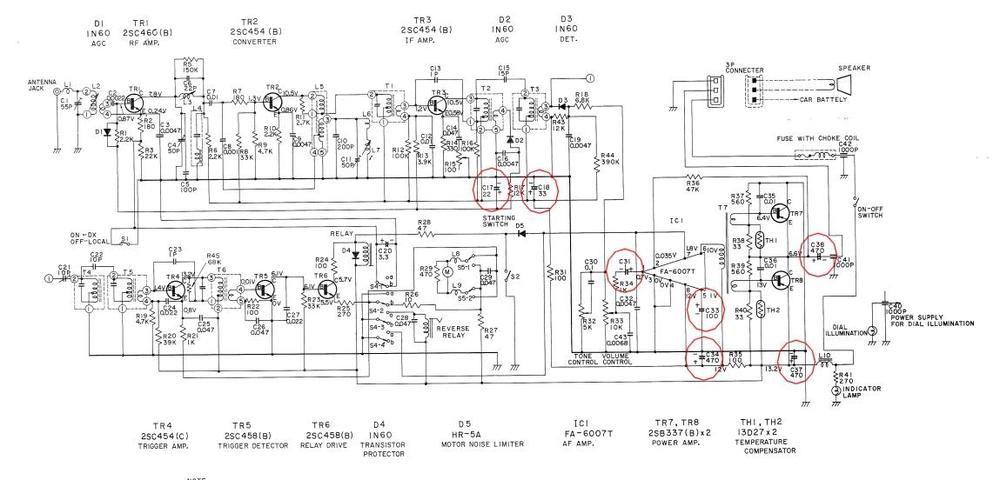
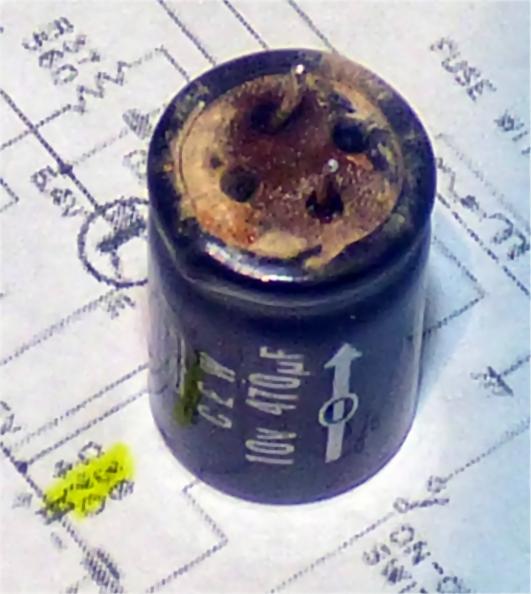
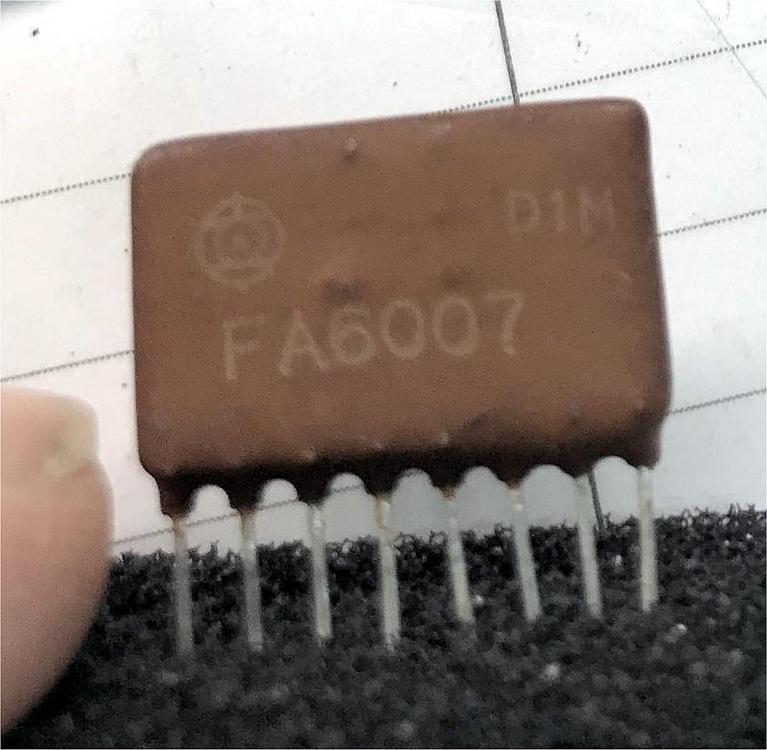
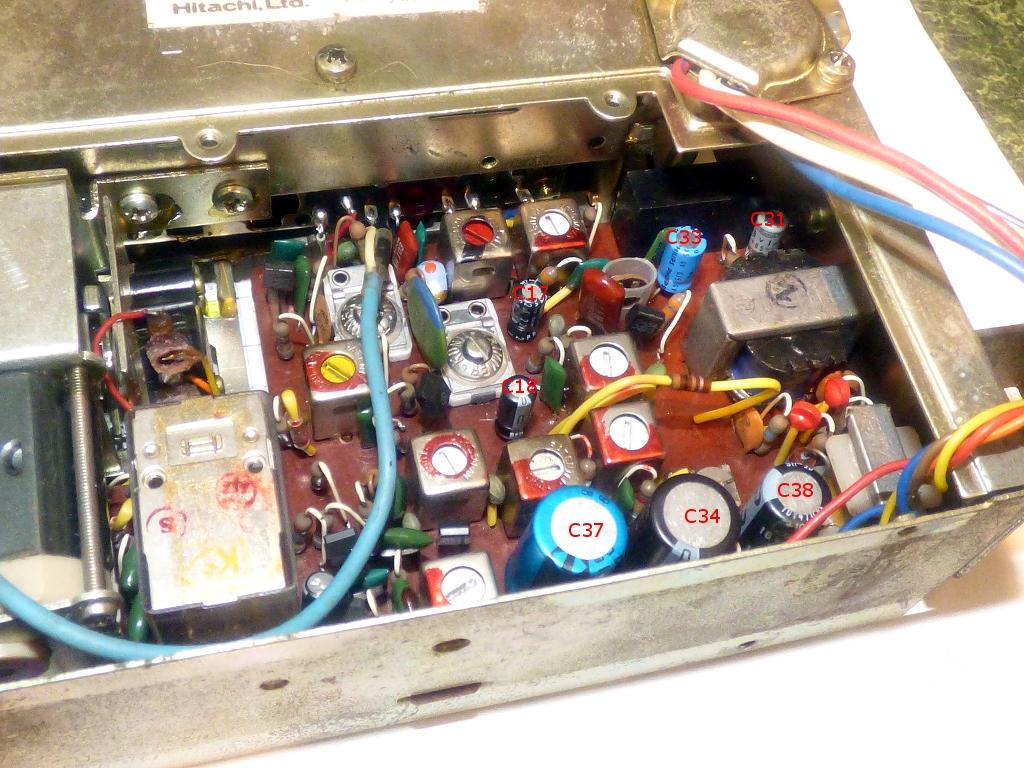
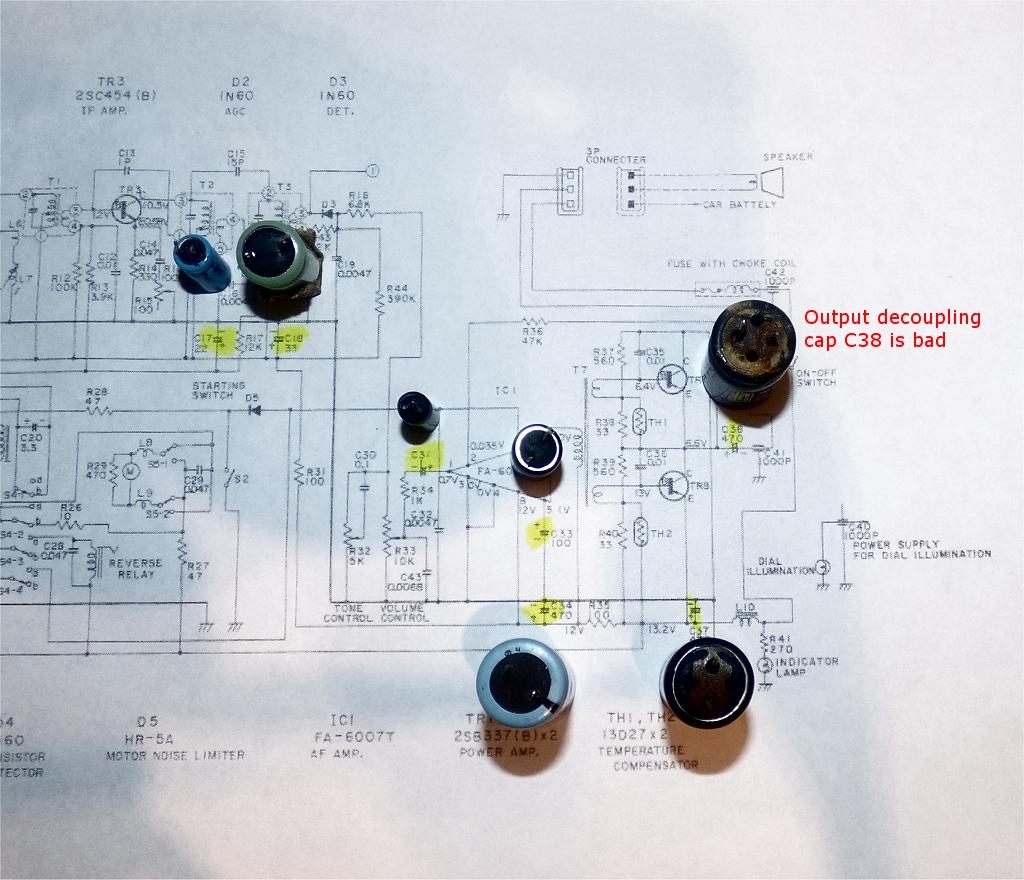
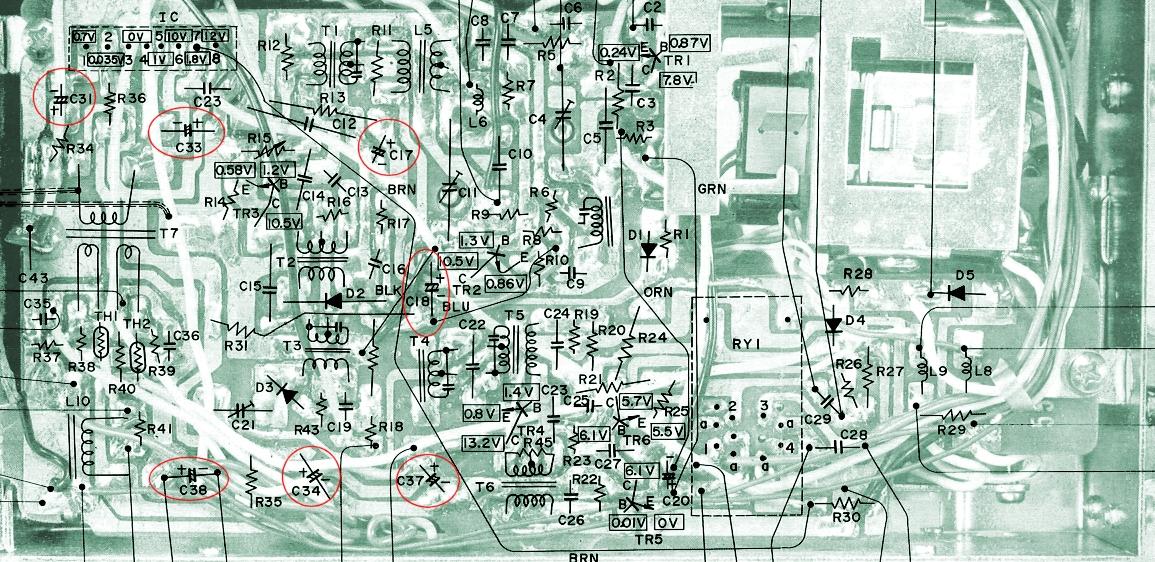
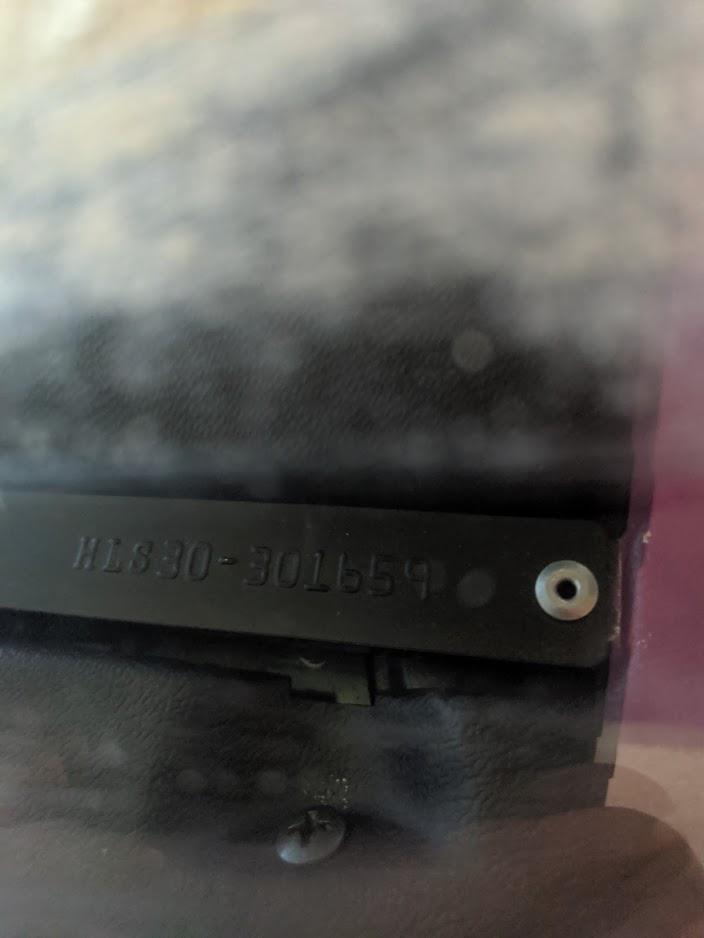
Hi All, My early Hitachi radio functions nearly 100% except for the audio output stage. I get a speaker thump when turning on but no static or sound. The volume and tone controls make no changes to the silence. I just replaced all caps and no change. I found the cap C38, which decouples the power amp transistors from the speakers, to be toast and the PO seems to have hooked up two speakers to the output. I am now starting to investigate deeper. The voltages on the power transistors are normal however I am getting ~230ohms across the input winding of the audio transformer T7 feeding the power stage from the Hitachi FA-6007T op amp. I'll check against my working radio. Here are some pictures of cap replacement to help others. I also included the service manual (thanks to @hr369 and @JDMjunkies.ch) ? Sadly there are no AM radio stations in this area so trouble shooting RF stages will be is tough. Hopefully it is just a problem in the audio stage. Electrolytic Capacitors: Crusty C38 Cap hitachi_tm-1081-zb_all_transistor_auto_radio_1970_sm.pdf
1 point
Hi All, My early Hitachi radio functions nearly 100% except for the audio output stage. I get a speaker thump when turning on but no static or sound. The volume and tone controls make no changes to the silence. I just replaced all caps and no change. I found the cap C38, which decouples the power amp transistors from the speakers, to be toast and the PO seems to have hooked up two speakers to the output. I am now starting to investigate deeper. The voltages on the power transistors are normal however I am getting ~230ohms across the input winding of the audio transformer T7 feeding the power stage from the Hitachi FA-6007T op amp. I'll check against my working radio. Here are some pictures of cap replacement to help others. I also included the service manual (thanks to @hr369 and @JDMjunkies.ch) ? Sadly there are no AM radio stations in this area so trouble shooting RF stages will be is tough. Hopefully it is just a problem in the audio stage. Electrolytic Capacitors: Crusty C38 Cap hitachi_tm-1081-zb_all_transistor_auto_radio_1970_sm.pdf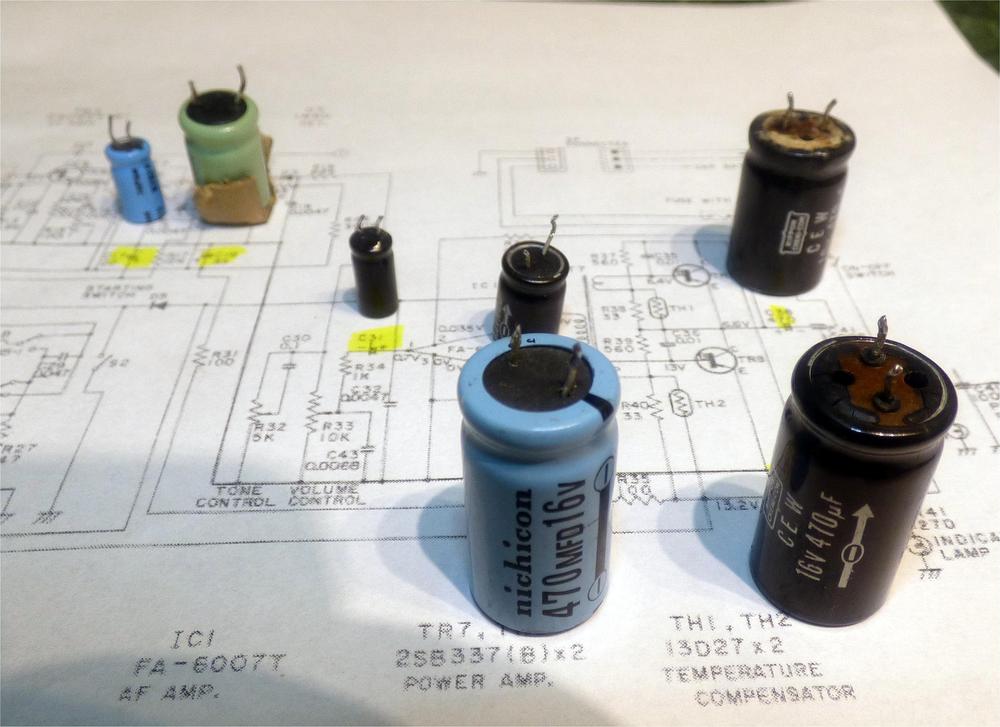


 1 point
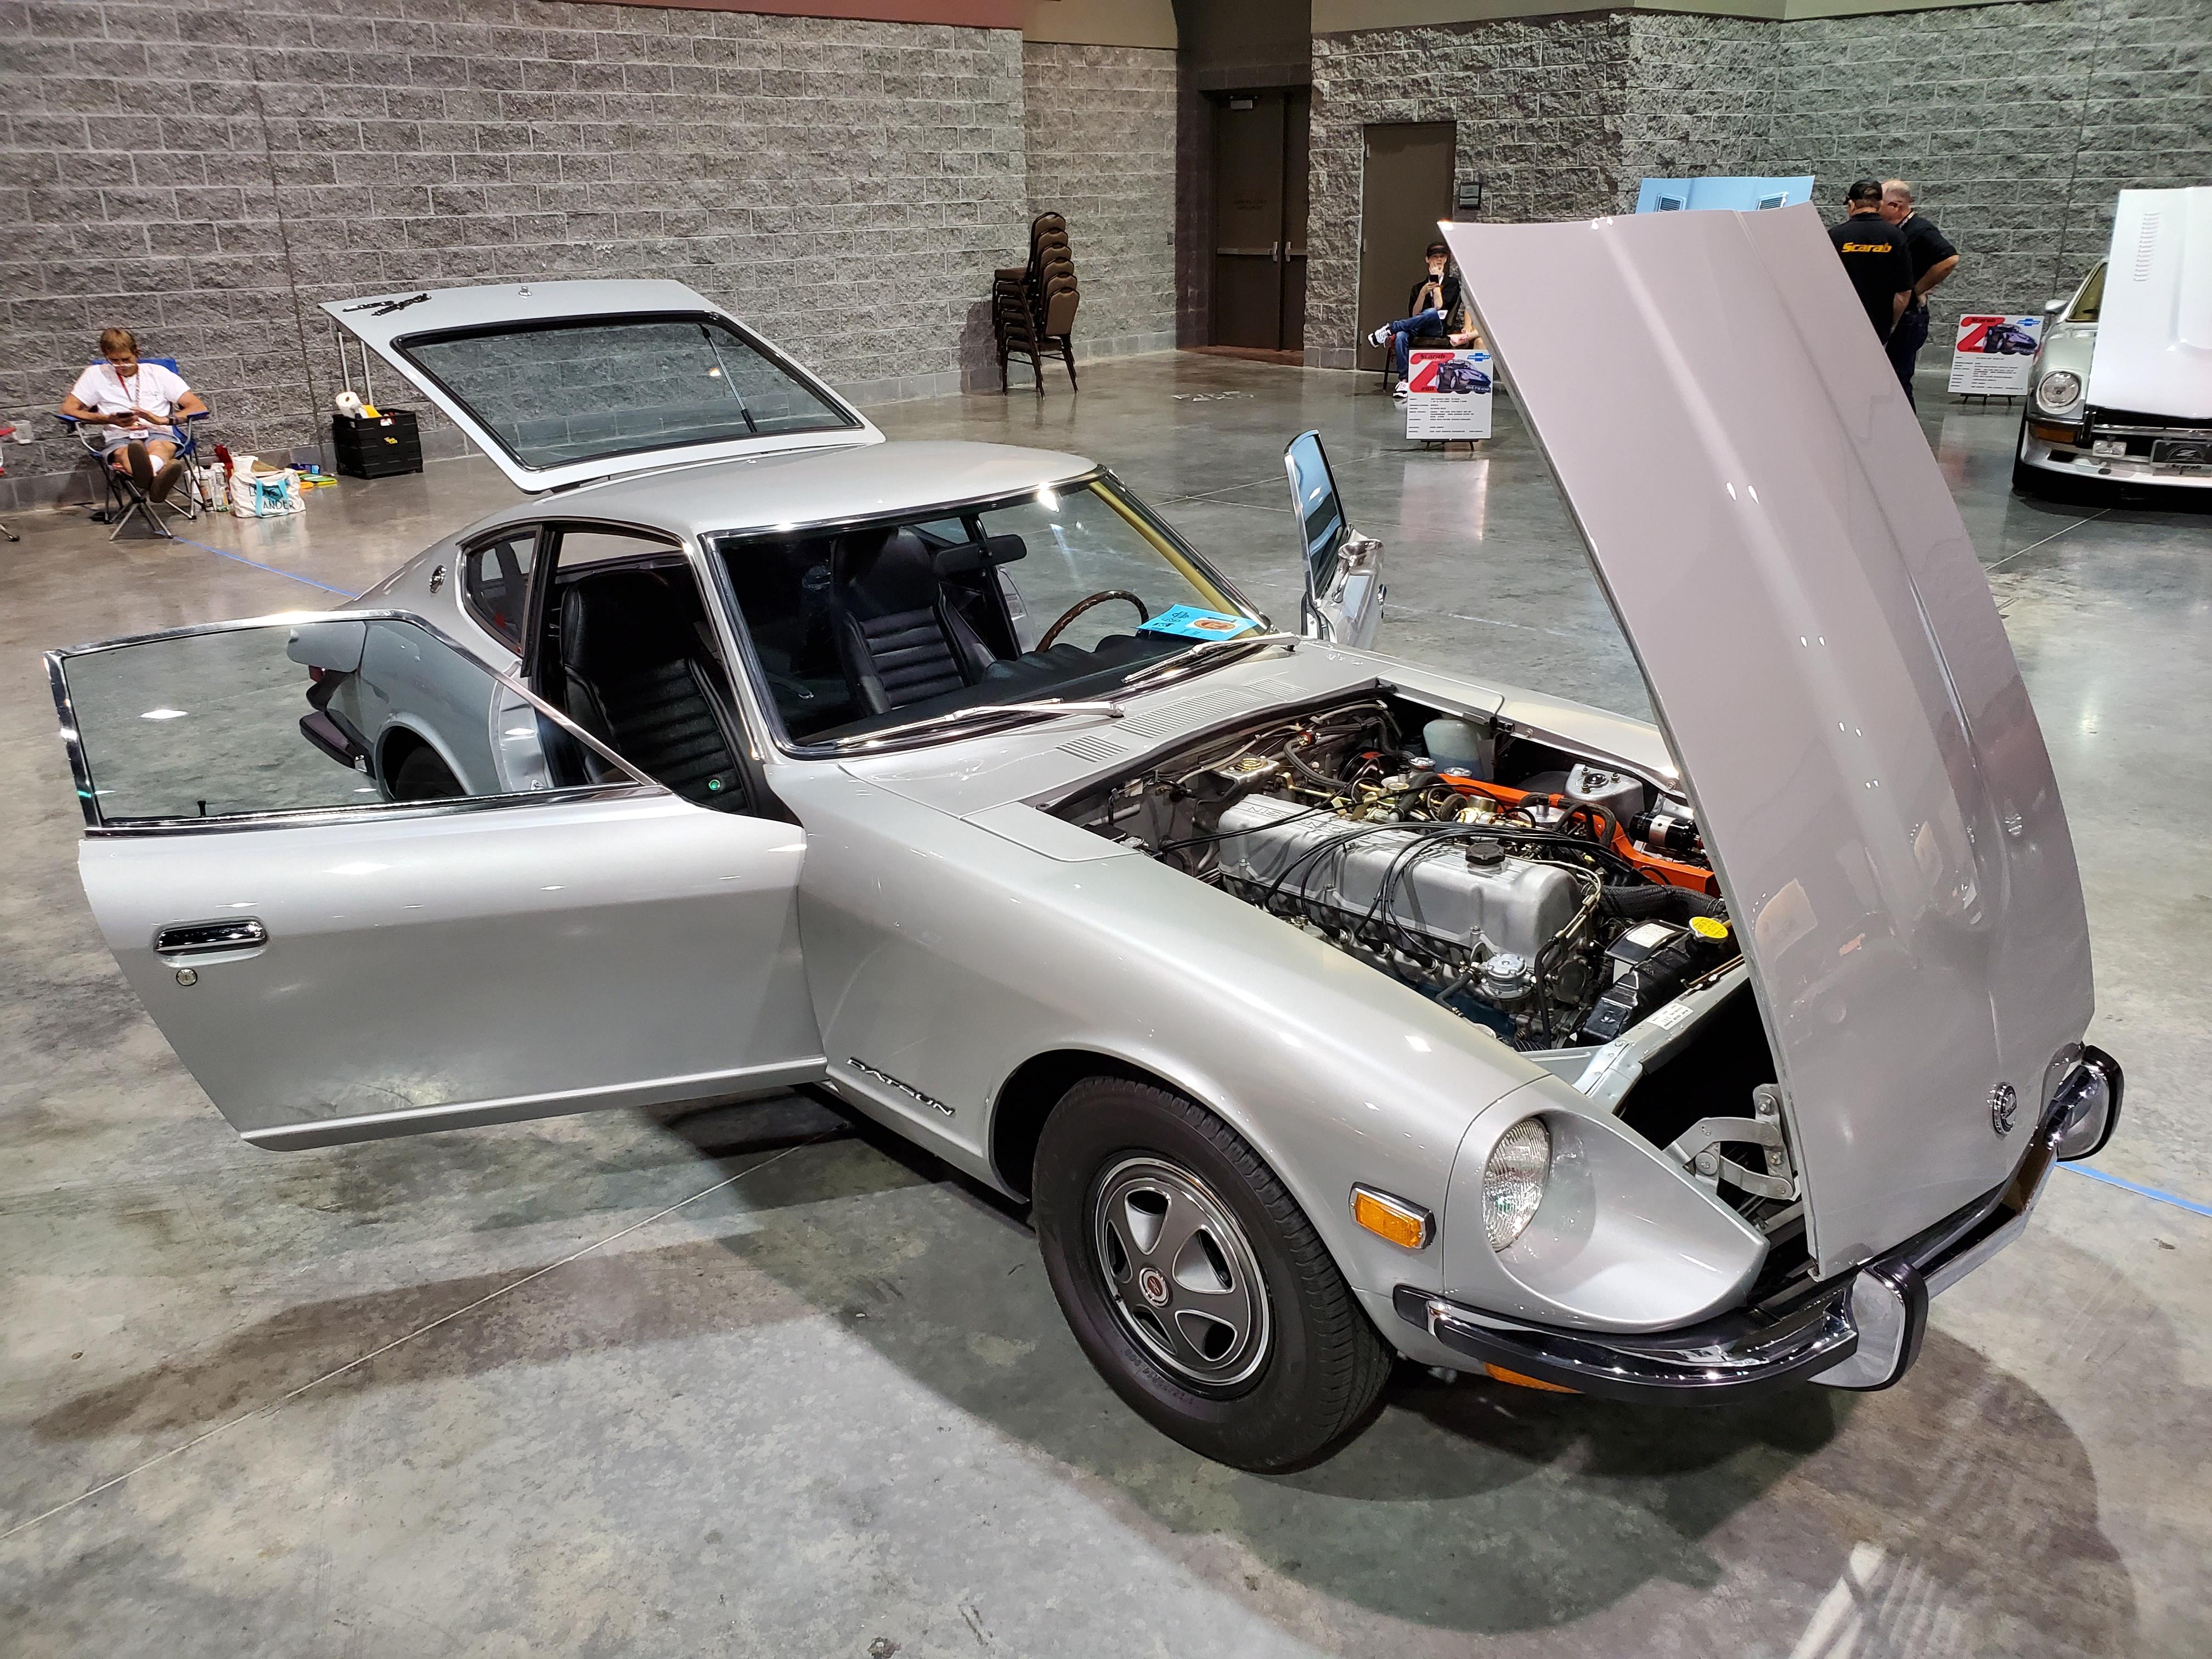
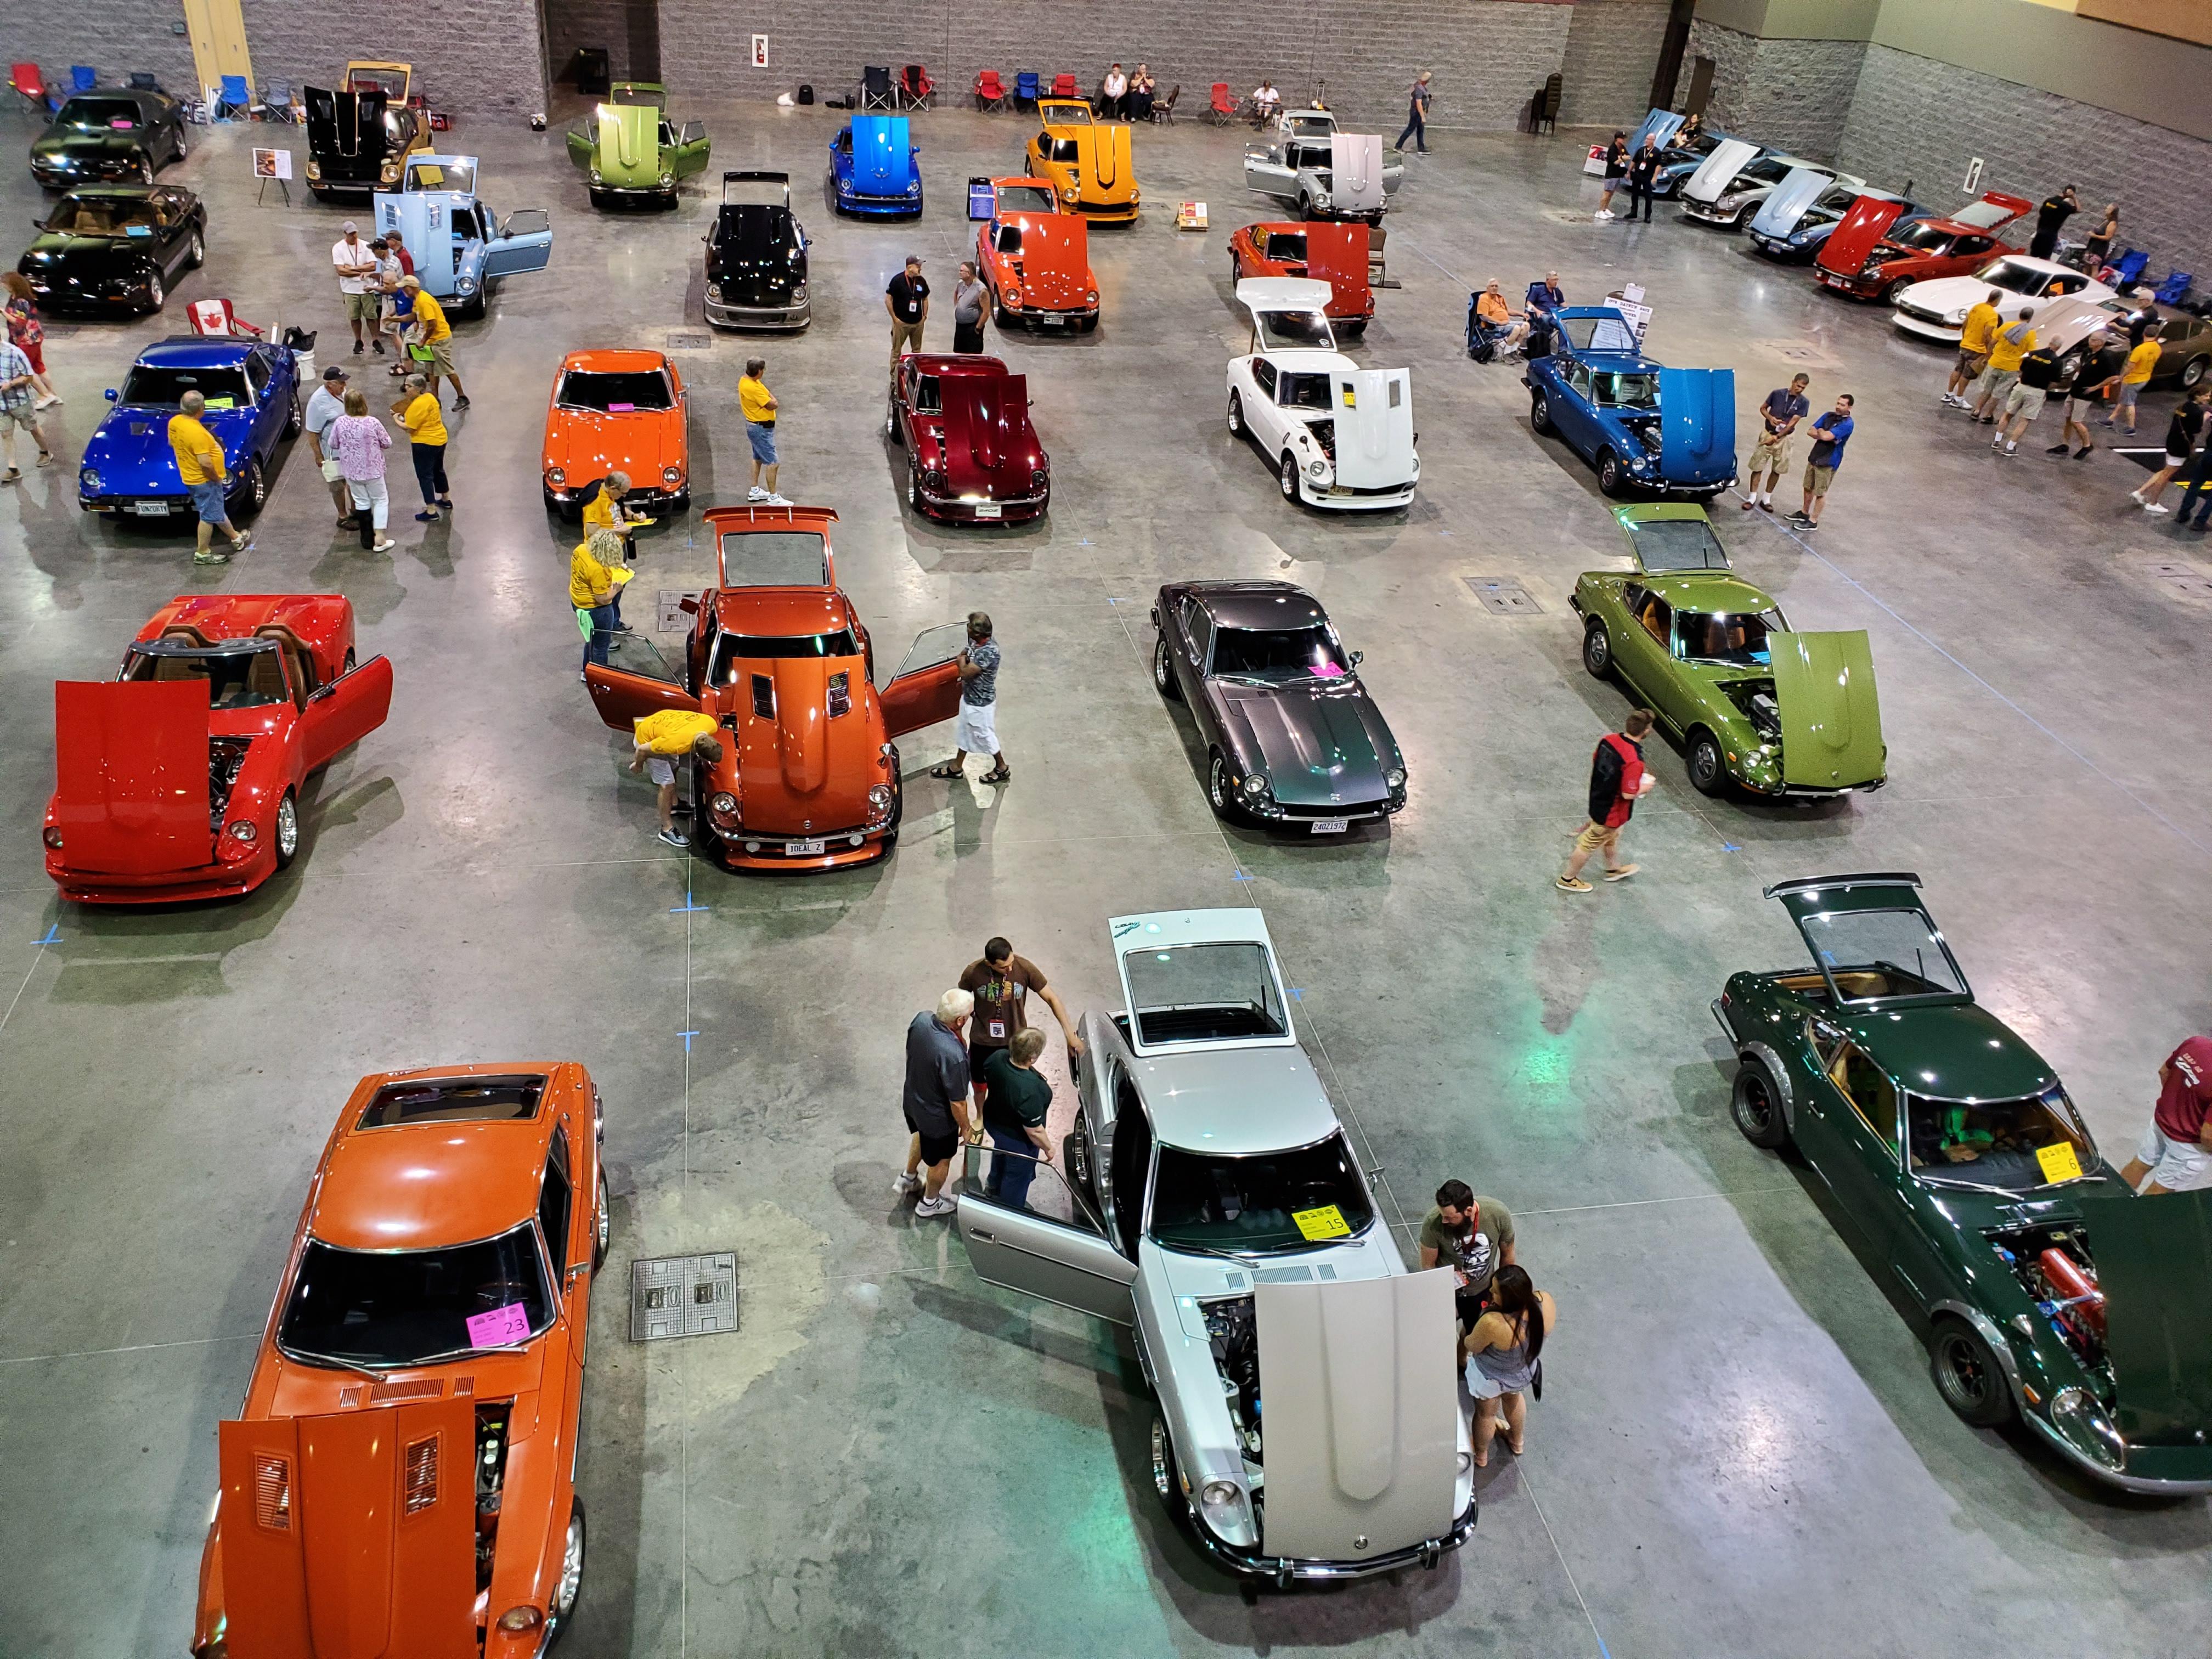
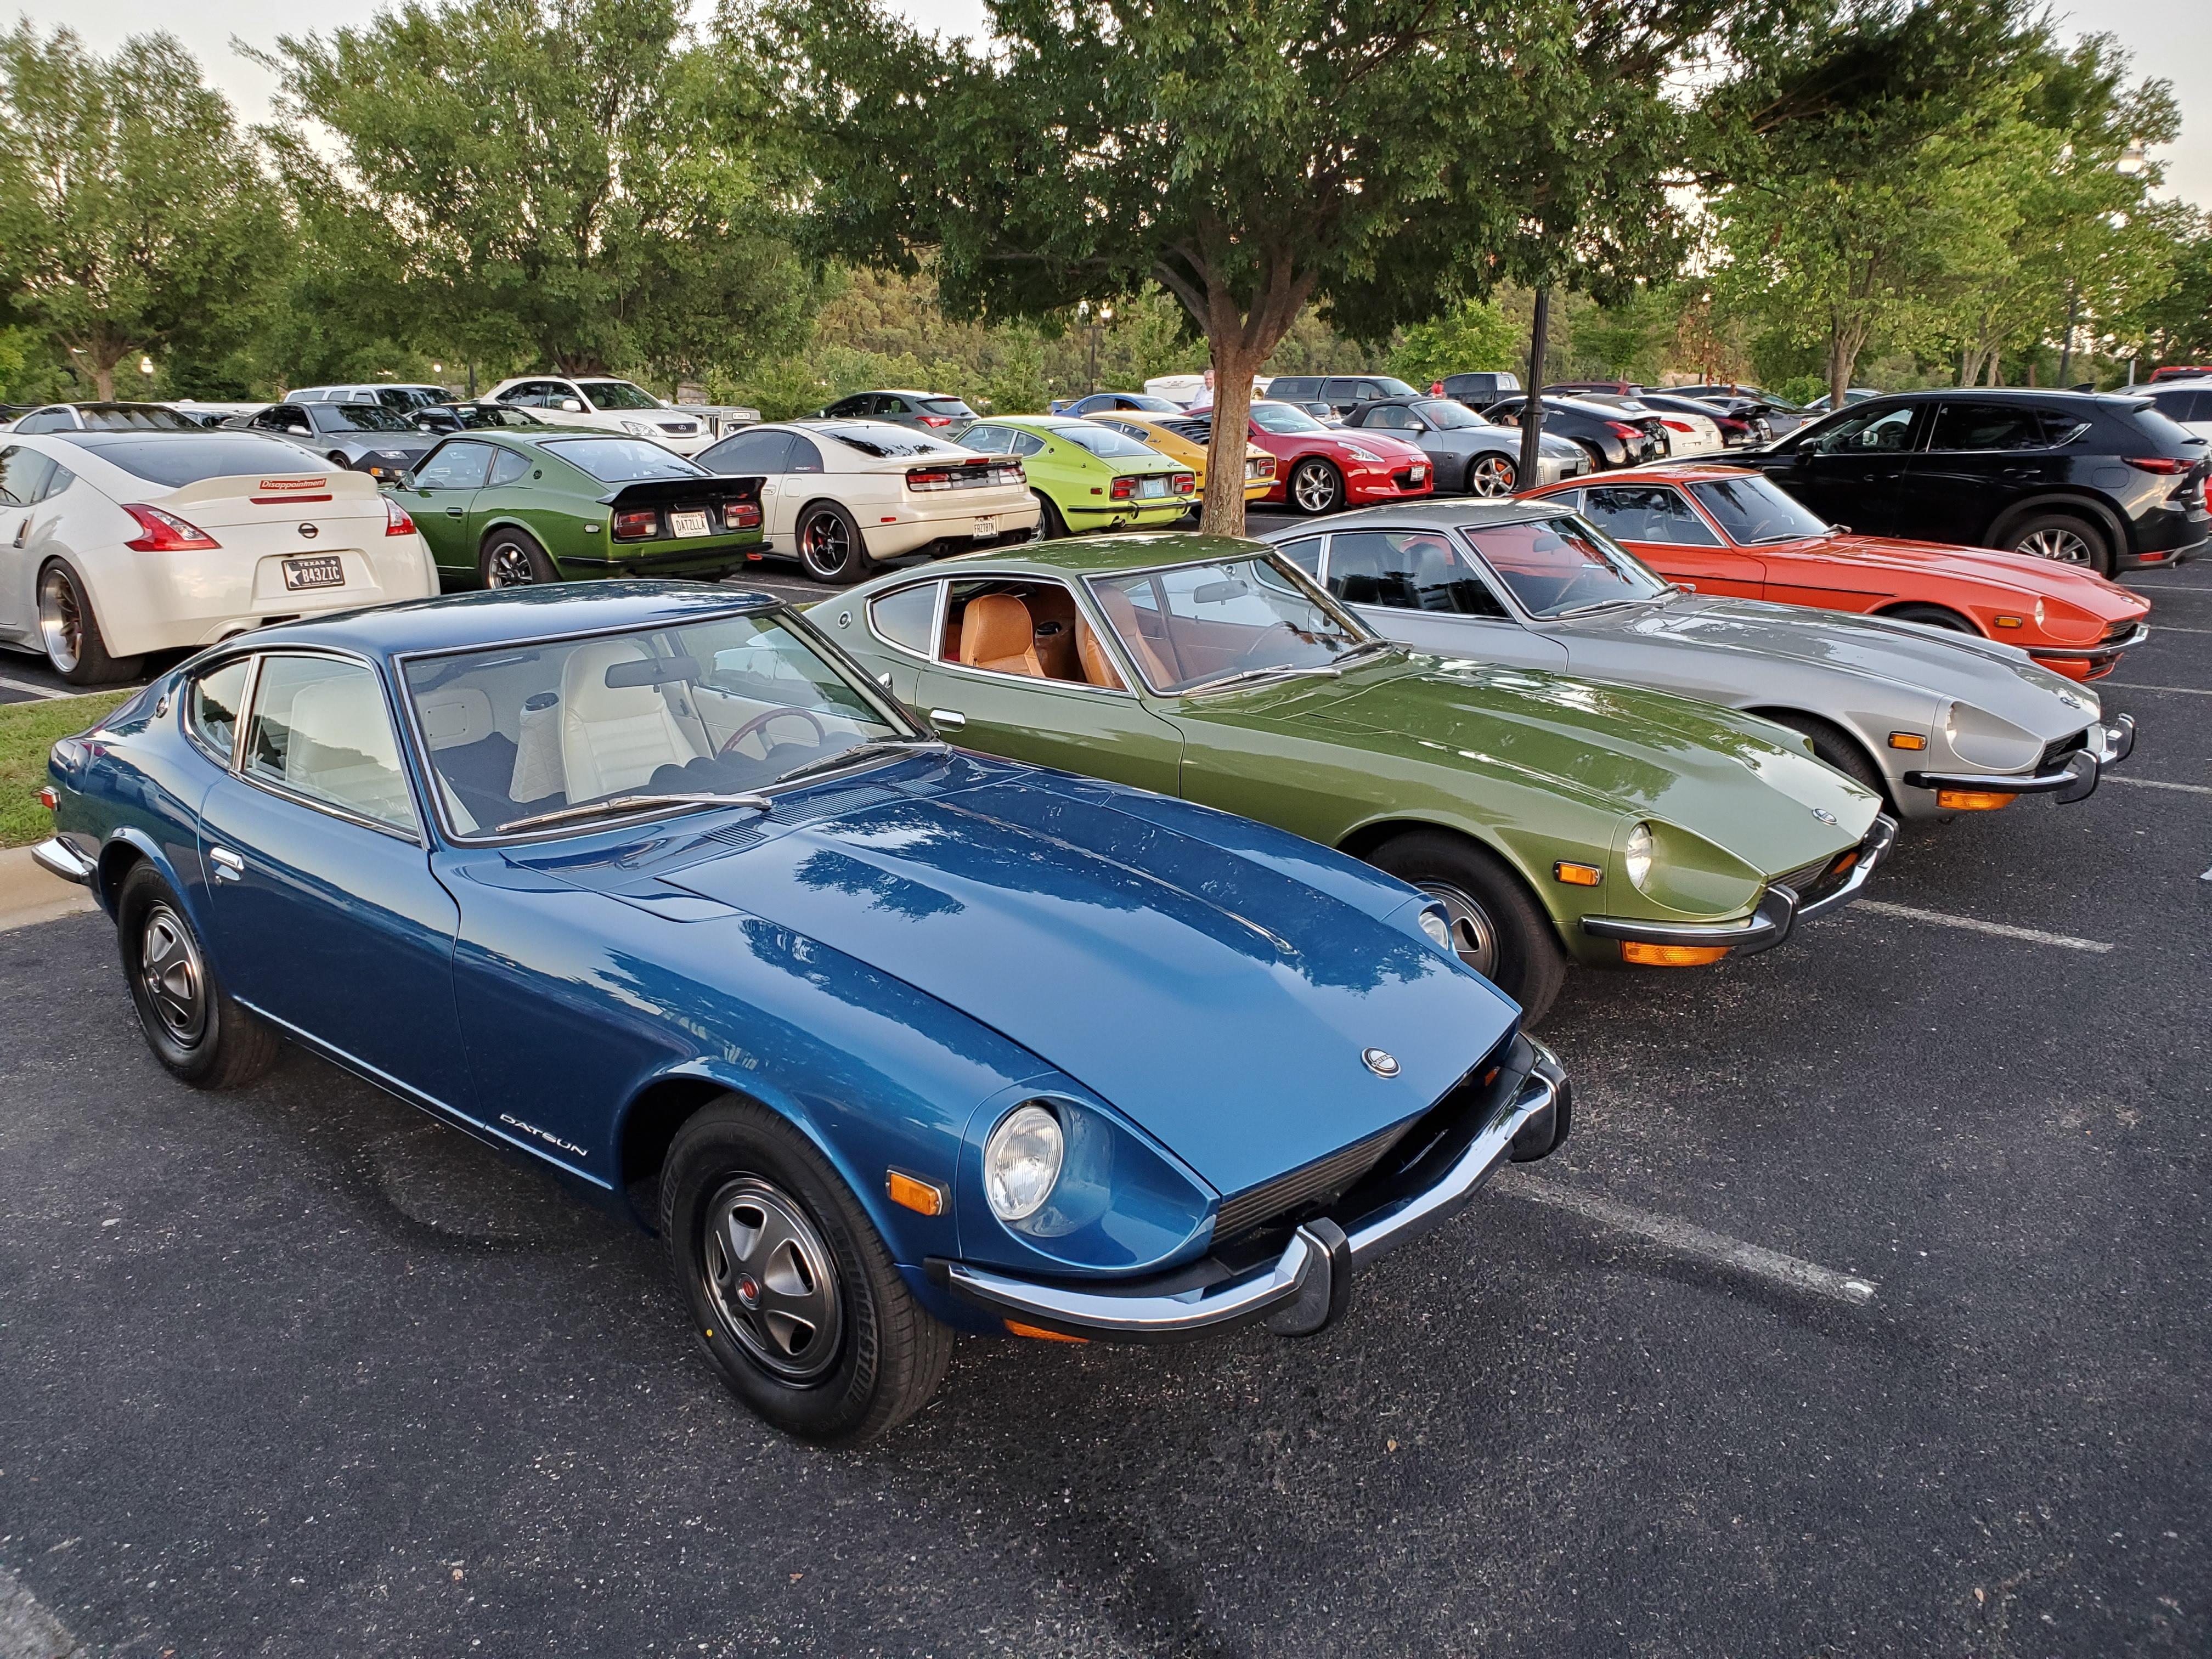
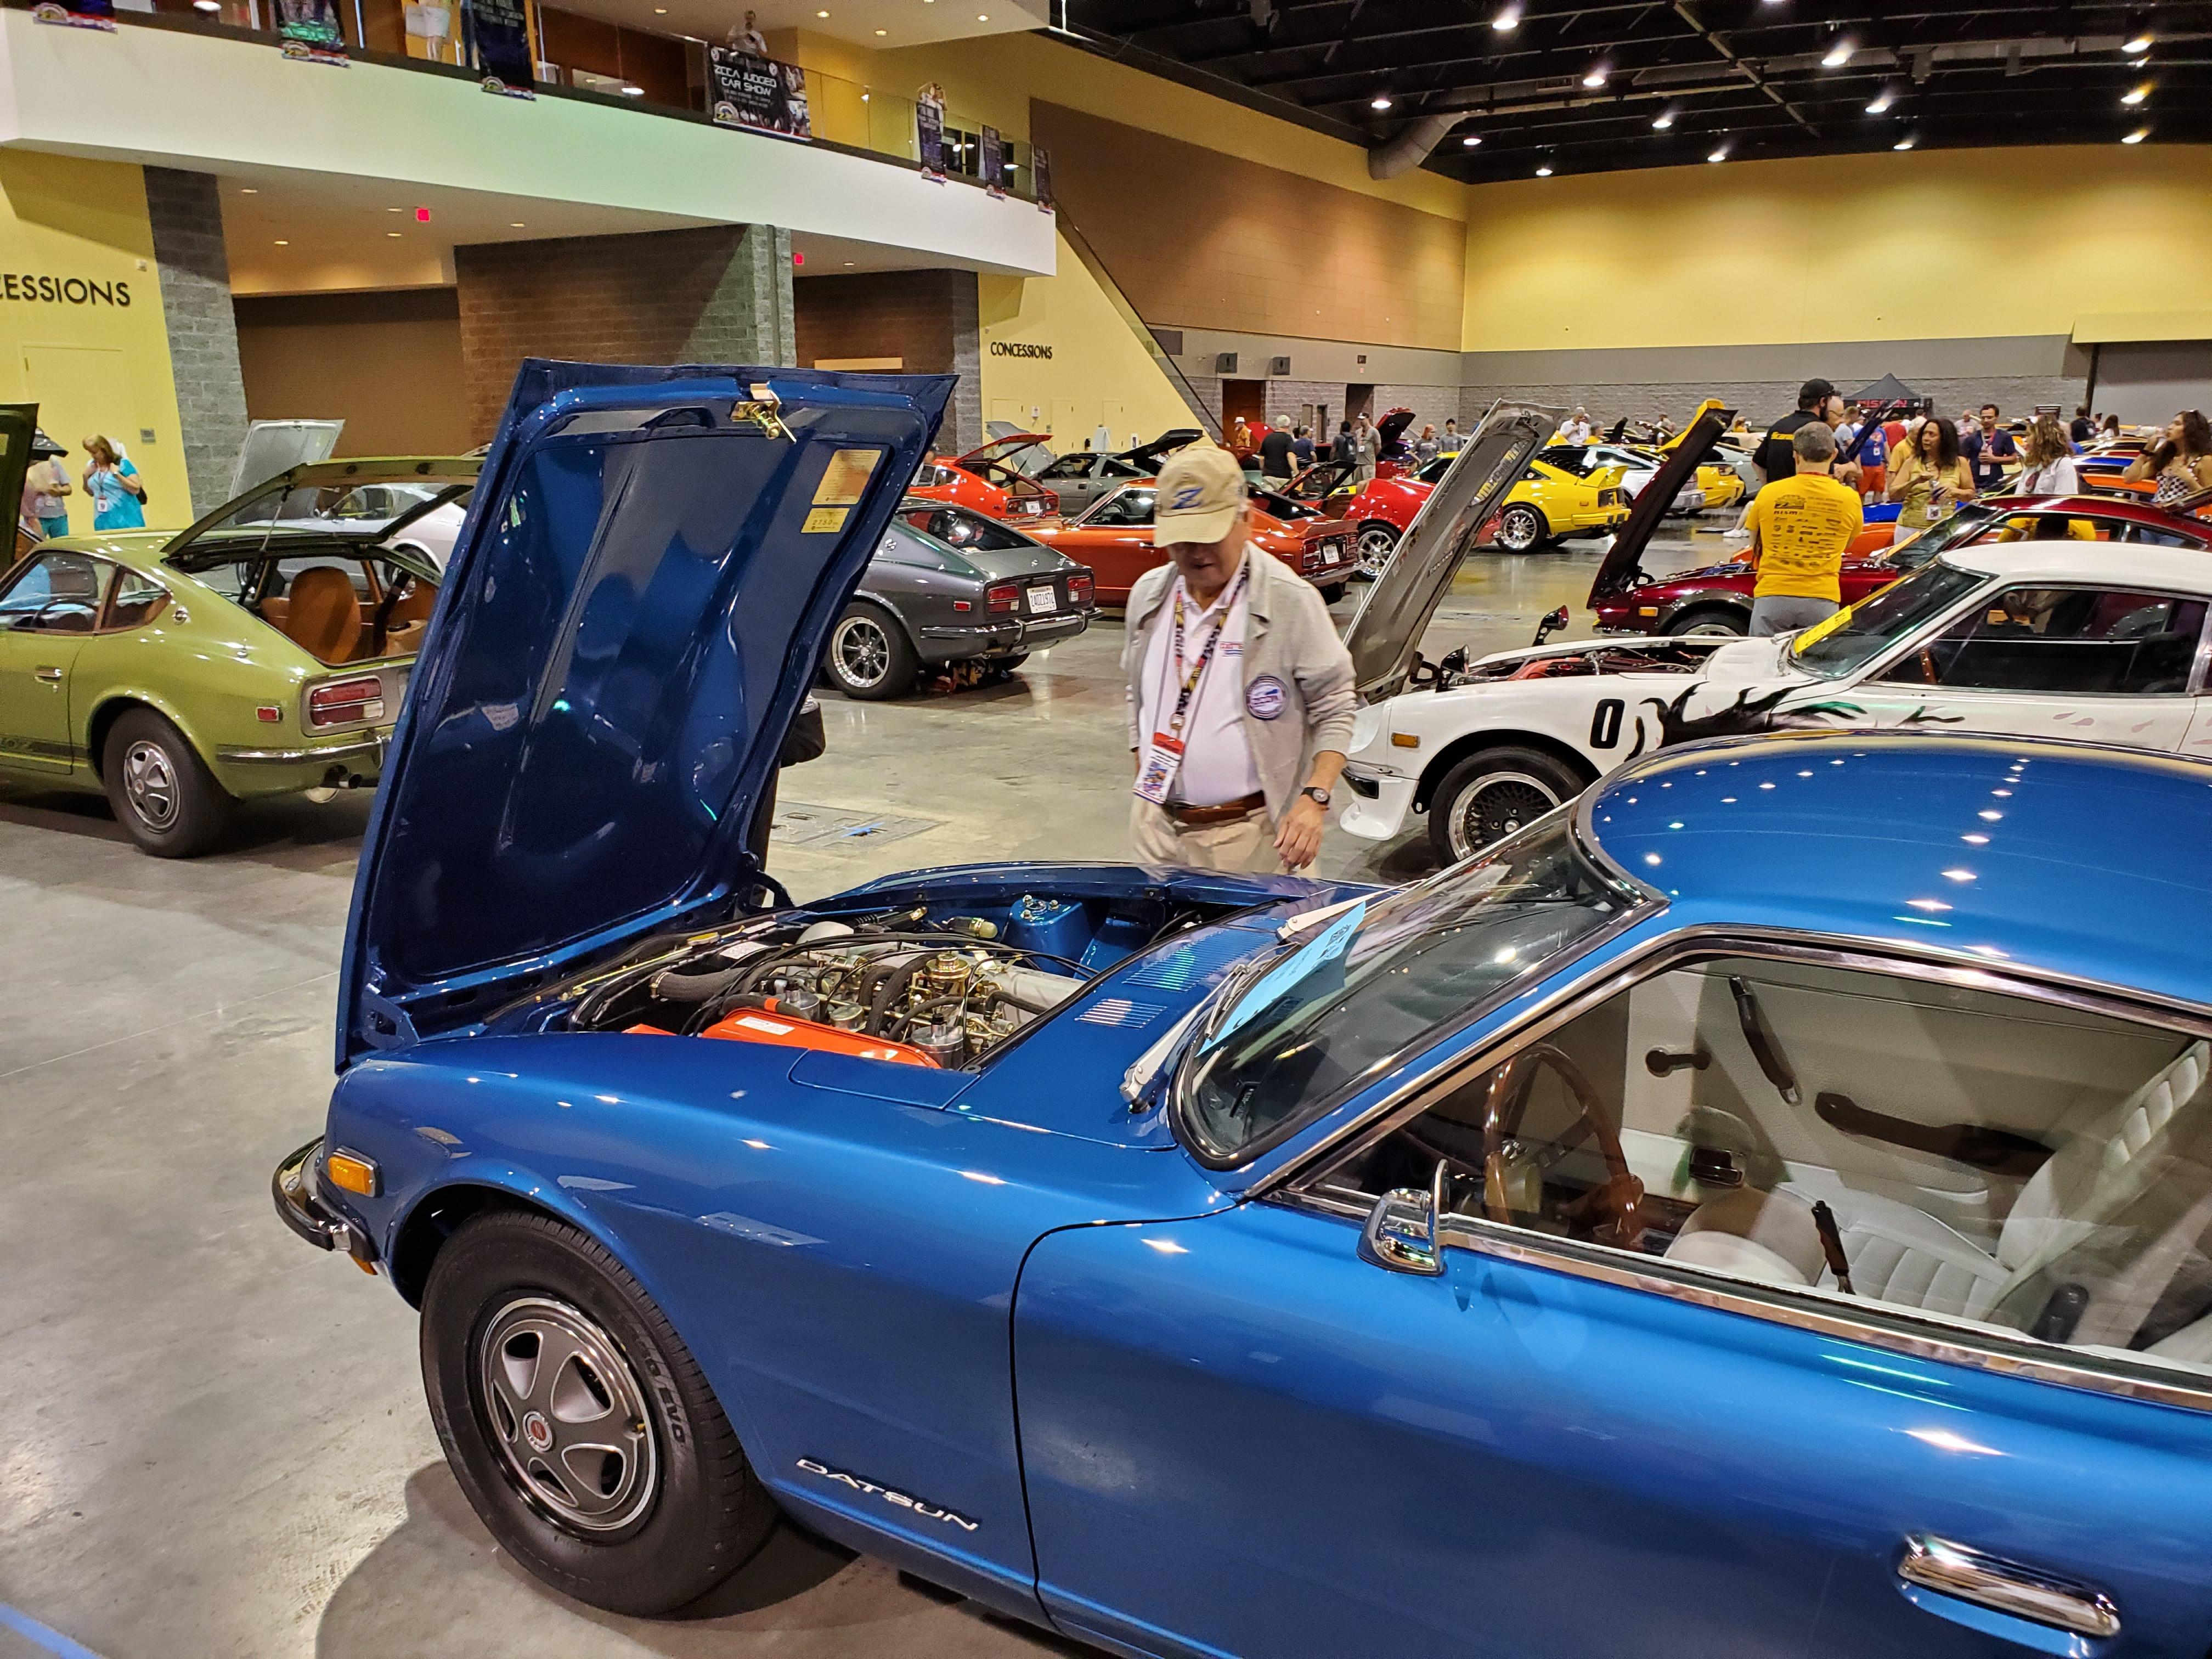
Was very amusing to watch Matsuo-San. He was opening doors and hatches, turning on engine lights, touching paint and engine at will. He is the only person that could get away with that. ? Actually, I think it's considered an honor to have him touch your Z1 point
1 point
1 point
1 pointWas very amusing to watch Matsuo-San. He was opening doors and hatches, turning on engine lights, touching paint and engine at will. He is the only person that could get away with that. ? Actually, I think it's considered an honor to have him touch your Z1 point
1 point 1 point
All of the valves wiggle a little bit, but yes, I've found that the exhausts wiggle more than the intakes. I'm not going to measure them, because then I'd know. I did measure the lengths of all the exhaust valves though, and found one that was twenty thousandths shorter than the rest. No idea why it's like that, but that one did not make my set of the six best exhausts.1 point
Yup! I Got it! Haha!! So not that it really matters, but that's an AF (Audio Frequency) amp, not an op-amp. Good luck with the repairs. I paid my way through a couple years of college fixing audio-visual equipment. One of the things I learned is that 95% of all failures are blown output stages. Even if the problem does not appear to be a blown output, it might be anyway.1 point
1 point
1 pointWell, that's pretty cool. I liked the product and its install so much I sent them a pic. Too bad there is a deep freeze in the background. Thanks for the link.1 point
1 point
1 point
All of the valves wiggle a little bit, but yes, I've found that the exhausts wiggle more than the intakes. I'm not going to measure them, because then I'd know. I did measure the lengths of all the exhaust valves though, and found one that was twenty thousandths shorter than the rest. No idea why it's like that, but that one did not make my set of the six best exhausts.1 point
Yup! I Got it! Haha!! So not that it really matters, but that's an AF (Audio Frequency) amp, not an op-amp. Good luck with the repairs. I paid my way through a couple years of college fixing audio-visual equipment. One of the things I learned is that 95% of all failures are blown output stages. Even if the problem does not appear to be a blown output, it might be anyway.1 point
1 point
1 pointWell, that's pretty cool. I liked the product and its install so much I sent them a pic. Too bad there is a deep freeze in the background. Thanks for the link.1 point
1 point 1 pointToday drained the fuel tank completely. Disconnected supply/return lines from tank to engine compartment, on both ends. Used compressor to blow air through both lines, from engine compartment back to tank. Pressurized air came out without no debris, both hold pressure. Tomorrow will connect an external fuel bottle, located near the tank, to the line supplying fuel from there to the fuel filter. If car starts then I'll know that the lines are good.1 point
I've never used sealant on head gaskets, and haven't blown one since around 1970. Go dry.1 point
1 point
1 pointWow. Interesting story. Looking forward to more telling pics once you get your hands on the car. That's right in Chuck's back yard!! @cbuczesk1 point
1 pointToday drained the fuel tank completely. Disconnected supply/return lines from tank to engine compartment, on both ends. Used compressor to blow air through both lines, from engine compartment back to tank. Pressurized air came out without no debris, both hold pressure. Tomorrow will connect an external fuel bottle, located near the tank, to the line supplying fuel from there to the fuel filter. If car starts then I'll know that the lines are good.1 point
I've never used sealant on head gaskets, and haven't blown one since around 1970. Go dry.1 point
1 point
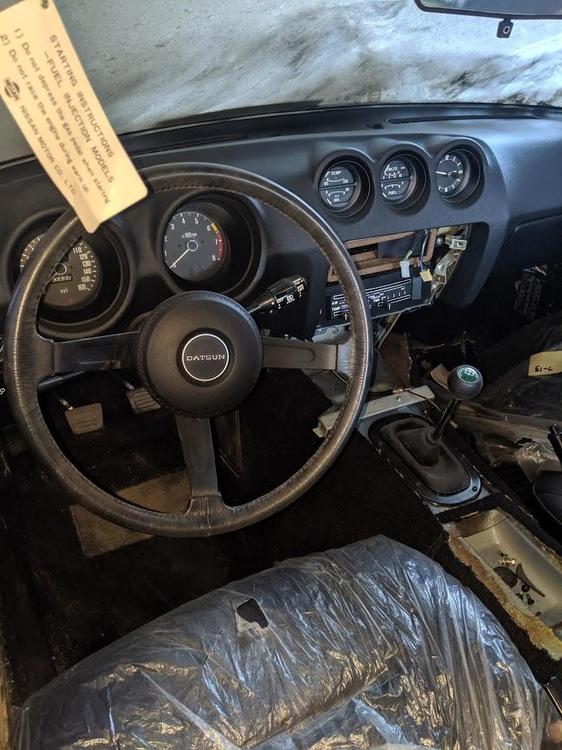
1 pointWow. Interesting story. Looking forward to more telling pics once you get your hands on the car. That's right in Chuck's back yard!! @cbuczesk1 point 1 pointNot sure why the plastic was left on the seat for 350 miles, so there must be a good story that goes along with the car. What did the owner tell you about why it is what it is? Dennis1 point
1 pointDo all you can to document the miles. If it is a 350 mile car, it is extremely valuable for a 280Z. I might be inclined to assemble it and run it through a high profile auction (leave the dust on it!). Then take the proceeds and buy a finished car. or you could put 20k miles on it and it would still be a very low mileage 280Z but you need to be able to verify the mileage. Maybe hire an appraiser to help verify the mileage. It would be worth the extra expense!1 point
1 pointNot sure why the plastic was left on the seat for 350 miles, so there must be a good story that goes along with the car. What did the owner tell you about why it is what it is? Dennis1 point
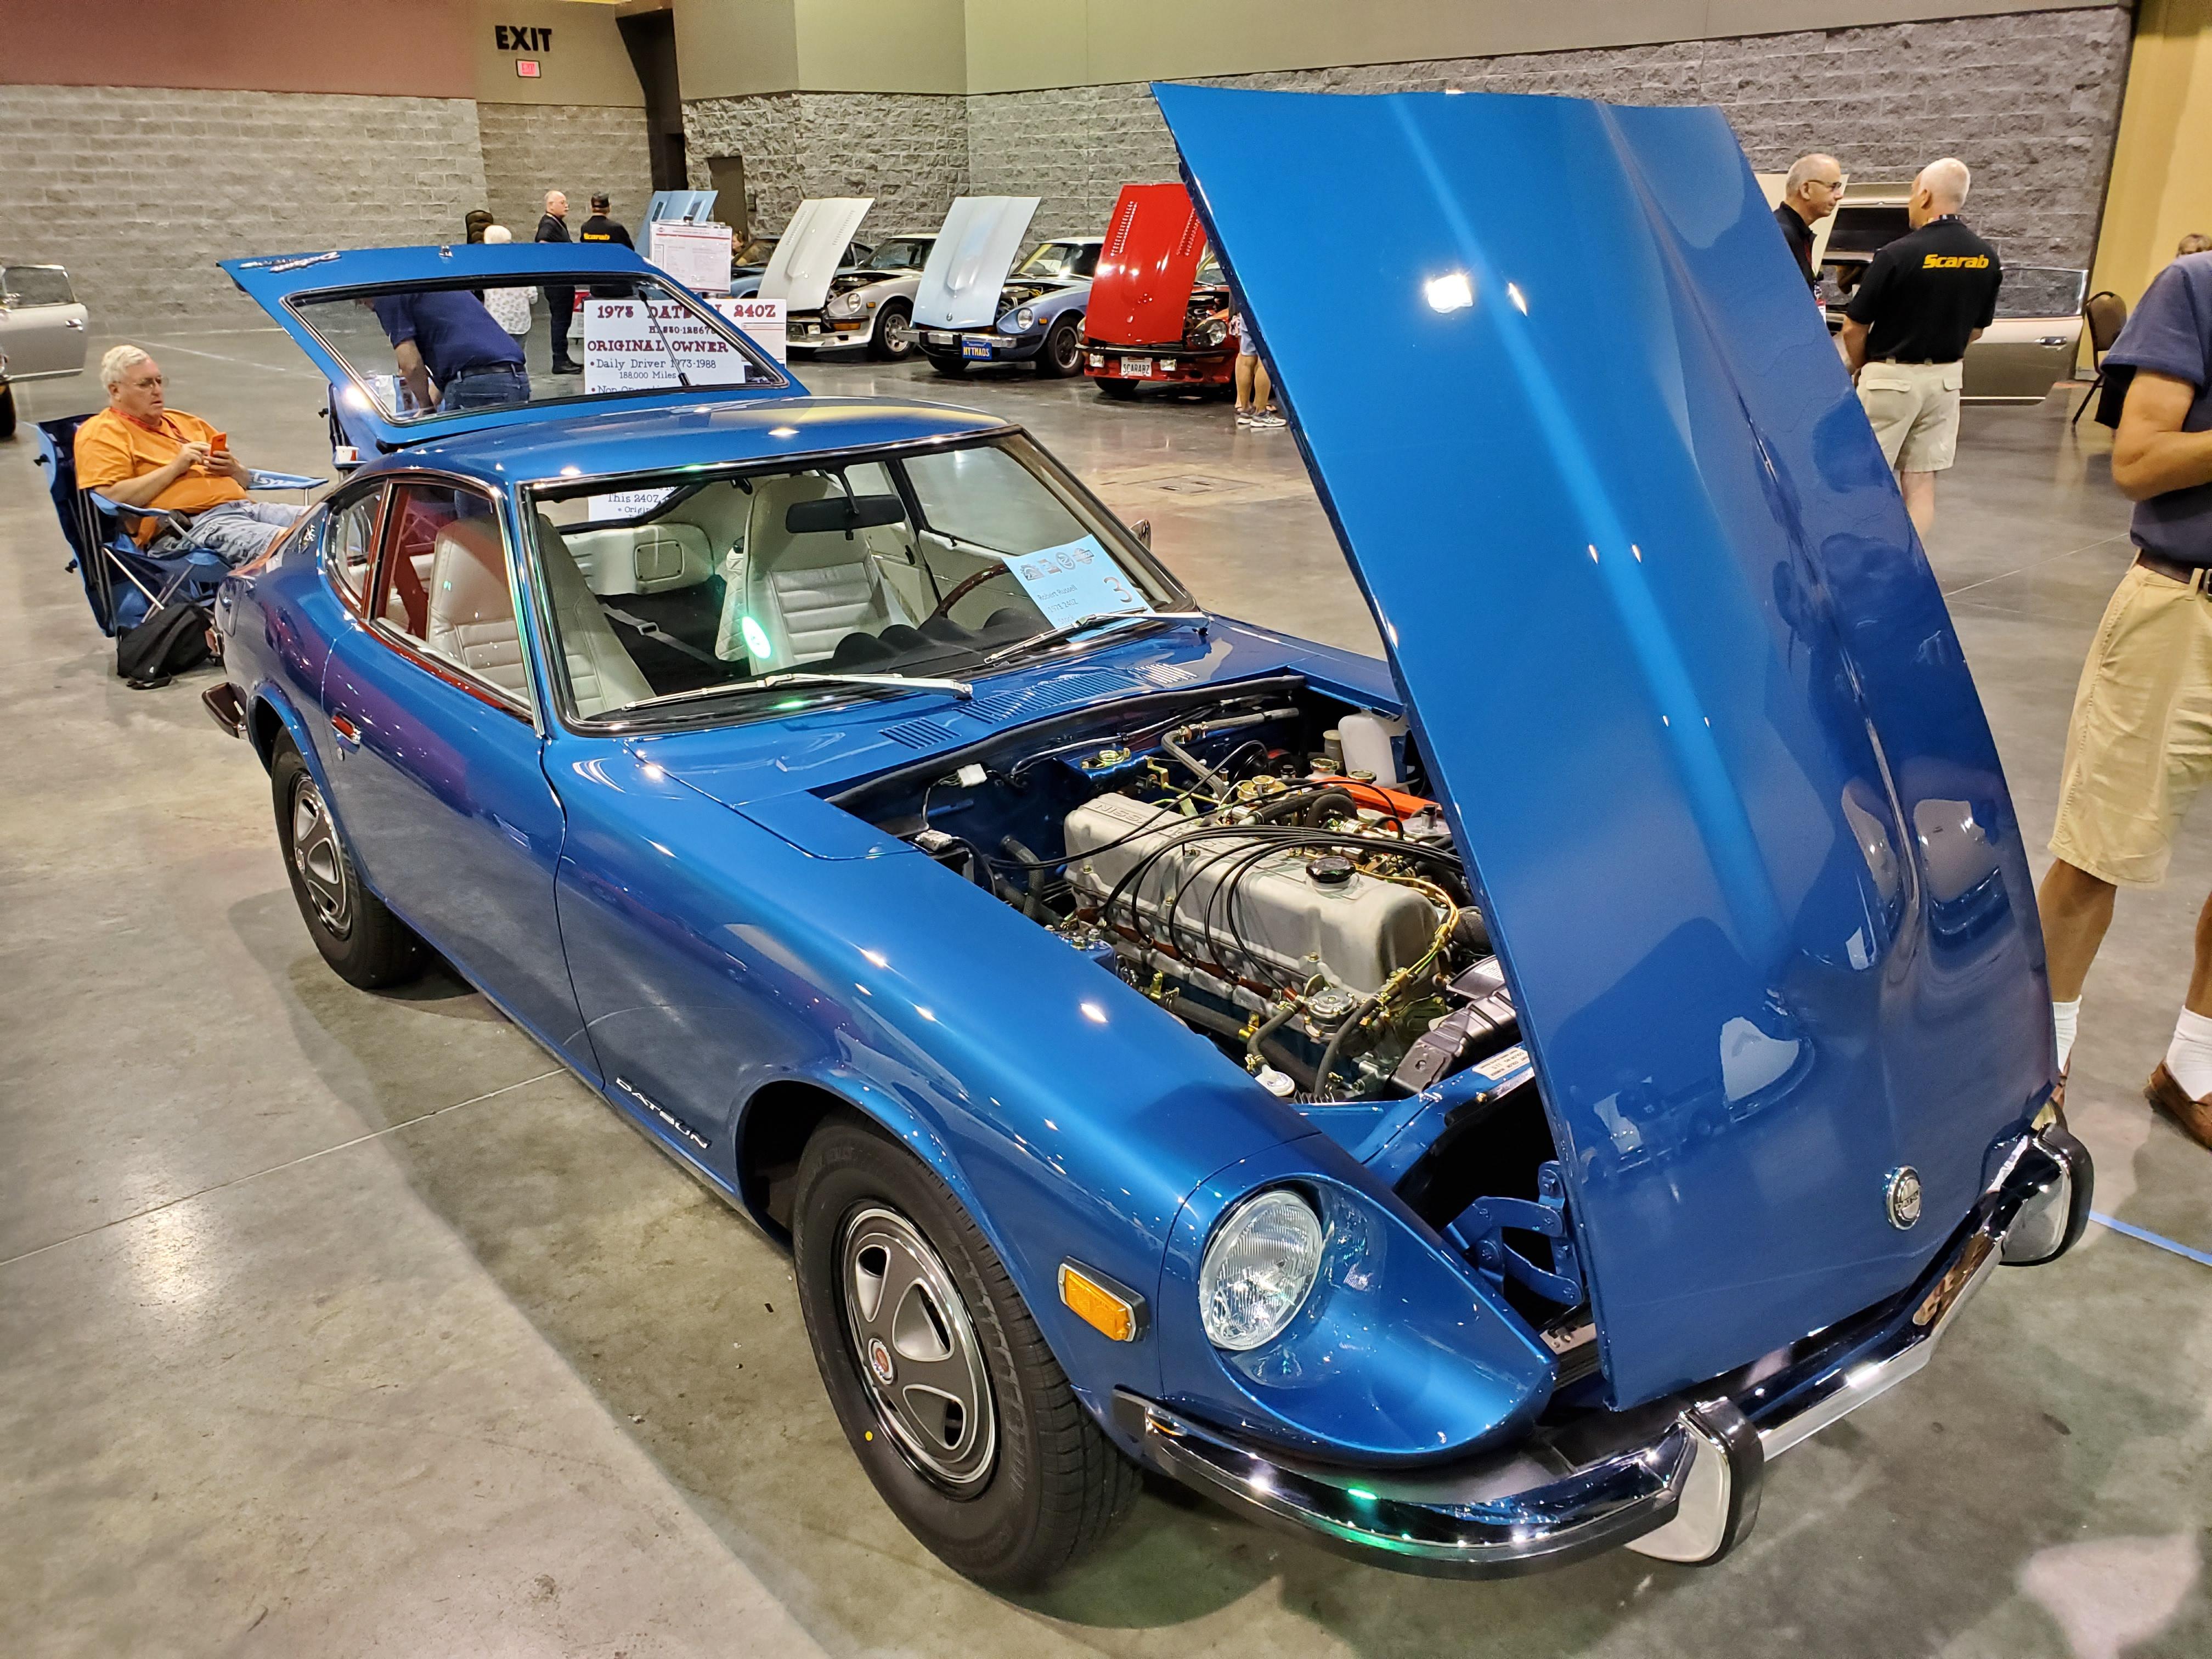
1 pointDo all you can to document the miles. If it is a 350 mile car, it is extremely valuable for a 280Z. I might be inclined to assemble it and run it through a high profile auction (leave the dust on it!). Then take the proceeds and buy a finished car. or you could put 20k miles on it and it would still be a very low mileage 280Z but you need to be able to verify the mileage. Maybe hire an appraiser to help verify the mileage. It would be worth the extra expense!1 point 1 pointI just noticed that it also has the diagonal "Datsun" emblem on the hatch over 280Z. My 1/76 build has the horizontal "Datsun" over the 280Z. The paint code looks like an ink stamp put on either before or after painting. Maybe it's an error and adds value, like a miscoined coin.1 point
 Installed some turbo wheels. Sent from my Coolpad 3310A using Tapatalk1 point
 1 pointI say clean it up and drive it, you'll love it. There is a whole procedure to go through before even turn the engine over much less start it, even though the car has no miles there is a good chance you'll find rust in the gas tank so that means cleaning the entire fuel system. That is an amazing find, keep your camera clicking.1 point
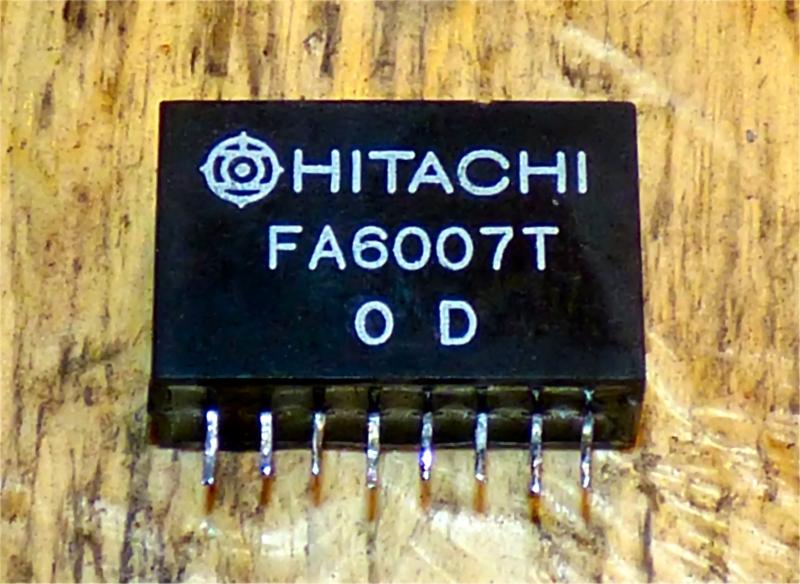
Just ordered an opamp to repair the radio. All is good. Old (Pin 1 is on left side above. There is a raised line on the left edge) New
1 pointI say clean it up and drive it, you'll love it. There is a whole procedure to go through before even turn the engine over much less start it, even though the car has no miles there is a good chance you'll find rust in the gas tank so that means cleaning the entire fuel system. That is an amazing find, keep your camera clicking.1 point
Just ordered an opamp to repair the radio. All is good. Old (Pin 1 is on left side above. There is a raised line on the left edge) New
 1 point
 1 pointDear god don’t let that dashboard see the sunlight it’s beutiful Sent from my iPhone using Tapatalk1 point
 1 point
It will still have the usual problems of surface rust in the engine bores and corrosion in the hydraulic system. Both are open to the atmosphere through open valves and vents. Don't try to start it without getting it ready to start, and even if the brakes and clutch work they'll probably fail quickly. Good luck, nice find. You could probably flip it to a museum or collector and use the money to buy a drive-ready car.1 point
1 point
1 pointIt will still have the usual problems of surface rust in the engine bores and corrosion in the hydraulic system. Both are open to the atmosphere through open valves and vents. Don't try to start it without getting it ready to start, and even if the brakes and clutch work they'll probably fail quickly. Good luck, nice find. You could probably flip it to a museum or collector and use the money to buy a drive-ready car.1 point 1 pointHopefully one of the members here can come over and take a good look at it to tell you the best course of action. IMHO keep it as original as possible for best value (plus if you plan to make it a daily driver, they are very nice in the stock configuration.1 point
1 pointIf it is really 350mi then sell on Hemmings or BAT. You have a car worth >$60k1 point
1 pointHopefully one of the members here can come over and take a good look at it to tell you the best course of action. IMHO keep it as original as possible for best value (plus if you plan to make it a daily driver, they are very nice in the stock configuration.1 point
1 pointIf it is really 350mi then sell on Hemmings or BAT. You have a car worth >$60k1 point Other than to facilitate cleaner removal, if that's something you do a lot, dry is the correct process. The last thing you want is that goop in the oil holes around those copper sealing rings around the two oil passages, The center one seems to have a large blob really near it. Heavy Danger is the term that comes to mind. Flat head, flat block, and cleanliness are all you need. The gasket does all the work. If you have corroded water passage holes that extend beyond any gasket hole, take care of those the right way, not with goop.1 point
Dry gaskets only except on coolant passages, sometimes the mating surfaces are pitted.1 point
Other than to facilitate cleaner removal, if that's something you do a lot, dry is the correct process. The last thing you want is that goop in the oil holes around those copper sealing rings around the two oil passages, The center one seems to have a large blob really near it. Heavy Danger is the term that comes to mind. Flat head, flat block, and cleanliness are all you need. The gasket does all the work. If you have corroded water passage holes that extend beyond any gasket hole, take care of those the right way, not with goop.1 point
Dry gaskets only except on coolant passages, sometimes the mating surfaces are pitted.1 point I think you are doing the right thing...removing head and starting over. I install head gasket, manifold gasket, and valve cover dry. I install the oil pan dry except for a thin layer of black rtv along the join line where the block and front cover meet on both sides.1 point
 Hi , dutchzcarguy reminds me this thread . I would like to explain the story behind the rear deck glass which Mr. Tamura struggled to make its style better . ( Sorry If I did it already before ) Mr . Tamura was thinking seriously about the curve of the glass which was nature when the glass was baked . The design team made clay model but usually they didn’t care about the curve of the glass . In the clay model , the glass area was put films and the area was cone , if you look from side , it looked flat . Mr. Tamura knew the glass is not flat but he could not be able to have actual glass , nor test it when he was designing the rear deck . He was afraid the design line of the roof and the rear end of the deck were not meet the curved glass . So he used his imagination fully, think again and again , he assumed curve rate which glasses normally have . He finally lifted up the end of the roof 10mm , also lifted up 5 mm at the rear deck panel where the bottom of the glass meets . He was happy his decision after seeing the car . A lot bolder , sharper , this rear and side view tensioned the styling a lot more beautiful. Mr.Tamura also said “ Mr. Matsuo was asking me what are you doing ? You need to be quick “ But after seeing his work , Mr.Matsuo said nothing about it . ” I felt Mr.Matsuo liked the re-finish of my work which made the roof line and side view much better than before , compared to the clay model which was used for the presentation for the executives “ Please see the drawings which was made by Mr. Tamura . Kats
 1 point
 interesting chat again. Its a bit of a 'bully' setup on there. People who really do not understand the cars and the wider model range, speaking about stuff like its correct and flaming others who normally are more factually correct.1 point
 1 point
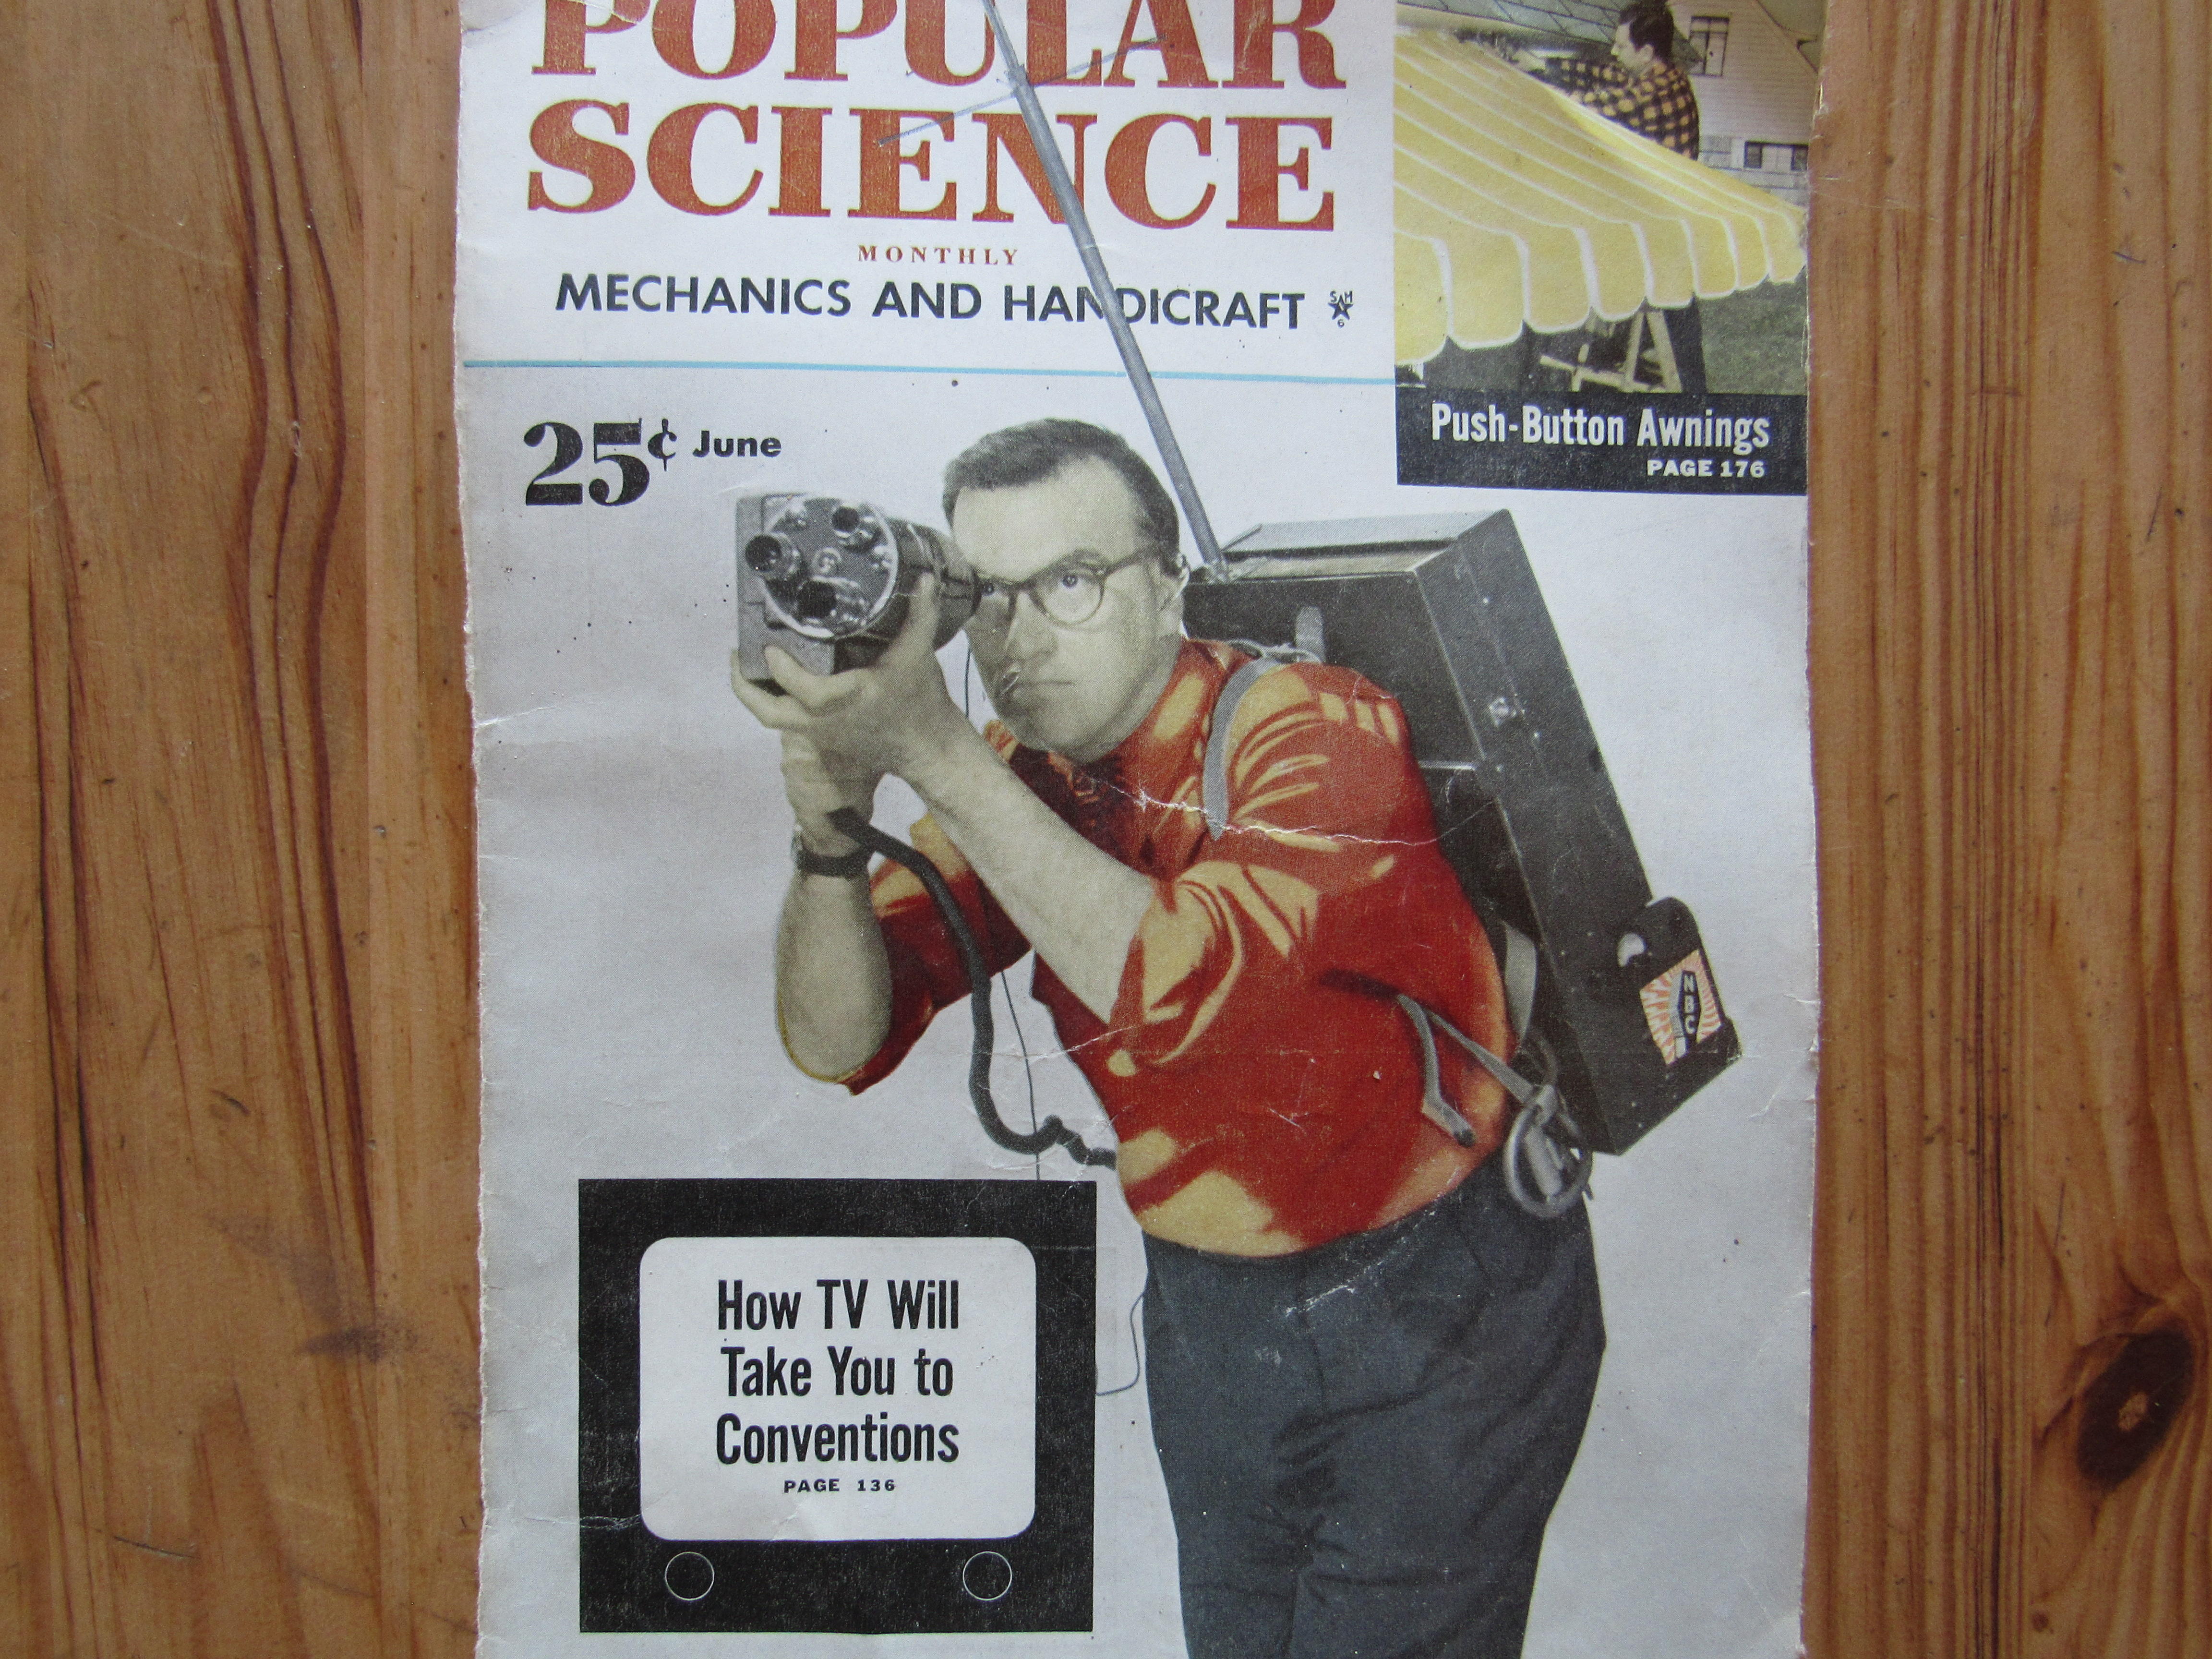
So who is volunteering to take their backpack camera and be the roving reporter for the rest of us poor saps who can't make it?
1 point
1 pointSo who is volunteering to take their backpack camera and be the roving reporter for the rest of us poor saps who can't make it? 1 point
 V-3 Kit: 17020-N3325 Electric Fuel Pump (Jidoosha Kiki) 17020-N3326 Electric Fuel Pump (Mitsuba) FWIW, Carl B.1 point


Important Information
By using this site, you agree to our Privacy Policy and Guidelines. We have placed cookies on your device to help make this website better. You can adjust your cookie settings, otherwise we'll assume you're okay to continue.