Leaderboard
-
Captain Obvious
Free Member5Points10,081Posts -
qz16
Free Member4Points147Posts -

siteunseen
Free Member4Points15,115Posts -
Patcon
 Subscriber
 4Points11,142Posts


Popular Content
Showing content with the highest reputation on 10/03/2021 in all areas
-
Put the “pin-stopper” back in and put the C clip back on. After you find it or get another of course. Simple! FS5W71B BTW Don’t ask me where the old one went. Put some sealer on either end as well, it could leak oil.
 2 points
 -
2 pointsSomeone asked: What do you think caused the issue that required the addition of the 2nd strut to obtain the necessary clearance? In thinking about this I believe that you need to understand this car’s starting point. My son, and I bought the car for one reason and that was to have the fun of restoring it. Our intention was to keep it, so every decision was based on what was best for the car. I believe that we did not knowingly sacrifice quality in any area. We bought the best and did our best, if for no other reason than we intend to keep the car forever. We started deconstruction immediately after purchasing the car. This is an important point. We had no history with this car. I don’t know if the hatch closed properly before we took it apart. It closed, so the real question is how uniform were the gaps, was the paint at the roofline scuffed/chipped. The answer on the gaps is that they did not impress me as being particularly bad, or indicative of a body issue. That’s not a very definitive answer, but it is all that I have. The paint was in miserable condition. There was zero clear coat and some rust in the typical spots, right dog leg, right fender near the door, right rocker, lower hatch, and lower right quarter panel. I don’t believe that I would have noticed a scuff or chip given the condition of the paint. None of this really mattered to us because we were going to restore every nut and bolt anyway. We were changing the color so we were taking it to bare metal and everything had to be removed from the frame. I am sure that the hatch is twisted/warped. Not so badly that it would not close, but bad enough that it was perceptible when laid out on something flat. Now, did it twist because it was forced at some point during its life? Did it twist over time because of the single strut? Did it warp because the glass was removed and it was stored for a few years? Was it warped because I live in Arizona and we get huge swings in temperature? Whatever the reason and whenever it happened (most probably before we purchased the car) the result is that it has some amount of twist in it. When the glass is installed will the weight take some of the twist out? When it is closed against the new weather strip will it tend to right itself to some small degree? Does the fault lie in the bodywork that I did? The point is I can’t answer definitively what caused the clearance issue. The car is 48 years old and we have owned for it for 5 years. like most of us it has a past. Was it necessary to add the 2nd strut or was there another way to solve the problem? I can tell you that I believe the 2nd strut is a positive improvement to a great car. Nissan thought it was an expense worth adding to an already great car, beginning with the 260z. My simplistic experimenting leaves no doubt in my mind that having 2 struts to balance the weight of the hatch is a good thing. And finally, it appears to solve my clearance issue. Do you need it to align your hatch? I don’t know, but I needed it to align my hatch given my abilities and level of patience. If you have a 240z I would check the spot welds on the hatch lift strut body mount. I would also check the hatch tabs carefully as someone suggested earlier; this may be a manifestation of the uneven force placed on the hatch when it is being closed. I hope this thread helps someone tackle a job that they might not otherwise attempt.2 points
-
2 pointsMy non-expert thoughts on the matter? Most of the fuel injection systems have a long-ish intake tract and some sort of air flow meter along the way towards the air cleaner. Both of those restrict the air flow. Might not be much restriction, but it's more restriction than a short stub of a carb throat running wide open. For example... When they went to the fuel injection in the 280Z, each cylinder got a whole lot less throttle plate cross sectional area to the air cleaner than they did when they were running carbs. In addition, the fuel injection system has that AFM flapper thingie which adds some restriction. So while it's absolutely POSSIBLE to design and install a FI system that provides no additional intake restriction over a typical set of carbs, I think it's cheaper for the manufacturer to use something that shares components like throttle body and air flow meters. I don't think the manufacturers went to fuel injection because of performance. I think it was because of driveability, fuel economy, and emissions. So I'm no expert in the field, but my take is that for most stock automobiles these days, if you're willing to forgo wide temperature range drivability, fuel economy, and emissions... I think you can get better straight up raw performance from a carb or a bunch of carbs. Maybe a set of ITB's and a huge MAF that doesn't provide only negligible restriction could be the same as carbs?2 points
-
2 pointsHaha!! I think you've been lying in wait just looking for the opportunity to use that!2 points
-
2 points
-
2 points15x7 on my 240. They look good and fit the wheel well without looking bug eyed.
 2 points
 -
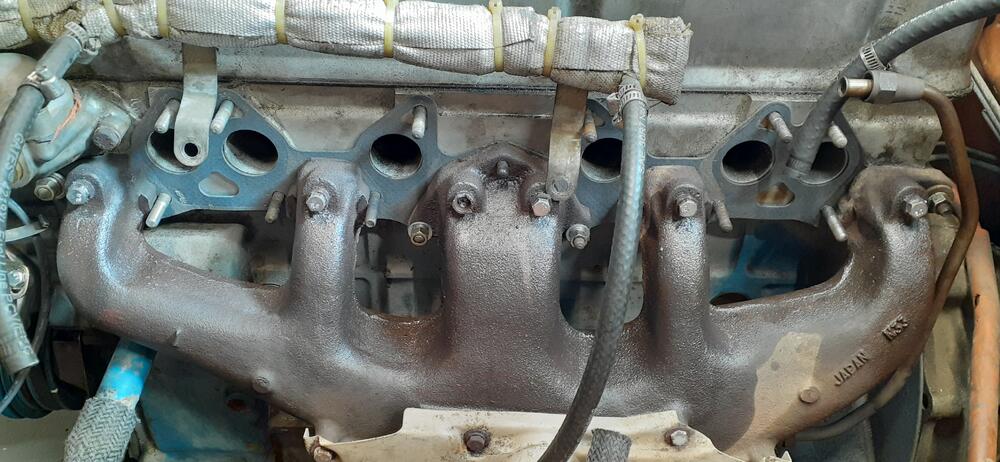
1 pointToday I pulled off the intake to address the exhaust leak. I cut off the air injectors and proceeded to tap the fittings with an M7x1 tap. One bolt broke as I tightened it, but I think it's sealed. I'll find out with another smoke test in a little while.
 1 point
 -
Just as an FYI: Transmission Parts Distributors has the same kit with free shipping. Ends up a little less expensive even than Rock Auto.1 point
-
1 point
-
1 pointYes. I own a few firearms, and knowing when to deploy them will keep you from queuing up for chow for 10-30 years. Nobody has a sense of humor nowadays.1 point
-
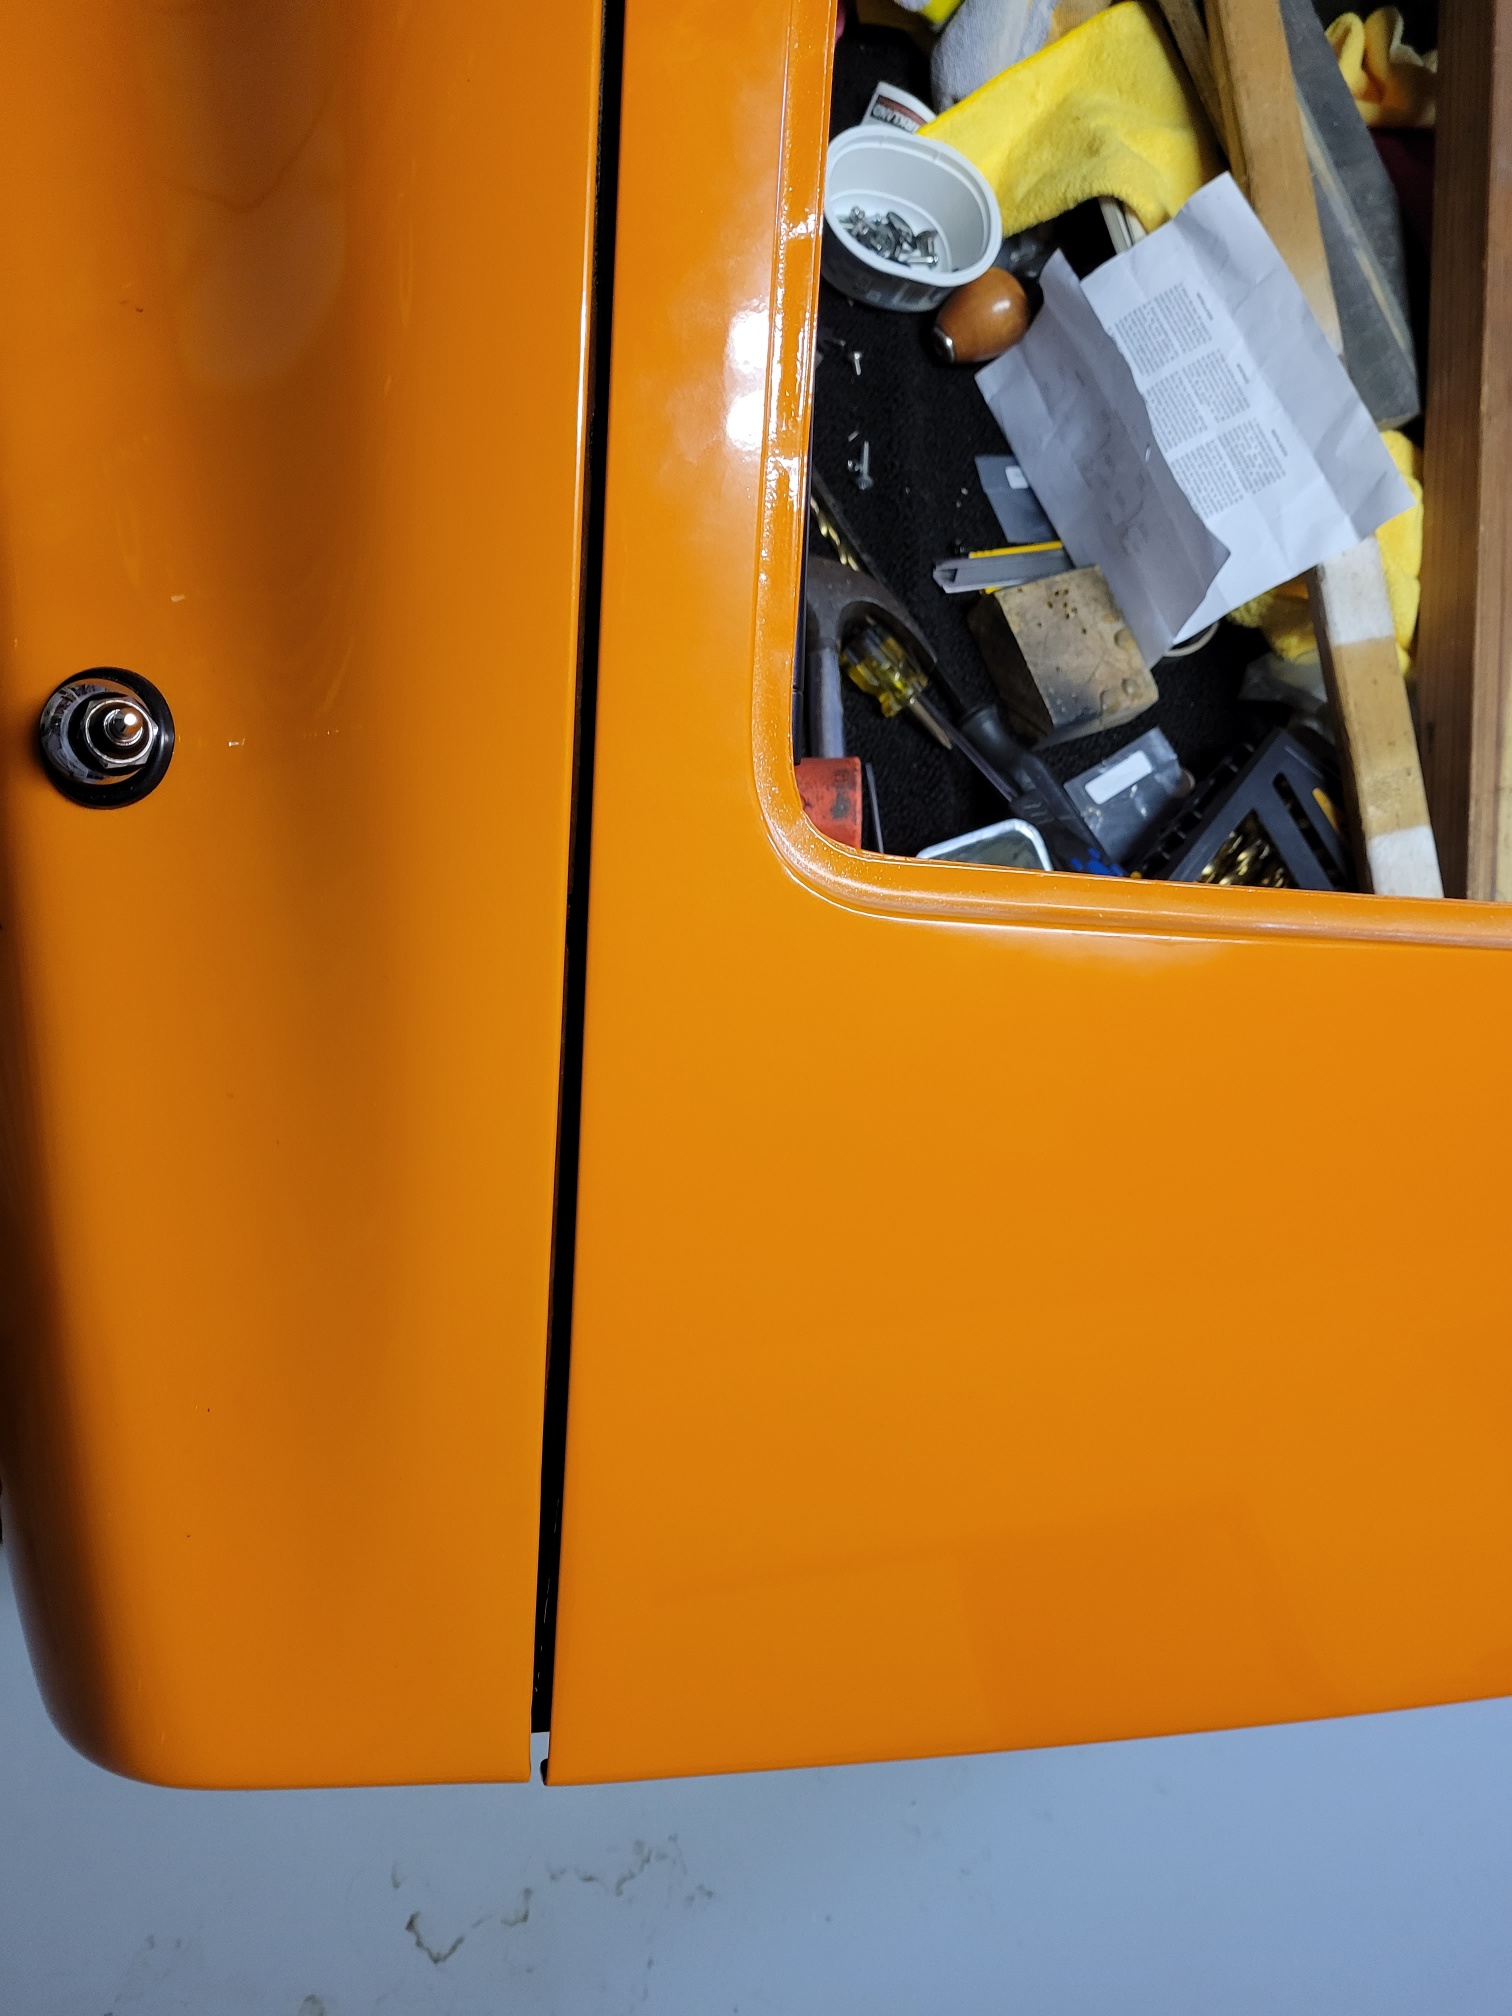
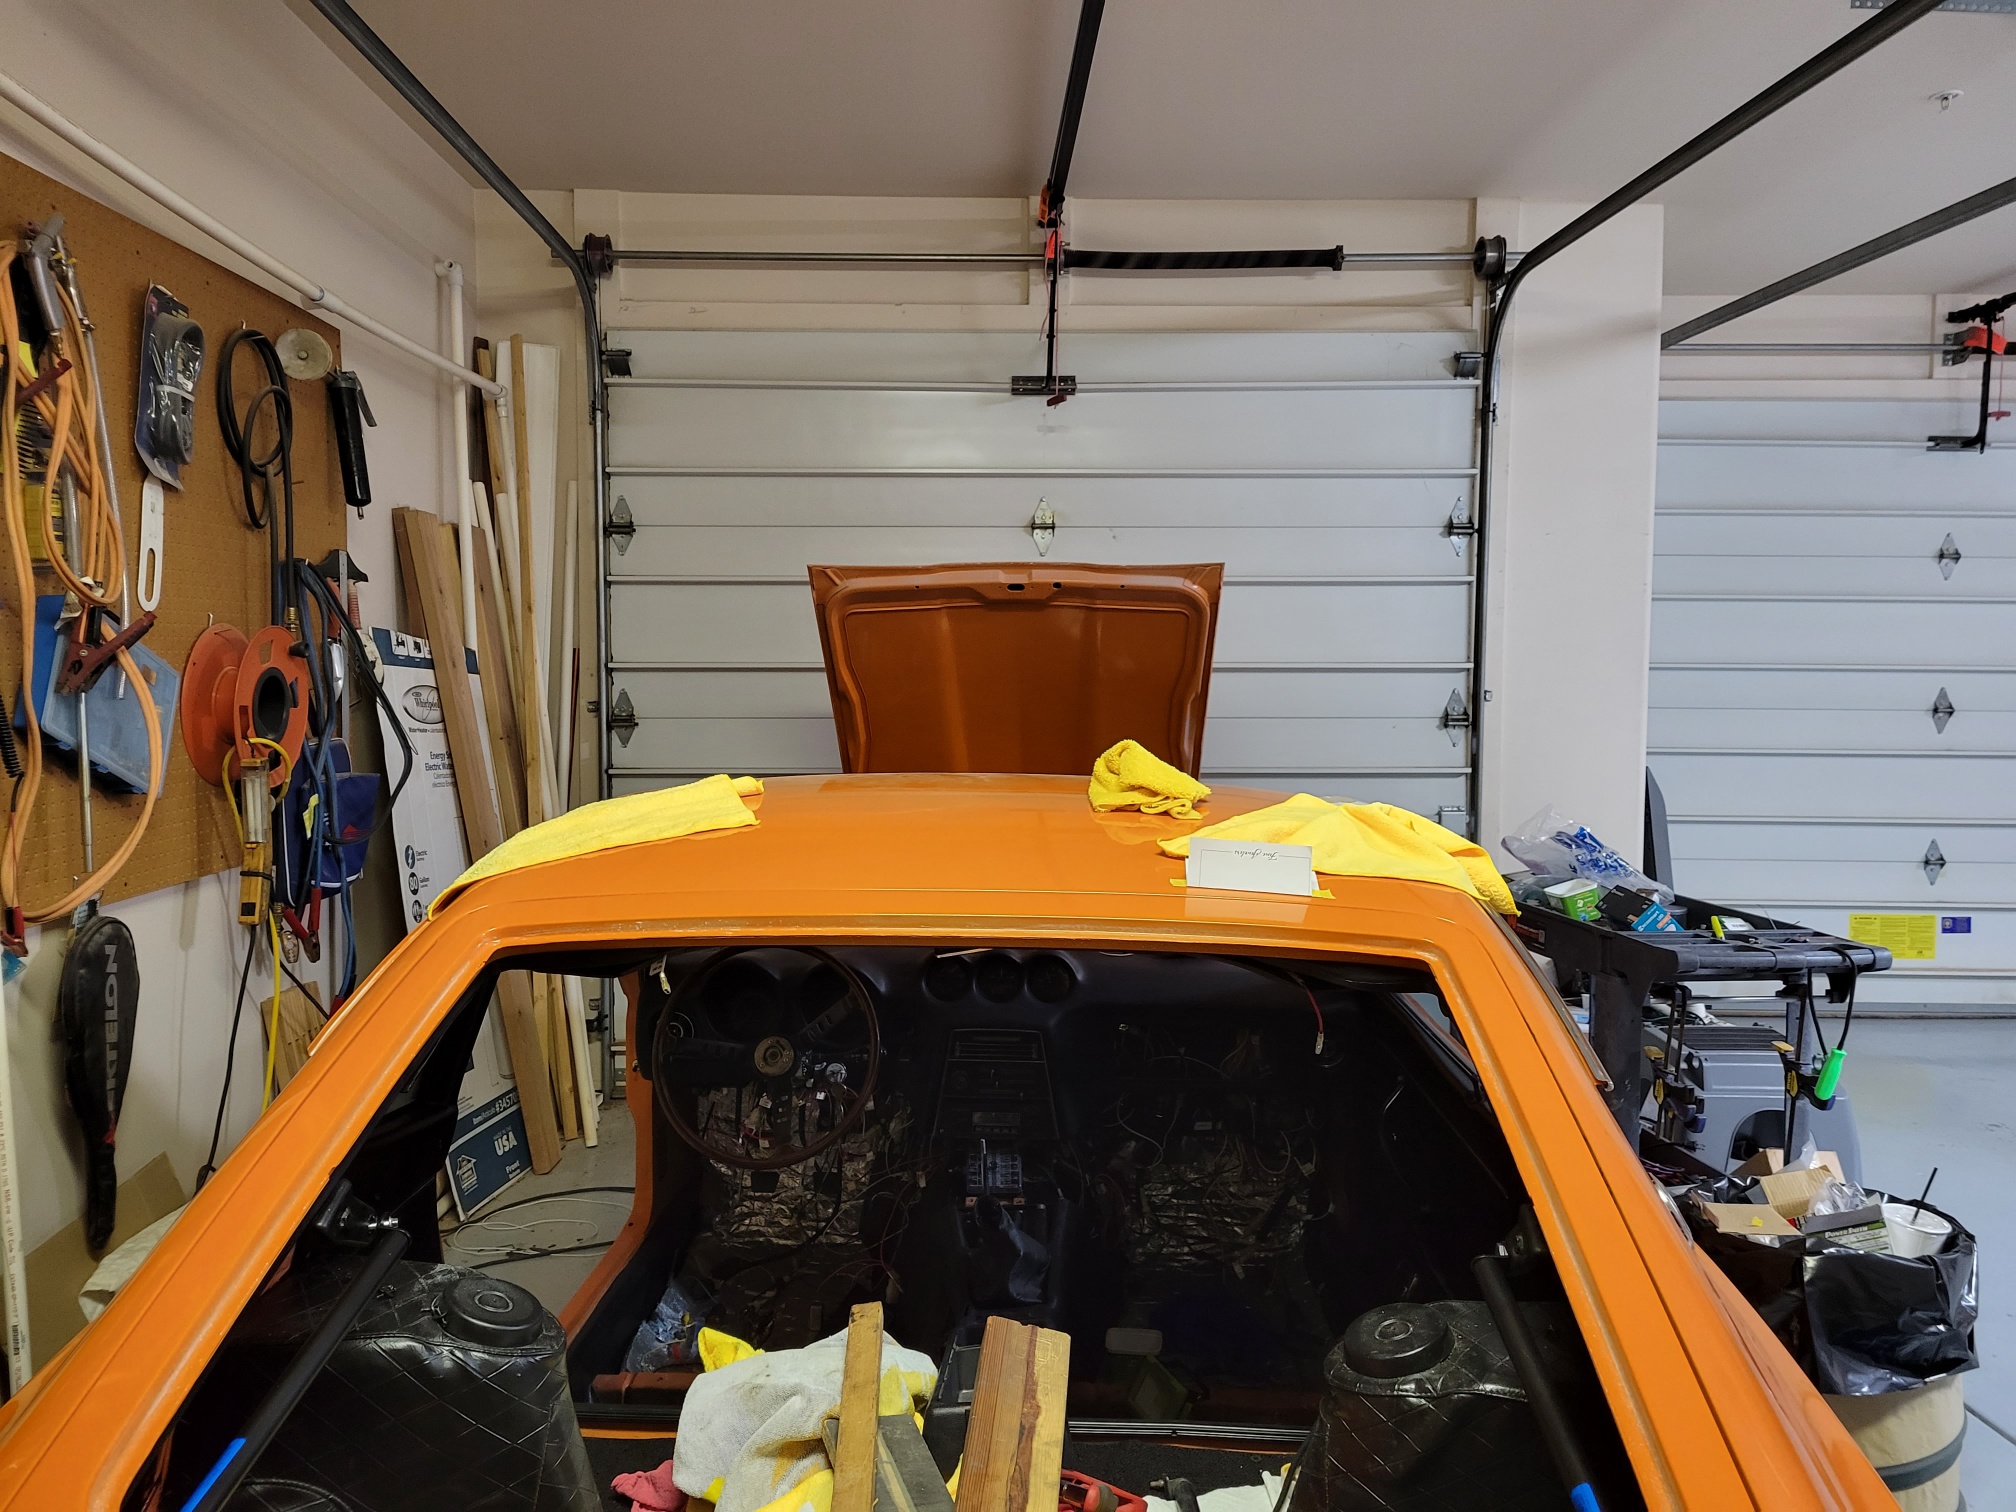
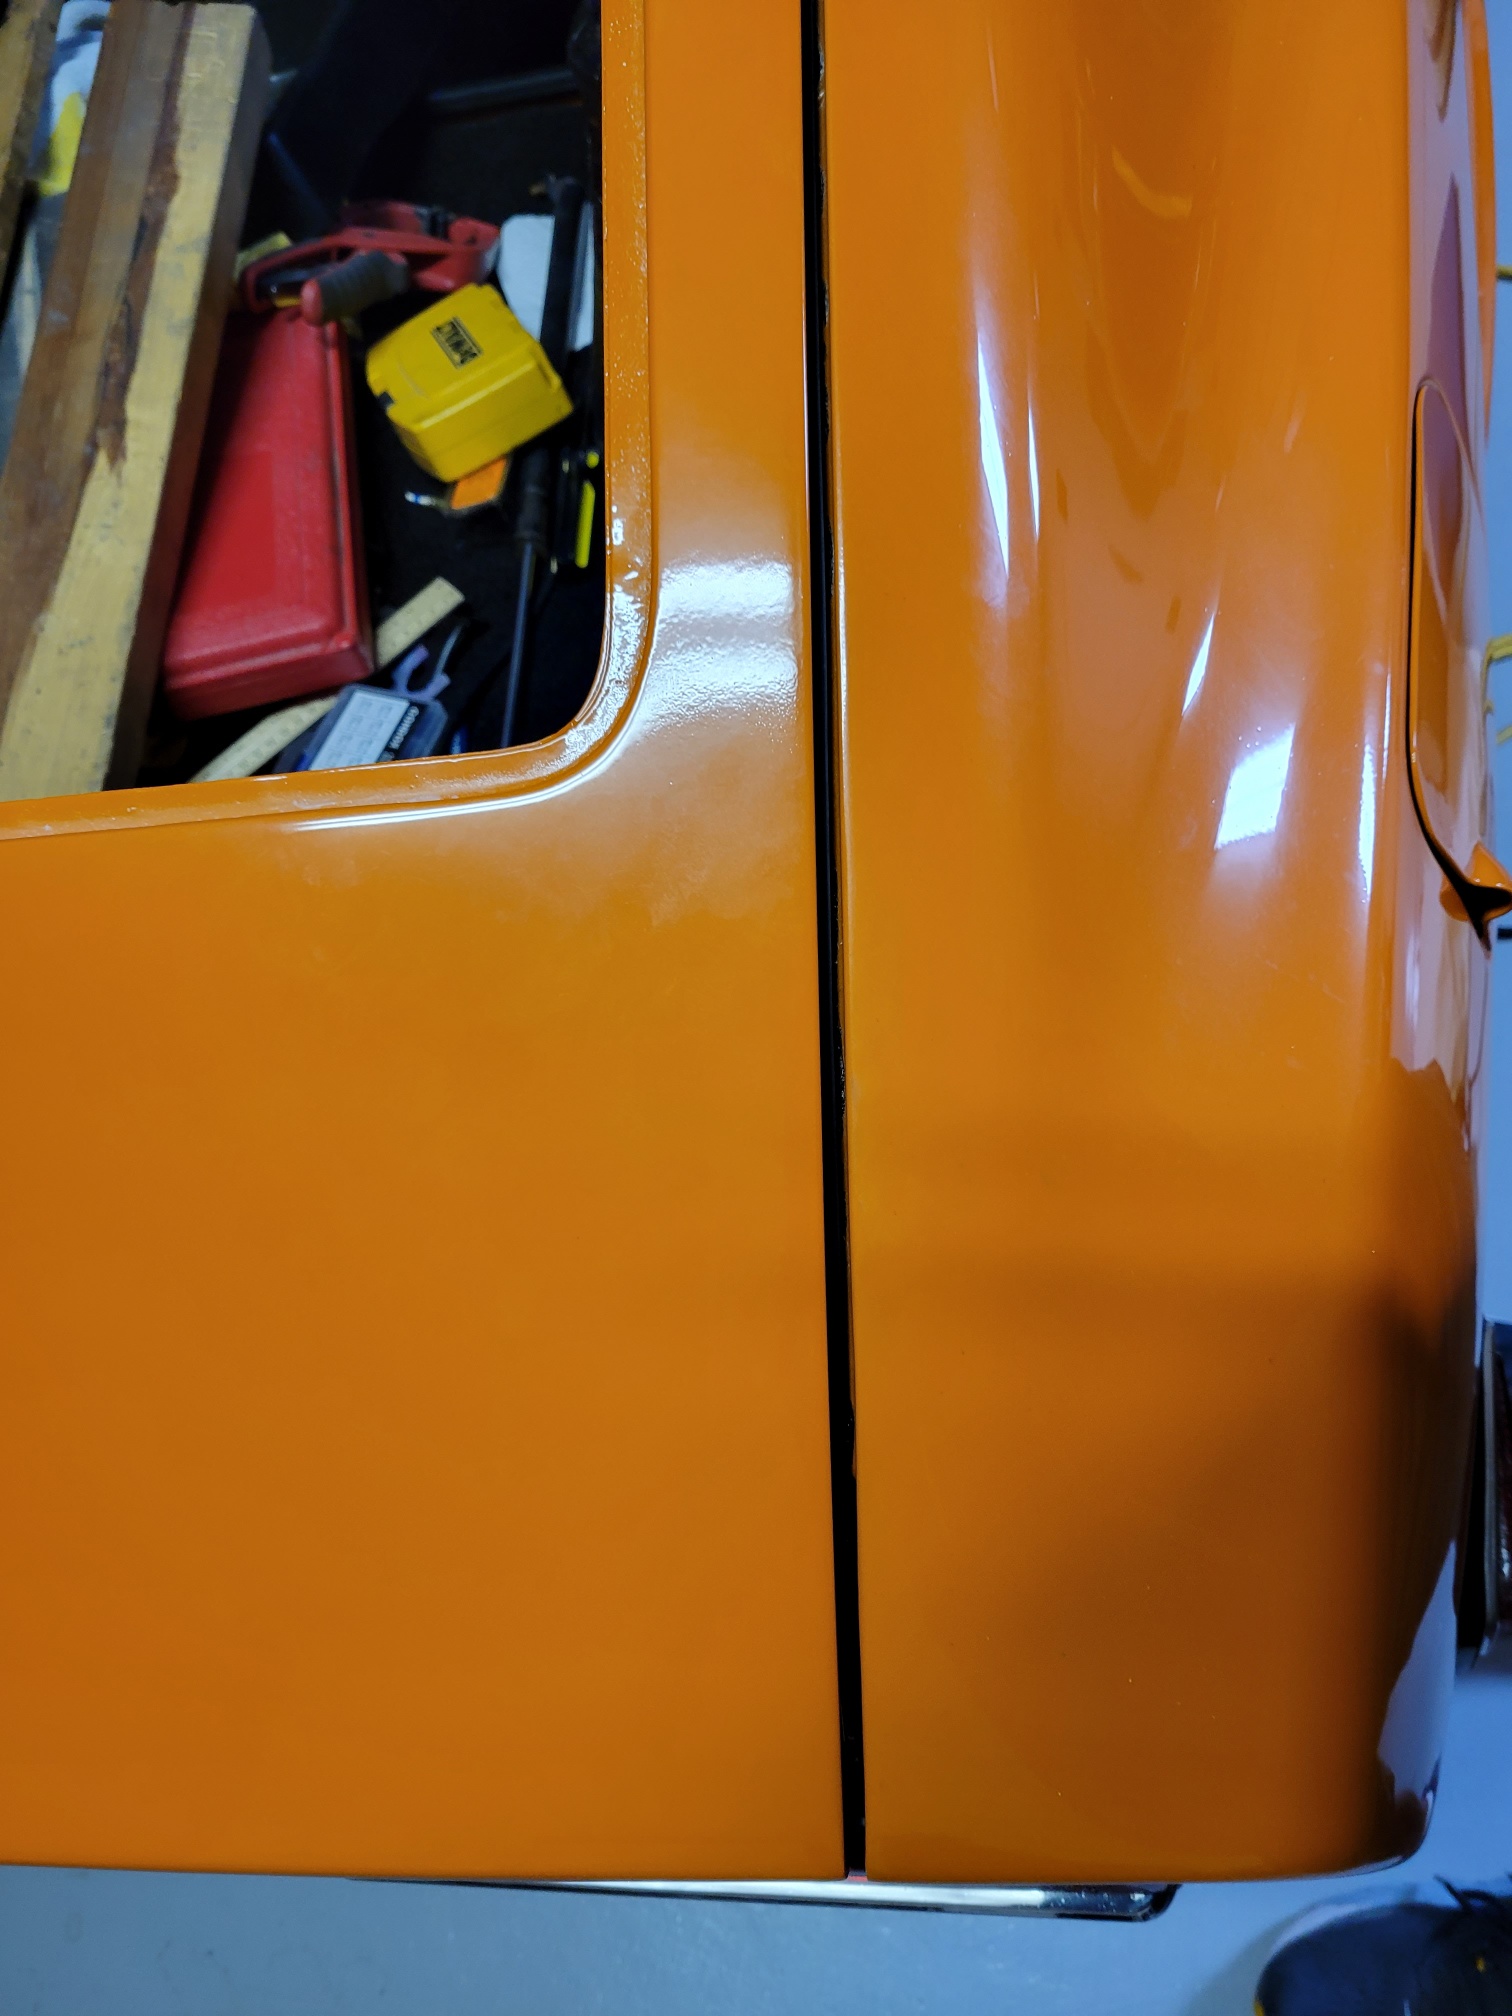
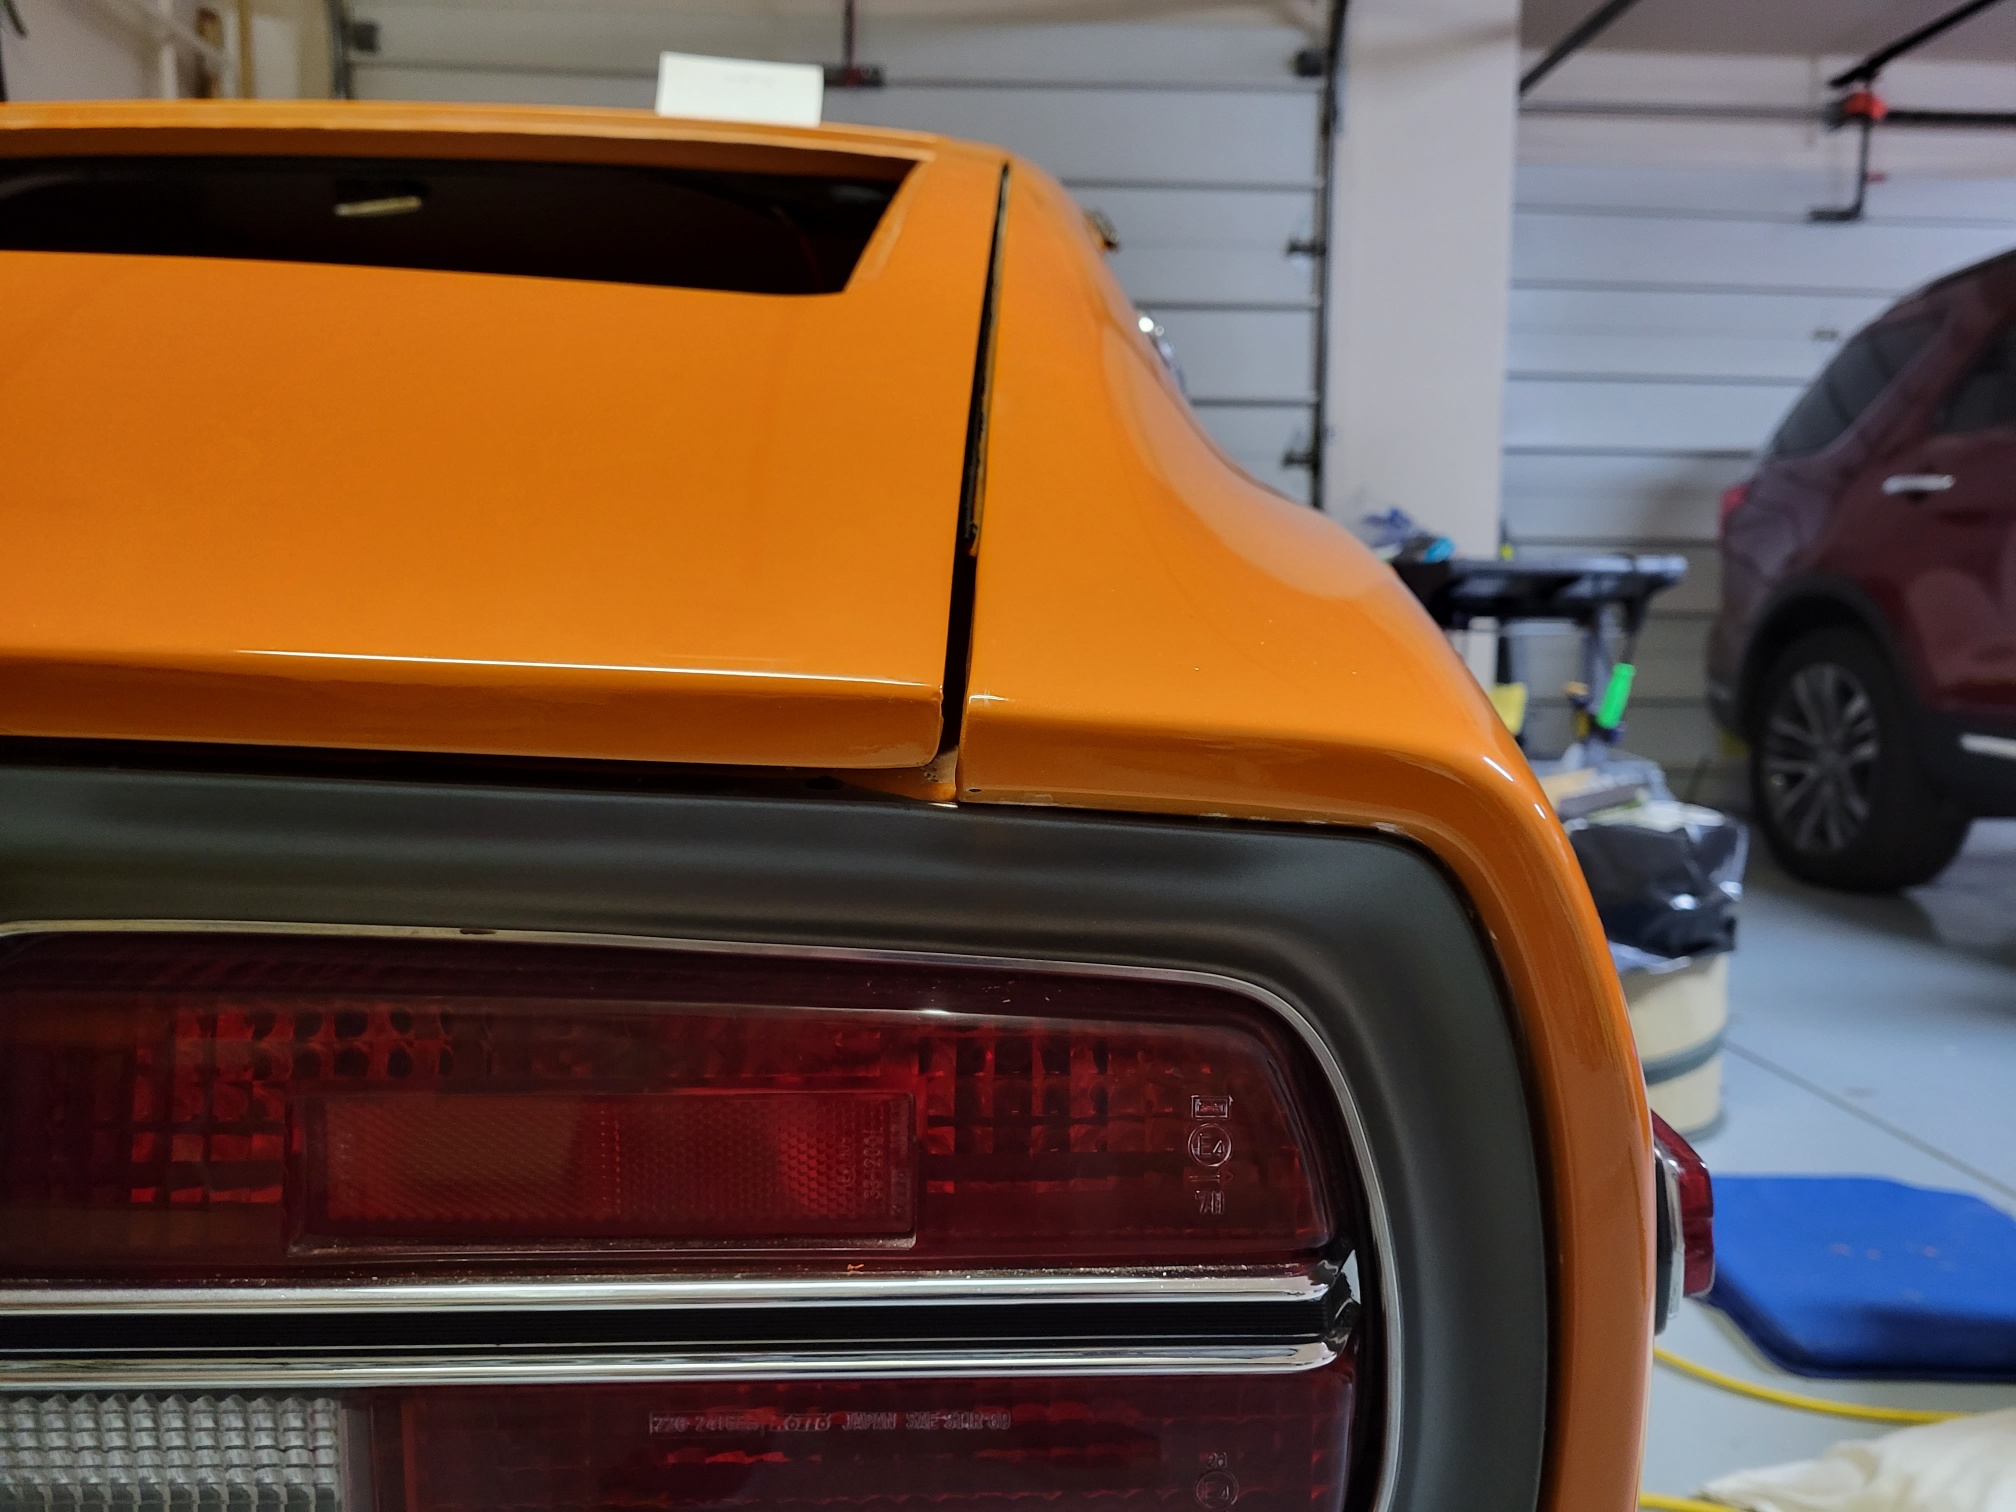
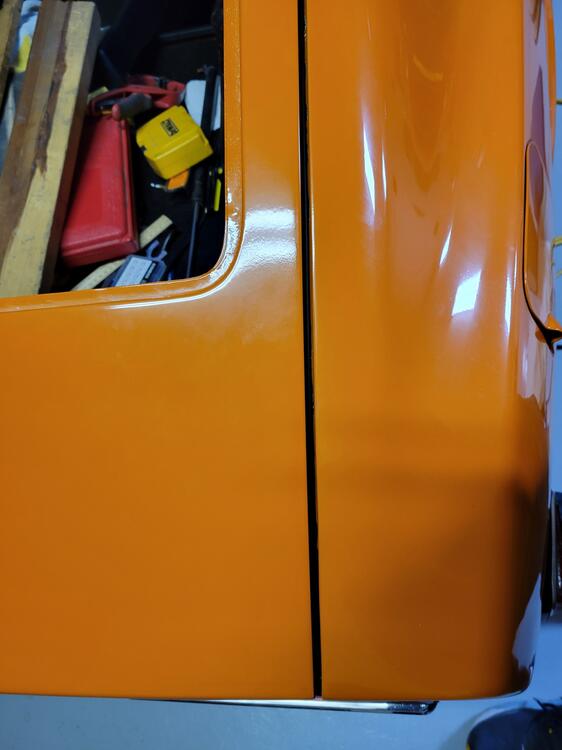
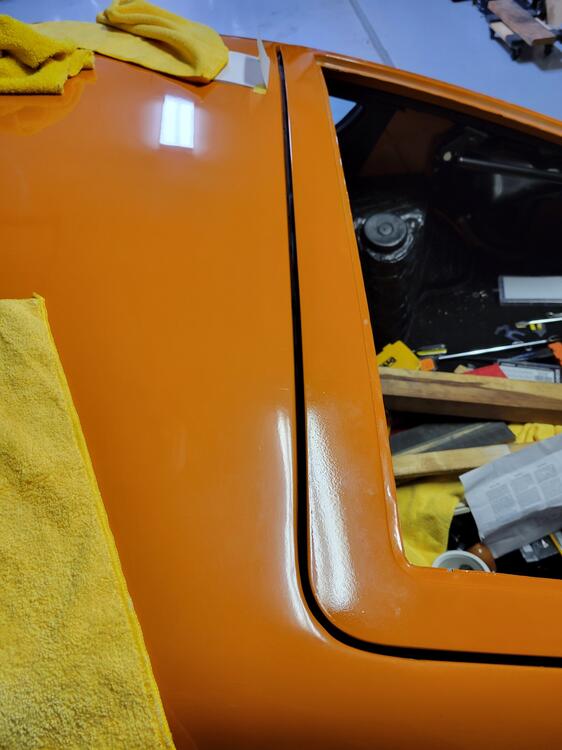
1 pointHatch Alignment Guide I have searched for a process/procedure, or guide to help me align a 240z hatch, but have not been able to find one. It may be out there, but It has eluded me. I am not a professional, just a do-it-yourselfer. I am restoring a 1973 240z. My hatch gave me a bit of trouble and this is the process that I used to achieve reasonable results. This is meant only as a guide, something that hopefully is a bit better than obvious. I think alignment is often considered daunting by some. It really is not rocket science. It takes effort, be patient, be careful, and be realistic. If you could look at a new Z coming off the line in the 70s, I think you would notice that they were great cars, but they were not perfect – for example their gaps were not always uniform. There is a phrase that I was taught on my first job after college – “The enemy of good is better”. There is another thread “Hatch Alignment” that has photos of my hatch, and its gaps. Please feel free to improve or correct any errors - thanks Install and clearance Check Remove the hatch striker to prevent the hatch from locking before it is aligned. Install the appropriate weather stripping. Tape the entire body opening of the hatch to protect it from scratches/chips while fitting the hatch. Install the hinges into the body. This requires two bolts per hinge. Adjust hinges upward toward the roofline. This will help if you have any issues clearing the roofline as you close the hatch for the first time. You might want to mark a line on the hatch body to define the position of the hinge. This occurred to me after I aligned my hatch. A good way to keep track is to make the most current line the longest. Installing the hatch is a two man effort. It requires two short screws per side. The hatch tab holes are beveled so there is no adjustment up/down, left/right. Placing shims between the hatch tab and the hinge move the hatch toward the front of the car closing the gap at the roofline. This is the only adjustment involved with the tab. My glass was removed during deconstruction of the car. The hatch is considerably lighter without it. I found it easier to handle the hatch without the glass. Some people recommend installing the glass before aligning the hatch. Do not install the hatch lift support strut. Do not let the hatch close, keep it propped open. There is only one strut for a 240z. The 260z and 280z had 2 struts, one on each side. Some, including me, believe that the single strut on the left (drivers) side causes the hatch to twist over time. The force of the strut when the hatch is in the open position forces the left side higher than it would be otherwise. I believe that this puts downward pressure on the right (passenger) side of the hatch driving it toward the body opening. Prop open the hatch with a stick. It should be high enough to be well away from the roofline. The hatch should move freely at this point. In addition to the tape I put thin towels along the body opening to protect everything. The next step is better with more than one person, especially if your glass is installed. Slowly start to close the hatch checking to make sure that it clears the roofline and the edges of the body opening. If you have sufficient clearance – congratulations you have passed the first hurdle. The next step is to align the hatch. If you do not have sufficient clearance, don’t panic yet. There are a few relatively easy things that you can do to help with clearance issues. You can add the second strut. This is probably a good idea anyway. Realize that the standard single 240z hatch strut has a force of 88lbs. If you add the second strut to the right side I would strongly recommend that you replace your original 240z hatch strut, with two 260z/280z hatch struts. Each of these is rated at 44 lbs. of force which is the equivalent of the original single strut at 88 lbs. The second thing you can do is to position your hinges to create sufficient clearance. The last thing that I can think of is to remove the hinge and enlarge the hole that the bolts go through to mount the hinge, this will increase the amount of adjustment that you can achieve. Adding a 2nd hatch strut To add the second strut you need a few parts including a body mount for the strut bracket. These body mounts were spot welded and they have a few bends that put them close to the quarter panel skin. The body mount bracket is not left/right side dependent. Most of the early S-30s that I have seen have broken spot welds. This could be due to the 88 lb. strut, or it could be due to the uneven forces applied from the hatch when closing and opening the hatch. Y You will also need the mounting bracket for the strut. This bracket comes in left/right versions. It screws into the strut body mount, and the strut is bolted to the bracket. The next piece to the puzzle is the strut itself. It is not right/left side dependent. Order a 260z/280z strut as it has half the force of the 240z strut. Make sure the mounting matches your hardware. I have seen these with either ball mounts, or shoulder bolts. The last piece is the bracket that is attached to the hatch and is the mounting place for the other end of the strut. This bracket is available from zcardepot. This bracket comes in a left/right configuration. I was not able to find new versions of the other brackets for sale commercially, which means you will have to get them from either a 240z/260z/280z. It is easy to remove them from a car with an air hammer or a hammer and chisel, without damaging the quarter panel skin of the donor. Adding the 2nd strut may help with clearance issues on the right side of the car. The location of the brackets is the mirror image of the left side. Since you can’t easily spot weld the body mount you can drill two holes and mount the bracket with screws through the channel of the body opening. Caulk these when done. If you need more specific assistance to install the 2nd strut I believe that there are directions either on this forum or on the internet. Hinge Positioning Positioning a hinge is not difficult. The hinge can be moved left and right as well up or down, within limits. There are two limiting factors. The first is that the captured nut in the body has a range of adjustment. The second is the size of the hole that the hinge bolt goes through. You should remove the hatch tab screws that hold the hatch tab to the hinge. After removing the screws you will need to prop the hatch on the right side so it does not collide with the roofline. NEVER remove the screws from both hatch tabs at the same time. The 88lbs of force in the strut/s can get the hatch out of control in a hurry. At one point I thought my hinge was adjusted as high up as possible, but it wasn’t. It actually was being restrained from going as high as it could by the rubber gasket that the hinge fits into. Enlargement of the hole in the hinge I was nervous about this alteration, but it is an option. I needed this alternative. Prop the hatch and remove the hinge from the car. Put it in a vice. With a small flat file or a small round file you can open up the hole the bolts go through. Figure out where you need the extra space and only open the area needed. Realize when you do this you will need a larger split washer and a larger flat washer. You do not want to remove too much material as this could weaken the hinge mount. Hatch Alignment I was told that if you separate everything, the hinges from the body and the hatch from the hinges that you turn a difficult task into a very difficult task. I wanted the best possible restoration that I could muster. Old hinges on doors, hatches, etc. usually have issues and I was concerned about rust issues in the hinge wells. Anyway, without realizing that I was making the problem more difficult I separated everything in order to refinish and substitute new parts. I also don’t know how you can inspect the hatch tabs without removing them from the hinge. If I had it to do over again I would mark the position of the hinges before working on the body. They ae left and right oriented and stamped with an L/R. If I was not going to do bodywork in the area behind the hinge then I would not remove them at all. If I were going to replace the hinge because it was weak or bent, but I was not going to need to do body work behind the hinge then I would wait until installing the hatch and replace one side at a time, after the hatch was installed. Bottomline: Even though I separated everything I was able to do a fairly good job of aligning my hatch. I do not believe that aligning a hatch is a very difficult job. Installing the hatch is definitely a 2 man job, especially if your glass has not been removed, but alignment can be done without help. Having said that 4 hands are better than two. The process is an iterative one. Make one change at a time and check your results. Protect your car with tape and towels. I will assume that you have achieved adequate roofline clearance, and that after every adjustment you check to see that you still have the clearance that you need. If you lose the clearance consider backing out the last change and see if there isn’t another way to achieve the alignment that you want. First step for me was to see if the hatch fit within its opening squarely. Another way to put this is to check if your right side gap (the space between the hatch edge and the body opening edge) is the same near the top of the hatch as it is at the bottom. If the gap is not uniform check the left side. If the left side has the opposite issue then you have an alignment issue. If it isn’t then you might have a more serious issue like the hatch or the body opening not being square. If one or the other is not square then you will not be able to get uniform gaps without doing body work. If you do not opt for bodywork then you may still be able to align the hatch to achieve the best possible result given the body issues. Assuming the hatch and the body opening are reasonably close to being square. Check the right side gap top and bottom. If it isn’t the same then you need to make a decision as to whether the top gap or the bottom gap is closer to the desired gap. If either the top or the bottom is too close to the body edge then this will be the point that you will want to affect. For example say the gap at the bottom of the right corner is too close to the body edge you have a few choices: i. you could move the left top side of the hatch closer to the roofline or ii. you could move the right top side away from the roofline. My preference is usually to avoid any action that decreases roofline clearance if possible. So I would put a shims behind the right side hinge under both bolts. This pushes the hatch top right edge toward the back of the car and the top left corner toward the front. I think it is best to loosen both sides of the hinge before inserting a shim under either bolt. I found it easier not to completely remove the bolt. Tighten both bolts a couple of turns at a time, until both are sufficiently tight. Check the right bottom corner if the gap is larger then we are moving in the right direction. Check the right side top and bottom gap. If they are more uniform then the adjustment was successful. I would check the left side gap top and bottom. If the gap is not uniform then you need to make an adjustment. Shims installed on the opposite side will move the side you are working on closer to the body at the lower corner. To affect the top corner of the side that you are working on shim the hinge on that side. When you have gotten the side gaps top and bottom sufficiently close to your liking you can move on to the next step. With the side gaps uniform top to bottom you will want to compare the left side gap to the right side gap. I am exaggerating to make a point, lets say the right side gap is 1 inch (at the top and the bottom) and the left side gap is .5 inch (top and bottom). It would be ideal to make both the left and right side gaps equal at .75 inches. You need to move the entire hatch (top and bottom) toward the gap that is larger (right side). To do this you will need to loosen both hinges. I was working alone so: i. I removed the hatch tab screws from the right side, and propped the hatch up with a stick. ii. Next I loosened the hinge bolts on the right side. This allowed me to move the right side hinge to the right, because it was not held in place by the hatch on the right side. You typically will not need to move the hinge very much. You can check that it has moved by lowering the hatch as if you were going to put the screws through the hatch tab. If the holes line up you have not moved the hinge, if the hinge is to the right by a small amount compared to the hatch tab hole then you have moved the hinge and you should tighten the hinge bolts. Make certain that you have not disrupted your previous changes to the hinge position or you will disrupt the progress made earlier on the side gaps. iii. Carefully, loosen but do not remove the left side hinge bolt (the left side hatch tab screws should still be tight at this time. Pull the hatch from the right side and push the left side hinge to the right. It will probably need some persuasion. My advice is not to hammer or rubber mallet the hatch. I did smack the hinge in order to move it. It is difficult because the hatch is still attached to it, and it would be best to have a second person to push the hatch top and bottom while you pull the hatch from the left side. Remember you do not need a lot of movement, and you don’t want to overdue it and have to reverse the adjustment. Keep checking the right side tab holes – when they line up with the right side hinge you have affected an adjustment to the right. Re-install the right side hatch tab screws and tighten the left side hinge bolts. Check your work and repeat as necessary. Remember the hinges have vertical adjustment and horizontal adjustment within limits. If you need more then they can provide then you will need to remove the hinges one at a time and enlarge the hinge holes to get additional movement. You will probably need to do this on both sides. Remember I said that hatch alignment was not that difficult, but it is work and it can be frustrating. Take your time, take breaks, if I can do it so can you. Now with the gaps uniform top to bottom on both sides and with the gaps relatively equal on both sides check the bottom corner of the hatch to see how it aligns with the edge of the quarter panel. If the body lines line up you can move on if not you can cause them to line up by adding shims behind the hinges on one or both sides – this drives the hatch toward the back of the car. If you need to move the hatch away from the back of the car you can accomplish this by adding a shim between the hatch tab and the hinge. I found it helpful to use double sided tape to hold the shims in place for the tab adjustment. Place the tape on the shim and stick it to the hatch tab then move the hinge up to cover the shim and insert the hatch tab screw. The last thing is to check the height of the hatch at the roofline. Adjust the hinges up or down. The best way to adjust the hinges is always to loosen both sides. Again, a friend comes in handy anytime you need to move both sides of the hatch at the same time. Hope this helps to make the job easier.1 point
-
1 pointIt looks like both of the bolts that attaches the housing to the head are broken in the pic. There is usually a lot of corrosion in those bolt holes in the housing and that front one is long. Maybe PB Blaster, some tapping, heat, and later some gentle prying repeated multiple times may free it up so you can slide the housing off and then get the bolts out. Sent from my iPhone using Tapatalk1 point
-
1 pointMaybe someone found the tracker and stuck it on one of your cars I think like many things, trackers are a get what you pay for item As for the 44 mag, I live in a very law enforcement minded community but lethal force in a theft situation is gonna get you in some serious trouble.1 point
-
1 pointOk this is a good question. That is part of a metal strip that goes Around the outside edges of the oil pan this was to prevent dimpling of the oil pan and gasket distortion by evening pressure of the bolts. The little metal piece on the side is where the exhaust runs so it is basically a small heat shield.1 point
-
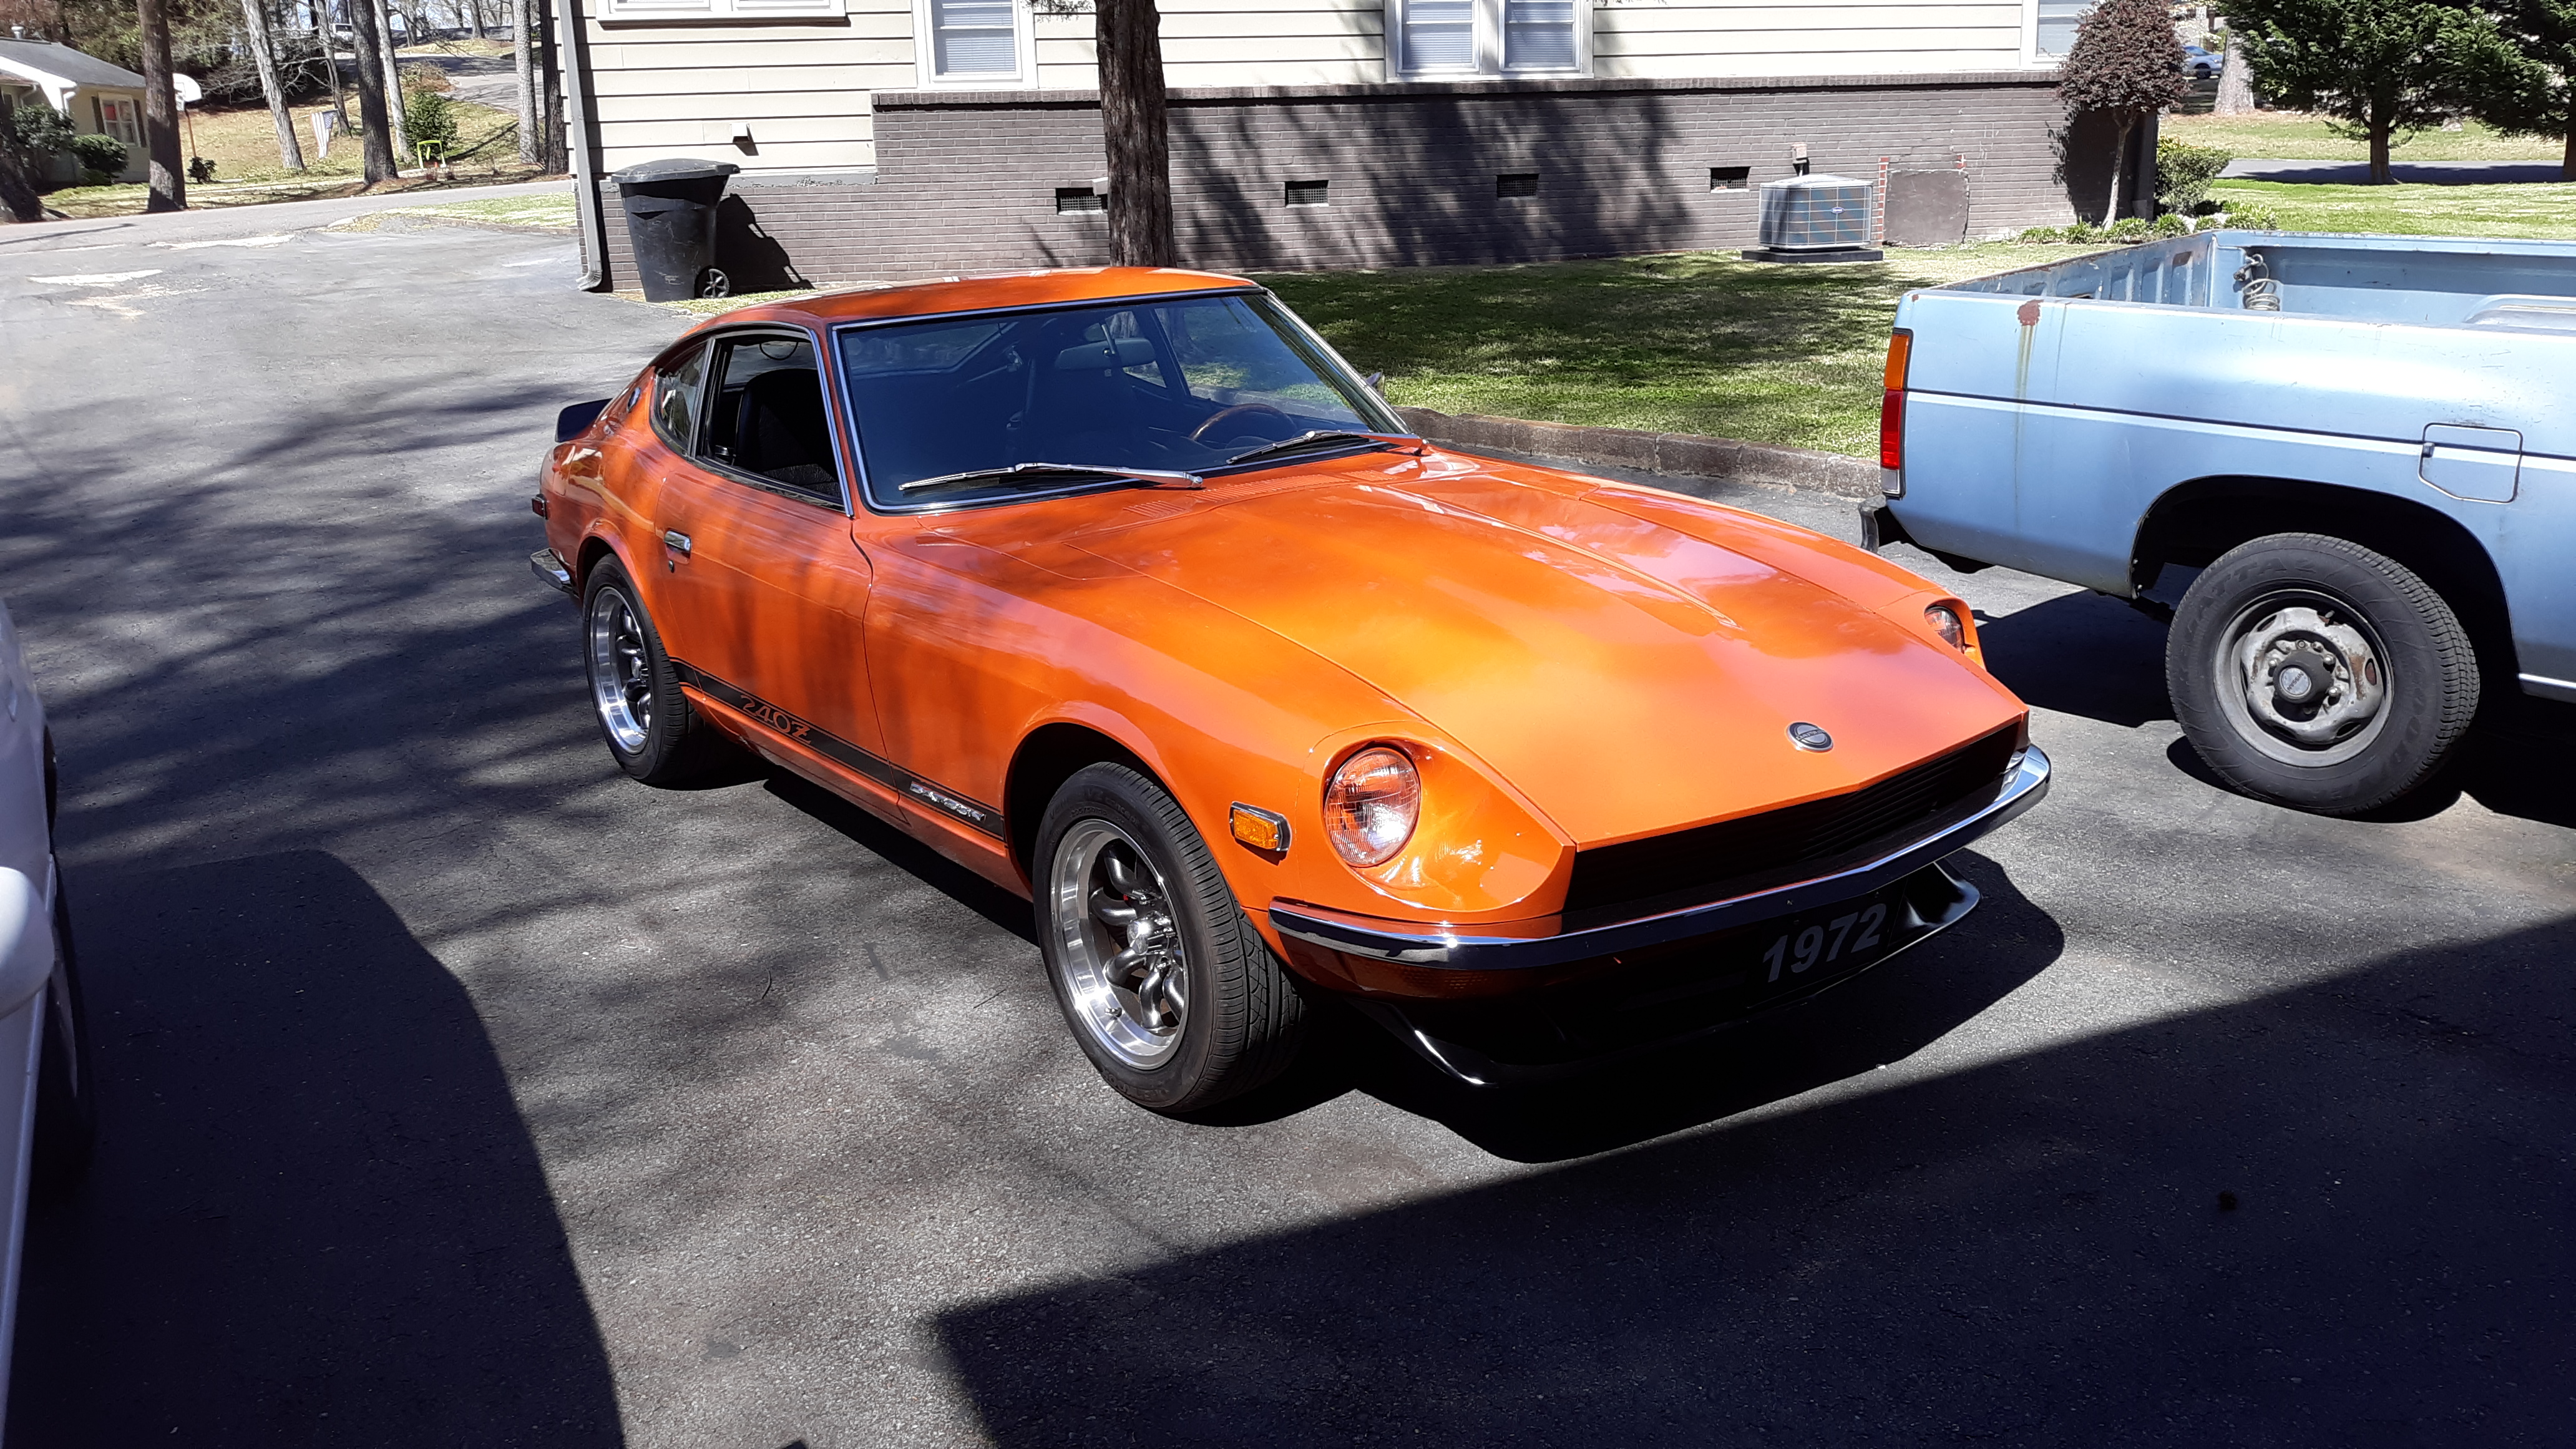
In addition to what @grannyknotsaid, you are in an area renown for rusted cars, and you don't have any photos of underneath the car or of other rust-prone areas. Grannyknot hits on the biggest issue. The 2+2 just isn't that popular. You have to be lucky enough to post an ad when one of the few people who wants a 2+2 is looking.1 point
-
The good news is my friend has decided to use his SUs for all the reasons mentioned until the initial running in period is complete. Thanks all for the advice and an interesting discussion - so far ;)1 point
-
1 pointI prefer Lojack and a 44 mag. It removes the source of the problem. Someone here mentioned security hardware. Are you talking about the nuts that attach the steering column to the brace? I still think notification and a 44 is the way to go. I live in a county that promotes it.1 point
-
Well the reason you have not had any inquiries about your car is that most if not all members here already have a Z and aren't looking for a 2nd, sort of preaching to the choir. Also a 2+2 is a harder to sell because they weren't that popular back in the day and still don't have a large following. The usual places to sell your car are craigslist, ebay, Hemmings, Bring a Trailer, and Auto Trader.1 point
-
Speed density systems eliminate the need for MAF. Carbs require taking into account the TAL factor where ported EFI does not need to deal with this . Less parts to go wrong with EFI . Temp compensation is automatic . I would break the motor in with the simplest method possible - SU’s1 point
-
I've heard that carbs can get better atomisation than injection. certainly the airflow through the venturi isn't the same as on ITBs. perhaps helps to vapourise the fuel. anyway, ultimately if they both deliver the same amount of air and fuel as each other, then they will produce similar power, all other things being equal.1 point
-
My understanding of ITB's is there is only a butterfly at each bore the same way a DCOE would be. There is a map sensor and a throttle position sensor. Using those inputs as well as rpm a fuel map determines fueling. No MAF used. I agree that fuel injection was developed for better economy and broad range drive-ability. I also believe that all out power is better produced with fuel injection. Atomisation is much better at 40-50 psi than 3-4 psi. It would be interesting to see some dyno work using the same engine from carb to FI Somebody like Eiji probably already has this info as he sells the Jenvey ITB's1 point
-
1 pointUnless one is an engineer, with very specific experience in the topic at hand, I've always advised against deviating from their guidelines - unfortunately, almost always presented in the form of poorly written installation instructions. For example, my all-time favorite is "Tighten securely". How many times I have argued with the marketing whizzes that such a statement means virtually nothing to one with no experience. Another good one is one that warns against doing something and offers nothing about why. TATFAW.1 point
-
Not only that but I can set up a fuel table to fuel at different levels across a myriad of throttle positions and refine that fueling based on O2 feedback. Fire right up when cold and idle perfectly without any choke. Anecdotally, I would think if carbs were superior then somebody, anybody would still be installing them on new cars... Now, don't get me wrong, I like carbs. I have SU's and may run some triple webers, but if I get an opportunity to got ITB's, I will and not look back1 point
-
1 pointMy Dad got me started using rubber tubes that were yellow and blue. I think they were Good/year but he always said they were what the nascar guys used because of the high heat. My Dad who was no pit crew member said they just tightened them down until the crush washer seated down and was tight. I can't find a pic now... Found something similar.
 1 point
 -
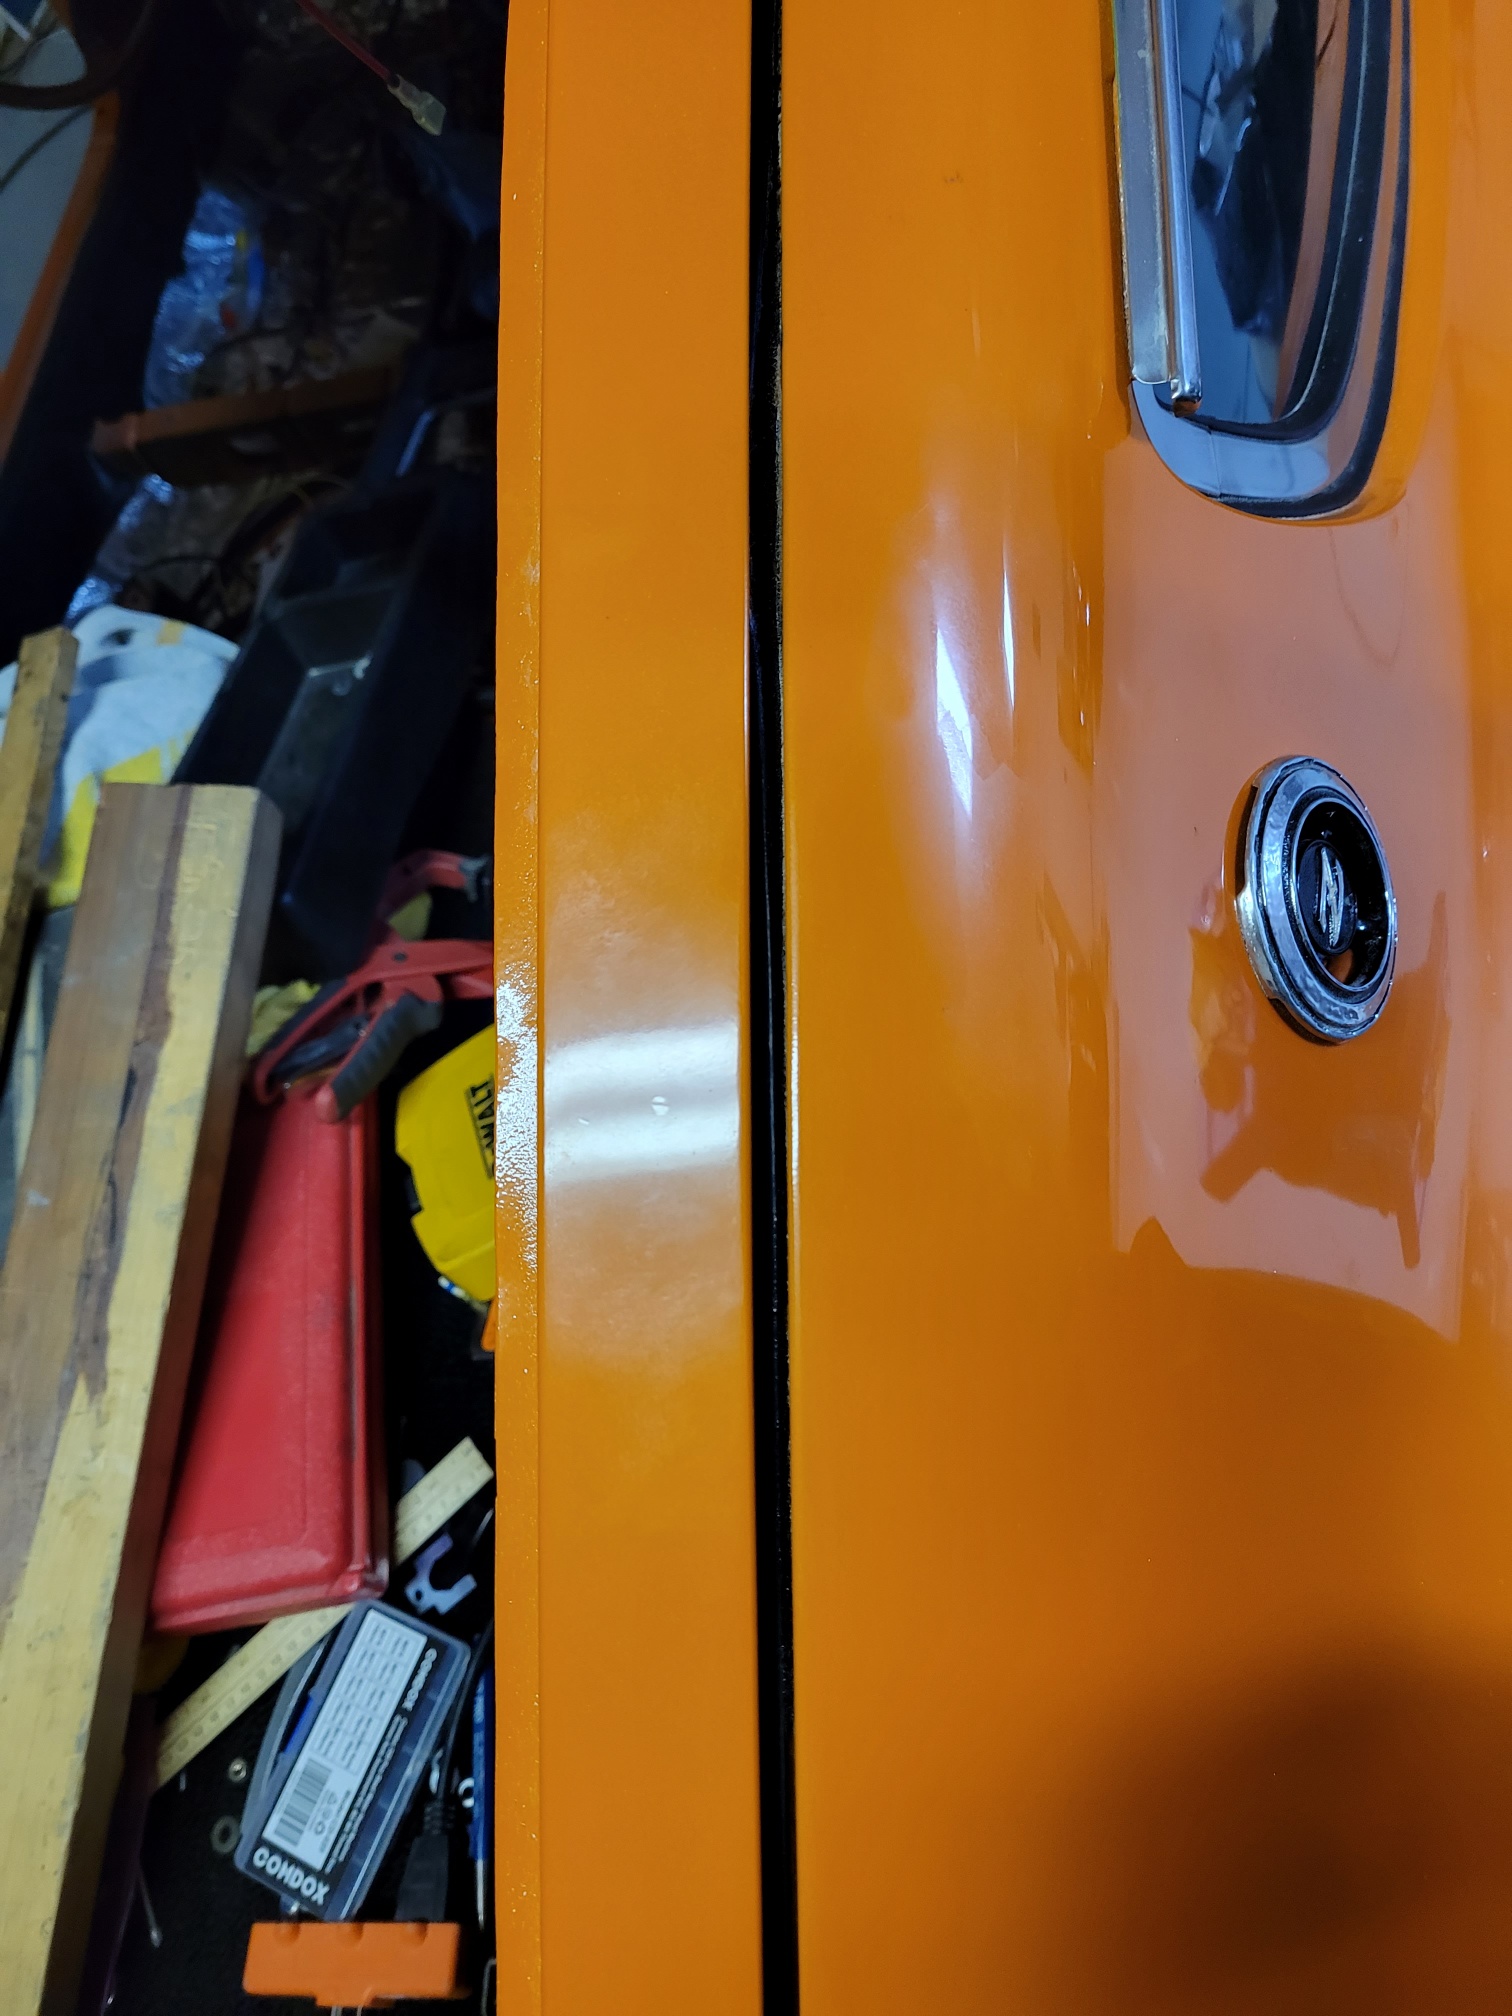
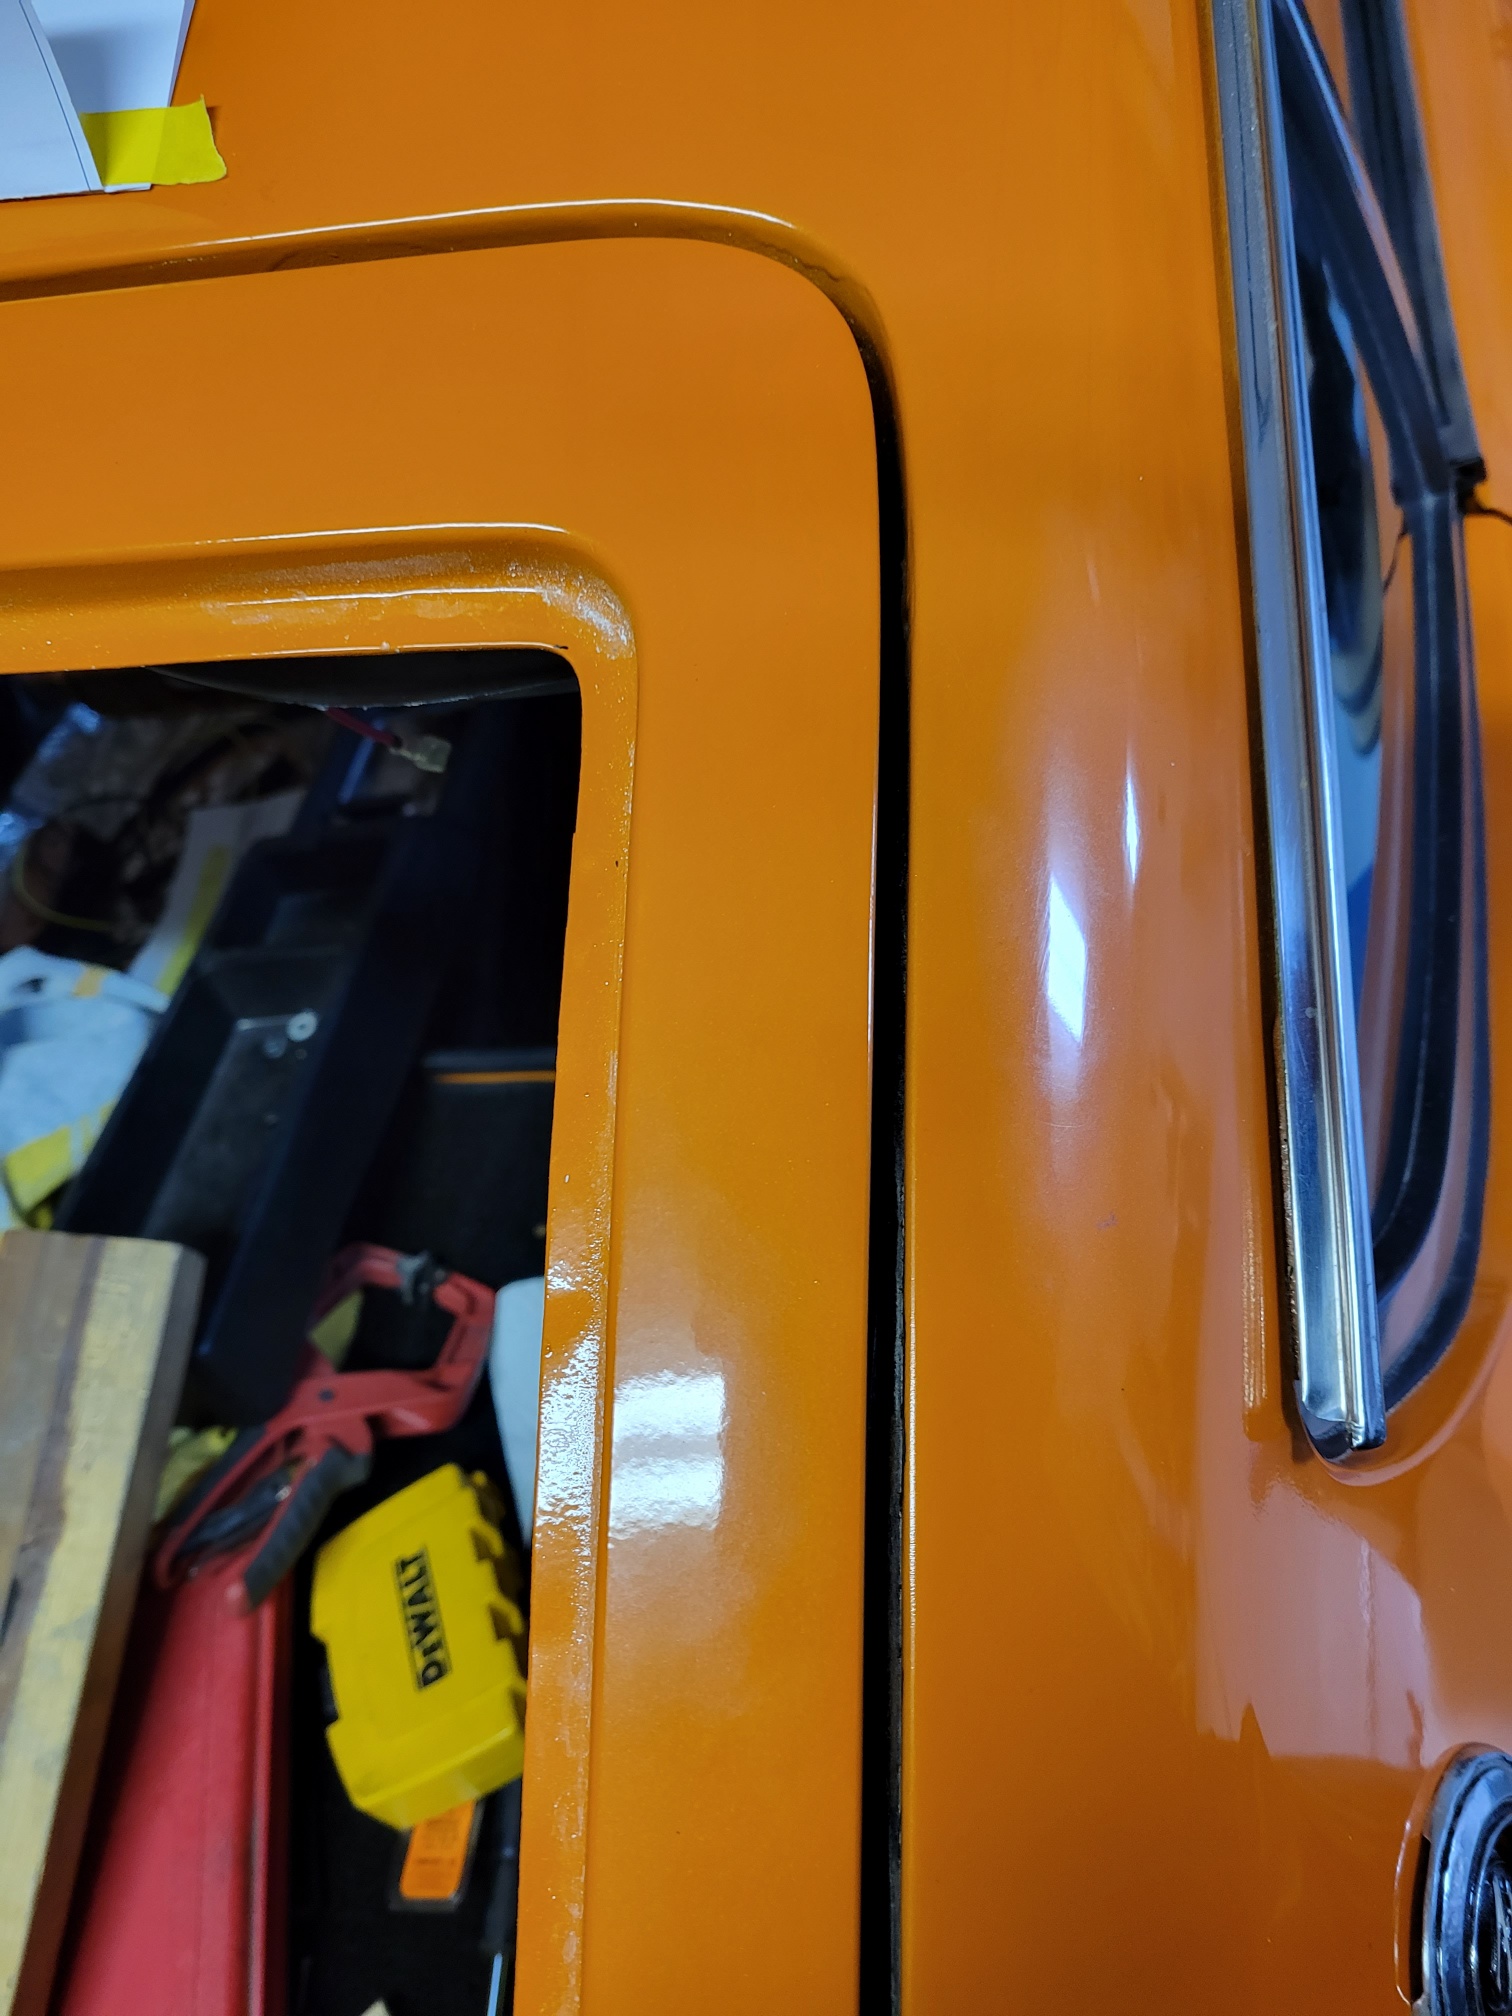
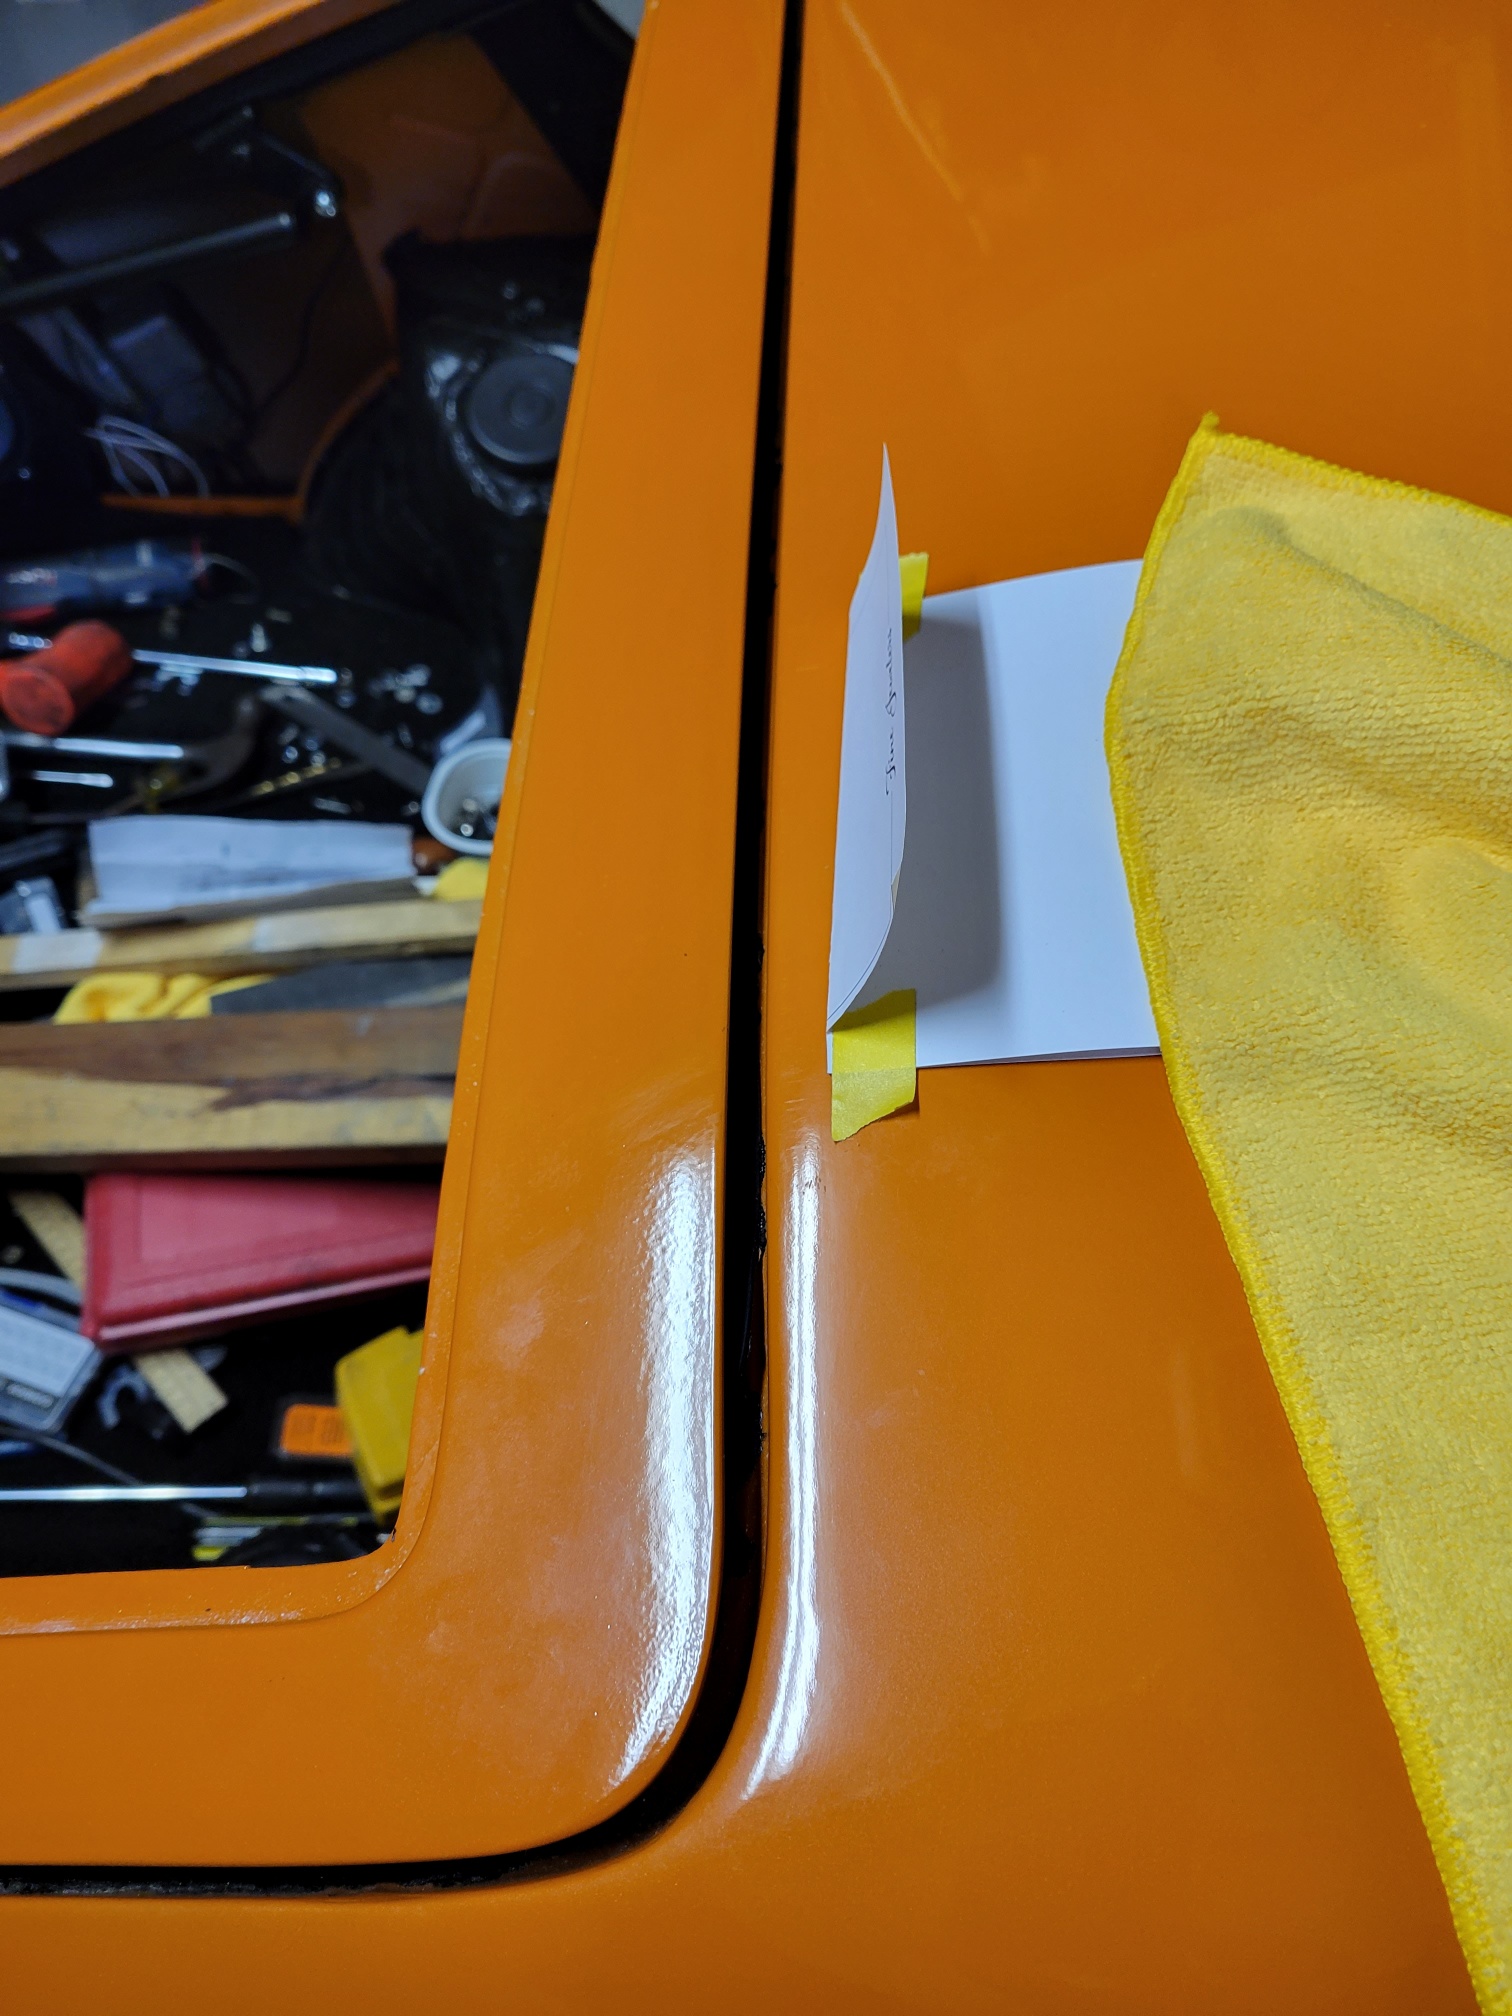
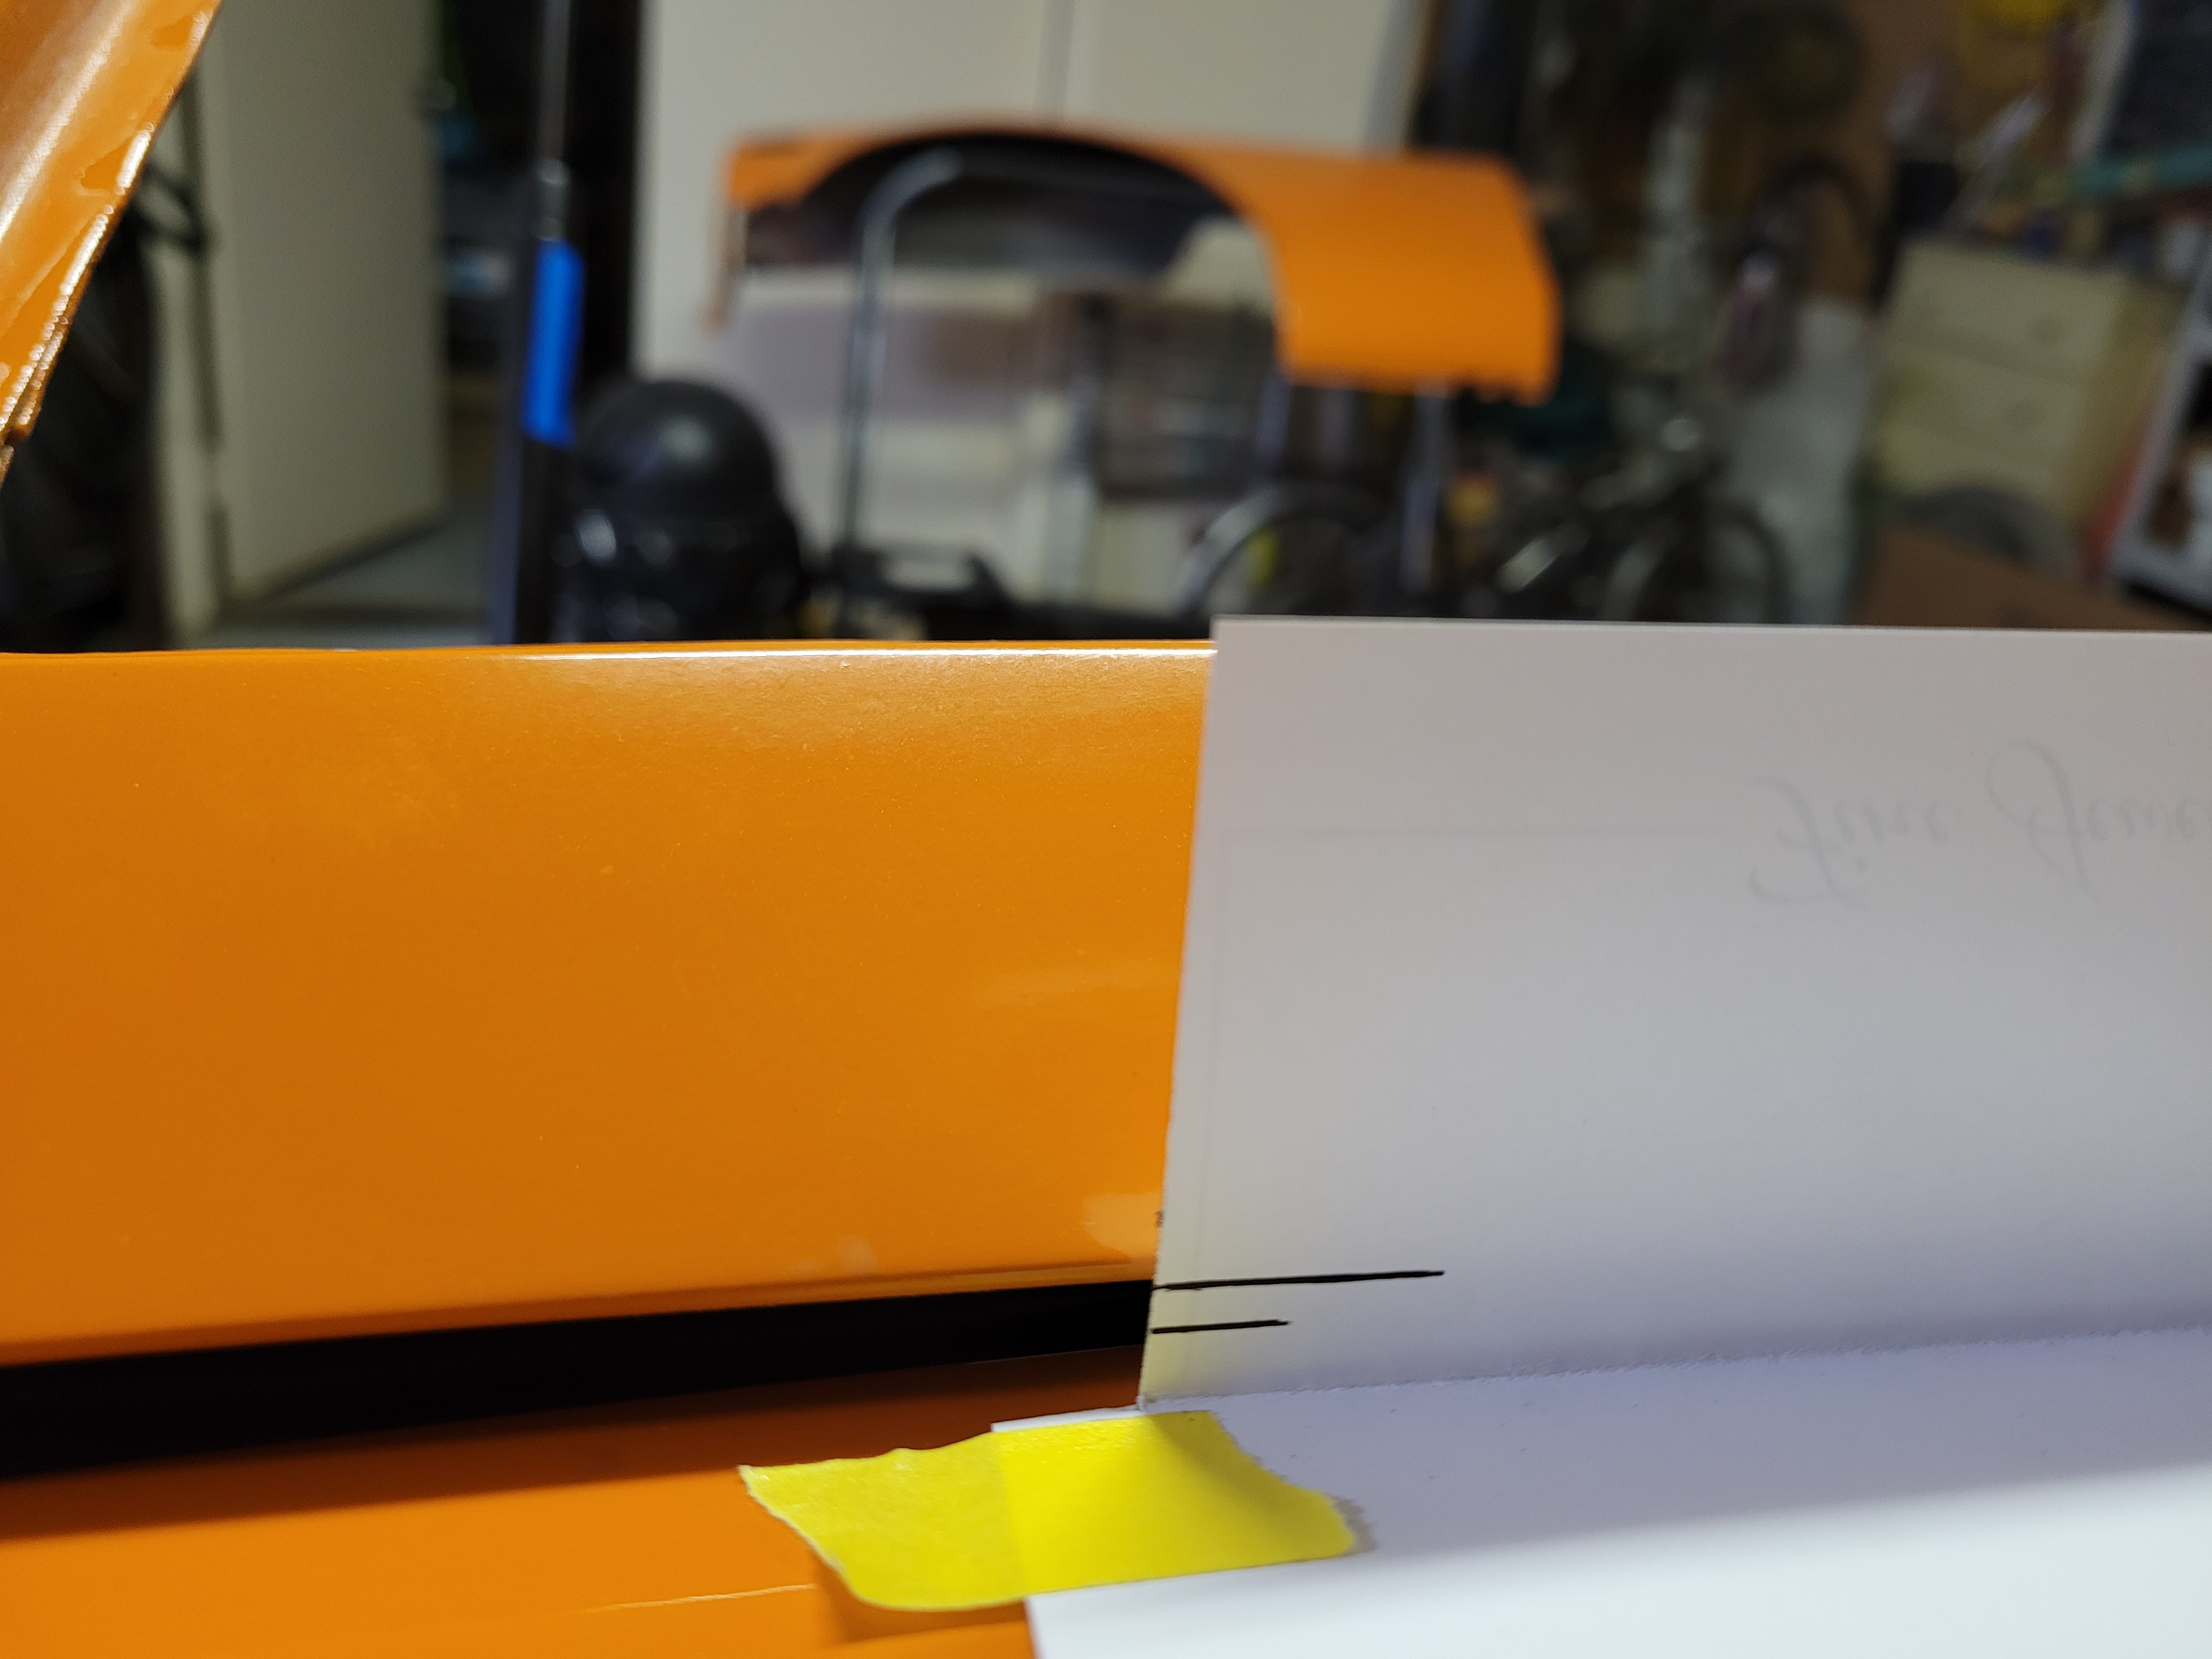
1 point2nd Strut It took a while to get the parts for the 2nd strut . I did not realize that the body mount was spot welded and the strut bracket was screwed to it. CS was able to source the body mount – thank you. Installation of the 2nd strut confirmed that the strut forces the hatch vertically upward, and provided the extra clearance that was required to protect the body. The image below shows the 2nd strut loosely installed. vertical rise hatch corner Earlier in this post I had a similar picture. In it I had lifted the hatch right corner by hand to show the maximum vertical rise that I thought would be possible. I did not move the paper with the lines on it. This latest image below, shows where the hatch right corner sits in its open resting position with the 2nd strut installed. Patcon - I was wrong about there being vertical movement in the hatch hinge. My comment made it seem as if there was slop in the hinge. My hinges are new, and they have little to no slop in the hinge. As you know, on a 240z there was originally only one strut to help raise the hatch. As you press upon the bottom of the hatch to close it you begin to overcome the 88 lbs. of force of the strut. As you push down on the bottom of the hatch; the top of the hatch, at the roofline reacts, in the opposite direction. The left side has nowhere to move as the strut is already forcing the hatch up, the length of the strut being the limiting factor. The harder you push the hatch to close it the higher the force becomes at the top of the hatch on the right side. This force causes the right side of the hatch to appear to rise, but it is actually causing the hinge to rotate on its hinge pin and in fact it creates vertical movement at the right corner. Eventually I think you create enough downward force on the bottom of the hatch to overwhelm the left side strut and the hatch rotates downward to the closed position. For whatever reason I need a little more clearance (probably earlier in the cycle) to clear the roofline. Putting the 2nd strut in on the right side seems to provide that extra lift. Below are the results after installation of the 2nd strut and aligning the hatch. Left Top Corner Right Top corner Right Middle Gap Left Middle Gap Right Bottom Corner Left Bottom Corner Hatch Top Left Gap Hatch Top Right Gap Hatch Roofline Hatch Lip Corners I am not satisfied with my work on the quarter edge corner or the hatch edge corners. I guess it just got past me at the time. I'll do better next time. As far as the the body line not matching. I think I will be able to address this with a striker adjustment and hopefully some help from installation of the glass compressing the new weather stripping.


 1 point
 -
Another low mile 280Z. Seems a shame that it spent so much time in the garage, not enjoyed. 1978. Already at $45,000. https://bringatrailer.com/listing/1978-datsun-280z-108/
 1 point
 -
It may have looked cool. Lowered and a stiff ride, she was ahead of her time.1 point
-
1 pointBe careful. Anti seize has been known to cause misfires due to disturbing the ground path of the plugs.1 point
-
1 pointIf the spark plugs were not torqued to spec, that could give you that result. If the same plugs have been taken out and put back many times, the sealing washers could be compromised. However, there could be some contributing factors, like failing oil rings. In addition to what @jonbillsuggested, do a compression test per the directions in the factory service manual.1 point
-
1 pointcheck and confirm its not water/coolant. Take the spark plugs out - are they coroded? what do the tips look like? (post a pic) have you had the valve cover off? it could be oil thats run down from the top. try cleaning it all up running again to see if more emerges.1 point
-
1 pointI'm in the "if they want..." group. Repo guys can get anyting. So with their knowledge and equipment anybodies stuff is steal-able. To add, my car lives in a garage and is never left alone at car shows, isn't parked as a normal car. My Camry is my DD. The only thing more important is my dog.1 point
-
1 pointStealing a stock Z? For me... Gone in 60 seconds and I wouldn't care at all whether the security screws were broken off or not. You need something more elaborate than that. Great list. Let me add... Break a window, reach in and open the hood, disconnect the steering coupler donut, jumper the starter solenoid, and then use the starter to crank the car to your place while steering by kicking the front tires in the direction you want to go. Bring extra batteries just in case the PO was having alternator troubles. Or a charger and a really long extension cord.1 point
-
1 pointYou registered two weeks ago, youve got 14 posts, and you're asking us how one would steal a Z?1 point
-
0 pointsI know my Z was repossessed by a California based bank on 1989. I have the bank repo sheet. So I think it’s experienced the means of theft. Defeating theft is pretty easy, you need to focus on the 95% of would be thieves. Covering the last 5% is difficult and expensive. Most thieves don’t want to spend 20 mins trying to steal a car. Anything more than 5 mins becomes risky unless they have a place the car is hidden like a barn or garage that they can work while the owner is away. But for a casual evening out for dinner with the wife you don’t need anything too elaborate. Something as simple as puling out the coil spark plug wire or a discrete coil disconnect switch would stop 98% of the walker-by thieves. My recently restored 1966 VW was stolen while I was deployed to Afghanistan in 2002. Stolen from a repair shop, was what I was told. Could have been the shop owner..who knows. I never saw the car again, never really got compensated because it was an old car and the insurance company said it was only worth $600. It was worth about $6,000 in reality and would be three times that today. Sent from my iPhone using Tapatalk0 points