Leaderboard
-
.JPG.cfcada9cf1c1b502df3f5f2f2ca3ff36.JPG)
SteveJ
Free Member9Points9,646Posts -
Captain Obvious
Free Member8Points10,081Posts -

CW240Z72
Free Member6Points229Posts -

siteunseen
Free Member5Points15,115Posts


Popular Content
Showing content with the highest reputation on 08/11/2021 in all areas
-
6 pointsTranslation - "After she left the garage, I sat in the drivers seat, grabbed the steering wheel, and made 'vroom vroom' noises. It was fantastic."6 points
-
5 pointsTo be honest, I didn't vocalize the "Vroom! Vroom!", but it was definite loud inside my head.5 points
-
4 pointsWith a helping hand from my wife, I got the new window channel glued into the window frames. The fit is good, not great, but that's fine with me. I reinstalled the window frames and buttoned the doors back up. There are fewer and fewer straggler parts lying about in the garage. After I was finished with the doors, I got in the car with the windows rolled up. It was blissfully quiet in the cabin. I situated myself into a nice driving position to get the feel of how it will be after the motor is back running, and I pressed on the clutch pedal to feel ABSOLUTELY no resistance. D'oh! A new master and slave are now on order. They were added to my task list, too. I'm thinking that the first attempt for engine start will be this weekend. Keep your fingers crossed for me.4 points
-
4 pointsHeyitsrama: A dried out joint. I hear they can be brought back to life with some time in a cigar humidor. Great idea, right? But I'm two years late?4 points
-
3 pointsIts SO much nicer with a working A/C. I took mine out for my weekly trip to the park, 98f 70% humidity. If I did not have A/C the car would have never left the garage. With the OD 5 speed, A/C, and the new rad, I can cruize 70-75 at about 2.7k, windows up so I can hear the stereo, enjoy the ride. its a 35 mile trip on way to the park, the temp gauge never moved of the middle of the E in TEMP.3 points
-
3 pointsPlastic cover is 100% original to the car. Second Z I’ve had with one, as it was for both CanTechZ and jfa.series1 above.3 points
-
What is CLR? I use a heavy duty basket from Skat Blast for the media blasting. I string some parts onto a wire to keep them from moving around too much. How do you wire wheel small parts? I can't hold on to them and wire wheel them without worry of wire wheeling my fingers! I used zip lock bags to keep things organized as I dis-assembled the car. I've created a sheet like you describe also. I will update this google sheet version from time to time until it is complete for my restoration project. Maybe we could consolidate if it makes a better version. When I get things back from the plater, I plan to put all the hardware back in the respective zip lock bags. I think it will take a few months for me to re-assemble everything after the car gets painted.3 points
-
2 points
-
2 pointsI would have stuck it in a baggie with a bit of orange peel. That would rehydrate the dried out weed, giving it that “just right cured and ready to smoke” texture.2 points
-
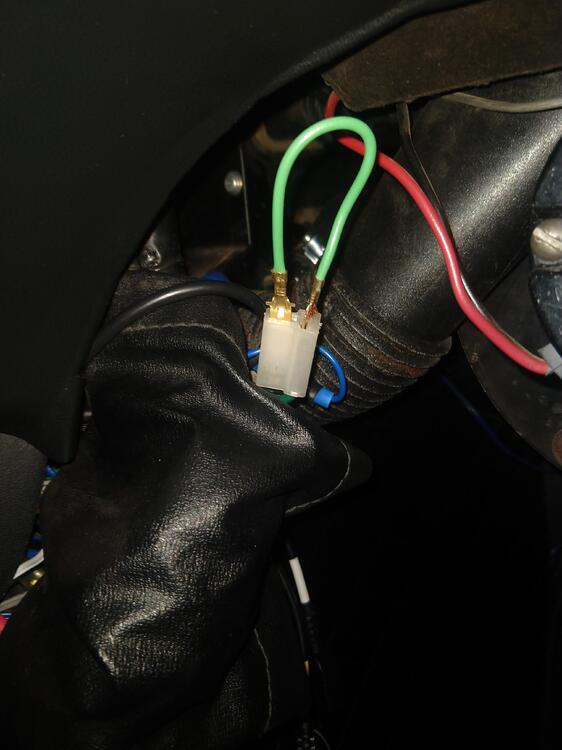
One of the wires in that connector is hot when the key is in the run position. When I was figuring this out here's what I did, the green wire is the jumper I've been referring to; This will give you power to run the electric fuel pump at the tank. Other than putting the impact switch in this loop it's all you need. You don't need all the relays Datsun put in their tech bulletin. I've been running this way since 2017 with no trouble.
 2 points
 -
I think having a document that shows and describes each fastener would be superb! Perfect candidate for a tech article2 points
-
2 points
-
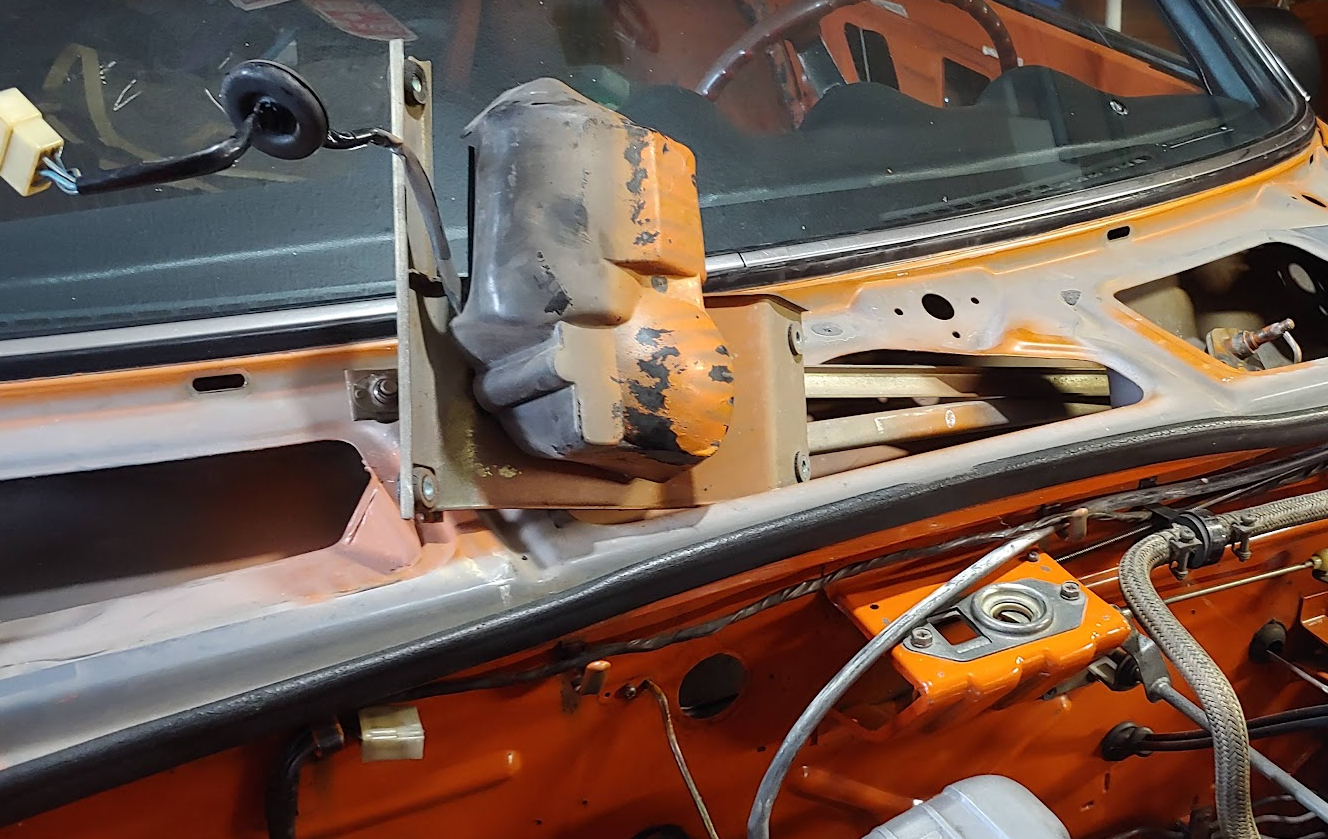
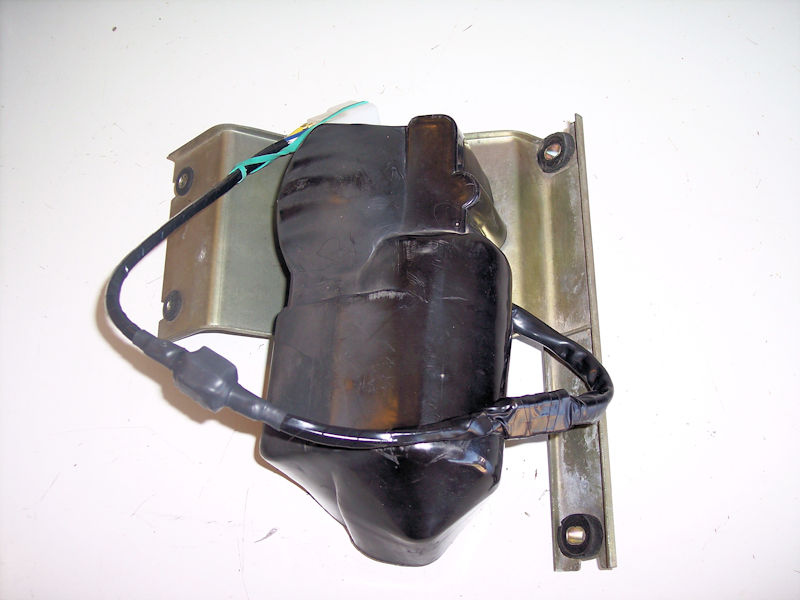
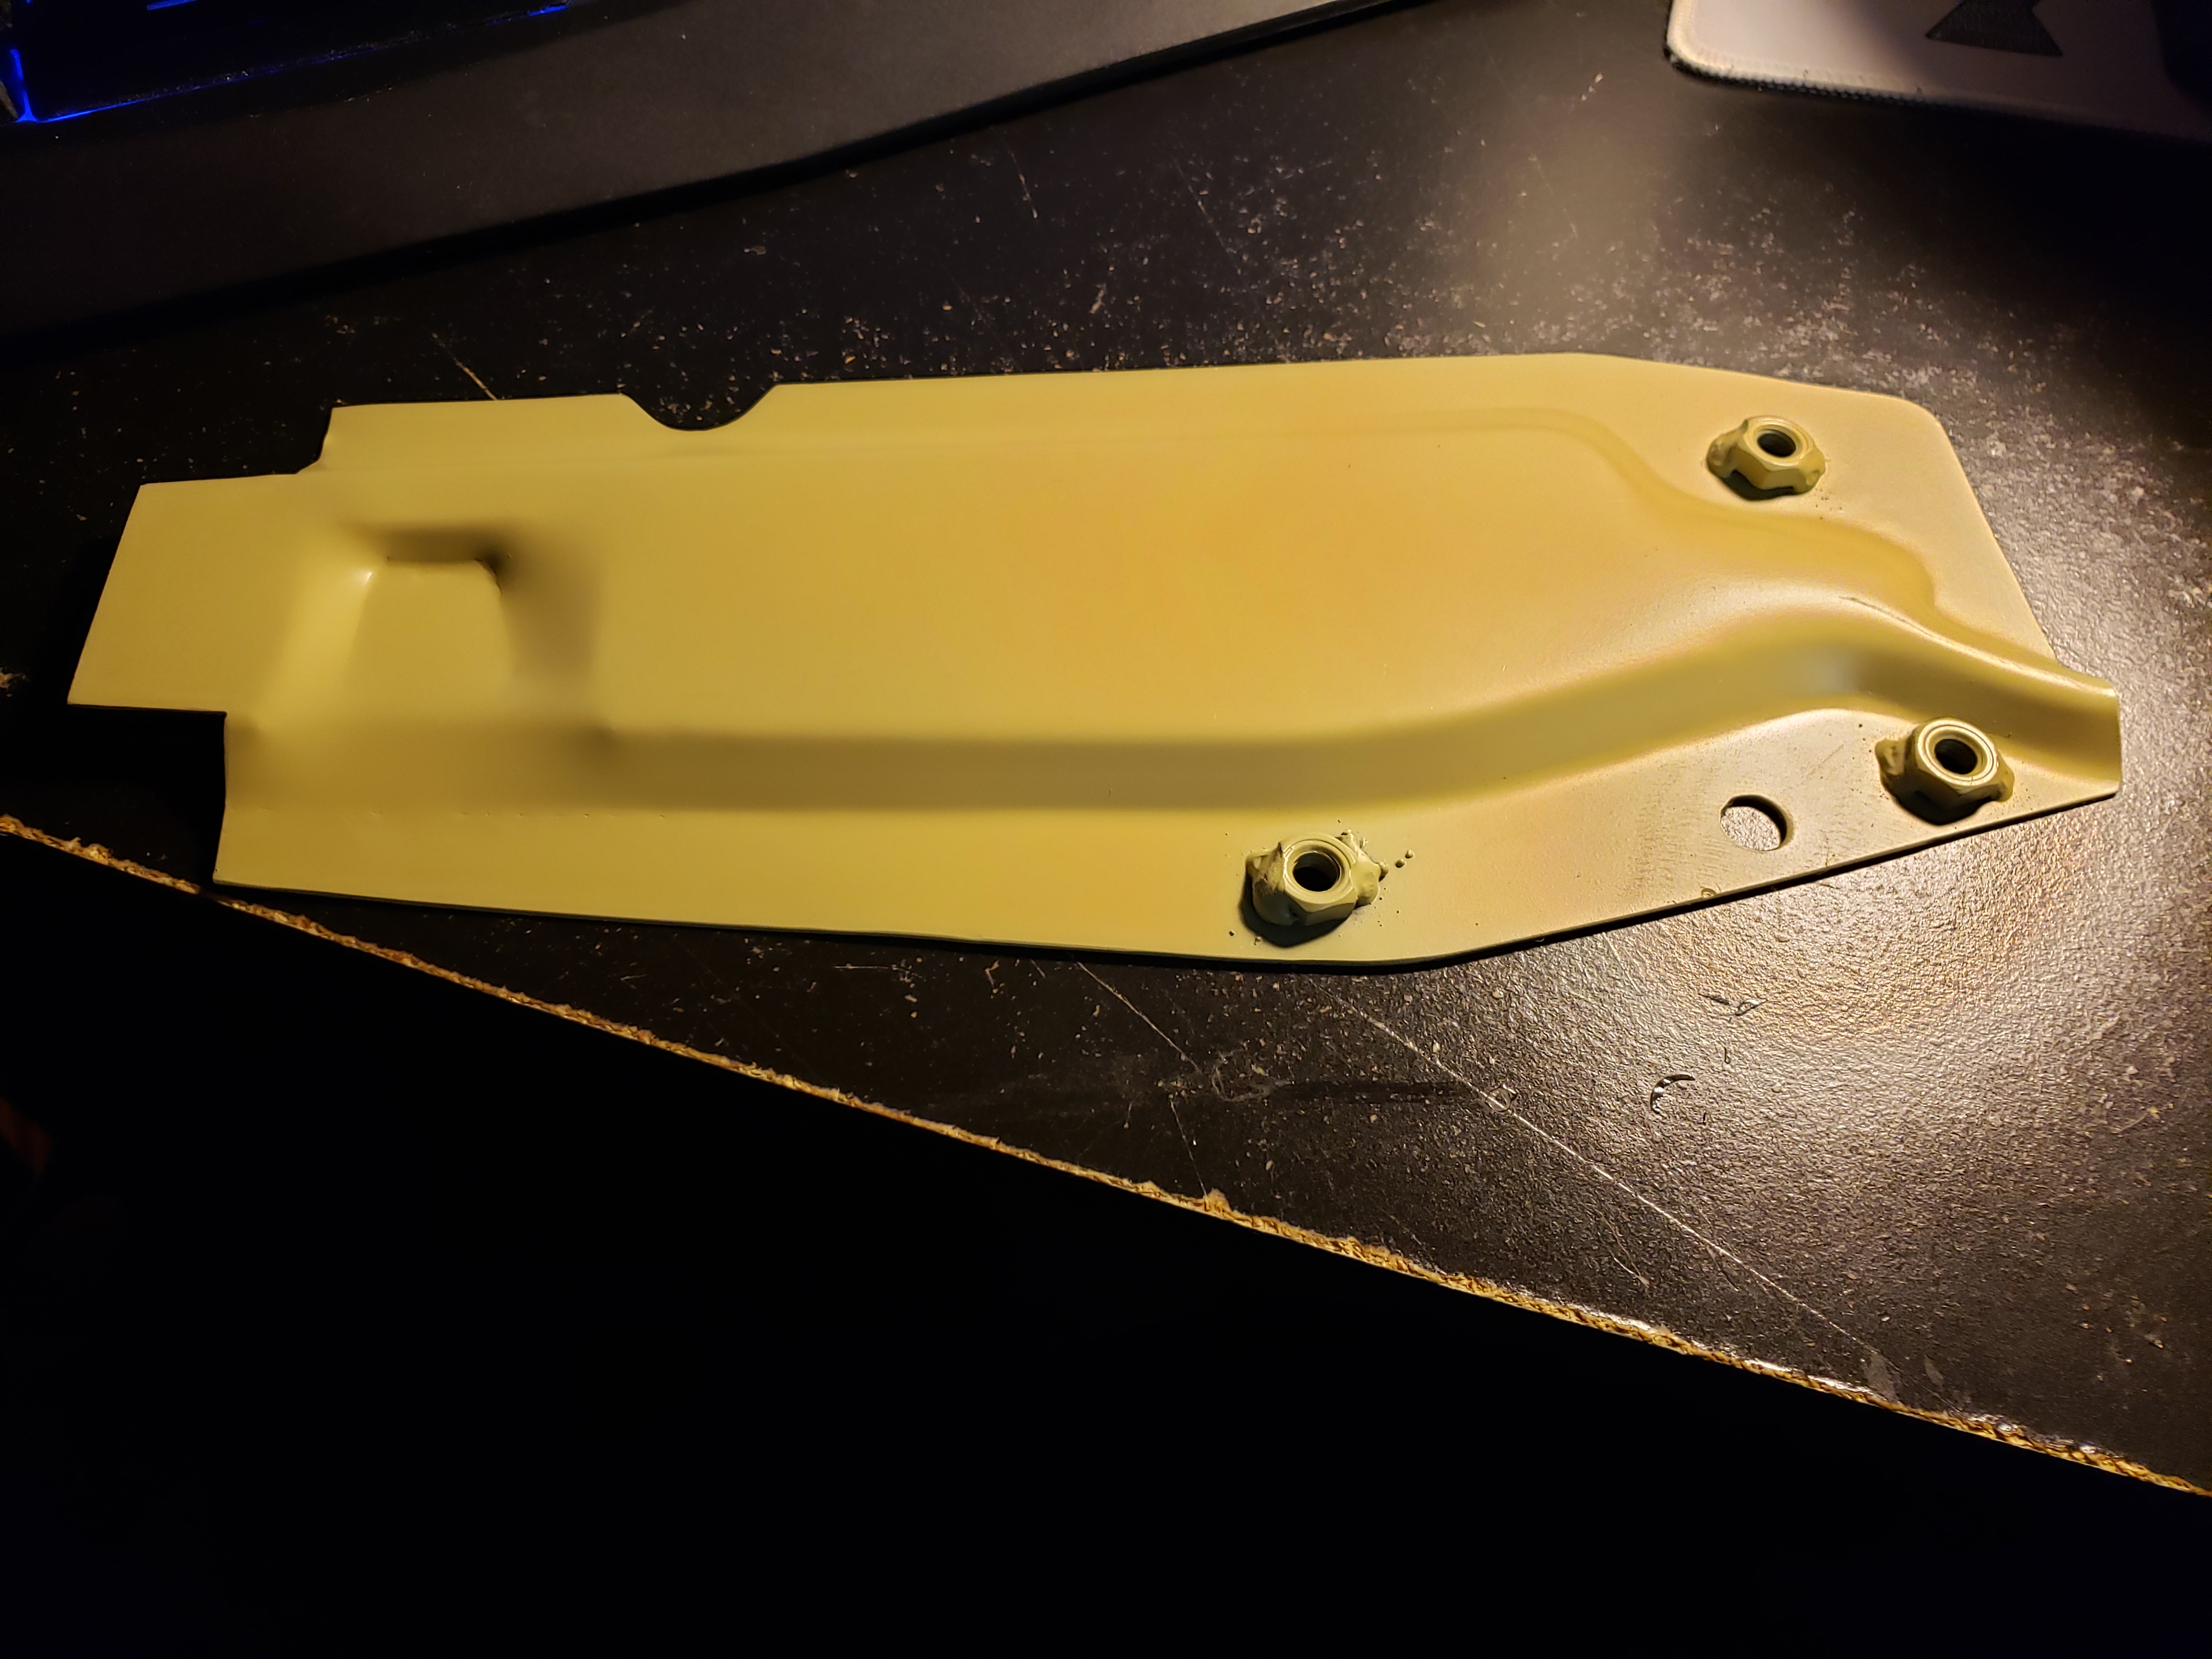
2 pointsI don't think I've ever seen a wiper motor cover like that before, only the vinyl bag type cover and that's on 240z's through to 280z's.2 points
-
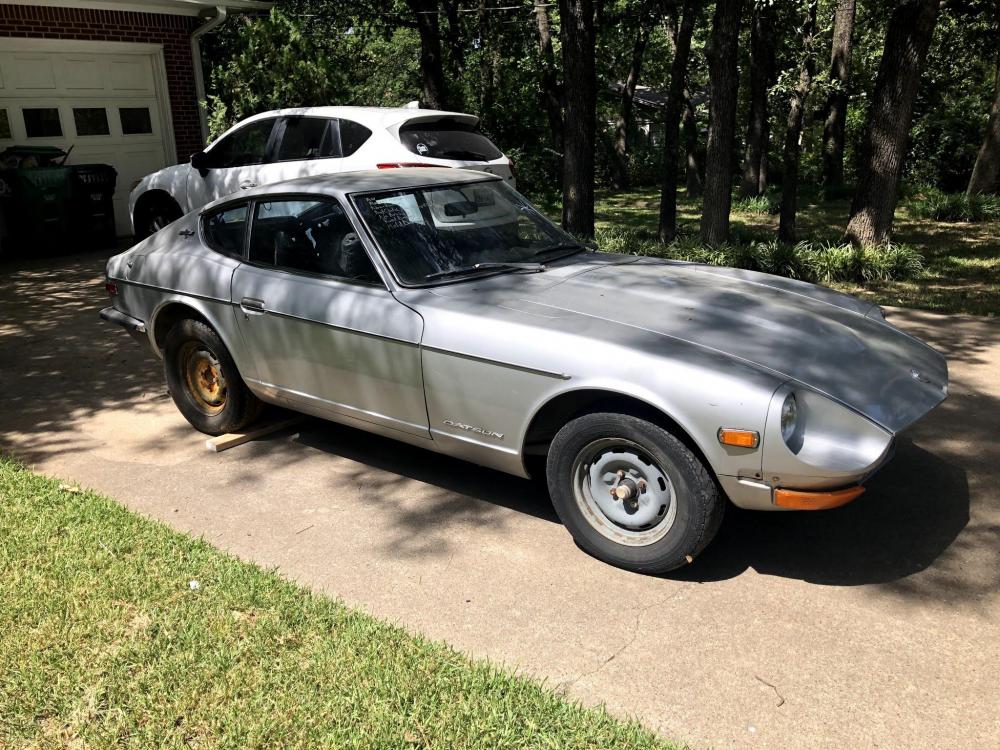
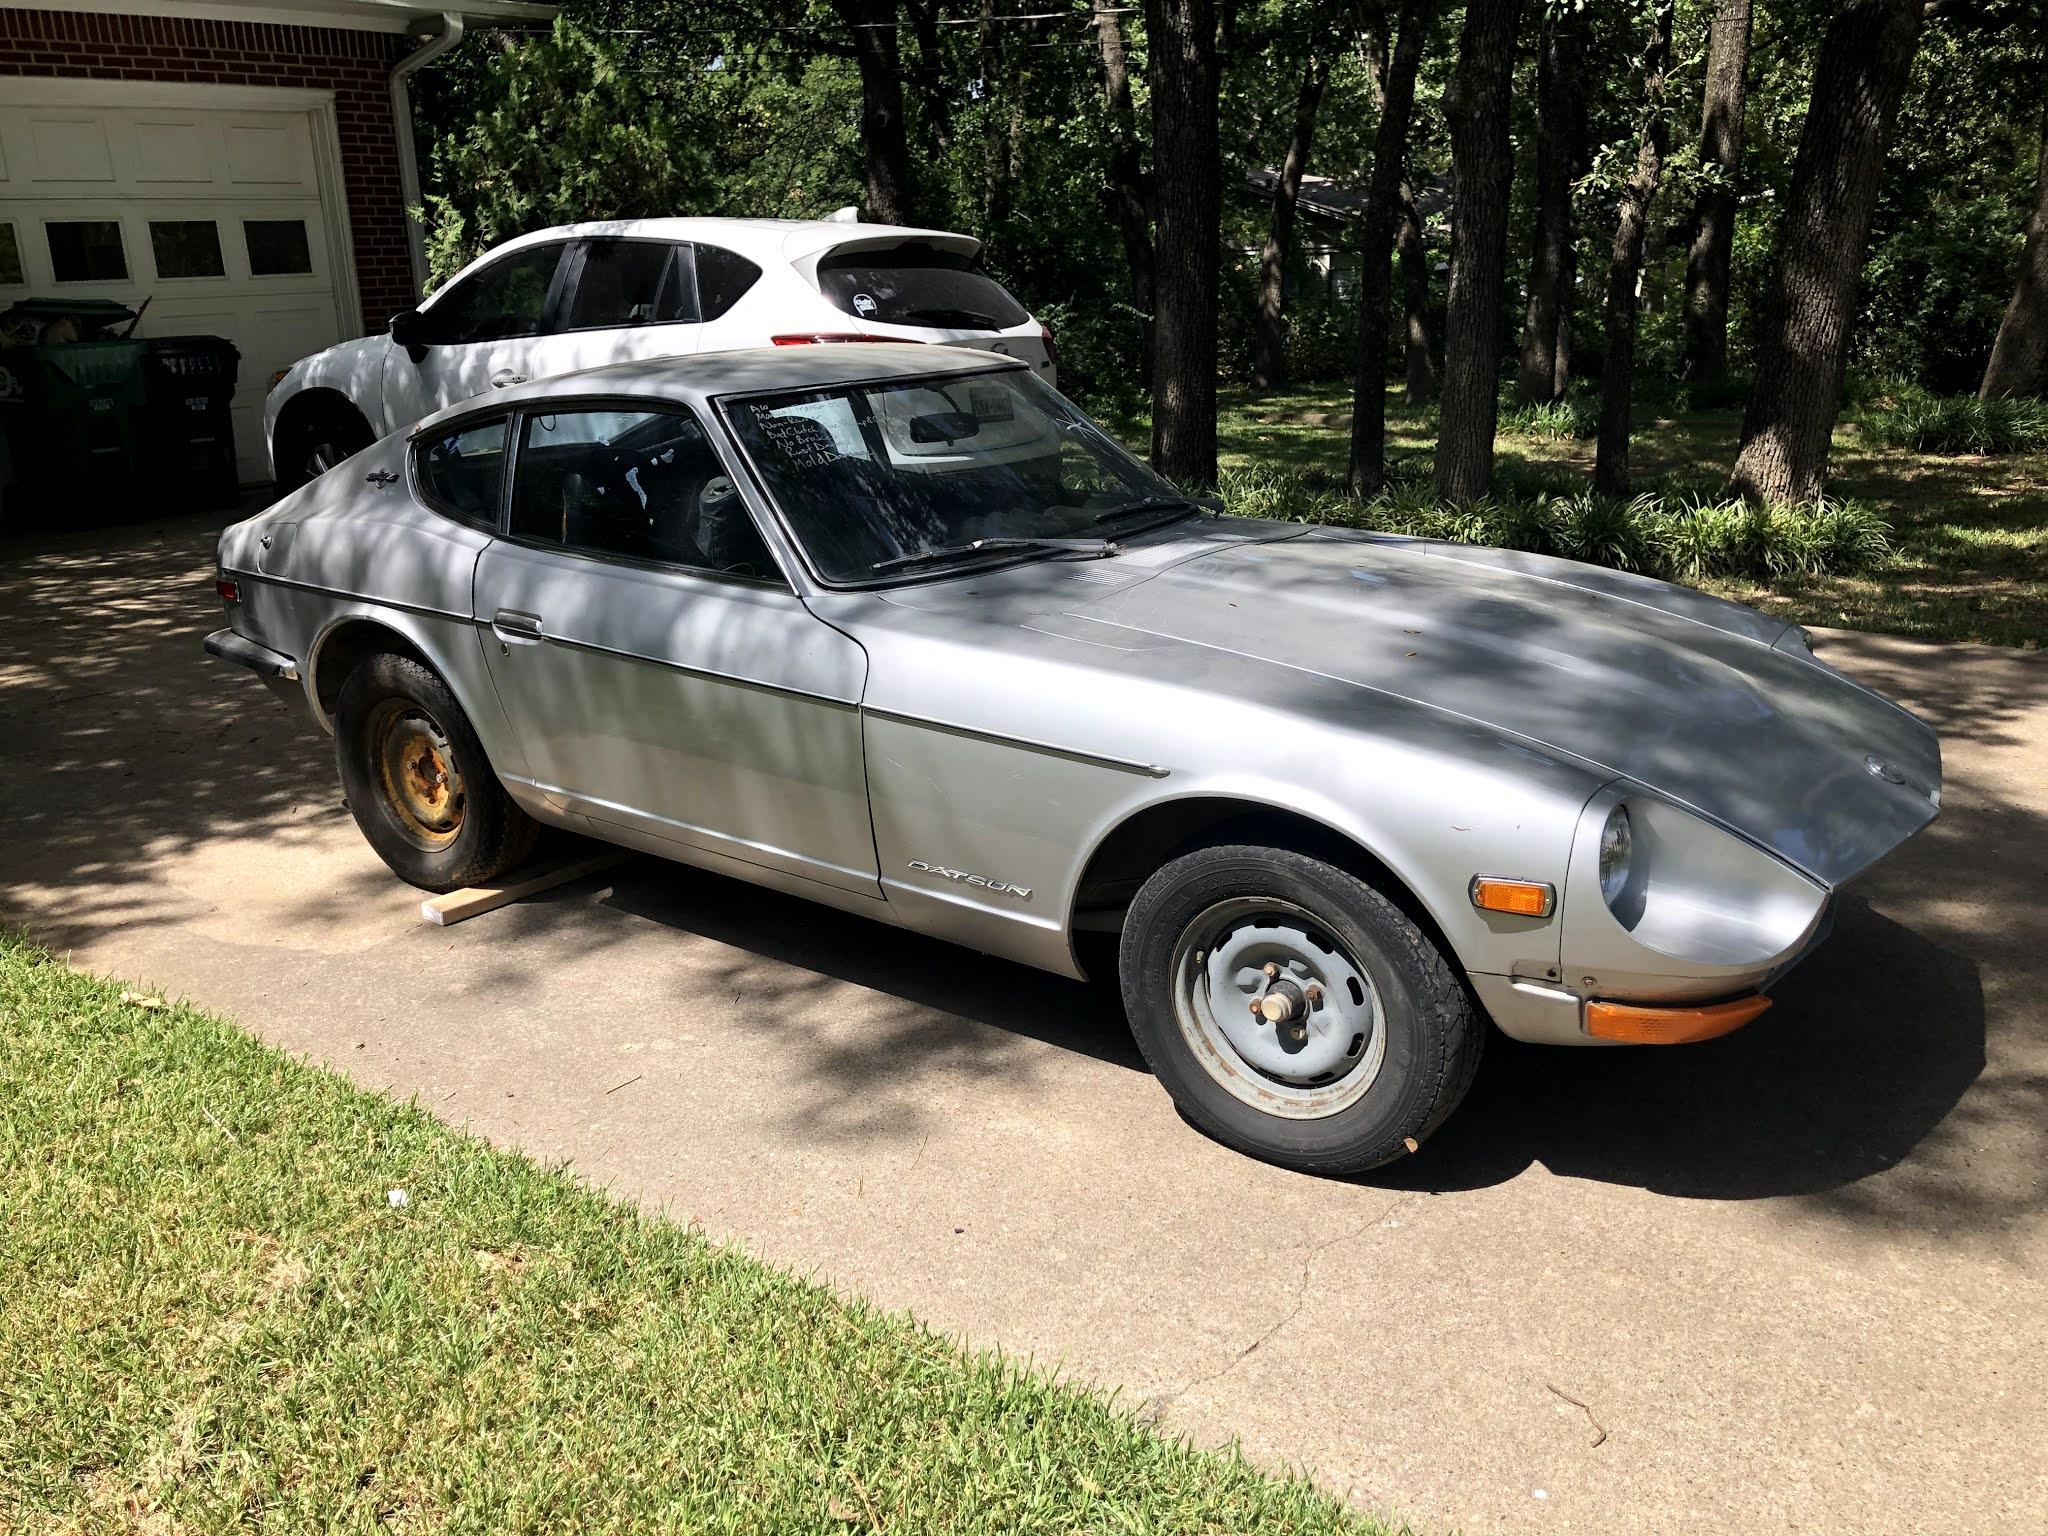
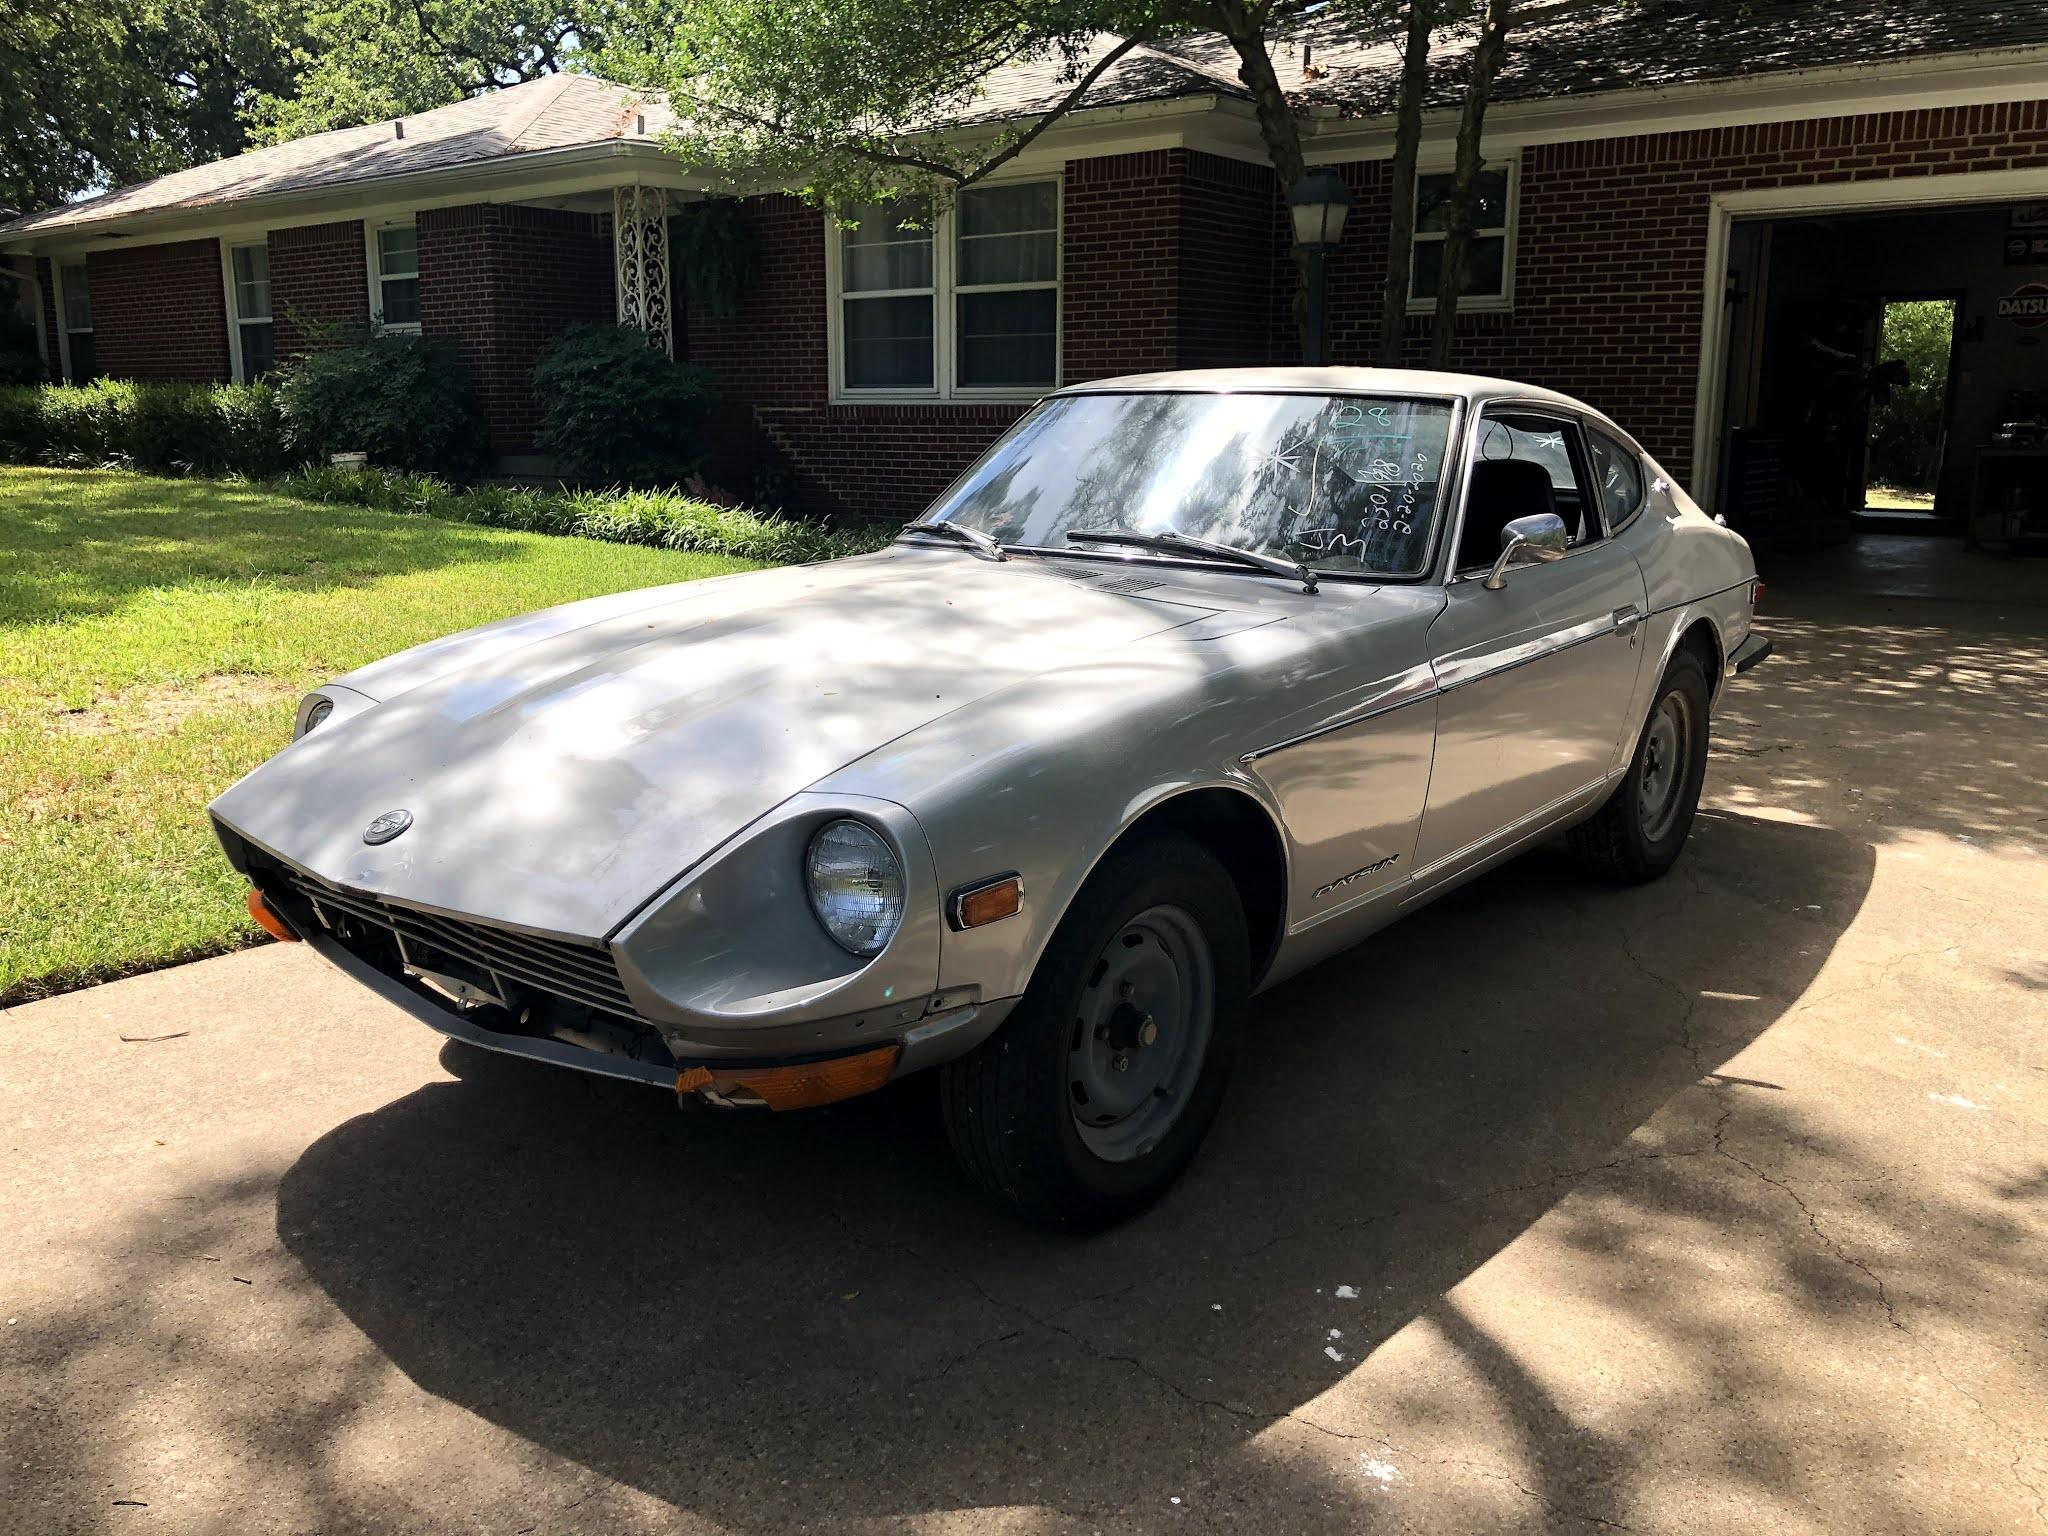
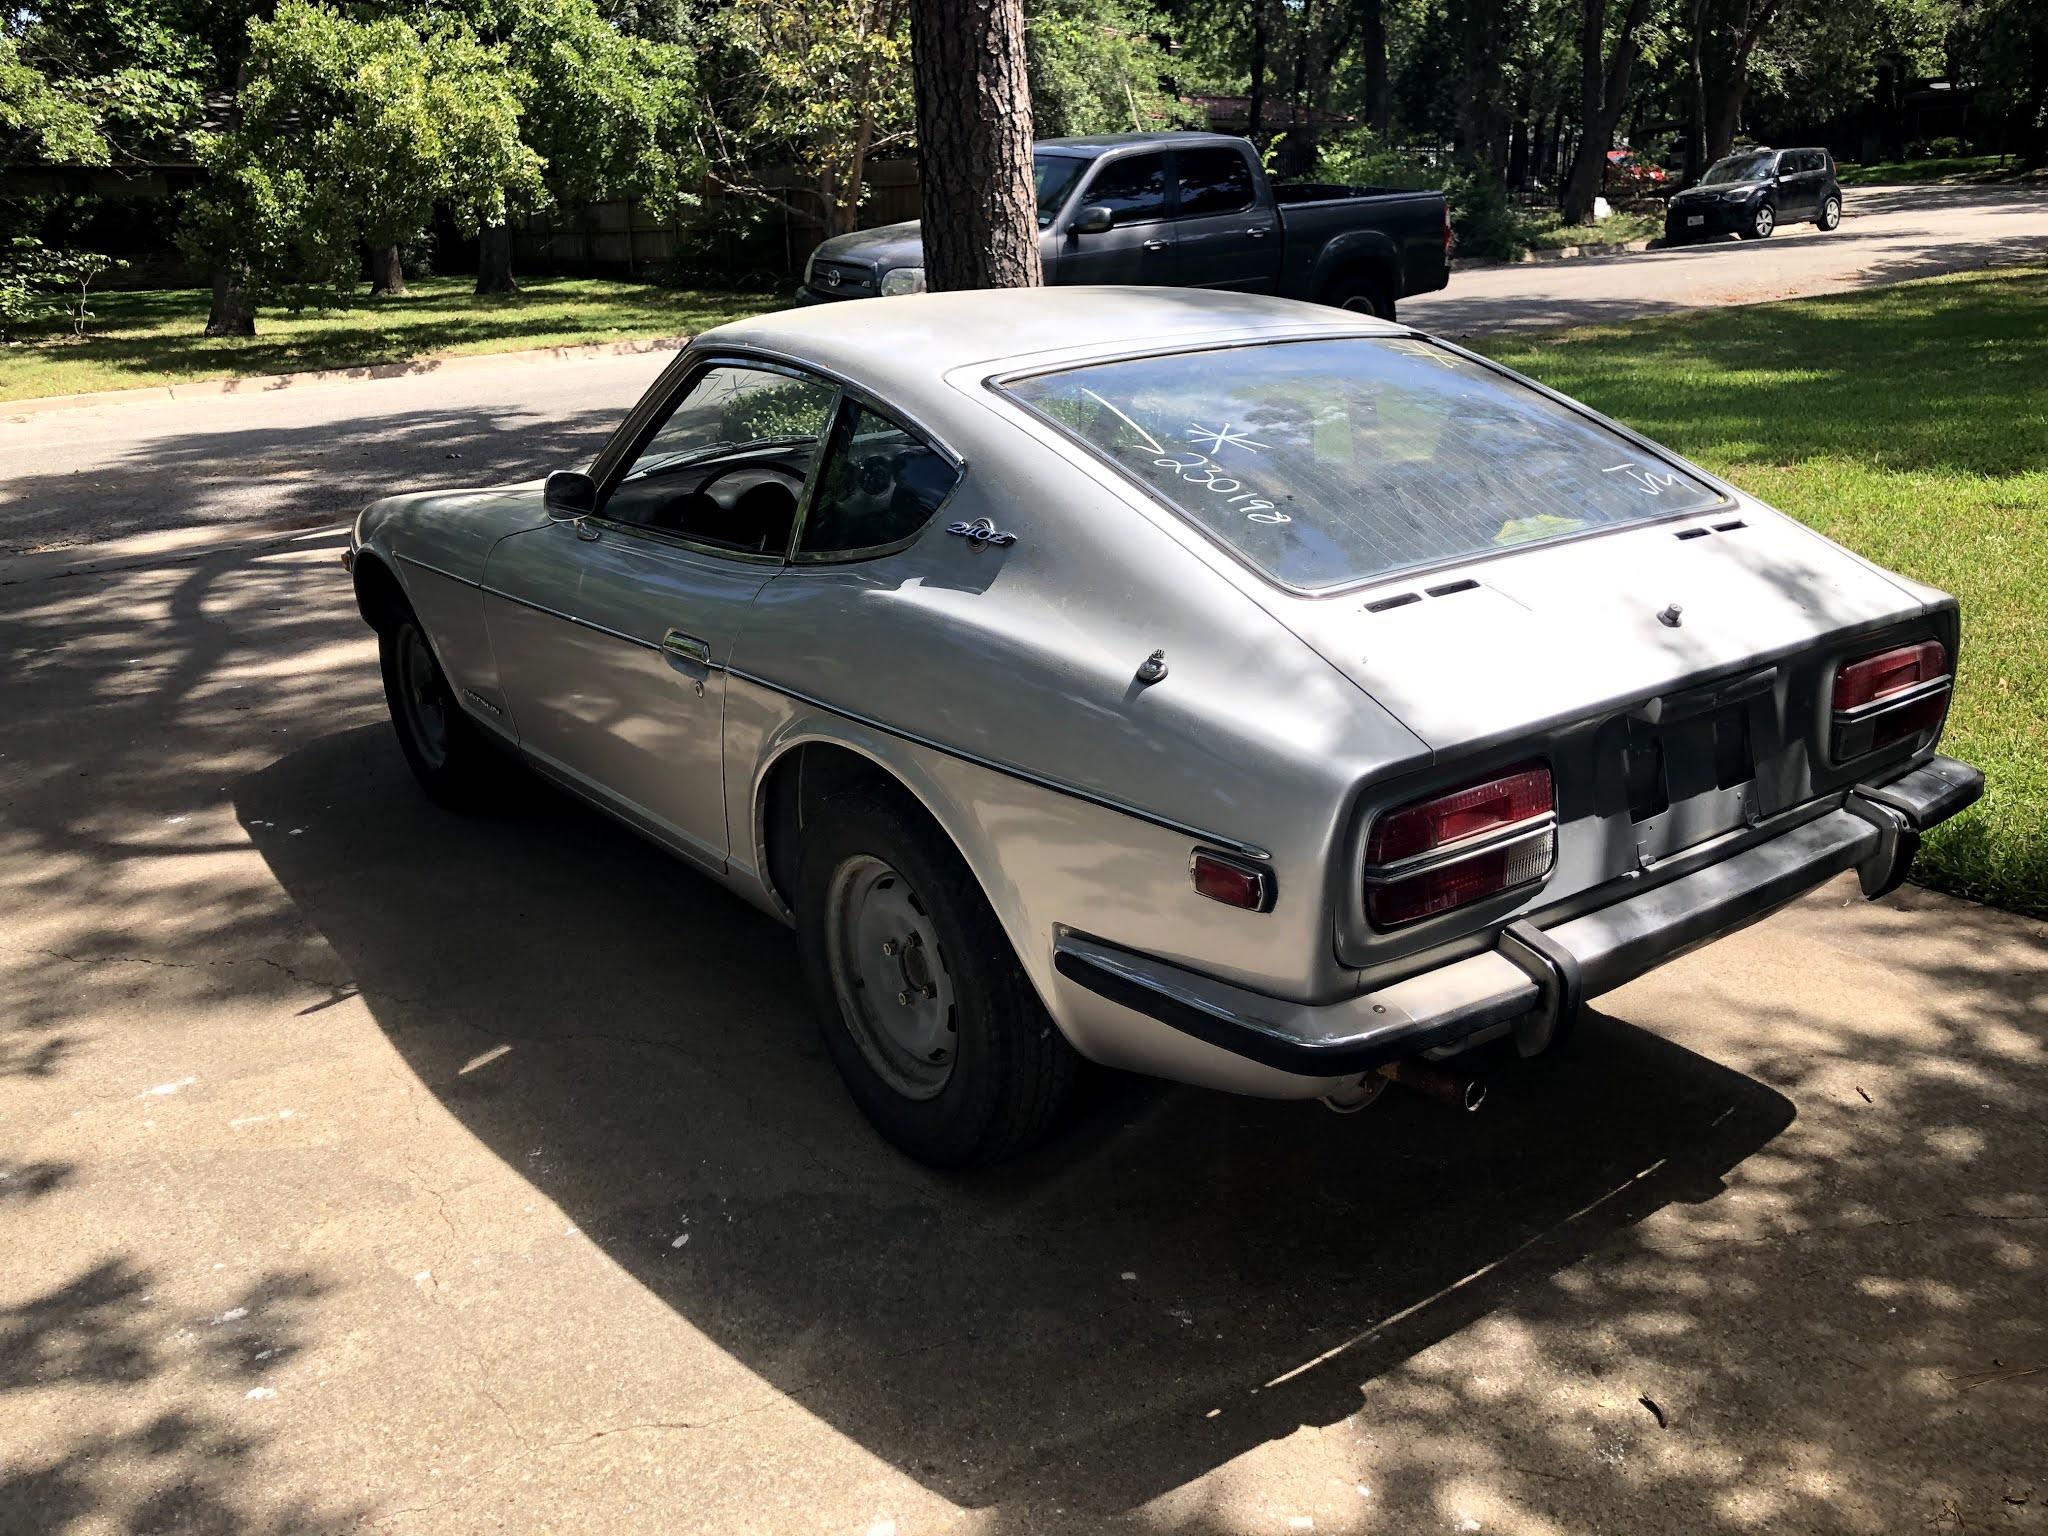
1 pointDecided to post up my restoration of HLS30-12070 that began earlier this year. I'm a long-time member of this group, but unfortunately lost my previous login information. Anyways back to the car and history of this Z: 1971 Series 1 240Z Purchased new from Earl Hughes Motors of Fort Worth, Texas on 12-21-1970 Original Color: 901 Silver Original Engine: L24-16418 Chassis Number: HLS30-12070 Mileage as of 07-11-2020 (date of purchase) 75,206 Last registration of vehicle: 1990 Car shows no signs of major rust or involved in any major accidents. It does have one repaint in the factory (or close to) silver. Missing front bumper, rear hatch vents, and hatch emblem. All other parts appear to be present and intact. First impressions, car shows to be a one-owner survivor that has spent its entire life in the North Texas area. Even living solely in a dry climate area, I was amazed how clean the body was from cancerous rust. There is no undercoating on the belly of this Z, making it very transparent of what the underlying steel has in store. Frame rails and floors are clean (minus a few previous floor jack mishaps we'll straighten out), all four wheel wells are clean. Rockers, dog legs, rear hatch area, hatch itself, doors, and the battery tray all look solid and well preserved. Goal for this Z is to go back 100% original as possible. We'll strip it back to the shell and build it up from there. This is the 6th (maybe 7th) Z for us to work on as a family restoration, and with a combined 40+ years in the paint/body/fabrication world should be a fun project to document.


.thumb.jpg.66f910d4a606b0e61cf0c2be225803af.jpg) 1 point
1 point -
This past week, I went to get my Z ready to move to my new place from where it’s being stored, I knew the clutch hydraulics was having an Issue, because the last time I went to see the car the pedal had no back pressure. I assumed I got a either a leak or air in the system, so I bleed both the master and slave cylinder and it was totally unsuccessful. I had replaced both the master and the slave about 18 months ago when I first started trying to get this car road worthy. I think they are both made by Wagner? This will be the 3rd master I’ve installed. The first I got from AutoZone and that one wouldn’t fit due to the rod being the wrong length. I tried to cut it and then it was too short. No biggie it was line $23. Then I ordered one from RockAuto which is the one in there now (about the same price) , BTW, I found it to be difficult to install due to the limited space under the pedals, and having to hold the pedal, while compressing the road and holding a light all at the same time while inserting the clevis pin. I remember saying to myself, “I hope I don’t have to do this again”. Not the case...So, it appear the master is bad now, it won’t transfer pressure to the slave and when I push the pedal with the cap off I can see a small boil of liquid come out of the reservoir. Well, this weekend, I decided I was going buy the real deal and ordered the Nabco master cylinder from a Nissan Dealership locally. The lesson learned for me in this is, it’s almost always better to buy OEM, this isn’t a hard and fast rule but if I would have done it right the first time I would have saved time, money and a lot of inconvenience. The new OEN master was $67 plus $4 tax and local pickup, being cheap doesn’t always pay...and sometimes it cost more, Buy once.....cry once. Lesson learned,1 point
-
To offer an alternative perspective: I’ve been seriously considering this https://www.merlinmotorsport.co.uk/p/malpassi-filter-king-regulator-large-glass-85mm-with-8mm-unions-fpr006 I have a fuel thank that was lined with the POR rustproofing stuff, that has now started to flake off causing some strange fish to appear in the fuel filter. The ONLY way to deal with it properly is to get the tank opened up, media blasted, treated and welded up again. But what I like about the filter king is the big bowl that allows plenty of buffer when those conditions appear at WOT. It’s a sticking plaster I know! Again, you have to decide what to put before the fuel pump as this is a post pump filter. Lots of options from cheap ... https://www.ebay.co.uk/itm/Sytec-Uprated-Fuel-Filter-8mm-In-Out-Fits-Nissan-Silvia-S15-SR20DET-/223910510203 https://www.ebay.co.uk/itm/Sytec-Motorsport-Clear-Glass-Fuel-Filter-For-Carburettor-8mm-Fuel-Hose-Tails-ADV-/273897052635 https://www.lsengineers.co.uk/fuel-filter-lf72.html To quite expensive ... https://www.carid.com/qrp/fuel-filter.html Depends also on the fuel rate you are expecting.1 point
-
1 pointMy woman is post menopausal, so these days it is mother thumb and her four daughters.1 point
-
1 pointSo what is the red megaphone thing at the rear corner of the valve cover? Remnants of an alarm system or something? I have no idea what that is:1 point
-
Such lists have been created by at least three CZCC members in the past -- in varying degrees of completeness. In fact, I think somebody just posted another one a couple of weeks ago. Here's my favourite (because it includes photos). It dates from 2019 and, IIRC, was posted by either @CanTechZ or @240dkw. Whoever it was, I hope they spot this re-post and claim credit. It's very nicely done. s30_Hardware_pictures.pdf1 point
-
1 pointNice to have help like that. Starting that motor will be a wonderful moment when all goes well. Fingers crossed.1 point
-
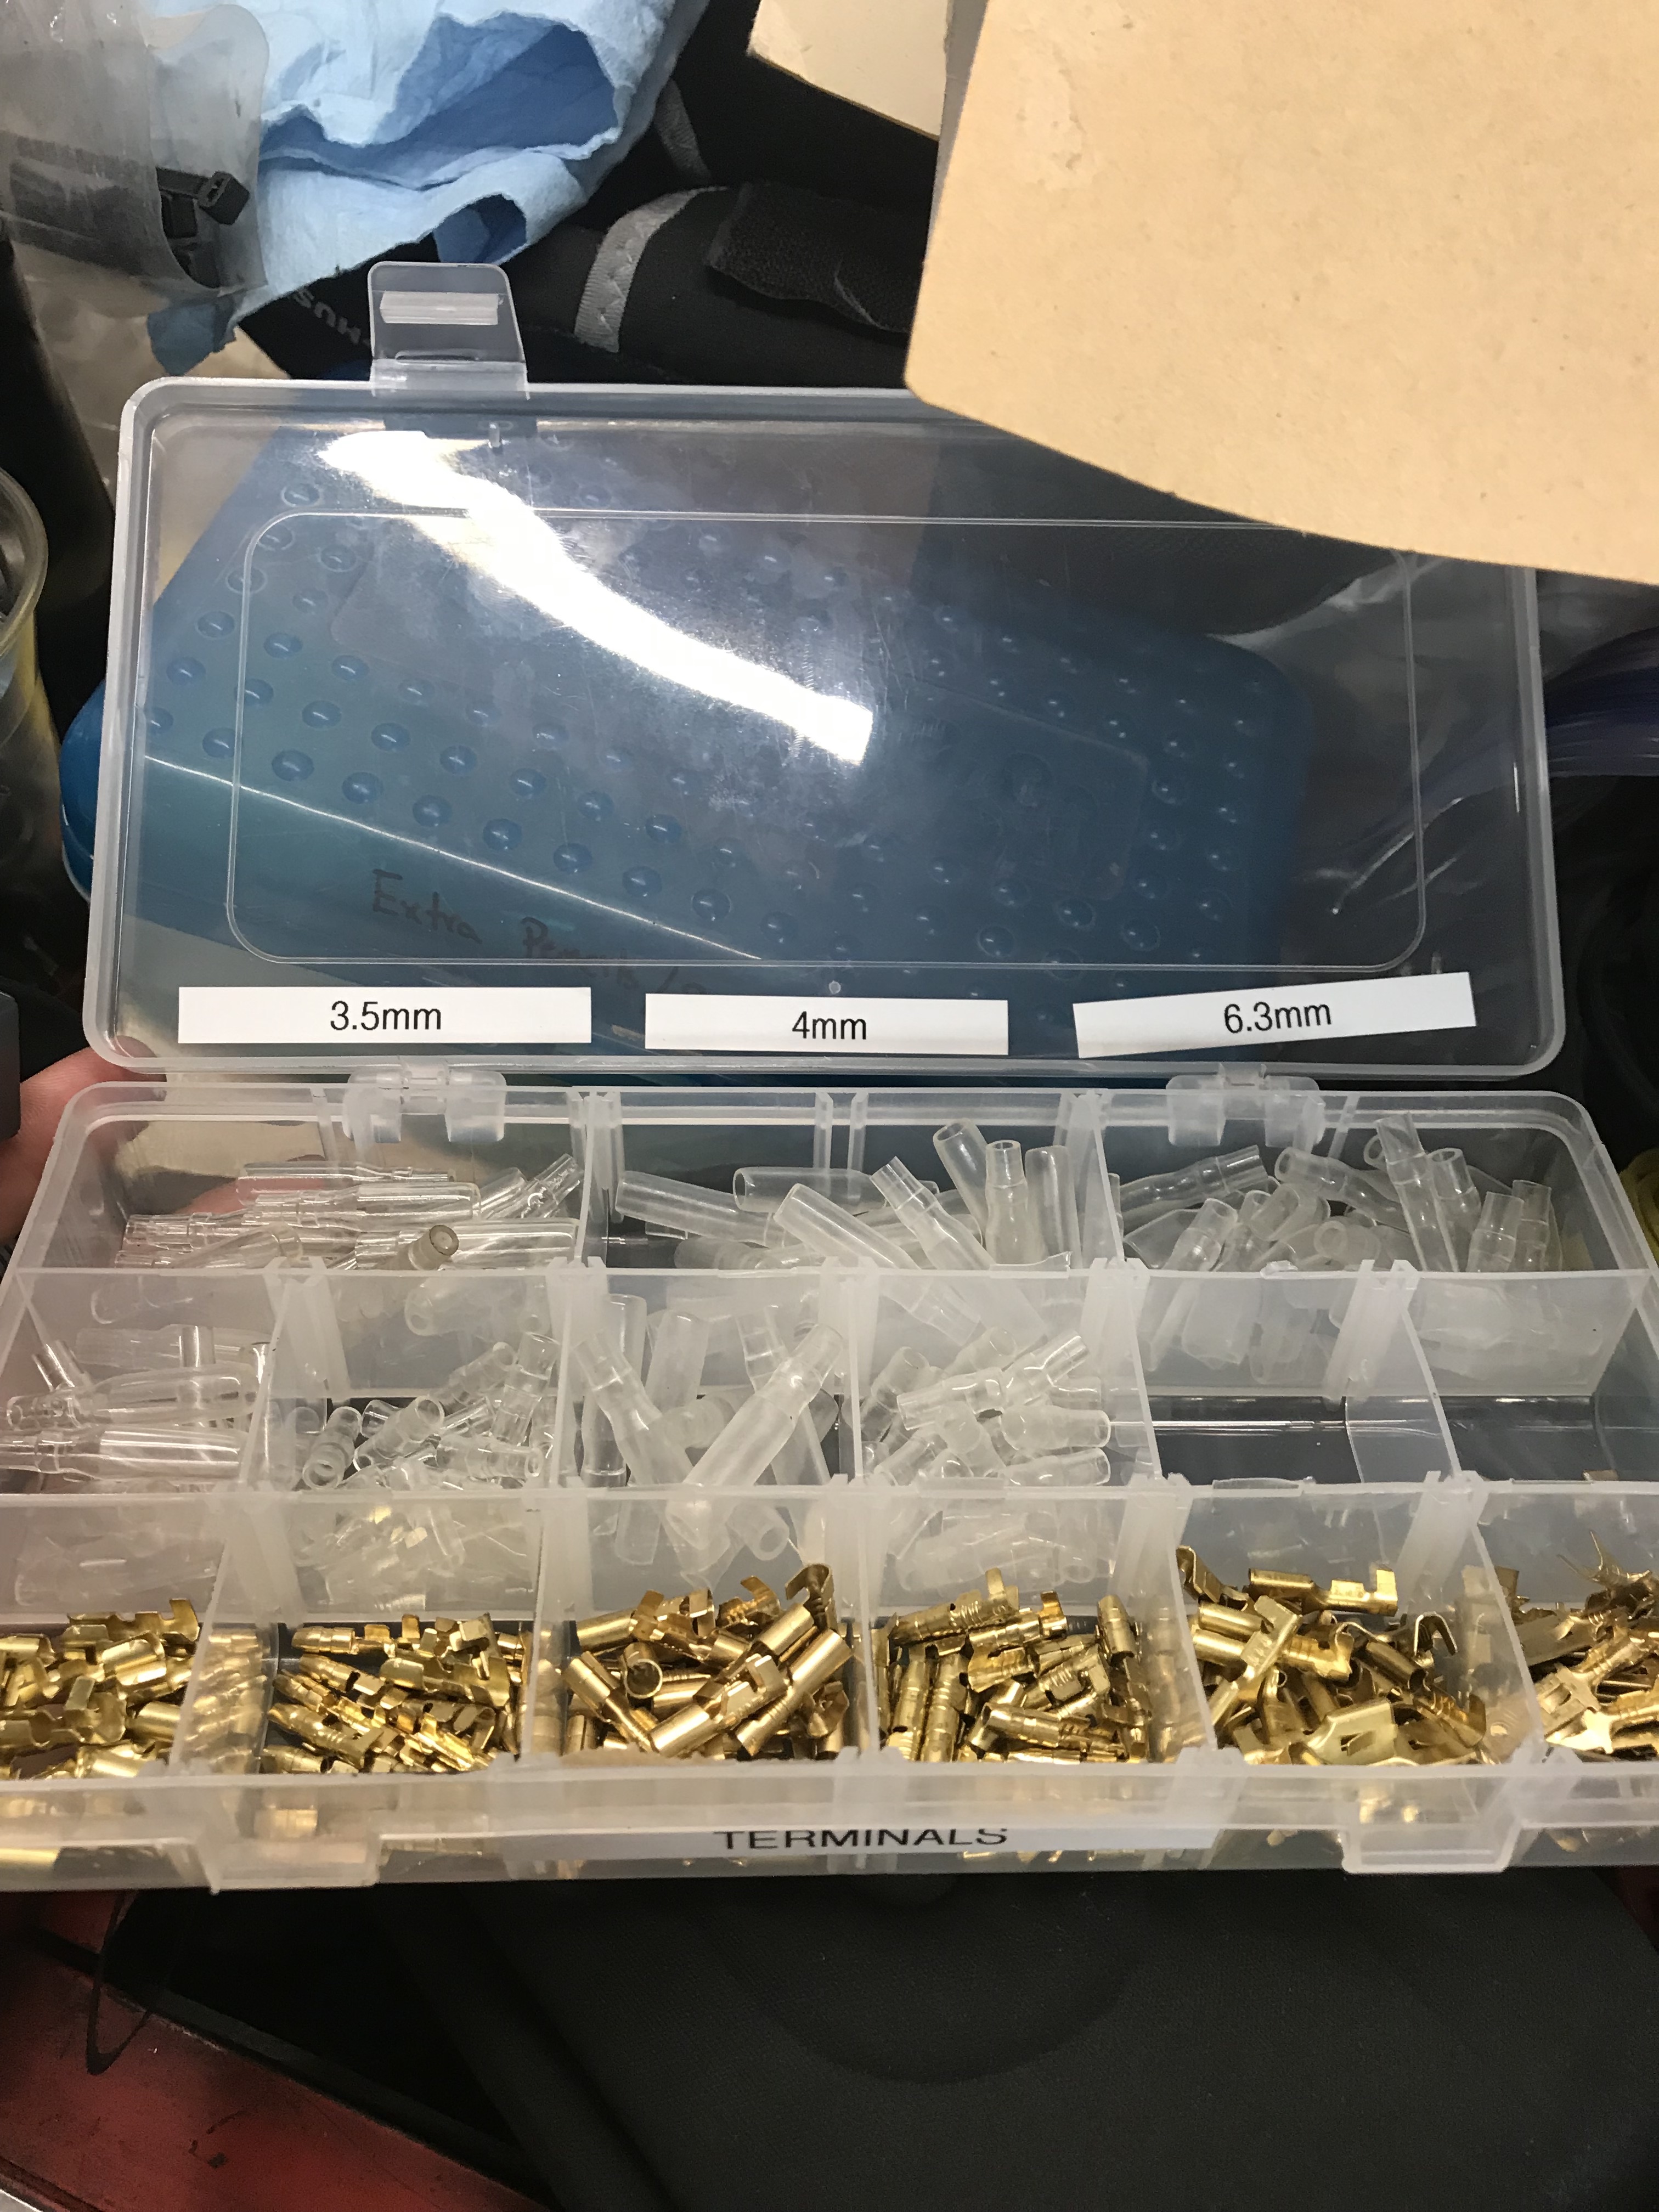
1 pointI like the connectors that vintage connections has, the density of the metal they use to make the terminal end is more than the ones that I got on amazon. Also the rubber sleeves they have are look more "period correct". All in all it makes the wiring feel more secure. I almost broke down and rewired the engine harness again, i talked myself out of it, i forgot my reasoning though. For most wires in the car I think 18 gauge TLX/GLX wiring will be sufficient depth on the length. I ended up ordering https://www.wirebarn.com/11-Pack-of-18-Gage-GXL-Wire---------------------ELEVEN-11-Colors-25-Foot-Each-Color----------BlackRedBlueGreenYellowBrown-White-Orange-Pink-Violet-Gray_p_550.html As well as some 12guage GLX wire for lines that draw more power... this wire is certainly better than the stuff at the local hardware store, for the price its probably cheaper too. You'll want to get some open barrel crimpers to make this all come together, https://www.amazon.com/Crimping-26-16AWG-0-14-1-5mm²-Connectors-Terminals/dp/B00OMMZ502/ref=sr_1_21?dchild=1&keywords=open+barrel+crimper&qid=1628662108&sr=8-21 should do the trick, I like the removable dies in the crimps, at least if i start modernizing the engine harness i can go grab a new set of dies that match the terminal style. Are the ends of the red wires melted? The blue plastic looks a bit weird.
 1 point
 -
1 pointThe quick-connect terminals (Fastons in AMP parlance) were crimped in a less than optimal fashion. I would strongly recommend to anyone needing to replace such style terminals to buy the very best available - AMP, Panduit, Molex, etc. Absolutely pass on the Amazon/EBAY Chinese versions that are reliably unreliable! Also, buy a first-rate ratcheting crimper that crimps the wire AND the wire insulation. It'll absolutely pay you in the end.1 point
-
I just took a look at a pair of (Hitachi version) SUs here, and the throttle opening cam starts to push on the throttle linkage at close to the same time the other linkage starts to move the nozzle down. So the answer seems to be... "Pretty much at the same time." Depending on where you have your nozzles set (how many turns down) and how you have the throttle opening linkage arm bent, you might get one a small amount ahead of the other, but not by much. I wasn't there when they designed it, but I suspect they were aiming at "the same time".1 point
-
1 point
-
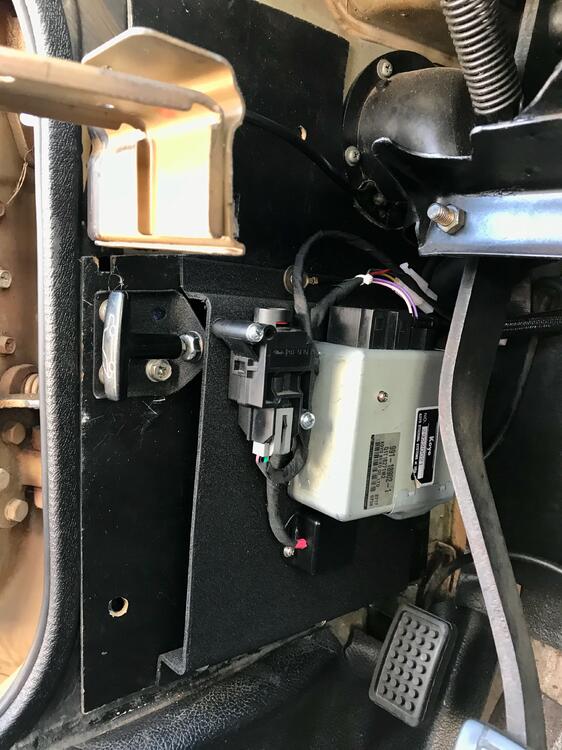
1 pointDitto. Honda upgrade hiding inside, Dave Irwin's relay in the wiring.
 1 point
 -
1 pointWhen I was 14-16 yrs old in 74-76 I worked at the Automat car wash in Burnaby B.C. The customers would drive up to the vacuums and then go to the waiting room for their car to come through the wash. There was an unwritten rule that stated any coins you found on the carpet or tucked into the seats were free for the taking, now at $3.17 per hour it wasn't hard to double you hourly pay on a busy Saturday. If you were lucky enough to be the one who got the job of emptying vacuum canister on a Sunday there was another $10 in there for sure.1 point
-
1 pointI was cleaning out my Corolla a couple years after I got it and found a fat joint in the rear seat where the belt buckle clip comes out. Shame it was all dried up, found it too late!1 point
-
1 pointcongrats! yes there should be a hole for the condensate hose.1 point
-
1 point
-
1 point
-
1 point
-
Well you're not a D as far as I've seen. The filter fits between the tank and the high pressure EFI pump where there's nothing but drain from the tank. They're good BEFORE the high pressure pump.1 point
-
You should add a clear filter between the tank and pump also. Cheap and easy to check for crud that may be in your tank. https://www.atlanticz.ca/zclub/techtips/fuel/g3filter/index.htm1 point
-
I certainly will. It'll be a while though, package tracking estimates delivery in December... Cost was $100 including shipping. The part itself was about $66. (Ish... exchange rate being what it is.)1 point
-
Thanks for the tips, guys. Made a deal with Woody for the part. Can't wait for it to arrive!1 point
-
1 point
-
One of the cars I worked on this winter have an older set of Z-Therapy rebuilds on it, so when I got to the point of putting the carbs back on, I didn’t look too closely for problems. But as I was syncing and setting up mixture etc, the engine would randomly change idle, always upward and sit there unstable as hell. Blip the throttle, fool with the choke and it would settle down. Then off it would go again with very little provocation. Finally realized I was just grazing the little fuel hose on the bottom with a tool or finger while working on them, it would set the idle off on one of its fits. What I was doing was shifting the nozzle around in its tube, creating clearance and a vacuum leak when it sat just so. I’m waiting for new nozzles from Z-therapy now, should solve the issue. The back carb is much better and doesn’t exhibit this behavior. Other carb sets I have laying around, from which I was going to snitch parts, are all worse. The nozzles literally rattle around in the tube. So expand your mantra when you help yourself or others decide on SU quality and vacuum leaks. It’s not just them shafts that get worn.1 point
-
1 pointGo ahead and replace it I say. The Exedy is a great choice. I have one in both my Zs. https://www.amazon.com/EXEDY-06009-OEM-Replacement-Clutch/dp/B001B5D7TE1 point
-
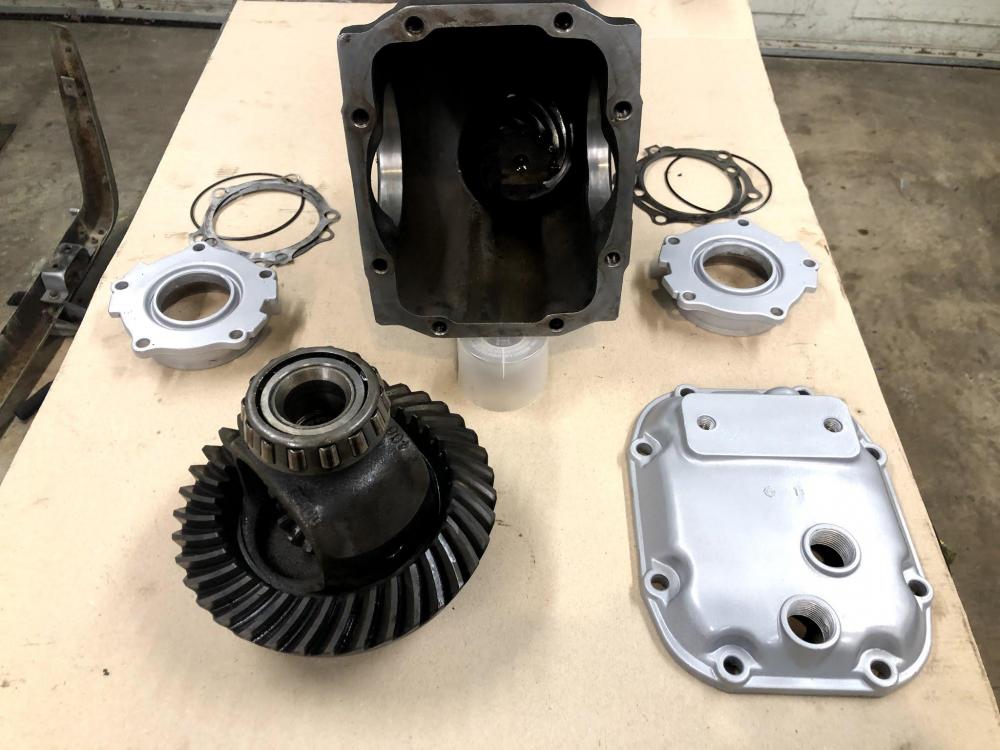
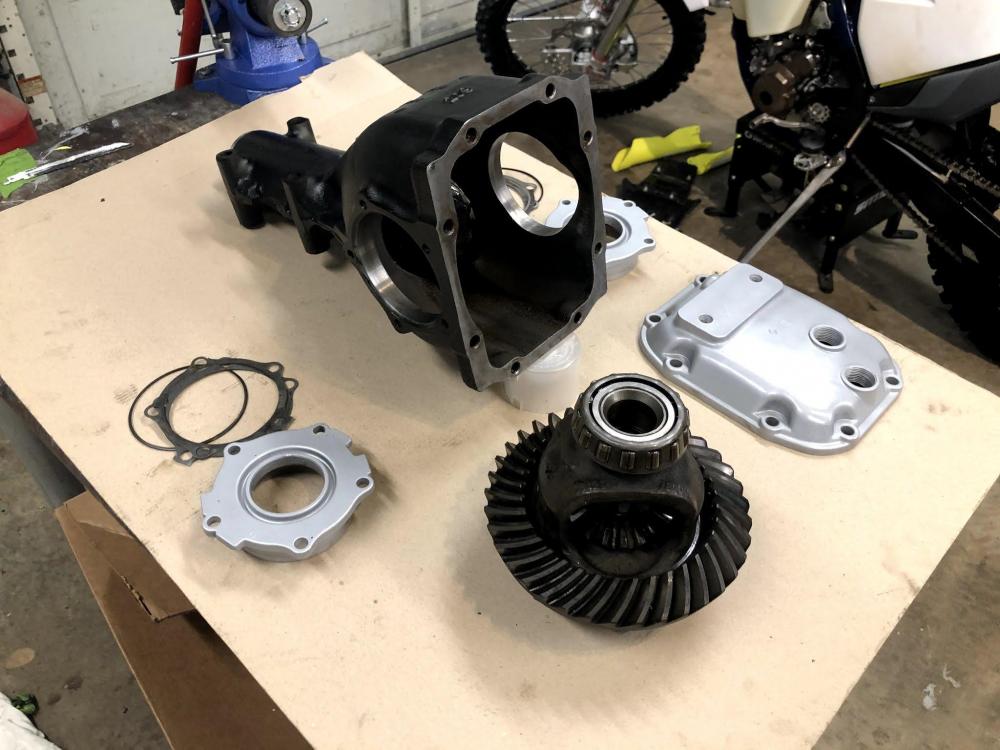
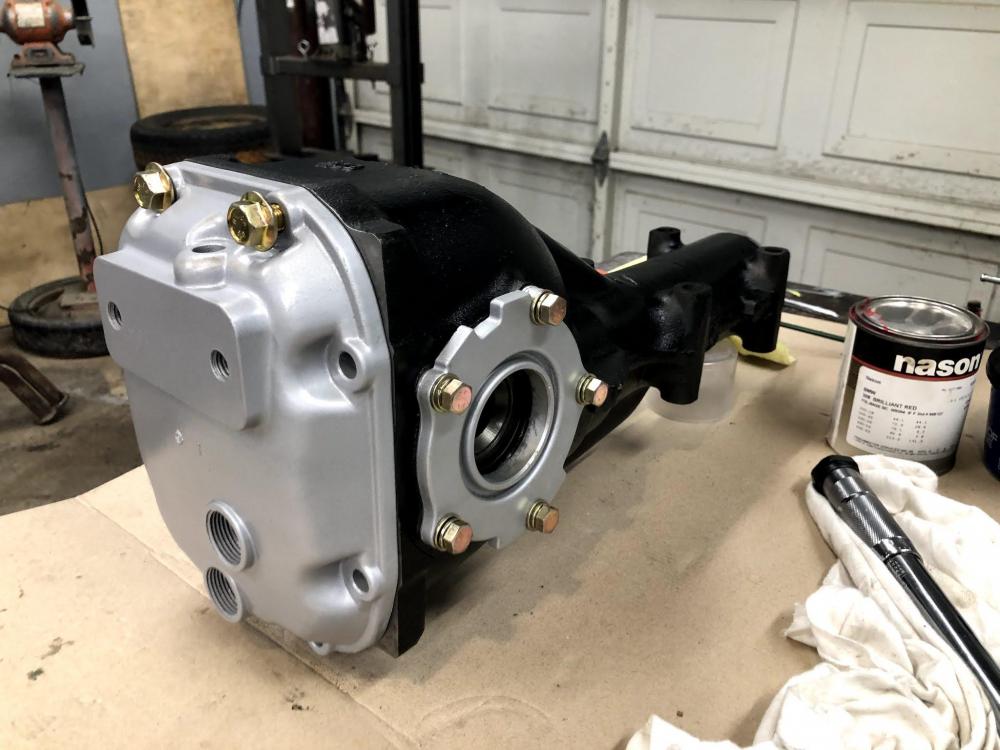
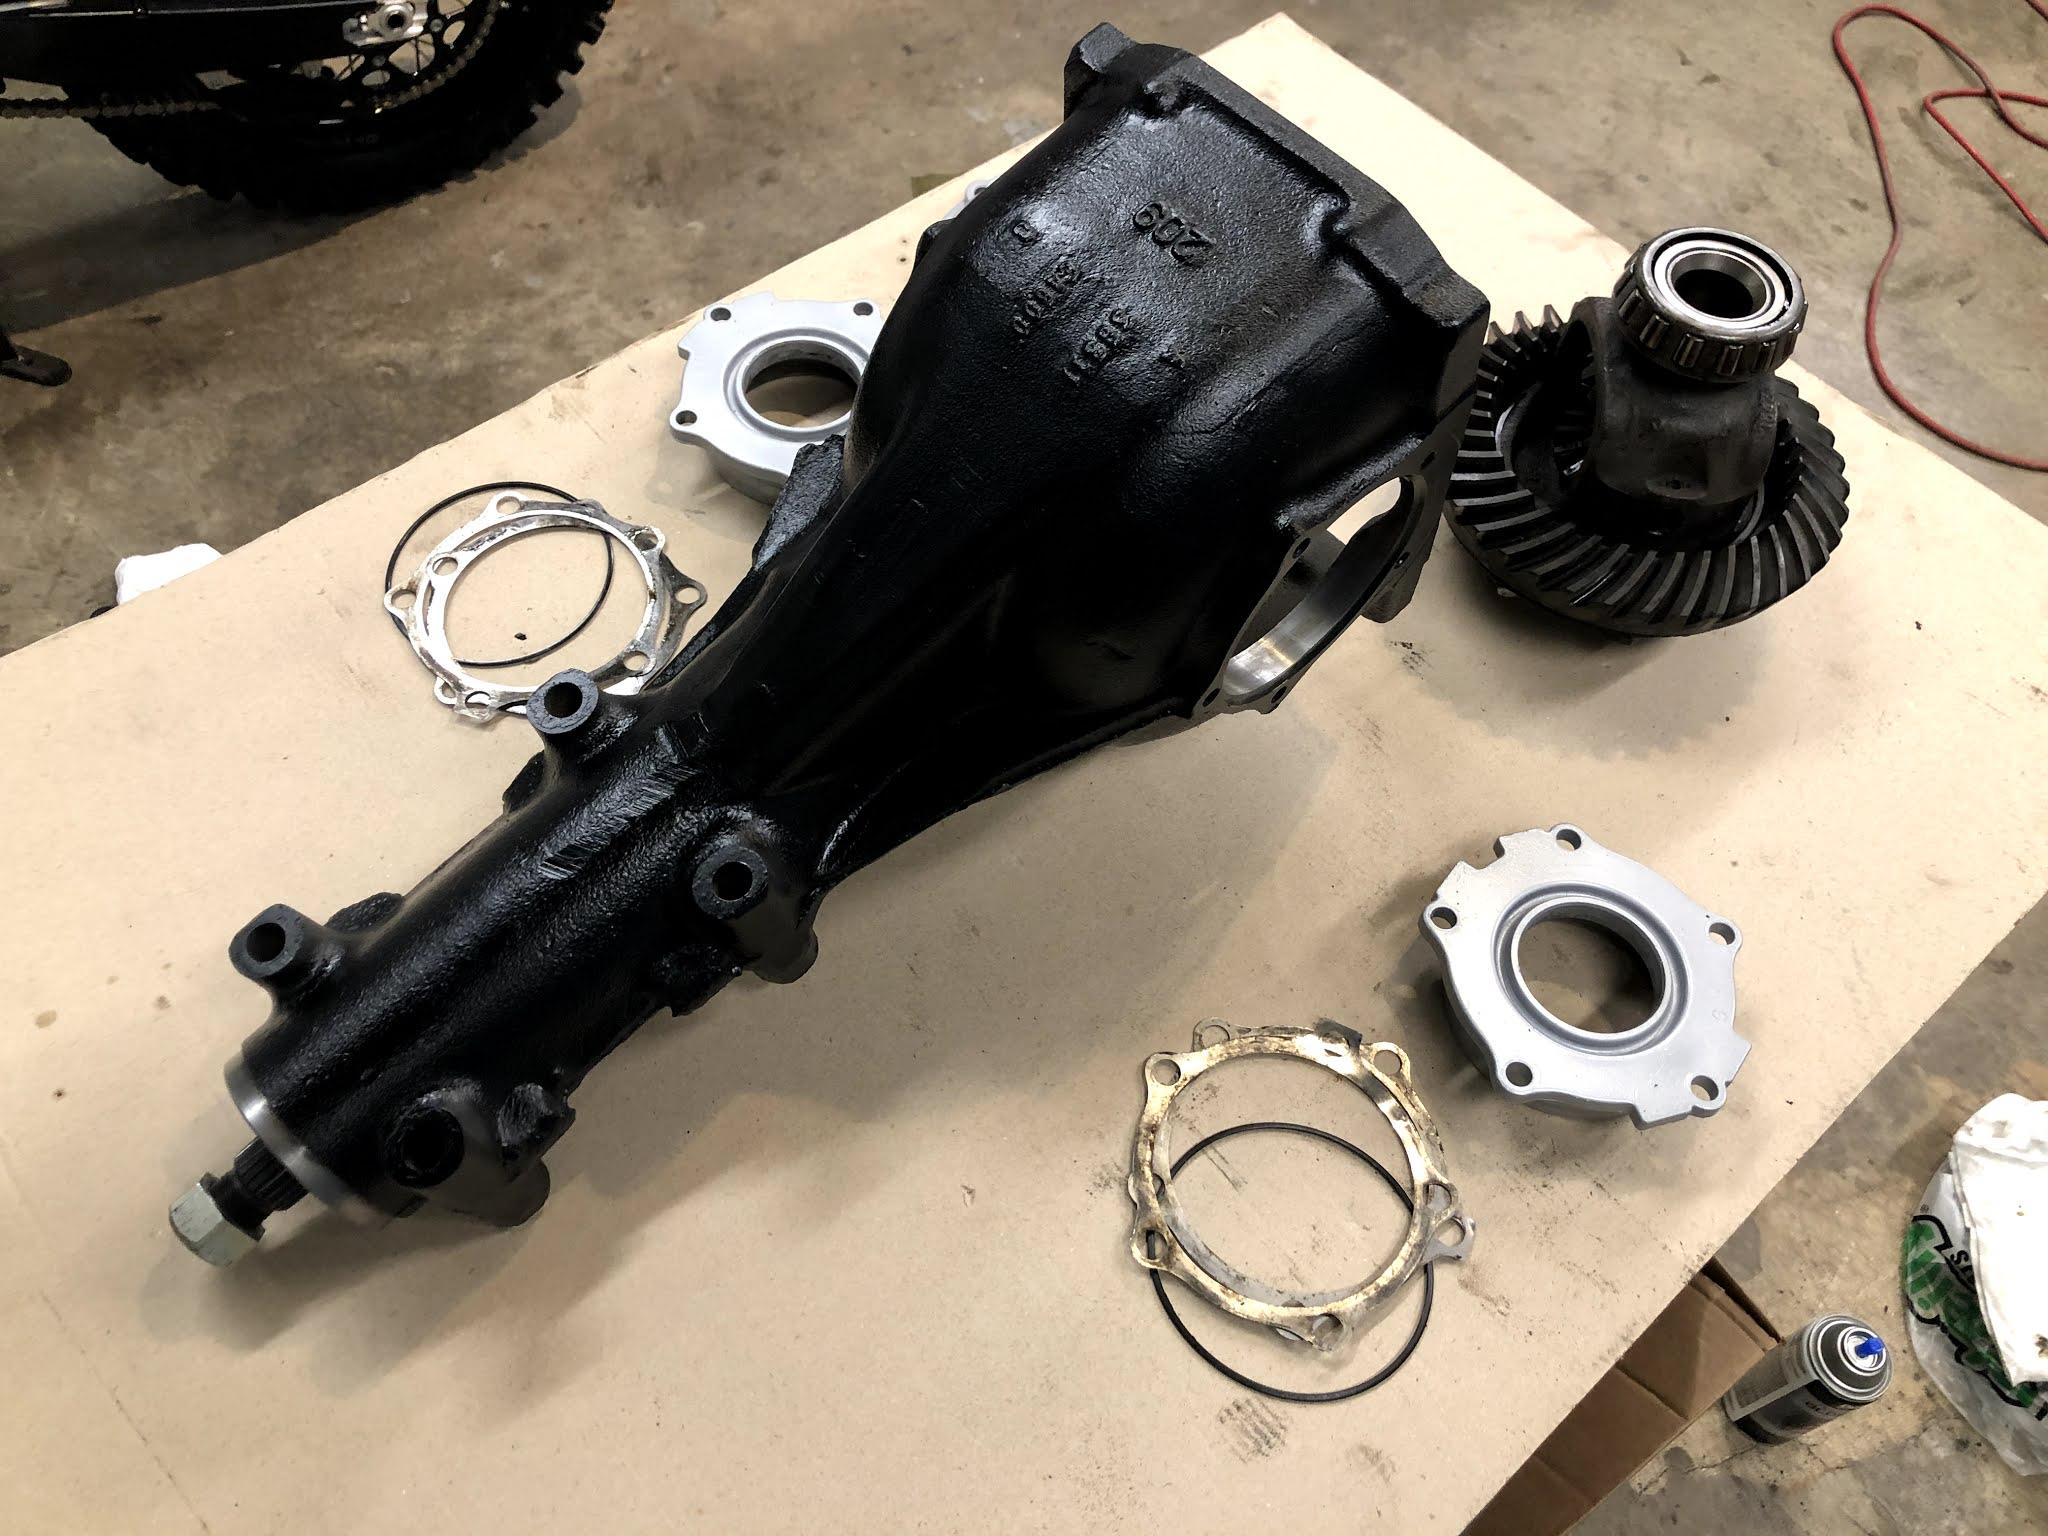
1 pointAfter a thorough cleaning and some fresh paint, the assembly was built back up with new seals, bearings, and contact pattern verified. At this point the remaining hardware not installed on the diff was sent off to be zinc plated. Once that returns it will get the final button up and torqued to spec. We are working with the goal of a 100% original appearing restoration (as possible). I know Nissan most likely built these assemblies up and painted the entire unit black, but I couldn't get myself to do that. A little raw aluminum and zinc hardware will look nicely when it's all back together.

 1 point
 -
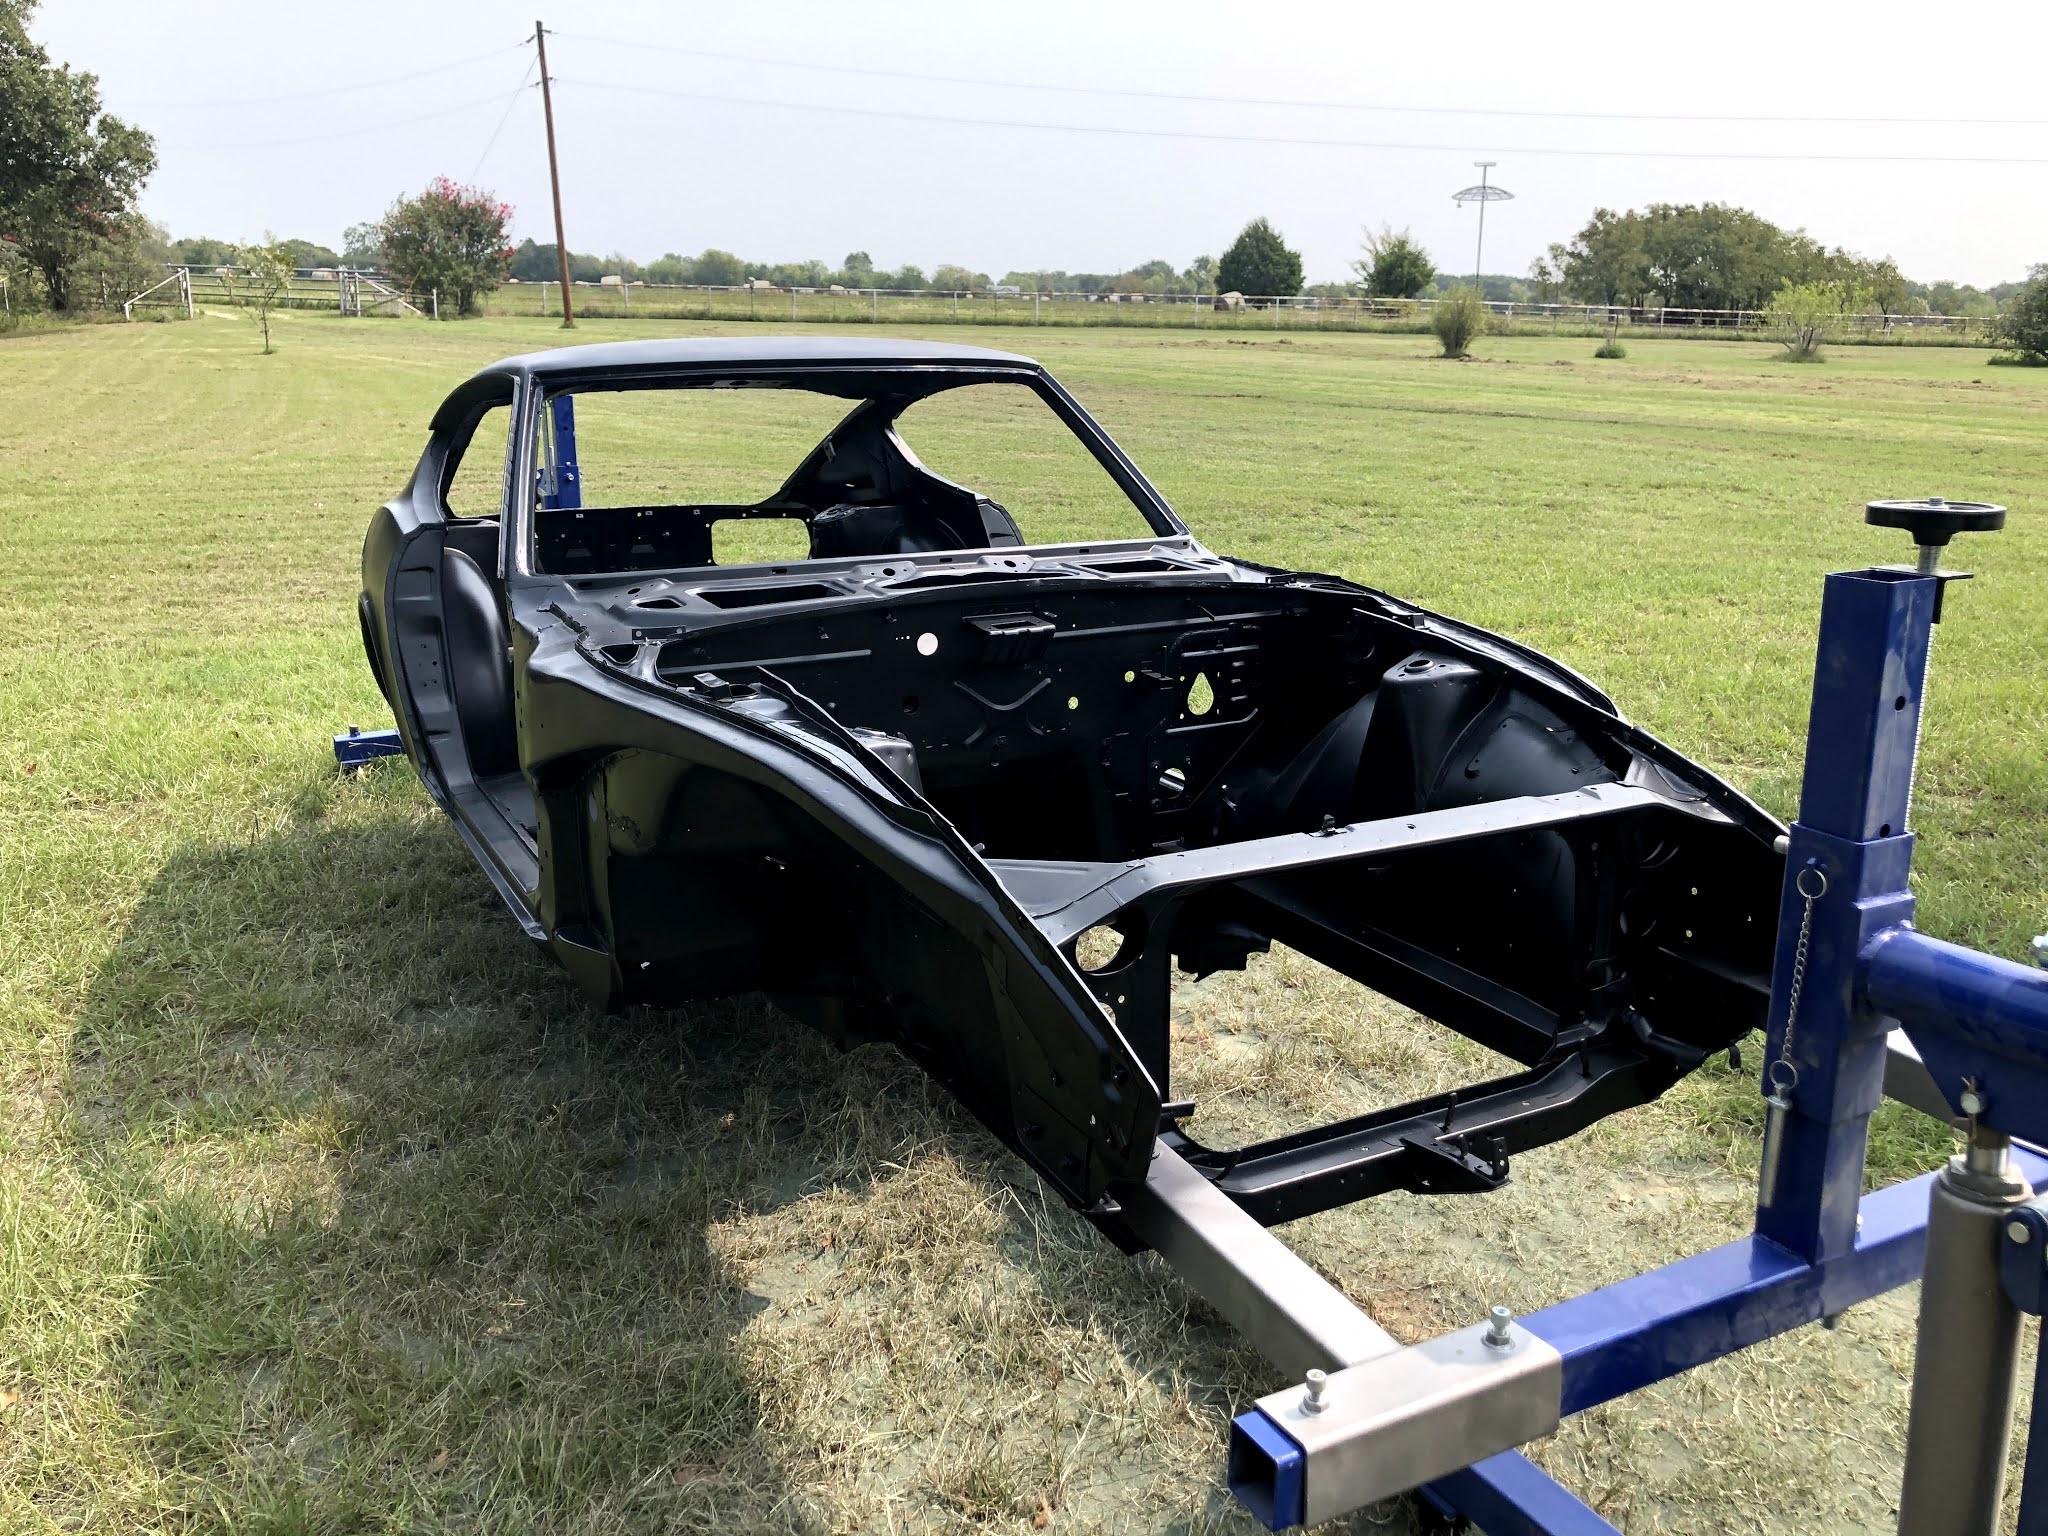
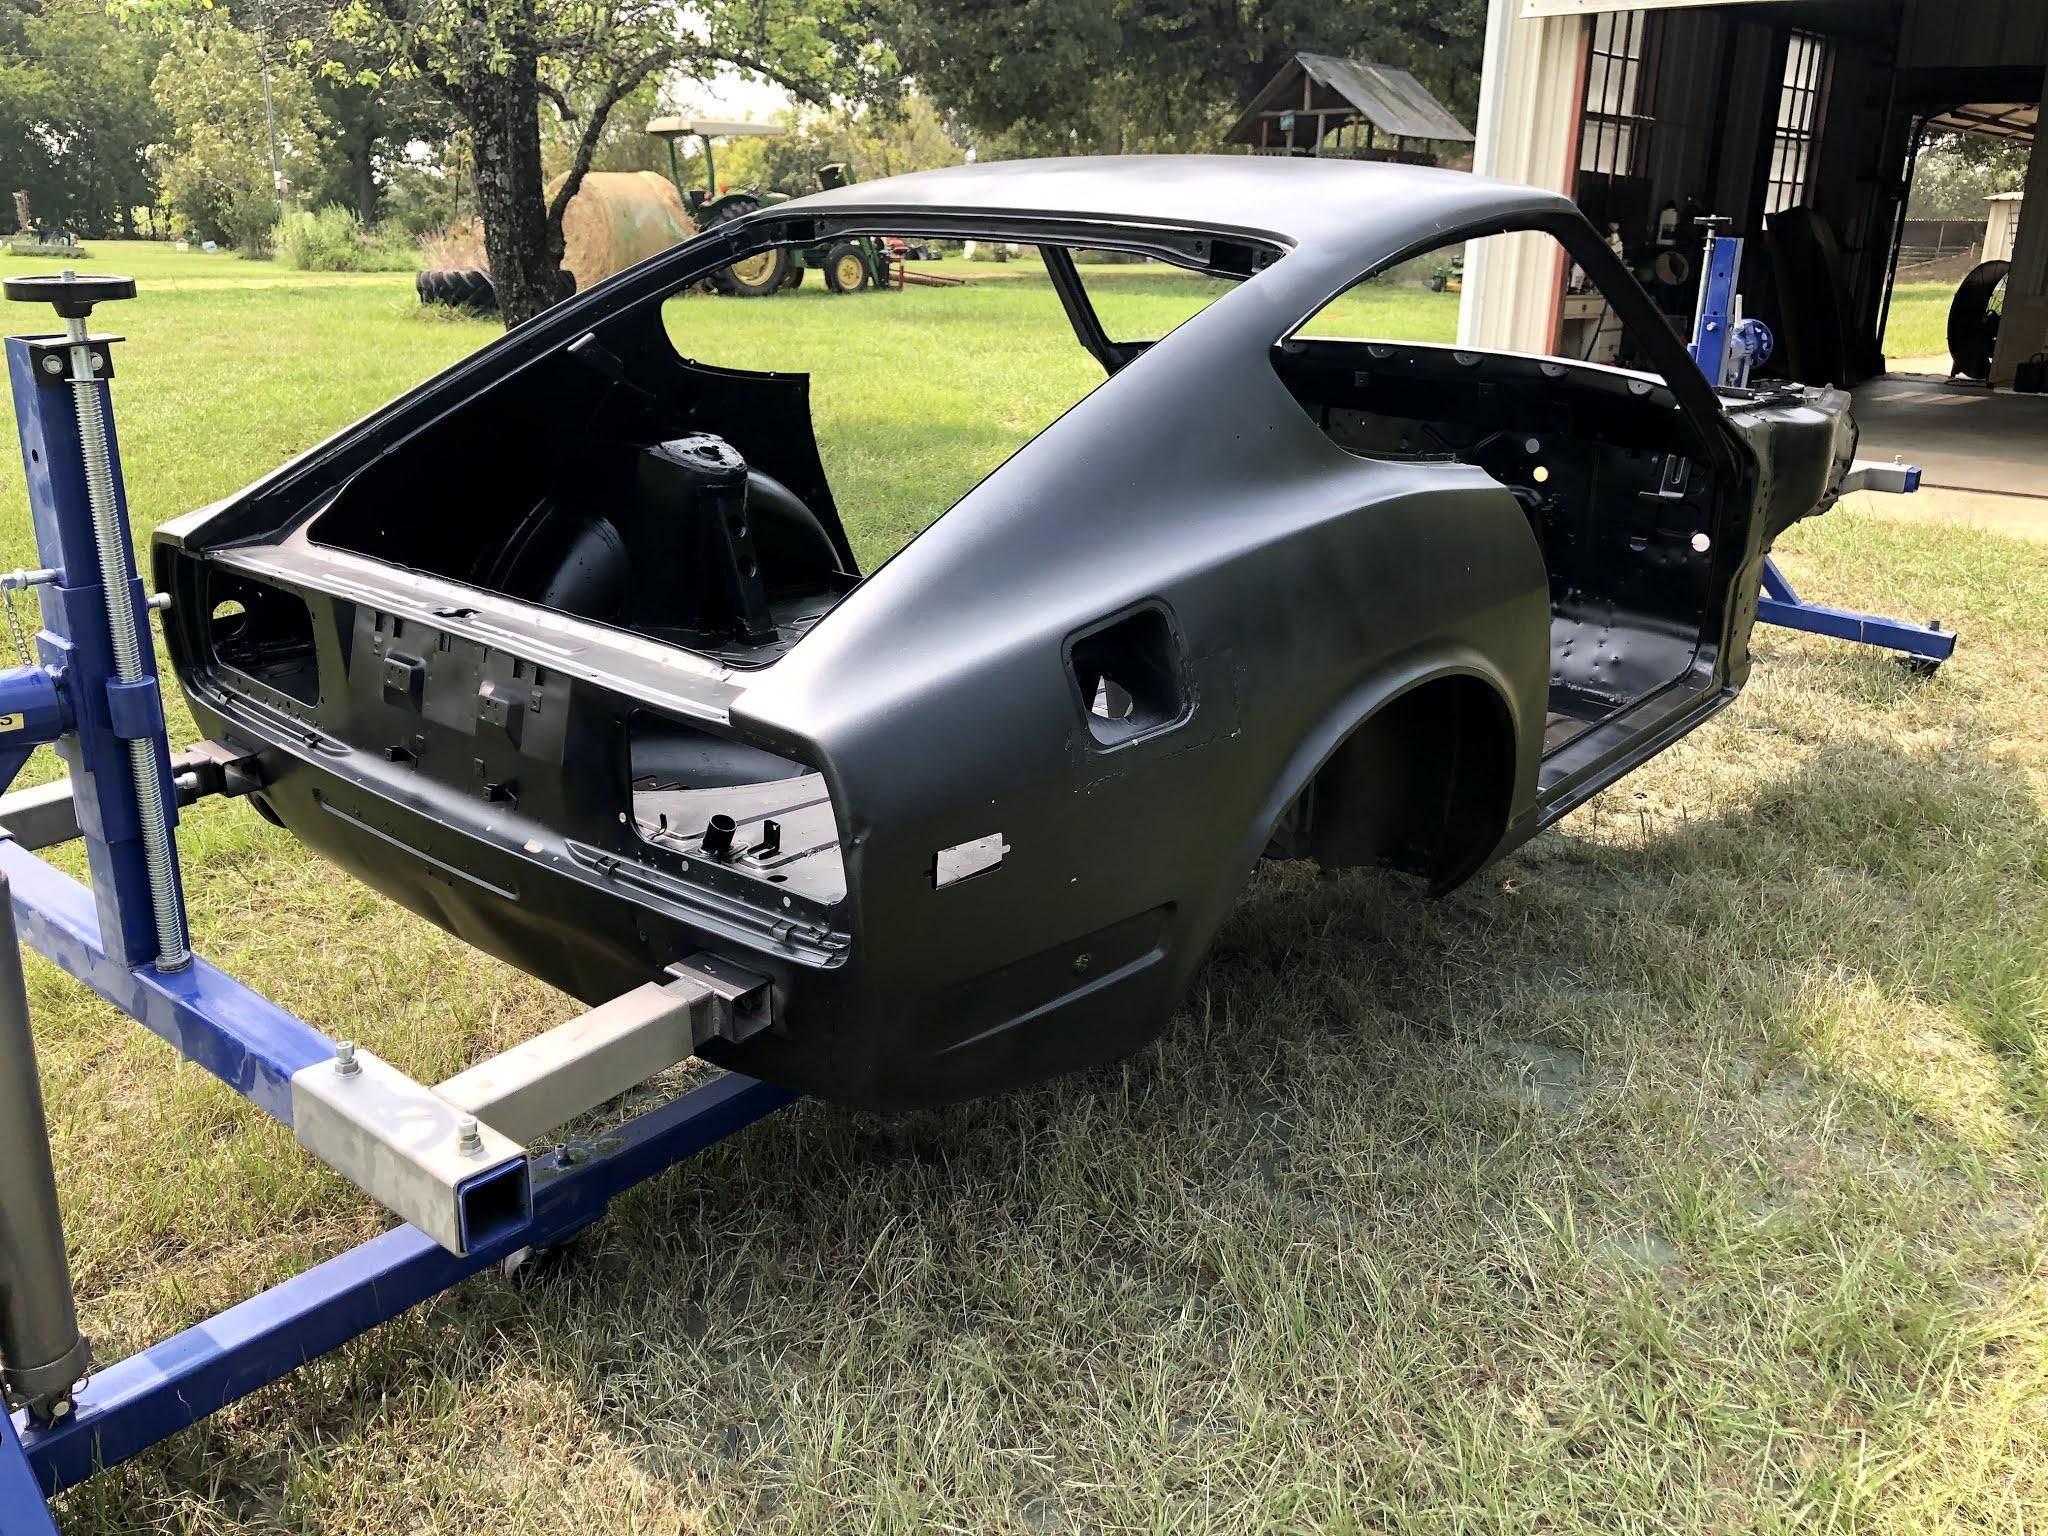
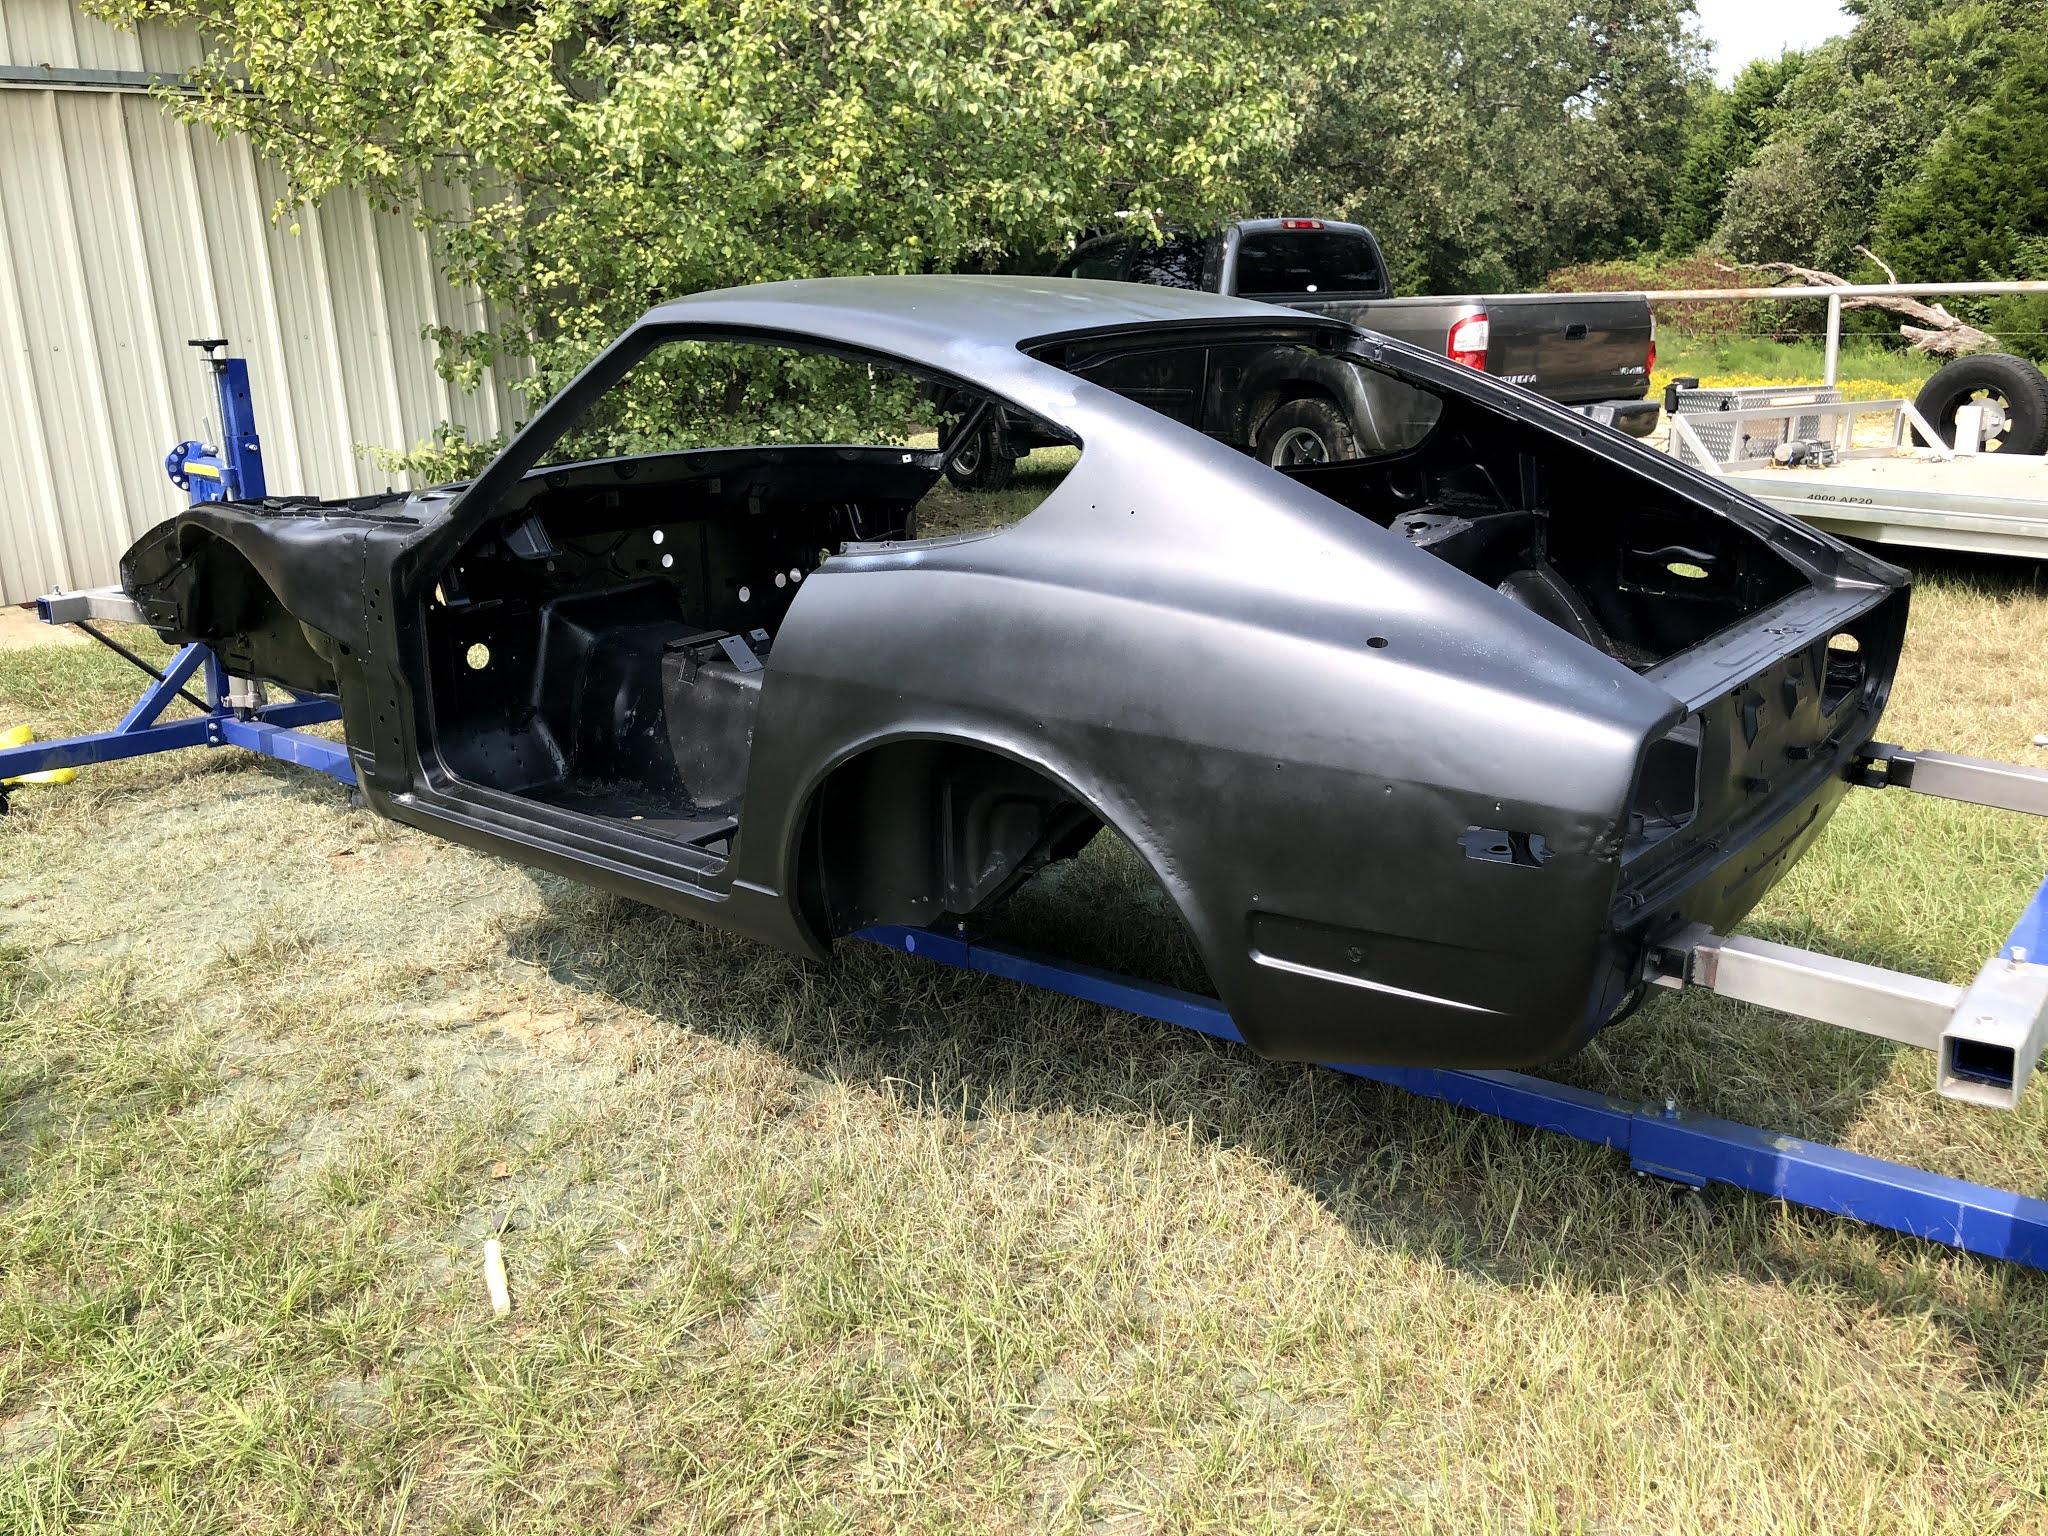
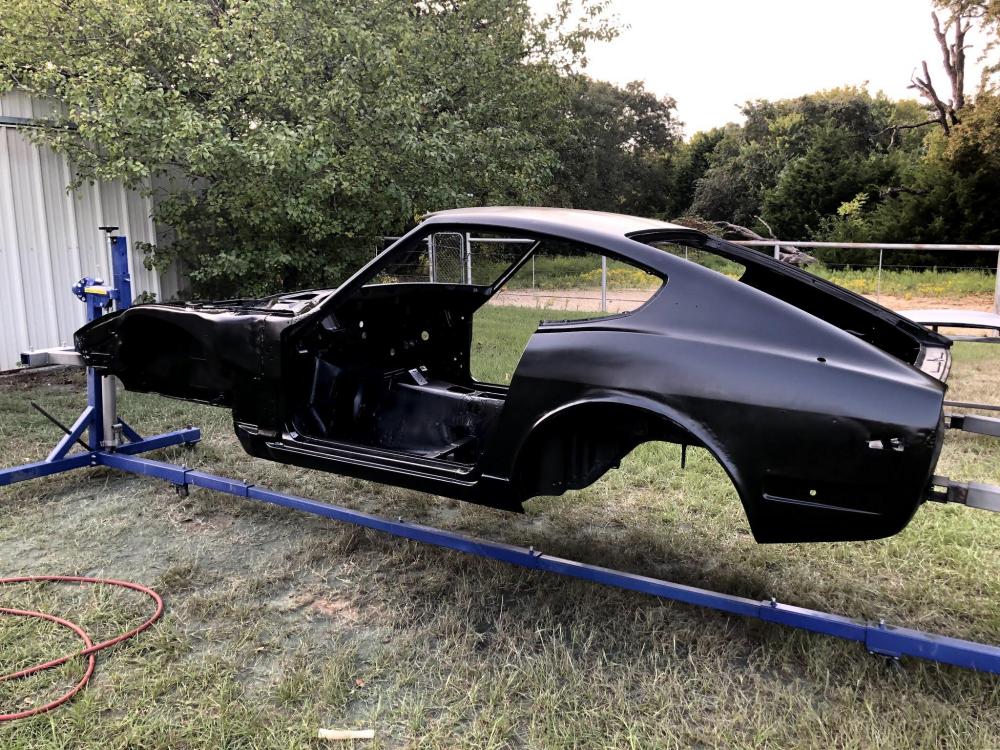
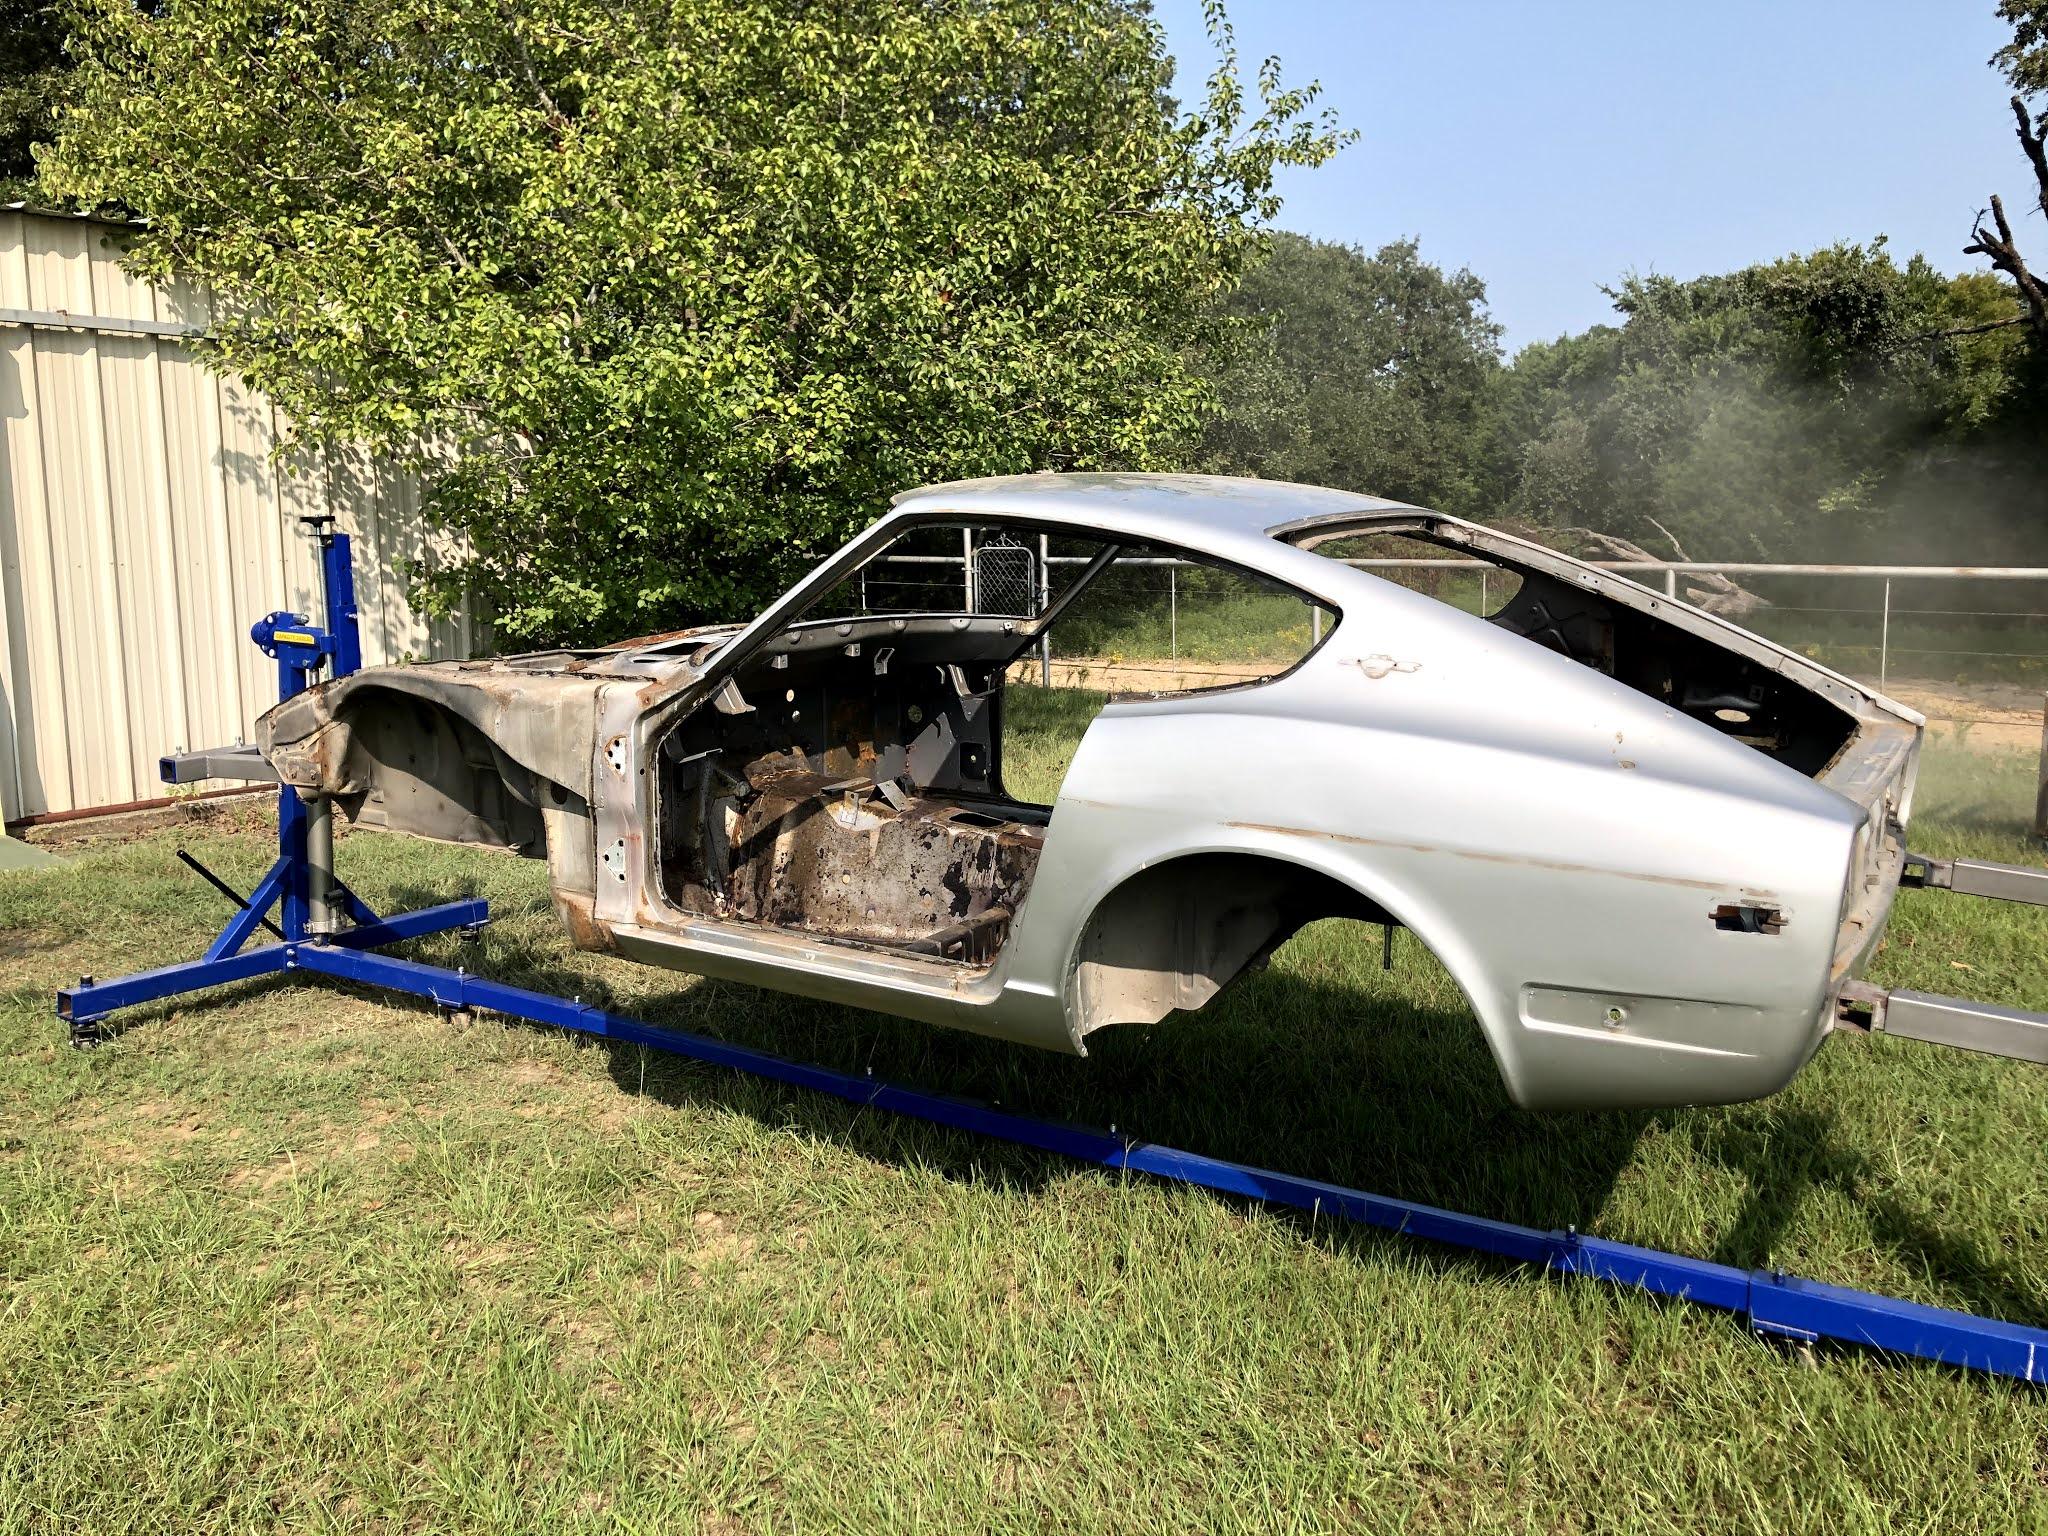
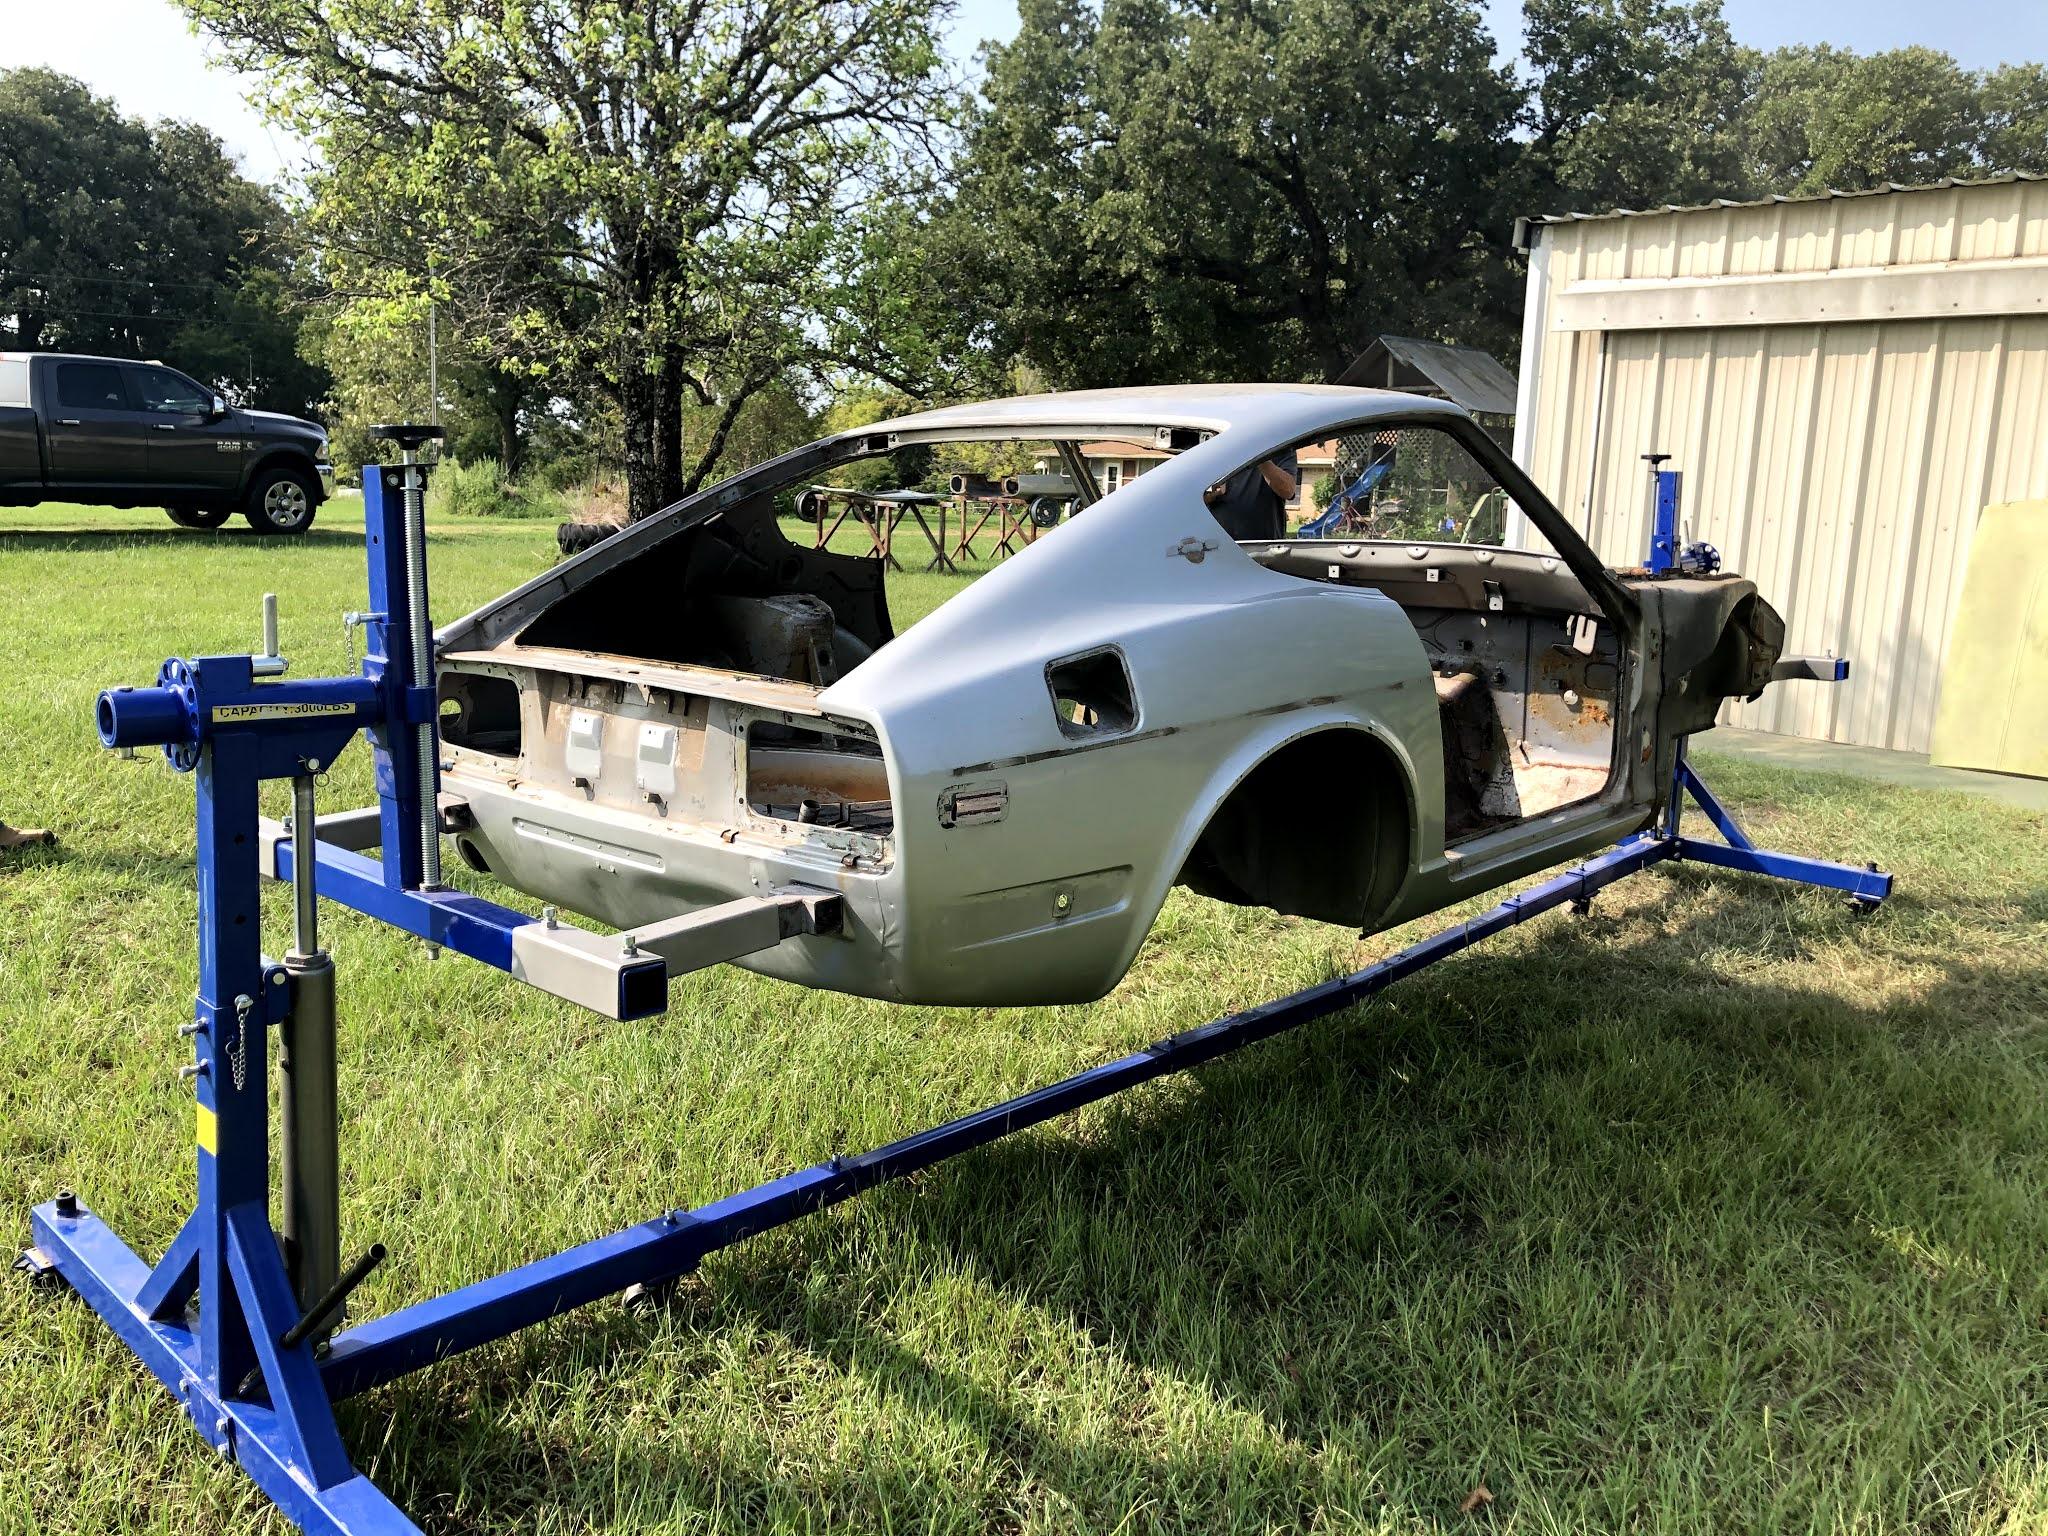
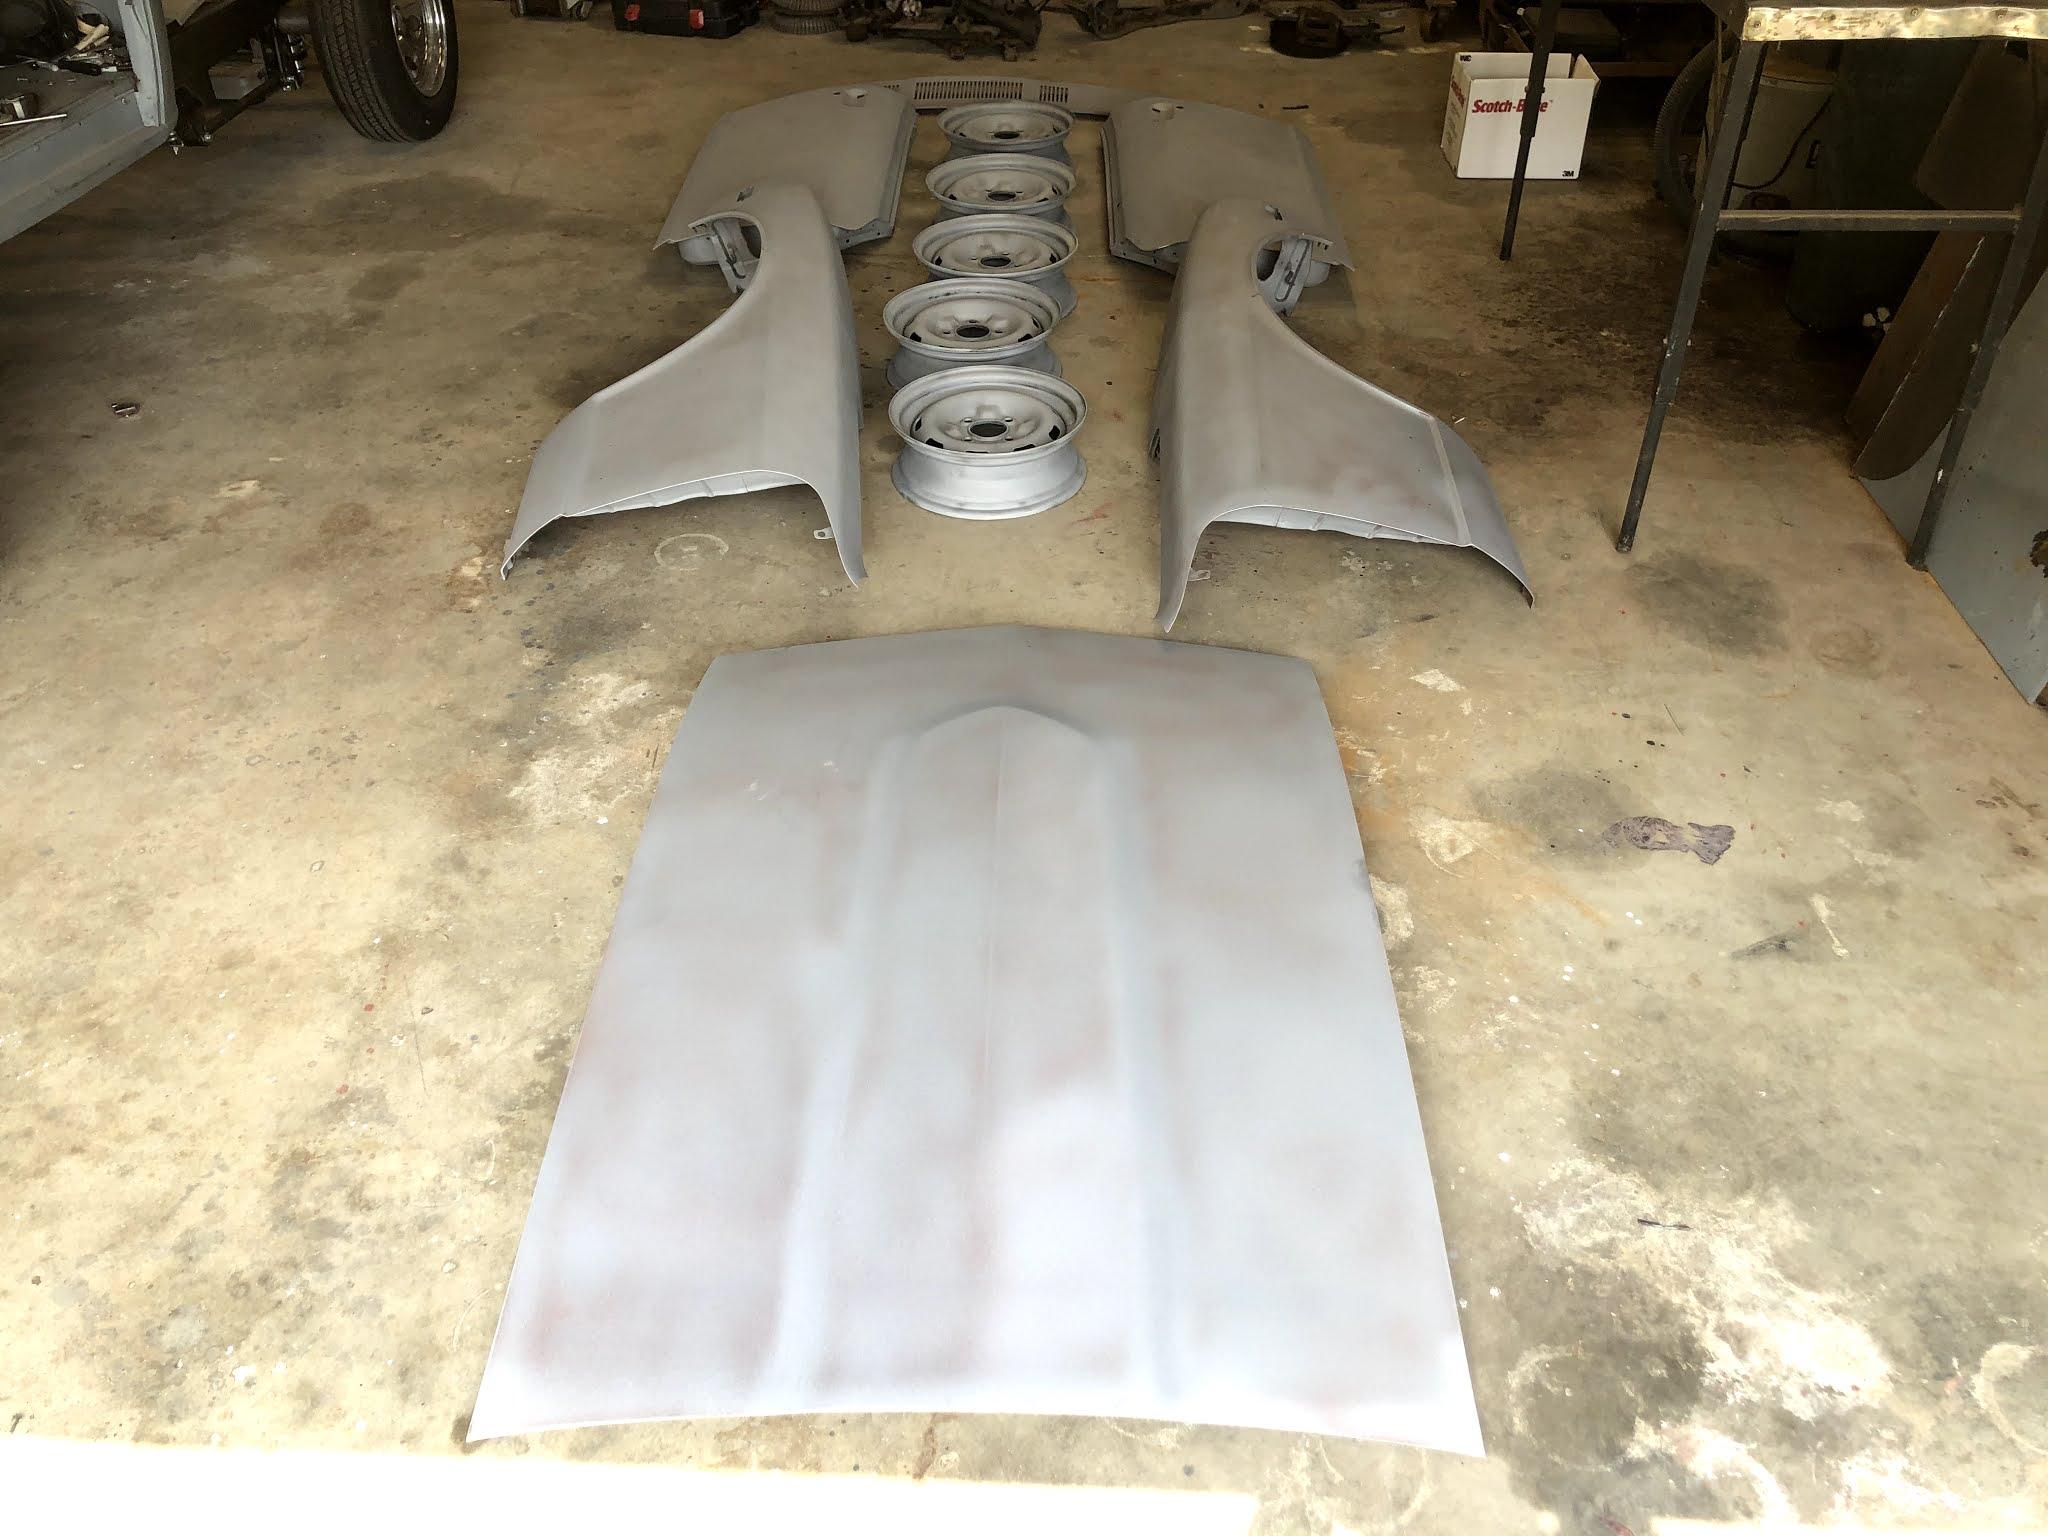
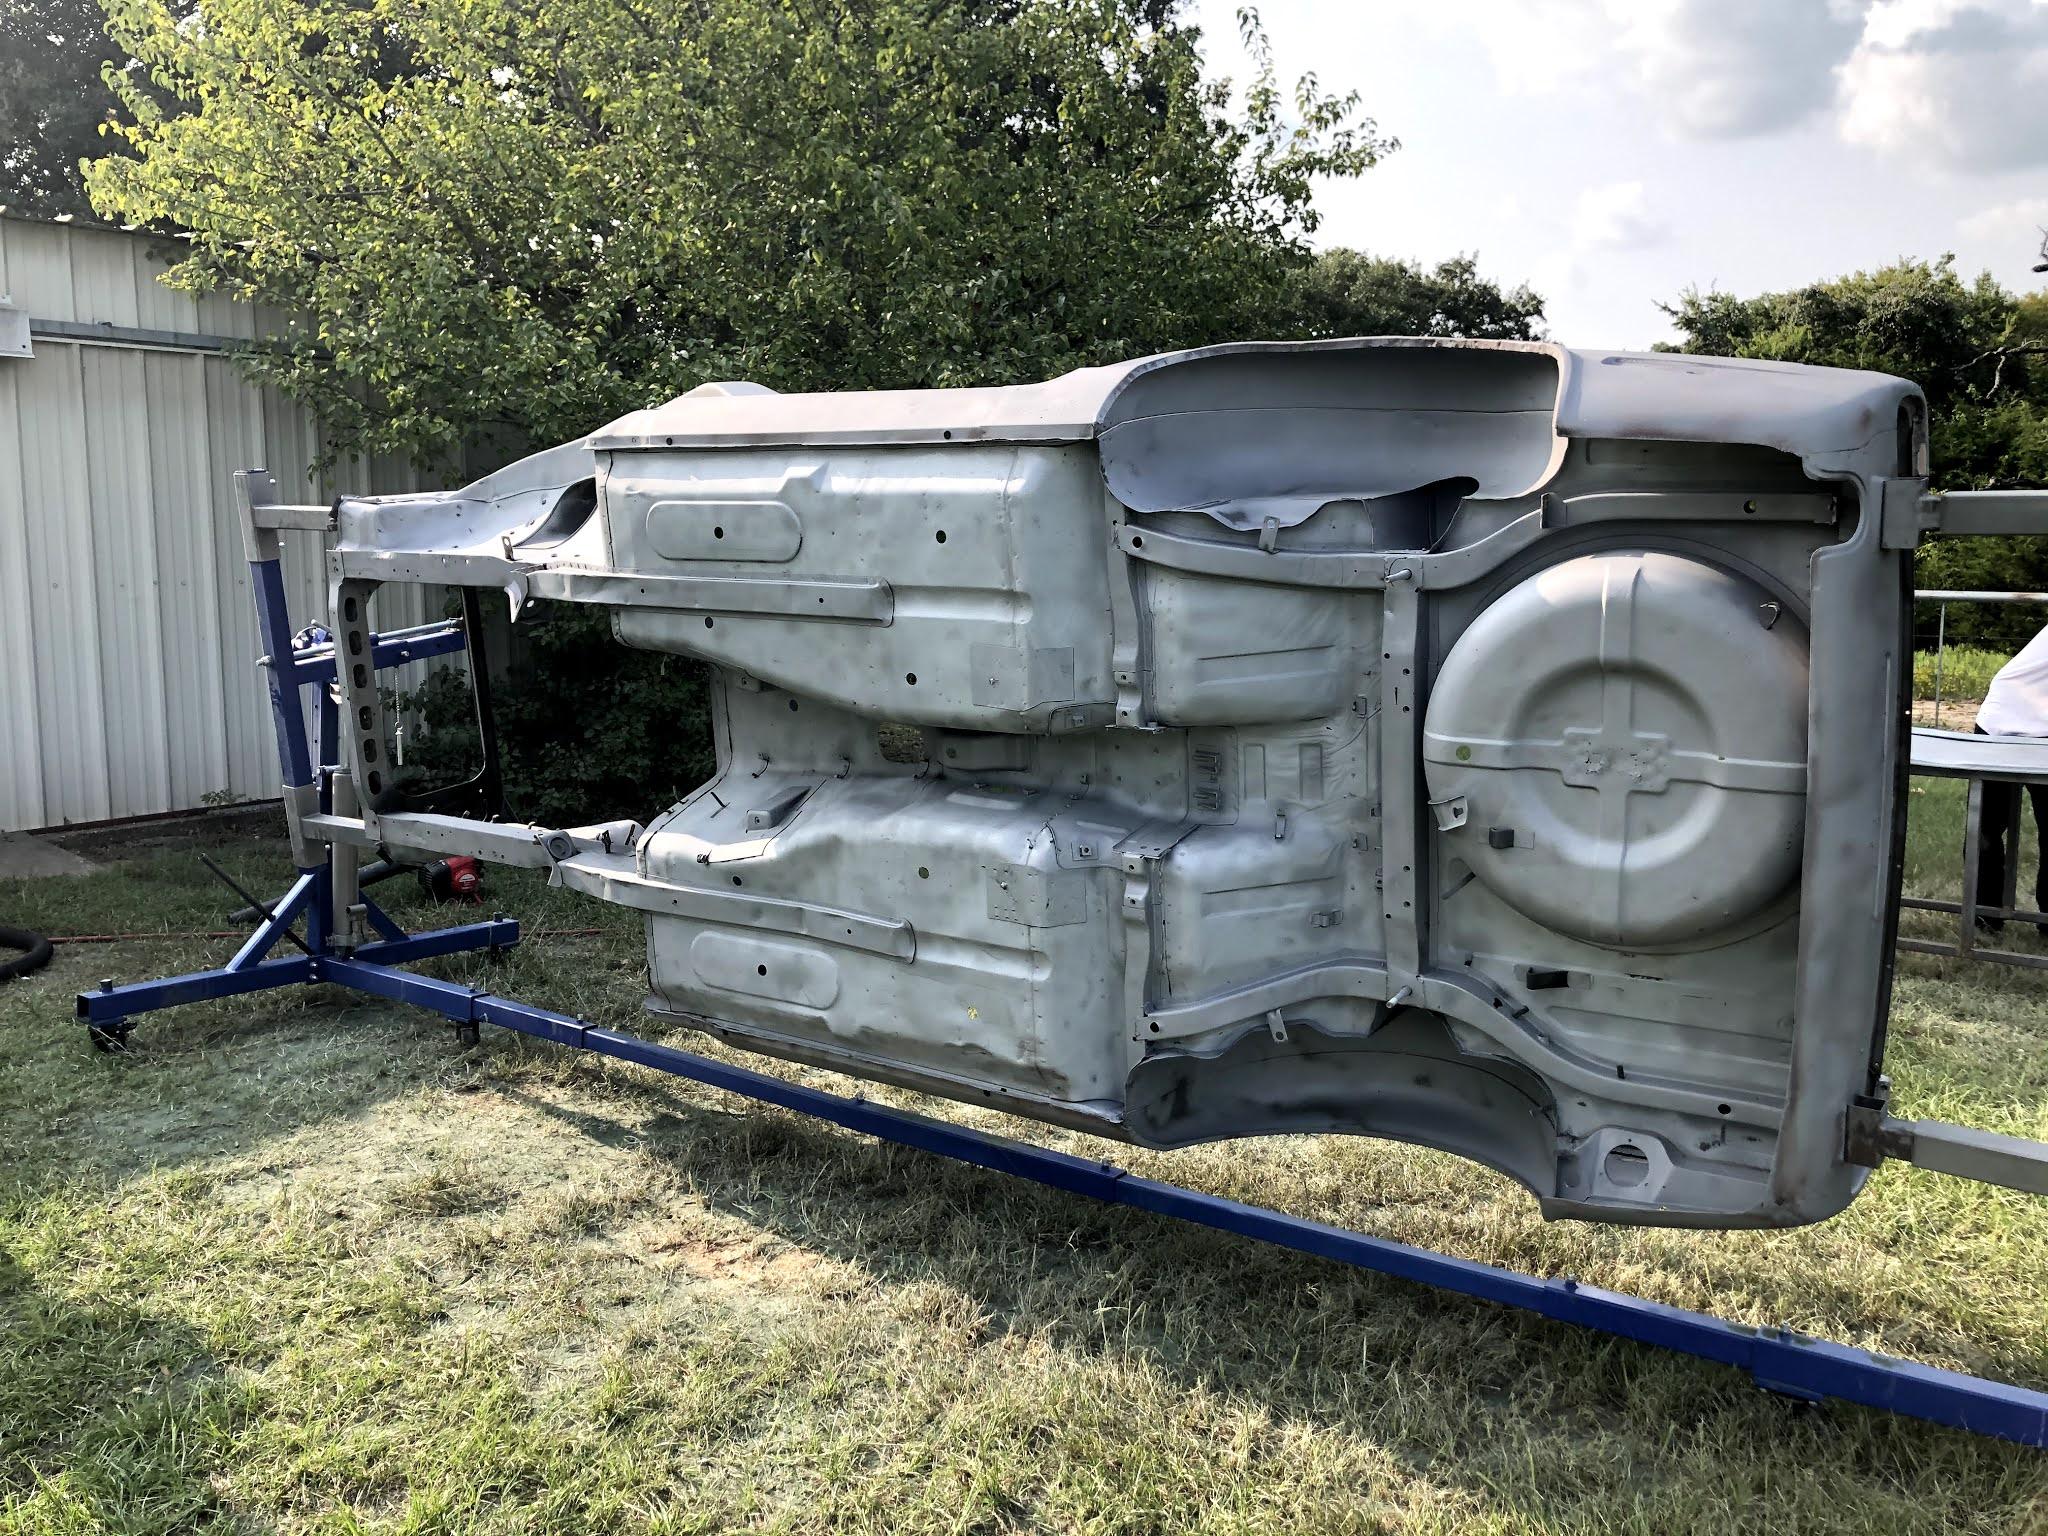
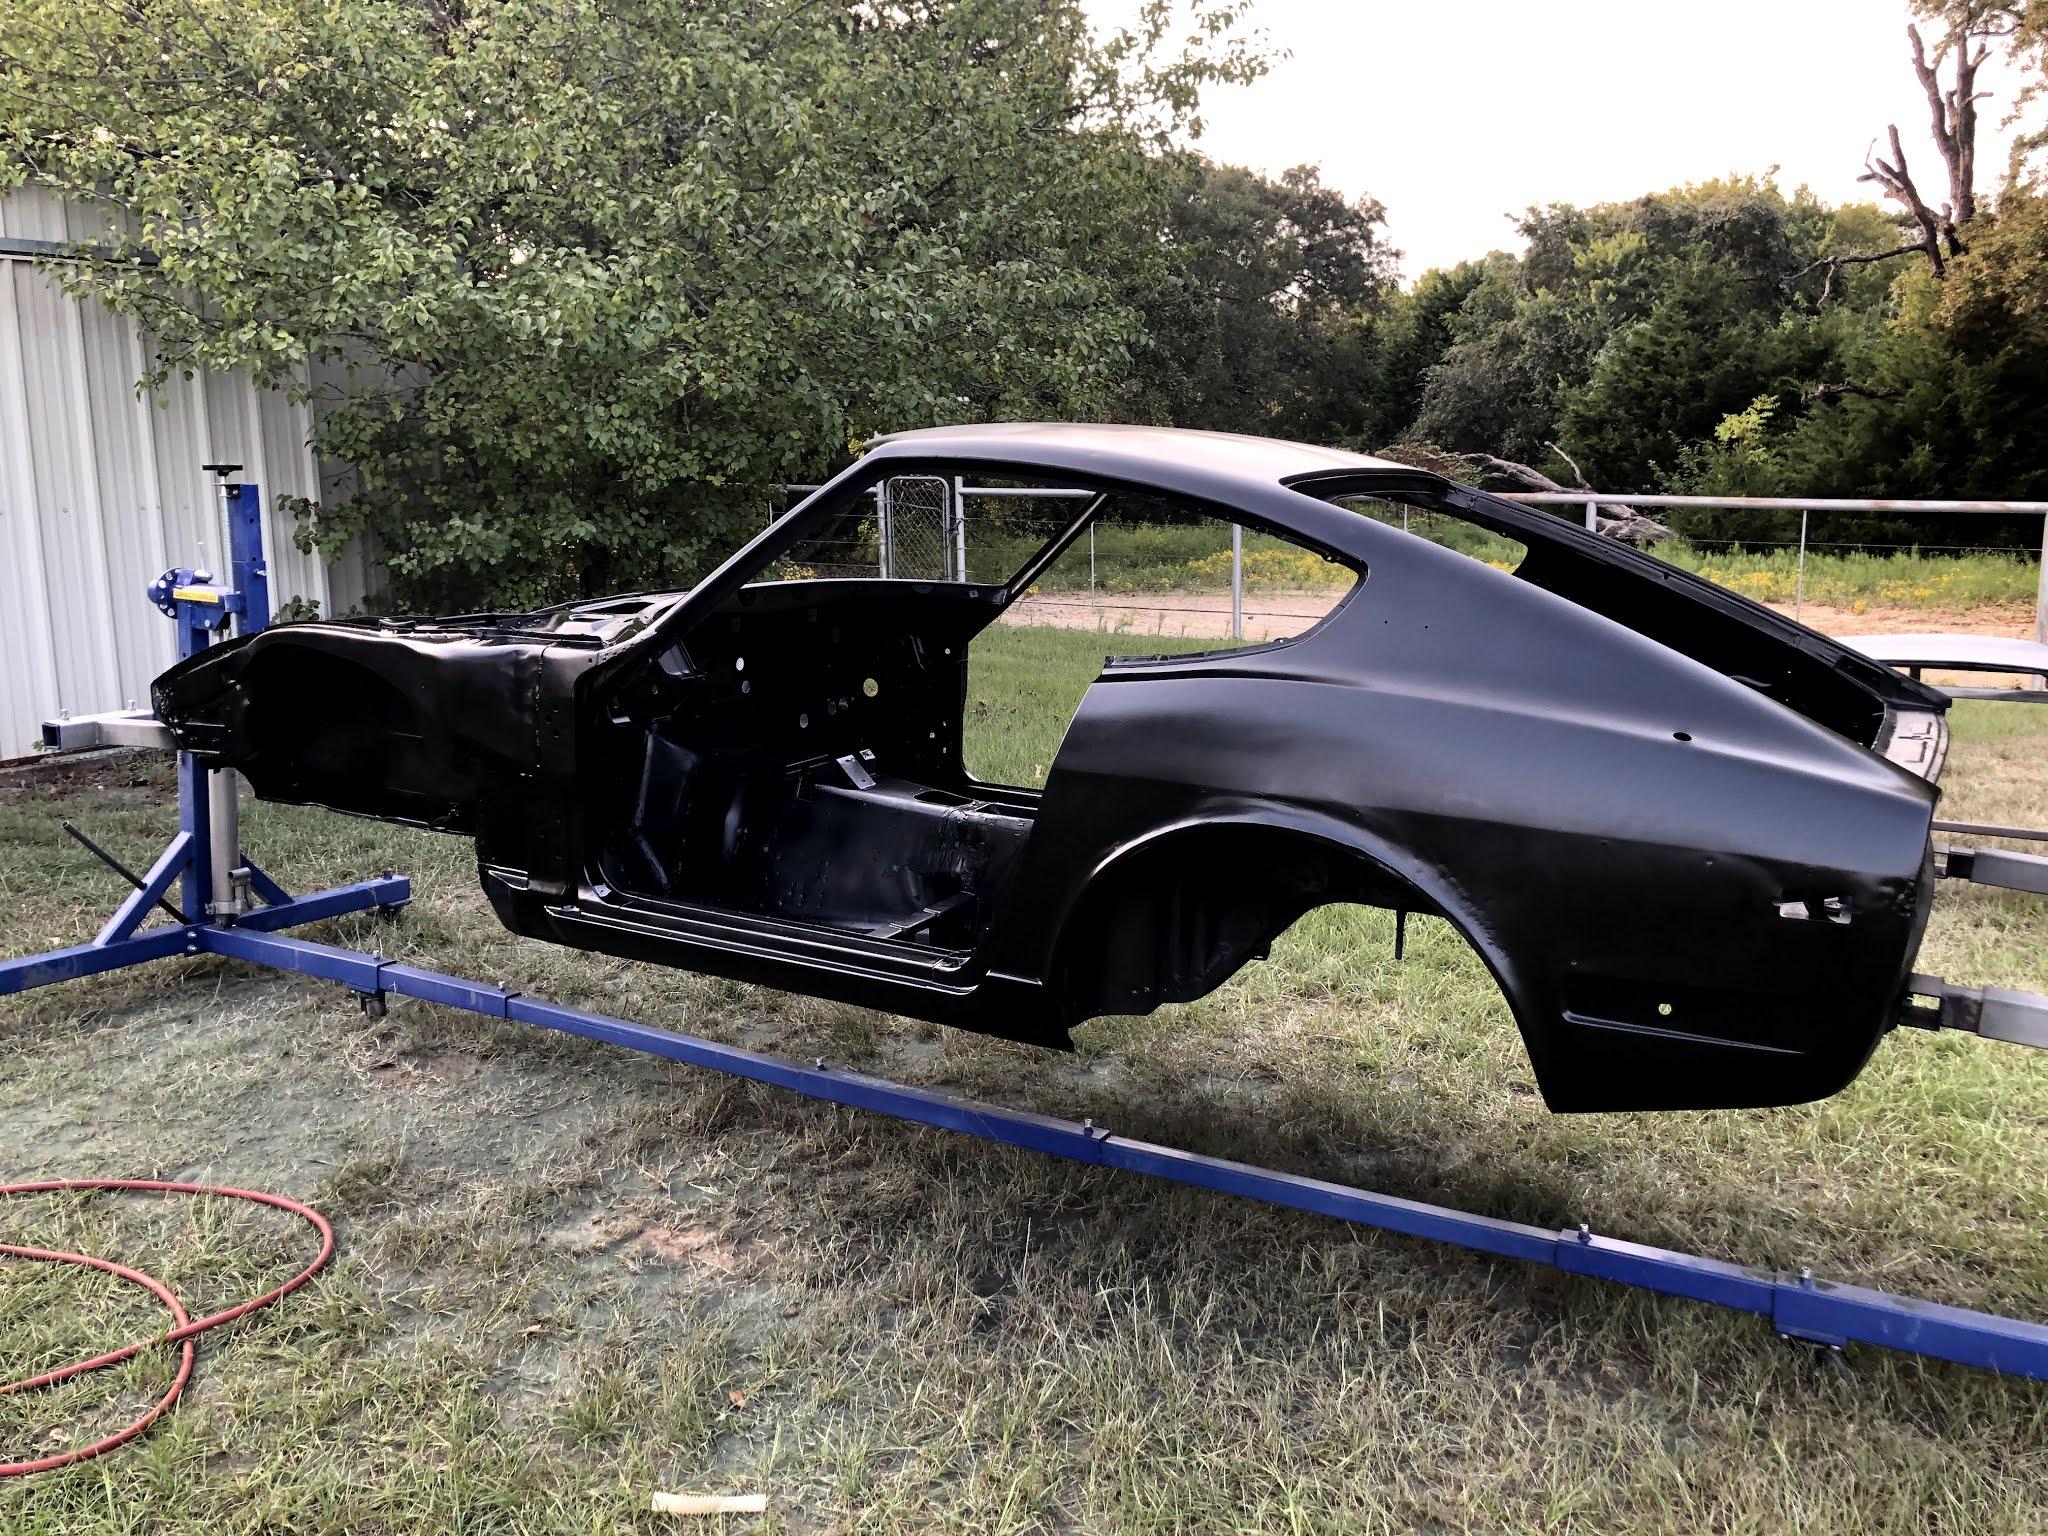
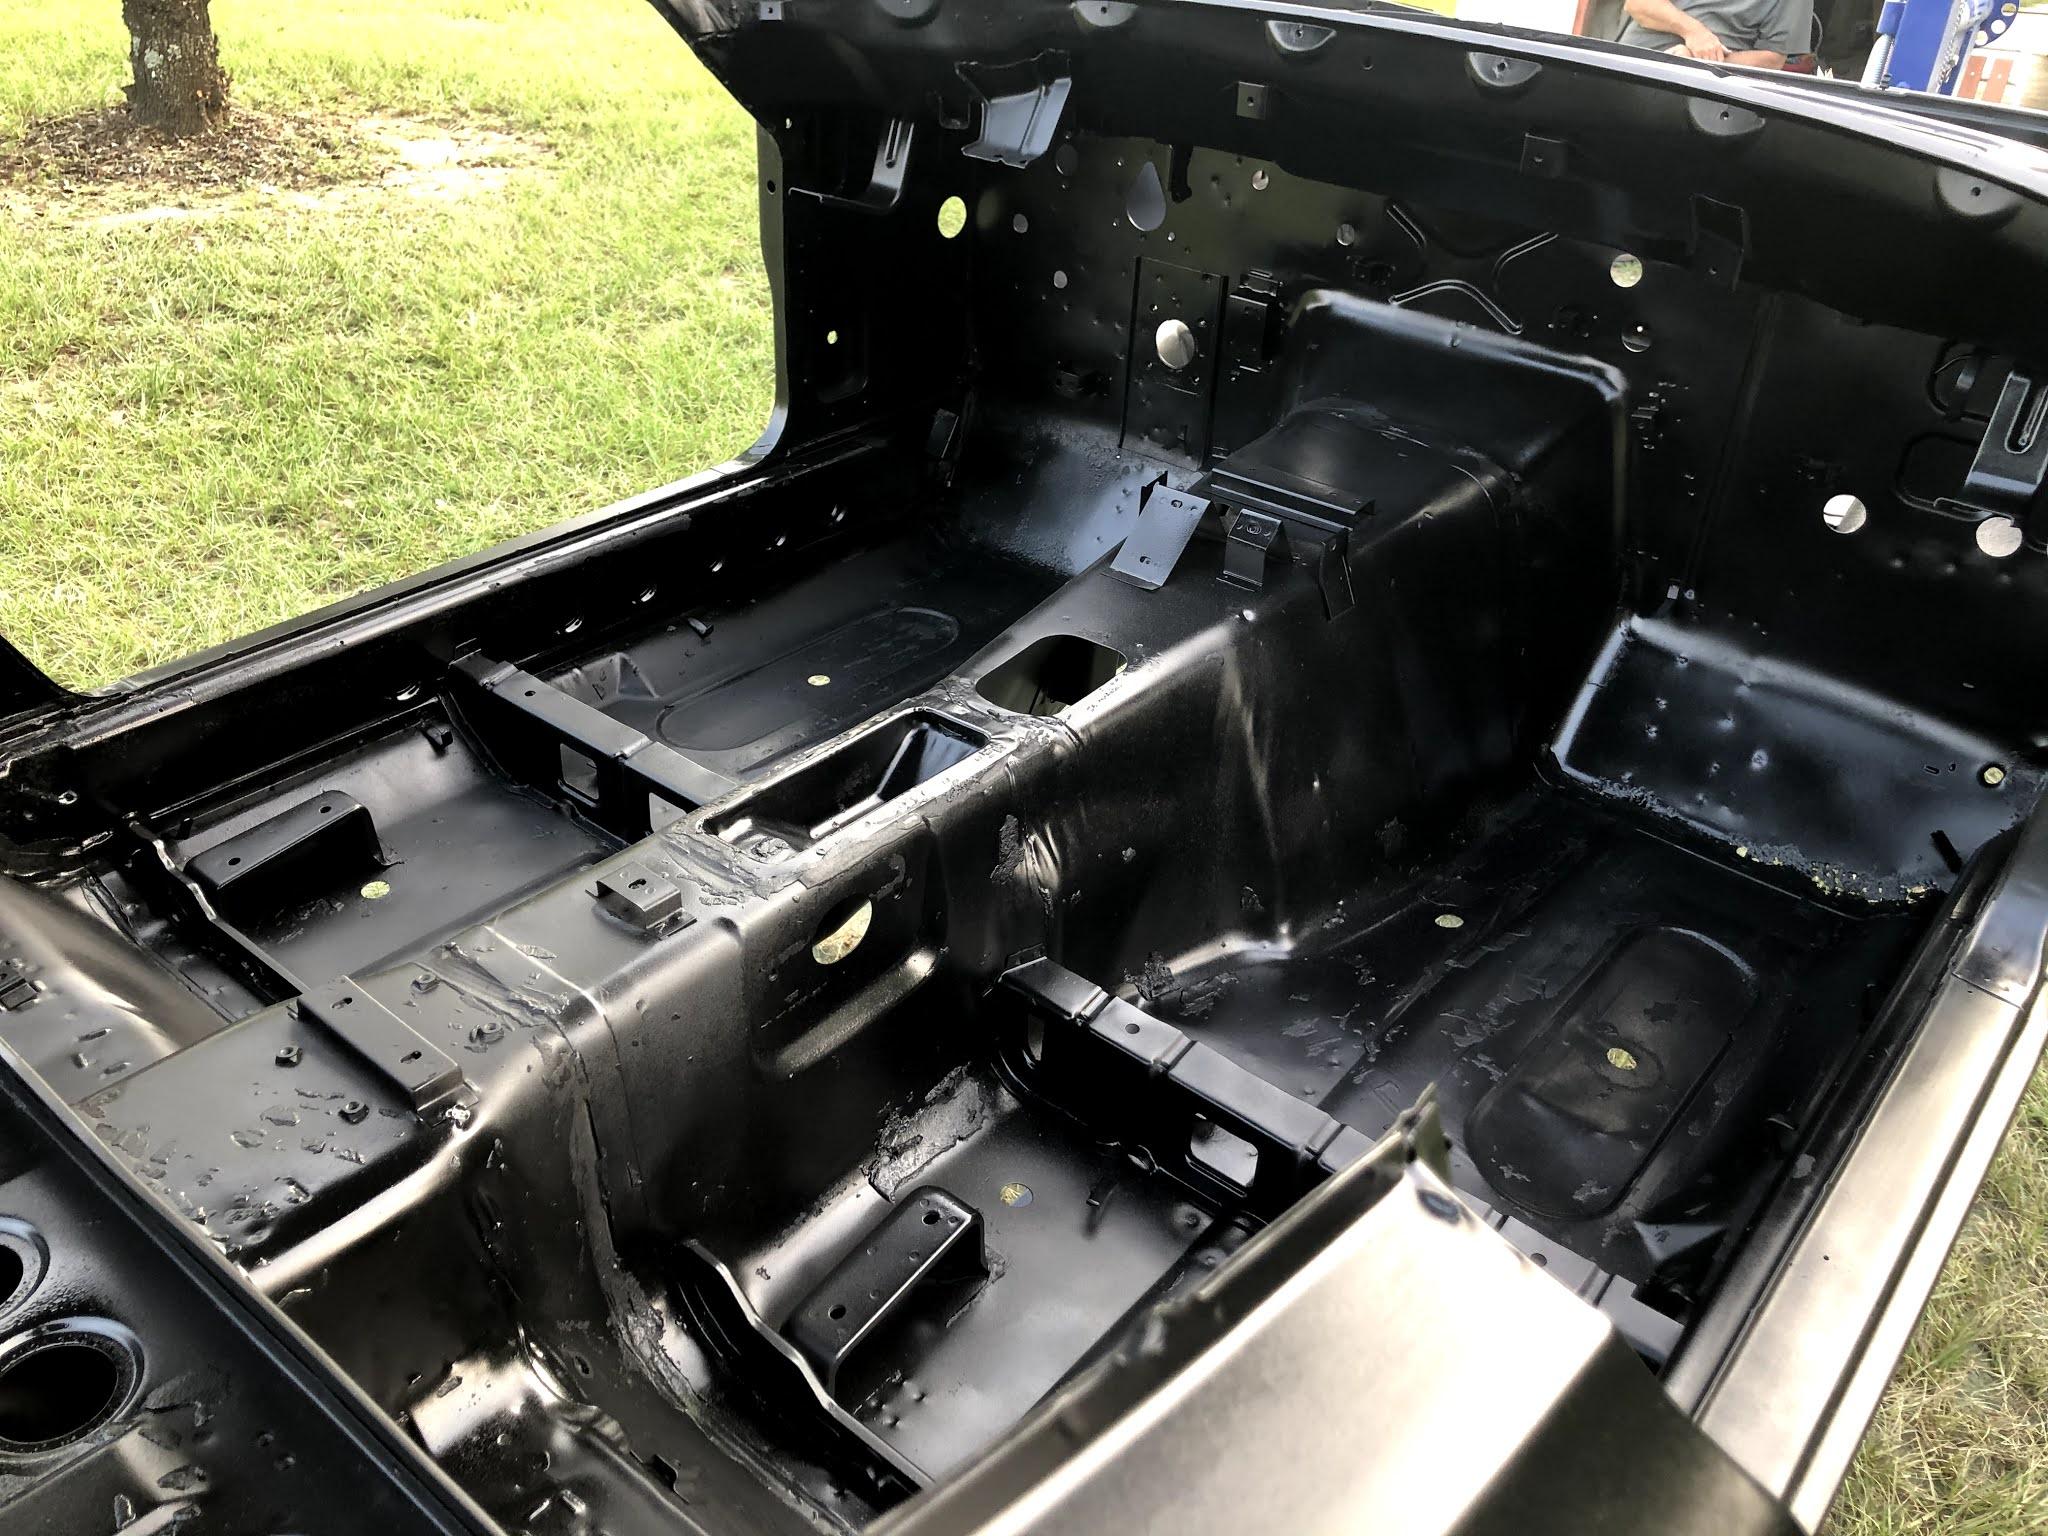
1 pointHuge milestone was accomplished on the Z. We had the entire shell and all components dustless blasted. We were very happy with the final results of this. No new problems were unearthed behind the respray. Shell was immediately followed up with a DTM (direct to metal) primer to prevent contamination from handling the raw steel.


.thumb.jpg.1cfe1d9109aa0ce668cdb6395a4066ad.jpg)
.thumb.jpg.34bc616637038fc0fc6997426b692e9d.jpg)

.thumb.jpg.403d9e6407955406e432cdcf50d2697d.jpg)
.thumb.jpg.3f565cbccebb6ed1b79281be63c4ebbb.jpg)

.thumb.jpg.f419e57109bc1f8518c65013bb22803e.jpg)
.thumb.jpg.a9d183e1bd1cd9a29d80fb04ae27e5ab.jpg)


 1 point
 -
0 points


.jpg.41ff9573640b0cfb1eab8b96a8680a92.jpg)


.jpg.916a28794d4ce29e9bcc75bd1047e19a.jpg)
.jpg.670db01c035099ecace5304c4984870b.jpg)
.jpg.f7c1741bfacaa12421e3547c32a41dec.jpg)
.jpg.84da57c65c5a6bcb34bfd12b1c6884b3.jpg)
.jpg.bf1e9b33728f5bc91953e414f30df686.jpg)
.jpg.5f0a8680469f0ba5e84f339d2786ee89.jpg)