


Leaderboard
-
Patcon
 Subscriber
 5Points11,142Posts
 -
ETI4K
Subscriber4Points383Posts -

siteunseen
Free Member4Points15,115Posts -
bravemushi260z
Free Member3Points36Posts


Popular Content
Showing content with the highest reputation on 05/02/2021 in all areas
-
Yep. That makes some noise. I'm surprised I can actually hear the turbine over the exhaust. The exhaust drone will really tire you out. I remember the first time I took a trip of many hours in a car with air conditioning. It was quiet, smooth, and QUIET. Those hours seemed to have passed in minutes. That said, that exhaust does sound real)y nice.2 points
-
2 pointsMrs. Racer 2.0 lived there for a while when married to her second husband. She told me about this the other day. The way I see it, situations like this will result in natural selection. All the idiots who ignore the cautionary protocols will infect each other, and hopefully they will all be removed from the gene pool.2 points
-
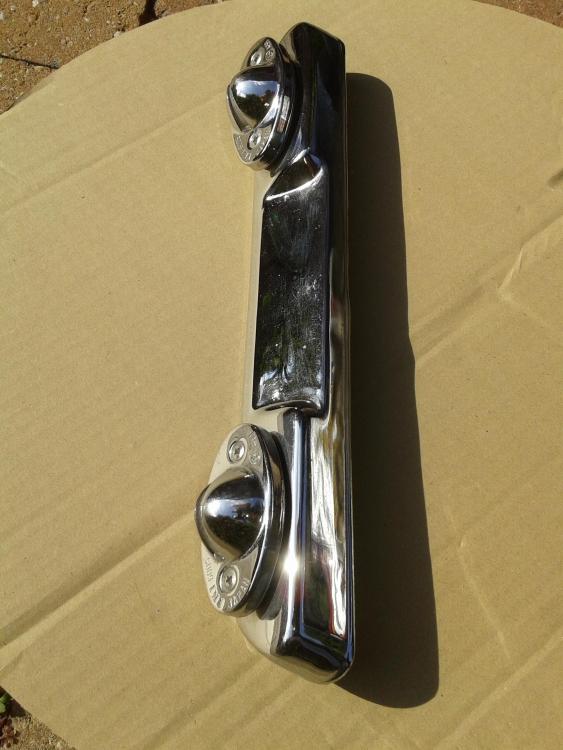
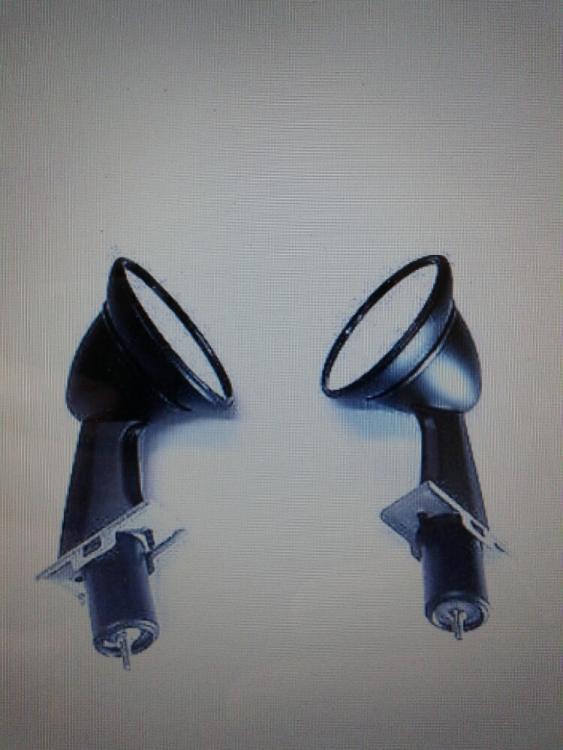
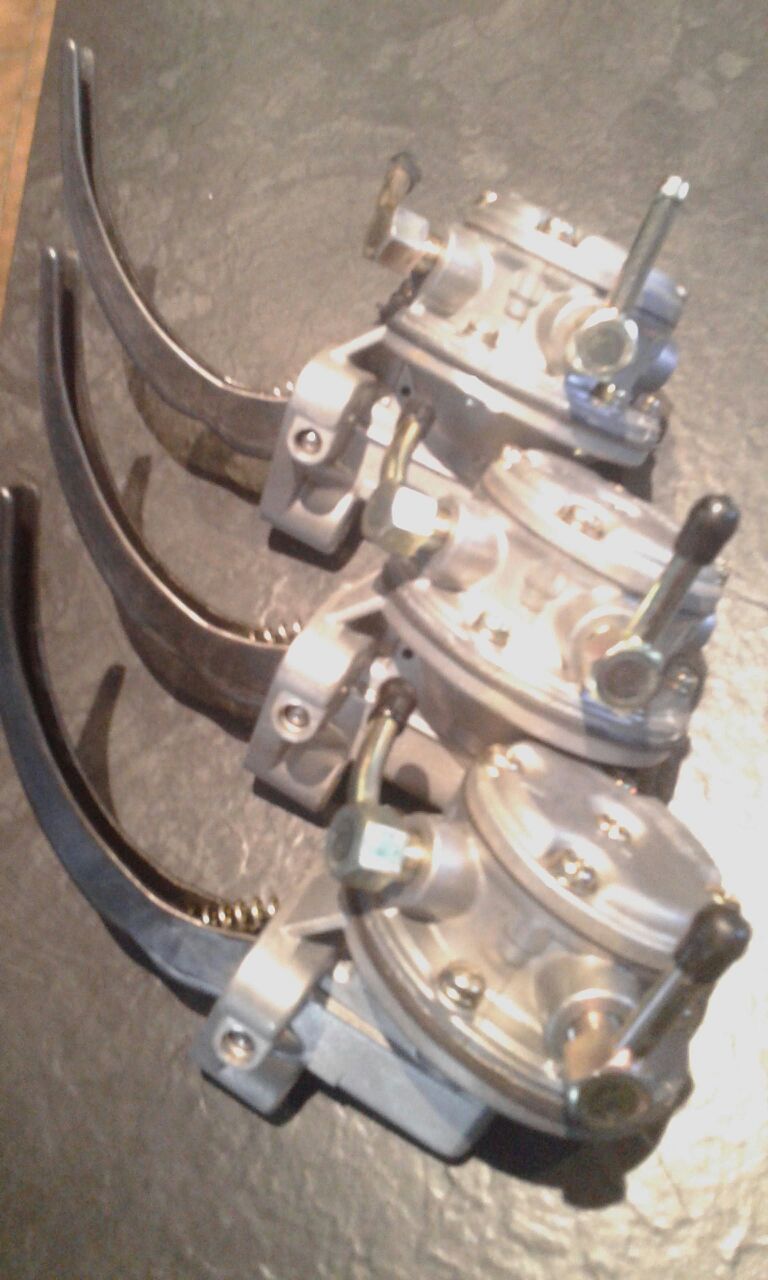
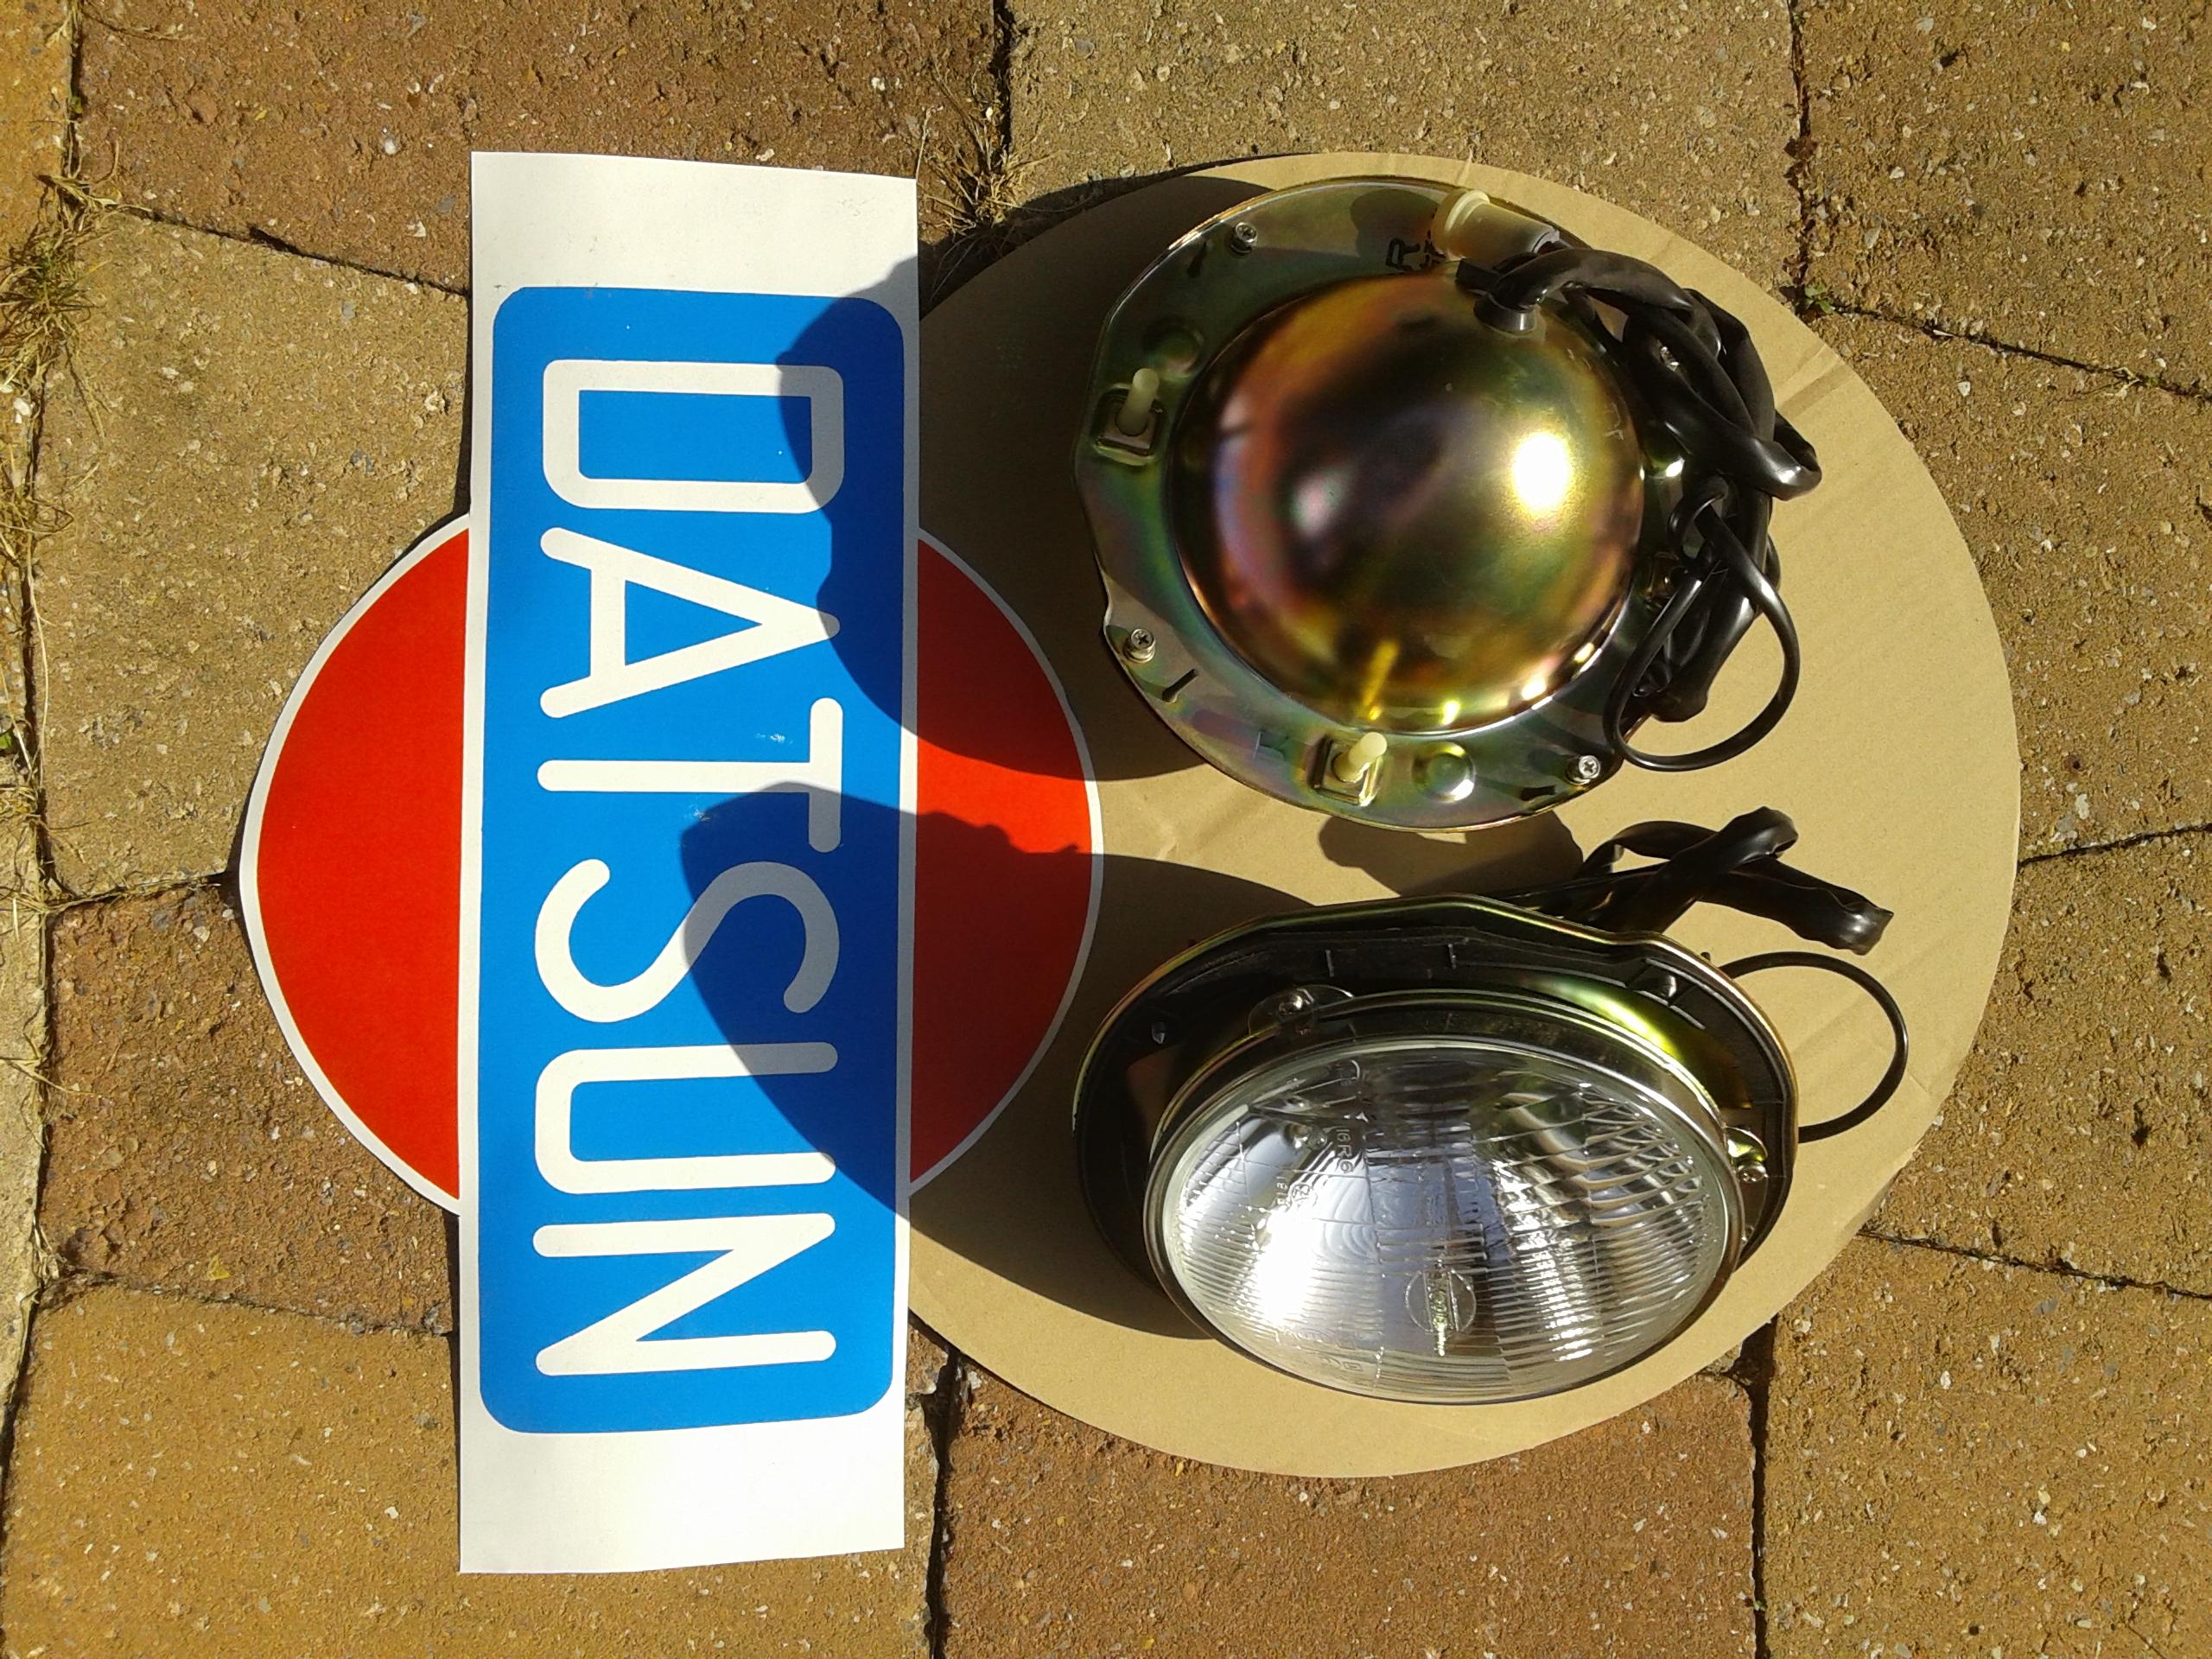
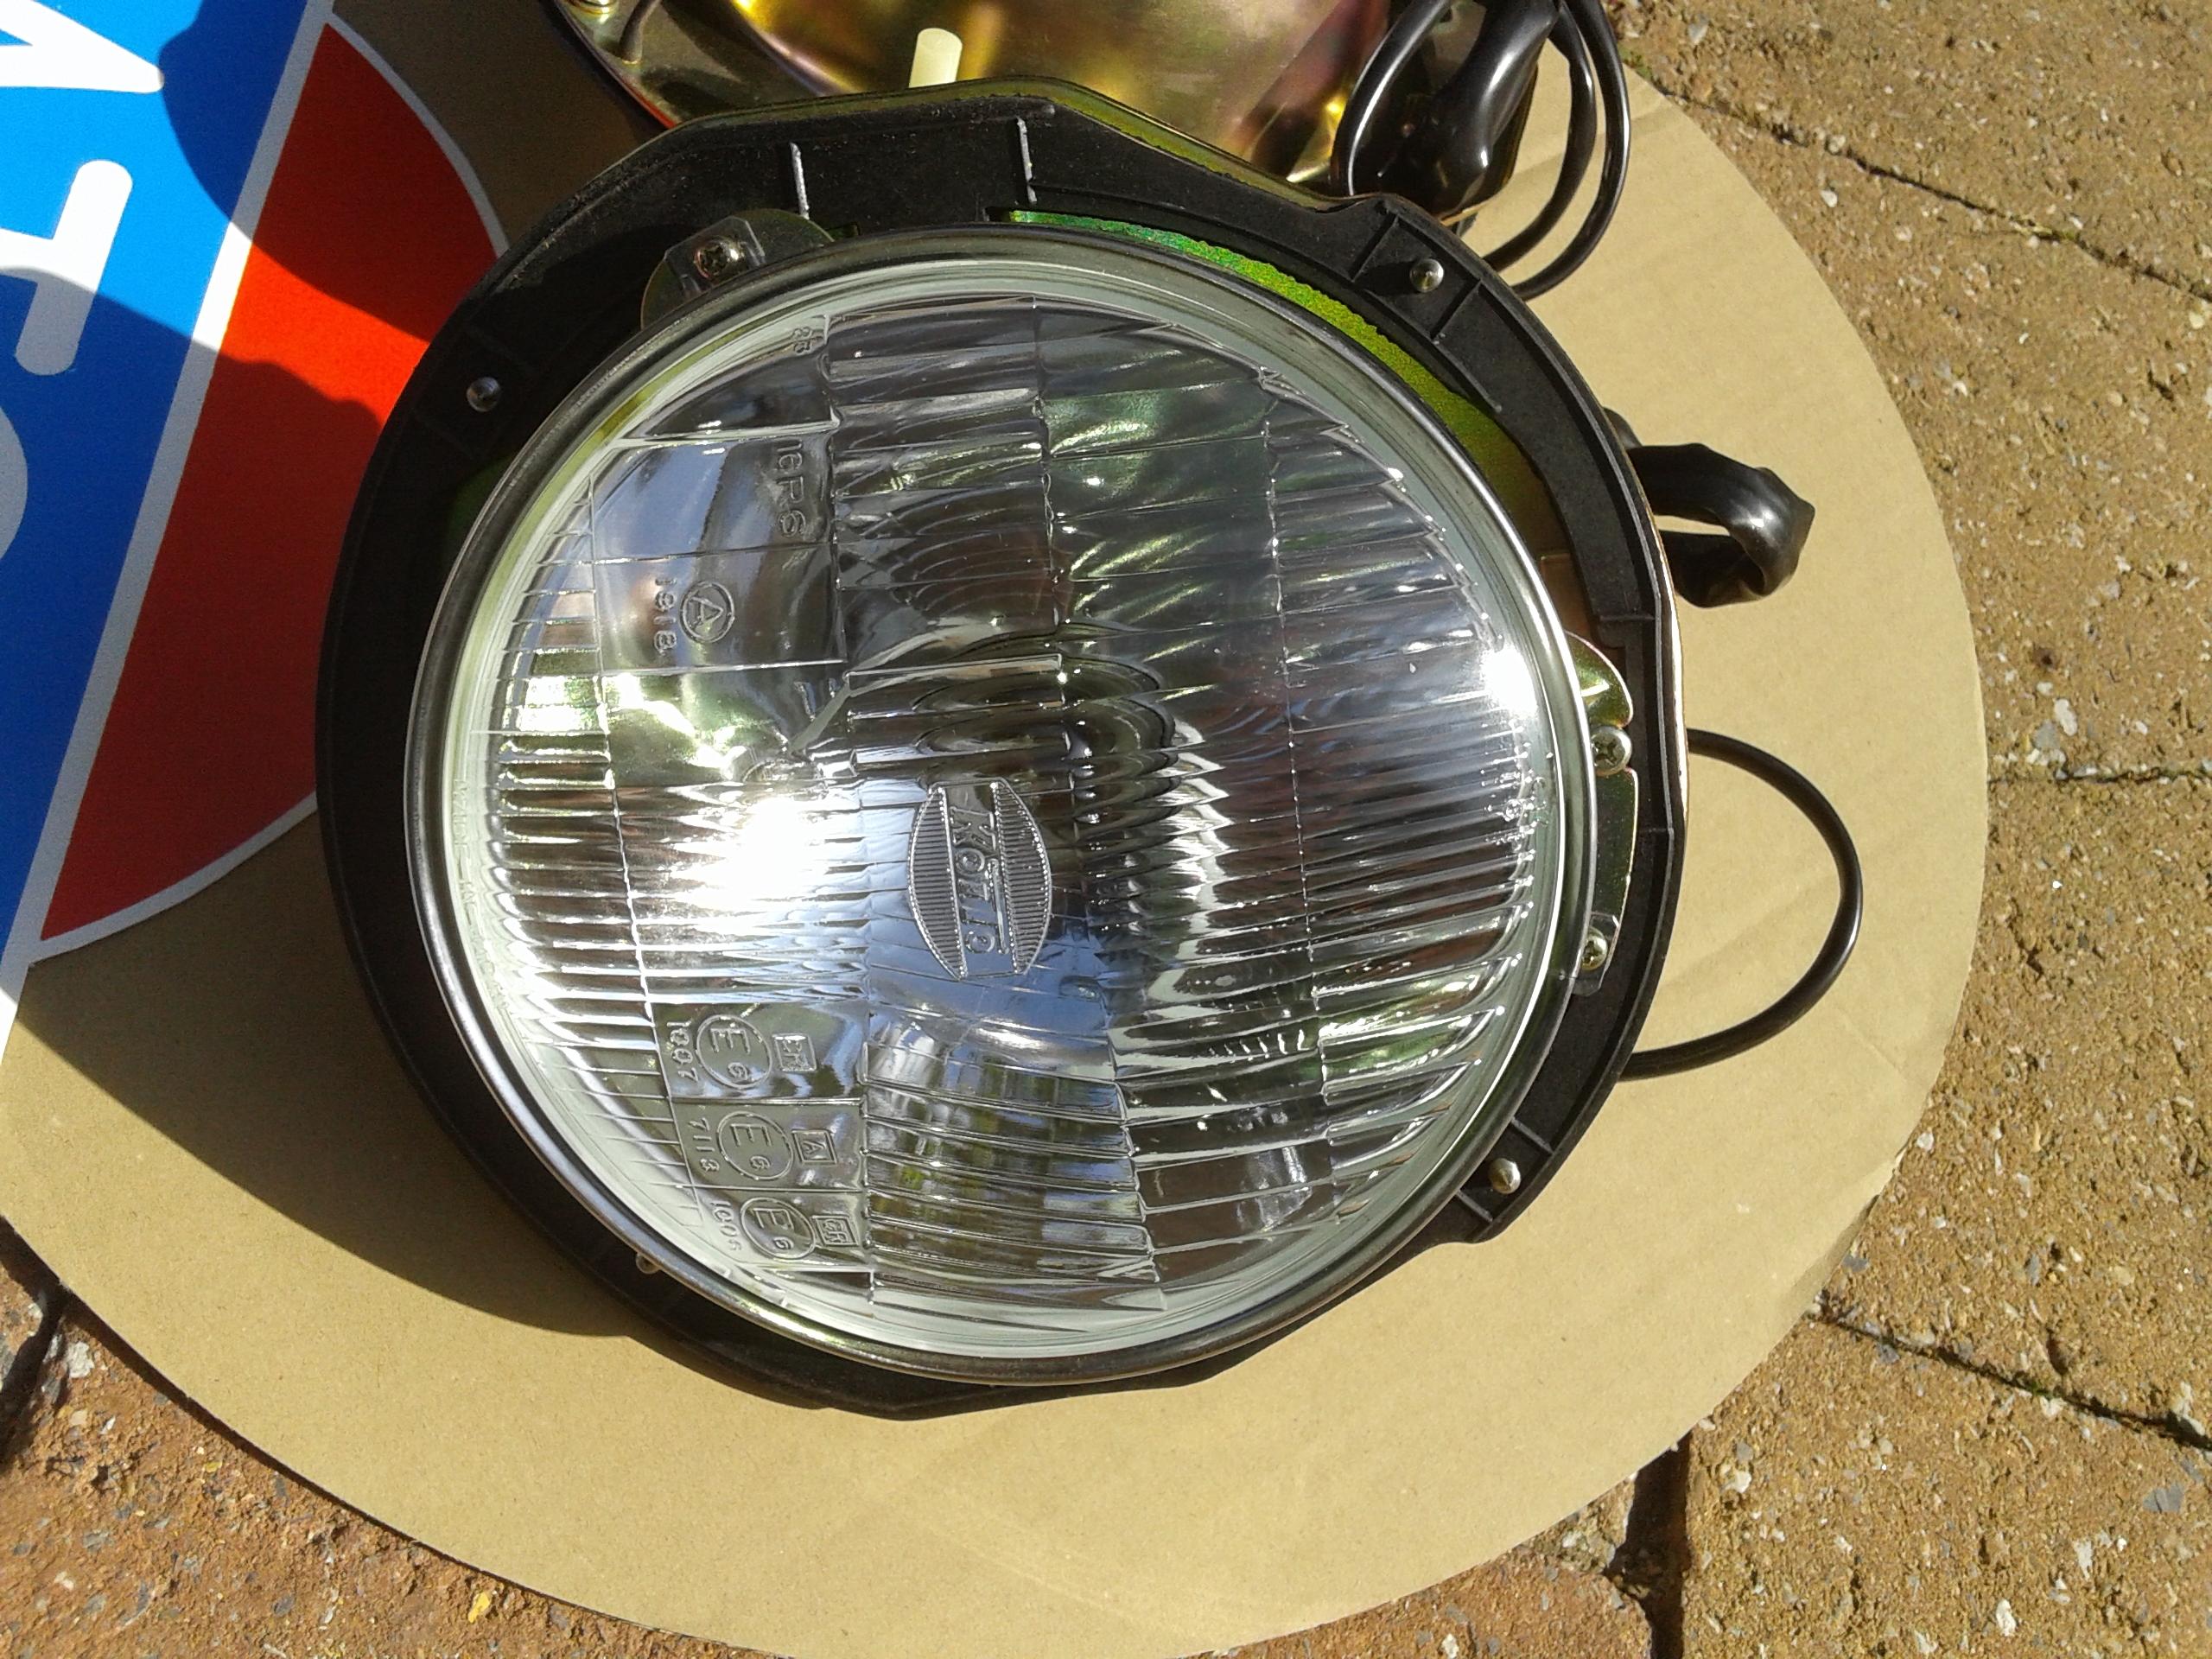
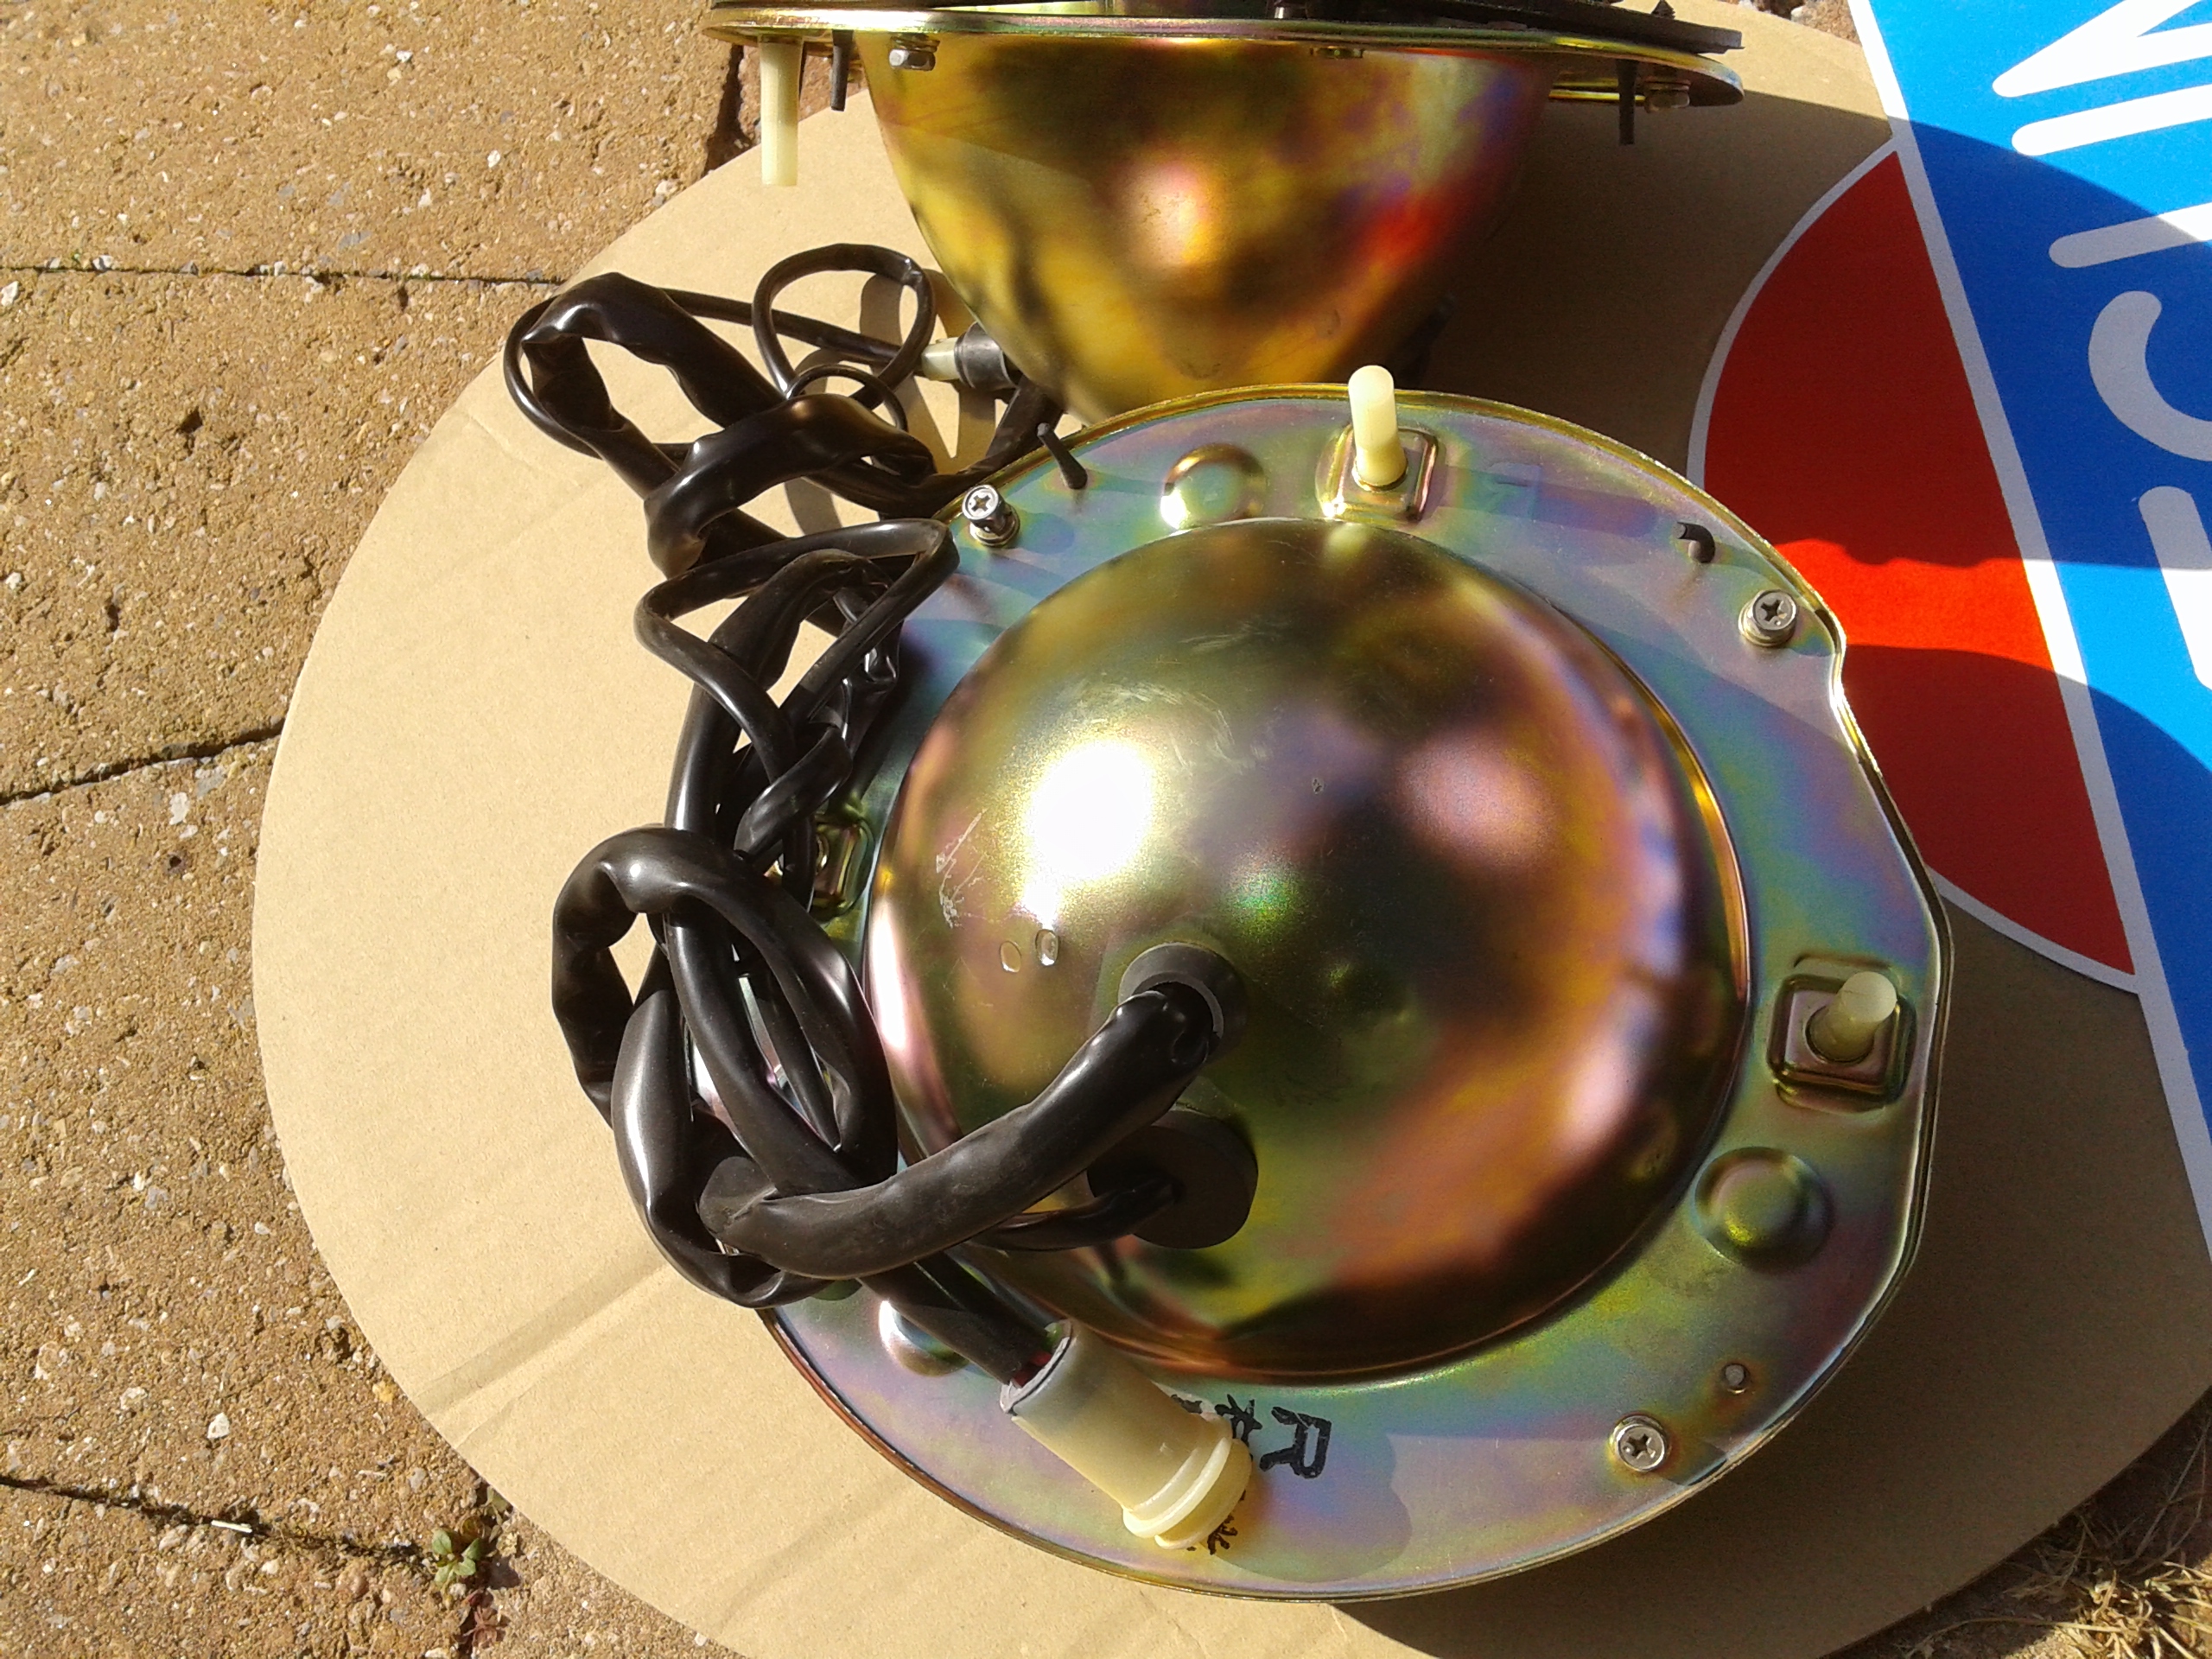
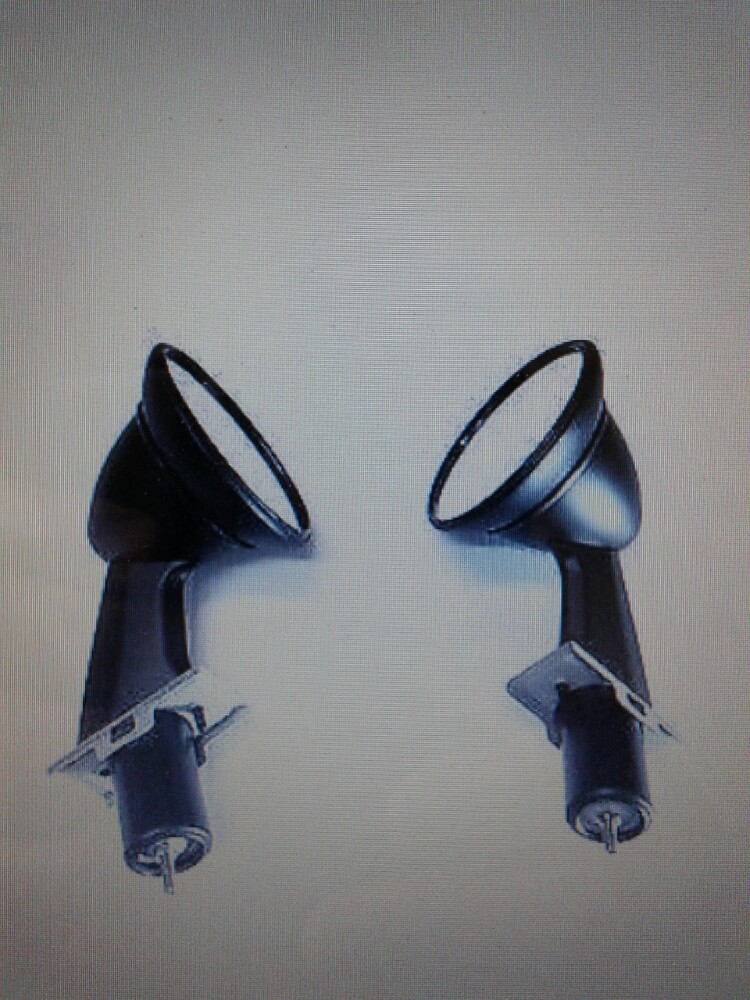
I got for sale a set of original 240z front fender mirrors in...ORIGINAL Nissan boxes !! I am asking for a bid over 500 euro's. As i'm not gona use them on my restoration.. (in a few years..haha i hope.. i thought i sell them here locally. But i could ship e'm anywhere.. Partnumbers 96301-E4100 and 96302-E4100 These parts are brand new in the orig box and are untarnished! This pic is an example, the orig ones are in theire boxes in my warehouse.. cellar! I also got some brandnew fuelpumps in nissan box Super original headlights with the dome glass 260z but also will fit the 240z (just another plug.) Very rare rear license plate lighting (only Japan and europe? for on the bumper.. is a used one but still nice.. They are always rusted away inside but... not this one!!! As last a set of Fenders came from the USA never used. these are the fenders sold by victoria brittish ...long ago.. stil in perfect order.. If you are interested in one or more of these things, i only sell quality stuff and always let you know by pics just before shipping in what state the parts are i send you! contact me here or on martzedcars@outlook.com Thanks. Mart. (Martin)


 2 points
 -
Holy crap guys it’s perfect now, it was just the linkage!! I readjusted it and now I’m idling at a smooth 800-1000. (Atleast I think so, my rpm gauge decided to stop working all of a sudden LOL). It also had a ridiculously loud exhaust for a car that’s actually pretty slow. Thank you so much for all your help!! IMG_5568.MOV2 points
-
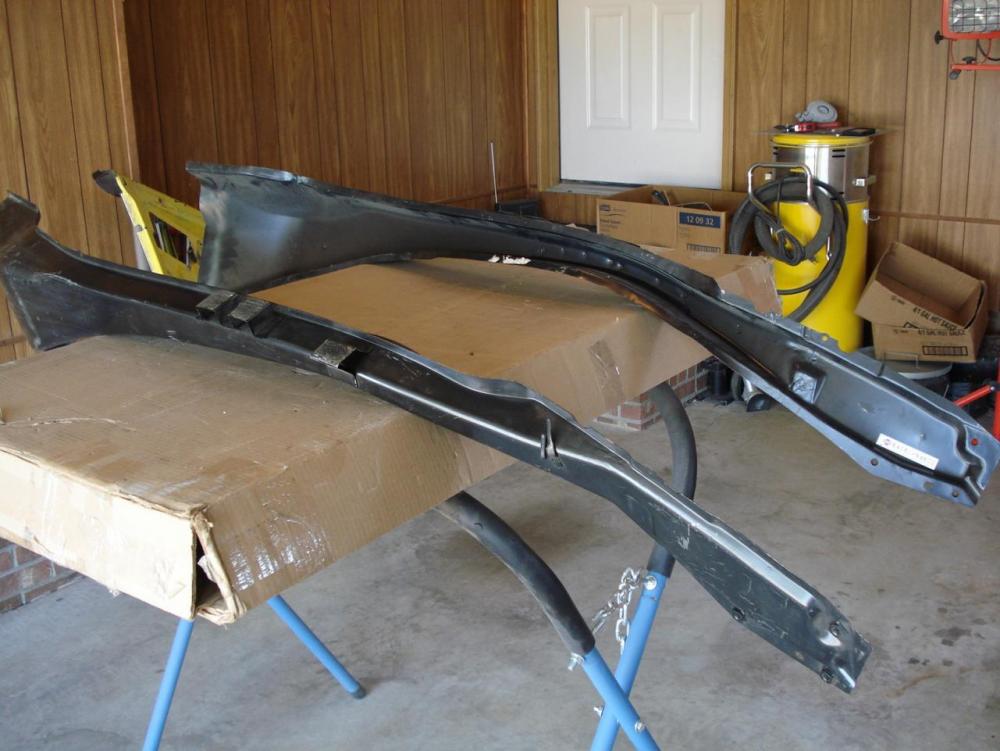
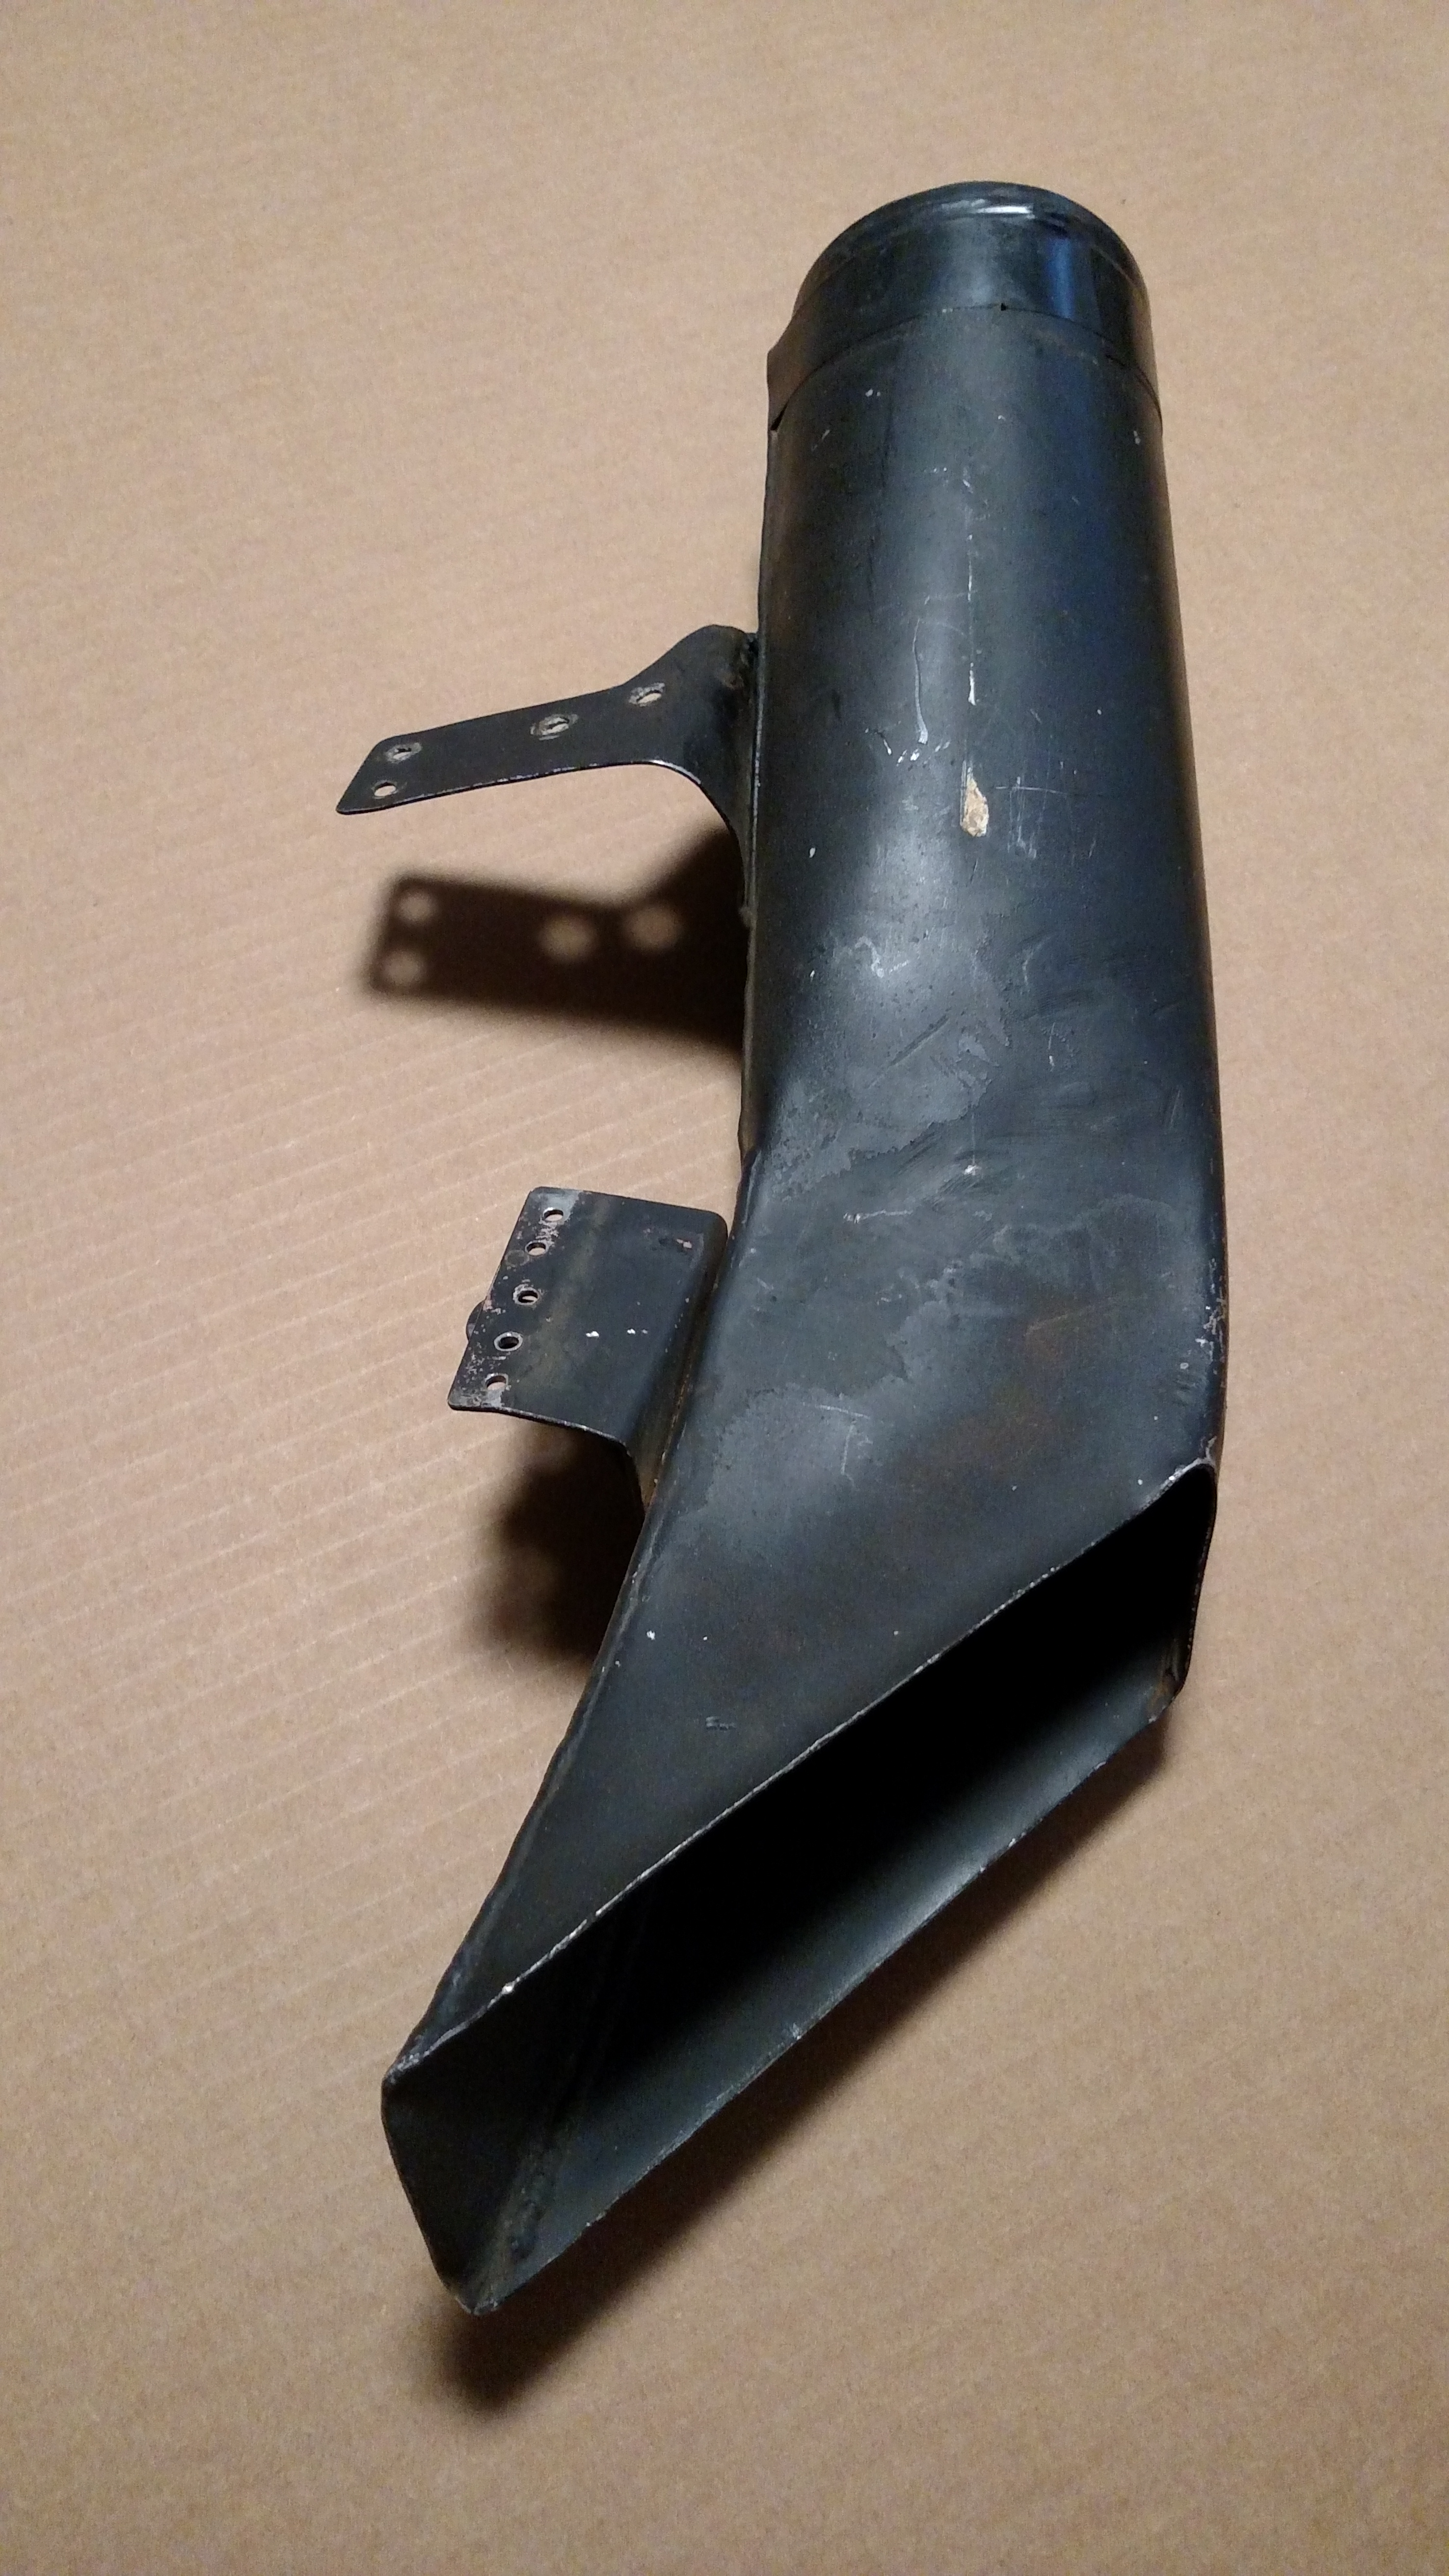
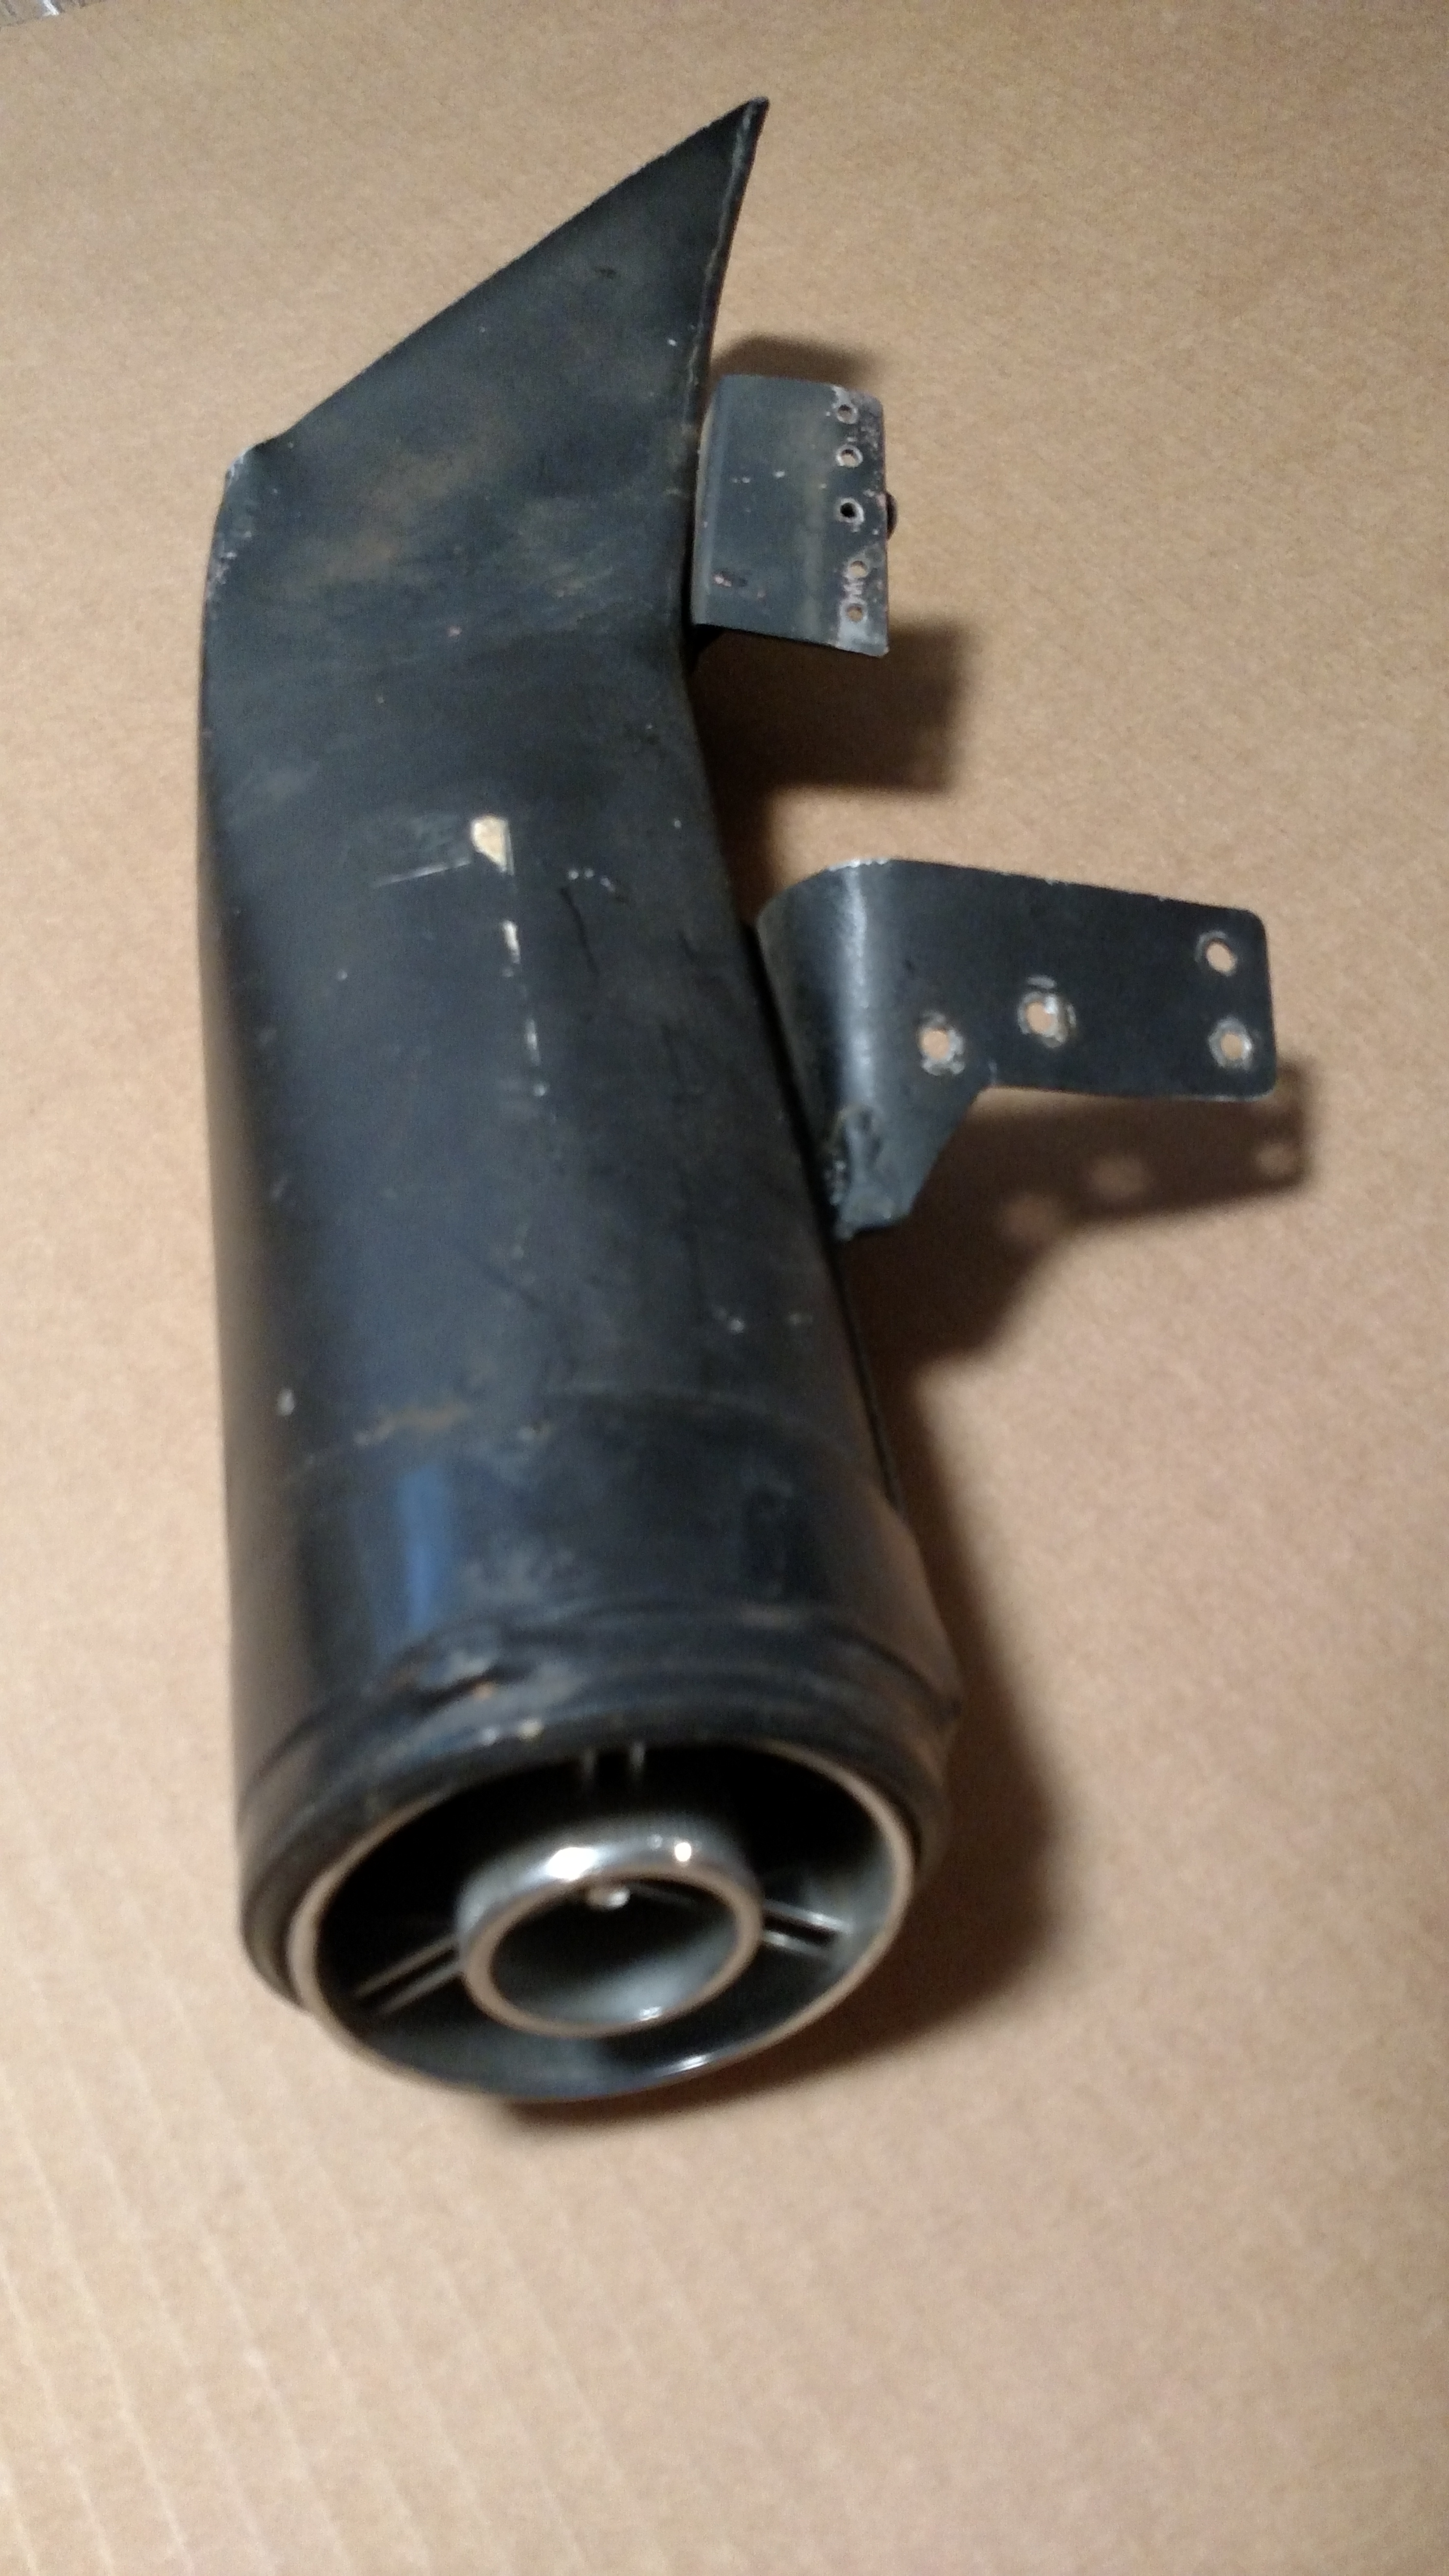
2 pointsUnfortunately that was one piece this car didn’t have when I got it. I’ve got one from a 75, and considered adding mounting provisions for the AC hose routing. As hard as the early ones are to come by I would hate to cut one of those up for mounting the AC line to it. Looking at it closer, in theory I may be able to install the drip pan over the AC hose bracket, and make shims that take up the gaps at the frame rail mounting points.2 points
-
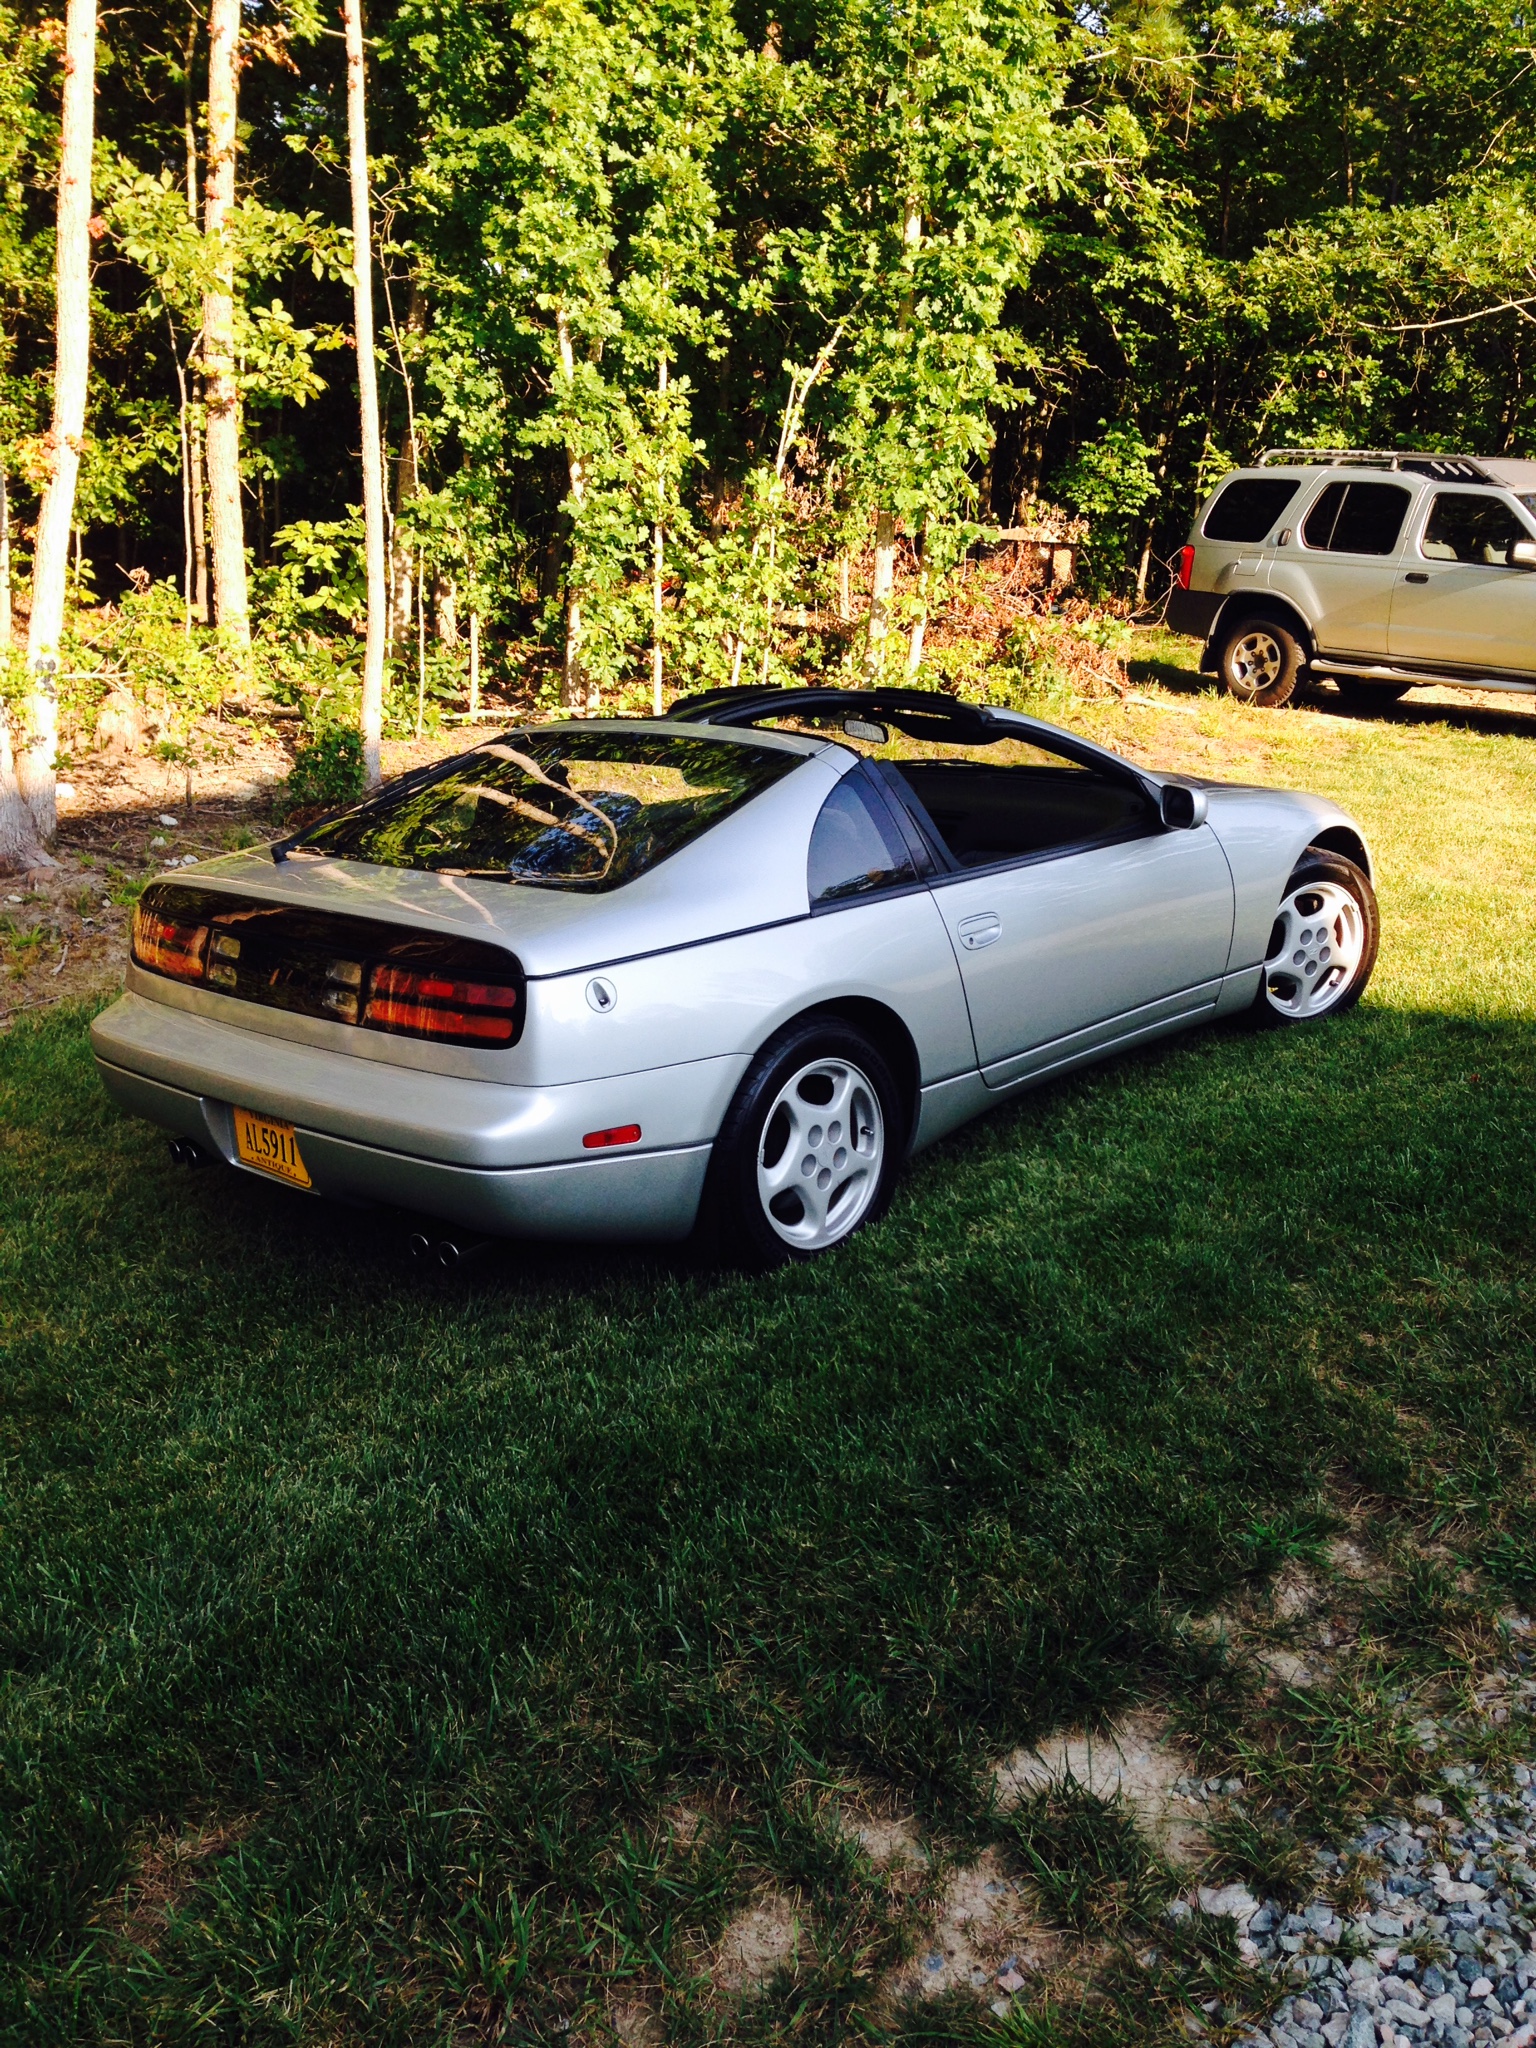
2 pointsThe Z 32’s are the second best looking Z series IMO. Mine isn’t turbo, but it’s still a joy to drive!

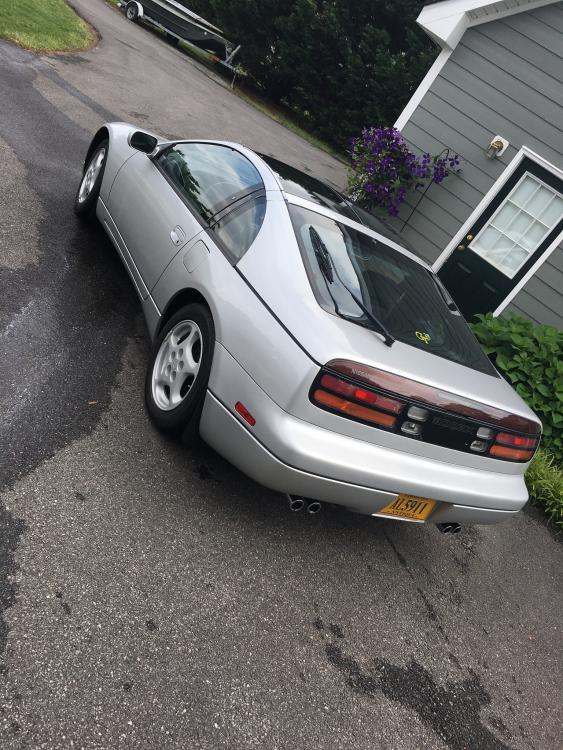
 2 points
 -
2 pointsNow go away, or I shall taunt you a second time! Injectors leaking air is a big deal. Take care of that and we'll see what happens next.2 points
-
2 pointsDoes your work area have a concrete floor? If so you could bolt the jig to the floor and use a hydraulic bottle jack under the lever. Then hammer and dolly2 points
-
Oh crap I did it again. Y'all are talking about Webers and I started reading at the last post. I'm sorry.
 2 points
 -
2 pointsThat's almost happened a few times, you have to stay nimble, know where your hose is at all times and plan out your route like a dance routine and rehearse a few times, not kidding. While your doing that be aware of how far your nozzle is from the panel, how fast is your arm is moving, are you getting good coverage and make sure you're not over spraying what the compressor can put out and catch up. I'll take an electrical gremlin or a carb problem any day, at least with those you can walk away and think about the problem, not with painting, you're there until the last coat of clear has been shot. Much respect for guys who do it for a living and don't cut corners.2 points
-
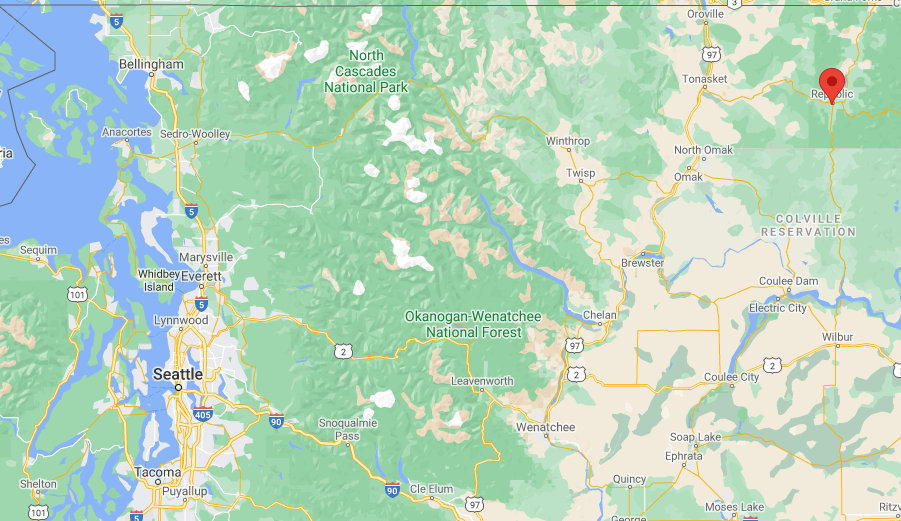
2 points2 points1 pointYou may be overly optimistic. Either that, or the gene pool has some strong survival instincts.1 pointWell not a Z directly, I use the Dodge to pull the trailer the race Z goes in, and my race Z, the brown 72, the multi colored series 1 low number Z and the others looked on while I worked. The Ram is 20 years old. Last year the tailpipe rusted off the muffler outlet. The muffler is nearly rusted through. Since the OEM 3” system is obsolete and NLA, I opted for a 4” stainless turbo to tailpipe with no muffler. This is the first startup. Mrs. Racer thinks it is too loud. Yesterday I stopped at a garage sale and found an unused 30” stainless muffler for &20. Gonna install it and see if it makes her happy.1 pointIt's Just an Odd Way to Write. A couple of Capitals for Emphasis is Normal but When You Sprinkle so Many in they Make Little Sense. It's Actually Harder to keep Hitting the Shift Button to write in This Weird Way. Which Makes it Even Weirder. Hence Queasy.1 point1 pointUsed to be a person went to the rural less-populated areas to get healthy. Not so much these days. https://www.q13fox.com/news/indoor-events-bring-virus-outbreak-in-republic-washington Republic is pretty far out there.
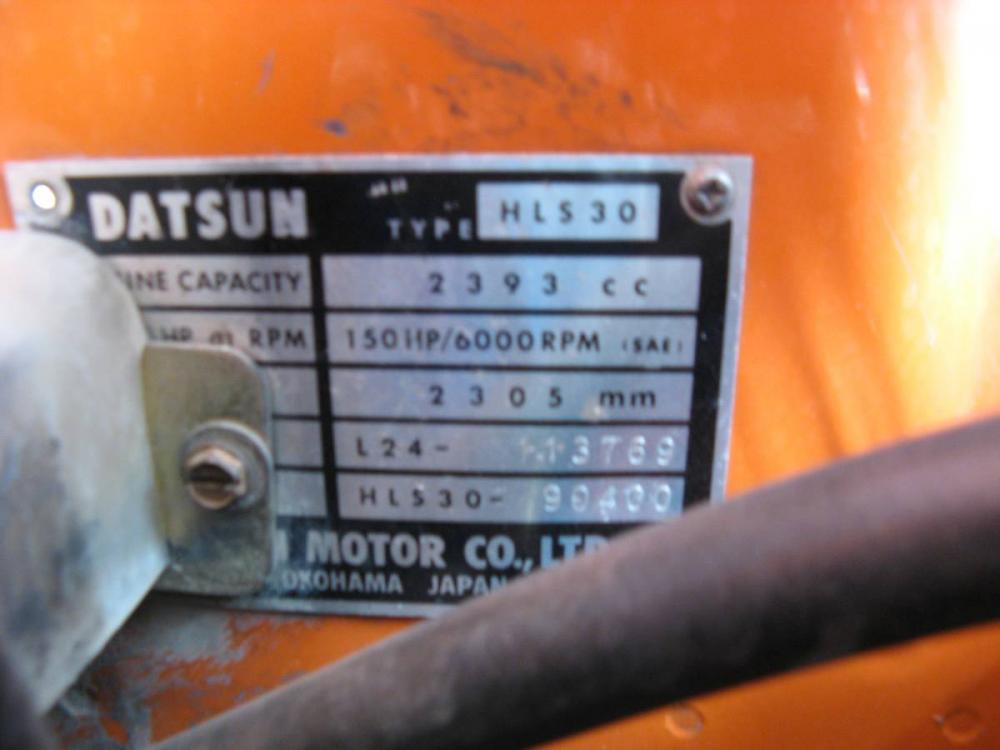
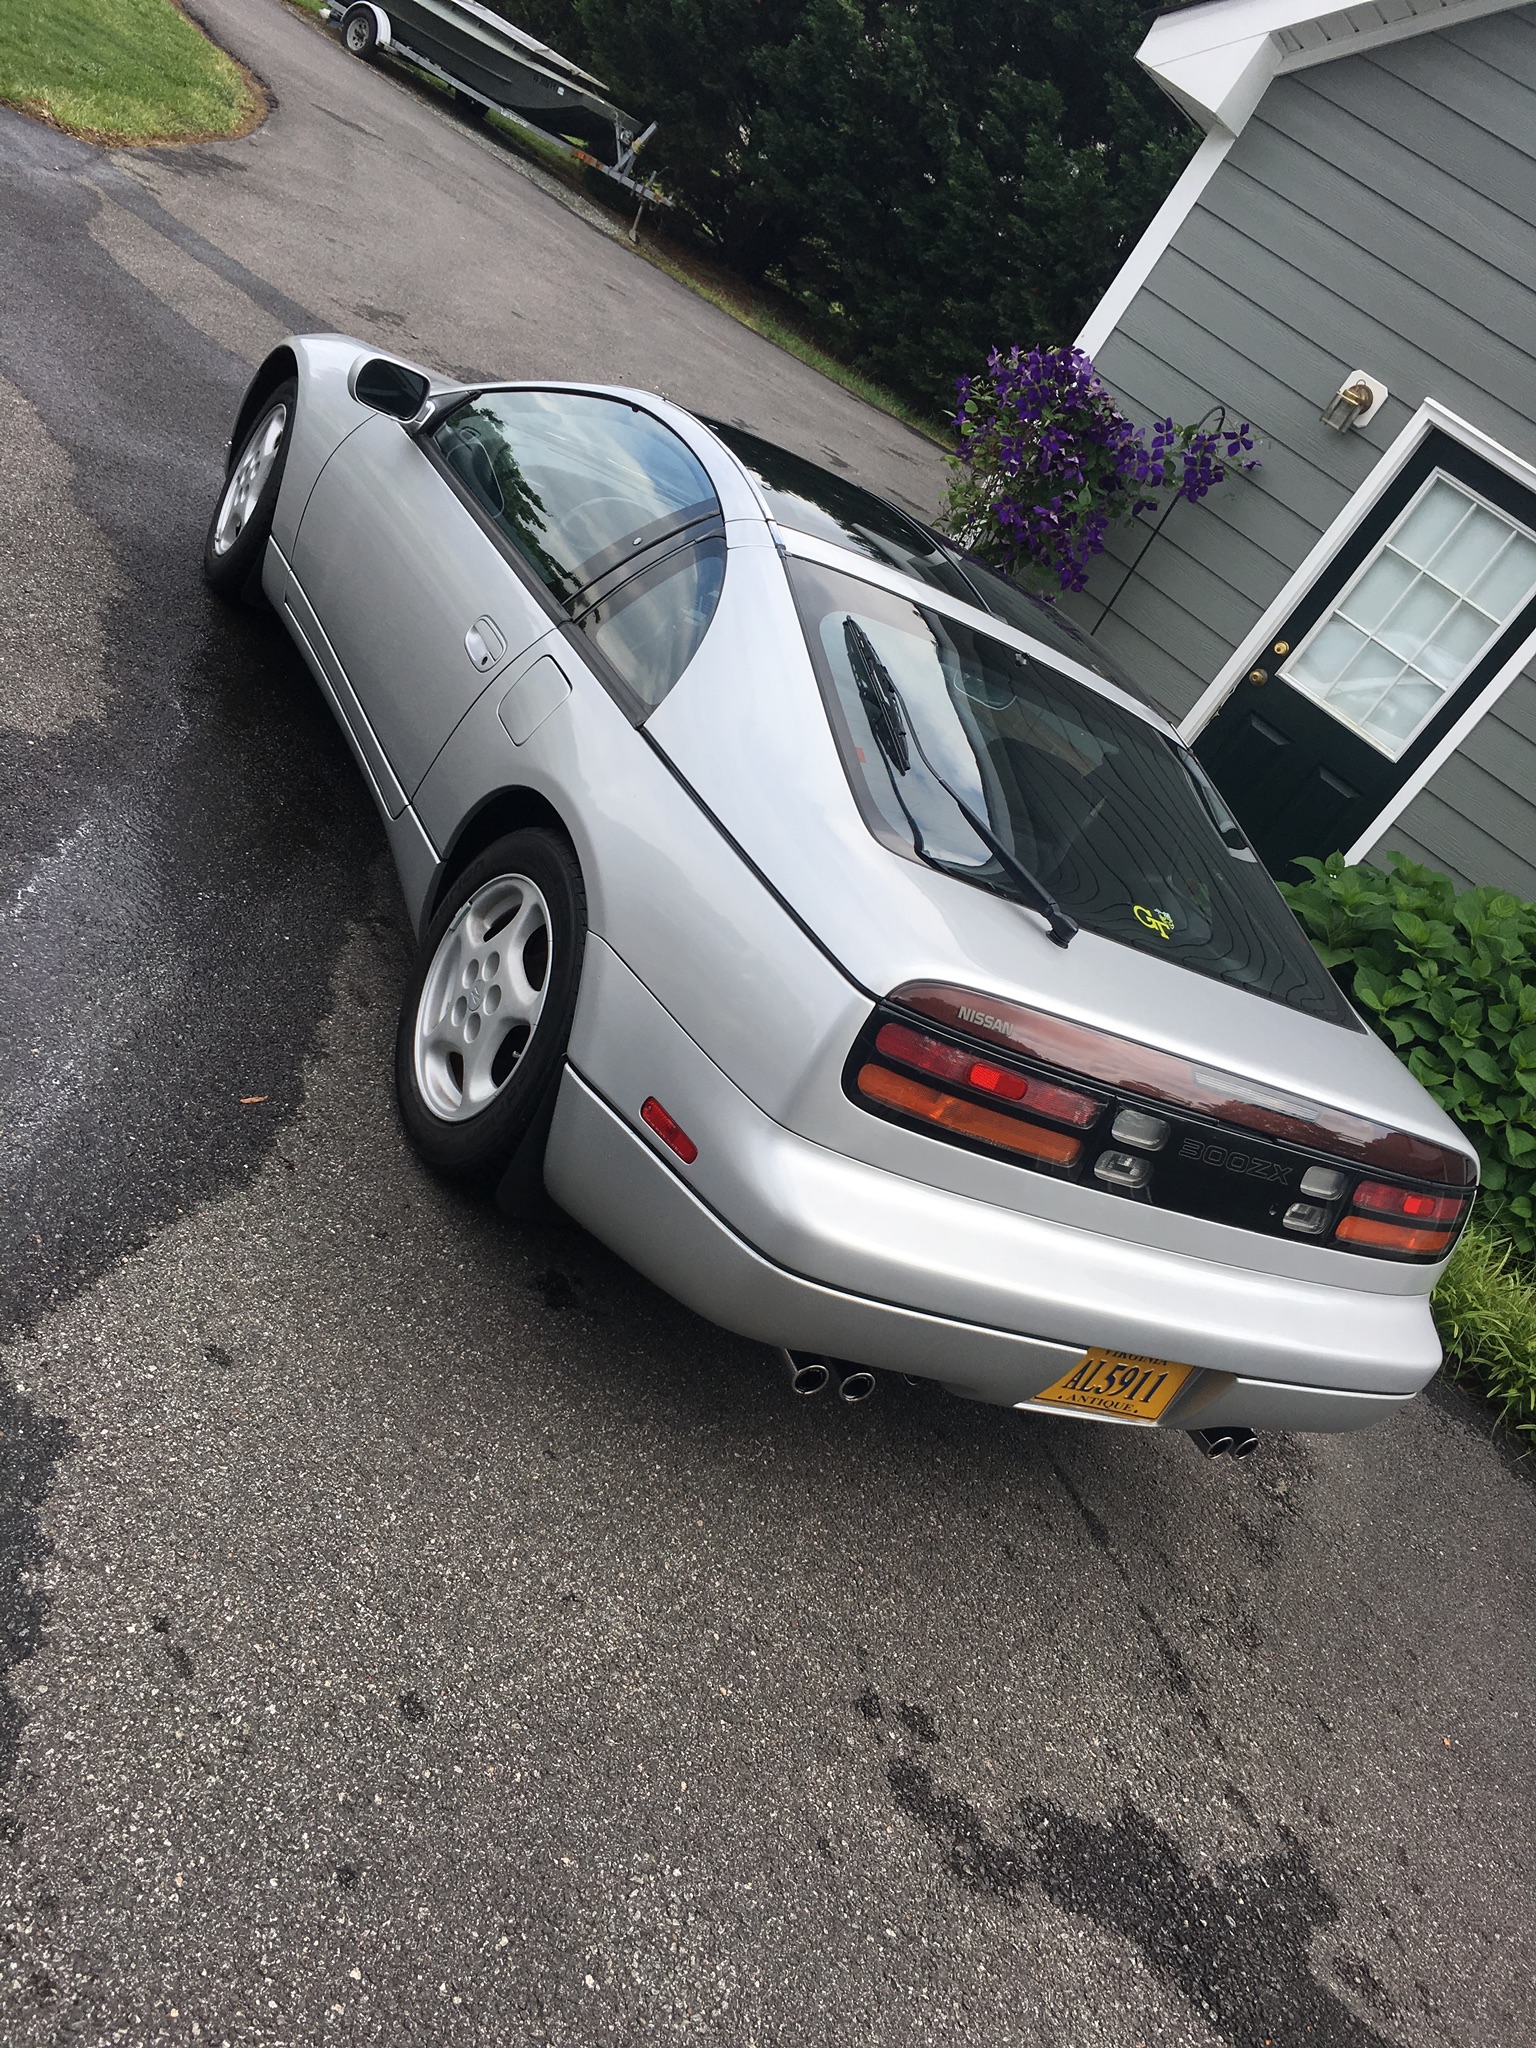
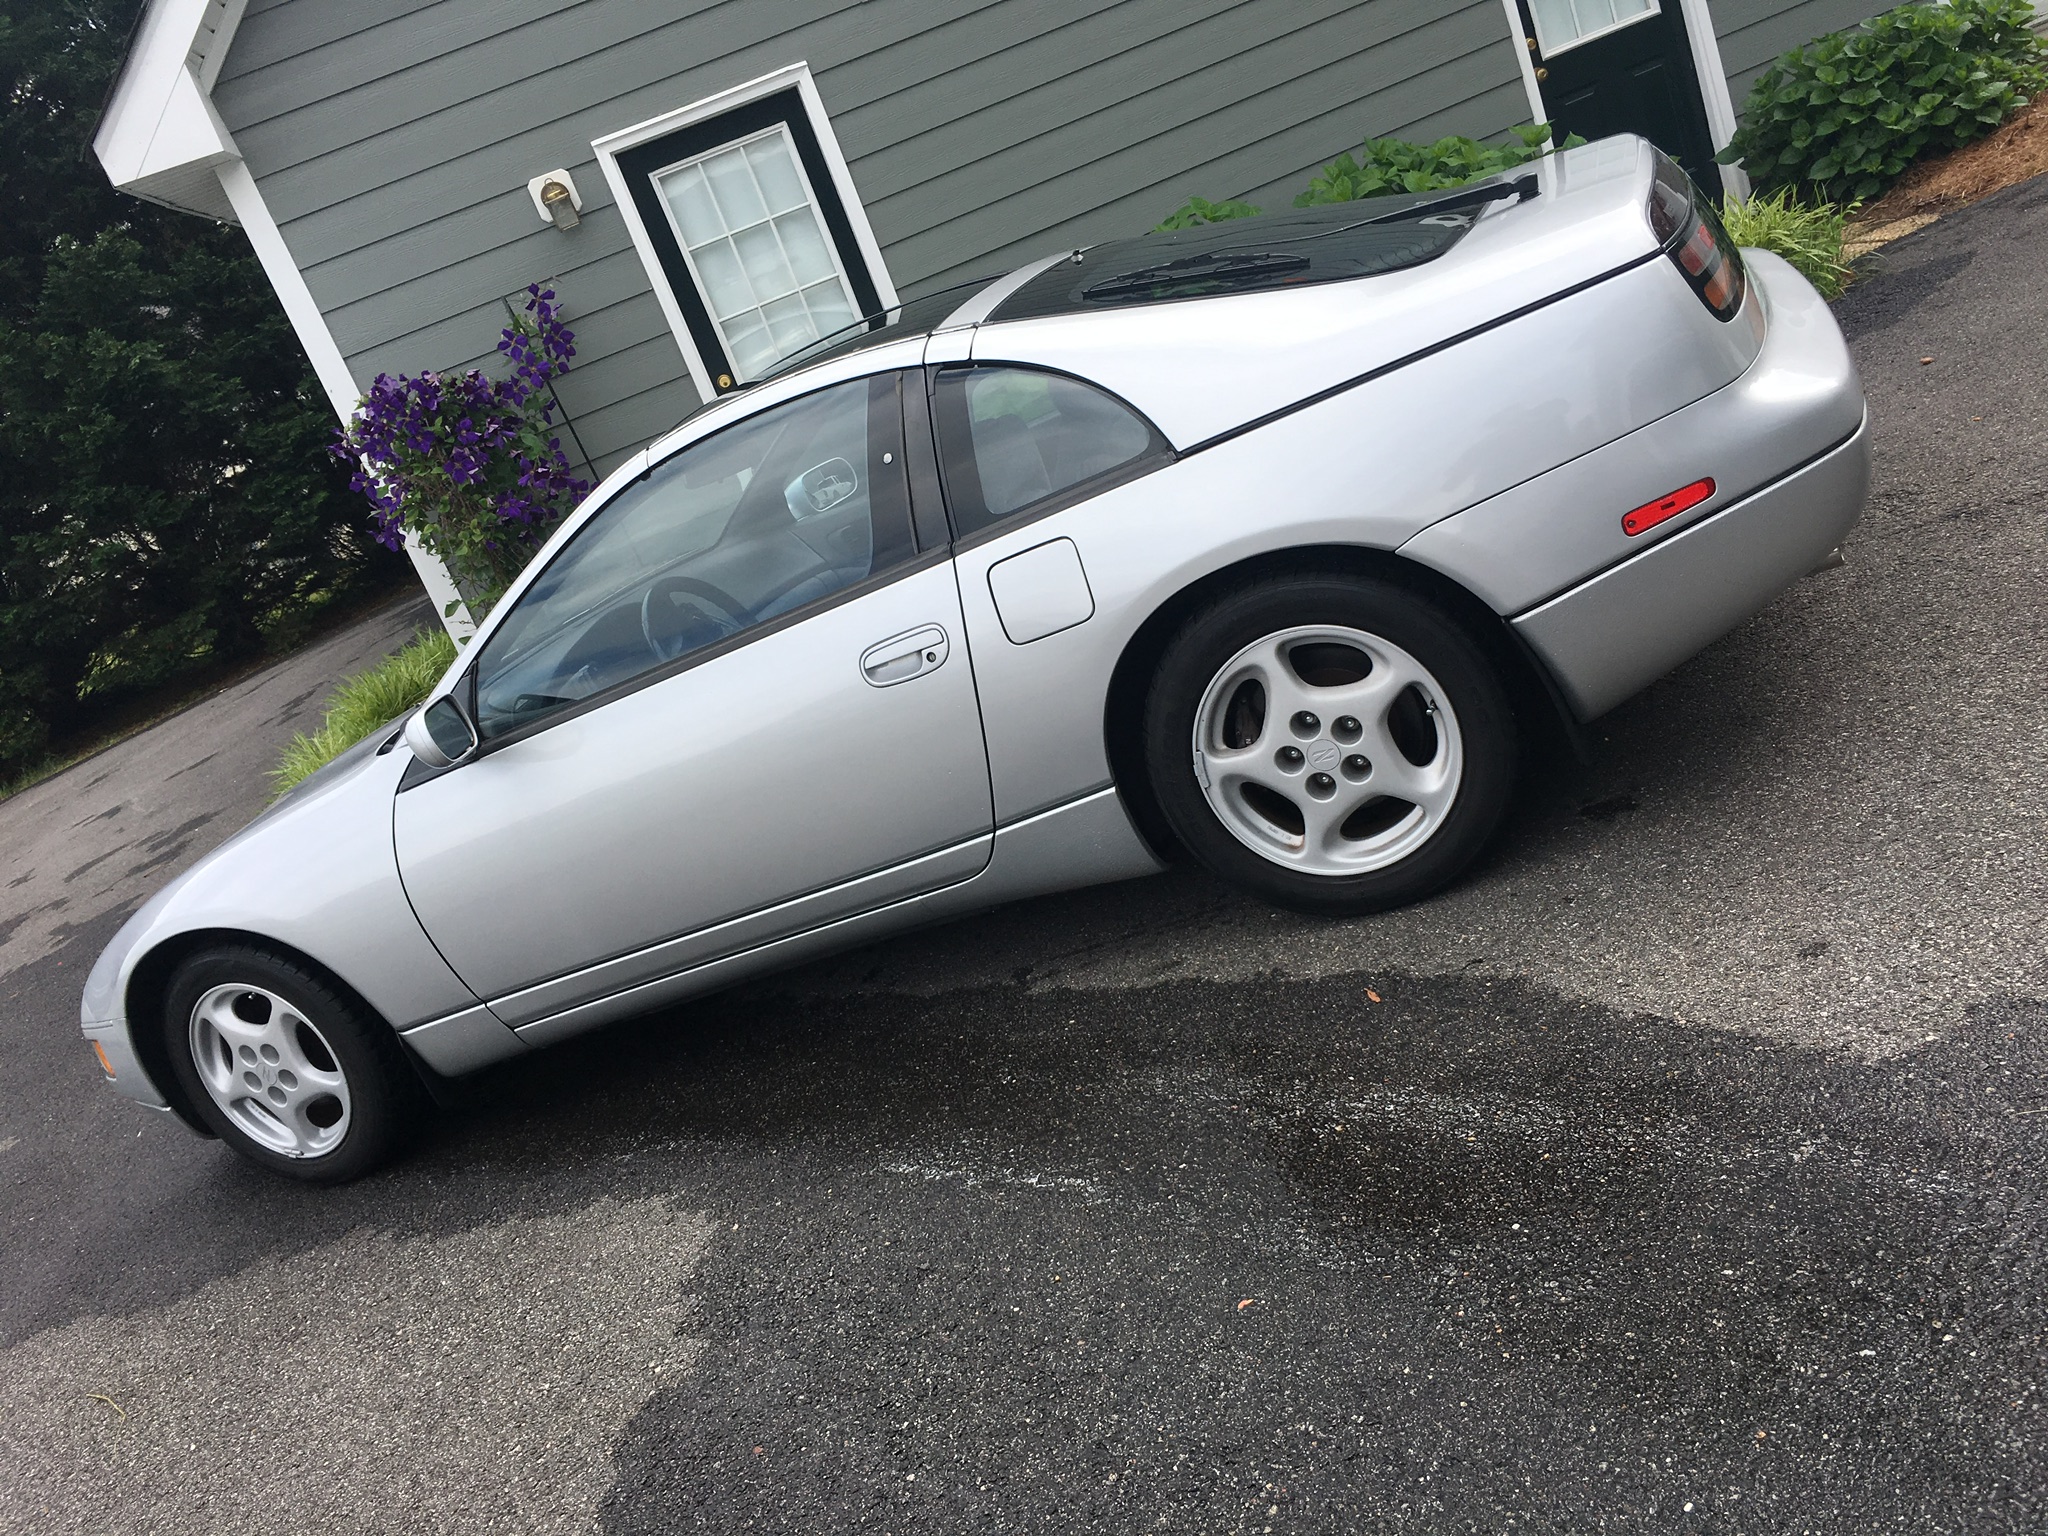
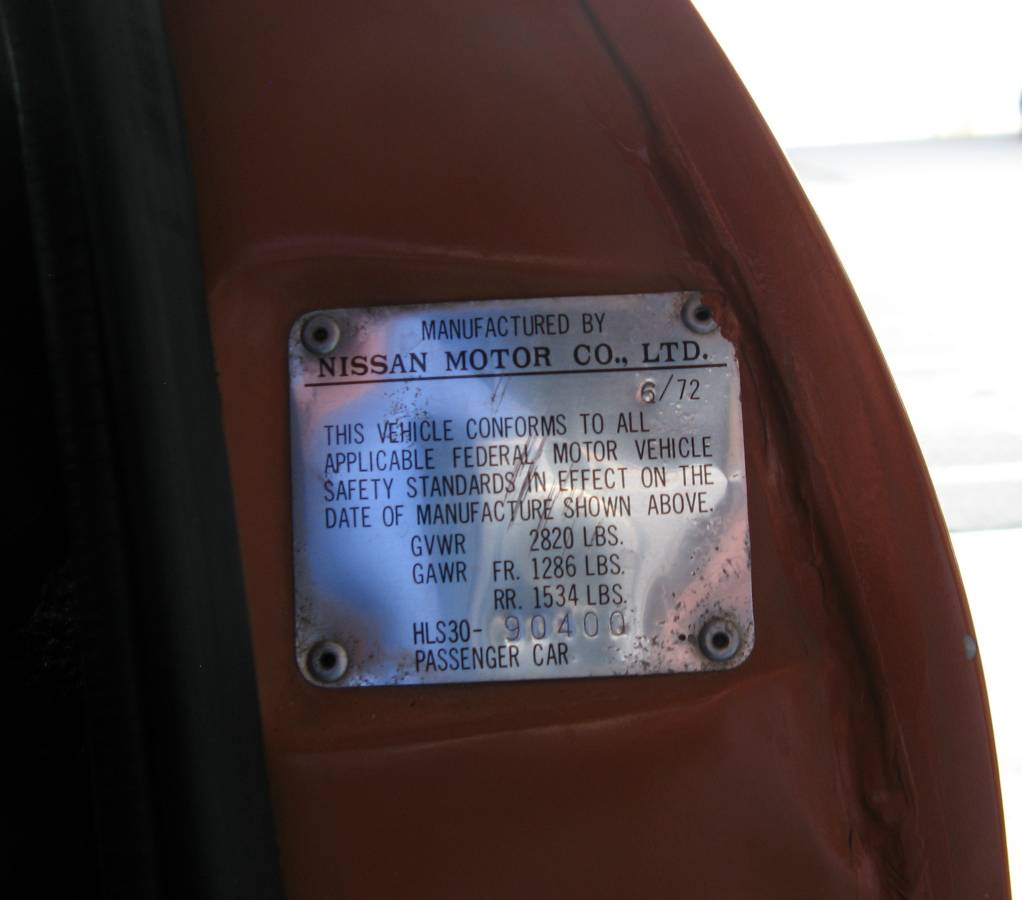
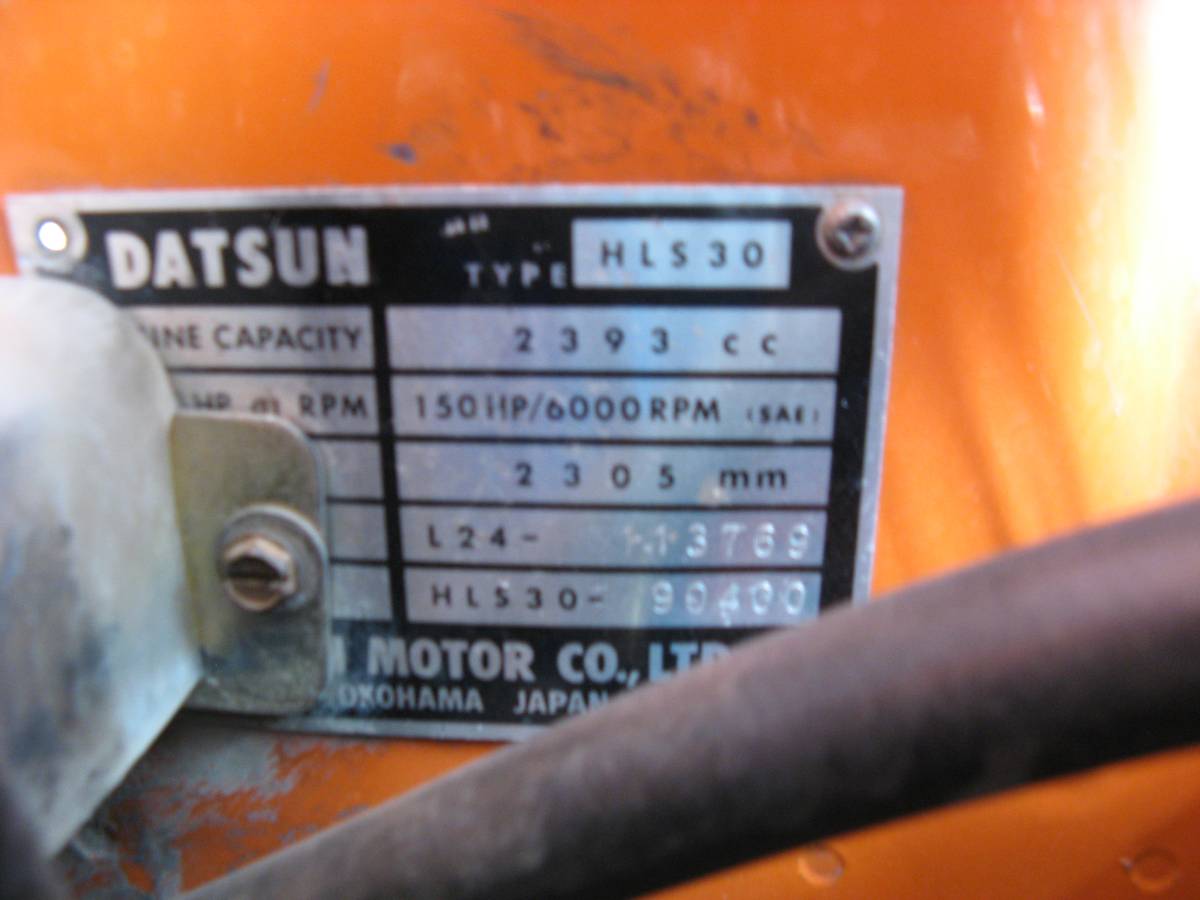
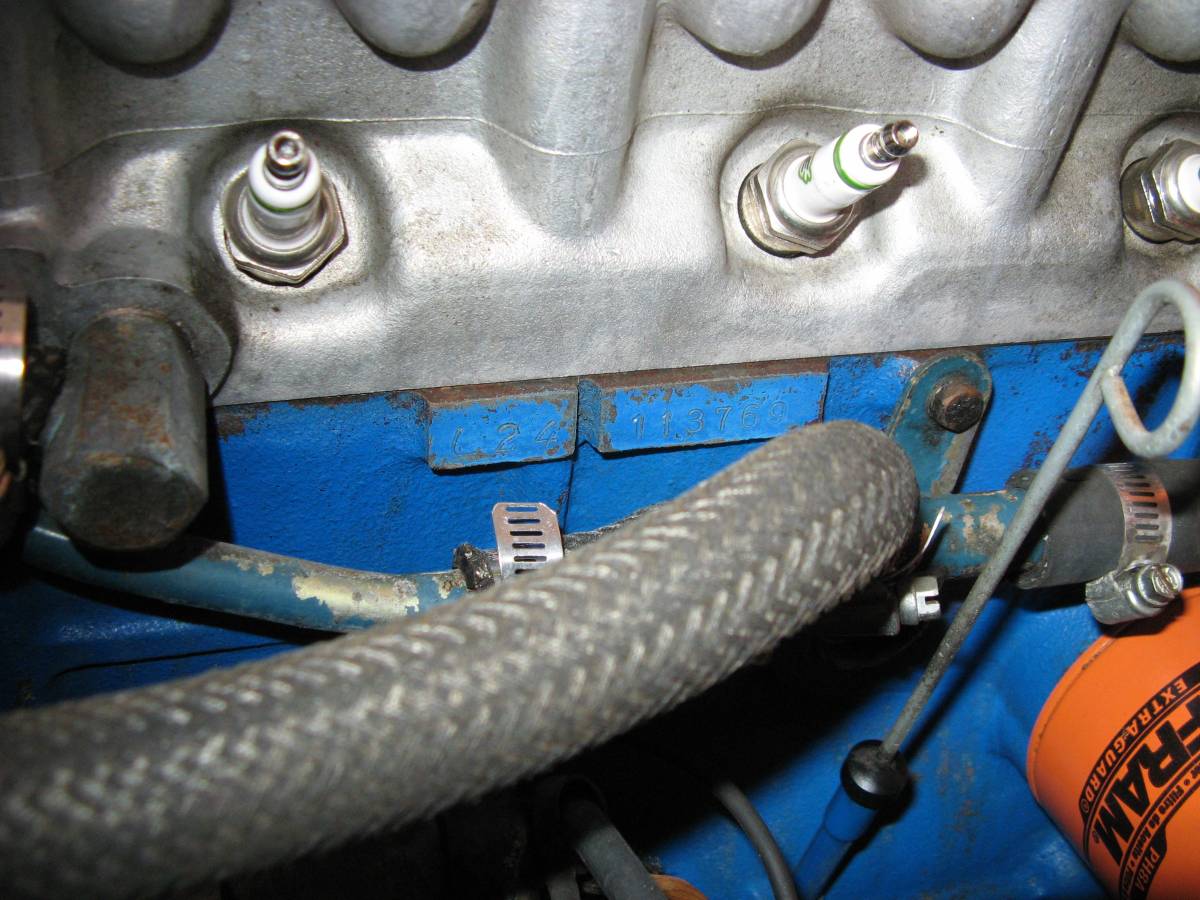
 1 pointI'm not sure that I get the same feeling about this seller as you do, Zed Head. As shown below, the seller provided pictures of the Data Plate in the driver's door jamb, the Data Plate in the engine bay and the Engine Number. However, now that I think about it a little more, I don't ever recall seeing a seller only looking for a best offer before. Normally, the seller will always have an asking price.
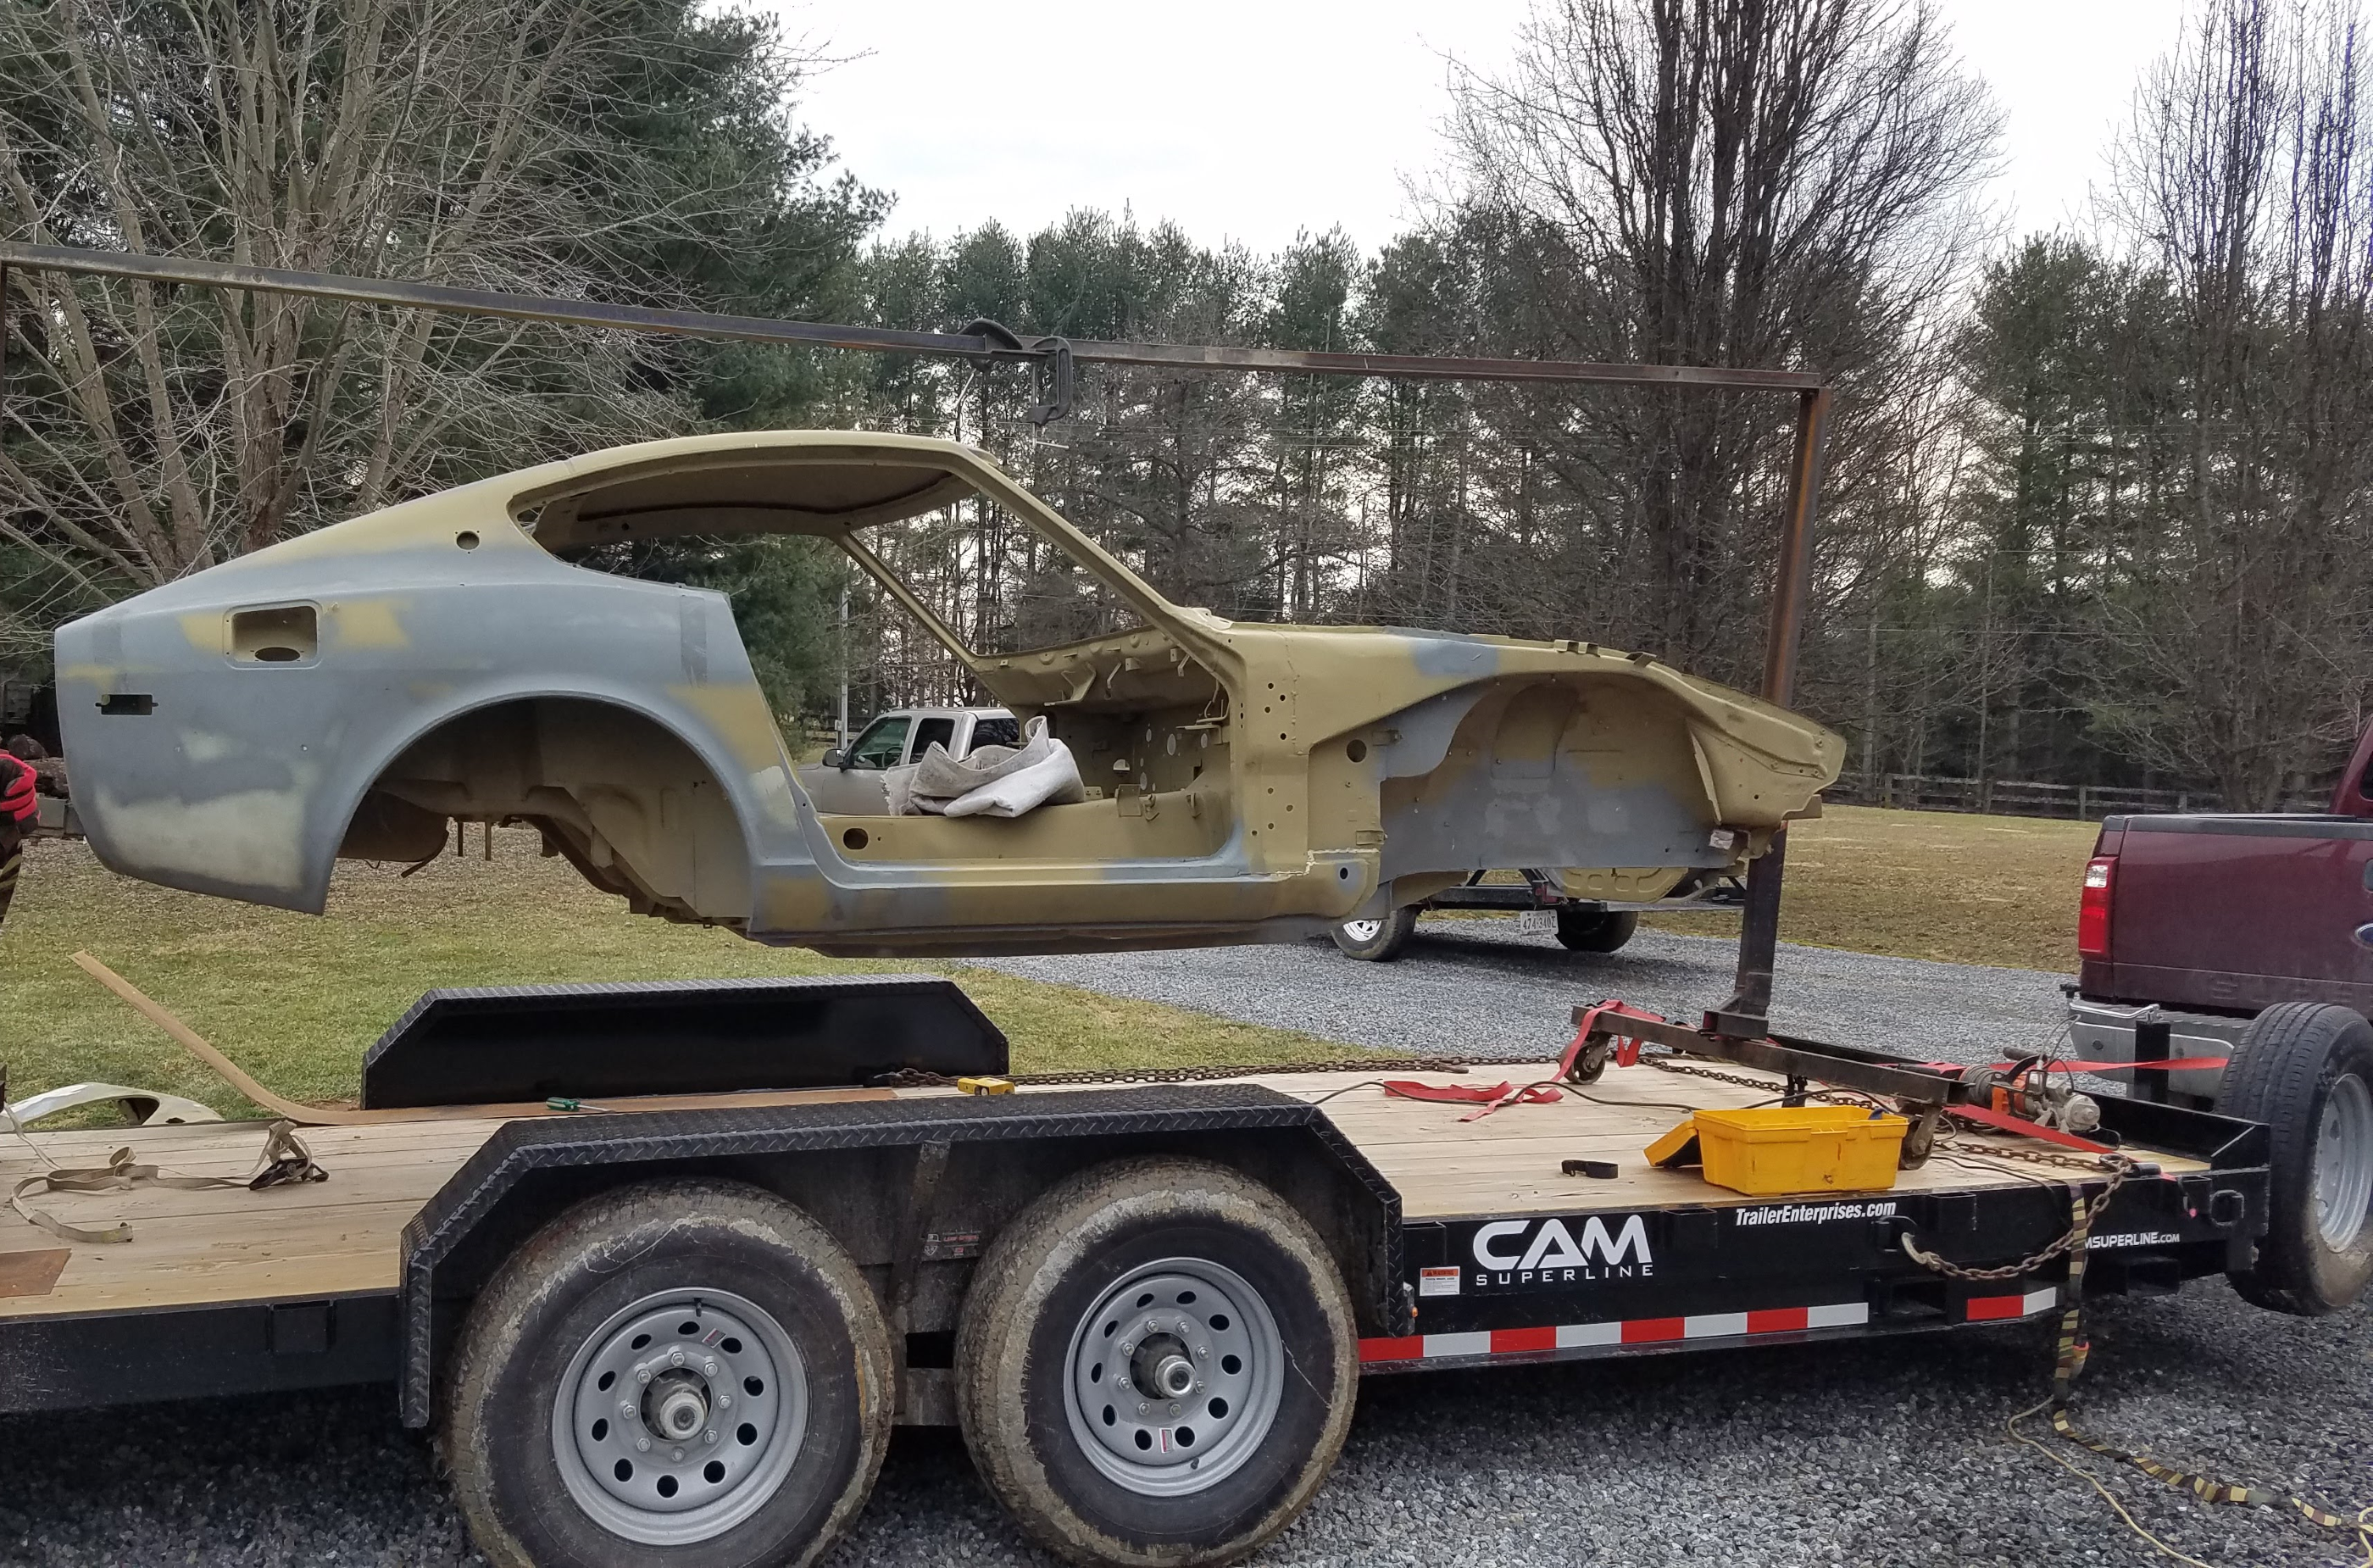
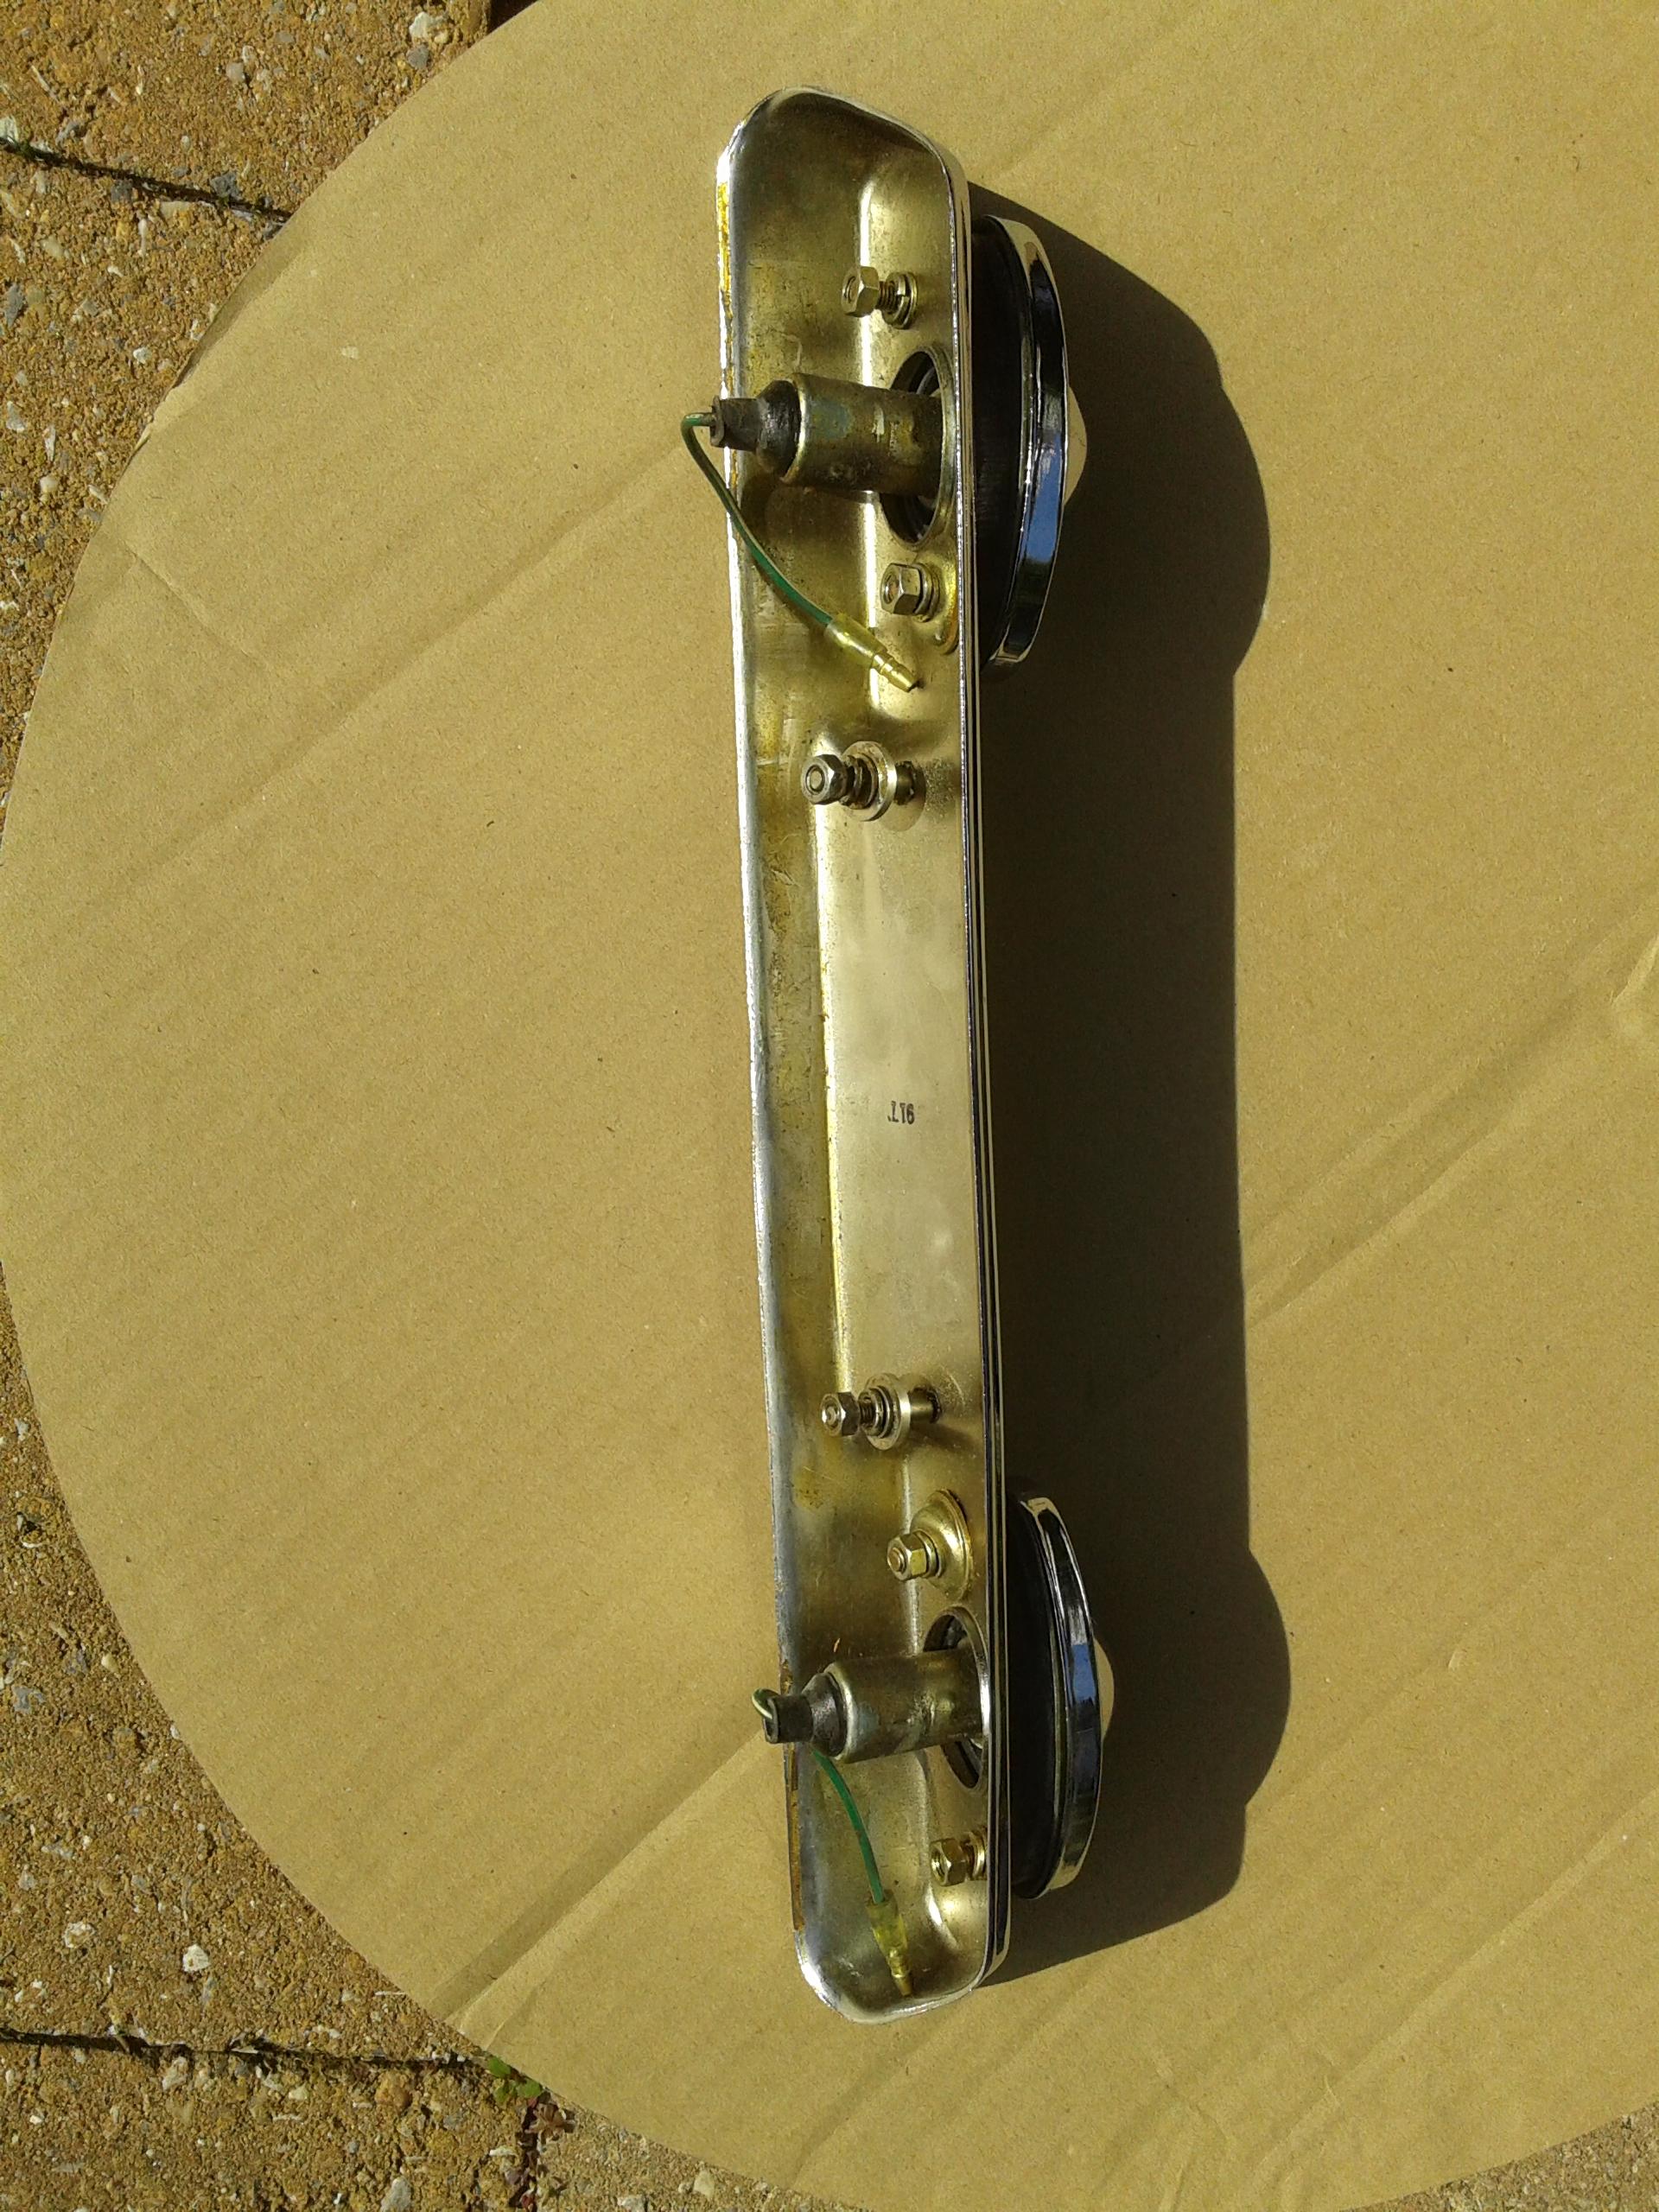
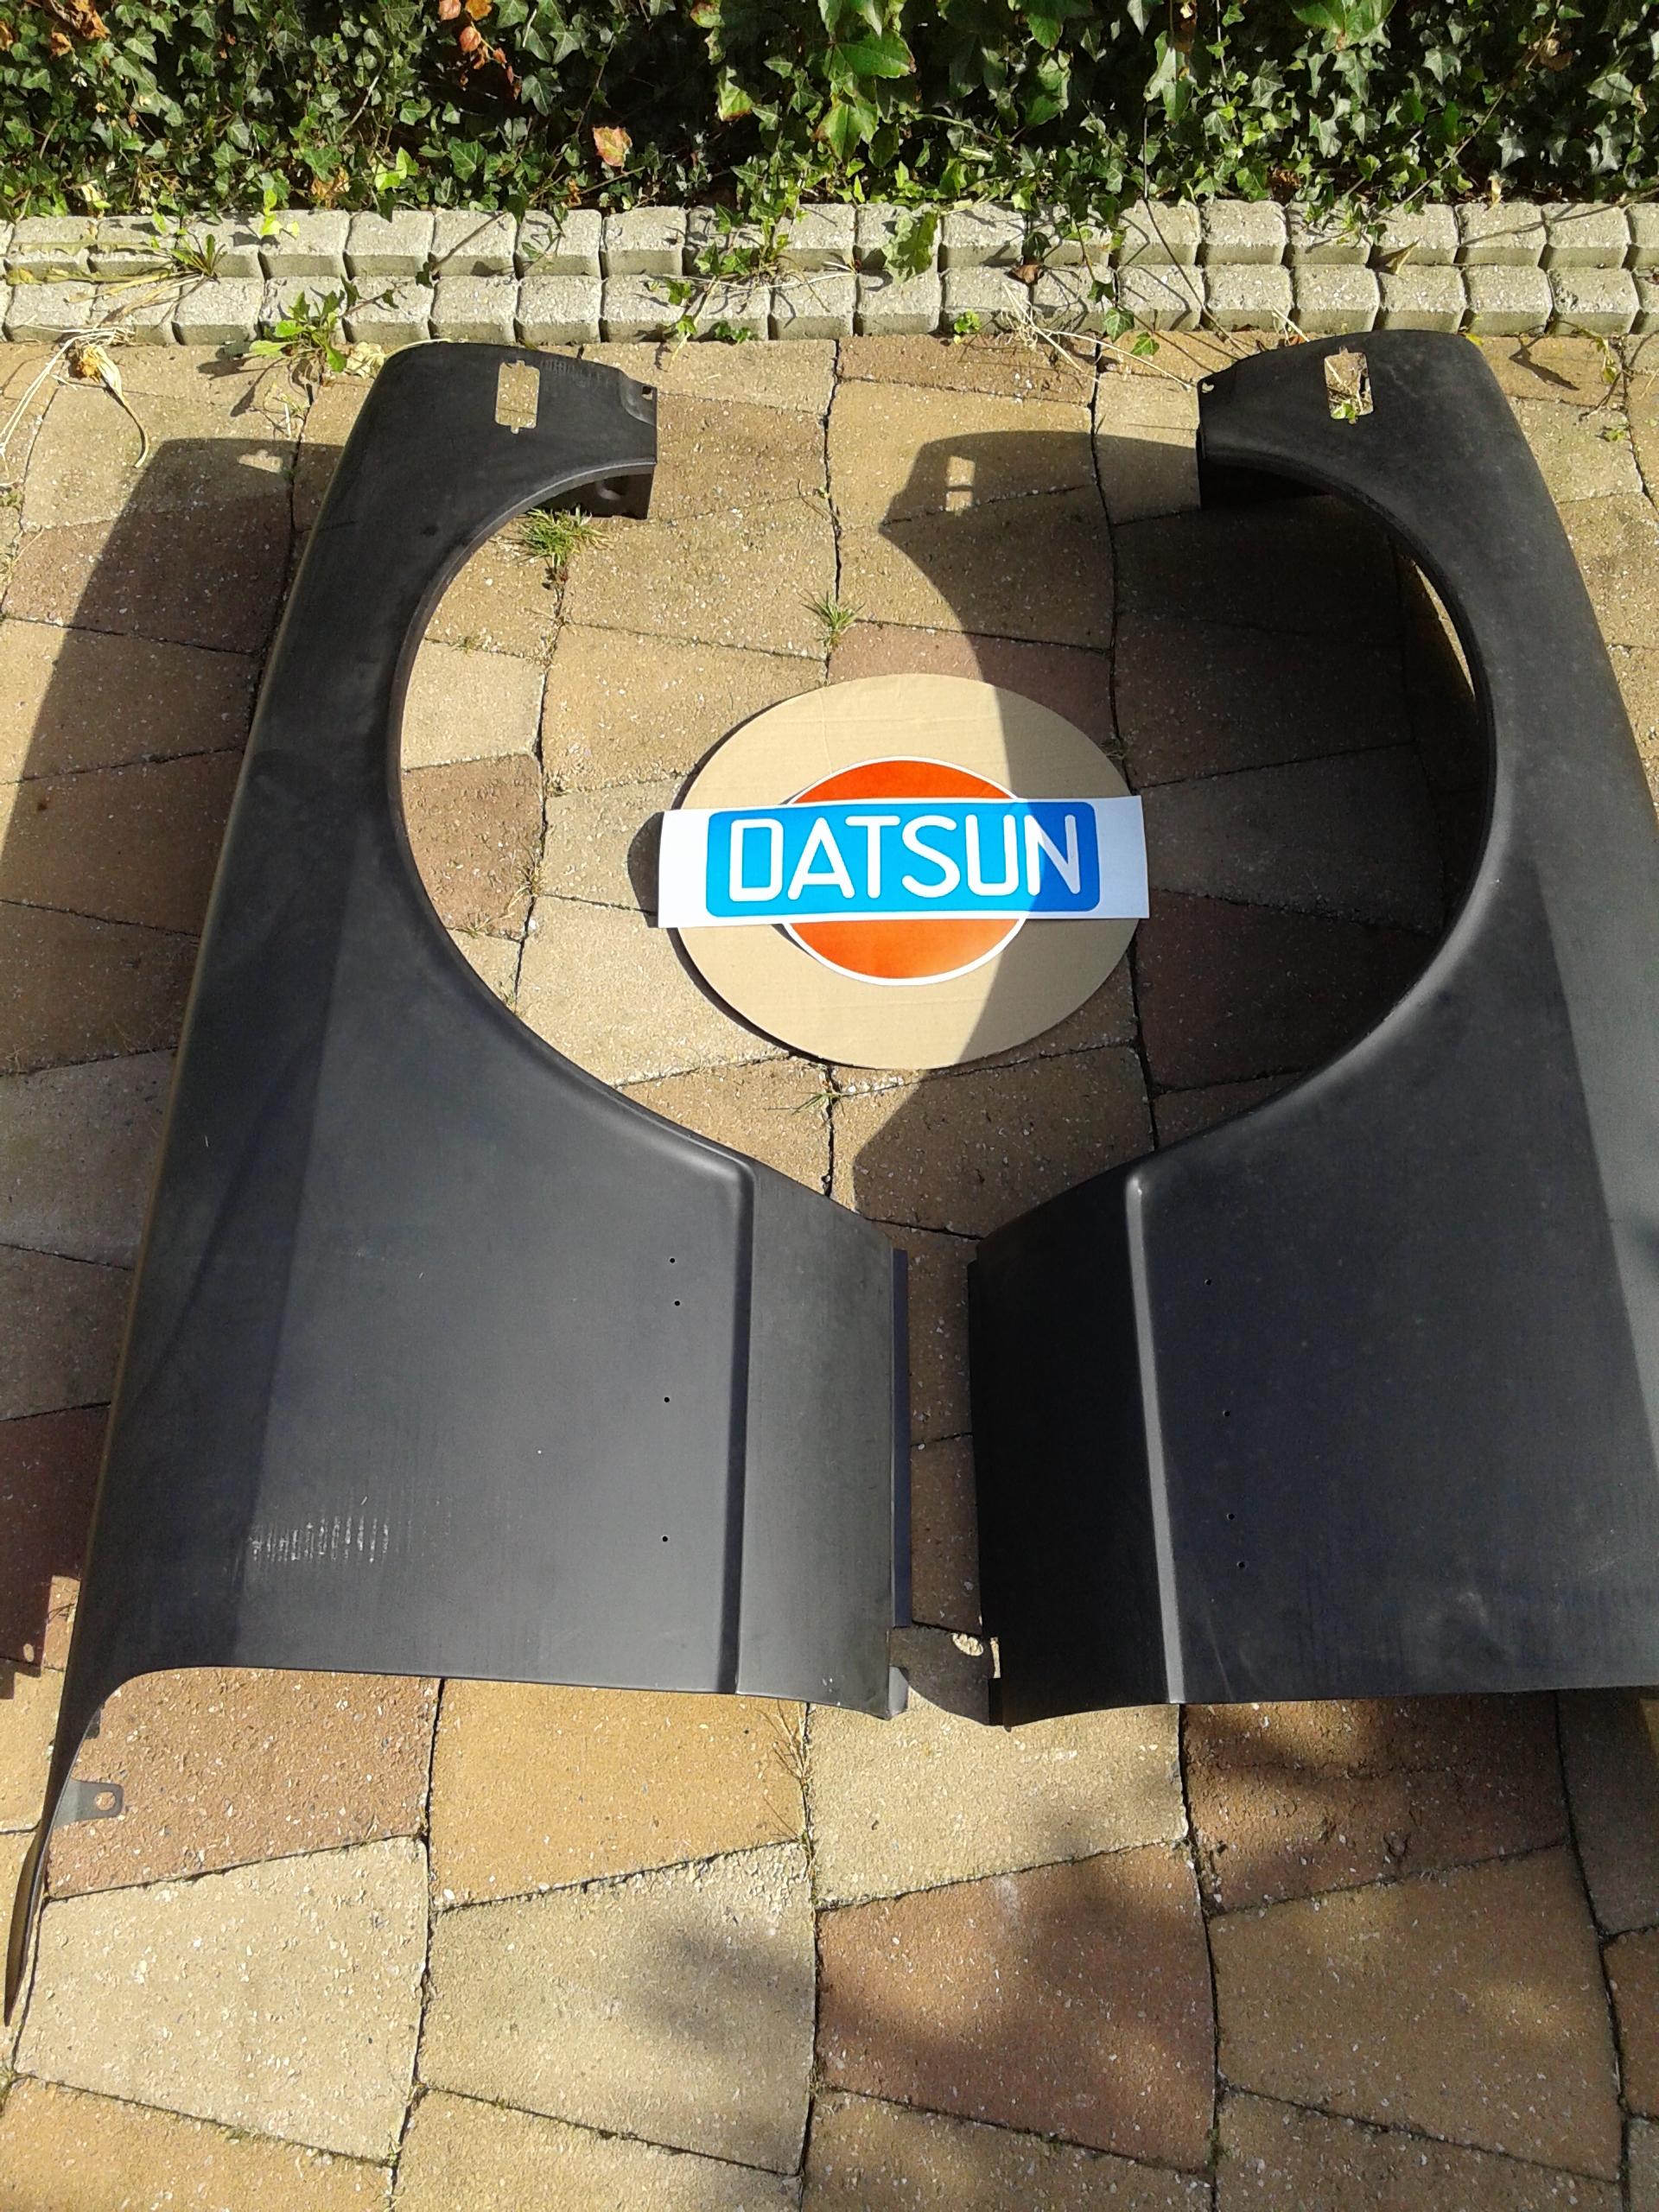
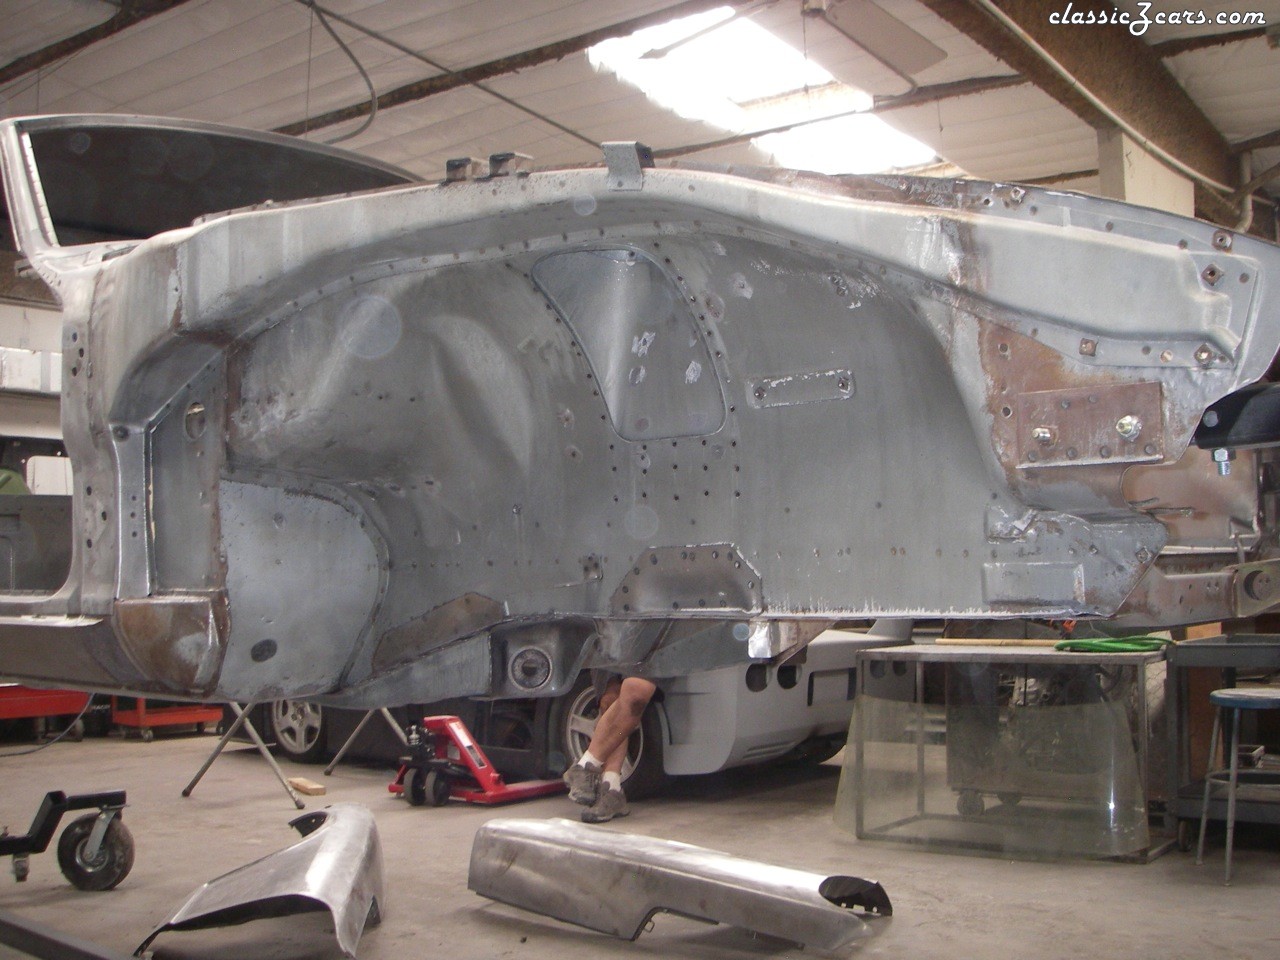
 1 pointWell, in your defense, it does say "by Nissan" in fine print on the rear ZX badge. Edit: I'm not sure what happened, but when i posted this, the last post was stating about how it still said Datsun on the ZX, but when I hit submit reply, like 9 or so other posts materialized instantly. So disregard, it's already been addressed.1 pointAlso this repair would be easier if you remove the doubler plate so you are not fighting the boxed section. You could remove the whole thing or just cut it far enough back to be past the damage. Then remove that portion. Then you can dolly both pieces inside and out. Weld back in with a butt seam and smooth them out. Also like Namerow suggested you could hold the car down closer to the front to reduce the stress on the frame rail. You could go on Ebay and order some frame clamps. I have an assortment that I use with come-alongs or chain binders for lighter damage work1 pointFurther to Patcon's suggestion, you could also consider sliding a next-side-up extension tube over the end of the longitudinal floor runner of your frame rig and then using that as a reaction structure (i.e. put the bottle jack between the extension piece and the lever arm). Depends on how long the existing frame 'stub' is. I don't think I'd try this unless that stub is at least 18" long (which your pictures suggest to be the case). The reaction load (which would be tension, not compression) would be taken out of the vehicle structure through the front-most support point of your frame rig. Right now, I believe that is at either the front crossmember location -- which is a good distance back from the rad bulkhead. I'd like to see the reaction load being taken up further forward. Maybe you could rig up a chain, looped over the lower part of the rad bulkhead and then anchored to the top of the new extension tube by way of a couple of (sturdy) welded-on eye-bolts. Include turnbuckles in the two chain drops so that you can pre-tension the chain. While considering how this 'adjustment' might take, it may help to stare at the following two pictures for a few minutes while asking yourself, 'What panels deformed during the collision event?' and then, 'How can I un-do that deformation?'. The panel's main strength in the vertical bending plane comes from that long doubler panel (which has been removed by the owner in the top picture). It works with the main stamping to form a box section (which is sometimes referred to as the upper frame horn). However, notice how that box section is weakened near the front by the big hole punched in the main panel to form the fresh air inlet for the car's cabin ventilation system. I suspect that that's where the deformation happens in a front-end collision. In fact, in the lower picture it almost looks like the outer wall of the doubler plate has been kinked. For reference, I've added a third picture showing a pair of virgin OE doubler plates.
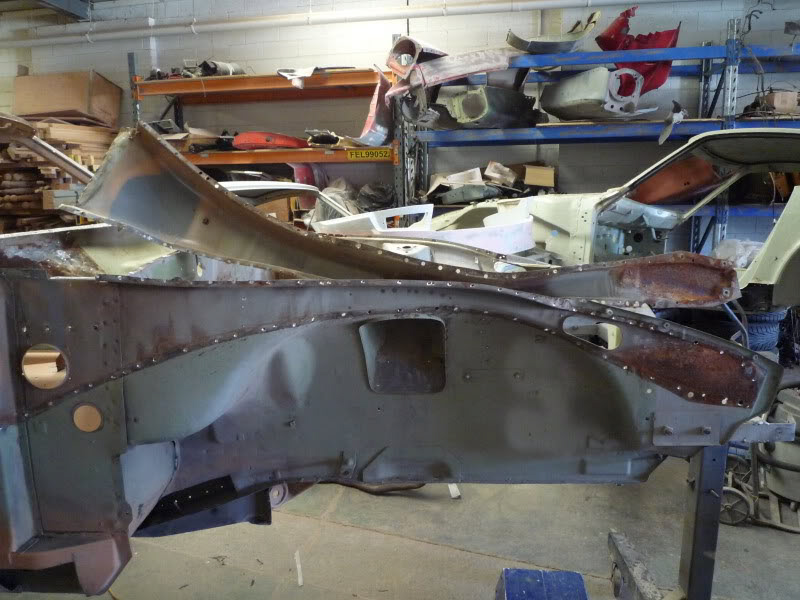

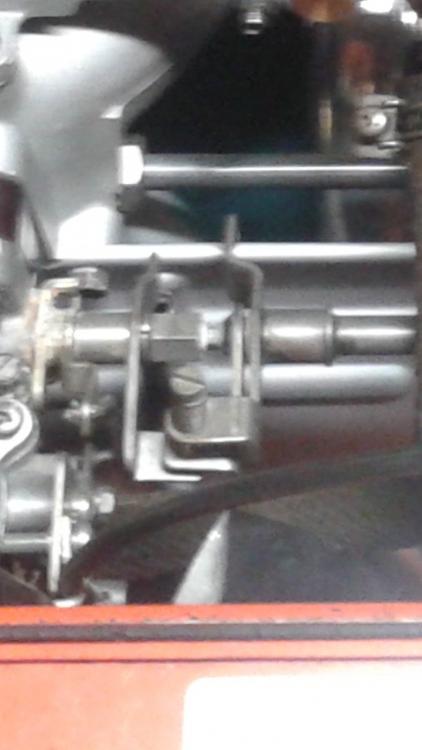
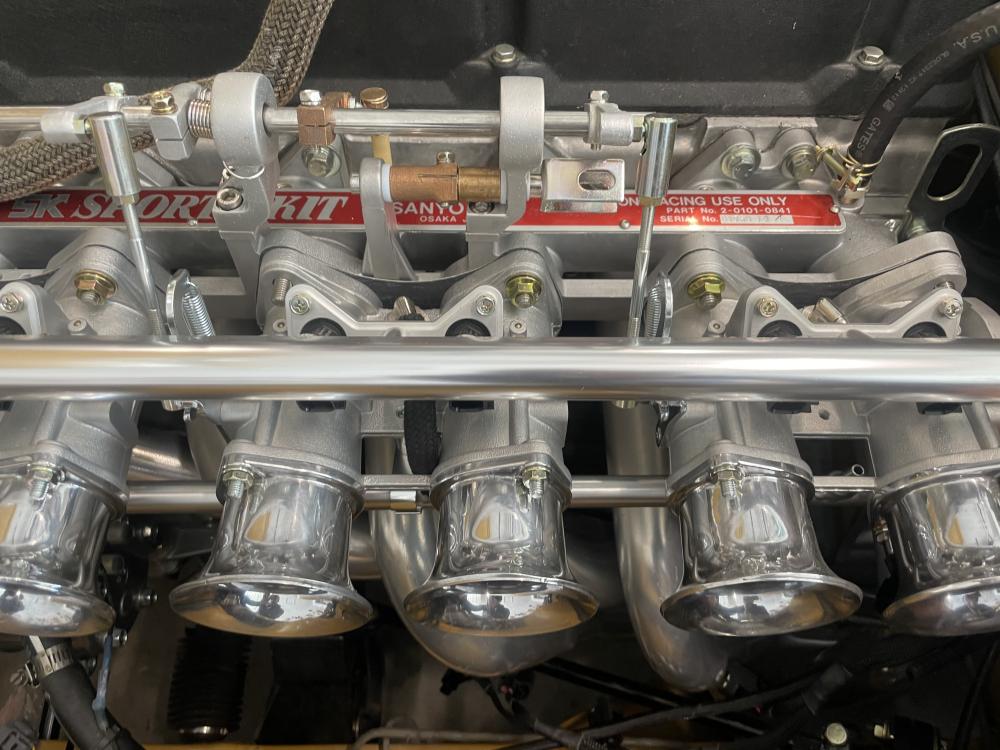
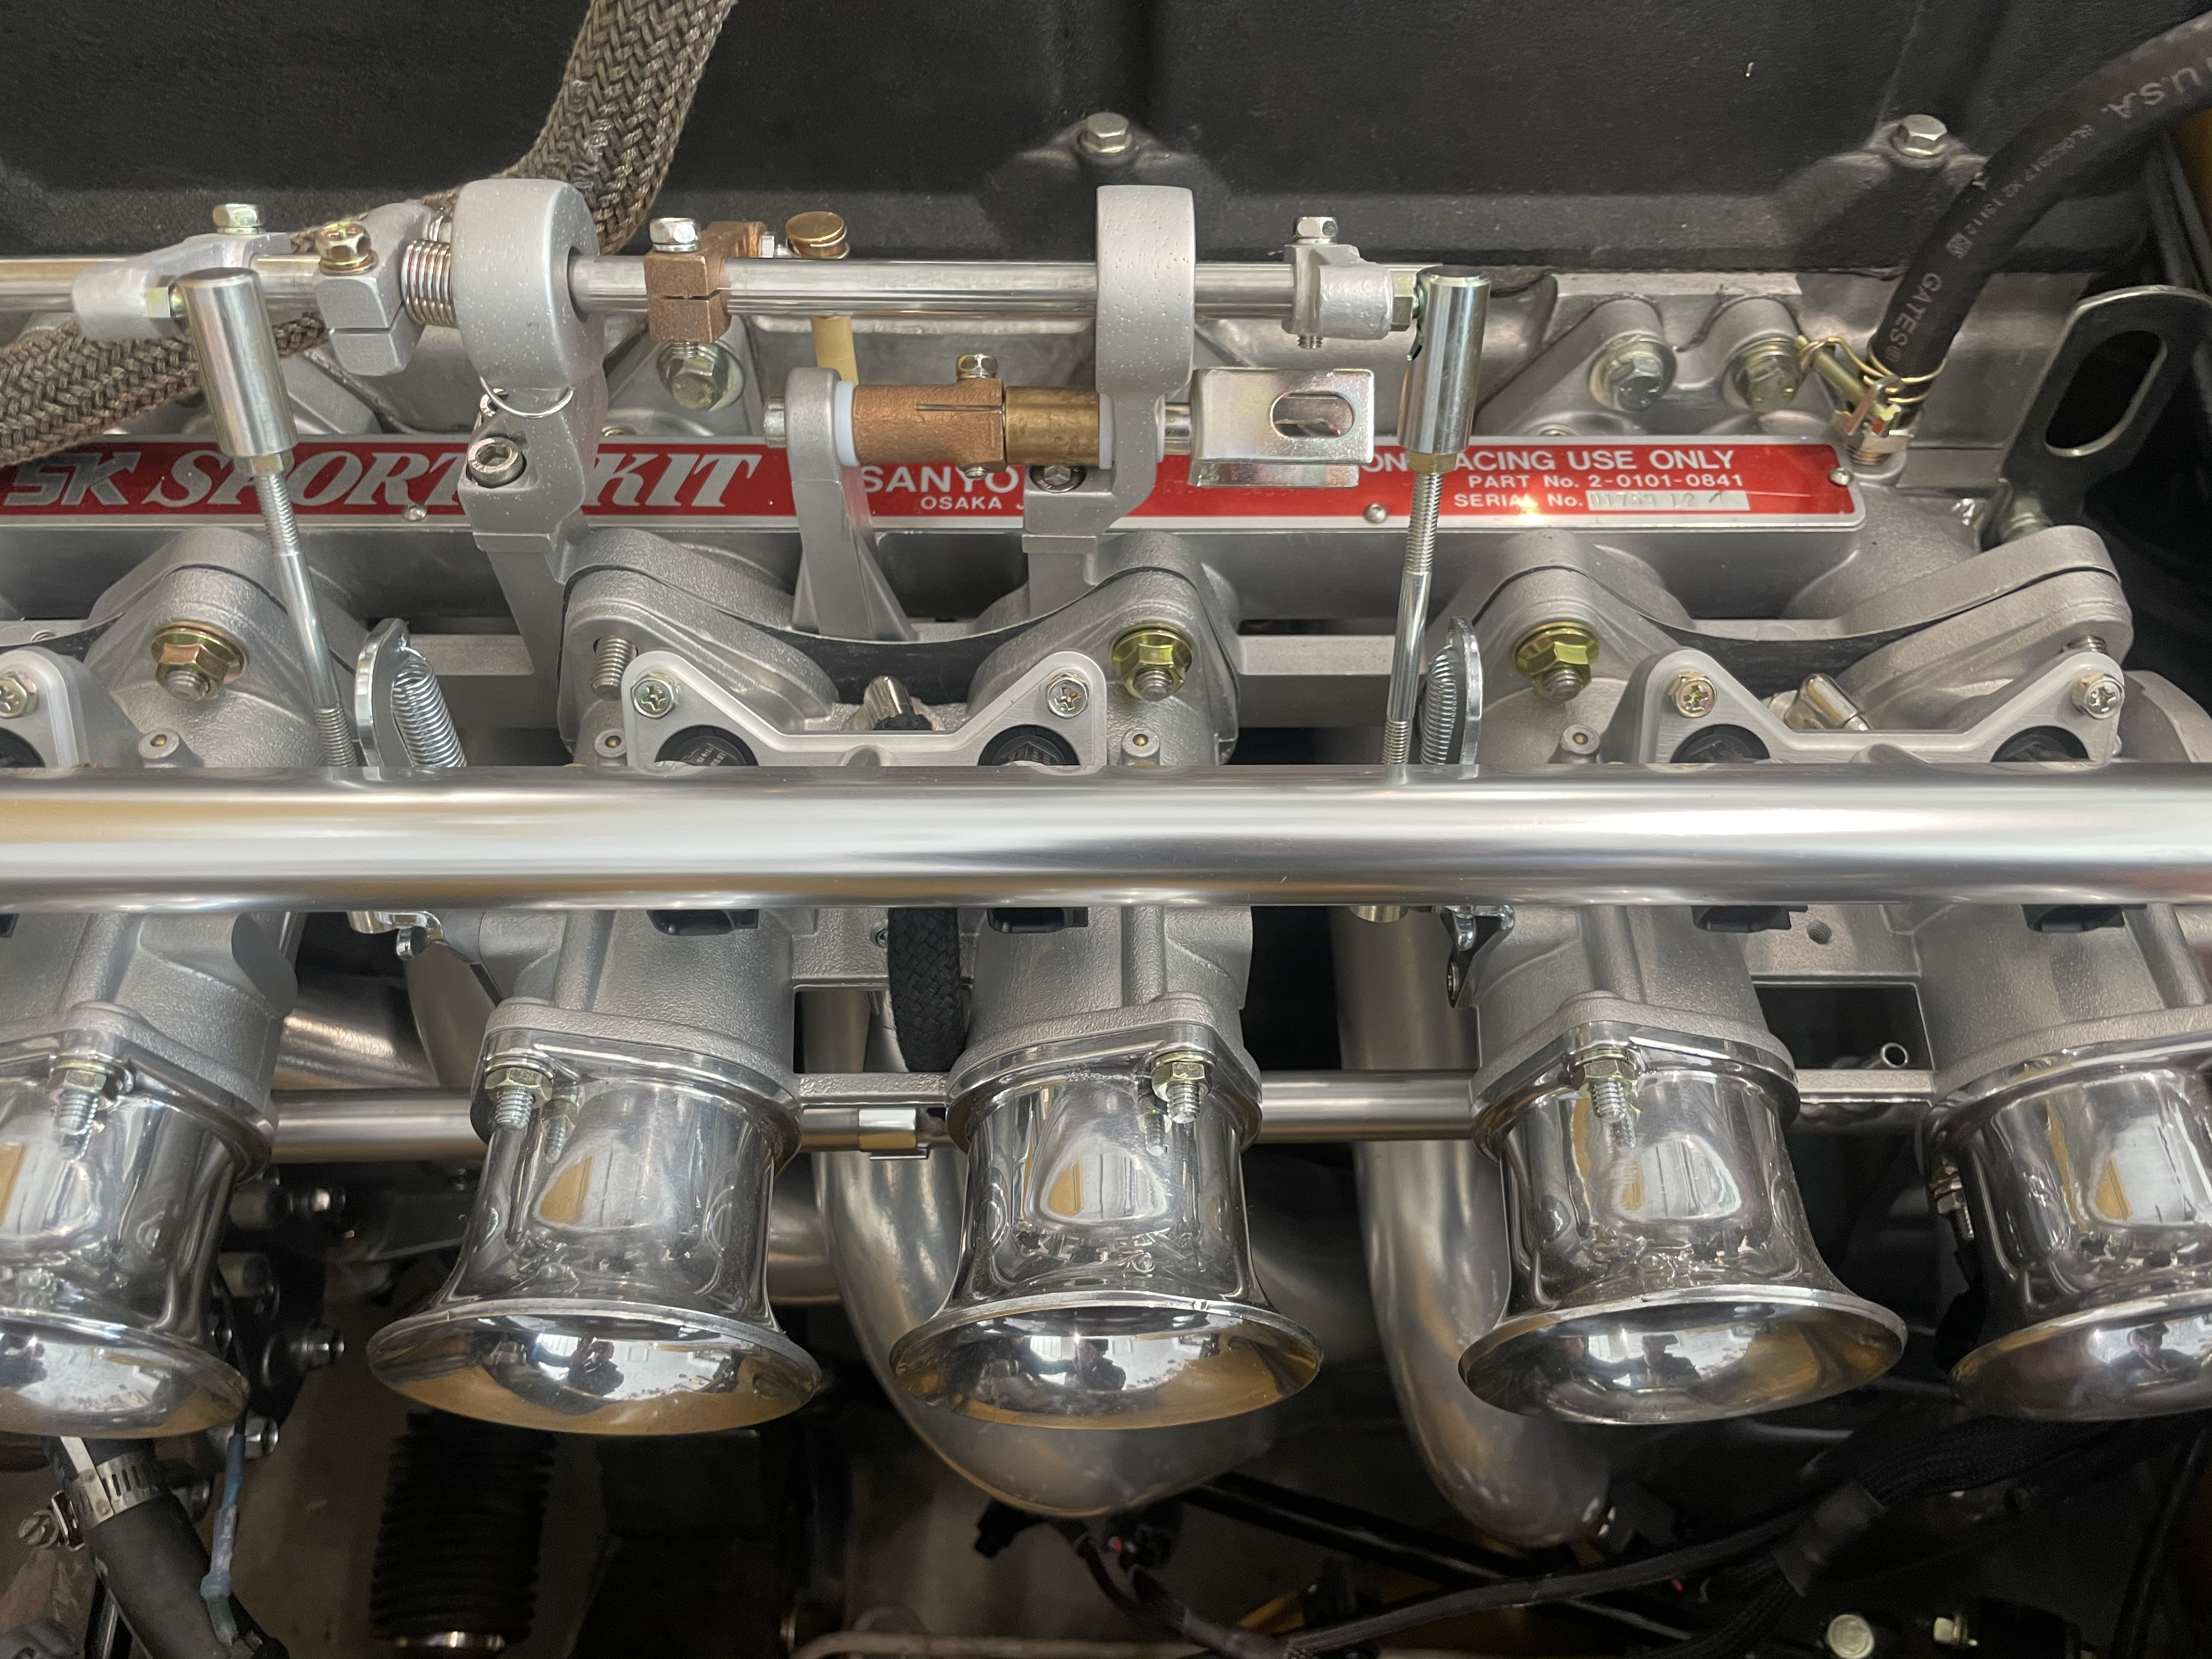
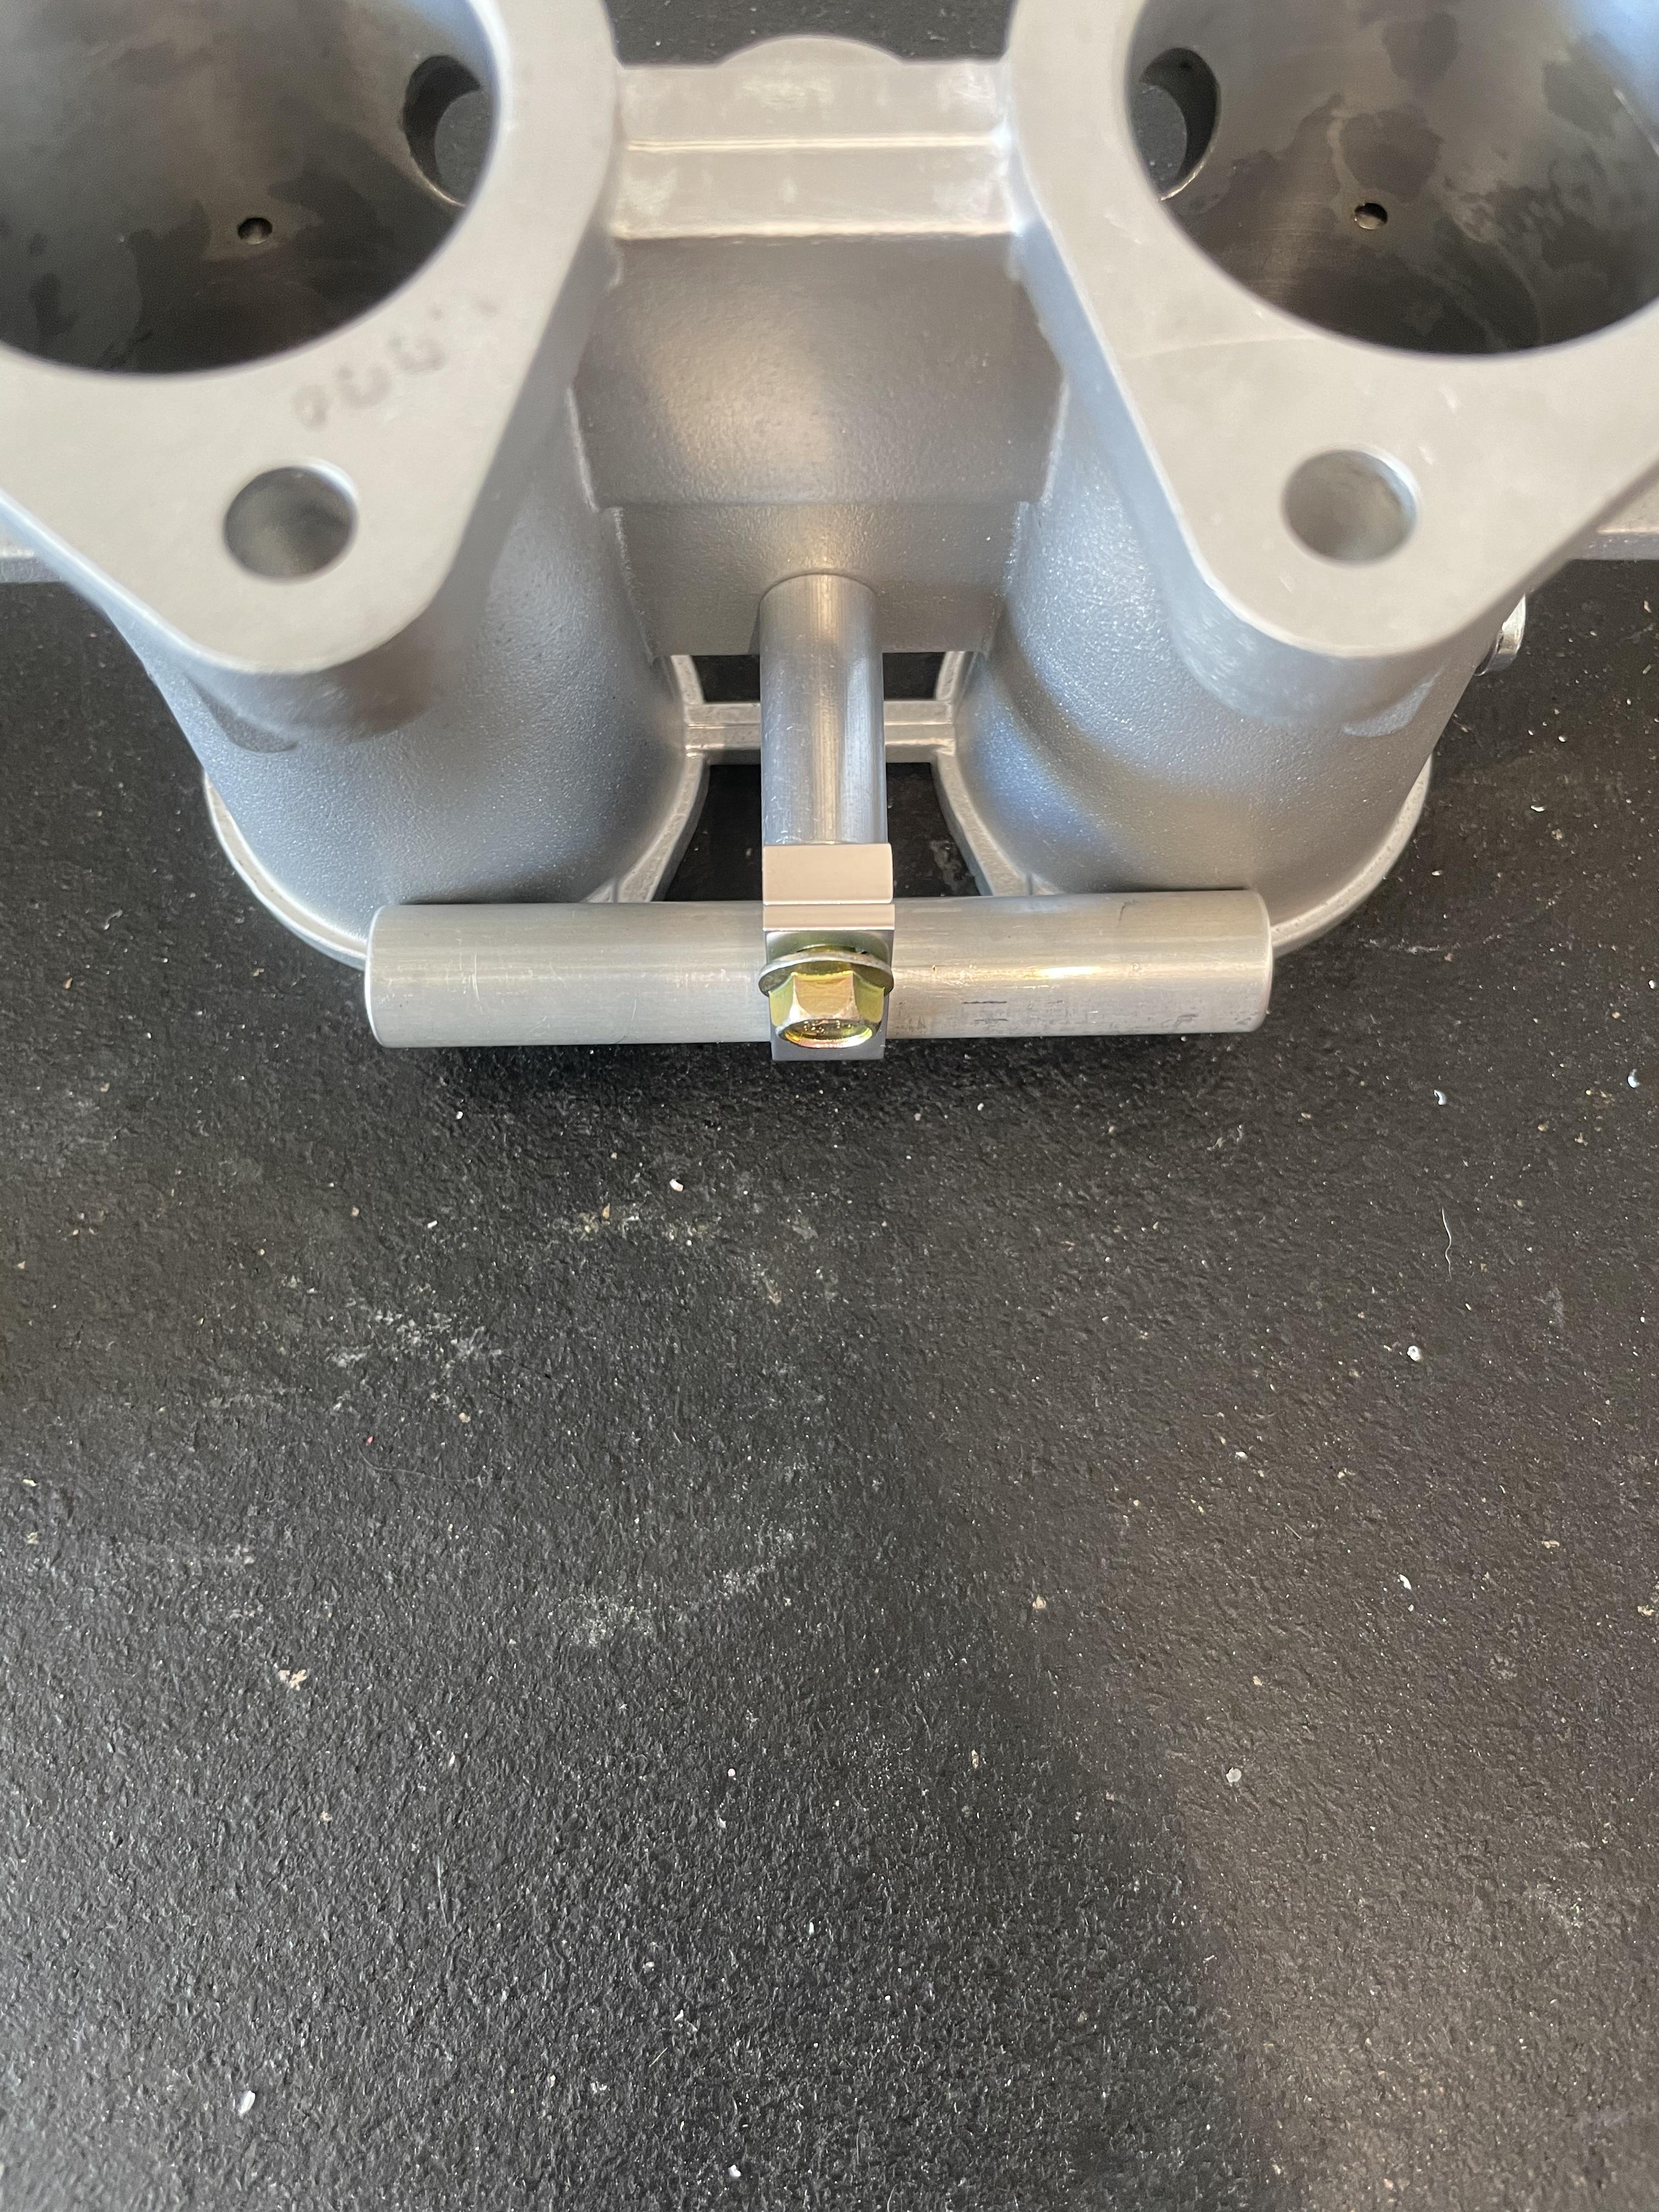
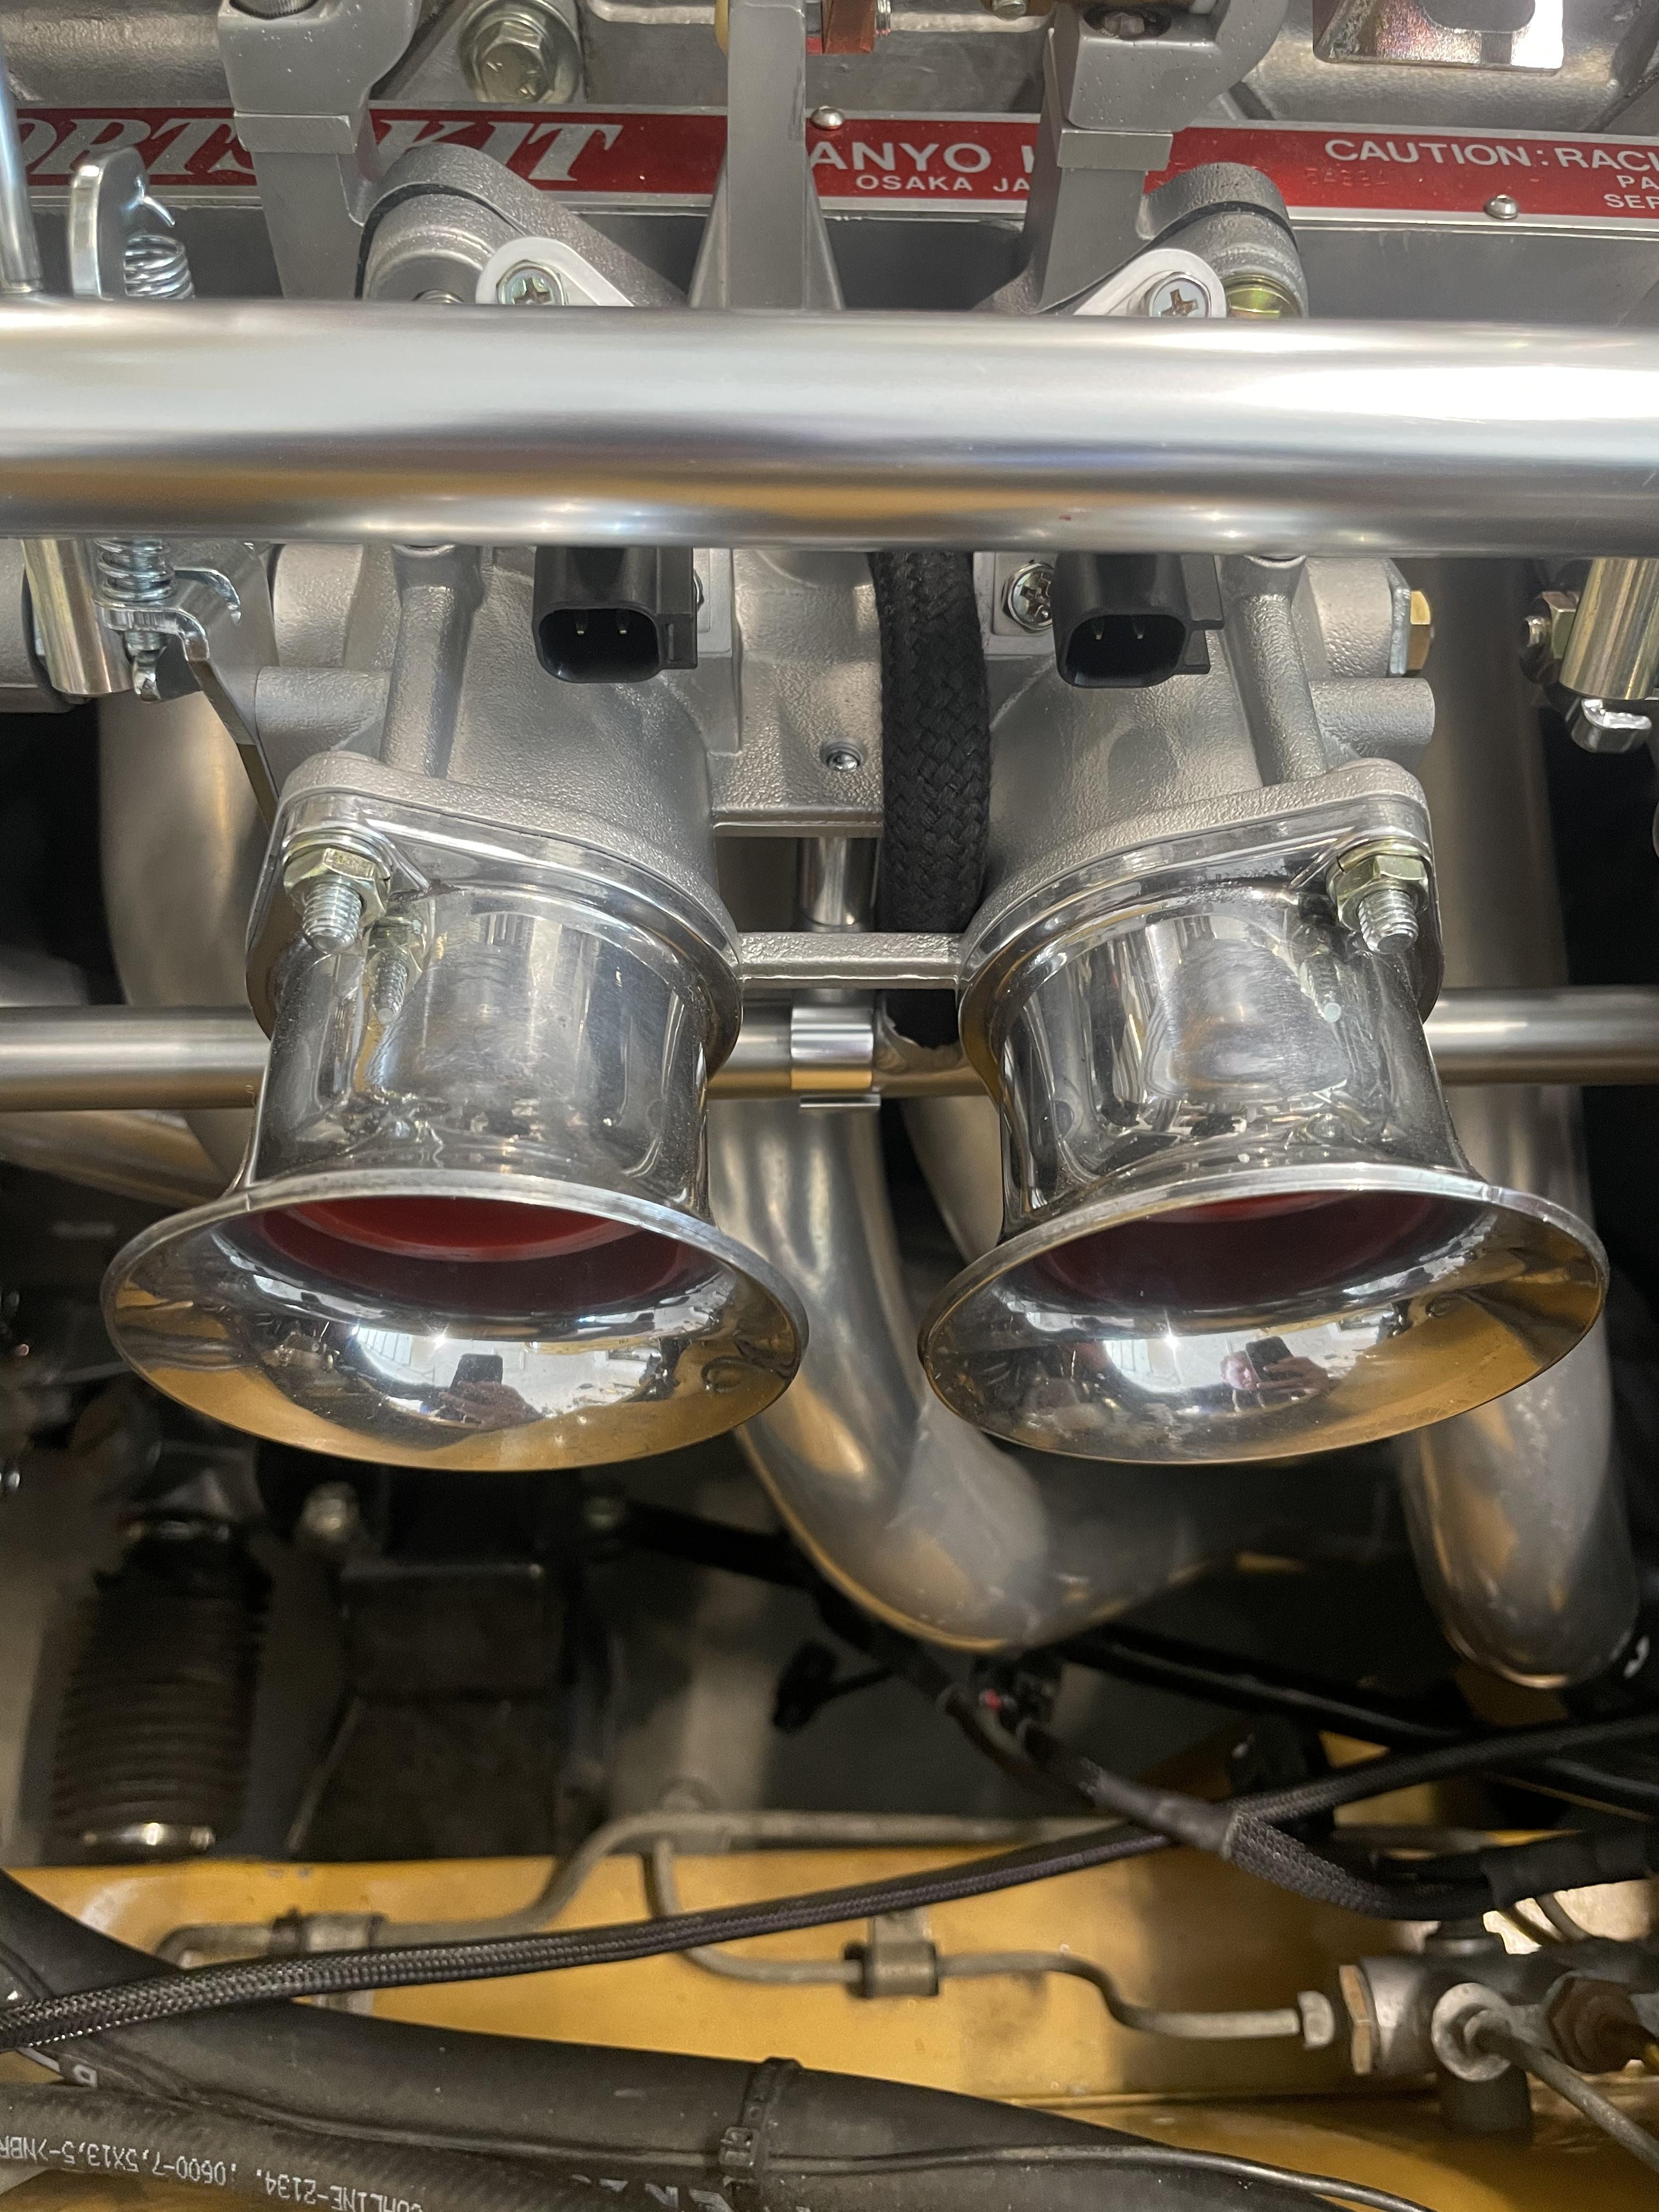
 1 point1 pointI think this ITB vacuum balance bar will work and look good. It’s far enough way from the header in this spot as well.


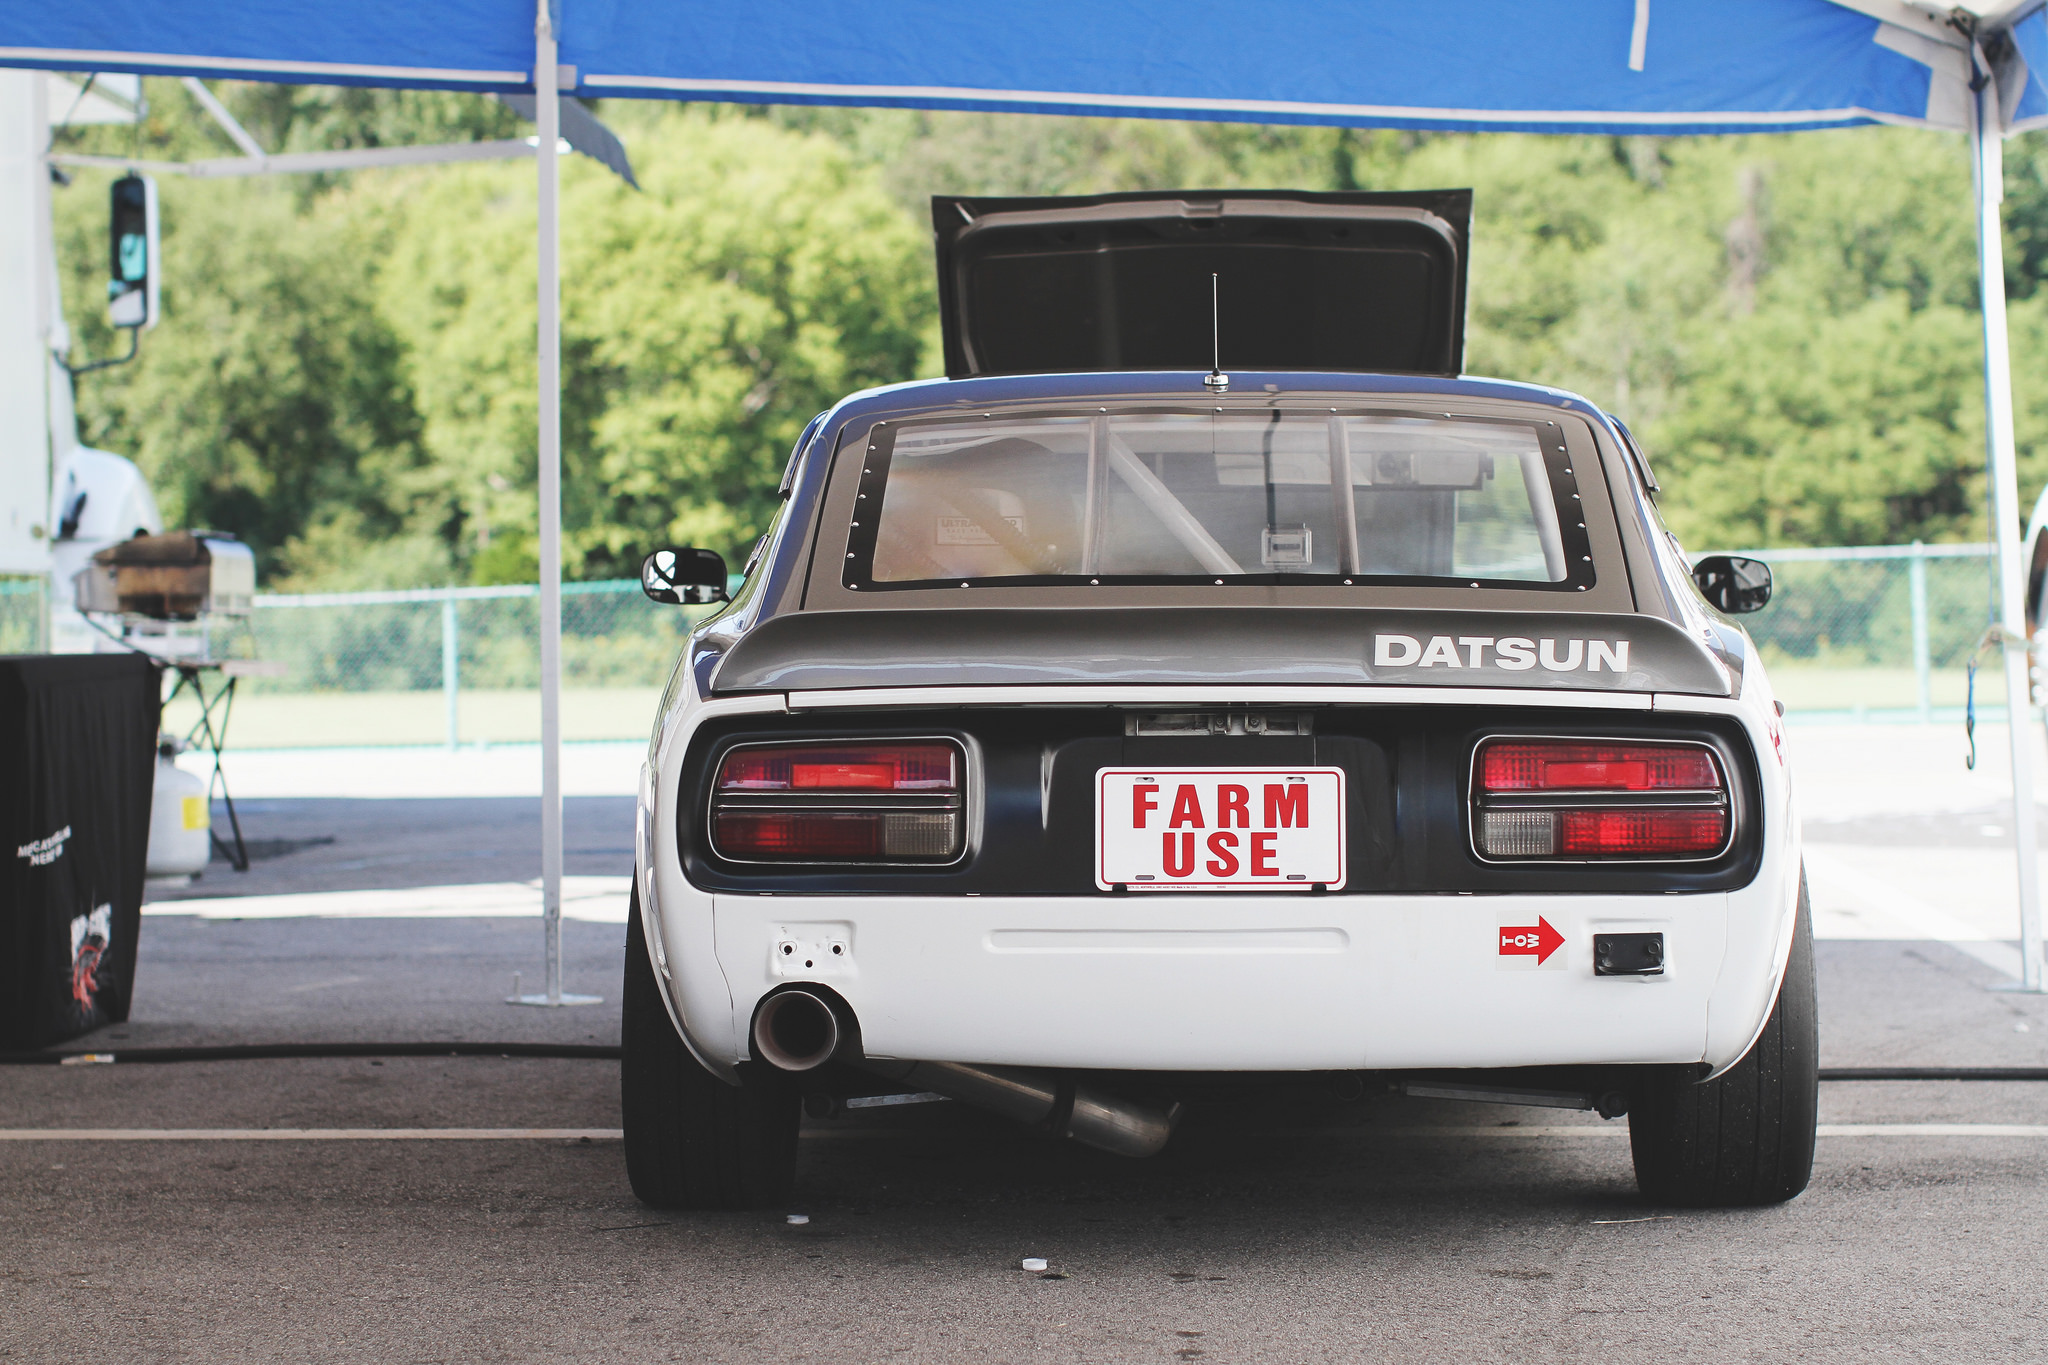
 1 point1 pointMight need balancing. You're working in parallel with a similar project.1 pointBoth the window net and the air scoop from that BSR 280 CP race car now reside on my 240Z race car. Neither make me as fast or as good looking as PLN.
 1 point1 point"Well you have to know these things when you're a king, you know."1 point1 pointI’ve got two that are not quite as separated and I’ve thought about getting/using some liquid electrical tape Edit: I can’t remember the brand I used before for something different, but it was thick and dried to a soft rubber consistently kinda like RTV/silicone. I thought about using Plasti Dip and just noticed they make a electric tape version. Sent from my iPhone using Tapatalk1 point1 pointGuys, anyone know how to fix the BCCD wire? Or do I need to find a new solenoid? Also, thought I'd share a tip. I needed to do some touch up painting in the engine bay. I bought a Master Airbrush Model G22 on amazon. It was 25 bucks and it works great. I highly recommend1 pointOkay I’ll loosen up the screws to not damage the carbs, I didn’t over tighten, I had seated them and turned them two full turns out, but while adjusting I tightened it in one more term. I believe the smoke coming out is run on(dieseling) from excess fuel. I’m going to borrow a fuel pressure test from autozone and see what I can figure out tomorrow. I’ll also unhook the gas pedal linkage and see if I can get the throttle stop to sit more forward as that may be part of my problem. no I don’t believe there’s any electrical solenoids on them1 pointKeep in mind that all of the repair work in this area needs to be done on the jig, not on the rotisserie. The lever idea might work really well if the radiator support was out of the way. Put some force on the lever and then dolly the crumpled area behind the radiator support. Does anyone know if the radiator support is plumb in the car or square (90d) to the frame rail?1 pointMake sure these flats are in the right order. I put mine back on wrong and it shot up to 2 or 3 thousand rpms.
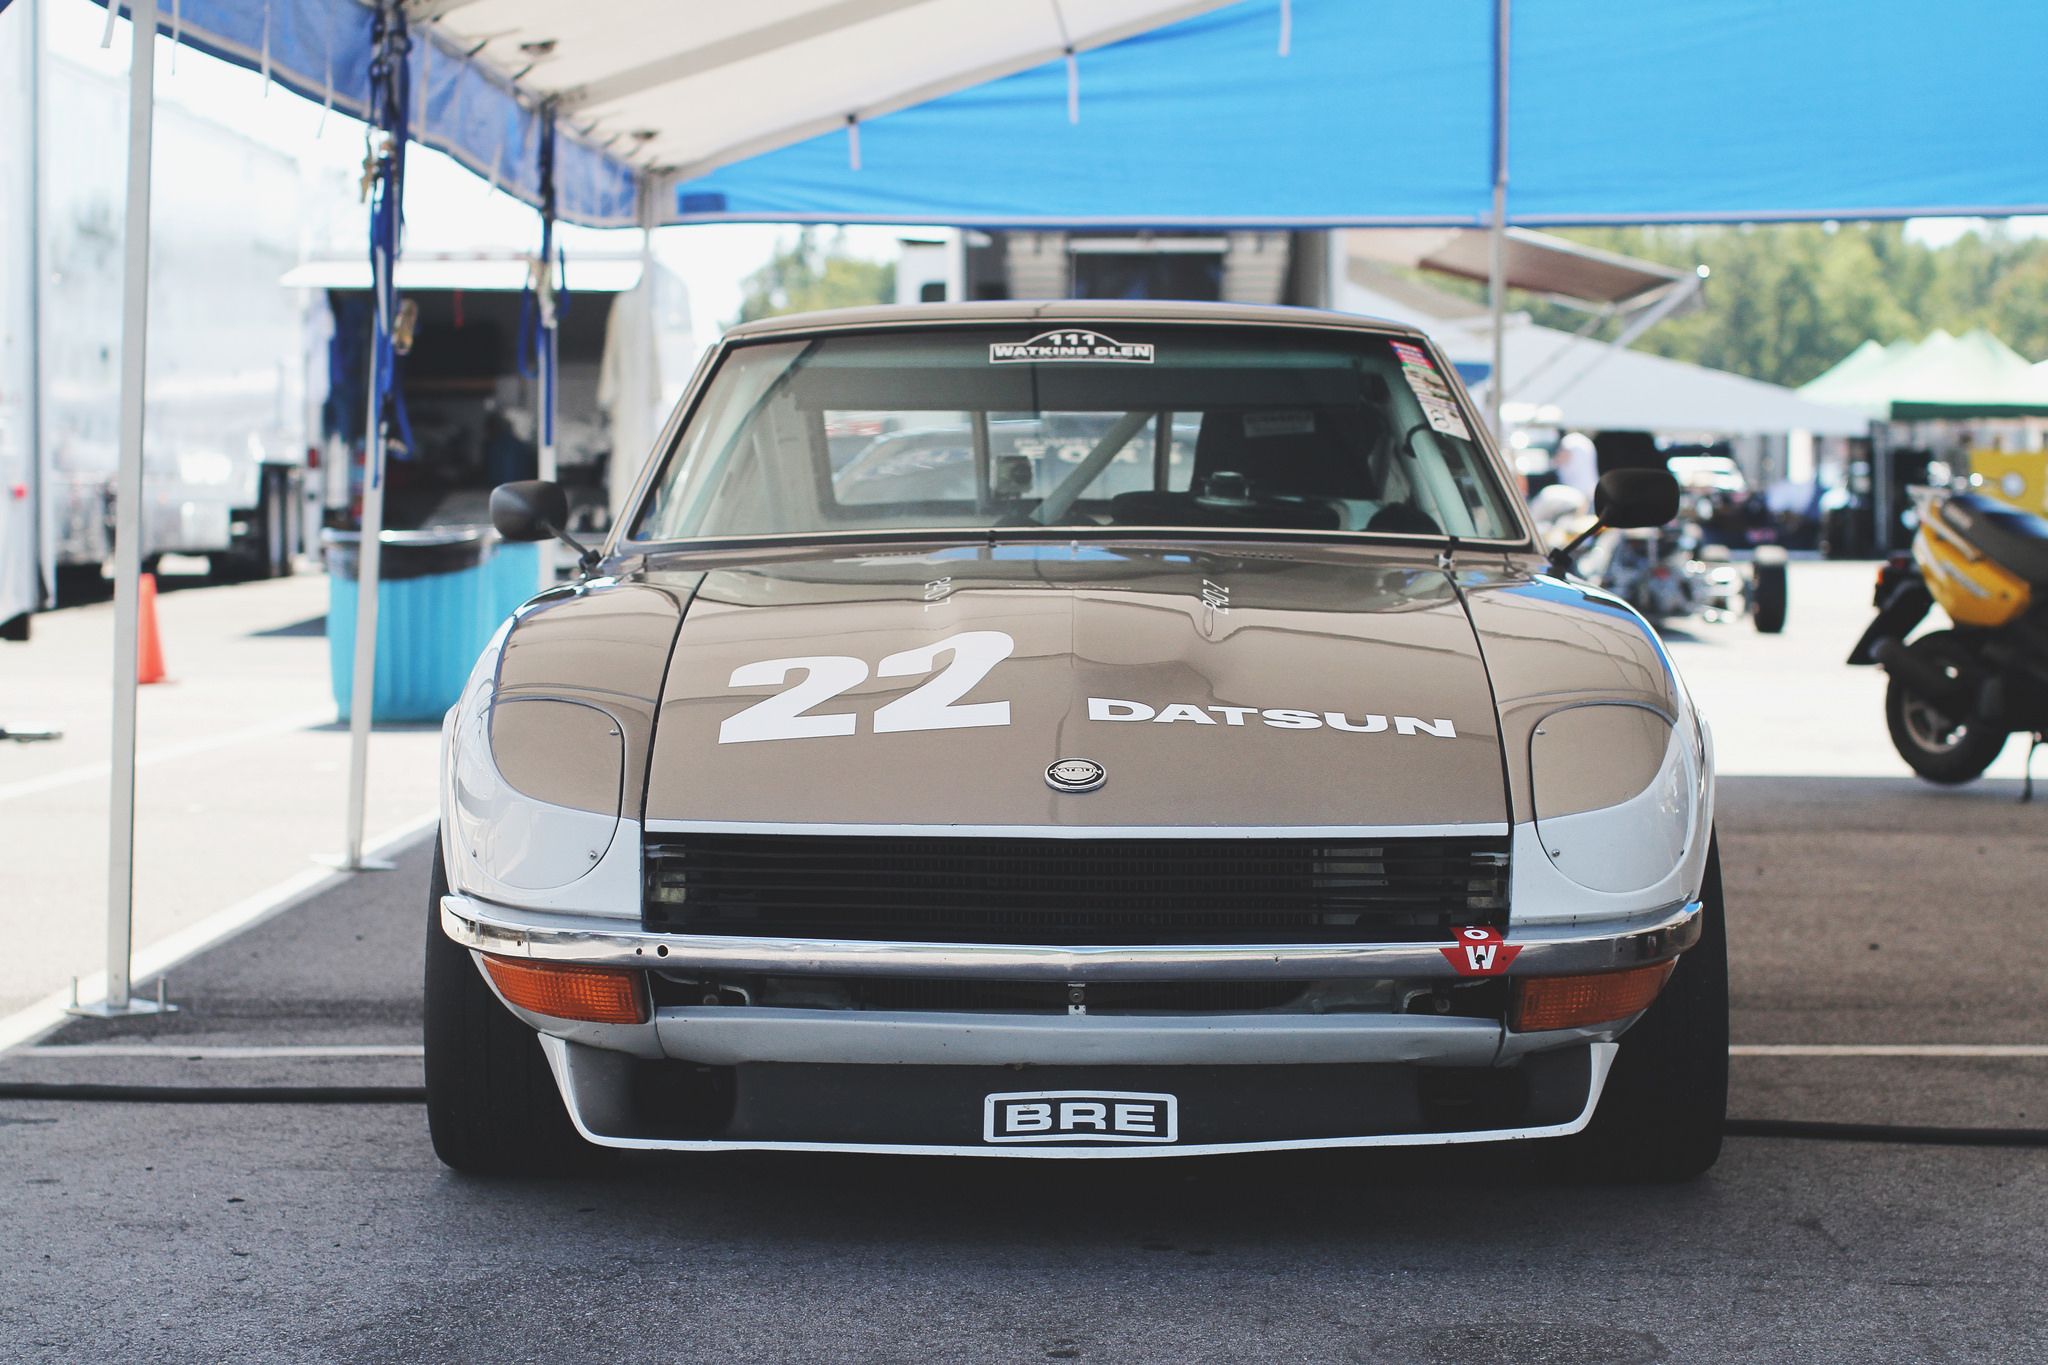
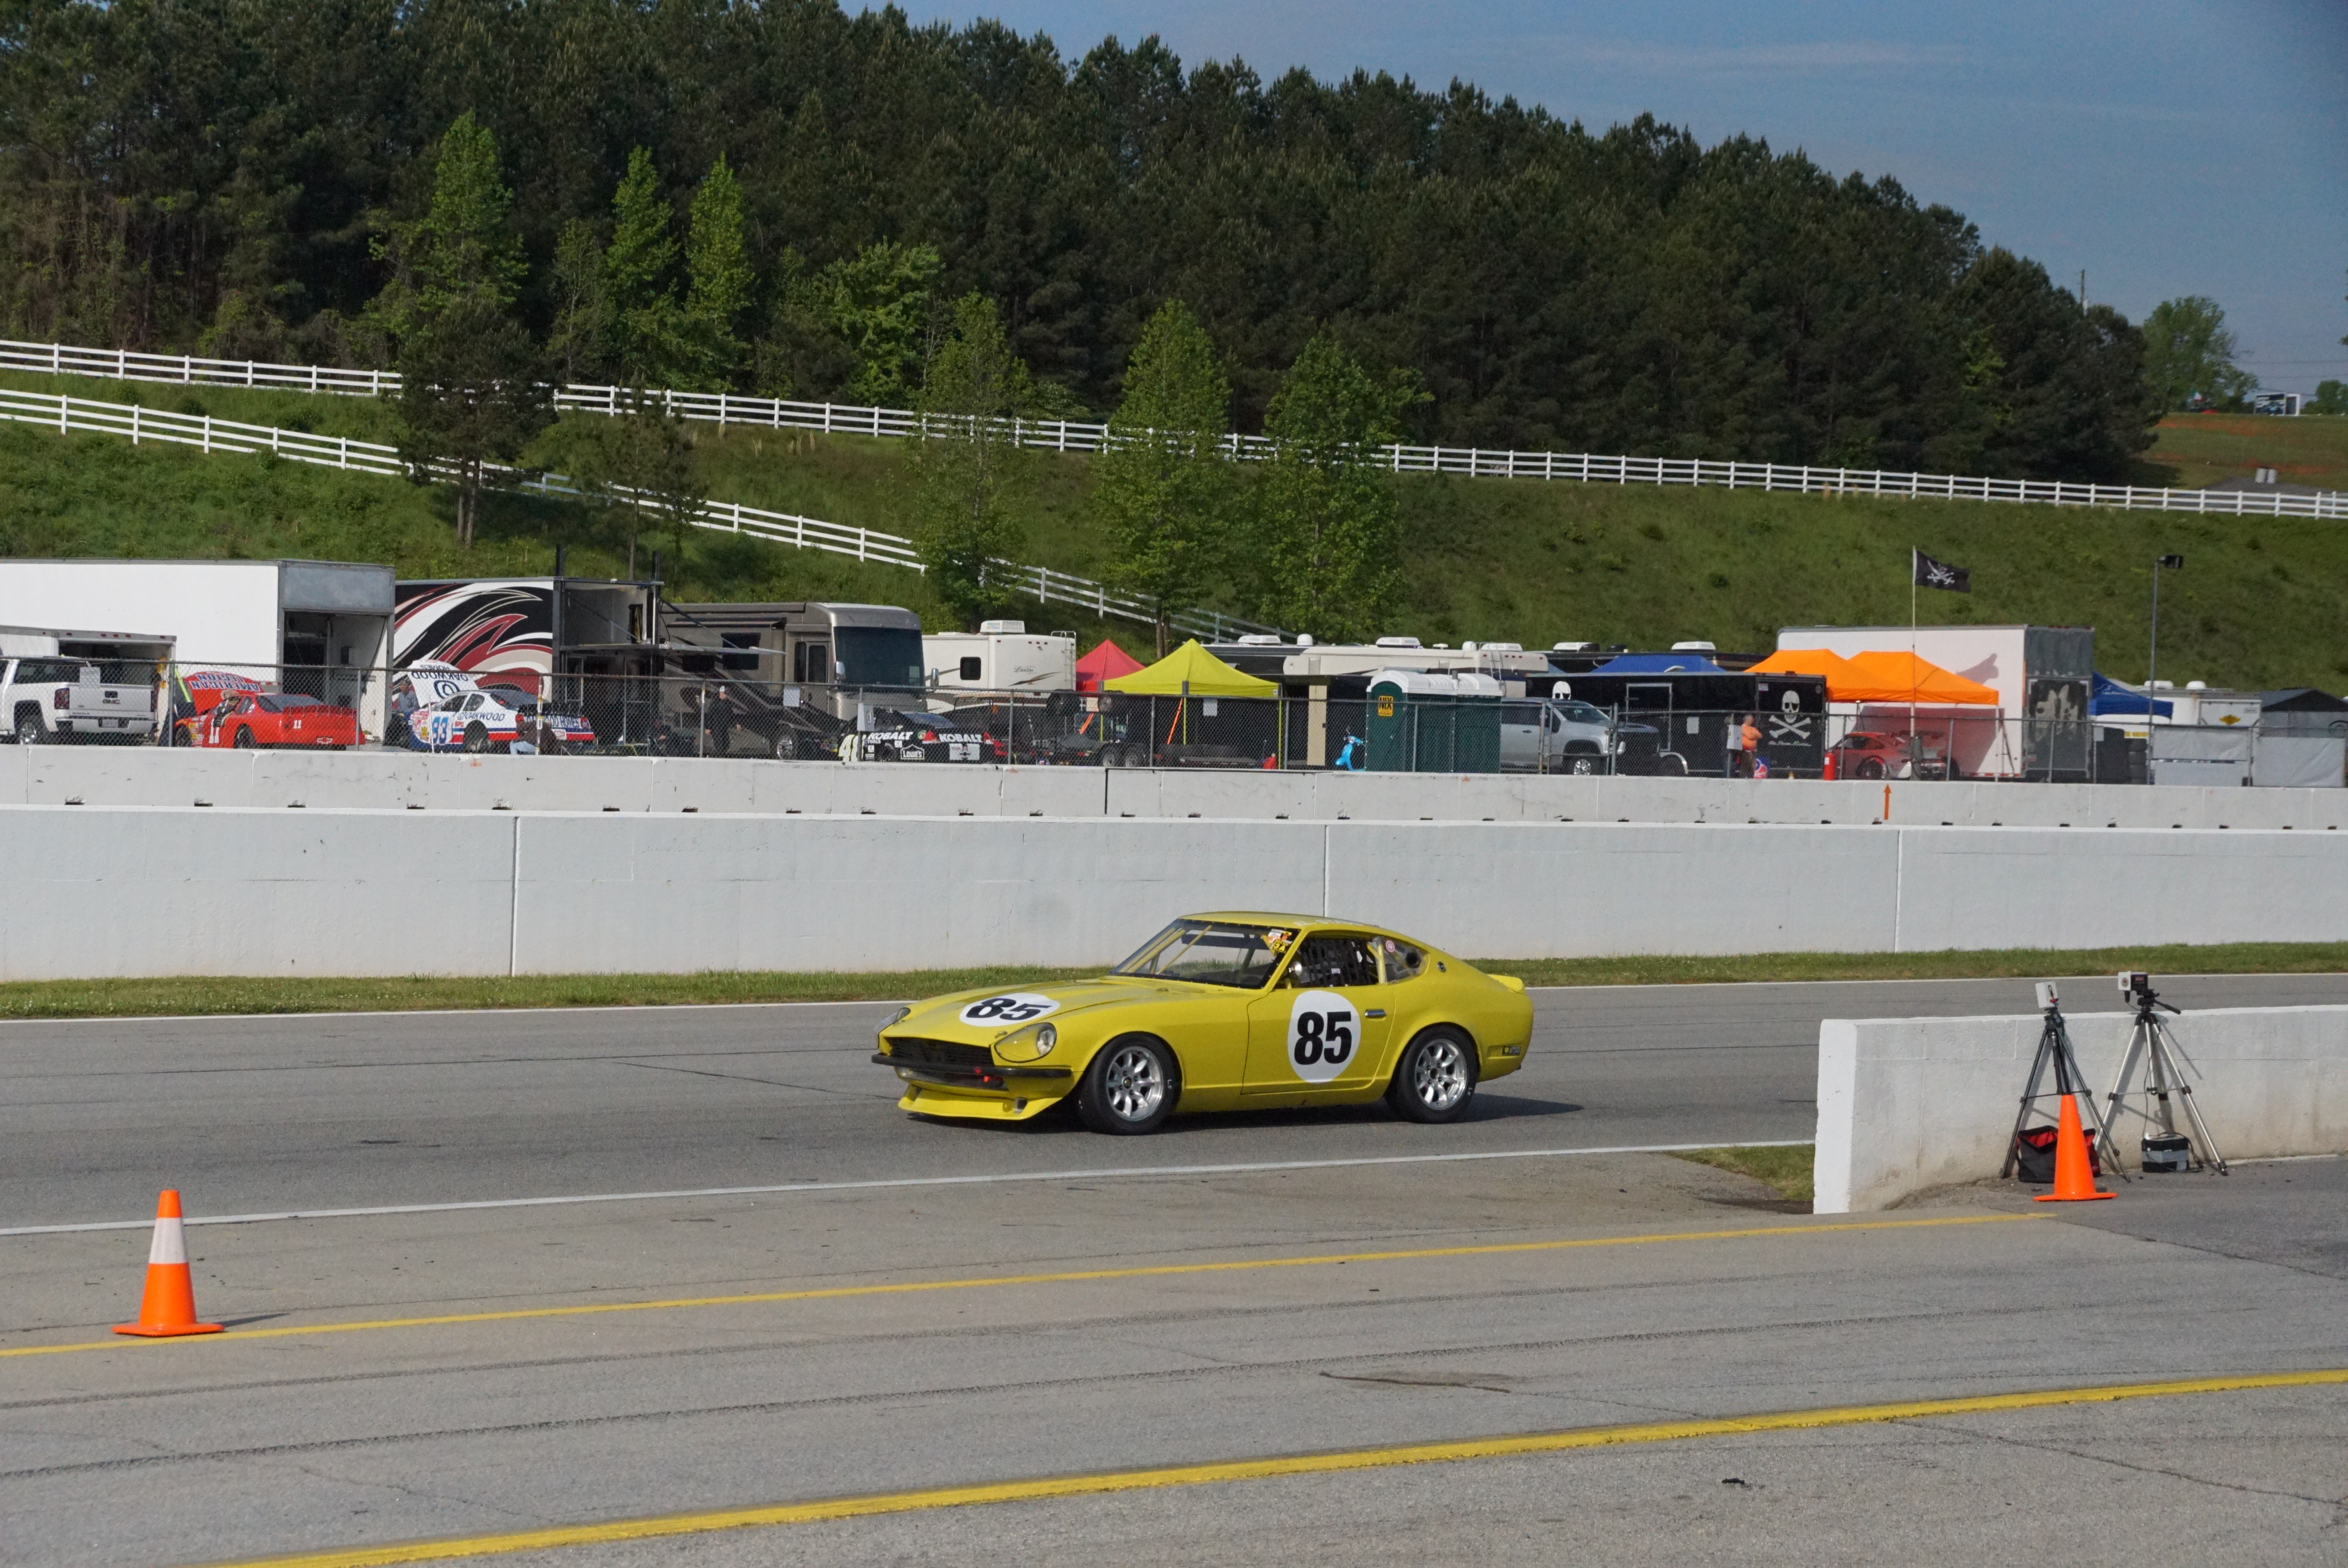
1 pointNice to see that the X-Y laser gave you some encouraging measurements Re your plumb bob measurements, I think you should would be quite satisfied with a discrepancy of only 1mm in your LHS vs RHS measurements. I think that's probably within the manufacturer's original build tolerance (which, in the 1970's was probably on the order of 1.5 - 2 mm for this type of long, front-to-rear measurement). One question, though: Did you measure both longitudinal (front-right to rear-right / front-left to rear-left) and transverse (front-right to rear-left / front-left to rear-right)? If you only did the longitudinal measurements, then you still don't know whether the frame is lozenged (also referred to as 'diamonded', IIRC). The plumb laser will make these measurements more convenient and more accurate. Trying to hang a plumb bob string from the center of a bolt hole or bolt head is not that easy to do with accuracy (especially if you're lying on the garage floor). At the back of the car, you should be using the 'C' points (holes in the rear subframe, just behind where the interior floor pan kicks up) as your reference. At the front of the car, you should use two different sets of reference points: 1) the front (or rear) LHS and RHS crossmember mount holes in the frame rails, and; 2) the centres of the big holes at the top of the two front shock towers. (1) will tell you about the alignment of the lower structure and the lower front suspension pickup points. (2) will tell you about the alignment of the front suspension's upper pickup points. Re the front bumper mount holes, I suggest you wait for corroboration from at least one additional owner of a damage-free Z to feel confident that they're supposed to be 'level'. Although logic says that this should be the case, you just never know. You have a lot of prospective time and effort a stake, so best to not begin until you're as confident as possible about what is 'correct'. Also: I'm leery about the float-level measurement methods that I've seen so far. They measure relative to an inertial level, but you can't be sure whether both cars are sitting at the same pitch angle (aka 'rake angle') relative to inertial (or, for that matter, whether the floors underneath them are properly level). Ideally, 'level' for the bumper mount holes should be judged using a vehicle frame of reference. Your X-Y laser can do that, but the float level measurements may be suspect. Another thing: Note that the front and rear bolt holes are drilled pretty close to each other, which means that any errors made in sighting on the bolt hole centers (or the bottoms or tops of the bolt holes) will greatly exaggerate the measured front-to-rear angle. If I was doing this, I'd use a compass to draw a bolt-hole-sized circle on a piece of wide masking tape and then draw on crosshairs. Then I'd stick the tape on the body panel over one of the mount holes. Now repeat for the other three mount holes. One last idea (which you can take or leave): If you conclude that the bumper bolt holes really are out of whack, you might consider trying a bit of 'caveman' body alignment as a low-cost, low-impact first step. Take some of the square tubing you have left over from your frame rig construction project and cut a pair of 8-foot lengths. For both, drill a pair of correct-size holes at one end that are at the same spacing as the bumper-bolt holes. Bolt the legs in place on the bumper/hinge-mount body panel, one one the outside of the panel, the other on the inside, securing them in place with two pieces of threaded rod (or a pair of really long bolts). Now you have a hefty 8-ft lever that's solidly mounted to the bent panel. If the front bumper-mount hole is higher than the rear one, you'll need to push down on the end of the lever. In this case, I would suggest you build a solid side-to-side wood trestle to put under the front of the front frame rails, right behind the rad bulkhead. Also, put some counteracting weight in car's hatch area (sandbags, more left-over frame-rig tubing, a couple of willing bystanders, whatever falls readily to hand). Now push down on the end of your lever and see if you can get that sheet metal to shift. If the front bumper-mount hole is lower than the rear one, you have a slightly different proposition. In this case, you'll need to lift up on the lever and that wood-trestle support-behind-the-rad-bulkhead idea isn't going to happen. When you lift up on the end of your lever, you'll really just be trying to lift the whole front end of the car (and support frame) off the garage floor. I'm too lazy to do the math, but I expect you won't be able to put more than 100 lb of lift onto the end of your lever arm before the vehicle and support frame start to lift off the floor. Still, 100 lb of force on the end of an 8-ft lever might generate enough torque on the panel to shift the local sheet metal in the process. And if none of this works, you can always move on to Plan B (hammer, dolly, torch). Disclaimer: I haven't tried the lever idea, so I can't guarantee that it will work. Or be safe. Caveat emptor.1 point1 pointU-joint #2 installed smoothly and seems to pivot very nicely in the differential end yoke. Next project is to install the 2 end yokes to the driveshaft tube yokes. I may have to build some type of jig to hold the tube while I press in the other caps with my small arbor press or find a very patient helper to securely hold on to the tube. I will keep you all updated and will try to have my wife post some pictures of the finished driveshaft. Thanks, John-Lugoff, SC.1 point1 pointWow! I'm glad she made it through all that. My Mom is 76 and starting to go through dementia. It's very sad to to talk to her on the bad days but nicer days every now and again. I'm totally helpless which makes me crazy but it is what it is and nothing can change it.1 pointHi Steve.....Your Z gets better looking every year. Hope you and Randy are getting number 46 back in shape. BTW the number 22 car of Woody’s is probably the best looking Z race car I’ve ever seen....not so much his 85 car LOL.
1 point1 point"Well you have to know these things when you're a king, you know."1 point1 pointI’ve got two that are not quite as separated and I’ve thought about getting/using some liquid electrical tape Edit: I can’t remember the brand I used before for something different, but it was thick and dried to a soft rubber consistently kinda like RTV/silicone. I thought about using Plasti Dip and just noticed they make a electric tape version. Sent from my iPhone using Tapatalk1 point1 pointGuys, anyone know how to fix the BCCD wire? Or do I need to find a new solenoid? Also, thought I'd share a tip. I needed to do some touch up painting in the engine bay. I bought a Master Airbrush Model G22 on amazon. It was 25 bucks and it works great. I highly recommend1 pointOkay I’ll loosen up the screws to not damage the carbs, I didn’t over tighten, I had seated them and turned them two full turns out, but while adjusting I tightened it in one more term. I believe the smoke coming out is run on(dieseling) from excess fuel. I’m going to borrow a fuel pressure test from autozone and see what I can figure out tomorrow. I’ll also unhook the gas pedal linkage and see if I can get the throttle stop to sit more forward as that may be part of my problem. no I don’t believe there’s any electrical solenoids on them1 pointKeep in mind that all of the repair work in this area needs to be done on the jig, not on the rotisserie. The lever idea might work really well if the radiator support was out of the way. Put some force on the lever and then dolly the crumpled area behind the radiator support. Does anyone know if the radiator support is plumb in the car or square (90d) to the frame rail?1 pointMake sure these flats are in the right order. I put mine back on wrong and it shot up to 2 or 3 thousand rpms.
1 pointNice to see that the X-Y laser gave you some encouraging measurements Re your plumb bob measurements, I think you should would be quite satisfied with a discrepancy of only 1mm in your LHS vs RHS measurements. I think that's probably within the manufacturer's original build tolerance (which, in the 1970's was probably on the order of 1.5 - 2 mm for this type of long, front-to-rear measurement). One question, though: Did you measure both longitudinal (front-right to rear-right / front-left to rear-left) and transverse (front-right to rear-left / front-left to rear-right)? If you only did the longitudinal measurements, then you still don't know whether the frame is lozenged (also referred to as 'diamonded', IIRC). The plumb laser will make these measurements more convenient and more accurate. Trying to hang a plumb bob string from the center of a bolt hole or bolt head is not that easy to do with accuracy (especially if you're lying on the garage floor). At the back of the car, you should be using the 'C' points (holes in the rear subframe, just behind where the interior floor pan kicks up) as your reference. At the front of the car, you should use two different sets of reference points: 1) the front (or rear) LHS and RHS crossmember mount holes in the frame rails, and; 2) the centres of the big holes at the top of the two front shock towers. (1) will tell you about the alignment of the lower structure and the lower front suspension pickup points. (2) will tell you about the alignment of the front suspension's upper pickup points. Re the front bumper mount holes, I suggest you wait for corroboration from at least one additional owner of a damage-free Z to feel confident that they're supposed to be 'level'. Although logic says that this should be the case, you just never know. You have a lot of prospective time and effort a stake, so best to not begin until you're as confident as possible about what is 'correct'. Also: I'm leery about the float-level measurement methods that I've seen so far. They measure relative to an inertial level, but you can't be sure whether both cars are sitting at the same pitch angle (aka 'rake angle') relative to inertial (or, for that matter, whether the floors underneath them are properly level). Ideally, 'level' for the bumper mount holes should be judged using a vehicle frame of reference. Your X-Y laser can do that, but the float level measurements may be suspect. Another thing: Note that the front and rear bolt holes are drilled pretty close to each other, which means that any errors made in sighting on the bolt hole centers (or the bottoms or tops of the bolt holes) will greatly exaggerate the measured front-to-rear angle. If I was doing this, I'd use a compass to draw a bolt-hole-sized circle on a piece of wide masking tape and then draw on crosshairs. Then I'd stick the tape on the body panel over one of the mount holes. Now repeat for the other three mount holes. One last idea (which you can take or leave): If you conclude that the bumper bolt holes really are out of whack, you might consider trying a bit of 'caveman' body alignment as a low-cost, low-impact first step. Take some of the square tubing you have left over from your frame rig construction project and cut a pair of 8-foot lengths. For both, drill a pair of correct-size holes at one end that are at the same spacing as the bumper-bolt holes. Bolt the legs in place on the bumper/hinge-mount body panel, one one the outside of the panel, the other on the inside, securing them in place with two pieces of threaded rod (or a pair of really long bolts). Now you have a hefty 8-ft lever that's solidly mounted to the bent panel. If the front bumper-mount hole is higher than the rear one, you'll need to push down on the end of the lever. In this case, I would suggest you build a solid side-to-side wood trestle to put under the front of the front frame rails, right behind the rad bulkhead. Also, put some counteracting weight in car's hatch area (sandbags, more left-over frame-rig tubing, a couple of willing bystanders, whatever falls readily to hand). Now push down on the end of your lever and see if you can get that sheet metal to shift. If the front bumper-mount hole is lower than the rear one, you have a slightly different proposition. In this case, you'll need to lift up on the lever and that wood-trestle support-behind-the-rad-bulkhead idea isn't going to happen. When you lift up on the end of your lever, you'll really just be trying to lift the whole front end of the car (and support frame) off the garage floor. I'm too lazy to do the math, but I expect you won't be able to put more than 100 lb of lift onto the end of your lever arm before the vehicle and support frame start to lift off the floor. Still, 100 lb of force on the end of an 8-ft lever might generate enough torque on the panel to shift the local sheet metal in the process. And if none of this works, you can always move on to Plan B (hammer, dolly, torch). Disclaimer: I haven't tried the lever idea, so I can't guarantee that it will work. Or be safe. Caveat emptor.1 point1 pointU-joint #2 installed smoothly and seems to pivot very nicely in the differential end yoke. Next project is to install the 2 end yokes to the driveshaft tube yokes. I may have to build some type of jig to hold the tube while I press in the other caps with my small arbor press or find a very patient helper to securely hold on to the tube. I will keep you all updated and will try to have my wife post some pictures of the finished driveshaft. Thanks, John-Lugoff, SC.1 point1 pointWow! I'm glad she made it through all that. My Mom is 76 and starting to go through dementia. It's very sad to to talk to her on the bad days but nicer days every now and again. I'm totally helpless which makes me crazy but it is what it is and nothing can change it.1 pointHi Steve.....Your Z gets better looking every year. Hope you and Randy are getting number 46 back in shape. BTW the number 22 car of Woody’s is probably the best looking Z race car I’ve ever seen....not so much his 85 car LOL.
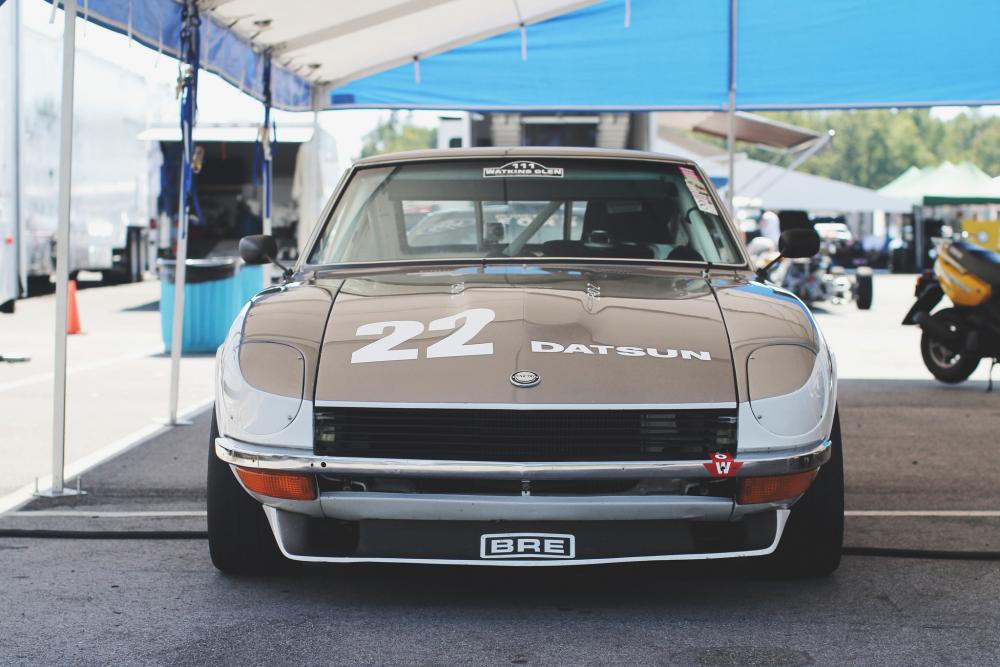
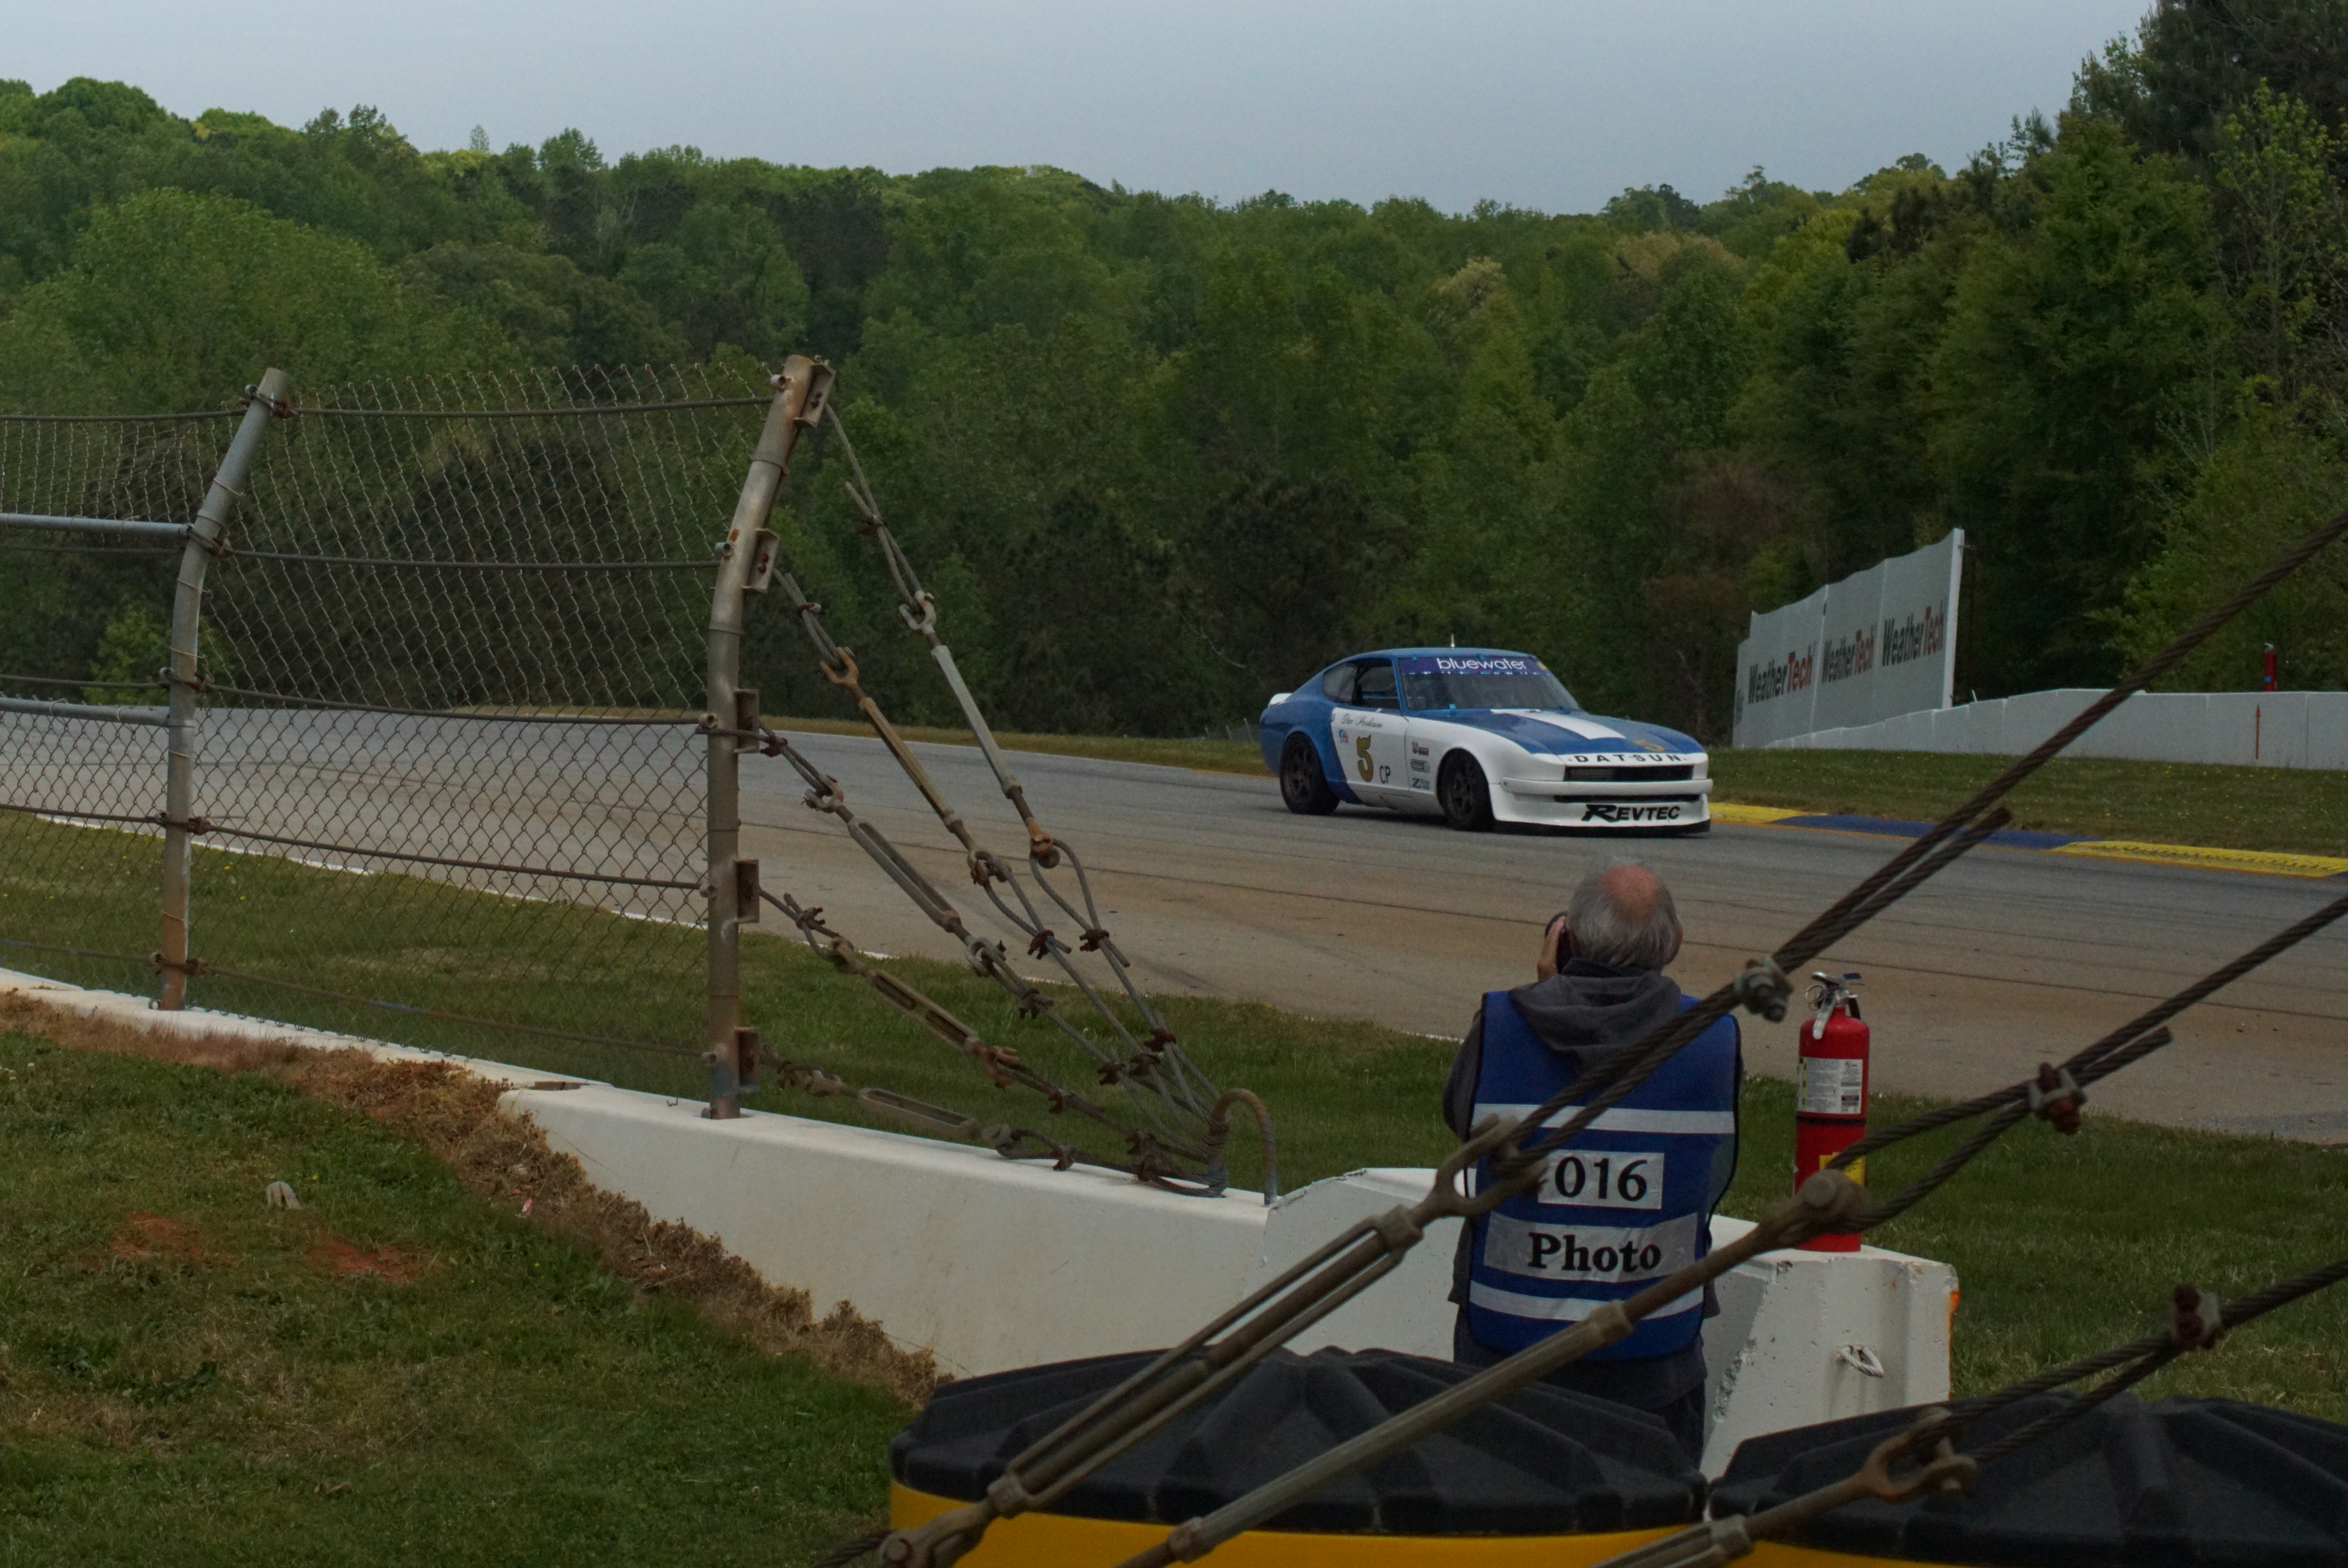
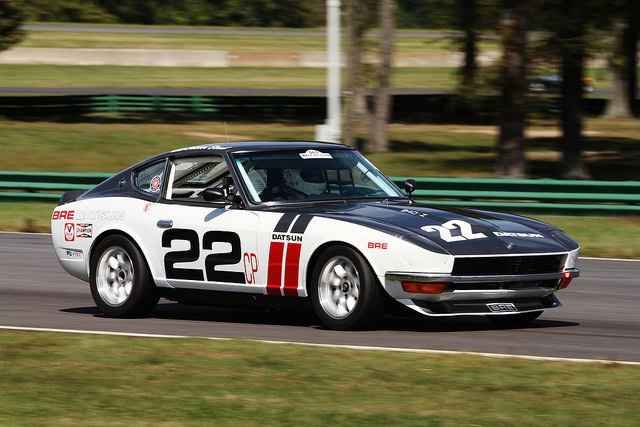 1 point1 pointI finally got out to Road Atlanta for the first time since the 2019 Mitty. It was good to be back at the track. The Z car count was down, probably due to Covid and the 100% chance of rain on Saturday. Greg Ira kicked @$$ today in his sprint race over some fast competition in his Dan Parkinson tribute car. Woody Staub, a friend of @Diseazd, went from 11th to 6th in the same race in the #85 car.

 1 pointI've never been too impressed by someone who shows up at a car show with a brand new car. Just doesn't seem to demonstrate any problem-solving abilities or particular skill set - aside from being able to make enough money to write a check, which is one skill I've never mastered, damn it! 😪1 point


Important Information
By using this site, you agree to our Privacy Policy and Guidelines. We have placed cookies on your device to help make this website better. You can adjust your cookie settings, otherwise we'll assume you're okay to continue.