Leaderboard


Popular Content
Showing content with the highest reputation on 11/30/2020 in all areas
-
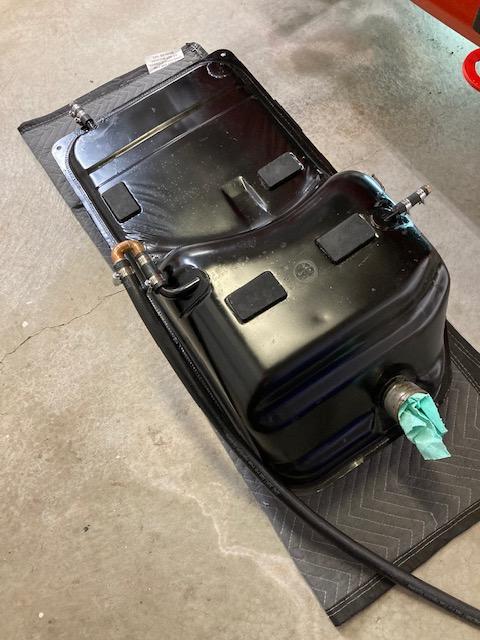
3 pointsGetting ready to put my refurbished fuel tank back in, wondering if I need any sealant on the filler tube to tank connection? 1972 240Z
 3 points
 -
3 pointsLooks great! +1 on no sealant. Consider a light coat of grease on the tank neck to assist it seating in the tube.3 points
-
View Advert Zstory JDM Blem mufflers For the month of December, several blem units are offered at the price of usd$190 shipped to your door (tracked and insured) also including the clamp and two reinforced straps necessary to fit it ! Slips over a 3.9'' straight exhaust pipe end 2.5'' entry pipe leading to 2x 2'' slanted and vertically stacked exit pipes Blem is an extra fixing bracket welded on than ground off - please study the photos Normal, current price shipped is usd$280 but out of stock until late January* with another batch in March *when parts prices and shipping will rise. Any questions, please don't hesitate to ask. Advertiser Sean Dezart Date 11/30/2020 Price $190.00 Category Parts for Sale2 points
-
2 pointsAnother option would be to attach the tach to your car and use some other device as a "reference" to calibrate the one you messed with. If you have a timing light with an RPM display, or an oscilloscope, or even meter that will read frequency. You could use one of those to monitor the engine, hold the RPM steady at some level and then compare what you get on your tach to what you see on the reference. Adjust the pot until the two read the same. Not as elegant as calibrating it on the bench with a signal generator, but if you don't have a sig-gen, then you do what you have to do.2 points
-
2 pointsI think it might be the start of cool weather. Fall. People closing up the windows and staying inside. And, maybe, back to politics...political rallies. Overall, the only data I really trust anymore is the hospitalization data. Some states have poor testing programs and/or seem to be manipulating the death data. But the hospitalization data is really hard to manipulate. There's a body in the hospital. https://twitter.com/COVID19Tracking/status/1333203797179392003
 2 points
 -
2 pointsActually, second edit, I can't even really see an attempt to "own" here. Seems like a total non sequitur. Oh well. I can kind of feel people getting lazy in my neighborhood, since we're in a county that's not suffering too badly. I guess the new term is "chin diaper", where people wear the face covering on their chin and only pop it up if they get close to someone. And can't seem to comprehend that just because you're drinking a coffee, it doesn't mean you can't get or transmit the virus. They're like school kids, finding ways to cheat the "rules". It's like some sort of self-correcting stupidity. Instead of continuing what works, stop and wait until things get bad again.2 points
-
2 pointsOn a positive note, Racer gets off of quarantine tomorrow, and can go back to work. Shift start at 5:48 am. Alarm set for 1:45 (long commute, and gotta get there early to get a decent parking spot). Back to the rat race. Yay. Yay.2 points
-
2 pointsTo loosen the fill plug, I suggest heat with a 3/4 drive to 1/2 reducer (https://www.amazon.com/TEKTON-47823-4-Inch-2-Inch-Reducer/dp/B000NQ4R4G) and 1/2 drive 1/2 pipe plug socket (https://www.amazon.com/gp/product/B006L23ILO). That way you can use an impact gun or breaker bar safely on the fill plug. By the way, using the socket and reducer combo only works if the transmission is out of the car. There isn't enough clearance in the tunnel to do this with the transmission in the car.2 points
-
2 pointsLooking at that COVID map, I can't help but notice that most (certainly not all) of the dark colors are in the red states that went Republican. It is a shame that this health and science issue was politicized.2 points
-
Just wrote this guy that’s selling the dash portion I posted earlier and this is what he said. If that true sounds like it would be a good unit to work with. Sent from my iPhone using Tapatalk1 point
-
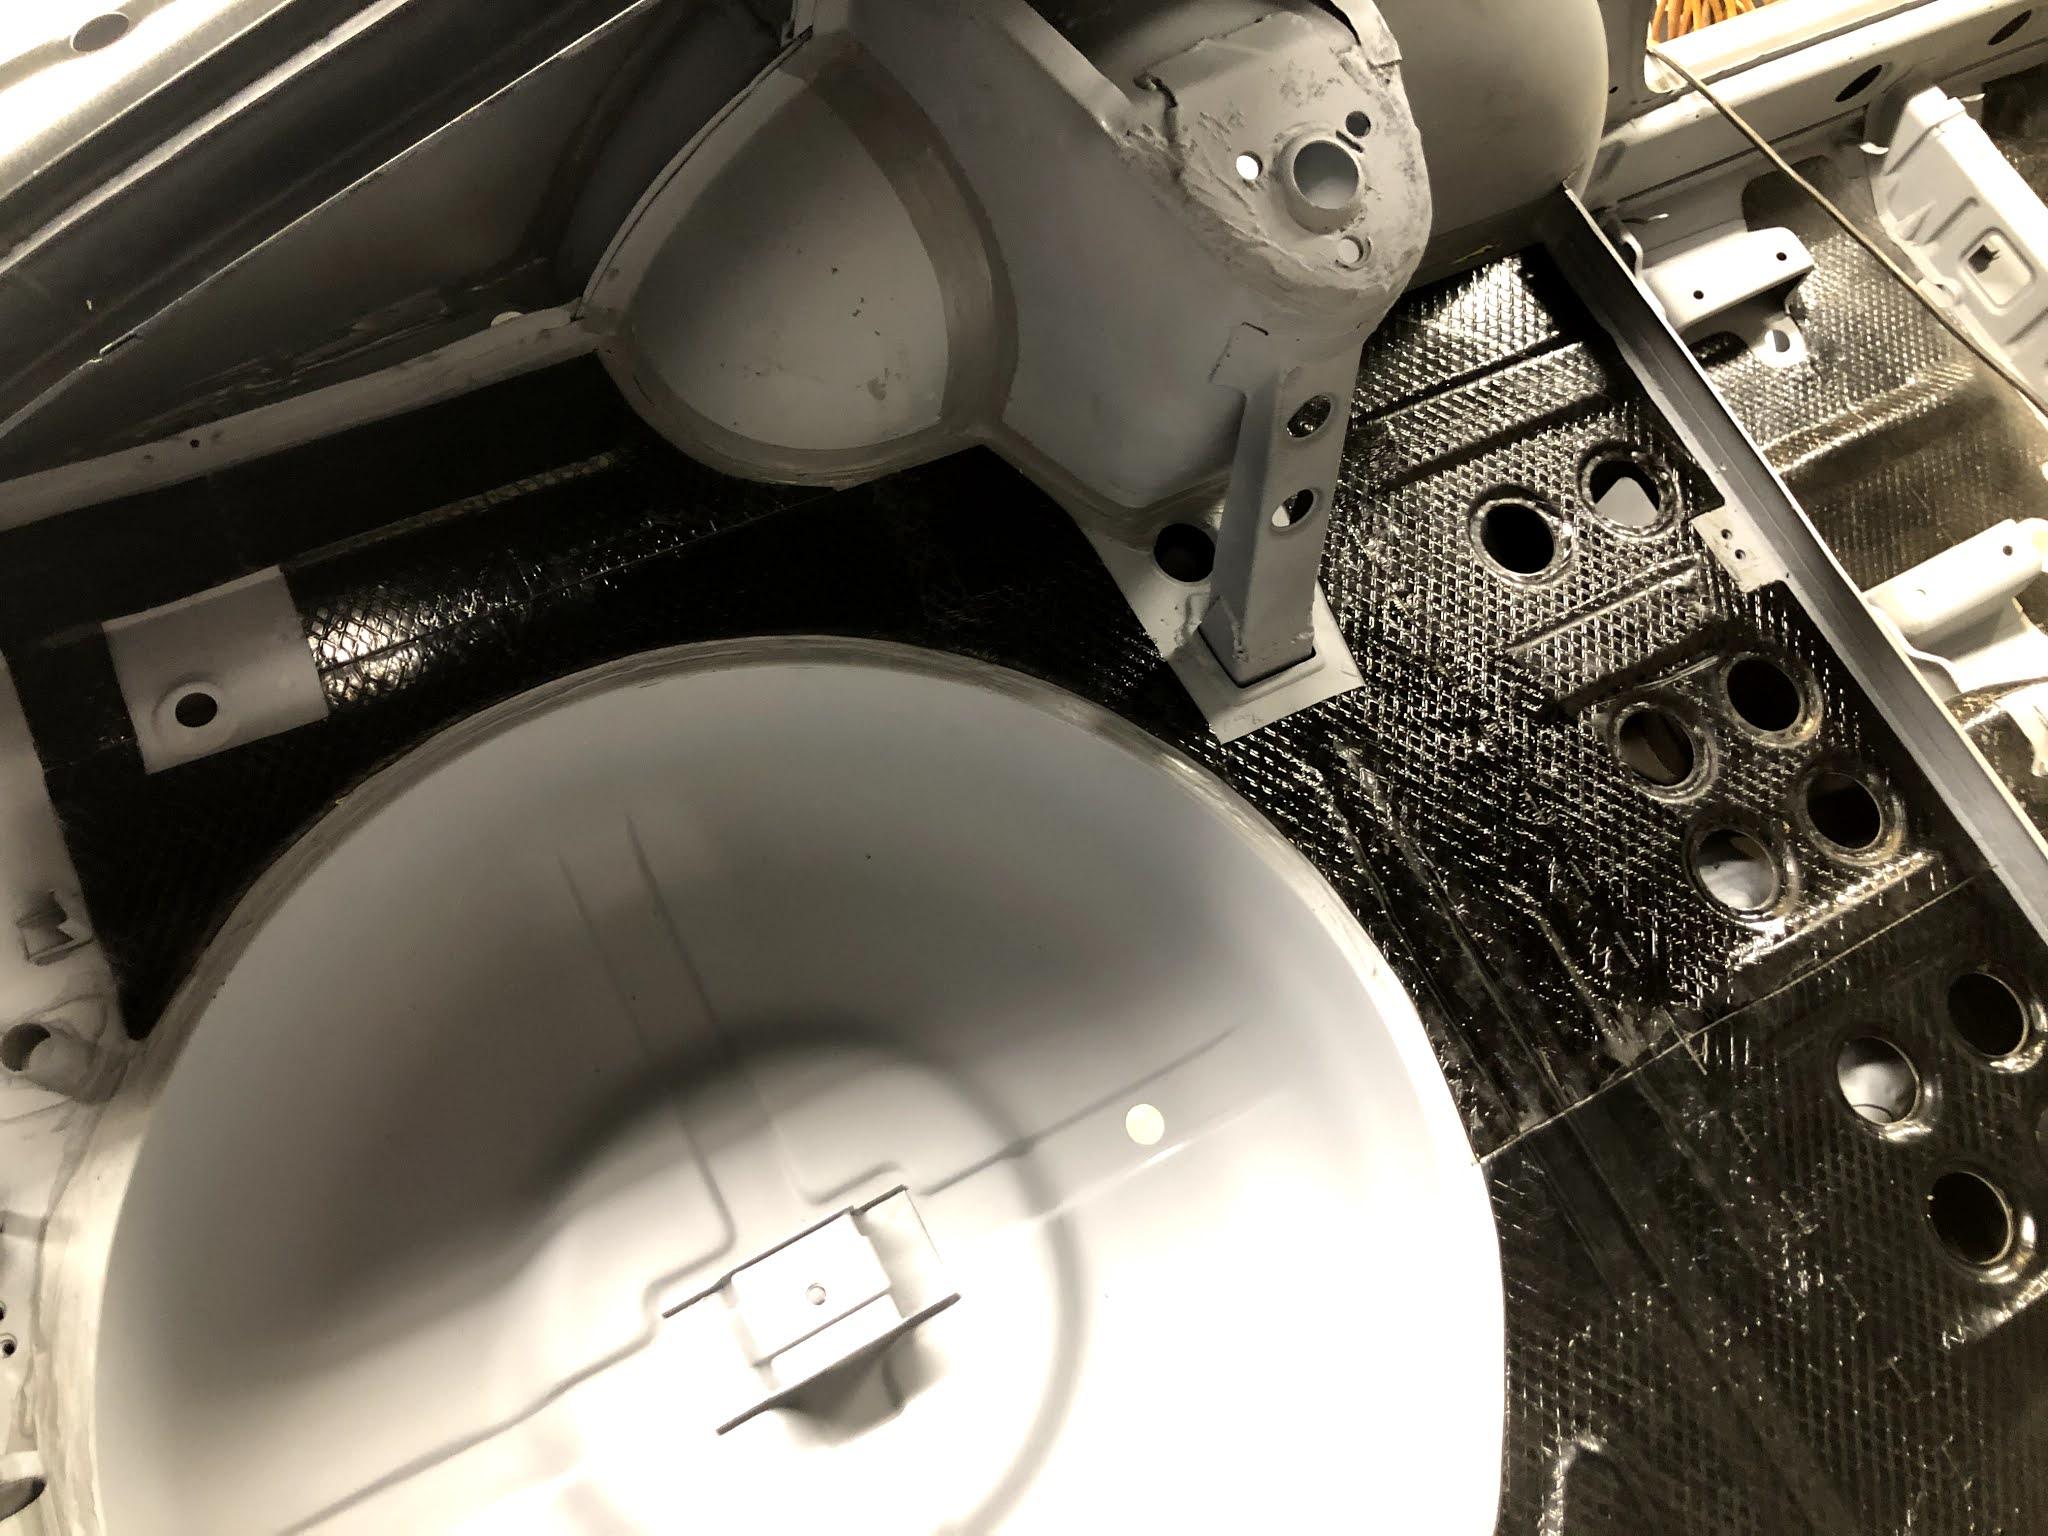
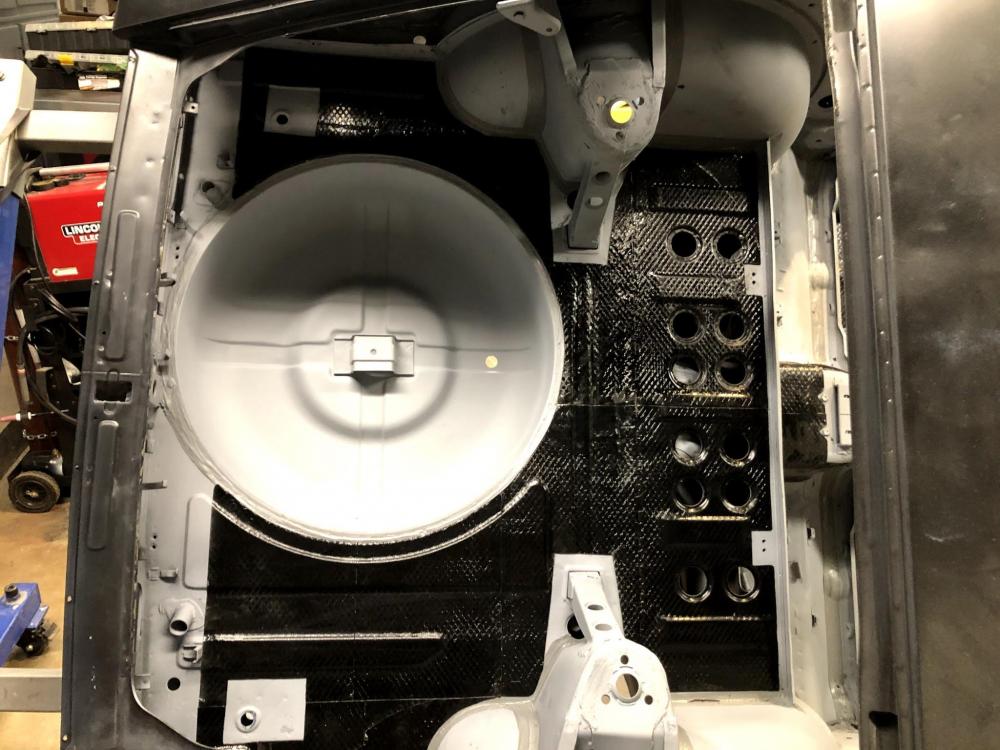
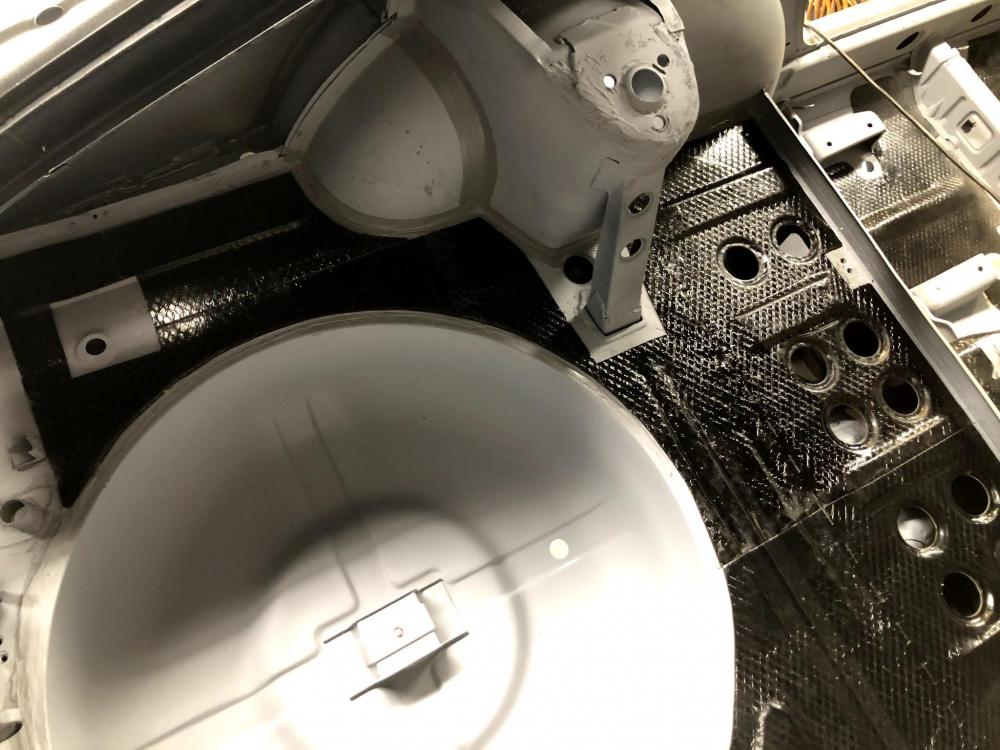
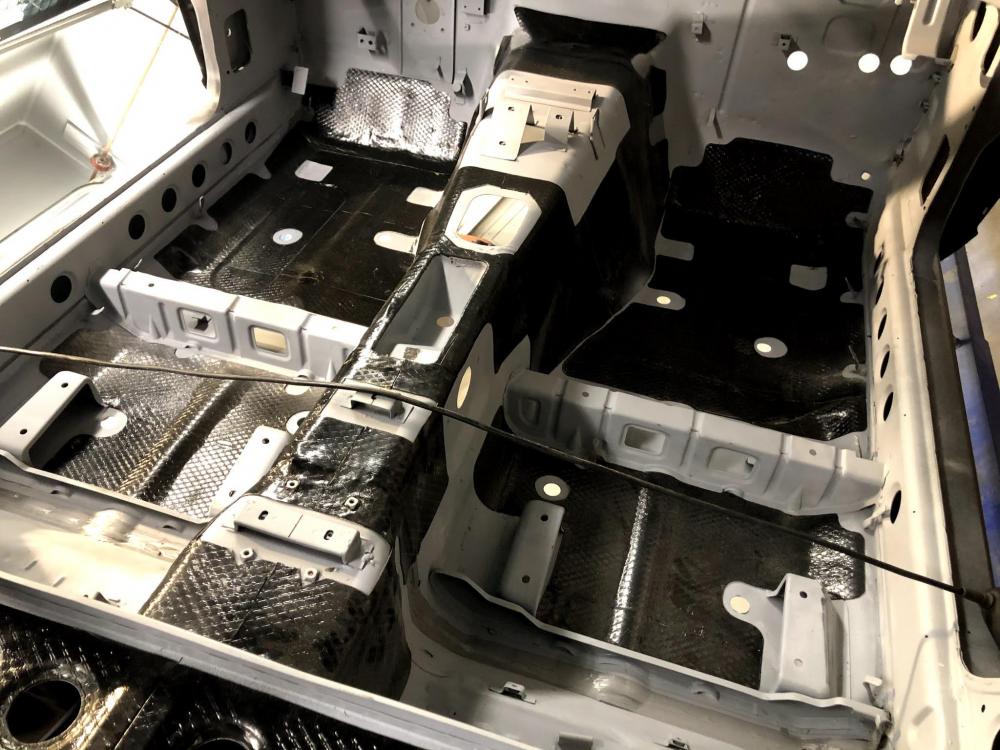
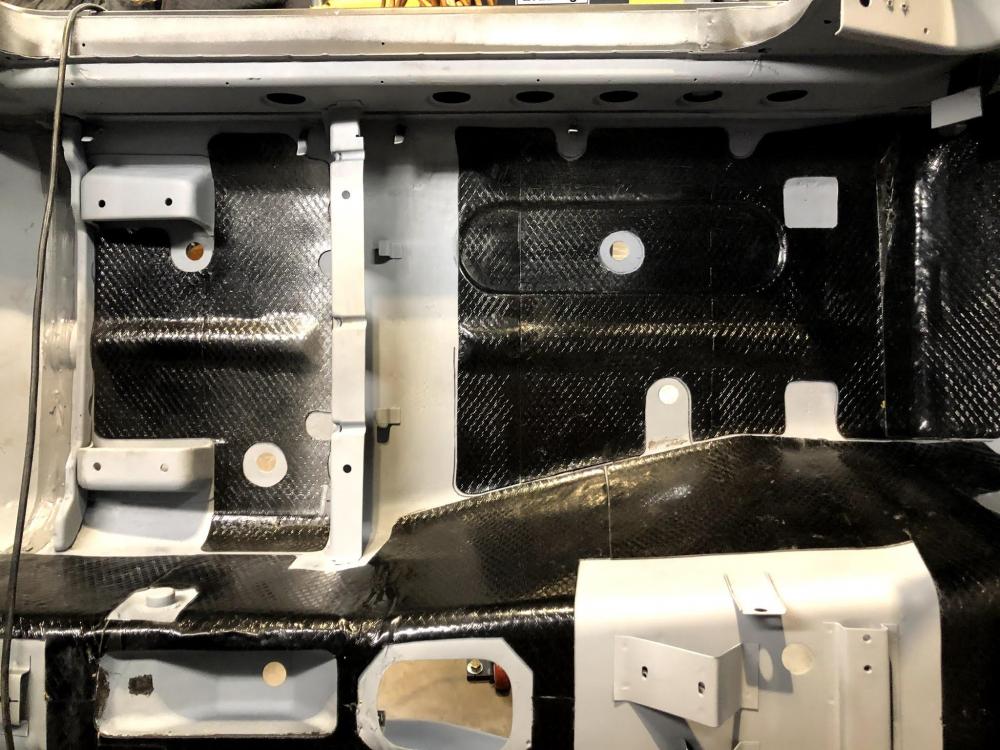
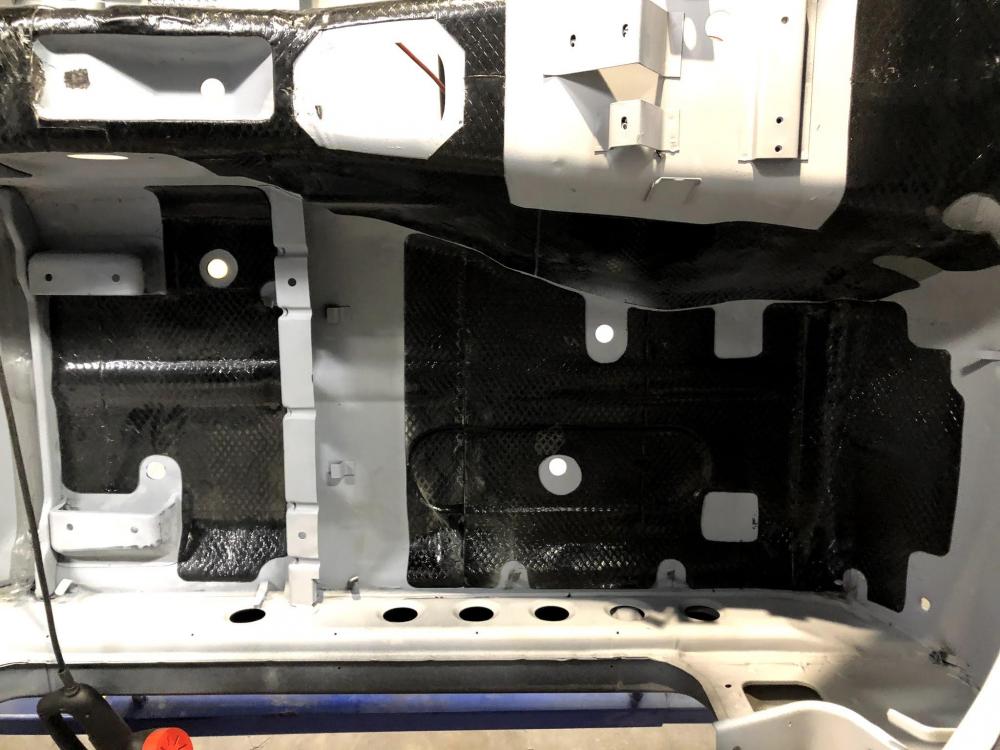
1 pointBack on the body for some final work to the interior before paint. When the shell was blasted we had all of the sound deadening removed so that any rust underneath could be removed and cleaned up. I wanted to maintain the original look of the floors best we could for this rebuild. To do this we replicated the factory sound deadening pads placed throughout the interior with sheets of a 3M material: Sound Deadening This material comes with an adhesive backed side and a top surface that can be painted. It goes on very easy and can be trimmed down to the correct size with scissors or a box cutter. Once ready for paint the entire interior will get a coat of sealer followed by the silver base color and clear.
 1 point
 -
here is me testing the tvx not sure if this is a fool proof test but should at least let you know if its completely bad. Sorry for he noise.1 point
-
Yes I would suggest going all new under hood, that is the SD709 comp a PF condenser to fit the opening (looks like you can go a bit taller here over stock per my video) and a generic drier with the trinary switch. I good local AC shop maybe some help here unless you know someone in the biz that can aid. The only down side to the in dash setup is the status of the evap and more importantly the expansion valve. If you go that route you should be prepared to have to replace those parts, I don't like the high prices folks are asking currently on ebay since they are selling untested. But it maybe the only way to go if you want OE. as far as playing nice 134a "should" be ok but you really should flush the evap if you use the old one. the best way to do this is with a the expansion valve out of the way (not easy). since all the under hood stuff is new you should be ok there. lastly check with ac pros, but I think using an ester oil vs pag would be a way to go if you reuse the old evap, ester is compatible with both mineral and pag IIRC. IF you go with a new evap as well then pag is ok, prob the way to go since its more commonly used. Personally I would go with all new under hood, look for a good deal on the under dash stuff and replace the evap with a brand new unit(unless you found someone that can actually attest the evap status as in I just pulled it and stored in a climate controlled (dry cool) area was working and has been leak tested. An open evap in a humid area with an untested TVX would be something I have issue with. Its a LOT of work, without knowing this I would not want to take the dash apart. A good ac shop prob could test for leakage of the evap. I did some testing on the tvx on an old video, not sure it is fool proof but it does show if the tvx is at least responding to temp changes. Again I would suggest consulting someone local with some AC experience to look over any work you do. You want barrier hoses, good fittings, for a leak free setup. the barrier hoses are a R134a thing, smaller molecules or something like that. fittings get confusing, you will prob have o ring style on the compressor/condenser/drier and compression on the firewall for a stock evap.1 point
-
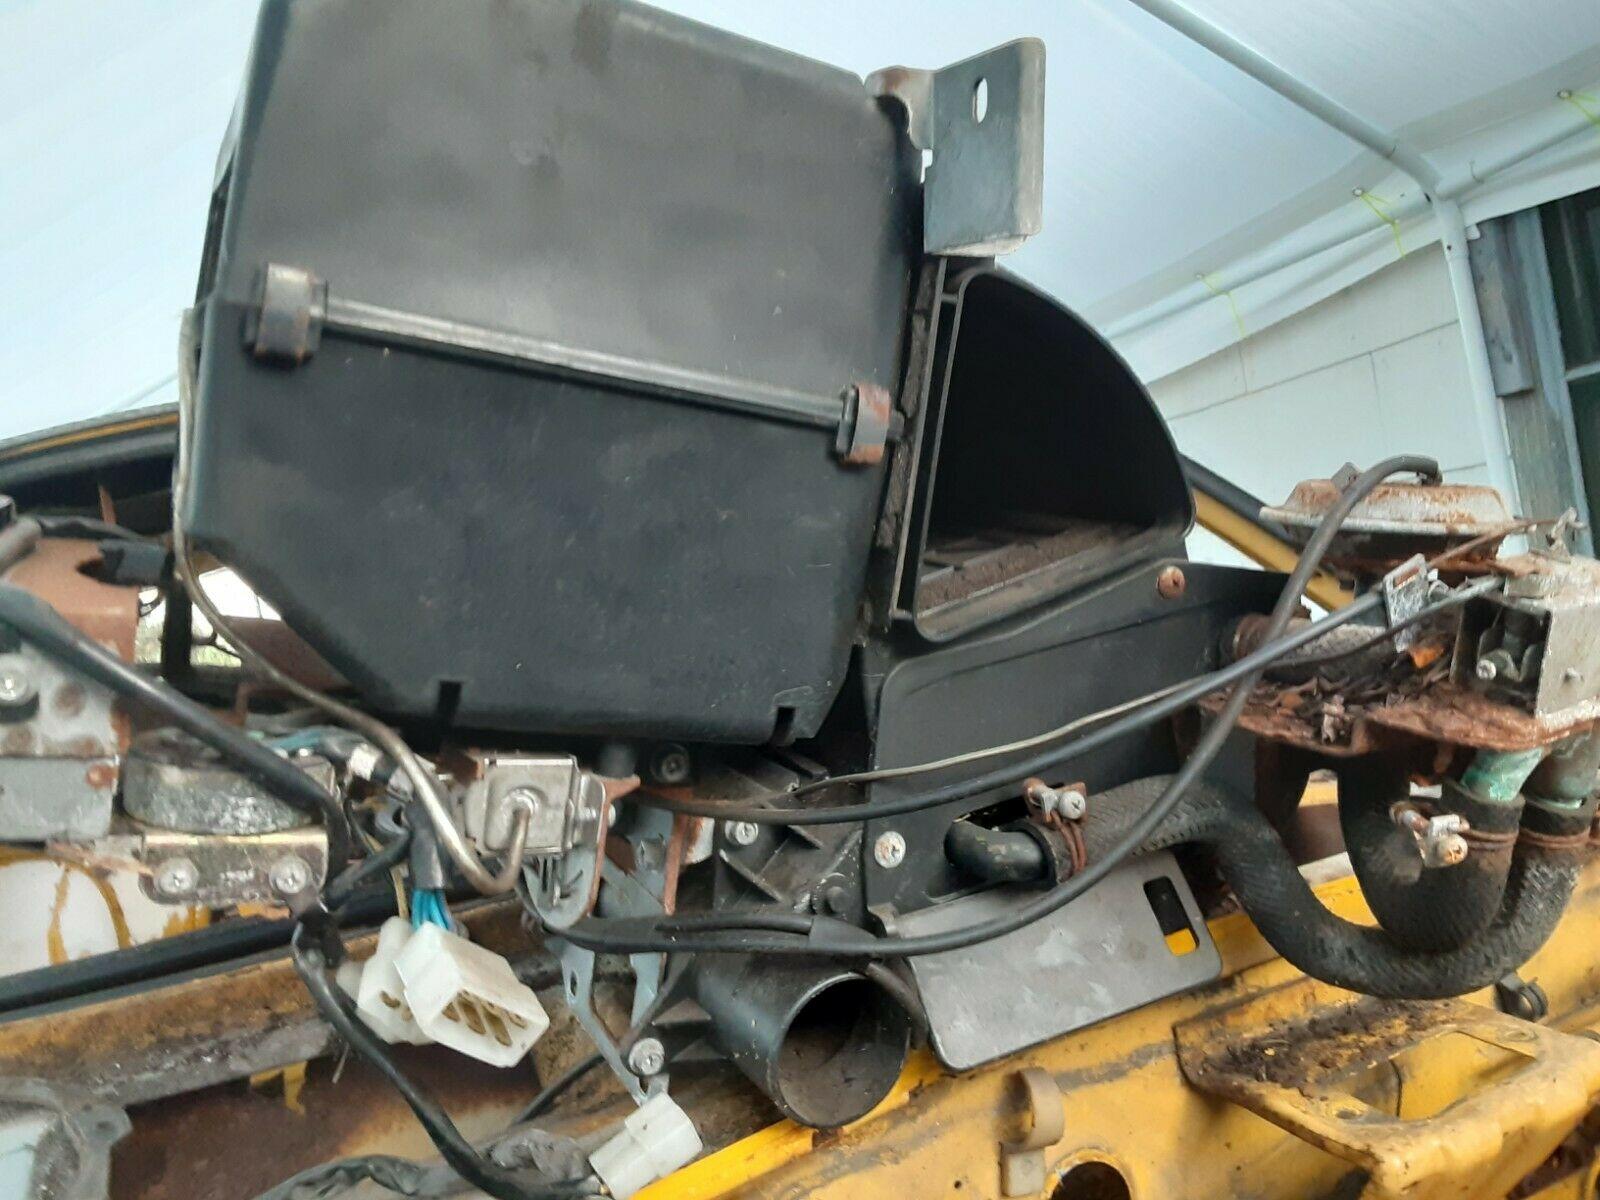
here is a factory kit (also from ebay) note the thermostat on the bottom of the evap housing. Note the evap housing uses clips to hold it together (after market boxes useds screws). the Tstat uses a metal rod that connects to the "TEMP" slide lever to adjust the turn on point for the compressor, it cycles on and off to adjust how cold the air is (the non OE do the same) unlike modern cars that often employ a "blend door" to mix hot and cold air on and keep the compressor running all the time to adjust temp out of the vents.
 1 point
 -
1 pointRight then chaps and chapesses (the latter clearly referring to Captain Obvious - the big tart playing with his shiny bits)! I took apart the Aussie pump I bought at a vast expense a few years back - this was the one that I thought had initially failed and swapped out for the original one on the side of the road. The diaphragm is utterly perfect and frankly I was impressed by the quality / thickness of it. The valves seal and release well and I can’t blow or suck through them in the wrong direction I gave it a suck and blow test with the vacuum gauge: it’s pulling 5-8 inhg and pushing 2.5-5 psi depending on how gently or vigorously it’s stroked. Here’s a video of the test in case anyone is interested in how well the mech pump, can blow ... (Forgive the staccato speech, weeks of insomnia is finally getting to me!) So it seems I need to turn my attention to a fuel blockage. I am getting black fish swimming around inside the filter and given that I replaced the fuel lines for alu with only 20cm of fresh rubber used, I am strongly leaning toward the POR15 treatment letting go. Some of it wasn’t flushed out properly by the PO and I wonder if there are lumps that aren’t fully set coming though? See the area where the float is sitting. You can see a black “eel” next to it before I flushed the tank. Also you can see a crater where the POR treatment wasn’t properly flushed out and has set. I would like to point out the soldierly self restraint exercised on a post so rife with innuendos! (“Oh matron!” You have to be old enough to know where that comes from)!1 point
-
Video Datsun 280z factory AC - YouTube as you can see you should have a unused connector coming off the alternator wire harness. A close look a the FSM should show this I presume. It connect to the magnet switches. There is a harness that also turns on the compressor clutch, this one is a shared harness with the BCDD so you should find it where the BCDD plugs in. I did not touch on the fuse box, I have a separate fuse called AC but my guess is its just the same fuse that would be labled for the air box fan on non AC equipped cars. The evap has a linear type thermostat with a cap tube going to the fins, make sure this is mounted on the evap box. there are add on kits designed for the 280z style, a bit simpler as they seem to be just an evap and a round T stat controller that would mount somewhere off the main panel (like the 240 kits). I presume you just set the panels to what ever you want that blows air thru the top vents and then engage the round knob controller. A bit cruder than the OE but prob works just fine. I the one I saw on ebay had a simple TVX (easy to get). You would still want to remove dash to install in place of the duct box from the heater box to the front panel. I assume it had no idle up, but that is not a big deal, you can just rev the engine up sitting at a light I suppose. Prob has its own relay for clutch engagement as it would not be incorp from the panel. Just something to watch out for, if you only wanted OE. I am not sure if the slide controls are different, I know the non AC does not have the "AC" label perhaps there is something diff in the vacuum switch, but I doubt it. The FSM goes in to a lot of detail on how to install AC as it was something done after the car was built. One thing to watch out for is if you are buying off ebay, there are NON factory AC add ons out there they do not funtion the same maybe thats a good thing, dont know, but just be aware of it. I recently saw a add on evap box that would fit where the factory evap box for a 280z goes, but it was def not a factory box, could tell by the construction AND it used a rotary thermostat switch. I bet it did not have any of the other stuff (magnet switches/idle up) but rather was just something you turn on (rotate the switch) and set the existing controls to vent. Maybe that is a good thing, I mean it would work and it is simple....for me I like OE since I prefer to be a survivor. I will post up some pics of what an OE evap and box looks like later.1 point
-
Spidya have a good selection of wav files for tuning their replacement electronics for our tacs. Download here https://www.spiyda.com/tacho-calibration-information Use your laptop or other device audio out to connect to your tac - not sure if our tacs are as sensitive but it’s worth a shot. And of course there is this .... https://onlinetonegenerator.com/ Ps. I have a tac that behaves perfectly until it hits 25-30 degrees C ambient temp, then the needle goes stiff. I think as they wear they need a bit of lube where the movement is. The rolling road guy told me it didn’t go over 5k rpm but in fact when the tac was cold and the throttle stuck on my old engine, it would happily find 8k! Strangely that engine produced lots of healthy torque after a few such events ;)1 point
-
In this one I removed the hatch glass and started breaking down the rear suspension. Hopefully the last dismantle video for a while...1 point
-
1 pointI did not use anything, just the clamp that comes with the filler tube, make sure there are no cracks in the filler tube though!1 point
-
1 pointI would avoid the `carter p4070` model in particular if you like to not hear the pump. I think anything in a similar style will give you the same problem I have, which is LOADS of cabin noise, i cant figure out how to dampen it. However I've used it since i got the car, never had an issue with it, so its reliability is nice. I like the Facet one, I would opt for that for easier install with the OEM bracket for the electronic fuel pumps. Iif that is also noisy then something like the Rx7 one you posted should work, my buddy uses one similar in his classic mini and his buyeye sprite, I never notice the noise they make.1 point
-
Sorry, I was being rather facetious, thus my comment "Easy - Peasy 😄" Still going with the damaged component being a varistor. And, I did notice the new electrolytic cap.1 point
-
1 pointMy only thought with the post was that it seemed like the east and west coast were hit harder earlier on and now it is really hitting the middle of the country. That was why I mentioned the time thing. Either way, it is pretty much bad news all around right now. San Diego is getting hit , although most of it seems to be in the southern end of the county. Again, just a matter of time before it moves more to the northern end of the county. Interesting enough, I recently read that some of the vaccine testing has begun in the south county of San Diego. Also, while it looks like the daily cases peaked about a week ago, we will probably get another blip up two weeks from now with all of the Thanksgiving gatherings. I am hoping that ends up being the final cases peak. Hopefully a vaccine can begin to make an impact. Also, from a chart standpoint, I am trying to think about what happened near the end of September, beginning of October. That is when things really started to take off. Rock concerts? family gatherings? Car shows?😐 I thought maybe it was Sturgis, but that was early August, unless there was some turbo lag going on.
 1 point
 -
It would still be interesting to talk about how tachs work though. I learn gooder when there's a problem to solve.1 point
-
1 pointI own a 1st gen. RX7. The elec. pump in it is virtually silent. Many z owners over the years have reported using the 1st gen. RX7 pumps (not sure about later gens) with satisfactory results.1 point
-
1 point
-
1 pointThat's 9 months ago when POTUS was telling Woodward how dangerous it was but not us.1 point
-
1 pointIt sticks in my mind that people also have used an RX7 electric fuel pump on a 240Z with good results, that may be worth searching and reading about unless anyone here has first hand experience.1 point
-
1 point
-
1 point
-
1 pointI don't think that was a stock fuel filter in the tank. I can't find any mention of it in the parts manual or FSM.1 point
-
1 point
-
1 pointHeat is your friend! Don't make it any worse. Big breaker bar. I probably wouldnt ever resort to LH drill bits. The problem would be getting whats left out of the case without damaging the soft aluminum. Might weld to it as a last resort. I have used a monkey wrench as a nuclear option in the past but that pretty much destroys the fill plug1 point
-
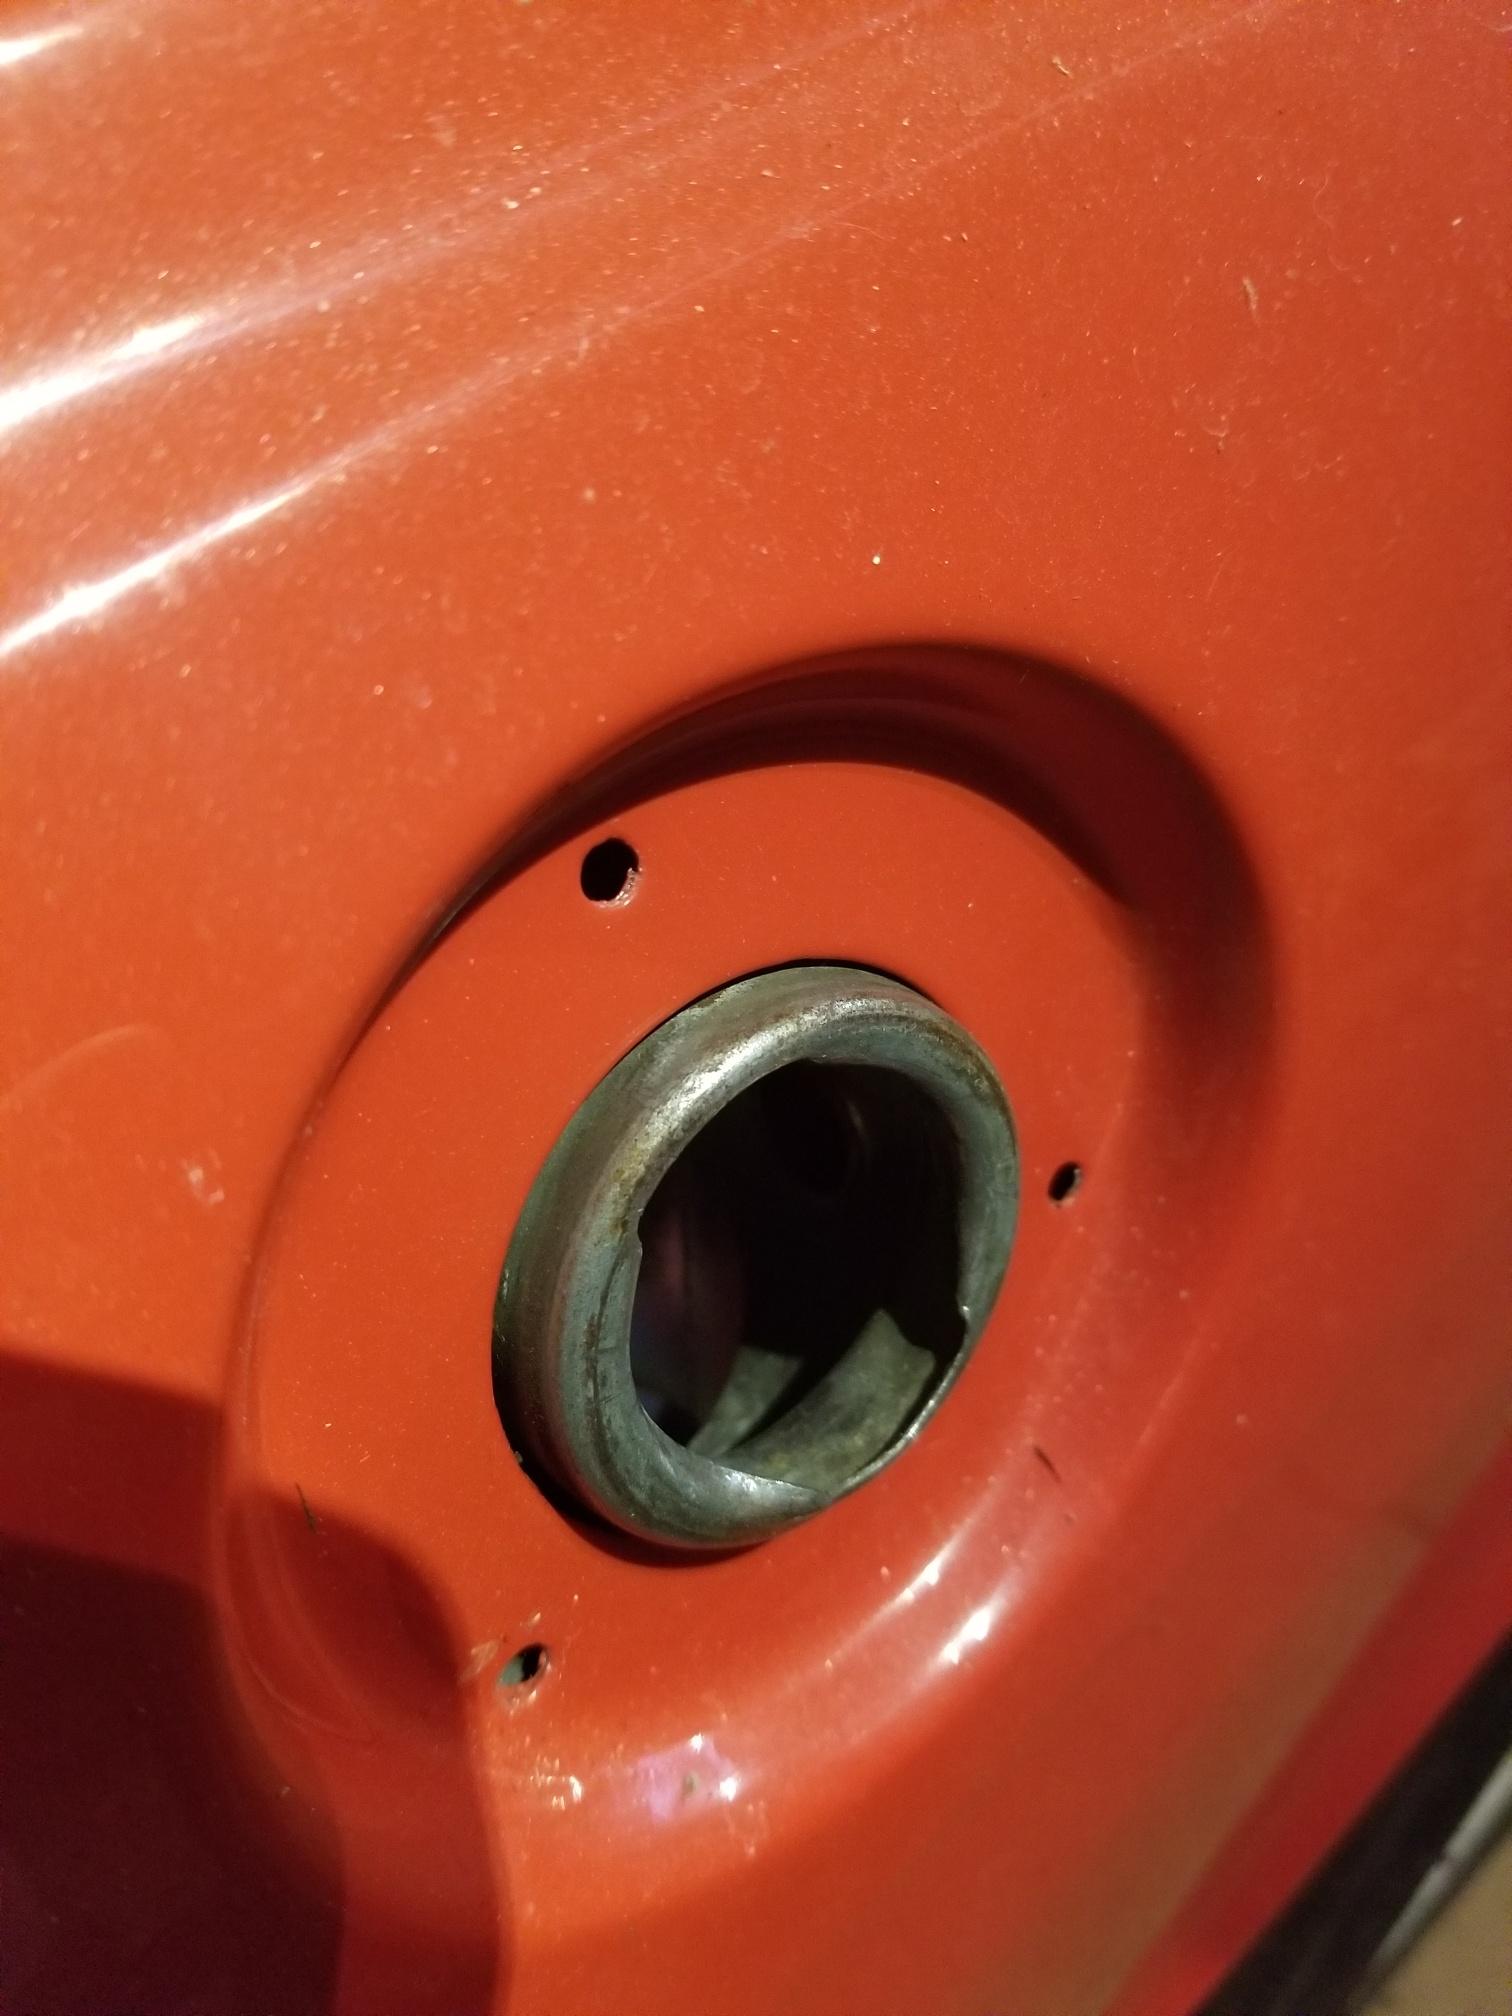
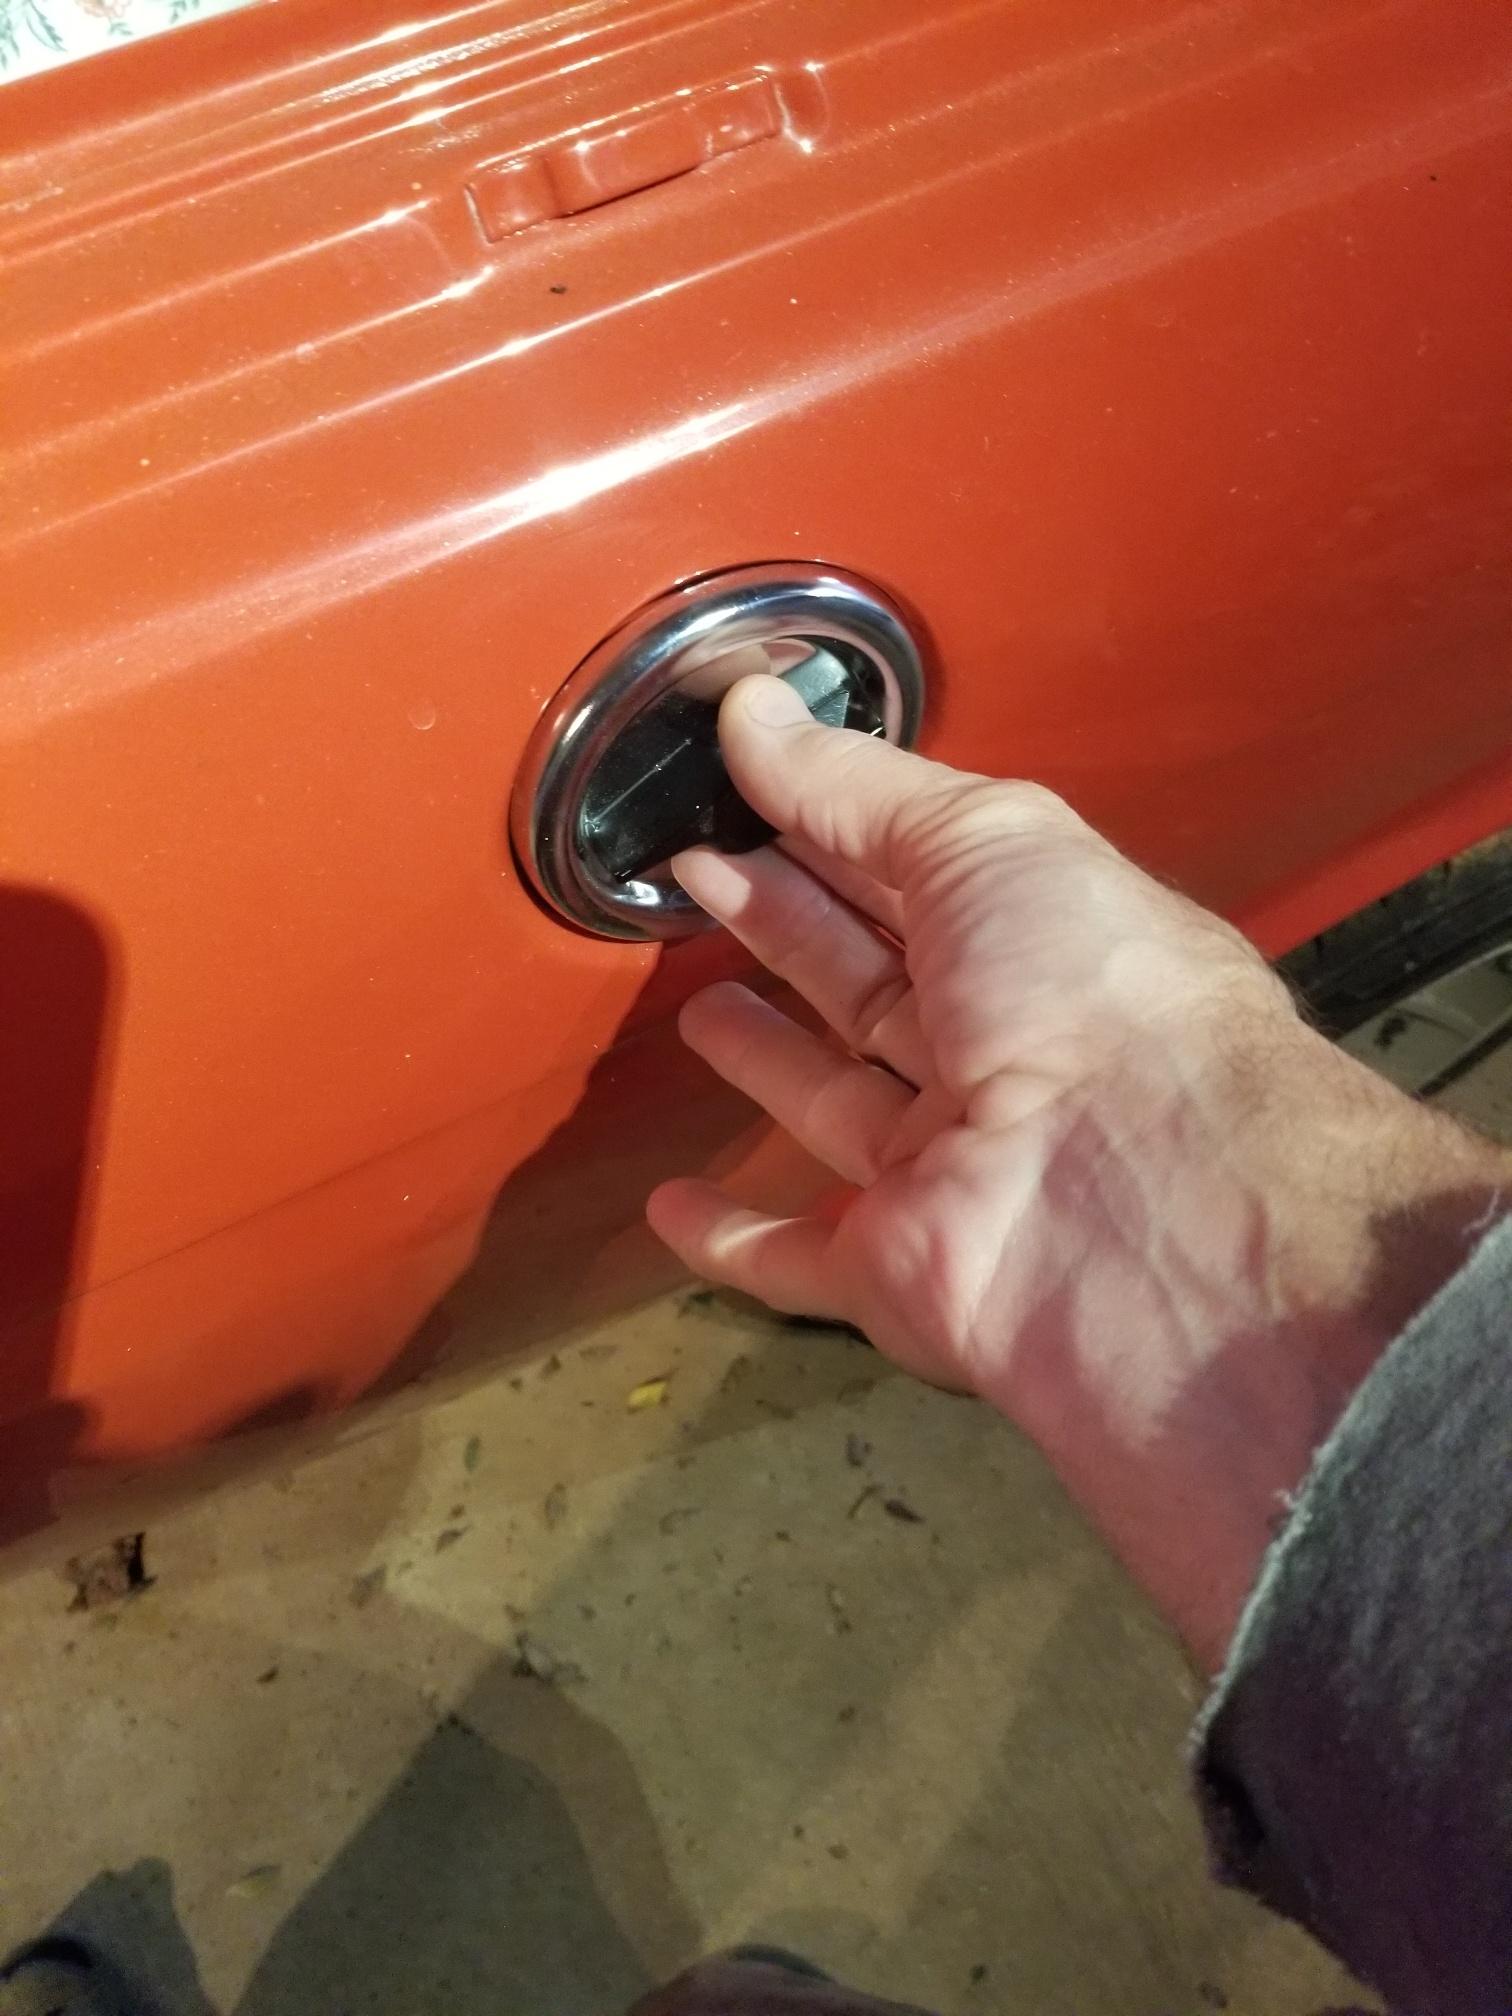
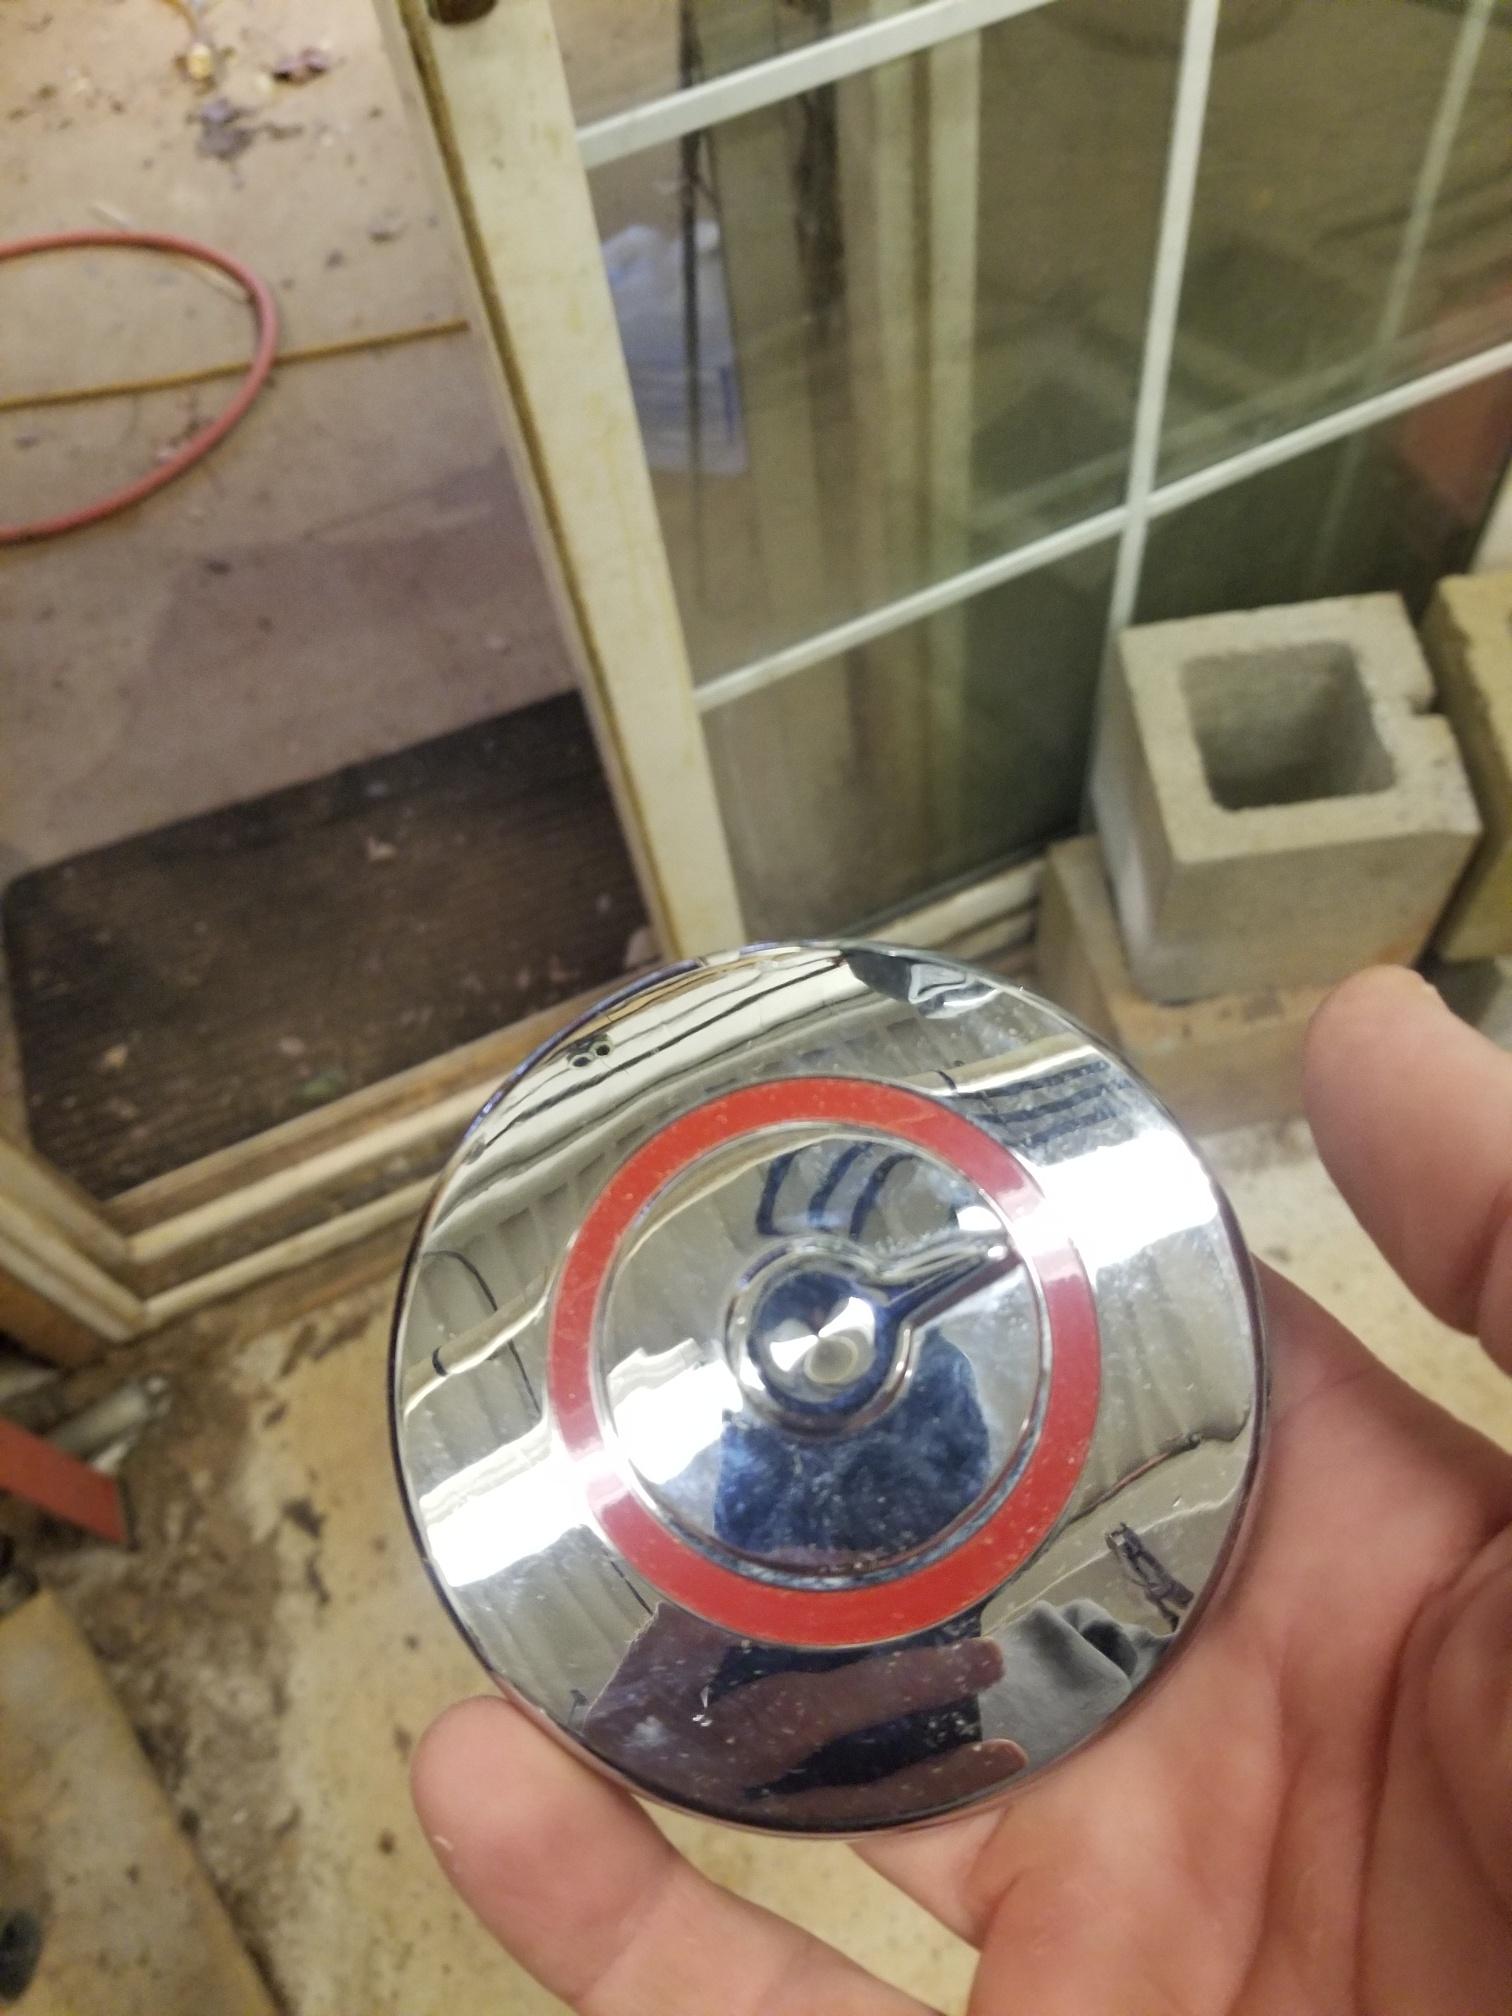
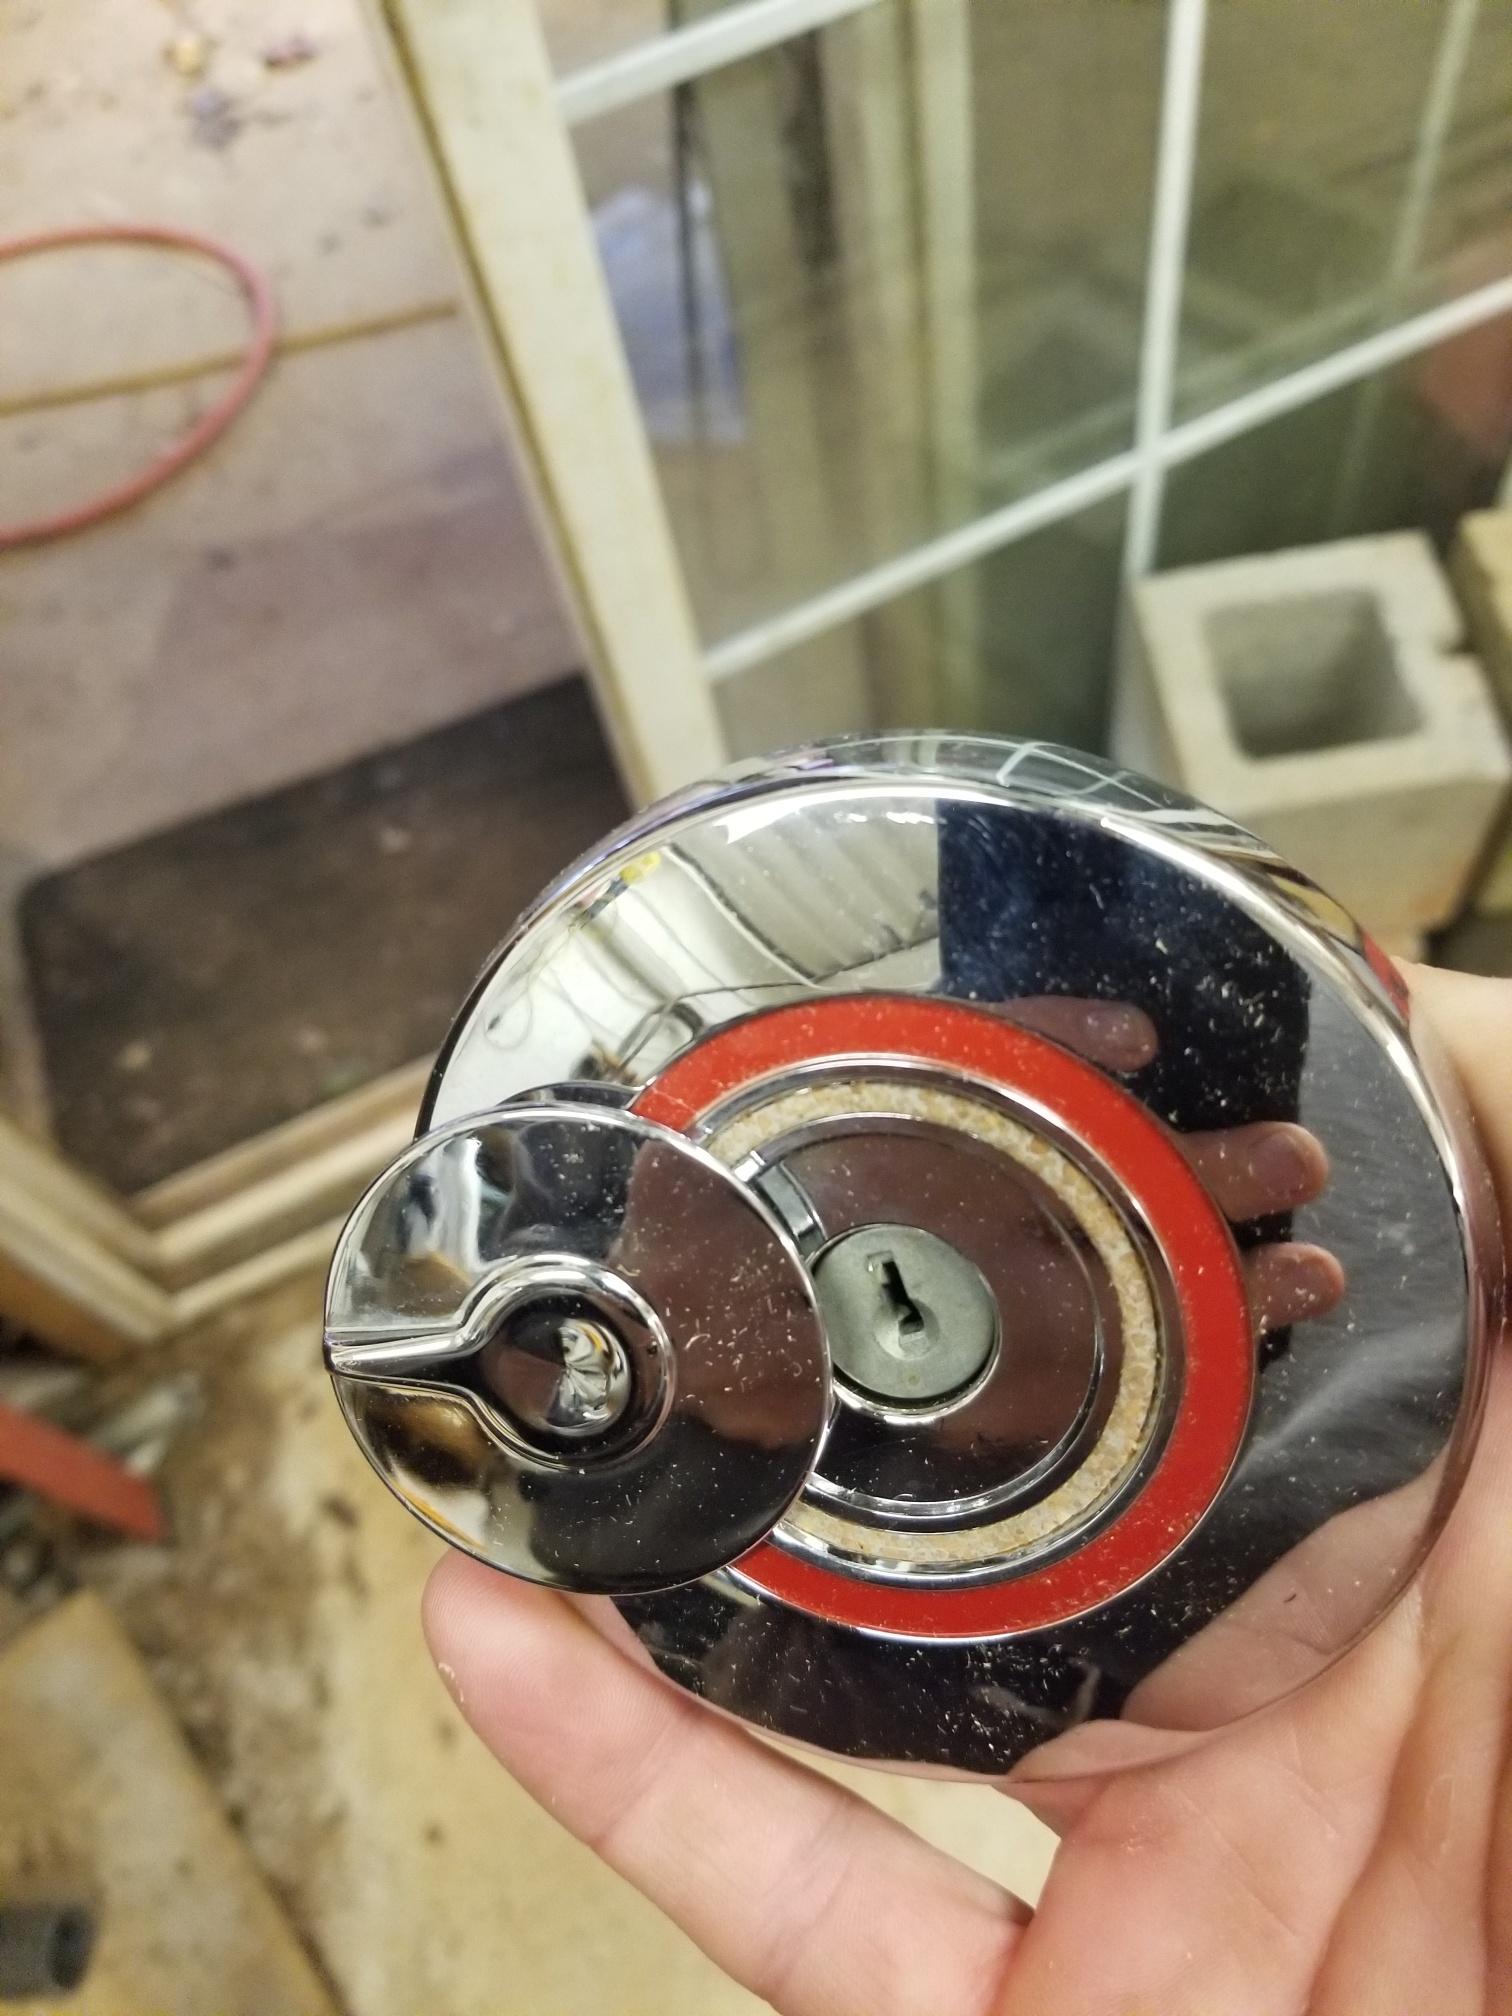
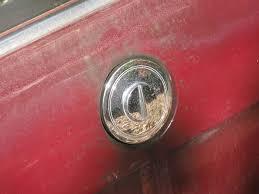
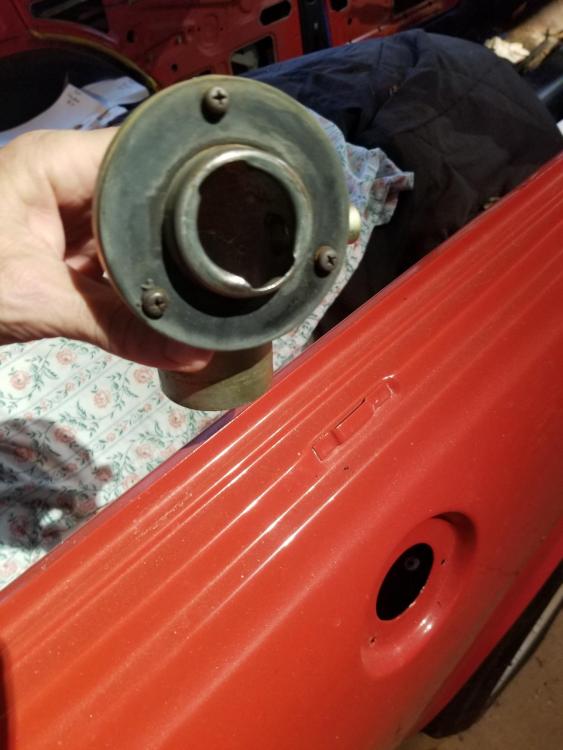
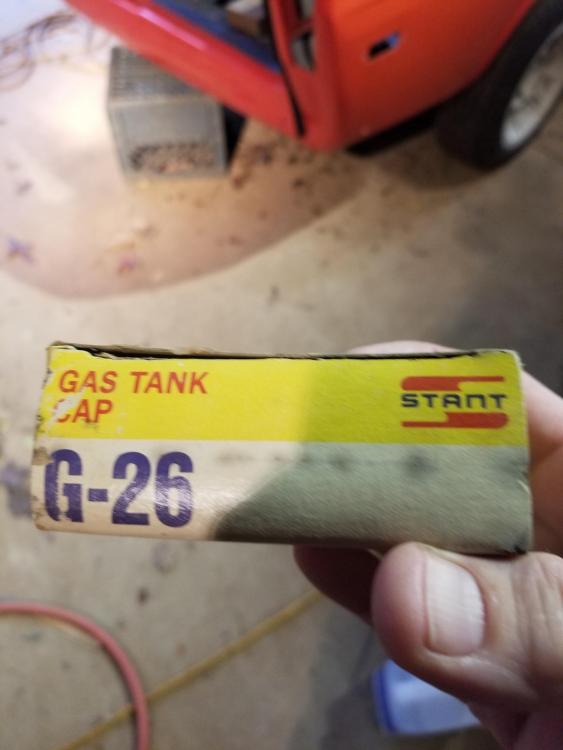
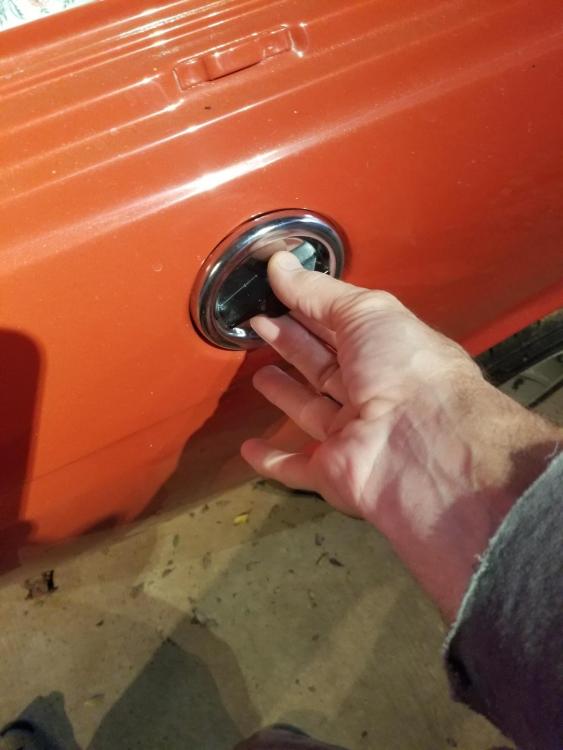
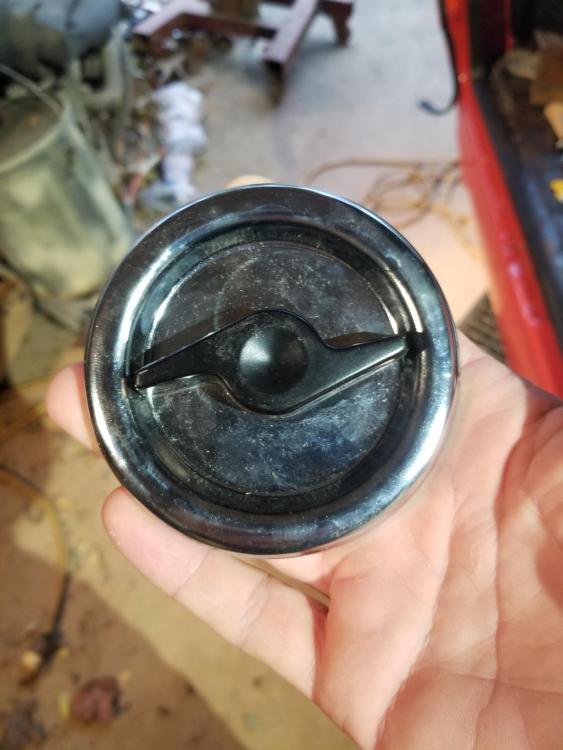
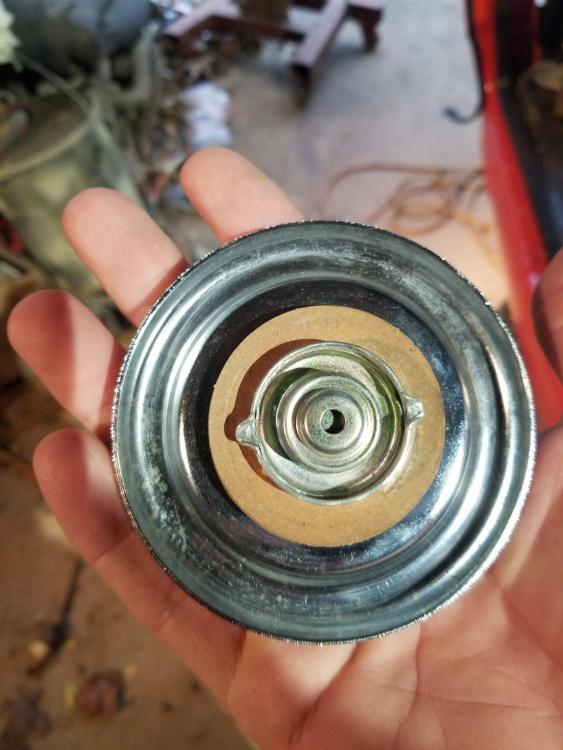
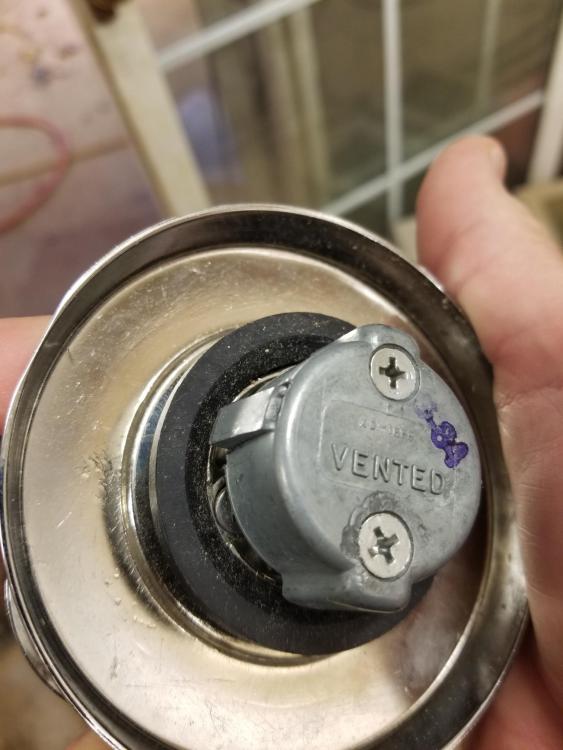
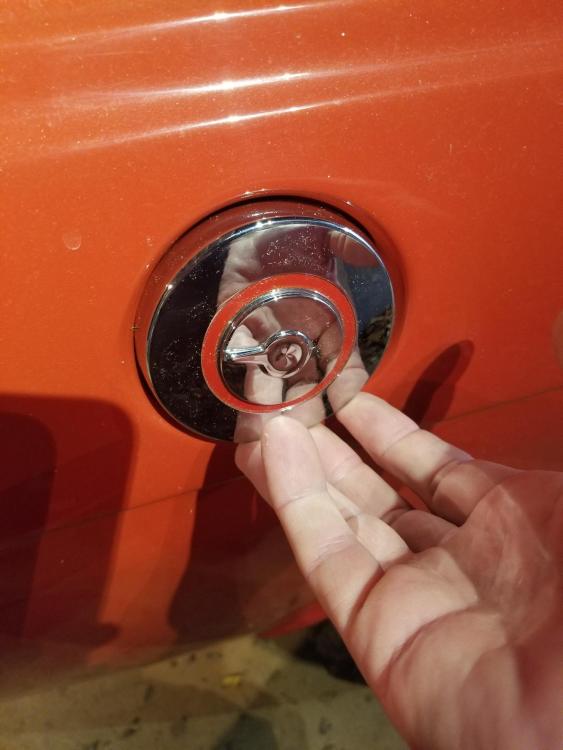
1 pointOk, so I have a little nugget for any other wagon owner out there... So this is the factory gas cap. Pretty much unobtanium. The last one I saw a year or two ago in Japan for $350 or so So this is what I'm working with The cap is obviously very visible and it would be nice if It pretty much filled the space. So I was googling around and I found a thread, I think it was on "The Realm" that mentioned a Stant gas cap. A G26...so off to Ebay It fits the filler neck fine and appears to seal Once I had the G26 you can find the vehicles it is supposed to fit. 57'-61' Chrysler, Dodge, DeSoto, Plymouth station wagons. Bingo!!! Then started looking for locking gas caps for those Marques We have a WINNER!! Merry Xmas to Cody... It has that factory applied red paint ring on it. It doesn't match and I may try to strip it off and polish it. We'll see after he gets it...


 1 point
 -
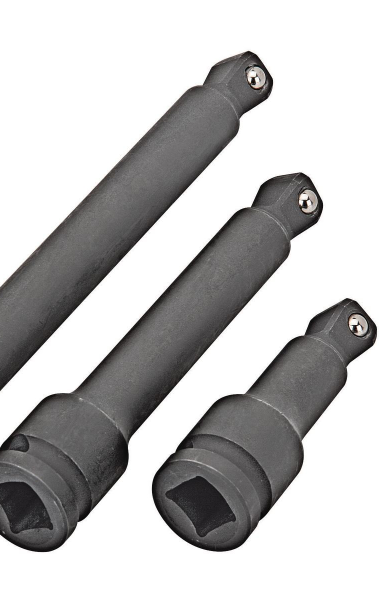
1 pointI found that these wobble head extensions, 1/2", get a good bite in the drain plug hole. It's a tough one. Once they get wallowed out it gets messy. This is the Harbor Freight version for an impact driver. No chrome helps it get a bite also. https://www.harborfreight.com/3-piece-1-2-half-inch-drive-impact-wobble-socket-extension-set-67066.html
 1 point
 -
Back to how it works. The signal from the coil is just a voltage pulse. The capacitor(s) just "collect" those pulses and convert them to some sort of steady voltage that creates a magnetic field. More pulses equals stronger field. So, what components fail in a way that makes them fail sporadically, to make the needle jump then fall back like yours does? Sometimes they work and sometimes they don't. I assume that there are diodes involved also. Not an electronics guy, just like to dig as deep as I can. The above is a simpleton's guess at how the tach works. Feel free to correct. The needle movement is similar to what happens with a funky ignition module. Is it possible that the problem is the ignition module and not the tachometer? Your point about some sort of test bench is relevant. I was watching Wheeler Dealer and the guy took a tach to a guy who had a pulse generator for testing them. So they aren't that uncommon.1 point
-
Just followed this step by step with carbed l28 and it was a breeze..... plus a great learning day.... thanks a million....much appreciated1 point
-
Start in the center and work your way out and be sure to tighten in three steps. Download the FSM from www.xenons30.com for the sequence and three torque steps. I've heard that the '77 FSM isn't working right on xenon's site, so pick the '76 or '78. The engine mechanical stuff is all the same.1 point
-
nice guide! i've been following it step by step but i'm stuck on what the head bolt sequence should be when i put the head back on?1 point
-
Step 42.......Don't forget the 2 little "hiding" bolts that attach the head to the front cover. Super job BLUE.....you should write a factory service manual....you'd sell a million!1 point
-
I'd like to add a step 37.5 Blue. Once the chain is wedged, stuff a clean rag around the chain so that nothing can drop down into the front cover. It's a big hole that attracts stray parts. If something drops down there, it's a big job to retrieve it. DAMHIK.1 point