Leaderboard
-

Zed Head
Free Member9Points19,238Posts -

240260280
Free Member9Points4,442Posts -
Captain Obvious
Free Member8Points10,081Posts -

siteunseen
Free Member7Points15,115Posts


Popular Content
Showing content with the highest reputation on 10/17/2020 in all areas
-
3 pointsLadies and Gents, it’s a wonderful day today. My Datsun has finally pass the smog test. Last night I readjusted the valves and was careful to have all within the same “resistance” when sliding in the feeler. Took the fuel pressure test again using different rental showed 30psi at idle... drove the car at least 30 miles on freeway before brought her in... the rest is history. much appreciate all the suggestions and guidances from everyone. We will deal with this again in 2 years . 😉 but for now I’m a enjoying it. more other little things here and there but at least I can drive the car now. thanks3 points
-
Right! And taking a cue from Arlo, there was a third possibility that we hadn't even counted upon. "Yes, they are the three screw carbs and someone at the big important show already raised the question if they were correct. And at the big important show nobody knew for sure if it was right or not, so they gave it a nice trophy anyway. So with my trophy as evidence, I claim that they are the right carbs for the car." I believe it's a variation on the 34th street defense. He says that people had seen three screw carbs on 71 cars. Well no duh. The transition date (according to the admittedly little research I did) is August or September 71. I could see those cars could maybe be titled as either a 71 or a 72. But...... The car in question on BAT is a whole year BEFORE that!! Door jamb plate says 8/70. I'm nearly 100% certain that the intake manifolds are the E46 version that works with the four screw round tops. The three screw round tops were not matched to that manifold because of the coolant scheme. Instead, the three screw carbs were paired with the E88 intake manifolds. So my question is... What manifolds are on there? If they are three screw carbs bolted to the E46 manifolds, then shapes of the carb faces do not match and the coolant holes on the carbs are hanging open to the wind. So it's a 70 head, a 70 block, 70 manifolds, 70 everything...... Except for the 72 carbs. Came from the factory like that. Really?3 points
-
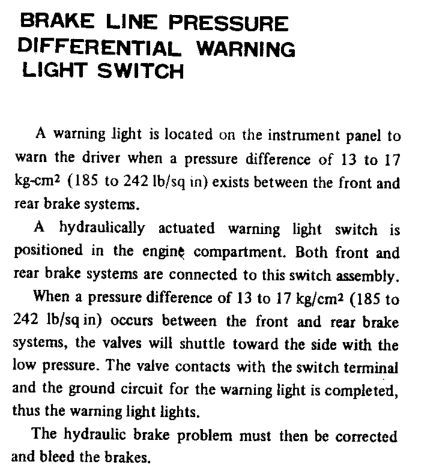
The self-adjuster was probably involved as noted. You should make a habit of using the parking brake, because it's what adjusts the back brakes. I was going to ask about brake pedal travel earlier because that's what happens before the brake warning switch is actuated. But, after just two weeks of ownership, baby steps are best (no offense). Your brakes probably still need bleeding, the pedal should be high and hard. More stuff will happen. See you soon...2 points
-
2 pointsPossibilities: https://www.busdepot.com/321819059 http://dynacorndepot.com/heater-box-clip-65-68-m3516a-mustang-65-68 https://www.gowesty.com/product/fresh-air-heating/20064/clip-heater-box2 points
-
You’re most welcome chap, but I’m intrigued to know the root cause. What I would guess at is that your self adjusters on the rear drums may have been stuck such that the rear shoes were very off the drums and travelling a long way before engaging. The action of the handbrake and the brakes together may have somehow released them? But all of this is conjecture! Let’s hope that has really fixed it. When you next take off the drums have a look at the self adjuster mechanism and see if it’s smooth or needs a good clean. One of mine had rusted solid and one side would brake before the other.2 points
-
An intelligent man with more time than most and an internet connections. Woof! I'm glad you and I are friends. Thanks Ms. Mark.
 2 points
 -
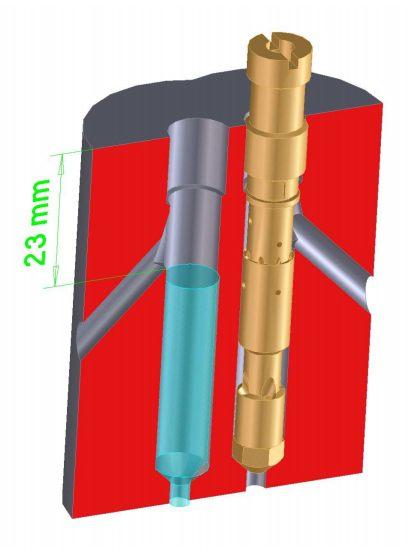
2 pointsCheck fuel levels. - Remove one main jet assembly in each carb. - Measure distance from top of fuel to the bridge where the main jet screws in. At 23mm, the fuel will pour into the carb throat.... not good. At 25mm down, the fuel will slosh into carb throat on bumps and such 29mm down is recommended. 31 to 27mm is a range for tuning.
 2 points
 -
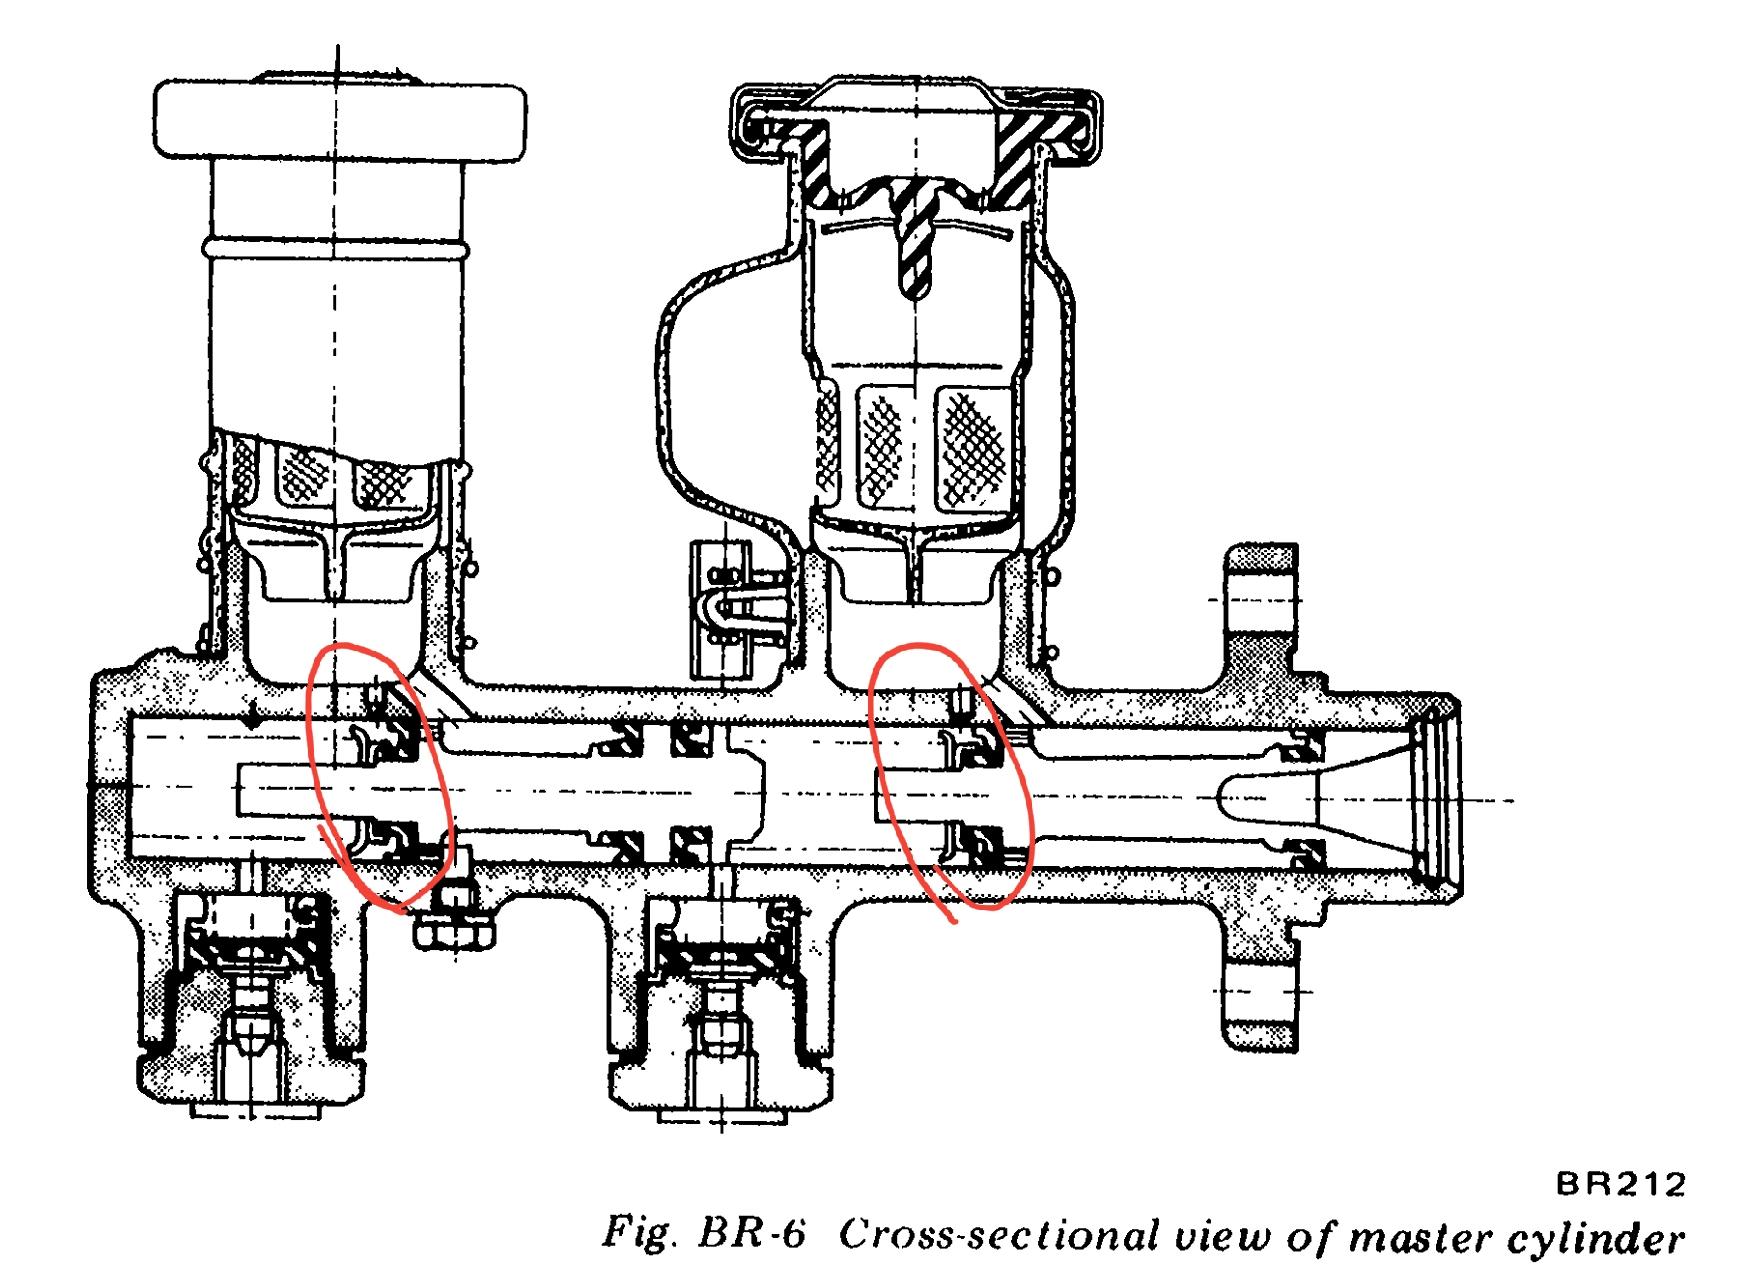
If your brake switch is activating when "fully" depressed, then you have an inbalance when the system is under high pressure. Basically at rest the mastercylinder is open to the reservoirs and the system is atmospheric. Once you press the pedal the ports to the reservoirs are closed and fluid in the front (closest to pedal) is transfered to the calipers and rear to the drum wheel cylinders. The two systems (front and rear) are balanced and pressure will build up when the pads and shoes make contact. The harder you press the pedal the more pressure applied. Both systems pass through the switch and then the proportioning valve. If the systems become unbalanced the shuttle in the switch will activate the switch. AK260 posted a good video explaining how it works. What could cause this pressure difference? 1. A low level in a reservoir allowing air to enter the system or the brakes were not bled enough to remove all air after repairs. The pedal should feel spongy depending on how much air is jn the system. 2. A leaking seal in the mastercylinder allowing fluid to leak back to the reservoir. The pedal should sink to the floor when you hold pressure on it, but the reservoirs don't loose fluid. Engine running when testjng this. 3. A leaking component in the system: caliper seal, wheel cylinder or brake line. Does it use fluid and are their visable wet spots around the calipers, brake backing plate or lines? Fair chance it is a master cylinder seal and likely one of the two primary seals.
 2 points
 -
In addition to what’s been suggested above, my money is is on a loose connection on your handbrake switch or a dodgy switch; where the contact or connection is moving with deceleration. Take off the vinyl cover and disconnect this little puppy, then see if you still have the problem. If it goes away, happy days and easy fix with a new switch or cleaning up the one you have. If that isn’t the problem, watch this video and test your brake warning switch; which is often mistaken for a proportioning valve. I had thought of it as a proportioning valve and wondered why it had a wire going to it! https://youtu.be/WwmYHVBLi2Q The purpose of this is to give you warning of a pressure differential in the system which could be a bad fluid leak on a pierced brake line or simply a dodgy master cyl. It could also just be a dodgy valve inside the warning switch. So again, an easy test is to unplug the wire going to it and if you problem goes away then you know where to look next! Keep us posted - always good to learn new things from another man’s afflictions ;)2 points
-
2 pointsHave you measured cylinder pressures? If they are correct then valve seals would be the next place to look. Pretty easy to replace, easier than replacing oil scraper rings on the pistons.2 points
-
1 pointAlso work from centre outward alternating towards back then towards front like the service manual shows.1 point
-
1 pointthe only thing in my favor after the rebuild in the late 90s that I have not put 3000 miles on the motor . it comes out in nice weather 1-2 times a month for a 30-40 mile drive only. It is also keep it in a heated garage .so I guess can throw a torque wrench on it and see where it is, if it does not move at 60lbs I will leave it alone. I guess on an old motor and left out side in the weather I would think twice about ,I agree with you on that. I did not know nissan recommends a cylinder head bolt torque after a valve adjustment. this could be a can of worms as I don't think anybody does it .1 point
-
We’ll be 50 miles down the road from you in a couple of weeks. Let me know if you want a grease monkey (with a face mask) to help bolt bits on for few hours! I’m sure I can negotiate a half day break from family duties! [emoji256]1 point
-
1 pointAfter so many years and miles it's dangerous to mess with the head bolts. Some are probably rusty and ready to break. On that topic, has anyone considered the clamping force of a head bolt that's half rusted through? Might be a cause of blown head gaskets on old engines. Who knows.1 point
-
1 pointDon't overlook the backing plate maybe rubbing on the drum. The bottom edge tends to get bent. More of a grindy squeal.1 point
-
I can see your house from my computer. There's a squirrel in your yard...1 point
-
1 pointYou could try taking them off and sanding, filing or someway removing the burnt layer of the shoes. You most likely have overheated the rears by pulling the E-brake up and locking in all that heat after a spirited drive. Unless you are on a hill I suggest not using the E-brake.1 point
-
1 pointnever did I retorque head bolt after a valve adjustment. I guess tomorrow when the motor cools down I will check the head , intake and header bolts just because it gives me a piece of mind and also would like to see if anything has change.1 point
-
1 pointMost do not do this. Perhaps dealerships did this back in the day. If you remove the head then some re-torques after re-installing would be good to do. Perhaps after 100mi and 1000mi1 point
-
1 pointDamn! That looks great. Maybe crimp your wires tighter on both ends, plugs and dizzy cap. Use dielectric grease too on all connections.
 1 point
 -
1 point
-
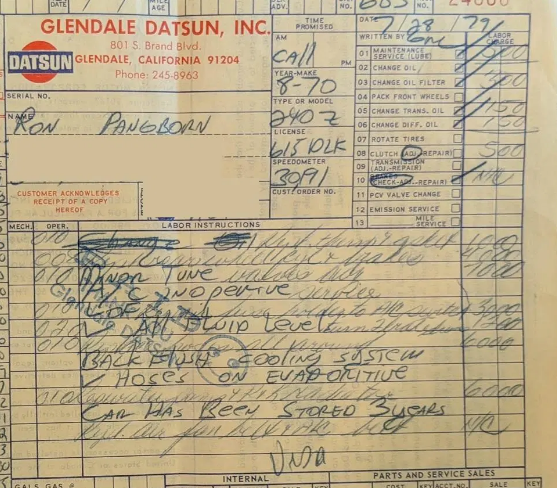
Here's some backfill on the pre-2002 times, besides just the registration cards. Apparently the car had been stored for three years before 1979. So that's 30,000 miles in about 5 years, ~ 7/71 - 7/76. So it had some driving done on it, about 6,000 miles / year. Only about 7 years total on the road, as an actual driver. These 5 plus 79 - 81. Post 2002 was just "show"-driving. There's also a list of parts, hoses, clamps, tuneup parts, etc., to go through. For anyone working on the puzzle. Picture #320.
 1 point
 -
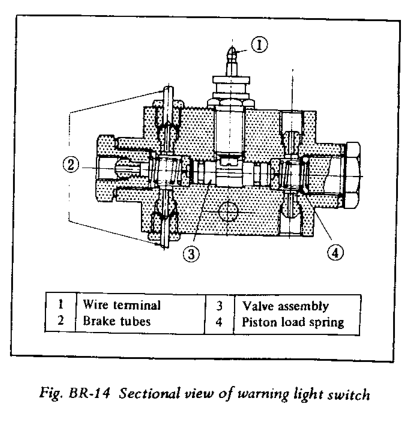
Here's a section from the FSM about the warning switch. I'd check fluid levels and bleed the brakes first thing. Check the pads and other parts also. You never know what a PO might have done. My calipers were on the wrong sides when I got my car. The drawing shows the little nipple that the wire attaches to, that AK260 mentioned. https://www.classiczcars.com/files/category/11-240z/
 1 point
 -
1 point
-
1 point
-
It seems like my 280 did that when the booster went bad. Do your RPMs fluctuate any when fully depressed? If they go up your booster may have a vacuum leak.1 point
-
1 pointE tube changes do not make a big differences except for the diameter of the tube. If you have F2 tubes then that would be very rich. F11, F16 are typical and should be fine for initial tuning. Jet sizes and fuel depth would be the first things to check. Also mechanical linkage is Very important. The throttle plates should all be closed as much as possible at idle before you attach the mechanical push rod ends. One tuning tip to ensure the linkage is right is to pull each plug one at a time and measure how much the idle drops.... you can quickly find out if one carb is working more than the others due to the mechanical linkage incorrectly opening the plates on that carb too much. This should be done at idle and off idle to cover the bases.1 point
-
1 pointIt will be stamped on the sides: 0.40mm idle jet 1.10mm main jet1 point
-
1 point
-
1 point@jalexquijano I remember a compression test from a while back but I don't remember the results. Could you post them again?1 point
-
1 pointJoseph, thank you for the explanation. Since I have an 8/71 car(Madkaw 9/71), I think I’ll wait to hear Lee’s remedies, before pulling the trigger, that is unless there is a “Black Friday” sale planned!1 point
-
😪 So harsh, so true. well, i've got an 'engine'1 point
-
Have you checked the fluid level in your master cylinder?1 point
-
1 pointLee from KONI has been made aware of these things. He is getting caught up (I'll never complain about my flooded inbox again, since he said his had around a thousand messages, sheesh!) and will be coming in soon for the following: 1. He has a simple something-or-other for those who for some reason need a longer adjuster knob. As far as we know, for the many hundreds that have sold so far, only two Z-Cars have had the issue of not being able to reach with the knob for some reason. We honestly don't know why at this time, but hope to research it and find out. Lee was gathering the information he had on his fix, and will share that soon. If anybody else has this issue, please let us know at (800)633-6331 or info@motorsportauto.com. 2. Lee and his engineers are looking at Madkaw's situation. Since that is miles above my pay grade, I'll leave that to Lee and his engineers, and look forward to what they have to say. He may have some other things to address, but those are the highlights. As far as what you said Madkaw, yes, we sent them O.E. 240Z, 280Z, and 280ZX strut housings, just to confirm everything. They already had the proper sizing from all the years they did the Reds, and this was just to confirm, which they did. As far as grinding the inside of the strut tubes, that was a misunderstanding on us. We should have been more clear that we've heard of many struts (and have some here in the building) where there is a hardened gunk buildup at the bottom from years of oil and such. That is often needed to be cleaned out, often by "grinding" with something to break off the gunk. However, grinding of the metal at the bottom of the inside is not something anybody should do and not what we intended to convey. Again, our apologies that we "muddied" that up, pun intended. Thank you for your patience on this Madkaw.1 point
-
1 pointThat looks leakproof!! Tell dad thanks for saving you the trip to the store!1 point
-
Gotcha. Sorry. In some instances, "age" is more of a factor than mileage. I guess I was giving them a pass on the brake booster as one of those.1 point
-
1 point
-
1 point
-
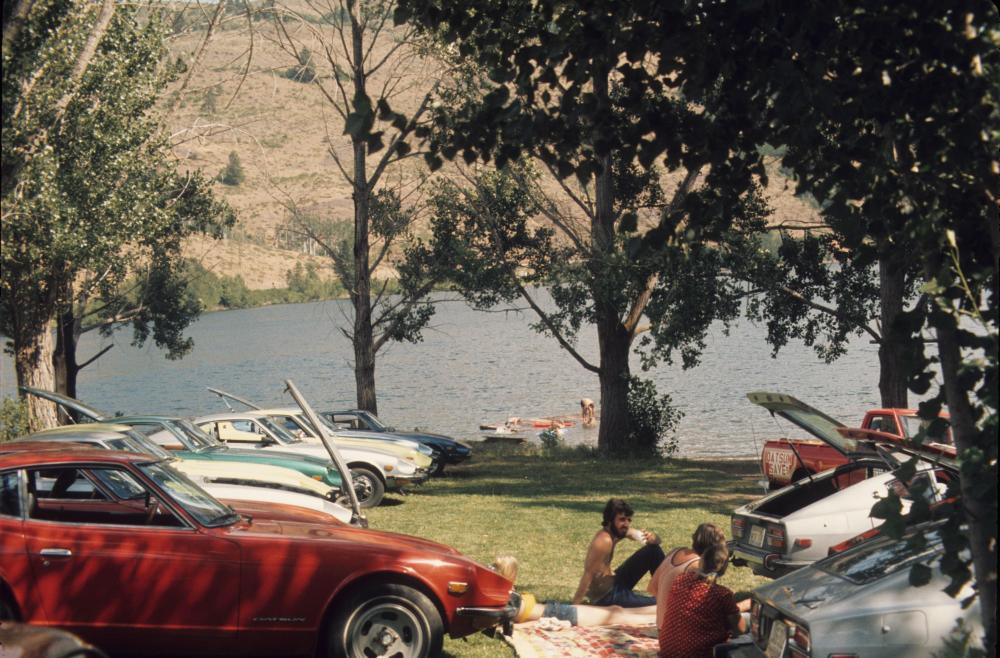
1 pointKeeping it stock for assembly documentation is a good idea. But not being Pure means you don't have to go find rare/expensive parts also. (Ask me how I know...:-) Like some of the "unique to the '73" throttle linkages and carb water circulation parts. Posting questions here will probably be your best bet. You might want to consider attending next year's ZCON in Colorado Springs, where I'm sure there will be some pure stock or near stock '73s to check . (I do not know about the 2020 ZCON, but at the 2019 ZCON in Branson , '73 240Zs took first and second place in the Stock category. ) Have fun and keep posting about your project on this thread! (I bought my '73 in Mt Vernon, WA while I was in the Navy. Photos are of a Fun Run sponsored by that Datsun dealer in 1974 over the North Cascades Highway. Lots of great twisty roads in WA...)

 1 point
 -
1 point
-
I would use a rubber sheet material rather than foam to be safe.1 point
-
Also no mention of work done to the mustache bar, it looks to like it has the newer style bushings without the flanged ends. Also the washers are the newer type. Normally wouldn't need servicing at 31K miles, IMHO. Regarding @240260280's mention of the oil pressure sensor, the wiring retainer is also missing. The one that picks up an engine mount bolt.
 1 point
 -
I saw your note, and thank you for asking for a friend. I guess what we'll see how that is explained. I'm expecting something like... "Thanks for bringing that to our attention. We went back through our records, and saw that many years ago we removed the carbs and sent them out to have them rebuilt by a professional, and those are the carbs he sent back. They are completely compatible with the originals and we simply never noticed the discrepancy." I'm expecting something like that and if that's the case, the originals are probably long gone. One could substitute a different set of four screw round tops in their place, but they would not be the originals. So I'm expecting Innocent oversight and maybe even come with the offer to include a pair of "like originals" with the car. I'm fine with any of the cars having had a life too. In fact, I think that's part of the story and can add or subtract value. What bothers me, however, is when it appears that someone is not getting what they think they are getting (and paying for). If the price tag is sized for a beacon of originality and unmolested quality, then the merchandise should reflect that value.1 point
-
I do agree with the reflection comment, but the paint is just off....even the underside. My 70 Z without dealer undercoating is completely safari gold on the bottom, no black areas. Just looks wrong And the silver painted parts drive me up the wall. In my opinion, car was refreshed before storage, then left to patina/rust.1 point
-
1 pointNice adaptation! I would probably have spent hours turning a spacer out of titanium or something. And then slapped myself in the forehead when I saw what you did.1 point
-
1 pointLOL! When someone tosses a grenade like that, someone is required to fall on it, right? I'm here for you and everyone else. Just trying to be helpful. It's a bundle of snakes under the stock 73/74 hoods.1 point
-
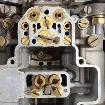
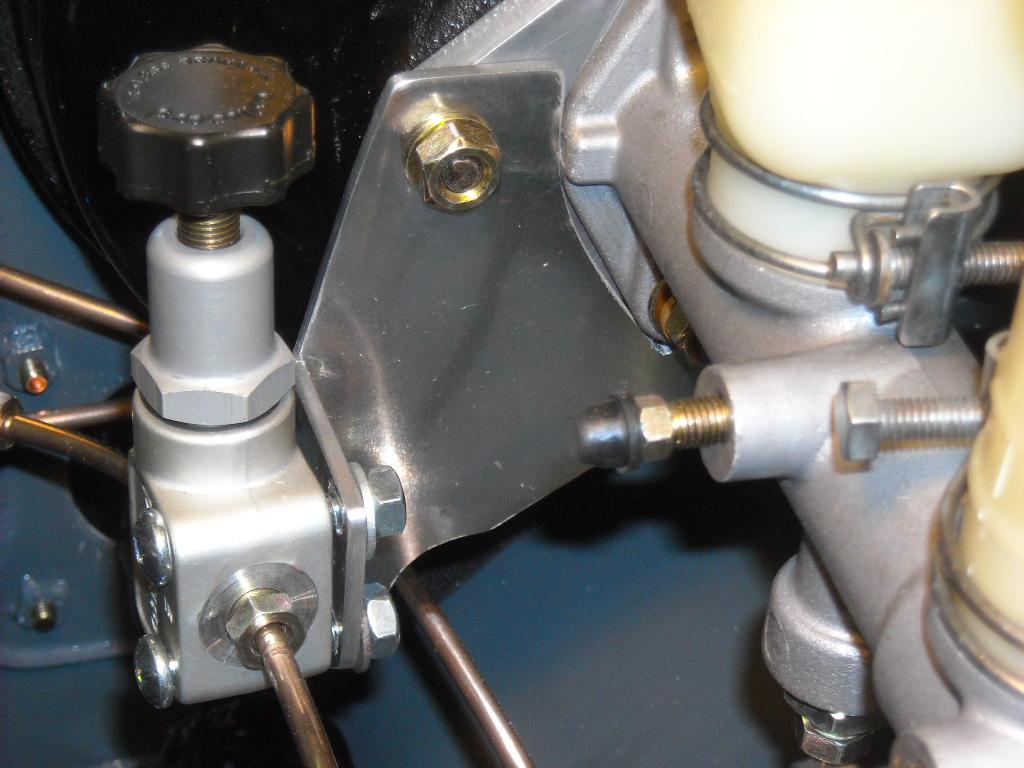
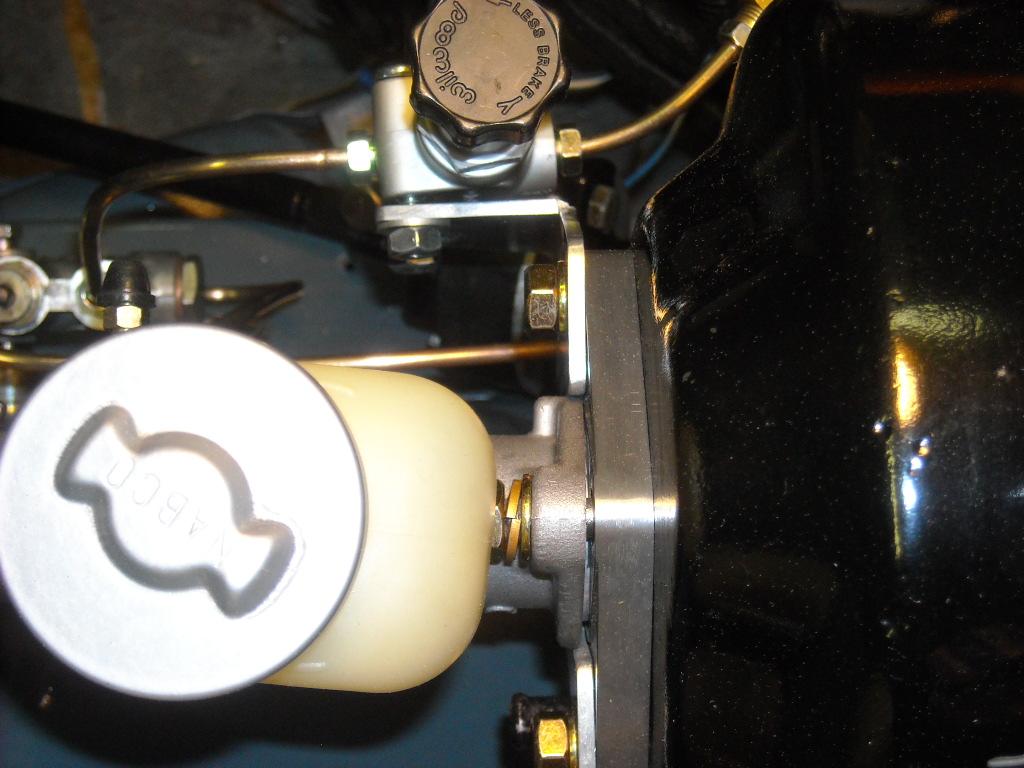
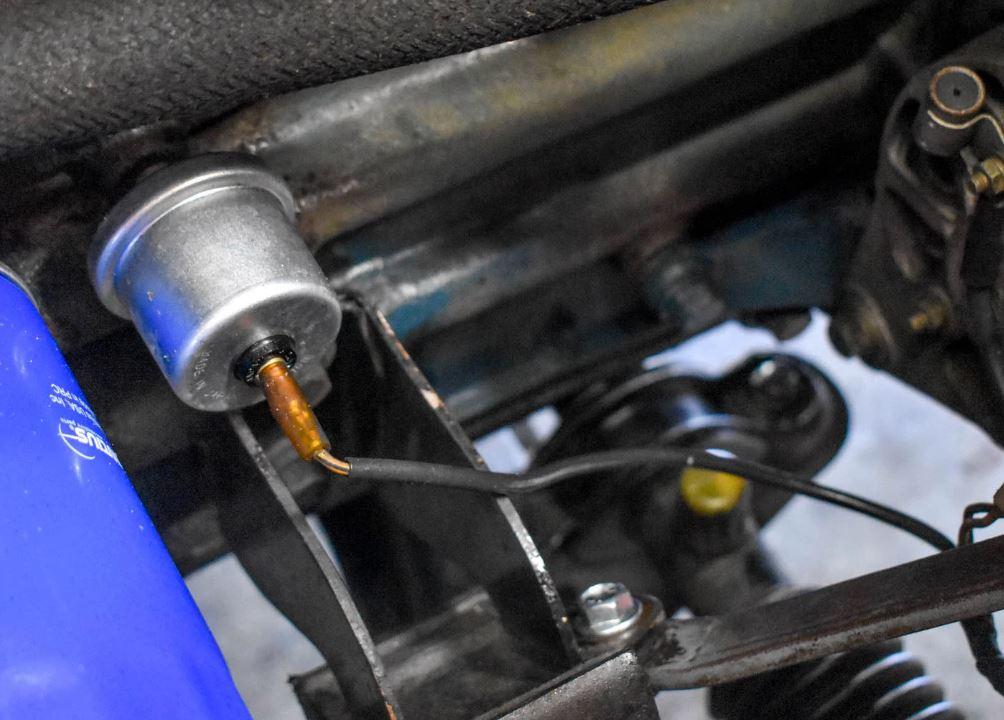
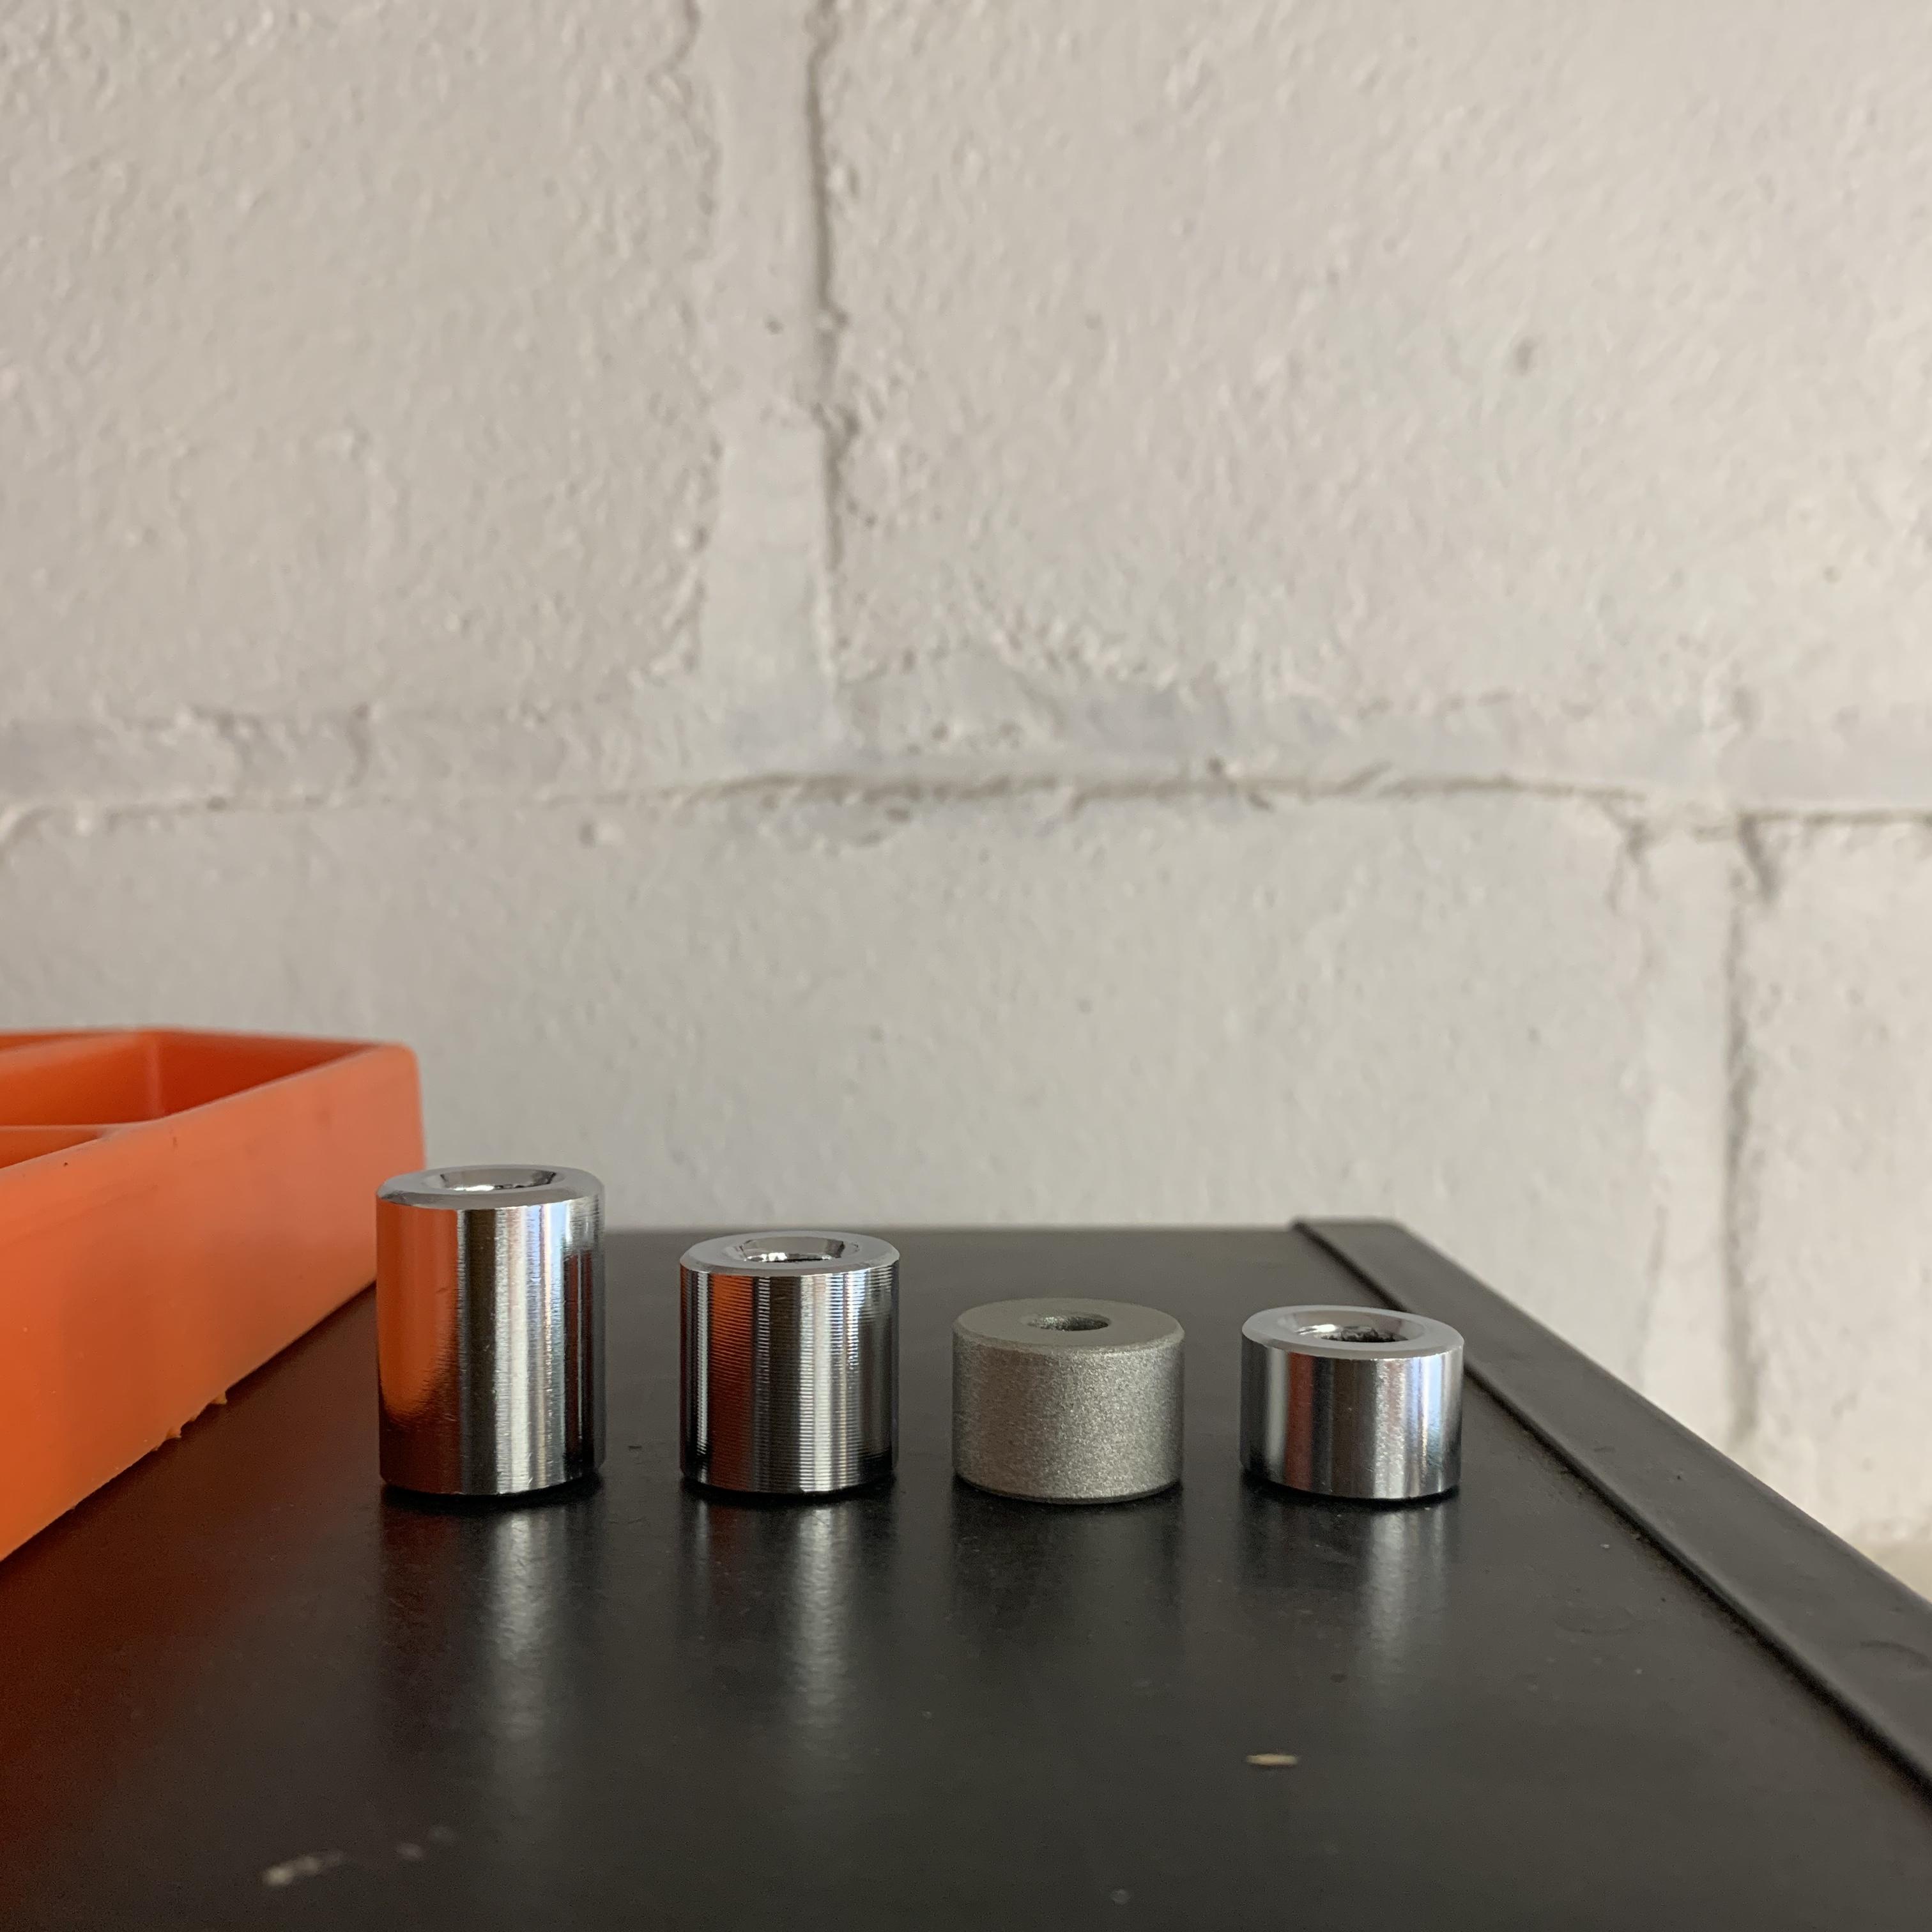
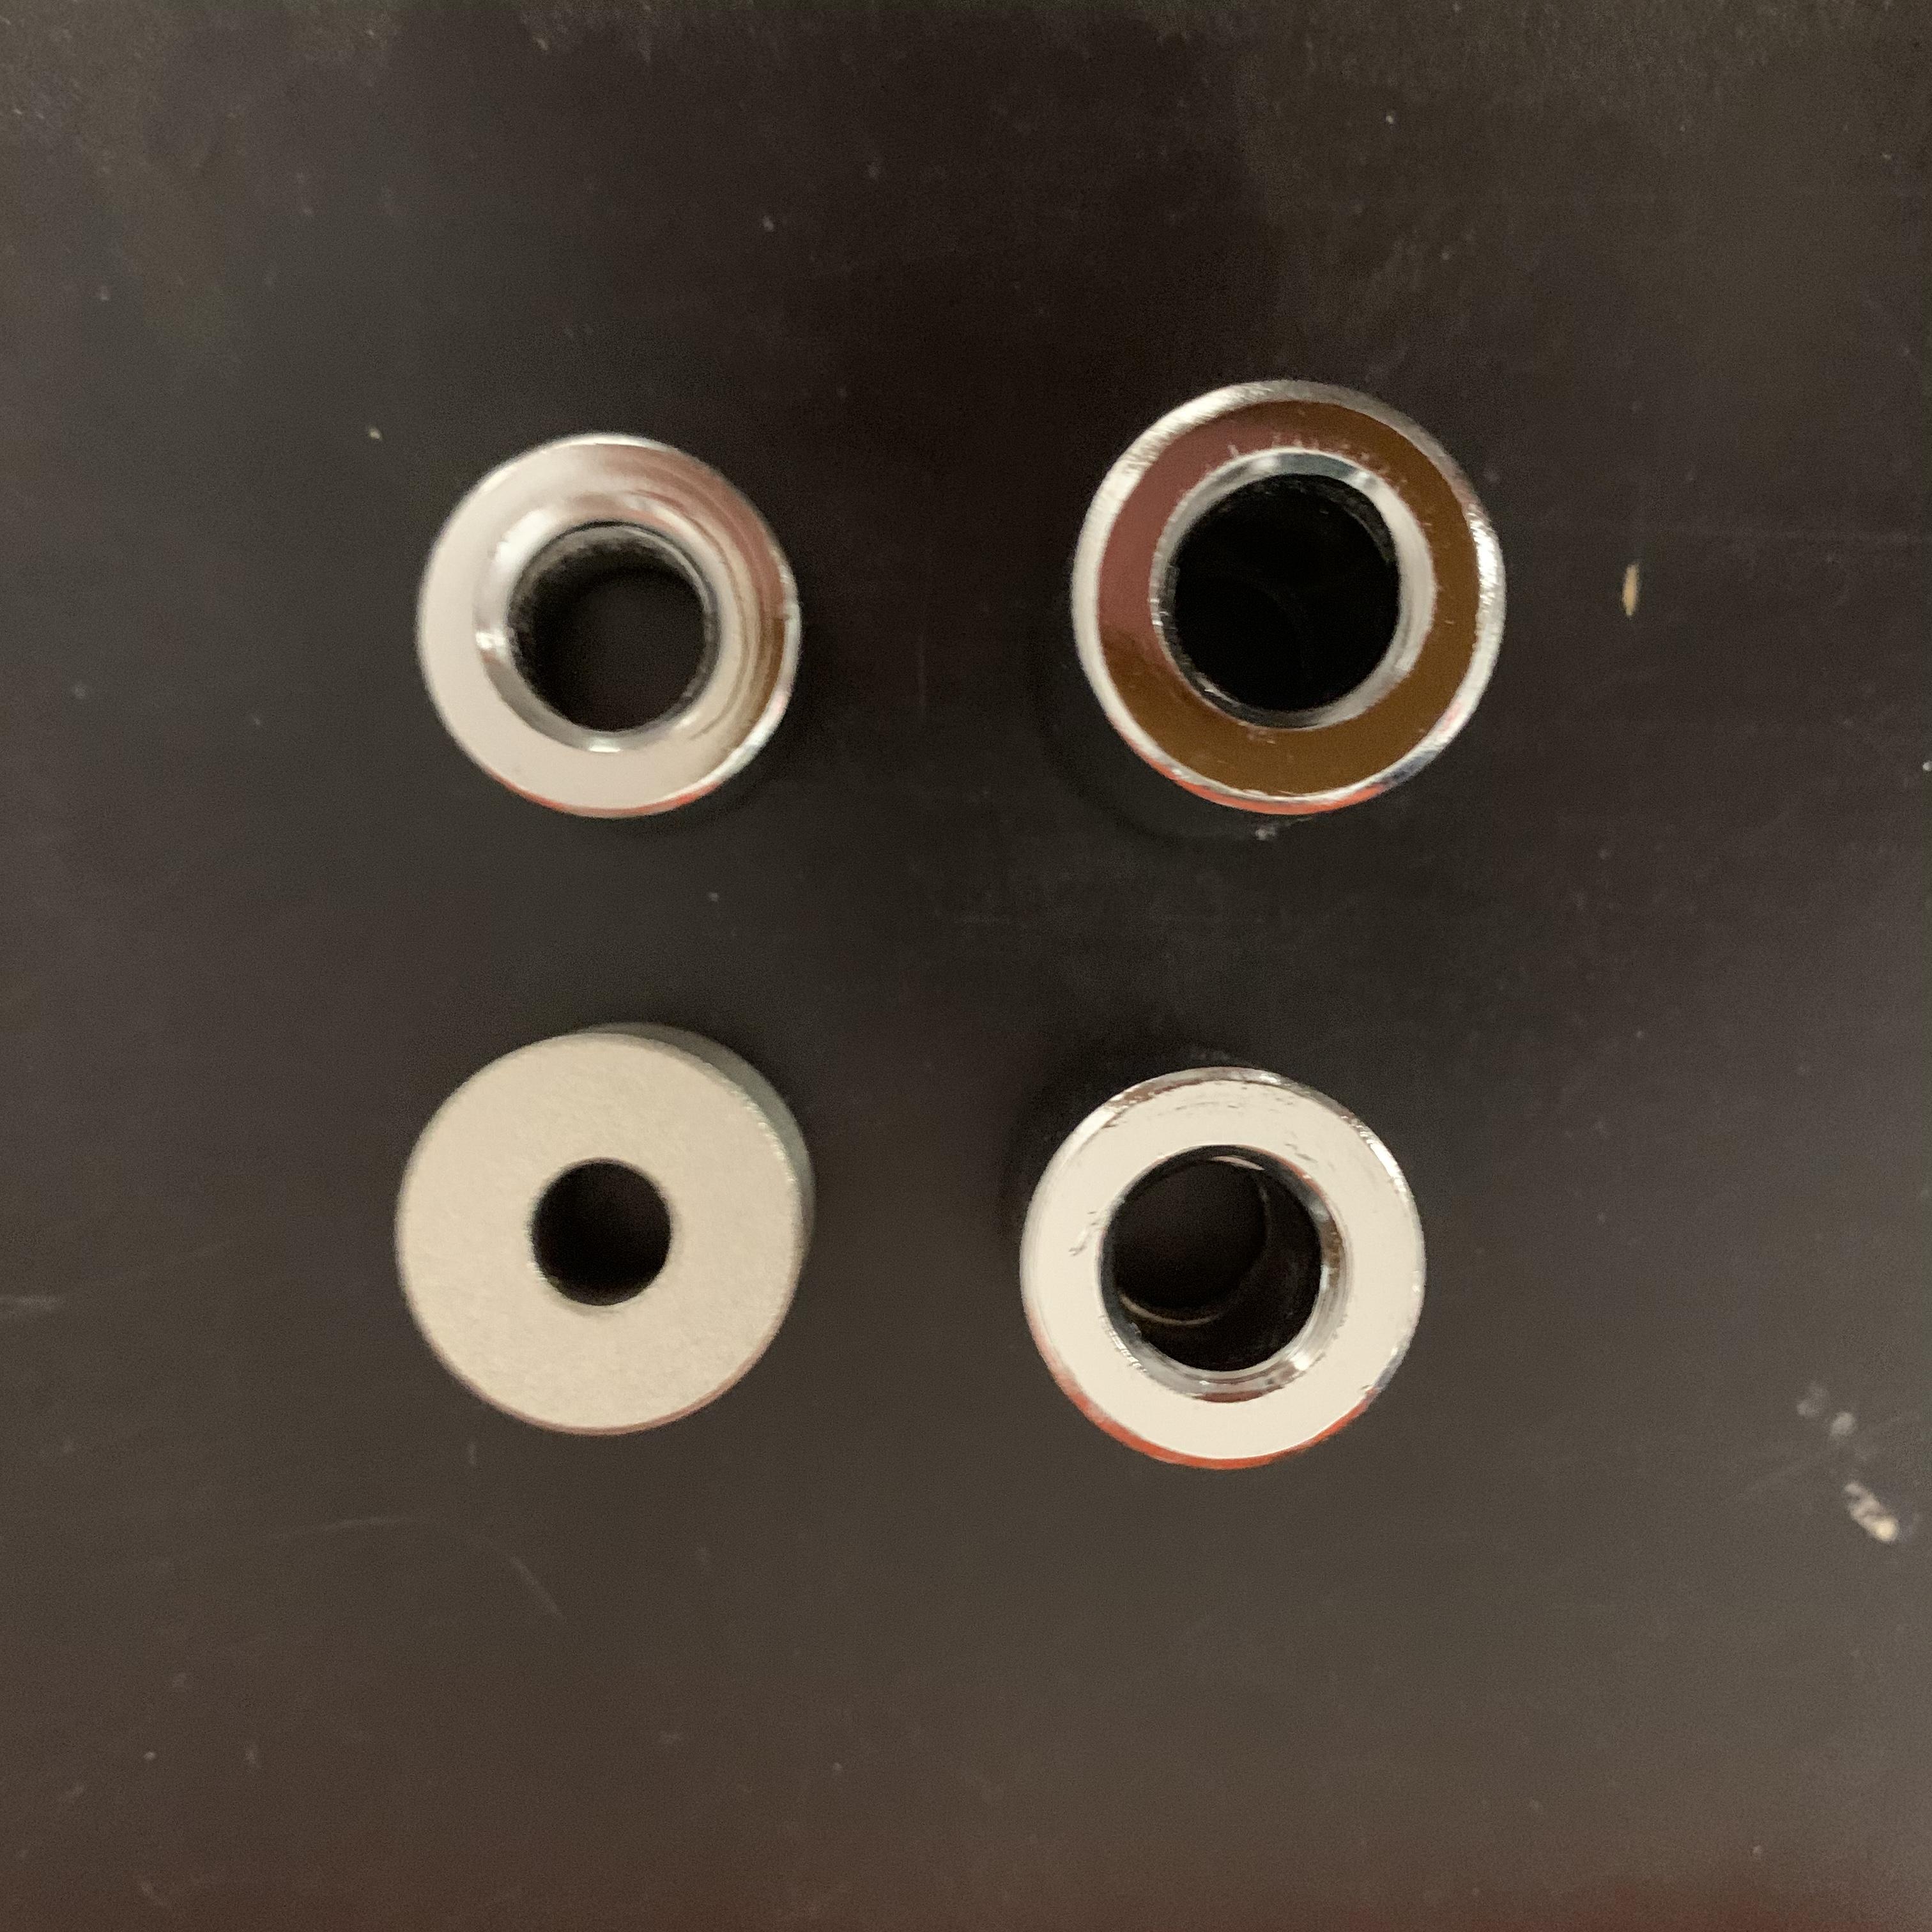
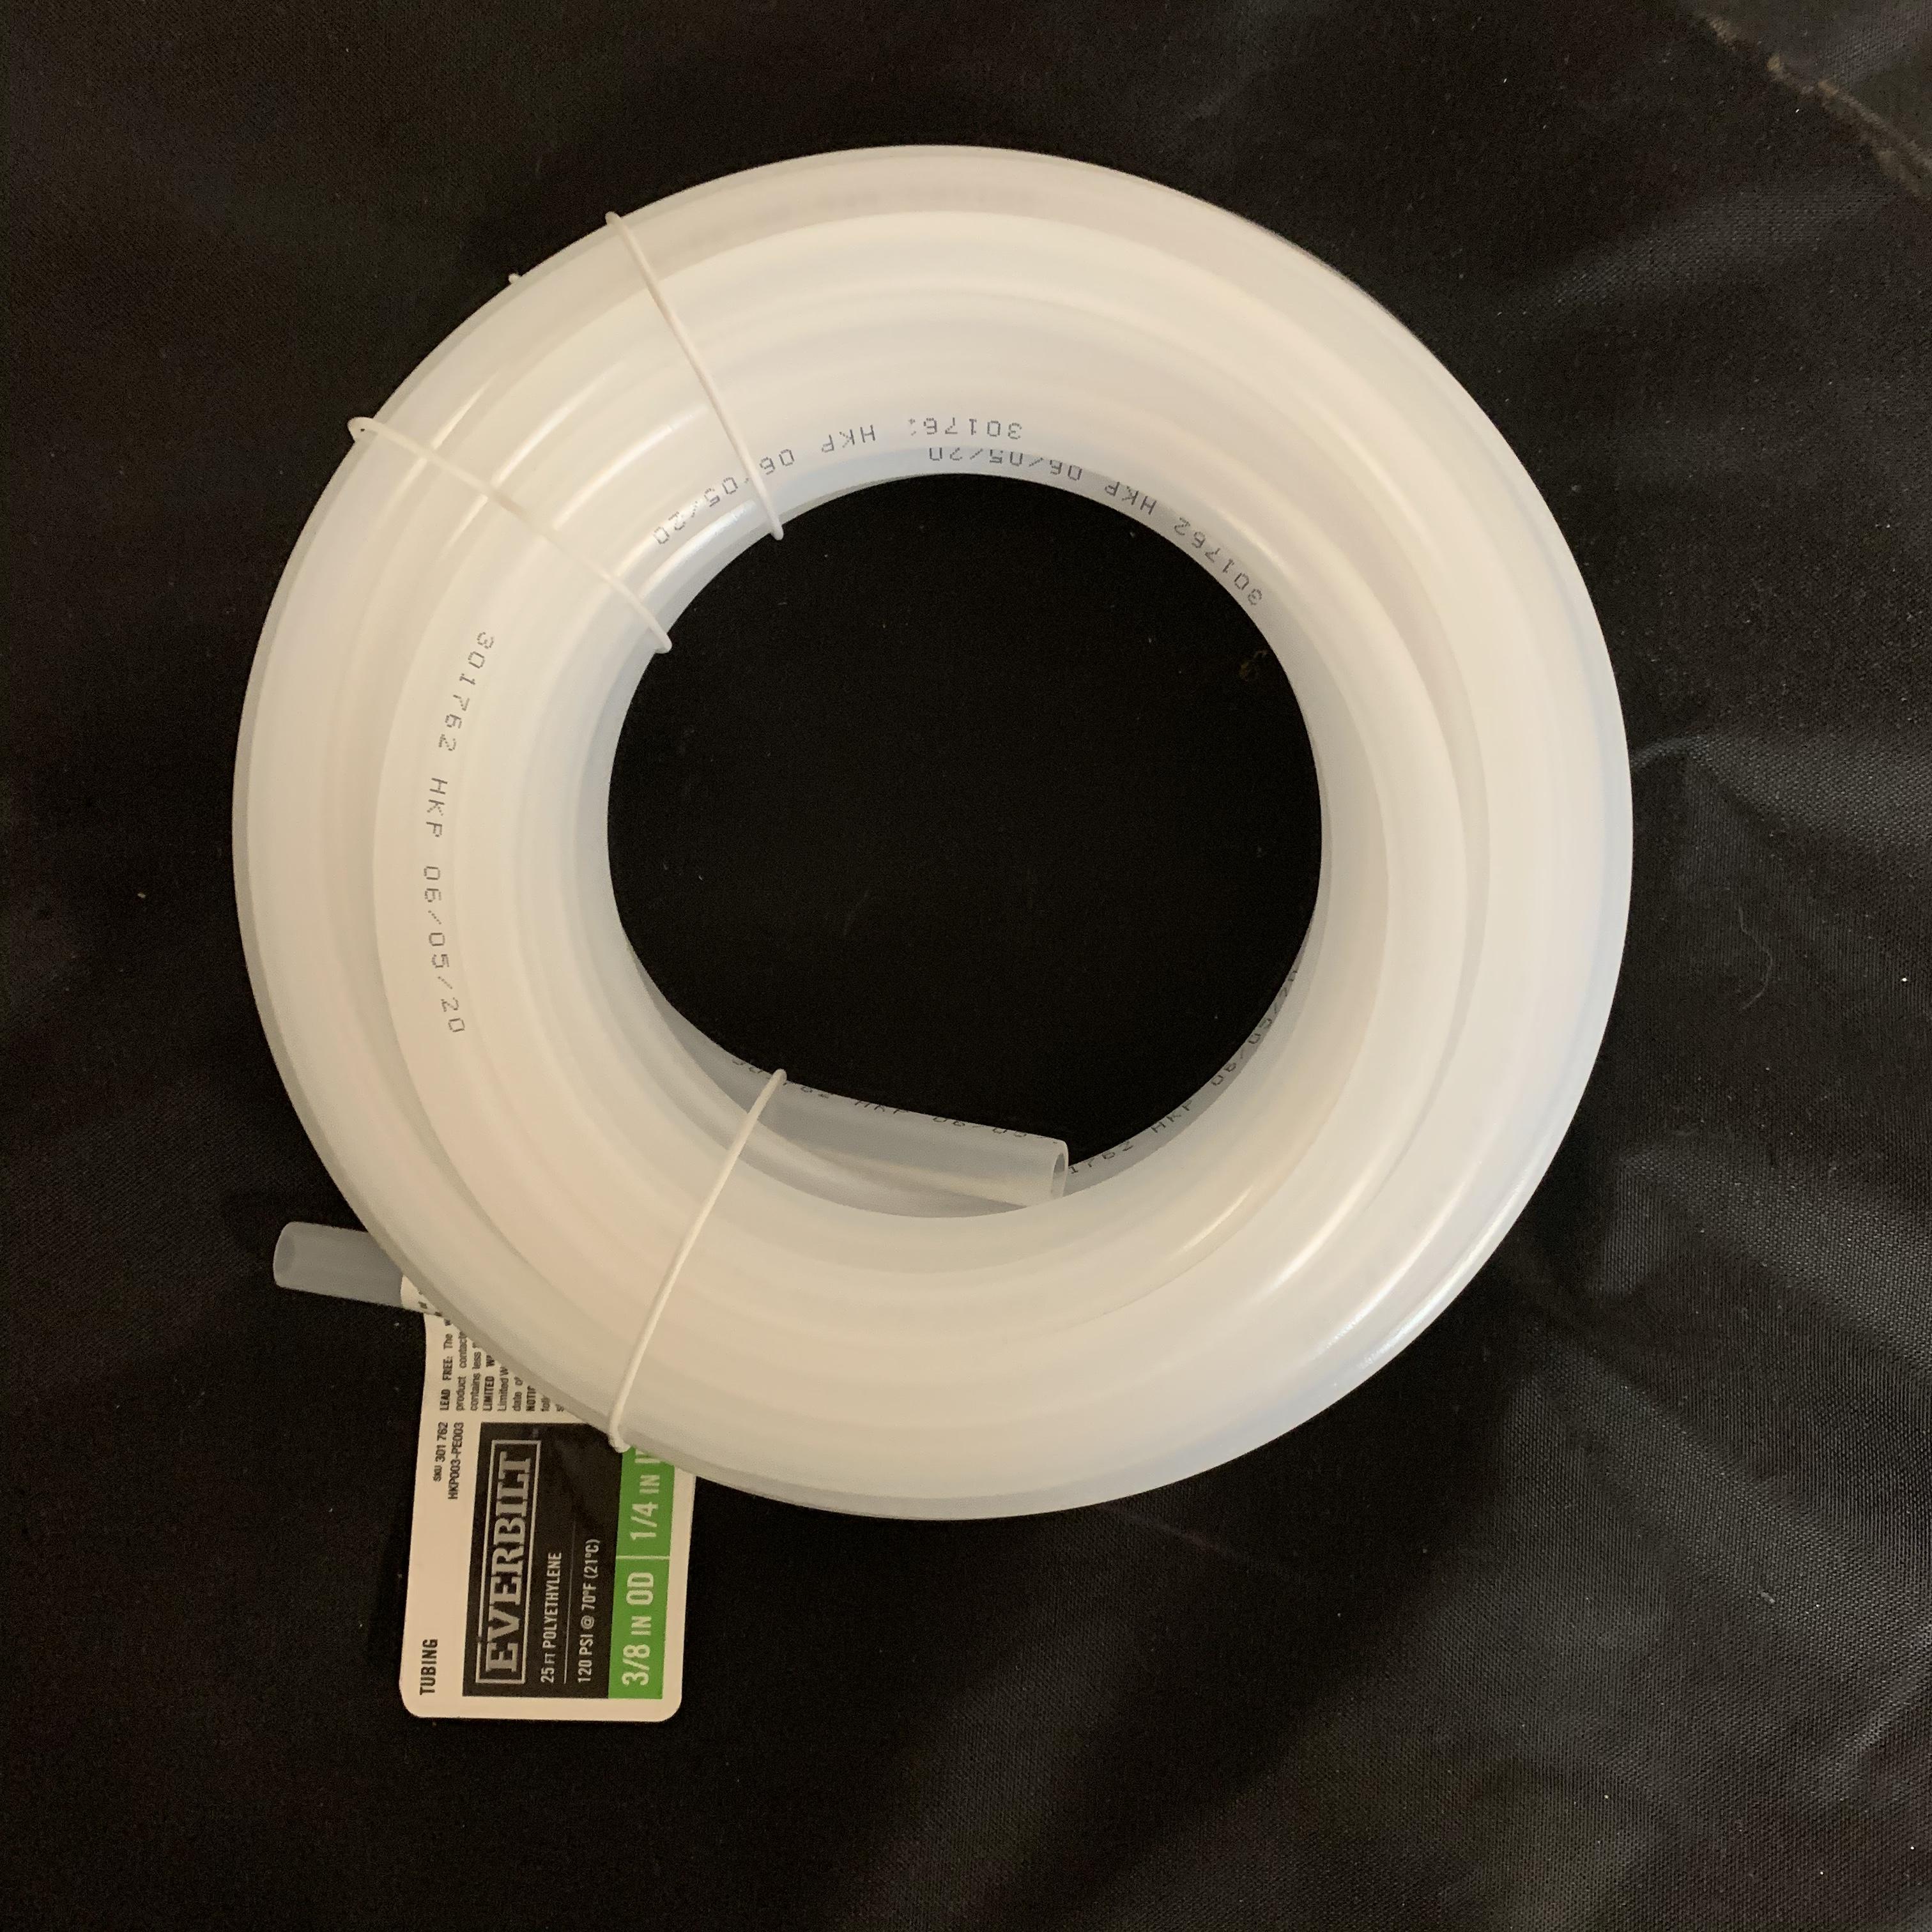
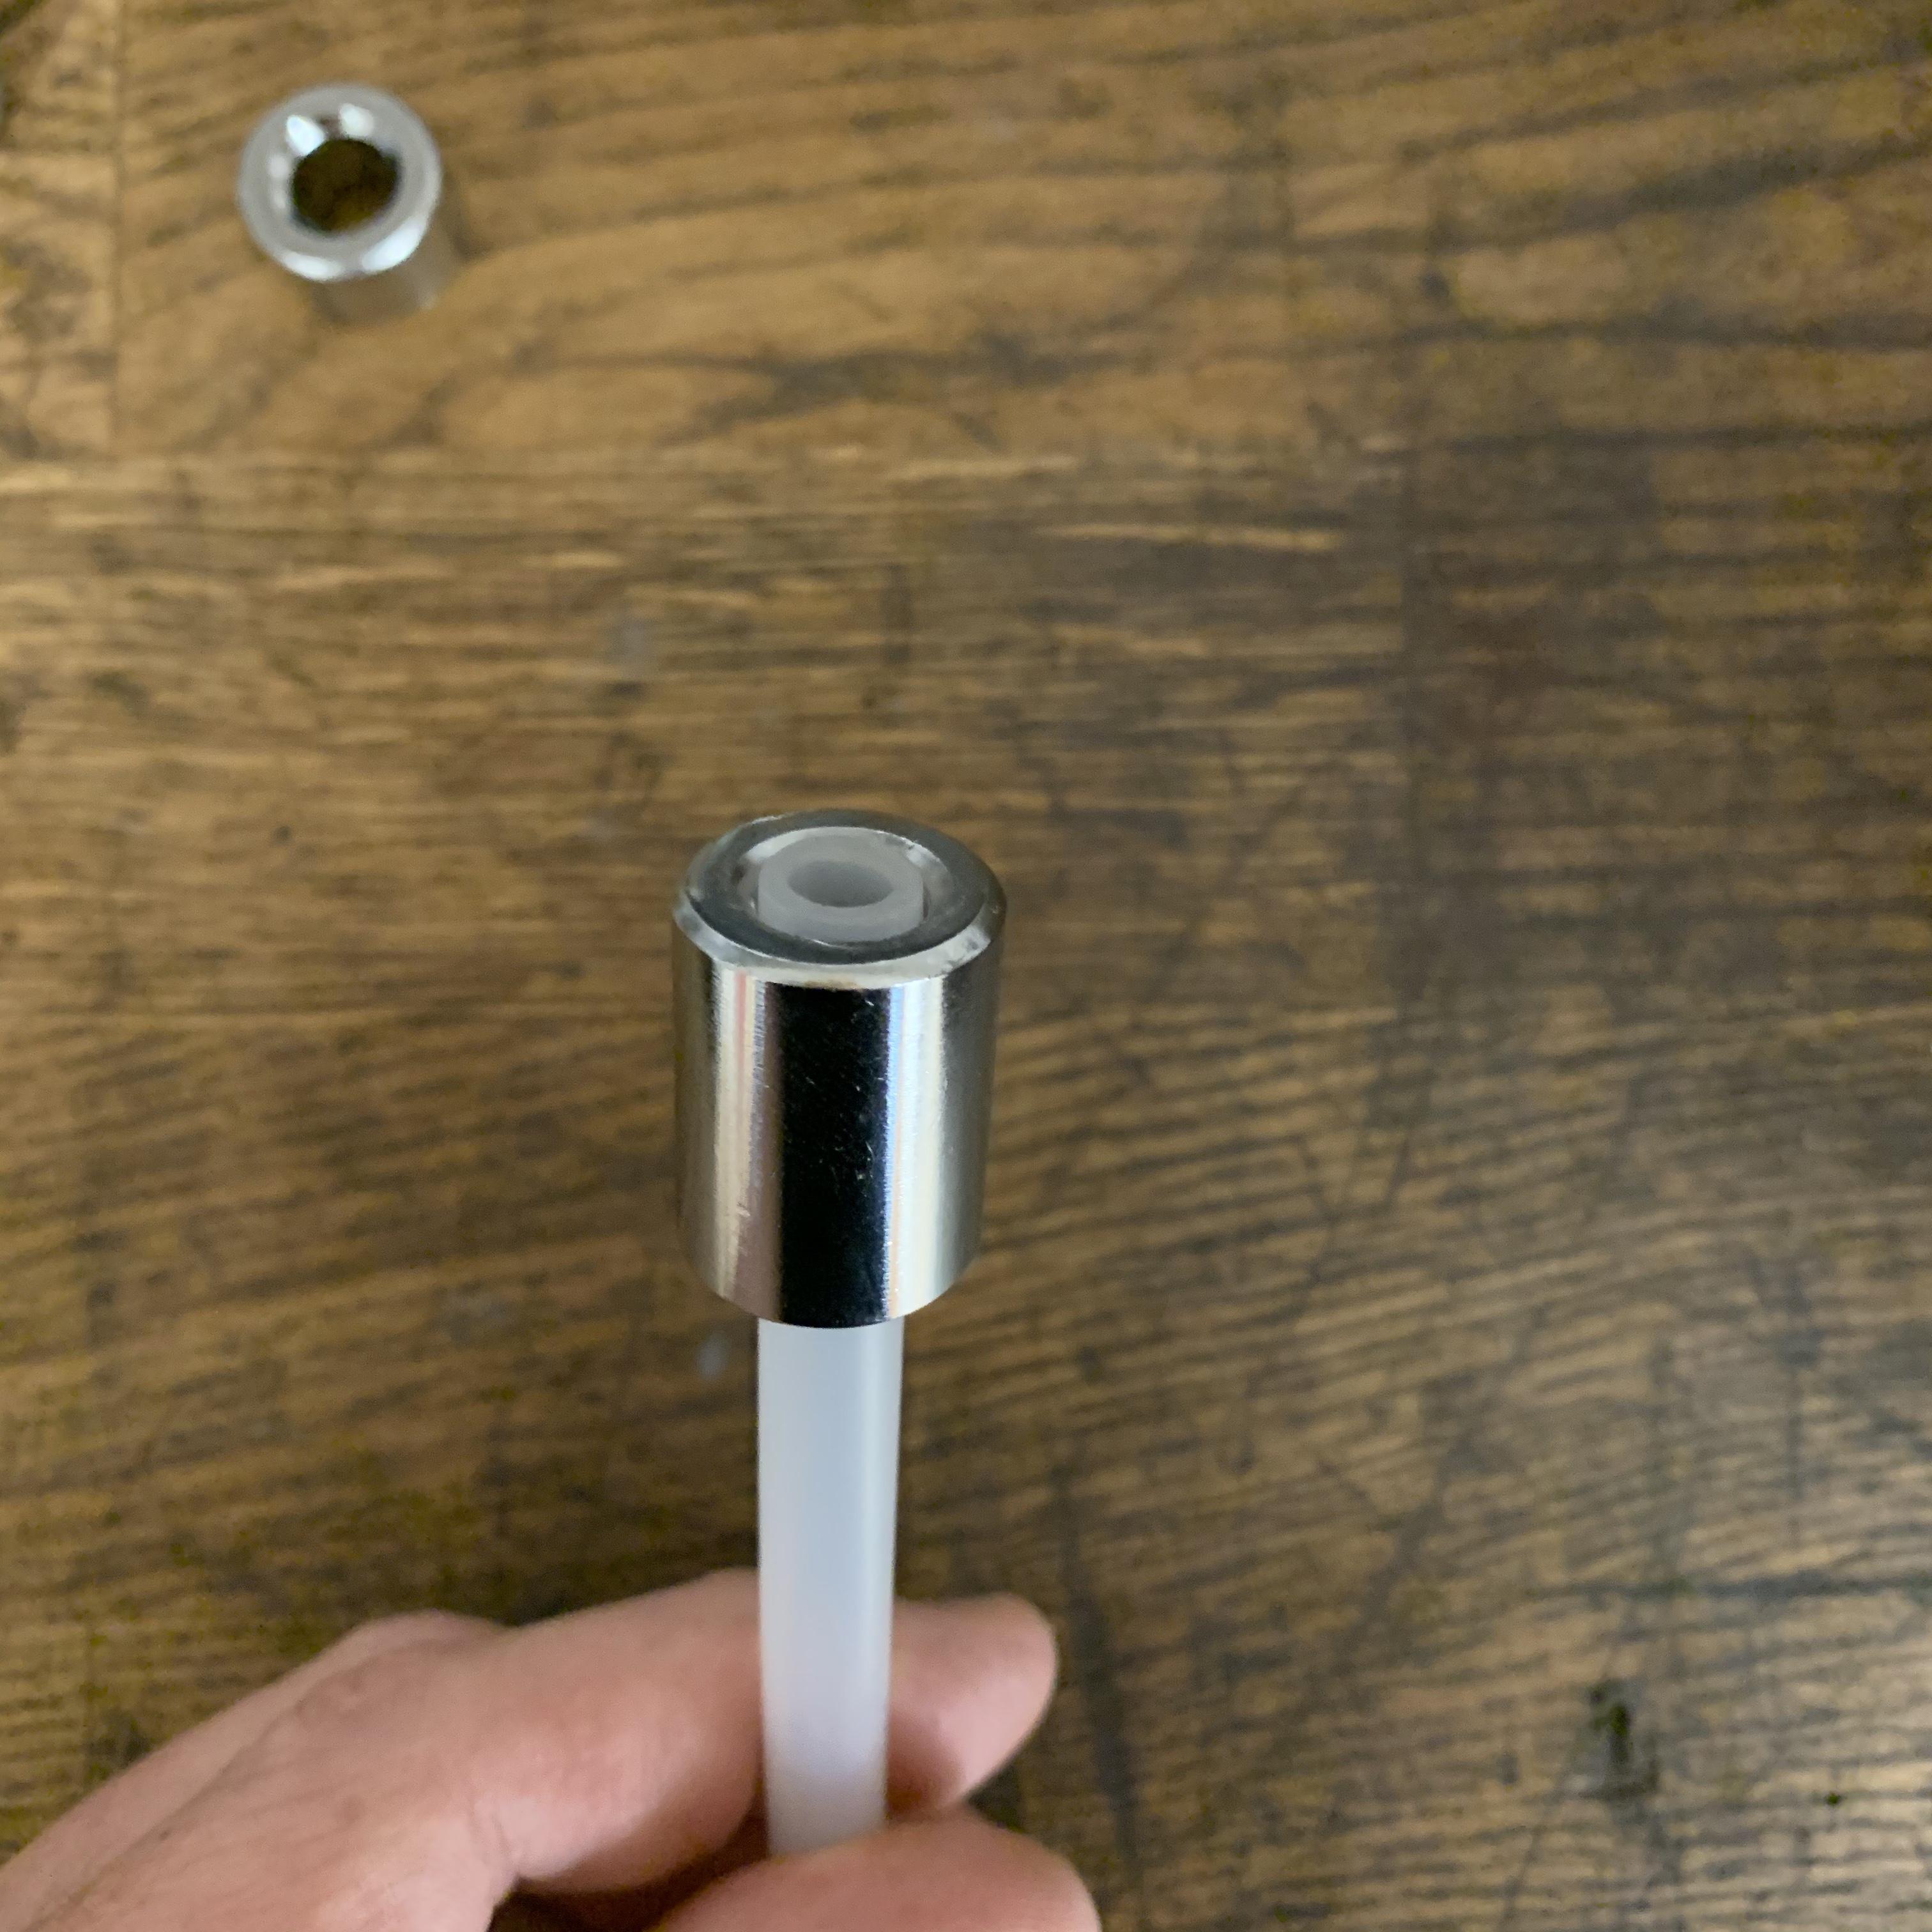
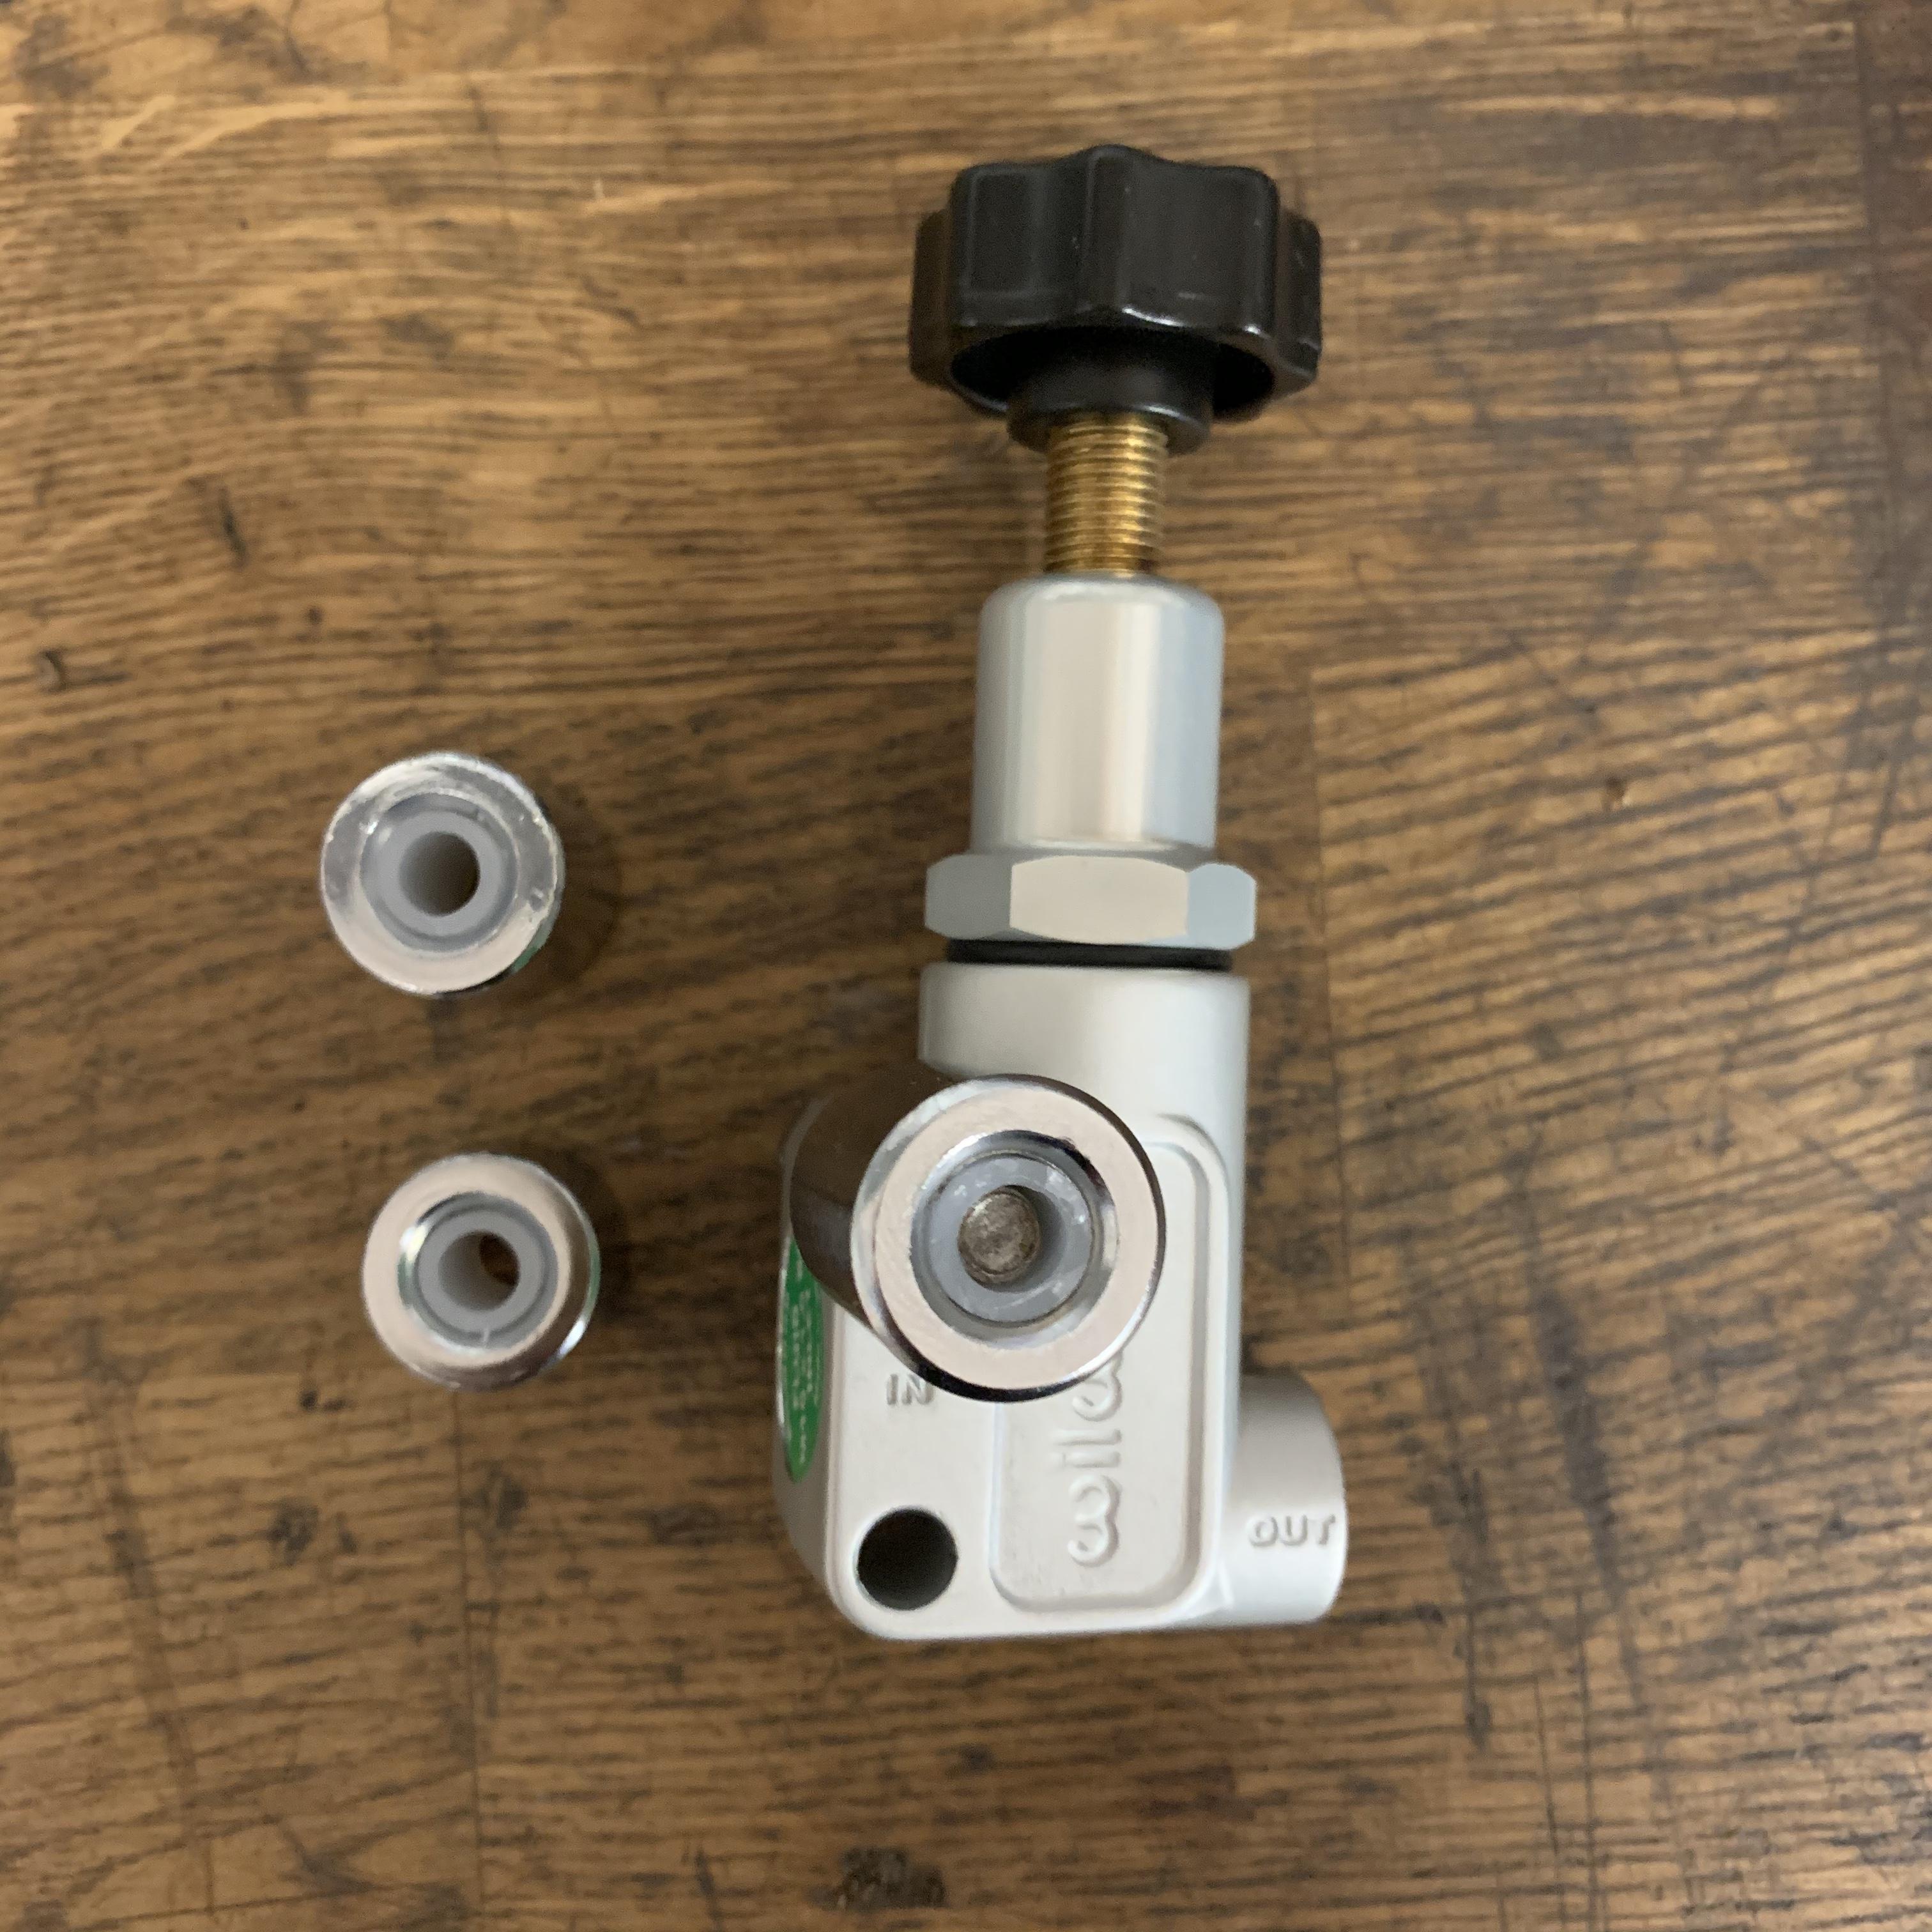
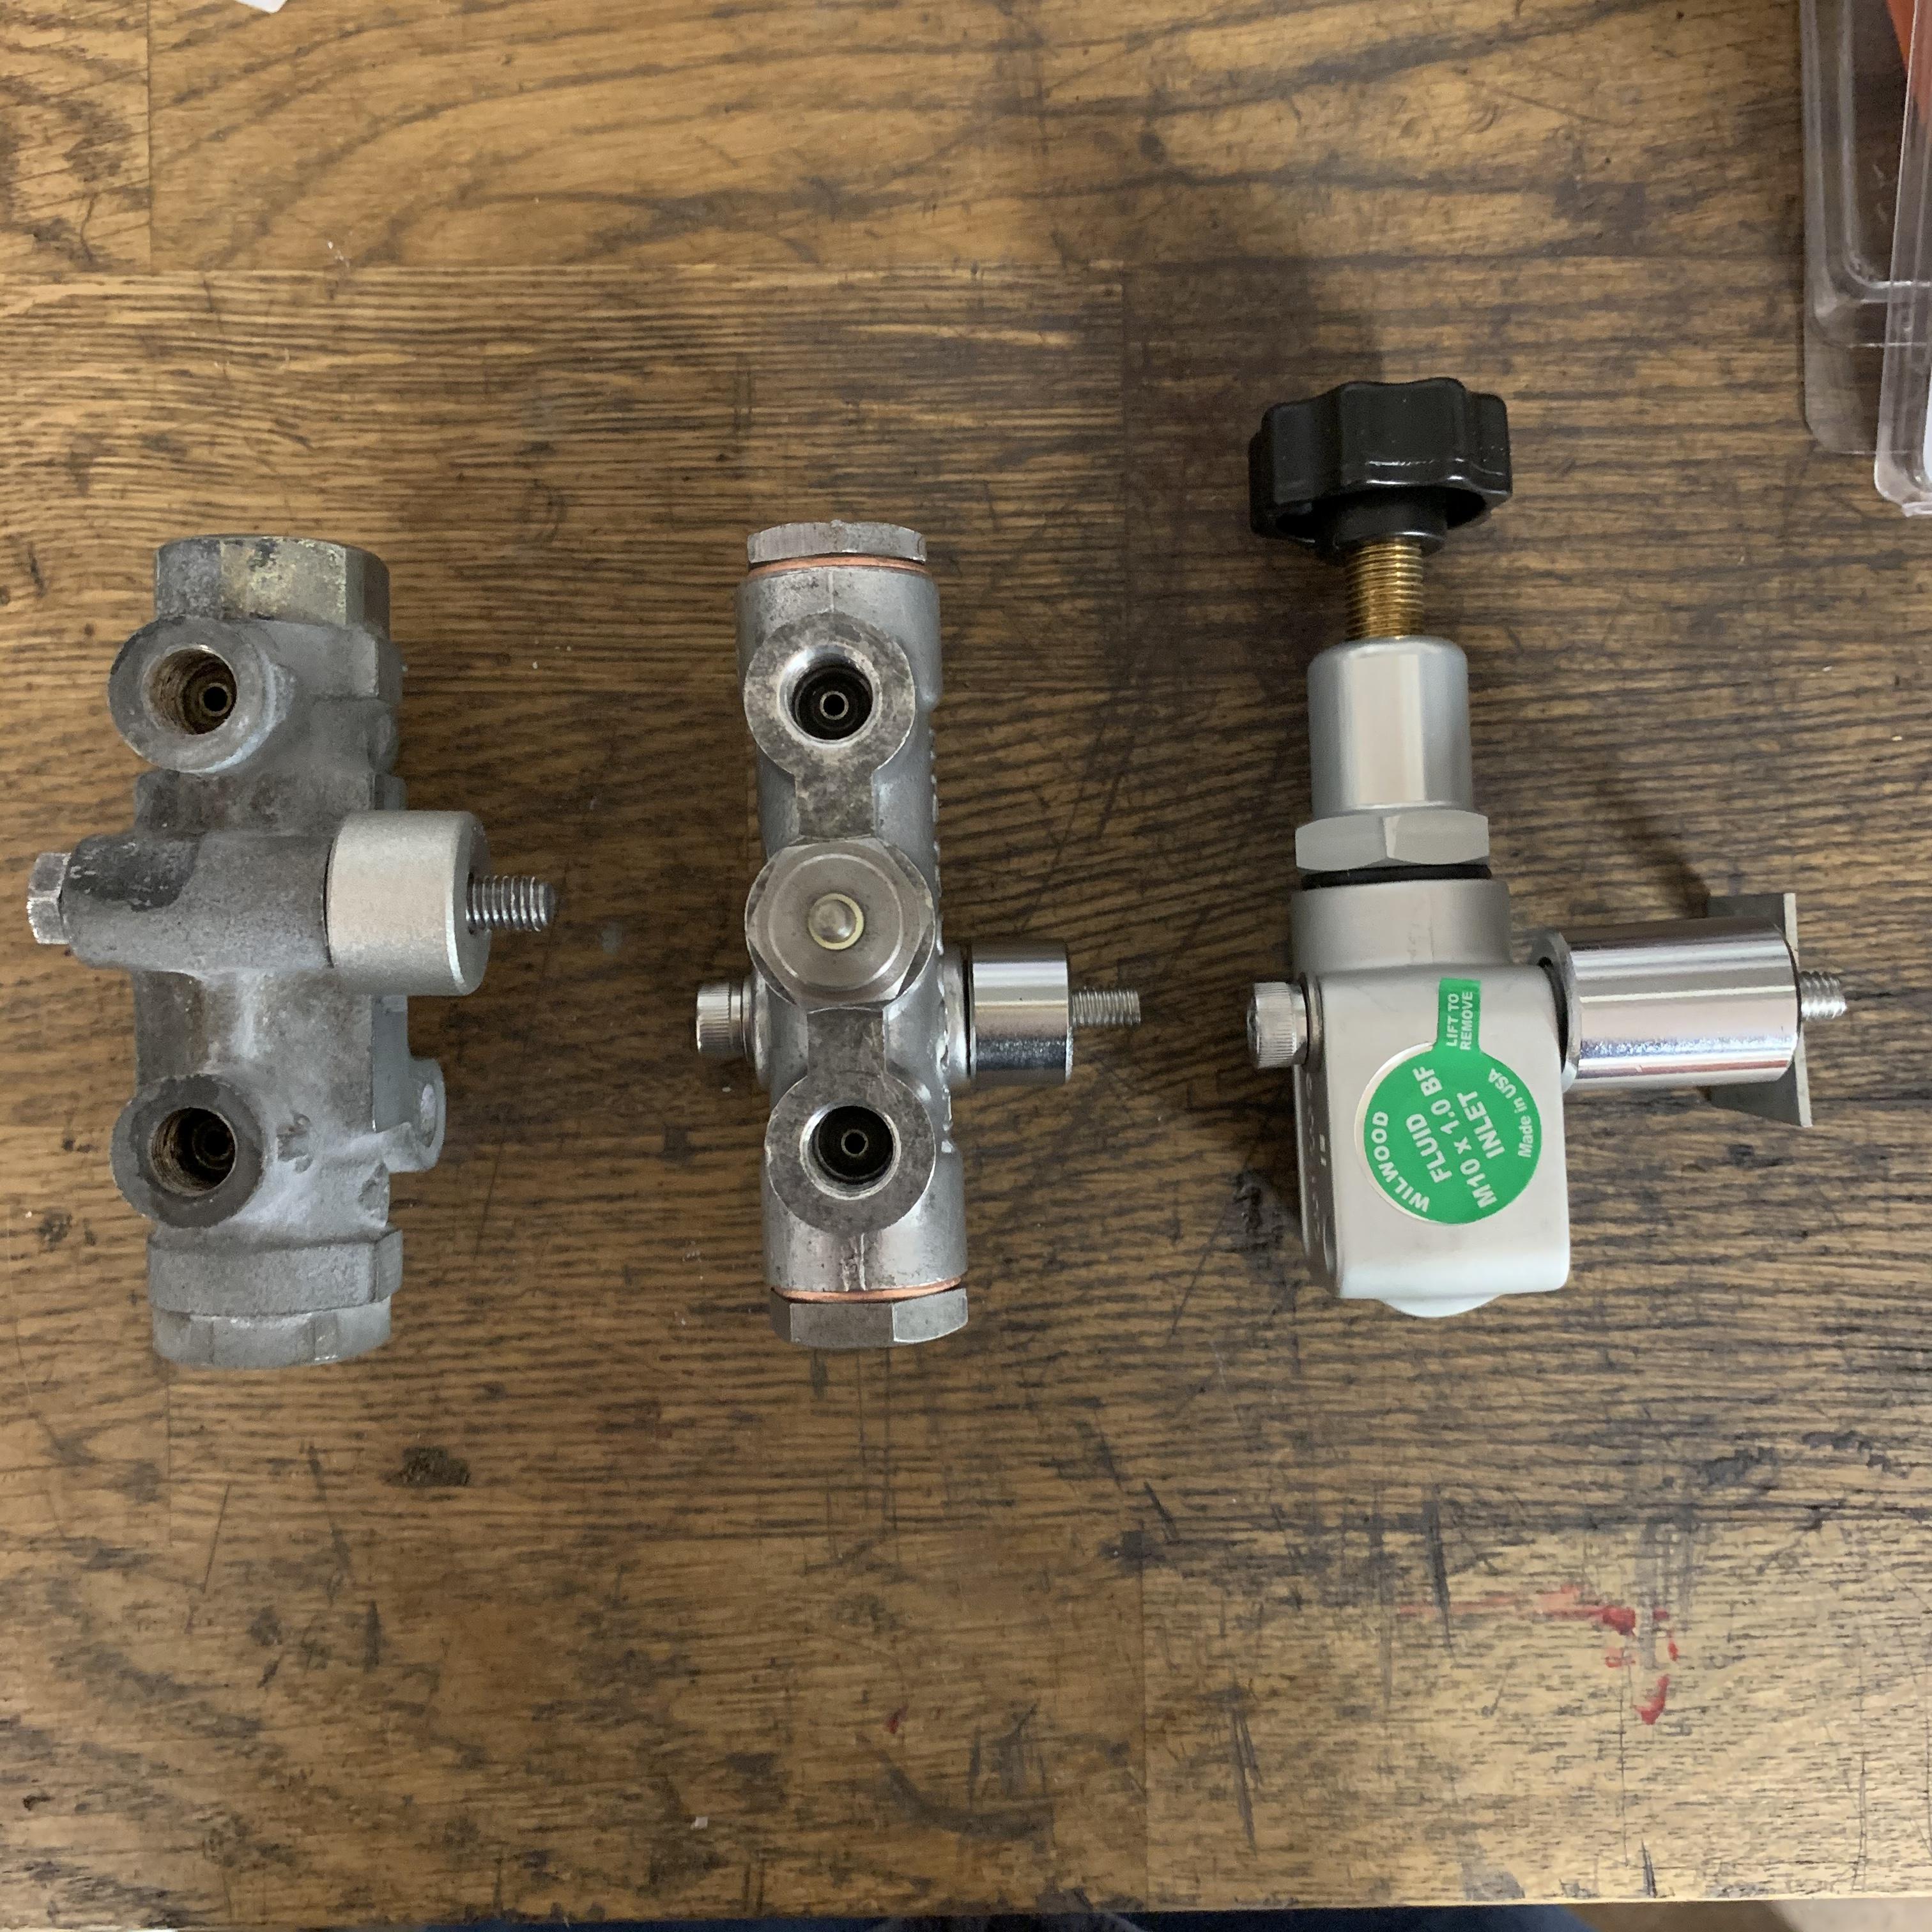
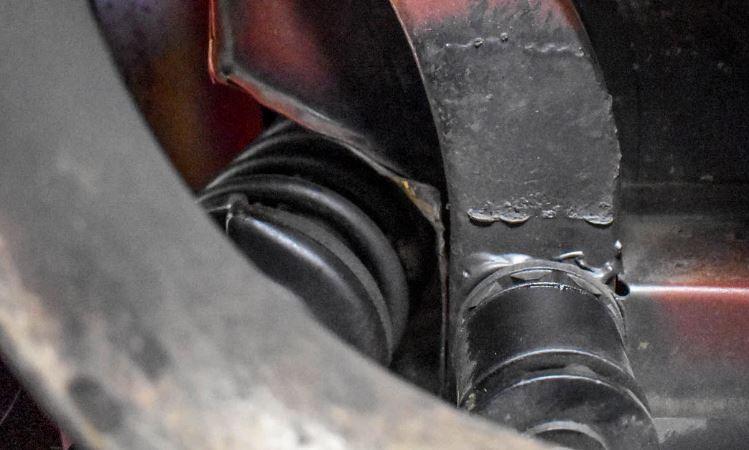
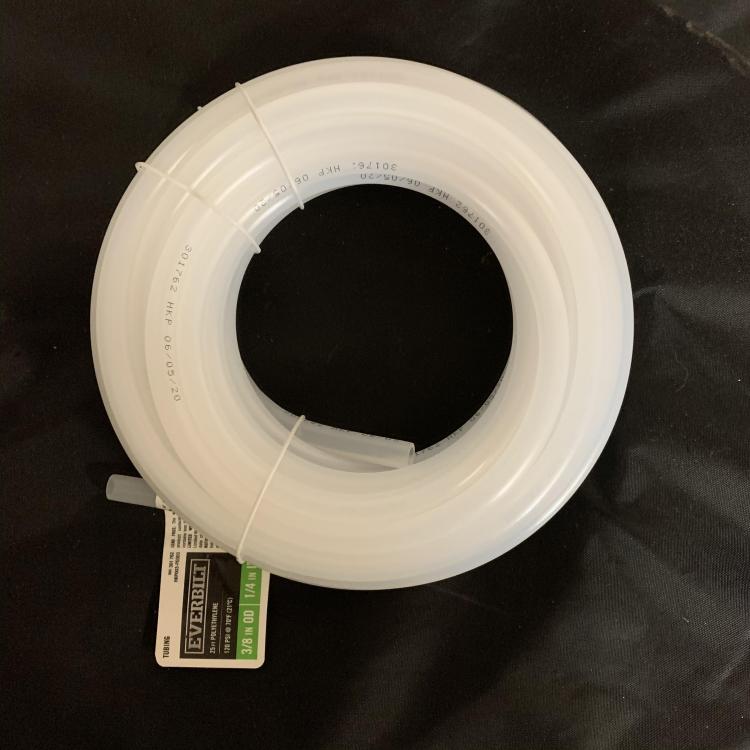
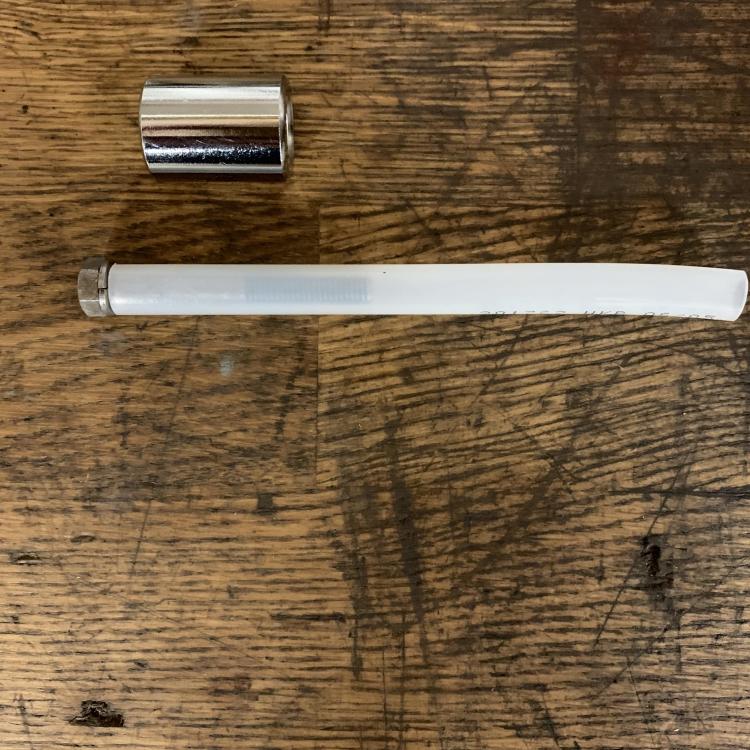
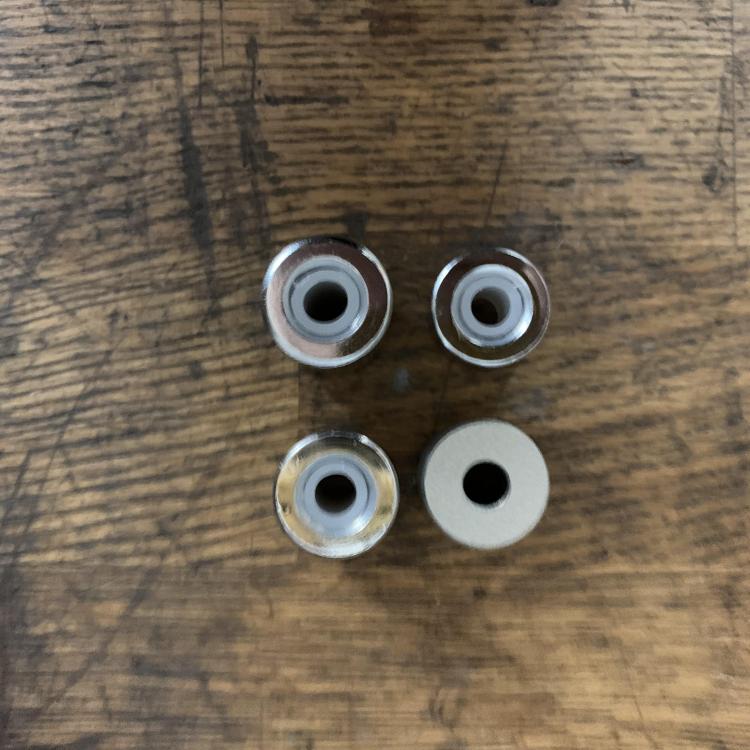
1 pointOkay, it’s been a while because I was stuck on how to mount the proportioning valve, but I think I have figured it out. Home Depot has chrome spacers that are close to the same outside diameter as the Nissan spacers, but in a variety of lengths from 1/4” to 1”. The problem is the inside diameter is 3/8ths and the bolt that needs to go through them is m6. To solve that problem I found some nylon tubing in the plumbing section that is just over 6mm ID and 3/8ths OD that I cut to the length of the spacers to act as a bushing. Sorry that some of those are blurry, but I think you get the idea. That last one shows the m6 stainless bolts I bought to replace the original 50mm hex bolts. Unfortunately, they are threaded the entire length and don’t have a grip, but they match what I am using on the engine and I think the nylon mitigates the need for the grip enough to use them. It’s not like they are holding the engine together. I selected lengths that give me as close to the same number of threads to the original configuration as possible. Trial fitting happens this weekend.


 1 point
 -
1 pointThanks for that! I'm looking forward to this project, however daunting it may be. I'm almost 70 now, but unless I get dementia of some kind, I have a lifetime of using tools and processes to fix and restore things. It's not so much the 'how' with this car, as identifying from piles and boxes what is what and where they go. It no longer an option for me to have a service or somebody else to finish this car....it's just gonna be me and friendly advice where I can find it. When I had a donor car is was soooooo much easier to see how the factory did things, but that ship has sailed. It has Webers on it and the original carbs I think still remain on the original engine....I'd have to look. But the Webers were fine and I was simpatico with them. I even had MSD ignition on it....although he can't find it at present. I'm not committed to authenticity. In fact, when I had sports cars, I was more devoted to the end game than matching numbers. I just think in this instance, it would be easier for me to stay stock because of all the original literature out there. This car was plenty exciting and fun to drive before I blew the rings in the original engine. I'm not gonna drive in rallies, or show the car, or race it....I'm just gonna DRIVE it and I hope, a lot. So right now it's back in mid-MO and I'm in southeastern-WA. The restorer is tasked with coming up with a $ amount to paint the car since it's about 95% prepped. After that, I go get it....but I'm not making the journey in winter.....done that, wore the T shirt. I have no reason to take chances like that anymore and the weather can change in less than a day during a journey like that. So....we're shooting for spring sometime. All I can say is that I hope he gives me a number I can live with. Kevin1 point
-
The foam does have a function. It is closed cell, so it does not absorb water. Also, if you seal the edges after securing it to the panel, no water will get under it at all. It supports the panel over the large unsupported area which keeps if from vibrating or from moving if you happen to press down in that relatively large, flat, unsupported area. Also, put the new foam piece (or reuse old) in place before doing final body work on that panel. It changes the final position of that flat area.1 point
-
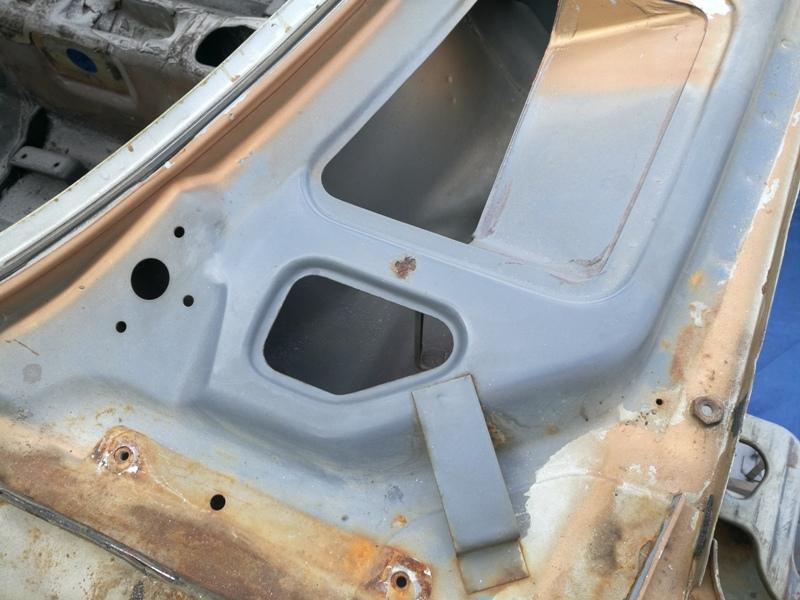
I am soon going to get the 240z I have been working on for a couple of years painted. It was originally 901 silver. My plan is to have the painter paint it like the factory did it. And so, I'd like to confirm how the factory did it, if possible. Why? While doing the body work for the last many months, I have concluded that the fasteners that secure some of the body panels in place change the final shape of the panel. A good example of this is the front fender. There are two bolts that secure the bottom of the fender panel to the unibody. Tightening those bolts down causes a slight distortion in the panel. If you get the bottom of the fender perfect while off of the car, and then bolt it to the car, you will have more body work to do to get the bottom of the fender perfect again. Additionally, I have found that aligning body panels is a task that takes several attempts before I achieve success. I don't want to risk chipping paint while handling freshly painted doors, fenders, etc., and attempting to align, tighten bolts with wrenches, etc. Therefore, my preference is to achieve correct alignment and fit while the car is in primer instead. So, I have these observations based on close examination of my car (production 6/1971) to share: It appears to me that everything on the car originally painted in 901 silver at the Nissan factory was securely fastened in place when the paint was applied with two exceptions: the rear hatch and the front cowl panel. I deduce this primarily from the following: Hatch panel: There was no silver paint on the 4 large, phillips screws that secure the hatch panel to the hinges. Additionally, it appears that the hinges were bolted in place on the body with the rubber hinge "seals" in place before primer and paint were applied. I suspect that the seals, hatch hinges, alignment shims and hatch panel were installed at the factory and correct alignment was achieved. And once properly aligned, the rear hatch panel was taken off by removing the 4 large phillips head screws that attach the panel to the hinges. Then, the hatch panel was painted while off of the car. This would greatly ease the job of applying paint in the top recess area of the hatch opening which appeared to have very good coverage on my car. Cowl panel: For the cowl panel, I note that the 5 phillips pan head screws that secure it to the car were not 901 silver. They were bare plated screws. And of course the black, plastic "receivers" which seal the body at the back of the cowl panel were not installed when the car was sprayed at the factory. Interestingly, the dark grey primer that was sprayed over the entire car just prior to paint, was not covered in silver in the cowl area just below the cowl panel. Examining the silver paint "overspray" from the factory in the cowl area (through the slats in the cowl panel), I believe that the cowl panel was loosely placed on the car body in its proper location, but without the plastic receivers or pan head screws to hold it in place, at the time the car was sprayed with color. The rest of the panels: Other than those two panels, all indications (to me) are that the rest of the panels which were painted 901 silver were all bolted in place when sprayed with grey primer, and the 901 silver paint that followed. All of the fasteners on the remaining panels were undisturbed after paint. Also, I specifically noted a lack of coverage of both the grey primer and silver paint in the area from the top to the bottom of the front, inside surface (frame) of the doors. In this same general area, I found a few silver paint runs on the doors and the hinges (bottom edge of the hinge springs especially). Other than the hood "alignment blocks", which are painted black, and were clearly installed after the car was painted, the hardware which attaches the front fenders to the body was finished with either in the grey primer (the fasteners accessed under the cowl panel) or finished with the 901 silver, indicating the fenders were bolted in place at the time that the car was sprayed with grey primer and then silver. The back edges of the headlight housings (those on my car are fiberglass) were bare, white gel coat - they were not grey or silver, indicating they were bolted in place on the front of the fender at the time that the car was sprayed with grey primer and then silver. The hardware securing the front left, right, and center valences had 901 silver on them indicating they were bolted in place when color was sprayed. The hardware securing the front left and right inspection panels was 901 silver indicating they were bolted in place when color was sprayed. The hardware securing the tool doors in the interior of the car was 901 silver indicating they were bolted in place when color was sprayed. Here is a picture that reveals a lot when you look closely. Note that the car had been repainted once in gold prior to my purchase of it. You can see that the silver is visible "under the gold" in various places where the gold has departed, such as just forward of where the front edge of the cowl panel seats against the unibody. Note where the grey primer is, and where it is not, such as the bottom left corner in the pic, which is where the fender bolts to the unibody. I'd love to hear from others on this topic. Please share what you have found either consistent with my observations or otherwise! Thanks!
 1 point