Leaderboard


 Subscriber


Popular Content
Showing content with the highest reputation on 06/07/2019 in all areas
-
6 pointsIreland; Roads. Incredible. Go. PS. Buy life insurance first... oh yeah, The scenery's ok too.
 6 points
 -
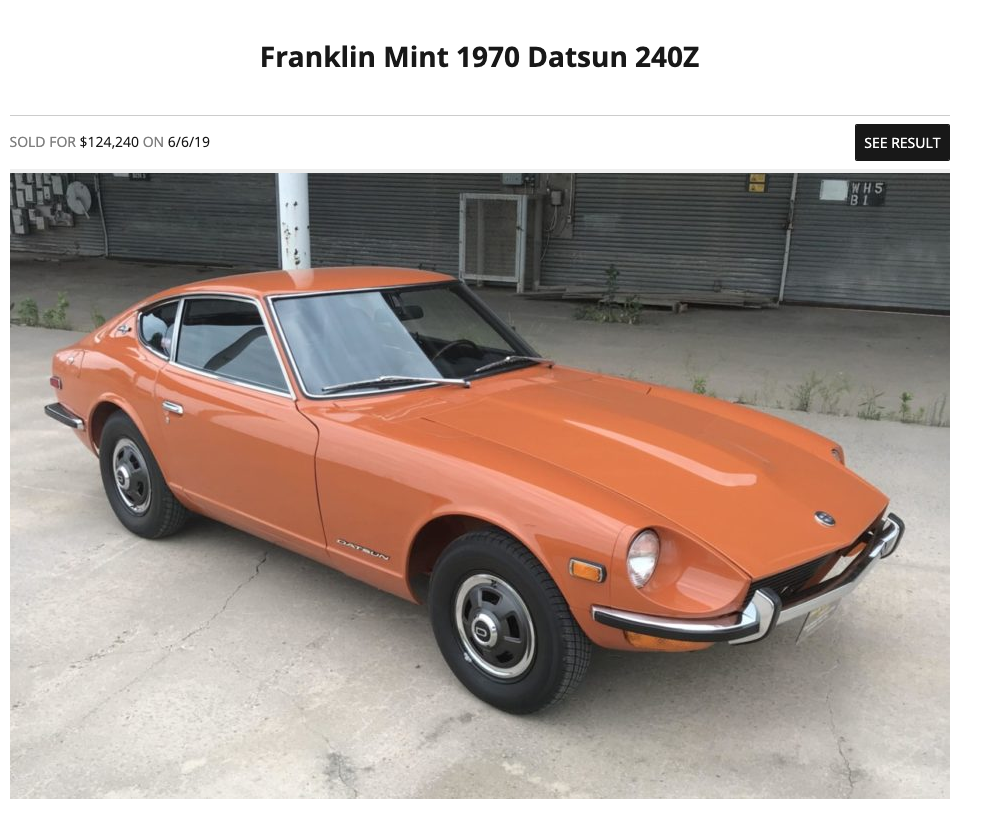
rturbo 930, Well, it IS a big deal. Its a Gold Medallion car, the car used for Mr. K's induction into the Hall of Fame, restored by the guy who wrote the book, detailed by a leading authority, and campaigned heavily. It will forever be the Franklin Mint car and will draw a crowd at car shows. Its called provenance. I personally share your thoughts, but the provenance thing is ruling (like the idea of value for a car Steve McQueen once drove).6 points
-
5 pointsNO straight roads. All perfect pavement. Could never drive every road. Too many, every one is tight narrow twisty, bounded by rock or bush RIGHT there at your mirrors and rims. Lots of on-coming traffic, including trucks, makes for continuous butt clinching, challenge filled driving. Glorious! Only downside is the passenger's constant screaming and pleading for mercy.5 points
-
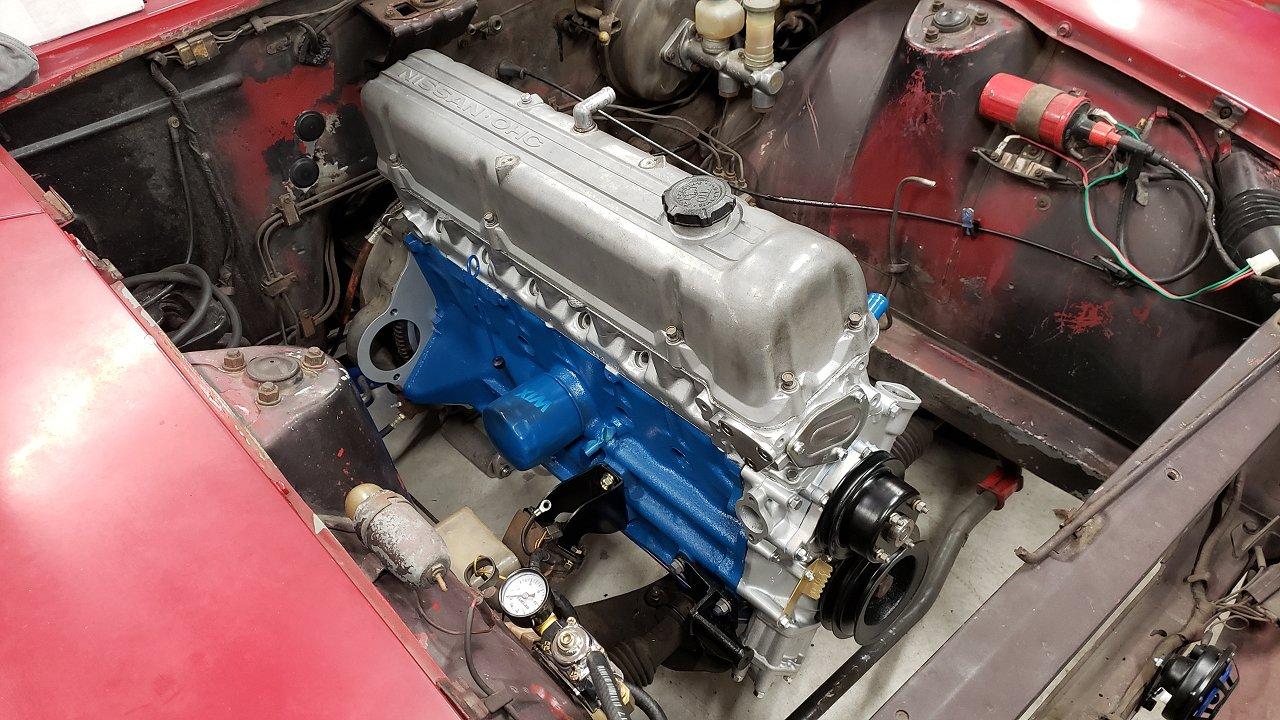
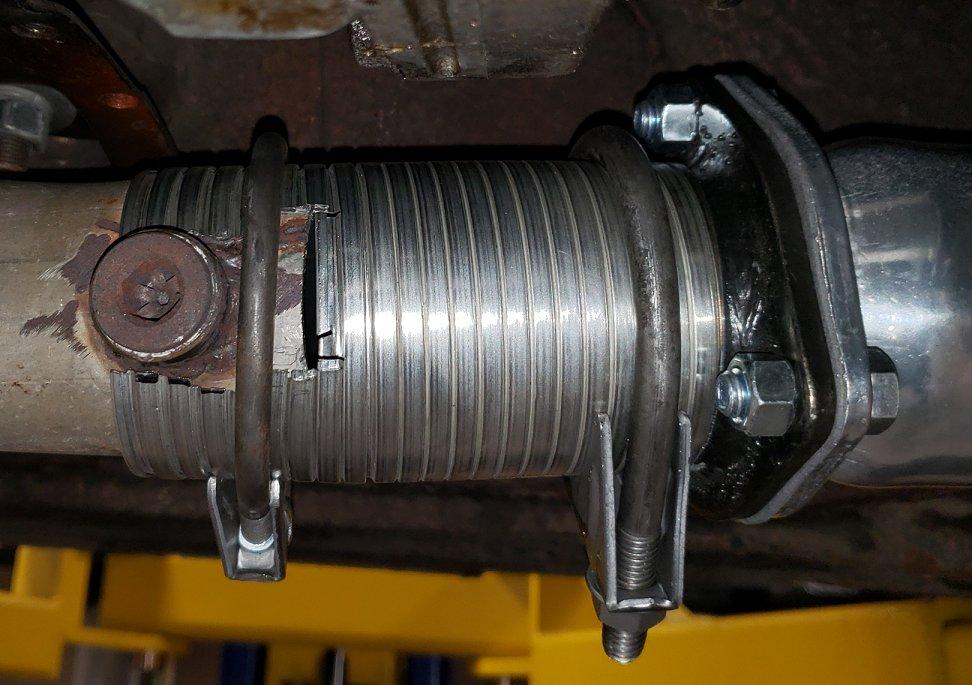
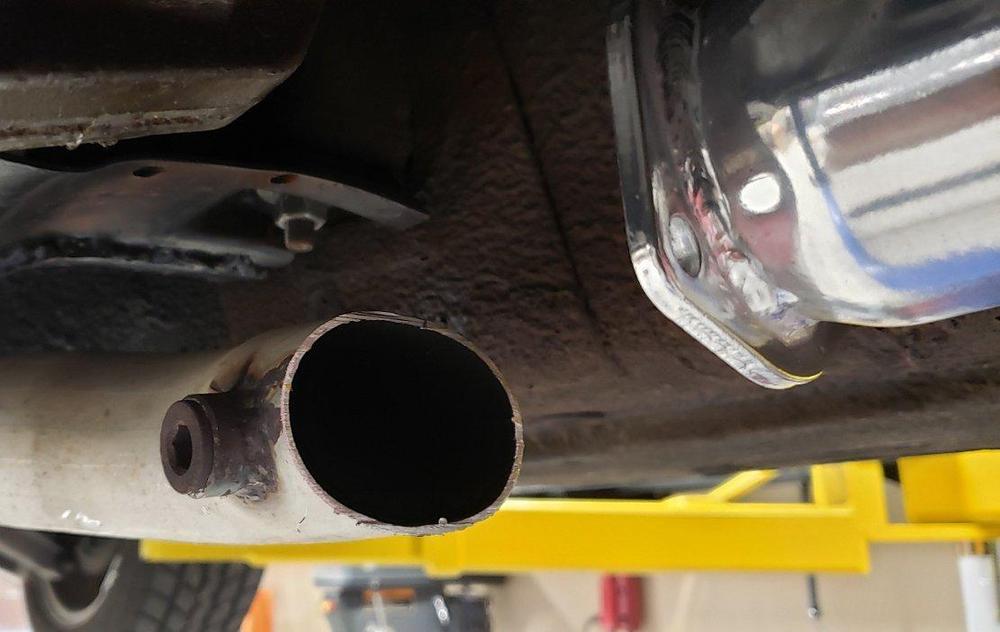
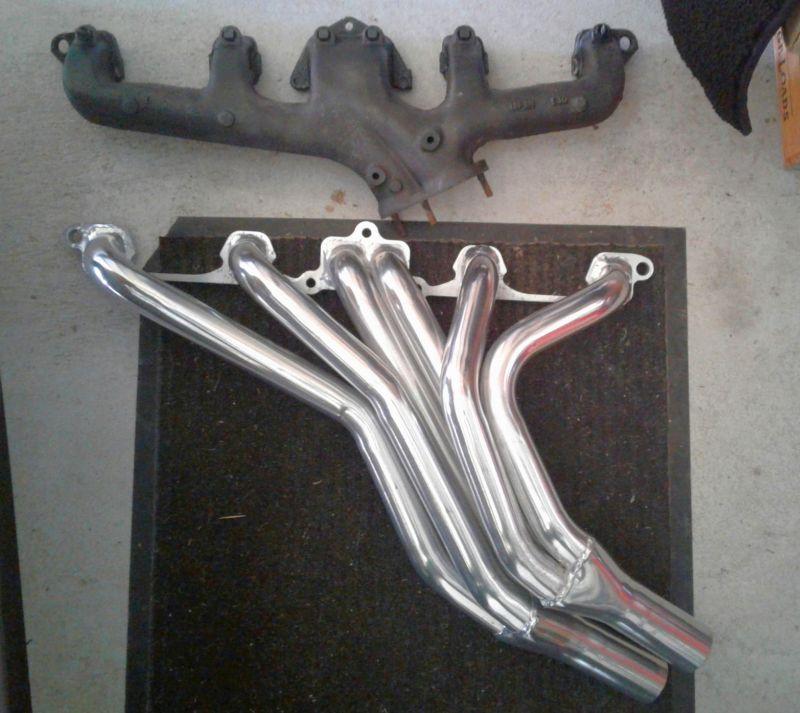
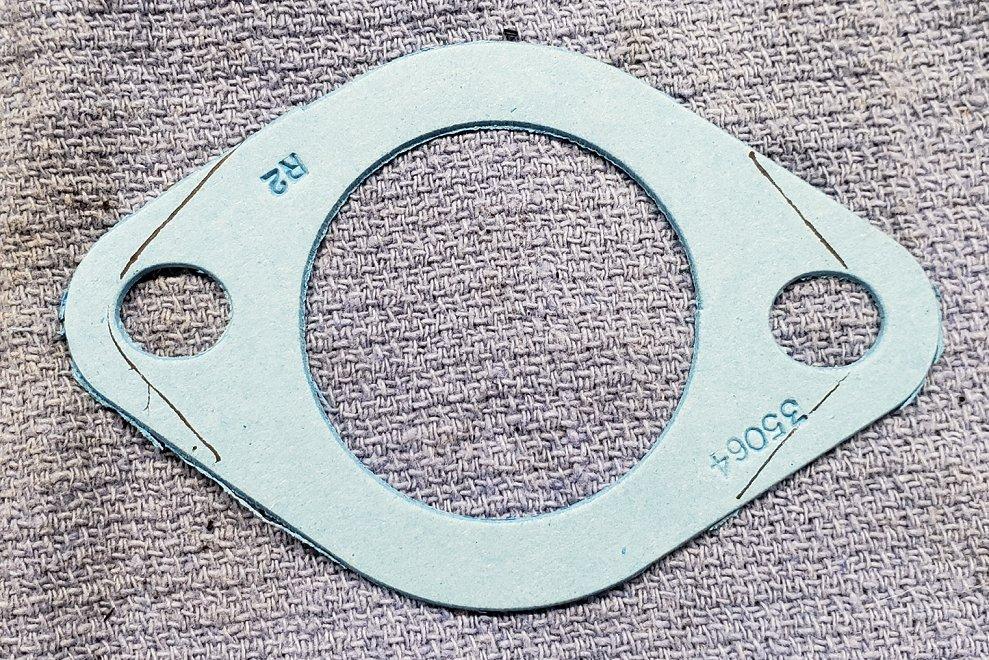
Knowing I needed to do something about the super loud exhaust, I set about a temporary solution to connect the new header to the existing exhaust pipe. This is so I could finish filling it with coolant, purge any air, and be in a position to drive it to the exhaust shop for something more permanent. I bought some 2.5 inch flexible exhaust tubing at the parts store and trimmed it to fit the oval shaped opening and around the O2 bung. Once I was close I closed the hole with some HVAC metal tape. Not leak proof by any means but sure quietened things down some. My wife helped me put the hood back on and I got the cooling system filled. With so much accomplished I decided a quick jaunt down the street was in order. The clutch action felt really good, brakes worked, the engine ran and rev'd great through the first three gears. I was honestly shocked as I expected coughing and sputtering from the carbs until they were tuned. After almost a year, it is back! All in all, I am super happy to have it back together and running again. I hope to get it to the exhaust shop next weekend or earlier and start tuning the carbs some. Stay tuned!
 5 points
 -
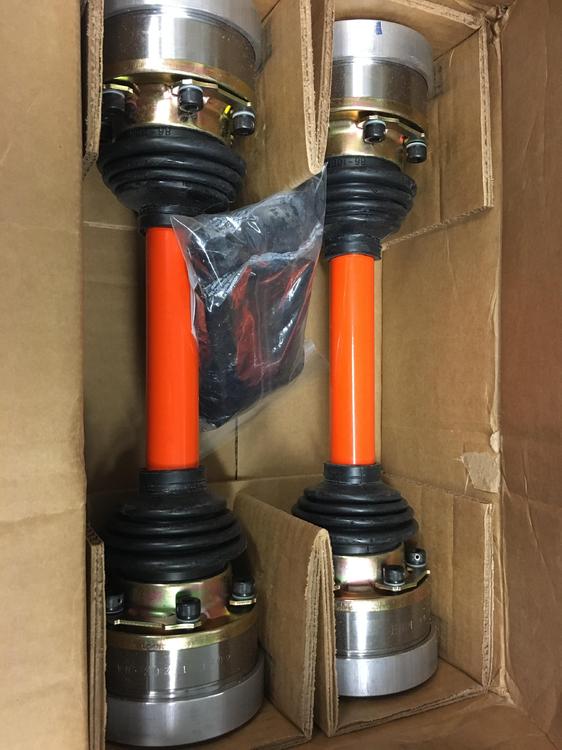
4 pointsWell here they are.......... Doesn’t look too difficult. I’ll take some pics of the installation.....maybe the Stroker motor won’t hurt these babies!
 4 points
 -
I am not sure it is a "complete random blip". Will be interesting to watch future high value cars. By the time I get my car done and running it will be too valuable to drive!4 points
-
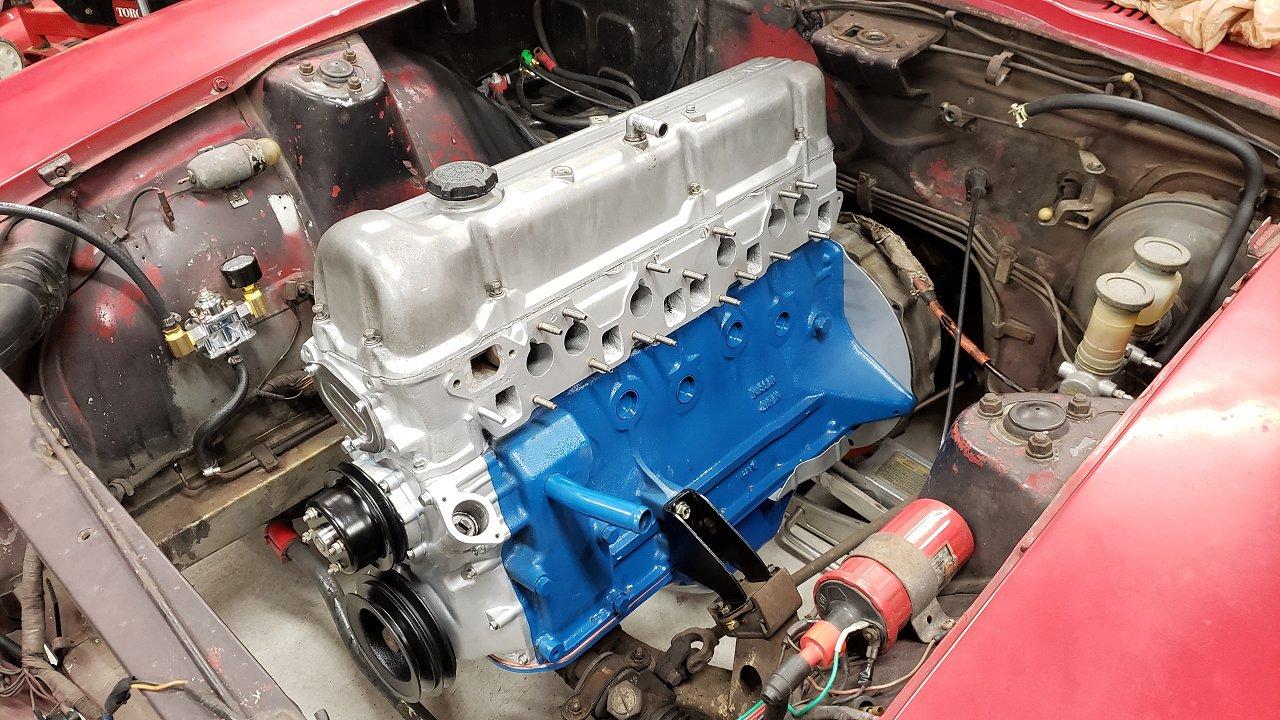
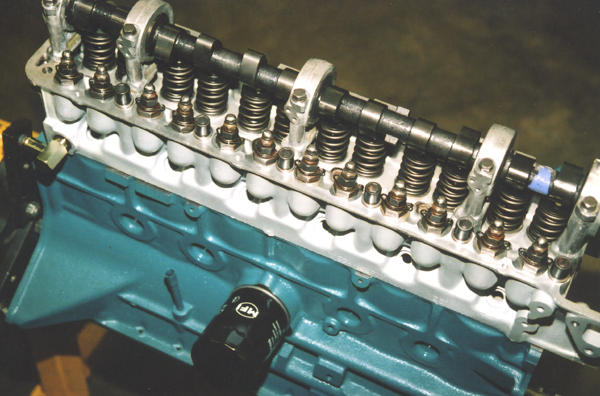
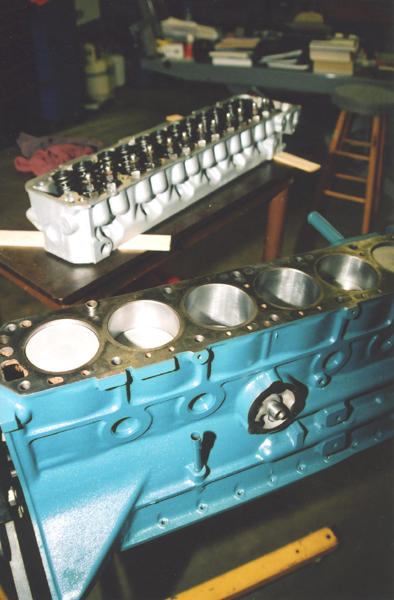
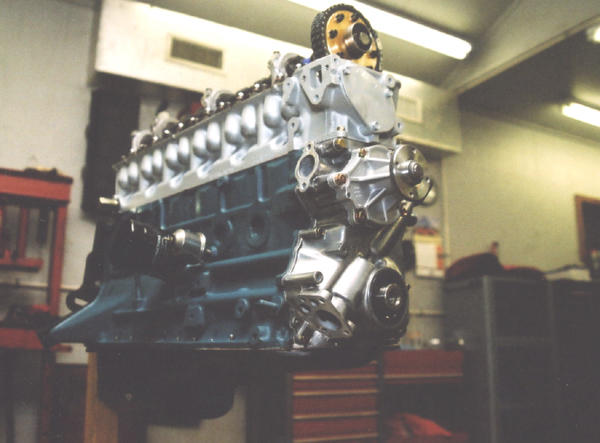
4 pointsYep, that's the place. It was called Revivations at the time. While all this body stuff was going on, I took the engine up to a machine shop in Tampa run by a guy named Tom and his son, Tommy. A real dirt track racers place, these guys were good machinists. The engine was cleaned and checked. The cylinders spec'd to standard bore. The crank shaft, fly wheel, and front pully were balanced together and Tom told me that I would notice the difference. The engine was way out of balance. The connecting rods were weight balanced and the original pistons were reinstalled with new wrist pins. Now, in spite of what you might think of my stockafied approach to what is correct and what is not, I'm not a huge fan of the "stock" HLS30 / 240Z. Great starting point, but... The engine was assembled (new freeze plugs) with a Schneider (mild) can and an Arizona Z adjustable timing sprocket. The combustion chambers in the head were cc'd and equaled. A competition front pulley was installed along with a competition oil pump. The early engines have an odd assortment of head bolt lengths and I was fortunate enough to find them new from Nissan. I'll bet they are all gone by now. Blue paint came from Banzai.
 4 points
 -
As people on this forum have said for years, "Save your receipts, your owners manual, your window sticker, your original bill of sale, anything that documents the history of the car or makes it a little more special than the rest." as it will add to the luster when it comes time to sell. That all worked for the BaT seller. I don't have much from my Z other than the original bill of sale. But, for my Porsche 914-6, I have documents from the original, and subsequent, owners as well as an accordion folder full of restoration receipts. All good to have for the next owner. With the Avanti, I have a copy of the original factory production order as well as the six page final assembly line inspection checklist. Best of all, I have hand written letters from the designer, Raymond Loewy, noting the Avanti's VIN. Provenance should probably be spelled Provenan$e. Dennis3 points
-
Technically, this is just one of a number of 'Blips' in the Z car world. While this is double what might be considered by Hagerty a 'Concours' level car, it's rarity is what makes it valuable. This pretty much goes with anything in a free market economy. Other Z car 'Blips' in the $100K range would be any of the gold medallion cars, the VZ cars, Very low S/N cars and low mileage original unrestored cars. These cars are going off in the $100K range RIGHT NOW, they are just not as publicized as this one. Yes, this is a minority of the Z car population, but it is reality. Yes, the average price of a very nice condition restored Z is going to be in the $30-60K range, but the cream of the crop are commanding top dollar and truly worth what the market will pay. Unfortunately, most of us are not in that market.3 points
-
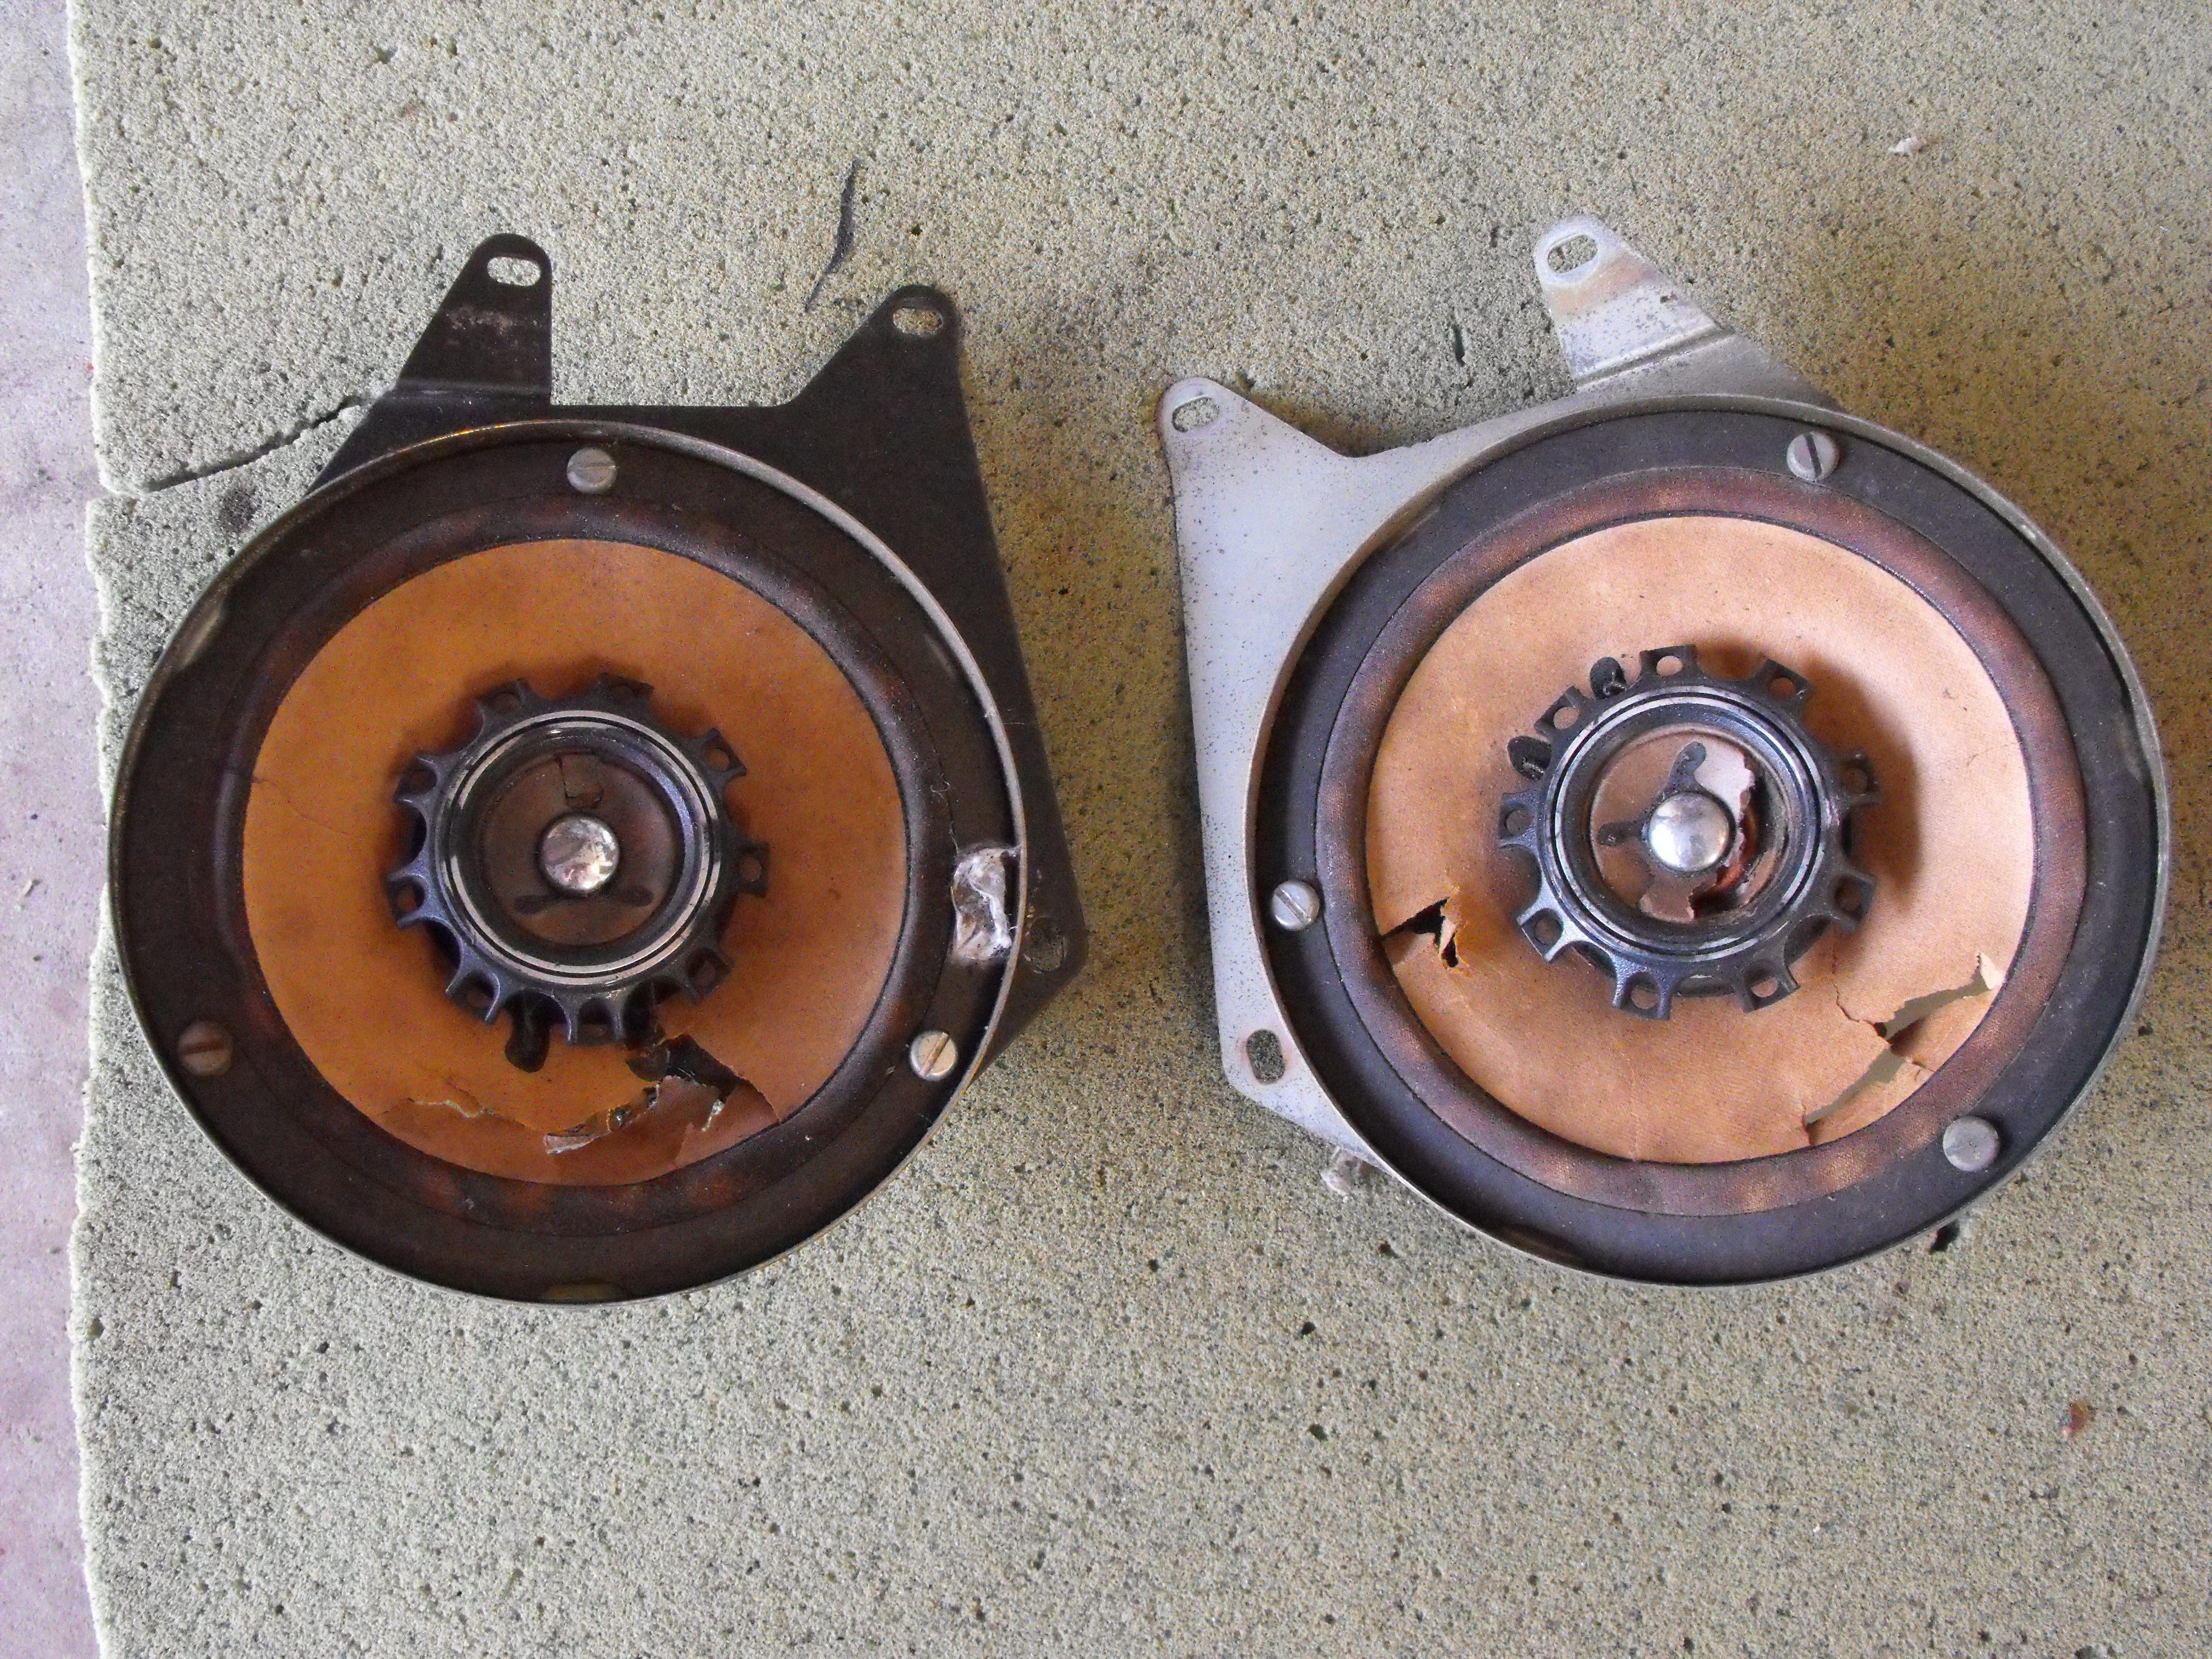
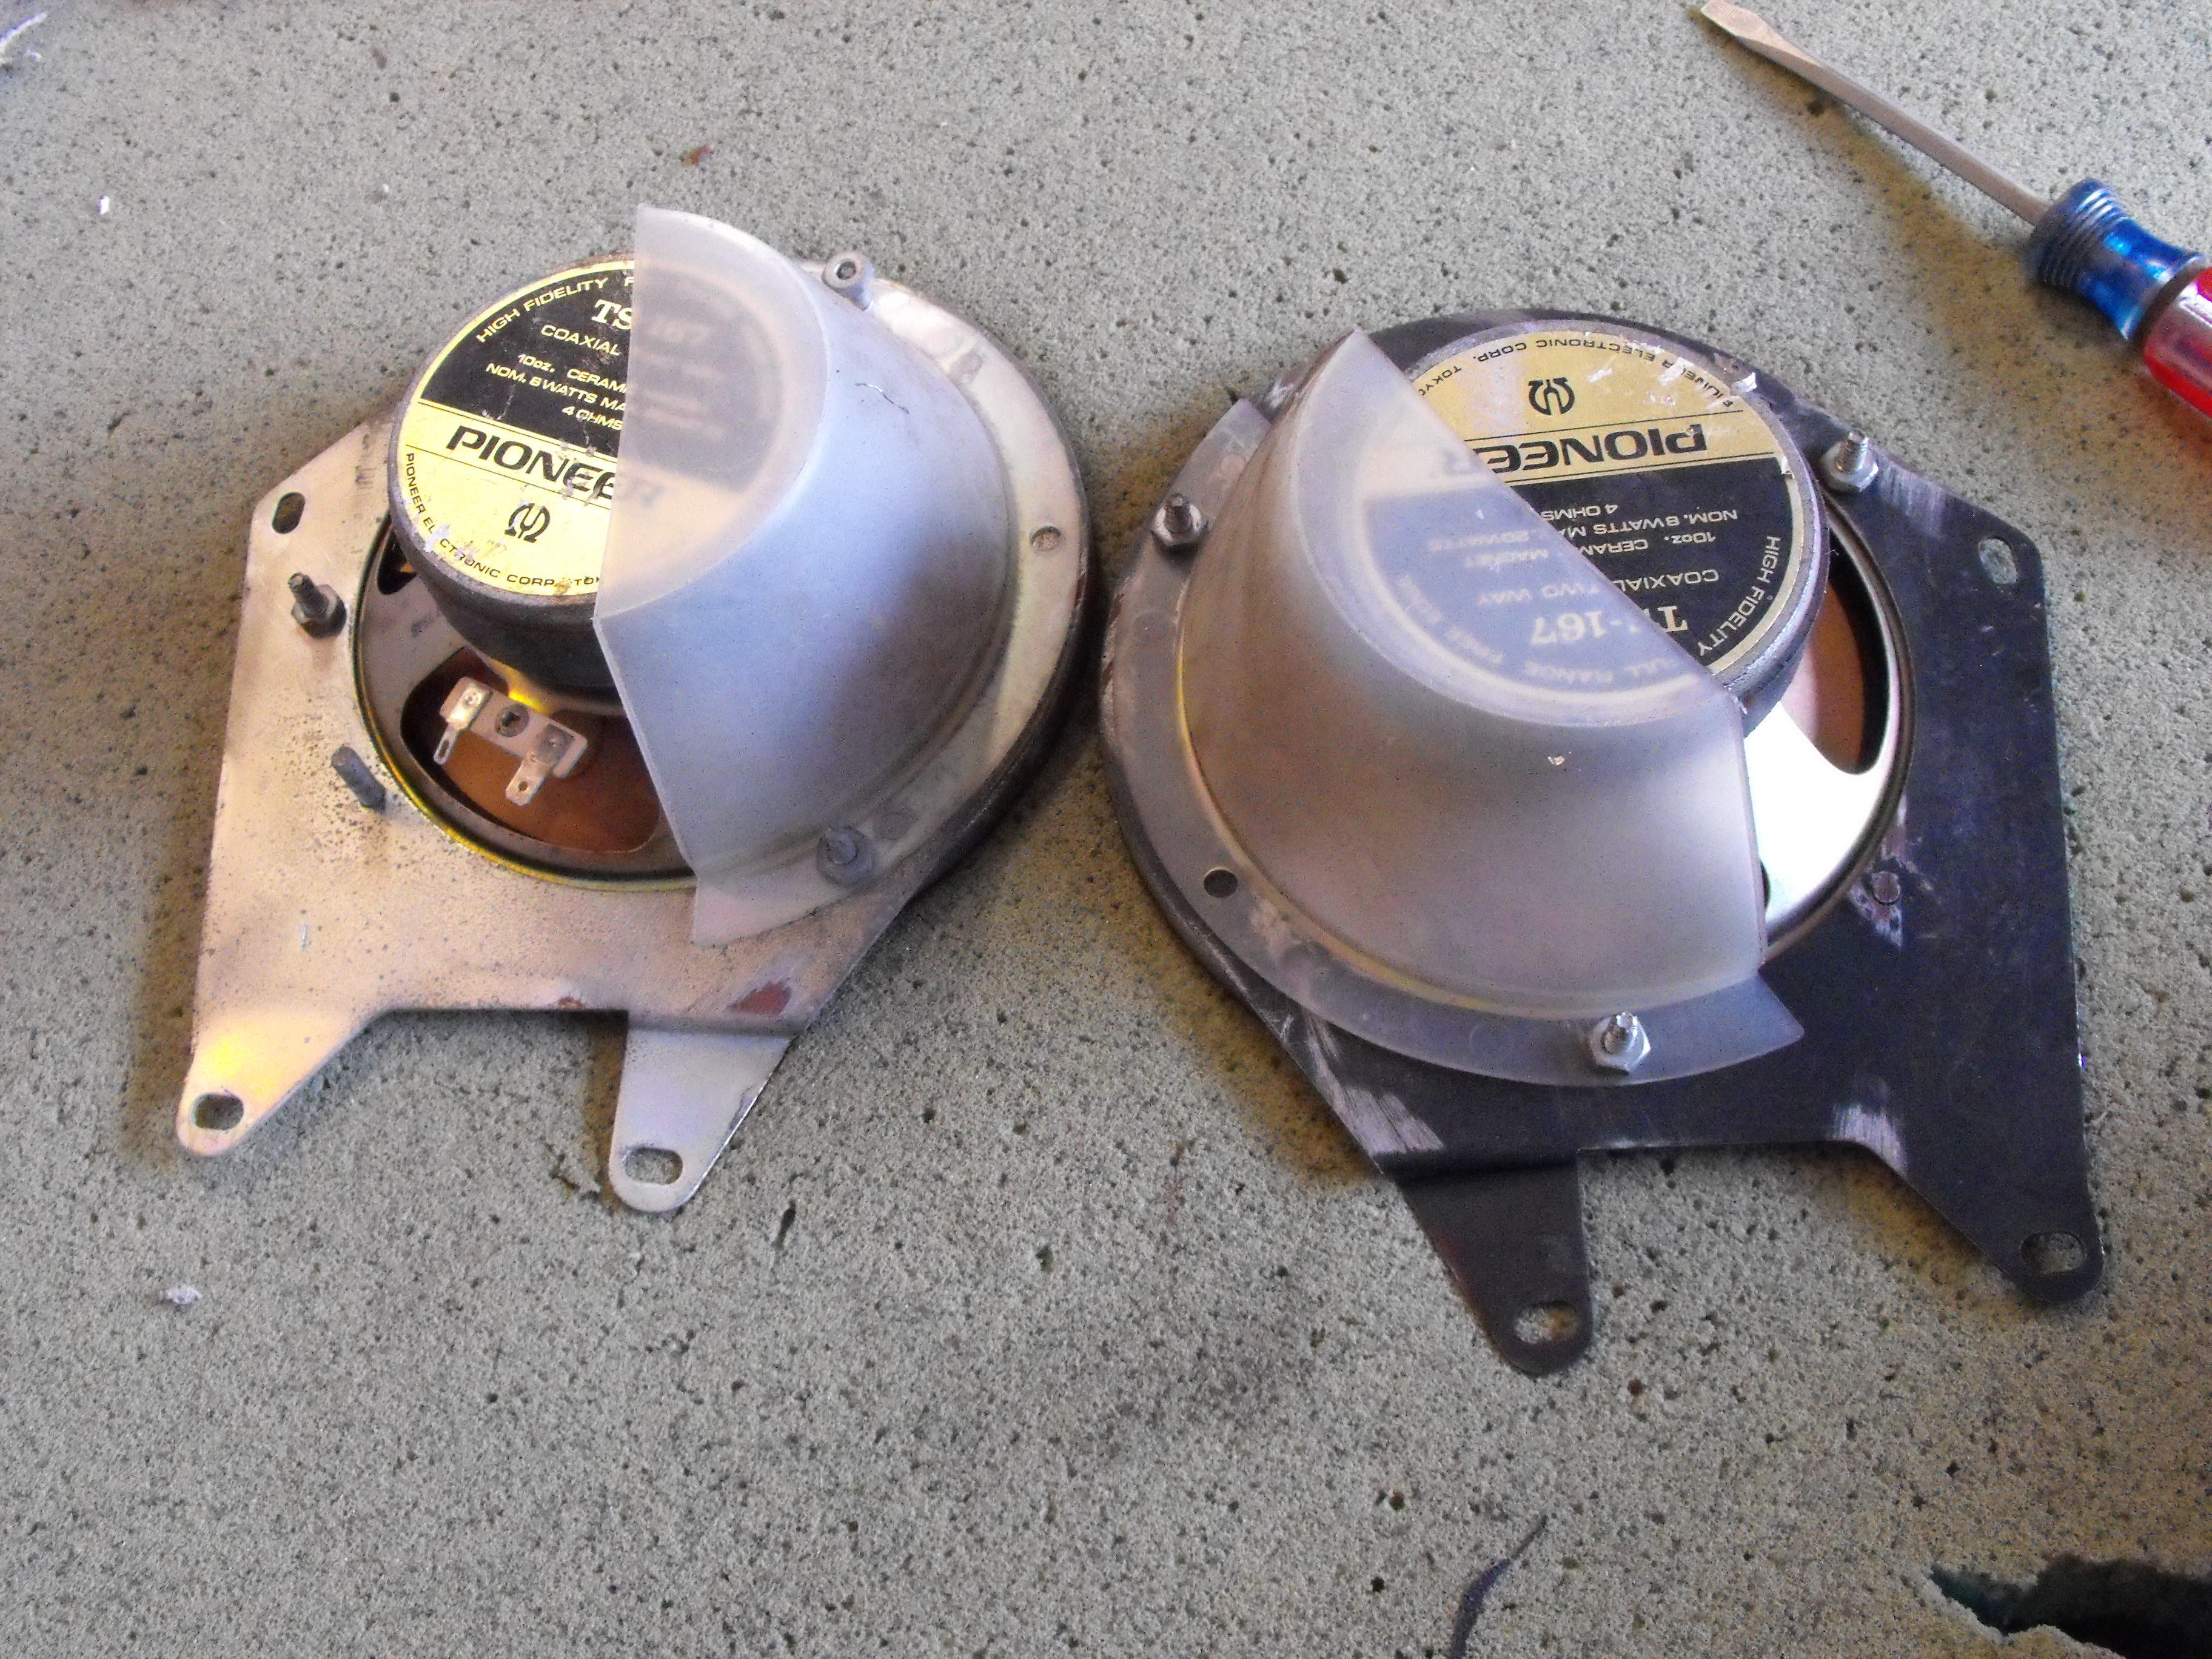
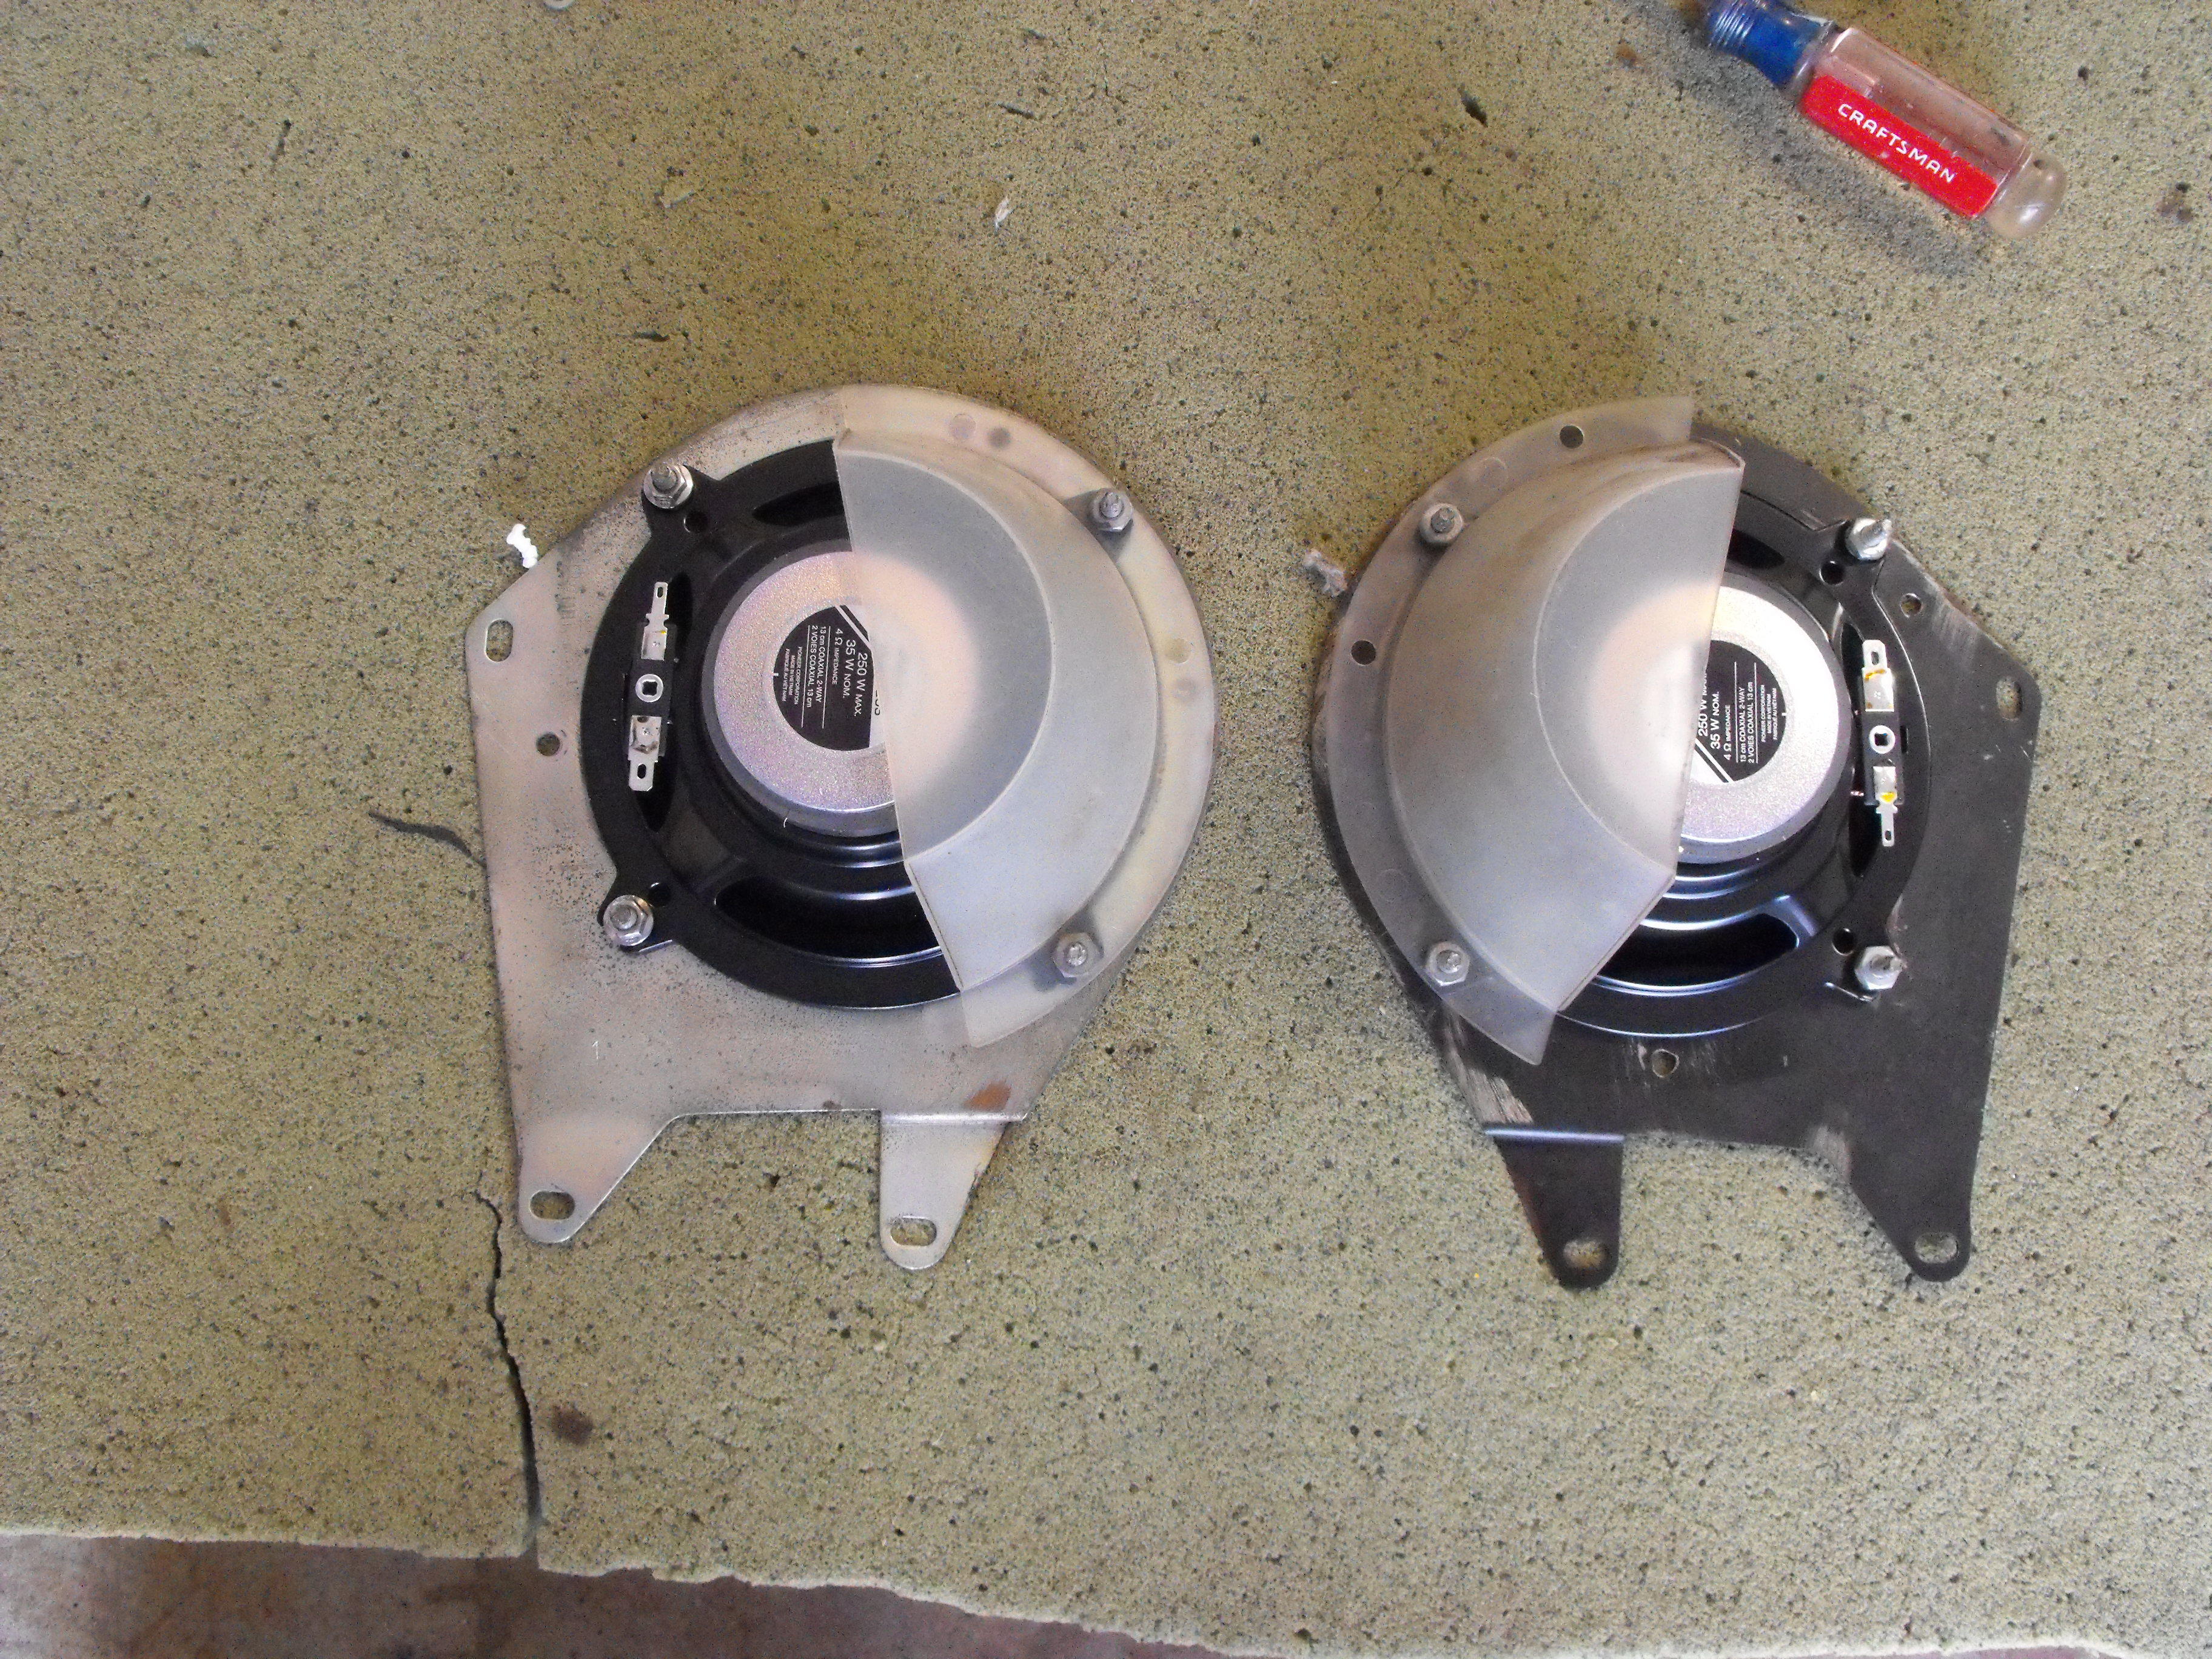
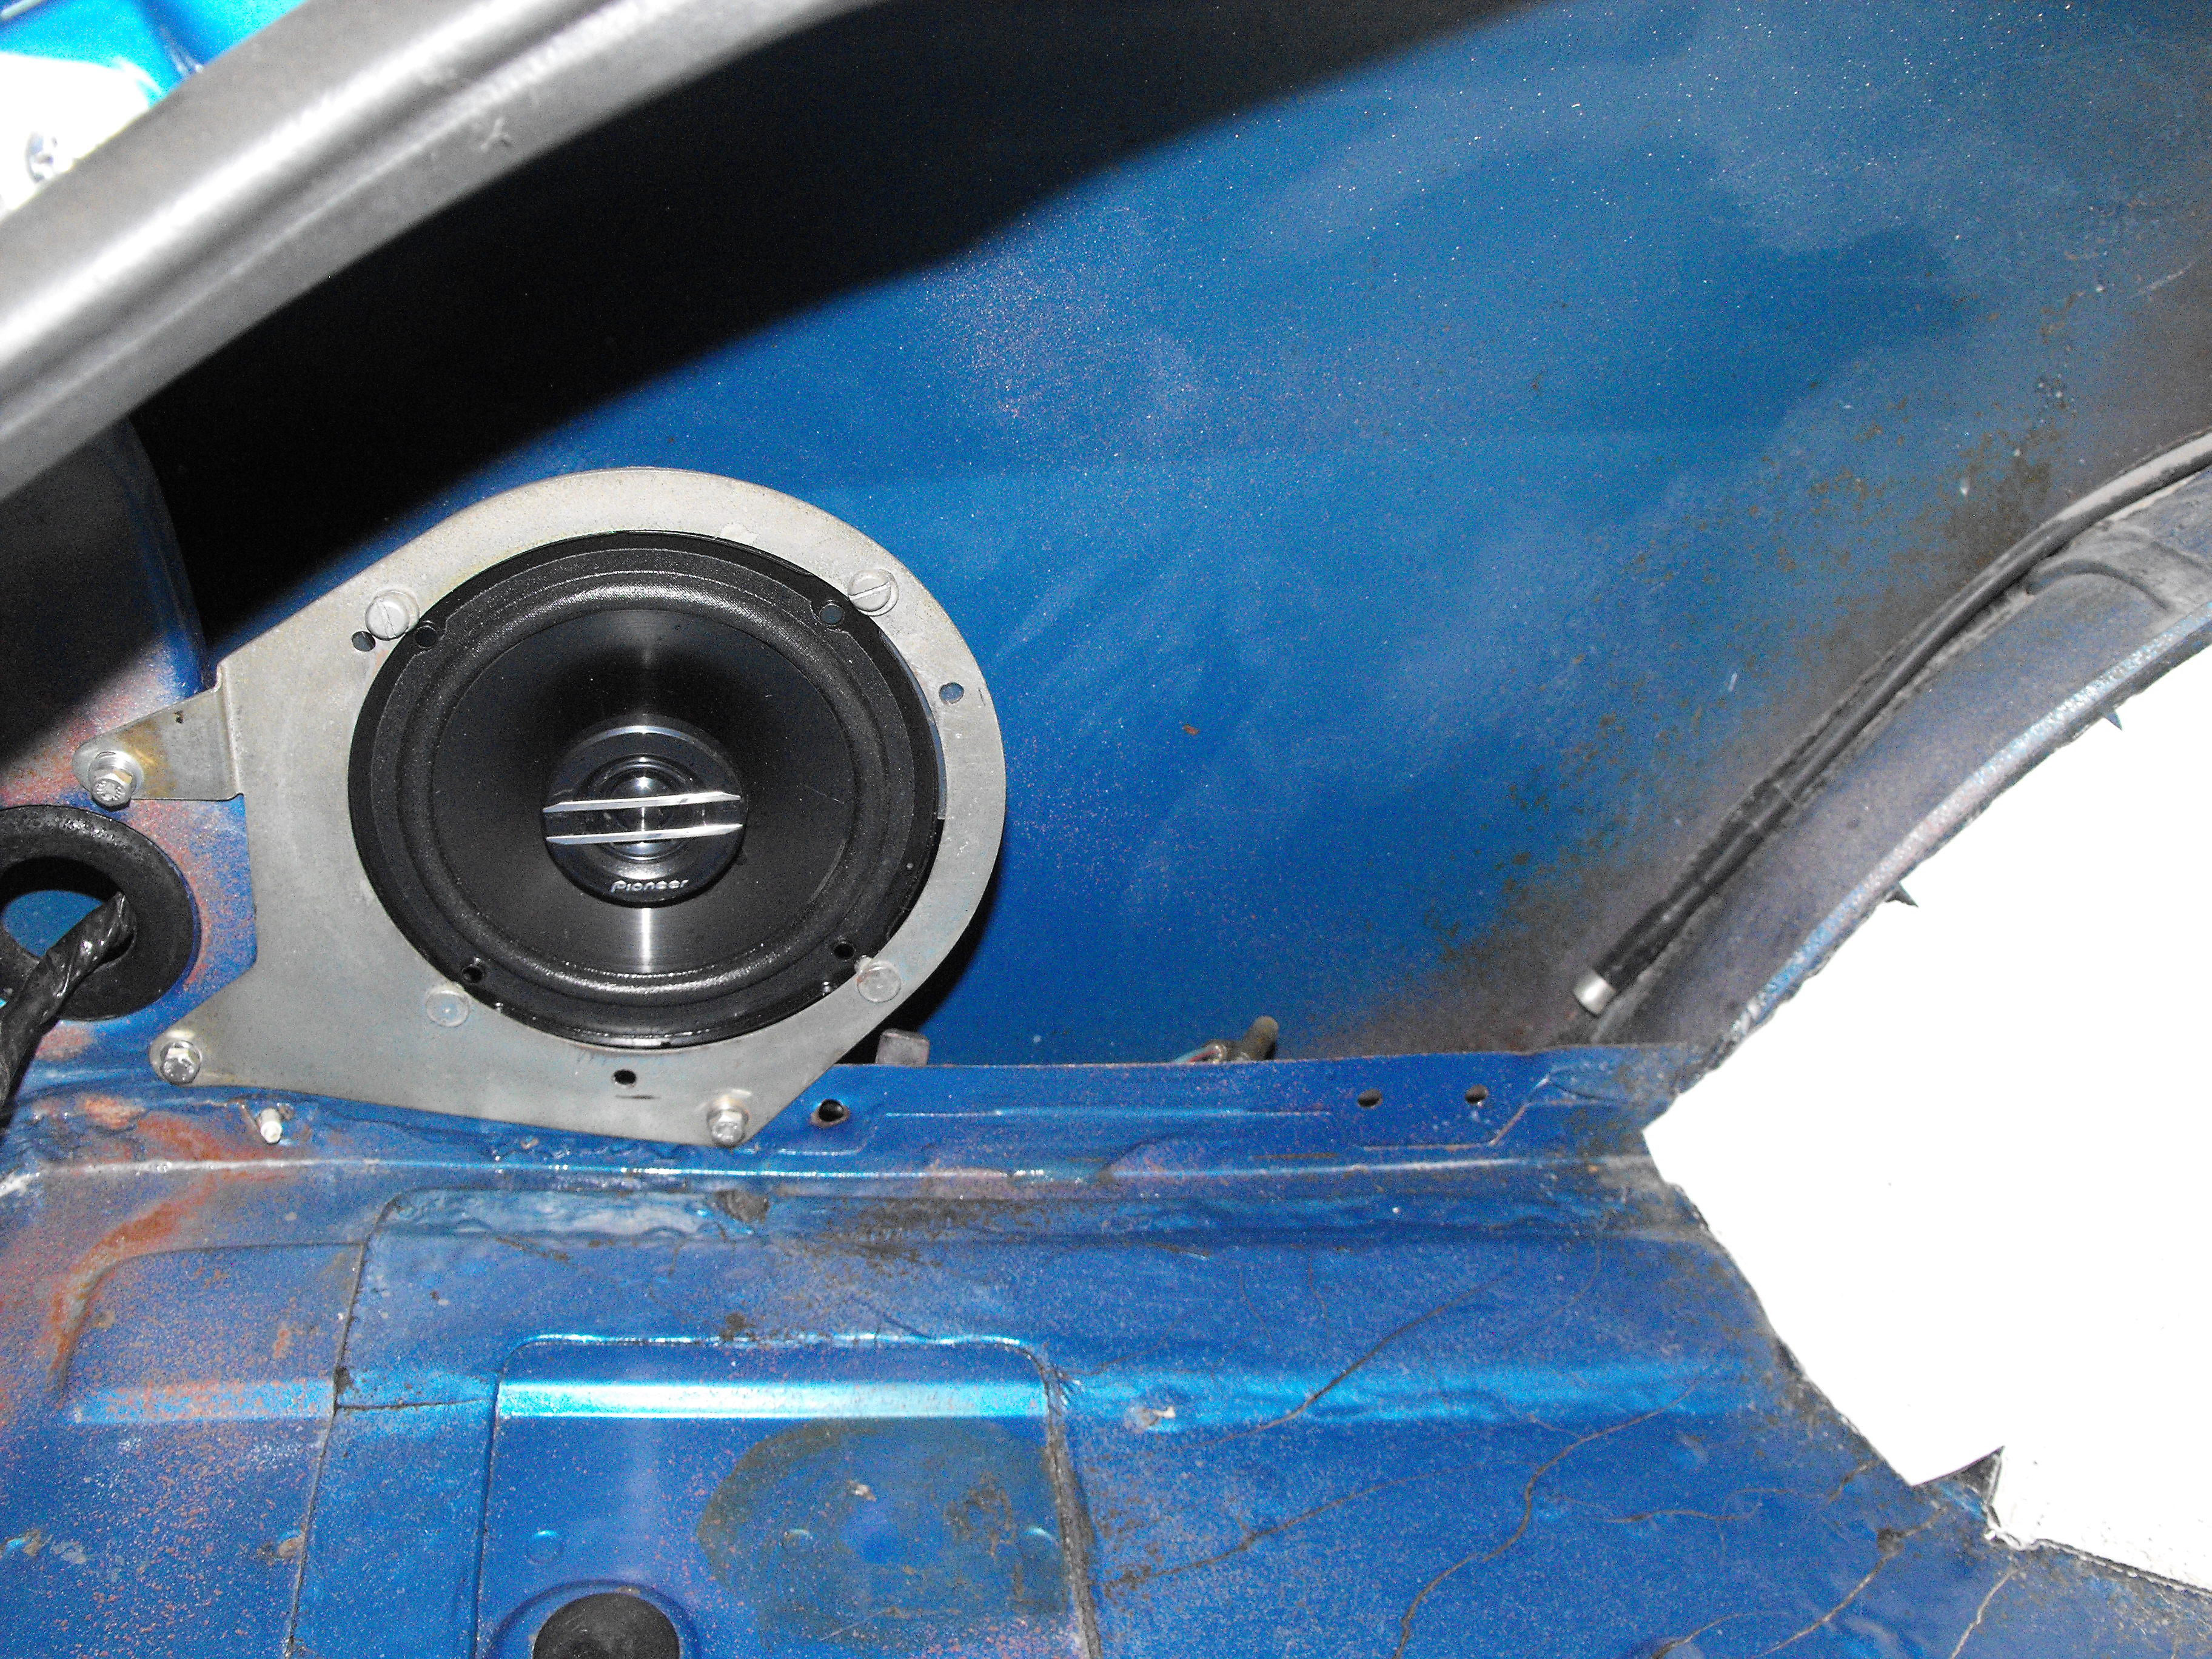
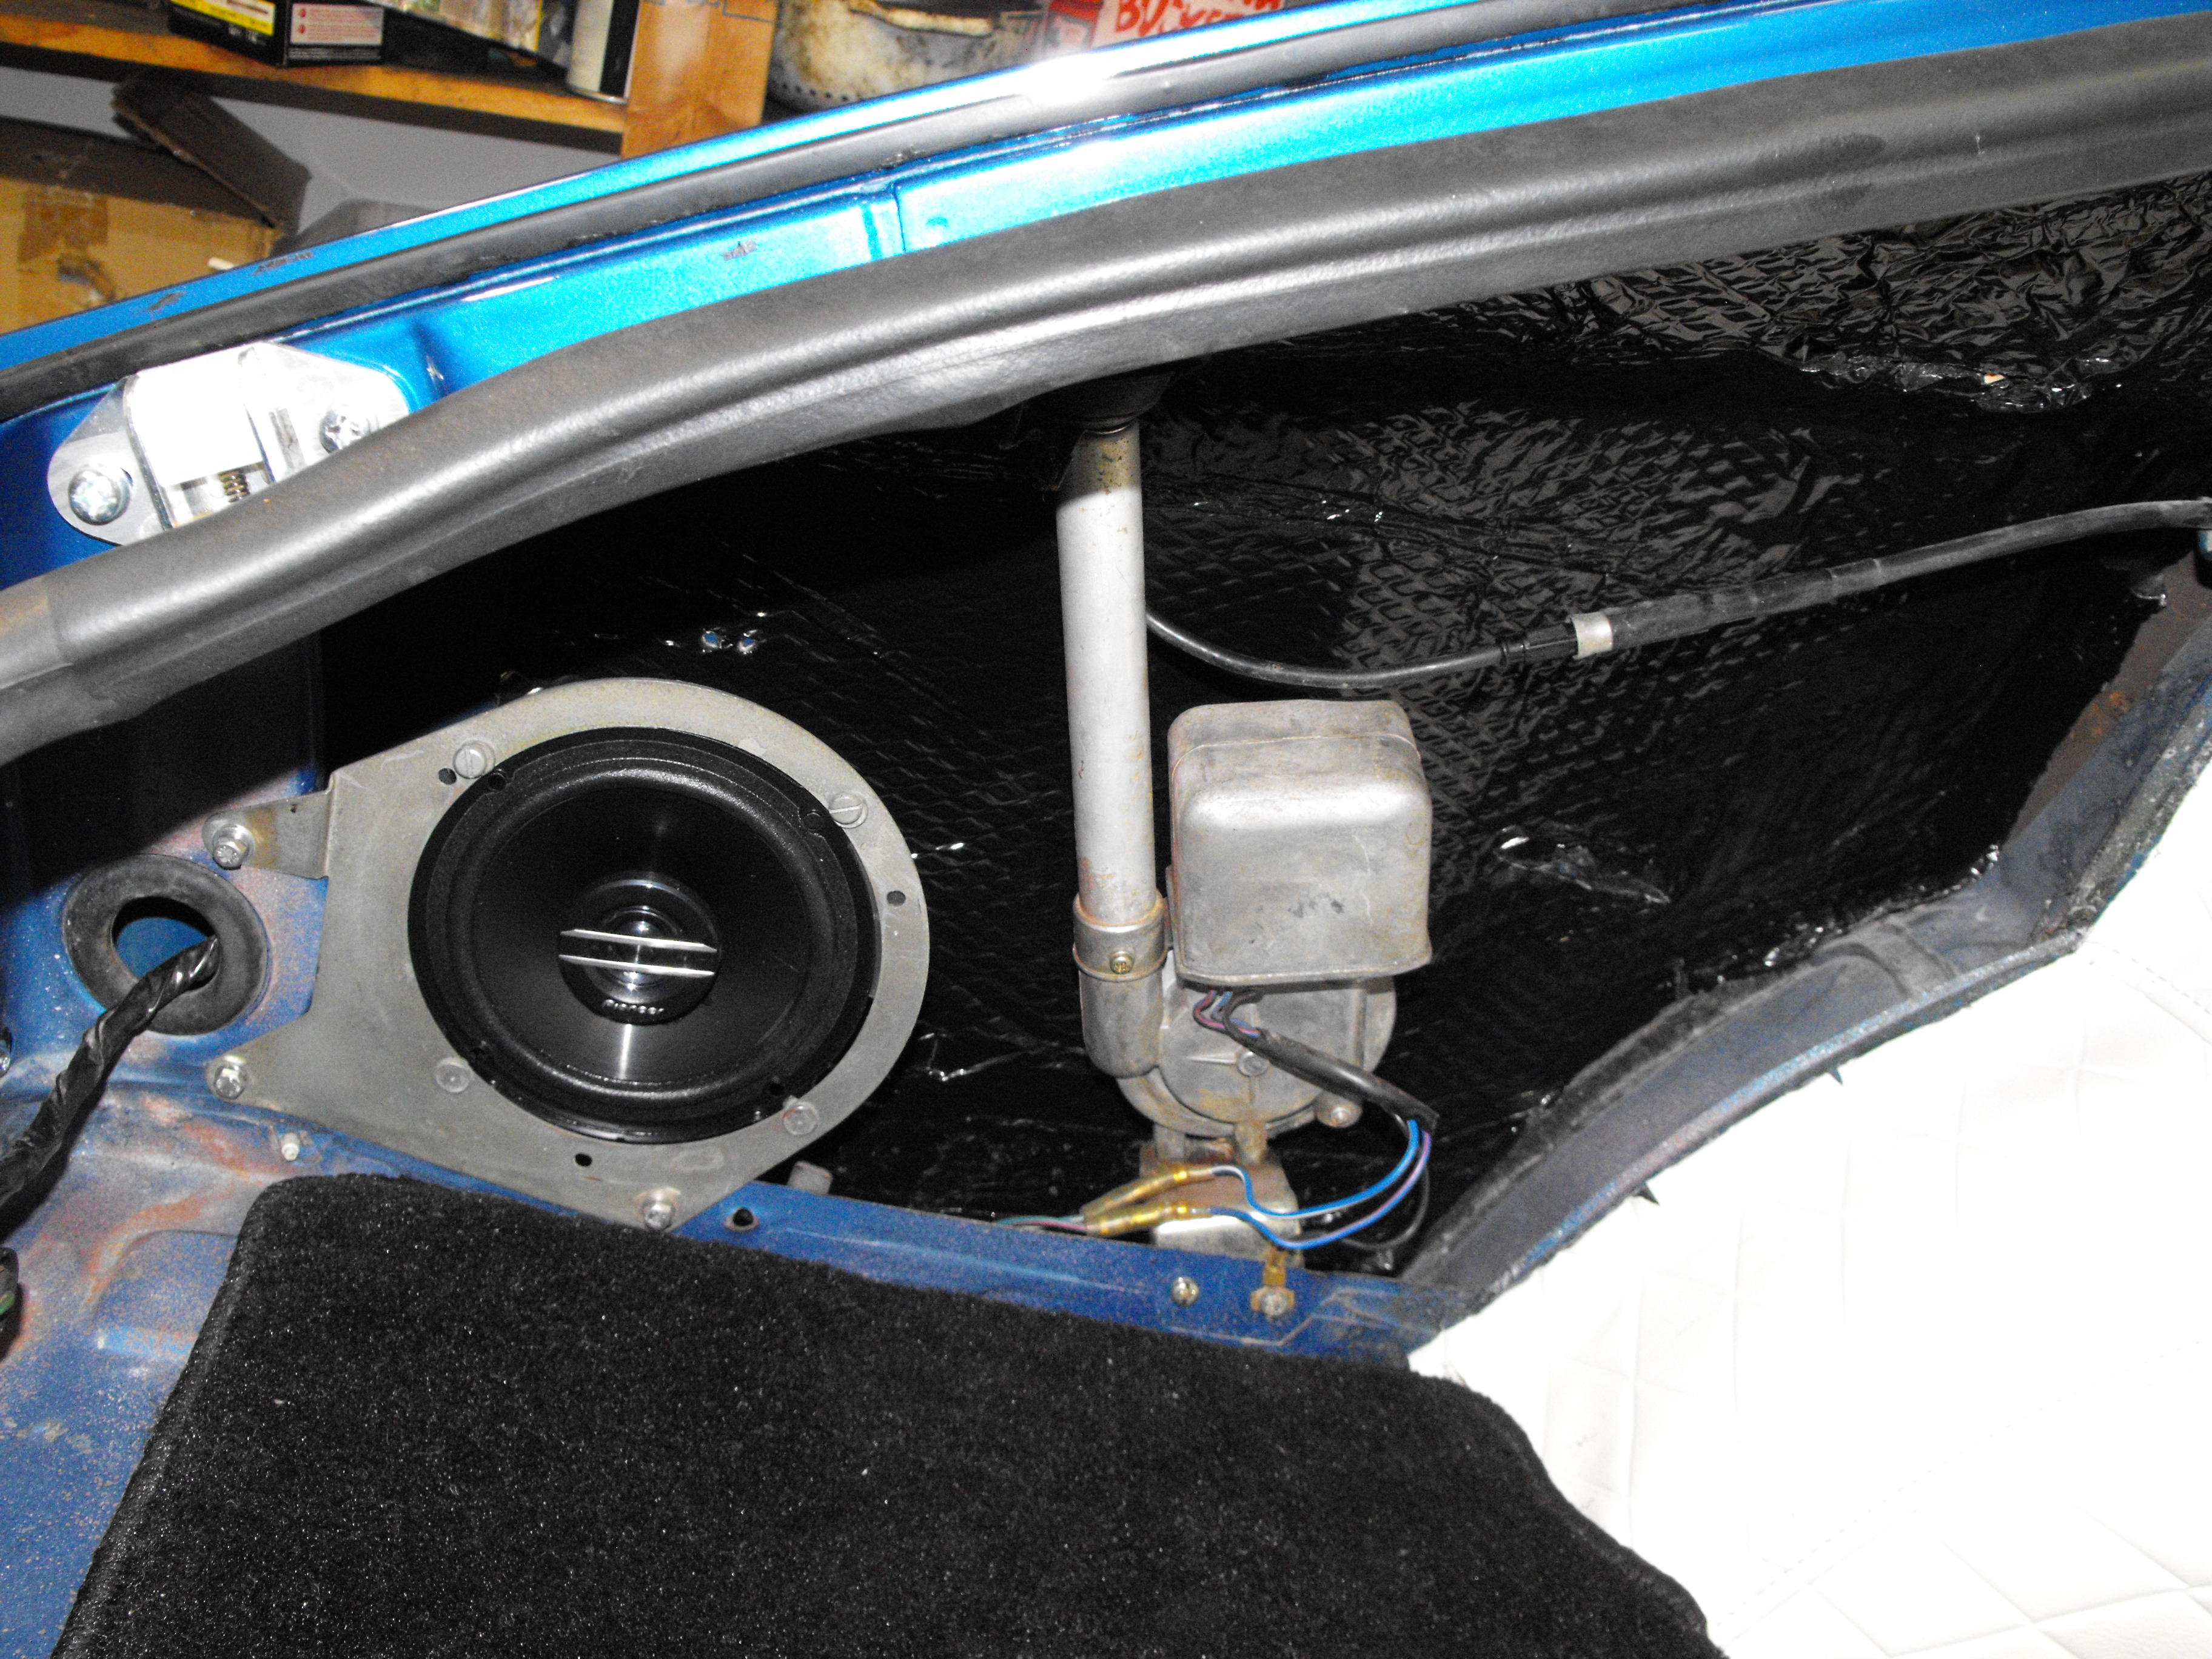
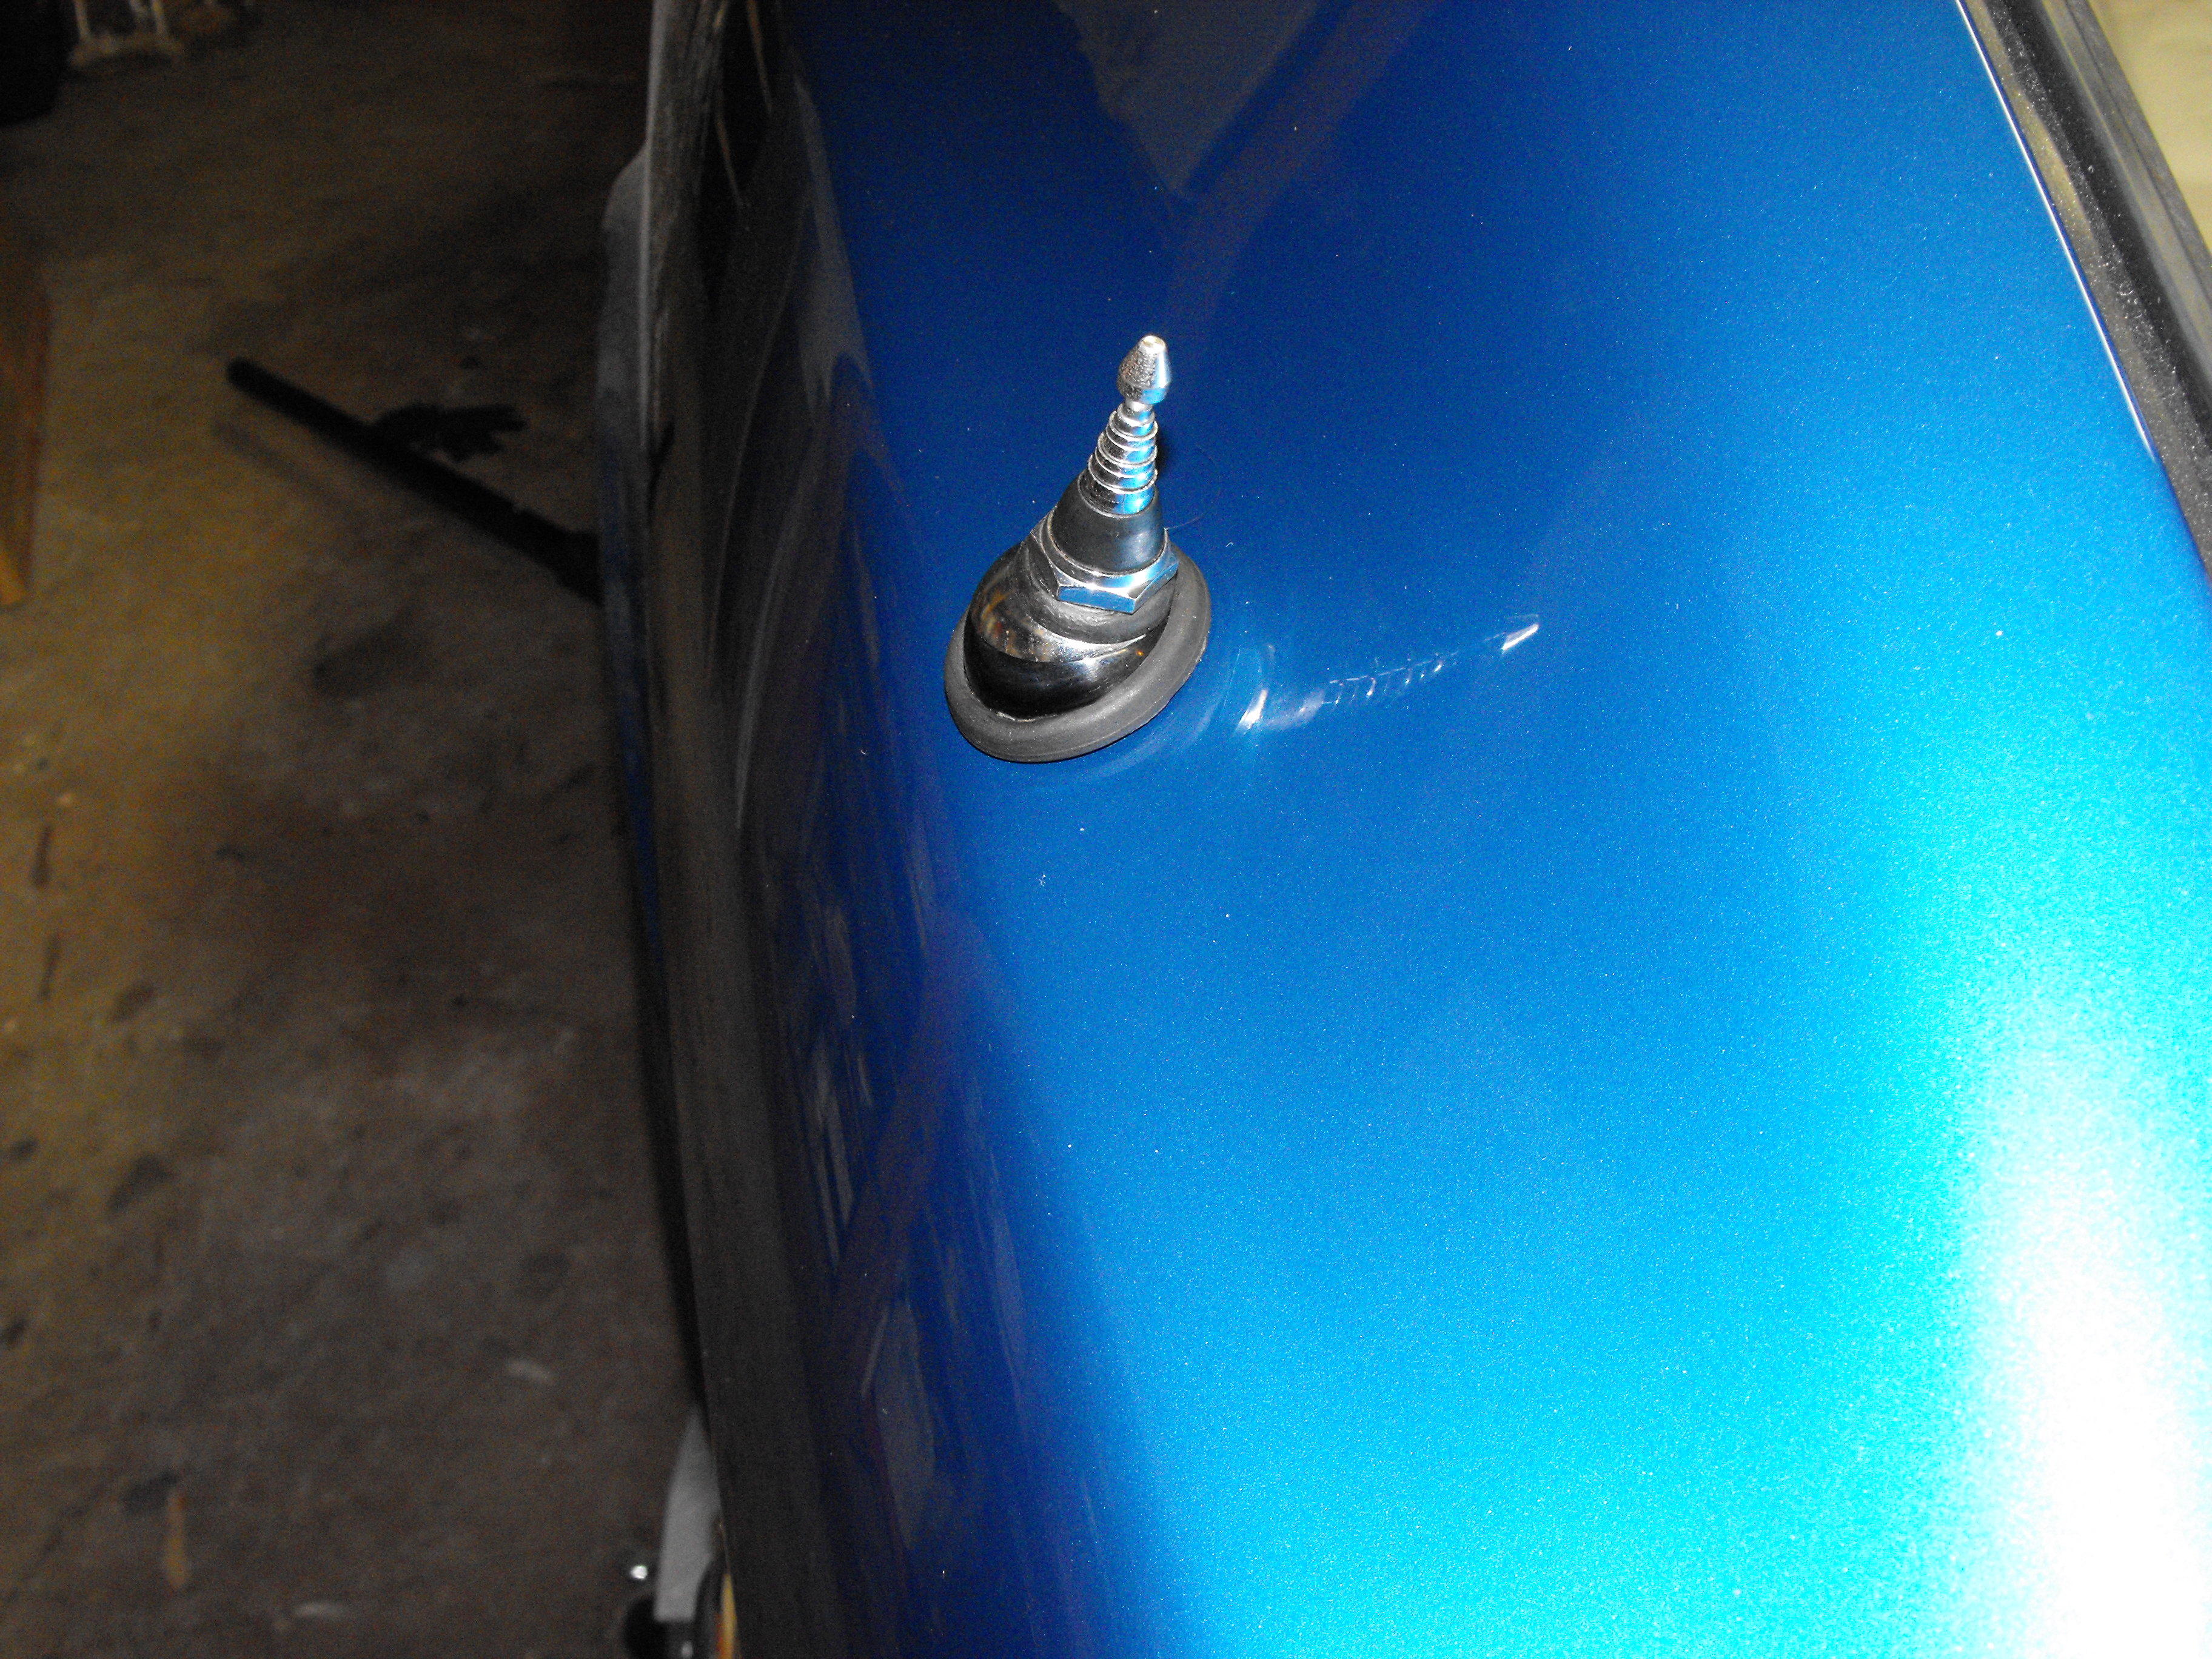
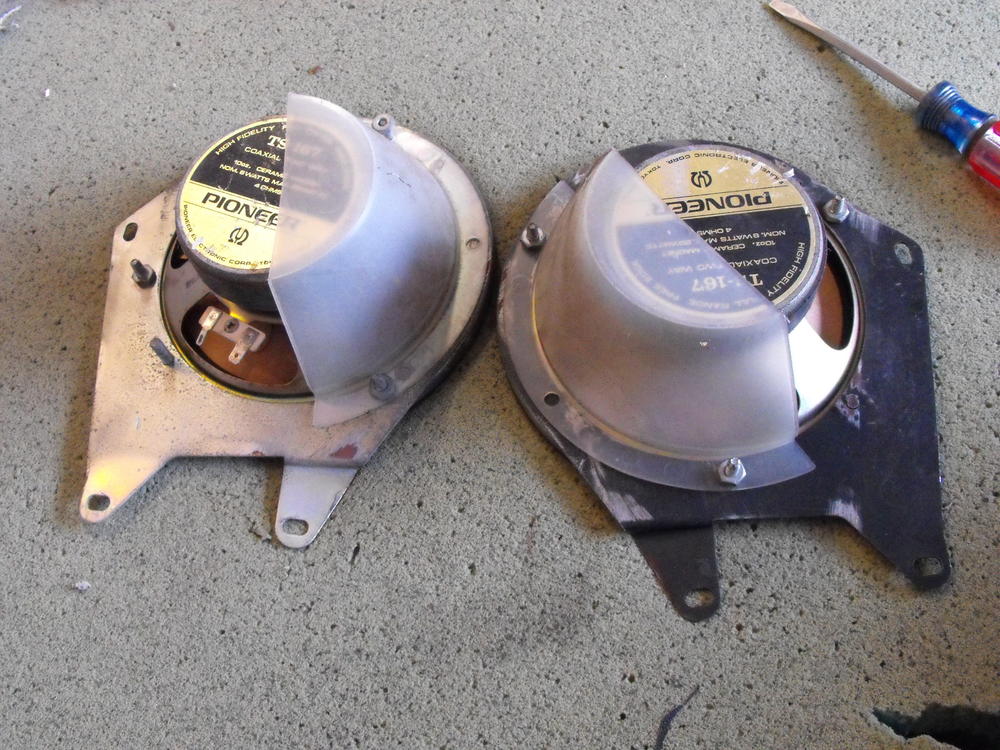
3 pointsReplaced the old Pioneer speakers with new Pioneer speakers. I installed the new speakers on each side, however, there is no wiring going to the passenger side speaker. I guess that can be hooked up in the future if needed. Cleaned up the antenna and did a little straightening so that it operated smoothly. Got the antenna installed along with a bit of sound deadening material. The rear end of the car is mostly complete at this point. My panel rivets should arrive tomorrow, so I will start with the panel install


 3 points
 -
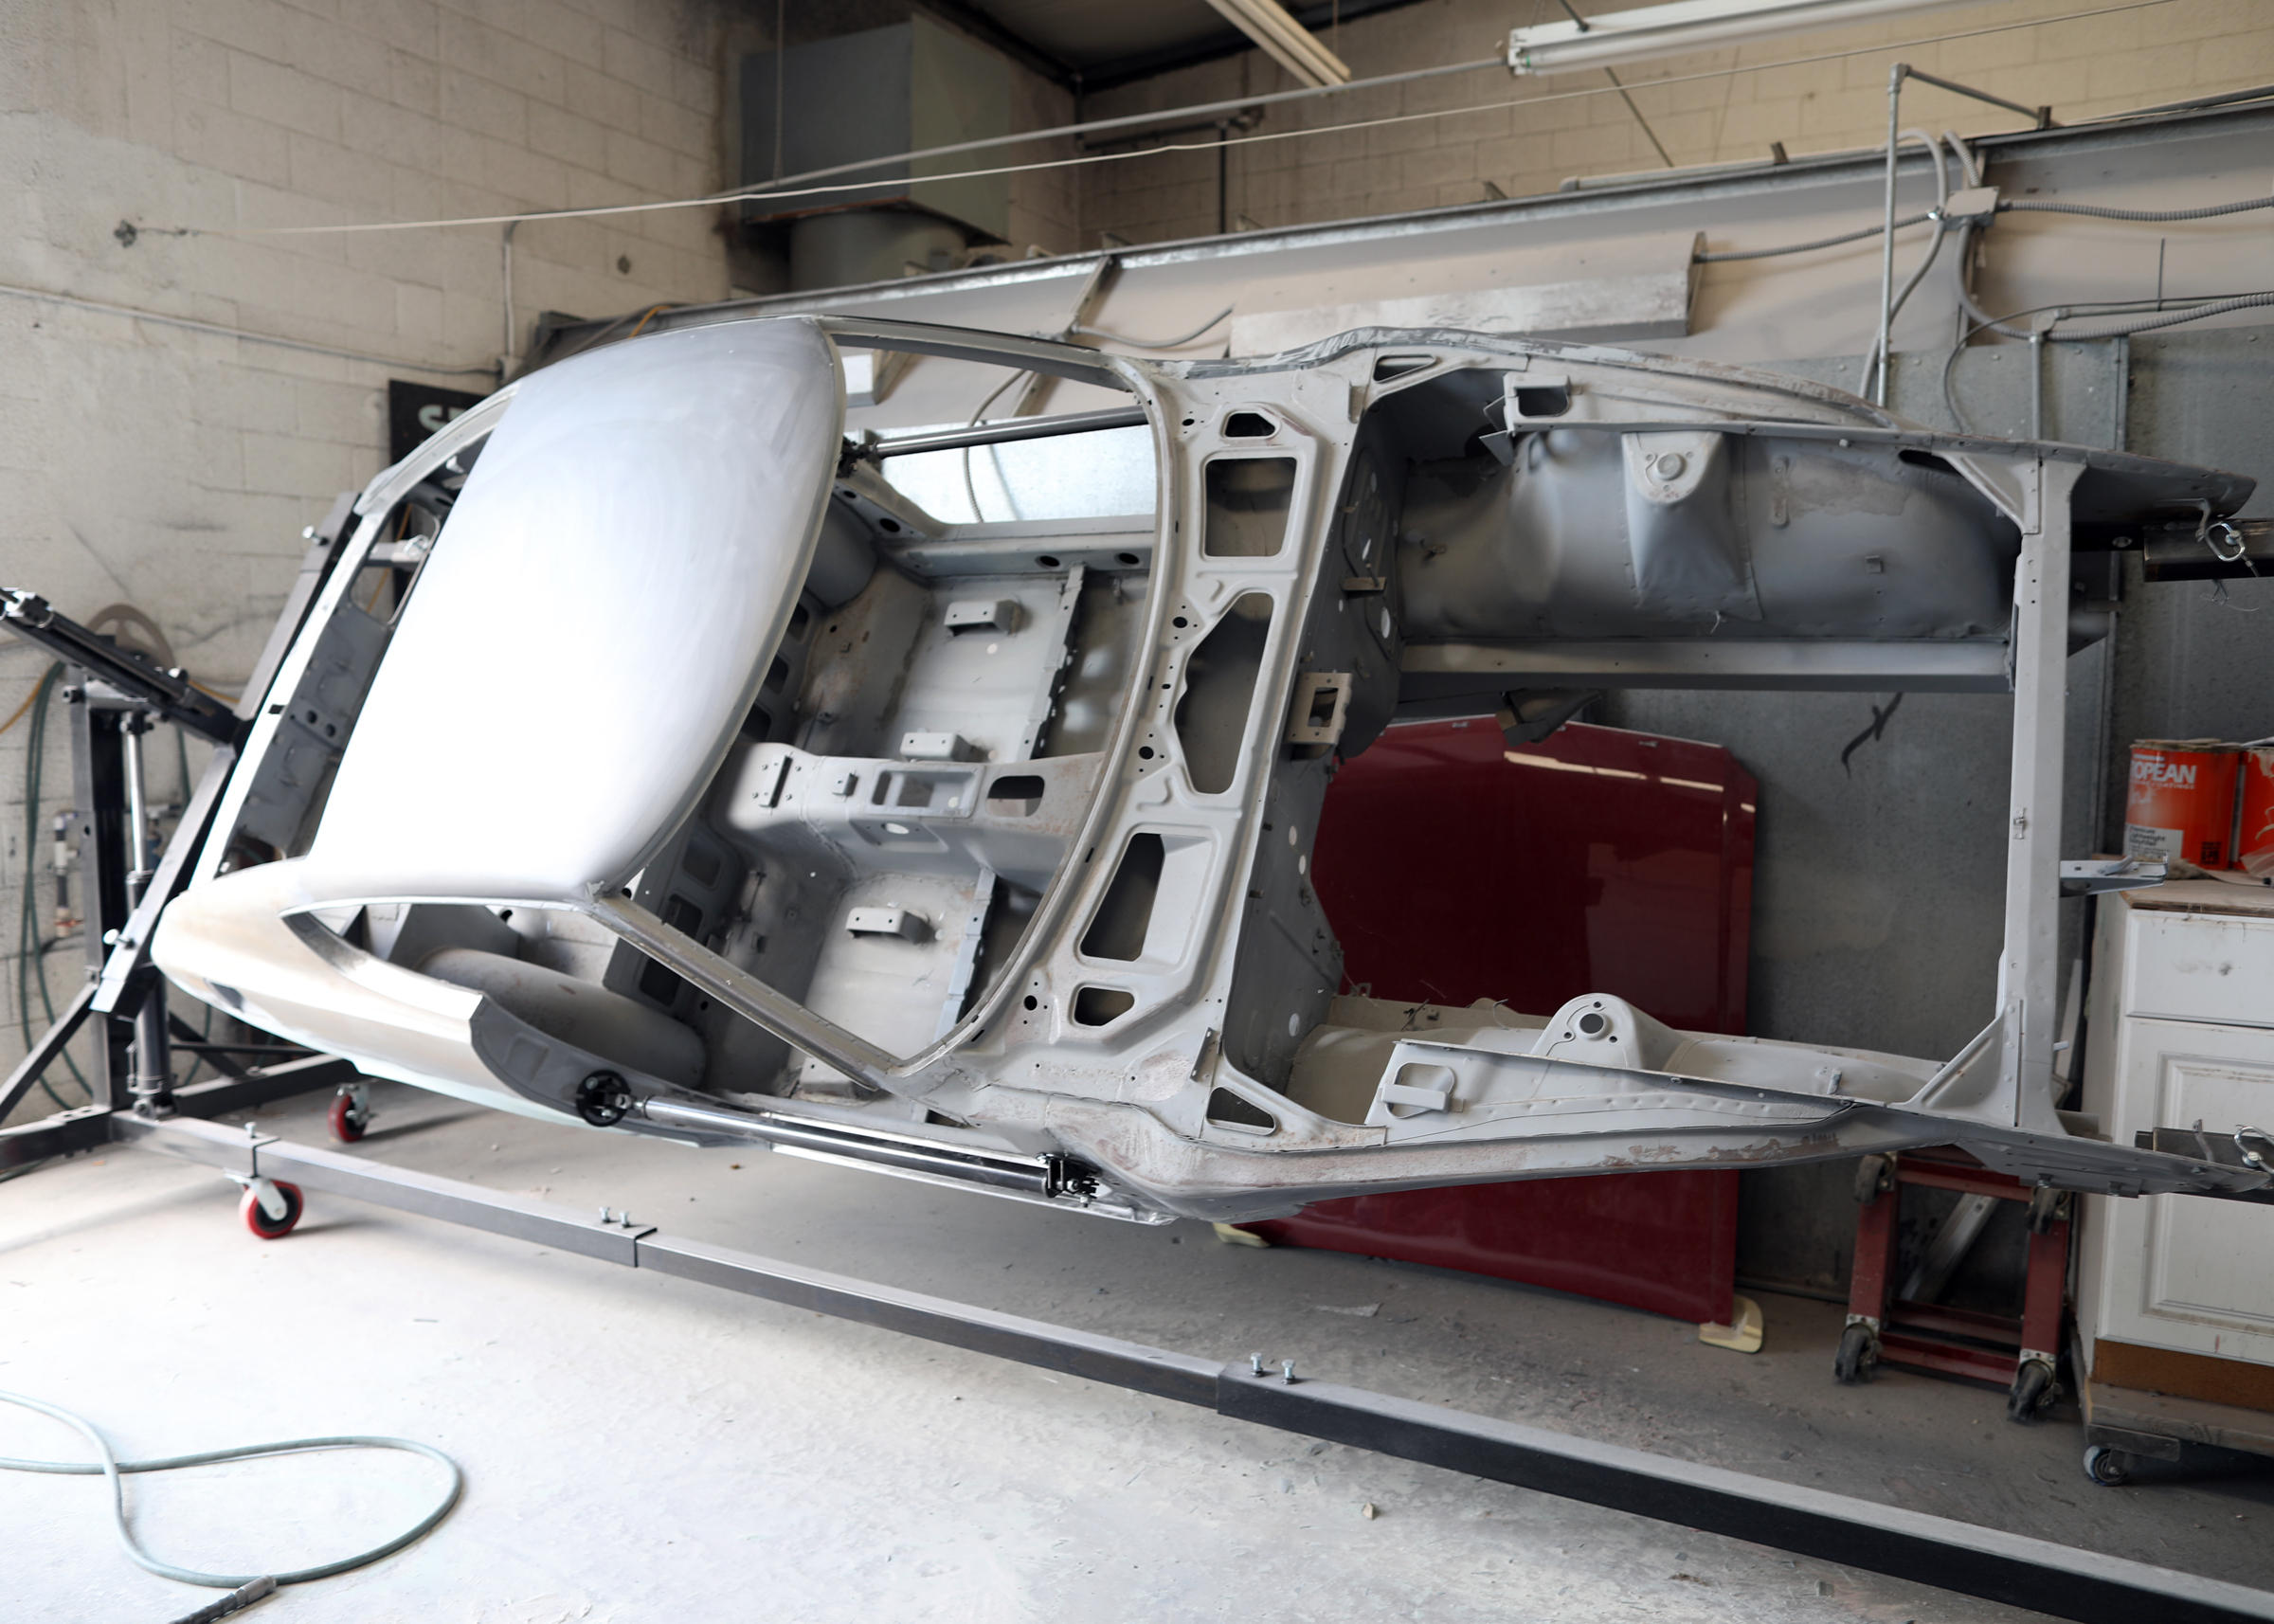
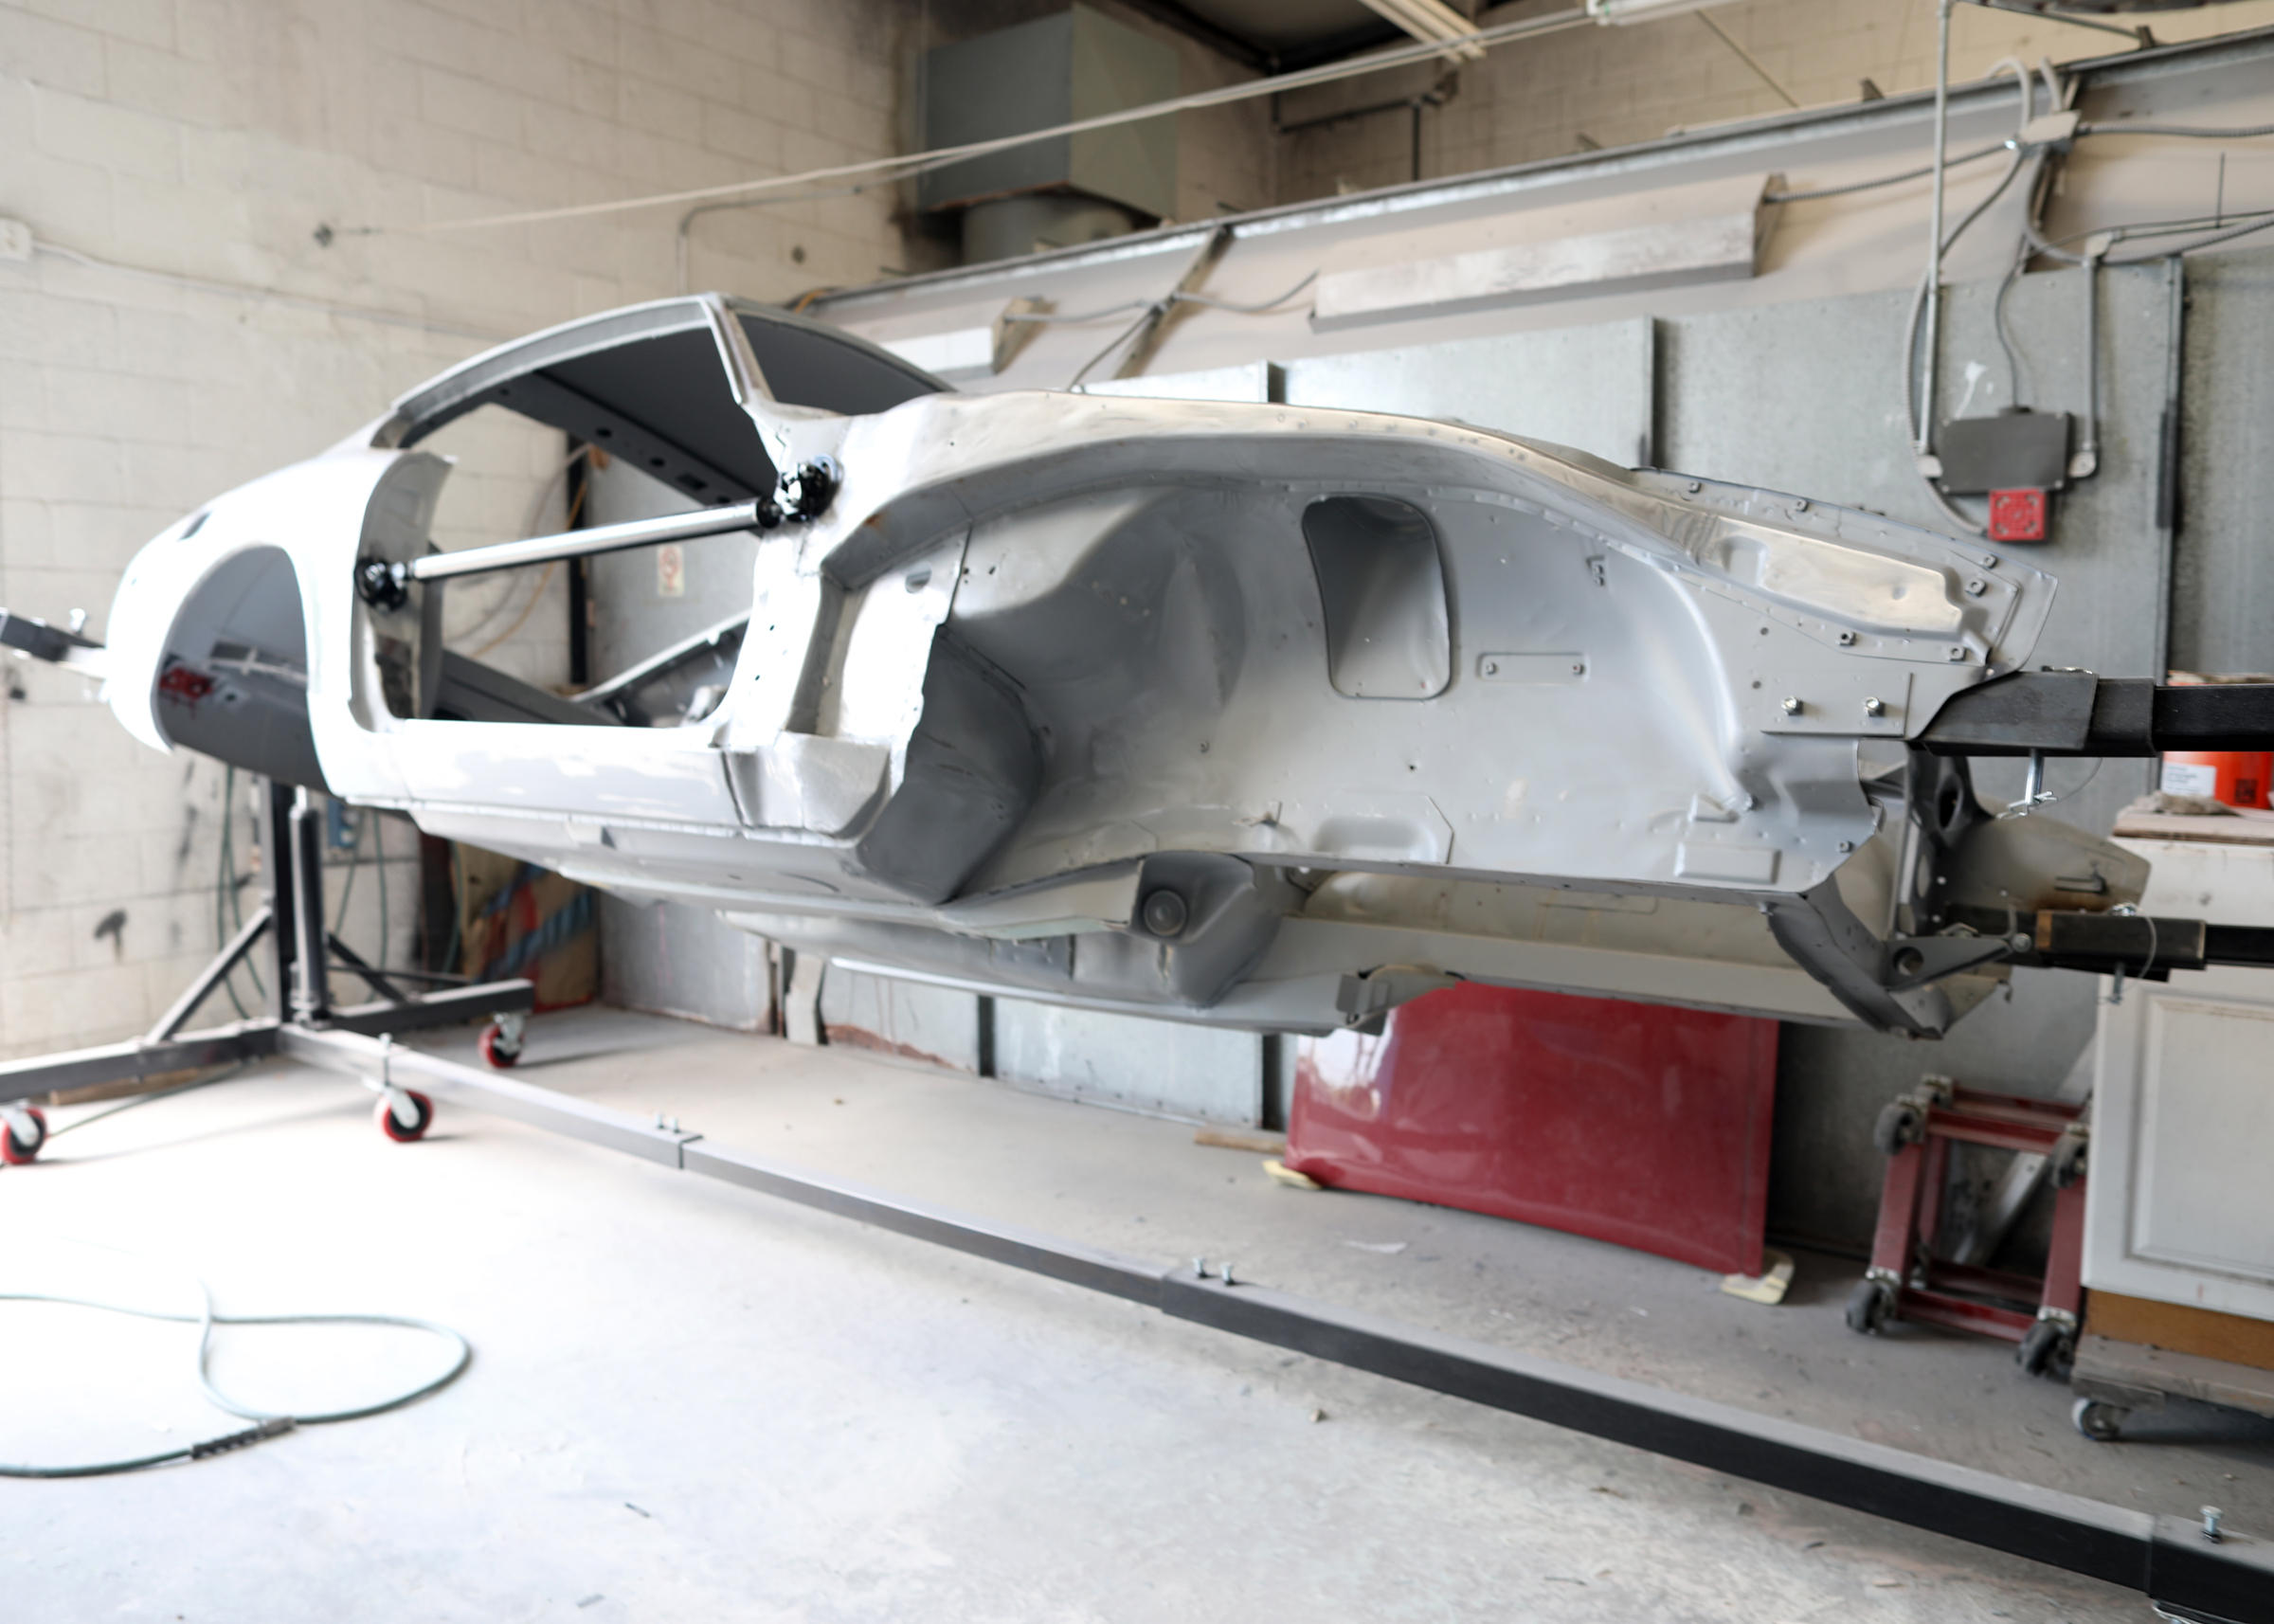
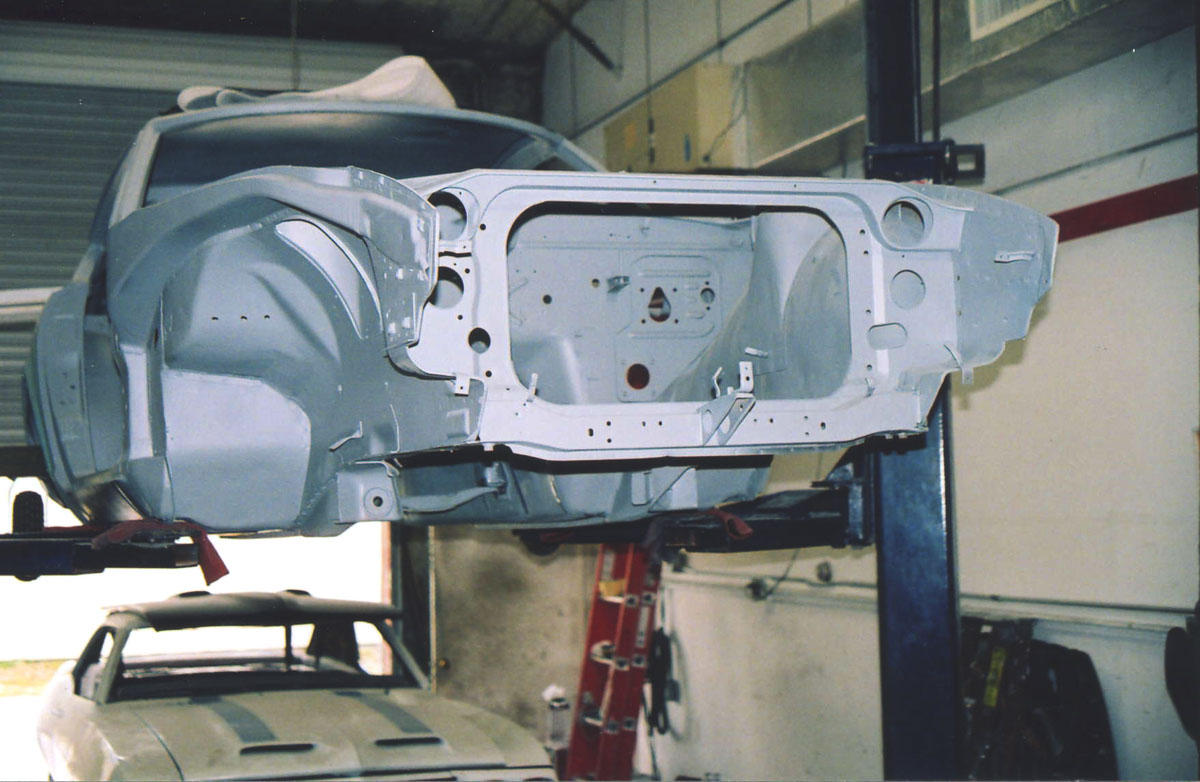
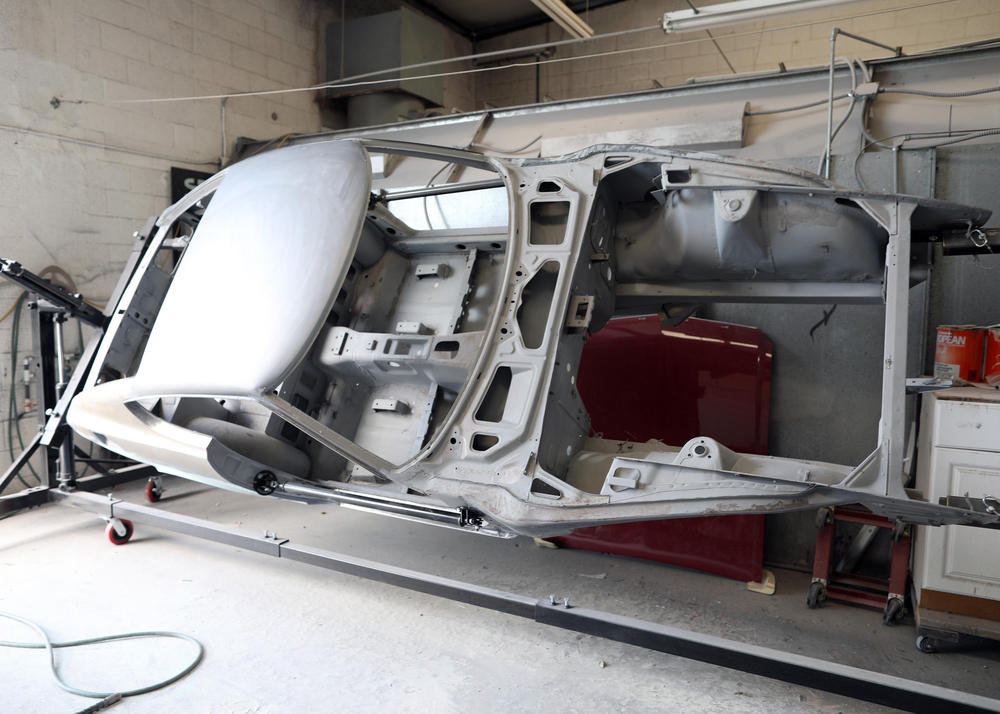
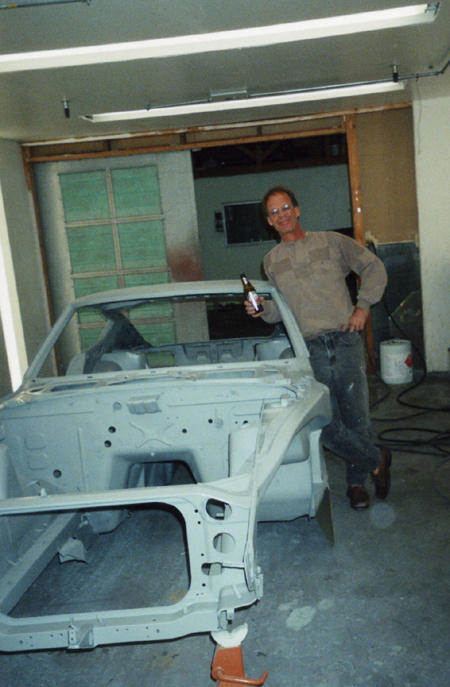
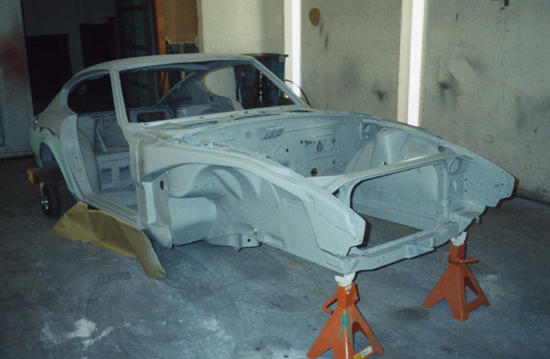
2 pointsI have been encouraged to start a build thread about my restoration of HLS30U-00026 so here goes. I started many, many years ago, as most of you know, and got sidelined during the depression in 2008 which lasted for me until 2014 or so. Although I managed to carry on with my involvement in the Z community over the past decade, the cars have been pretty much sitting in storage and very little work has been done. Then about a year ago, I got back into it and started sorting through my stuff, creating little projects and slowly stepping back into the restoration. A month ago, I talked to the guy who is doing all the paint and body work for Steve / Twin Cam Sportscars. Steve's business / shop is right around the corner from my shop and I have known Steve forever. You may recall that Twin Cam Sportscars helped with the restoration of Classic Motorsports magazine's Lotus Elan that appeared at Amelia Island. I started the work on the chassis years ago with another body shop that associated with Twin Cam, "Beautiful Bodies", but he went out of business during the depression. Now its Kim / After Hours Racing who agreed to take on the partially completed chassis. And here is where we are today...
 2 points
 -
Finally getting rid of the stock exhaust manifold. This header is going to mate to the existing 2-1/2" exhaust pipes. Going very well so far.
 2 points
 -
I have a feeling more people are going to keep their car stock, So they can resell them later at a higher price. As far as the 260z value is concerned, Just give it time2 points
-
Yeah, I don't really know anything about the car, it looks very nice, but it seems to me that the price was driven largely by hype, and people fawning over how amazing it is. It's like they want the car to be more special than it actually is. It's a nice car, but the big deal seems to be that it was used to create a model 240Z (hence why they're calling it the Franklin Mint car), and that just isn't a big deal.2 points
-
2 pointsAfter a bit of a delay it's time to get my project back on track. I have been in discussions with a very talented and respected auto restorer near me, and he is willing to take on my project. If all goes right my car will be on his rotisserie in the fall. Lots to follow soon. Cheers, Mike2 points
-
2 pointsWell after going thru every EFI check and confirming everything was within specs I was getting close to giving up. I kept thinking about what Zhead said about vacuum. SO I went in that direction but couldn't find and leaks. So I removed the EGR valve and started the car with the EGR port in the manifold open. The car idle at 800. So that led me to believe I wasn't getting enough air. I removed the hose that goes from the throttle body to the AAR and then removed the nozzle on the throttle body where the hose connects. Turned it over and the gasket on the bottom, WHICH I HAD MADE, was missing the center hole. I guess for whatever reason I forgot to punch it out. So, just want to thank everyone for their input and for making me think harder than I'm use to. Thanks again.2 points
-
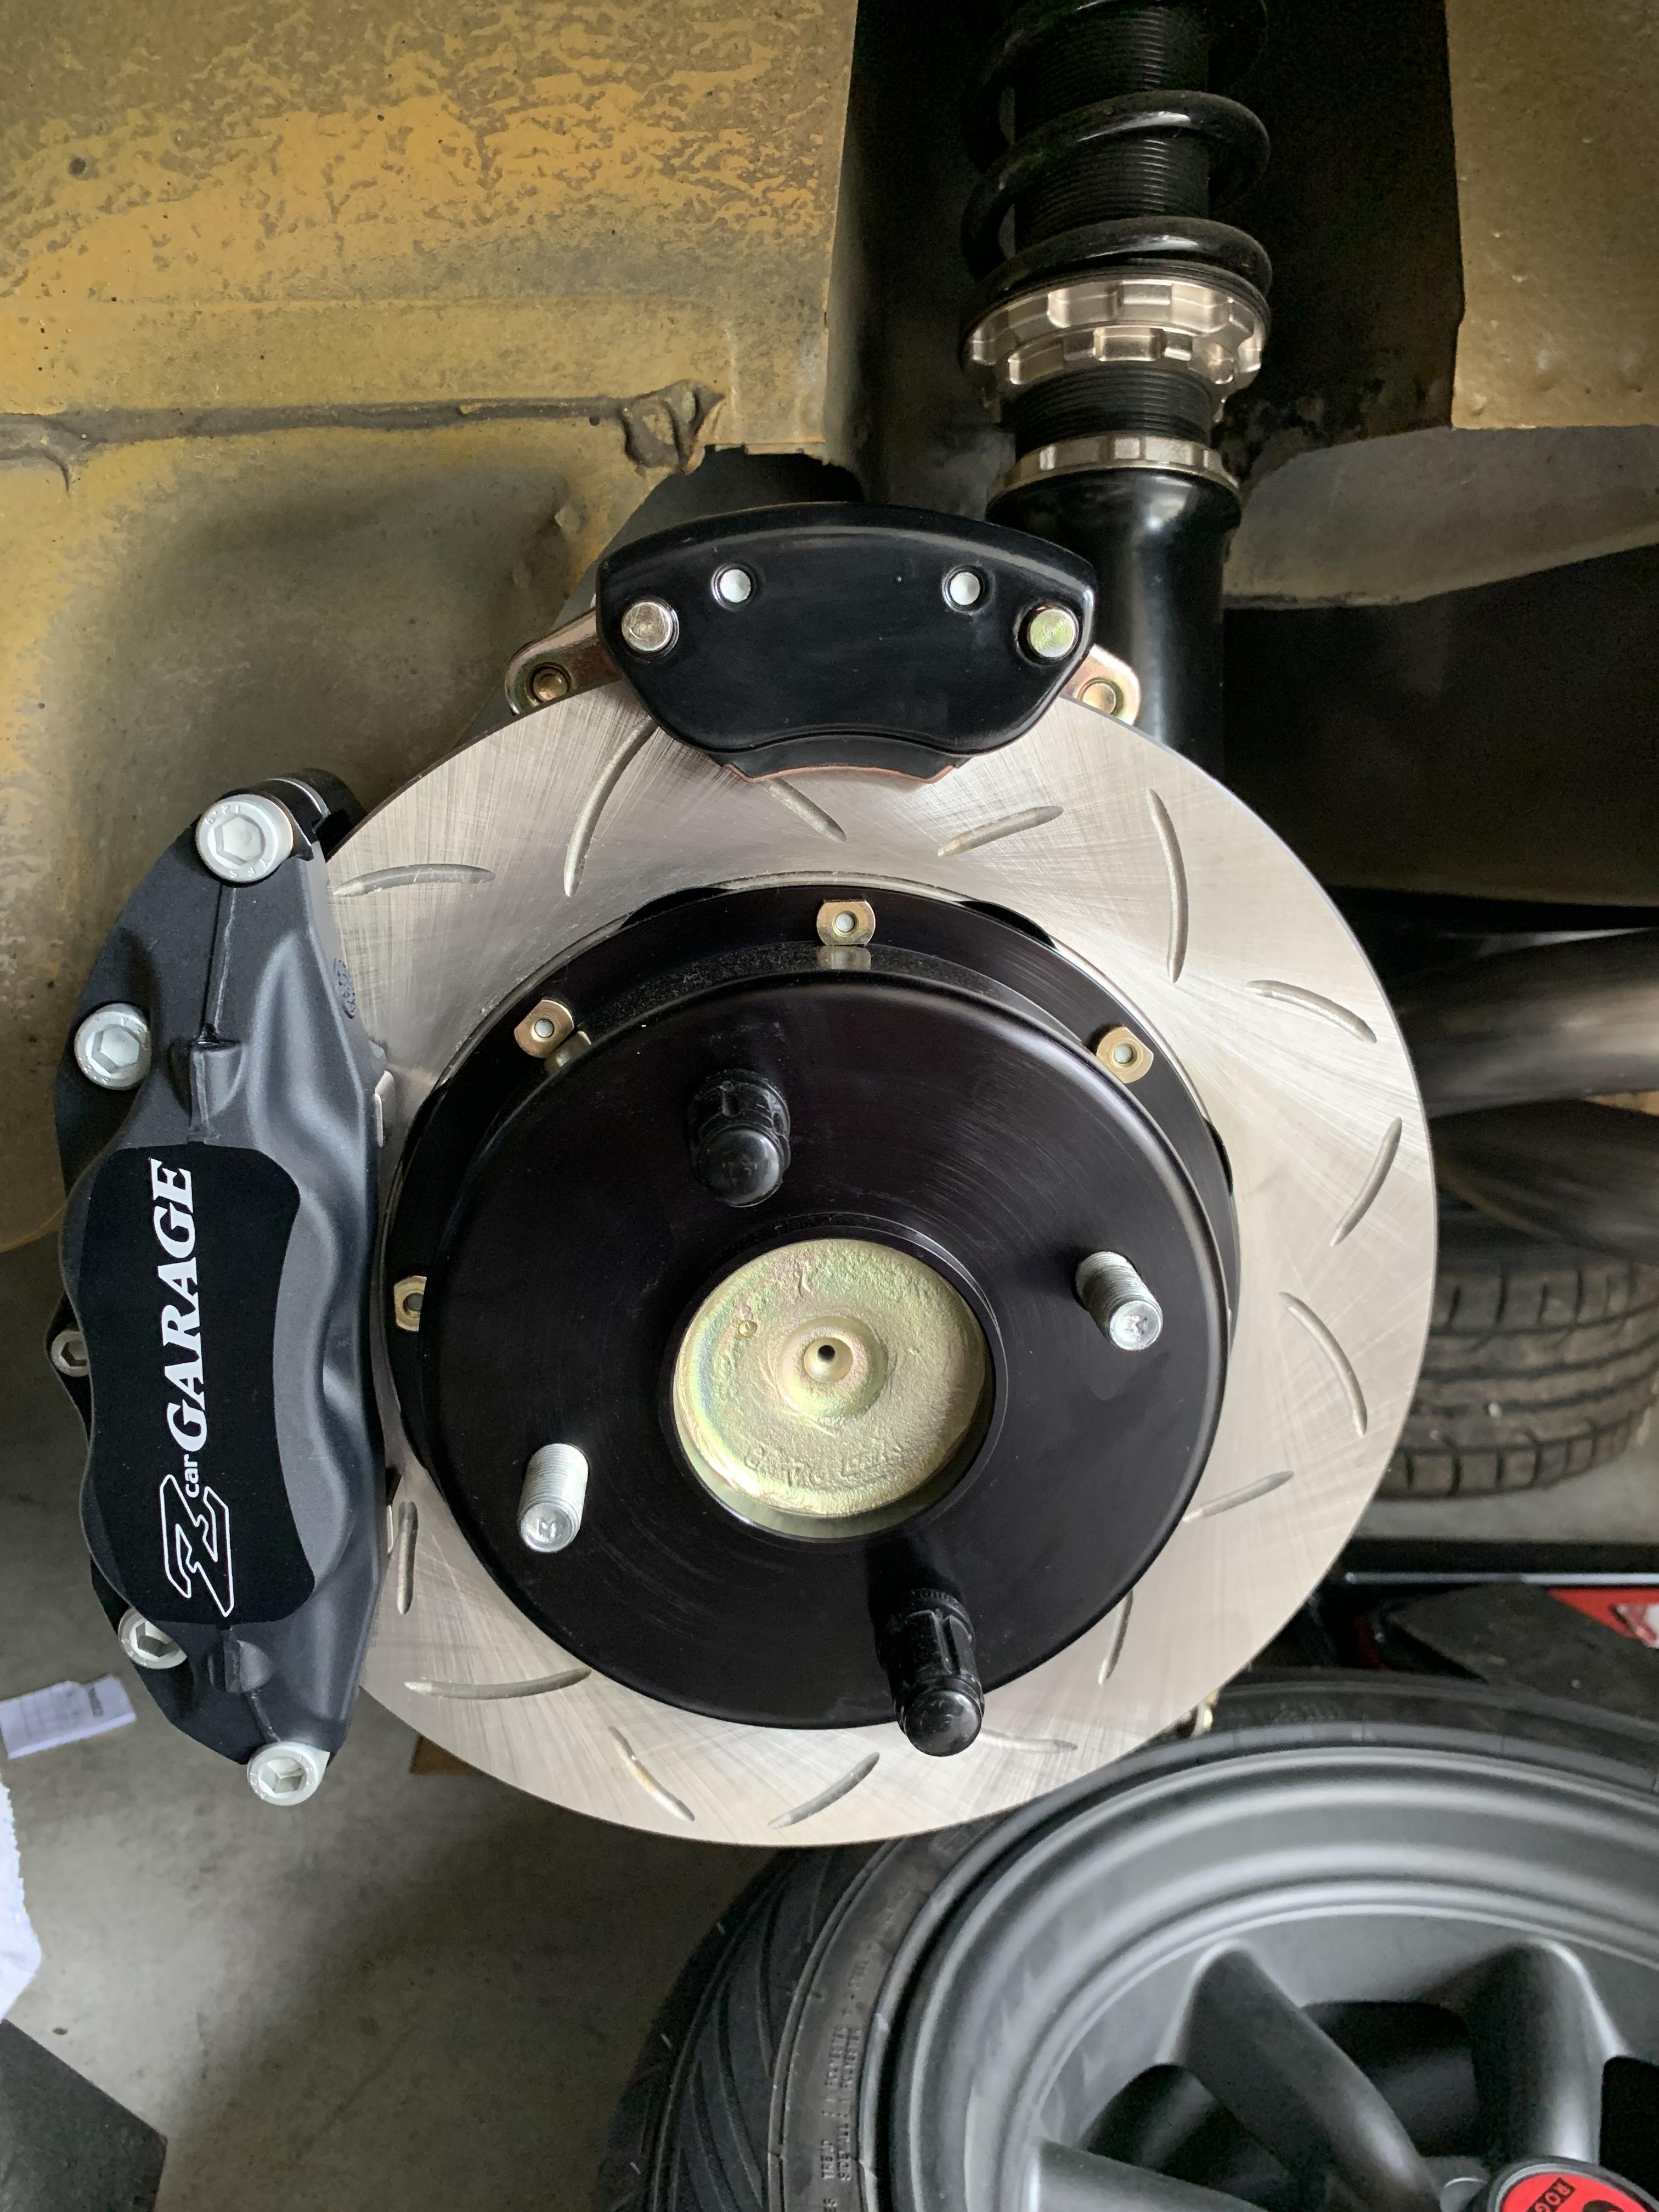
2 pointsRear e brake is on. Just waiting on a rear brake hose and some fluid.
 2 points
 -
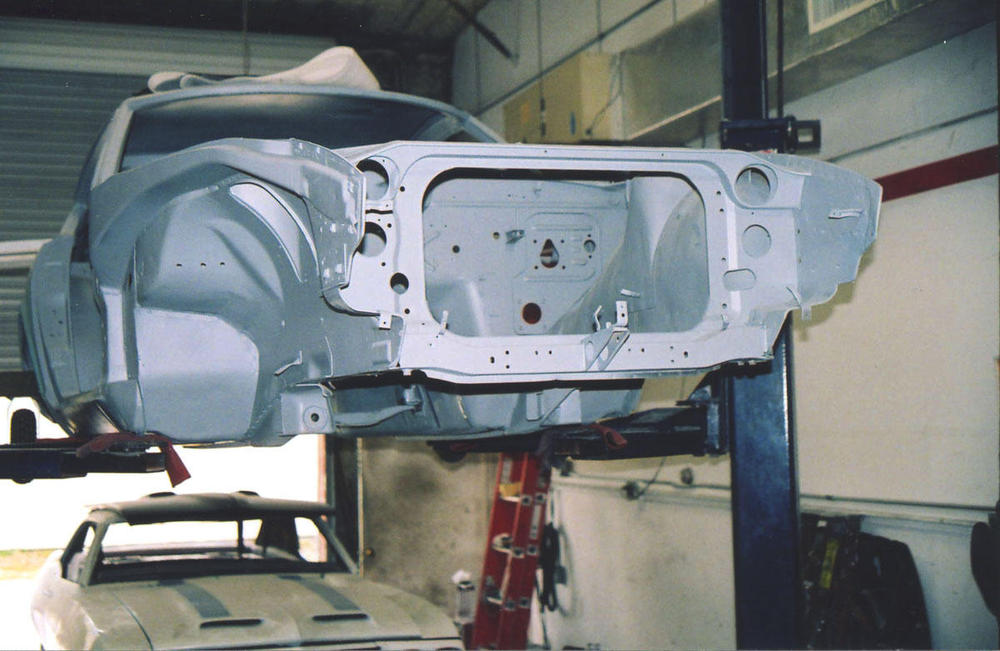
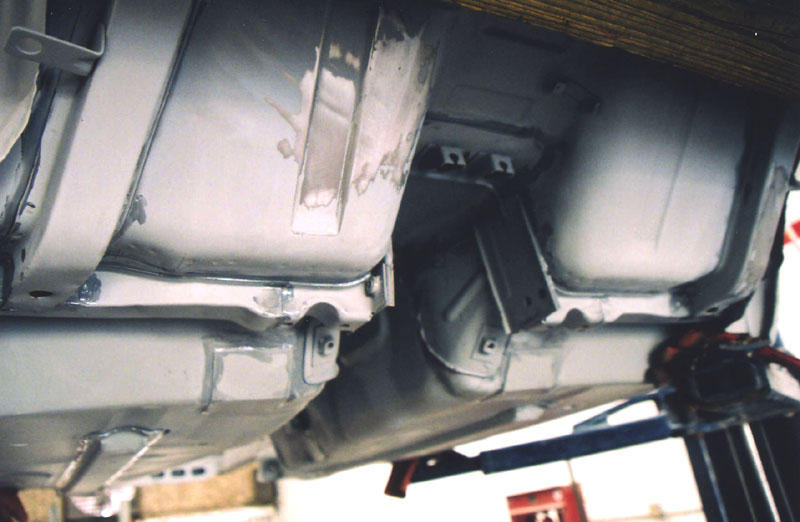
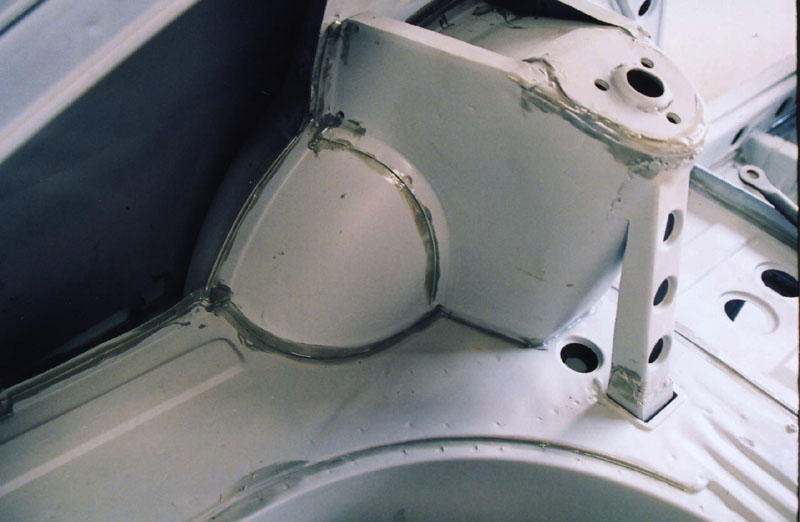
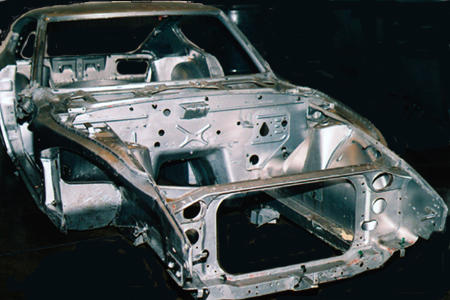
2 pointsTo insure that the interior chassis areas would not start rusting again, etching primer was sprayed inside the body panels with a garden pump sprayer and a long plastic wand. All the seams had to be sealed. The complete body had to be wiped down with a metal prep etching wash. This was all done on a lift.

 2 points
 -
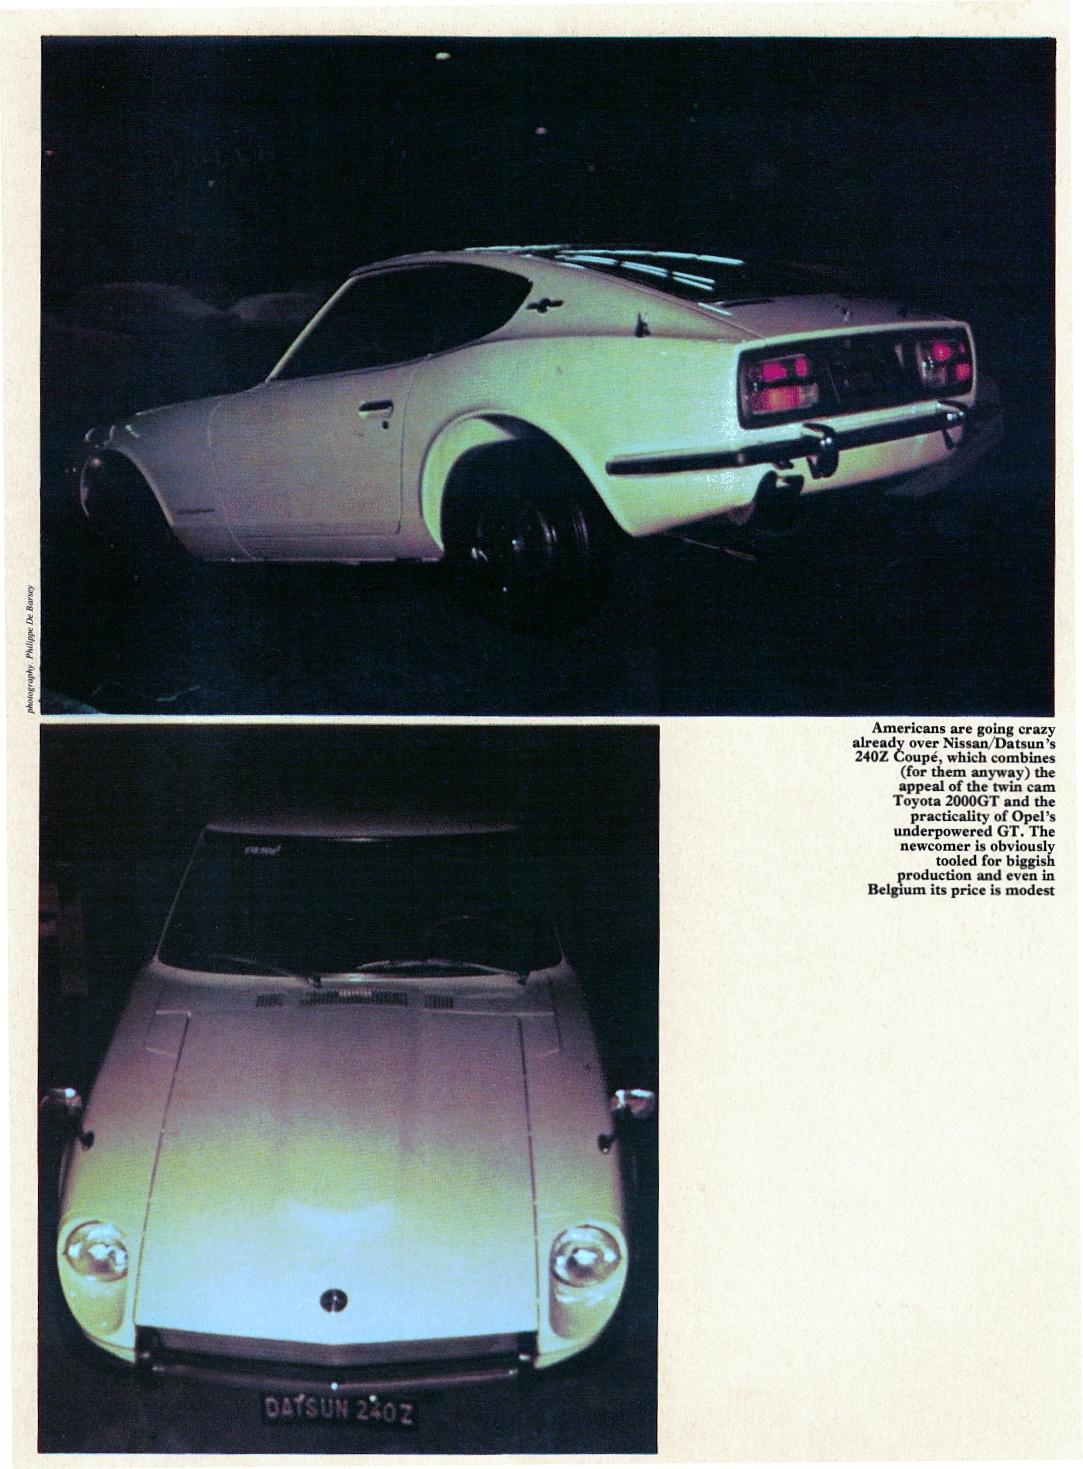
https://www.autosport.com/f1/news/143908/march-cofounder-robin-herd-dies https://www.motorsportmagazine.com/opinion/f1/robin-herd-1939-2019 " March Engineering designer Robin Herd was one of the very first customers, having bought the actual Earls Court Show car and is delighted with it. " (Source: Motorsport Magazine, March, 1972) (Source:Datsun Fairlady Roadster To 280ZX: The Z-Car Story -Hardbound By Brian Long)
 1 point
 -
I get it and have started browsing for a 260 or 280z that I could run and modify, but I agree with Mike. It's only a matter of time for the 260 & 280 start appreciating in this manner.1 point
-
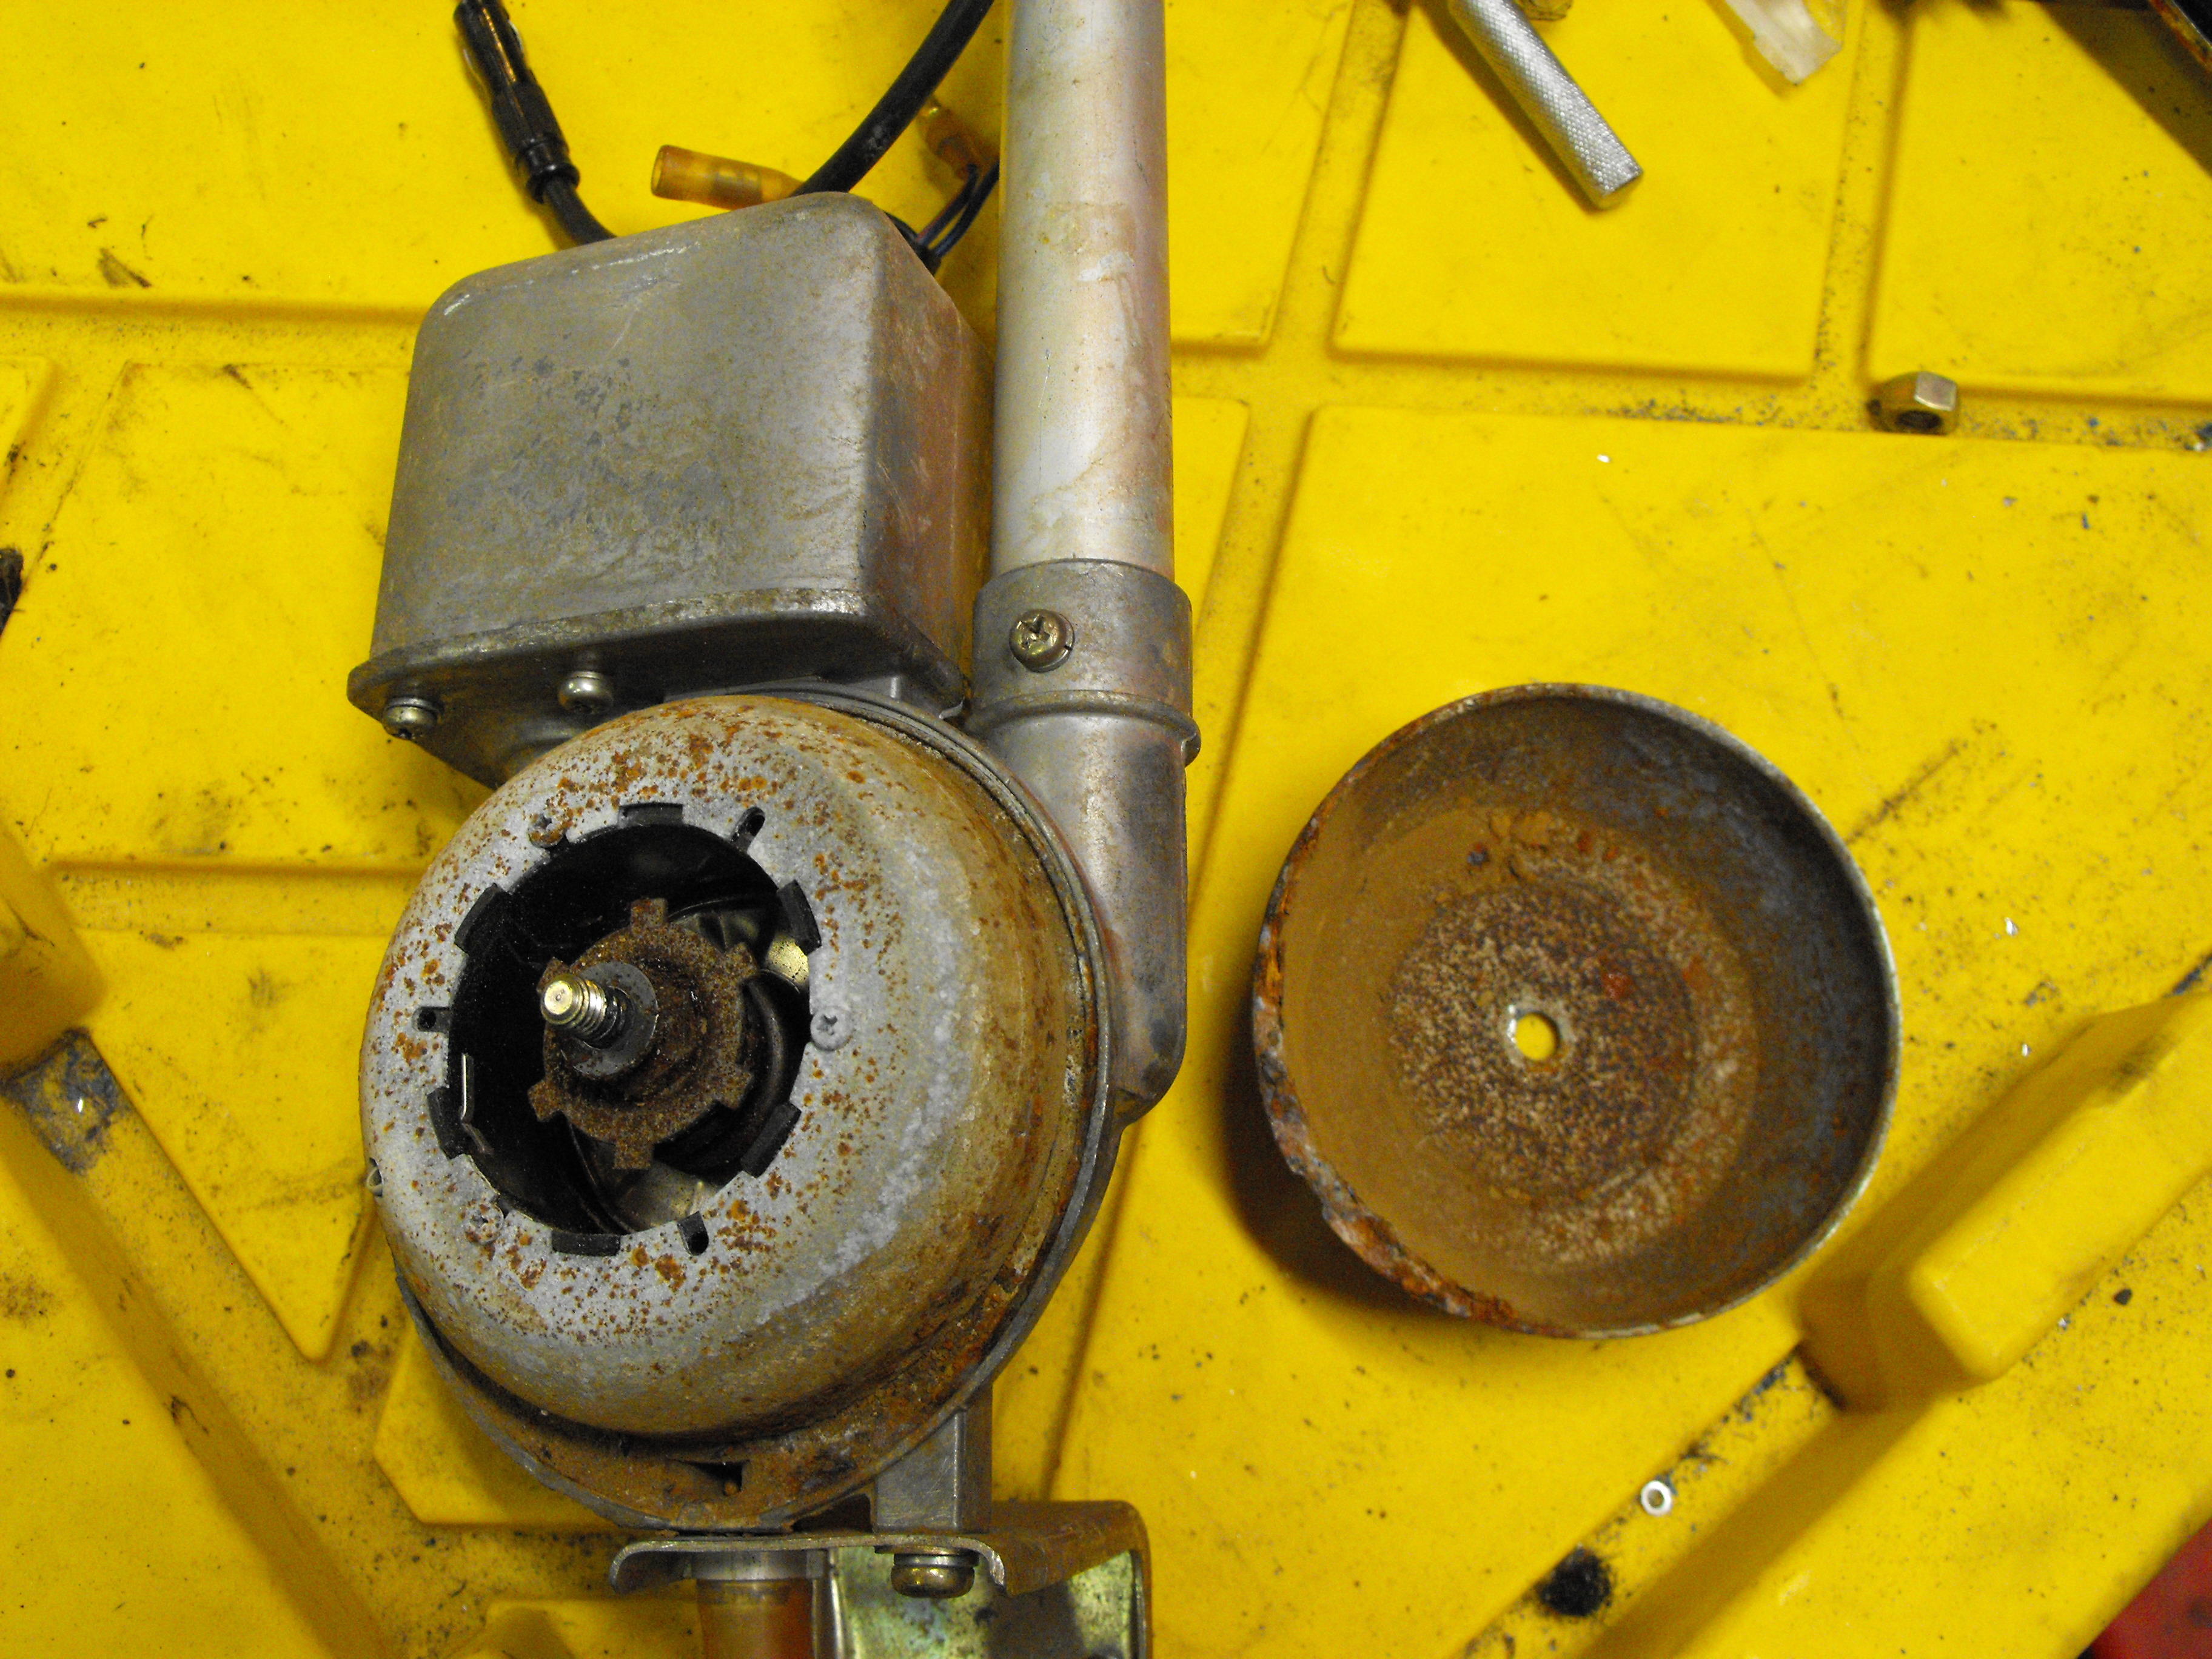
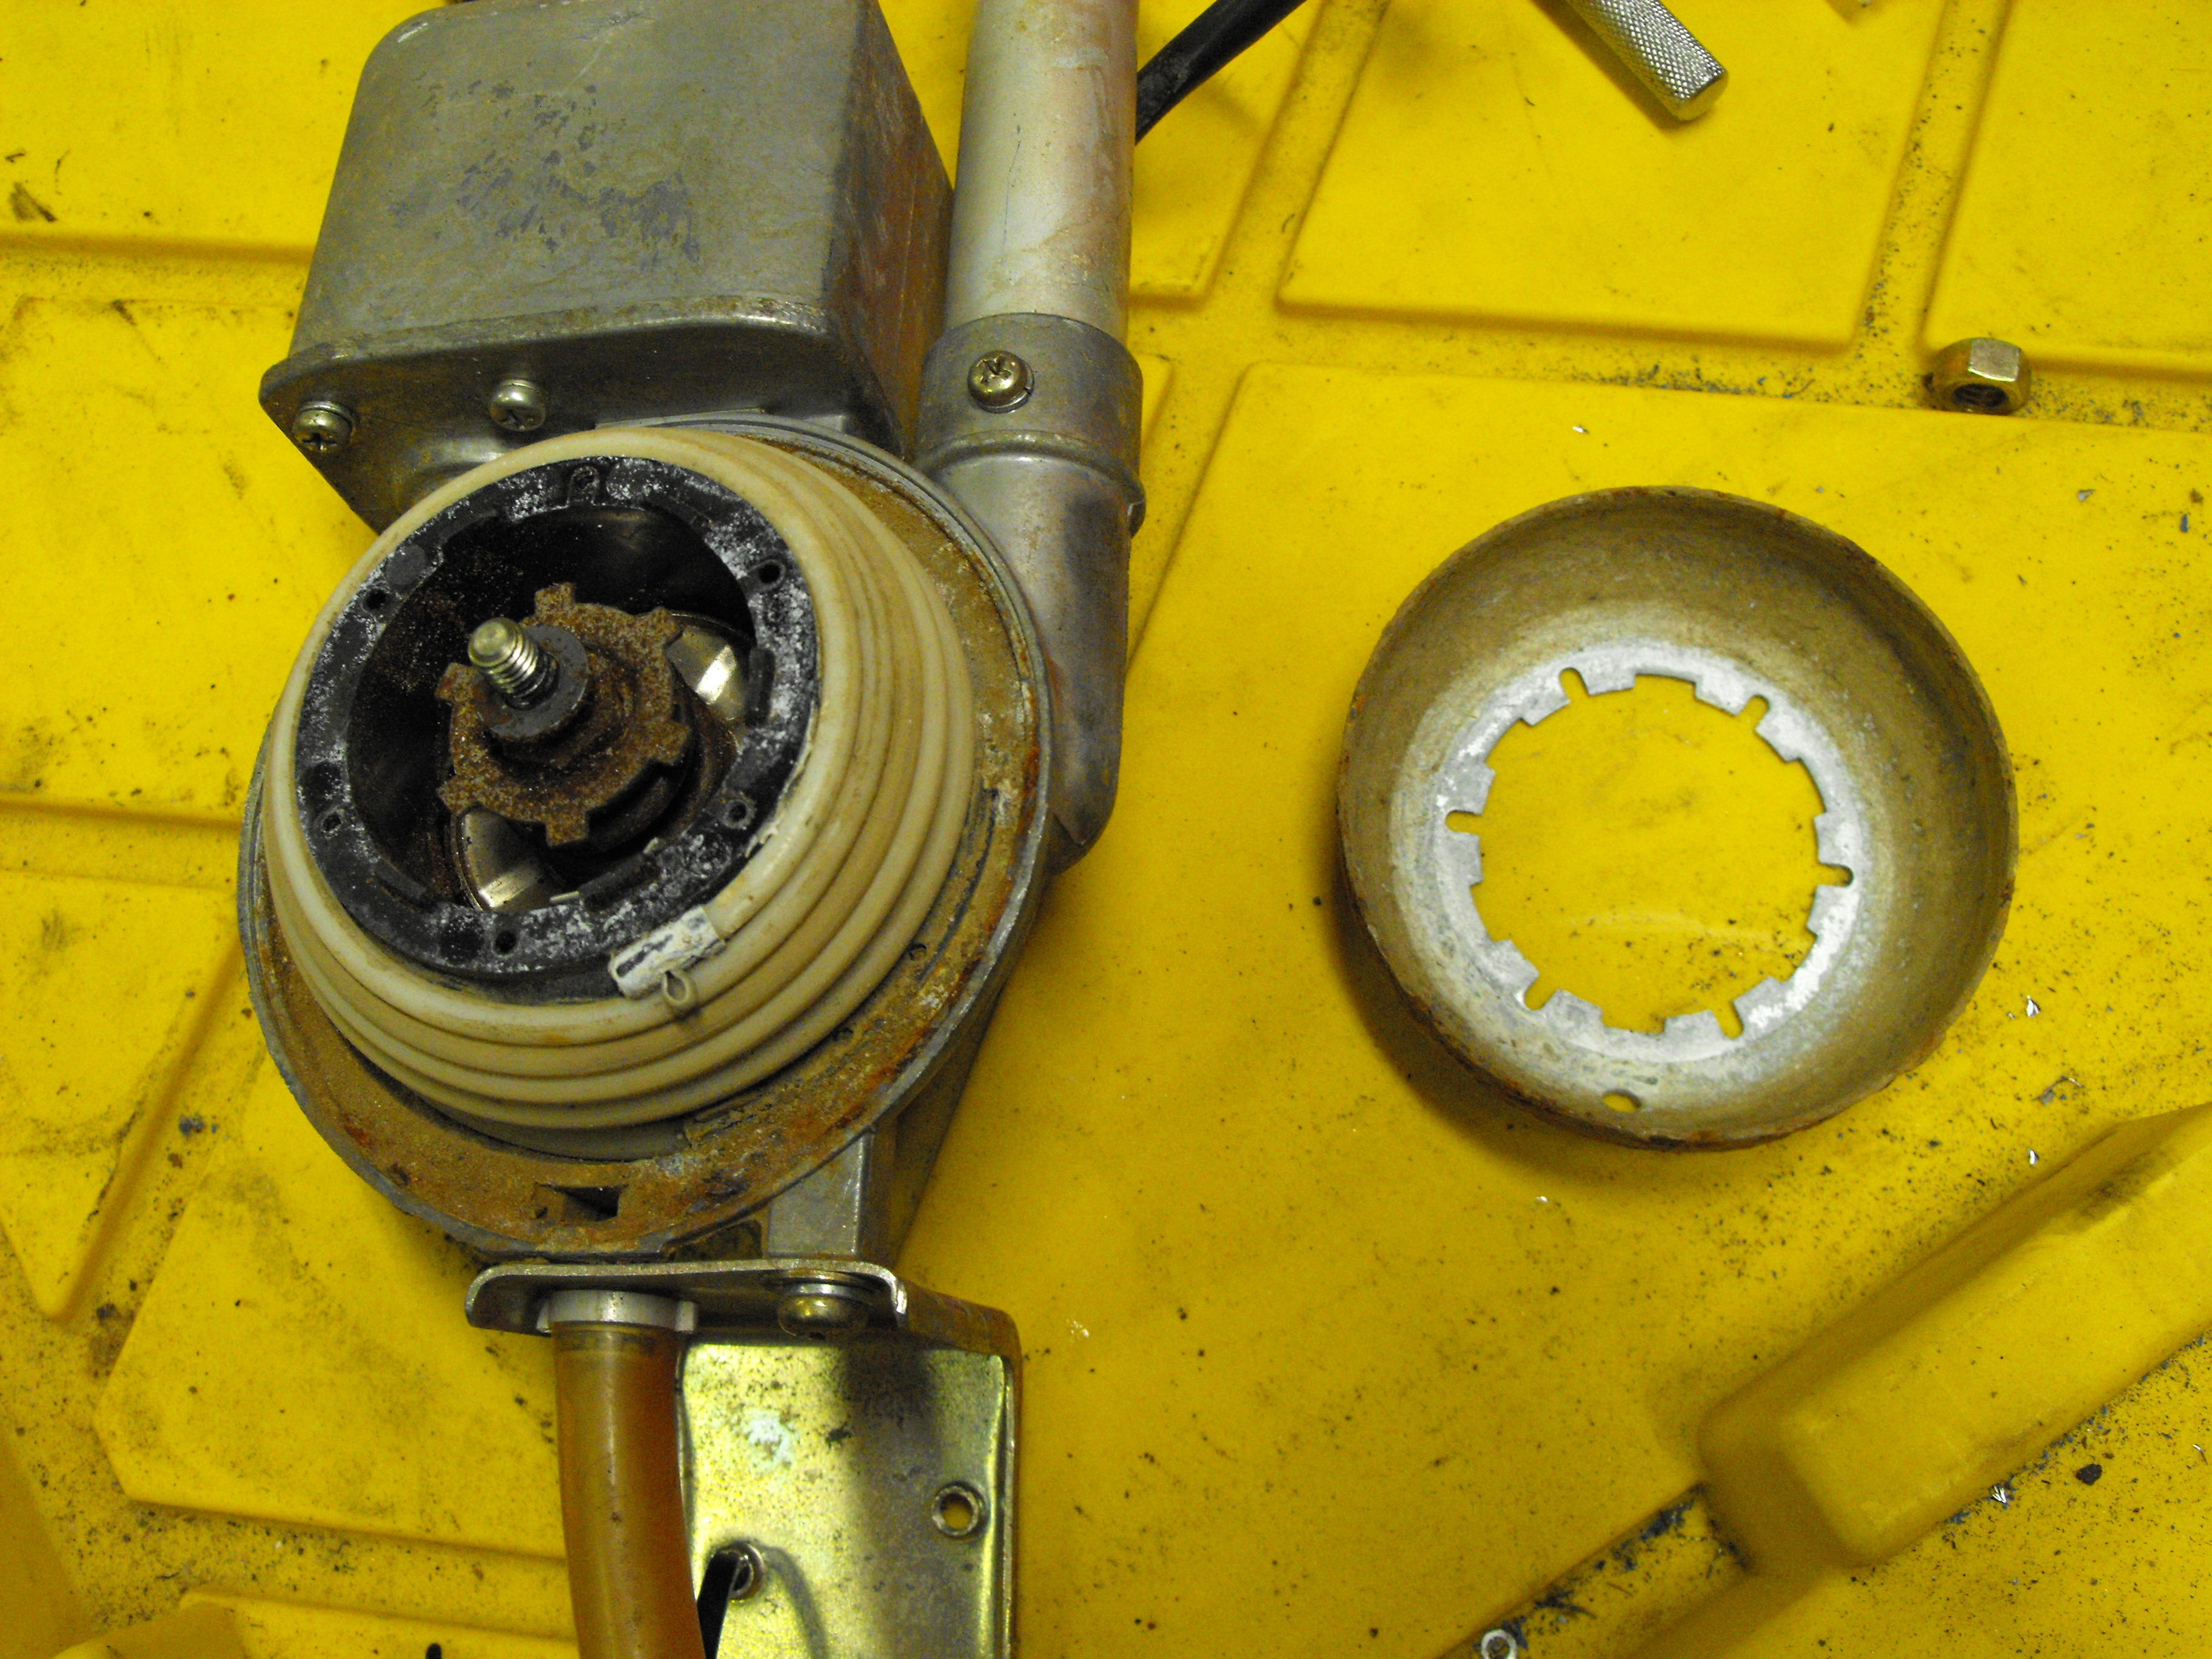
1 pointMotorsport and ZCar Depot are good starting points. I have a combination switch if you want to go back to the factory light setup. Somebody probably has some window cranks to replace the vise-grips. https://www.classiczcars.com/forums/forum/93-vendor-marketplace/
 1 point
 -
1 point
-
1 pointI believe the Irish invented a beverage or two to calm the passenger. Perhaps that is the solution!1 point
-
1 pointGav, See if you can find an electronics / TV repair shop in your area. I took all my radios and the tape player for inspection years ago. They are not very common anymore, unfortunately.1 point
-
Glad to hear its running. Gives me hope. ? engine looks great!1 point
-
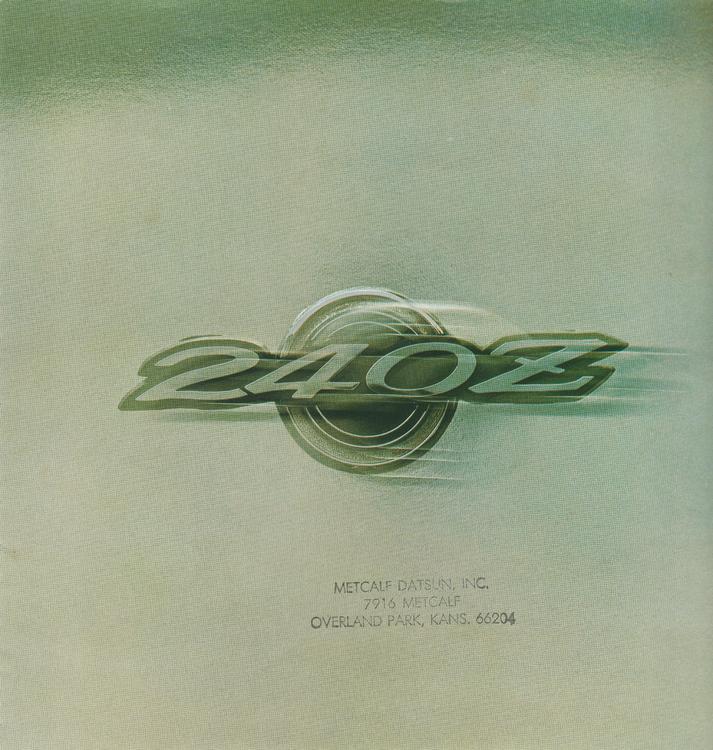
1 pointIf it helps, here are photos of the steering wheel and interior from a 1971/1972 brochure: The cover of the brochure, for reference:

 1 point
 -
That is a lot of angle on the front arm, like the struts are not moving or the springs are to heavy. Did you remove all 4 when you changed the struts? Like ZH said maybe mixed the front and rear springs? Also are the Tokico's set on #1 dampening?1 point
-
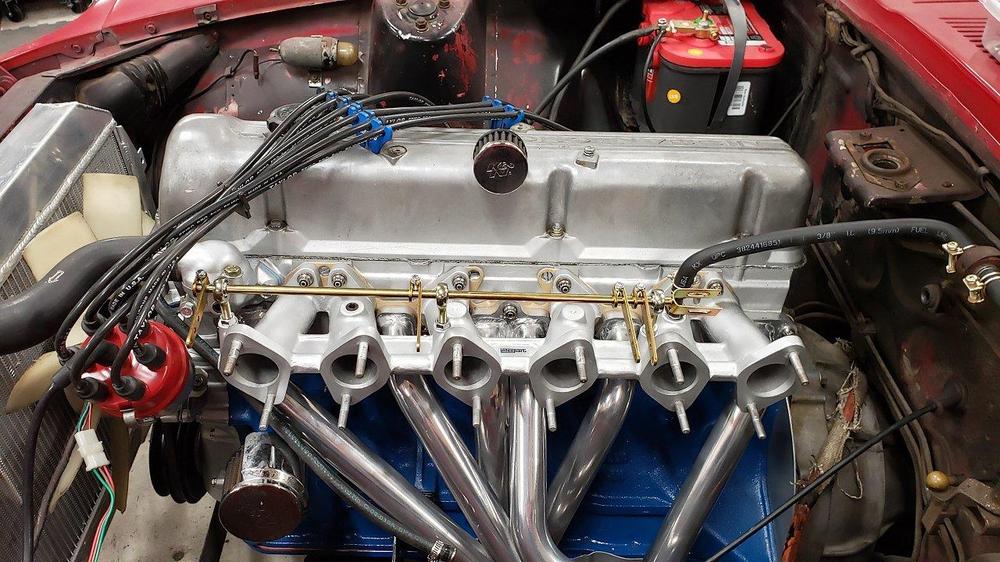
My new o-rings from McMaster-Carr arrived. These were to replace the flattened o-rings in the soft mount holders. I glued them in with a little shoe goo and laid a board with a book on top to provide even pressure over night. The next day was carb install day. Getting the carbs on with the heat shield is a bit challenging as it adds another item you have to contend with in an already tight space. Some patience and care not to drop anything saw it come together in the end. I left the linkages loose for now as I know syncing and tuning would be in my near future. With a cursory system and fuel pressure check complete and a fire extinguisher at the ready, I put my wife in the driver seat and had her turn the key while I worked the carbs and choke. After about 7 spins of the engine I could tell there was nothing happening. A second inspection revealed a coil ground wire I had removed and forgot to re-connect. Once connected my wife turned the key again and I don't think the engine turned a full rotation before IT FIRED UP! It scared my wife as the open header exits right under the driver seat. (sorry sweetie) I dis-engaged the choke and was shocked to see the engine settle in to an idle at 1k RPM. With the open header, it sounded awesome! I had to rev it a little bit just to hear it. WOW! With the stage-2 cam, new timing chain, and lightened flywheel, it revs super quick. It really sounds like a race car. Unfortunately it cannot stay that way.

 1 point
 -
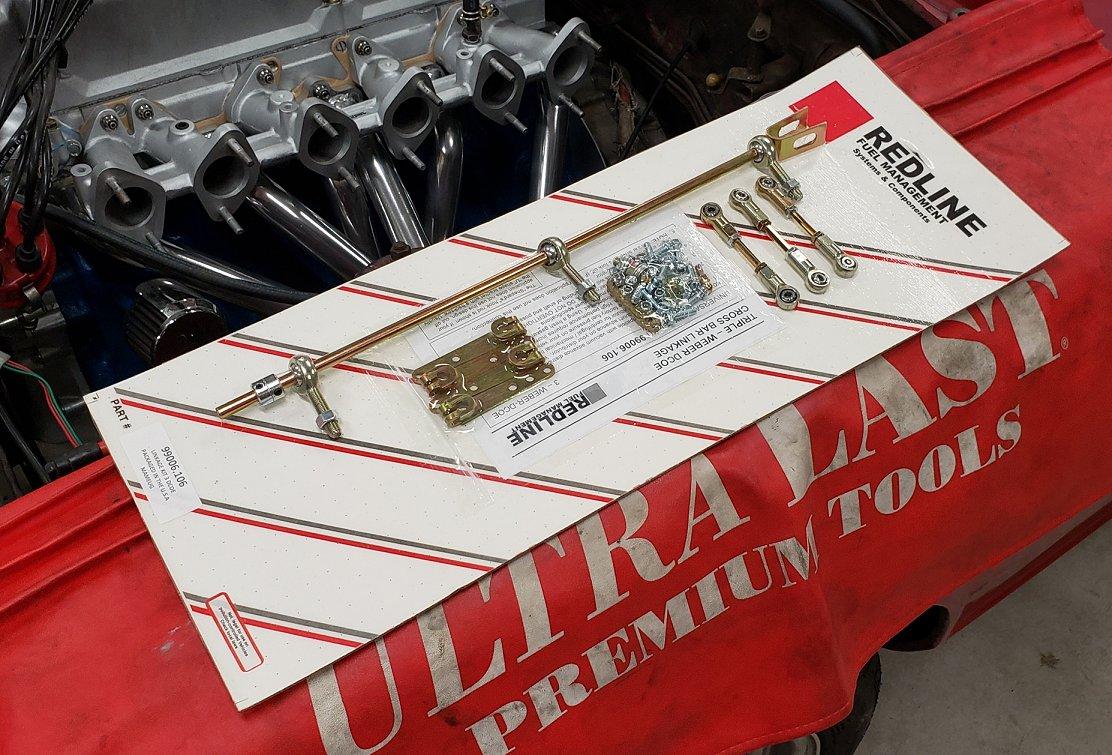
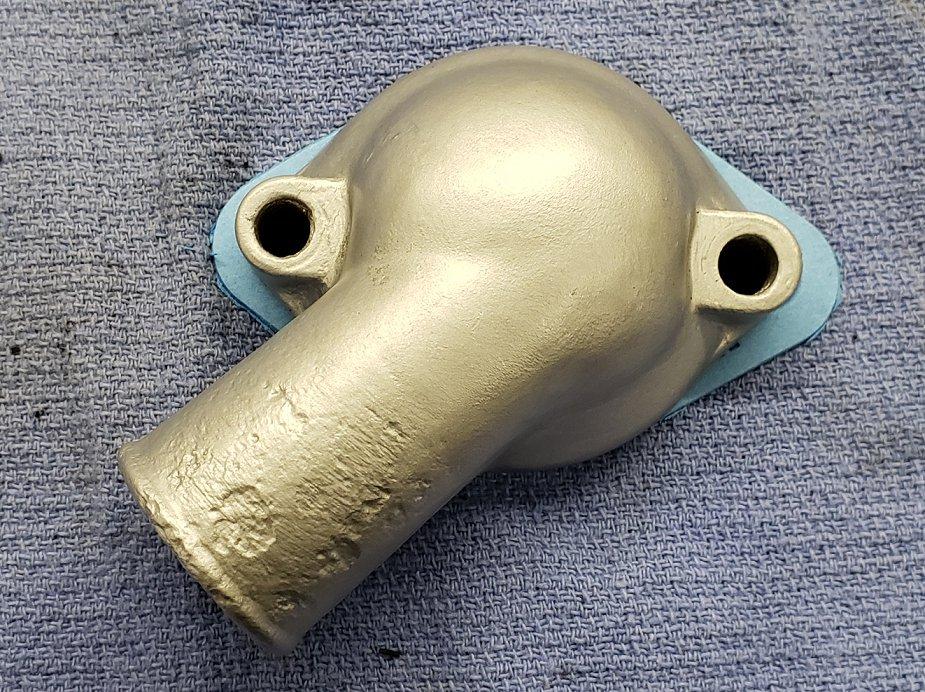
Got a few updates as the finish line gets closer. I ordered a new 160 degree thermostat and Fel-Pro t-stat gasket. The gasket is labeled for a small block Chevy. It was sorta close and after some trimming it was much better. With the upper t-stat housing installed I put on a new Wix filter and filled it up with fresh Valvoline 20w-50 VR1 racing oil. I never made a tool to prime the pump but I did pour some oil in it when I installed it. With no spark plugs the engine turned over pretty easily. I pulled the valve cover and asked my wife to watch the cam and tell me when the oil starts flowing out. After about 10 turns the cam was liberally covered so the valve cover went back on. I spent the rest of the day getting everything buttoned up. As I started to organize the new carb linkage components, I quickly realized an oversight I had made. I should have setup the linkage bar before installing the intake. No biggie, a few minutes pulling the intake and about 20 minutes spent getting the bar straight and the linkage arms on.


 1 point
 -
I see two things potentially wrong... First is that the floor jack appears like it could be pushing inward on the rotor and helping limit the natural outward movement of the hub as the suspension tries to move upward. Might be better to rotate the floor jack ninety degrees so the little wheels on it will allow it to move easier inward and outward with respect to the center of the car. The second thing? I can't see the right side front wheel but I suspect it's hanging free? If that's the case, then your sway bar (roll bar, anti-sway bar, etc) is fighting you. Just like it's supposed to do. In operation, the sway bar tries to keep the levels of the two front wheels the same. So if you've got one hanging and the other being pushed up by a jack, you're twisting the torsion spring that is your sway bar. You might try temporarily disconnecting the sway bar. Or better yet... Just lower both front tires onto a pair of roller bottom moving dollies. That will allow them to squirm to their proper position and then tighten up the transverse link bushing bolts while the suspension is loaded.1 point
-
Mike , I am with you . Thanks for telling me the story when I visited your shop last month. We know you are the best in the world . It is a Z heaven. Many gold medallion cars have been taken care of by you . Kats1 point
-
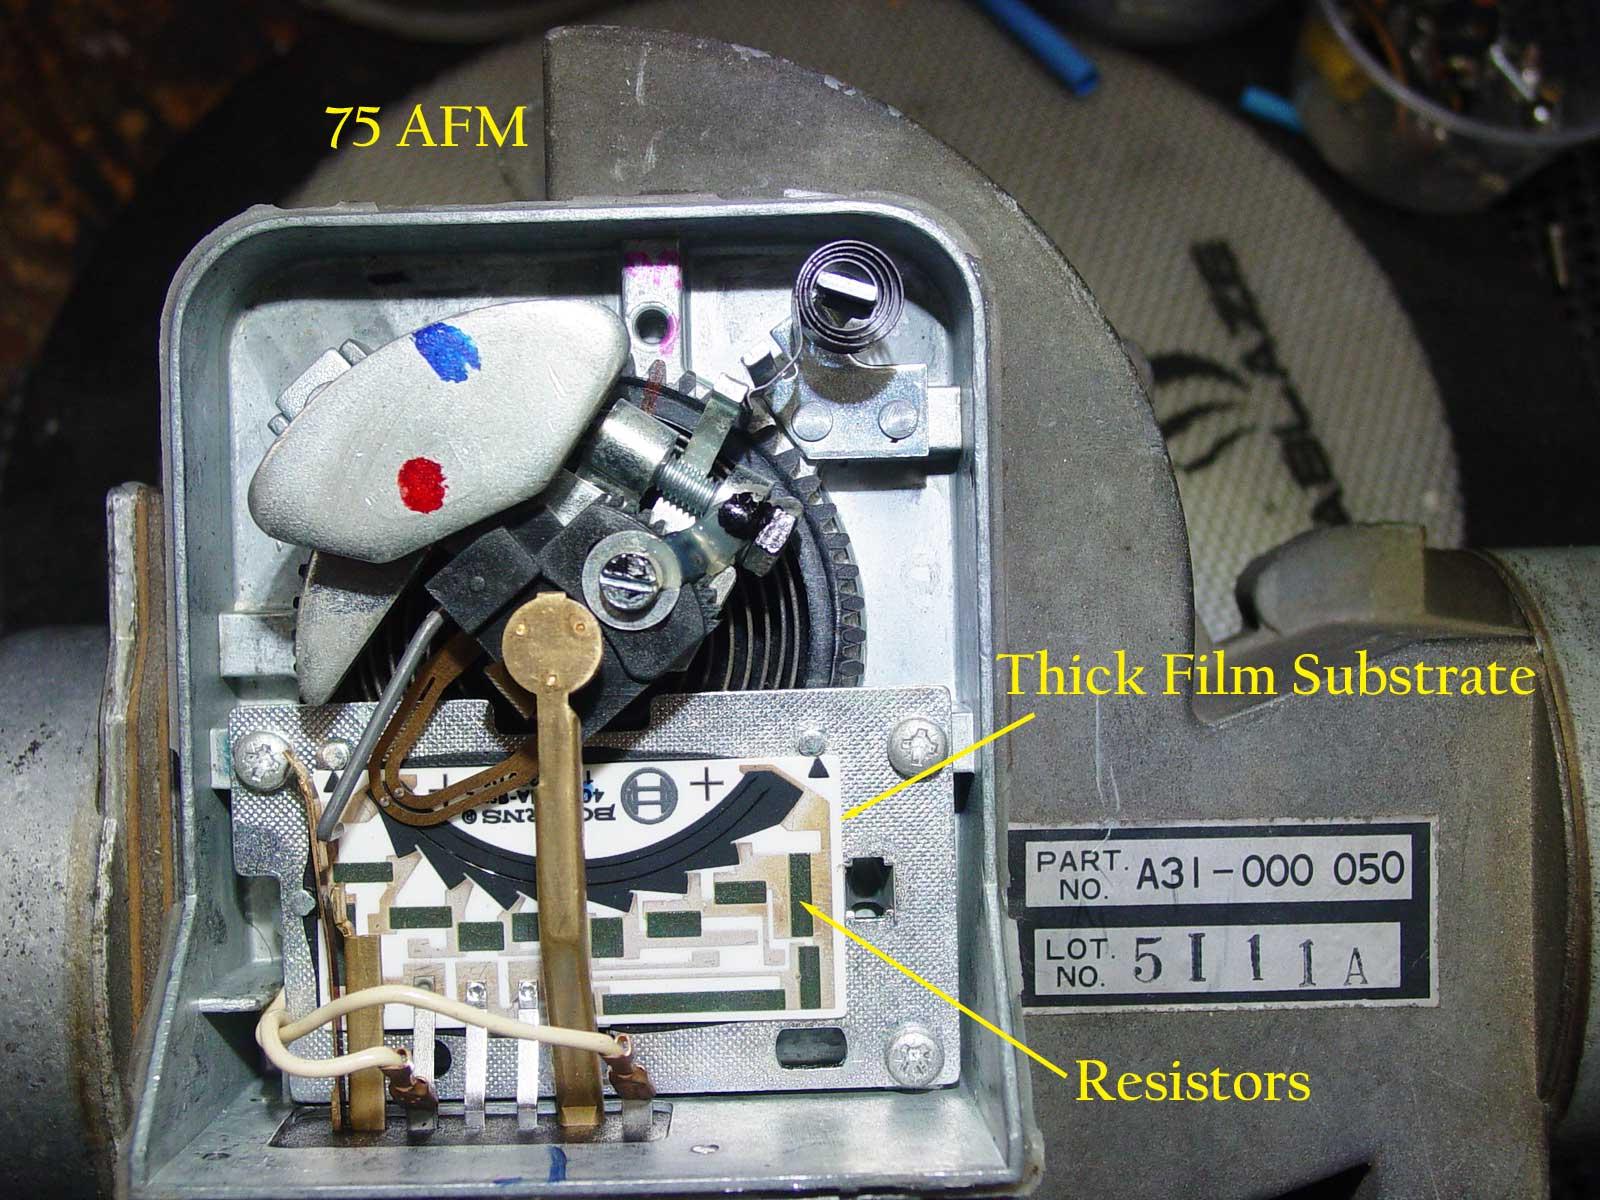
Sorry I didn't see this thread earlier, but through I would throw in a little more knowledge about AFM meters. The air flow meter is a very very sensitive instrument and has several known weakness. One of which is the temperature sensor. If this drifts the signal sent to the Control Unit will change which in turn will change the air fuel mix. And create a cascade of changes/problems. Second the substrate, called thick film ,has resistors that will drift over time. The resistors are ruthenium dioxide (look and act like glass )when centered or fired at high temperature. The exact resistor value is trimmed with plunge cuts into the ruthenium via a laser and the value desired monitored by an ohm meter. This all sounds good, but the problem comes with time when cracks develop at the end of the laser cuts. In essence the cracks grow and the resistor changes value. This can be minimized if the substrate with resistors are cured and the resistor values rechecked. This costs big $ for commercial products so they eliminate this step. In addition, the white substrate is alumina (aluminum oxide), very brittle and prone to cracking if not attached to a very rigid surface. One word of warning NEVER REMOVE the screws from the substrate. You will crack it. My 75 OEM AFM has a thick film substrate made by BUORNS and the one currently in my car is made by OHMIC?? So we have resistors and temperature sensors that change over time, gas which is been reformulated, and different manufactures of the resistor substrates . My original AFM in my 75 would intermittently quit working and at the time and I had no idea what was in the AFM. I was told that it, the AMF, was bad so it was replace. What I discovered was that the air temp sensor was slightly out of speck. The resistor substrate is just fine. This OEM AFM always caused my engine to run rich as well as the current AMF I have on my car. What I believe is the gas has changed in CA and the AFM as adjusted for the 70-80 vintage gas is the problem. For many years I have had to adjust my AFM to the leaner side to get through smog testing. Nothing has changed in my AFM , but the gas has changed. As I discovered recently the boot between the AFM and the TB must be air tight. I struggled for days tuning a new motor only to find I had several small cracks in this boot. Once the cracks were sealed what a difference. Ok one more thing to pass forward . The engine water temp sensor next to the AFM air temp sensor are the two most important parts of the FI Control Unit inputs. If either of these two items drift or change it throws everything off. The change I speak of is a slow drift out of specification. Particular attention to their performance is key. Well this is my 2 cents worth and I hope it helps someone trying to learn about the FI process. Also check out the enclosure. Ron
 1 point
 -
1 point
-
Don't feel bad - it was an opportunity buy. Glad it will have a good home. As Cliff said, still in stock thru Courtesy.1 point
-
1 point
-
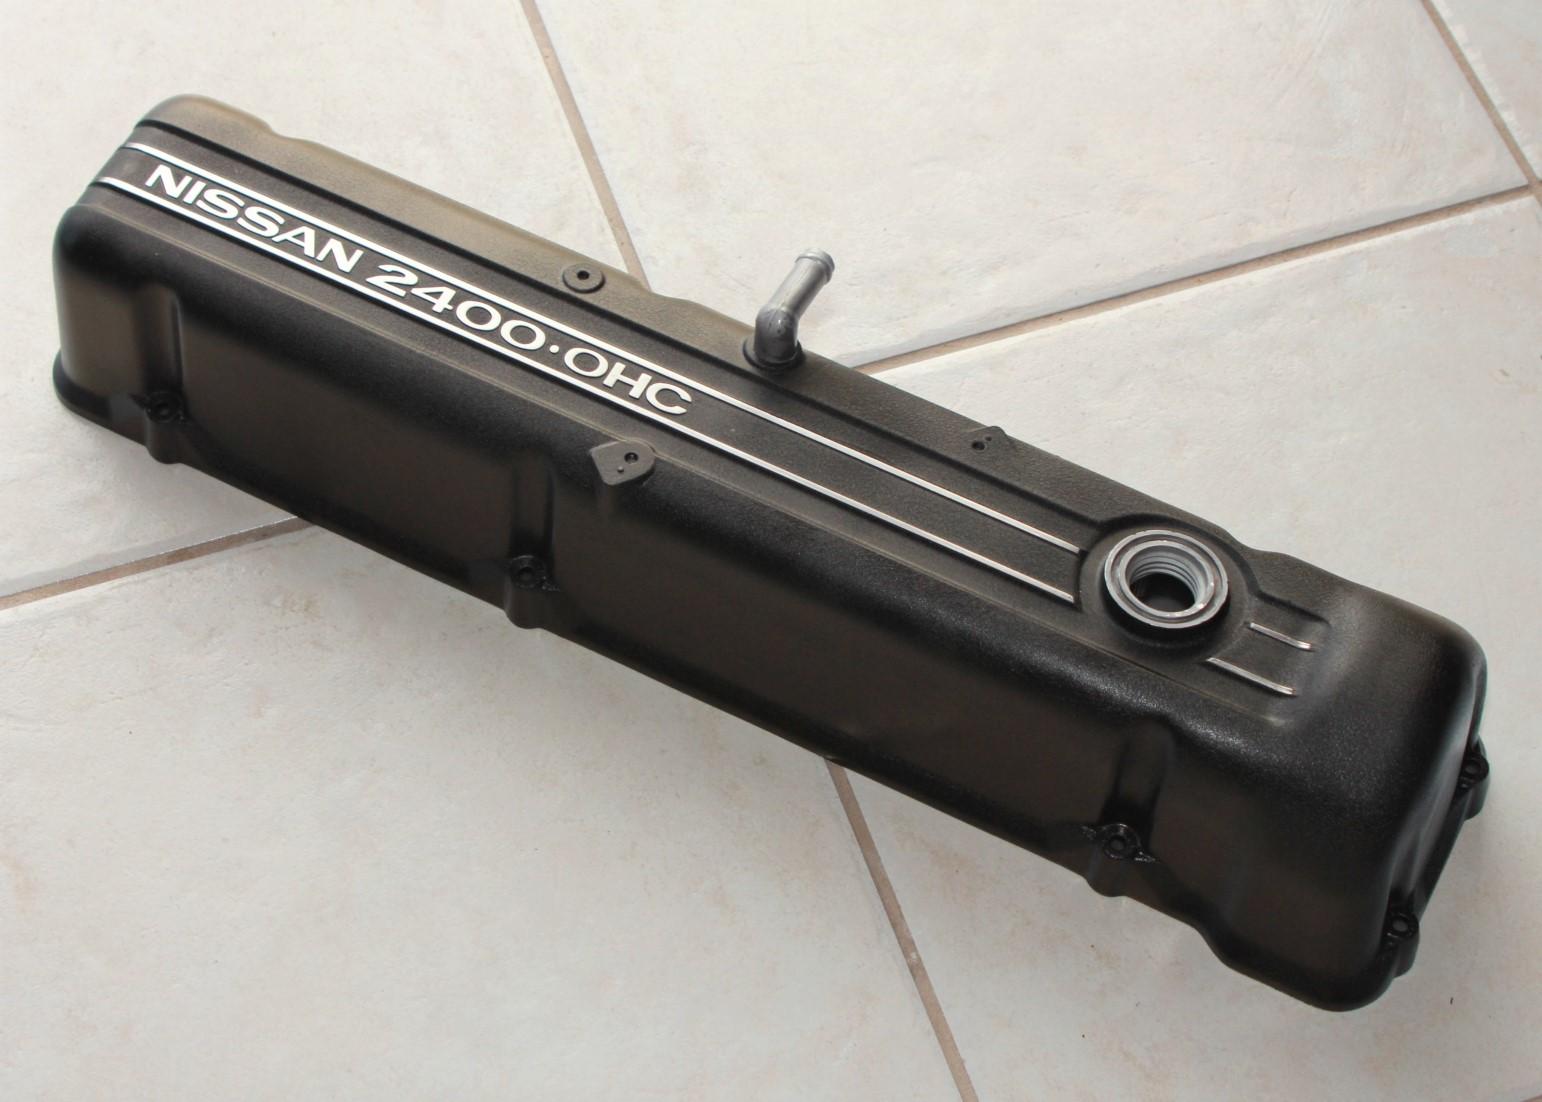
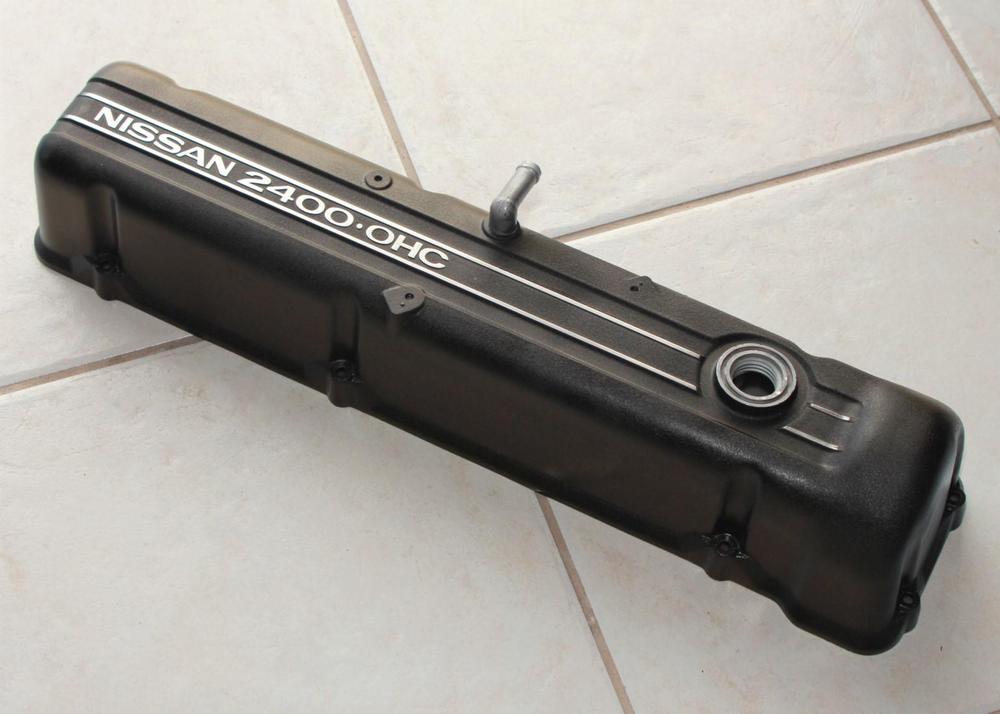
1 pointThe engine is going back together without the emission control hardware. I have an exhaust manifold without the air injection ports and the non-emission intake manifold. I happen to really like the Hitachi carburetor design, have worked with them during my British car SU days and will use Z-Therapy rebuilds (perhaps slightly modified). I decided to paint my valve cover wrinkle black as a throw-back to my racing days. I'll post more pictures of other completed components soon. I have to start taking pictures!
 1 point
 -
1 pointFinally the whole chassis was sprayed in a continuous primer. I started to place the sound deadening "tar mat" sections, but didn't like the material and that's about the time that the economy fell on it's ear and my income went to hell.
 1 point
 -
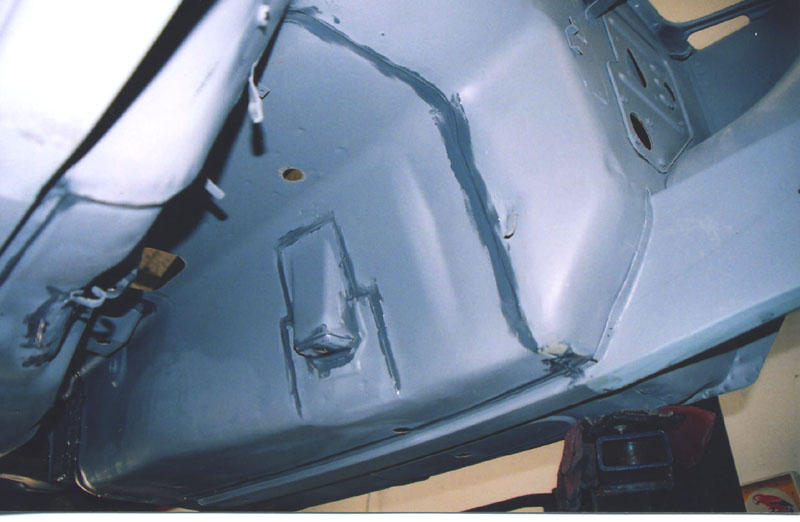
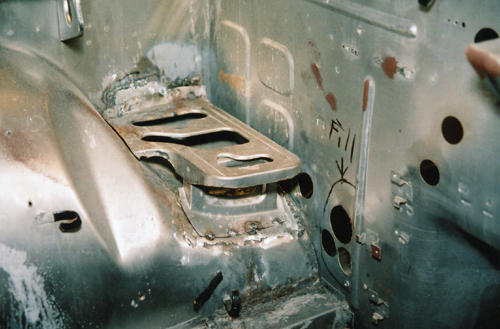
1 pointThen the welding started. What was once rust was just a hole in the metal and 26th got new floors, one new frame rail, dog leg rocker panels, and some other areas.

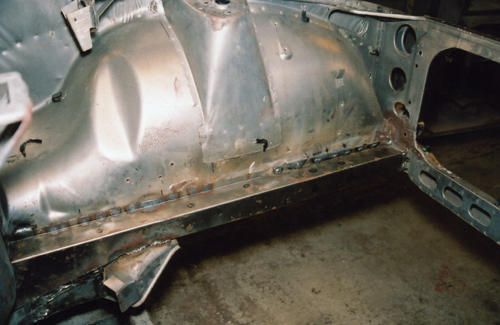 1 point
 -
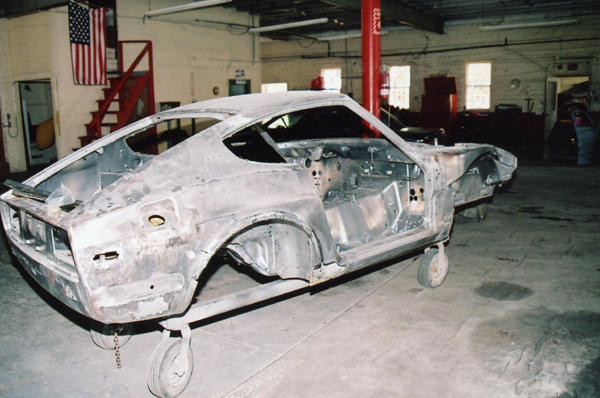
1 pointTo make this "build thread' complete, I should rewind for a moment and discuss how I got to this point. Much of this has been posted before, buried in the archives somewhere. I bought 26th in 1984 from the estate of the original owner. Rob bought the car new from a local Datsun dealer and I remember when he bought it. 26th was imported in Jacksonville Florida and delivered in May, 1970. When Rob passed away, his son who is a very close friend asked me if I wanted to buy the car from the estate. I drove 26th for several years and decided to do this restore after dealing with rust issues on two separate occasions. She was literally rusting from the inside out and major work was needed. There is a place in Wachula, Florida that provides a complete rust removal process called reverse electrolysis. The body shell is immersed in a big tank with electrodes and a sacrificial anode to remove all the iron oxides resulting in bare, rust free, metal.
 1 point
 -
1 pointThis is great Chris! I think you should also put a few of the "in the field" shots to show the progress from your archeological rescue.1 point
-
1 pointVery cool and thanks for sharing a little bit of history. Looking forward to watching the restoration. ?1 point
-
1 point
-
I celebrated my 40th birthday over the Memorial Day weekend and my wife asked me what I wanted. My wish list was three things, 1. Lunch at Gloria's 2. Make me a homemade chocolate meringue pie and 3. help me put the engine back in the Z car. Needless to say I have a wonderful wife and I got everything I wanted for my birthday. It took us about an hour and a half to get the engine in. Getting it lined up on to the transmission and tilting the motor over at the same time proved to be harder than we anticipated. In the end we go it done together. I used some long bolts to help draw the engine the last inch to the transmission. If I ever do this again, I will just pull the transmission with the engine like I have done in the past with other cars and re-install in reverse fashion.


 1 point