Leaderboard
-

Zed Head
Free Member4Points19,316Posts -

Av8ferg
Free Member4Points1,538Posts -

dutchzcarguy
Free Member2Points2,680Posts -

CanTechZ
Free Member2Points1,314Posts


Popular Content
Showing content with the highest reputation on 04/26/2022 in all areas
-
3 pointsThis used to be a hot topic and John Coffey actually measured a bunch of half shafts, compressed, and found that they were all the same length. He had the work on his Beta Motorsport site for a while and then on a separate Facebook page but I think it's all gone now. I think the original subject was about why half shafts bind in 240Z when you install an R200. The question never really got a good answer. But at least a bunch of half shafts got measured. One of the Z books, maybe the Humble Restoration book, has a TSB in it about Nissan removing one of the ball spacers in the half shaft so that it would extend further, so a longer shaft suggests a newer half shaft. But, compressed they're all the same. In short, there's not really a left or right shaft.3 points
-
2 points
-
2 pointsI saw that too. Same price… I’m picking the dirty, oiled one tomorrow as he gave some discount… I’m going to use that discount to buy rebuild kit and still have some left over for few cold beers and still cheaper than $1000. He got to make profit somehow as he had to pull it from a car, I’m cool with it. Hopefully the oiled is from engine rather than transmission. I hope I don’t make a big mistake2 points
-
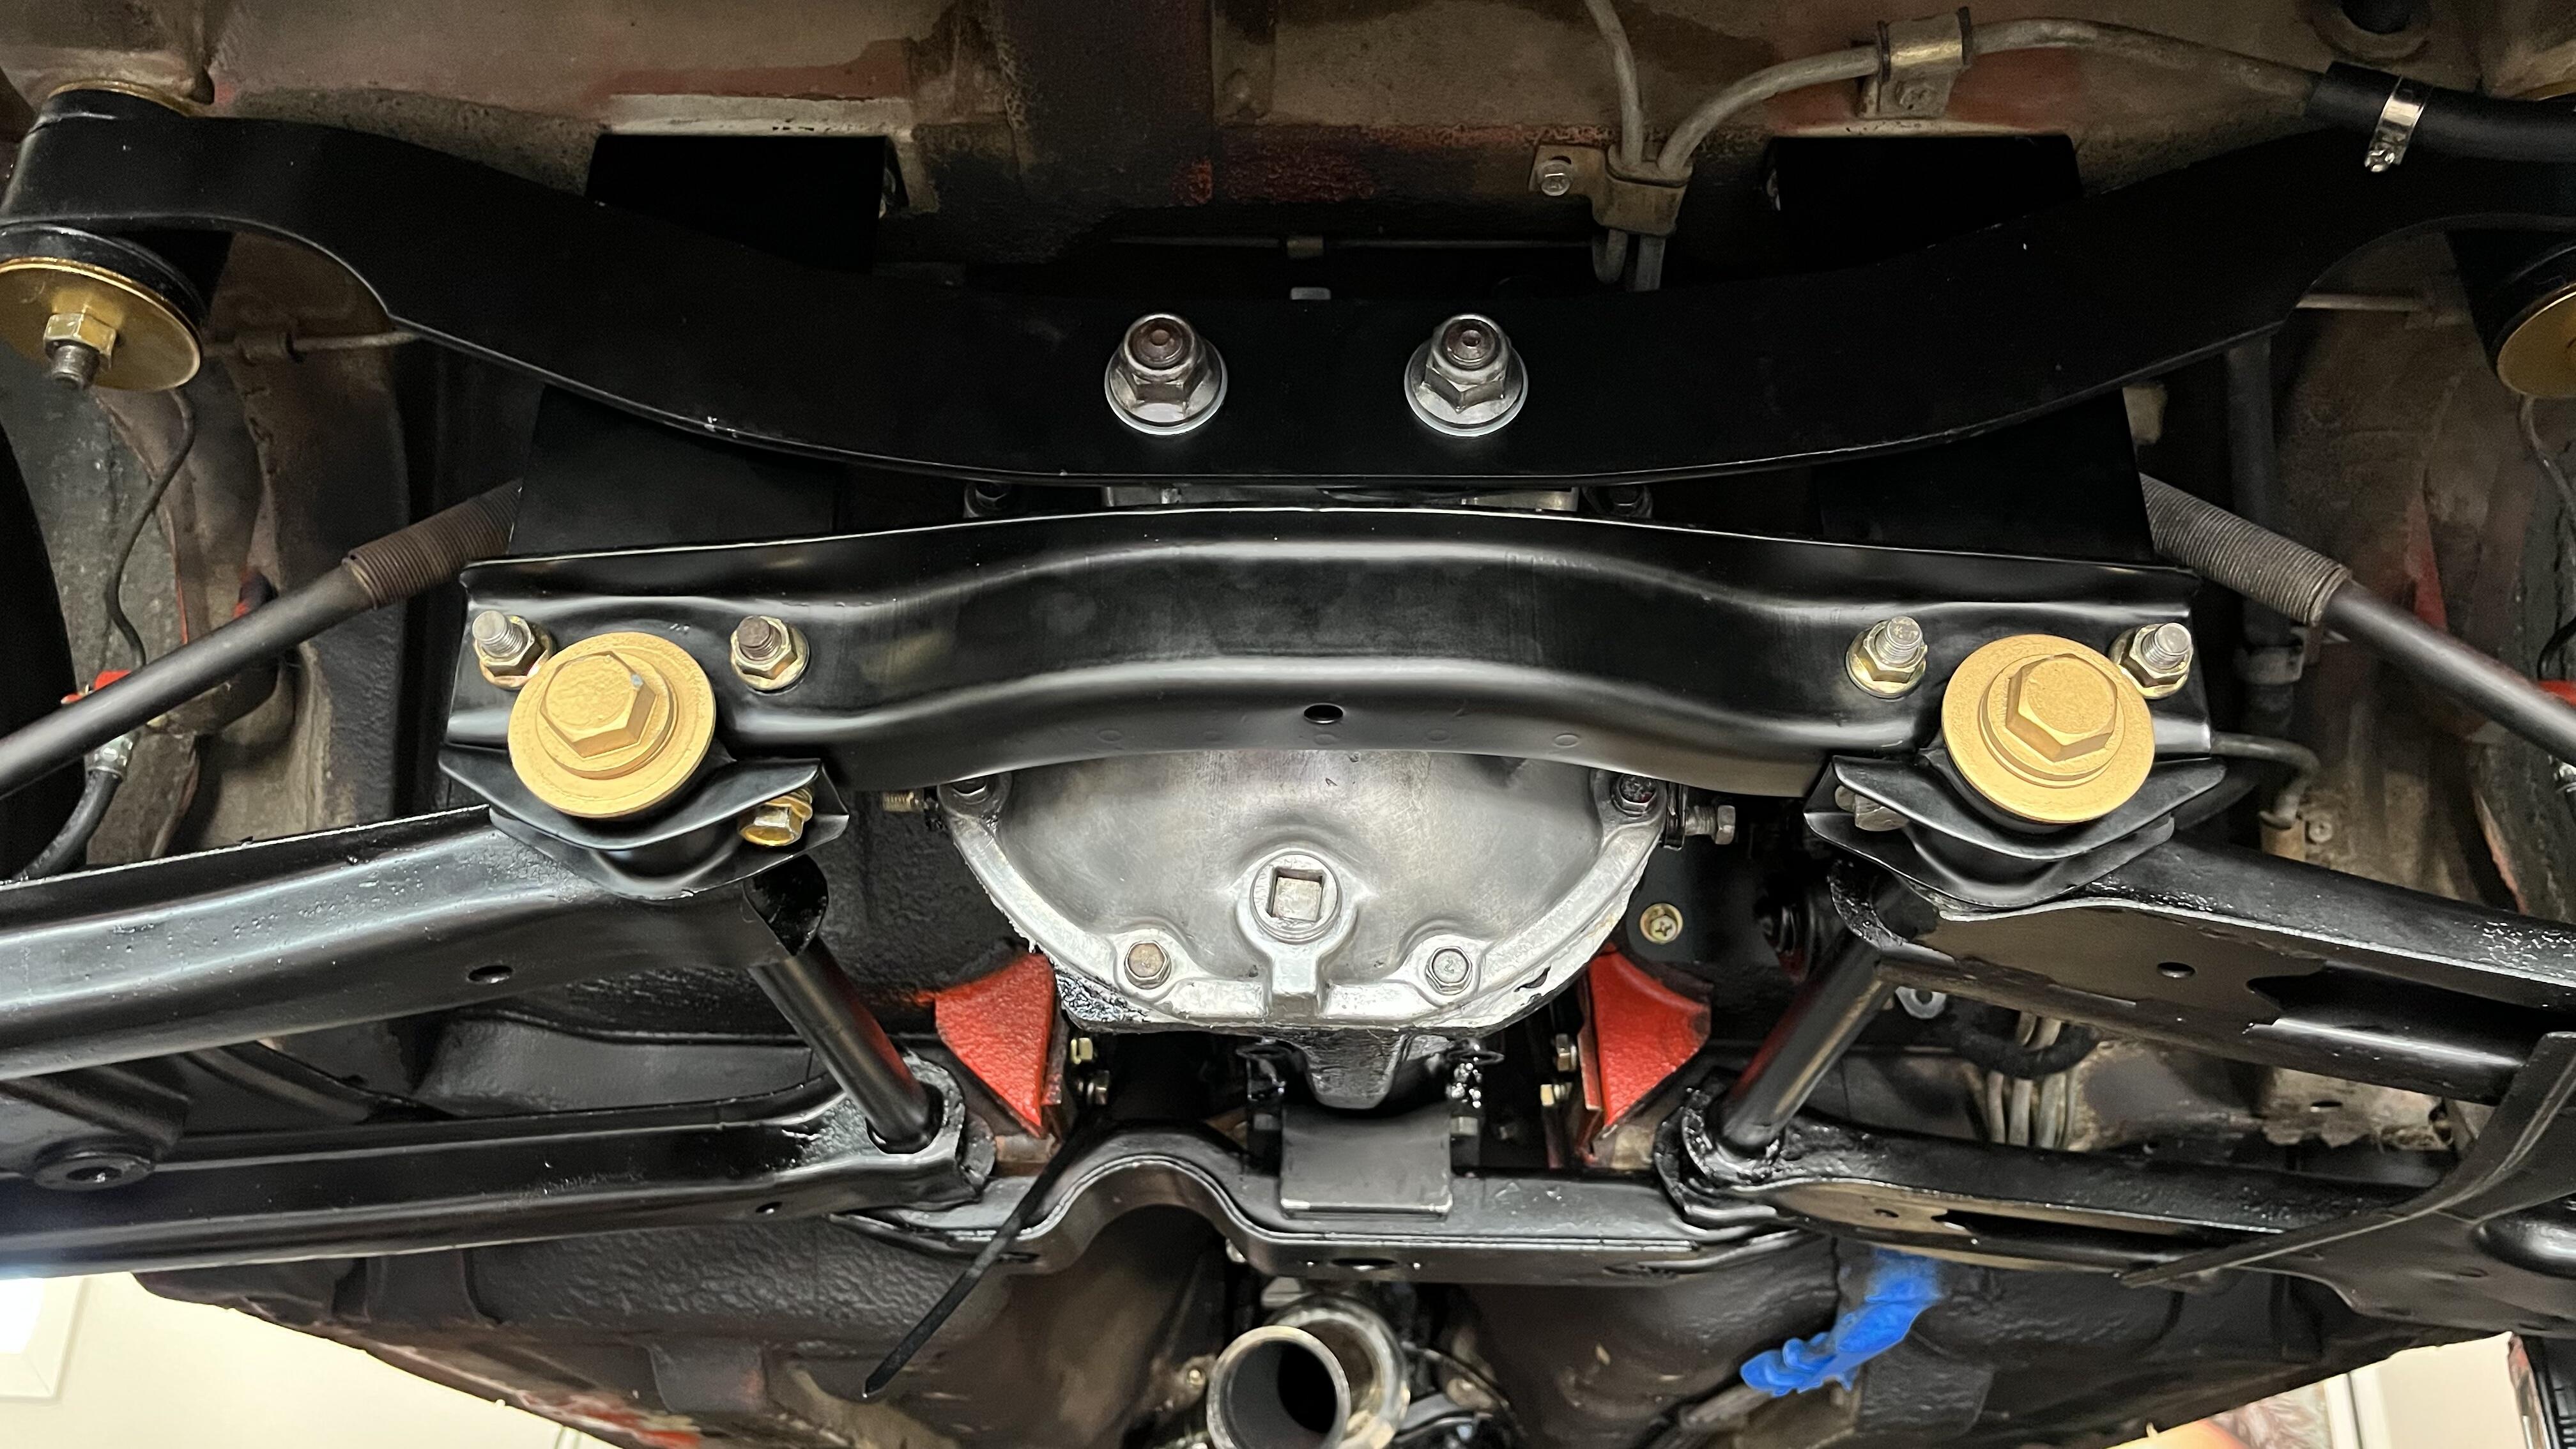
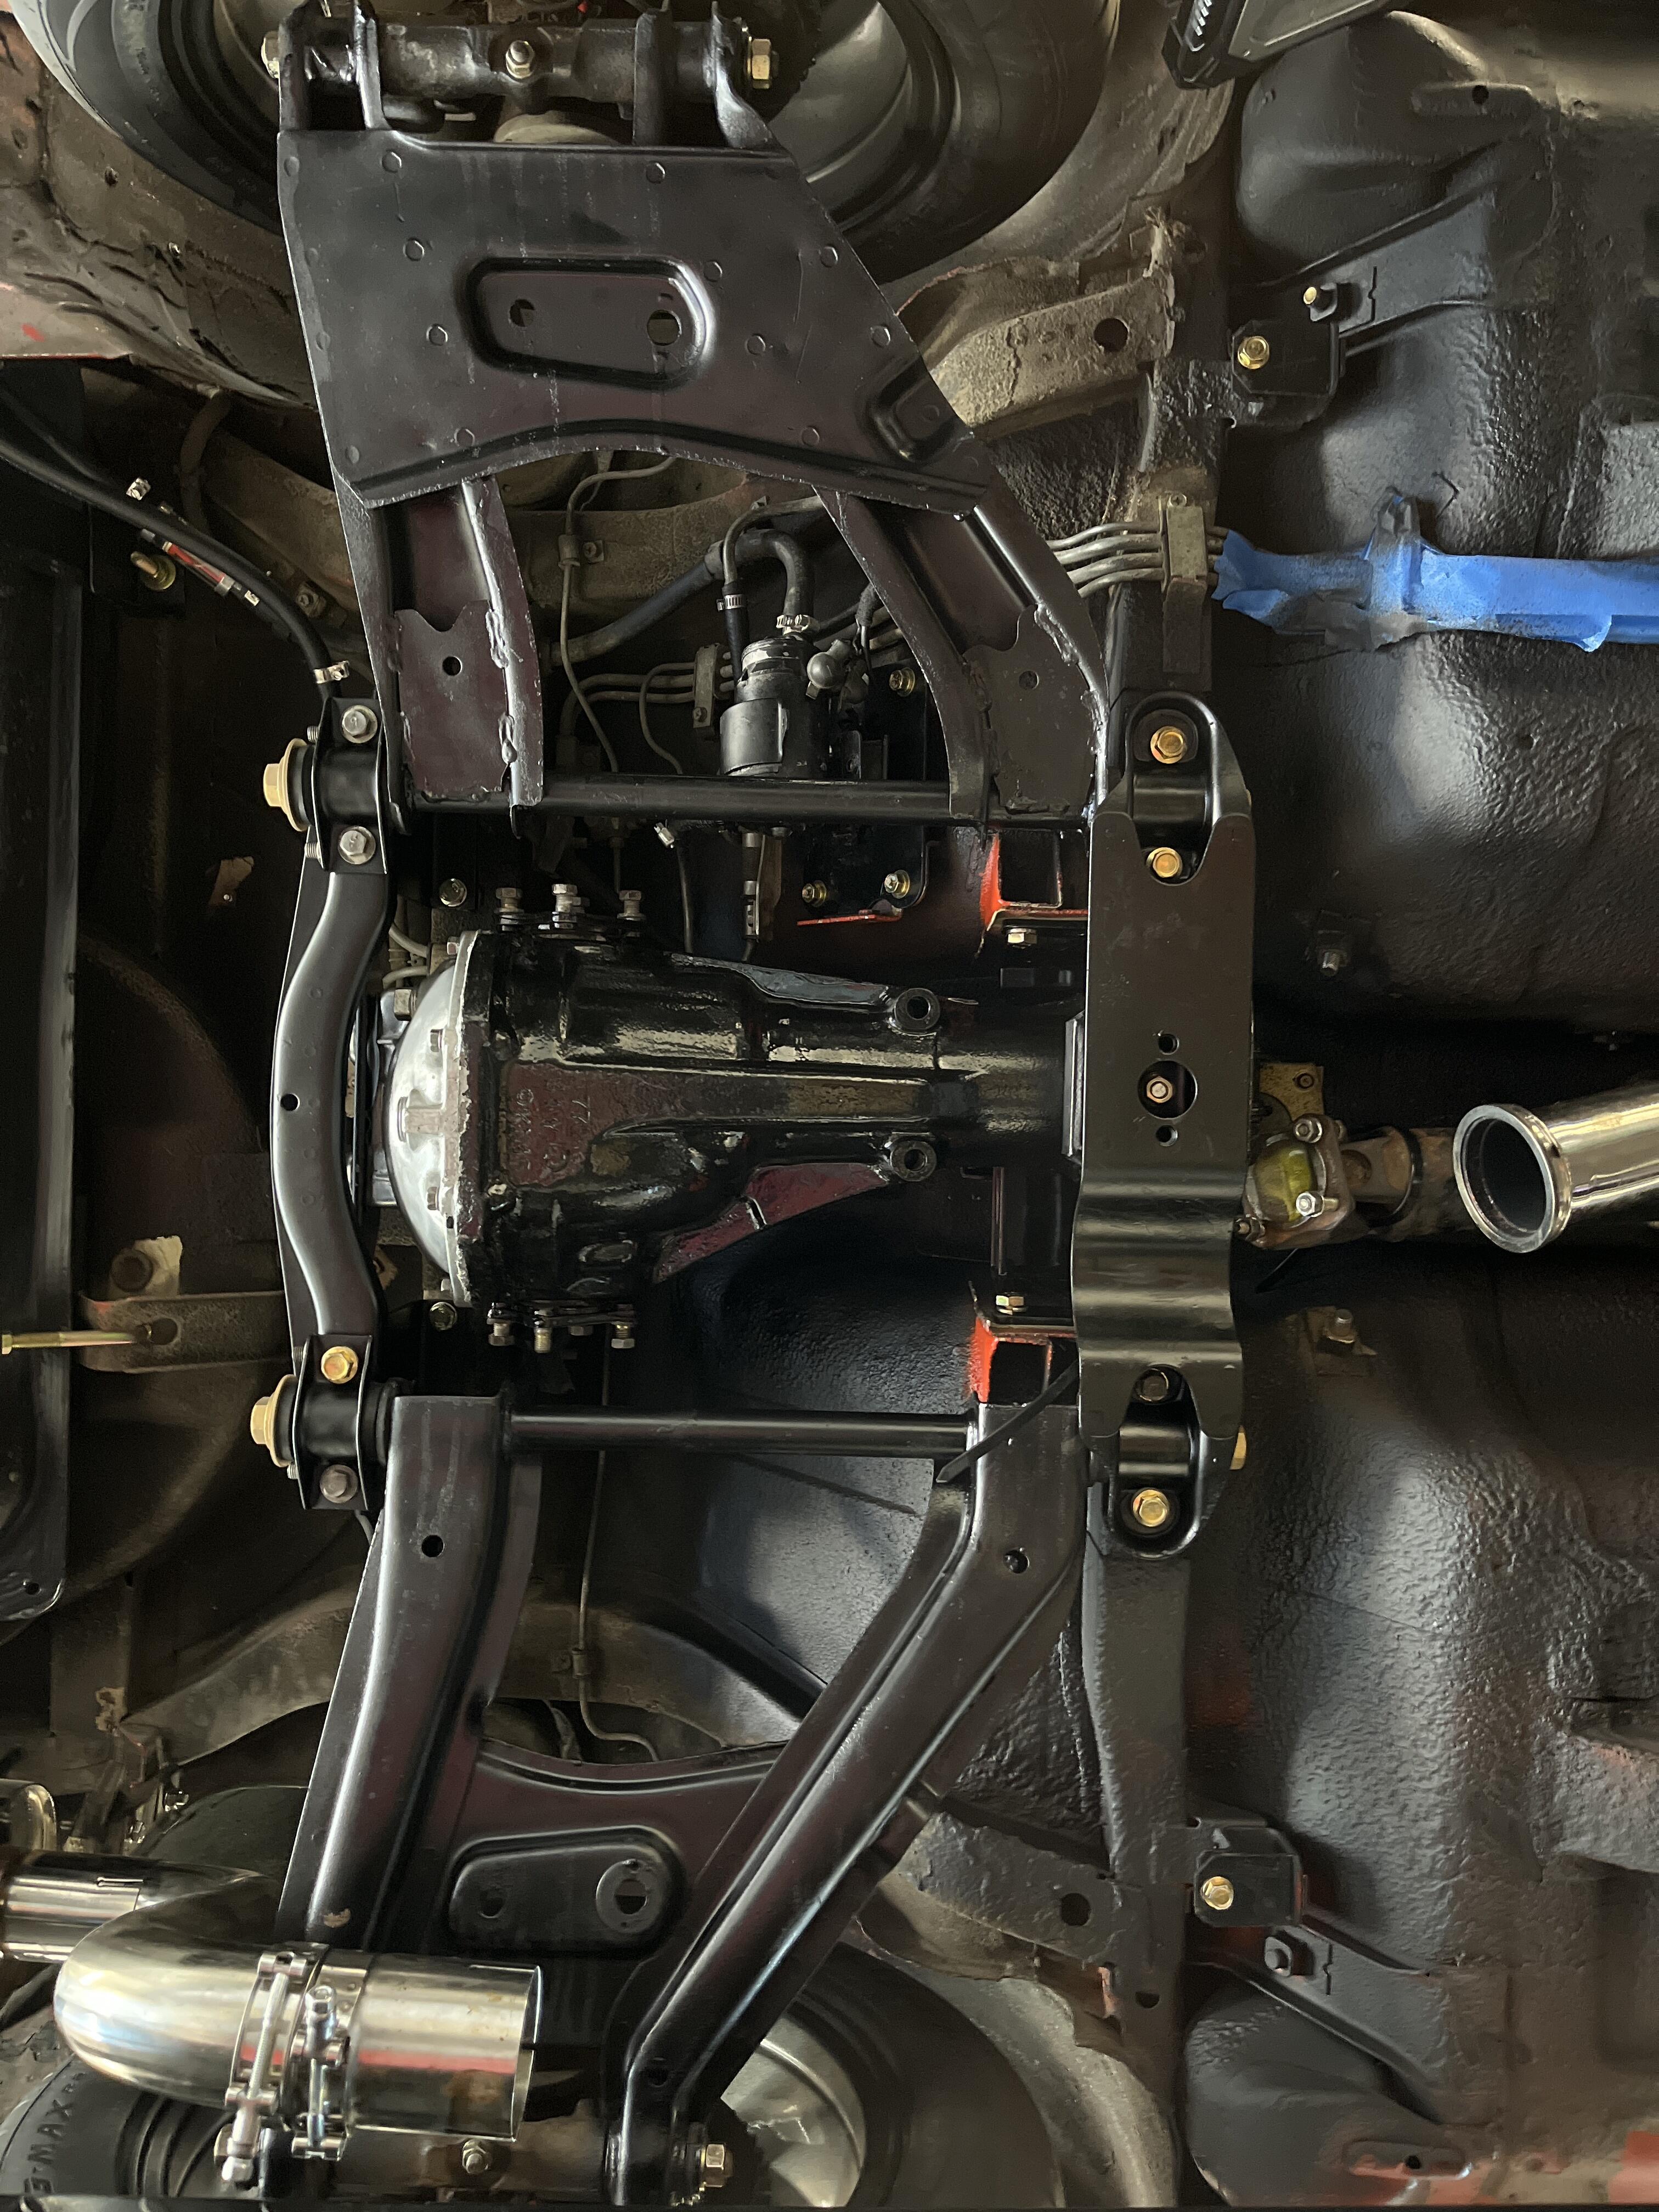
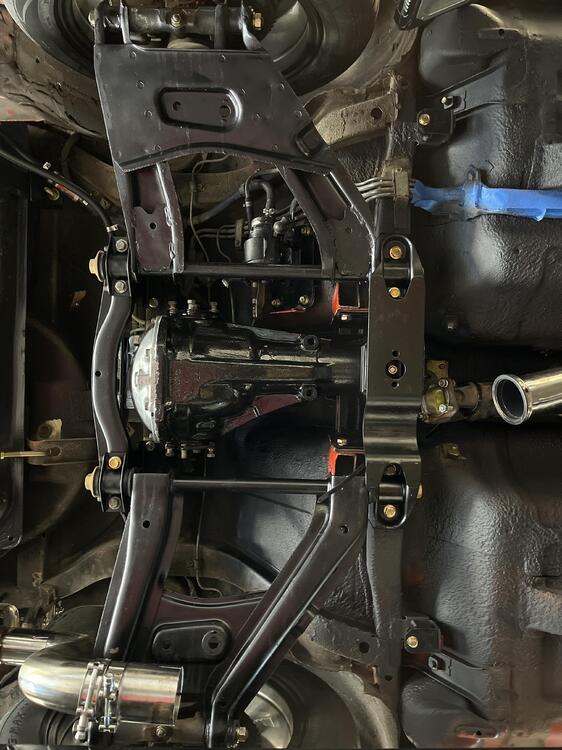
2 pointsI wouldn’t wish this job on my worst enemy. It is very challenging to put this differential in alone. It weight upwards of 80lbs I’d guess and holding things in position while trying to get bolts in and tightened is no easy task. I really hope I like this 3.7 differential because it will take a lot to send me back in there.

 2 points
 -
Can't answer that since I went electric fans and as you can see from the picture the tabs on that electric fan shroud were a perfect fit on the engine side of the radiator.1 point
-
1 pointI just put the Classic Tubes set (OE steel, not SS) in my 5/71, all except the flow guide vent line (I reused the OEM tube). Mostly accurate - I had to do some serious re-bending on the clutch master cylinder line to match the OE one I pulled out, and I had to adjust some of the bends in lines going through the 4-gang mounts on the firewall to get them to sit right, but overall I'm happy with the set.1 point
-
1 pointThanks ZedHead, I appreciate the information! Maybe I’ll get them in today but will be headed to work soon…so more she’ll be sitting again. I think I predicted this would take 6 weeks to complete…I’m on target. I still have to install the new rear springs and shocks back there..(let’s add 2 week for that). life happens [emoji38] Sent from my iPhone using Tapatalk1 point
-
1 pointI had an issue with my exhaust flange being warped. My mechanic used an extra thick manifold from Remflex that sealed the leak.1 point
-
No emoji for loss of a loved one. Keep up the love for Project Georgia.1 point
-
This guy has a couple 5 speeds for sale near you. 818 298-2549 text only https://losangeles.craigslist.org/lac/pts/d/datsun-240z-280z-280zx-parts/7473103638.html Sent from my iPhone using Tapatalk1 point
-
So it’s been a long time since I have worked on the car. 2021 proved to be a the worst year I’ve experienced so far in my short life. My dear mum suffered complications during surgery in January 2021, she fought the good fight but ultimately we had to let her go last year in September. I have never suffered such pain. 6 months on though I’m in a much better place. During her stay in hospital I was still working on the car and it was a welcome distraction for me and a stress release, or maybe more of a stress replacement? I’m not sure. So I will be dedicating this project to my dear mum and will change it to Project Georgia In loving memory of her. then in February we bought a new house and have been flat out preparing the old place for sale and moving into the new place. Bonus is the new place has an awesome man cave two car garage! have made small progress on stripping the dash in preparation for reskinning. It’s a very rough dash so I’m letting the pros deal with it. hopefully get back to working on the car once all this house business is sorted.1 point
-
1 pointYou can also do it from the underside, just drill right through the floor, then drill some extra holes, clean up everything with a steelwire brush (on a drill) and put the new rails in place from the underside, just put some little welds from the underside and then if it is positioned right, weld the whole thing together. (Just clean it well because the stuff on that floor catches fire easely... ask me how i know... 😉 )1 point
-
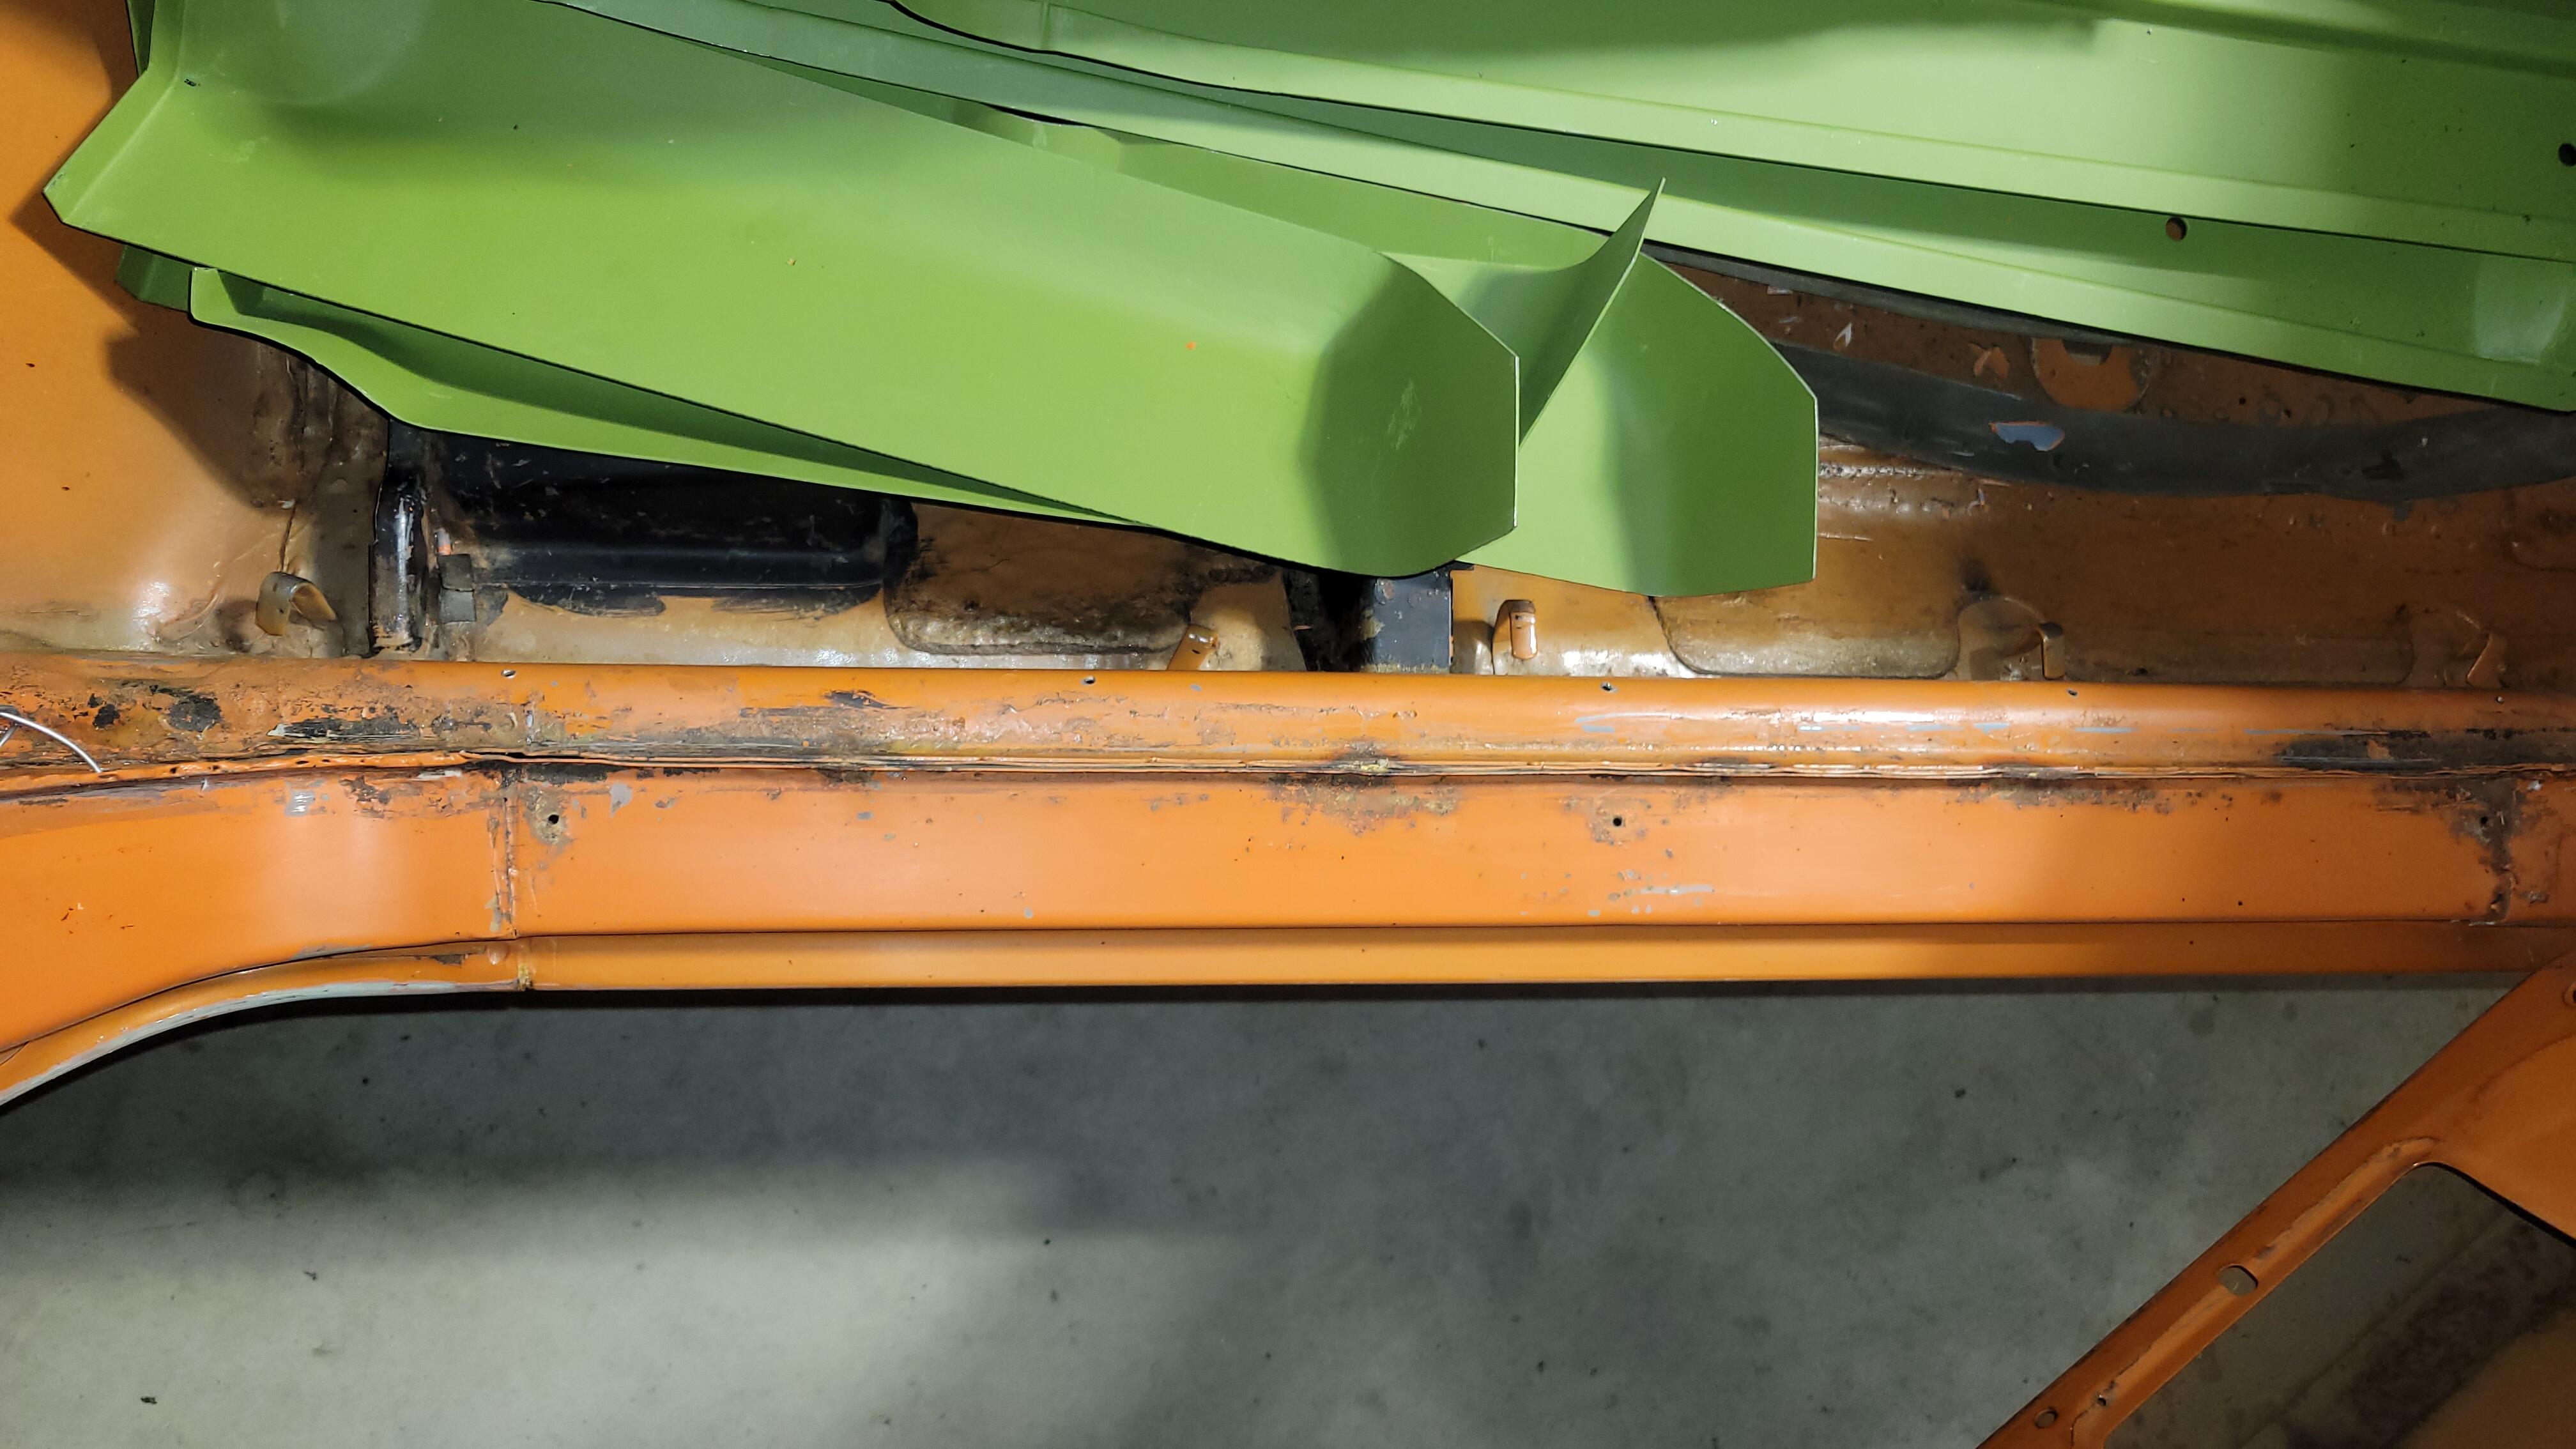
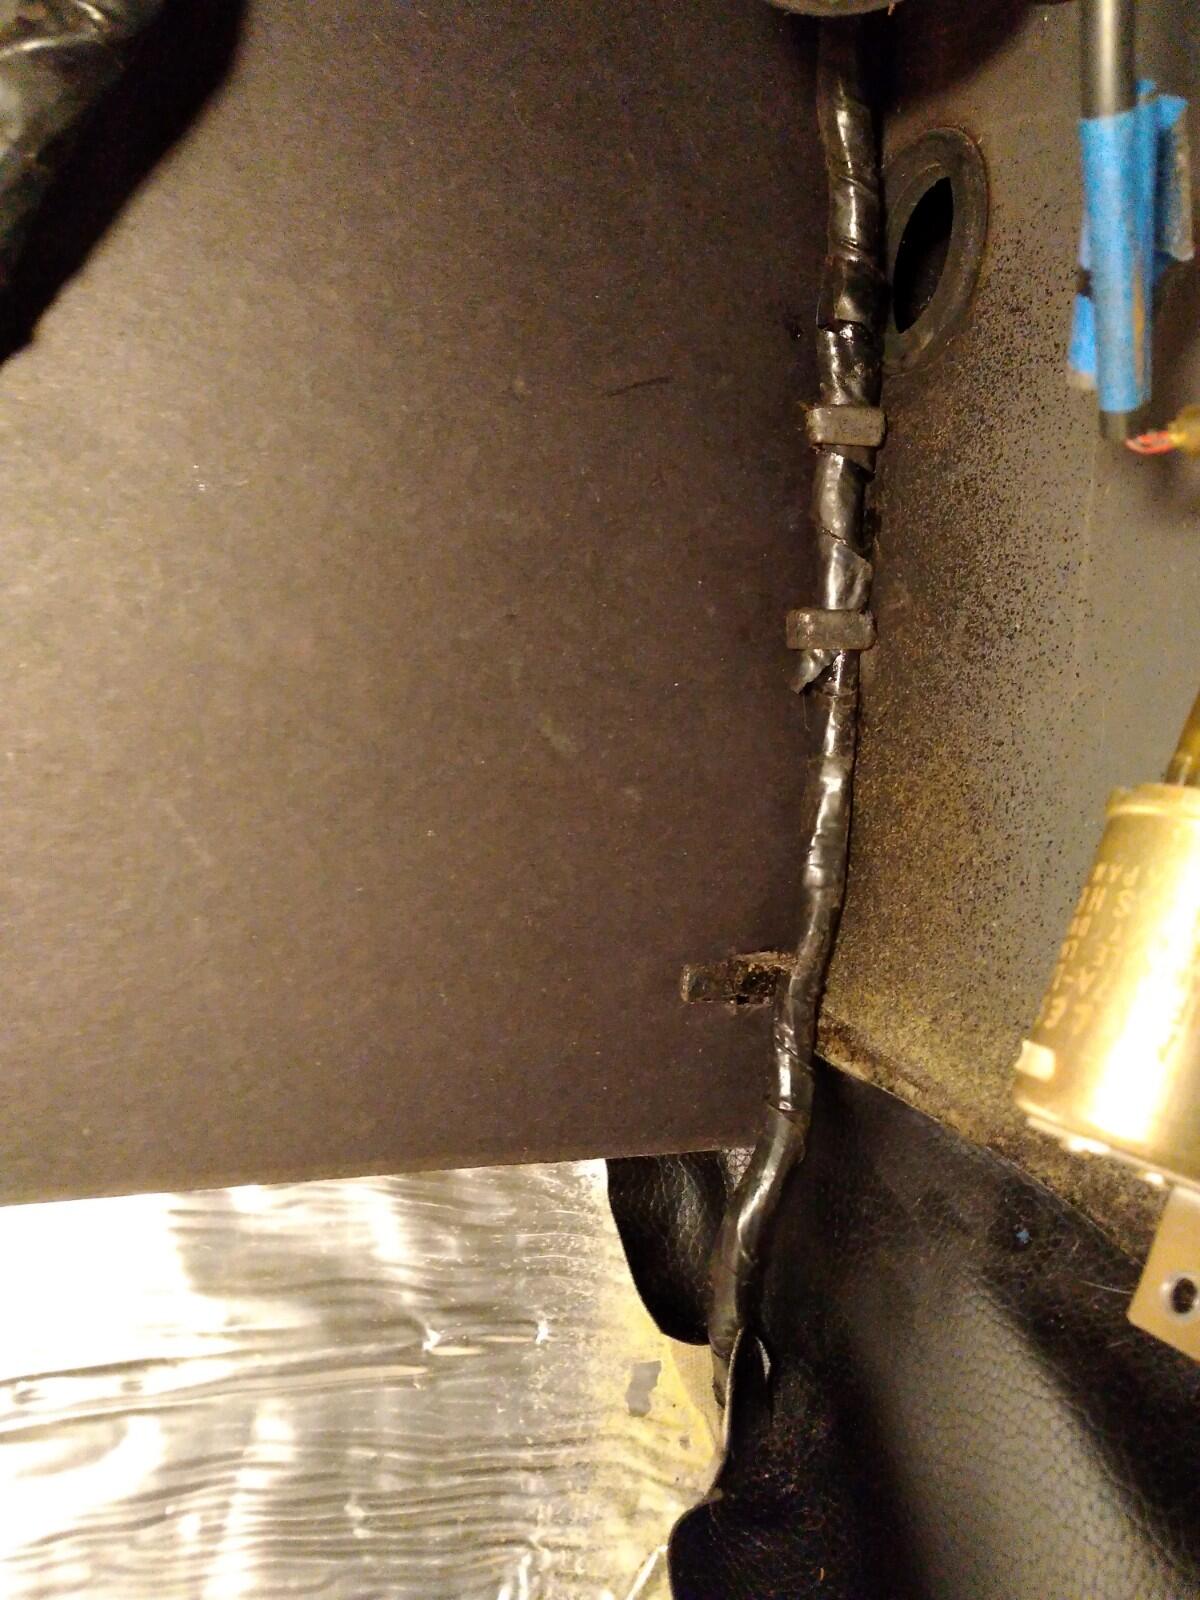
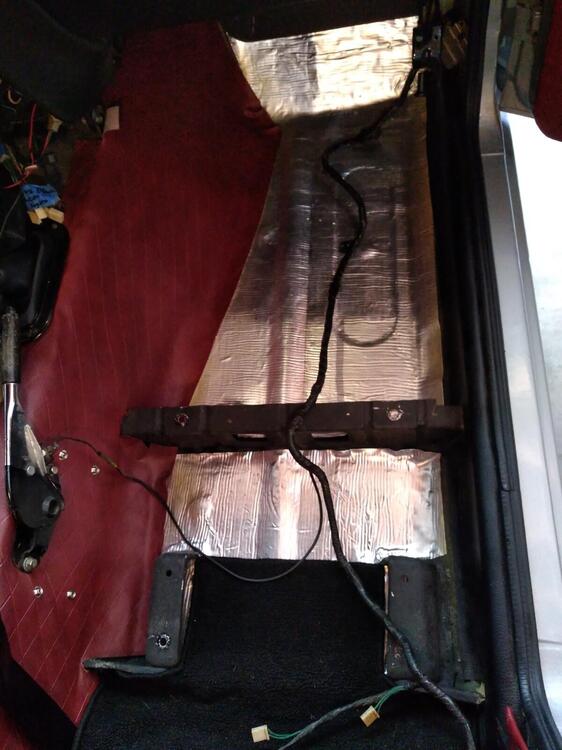
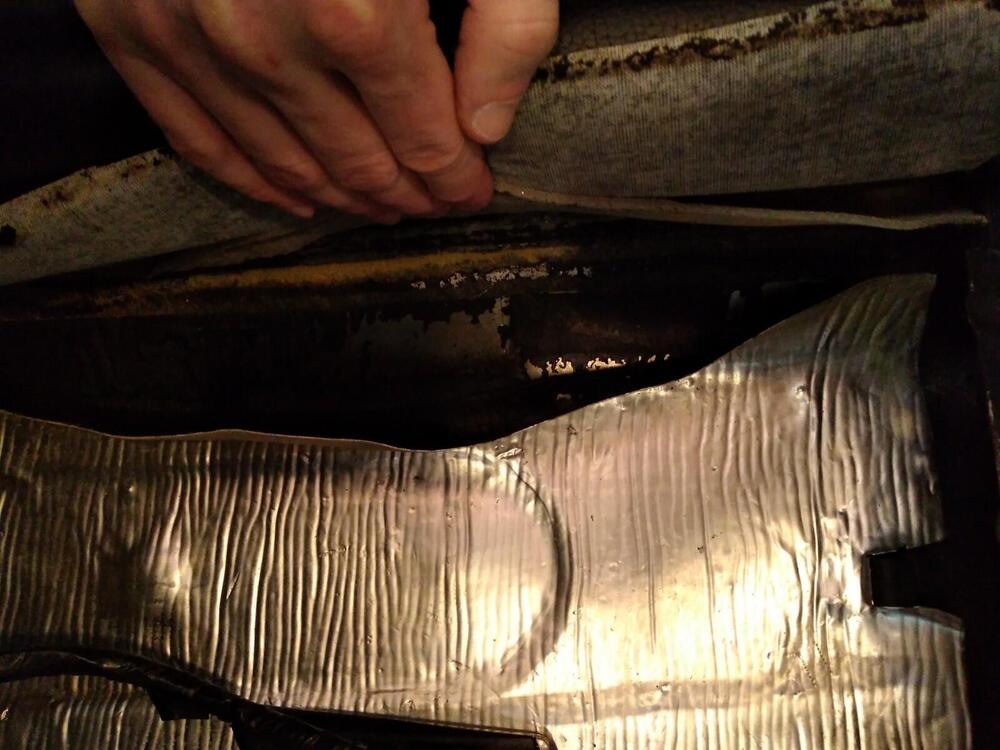
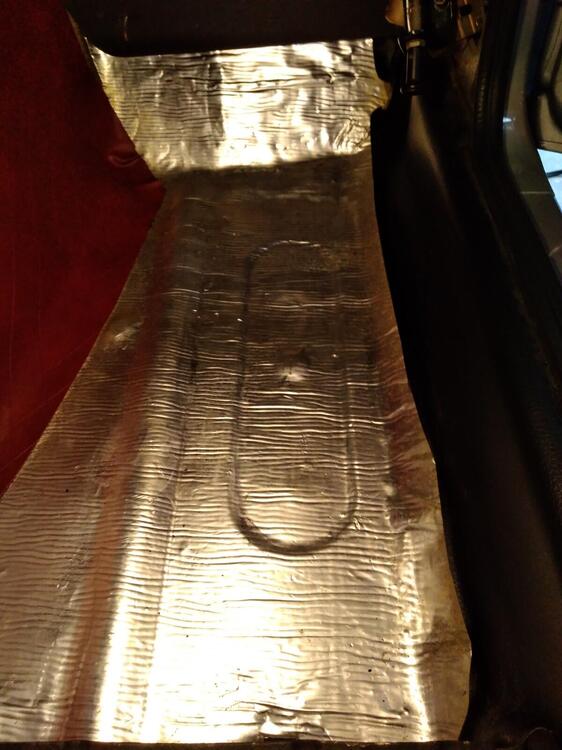
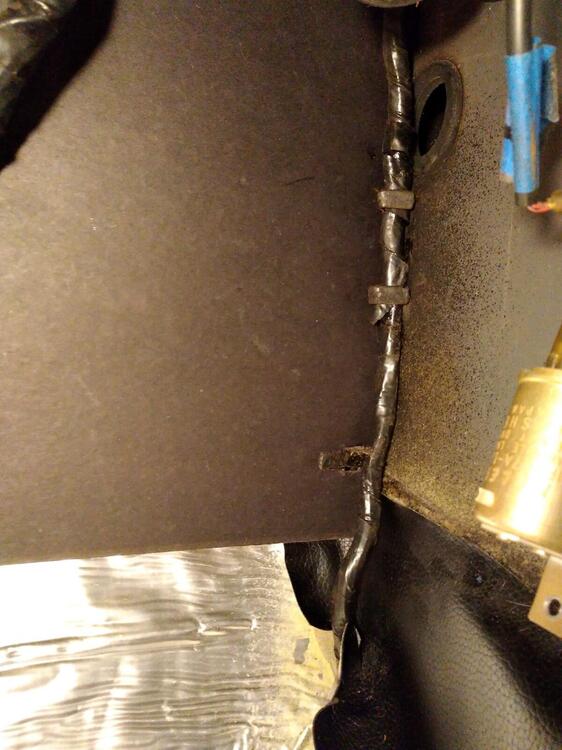
1 point^Thanks! Those are REALLY helpful. So here's what I was dealing with: So either 1) the '72s didn't have tabs for the harness (unlikely), or 2) the body or interior guys removed them at some point: Nothing underneath the vinyl. I'm thinking someone removed them, since there ARE tabs on the driver side for the antenna and speaker wires. I tucked the body harness into the corner underneath the sound deadening as best I could, and hitched it up along the corner of the firewall. Came out OK. The vinyl looks a little lumpy, but hopefully it will settle down with time.
 1 point
 -
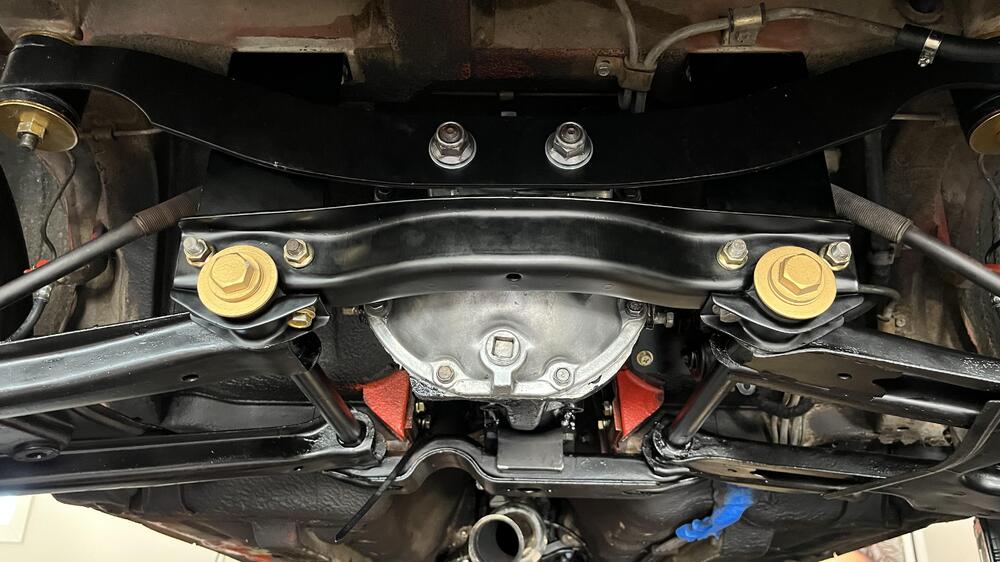
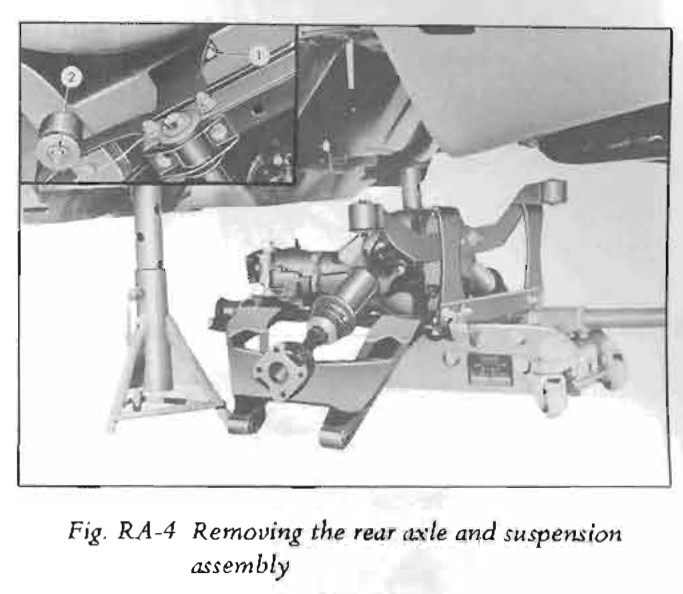
1 pointI was on sway bar also. The mustache bar (aka transverse link) is installed oppositely for the R180 and R200. The FSM only shows the R200 for the 280Z. For some odd reason they ignore the R180 in the RA drawings for the 280Z, even though they include it in the Prop and Diff chapter. This is R200 from the 1978 280Z FSM. This is R180 from the 1973 FSM.

 1 point
 -
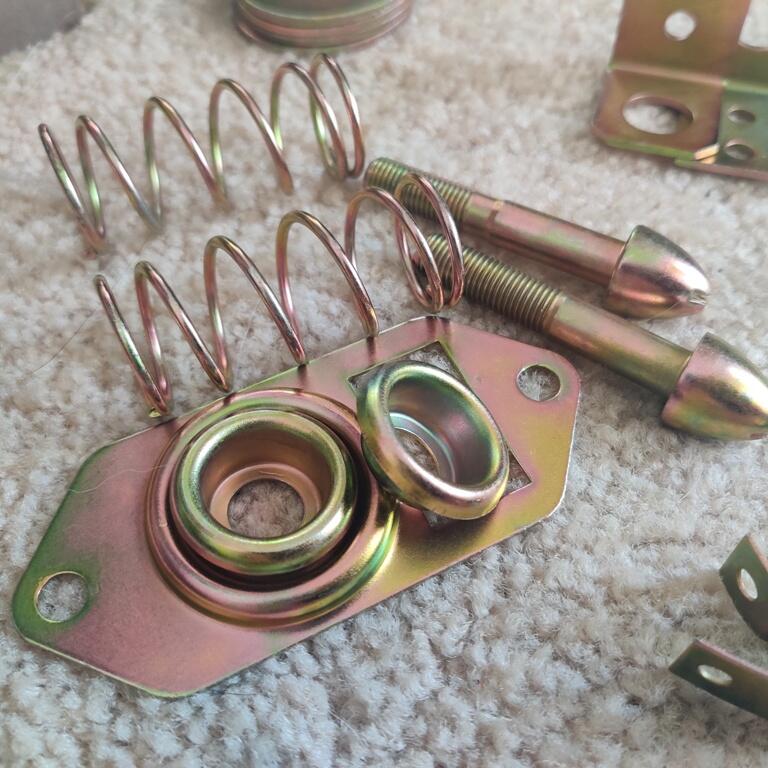
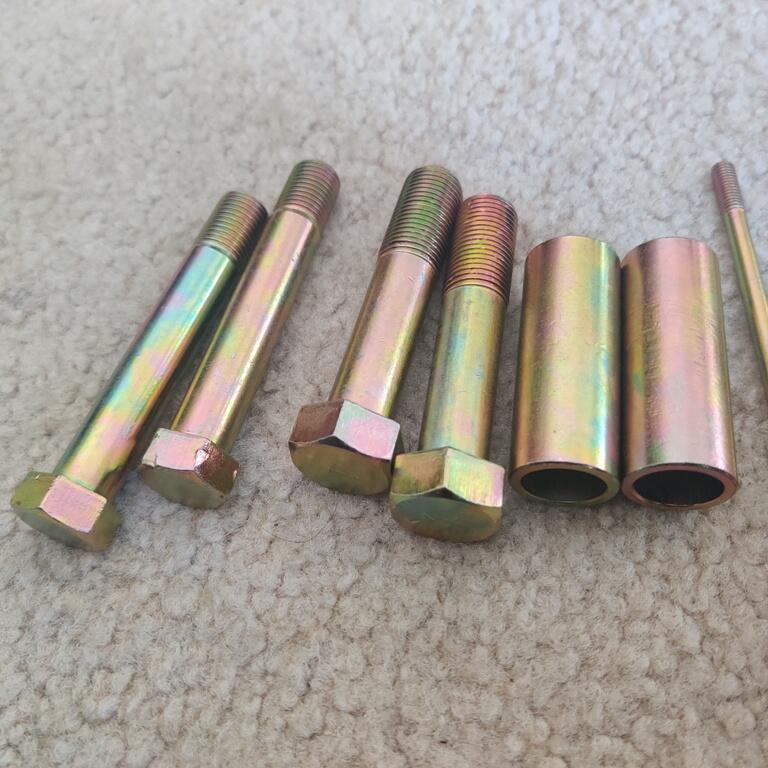
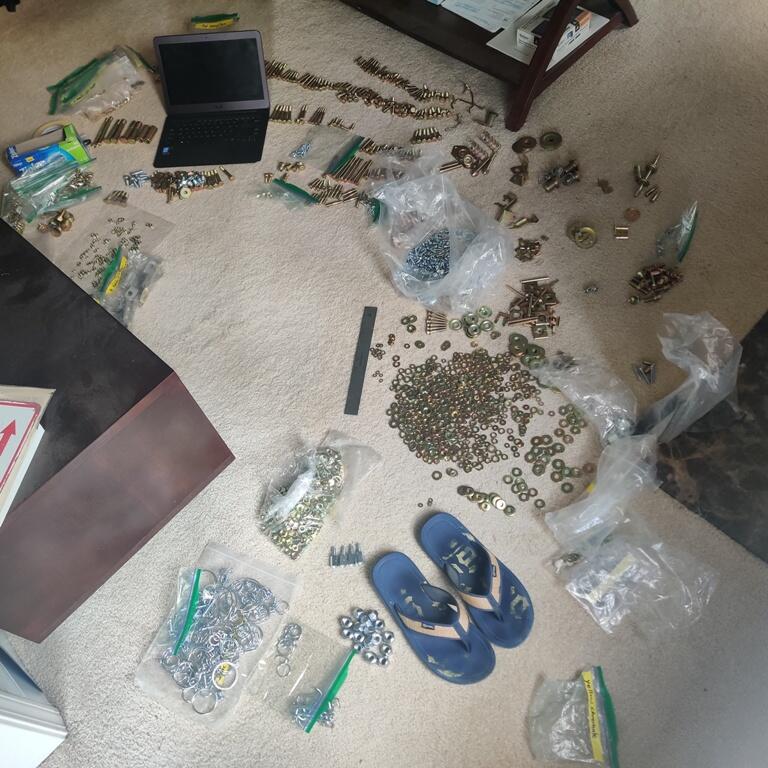
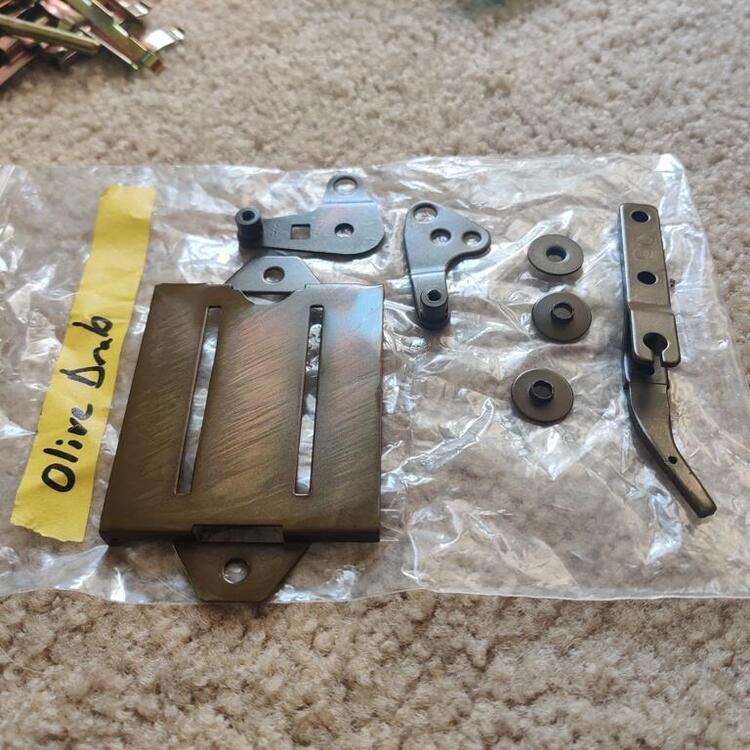
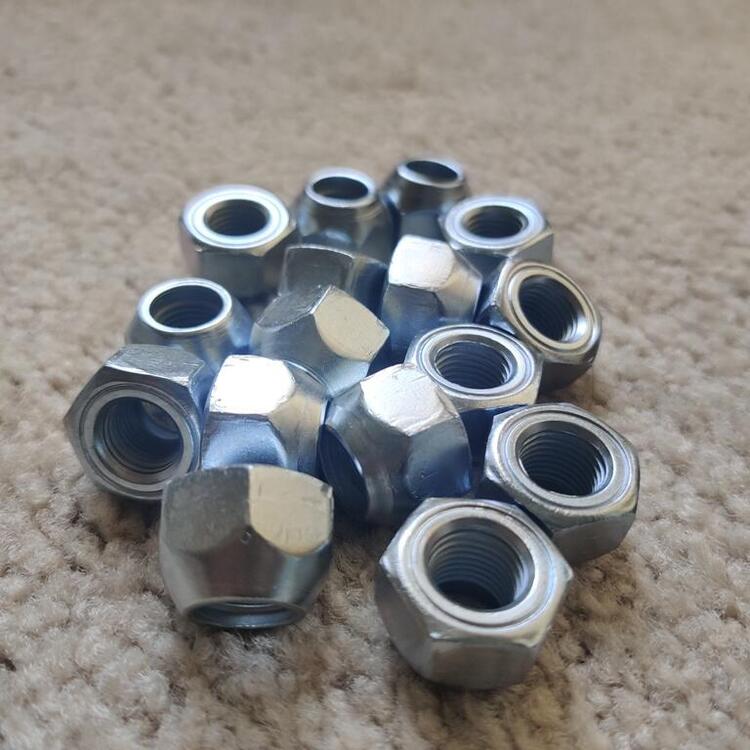
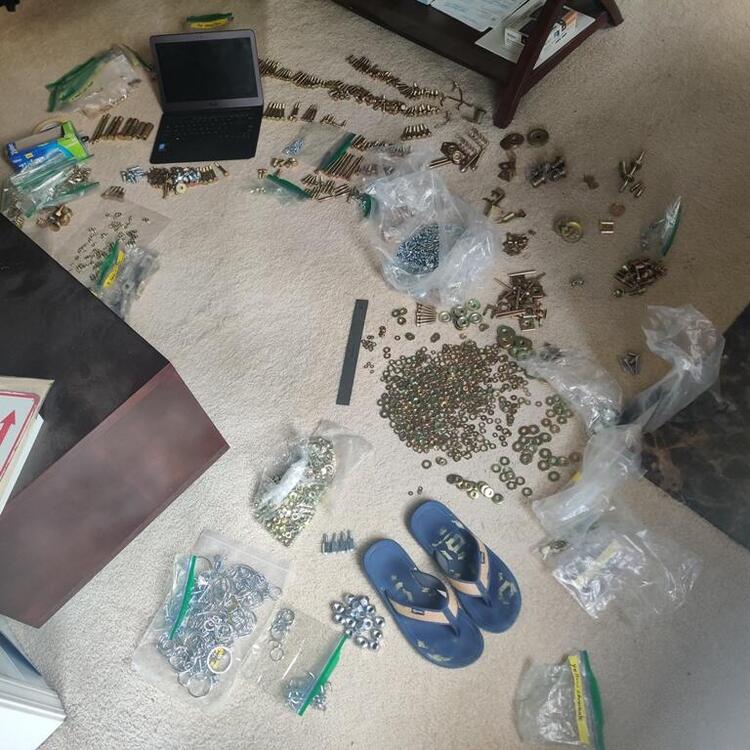
I guess I have taken a pretty long break. Looking back over the last couple of months, the progress has been little and the updates few. I have, however, been waiting on some hardware to be plated, and quite bit of it showed up on Saturday! I spent many hours on my living room floor hunting down fasteners using my spreadsheet and ruler, and putting them back into their respective zip lock bags with labels which identify where they go on the car. I have many hours to go! None of the larger parts have come back yet, but I was in desperate need of the fasteners for the hood, hood hinge plates, fenders, inner fender supports, cowl, inspection doors, and hatch hinges. Especially for the inner fender supports and the fenders, I am proceeding with my plan to do final assembly before paint, meaning these parts will not be coming off the car when it goes to the booth for paint - nor after. Final primer coats, sanding, etc. will be done with all fasteners torqued to spec. The inner fender supports and foam rubber seals push on the fenders when the fenders are bolted in place. The fender panels, therefore, "move" a little when bolted down. To get them as straight as possible, I need them fully secured when doing final sanding. So, here are a few pics. I am pleased with how most everything I have received looks. Part of what is special about this car is how little rust it had. That carries over to the fasteners as well. For me, there is substantial value here when it comes to the fasteners because they haven't suffered the rust pitting that many do. The olive drab doesn't match the factory color well, but it looks pretty nice as the only reasonable alternative I think. I didn't send anything else to get that color - I missed including a couple small brackets, but those look ok as original anyway. Only a small number of bolts do not look as shiny as I would prefer. And for some reason, hex nuts came out exceedingly shiny. I am hopeful that the large parts will come out nice.


 1 point
 -
1 pointSorry Pat, just saw this. Thanks! Pretty much hammer forming. I did use the vice as brake in the beginning to make the wide U shape then flattened the one end back down in the vice and started beating. Ended up rounding the lower angles using a 3 way trailer ball hitch as dolly in the vice. Sent from my iPhone using Tapatalk1 point
-
1 pointA good way to do the rails is (when your car is empty inside , you took all the interior out..) is to weld them from the inside! first you drill holes from 1/4 inch in the old spotwelds than take off the old rails.. then you can weld the new rails from top.. from the inside and they will look also much better as you have no weld mess on the underside. (you will see that it almost looks like original.) You may want to drill some extra holes for new welds also.. (I had to drill every inch a hole from 6mm (i did even 7,5 mm) to get my old 240z through the APK (Dutch MOT!) when i made it a new floor and rails in 2000! If I had not done that, the car would not have passed the strict inspection!) (Btw.. about the fan when welding.. don't put it to close to your welding ofcourse.. otherwise you need a lot of gas and you make bad welds.. just let a fan above you blow the smoke away.. What i sometimes do is take compressed air and blow away the smoke and also when you are making a lot of dust, blow it away, you need a lot of air.. Also when you have a small fire from welding it's always handy to have the compressed air within reach.)1 point