


Leaderboard
-

siteunseen
Free Member5Points15,115Posts -
Patcon
 Subscriber
 5Points11,142Posts
 -

Av8ferg
Free Member4Points1,538Posts -

Diseazd
Free Member4Points3,362Posts


Popular Content
Showing content with the highest reputation on 07/25/2021 in all areas
-
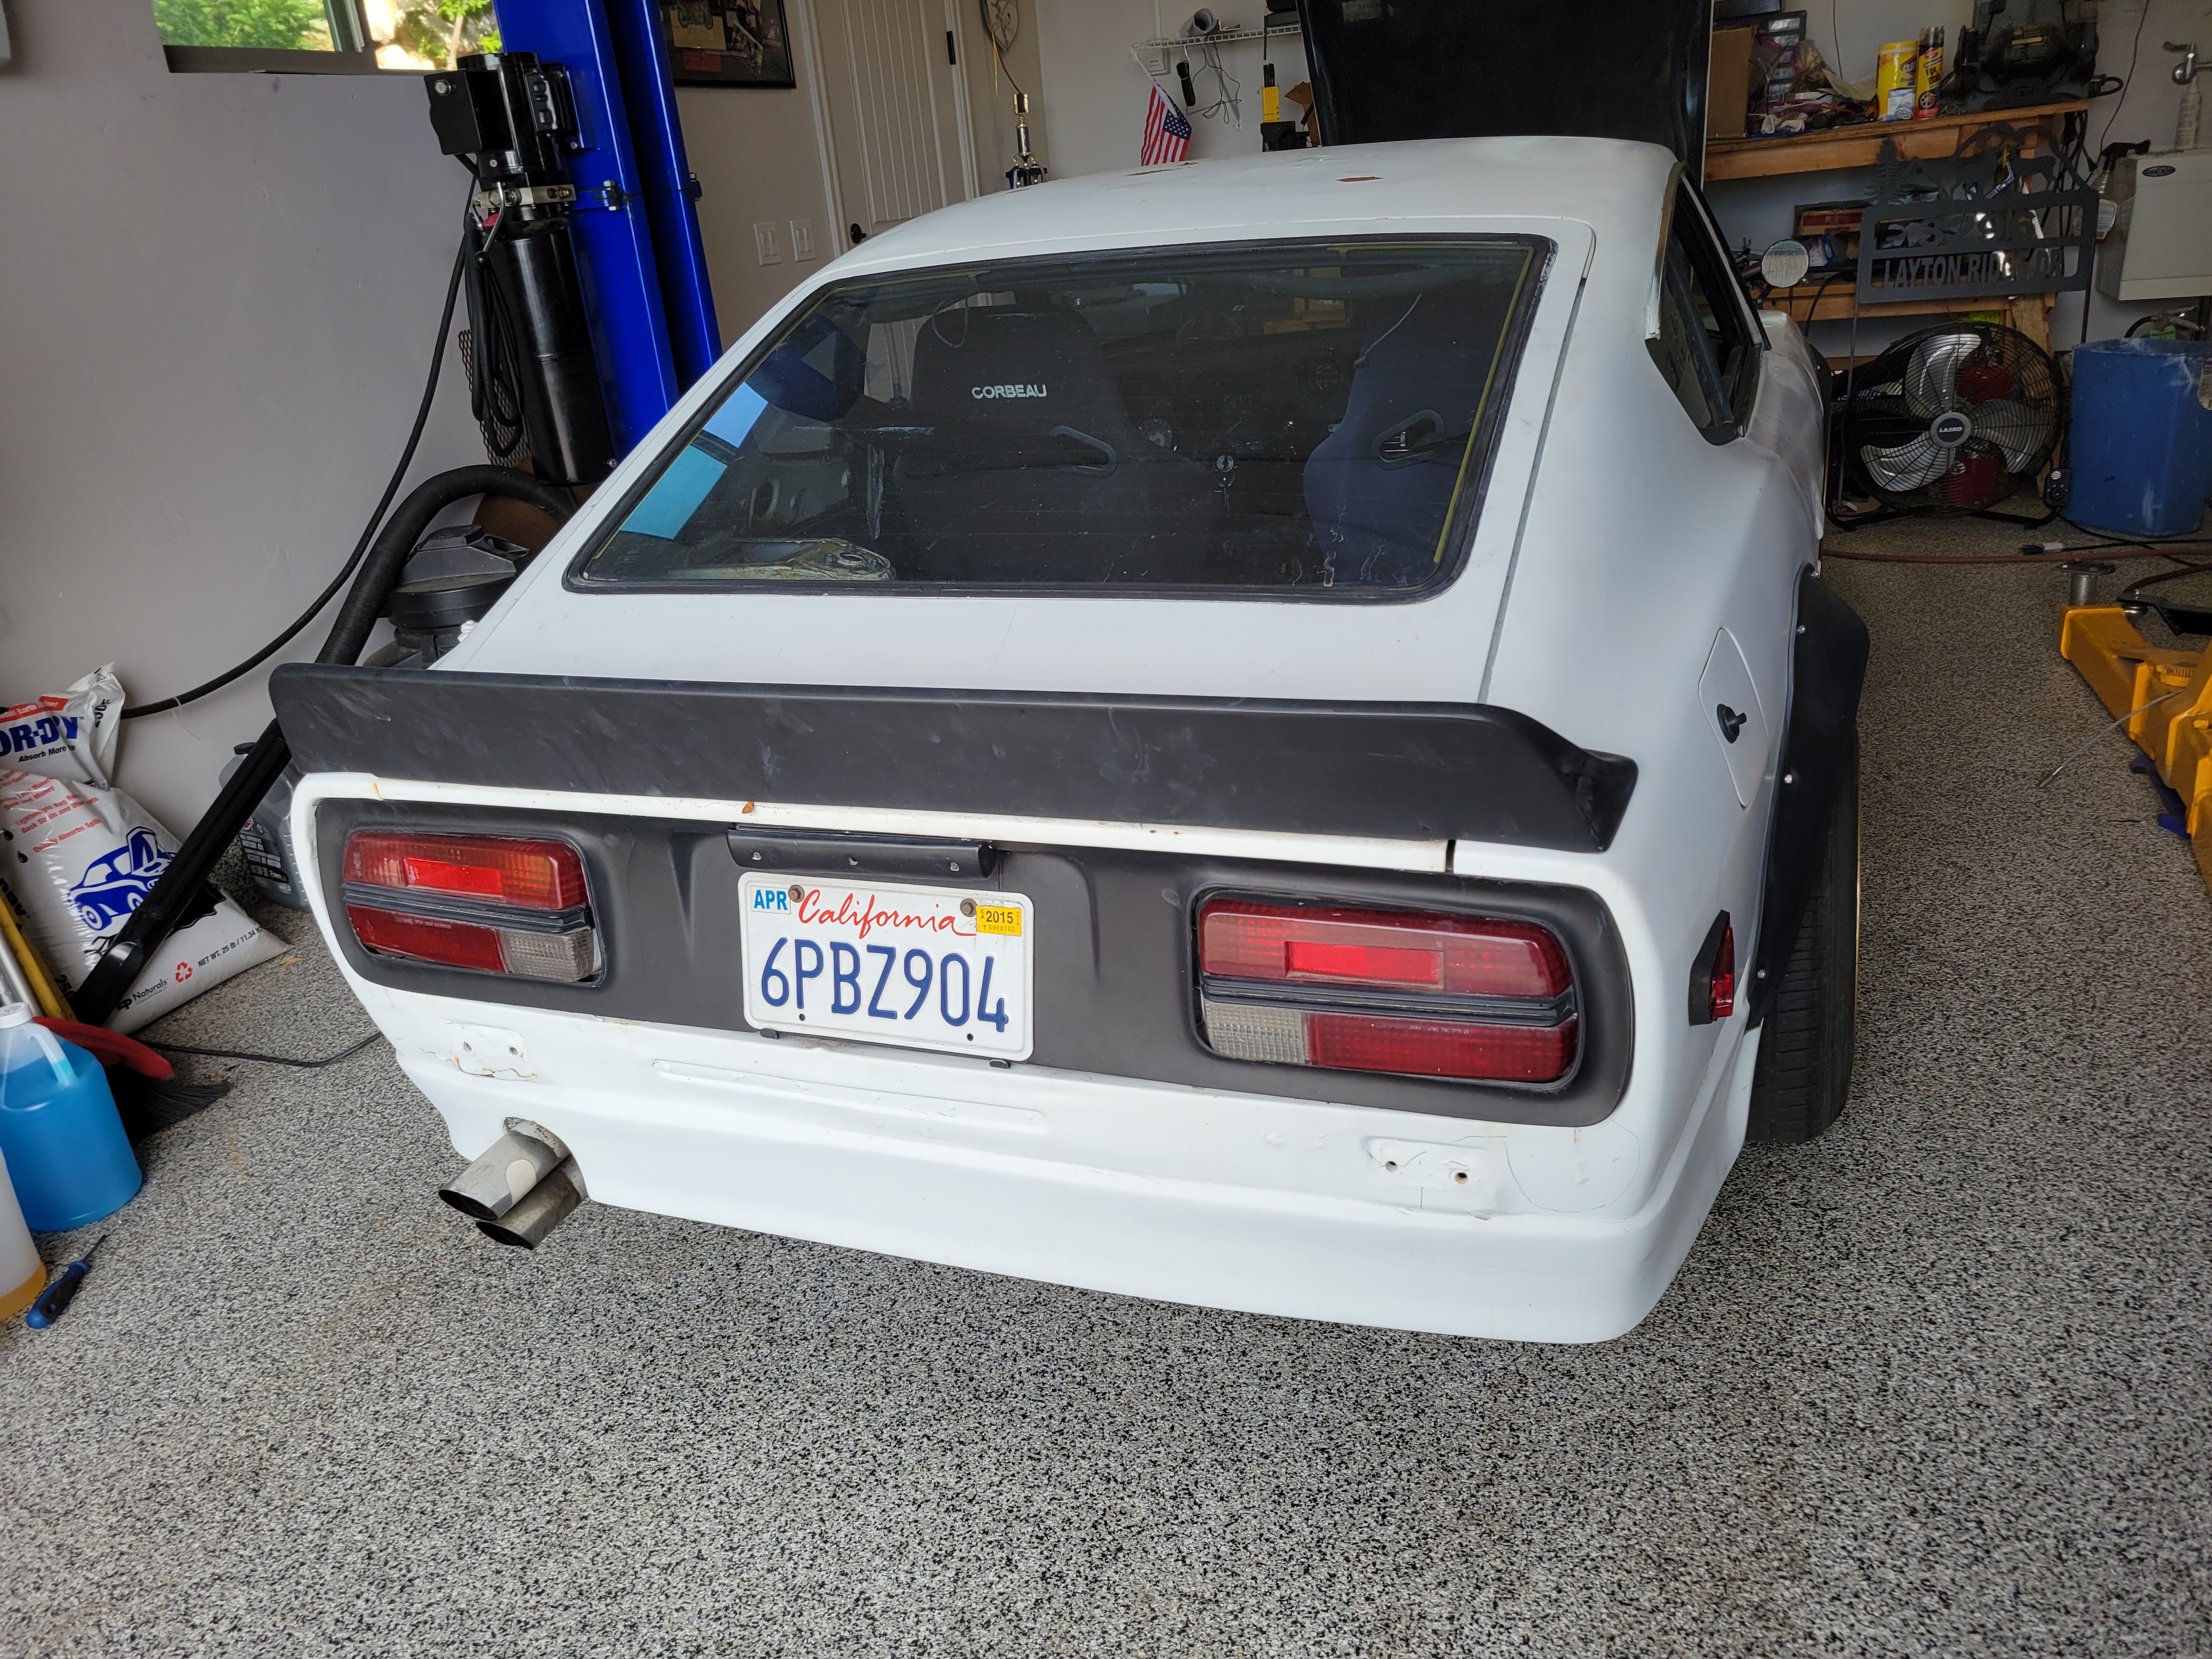
Love your Z Moelk........but how can you sleep at night missing the little black door stopper? I’m so disappointed...😜4 points
-
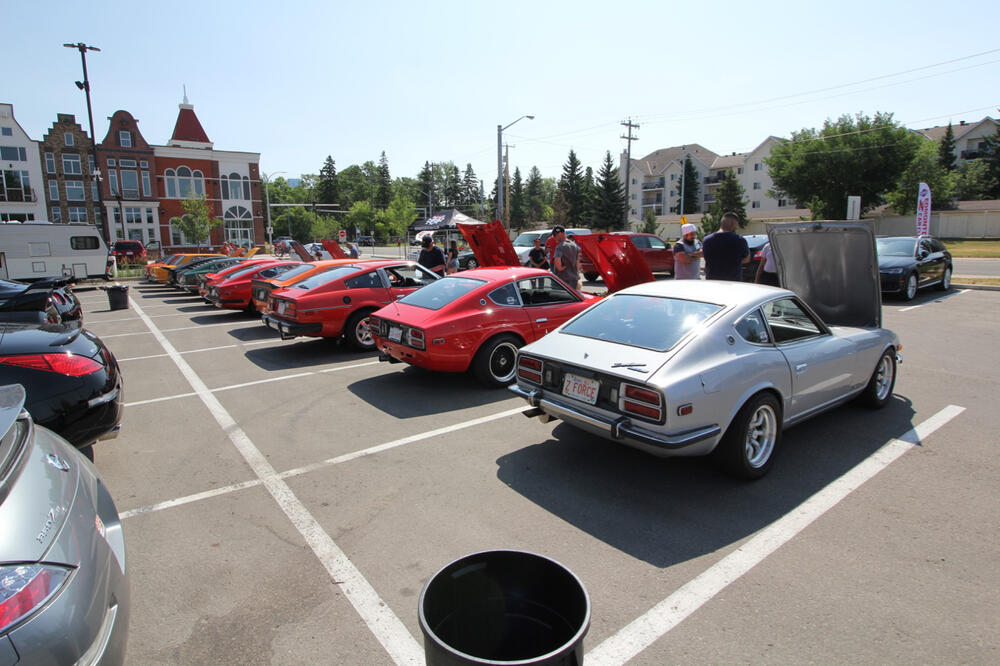
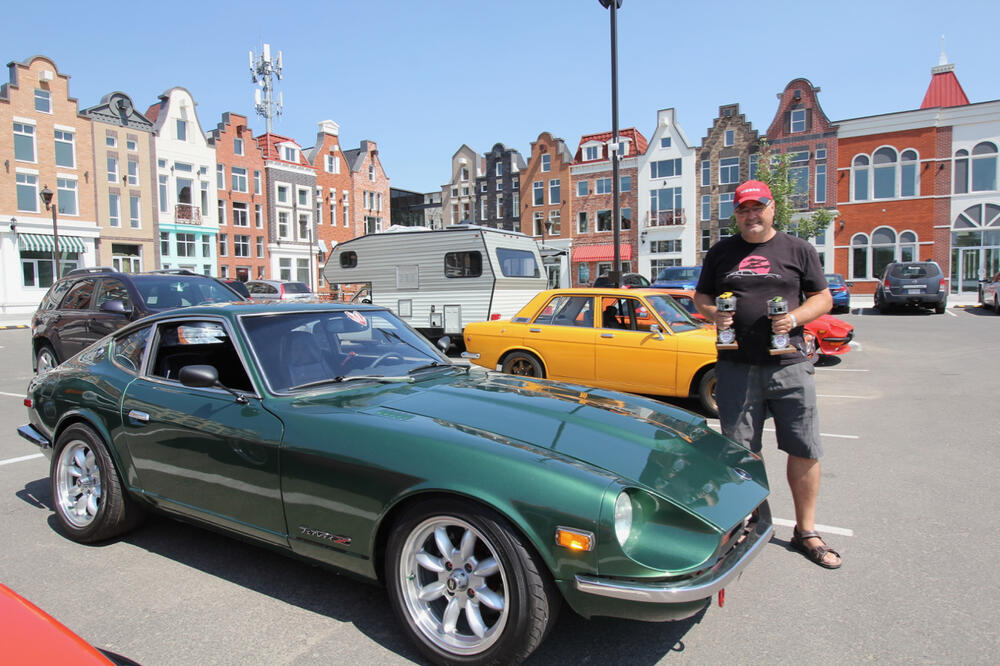
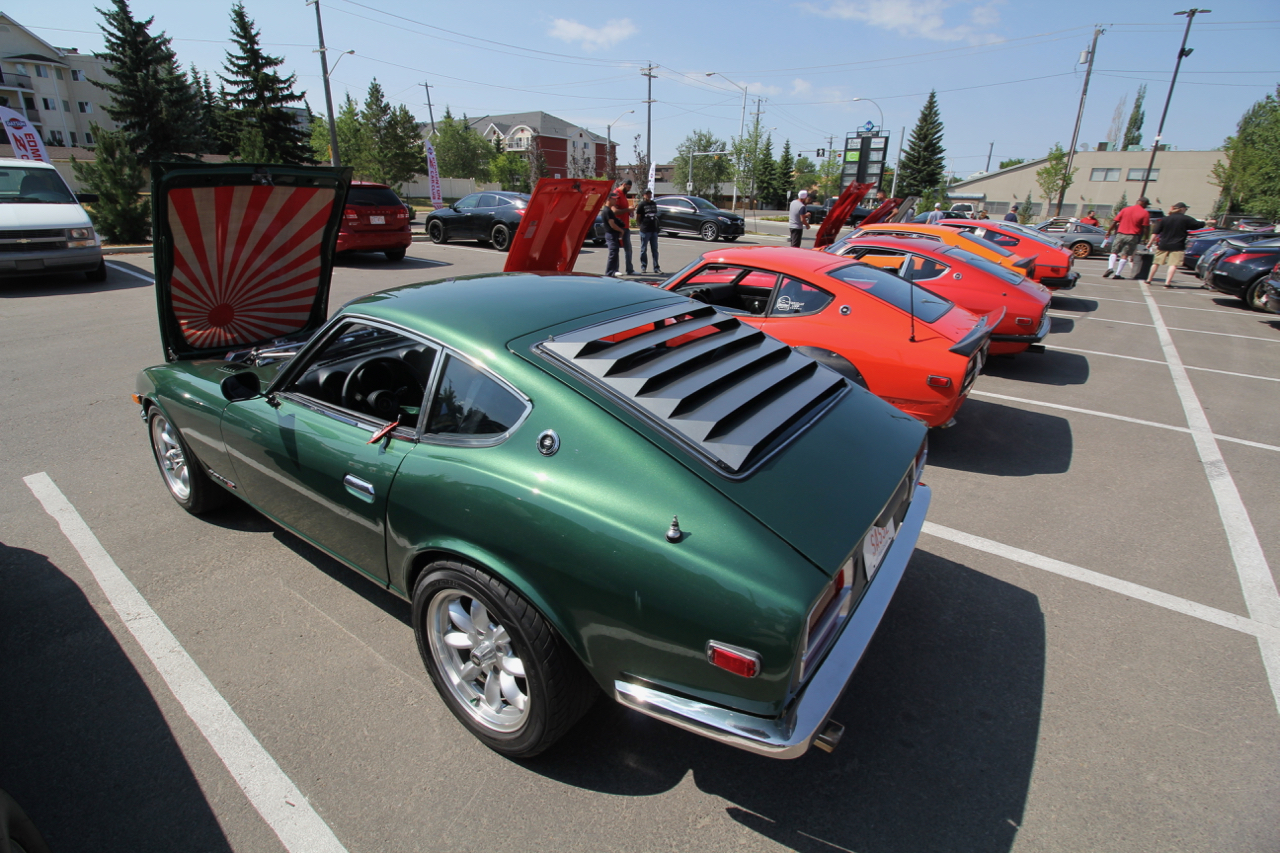
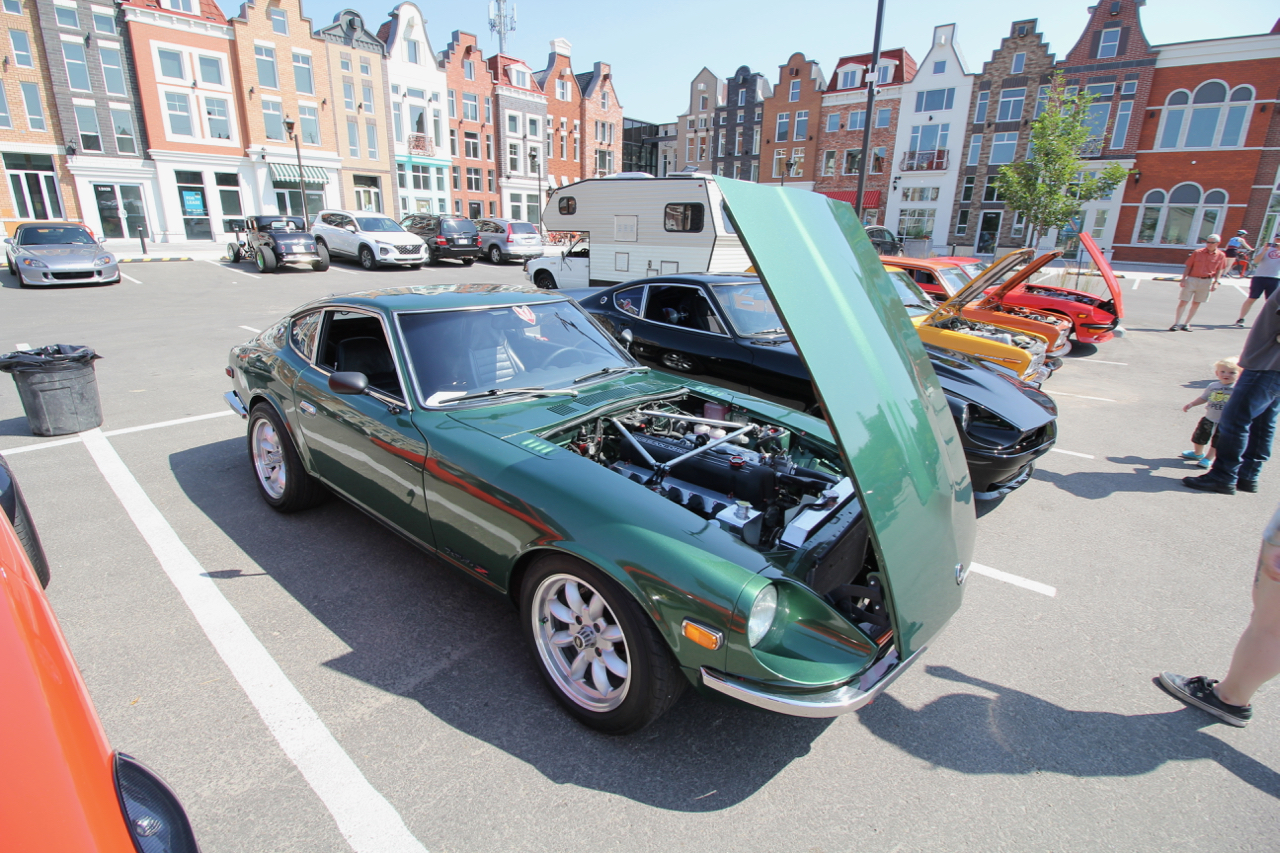
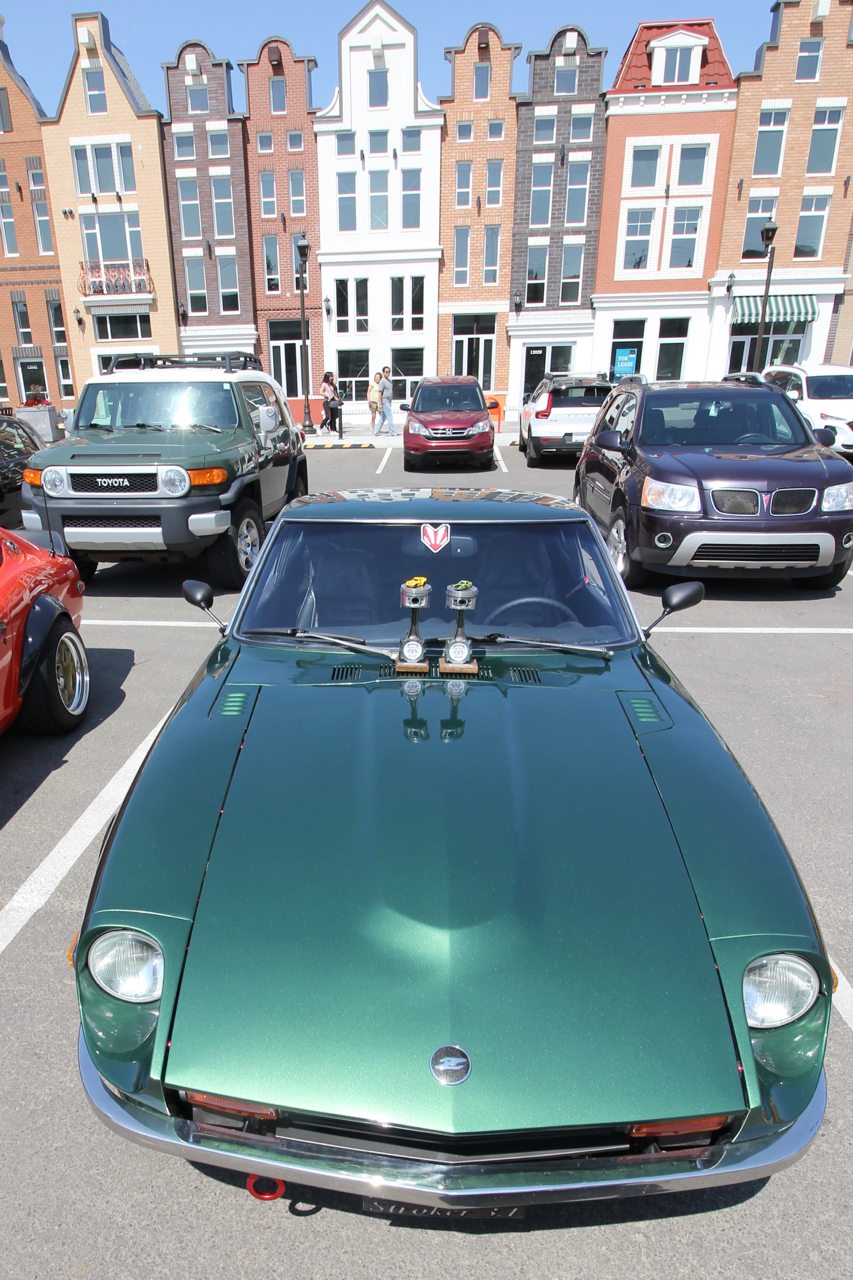
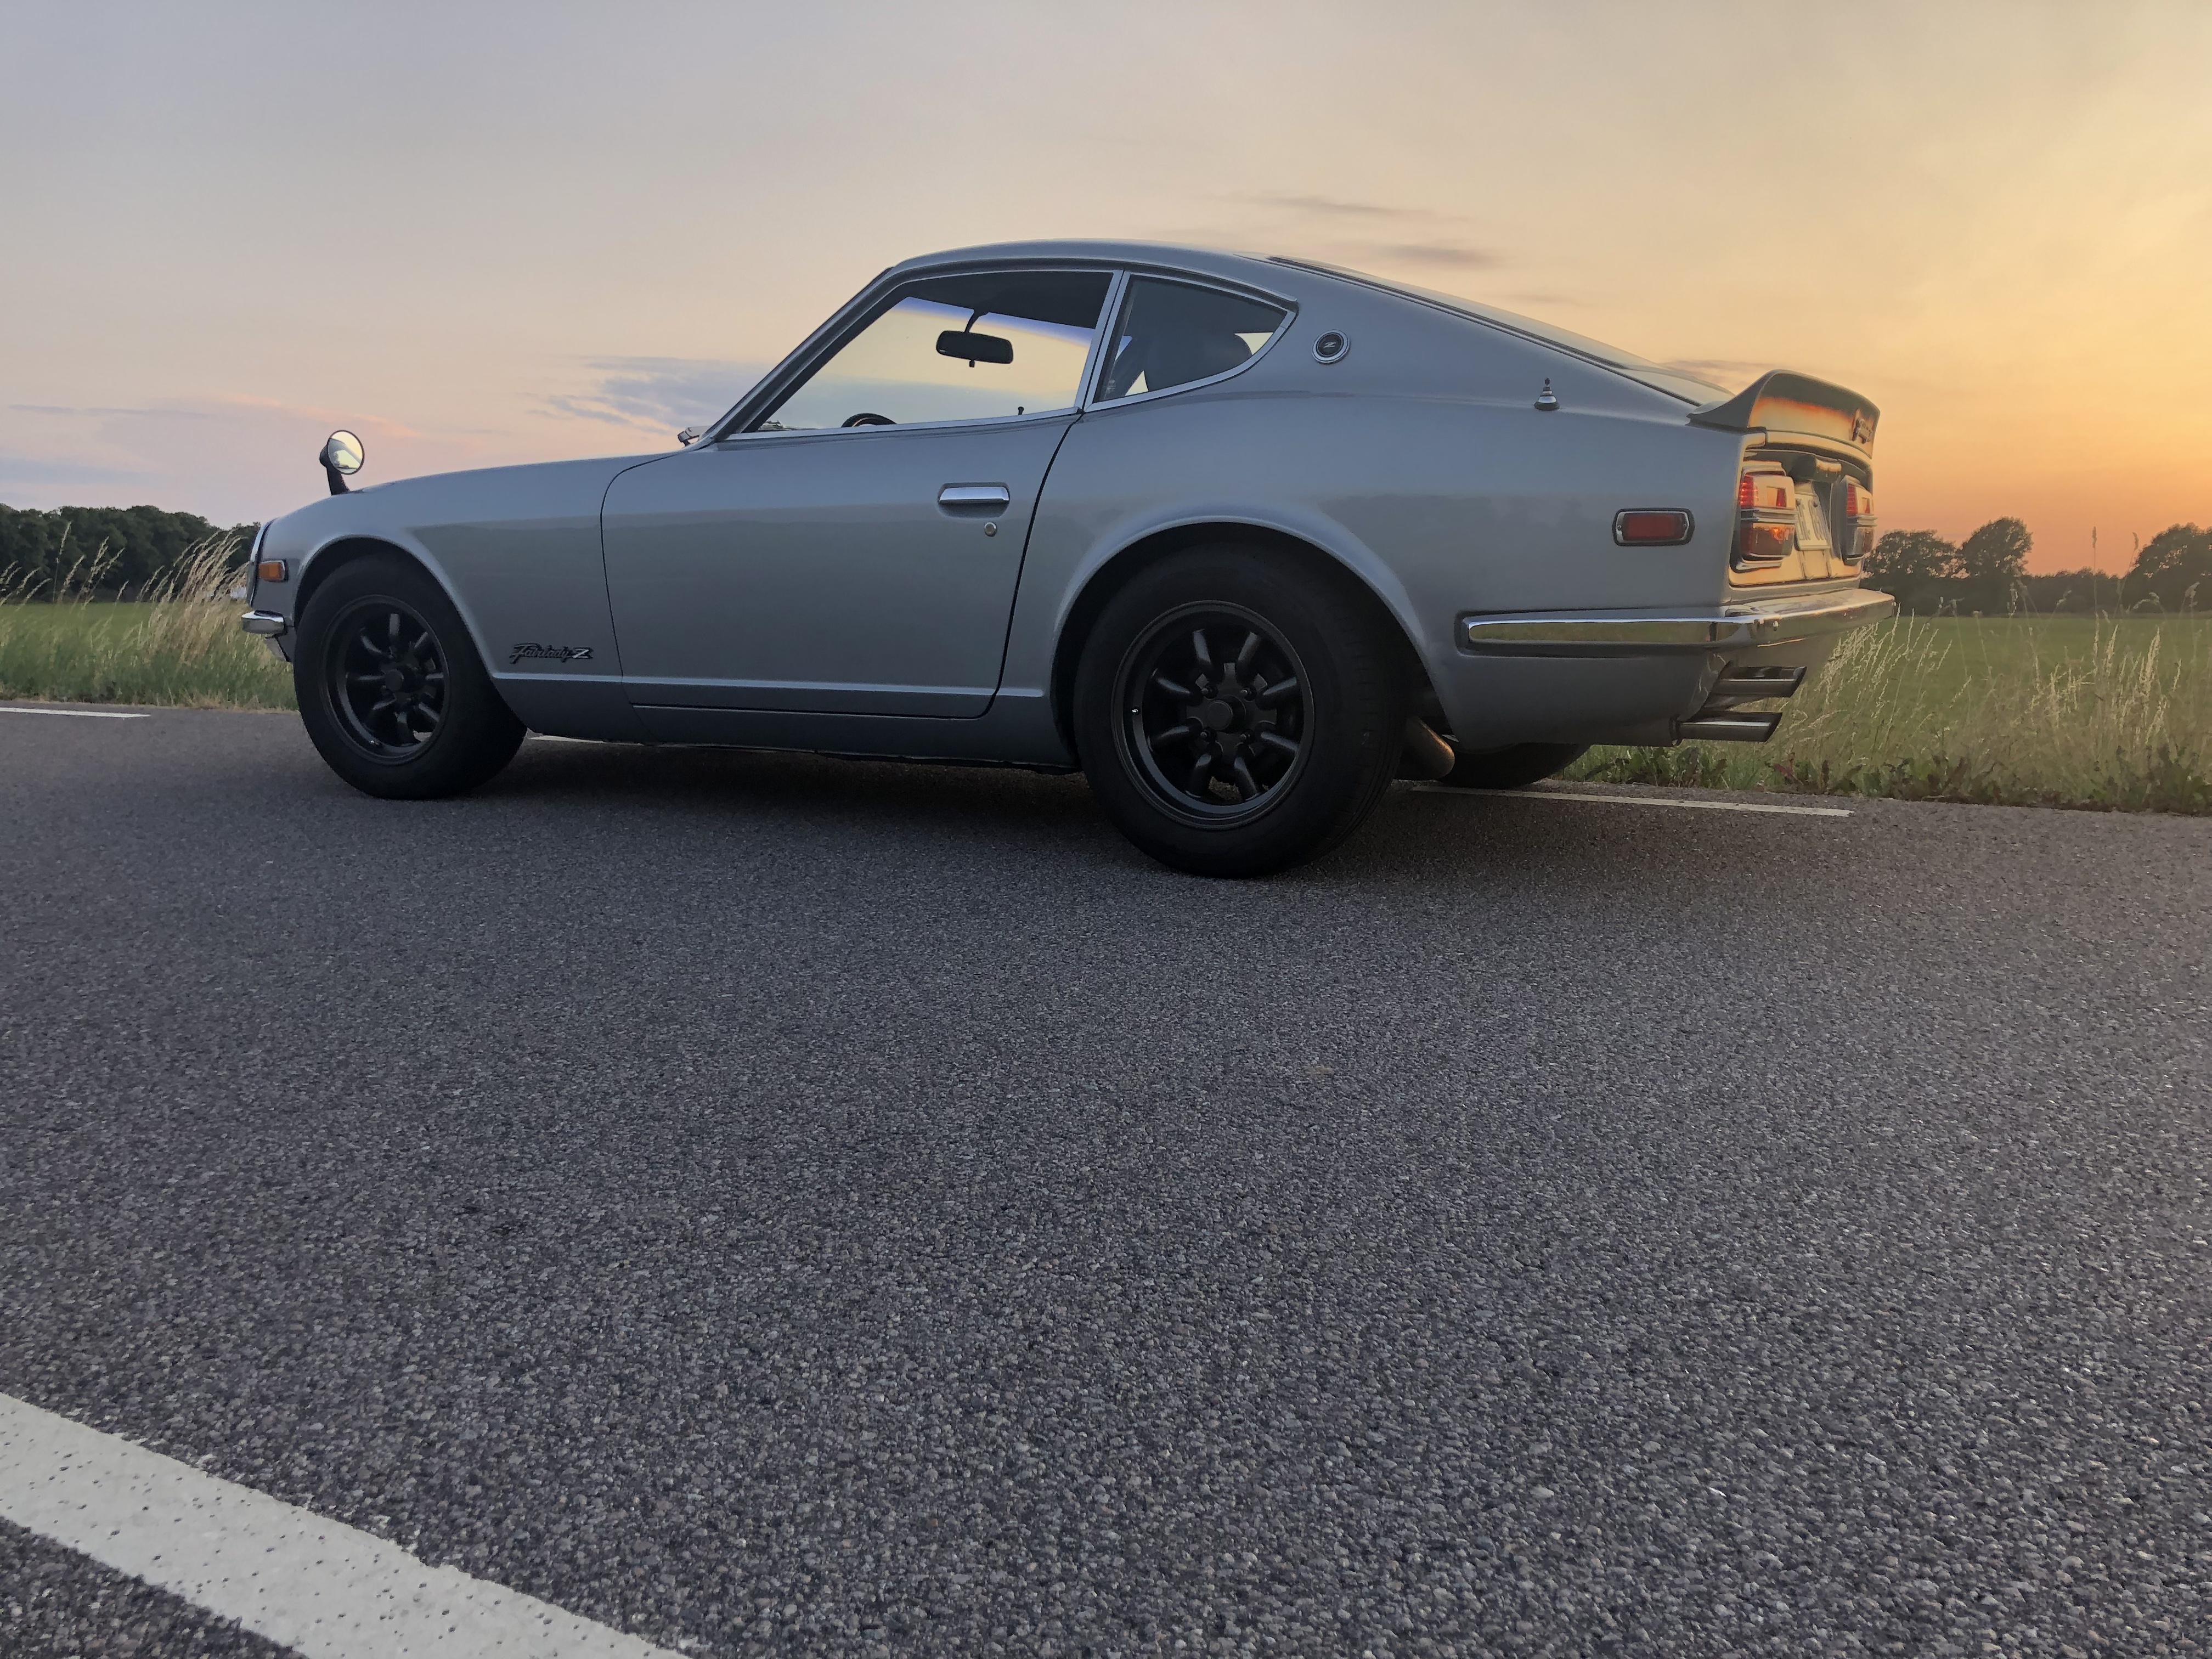
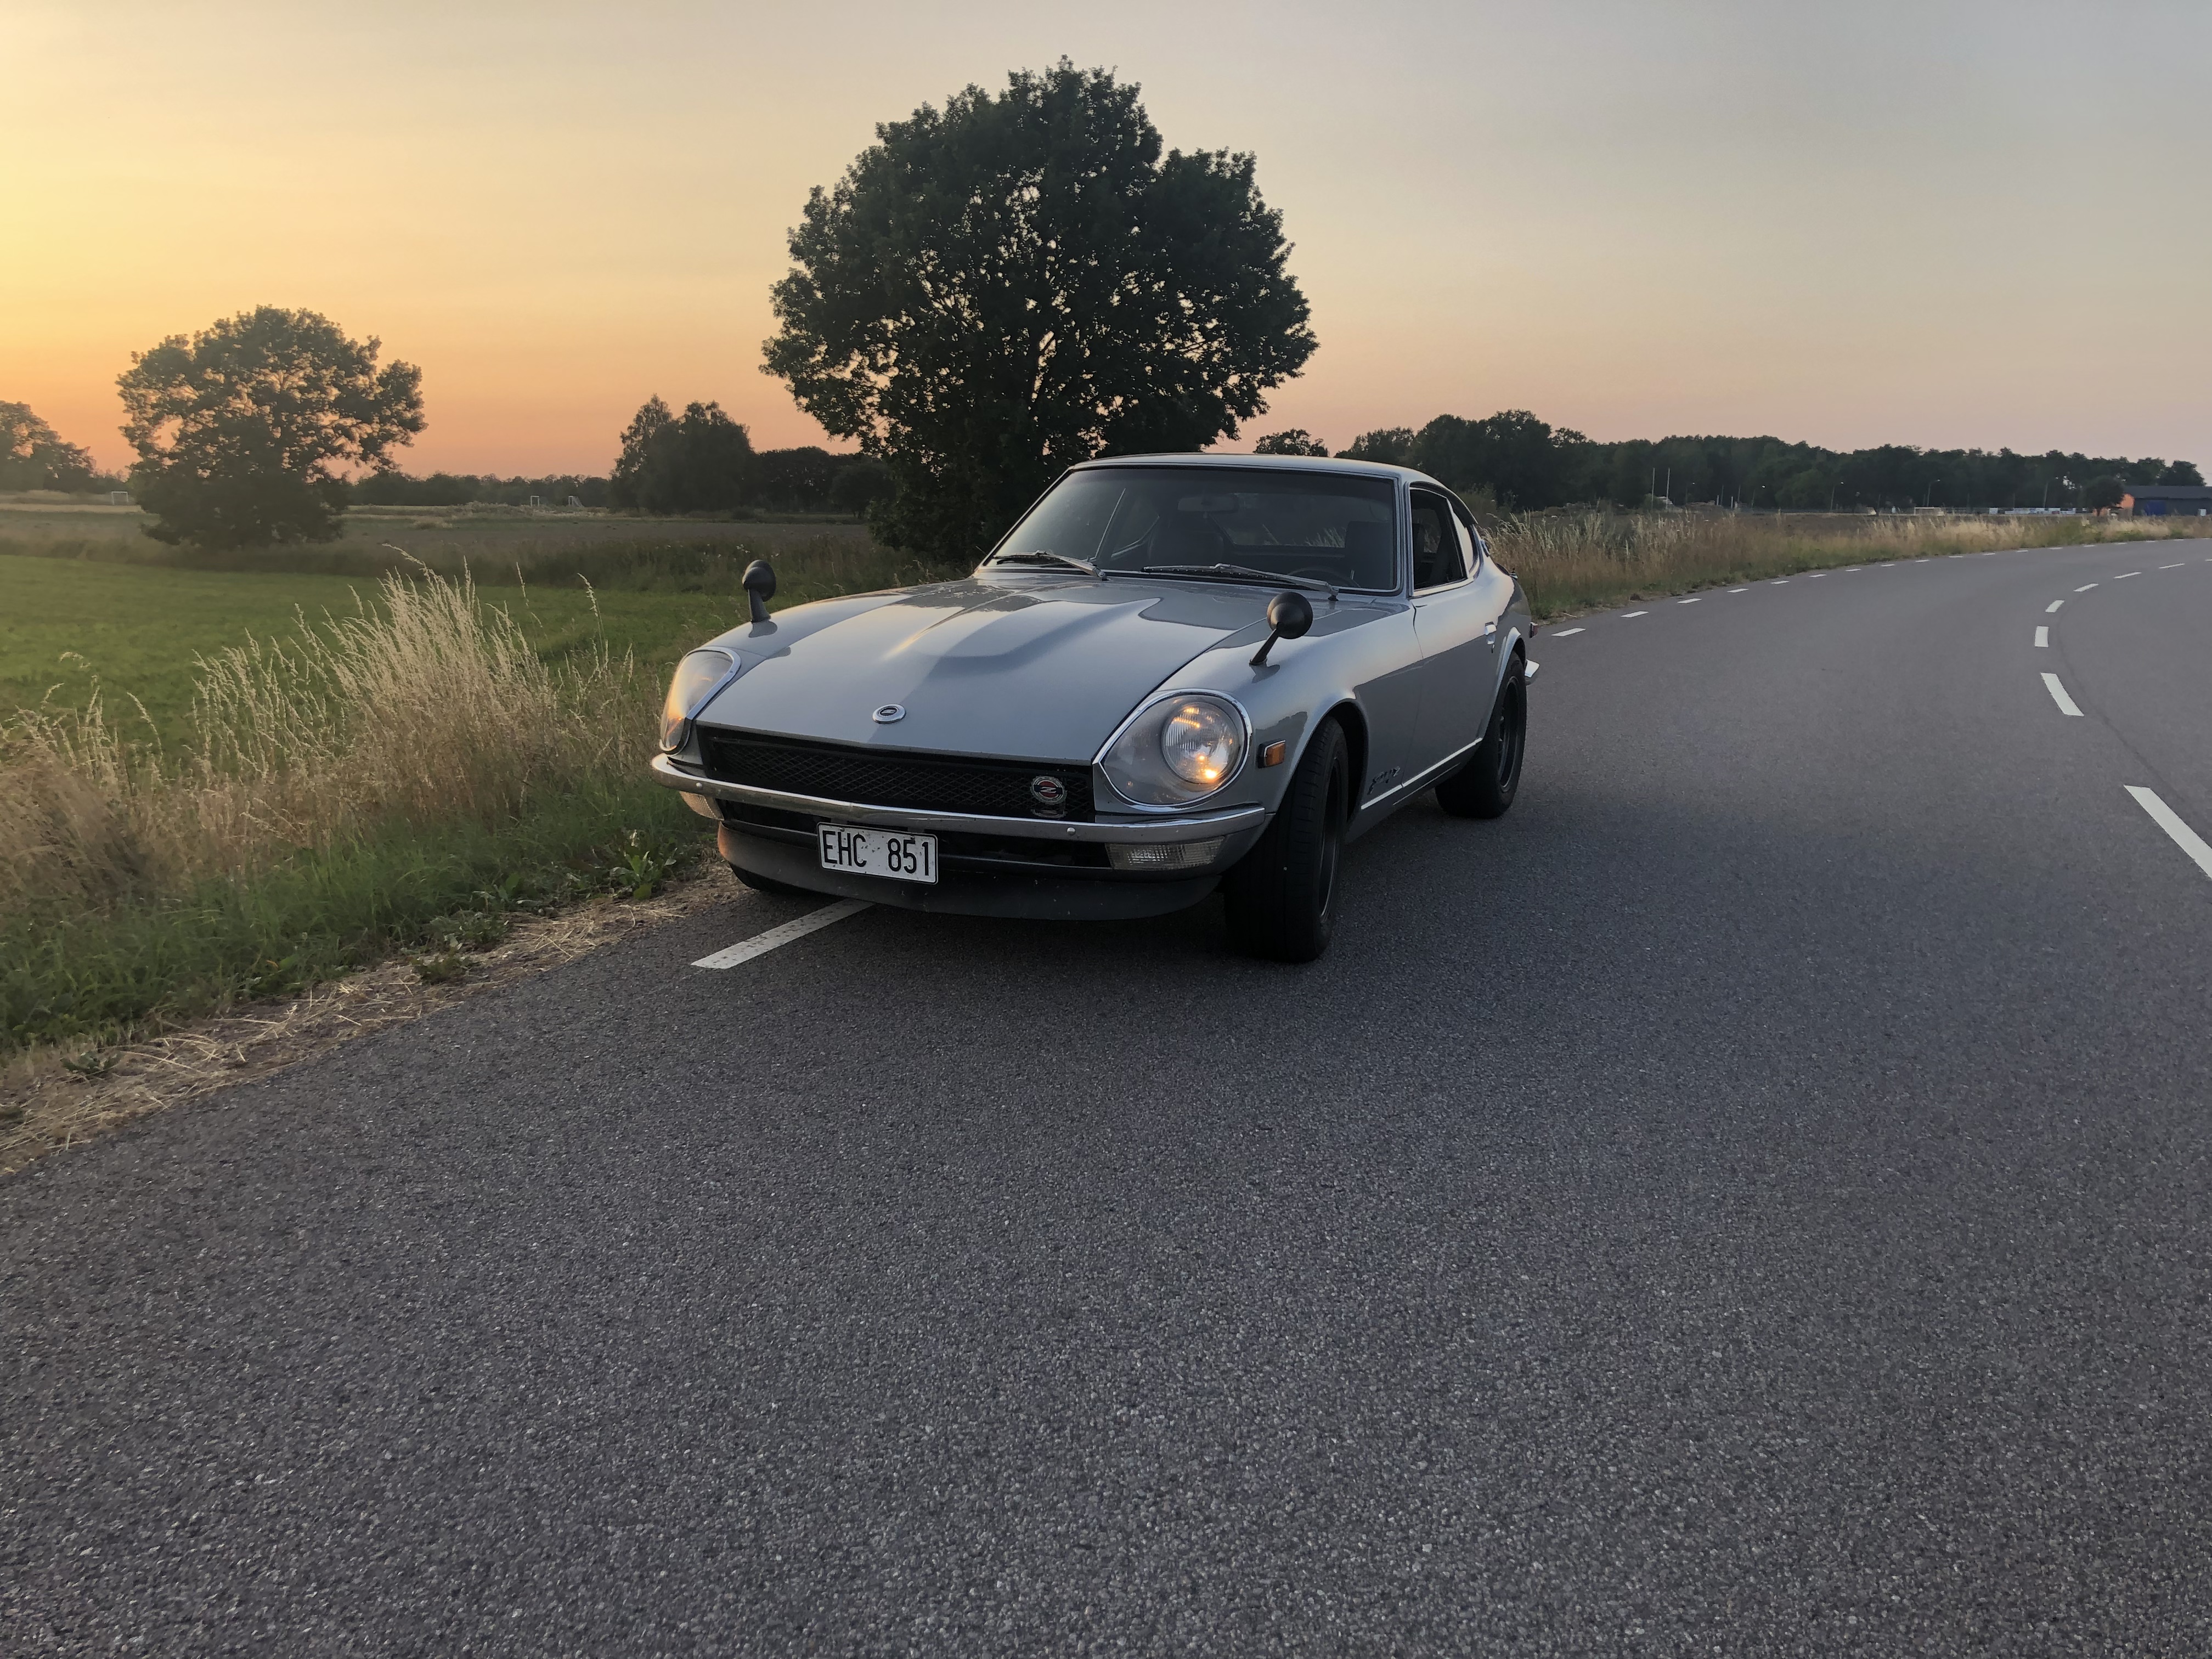
3 pointsWell, it has been a long time coming, but I finally got the car out to a car show. Went to the 30th Anniversary of the Edmonton Z Car Club Car show on Saturday. Wow! Where did all of these S30's come from! It was a great turnout with lots of great cars. I am over the moon thrilled with SASSZ and how she looks in the sunlight. We weren't the only ones apparently because we took first place for the S30 class and Best in Show to boot! Validation after all this time feels amazing... Thanks to everyone on this forum that have helped push me along with advice and encouragement, parts and knowledge. This was indeed a village effort to get me this far!


 3 points
 -
3 pointsPlywood and steel wheels purloined from street skates in the early sixties. Sixty years later a few of the old memories (scars) remain and remind me of the good old days of adrenaline fueled afternoons and the painful recoveries.3 points
-
View Advert Restored 240Z Tail Light Panels Up for sale is the last set of 240Z tail light panels I expect to complete. They have been restored to the OE color and finish. The stainless steel bezels have been polished to a chrome-like shine and are free of dings or scratches. The back sides have been thoroughly cleaned, any traces of surface rust removed, and sealed with a fresh coat of primer. I’ve included a pic of a set I recently completed and installed on my car with the license light refinished to match. Also available (not pictured) is a matching restored grill for a ’72-73 240Z. It was completely disassembled, parts straightened/repaired/replaced as required, stripped to bare metal and refinished. This grill will fit a ’69-71 Z if the lower/outer brackets are swapped out. The tail light panels are $295 including standard domestic shipping. The matching grill is $315 including standard domestic shipping. A 10% discount is available if both parts are purchased together. Payment via PayPal, PM if interested. Thanks! Advertiser jfa.series1 Date 07/25/2021 Price $295 Category Parts for Sale2 points
-
2 pointsI believe I already bought them at zcardepot, they were $20 a piece. I installed the outer tie rods (Moog) just the other day and had the car aligned, happy to say about 70% of my shake is gone but there was still the obvious inner rod play, just waiting to get those delivered with the boots. Only installed the outer tie rods because I had a track day yesterday, aside from a fire starting on my headers or one of my webers, the car ripped and handling felt a lot better too. I'll update with pictures when I get the inners on2 points
-
Got it running after 7 or so years. Found out it has an L28, coilovers and a 5 speed. Here we go.
 2 points
 -
2 pointsThis weekend I decided to go after the carburetors. The car had not run in 9 years, and I was worried about what I might find. As I pulled apart the float bowls, my worries were confirmed. The bowl in the rear carburetor was lined with a rusty-colored dust. The bowl in the front had some black ooze in that clogged the line going to the nozzle. If you are ever thinking about just adding some fresh gas to a Z that has been sitting for a few years, I suggest that you don't do it until after you clean out the carbs and fuel system. Many components in the float bowl were rusted. I presume it was in part related to the ethanol fuel that was in the bowls when the car was last running. I cleaned out the float bowls with carb cleaner and blasted out the last of the ooze with some compressed air. The rusty parts got tossed into a container and immersed in EvapoRust. After they have sat in the container long enough, they will be rinsed with denatured alcohol, dried, and coated with oil to keep the rust from coming back. (Update: I just looked at them. They look a WHOLE lot better after a couple of hours of soaking.) I also ordered new filter screens for the banjo bolts as I do not deem the old ones as being reusable. Here's a video of the float bowls after I opened them up.

 2 points
 -
2 pointsCharles, @Patcon you are another of my friends that "ain't scared" of nothing. I can't imagine you killing a snake. You'd pick it up and see how unique it is then let it go on it's way. Your the guy on TV shows.2 points
-
2 pointsMark you were the pioneers. The Lewis and Clark of skating. Sent from my iPhone using Tapatalk2 points
-
1 pointhttps://www.rockauto.com/en/moreinfo.php?pk=1101766&cc=1209204&pt=5220&jsn=126 Looks to be Tri-Metal!1 point
-
1 pointThanks @Zed Head Update: I was able to push the 12mm bolt thru what I believe was gasket sealant. For the upper 10mm, I had an extra bolt that I ground to a point. That one pushed right thru the sealant too. All's well in Seattle again. Thanks much as always for the support! JH1 point
-
1 point
-
1 pointThat wire is in the engine harness which will plug into the dash harness just to the right of the glove compartment (or jockey box). So, you have three connectors: female bullet at the sensor, (looks like) 6-pin connector under the right side of the dash (Yellow wire), and connector at the gauge.1 point
-
1 pointA few years back @Captain Obvious turned my old skateboard veneers into a shifter knob. It’s cool to keep using the old board, lots of memories with it…. Reduce, reuse, recycle I guess 🙂 The new one is slightly larger, so it fits my hands better…1 point
-
Yes, this is the exact same issue I had. I also had a full tank of fuel and didn't want to mess with emptying, dropping, etc. I didn't have a delivery issue, though. Like I said JB Weld "fixed" the problem. Cheers, Mike1 point
-
Scott K in #202. Very fast driver in a very well sorted out 240. Telemetry and a coach with a driver who listens and isn't afraid to wreck his car (as long as no one else is around) while he tries to be faster in one segment of the track or another.1 point
-
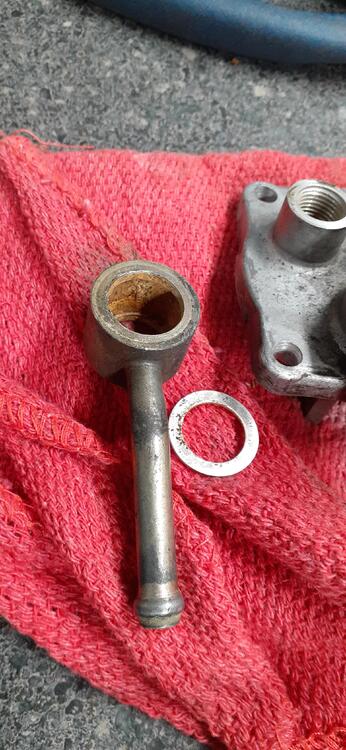
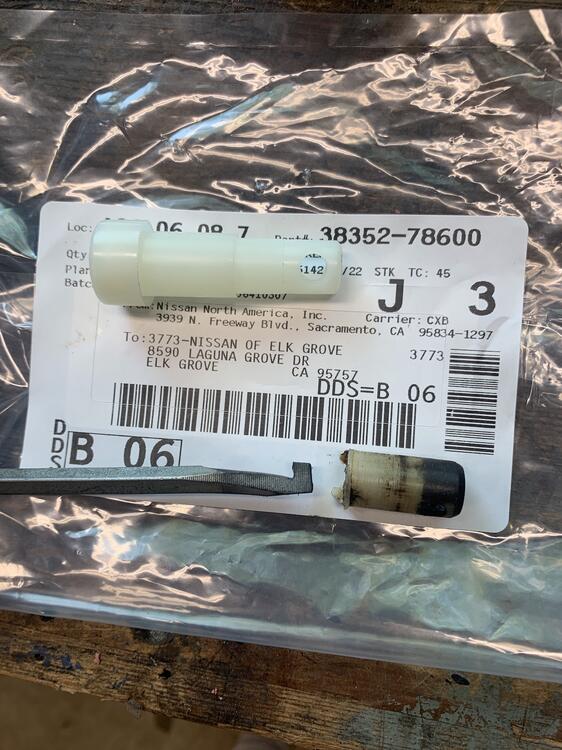
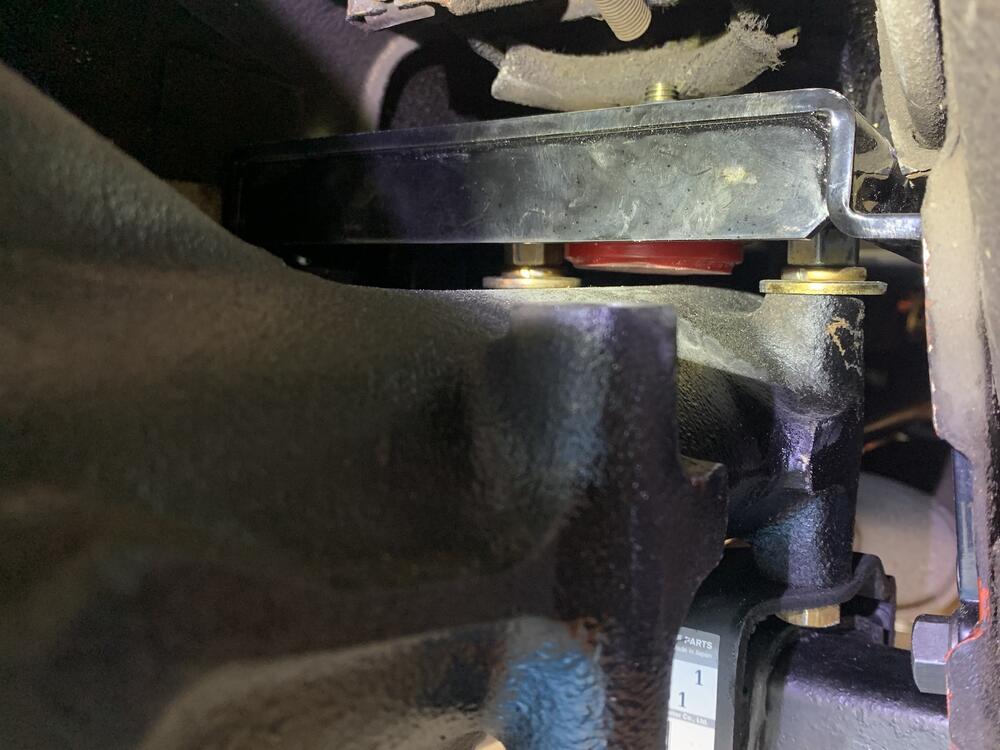
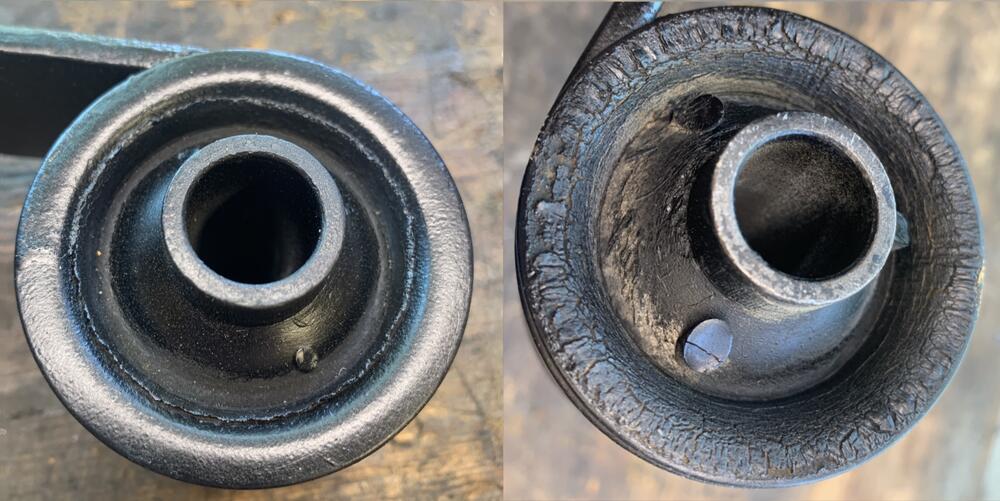
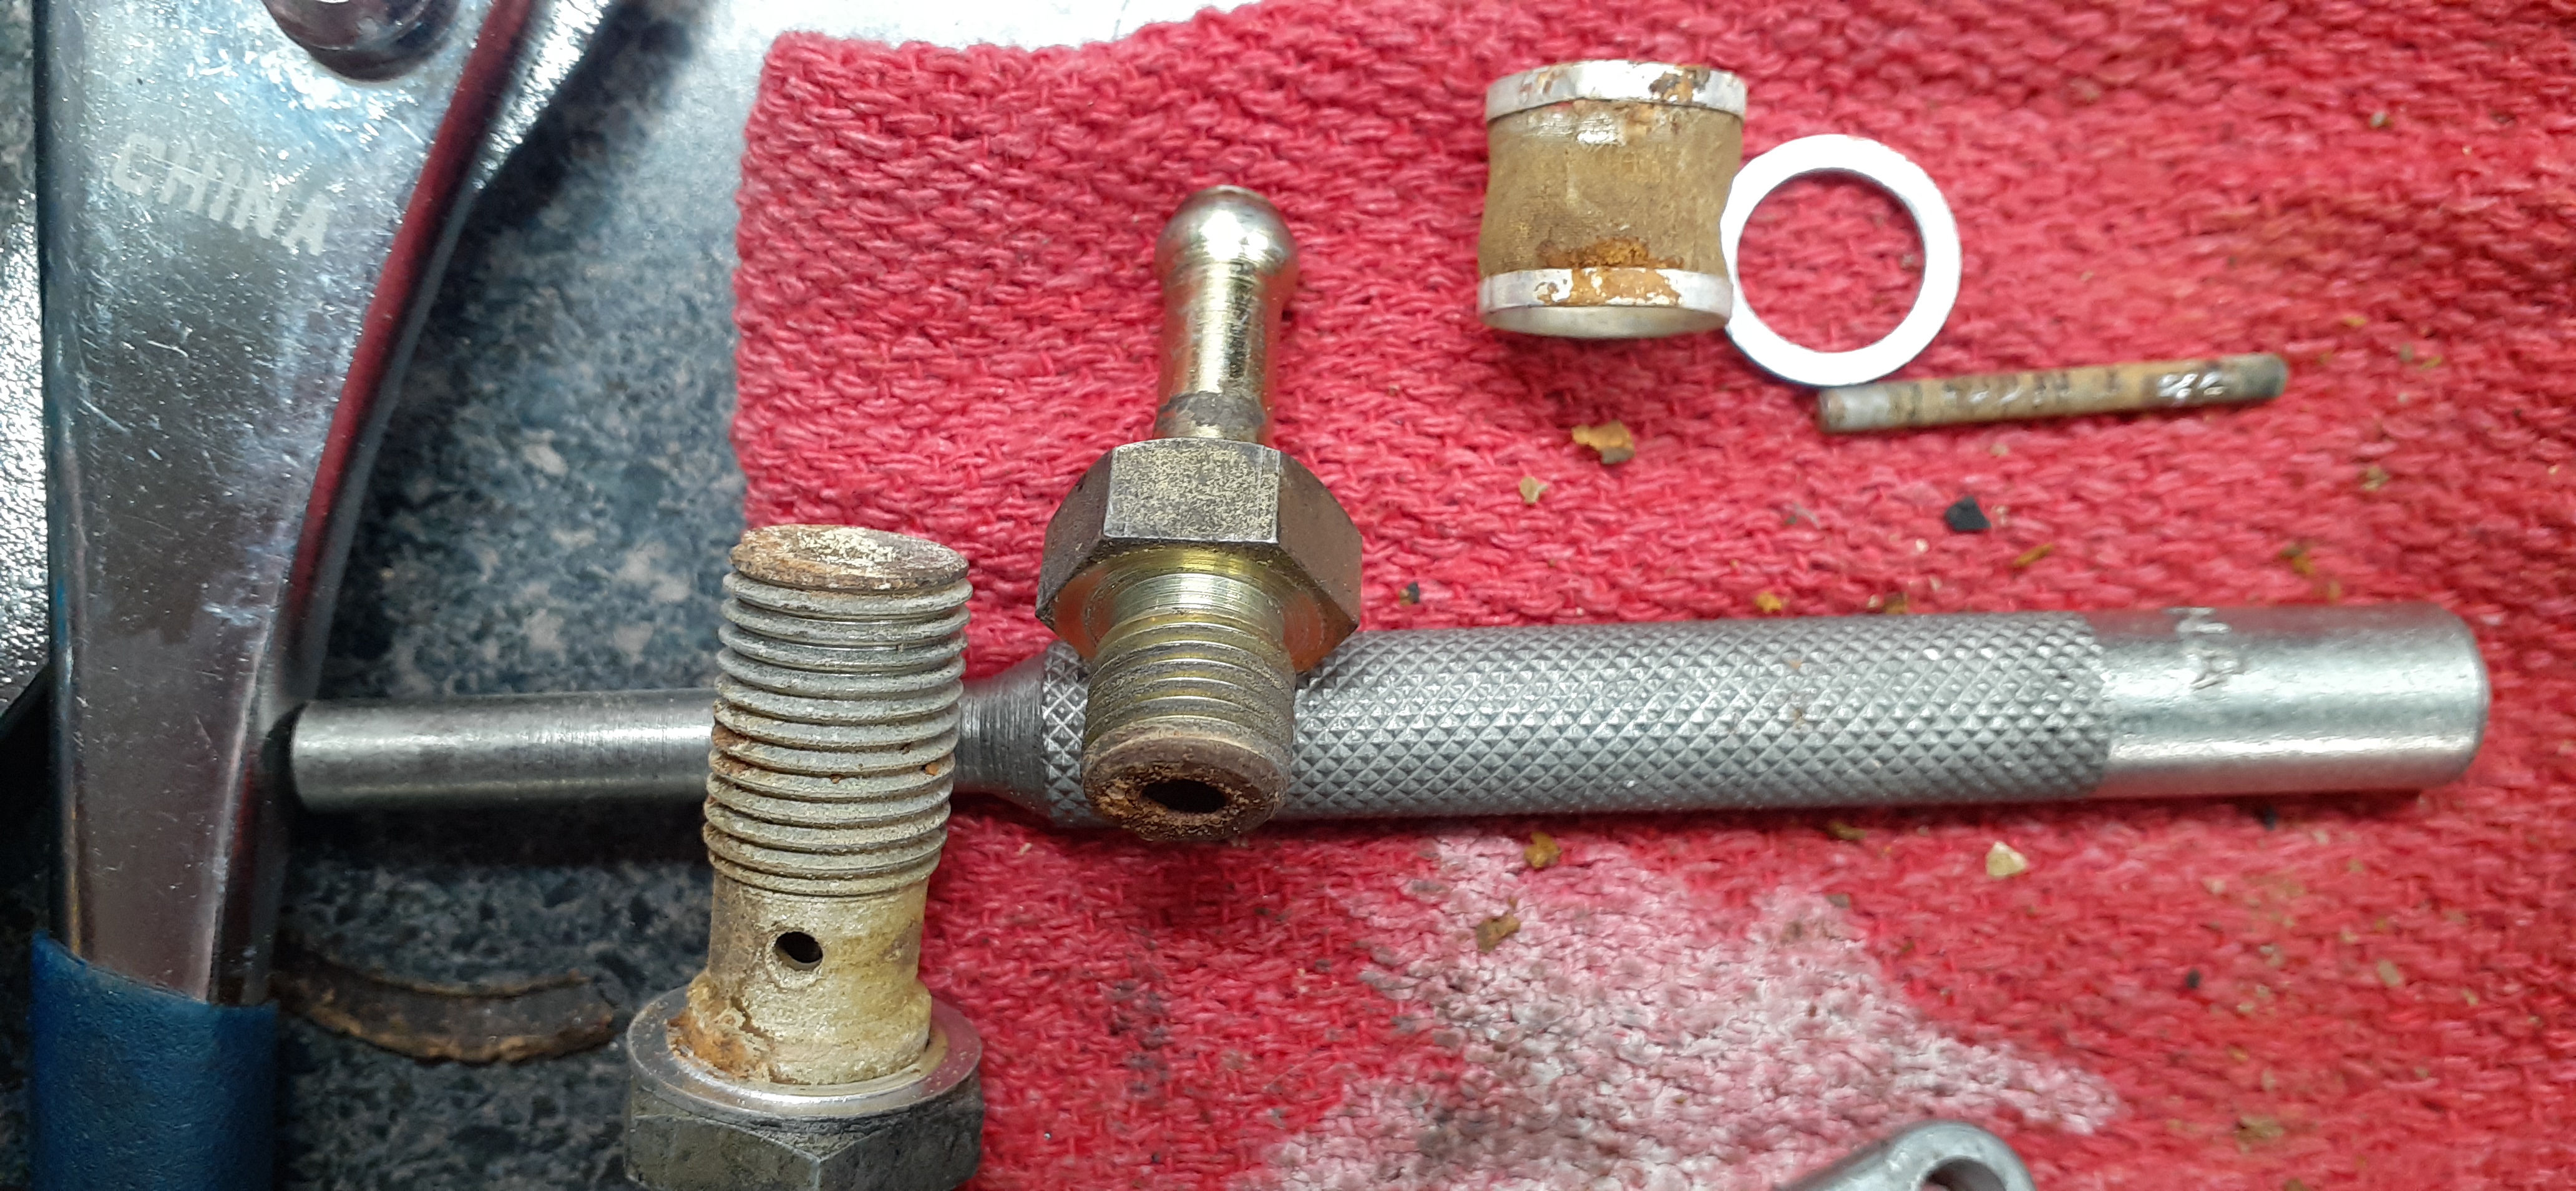
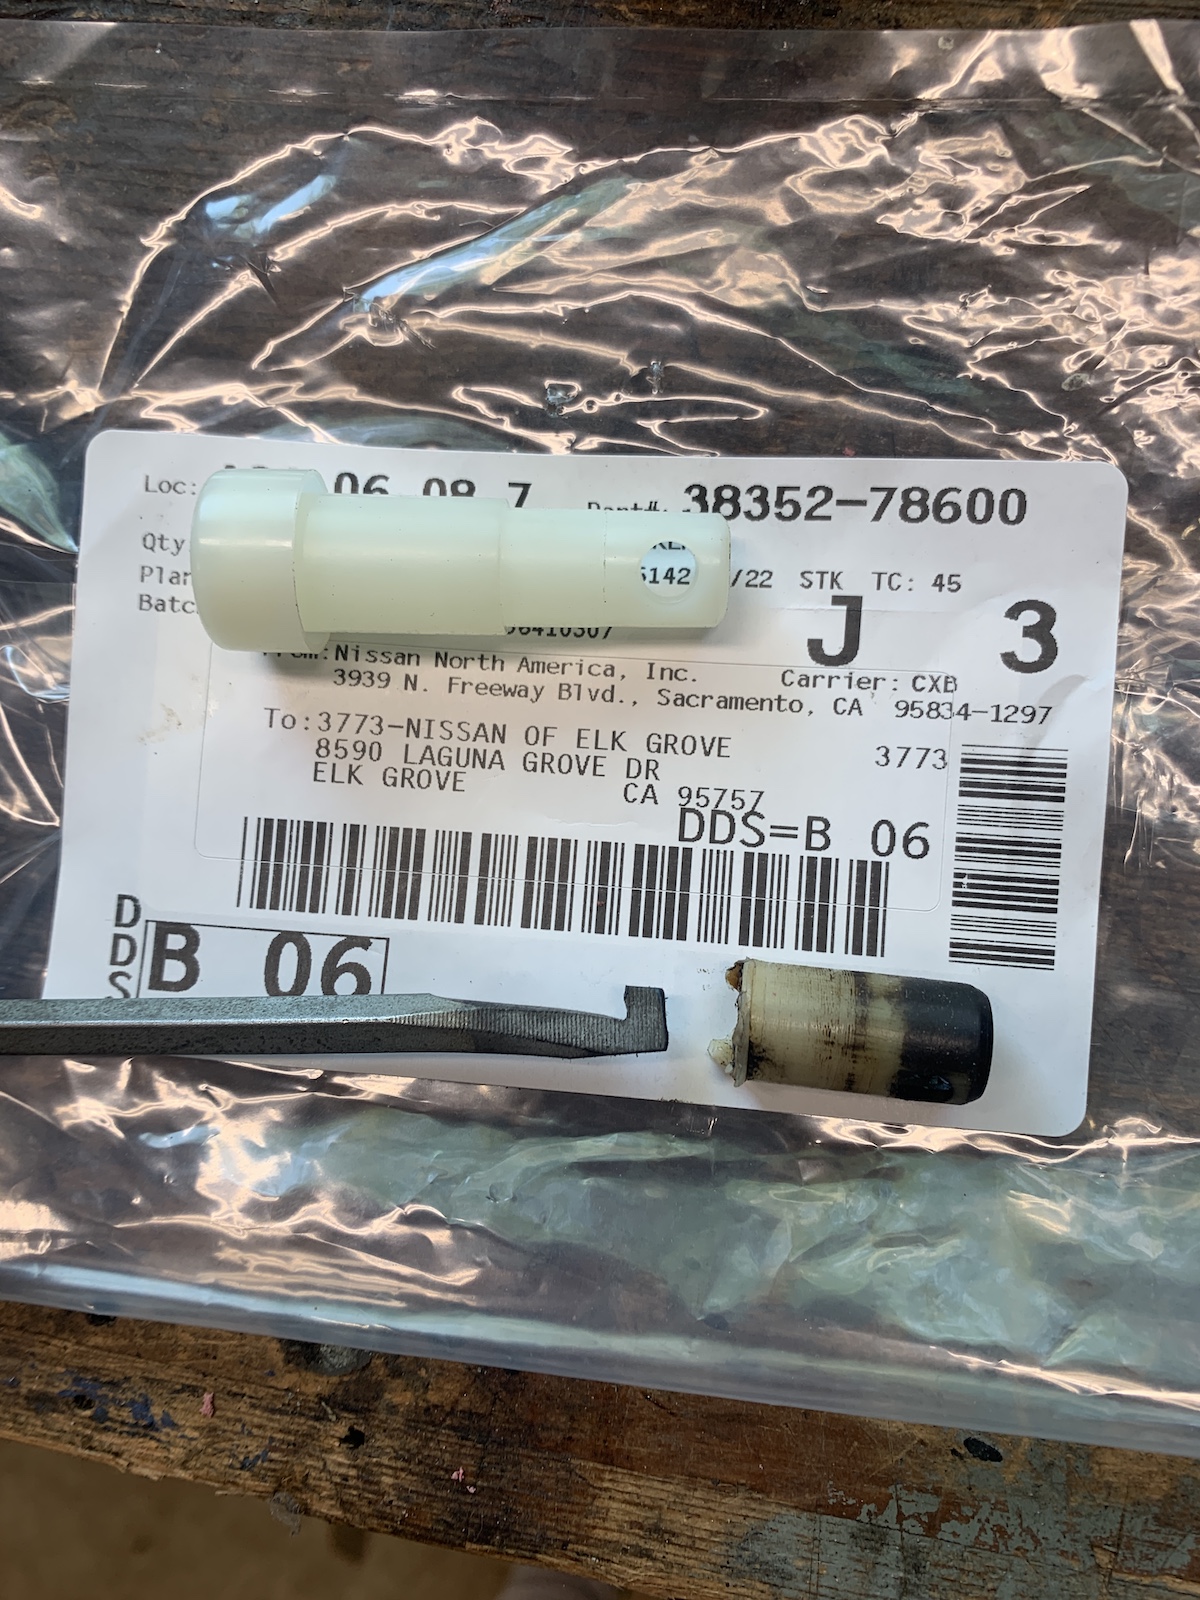
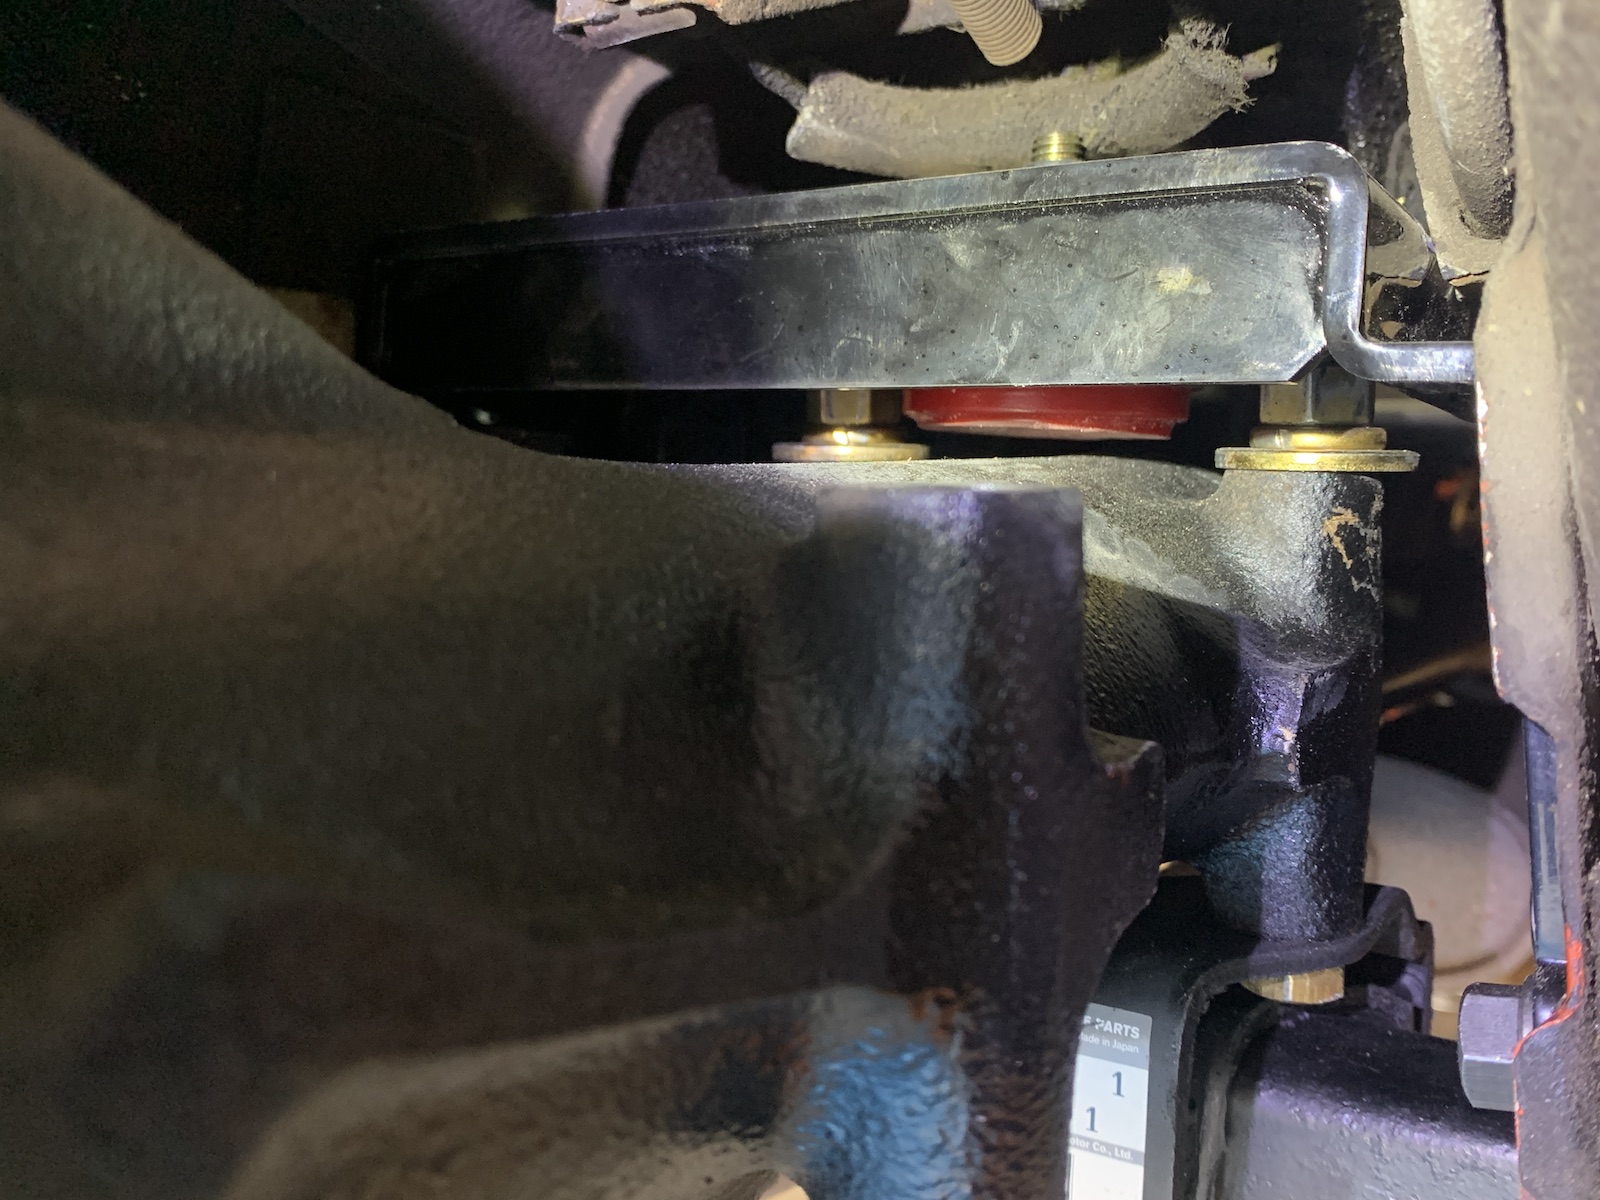
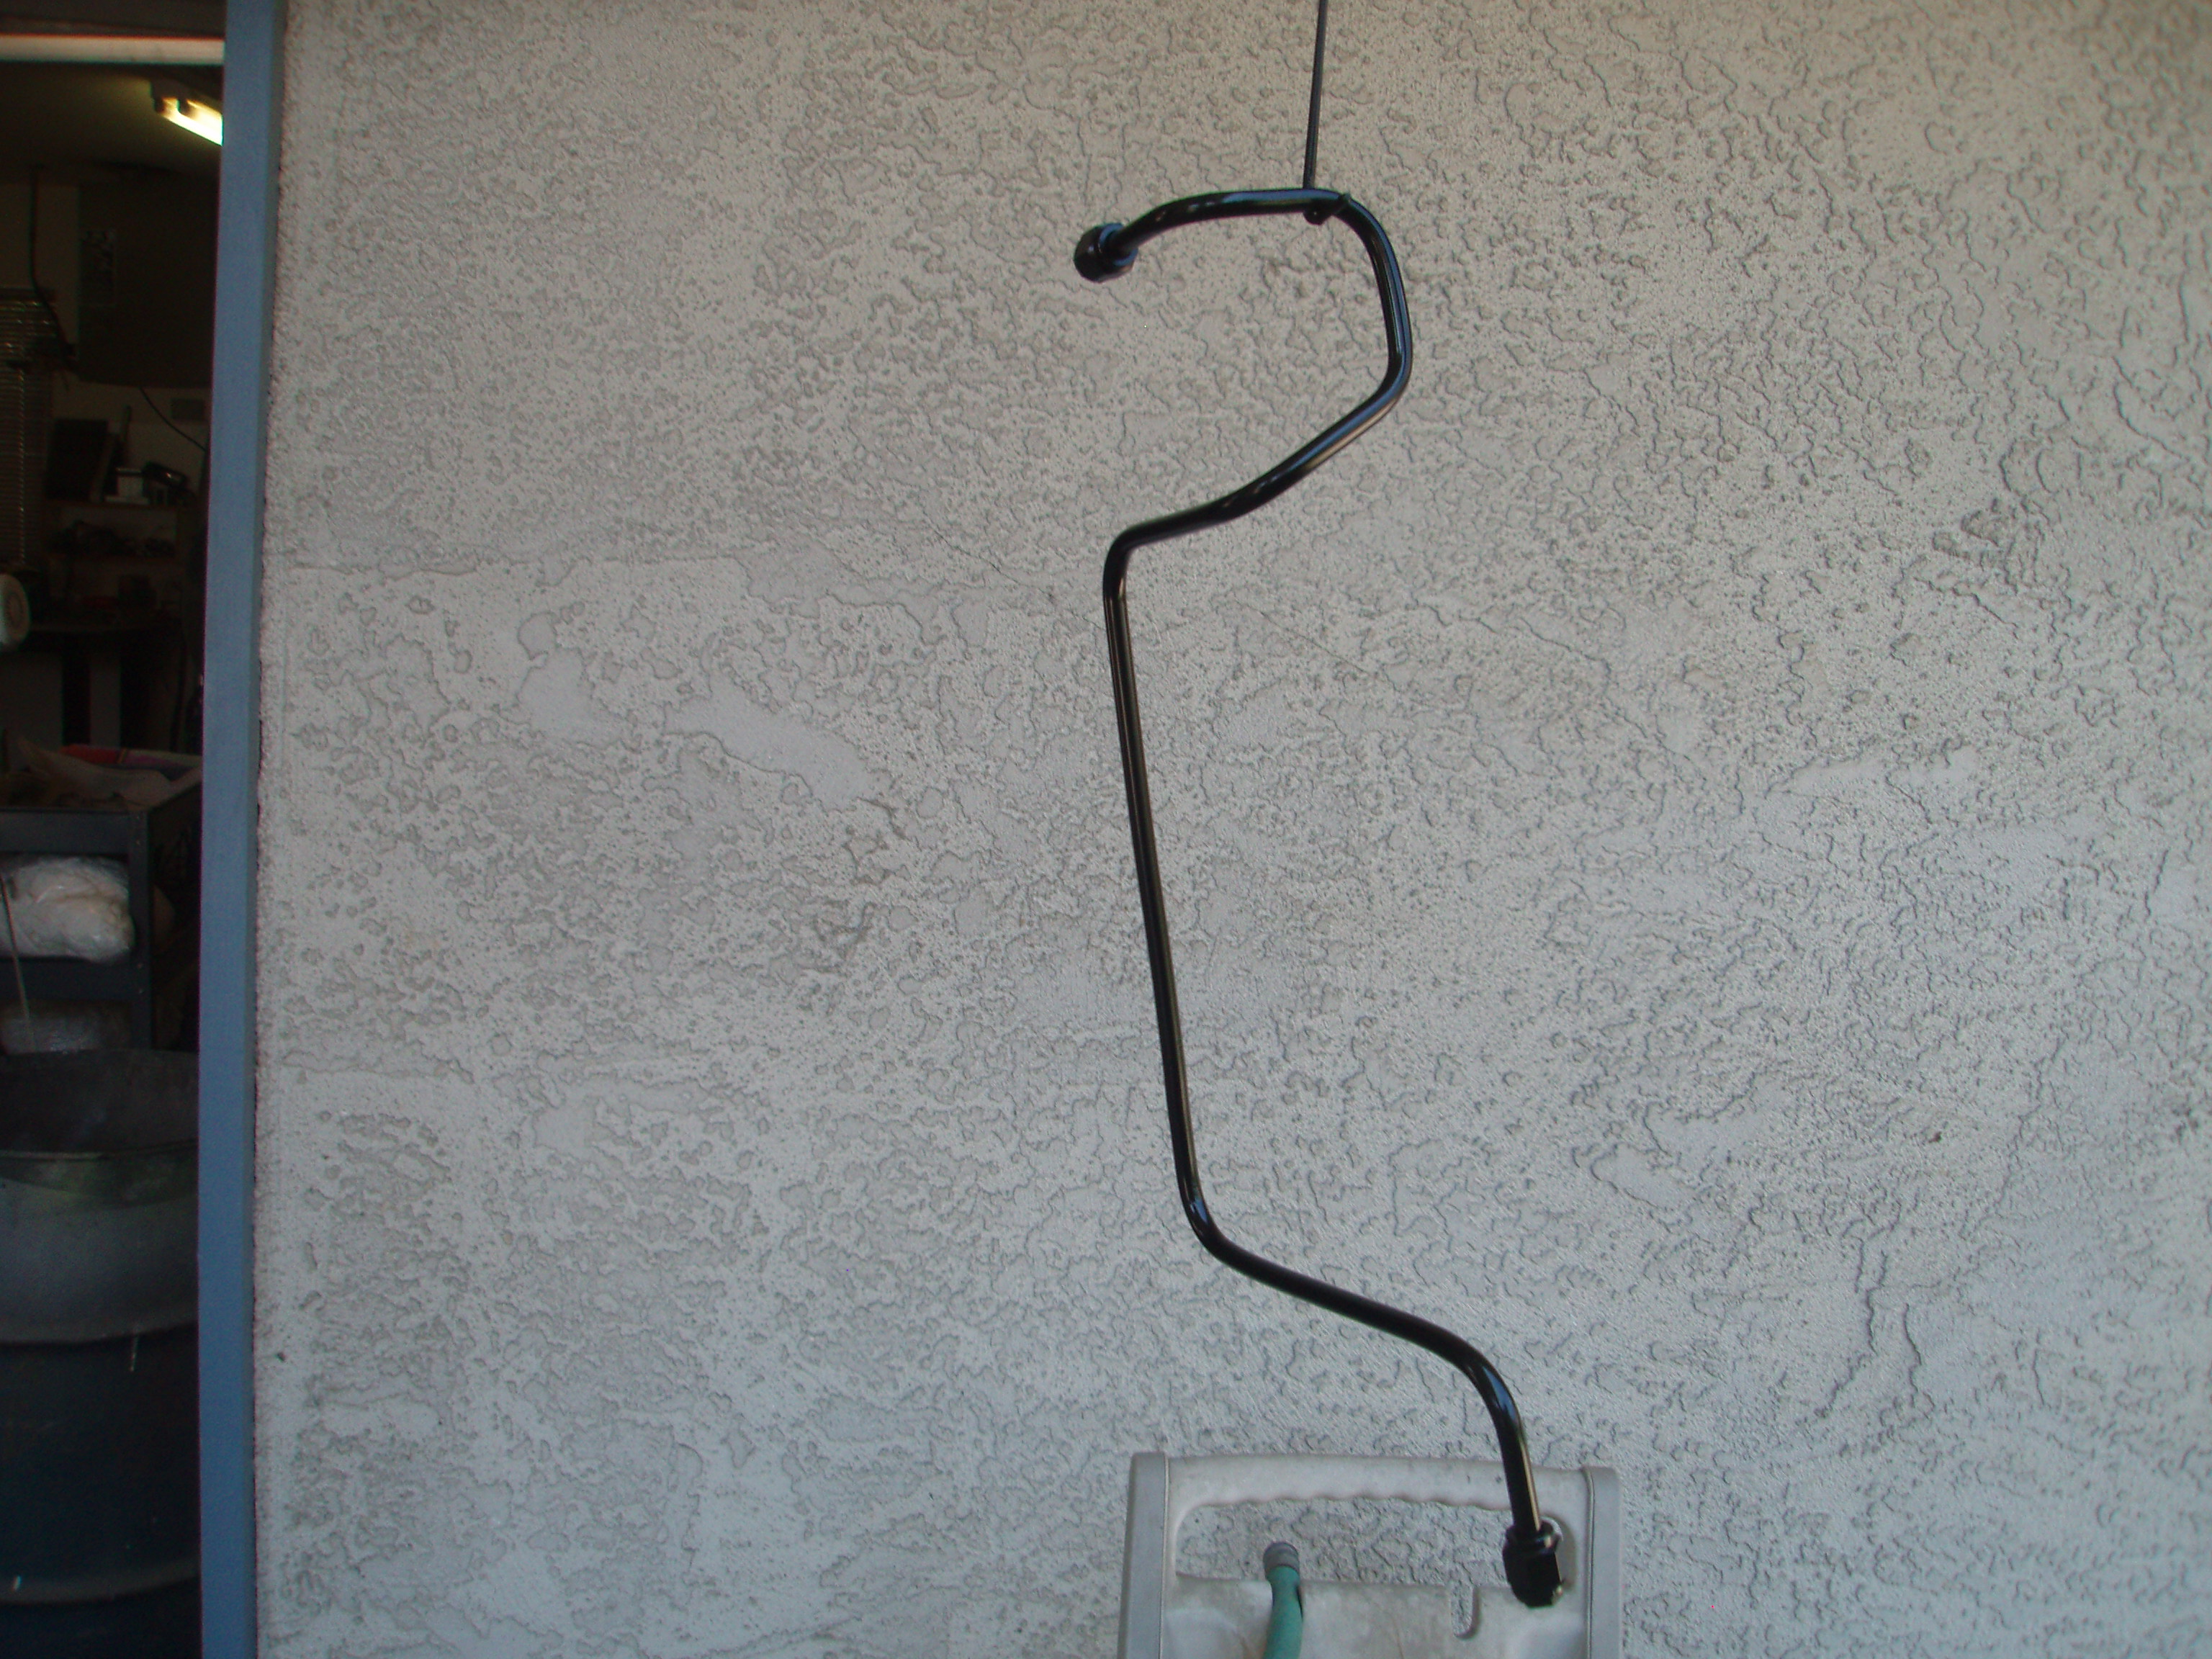
1 pointI modified an old screwdriver to help remove the broken off breather vent. Basically catch the top of the sideway holes and pull up. New 38352-78600 is $7 from dealer. Here's a pic of the TC mount clearance. Hard to believe the factory used a belt instead of something like this.
 1 point
 -
1 pointWe may have been pioneers but we were crazy to do that. Steel wheels on asphalt and concrete had little to no cornering capability or control. We thought ourselves to be bulletproof back then but we were little more than passengers on a gravity express. No slalom course, just a schuss to see if we could stay on till the bottom of the hill. Frequently, we didn't. The adrenaline addiction stayed with me for years1 point
-
1 point
-
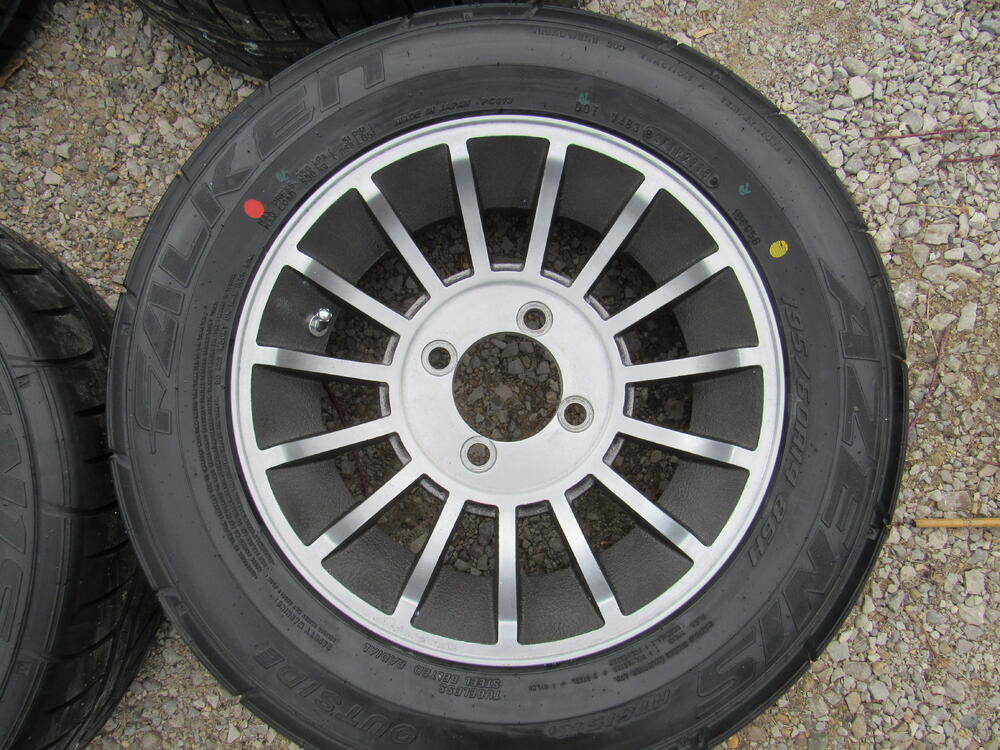
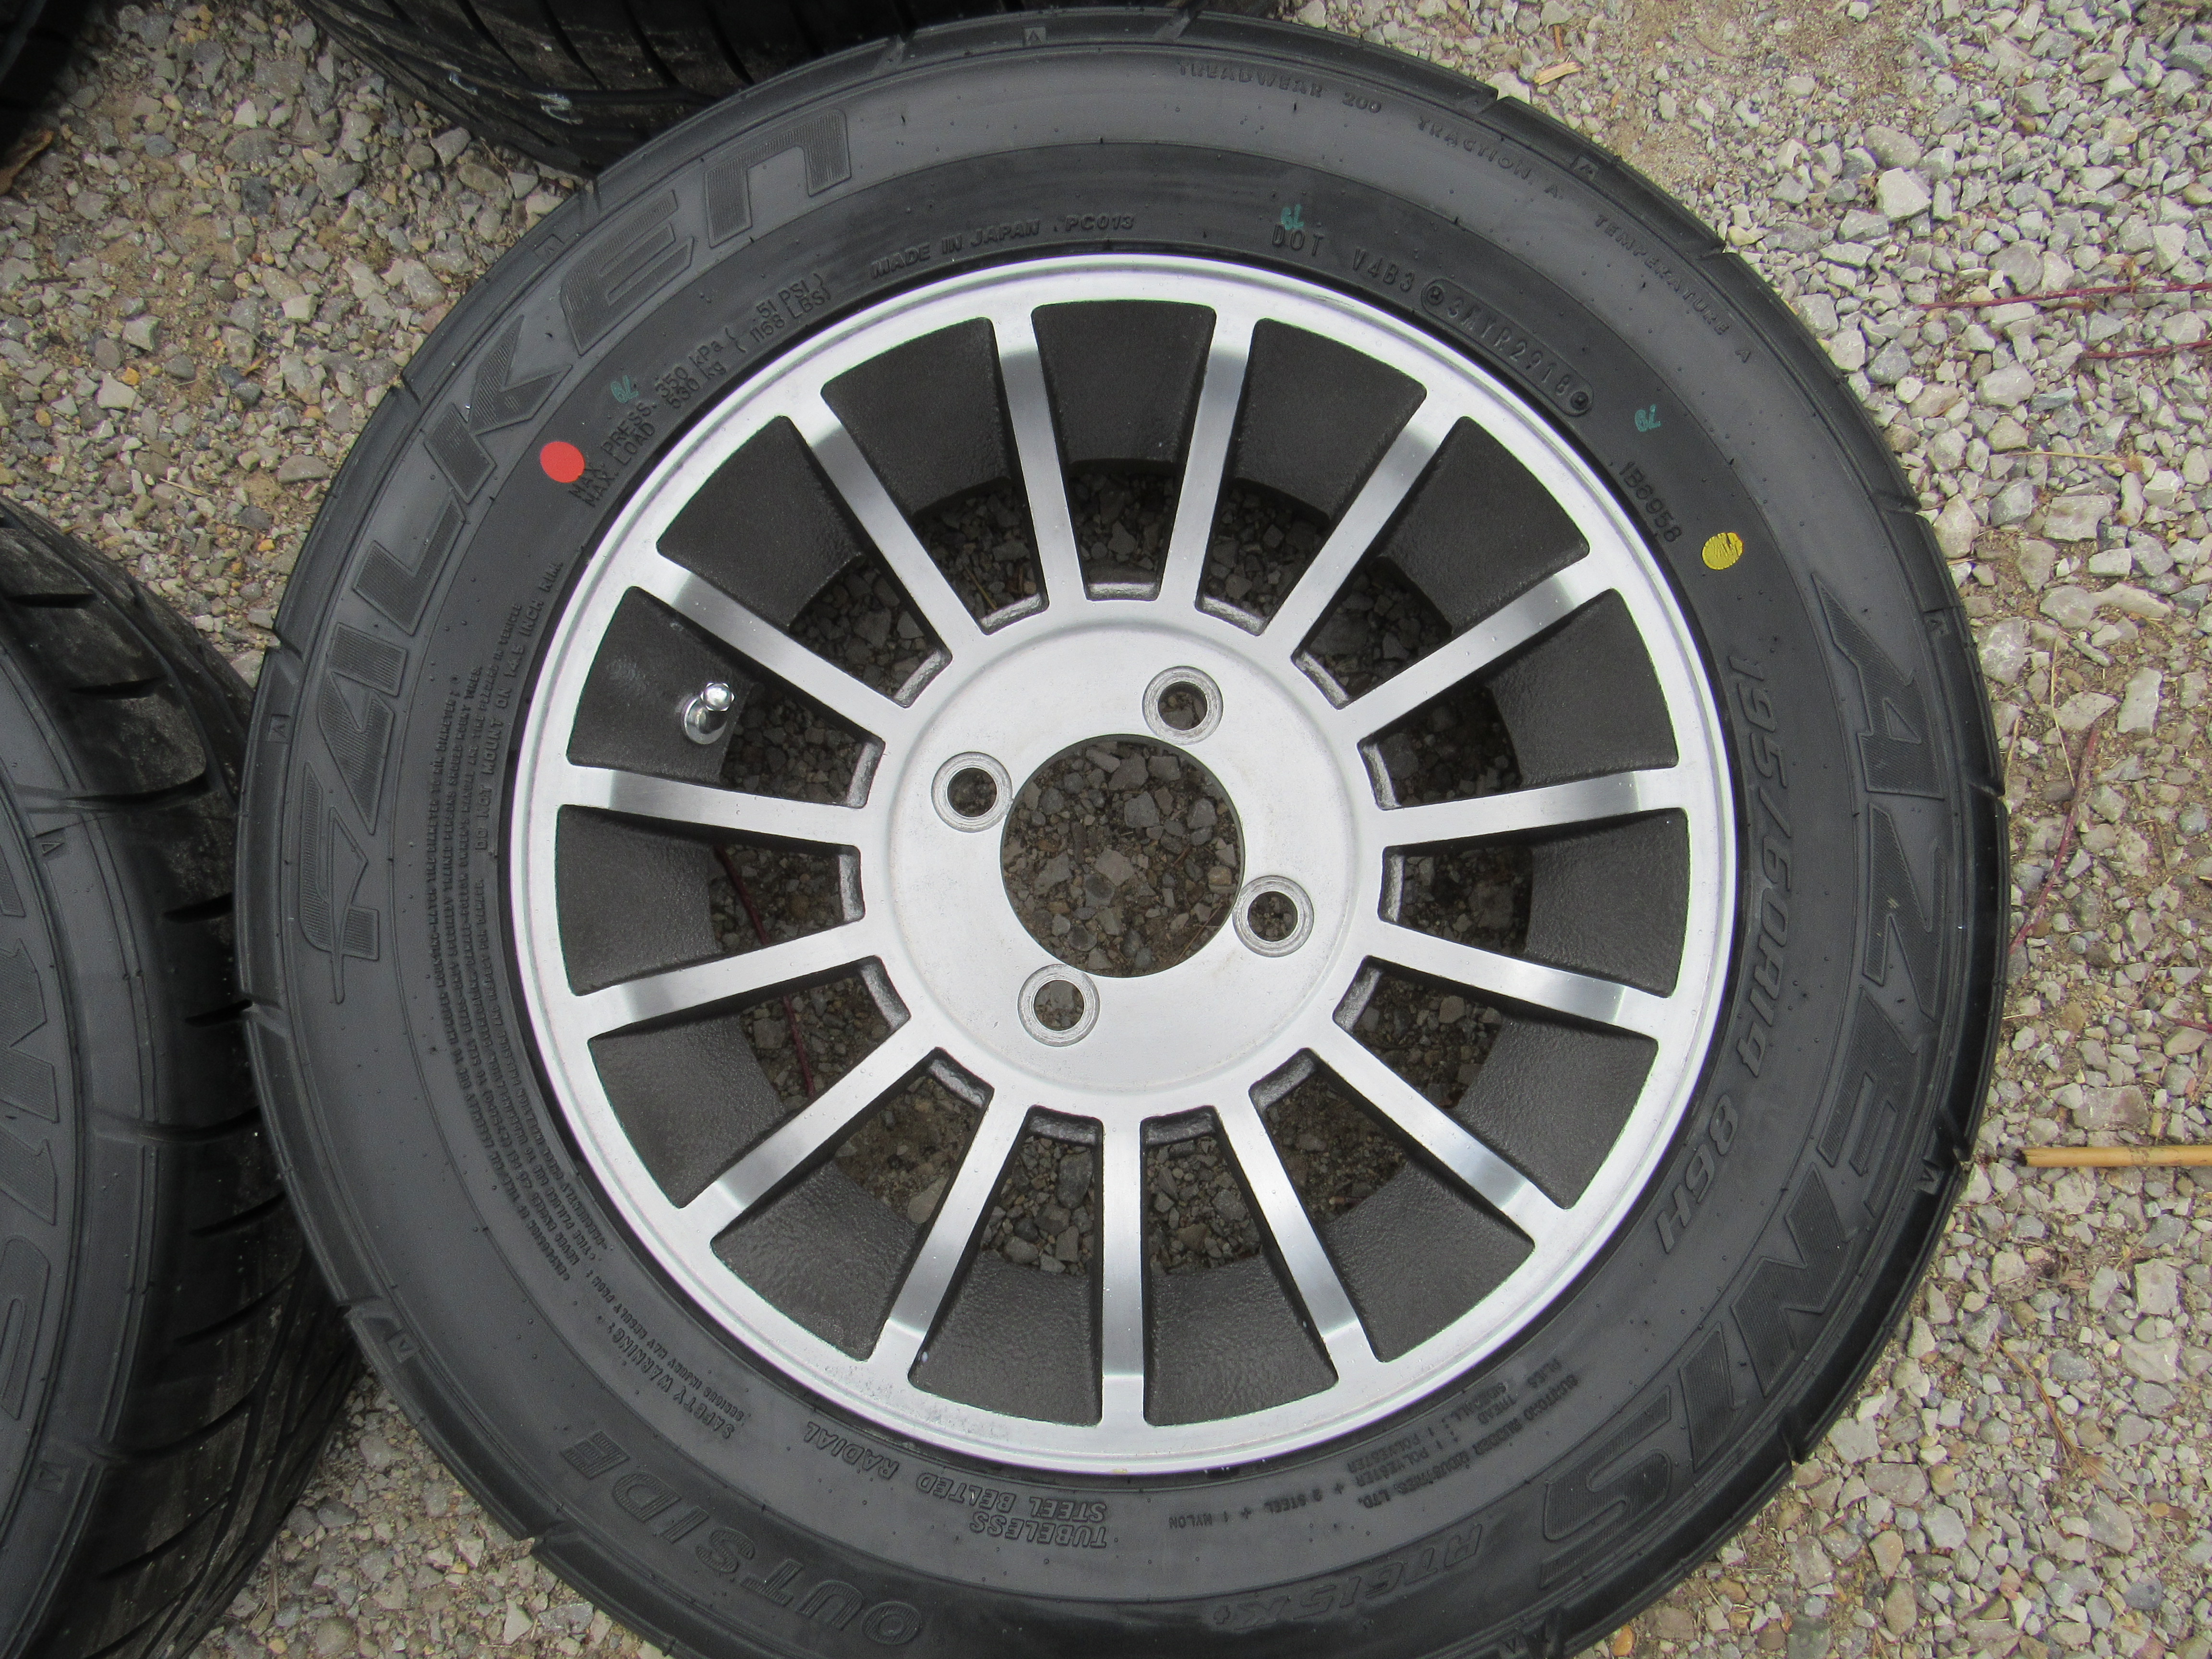
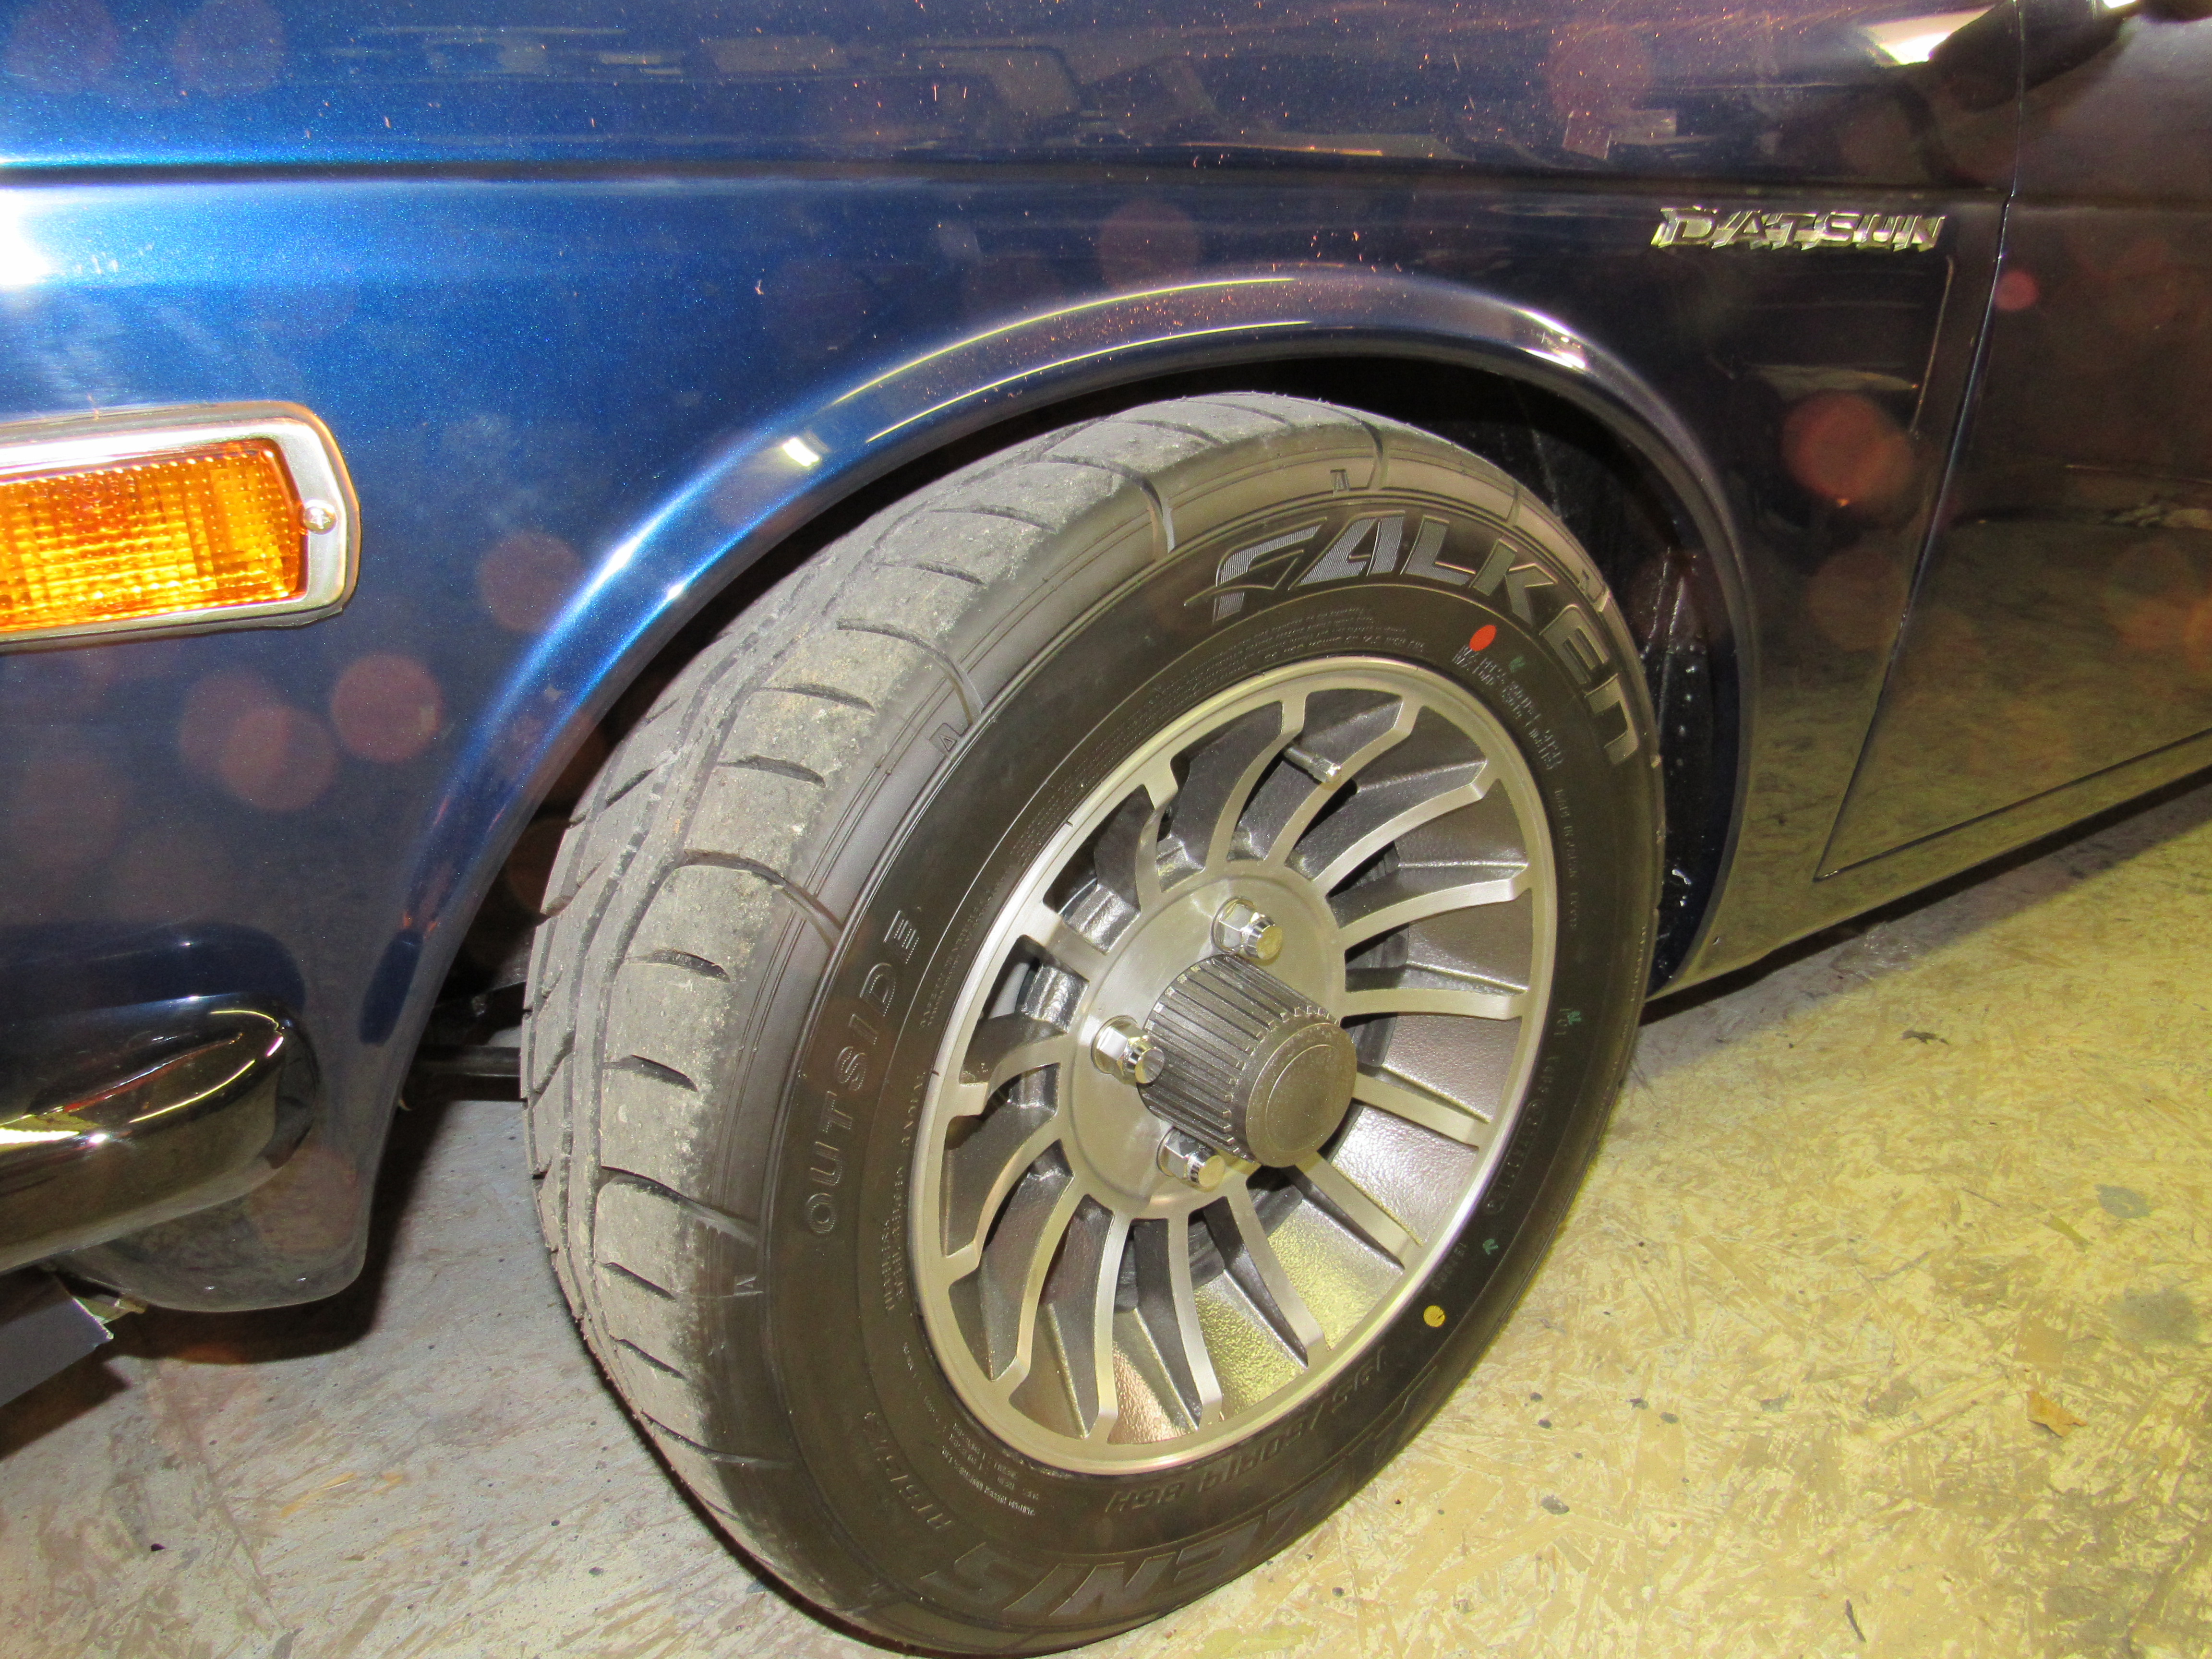
1 pointI have 195/60/14 Falken Azenis on my 510, good looking tire and although I haven't pushed them yet they seem to be pretty sticky.
 1 point
 -
Those little fuc… always break in half when i try to pop them in….i have given up on them…1 point
-
1 pointA tire calculator is always fun to play with to try out different sizes, https://tire-calc.com/1 point
-
As long as you haven't run into thin heater duct sheet metal held on with wood screws you know your PO wasn't too bad. It looks like you'll need both outer rockers at least, you may be able to save the fenders with repop fender patches, https://tabcoparts.com/16721.html There are more expensive, more accurate patches but Tabco is not too bad.1 point
-
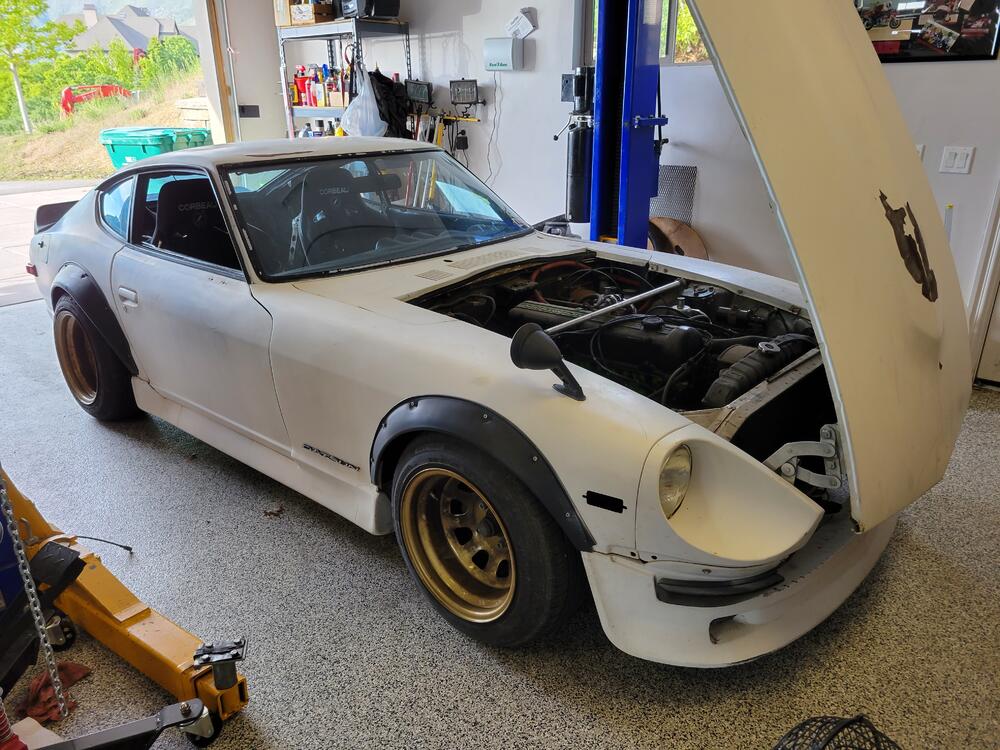
1 pointSo, with the garage organized better and with the 73 no longer being covered in odd materials, it was time to start. I made a list and quickly knocked off a couple of items (removing the dead Crane box and replacing the bad temp sender) while adding two more new items. Then I reformatted the list, making a space for completion dates as items get checked off and adding blanks for more items as I encounter them. The next weekend reassembled the door, finding the old dovetail was broken. I also installed a Pertronix Ignitor in the old 73 distributor that was still hanging out in the garage, though if it gives me a headache later on, there is a 74 distributor in the parts bin that could see an HEI trigger in the future. Meanwhile, the parts orders continue, including a couple of rebuild kits for the carburetors. Sorry flattop fans, the 73 has some 4 screw SUs purchased 25 years ago. To do list for the 240Z.docx1 point
-
1 point1 point1 pointI love my 15" rewinds. 205/50 Falkens is what I run. They fill the space perfectly in my opinion. 16" are too much for a 240 so I put them on my 280. Still a little too much for me but way better on the 280. Go to motorsportsauto.com I think and they have suggestions on tire sizes for our cars. Rewinds are super light, you can't go wrong money wise vs. wheel combo.
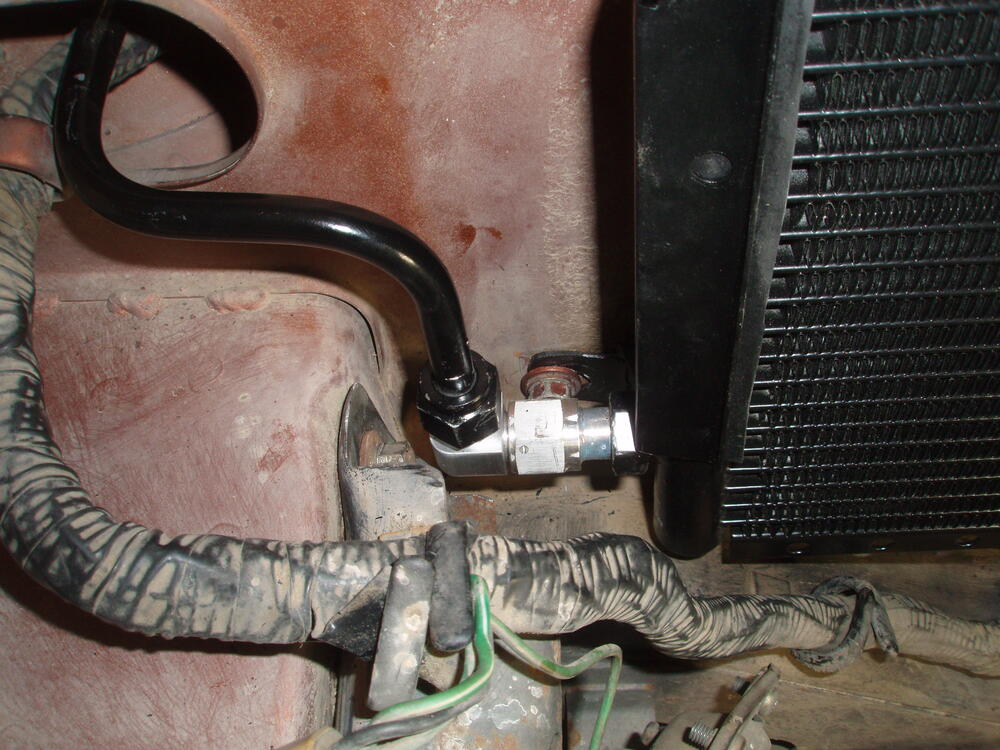
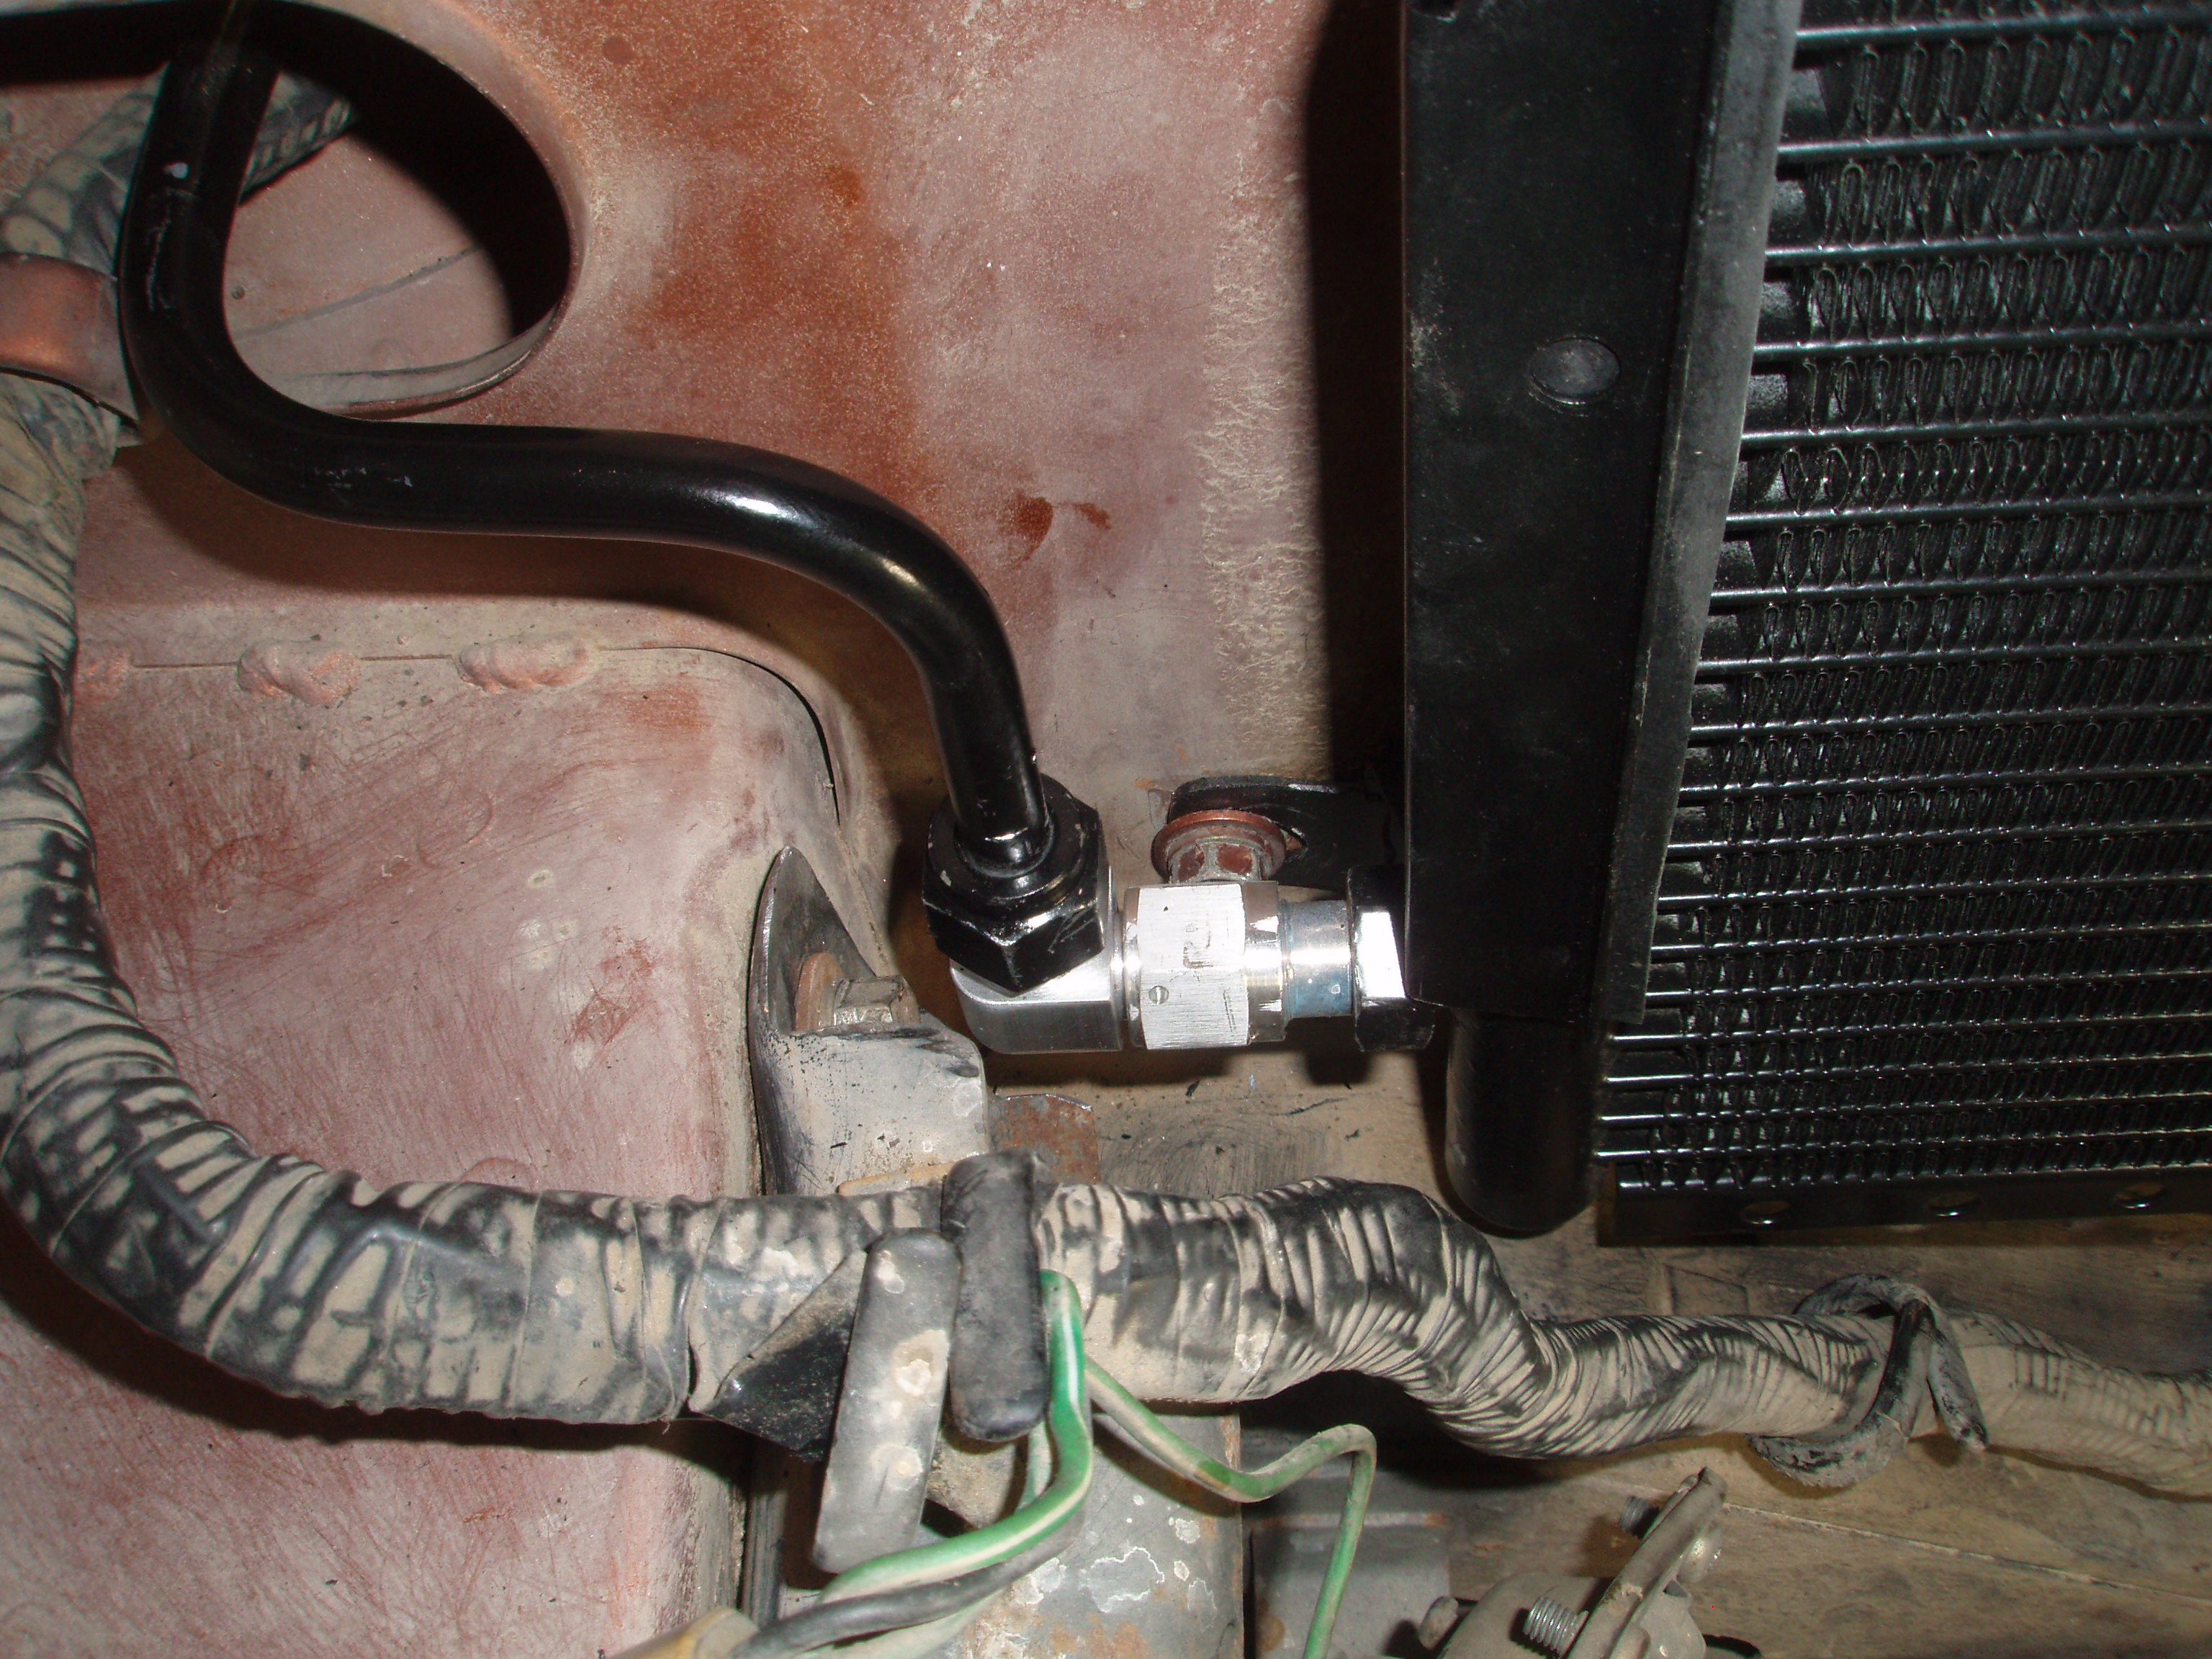
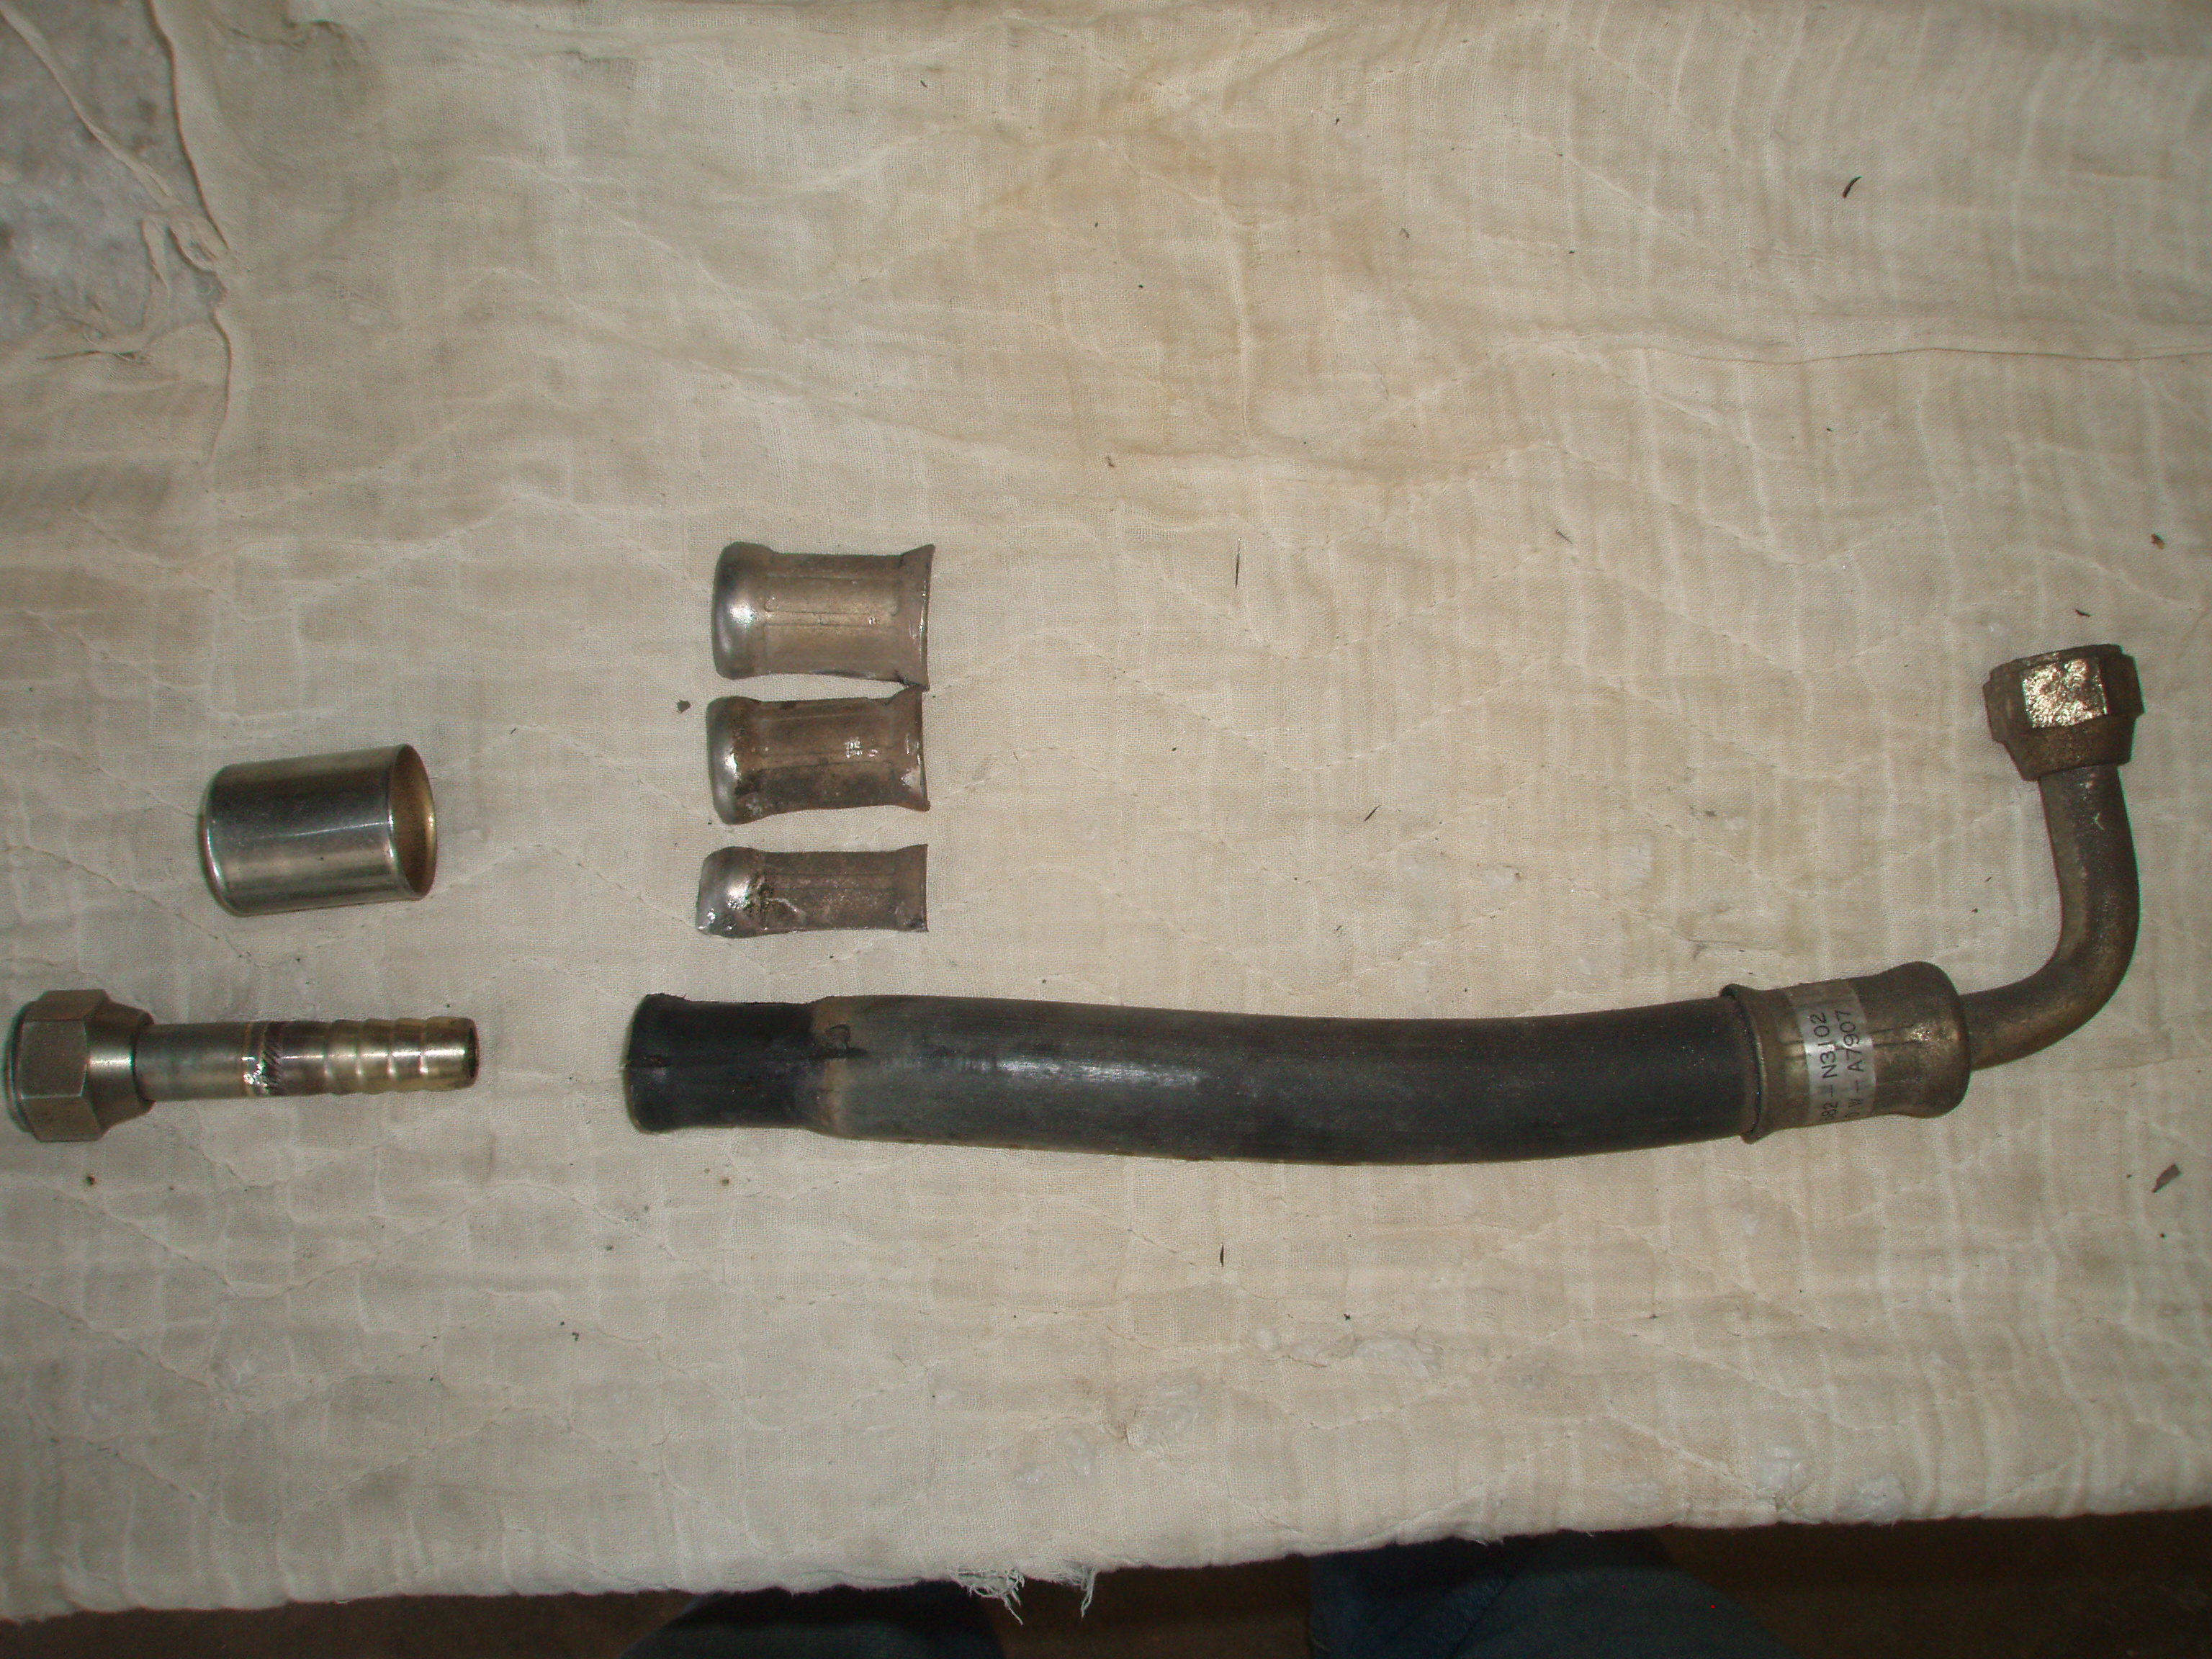
 1 pointIf it is just moving on the outside then it will be much easier to solder up, just make sure you go through the usual measures for cleaning the tank and purging it of all vapours. I like using the vacuum clear on reverse so it is blowing fresh air in.1 point1 pointMark I figure there's nothing you haven't done or have happened to you. Your eyes tell a story I only wish I could see. Kathy's do too! It takes one to know one just scratches the surface. I'll always be thankful you two are part of my life. You've done a lot of living my friend.1 pointIf the outside is loose and the inside pick up doesn't move then you may be pulling air instead of fuel1 pointBoth sides have been patched already. I would redo all of that. I suspect there is more concealed rust under those goober welded patches Fortunately all of that metal is now available. Depending on how deep it goes. Very common to see mesh or crumpled up newspaper behind repairs like this. The bondo needs something to help it fill the hole until it gets hard. PO's Got to love em...1 point1 pointWe never wore helmets...you might get beat up if you did. Today it’s mandatory. We had a 13 year old hit his head skateboarding a few years ago in my neighborhood. He died in the Ambulance due to being intimated into his stomach. Very sad. We know the family. His family set up a foundation. https://www.doitfordrew.org Sent from my iPhone using Tapatalk1 point1 pointThanks ZH, just bought OEMs from NissanPartsDeal for $48 each. Expensive but I’m not in the mood to modify and have more headaches. https://www.nissanpartsdeal.com/parts/nissan-insulator-mount~11220-n3300.html Sent from my iPhone using Tapatalk1 point1 pointI thought I would post what I have done to complete my retrofit from R12 to 134a. I ordered a Vintage Air 12" x 24" condenser from Summit Racing since the old condenser was a 12 x 24. The new condenser comes with #6 and #8 male o ring fittings. Since I am trying to keep this retrofit stock looking as possible I found that you can remove the stock condenser's brackets and reuse them on the new condenser with a little modification. Since the new condenser is slightly wider you will need to slot the 4 mounting holes about 3/16" toward each other. The only other modification needed is on the left side bracket and you will need to make an opening for the #8 male fitting to go thru and removing a small section of the bottom to make room for the #6 fitting. In the process of doing this last step you will need to remove the bracket that attaches to the core support but you still need this support so you will have to modify the attachment point. I made a small bent piece of metal and welded it onto the bracket that kept the hole location correct before I cut off the bottom porting. Here are three pictures, the first is of the stock brackets after unbolting them from the old condenser, then the modified left side bracket and then a close up of the bottom portion. To attach these brackets to the condenser it is simply a matter of using 3/32" neopreme strips between the brackets and the condenser. If you have ever reset door window glass back into the u shaped window mechanism you know what a grip this process has. Just shoot some Windex window cleaner on the neopreme and brackets and shove them together making sure the four mounting holes align up to the holes in the core support. Upon mounting the condenser you will note that the condenser's #6 and #8 fittings are very close to the top air inlet for the cabin and the front bumper bracket. You will need a tight 90 degree #6 fitting (Summit Racing) and a slight trimming of the front bumper bracket's rear most flange. Pictures 4 and 5. To replicate the hard lines I purchased two 4 ft. premade aluminum (U-Bend-Em) hard lines. The #8 line with male and female o ring ends, the # 6 line with female o rings on both ends. You can order these lines in various lengths but I chose to try to make it look stock hence the 4 ft. length. If you choose the 4 ft. length for the #6 line you will have to be careful when bending that you allow yourself the ability to physically install the bent line in the hole in the core support and around all of the other stuff that is in that area. I used a new drier that came with #8 flare fittings so the original hard line from the firewall to the drier just bolted up like stock. On the other side of the drier going to the condenser I ordered a #6 flare to male o ring adapter which then bolted up to the #6 female end on the hardline from the condenser. On the #8 fitting on the condenser I had to trim slightly the metal that surround the cabin air inlet tube in order to get it installed. I then I bent the tube 180 degrees (use tubing benders on all the the hard lines) so it traversed across the condenser and then thru the core support hole like original where it attaches to a #8 female 45 degree hose fitting. I will use the stock bracket to attach a line clamp onto the tube to reduce vibration as like it did stock. At the end of this hose I needed to attach to the compressor. I could not find a #8 90 degree fitting with the filler port on the side so I took a 135 degree fitting that I already had that had the filler port on the side and very carefully straightened it back to 90 degrees and installed it. For the #10 line going to the firewall I used a #10 135 degree fitting with filler port but on the other end I ran into a problem. The #10 hardline that is stock in the Datsun is a weird size. It is a #10 hardline but it has a #8 male flare fitting end. So finding a fitting that goes from a #10 hose to a #8 female flare fitting could be a problem until I realized that I already had one on the old hose that I removed. I simply very carefully cut off the metal crush sleeve, got a new sleeve and squeezed it on like any other fitting. This system results in both filler ports to be easily accessible and next to each other on top of the compressor. In the following pictures I show the bent to fit #6 line already painted and ready to be installed. The next, the # 8 hard line test fitted (I will paint it before final install), the engine side install, and then a pic the # 10 line with #8 female line removed from the original hose. If I were to do this again I would see it I could find a condenser that had the #6 and #8 fitting closer to the center of the condenser as that would allow more room to get the hardline on without any interference from the car's body. I might also order a longer #8 hardline and bend it to go around the outside of the condenser as opposed to going across it. One last thing I did was to upgrade the blower motor to the 1998 Kia Sportage blower motor. In addition to making the hole about 1/8" larger in diameter you will need to change out the three spacers to new ones to form a good seal. The spacers that I made were out of some 1/2" round stock with a 5/16" hole and .666 long.


.thumb.jpg.afada0a4ce6008ed0c3a35eda4263d6f.jpg)
.thumb.jpg.786451715a9948e161655bcb7dfacd56.jpg)
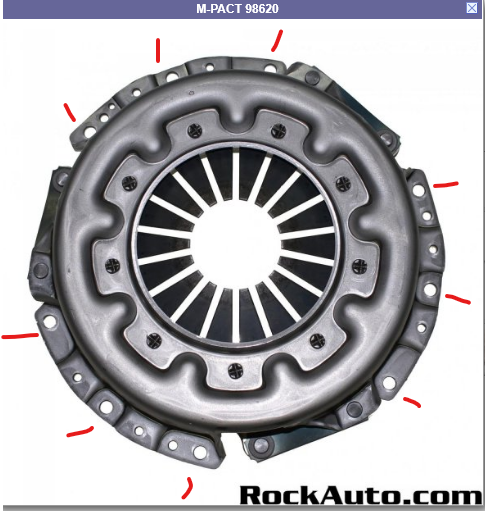
 1 point1 pointHe was growing a car guy!! A little danger is a necessary ingredient! 😉1 point1 point1 pointNo, the patterns are different. The 240 mm is three sets of three holes, and the 225 is six evenly spaced holes. You can see it in the pressure plates. You can't use a 225 plate on a 240 flywheel, or vice-versa. Edit - this statement might not be correct. CREATE DO LOOP - 225 (8 7/8") 240 (9 1/2")
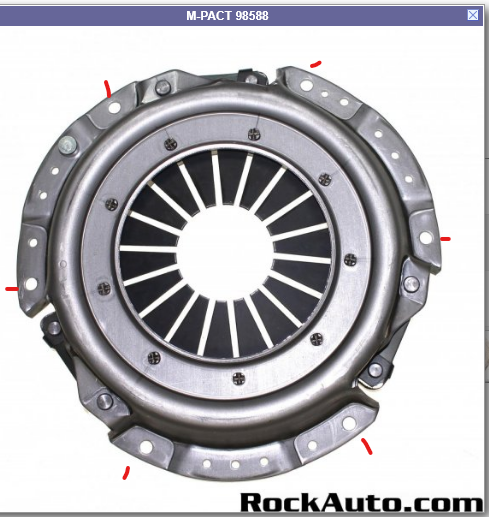
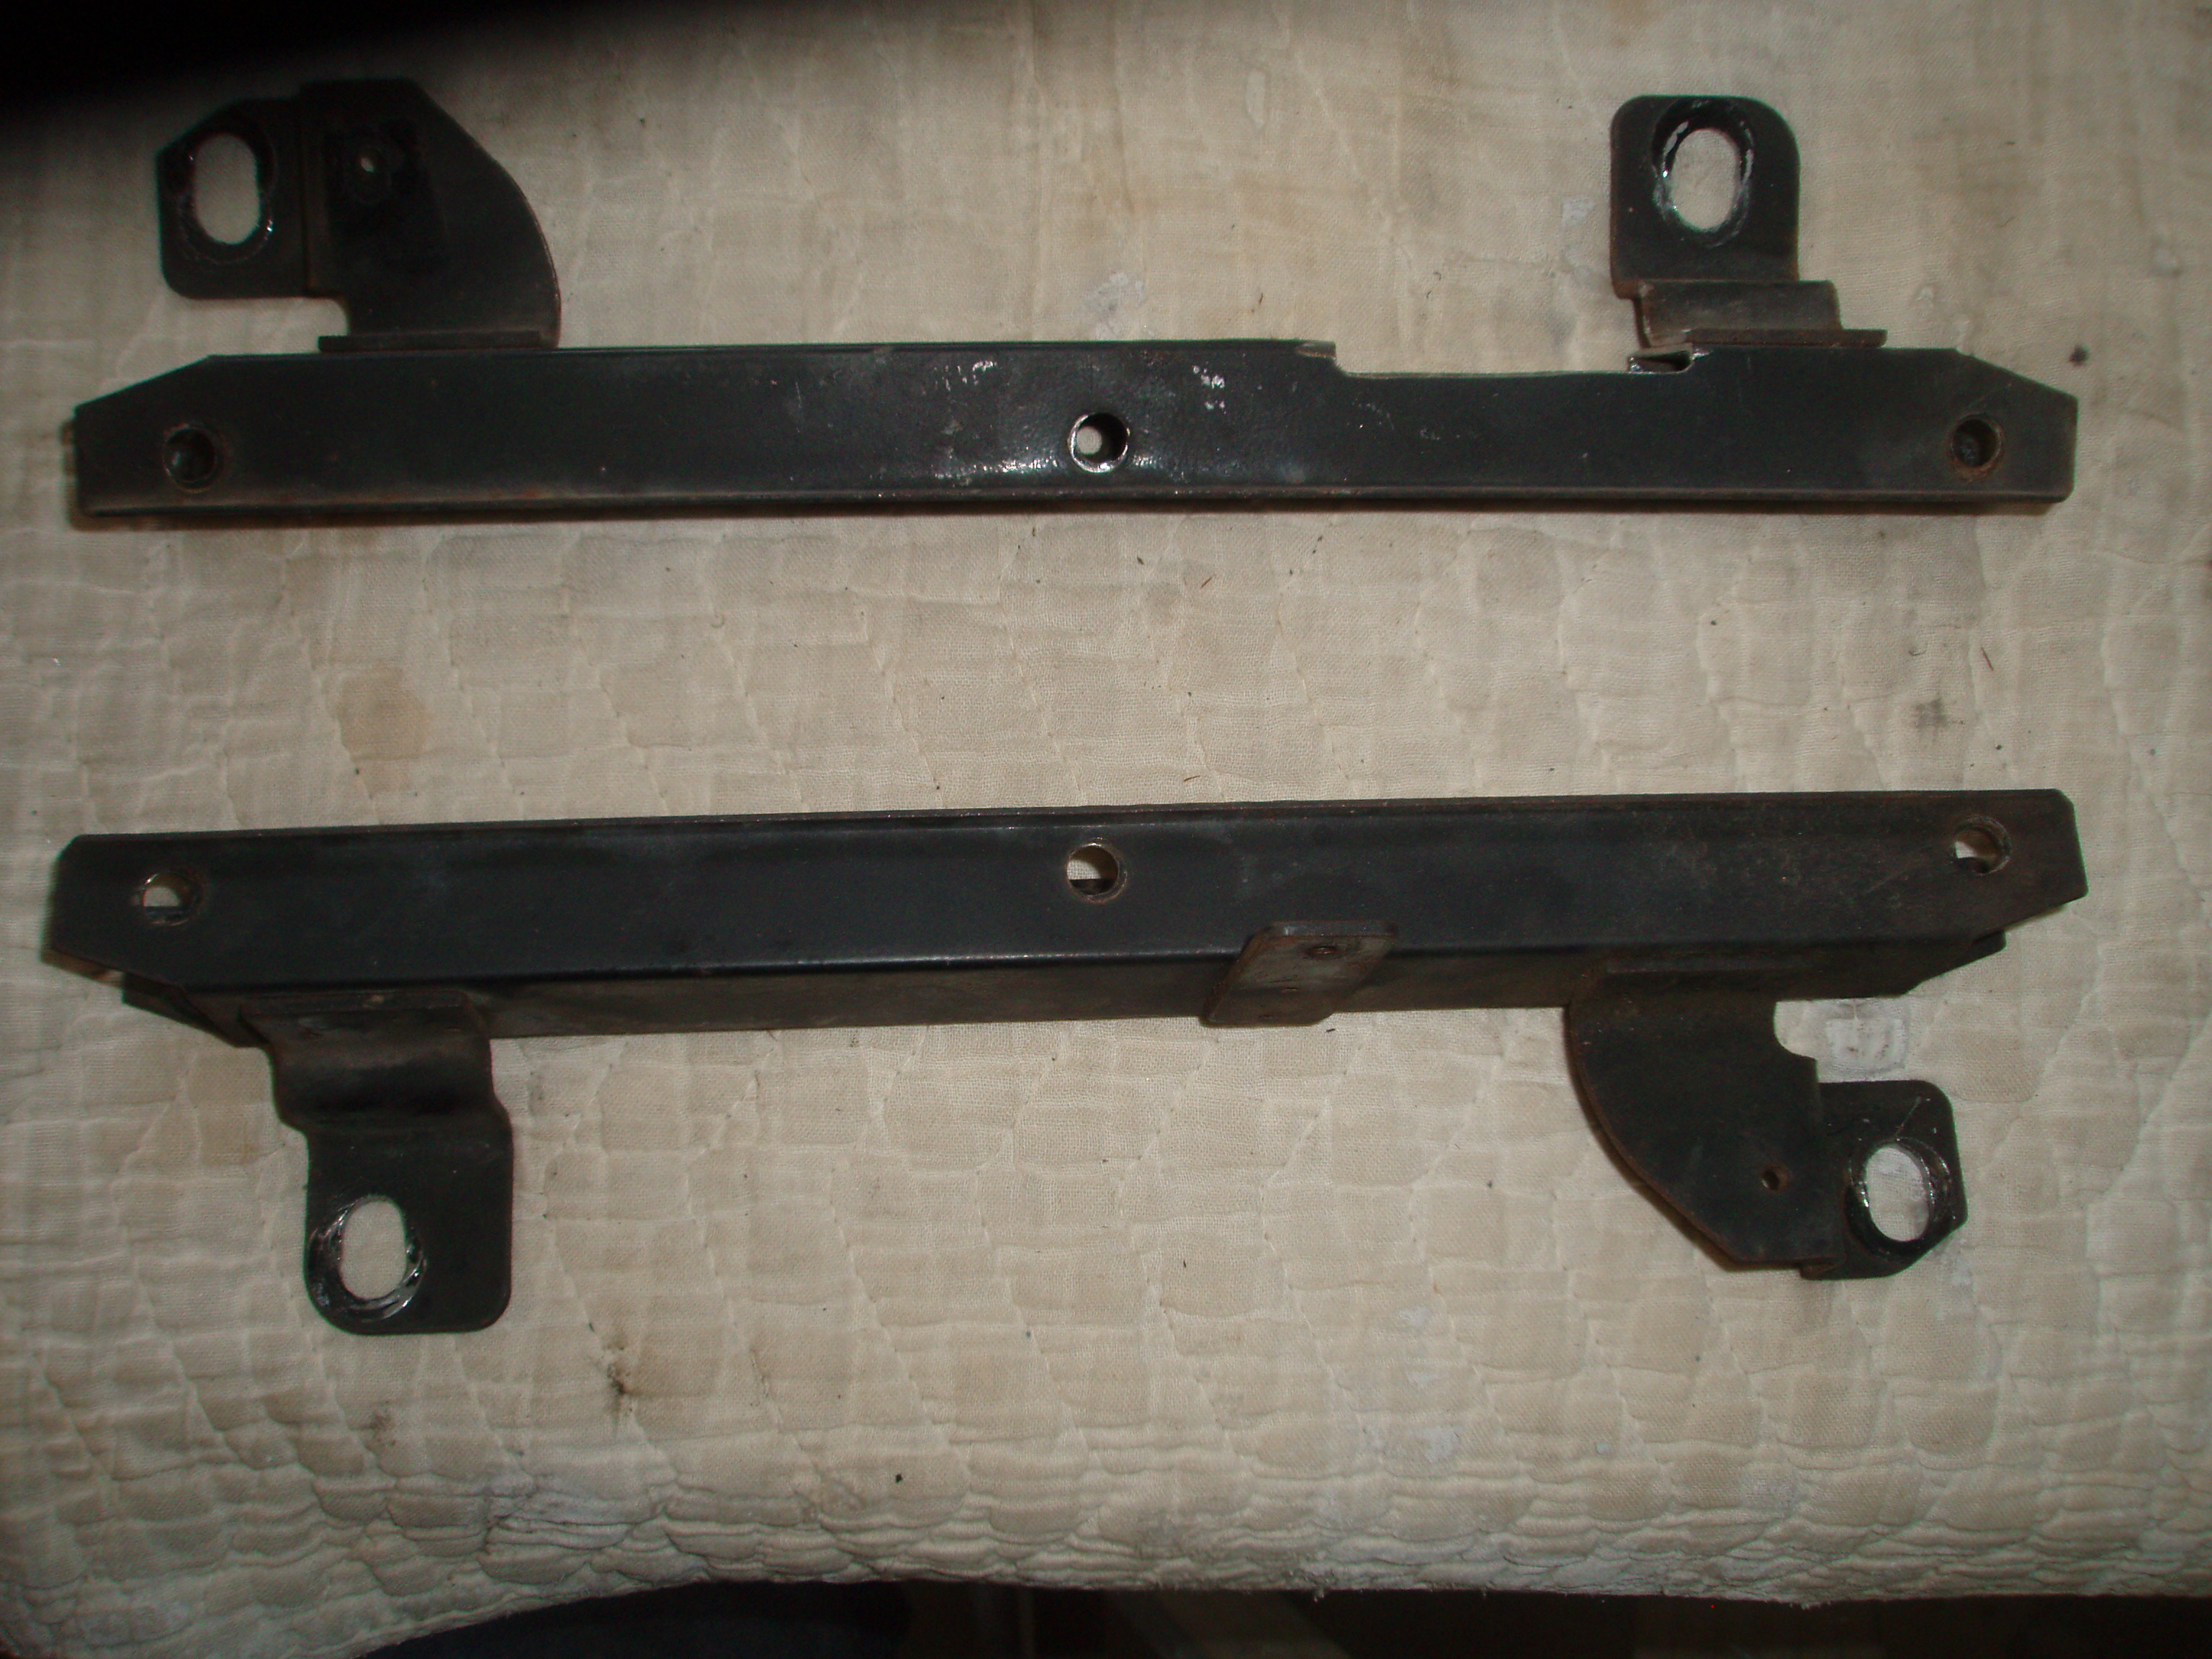
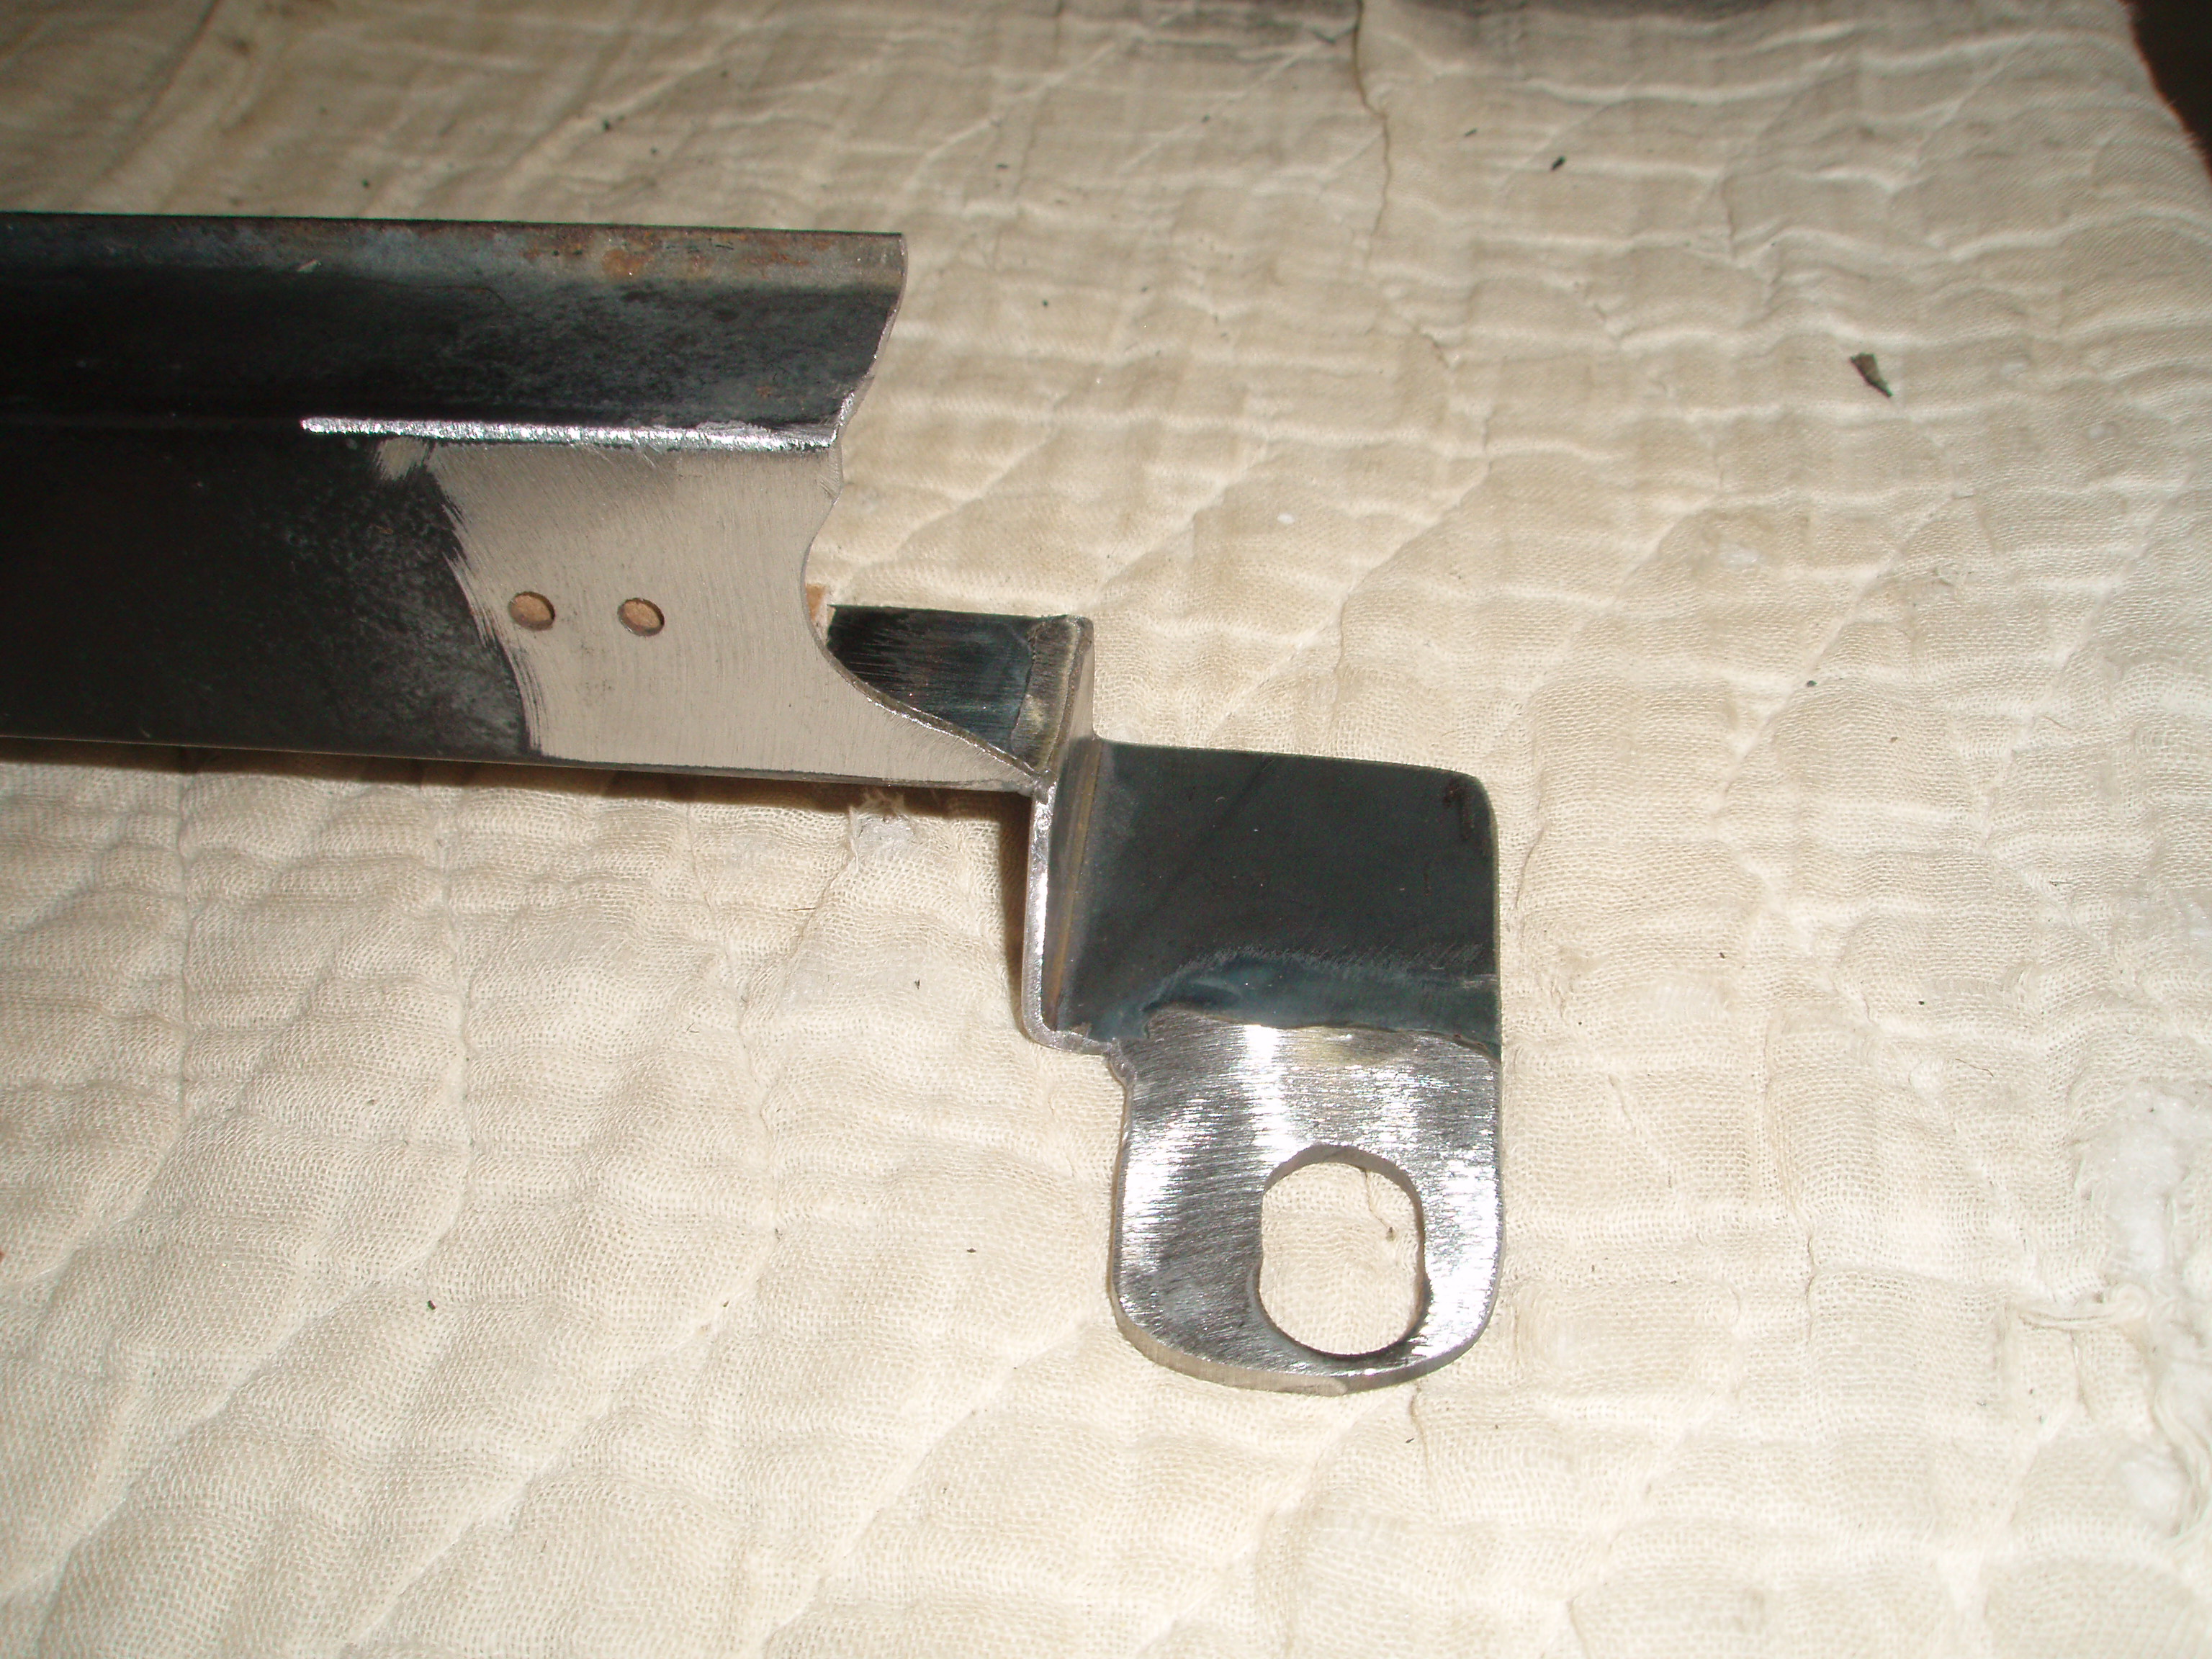
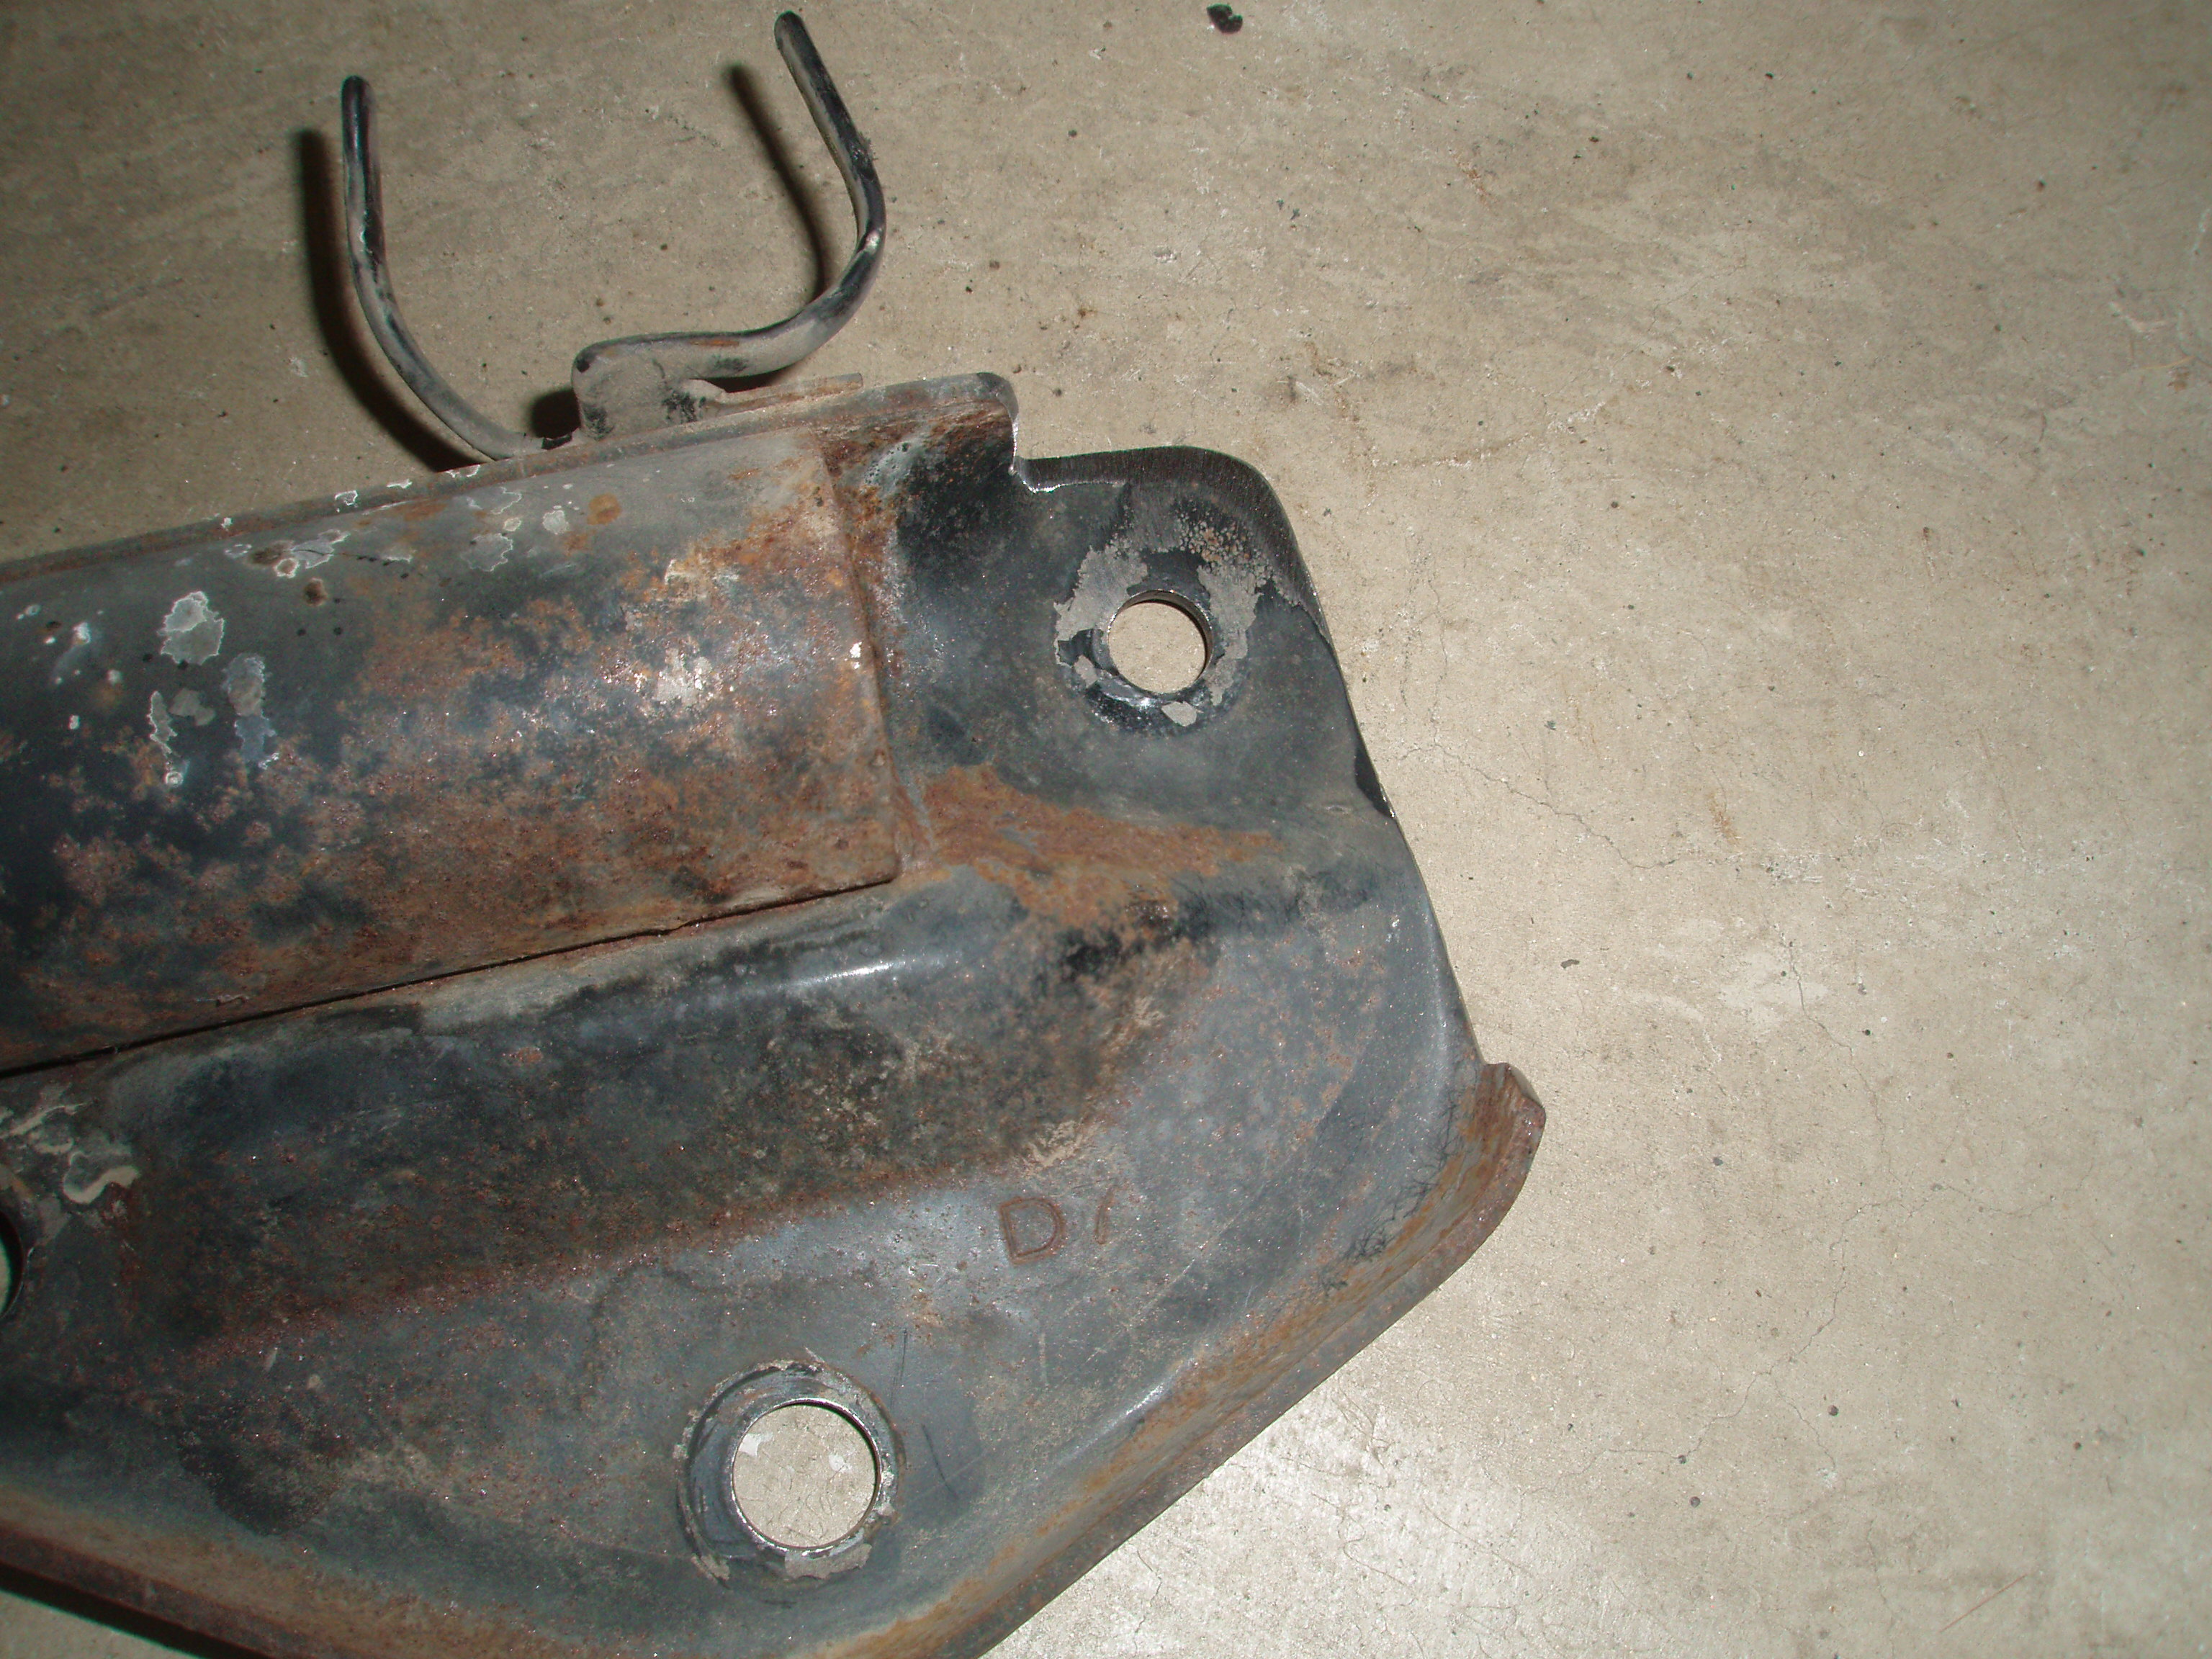
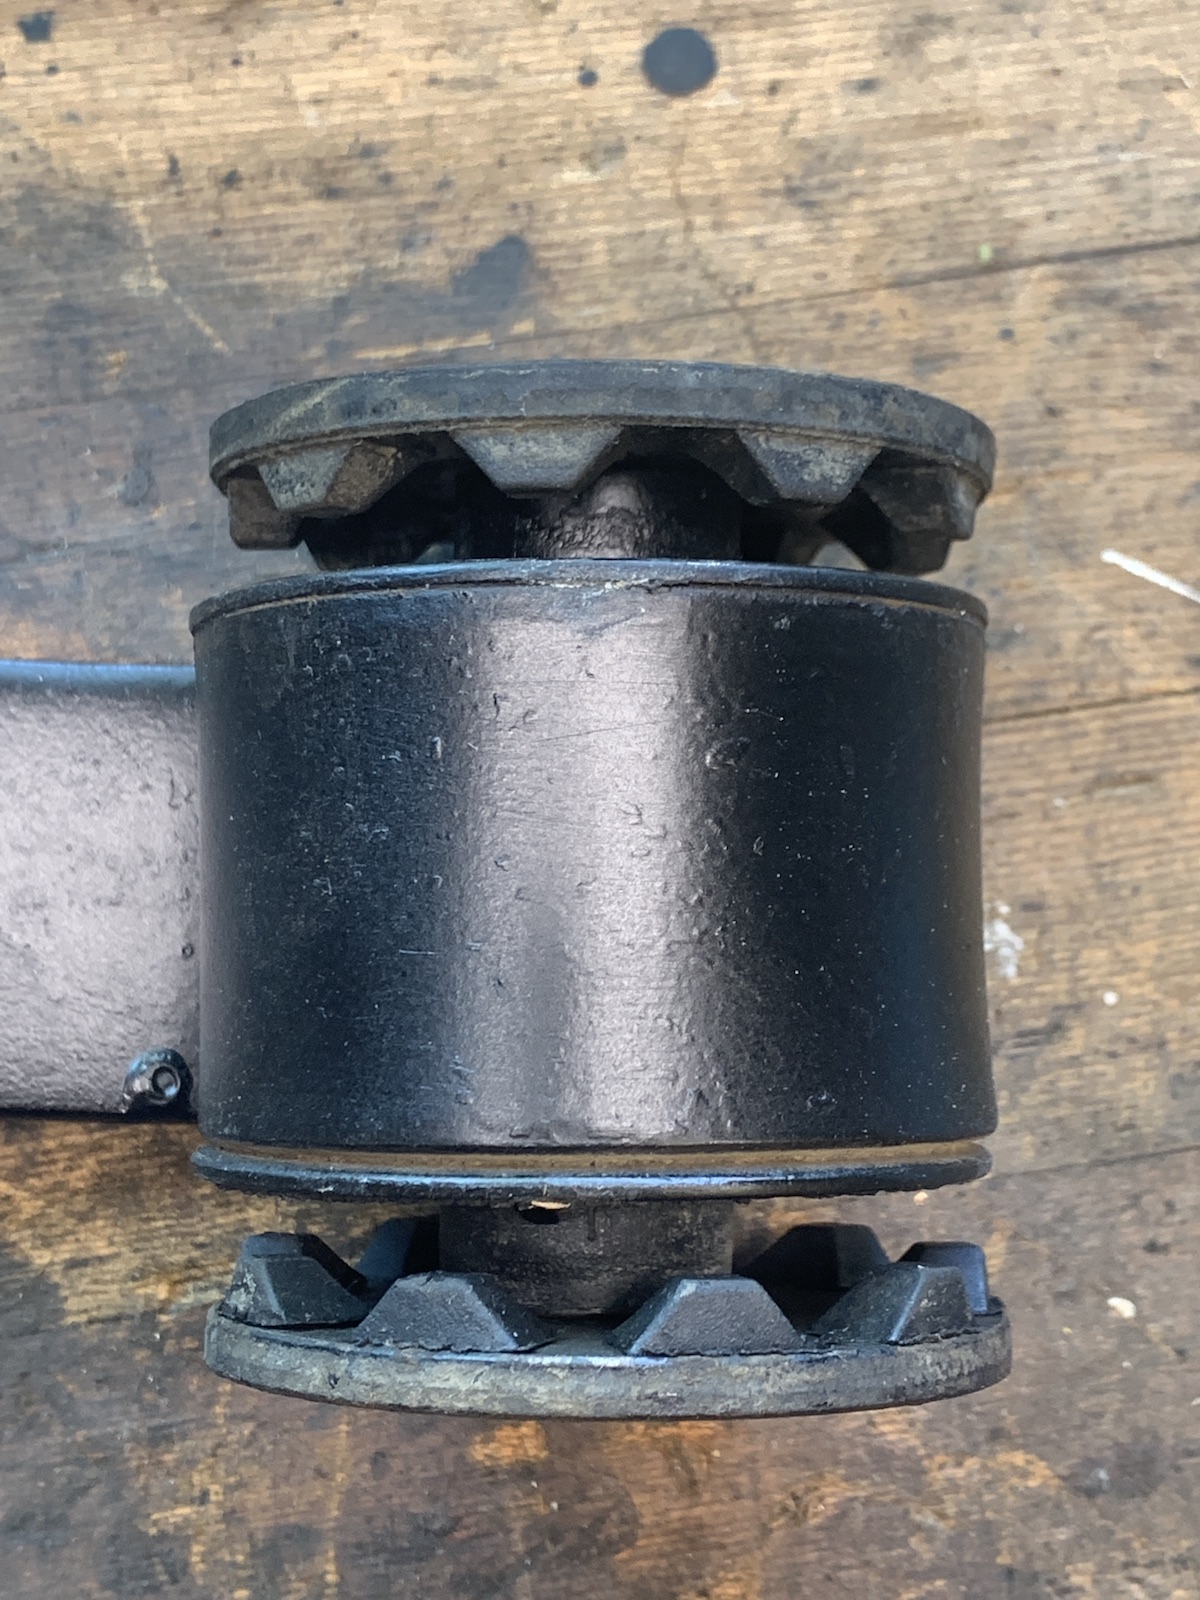
 1 point1 pointTo my understanding a smaller diameter clutch will bite/engage harder because of the reduced surface area and mass. With the larger clutch you retain the engaging characteristics to be closer to "OEM" yet are able to get the benefit of a lighter flywheel (better throttle response). I'm quite happy with the setup. perhaps others can chime in....1 point1 pointCleaned up the rear wheel wells with soap and a scrub brush, turned out pretty good. Dealing with the mustache bar now, to get the differential in place so I can adjust the bushing on the new TC front mount I bought. I've read a few mustache bar links here, pro's and cons of replacing the bushings, the nonexistent serrated rubber washers, etc. The bushings in mine seem good, not too hardened, so I don't want to replace with poly for now. The washers on the other hand, not so fortunate. While cleaning in my solvent tank some of the rubber nubs fell off, and a few were already missing. I know these are no longer available, but was wondering if anything has changed in the last couple years since those last posts? It seems to me that these washers only come into play as the differential attempts to twist, and there's an 1/8" gap between them, IMHO they're just added insurance in case of complete bushing failure. I suppose with a healthy engine there would be occasional contact, especially with new soft rubber bushings. I could be wrong. Anyway, just wondering what others are doing for the washers for the stock rubber bushing setup. Fabricate your own? Motor mount washer substitution of some sort? Use as is and forget about it? On another note, I wish the TC mounting bracket had a little more clearance next to the brake/fuel line bracket! I did ground out a little notch for added room, but just another 1/8" more in that dogleg bend would have been really helpful. I had to use a bottle jack to wedge it into place. [emoji53] And, got most of the fasteners decently plated using my home Caswell system, not perfect. About 4 hours work here for cleaning and plating.
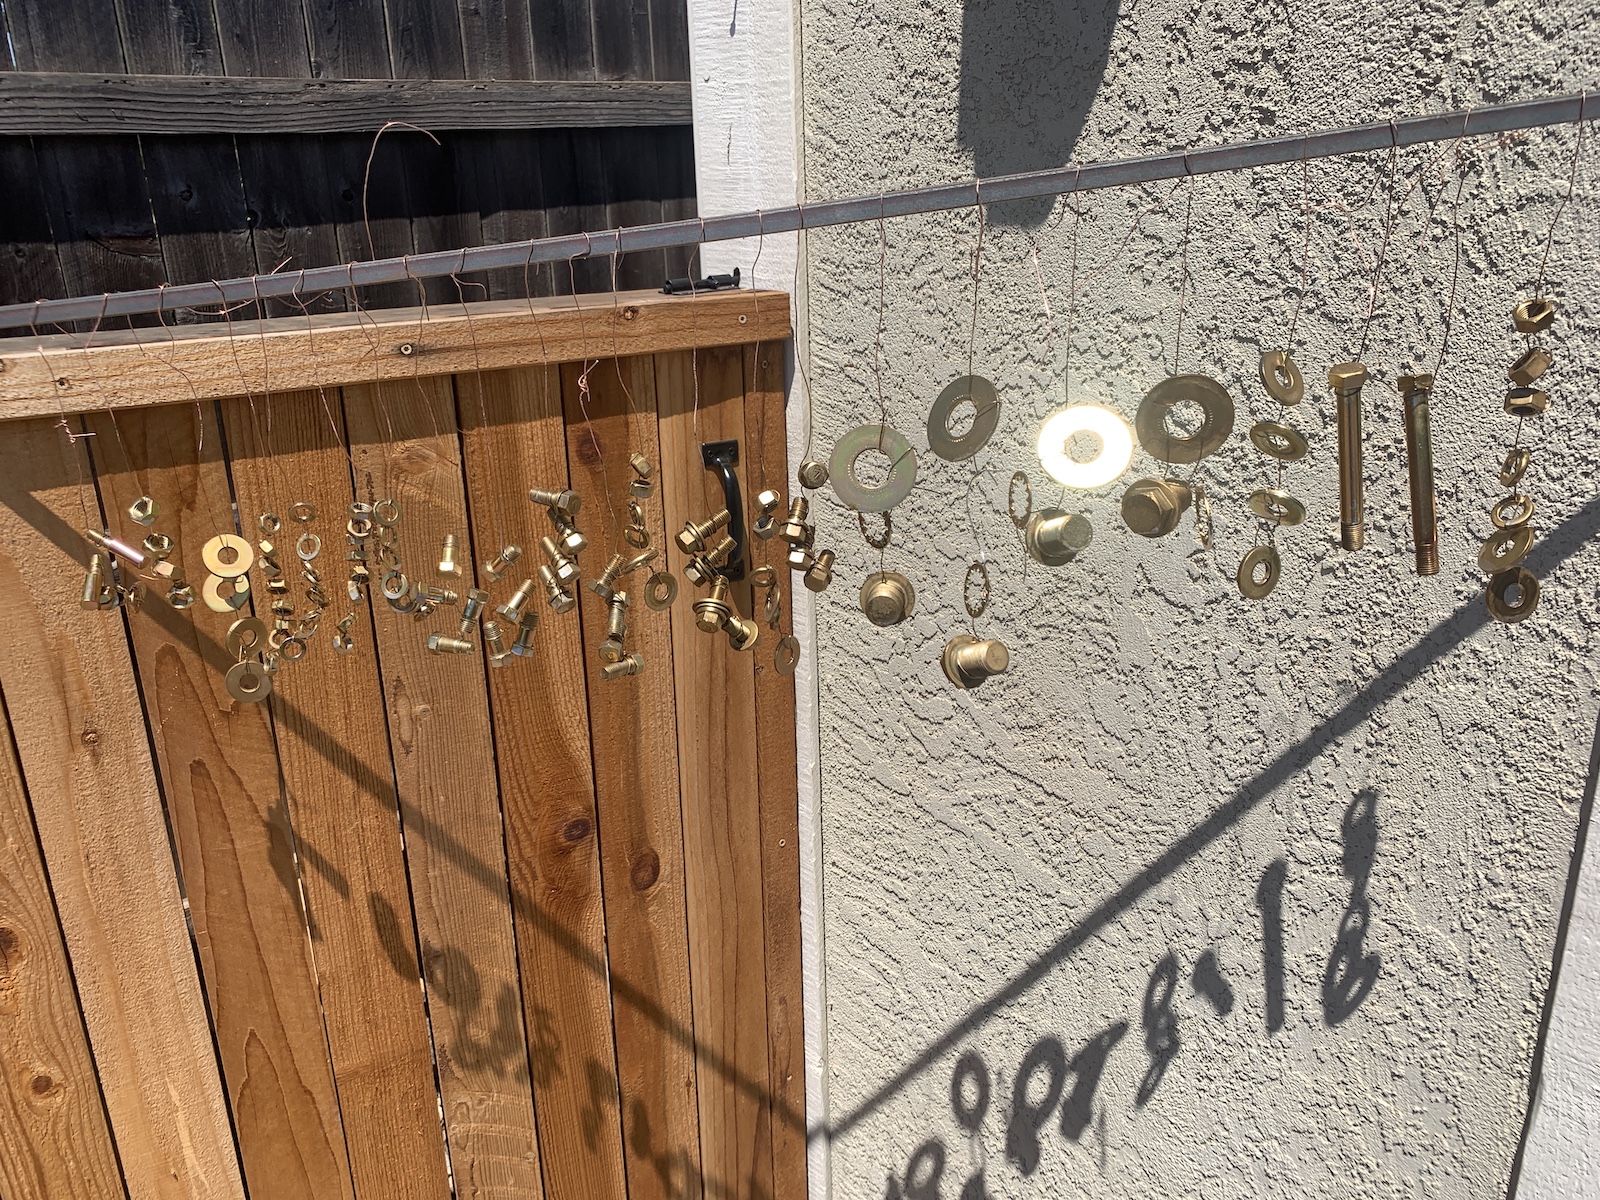
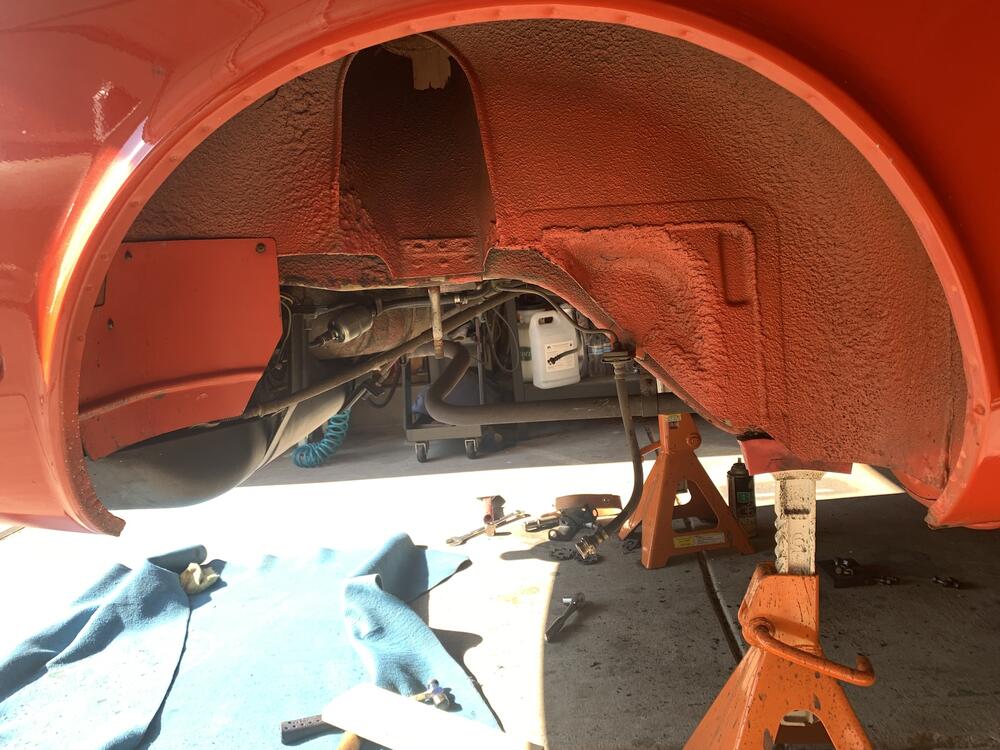


 1 point


.jpg.4d58e289b064783c23e29bccd0c8d0ce.jpg)
.jpg.6b8381aa49777487b08e61b7389aae2d.jpg)


Important Information
By using this site, you agree to our Privacy Policy and Guidelines. We have placed cookies on your device to help make this website better. You can adjust your cookie settings, otherwise we'll assume you're okay to continue.