Leaderboard
-
Matthew Abate
Free Member8Points1,204Posts -

wheee!
Free Member5Points4,607Posts -
240260280z
Free Member4Points5,426Posts -

ConVerTT
Free Member3Points422Posts


Popular Content
Showing content with the highest reputation on 04/04/2020 in all areas
-
5 points
-
3 pointsAnother shot in more sunlight... Sent from my iPhone using Tapatalk3 points
-
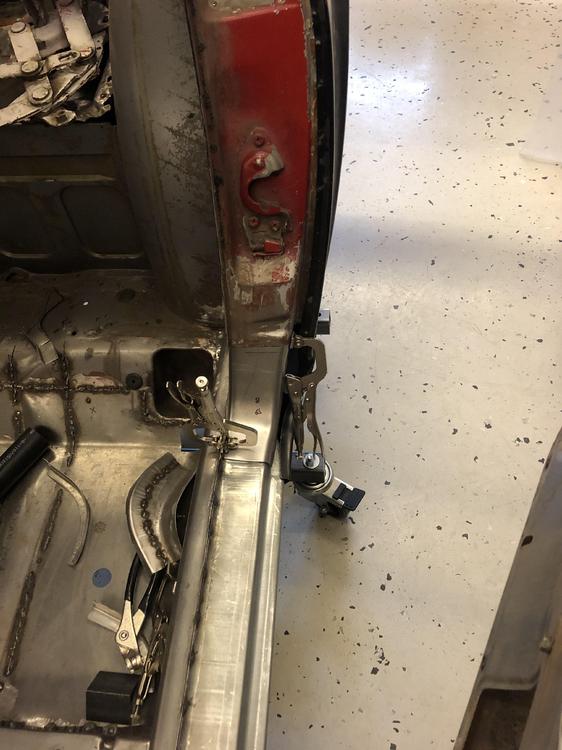
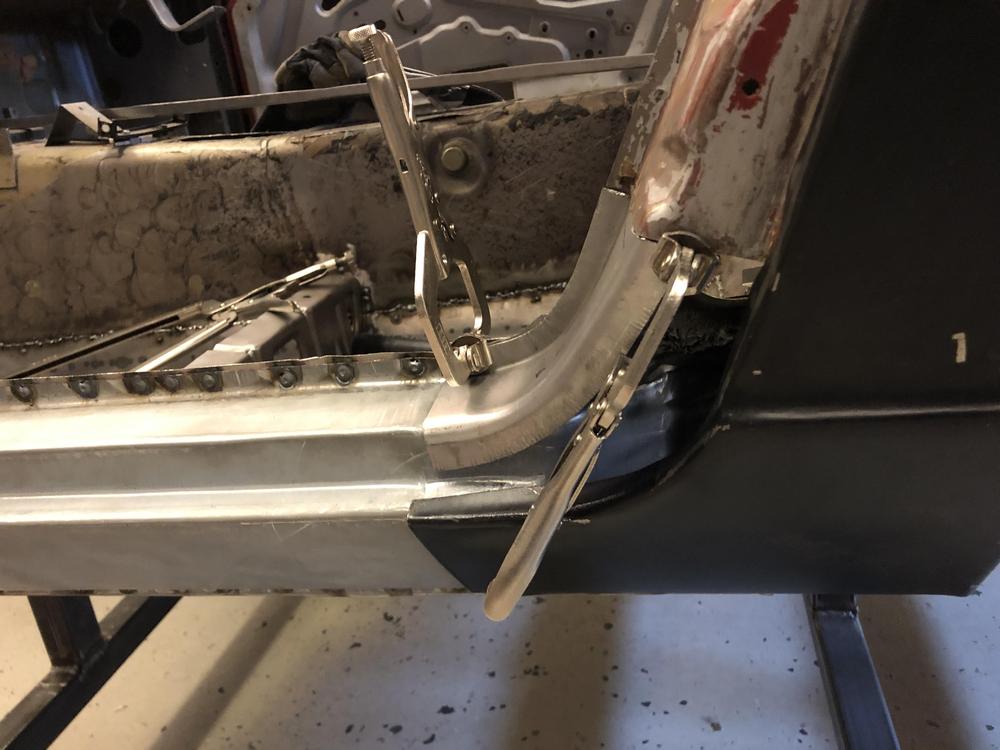
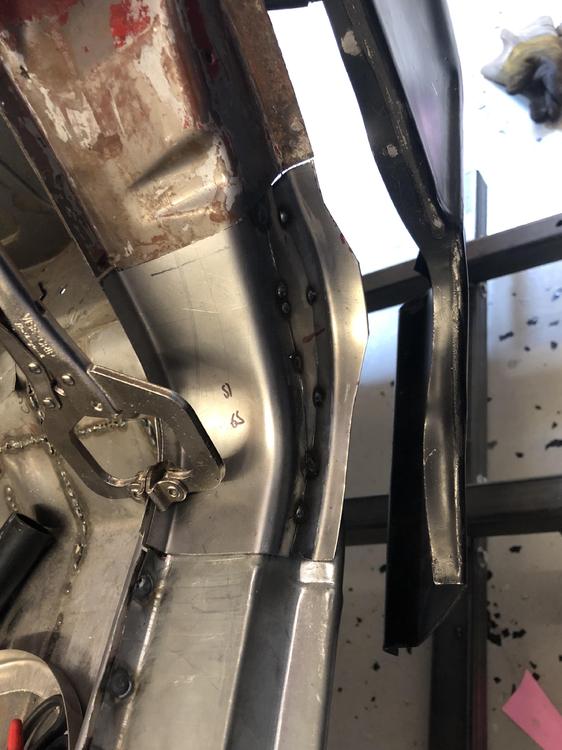
3 pointsMan ... this took a lot longer than it should have ... for @wheee! - failed attempt laying on the floor pan ? Just about there....Sorry I didn't take more pics. The process is pretty straight forward - basically measure, bend, shrink, shrink, shrink, stretch, stretch, stretch, test fit, ???, stretch, stretch, shrink, test fit, more ???and so on till ??? Still have to work the PS tomorrow ...


 3 points
 -
2 pointsSure is pretty!! I wish my paint still looked like that! The PO did a clear coat and it started getting dandruff a year or so ago. All the sky-facing surfaces have peeled up like a 3rd degree sunburn.2 points
-
2 pointsThis made me laugh, then cry a little... Sent from my iPhone using Tapatalk2 points
-
1 pointHi all, I've just received my 1973 240z! The previous owner towed it out from MO for me along with piles and piles of parts. We went over it together and it's in better shape than I expected (it was a Craigslist transaction over the phone between MO and NJ). I'm sure that I'll start finding nasty surprises once I start into it, but for now I'm basking in the glory of having a Z in my garage.1 point
-
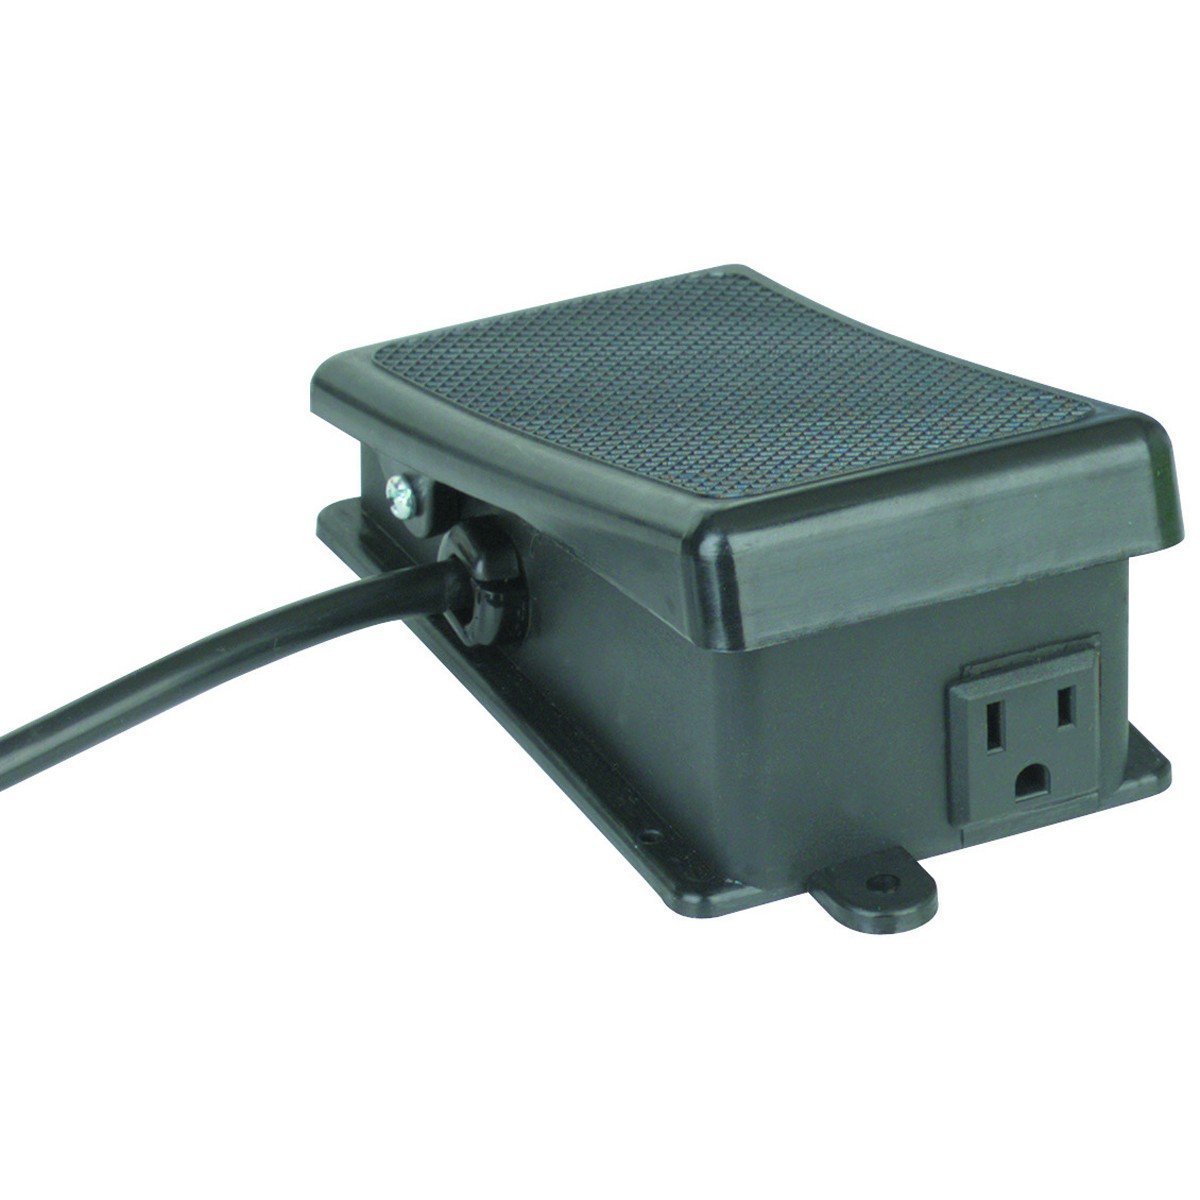
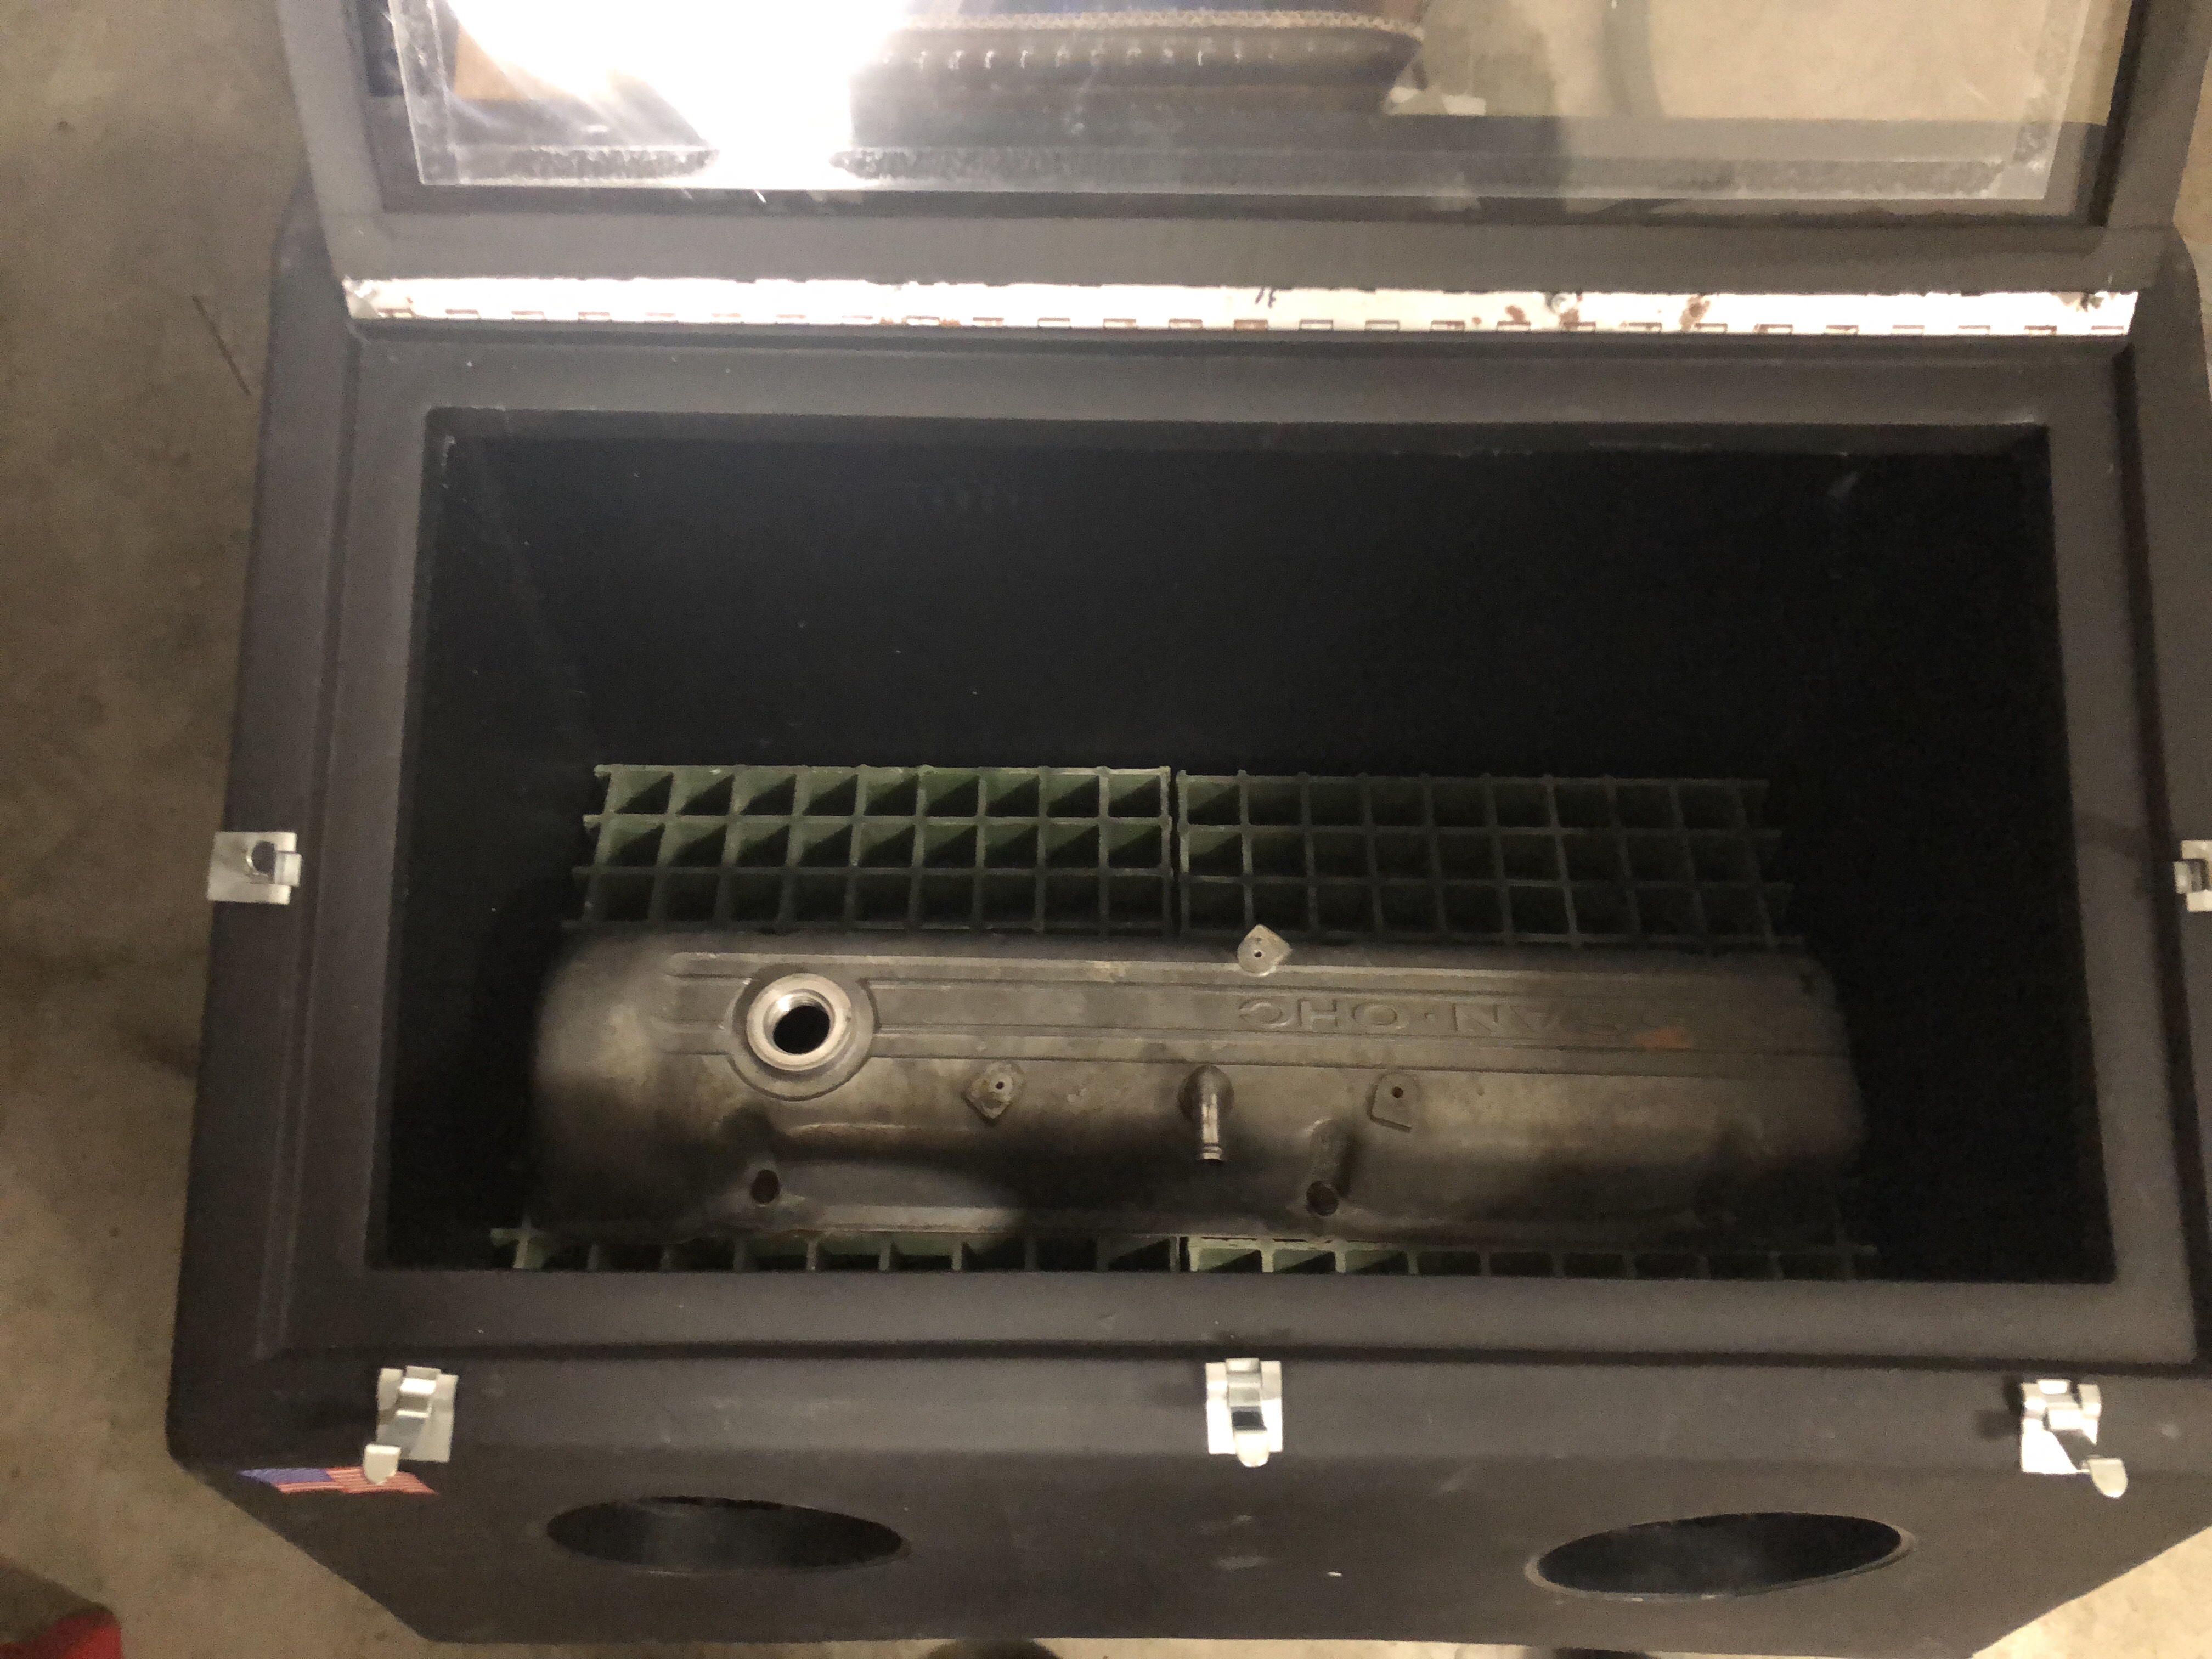
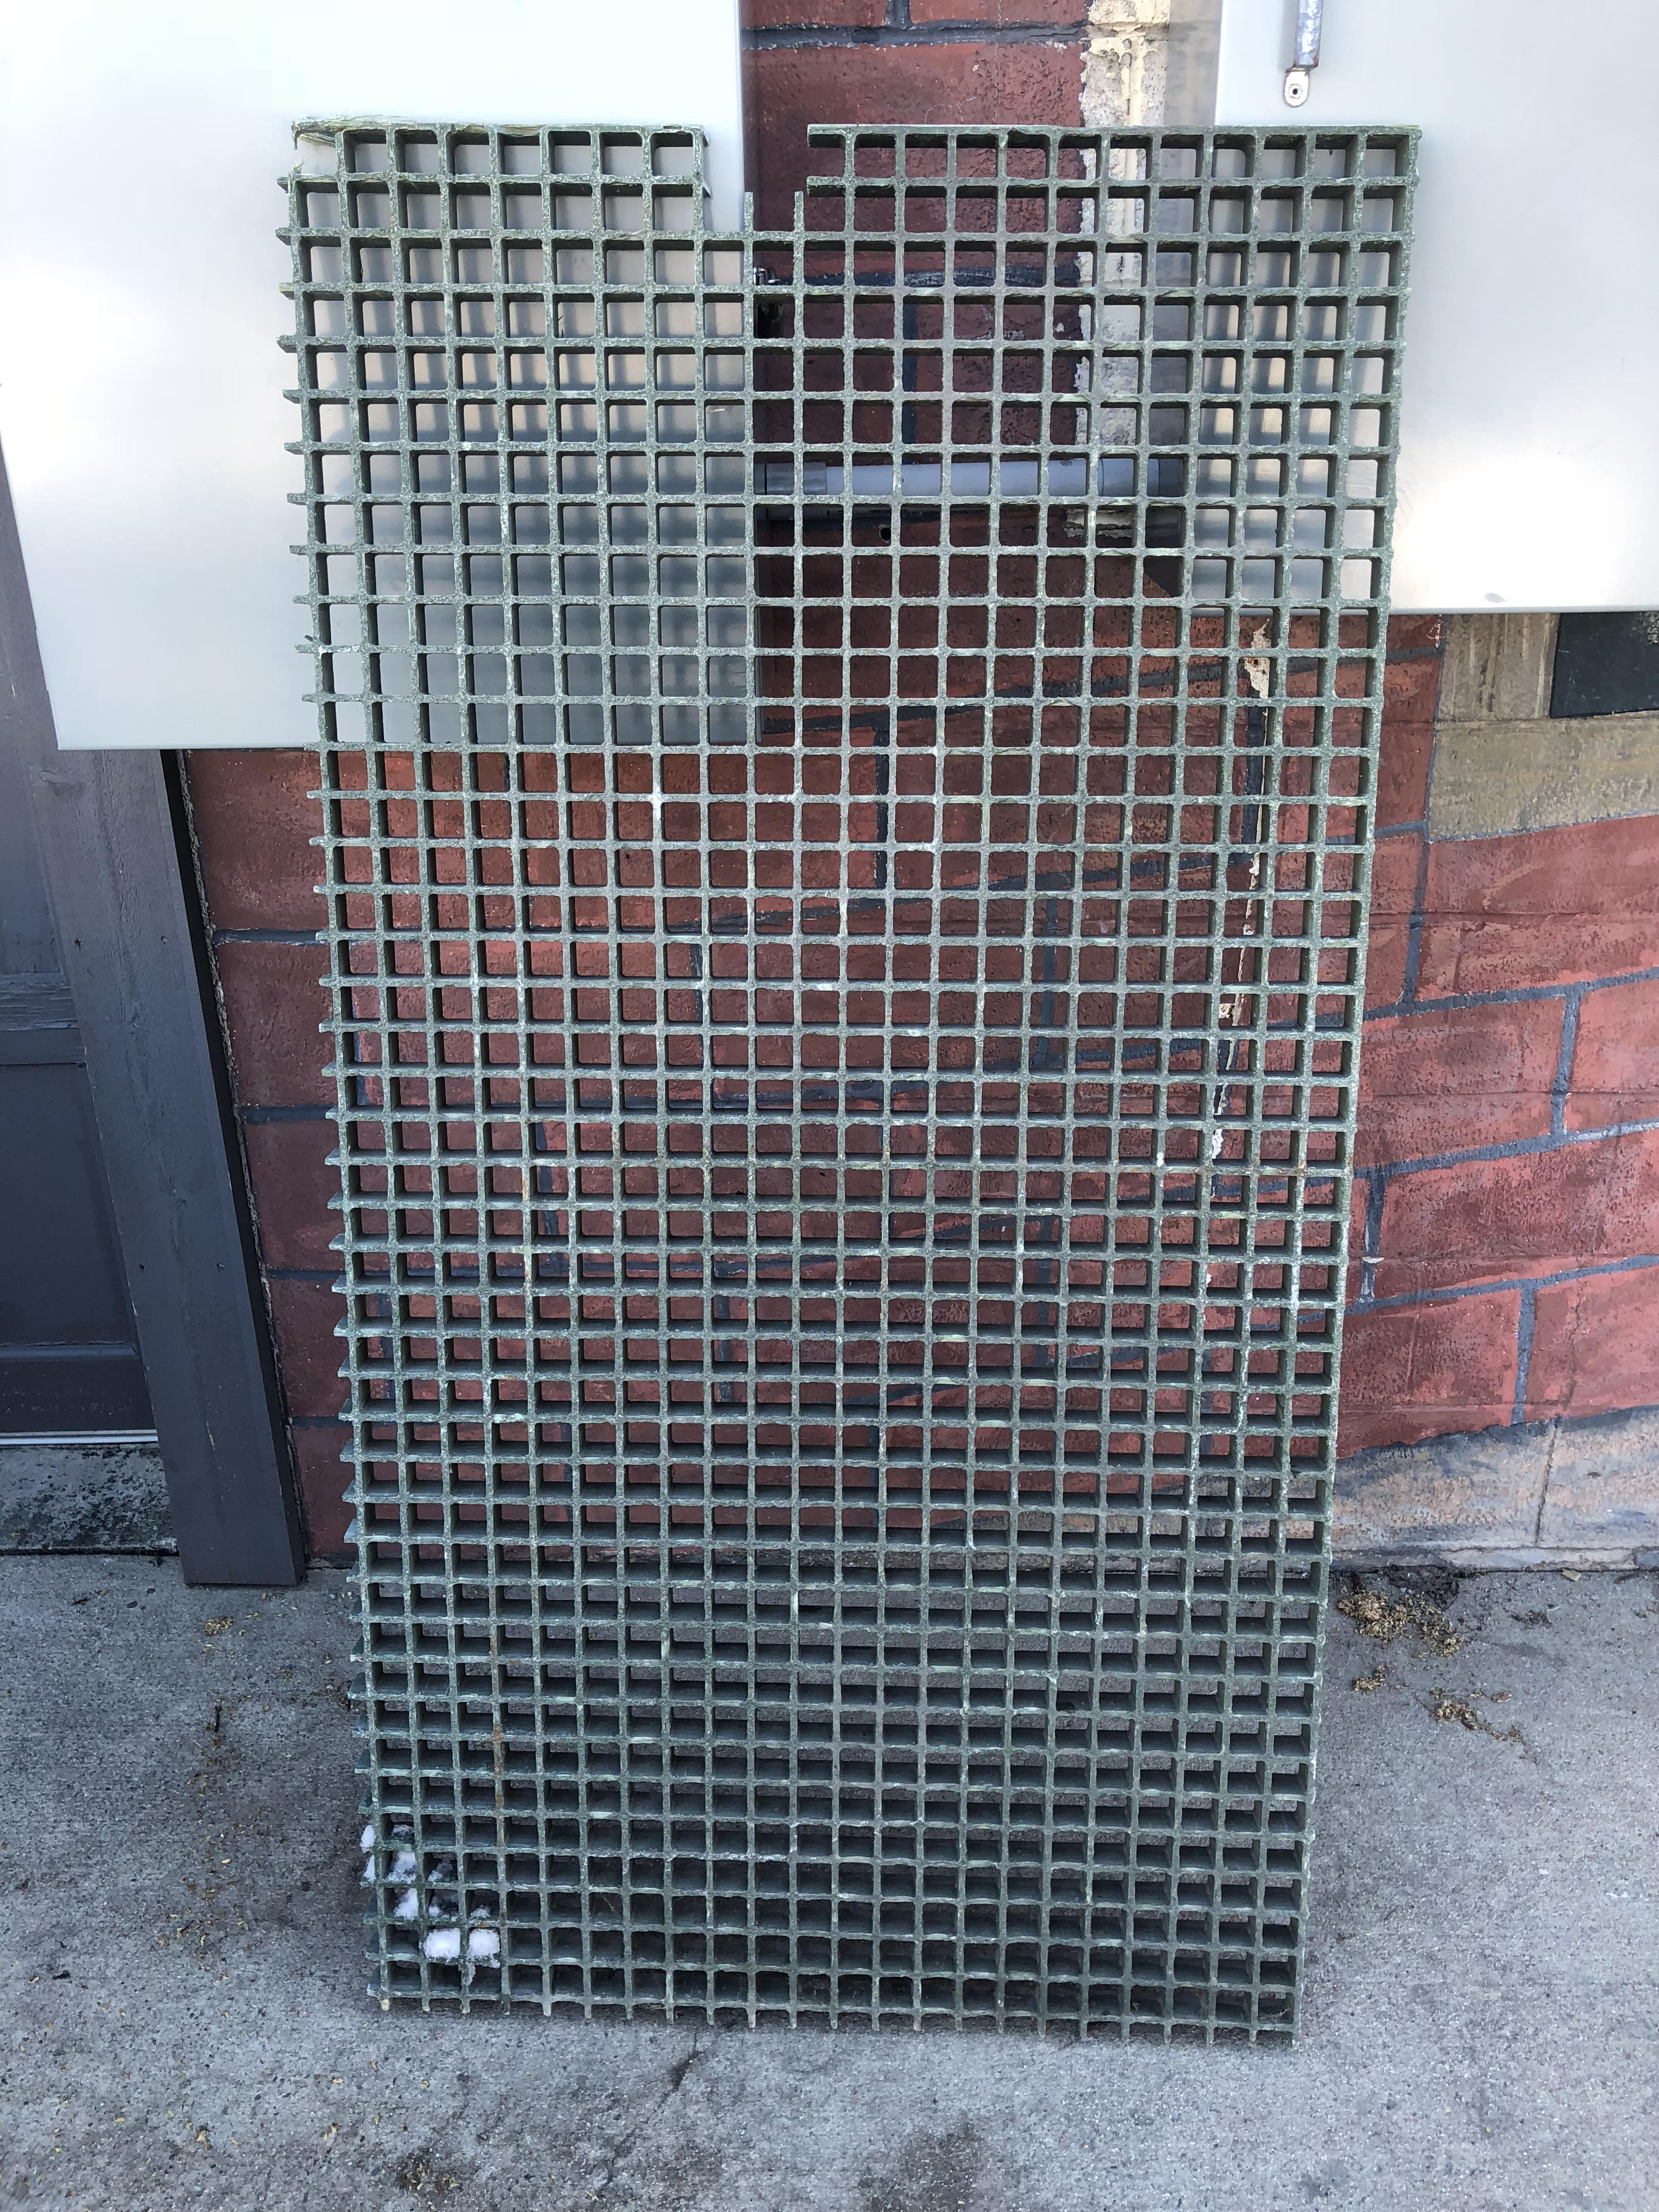
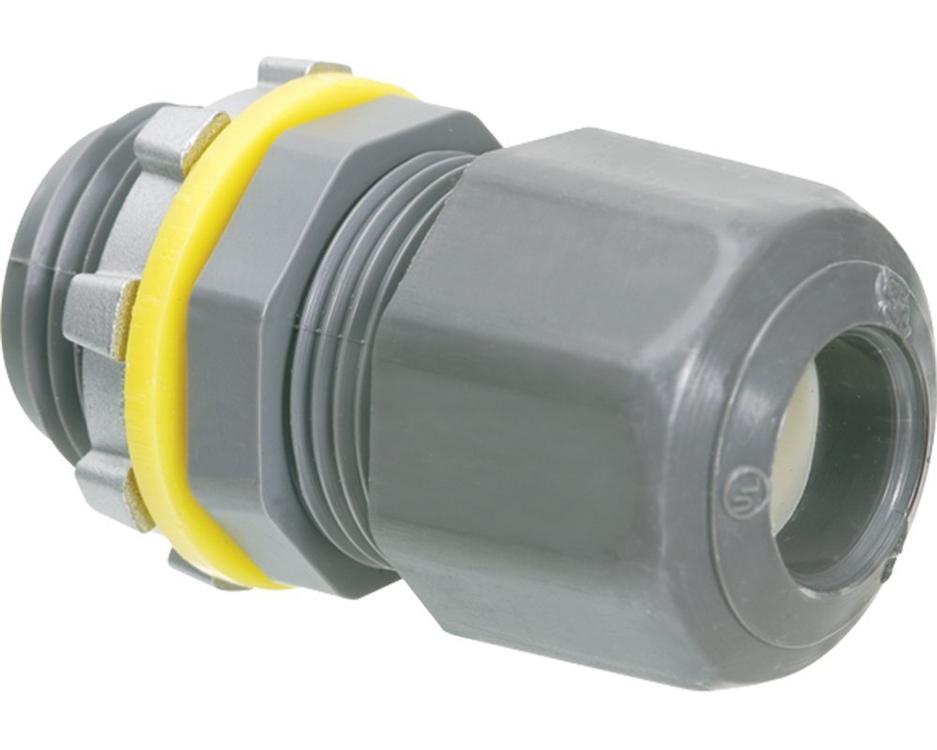
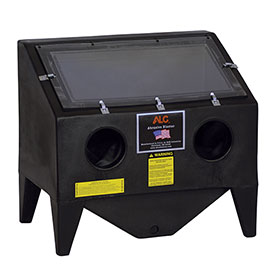
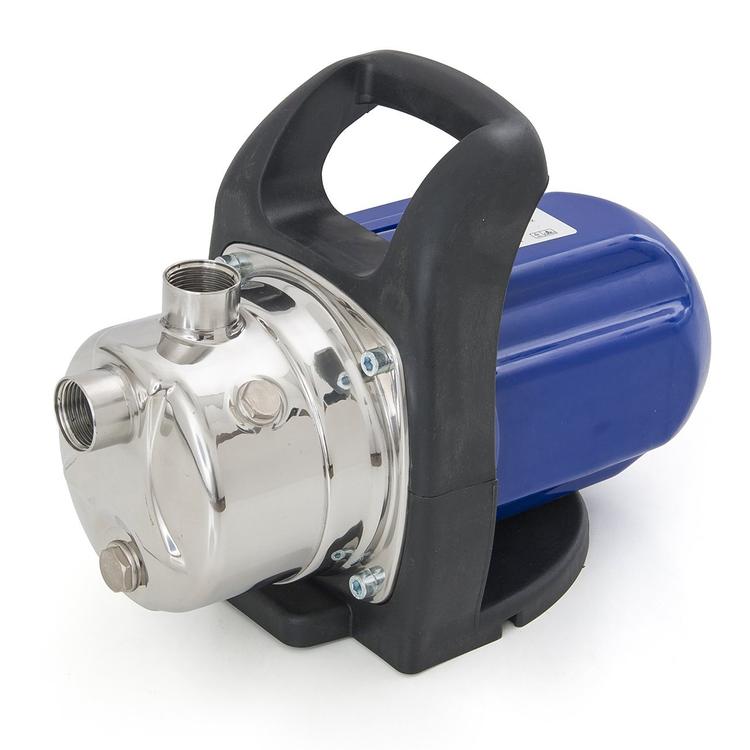
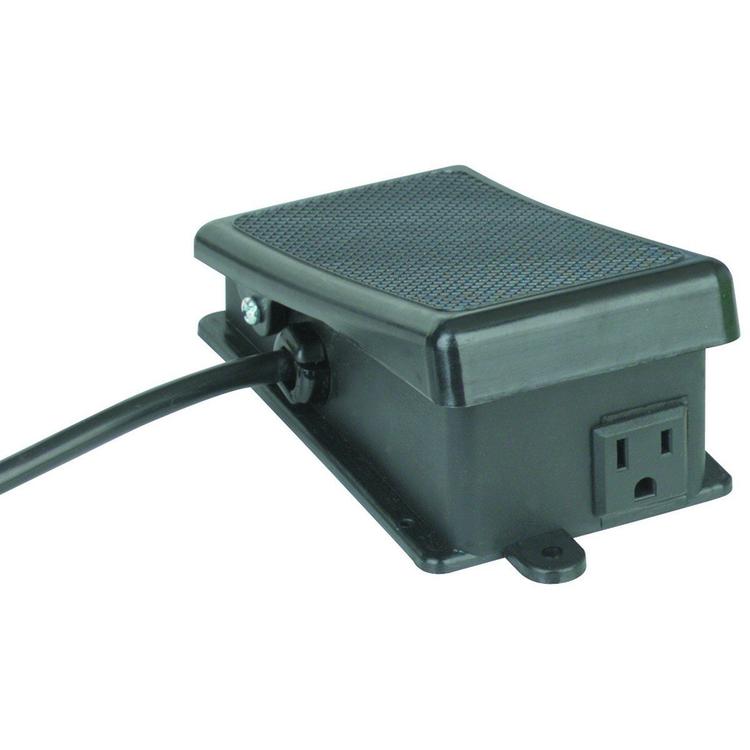
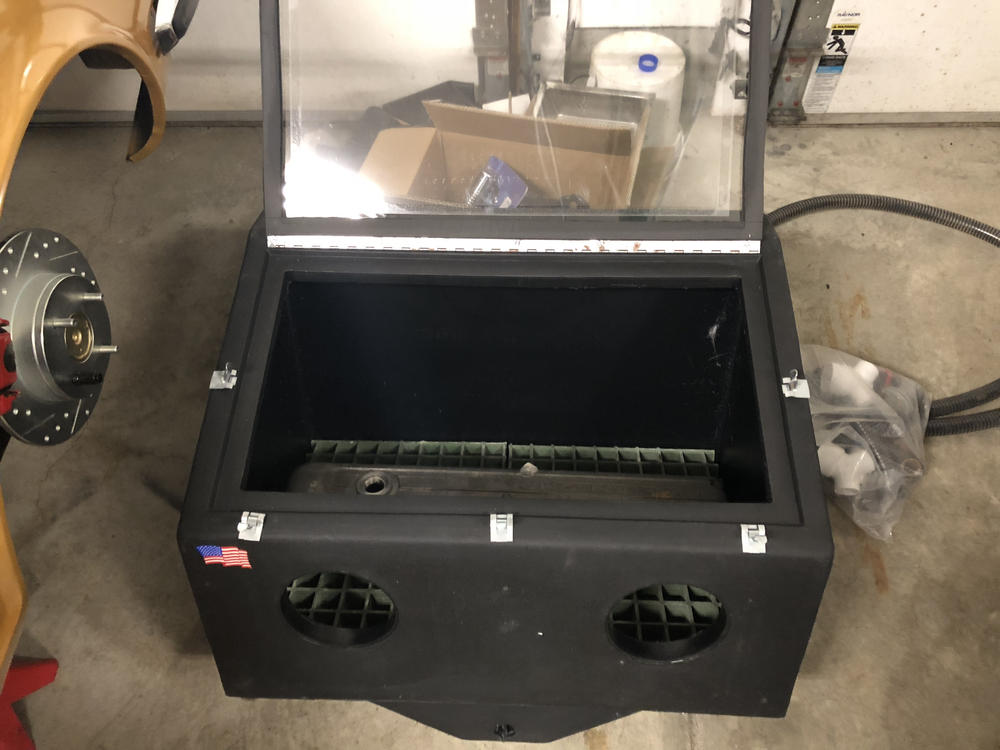
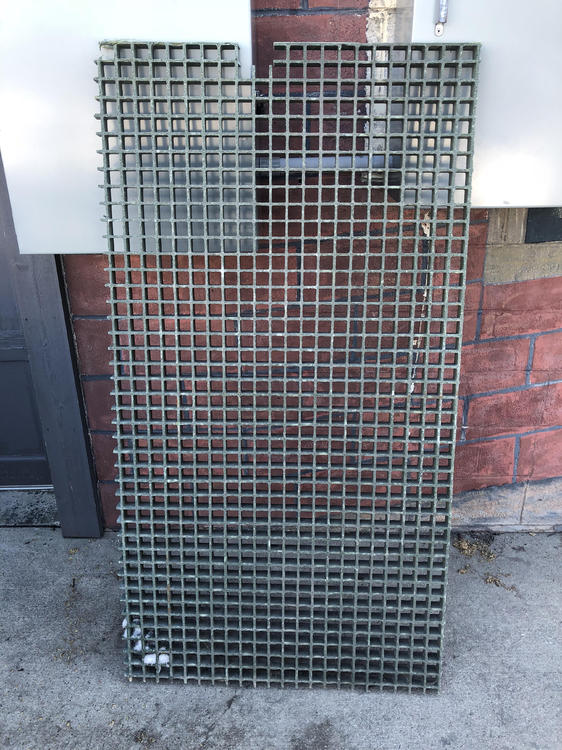
I have decided to make my own vapor/ hydro blasting cabinet. I have a bunch of Datsun parts (mikuni carbs, intakes, ac, head etc..) that I want cleaned up and shiny. I really really like the look of hydro blasted or vapor blasted aluminum parts. So I live in a tiny town, that's about 1.5-2 hours from a major city, but even that city doesn't have anyone that hydro/ vapor blasts so I am either shipping parts (expensive, and chances for damage) so it's time to make one. The basics of vapor blasting is a glass slurry mix (ratio unknown as of yet) of water and 170-325 Glass Bead (tiny beads) pumped in circulation through a gun that has compressed air attached to push the slurry at high speeds. Which doesn't damage or pit the aluminum, basically from what I read, it almost picks out the dirt out of the surface. It doesn't even affect zinc, rubber etc... I was just going to get a harbor freight cabinet and ruin it, but decided to look around the web first. I figured someone makes a plastic blasting cabinet. Which turns out they do! Simple, light and pretty cheap. I will probably end up using it not very often, so I would rather it not rust out. I ended up getting one off ebay for 175$ shipped! Retail on it is like $350. So I was pretty stoked. I wanted this size to fit a datsun L6 head. The one I bought: 31" version https://www.summitracing.com/parts/sni-40390 Smaller: 22" version https://www.northerntool.com/shop/tools/product_200136624_200136624 Pump: Next was a slurry pump, I wanted centrifugal so that the slurry wouldn't ruin it. I decided on this one. According to vapor honing videos you want good psi from the slurry pump, this one is 63 psi. I will be going from 1" down to 1/2 or so for the gun, so that psi will be lower. https://www.amazon.com/gp/product/B00TQCSUZK/ref=oh_aui_detailpage_o04_s00?ie=UTF8&psc=1 Lightening: I wanted to be able to see inside and I would rather not get electrocuted. I found some neat LED's on amazon that are meant for fish tanks. They are 12v that use a small ac adapter and are fully waterproof. I got 2 warm white 12" long ones. https://www.amazon.com/gp/product/B00OP3P1AM/ref=oh_aui_detailpage_o01_s01?ie=UTF8&psc=1 False Bottom: The blasting cabinet came with super super shitty screen for the false floor. Which is mild steel, so I threw that in the trash. I have a bunch of stainless grating (I own a brewery and we have lots of scrap) that I was going to use. But I was worried about damaging the aluminum on sharp stainless. Then I had an idea! Plastic grating and I actually had some laying around! It's a fiberglass/ plastic grate meant for standing on. I cut it down into two pieces and she fits perfect and are easy to remove. I also have a small stainless basket for smaller parts. It has very small holes so it should keep anything small from going down to the pump. Through Hull: I needed some way to get the slurry out without leaking. I decided on a cheap through hull for a boat. Which fits perfect. The pump is 1" so I decided to run 1" hoses from the cabinet to the pump and back to the cabinet. I went stainless, which is a giant overkill. But whatever. I will also pump a wide screen on the through hull so it doesn't suck anything large into the pump https://www.amazon.com/gp/product/B001HC0R6W/ref=oh_aui_detailpage_o00_s00?ie=UTF8&psc=1 Water tight Pass through: I will use liquid tight cord Strain Relief Cord Connectors. You can buy them online or at any homedepot. They have a few sizes. I should be able to use them for the compressed air into the cab, slurry and 12v. So it will be water tight. 120v Foot Switch: Since your hands will be in the machine I decided to use a foot switch for the slurry pump. https://www.amazon.com/Power-Maintained-Latching-Foot-Switch/dp/B004LJ6MYE/ref=sr_1_1?ie=UTF8&qid=1520527436&sr=8-1&keywords=120v+pedal+switch I will hopefully finish it this weekend, I will use marine 5200 on all the through hulls. Should be a fun project! Videos of vapor blasting honing: https://www.youtube.com/channel/UC2DdHXu6oFqUWZ-rNNR7Bcg Some of the before and after are amazing.


 1 point
 -
I've been reading another thread that focuses on the new floor and frame rail stampings being offered by a shop in Florida (name?). I noted that there seems to be uncertainty over the actual OE panel thicknesses used for the S30's panels and stampings. Given the shear number of experienced S30 restorationists who have been participating in the CZCC website over the years, I'm a little surprised that we don't already have an in-place consensus on the gauges of the factory floor and rail stampings (not to mention all of the rest of the S30 structural and body panels). One would have thought that this would have been discussed and agreed upon long ago? @Patcon @ConVerTT @grannyknot @240260280 And yet... I've never come across a posting that pulls all of this information together in one place. So... here's a table that shows information that I've either collected from others in old posts or measured by myself from pieces from my 1970 and 1972 Z's (and the replacement frame rail that I ordered from ZeddFindings) (worth noting that measured thicknesses don't always line up cleanly against American gauge specs. My guess is that its because the Nissan OE panels were created from metric-spec steel sheet sourced from Japanese steel mills.) If you have a panel thickness measurement that you'd like to offer for any of the S30's panels or major stampings, maybe you'd like to consider posting it here so that we can build up a more complete library. Or, if you already have your own table of panel thicknesses, why not post it here so that everybody else can benefit? Panel Location Measured Thickness Gauge (reported) Gauge (derived by Namerow) Measured (or reported) by Front Apron (under Battery Tray) 20 Grannyknot Tabco replacement panels 20 manufacturer Thicker-gauge panels & pieces (locations?) 18 2manyZs, kmack Lower Front Frame Rail 0.050” 18 Carl Beck Lower Front Frame Rail - Zeddfindings 0.062” 16 Namerow Upper Front Frame Rail (‘Horn’) 0.054” ~ 16 Carl Beck Front Valence Panel 0.032” ~ 20 Namerow Front Crossframe 0.076” ~ 14 Namerow1 point
-
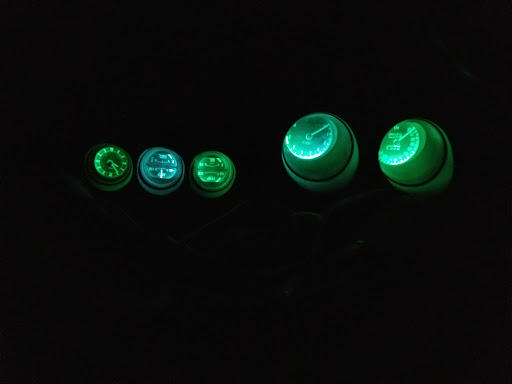
I kind of like the effect of the white bulbs in the center gauge and tach. Are either dim-able? And lastly, why is your car upside down? ?1 point
-
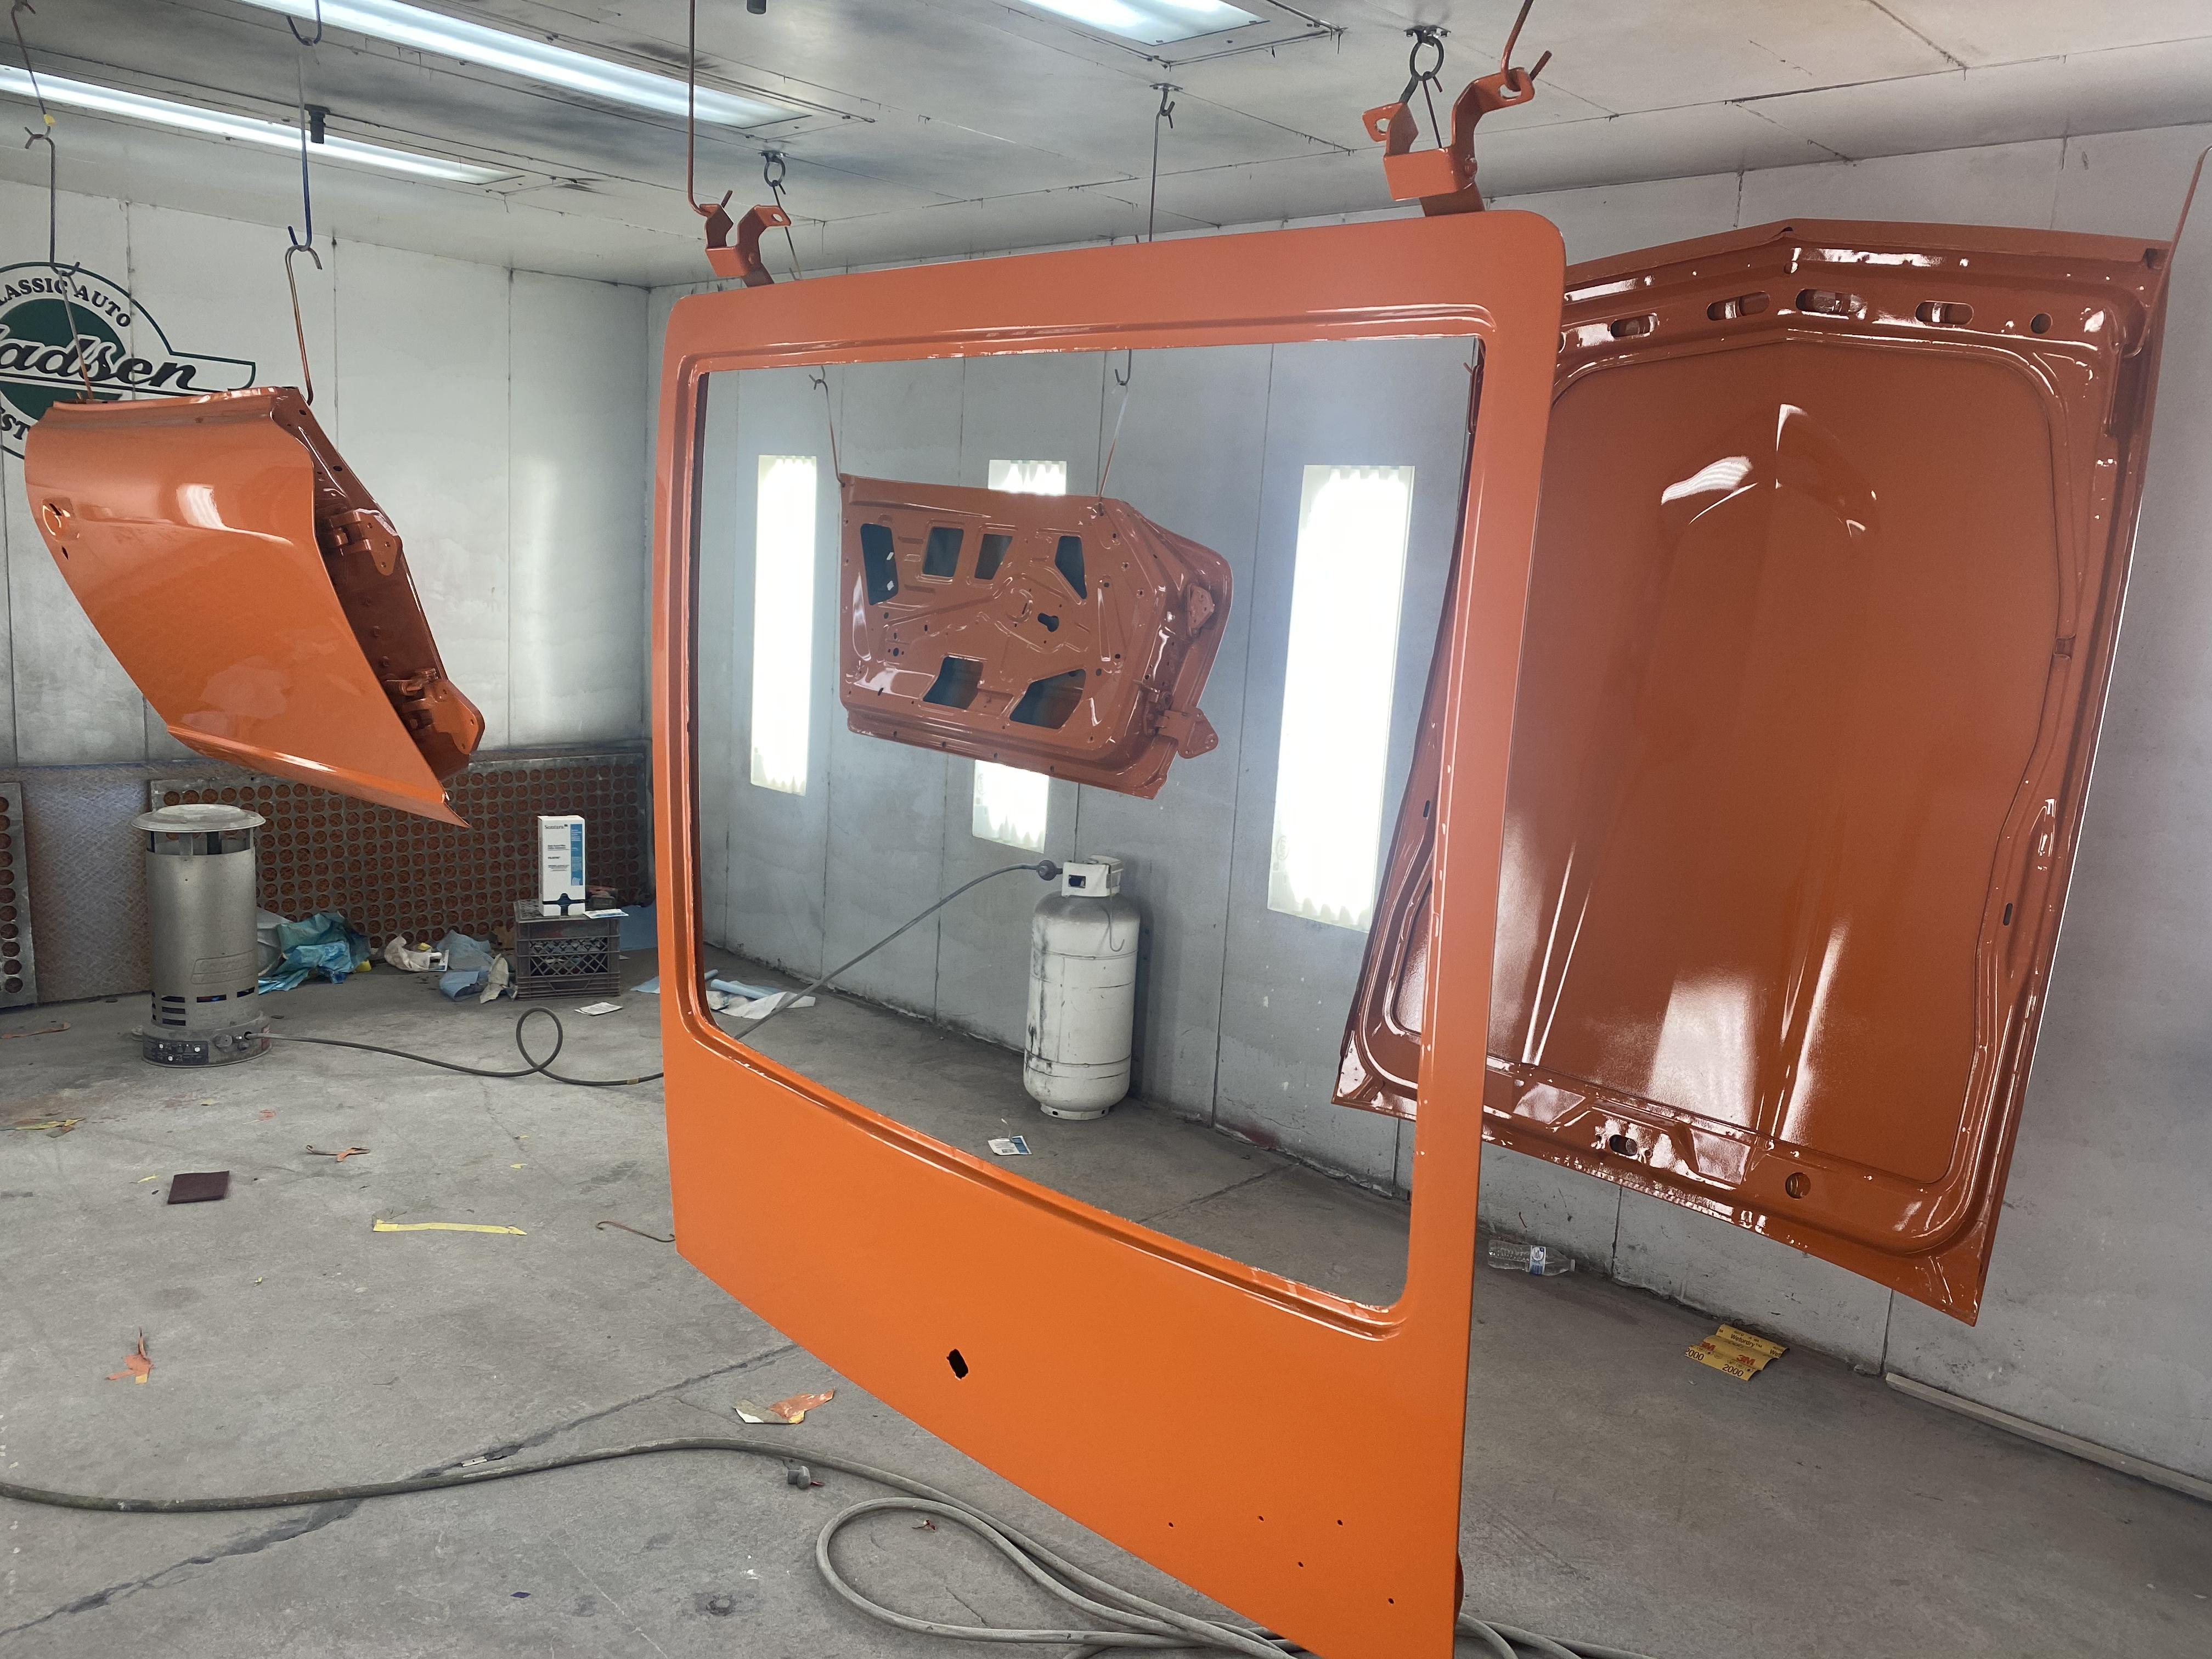
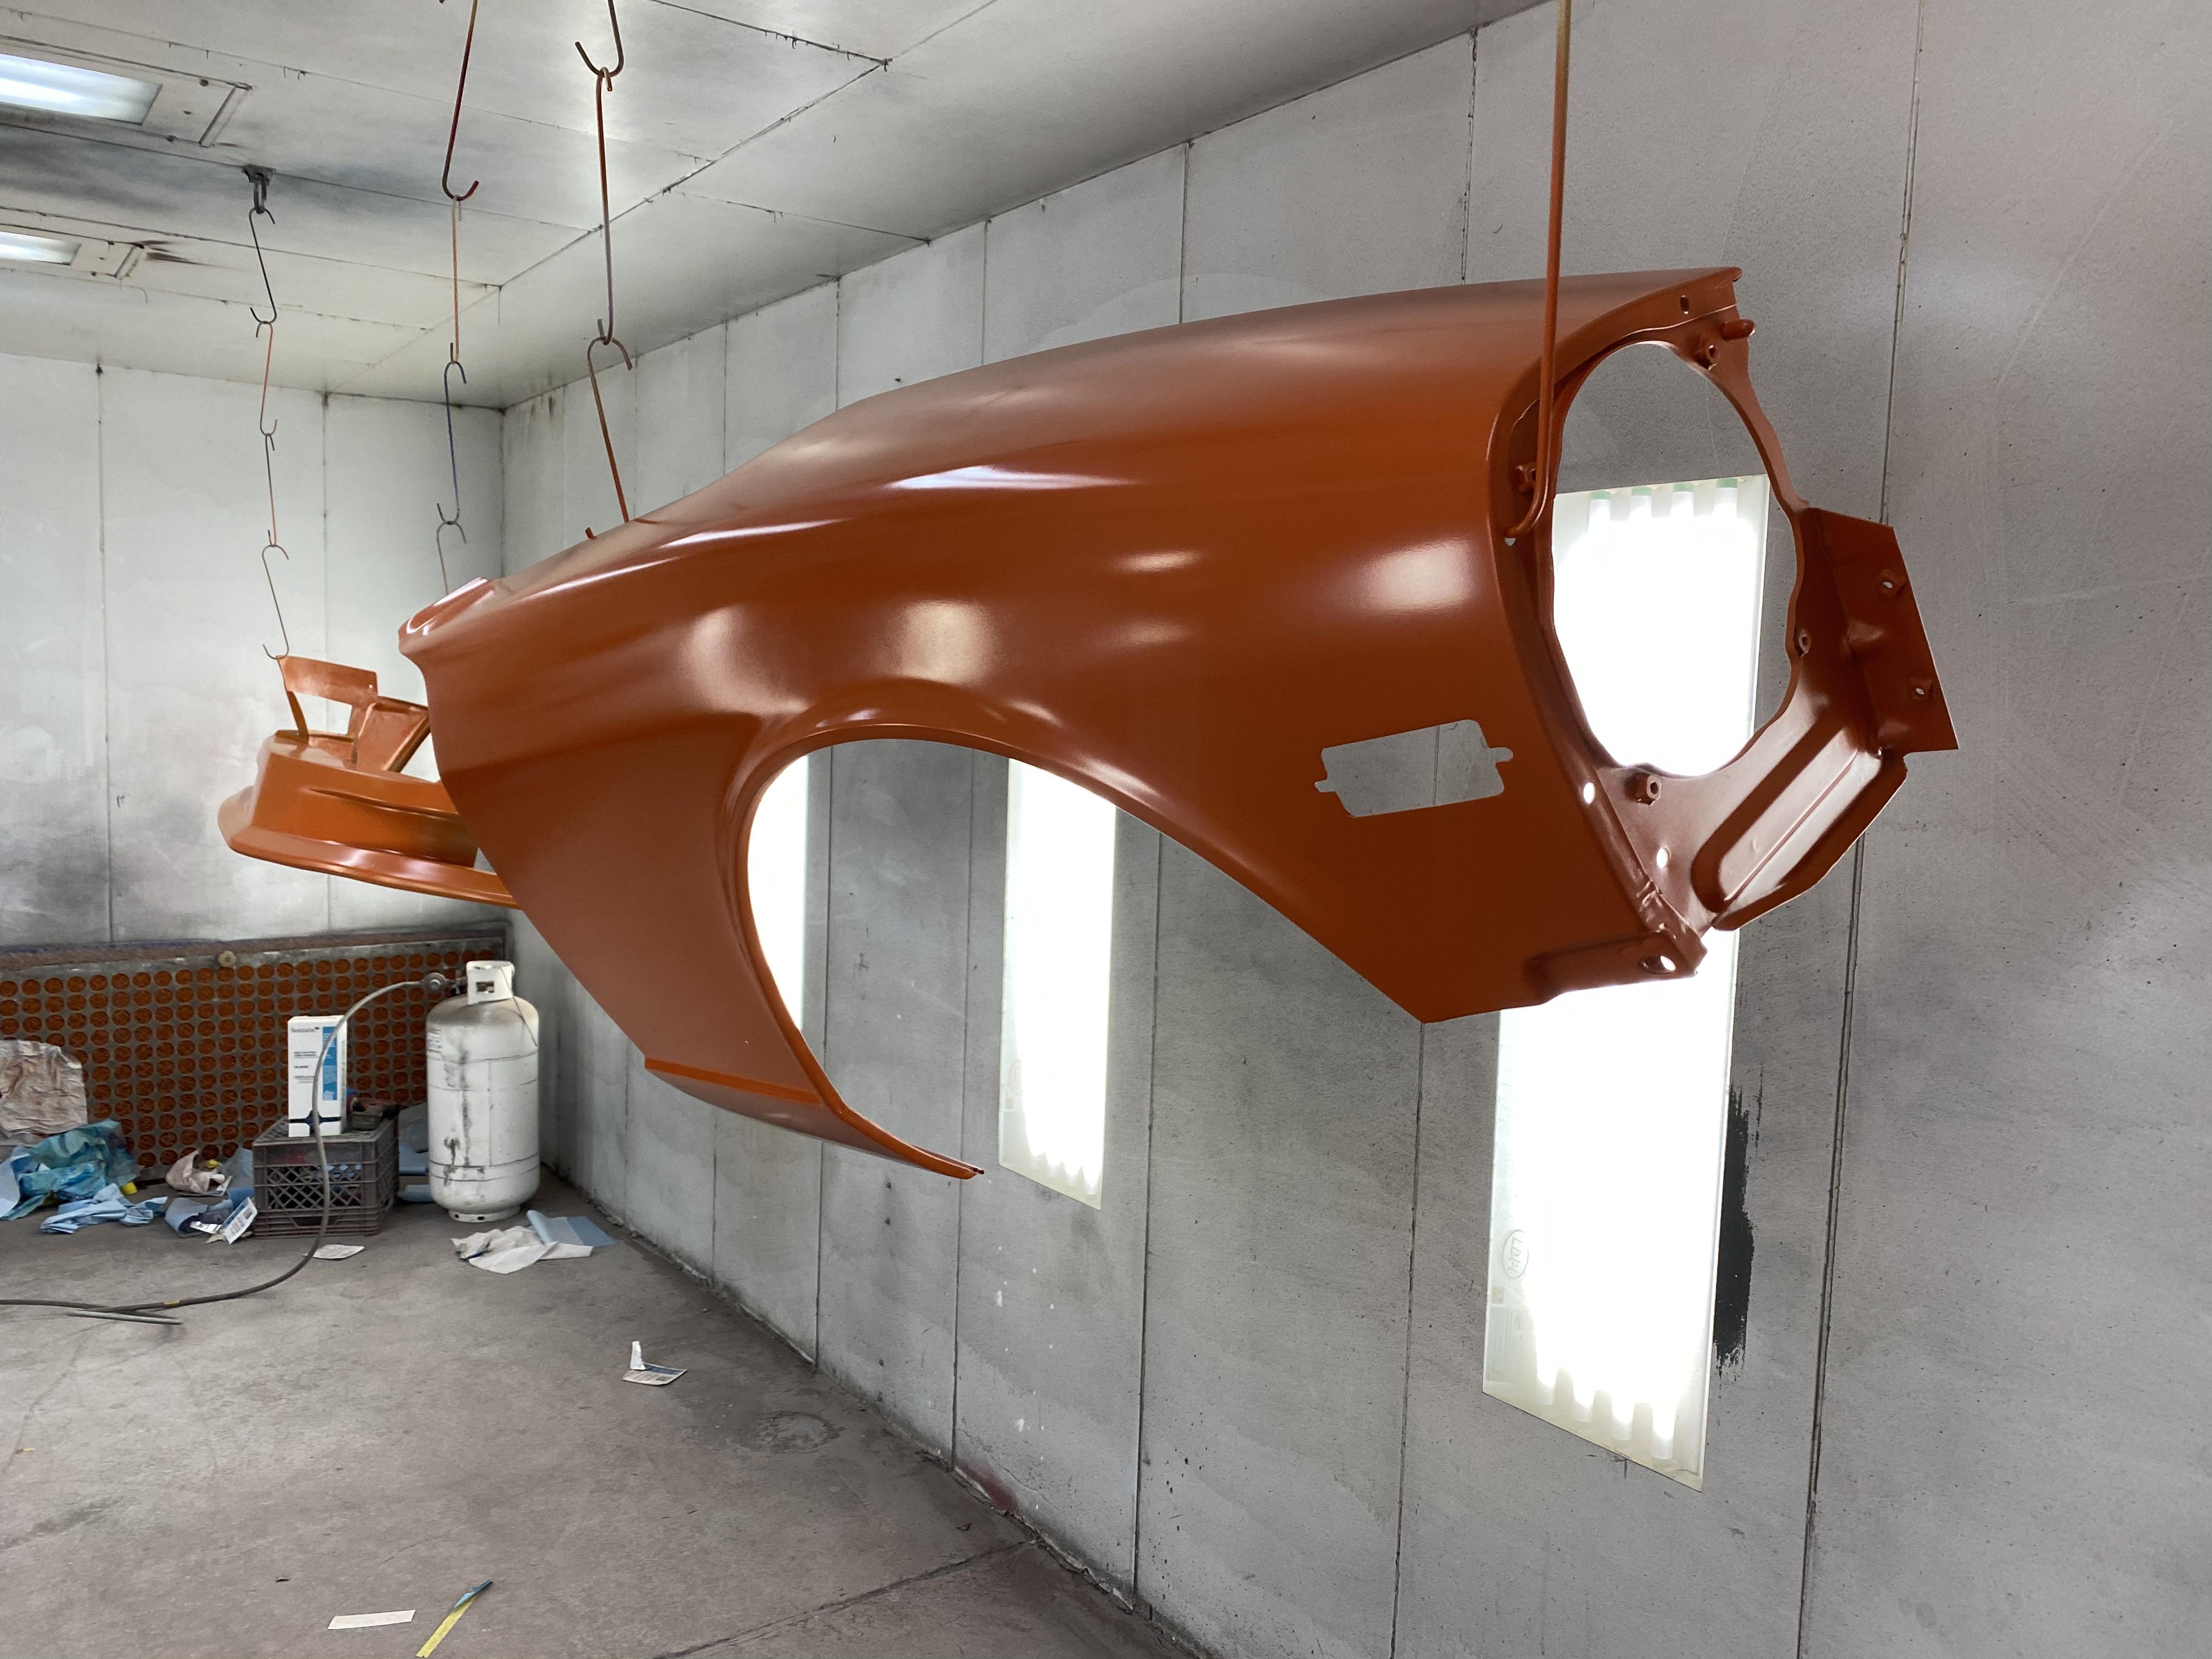
1 pointWooHoo!!! Also, it seems like a bad idea to have a propane heater in a spray booth on the discharge end but that's just me...1 point
-
1 point
-
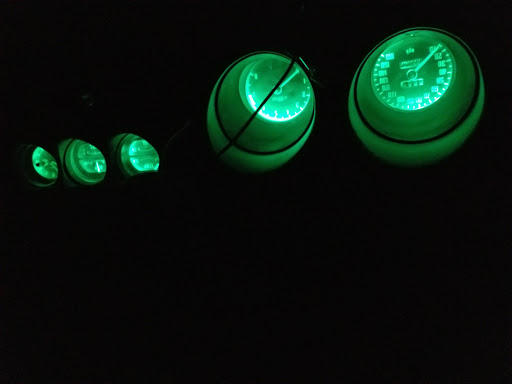
So, the white LEDs were to be delivered on 4/21, but they arrived yesterday 4/3. For comparison (image 1) I installed 2 white LEDs in the Tach and I installed 1 white LED in the center gauge (AMP/Fuel). The remainder of the gauges and the speedometer has Green LEDs. Green LEDs populate all gauges in image 2. image: 1 image: 2
 1 point
 -
1 point
-
1 point
-
1 pointThanks for sharing!! I love the other open tabs!!! COVID 19, Face Masks, McLaren F1 engine! [emoji1787]1 point
-
I did the sound proofing thing last summer - and wow!! It’s so much more enjoyable for a mere 10-15kgs more. I covered 40-60% of panels - you don’t need to cover the entire panel. I did the wheel well, rear deck, the doors made a HUGE difference, the trans tunnel, floors and some of the bulkhead. I wish I had the headliner loose like yours to do the same but didn’t want to rip it off. Do that one and you get a huge reduction in wind noise and resonance. Rear strut towers are particularly noisy parts of the car. So I did this ... I wish I had done a better video of the actual insulation but this was just to show some friends the difference ... [/url] Also, for the under carpet thing and between door cards and the doors I used closed cell foam like these ... 12mm under carpet, 1.5mm doors ... https://rover.ebay.com/rover/0/0/0?mpre=https%3A%2F%2Fwww.ebay.co.uk%2Fulk%2Fitm%2F282327879665 The MLV reduces panel vibration, the closed cell reduces reflections within the car. Upside: much less wind and road noise, far nicer cruising, you get to hear the exhaust better as it’s less like night club loud and more high end hifi loud. Downside: with all the white noise and resonance gone, you can now hear all the transmission / mechanical whines ;)1 point
-
Im working on making my car more comfortable, i cleaned around the hatch of the car, added some sound-deadening inside the empty spare wheel well. Got the arm rest installed on the drivers door.... My buddy gave me some moving blankets, i just realized i could cut one up and have it go under the rear carpet for some additional dampening. ooof. gotta install the headliner back in the car, maybe this weekend....1 point
-
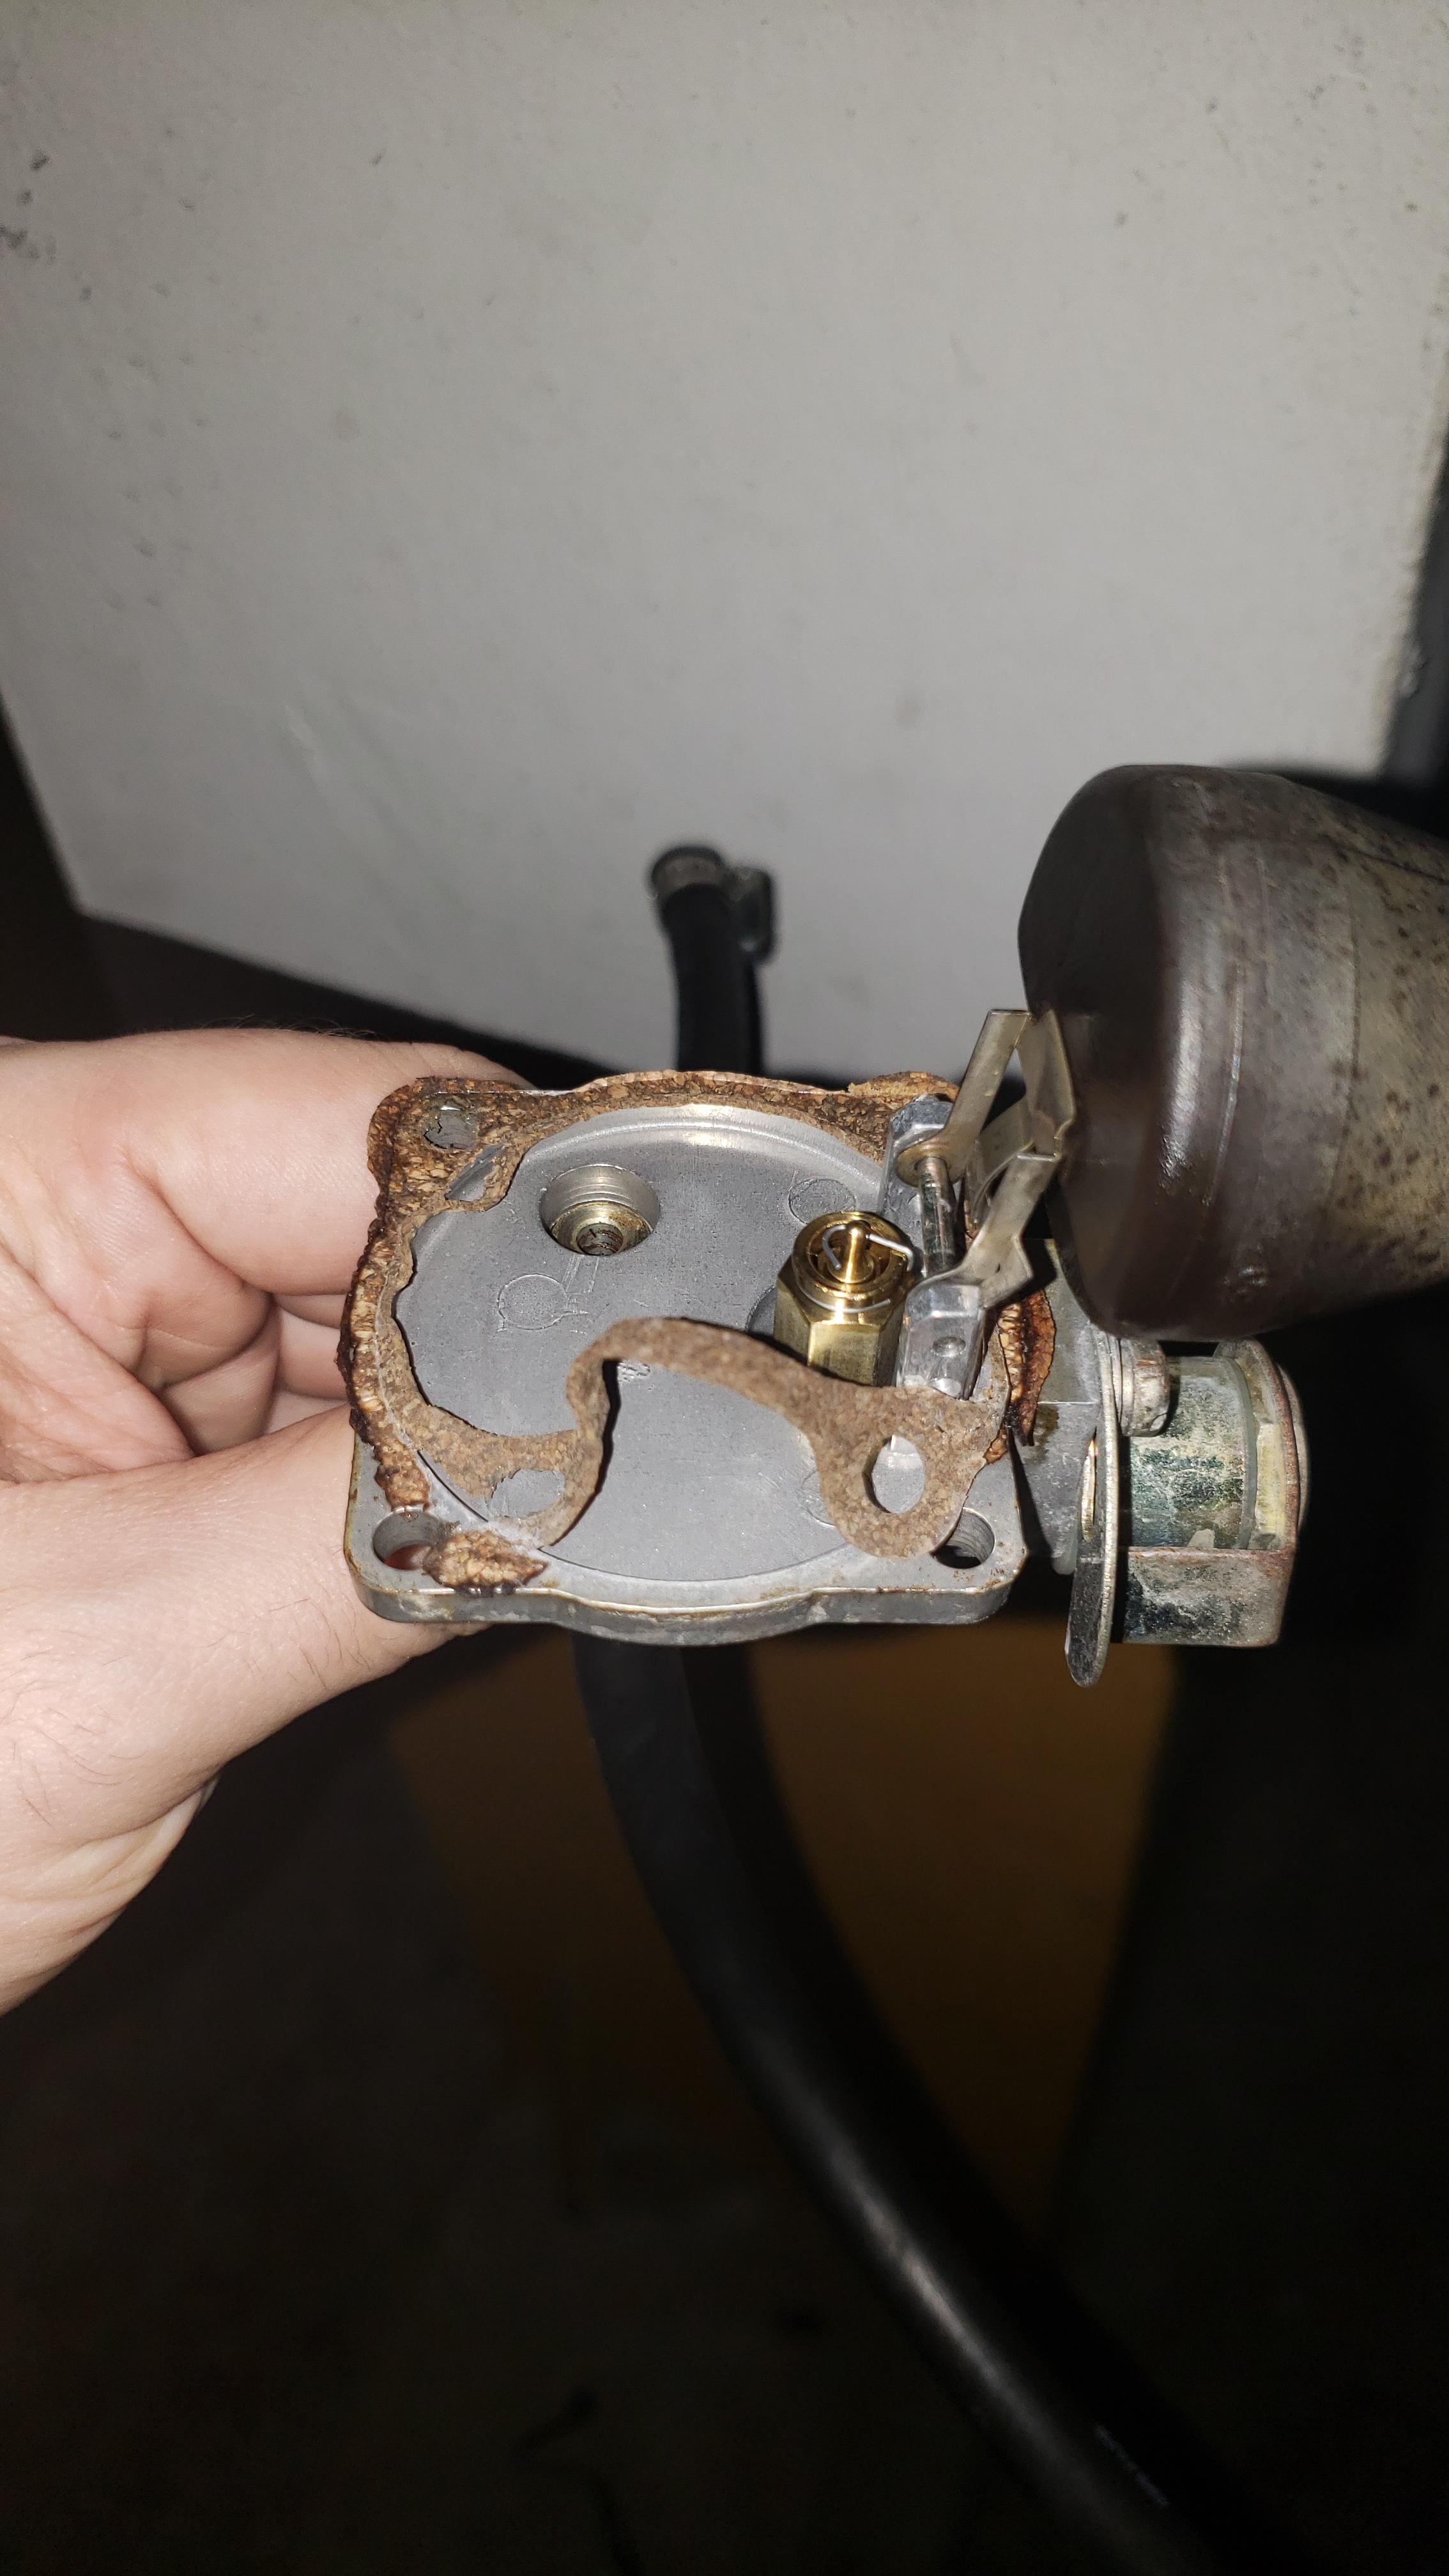
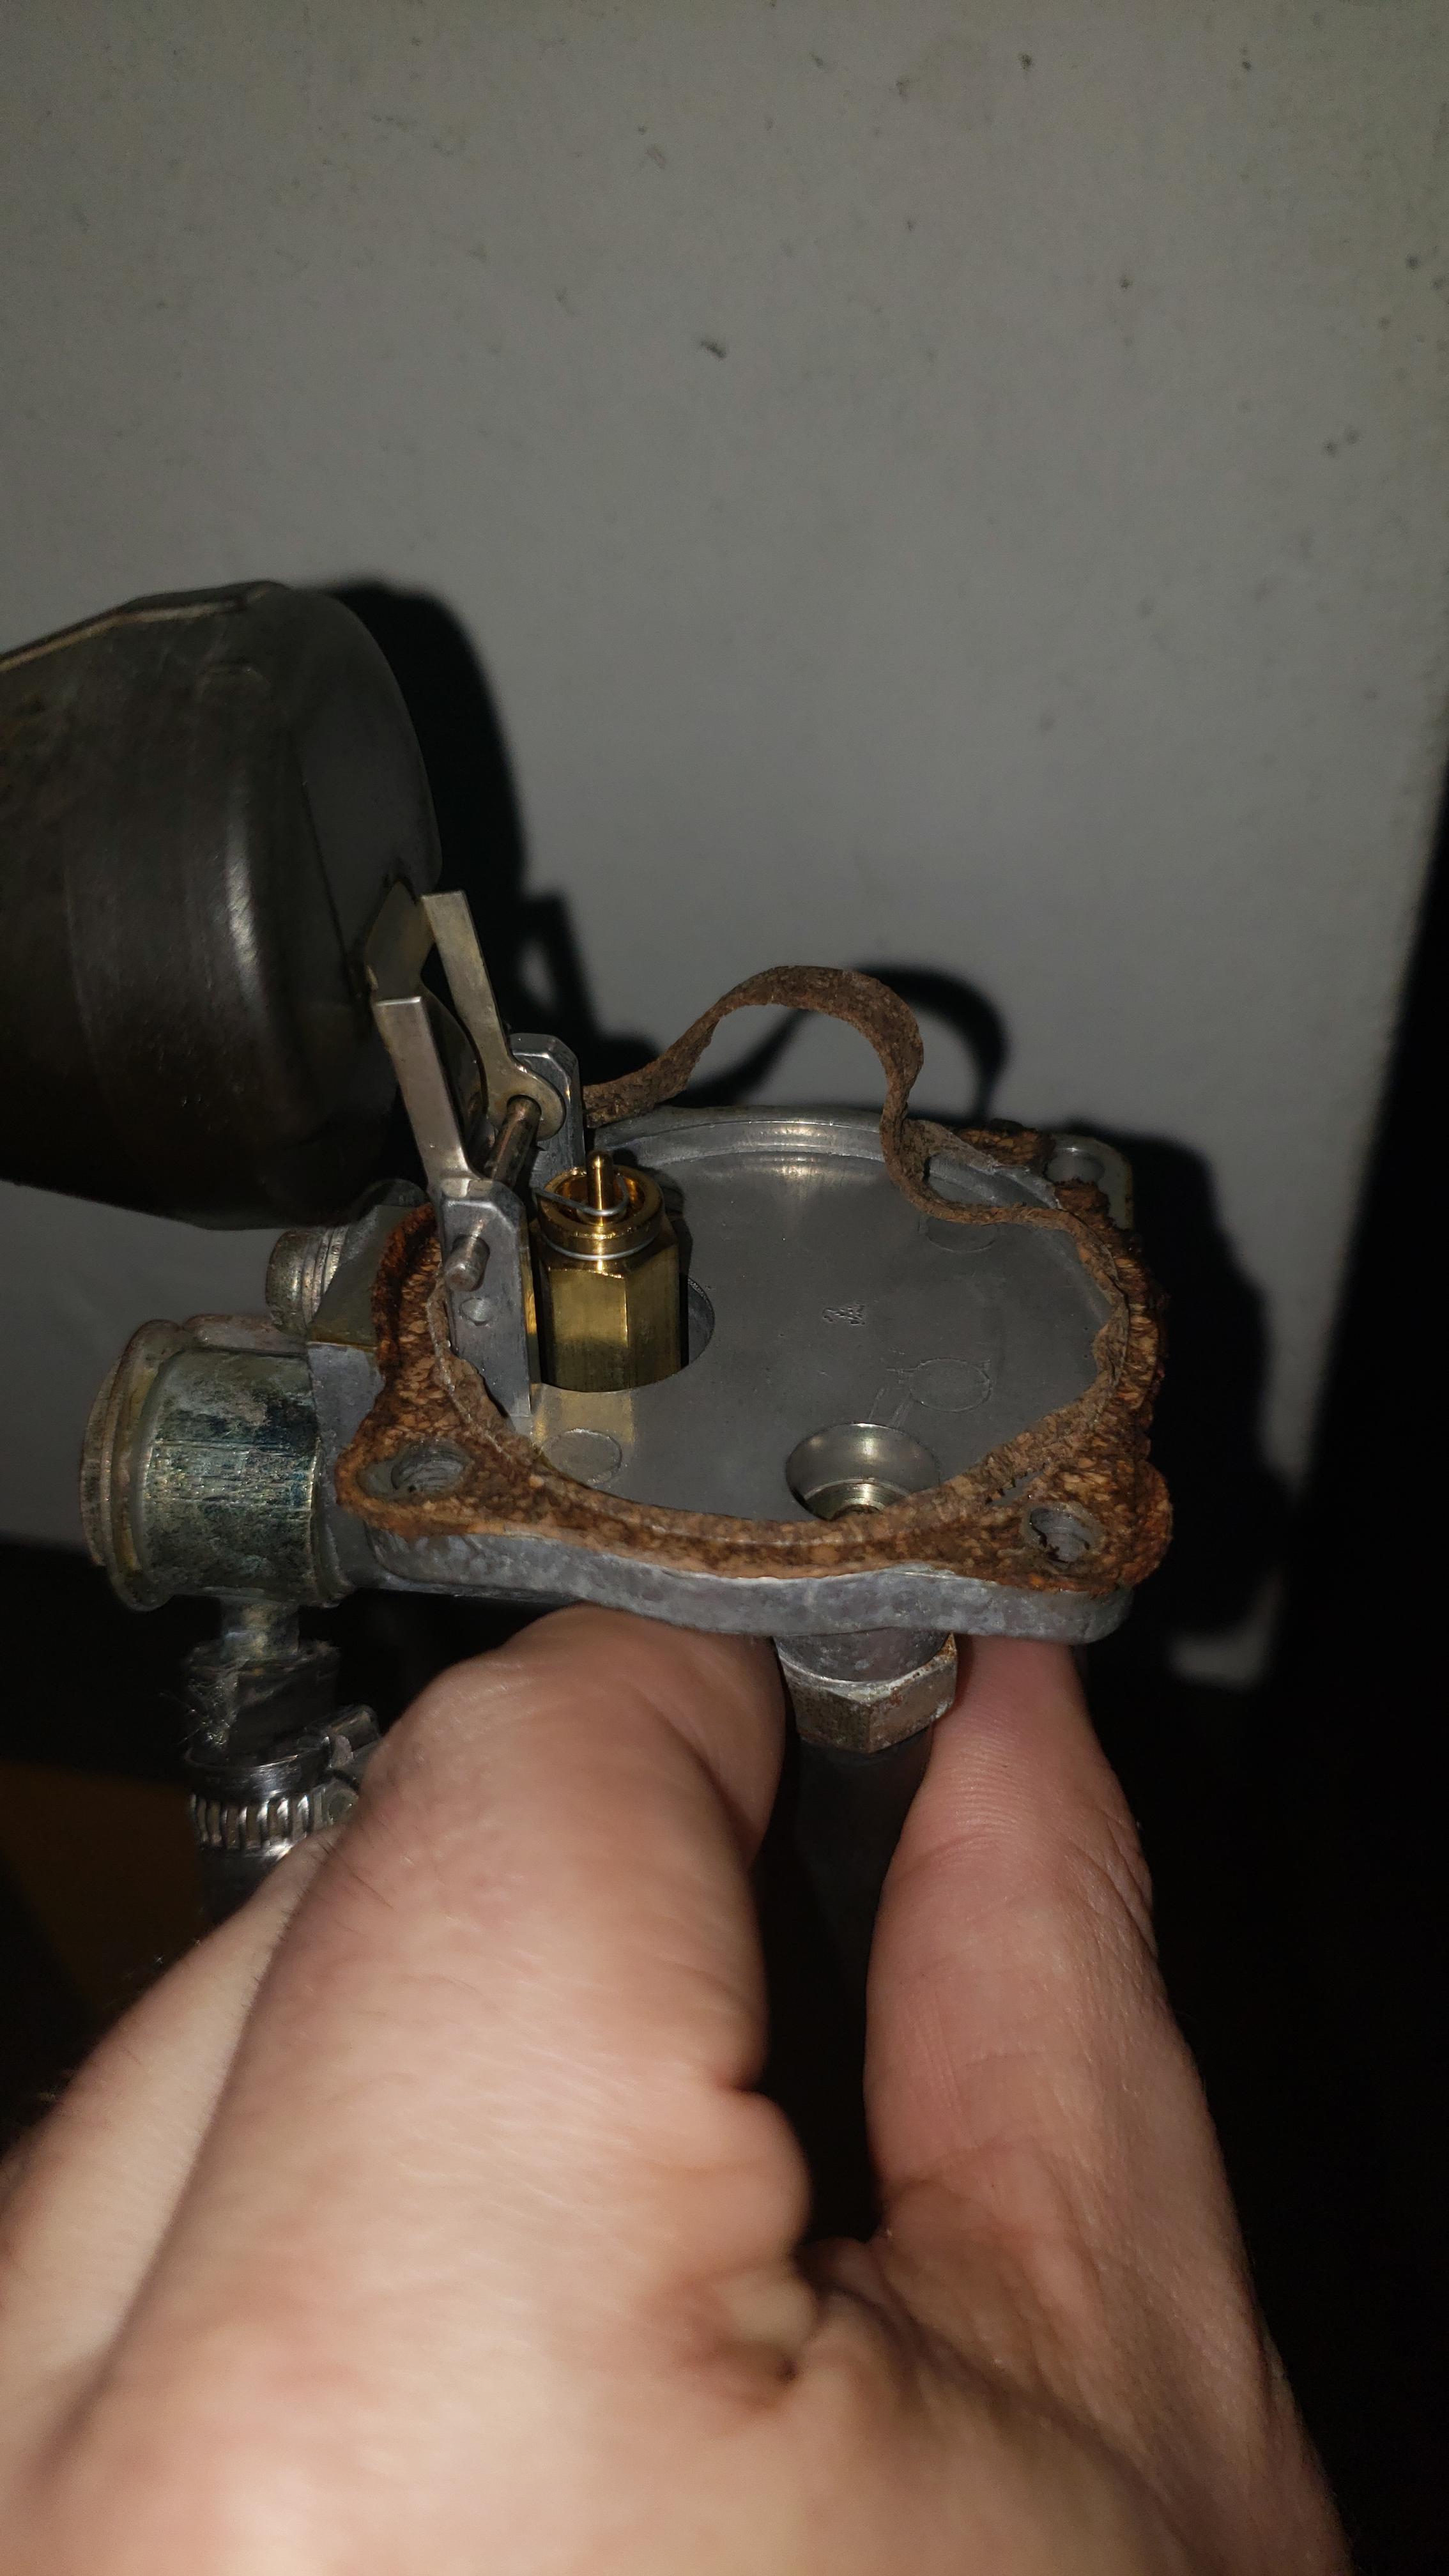
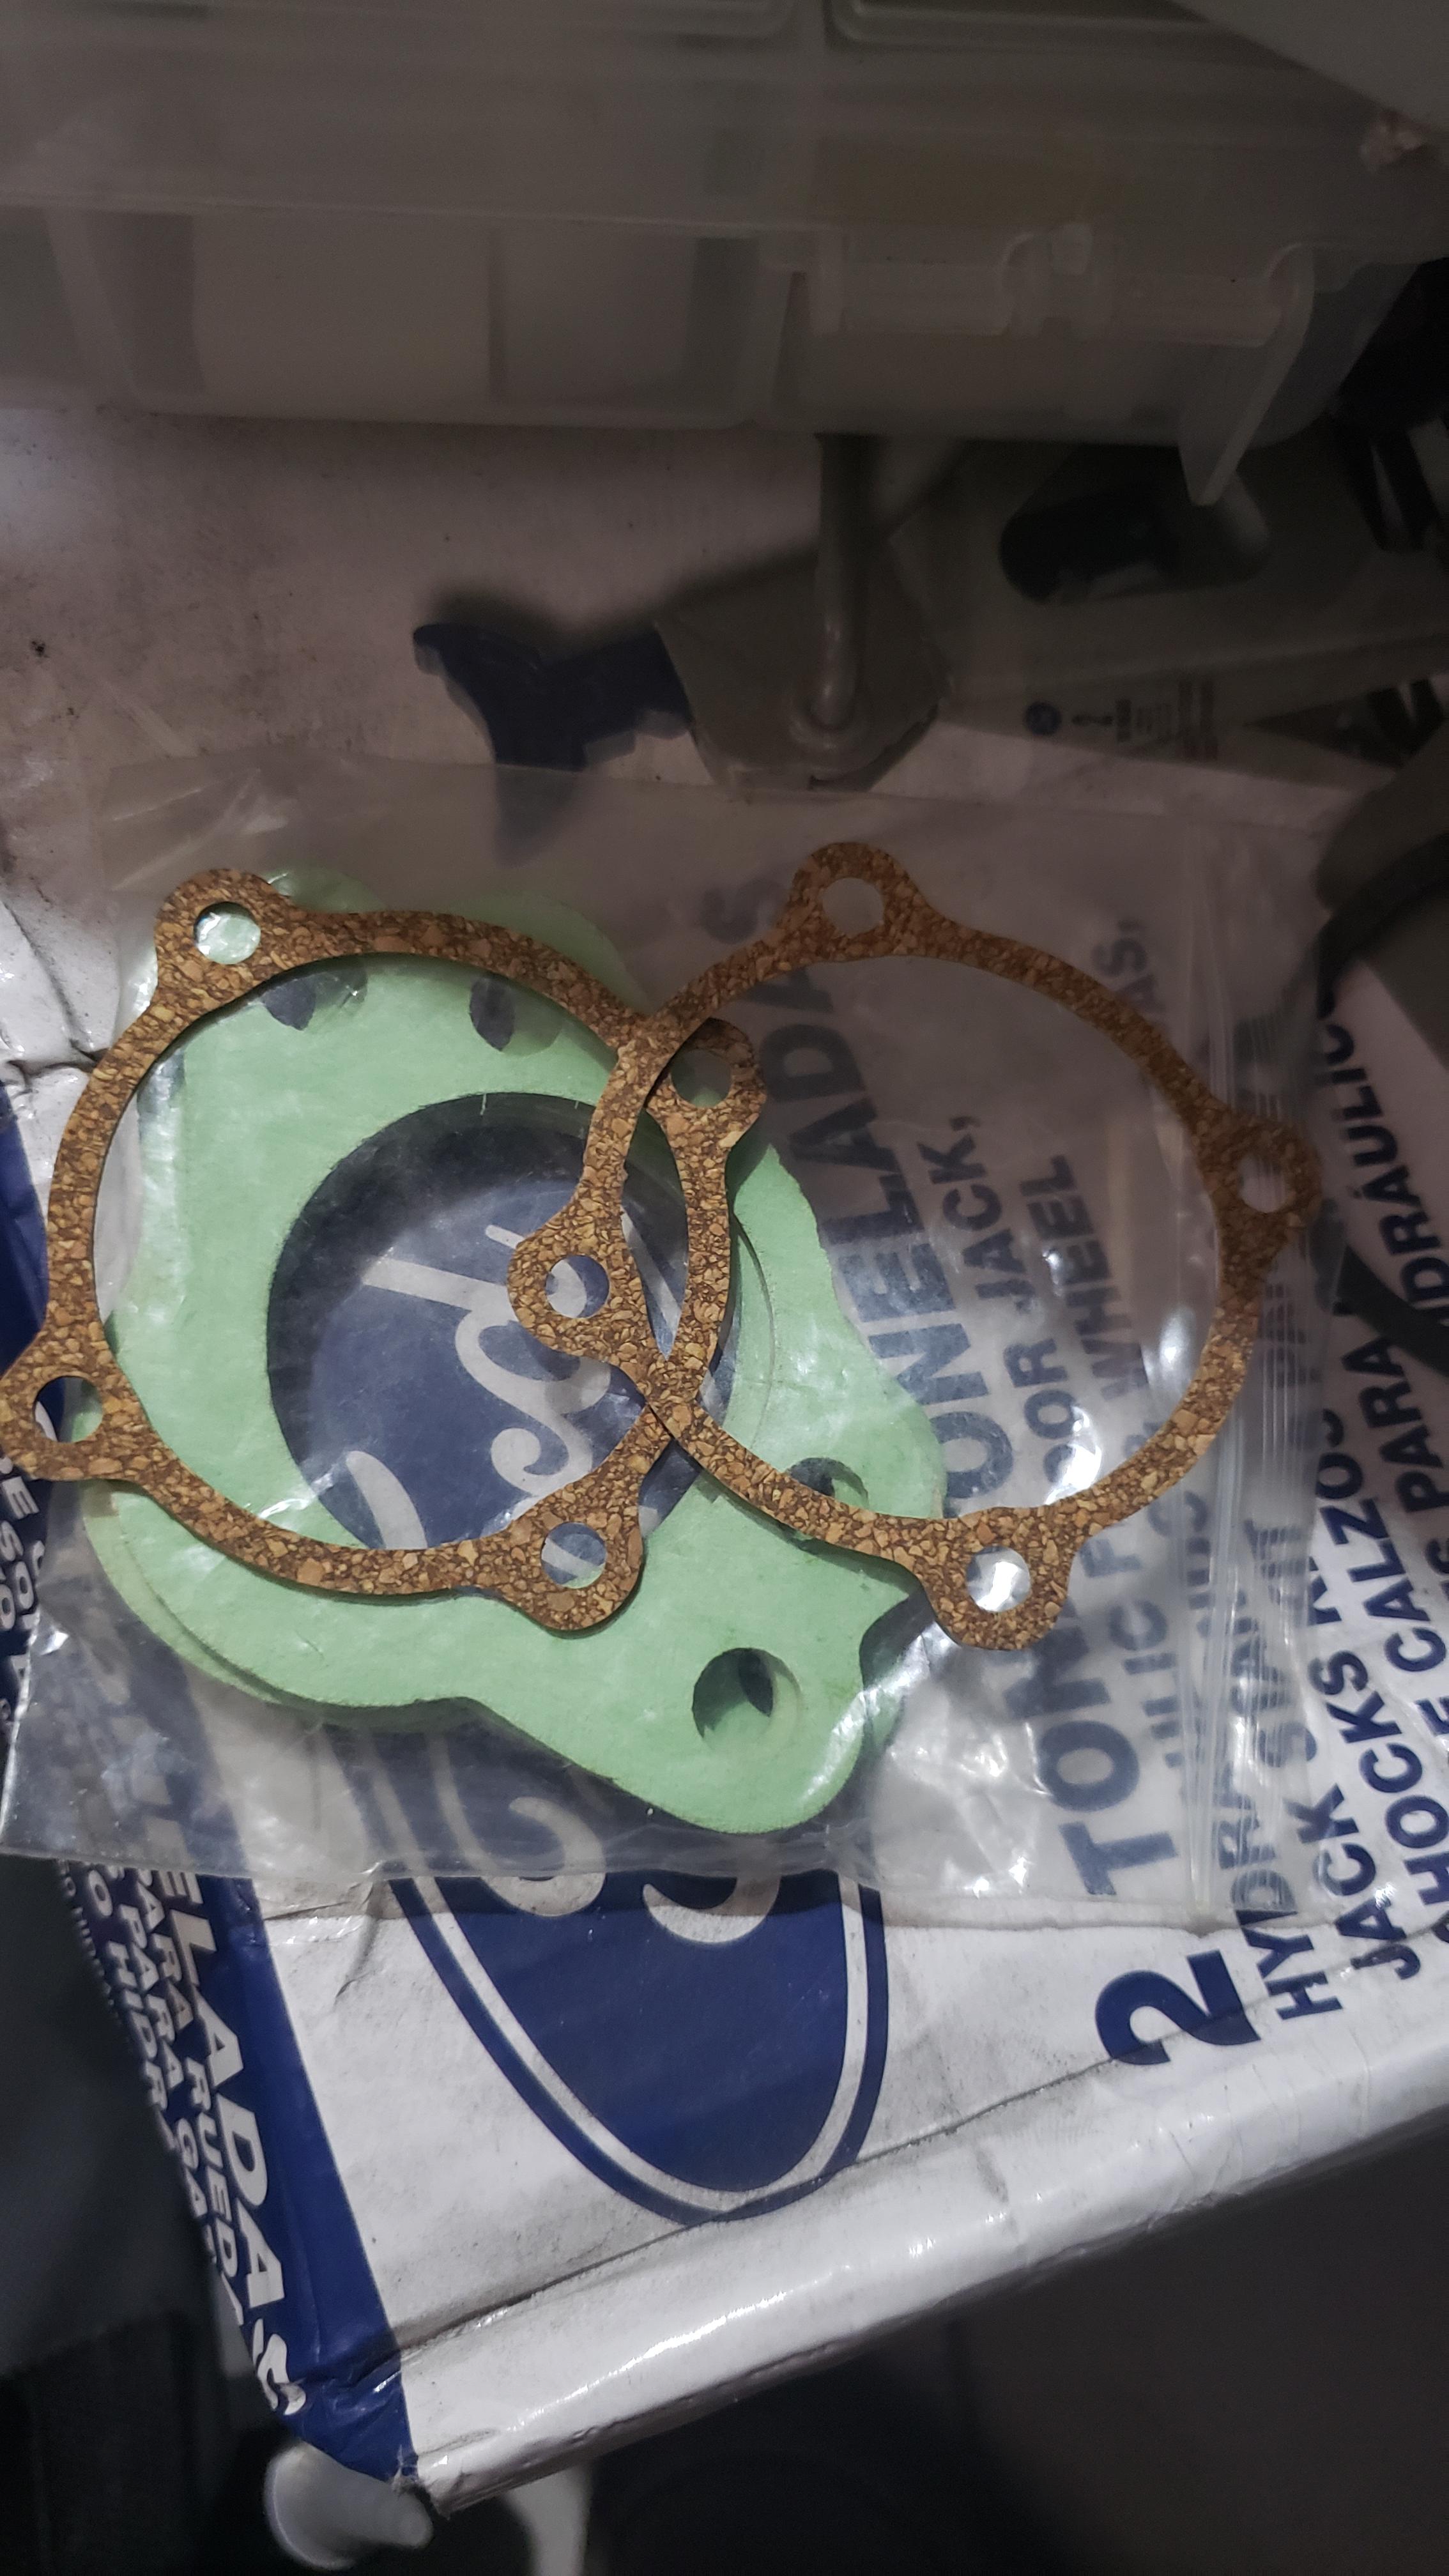
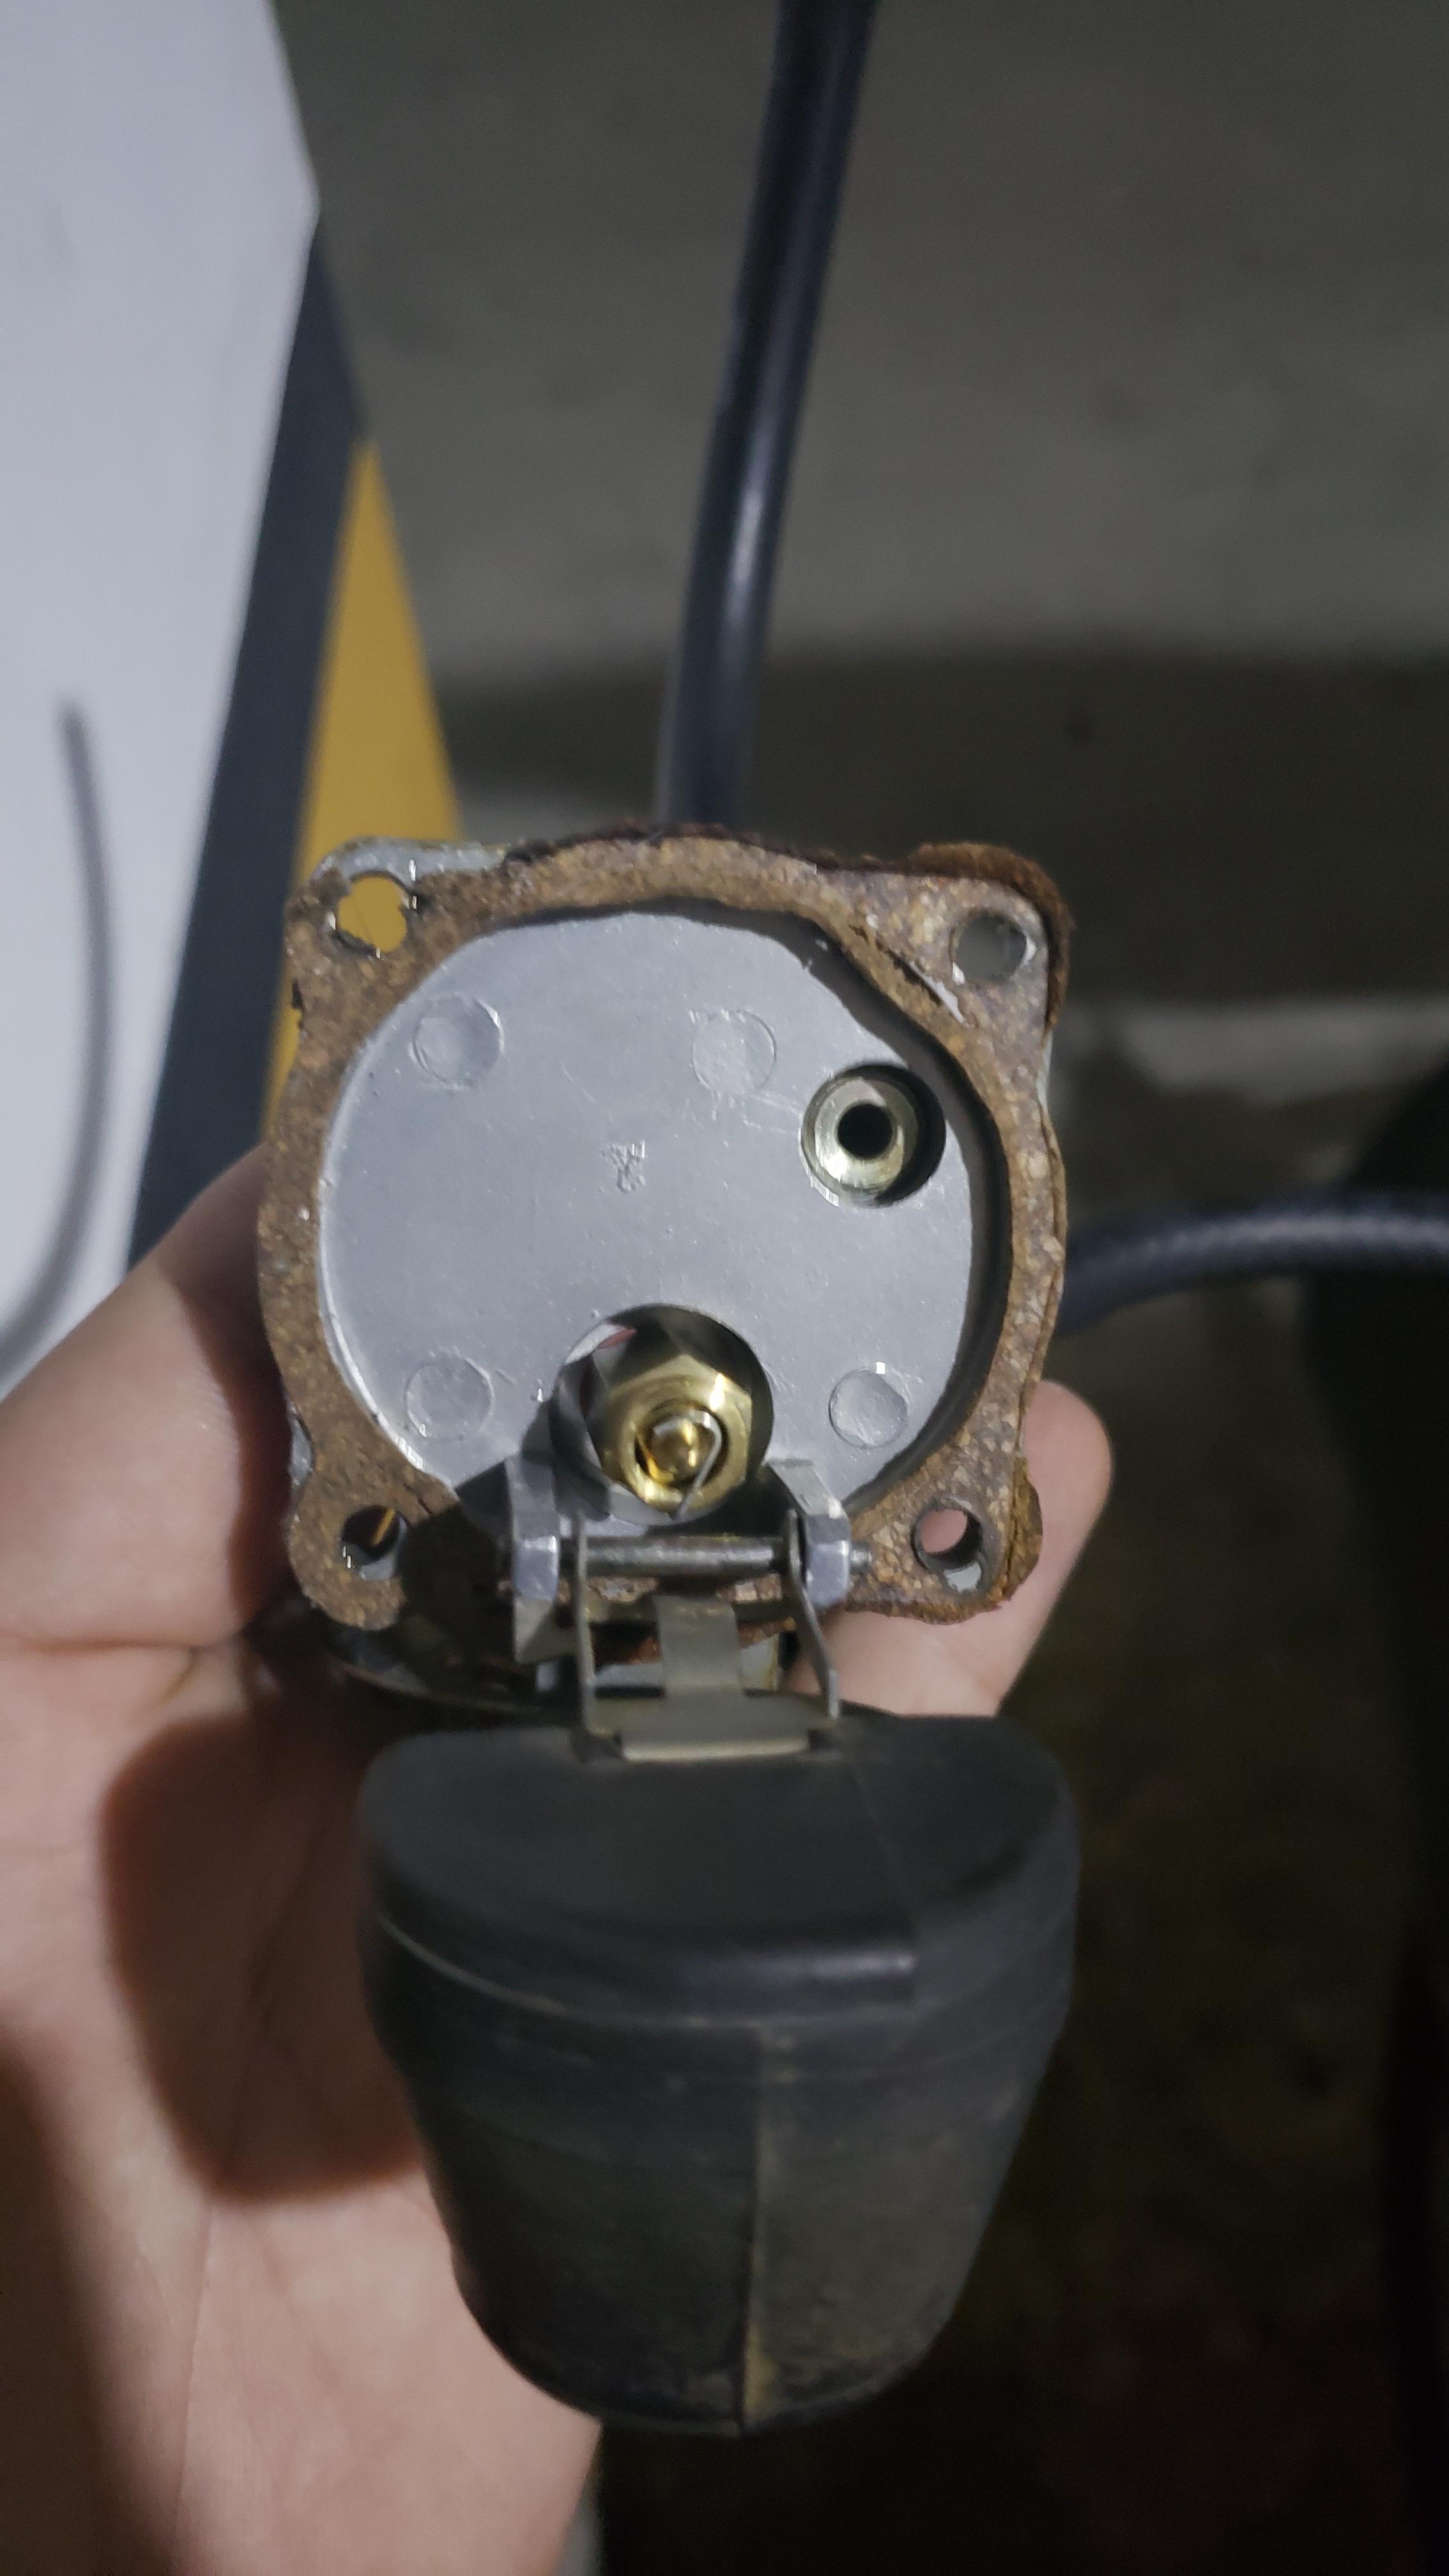
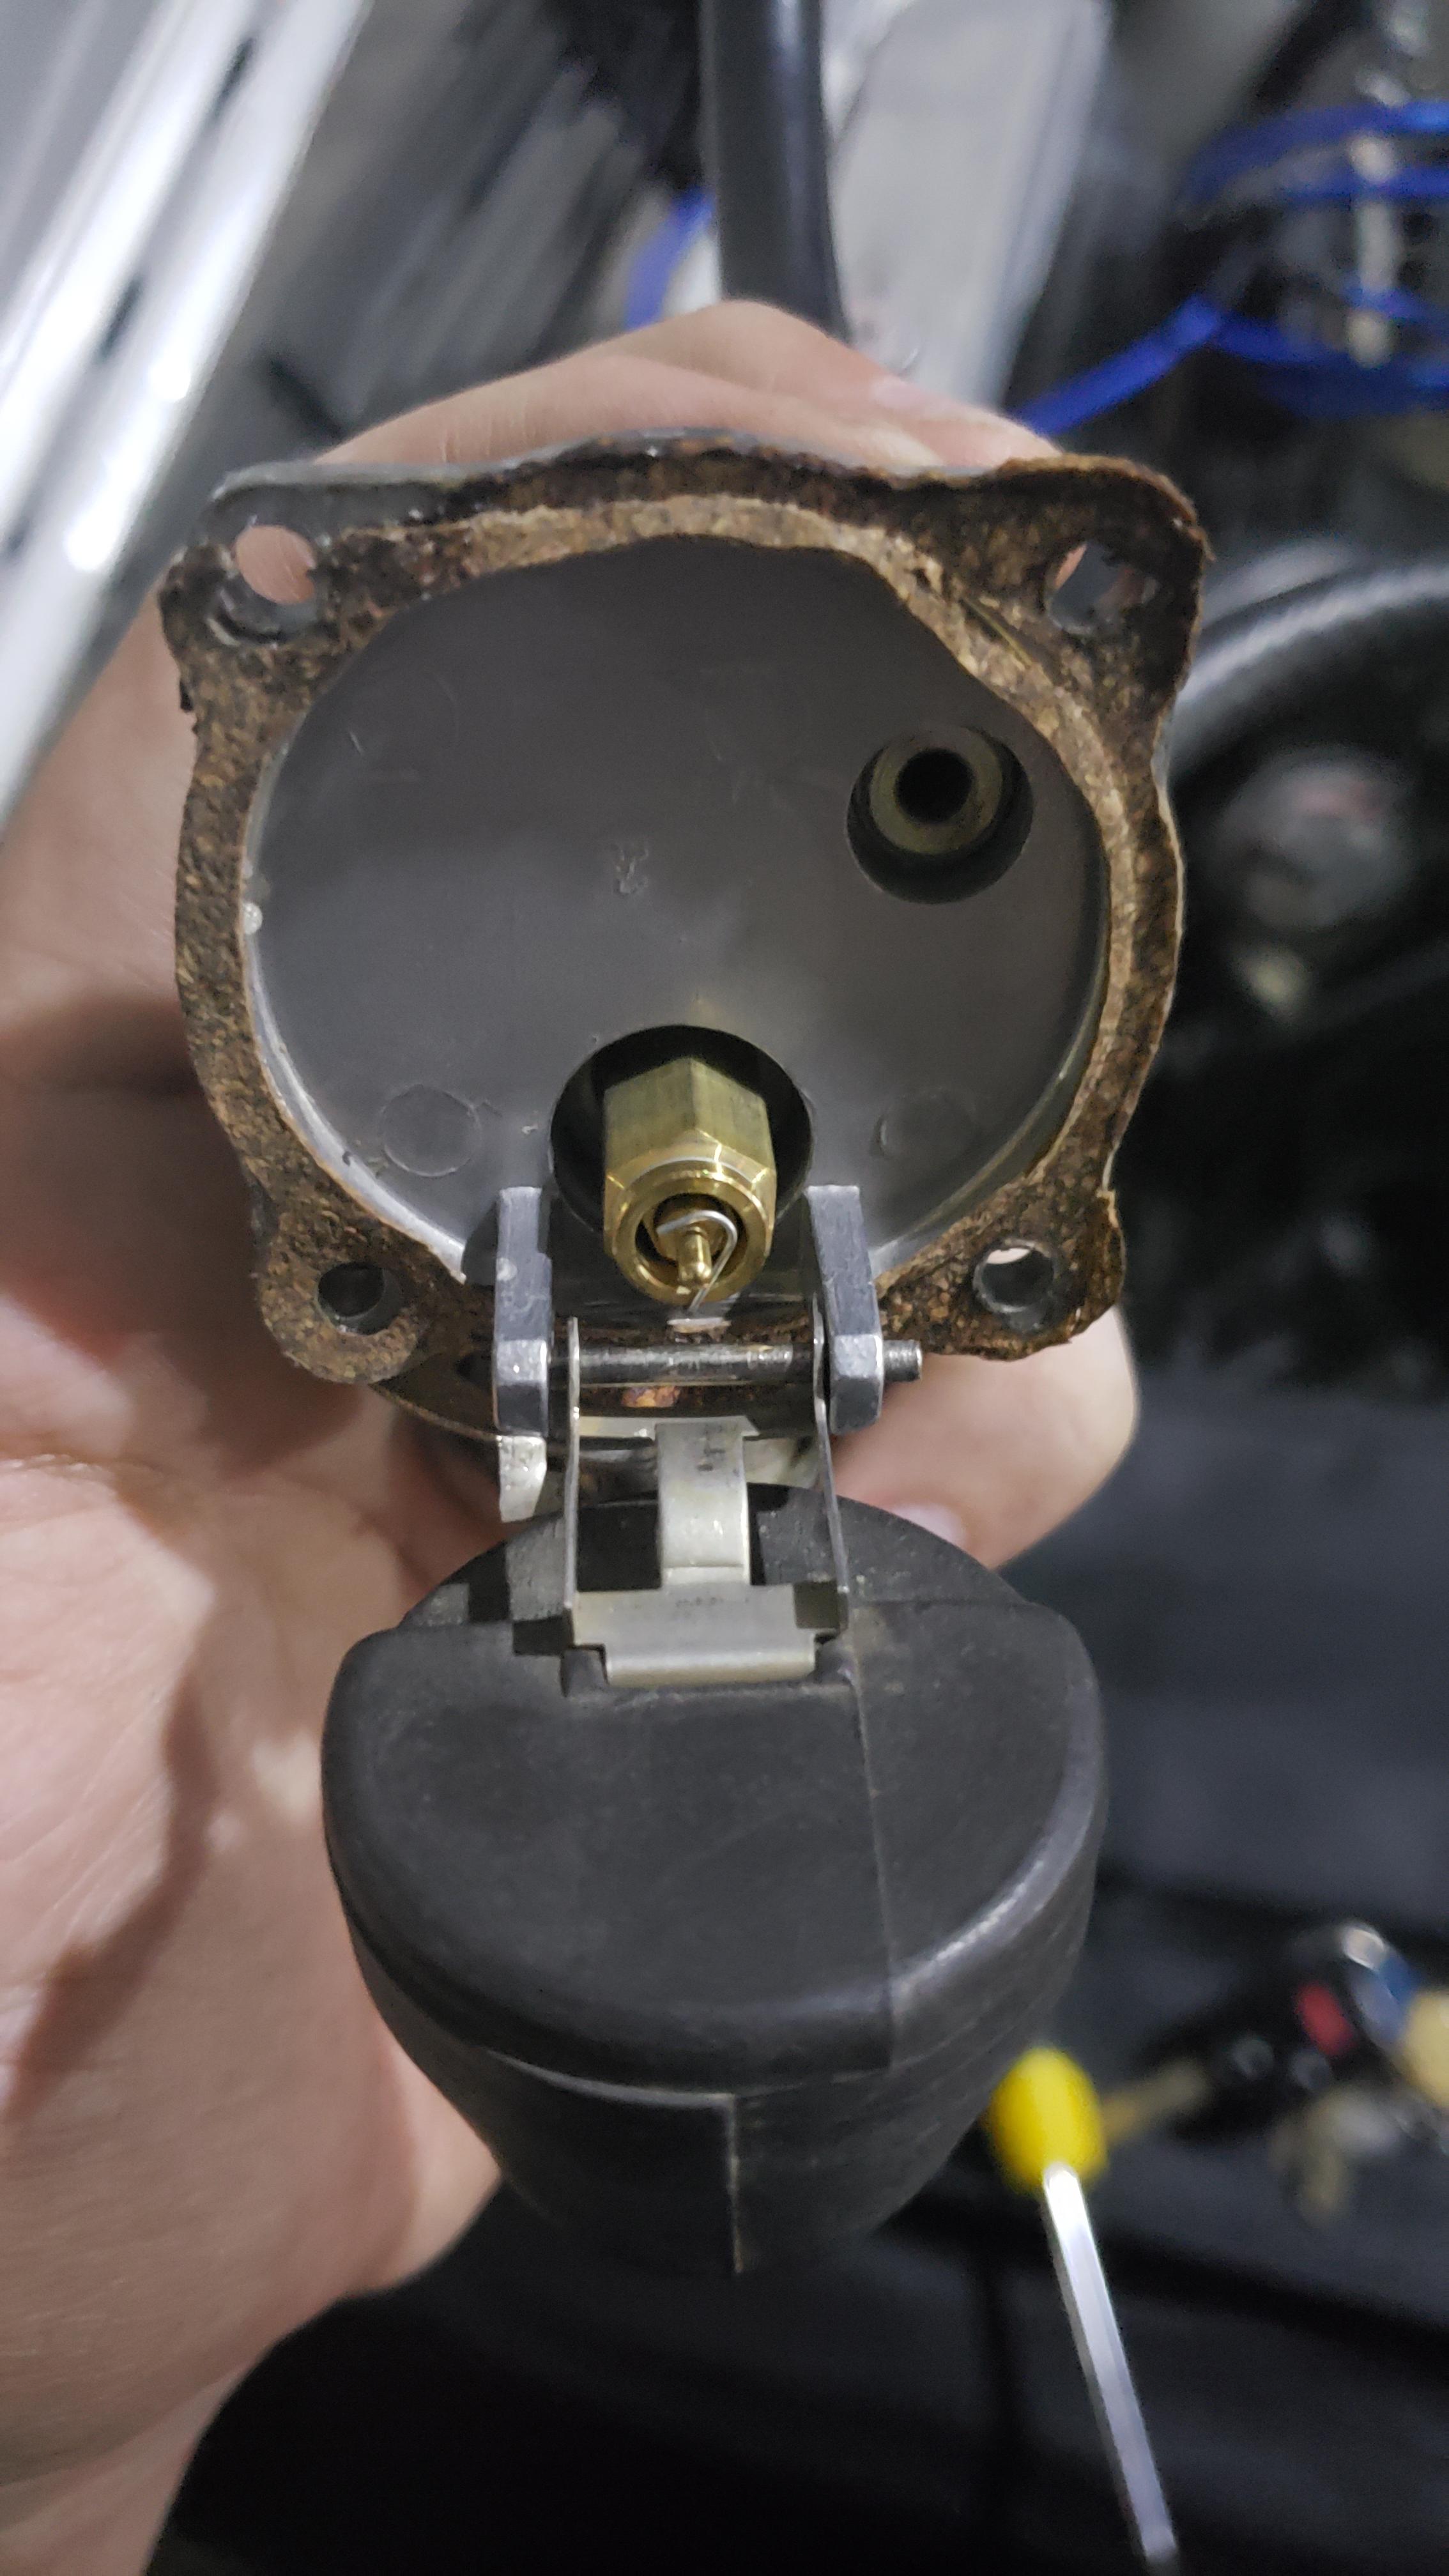
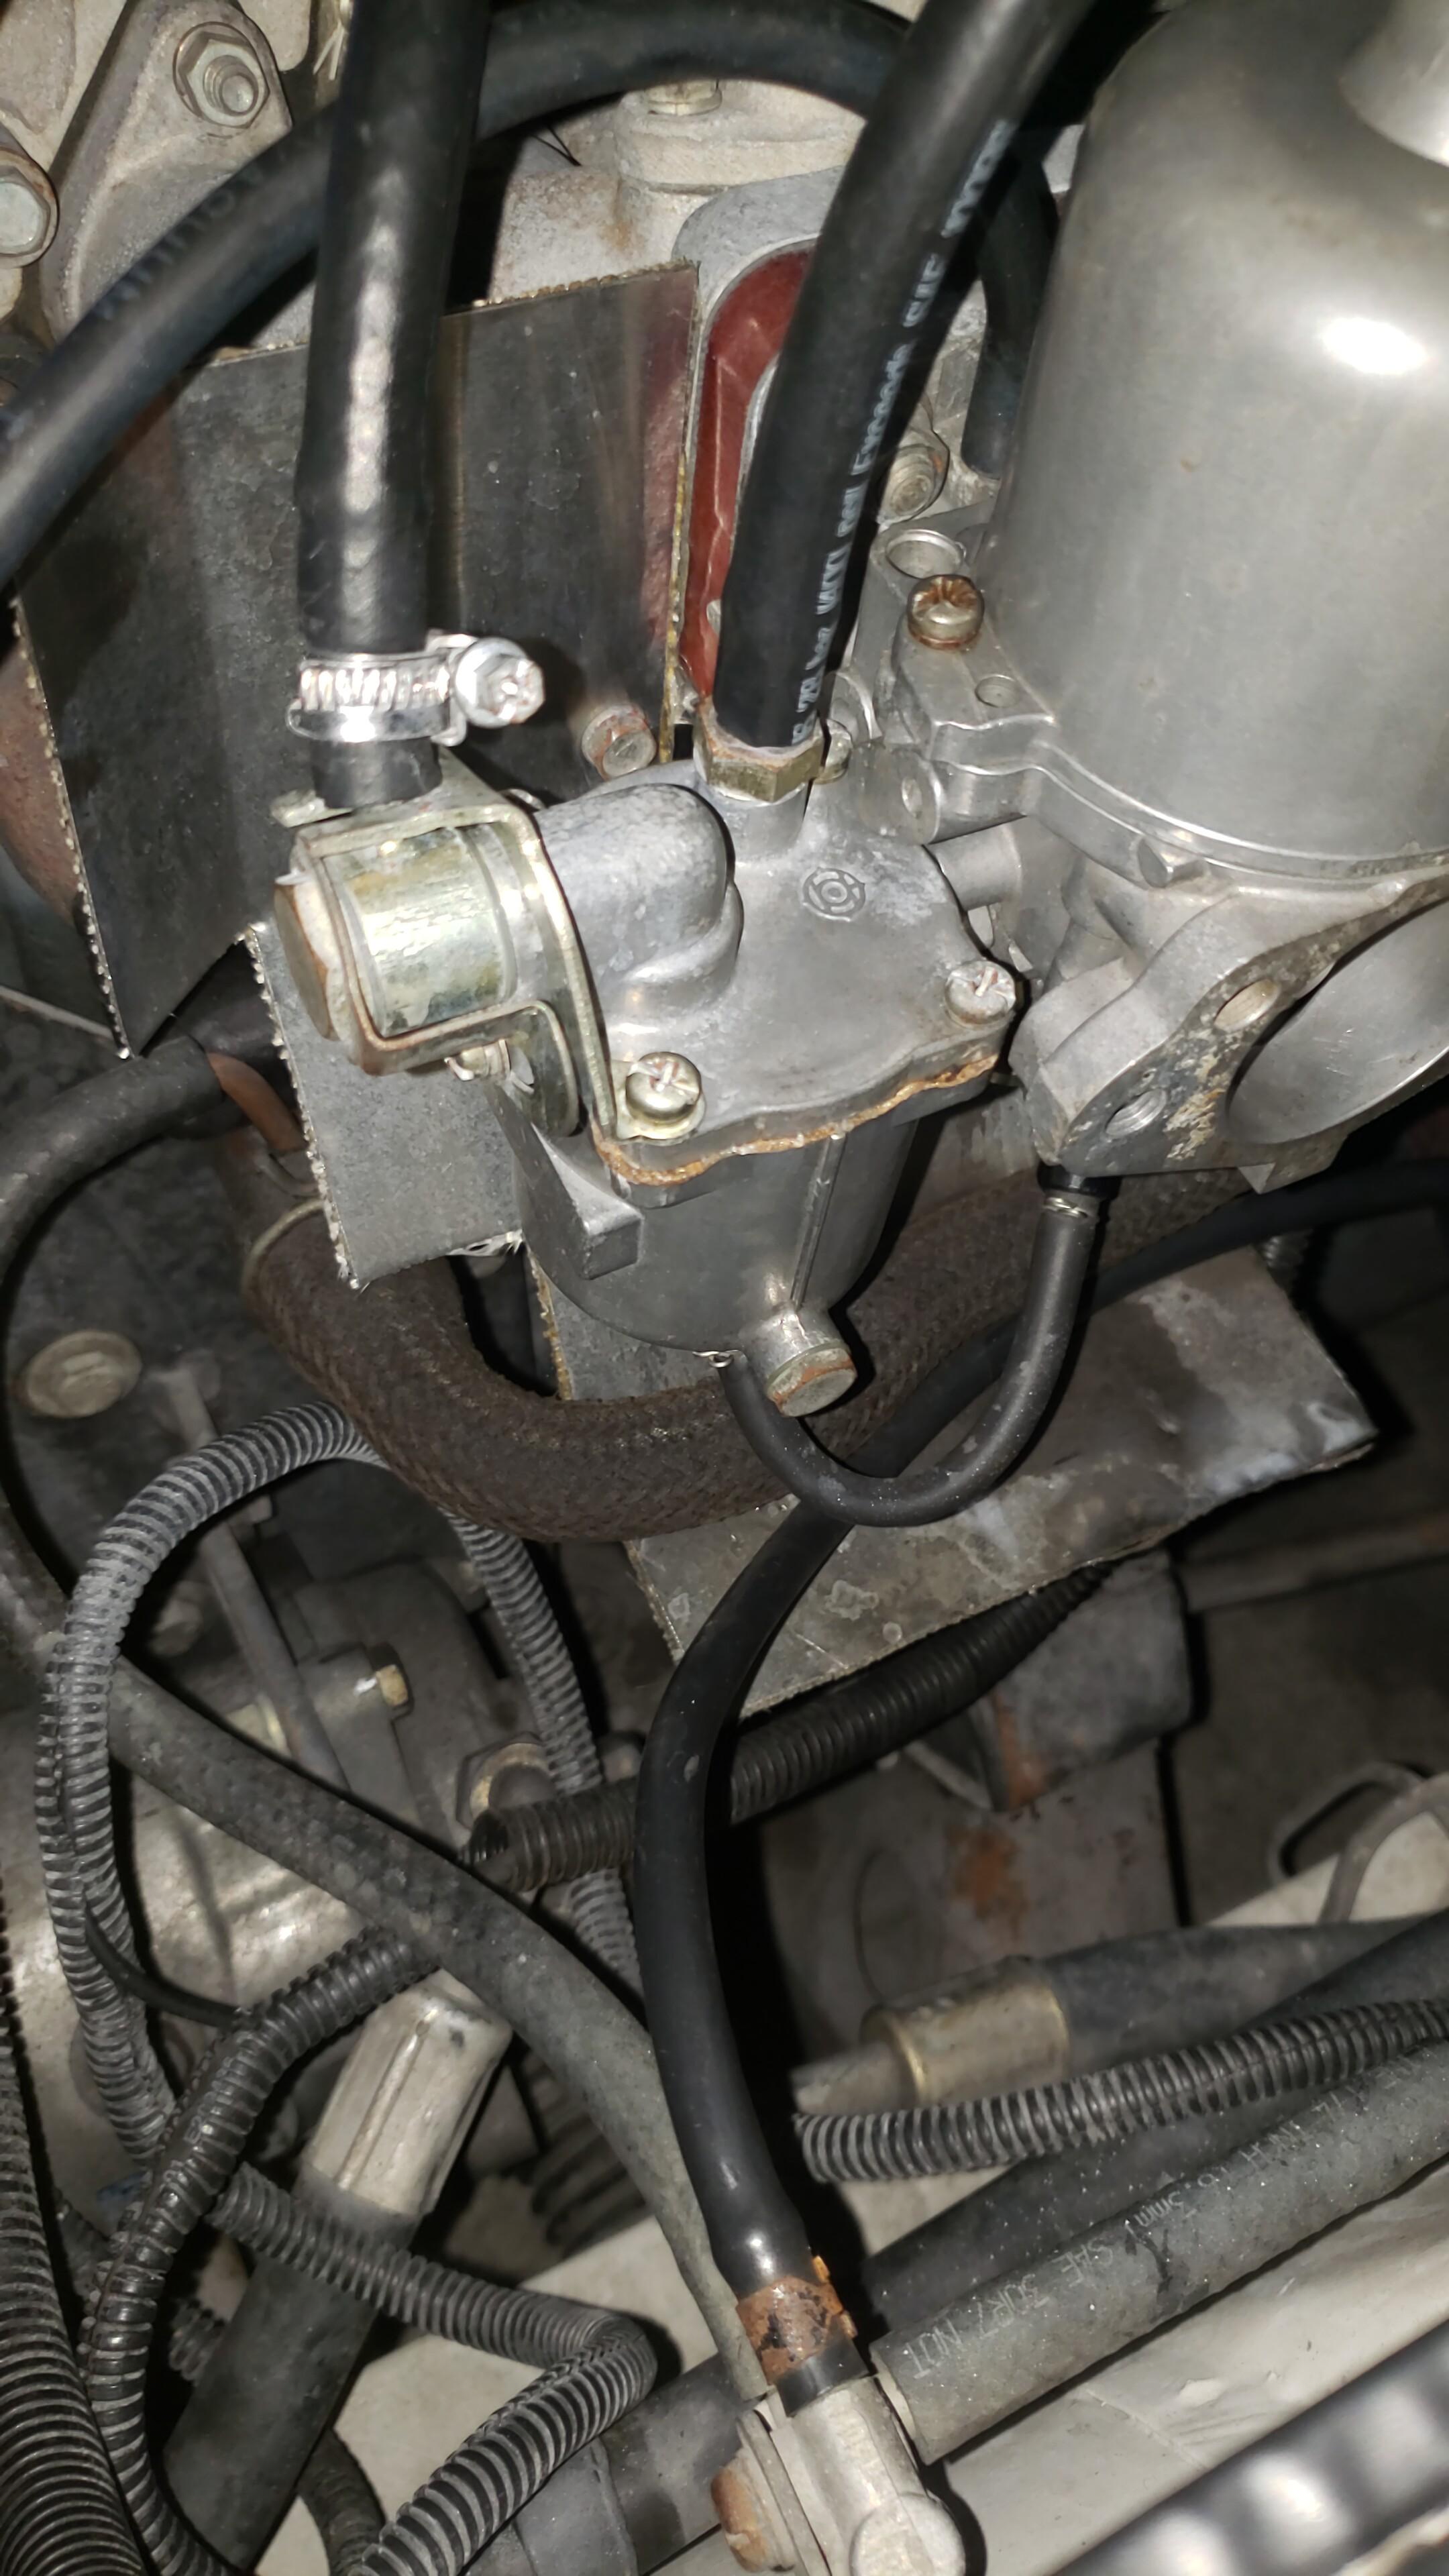
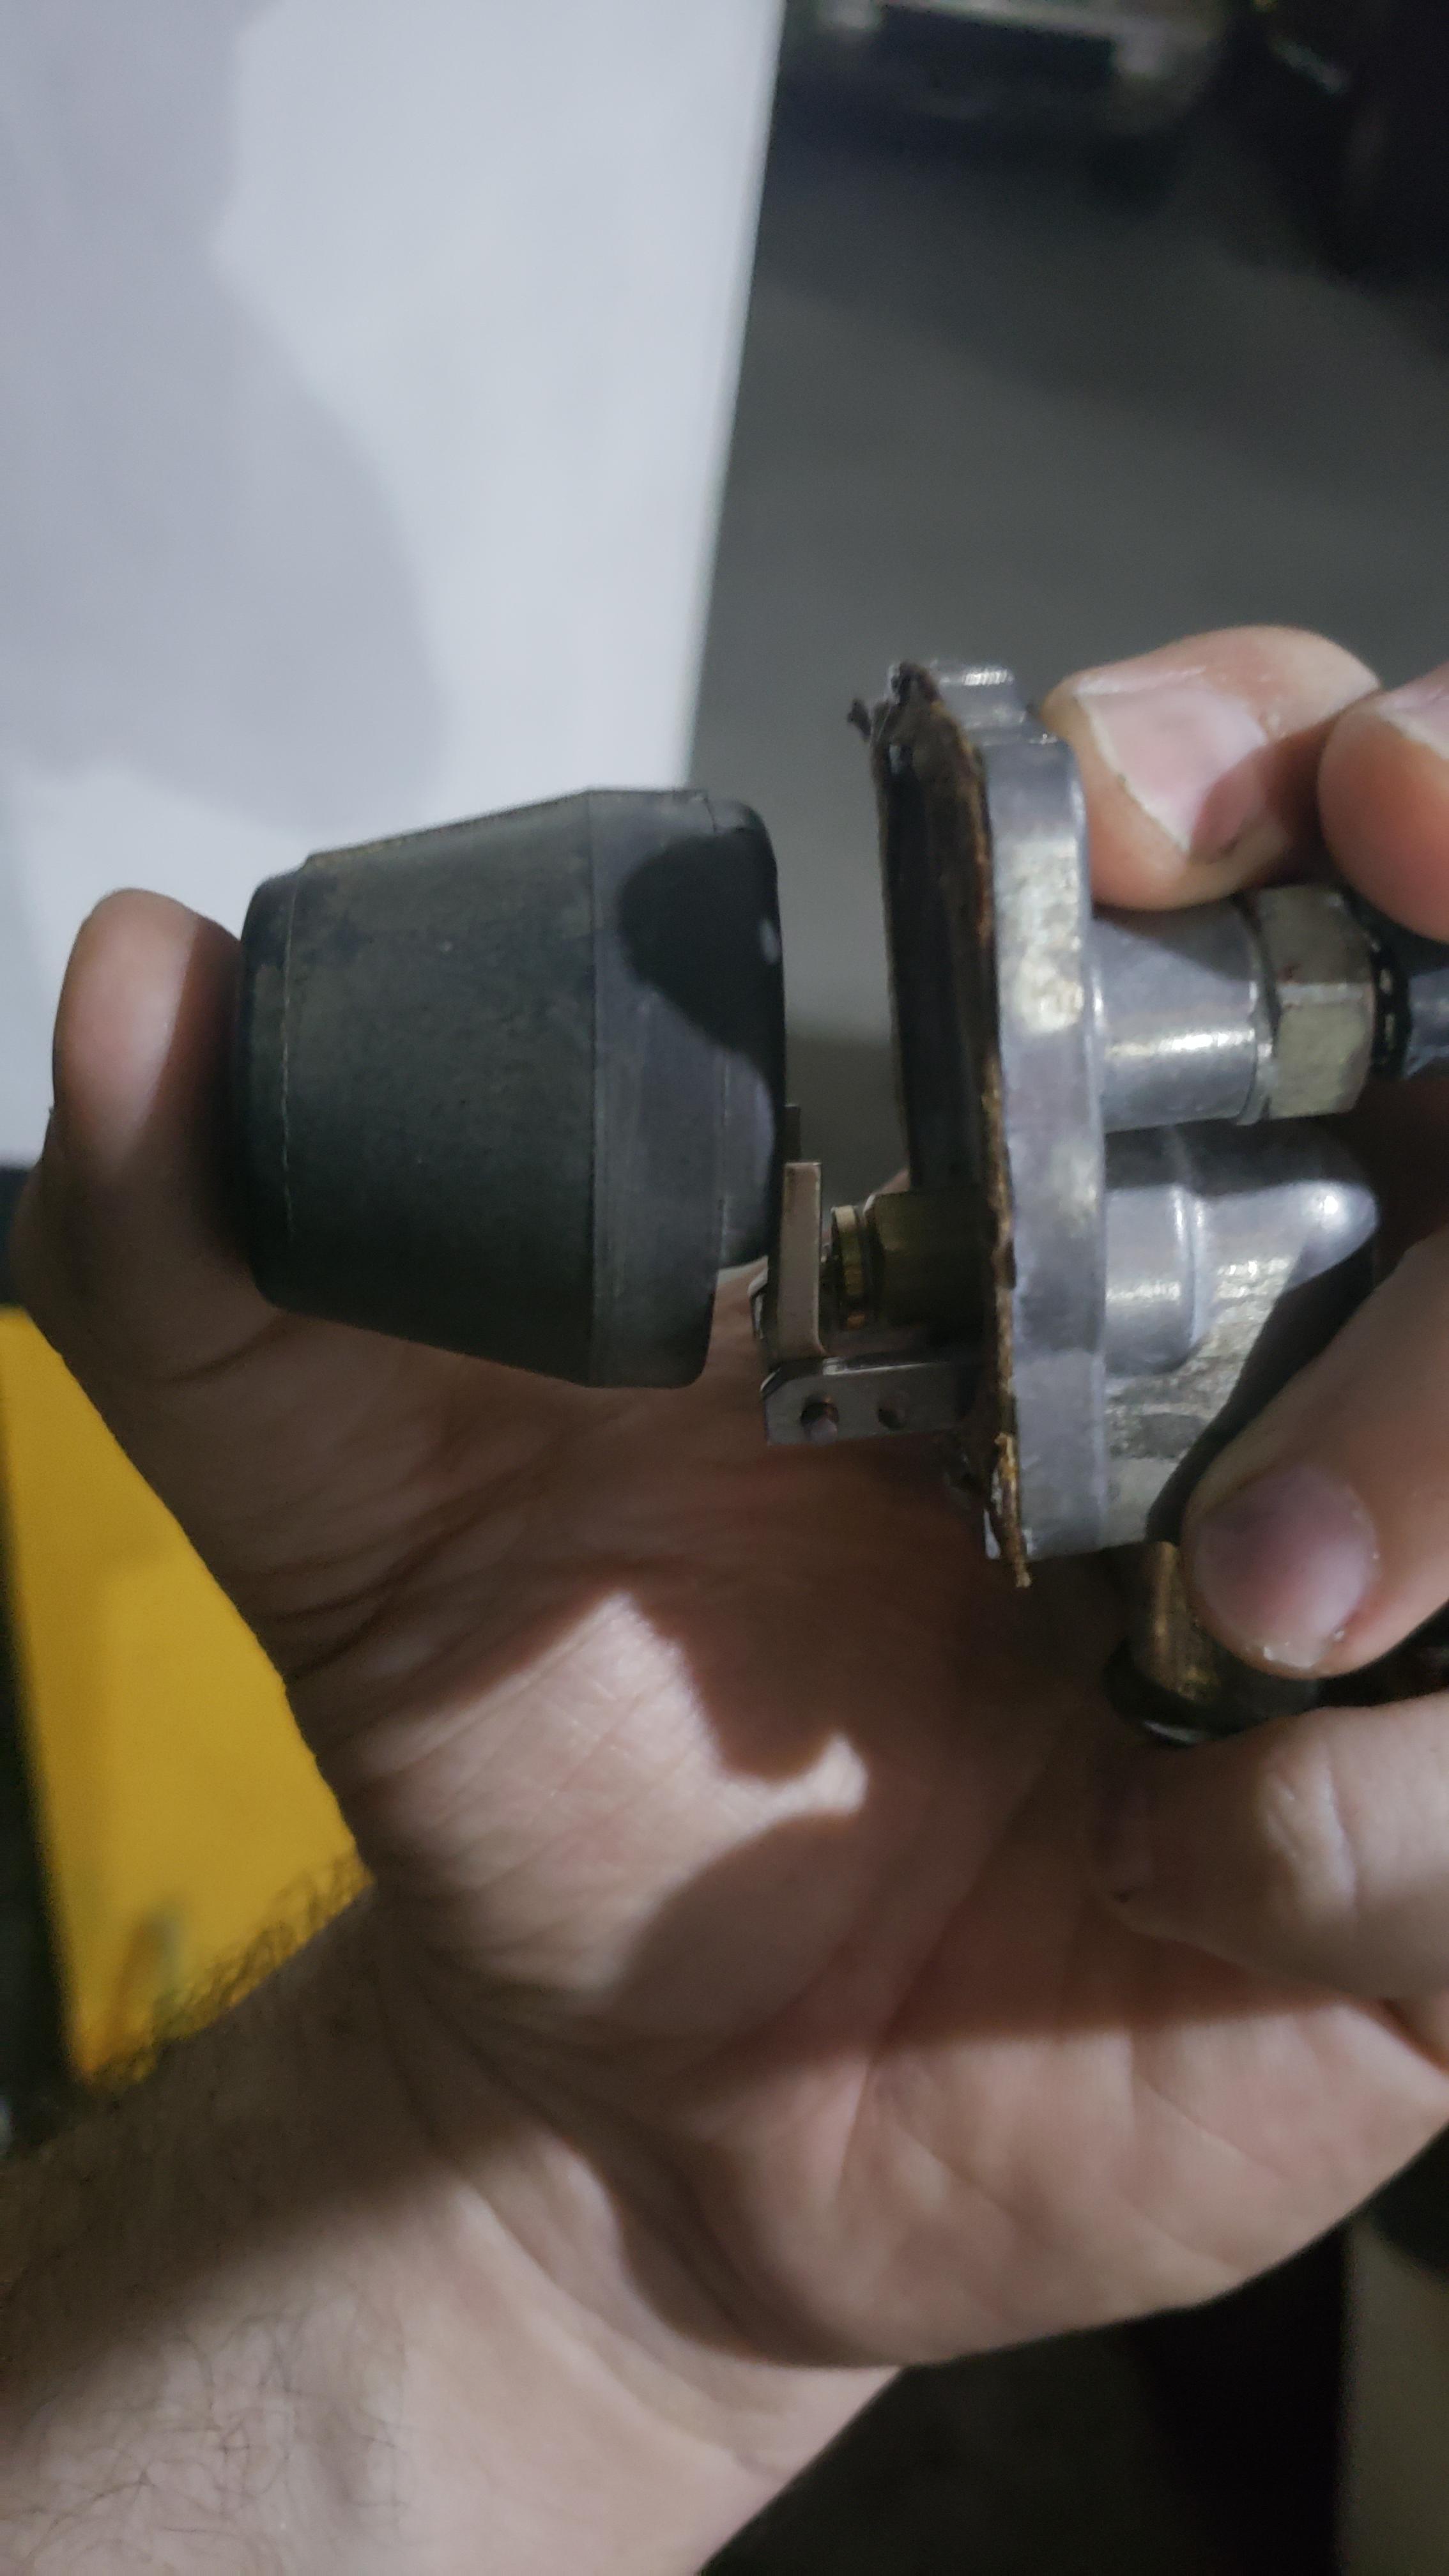
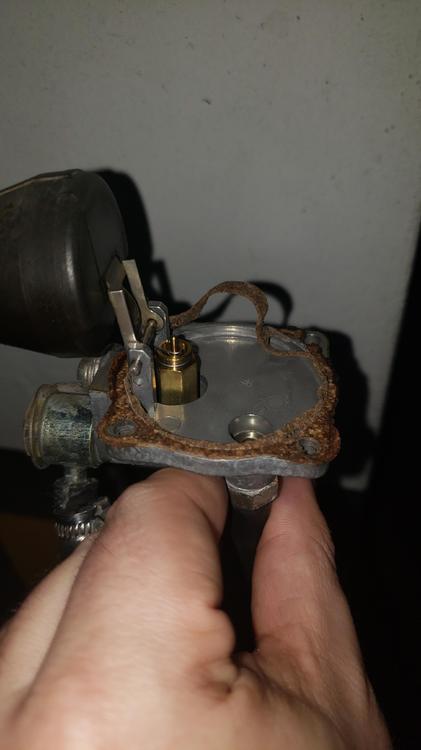
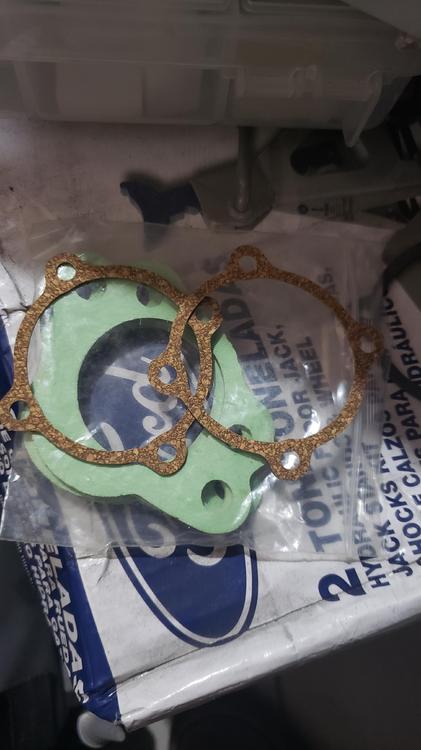
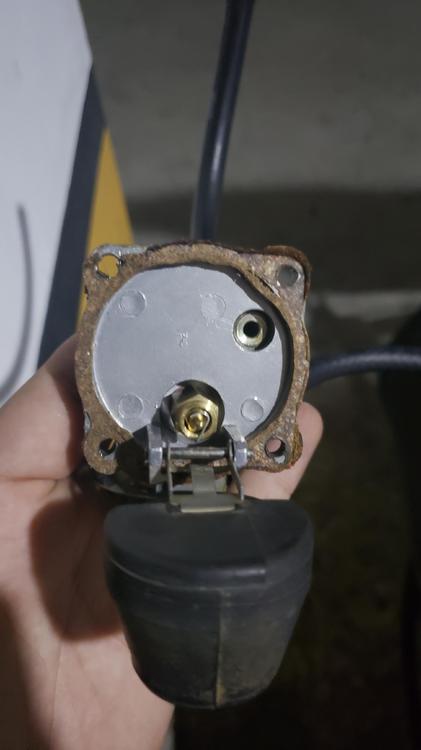
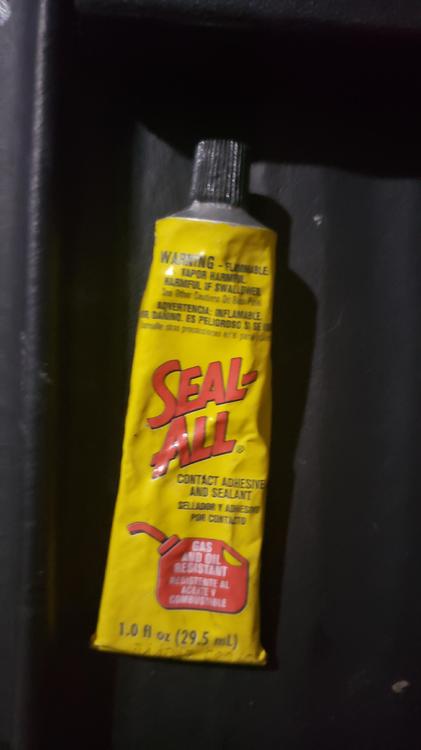
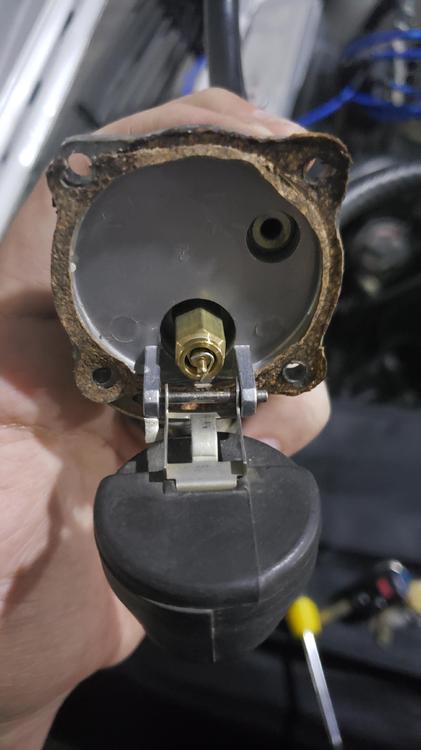
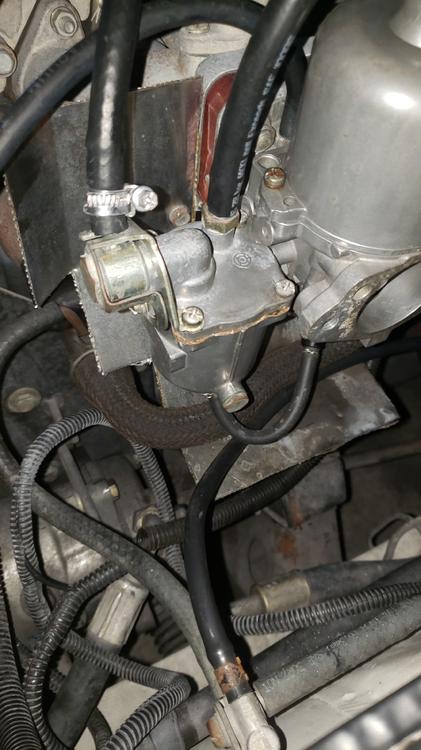
Well i guess it was indeed the gasket. I do have some spares but since i will be adjusting the floats i will only use them when they are fully adjusted. I tried a sealant to fix this one. Hope it does not leak if i decide to drive wild.

 1 point
 -
1 pointInteresting graphic https://public.flourish.studio/visualisation/1539110/embed?auto=11 point
-
A couple other nice straight sixes.....not mine. Turn the volume up! F3D64477-31A2-4671-83D6-2068CF272EEC.MOV 37FC2E77-88E5-407B-9594-A39AC8B2BEEF.MOV 53A992B8-737B-488B-AA95-5397D7DCBF30.MOV 13E87004-14B7-4637-AB77-AC2B5C335298.MOV1 point
-
1 pointYou're right. In this case, nuts is a Sociopath and an extreme Narcissist all rolled into one. In the 1830s this disorder was called "Moral Insanity".1 point
-
1 pointThat guy is nuts! Just scolded some girl for being nasty. Hello pot, this is kettle and you're black as s h i t. He gets off on calling detractors stupid but hateful nicknames.1 point
-
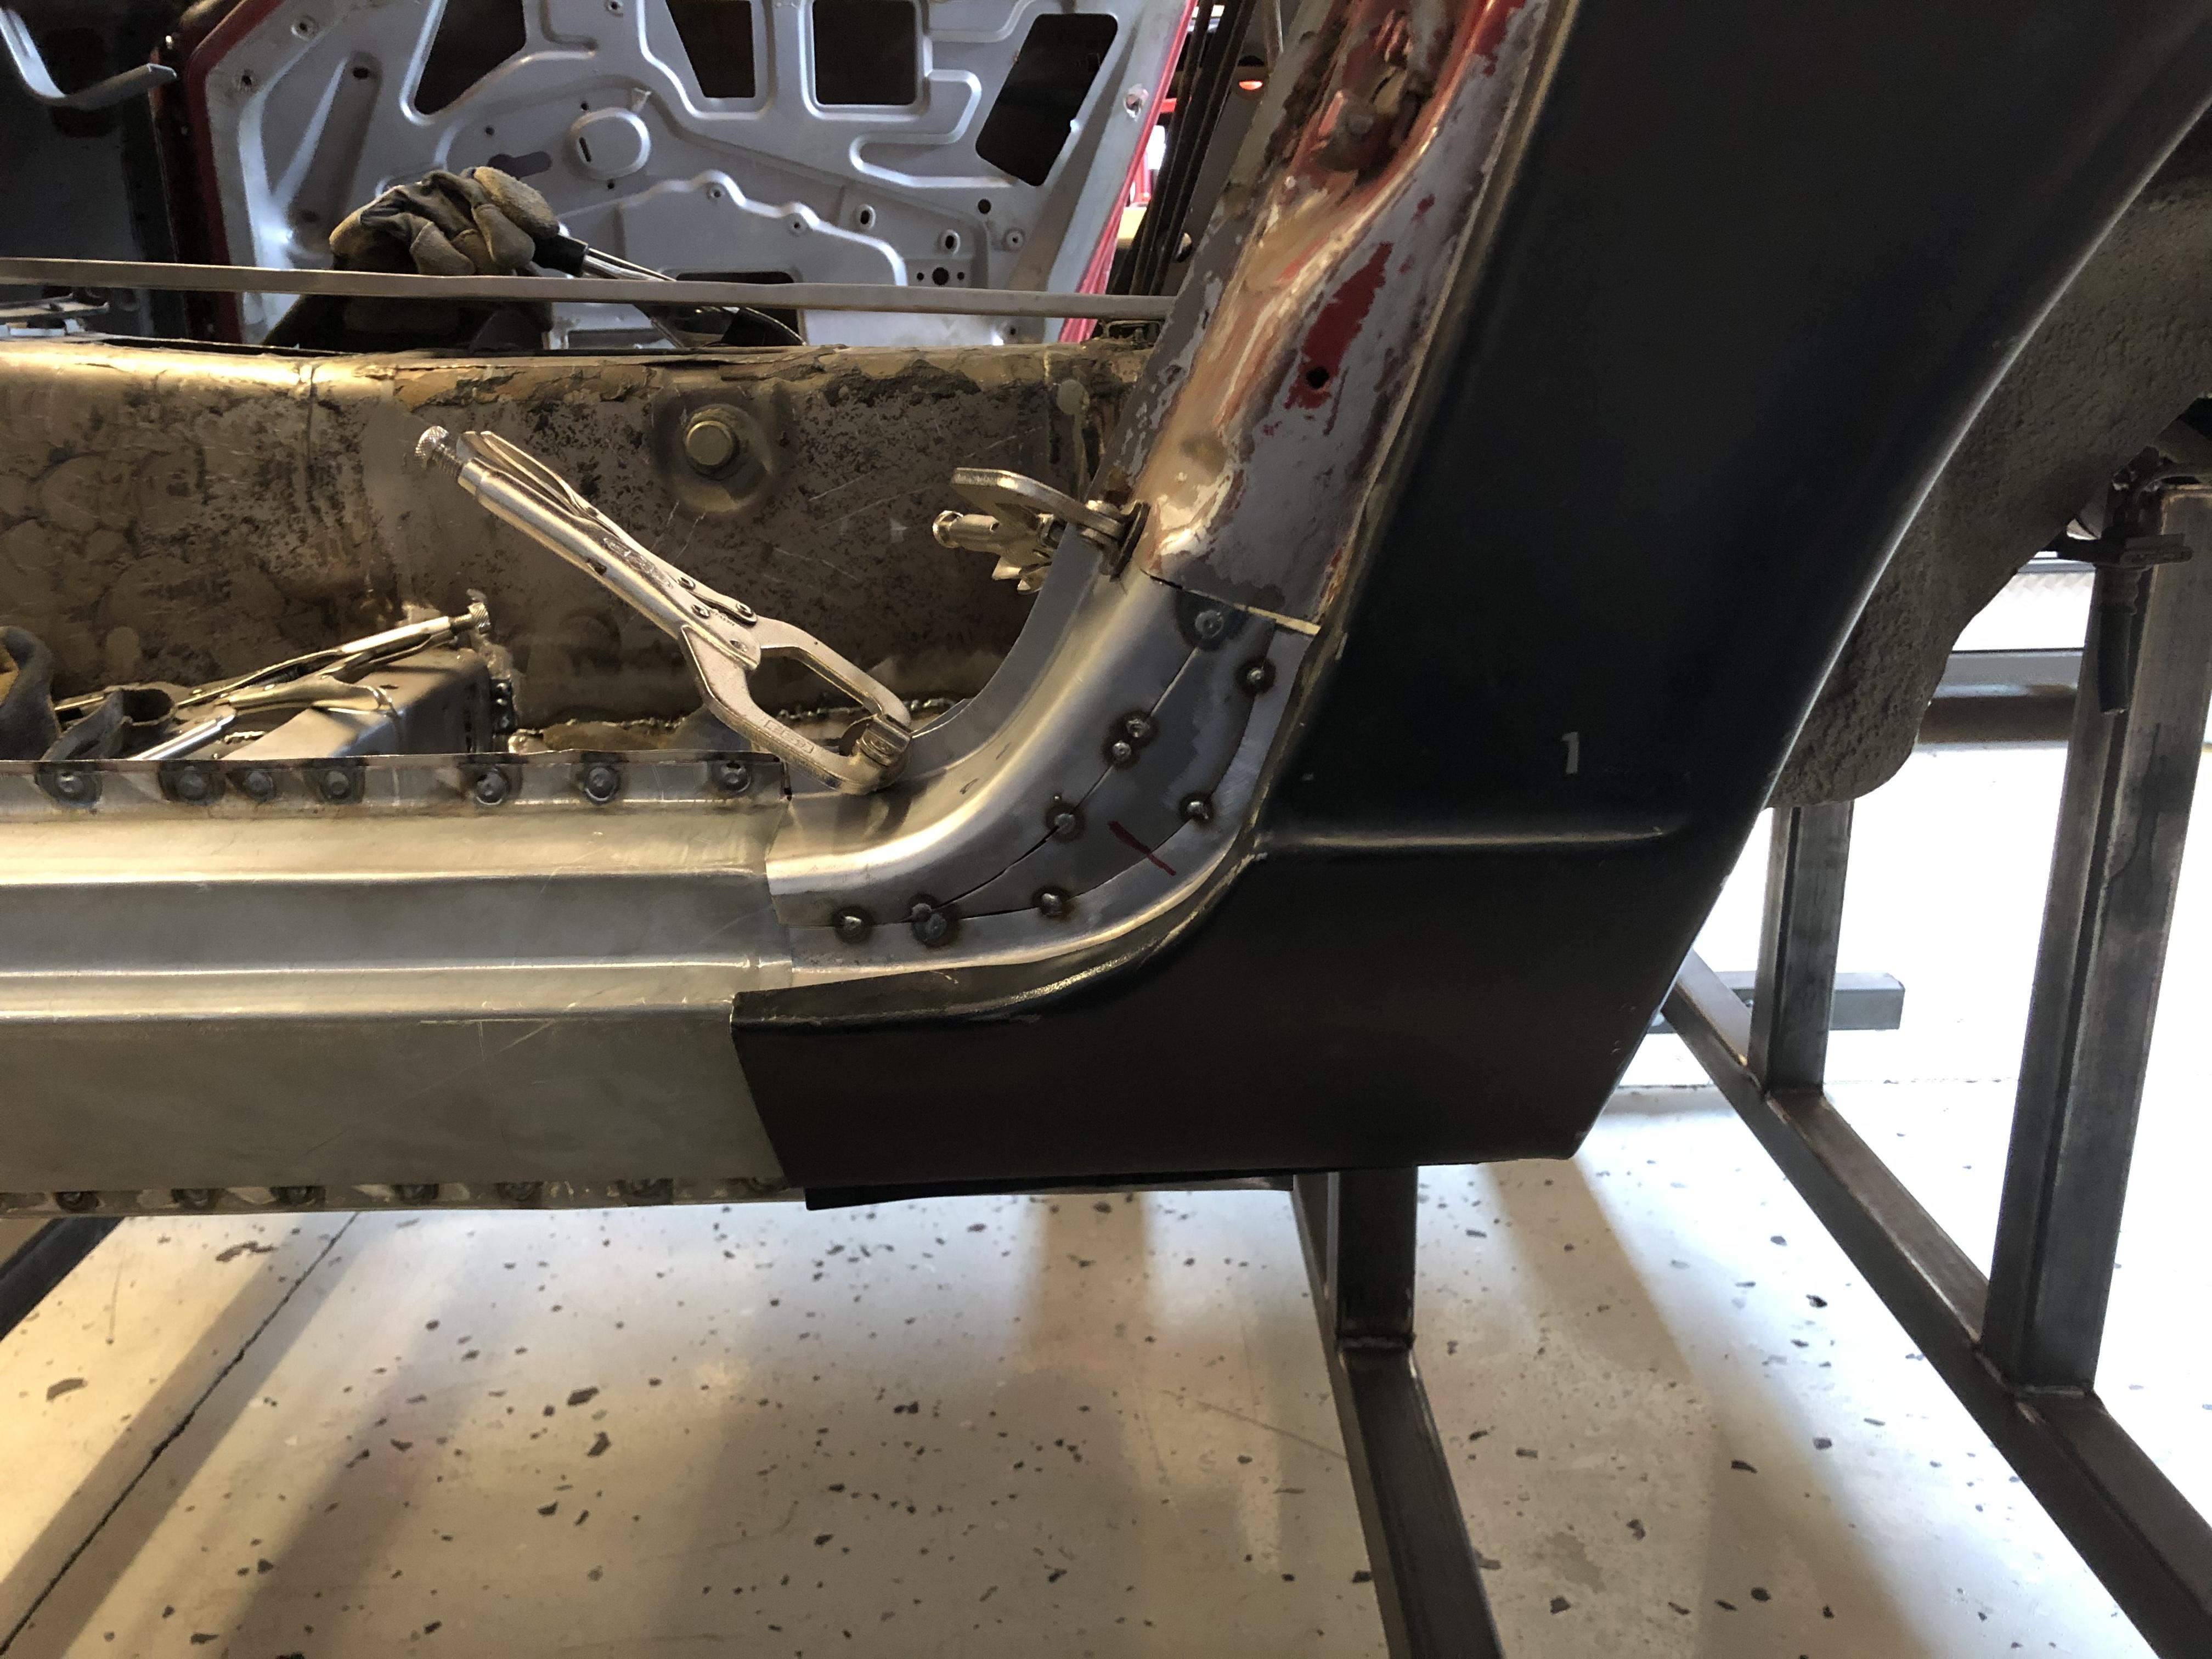
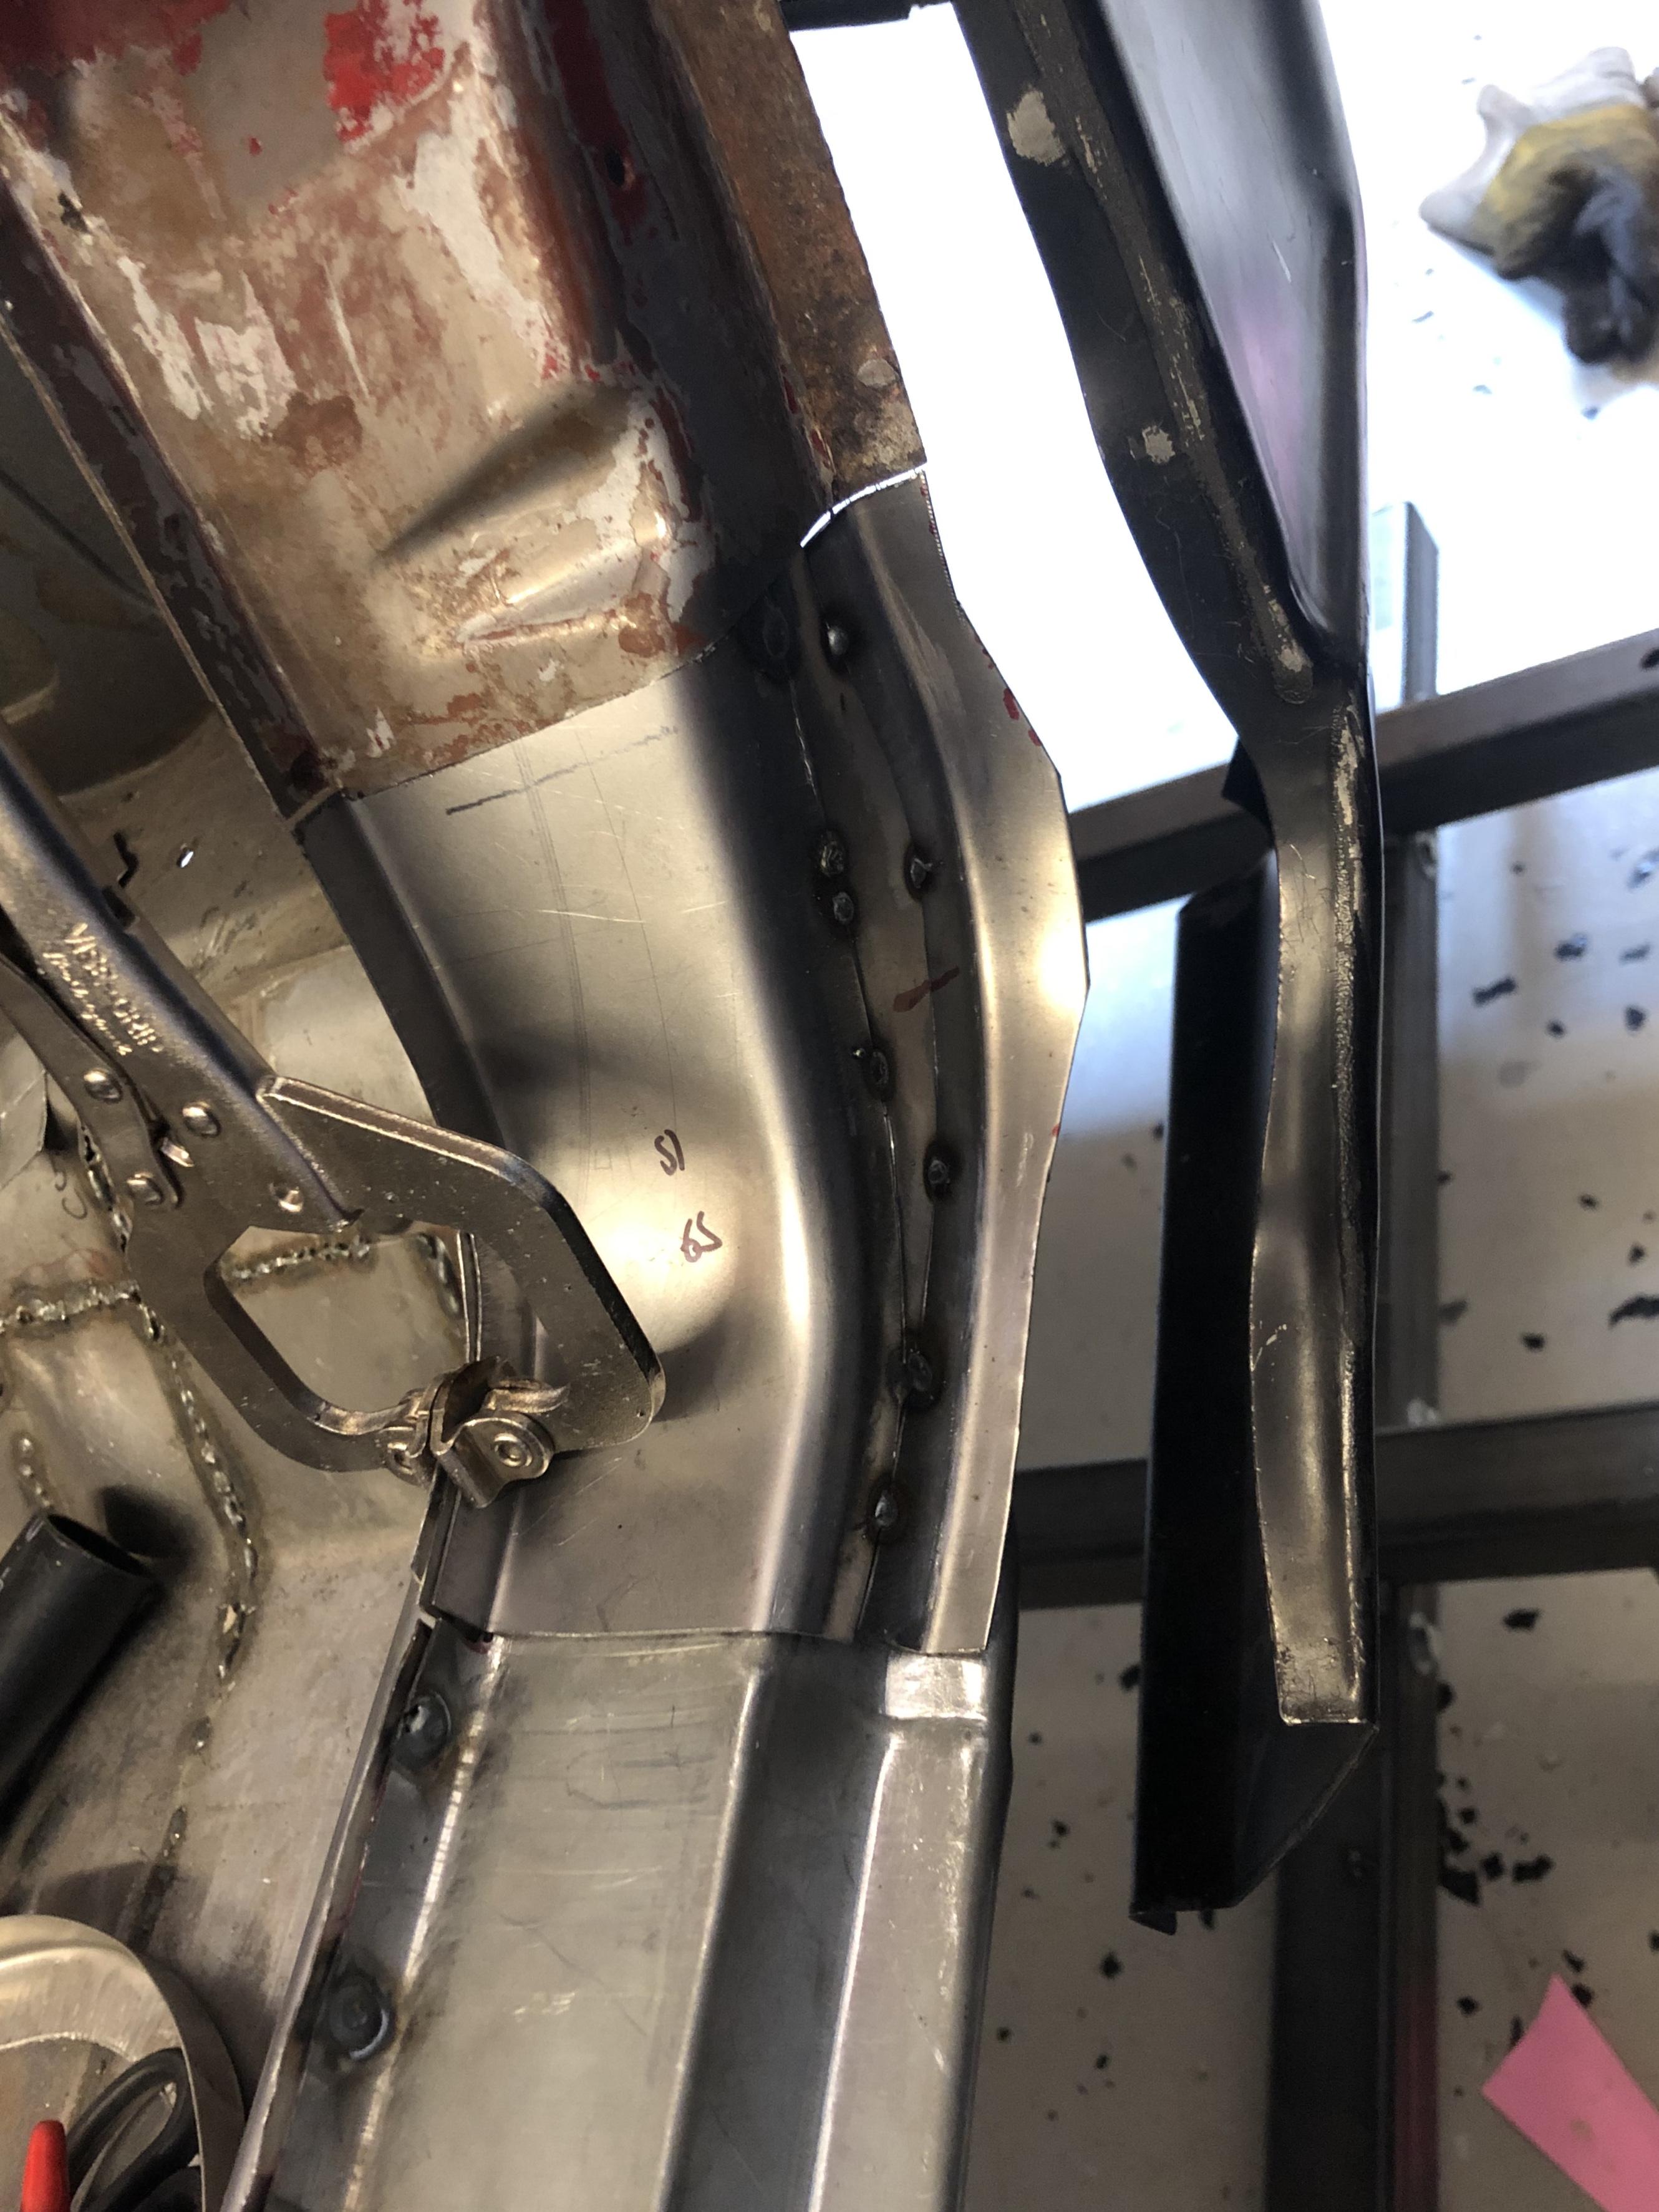
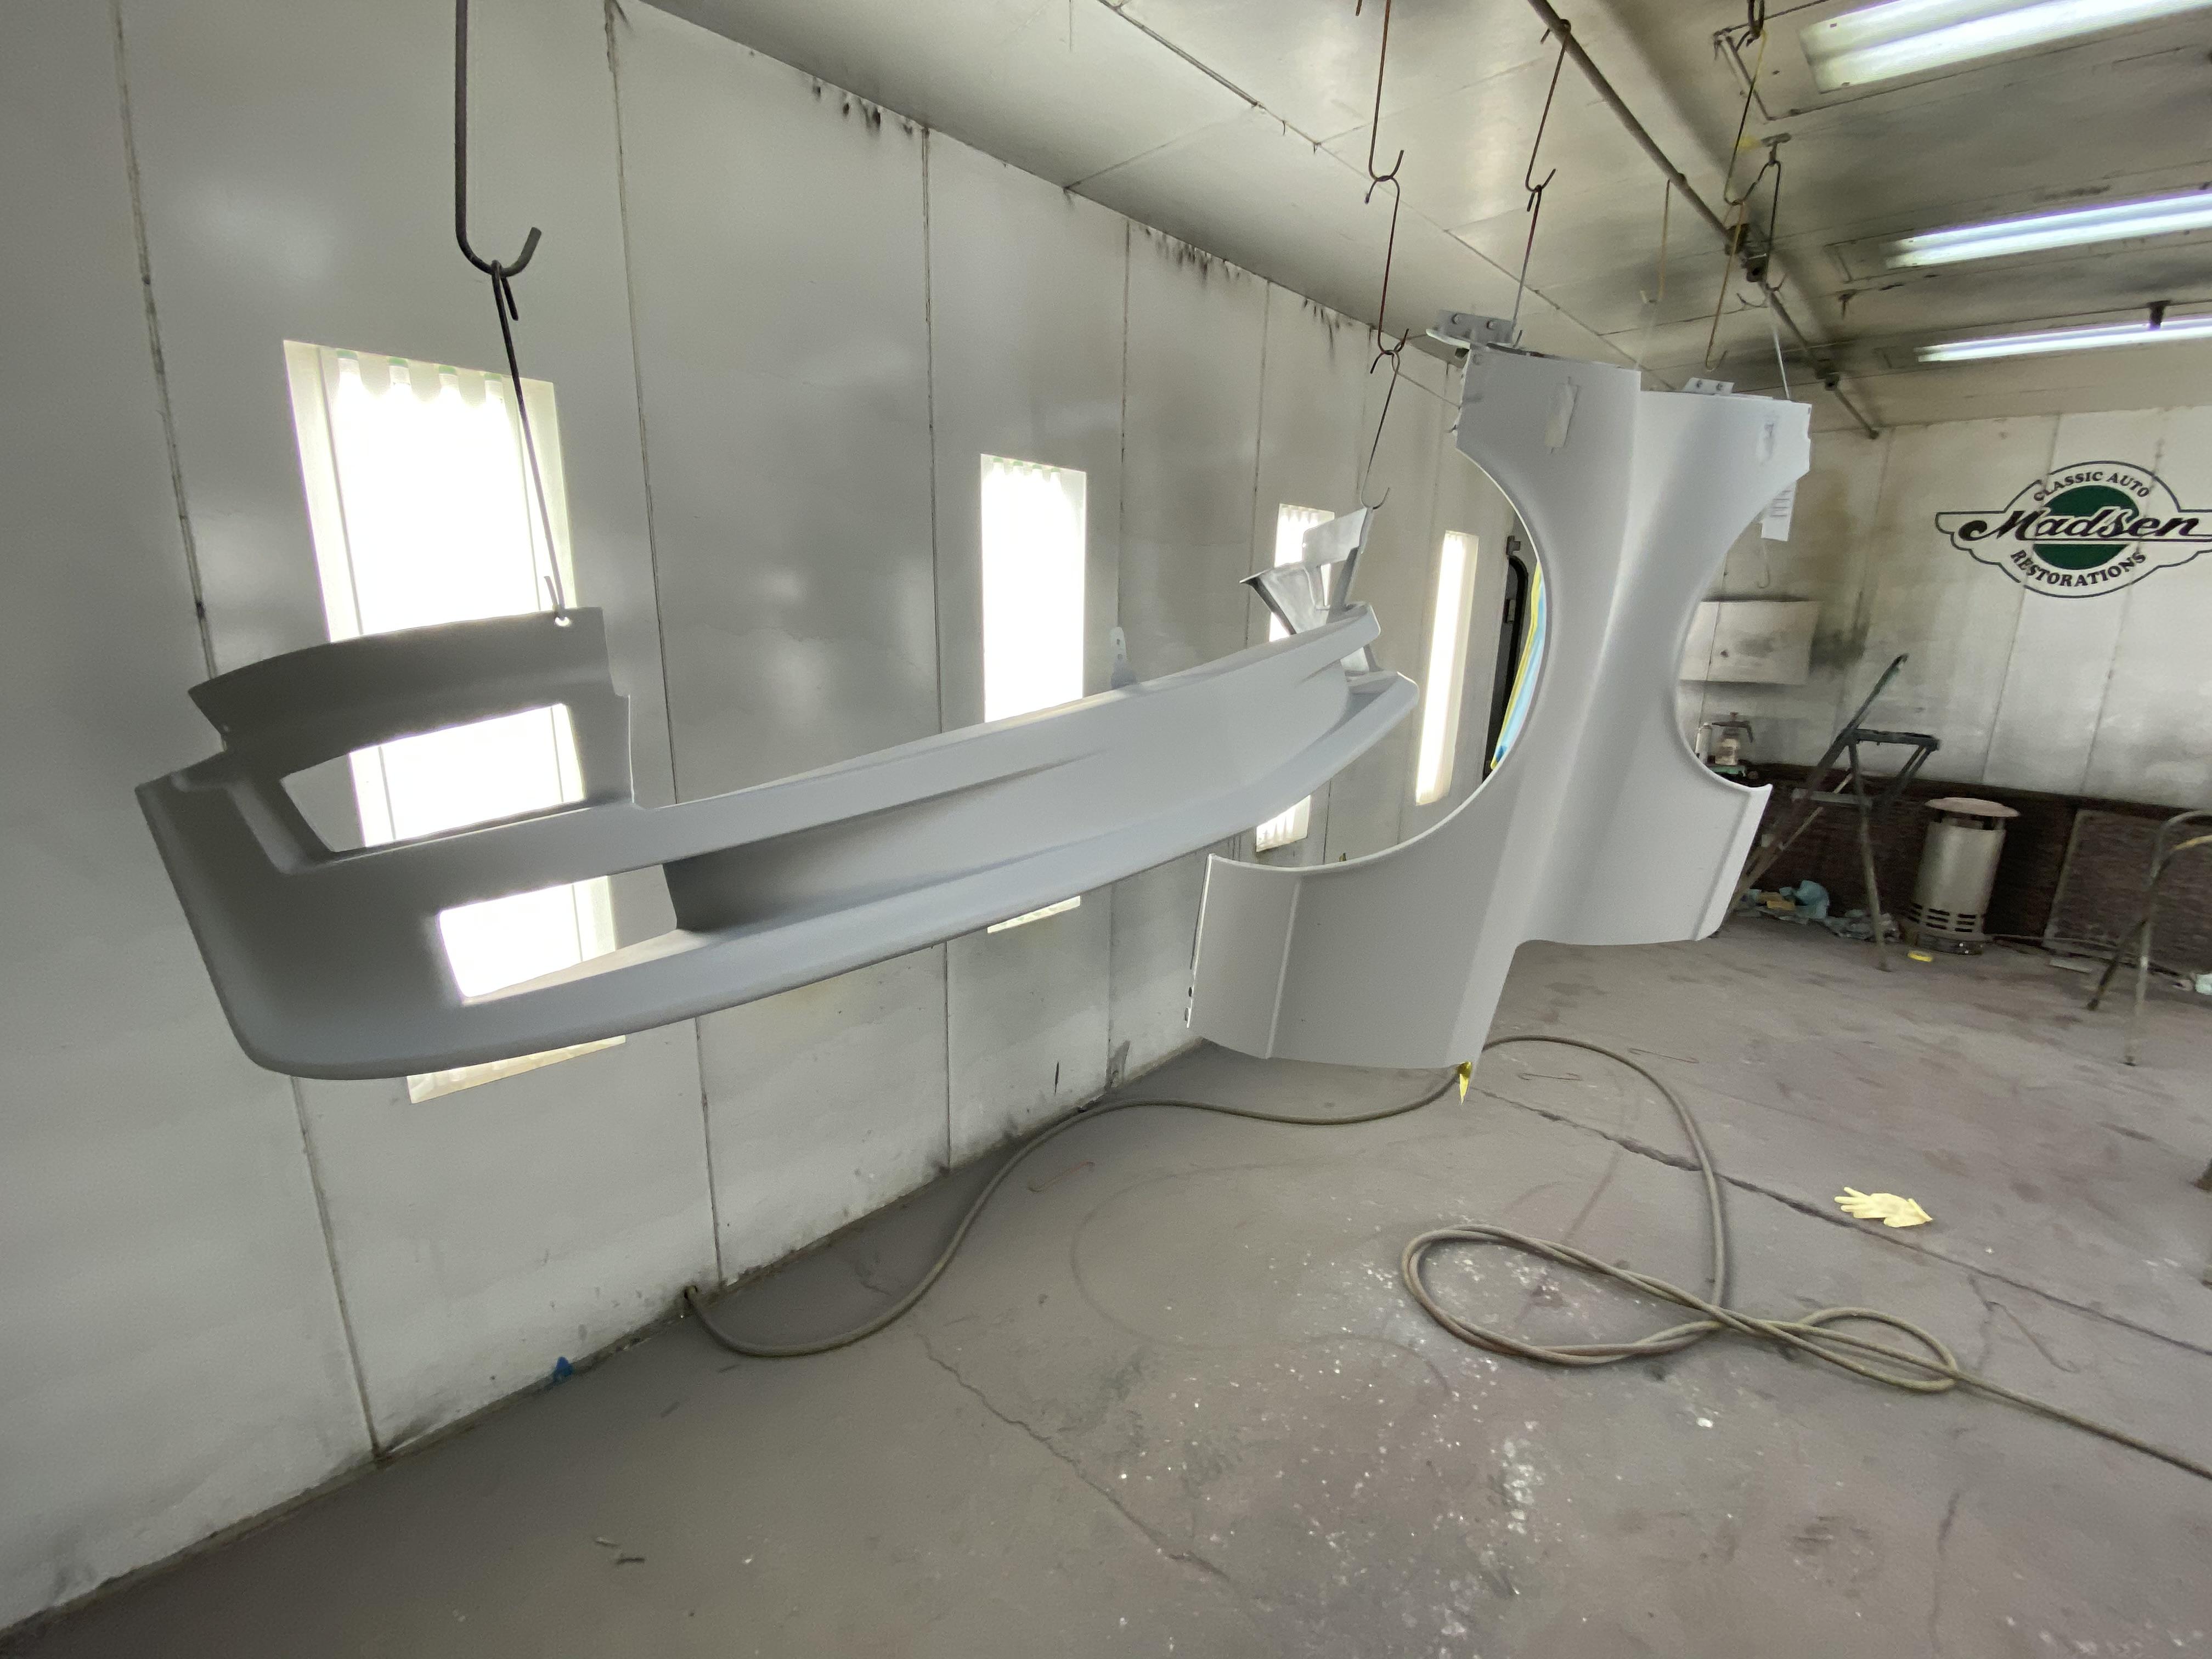
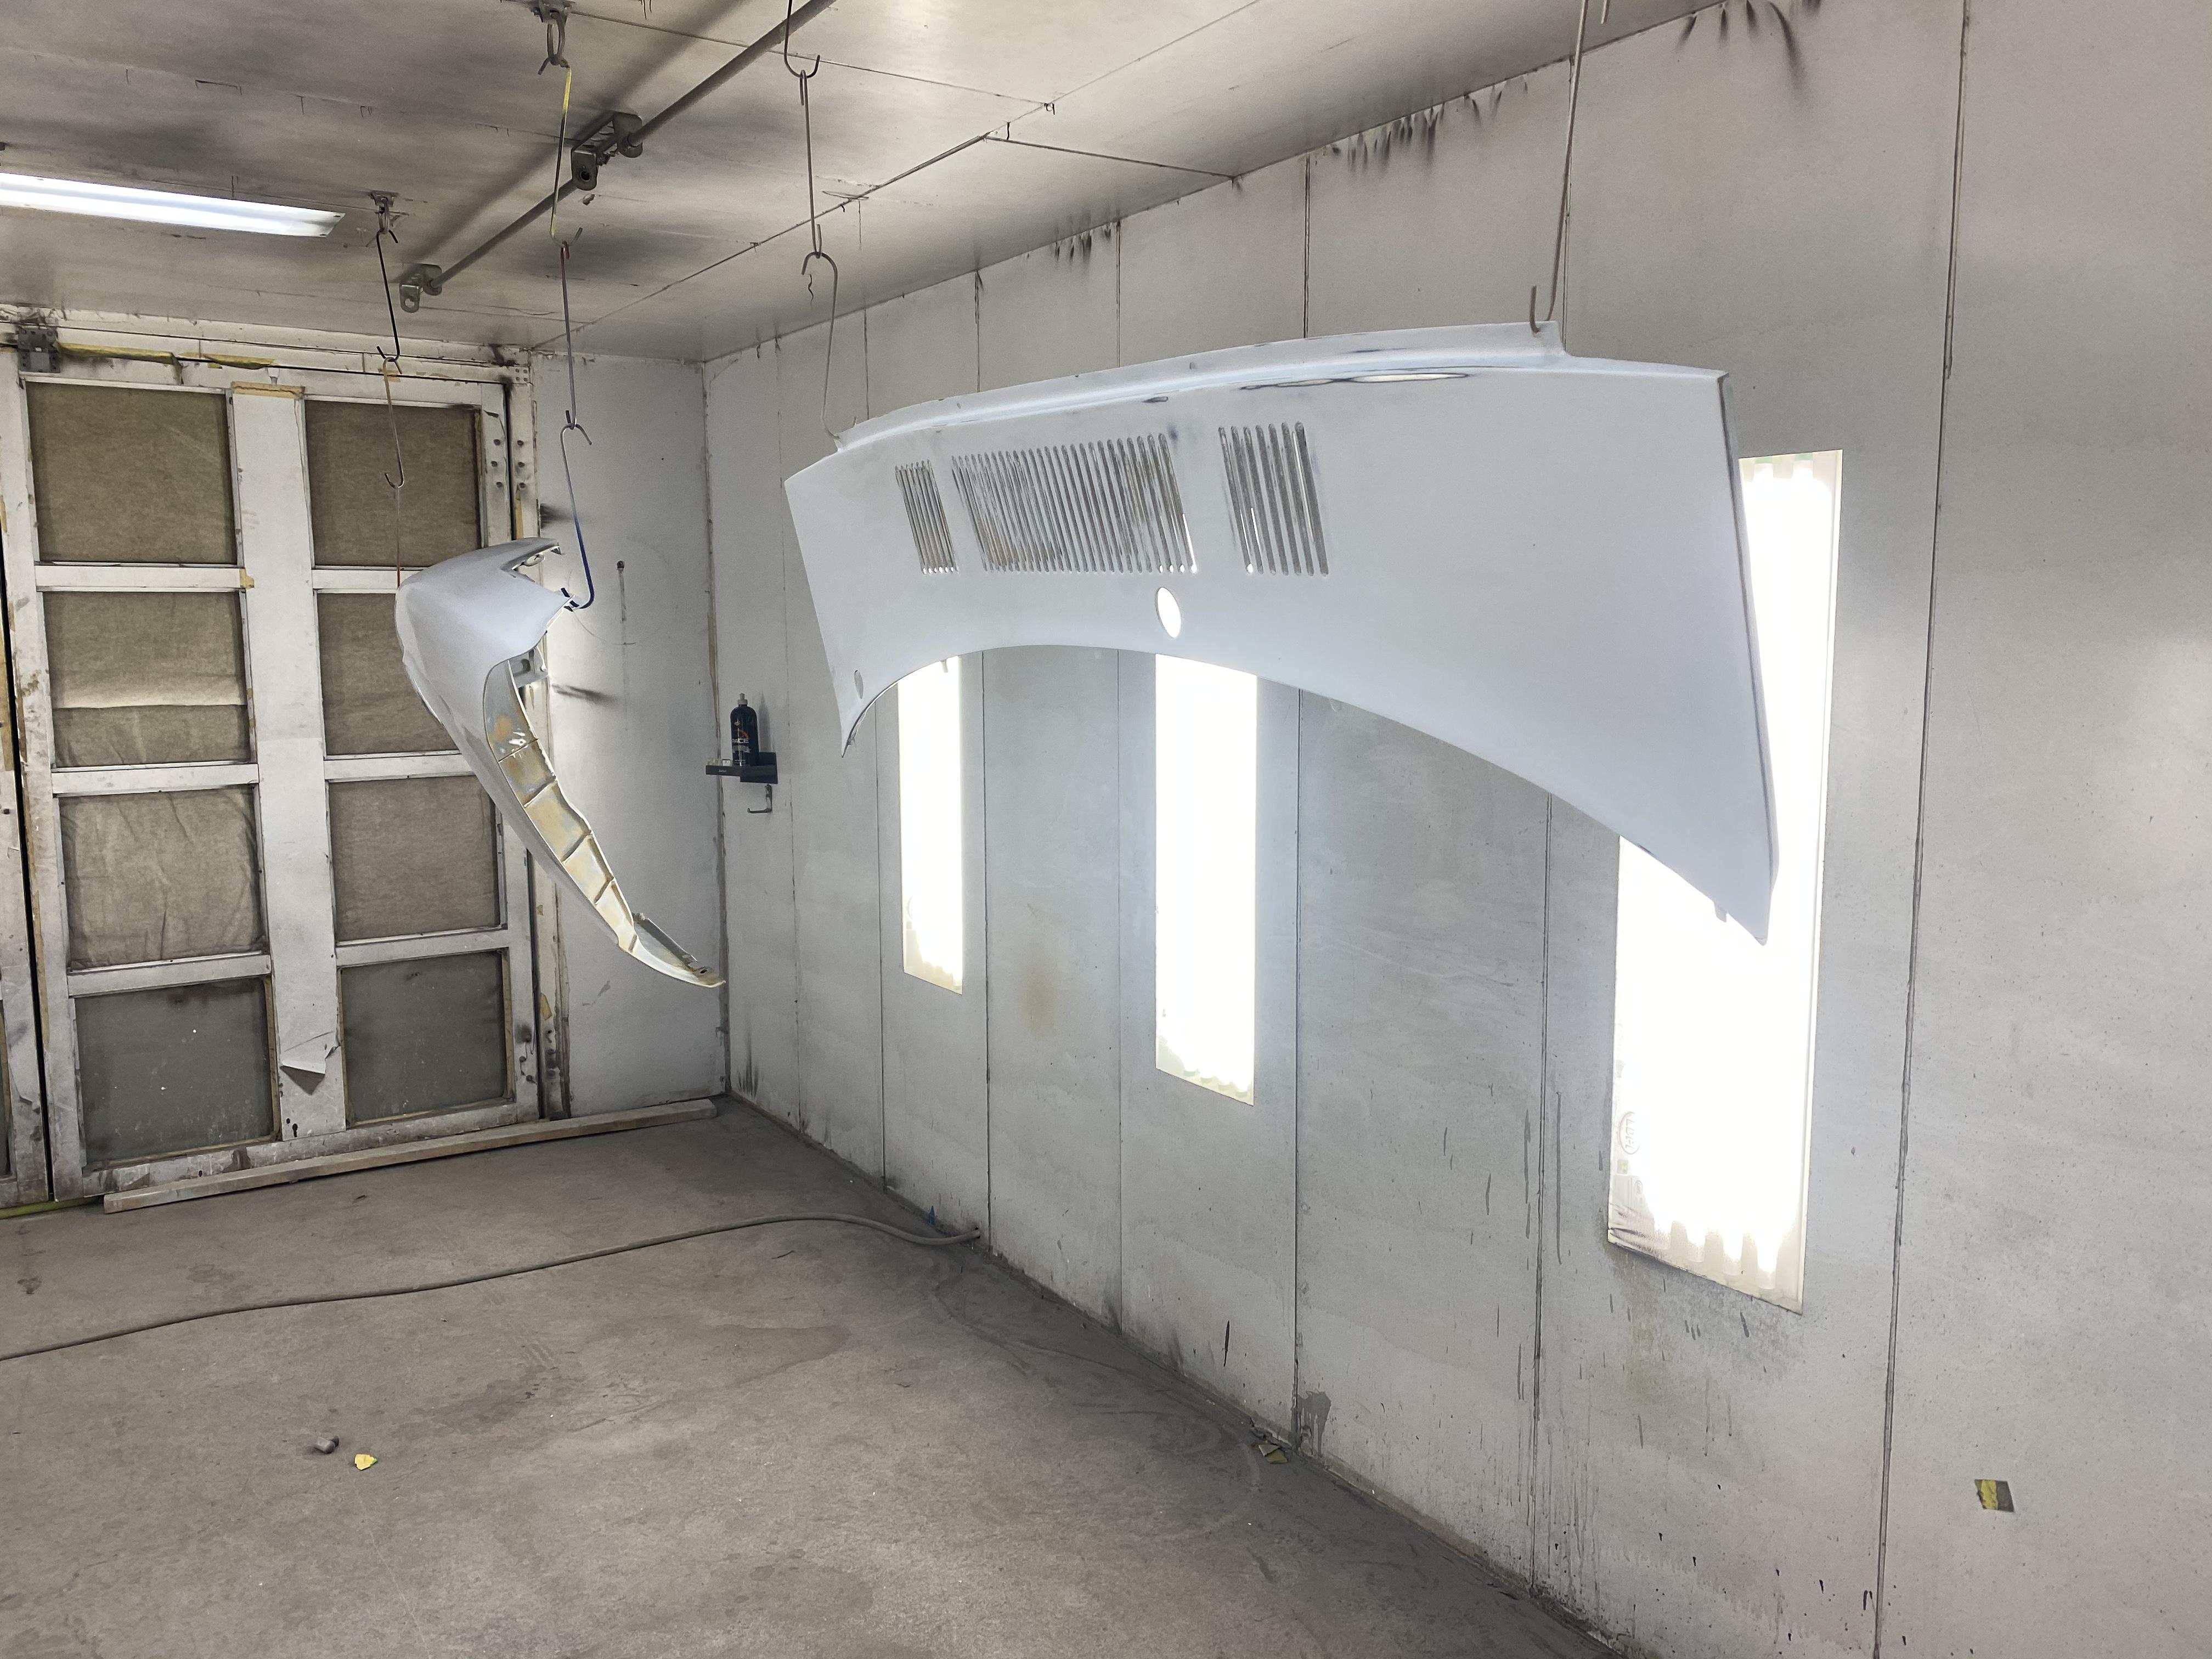
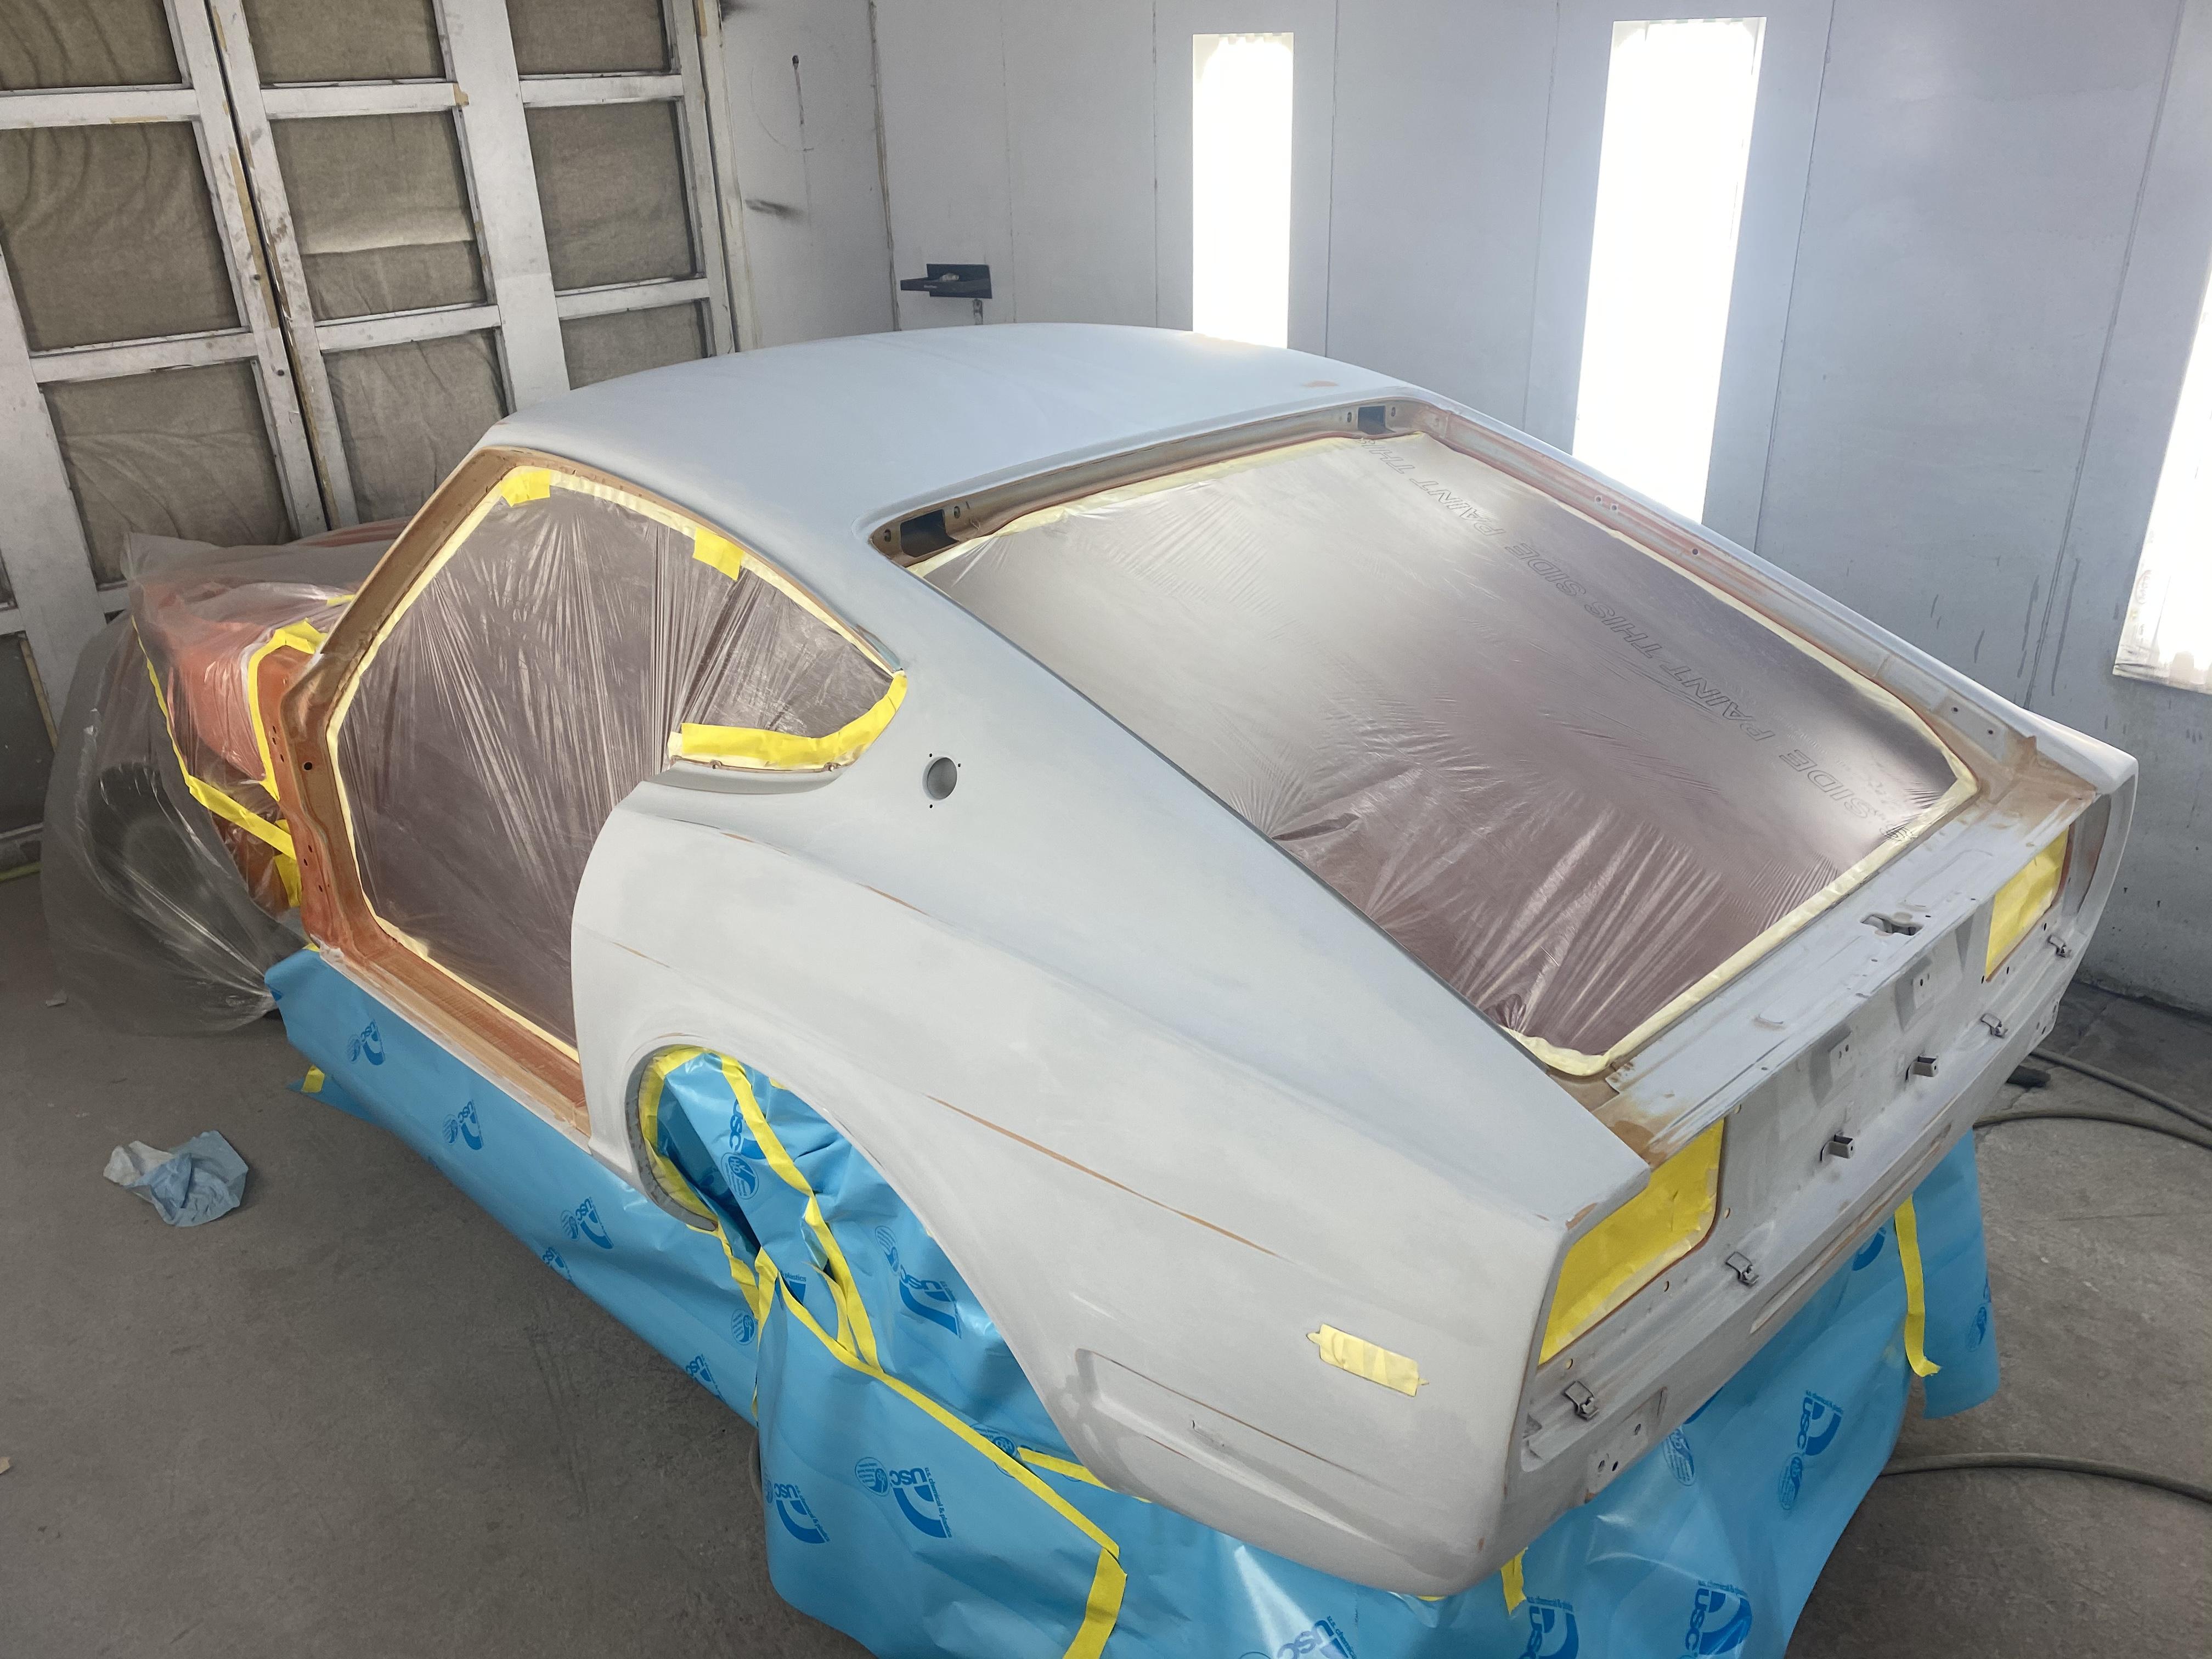
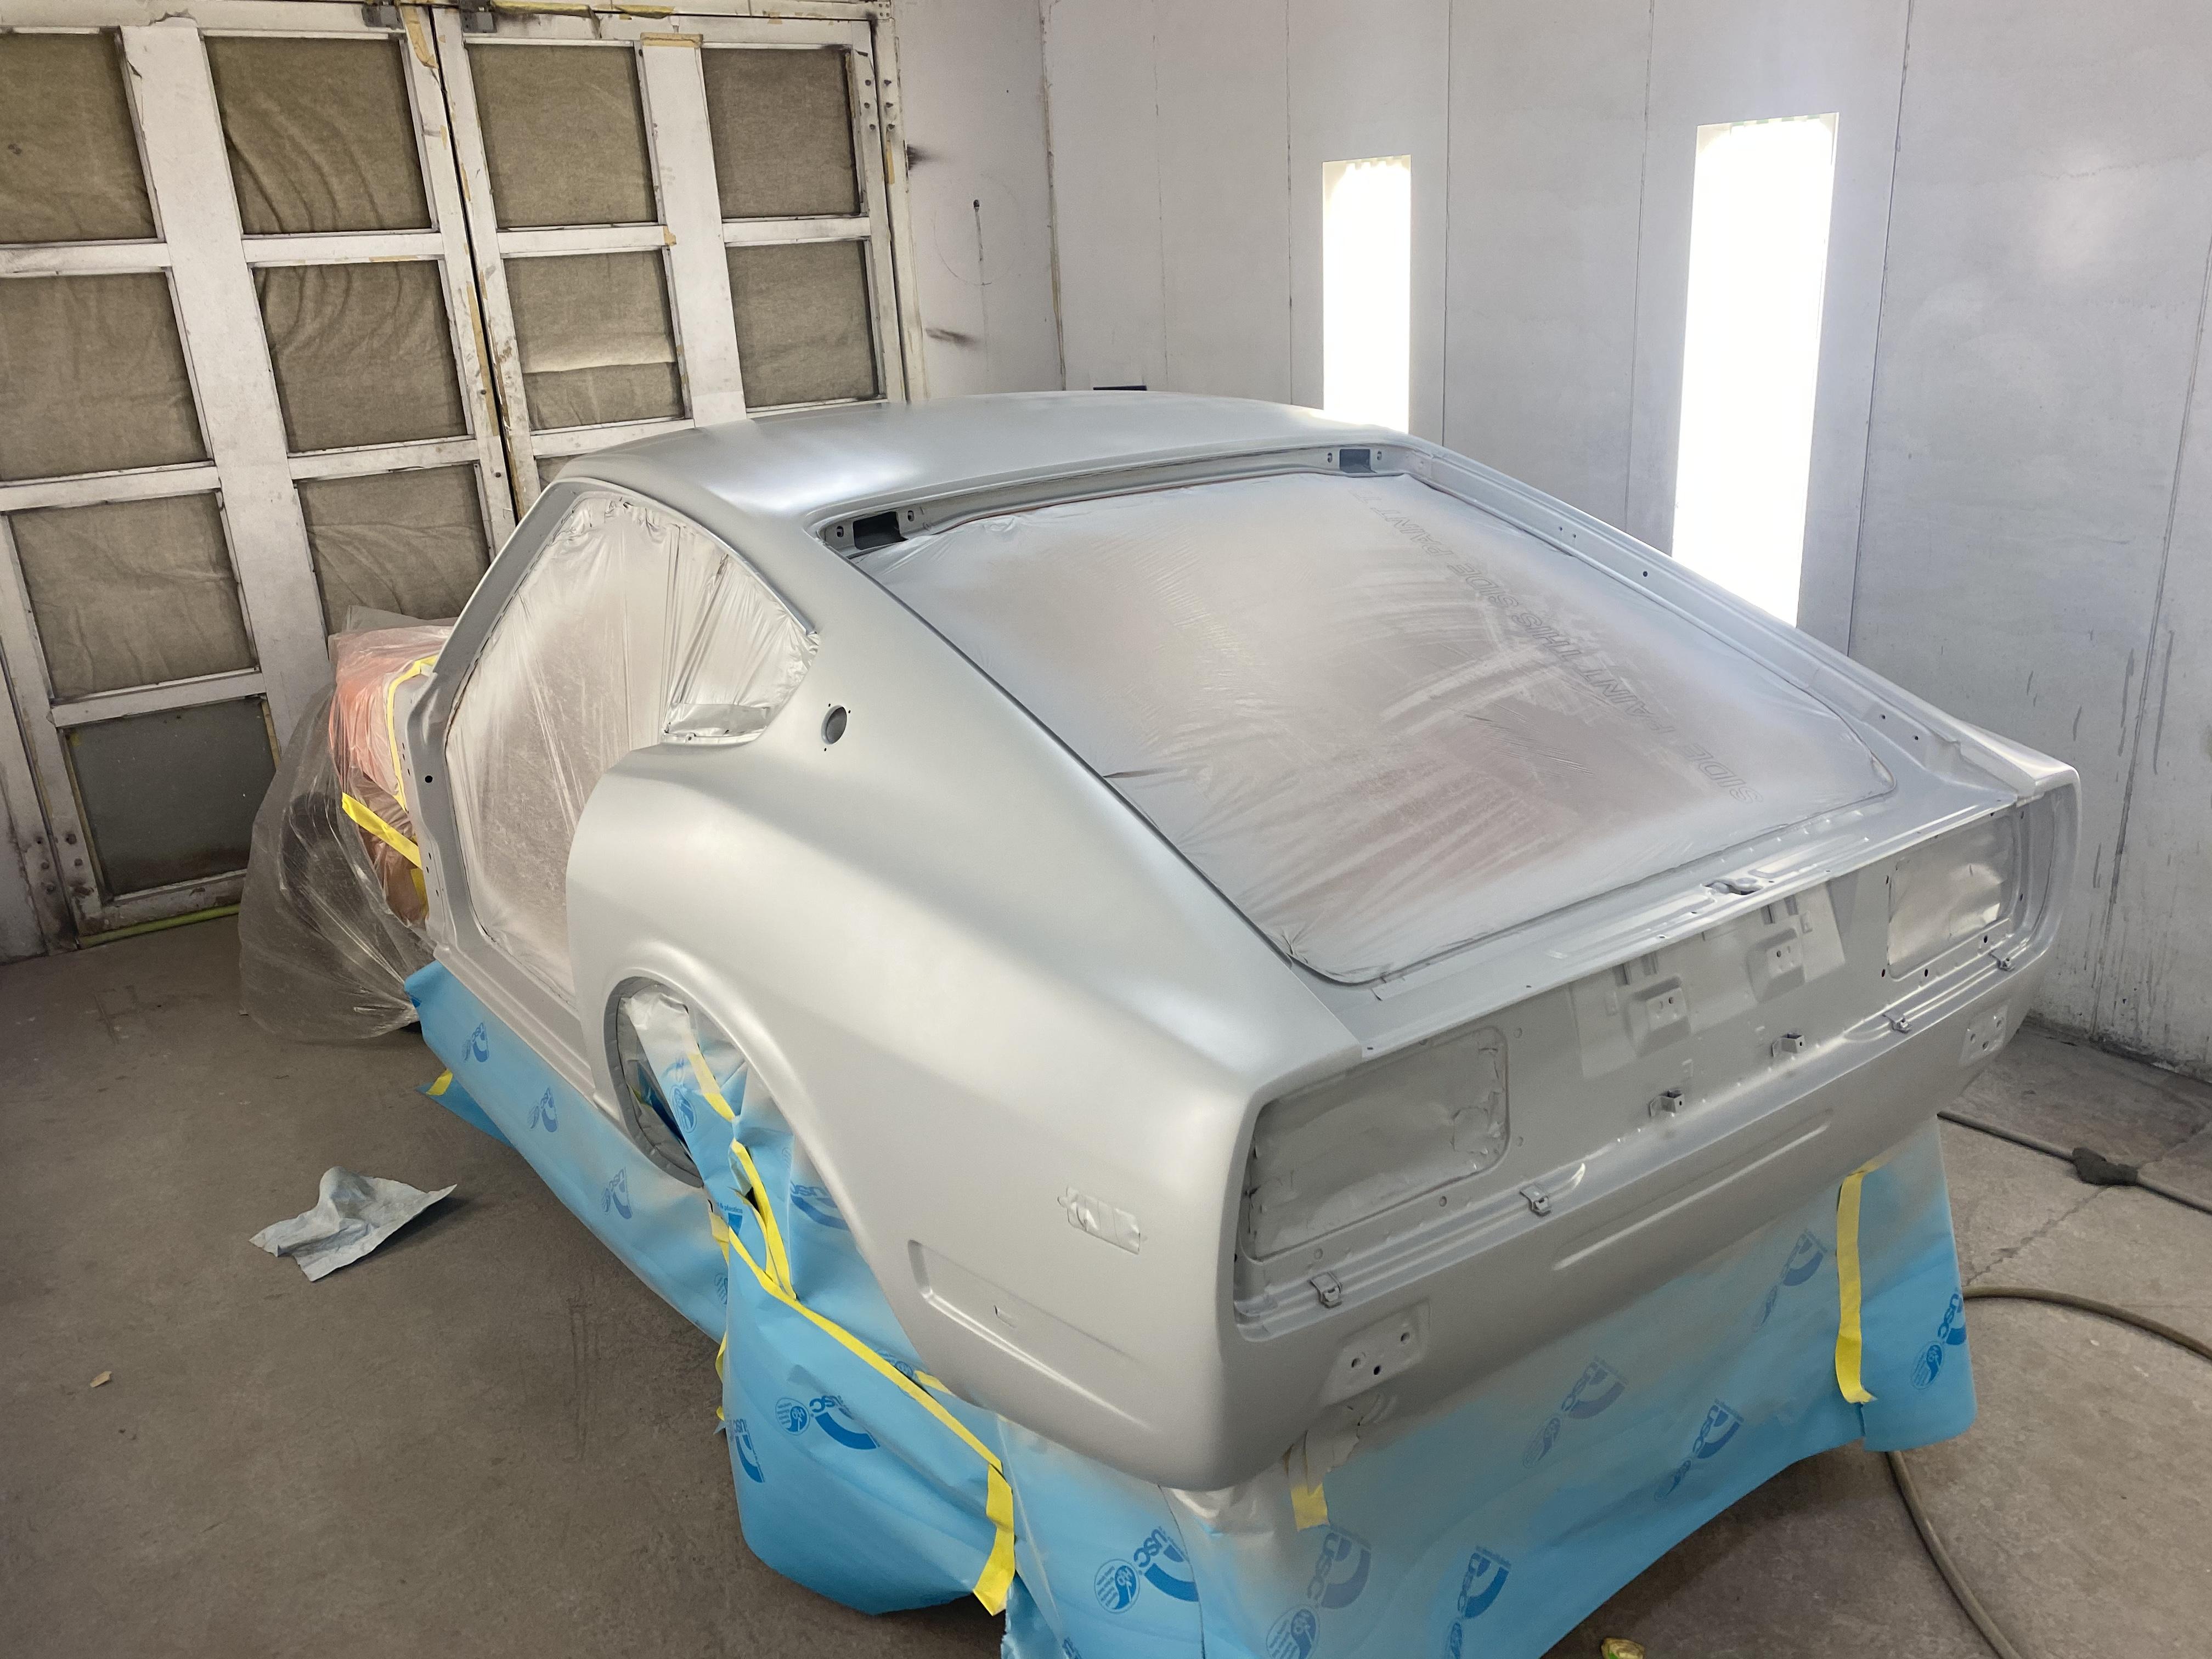
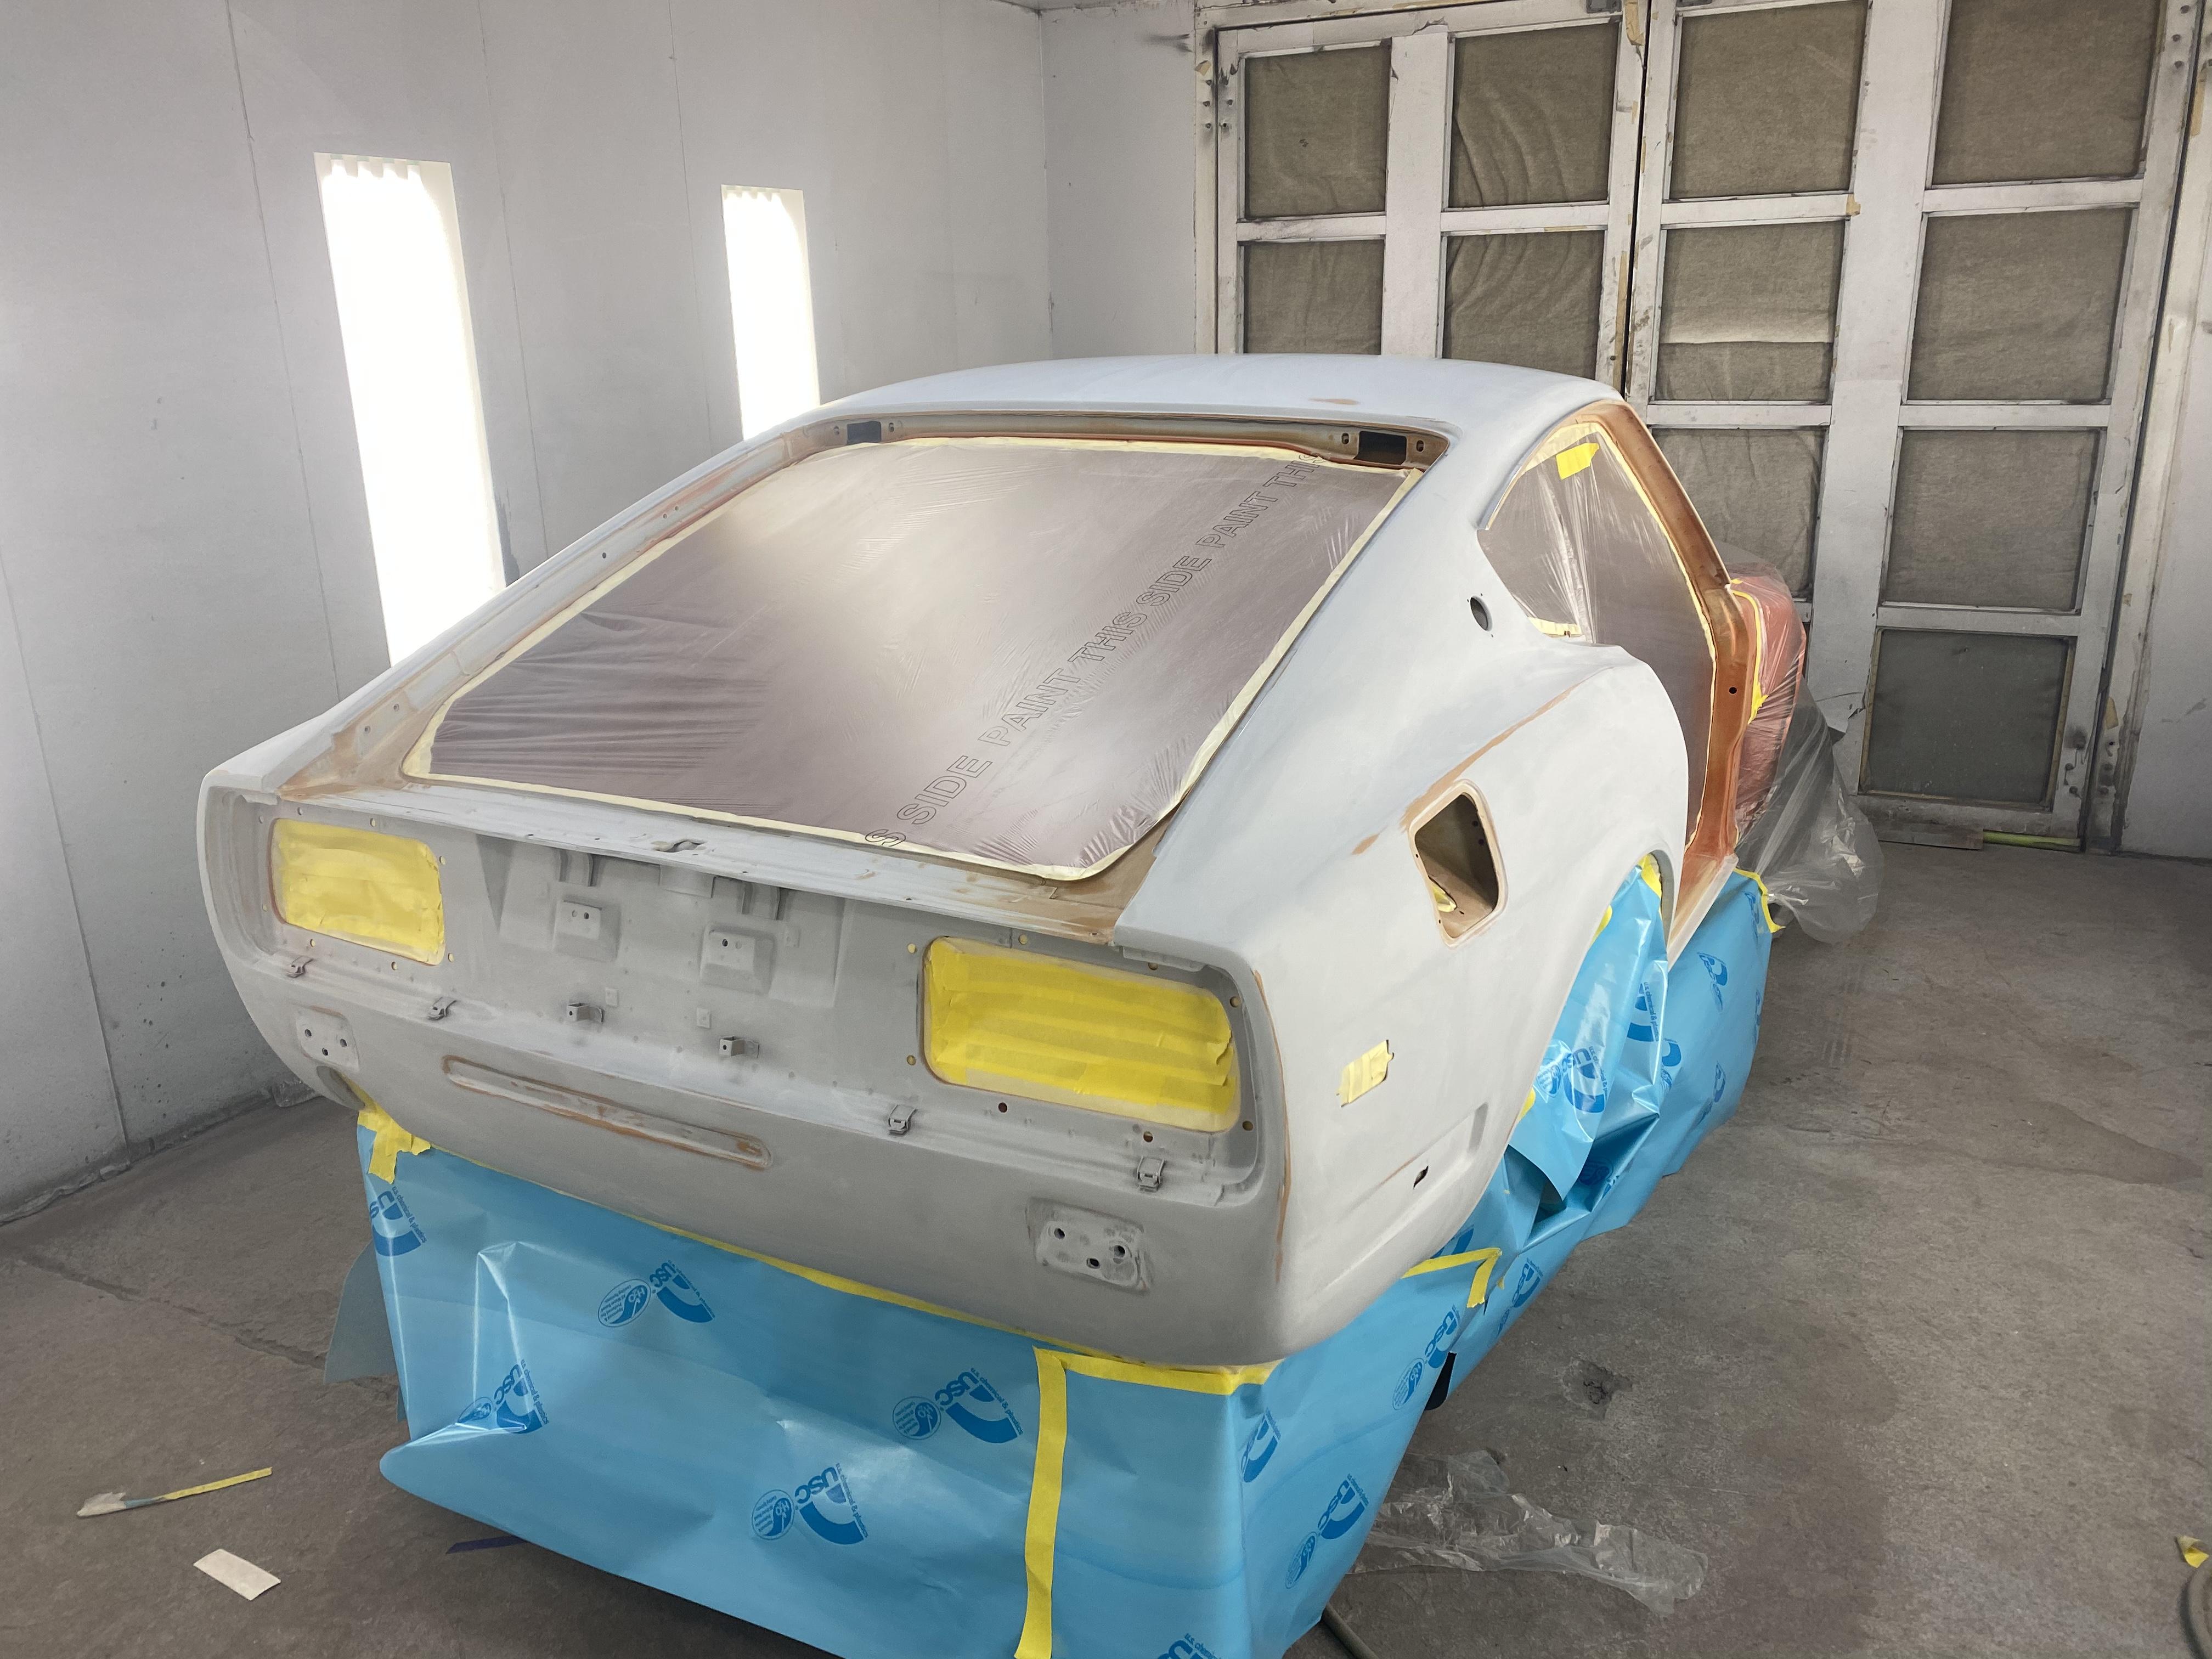
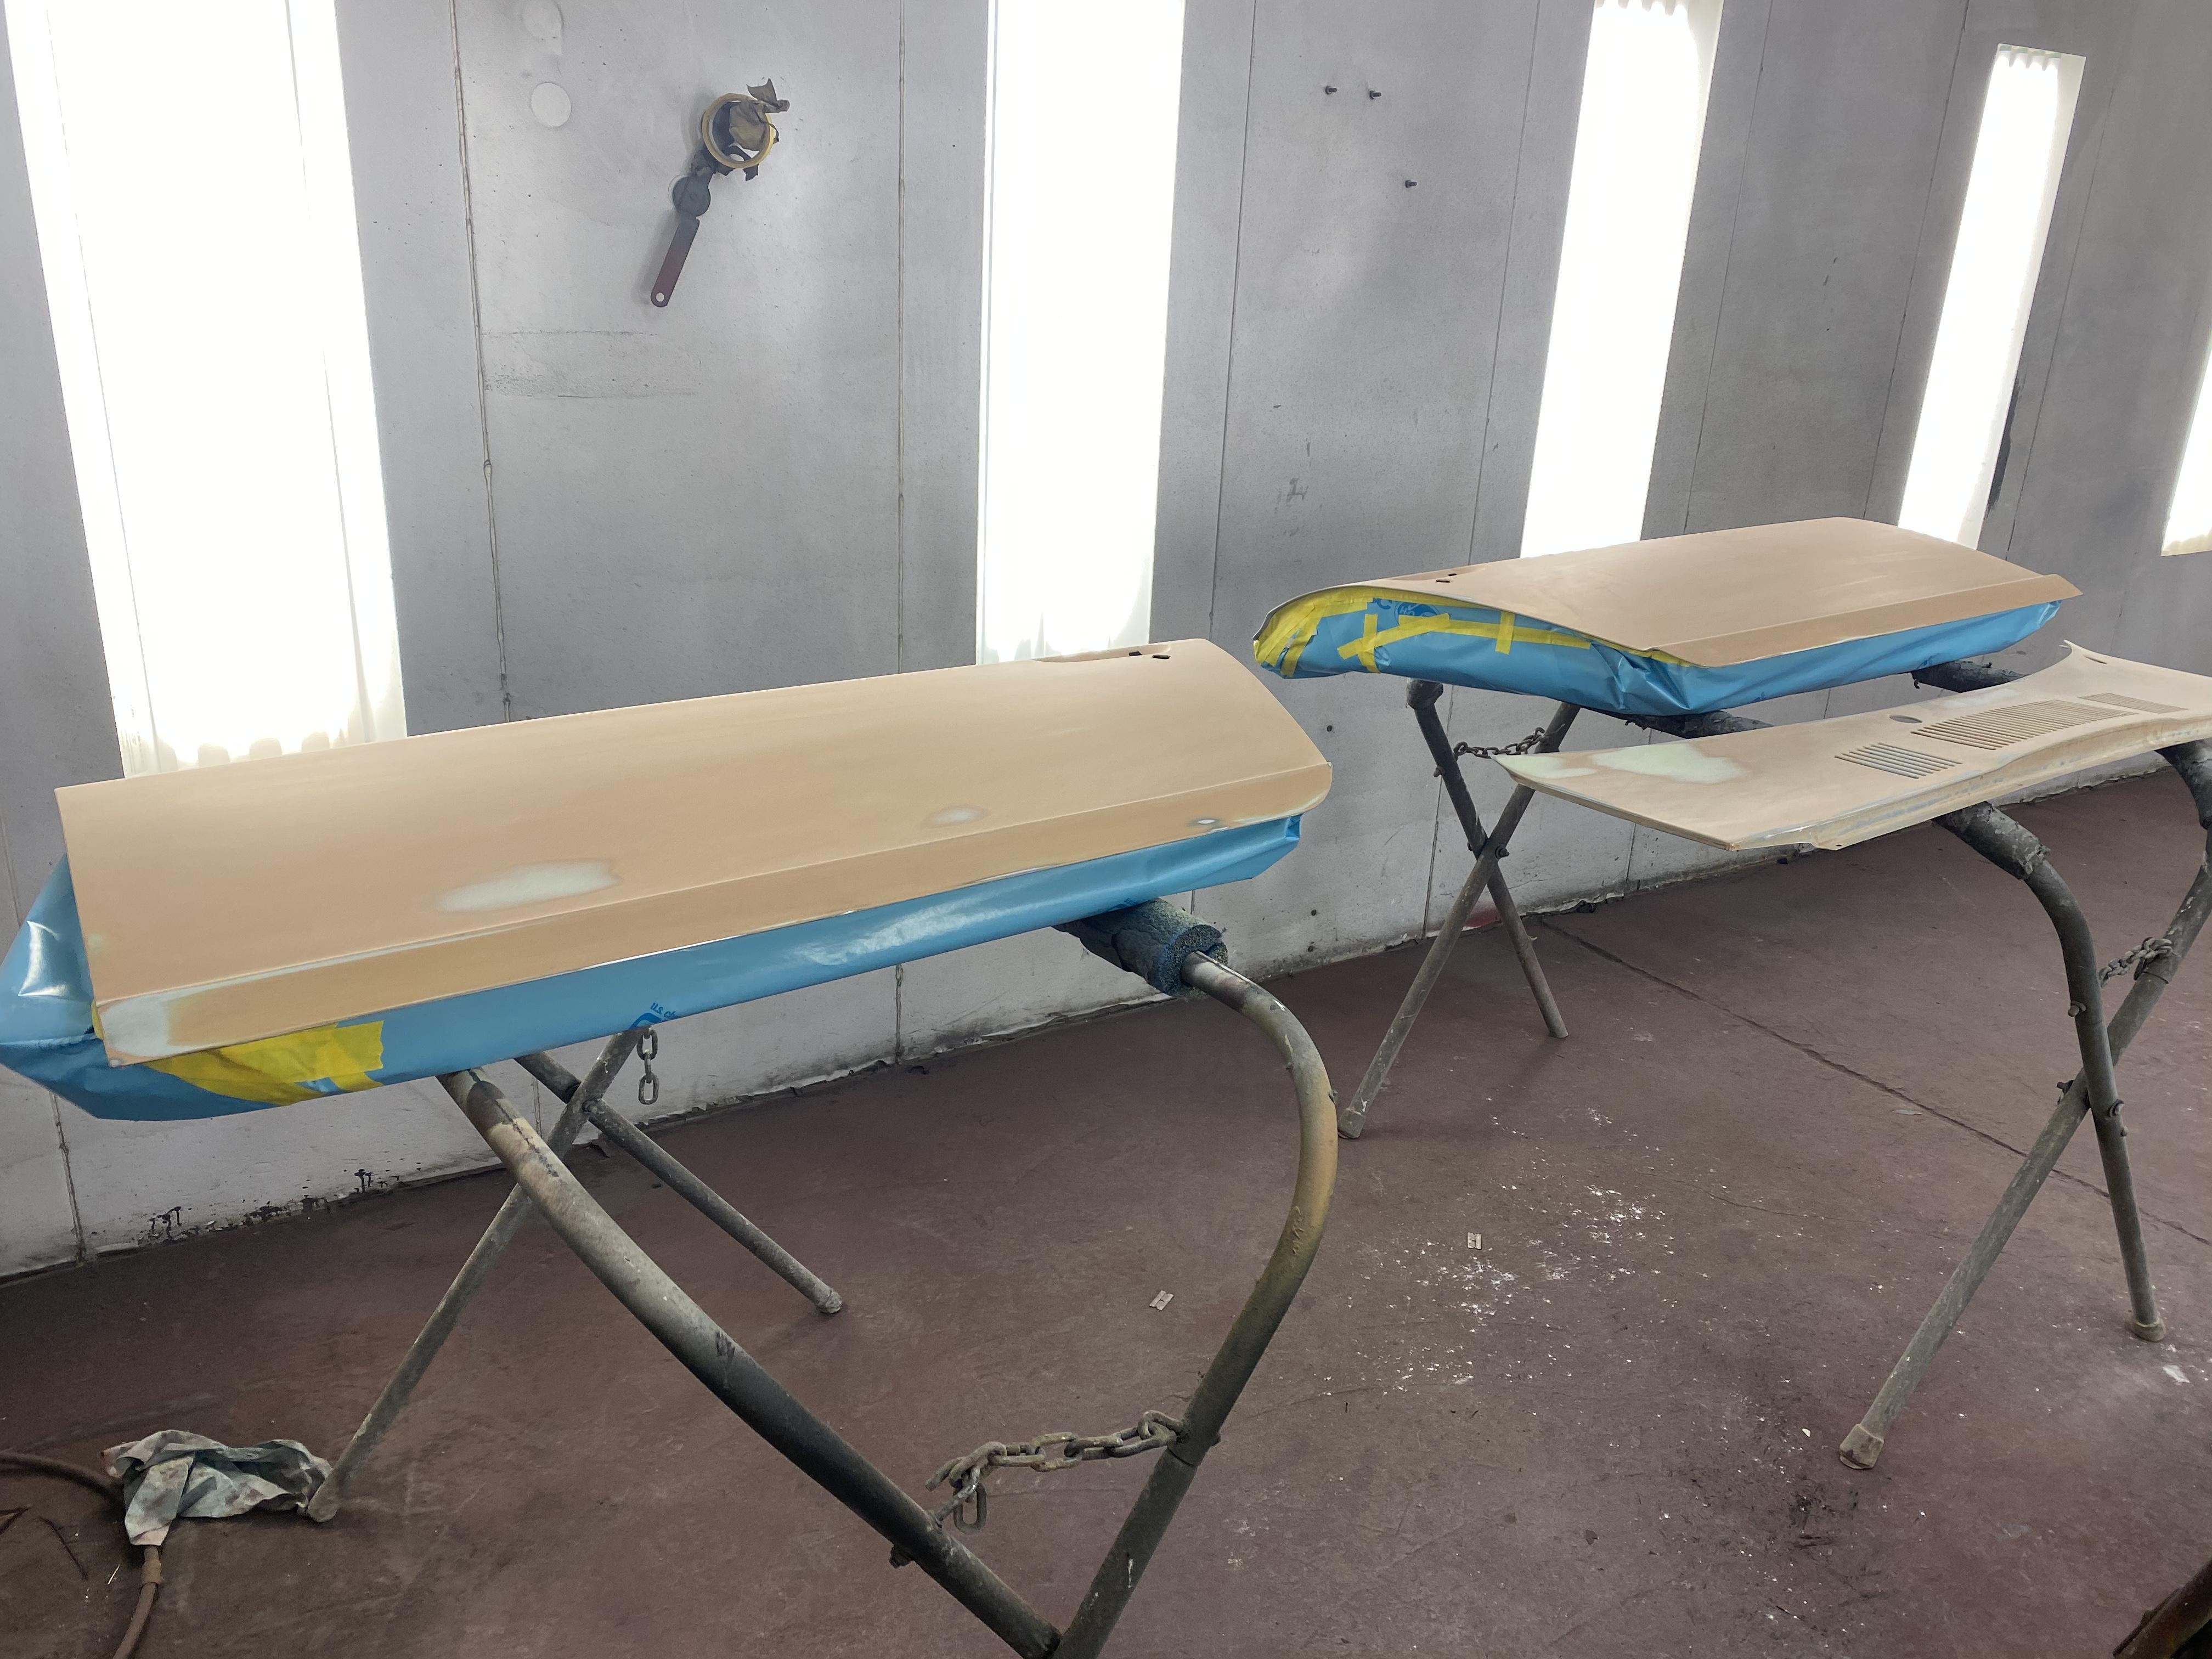
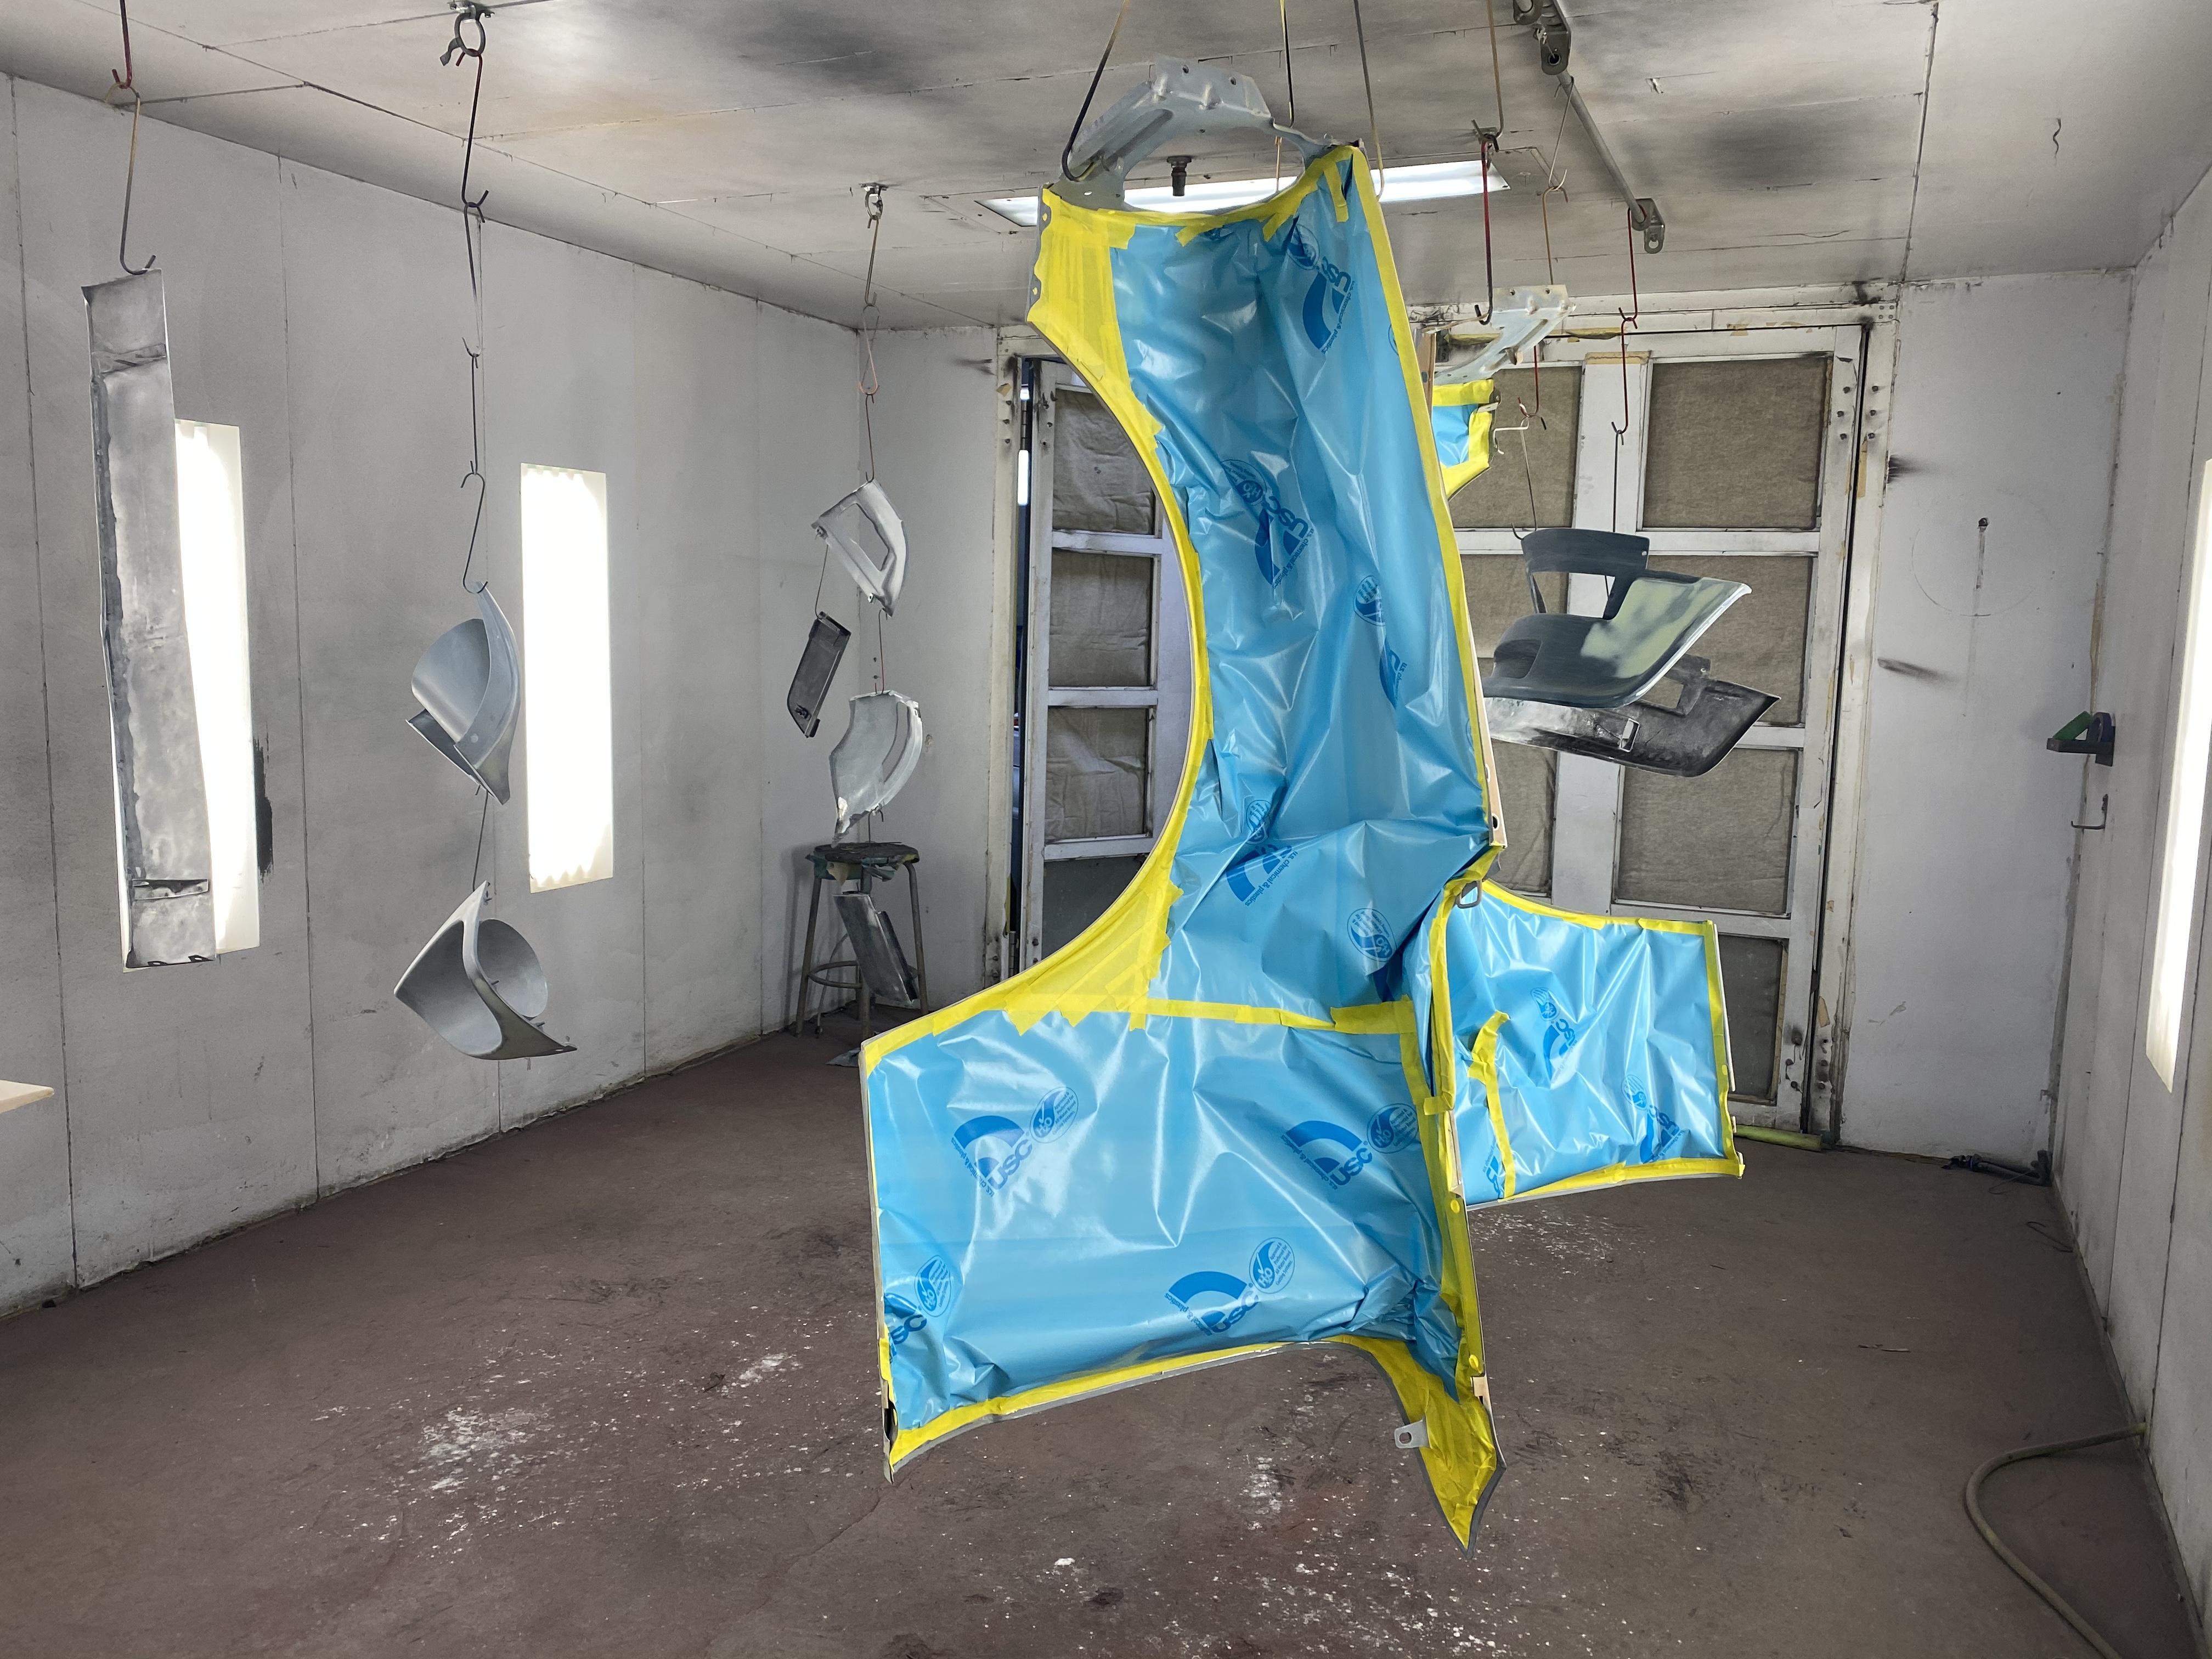
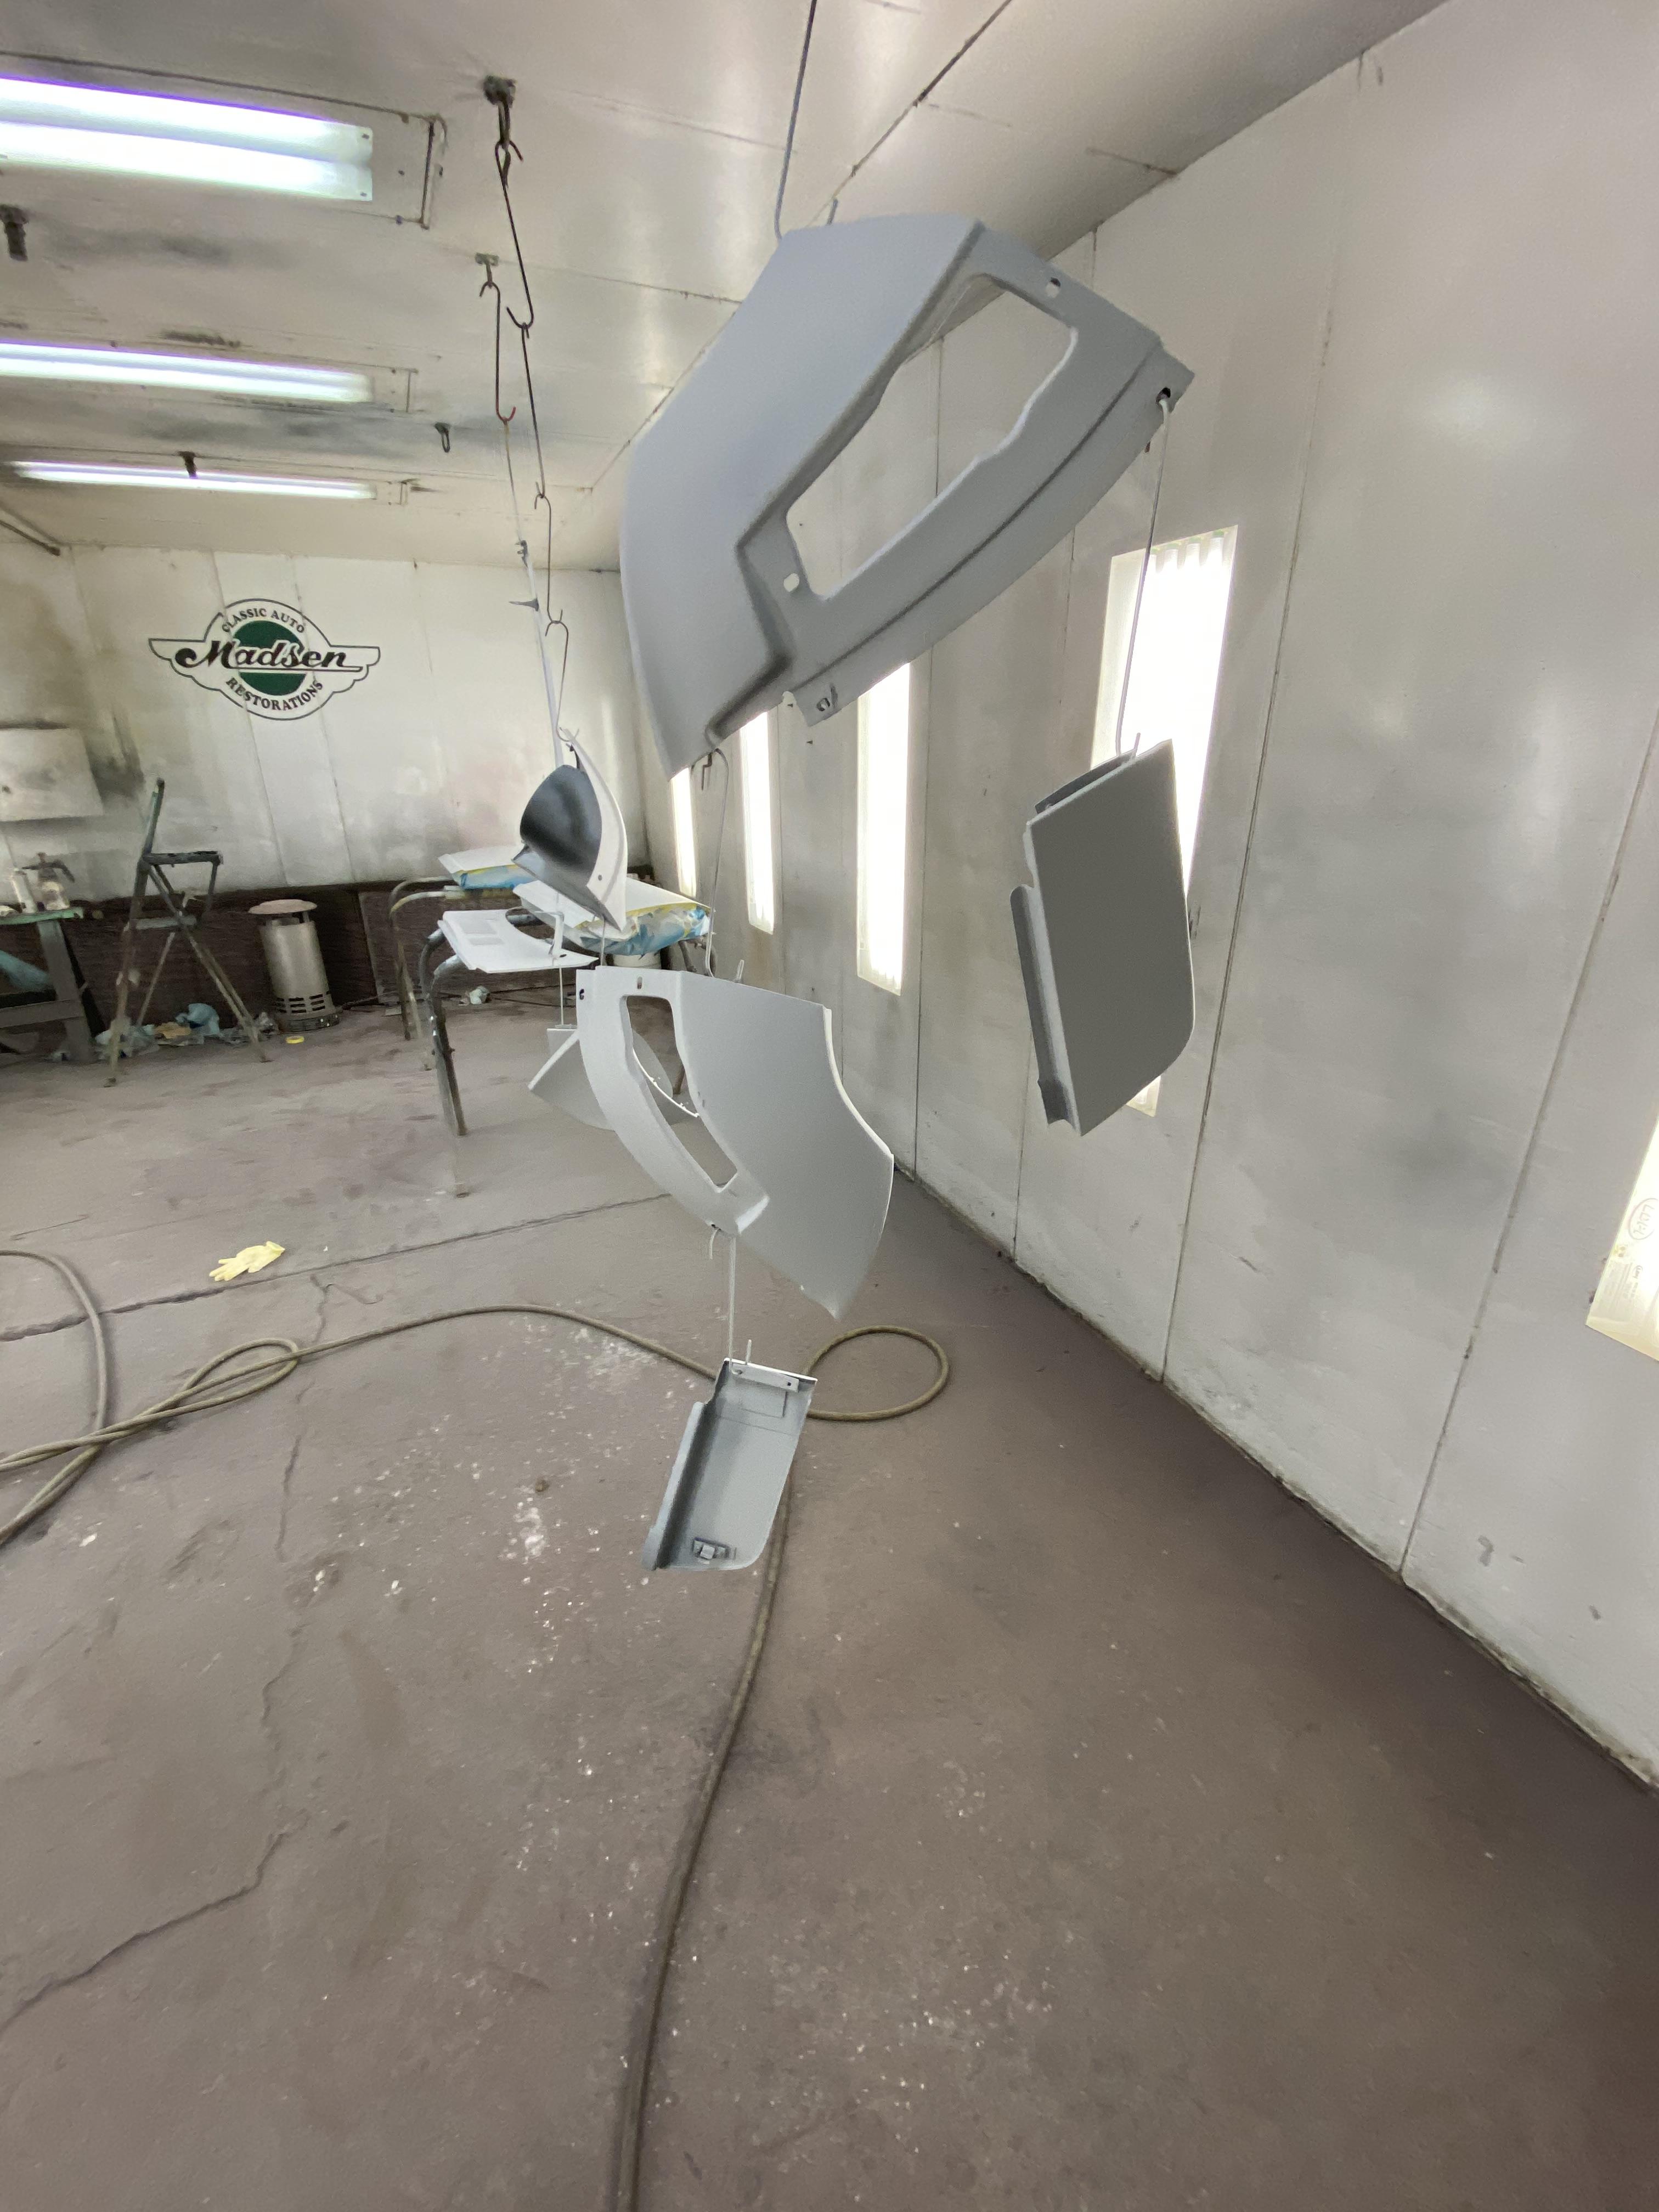
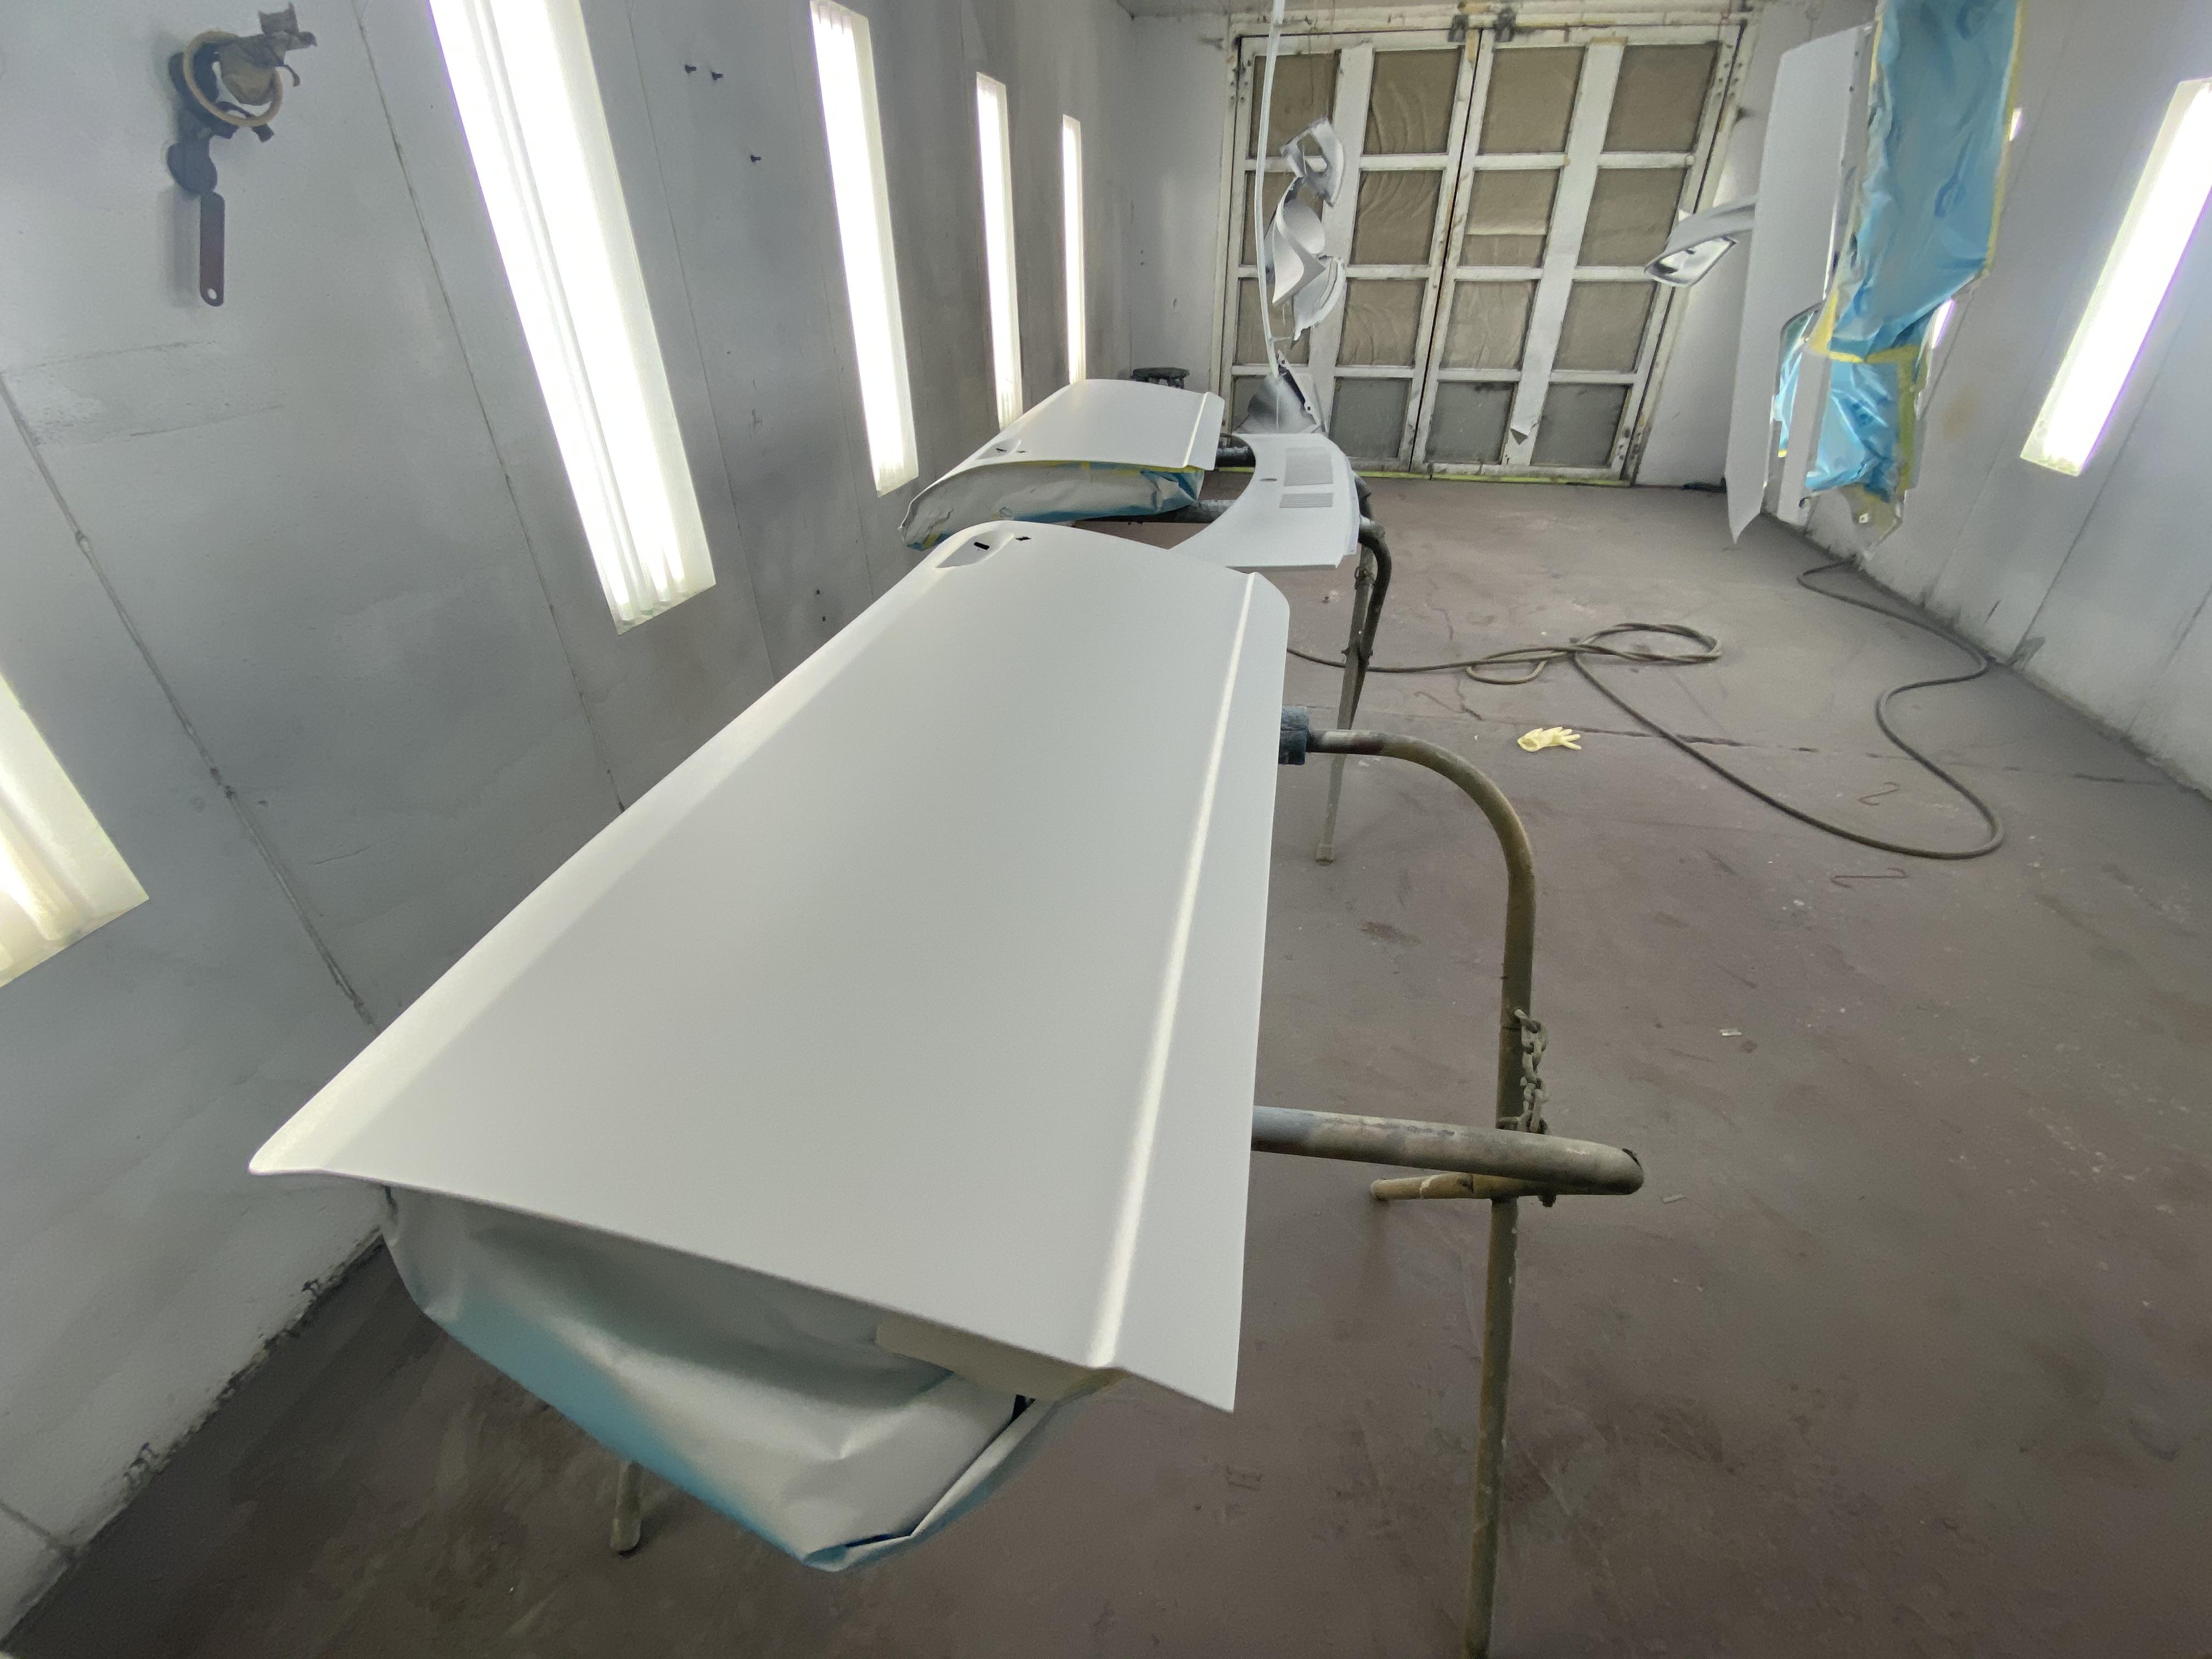
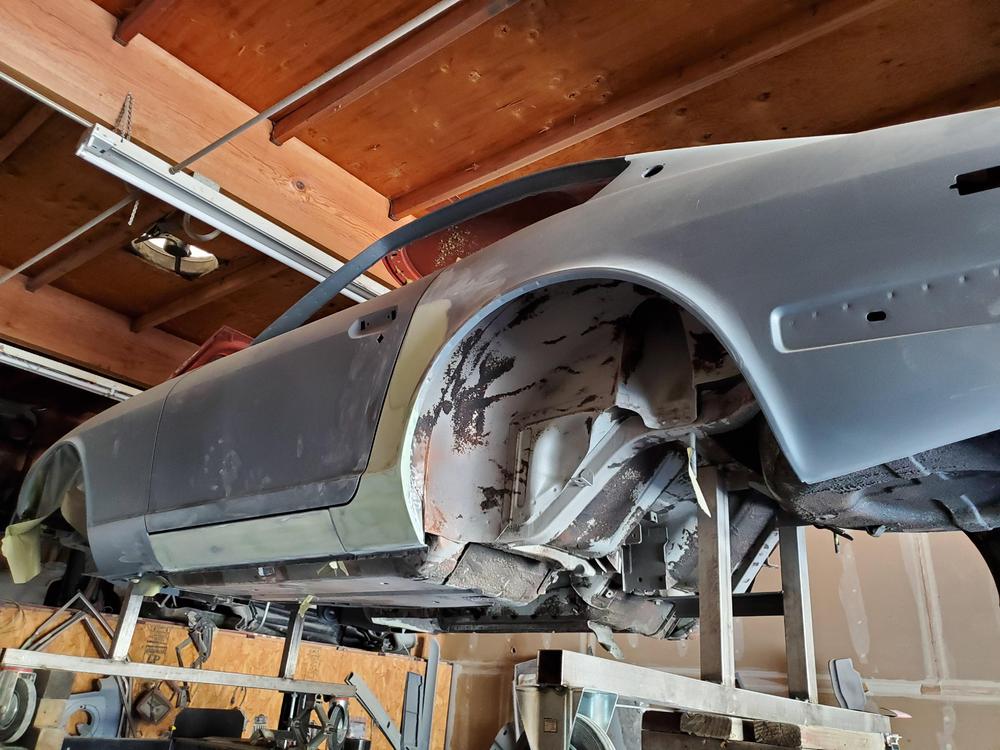
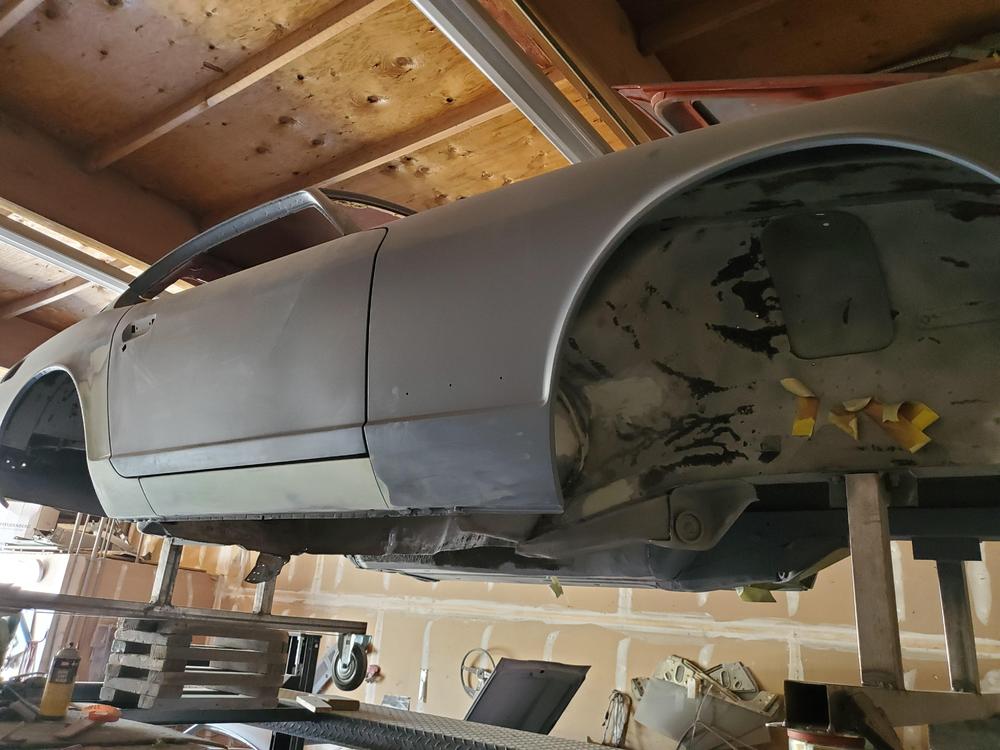
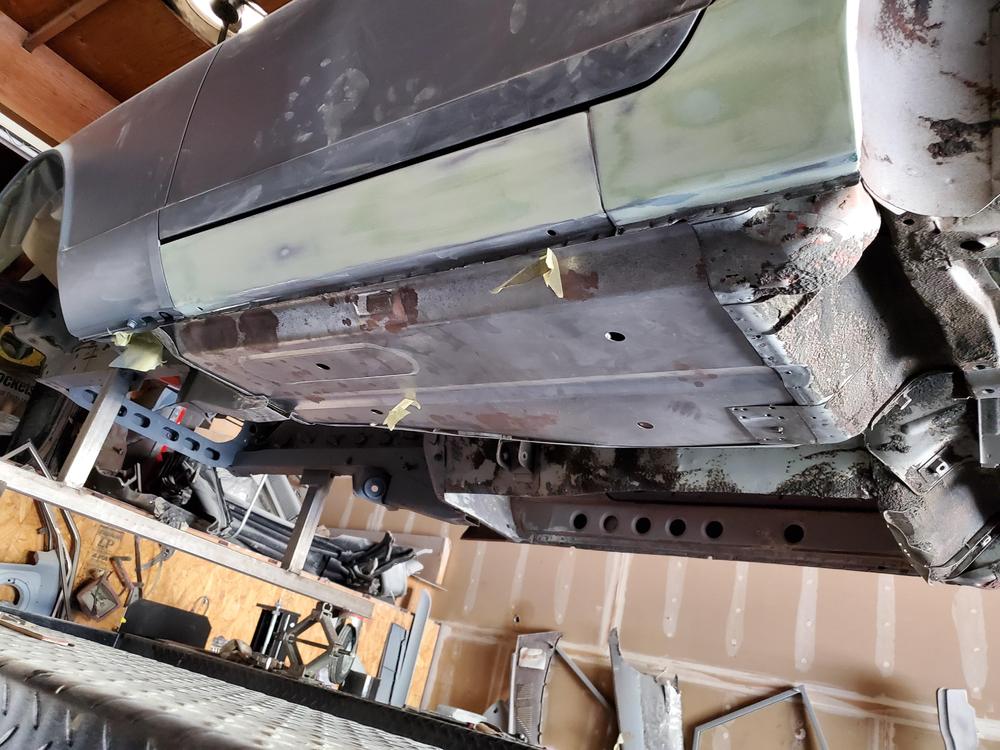
1 pointHere are the latest pics from the body shop. We are pretty far along on the outside portion of the body, doglegs and inner panels have been fixed along with a number of other rust areas. Once the floor pans are finished up we should be in pretty good shape.

 1 point
 -
1 pointHi there, Not sure if this is the right place to post this, but I was browsing around and noticed that there really isn't any up-to-date Datsun registries anymore. The one on zhome is outdated and difficult to update and the ones on facebook have a lot of other junk. I was thinking of creating one to highlight all the different Datsun's all over the world and add photos, build links etc. Do you think there is space online for another registry?1 point
-
1 pointIt's the internet, there's always room. If you got the talent, time and resources to create an updated registry, go for it!1 point
-
Started her up for this season. IMG_0079.MOV IMG_0077.MOV1 point
-
She hasn't figured out that you've been wearing her panties? Sorry, you skidded right in to that one.1 point
-
1 point
-
As a business owner, if I was being endorsed or using the endorsement of somebody convicted of fraud, I would want to be told. If I continue to use them, then that is my prerogative but I would at least like to be made aware of something that might not be readily known.1 point
-
1 point
-
1 point
-
1 pointContinued WT Wheel and Tire.pdf RA Rear Axle and Suspension.pdf SE Body Service Equipment.pdf SE Service Equipment.pdf ST Steering System.pdf TM Transmission.pdf1 point
-
1 pointContinued RA Rear Axle and Suspension.pdf EG Engine General.pdf EL Engine Lubrication System.pdf EM Engine Machanical.pdf ER Engine Removal.pdf ET Engine Tune-up.pdf FA Front Axle and Suspension.pdf FE Fuel and Exhaust Systems.pdf GI General Information.pdf PD Propeller Shaft and Differential.pdf1 point
-
It will be tough to see them go to the crusher but it was a fun car.0 points