Matthew Abate
Community Member
-
Joined
-
Last visited
Everything posted by Matthew Abate
-
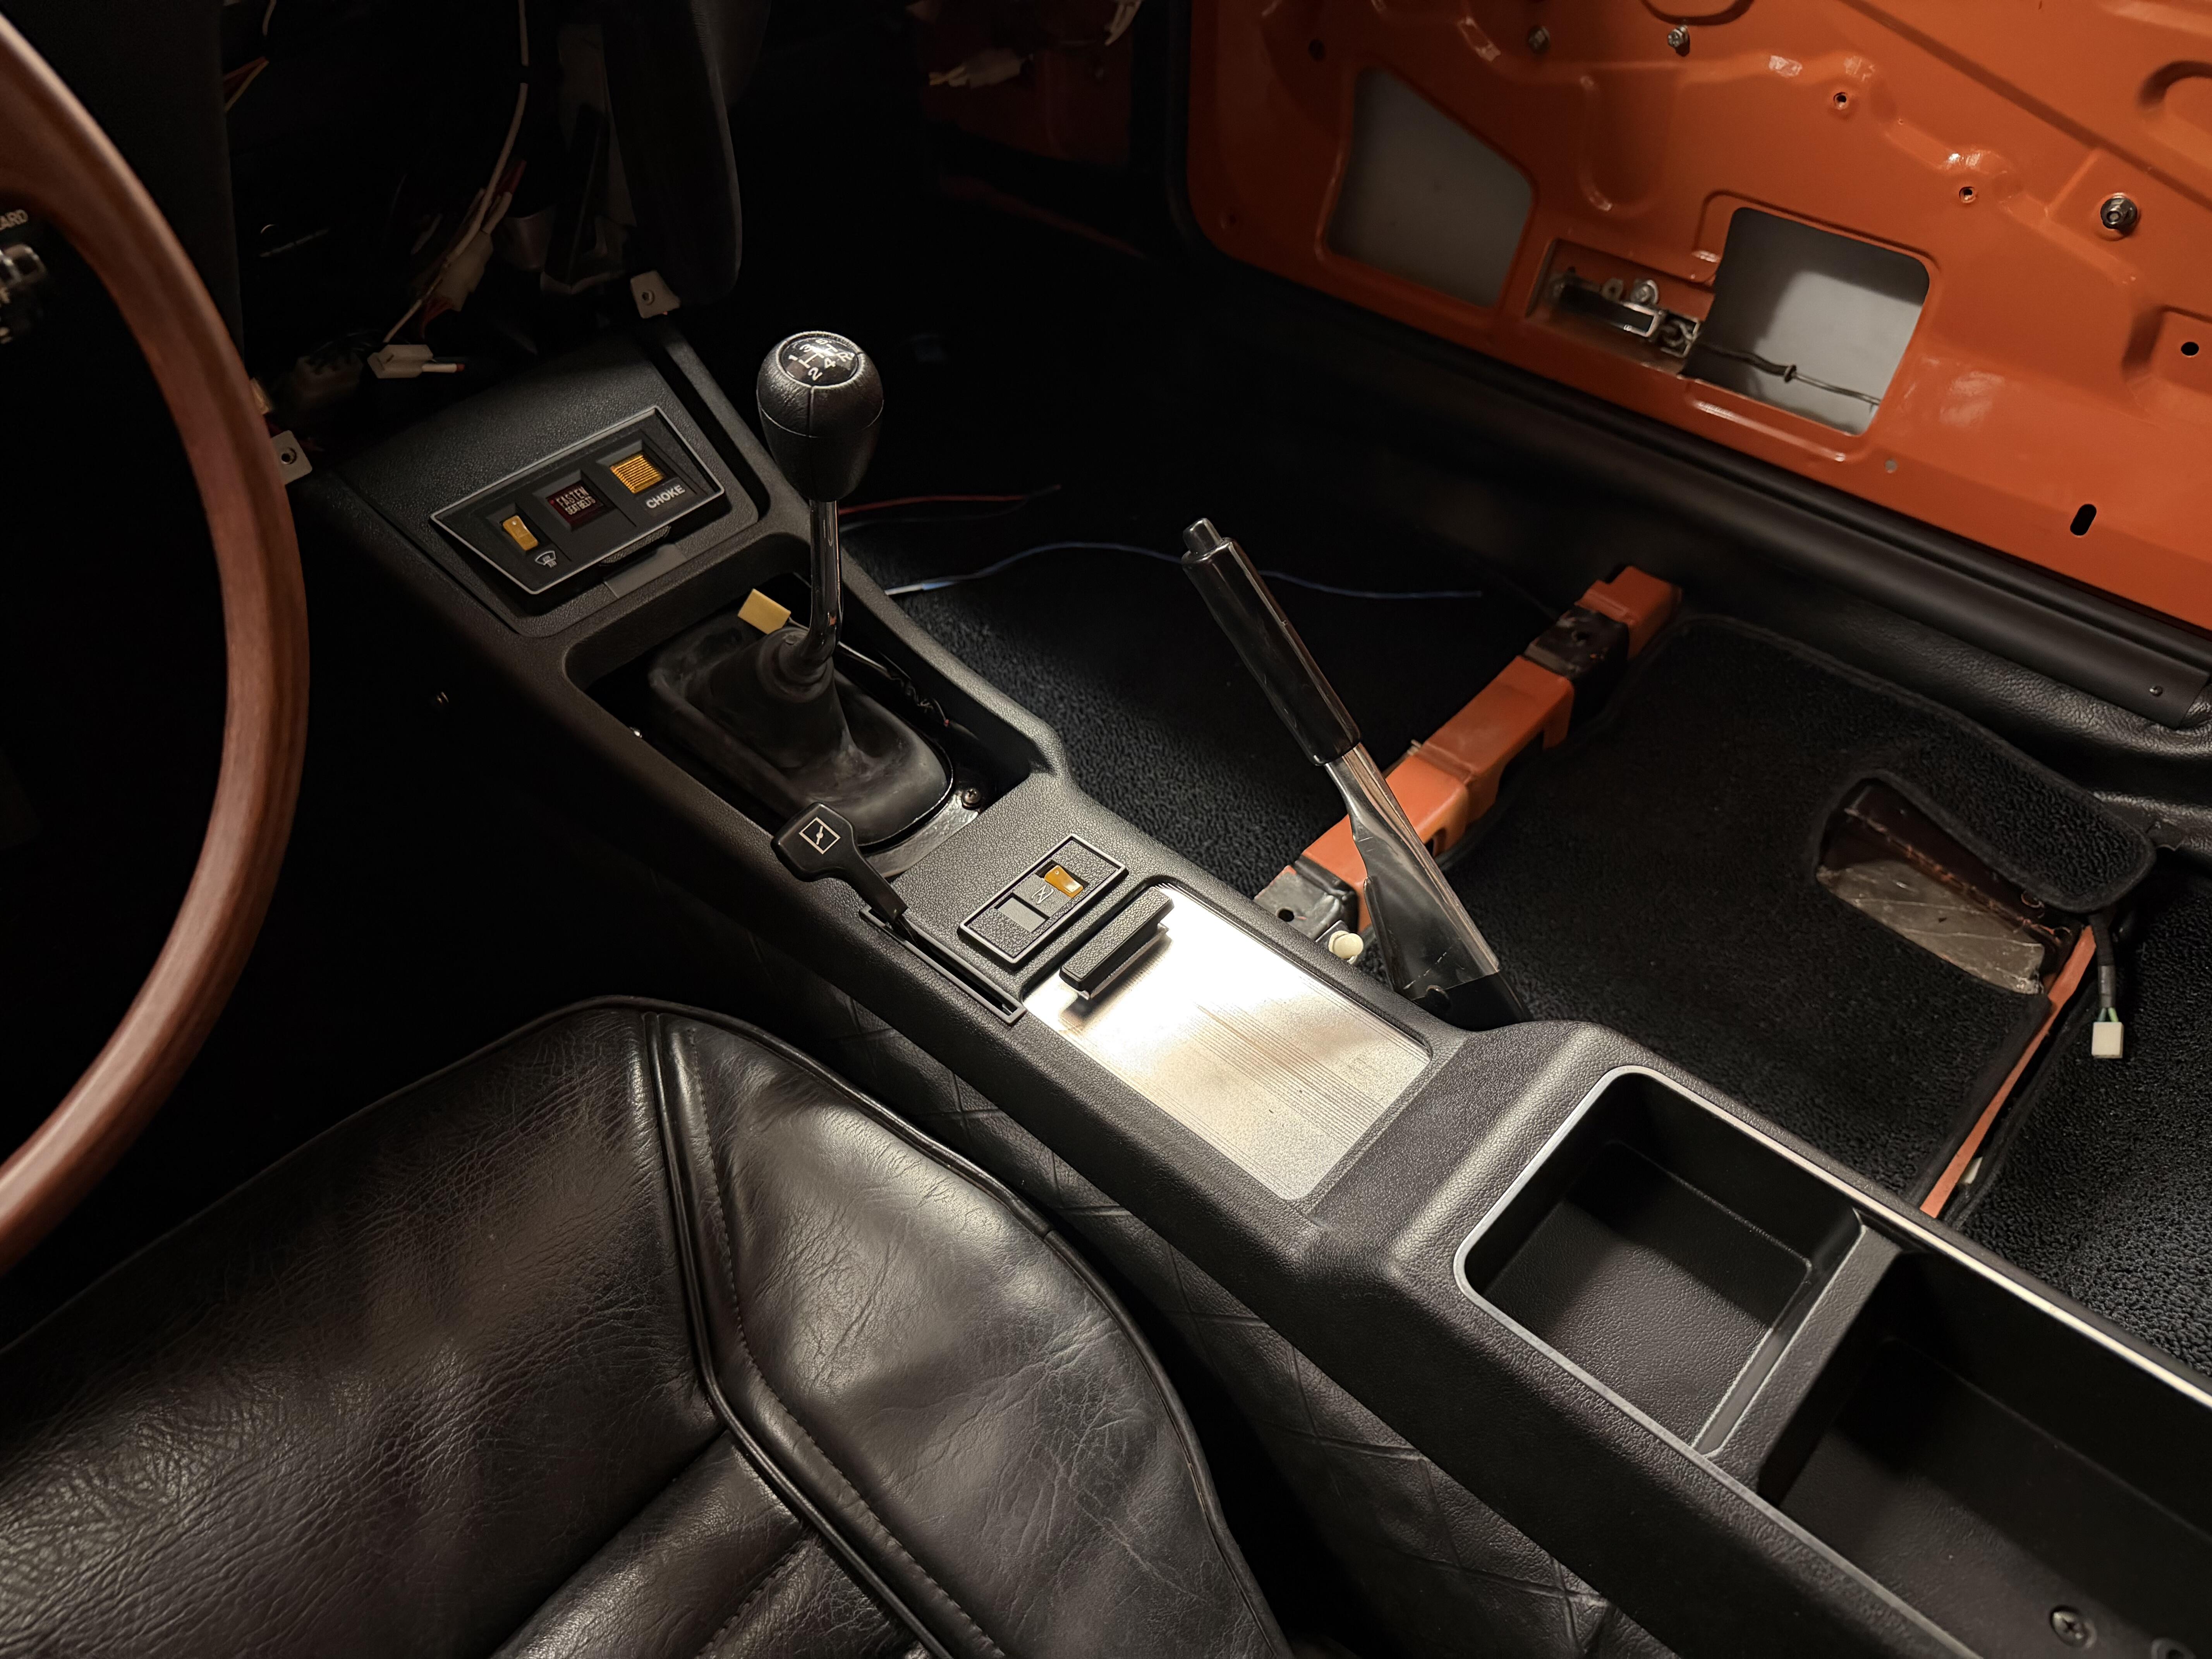
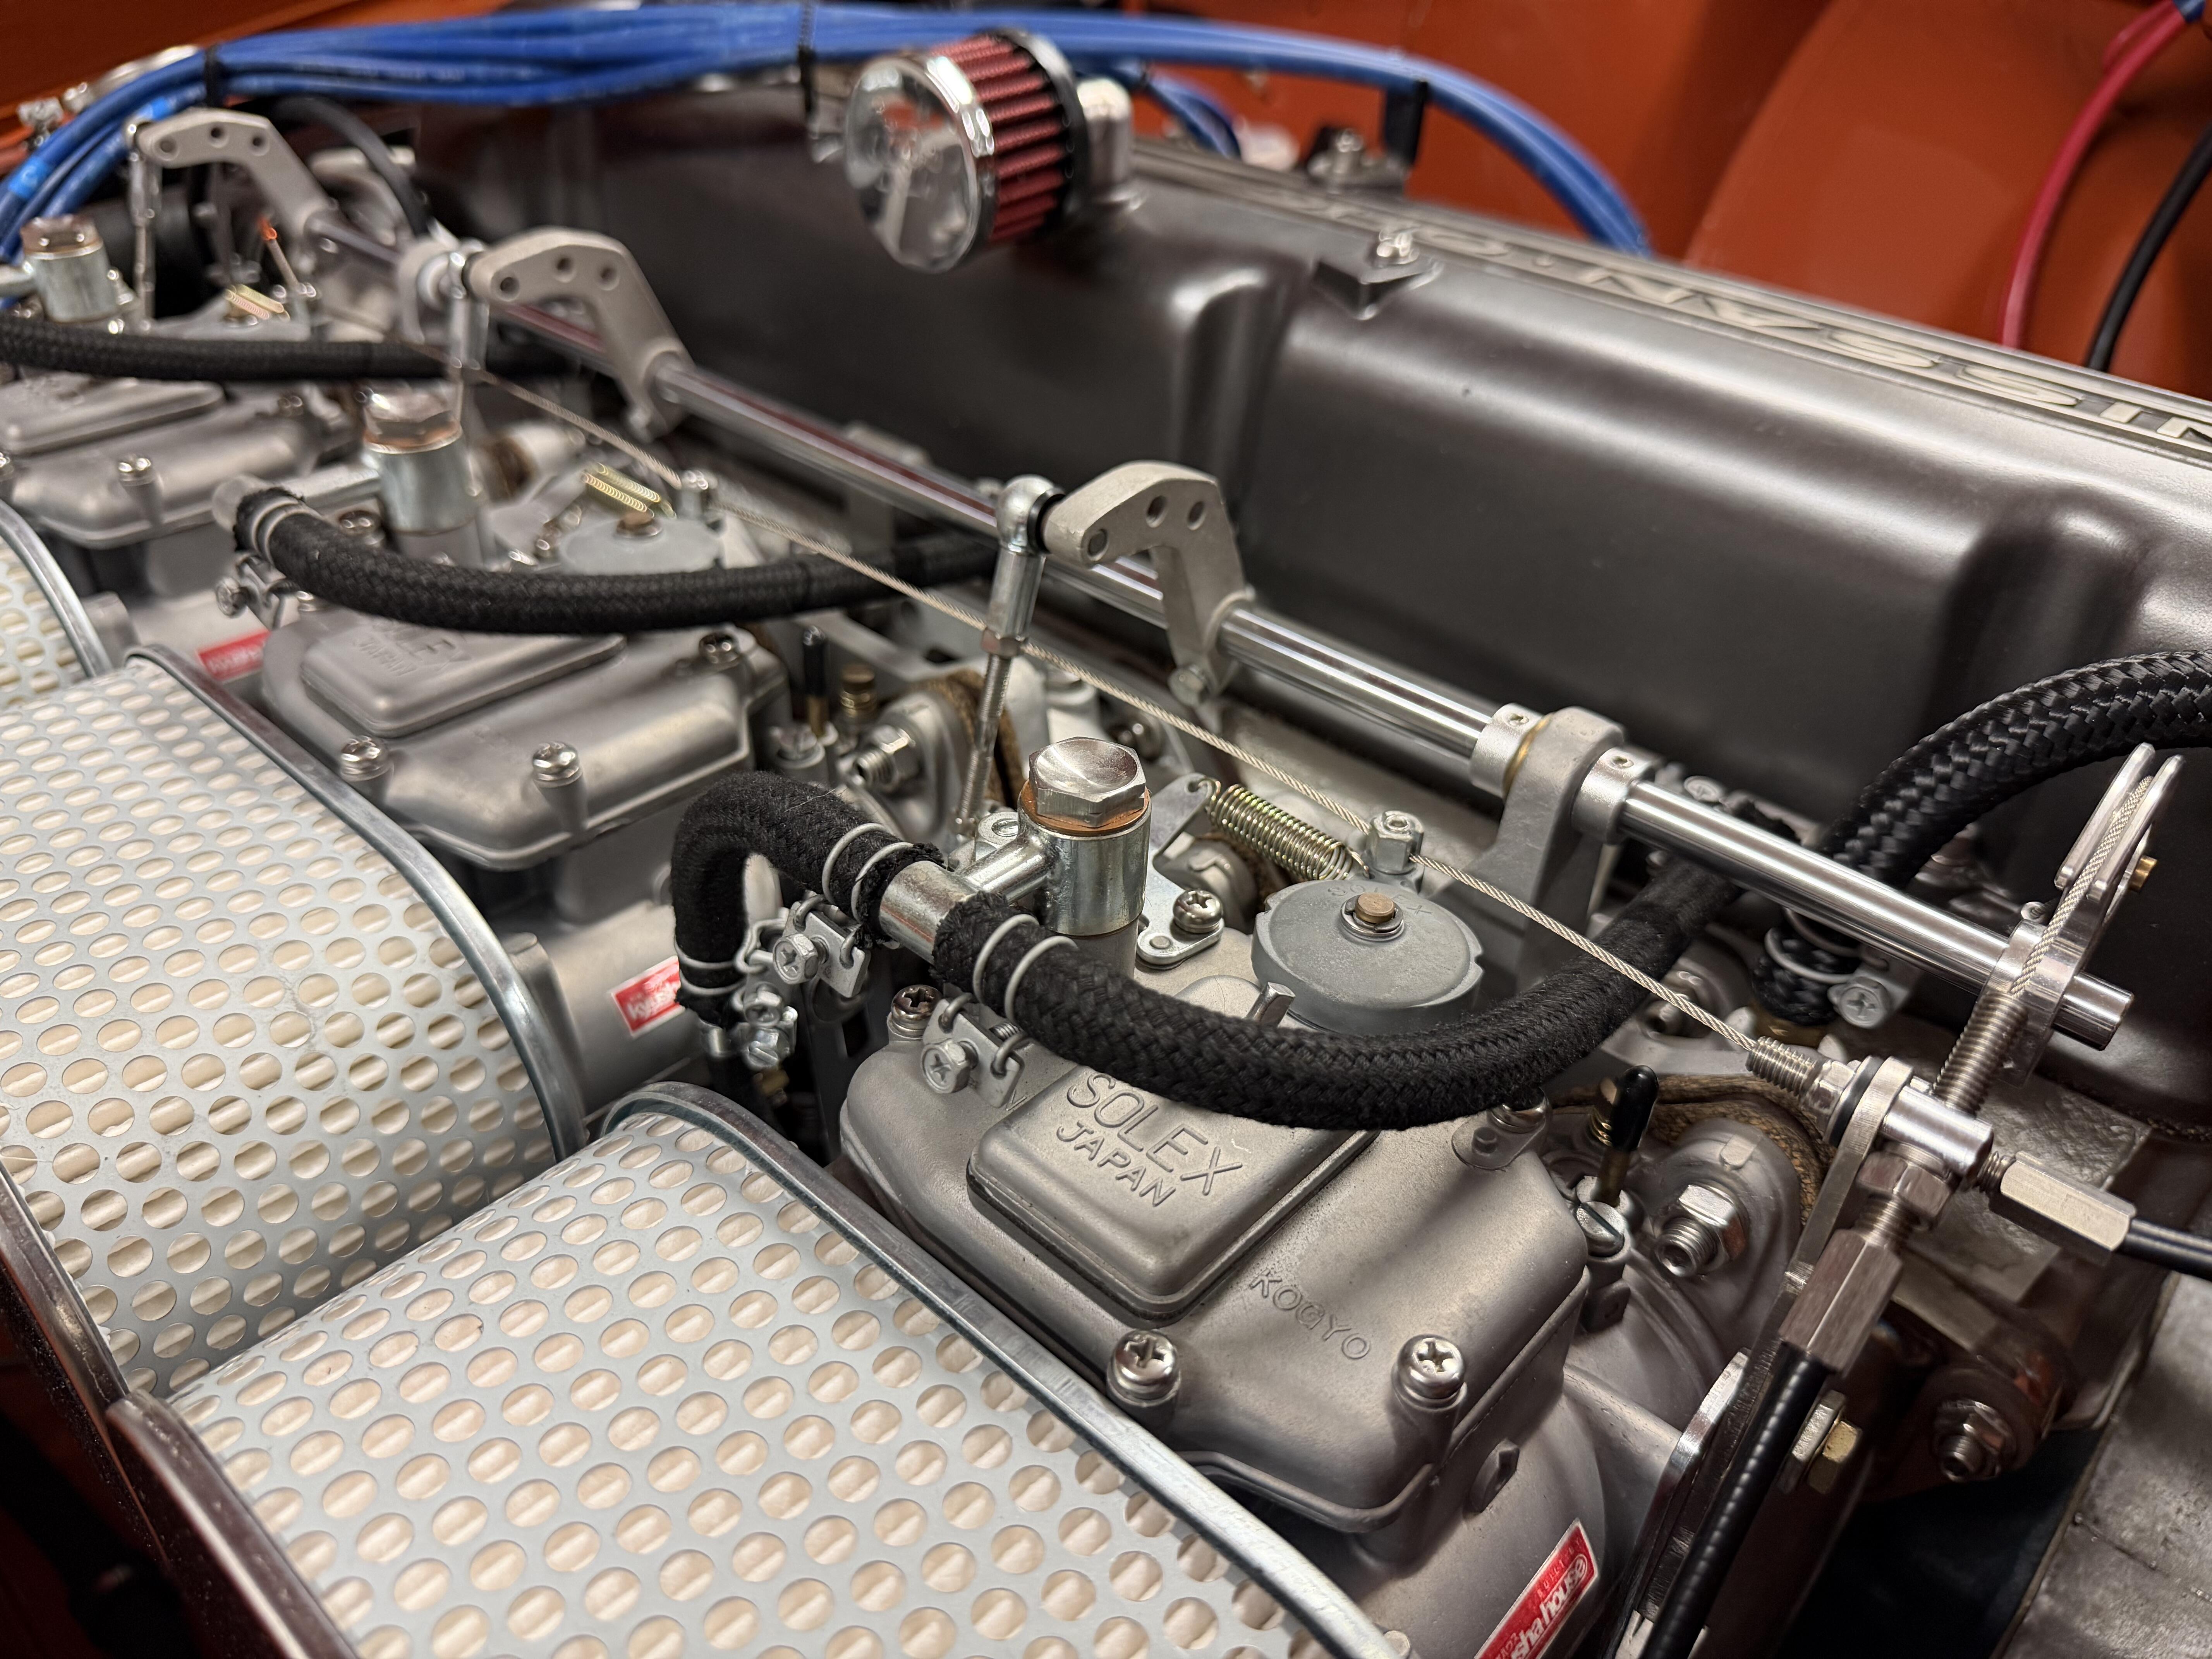
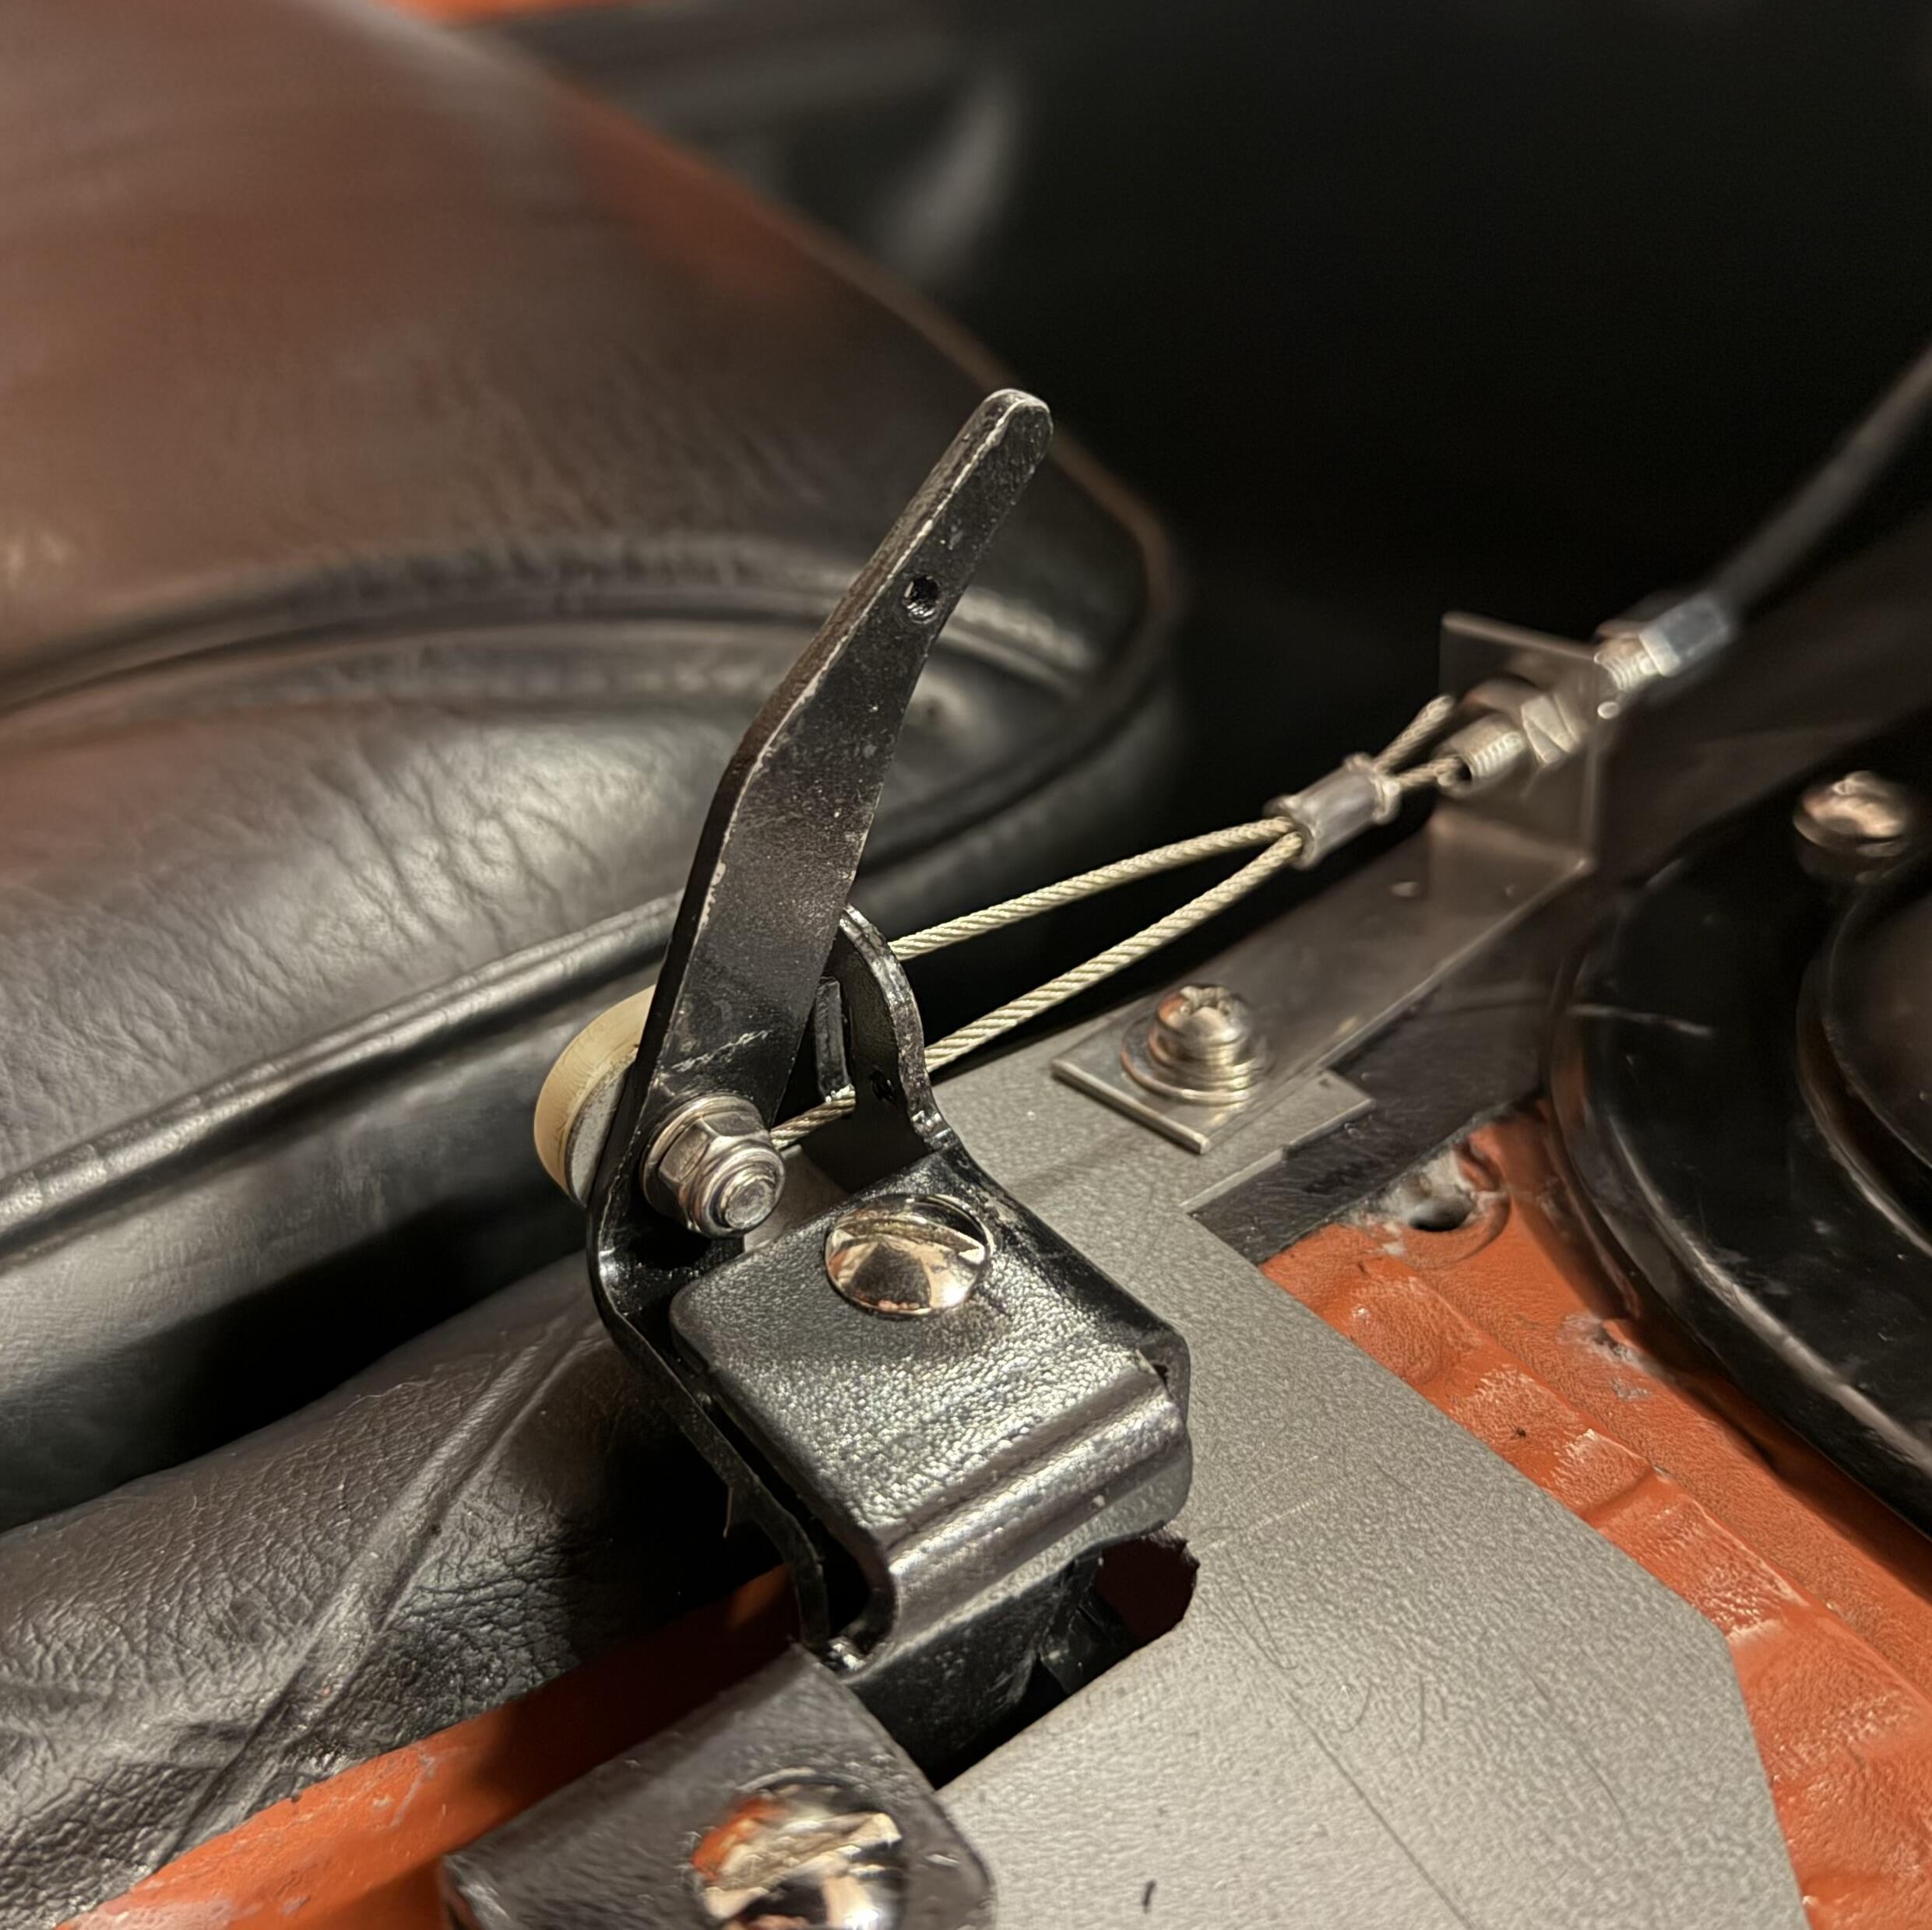
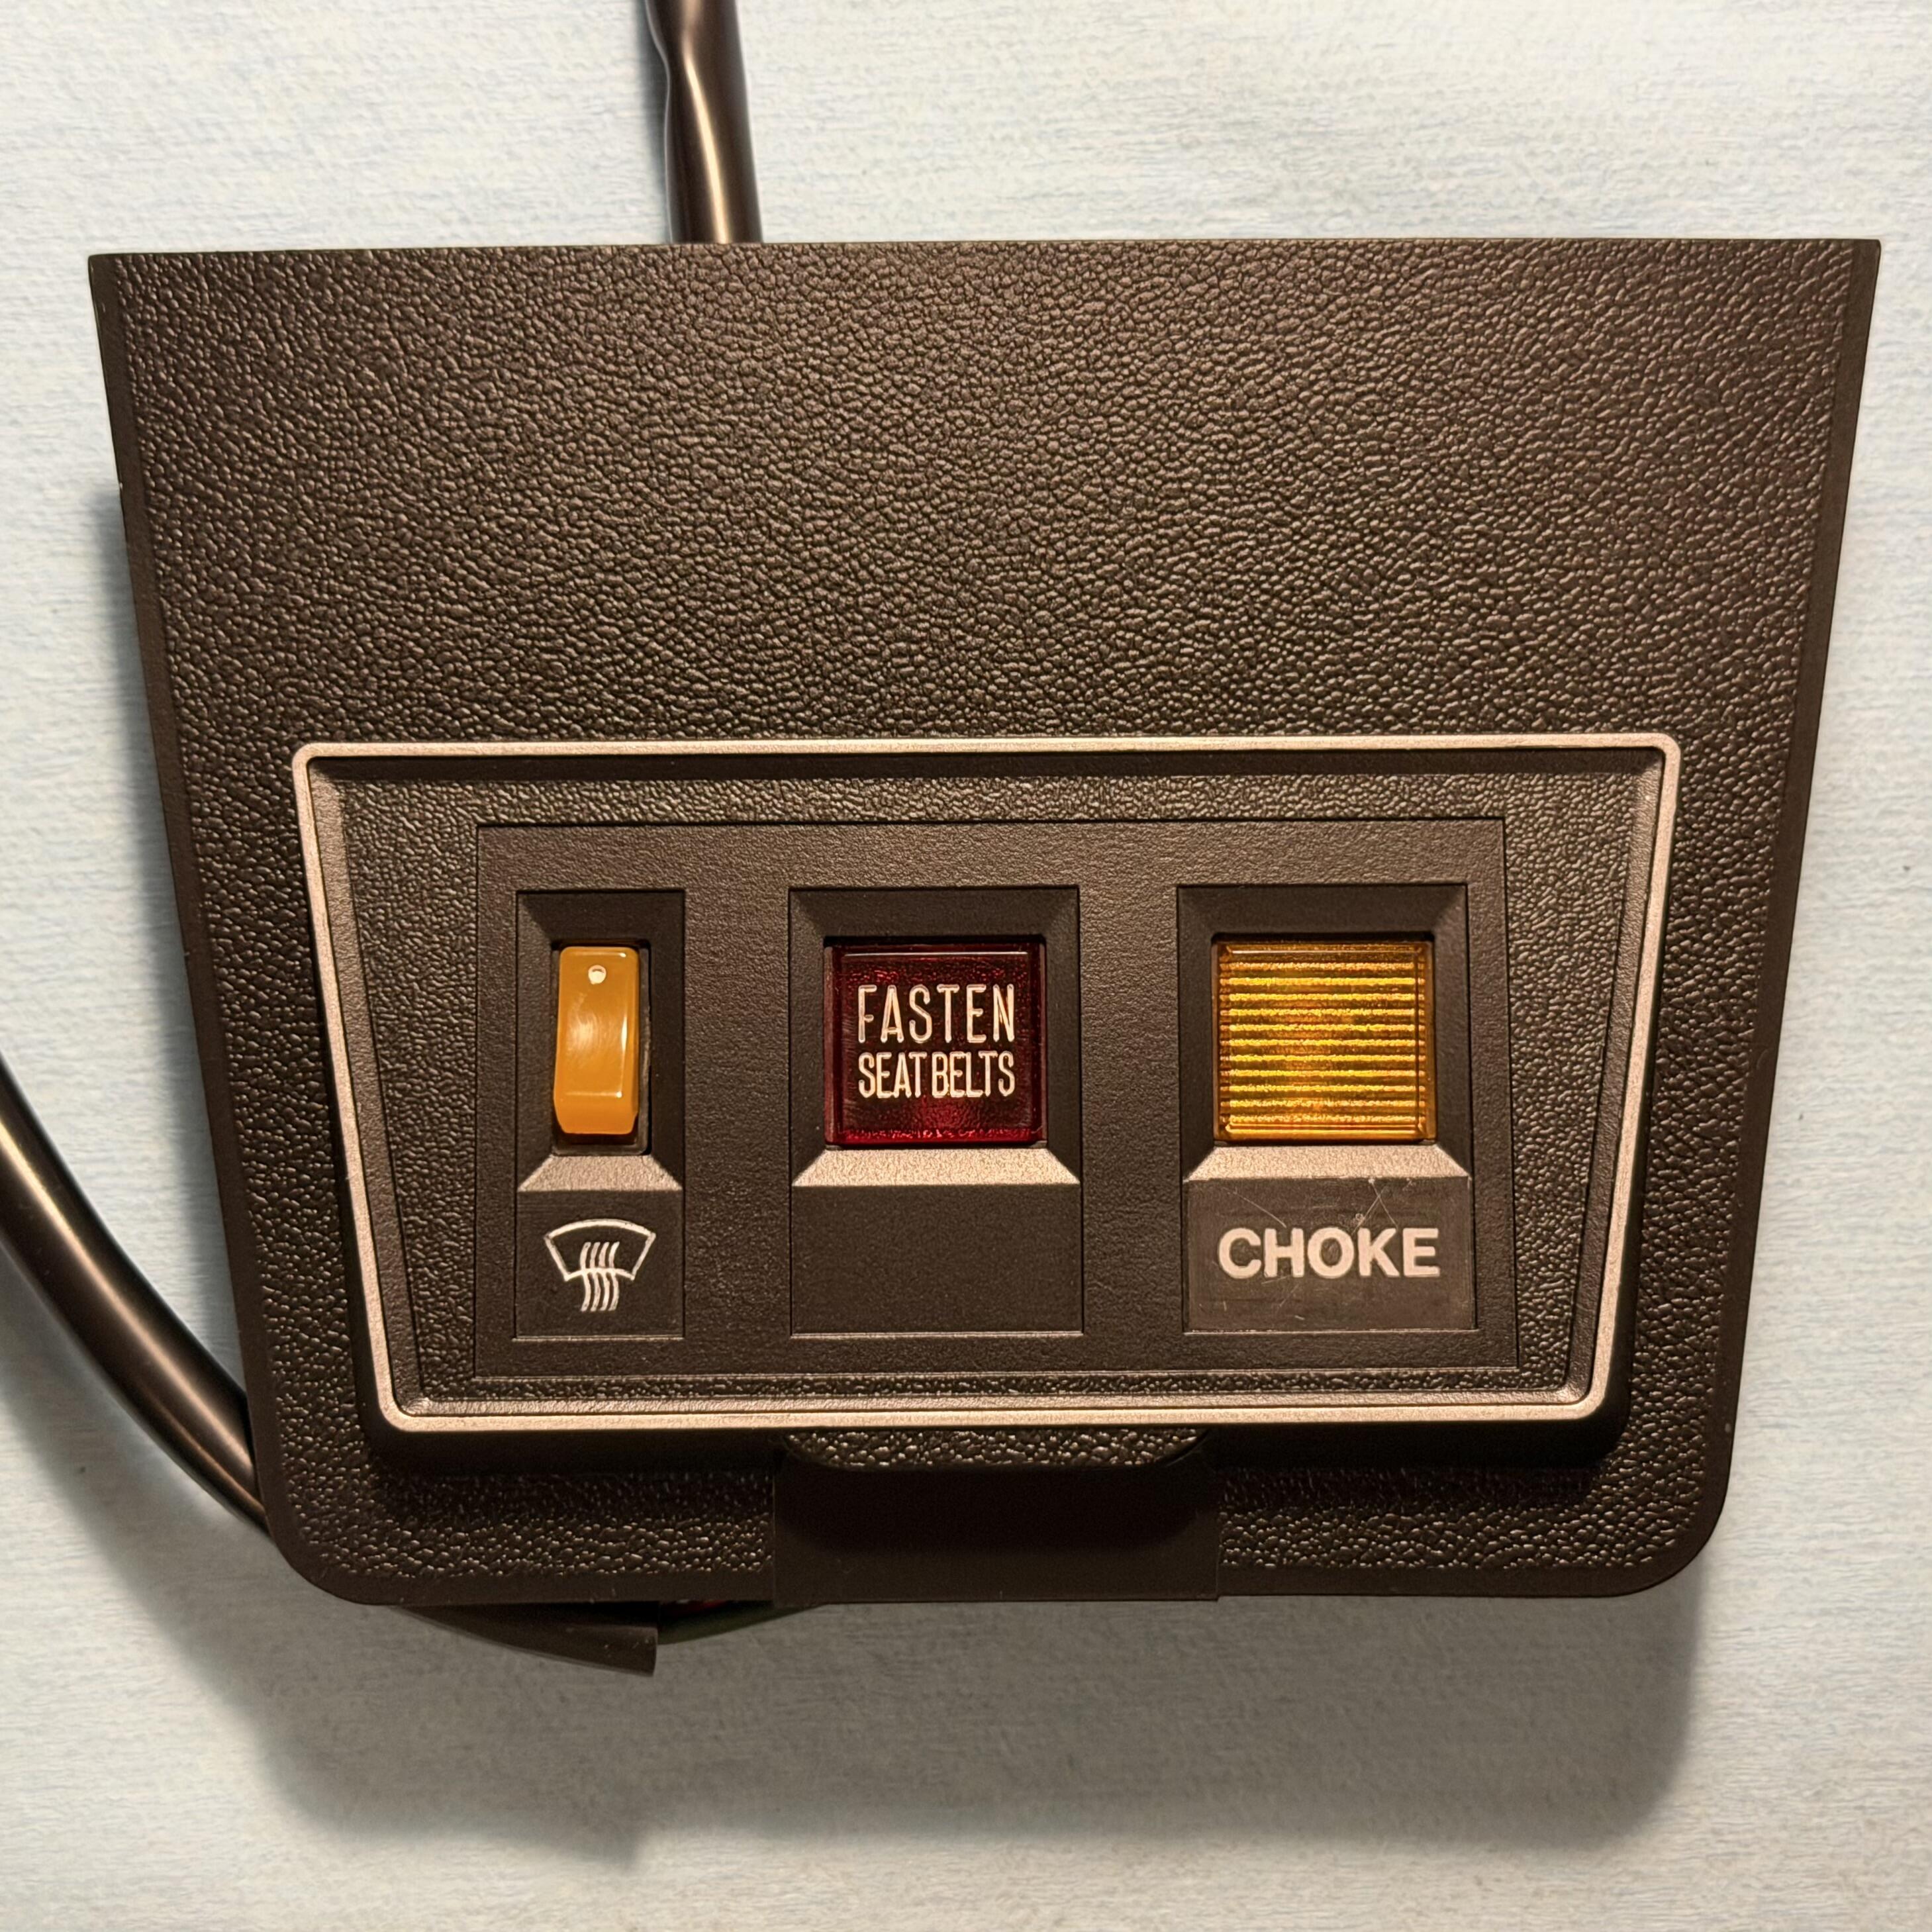
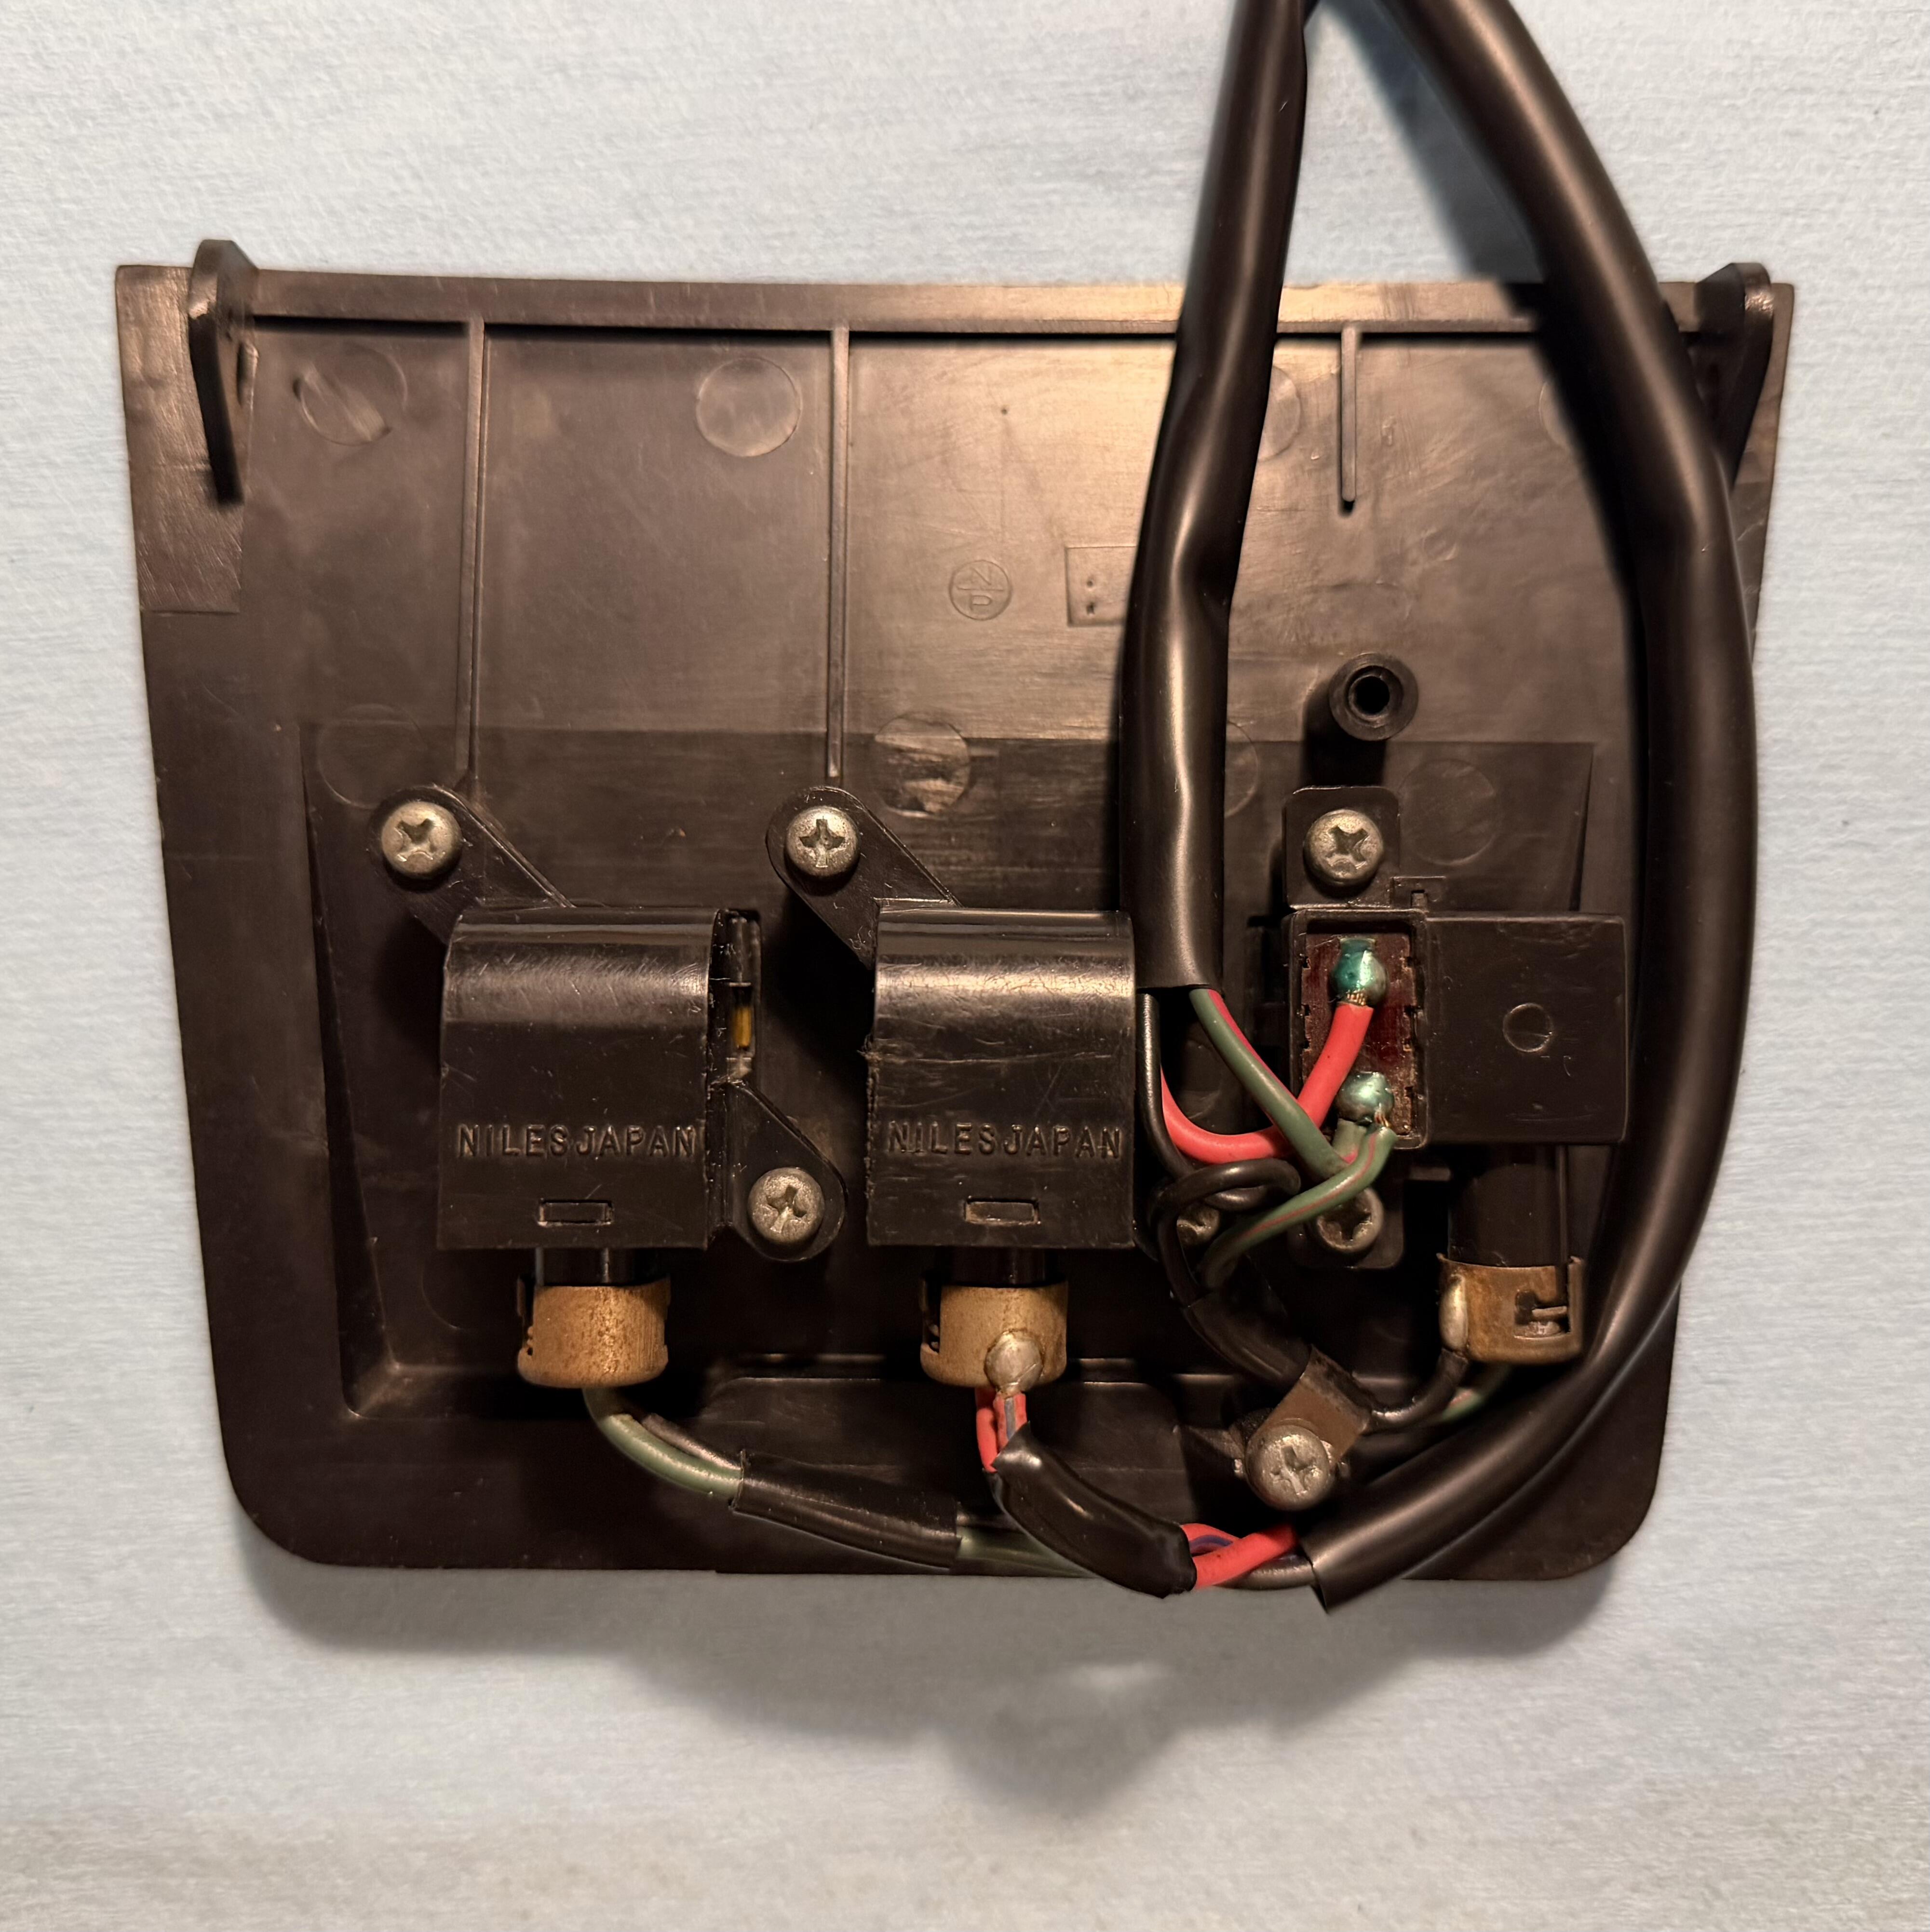
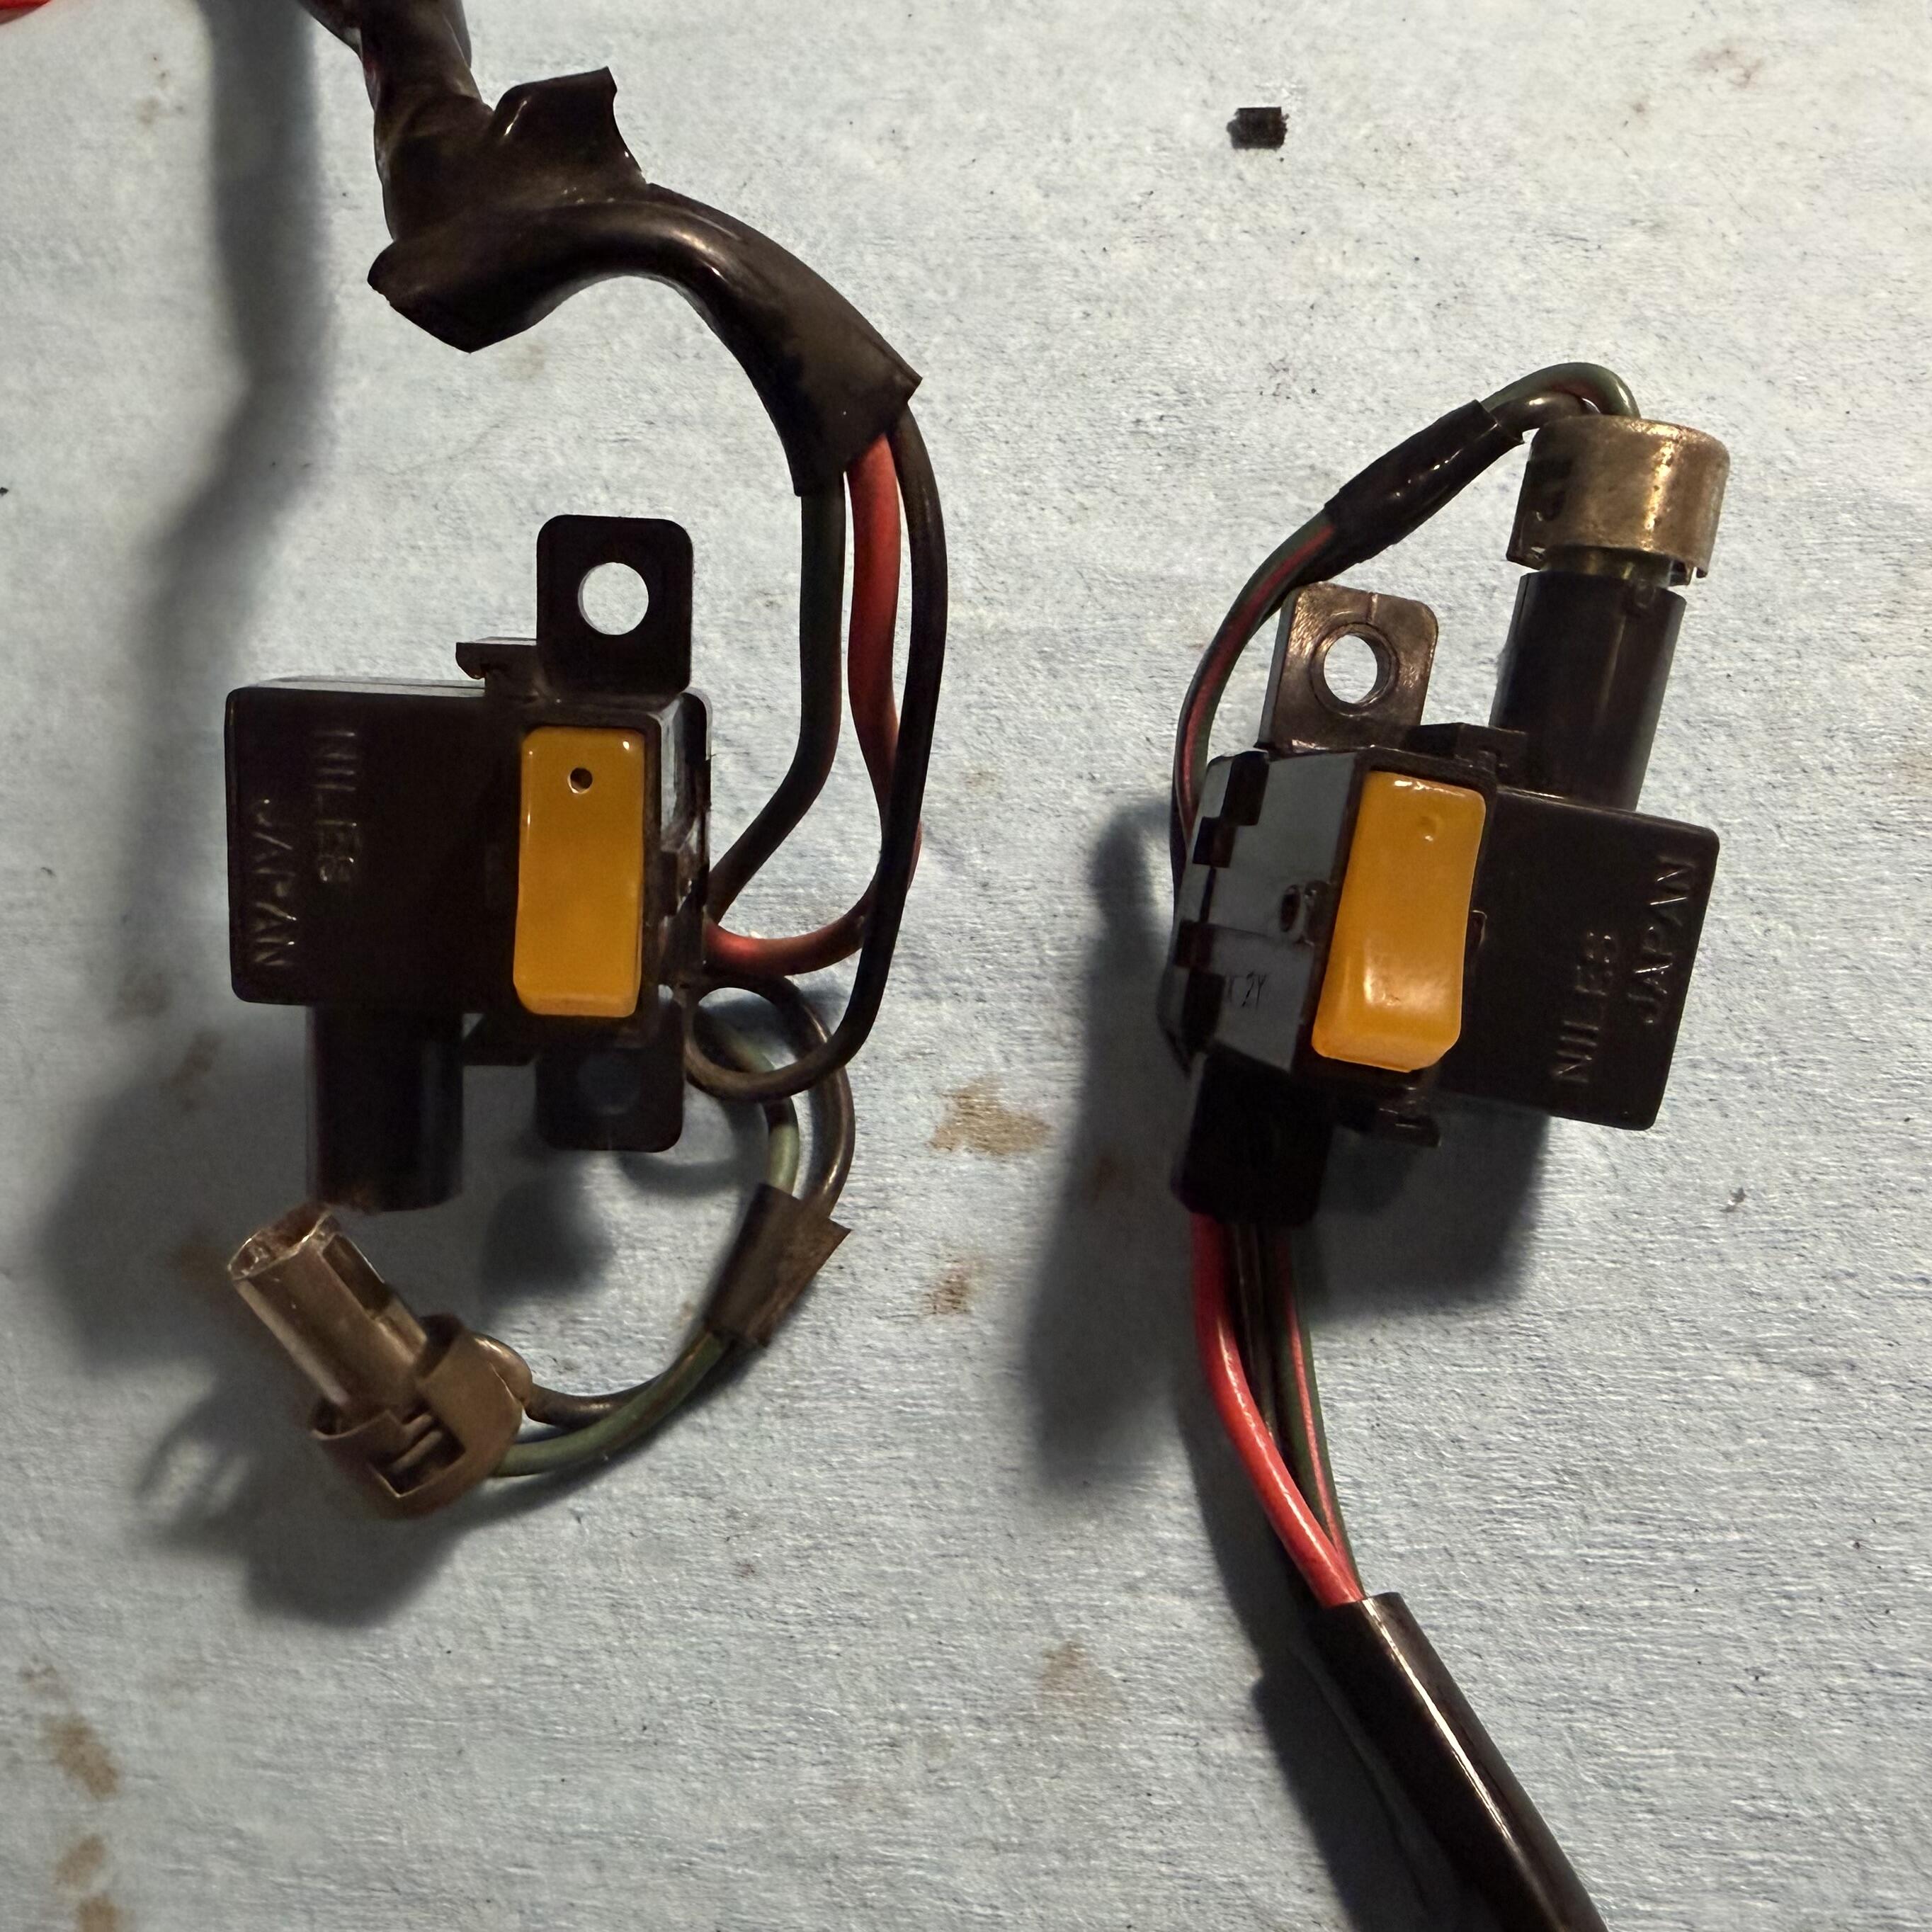
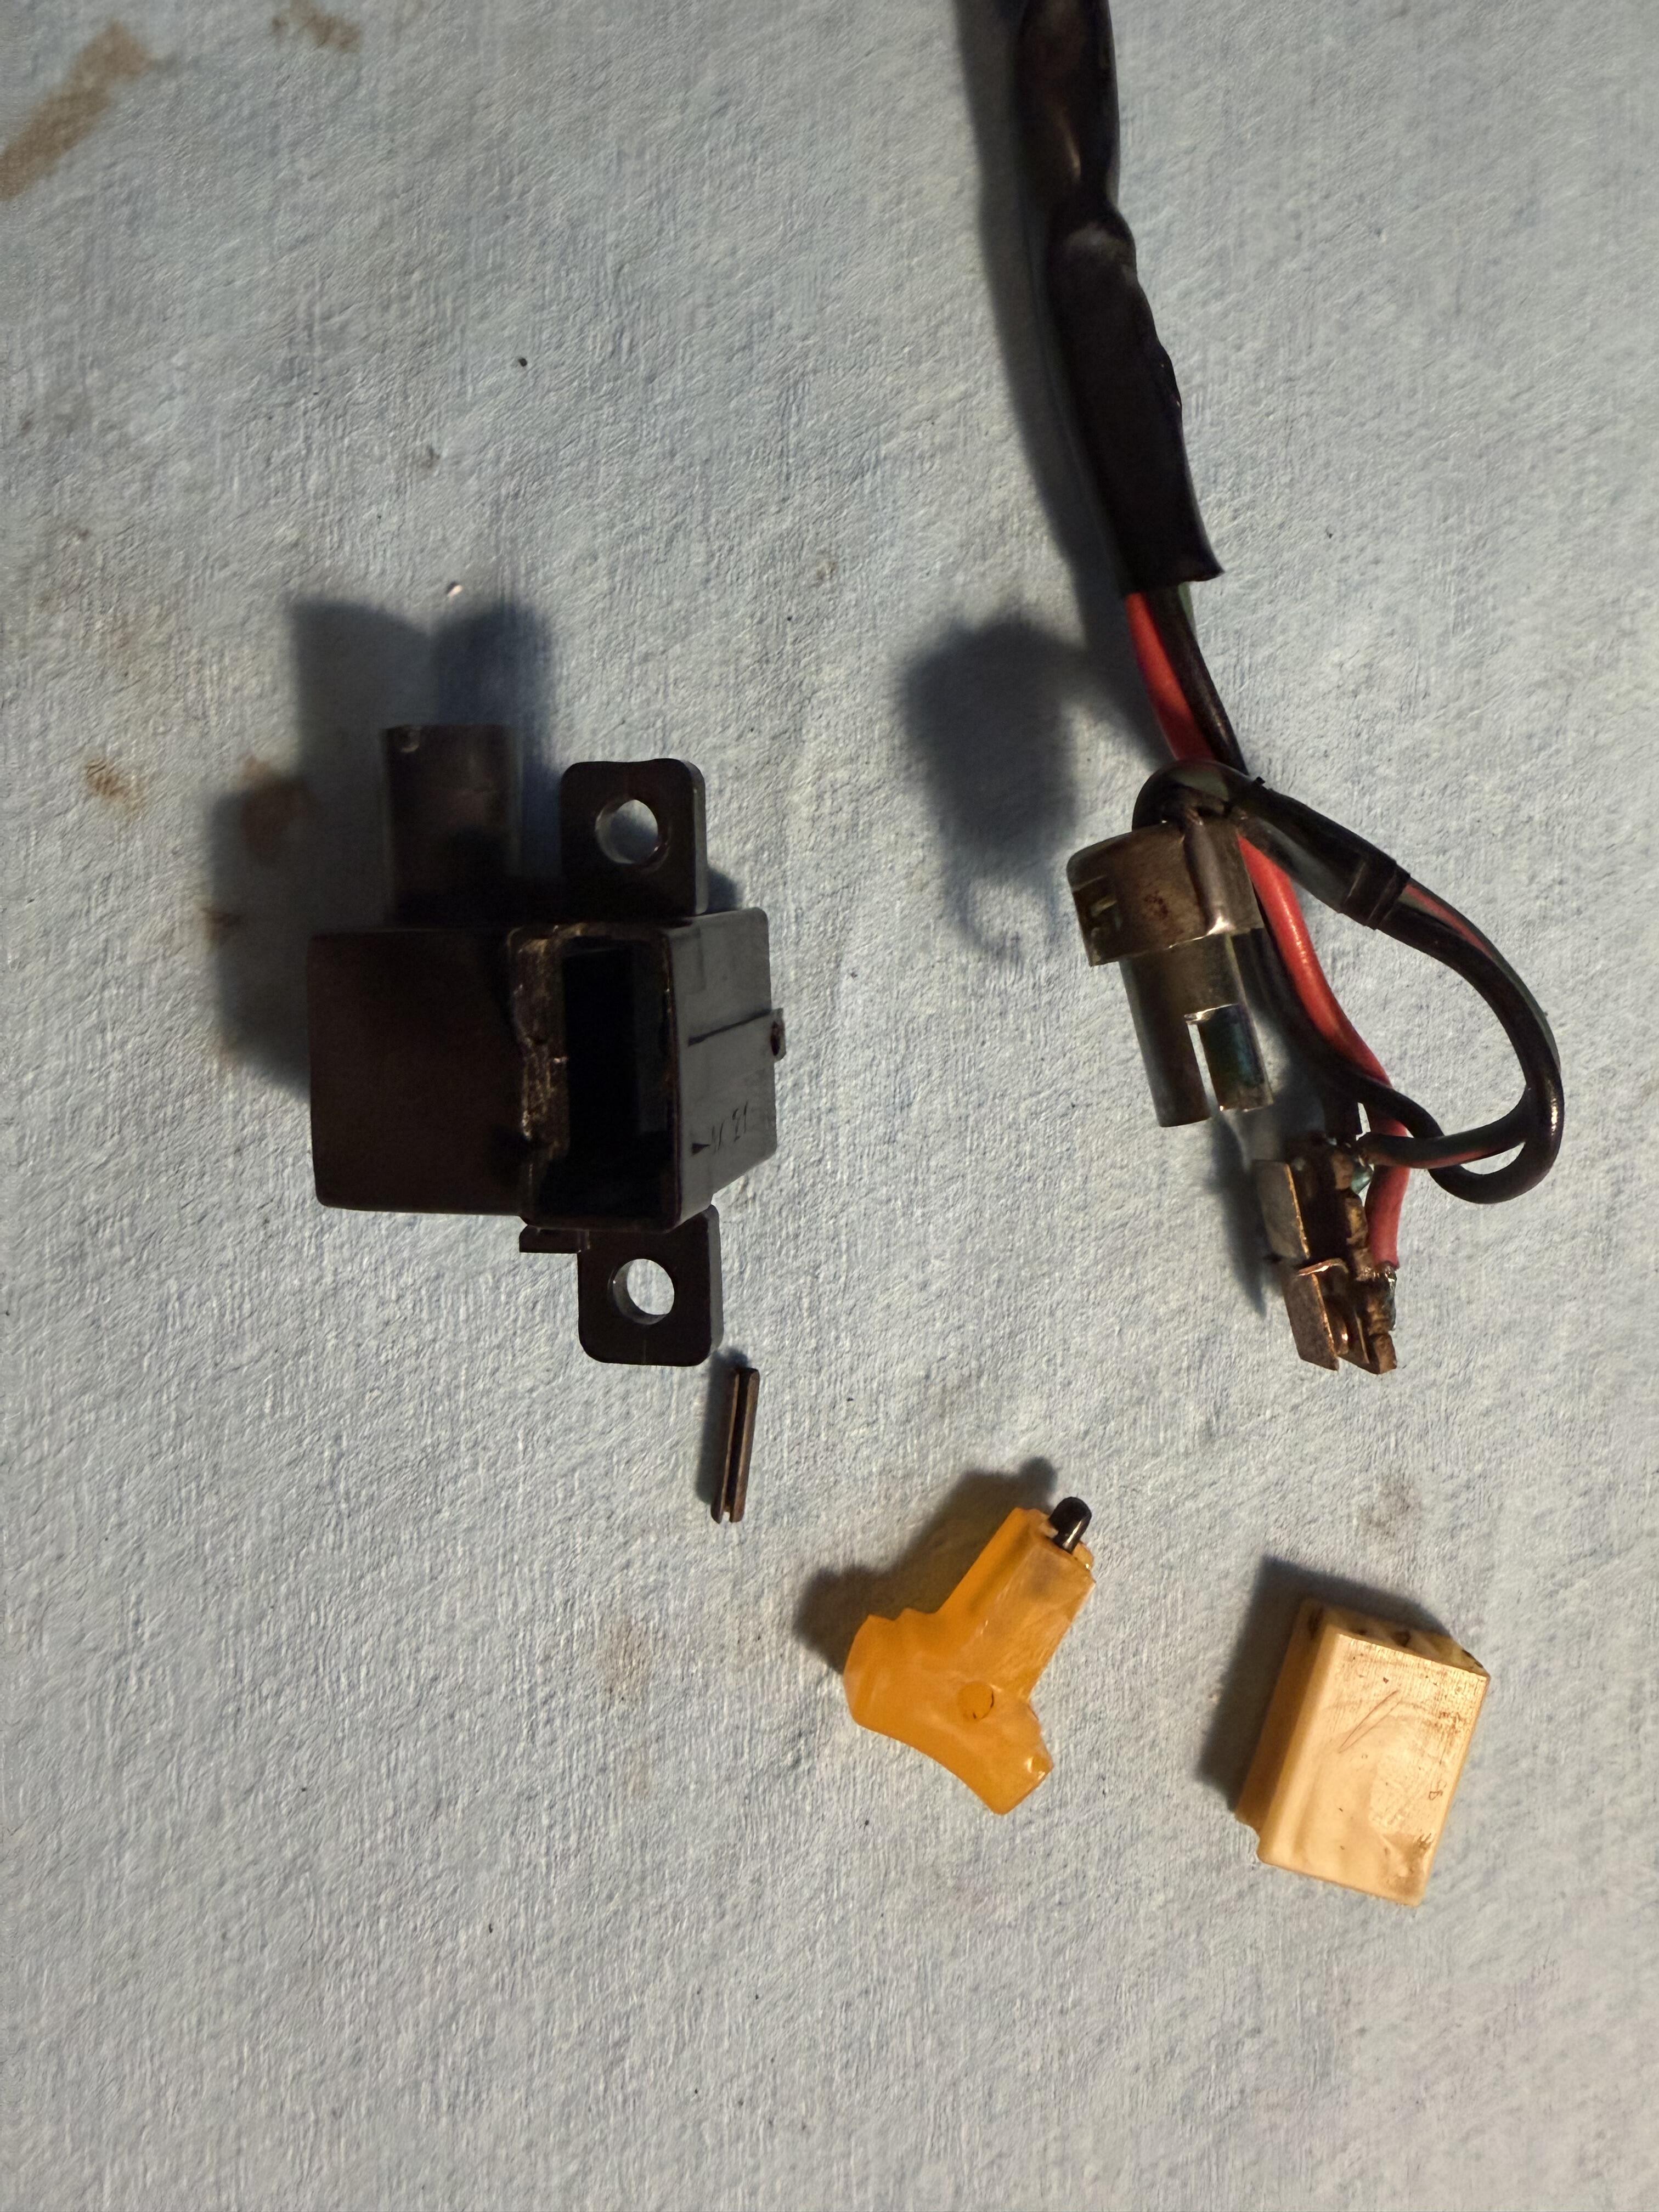
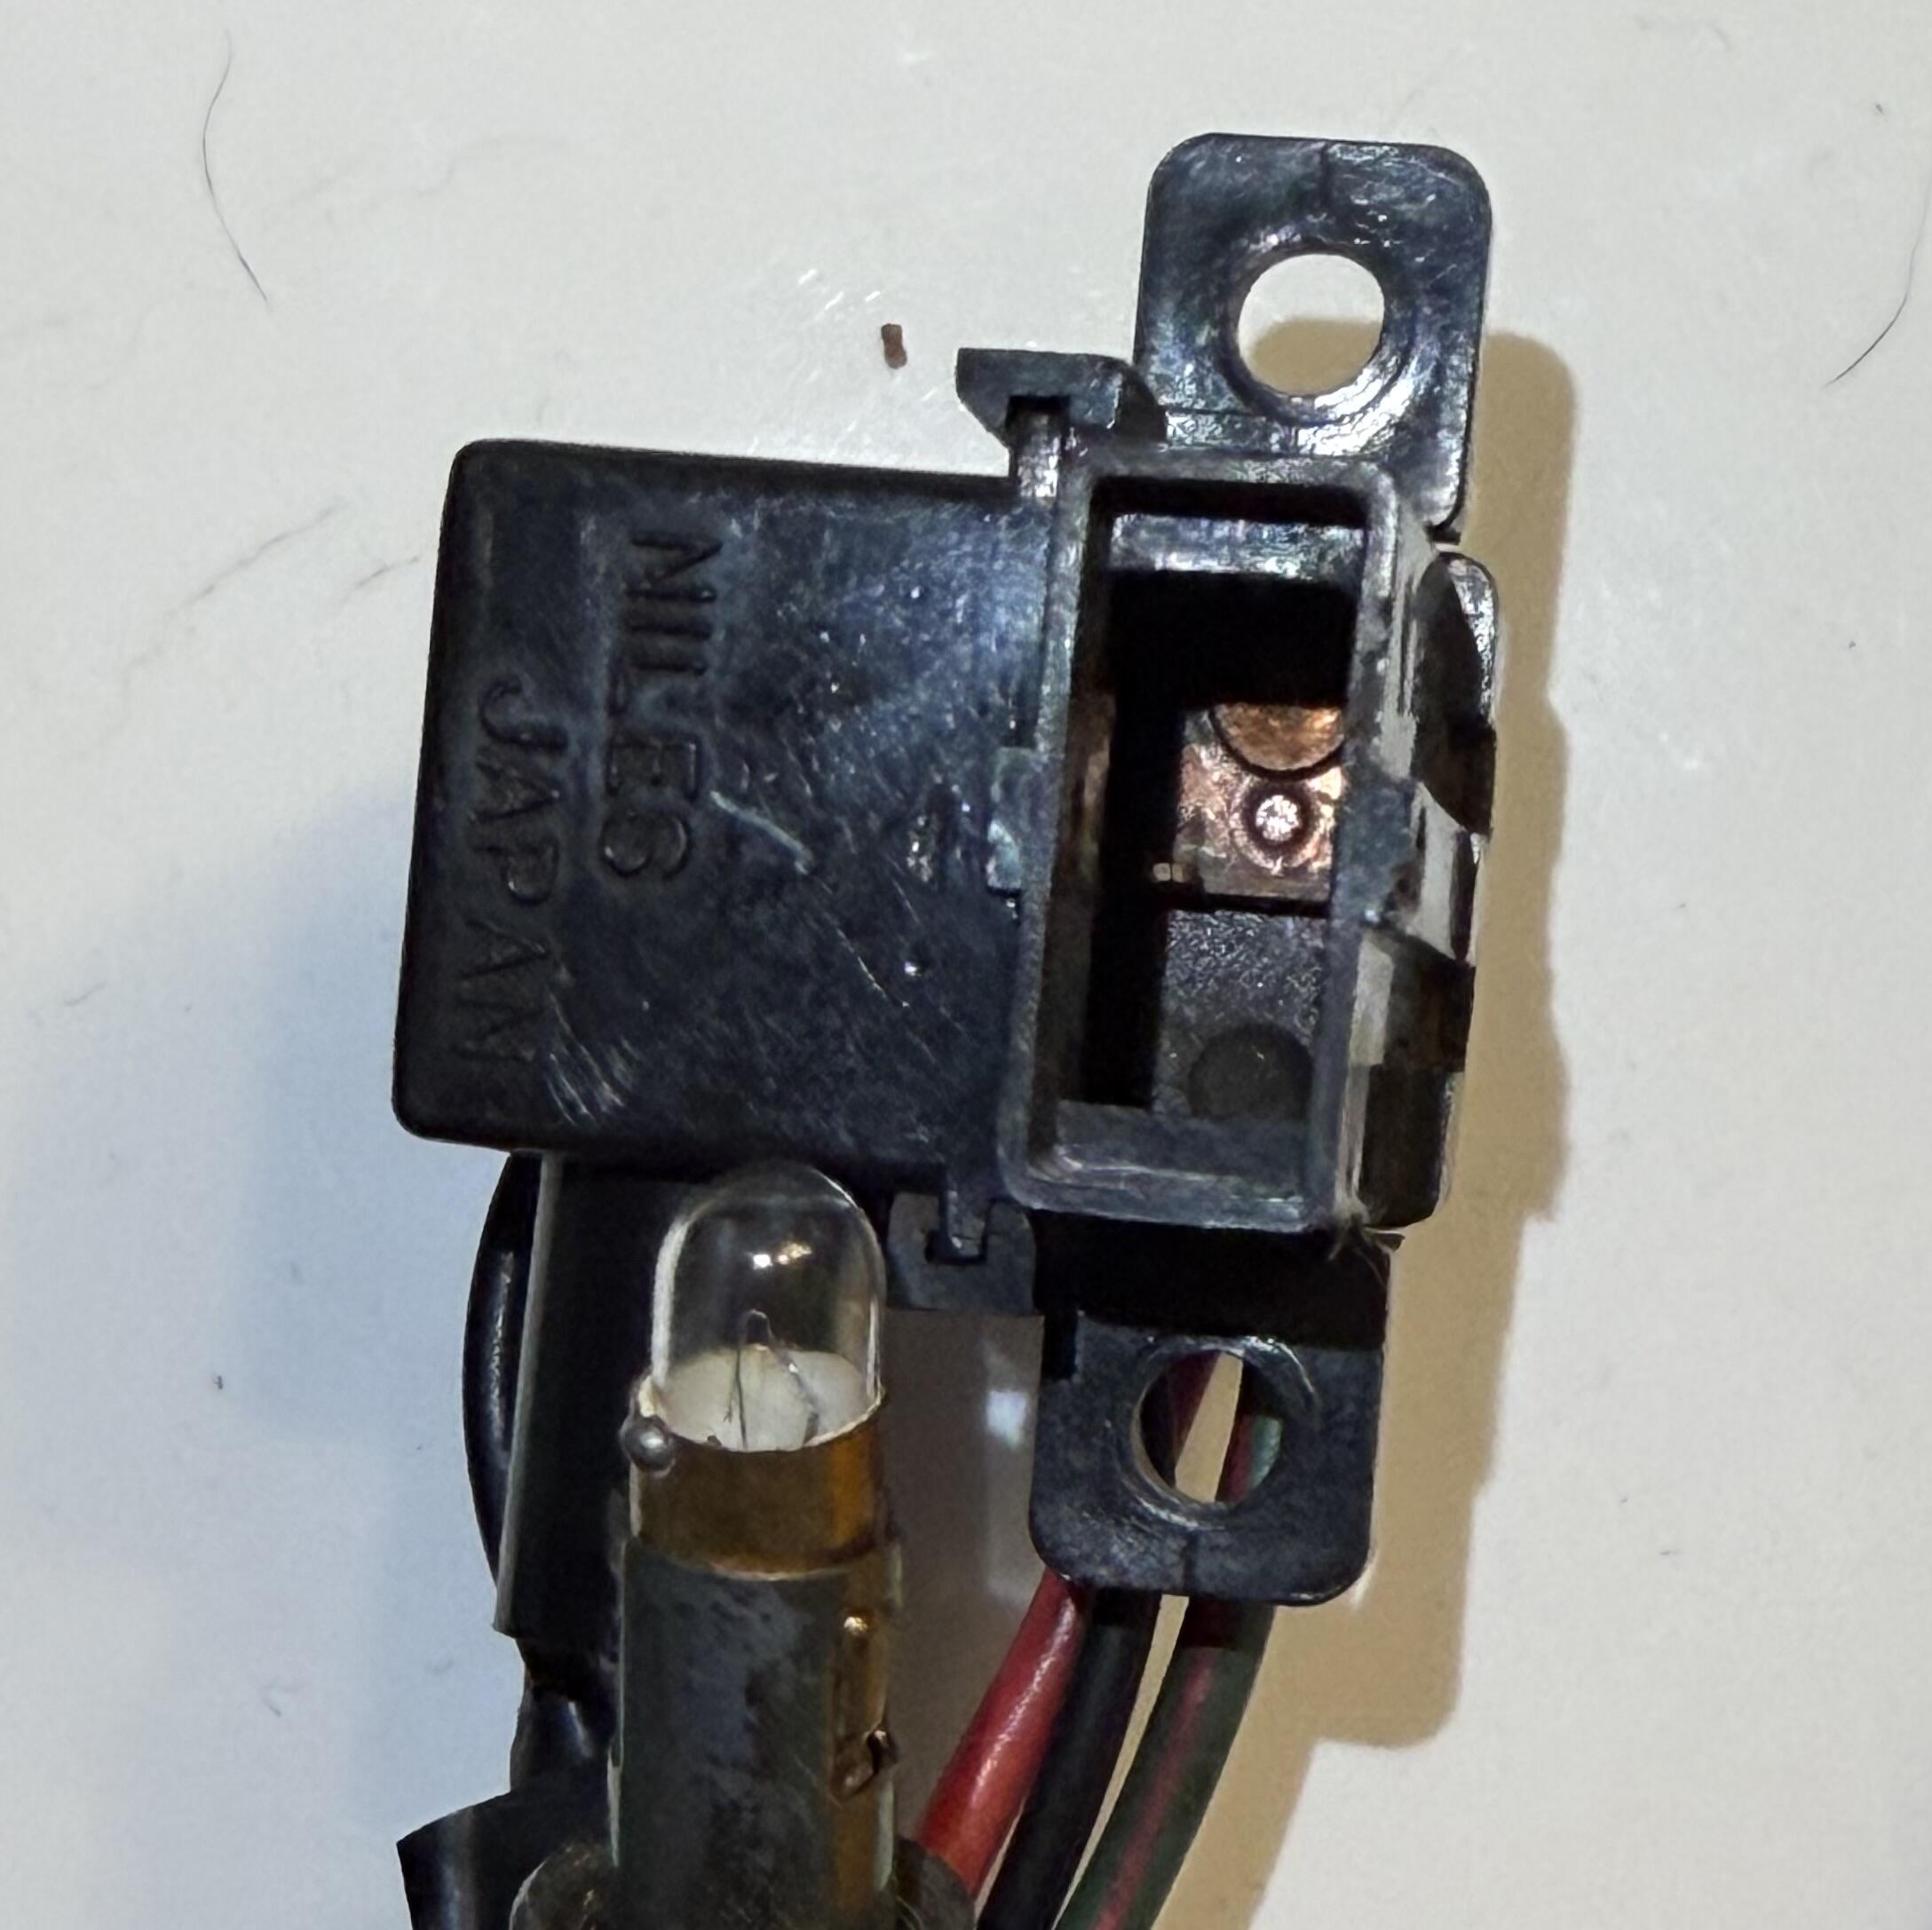
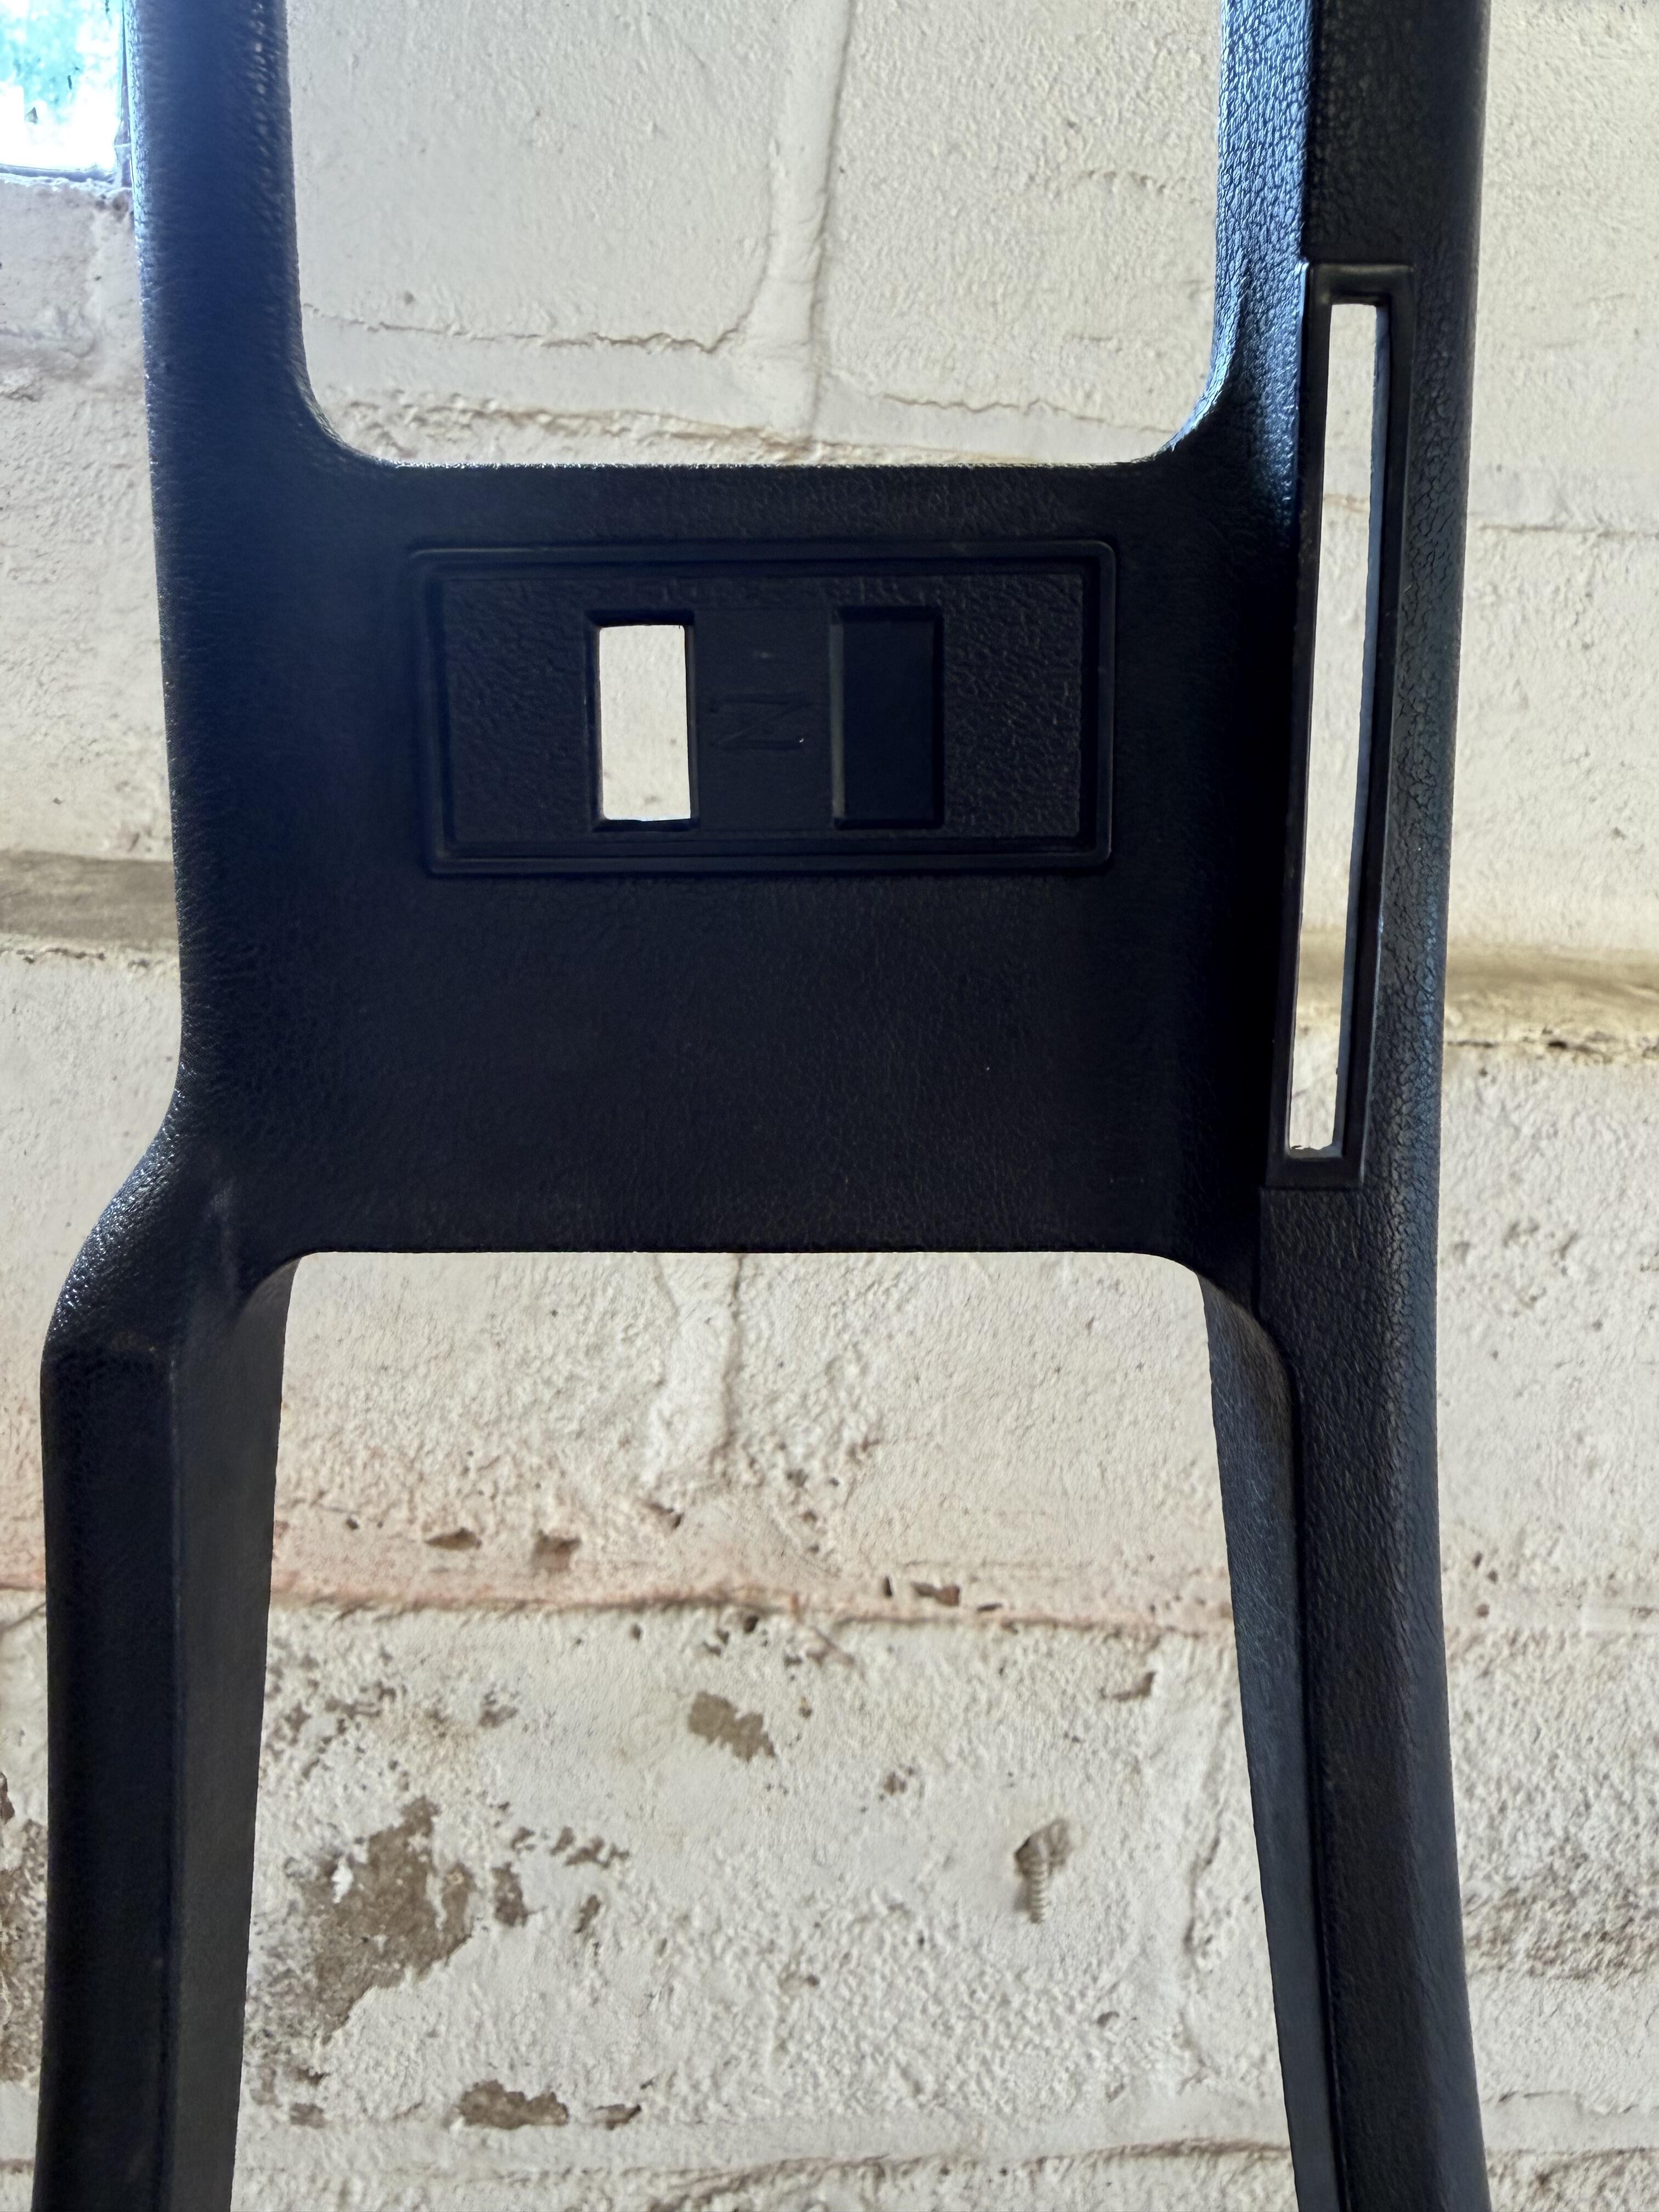
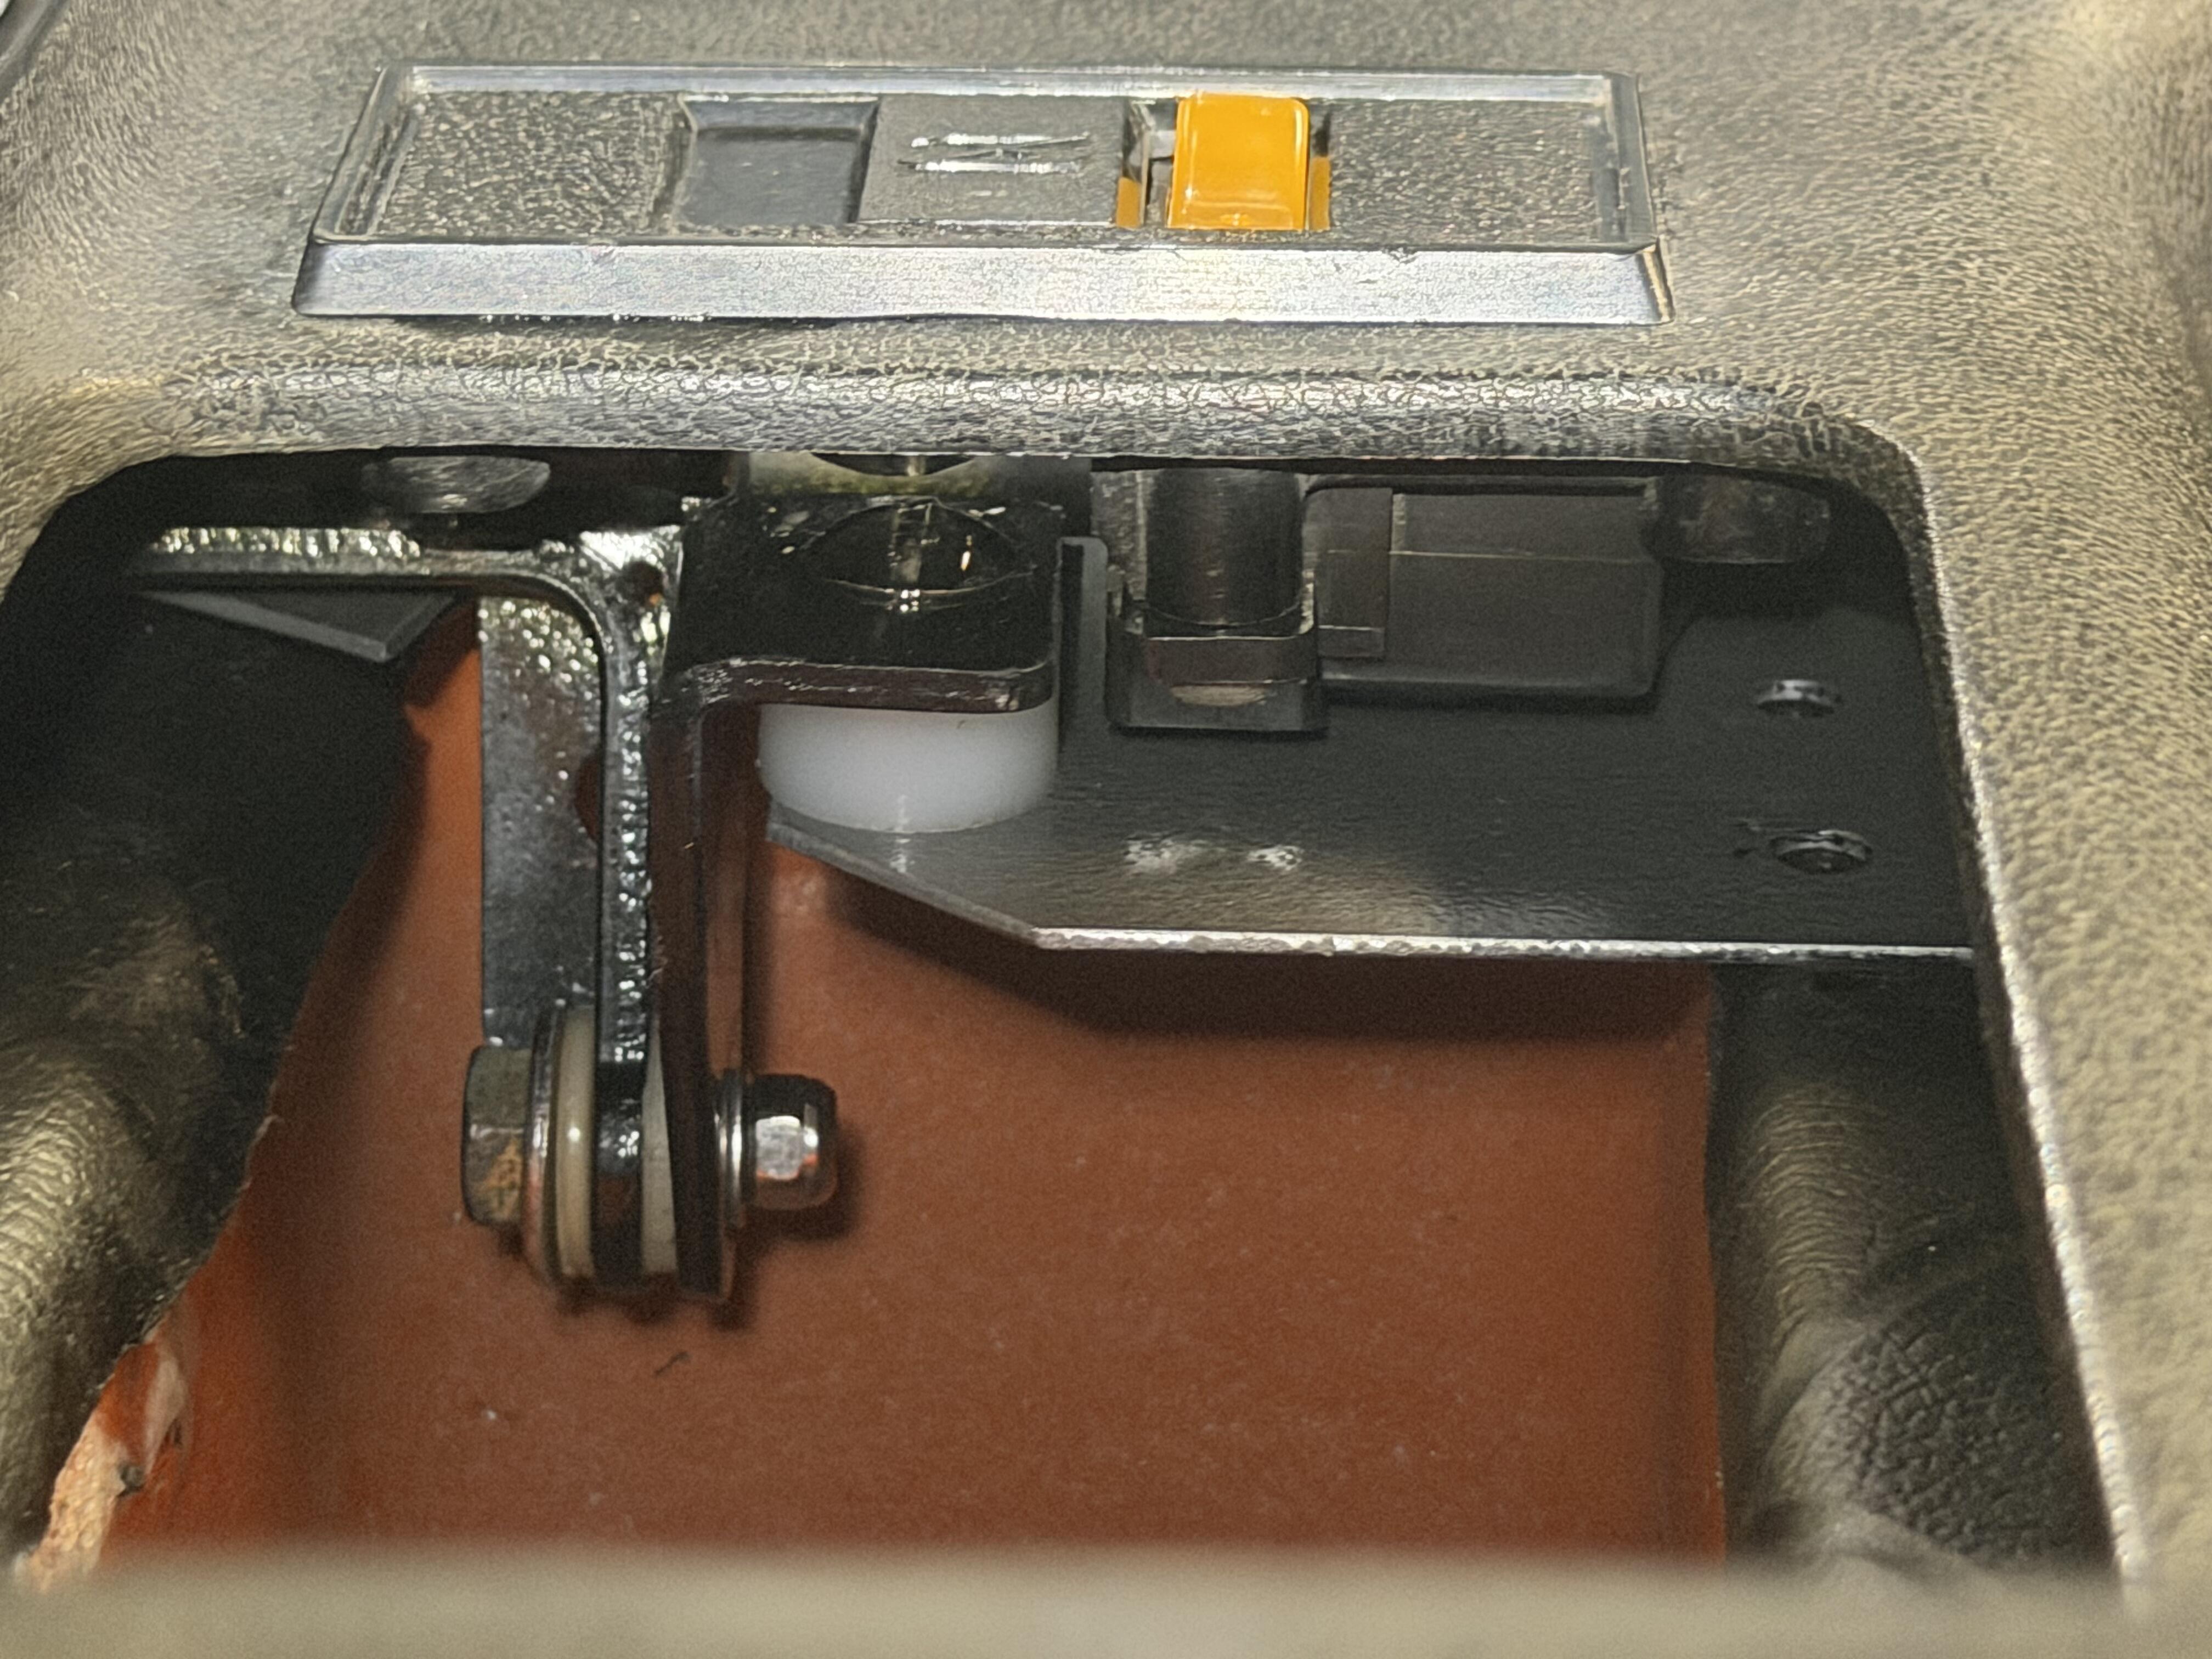
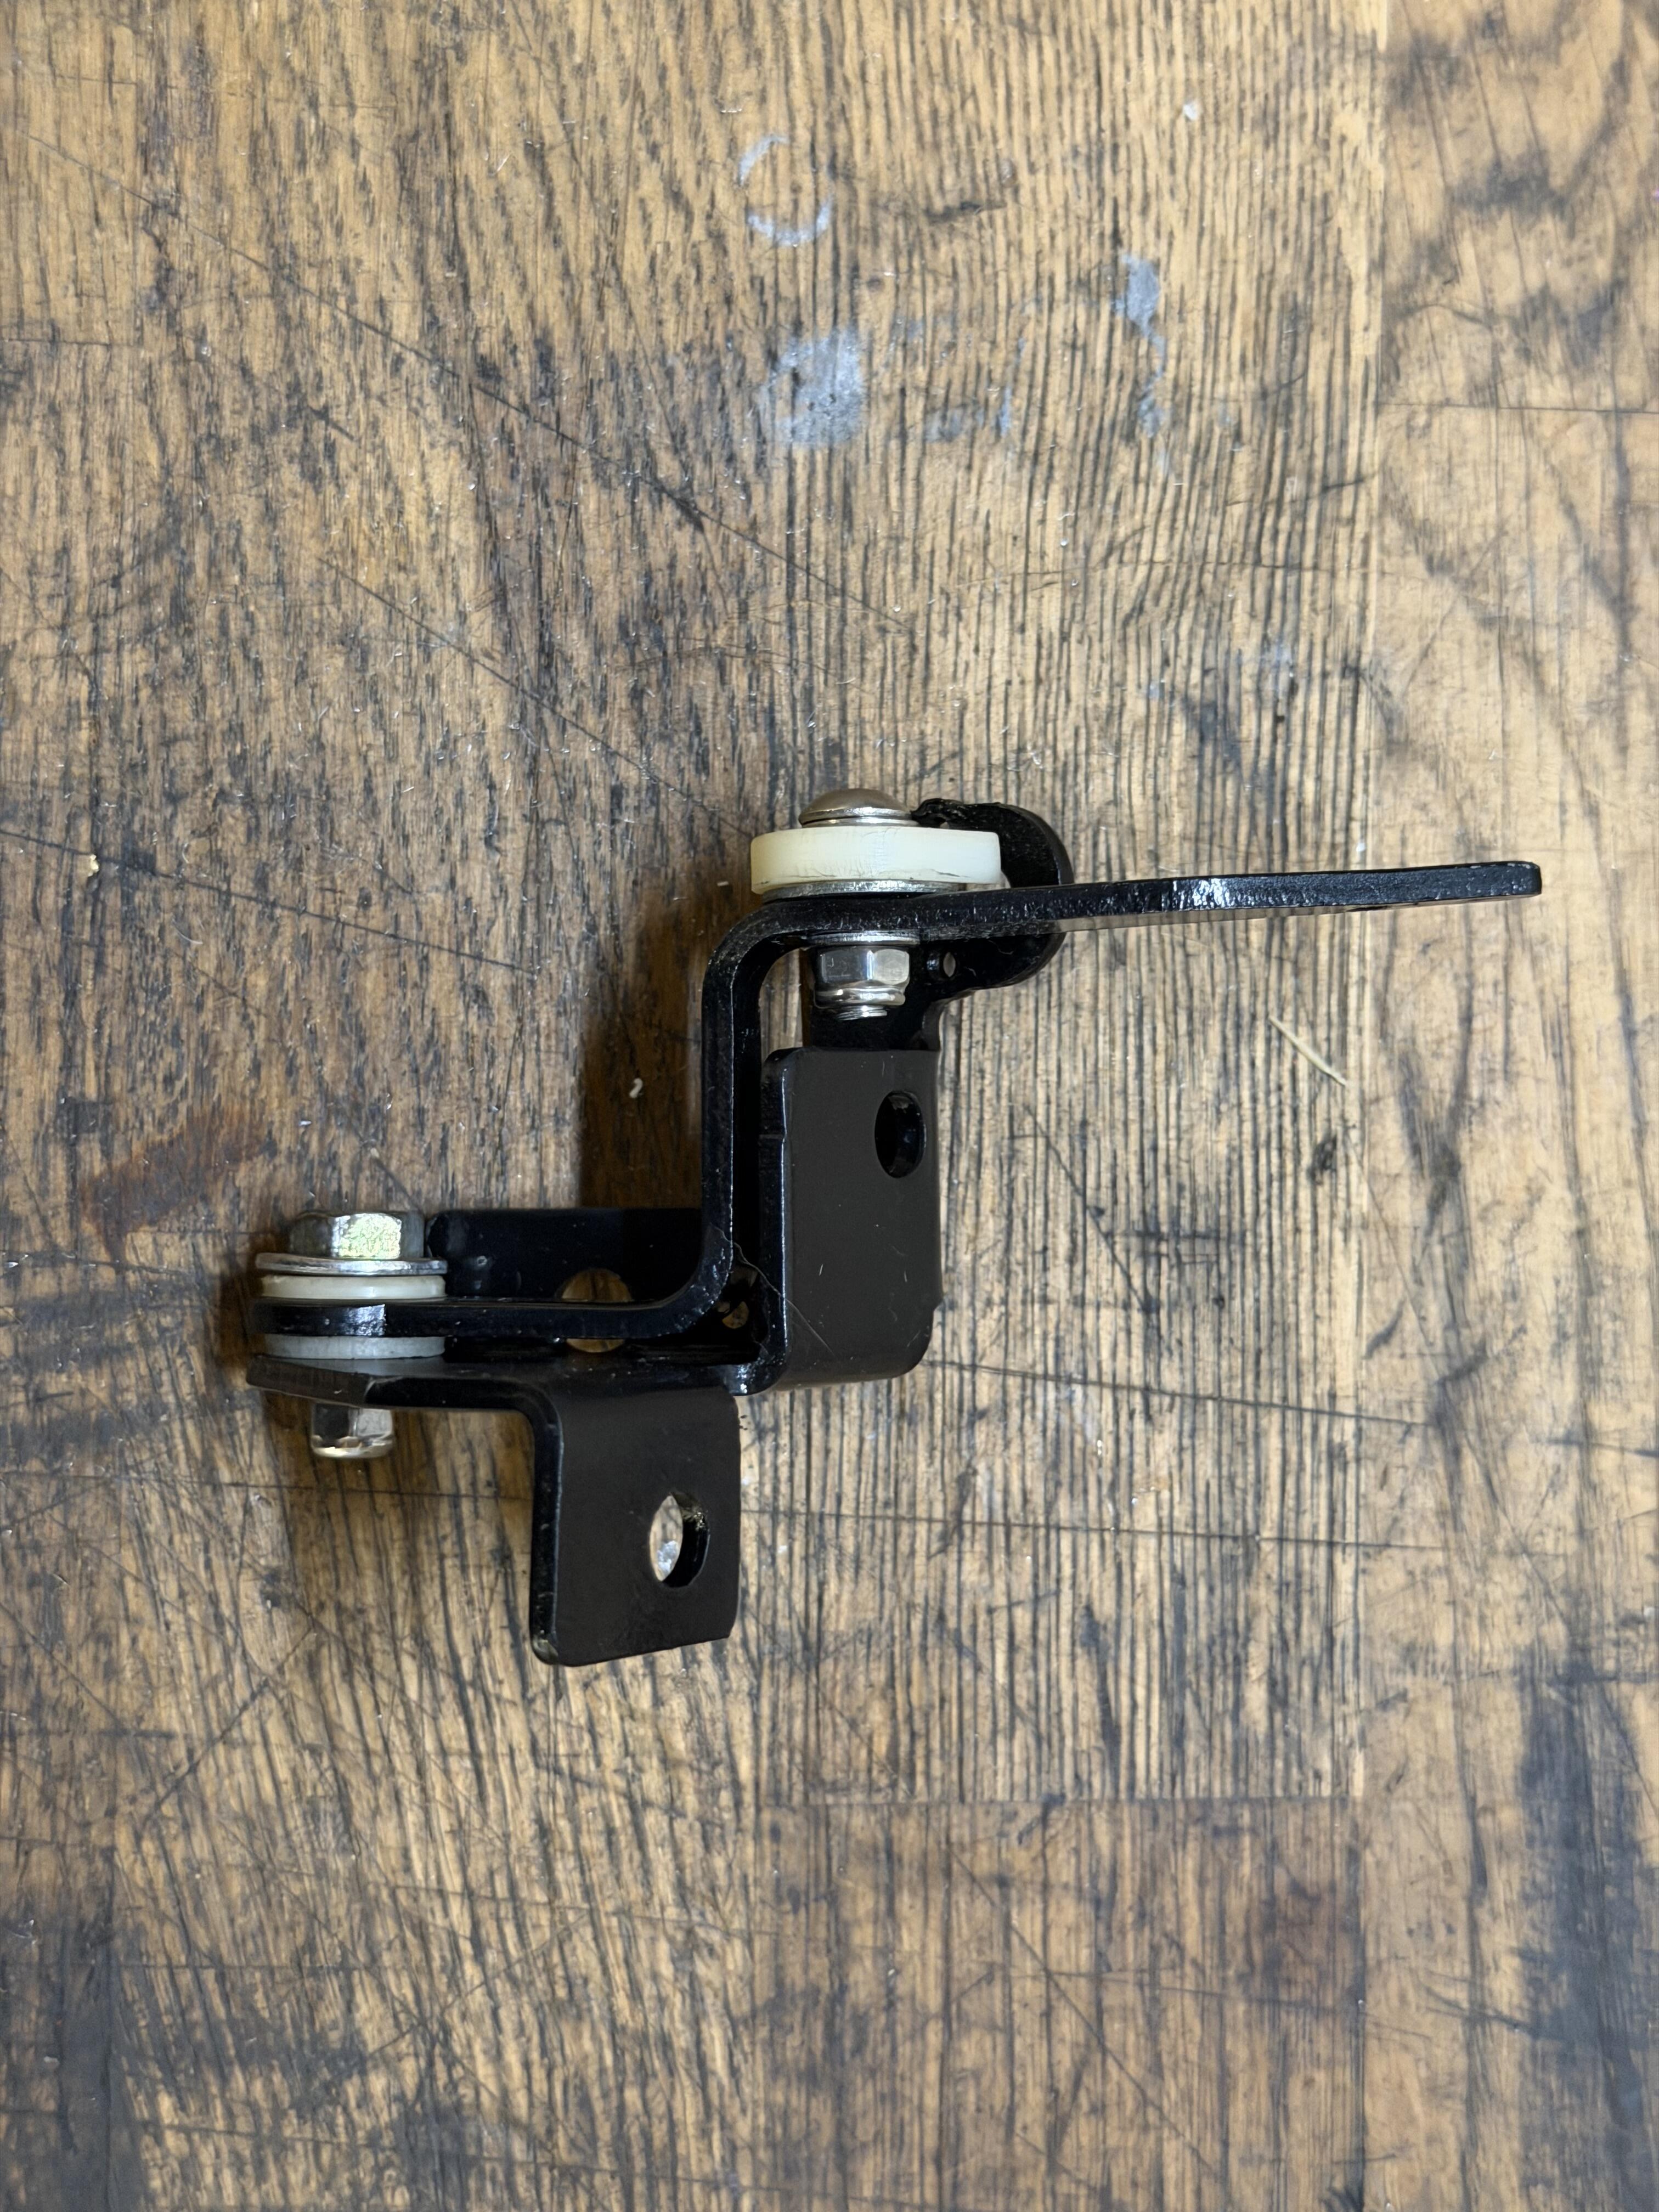
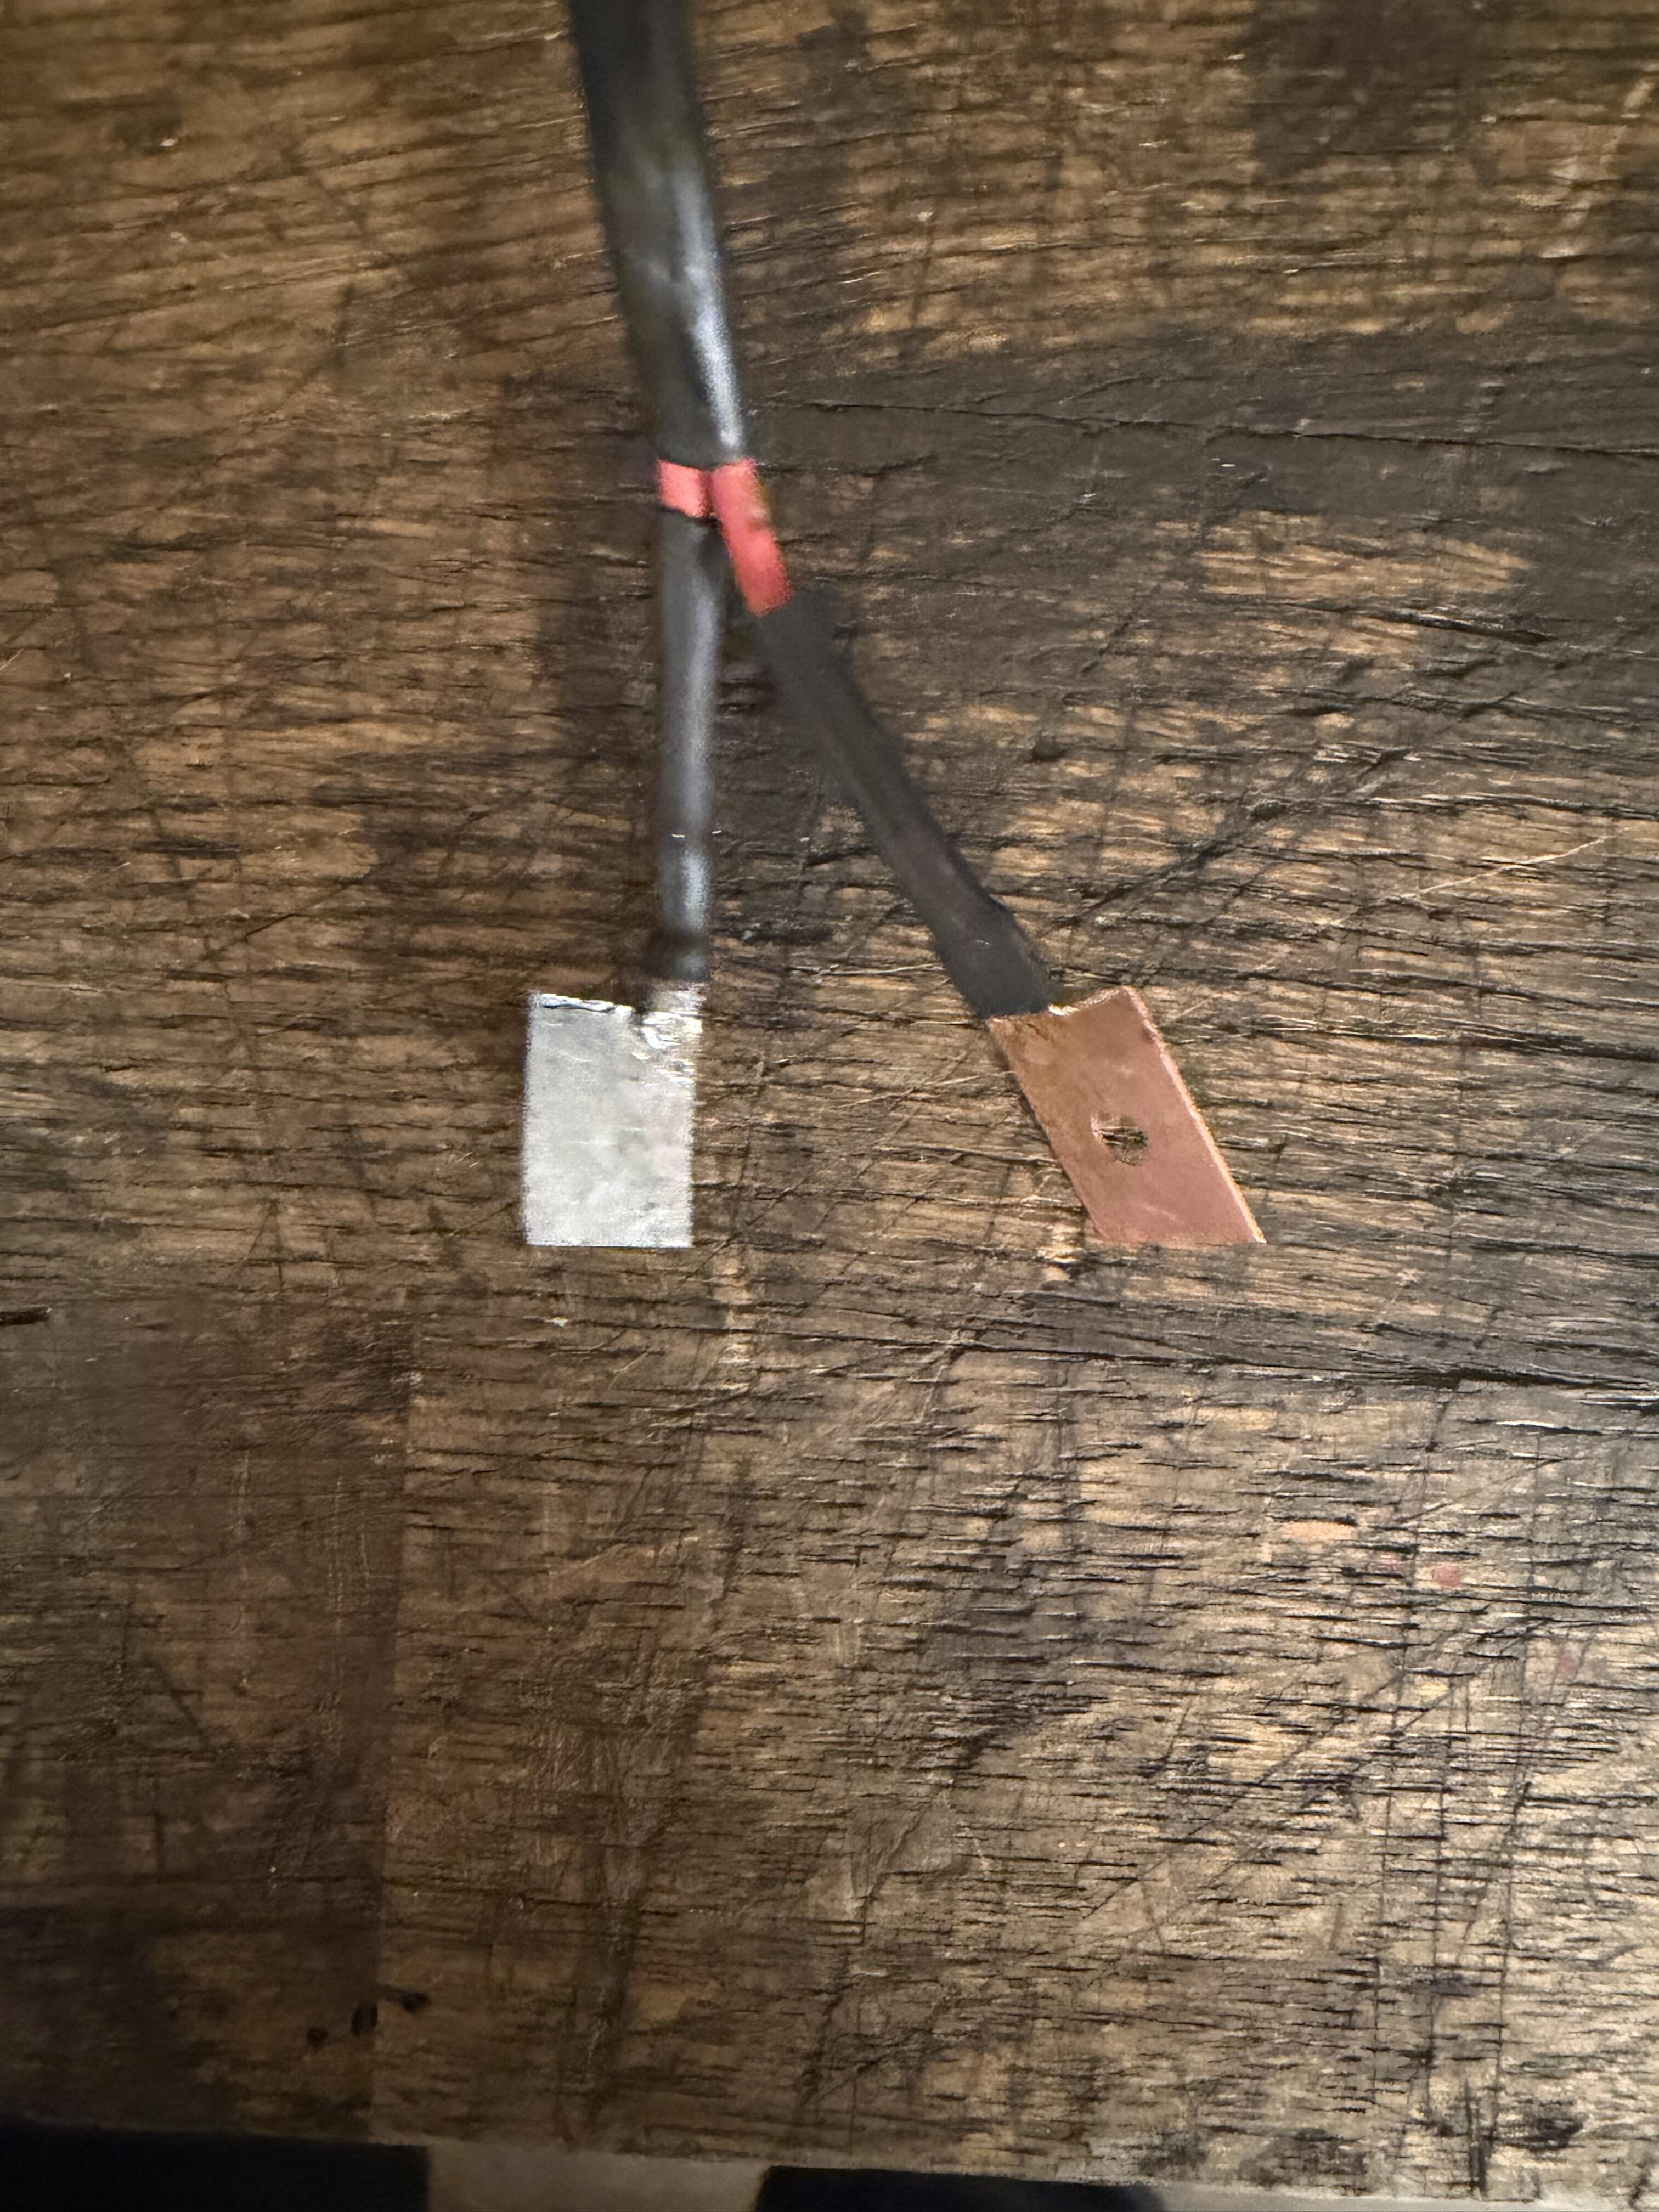
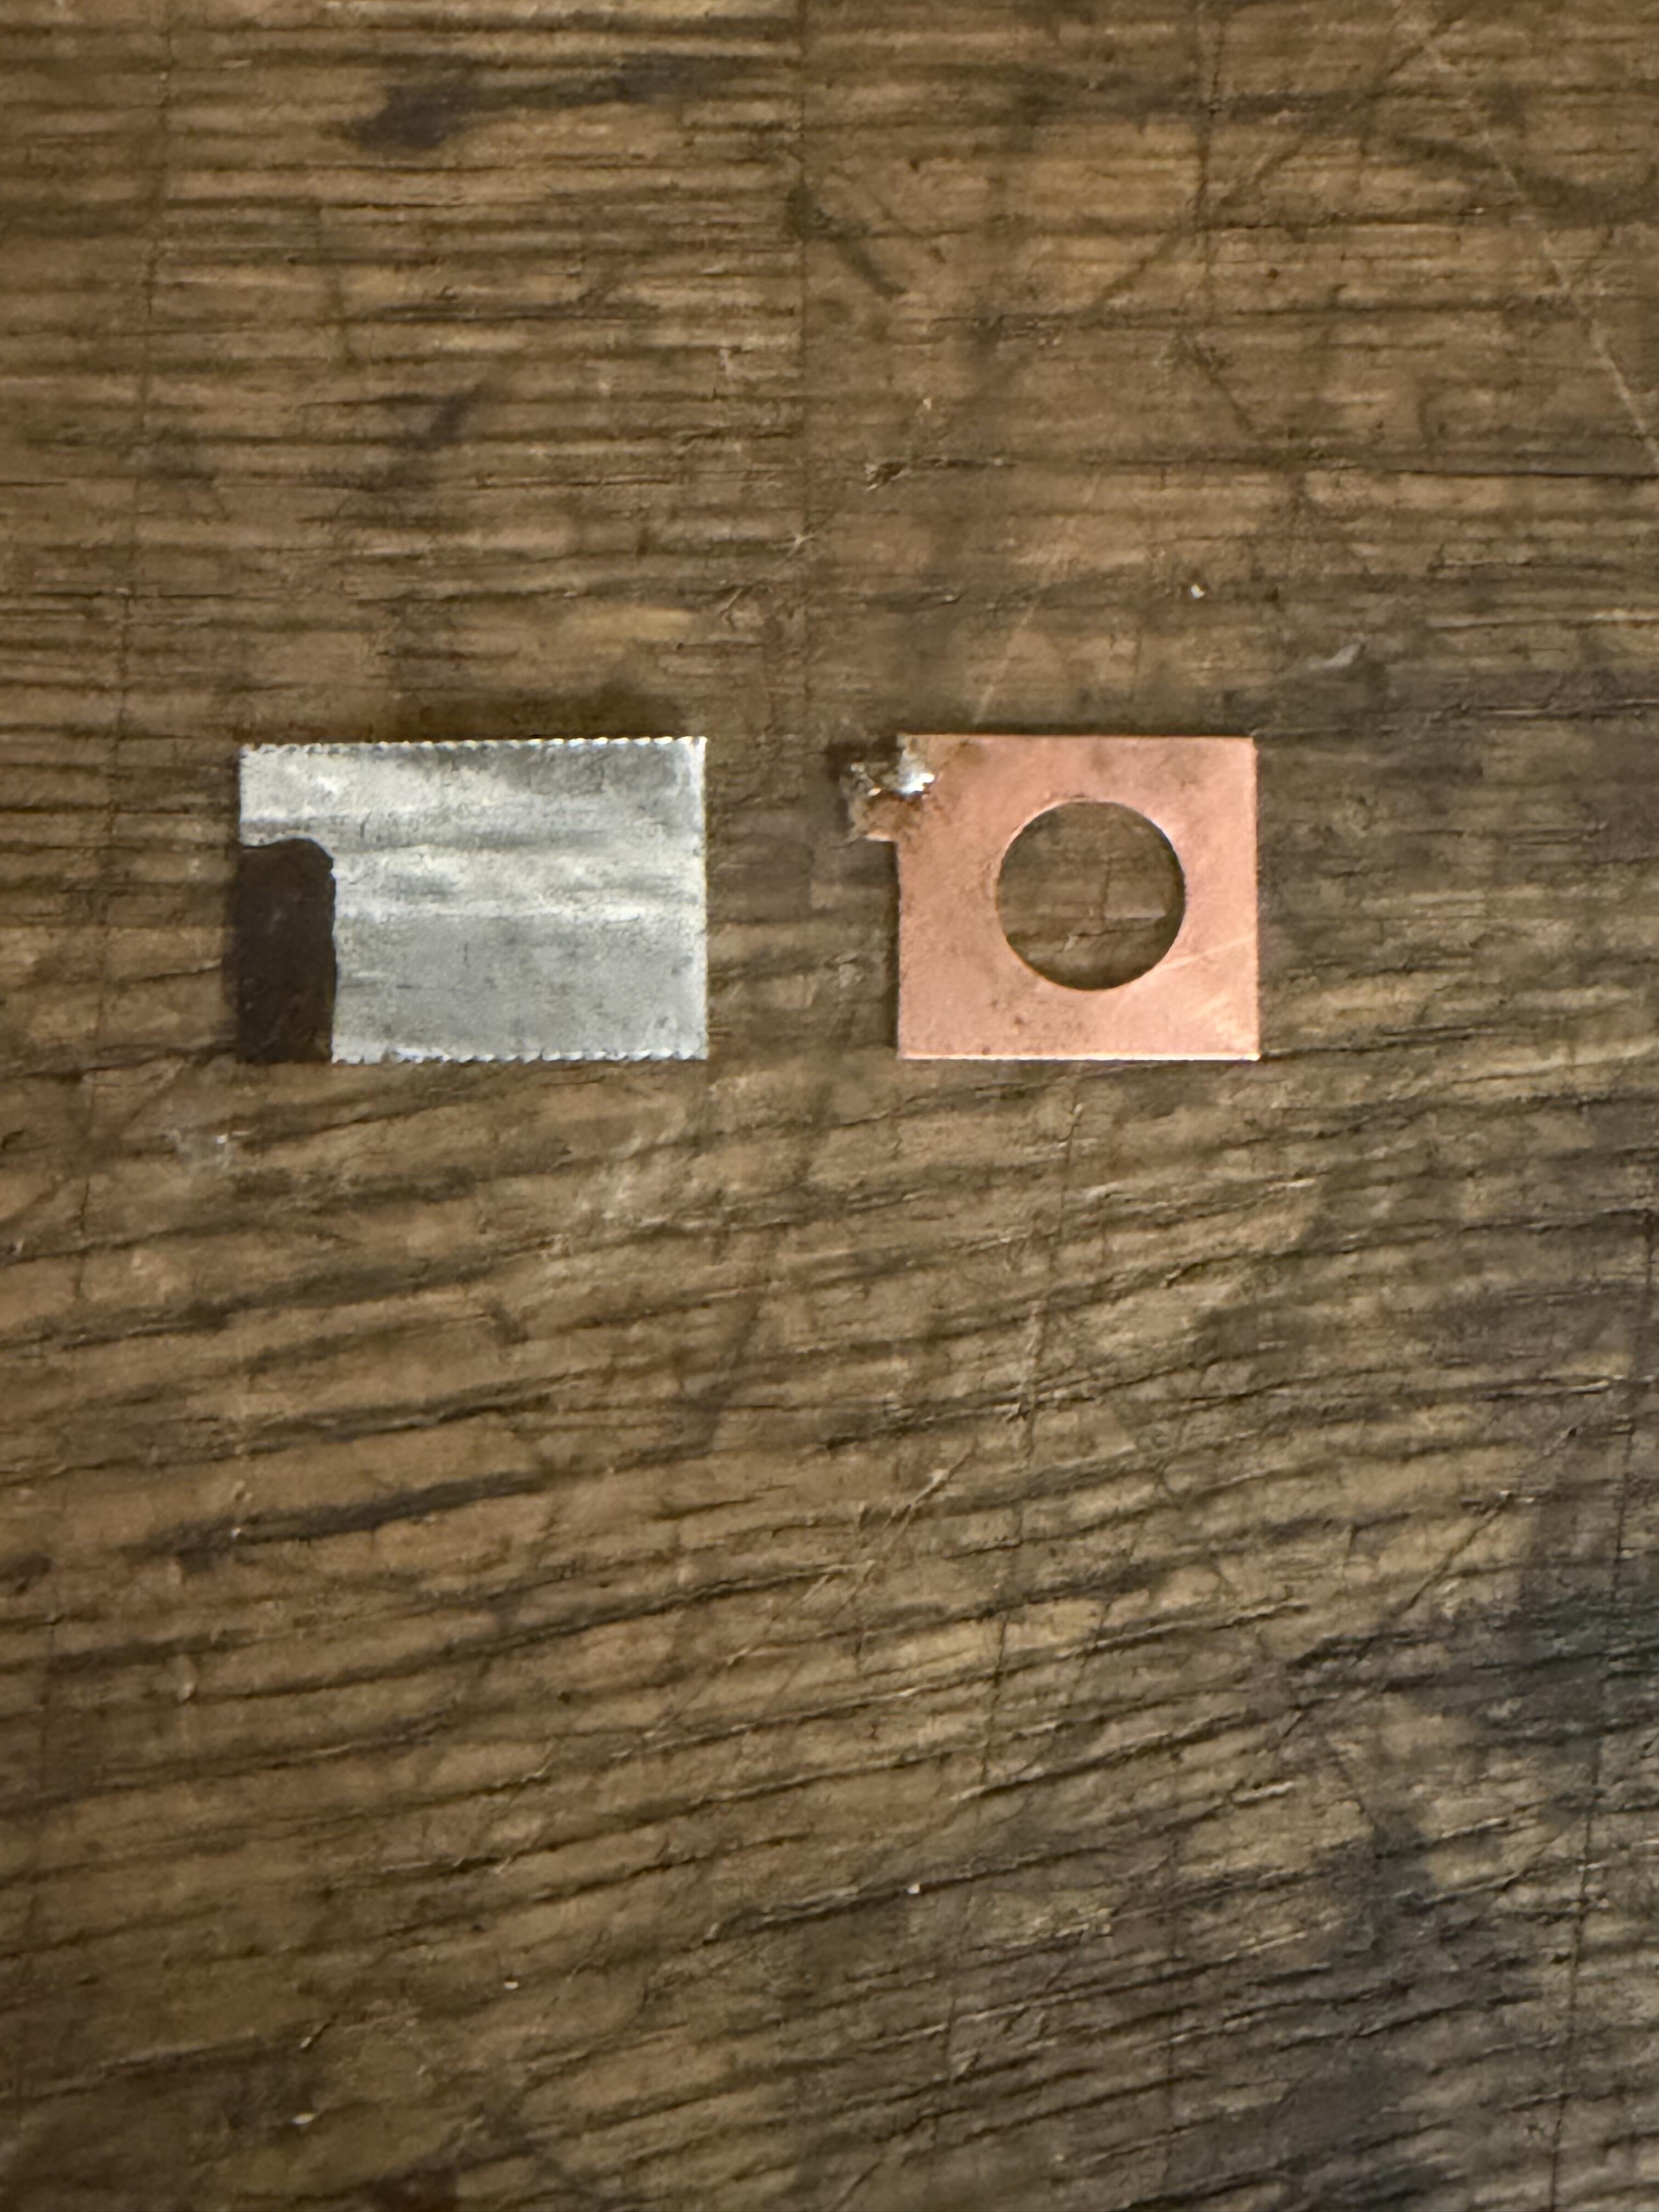
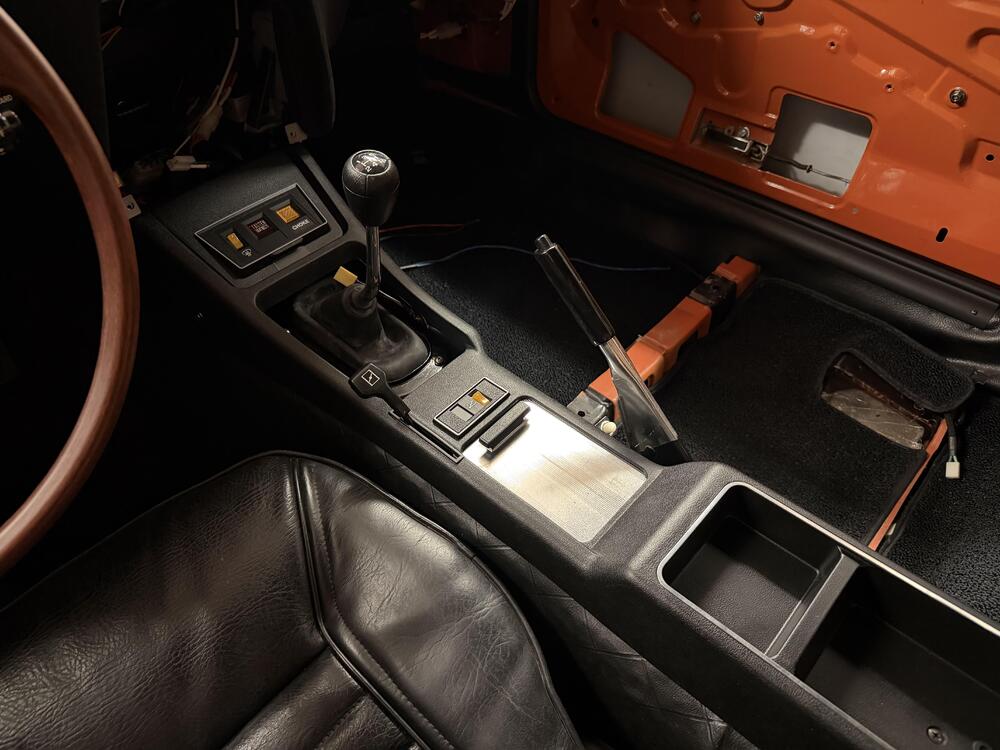
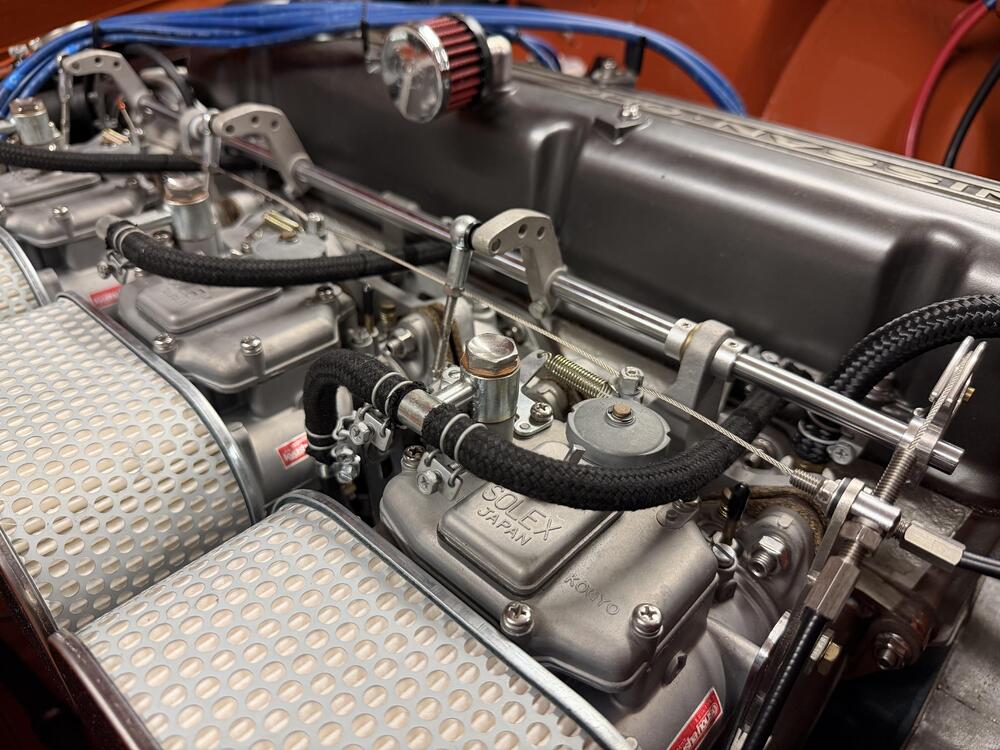
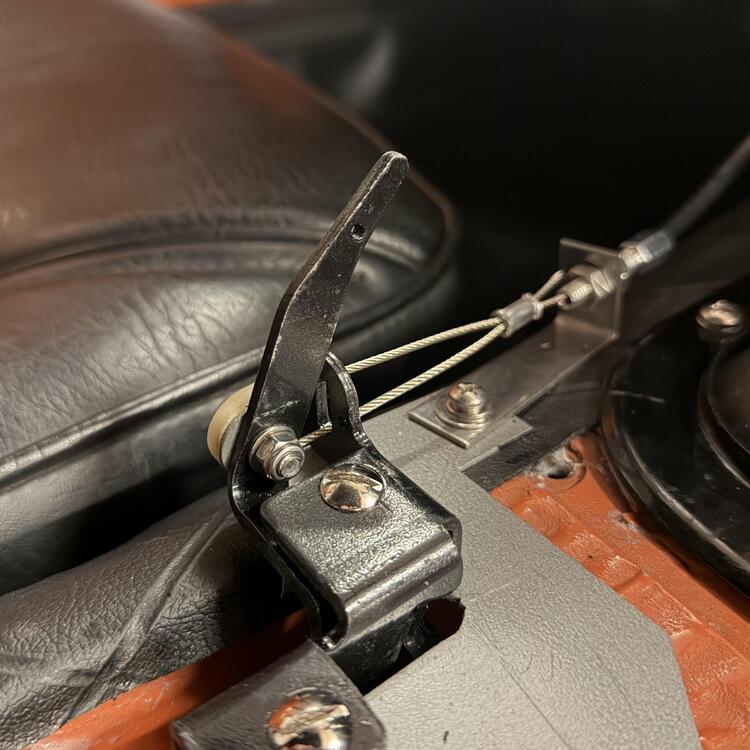
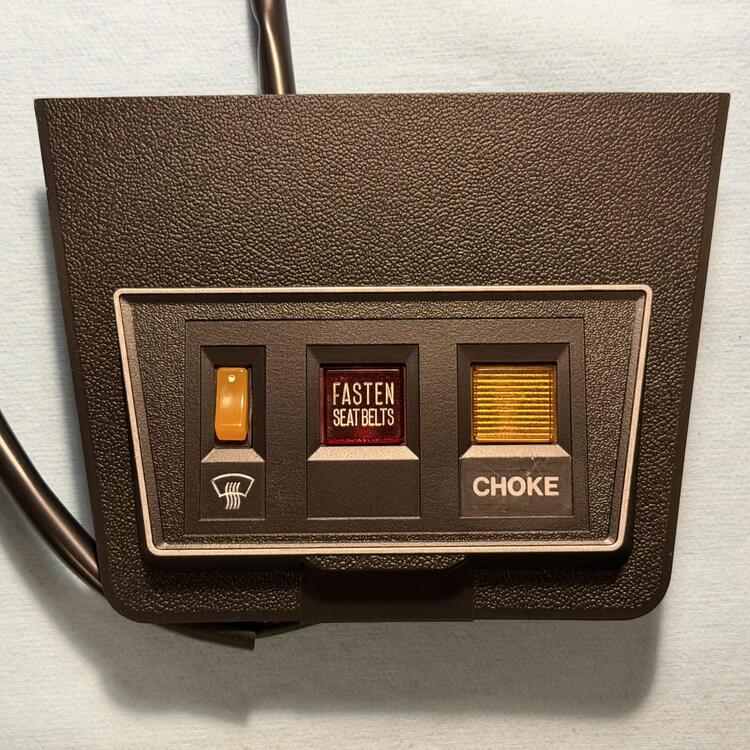
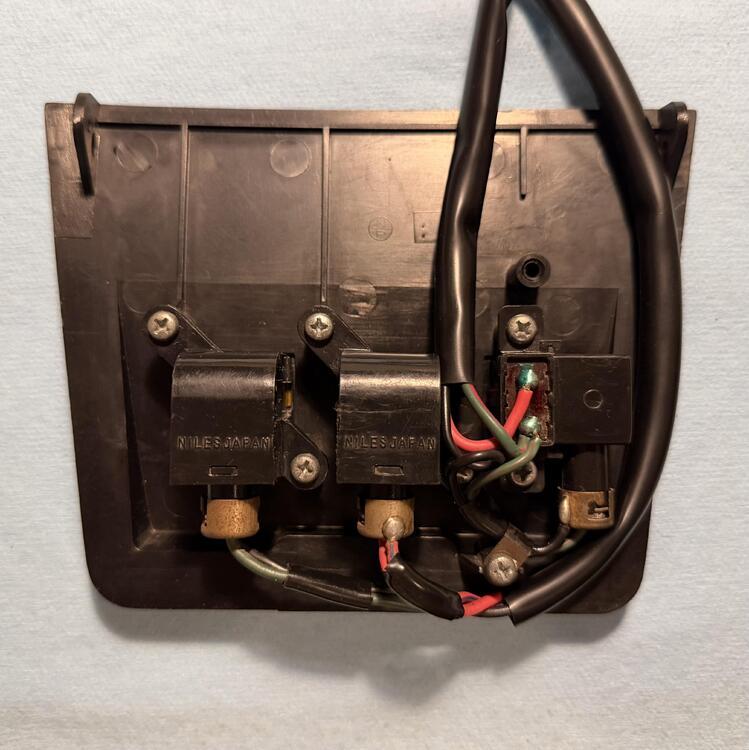
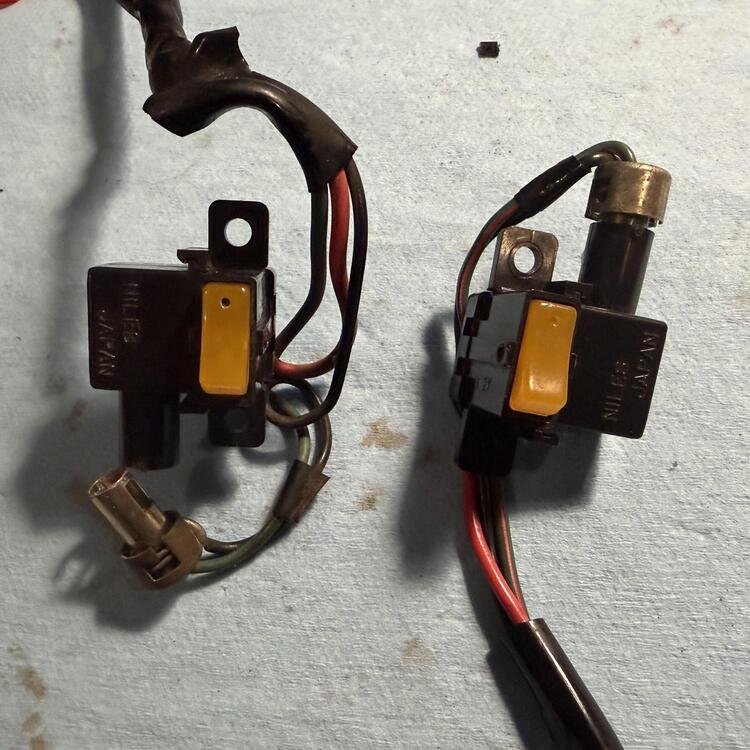
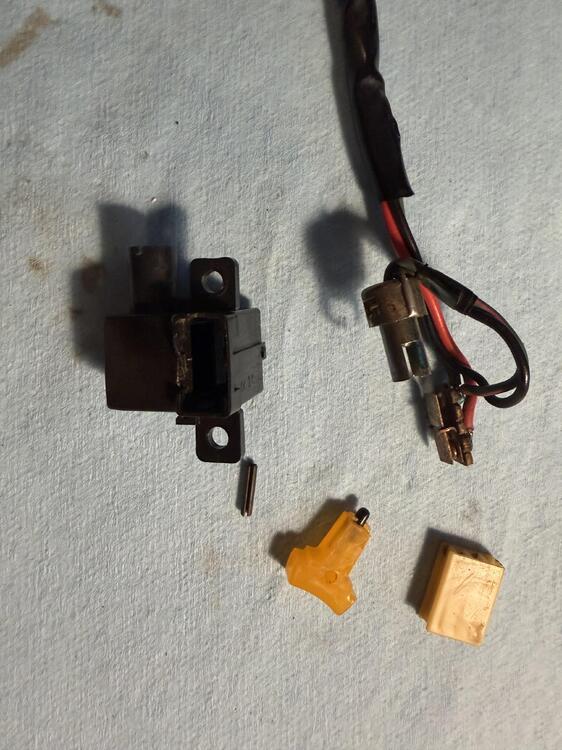
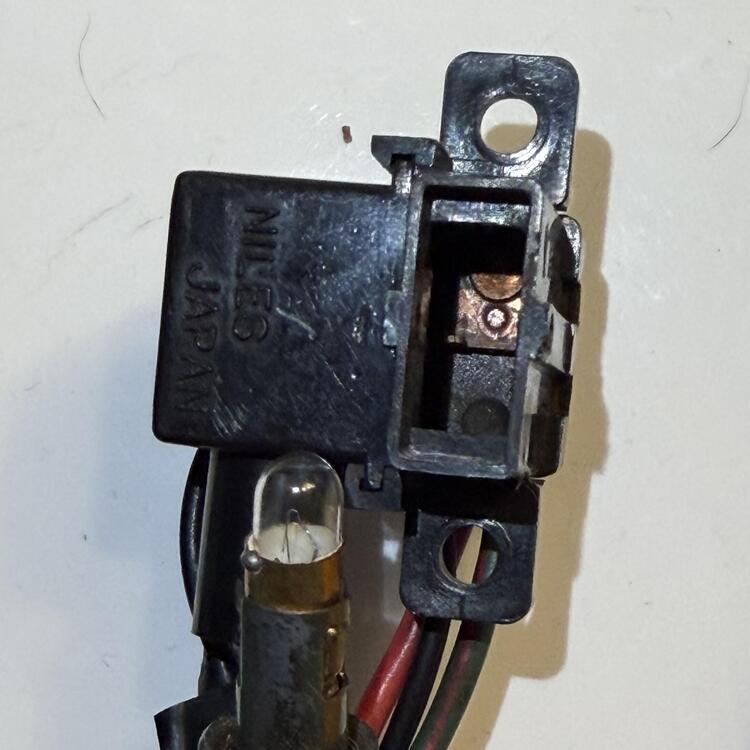
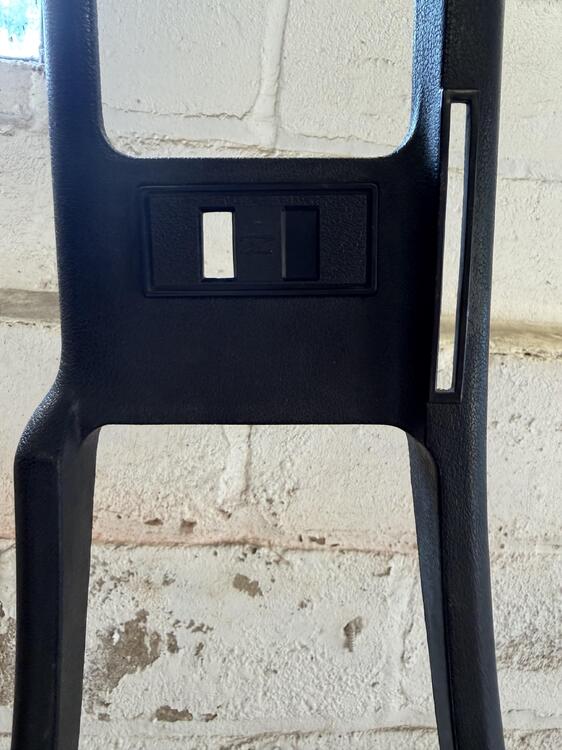
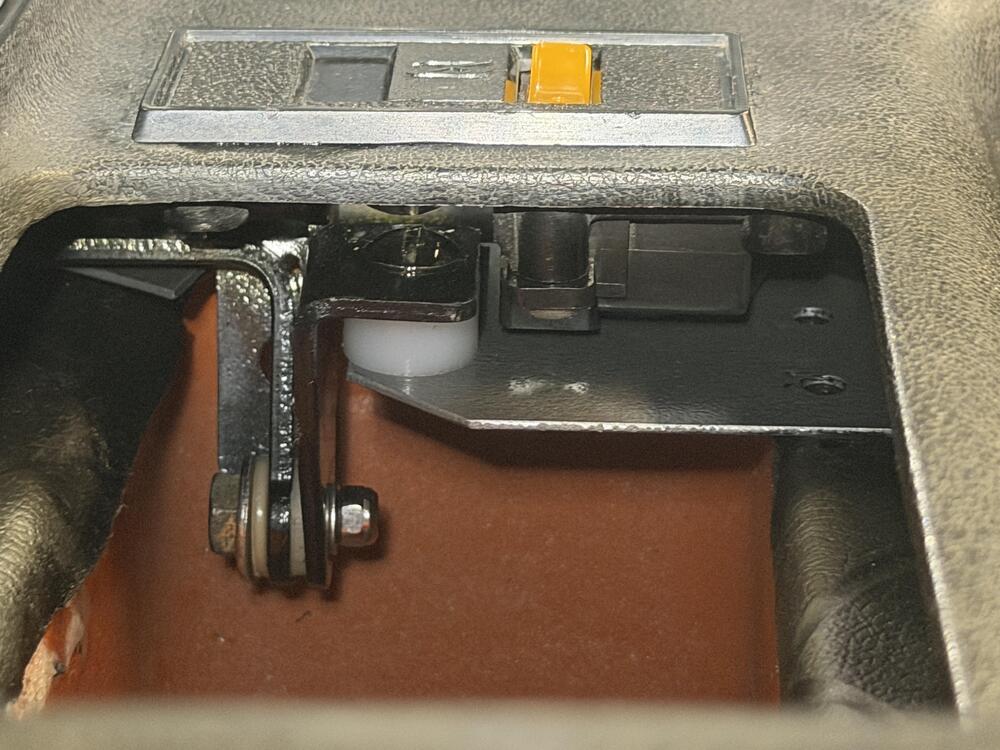
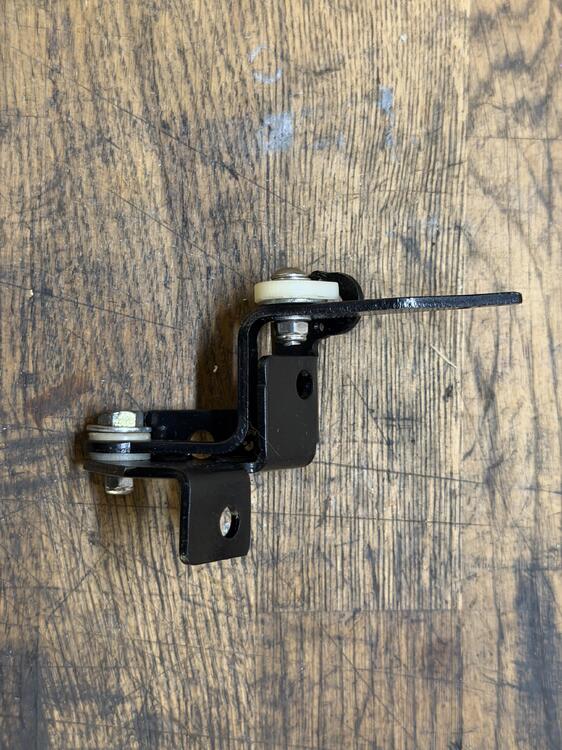
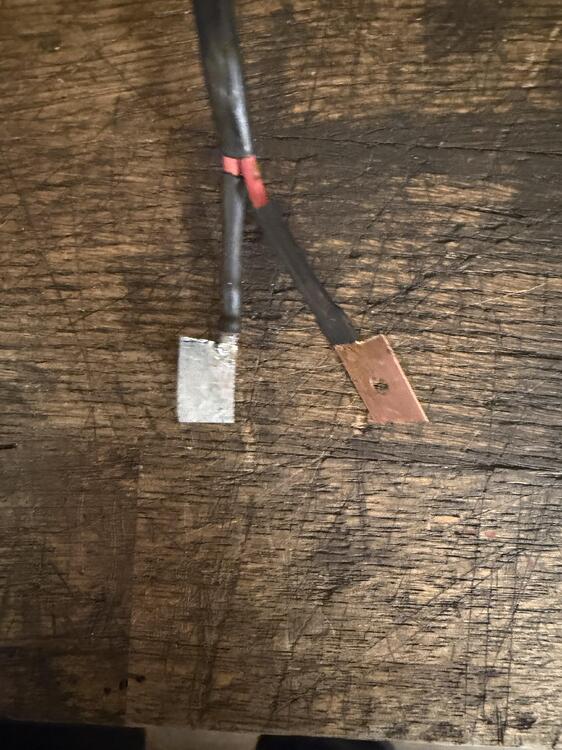
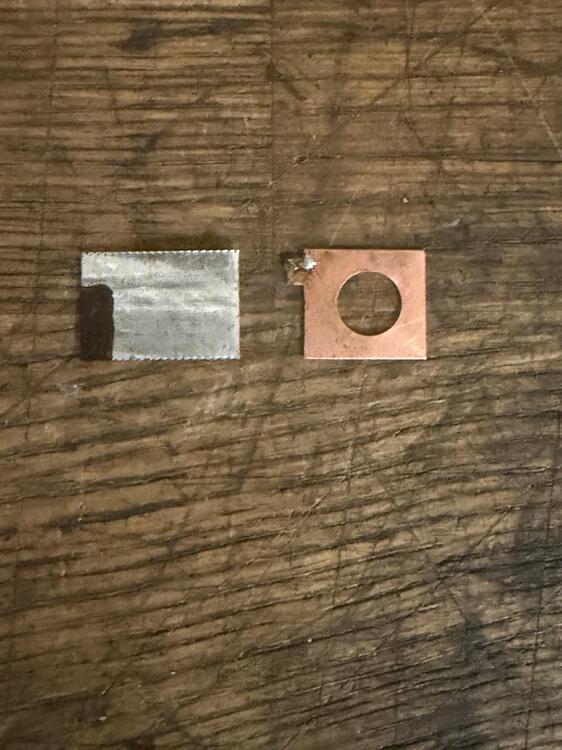
I finally got the center console in today. I had to repair a crack in the right rear corner, but that was no big deal. Some superglue, some JB Weld for plastic reinforced with fabric, some putty to fill what pits the super glue didn’t cover, and it’s nearly invisible. I sprayed all of my interior plastic with SEM Landau Black, and this piece came out the best. Other than the steel trim ring around the trays in the back, I used chrome paint pens for the silver trim. It looks okay. I kind of wish I had gone with silver leaf, but this is probably more resilient. The defrost emblem is done in white nail polish. I just masked the “choke” label. All of the hardware is new. The ash tray was surprisingly easy. The rail was pretty corroded, so I cleaned it up and sprayed it with zinc paint, but the cover just needed a polish. All of the switches were much less clean, so they were disassembled and cleaned up. I had to fabricate a terminal for the choke lever switch because it had snapped. I used a tab from some HVAC duct that gave me the same reading on the ohm meter as the original piece, so should be fine. I don’t know why the original had a hole in it, but it works without. Speaking of switches, I also made myself a switch for my fog lights and mounted it in the console between the ash tray and the shift stick. I used a junked defroster switch I had replaced with a better unit, so it wasn’t a problem experimenting. It has to go in upside down so the light doesn’t hit the choke lever, which meant inverting the guts. Basically I just popped the bottom out of the switch so the mechanism was reversed and put the button back in up side down. There was some cutting and filing involved, so do do this with a switch you care about. The console already has bosses and a hole for a switch like this, I just had to cut out an opening in the trim plate glued to the top of the console for the switch to poke out. The only issue is I don’t have a ground wire for the light, so I’m going to have to make a mini harness that will splice it into the ground wire for the defroster switch light. I think it looks great. The only thing I would change if I could is to make the switch green instead of orange. The other modification I made was repurposing the choke cable for the starter valves on the Mikunis. I doubt I’ll ever use them, but it’s nice to have the lever actually do something. I used a mounting plate for the lever because I didn’t want the console to crack, which meant a lot of fiddling to get things to line up and clear each other. I will need to make a new bracket for the throttle and choke cables now because the angle isn’t quite right. The fuel lines are also closer than I would like. I have around 3mm of clearance, so I’ll put sleeves on the cable between the starter valves just in case. There’s probably something I can do to raise the cable more, but that will take some thinking I can’t handle right now.
-
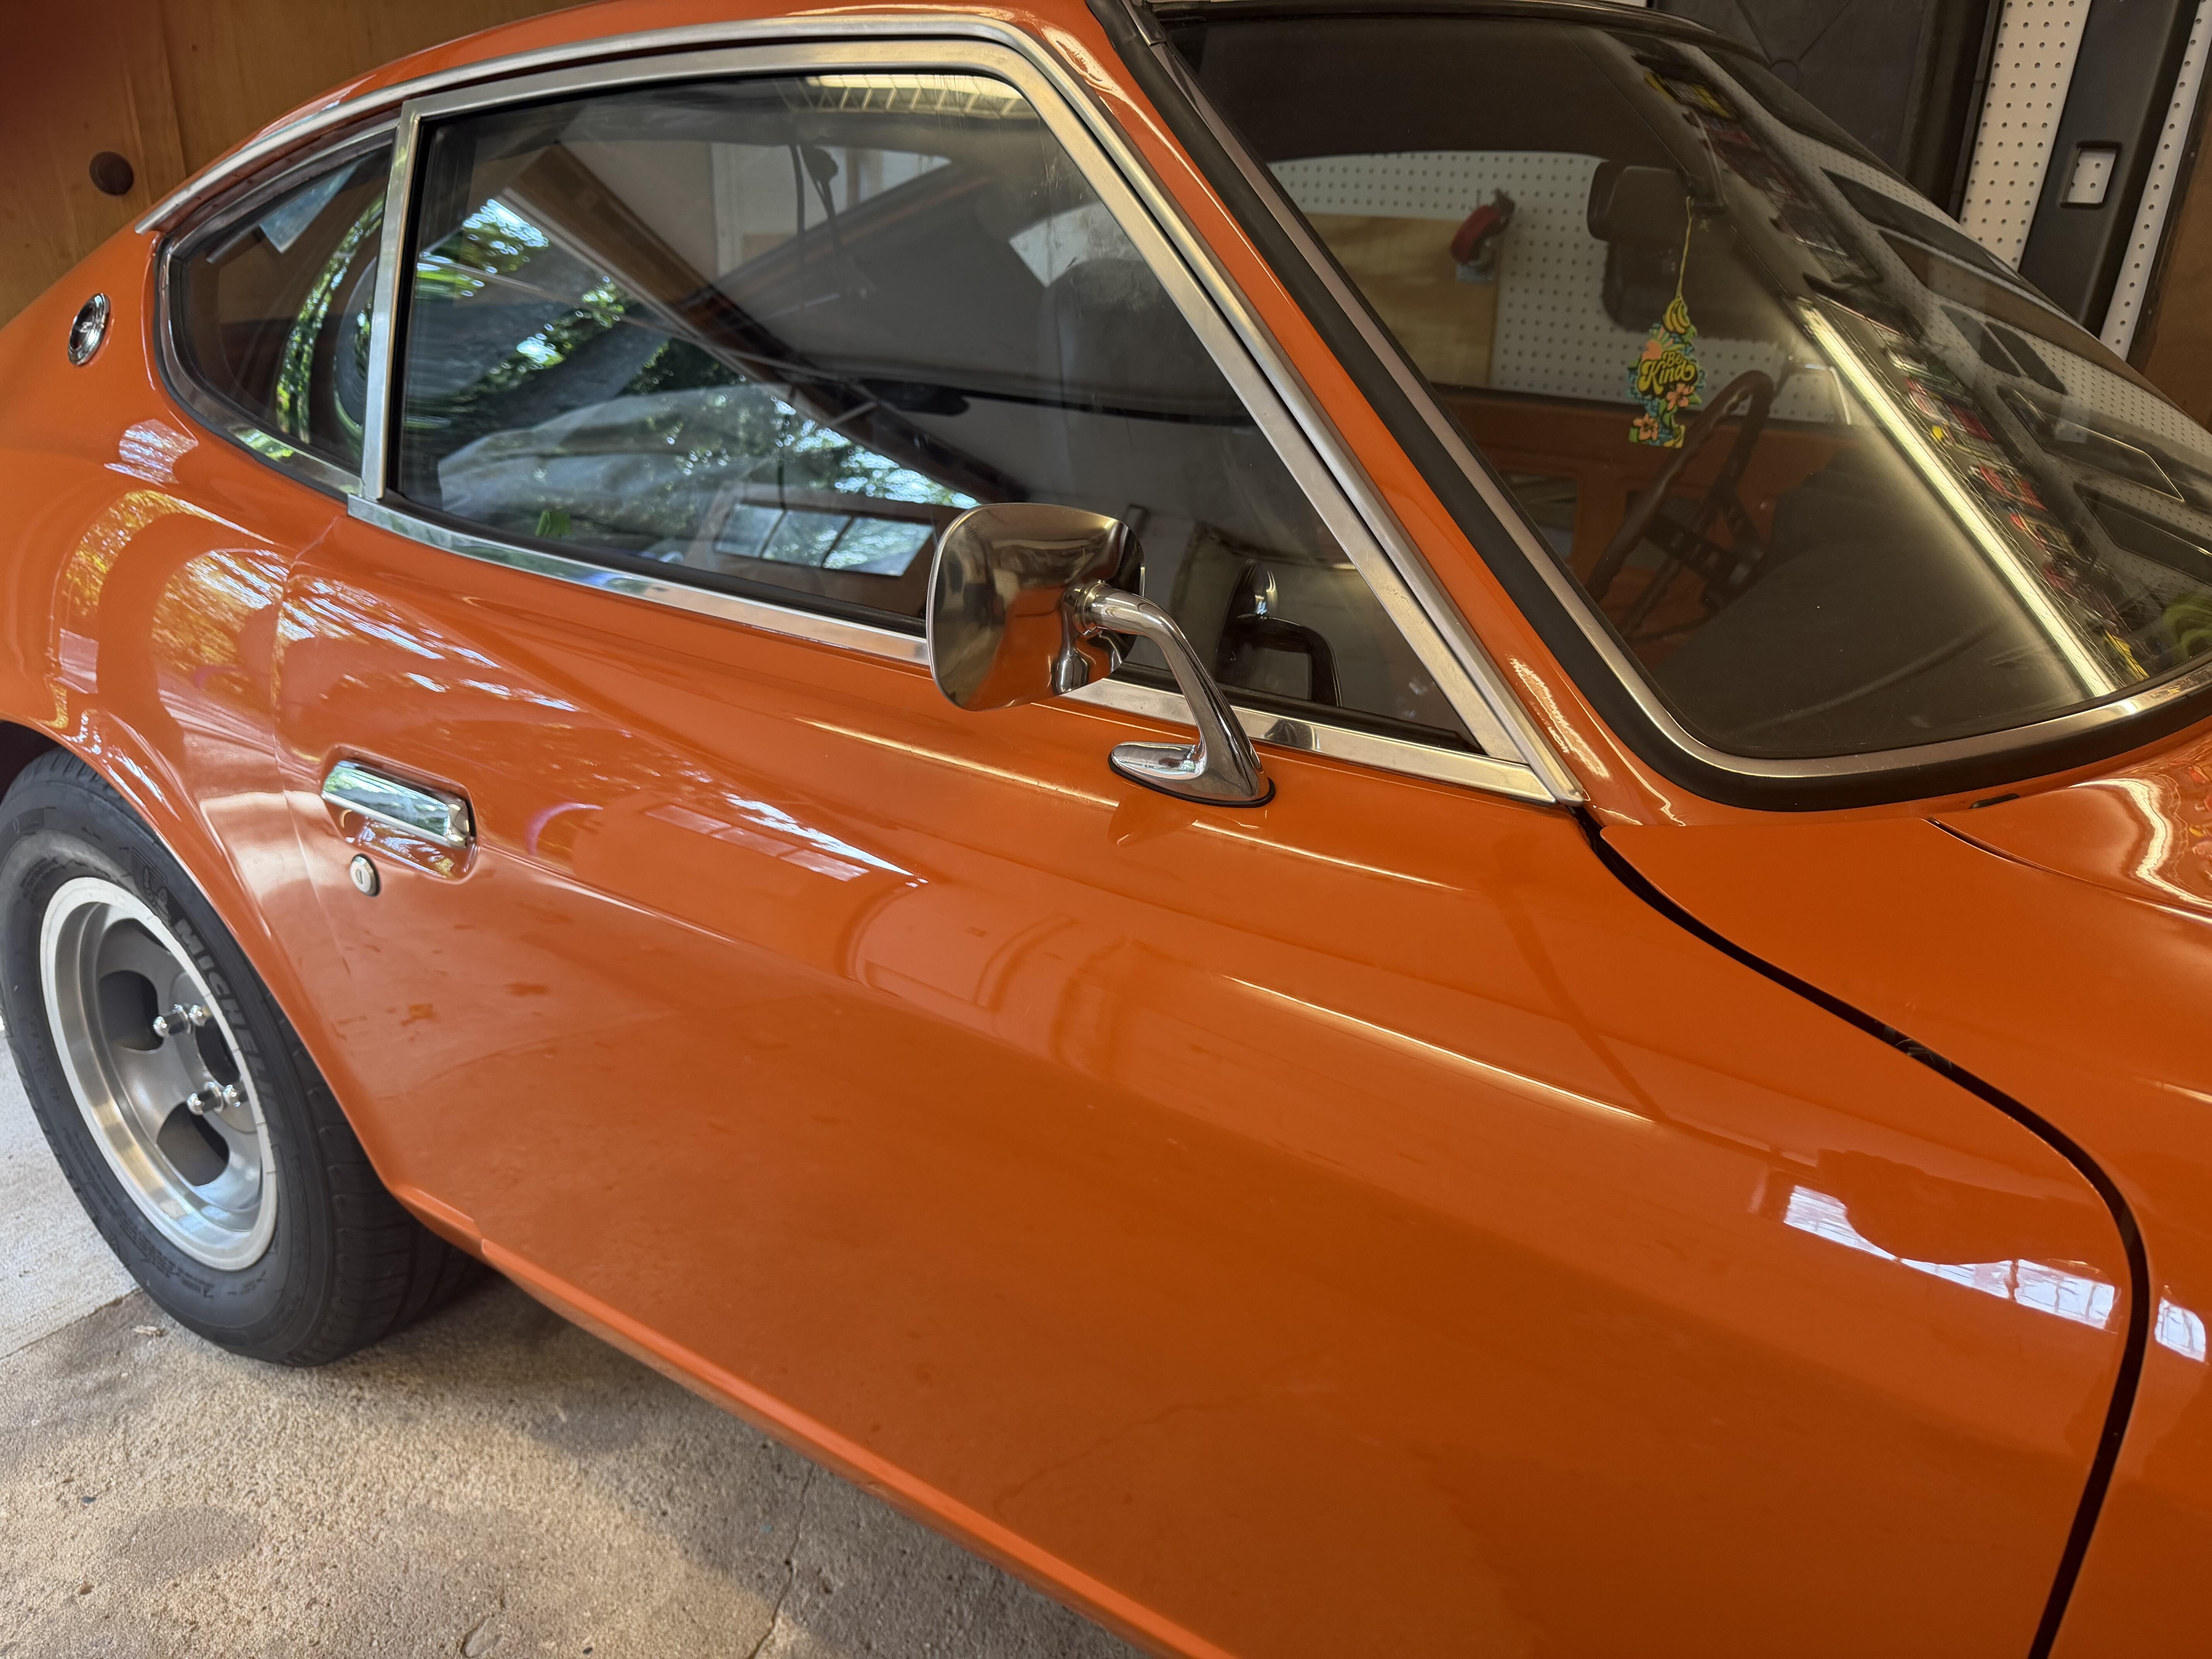
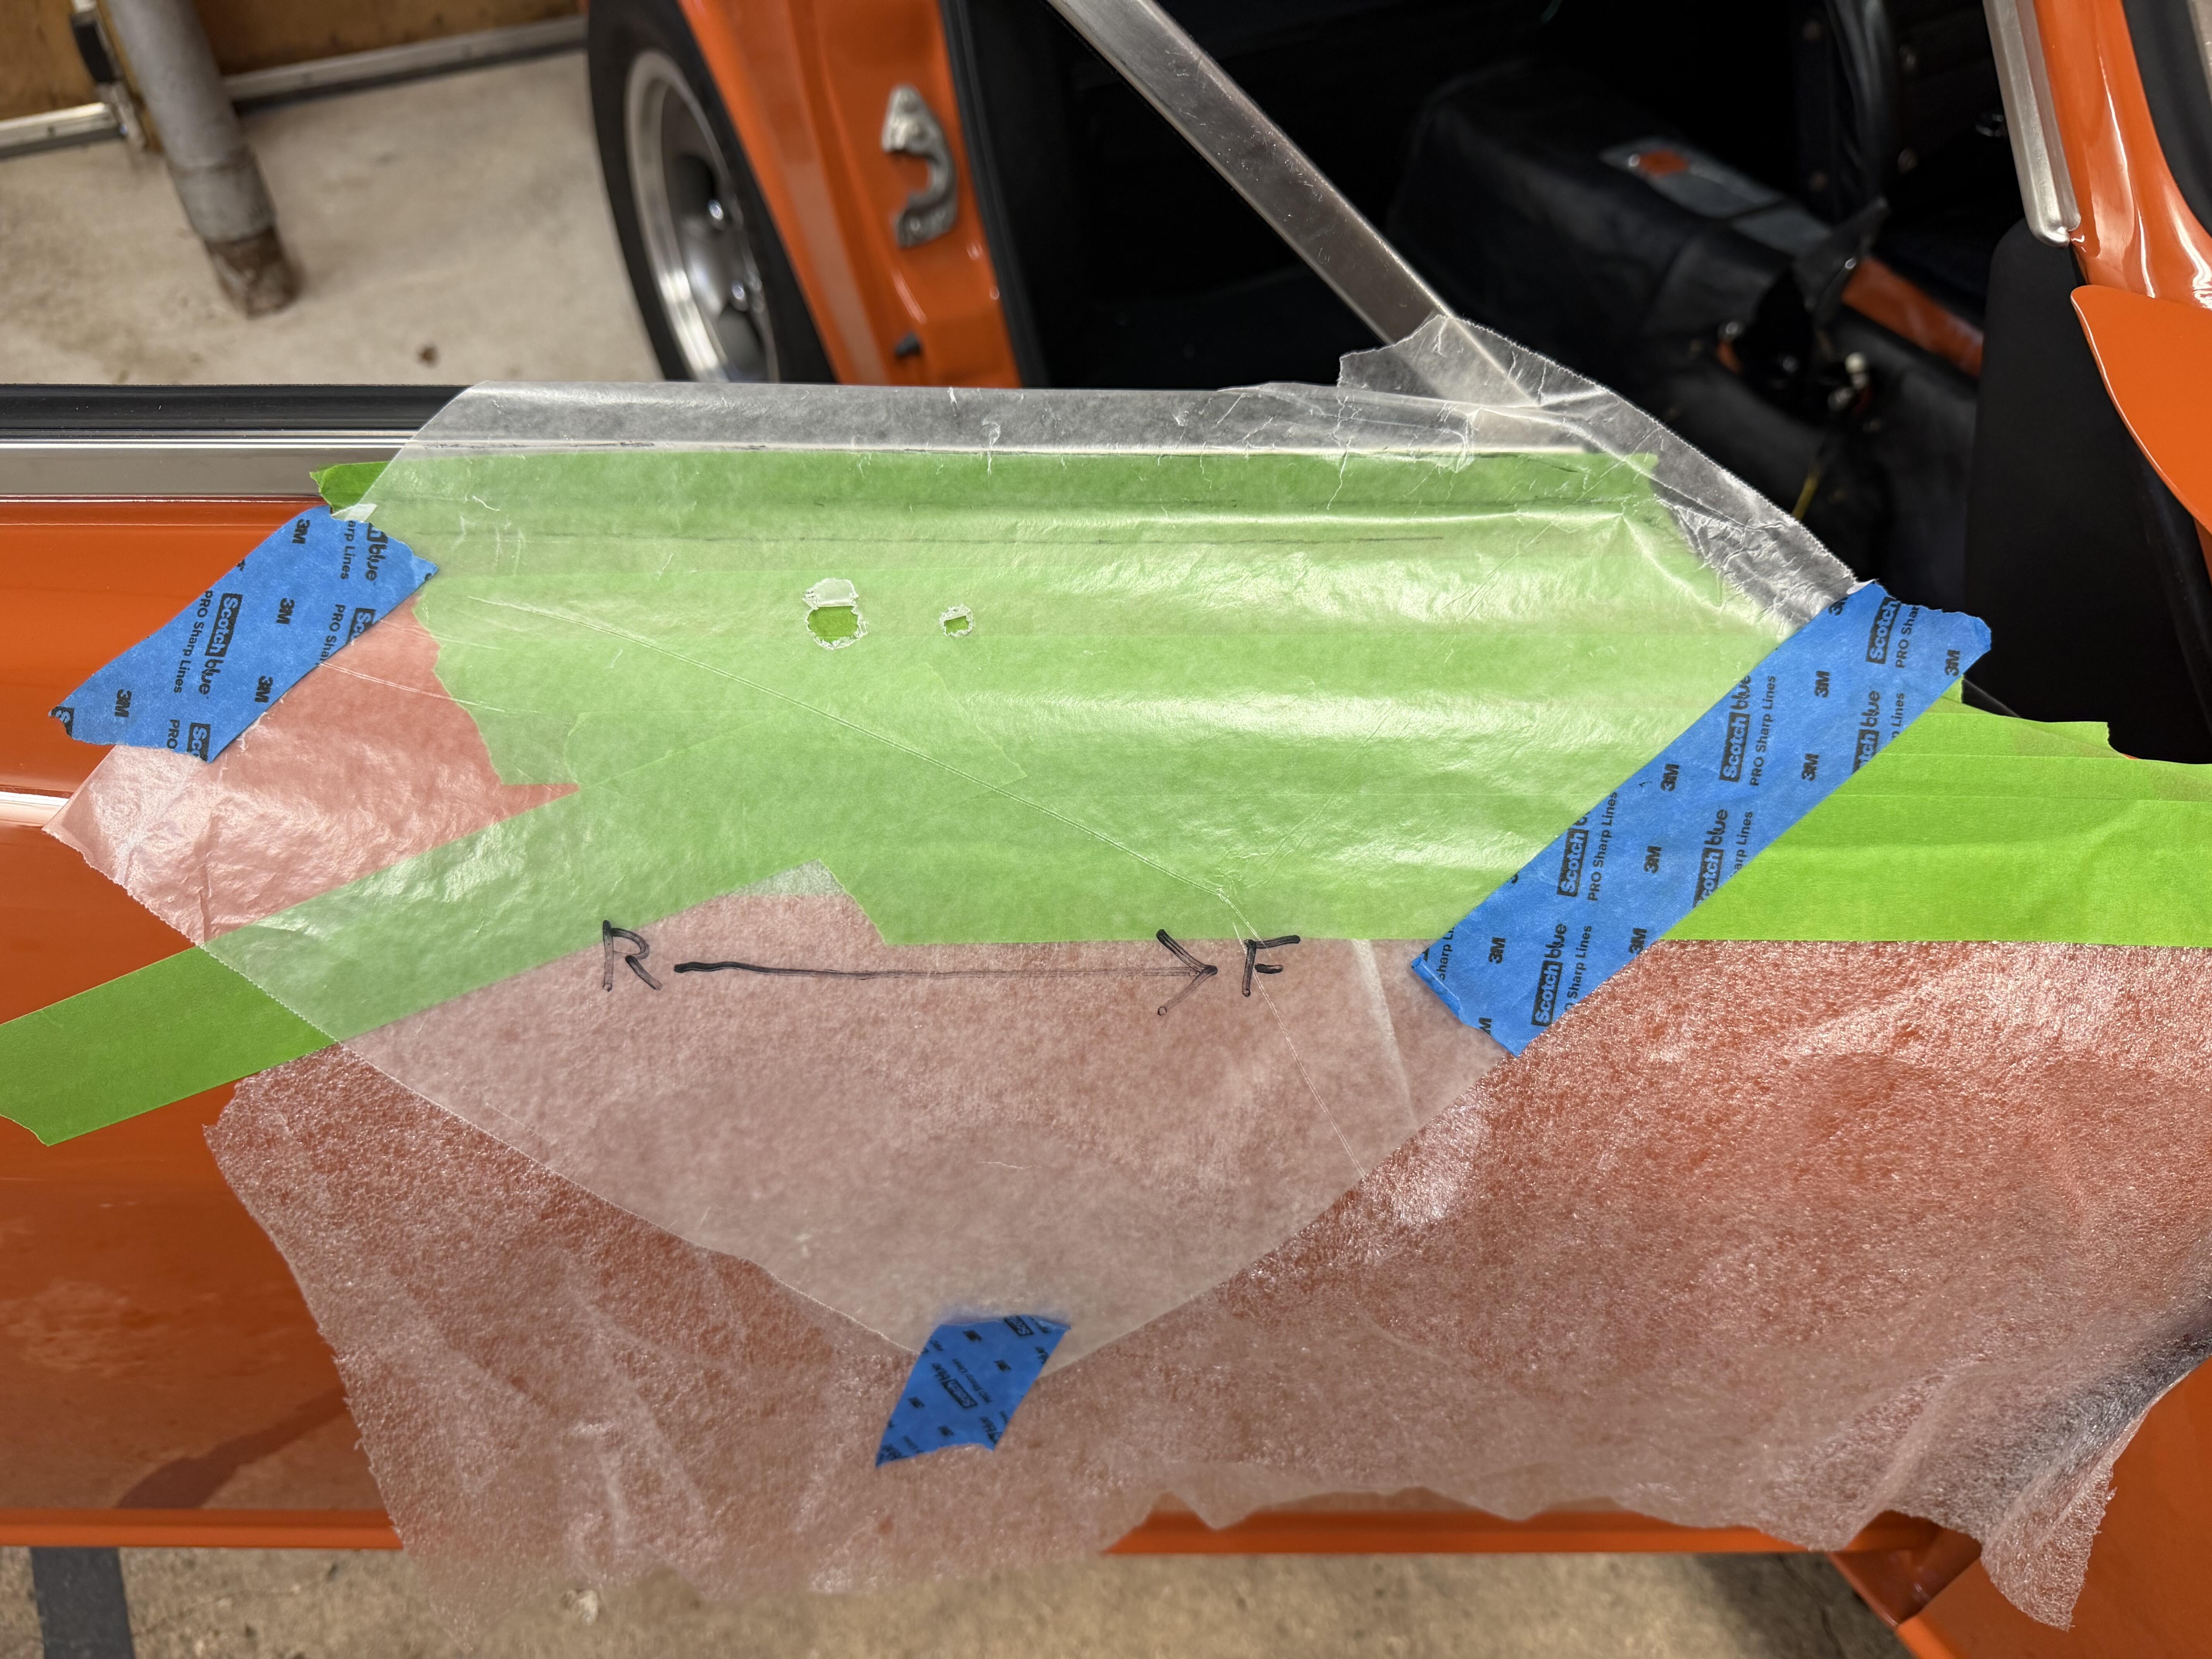
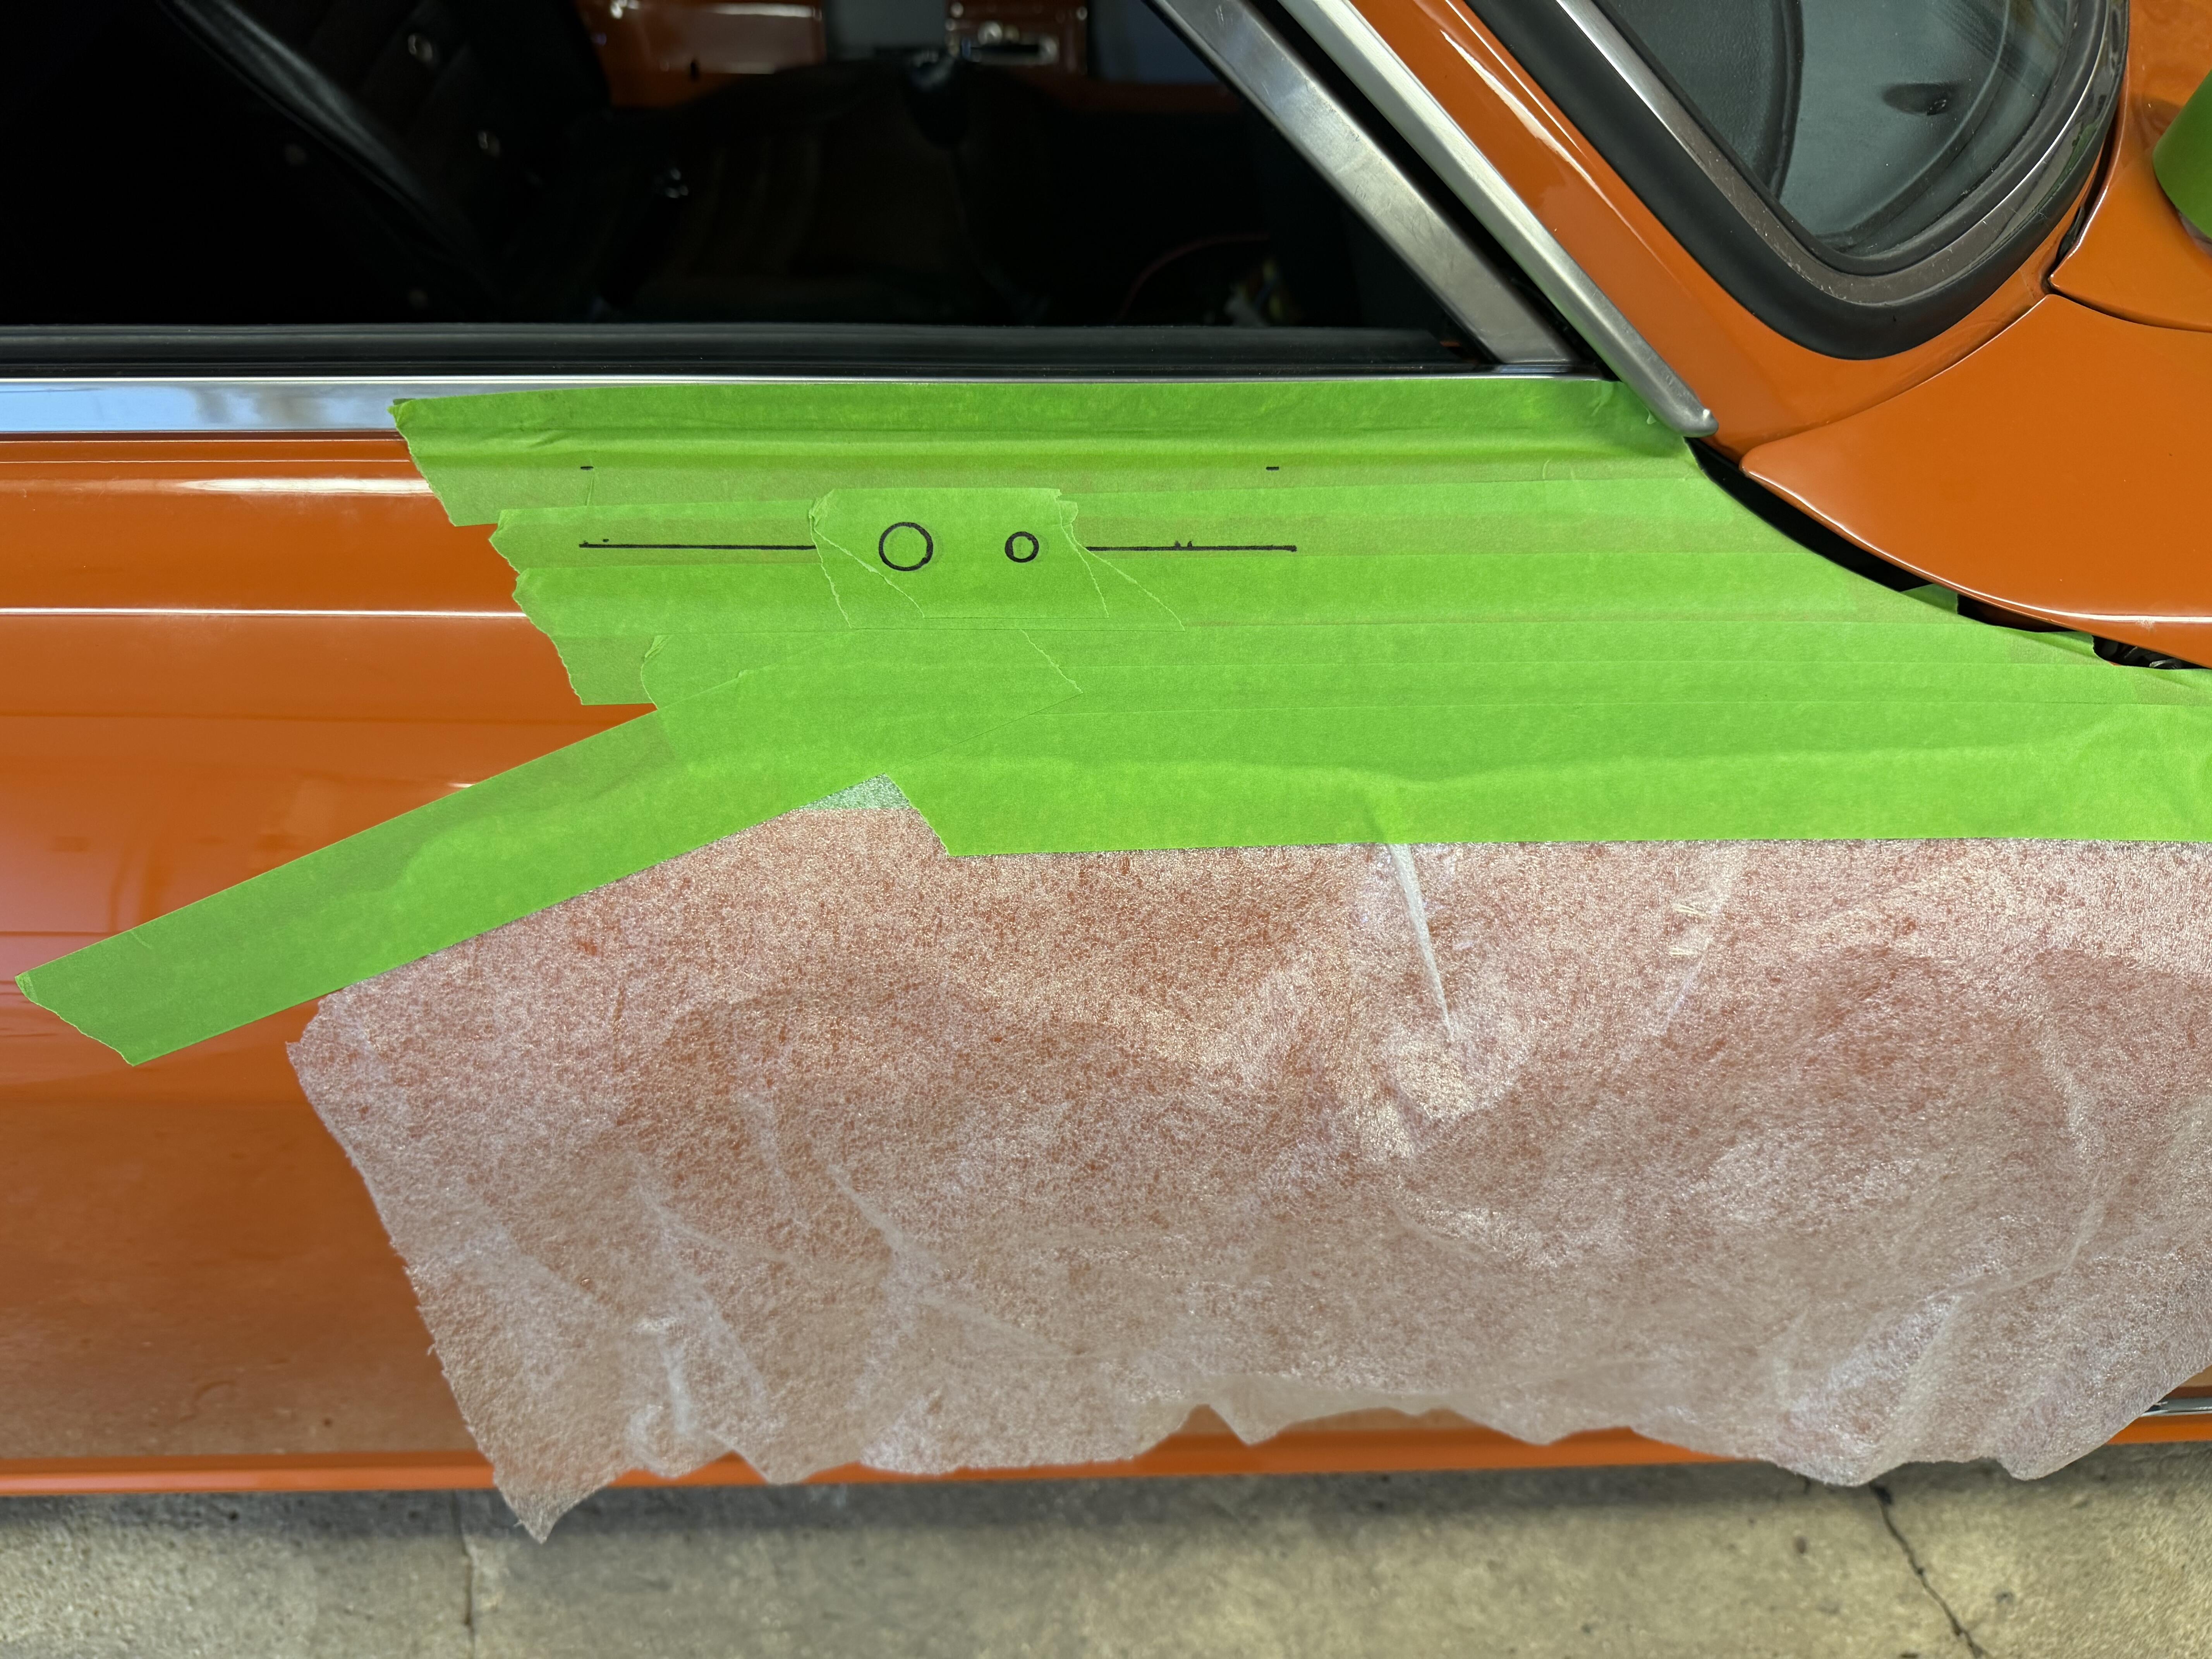
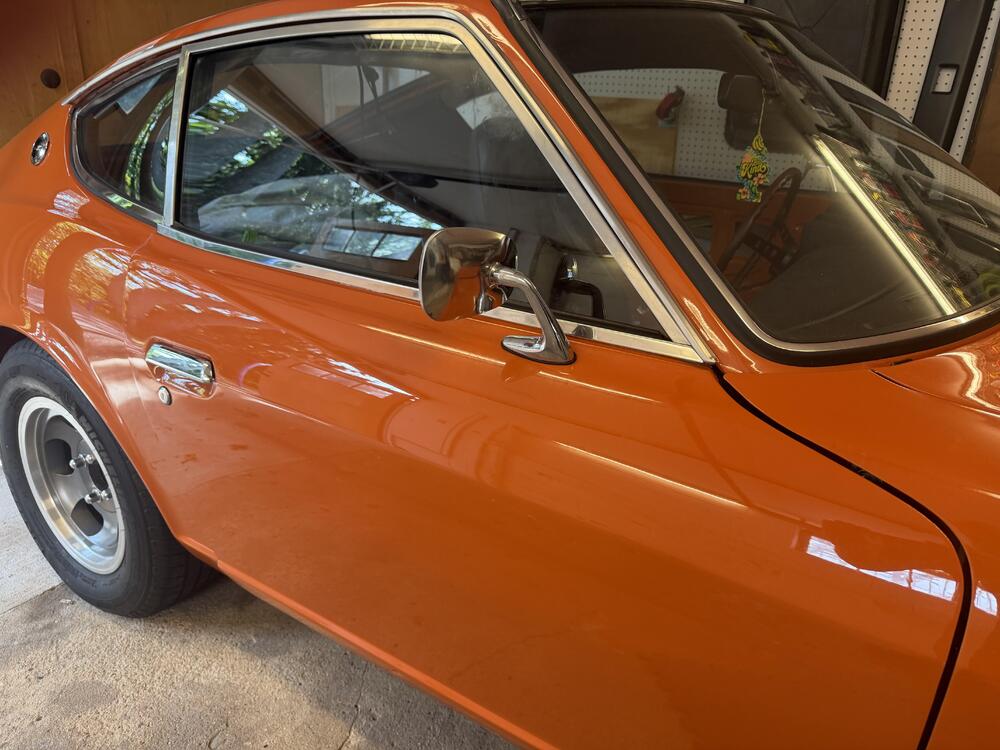
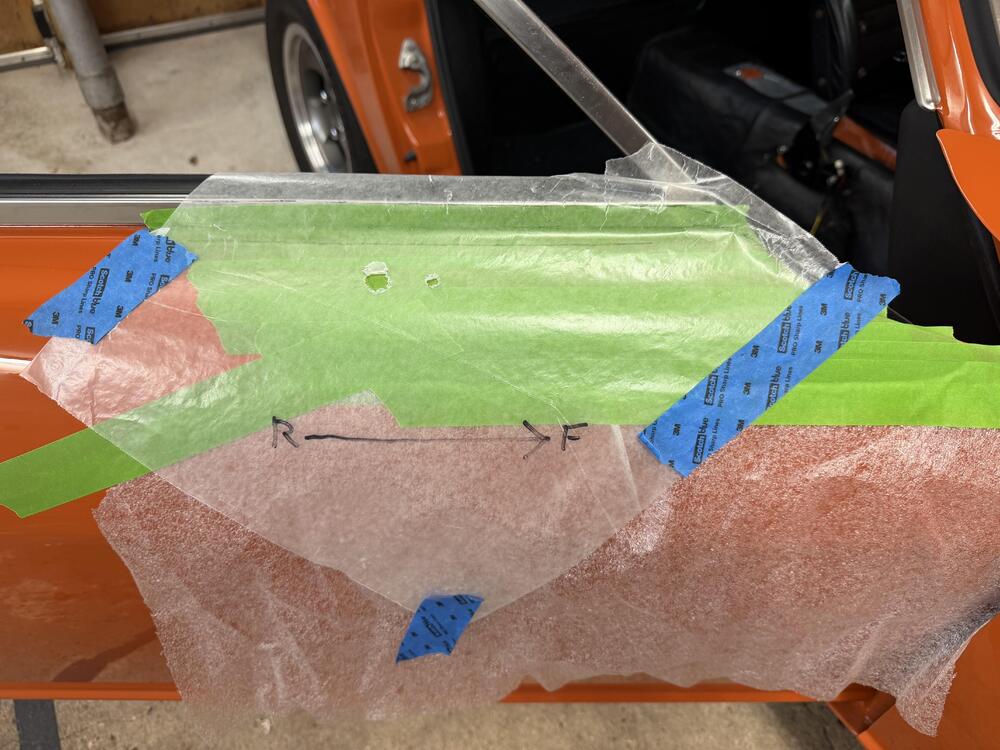
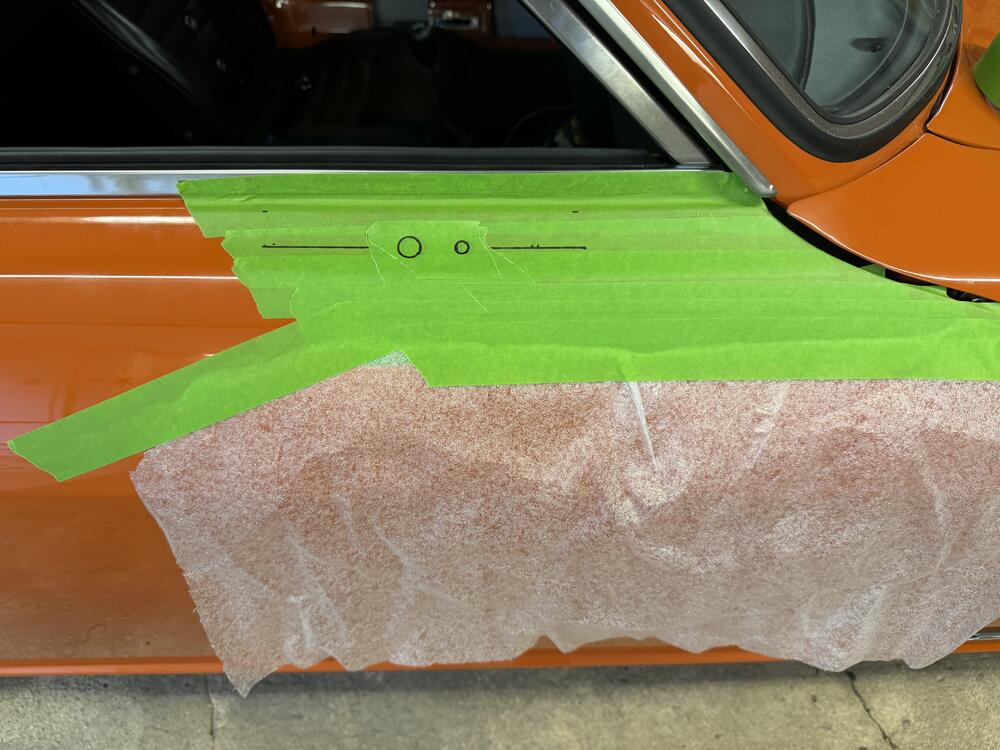
Bummer. Looks like I’ll be having a port added to the aluminum pan. In other news, I added a right side mirror (replica) today. Getting it to match the left side was simple. I traced the contours and the holes for the left door onto velum and retraced those onto painter’s tape I had on the right side door. After quadruple checking the measurements and making some tweaks I used a stepped drill to make the holes (28mm and 9mm). Bolting it up with the window in was tricky until I remembered that the stud in the mirror can come out, which lets you thread the nut onto it and pass it up from the inside. I positioned the reinforcement plate first using a really long bolt with a flange washer on it as a threading tool. Getting it perfectly matched to the left side means the visibility it provides is meh. Because it’s a replica that uses the left side ball joint it doesn’t turn in as much as I would like, so I’ll have to get used to looking further out and less behind me than I’m used to. Good for blind spots I guess.
-
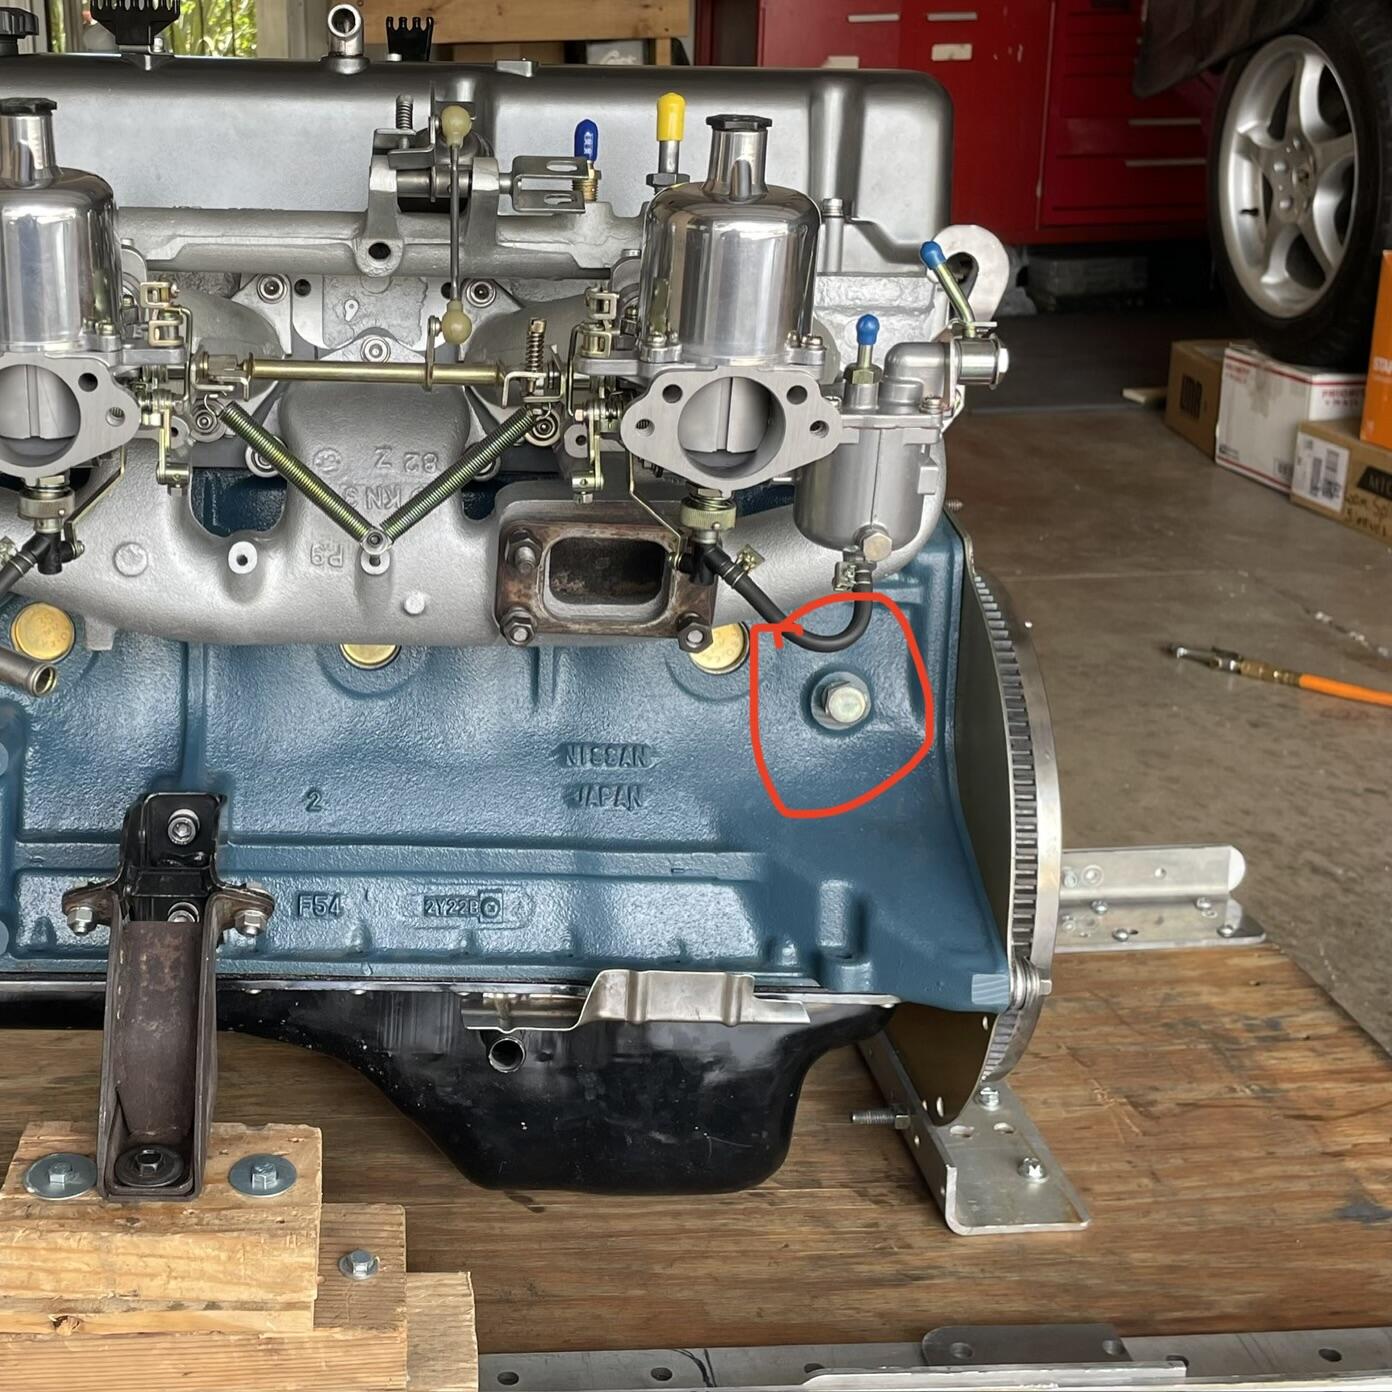
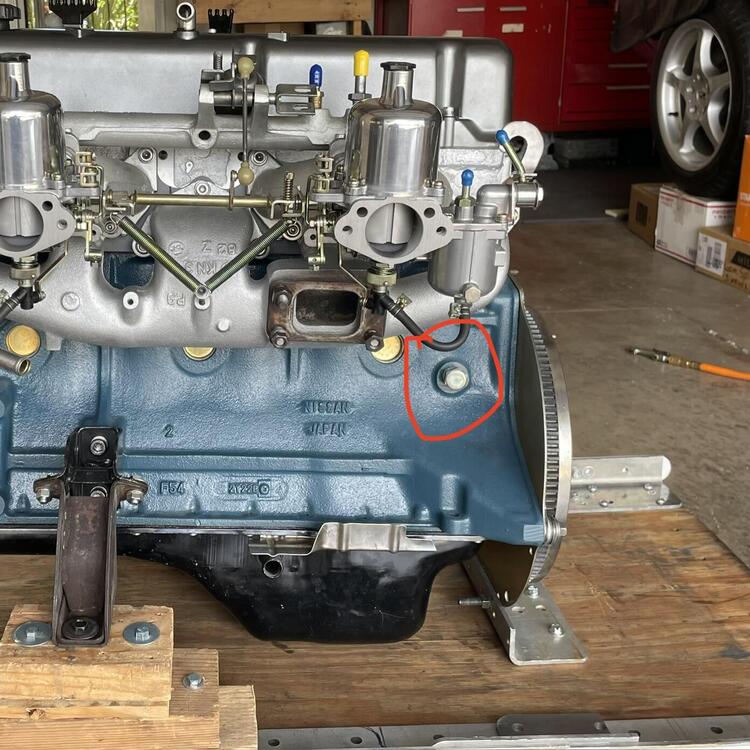
Another mystery hole: Anyone know what this port in the red circle is? It’s an F54 block. I’m hoping it could be repurposed for an oil return line from an Air/oil separator.
-
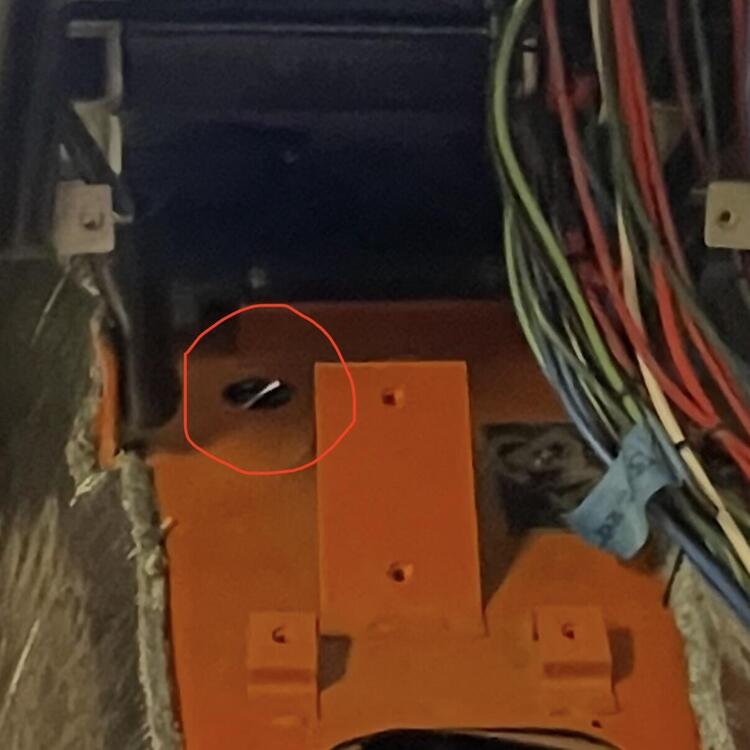
Anyone know what the hole circled in the photo below is for? I thought it was for the choke cable, but apparently that’s on the passenger side in 1973 cars. Something for an automatic transmission?
-
I was having some major tuning problems up until today. After pulling the vacuum and plugging the port, setting the timing to 7°/750 rpm per the 240z FSM gave me a wild amount of backfiring when cruising or accelerating at partial throttle from both the carburetors and the exhaust (WOT was fine). Setting it to 34°/3,000 rpm gave me an idle at 24°/950 rpm, so the car would not start. I took it back down to 12°/800 rpm just to get it running again. I had been all over the place with this trying to dial in my jetting, but the mis/back firing was still happening whether I went rich or lean. I started to wonder if it was a problem with the weights in my distributor. It’s an e12-80 that was rebuilt by California Datsun. Everything worked as expected when I received it, but I didn’t check the value on the weights or their springs before I put it in because it’s a ZX distributor in a ZX block with a ZX head and he didn’t claim to have modified it. Long story short, I messed with every jet option I could set up and finally landed really close to what the Mikuni manual recommended in the first place: 140 main jets (manual calls for 145), 200 air jets, 52.5 pilot jets (manual calls for 57.5), and 0.45 pump nozzle. The mistake I was making was mentally focusing on the main jets too much. I’ll read the spark plugs after I put some miles on it, but I smells much cleaner than it was before I started messing around, the misfiring and backfiring under load has stopped, it starts immediately, and it’s damned quick. Now to fine tune the idle speed, check my fuel pressure again, and sun the carburetors. What a saga (although not as bad as the brakes).
-
Fixed. I don’t know what did it, though. I pulled the residual pressure valves out of the ZX master cylinder, but I also change from Nabco to Tokico reservoir caps. They have a slightly different design and there was a theory that the MC might be pulling in air from the back seal if the caps don’t let air in. I also had an extremely slight leak at the junction between the front brake lines where the OEM bias regulator used to be. And I bled the system again. So who knows. Could have been any one or combination of those, but I can screech the fronts now, which was not possible before. Now to get the bias right.
-
Yes, they are grabbing, just poorly. I did have the proportioning valve fully open, which I think means the rears are set to 50/50. I can’t spin the wheel by hand when it’s up on jacks and someone steps in the pedal, but that doesn’t mean much beyond there is some pressure going to the front.
-
46010-p6500: 46010-E8702: 280zx RPV parts (Nabco):
-
I mentioned that the ZX had four wheel disc brakes and his response was that the rebuild kits and new replacement MCs have them but they weren’t used from the factory. I don’t know if that’s verifiable. There’s a discussion on hybrids about this and I would say it’s inconclusive. I dug around and found a number of forum comments saying they should be removed when using discs in other cars (corvettes, hot rods, etc.). Wilwood says to use them when the MC is mounted below the caliper. They recommend 2 to 4psi for disc and 10psi for drums. However, there are inline valves, not components in the MC. They don’t say anything about not using them when the MC is mounted higher than the caliper. I don’t think this should effect the clamping force of my brakes, though, because they only restrict flow BACK to the MC. I could just see what happens if I remove them. It’s a zero-cost change that I can reverse if it doesn’t help. If that doesn’t work I’m going to have to revert to stock in the front.
-
I had ask d Silvermine Motors for advice a while back because they sell some of the bits I’m using, and they suggested today that it could be because I installed the residual pressure valves that came in the rebuild kit. Apparently they are only meant for drums and should be removed / left out on the ports feeding disc brake calipers. I also just saw a video from Summit Racing saying that a larger diameter MC means less pressure and a harder pedal, reducing clamping force. I would have thought the lines would determine that, but I guess a given amount of force spread over a larger area could cause that.
-
Okay, as usual it ended up being something stupid, but I’m not 100% certain it wasn’t also air in the system. This morning I got in the car and the brake pedal was firm, so no air, right? Just wait… In order to confirm my pedal was not bottoming out prematurely (I only have 2 inches of pedal travel) I pulled the master cylinder off the booster and measured the pedal travel again. Or rather, I didn’t have to because it went to the floor. Okay, so that confirmed that the pedal travel is not being determined by the booster or something under the dash fouling it. Next, I reconnected the MC and bled it via the bleeders on the side. For one, I got some air out of the rear bleeder (for the front brakes). Also, the pedal went to the floor. So this confirmed there is nothing physically obstructing the piston movement inside the MC (assembled incorrectly, broken spring, whatever). Next, I checked the pedal travel with everything closed up while bleeding the right front caliper. It went to the floor. I also got a fair amount of air. So now I know for sure that the pedal travel is being determined by the available space for fluid (i.e. the caliper piston stroke). Next, I bled the whole thing with the power bleeder (left rear, right rear, right front, left front). I let a full quart of fluid pass through each caliper before moving to the next, which is more than double what the lines and calipers hold. I got zero air from any of them. I checked the pedal travel and it was back to 2 inches. Then my buddy who was helping asked me if the reservoirs were over filled. Ding ding ding! They were above the max fill lines by a quarter inch, so I removed fluid until they were at the line. Now I have 2.25 inches of travel. I took it for a test drive and was able to lock up the rears at ten, twenty, and twenty five mph, both on flat ground and down hill. The brakes still don’t inspire a ton of confidence, but that is likely due to the proportioning valve biased too much toward the rear brakes. I plan to adjust this properly on Sunday in a large empty parking lot. I’m also going to pull out some more fluid so the reservoirs are not right at the max fill lines to see if that does anything of note. That was a painful way to learn what happens when you overfill the fluid.
-
Depends on what you mean by factory. Nothing is original except the pedal box. I have an off brand booster from Z Car Depot with an OEM check valve (the hoses are clamped) and push rod, a 15/16ths Nabco 280zx MC, a Wilwood manual proportioning valve, stainless hard and soft lines from Z Car Depot, ‘84 Maxima rear calipers, and Toyota S12W front calipers. The MC rebuild kit was NOS and made by Nabco. The soft parts were in good shape, so I used them. Right now I think if it is the MC it’s either because the seals are leaking or that I over honed it and it’s not forcing the fluid down, but it’s not leaking out the back, so I don’t think it’s a problem with the hone. It’s possible it still has air in it, but I’ve bled it at the bleed screws a few times. One thought I had this morning was maybe I have air trapped in the caliper cylinders, but I have them on the correct sides and the bleeders are pointed up, so I expected the power bleeder to take care of that. The pads on all four corners are skimming the rotors without pressure more than I would have expected, so maybe something is up with that. I assumed that was just because they are fresh out of the box, though. I have not read anything about this MC being too small for this combination of calipers, but maybe that’s part of it. As far as the brakes being weak, I can’t evaluate the cause of that until the pedal stays firm.
-
Okay, I’m throwing my hands up. At this point it’s voodoo. The new check valve made no difference, plus the pedal is soft again after sitting since my last post. The only thing I can think of is there is air in the system somewhere. I expected all this bleeding, especially with the power bleeder, to have taken care of that, but I have no idea at this point. No money to take it to a shop or buy anything, so I have to figure it out with what I have, which means I’m going to take a break and let it sit for now.
-
Edit: I have a new check valve coming in the mail, just in case. So the pedal is still firm after sitting for a few days. Right now I think there is a relationship between the weak brakes and the pedal only having 2 inches of travel. I think it’s supposed to be 3.5 inches. I can’t think of what would cause both of those issues at the same time, though. I used a NOS rebuild kit on the master cylinder, so I don’t think it’s the relief valves, as someone mentioned earlier. I’m pretty sure I checked the block with the pressure sensor that’s on the inner fender and it was clear of debris. There’s nowhere else for the front brakes to have restriction because all of the lines are brand new and the calipers were fresh out of the box. I also don’t think it’s a capacity issue. I’m using the 15/16 version of the 280zx MC, which is supposed to be enough. So what would cause the pedal travel to be too short? I don’t see any interference under the dash. I can’t tell if the pushrod is bottoming out inside the booster or not. The pedal just stops.
-
okay, progress but not full resolution. I readjusted the pushrod on the engine side of the booster using a home made version of the tool Zed Head posted above. Then I went under the dash again and measured free play (now 0.5”) and travel (almost exactly 2.0”). The brakes are still weak, but the pedal is firm. I’ll take it for a longer test drive in the morning to see if anything else is going on. I have no idea if the pushrod was secured when I got it. The purchase was years ago, and I think I installed it into the car pre-Covid. That’s how slow this build is going.
-
God, I hope not. How would I find out? I’m guessing pull the booster out and possibly open it up. I bought it new from Z Car Depot but about seven years ago. It would have to have been a faulty booster out of the box. My dad thinks the booster pushrod is not long enough, because I have the clevis all the way at the end. I’m skeptical but it’s possible, because it’s not a Nissan booster but some aftermarket thing. I’m going to mess with the pushrods and pedal position tonight to see if I can adjust some of this stuff out of the equation.
-
Hopefully. It feels like I have competing problems. Not enough pedal travel would suggest the MC is preloaded and the pushrod needs to be shortened. Too much free play suggests the pushrod is too short and has too much gap to make up before it starts working. I was originally leaning toward the latter because this could also cause travel too be too short if something else is stopping the pedal before the MC is fully engaged, explaining the weak brakes, but I can’t figure out what that would be. The pedal isn’t contacting the pad and I don’t think the spring is fully stretched. I don’t think there’s anything else in there that could cause interference.
-
Okay, here’s my status after fixing Thursday night’s fiasco of swapping the lines and then swapping them back to their correct positions: I verified that all of the lines are correctly routed. Forward reservoir goes to aft port on the pressure sensor block, then to the proportioning valve, then to the rear brakes. After reservoir goes to forward port on the block, then to a junction, then to the front brakes. I disconnected the MC from the booster and checked for leaks. There is no brake fluid or other residue in there. I also checked the push rod length and made sure it has about 1mm of clearance between it and the back of the MC piston, and that it is tightened down. I checked the brake pedal height. The face of the pad where your foot touches is 7.5” from the carpet on the firewall. This exceeds the 5.8 to 6.2” I’ve seen recommended, but I’m not sure where that measurement is supposed to be read from. Is it the back of the pedal, the face of the pad, or somewhere else? The brake pedal has almost exactly 3” of travel, 1” of which is free play. Red flag. The pedal does not contact the pad on the firewall when fully depressed. I bled the MC at the side bleeders with the caps off, running that fluid back into the reservoirs with hoses. Then I put 44 fl oz of brake fluid into the pressure bleeder, connected it to the reservoir for the rear brakes, and pumped it up to 15psi per the instructions. I let that sit for 15 minutes and went around the car looking for leaks. I didn’t find any, so I checked the pressure. No change. I bled the left rear brakes until I had zero air, allowing about a pint of brake fluid to pass through the system. I filtered the fluid, put it back into the bleeder, brought it back to 15psi, and did the same to the right rear caliper. I repeated this sequence on the right front and then the left front. After all of this (and with the engine off) the pedal is firm, but the amount of free play I have is concerning. I tried getting rid of the slop by increasing the length of the pushrod, but it persists even when I know the push rod is too long and is pressing the piston as I tighten the MC down, preloading the MC. I put it back to 1mm of clearance for now. I’m thinking this might have been my issue all along. I’m not sure if the pedal travel spec included the free play or not, but if not then I don’t have enough pedal travel. Either way I need to reduce the free play by at least 0.5”. I’m not sure why there’s so much free play in the pedal. The pivot bushings are brand new and snug. I’m going to get under there and see if it’s at the clevis today. Maybe the pin is too small and needs a bushing. I know the pushrod moves freely in and out about two millimeters if you push and pull it with your fingers. I assumed that was slop at the clevis. I don’t thing that would translate to half an inch at the pedal, though.
-
Well, looks like I’m making stupid mistakes because I’m tired. After I got the lines swapped I realized that they were not wrong in the first place and now they are. Back to work.
-
I figured it out. I have the proportioning valve connected to the wrong line.
-
So what’s another reason I would have a stiff pedal after bleeding that gets soft after sitting but no fluid anywhere under the car? If it’s not trapped air, fluid has to leave the system to introduce air, right?
-
Pretty much. I bought a pressure bleeder and I’m hoping it will be the silver bullet. I am CERTAIN I don’t have a leak. I’ve gone over the entire underside of the car and checked every junction multiple times while my buddy pumps the brakes. There’s no residue anywhere, and the reservoir levels don’t change over time. There has to be a bubble somewhere in the middle of the system, maybe before the proportioning valve, that just won’t move. I can’t think of anything else, and I can’t evaluate the effectiveness of the calipers until that gets resolved.
-
The lines going from the MC to the block with the pressure sensor are fitted correctly, and I always bleed the car starting from the left rear, to the right rear, right front, and left front. I’m going to try bleeding it again to see what happens.
-
Tough to remember because I've done it so many times now, but i think the last bleed i got some air at all of the calipers except the front left. But it wasn’t a huge amount. Every time it seemed like things were good to go, then the next morning it was back to where it was.
-
The entire system was either brand new or rebuilt. One thing I was thinking is the junction above the differential might have a bubble that won’t come down. That’s the only real high spot I can think of, though.