


Topics Last 30 Days
Showing topics, images, events and files posted in for the last 28 days.
- Past hour
-
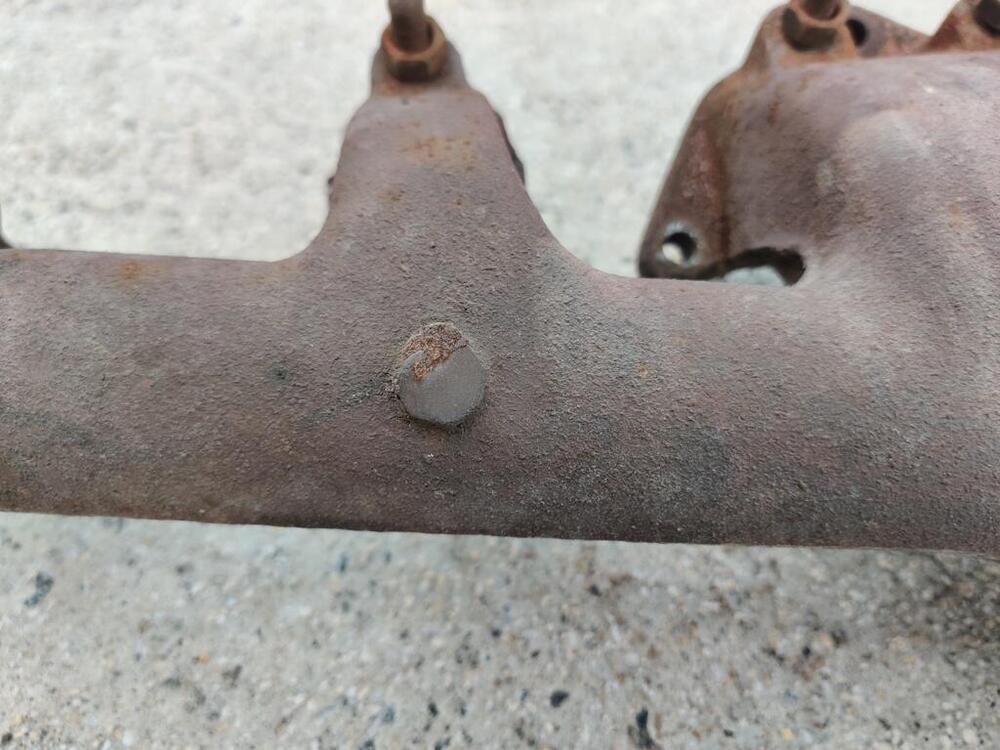
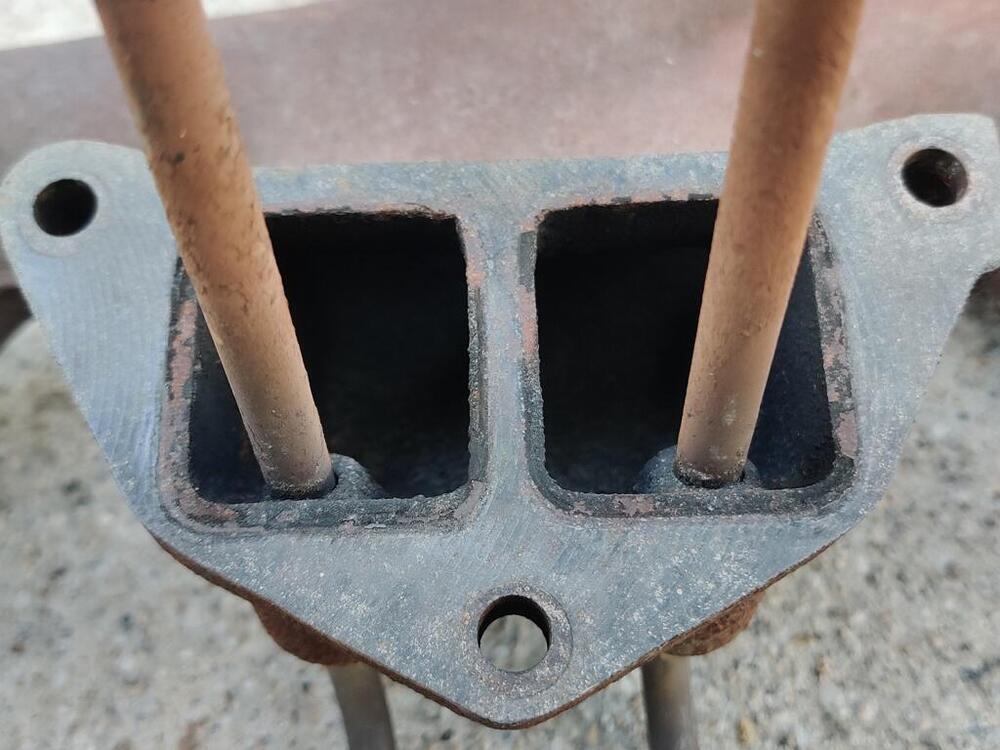
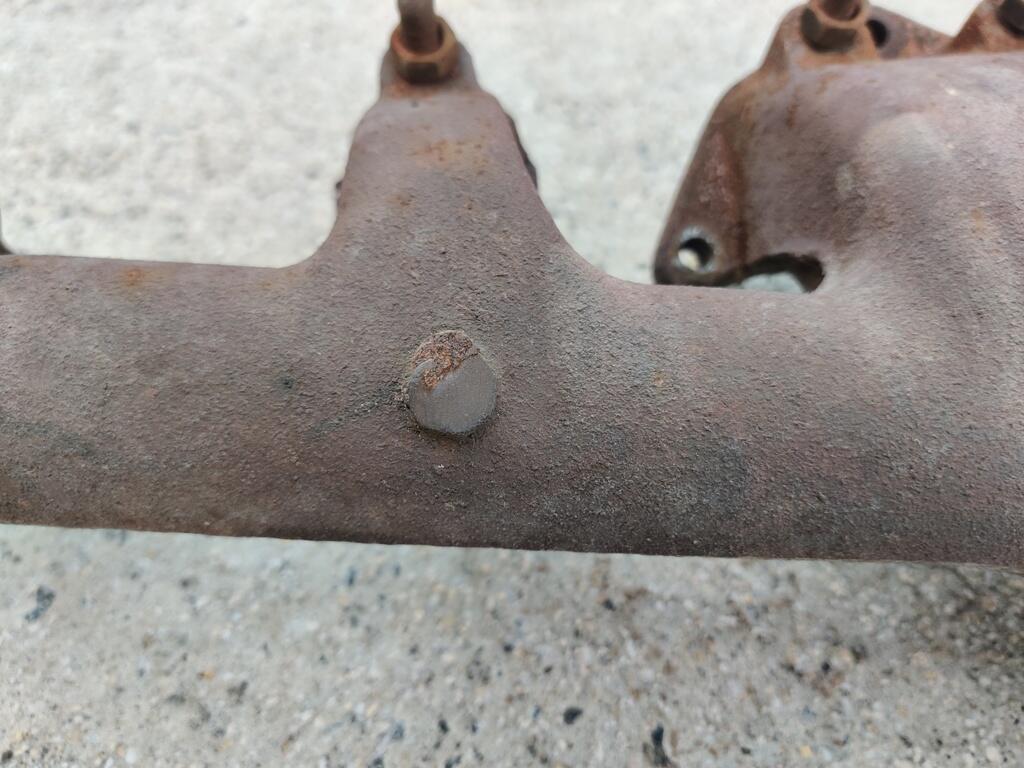
 I am a bit dubious regarding the "correct" finish of the exhaust manifold. I do not think there was any kind of coating put on it by Nissan originally, so... wouldn't it just be a typical cast iron (as cast) color? If so, I think what you have there @motorman7 looks accurate. Not that this would necessarily be good reference info, but I personally kind of think it is - here are a few pics I just took of my 6/71 car's original exhaust manifold. The car was originally owned and driven in AZ for at least several if not all of its years on the road, and then stored in a garage in Colorado AZ for 30 years... Honing in on a "least rusted" portion: Machined (and not rusted) surface:
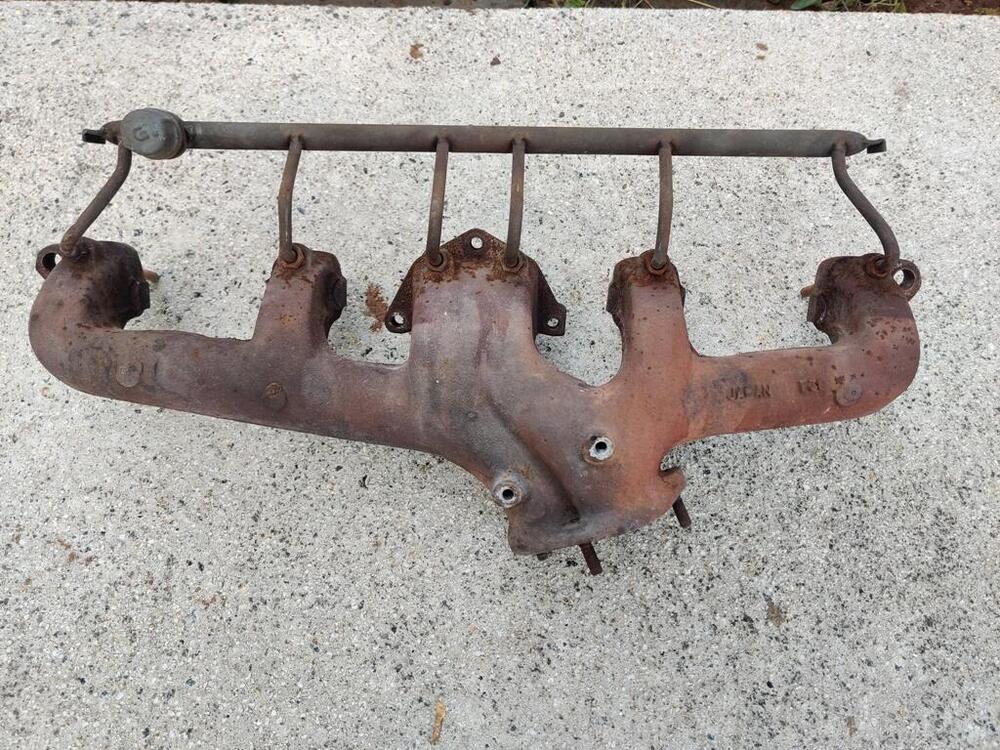
- Today
-
 That rubber glue may be the least of your problems! I've done a Z dash pad restoration, starting with something that had only 25% of the deterioration that yours has. Even at that, it was a time-consuming job. Not only does the pad surface need to be levelled (not easy to get right, given the multiple contours), it's also necessary to 'V' and then feather-edge all of the cracks so that the filler won't crack along the seams. I'll bet it would take you 20 man-hours of effort (or more) to level, edge-treat, fill, sand, and paint a dash pad like yours to a decent level of final finish. But before you even get started down that road, you'll need to convince yourself that what's left of your original pad has enough structural integrity to prevent the pieces from moving around independently when the cabin temperature goes up or down. With its many full-depth cracks, I don't think I would trust your badly broken-up dash pad to meet that requirement. As a litmus test, it would be interesting to know whether a professional dash restorer like Just Dashes would accept your dash for restoration. Maybe you should send a picture and ask them. IMO, your best path forward will be to either: 1) buy a used dash that offers a better starting point for a DIY restoration (as Siteunseen suggests), or; 2) buy one of the replacement dash pads that have recently become available. In the latter case, you unbolt the old pad from the underlying steel structure (known as the 'armature') and then bolt on the replacement pad. There are a couple of threads on this site that discuss these replacement pads. As a third, lowest-cost/effort alternative, you could just replace your old plastic dash cap with a new one.
 -
 CO, I have to apologize on what I said about the barb fitting taken off the 260z balance tube. I went back and looked at the balance tube, the fitting I have with 27 tpi did not come from the balance tube, it was in the box of parts and I assumed that's where it came from. You are right, you know your stuff. As soon as I get the brake problem solved I'll get back to my mixture adjustment and vacuum leak. Jim
 -
 If it was mine I'd watch the play at the adjusting nut on the rod. Press the fork against the pressure plate fingers using one hand and run the nut in until you have contact with the fork with the other one. That would be zero play. Then back it off 1.5 turns. Easier to do the adjustment without the spring attached, since you'll be able to feel when you're on the pressure plate fingers. I've never done one but I think I understand what they're trying to accomplish. 2 mm of play between bearing and pressure plate when the slave clyinder is at the start of its stroke. Don't forget to check the pedal adjustment at the MC also. I've adjusted play there in the same way. Just max out the adjustment rod, being careful not to press the piston in to the MC bore, then back it off a bit. Another feel by finger job. And you don't need to remove the clevis you can turn the rod with a pair of pliers or a strong grip while everything is assembled.
 - Yesterday
-
 Ready for my close-up Mr. de Mille…
-
$36,000

-
@Derek makes something similar. https://forums.hybridz.org/topic/119641-twin-cam-head-for-the-l6-from-derek-at-datsunworks/?do=findComment&comment=1249401
-
 Thank you, Buddy.
 - Last week
-
 Hi Bob: If you are still looking for a welder I would recommend Elhot Metal Fabrication. He is working inhouse at the Shop club on 6th Ave S. He has done rust repair on 3 of my cars over the last 20 years and he is top notch. Of course with 30 years of experience, he's not cheap. Cheers, Mark G
 -
 You are correct, I always has a very good pedal feel and then I did not. I think part of the issue is a bad check valve, and here is why I say that. I ran the check valve test with a vacuum gage installed down stream of the check valve in between the check valve and the brake booster. Warmed up the engine Let the vacuum gage settle down to about 45 mmHg or so (I think that was the number) Shut off the car and watched. The needle proceeded to drop and drop and drop and drop down to zero after about a minute or so. If memory serves last time I did this test, it held. So I ordered a new one. I will have to see if this helps or not. Either way, I suppose it is time to change it out as I installed that one back in 2009 according to my Z maintenance book I keep.
 -
 Update. It's been several months when I posted questions about a soft feeling brake pedal in my 79 zx. I checked the vacuun check valve and found it to be defective. I didn't even use my vacuum test equipment but instead just removed it and blew and sucked through it and knew it wasn't holding vacuum. I replaced it and now have very good, stock brakes again.
 -
Yes, take it a lock smith. If the core can be removed from the cylinder it isn't that difficult to make a key. Key blanks are common. I can't recall if the core is wafers or pins. Come to think of it, it's a double cut key, so it would be a wafer lock. To remove the core from the cylinder without a key, not a big deal to pick the lock. I have no idea what a lock smith would charge, but it's not a big deal. When I closed my business I kept all the key blanks, I probably have what you need. Jim
-
This was a clue that it was an electrical problem. If the engine was still spinning because it was in gear then spark will still move the tachometer needle.
-
 I think you may find @26th-Z and @Carl Beck already have most if not all of the documents. I've hoovered them up for my archive. Will be interesting to see what if goes for this time, I think it sold at least once or maybe twice since the last BAT appearance 6 years ago.
 -
 Any update. I suspect a gas tank from S30 World might be in my future along with Vapor Lines from Resurrected Classics.
 -
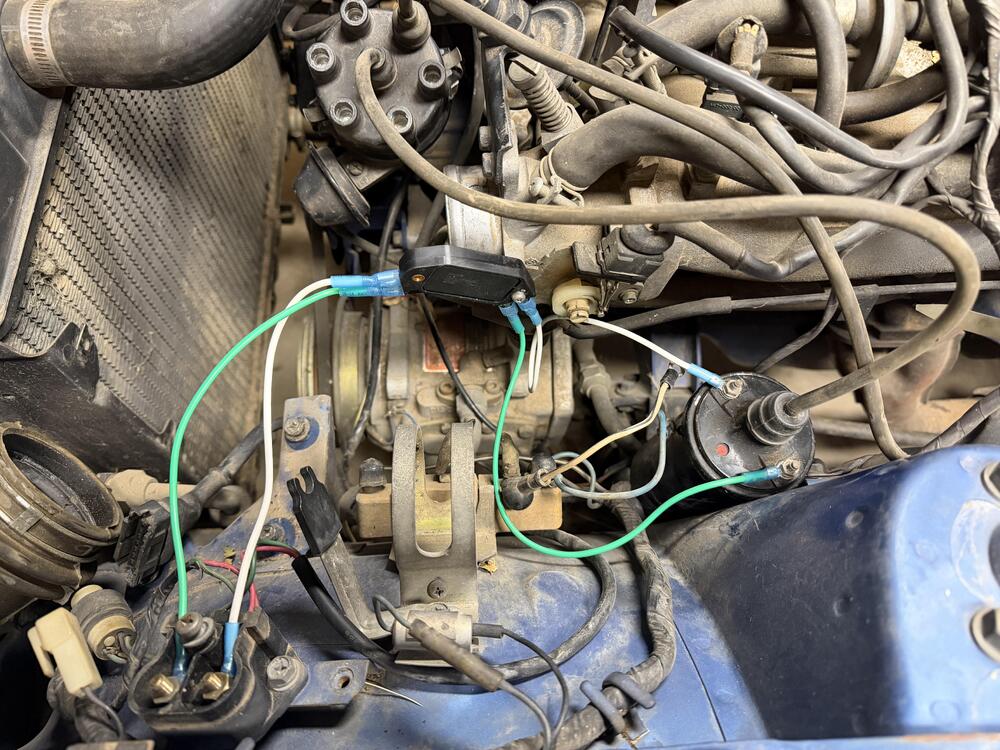
 I pulled the computer out and took it apart. It looks really good, so I put it back together and started on the ignition module replacement. I followed this diagram that I got from the knowledge base and tried it out, but no joy. I didnt see anything about needing to run it through the ballast resistor, so I left it out of the new circuit. Im not sure which side is + on the coil so I put the new green wire where the old one was. I found another post that had a resistance measurement for the pickup coil. Looks like its suppose to be around 720ohms. Ill check that next time im out. Im sure im missing something, but im was too tired to really use my brain. The module is bolted to the throttle body temporarily. And I broke out my new plug wires as well. Anyone have any suggestions?

-
 @Yarb
@Yarb

 All, Thanks for the info. Dropped the R200 in the car, your are correct, the driver side side axle is shorter than the passenger side. Installed the short axle in the CLSD, engaged flush and installed in the car. never run a clutch diff before. Are there better oils and weights to run in a CLSD? Spent the dollars on Red Line 75-90 w full syn for the open diff but not sure this is correct for the clutch unit? Any help would be welcome. Thanks again.
 I plugged mine off but it doesn't get very cold down here. Less chances off leaking, losing coolant was my main reason. Lots of info in these threads... https://www.google.com/search?q=plugging+water+to+carbs+240z+classiczcars.com&sca_esv=77dc914585b7f4b2&rlz=1C1VDKB_enUS1121US1121&ei=1oETafjINaKHp84P-LudoAw&ved=0ahUKEwj4i8S_3uqQAxWiw8kDHfhdB8QQ4dUDCBM&oq=plugging+water+to+carbs+240z+classiczcars.com&gs_lp=Egxnd3Mtd2l6LXNlcnAiLXBsdWdnaW5nIHdhdGVyIHRvIGNhcmJzIDI0MHogY2xhc3NpY3pjYXJzLmNvbTIFEAAY7wUyCBAAGKIEGIkFMgUQABjvBTIIEAAYgAQYogQyBRAAGO8FSJZBUOkFWKcfcAF4AJABAJgBlgGgAcYIqgEDMC45uAEMyAEA-AEBmAIKoALsCMICDhAAGIAEGLADGIYDGIoFwgILEAAYsAMYogQYiQXCAggQABiwAxjvBcICCxAAGIAEGLADGKIEwgIKECEYoAEYwwQYCsICCBAhGKABGMMEmAMAiAYBkAYIkgcDMS45oAfSHLIHAzAuObgH5wjCBwUwLjguMsgHFA&sclient=gws-wiz-serp
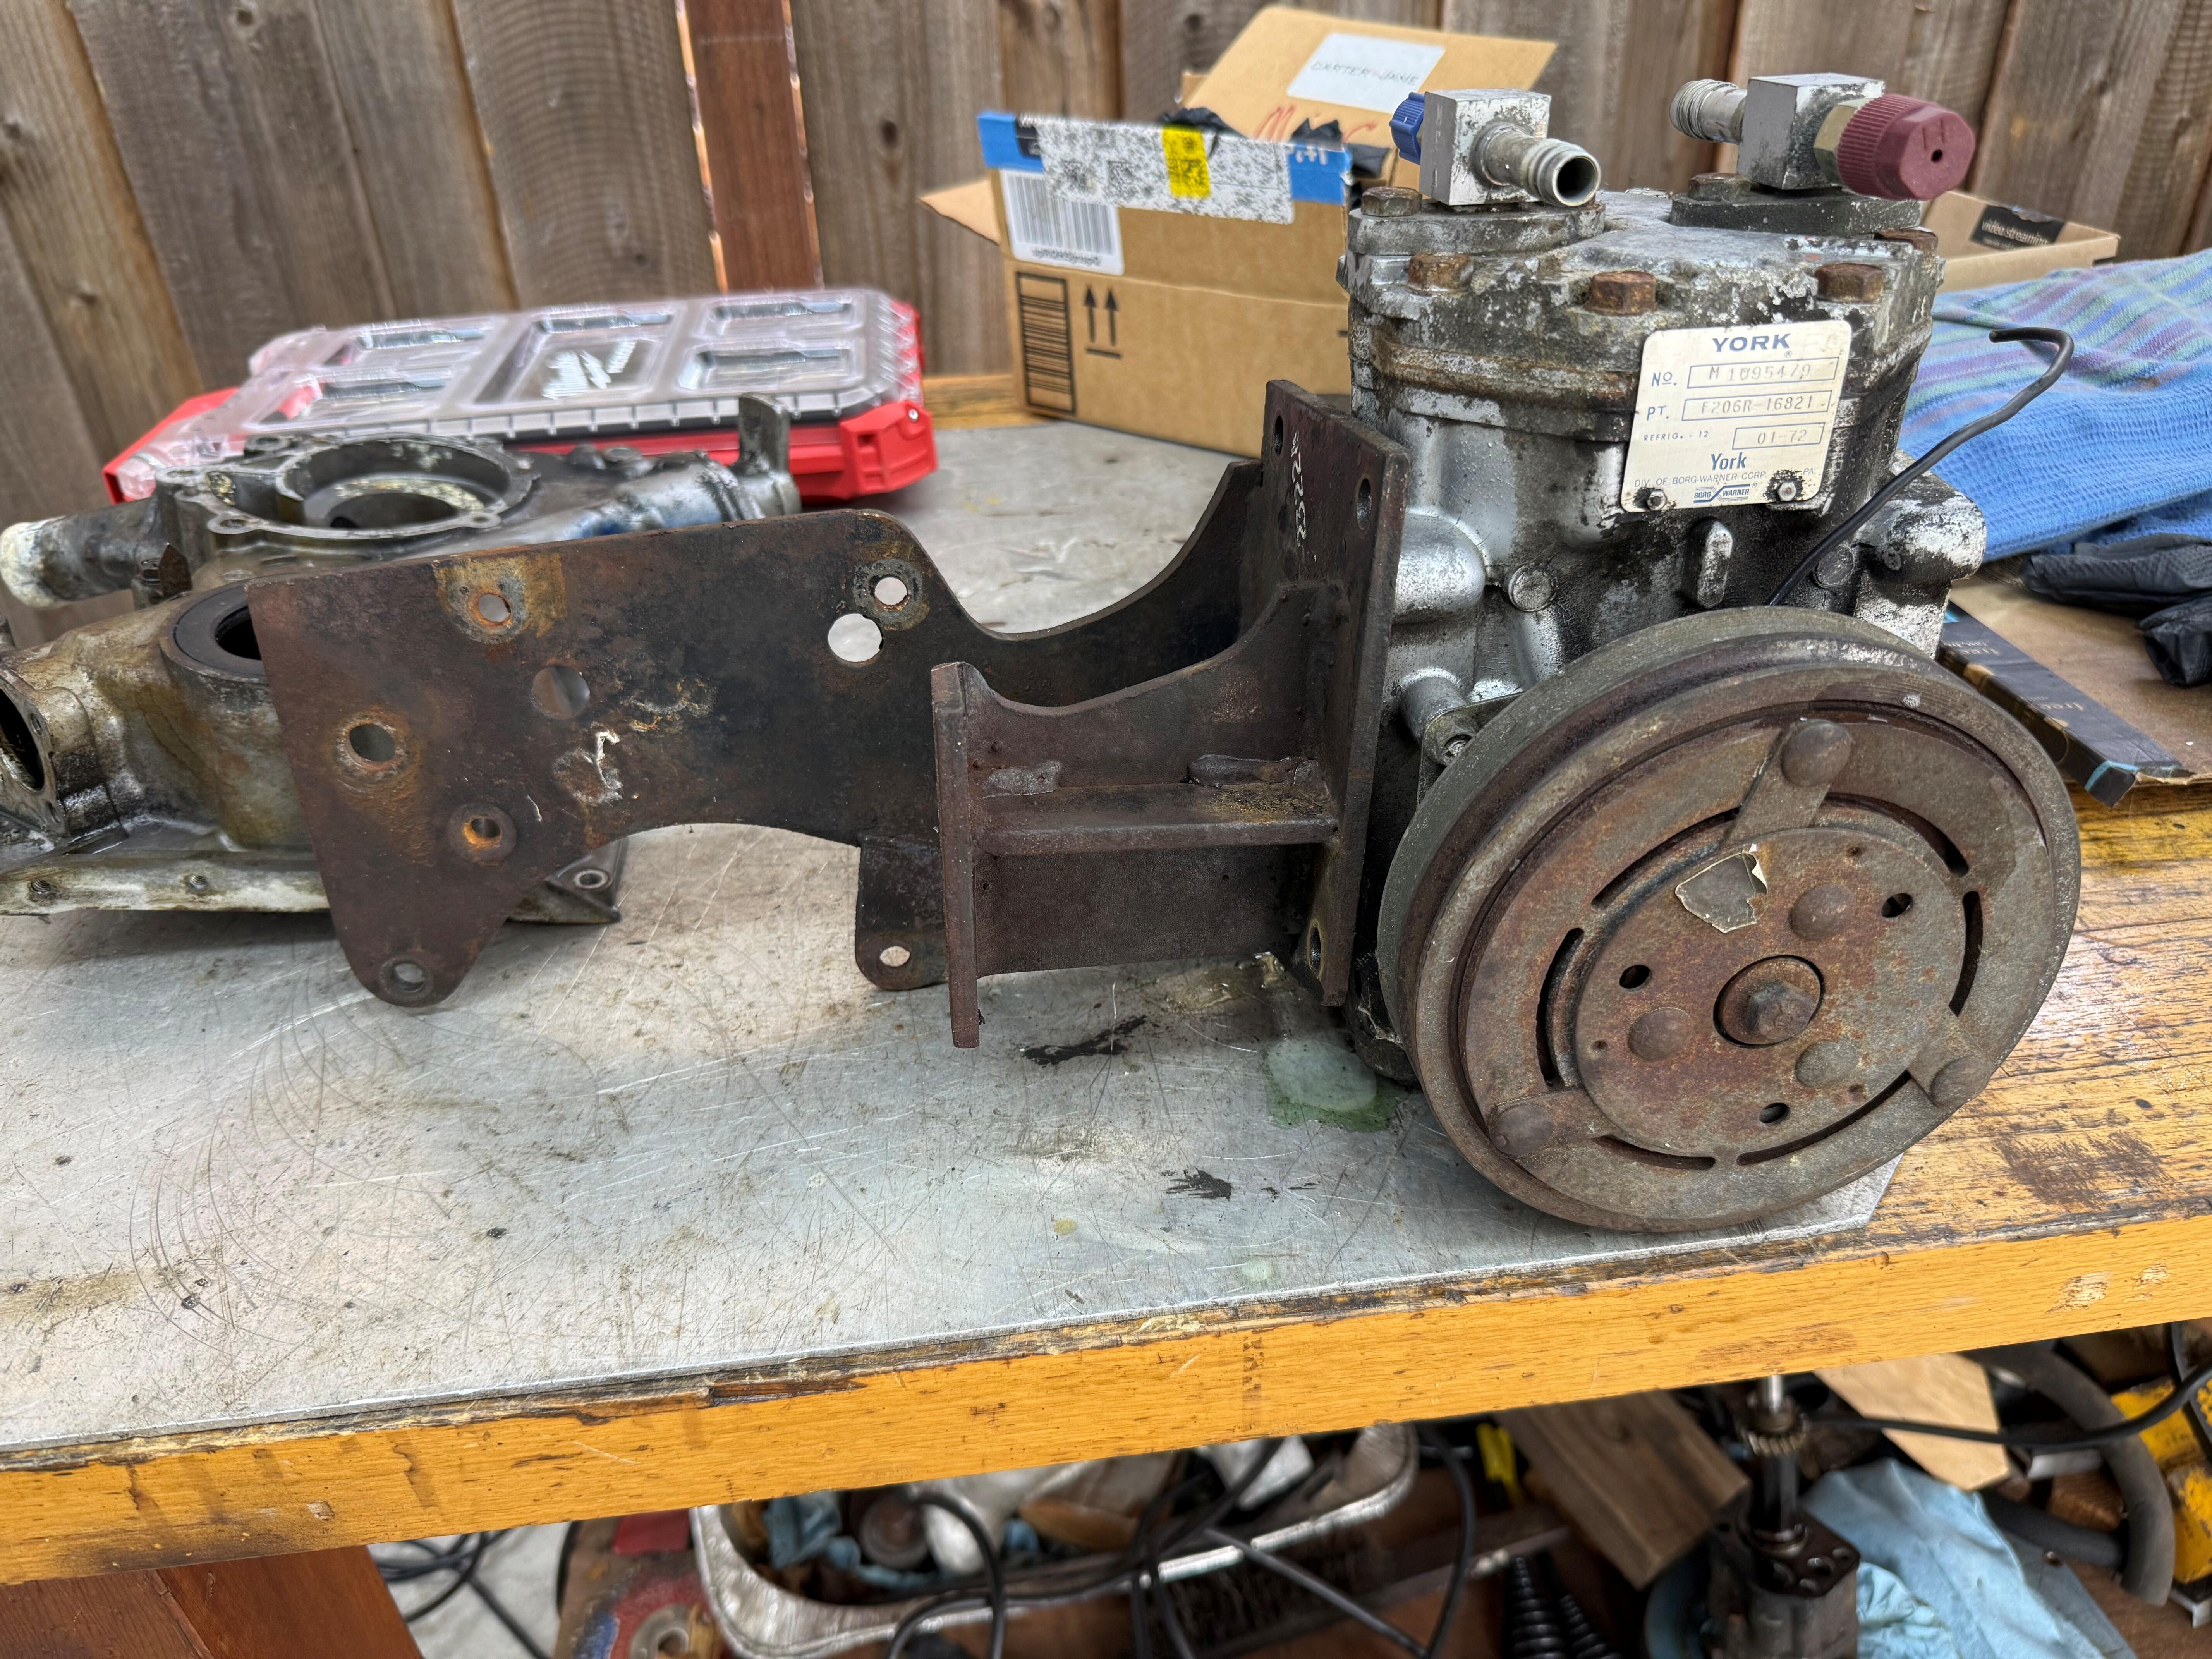
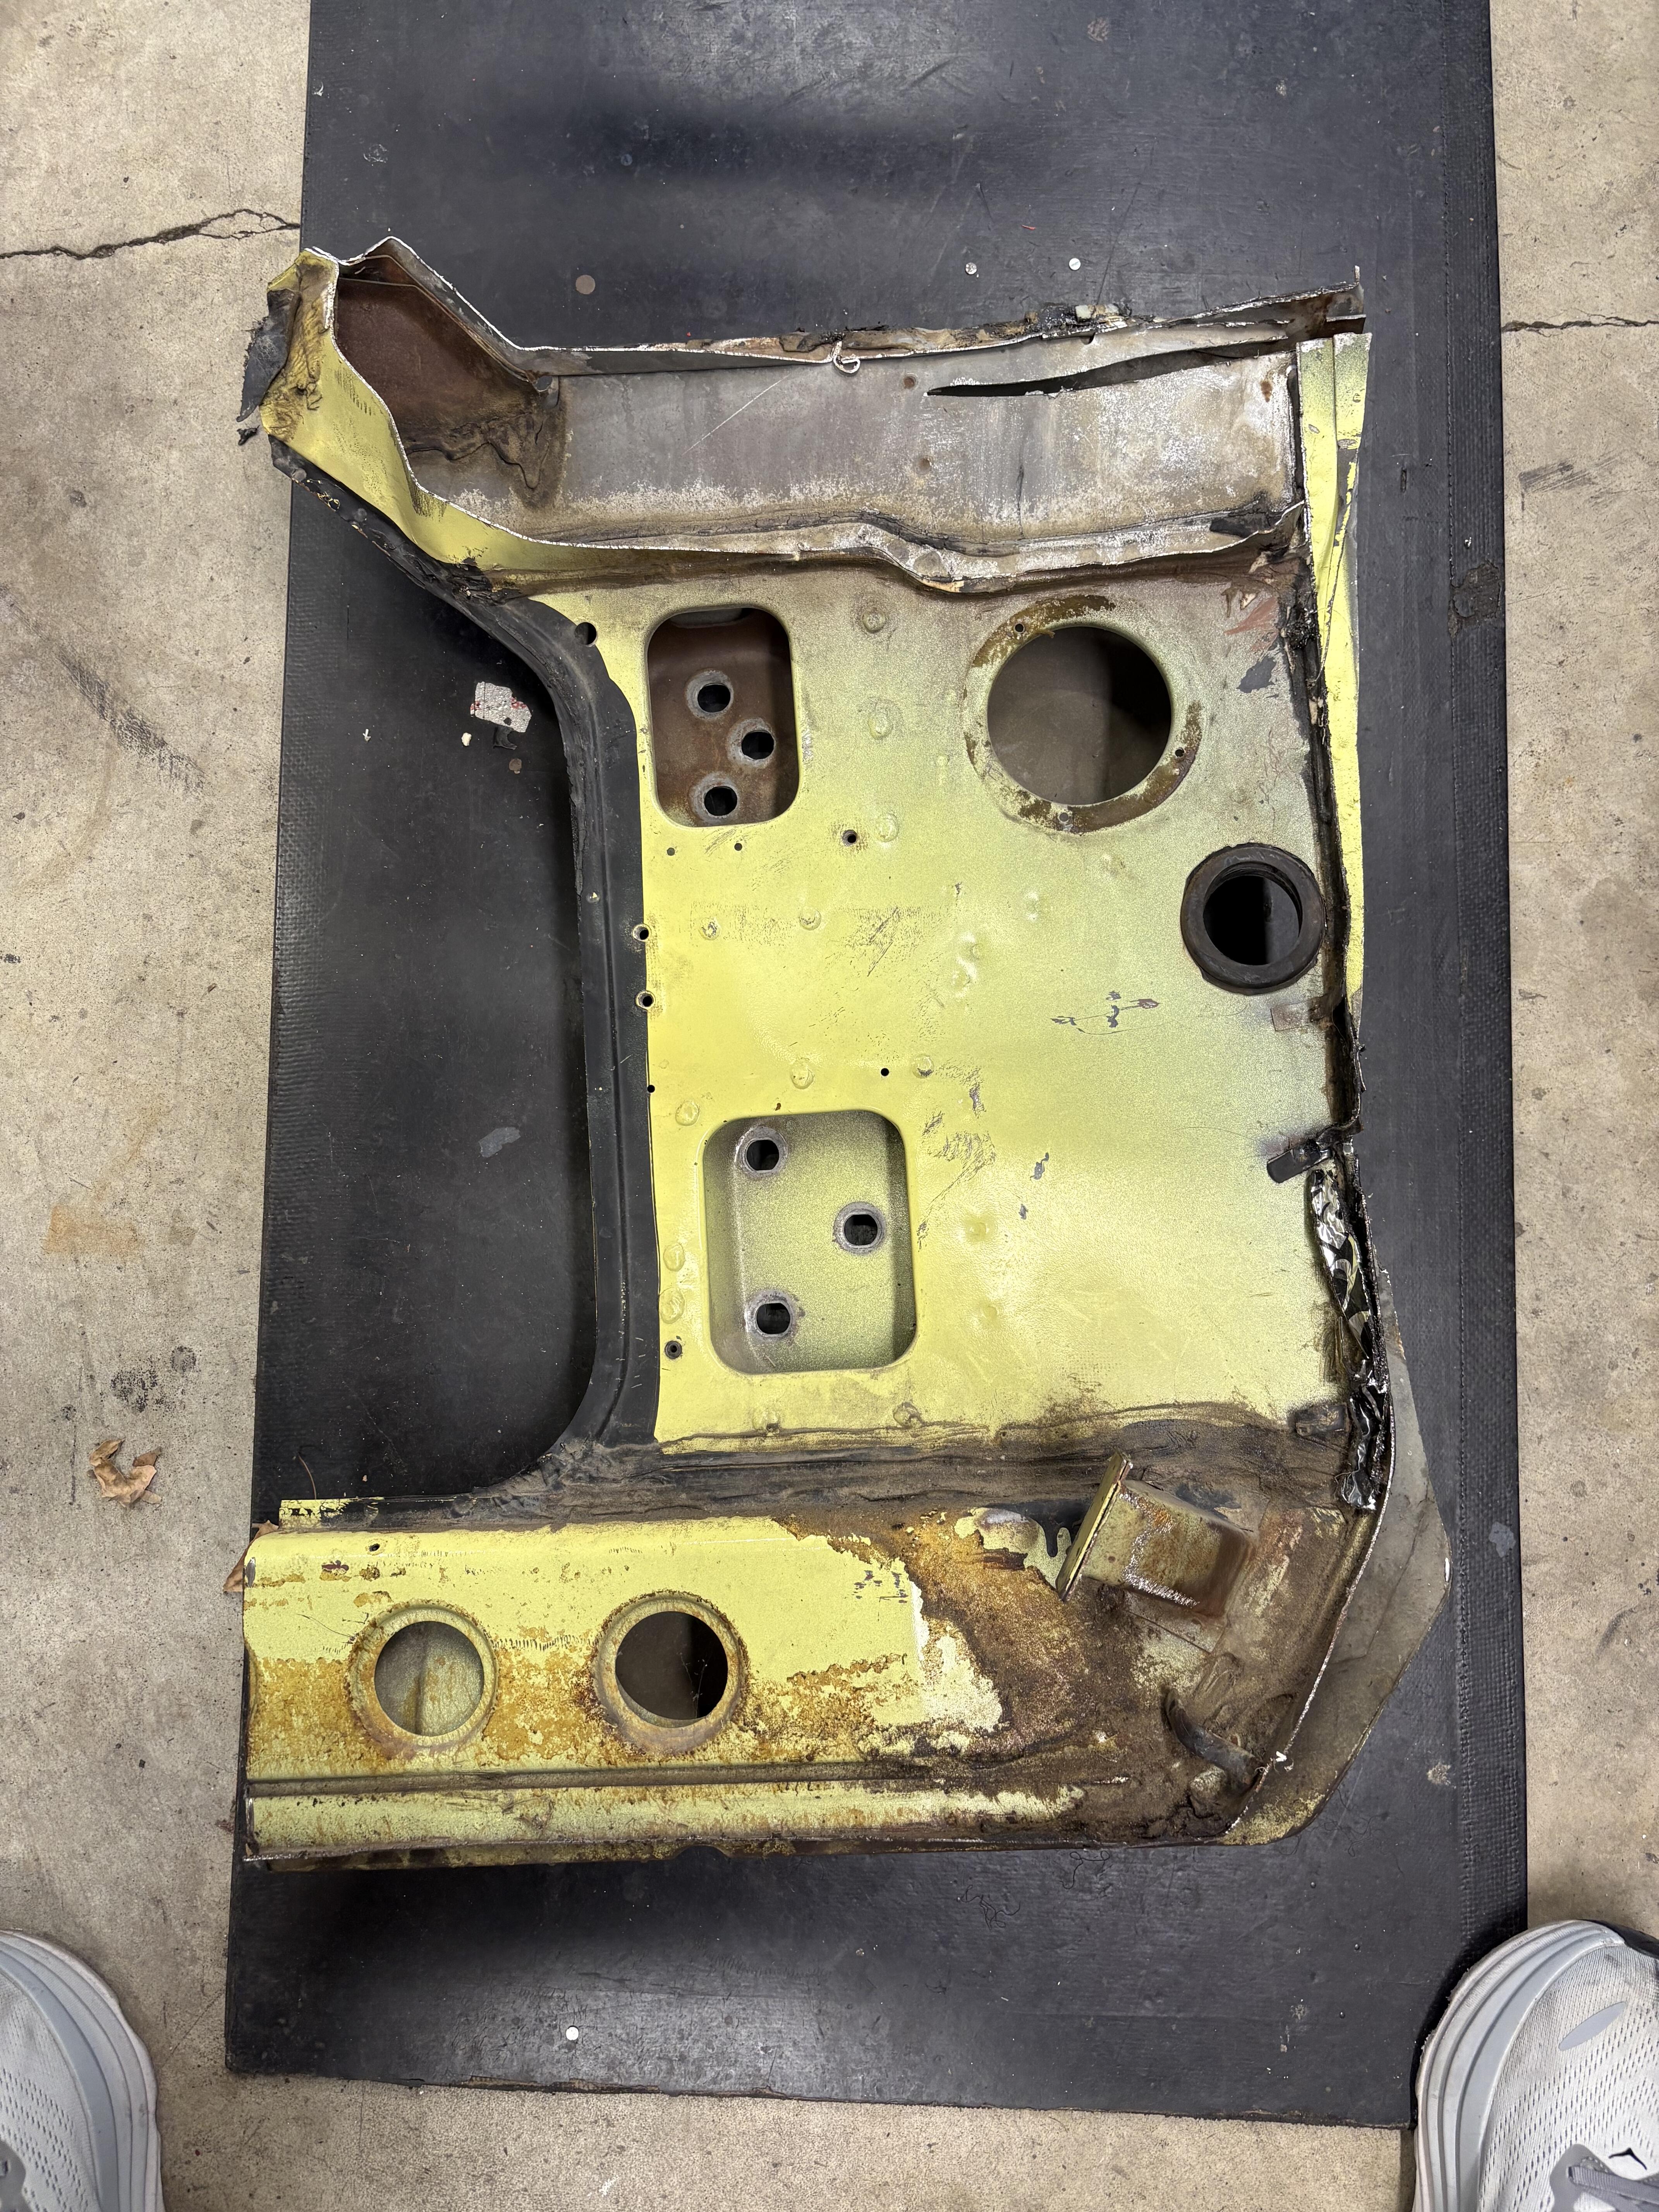
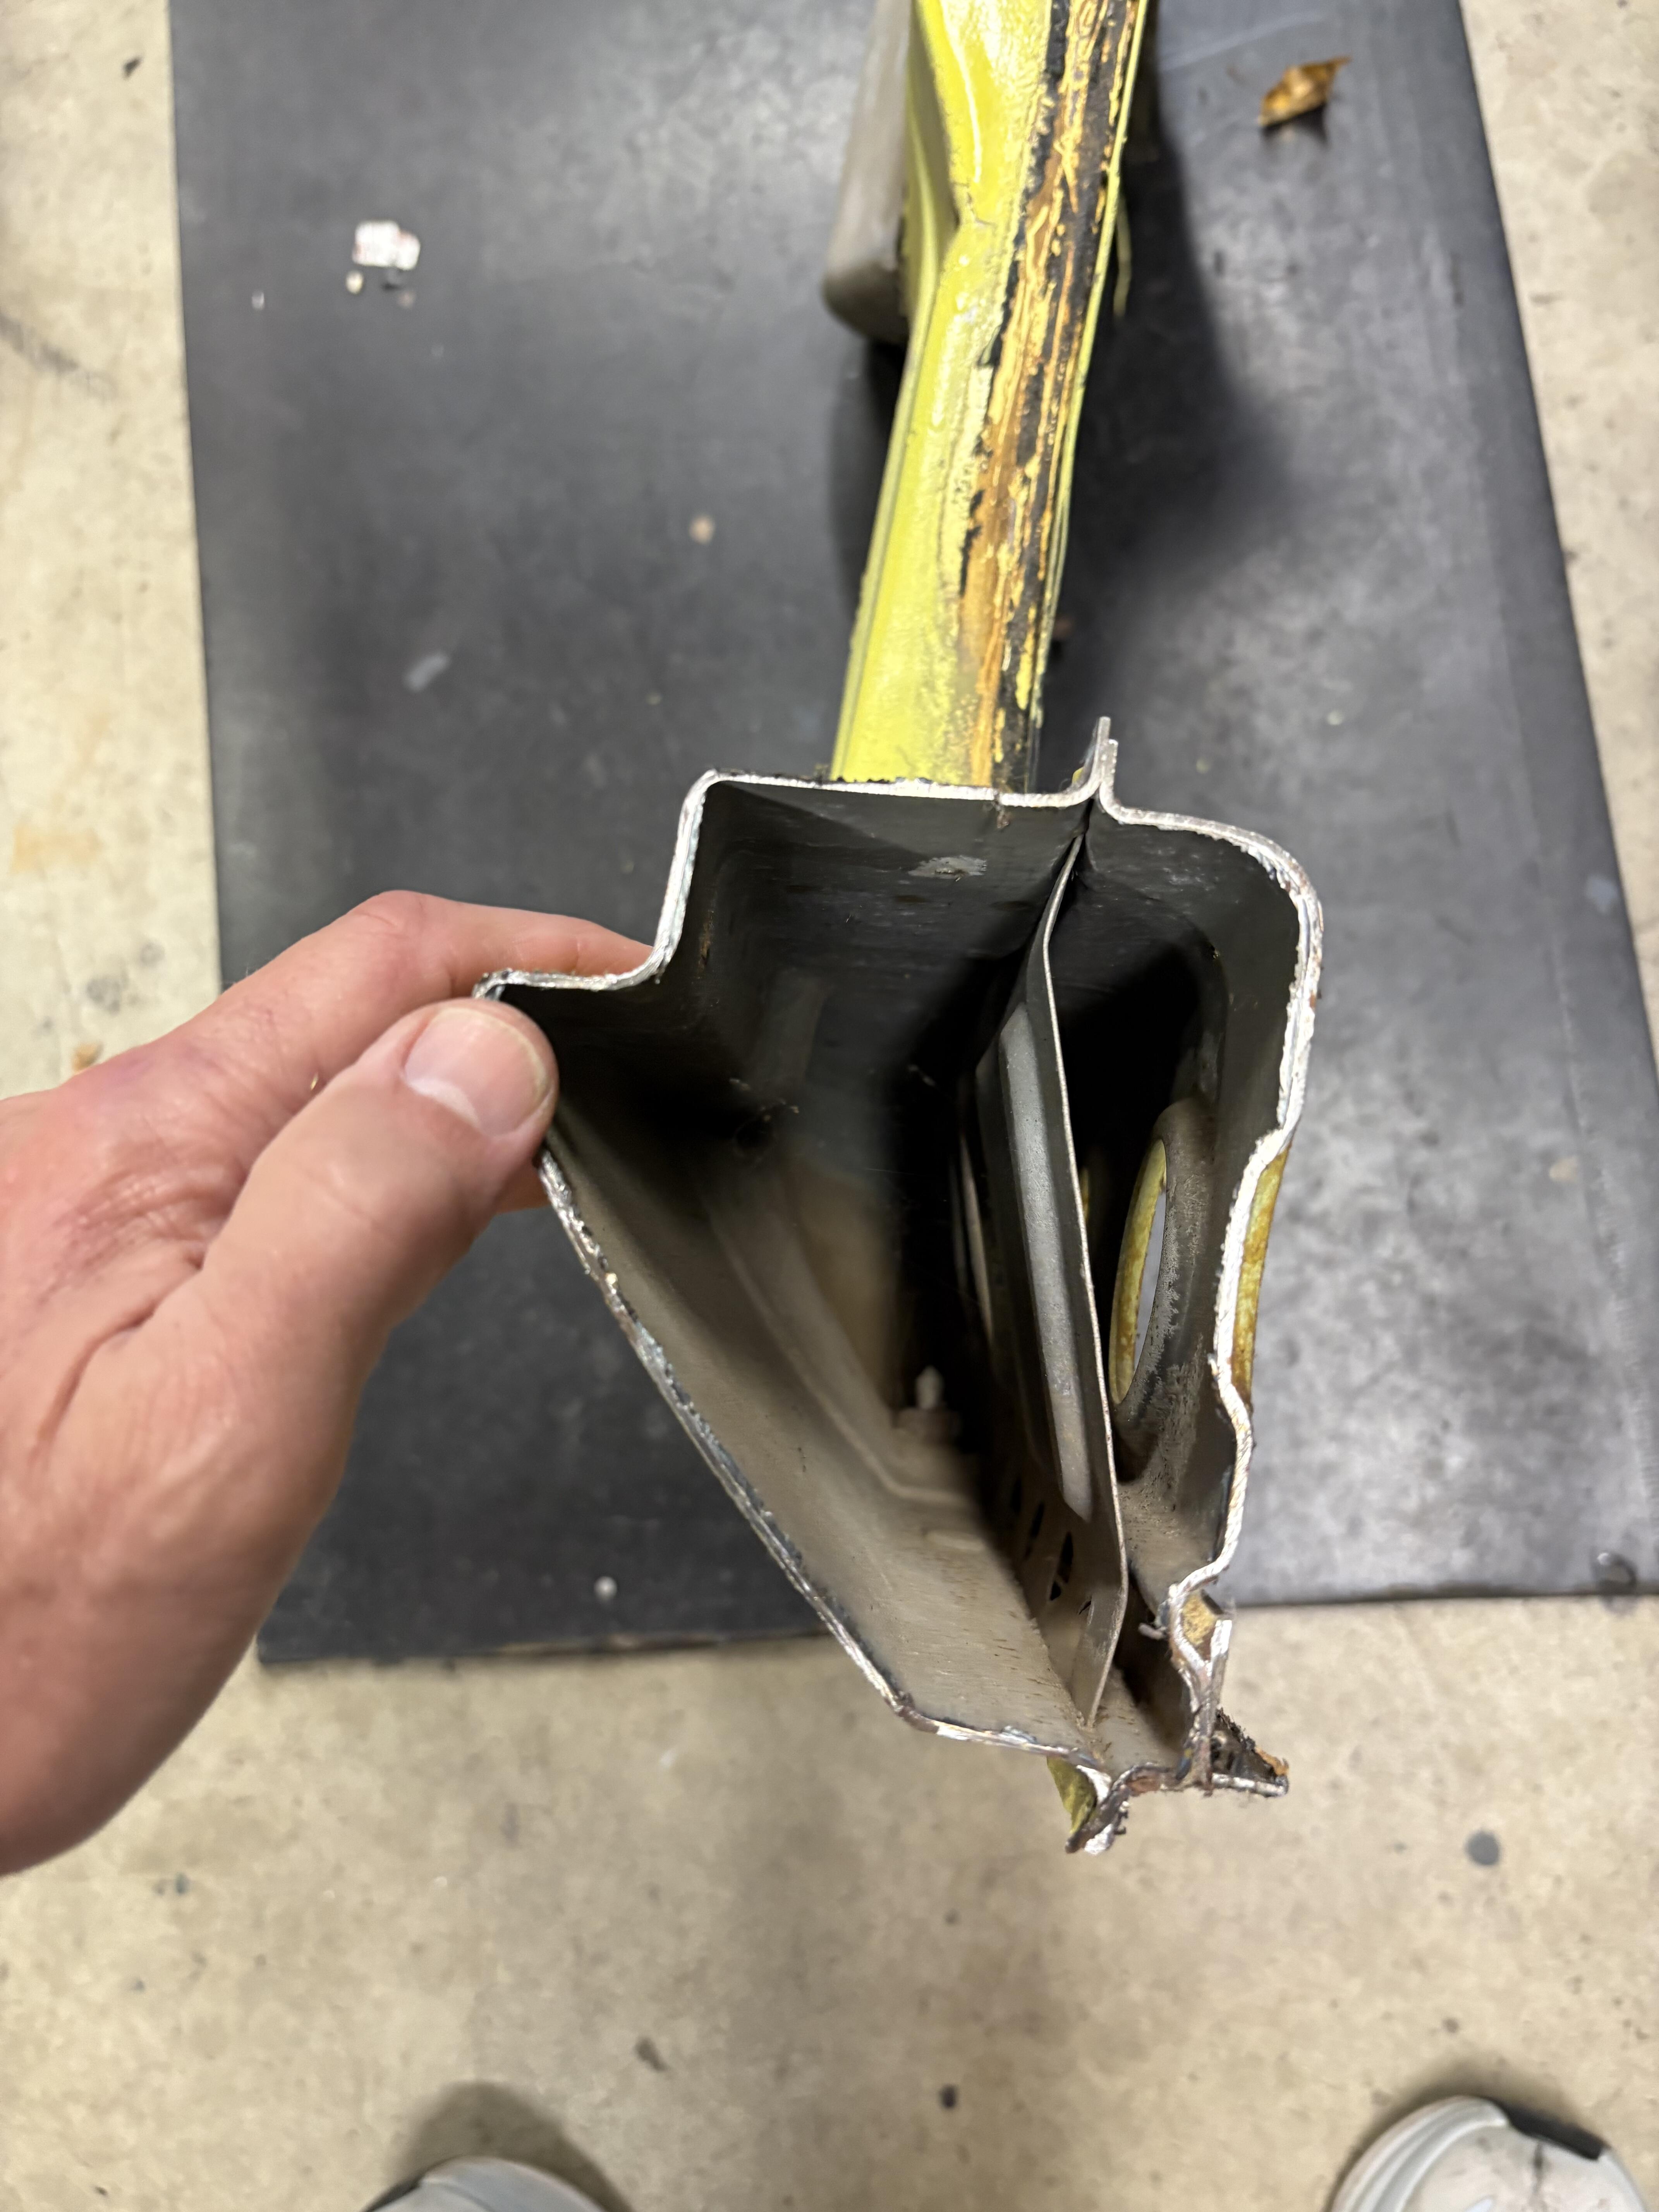
 About rust free section from a series 1 . Not using this so up for sale. Hard to find a clean section like this . I’ll ship anywhere 200$ Email Sfinnerty1018@gmail.com
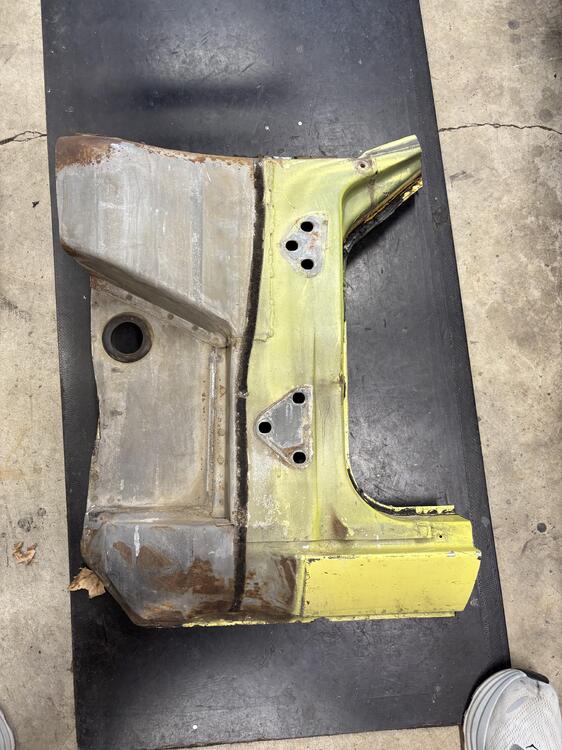


 Thanks! Of course and now that I know I was able to find in shop manual.
Well hell! @Tanker what year was that Honda electrical brake booster? Did you get a hold of the 3D print file? I’m intrigued but I can’t find the Facebook thread! 😫
Thanks! Of course and now that I know I was able to find in shop manual.
Well hell! @Tanker what year was that Honda electrical brake booster? Did you get a hold of the 3D print file? I’m intrigued but I can’t find the Facebook thread! 😫 @Terrapin Z - you have a PM! @kickstand80 - you have an email.


Important Information
By using this site, you agree to our Privacy Policy and Guidelines. We have placed cookies on your device to help make this website better. You can adjust your cookie settings, otherwise we'll assume you're okay to continue.