Leaderboard
-

siteunseen
Free Member5Points15,170Posts -

CanTechZ
Free Member4Points1,314Posts -
.JPG.cfcada9cf1c1b502df3f5f2f2ca3ff36.JPG)
SteveJ
Free Member2Points9,683Posts -
Patcon
 Subscriber
 2Points11,182Posts


Popular Content
Showing content with the highest reputation on 09/14/2022 in all areas
-
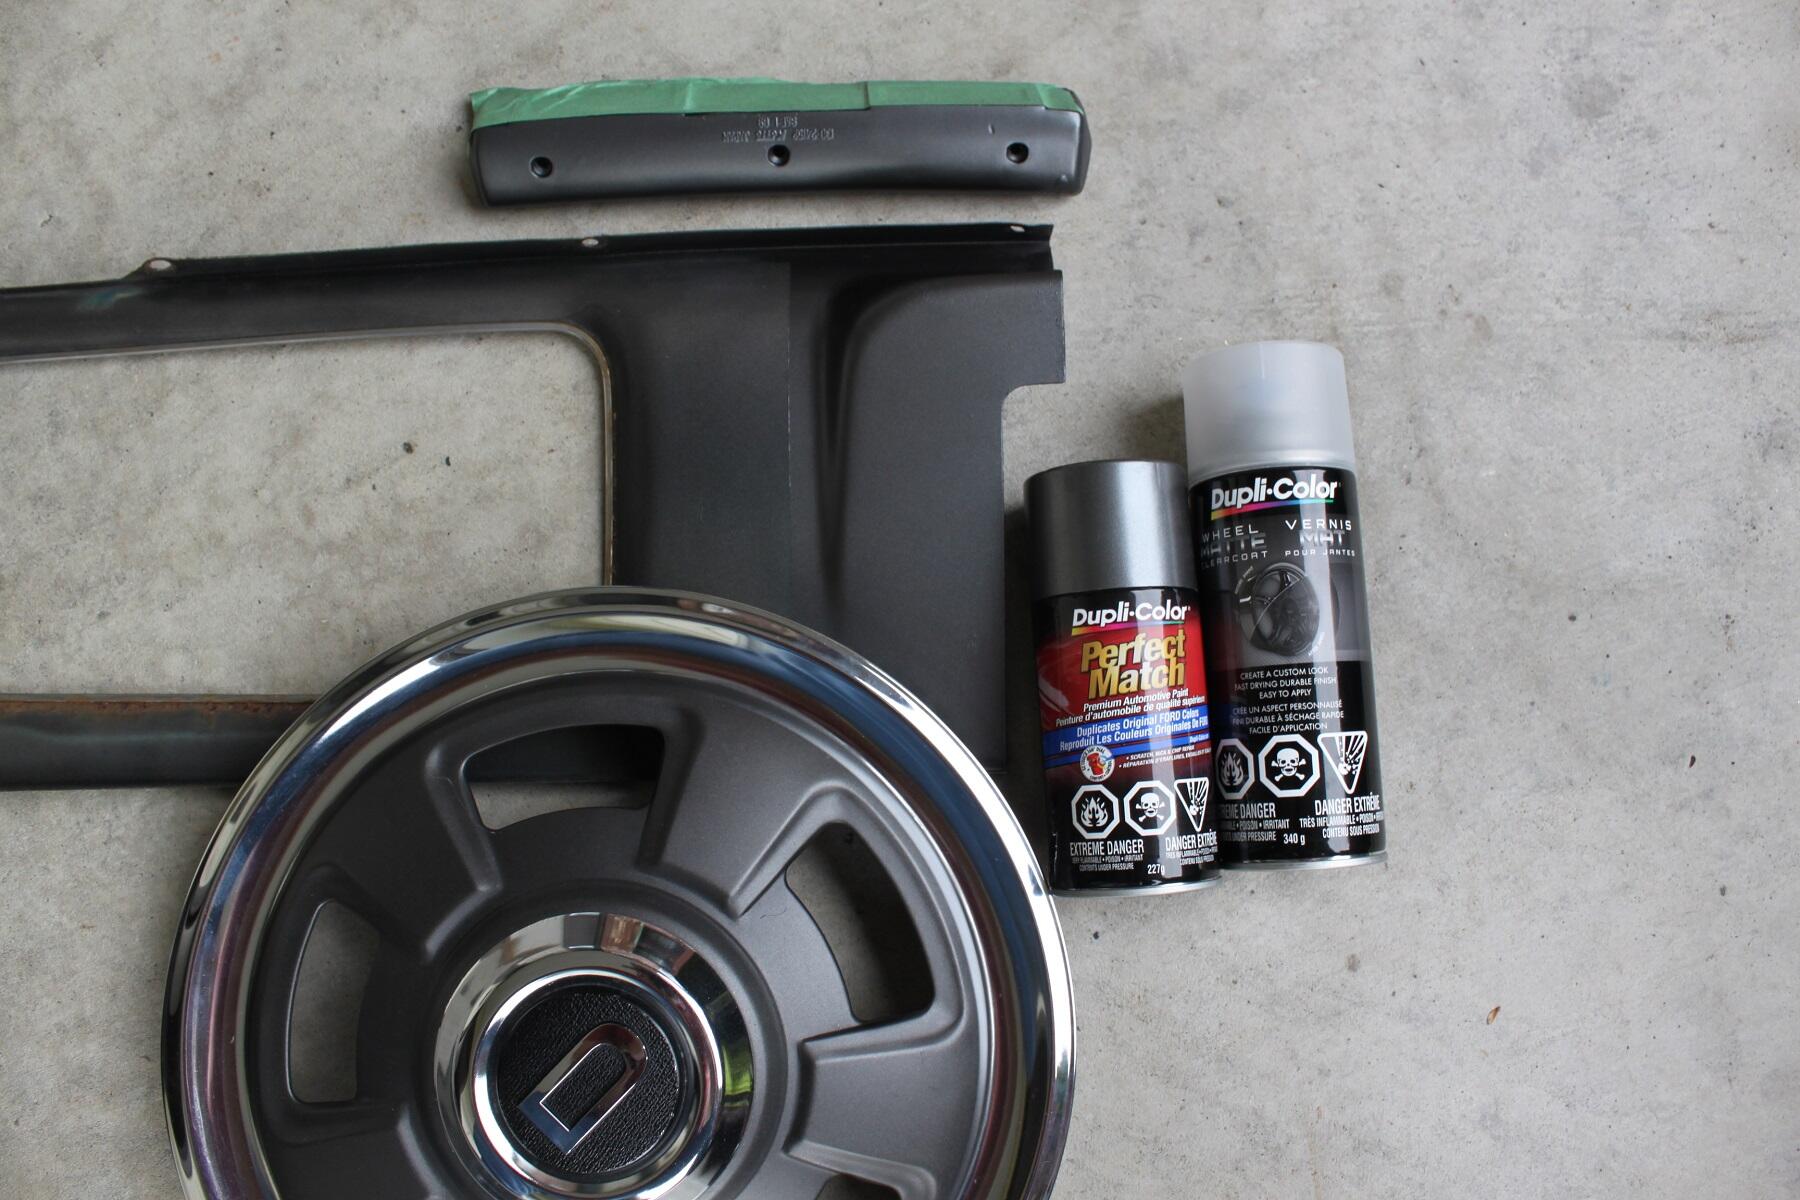
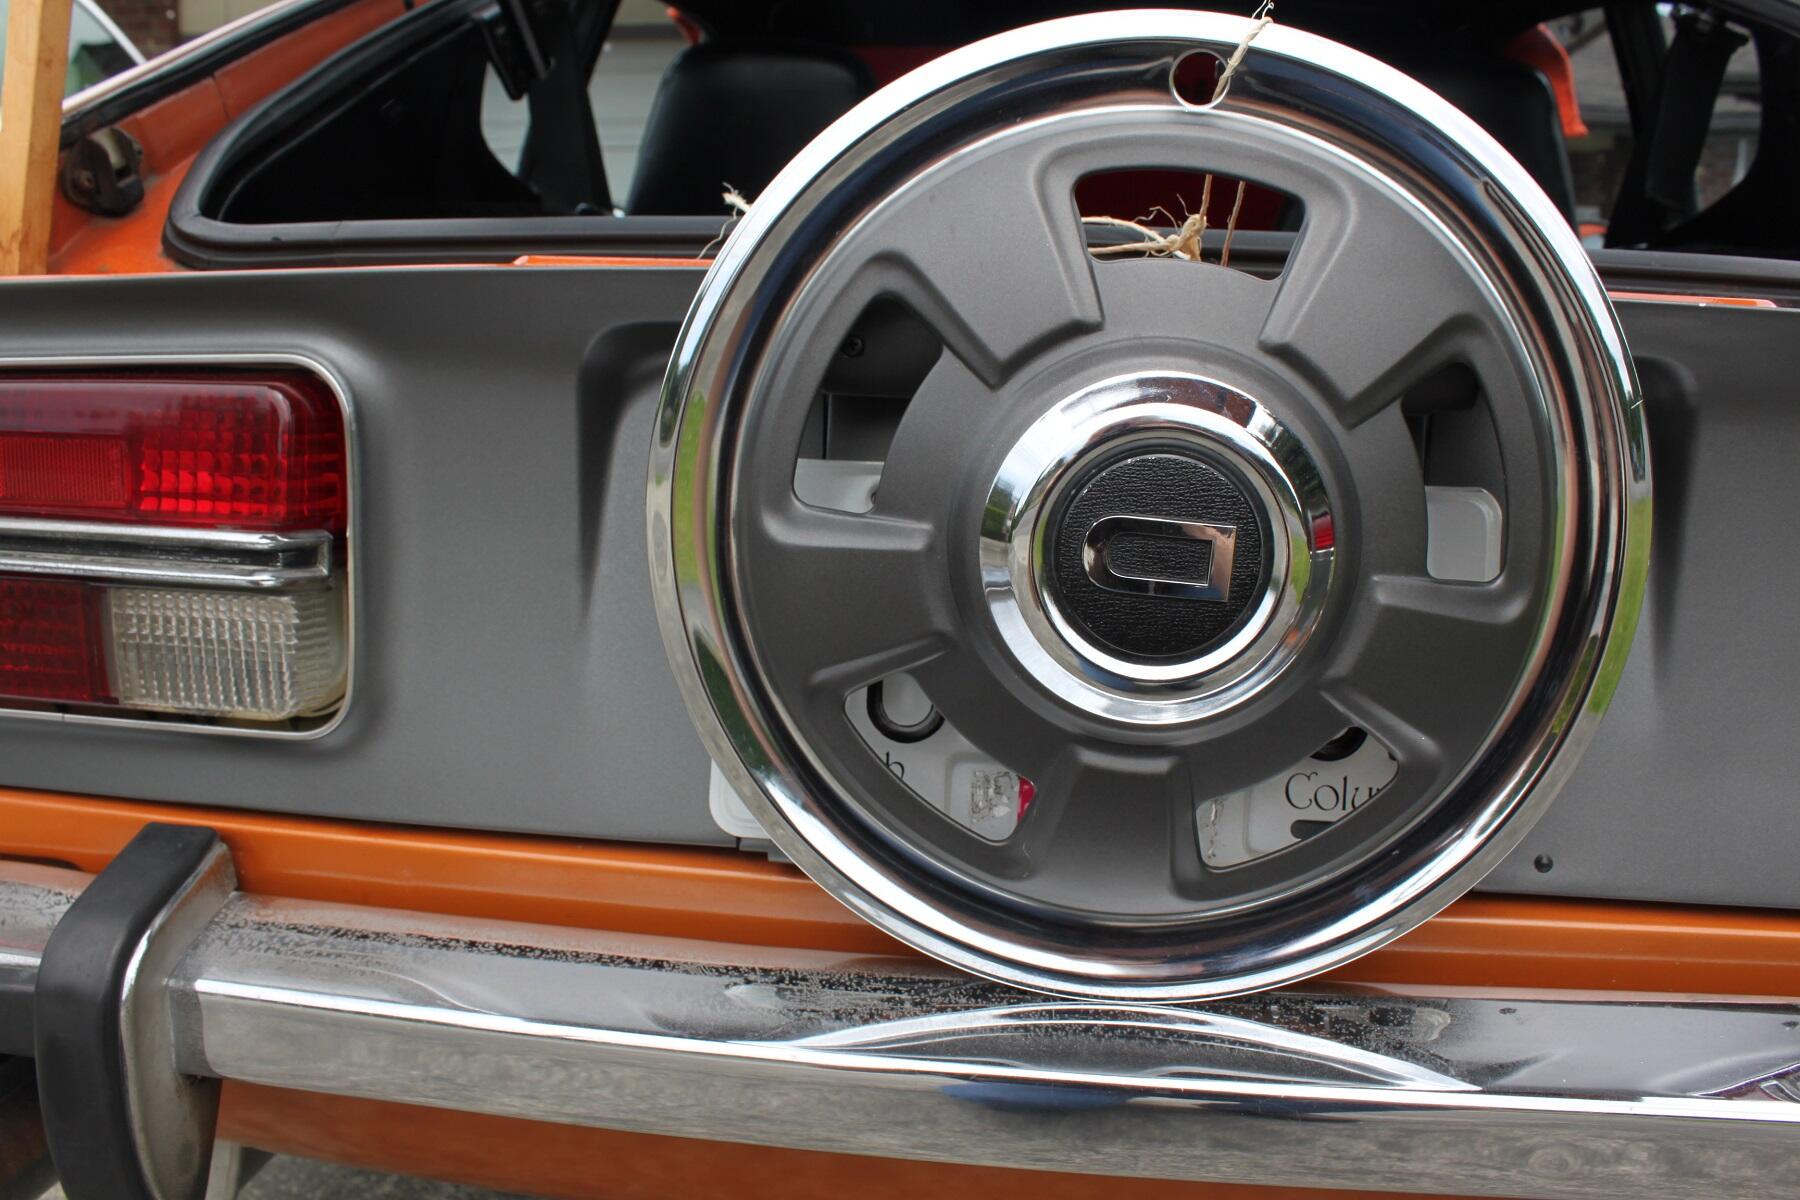
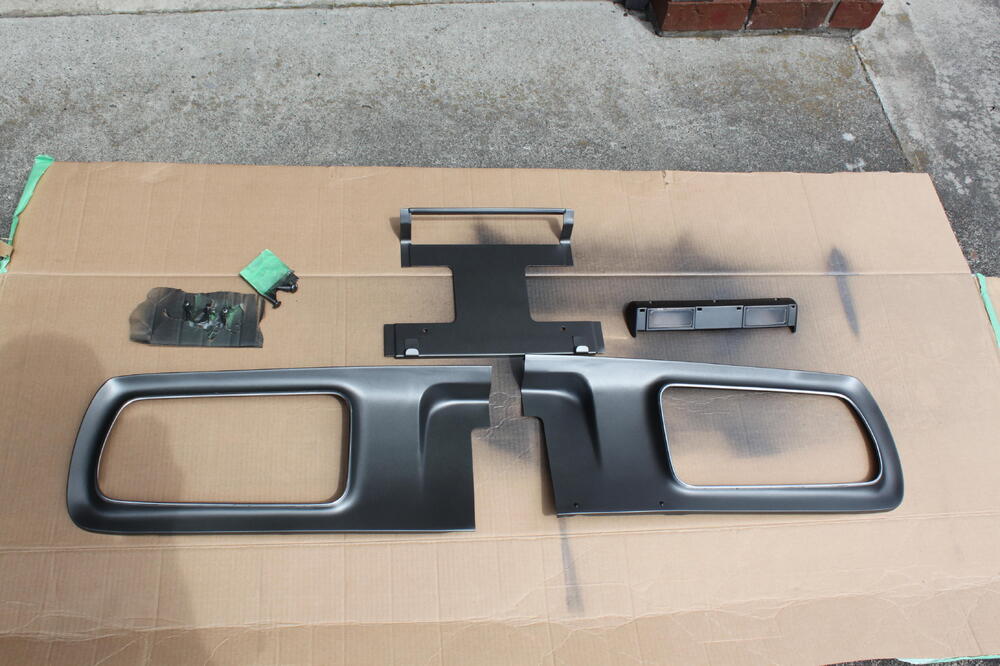
4 pointsThanks Site, I'm still very happy with the results. When I picked the color back in 2016, I must have looked a little strange in my local Canadian Tire store holding a hub cap up to various cans of paint. Lol This is a test I did on the inside of a tail light finisher that had OE paint in good shape partly painted with DC dark shadow grey and matte clear. Here is one of my unrestored hub caps against the end result,

 4 points
 -
That's always hard to see when you dig into a project. Anytime you see rust bubbles, just assume there's a hole behind it. Almost always is... At some point the surprises will end and you will start getting nice new metal in place2 points
-
I bought from Streeter Corp, Jesse is great to deal with and gets you better pricing then RHD. He also can get answers from the factory.2 points
-
2 pointsThe matte clear makes the look original to me. It smoothes out the metallic shadows and light spots you get from using rattle can grays. @CanTechZ hit the perfect look in my opinion.2 points
-
1 pointHi all I’m new to the forum from Tampa bay happy to be around the classics family Sent from my iPhone using Tapatalk1 point
-
1 pointThat starter is a gear reduction starter from a ZX. It’s brand new. It does sound odd but works perfectly. Spin faster than the stock Z one. This one is made by AC Delco bought it on Rock Auto https://www.rockauto.com/en/catalog/nissan,1982,280zx,2.8l+l6,1209350,electrical,starter+motor,4152 I won’t forgot how to swap these modules out. It’s dummy proof.1 point
-
I didn’t immediately see the stock resistor there as I quickly removed the TIU with my 3yr old in tow. Just removing the TIU made the tach work! Is there a benefit or harm to removing the resistor I soldered in if the tech is working? Thanks again and happy I found this thread as FB responses months ago were not this helpful.1 point
-
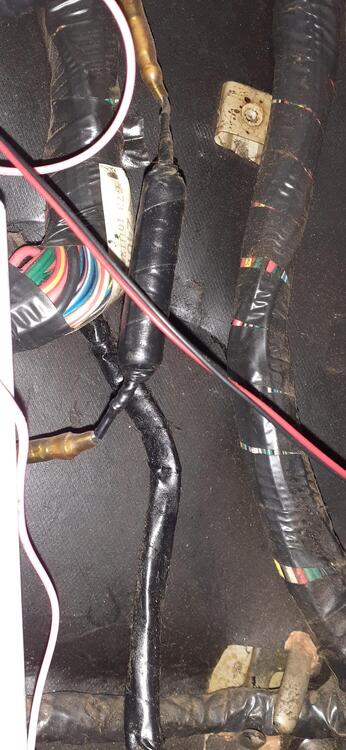
Also, here is a picture of the resistor in the passenger footwell of my 260Z. As @Zed Head said, it's taped up like a mummy. It might have different connectors in the 280Z, but this should give you an idea of what you should be looking for. It will probably be below where the engine wiring harness comes through the firewall.
 1 point
 -
First he needs to take out the TIU and 10K resistor to see if he has a problem. I would not be surprised if getting rid of those (along with ensuring the stock resistor is in place) fixes his problem.1 point
-
It's a lump in the taped up harness. Like a frog in a garter snake.1 point
-
1 point@ensys.... just seeing this. What you wrote above is how I understand it AND it is consistent with what I figured out while rebuilding a 1972 manual transmission D612-53 distributor this past week. For the D612-53, the advance curve is documented in the 1972 FSM on pages EC-12, EC-28, and EC-29. The curves show distributor RPM, not crankshaft RPM so you have to double the number to arrive at the crank advance number. The manual shows an average curve of 12x2=24. When I rebuilt the distributor, I was able to see that the top weight is stamped with the number 12....indicating 24 degrees of mechanical advance at the crank...consistent with the manual. FYI, the technical bulletin manual for Jan 1969 through Dec 1972 has a section that shows advance curves for some of the distributor models that Datsun had produced to date at that time. So if your distributor is an early one you might find it listed in this technical bulletin book starting on page 88. The models listed in the manual for the 240z are D612-52, D613-01, D614-51, and D614-52. In case you have the euro spec distributor, the advance curve works as follows....based on my research and notes (also consistent with my testing using timing light and mityvac). Initial 17 degrees at 650 rpm Mechanical is 6 distributor degrees or 12 crankshaft degrees. Starts at 900 rpm and reaches 12 crank degrees by 2,000 rpm. I haven't rebuilt my euro spec distributor but I would expect the weights to have a 6 (or something close) stamped on the top. Vacuum is 5.5 distributor degrees or 11 crankshaft degrees. Starts at 3.94 inHG and reaches 11 crankshaft degrees by 9.6 inHG.1 point
-
1 point
-
The whole series thing just helps establish a sub-category value pecking order and strokes egos of early production owners.1 point
-
0 pointsI read on Zcar.com that Z Car Source closed. I called their number, and the outgoing message confirmed it. 😞0 points
-
Progress has been steady lately, but the deeper I get into this the more I feel like throwing in the towel… you will see why shortly… unpicked the beaver panel today, all went well with no surprises. Now I will have good access to repair the box section behind it. couldn’t resist putting the replacement piece on to see moved onto the roof skin next. As I began I felt a sense of impending doom… wire wheeled the rain rail to reveal the spot welds. before after ah no, Your eyes do not deceive you, that is a giant frickin hole over the A pillar. Gazing into the darkness of this chasm I felt like my soul was being pulled from my body along with all my motivation for this project…. it was like gazing into the eye of Sauron himself…. Where the roof skin joins the rear quarter was also a huge hole. I’m yet to perform the archeological dig to extract the bog artifact from its resting place I didn’t even bother trying to unpick the spot welds, I just cut what little metal was left. Then I did a lot of swearing, bird flipping and inanimate object abusing. then I unpicked the rear of the roof skin. I used a 25mm scraper blade to help check if the panels were separated and to separate the last bits that were holding on, this allowed me to do minimal damage to either panel. I found it incredibly useful. I found the roof skin was tacked the roof structure in the corners where they couldn’t get the spot welder, I believe this is from factory if anyone can confirm. so halfway to having the roof off now, should knock it off next session, then start tackling the rear quarter panels. I feel like Captain America, I keep getting beat to the ground by this car, but somehow I manage to pick myself up and utter “I can do this all day….” But lately I’ve been getting ever so close to throwing in the towel.0 points