Leaderboard
-
.JPG.cfcada9cf1c1b502df3f5f2f2ca3ff36.JPG)
SteveJ
Free Member24Points9,646Posts -
S30Driver
Free Member8Points1,580Posts -
Captain Obvious
Free Member7Points10,081Posts -
Namerow
Free Member6Points1,553Posts


Popular Content
Showing content with the highest reputation on 08/25/2021 in all areas
-
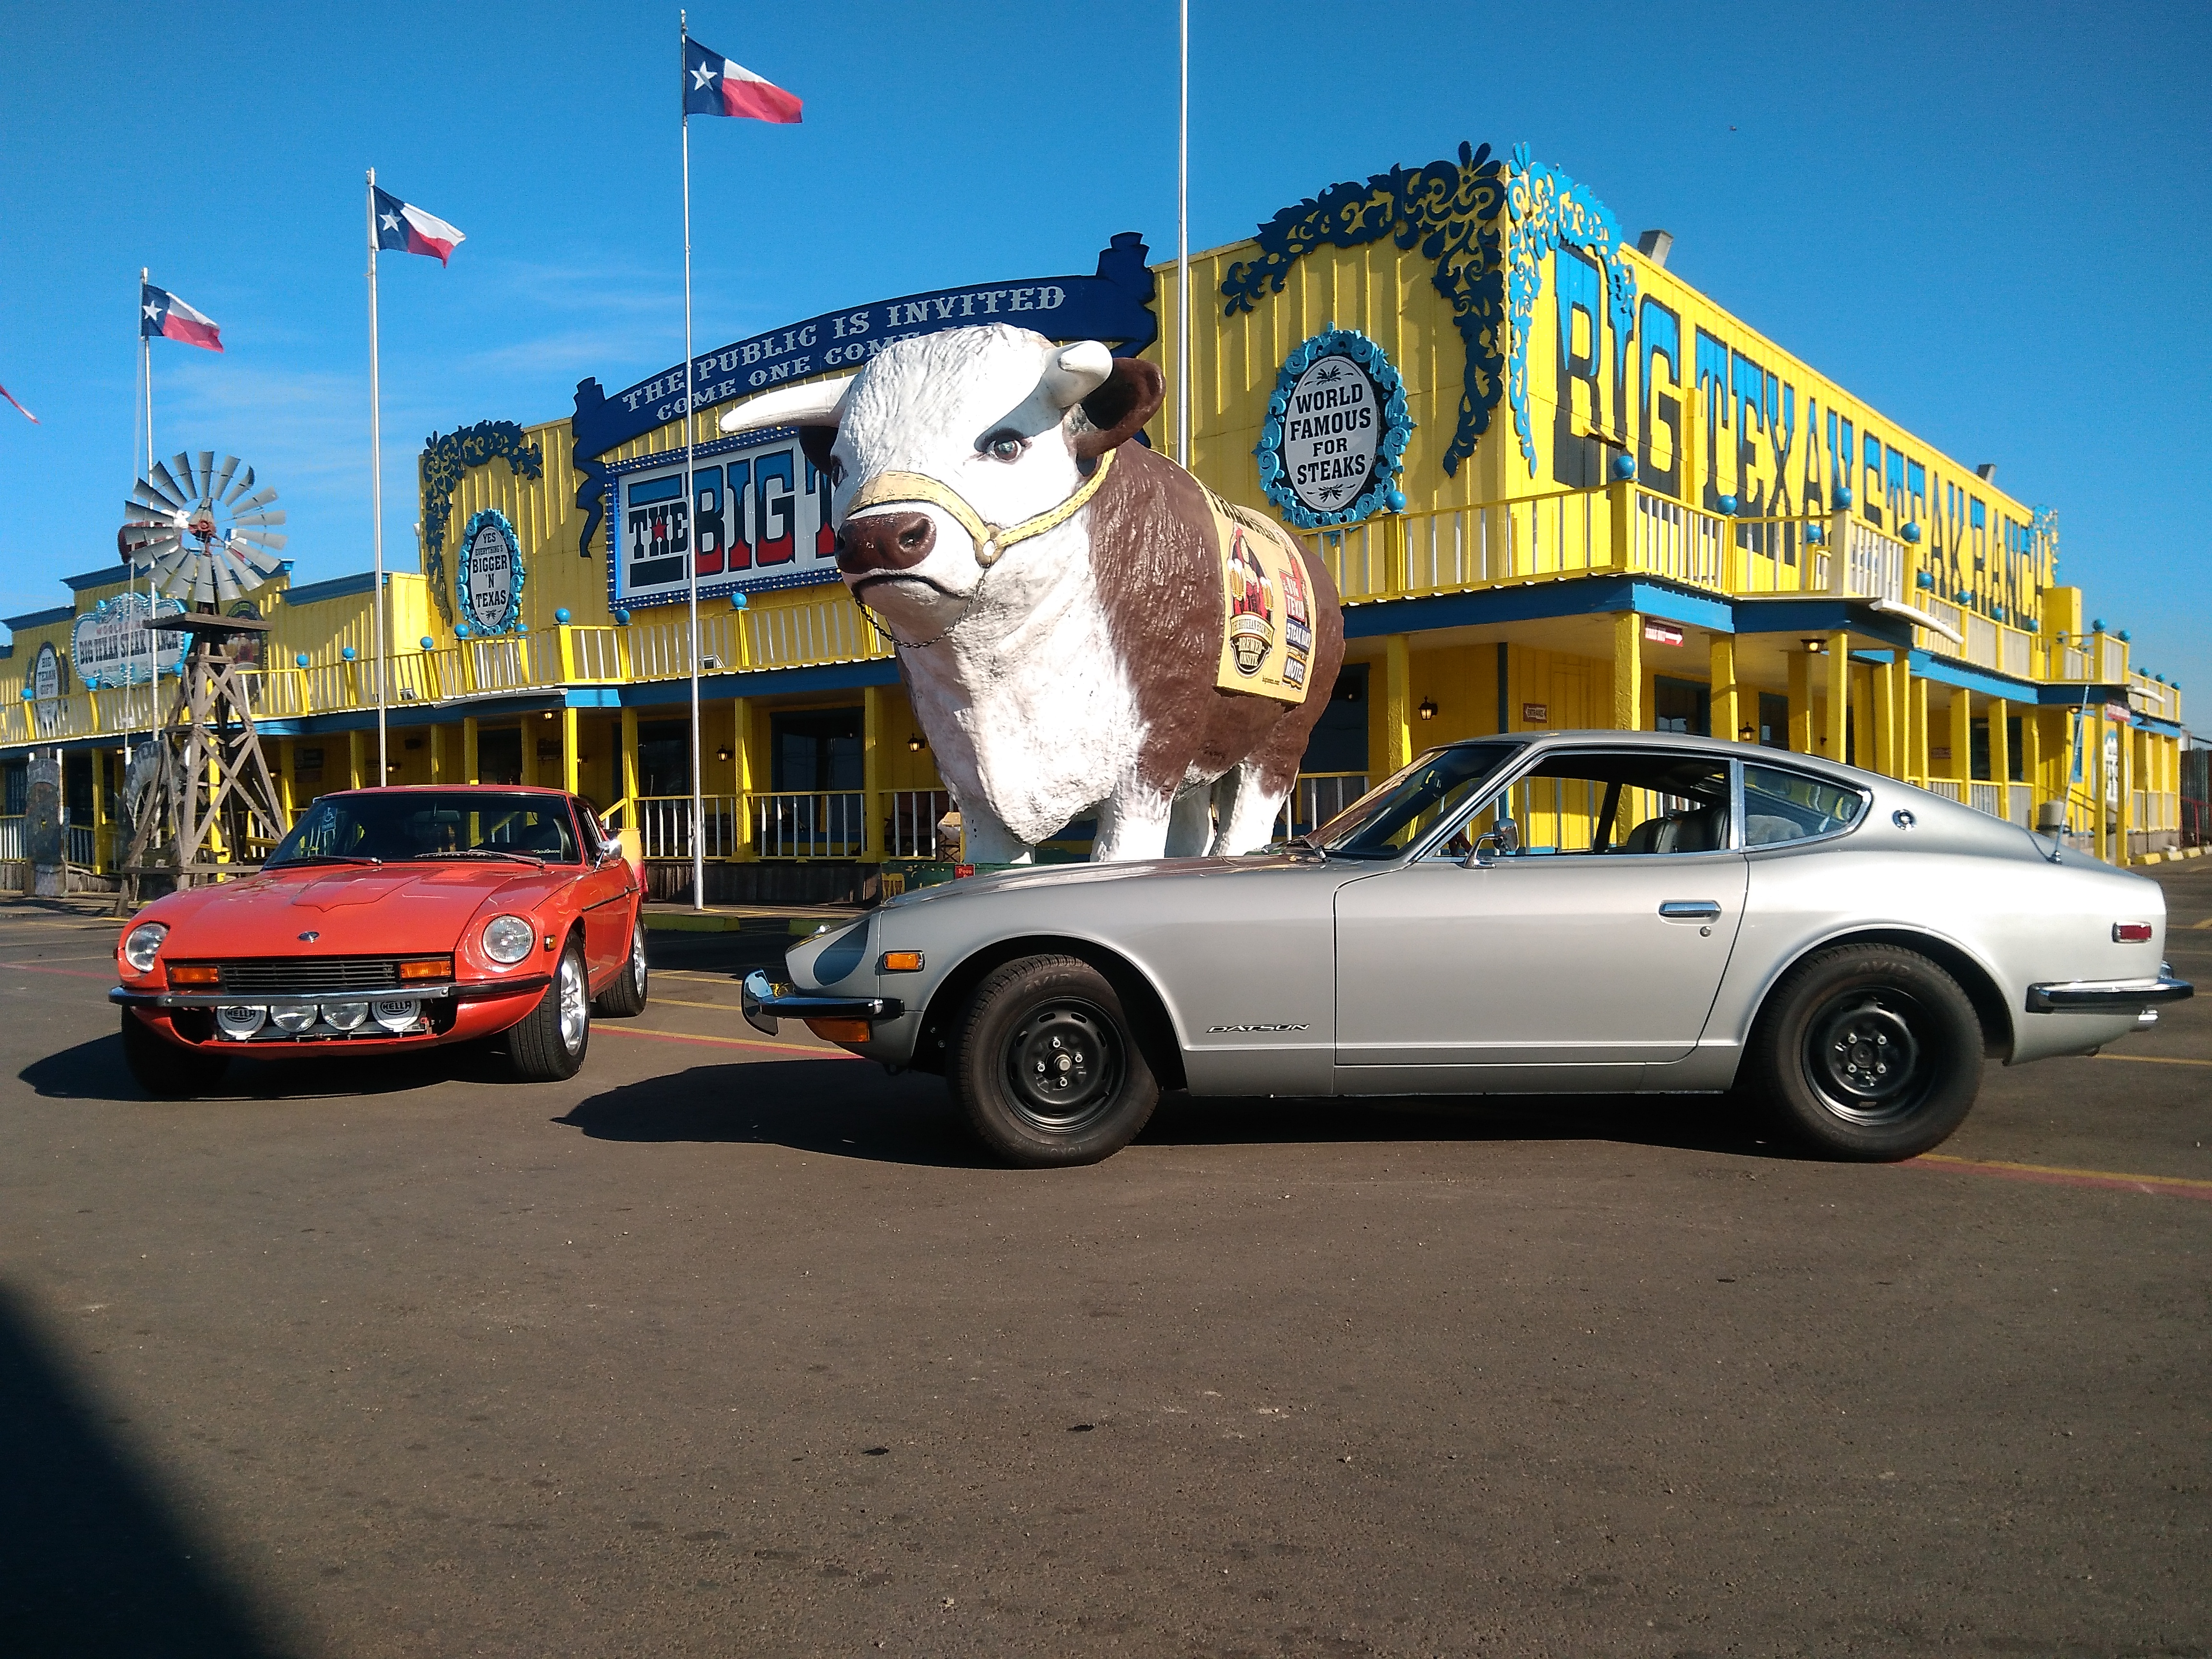
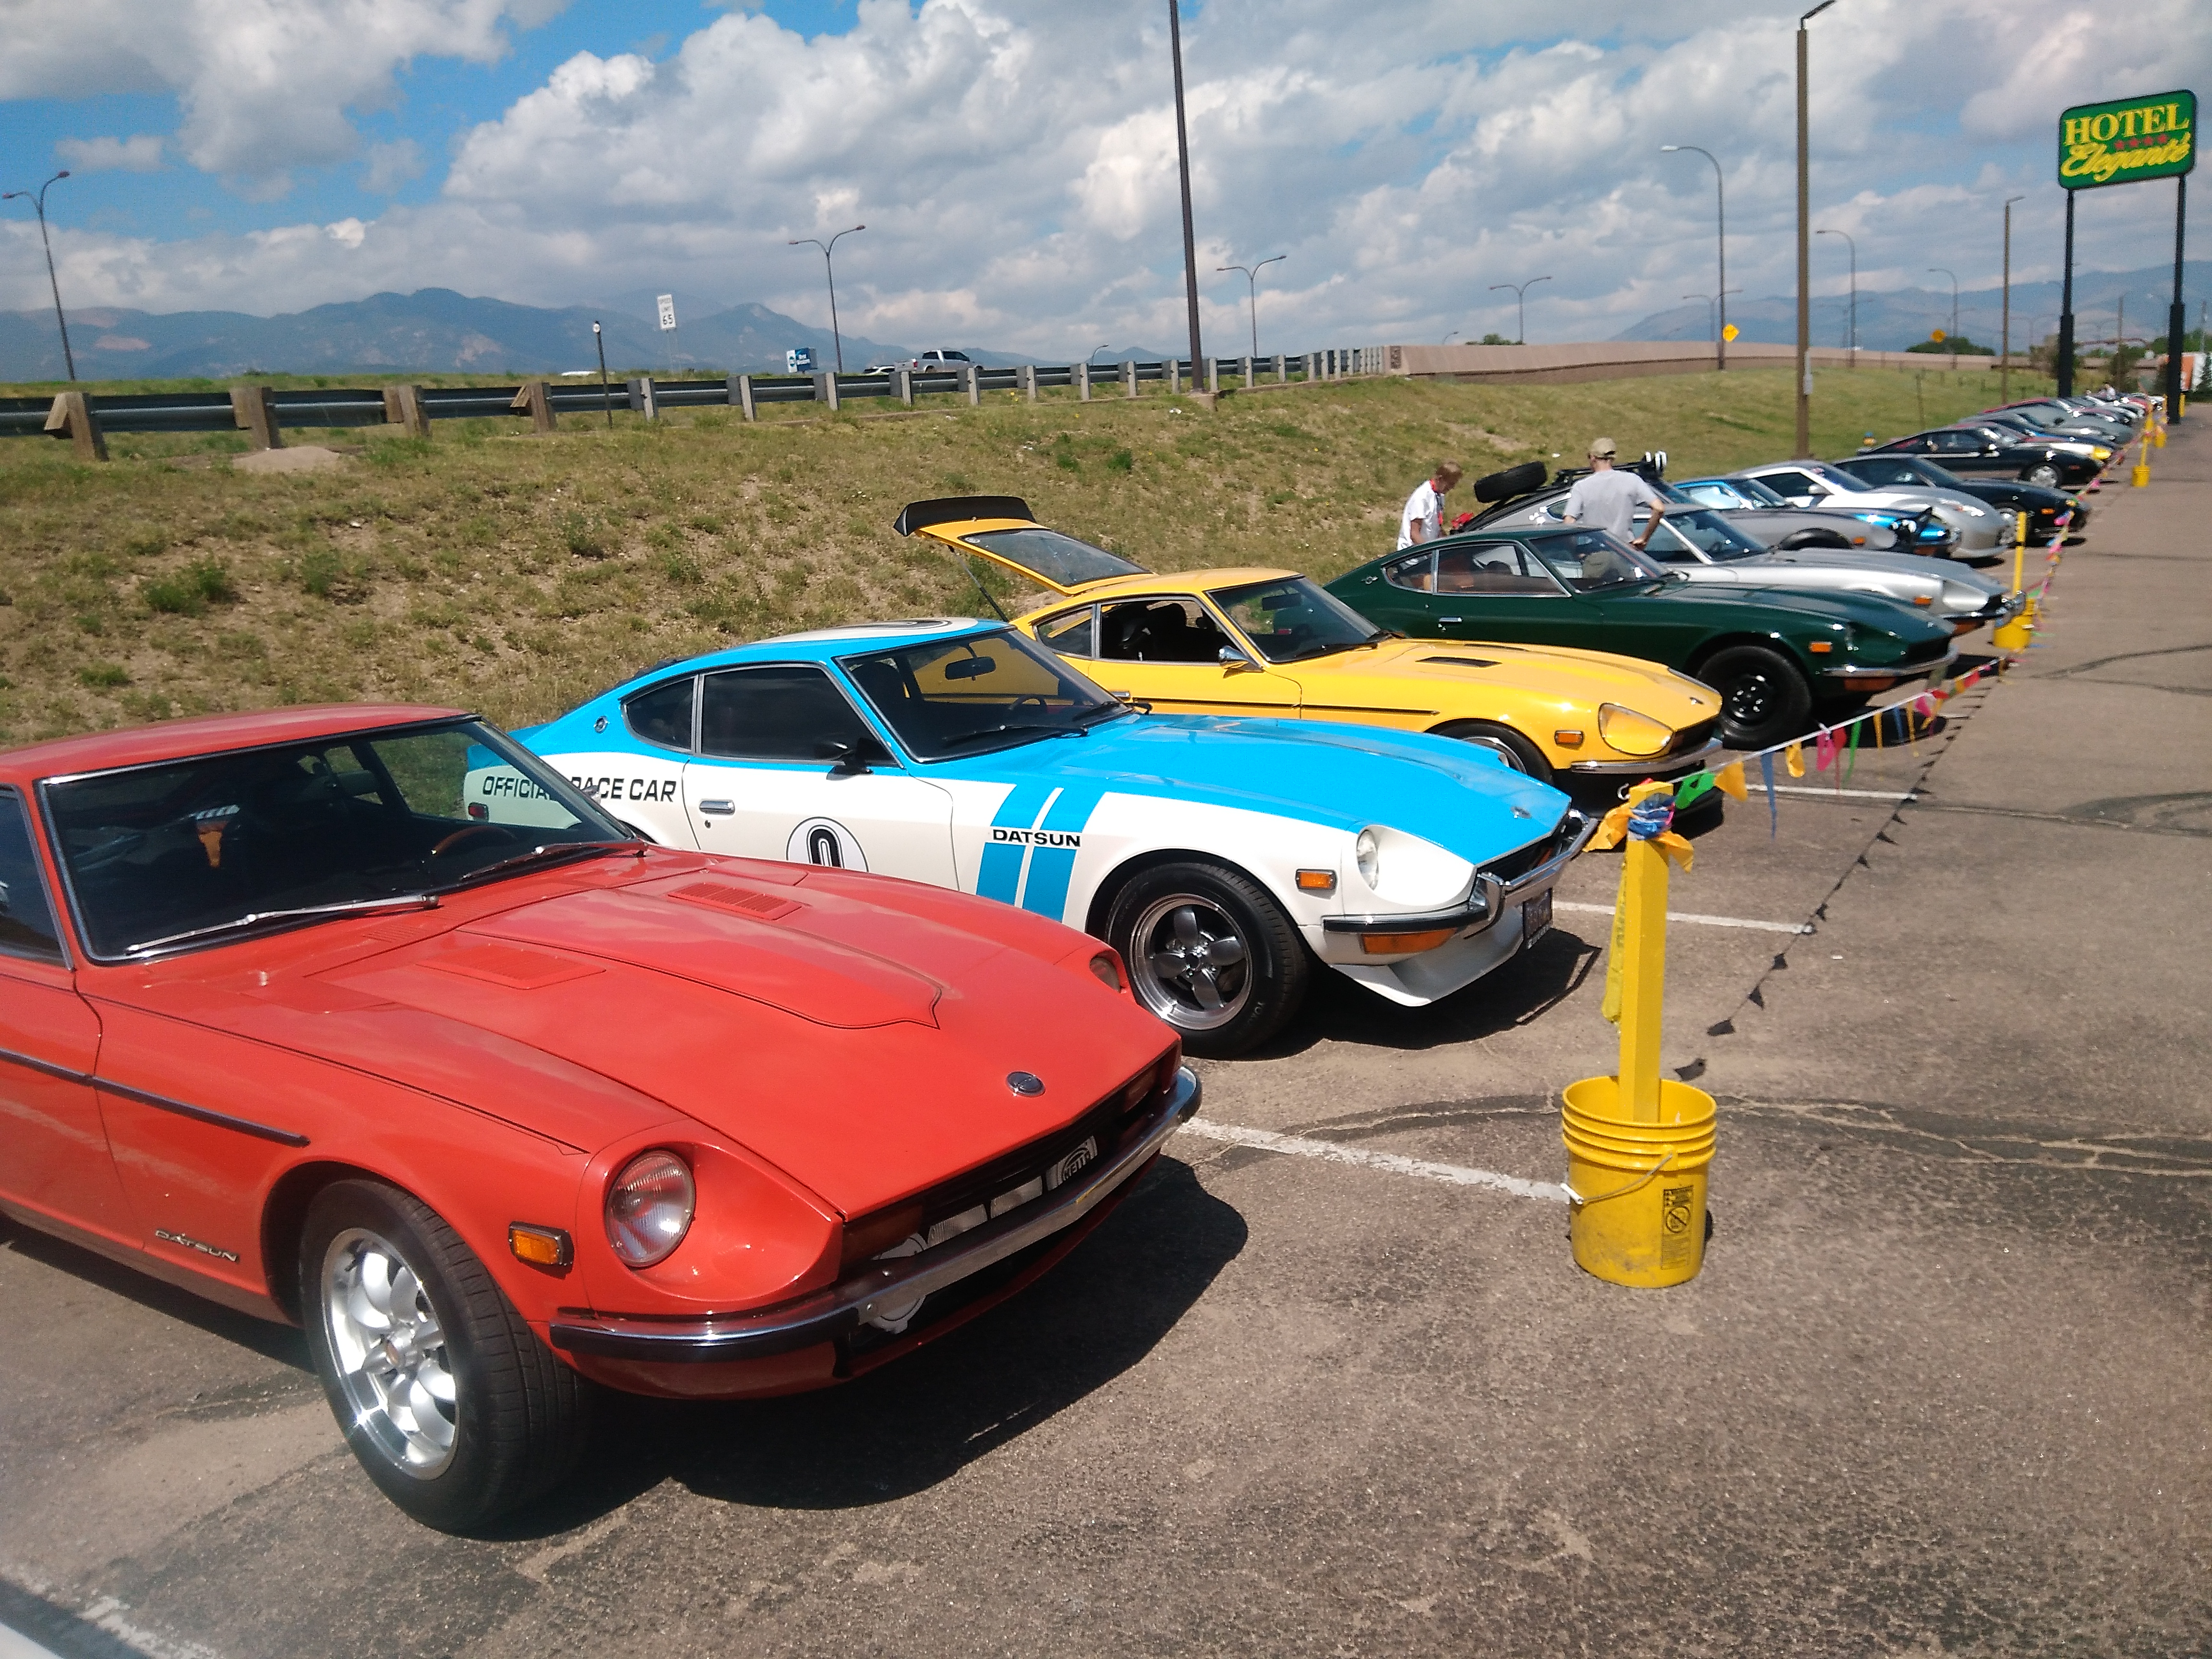
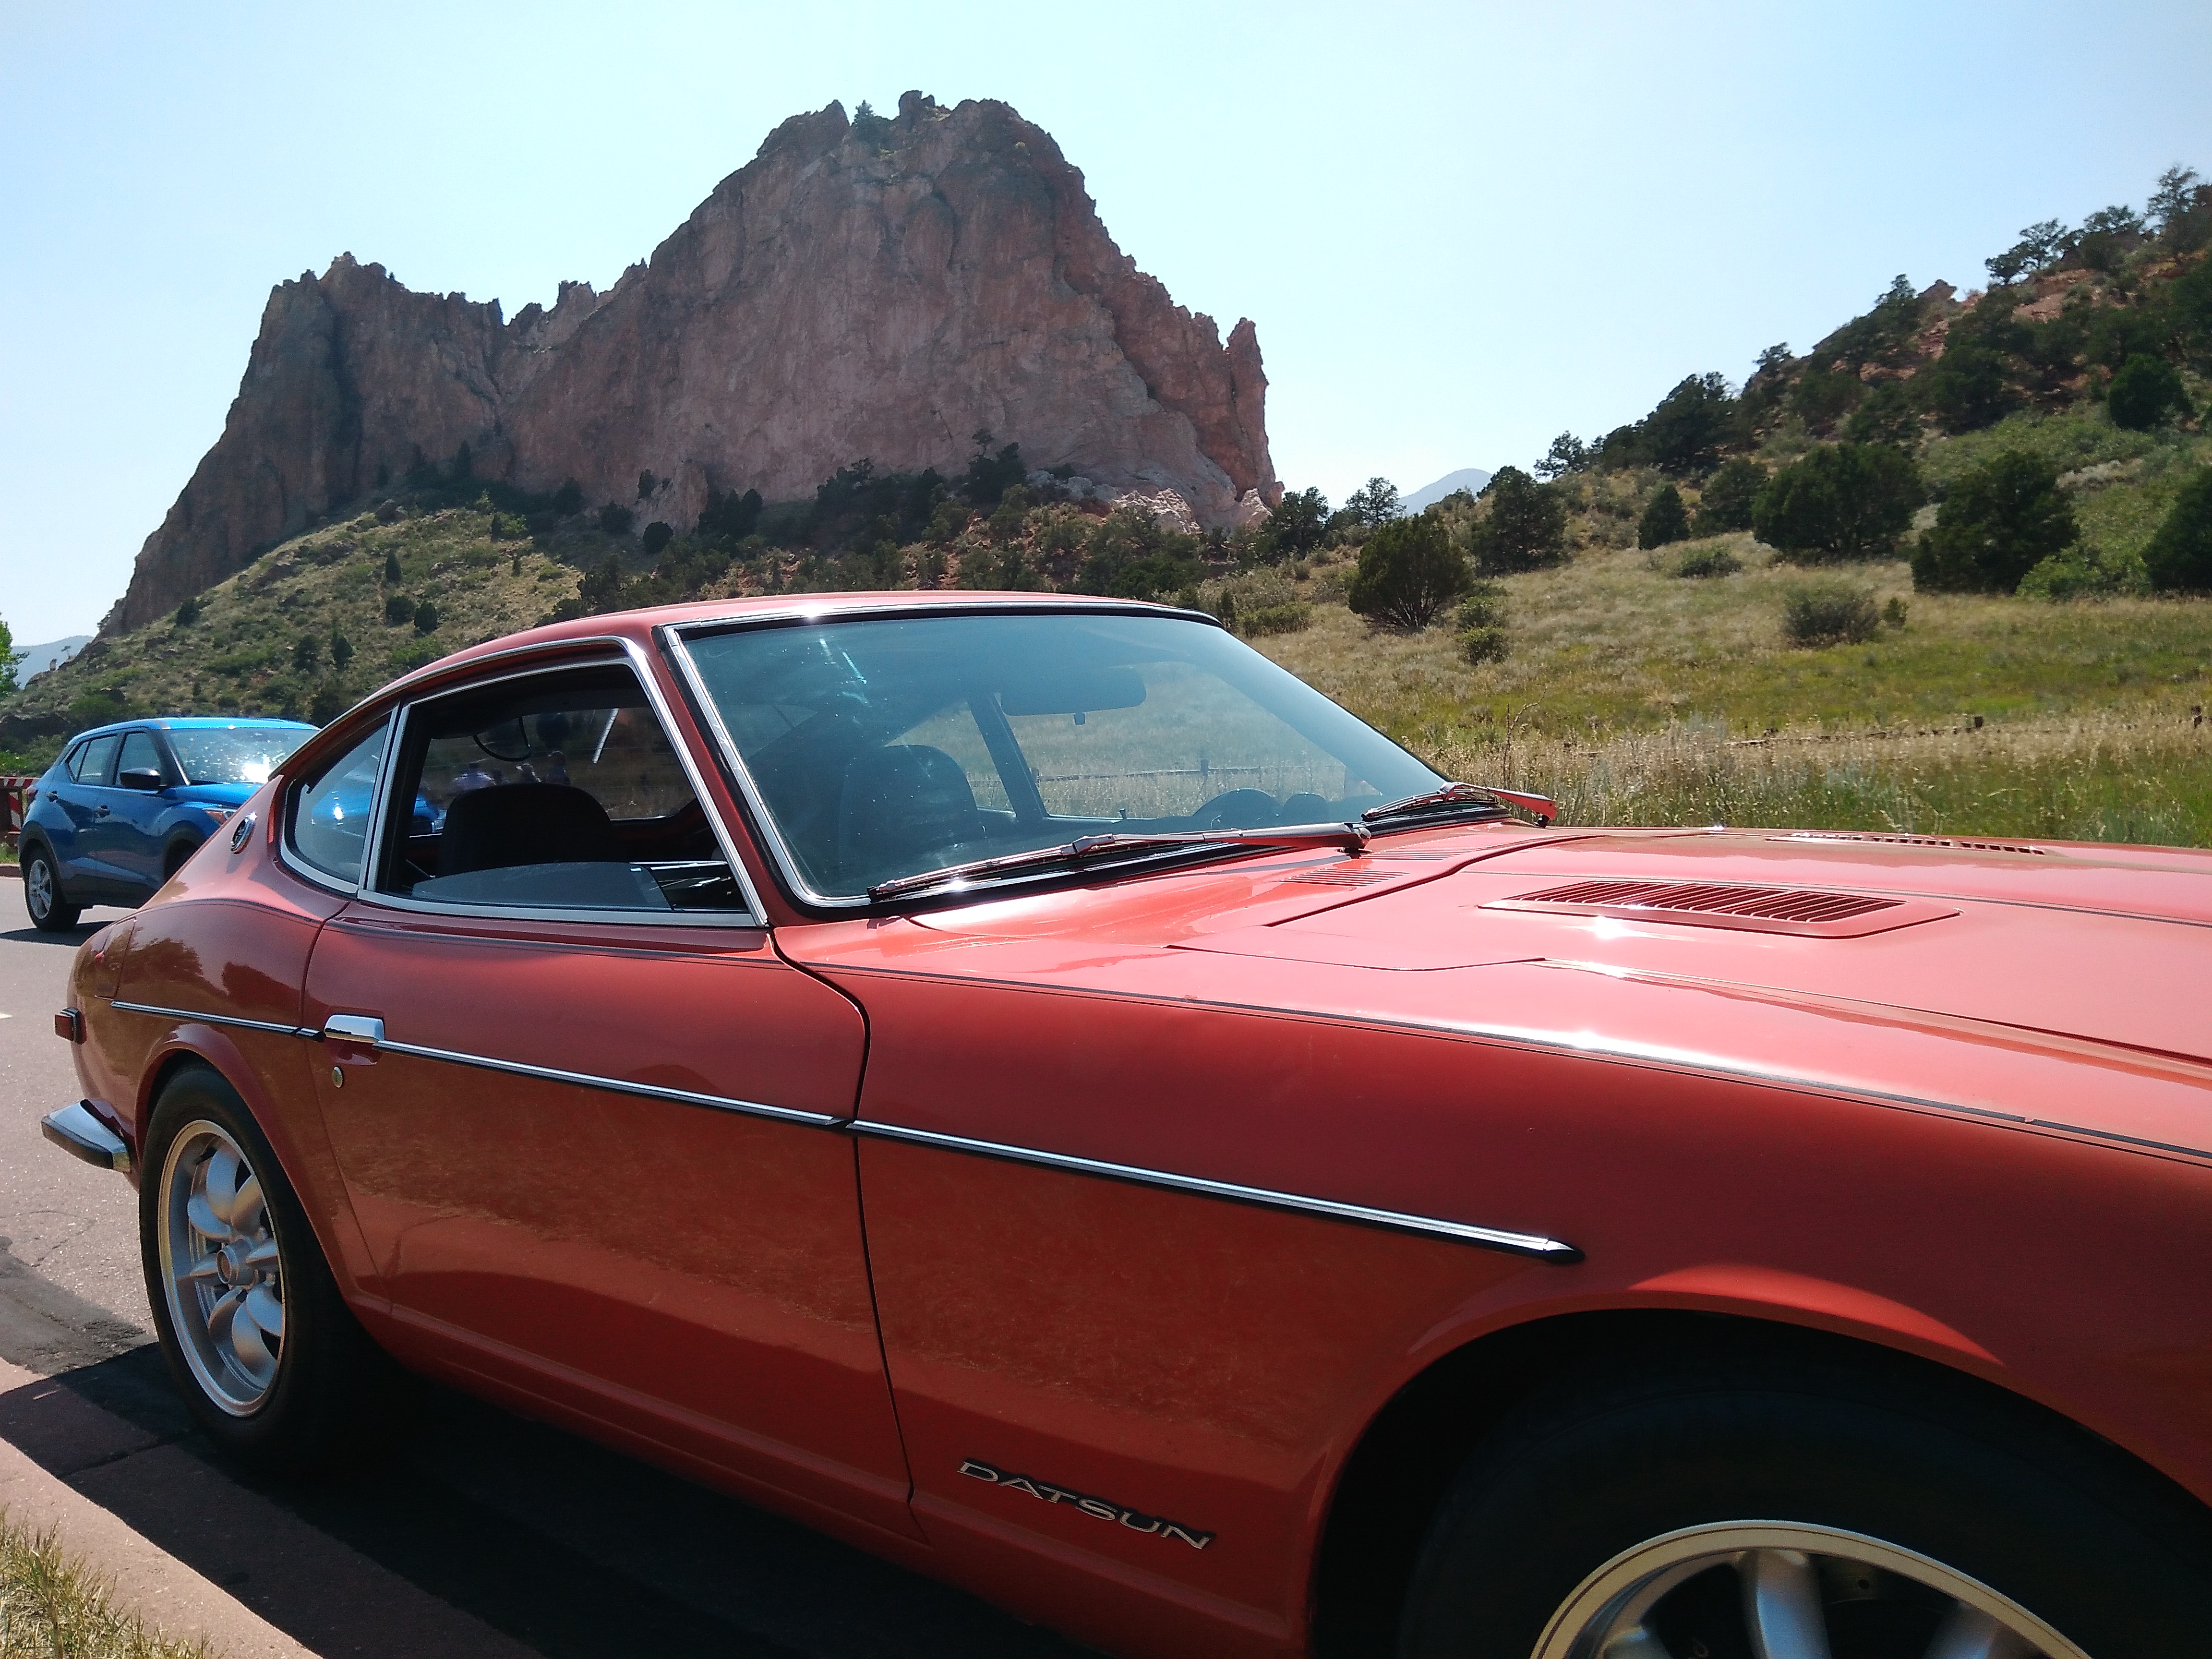
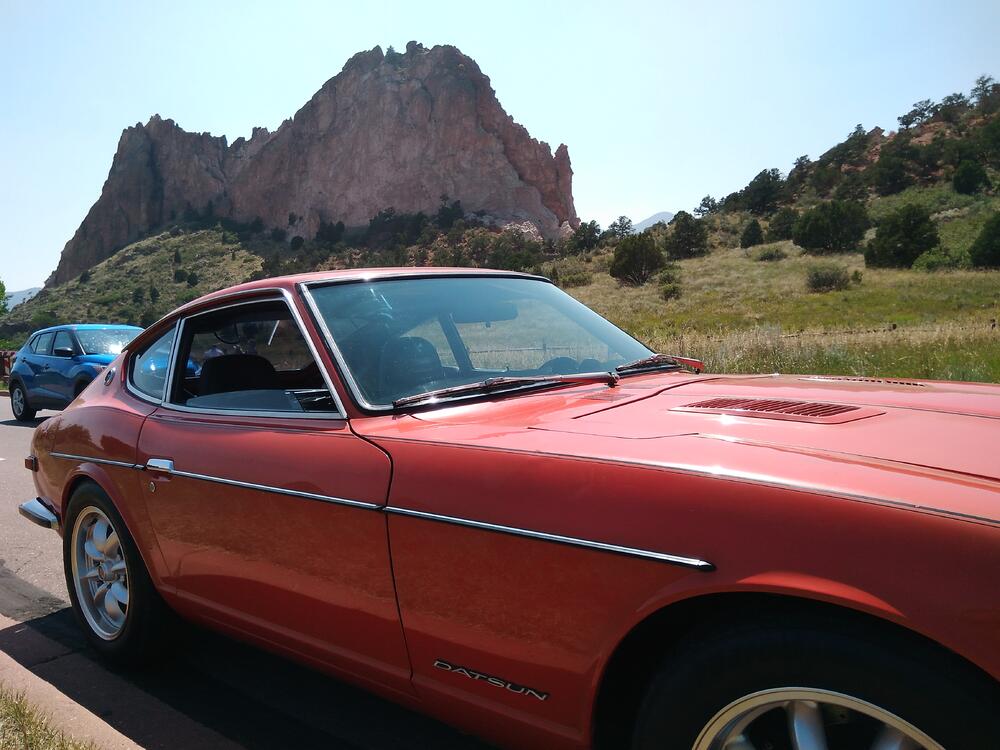
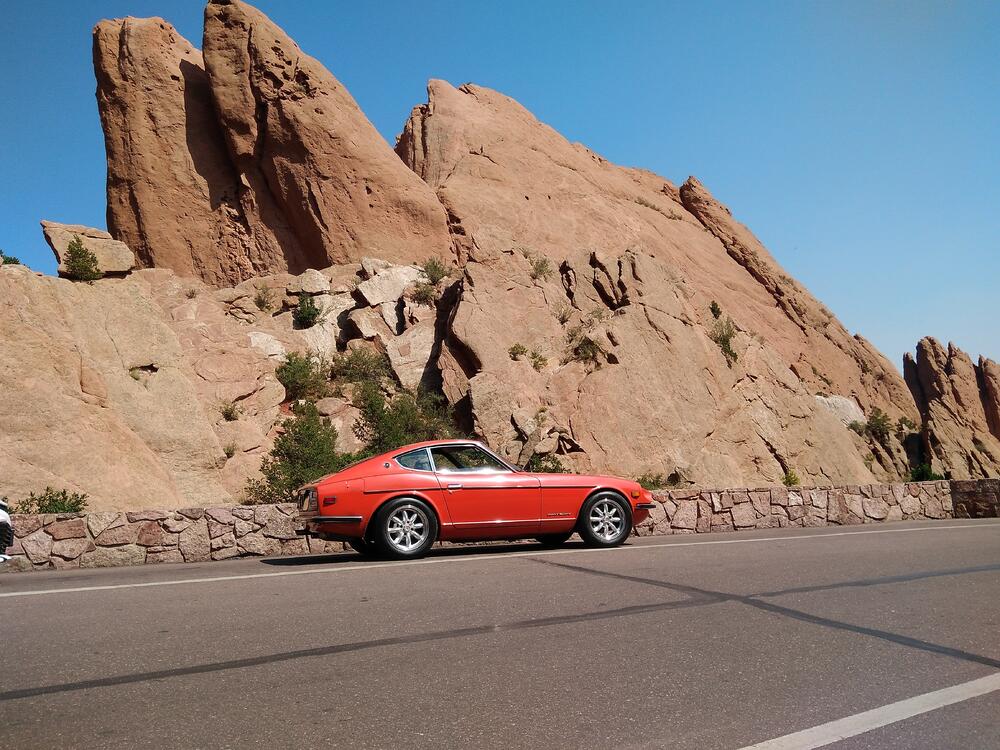
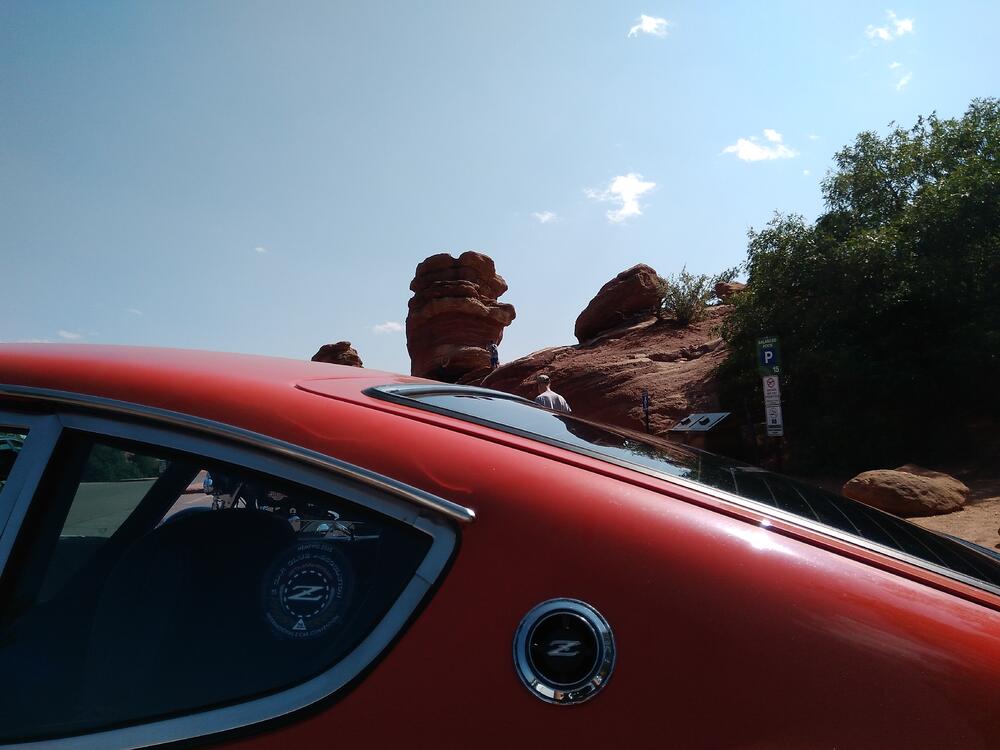
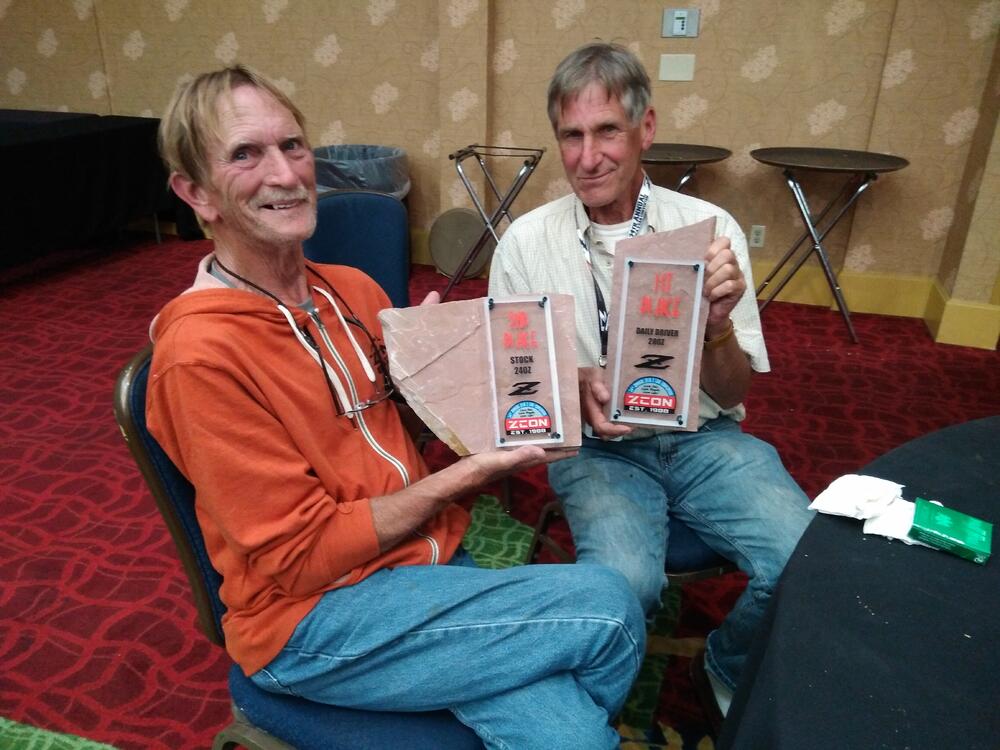
7 pointsDatsun ... We are Driven Myself and Zup live up to that slogan! Departed Saturday morning with a overnight stop in Amarillo Tx. Had some great steak at the famous Big Texan. Off the next day to complete the trip to Colorado Springs, (about 1600 miles roundtrip) arrived safely with minimal bugs embedded in the front end in the afternoon. Got a little dicey going over the high pass south of Colo Springs, all the carbed cars I saw struggled with the altitude change and Zups flat tops were no exception. CO and Wayne came in Wed night and we had another steak dinner Thursday. Zup's son and his girlfriend were at Zcon which was great for him. All in all, a great time. Here are some random pics Got a thumbs up from John Morton Garden of the Gods


 7 points
 -
6 pointsDon't consider heat as a 'last resort' strategy. Instead, make it part of your basic strategy. As mentioned by someone else earlier, don't use a flame source (i.e. don't use a torch). Instead, use an electric heat gun (inexpensive, easy to find, easy and fairly safe to use). I would suggest that you heat the area around the plug for about 2 minutes. Then you can go with whatever wrench strategy you decide to use. The square-head type of plug (whether male or female) isn't designed for high-torque, so it's not too hard to round off the corners if you get sloppy. Make sure that you choose a wrench that fits as closely as possible. In fact, a pipe wrench (a big one) may prove to be the most suitable because these are designed to self-tighten (if you use them properly, that is). Another option is an 8-point ('double-square'), 1/2"-drive 17mm socket fitted to a 24" breaker bar. The type of socket that I'm talking won't be available at your local tool store. You can order one from Toolpan.com ($7.50), but it may be a few weeks before they can ship. No matter what wrench you choose, one of the challenges can be positioning. With a four-sided plug head, a pipe wrench can only be installed in four positions -- i.e. stepping around the plug head at 90-degree intervals. An open-end wrench is much the same, although they're designed so that the wrench end is about 10 degrees off centre, meaning that if the plug head is oriented at 12 o'clock / 3 o'clock / 6 o'clock / 9 o'clock then the wrench end will be at (for the 3 o'clock example), either 2:45 or 3:15, achieved by flipping the wrench over. The double-square socket on a non-ratcheting breaker bar will let you adjust the breaker bar position at 45-degree increments.6 points
-
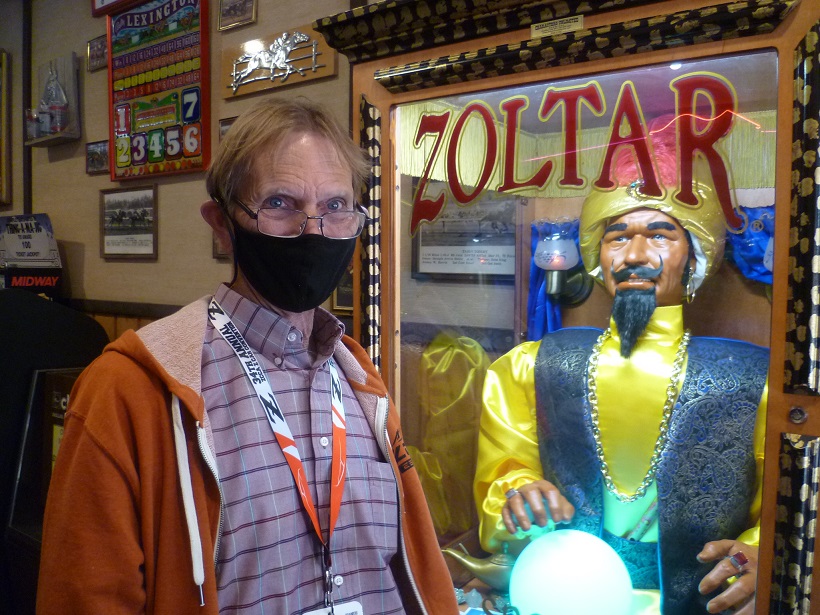
5 pointsThe arcade / museum in Manitou Springs. Lots of machines from decades gone by. Here's the results of Wal280z's grip test. No surprise: And here's my vote for the best pinball machine ever made. Bally's Fireball:

 5 points
 -
5 pointsEasy night for me tonight because I'm running out of parts I need to put on before the first test drive. I installed LED bulbs on the markers and turn signals. I also had to replace the left front marker because corrosion had taken its toll on that poor lamp socket. Fortunately I already had a replacement in my parts stash. I also installed the license plate light I purchased from @jfa.series1. It looks good, Jim. I was going to install the horns today, too, but the Amazon envelope with the horns was empty when it arrived. Fortunately Amazon customer service immediately dispatched another set, so I might have them tomorrow. After I get the horn relay, elbow for the heater hose, and new tires, I will be ready for a road test. Considering how it had been off the road for 11 years, it's not bad that it's almost ready to roll in just about a month and a half.5 points
-
3 points
-
3 pointsNO! One false move, and you would be looking to pay for a replacement transmission. You want to remove the plug, not break the case. For the fill plug, find a thick 19 mm or 3/4 inch open end wrench. Use a brass hammer, deadblow hammer, or rubber mallet to hit the wrench to loosen it. If it doesn't want to turn, try turning it SLIGHTLY clockwise (tighten) and try to loosen again. Also as stated elsewhere, heat can help.3 points
-
2 pointsI remember letting the tensioner pop out back in the 80's. You will only let it happen once. 🙂 It adds time to the job, but pulling the front cover really isn't that bad. It adds a few hours at most. I've done air, rope, and rubber hose to hold the valves closed. Rope is the best method. The hose is a bit to squishy and allows some valve movement. Air works fine, but is too risky. if anything goes wrong with air, the job gets MUCH harder. I have had good luck with the KD valve spring compressor tool on stock valve springs, but performance springs and spring caps make it much more difficult to fit. I have to remove one of the two cam hooks for the three valves closest to the towers in order to get the tool to fit properly over the valve spring cap. I've probably used the tool at least a dozen times and likely more over the last 25 years.2 points
-
2 points
-
2 pointsUnfortunately you picked the wrong time to be CDO. (I prefer having the letters in alphabetical order.) 😉2 points
-
2 points@Shawninvancouver Did you ever receive the lugnut key you ordered? Did it fit? Inquiring minds want to know.2 points
-
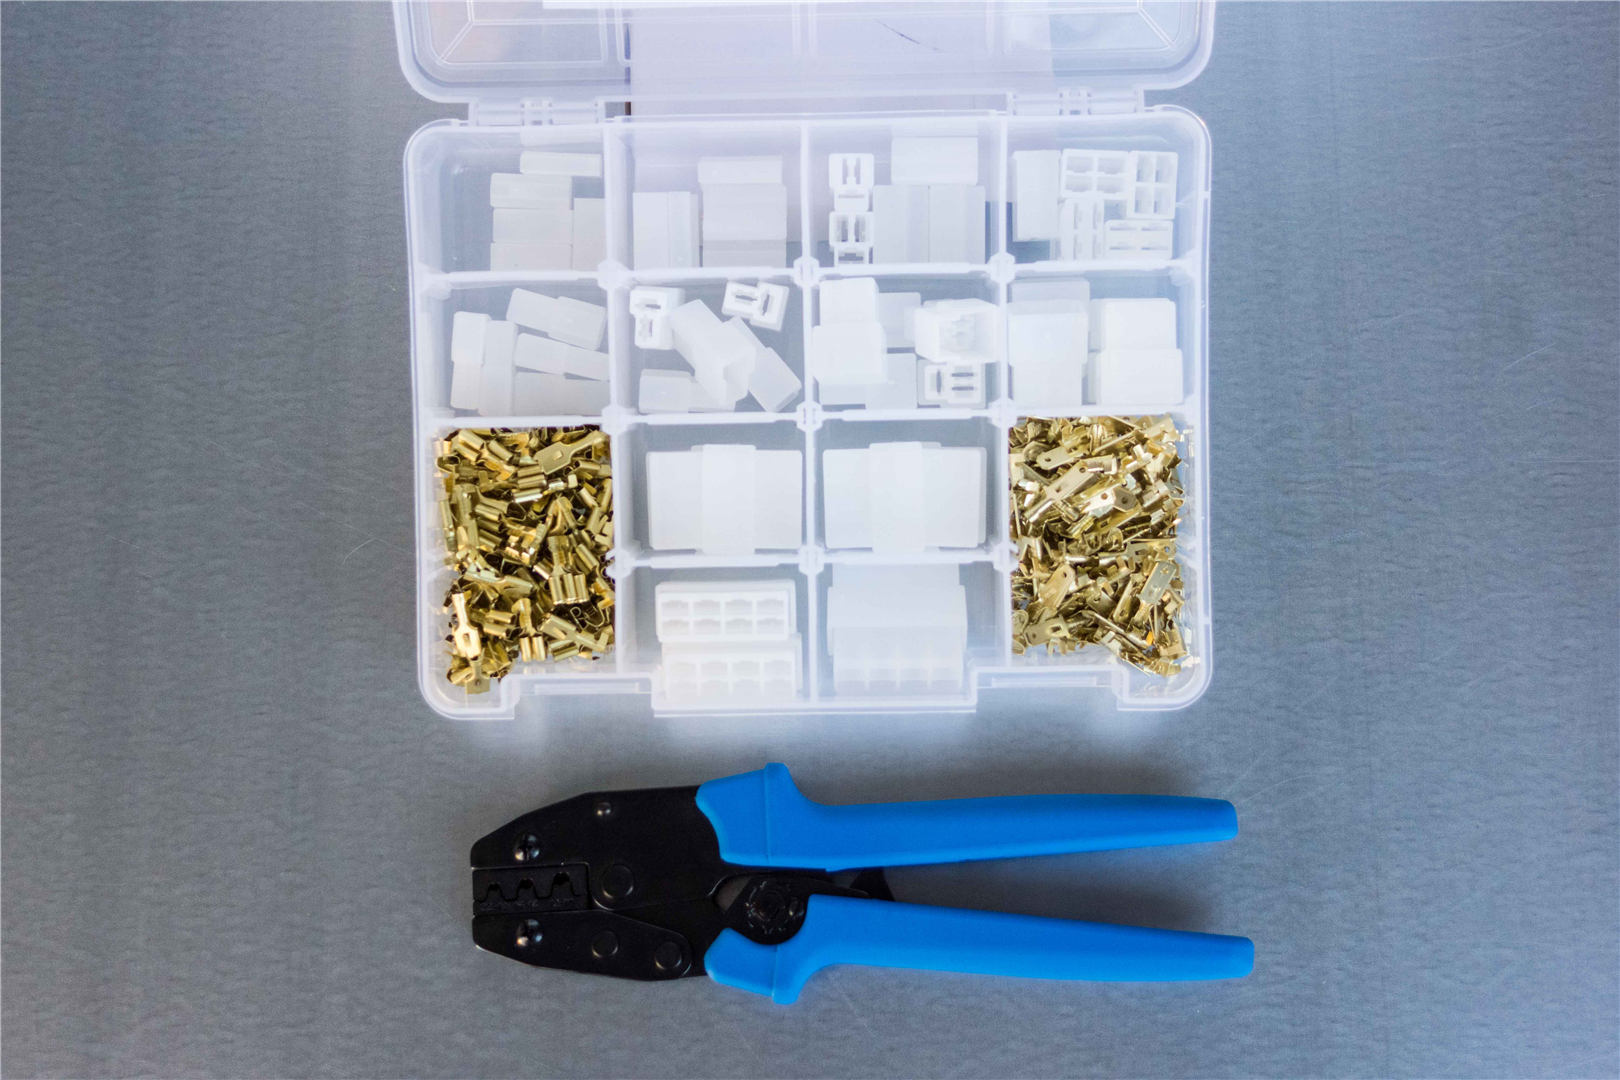
2 pointsFrom Nostalgic AC, it looks to be around $1650 plus the cost for them to integrate controls.. That includes the crimping tool. You'd still need the freon and vacuum pump to draw down the system prior to adding freon. For that, find someone with a good vacuum pump. Don't rely on a HF special. Moisture in the system will degrade performance. You also want to find air leaks before you dump freon in.2 points
-
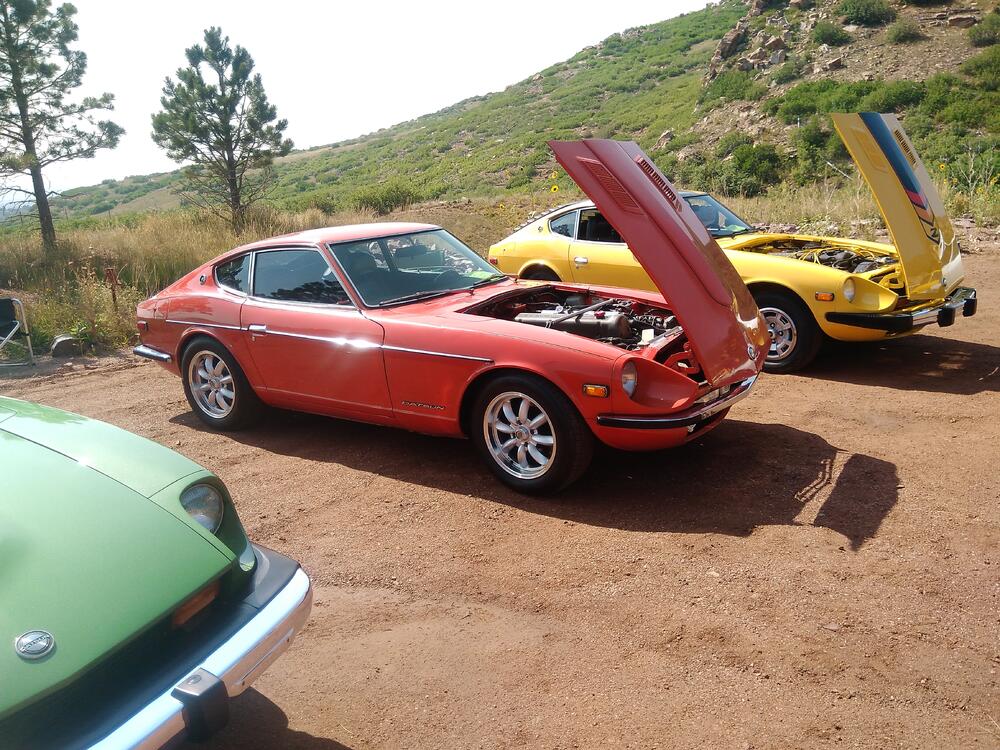
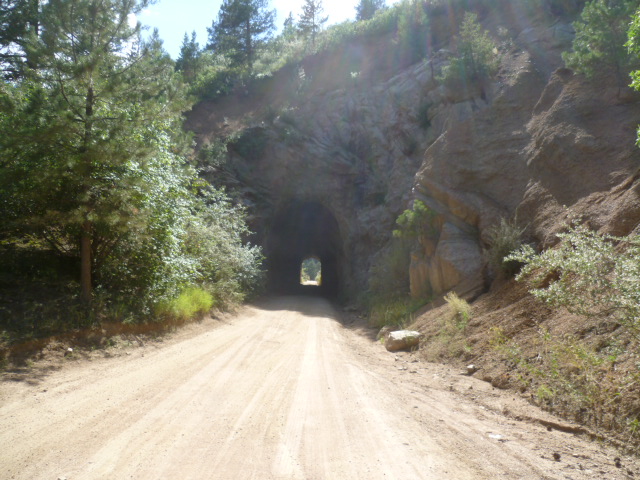
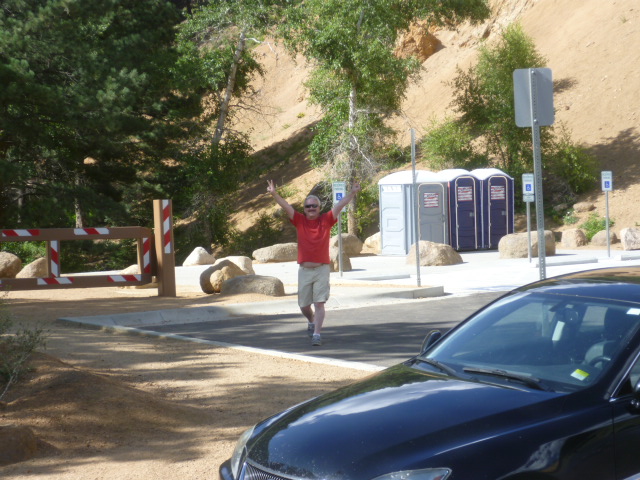
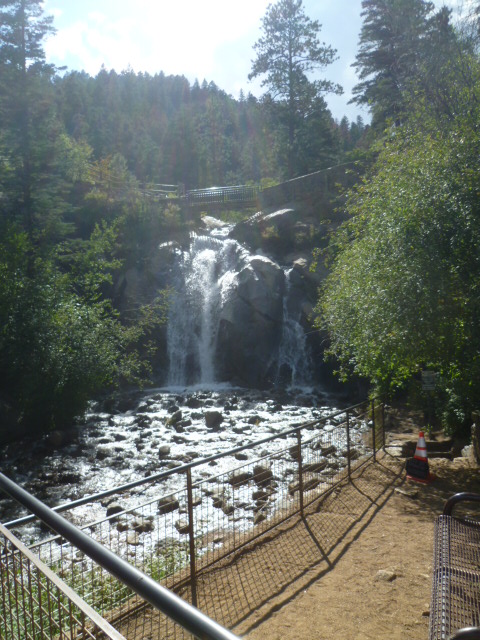
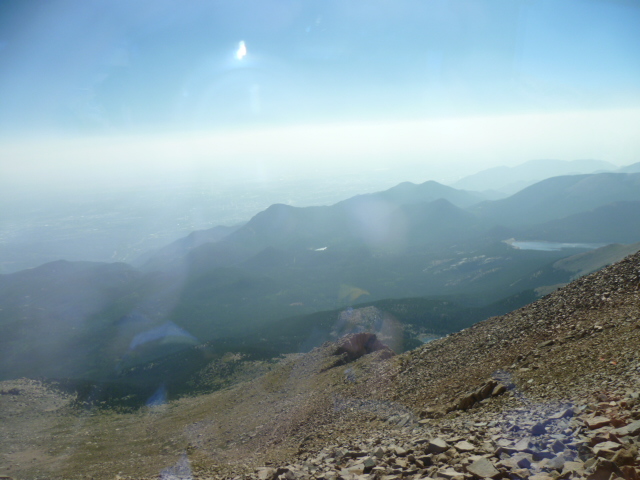
2 pointsAnd a great time was had by all!! Here's a couple pics from my collection. Zup, CO, and wal280Z up on the mountain overlooking Colorado Springs. We're on the old Gold Camp Rd. This road used to be a railroad between Cripple Creek and Co. Springs. Since it wasn't used anymore, they took up the rails and turned it into a "road" sorta: There were a couple places along the old train route where it was easier to tunnel through the hills than go around them. Some of these tunnels have completely collapsed and are impassable, but some of them are still in use. Here's tunnel #1: We stopped for a break a little later in the day. This pic needs no explanation: Quick sightseeing stop at Helen Hunt Falls: Quick stop to see Starr Kempf's kinetic sculpture artwork: Bristol Brewing: Cog railway to the top of Pike's Peak: My crappy pics from the top of Pike's Peak don't do it justice at all, but here's what I got:


 2 points
 -
2 pointsIf I was aware of them, then the problems wouldn't be unforseen. 😉 Anyway, that's part of posting a detailed plan is to see what you might be missing. I might have the bandwidth to compare your plan to the BE section of the FSM and wiring diagram, but unless I know exactly what you're thinking you need to do, I can't guess at what you overlooked. If you replace connectors on the components/dash harness, make the engine harness slightly longer to compensate for losing length where you replaced connectors. Helpful hint: After you download a PDF of the wiring diagram, go to the Autodesk website and download a copy of Design Review. Design Review is made to create drawing markups on native Autodesk DWF files, but it can also open JPG and PDF files. This would allow you to make notes on the connectors you need throughout the engine harness. If you need some guidance after downloading both, I can help you then.2 points
-
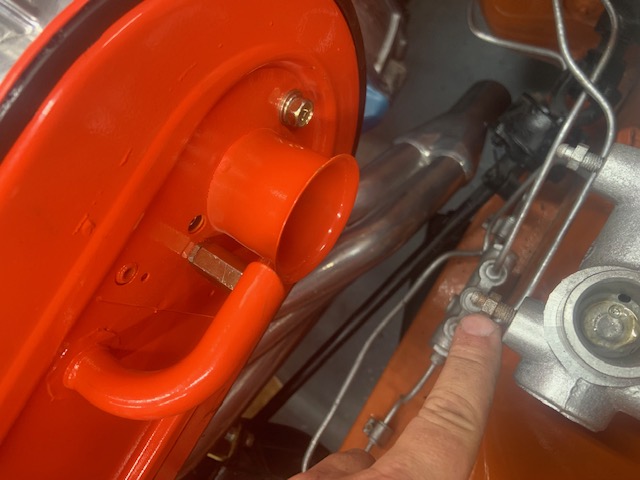
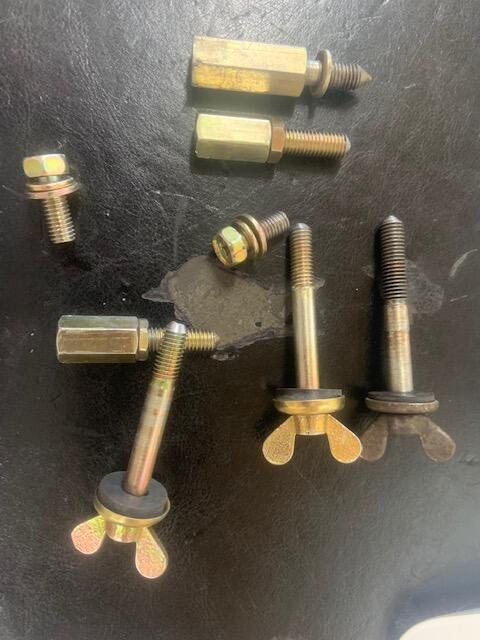
1 pointBolt set came in. I have an image for reference of all of it. i have also in the image for comparison an original 240z rabbit ear type bolt. You can see they are almost identical except the new ones look better. Also i put in a datsun roadster cleaner bolt which i know some have used. While it does work you can see its a little longer so the new ones work better. On a side note..... i cant get my air filter and front cover on. There isn't enough room....it hits the bleeder valve i am pointing to on the brake cylinder...of course the new set has nothing to do with this but anyone got an ideas why this is happening? I do have 2 sets of gaskets on the back side of the air housing meeting up with the carbs.... if i remove them i can get the cover on but by a millimeter
 1 point
 -
1 pointIll go with a regular wrench to assure I don’t break anything, I don’t want more problems thwarting my process or ruining my wallet. Power tools still scare me, just the thought of stripping or breaking anything. Thank you. Sent from my iPhone using Tapatalk1 point
-
1 pointI’ve never really trusted them, but I heard they are better for removing bolts than actually tightening, the PO used a impact wrench all over the place. Since everything looked forced and was stripped (starter, radiator, the protective pan under car, bolts in trunk).1 point
-
1 pointI did that not too long ago, and I think I unscrewed one end to put on the boot, but wouldn't swear to it.1 point
-
1 pointJust make sure the food you bring will fit in a microwave. I have plenty of room for the beer. If needed I'll throw all the fridge crap in the trash to fit more.1 point
-
1 pointYeah, a little later I found myself wondering how it could have gotten out of sync, since I don't recall seeing anyone describing touching the chain while doing the valve stem replacement.1 point
-
1 pointI know of no way to get the chain tensioner back in then by removing the front cover1 point
-
1 pointIf you ever do this again, make sure the car is in gear and wheels are chocked before you apply the compressed air. That will keep the pistons from moving. How much PSI were you using? Someone else will have to provide guidance on the timing chain, but yeah, you're going to have to reduce tension to get the chain on. Life is a cruel teacher. You get the test first and the lesson afterward.1 point
-
1 pointThe loose end of the spring can be hooked around the steel fitting on the clutch hydraulic hose. Did you cut the A/C hoses? If so, why? They cannot be spliced back together, and you will need to replace them with new. The ring terminal should be a chassis ground. The other wire, I’m not sure.1 point
-
1 point@Wally, @Zed Head is correct. I'm pretty sure the ring lug is a body ground. There should be a threaded hole in the fender nearby. If you are considering re-using the AC lines, block them off. A better idea is to remove the AC stuff completely if you're not hooking it up and get a better setup when you do want AC. For the bottom photo, you need to give a wire color. In other words, pull down the protective sheath, clean the wire, and report the colors.1 point
-
1 pointThe thickness and color of the wire makes me think it's alternator/fusible link related.
 1 point
 -
1 point
-
1 pointYours is too blindingly clean for me to compare to mine: I think your pinky wire (in your pic) corresponds to my wire with the red arrow, which goes to my starter. But mine doesn't have that type connector on it.
 1 point
 -
1 pointThey should have has the two Hooters girls that were at the show do the reveal. One on the fender, the other on the roof. Could have recreated the fall 69 240z dent at the hotel launch.1 point
-
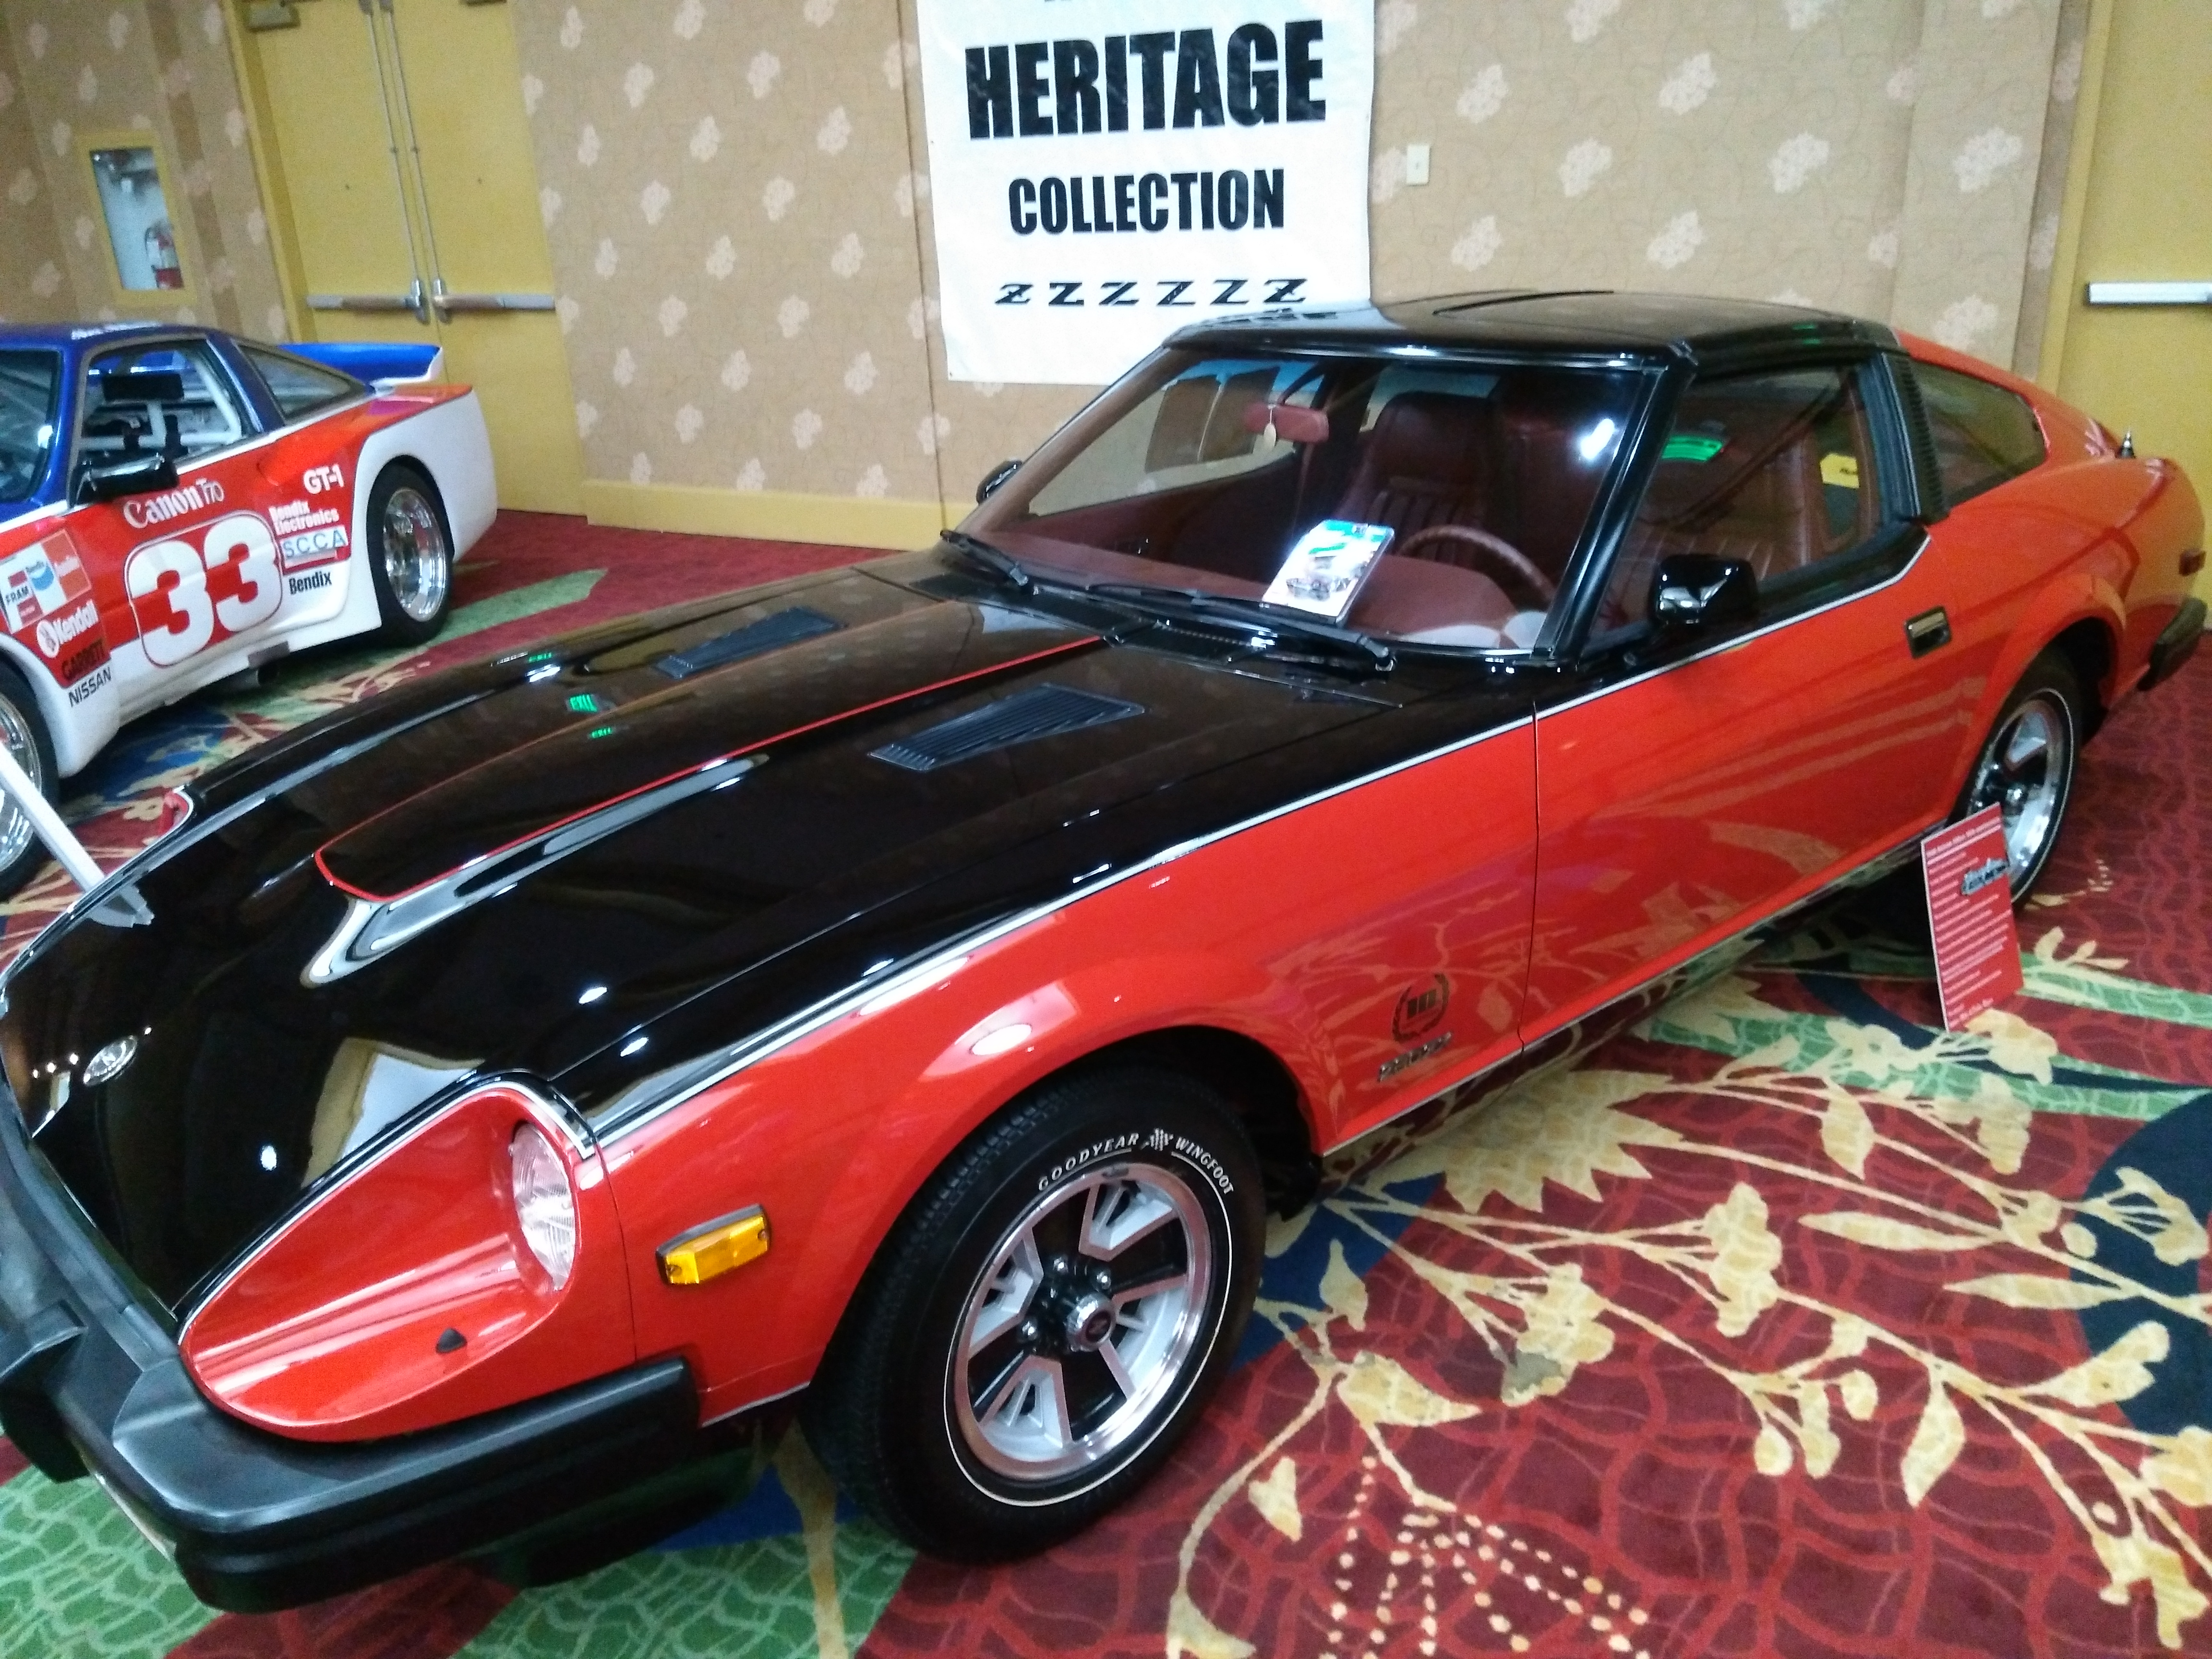
1 pointNice to see these photos. I posted a video of the Z reveal, but there's evidently not much attention to it. I have the brown/gold 280ZXT which was one row over from your car at the show. It was next to the red/black museum piece 280ZX.1 point
-
1 pointUnfortunately, it's pretty much "There ain't no such thing." The generic kits from MSA and the like are for people who can work without any instructions. With Vintage Air, it seems like you need to be lucky enough to find a dealer who will work with you. Many of their dealers are muscle car guys. If you have a good dealer nearby, you will have better success. You might want to reach out to Nostalgic AC. Their products are similar to Vintage Air. They don't rely upon a dealer network. With either Nostalgic AC or Vintage Air, you will need to piece together the system. This isn't exactly rocket surgery though. I believe Vintage Air used to have a guide on component selection. You'll need Compressor with bracket (Nostalgic AC has an L series specific bracket by the way.) Condenser (possibly with fan to keep air moving past) Drier Evaporator (Vintage Air and Nostalgic AC both have evaporators combined with defrost units. That's what I would use.) Controls (I believe that you can pay Nostalgic AC to retrofit their controls into your current control panel.) Hoses with fittings Crimping and cutting tools (for a DIY install) No matter what, you'll be installing yourself or paying someone to install.1 point
-
1 point
-
1 pointAnticipate having to replace the connectors on both the harness side and the component side for many components like the headlights and front turn signals to name a couple off the top of my head. You'll have to replace all of the connectors between the engine and dash harness, unless you want to source a lot of Yazaki connectors. That's about 70 wires at that junction. You will need to pull the dash and remove the harness to change all of the terminals and connectors. Otherwise you won't have enough room to work. Don't scrimp on your stripping tools or crimping tools. Try to match wire colors with the existing wiring. You might have to clean up the wires to figure out what colors you need. I haven't found a source with a straight line for the tracer. I have only found spiral tracer. Here is one source. It may help you budget: https://www.sherco-auto.com/striped-tracer-wire.html If you have space, get 2 4x8 sheets of pegboard. Take your existing engine harness and string it up on the pegboard (zip ties and pegboard hooks). Then use the other to build the replacement harness to make it where you copy lengths. As for re-using connectors, the round ones are Yazaki. Look up Eastern Beaver as a source for those terminals. I hope you have a good budget. For the spade terminals, look up Vintage Connections. Write out a detailed plan. Post it here, but in a new thread. We can look at what you're missing. The plan should also have your budget, supplies, etc. Make sure you can afford the endeavor.1 point
-
1 pointBoth are excellent suggestions. As I recall he has a reasonably new set of NGK wires and we tried swapping two wires. He eventually bought a Bosch cap and rotor and verified a hot spark. I hadn't thought of a helicoil.1 point
-
1 pointI know it was discussed but I'm not sure we ever got good enough feedback to rule it all out. If it were mine I would see if the former 240z racing mechanic had a good dizzy cap and wire setup and swap it all out as a test. Also check #4 plug for a helicoil. Maybe there is too much resistance right at the head It is CaDatsun after all1 point
-
1 pointMy first one required a pipe wrench and a jack. Much like Cliff, I recall a bit of vehicle lift before it loosened.1 point
-
1 pointThe old fashioned original impact tools work well. Three pound sledge and a hefty wrench. Pipe wrench or a solid open end wrench. More slow motion high mass inertia than high speed low mass.1 point
-
1 pointYou will get a low number if one of those tube adapters is used in the spark plug hole. It increases the effective combustion chamber size. Five 110's and a 100 looks pretty even overall. Four is the dirty one though and he shows three as the low pressure. So, bad oil ring seems to fit best. Bummer. I'd run a hot plug in #4 to keep it clean. I think it's been suggested before.1 point
-
1 pointWe narrowed an ignition problem down to cap, rotor, wire and their connections because it affected one cylinder. I thought we had ruled those out in the beginning. Thoughts?1 point
-
1 pointI wouldn't but a 1/2" drive would work. I'm old fashioned and my manual torque is what I go by. An impact gun could damage something before you realize it. My $.02.1 point
-
1 pointHeat makes a big difference. Expands the aluminum and softens the sealer. Even one of those blow dryer heat guns, doesn't have to be a flame.1 point
-
1 pointMy only problem with the oil blow by theory is that it looks like carbon. I am not truly convinced that we have eliminated ignition as a culprit Boroscope might help...1 point
-
1 point
-
1 pointWhat else would he say? Those rings have to be staggerd. The oil control ring is a worm ring that has a top and bottom solid ring also. Have you had this problem all along or just recently?1 point
-
1 pointI also have put those Wesco seat belts in my 240Z and am very happy with them.1 point
-
1 pointCalifornia Datsun motor, that's the problem and most likely Jorge has had this problem since day 1. My opinion from all I've read over 10 plus years about California Datsun. He sold a motor to a dude in Panama. No chance of any blowback. No shudder here Mr Maras.1 point
-
1 pointI shudder at what I'm about to theorize and I hope I'm wrong. I'd like to hear everyone's opinion on this theory and if there's a method of confirming it or hopefully blowing it out of the water (borescope?). So far, we've crossed off ignition problems, valve seal has been renewed, several compression tests have always been within specs or explainable if they weren't (throttle closed), carbs are tuned, valves have been set, I'm now down to asking myself what could foul #4 plug and I'm left with a broken oil ring in #4, If the top ring compression ring is good, that could explain no compression loss. What do y'all think?1 point
-
1 pointBack tracking on the steering rack brackets. All my stuff is back from powder coating and when I placed the steering rack brackets onto the crossmember is clear to me there is only one correct direction. When you have the bracket matting surface pressed to the from bolt matting surface of the crossmember you can see it creates a serious gap on the rear portion of the bracket. Pics below show wrong and right direction, you can see the massive gap and this could be why so many people experience rack play. If both matting surfaces are not flush when bolted down you will not have the same clearances around the bushing. Sent from my iPhone using Tapatalk1 point
-
1 pointThat kind of looks shorter than normal. Someone might have cut it shorter or made a replacement from some tubing. The later years 260-280's had a tube without the extra barb on them. maybe it was swapped out at some time.1 point
-
To continue on Jeff's thought, I've heard that the narrower track width in the front makes it easier to steer? What are your thoughts on that Jeff?1 point