Leaderboard
-

siteunseen
Free Member20Points15,115Posts -

Av8ferg
Free Member8Points1,538Posts -
Jeff G 78
Free Member4Points3,007Posts -
grannyknot
Free Member4Points5,158Posts


Popular Content
Showing content with the highest reputation on 08/09/2021 in all areas
-
8 pointsPlenty of beer wisdom too. I should change my last name, eh? -Cliff Clavin8 points
-
3 pointsThe wealthy Ferrari owner, who only putts around town a couple of times a month takes his car into Tony's and says it isn't running very well, Tony says "No problem, I'll personally fix it myself" Tony grabs the keys and takes the Ferrari on ripping mountain drive, an hour later he pulls back into the garage with engine purring like kitten, he calls the wealthy owner and tells him to come and pick up the car. The wealthy owner shows up and starts the engine, "It sounds fantastic!" Tony smiles and hands him a bill for $1,500.003 points
-
3 pointsAccording to Wiki... Italian tuneup is a slang automotive term for attempting to restore engine performance by driving a car at high engine speed (RPM) and load. The term originated from Italian mechanics in the 1950s using this practice to burn off carbon deposits from the spark plugs of sports cars.3 points
-
3 pointsJim, thanks just wanted I needed to hear. The thought of cutting my struts to put coilovers on didn’t seem like something I wanted to do. I’m going to research your suggestion. And it’s always about the journey and not the destination, but at some point I do want to enjoy it. So no more mission creep for me. Like you said Jim. Get the engine bay cleaned up, replace the engine rework the front end suspension and steering and enjoy it until the winter hits and then tackle the rear end. Wife hasn’t complained about the car at all. We’ve had several visitors to the house and every one of the men always talk about how much they love the Z. My wife is hearing it and realizes it’s not exactly the POS she thought it was . Still hates the Viper though!! Sent from my iPhone using Tapatalk3 points
-
3 pointsHow about this guy. Even has the same first name! Sent from my iPhone using Tapatalk3 points
-
3 pointsYep, it is. Seems the problem is it takes TIME and MONEY away from doing things together, you know, like used to do.😁 After "parking" my car for 27 years, I just want to finish it. I am highly focused, and typically singled-minded when I have a major goal. That works well for getting shizel done, but does have a cost with relationships. Oh well, life is a balancing act.3 points
-
2 pointsCliff's Alabama Tune Up Drop your baby off and I'll beat the $^!# out of it then charge you $1,000. It's way cheaper than sending it to Italy. Guaranteed by Shaquille O'neal. Fill and chill.2 points
-
Well you're not a D as far as I've seen. The filter fits between the tank and the high pressure EFI pump where there's nothing but drain from the tank. They're good BEFORE the high pressure pump.2 points
-
2 points
-
2 pointsDon't worry about Kats, he's fine. I'm in regular contact with him. Lots of disruption in his industry (air travel) at present, as you might imagine.2 points
-
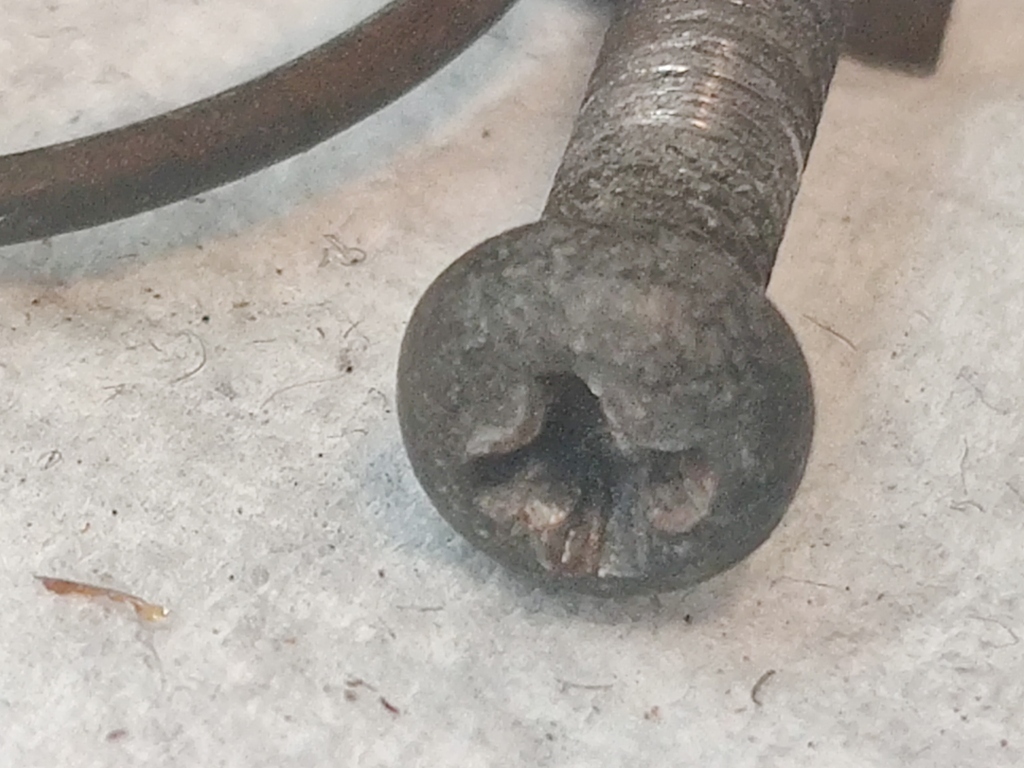
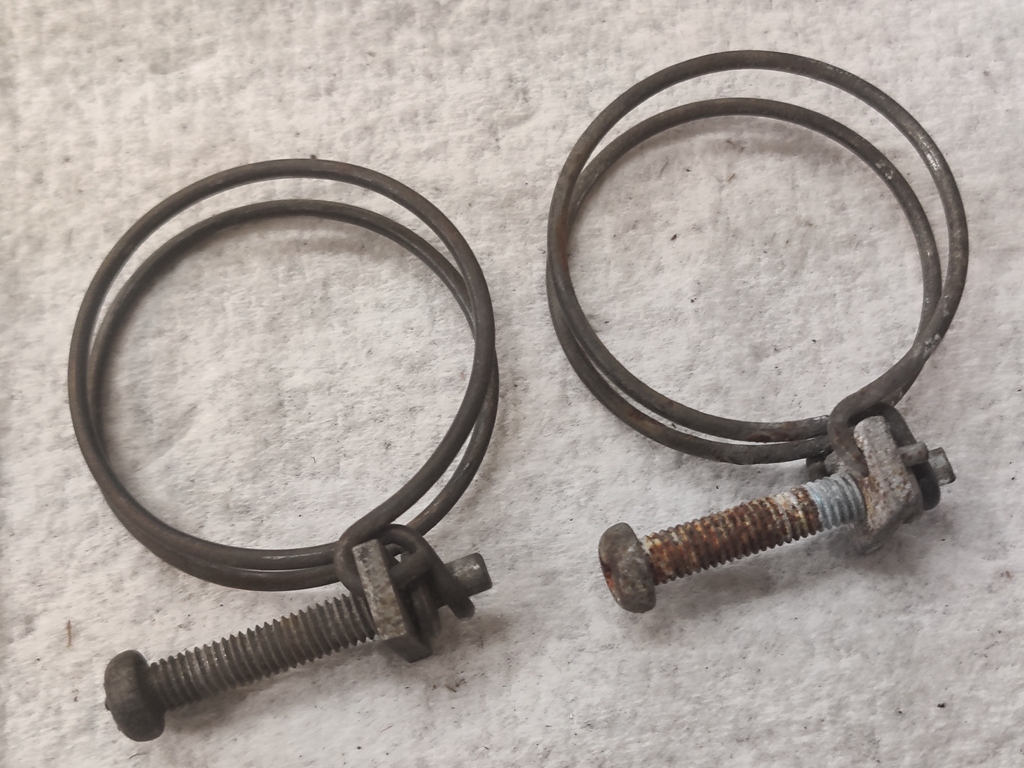
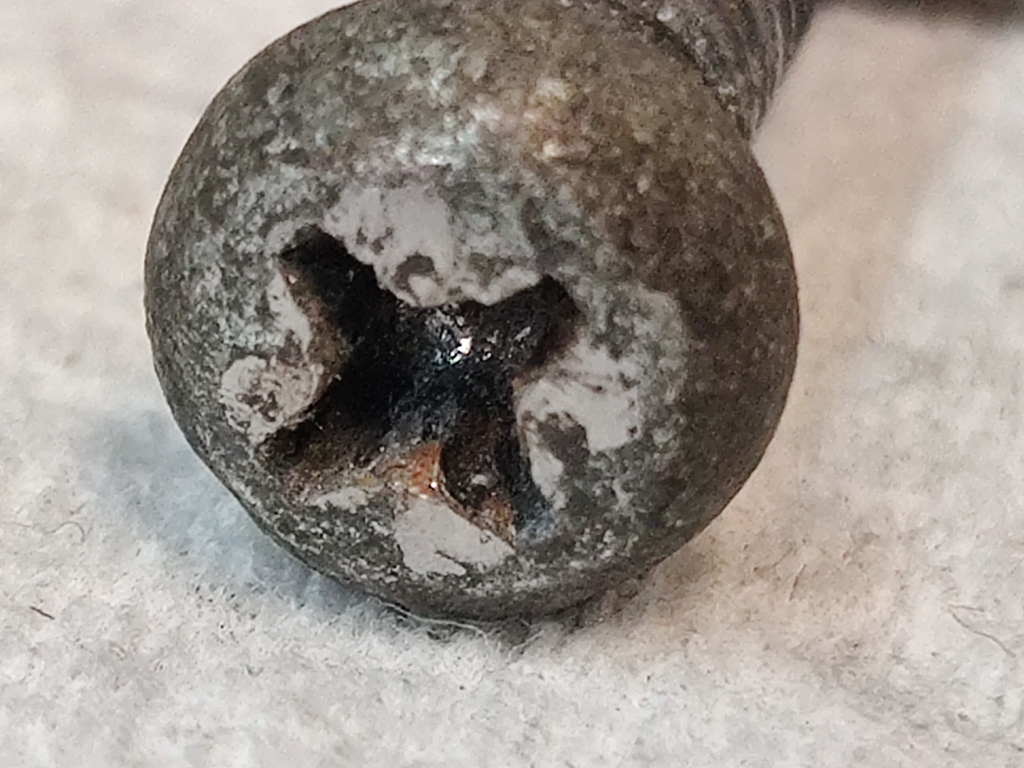
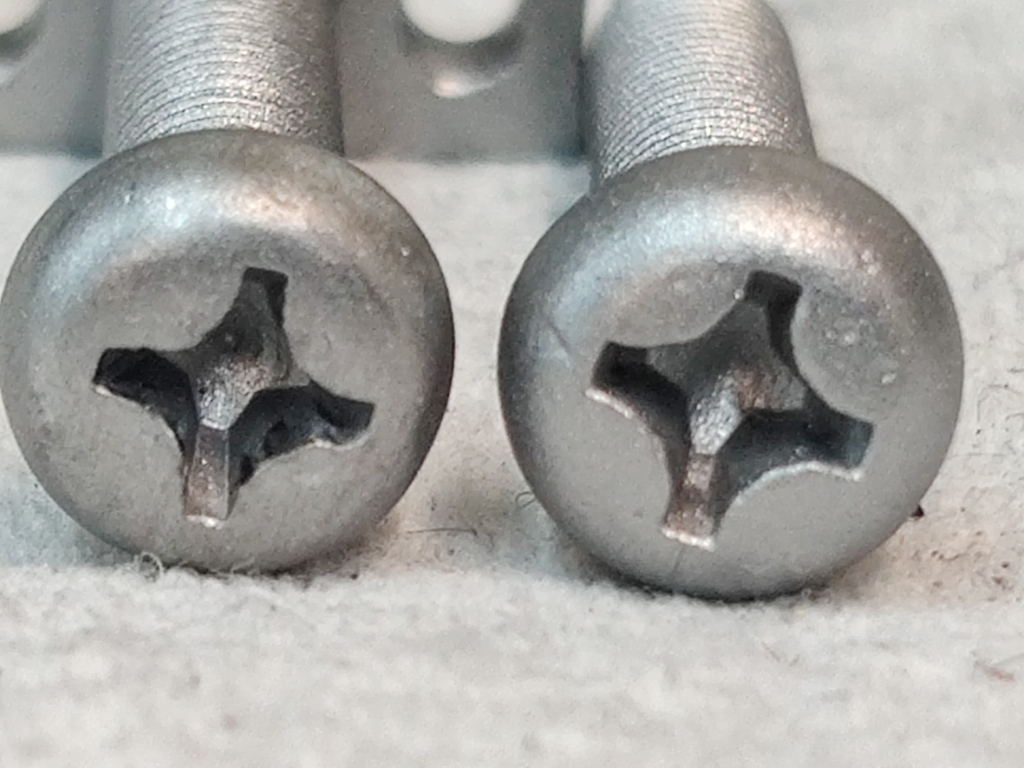
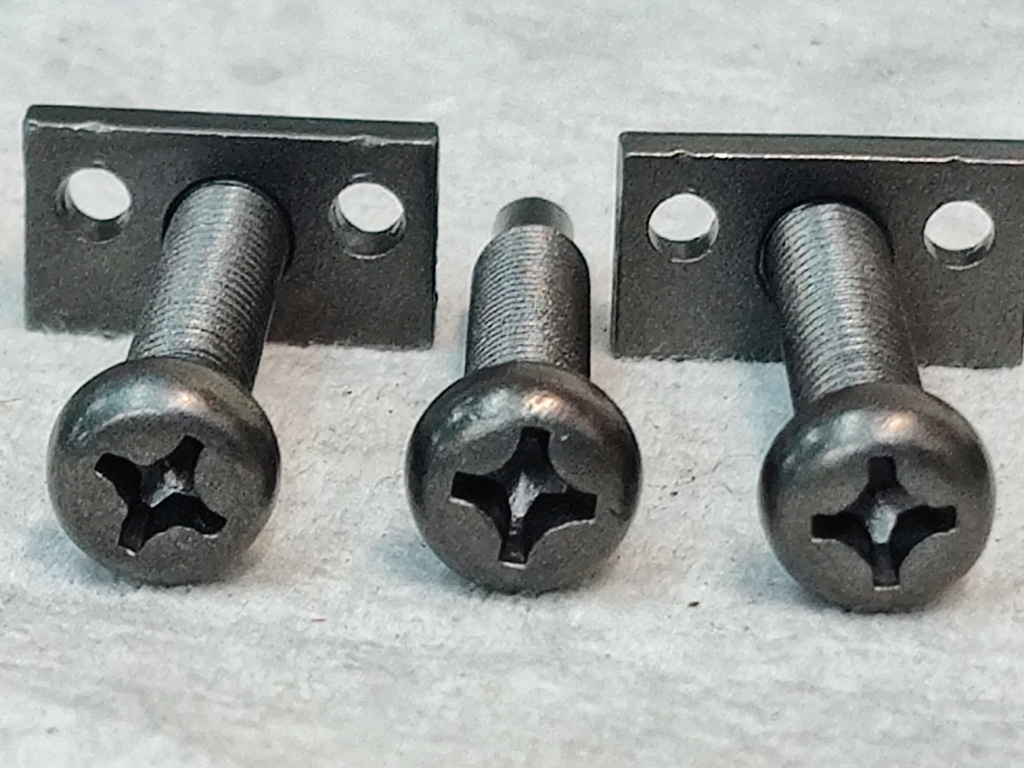
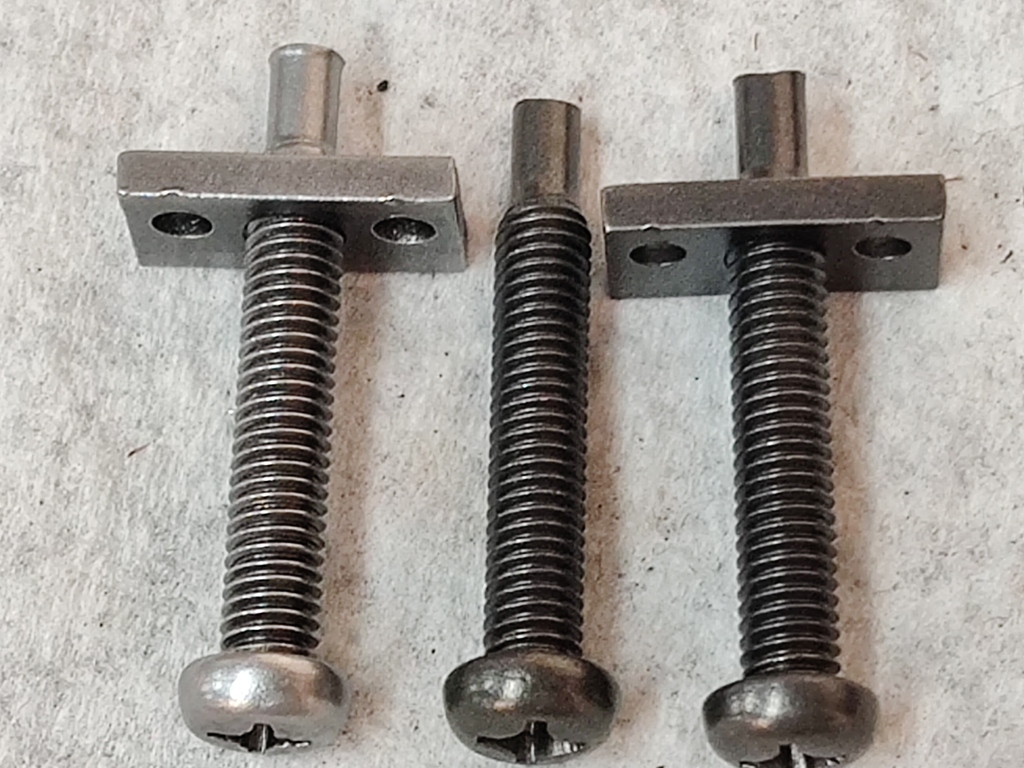
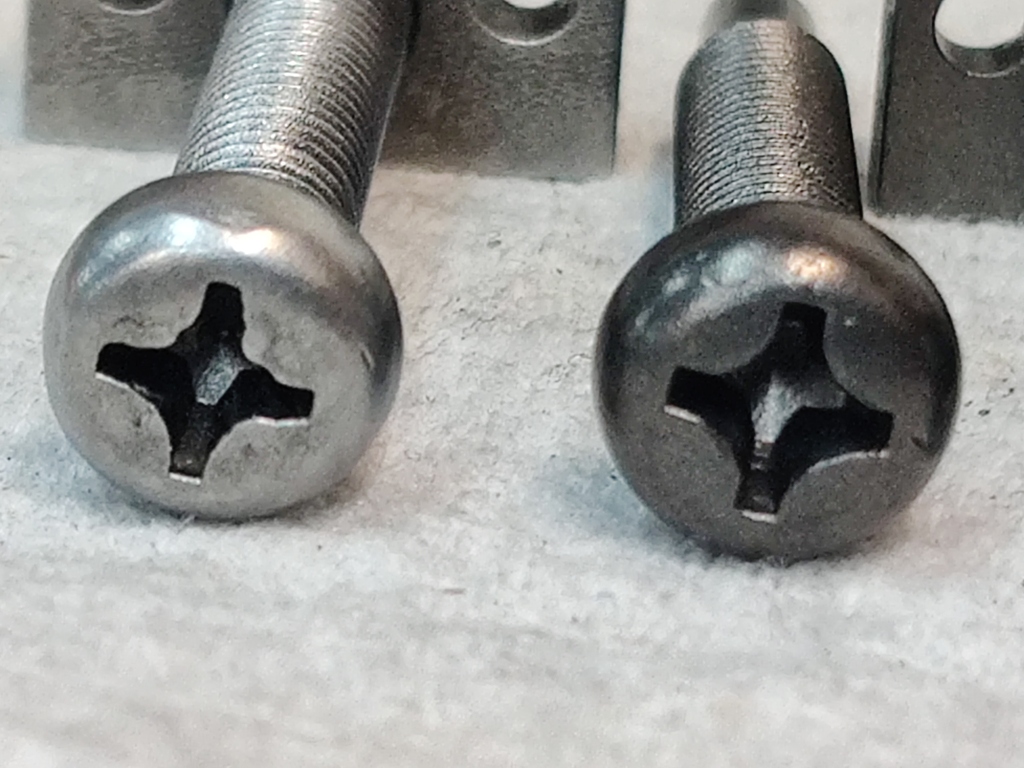
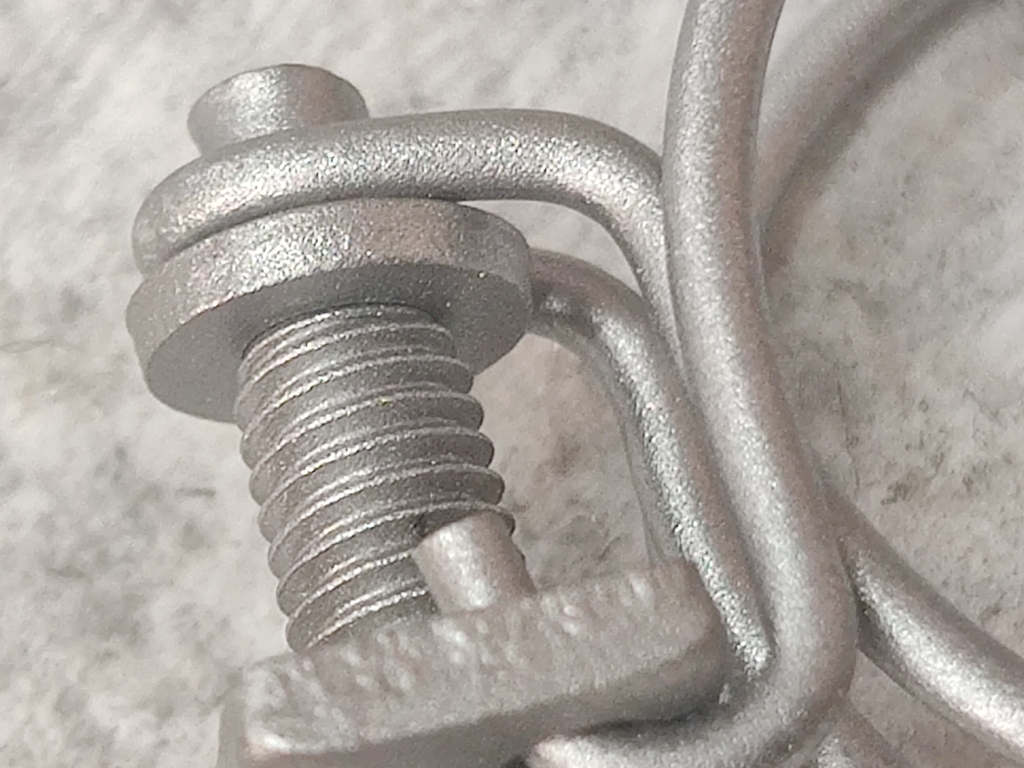
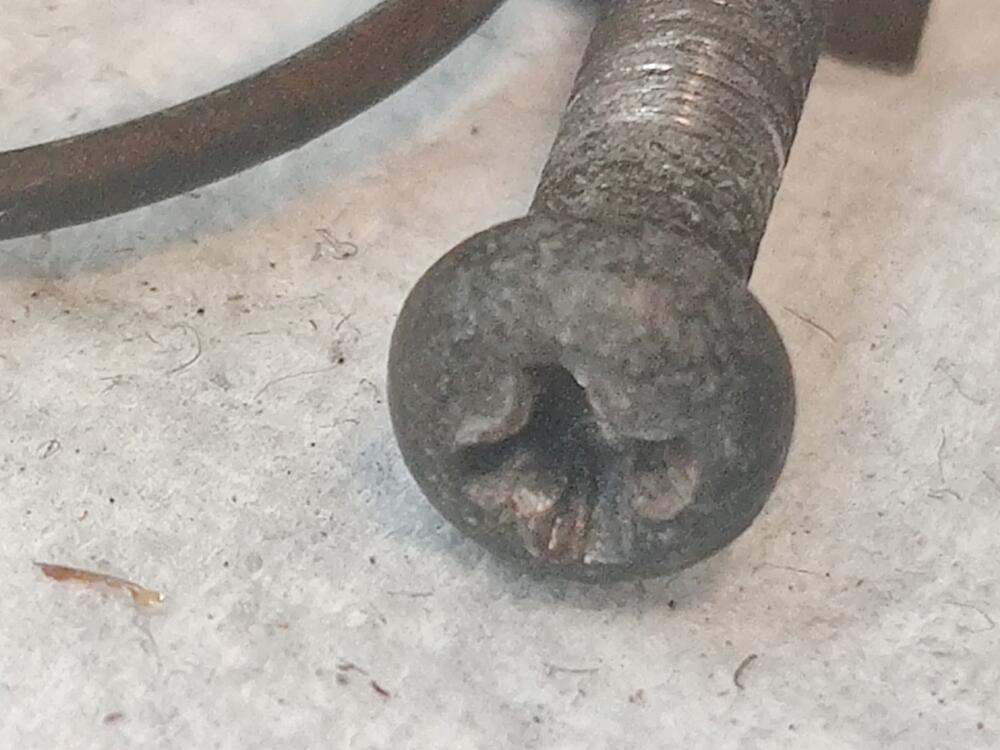
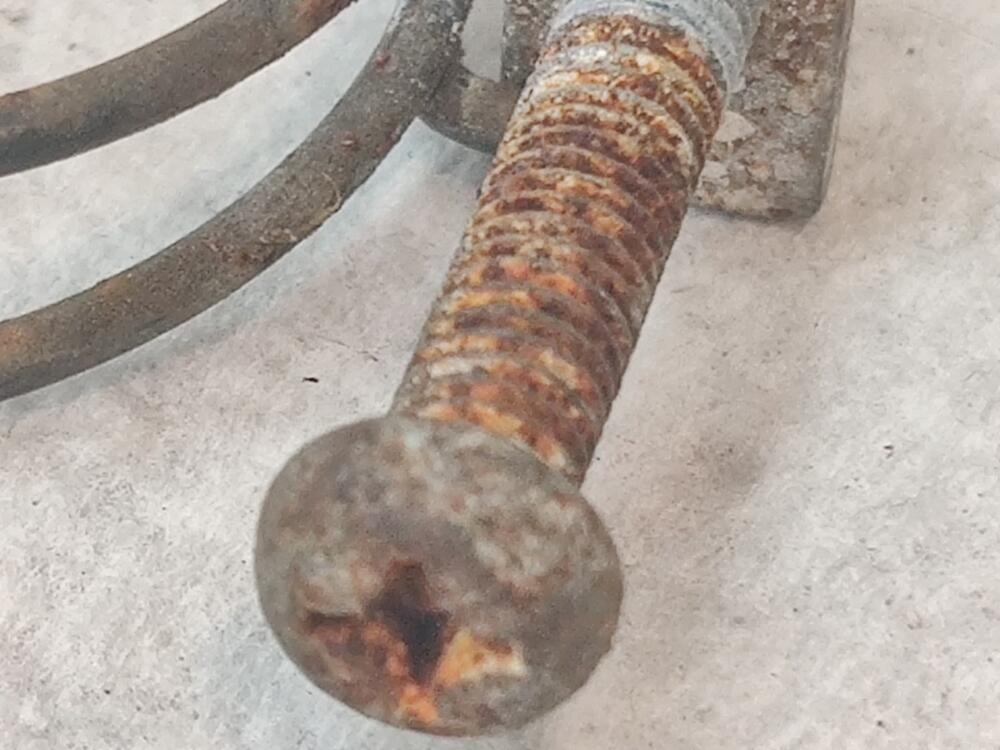
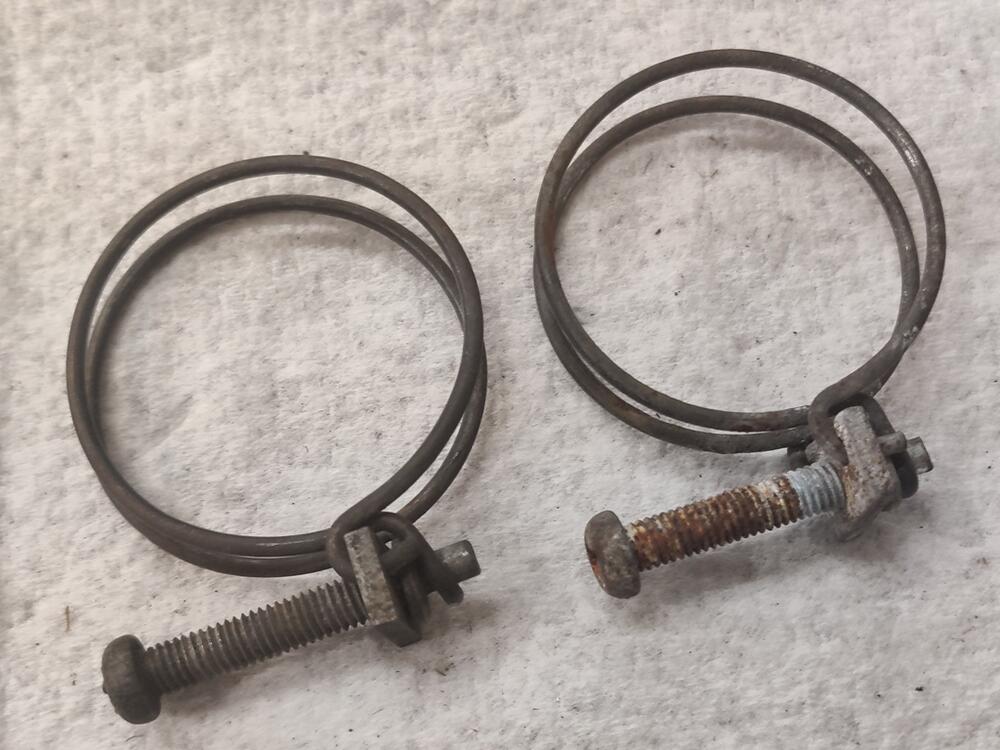
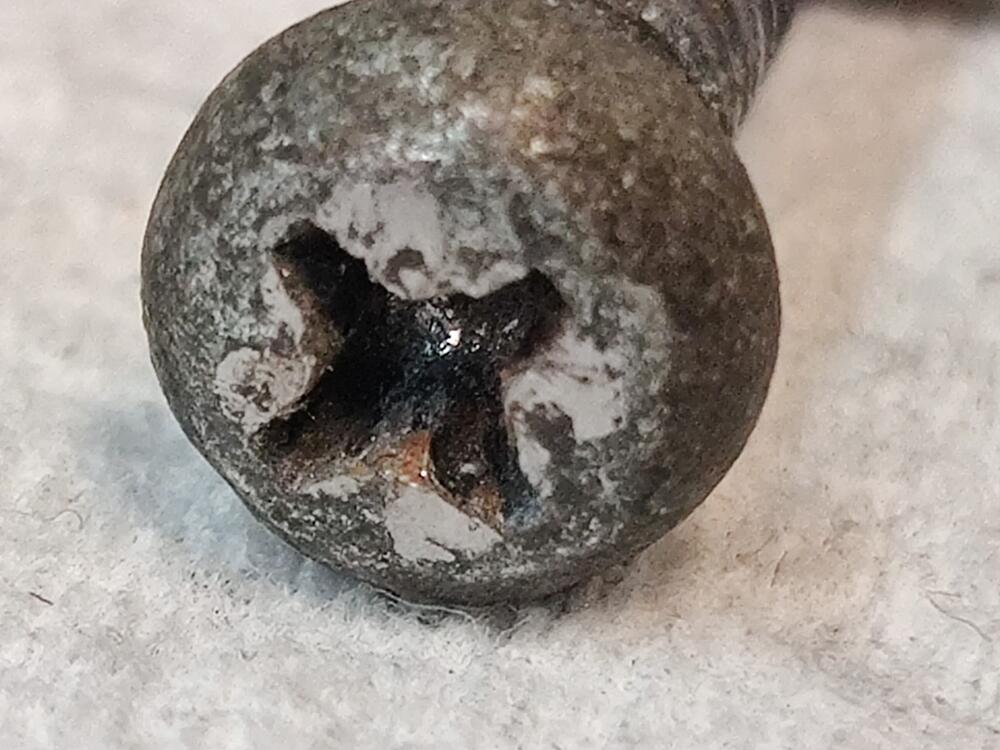
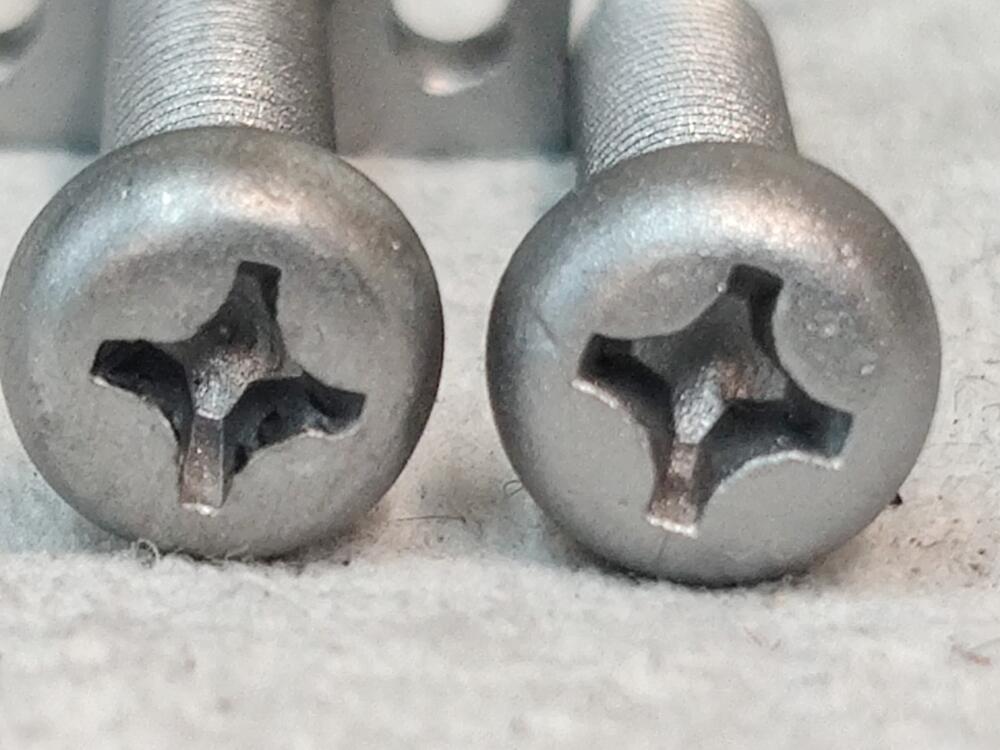
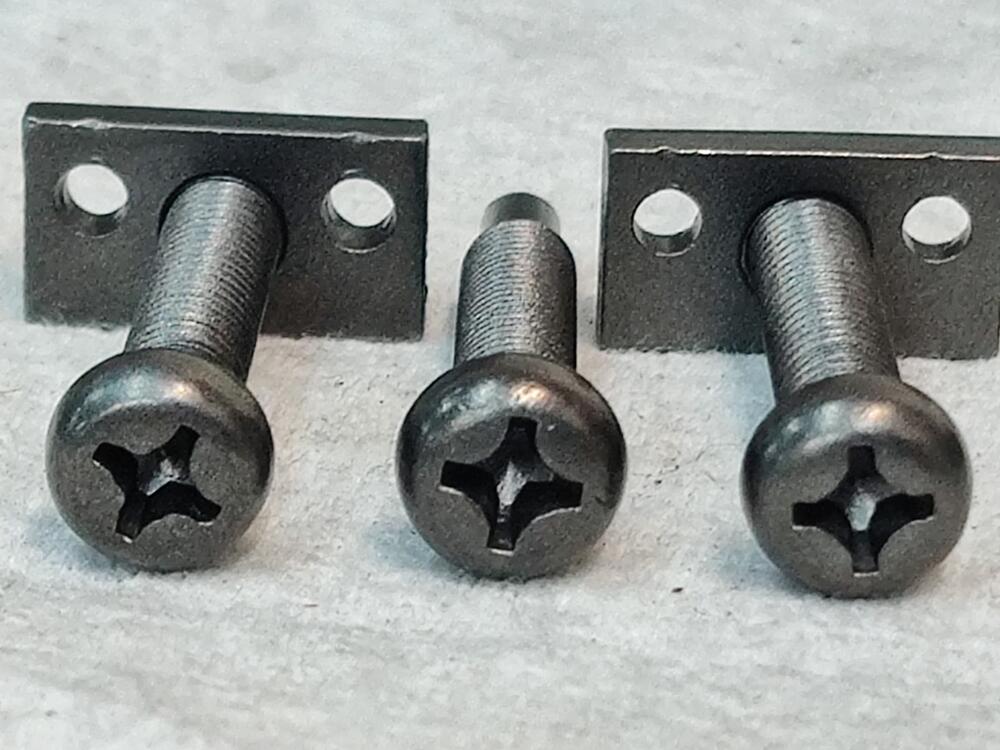
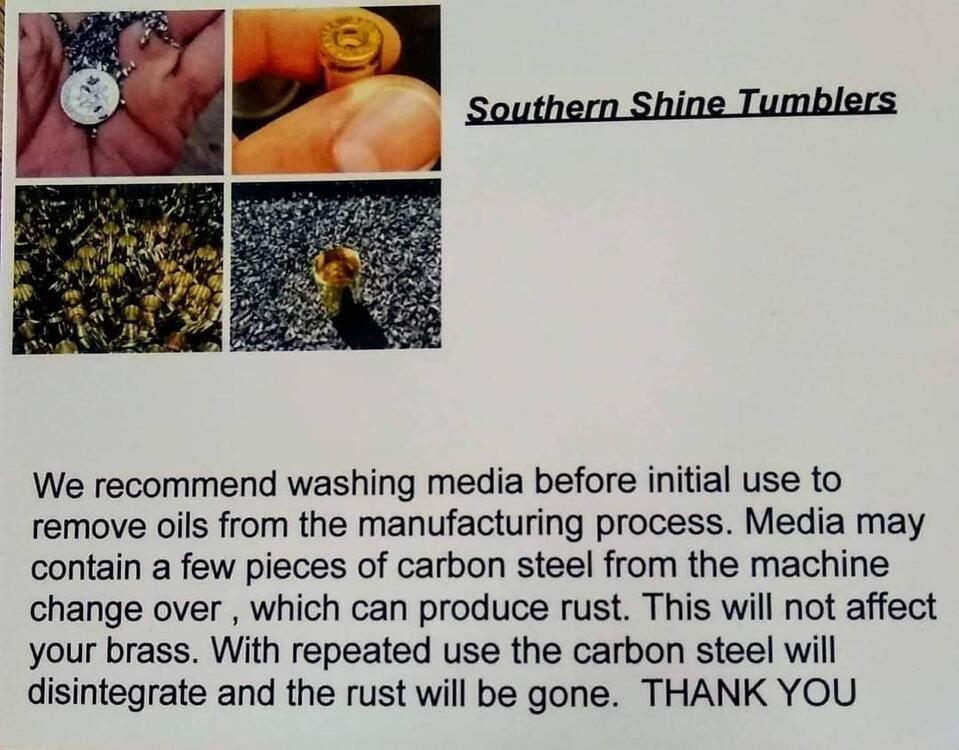
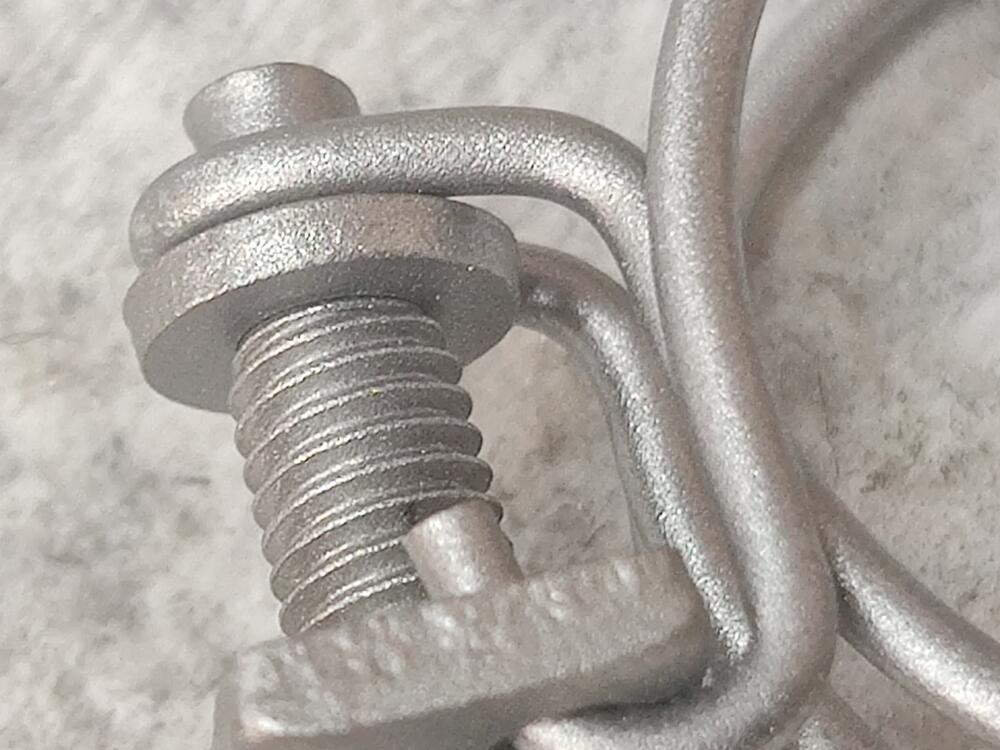
I thought I would take content from a post in my "build thread" and share it more broadly here. I've been working to prepare almost all of the hardware for my 6/1971 240z for re-plating, and have learned some, improving my process along the way. Here is some example hardware I ran through the process this week: These hose clamps are in pretty average condition after 50 years. Note that the less rusty one has some common damage on the phillips head. It has been mangled a bit. Something I have learned is that you can restore most philips screws with this type of damage by tapping the area with a hammer. I place the bottom end of the screw on the flat surface of my vise, and then use a hammer with a smooth face to tap on the top of the screw, working the metal back down where it belongs. I chose this one as an example to show that even when mangled this badly, decent results can be achieved (more pics below). So, here is a description of the process. Use these glass beads from Northern Tool and Equipment, important for size of grain, and bead blasting at 90 psi with a 1/8th inch nozzle to remove all rust, and to establish a consistent finish. I use one of these baskets and find that putting a variety of hardware (big and small) is great for trapping the parts in place so I can blast them without them flying around too much. For large parts, you don't need to use the basket, and you can then go back over them with the pressure at 50 psi to put a smoother finish on them. This smoother finish allows "second stage prep" by hand with less work. After glass bead blasting, all hardware (bolts, washers, nuts, screws and odd small bits) then goes straight to tumbling in one of these vibratory tumblers. I now use a stainless steel media (bought from Southern Shine Tumblers on Facebook). See pic below. It consists of tiny little bits of stainless steel that are good at getting into tight spaces, like between threads, phillips head recesses, etc. And I now use it dry. I was using water and a bit of citric acid, but I think that is best for doing brass shell casings. I was fighting keeping the parts from starting to oxidize/rust, and have found that the media works better and faster dry... to put a nice finish on the hardware. Minumum time in the tumbler is about 2-3 hours. You can add 2 to 3 times that and get an even nicer finish. For large parts that I can't tumble, I use a Dremel tool and the little wire wheel brush attachments after the glass bead blasting (first) step. For final, more consistent finish, I follow that wire brushing by hand rubbing the large parts with #0000 fine steel wool. It doesn't take a lot of work at that point by hand, but the combination of using the Dremel followed by fine steel wool by hand does end up taking some time. After hammer and top of vice on the screw head, then after glass bead blasting - with comparison to head that was not damaged, and lastly, close up of bead blasted texture: After tumbling, the hardware has a dark grey look to it. After wiping with lacquer thinner, the repaired screw in the second and third picture here is notably lighter in color. Sanding the top of the screw briefly with 320 grit or 240 grit would have been a good idea before tumbling, as I see some surface imperfections, but the screw looks pretty good compared to its initial state. Most of the screws I have done this to were not in as bad a starting point as this one. If you want to get the same media, send an email to Southern Shine Tumblers first to inquire on pricing and availability: southernshinemedia1@gmail.com They accept PayPal.


 1 point
 -
1 pointIf you're a visual type maybe you'll see what I'm saying. "Unload" is what my Dad said???
 1 point
 -
1 pointJust realized that you can get the angle from the oil pan also. The bottom ends up parallel with the floor of the ground. Assuming a perfect world.1 point
-
A very muched stressed topic in the ztherapy.com dvd. The flat bar isn't flat at all. You bend it until the opposite ends look the same as far as parallel goes then put it on and then you may need to twist it to get it working smoothly. There's some videos on you tube you can see what we're talking about.1 point
-
The flat bar (ish) choke linkage that attaches to the nozzle can cause the nozzle to bind and not return to the top. The ends of the linkage must be parallel to their mating surfaces. A slight twist to the linkage piece, with pliers, is usually all that's required to align it. Unfortunately, the carbs have to come off to check the alignment accurately.1 point
-
Not to be a D but I think those clear filters are not rated for the higher pressure of fuel injection. Sent from my iPhone using Tapatalk1 point
-
1 pointWhat's the story behind that? I've always heard FIAT, Fix It Again Tony. That's Italian right? Tony Soprano, Tony's Pizza, Tony's spagetti sauce etc. Tony bologna.1 point
-
When I connect choke cables I do not lift the cable coonection at all other than to make sure they are even to each other. The choke handle moves more but you know they are all the way released when the handle is down1 point
-
I'm not sure this is what you're talking about but thought I'd share my experience on one I bought. Make sure the J hose that connects the nozzles to the float bowls have the soft rubber hoses and that's not holding them in a bind. I bought one that had regular fuel hose instead and the nozzles weren't coming all the way up. Garage smelt like gas all the time and the carbs were adjusted witout knowing that so there was some back it up and start over issues to get things right.1 point
-
1 pointAfter looking it turns out the wall it’s usually parked in front of also has little splats. I figured it was nothing to major but Im always worried and had to ask, glad it’s something normal. Sent from my iPhone using Tapatalk1 point
-
1 pointMine do it warming up, extra fuel I suppose from choke on the 240 and cold start valve on my 280. Then it goes away after an "Italian tune up" romp.1 point
-
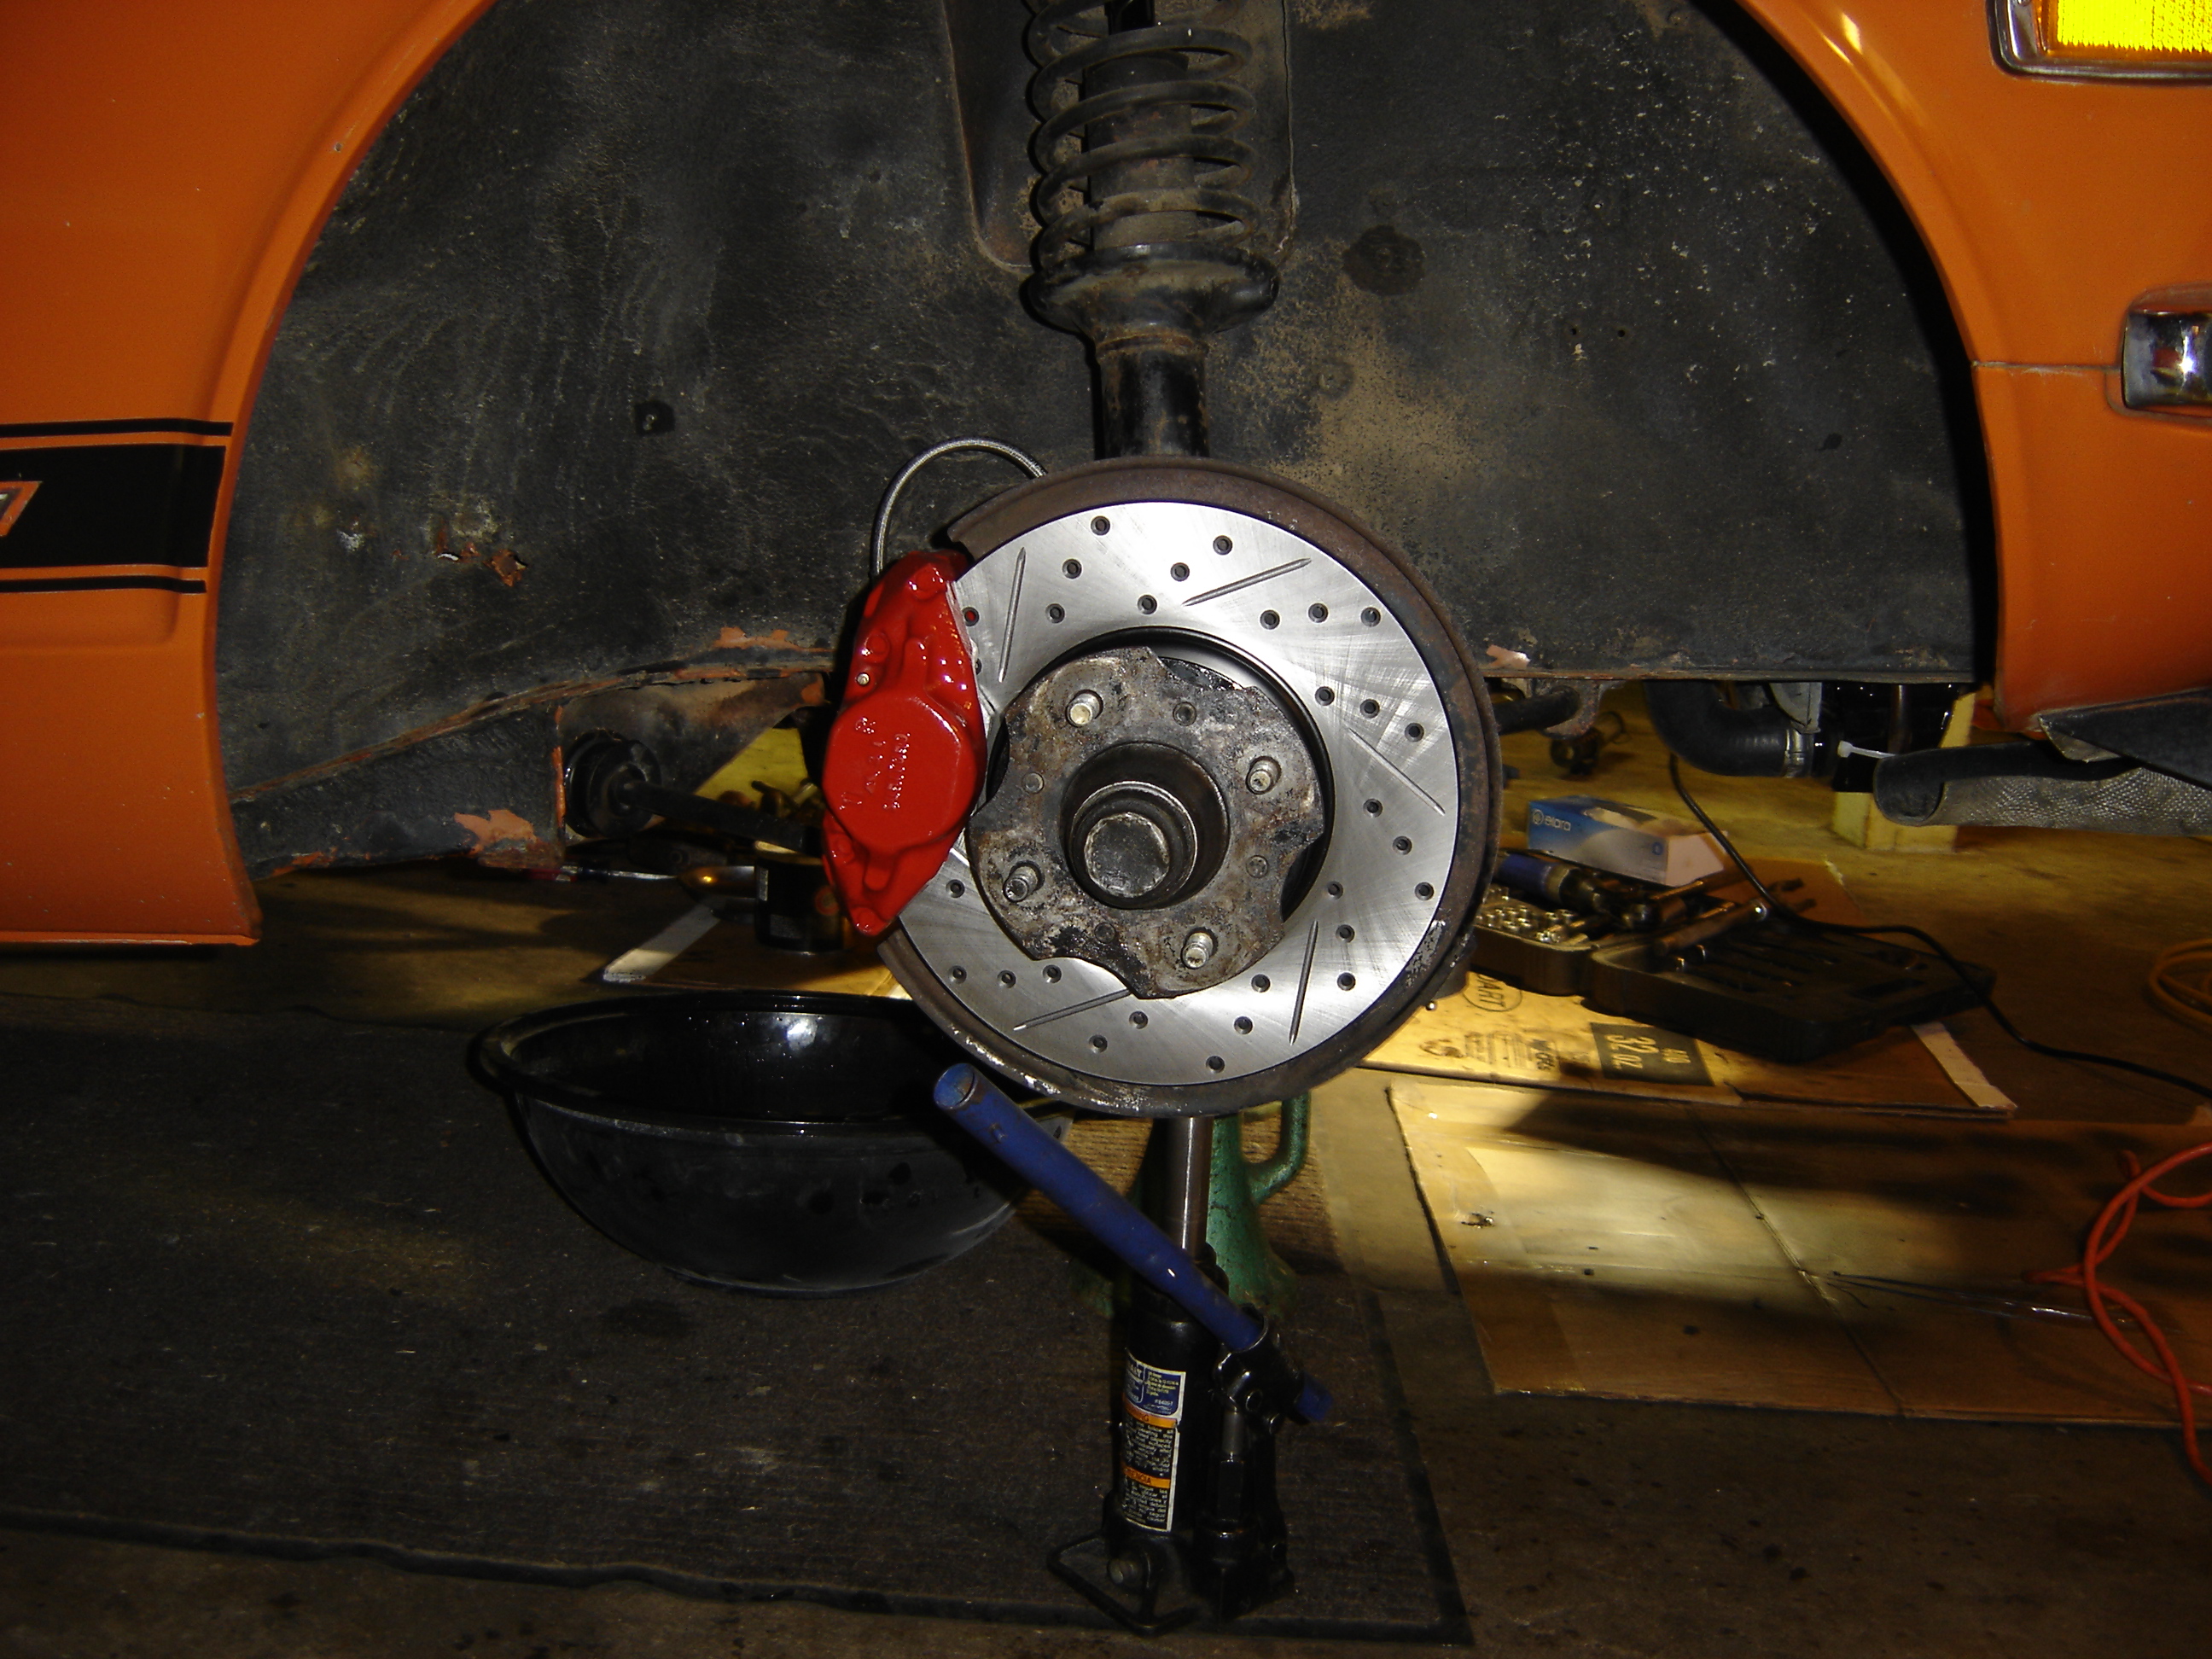
1 pointIf you use a small bottle jack or some kind of jack under the "A" arms to take the drop down load off it'll make things a lot easier to work on. I figured that out changing the tie rods. Just jack it up enough to level out the weight, none down and none up. You'll see what I mean if you give it a try. Whoops! Stub axle up front. "A" arms in the back.1 point
-
1 point
-
1 pointYou are walking down a path. Pull engine. Replace transmission. Clean engine bay. Rework the front suspension. Next stop, rear suspension. Where does it end?1 point
-
1 pointMake sure you've had a few beers first, you'll be more beleiveable (at least in your head}.1 point
-
1 pointCan’t wait to use that logic on my wife and see how she reacts! Sent from my iPhone using Tapatalk1 point
-
Yeah, most of the linkages on the SU's are a sloppy affair. I wouldn't worry at all about the slop in the fast idle actuator, and I also wouldn't worry at all about the fact that the linkage that connects to the nozzle wiggles around a bunch. Except... When the choke is off, that linkage that connects to the nozzle should always be pulling the nozzle up tight against the underside of the carb. In other words, even though the linkage is sloppy, there should still be some spring pressure pulling that nozzle all the way up "with a snap" when you push the choke off. So, I got two quick thoughts... First thought is that you simply have the choke cables mis-adjusted and pulled to tight. If that's the case, even with the lever pushed all the way to "OFF", the nozzle will still be held down a little bit by the cable. To check that, what happens if you loosen the clamp screw onto the cable and let the lever down further? Does the nozzle come all the way back up then? If that isn't it, my second thought is that maybe one of the return springs on the choke linkage mess is not installed correctly. Take some good pics of the springs on that choke actuation linkage so we can have a look?1 point
-
1 pointGreetings! I’m in the sharing mood again, so thought I’d share an episode from the series “I have no idea what just happened, but you won’t believe what the solution was”. Yesterday, local Z owner wants to drop by for an SU tune on a recently acquired late 71. It’s “running” but is overheating and doesn’t run “Well” overall. Suspect mixture too lean or fuel supply lacking. So do the usual, no need to bore you with details, but here is the overview, no order intended. Bowl fuel level Fuel pressure air flow sync linkage evaluation. How many turns down for the knozzles, Nozzles were down 1 turn on the front and 1.5 turns on the rear. Aha. Too simple. Turn them down 2.5 each. As I have decided in the past, got the AFR gauge out finally, stuff it in the tail pipe, 12.5-13 at idle. Much better. That should do it. Get the owner to go for a quick around the block test to see if there is a noticeable change in performance. Goes around the block and comes back with big smile. I could here him enjoying the hell out it, the exhaust is not subtle on the car. Says there is 50 more HP and while it was short drive, the engine temps were much lower than before. We are DONE I say. About this time another friend drops by, so the inevitable conversations ensue and finally I decide the put the air cleaners back on and send the young man on his way. I do so, he starts the car, and it sounds a bit rough, but off he goes.1 point
-
1 pointThanks for sharing that. It's a good thing to add to the memory banks. That's similar to what I dealt with recently. I tuned a friend's 72, set the floats higher, etc., but the car wouldn't run worth a damn. Another friend messed with the dwell, and the car ran better for a short while. The first friend had me check the car again, and I told him it had to be the ignition. When I finally installed the Pertronix, that car ran like a scalded dog. It was another matter of having fixed everything else, what is left to mess with?1 point
-
1 pointI’ve had guys come to me with the fuel supply plumbed into the vent lines, The vent lines T’d and joined to the fuel supply lines, and every other combination of crazy things It’s not like 4-5-6 were dead, they were alive, BUT the imbalance of richness or lean-ness or power was not making the engine run all that bad, it was just making such an interest exhaust note. Anyway, file this one away. Either leave your fuel vents open, or connect them to the air cleaner through hose with an actual hole that does all the way through.1 point
-
1 pointWait Till she hears the " Peace Of Sh*t " is gone up over 80% in price only in this last year!! Thats golden... I'm glad that i don't have to answer for my hobby!1 point
-
1 pointYou could try immersing it in wintergreen oil, some of his rubber parts have been out of stock for a long time.1 point
-
1 pointYea, I already buttoned everything up with a composite/metal gasket. Sounds SO much better than before(obviously given the state of the old gasket. When I replace the header I will go ahead and get the fiber gasket.1 point
-
1 pointI tried a magnet on the OE intake/exhaust gasket from 1972. It wouldn't hold itself but definitely had some pull. That's the old stock exhaust manifold from Nissan. The gasket that came with the 6 into 1 header from MSA had zero pull from the magnet. It feels like thin cardboard. So Mr X is right from where I'm standing along with MSA. But! my Nissan metal exhaust covered gasket pictured above is as quiet as a church mouse with the header. I did not use the MSA supplied paper/fiber gasket. Just a bulls**t observation is all. "Whatever works"1 point
-
1 pointI haven’t done a whole lot other than pull and clean things as they come off. The first thing that started it all was a rotten coolant hose going to the air control valve. Oh I’ll just fix this and put it back together, Cleaned it up a little and replaced the nipples with ones from my donor 280zxt parts stash. Then from that to now Of course I had to keep cleaning things up and pulling them. One of my main goals is to paint the engine bay the body color. Never liked being able to see the red and someone else decided to rattle can black what they could while apparently removing nothing. At least it cleans off relatively easy. I’m currently cleaning up and undoing the wiring harnesses. Sent from my iPhone using Tapatalk1 point
-
1 pointI bought a new set of (whole engine)seals for my 280zx and there where no longer metal parts in the in/out seal.. they say it's better that way.. i will know.. in a few years.. i hope.. when i get these IN this year.. Btw.. to check the flatness of your exhaust header, take a thick peace of glass and some abrasive material (like where you clean/polish with in the kitchen). Go over the glass with some abrasive on it with the exhaust header. you can see the un-flat spots in a minute (or 5.. 😉 )1 point
-
1 pointGetting the engine to sit on the mounts during install can be very tricky. Adding the DS install will make it MUCH harder to line everything up. My 260Z with a 1" rear bar makes the DS removal very difficult, but far from impossible. You just have to get the right combination of wrenches and angles to reach them.1 point
-
Make sure to treat the hollow spaces. Rust seems to have taken that z alot1 point
-
1 pointResist...that’s what I had to do. My wife hates my Z too. Says “what a piece of crap”. She only appreciates something with headed seats, SiriusXM radio, adaptive cruise control and CarPlay. I don’t need that crap. Wait until she finds out it doesn’t even have cup holders. I had to tell my wife, why do you want to stop me from enjoying my hobbies...that’s not what your do to someone you care about. You can also say, you can’t get much money for it the way it is but with some work it has some value and working on cars is better than drinking booze and gambling. It’s a harmless hobby. Resist! Sent from my iPhone using Tapatalk1 point