


Leaderboard
-
Captain Obvious
Free Member10Points10,081Posts -
wal280z
Free Member4Points514Posts -
Cruzzar
Free Member4Points37Posts -

siteunseen
Free Member3Points15,115Posts


Popular Content
Showing content with the highest reputation on 07/16/2021 in all areas
-
3 pointsJust needed some positive thoughts from the team, was able to get the pin in. Shifter much better.3 points
-
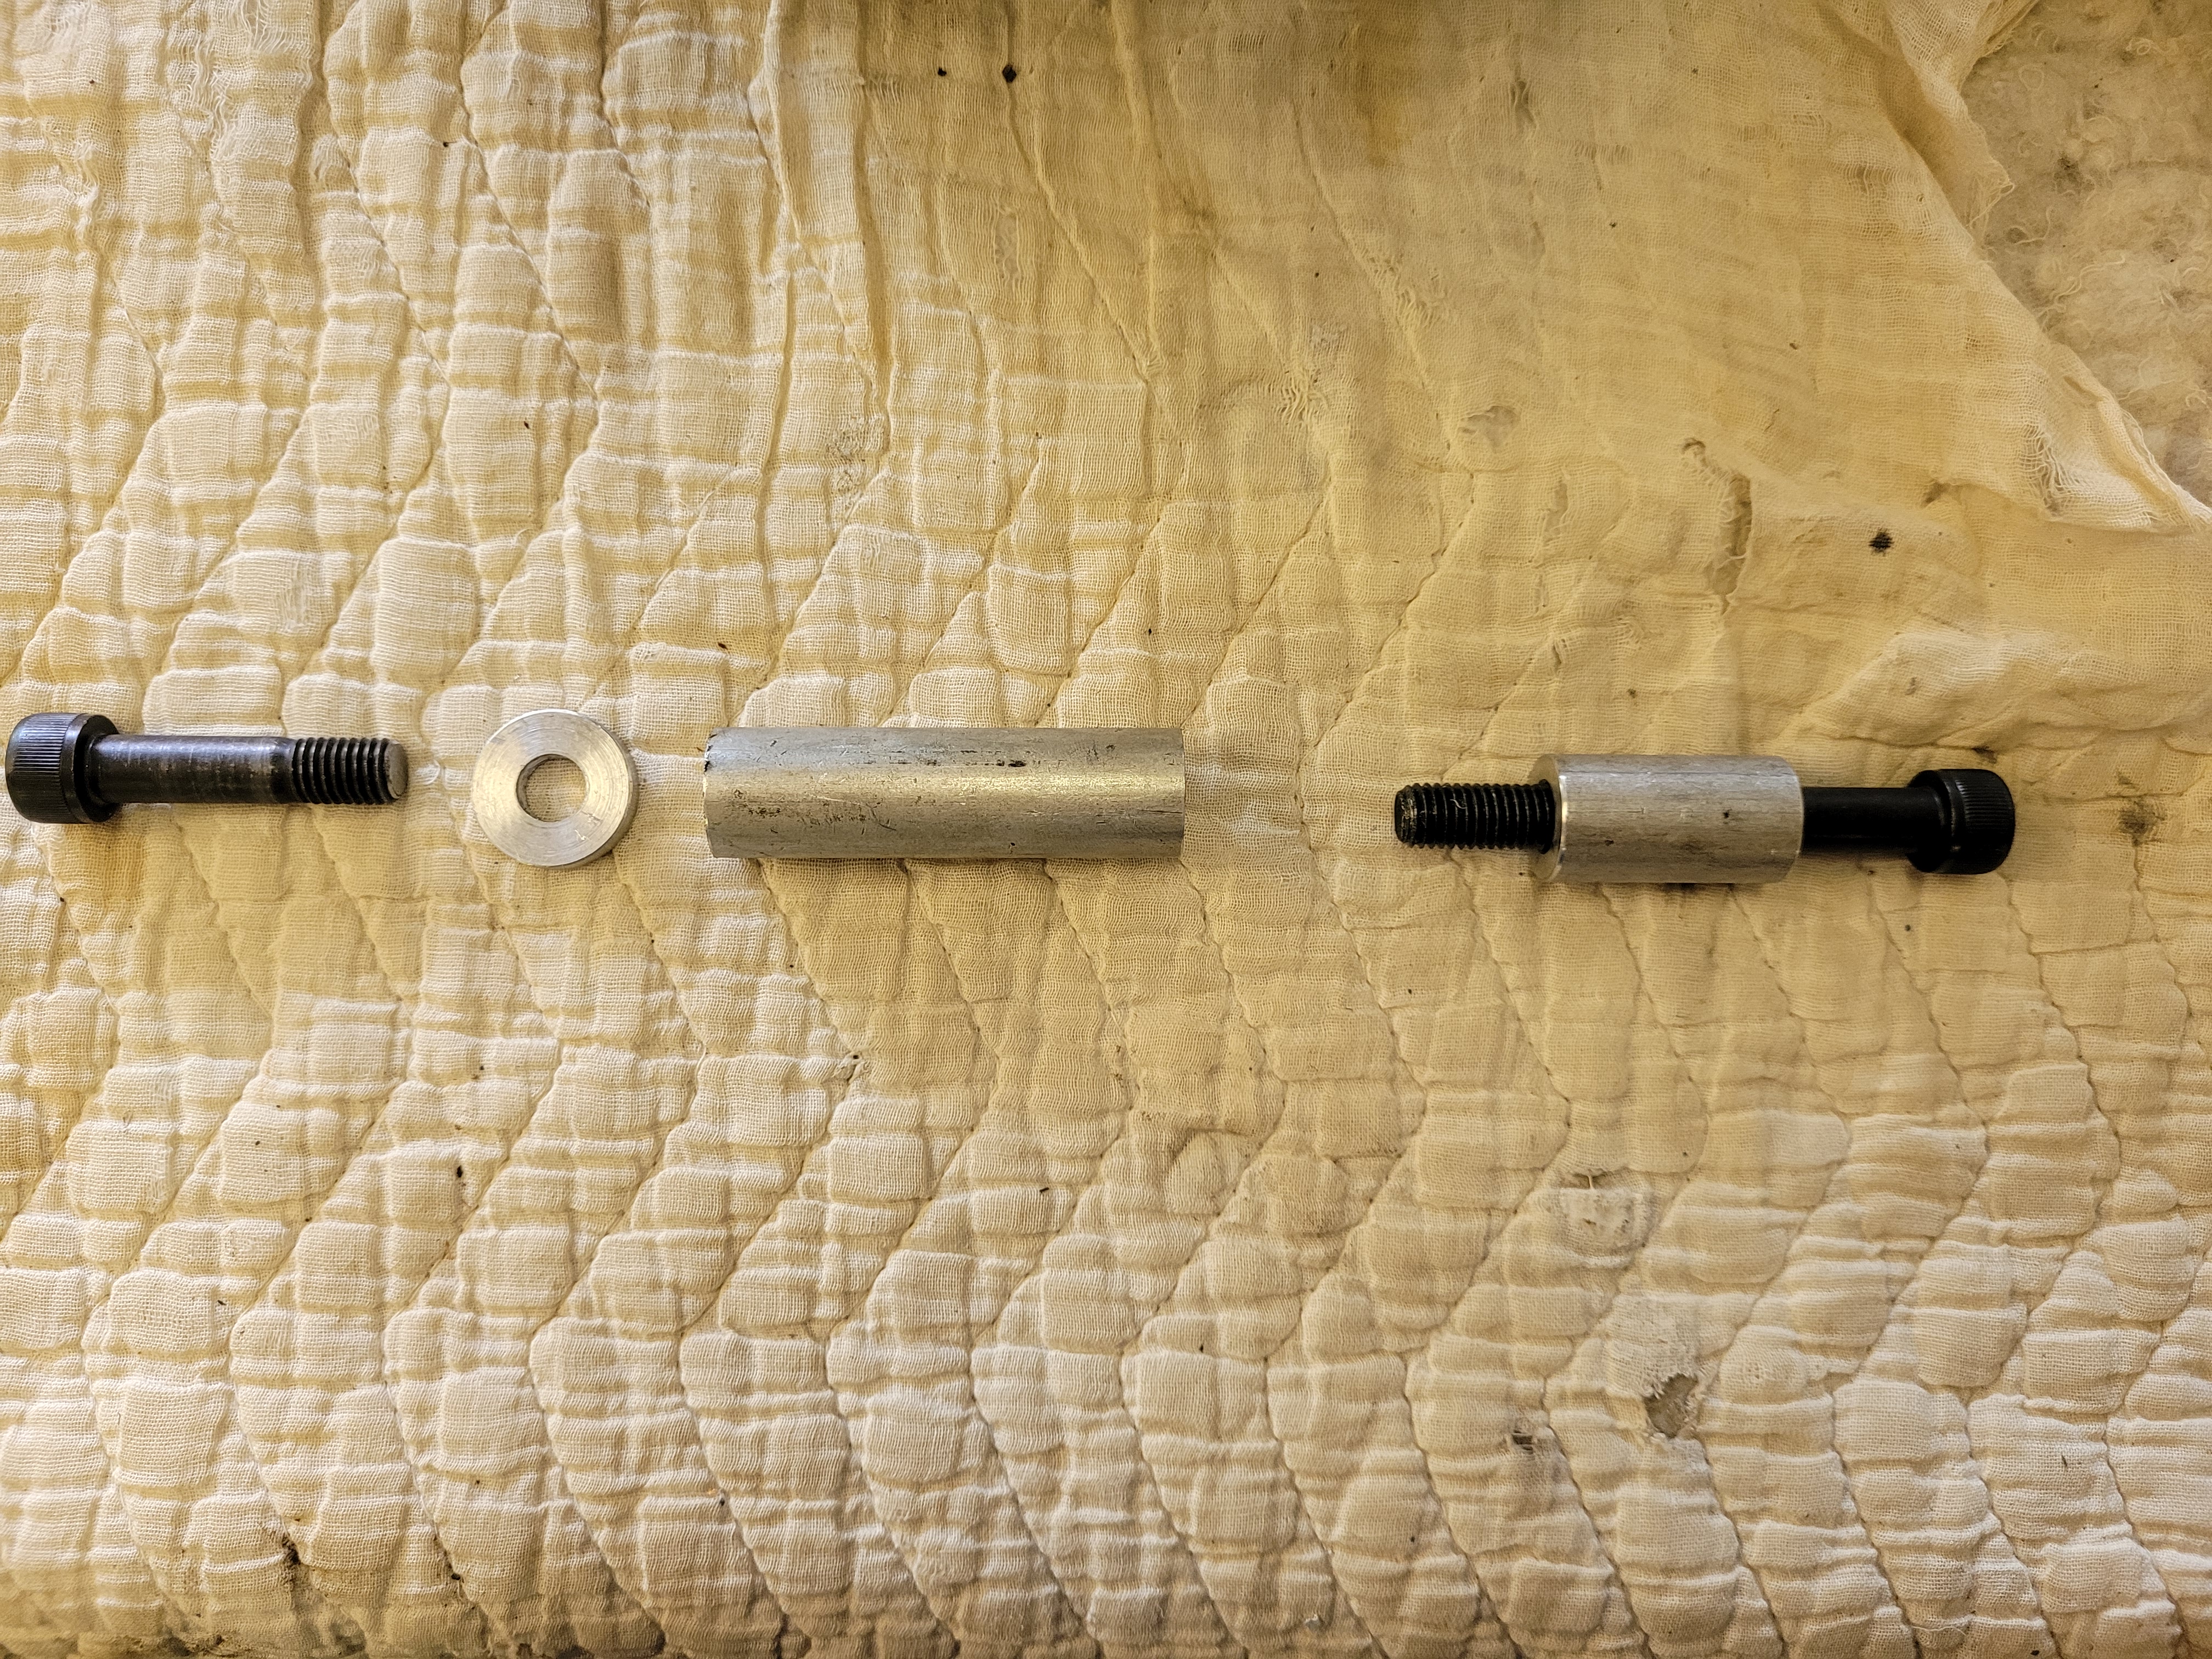
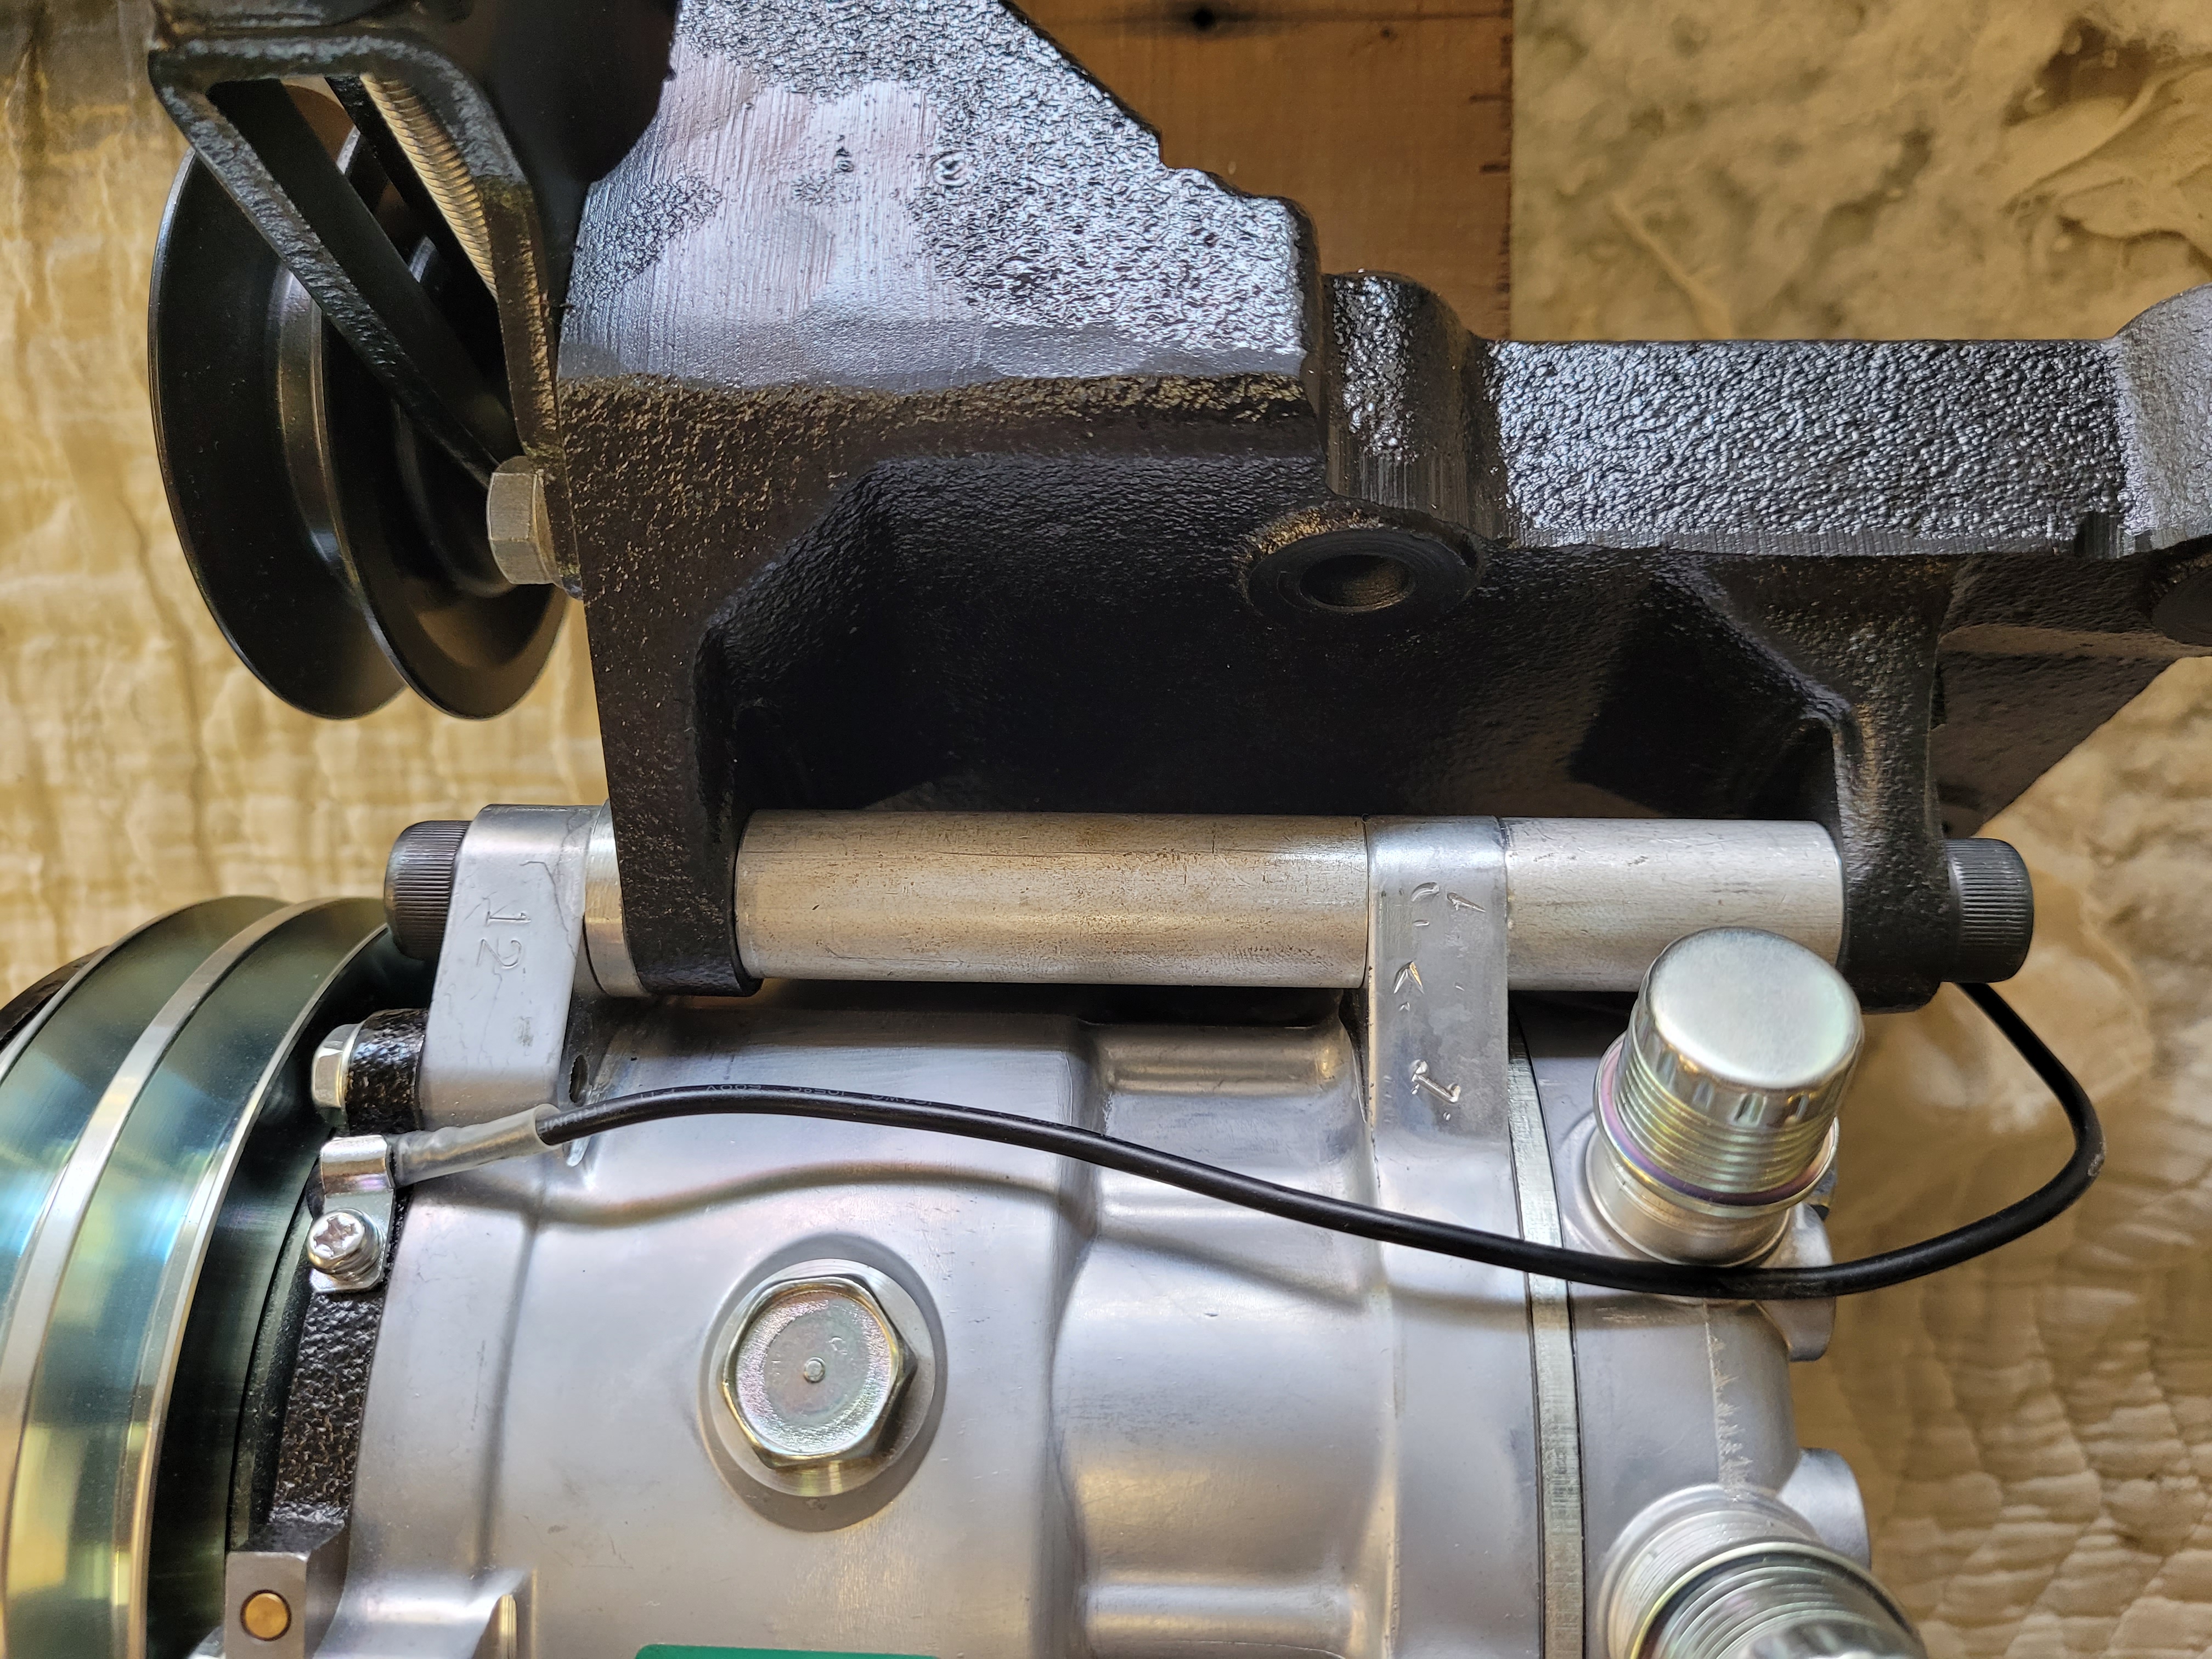
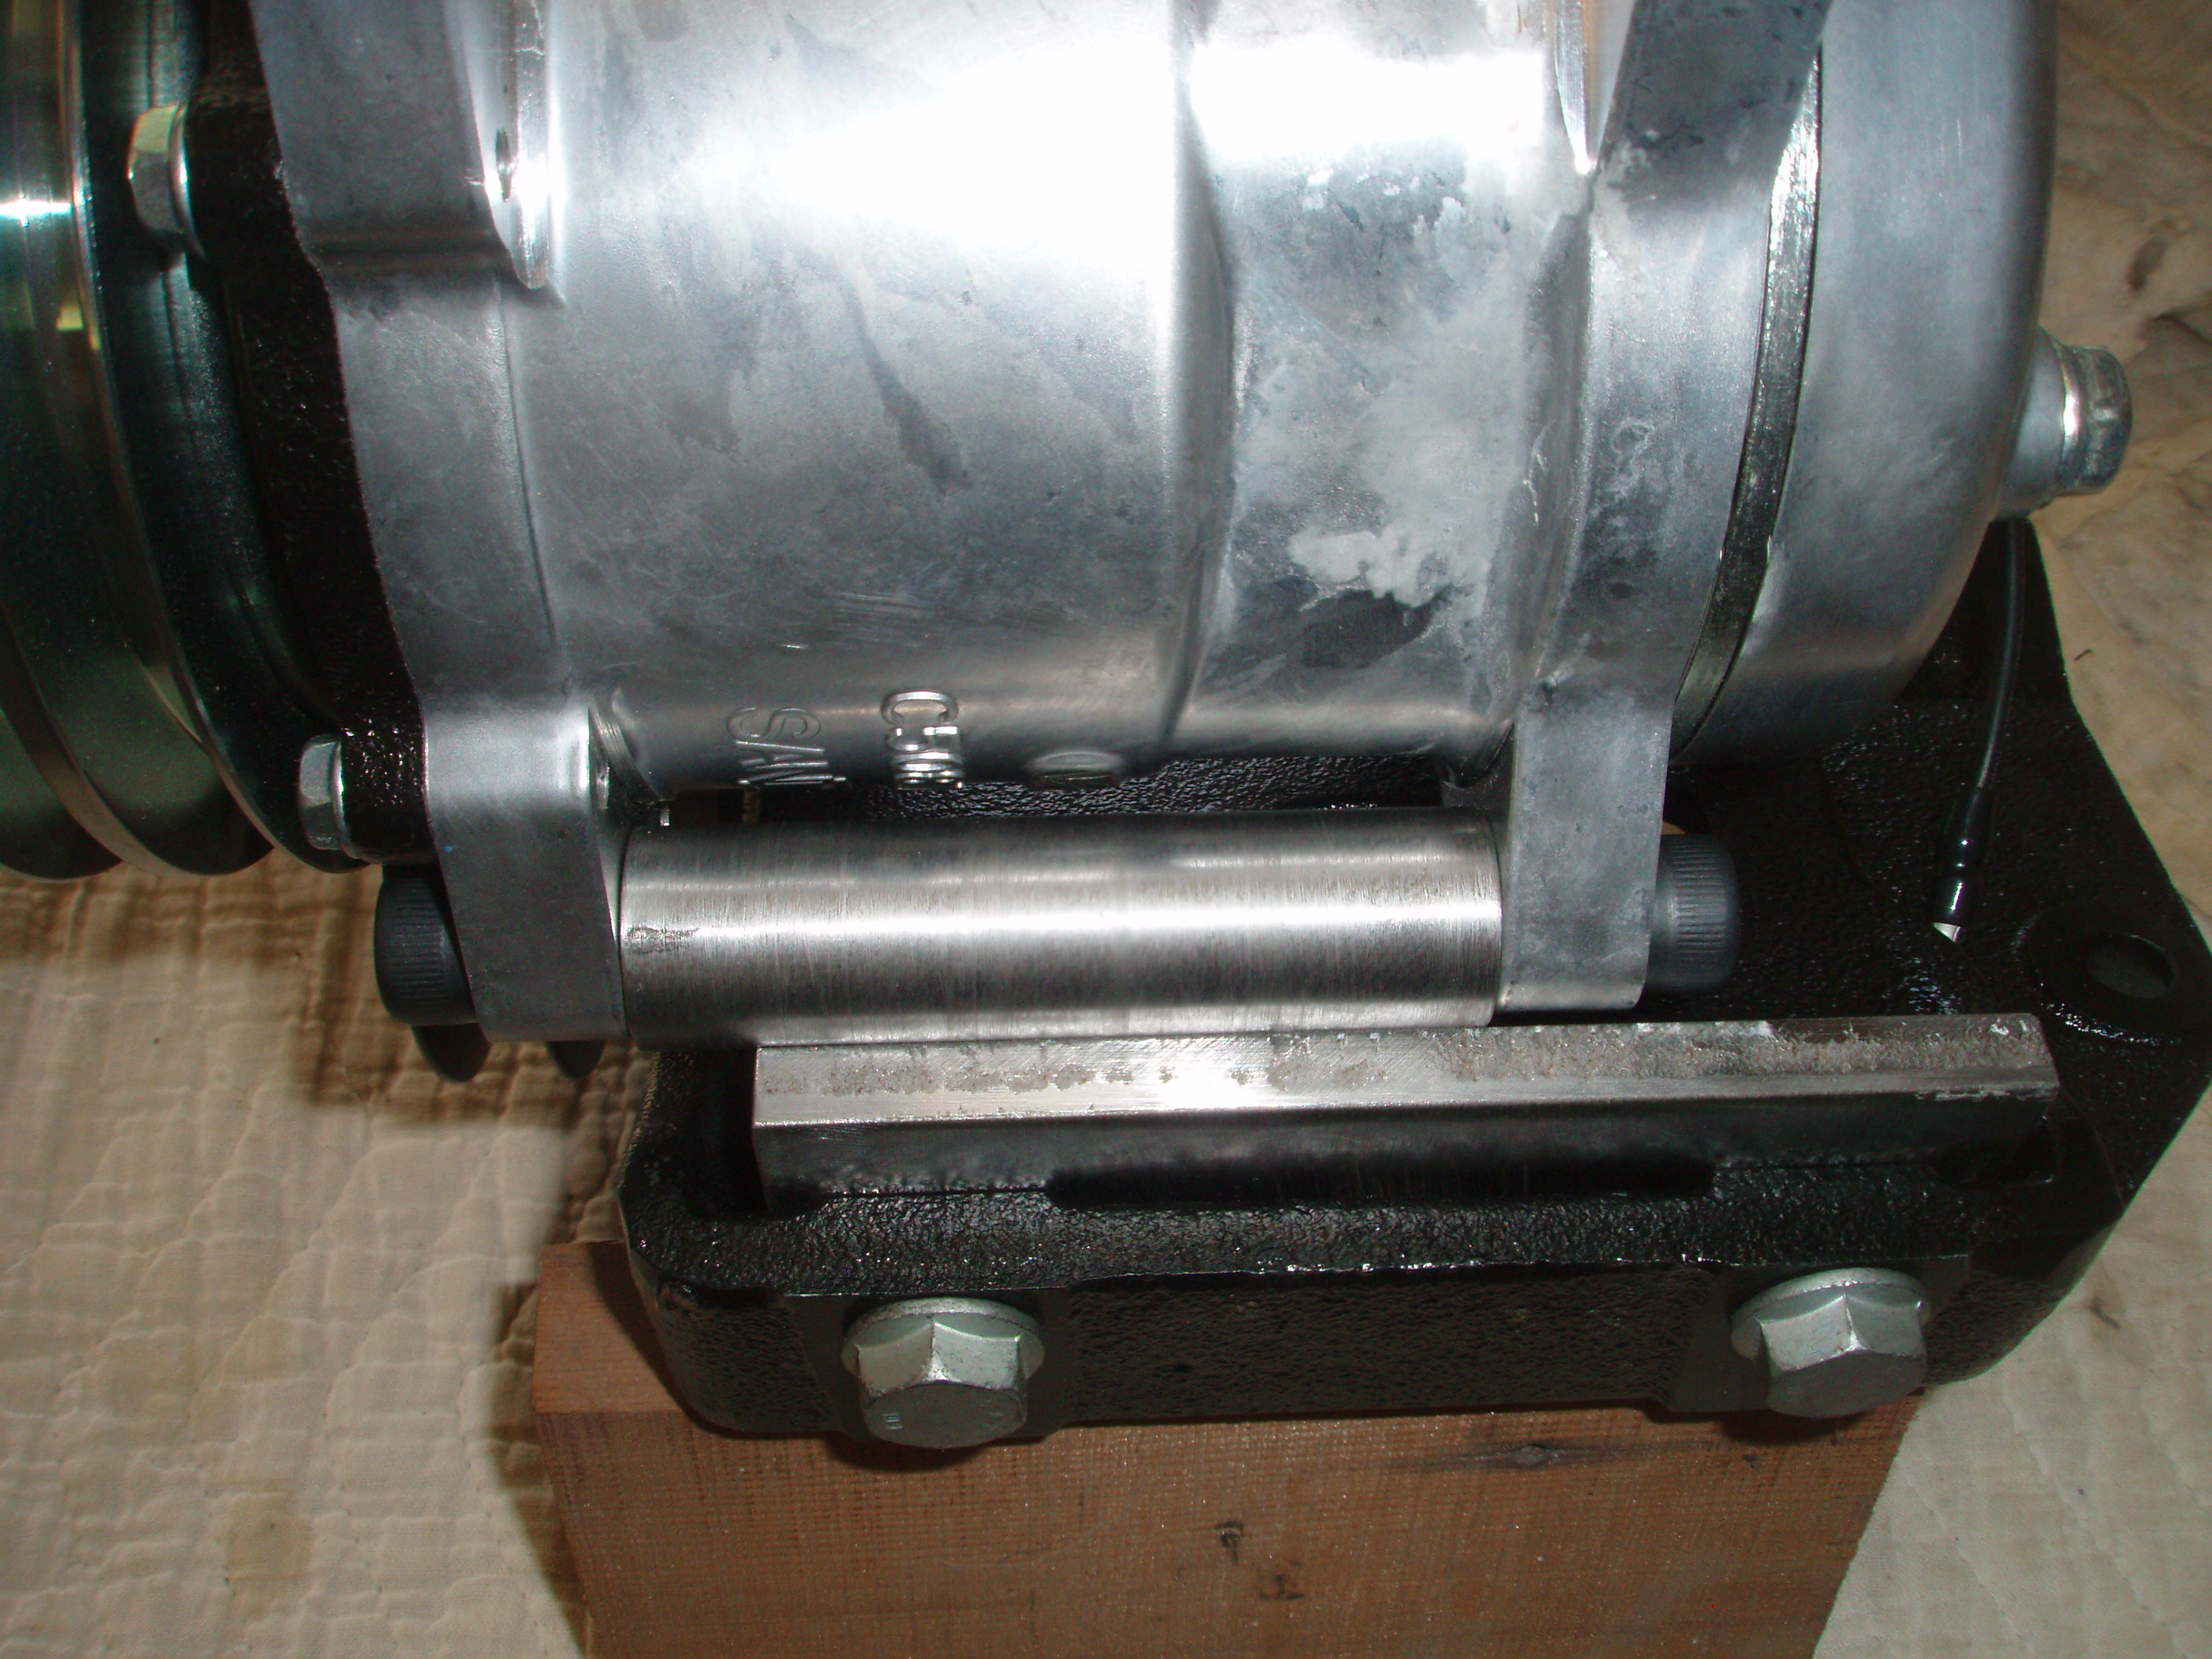
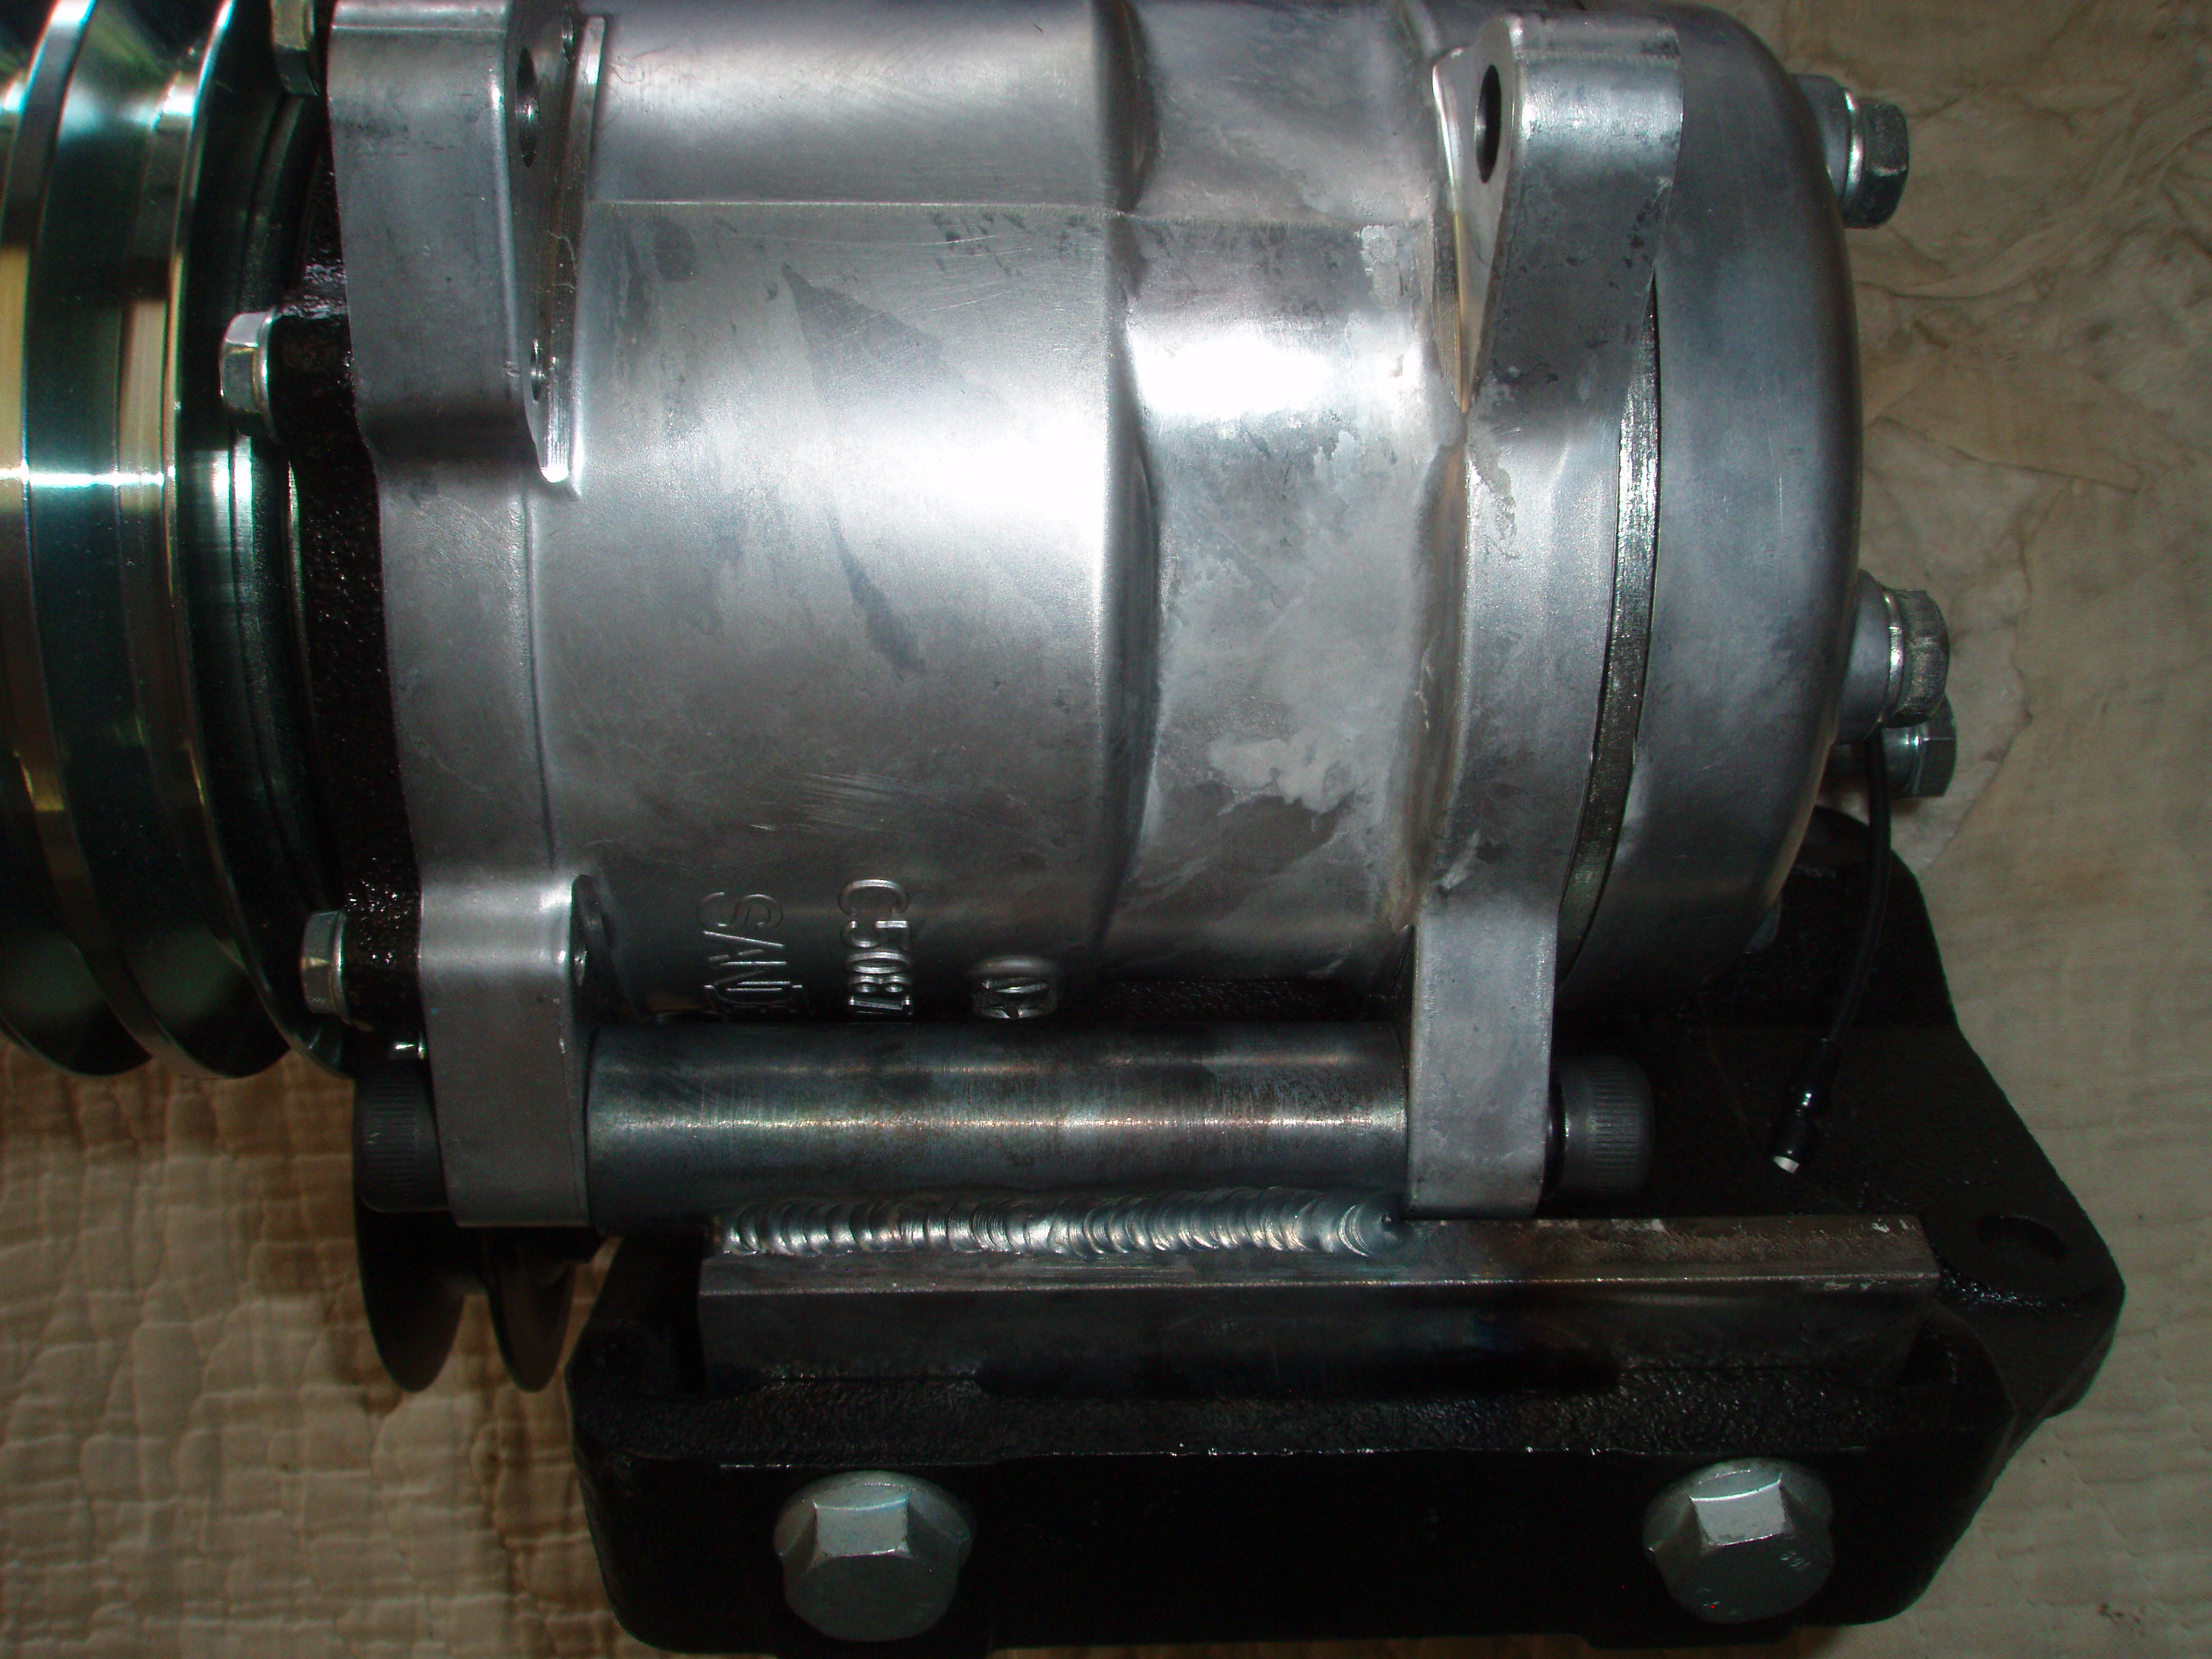
2 pointsI thought I would share how I went about converting my old R12 system in my 1975 280Z to R134a. My system charged up OK after sitting dormant since 1995. It still had a charge in it but not enough to cool the air. Once charged it put out about 50 degree air on a 102 degree day (good) but the old Hatachi compressor made some really nasty noises (bad). The compressor was louder than the motor while driving down the road. I worried that the dying compressor would contaminate the system and if it plugged up the expansion valve I would be up the proverbial creek without an adequate means of propulsion. I am trying to keep the engine compartment/car looking relative stock. I upgraded to a Sanden 508 compressor and then adapted it to the stock compressor bracket that mounts on the side of the L28 block. I chose to stay with the original bracket because it incorporates the belt tensioning pulley and it is stock. I know that you can purchase aftermarket brackets that will bolt up to the block (and I have to believe that they have to weigh a lot less) but to tension the v-belt you must rotate the compressor and again it does not look stock. I could have made my own bracket but it would have been similar to the stock bracket. Unfortunately the mounting ears/pads for the Hatachi compressor do not match up with the Sanden but by making some spacers and a bottom bracket the Sanden bolt up to the Datsun's bracket with no modifications to the bracket. To do this adaption you must have access to a welder, a metal lathe, some 7/8" round stock, a small piece of 3/8" flat stock and a good caliper to make some accurate spacers. First I made a small spacer out of 7/8" dia. material with a 10mm hole (you can use a 'X' letter drill) that would align the second groove of the Sanden's pulleys with the stock tensioner pulley on the Datsun's bracket. Once this is done then you can make two additional spacers. Each of these spacers must be made so that they just barely fit in position. If you have too much space you risk breaking or cracking one of the mounting ears off your new compressor which would probably ruin your day. In the first picture you can see the arrangement of bolts and spacers. You will need to purchase metric allen head bolts because of the space needed to tighten them up will not accommodate a hex head bolt. From the left I have a 42mm long bolt, a .184 thick spacer, the next spacer is drilled and tapped for a 10mm x 1.5 on both ends to allow the tightening of the two opposing bolts. The next spacer is drilled all the way thru and a 80mm long bolts passes thru it and threads into the previous spacer. Hopefully the second picture will show how all of this goes together. In order to attach the bottom compressor mounts you will need a 1 1/2" x 5" x 3/8" piece of metal that is notched to allow it to fit in the area that the old Hatachi compressor bolted to. Cut your metal, notch it and transfer punch two marks that will be drilled and tapped for 10mm x 1.5 threads. You will also need to make a 7/8" diameter spacer that fits between the two bottom ears of the Sanden compressor (get a good fit with very little clearance). This spacer needs to have both ends drilled and tapped for 10mm x 1.5 threads to accommodate two 10mm alllen bolts that are 30mm in length. You will need to make the flat plate out of 3/8 and the bottom spacer out of 7/8 diameter stock so that when the two come together there will be enough area at their intersection to complete a good weld. Bolt the compressor up to the bracket's top mounts with your three spaces and bolts, attach the flat plate to the bottom of the bracket with 10mm x 28mm long bolts, mount the bottom spacer onto the Sanden's bottom ears and rotate the compressor so that the bottom spacer and flat plate meet. Make sure your pulleys are aligned, my narrow spacer (.184)may be a little different than your application, tighten up the top bolts and spacers and tack weld the bottom spacer to the flat plate. I then pulled off the bottom bracket and tacked welded it on the back side and reinstalled it to make sure it did not pull out of alignment. It was good so I finished welded it, put it back on and checked it again and then pulled it off, bead blasted it and put a coat of paint on it. Pictures 3, 4 and 5 should help explain. Done. Tomorrow, I will start the install of a new condenser with o rings onto my radiator and how I will go about making connections onto the existing flared hard lines.


 2 points
 -
Switch the two wires on the fuel pump, if they are backwards the pump runs but runs backwards and it will never start. Ask my how I know.2 points
-
2 points
-
2 pointsI'm no Holly expert, but if you can nurse it to mid-RPM's, but it still dies when you punch it, I would suspect crud in the mains. I would agree with your expectation if it was an accelerator pump issue. Even with no accelerator pump at all, you should be able to nurse it to WOT and full load. And even if you didn't nurse it, I think it would bog bad, then catch and scream. I think your mains are plugged and you're just running on the idle jets.2 points
-
2 pointsI have been away for a few months but really enjoyed this discussion. Adding weight to the float is a really interesting idea that I will keep in mind. With added weight, you could trim the side of the float so you eliminate the problem with the float hitting the bowl on the front long ear carb. I have shaved a float before but didn't think of adding weight. FYI, I shaved it by sanding it. Solved the clearance problem but...reduced weight. I know we all end up solving our float adjustment problems in different ways but here is what I have settled on. I use two rear lids and two short needle jets. The long ear, long needle valve 72 idea for the front carb was....to me... a mistake. I don't pay any attention to measuring how many mm down from the top of the lid that the fuel level should be. I remove the piston domes, pistons, and drop the nozzles down 10 full turns. Then I set the float tabs so that the fuel sits at or just below the top of the jet. I tune with a colortune. O2 sensor would be better and I will try that some day. One last thing. Take a look at some of the photos of needle jets earlier in this thread. Notice that the stock original needle jets have a needle that is larger in diameter, is nicely rounded at the tip, and for me at least moves up and down more precisely. New needle jets are cut straight at the end, are thinner diameter, and rock around a lot. I think this, combined with the curved tab come together to make it really easy to have new needle jets get tripped or stuck on the curve of the tab. Just my theory. Anyway...great read. The fuel density theory and idea to add weight are really interesting angles to think about.2 points
-
2 pointsYes, it's possible. And that is what I would recommend to the OP if he's really wondering what the numbers really are.2 points
-
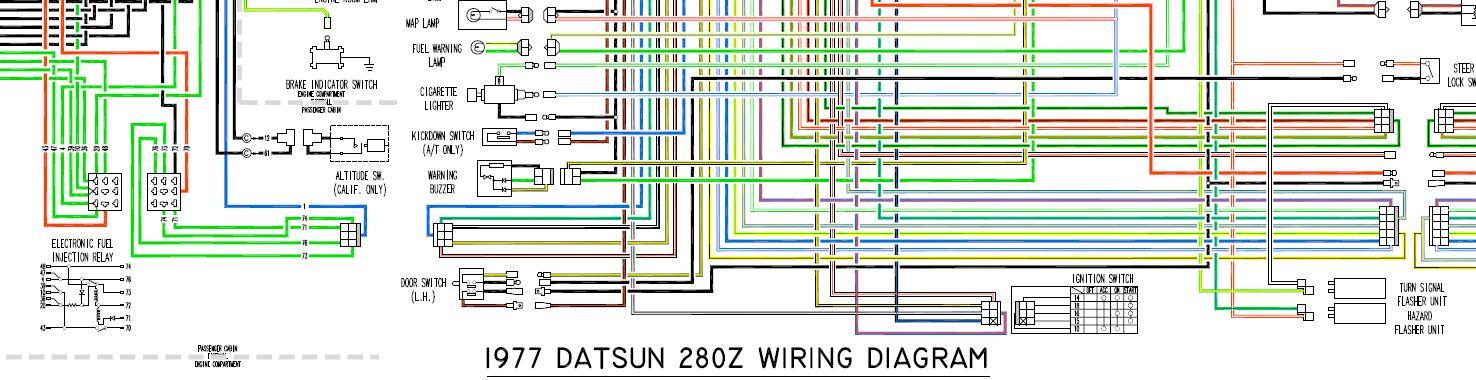
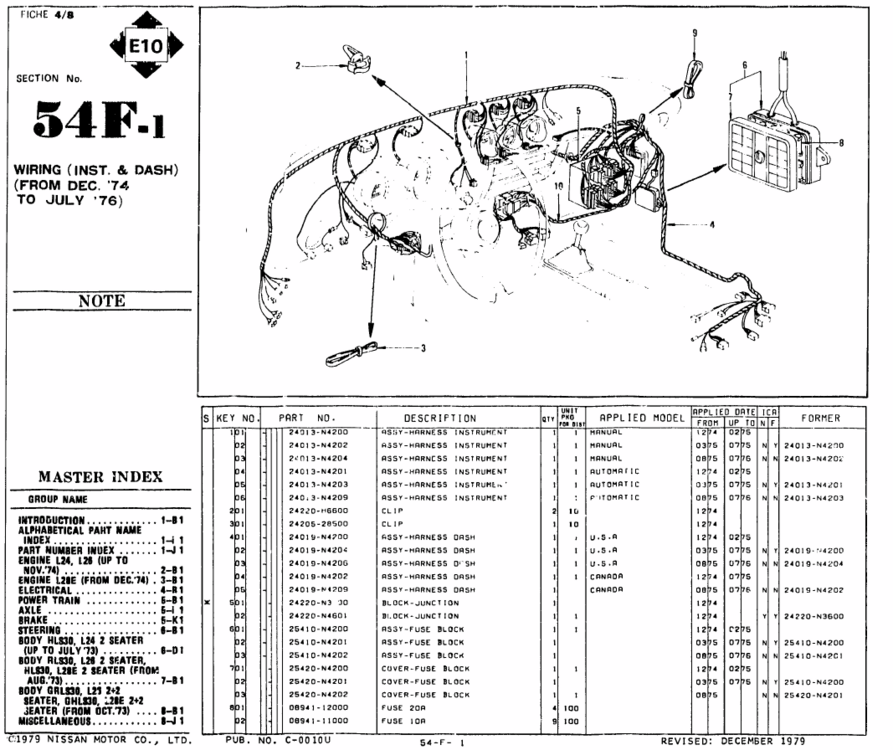
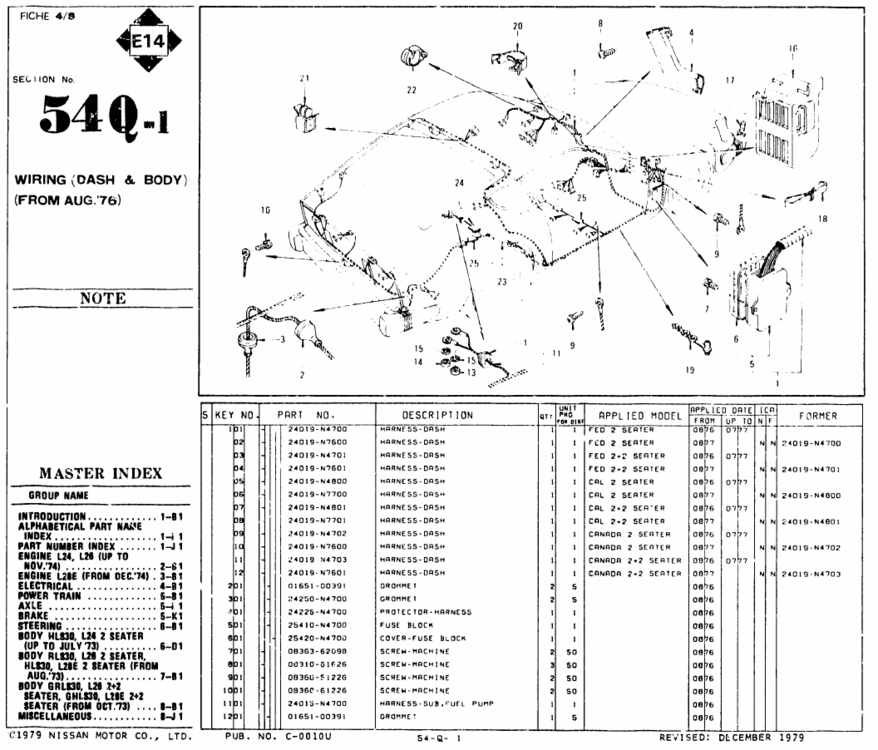
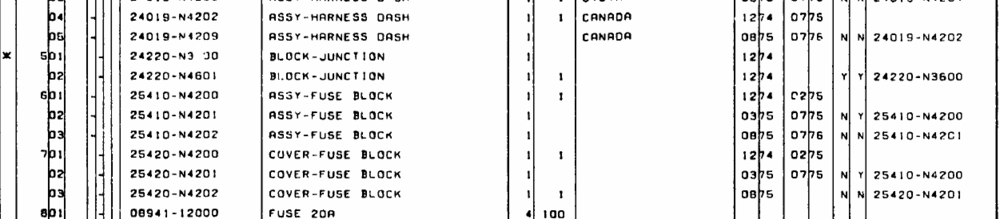
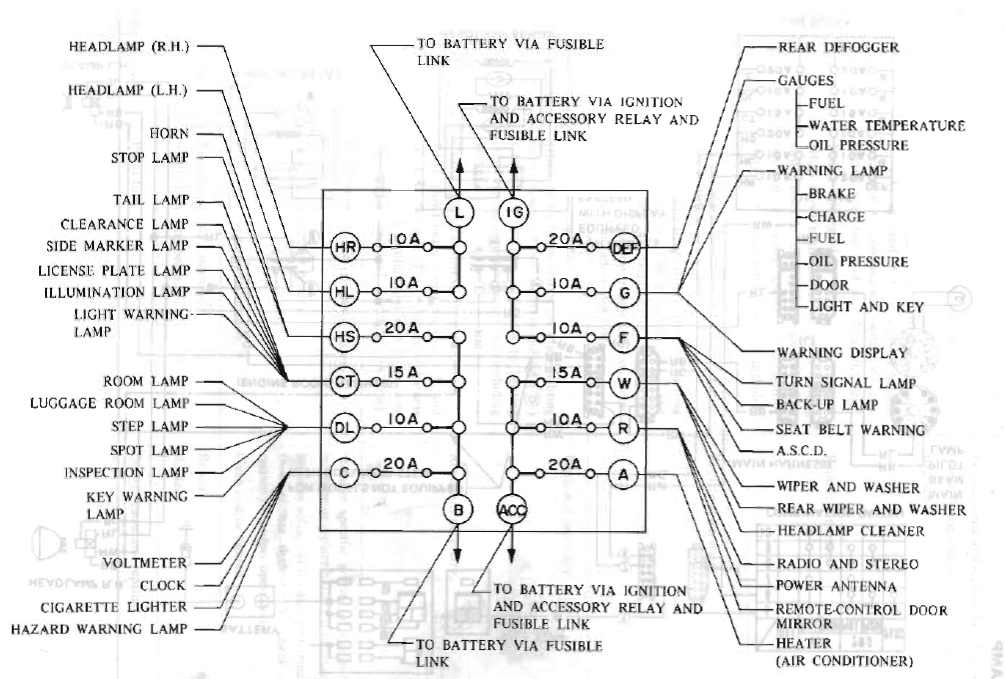
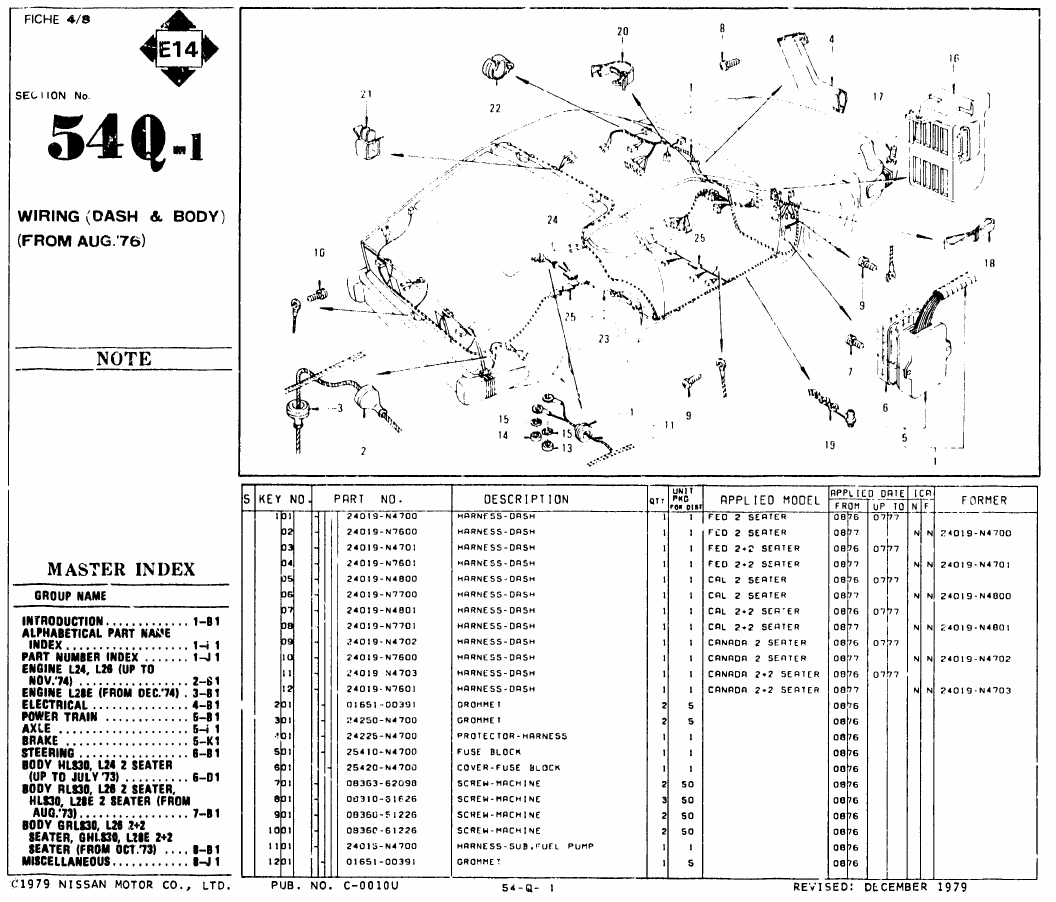
1 pointQuestion for you guys, is there a master fuse list for the s30s? I found the below image that lists which fuses cover which electrical aspects of the car but only for a 280zx (below image). My voltmeter fuse blew while driving today which apparently shares that circuit with the hazard switch, so I was curious if there was a list like the below for a 1978 280z that would list where else I should look for the short.
 1 point
 -
1 point
-
1 point@PatconThat resembles the 4 barrel Carter carb we recently removed from a friend's 55 Packard Patrician. It sat under a shelter for ten years, air filter off, and the carb was filled with nut shells and squirrel pee. We got the primary throttle shaft unstuck but no luck on the secondary shaft. A replacement carb was unobtainium. He sent it to a carb. rebuild shop in Cal and got it back in about 5 weeks, cost was less than $400.00, and the carb looks and runs like new. I don't remember the shop name but if this sounds like an option I can get it for you. They were very informative over the phone.1 point
-
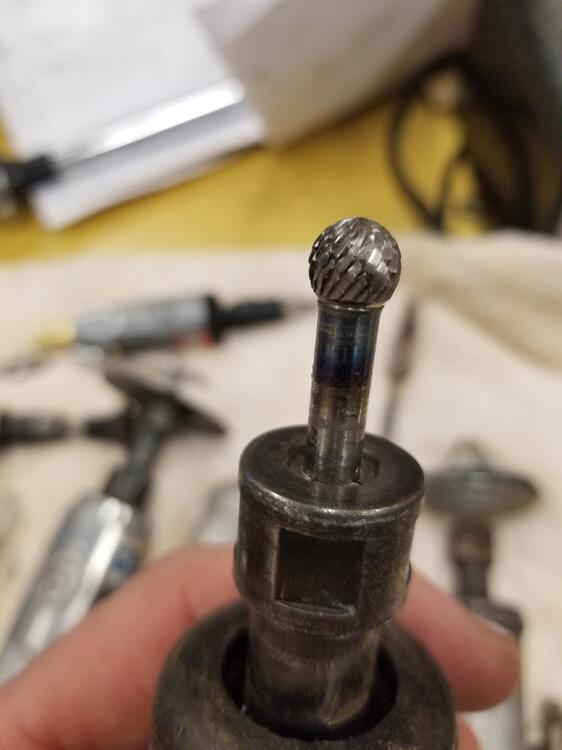
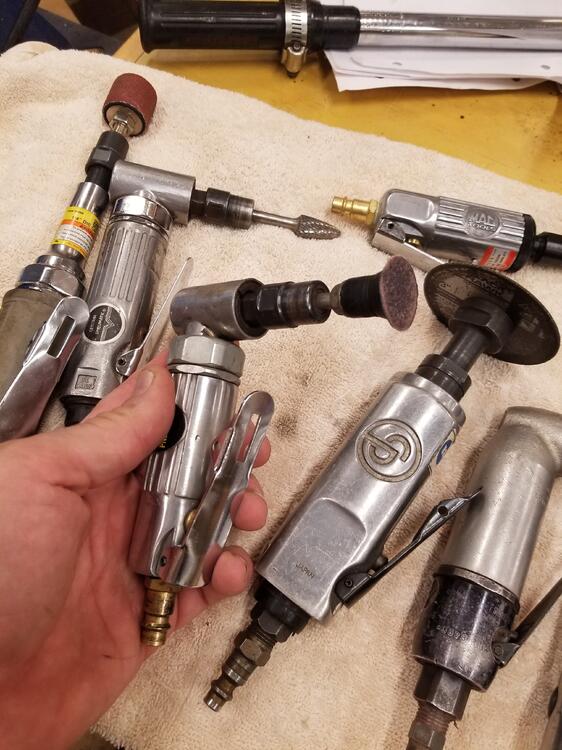
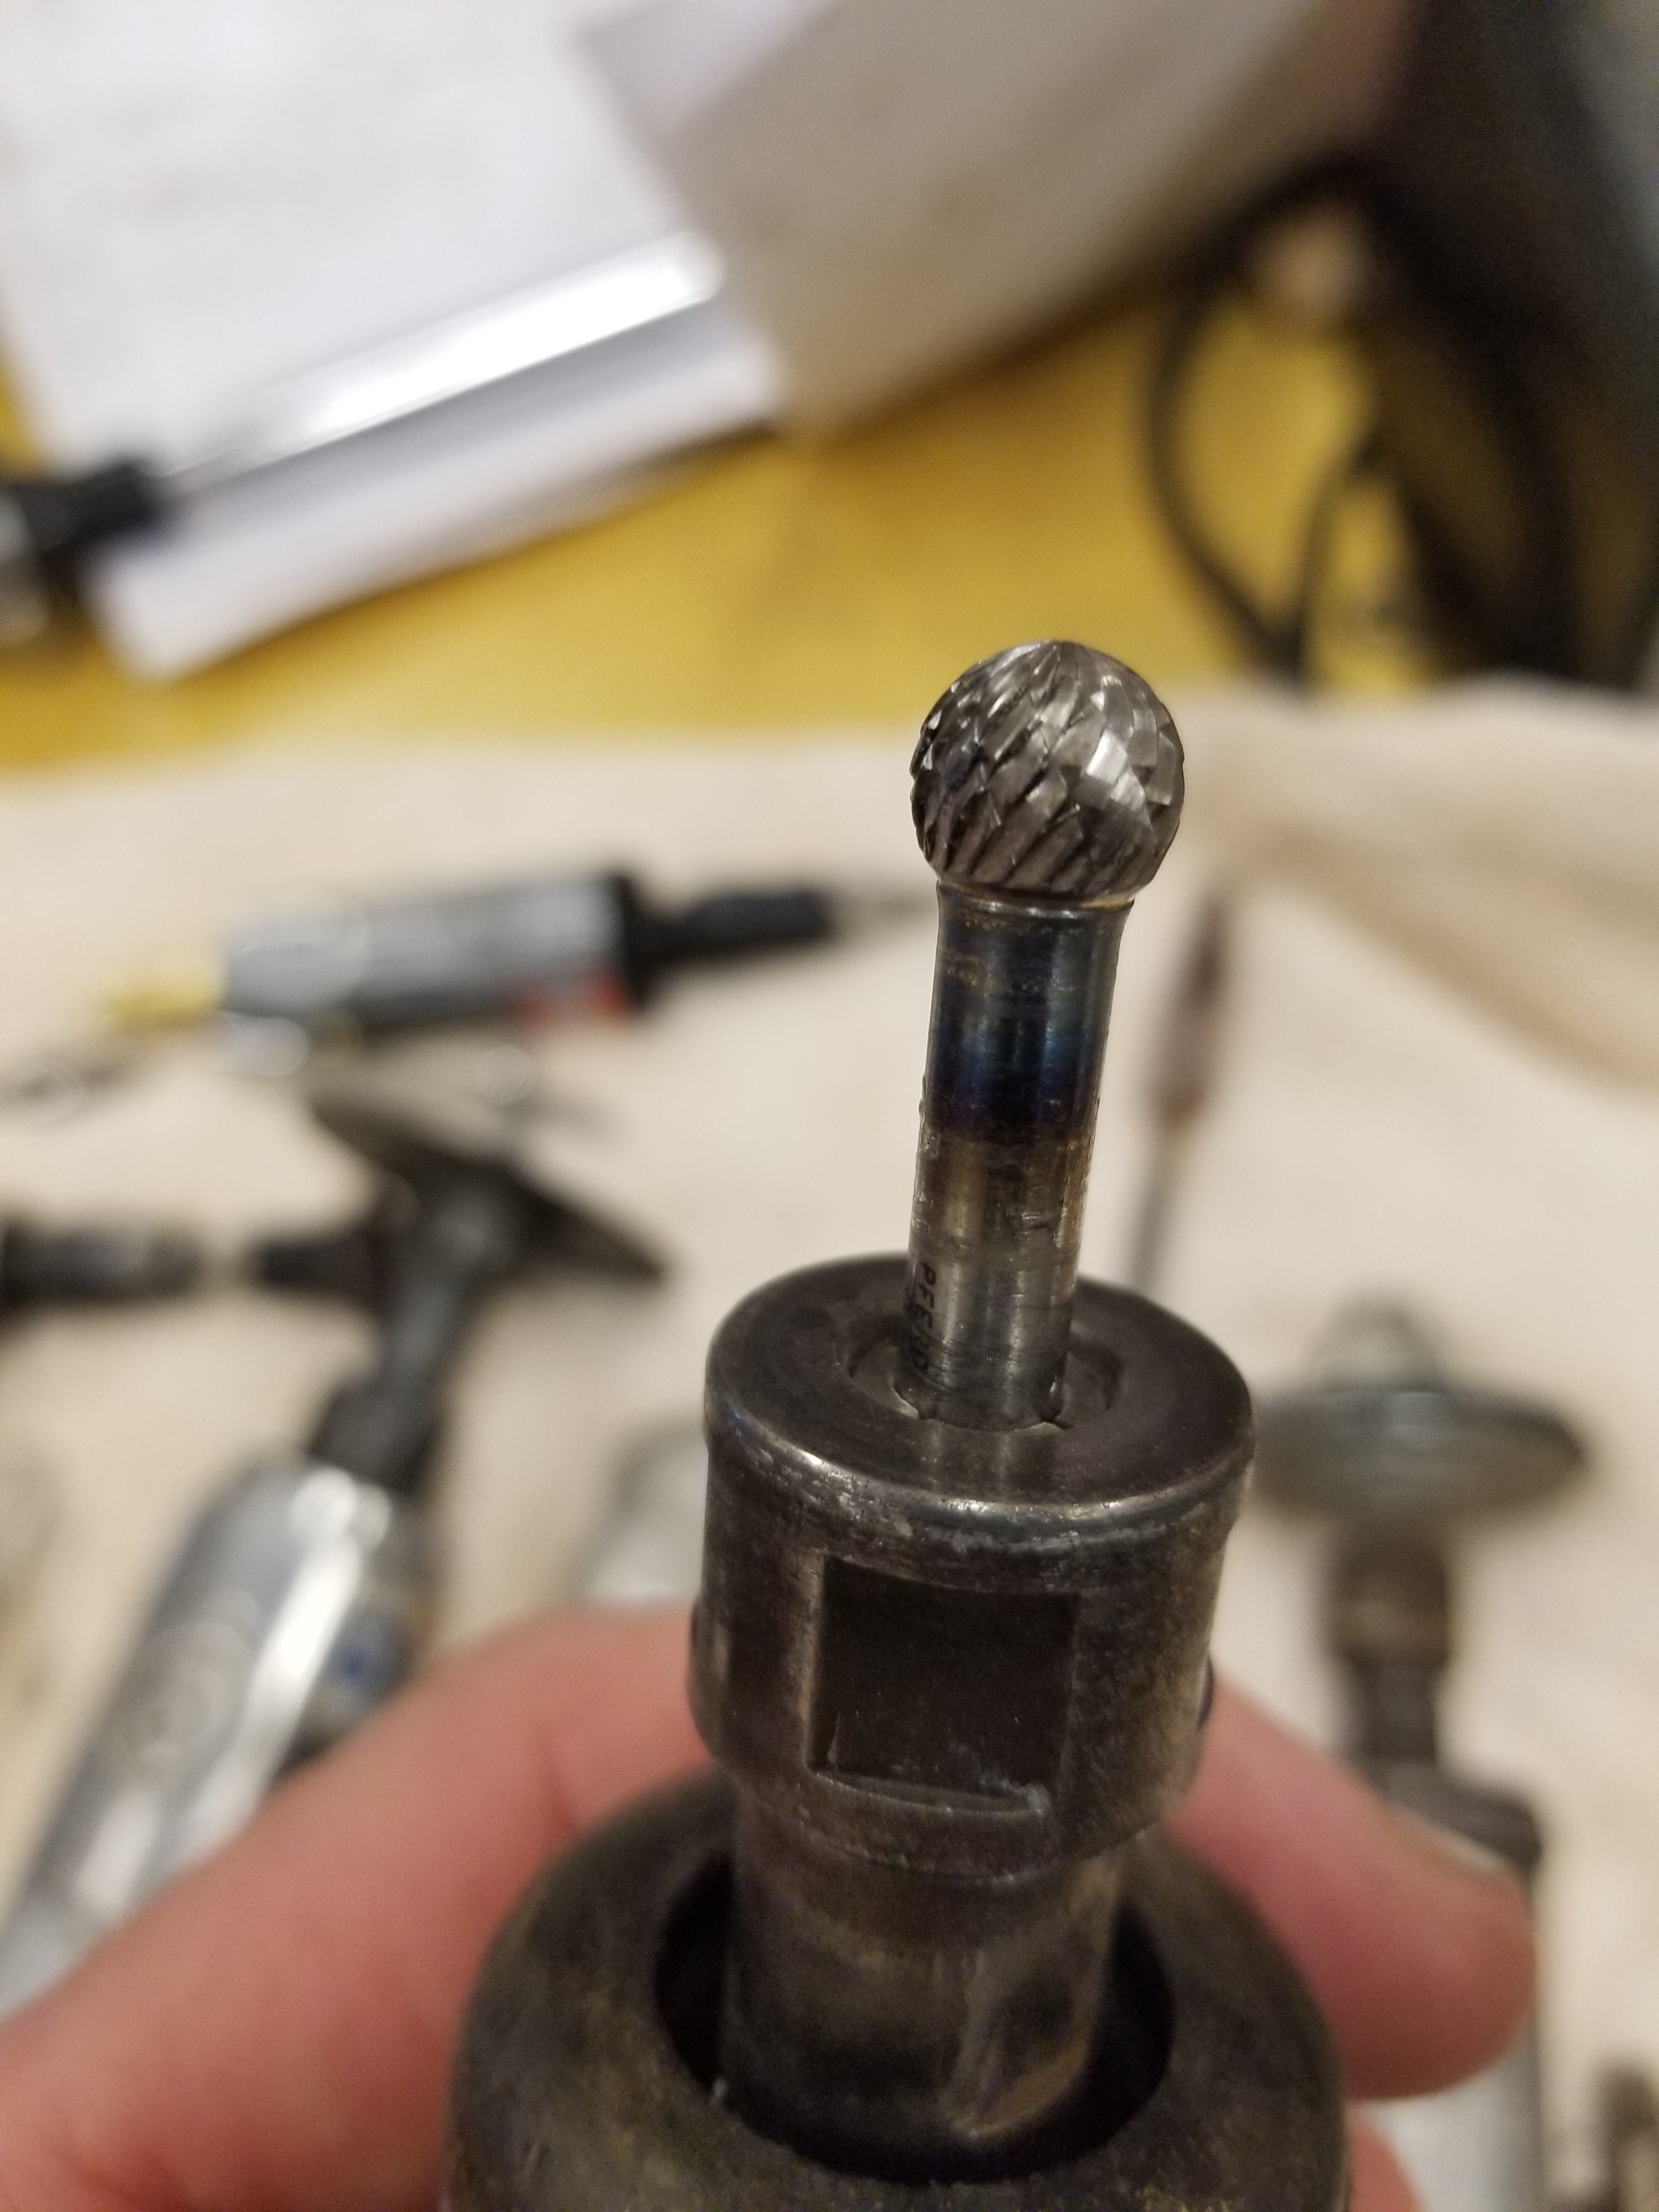
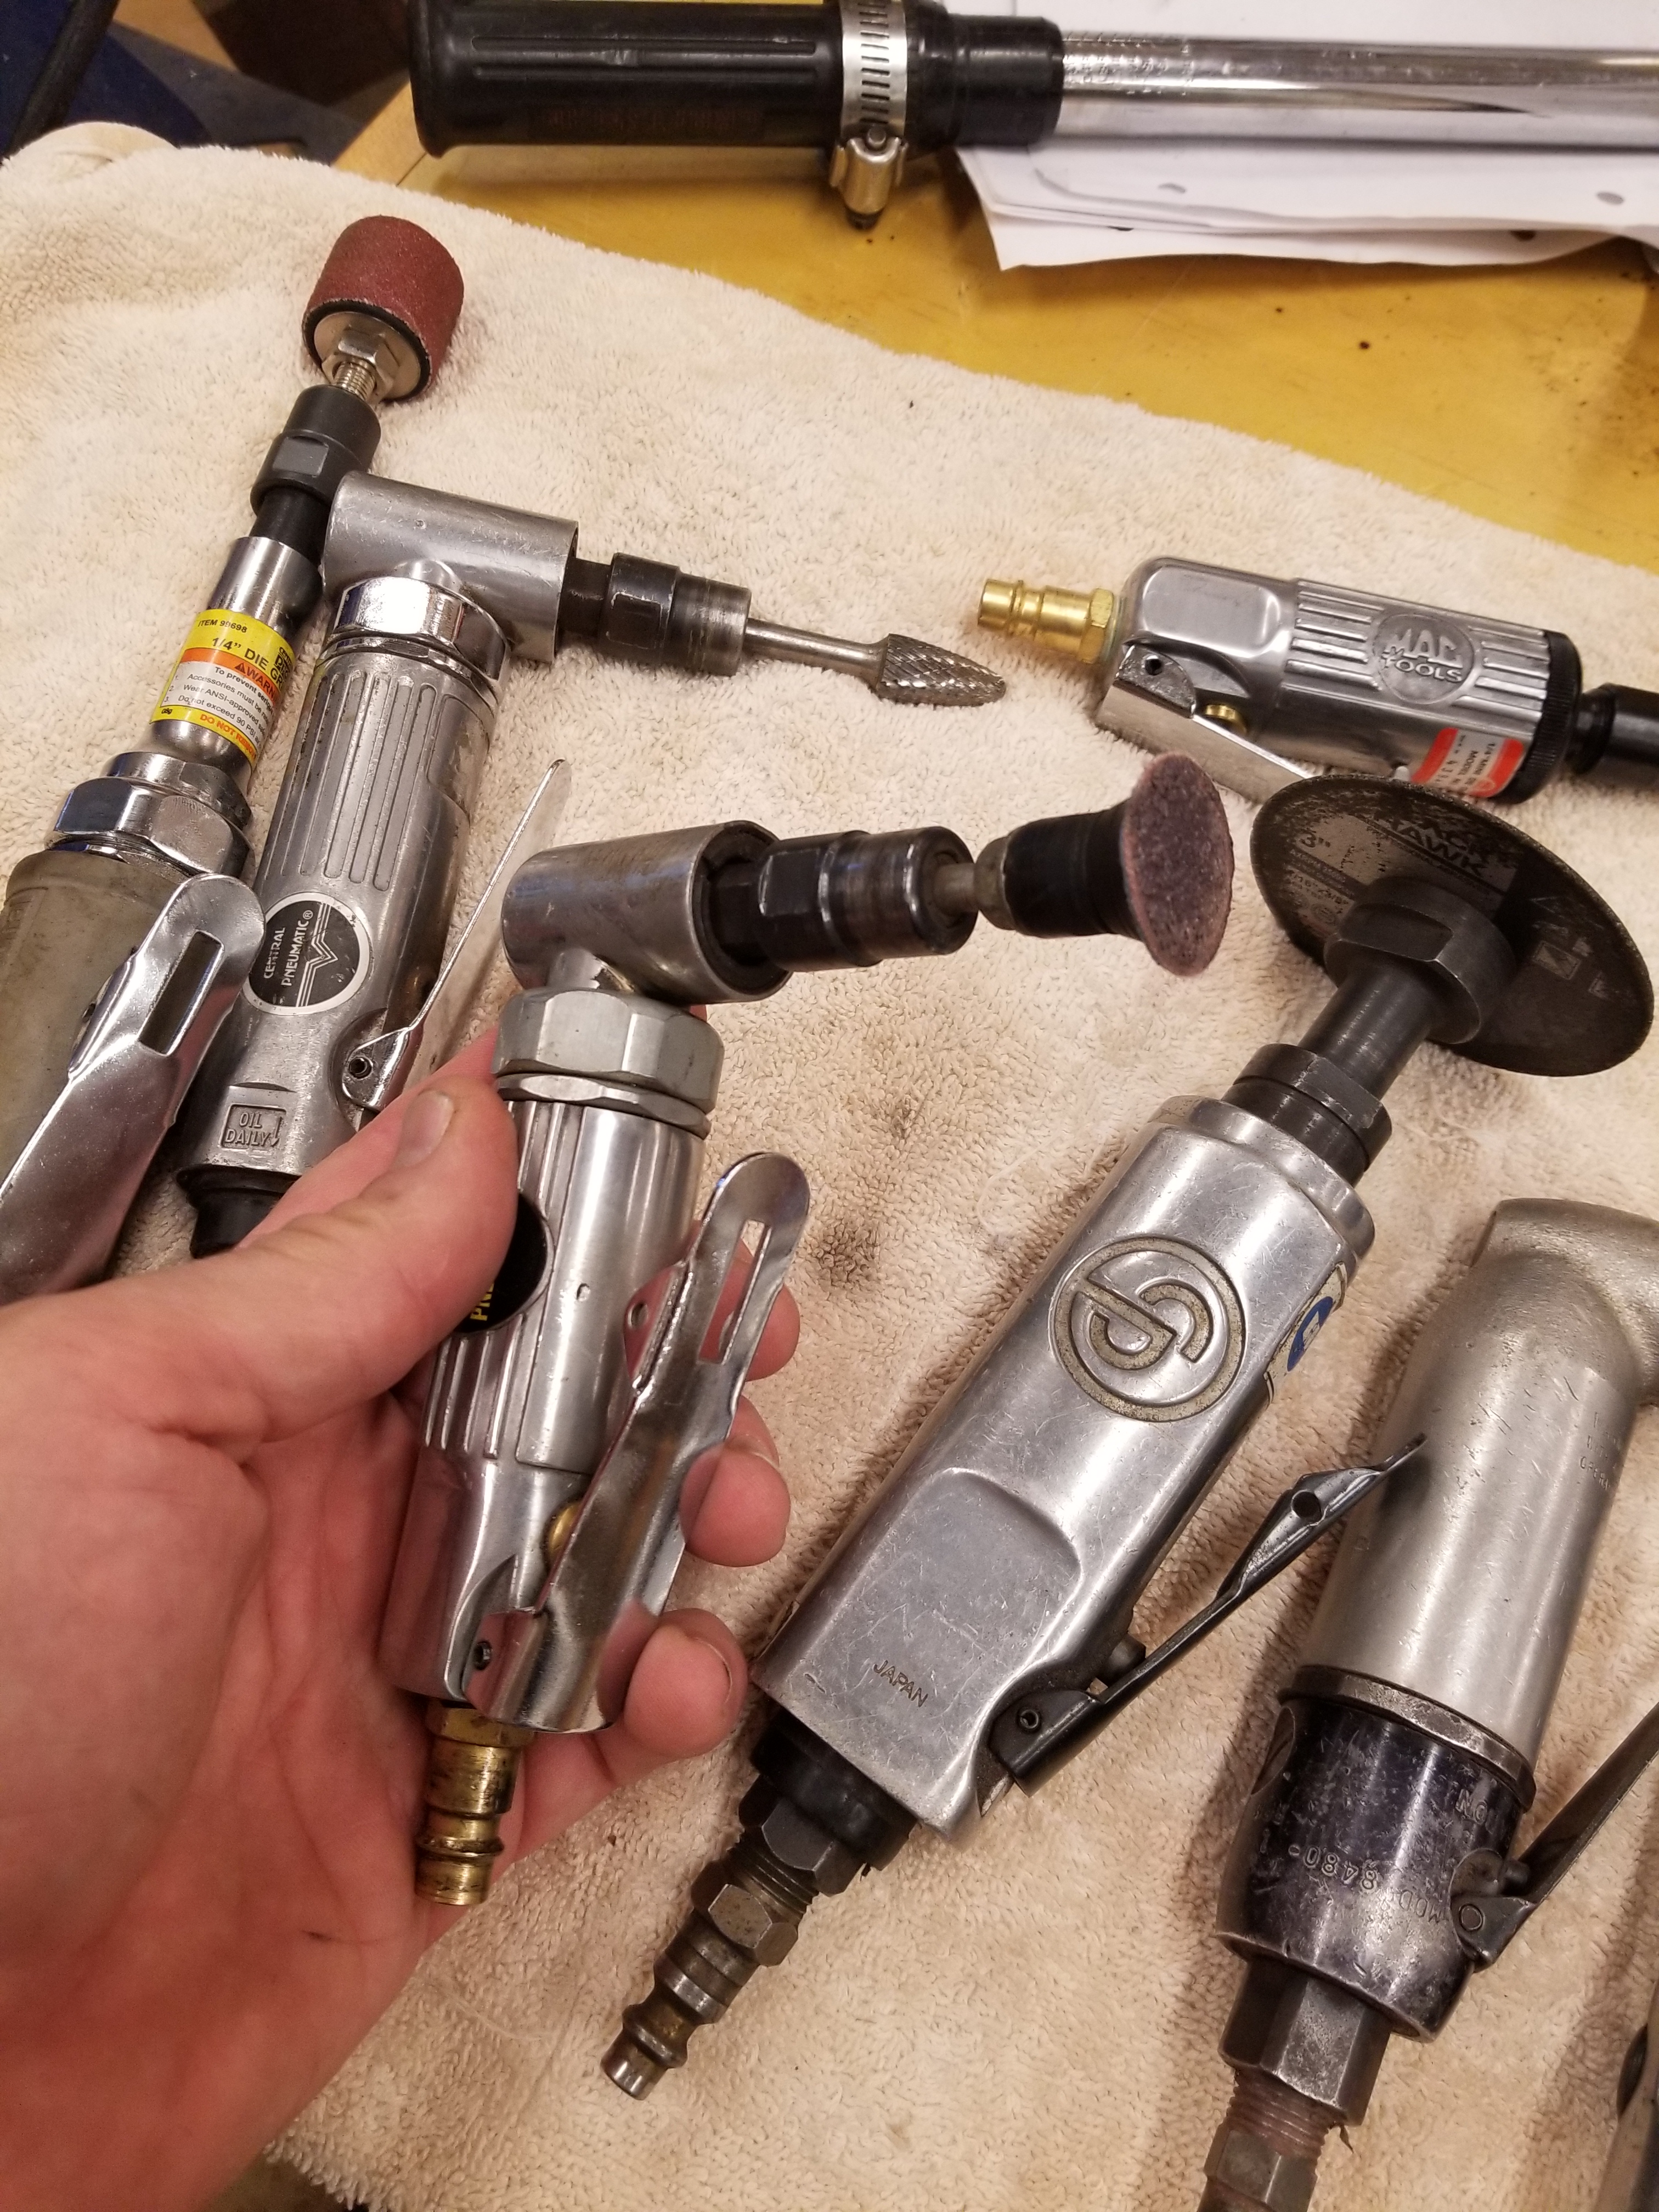
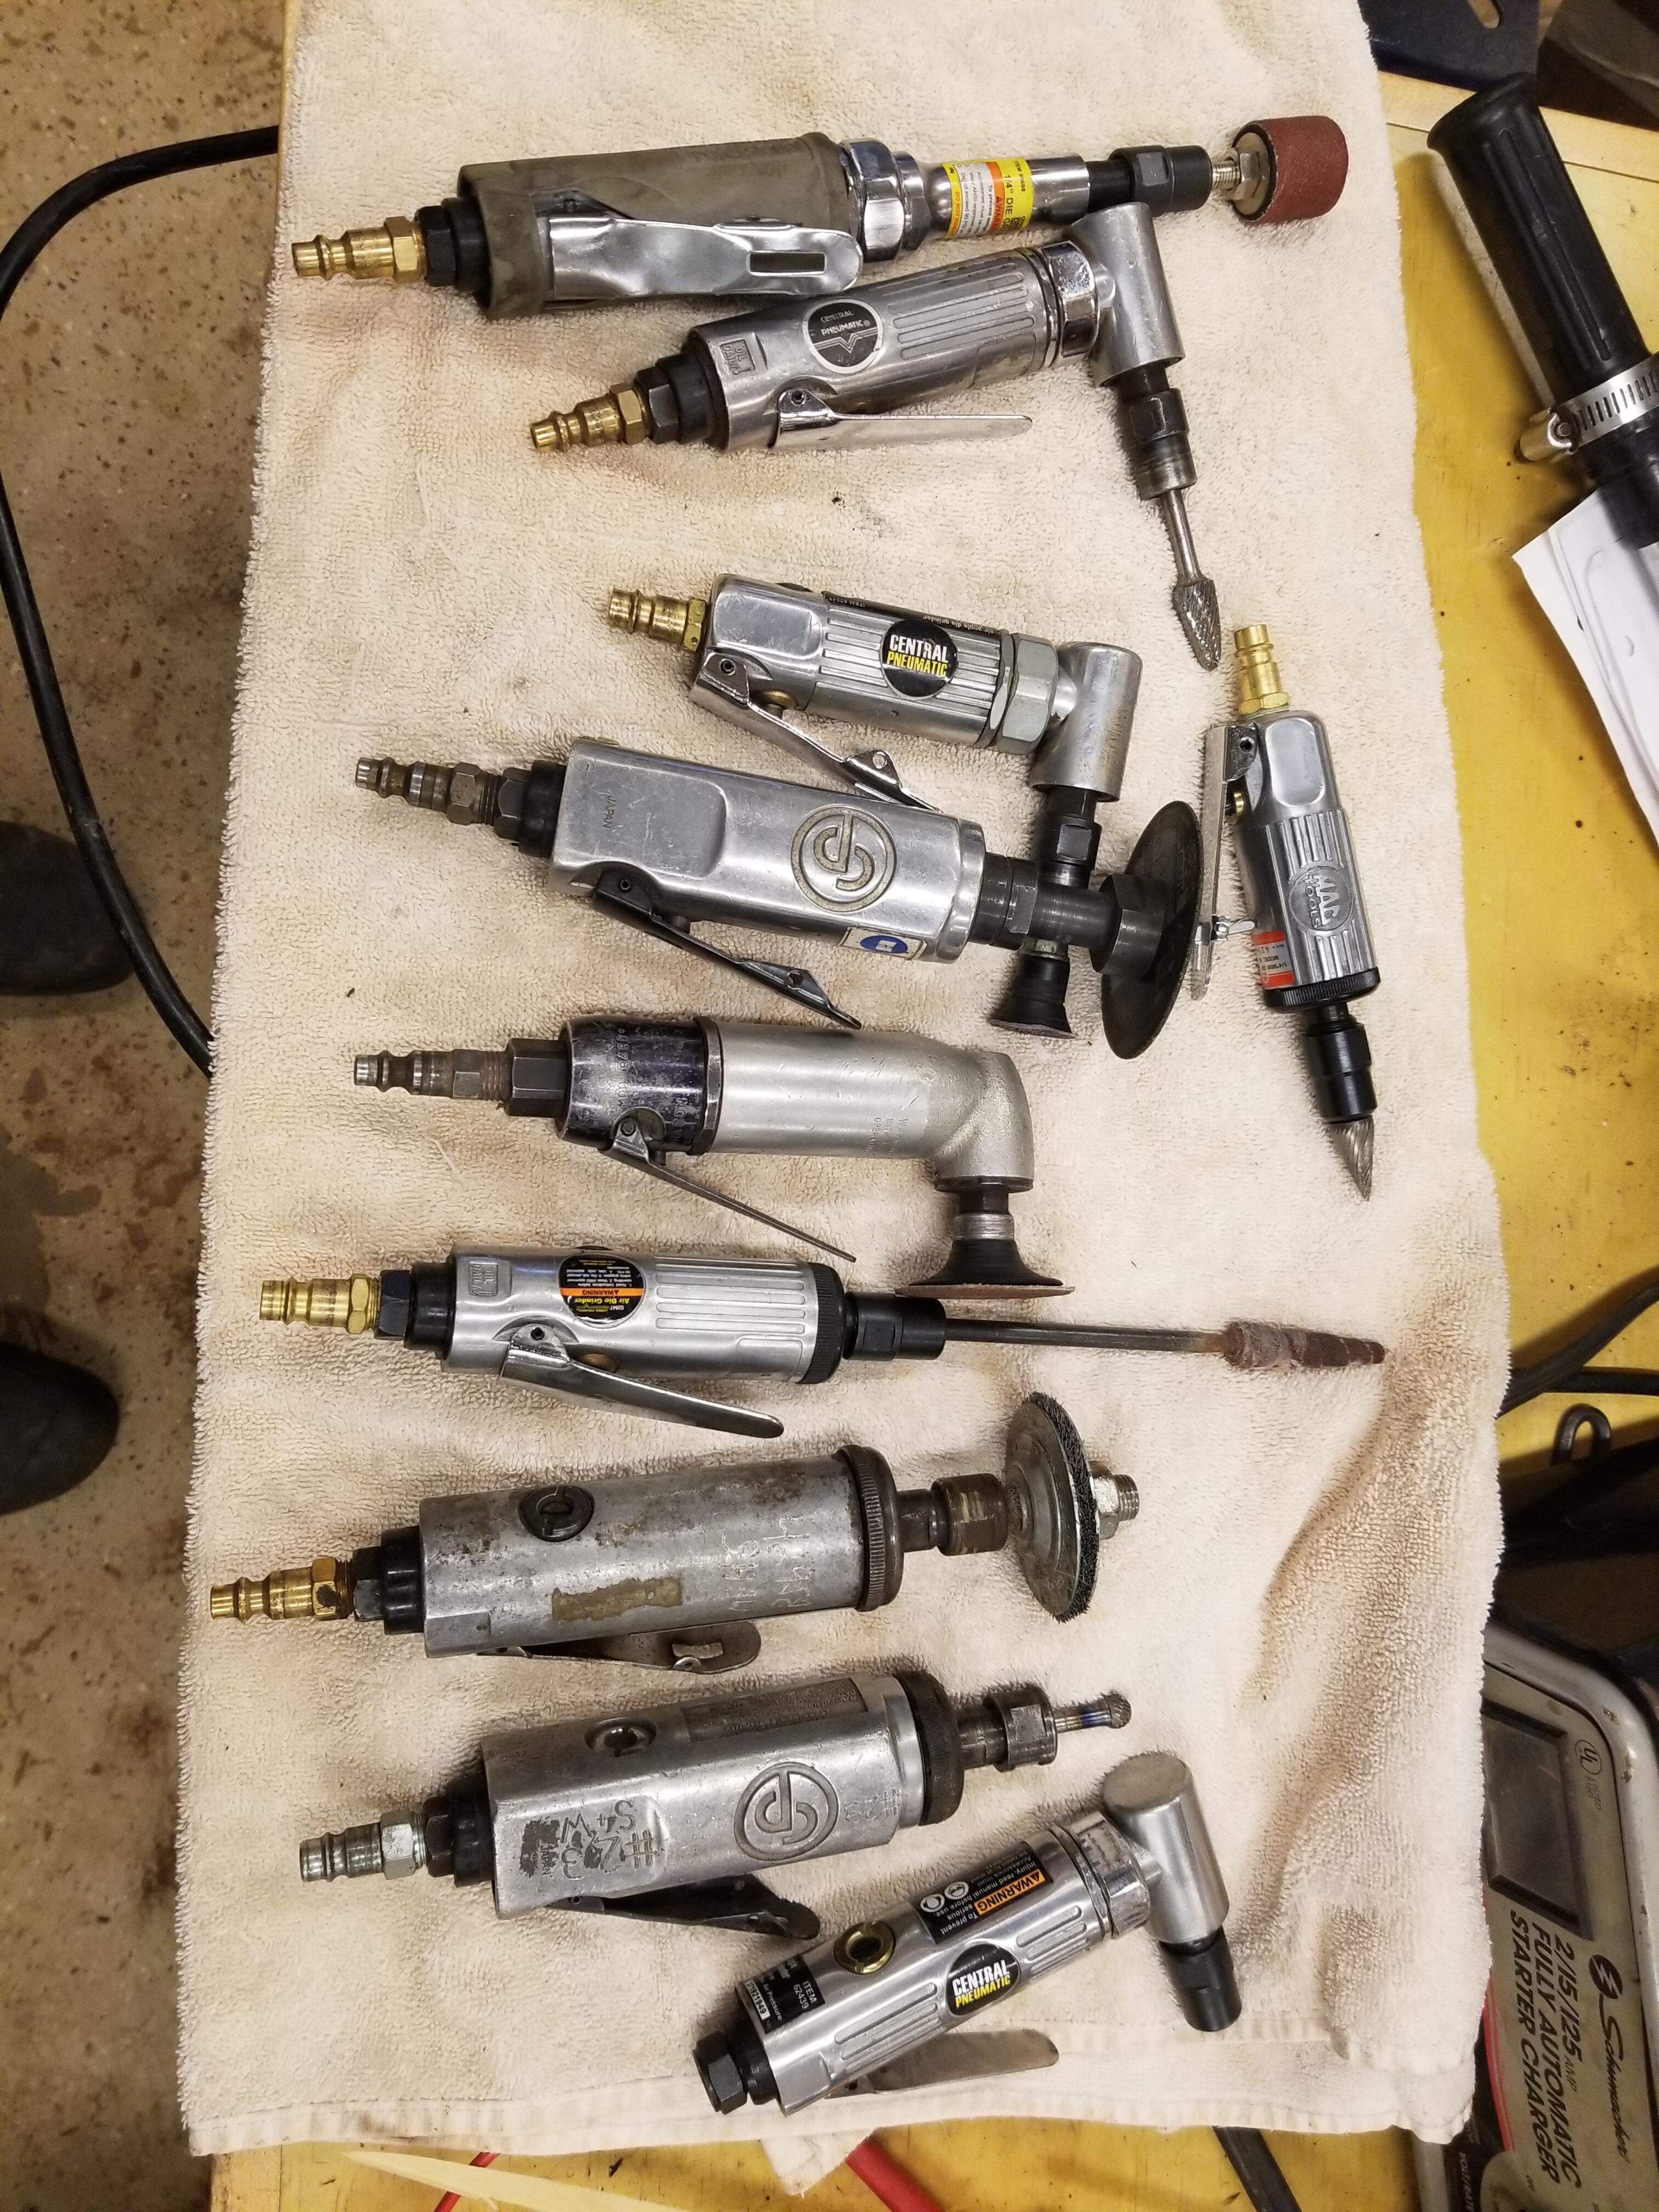
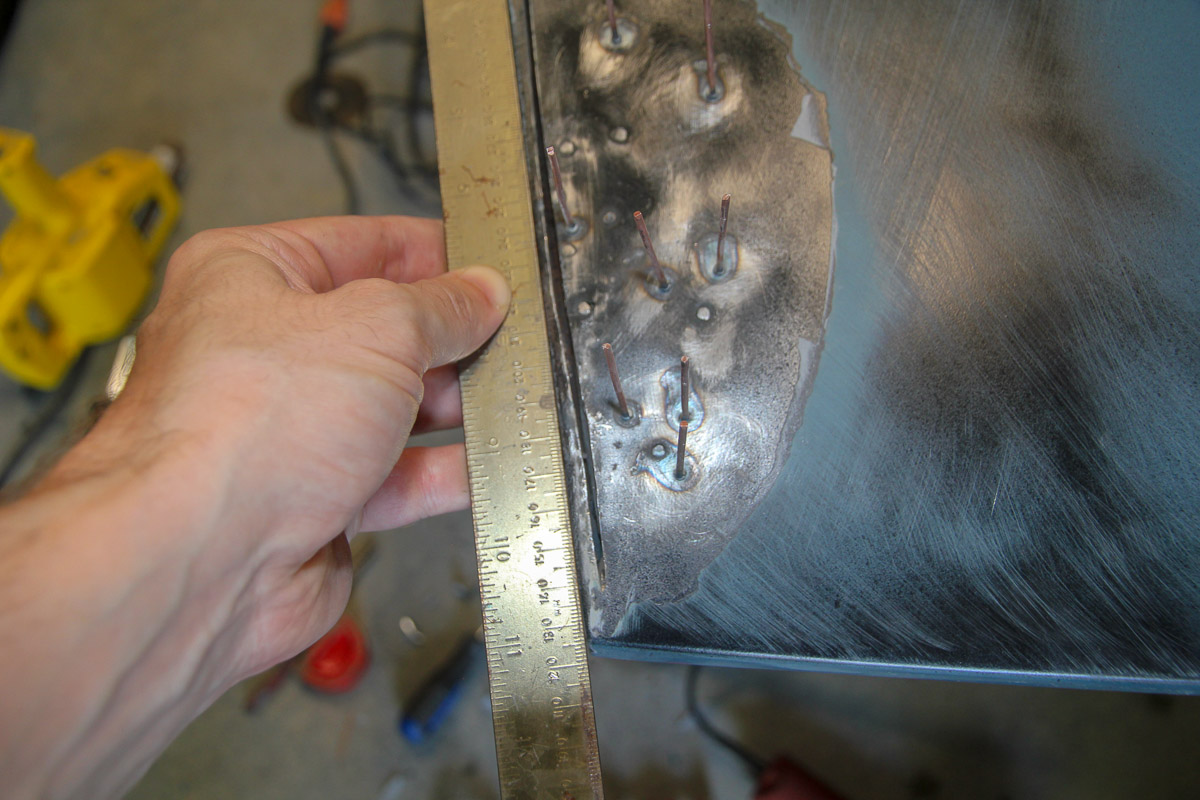
I have never used a low noise type. But if it's anything like the low-noise type air ratchet I have; it wont be very quiet. Maybe the low-noise type are intended to be hearing safe I was wrong... I have more than 6 or 7 . This isn't even all of them. Sorry about the rotation. It displays properly on my computer and in an editor... This is my tool of choice for spot welds. You can tell it's been hot. It's done hundreds of welds. I find a straight one is easier to use than the angle grinder because of the better leverage This is also really nice for dressing welds. A 1" Rolok The biggest problem with it is the pads go very quickly!! They are also hard to source and about $0.35 each. I normally dress welds mostly down with the 3" cut off wheel. Then fine tune with the 1" and 2" Roloks
 1 point
 -
1 pointJim, There are hotels between your home and Colorado Springs. You don't have to be the Hulk and drive it in one day. Would like to buy you a beer. In Colorado Springs.1 point
-
I'm talking about pre drilling the spot weld with a separate 1/8" drill bit then when you go to use the cutter the spring loaded drill is held captive. Actually it is the spring that is the problem, it doesn't push with enough pressure. I spent about $70 on that kit and I was determined to get my moneys worth out of it.1 point
-
1 point
-
Jim, had to edit your response. The fuse is in the fuse block. From the factory. (In the spirit of I went downtown, to look for a job... but there was no job)1 point
-
1 pointTo add to the confusion... from the microfiche... It appears the issue is mid model year 1975... 54Q-1 is for model year 1977-78 54F-1 is for model year 1975-1976
 1 point
 -
1 point
-
1 pointWhen you winterized it last year, did you drain the bowls or was there fuel in there over the winter? My armchair mechanics opinion is that it's just a "simple matter"* of taking the carb off and giving it a good deep cleaning. * Proof is left to the student.1 point
-
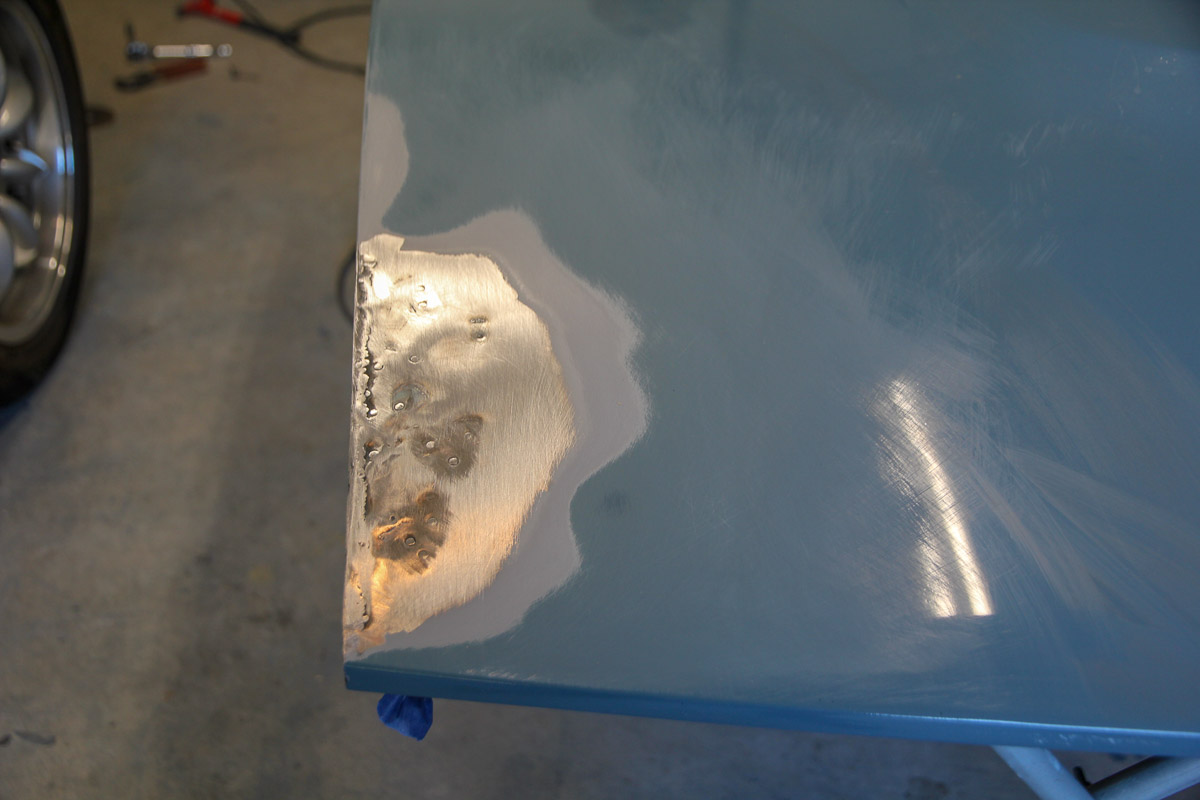
Yep, weld through primer. I’m using copper, upol brand.1 point
-
1 pointUsing a buffer set to 1000 RPM and a wool pad, take it slow and use a generous amount of compound. I used the same 3M cutting compound for paint. I'll wipe compound all over the lenses so that corners don't heat up and melt. Just wrapped up doing the LH lenses tonight with this same procedure. It doesn't take much to clean the lenses up.1 point
-
So you can hear the fuel pump running, but fuel is not making it through the fuel filter... Have you had the fuel pump apart or disconnected? If you had it apart, there are some uni-directional parts inside that are relatively easy to assemble incorrectly. And you didn't have it apart, but had it disconnected... I've heard about some people getting the connections backwards and the pump wont pump if running in reverse. Another idea is the FSM says it might be difficult to get the fuel pump to prime if the tank has been run completely empty. I've not had that issue, but they warn about it. And lastly (just because I have to)... Maybe your filter is clogged?1 point
-
1 pointWearing mask is back. No shitrts no shoes no mask, no entry. No shaving, no clipping nose hairs, no kissing girls asses. I'm happy! Let it be...1 point
-
1 pointHas to be 1800 rpm or slower. I have a two speed buffing wheel. I use a string buff with plastic polish at 1800rpm's. Works great but have to wear a mask because That buff is very dusty. Ive done lots of lights1 point
-
I have a drawer full of die grinders, maybe 6 or 7. Cut off wheel, 2" roloks, 1" rolok, 3 or four different burrs, steel brush. They're so maneuverable and fast. Just noisy...1 point
-
The trick to that kit is to pre drill the spot weld with a 1/8" drill then the cutter stays on track.1 point
-
1 pointI have replaced a few door handles on the S30 and never once removed the glass, that is not necessary. The new one goes in just the reverse of the old one coming out. Depending upon how well you can reach your hands up into the door shell and what tools you have available you may want to attach the rod to the handle before installing the handle, I've done it both ways. Are you having troubles with a particular part of the installation?1 point
-
Glass out for sure. Anything other is lipstick on a pig.1 point
-
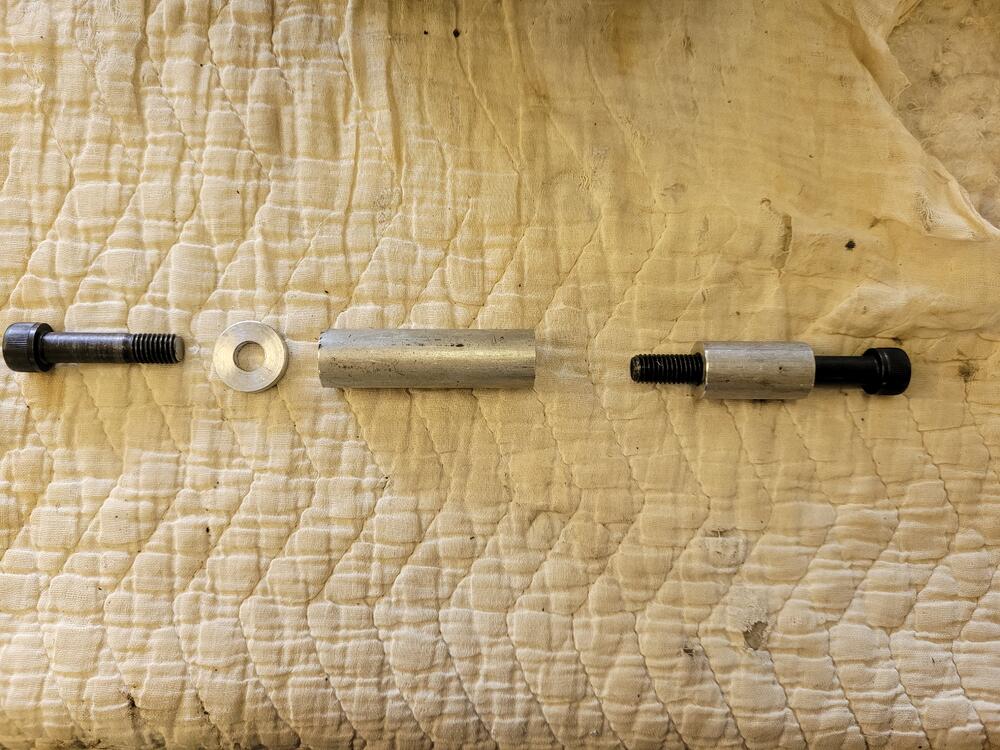
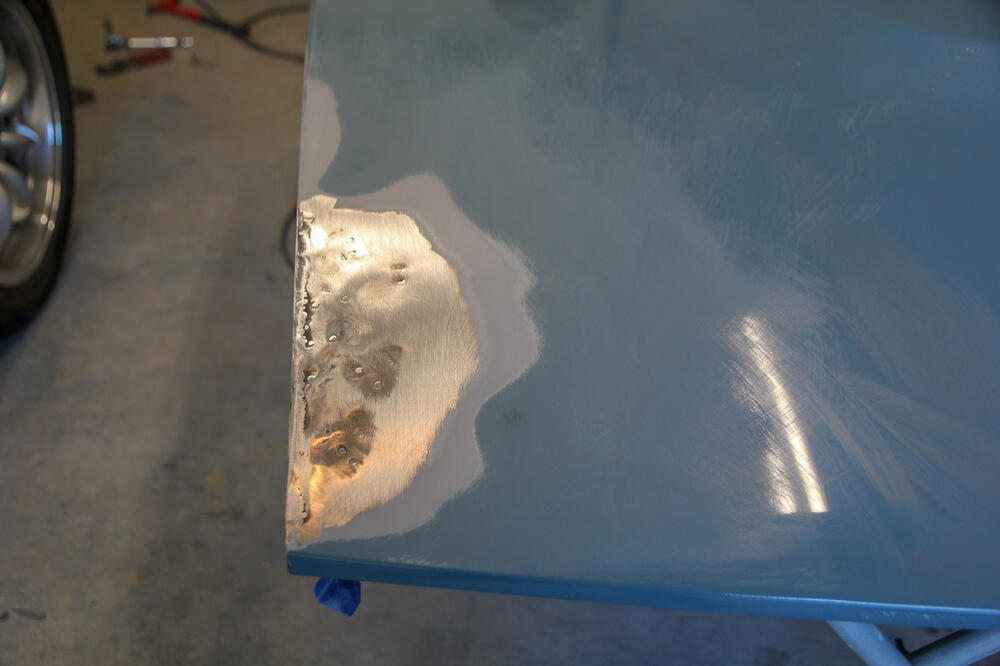
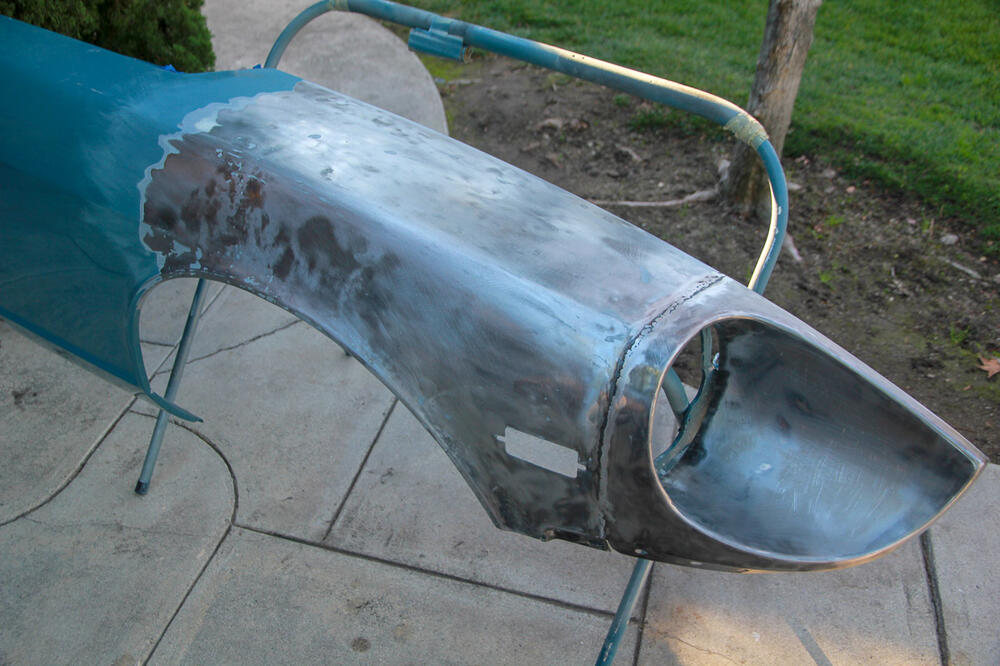
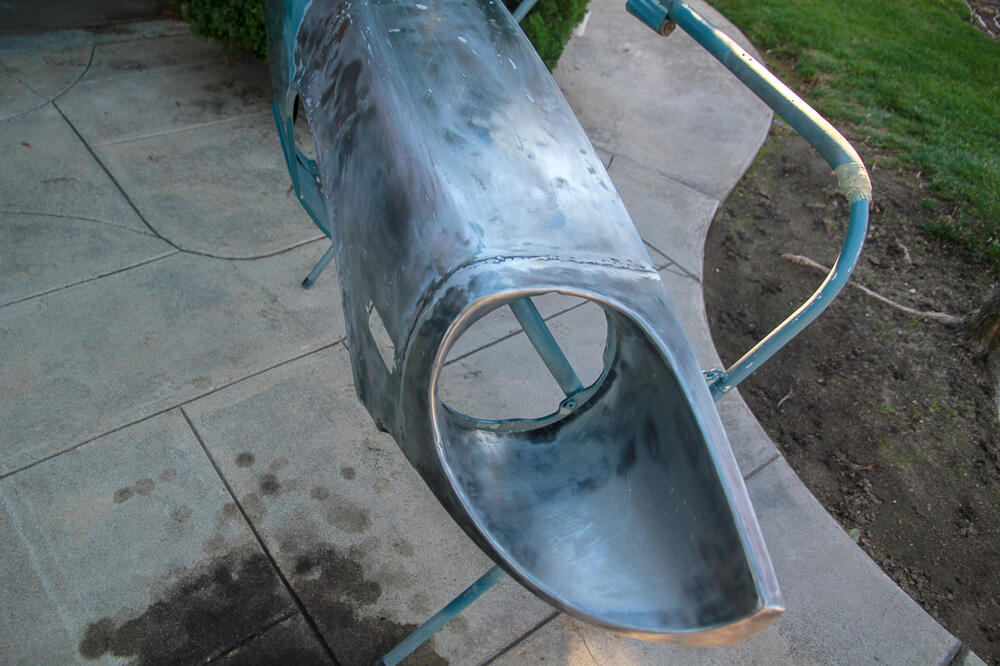
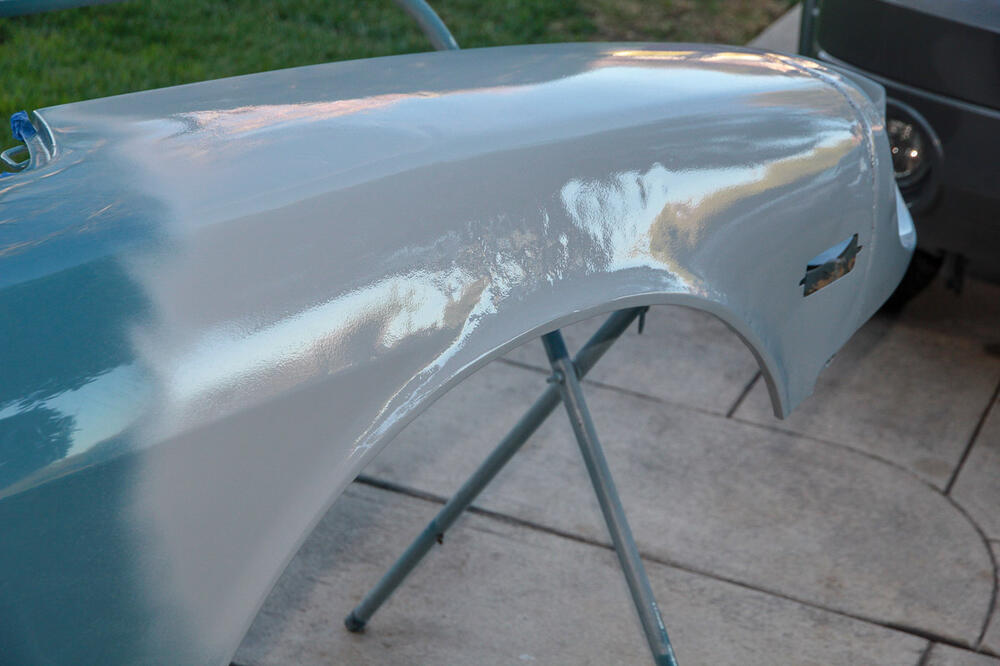
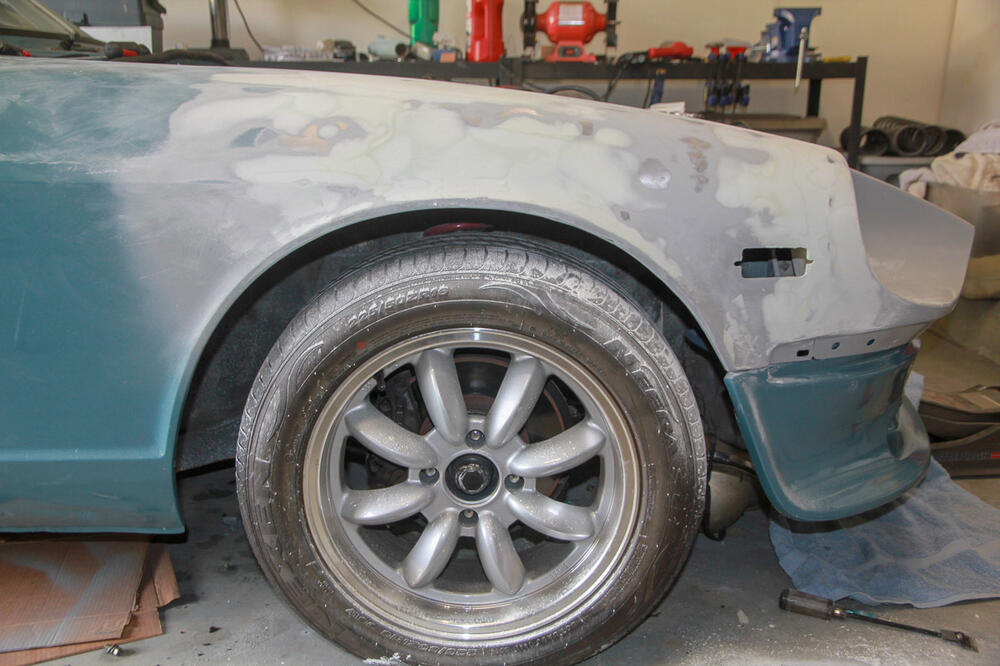
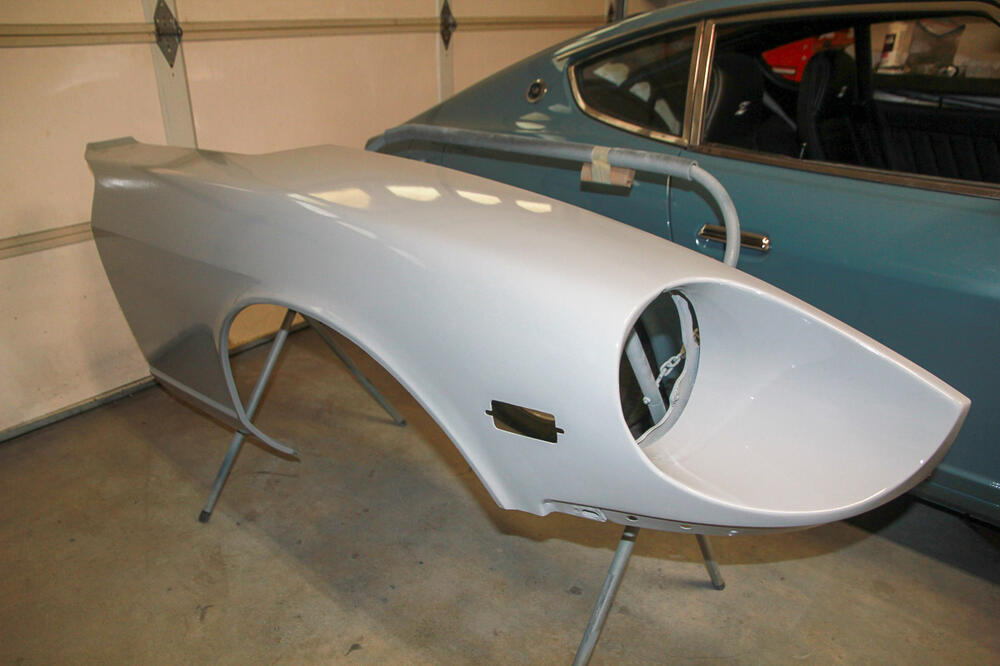
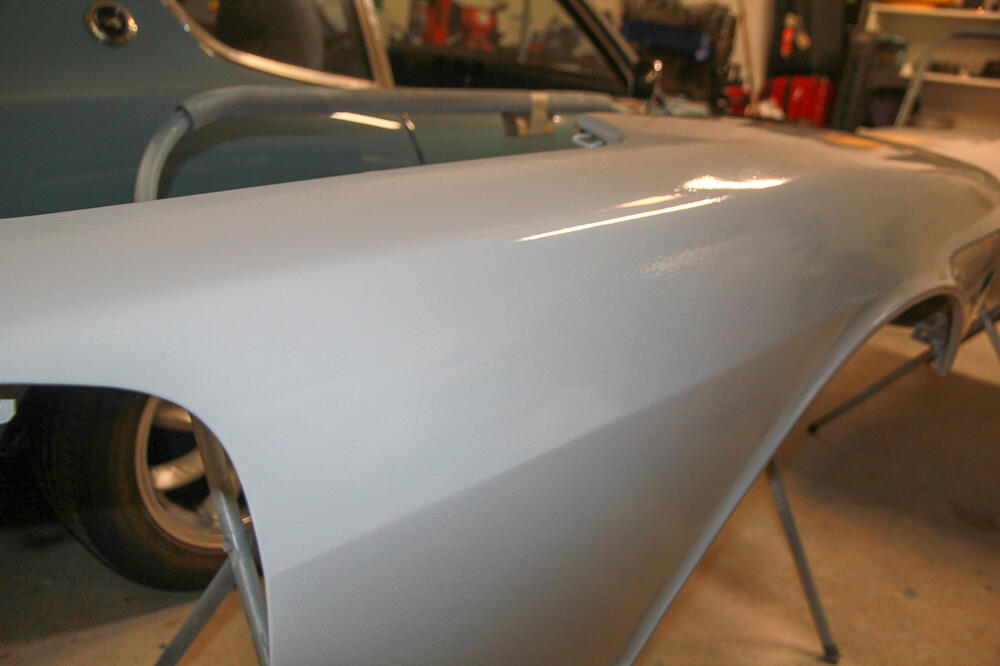
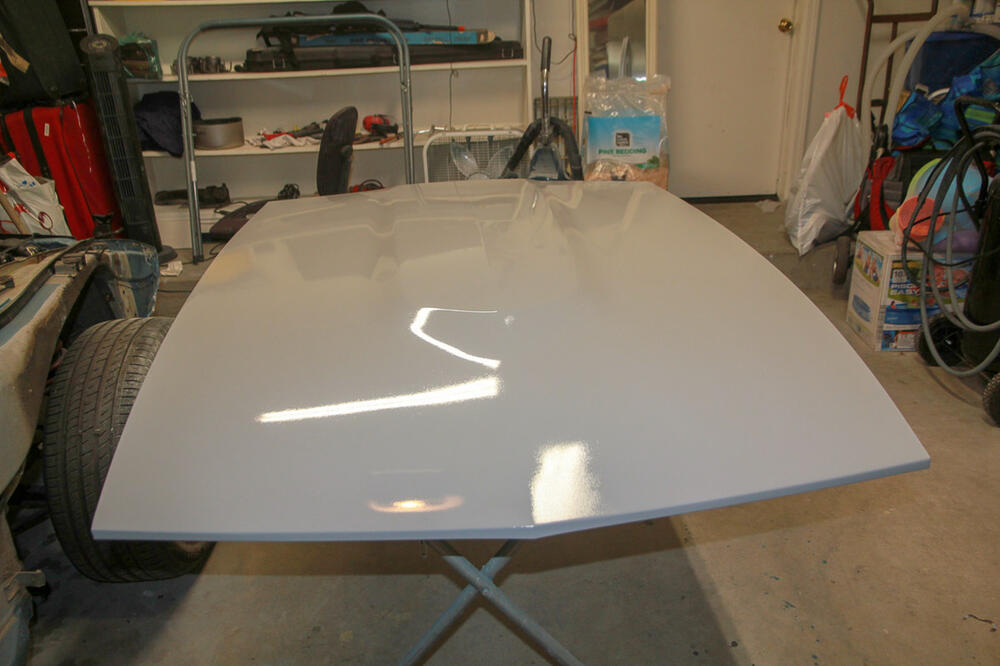
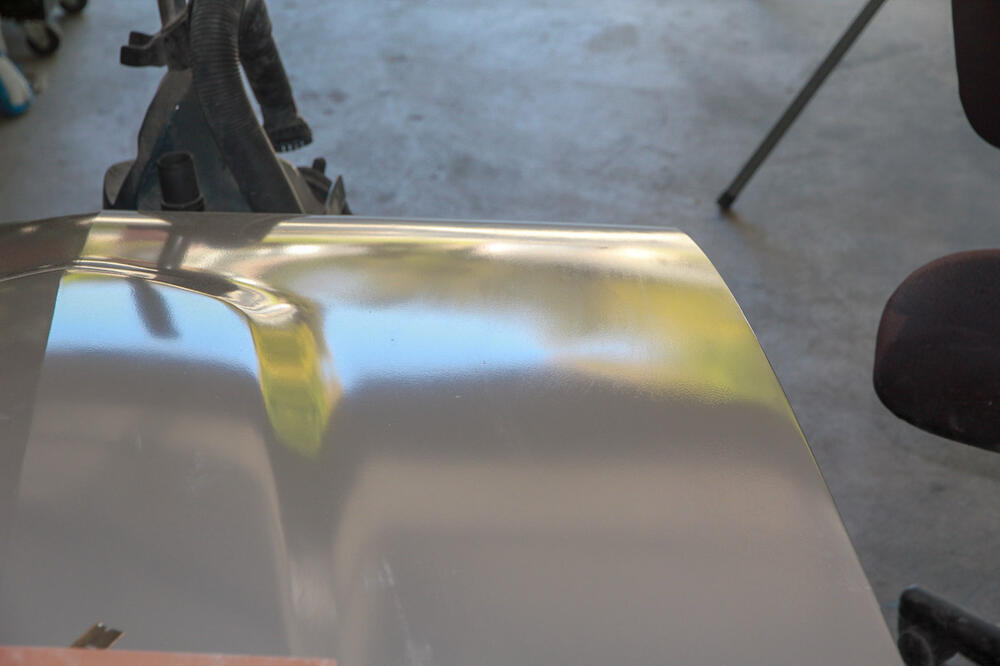
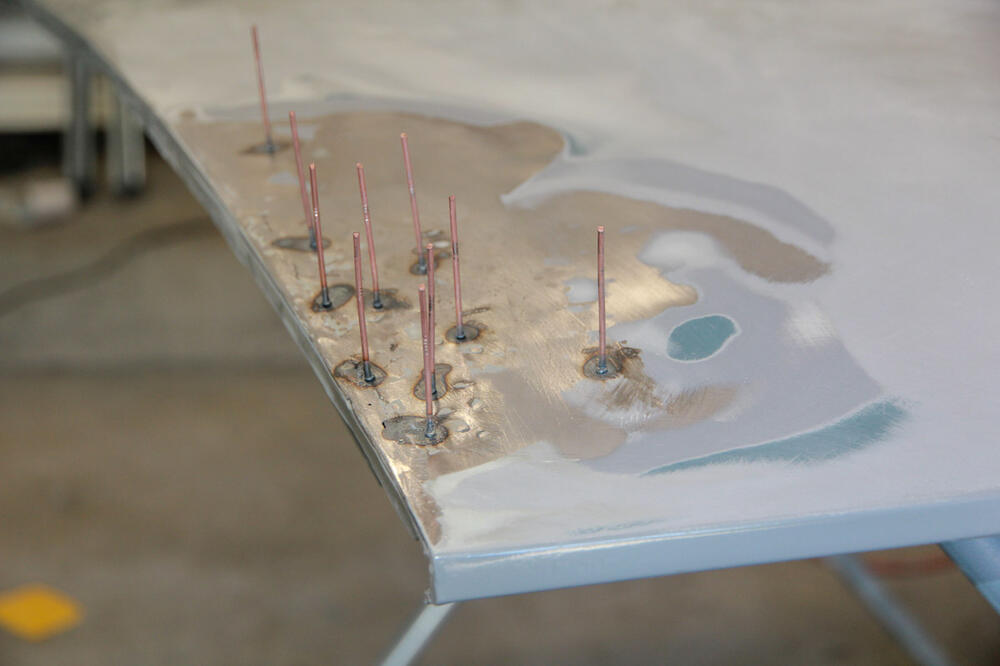
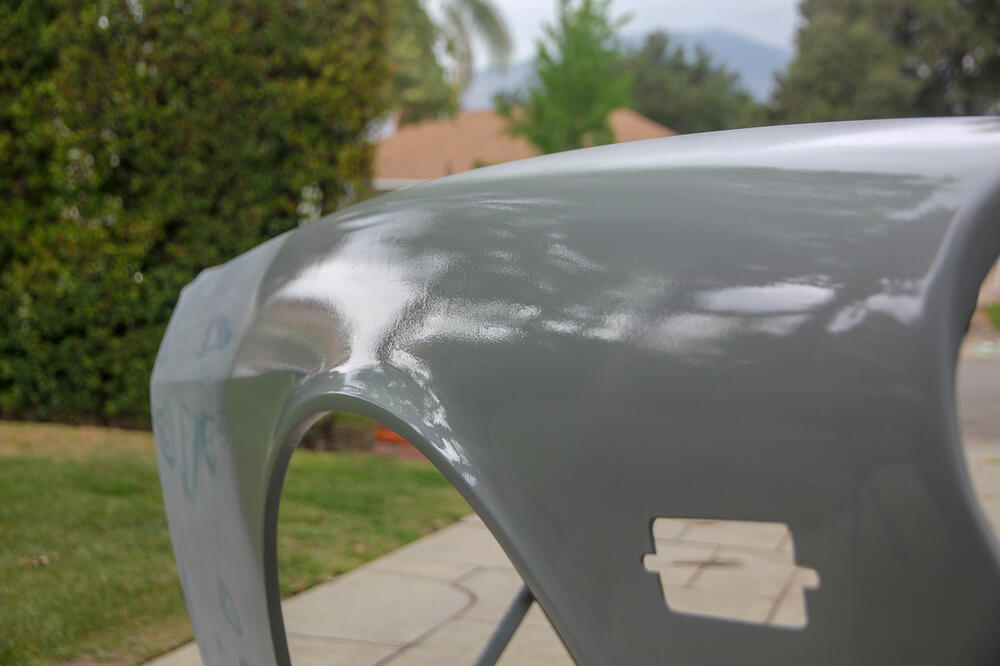
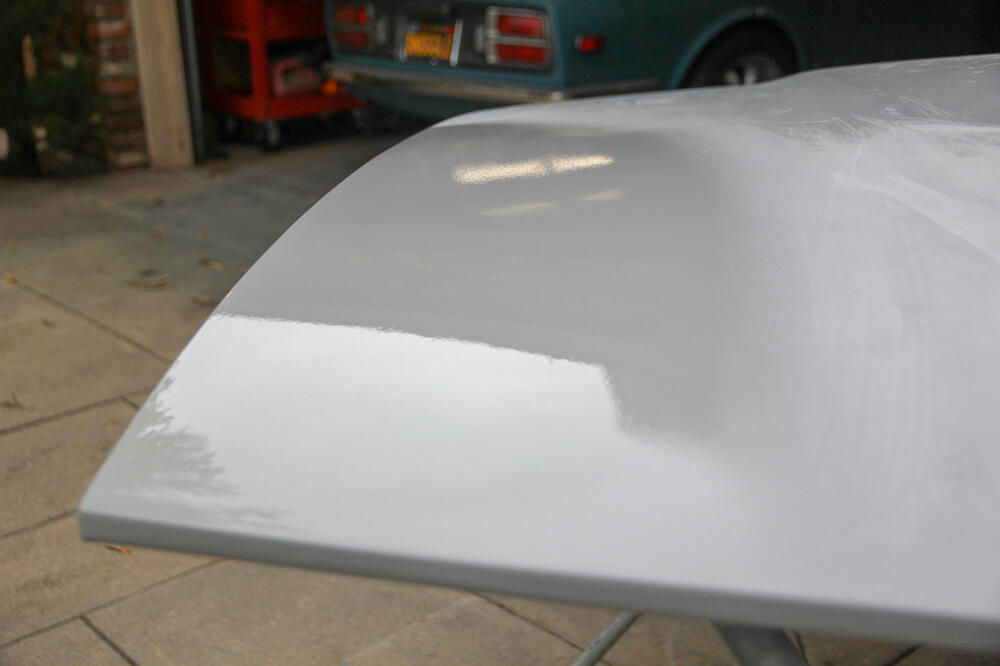
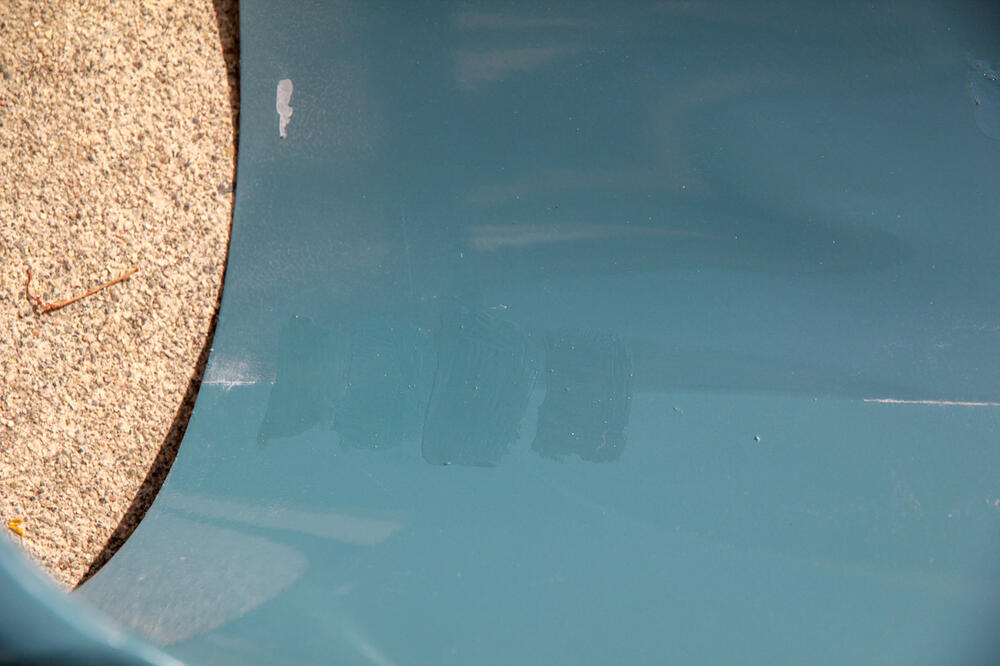
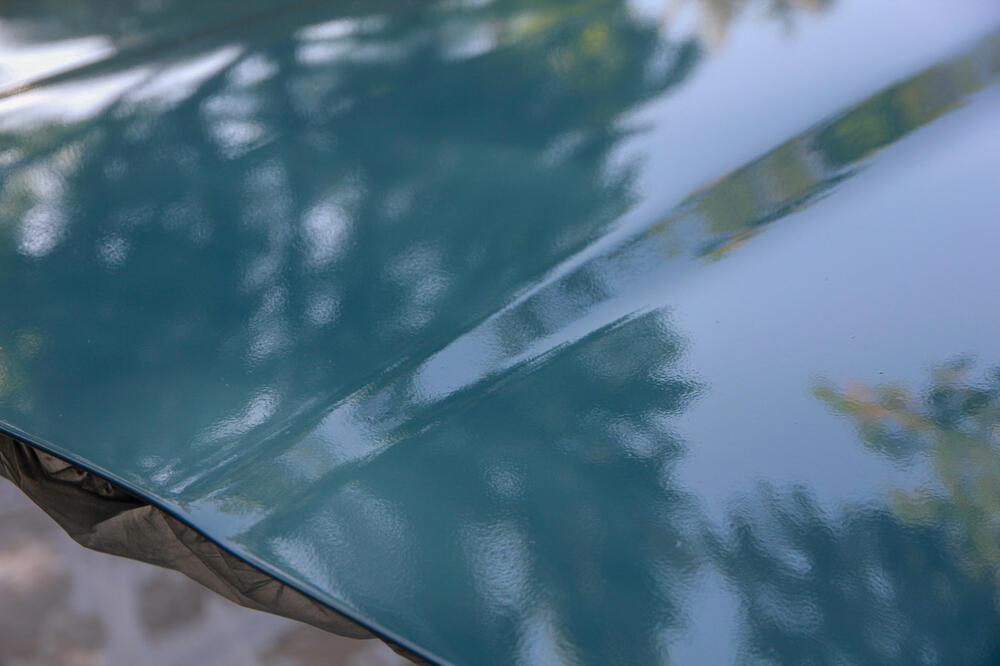
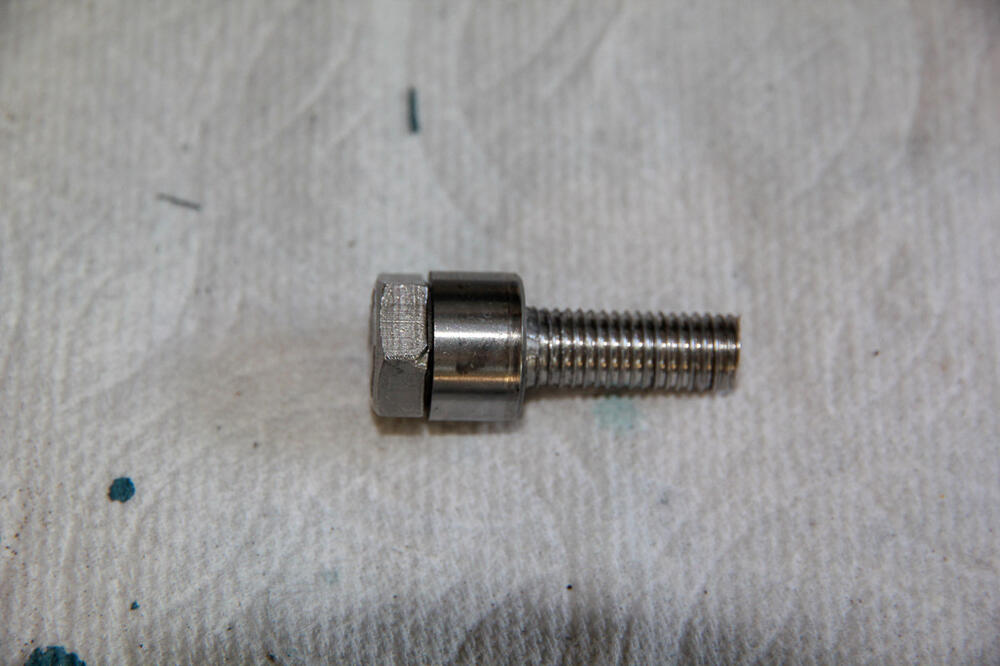
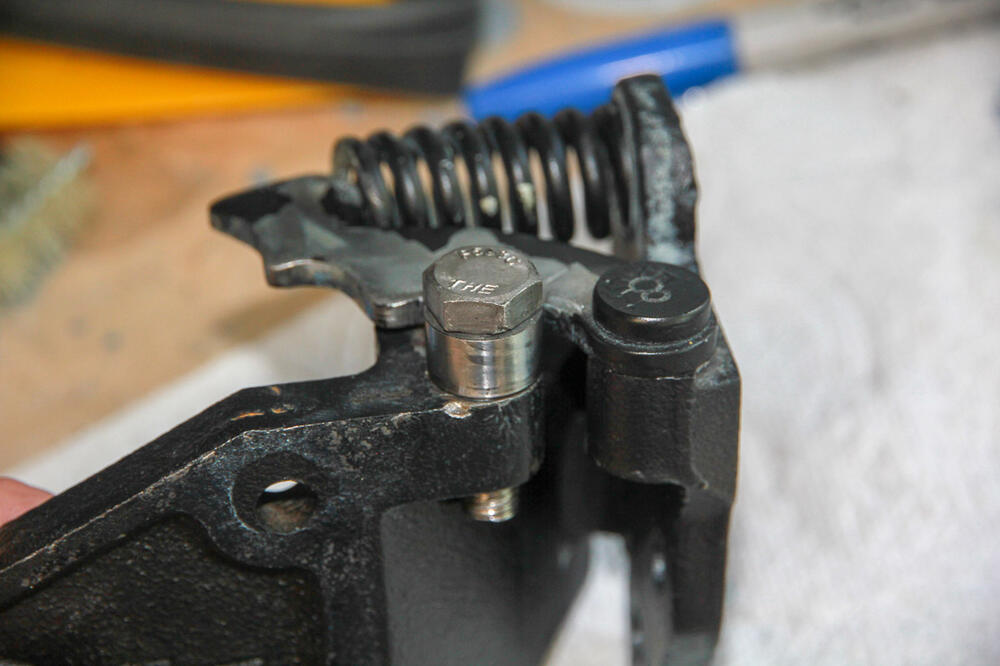
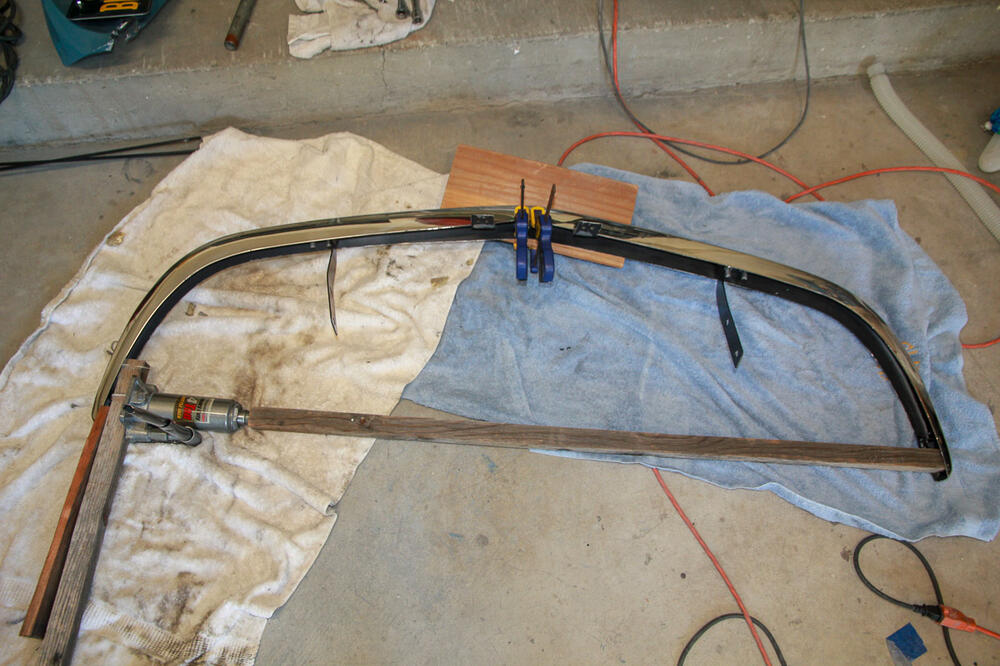
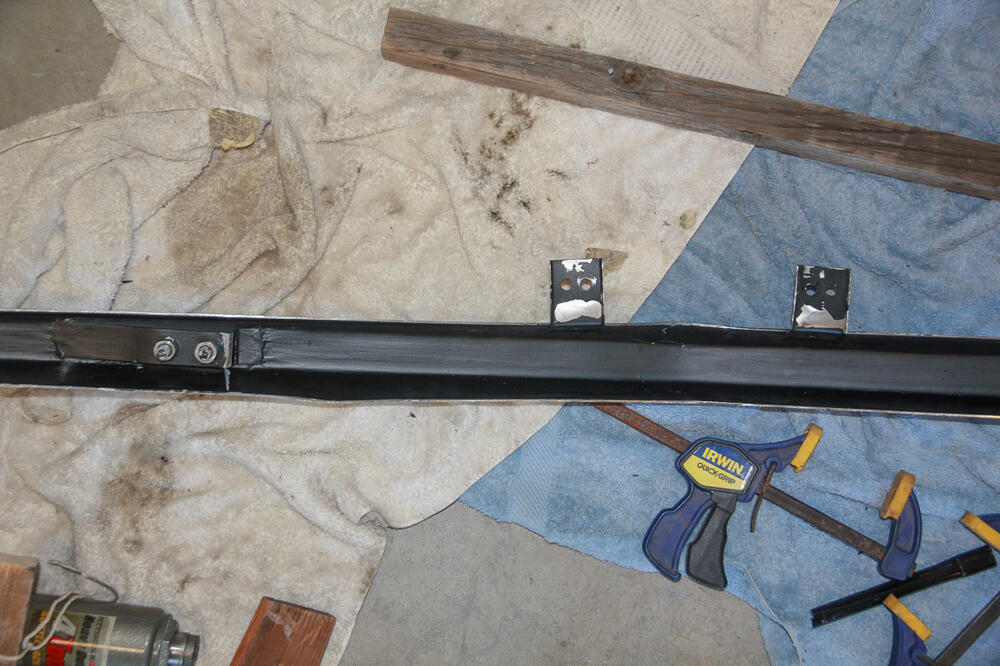
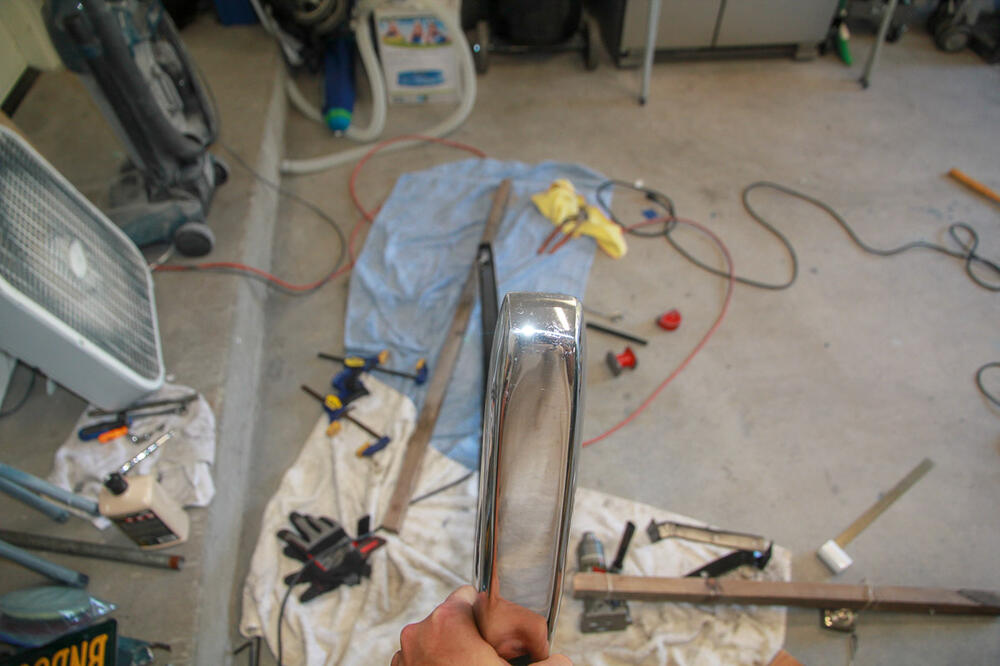
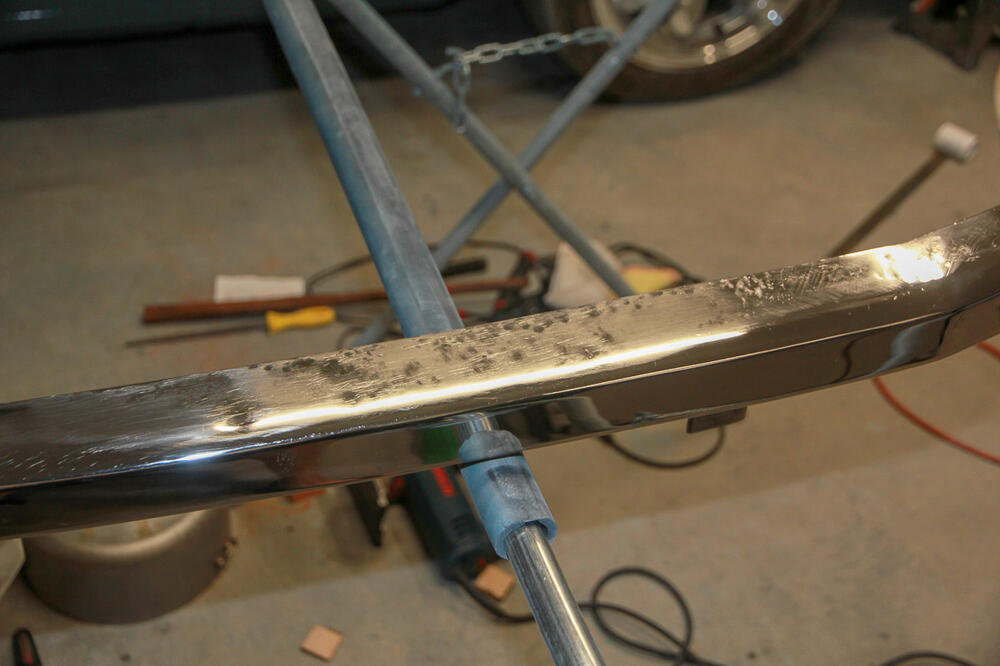
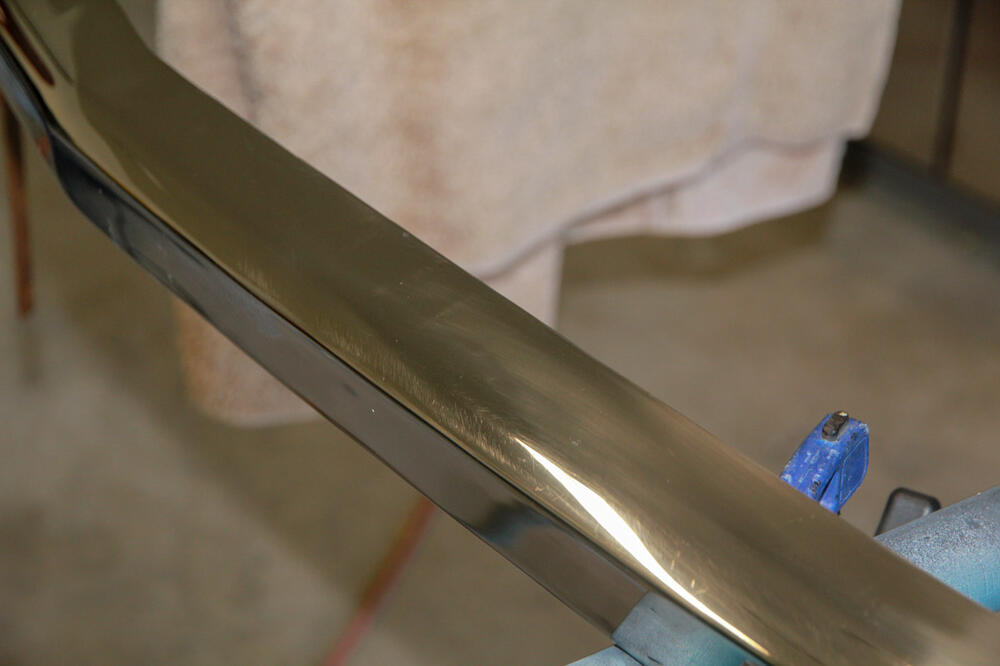
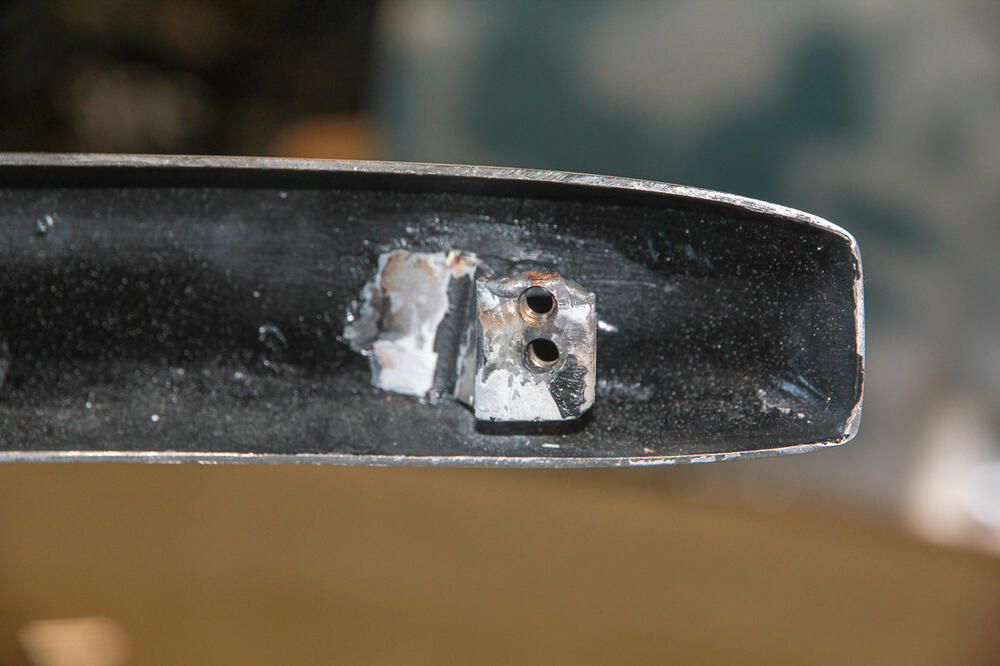
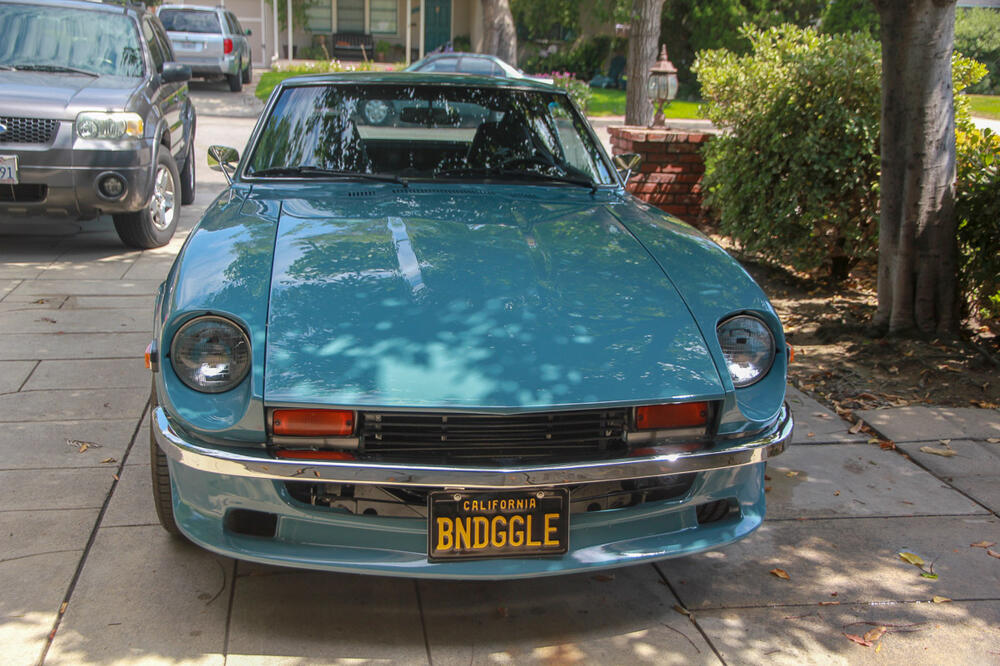
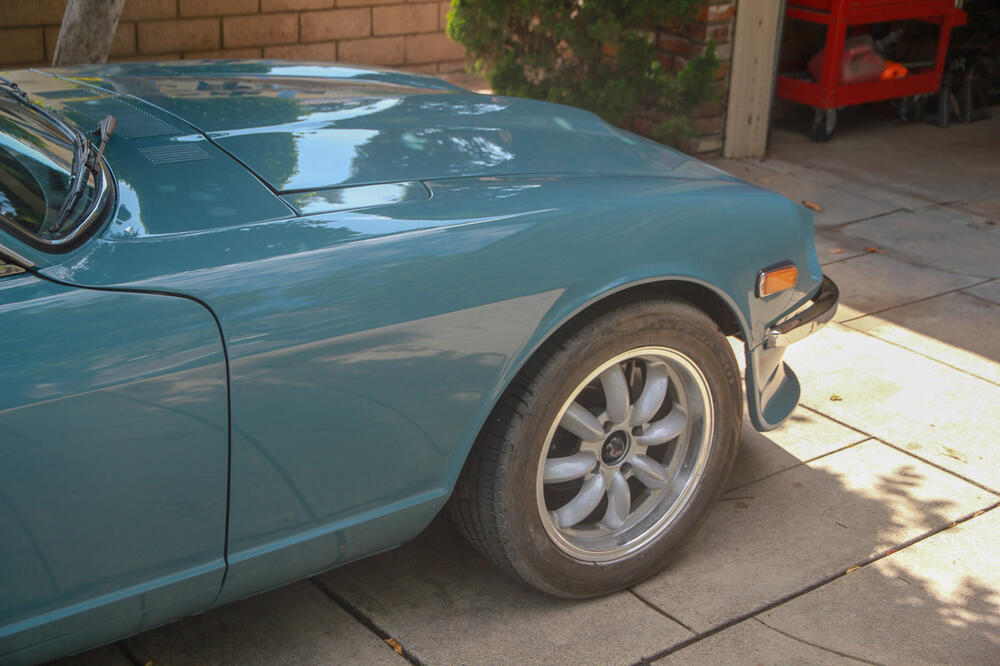
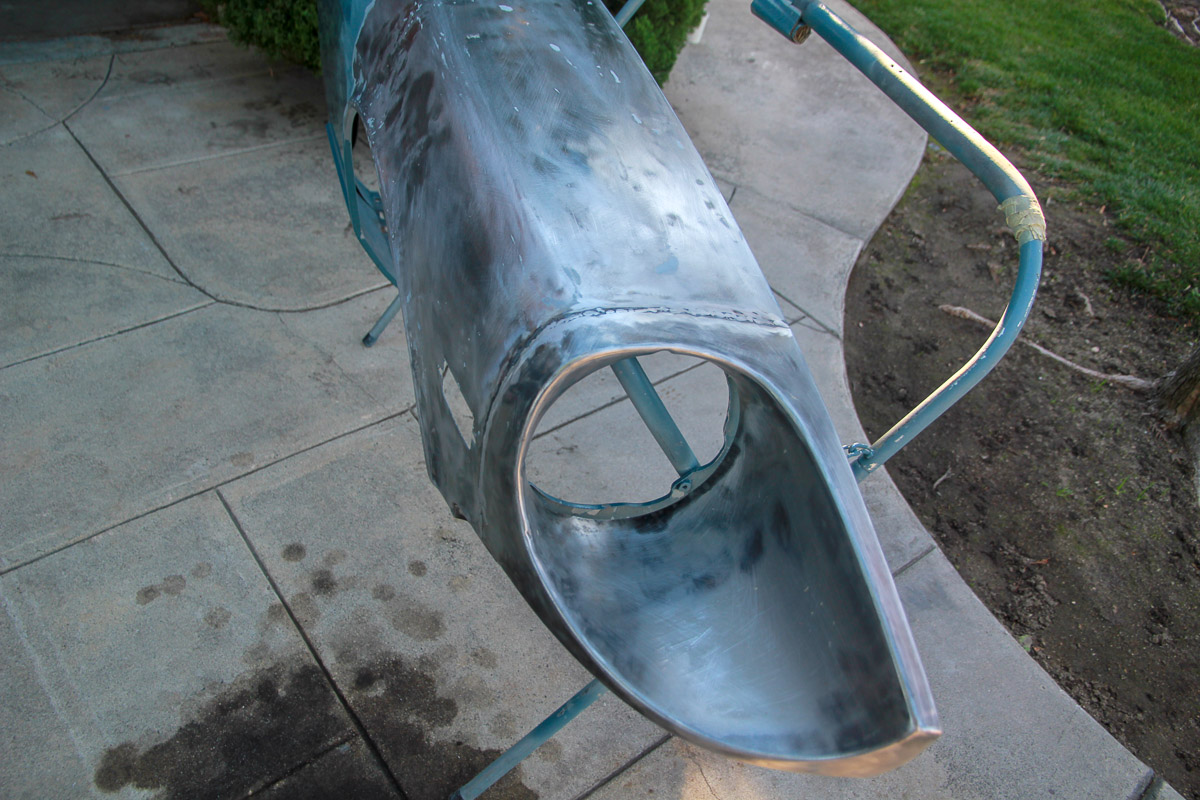
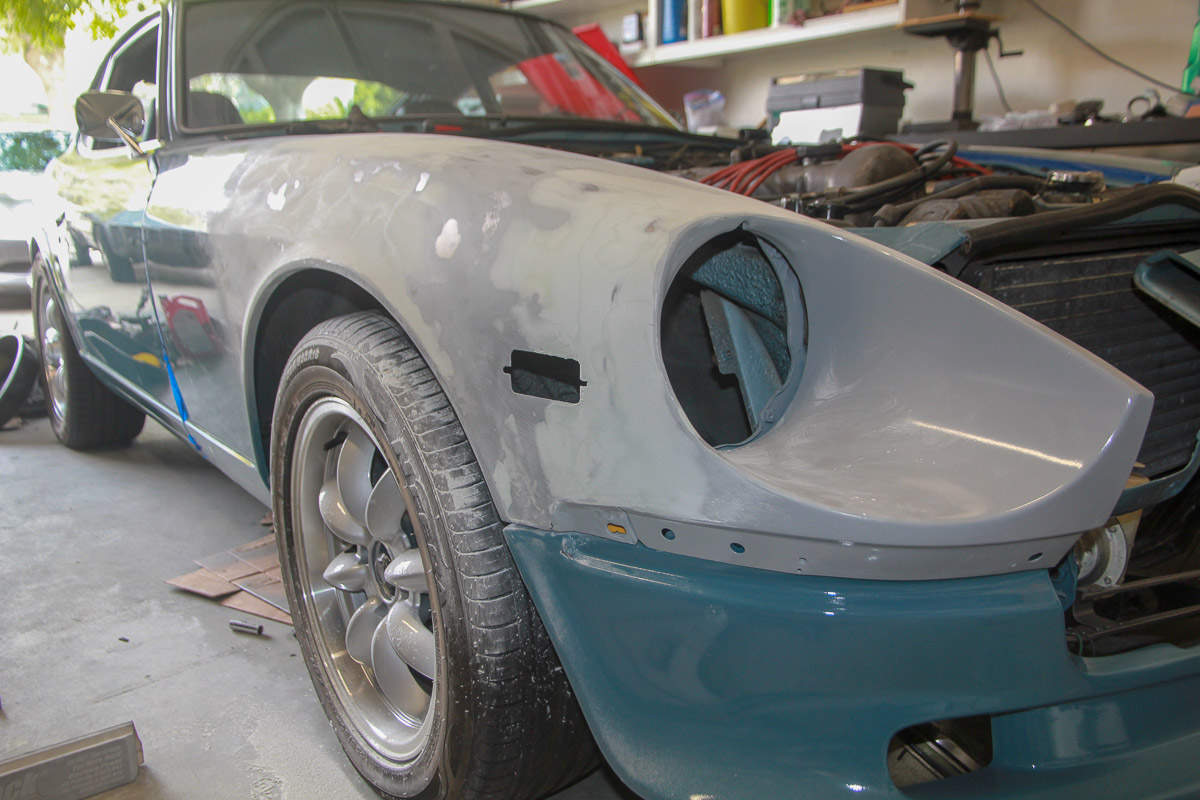
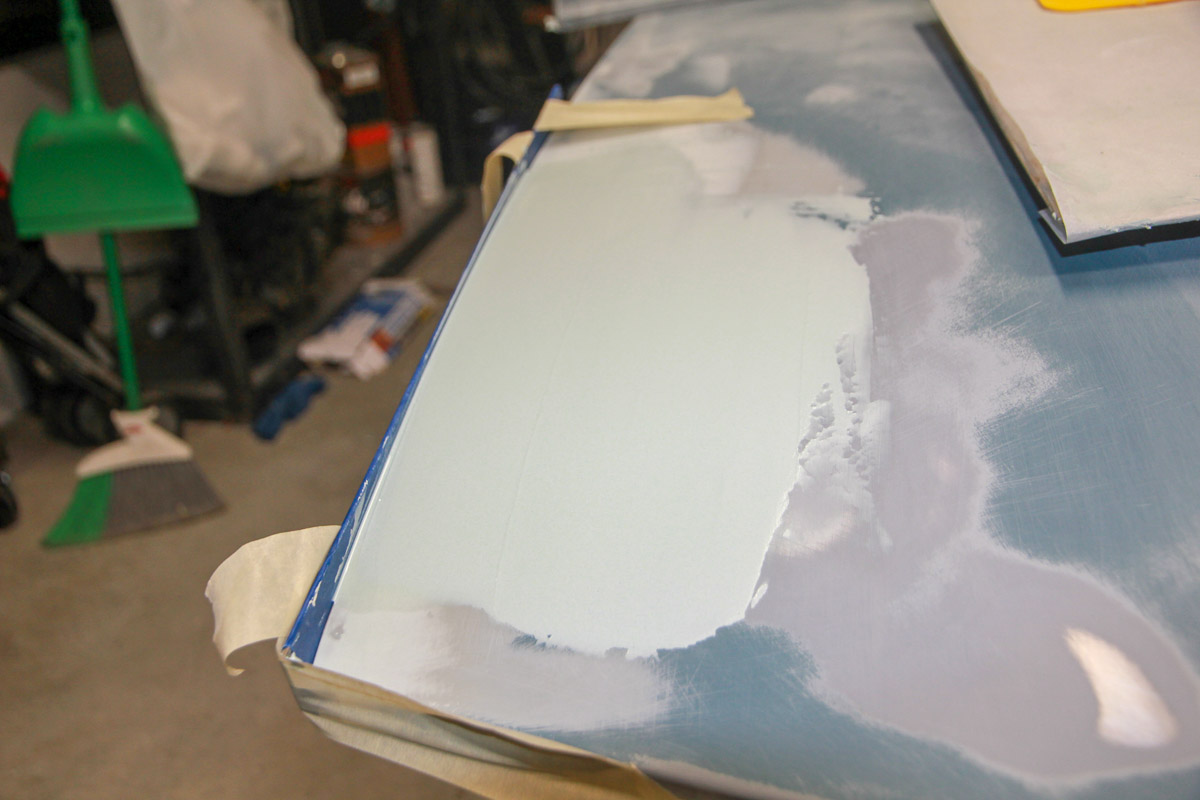
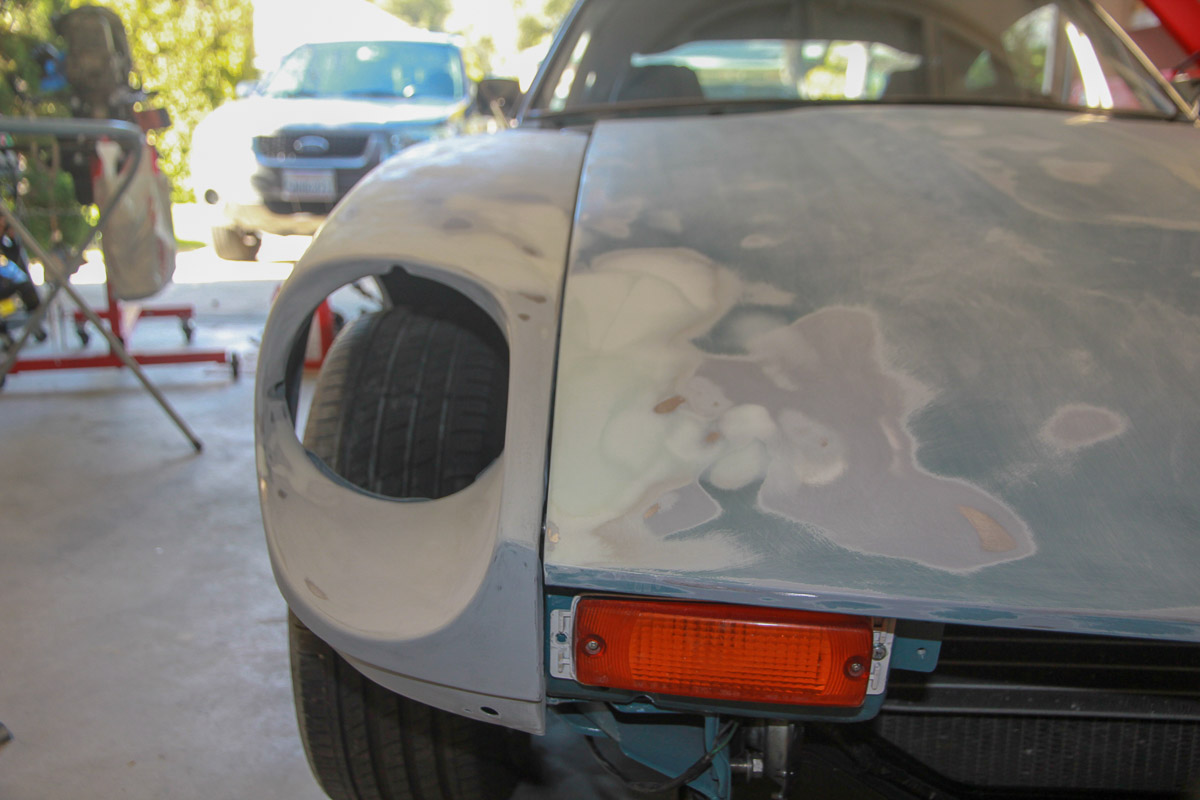
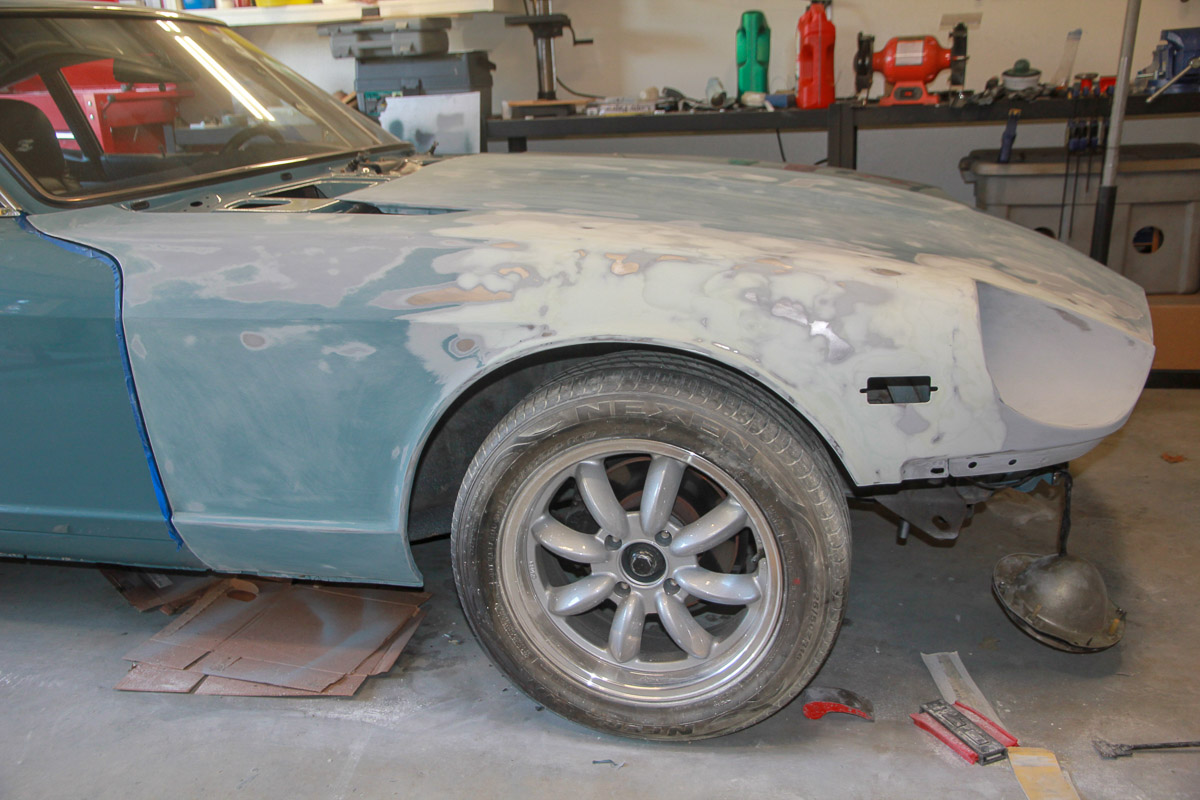
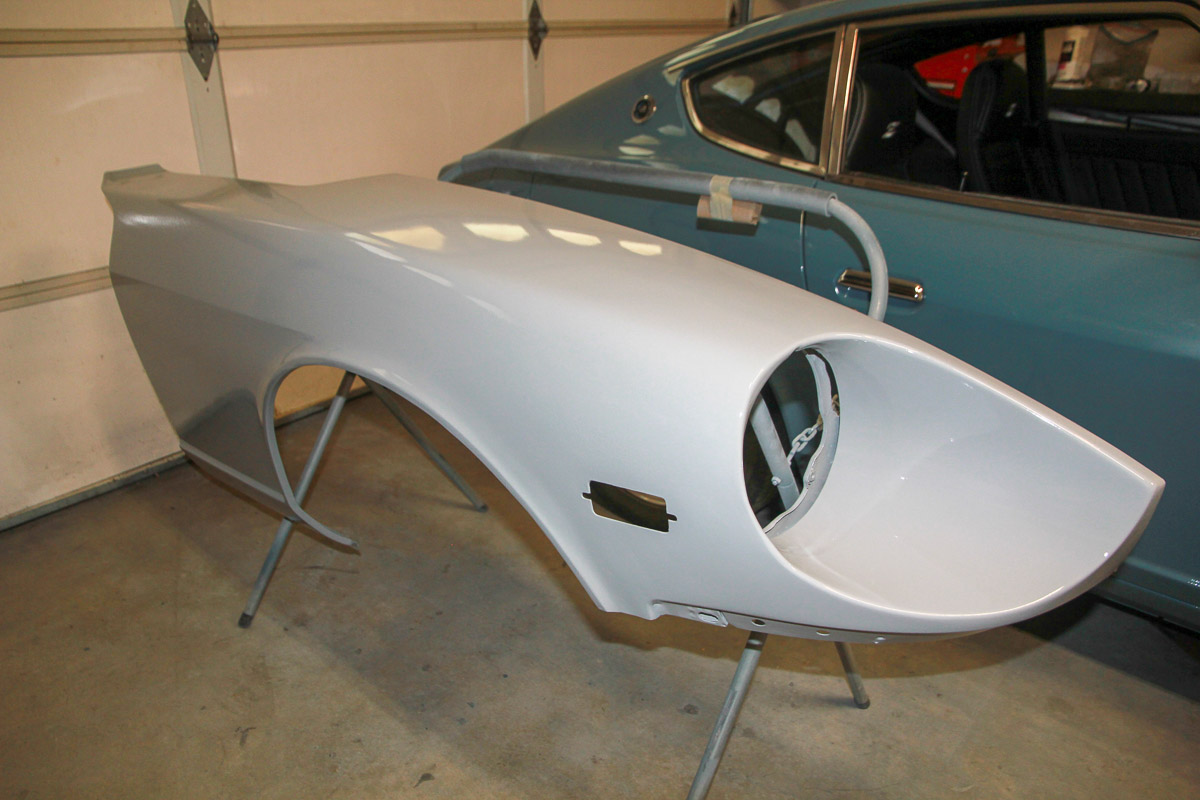
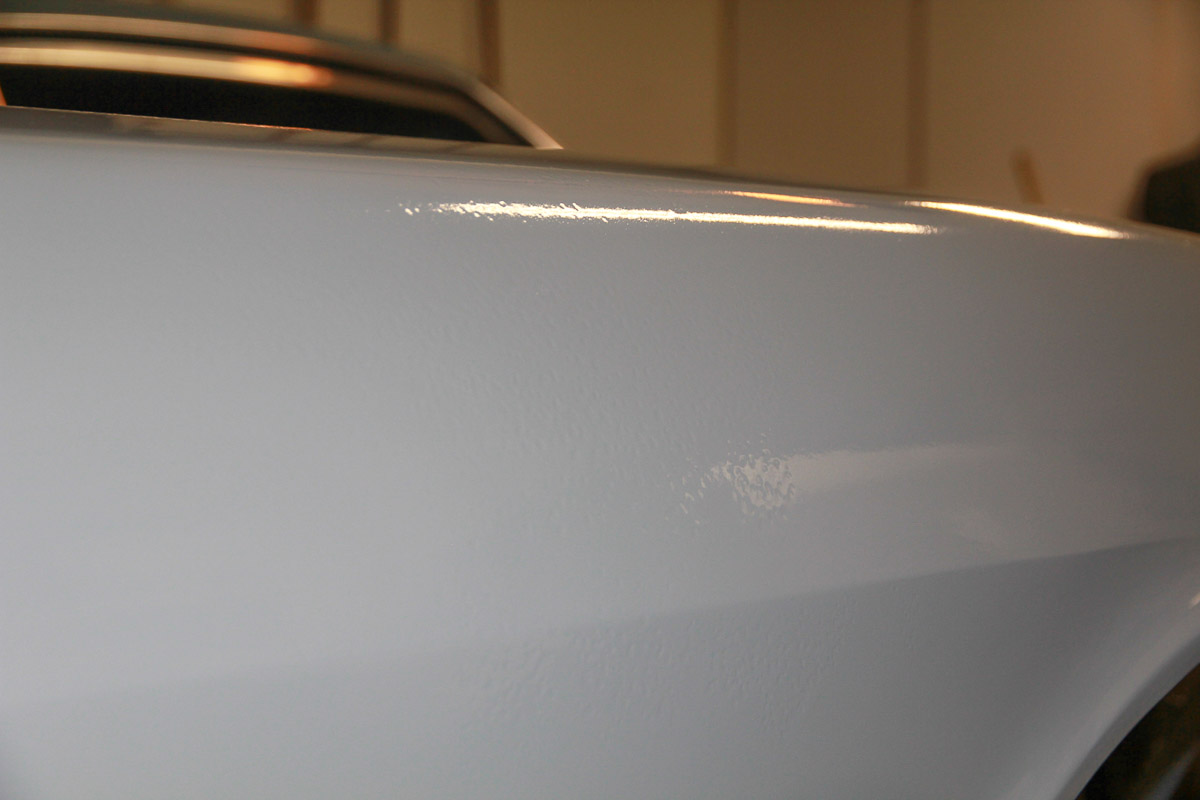
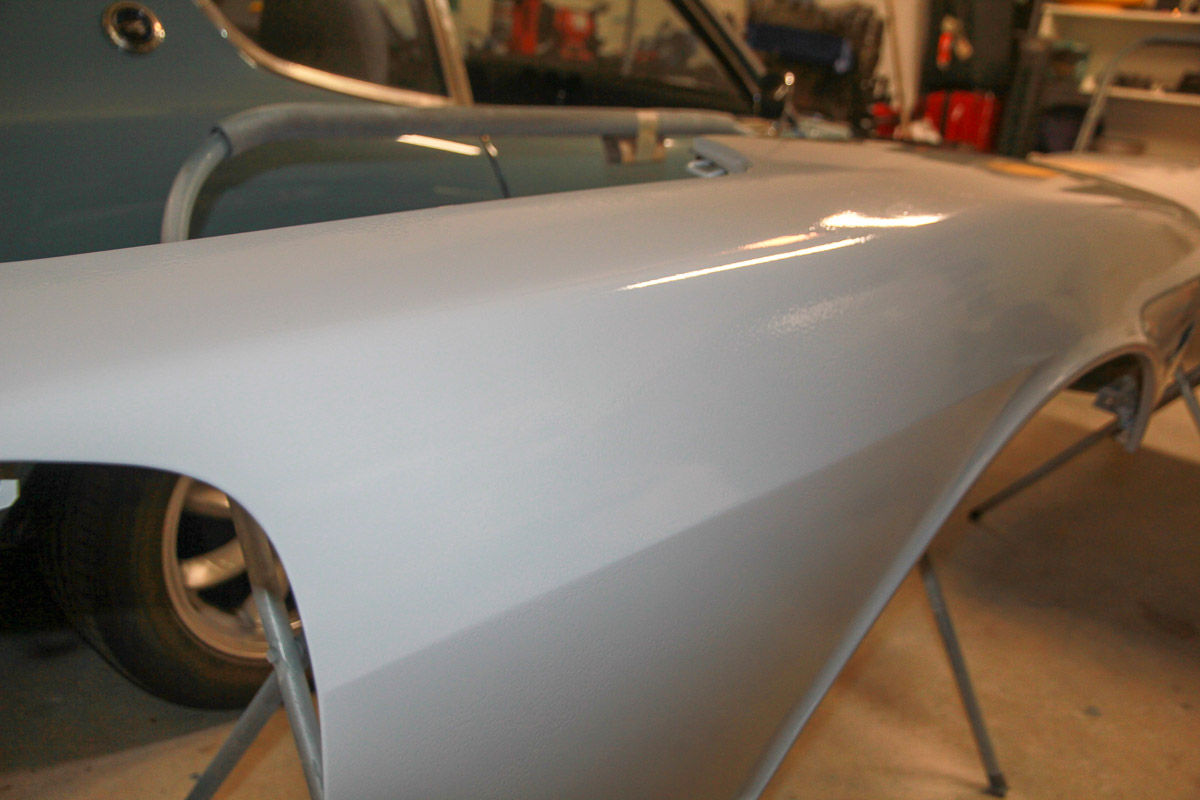
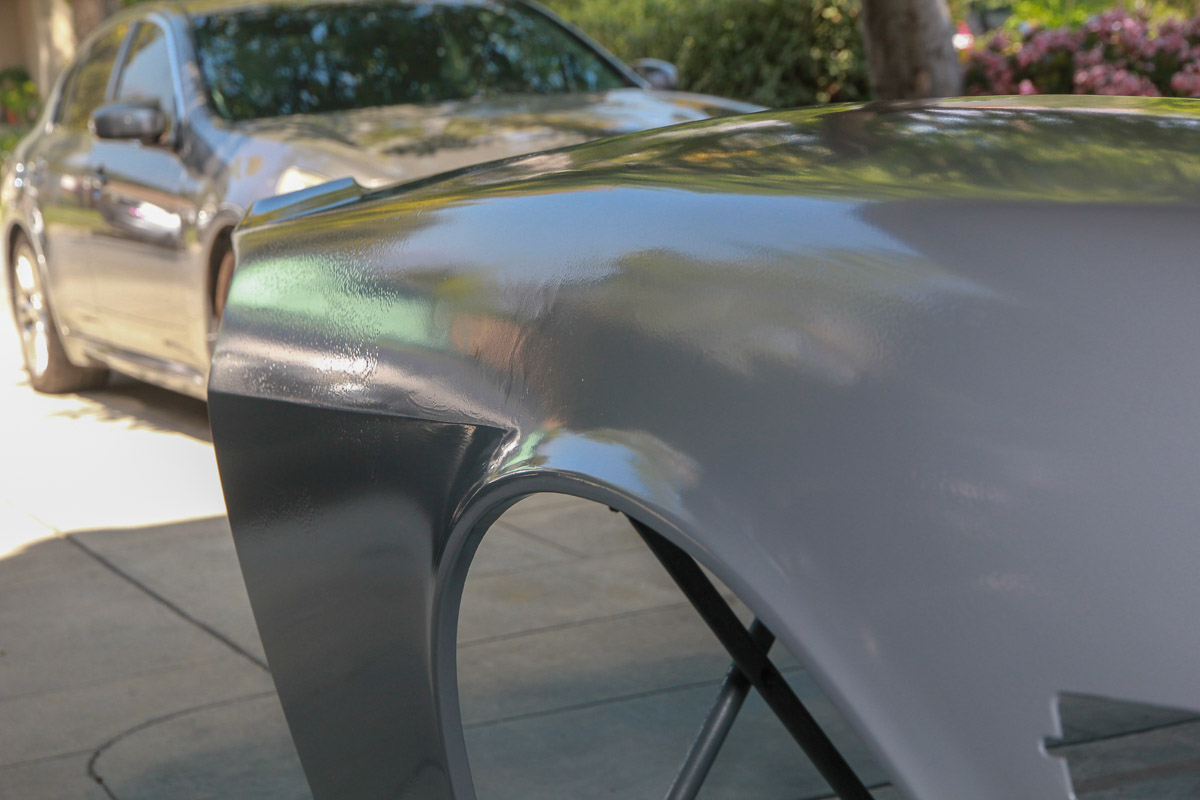
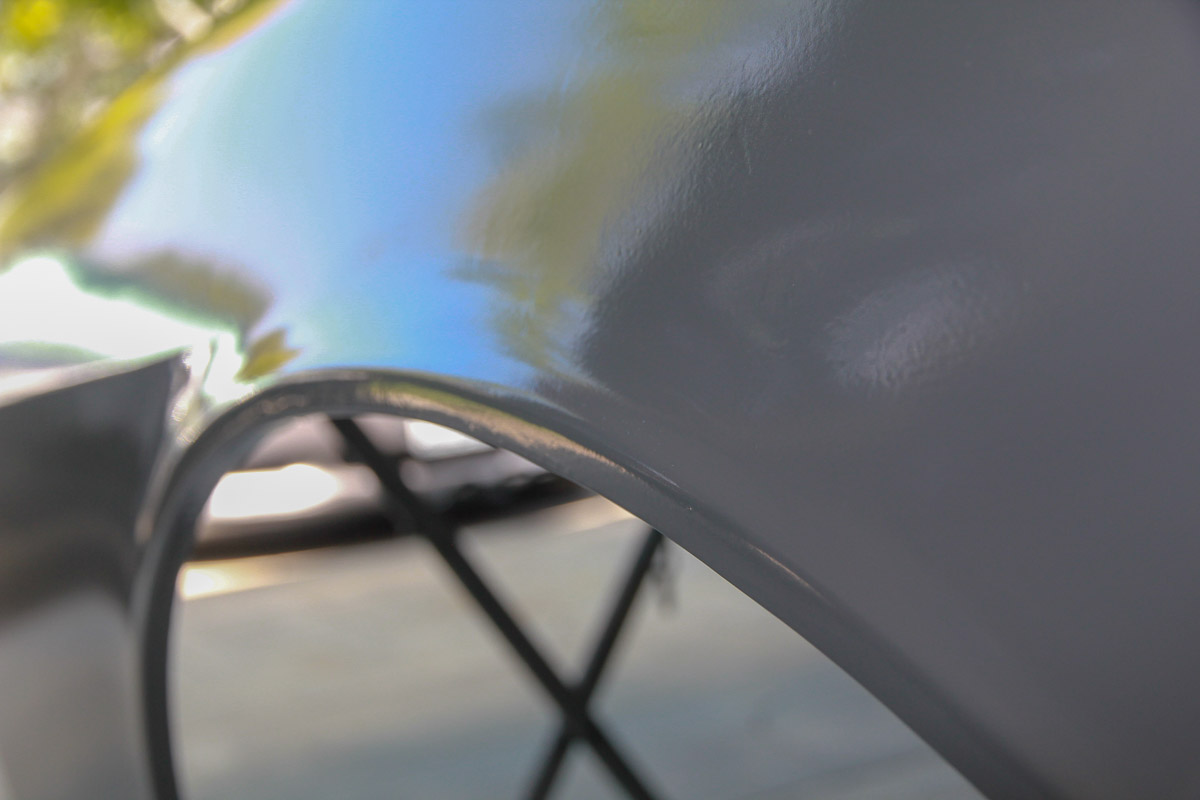
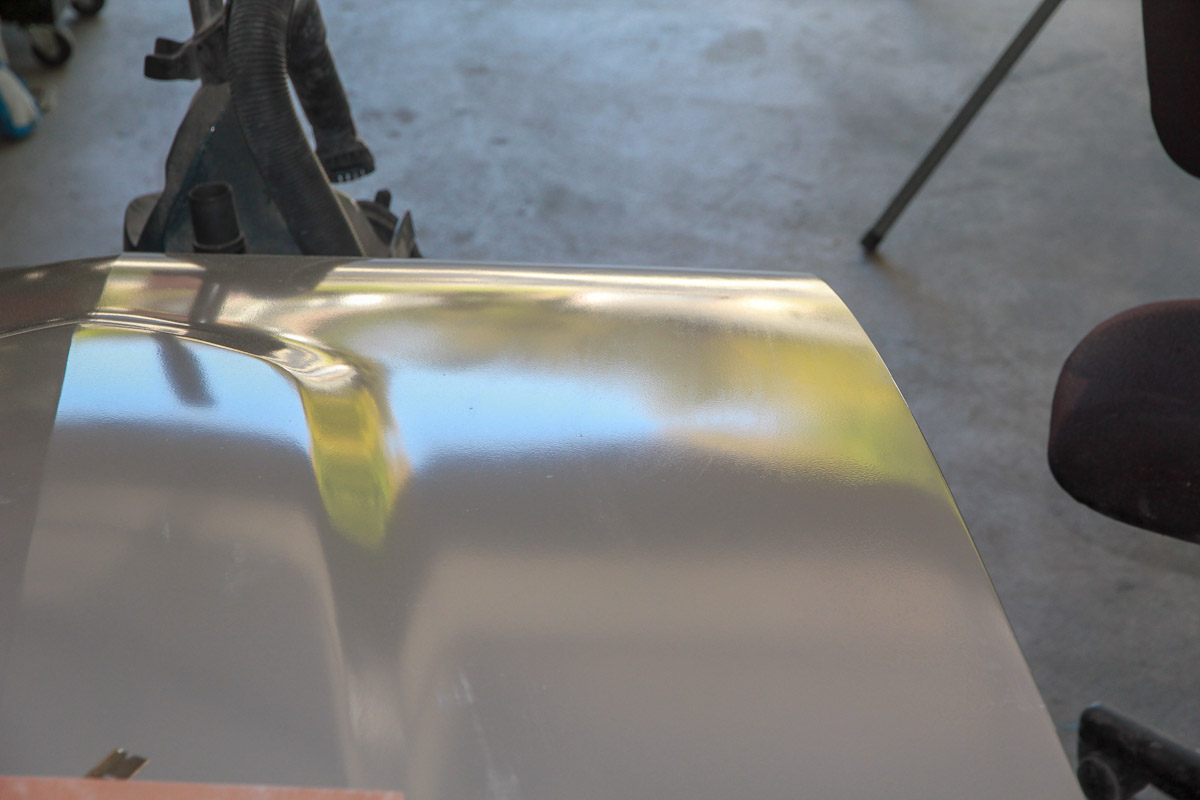
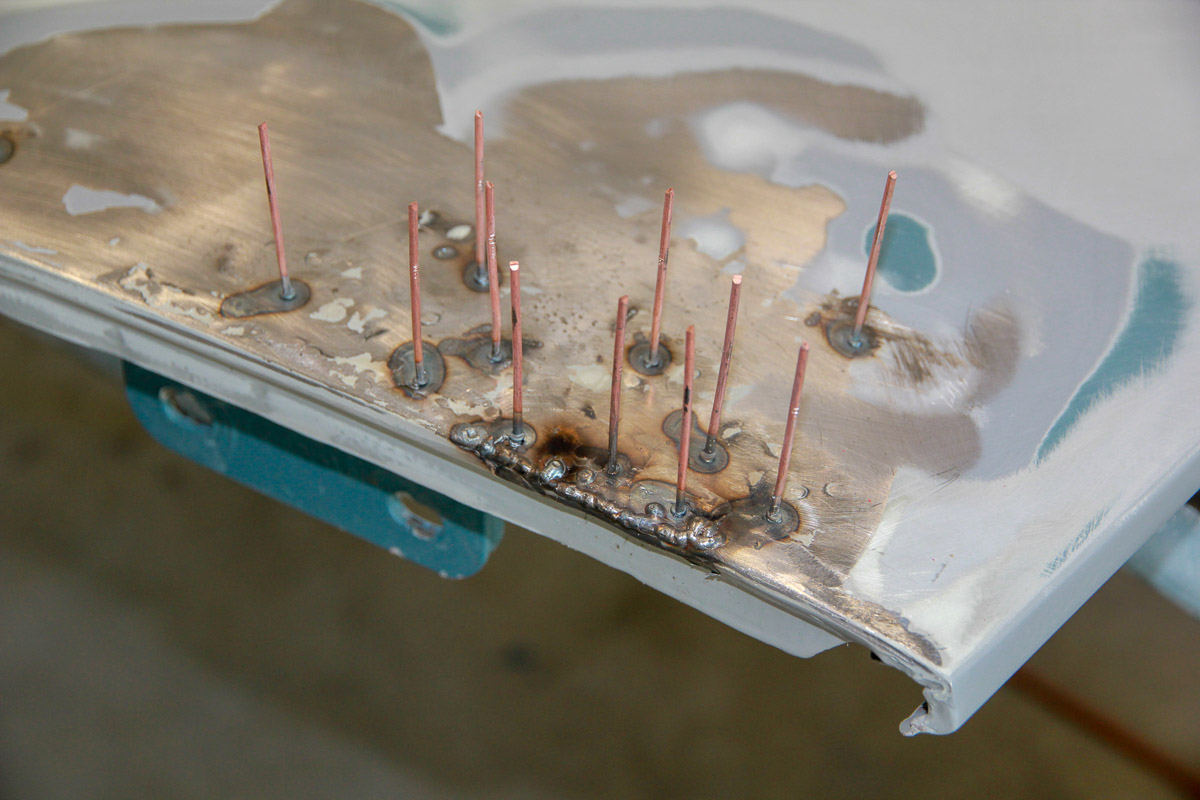
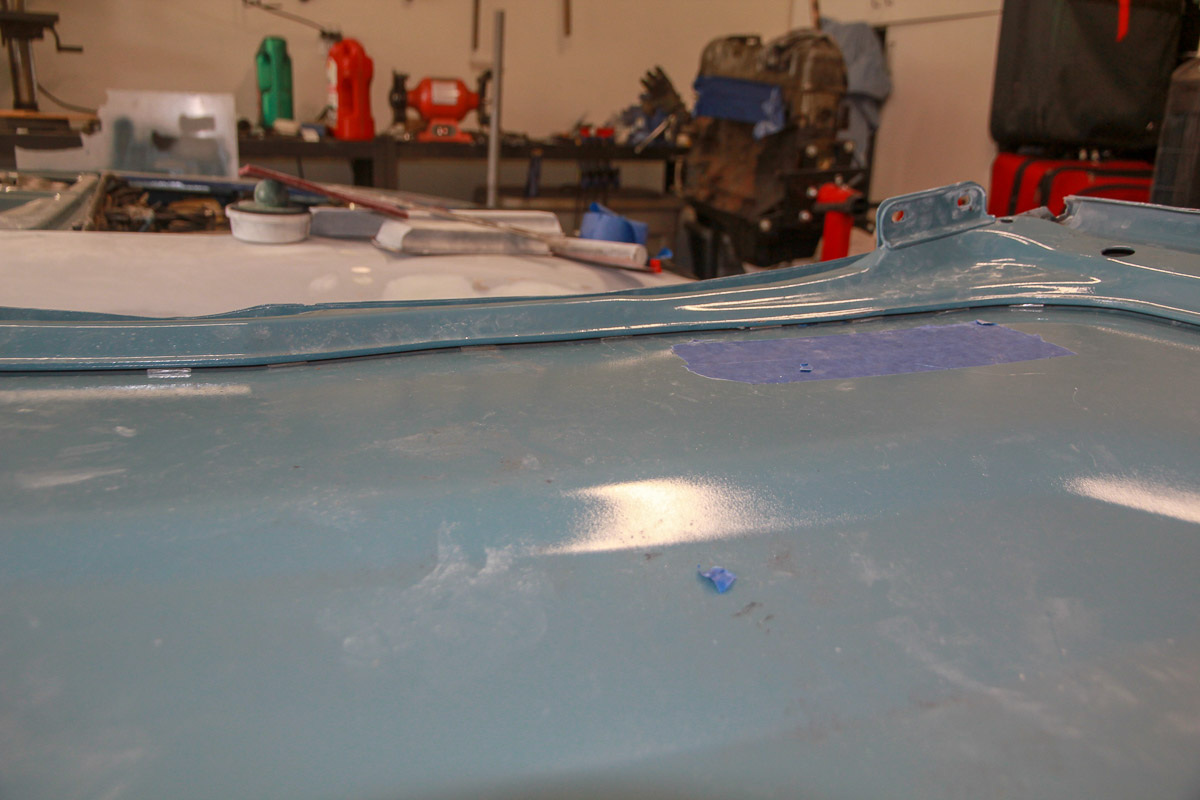
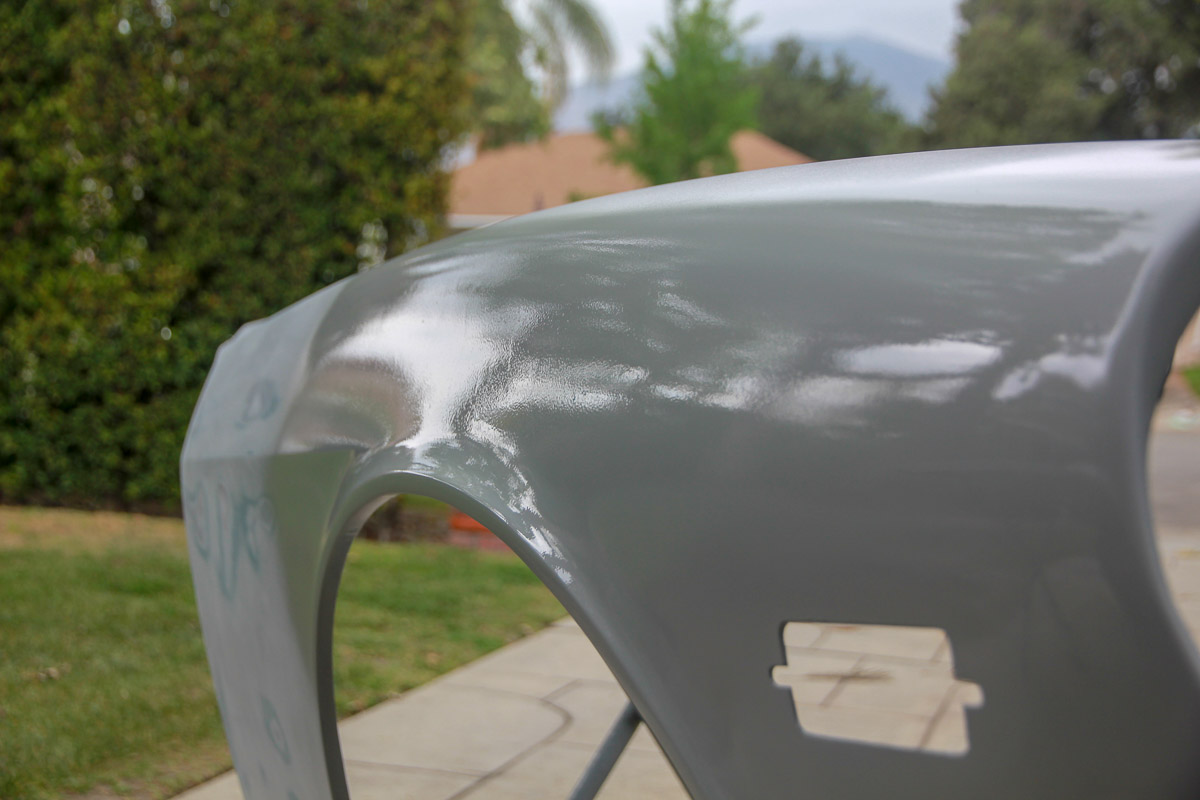
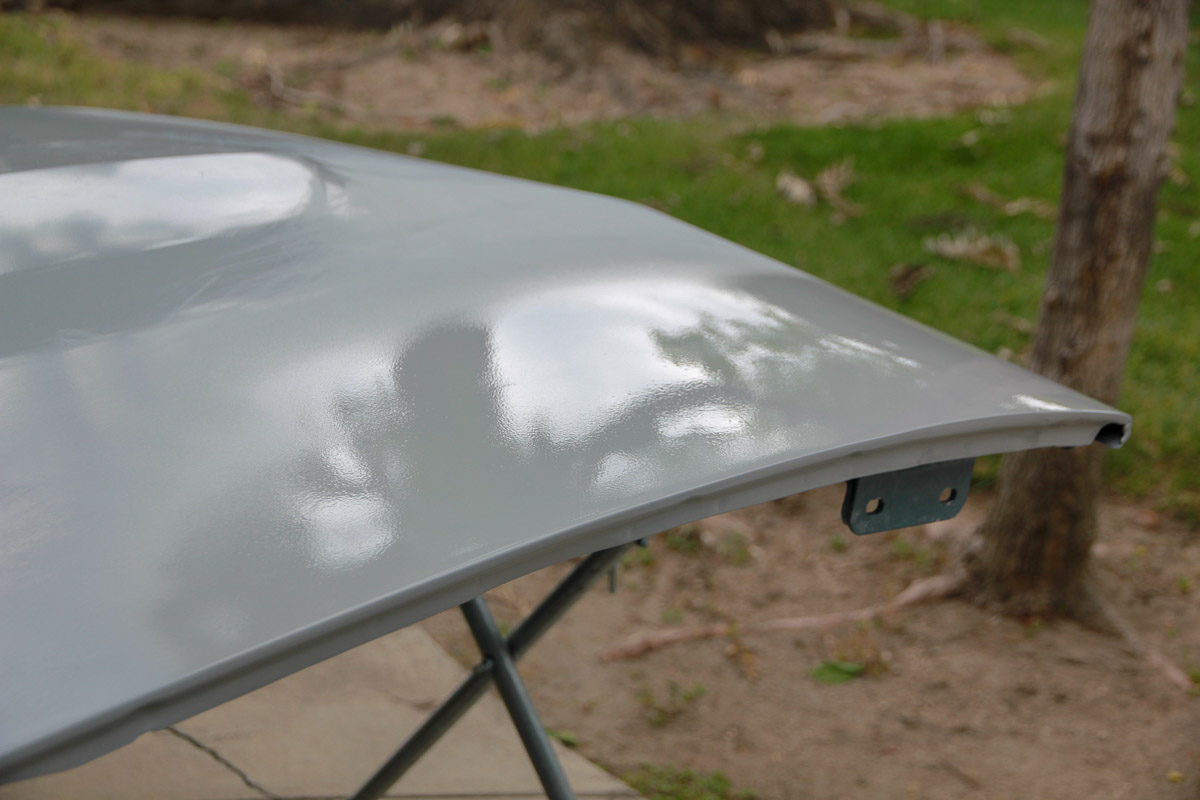
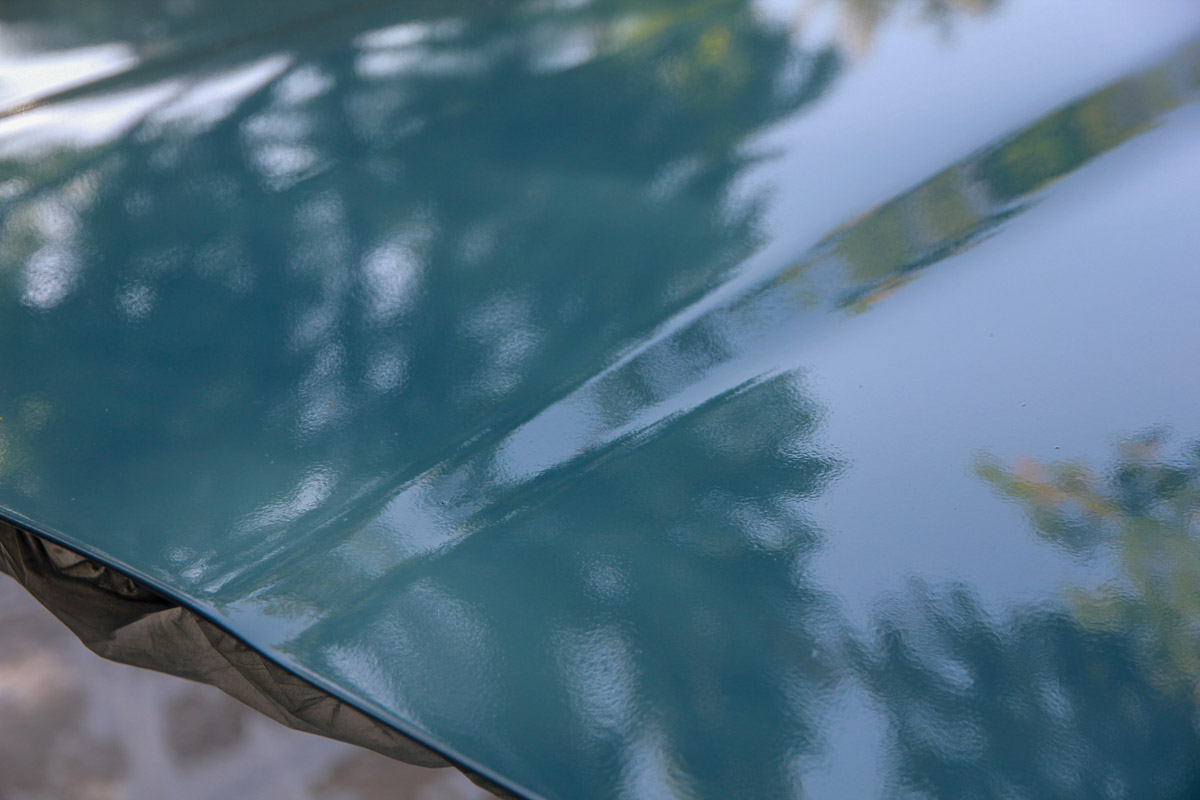
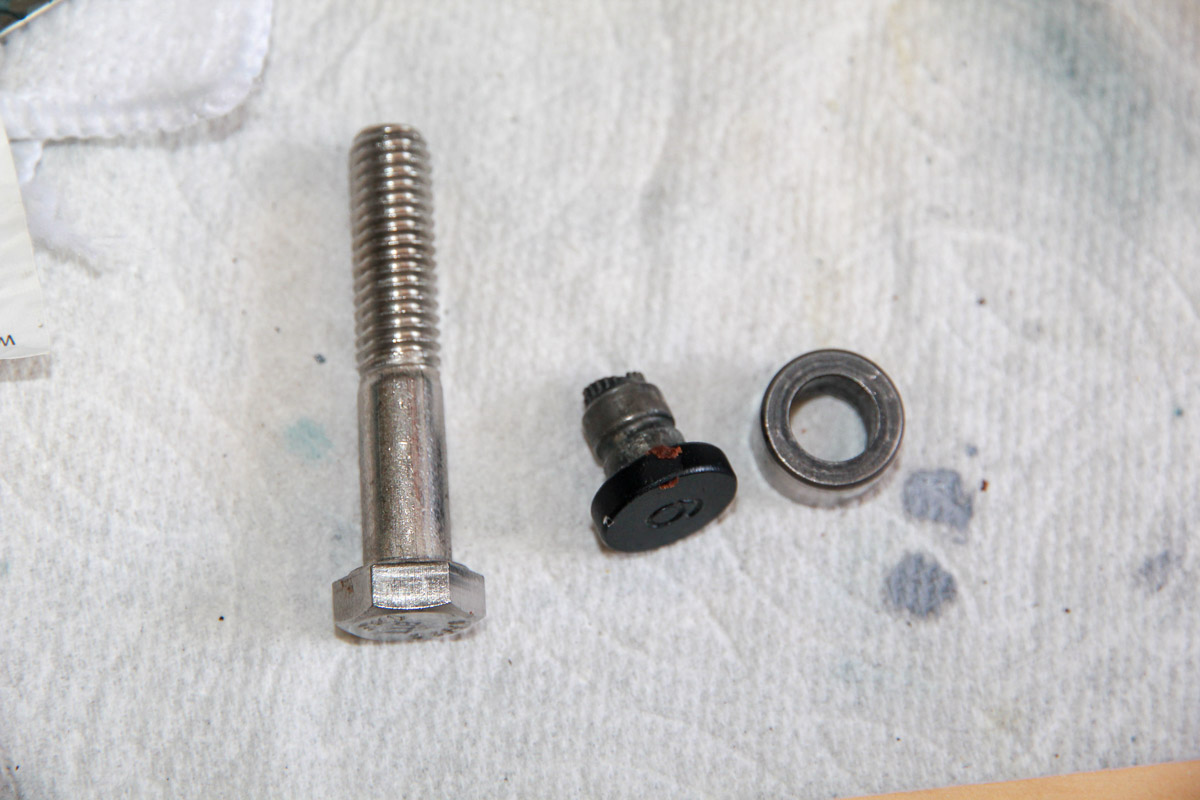
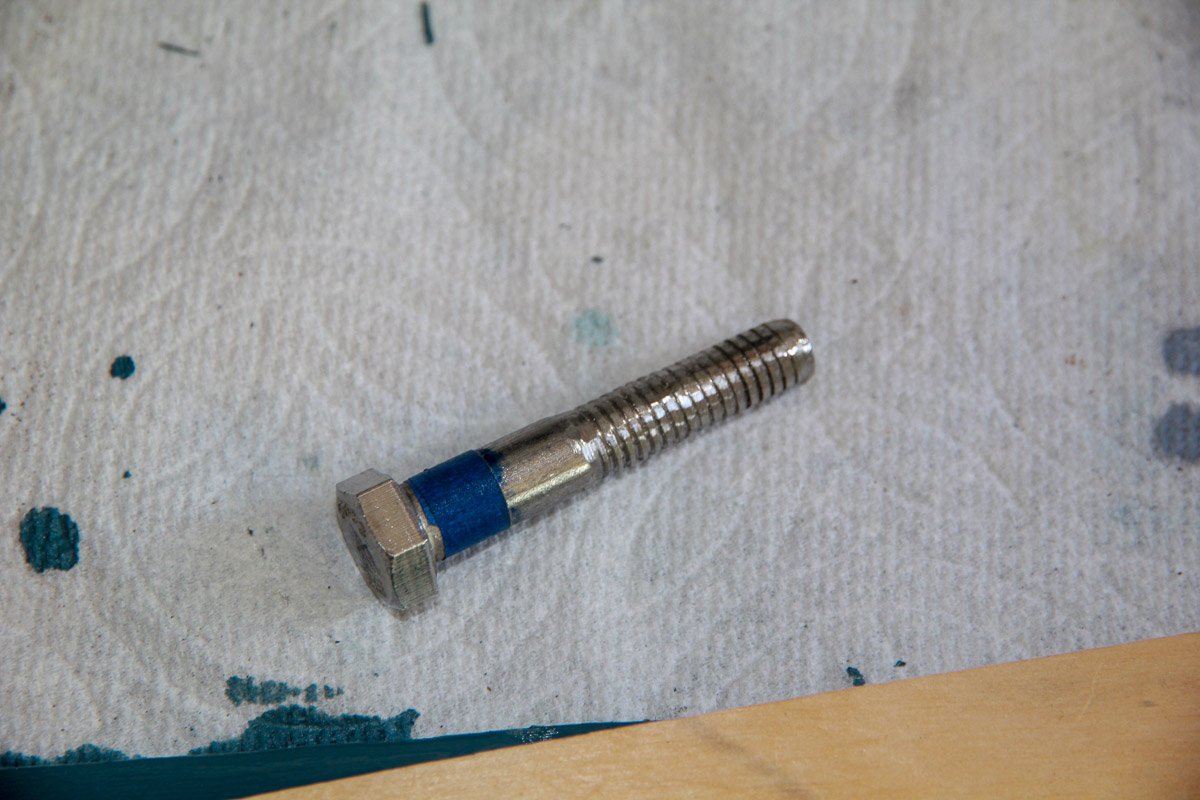
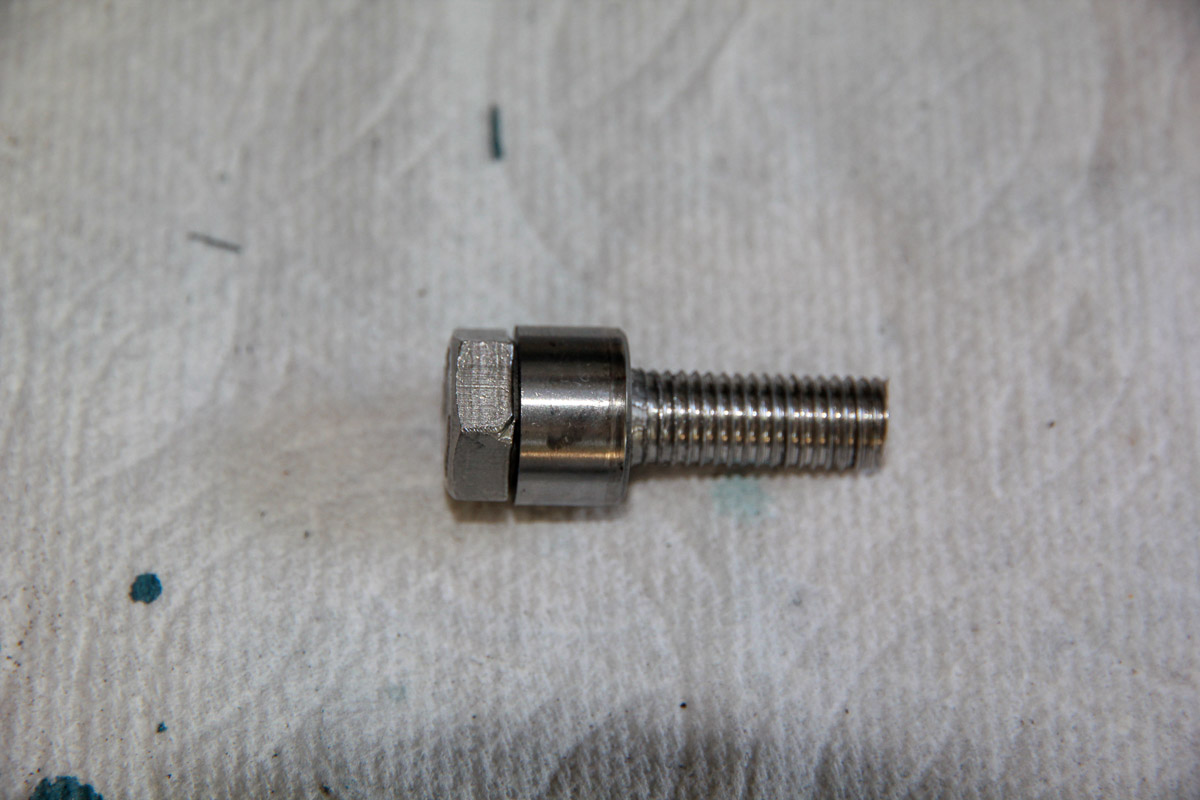
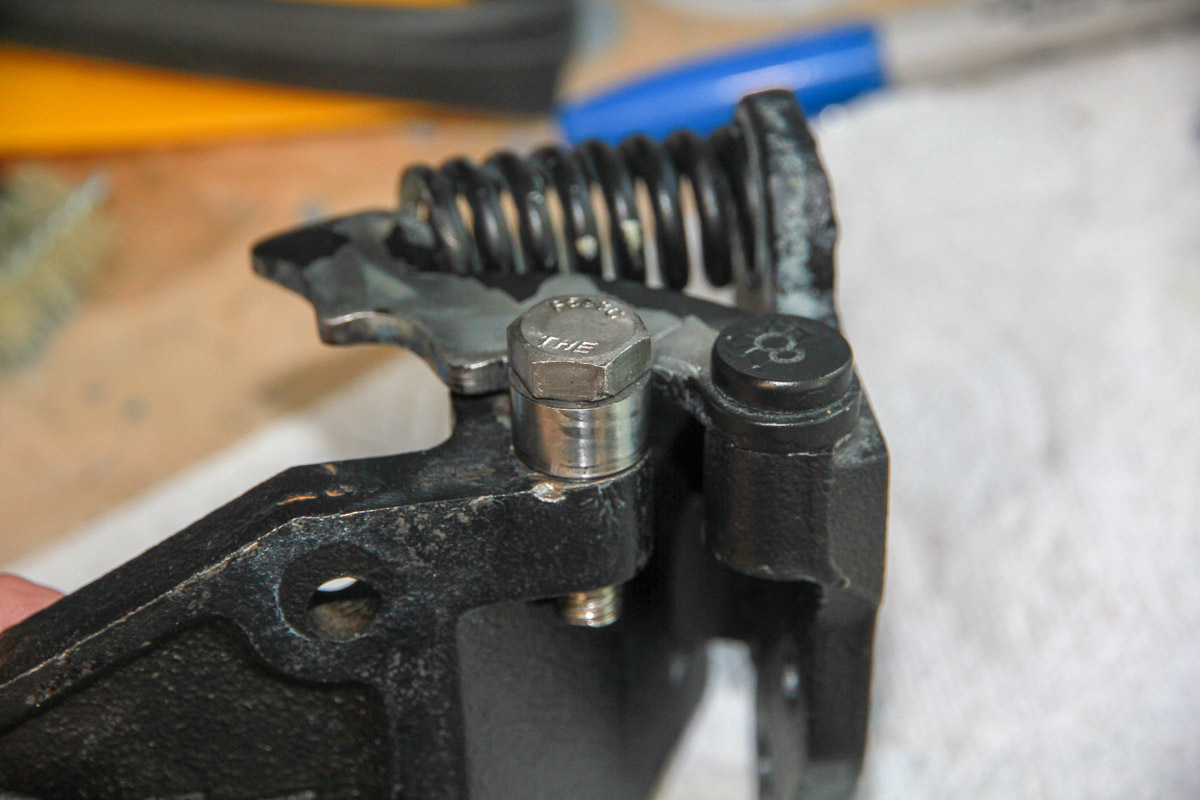
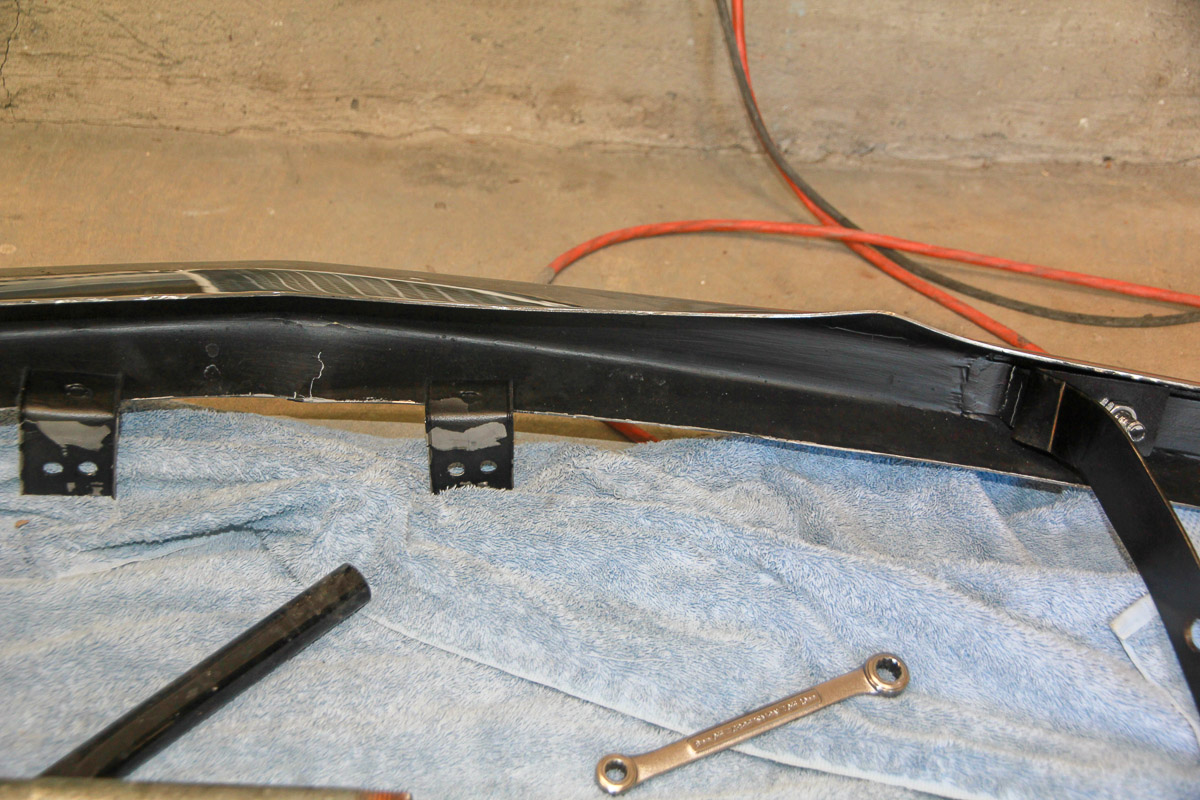
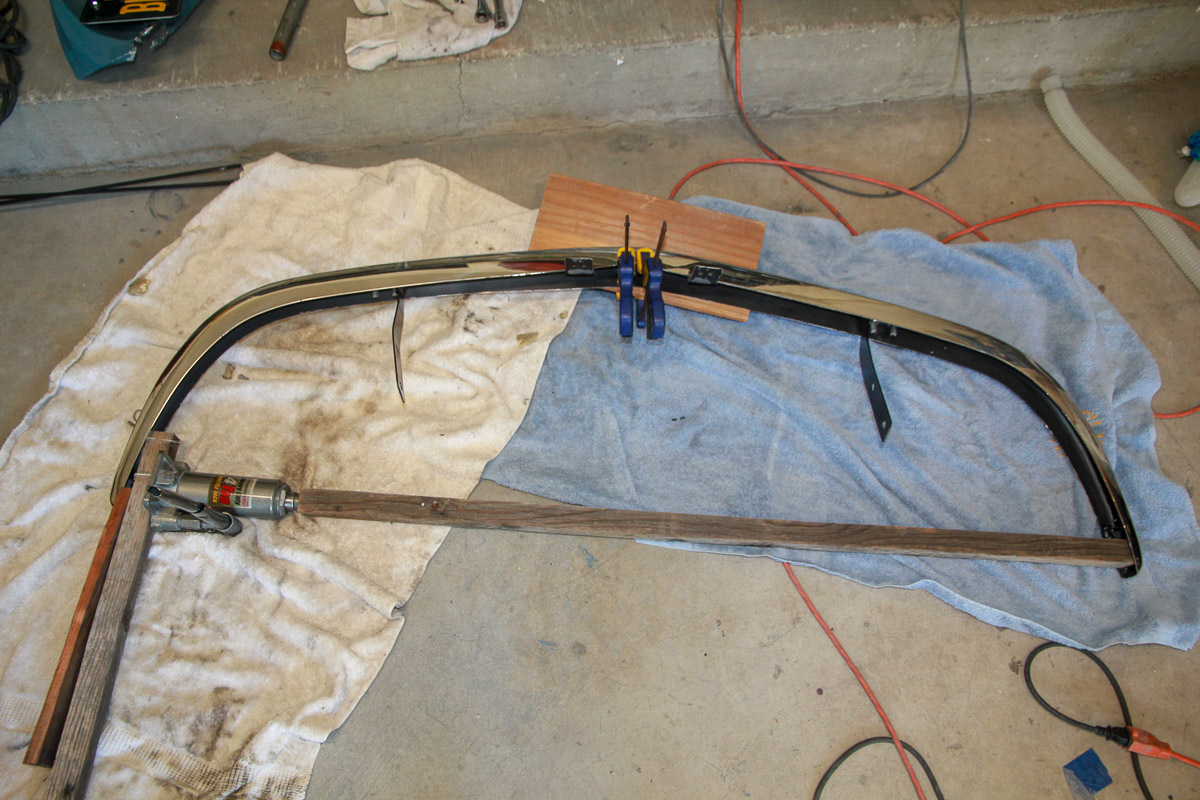
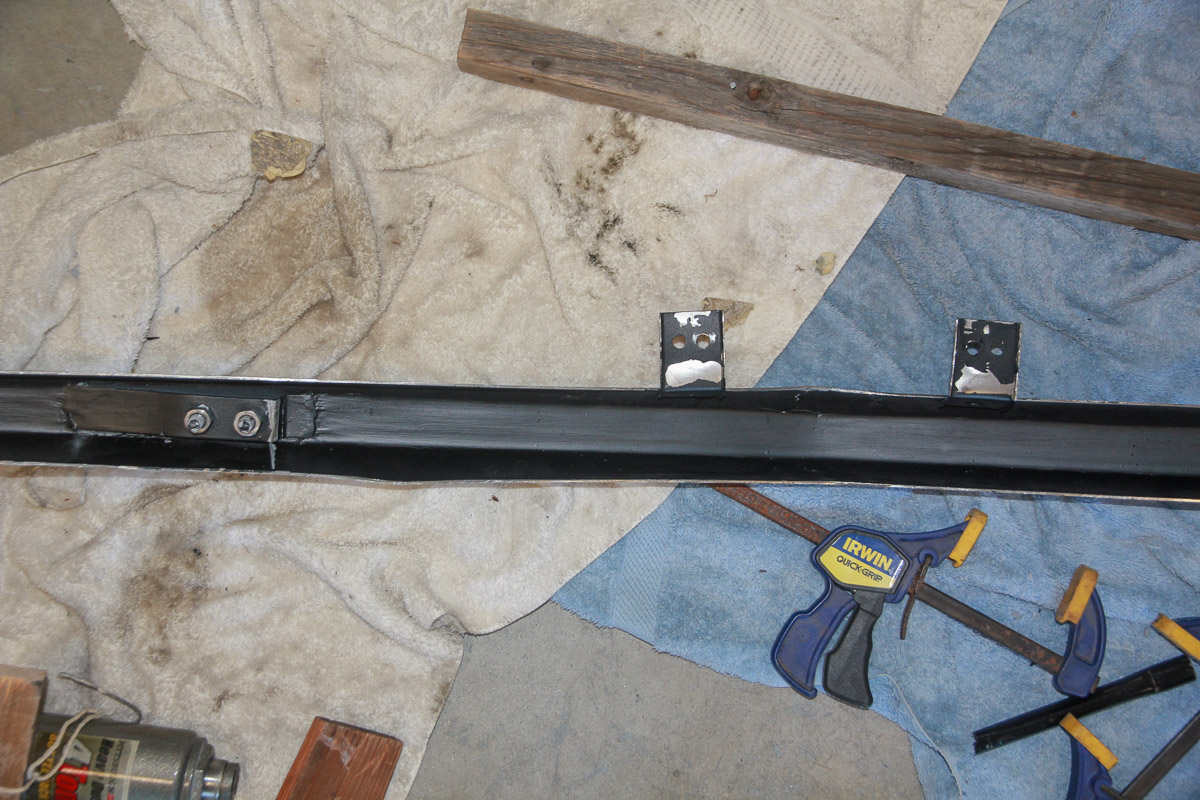
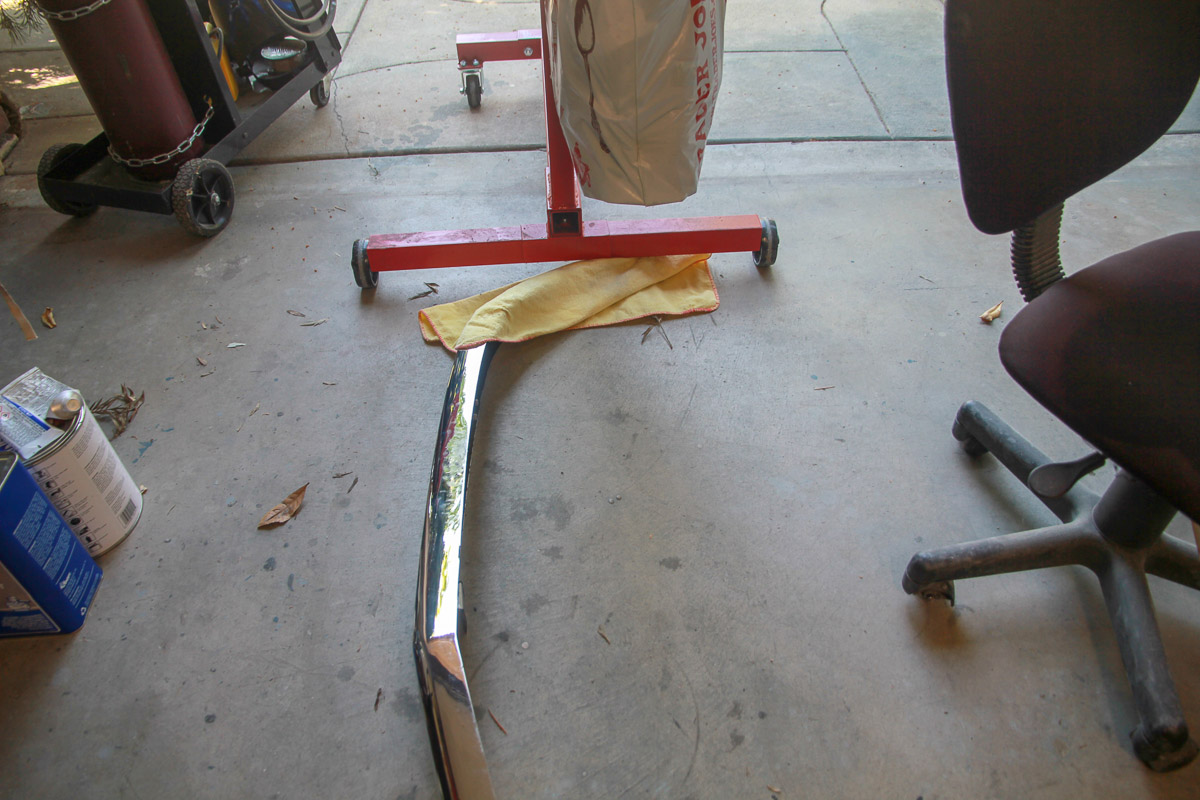
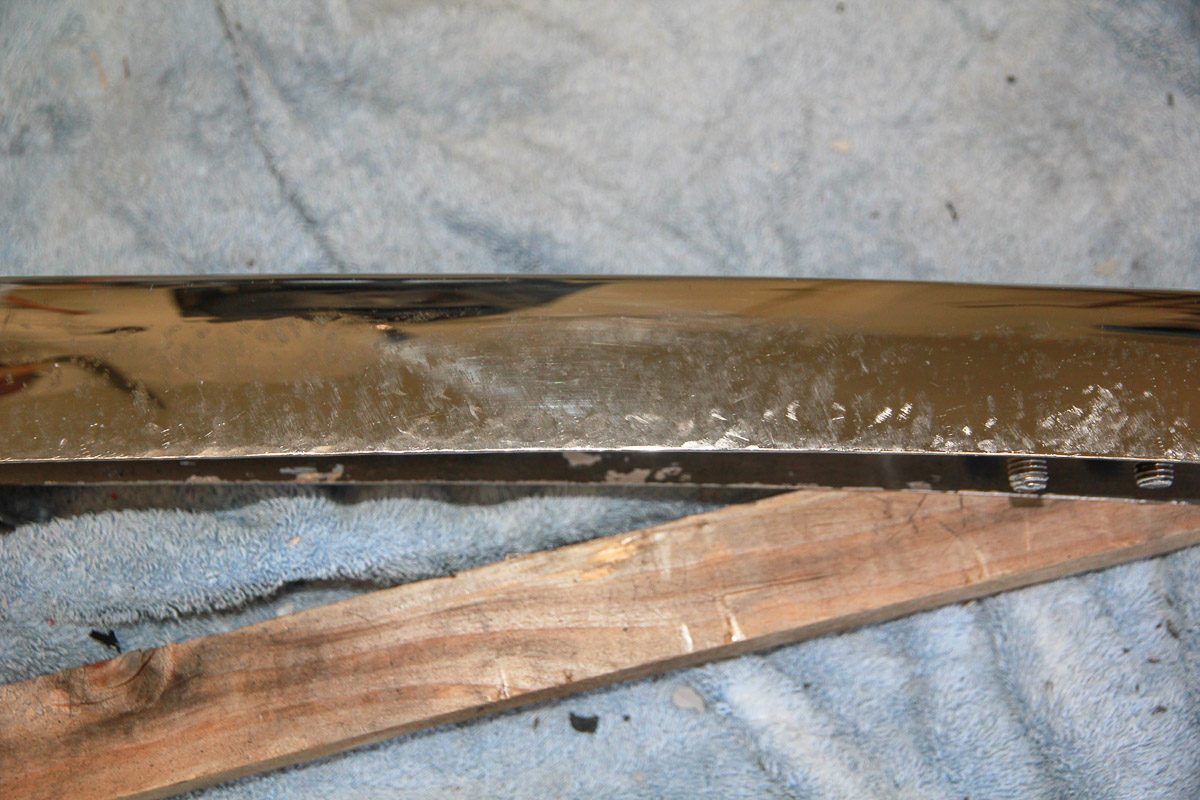
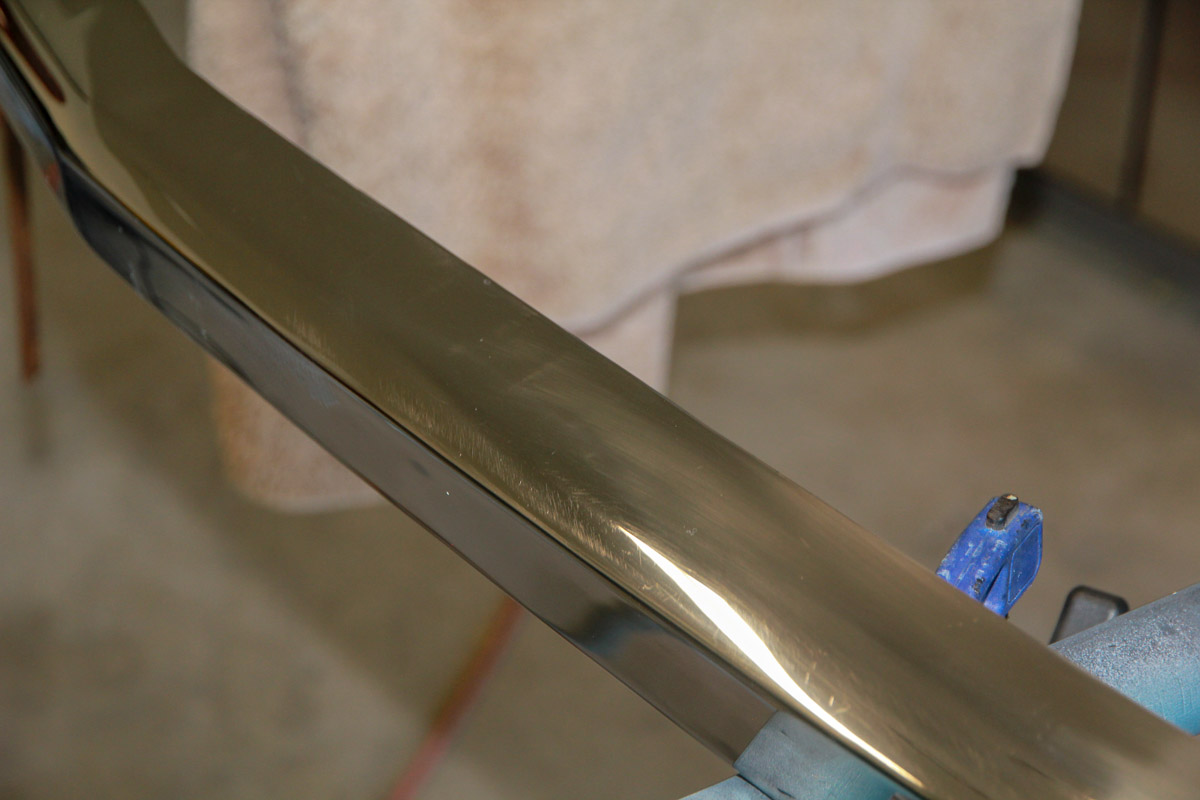
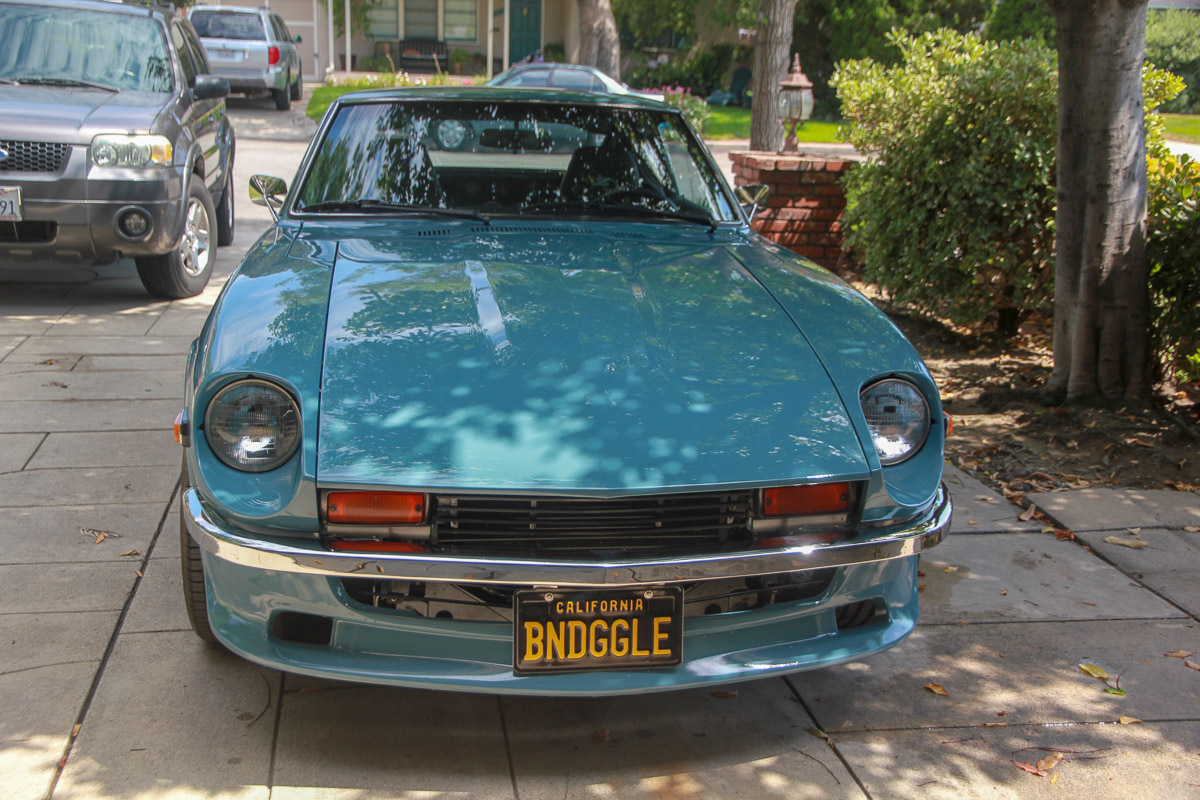
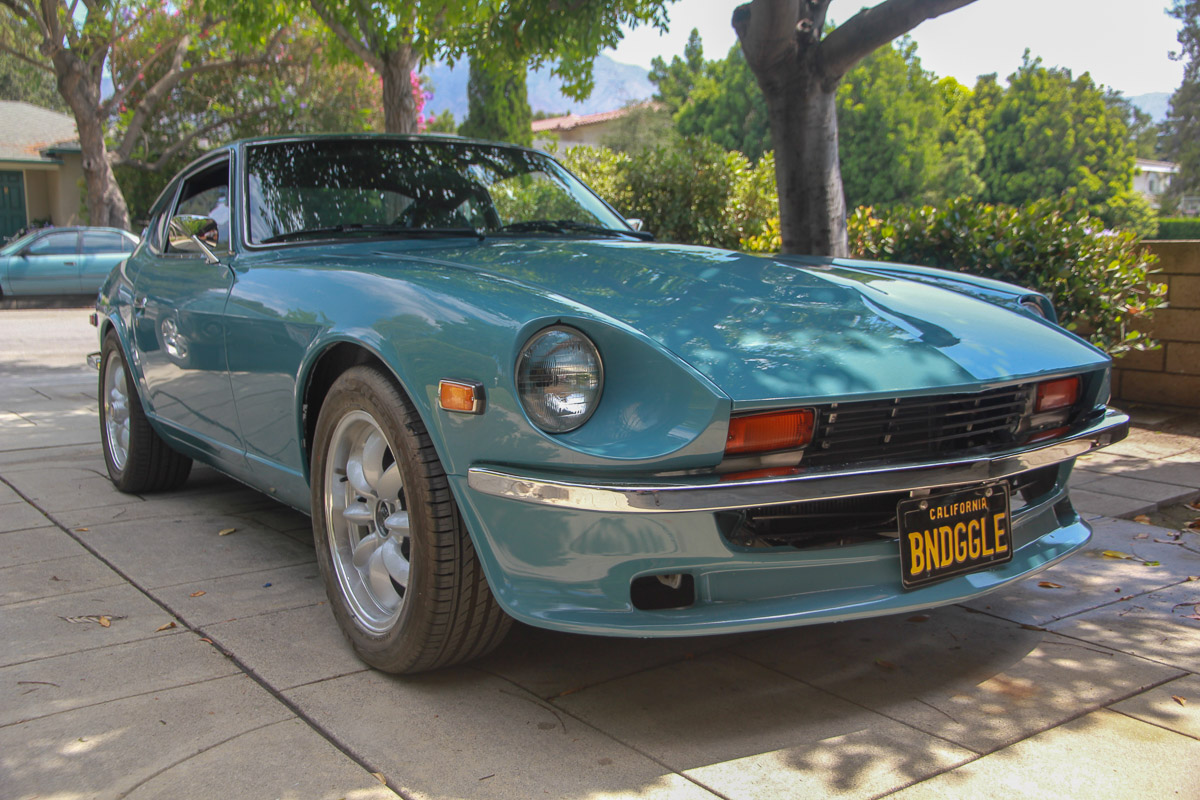
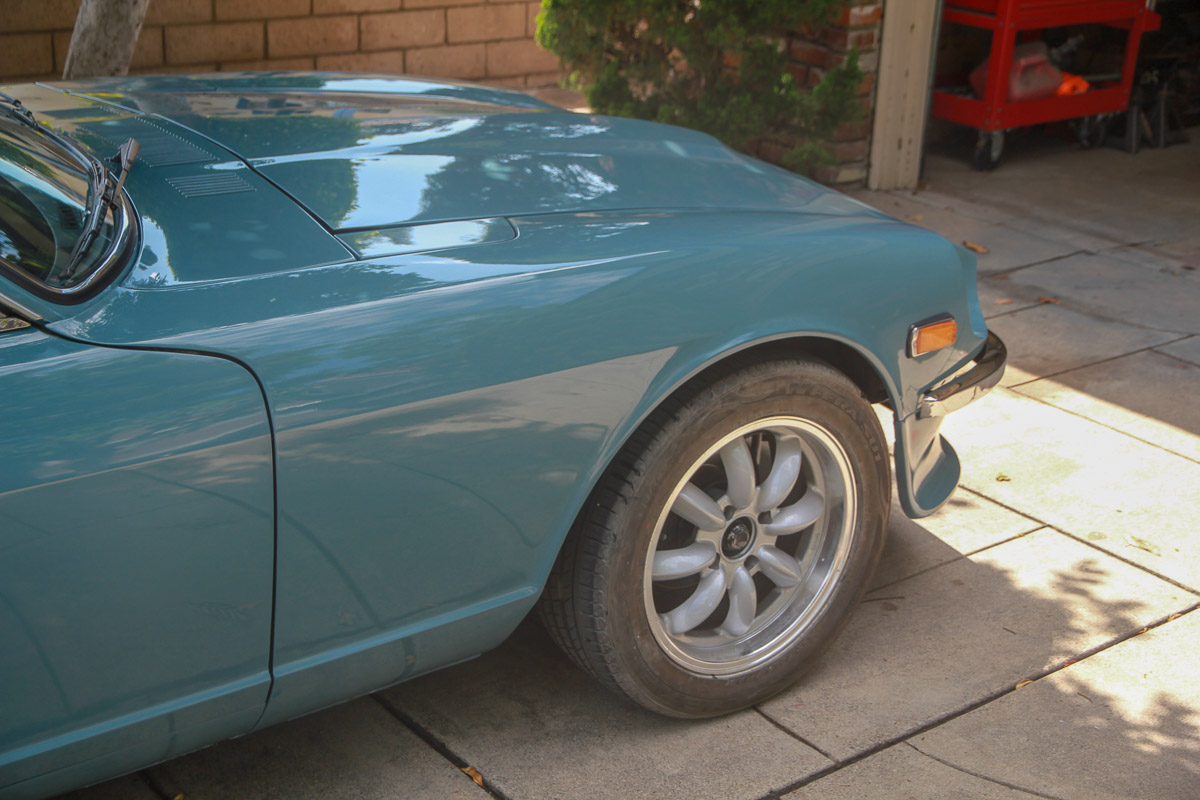
Well folks, it's 9 months later, and I have a whole car again. It was slow going: no driving because of the pandemic meant no real urgency, some anxiety about my ability to do the job well didn't help, but mainly it turns out that it just isn't as fun the second time around. Photo dump (of the things I remember to photograph): Here were the earlier days. The hood edge was crushed a bit and there was no hope of pulling it out and I wasn't going to just use filler. So cut and welded first, then filled. I probably applied and sanded off filler 8 times trying to get the curves right, but (spoiler alert) it just wasn't cooperating. Got lucky and found a nice headlight bucket on eBay for a very reasonable price. Couldn't find a fender, so I beat it into the best shape I could and welded the sugar scoop to it. The coat of epoxy showed just how much work I still had to do. A ton of sand-fill-sand on the fender, but it got there in the end. The wheel arch and the curve where the fender/headlight come down to the air dam were the biggest challenges. Time jump to late March, and I was feeling pretty good about the progress so sprayed both the hood and fender with epoxy to get ready for some final block sanding. Put too much paint on at one time, so I had to clean that up and do some touchup work on the wheel arch. Worse: after spraying the hood, I could see a flat-ish spot that I had felt when sanding, but talked myself into thinking it wouldn't be so bad. It was, so I stripped it all off and started over. Realized part of the problem is the hood on that side had kind of collapsed, so I shimmed it with pieces of steel bar (I had to do something similar on the other side a few years ago -- my poor hood is kind of a horror show). A few more rounds filling and sanding, and it finally came together. Let's talk paint. The guy I bought the paint from originally no longer sells that brand, so he had to try to match it. It wasn't great: I had to go back a second time to and have him tweak it, and I still wasn't confident in it. He gave me some extra black so I could adjust the tint myself. Tested on the old headlight bucket (good thing I saved it!). The dark half on top original, the light is what he gave me, and the blotches are my continued adjustments. Fortunately, I also had just enough of my old paint for one coat at the end. Still, there was a lot of hand wringing on my part about the color and a real concern I'd have a hood and fender that didn't match the rest of the car. Did a pretty okay job putting the paint on, though! Quick break for a "while I'm at it" job. The detent roller pin on the door hinge popped off a couple years ago. Not a huge deal, but an annoyance, and I already have the car apart so I should fix it now. Turns out you can't buy a replacement pin and I didn't want to get a whole new hinge if I could avoid it. Went to the nuts and bolts section at Home Depot and found a stainless bolt that fit the roller. Ground down the old treads enough to get the die to fit and cut new threads, then tapped the hinge. I don't know about longevity, but it works for now and only cost about $1.50. And finally the bumper. It twisted and buckled in two places in the collision. I used a bottle jack and 1x1 to get it back to the mostly-proper width, then wedged it under my engine hoist to fix the twist. It still needed more convincing, and I figured I had nothing to lose, so I beat the bejeezus out of it with a hammer to do the rest. Did a lot of hammer and dolly work, filing, and sanding to fix it, and had a couple spots that I just couldn't correct. So I turned the bumper upside down and now they're on the bottom. Had to weld in a couple of new nuts to make it fit right against the car. Polishing was a Sisyphean ordeal and I got to the point where I was only making the things I was trying to fix worse. So I called it. The finished product:


 1 point
 -
1 point
-
its pretty normal for it to look very low on the gauge at idle and warmed up. I wouldn't worry about it as long as it ahows higher when driving.1 point
-
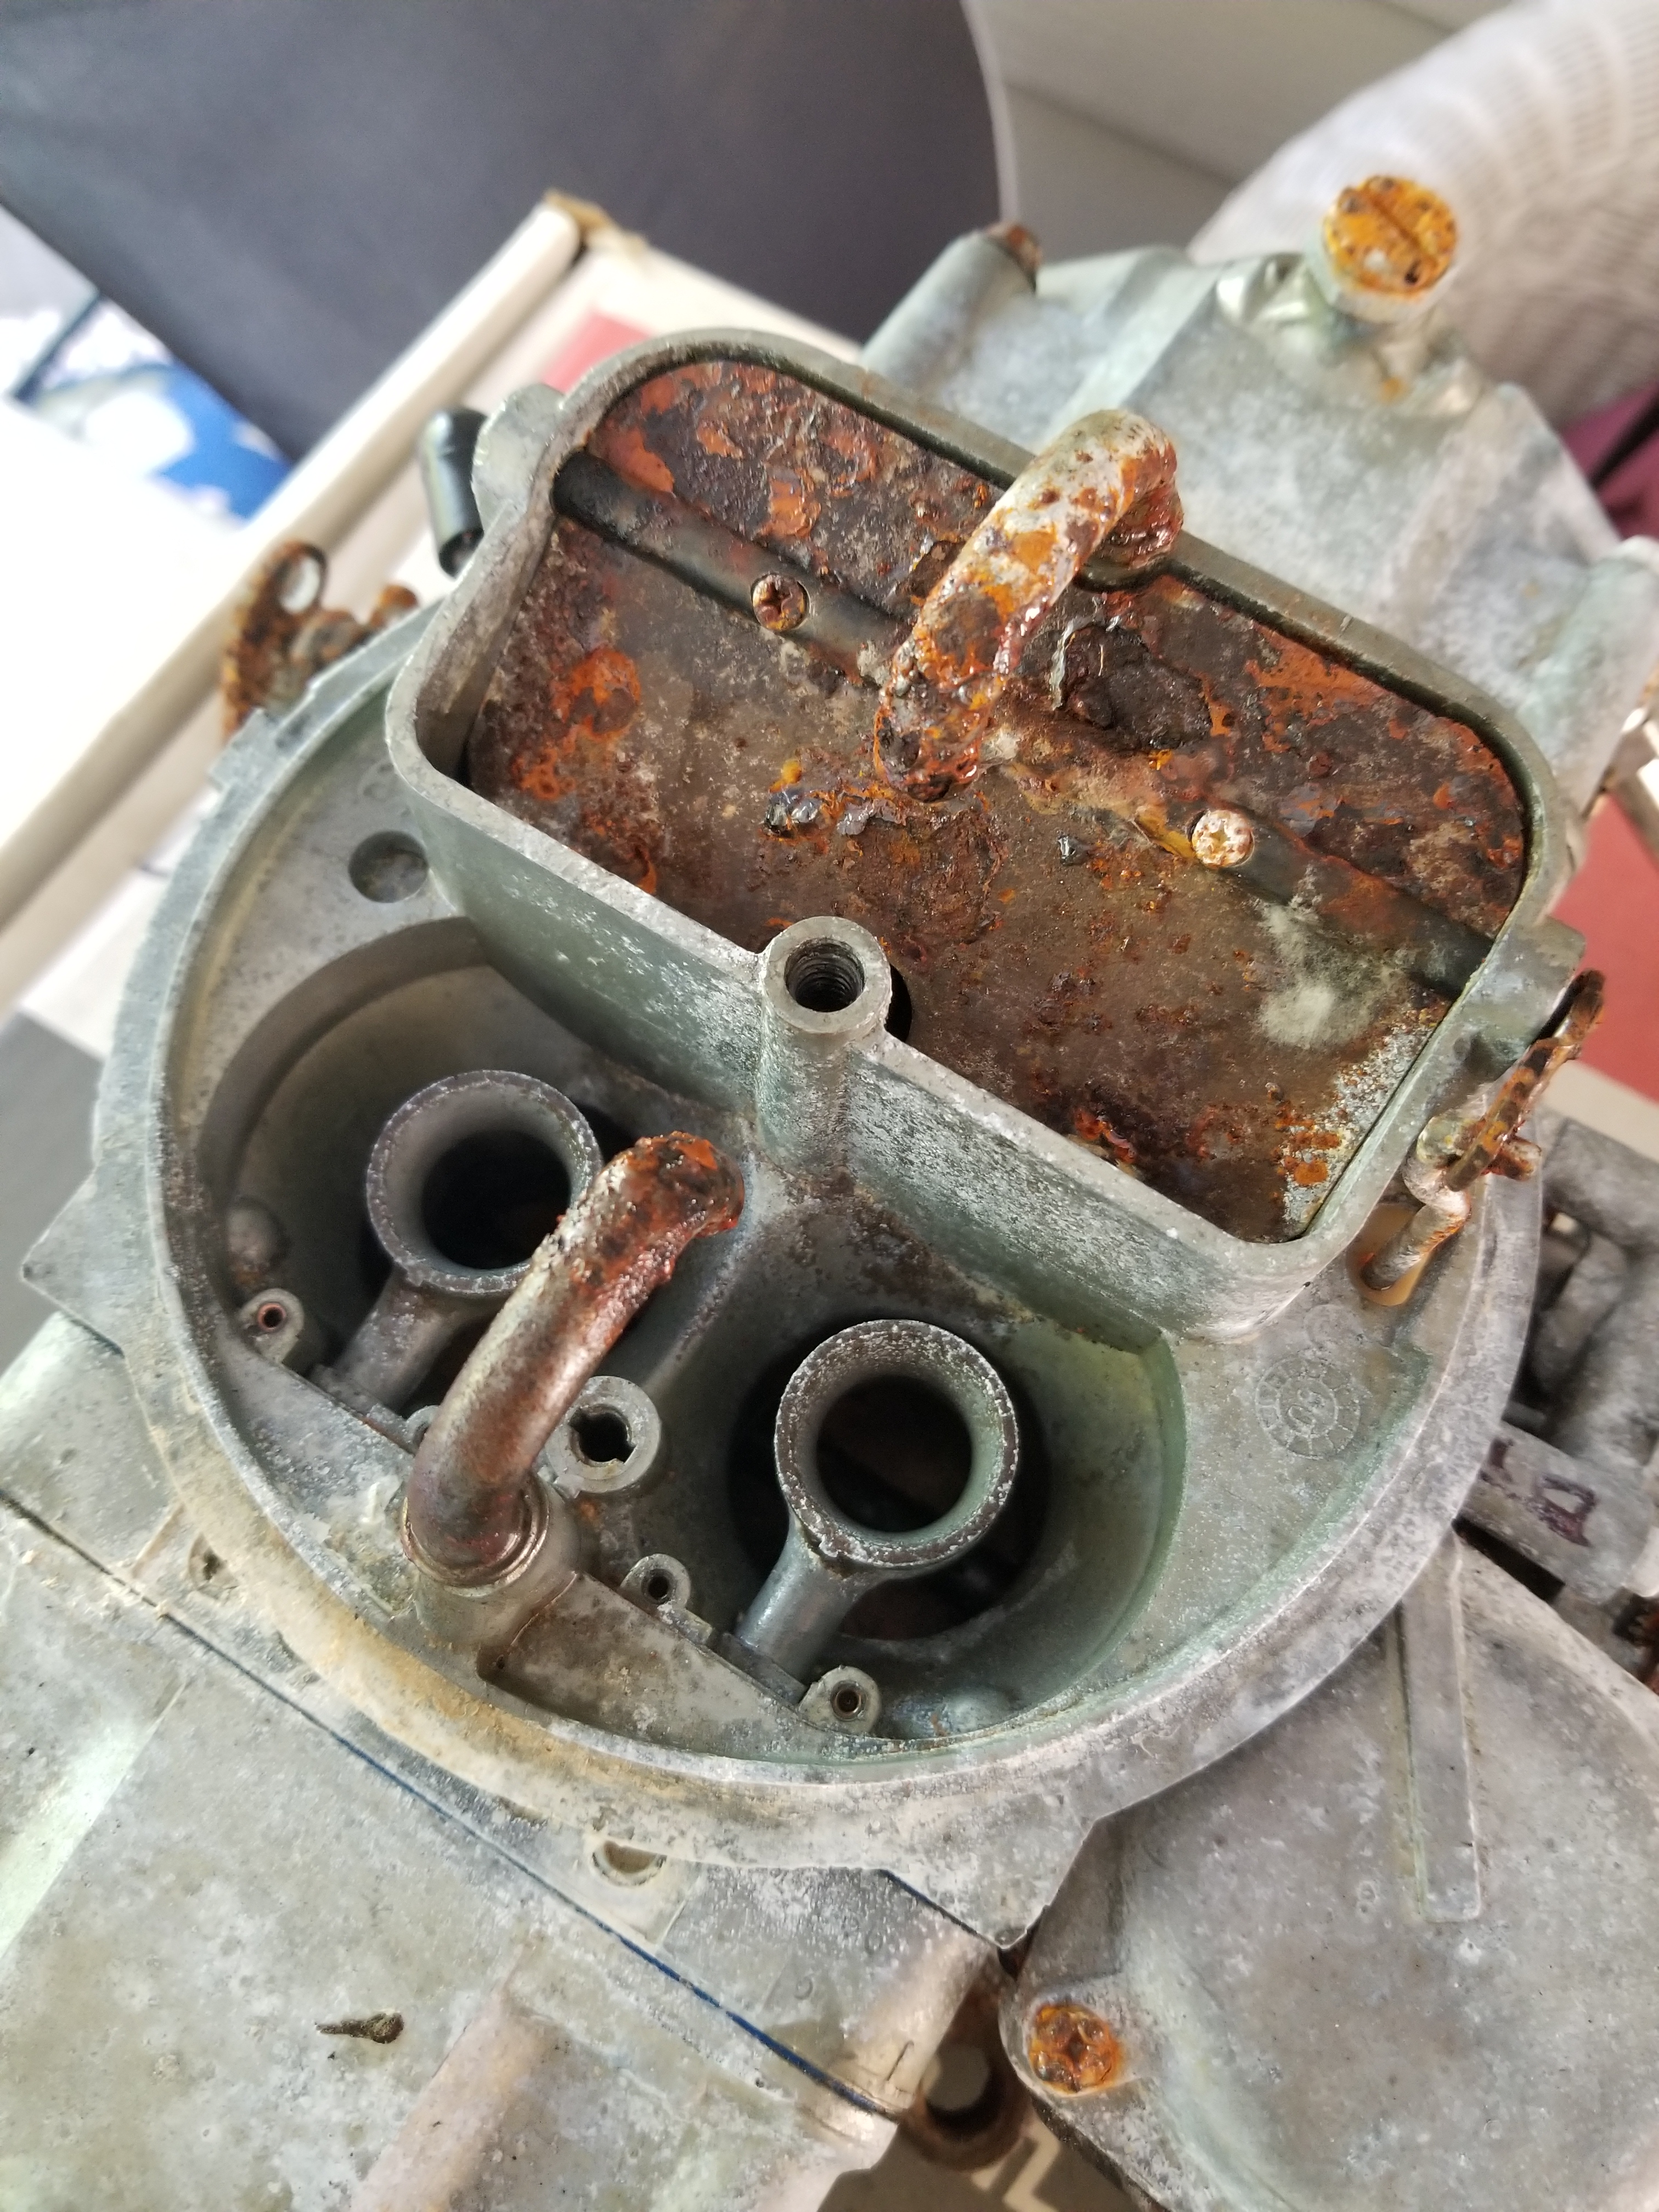
1 point1 point1 pointNo worries Jim. me & Jim D will swing by and pick you up on our way past the north Dallas area ....1 point1 pointWith that old Jetson's phone you have take an extra battery and charger along for the testing. Maybe some flares and a blanket or two. You can keep warm with one and send smoke signals with the other.1 point1 pointOh, and before anybody asks "Why did you pick 9 grams of extra weight?" The answer is "because that's what I found in my scraps box."1 point1 point0 pointsThis might be a contributing factor!! Secondaries won't even move. This is probably what happens when you don't buy a marine carb...? Fresh water boat only
 0 points0 points


Important Information
By using this site, you agree to our Privacy Policy and Guidelines. We have placed cookies on your device to help make this website better. You can adjust your cookie settings, otherwise we'll assume you're okay to continue.