


Leaderboard
-

Mike
Administrator13Points23,065Posts -
jfa.series1
 Subscriber
 7Points2,734Posts
 -

240260280
Free Member6Points4,442Posts -
240z70
Free Member5Points82Posts


Popular Content
Showing content with the highest reputation on 06/03/2021 in Posts
-
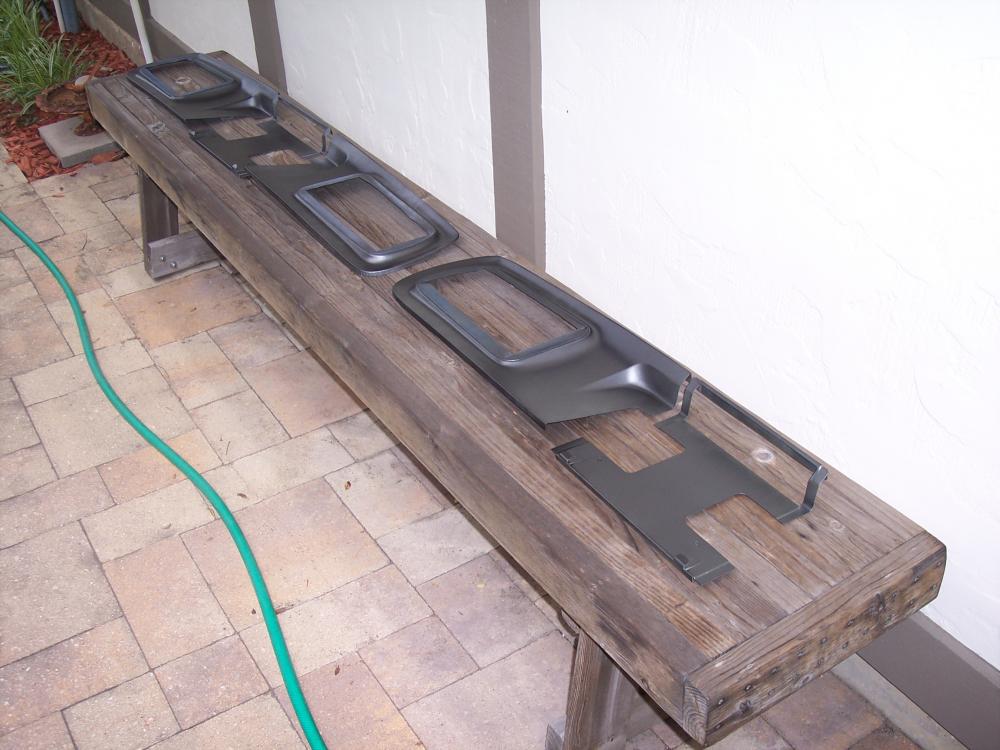
6 pointsAfter weeks of rain we are finally getting some somewhat dry days (discounting Florida-quality humidity) and I can get a bit of painting done. Two sets of tail light panels got their first coat of Dark Shadow Gray today. One set is targeted for my ride to swap out the satin black set on it as part of the resto, the other set will hit the classifieds when complete. A grill to swap has been completed for some time.
 6 points
 -
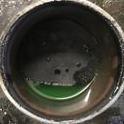
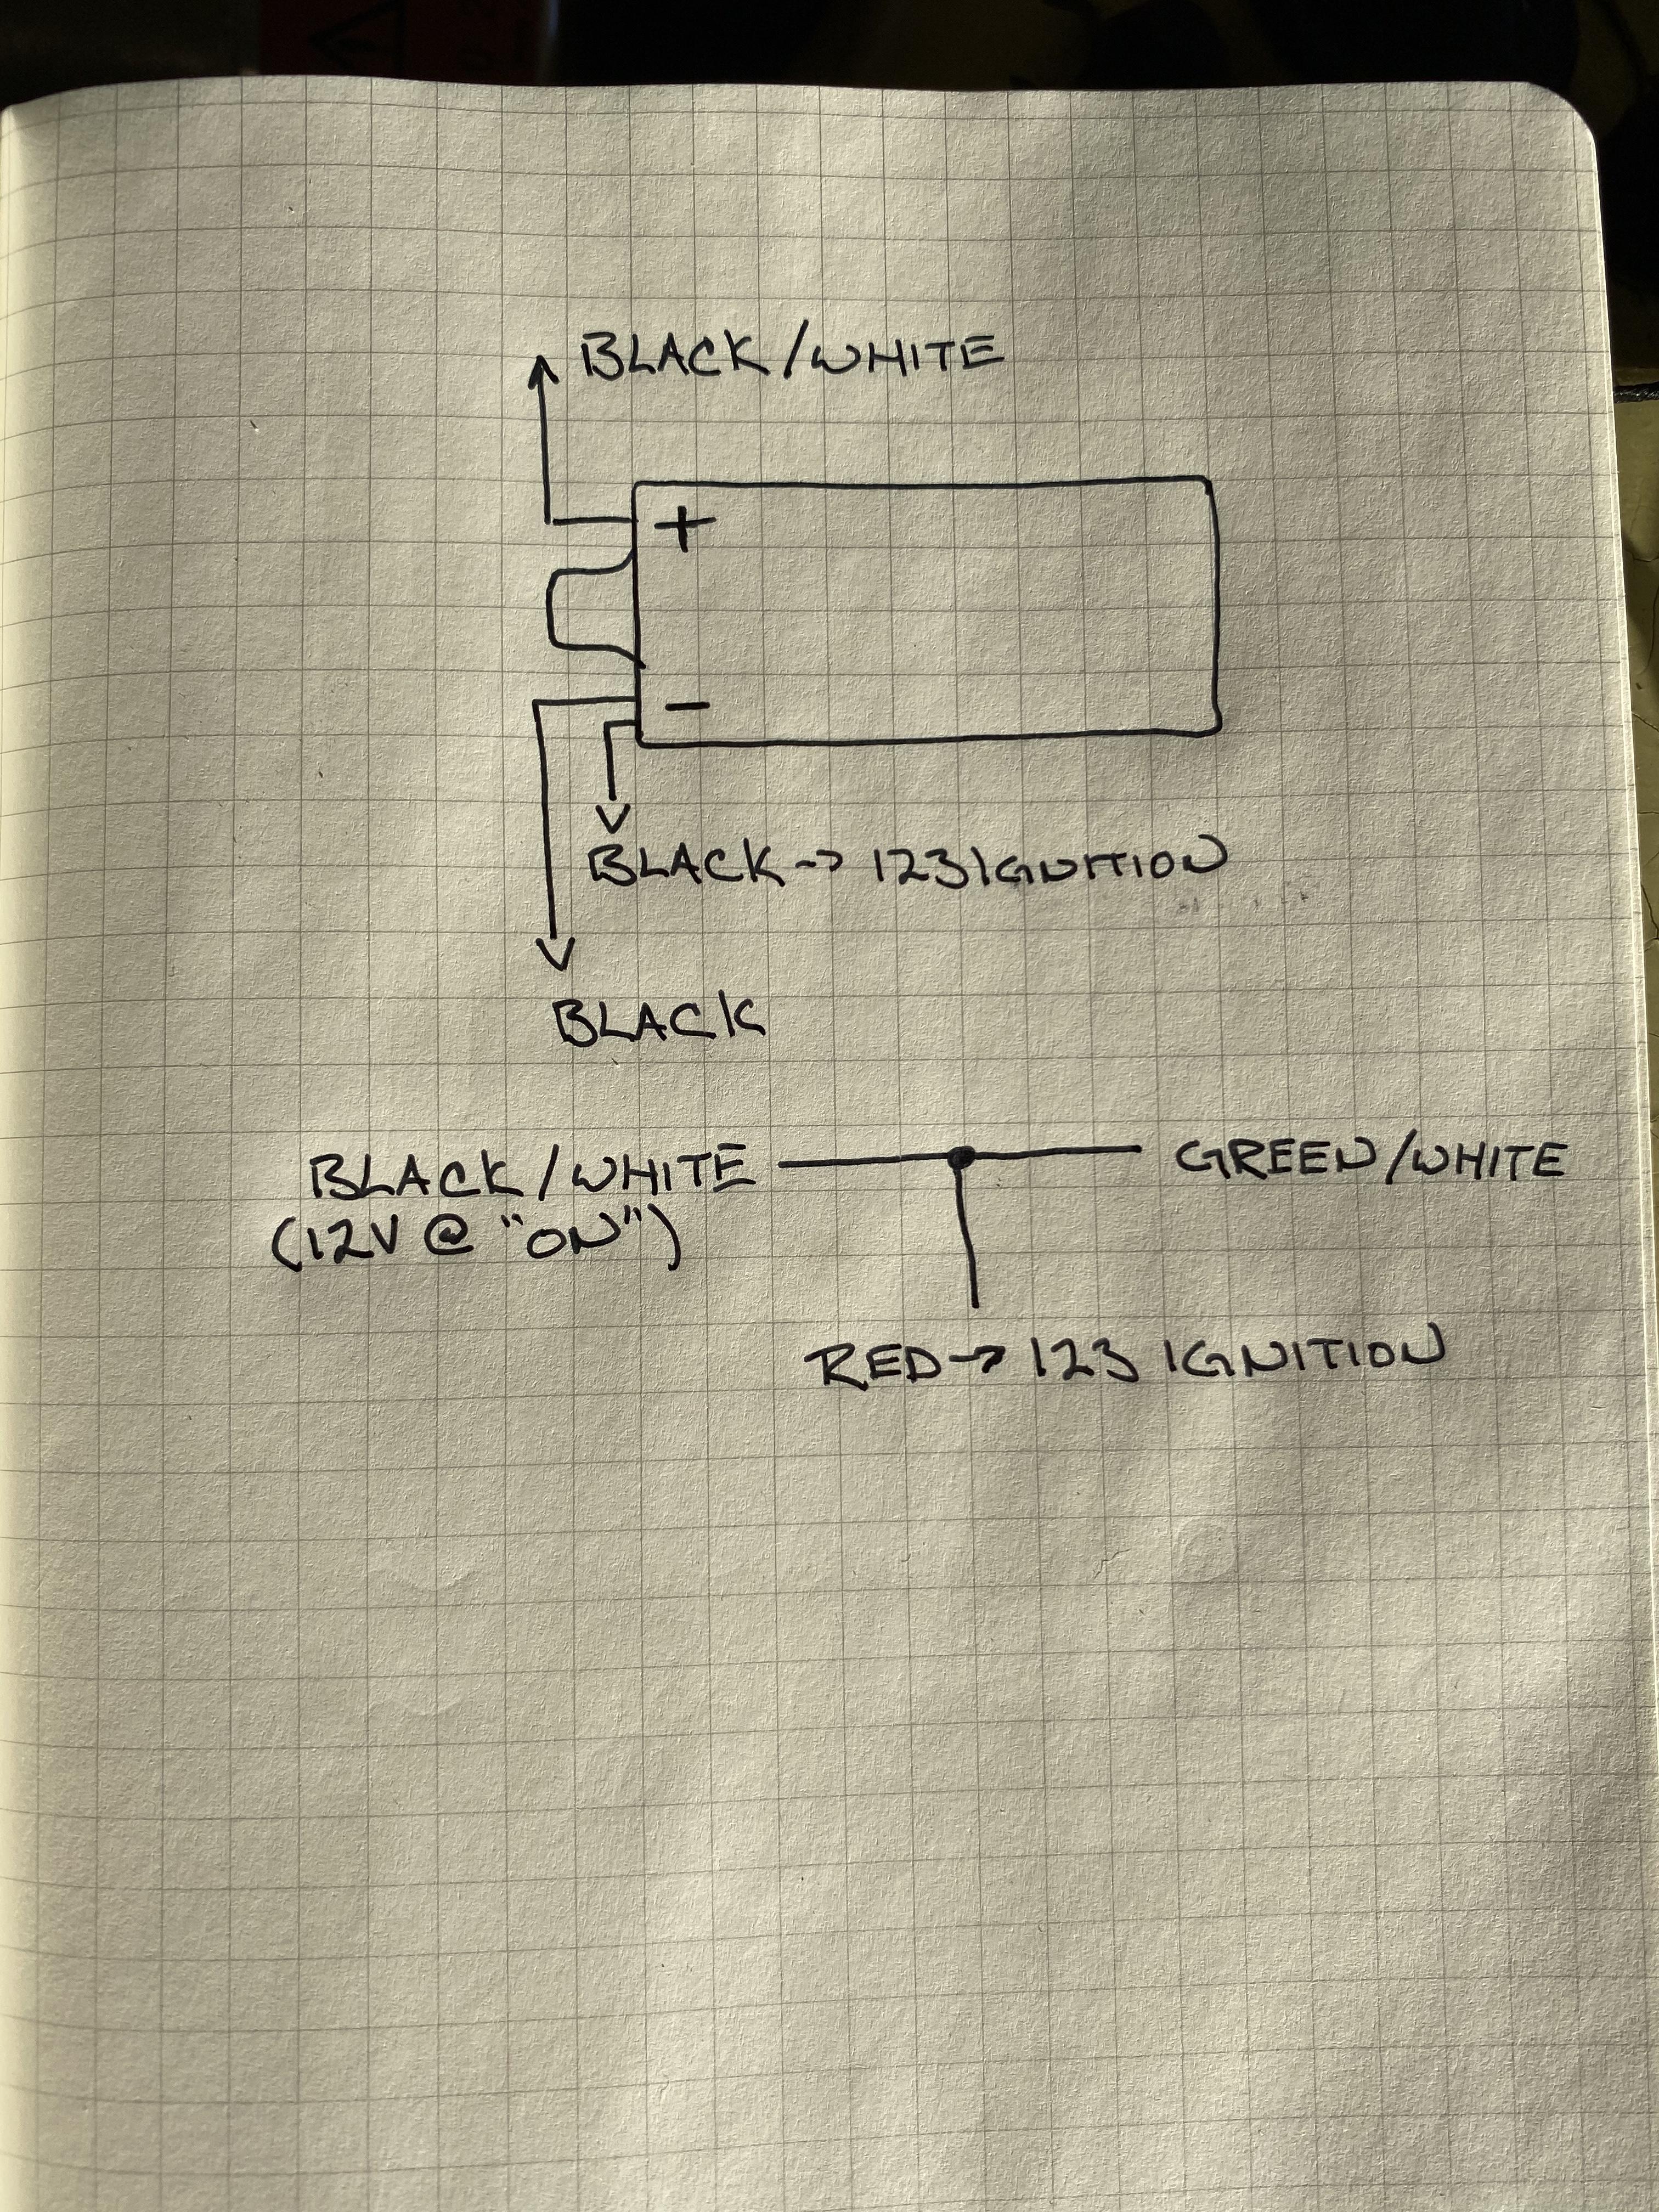
6 points6 points4 points4 points4 points3 points3 points3 pointsI've always thought it was to lessen a rough and shaky steering wheel, a shock absorber, plus a quicker way to remove the steering rod.3 points3 pointsSpeaking as one of those Geezers who just hits the "command+" keys to enlarge the font, can anyone tell me how to make my TV louder?3 points2 points2 pointsMy guess is that it was put there to serve as a means of dampening excessive vibration and/or part of the collapsible steering wheel assembly for US crash safety requirement of the period.2 pointsLet me just restate my sentence now. "Great news!!!! Bosch relay #0332514120 does in fact WORK! Received my unit today and tested it and confirms it does work. Operates exactly as the old one with fuel pump turning ON in start and shuts off if AFM does not trigger fuel power. Connectors fit perfectly without modifications needed! Relay is slightly bigger than my old one but it will become a cheap insurance piece now!"2 points2 pointsPat, could one just make one? I mean, if you have a metal lathe you could turn a big chunk of aluminum (very expensive..) or just a block of hard wood such a oak, etc. and make it. It should not be a problem if the wood is hard and can fend off damage from the pressure and it would be very cheap to make. almost any size bend you want. Add a bottom base and screw it onto your work bench when you need it. The other idea I had was just buy (fleamarket/craigslist) some cheap V-Groove Belt pulley/wheels that have the same shaft hole size, grab a small steel plate, weld a shaft on it vertically, and put all your different sized V-Groove pulleys on the shaft. Just make sure that the pulleys have the same center hole diameter size. Or make multiple shafts, one say for larger pulleys and others for smaller tubing sizes. That will let you do anything from small tube size up to whatever size you need. There is not many sizes that one would need. Anyway, just an idea of how to possibly do it on the cheap and easily accessible. As my dad use to say " Be frugal, when you need something, make use of what you have first, then look for the easiest solution to adaptation to fulfill the need'.2 points2 pointsTweeds, hey what can I say? You were right on the money with that tool. Simple to use, no issues. Did not eve try the other type that I have since I did not want to waste time and definitely not waste line once I had it in place, isolated and secured....Thank you for the advice. Also, thanks to all who have provided input which I will follow. I will try to bleed the MC first, then I may just redo the wheels, and try again. I will also check for leaks. If I cant fix it, I will remove the booster and either make my own reaction disk if it is missing, redo the booster push rod adjustments or just plain replace the booster with a new one. If I go with the adjustments, and it still does not work, that will be an automatic decision to buy and replace the booster. If I don't feel like messing with the adjustments, then that will also be a decision to just replace the booster. Don't know yet how I will feel. Getting tired of bleeding brakes to no avail.... https://www.jegs.com/i/JEGS/555/631011/10002/-12 points2 pointsI agree with grannyknot, when I read your post my first reaction was air in the system. When I replaced all but one of my brake lines last year, I had this exact problem. It kept coming back too as there was the tiniest weep in two of the connections that simply needed tightening up a fraction more. Use white kitchen towel / tissue to check the lowest point of each pipe to ensure you don’t have a tiny leak somewhere. Lastly, I stopped using the pumping the fluid back into the reservoir method as I found it was introducing very small air bubbles back into the reservoir. These days I just pump it into another container. Ps. I just discovered this tool at the weekend. If I did it again, I would buy one of these.2 points2 points2 pointsI think your web browser settings might allow you to increase the font size. You can also use “control and +” at the same time to increase font size and “control and -“ to decrease font size. ”control and 0” to reset it. on a Mac you have to press “command” rather than control.2 points2 pointsI've never had to fool around with the reaction disc but you can bleed the MC by routing some clear hose from the bleed screws on the MC and bring that hose up and immerse into the brake fluid reservoir then just pump the brake pedal until all the air bubbles are gone, without bleeding the air from the MC first you'll never get it out of the rest of the system.2 points1 point1 point1 point1 pointRockauto typically carries a good selection of aftermarket rubber bushings that can fill in the gaps for missing Nissan items.1 point1 pointI bought a car stethoscope to do that. Hoping to have time this weekend to troubleshoot.1 point1 pointa large bore rubber hose (like a heater hose) held up to the ear and then move the open end around the engine bay may help zero in on the noise. it sounds external. this technique is very good at finding exhaust leak noise.1 point1 pointAdjustment Disorder. https://www.webmd.com/mental-health/mental-health-adjustment-disorder We can help you work through this. Fortunately, I'm married to a psychologist so I no longer care what kind of oil filters are on my cars.1 pointCharles has a good point, Shawn. Start with the easy stuff first. That would be the first paragraph in post #6. It sounds like the electric fuel pump operation will be more challenging for you to diagnose, but that's okay. Also, let's pause to talk about safety. There is a good chance you'll be needing to work around the gas tank. Do you have access to a lift or solid jack stands? Jack stand points are shown in the FSM. Wear safety glasses to keep all of that old grease out of your eyes, and your Covid mask will keep that crap out of your mouth (experience talking here). If you need to replace the hoses in the tank, drain the gas tank. There is a drain plug on the tank. Just make sure you have enough storage to catch the gas. I like using a huge oil catch pan (5 gallon) and have a couple of 5 gallon gas cans in case the tank was pretty full. Have plenty of 5/16 fuel line (low pressure fuel line will work). If you remove lines, do it section by section so you don't accidentally mix up your supply and return from the tank. As I mentioned before, if the fuel line around the electric fuel pump has never been touched, it is definitely old and brittle. When I dropped the tank to remove the rear bumper many years ago, those lines snapped like dried twigs. Have compressed air available to blow out the hard lines, too. It doesn't hurt. You may need to drop the tank and clean it out, too. That is a technically easy but time consuming process the first time you do it.1 point1 pointOn the noise in the video: It is a knocking sound, not a ticking. It is deeper and not a noise that the valve train would make. It is most likely a main or rod bearing. The only way to know for sure is a tear down. As for the valve adjustment, here is how I do it. Set the engine at #1 top dead center, using the timing mark on the crank pulley as a reference. The #1 cylinder will have both valves closed and can be checked and adjusted. Also, half of the other valves will be closed, or the cam lobes will be in a position to allow adjustments. Then rotate the engine one full turn until the timing mark is again lined up with the zero mark on the pointer. I forget which cylinder is then at top dead center, but the other half of the valves will also be in a position that they can also be checked. I have done it this way hundreds of times, and can run through a valve adjustment in less than 15 minutes. Remember, the lash settings are specified on a hot engine, and if you fiddle around too long, the engine will cool too much to facilitate proper adjustment.1 point1 point1 pointI think another forum member recently had an issue with his booster that he got from a supplier, unfortunately they sent in the old one as a core exchange. makes me even more inclined to say rebuild is the way to go.1 point1 pointOh no I trusted you! I just wanted to inform the previous members of the attempt.1 pointDid you think I would steer you wrong? I think Tony D was posting about the VW fuel injection relay over at Zcar.com back around the turn of the century. I'm a vast repository of useless trivia, but sometimes some useful information sticks, too.1 point1 pointActivities: Front to back Brake Line replacement, Rear Handbrake cable replaced, Clutch Line replaced due to visible wear and tear, MC pressure retention valve, remove & replace speedometer cable. MC Pressure retention valves were seen in both MC orifices. The one servicing the disk brakes was removed. Clutch Line Replacement: No problem, Adequately bled it afterwards. Clutch functions well. Rear Handbrake Cable: One heck of a job. Because of dual exhaust, and drive shaft were in place, this is one *itch of task. No room to maneuver. However it got done. May still need additional adjustment but for now it stops the car from rolling. Also, the cable is longer on one side than the other. Didn't know that.. Issues, one of the tabs securing the line to its holder in the tunnel broke, had to make one. Will need to buy replacement ones but they are narrower than the brake holding tabs and not sure where to get these new. Remove/Replace Speedometer Cable: R&R Speedometer cable. You have to be a circus contortionist to work upside down under the dash....Got done. When tested it was a bit jumpy/ delayed, but it did work. Could be because of years of non-operation and that fault may be inside the gauge itself...The old cable was rusty and had broke in half. The plastic/rubber outer casing was damaged and missing in some spots. Front to Back line replacement: Well, I actually did "OBVIOUSLY" forget, BUT the line was only flared on one side (back), since i cut it longer than needed because I want to place it first and then see how and where i would cut it....hah hah, before I attached it to the car. So the fitting was fed on the hood side and I tied a rope behind it, then pulled on the rope while underneath the car and the fitting made its way all the way to the back...Pretty easily, actually. Cut back the old line to the tunnel area so it would not be left in the engine compartment and leaving the securing tabs there free for the new line.Then I isolated the line, by getting two long pieces of fuel hose 5/16 or 3/8 and cutting it long ways in a spiral cut that would wrap around the line the entire length of the under-body. Then I zip tied the hose every 6 inches around the line. Did not cut the line on the back side, just bent it out of the way. The next thing was to now secure the line/hose along its way and out of the way of any pinch points and/or moving parts. Then the final touch was to bend and secure the line along the underside. Looked good. Now that left me free to bend and secure the new line into the brackets in the engine compartment that had held the old line. Now came the time to put on the front fitting and bend the line accordingly to the MC. Then I knew where to cut it and flared (once again ensuring that the fitting was on the line and facing the right way. Then I flared it and could now connect it to the MC. Bled all four wheels, and tested brakes: The brakes do stop the car BUT take 3 times the distance. The brake pedal does go all the way down and is soft, (feels almost like power ABS Brakes) not that traditional had mid way resistance. Will have to analyze and address again. I guess another way to put it is to compare it to the steering on a 240z compared to the powered steering on a new car.. Known: The MC is a 15/16 which provides additional stopping power (~20%+) versus the stock 7/8 MC, and the Booster is a 7" double diaphragm which also provides additional stopping power (~27%). Together, the added stopping power should make the car brake and curl on a dime. It does not. Suspected: The Booster reaction disk is missing, and the booster push rod is not correctly adjusted for length. This would create a long brake push. It does not have an airy mushy push like when a brake system has when it has air in the system, HOWEVER I did not bench bleed the MC and the fluid receptacle was empty. Path forward: Remove the MC, Remove the Booster, check for existence of reaction disk (if not there, buy/make one - 6mm thick I believe), Adjust booster push rod correctly, reinstall booster/MC, bleed MC. May also re-bleed the 4-wheels. Assistance: Any and all would be appreciated in the form of diagnosis, suggestions, and information on perhaps where to get a reaction disc and what the soft brake causes could be.1 point1 point1 pointThe suspension parts should be identical between the 2 cars so you shouldn't have a problem there, the poly bushings, although they may improve the handling will give the car a harsh ride, if you're tracking the car they will be an asset, if it is a street car you may regret your choice. There are a number of members here, myself included who have installed poly bushings only to turn around and replace them with fresh rubber bushings. Sand blasting then paint or powder will give you great results.1 point1 pointPower Brake Exchange in San Jose, they also have a location in So-Cal, get them to power coat it too, they rust out fast.1 point1 pointHere ya go... https://www.thezstore.com/page/TZS/PROD/24-5231 if you have a 2+2: https://www.thezstore.com/page/TZS/PROD/24-52321 point1 pointI am going to agree that this is the issue because it was so hard to unclog, and I could have broken it when shoving wire and stuff through. Removing tank as we speak. I will send it off somewhere tommorow. Fingers crossed this ends the EFI nightmare for good. Never knew this was a problem until now, because the flow was much better before I drained the tank today, but still pulsed every once and a while. The difference is I have 8 gallons in the tank now, and I had a full tank before. Likely masked the problem until now.1 pointWahoo it works! Thanks for the help @Firepower For anyone else who stumbles n this thread, here’s how I wired it up. I made a “Y” connector to connect the following wires: - Green/White - Red wire that goes to the distributor - Black/White wire that gets 12V when your key is switched to “on”. The other black/white wire (which does not read 12V when the key is in the “on” position) goes to the positive terminal of the coil.
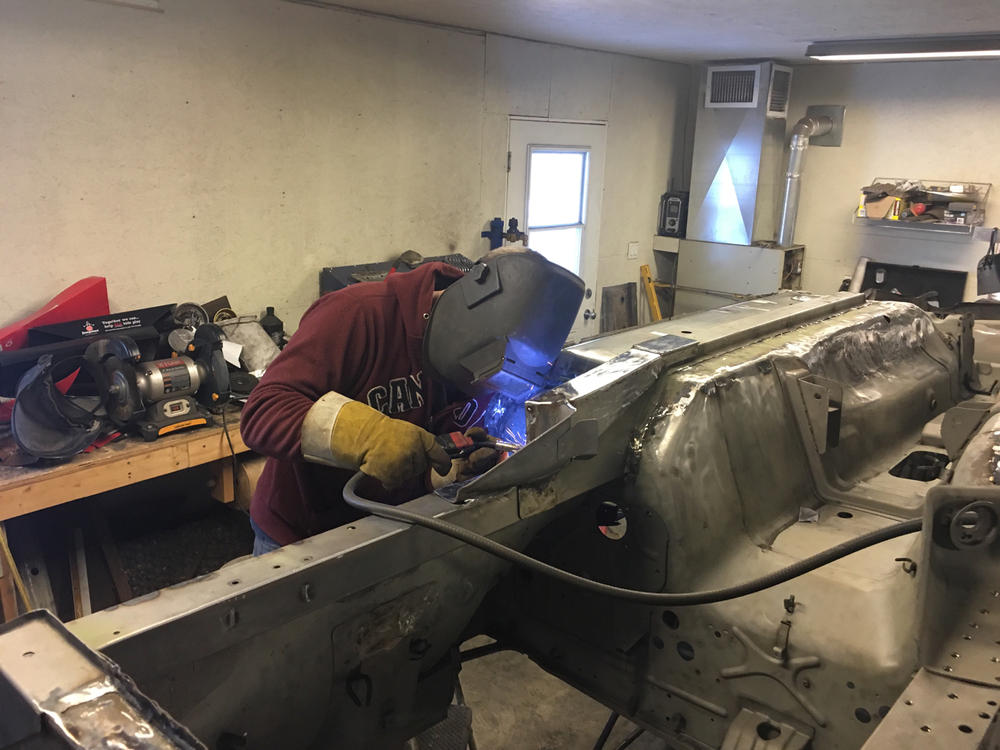
 1 point1 pointCarnegie Hall is just around the corner. I'm no welder, but one anecdotal piece of advice to me that helped me.... While you're laying down a bead with a MIG, it should sound like frying bacon.1 point1 pointI am a mechanic, but not a restorer, and I have decided to weld and fix all my rust issues on my 240 and fully restore it. I have the room to do it. I can see if you dont have the room to do it may make it more daunting, but where theres a will theres a way.
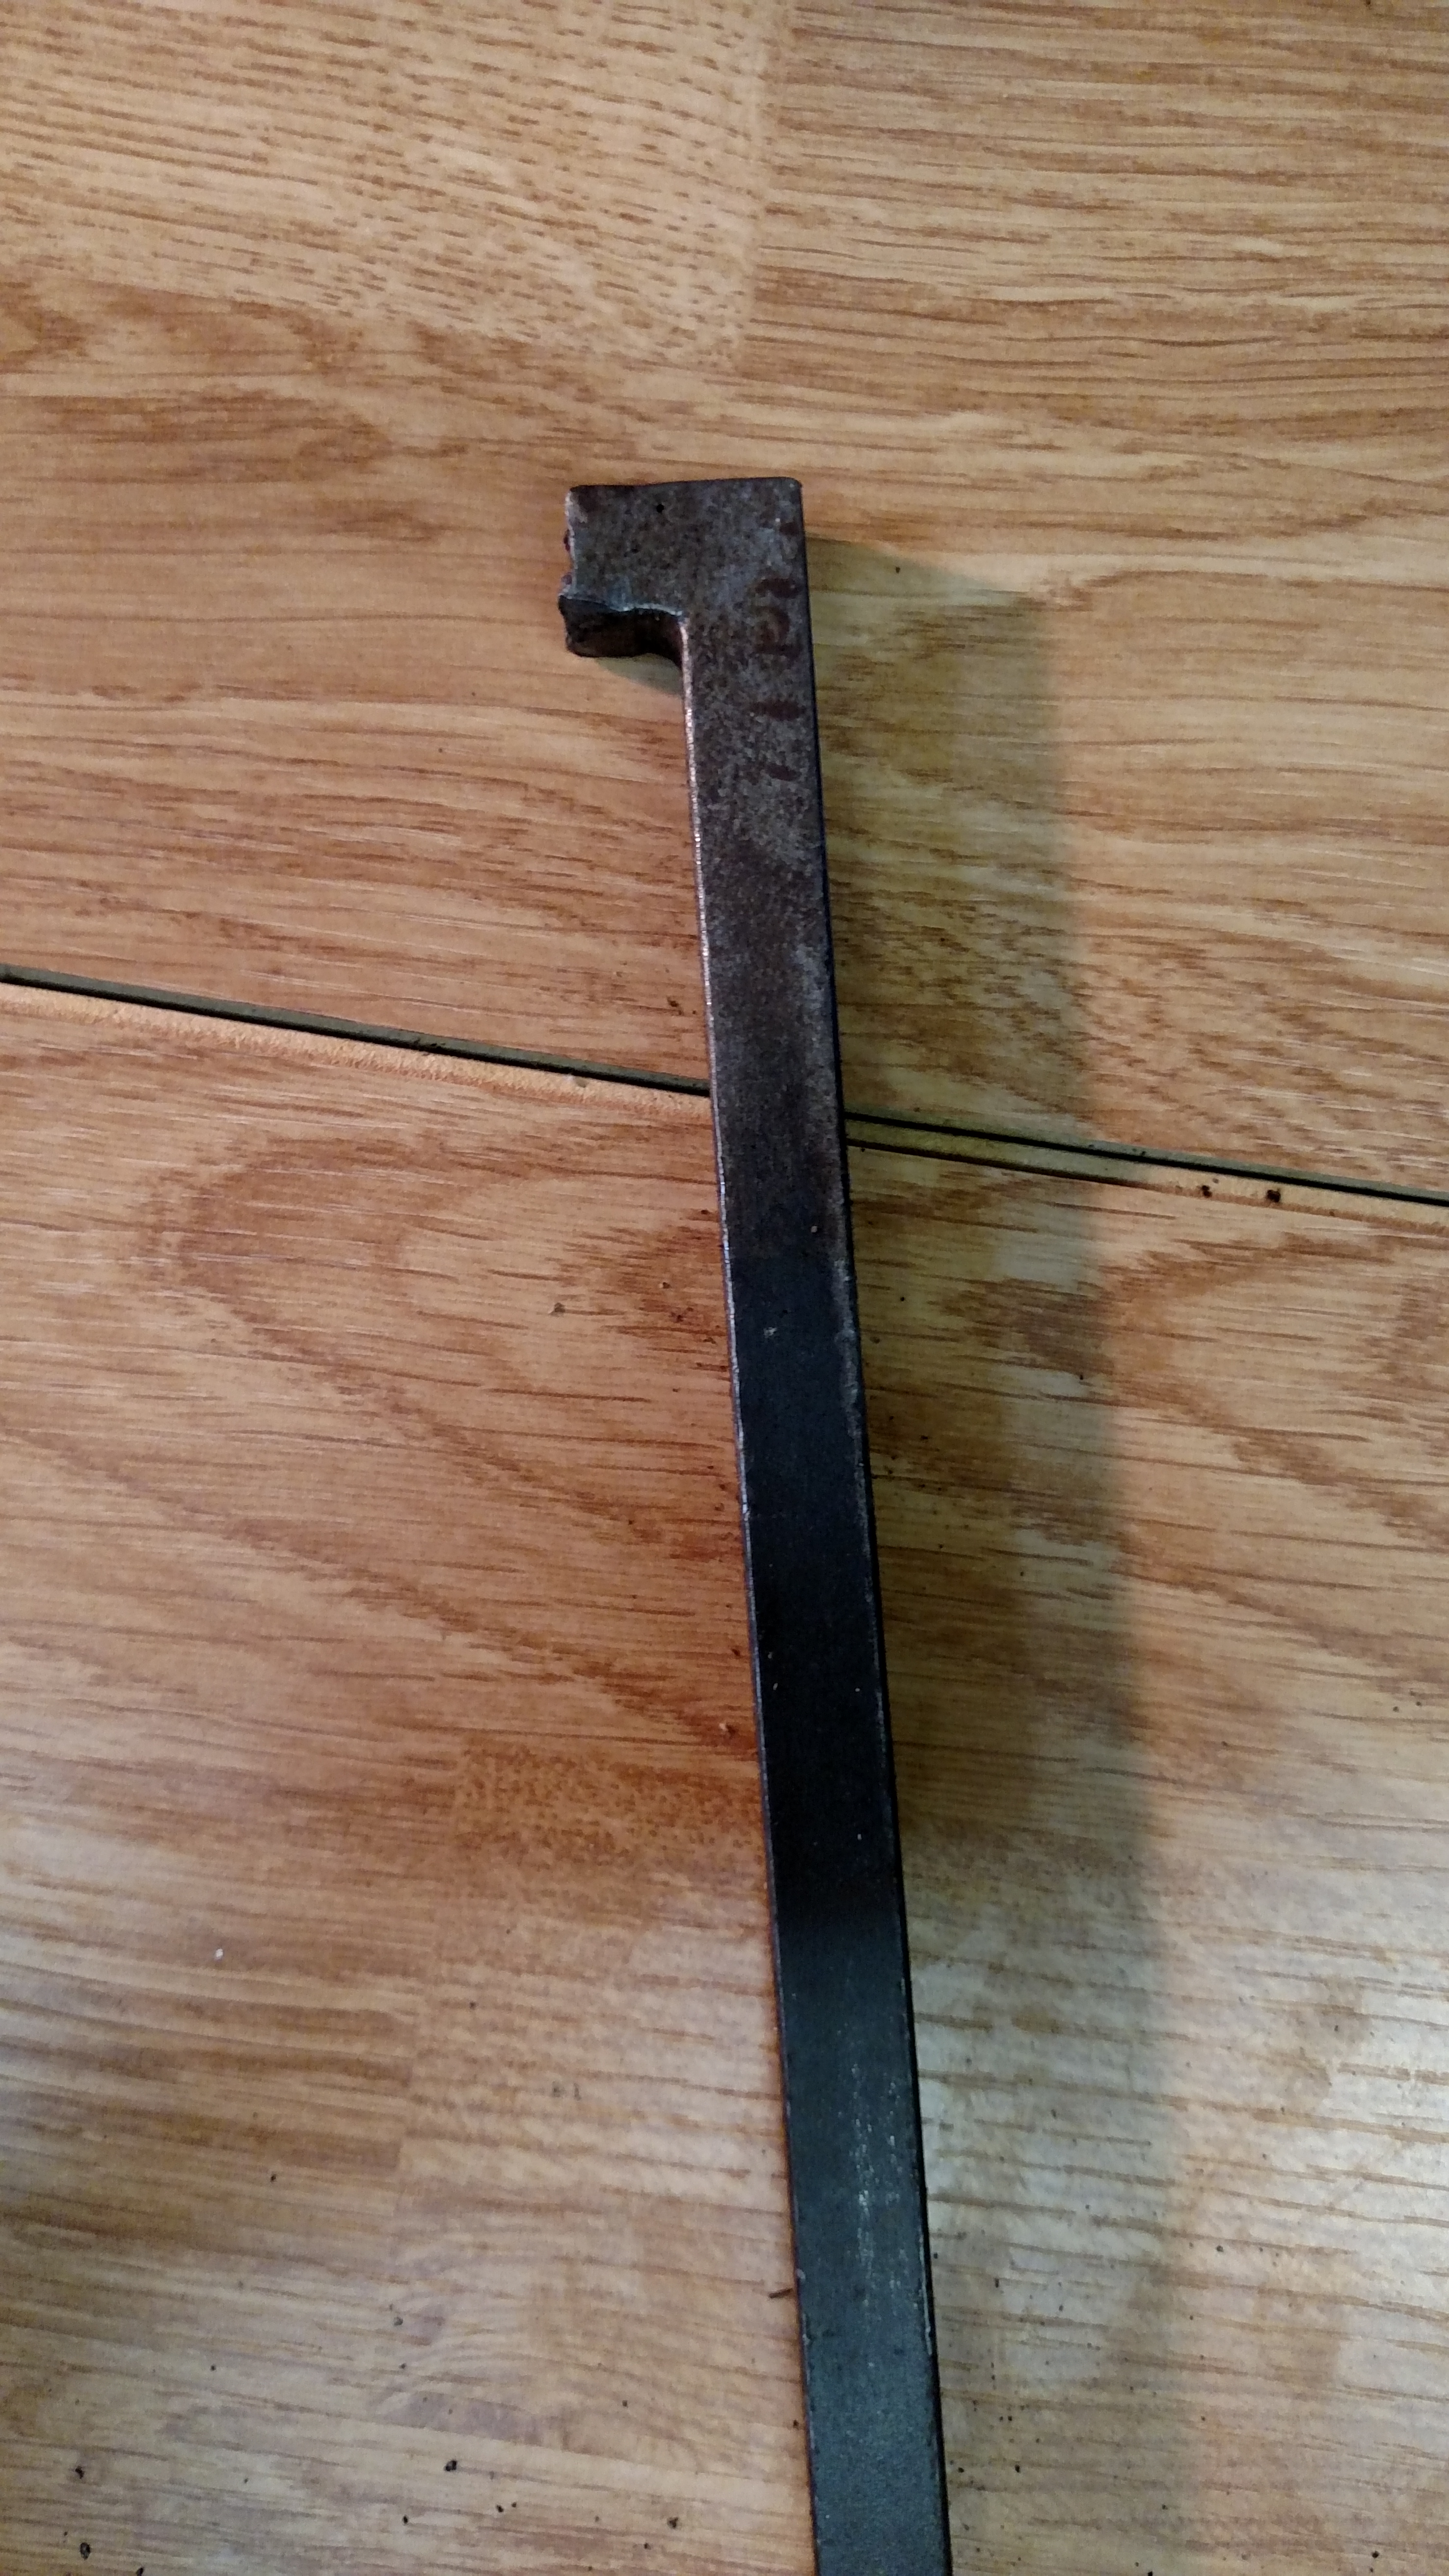
 1 point1 pointI think the point he is trying to make is: ...not trusting parts that look suspect. If you're going to touch it, go ahead and make sure it's good. Of course the Datsun way for many people has been run until it breaks, then patch it. These have been cheap cars for many years. That has changed greatly recently. I tend to come down more on the side "if it ain't broke don't break it" I have limited funds to throw at projects. The exception being if I want it pretty, then by all means tear it apart and plate everything!1 point1 pointOk so I mis measured. Looks like it is 18g. Sent from my iPhone using Classic Zcar Club mobile
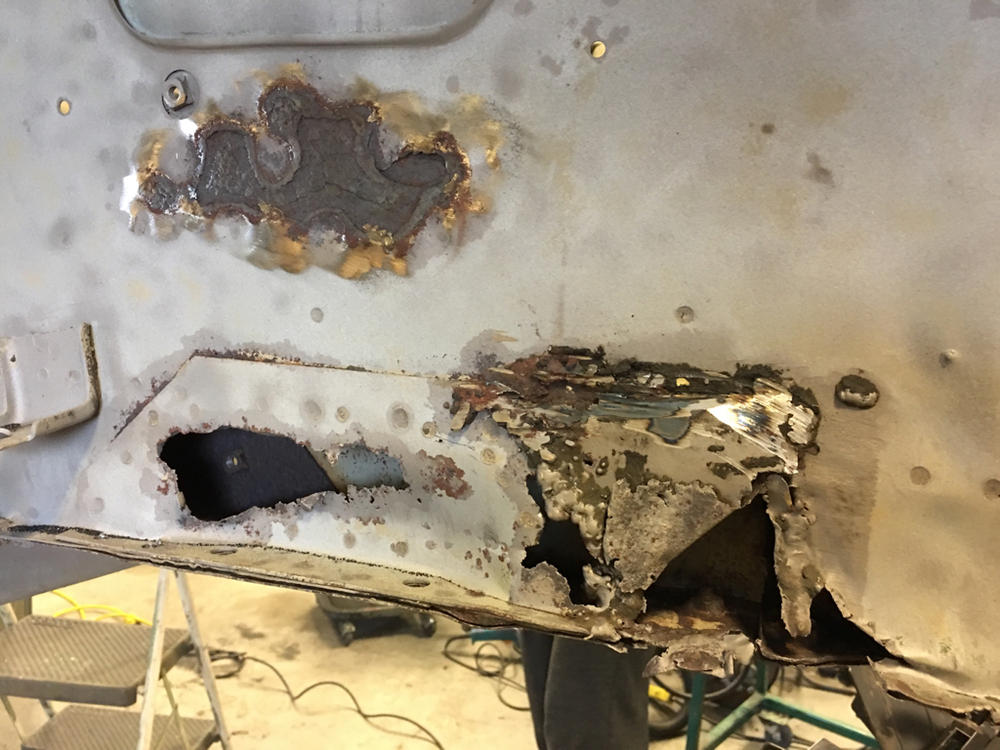
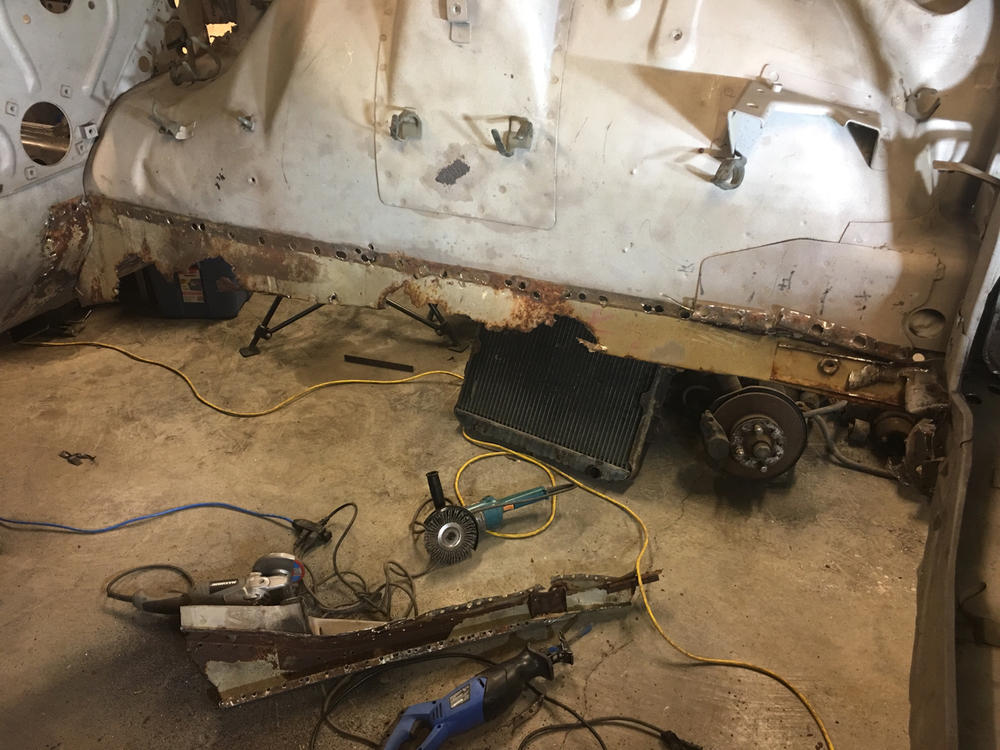
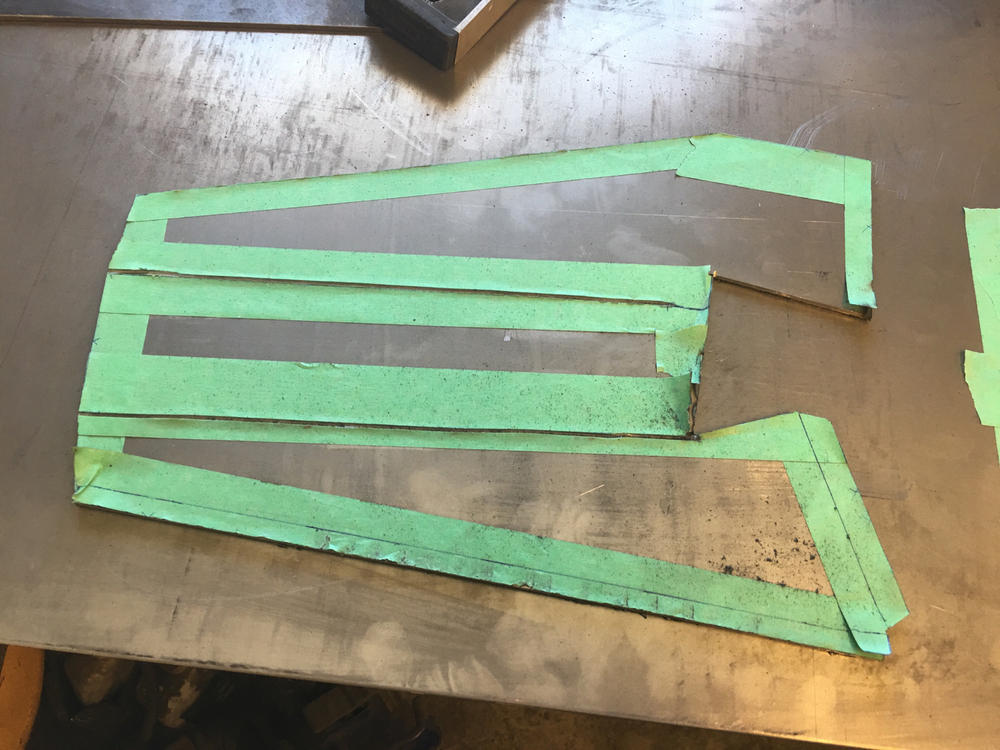
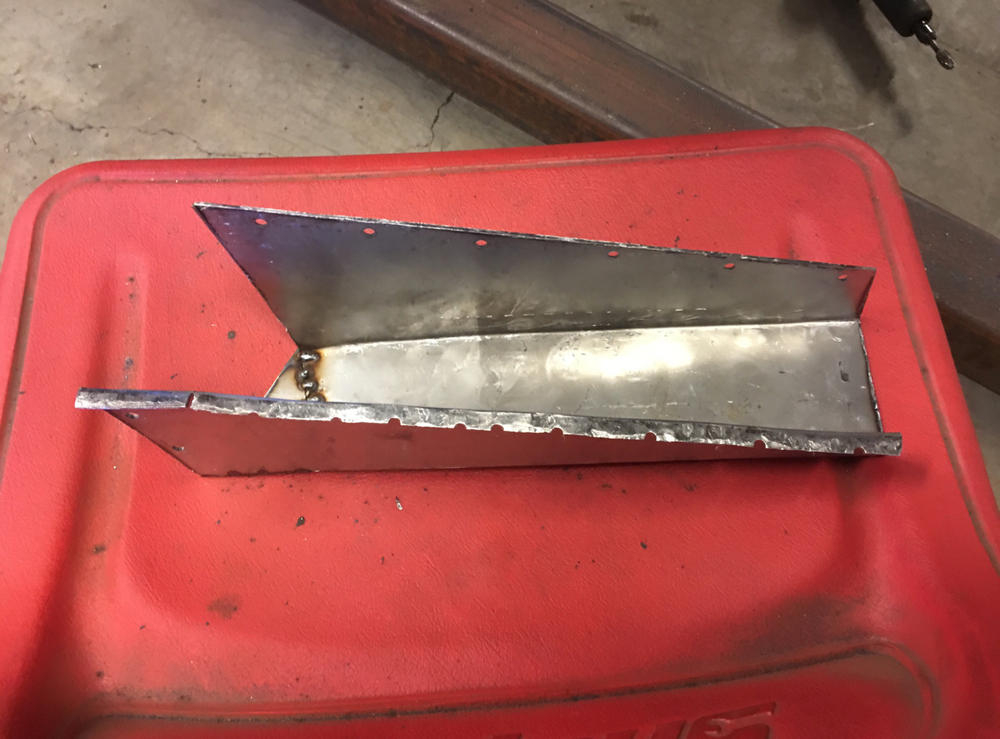
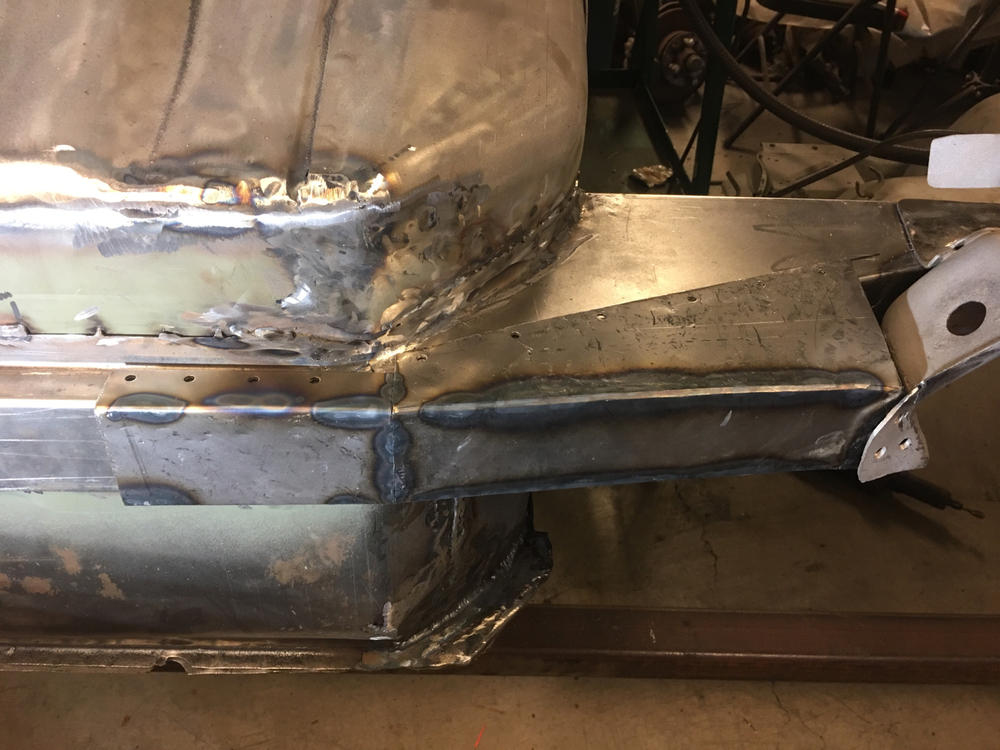
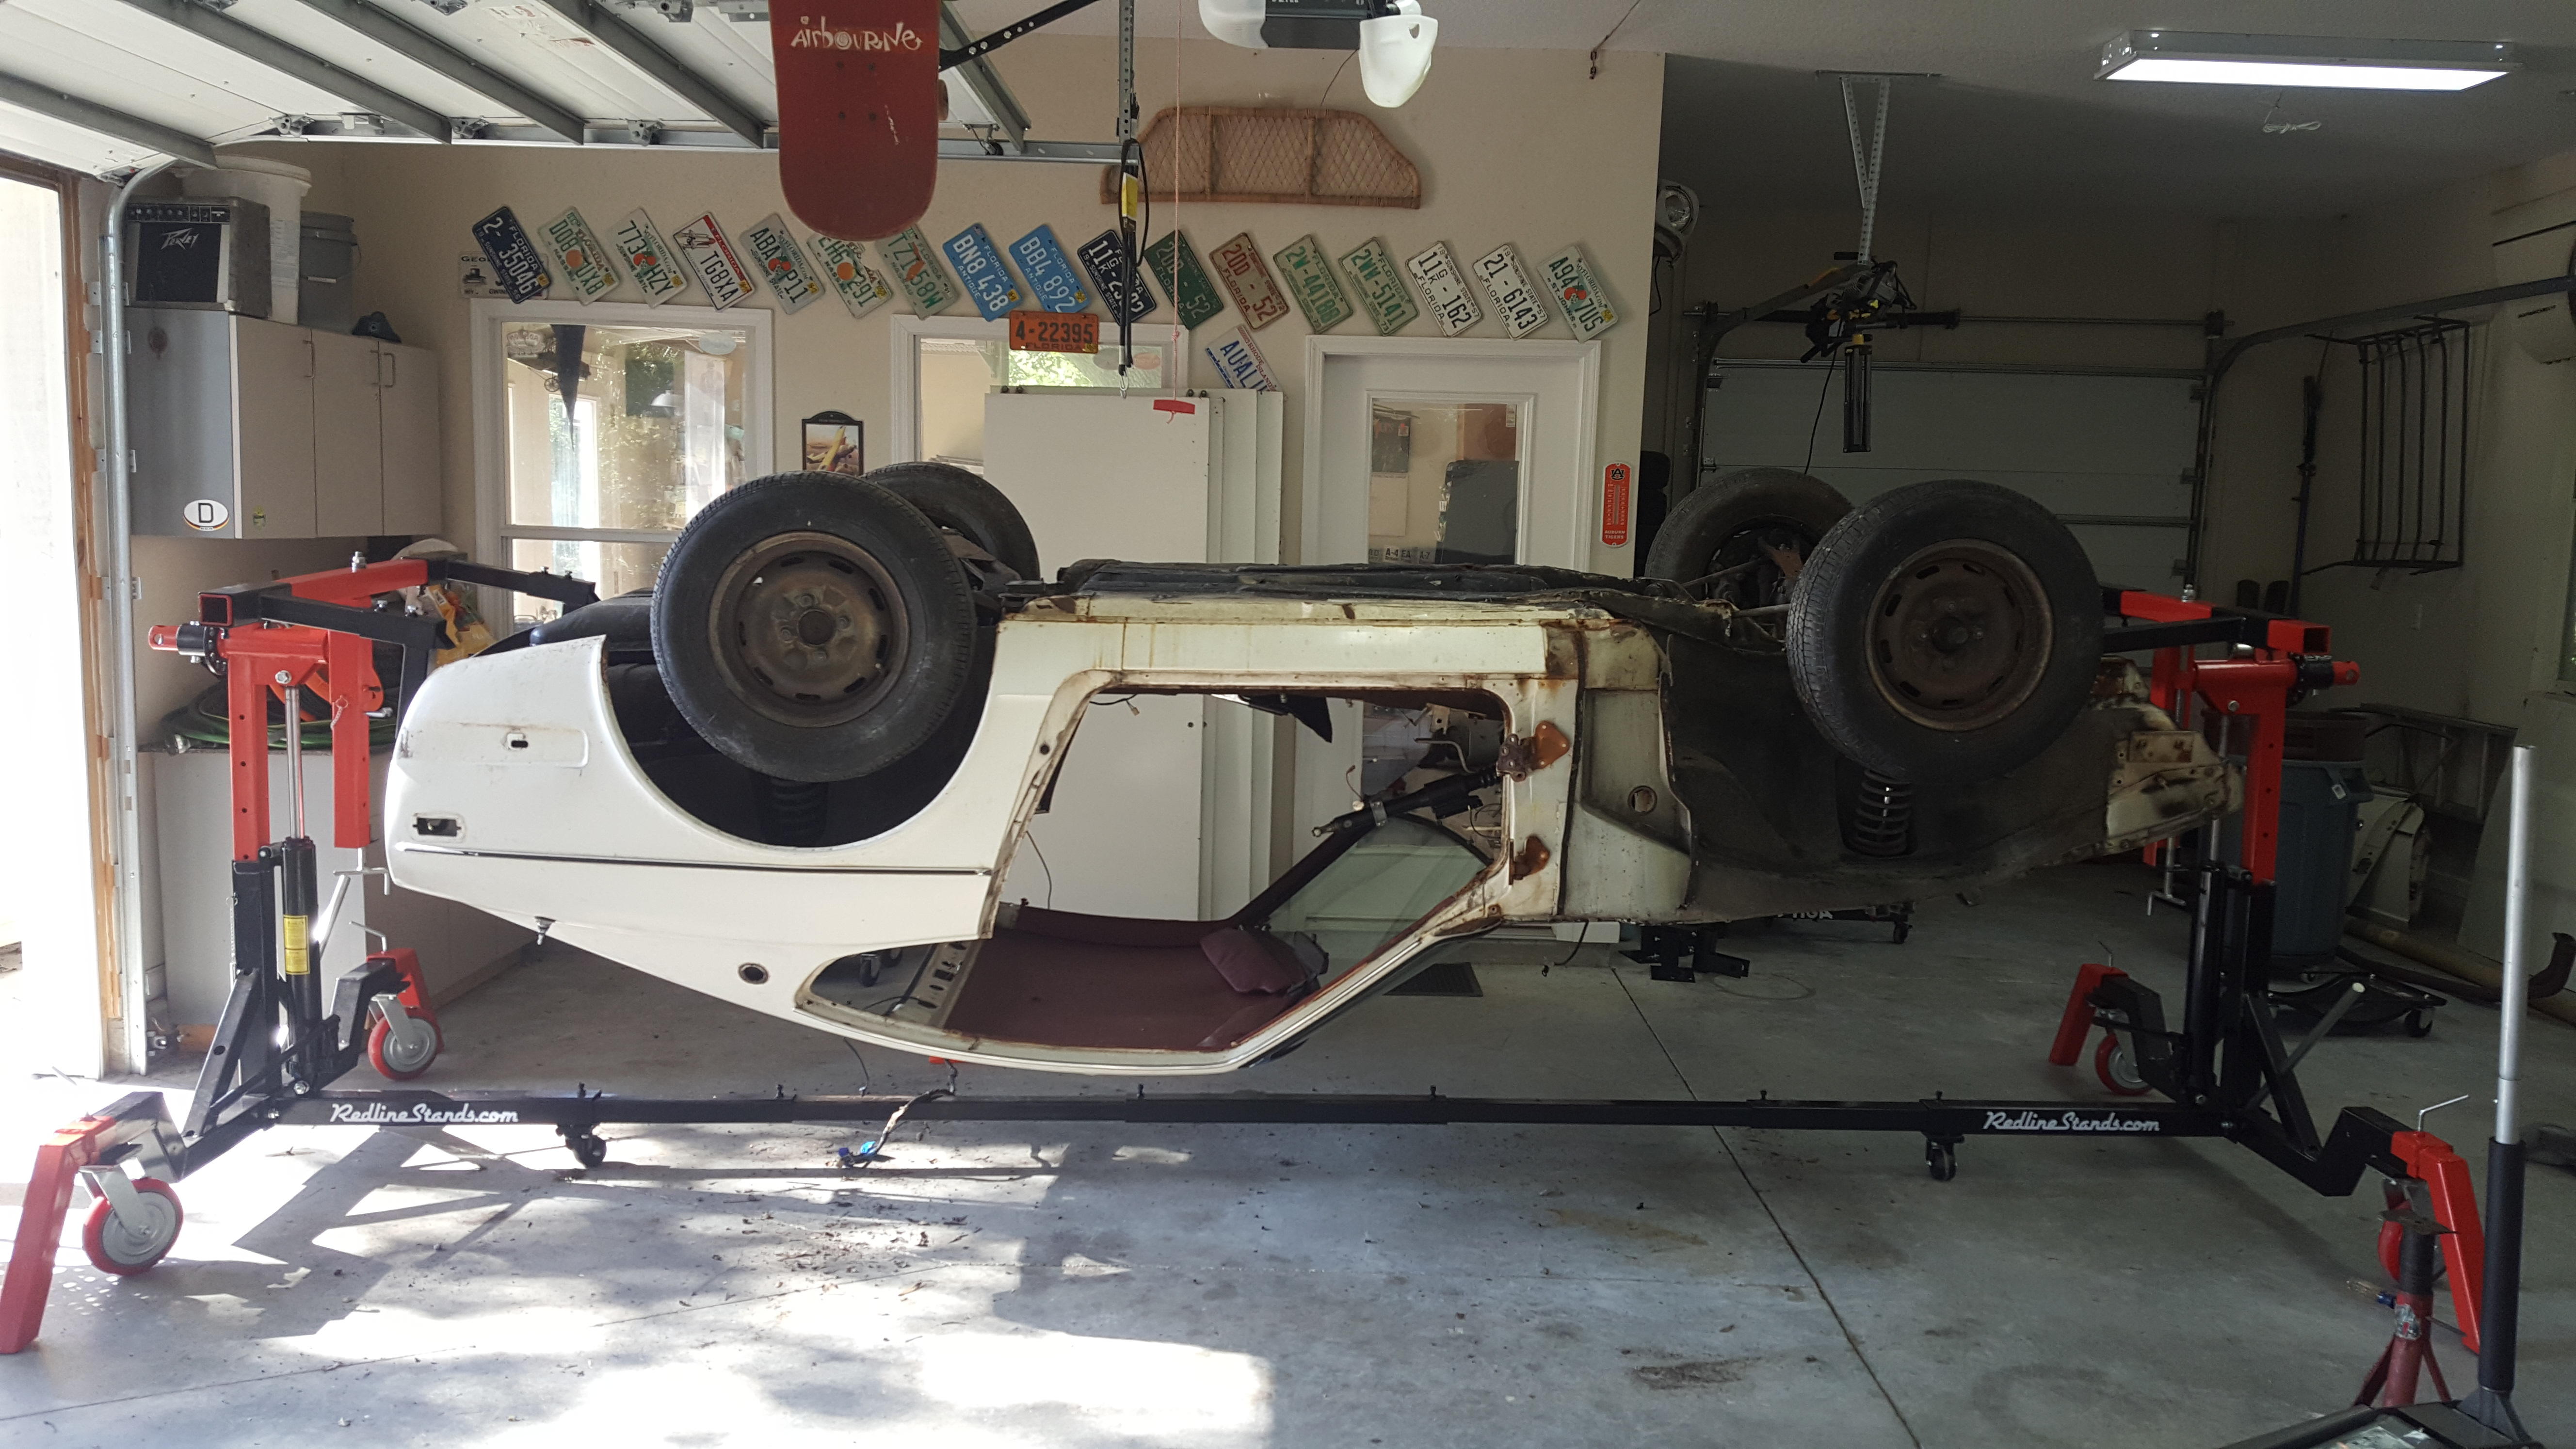
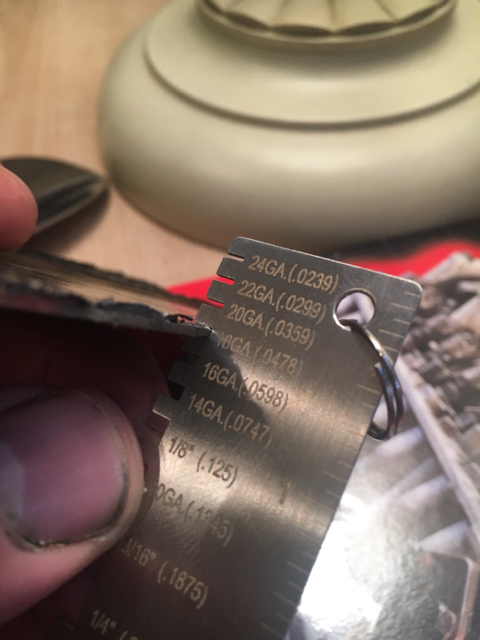 1 point1 pointI used a sheet metal gauge Sent from my iPhone using Classic Zcar Club mobile1 point1 pointOMG.... that is bad... the front frame rails are done along with that front cross member.... Get new parts/metal in there soon. Start reading here:
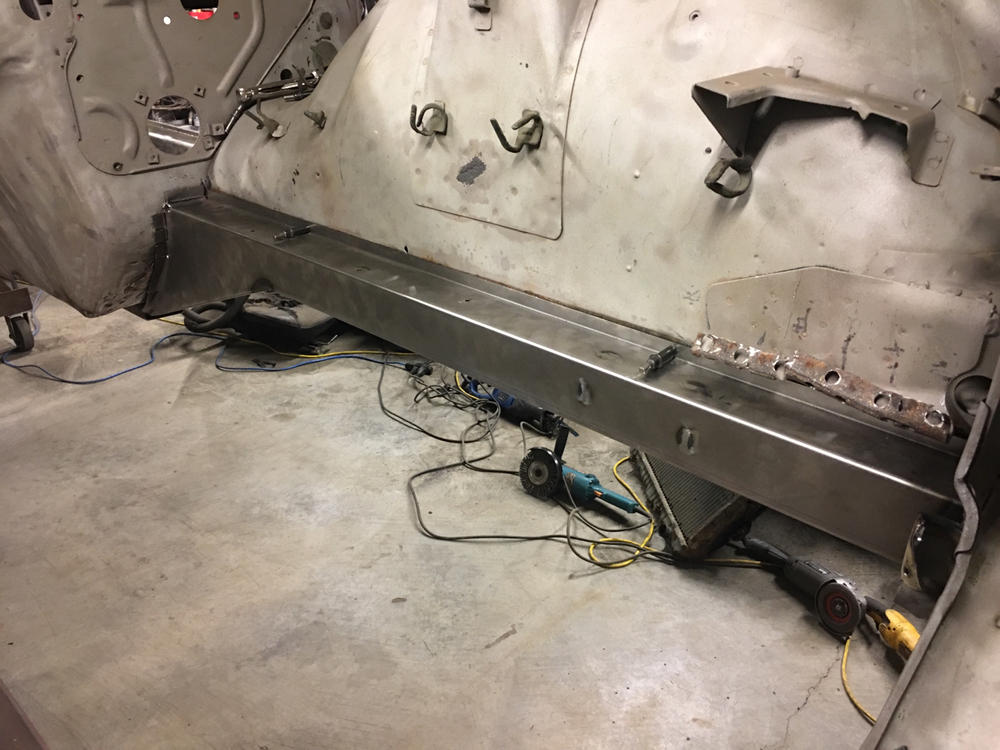


 1 point1 pointAbsolutely it's worth saving, I agree with the others, if you have it done by someone else it could get expensive but if you are willing to get filthy dirty you can learn to do it yourself and save lots of money, in the end you will have a solid car that you saved and I can tell you that first drive after putting it back on the road is a pretty wonderful feeling. Have a look through the archives, there are dozens of threads where someone just like yourself repaired extensive rust and brought their Z back to life, the peanut gallery here on this forum will talk you through the whole procedure.1 point0 points


Important Information
By using this site, you agree to our Privacy Policy and Guidelines. We have placed cookies on your device to help make this website better. You can adjust your cookie settings, otherwise we'll assume you're okay to continue.
Account
Search
Configure browser push notifications
Chrome (Android)
- Tap the lock icon next to the address bar.
- Tap Permissions → Notifications.
- Adjust your preference.
Chrome (Desktop)
- Click the padlock icon in the address bar.
- Select Site settings.
- Find Notifications and adjust your preference.
Safari (iOS 16.4+)
- Ensure the site is installed via Add to Home Screen.
- Open Settings App → Notifications.
- Find your app name and adjust your preference.
Safari (macOS)
- Go to Safari → Preferences.
- Click the Websites tab.
- Select Notifications in the sidebar.
- Find this website and adjust your preference.
Edge (Android)
- Tap the lock icon next to the address bar.
- Tap Permissions.
- Find Notifications and adjust your preference.
Edge (Desktop)
- Click the padlock icon in the address bar.
- Click Permissions for this site.
- Find Notifications and adjust your preference.
Firefox (Android)
- Go to Settings → Site permissions.
- Tap Notifications.
- Find this site in the list and adjust your preference.
Firefox (Desktop)
- Open Firefox Settings.
- Search for Notifications.
- Find this site in the list and adjust your preference.