Leaderboard
-
Captain Obvious
Free Member6Points10,081Posts -
duffymahoney
Free Member6Points961Posts -
S30Driver
Free Member6Points1,580Posts -
jfa.series1
 Subscriber
 4Points2,733Posts


Popular Content
Showing content with the highest reputation on 07/04/2019 in all areas
-
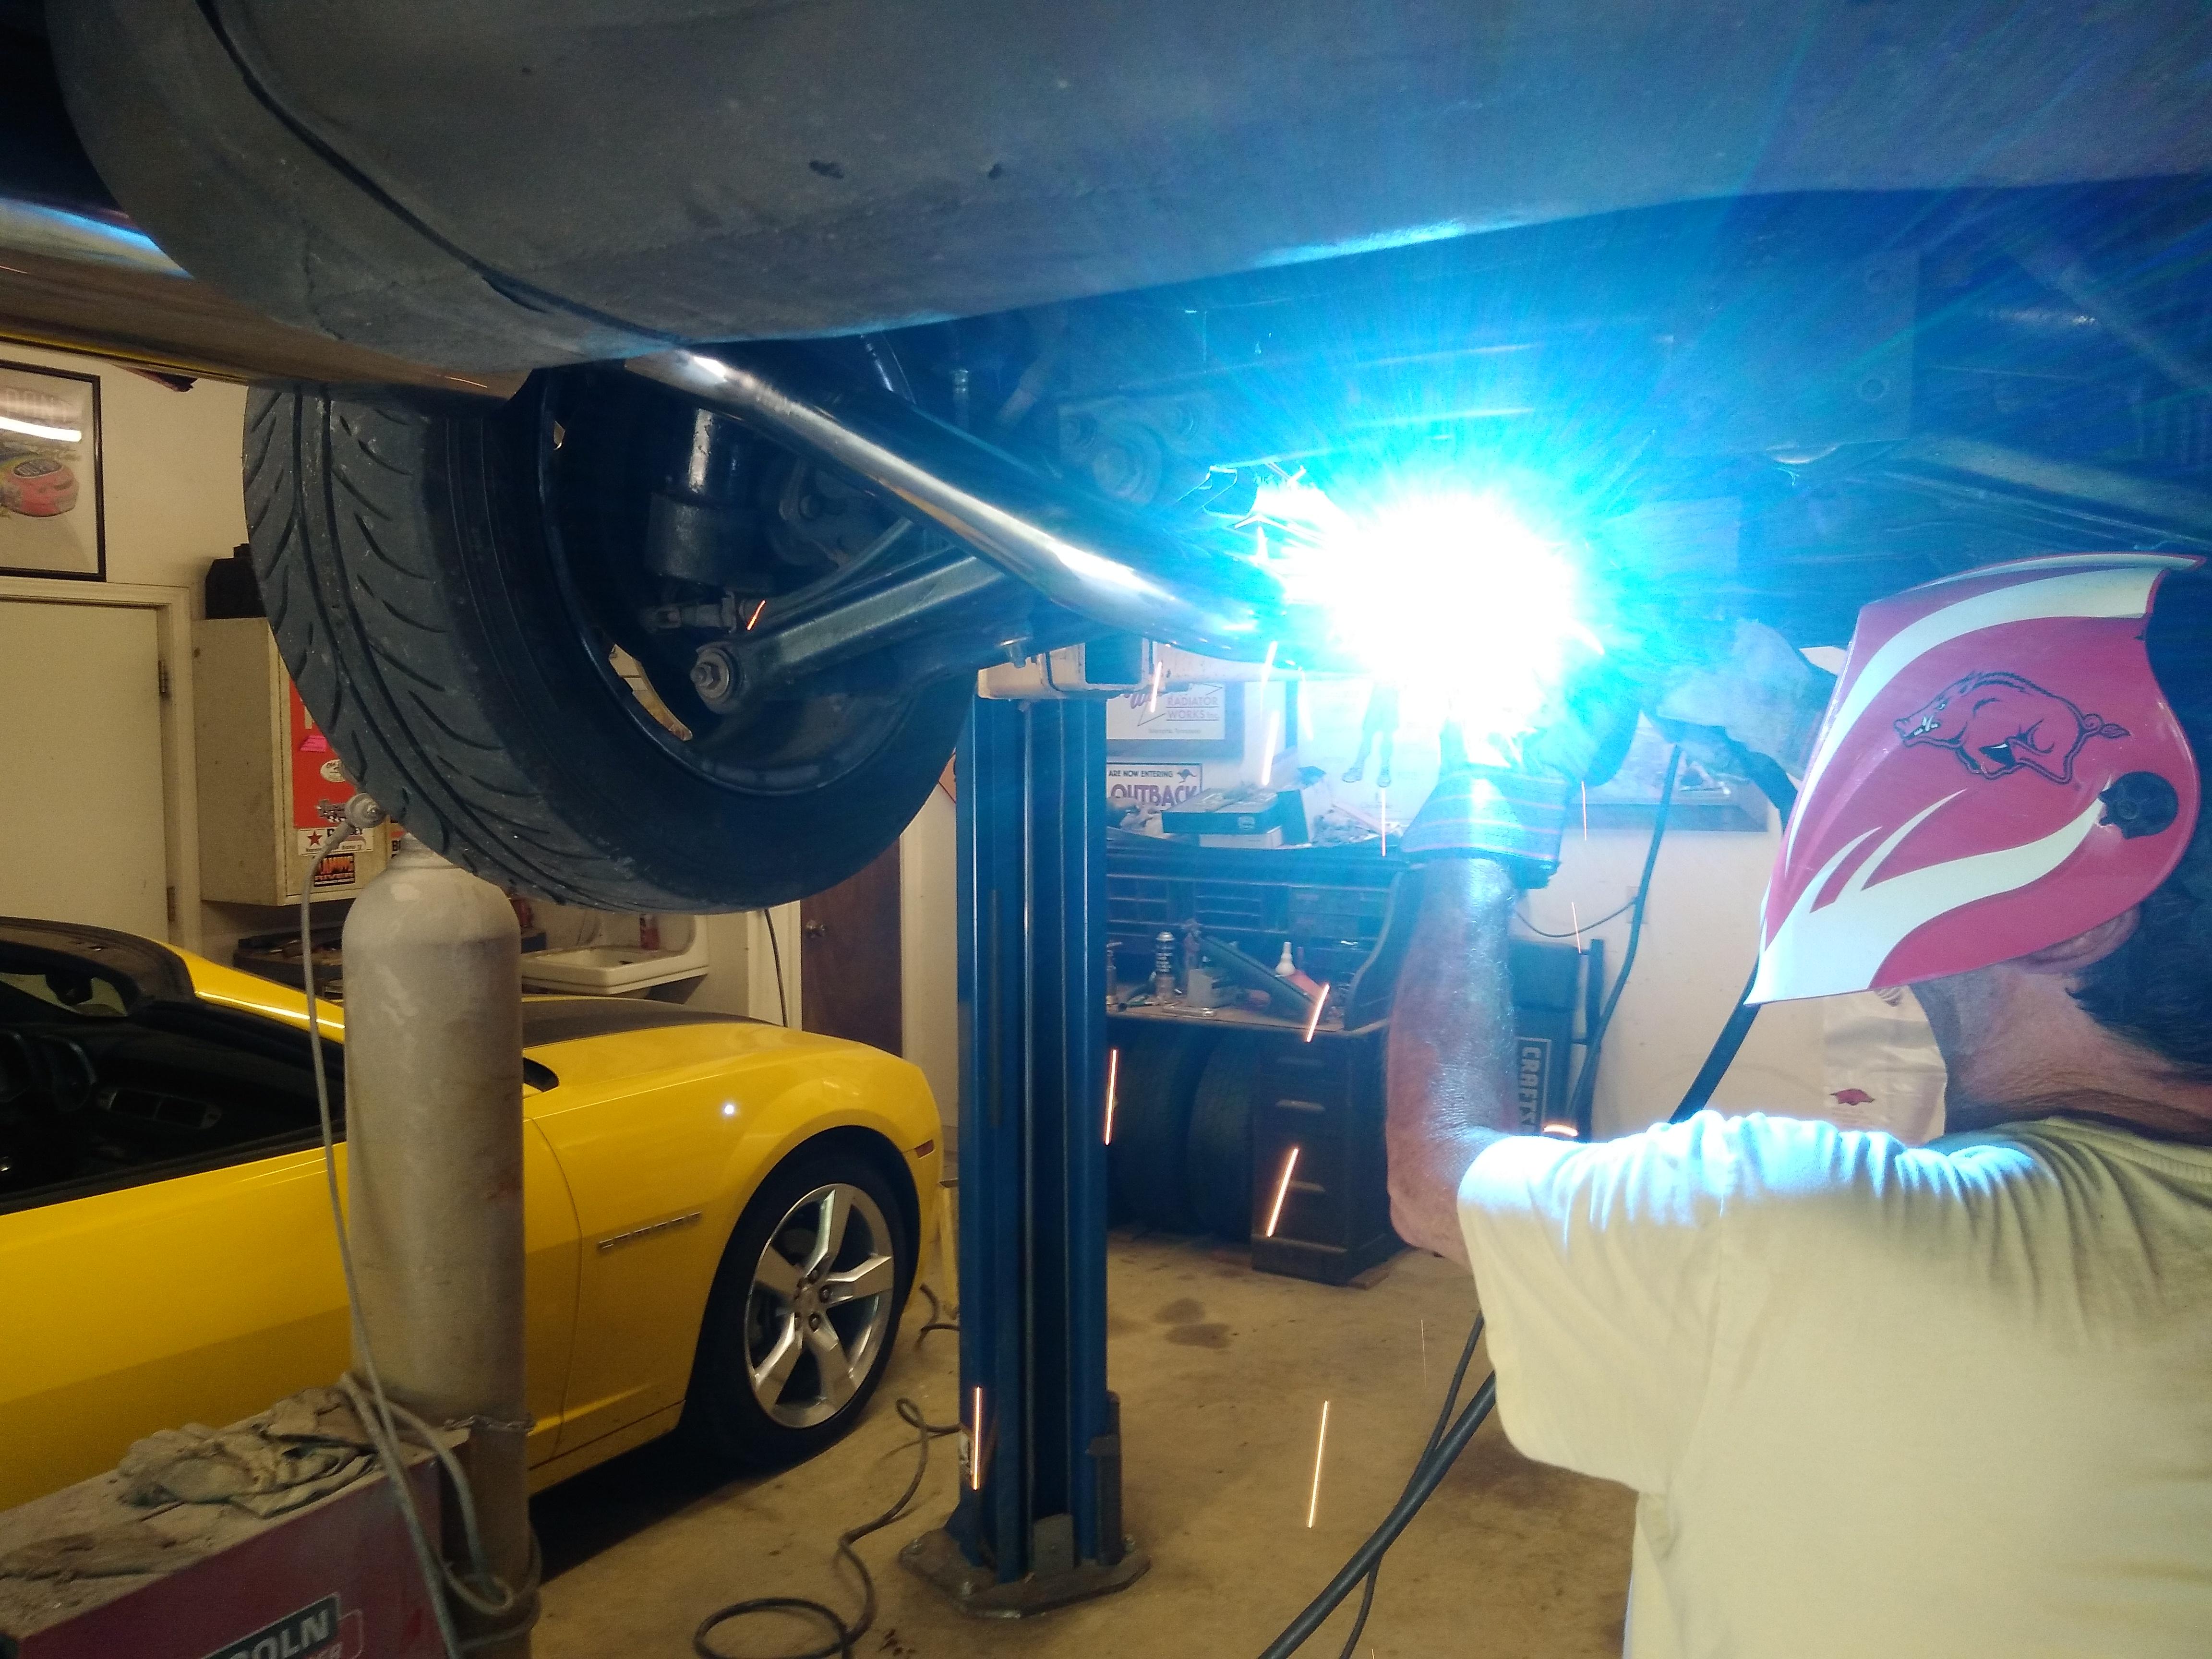
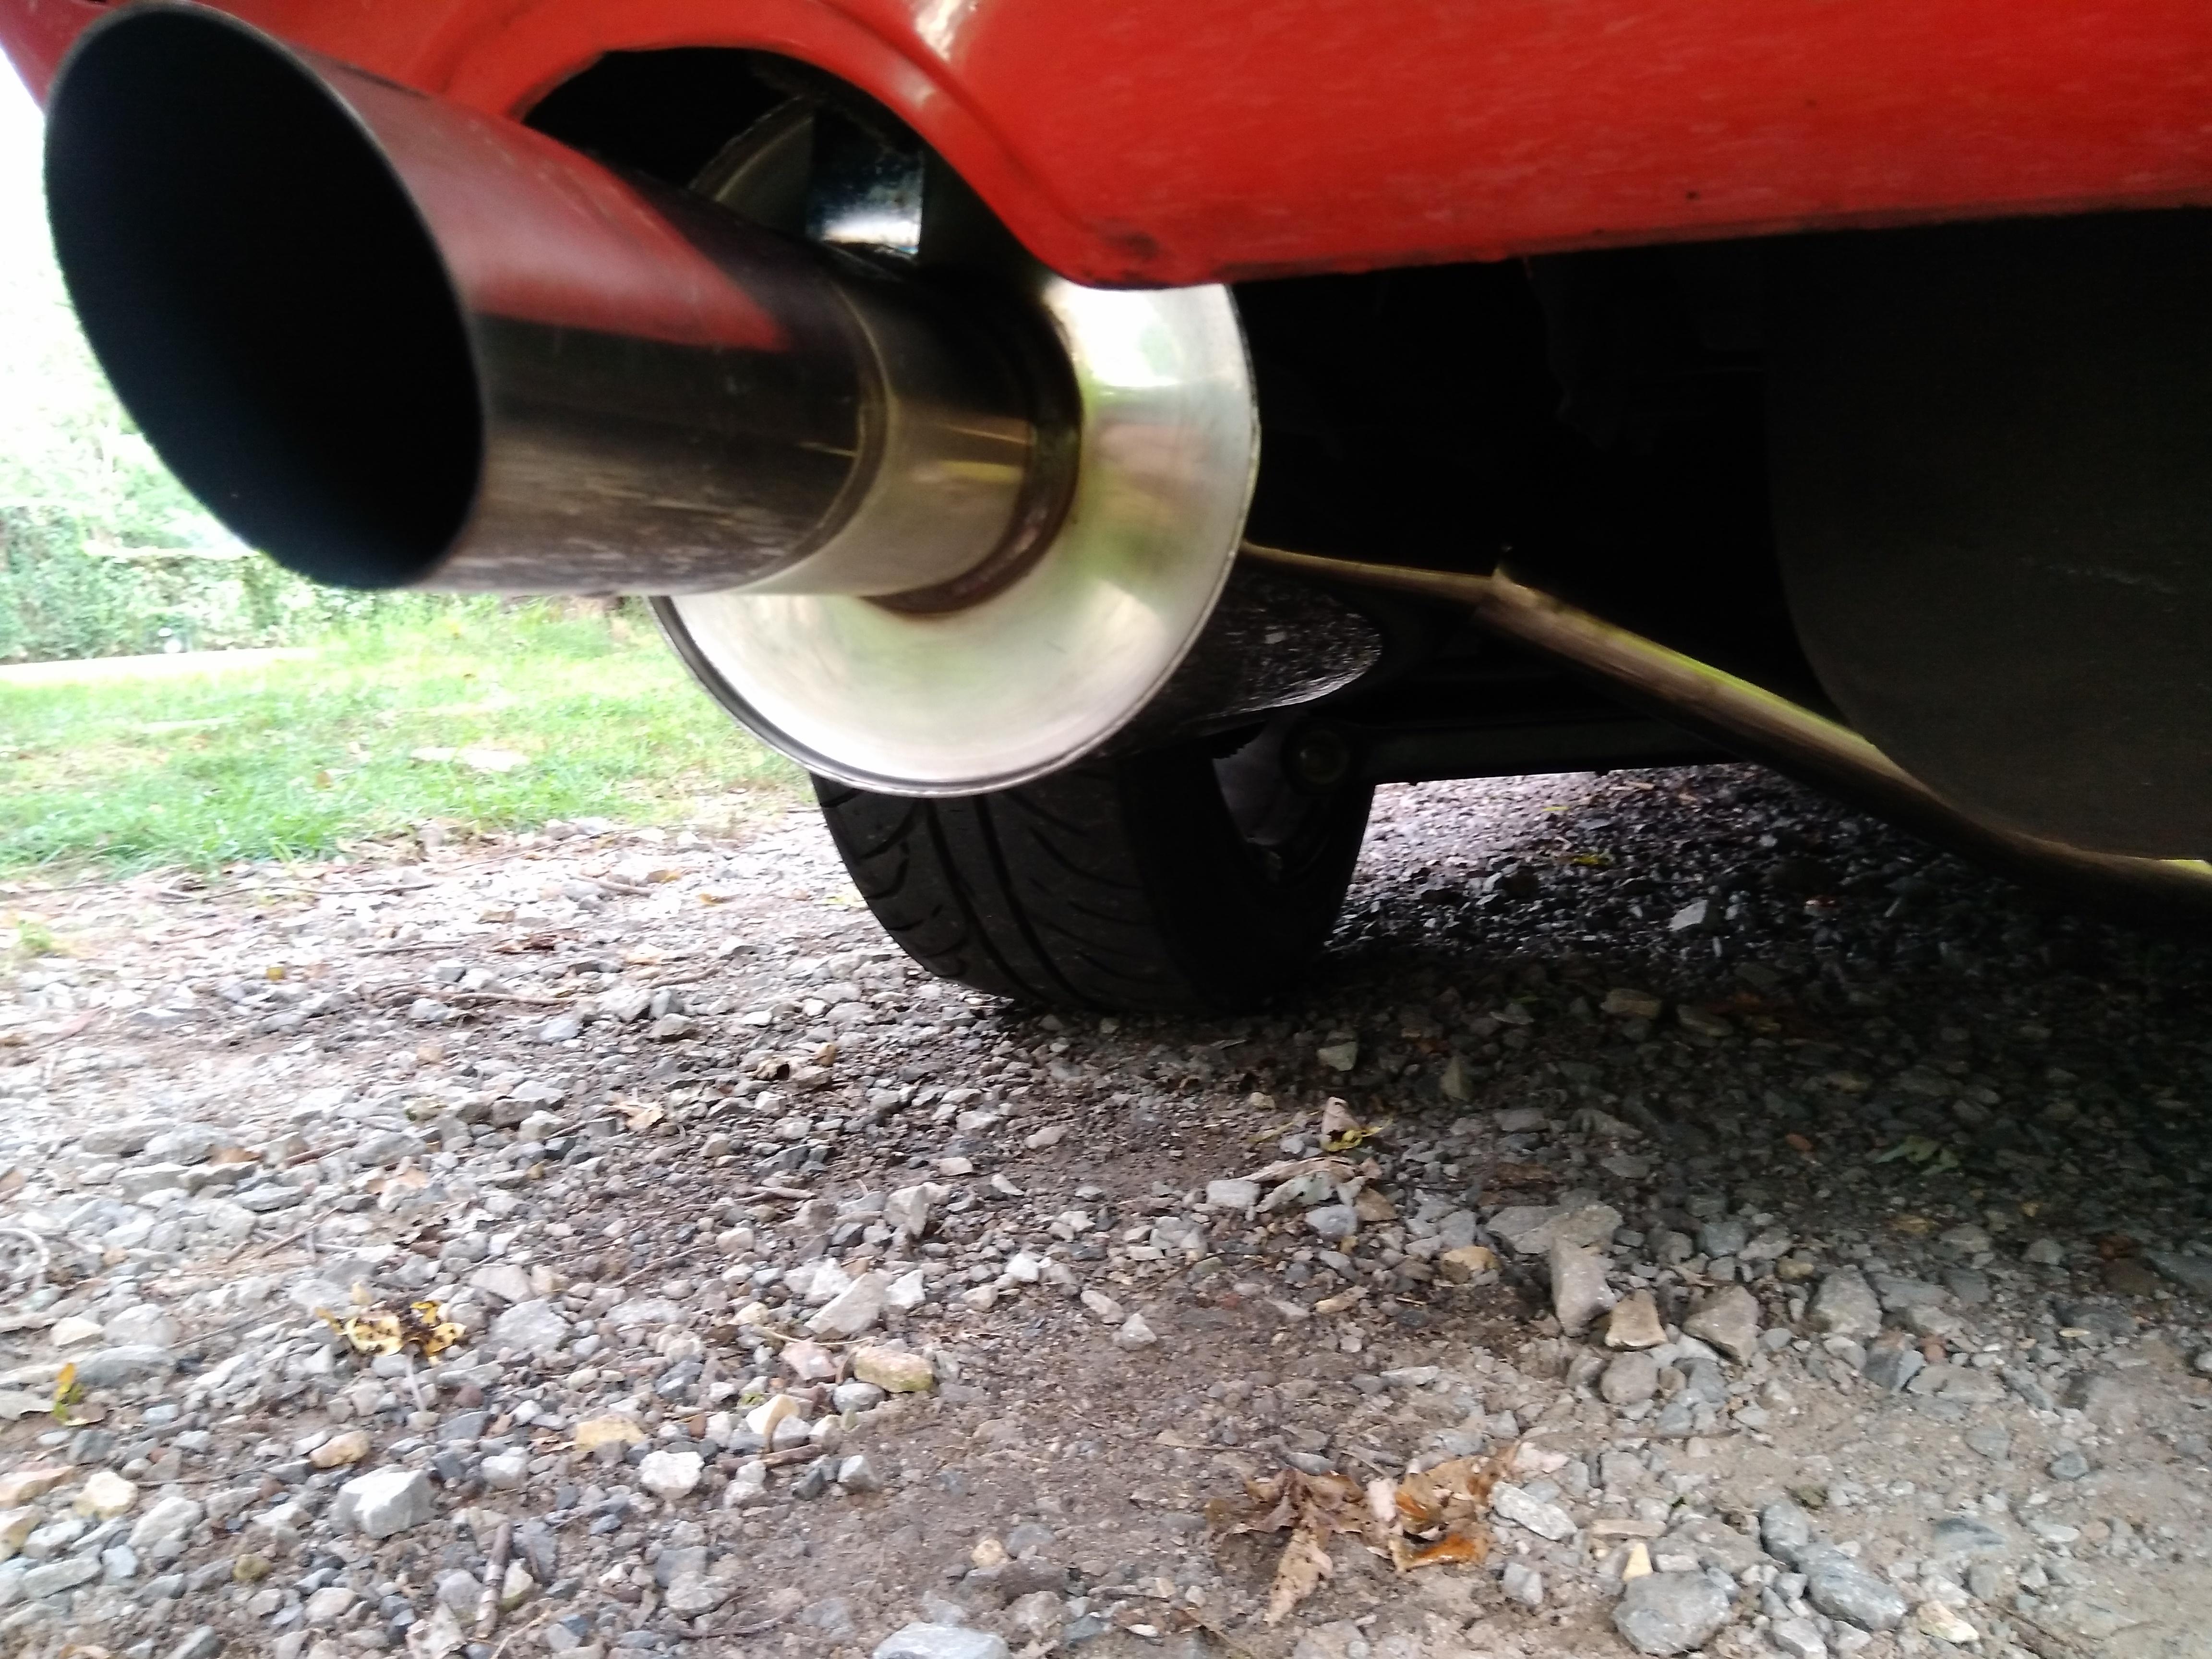
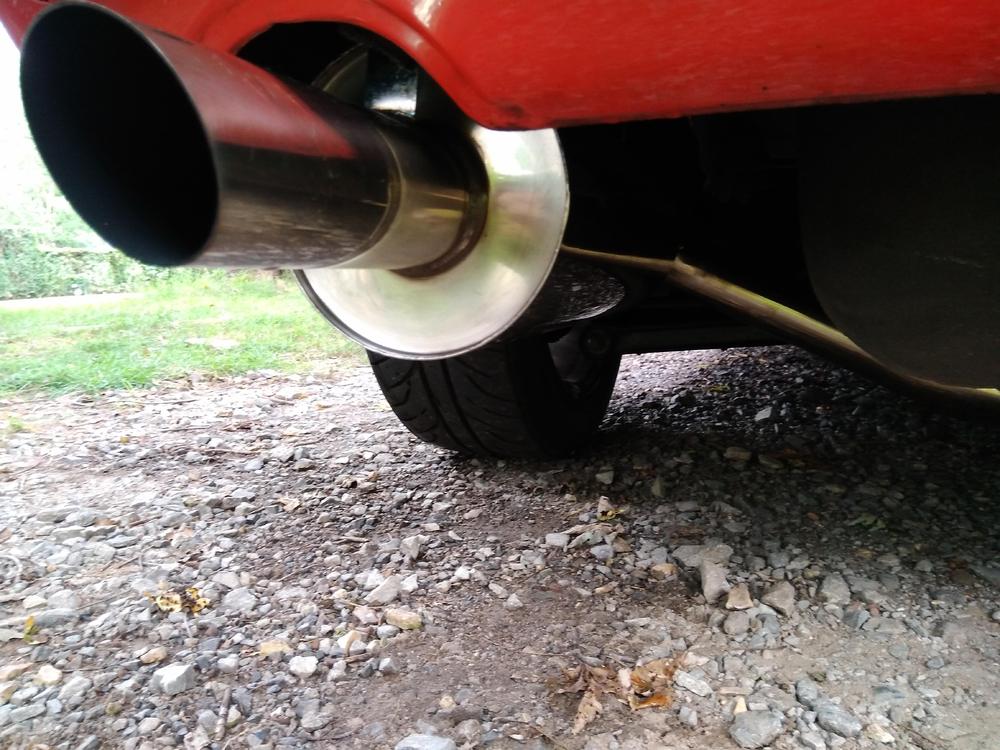
6 pointsMy order from Sean Desart arrived safely so last weekend I replaced the muffler & S pipe with 2 pieces of the Z Story S30 system. When the downpipe is available to mate up with the stock manifold, I will order the remaining pieces to complete the exhaust system. I also purchased a stainless resonator and an adapter to go from 2 to 2 1/2 inches. My great neighbor across the street let me use his lift and mig welded a new resonator and the 2" to 2 1/2" reducer, or increaser in this case to adapt to the stock system. Everything fitted up great, the quality is beyond excellent, and the sound of course very pleasing. Nice burble at idle, and beautiful note going up thru the gears and highway speeds. Can't wait to get the rest of the system, hopefully next spring. Will do a video with sound clip when I have a chance. Thanks @Sean Dezart for making available a great product!

 6 points
 -
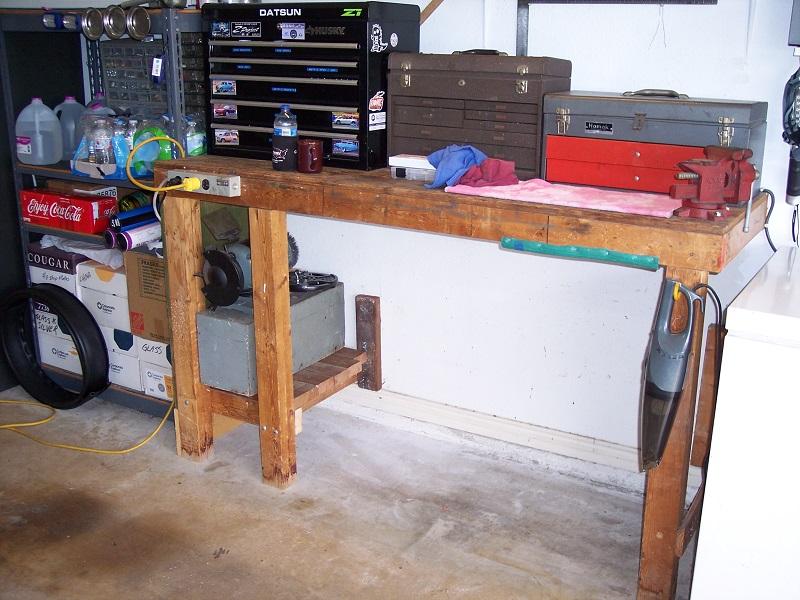
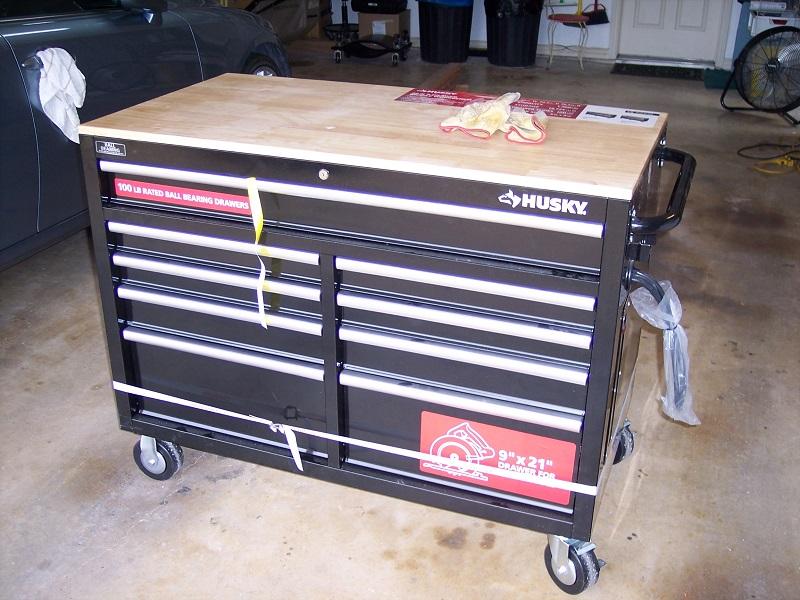
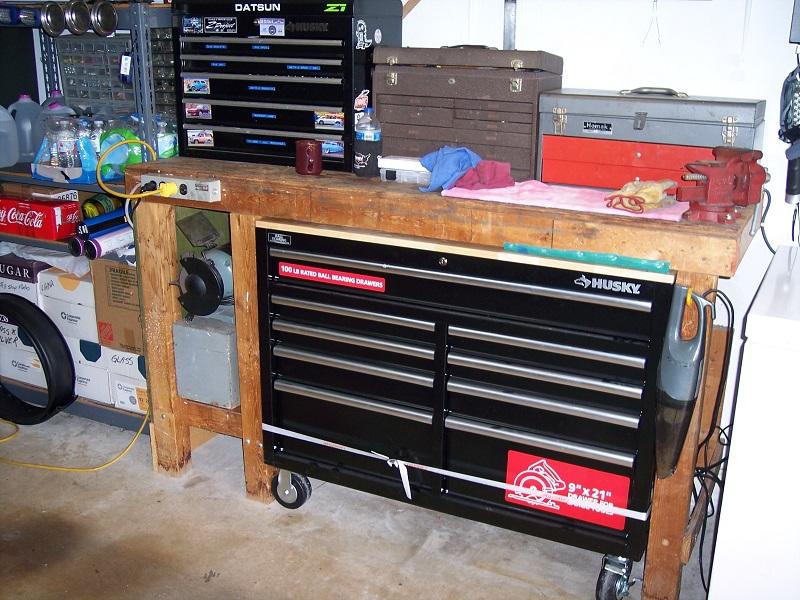
4 pointsI built my workbench over 30 years ago and put the deck height at 42" just to make work and tools a bit easier to get to. A few years ago I gave up some of the length to make room for a shelving unit. Of course this also reduced available space for tool storage, resulting in stuff stored in different spots around the garage. Further complicating things is that I keep three cars stored in a slightly oversized 2-car garage so floor space is already at a premium. I recently spotted a mobile workbench at Home Depot and took note of the dimensions. Checking under my bench I realized I fortuitously had the EXACT right sized opening for the unit. All I had to do was clear out and remove a shelf under the deck. The install took place yesterday, it looks like a custom install, and lots of tools now have a new and organized home!
 4 points
 -
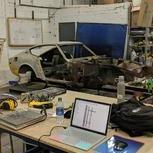
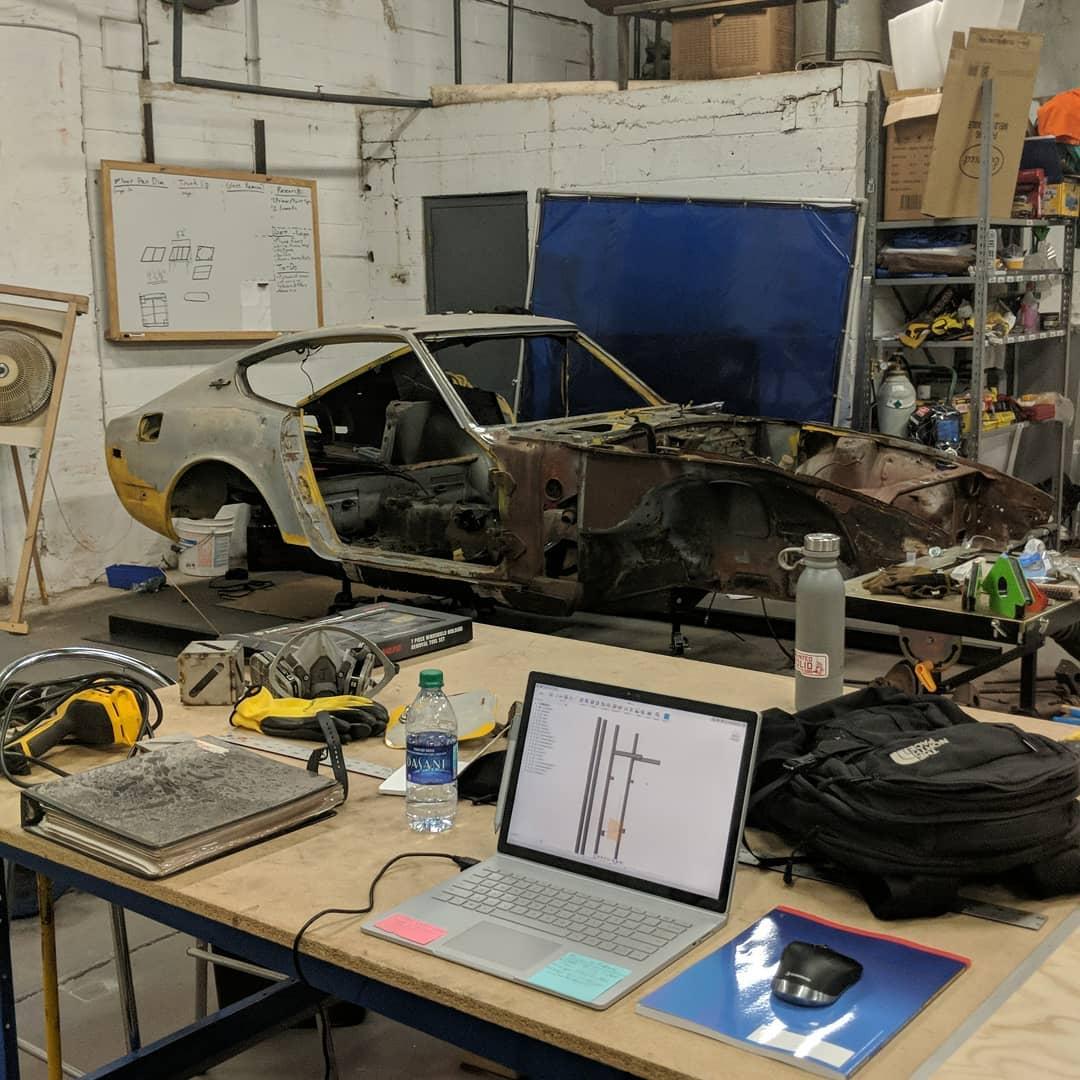
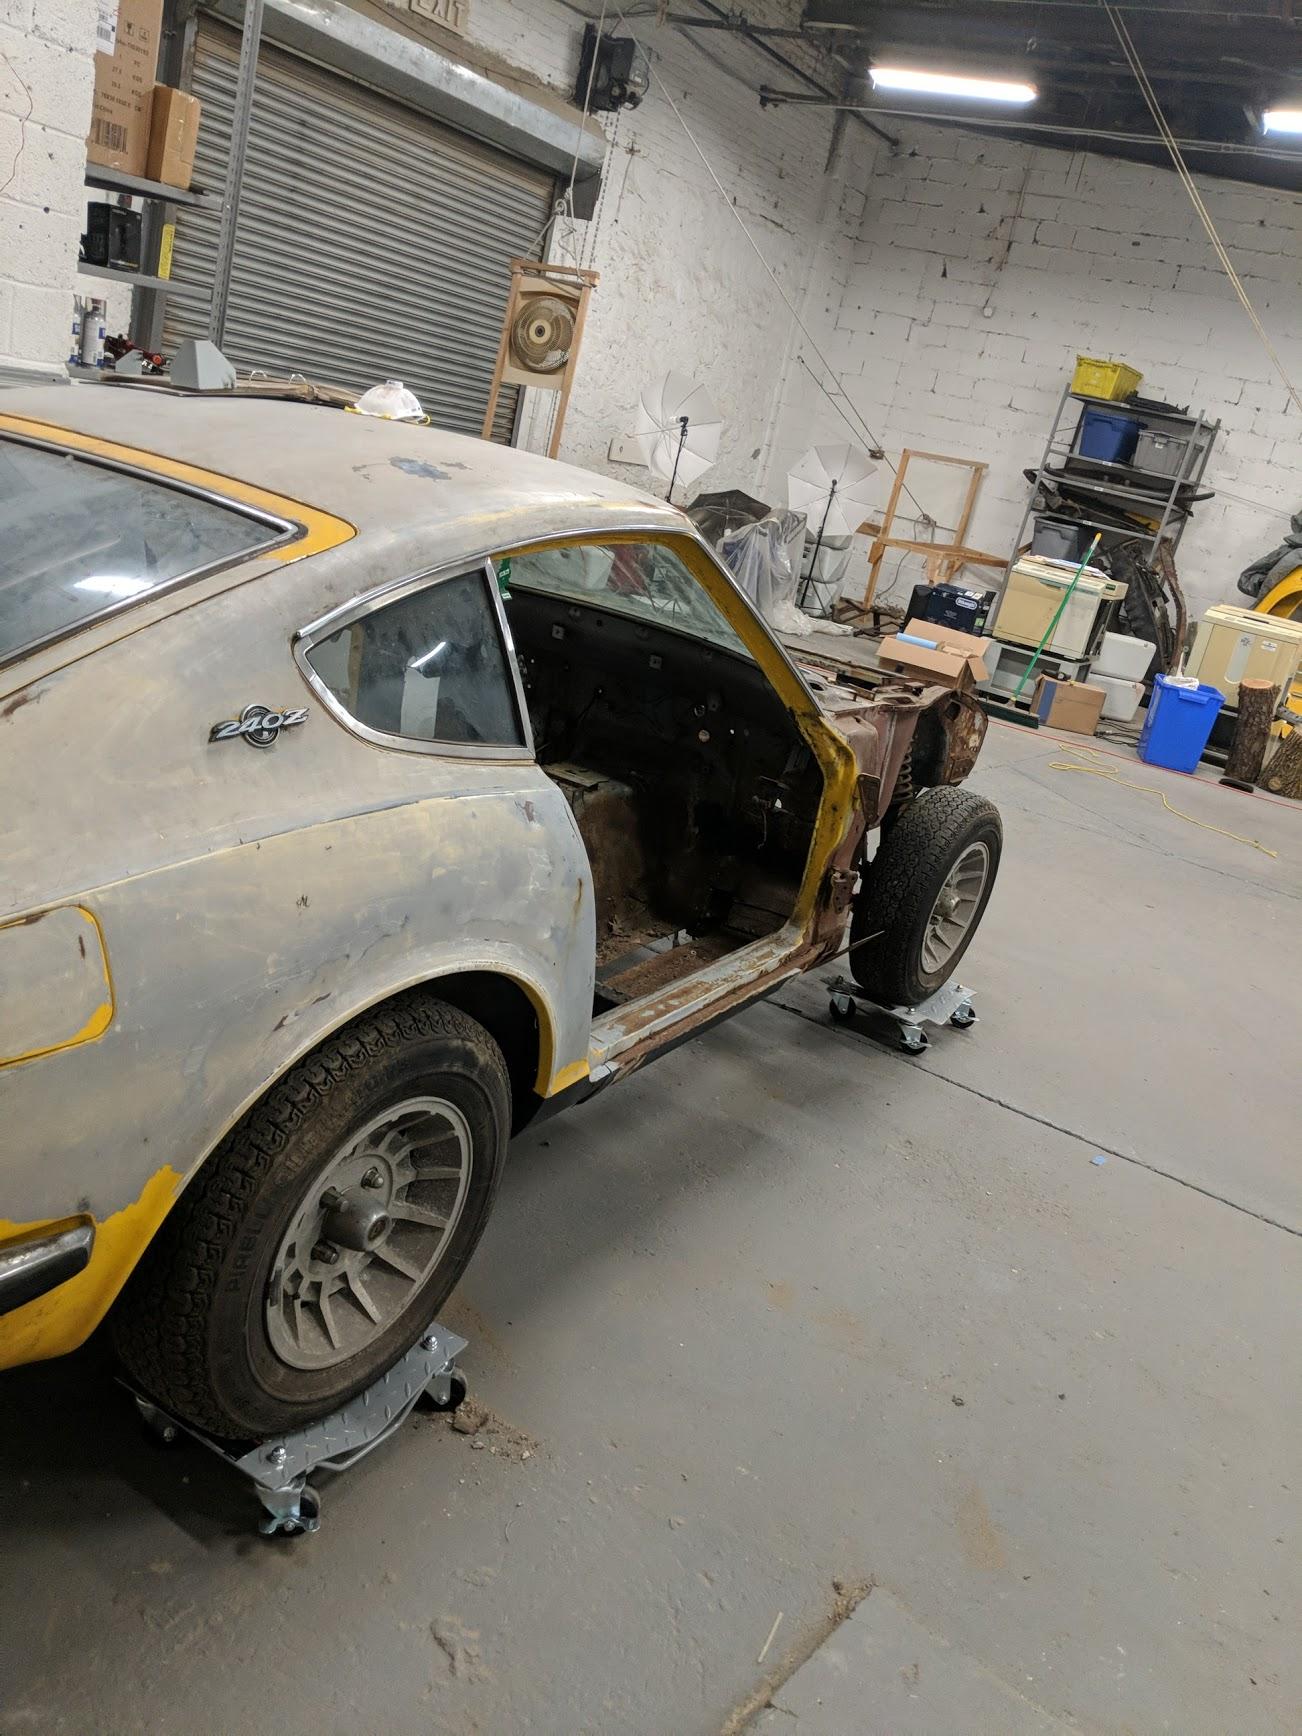
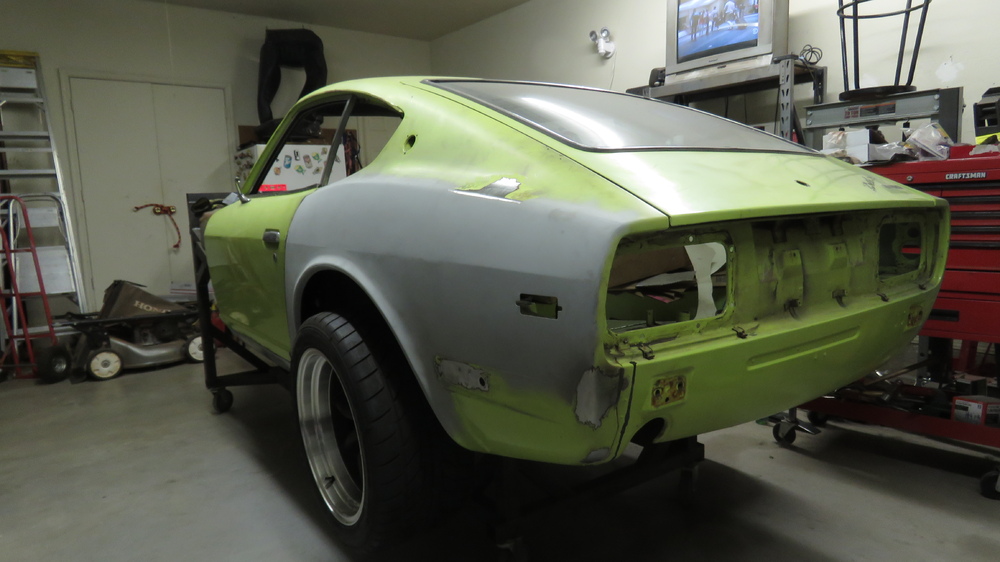
Hey everyone, I'm new to the forum so I'd like to say hello! I'm an engineer and I'm trying to restore a 1970 Series I 240z in Philly. I bought the car sometime late February and since then I've been getting all of the tools I need to rebuild the car from the frame up. So far there are a few major areas of concern on the body and frame that I need to either replace or patch up including, but not limited to... Both rear quarter panels, trunk floor, both floor pans, firewall, frame rails (front), various lips, possibly an A-pillar and etc. I'm using CAD and the technical drawings from the factory service manual to try and make my own jig, but I'd like to know if any of you know where I can find plans that have been used to successfully make a chassis jig from scratch. The drawings from the manual are sort of difficult to read and I'm trying to do this without making too many mistakes. ? Lastly, I plan on making technical drawings, and even some CAD models that I'll upload here when I'm finished and I know everything is functional.

 3 points
 -
3 points
-
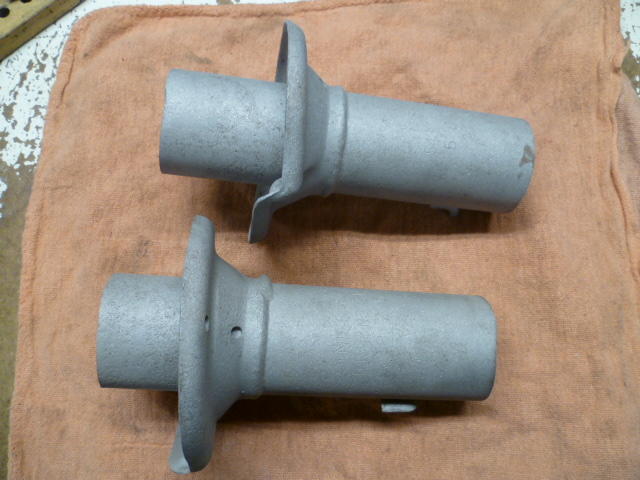
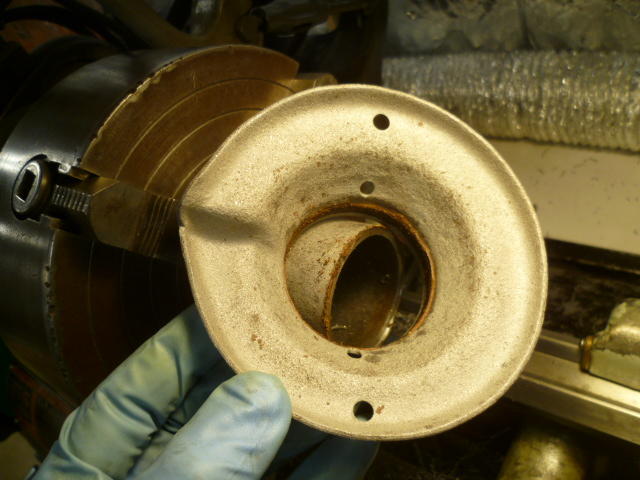
3 pointsLOL. My story didn't quite play out as described by Blue, but there has been non-ideal events occurring all over the place that have pushed the priority of this project back a little. So the short answer to your question is... No, nothing that you haven't already seen. Here's where the project stands. I got the strut tubes from you (I thank you again immensely): I chucked them up in the lathe one at a time and cut the spring perches off the tubes: Here's what they looked like before and after they met Mr. Lathe: And here's both of them done: And that's where the project stalled. They've been helping hold down my workbench since this point.
 3 points
 -
It needs replacing, unless the car has been restored at some time it will be worn.2 points
-
Did you figure out why the fuse blew? I know I'm not you, and you aren't me, but I would want to figure out why it blows before I paint it... I guarantee the bumpers aren't causing the short... I know wiring isn't for everyone, but...... there is a present for you (and every other 1977 owner), right here on this site.... Check out the download section, specifically wiring diagrams... https://www.classiczcars.com/files/2 points
-
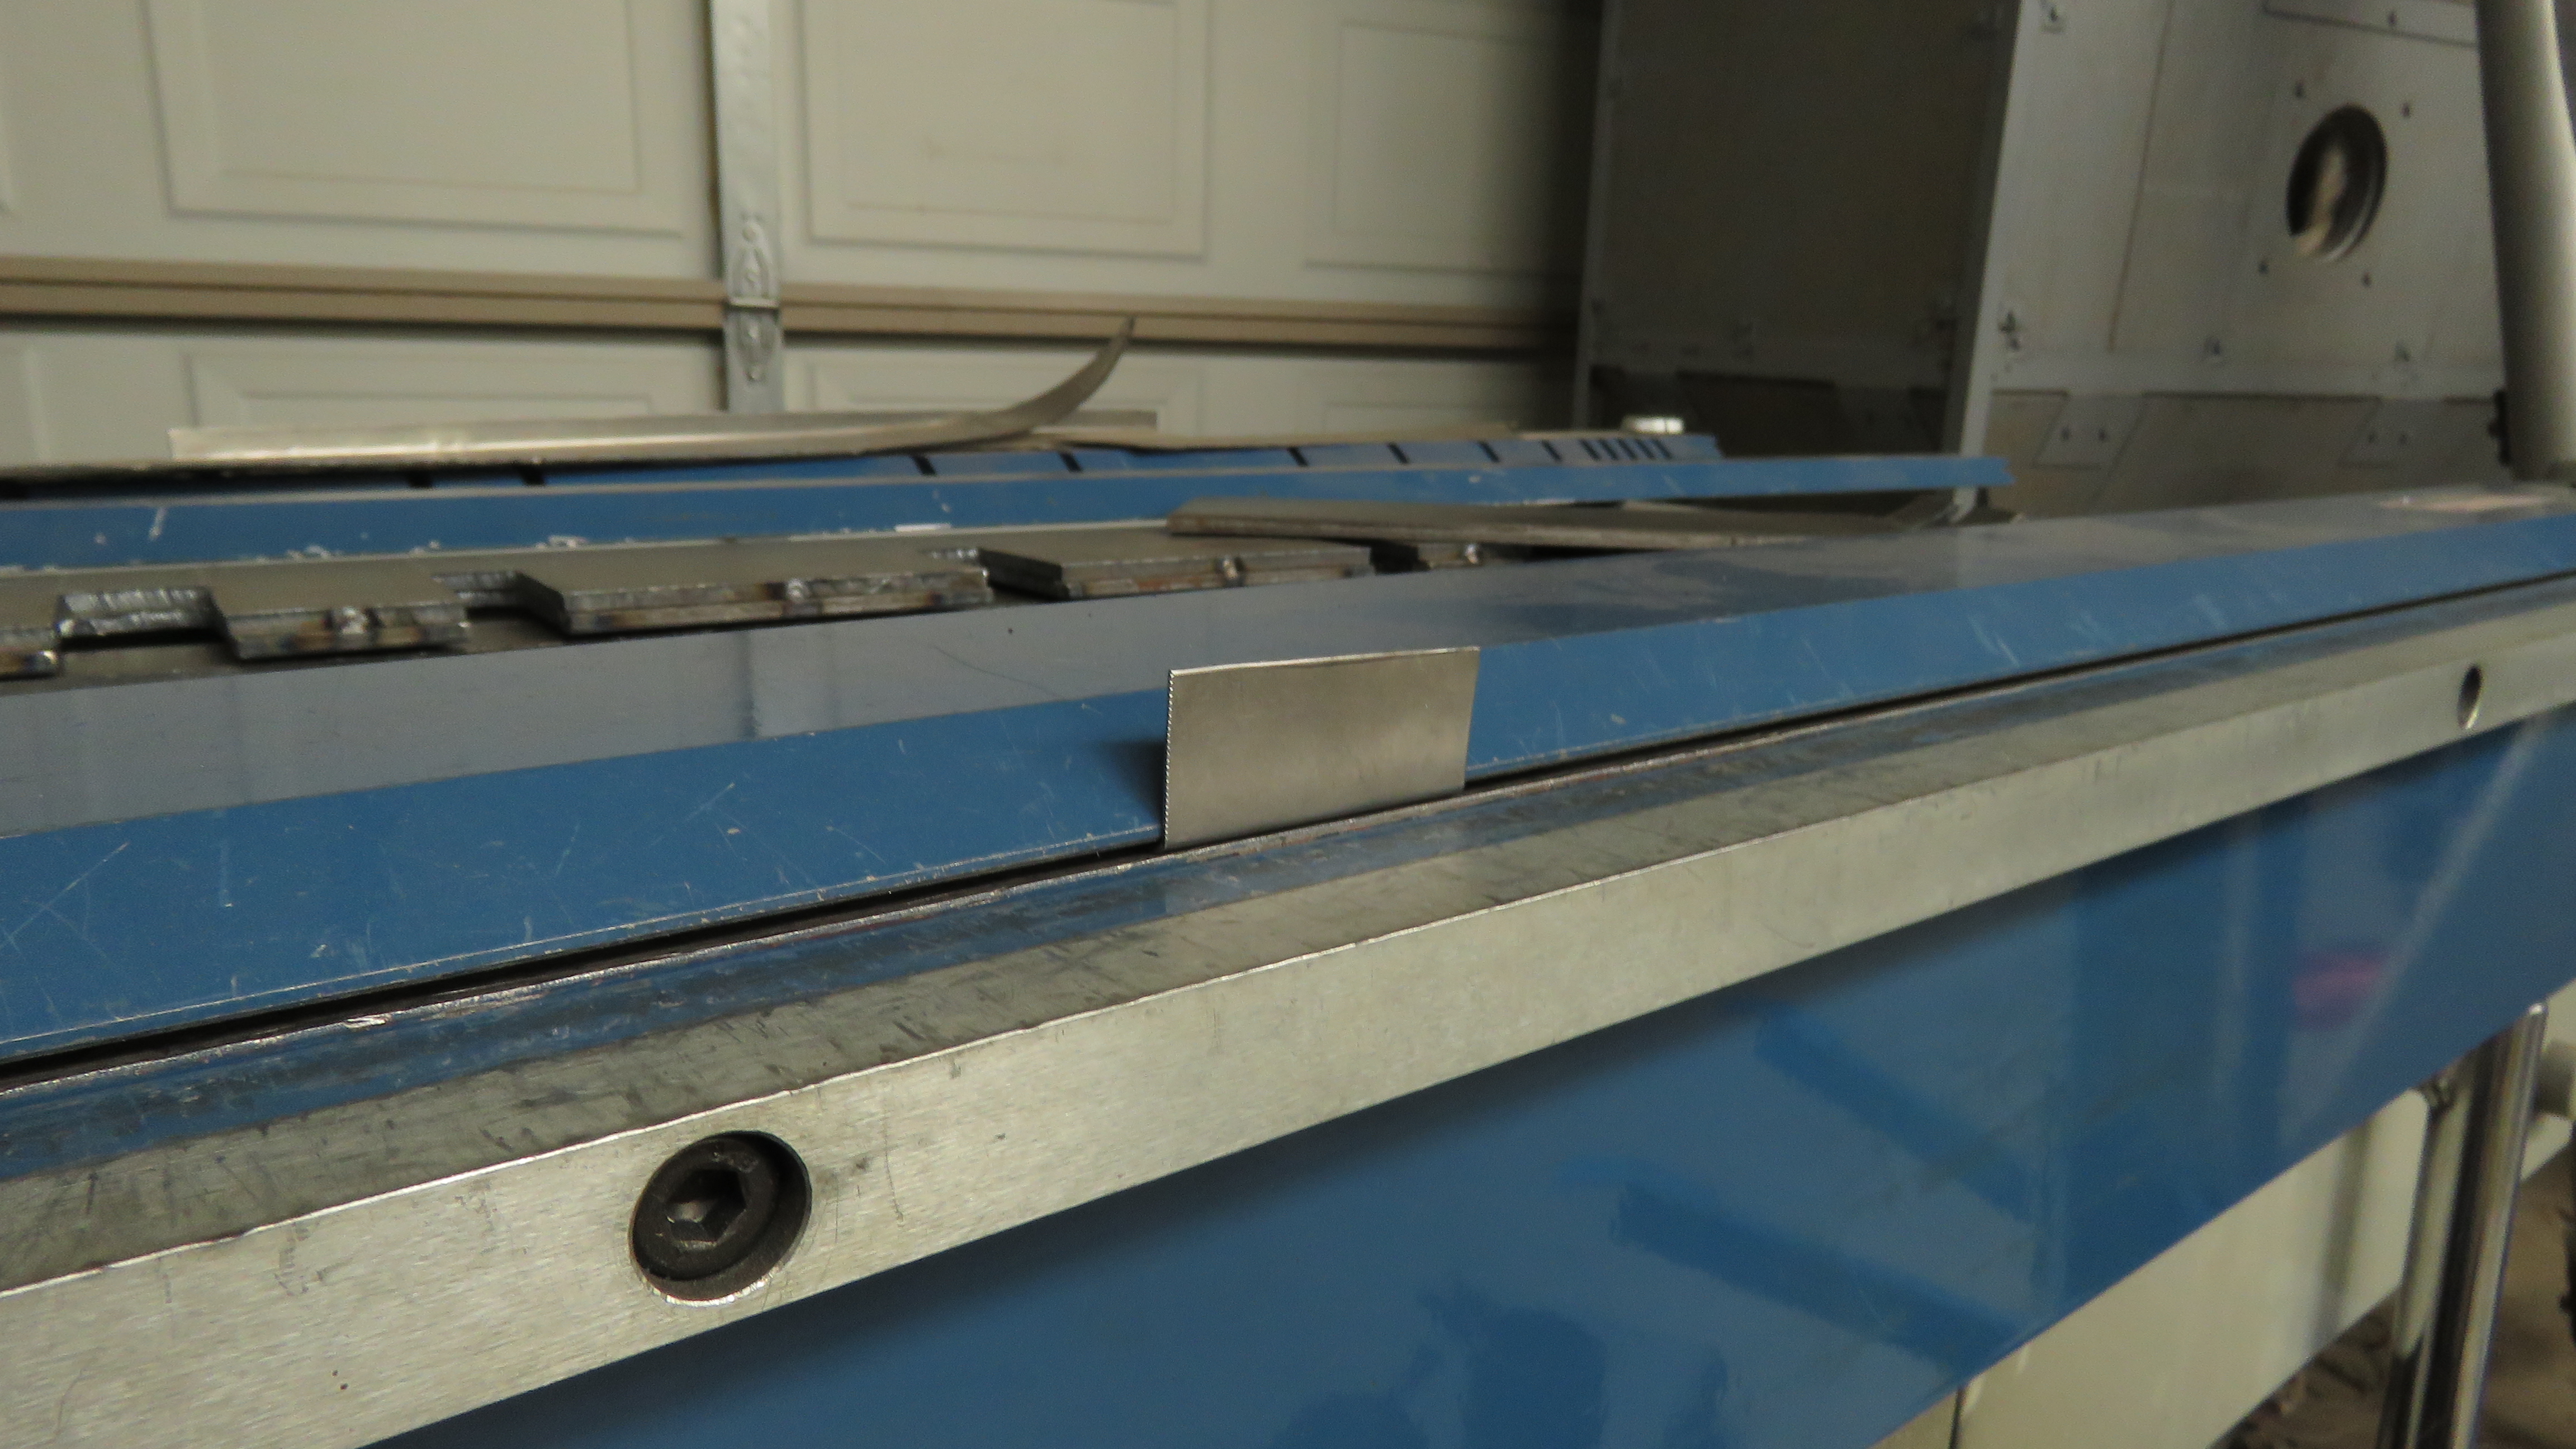
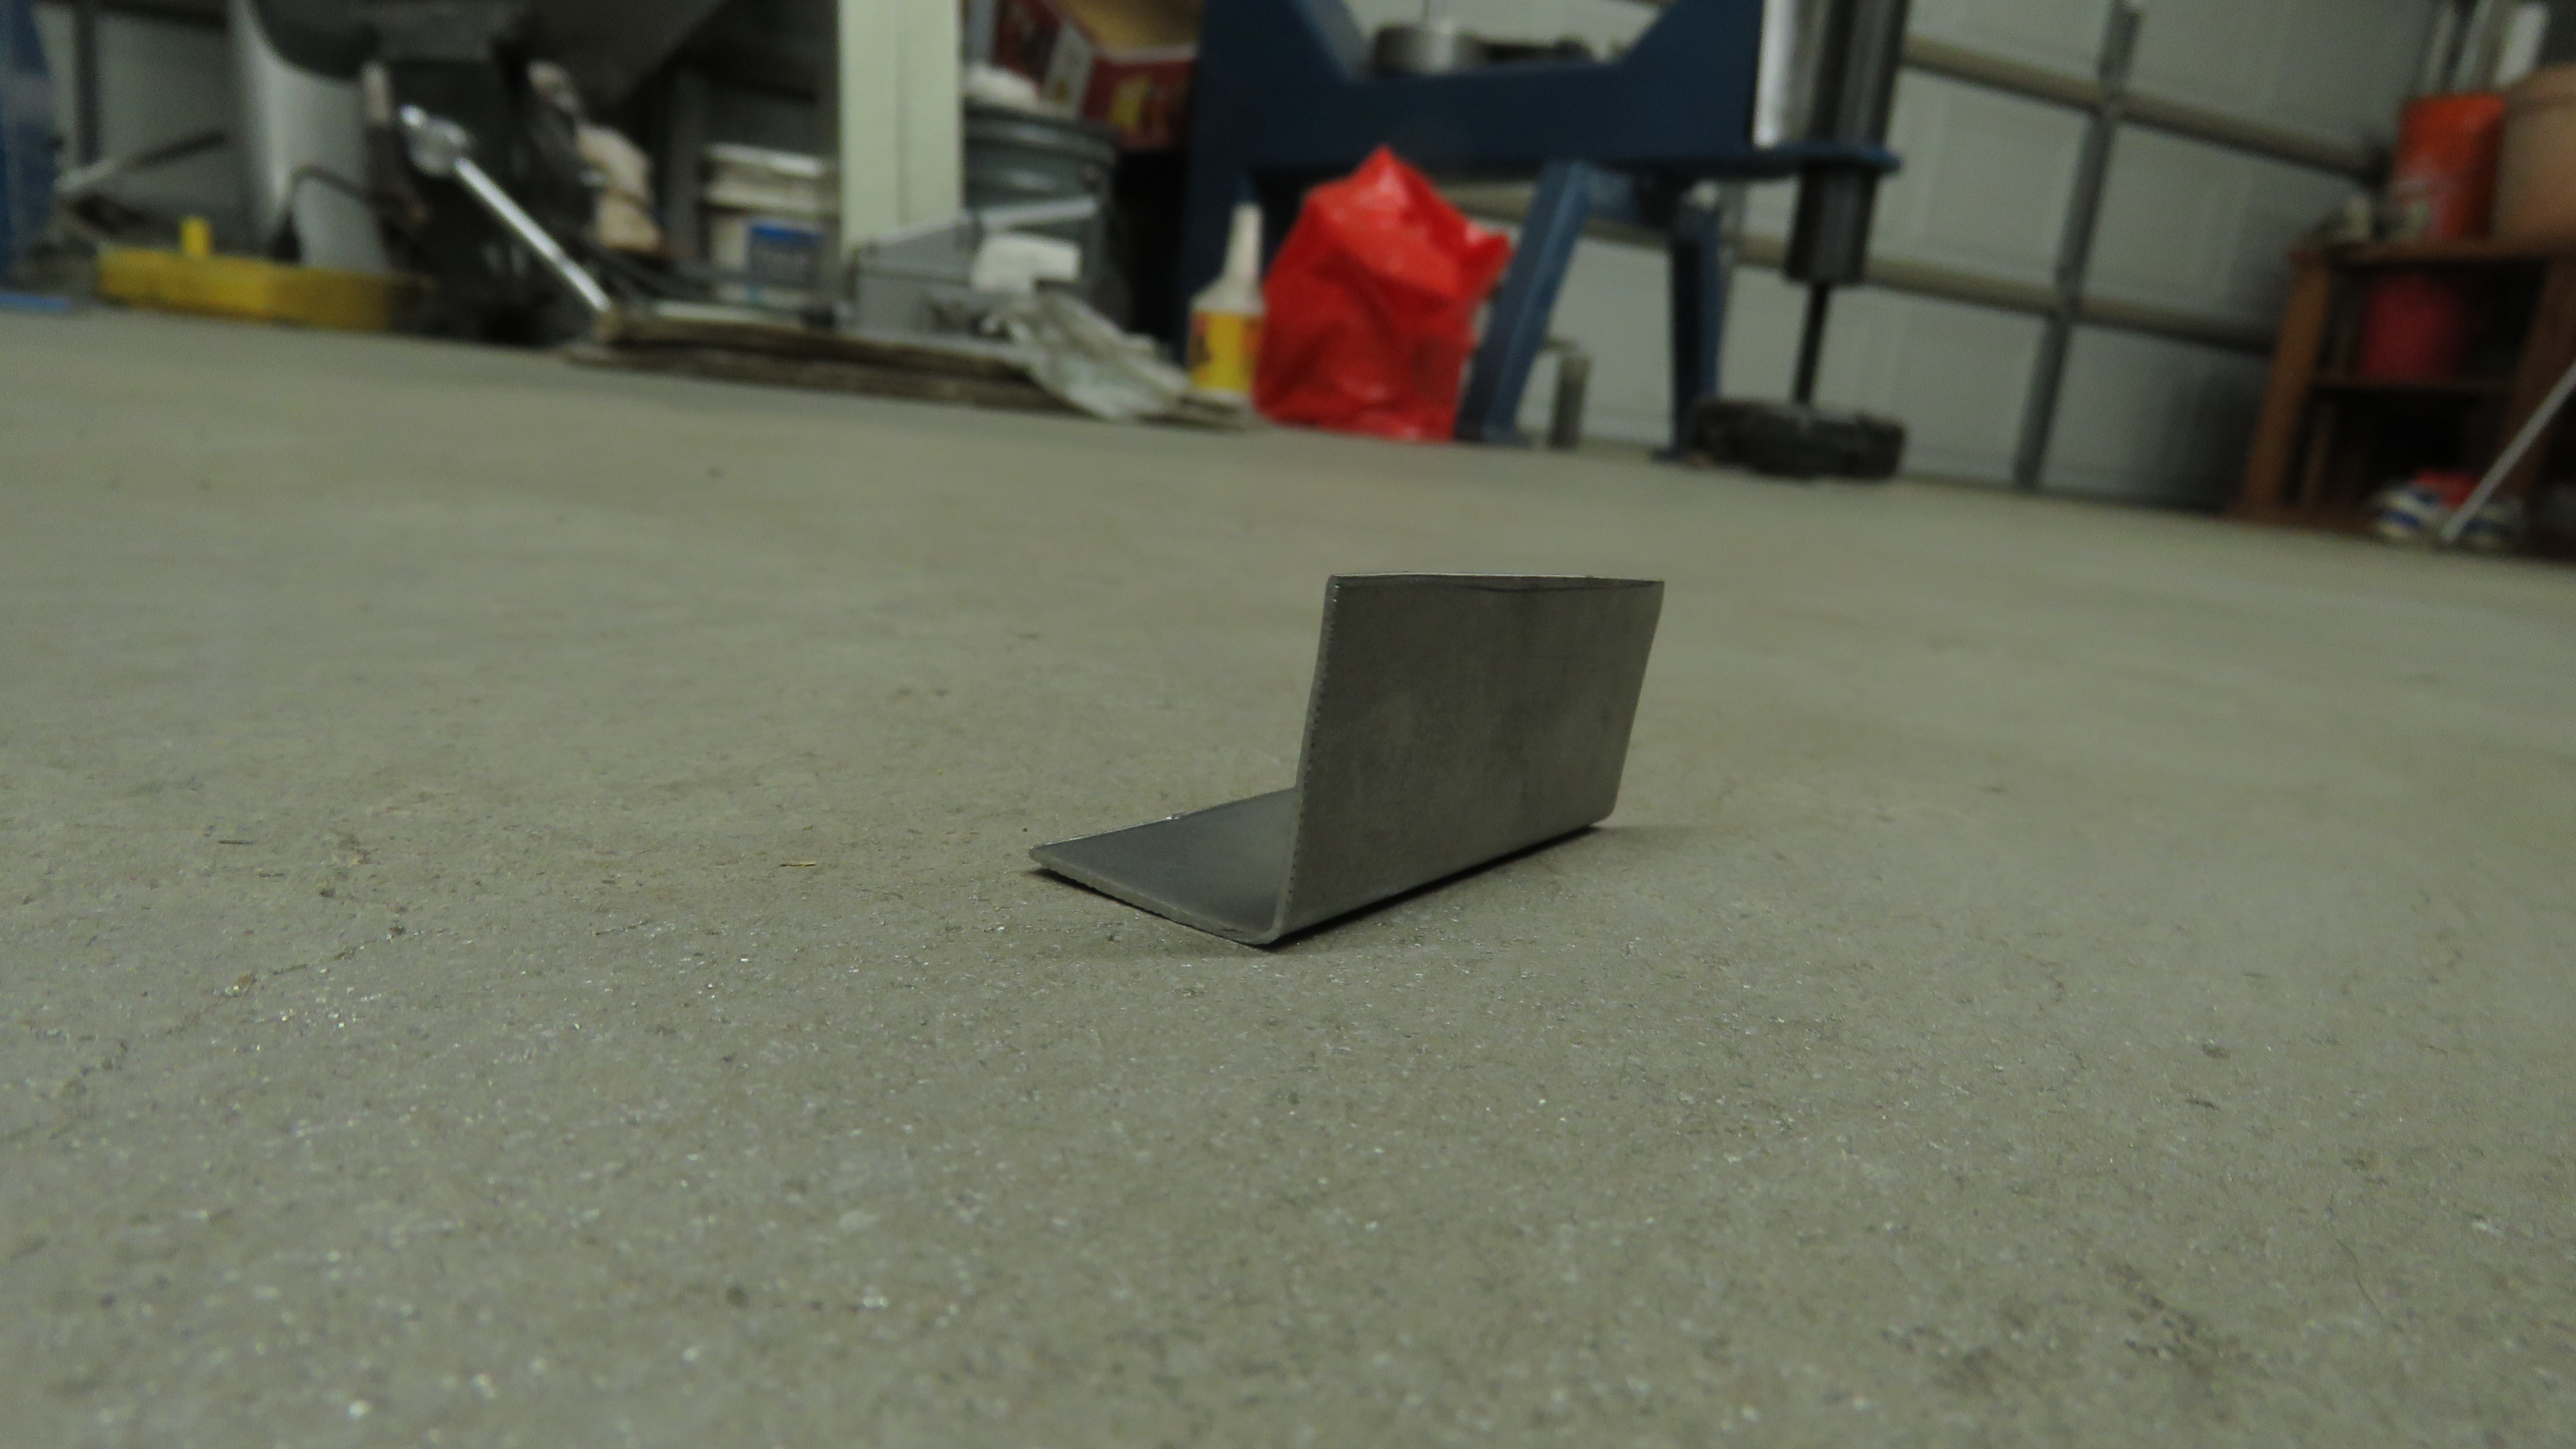
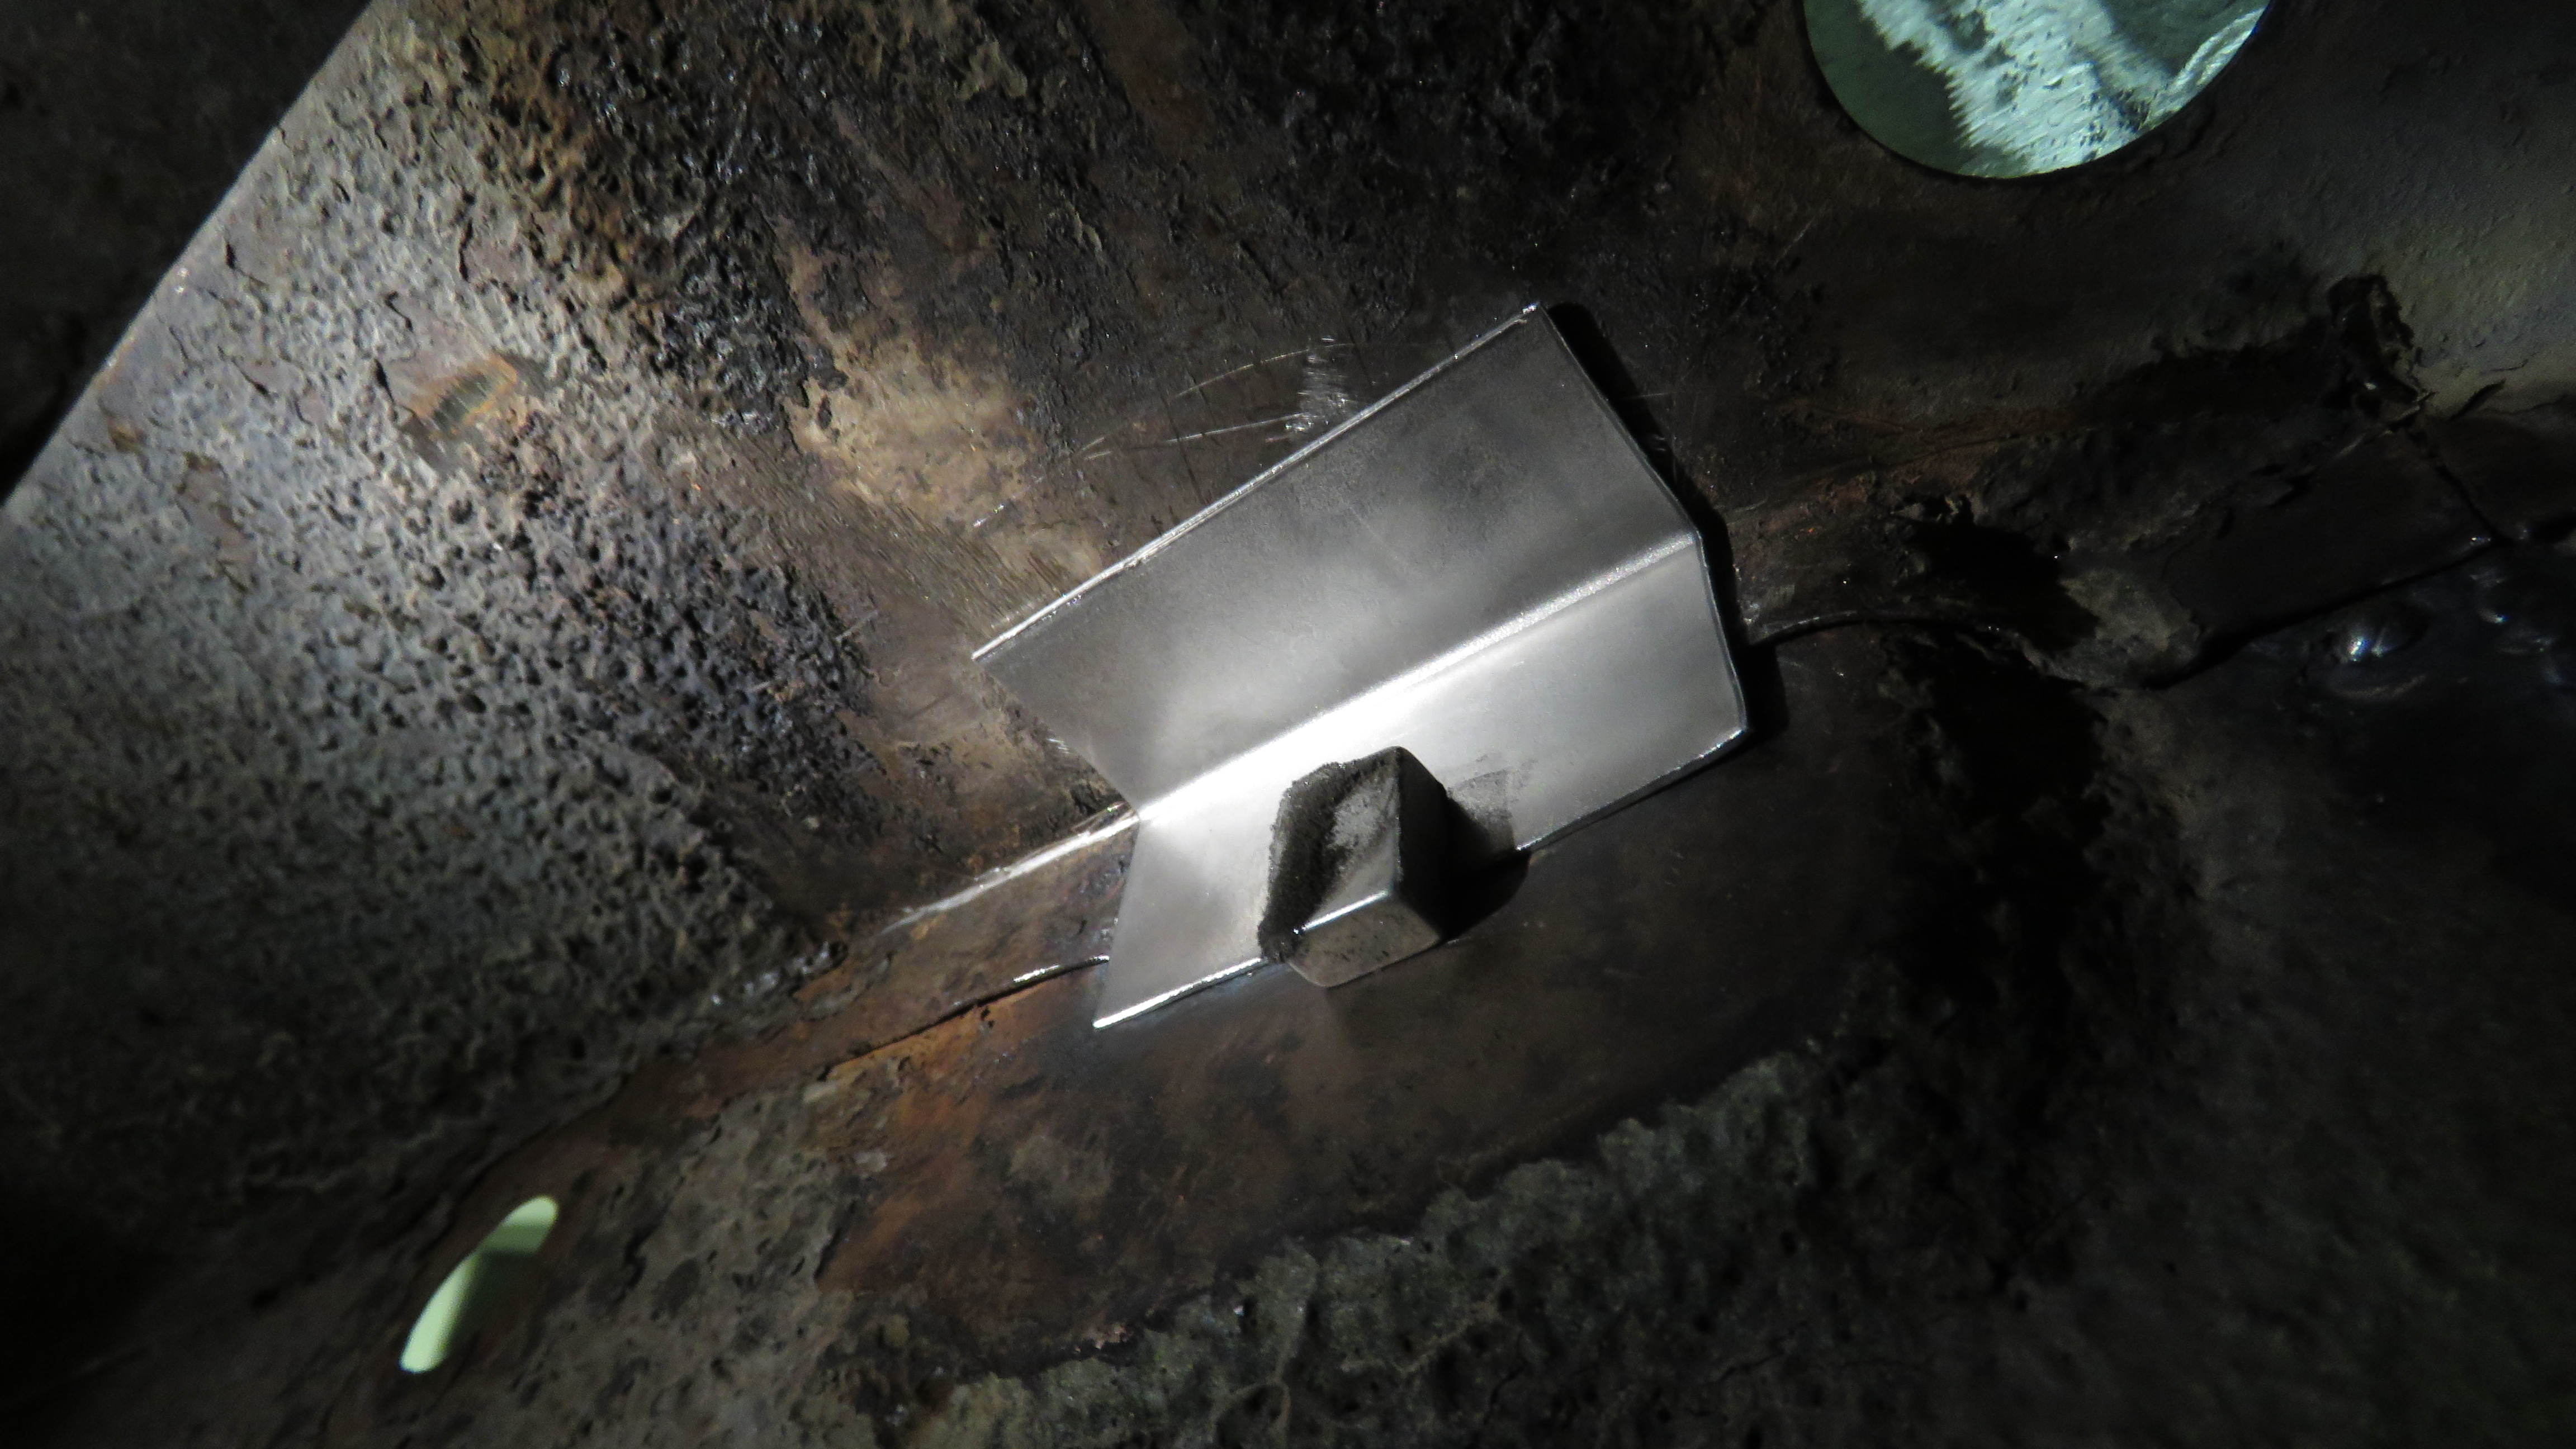
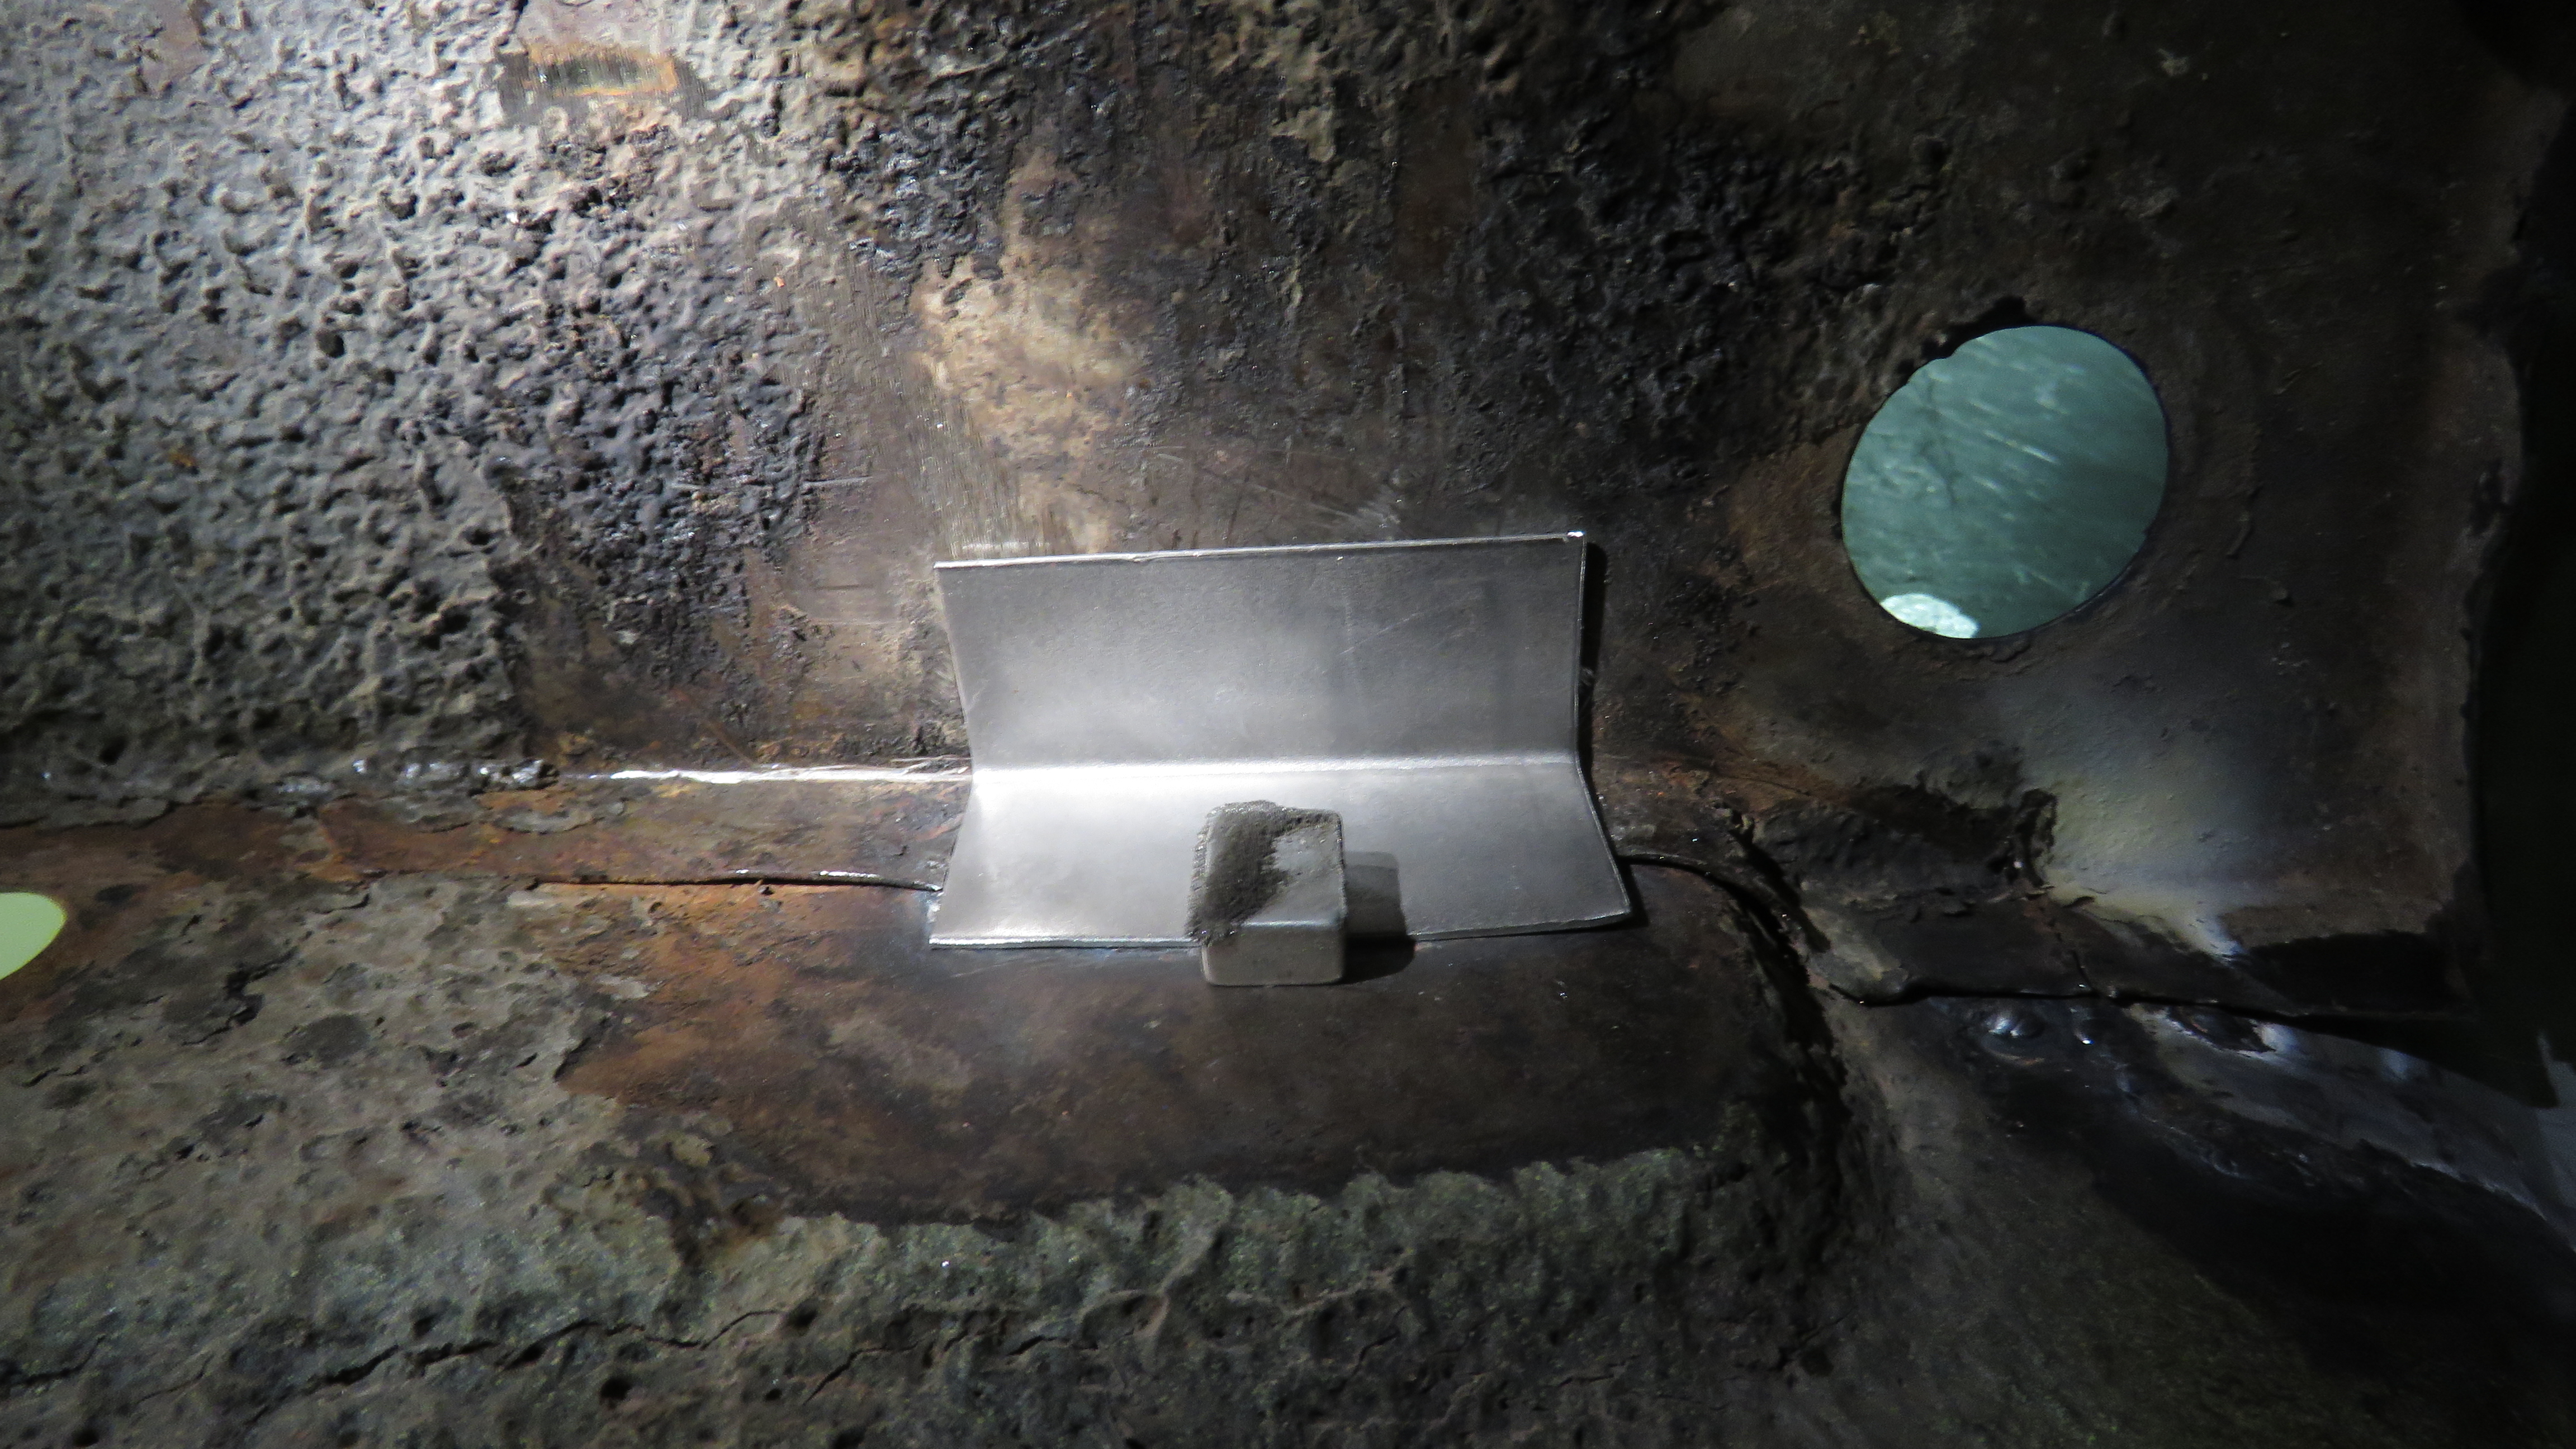
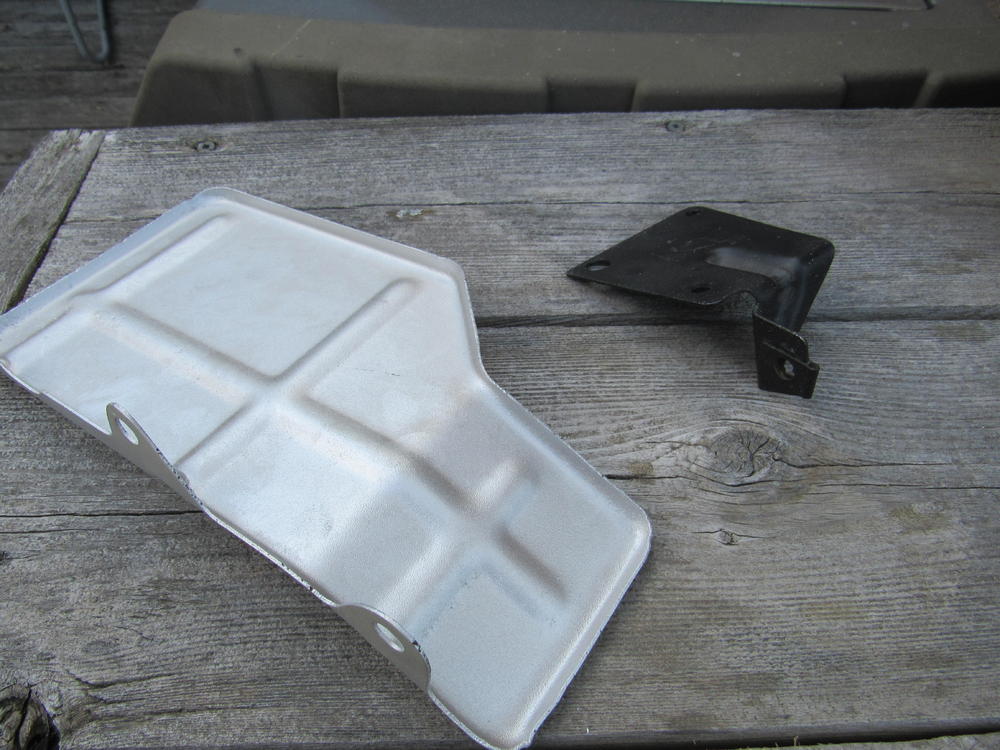
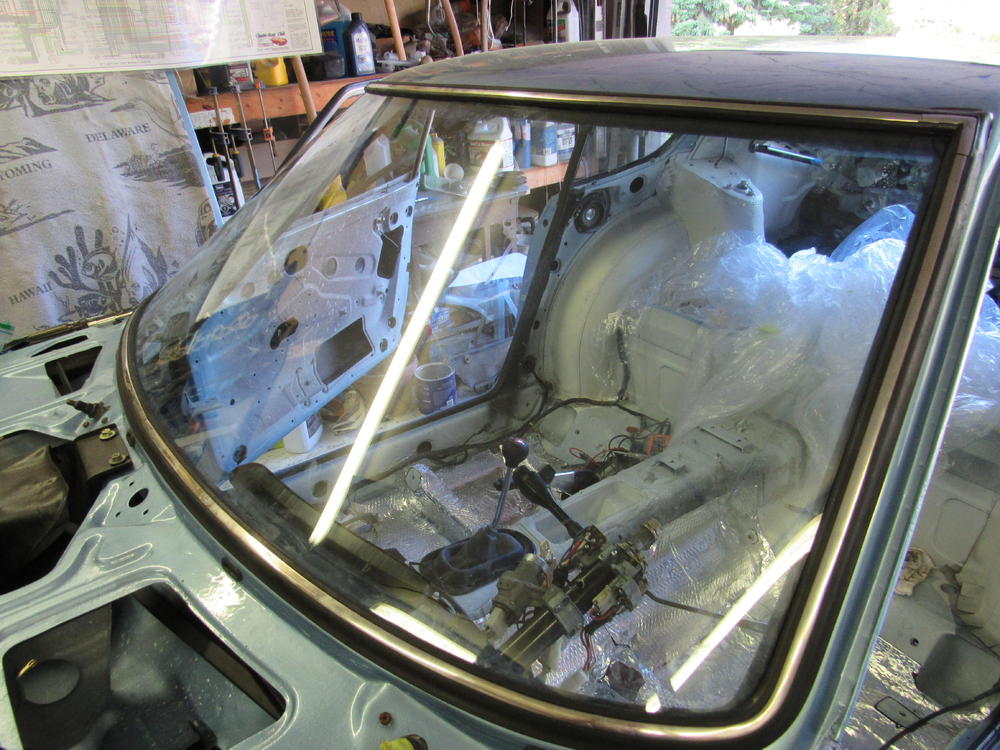
The engine is running now and the box of parts to reinstall is getting close to empty but I have a couple parts I can't find a home for. The heat shield, somewhere in the engine bay but can't figure where and the black flangy thing I think goes in the driver's or passenger's foot well. Any ideas? Also finished up installing all the glass today.

 1 point
 -
Welcome aboard neighbor!! Might be something in this thread that could help maybe? https://www.classiczcars.com/forums/topic/61482-240z-gets-jiggy/#comments1 point
-
1 pointHi Jim. Thanks for the compliment, just happy to have helped out and hopefully you don't have any exhaust drone.1 point
-
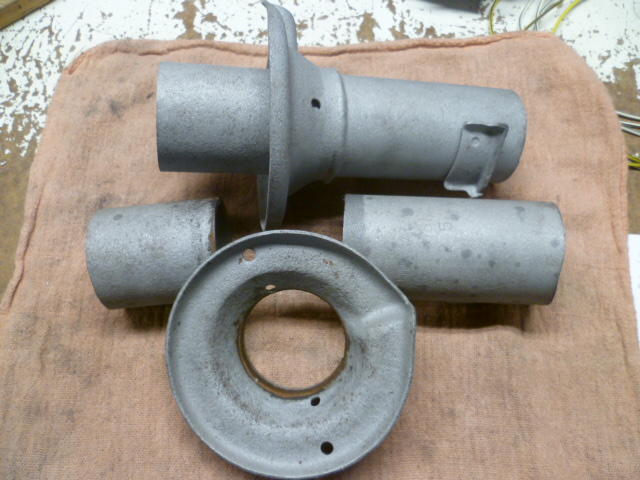
1 pointJust for proof of concept, before I cut the second perch off, I tested the first one. Used a rubber mallet to tap the now liberated loose perch back onto the strut tube and position it a little lower than it was originally: And here's a shot showing the relative heights of the perches. You can tell by the position of the tab welded onto the tubes that the perch on the left is lower by about an inch. The idea would be to re-weld the perch back into this new lower position on another set of complete strut tubes. :

 1 point
 -
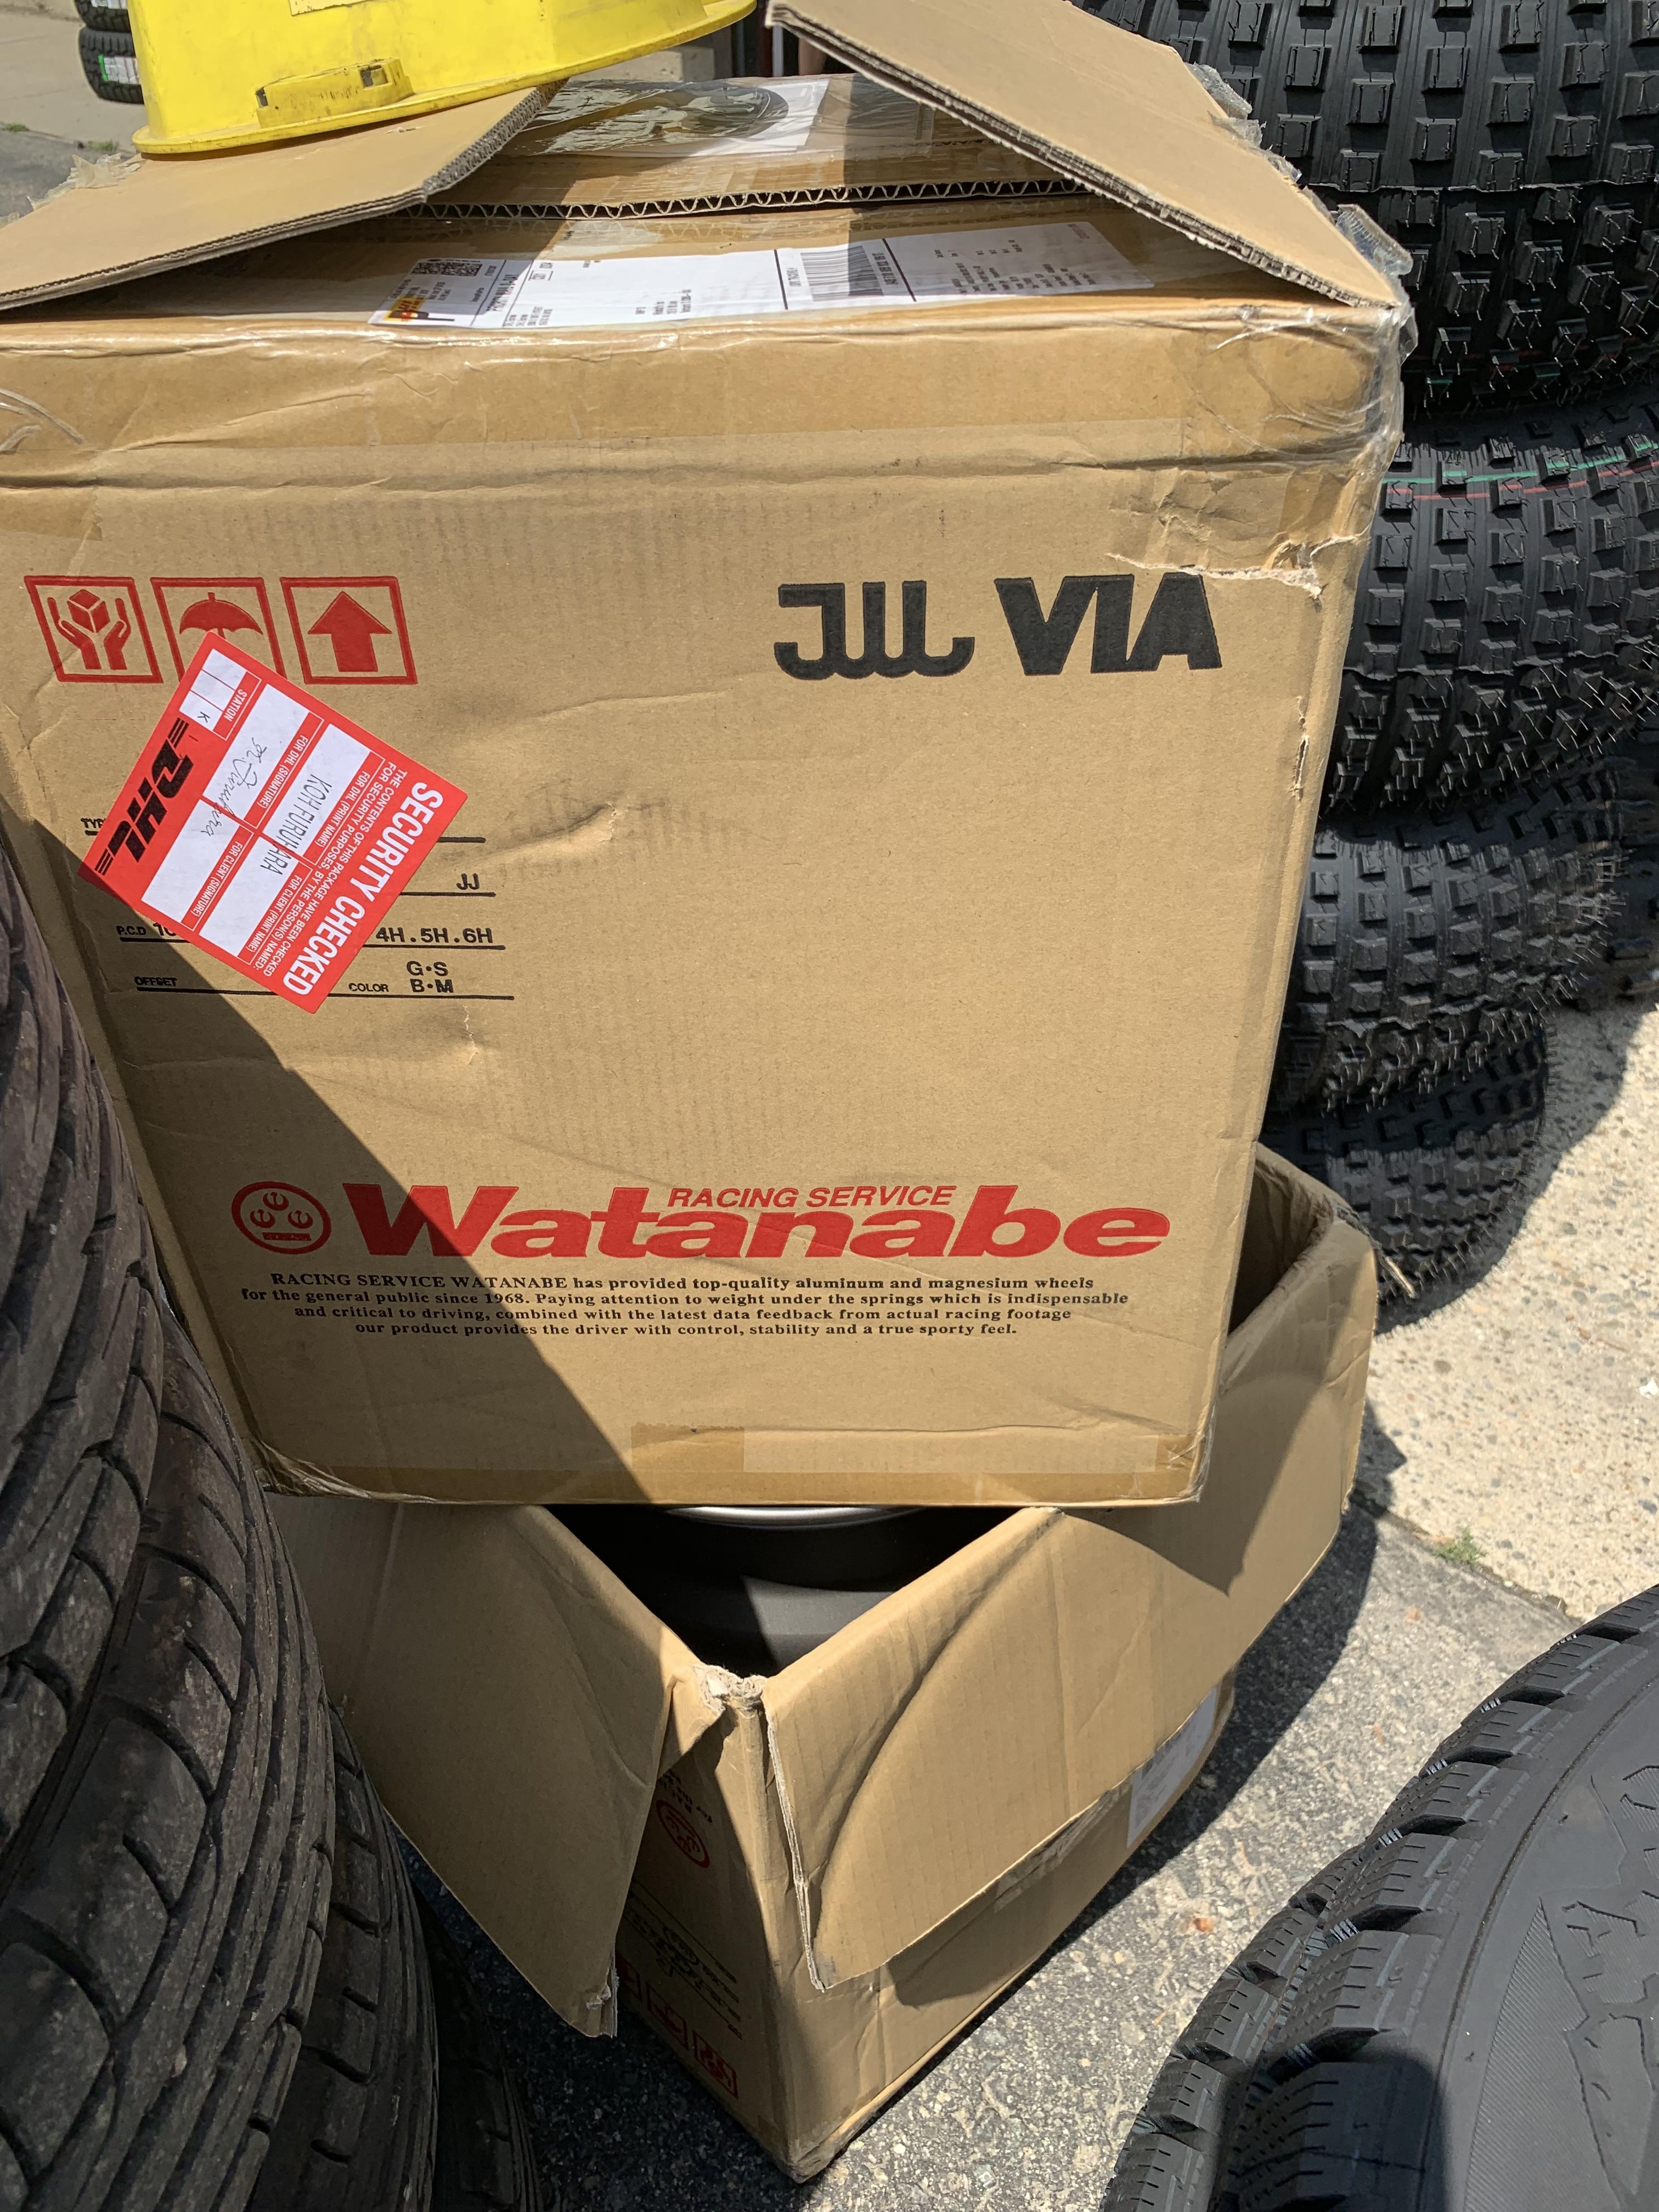
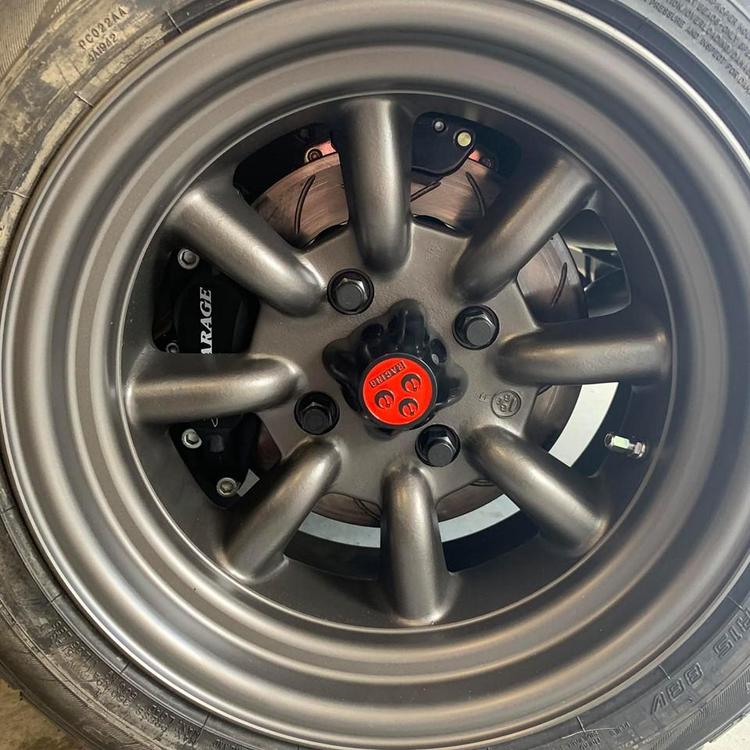
1 pointLooking snazzy. I went with stainless black lug nuts. I also have the raw stainless, it's a hard choice.
 1 point
 -
1 pointHaha! Okay thanks for your tips. I will give them a try when I get home from work.1 point
-
1 pointGrease is the last thing you add before the shaft is assembled. It will bind up your shaft as it slides back in and push the balls and spacers out. Go slow, as the first half of the assembly will slide in easily, then you will need to keep even pressure on the spacers etc. Add the remaining grease as per the thread I quoted above and you can close up the assembly with the top plate and snap ring. I also placed the open shaft in a vice, vertically so I could lower the ball/spacer shaft assembly down vertically as well. This made it easy to use two hands on the shaft and control the balls and spacers. Yeah, I know.... siteunseen is gonna have a field day with that last statement.1 point
-
Good point, sir. I forgot to bring that up. Yes, it is a challenge, but you can get the bulb in the socket wrong. As Egon said in the movie Ghostbusters, "Don't cross the streams."1 point
-
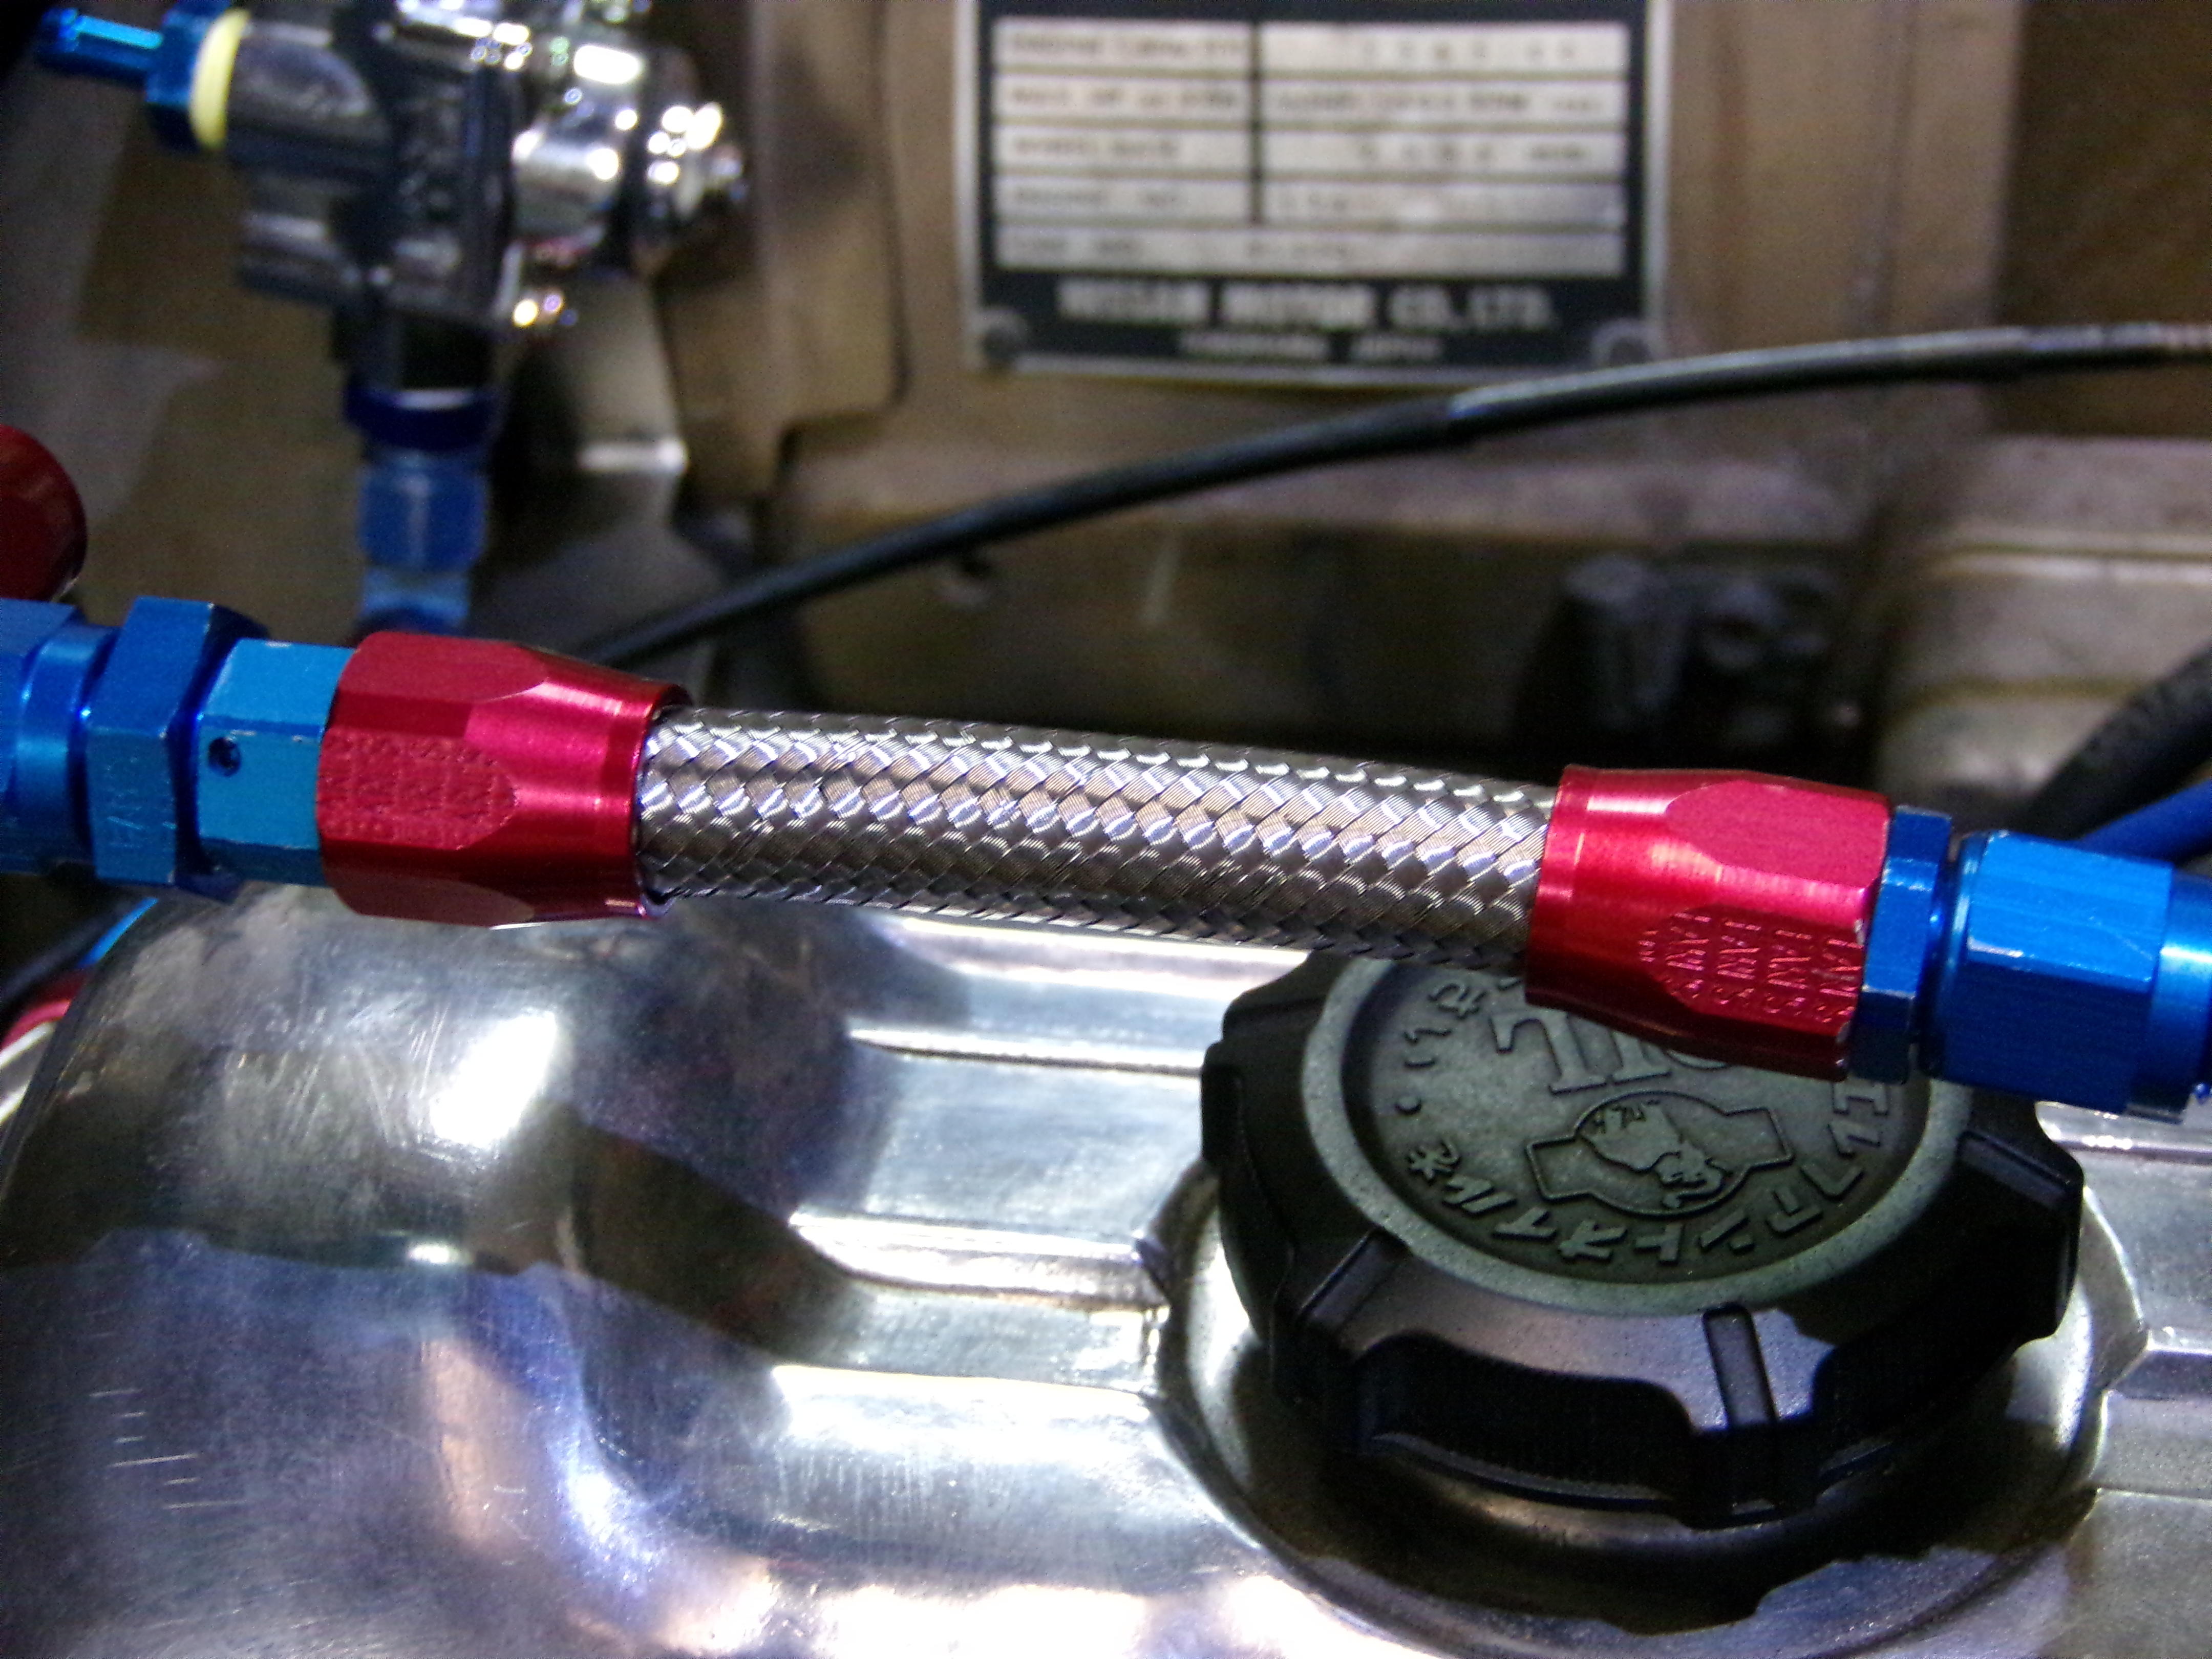
1 pointOkay, the page has been updated with Day 3 activities. I figured out how to do AN fittings today. It's hard to believe that I'm the same person as the idiot who couldn't do it yesterday. I also hit a minor stumbling block in that the fuel pressure gauge has a 1/4" NPT fitting. I couldn't find an AN connector with a fuel pressure gauge port larger than 1/8" NPT (and I already have one of those), so I ended up ordering another fuel pressure gauge that has the same range as the one supplied by Rick but with the 1/8" NPT fitting.
 1 point
 -
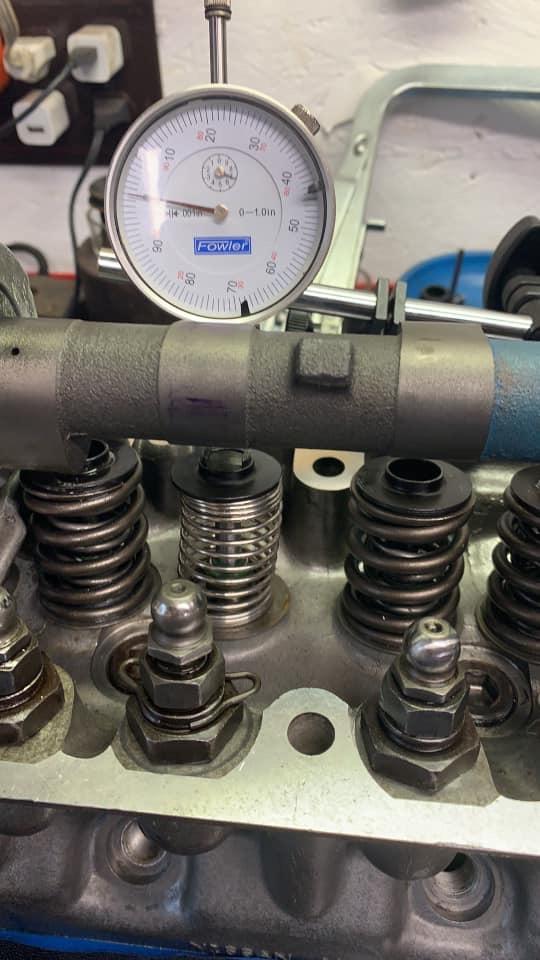
1 pointActually moving forward again on the motor. The big cam arrived and I can start doing lash pads . Should get lucky and have just two sizes , and I have a set for the one size. Short block is just where I left it - all assembled under the bench. Things should roll pretty fast now. I was hoping for this high drama push to put the big motor in at the last minute to make it to Z con- but reality just kicked my arse again. Be glad to take the 2.4 !
 1 point
 -
View Advert ITB Extrudatube 45mm with Cannon Intake mint, like-new condition 45 mm injectors included throttle valve position sensor fuel rail each throat has manifold vacuum tap at injector outlet collected into log for MAP sensor adjustable and reconfigurable throttle lever $2000USD + shipping Can ship from USA when on travel Advertiser 240260280 Date 07/03/2019 Price $2,000.00 Category Parts for Sale1 point
-
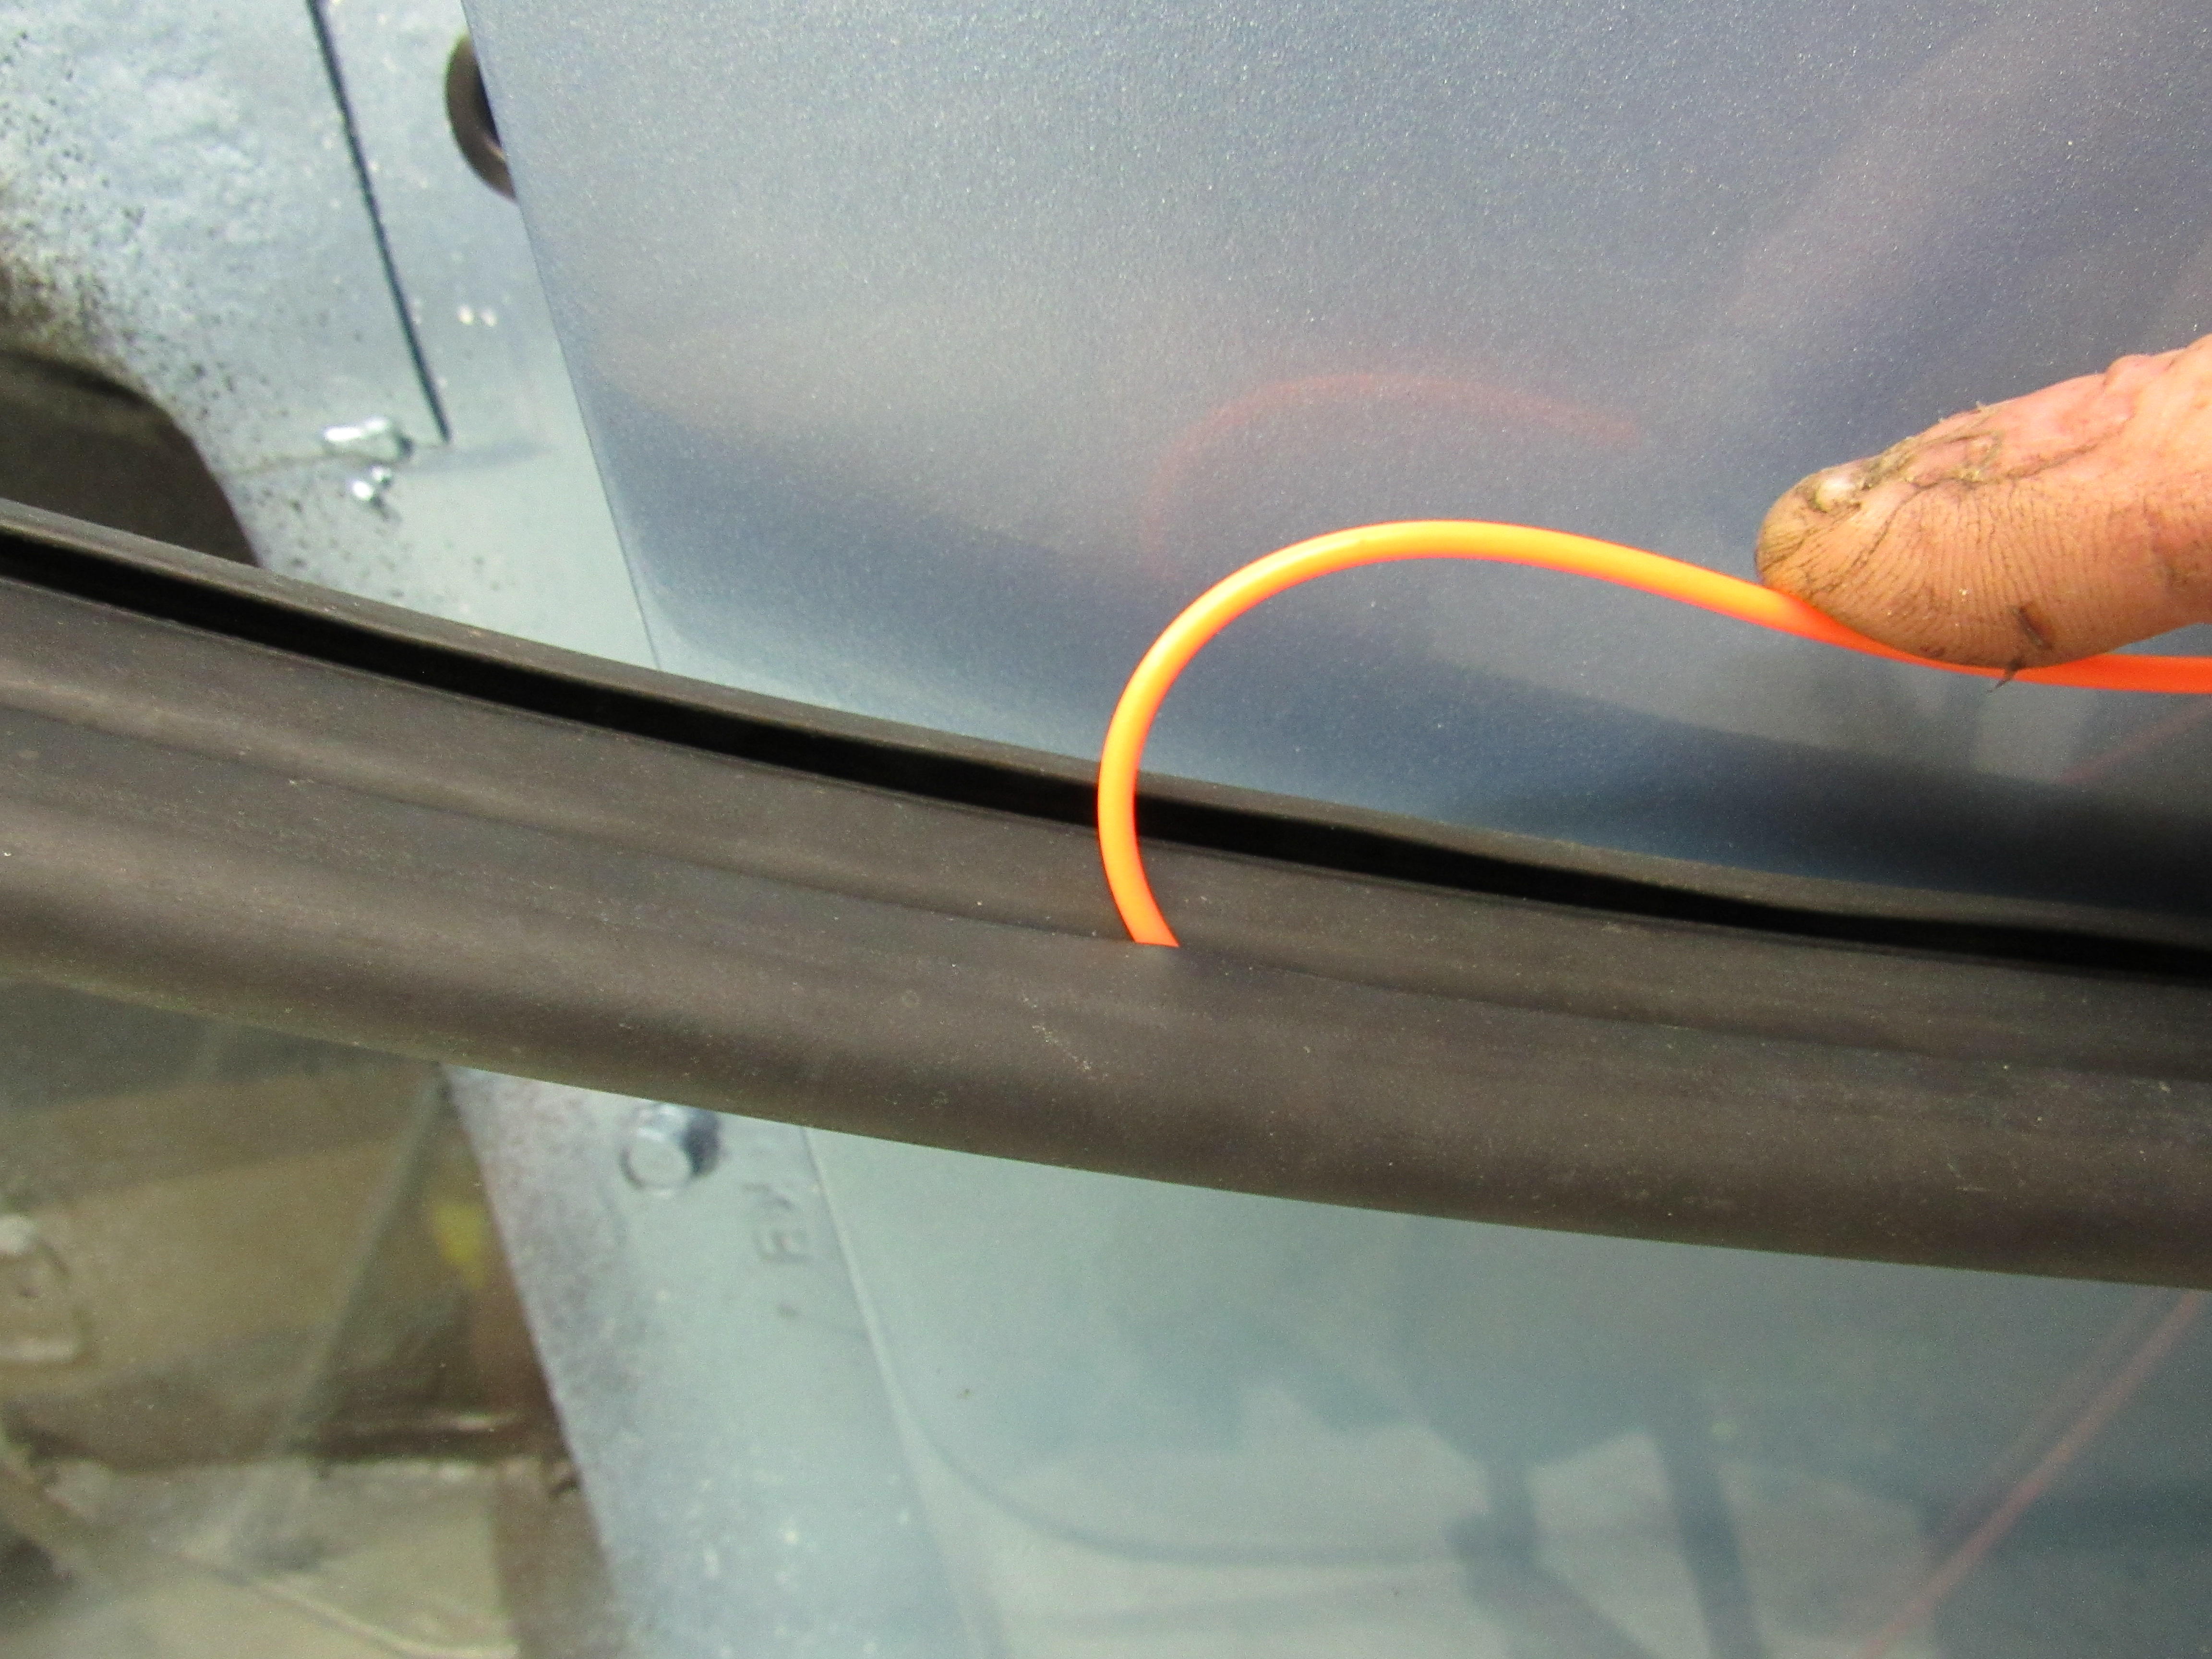
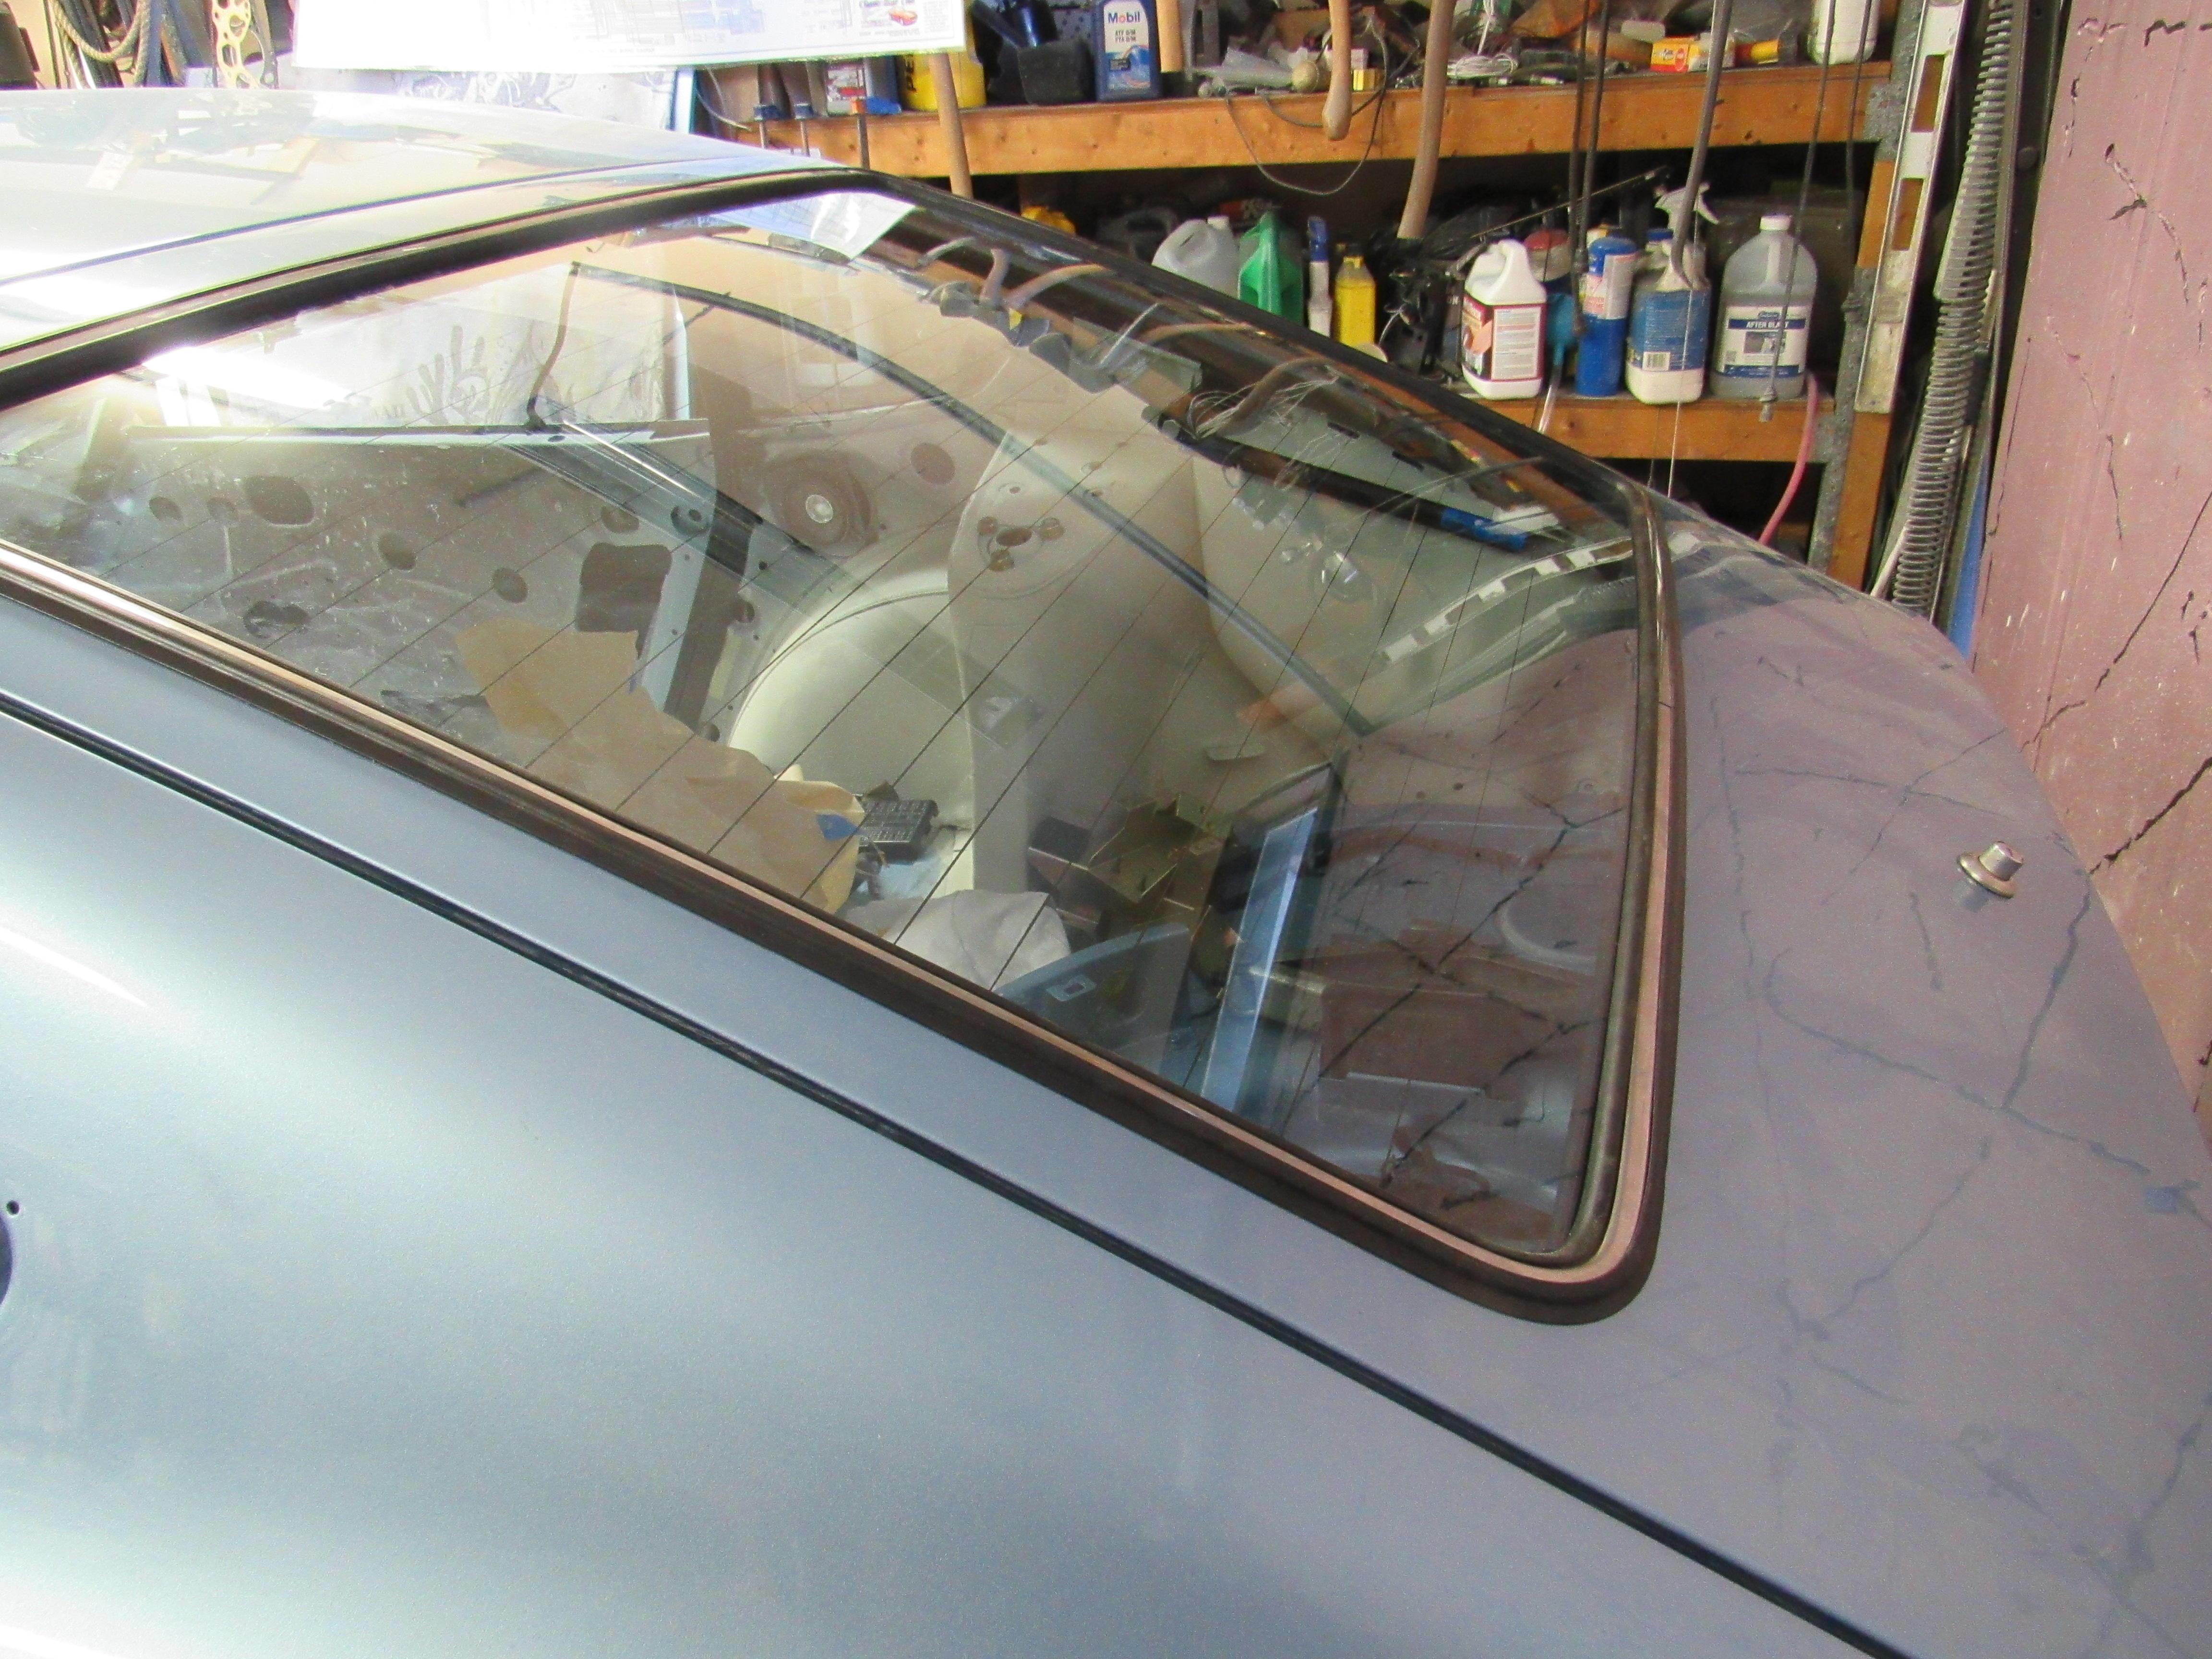
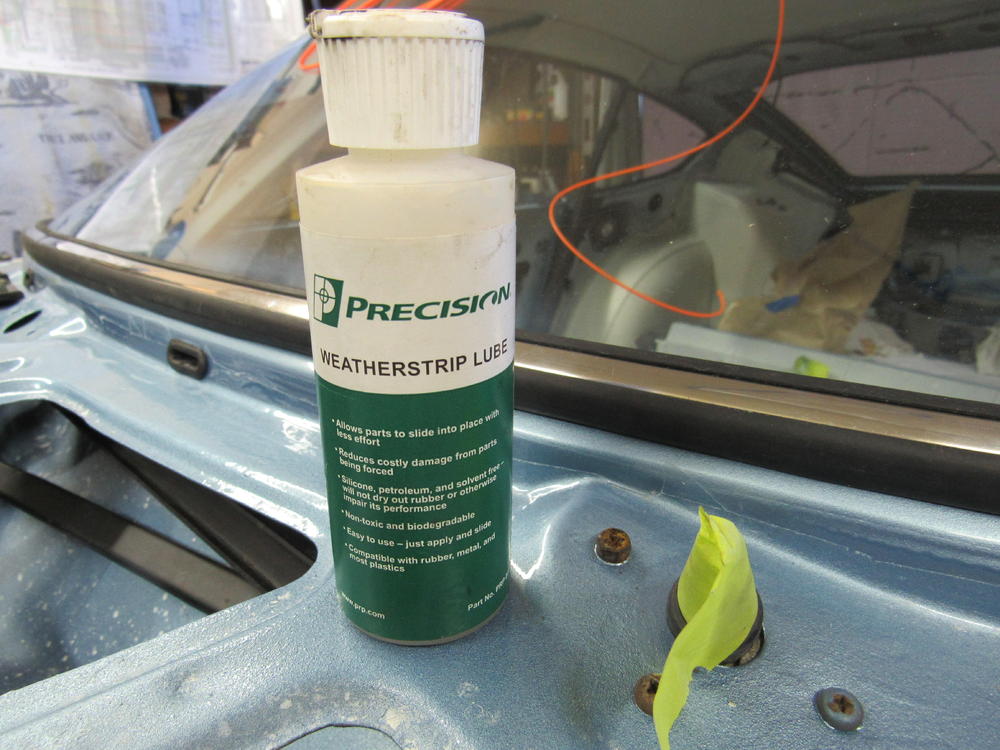
I use the lube from Precision, this is the third car I have used it on and still have more than half left, another benefit of the monofiliment is with a bit of pressure you can just roll it into the chanel , just popped in the rear glass the this afternoon and will do the windshield tomorrow.

 1 point
 -
1 point
-
1 pointI designed and fabricated the heat shield. It is aluminum with "Thermo-Tec 13575 Adhesive Backed Aluminized Heat Barrier" (can be found on Amazon). After I installed headers, I found a lot of heat coming up between the carburetors with the stock heat shield. This heat shield dropped the temperature between the carburetors by about 100 degrees F.1 point
-
1 point
-
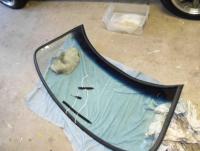
Sure: Cut out the original rubber seal as much as you can before taking out the old glass. First cut out above the glass so that the edge is exposed then get a knife blade behind the glass to free it. Do all around before lifting. Remove all old seal and sealant. Address any rust on the pinch weld Install new seal on new glass Install stainless steel trim Fit weed wacker monofilament line inside seal where the pinch weld will go Fit glass into position with 2 helpers (1 inside and 2 outside) Inside person slowly pulls line while outer two push/gently hit glass into place. Start from middle of bottom (or top) and work outward to both sides evenly. Optional: Once fitted, use a long nosed tube of silicone to place sealant between glass and seal Optional: Once fitted, use a long nosed tube of silicone to place sealant between body and seal Tips: Watch some glass installs on Youtube where they use a cord/rope Use a spray bottle of soapy water as a lubricant1 point
-
1 pointI suspect you are boiling your brake fluid or the water in the system. You might want to consider converting to a better high heat fluid if you are going to spend any sort of time on the track1 point
-
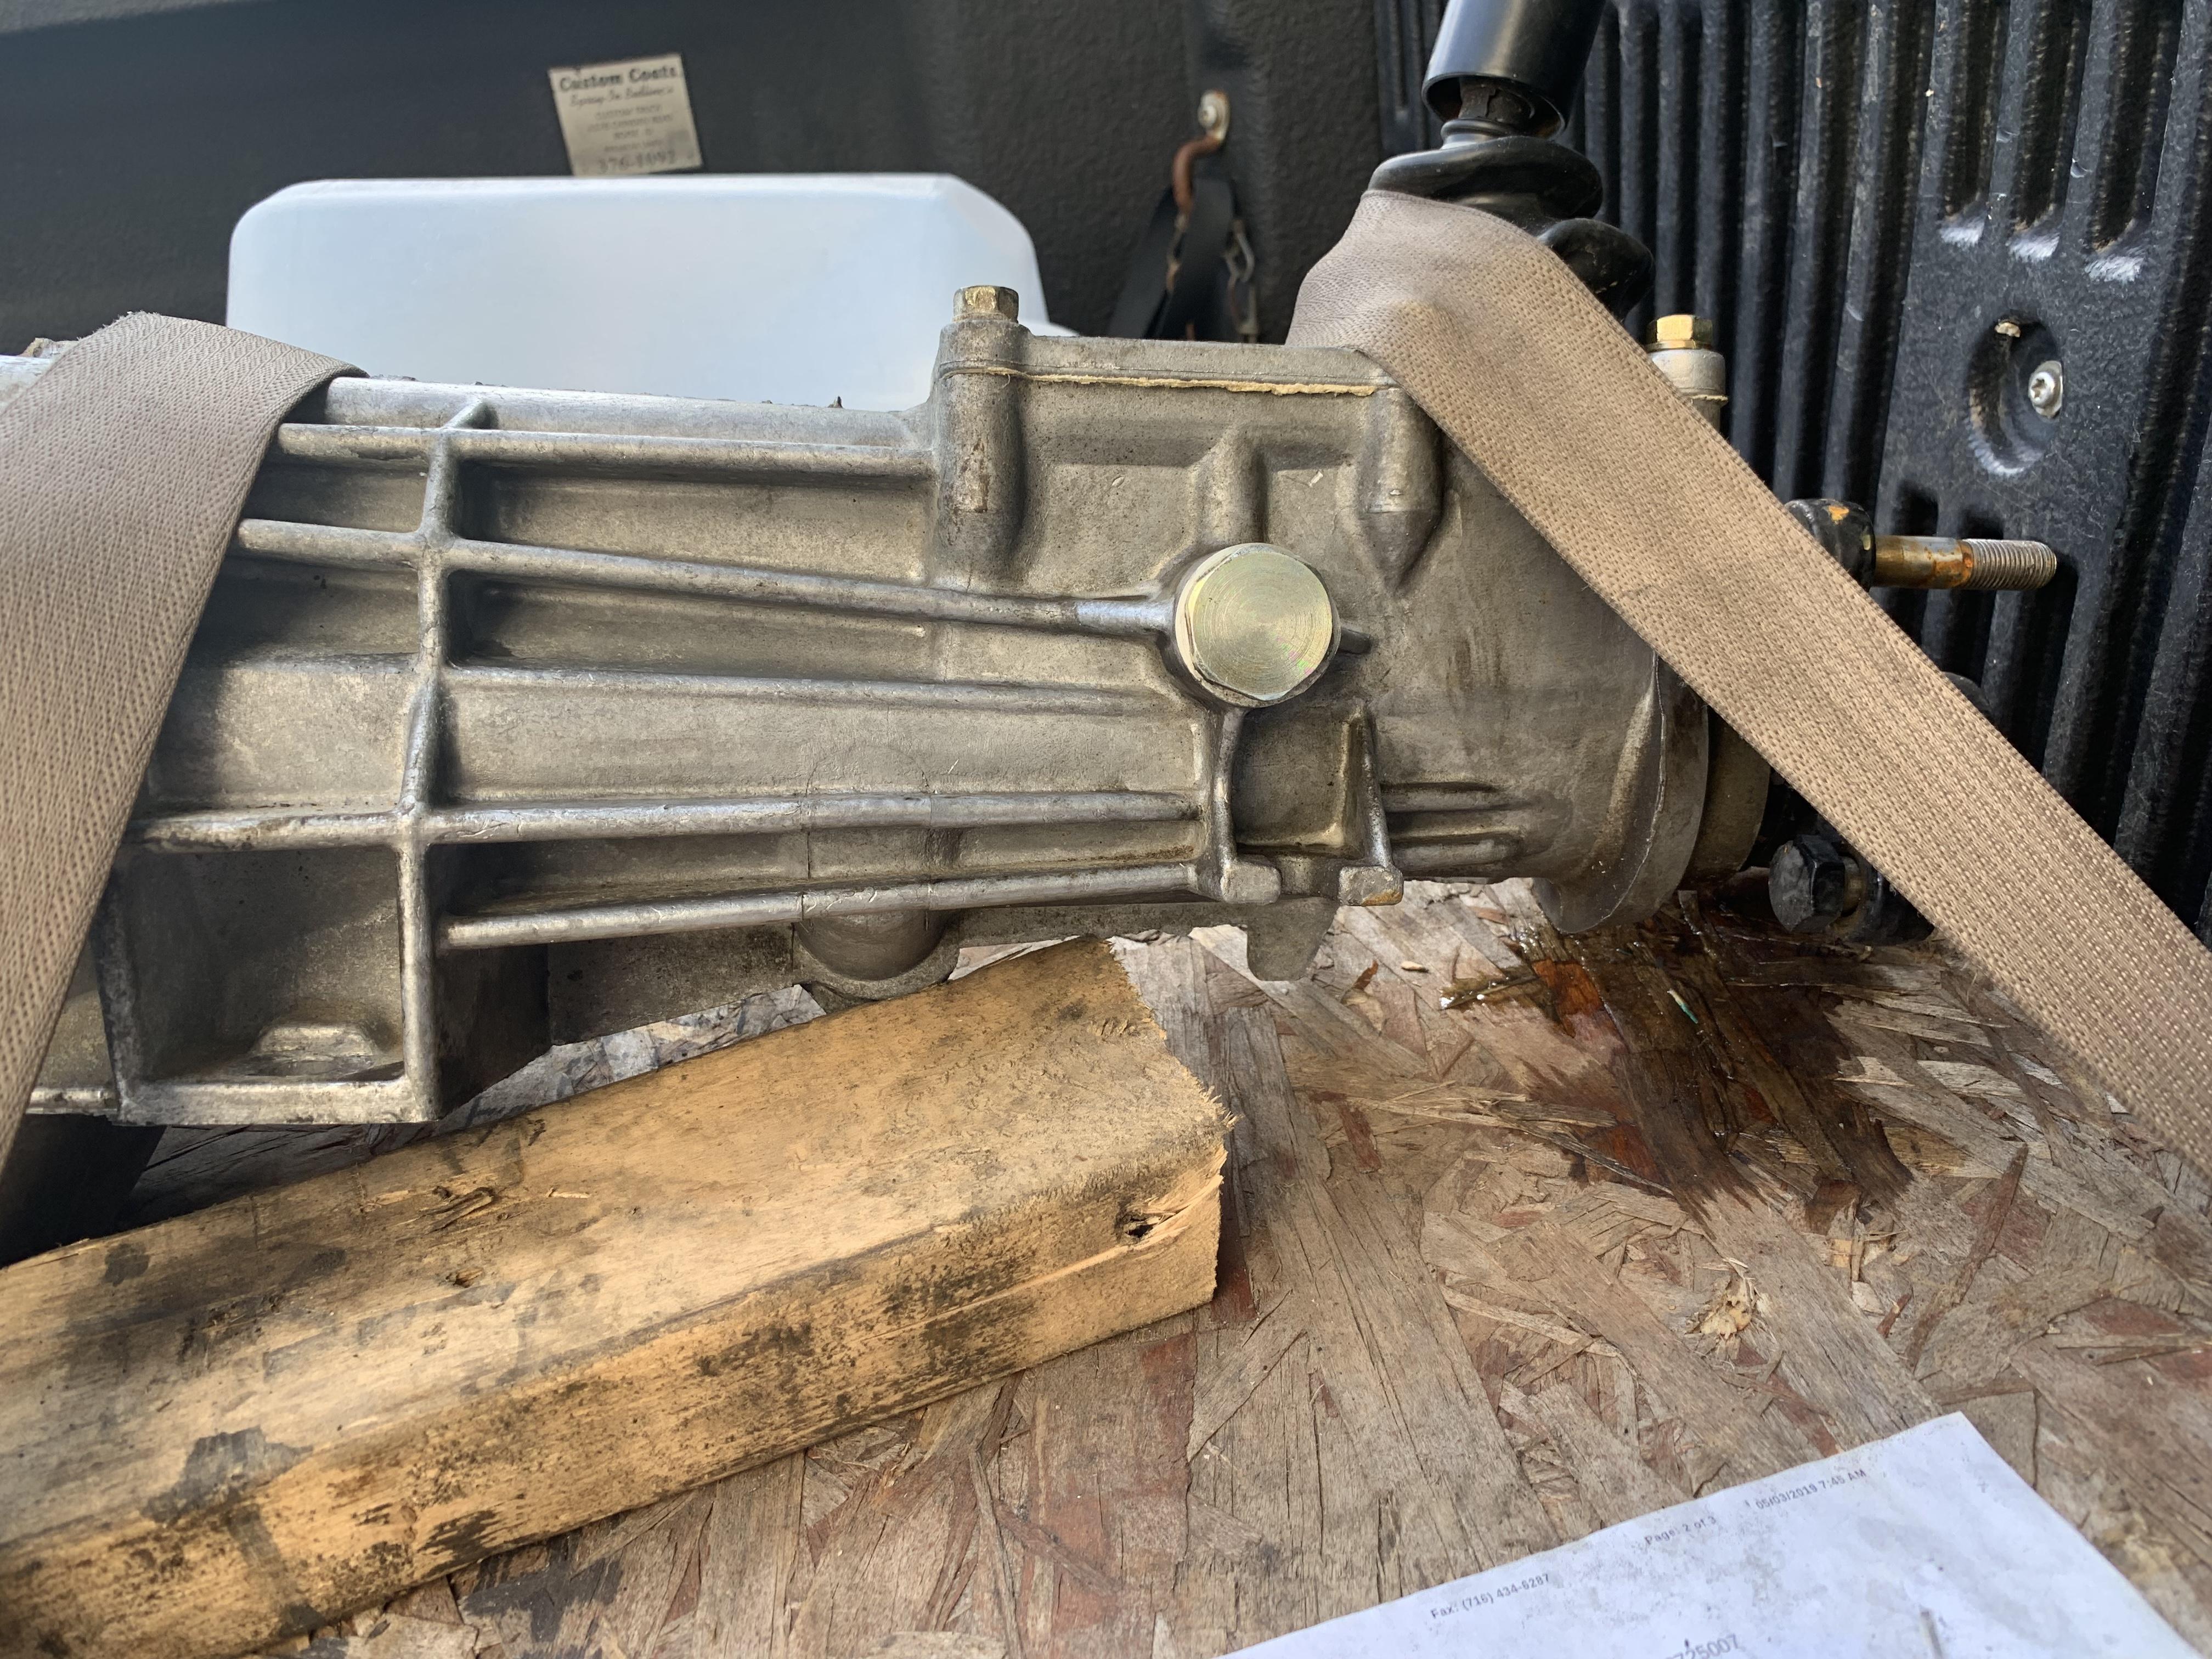
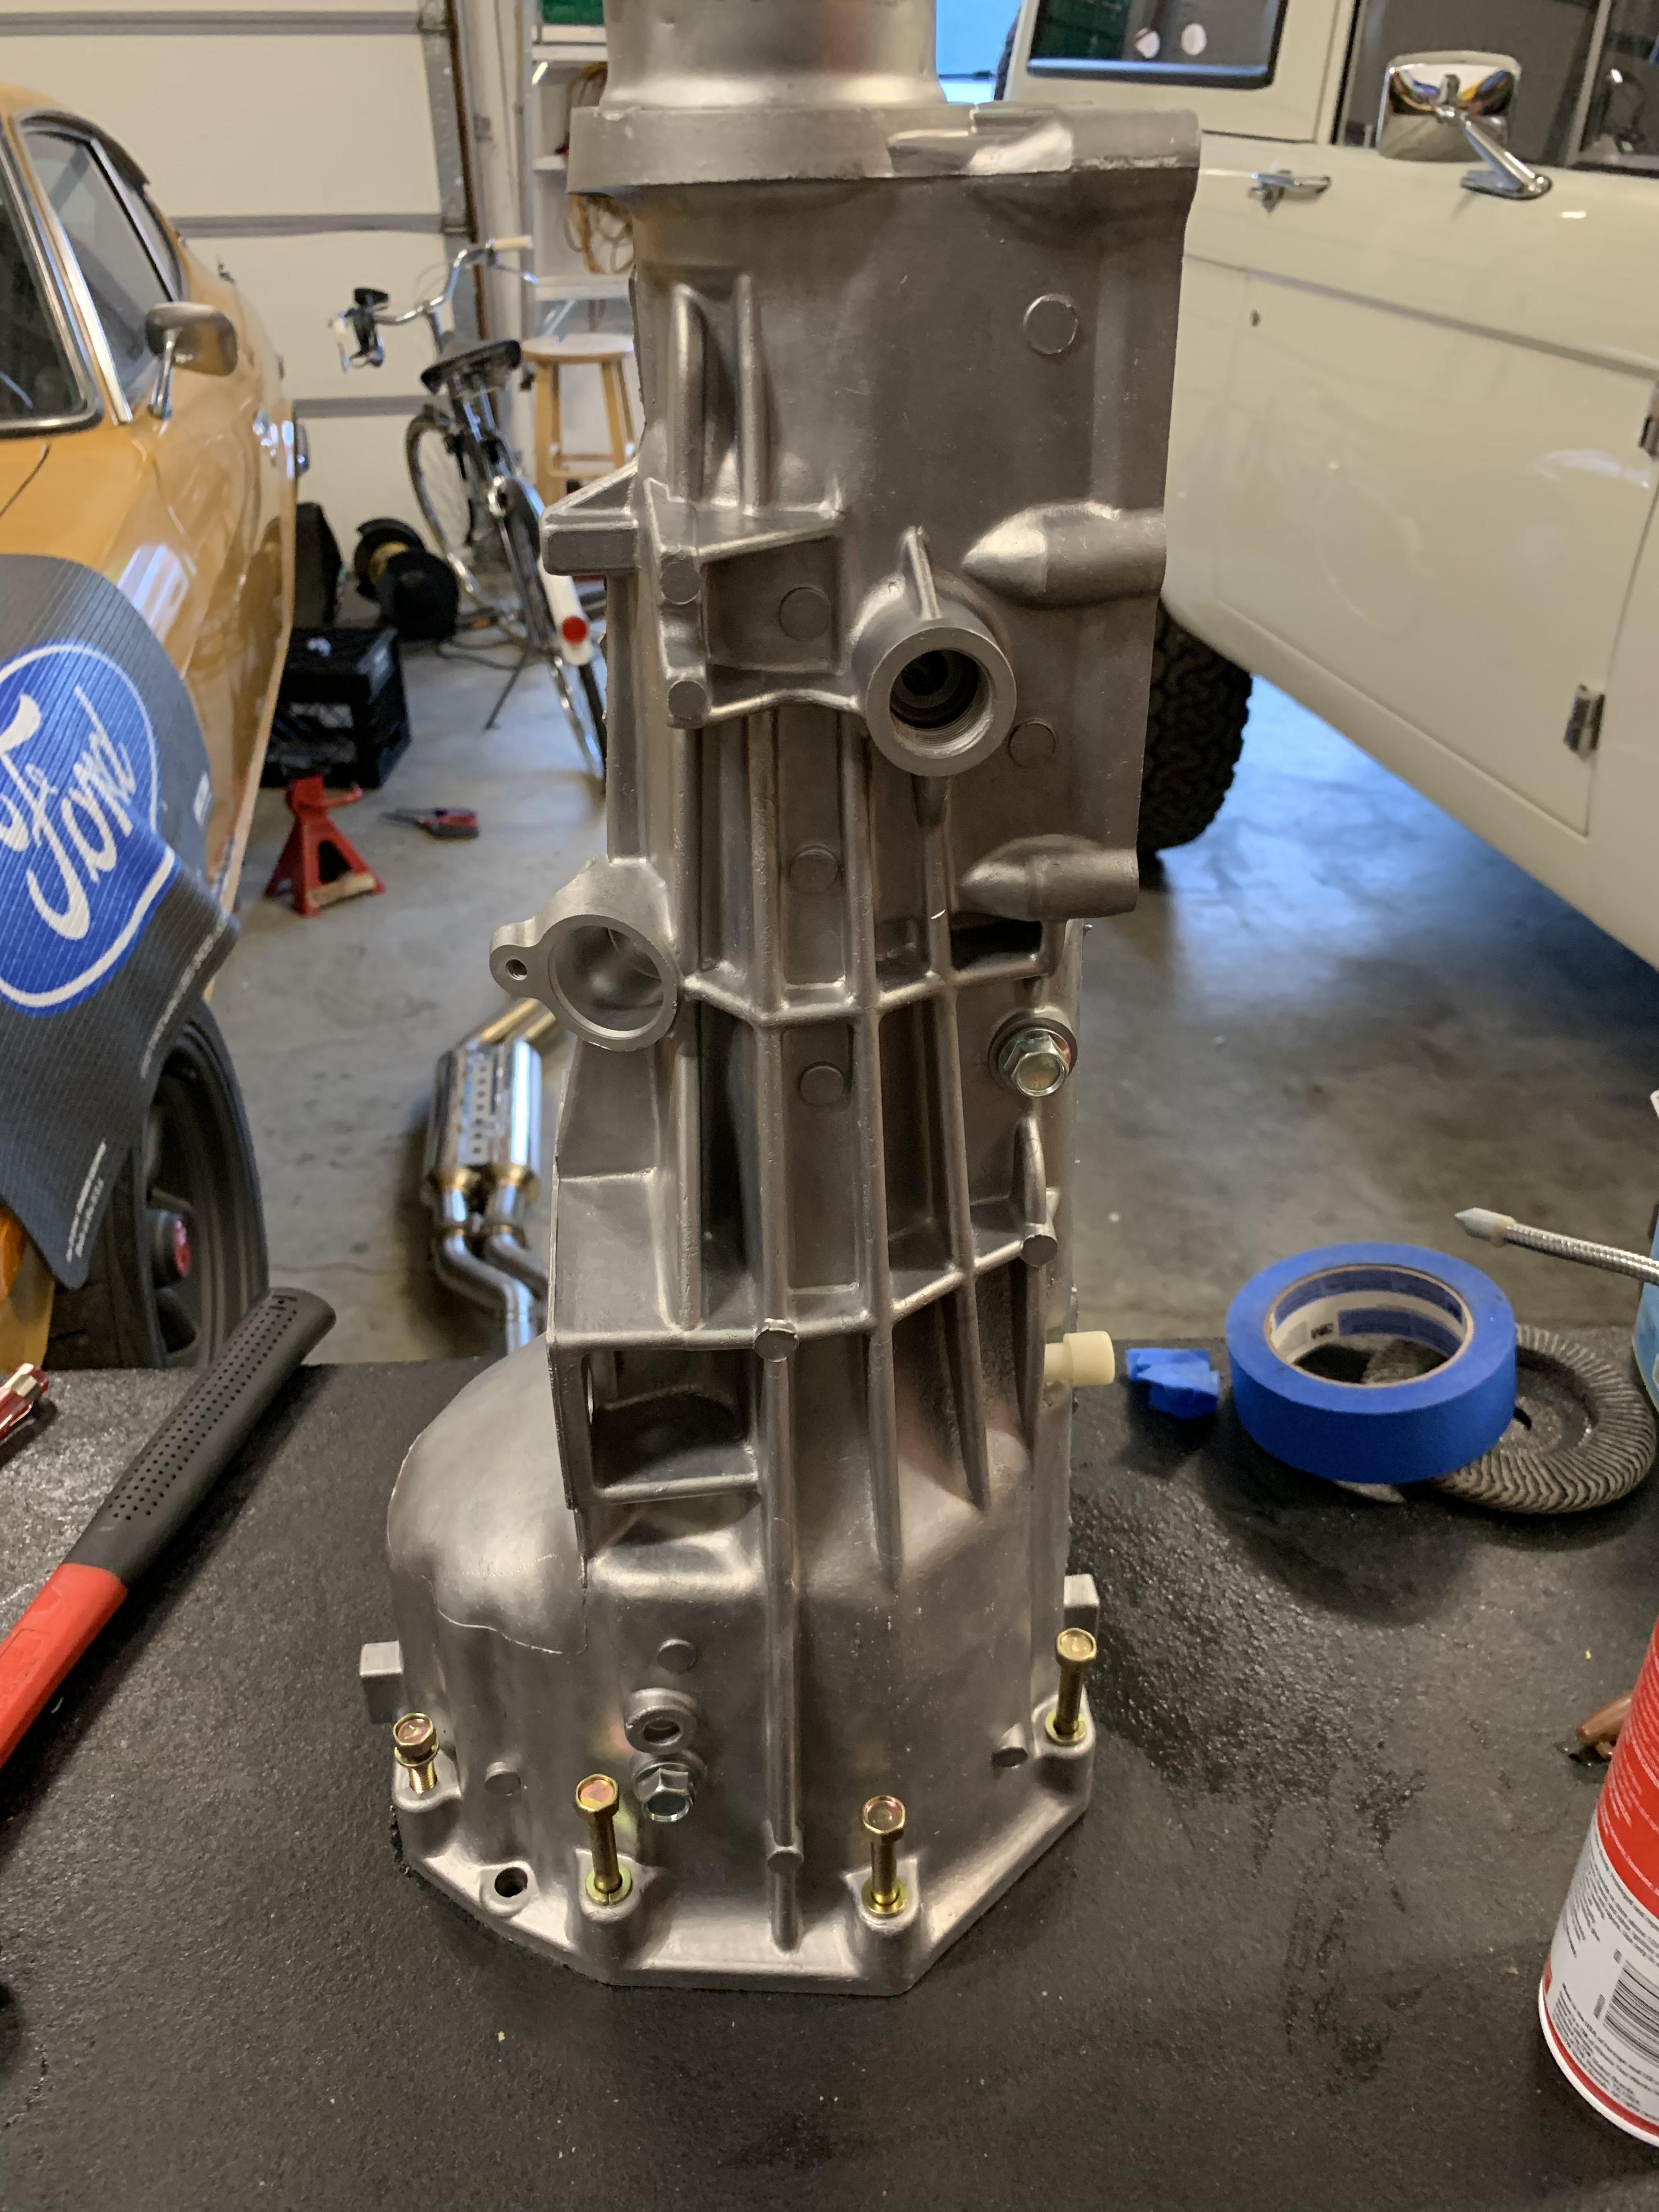
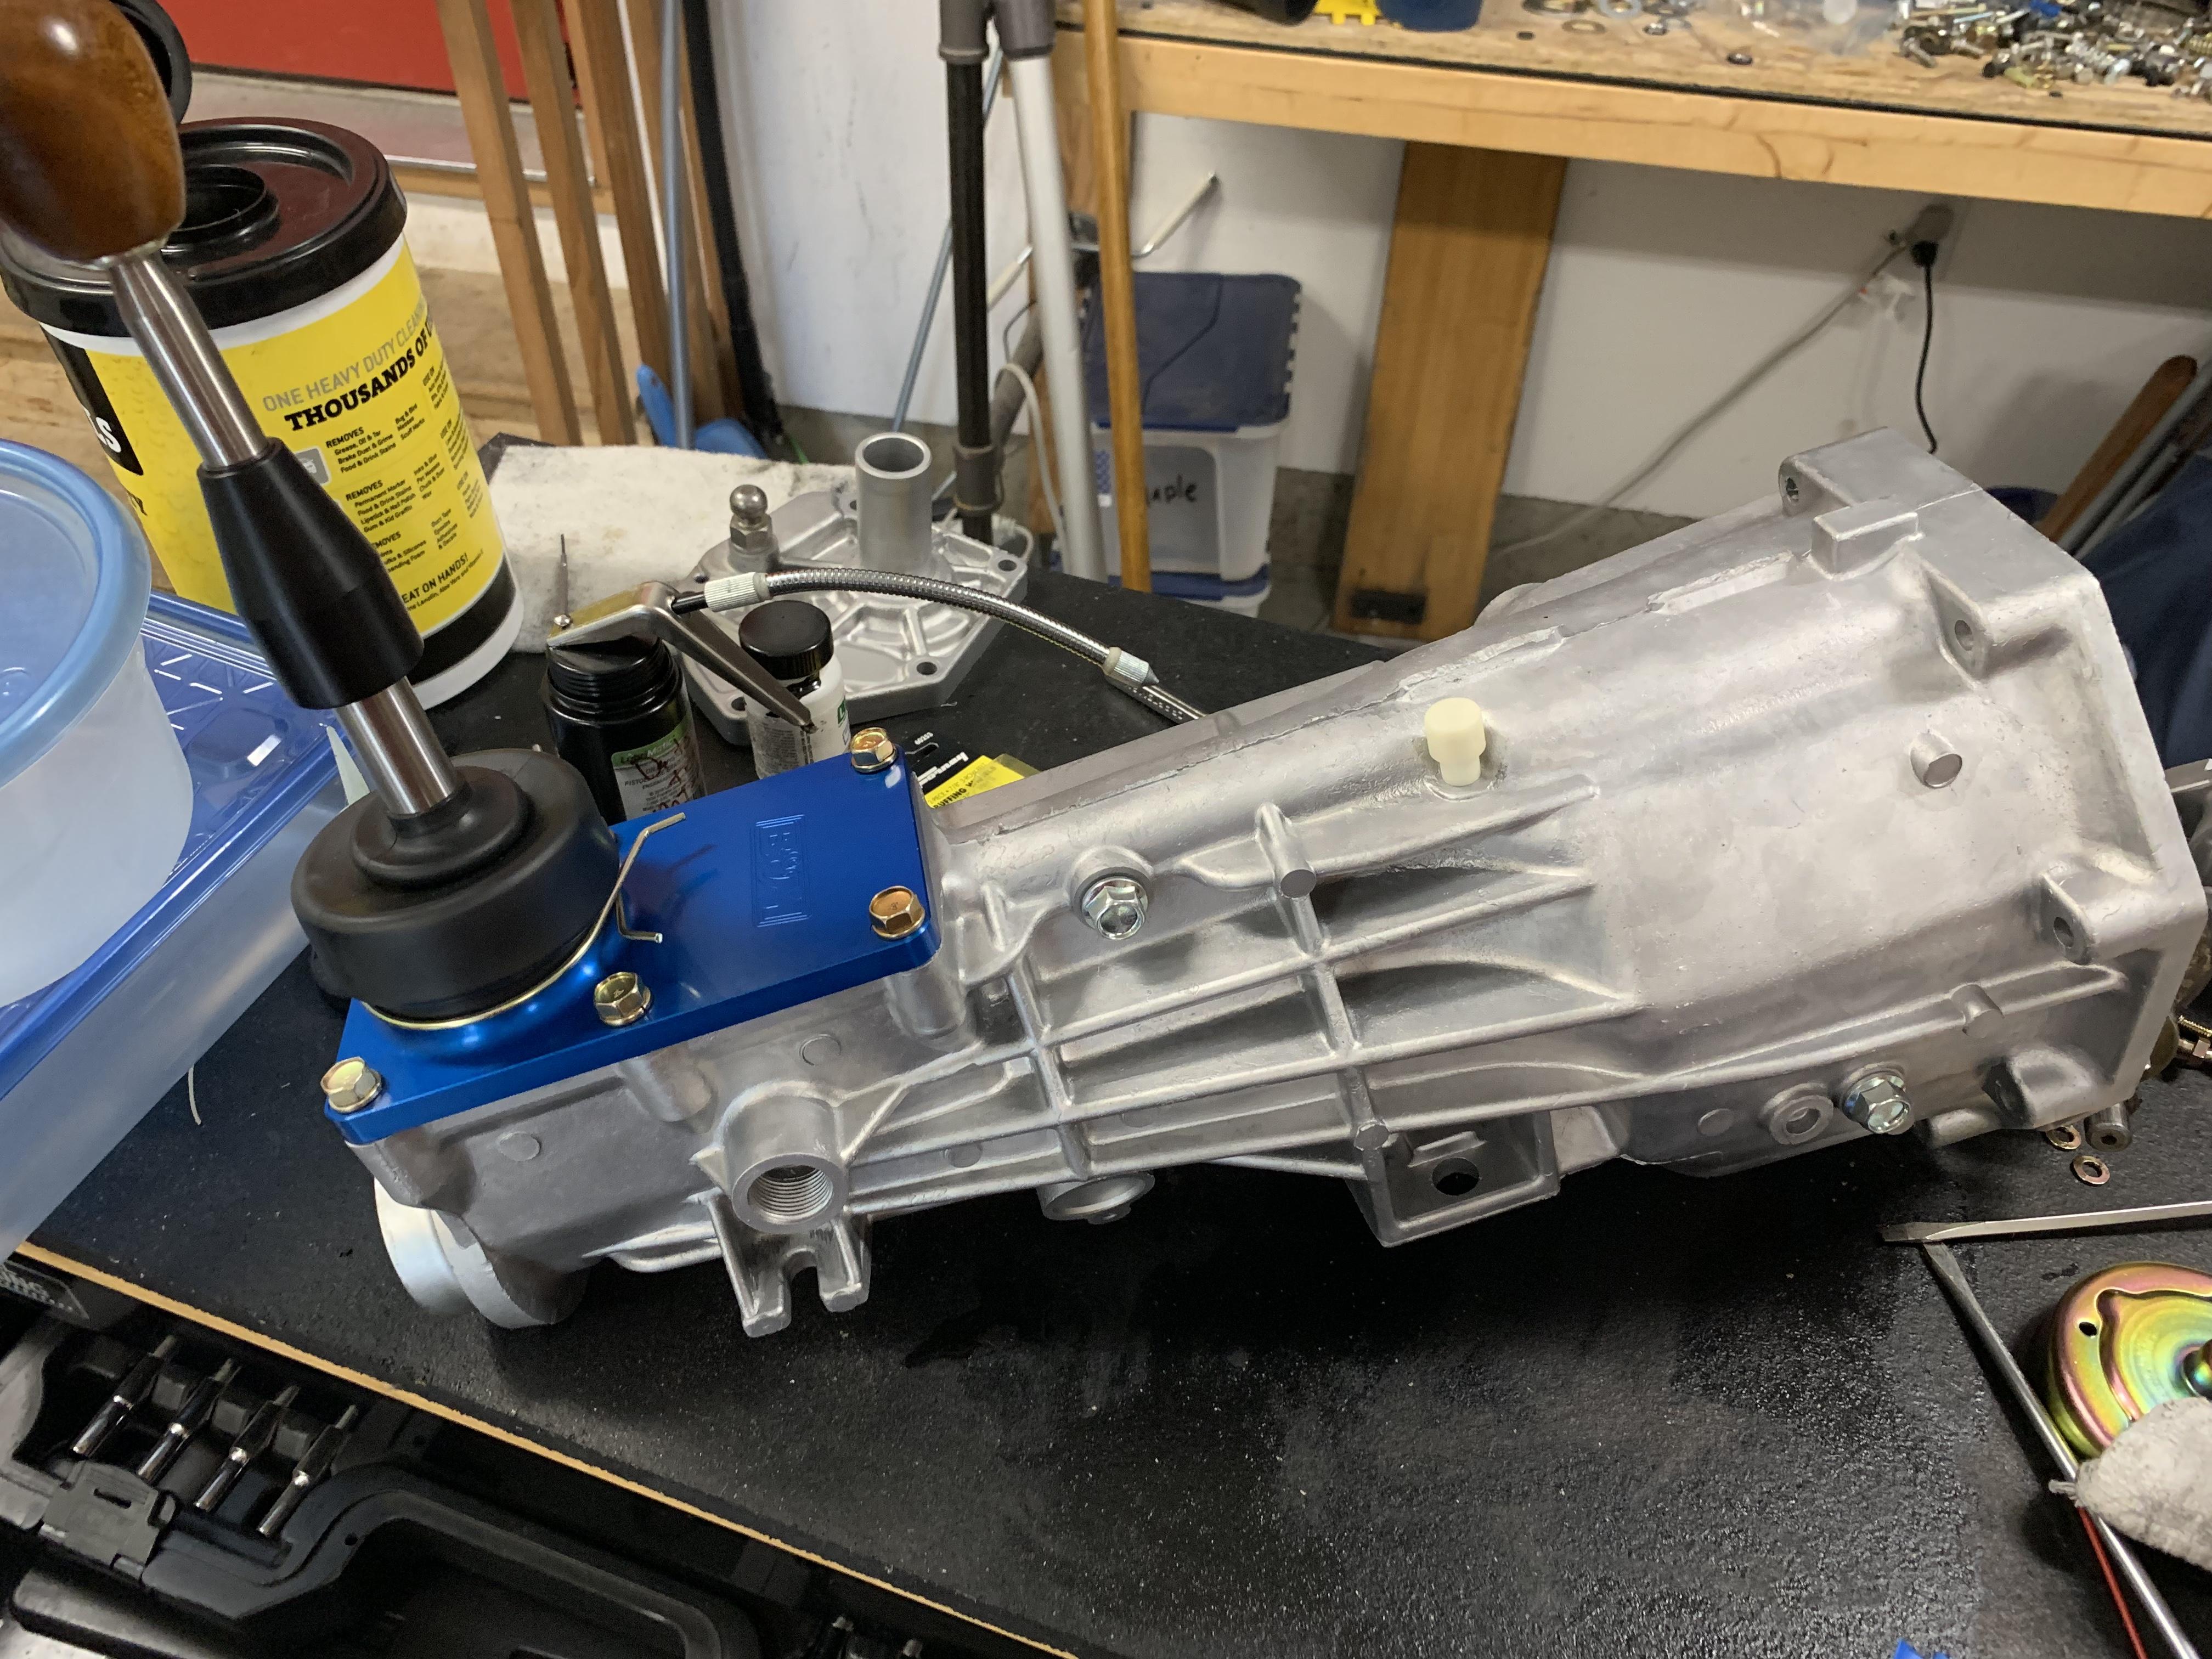
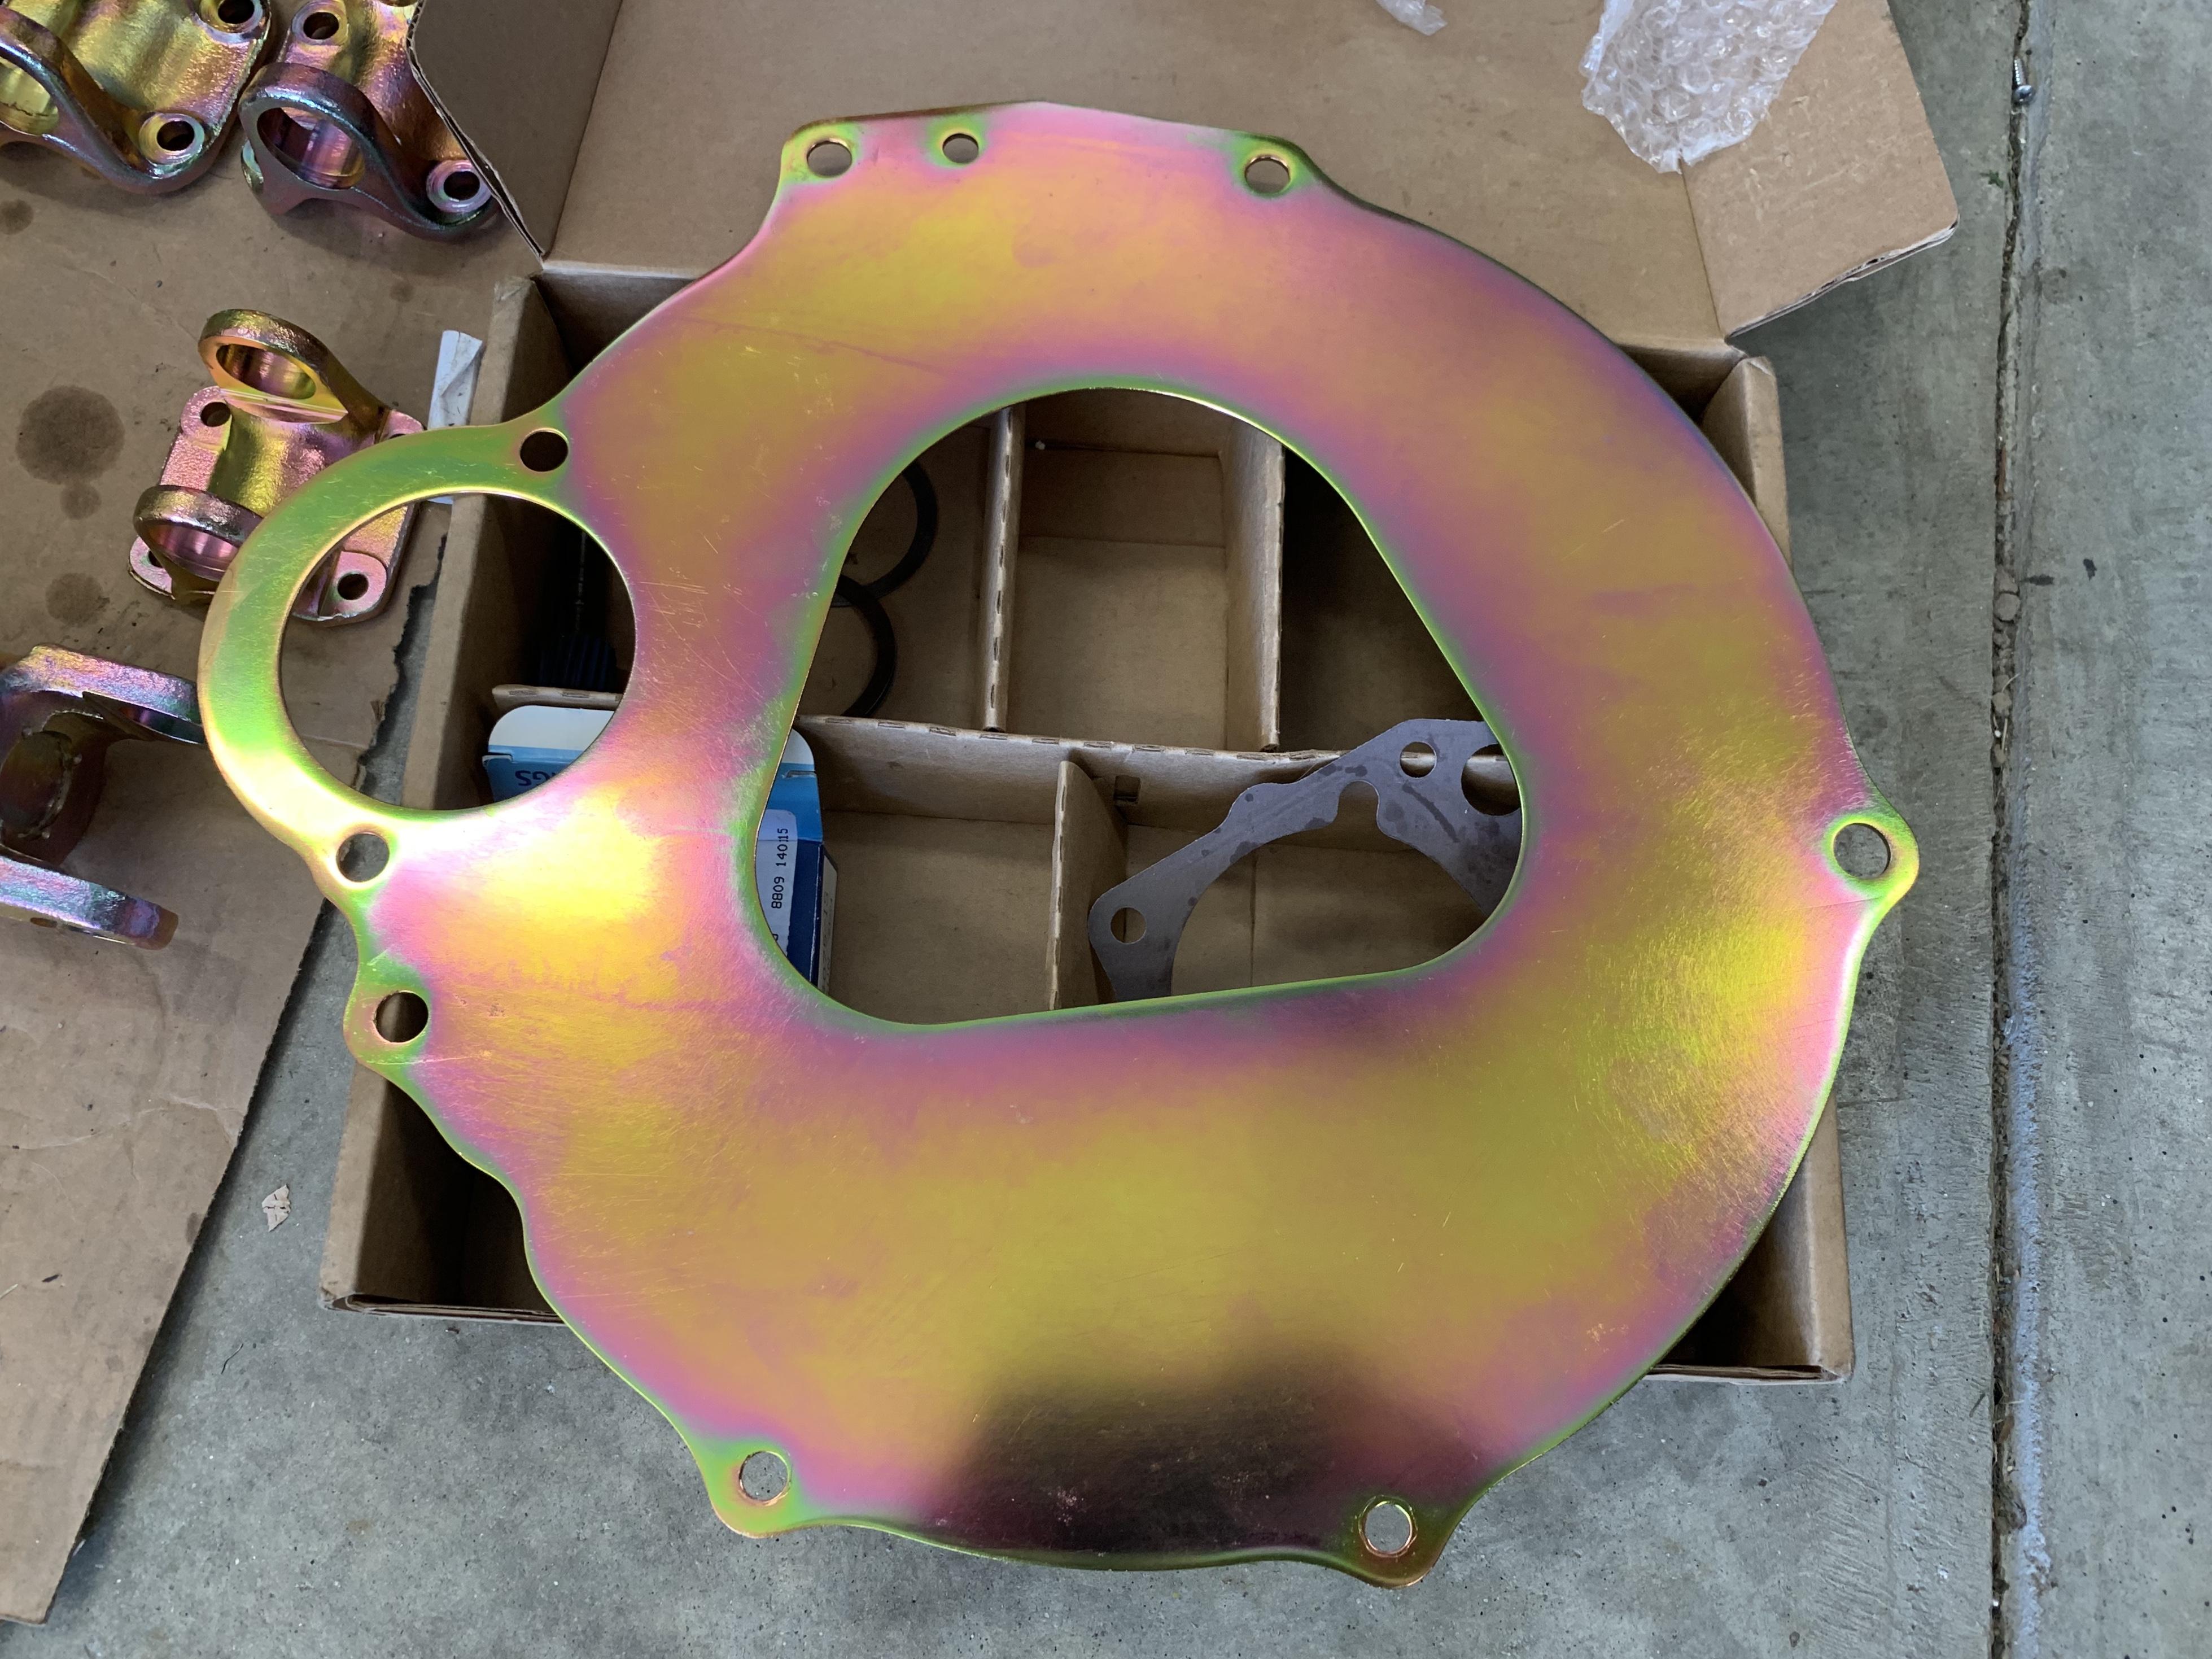
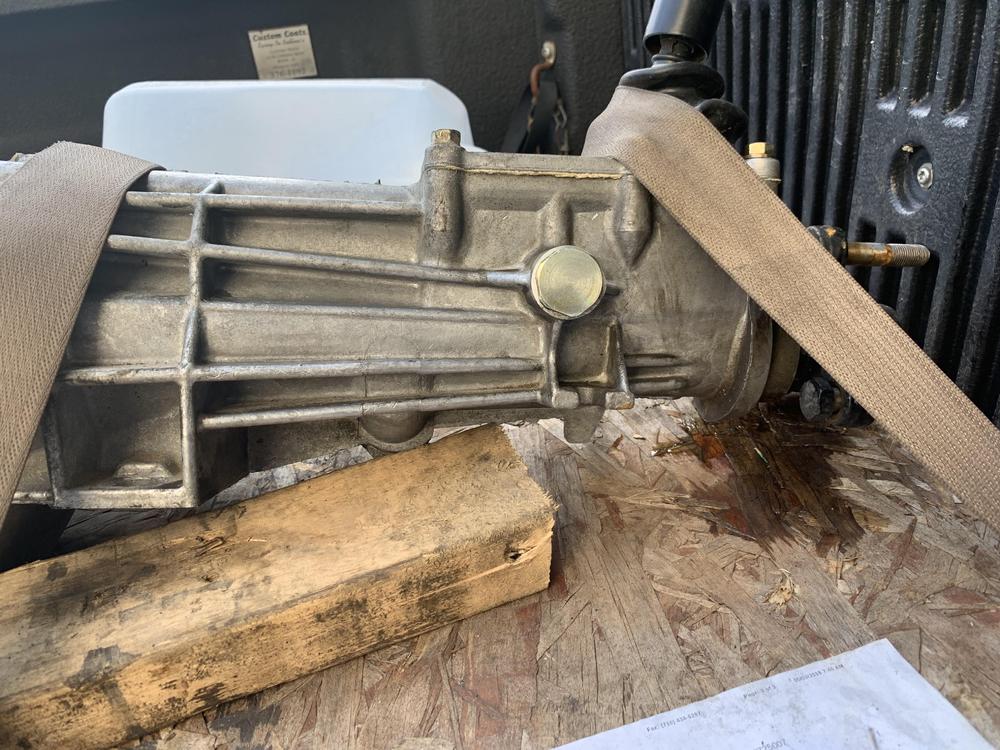
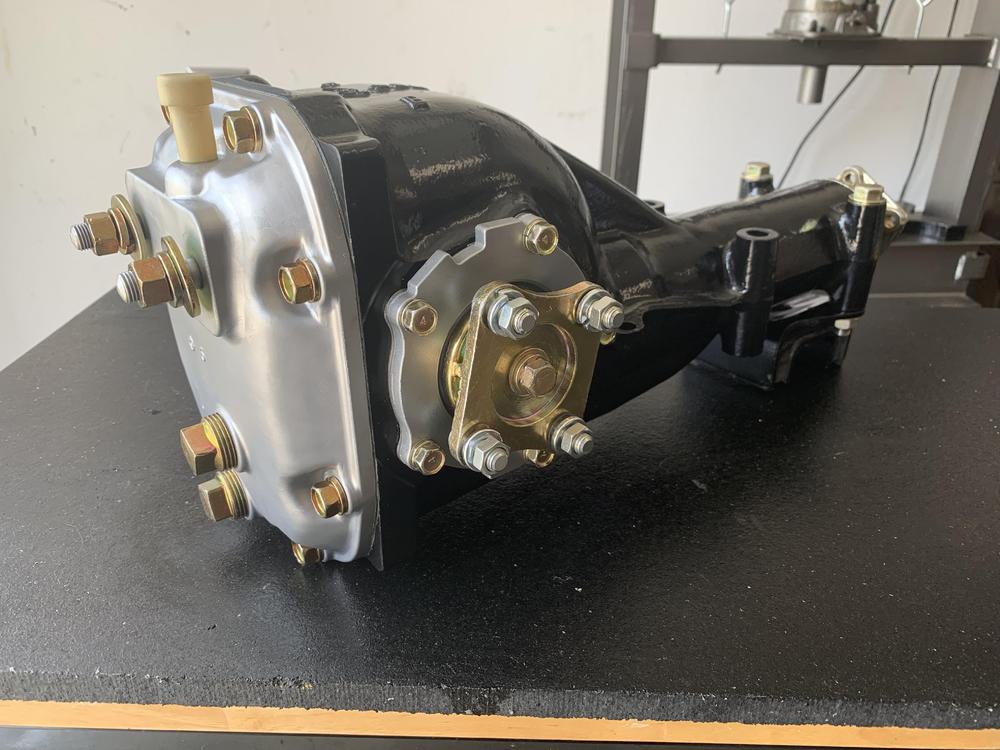
1 pointFinally got the ka trans. This is a low mileage (500) miles trans. Been sitting on the shelf since 1989. I found it on some parts website. Vapor and some zinc and it’s looking amazing. Bell housing mods are being done Emerish racing.

 1 point
 -
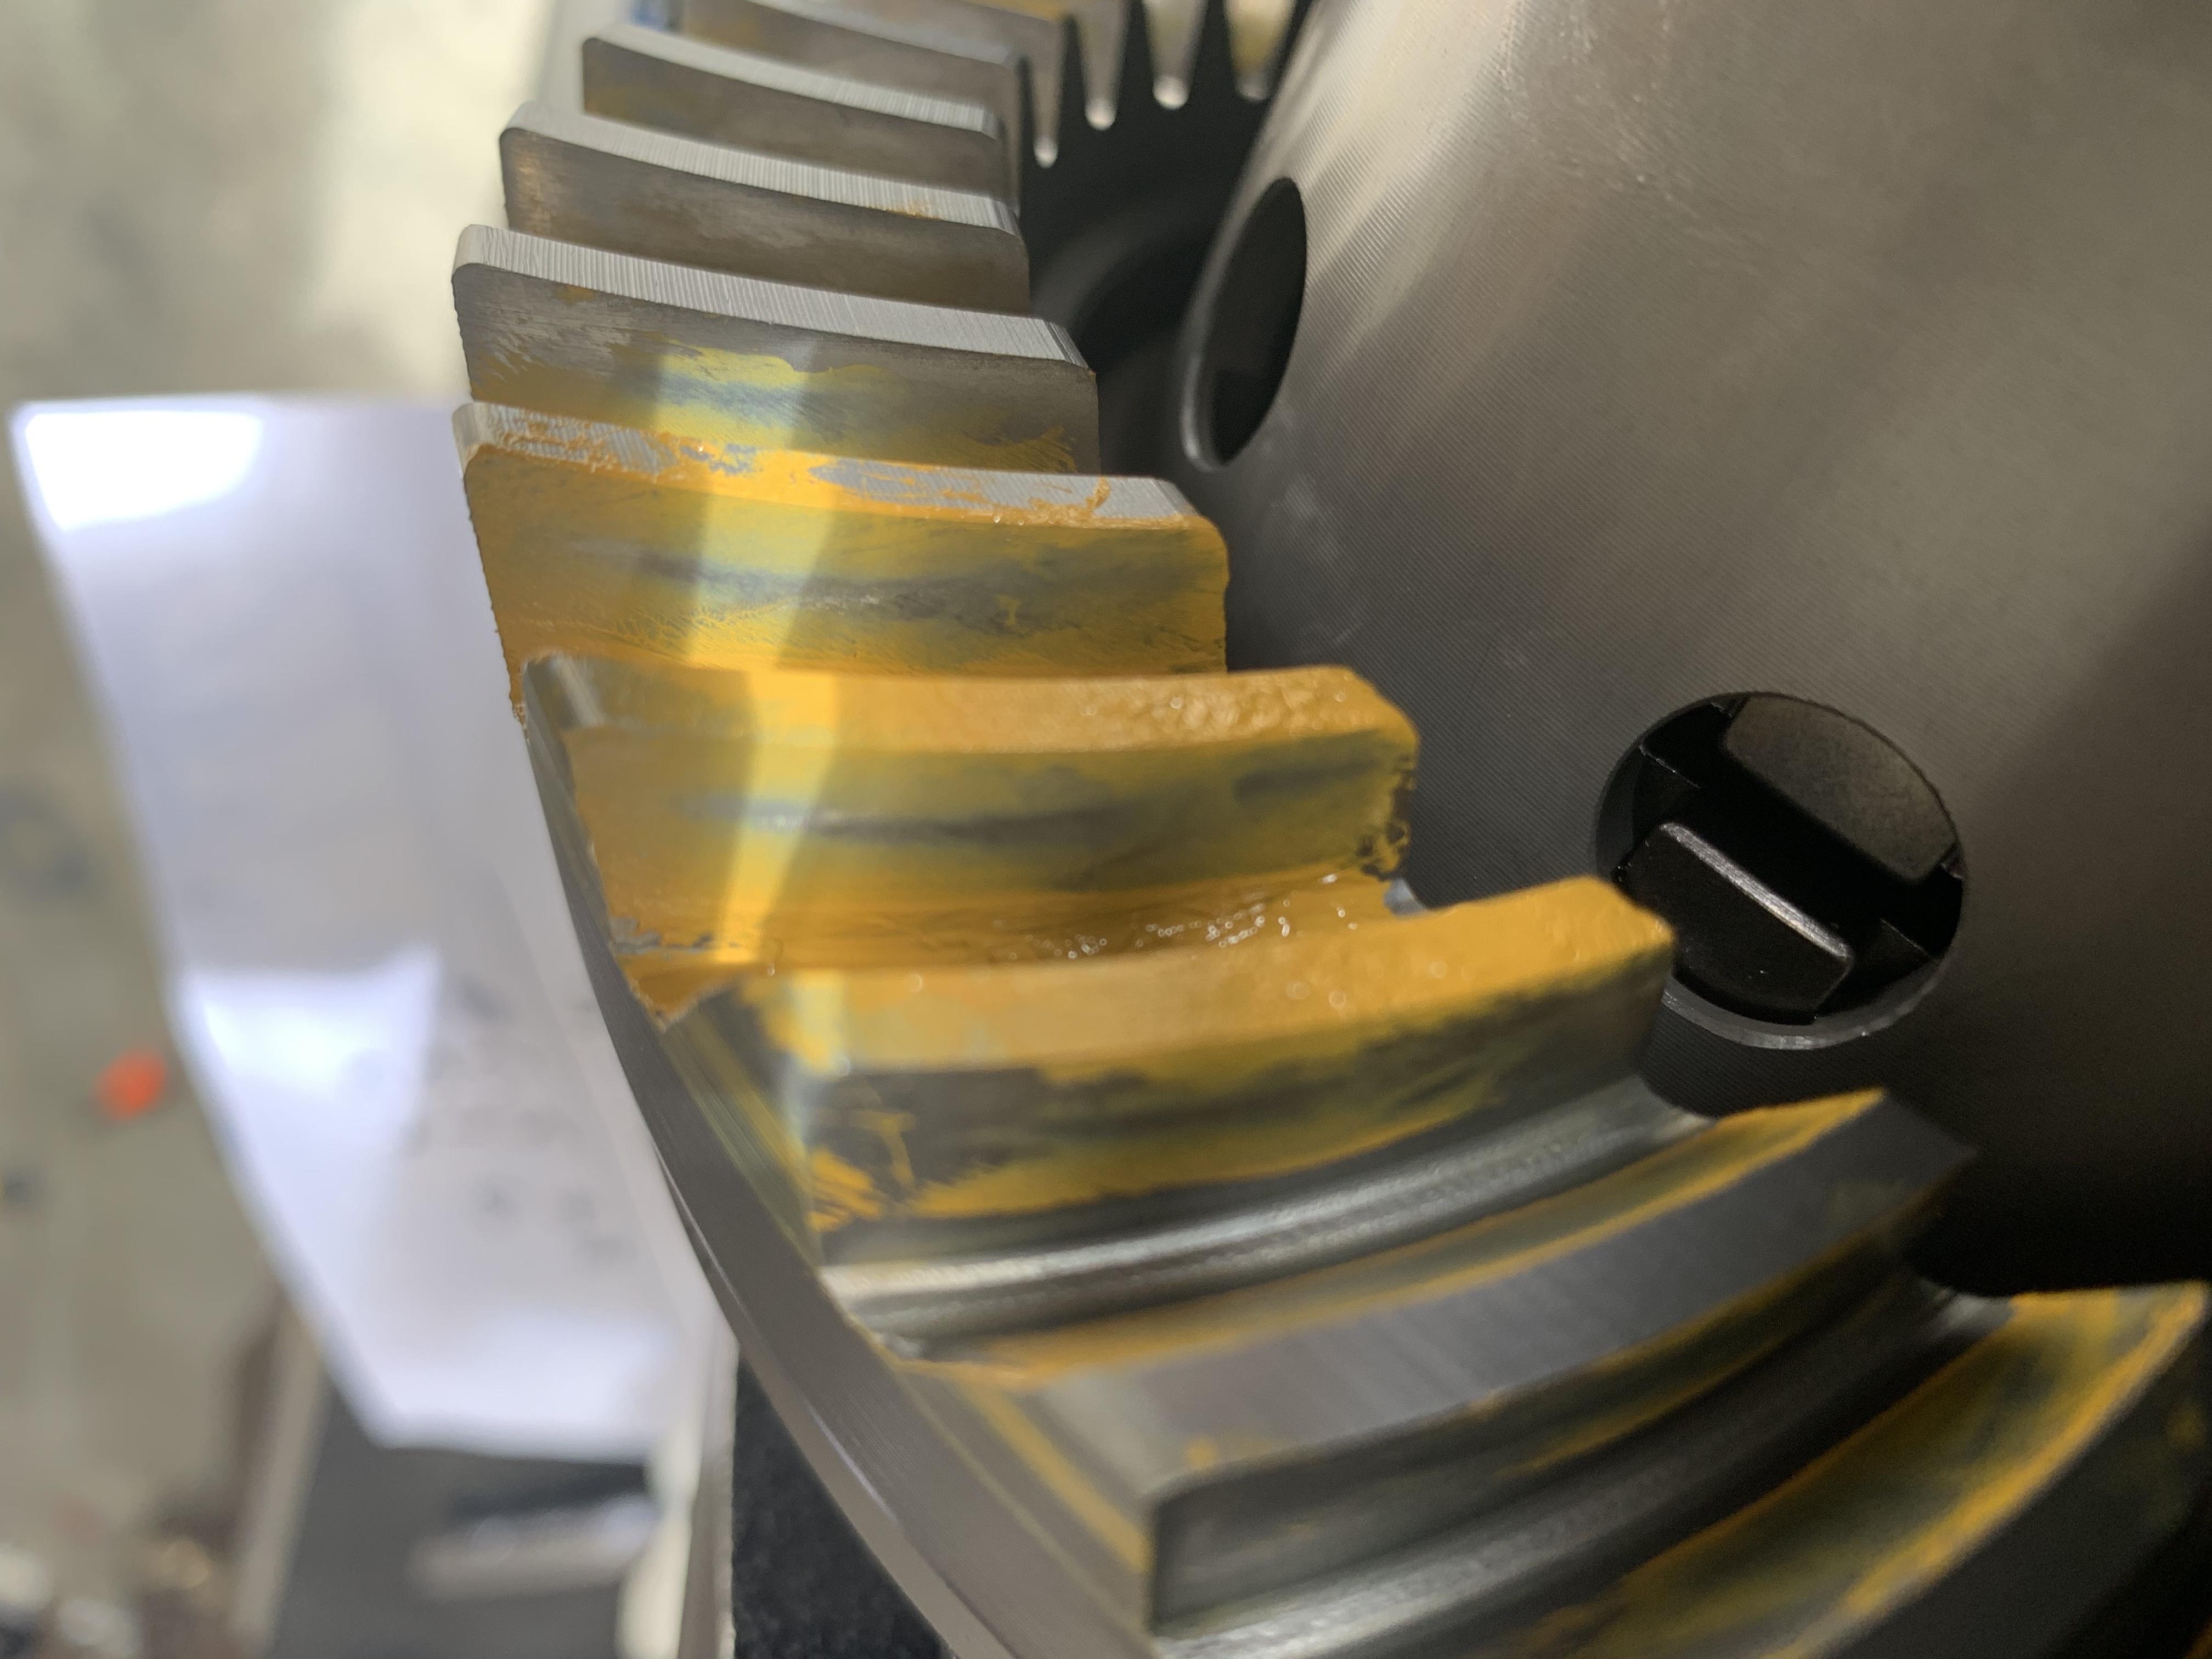
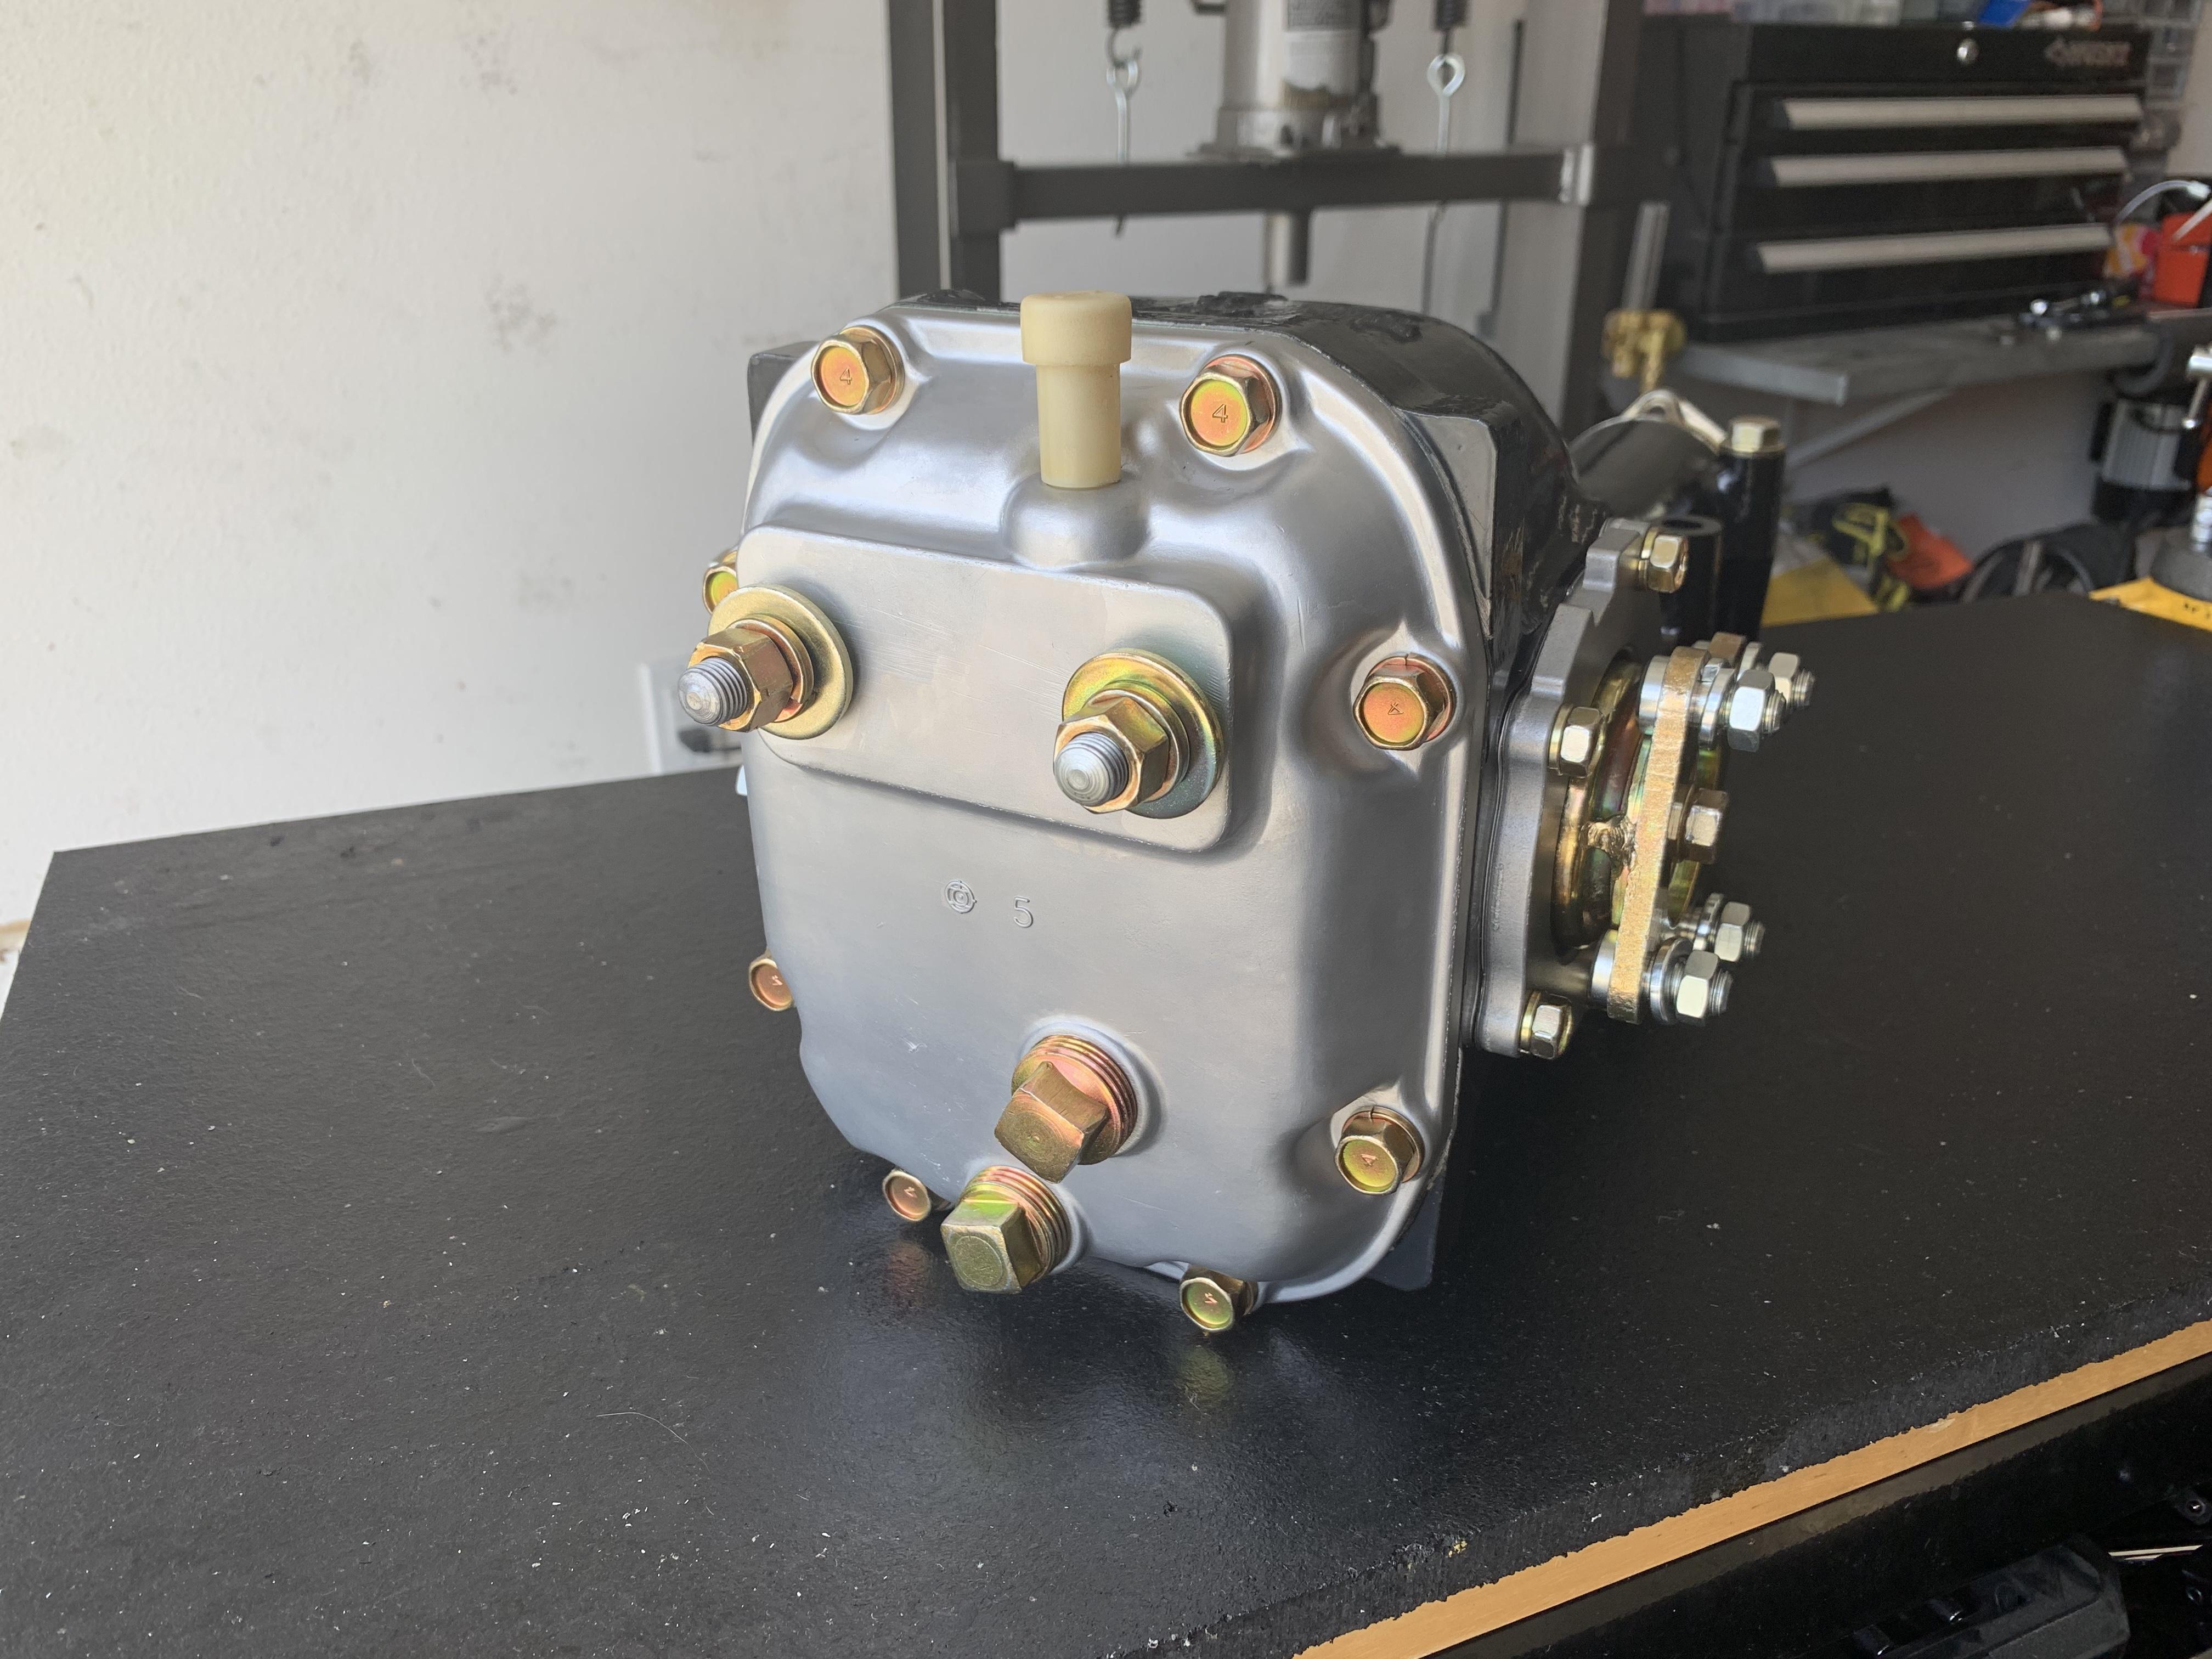
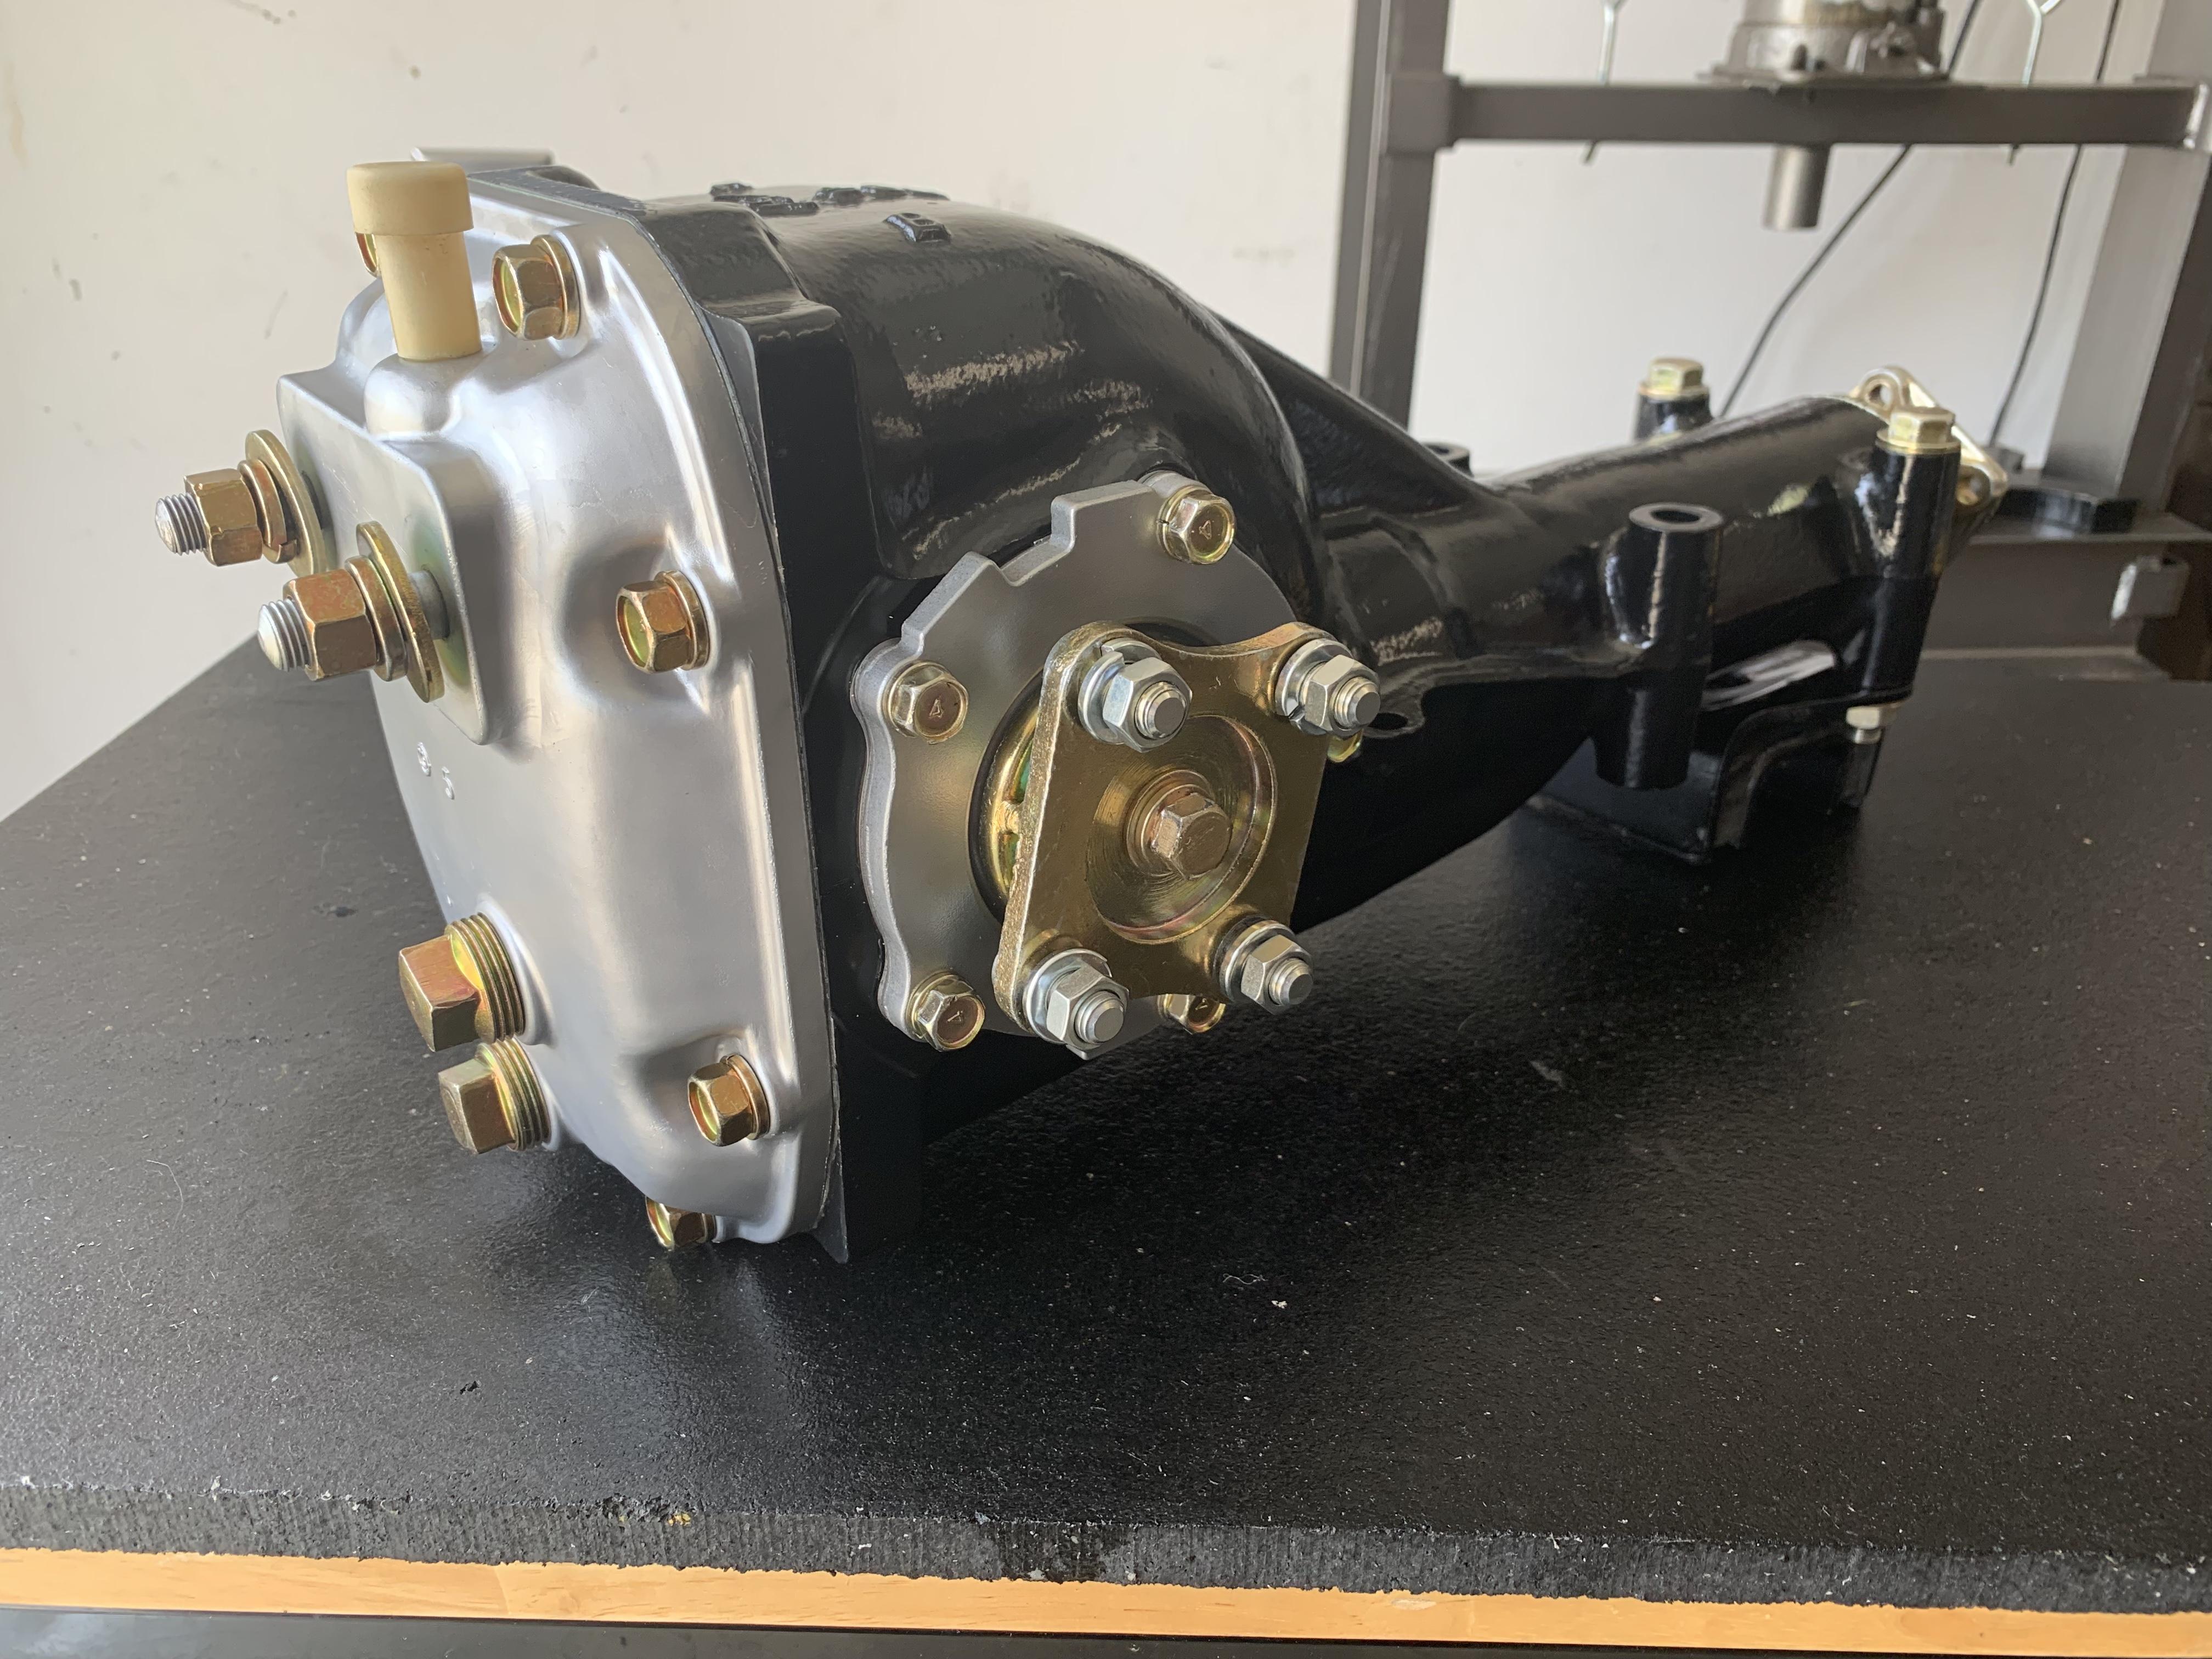
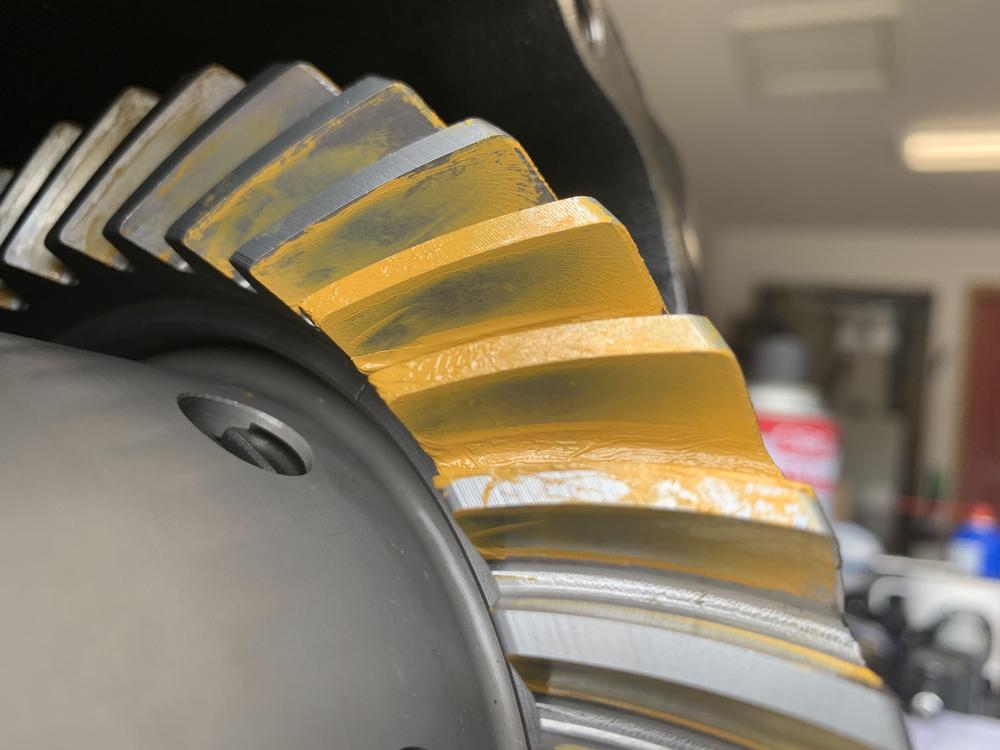
1 pointWell shimming the r-180, backlash, pre load and wipe pattern took most of a couple days after work and most of a Saturday morning. I think I took it apart 20+ times. Finally happy with the wipe pattern. Luckily I didn’t have to change the pinion shim. Edit: I think in a perfect world I would have had a special tool to set the pinion nut at the factory 125-150ftlb. Then used different shims to get the bearing pre load perfect. But I had no way, so a couple of hits with the impact is what I used to set pre load, I found that info on here and a few youtube videos. It's not precise at all, just hopeful the factory had it correct enough. A bunch of site posts and a few guru told me to just reuse the pinion shim and move on. Everyone basically told me backlash is the most important. Ended up with 5 thousandths for backlash give or take and then ring side backlash shim if .05 and other side of .07. Total inch pounds is around 8-10 on the pinion. No carrier I had around 3 inch pounds for the pinion. This is worth paying someone to do. Just FYI. I had fun. But super frustrating.


 1 point
 -
1 point
-
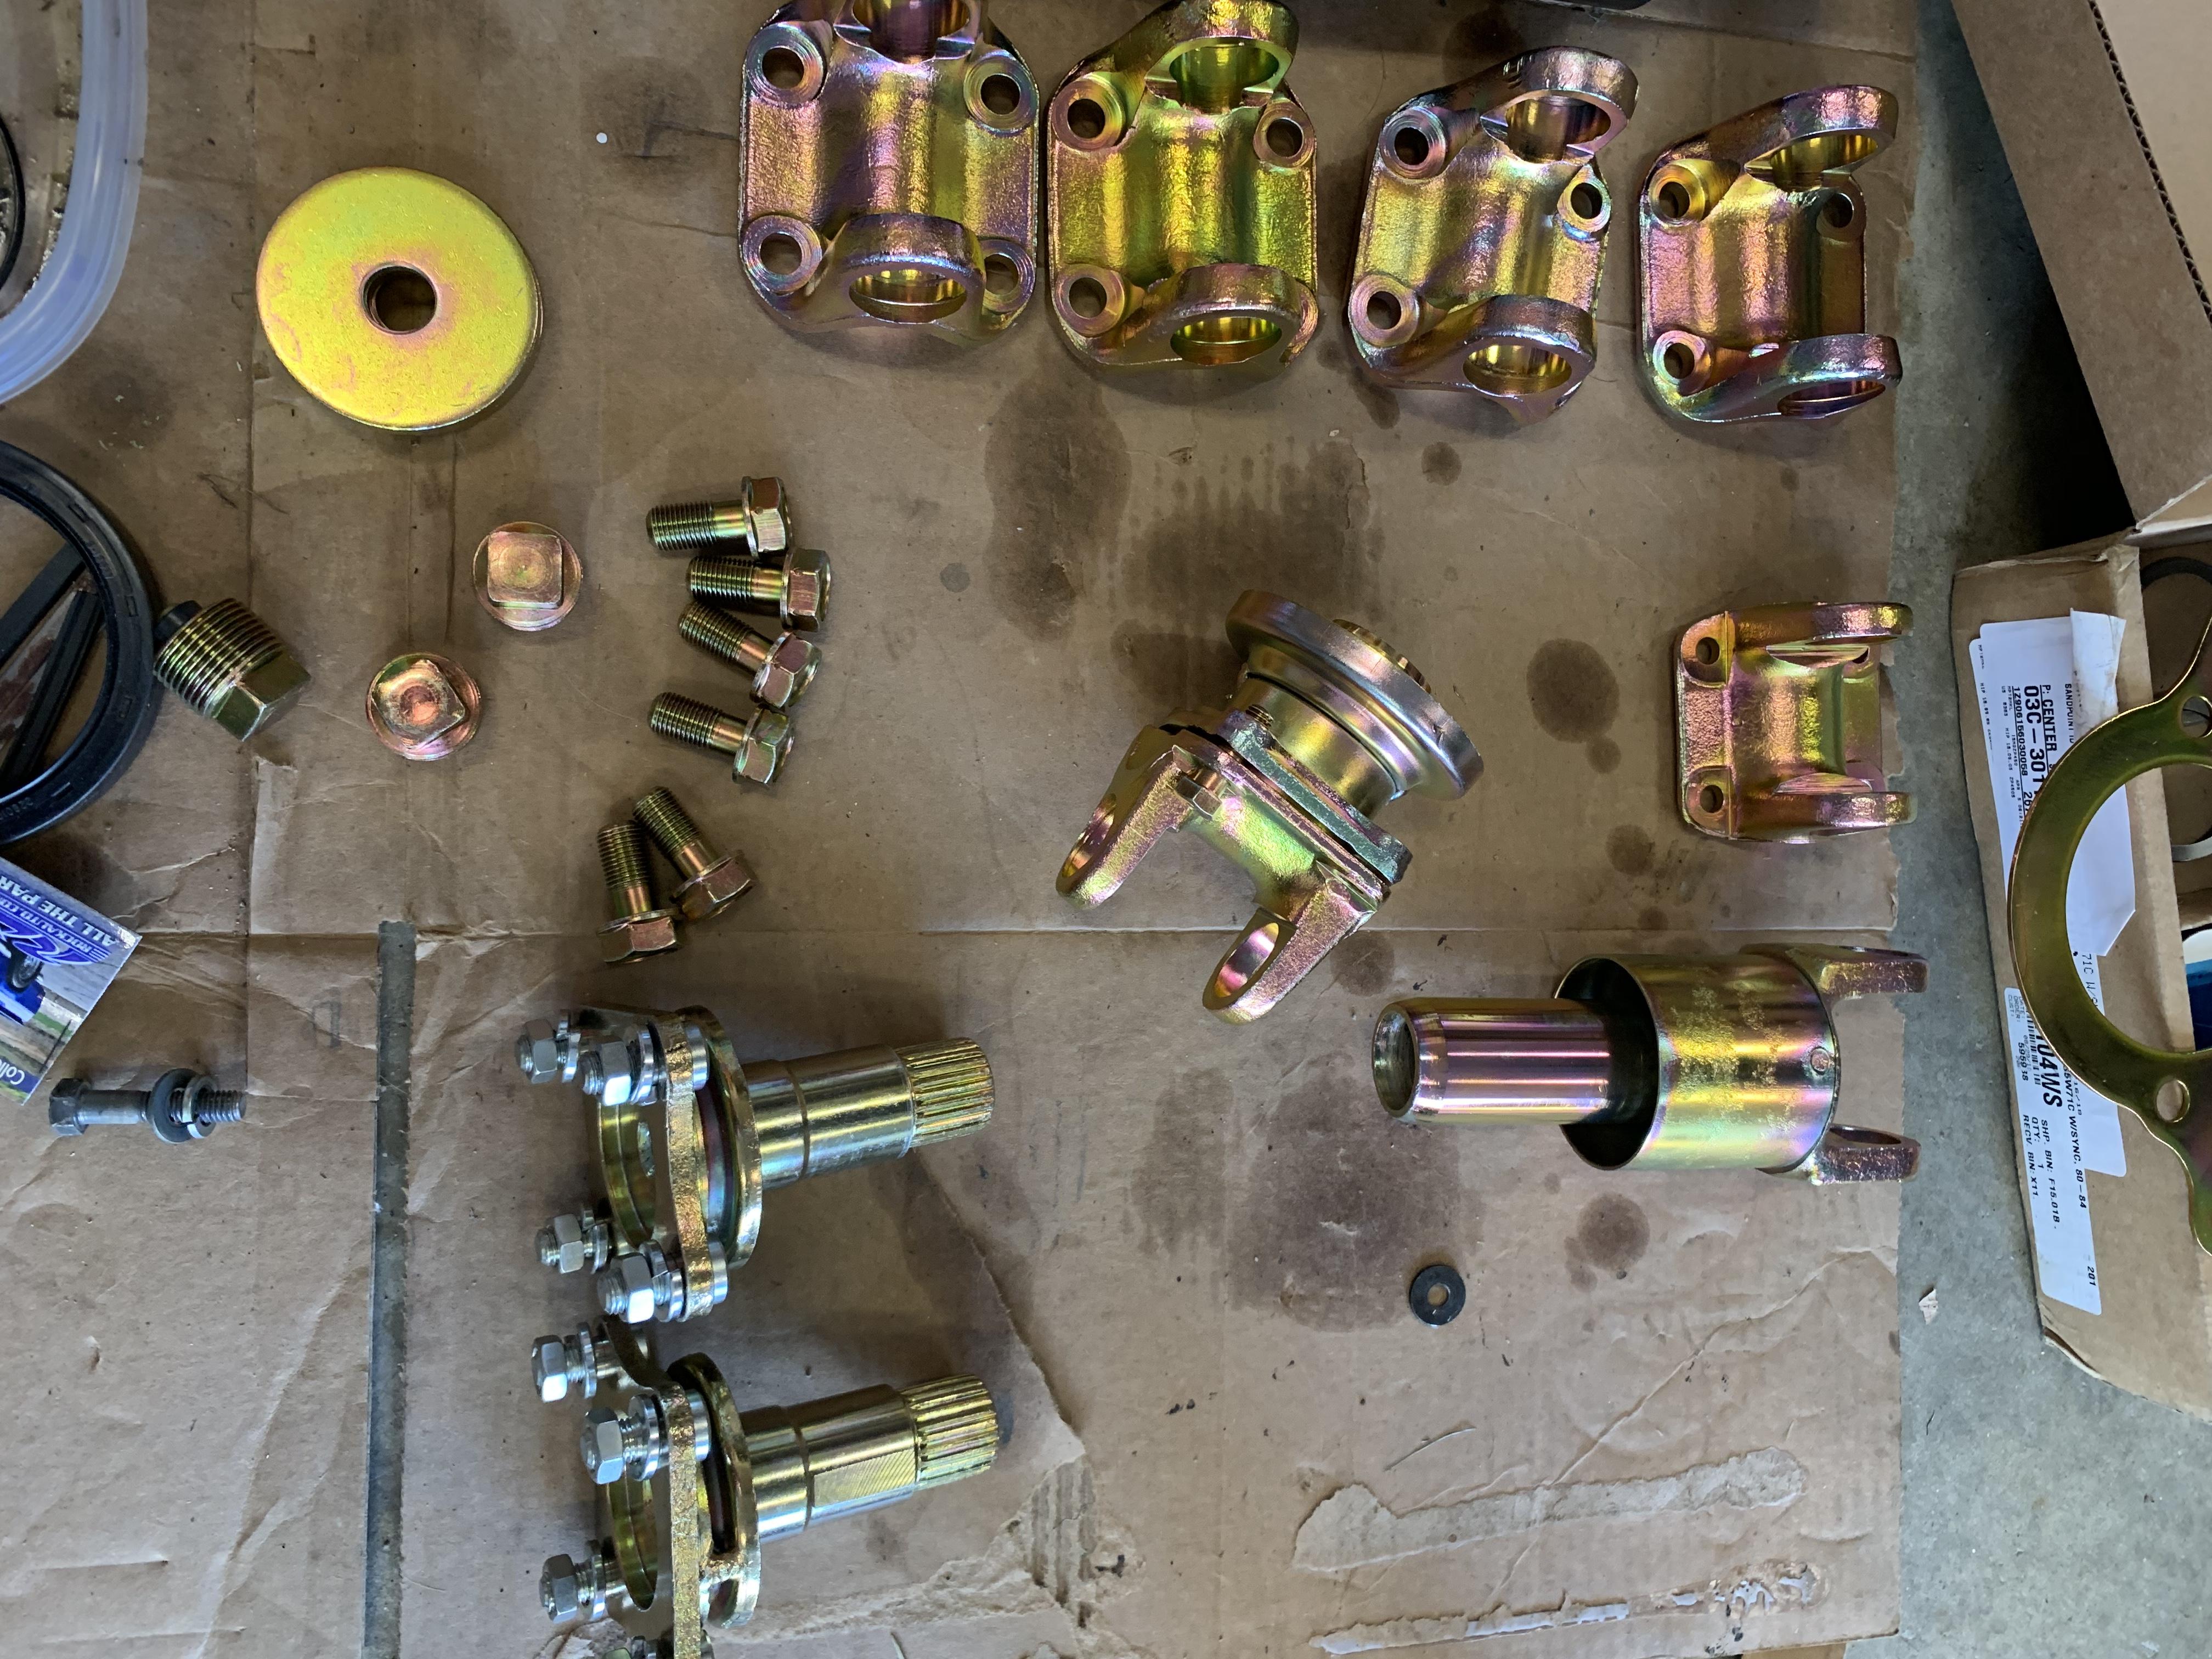
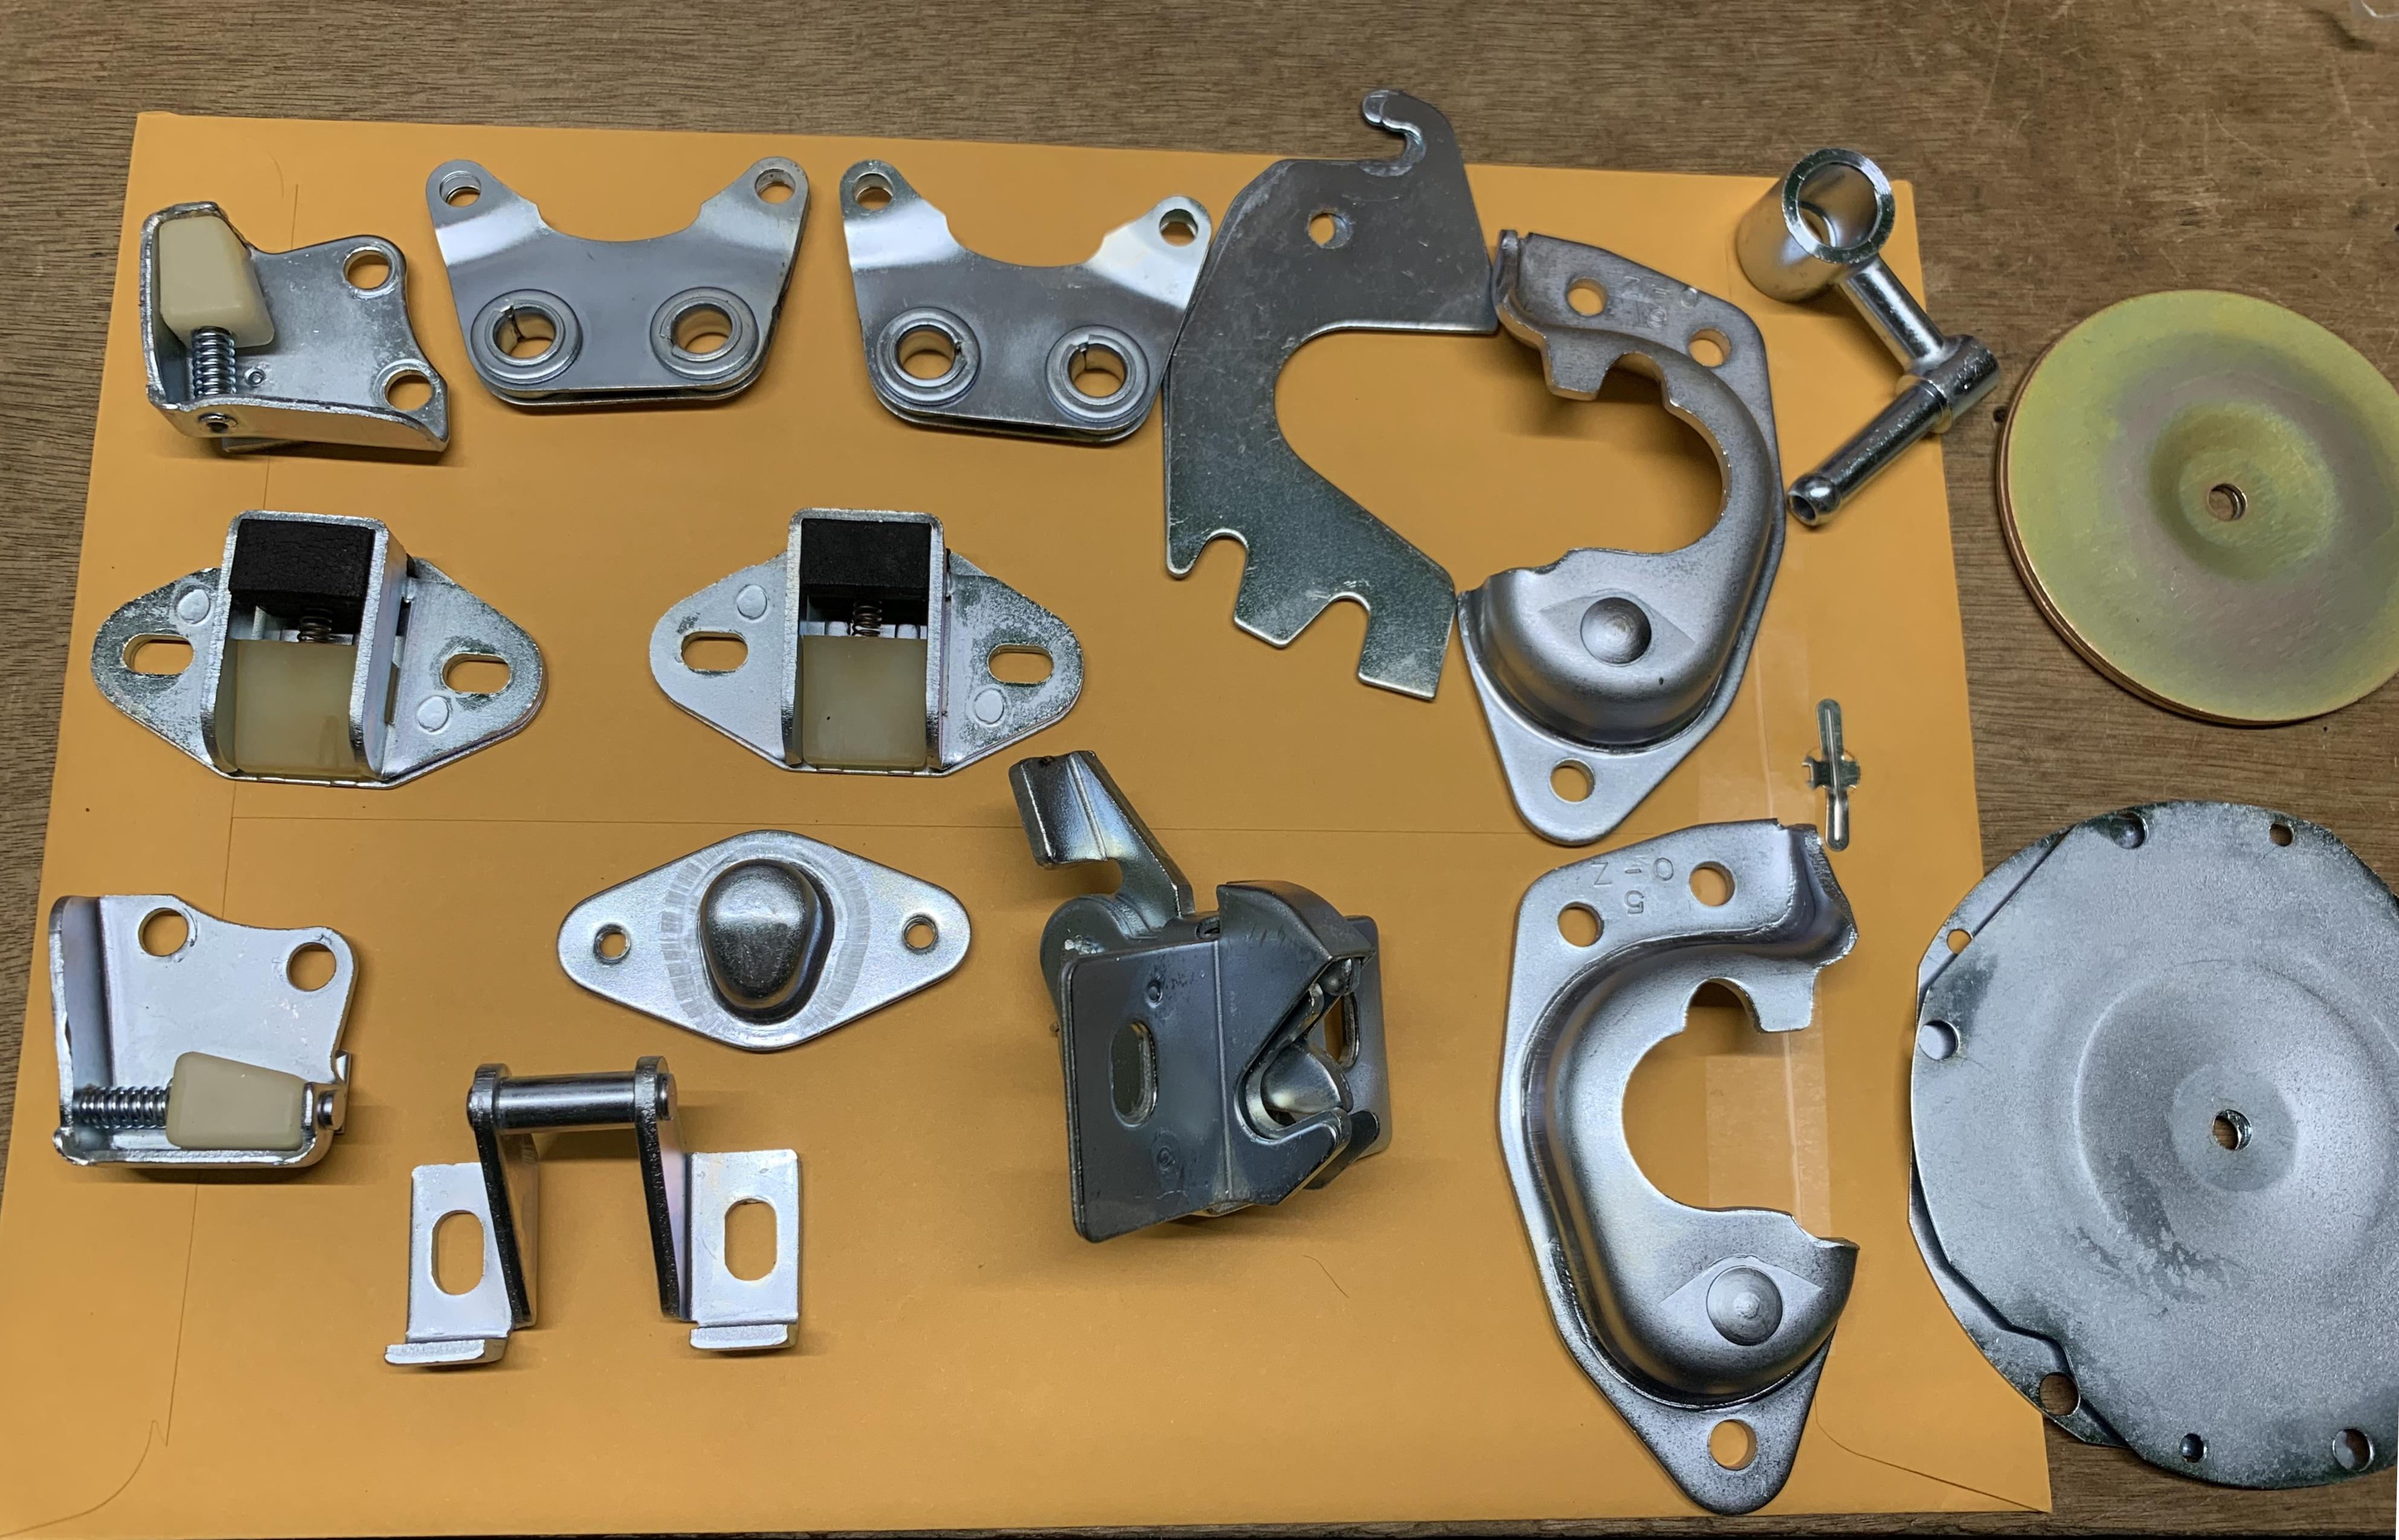
1 pointDoor, hatch and horn parts are back from zinc. Also tons of nuts and screws. Zinc day is always the best.
 1 point
 -
1 point
-
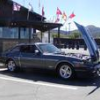
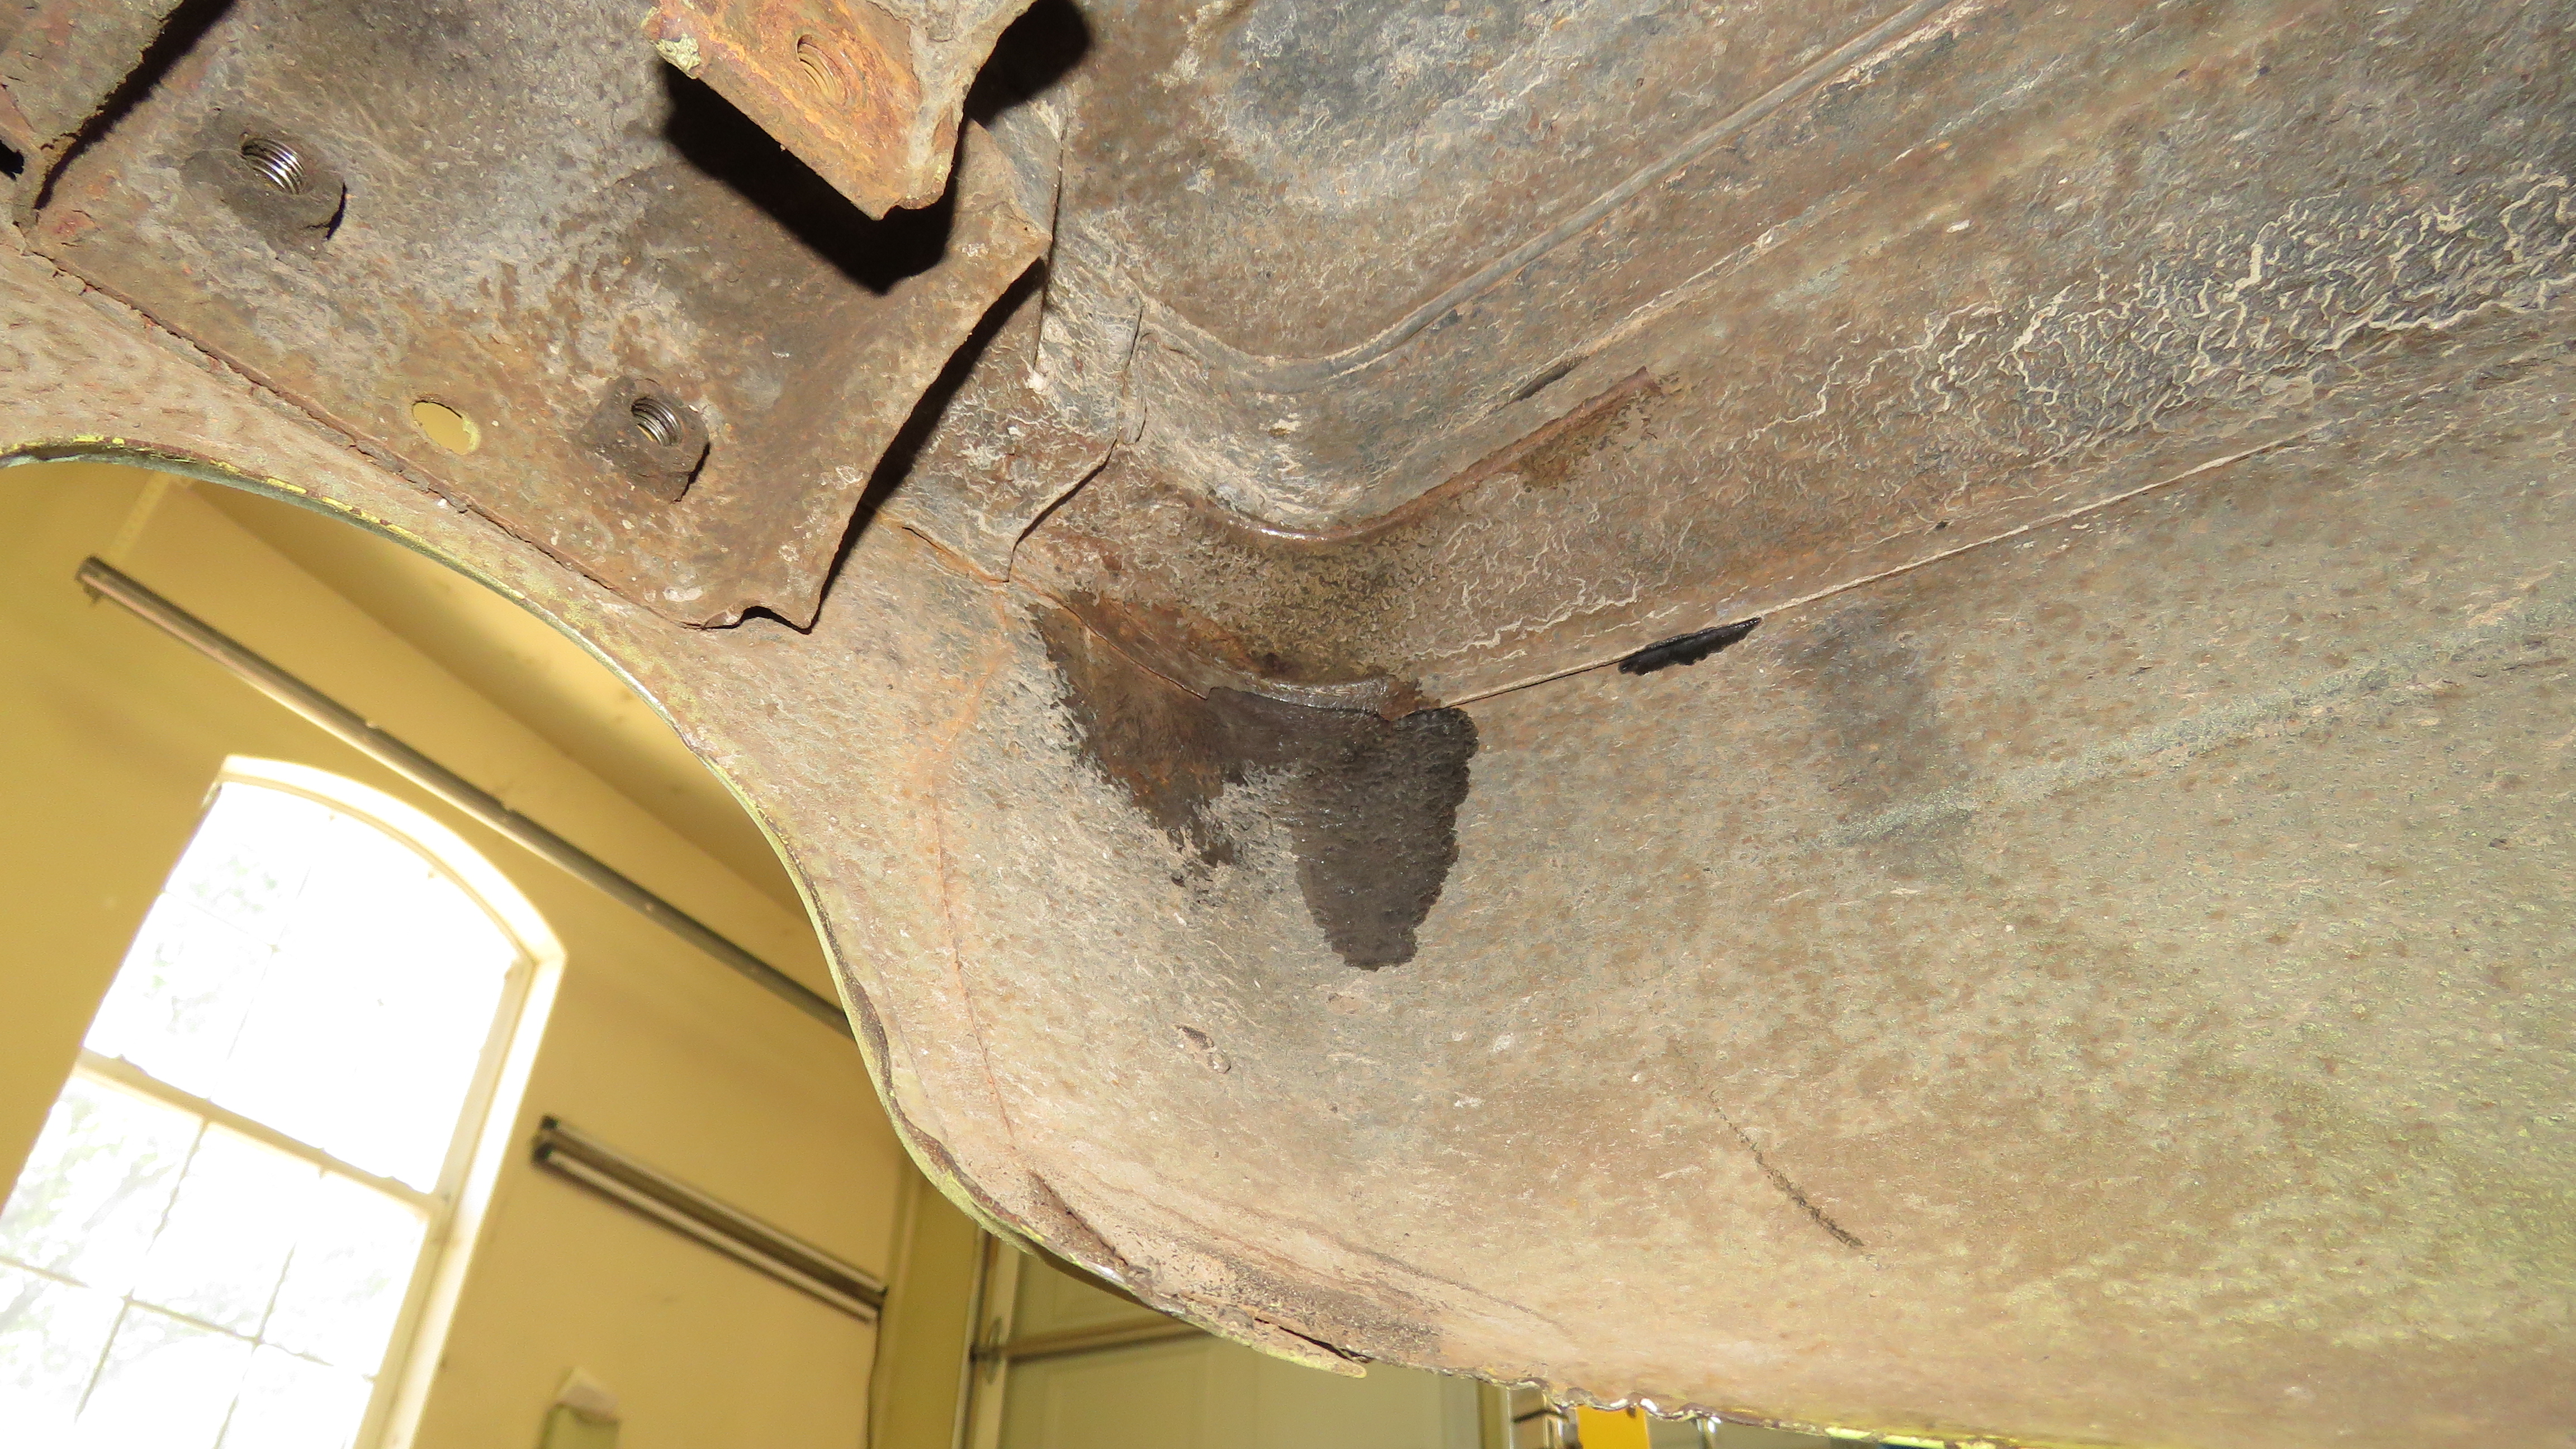
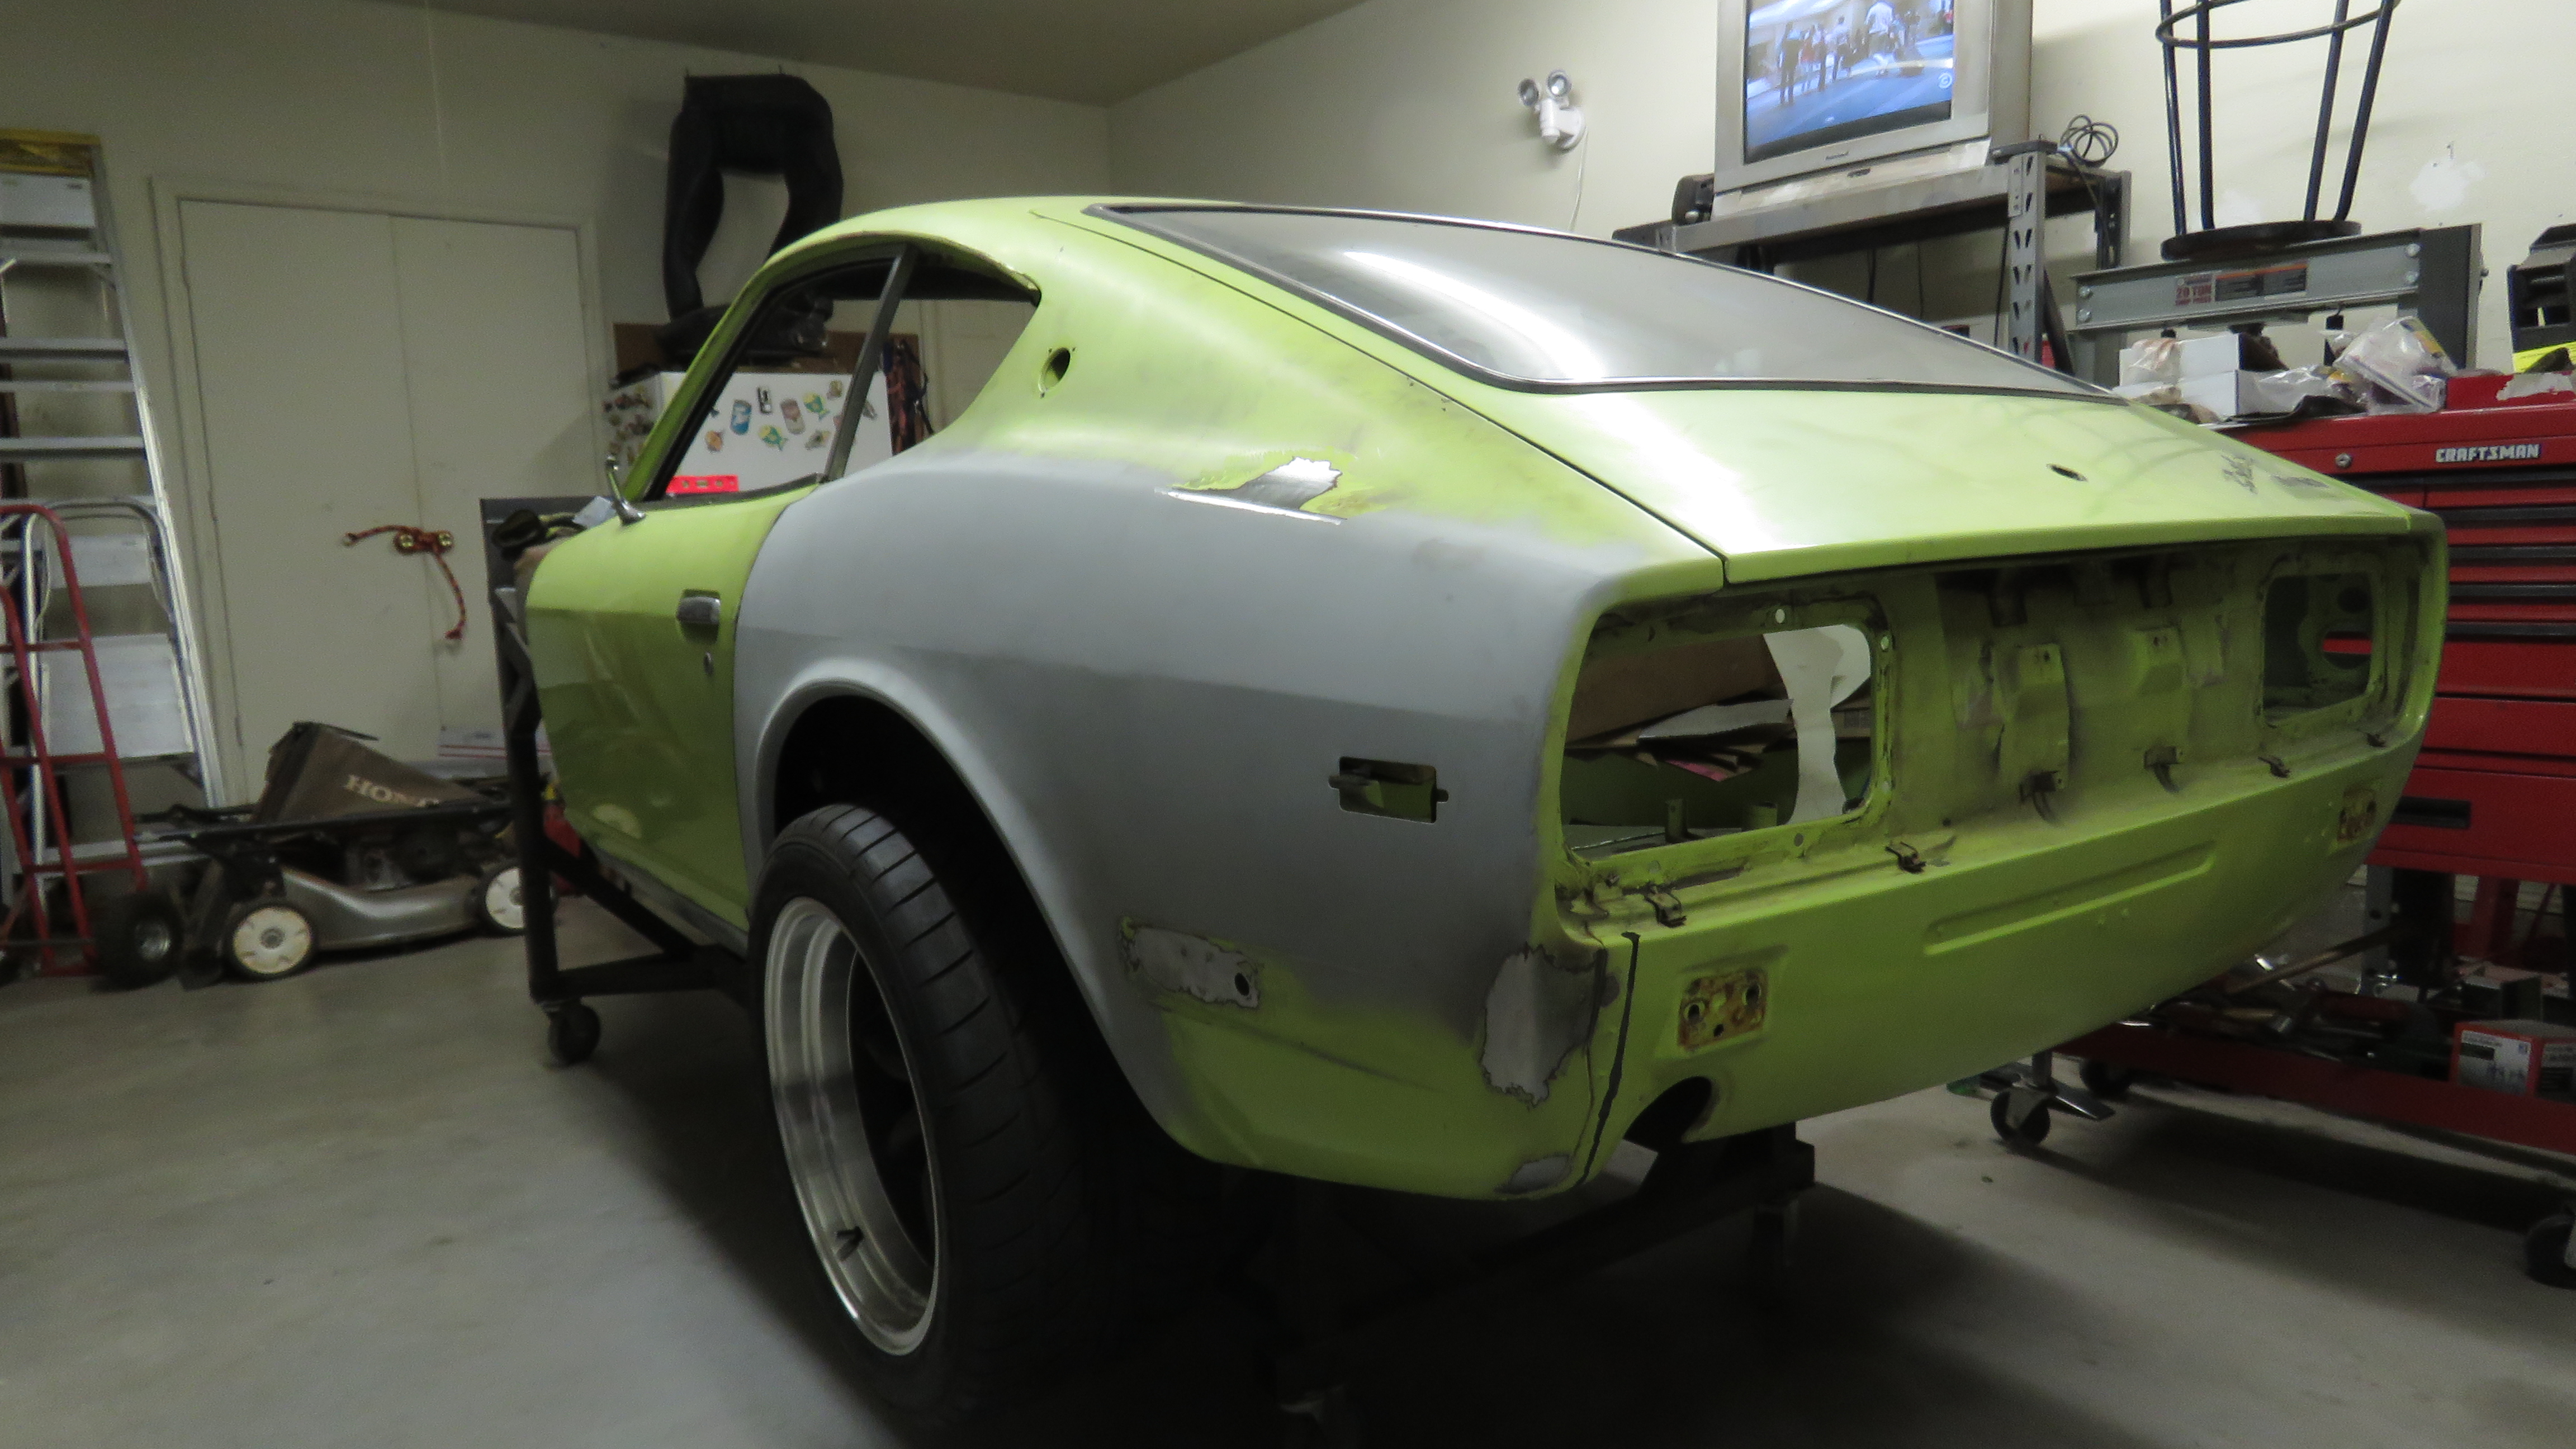
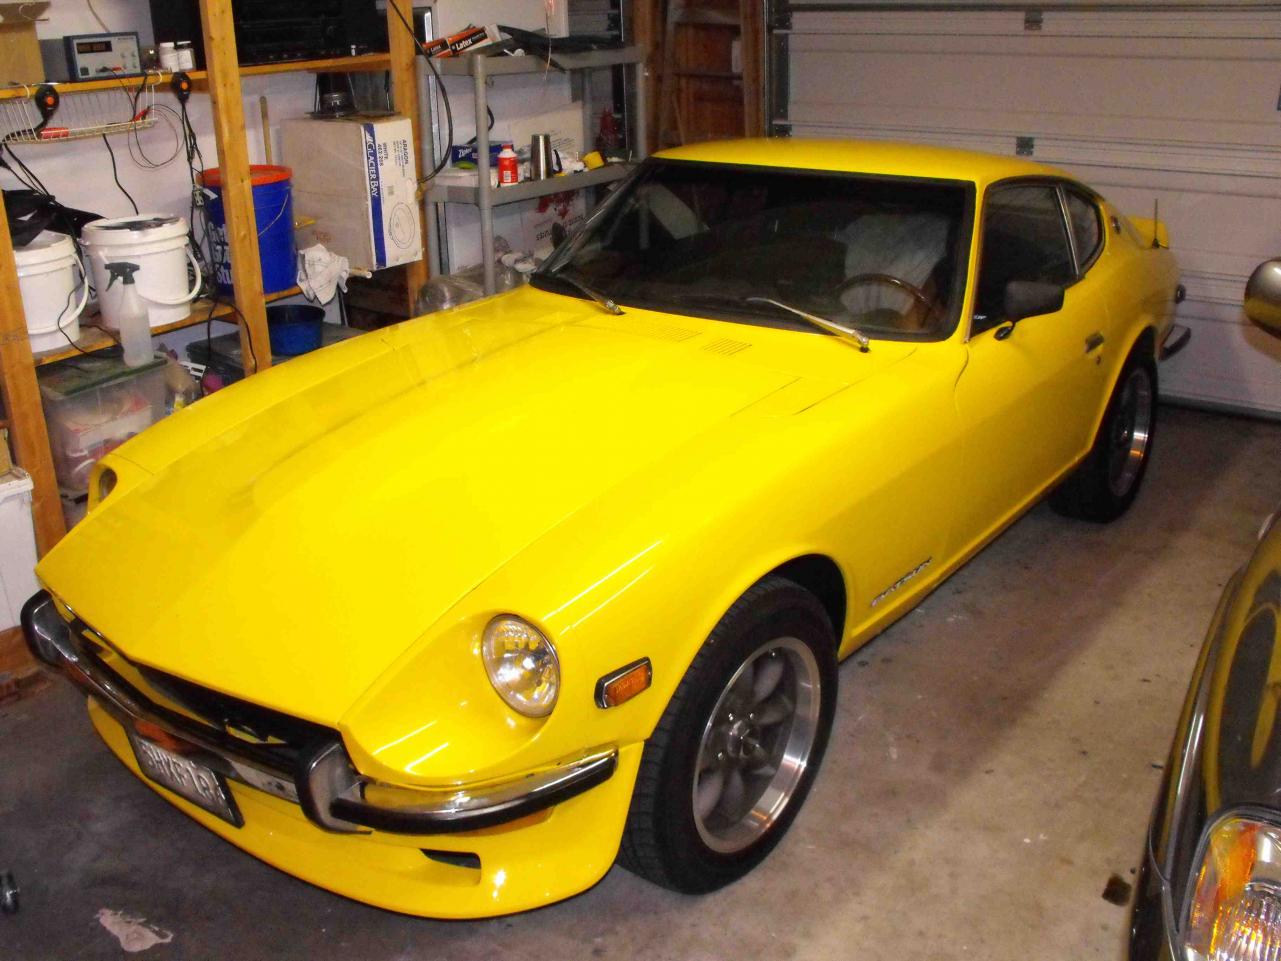
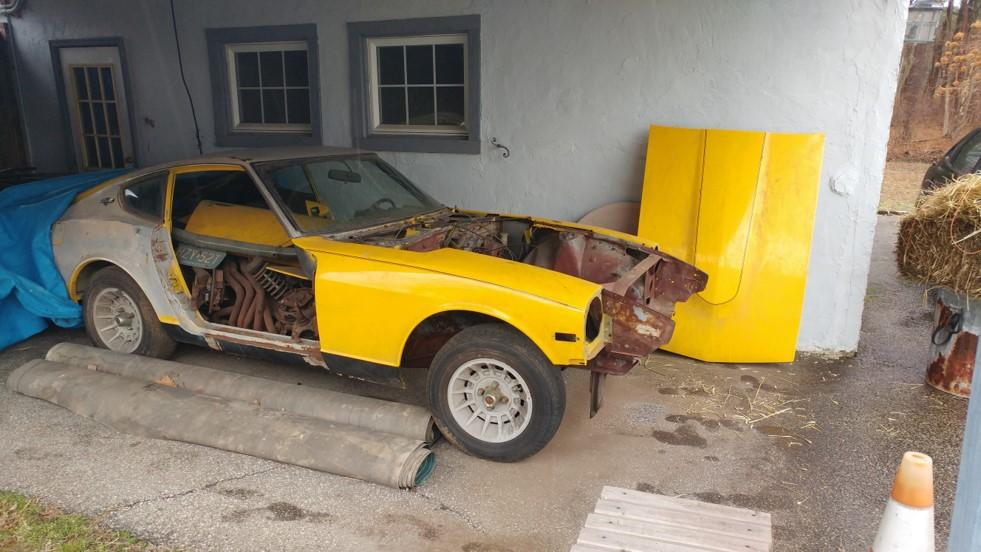
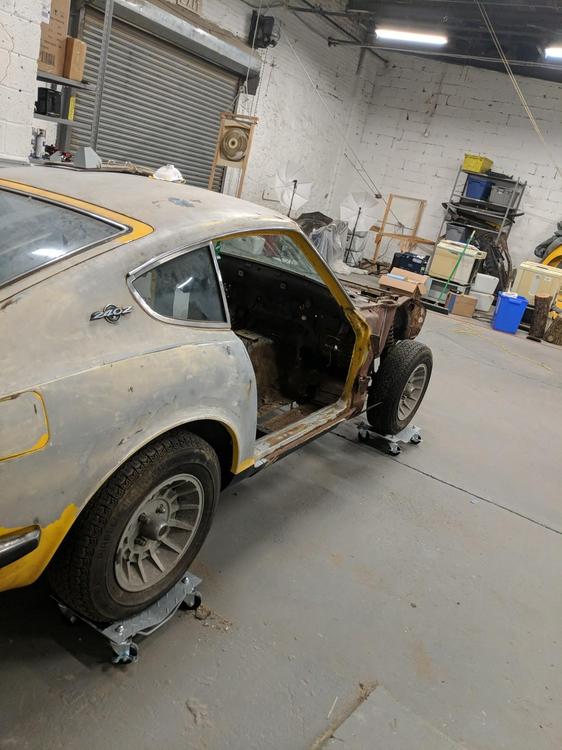
1 pointThis is a prime example of what is achieveable. ABSOLUTE NECESSARY ITEMS NEEDED.....TIME.....DESIRE........TOOLS.....SOME MECHANICAL ABILITY, and most of all a TON OF COMMITTMENT. Boy I thought mine was in bad shape but this car obviously spent a lot of time in its youth north of the Mason Dixon line. Other than this young man's true mechanical skills the thing that impresses me the most is he kept at it even knowing his task would be monumental. Most of us here know how reltively simple it is to replace and upgrade the mechanicals for they are pretty much plug and play. But to develope these skills, when you are not earning a weekly paycheck to do so is really top of the table in my book. Jobs like these can intimdate professionals but self belief concurs just about anything. After I finish work on my 70 I will definitely farm some panel pieces to him. Maybe if I am fortunate enough to enlarge my garage the use of an English Wheel and metal benders and TIG welder may find a home there. Great stuff indeed! STAY ON IT MAN!1 point
-
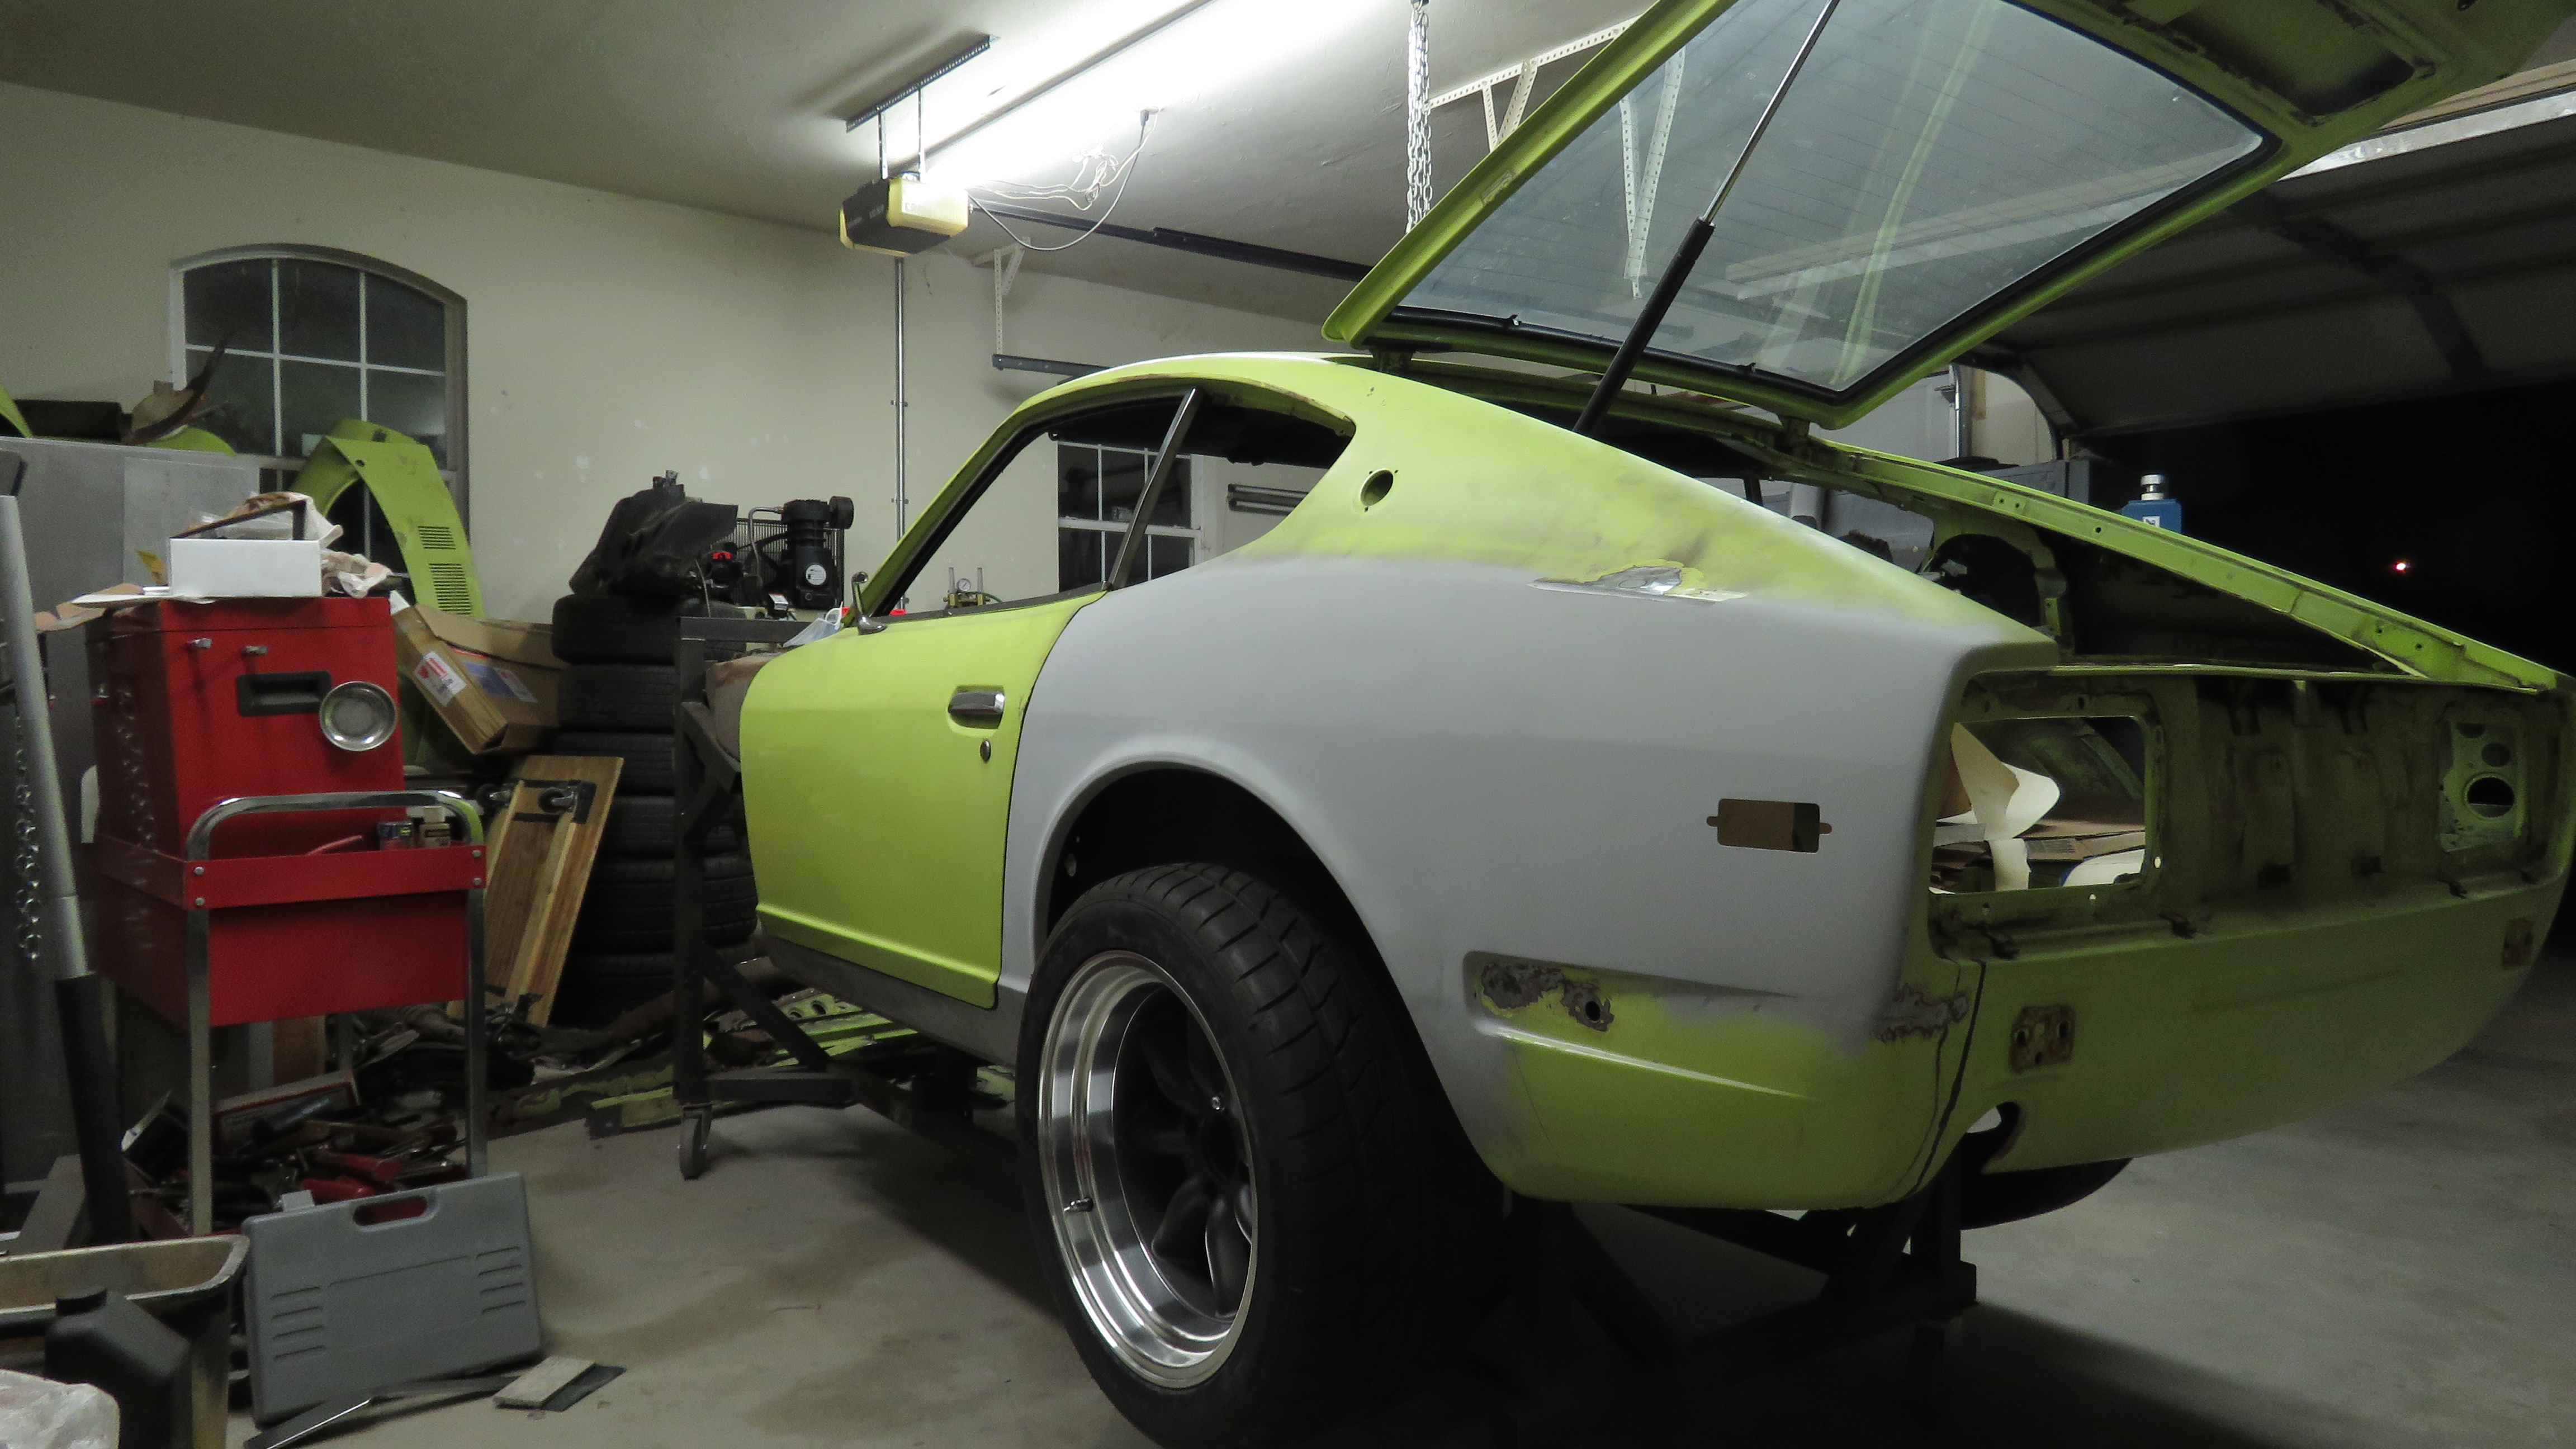
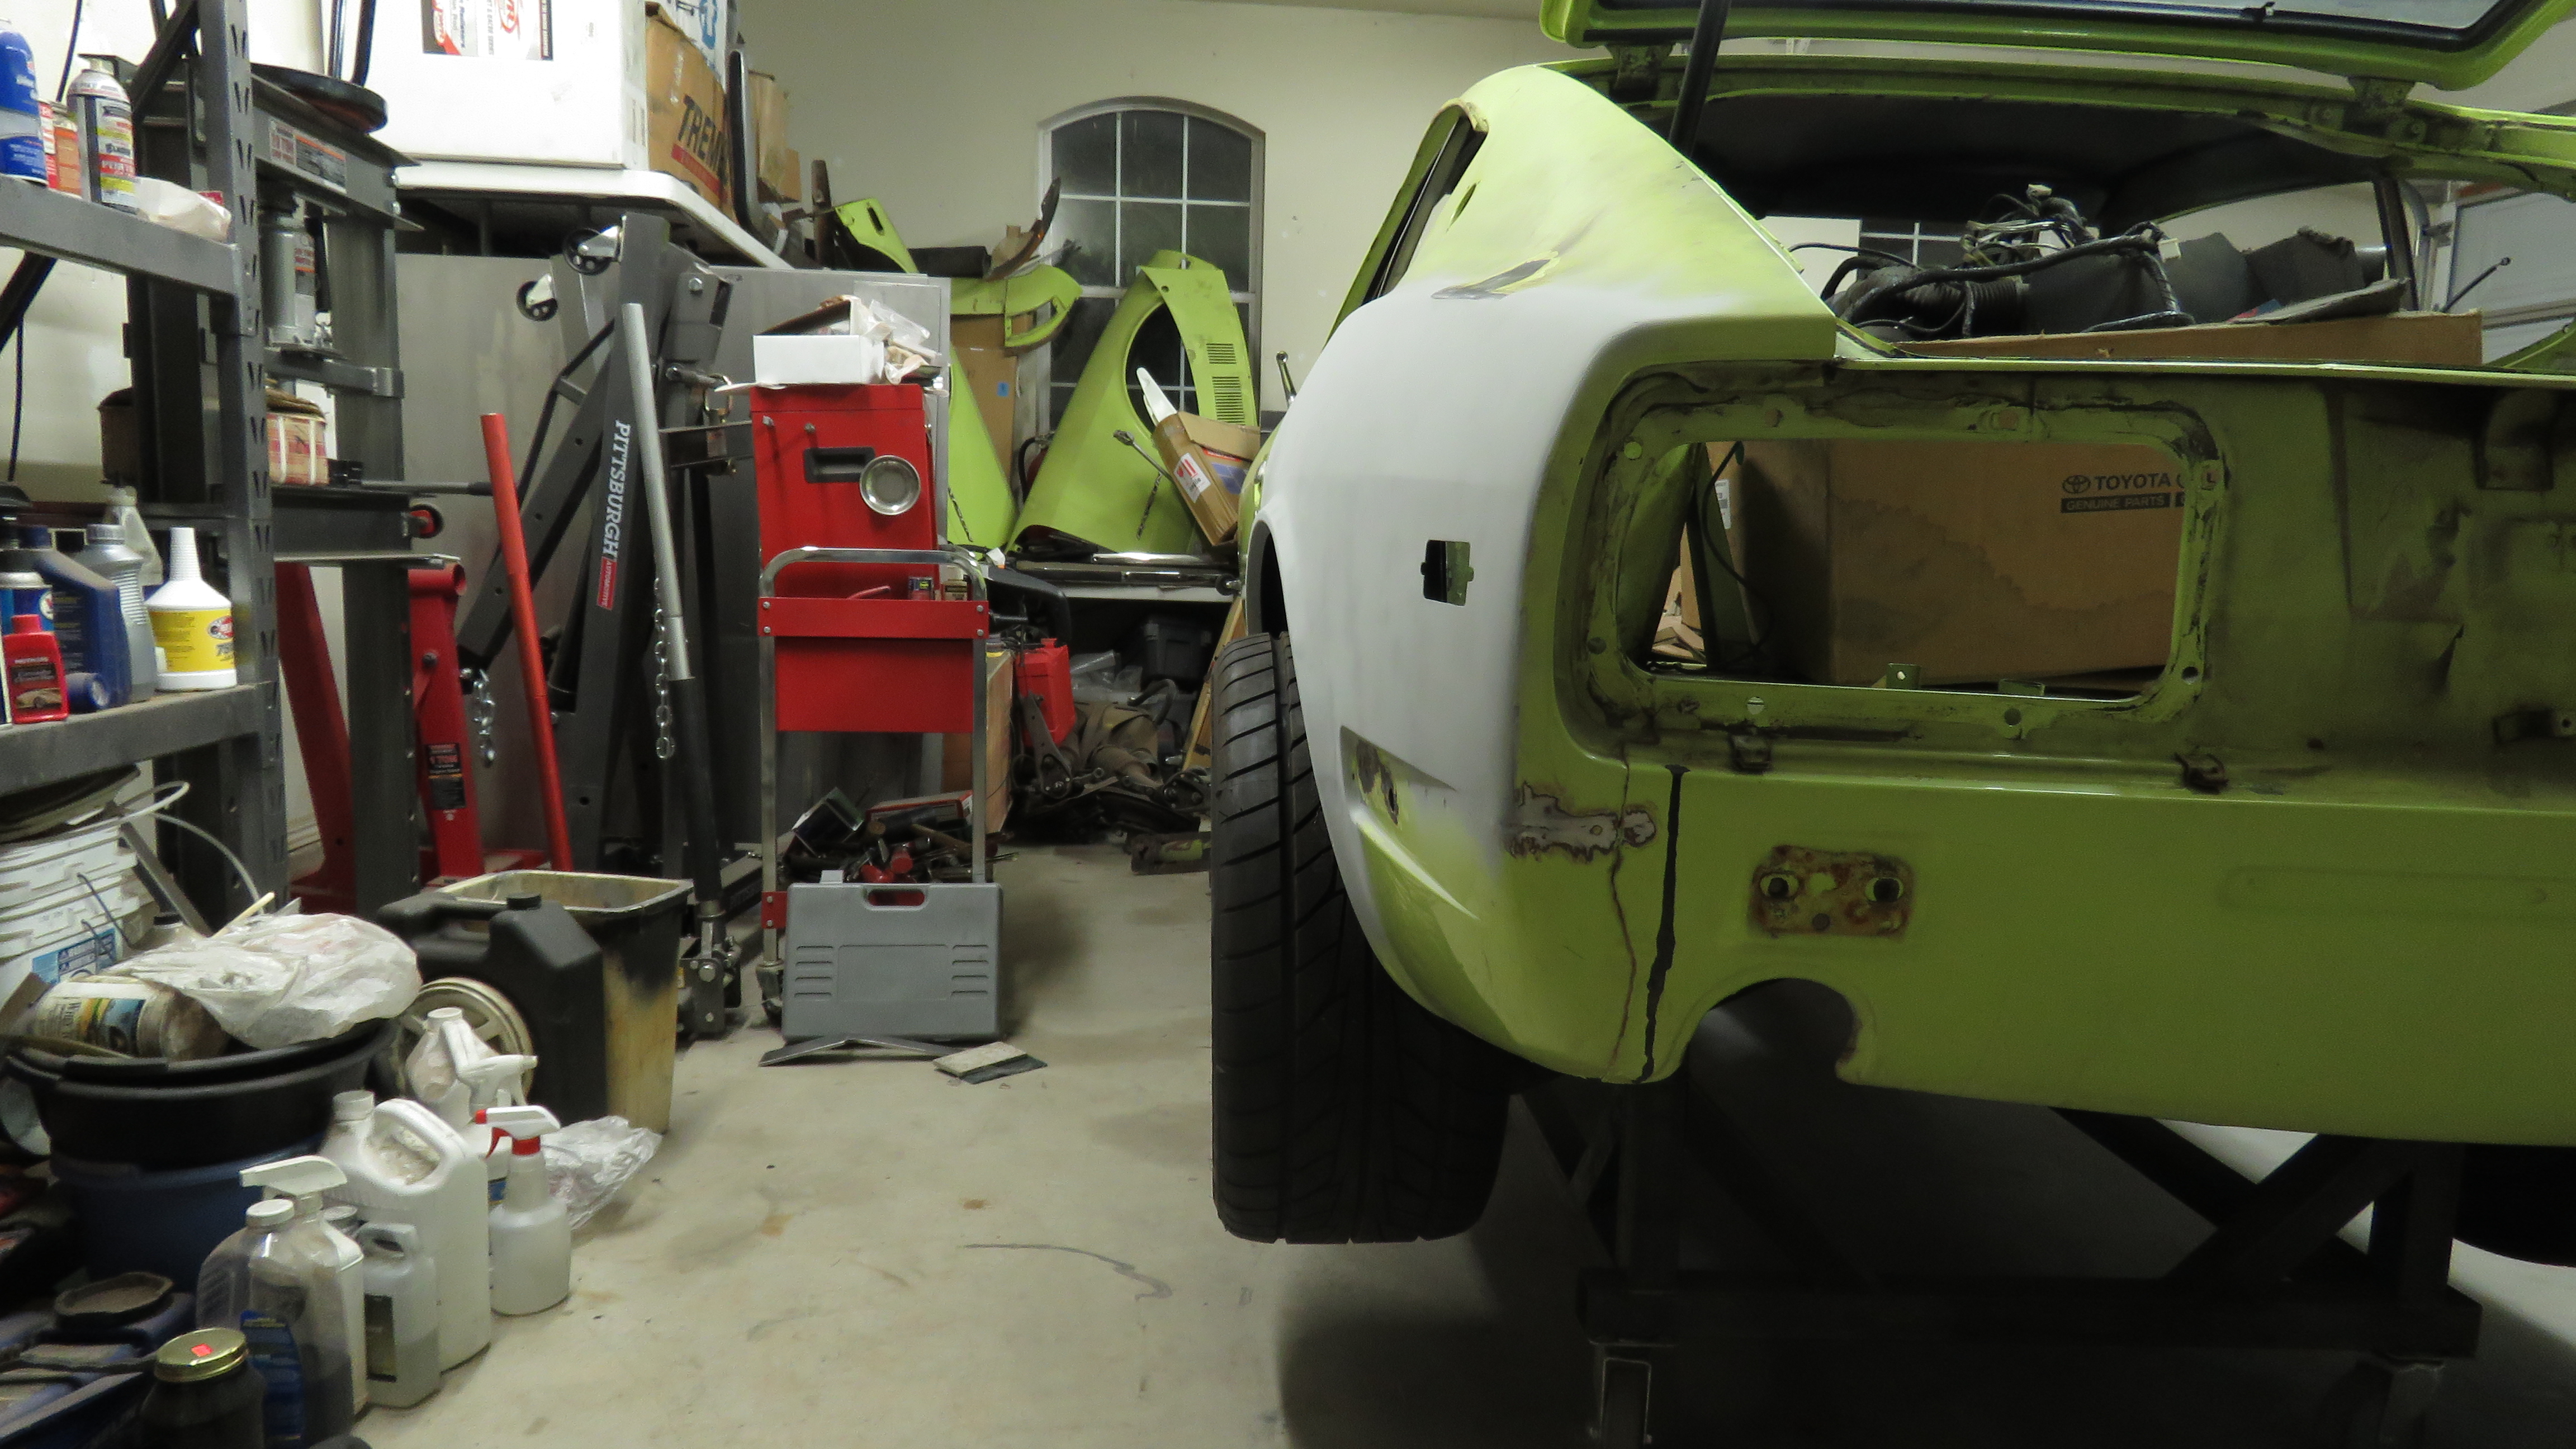
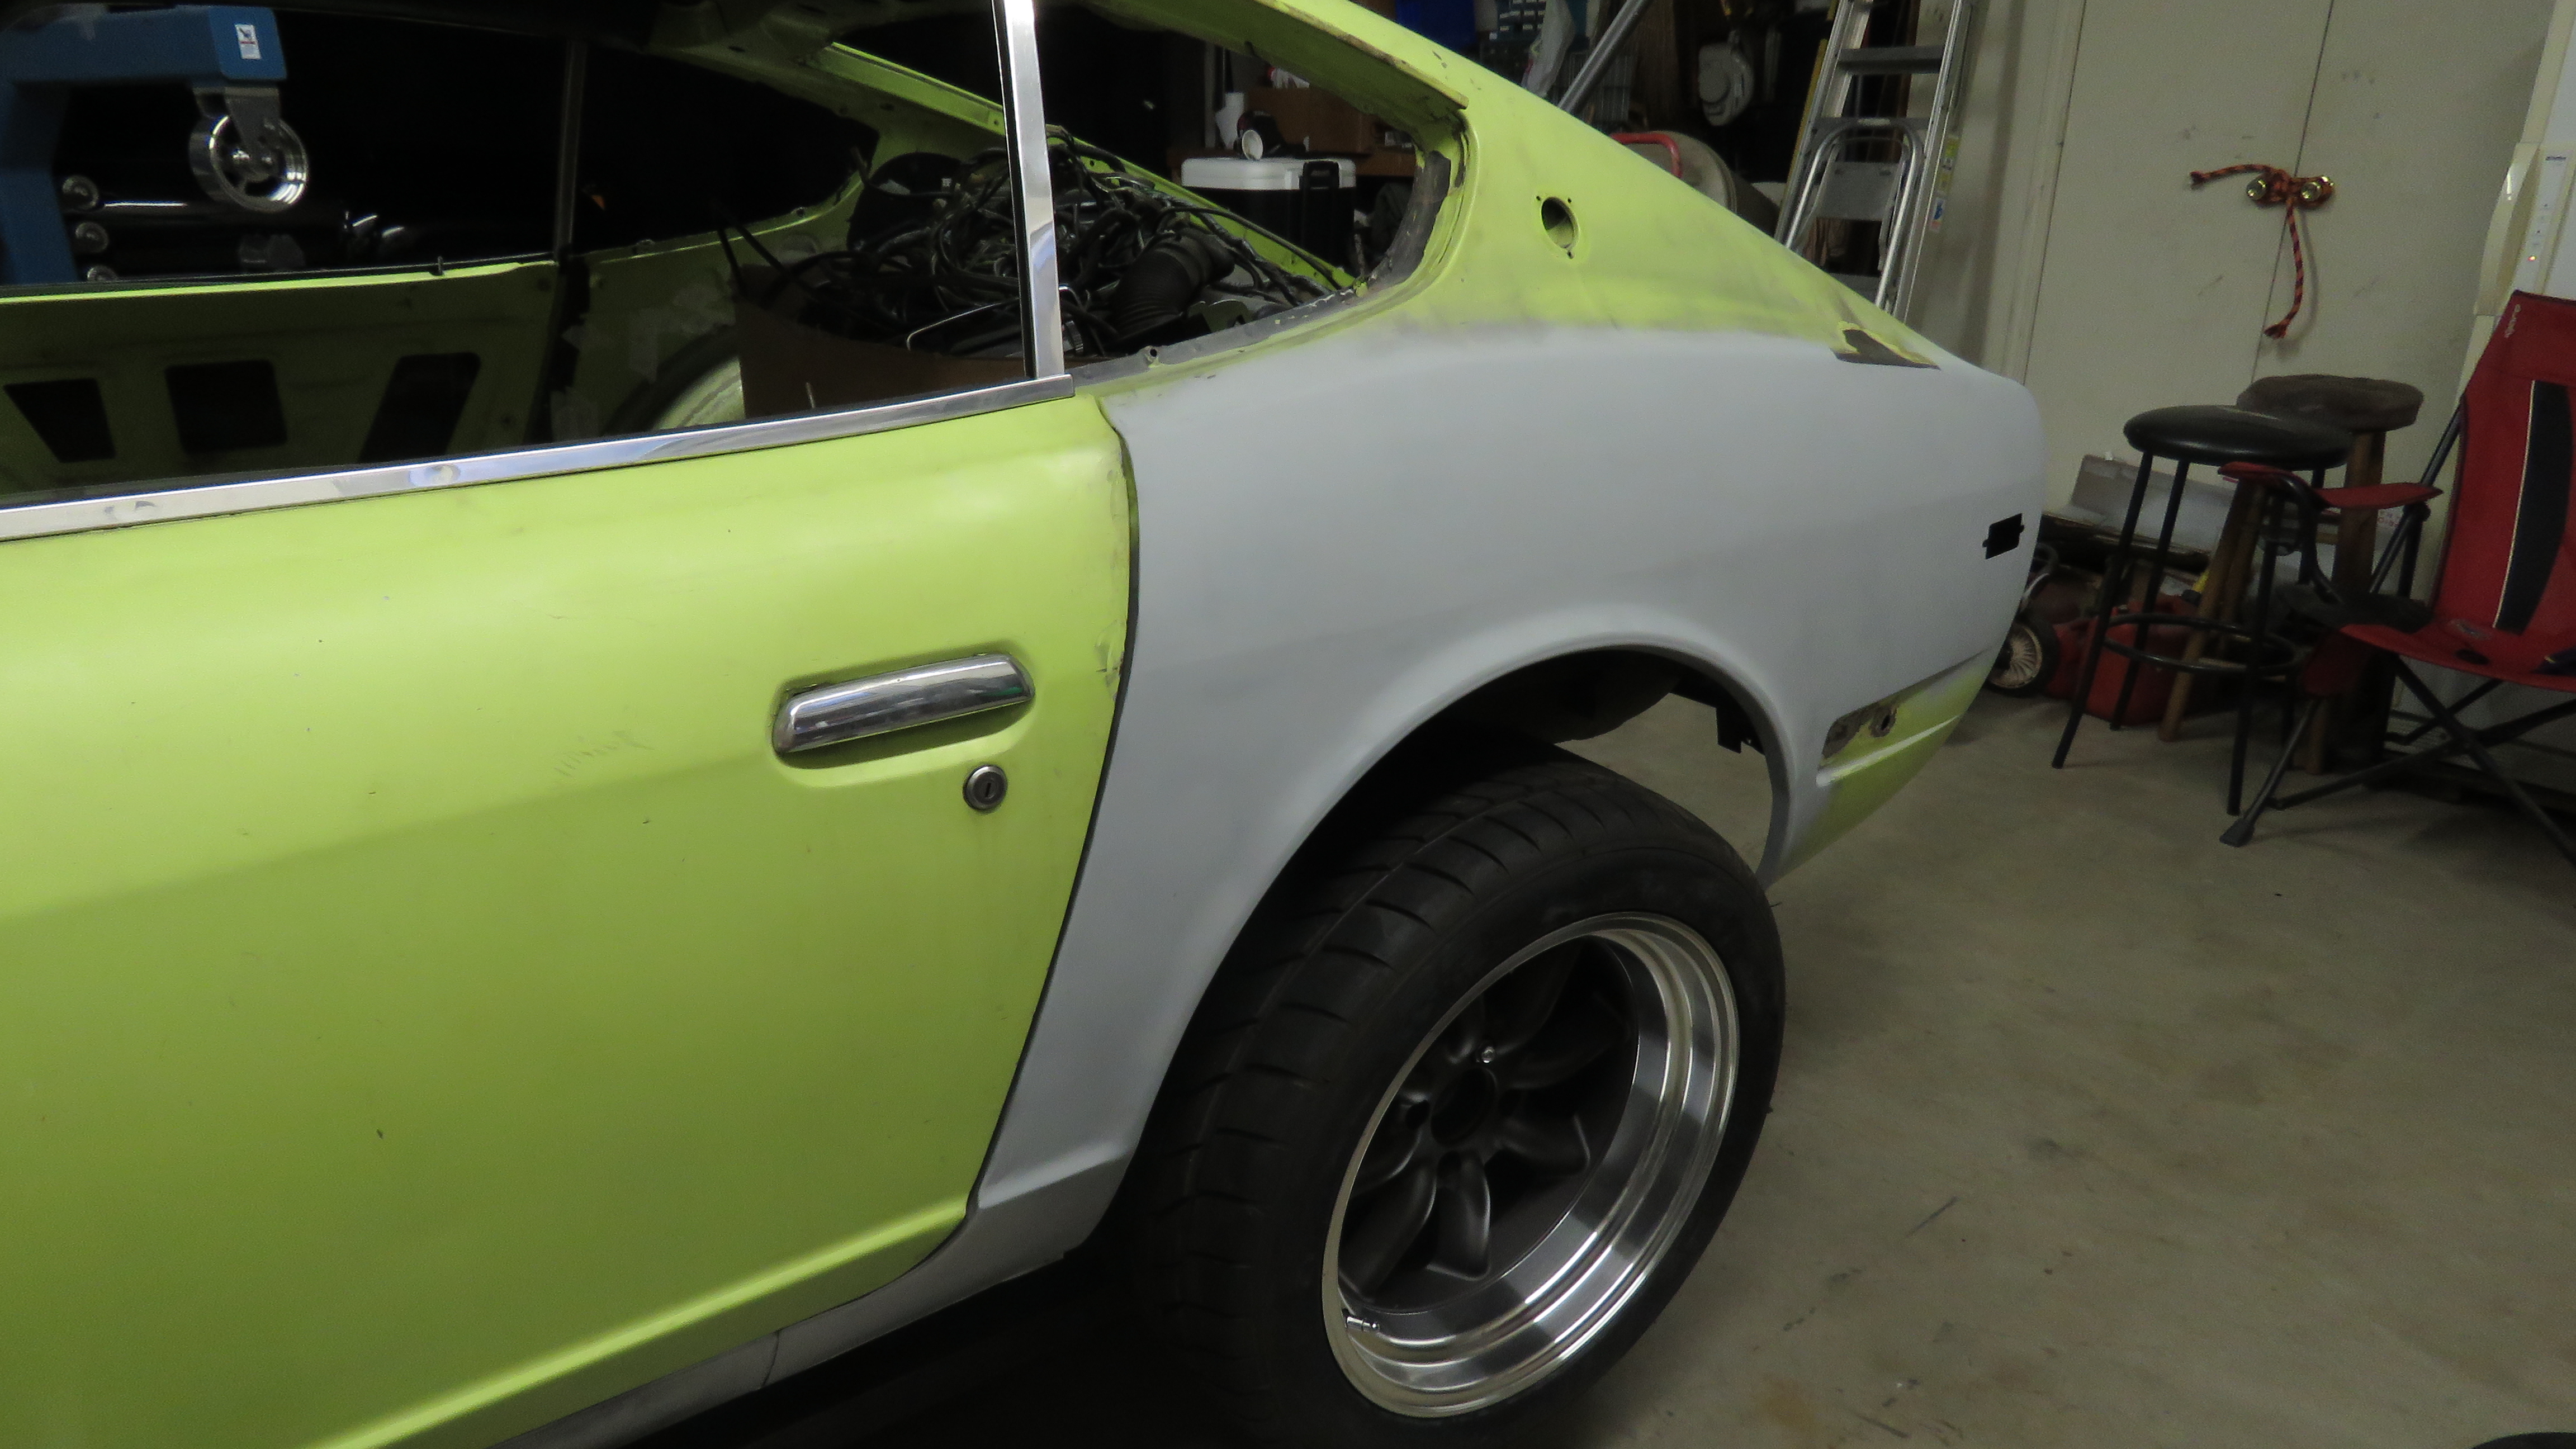
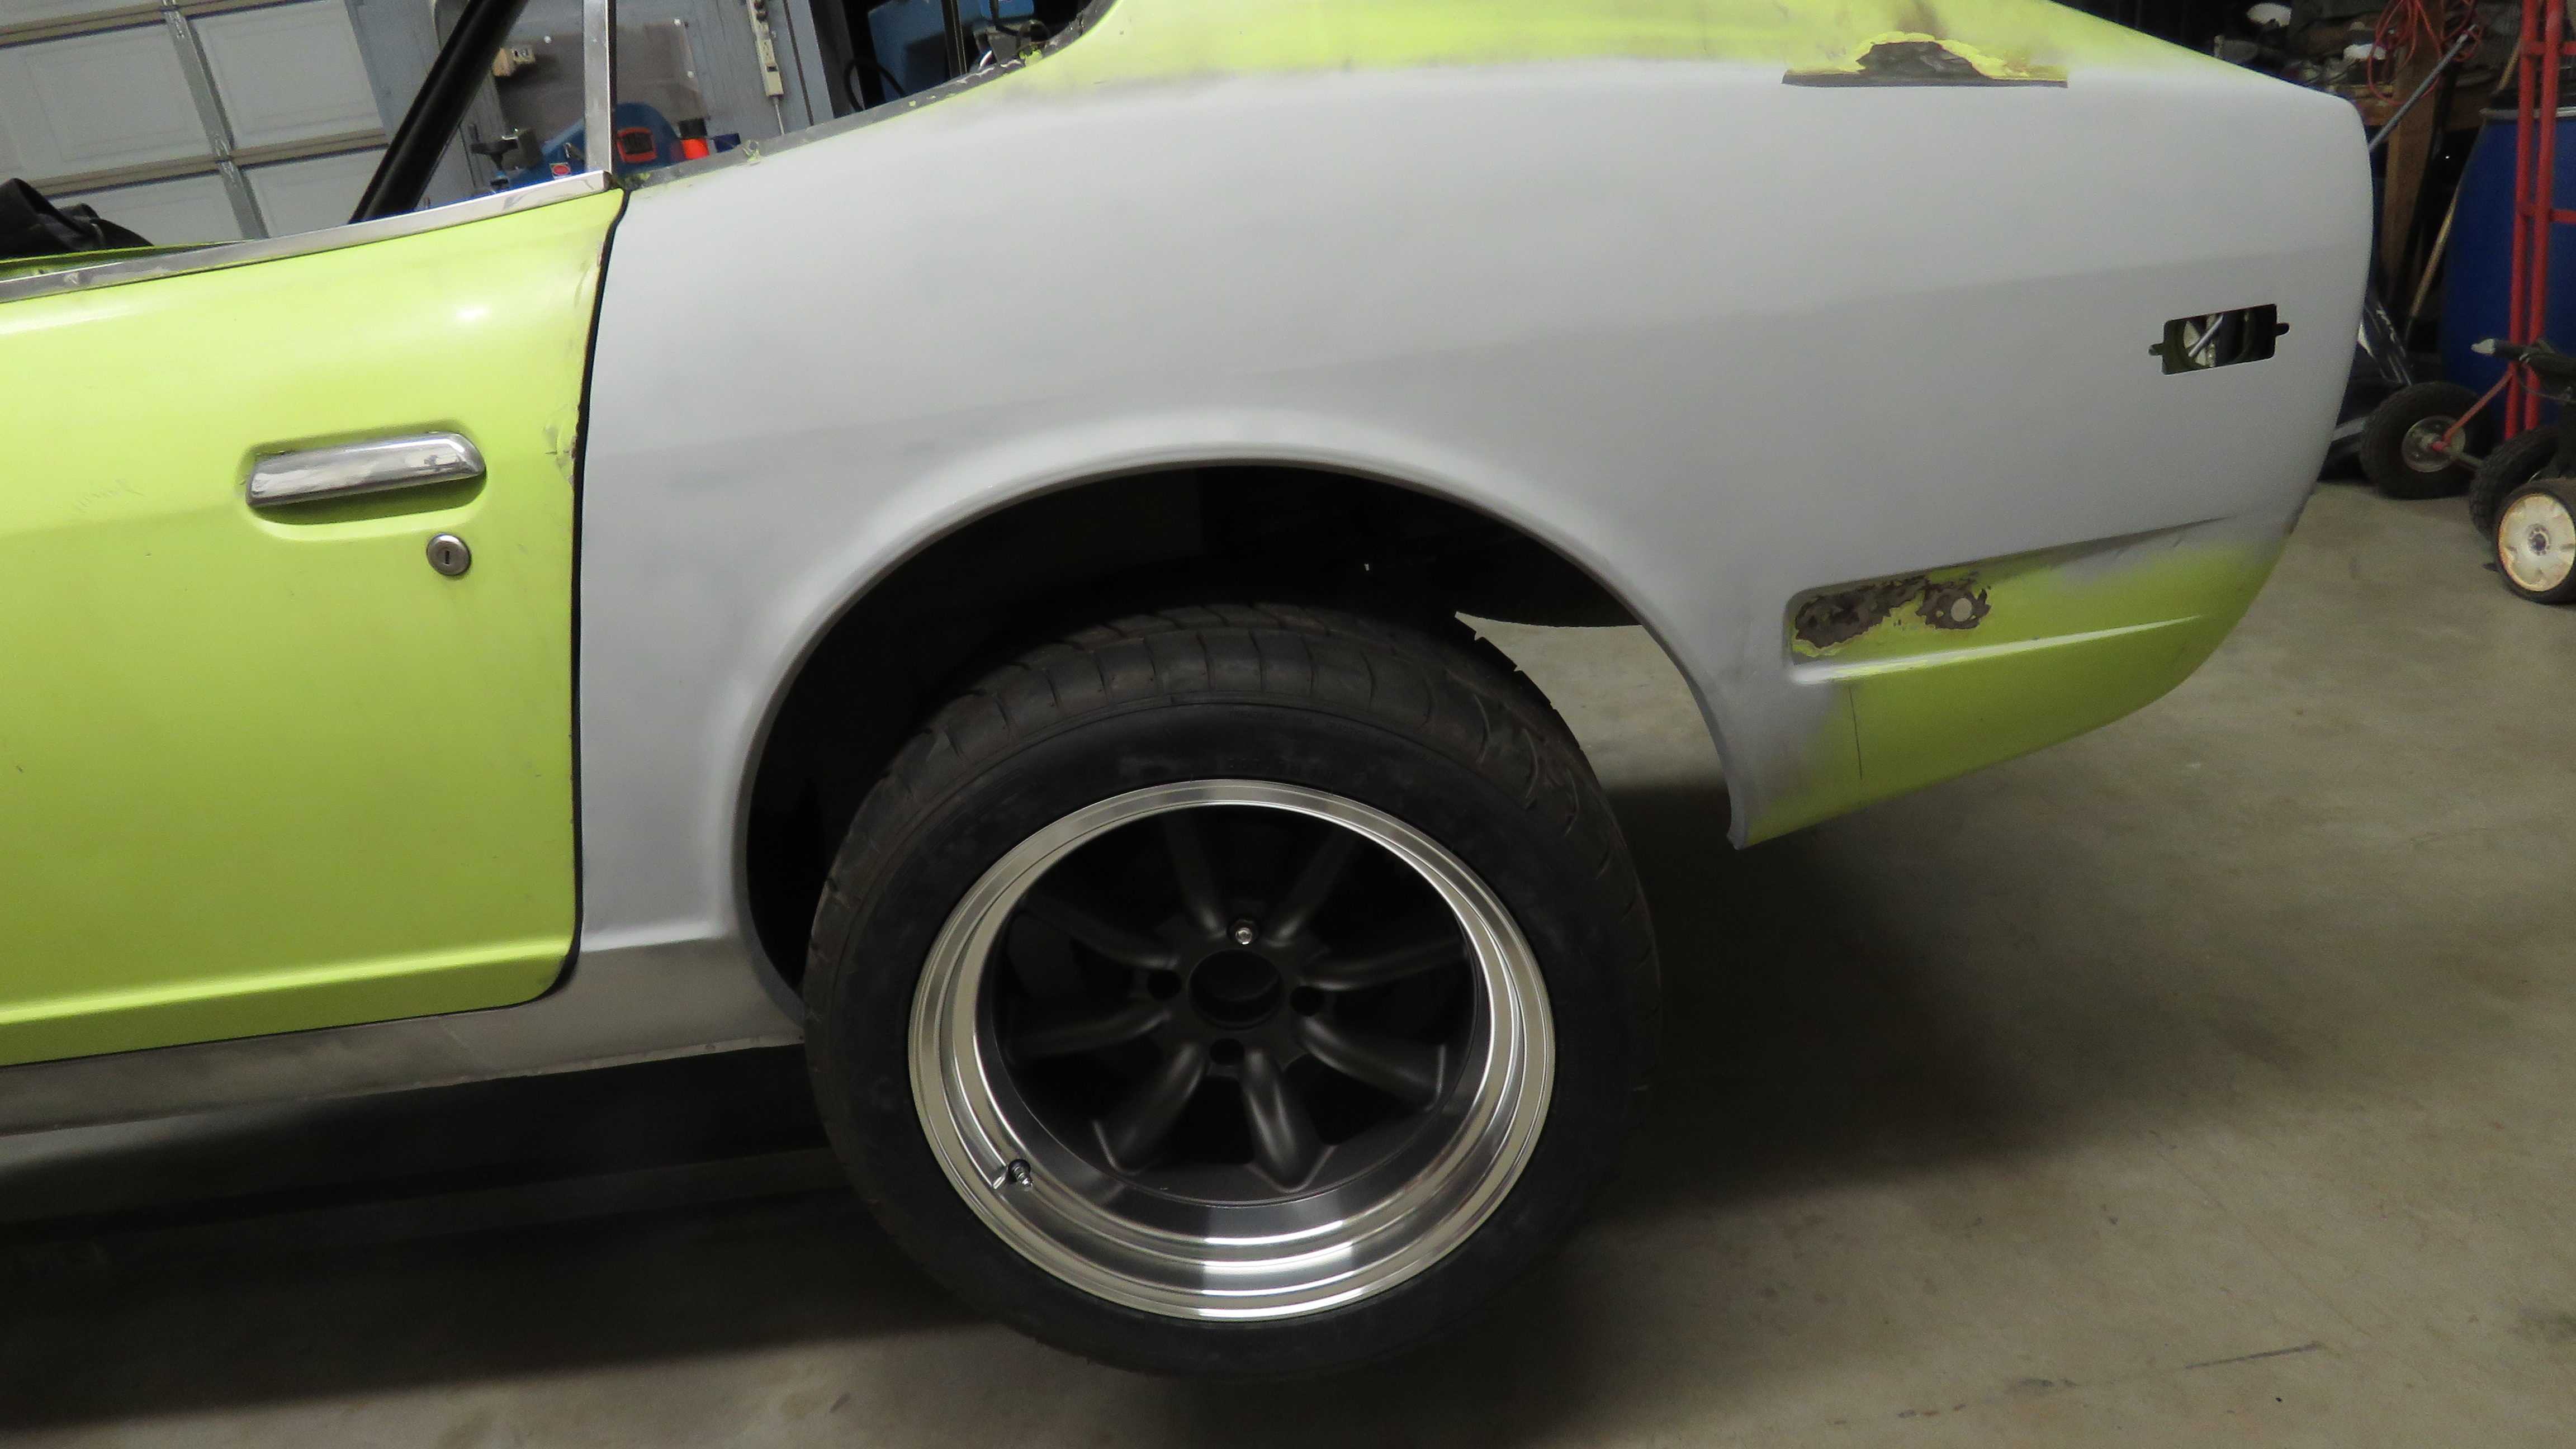
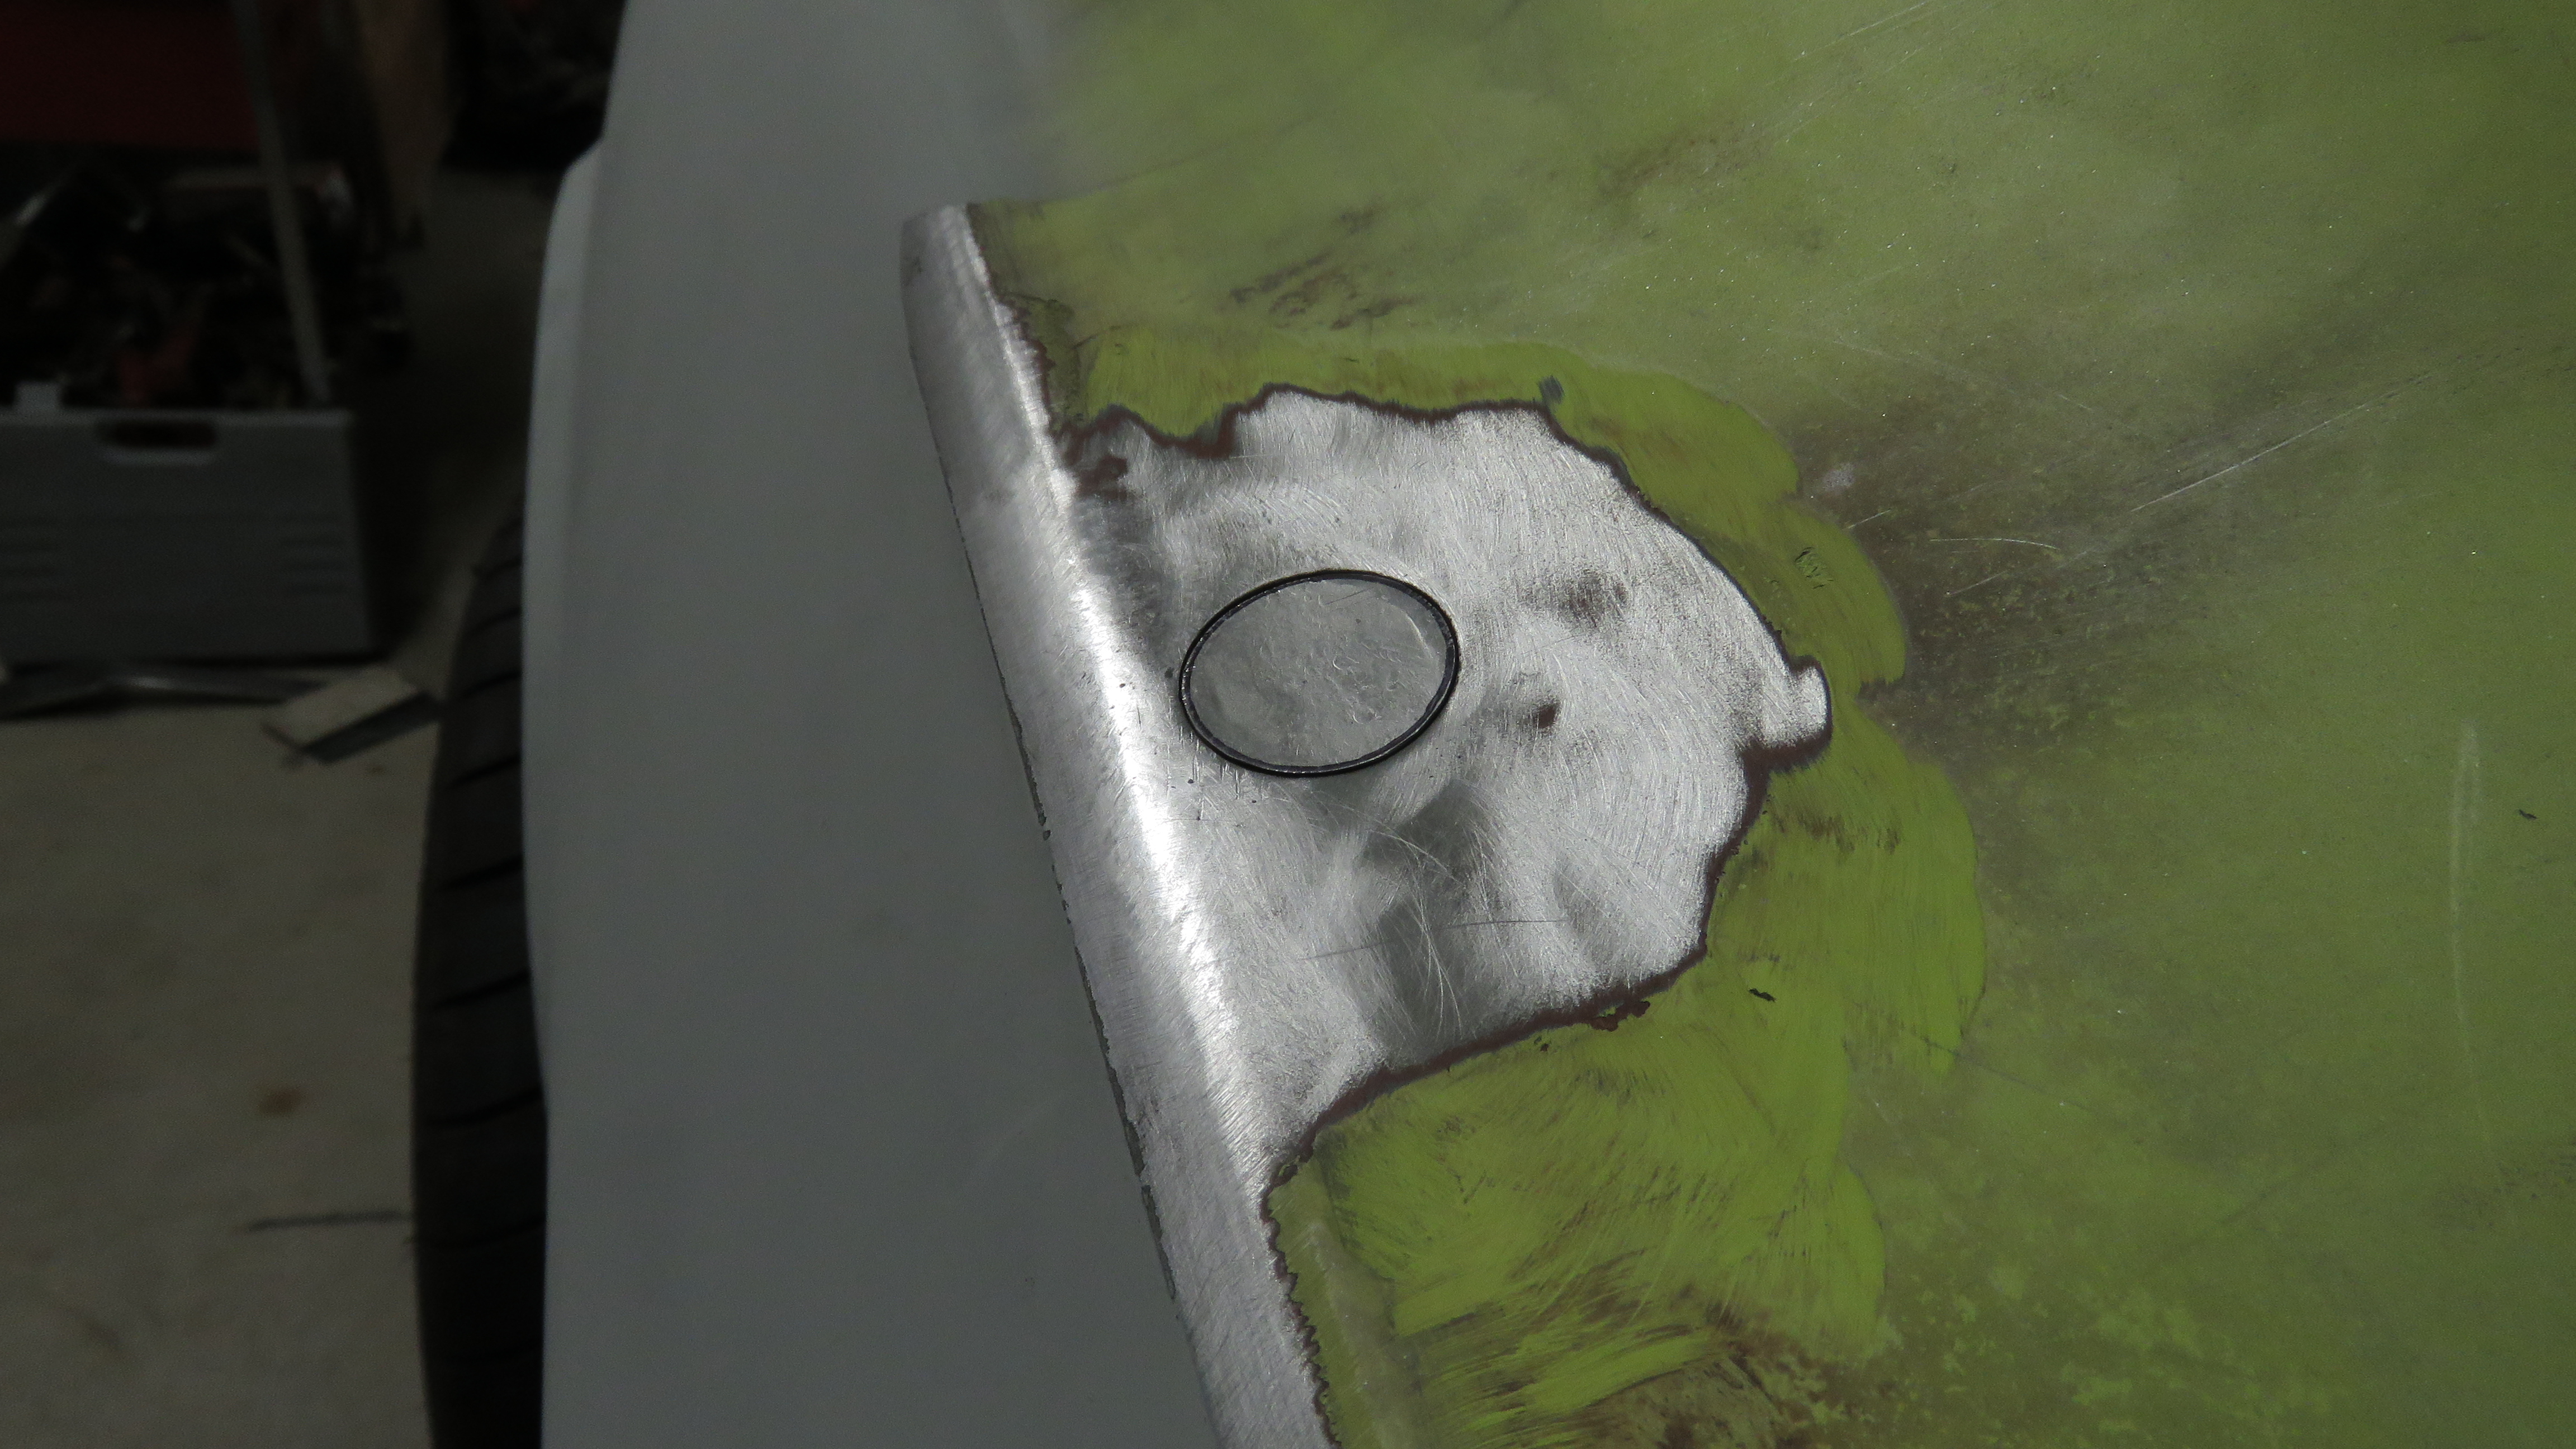
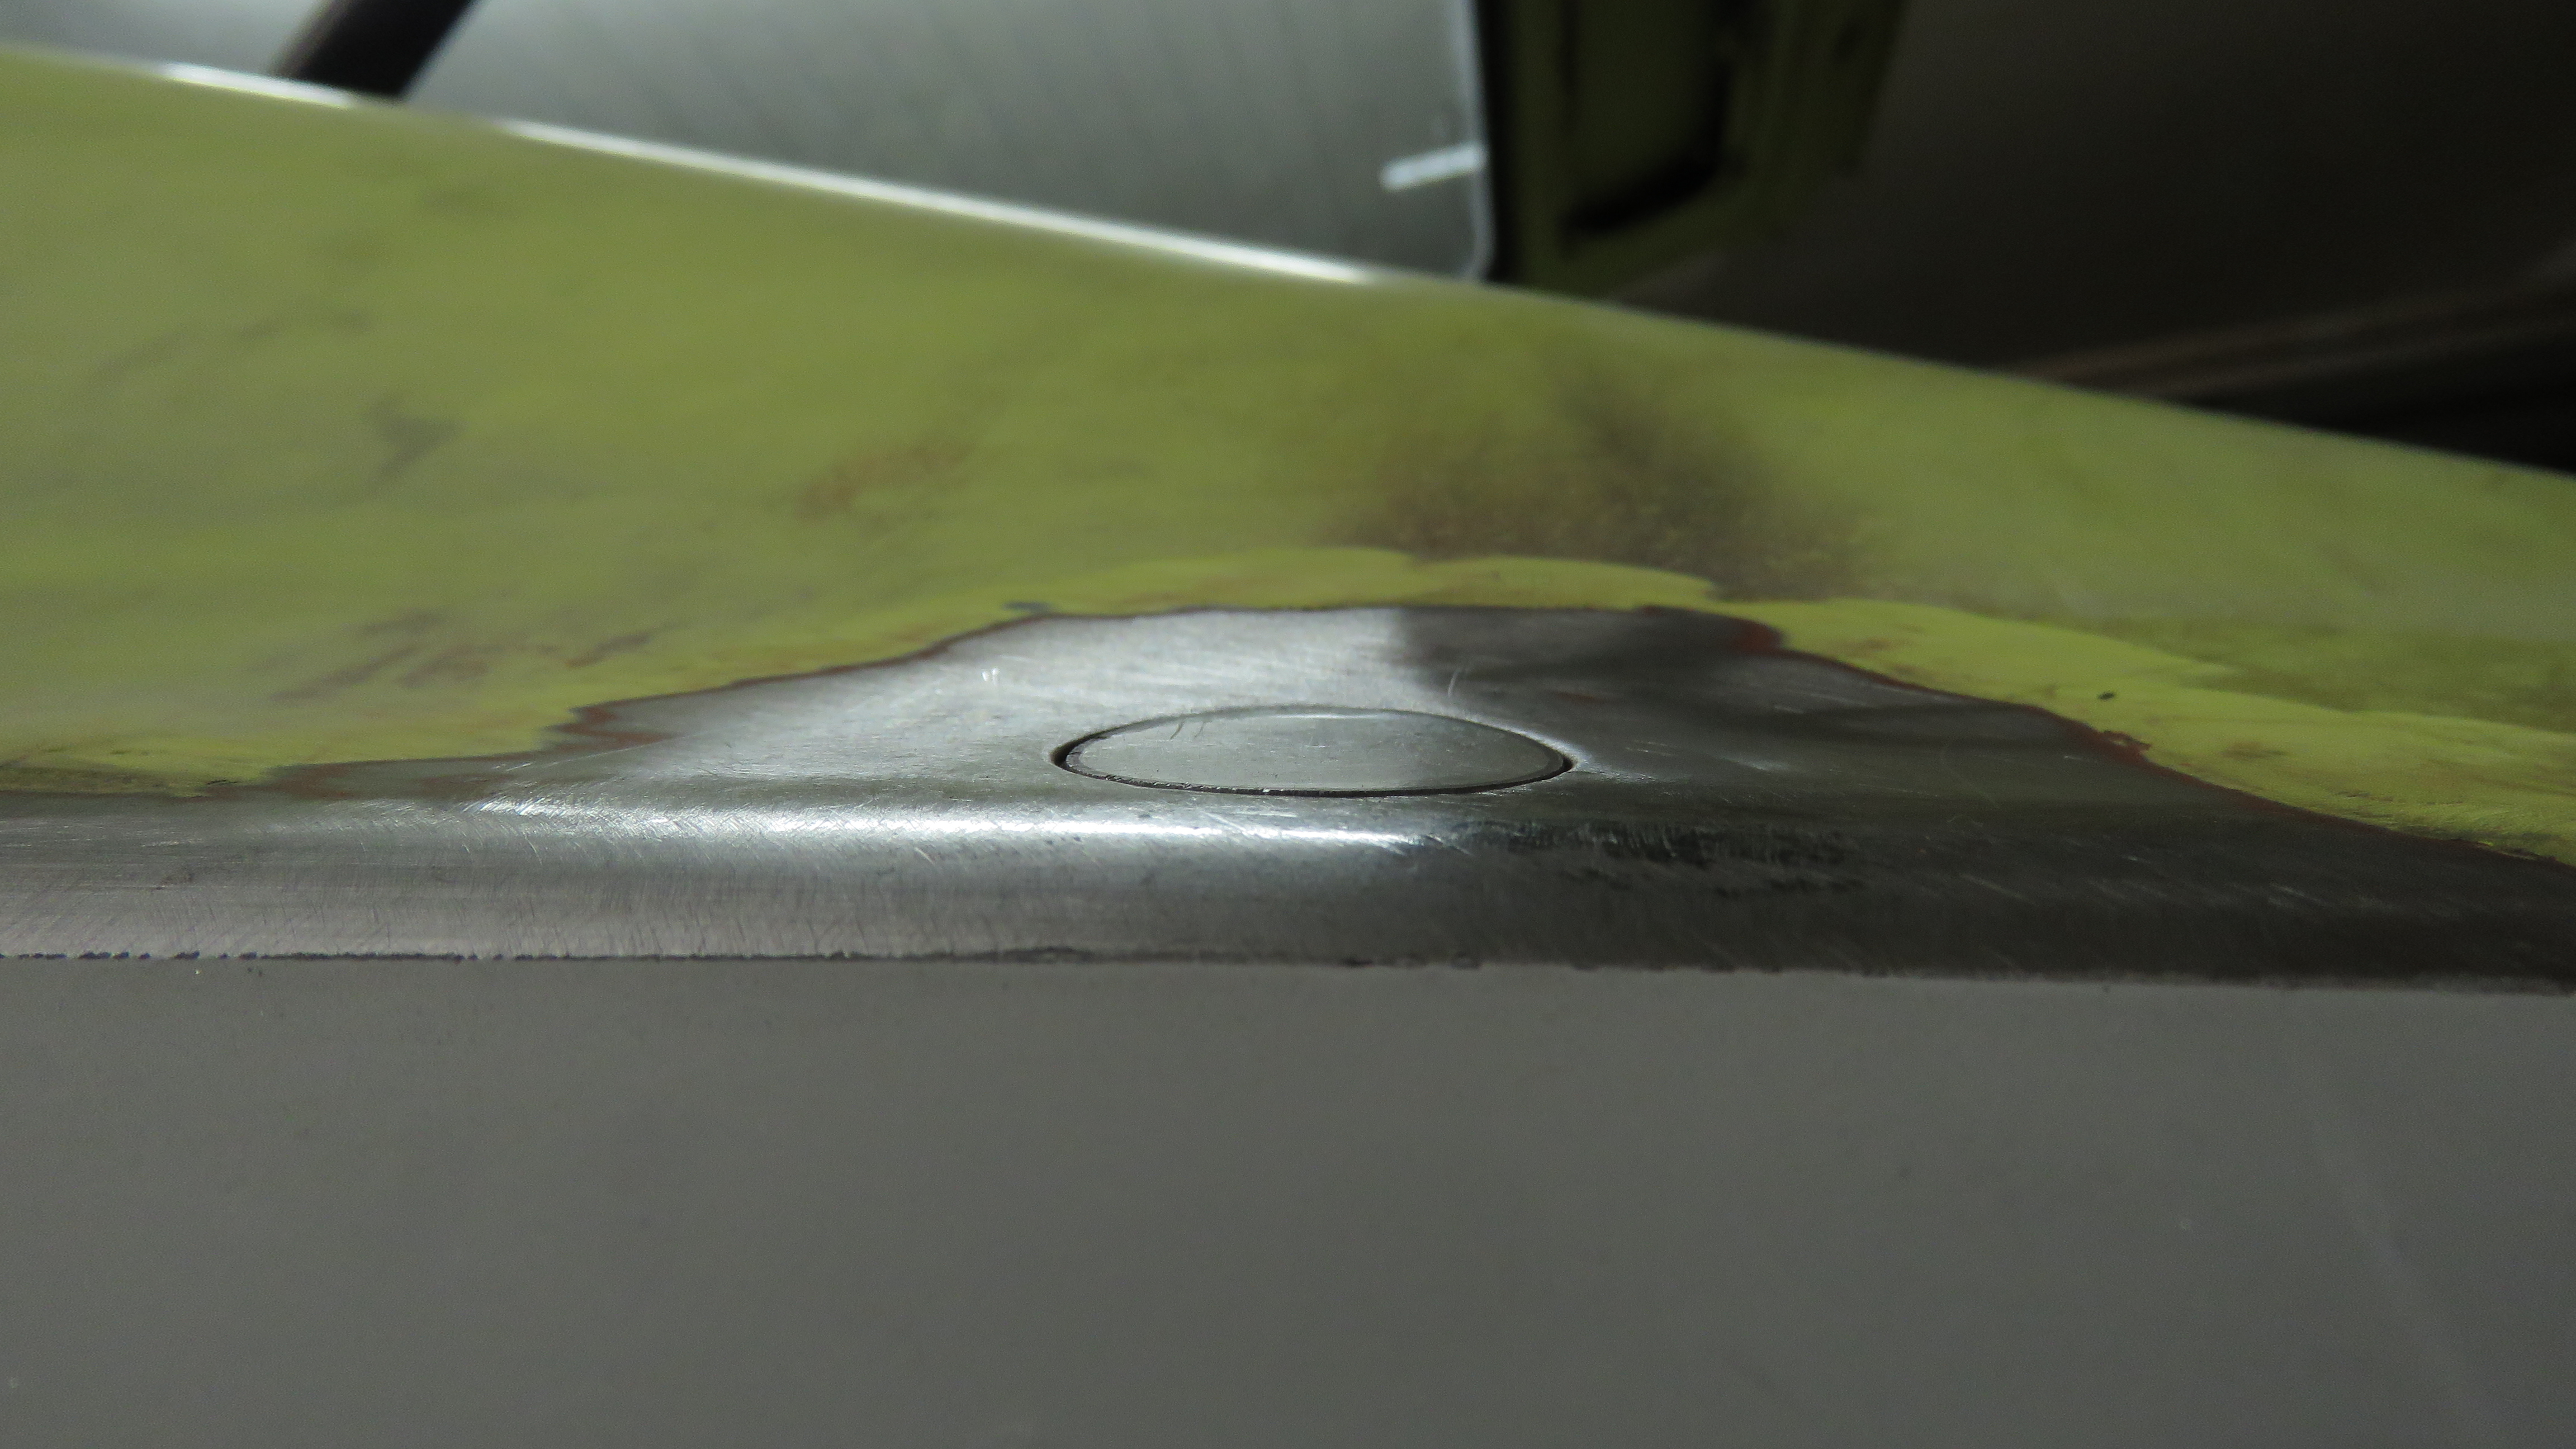
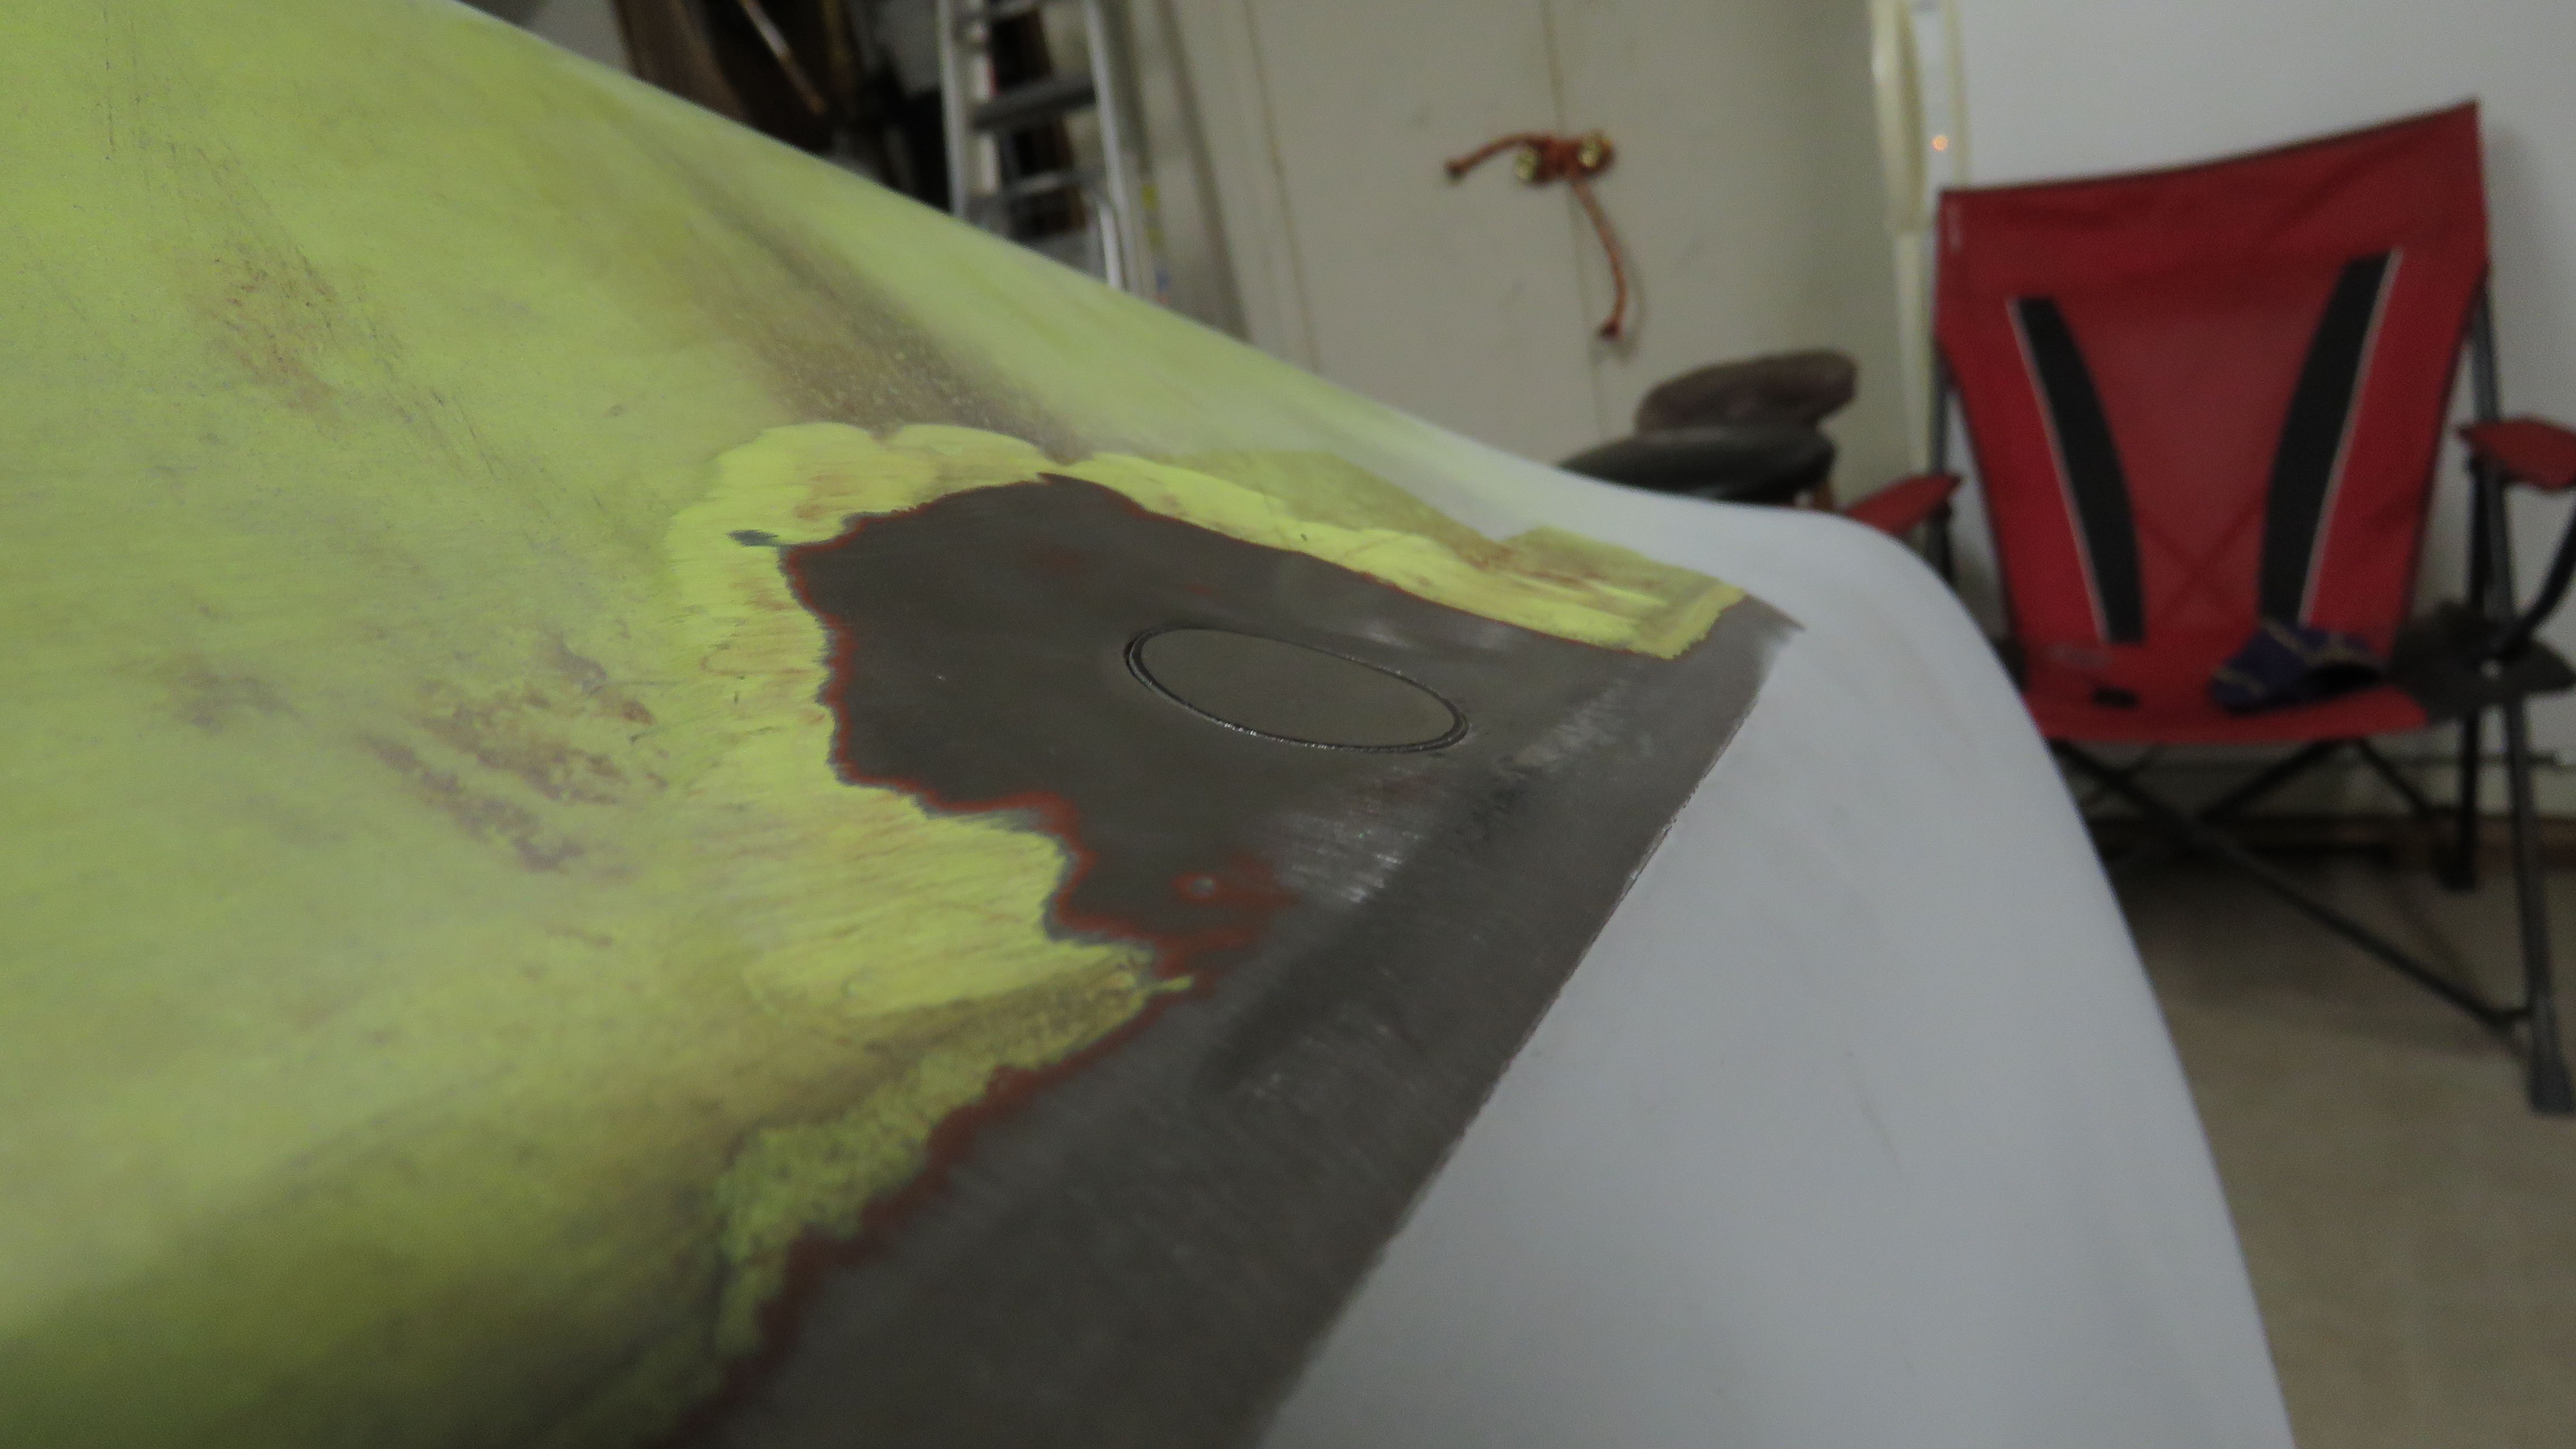
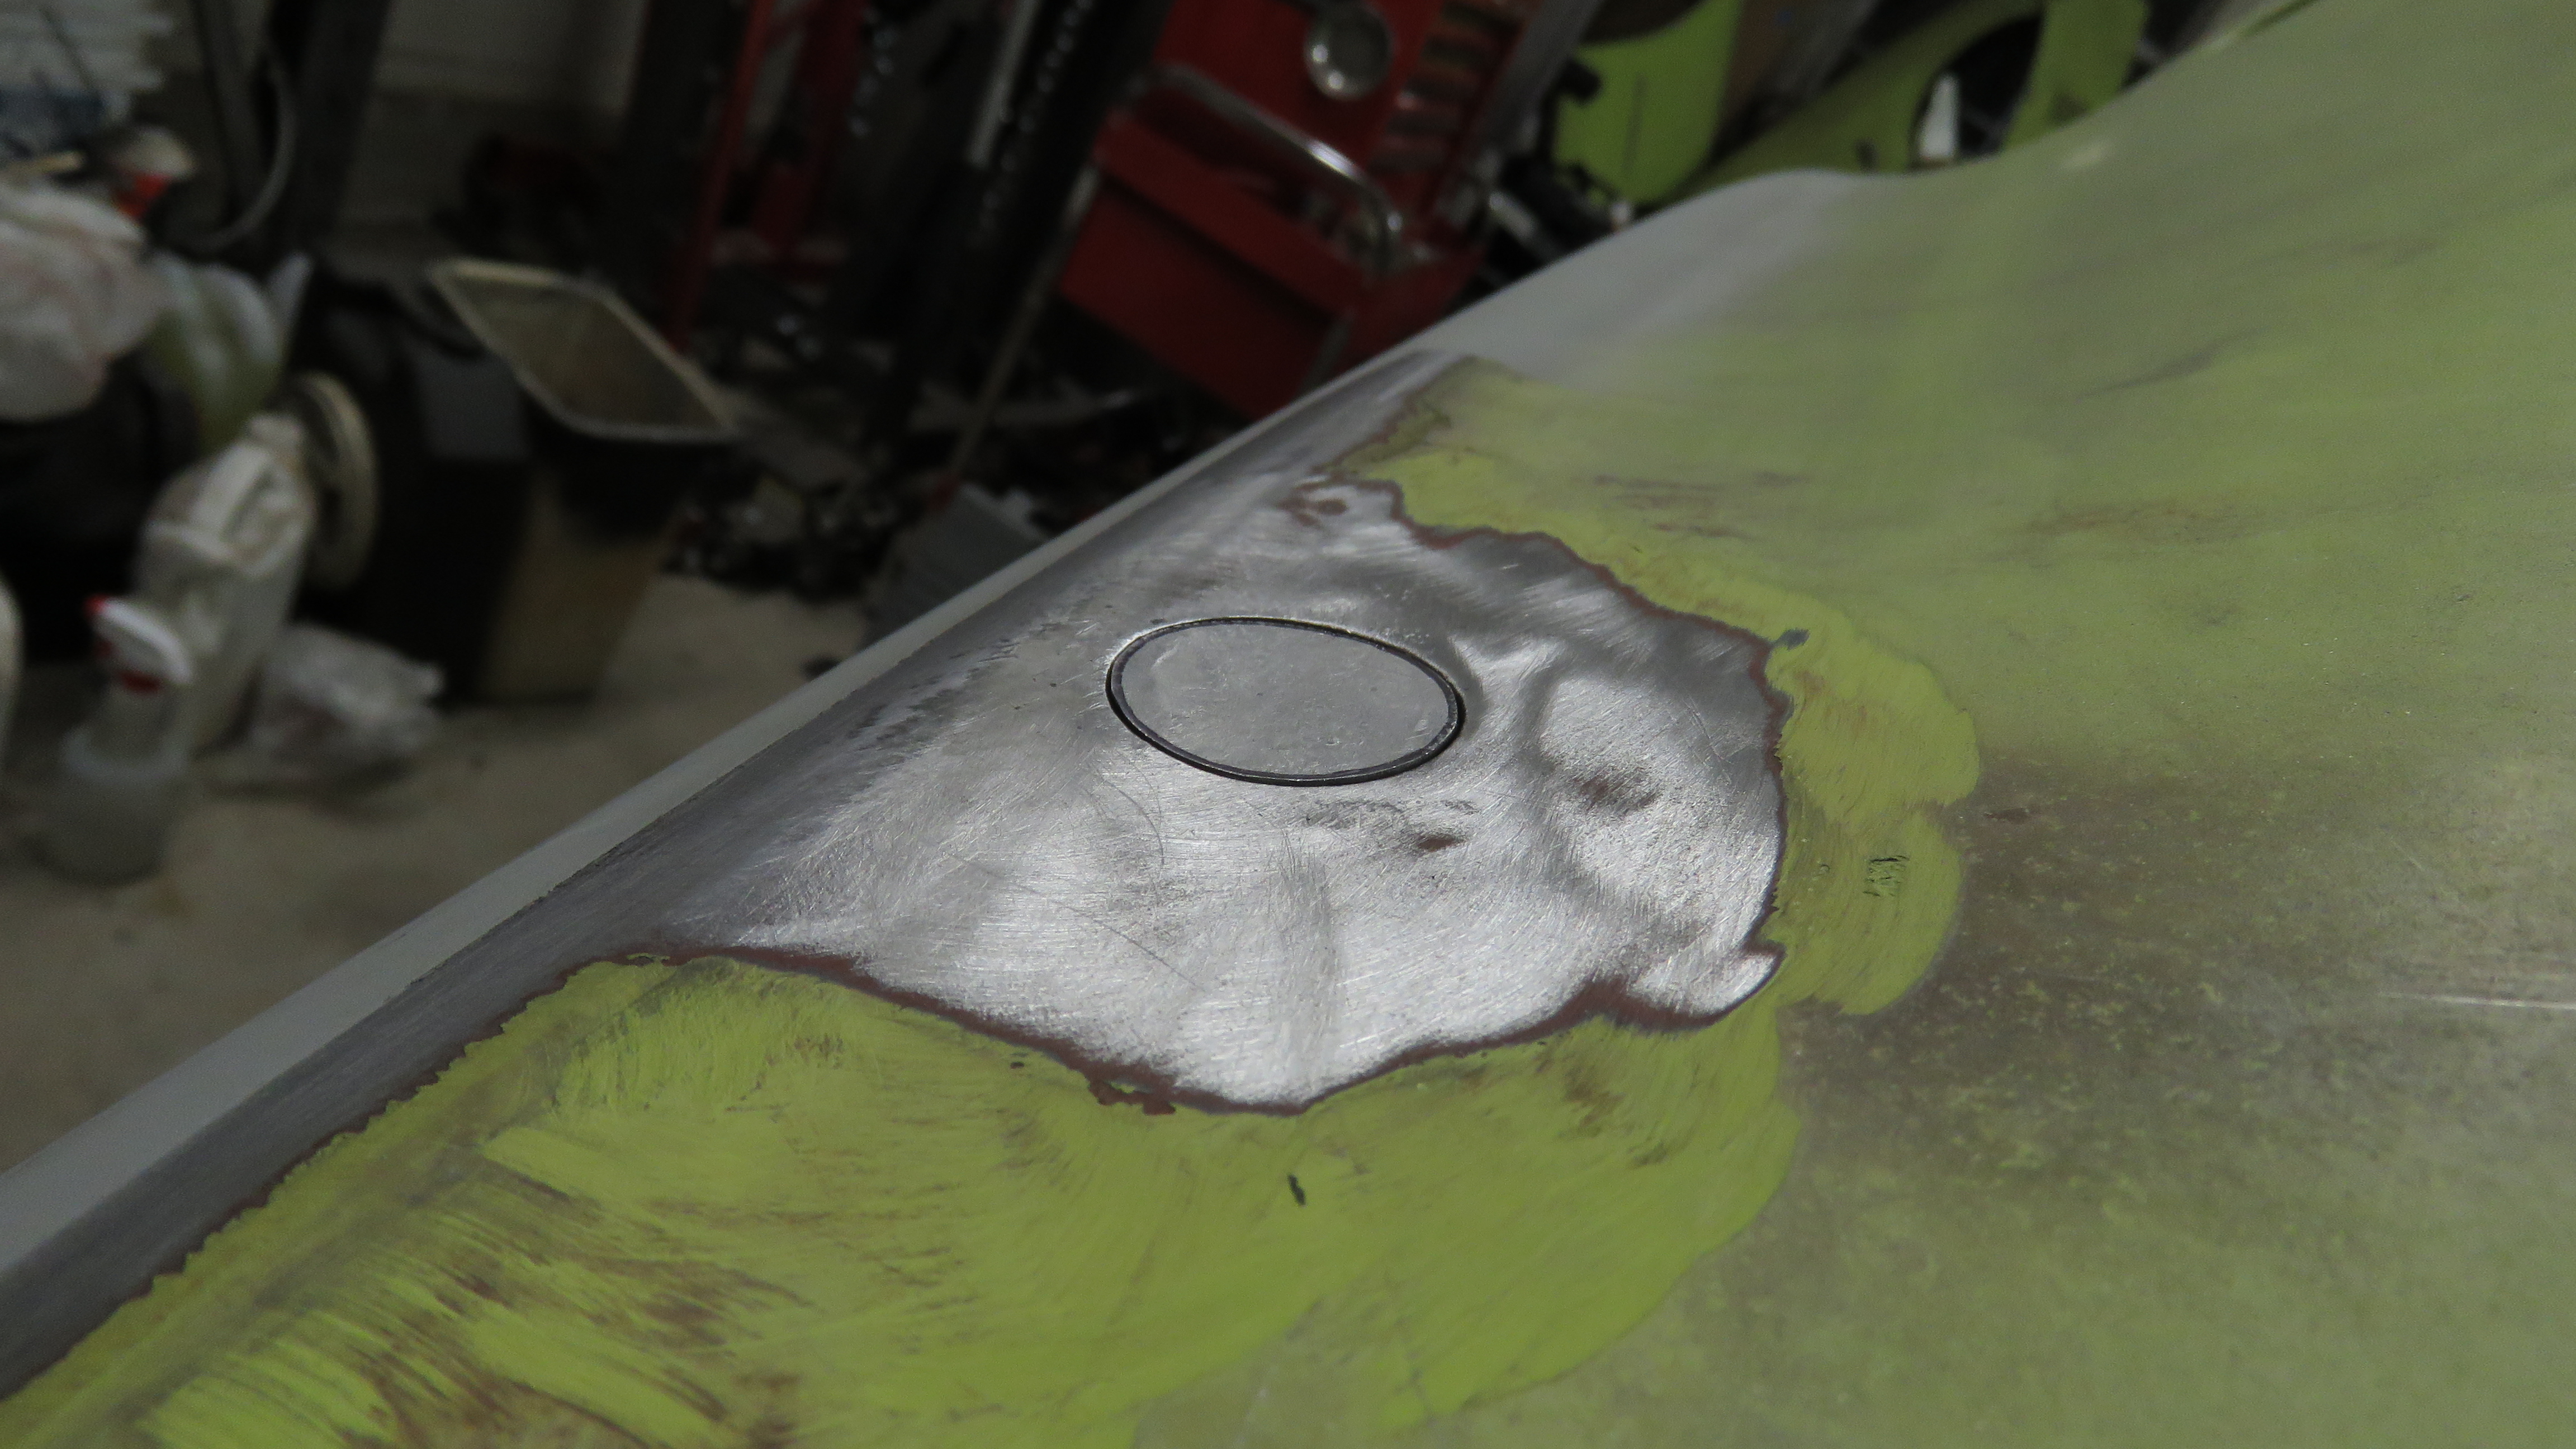
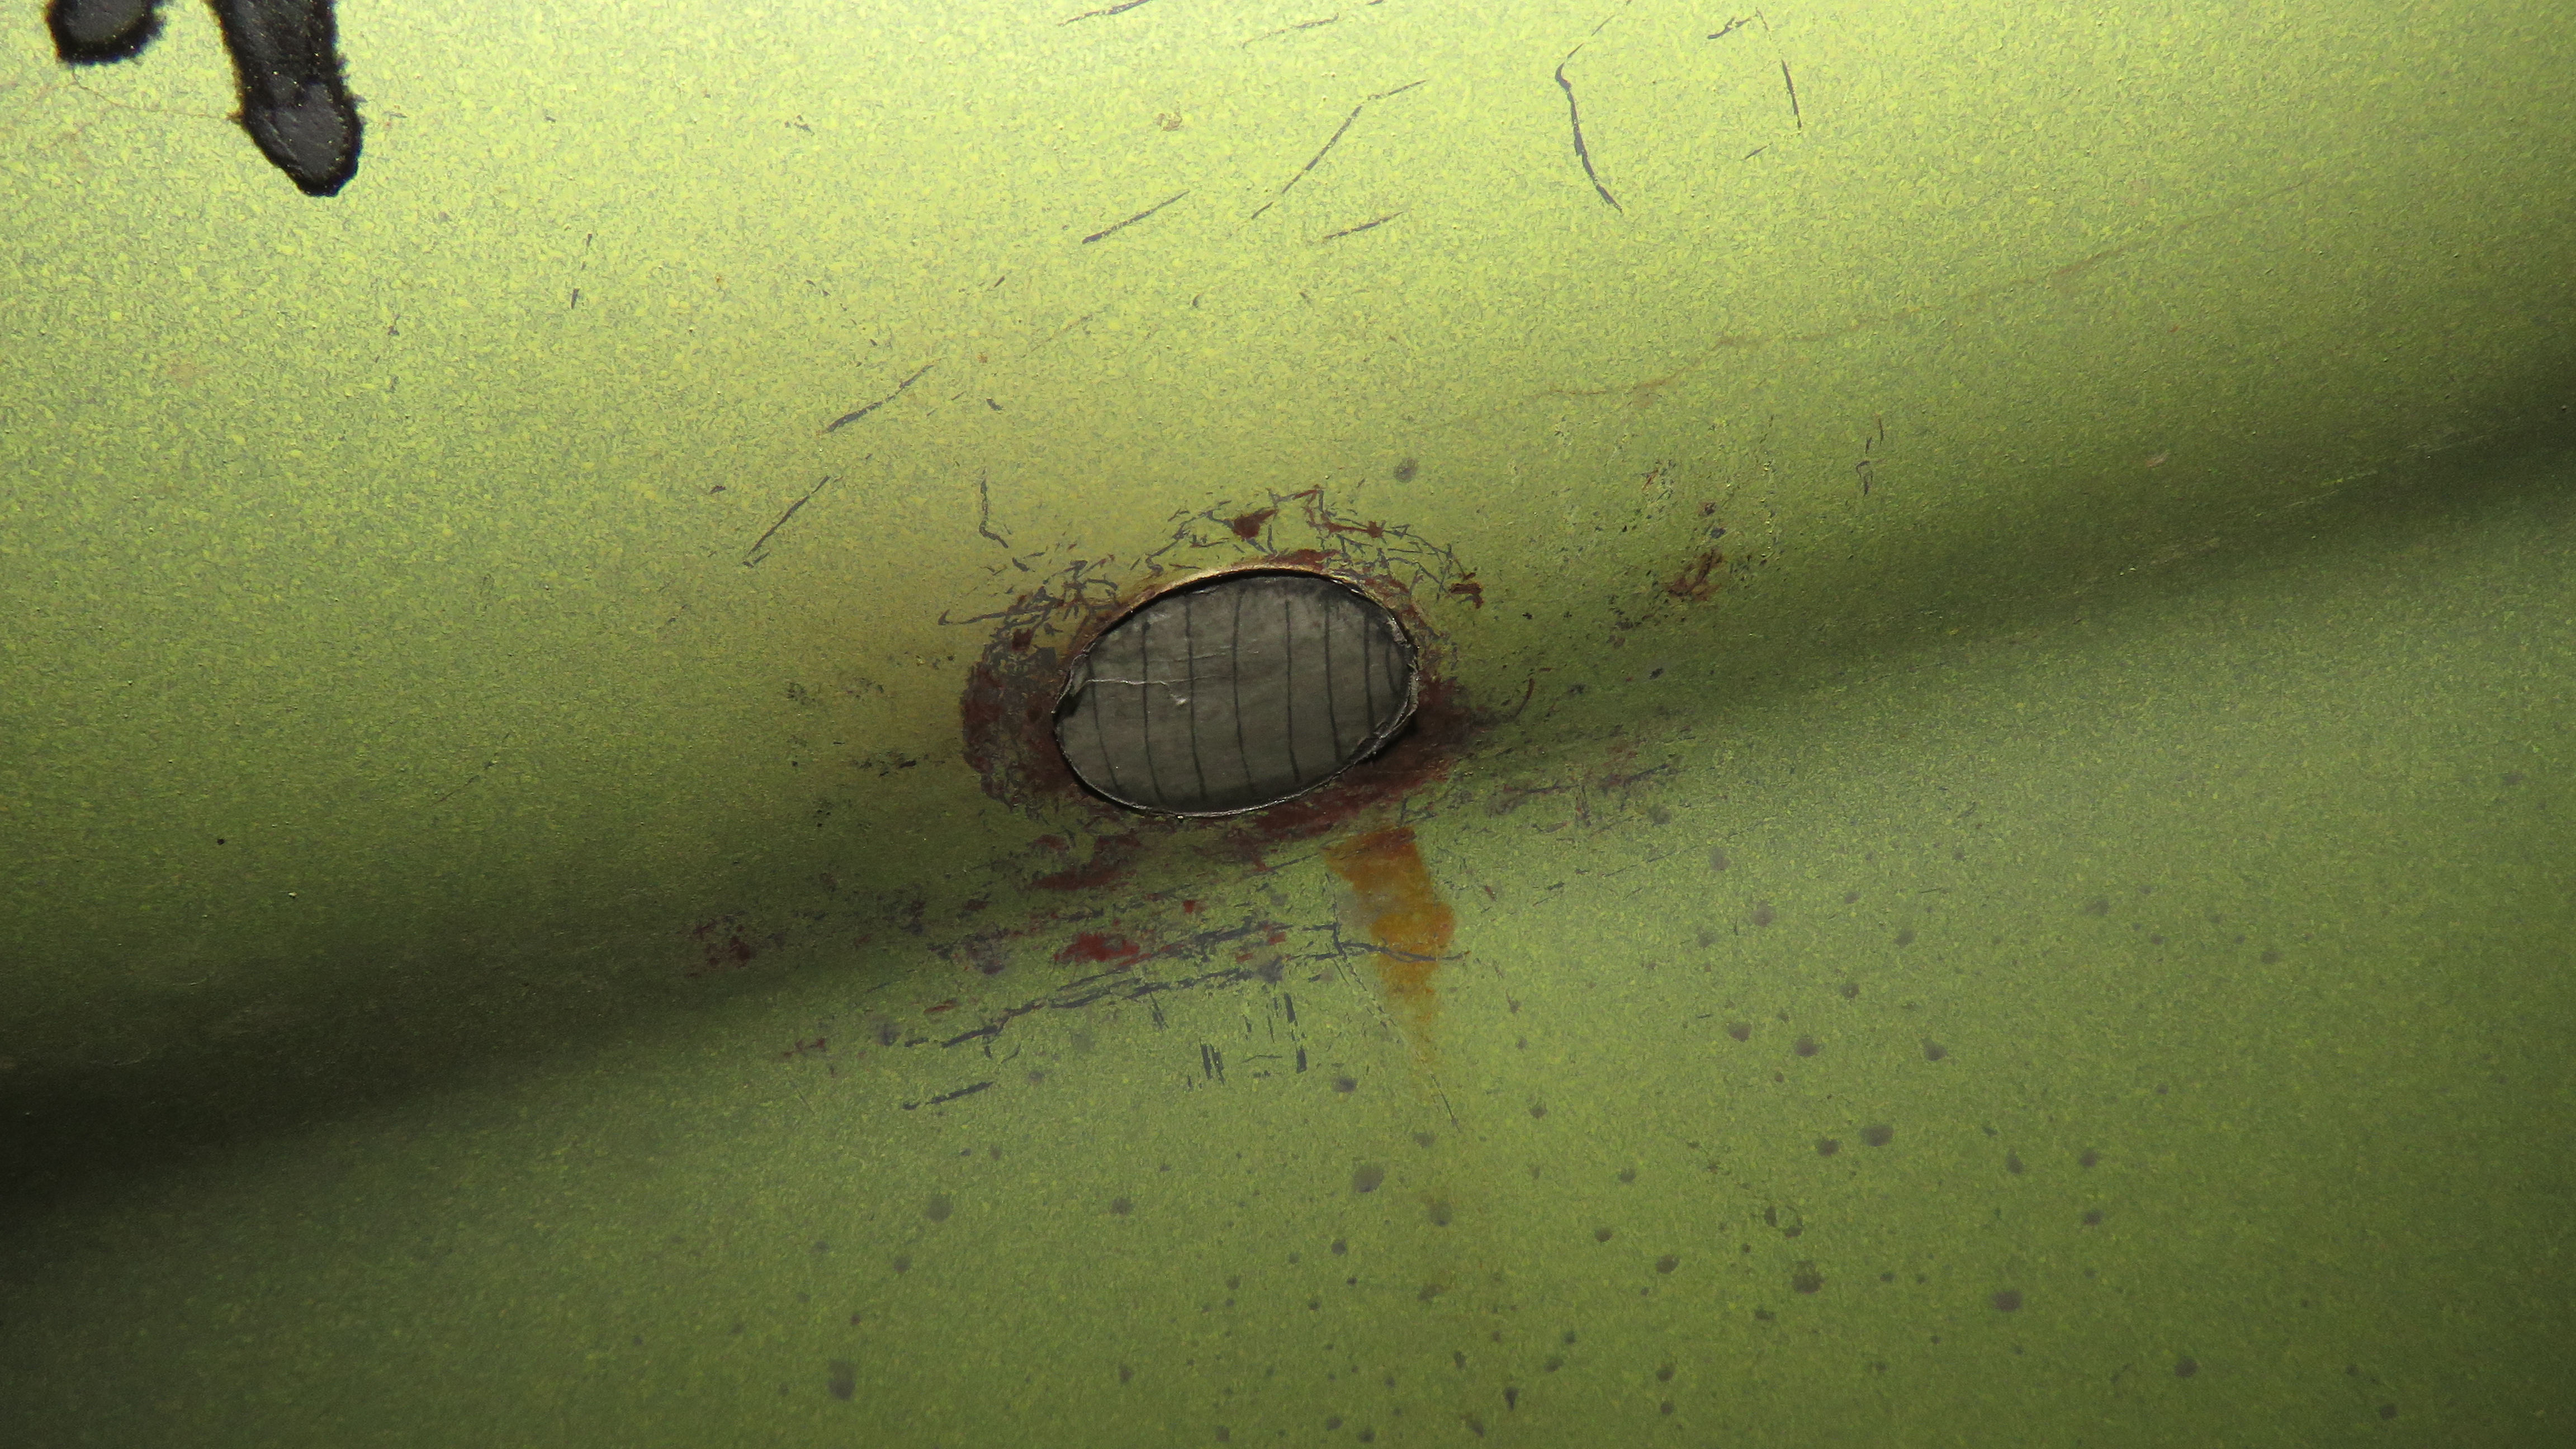
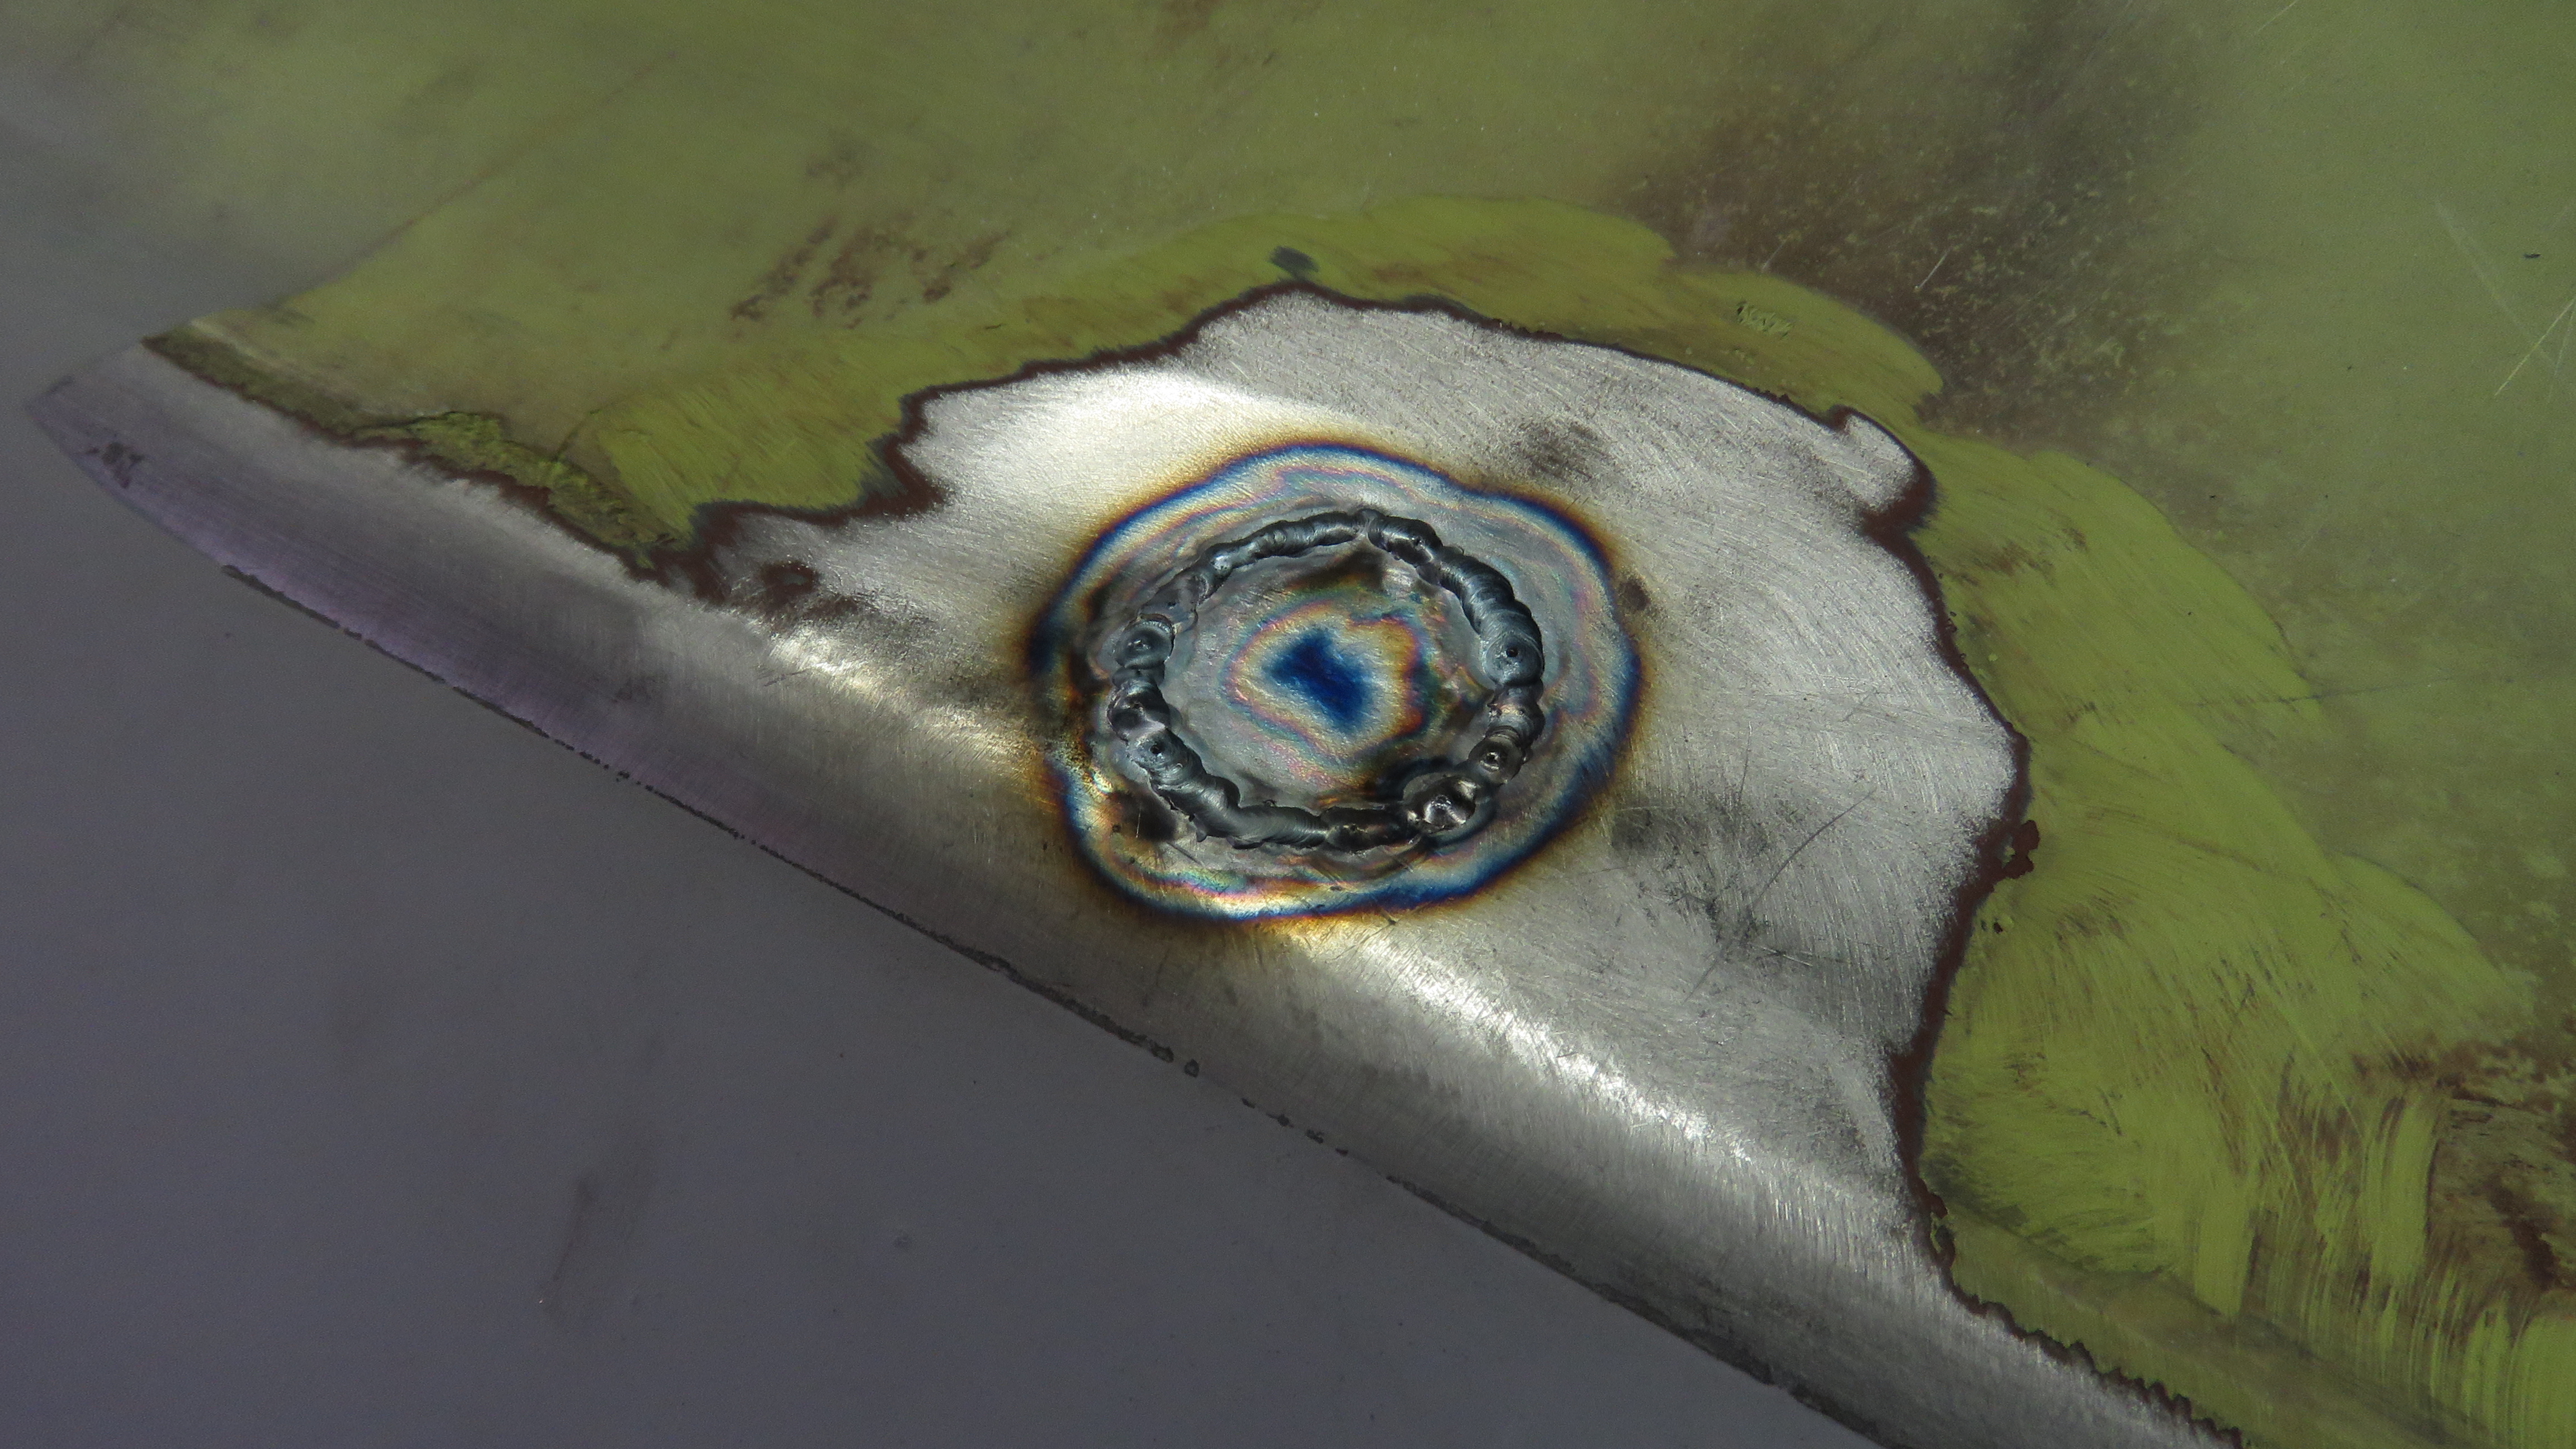
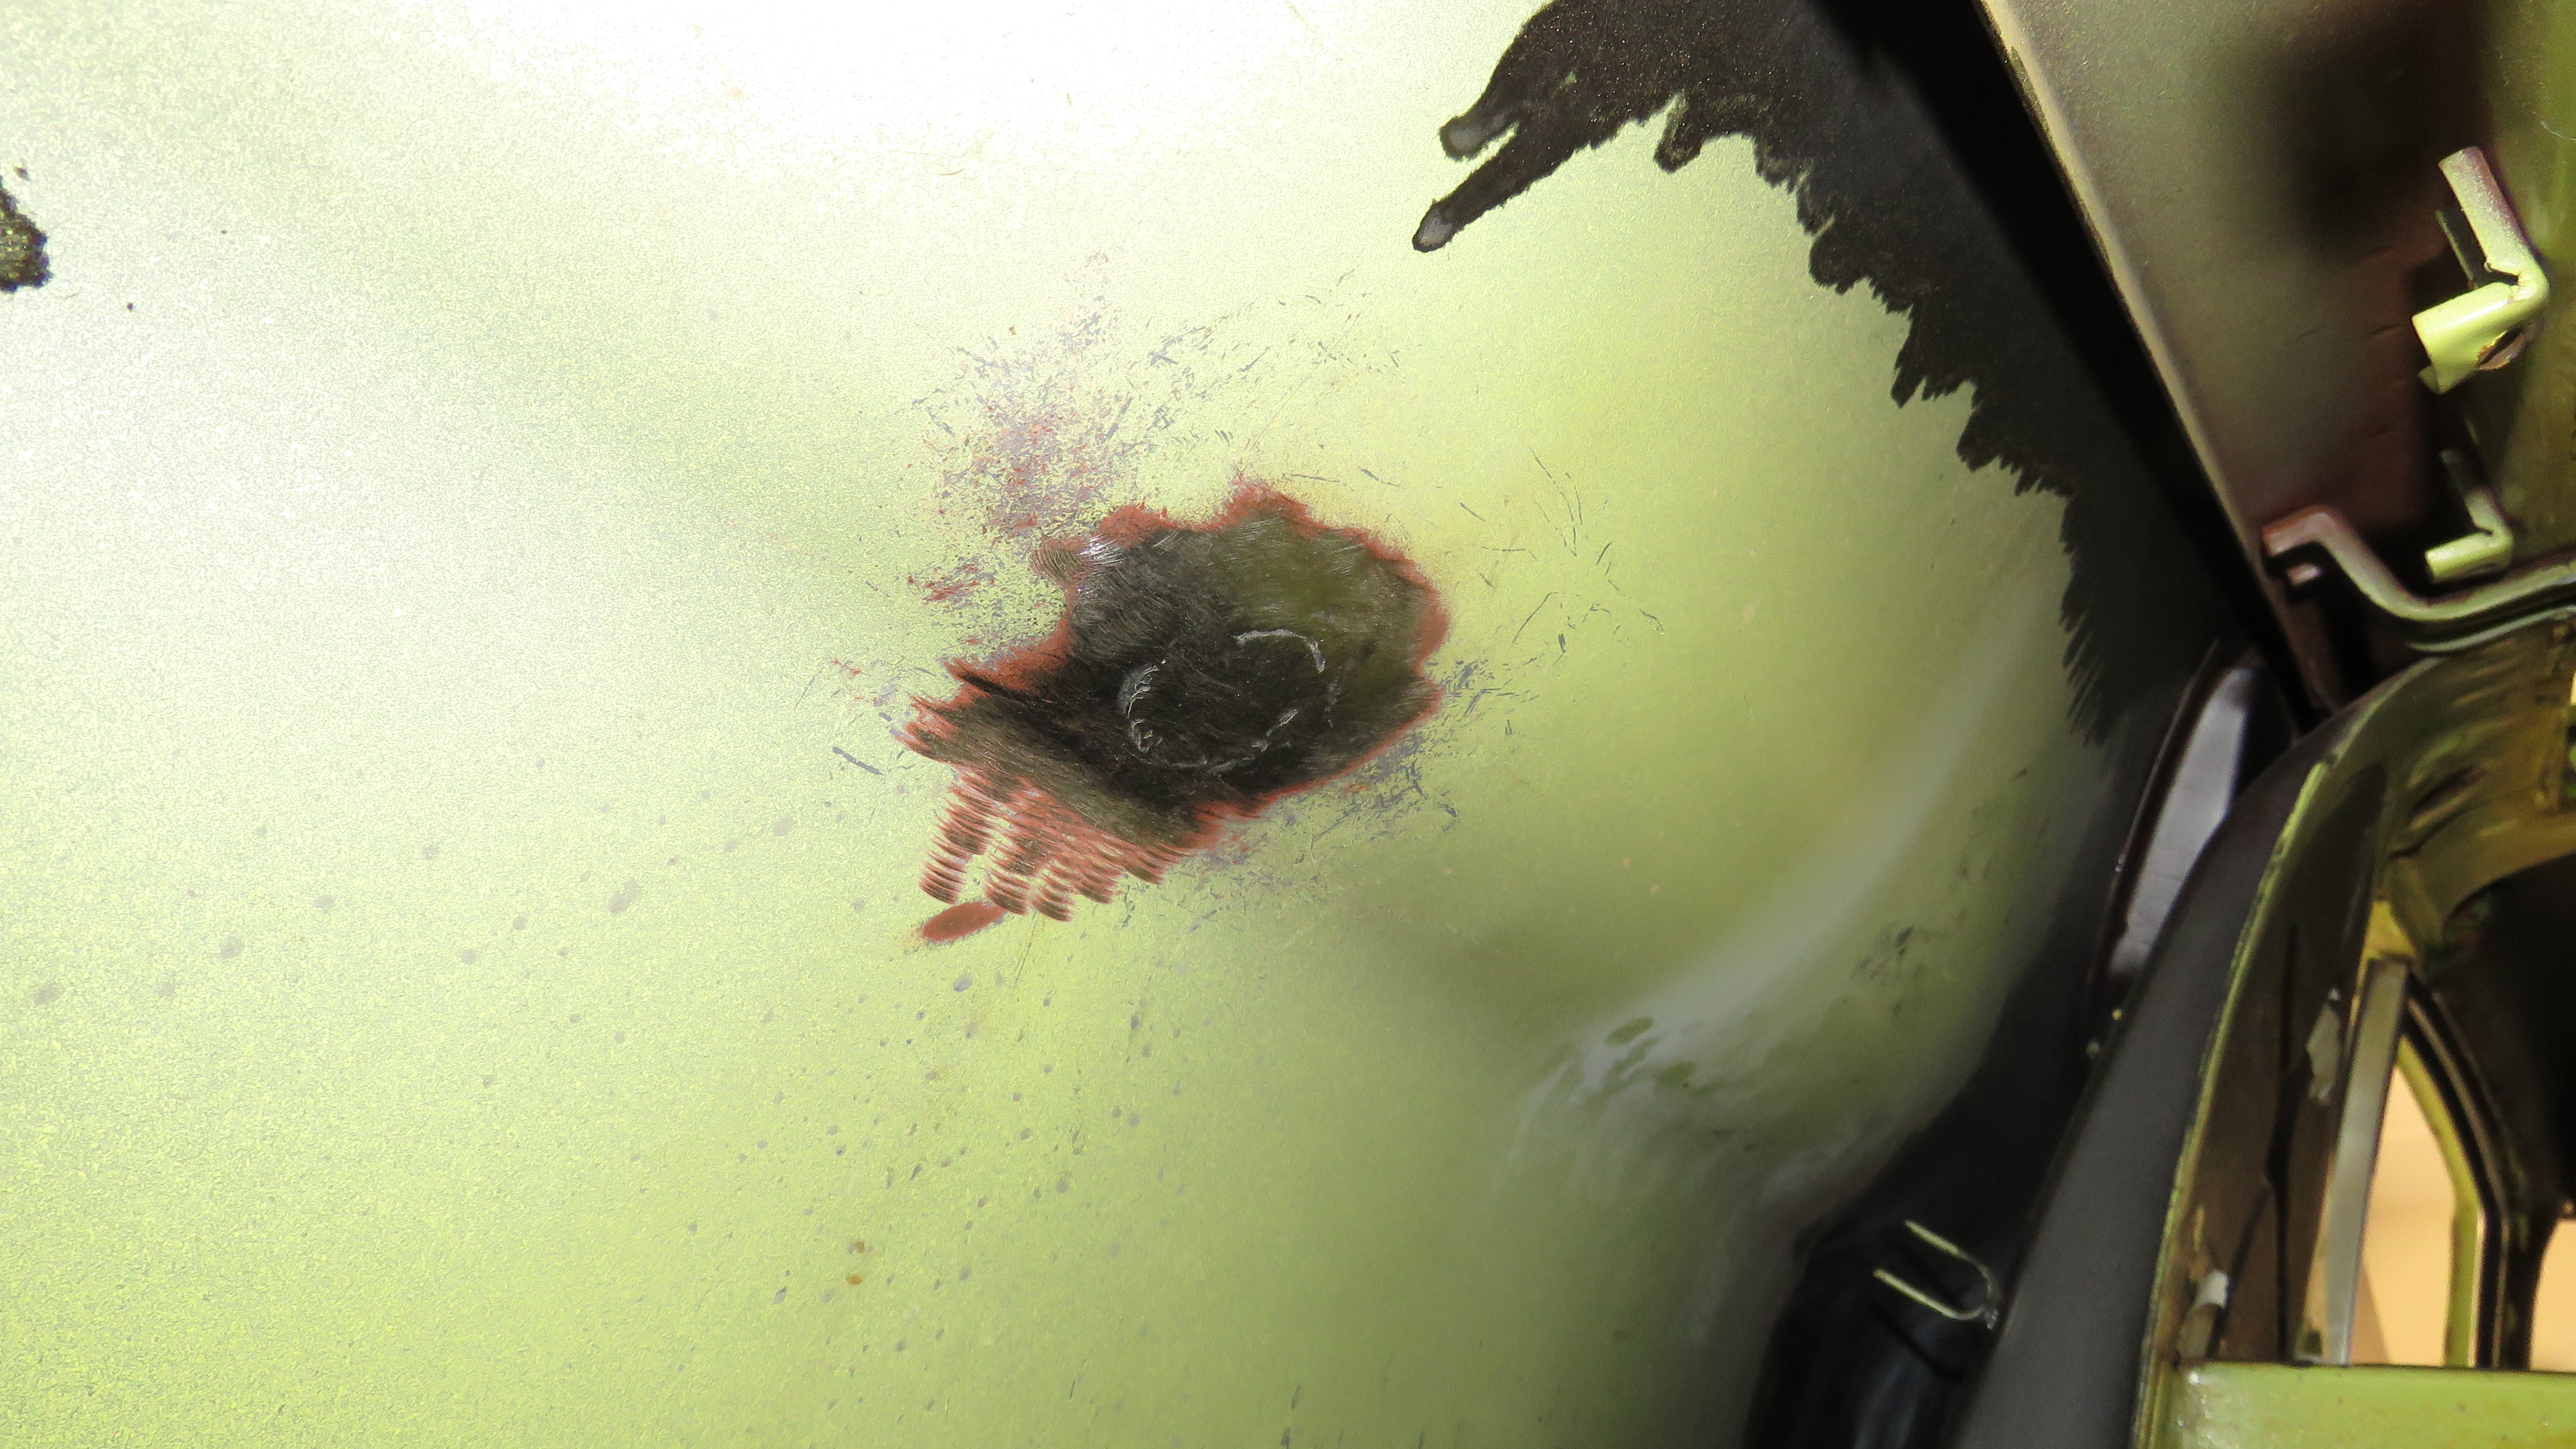
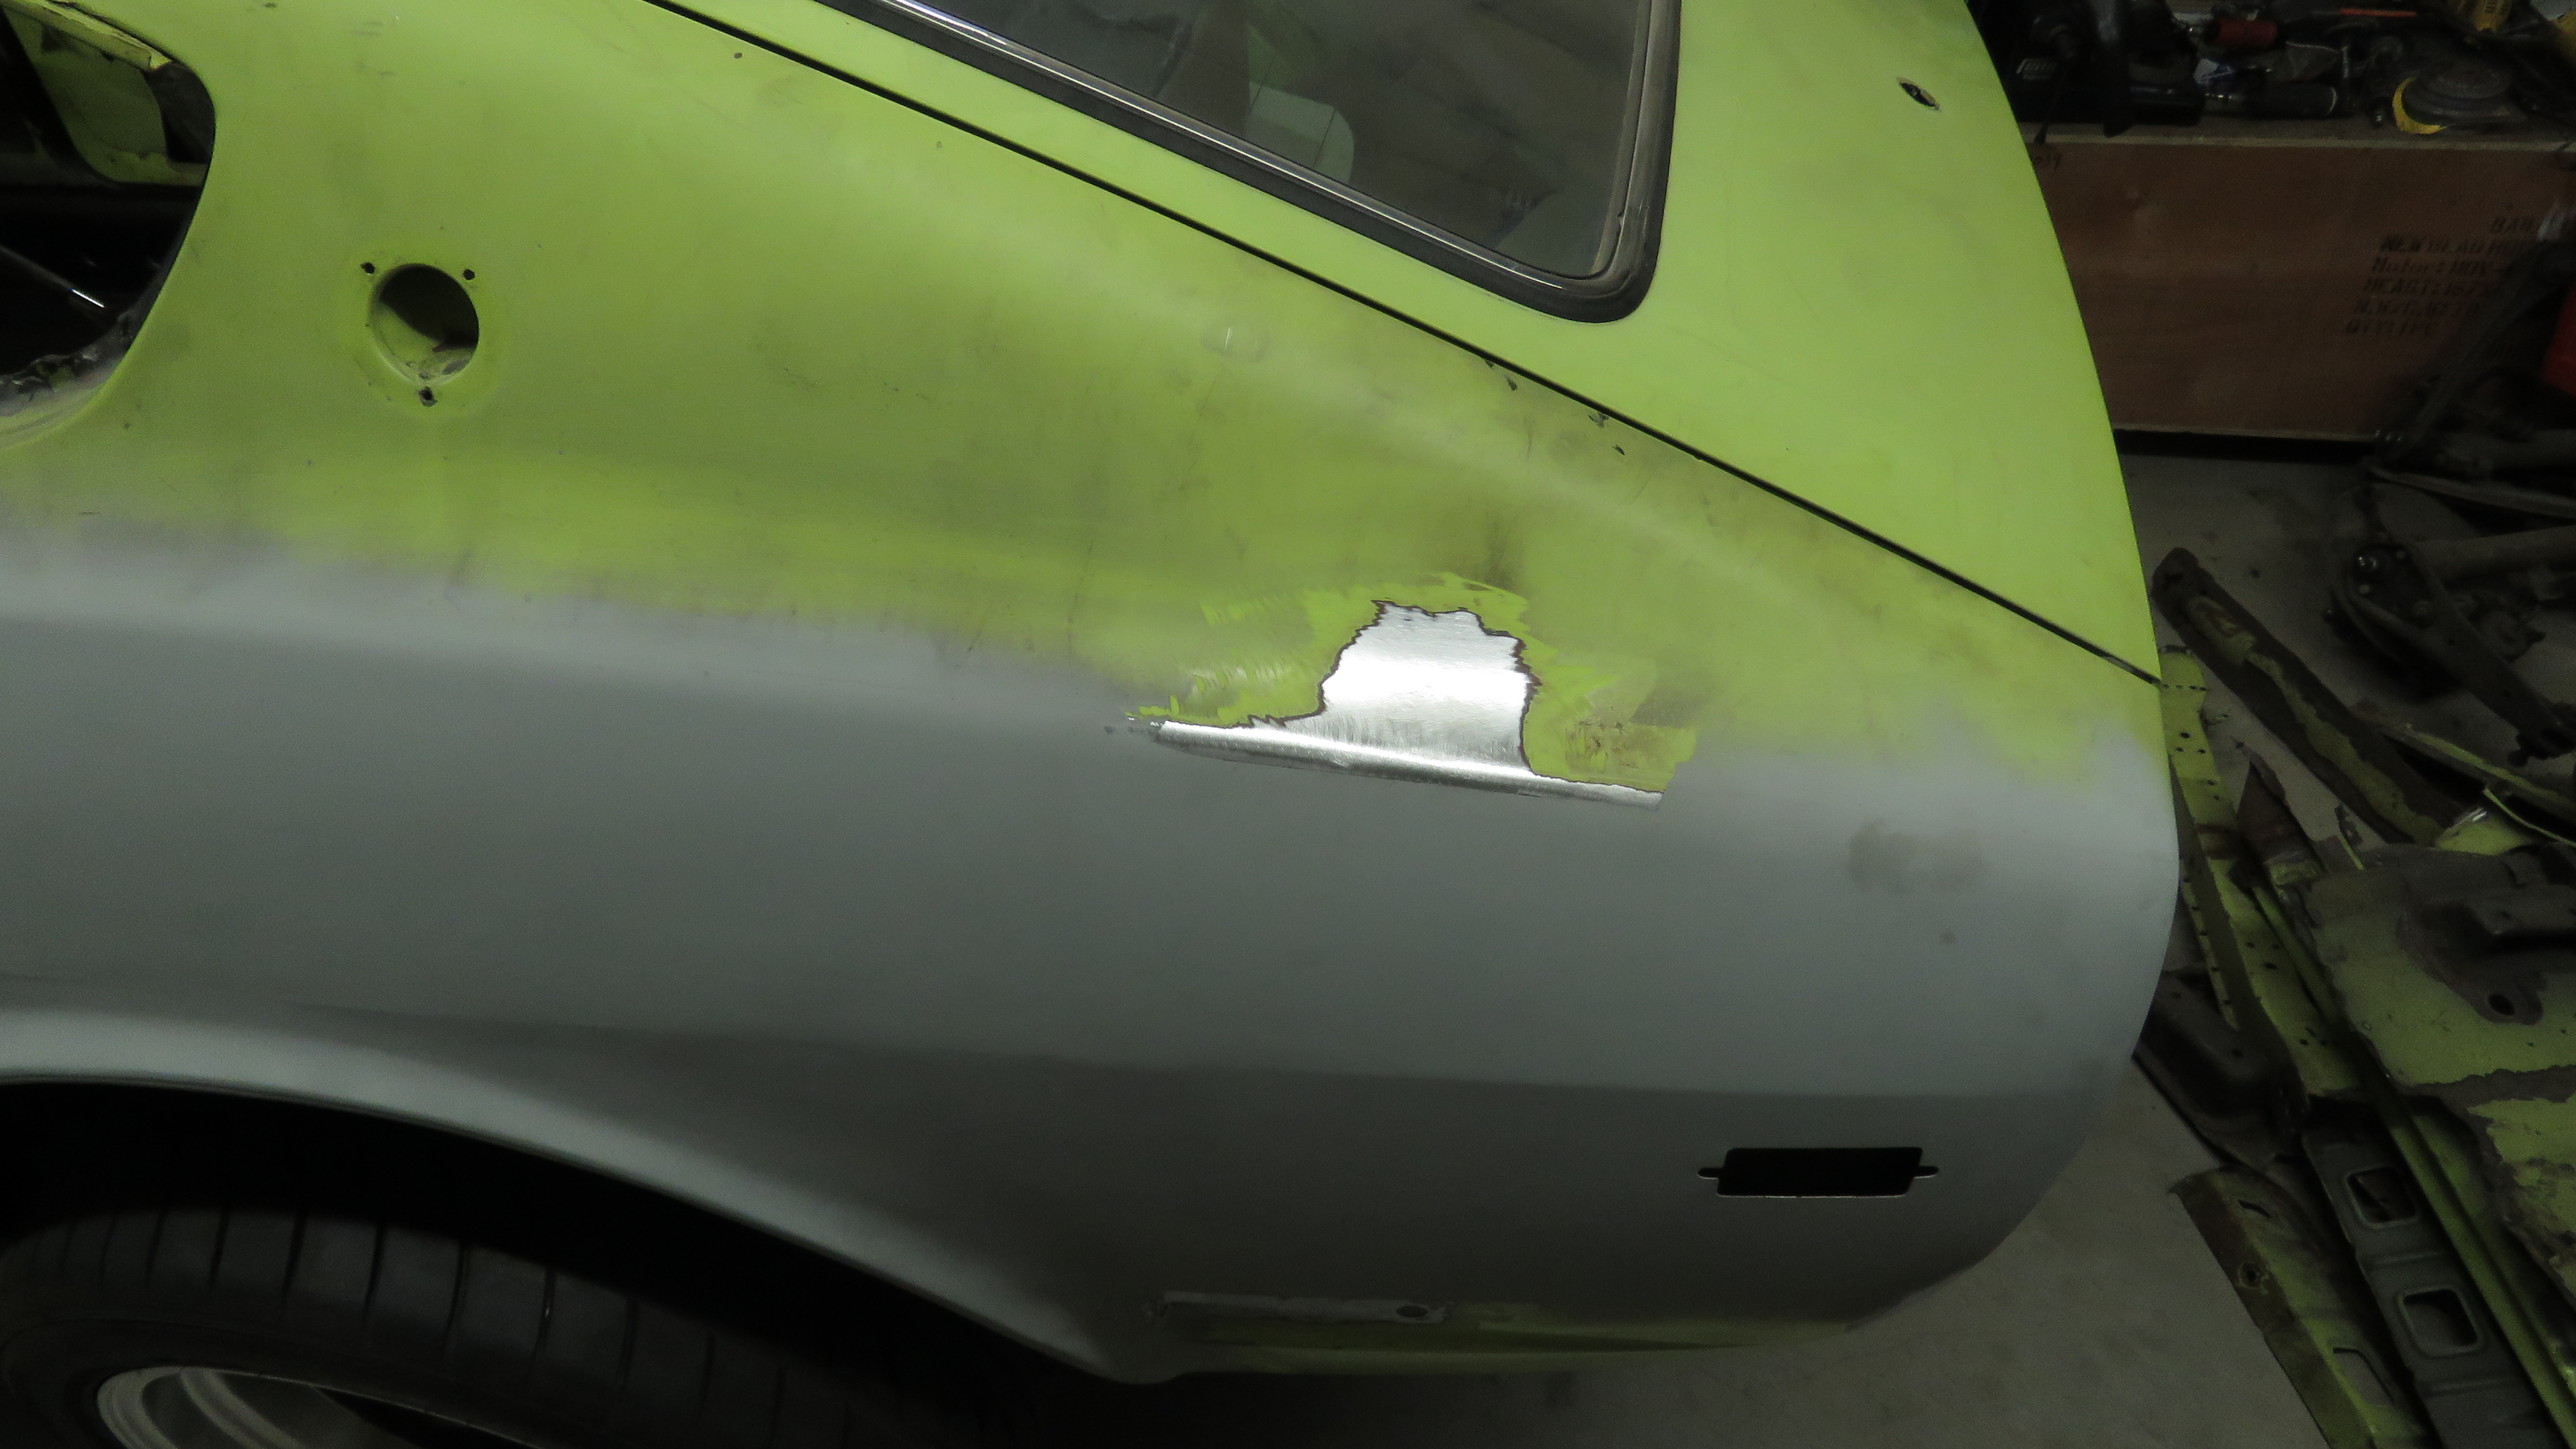
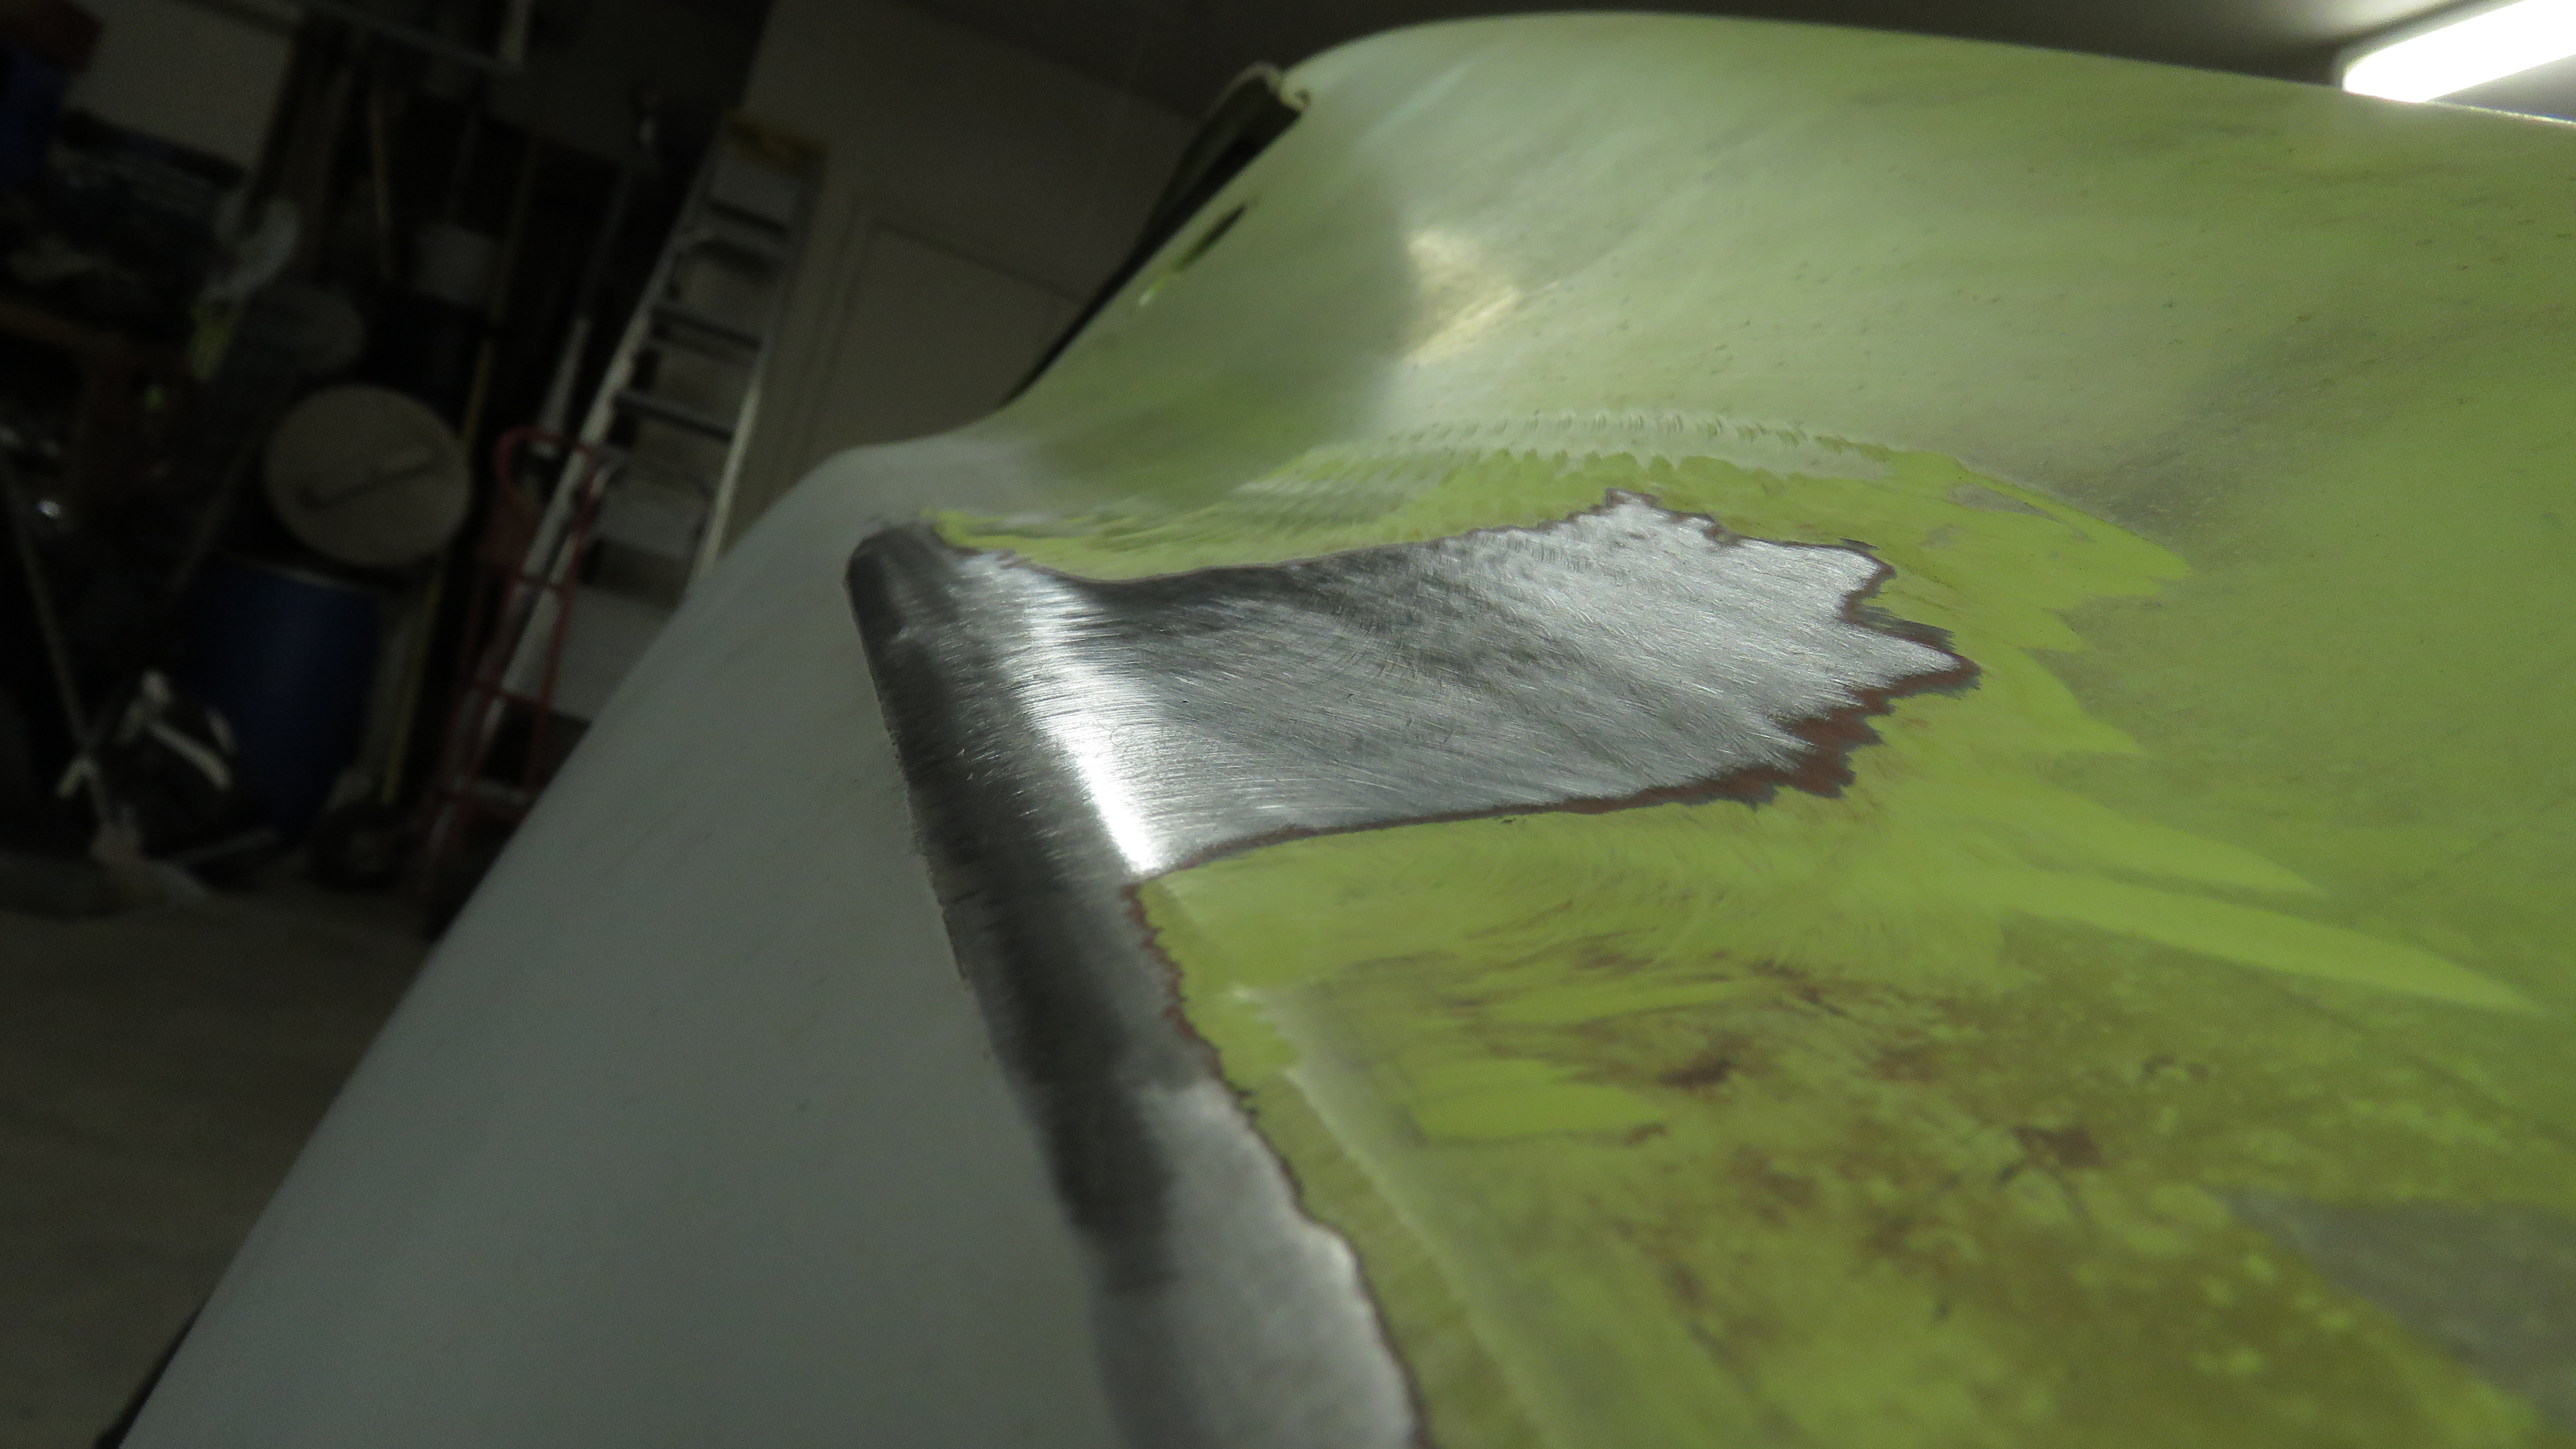
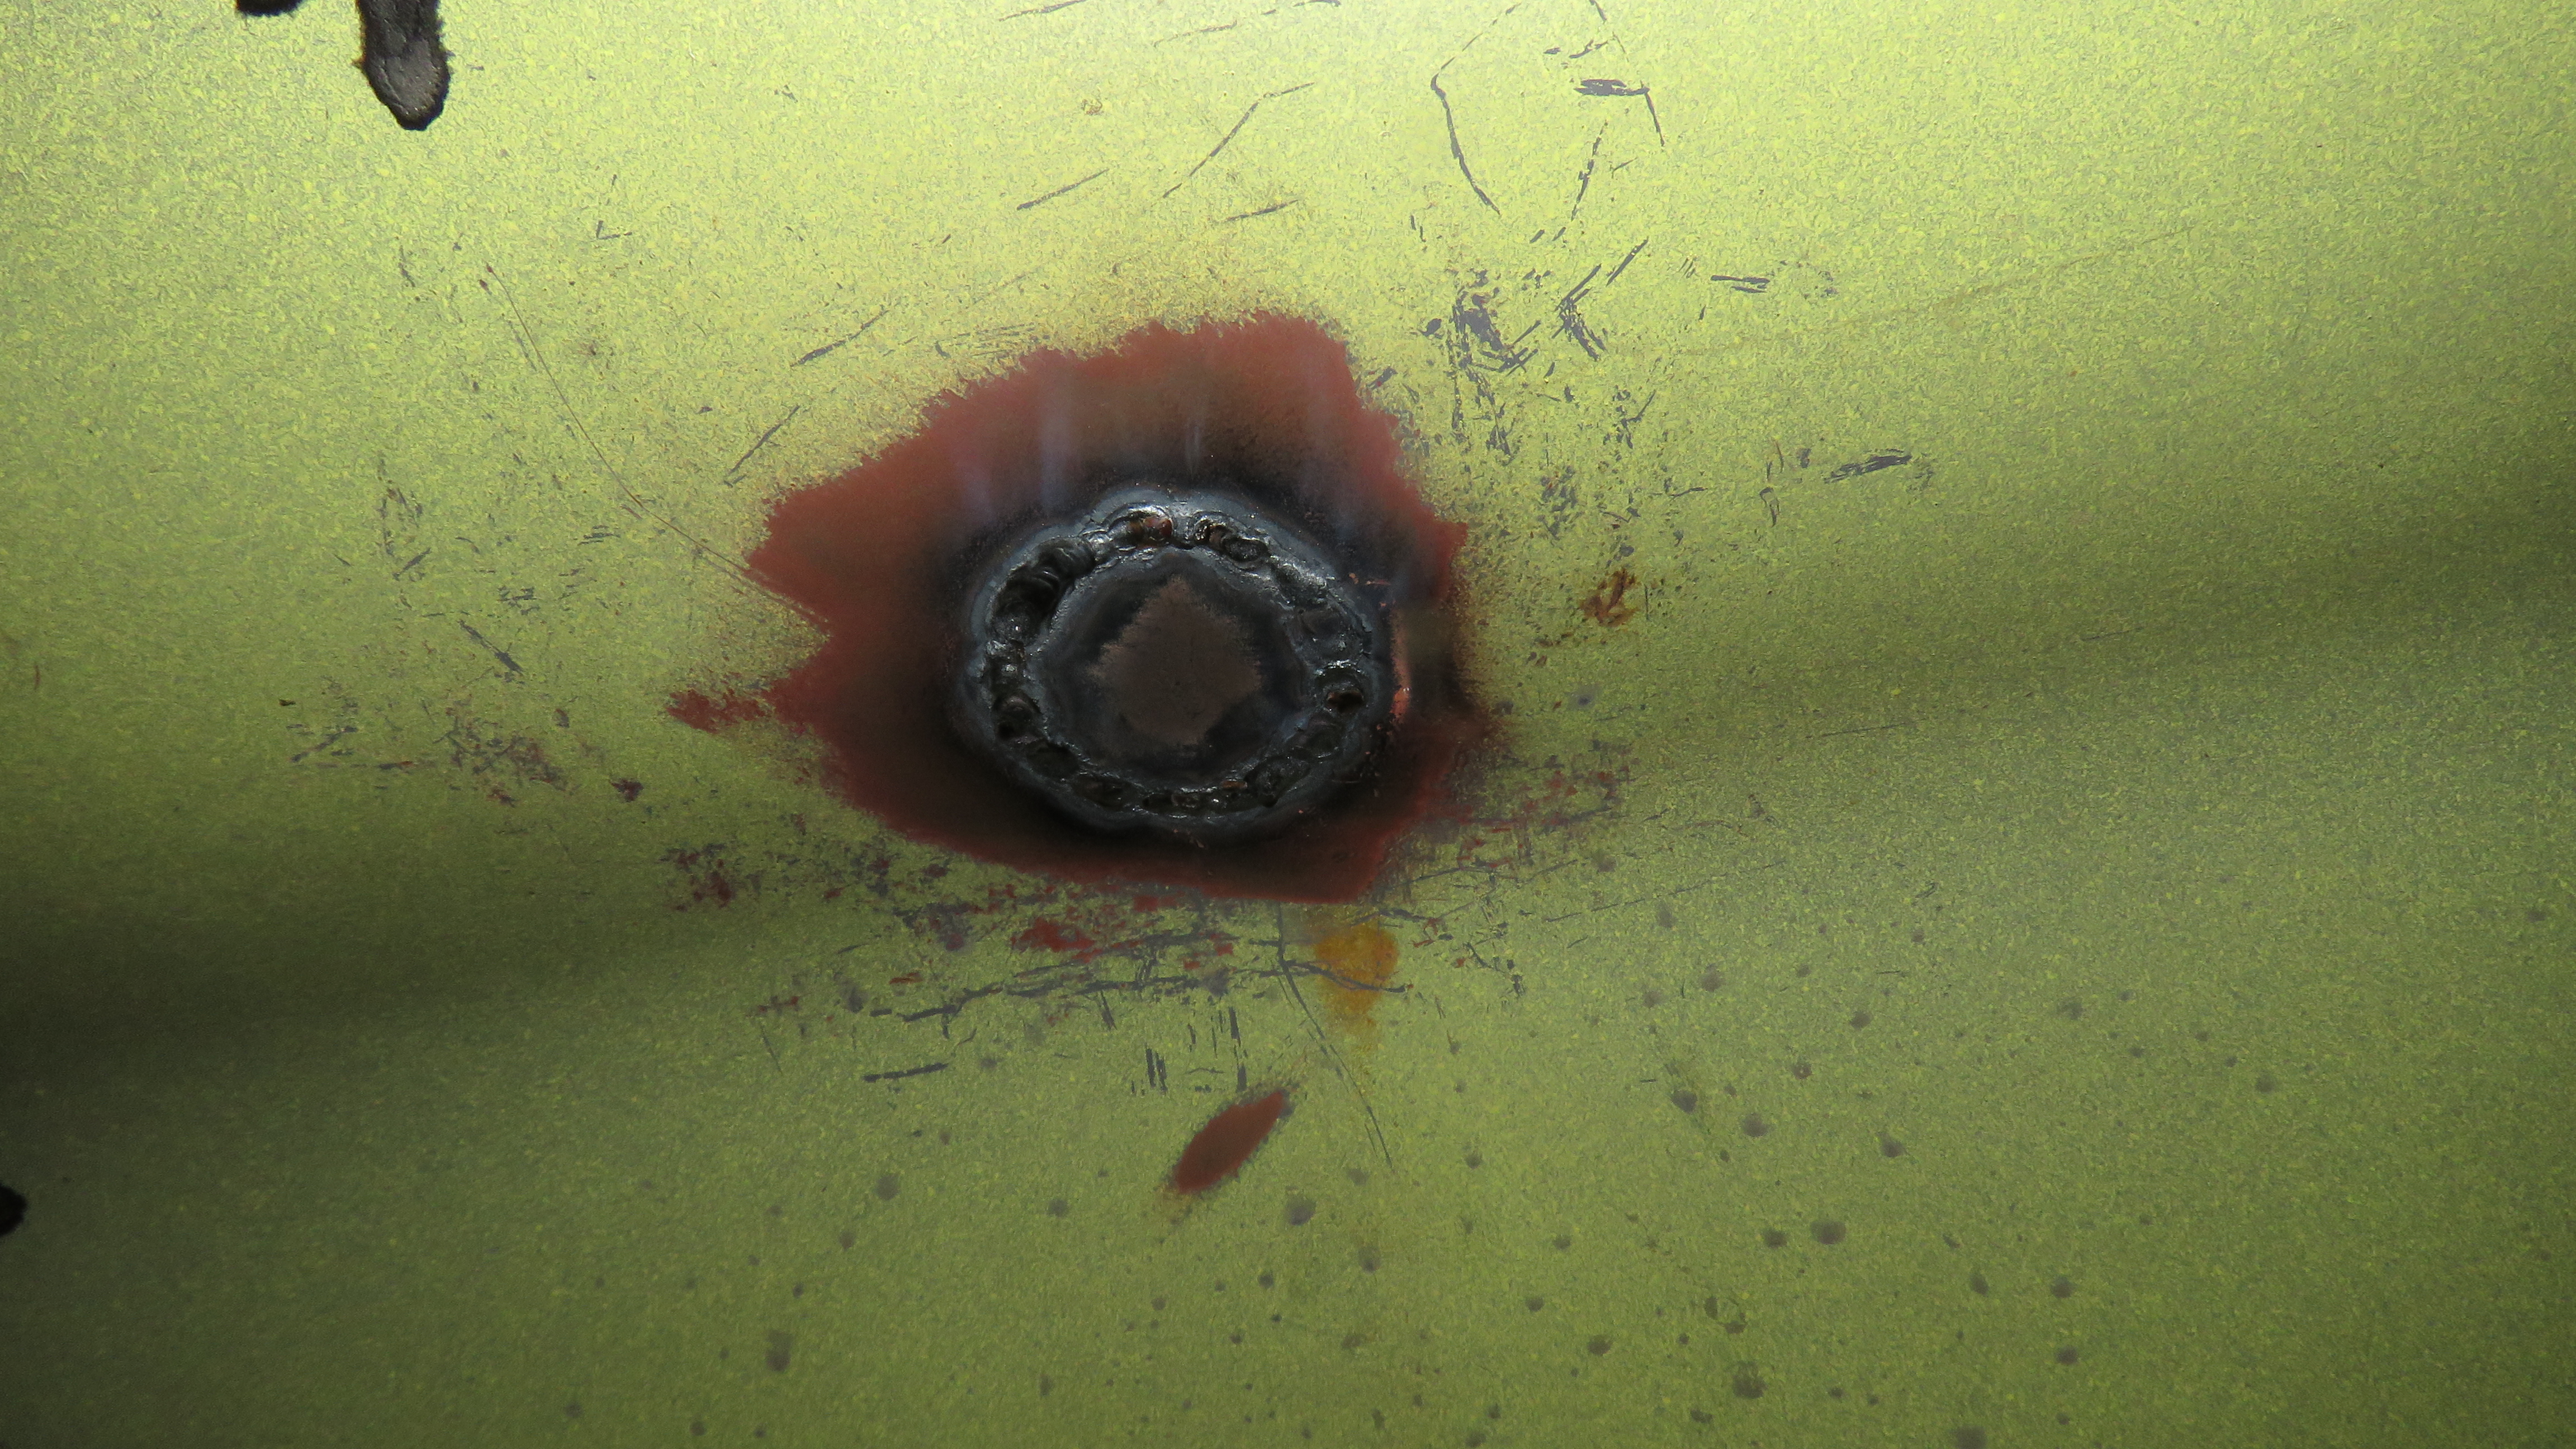
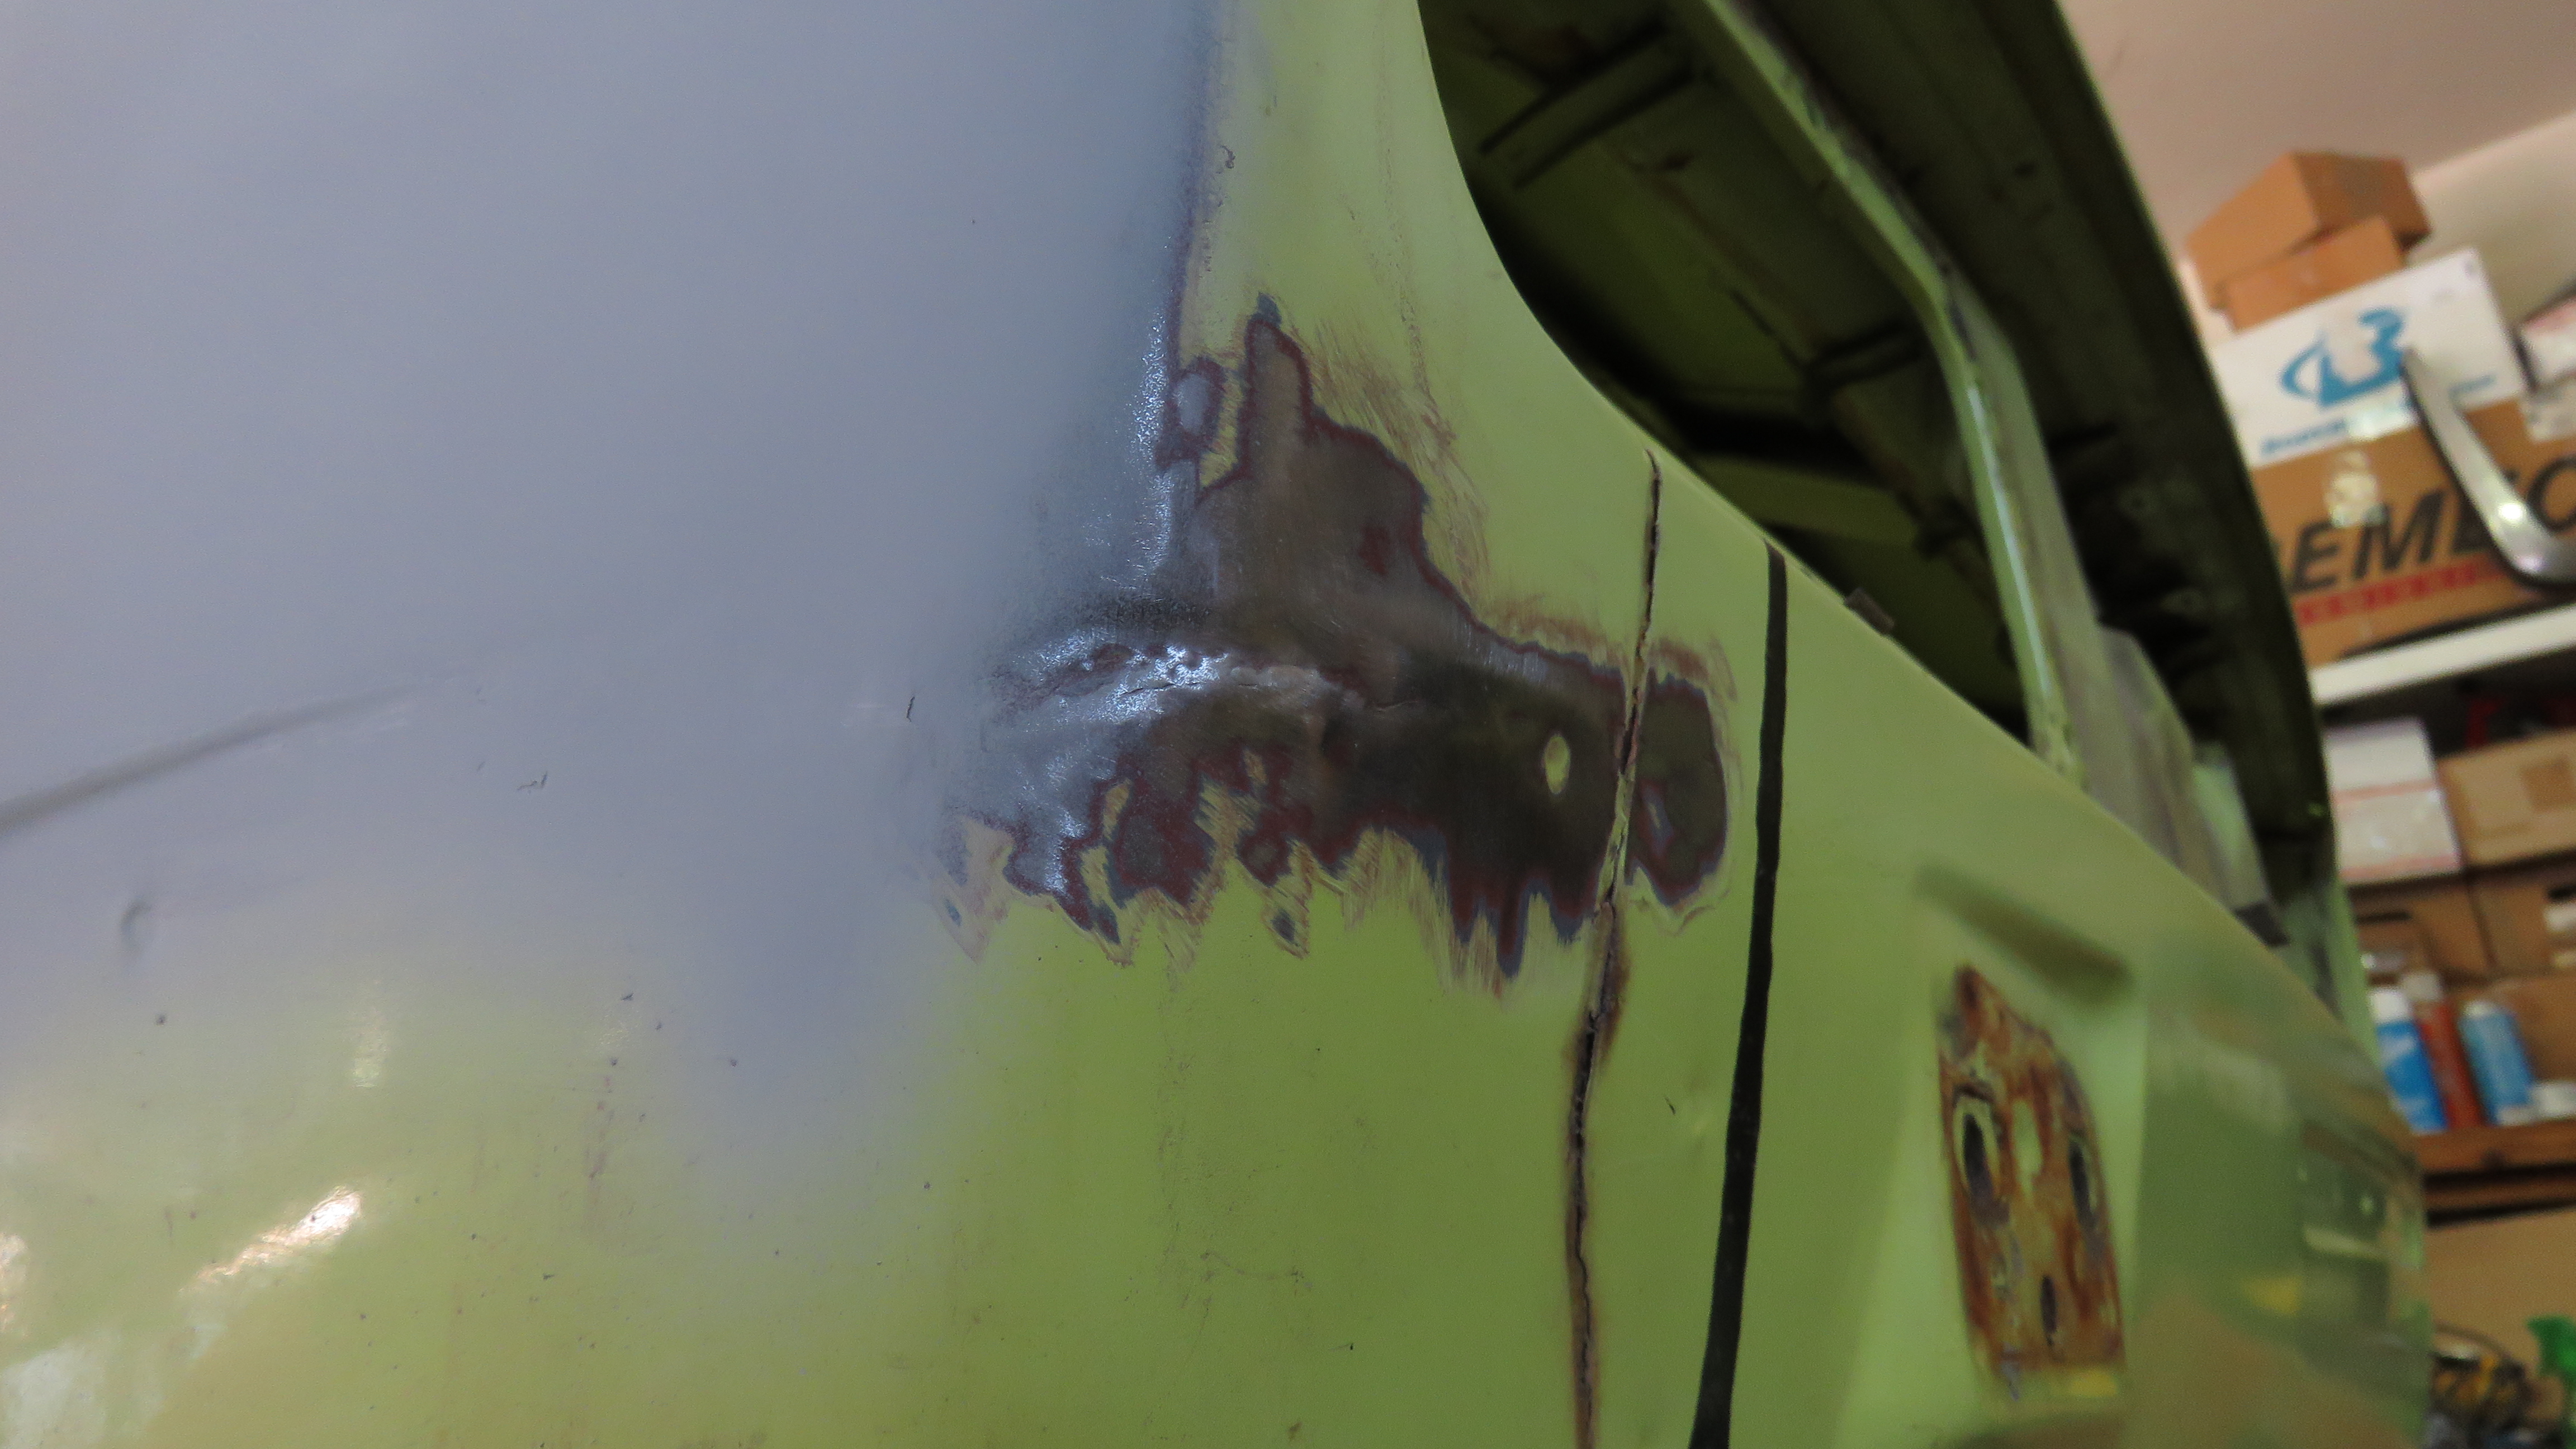
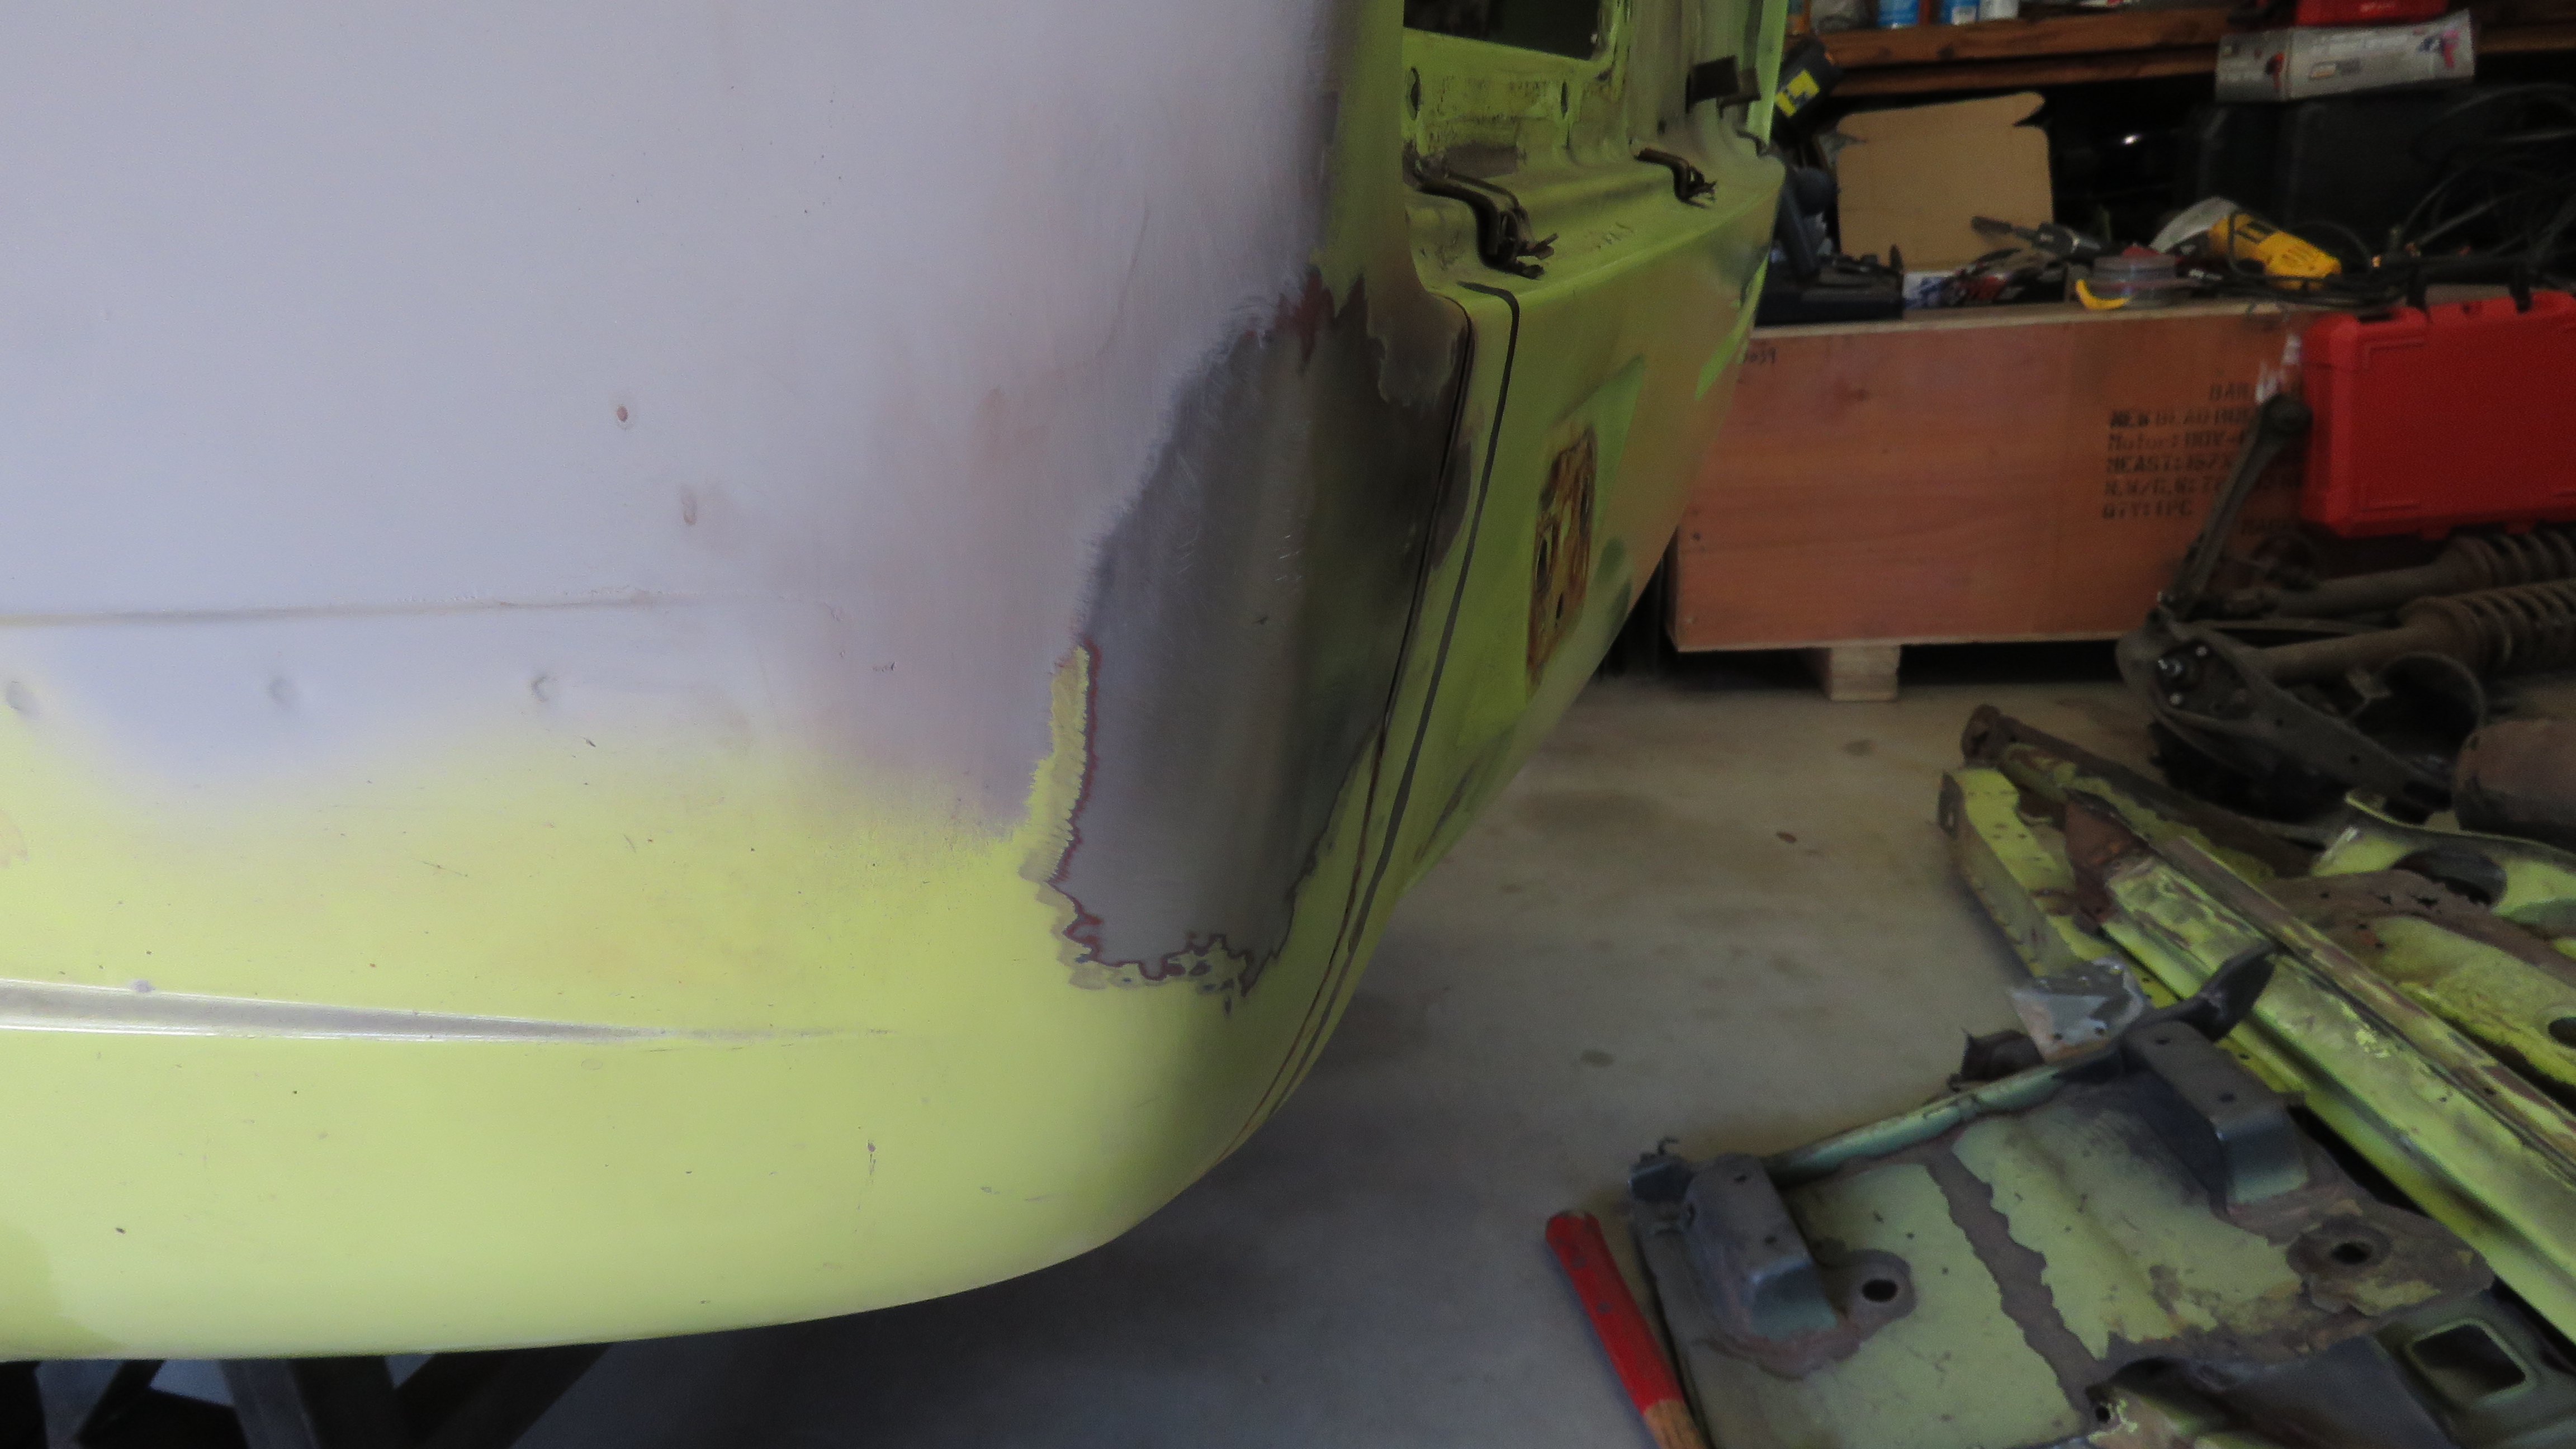
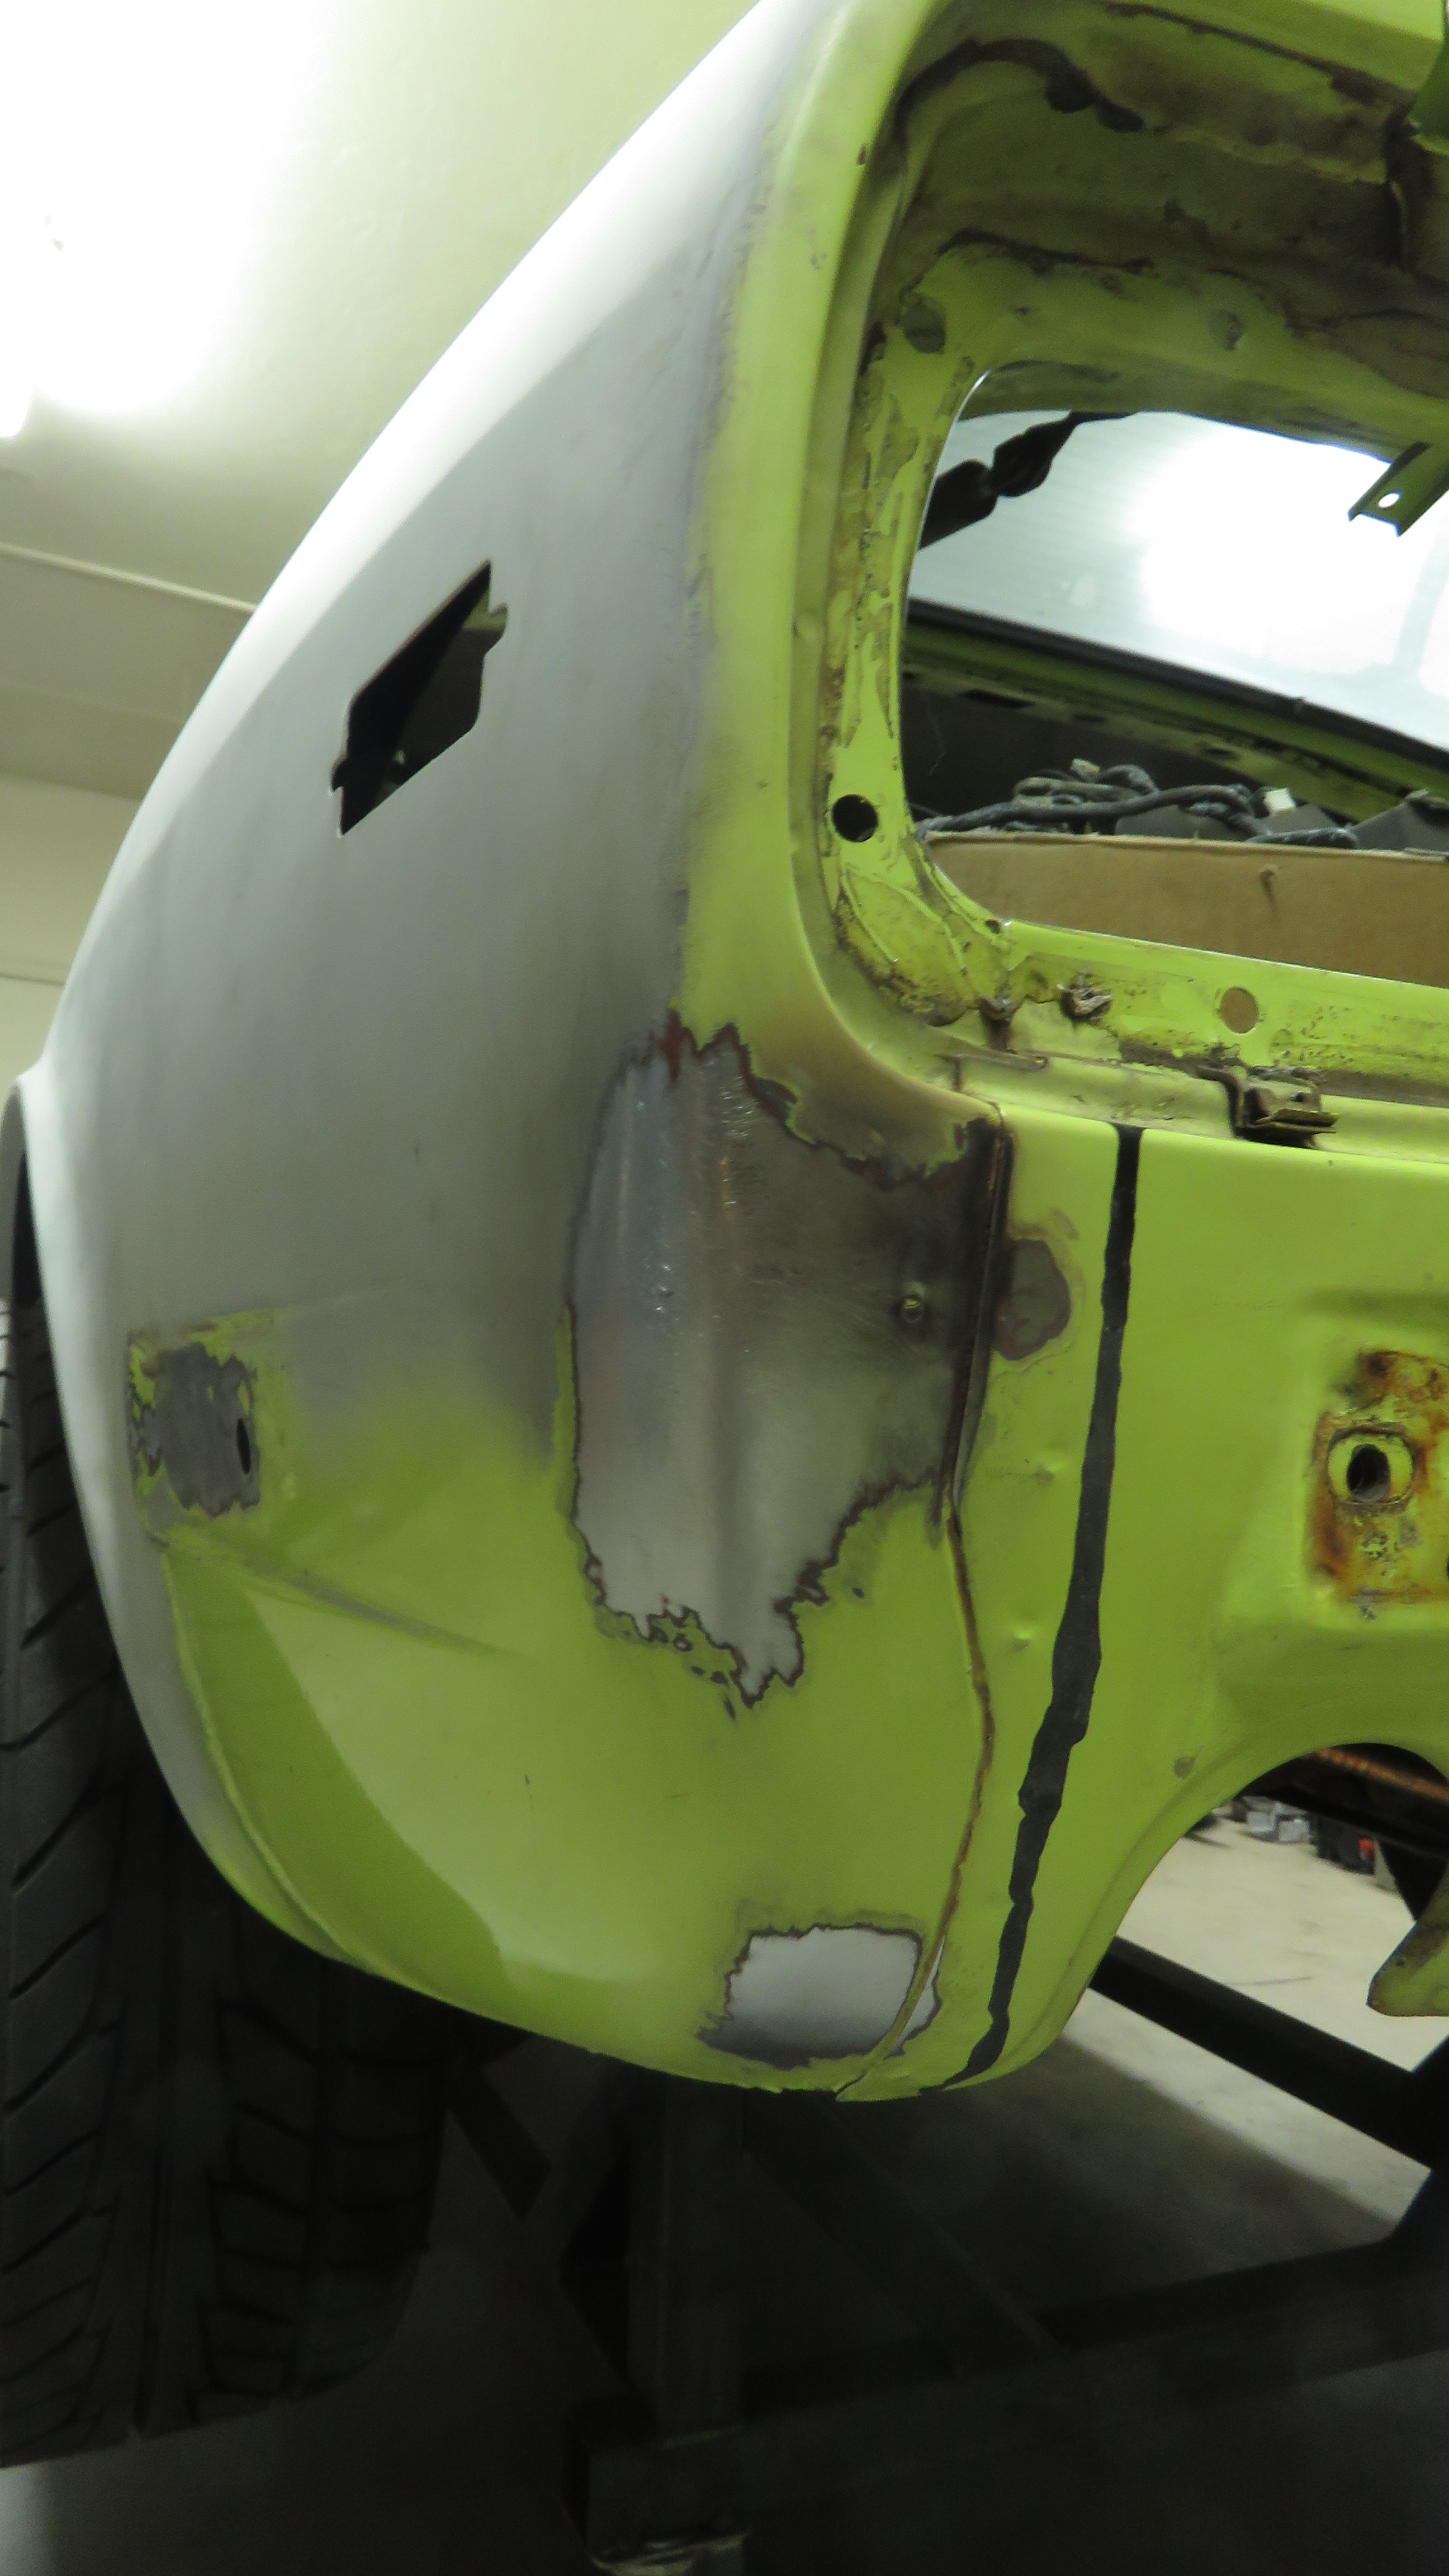
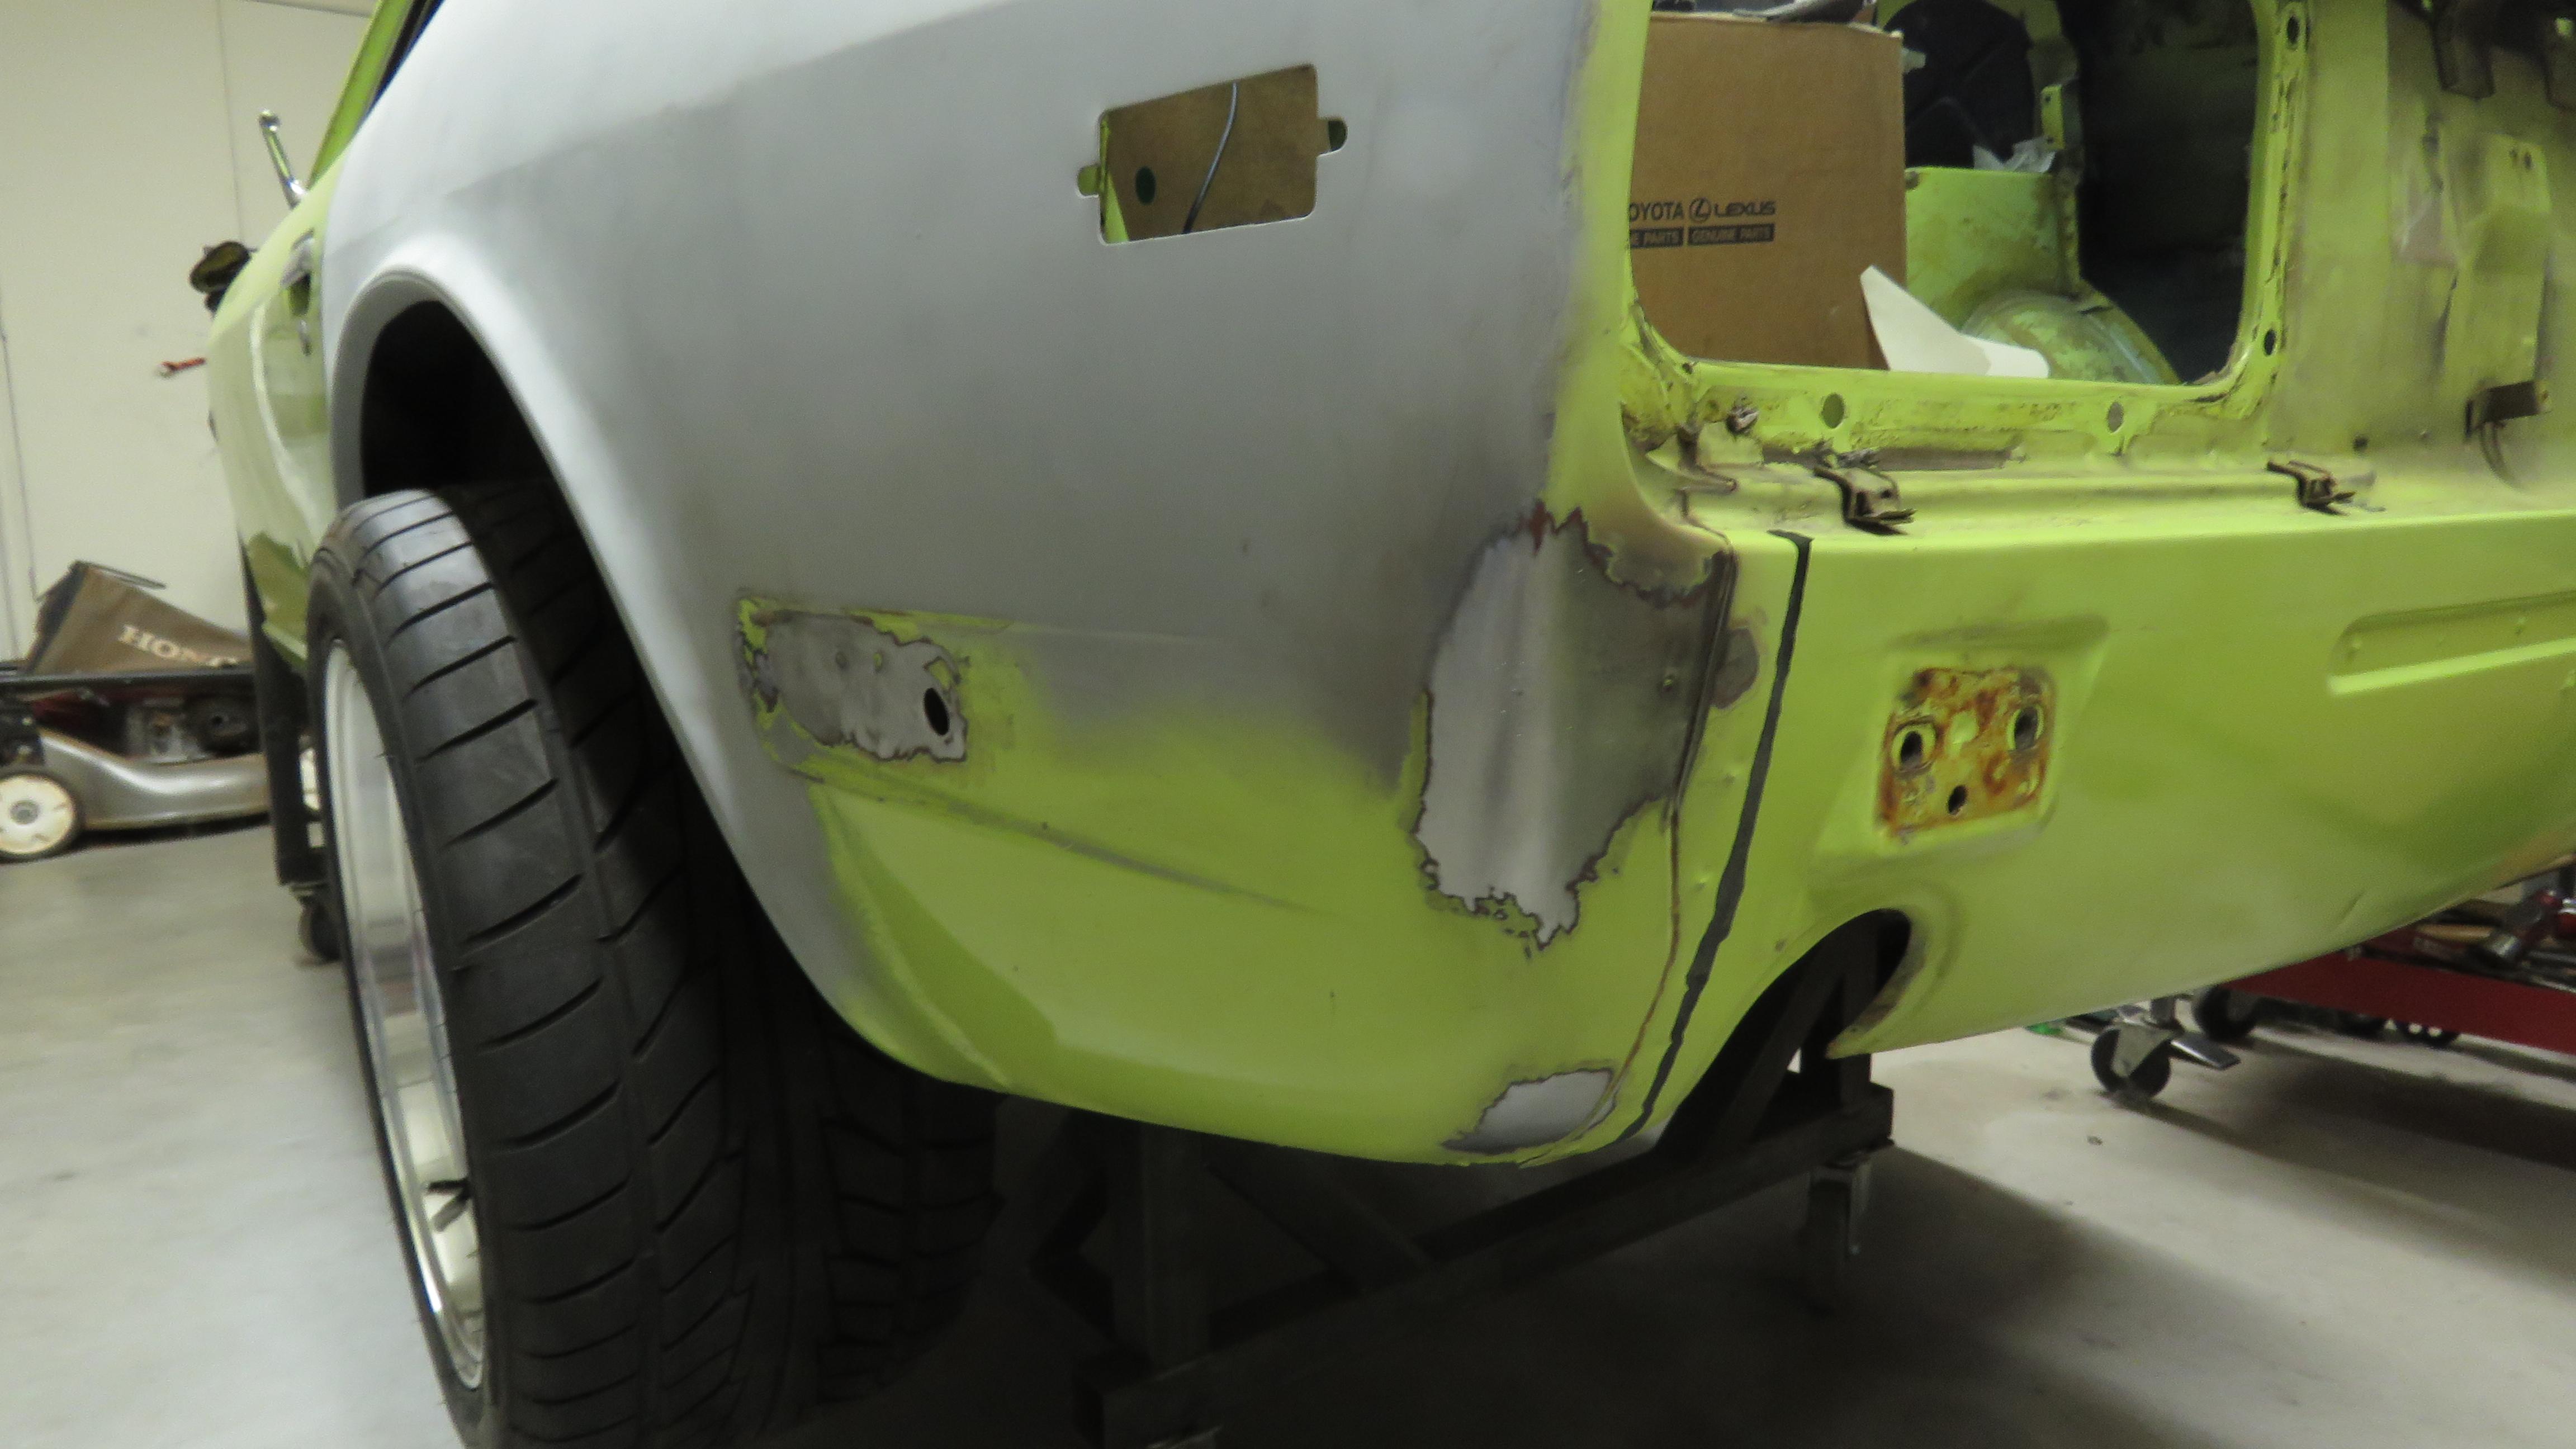
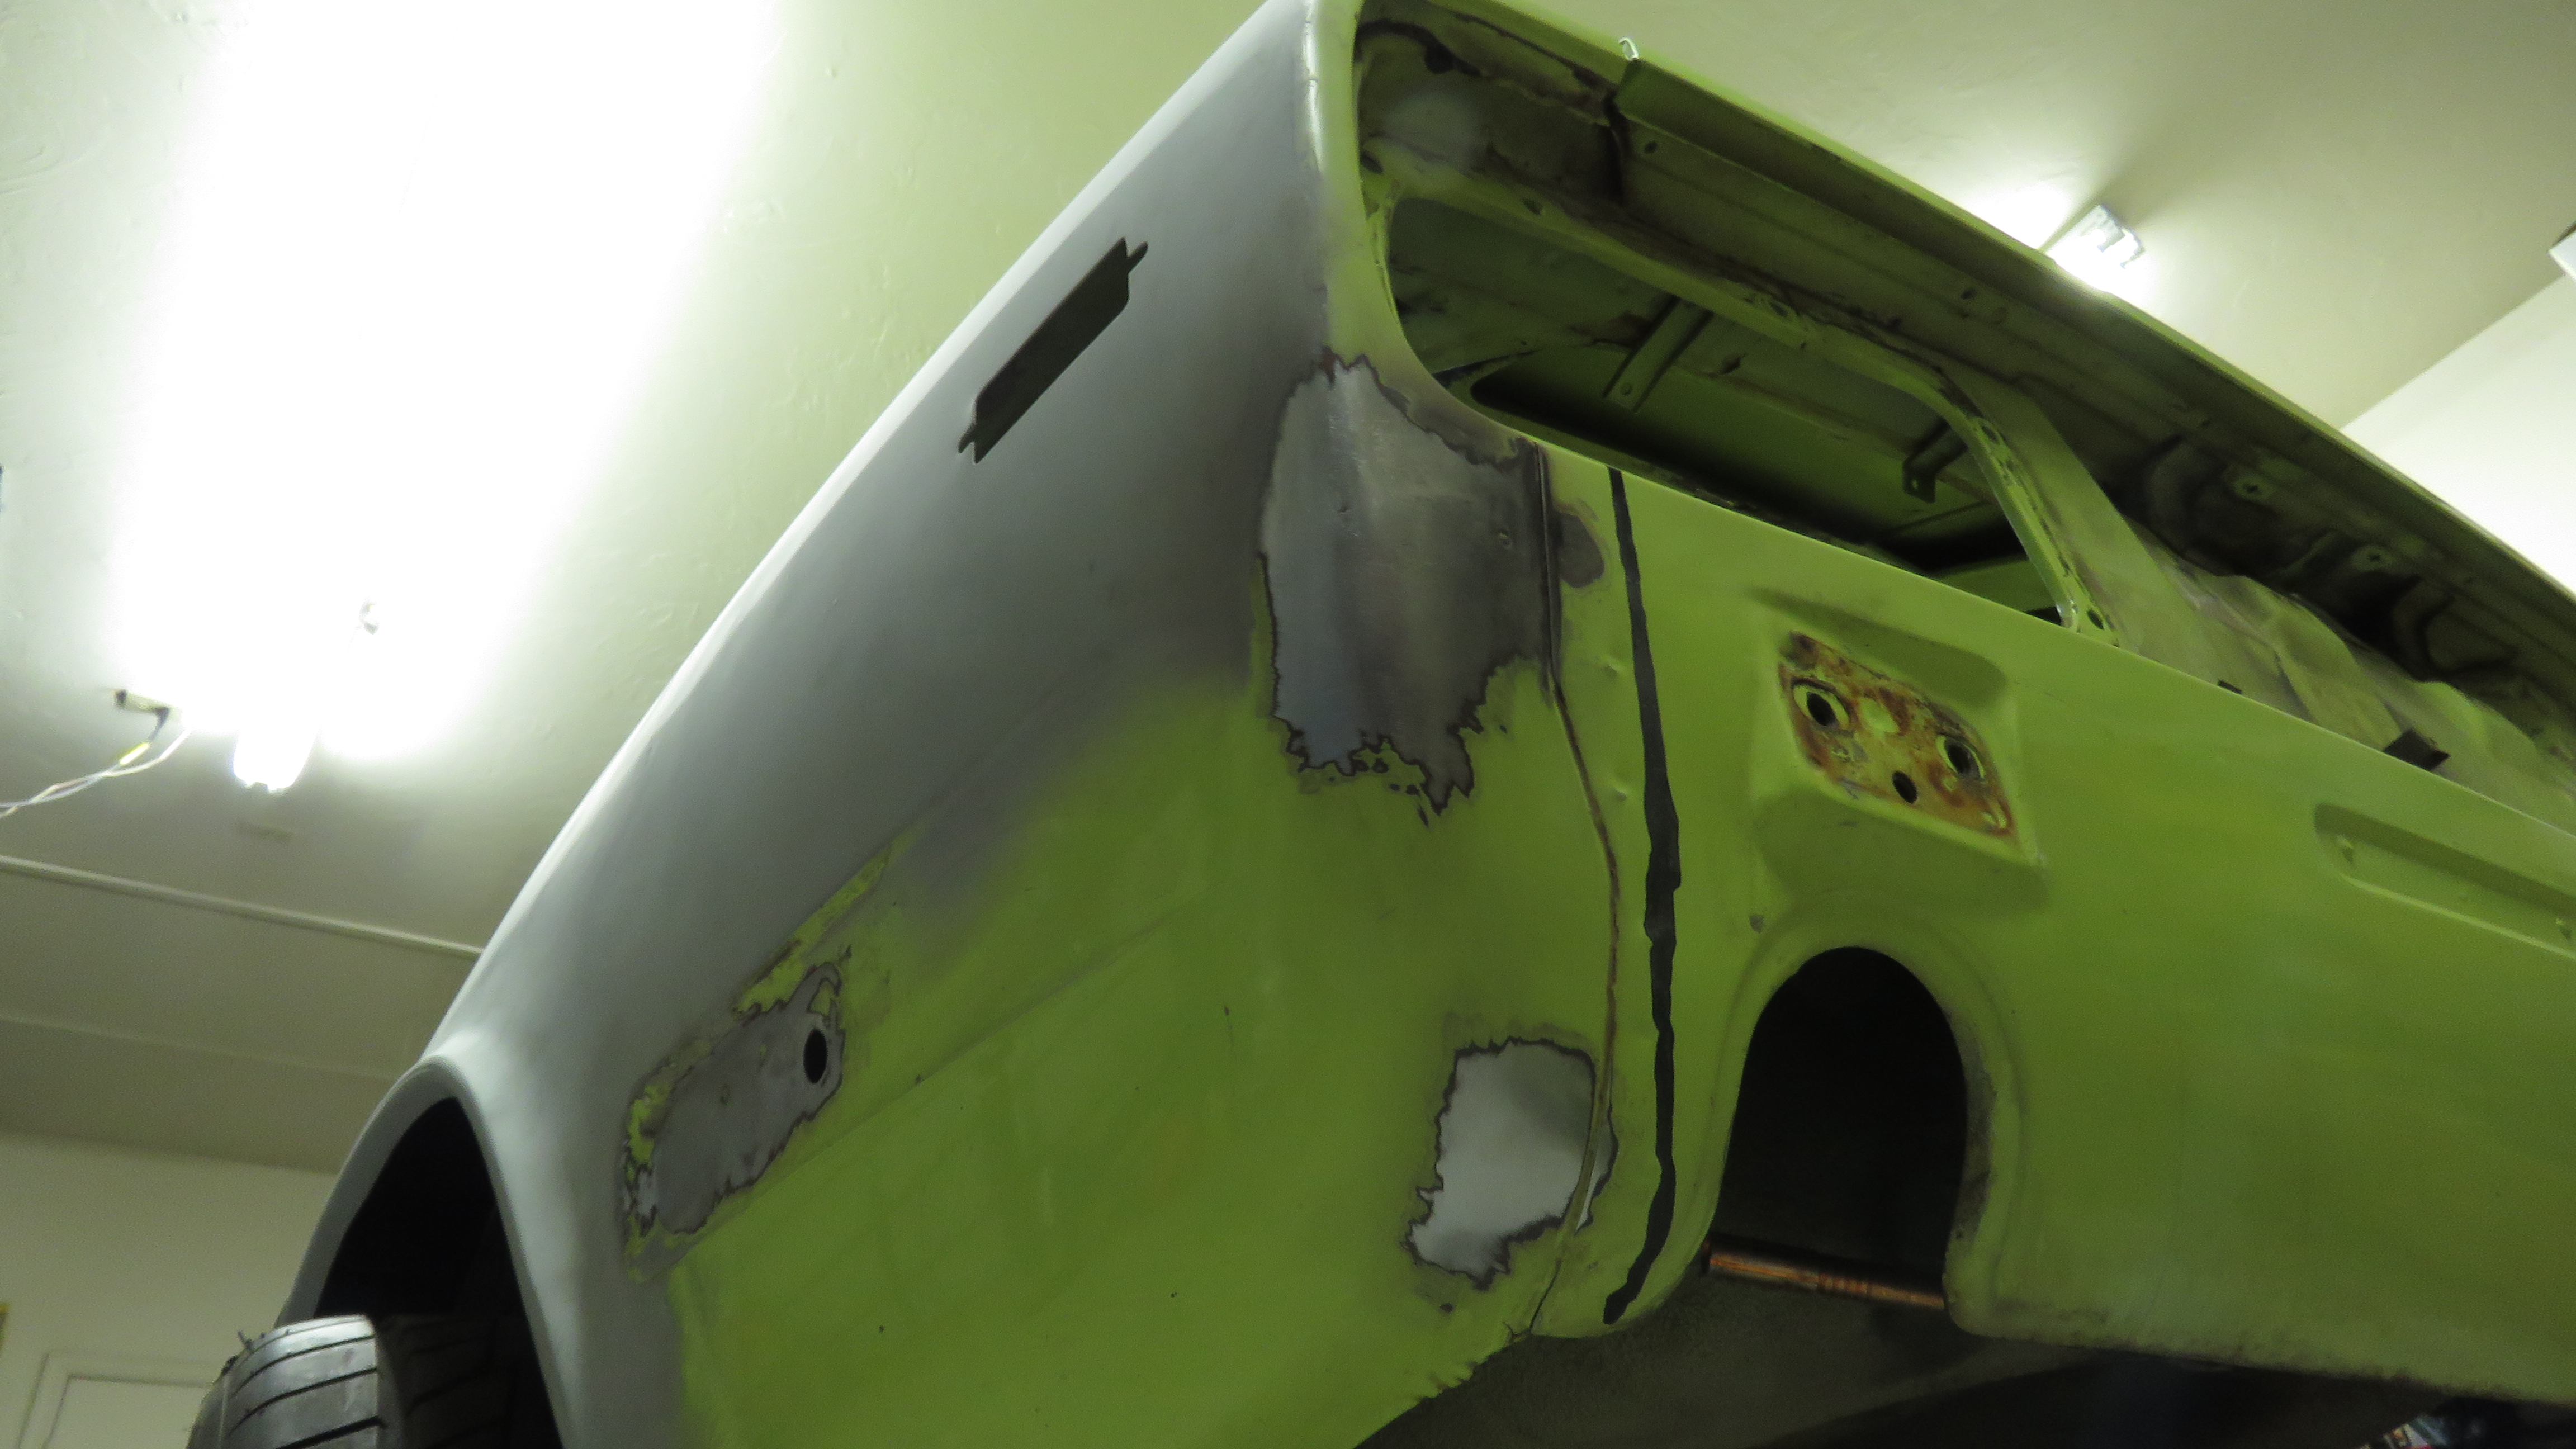
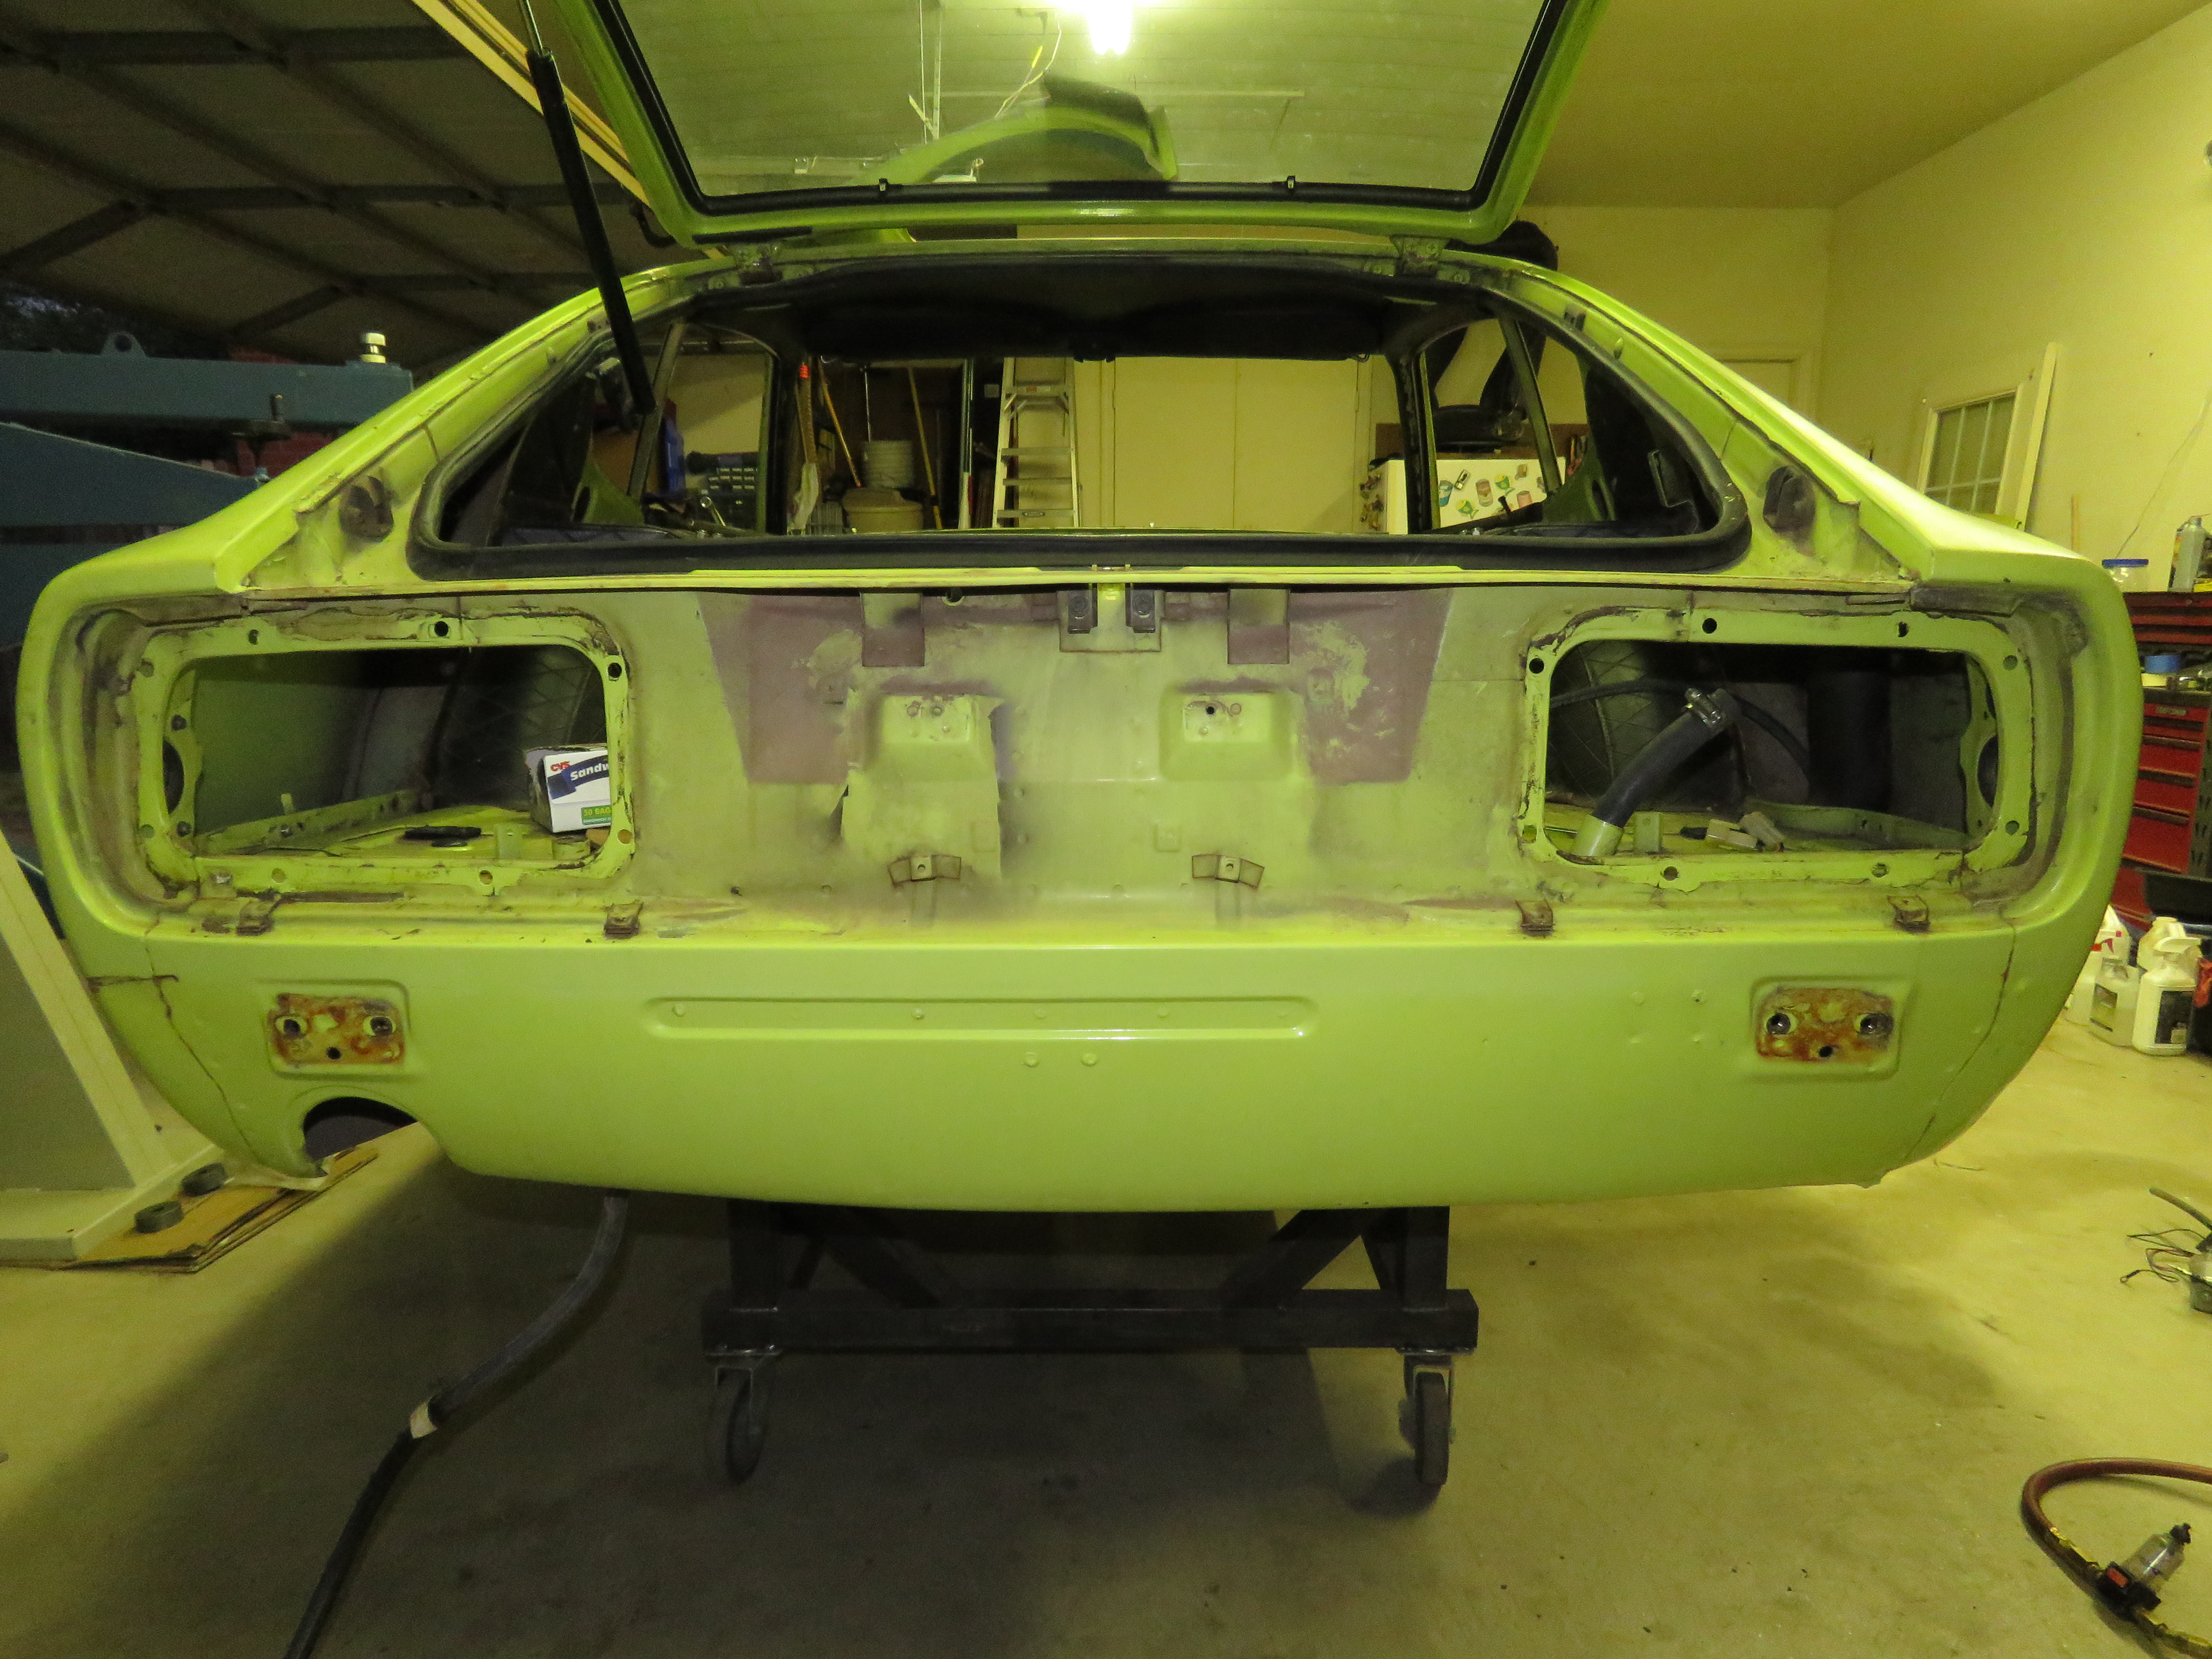
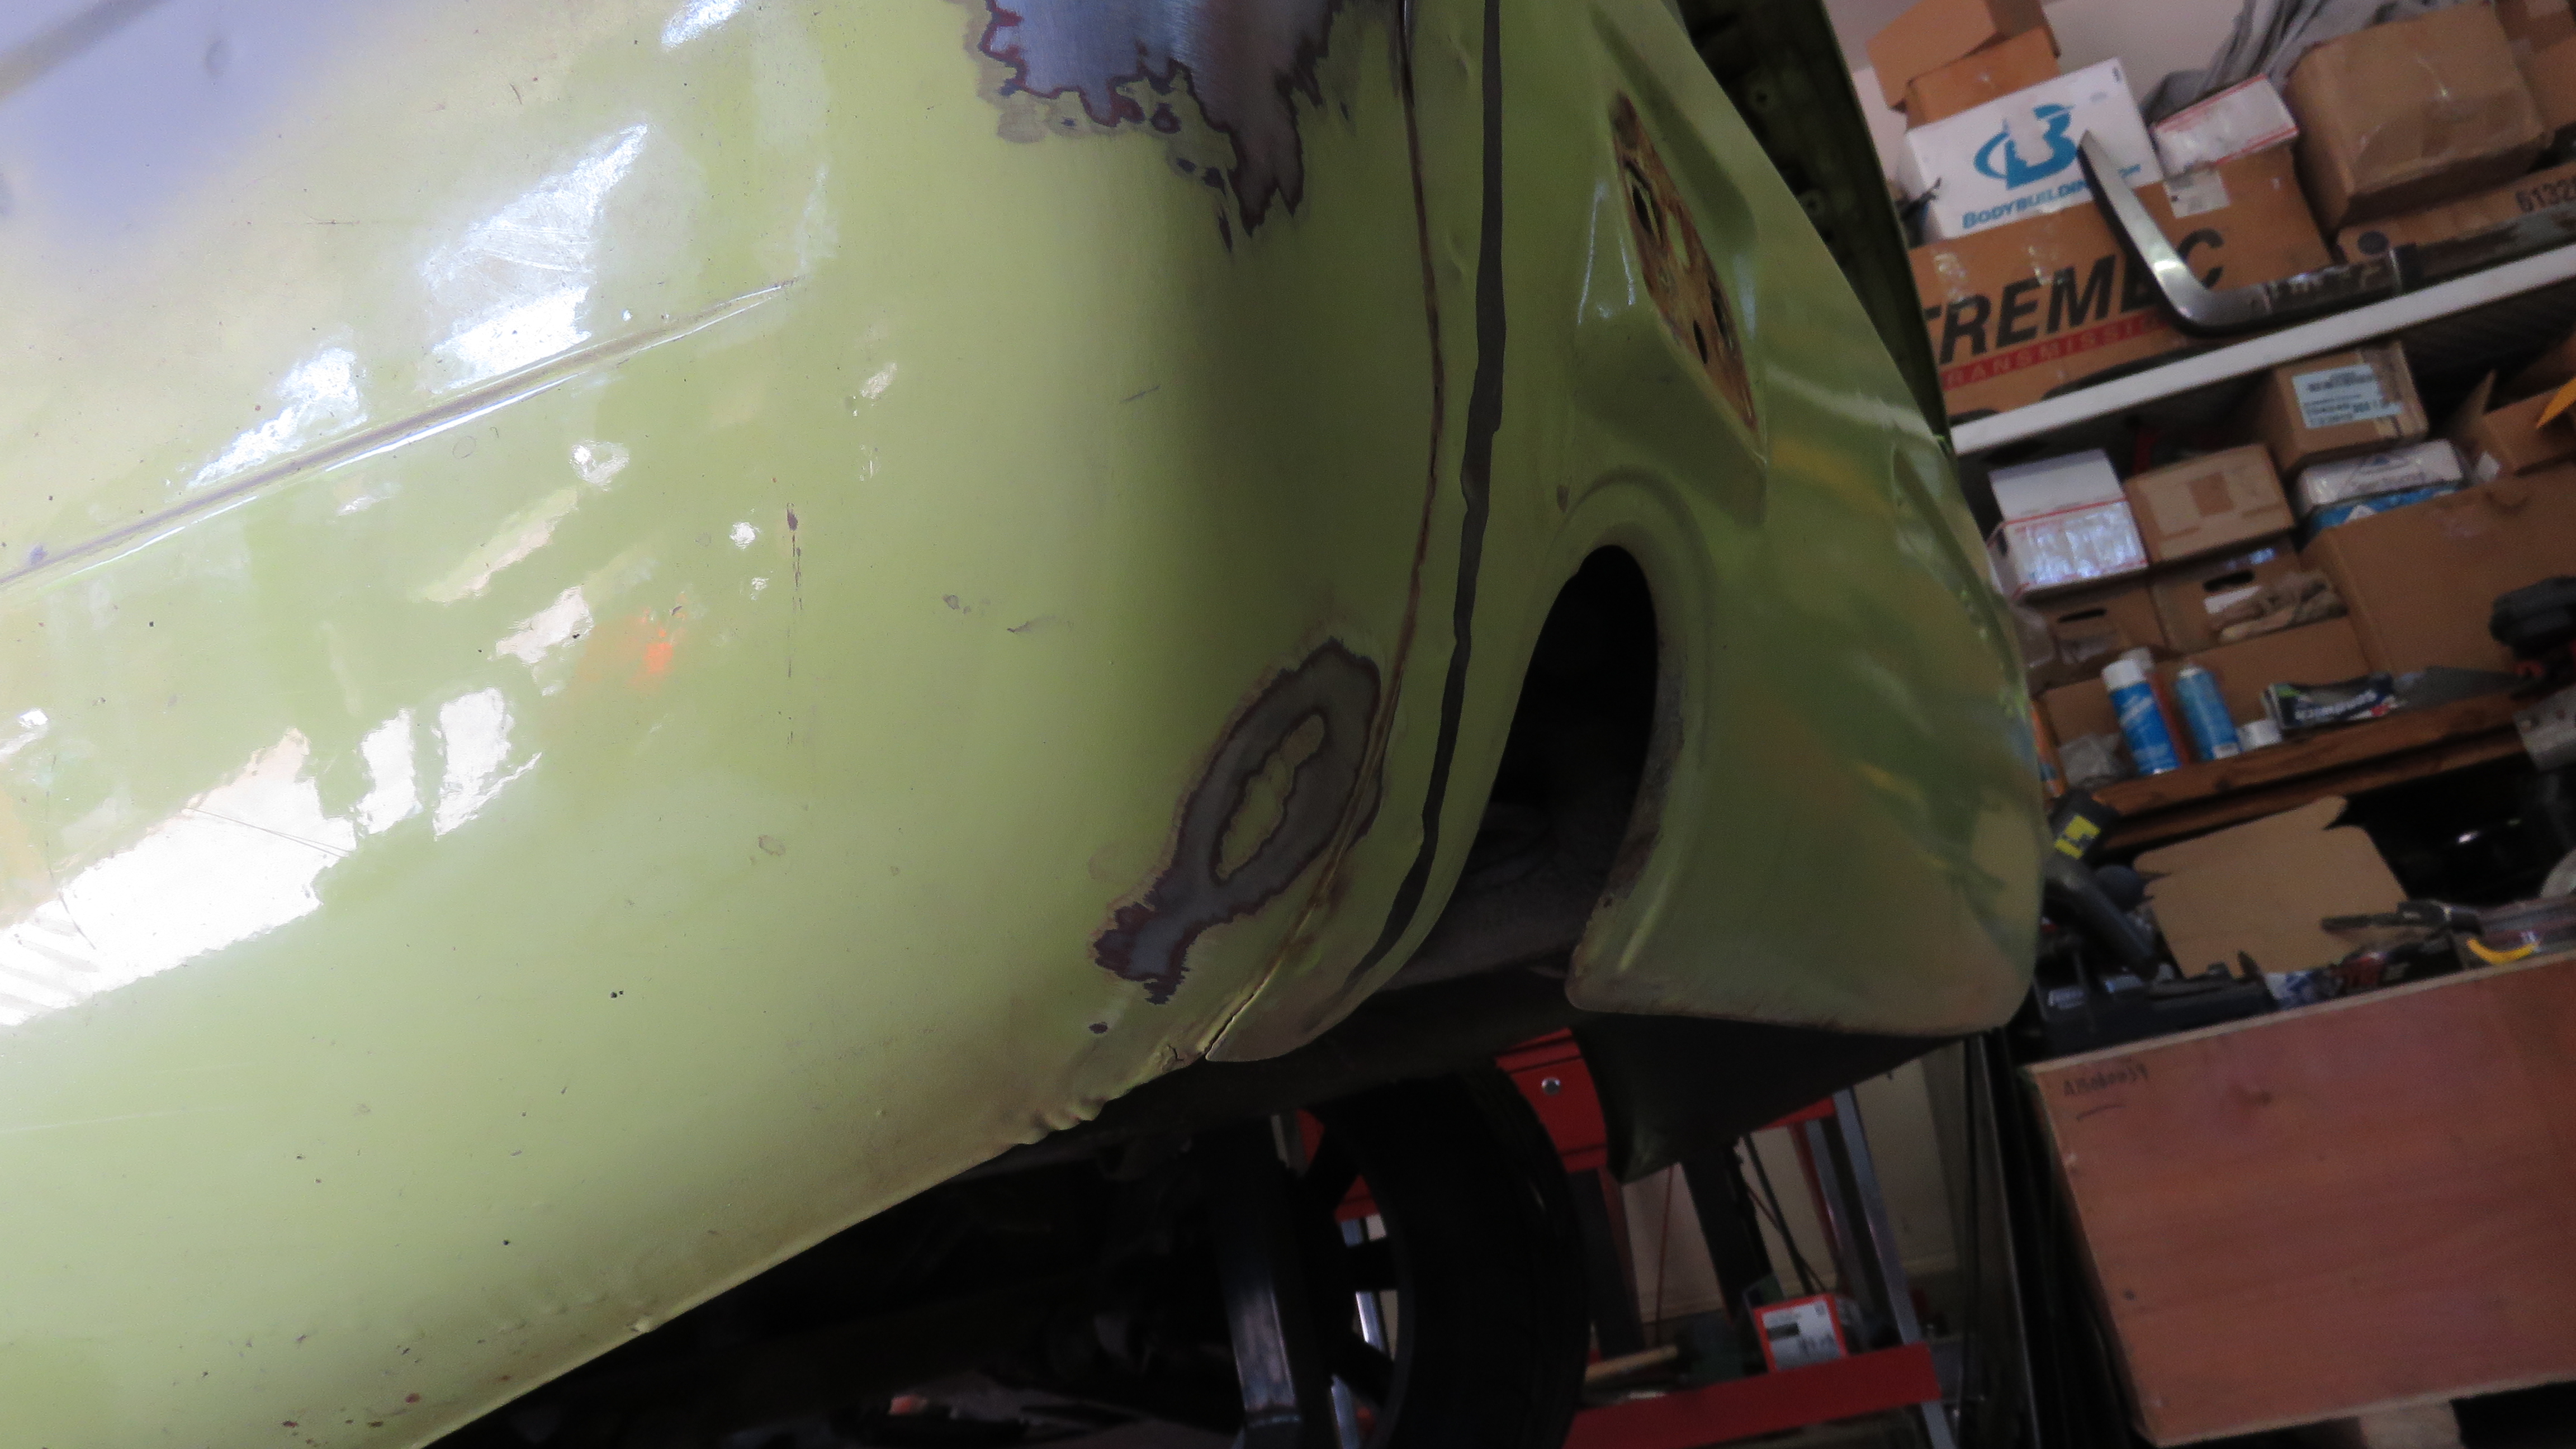
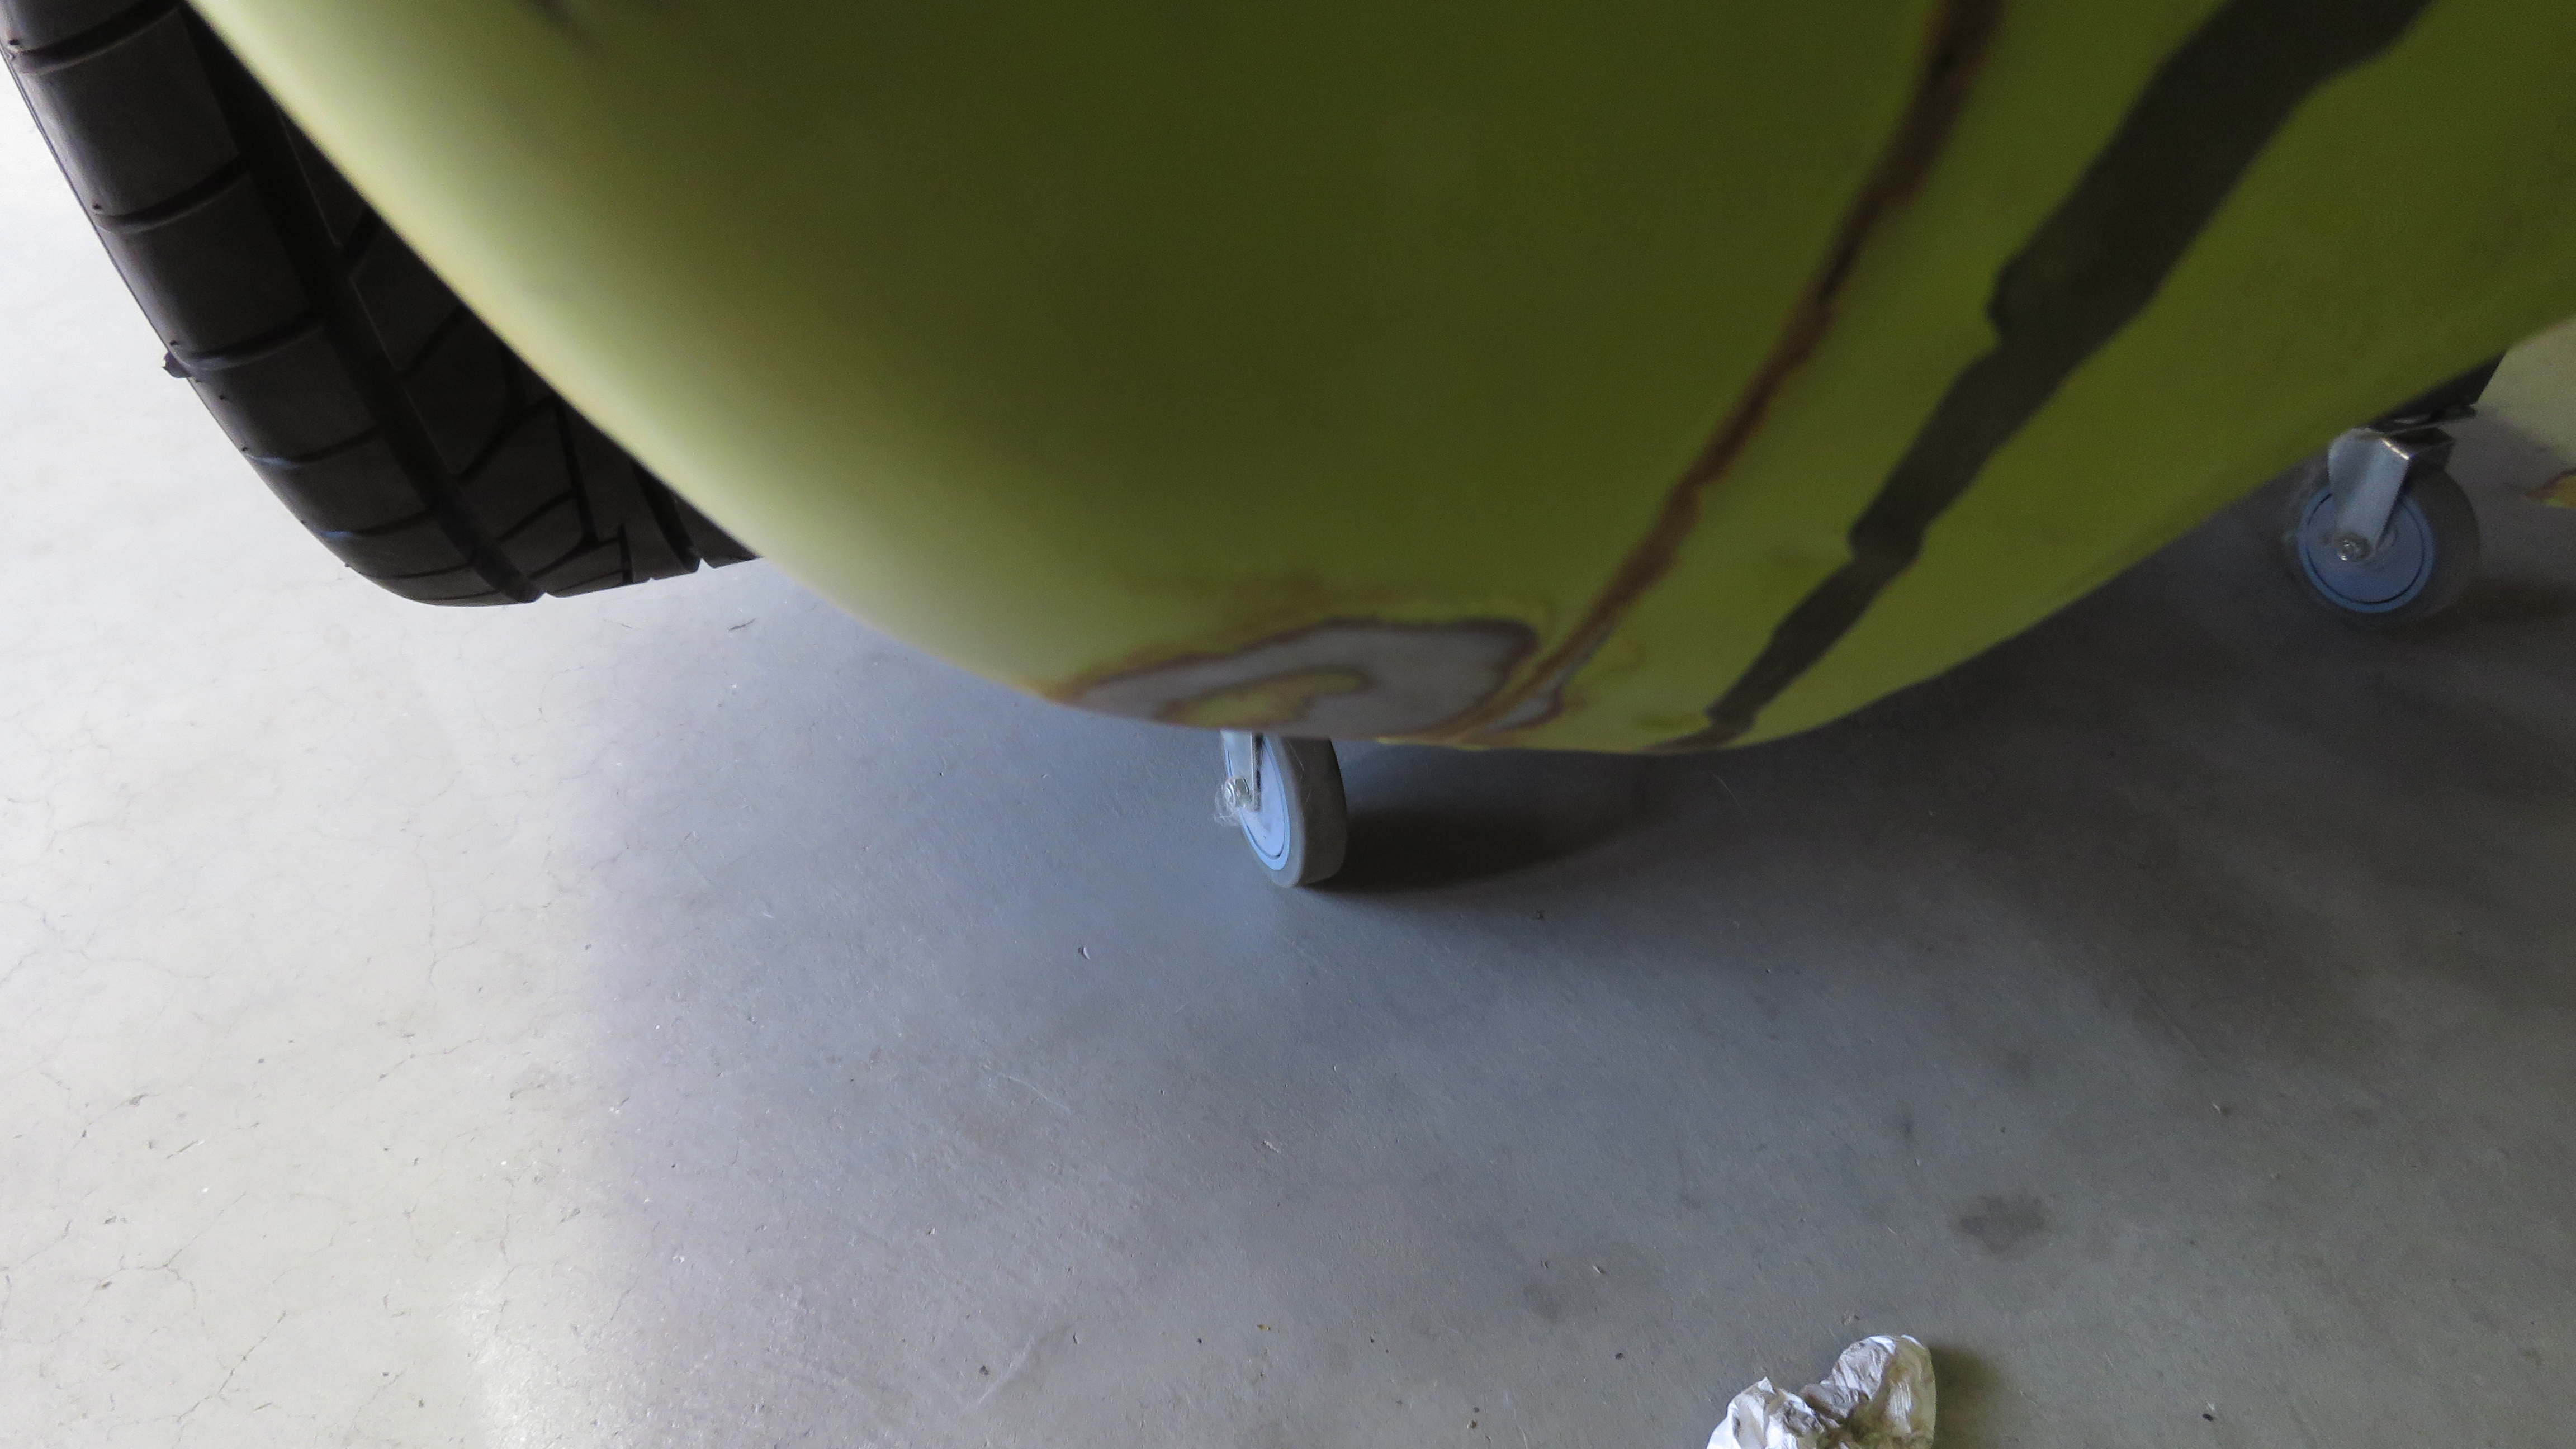
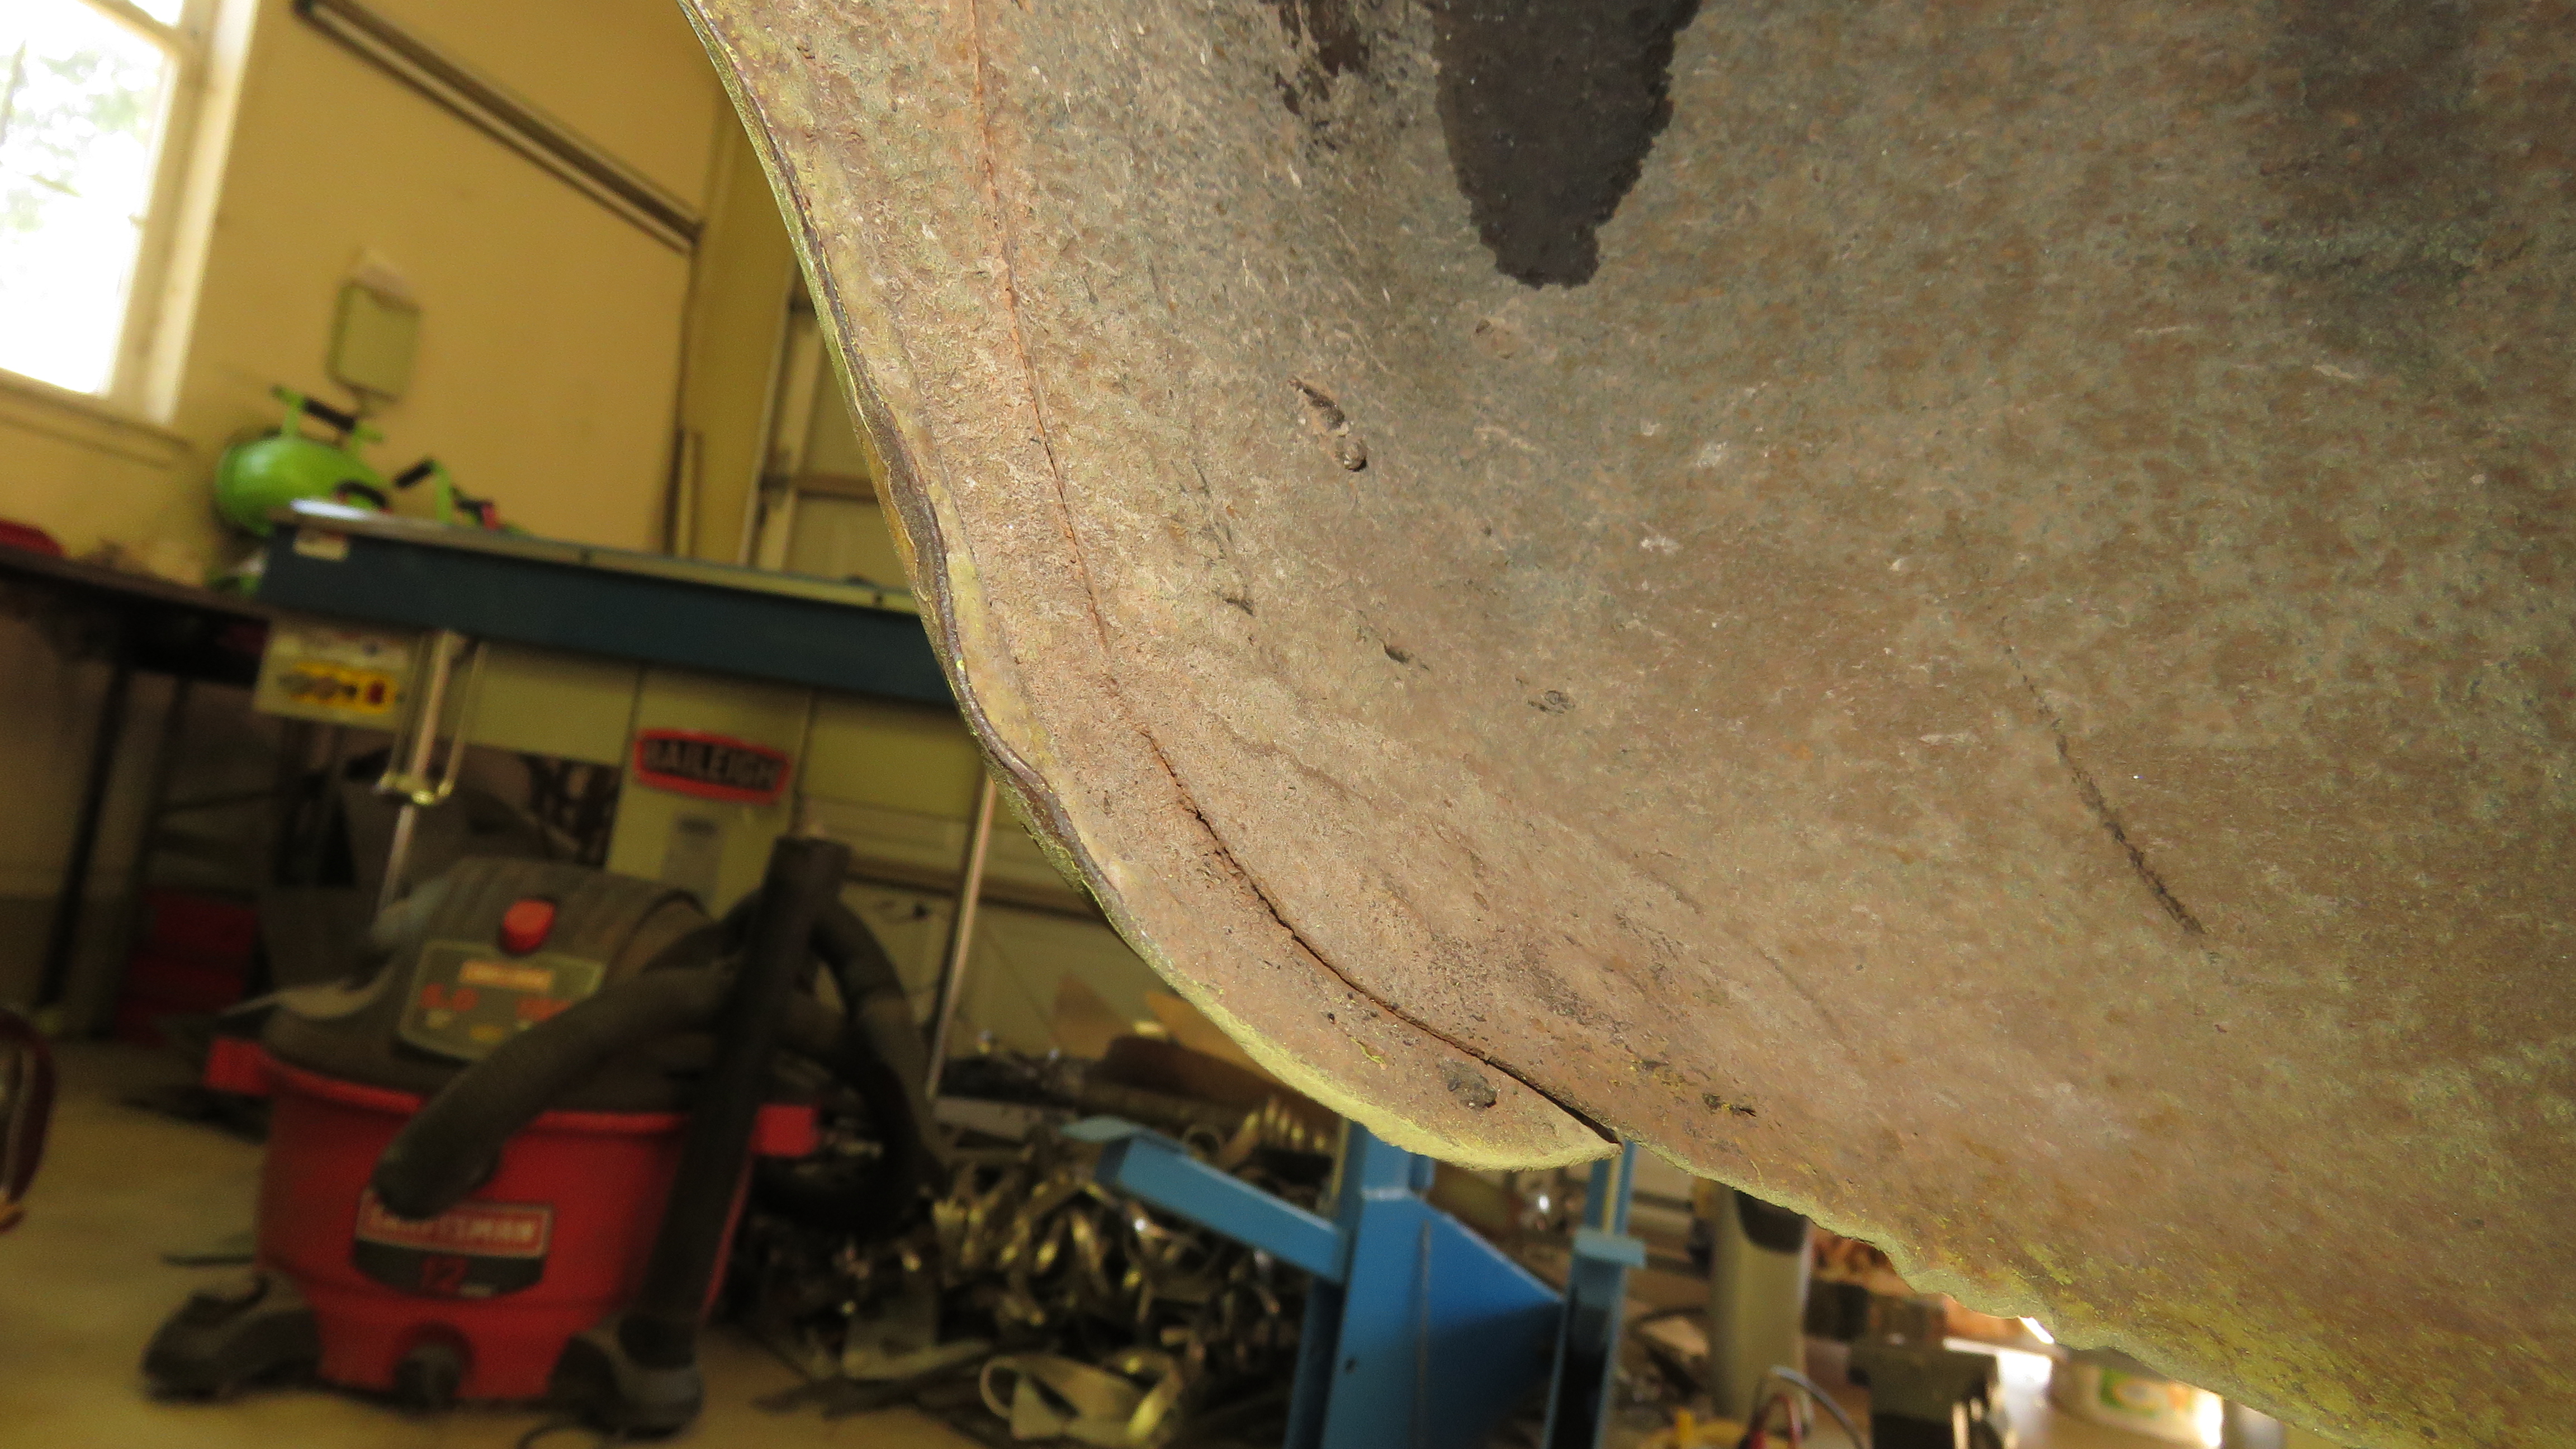
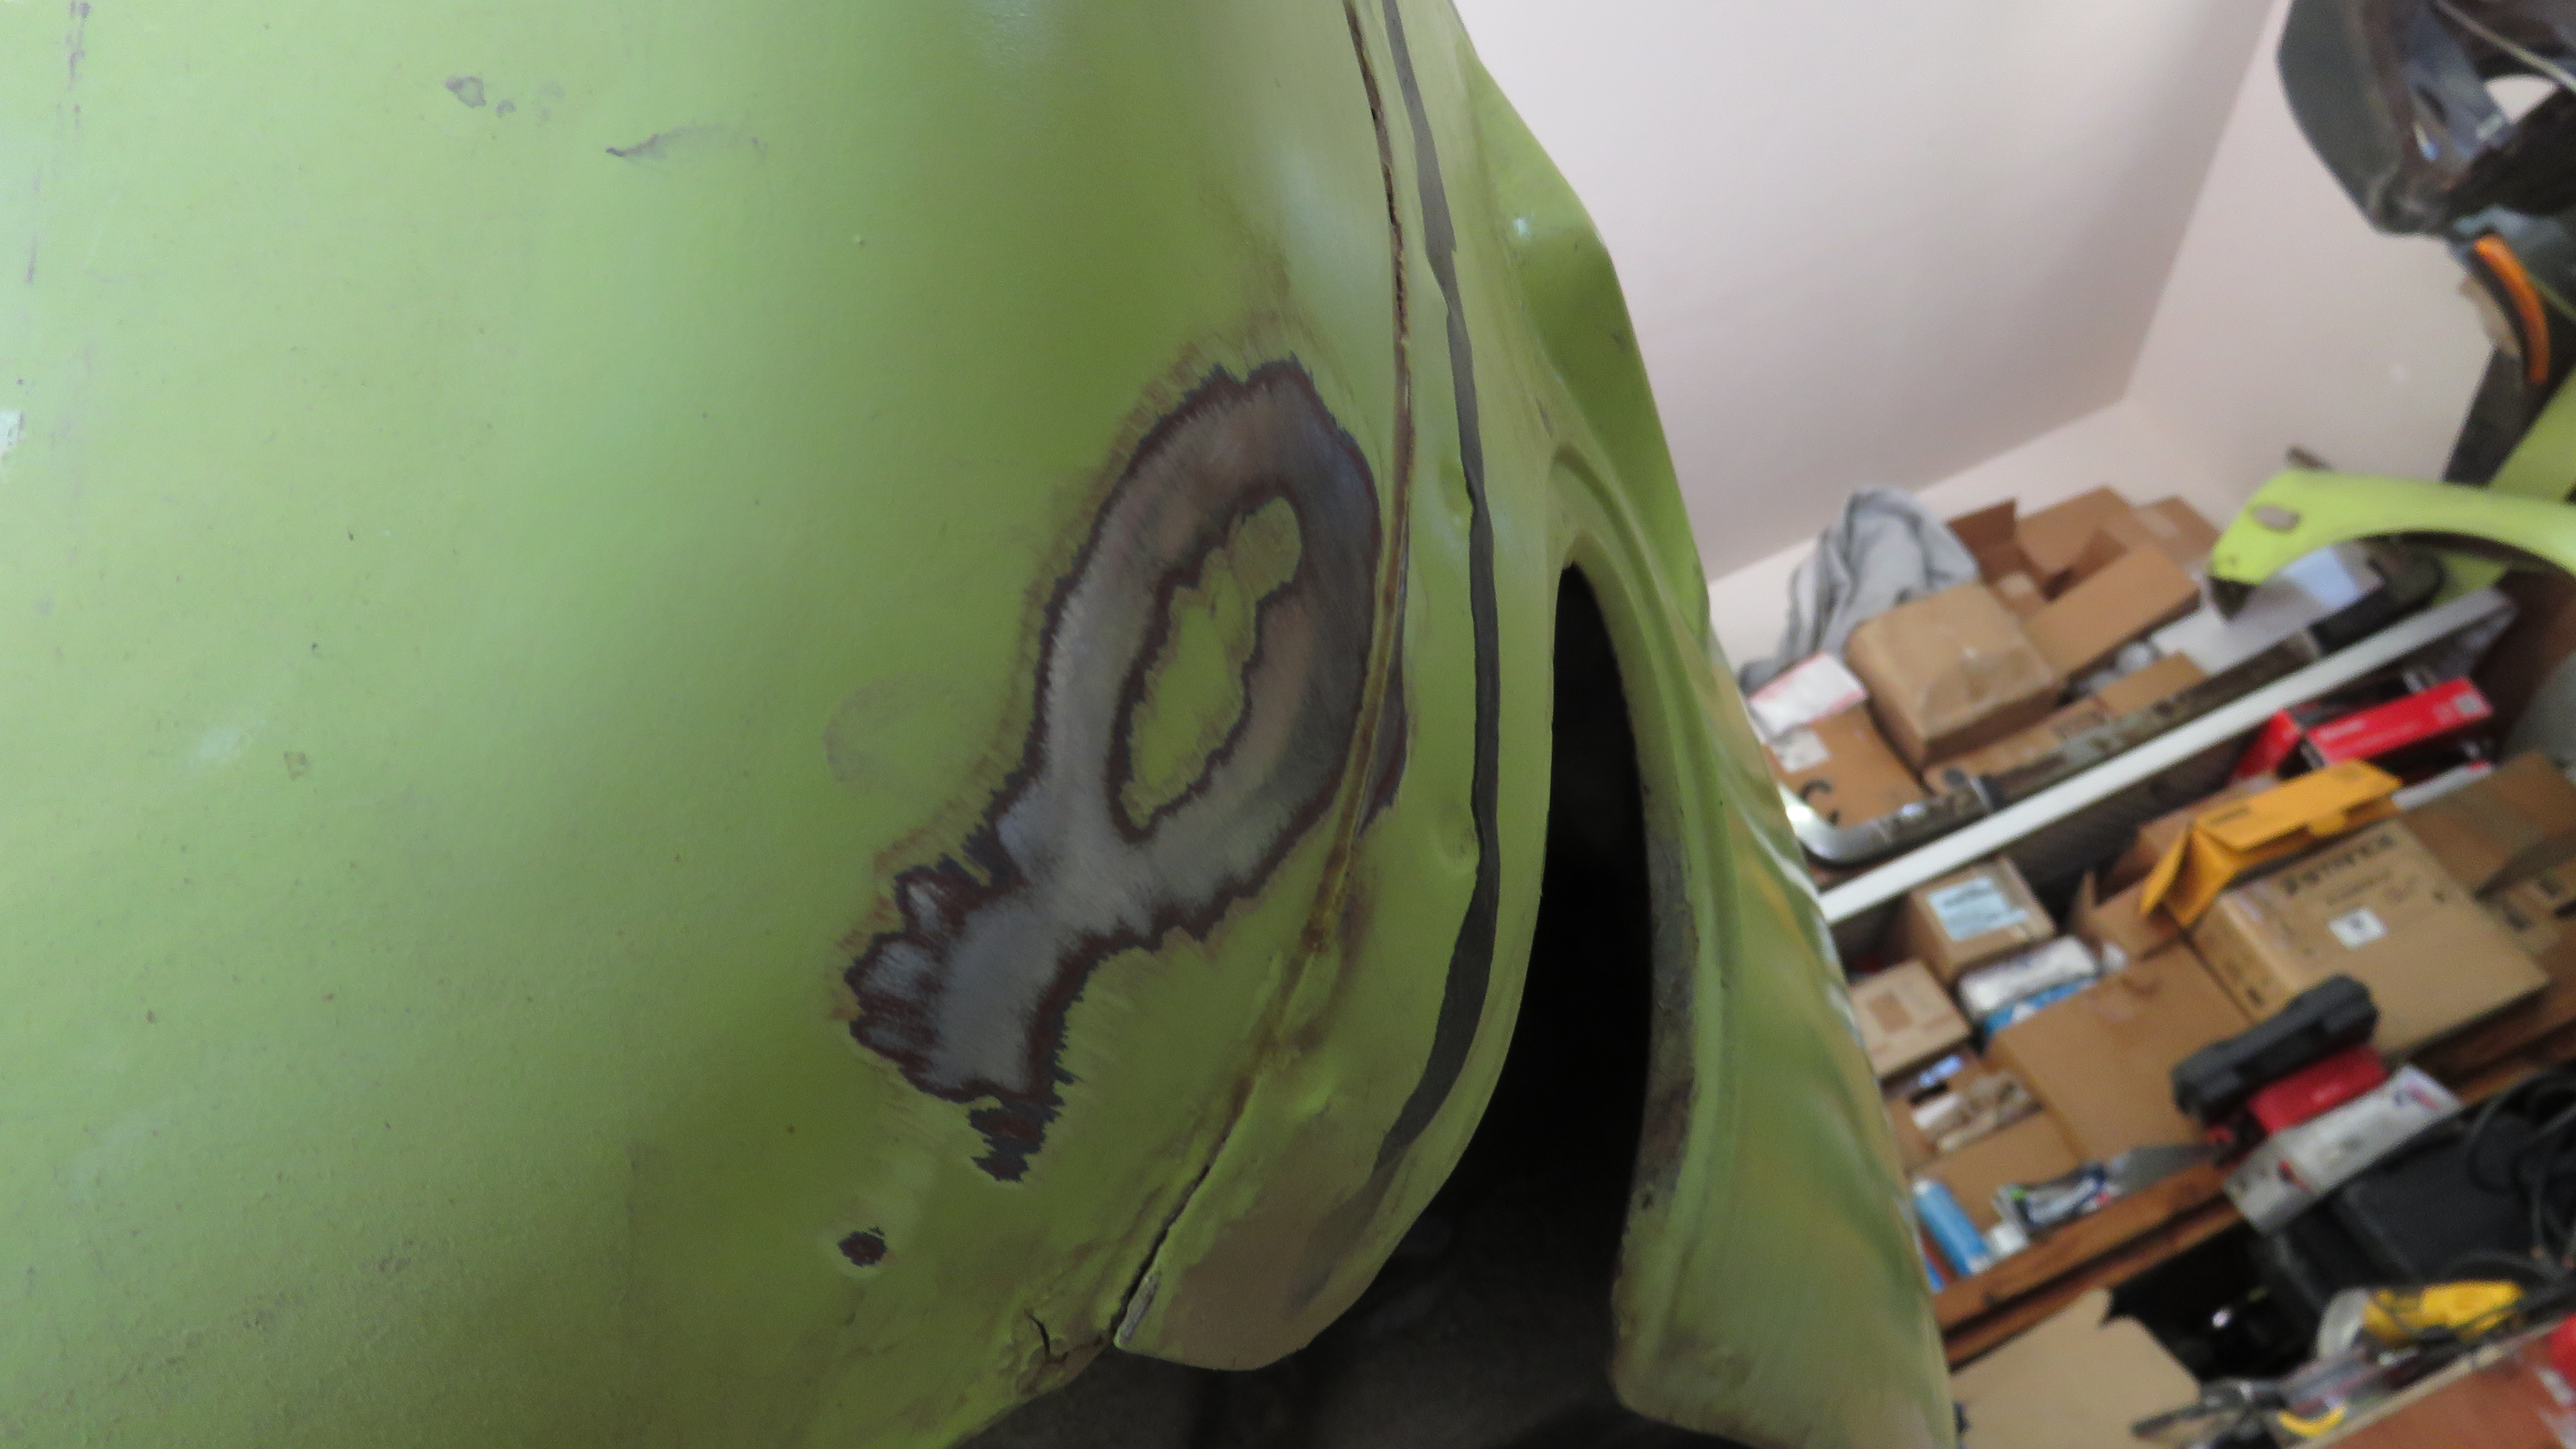
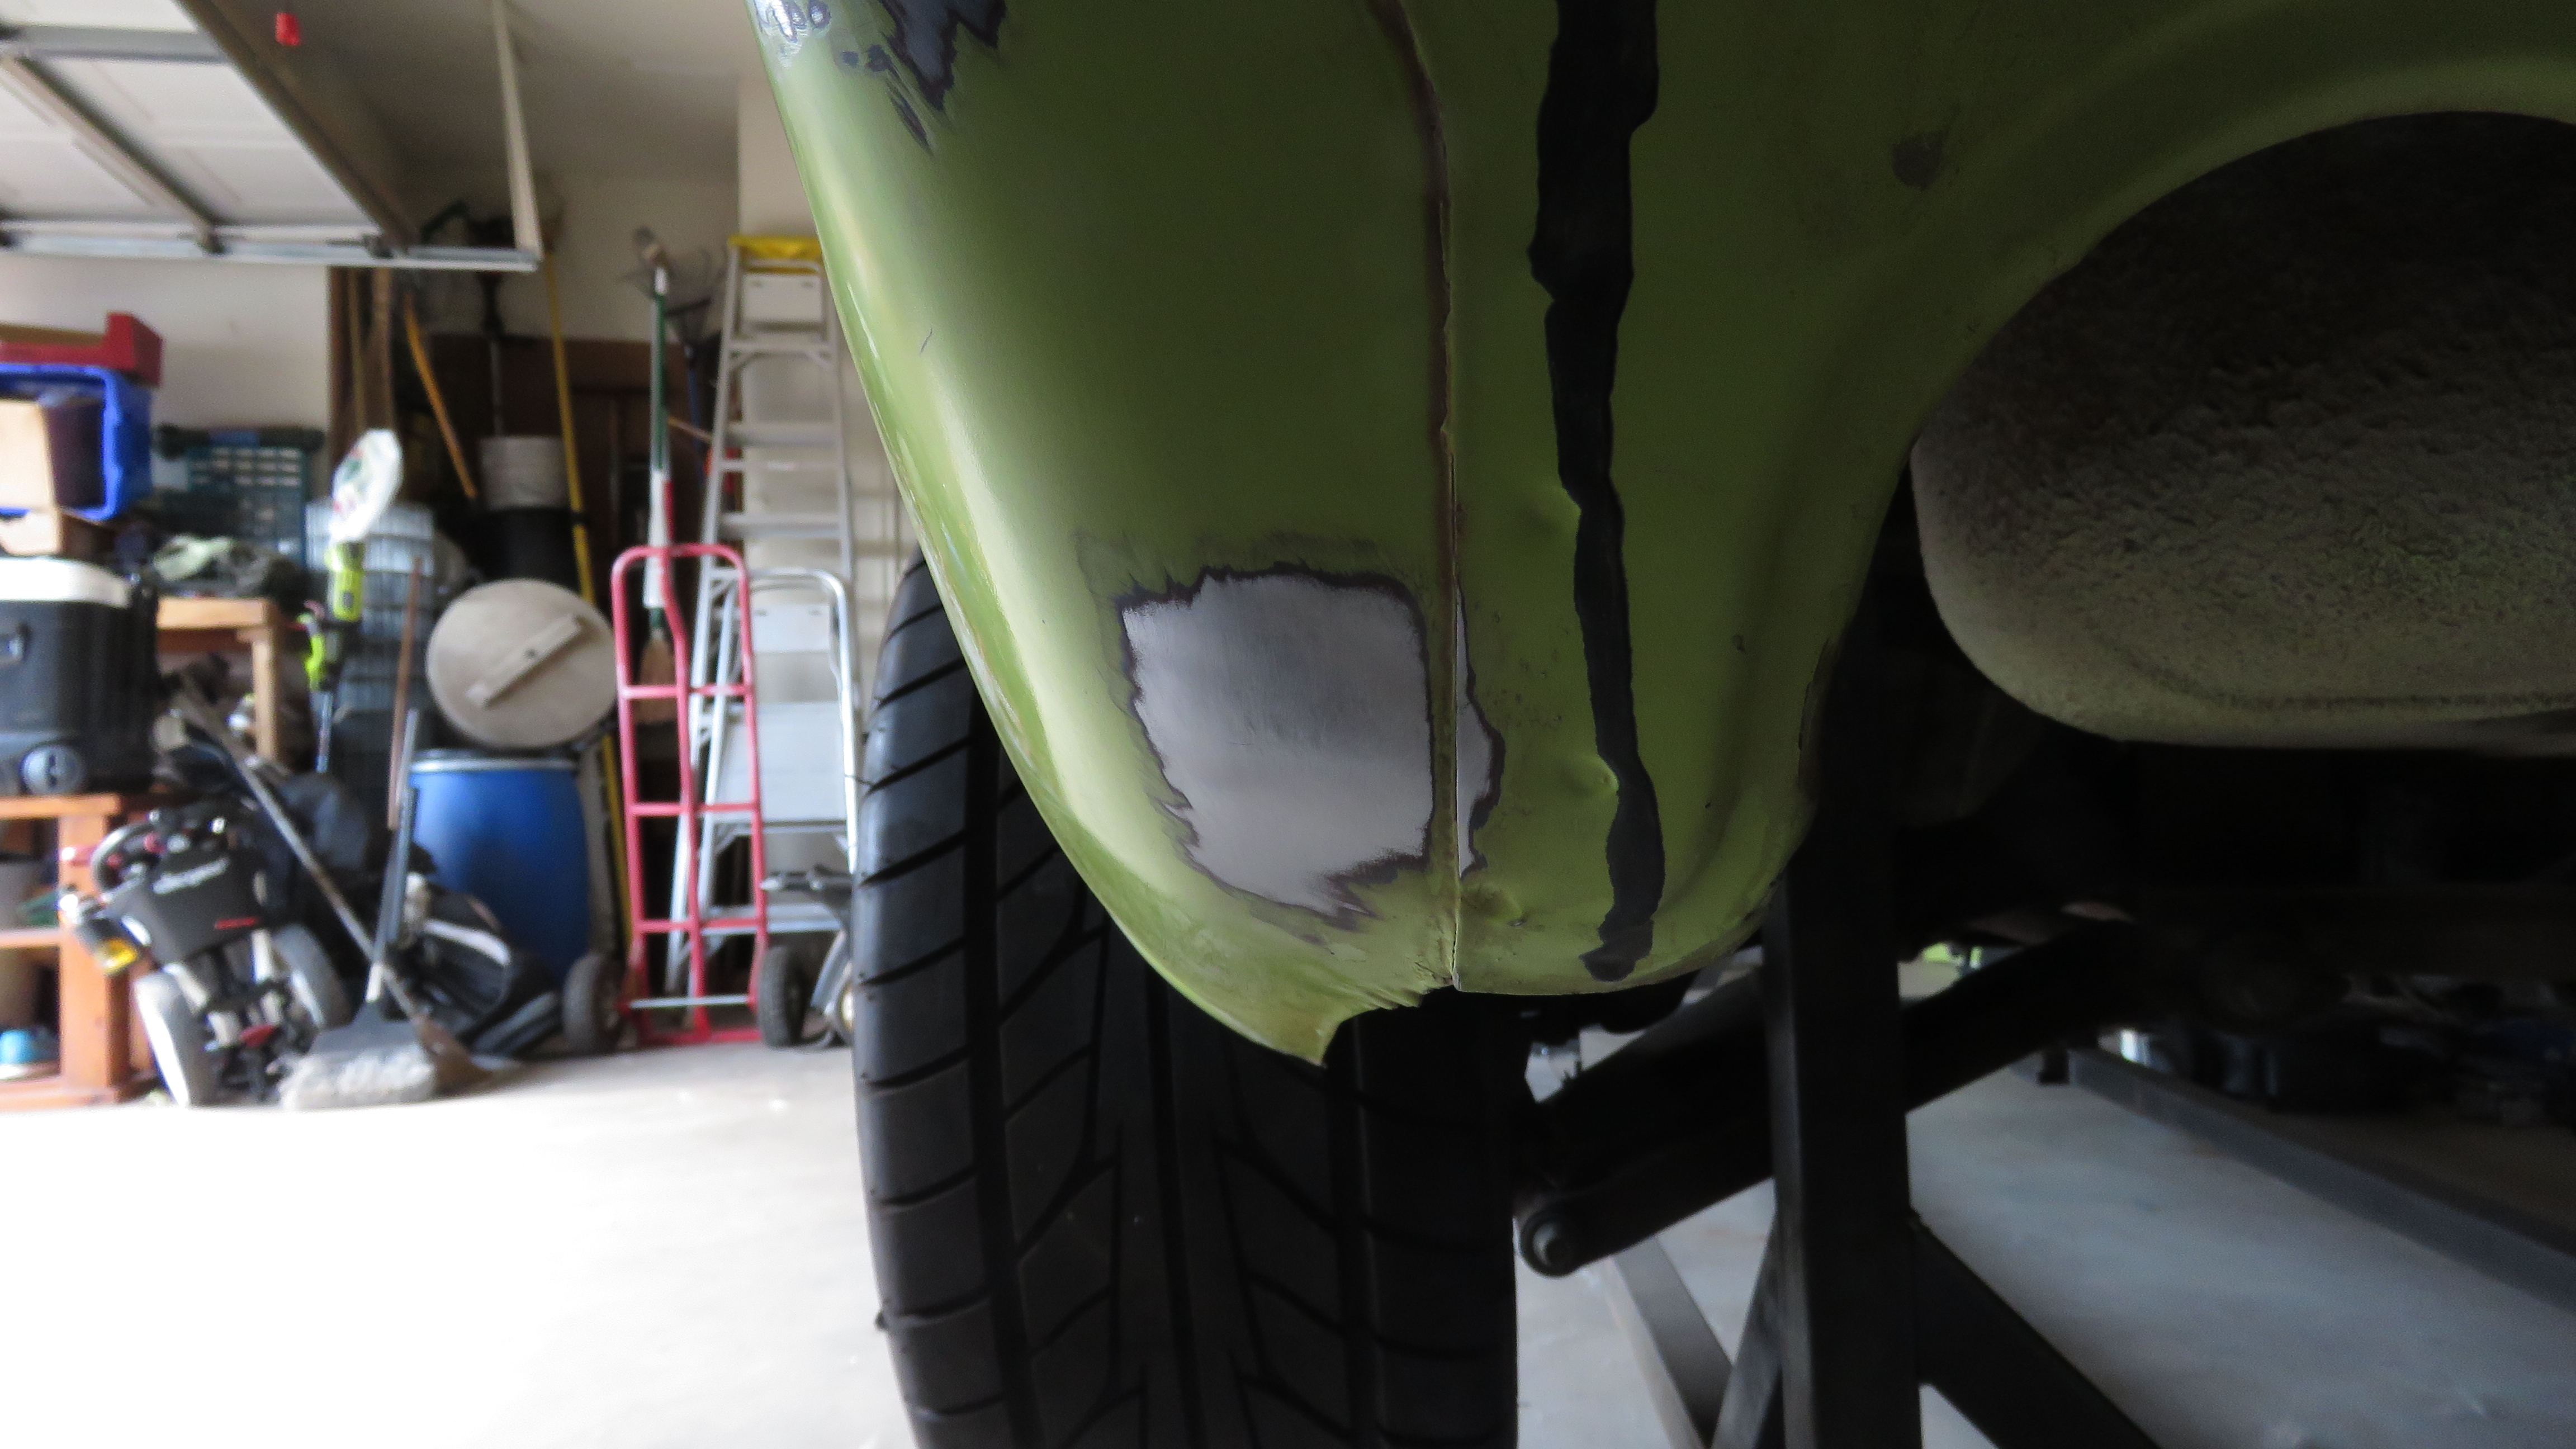
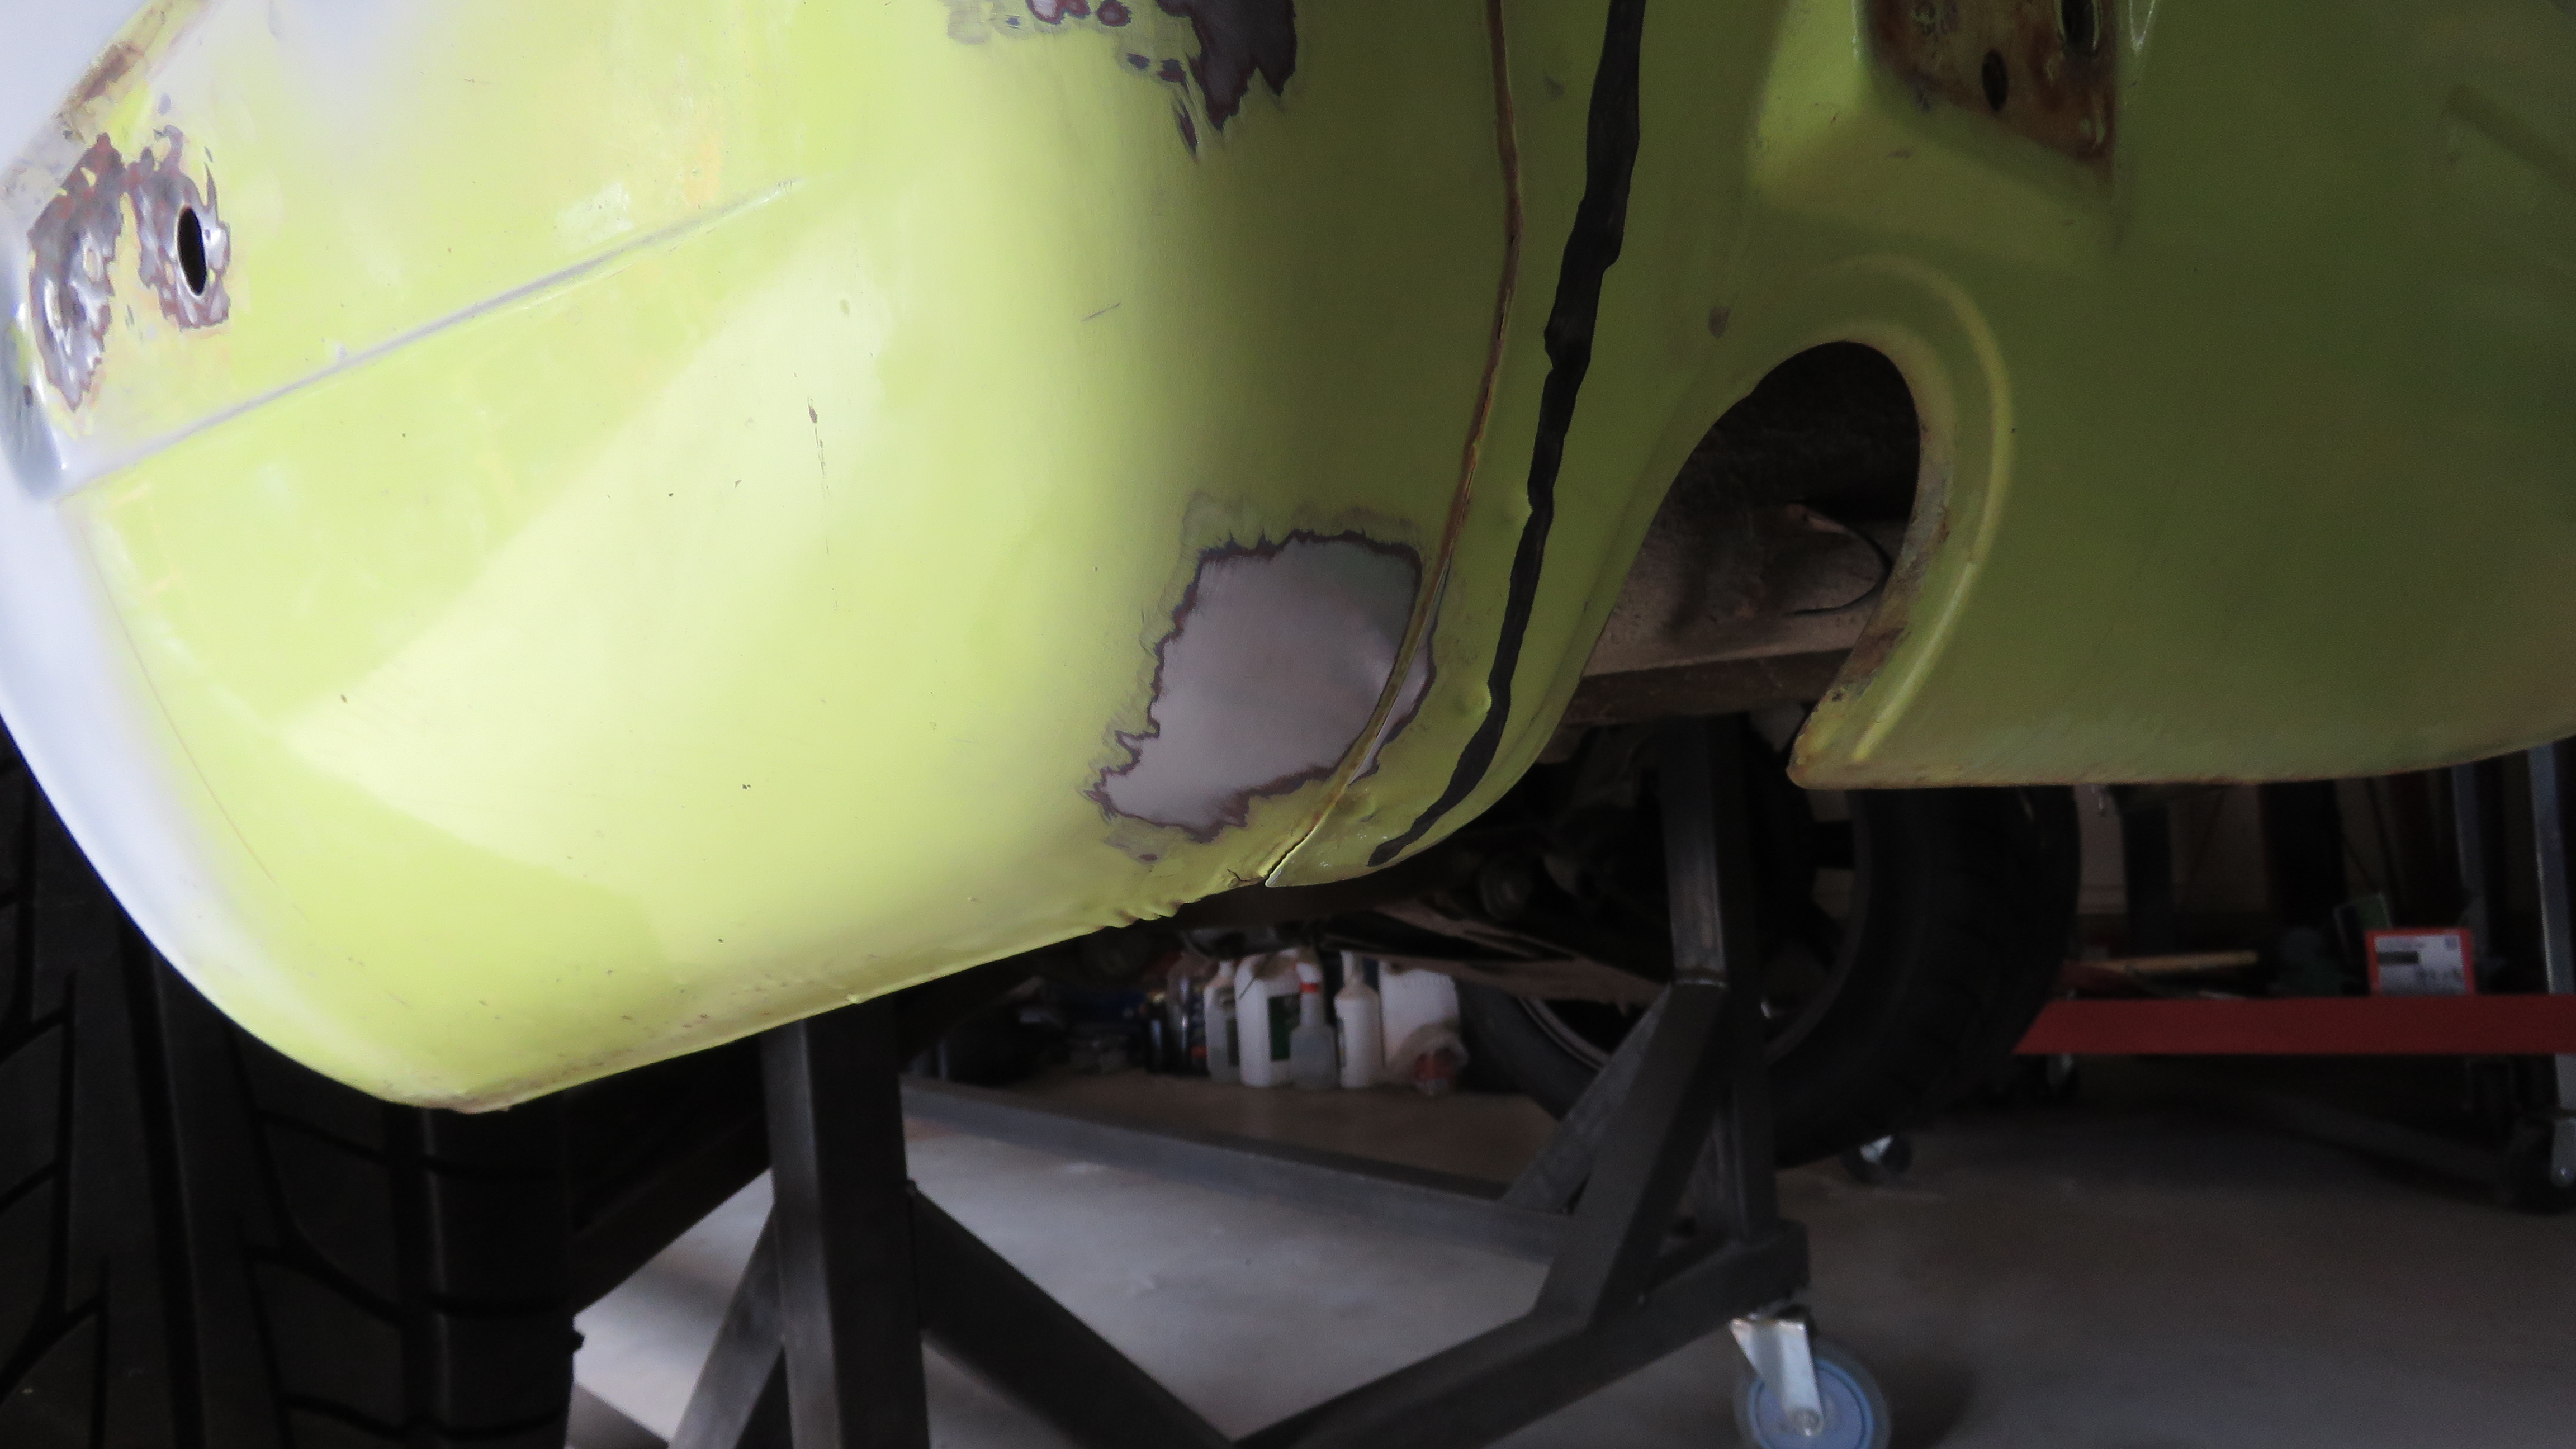
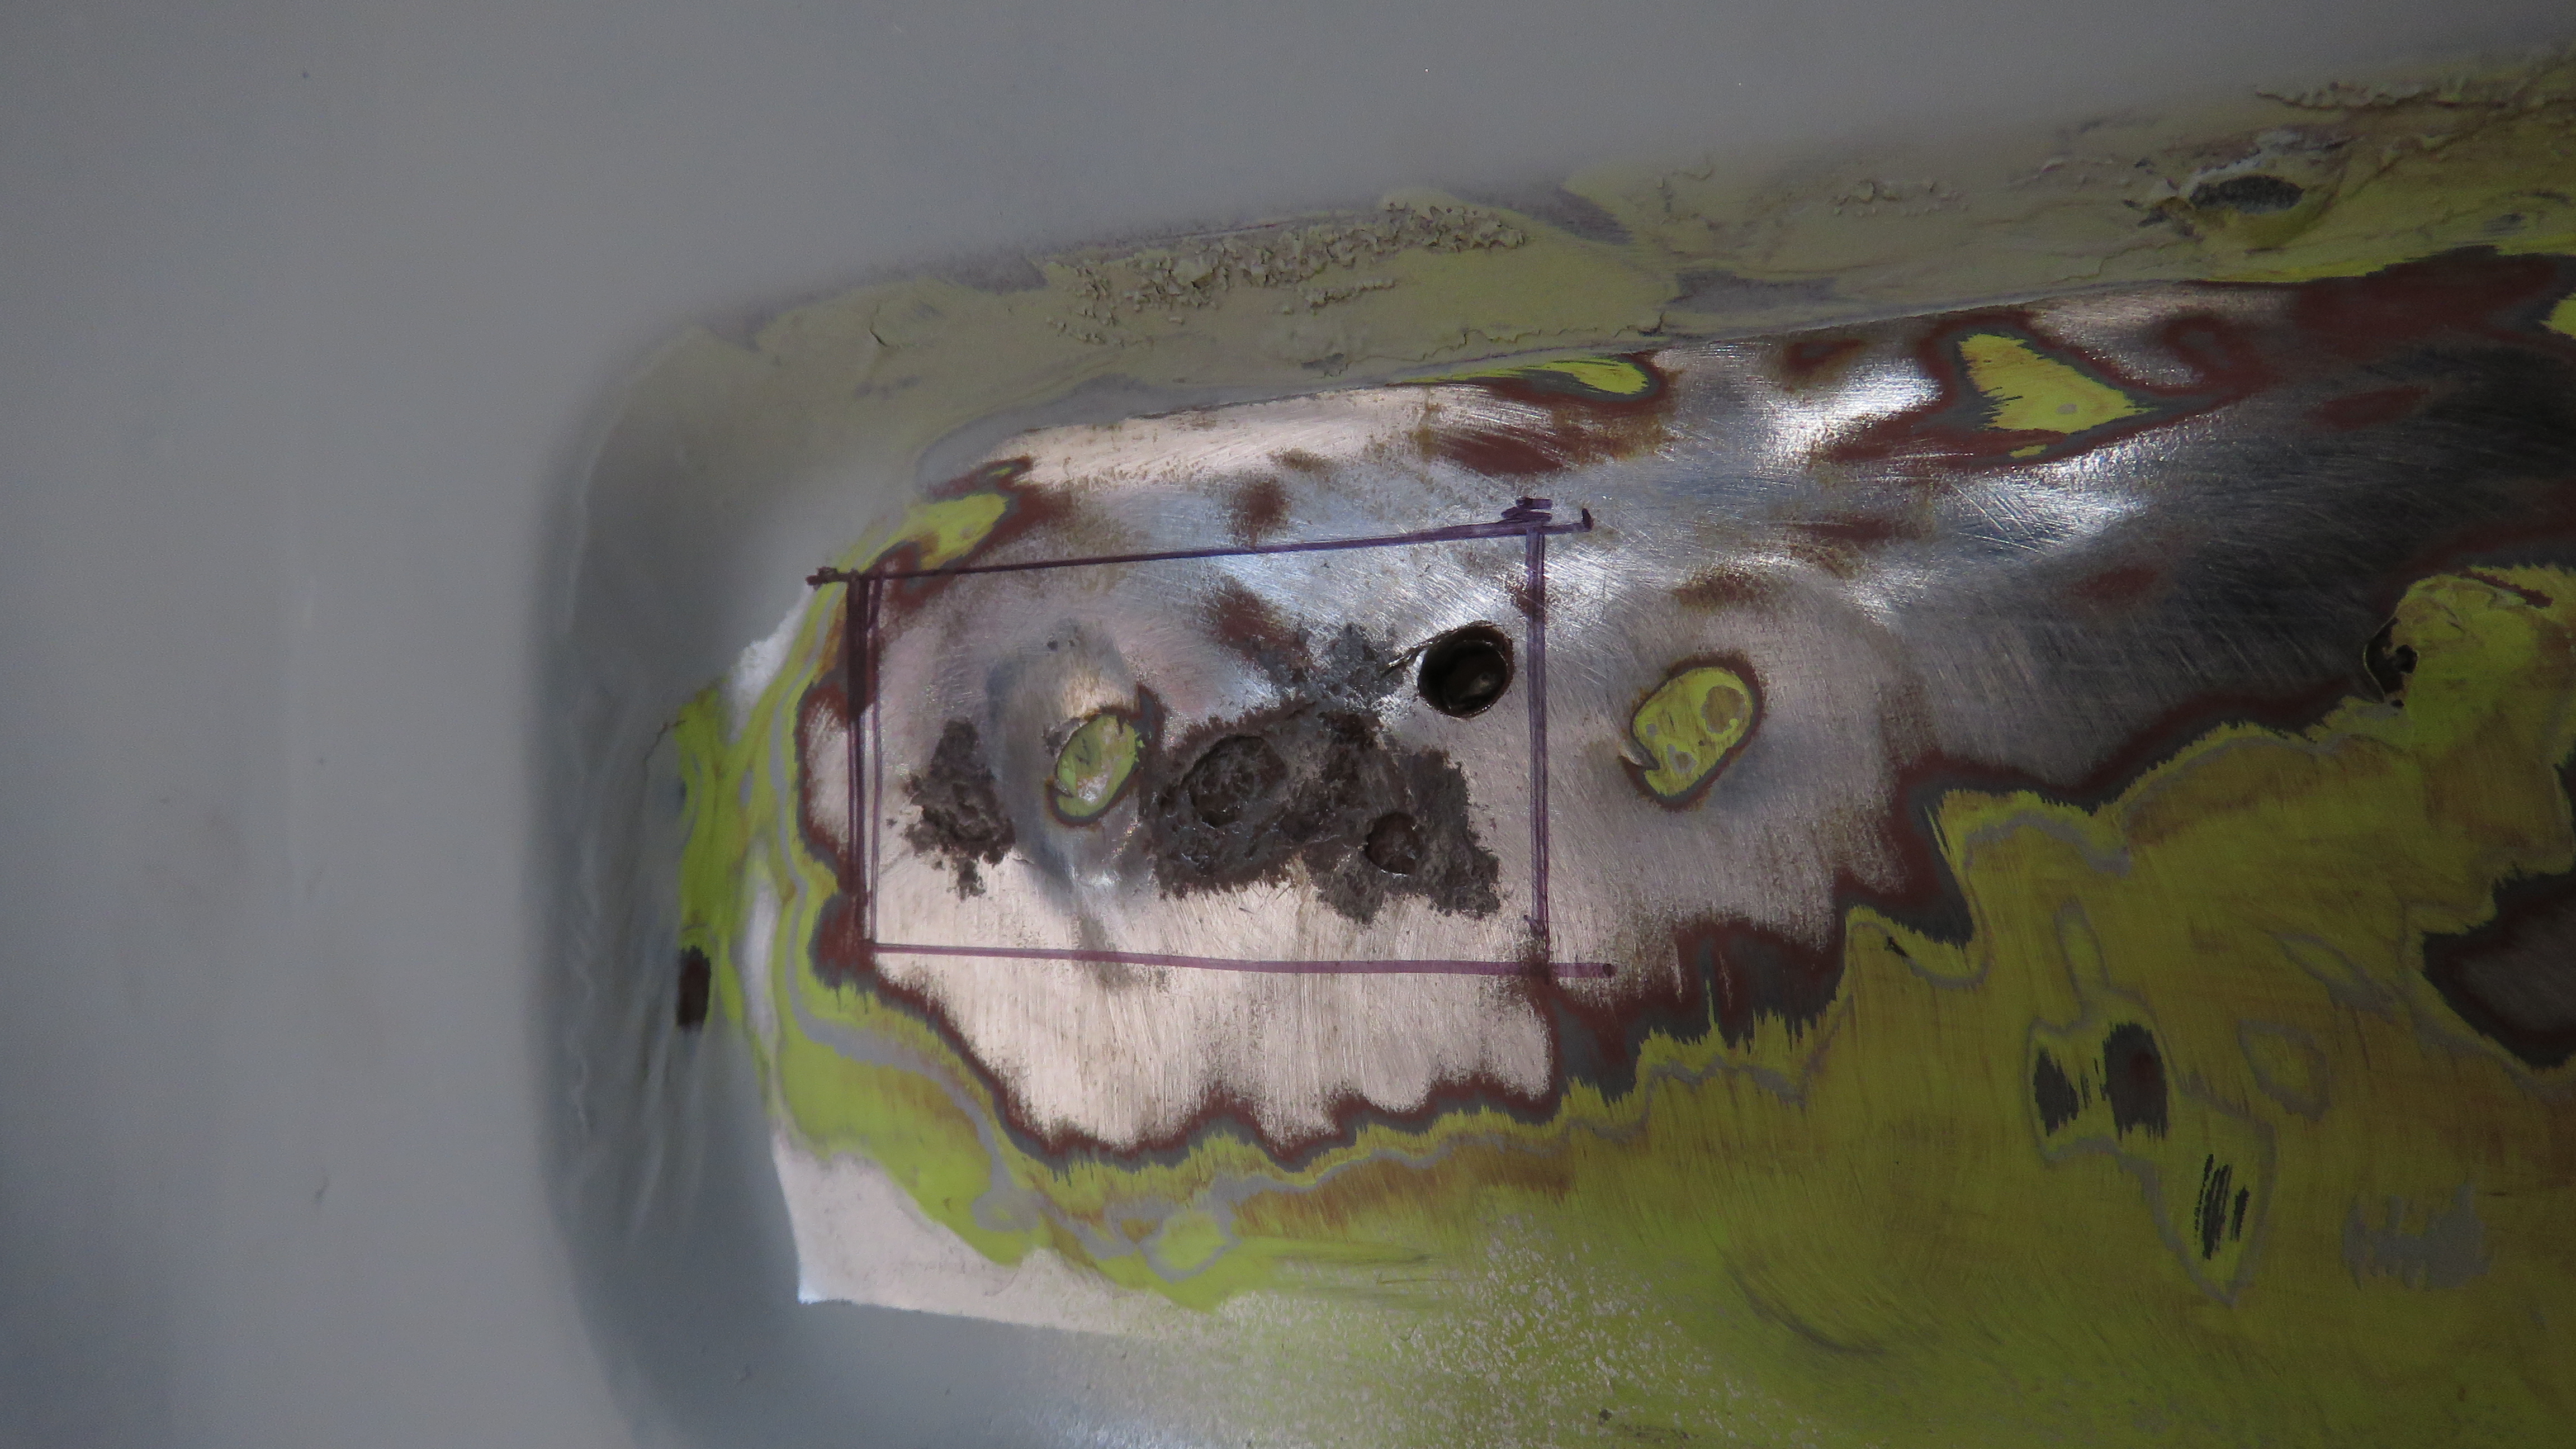
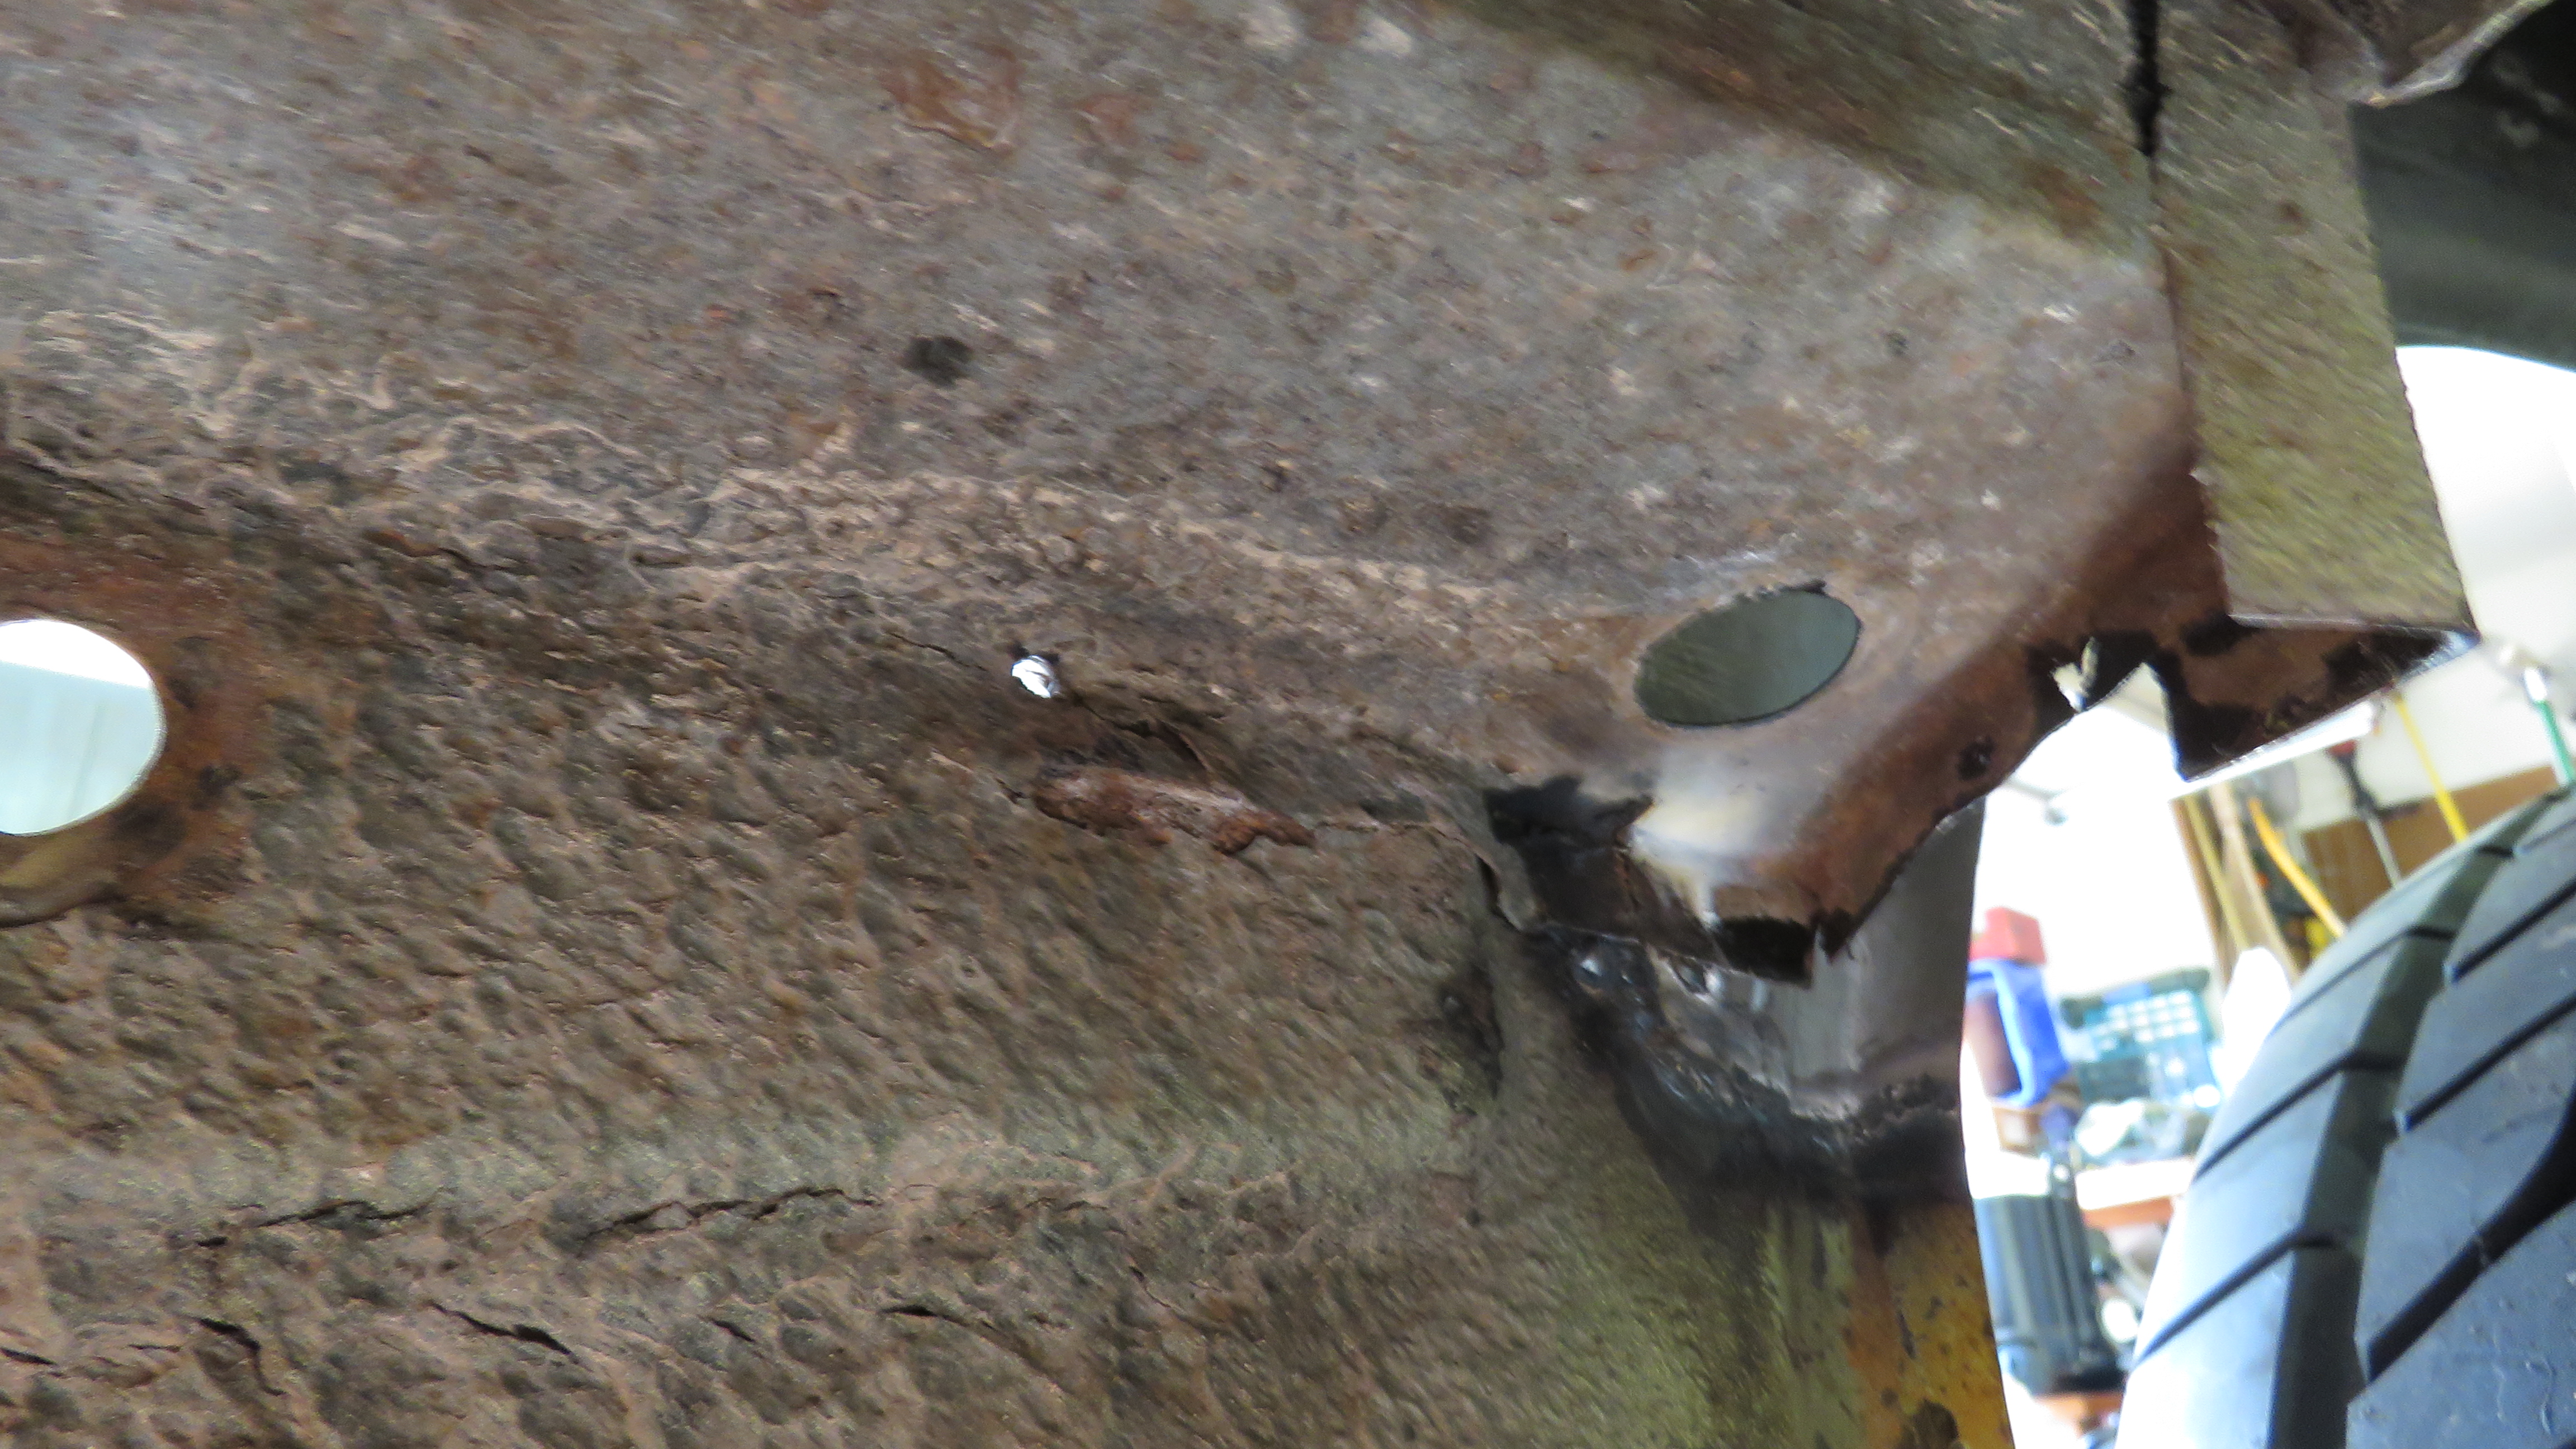
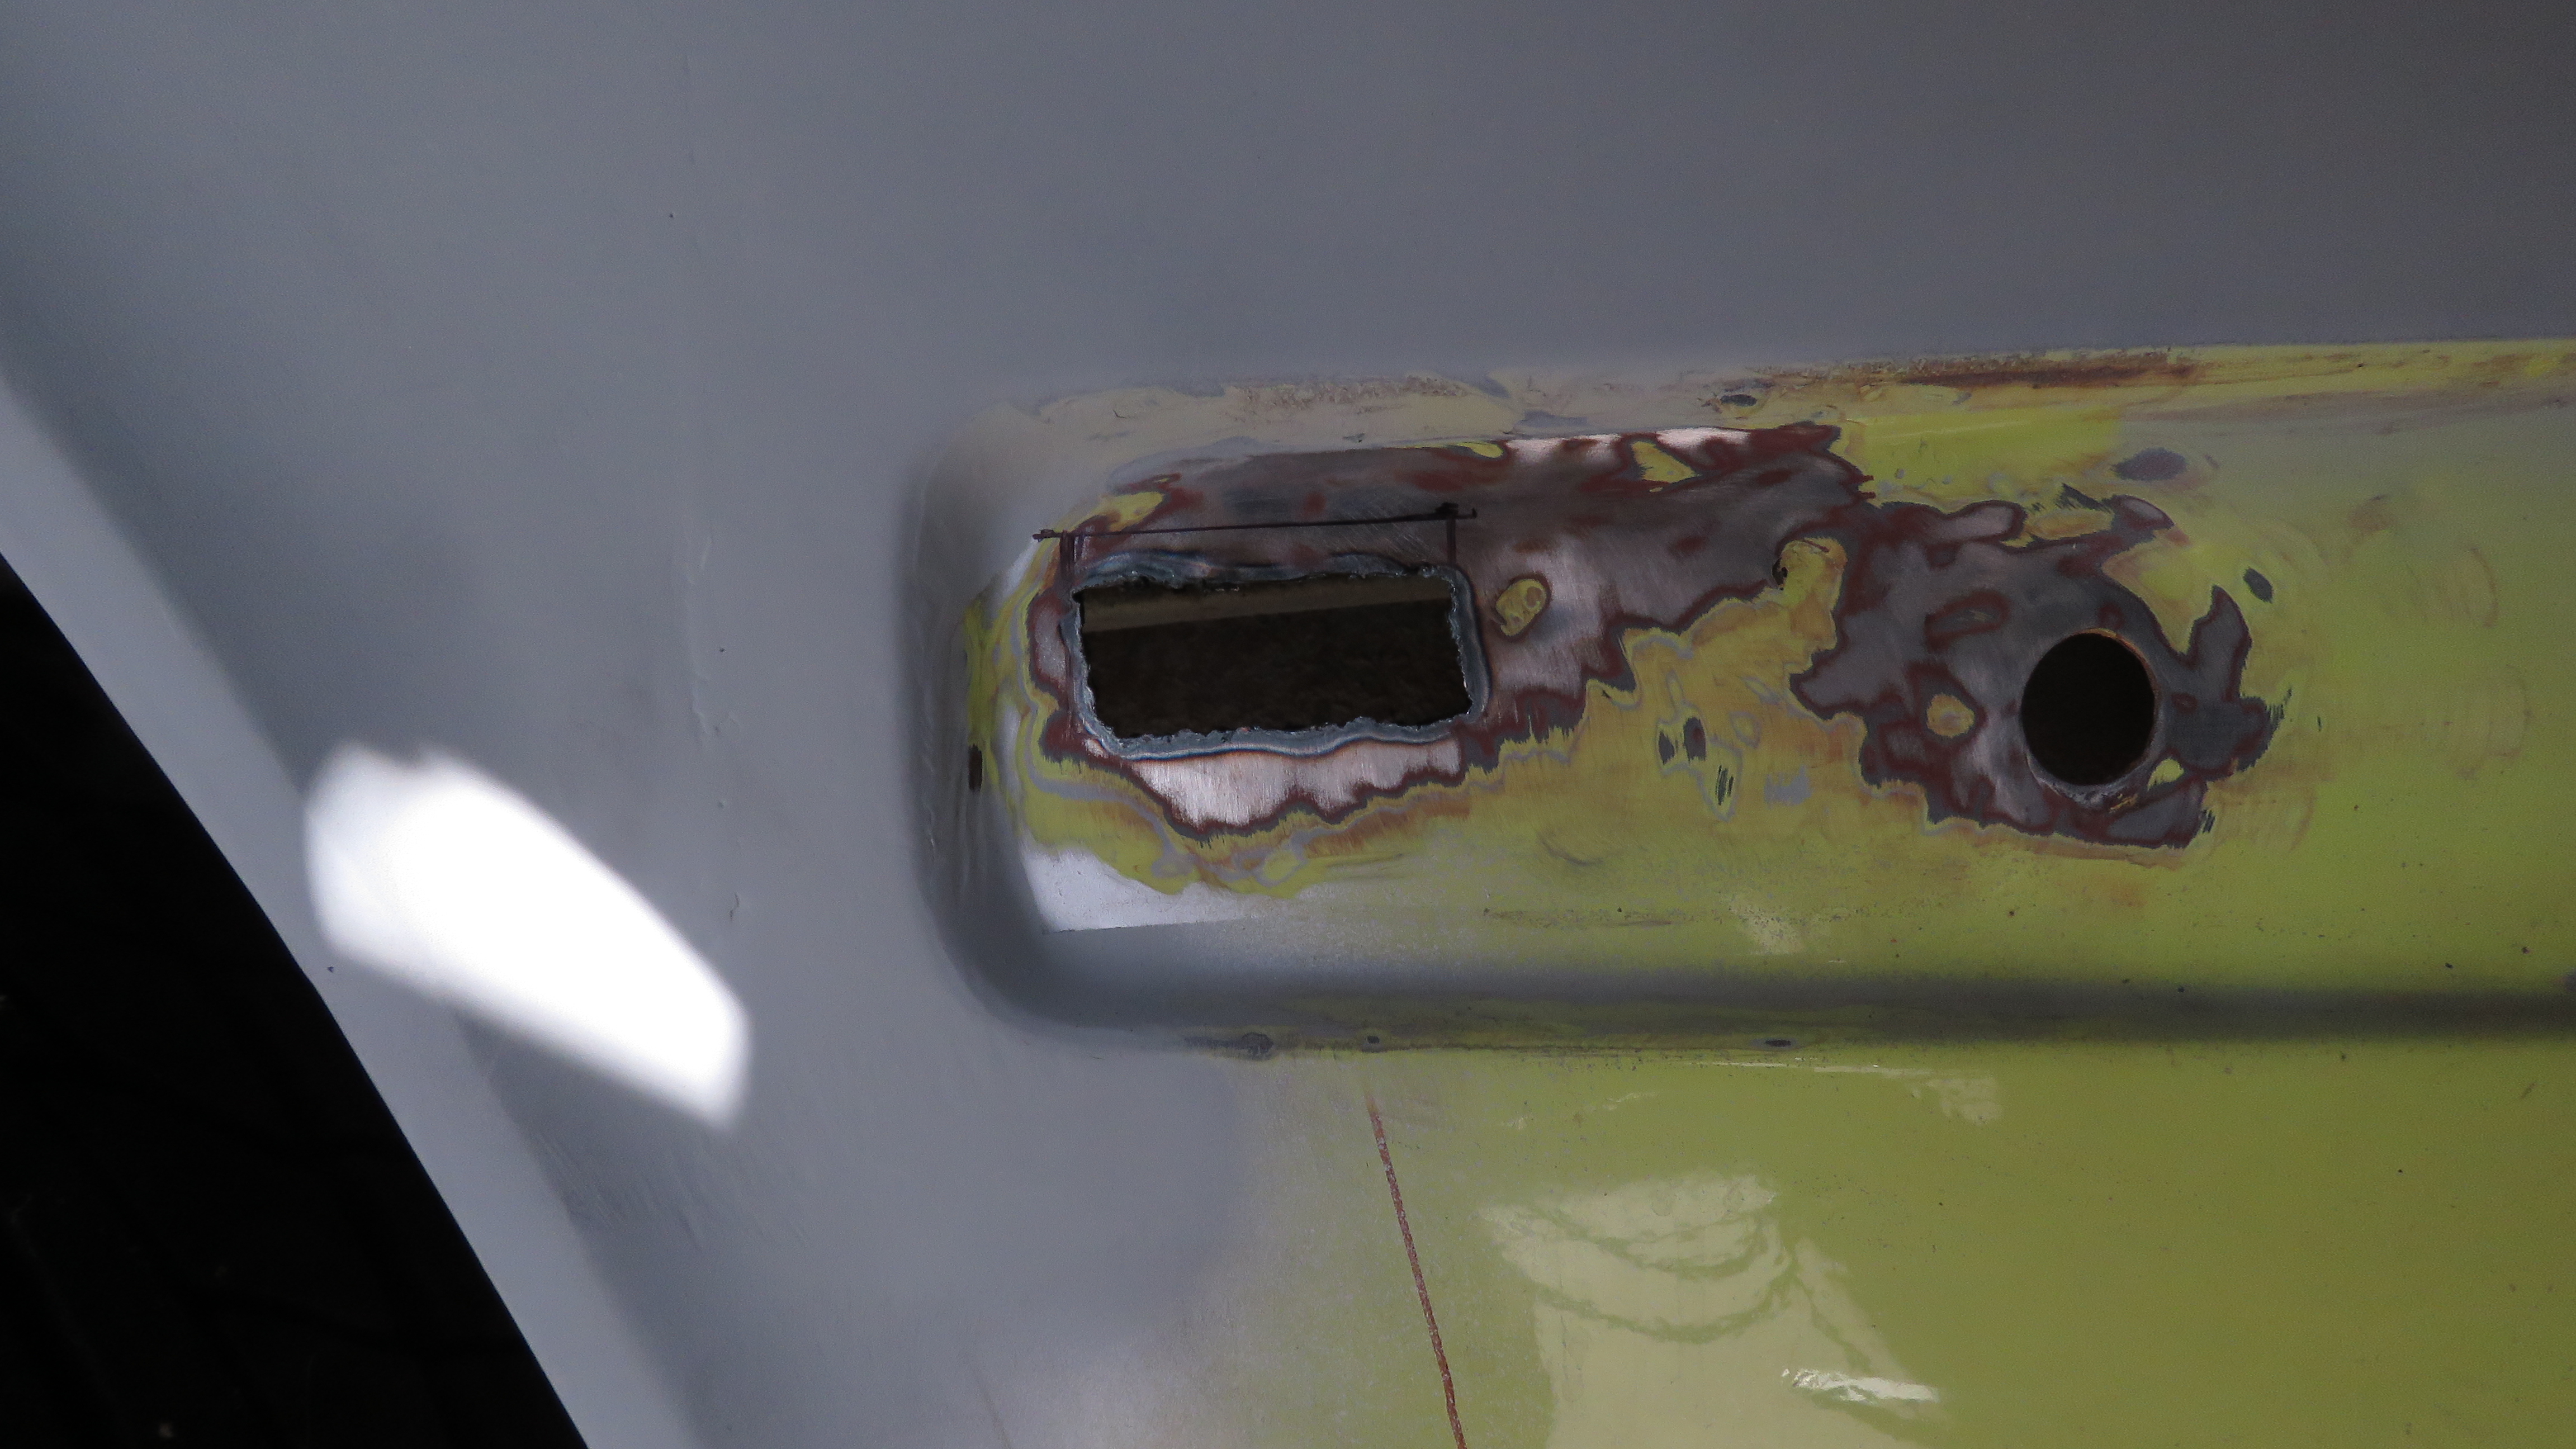
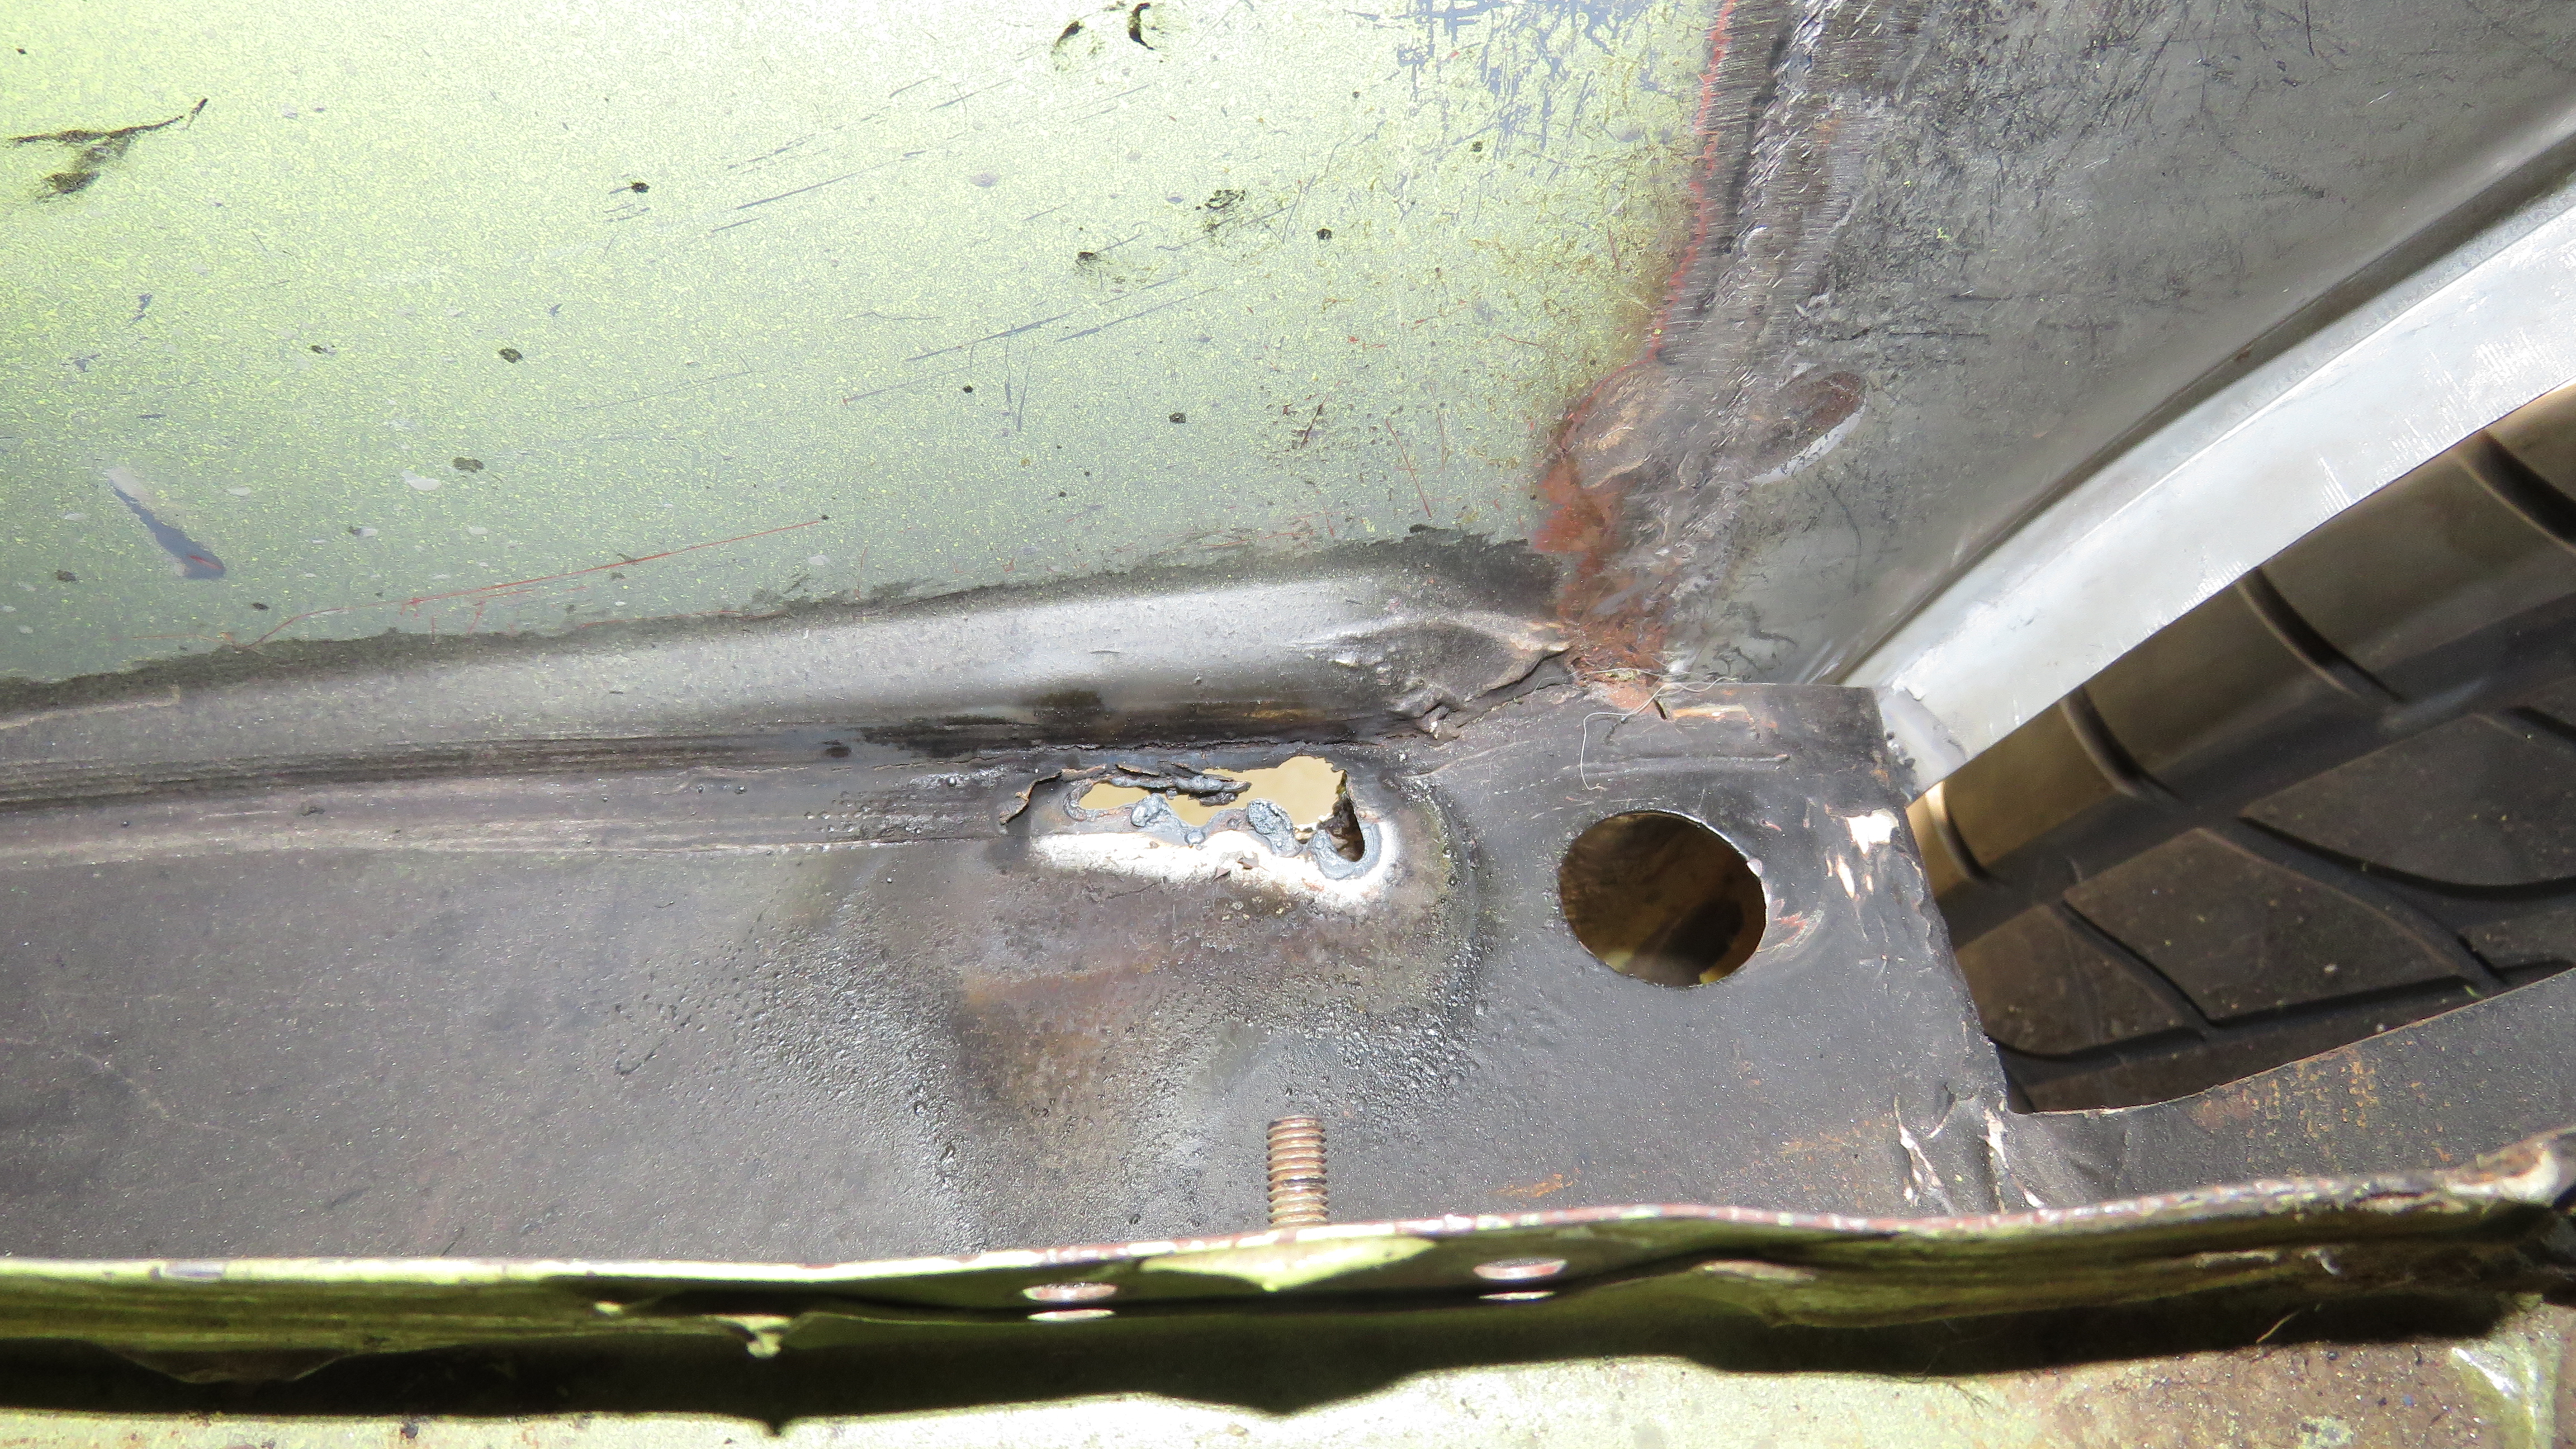
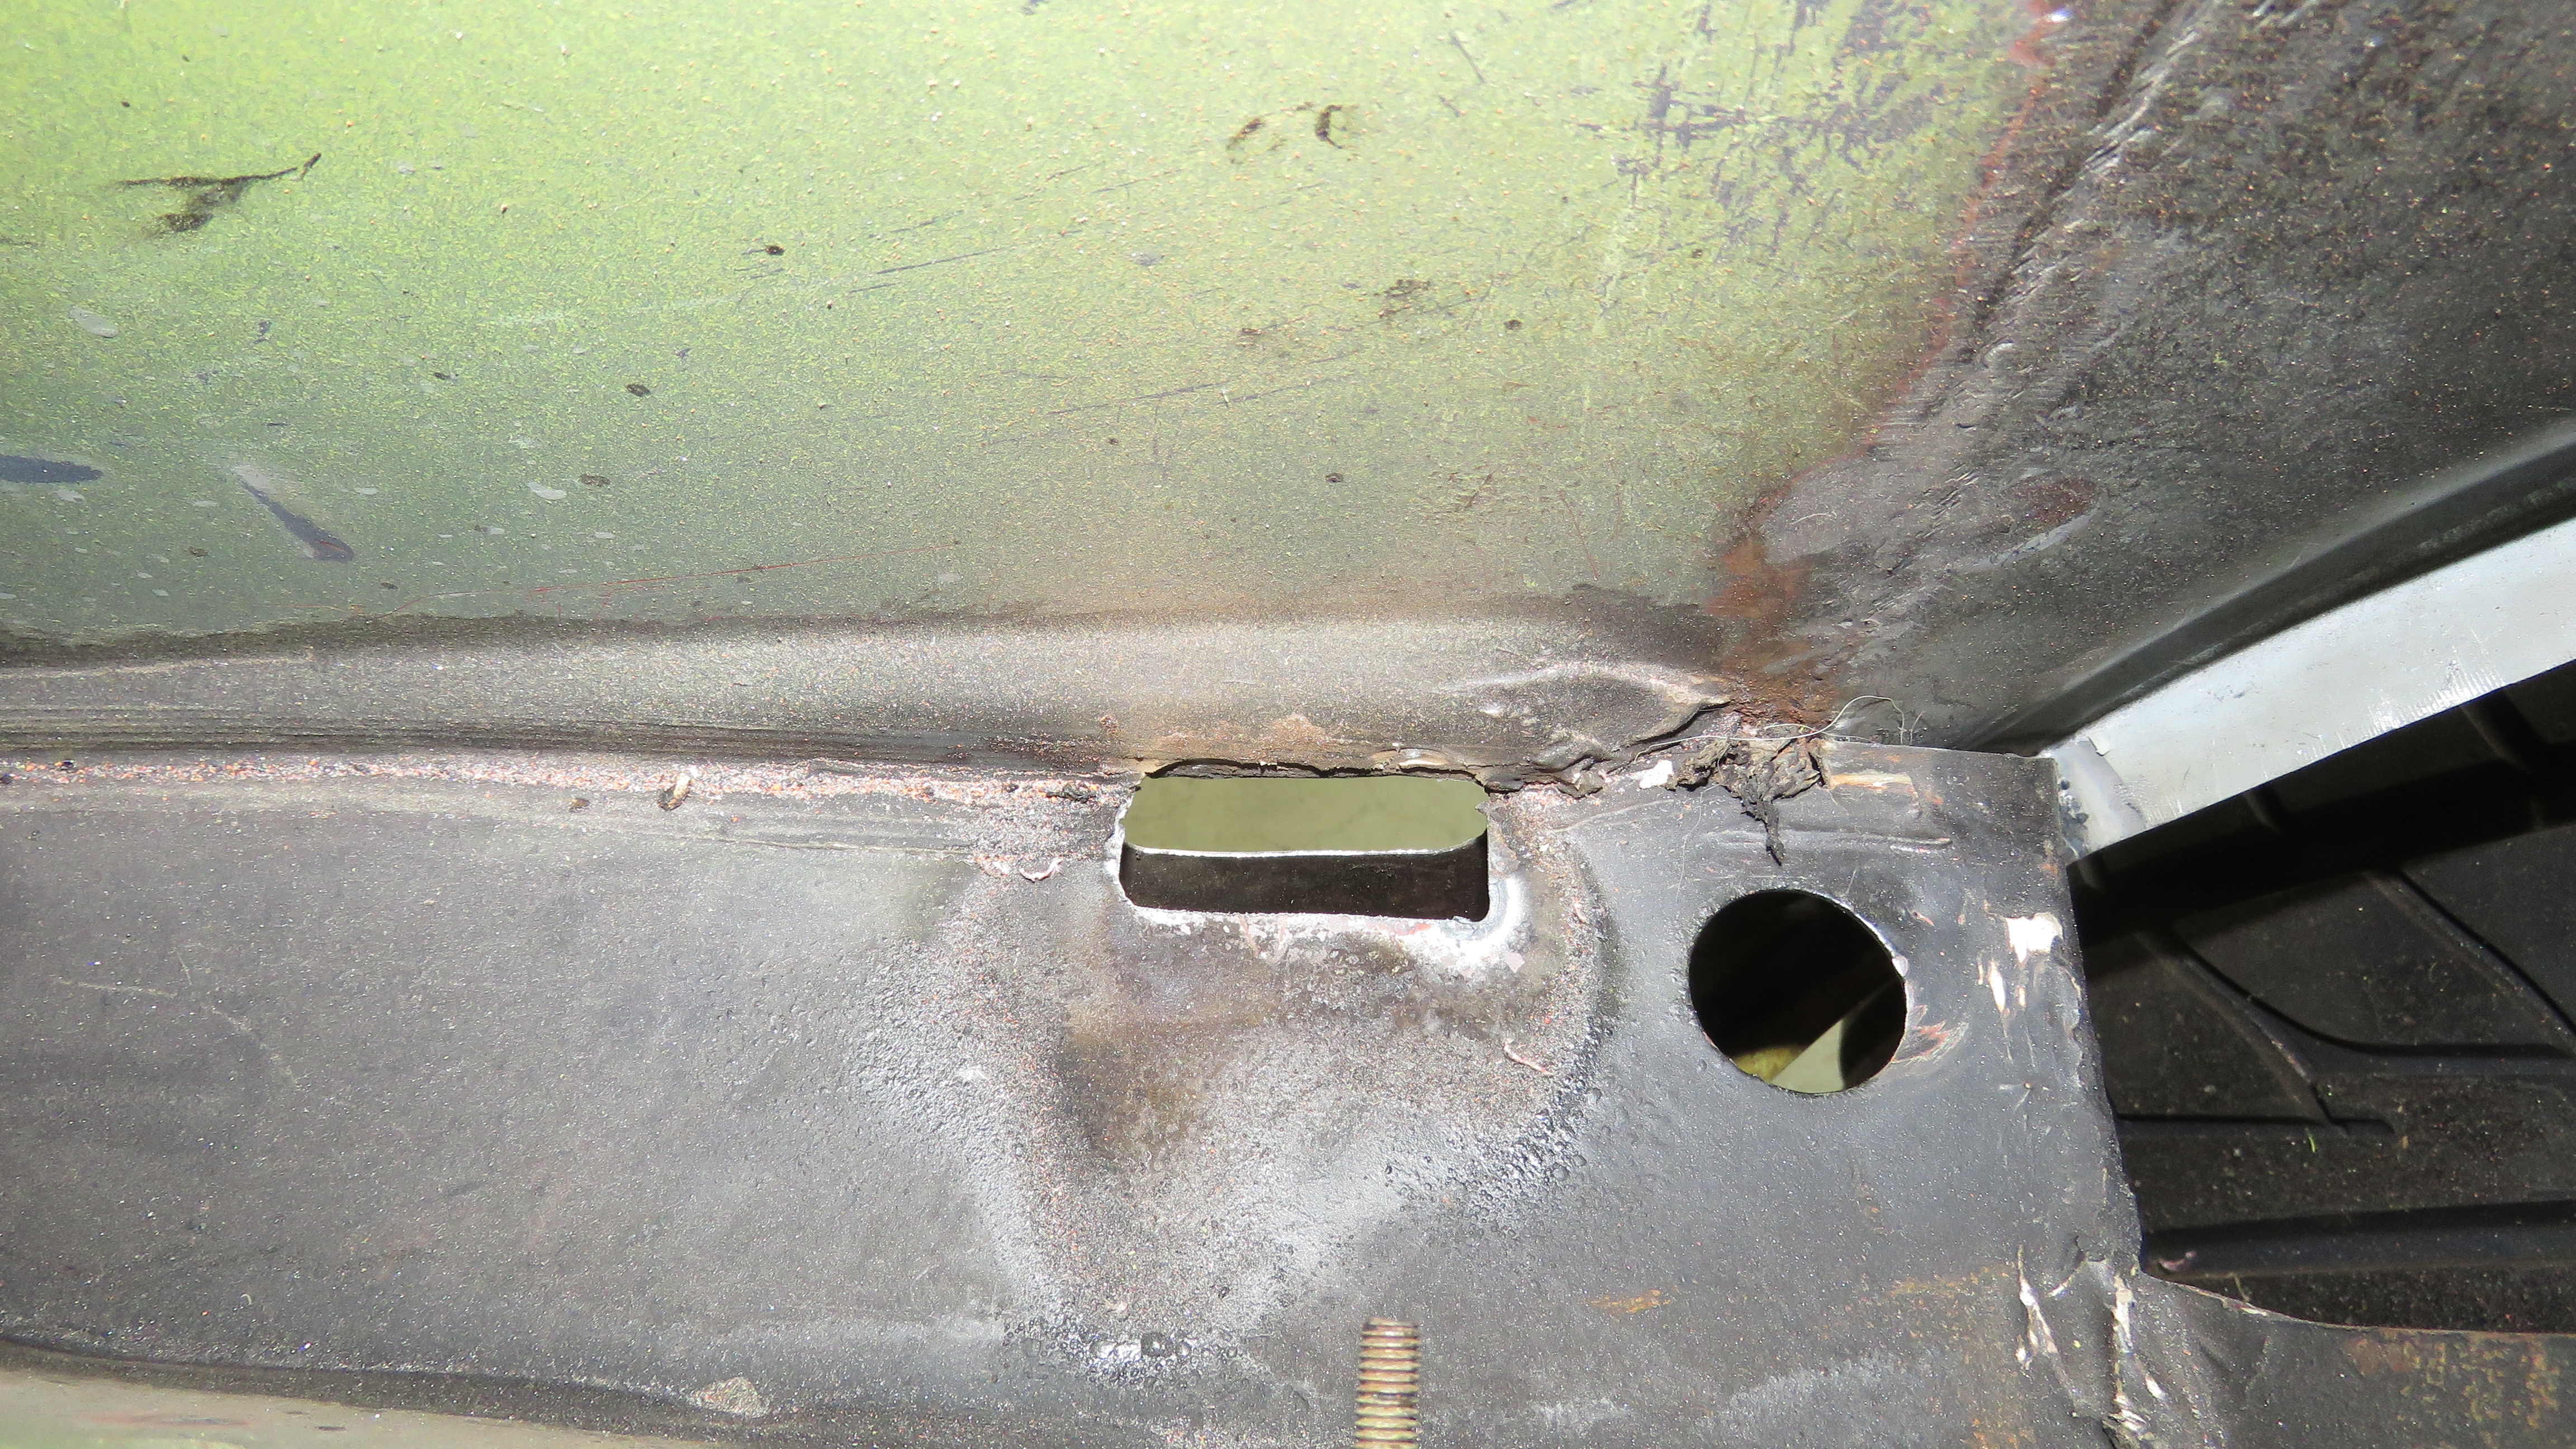
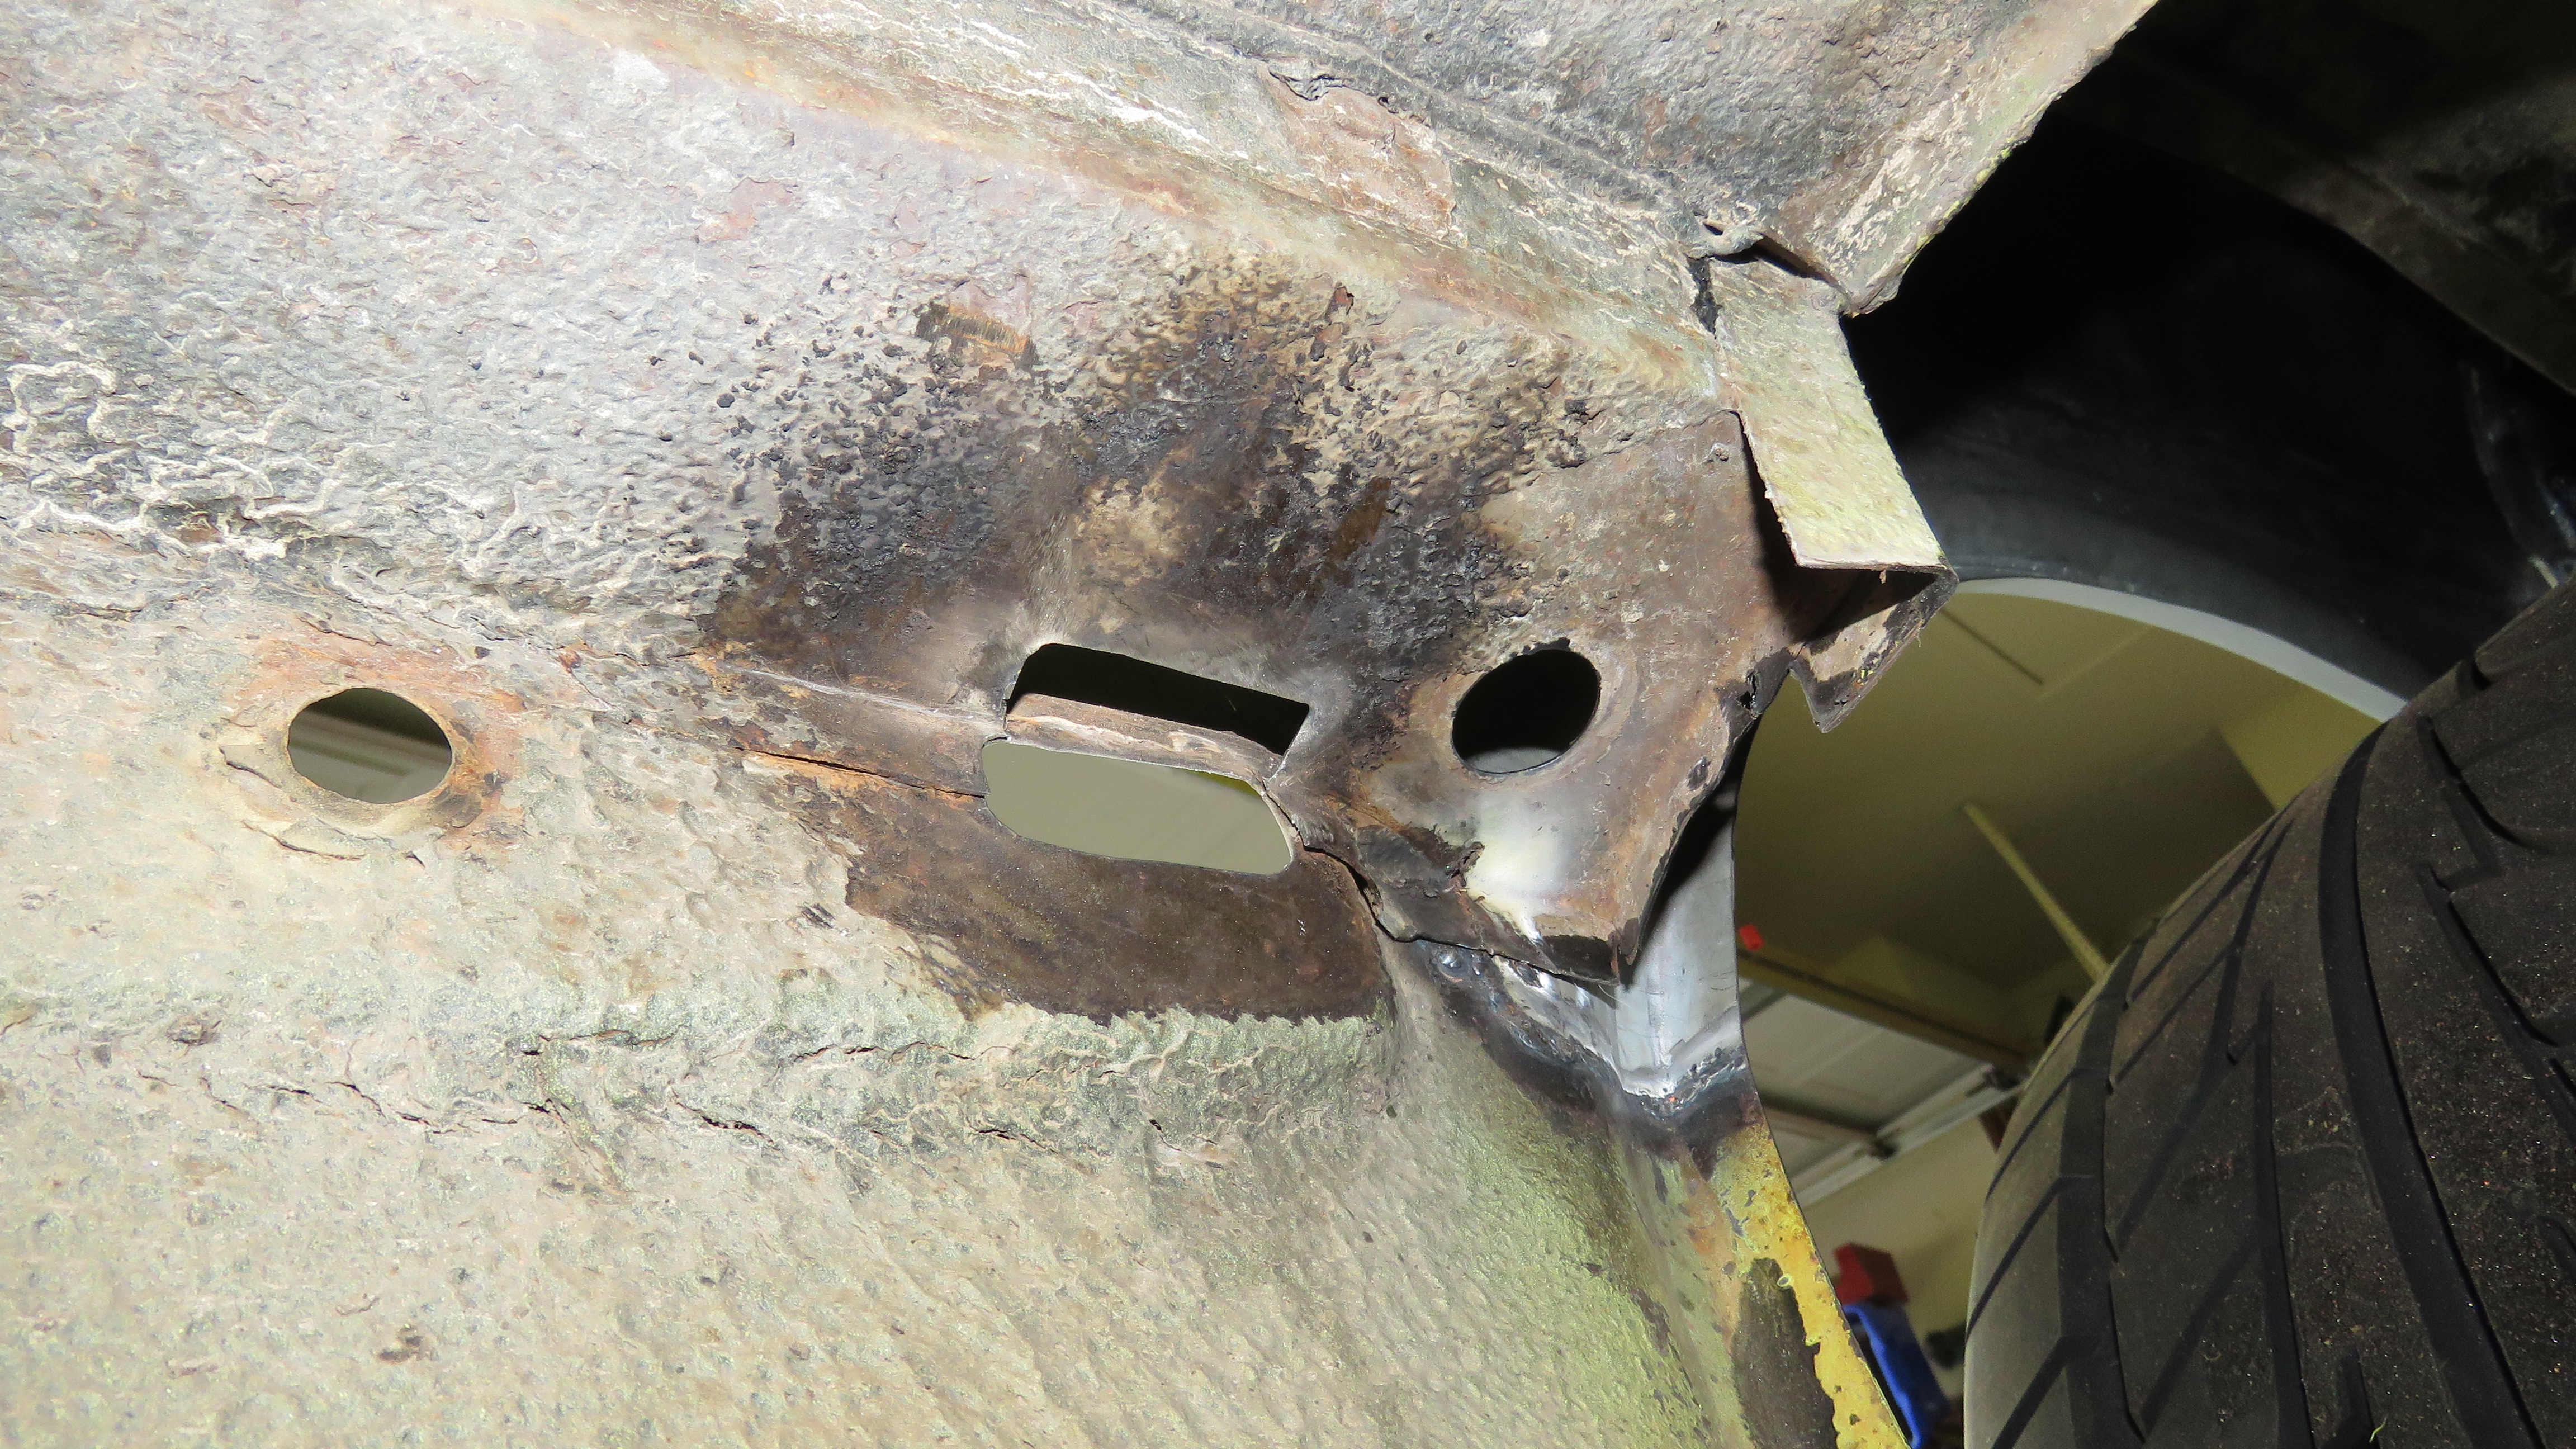
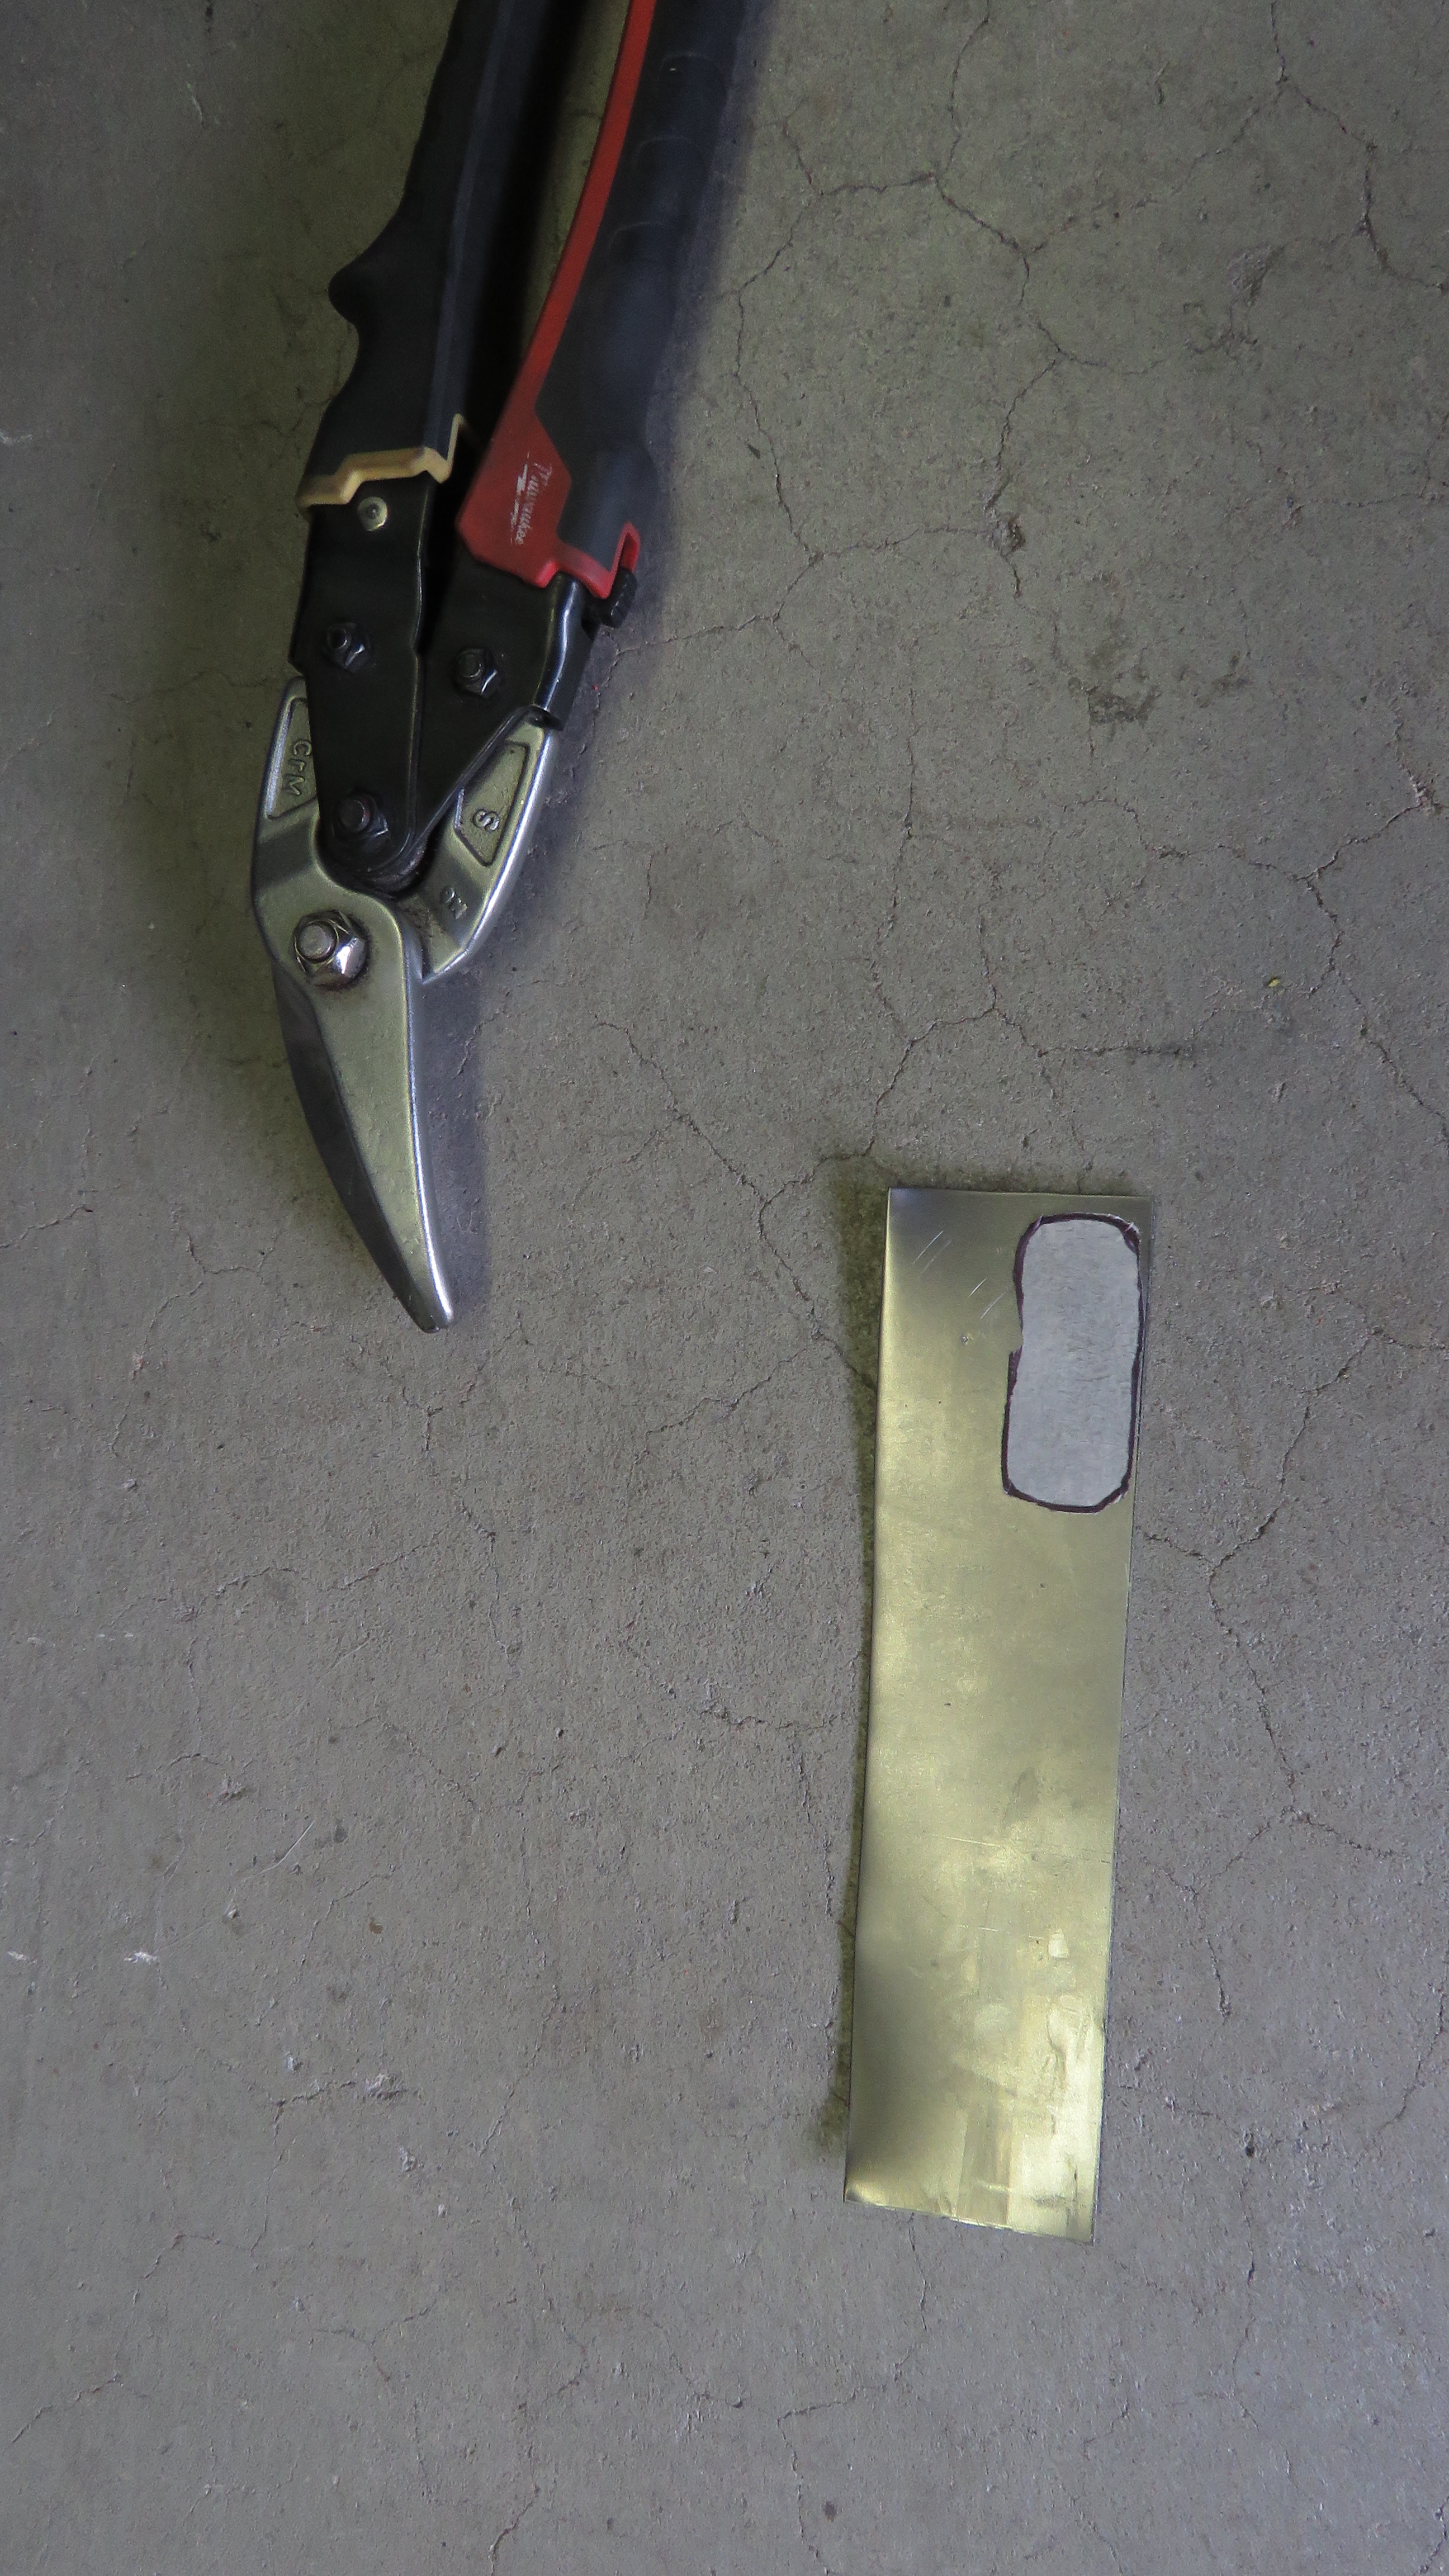
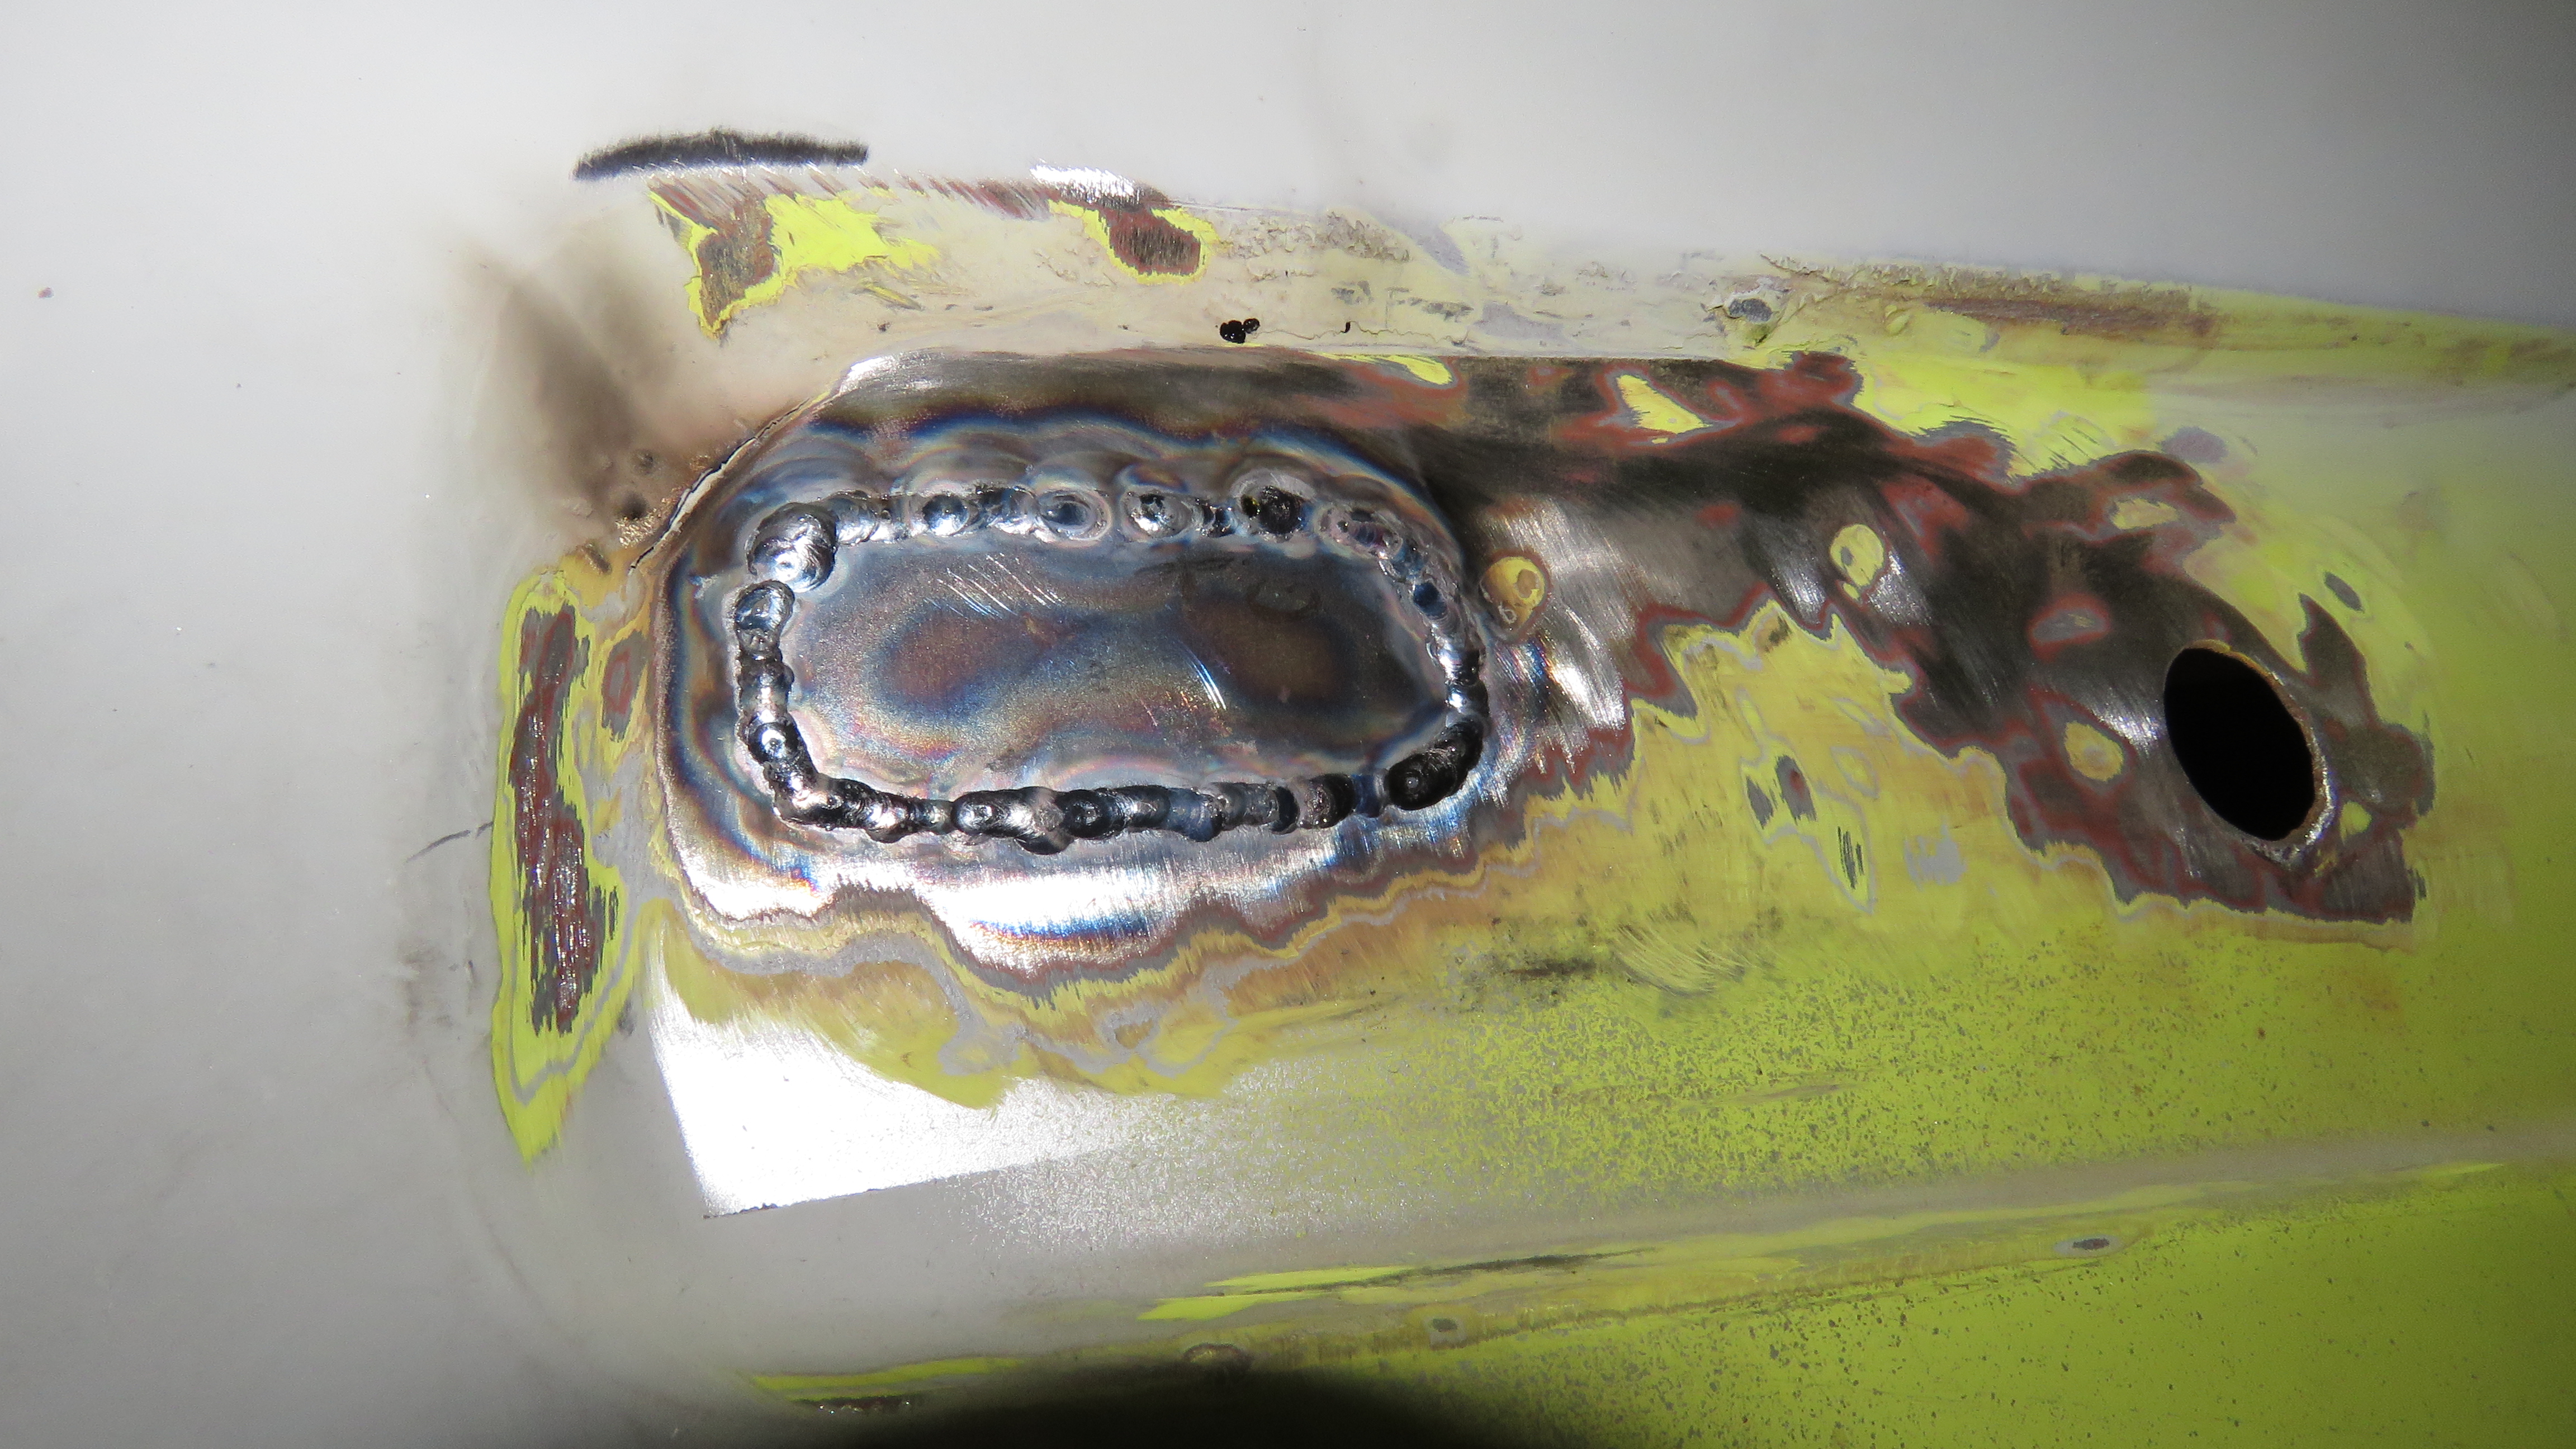
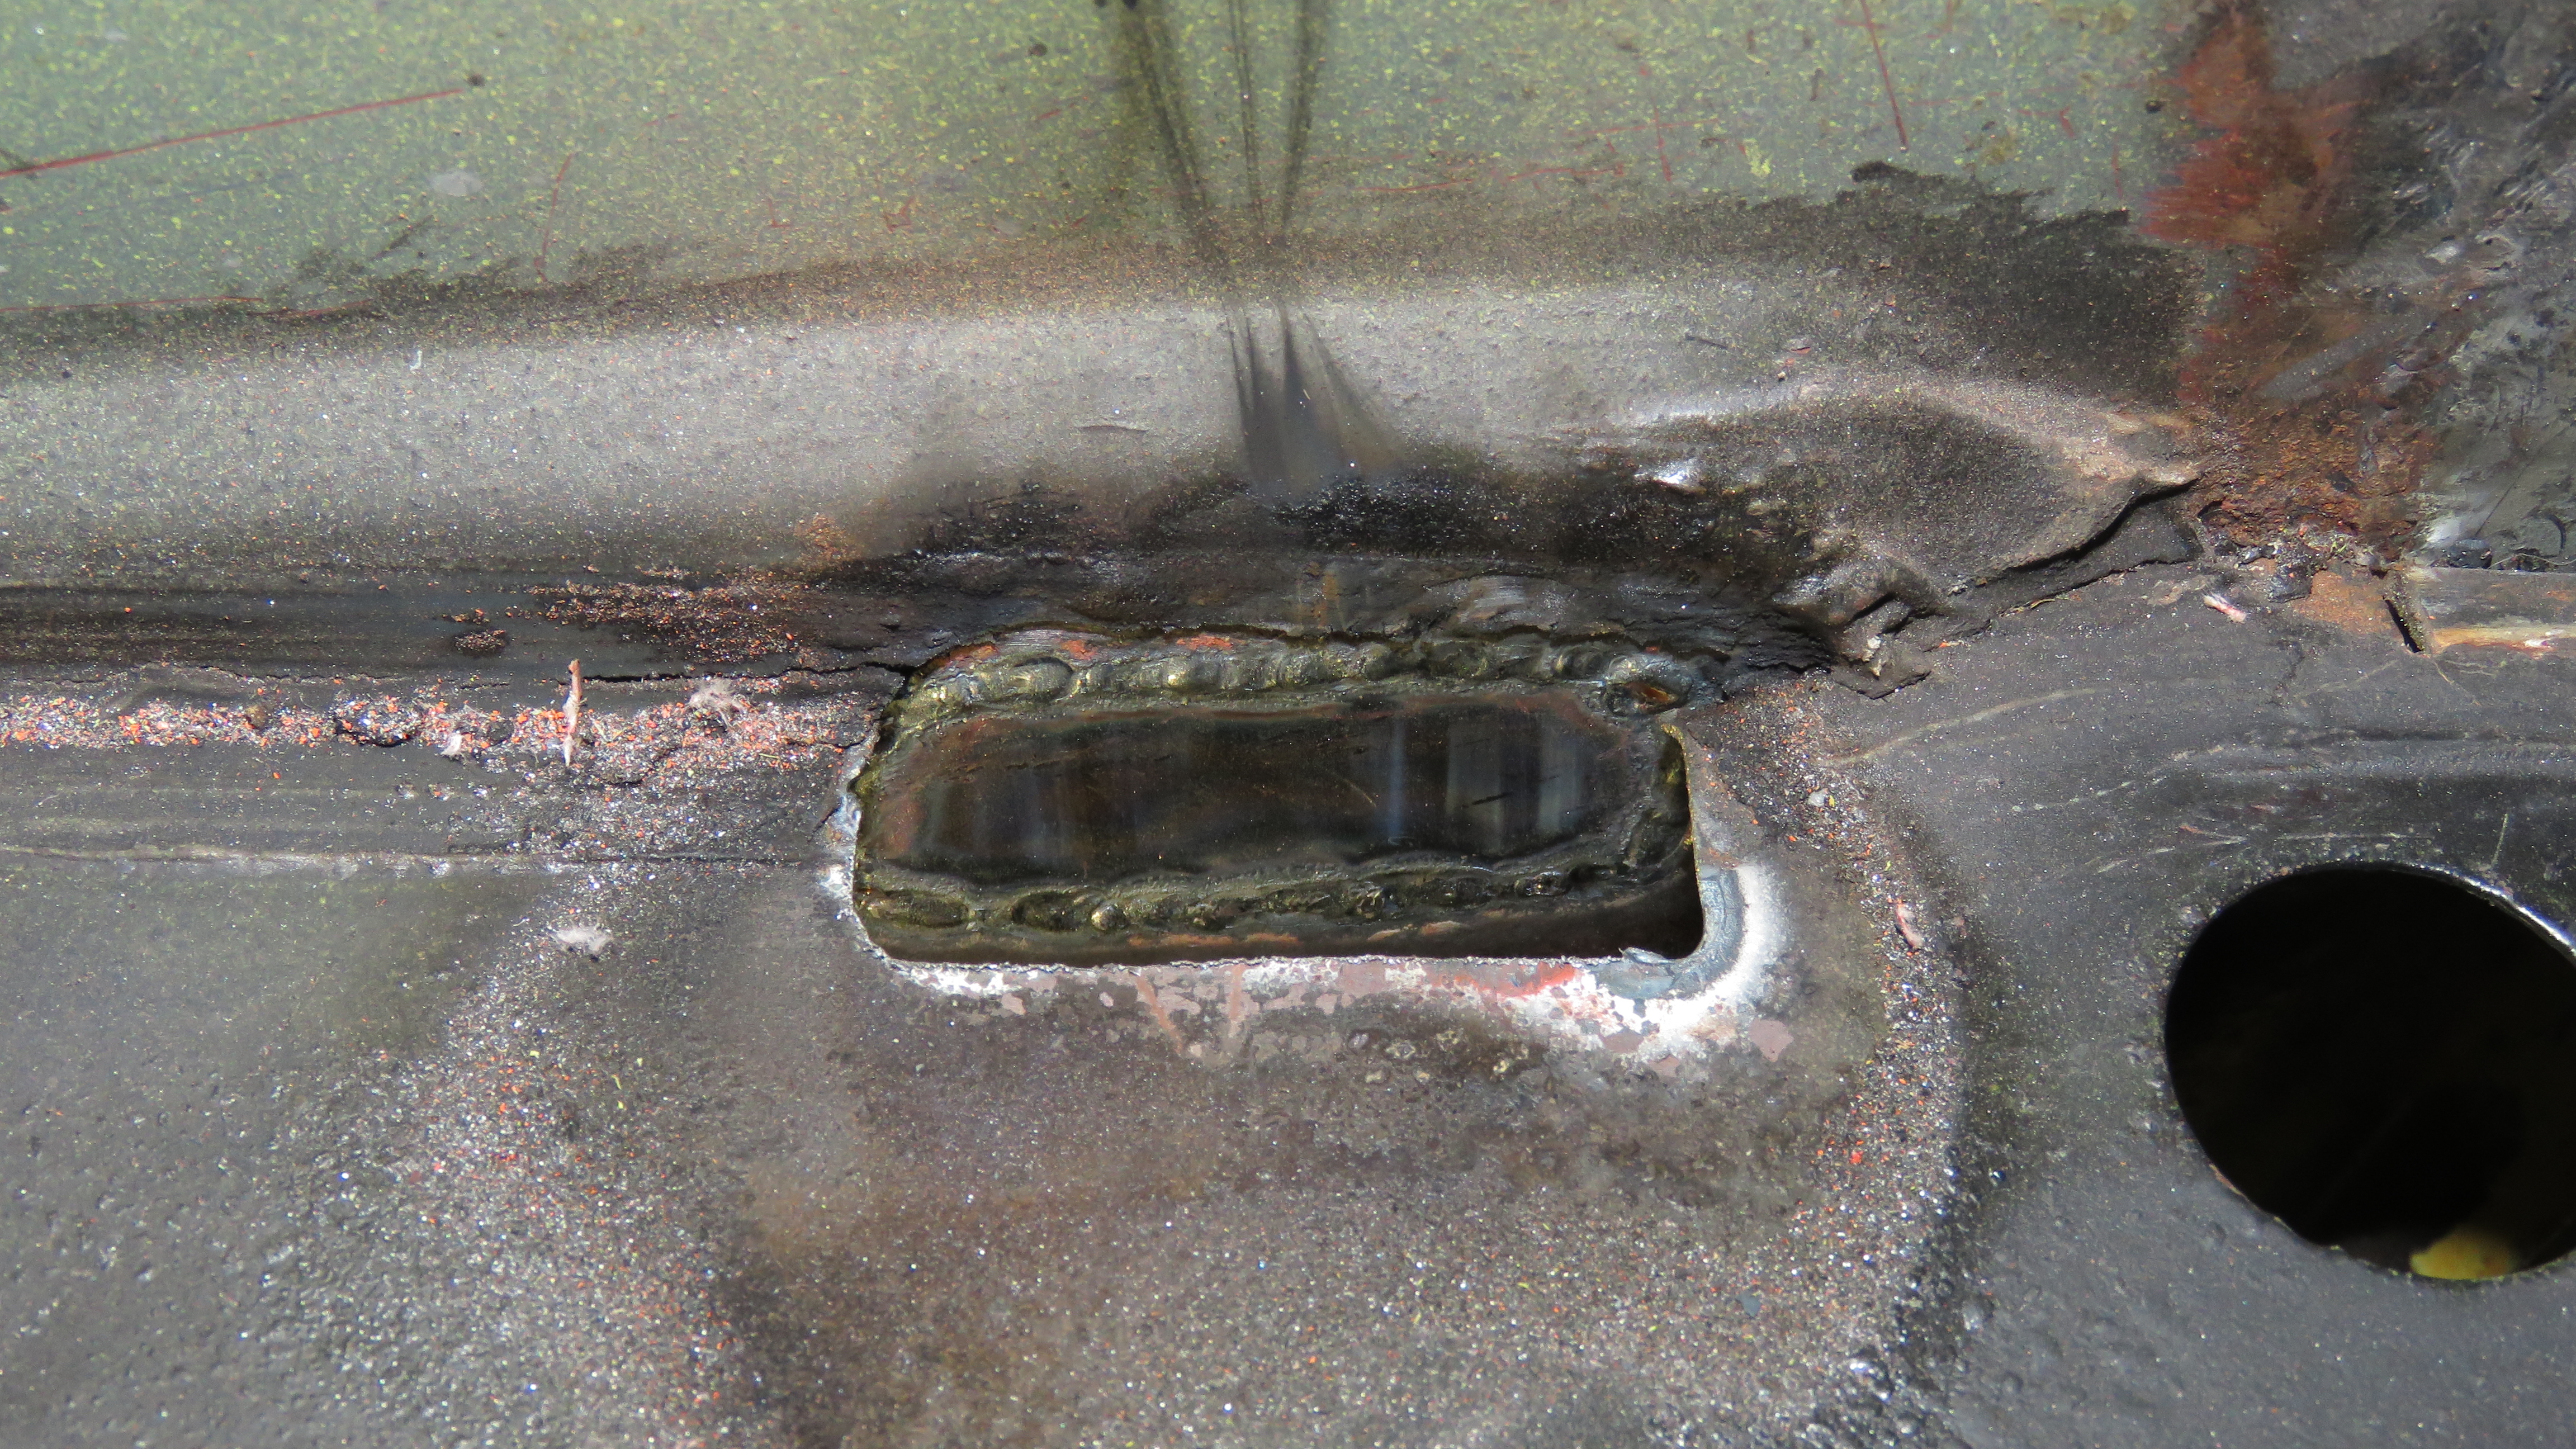
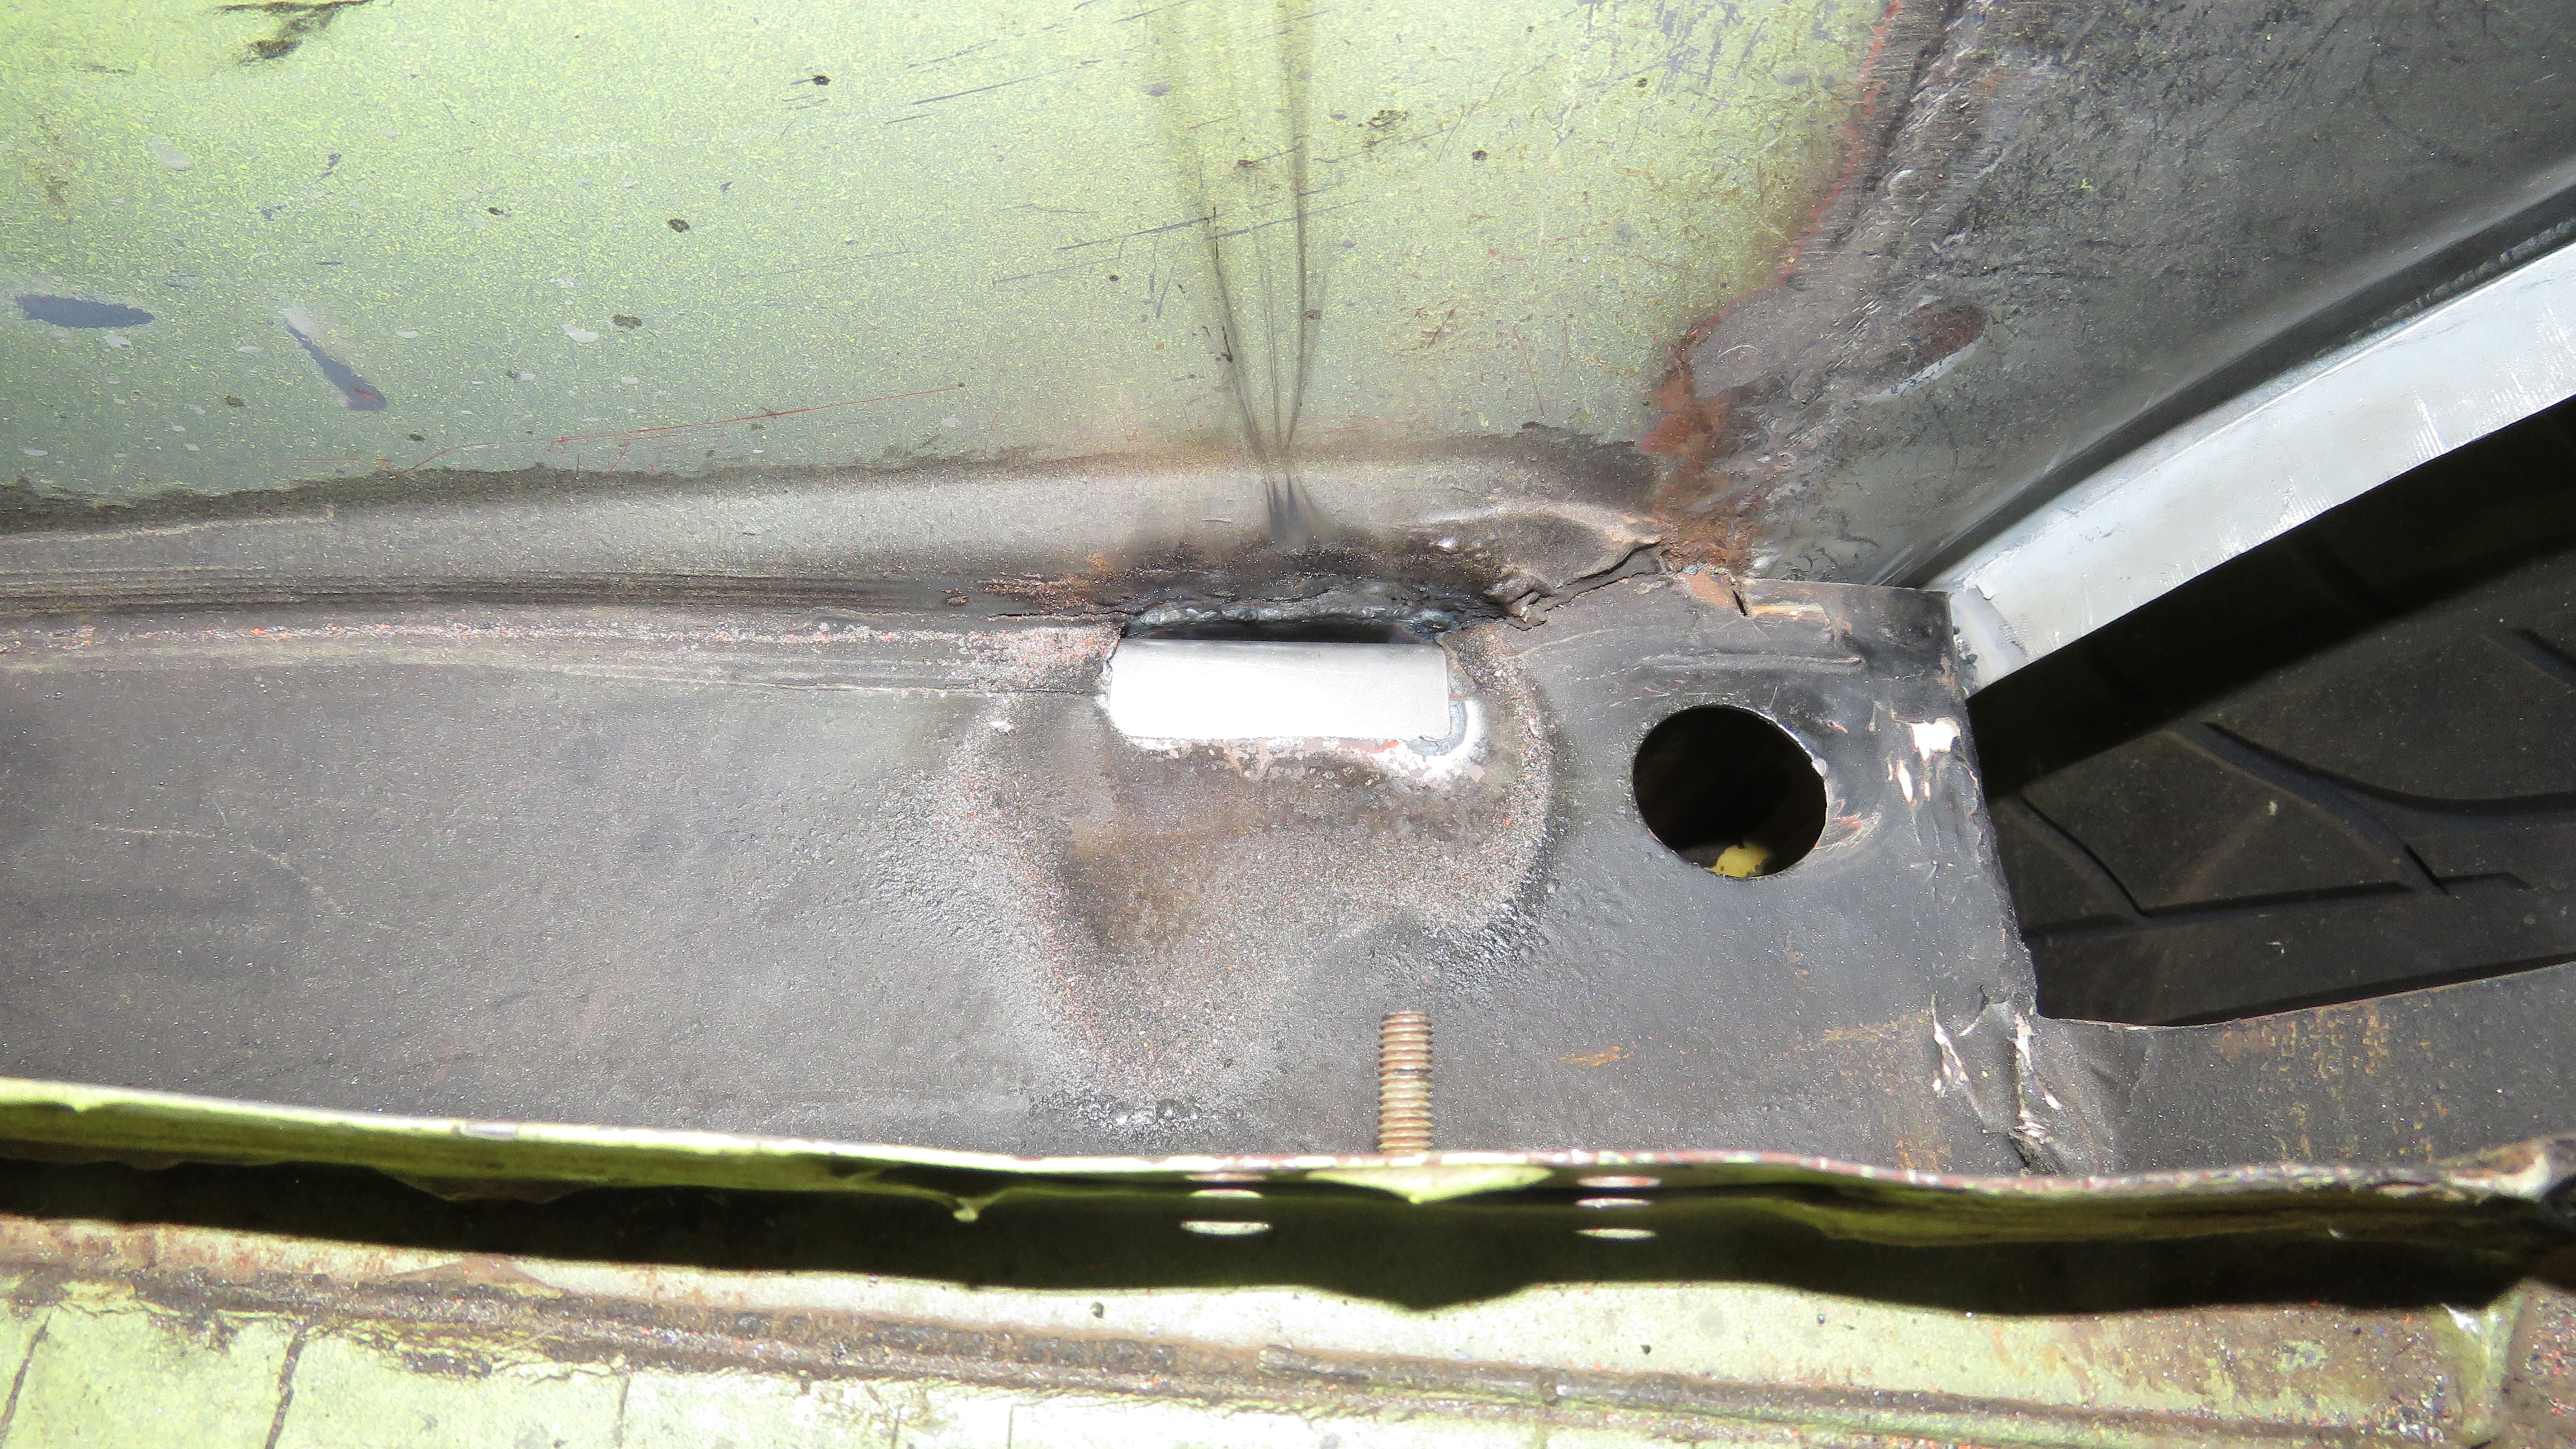
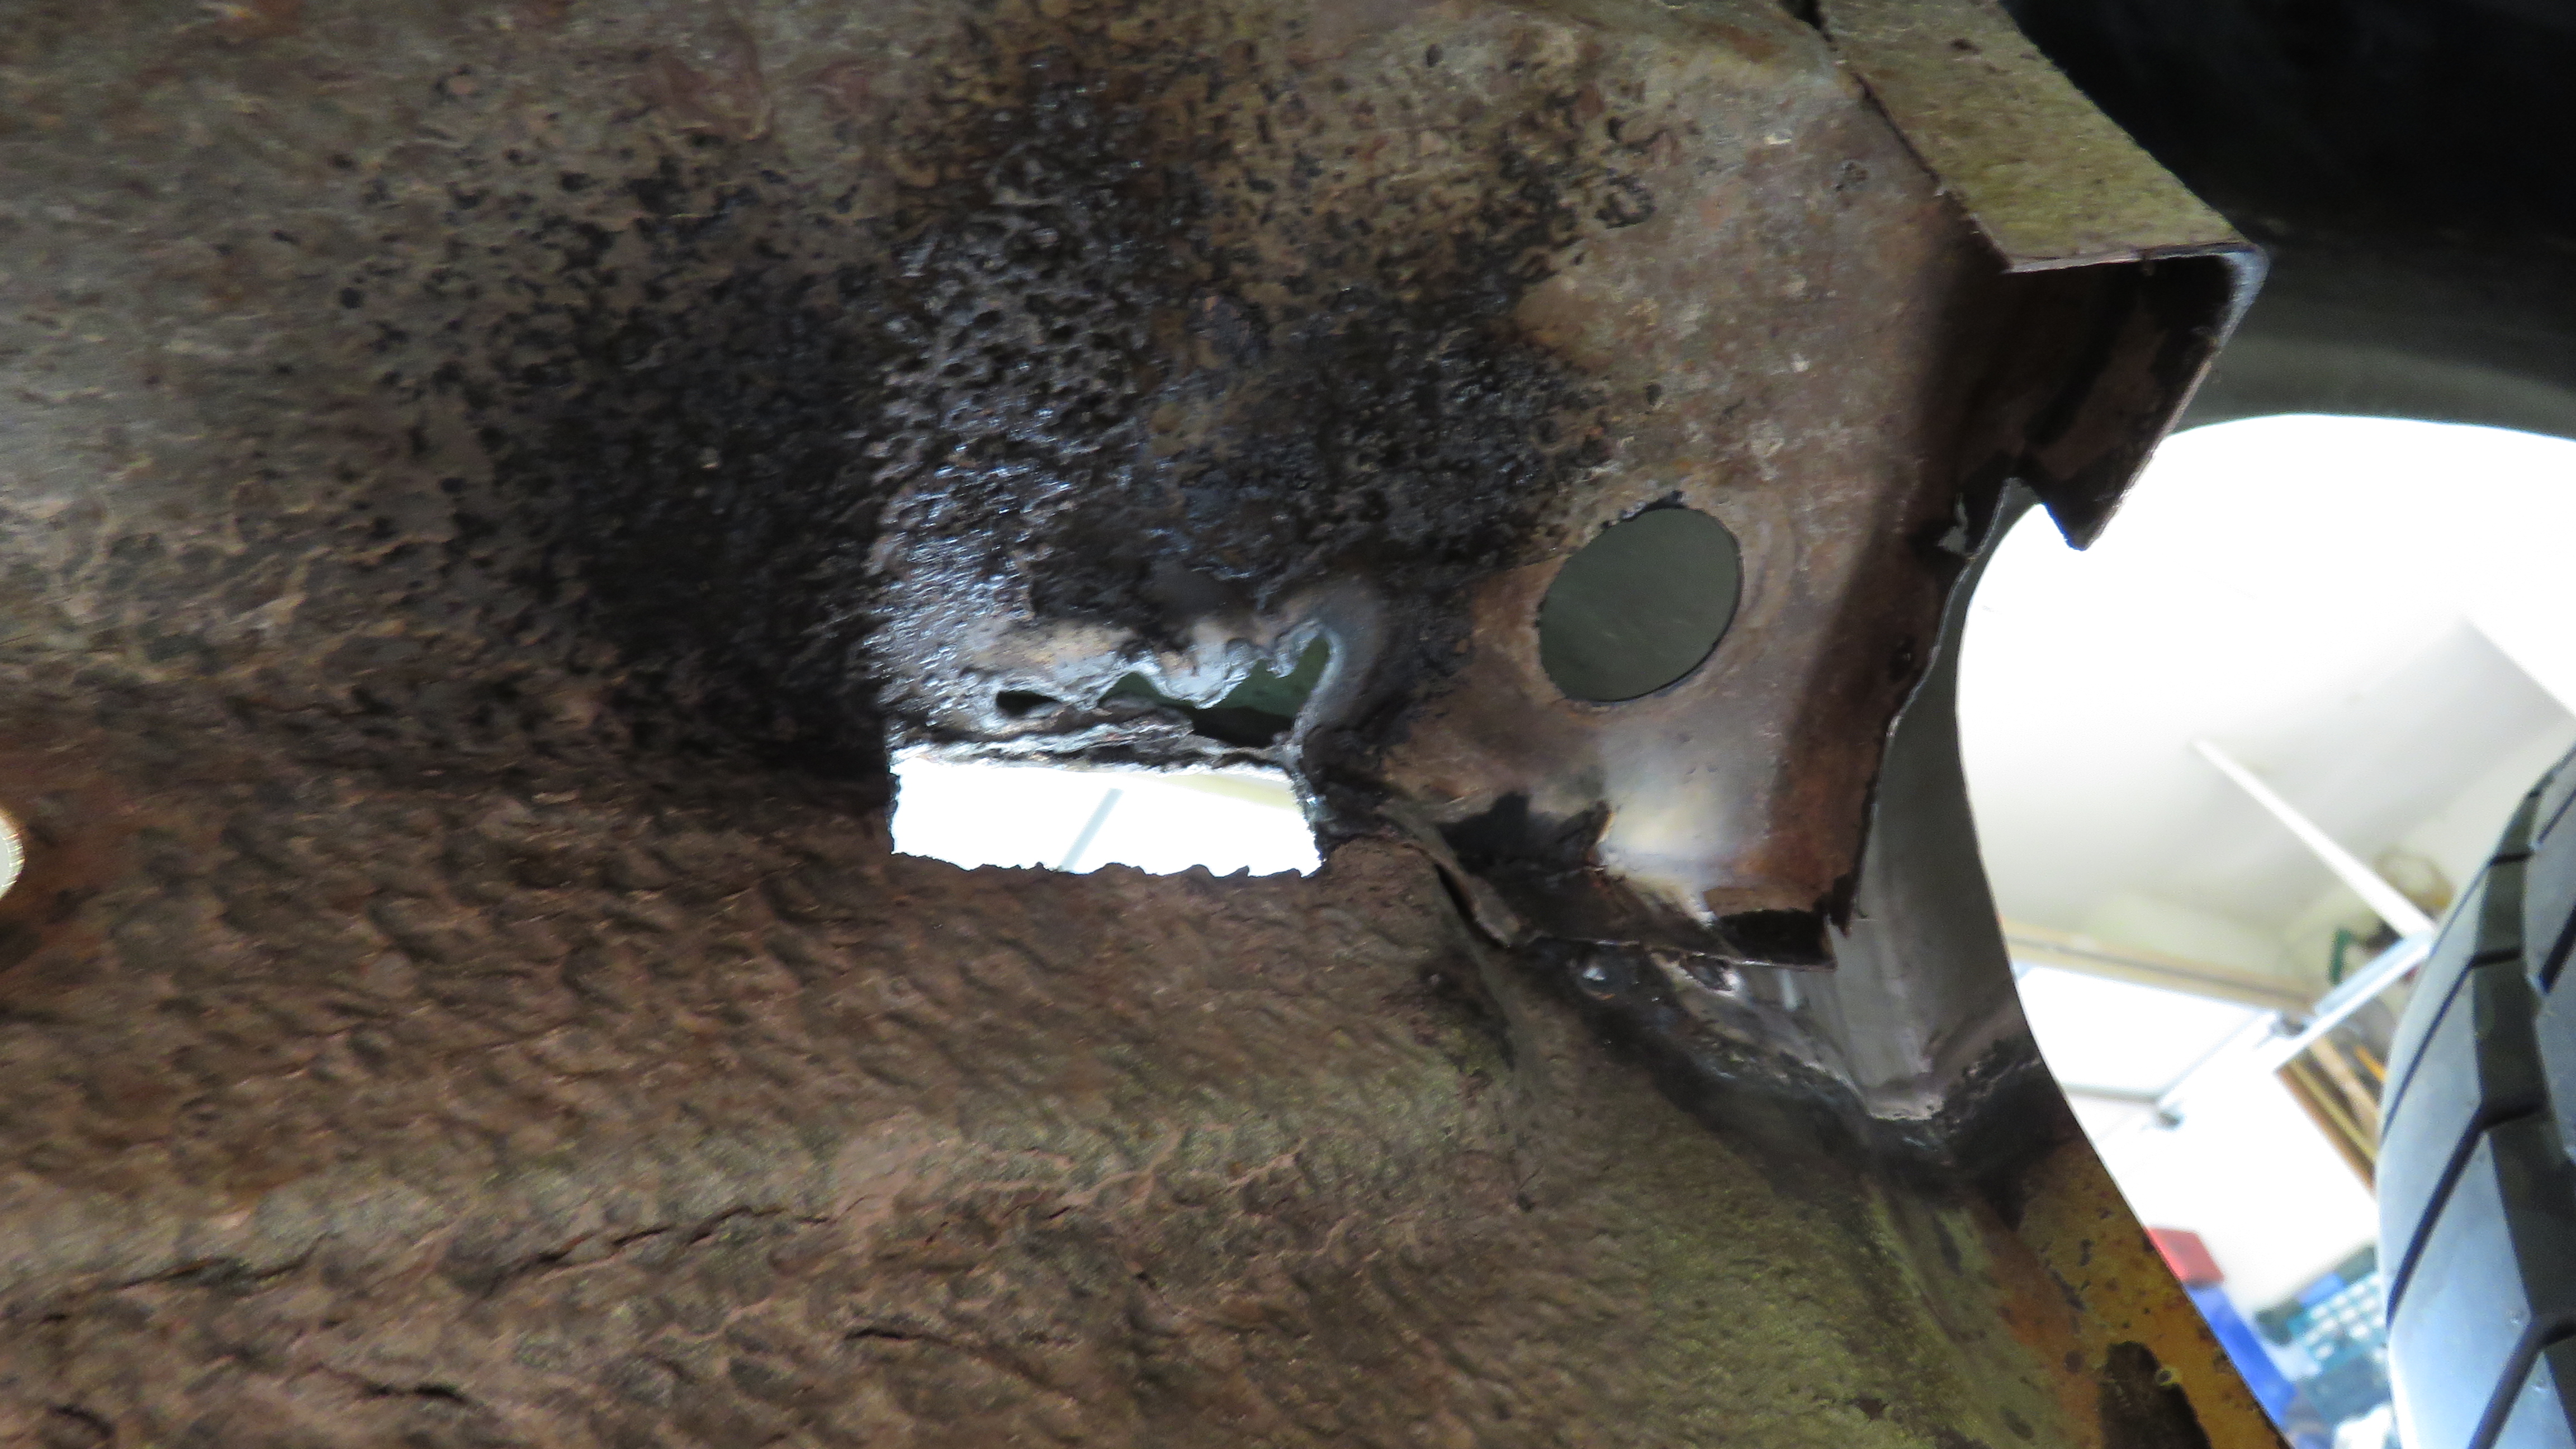
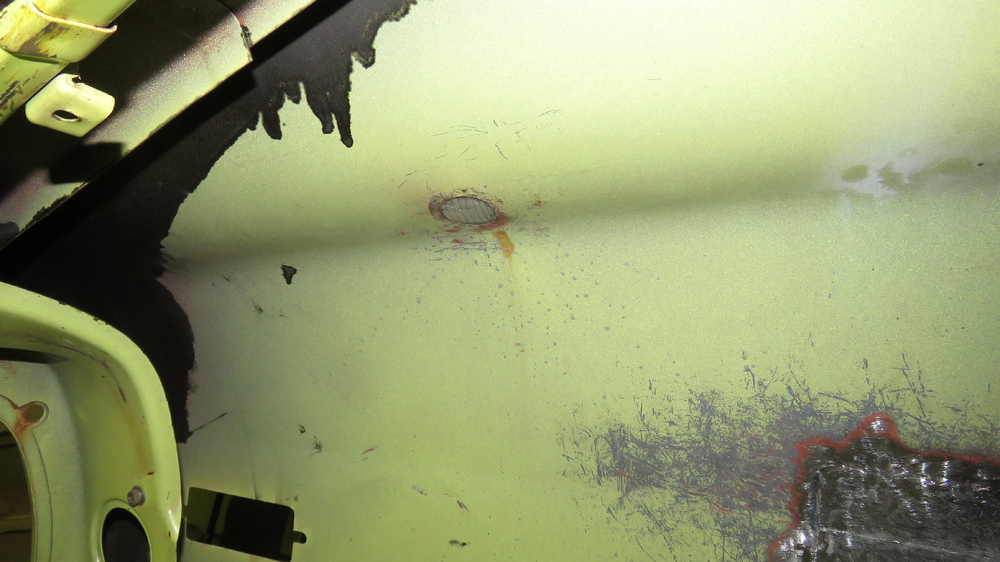
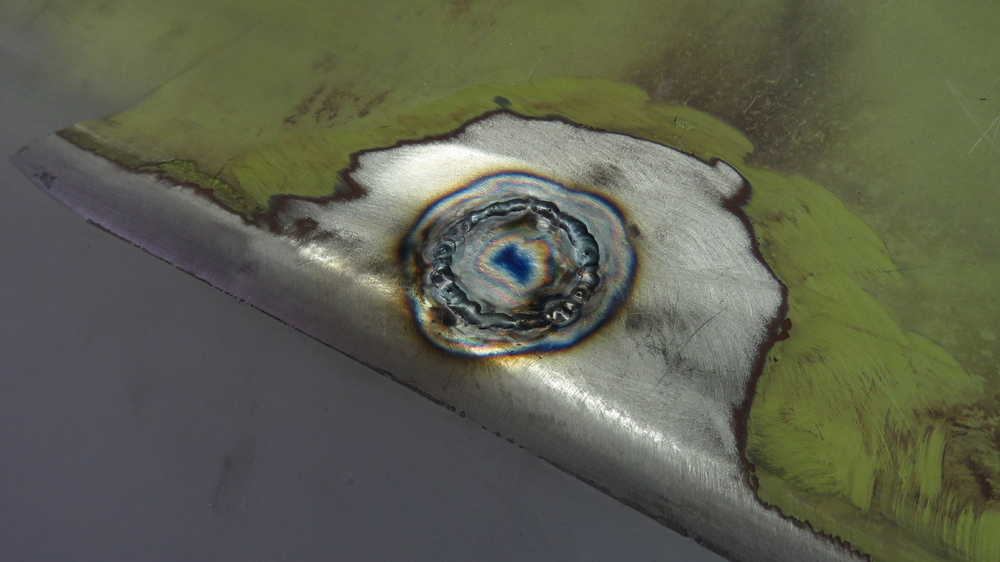
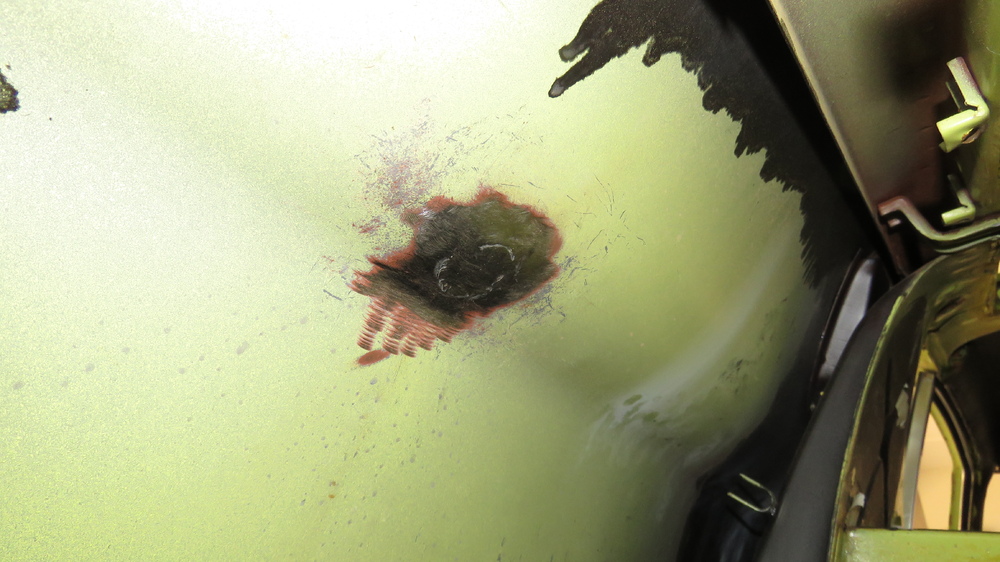
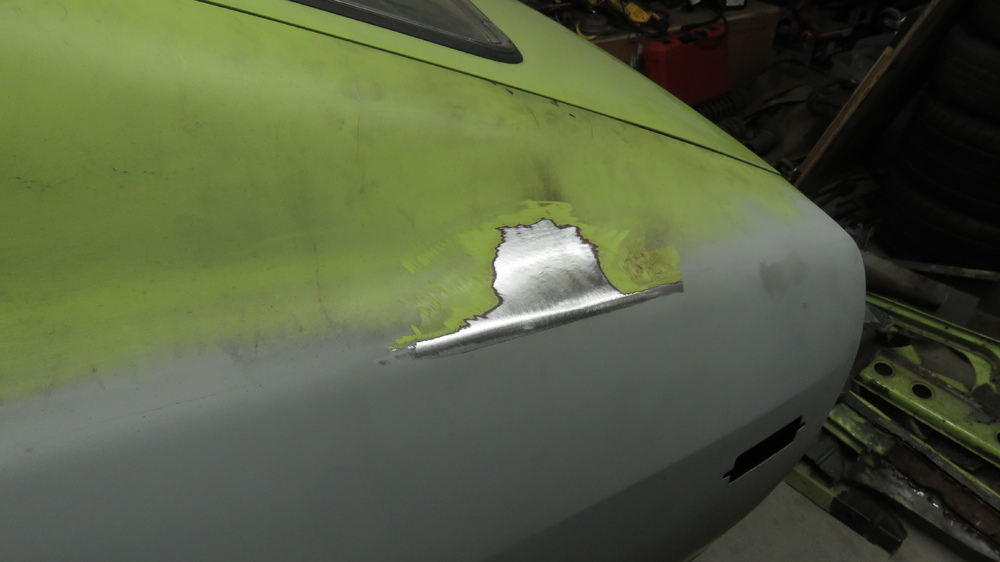
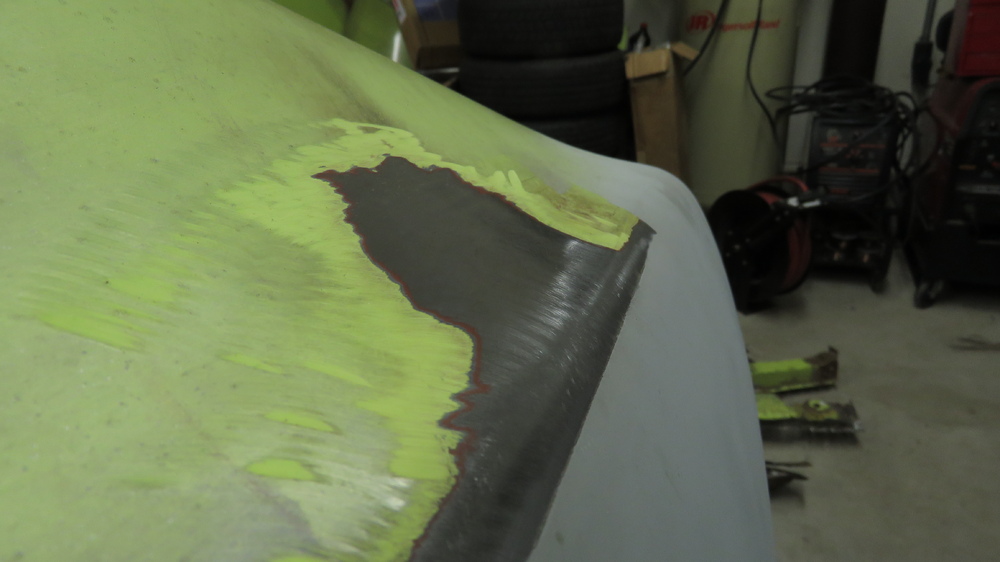
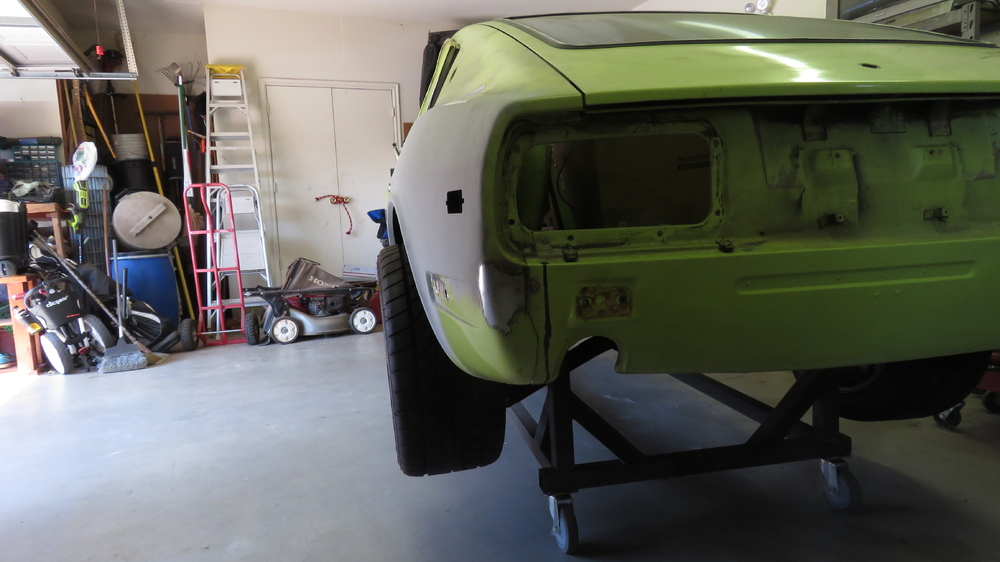
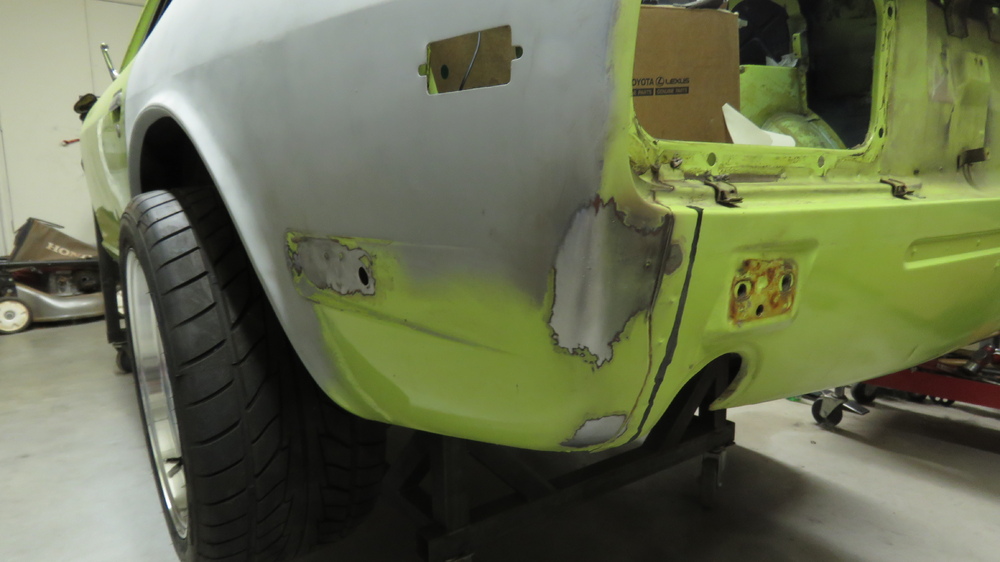
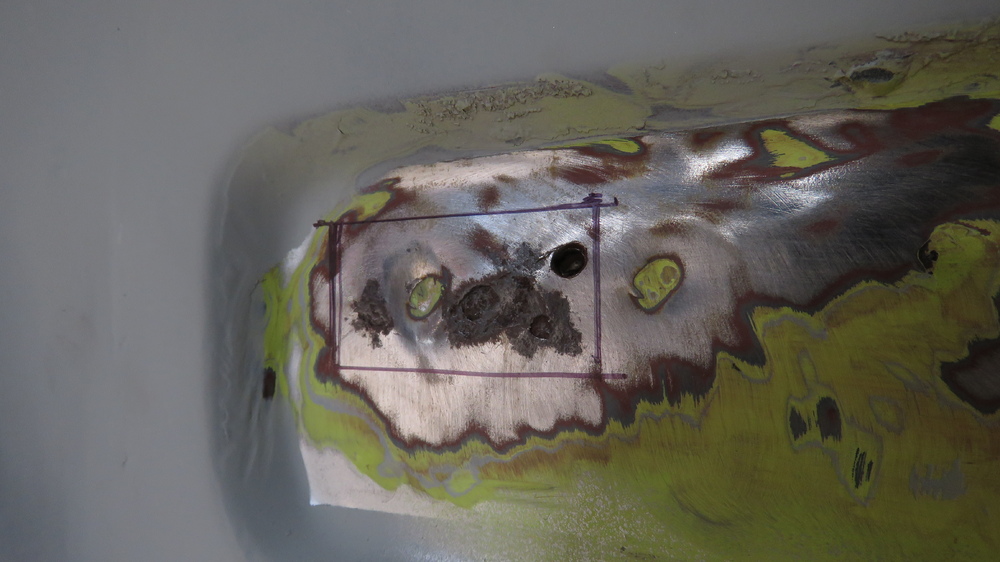
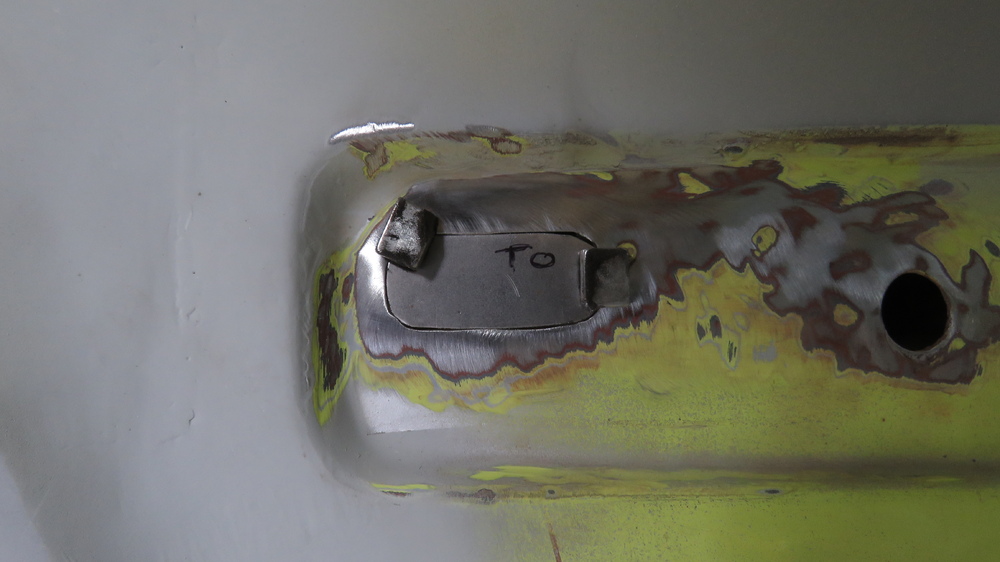
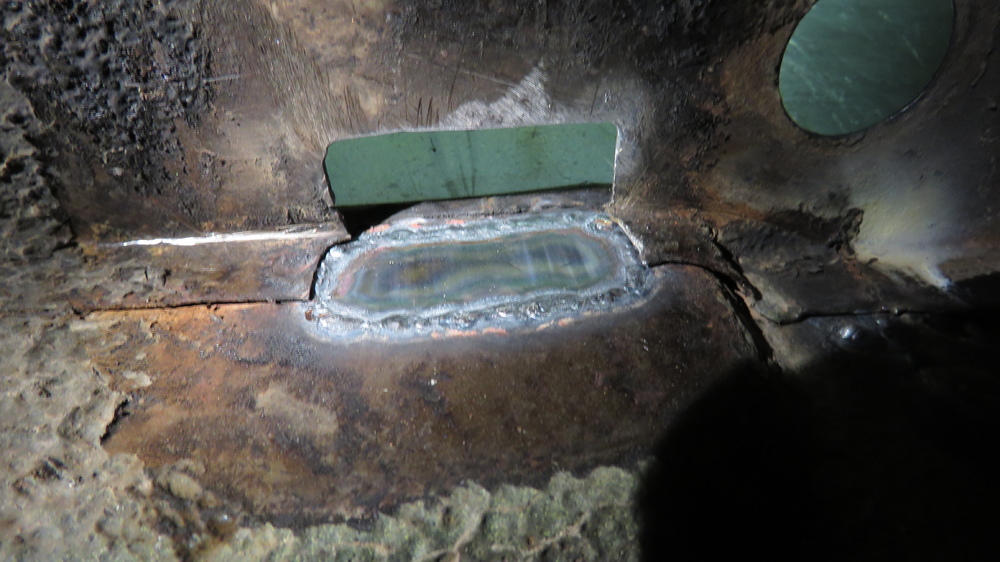
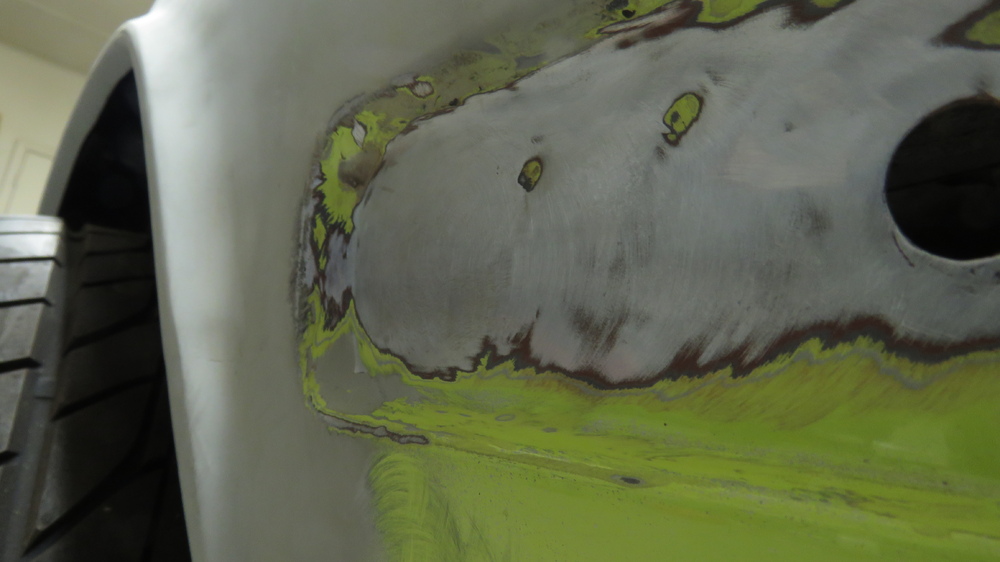
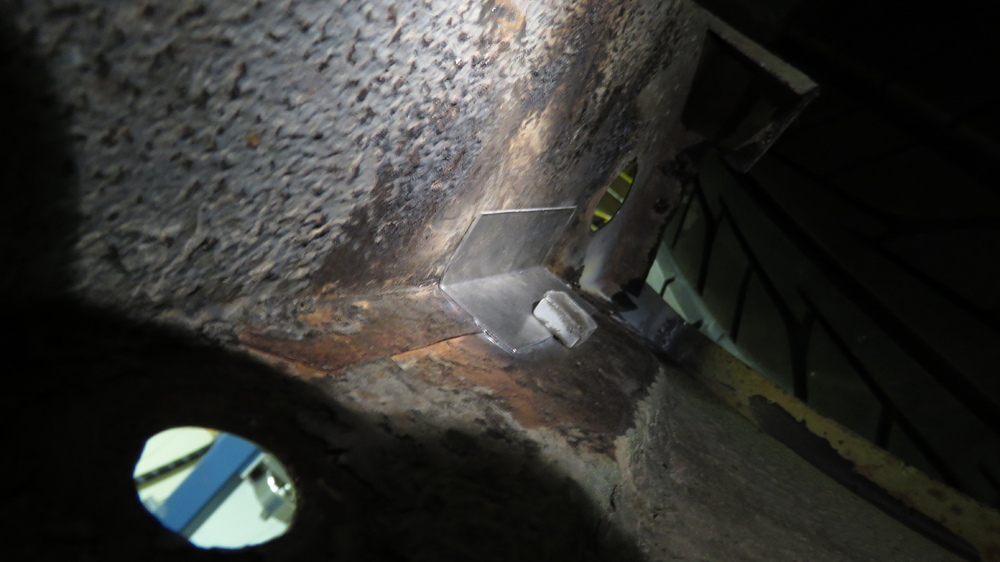
1 pointAnother slow progress update. So I am kind of mad at myself for not knowing what happened to the pictures when I reworked on the driver side quarter panel. I must of either forgot to take pictures or accidentally deleted them. But anyways here are some pictures I took before welding the antenna hole. The crease got a little banged up during the rework, tried to crease it back out some. The Antenna hole metal piece cut out and test fitted. I used tape to get the shape. Taped over the hole, then just marked on it. Peel the tape off then tape it on to a scrap piece of metal to make the piece to be welded in. Used my snips to cut it out, then fine tune it with a sanding disk. I marked lines on the tape so i know the direction to curve the metal piece as antenna hole area isnt flat and has a slight curve. Tig Welded into place. I used the pulse feature this time. Starting to get used to using pulse and liking it. I probably didnt need to add that much filler, but it all worked out in the end. Welds sanded down and some hammer and dolly work, then shrinking disc work. Had to fix a sharp dent in the driver side rear. It appears that sometime in the past from the previous owner, that he either got hit in the rear or he backed into something that cause the rear metal bumper to get pushed into the rear quarter and leave a nasty dent. luckily it was right below the structural beam on the underneath of the car and I was able to get behind and pound out the dent. If the dent was covered up by the beam, then im not sure what I would of done. Probably would need something like a dent puller weld kit, weld on a rod, then attach the dent puller to the rod and start jacking it...... The area right below the tailight in the corner is lower than the area I worked on. I cant get behind it and this would be a case I would need the dent puller to bring it out flush with the area I worked on. Only thing I can think of is make something that can reach back there from the inside of the car and use my slapper to help bring it back out. Older picture of the dent. Dont have any good pictures of it other than the one above. Good as I can get it. Painter will either need to Bondo up the sunken part in the corner below the taillight to blend it the area i worked on or user what ever trick tool they got. Also had to work on a small dent in the rear driver side bottom corner. You know I just dont understand why there are so many dents in the rear. I fixed two I or so think on the passenger side and now all these on the driver side. You can kind of see in on the back side. Smooth out. There was a bad rust spot on the driver side quarter panel in where the bumper would cover it up. I used my plasma cutter to cut it out. Pretty angry with myself because I either cut to high up or I cut to hot or maybe the angle I was holding the torch while cutting, but it ended up cutting a hold in the quarter panel support. Made more work for myself than needed. Belt sander used to smooth out the holes. Used the tape method again to getting the shape needed. Welded in. Smooth out. My replacement piece for the support bracket. Used my magnetic sheet metal bender. Now I just need to trim it to fit and weld it in. Will do that tomorrow. Dents, antenna hole, and rust spot fixed. Now I can start getting those quarter flares mounted and panels trimmed out so i can make the inner wheel well. Stay Tuned!!


 1 point
 -
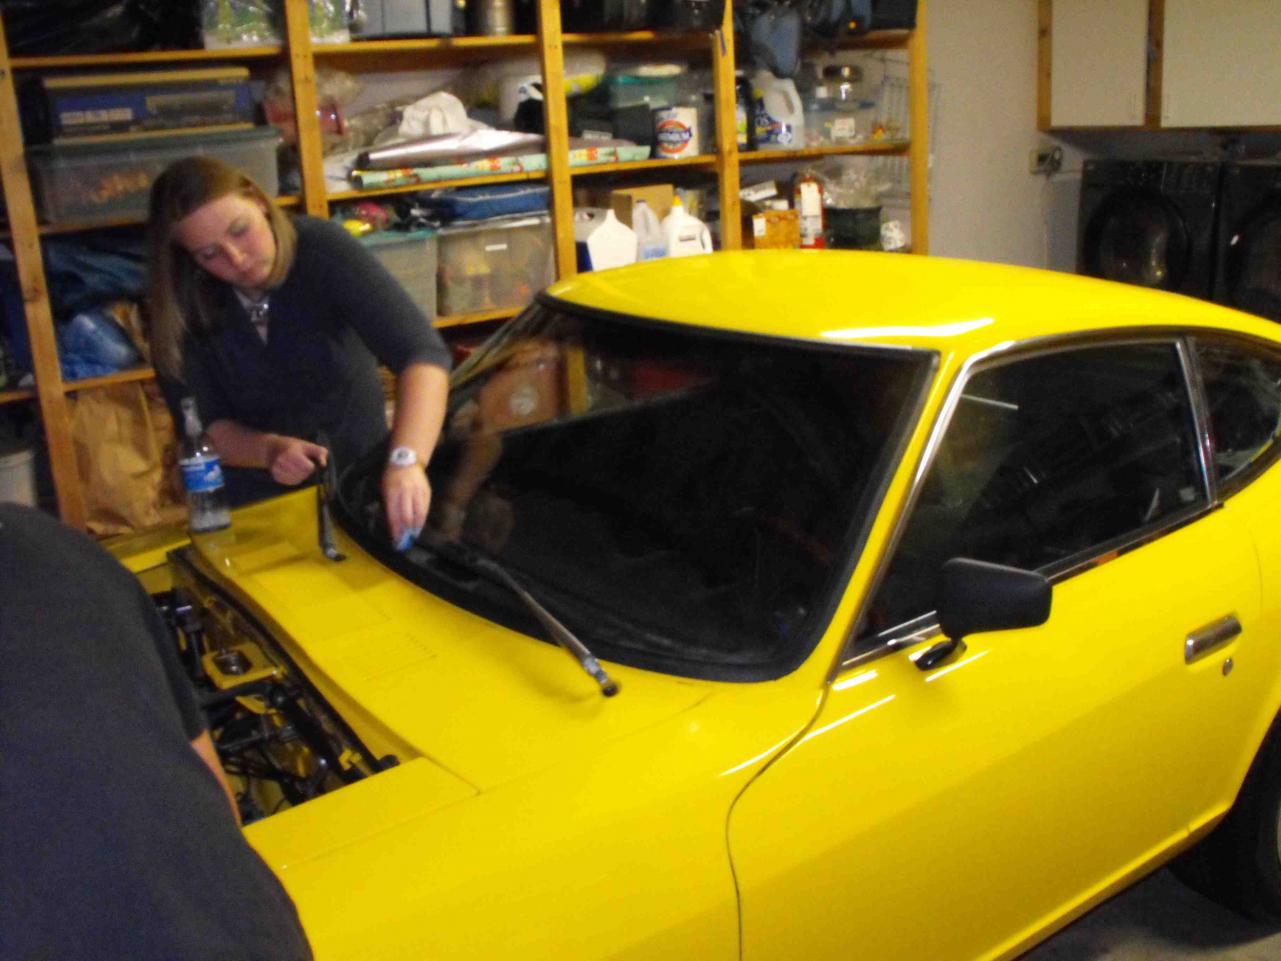
The front windshield was the exact same process, no trim. The only difference was that I started at the bottom middle, moving towards the drivers side, and once I was half way around (at the top middle), it got a difficult to do my zipper technique. So I went back to the bottom middle and pulled the cord and zippered along the passenger side and then up. This went very smooth. Once I moved past the lower passenger corner, the windshield settled into place. The rest zipped easy. Once I was finished, my daughter cleaned the glass. I put the trim in several days later. It was not that difficult, but again took a process. I slide the trim edge that was on the paint side into the groove. I used a small round shaft screwdriver to roll the glass side edge of the rubber over the trim. My guess is that this process works well wih new rubber. The process may be different if an older gasket were used

 1 point