


Leaderboard


Popular Content
Showing content with the highest reputation on 05/28/2019 in all areas
-
3 pointsI would agree with the likelihood pointing to that. Don't forget though that the seller says he took it off his new GS31, which points to a production date on, or after, mid 1976. Some may find that a reason to mistrust it as a reference for earlier cars. You think he refurbed the wood composite, but didn't bother to strip and repaint the spokes? I think its the original (Izumi) factory finish. Not to add weight to your argument, but here's one of the brochure images for the mid-'76 up S31-series cars in Japan. I have no evidence to support the theory, but I have a hunch that they might well have used specially made 'blond' steering wheels for brochures and advertising, simply because they showed up better for contrast than the production items:
 3 points
 -
3 pointsI'm still looking Jim... Hoover bag is low on this but working. I need a Roomba!3 points
-
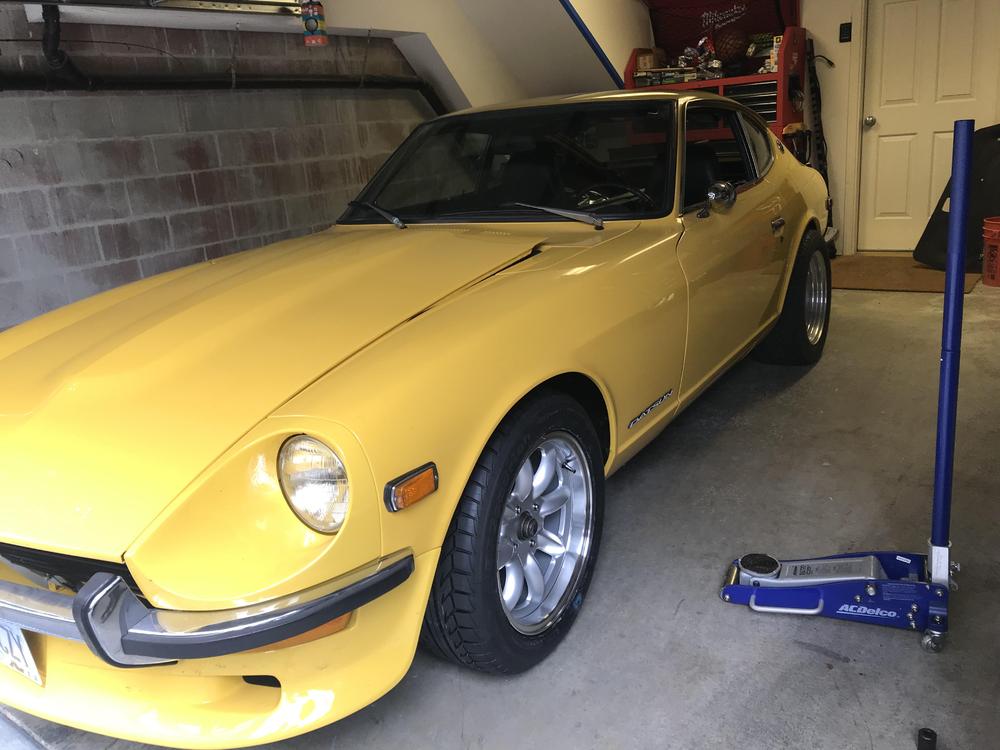
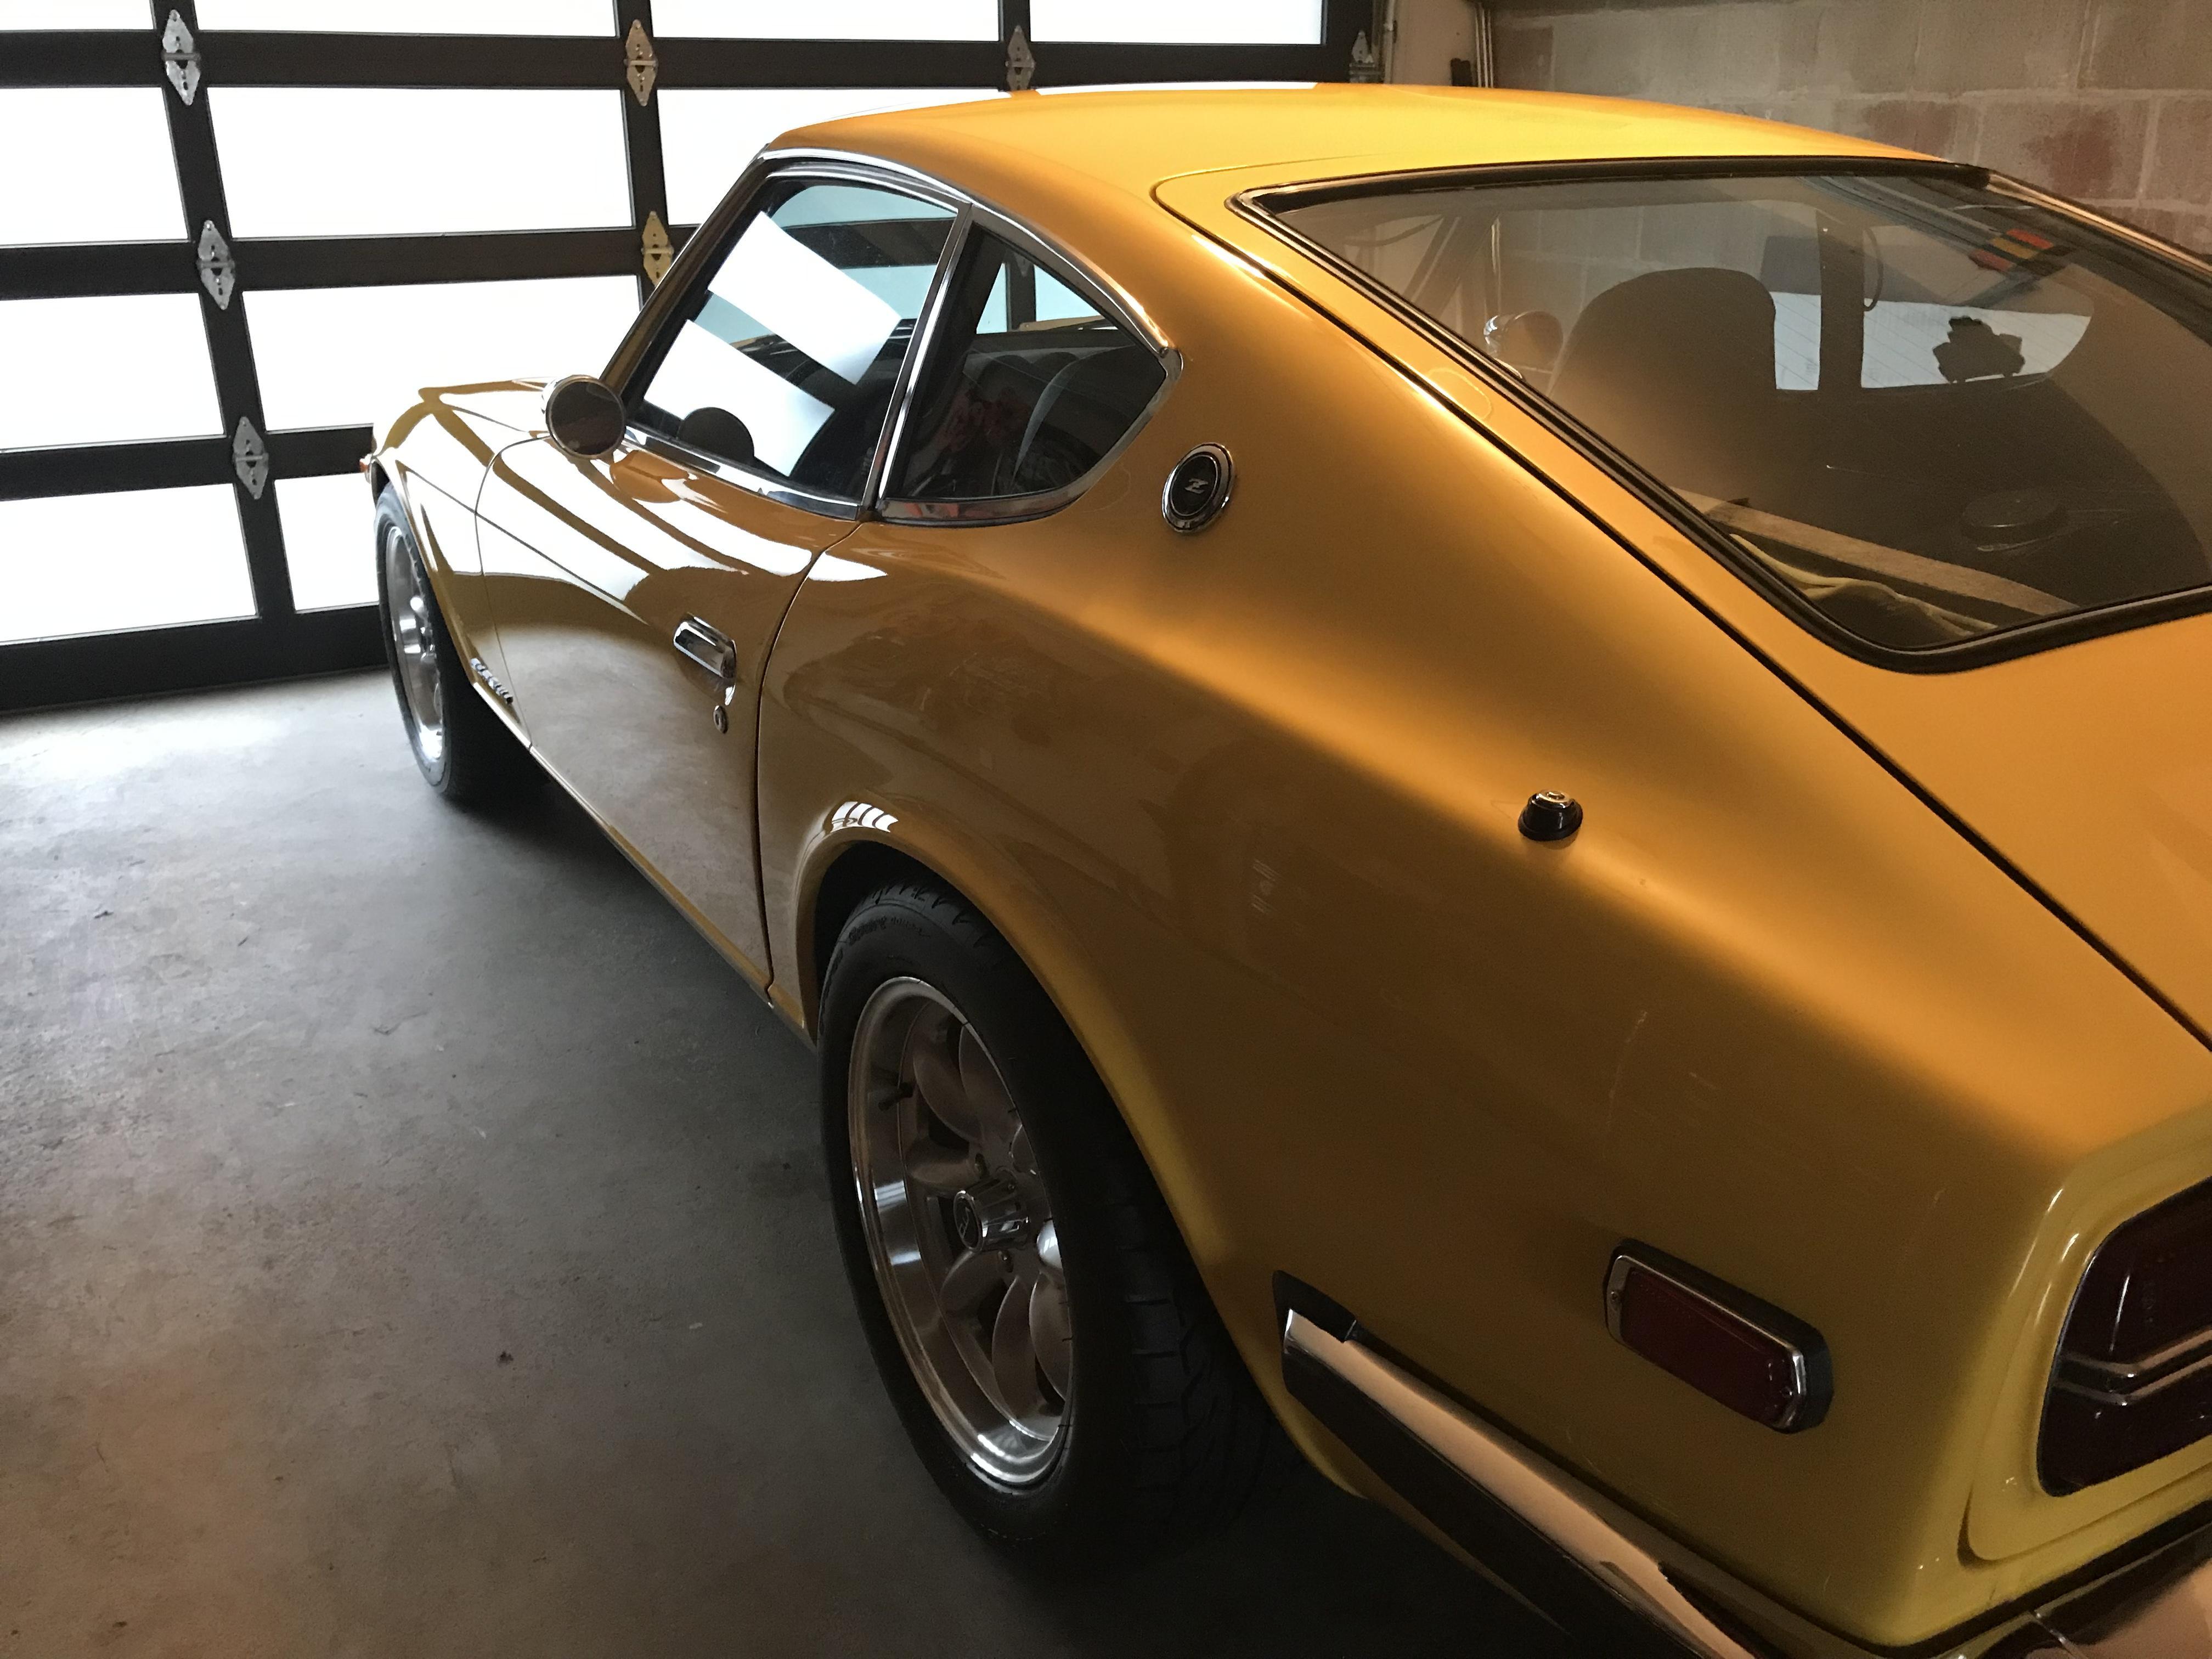
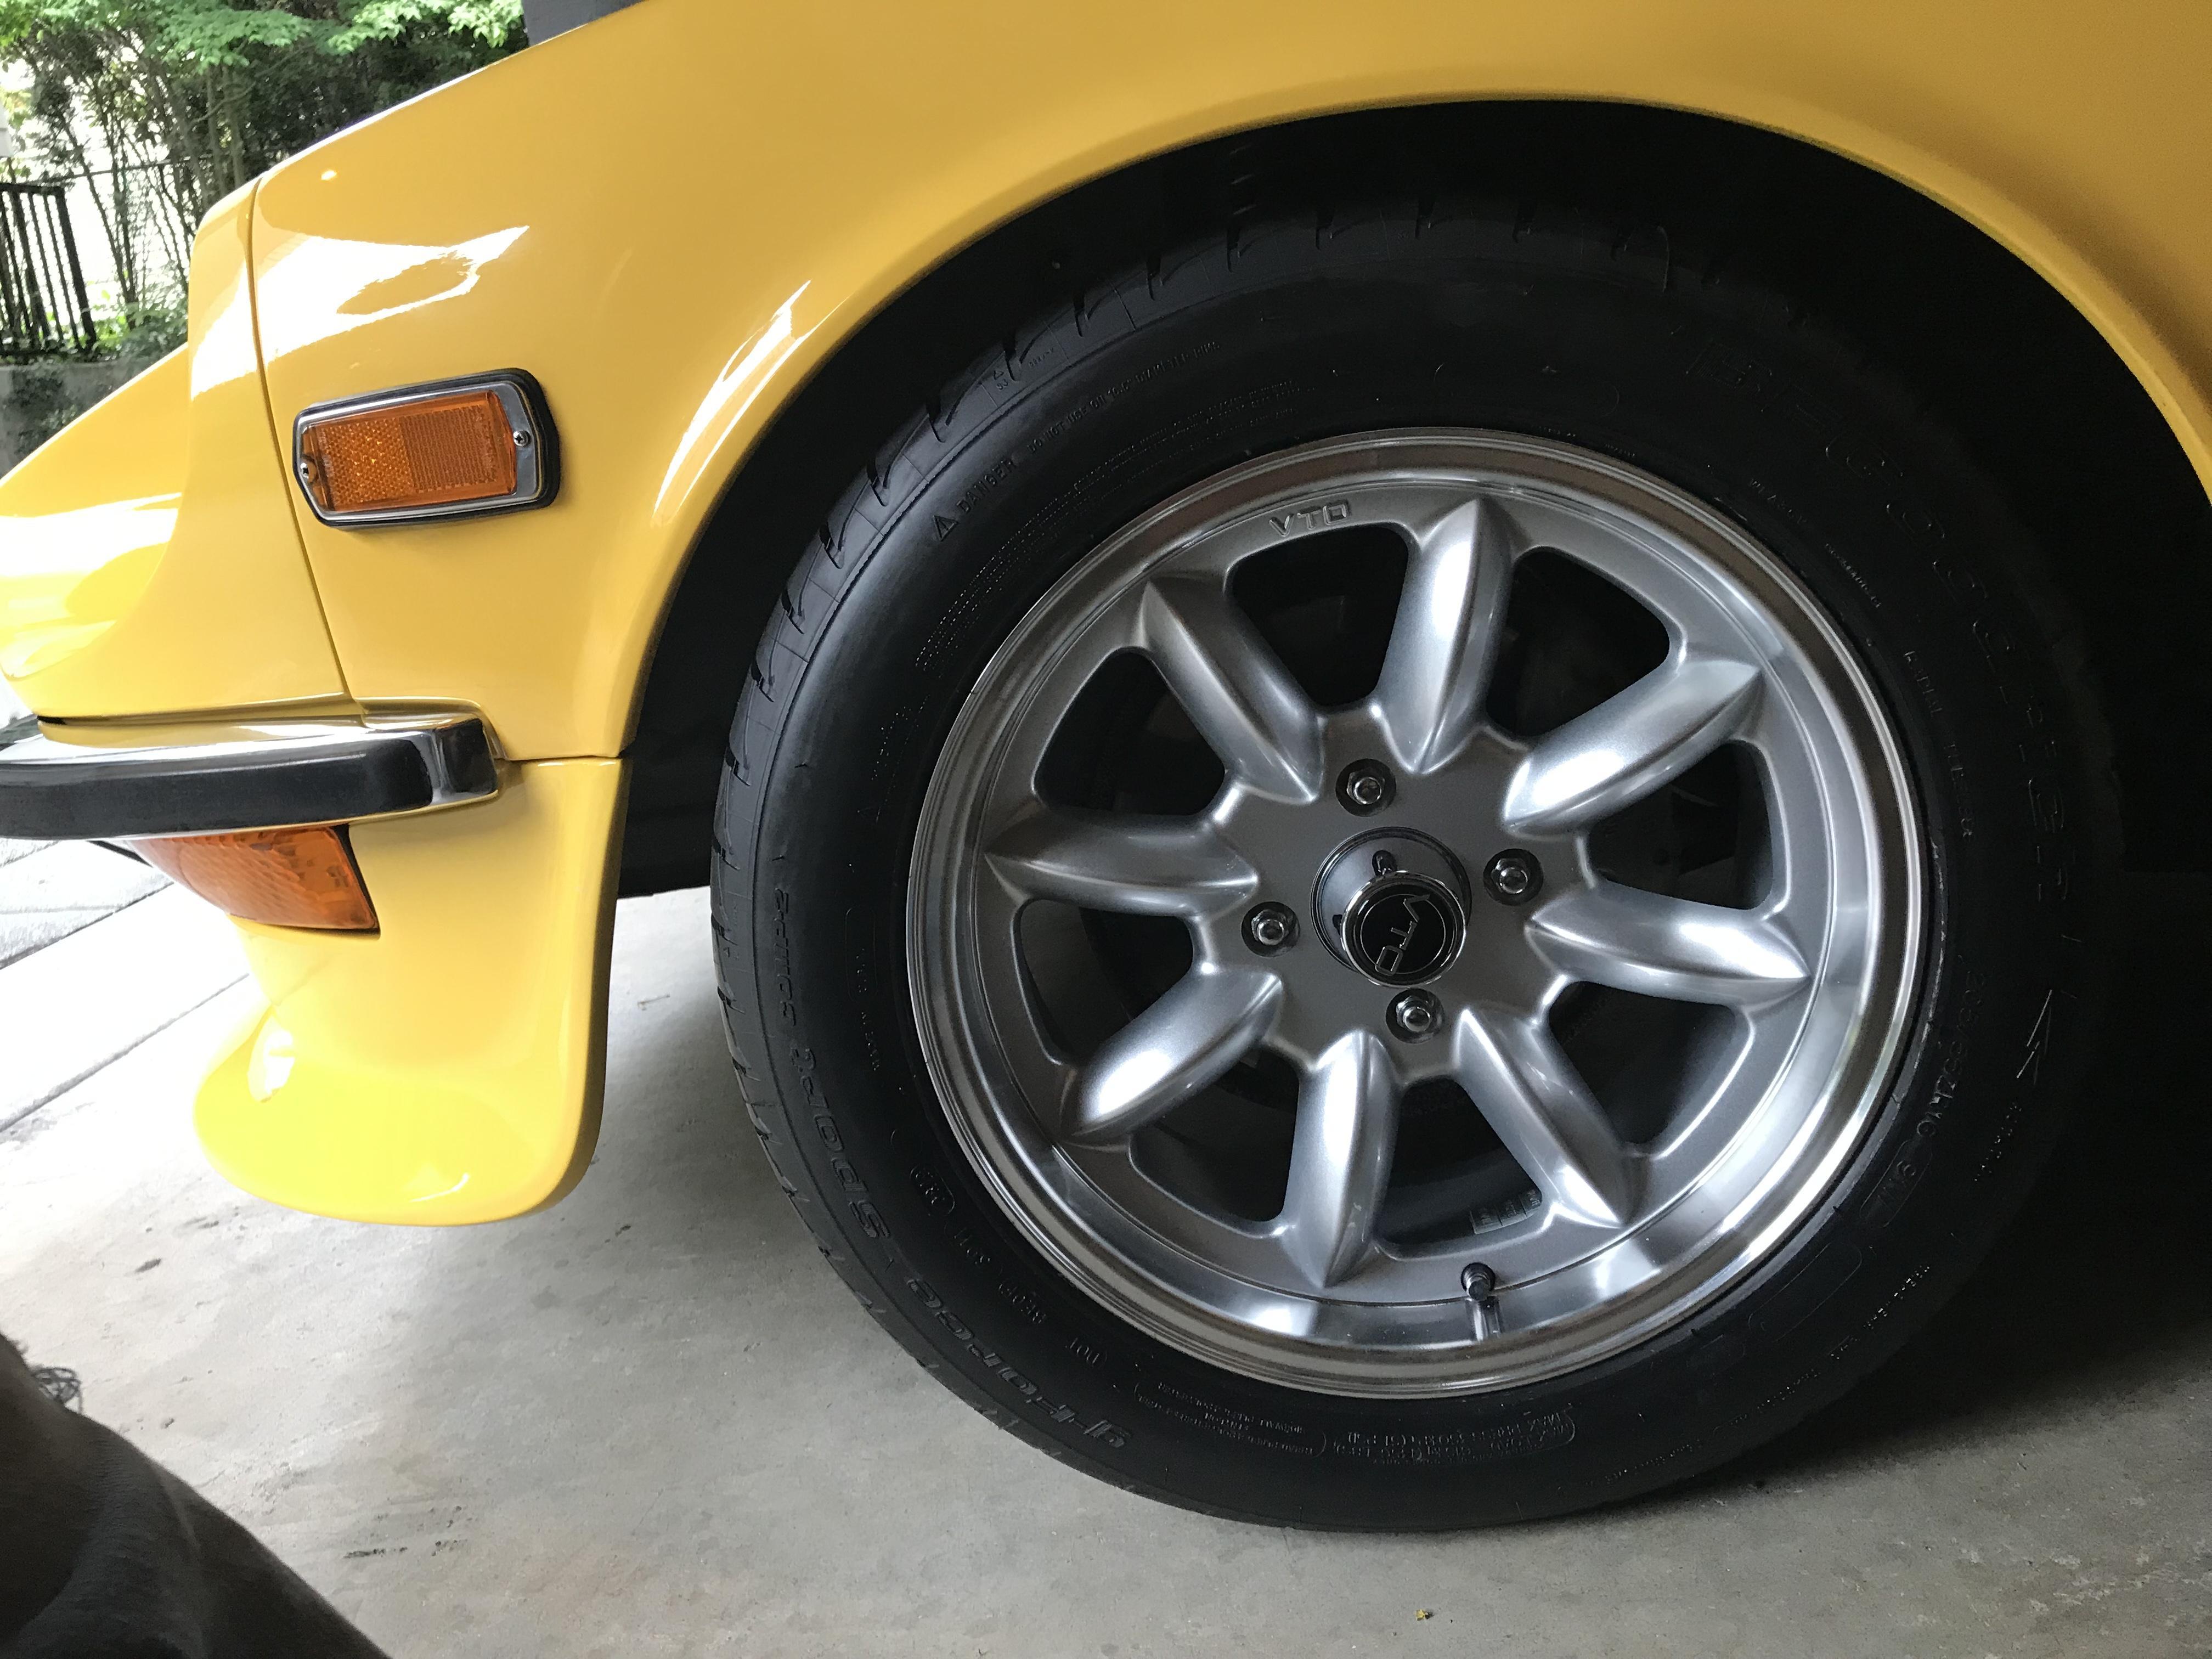
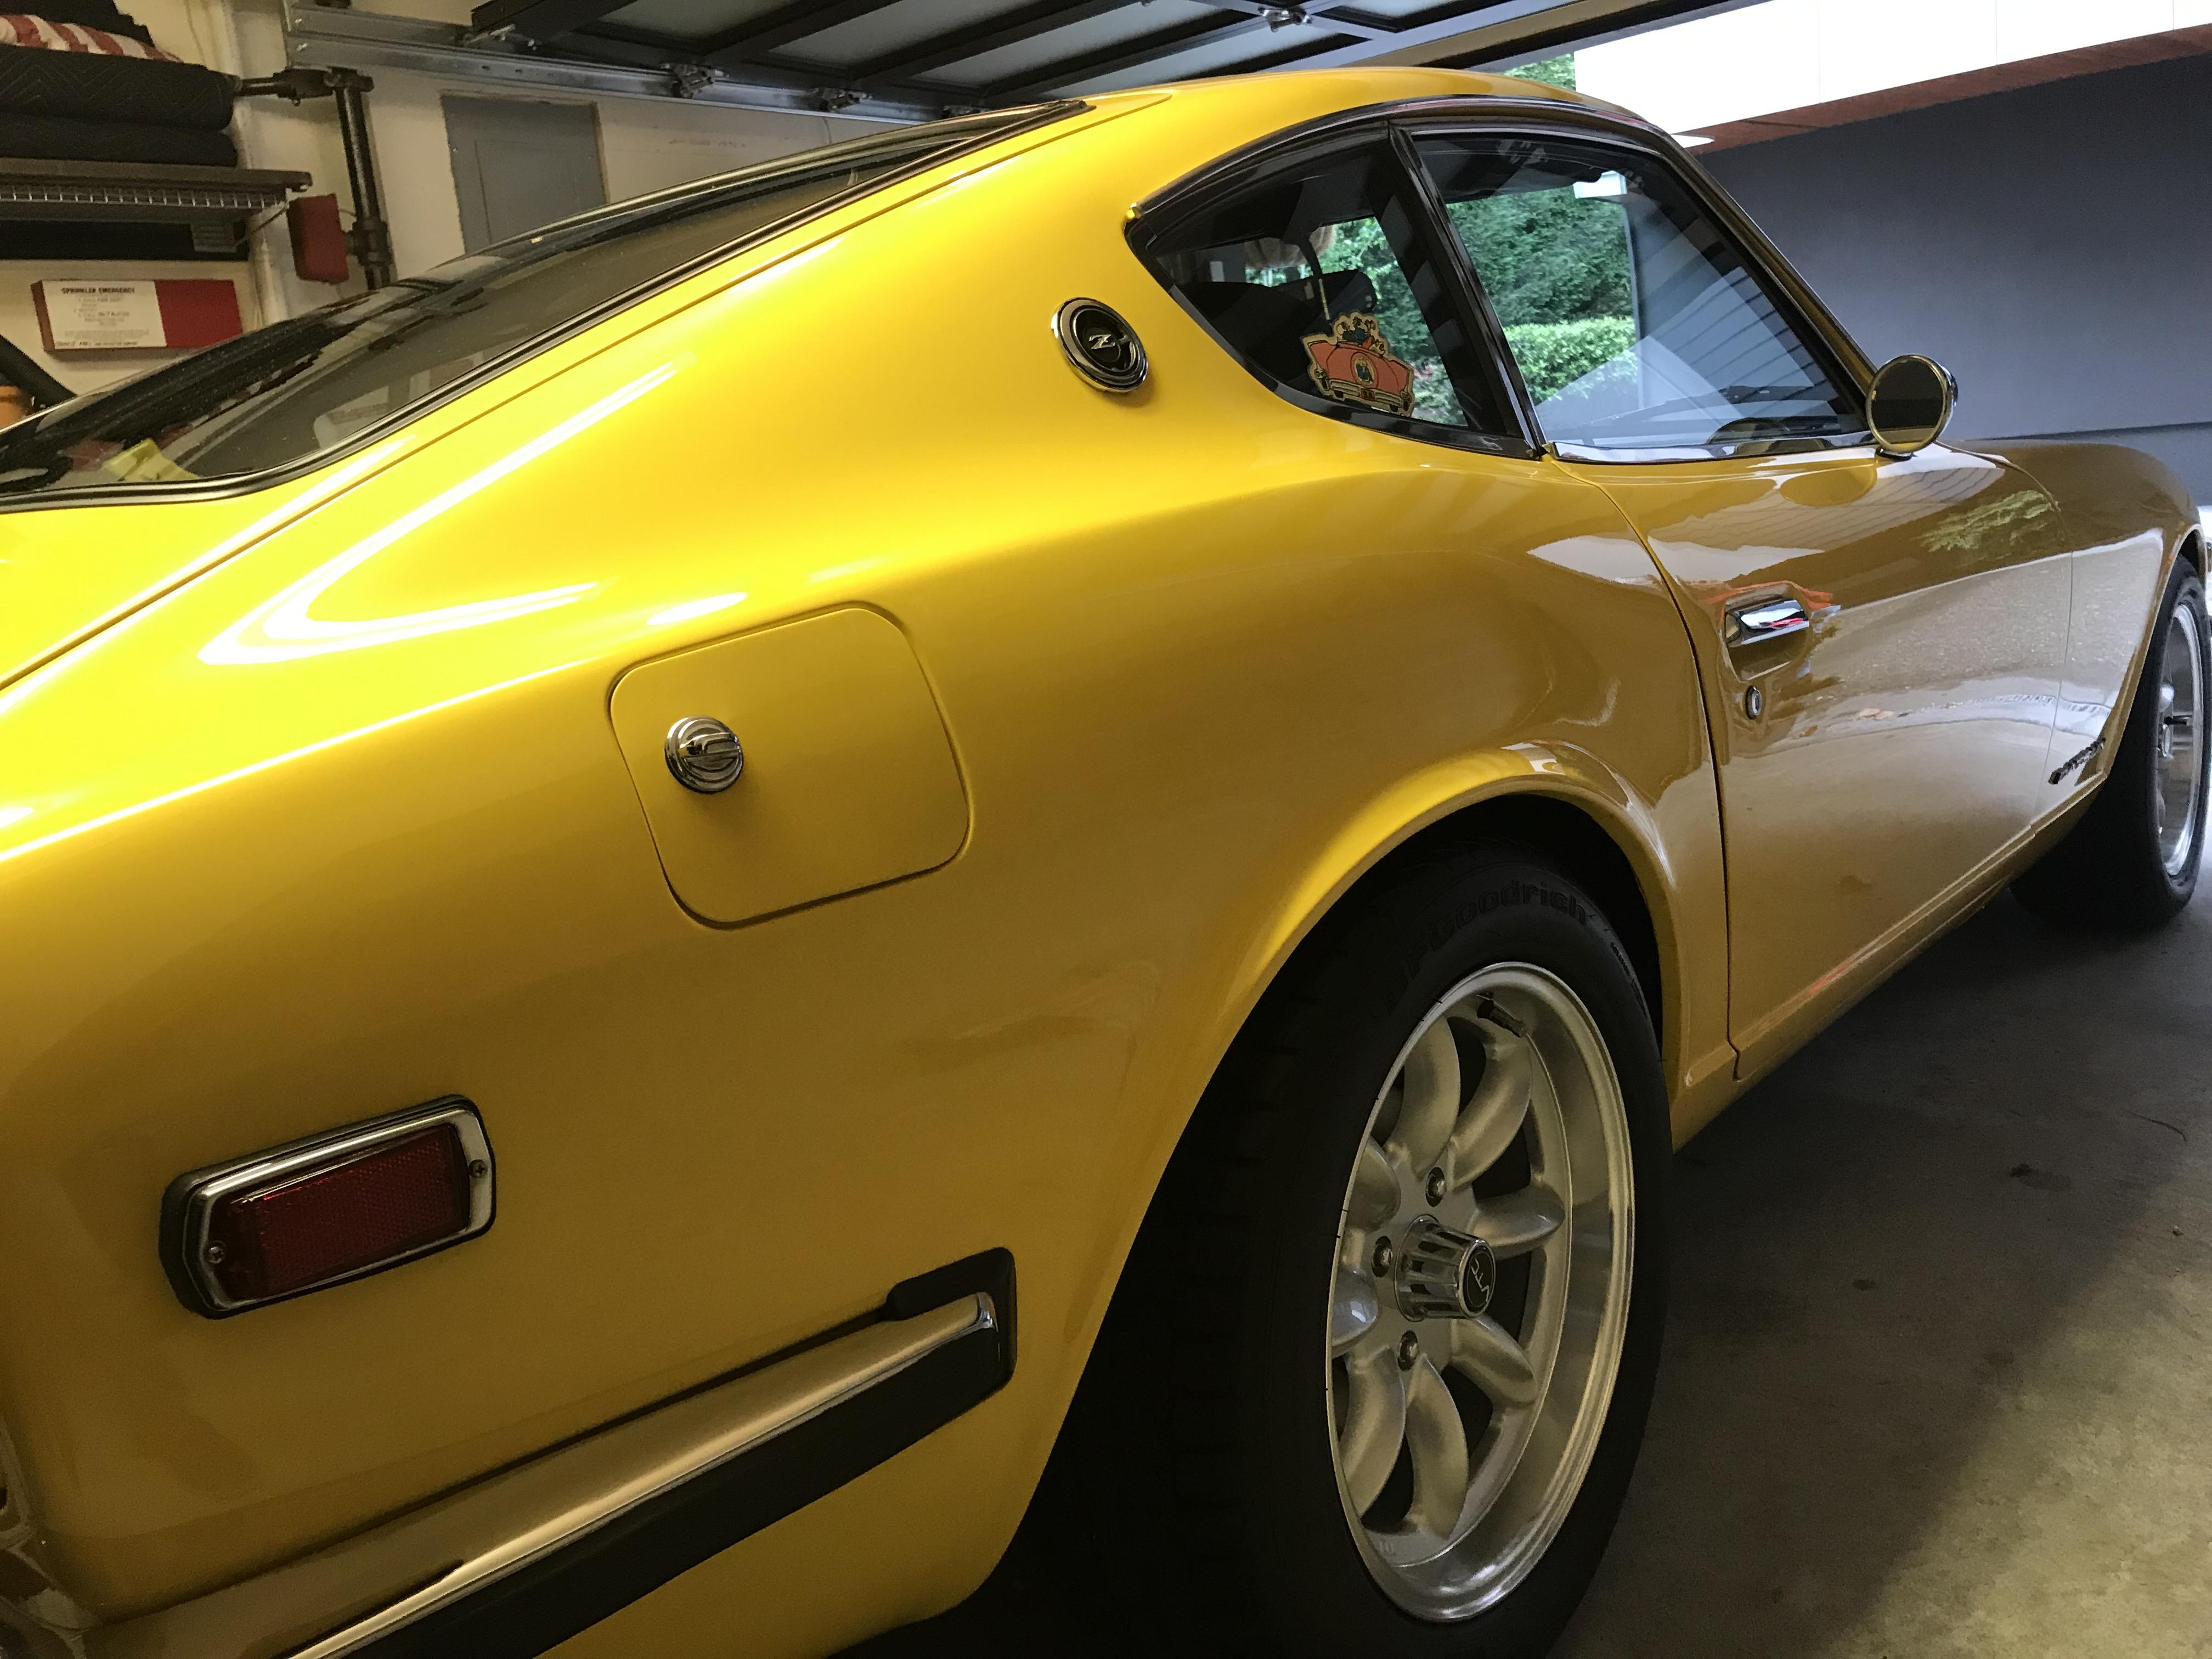
3 points3 pointsDecided to update my build thread with some of my latest photos in 2019. Old thread, time to bring her back to life after installing new VTO wheels and BFG summer tires... Both new wheels/tires here: New fronts: New in front (no caps), and old wheels on the rear.. Both new wheels on the passenger side: Old wheels on the rear, driver side, just for comparison... Here's the fit on the rears...


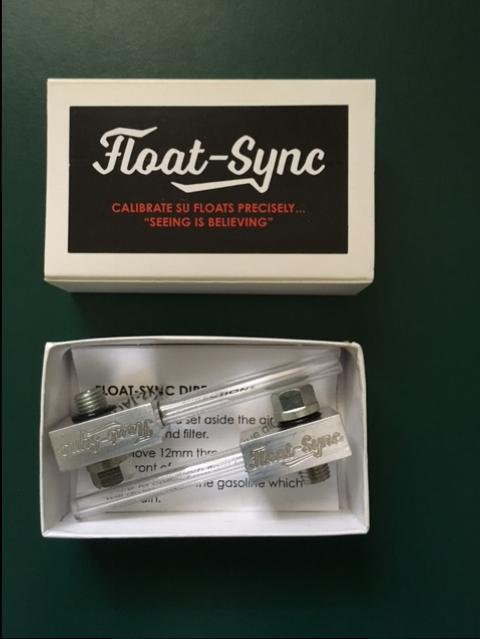
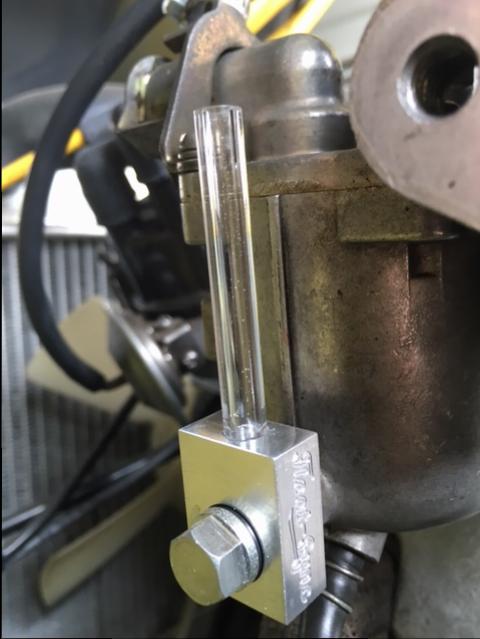
 3 points2 pointsThread Hijack Alert! If we can agree that this is a "Almost-NOS" wheel having been well-stored and protected for many years, then can we also agree that the rim color accurately represents the wheels delivered in production cars? When we look at other recent threads showing lots of promotional photos with blond steering wheels, where do we find any production cars actually delivered with anything other than a red-toned wheel? While I cannot produce a photo of my car at time of delivery, I can state with confidence that this is how mine looked. I have several wheels I picked up for restoration and they are consistent in showing the red color where color remains intact.2 points2 pointsA stock 1970 with original parts in excellent shape (original or restored) is valued >$50k these days..... modify with care. Values are going up!2 points2 pointsBut that's my point. It's not his 'English translation', is it? It's a third party algorithm which is not really up to the job of understanding the nuances of the Japanese language.2 points2 pointsThat's because it's not a "translation". Machine software simply isn't up to the task of 'translating' a small ad like this one. Nowhere does the seller describe this as 'NOS', and the steering wheel itself is not an Export specification item (the seller specifically states that he took it from his late model GS31 Fairlady Z-T 2/2) so it will be the shallow dish Japanese market type. The horn button however is an Export type 'Datsun' logo version, which the seller states was taken off of a Datsun Competition steering wheel he bought at the time and swapped onto his car. So it's pretty simple. He bought a GS31 Fairlady Z-T 2/2, took off the steering wheel and replaced it with a smaller diameter Datsun Competition item, but switched the 'Z' logo [plus 'trumpet' horn mark] horn button from the original steering wheel onto the new Datsun Compe item, leaving the original steering wheel - mated with the 'Datsun' horn button from the Compe wheel - in storage for possible use when the car had its inspection. The asking price might be a bit fanciful, but let's not put words in his mouth.2 points2 pointsIt’s good to see pics. I’ve always thought most restore with to much brown and not enough red. Its been mounted for sure. See the nut marks to hold it on and the horn ring has wear. Hard to sell as NOS in my opinion.2 points1 pointI've been working on a new product for the last six months that I'd love to get some feedback on. I've always known getting the floats in SU's set properly, and knowing for sure they were set the same in both carbs was important, but the method of doing so always seemed imprecise and less than elegant. I developed Float-Sync to know precisely where floats were set and have a visual reference, without removing the float bowl lids. On three screw SU's, there's a threaded plug in the float bowl that can be easily removed to substitute Float-Sync. The level of fuel in the float bowl dictates the level of fuel in the jet nozzle. This is a big deal for SU carburetors because the fuel level in the jet nozzle directly impacts engine performance. When the engine is running, a vacuum is created in the SU carburetor venturi that pulls fuel out of the jet nozzle, mixing it with air and drawing it into the engine. If float levels are adjusted too high, fuel puddles at the top of the jet, allowing too much to be drawn into the engine, creating a rich condition. If the float is adjusted too low, it's harder to pull fuel out of the jet, creating a lean condition. A rich condition can cause plug fouling, poor fuel economy, gas fumes, diluted crankcase oil (contributing to blow by and reduced engine protection), and in extreme cases potential for an engine fire. A lean condition can cause the engine to stumble, back-fire, ping and run hotter than it should, creating the potential to burn valves. Float-Sync allows you to see precisely where your floats are. You can see the fuel level, with the engine running, throughout the entire RPM range… all without opening the float bowls. You will never wonder again if your floats are adjusted correctly. I'd be interested in your feedback and suggestions. I listed a few sets for sale on eBay yesterday to gauge interest. Thanks
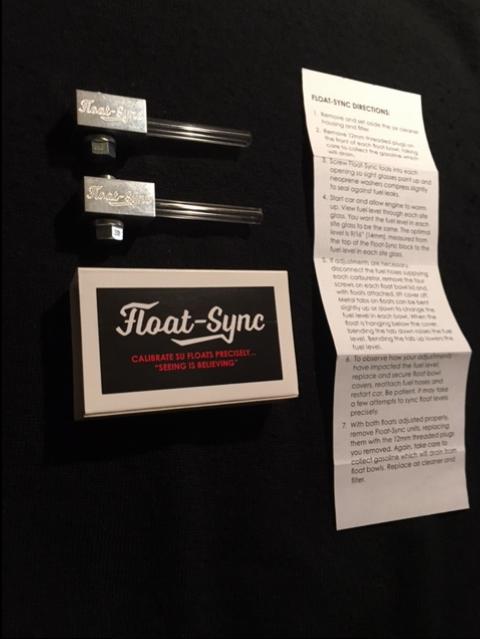
 1 point1 pointMine would be a 72 with US emissions so the numbers match what I'm seeing. Thanks for the chart!1 point1 pointI've never seen a blond wheel shown in the early ads nor the deeper red (maroon) sported by the almost NOS wheel being held for ransom. IMO it's been refurbished.1 point1 point1 point1 point1 pointWhile that is a very nice low vin, I have to say there is nothing different with the fuel sender wiring on a early car compare to any other 69-70 car. I am guessing based on the fact that you stated in a early post that there is a green wire going to the fuel pump that some PO has messed with the wiring as a 69-70 car would not have had a rear fuel pump and has it been added. So I would recheck the loom. It might be a white connector the the short piece for the fuel sender plugs into. Follow the green wire back into the main loom.1 point1 pointI still wonder though, if it's not NOS how does this guy expect to sell it at such a high price?1 point1 pointVin is #399 build date 11/69 that is why i was asking for anyone with the early z to perhaps shed some light....I will take pictures of what I have.1 point1 pointhttps://www.yoesheadporting.com/product-page/datsun-240z-260z-280z-cam-oiler Updated link... we have no affiliation/experience with this business, but, it looks like a nice part around $200...1 point@=Enigma=, I know it's been a few years since you asked this question. The triple SU's were very unique and pulled hard. They weren't mine and built by Steve at Ztherapy. He wanted to make a point by building something that other said "could not be done..." In the end, Steve installed my triple Mikuni's which I think sound much better. ? Mike1 point1 pointIt sure if anyone has interest in my truck project , but it’s actually starting to look like something . Always kind of fun getting the body panels on after being off for a year- oh yeah- that’s what it looked like -lol. really anxious to get the motor in and be able to move this thing around. It’s slowing me down not being able to move it to the studio. This will be a fun install. A very tall motor in a tall truck - it will be close !
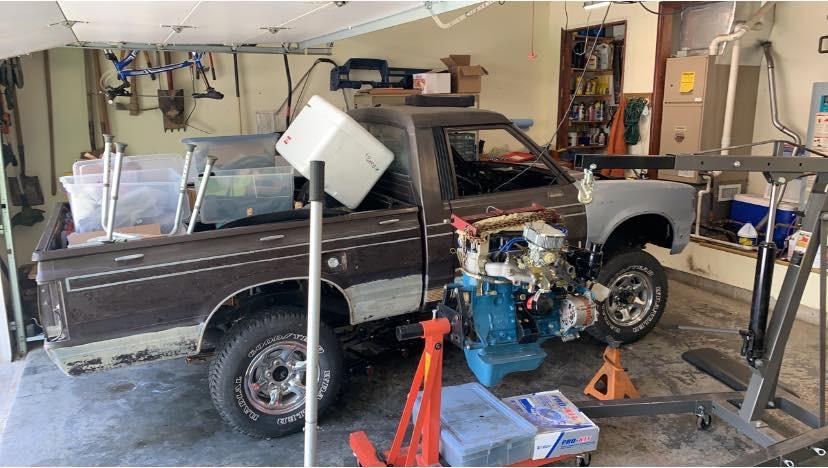
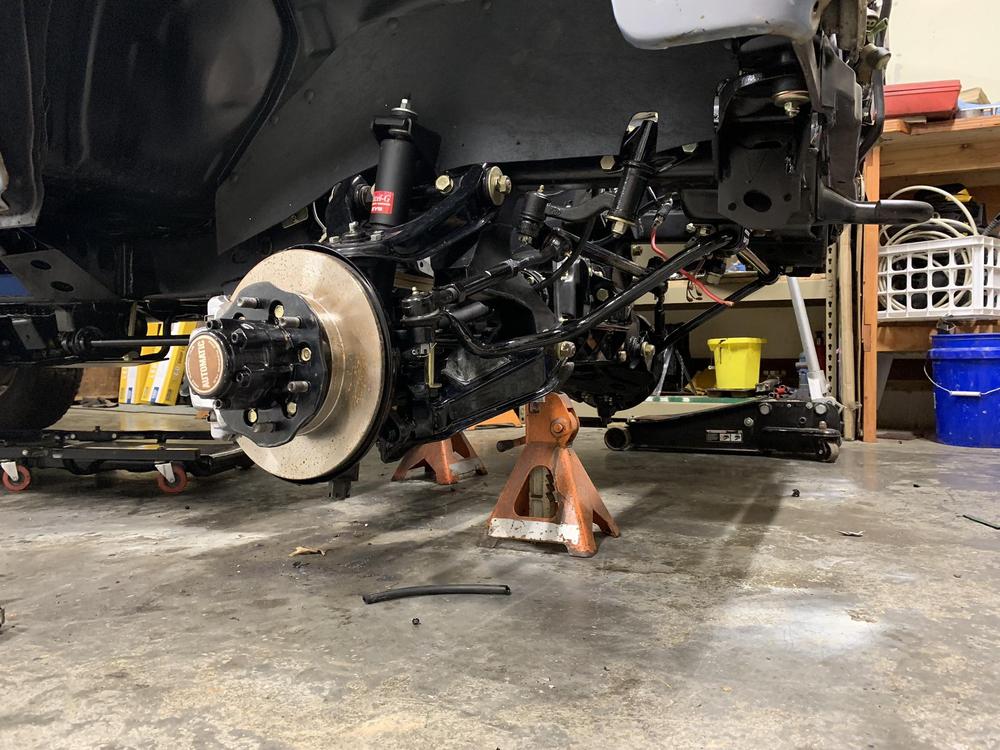

 1 pointJust saw this... Kats, any chance you can send me contact info for the bracket? I found something on Facebook but not sure if it's the same company or not.. Thanks for all your help. You've renewed my passion for my own car since I drove your Z432 in Kyoto.. ? Mike1 pointThanks for that. I added his listed item in my watch list I'm not ready yet, but I like to bookmark things for when I am. Otherwise I can't find them later or remember which thread it was in1 pointThanks Kats, Mike is looking for the bracket. I am sure that he will pick up on this post. Thanks for the information I guess I just thought it made sense that the removal cap would be at the top for access. After a little research I found that I sourced the two parts (pump/bracket) separately.1 pointWell here we go again, lots more to report and I really need to control myself with spending on this car! The car was selected and displayed with Petrolicious for their first ever UK meet at Bicester Heritage, it certainly kept in very good company within the main site. I’ll also admit that I was very excited by this as their channel is the reason why I ended up buying my 240Z so it was a big deal for me. I’ve seen some photos of the car from the day but I’m sure there’s more to be found. Great to catch up with several club members and we had awesome weather for it. Finally our new brake package has come together and now been fitted up, I need to start with a huge shout out to Iamatomman (Gary) for sorting me out in this regard. I’ve been searching for a long time to get the right solution to this element of the build, I’ve not been a fan of the shouty willwood solutions and equally not convinced that the Hilux setup was up to the task with its more limited ‘performance pad’ options for a 4x4 and weight. Bring in the perfect solution in my eyes, R32 GTR Sumitomo Brake Calipers with 296mm vented disks. Gary’s made custom titanium brackets and re-drilled the standard GTR disks so that these bolt straight up to stock 240Z hubs. As you’d expect with a GTR, the brake pad choice is phenomenal so we’ve put on some Porterfield R4S pads designed for fast road and track use. These so far seem to be superb with great bite from cold and just get better the more heat you put into them, the only downside as you’d expect with any performance pad is a little more dust with enthusiastic use. With the car only weighing in at 1000KG this setup is hugely over spec’d and gives massive amounts of confidence, particularly with modern traffic. Having got the kit from Gary, sourced a set of callipers off of ebay and refurbished then with thanks to Big Red, picked up the pads from Porterfield and refurbished the brake fitting kit I got with the brakes to save a bit of money, we were good to go. Doing my usual with any European trip looming I decided to fit these last Monday evening after work on the driveway with our scheduled departure of Thursday morning. What could possibly go wrong! As expected a few headaches, 6 hours, a packet of crisps, numerous cups of tea later everything was fitted up with the assistance of LED floodlights at midnight. Test drive was revealing a very spongey pedal however that was a problem for a new day. Certainly had some fun removing the original brake dust shields (now too small for our big disks anyway), removing the old disks and hubs and wrestling everything into place. At the same time with rain scheduled for Spa and knowing how lethal our tyres are in the wet (even if very fun and childish in the dry) I decided it was time to bite the bullet and replace these with something deserving of the rest of the car. Finally we had a set of Yokohama AD08R tyres on their way to be fitted before the trip, in a last minute dash I managed to get the brakes re-bled and working, tyres fitted, filled with nitrogen, booked a trip to Edinburgh and flew out all on Tuesday leaving last minute packing and preparation for 9.30pm on Wednesday night before we left. I’m very relieved that I decided to leave the stock MC installed for now with the time I had available, while the car needs it and the pedal has a little too much travel, this remains a headache for another day as I still have no idea as to how to properly adjust the rod to it. We had an amazing time out in Spa, with the car covering just over 1000 miles in less than a week. Great company and tour guide from Tony, being shown some nice backroads closer to Spa which could be enjoyed away from the Motorway (even drove the old track). What a circuit Spa is, the elevation changes were fairly breath taking. I can see why it’s a bit of a Mecha for motorsport fans and definitely the most exciting circuit I’ve visited and driven to date. As hoped and with the car running so well we got a track session for Saturday evening however much to our disappointment it was plagued by safety cars while a wall was being rebuilt. Unfinished business and a return visit one day I’m sure… The car felt really keen and we’re super impressed with the new tyres, for a road tyre they really hang on through the corners and still slide nicely at the limits of traction. Less childish behaviour can be had with the trade-off of superb grip on the road. We could really push people through corners and drive around them however in a straight line we were still left lacking and wanting more with almost everyone pulling away. Certainly some drag racing going on against Peugeot 205’s. Thoughts are turning to building an engine with approx. 200 bhp flywheel that revs happily to 7000prm without spending the earth…. The trip didn’t leave the car unscathed though and we picked up a big stone chip on day one of the trip which we watched expand all trip until we got home. I’m relieved to say that despite it having spidered outwards, Kenneth from Autoglass has saved the windscreen with a resin filler yesterday. Quite scary seeing how big it had really got when he applied some pressure to it. I’ve also got rubber trims turning up to try and reduce some wind noise and make the car a little more comfortable for longer journeys. These cars are never really finished but I feel as though the whole package has really moved on, particularly when I compare it to the sloppy driving experience the car started with… IMG_0135 by Mark Woodrow, on Flickr 6D62364D-FE32-4CE8-8041-18E19804611E by Mark Woodrow, on Flickr IMG_0123 by Mark Woodrow, on Flickr IMG_0127 by Mark Woodrow, on Flickr IMG_0141 by Mark Woodrow, on Flickr IMG_0163 by Mark Woodrow, on Flickr IMG_0144 by Mark Woodrow, on Flickr IMG_0167 by Mark Woodrow, on Flickr New tread pattern looking alot meaner: IMG_0186 by Mark Woodrow, on Flickr IMG_0191 by Mark Woodrow, on Flickr IMG_0303 by Mark Woodrow, on Flickr Getting a little dusty IMG_0285 by Mark Woodrow, on Flickr Think we'll need to take a trip to the French Riviera next Version 2 by Mark Woodrow, on Flickr1 point1 pointThe three screw carbs had different length float valves than the earlier 4 screw carbs. Here is some info about fuel level settings from a few years back.1 point1 point1 pointThese look great Randy! I've cobbled up my own but nothing this slick! Ok fellow innovators, to me the real holy grail is to contrive a method to adjust the float levels without the trial and error madness of removing the lid and bending little miserable tabs. That together with an external indicator of the fuel level (see post #1) would be pure nirvana.....1 point1 pointwhat he said. it's actually pretty easy to see the fuel level - when it gets up to the top of the jet, the meniscus (little concave section of liquid) inverts/flattens and is quite visible with a small flashlight. you can do it in the reverse order as well: start turning the nozzle down, counting the turns while watching for the fuel to hit the top of the nozzle - it should be exactly 10 turns (10mm). if it's less, you're rich/the float is set too high/too much fuel in the bowl, if it's more, you're lean/float is set too low/too little fuel in the bowl. sounds trickier than it is. hardest part (for me) is remembering how many turns i'm at w/the nozzle... i found this method to be very precise and it gives repeatable results. i do have an electric fuel pump, which makes it easier as you don't have to crank the engine to fill the bowls at the correct pressure.1 pointWell then it looks like a trip to the hardware store is in order, as previously was stated If you purchase a reproduction part you can't assume that the four screws that join the two halves will be exactly the same as oem. This older topic, that you have recently posted on, has a very good description on the other two screws, see post #4 by george71z. http://www.classiczcars.com/topic/40203-needed-installation-hardware-specs-for-240z-steering-column-cover-clamshell/ I see you were looking for a picture of the screws. We all know a picture is worth a thousand words, but in this case I think George's description is more than enough. For me solving some of these small issues myself is one of the joys of owning a classic car.1 point


Important Information
By using this site, you agree to our Privacy Policy and Guidelines. We have placed cookies on your device to help make this website better. You can adjust your cookie settings, otherwise we'll assume you're okay to continue.