Leaderboard
-

siteunseen
Free Member6Points15,115Posts -
Captain Obvious
Free Member5Points10,081Posts -
Terrapin Z
 Subscriber
 5Points1,333Posts
 -
.JPG.cfcada9cf1c1b502df3f5f2f2ca3ff36.JPG)
SteveJ
Free Member5Points9,646Posts


Popular Content
Showing content with the highest reputation on 02/18/2019 in all areas
-
3 pointsFirst, let's go over terminology. This is important for clear communications. Voltmeter - Measures voltage (difference in potential) across a source or a load, such as across the terminals of a battery. Ammeter - Measures current flow through wires. Ohmmeter - Measures the resistance (opposition to current flow) of a load. VOM - Volt Ohm Meter: This is a meter designed to measure voltage or resistance Multimeter - A meter that at a minimum measures voltage, resistance, and current. Some multimeters can measure frequency or inductance, and others have functionality to test transistors. Autoranging - A VOM or multimeter that will automatically select the range for the display, going up or down orders of magnitude. Continuity - Continuous, as in a continuous piece of wire. Now let's talk about resistance. Wire has resistance. Connections have resistance. Both should be low enough that we can ignore it if things are in good working order. Even a VOM or multimeter has resistance. An air gap has very high resistance. If you are using a digital VOM/multimeter with autoranging, the first thing you do is set the meter to measure resistance. The display will typically show OL (open line), and there will probably be a capital M near the reading to show megaohms. Touch your leads together. The display should go down to less than 1, and the M should disappear. If the meter has a continuity buzzer, it should be buzzing at this time. Please note that the threshold for a continuity buzzer may be several ohms. The autoranging feature will change the display, possibly without you realizing it. It can go from megaohms, to kiloohms, and to ohms virtually instantly, so you have to watch for the M or K on the display. If you have to set the range manually on your VOM, start with the LOWEST range when you are checking for continuity. Touch the leads together and make sure the reading goes down to less than 1. If you are using a higher range, the display may read less than 1, but you could have a lot of resistance. My philosophy when checking continuity is to IGNORE THE CONTINUITY BUZZER. The value on the display is important. So go back and start over. Have a notepad with you to record readings. Also, where exactly are you placing the probes for the meter? Be specific so we can tell whether or not your technique is correct. Finally, what year Z do you have? There are differences, and if you need help, we need to know which FSM to refer to. Feel free to post a photo of your meter so we can verify what setting to use on the dial.3 points
-
3 pointsWell, it's not like it doesn't work at all, but I didn't like the results. I tried it because I had the TIG (which requires 100% argon), and my welding gas guy told me I could share a tank between the two machines and run straight up argon on both. I found the weld beads noticeably tall and lower penetration. So now I unfortunately have two bottles. One tank 100% argon for the TIG and another tank of 75% argon 25% CO2 for the MIG. I did some digging online and the general consensus is that my results were typical. Here's a pic from someone else that describes what happens Less heat into the workpiece so you end up with a tall narrow bead and lower penetration: Here's some web pages with some good info: https://welditu.com/welders/mig/tips-mig/mig-welding-with-100-argon/ http://shdesigns.org/Welding/gasmix.shtml All that said, I've read on the internets that if you surround the welded area with strong magnets, the oxygen atoms are pushed away hence no need for gas. I'm not sure that would work for 100% argon though since the argon is inert.3 points
-
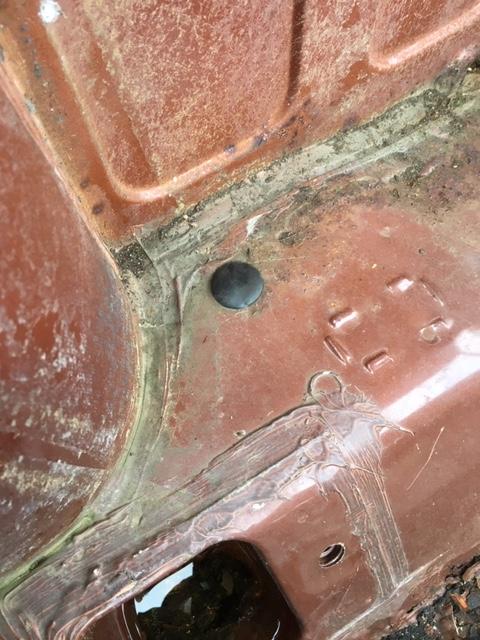
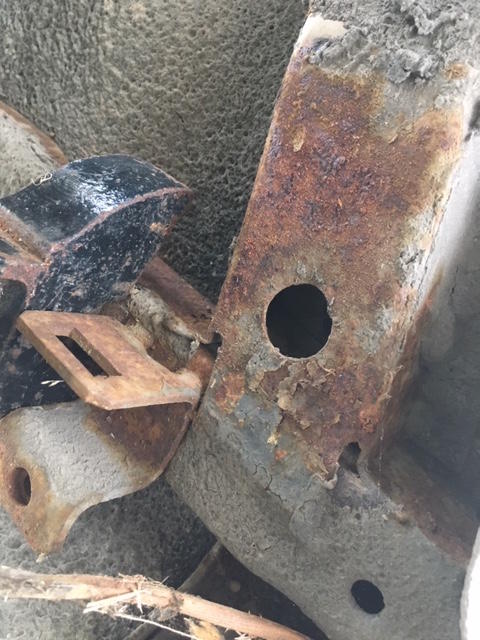
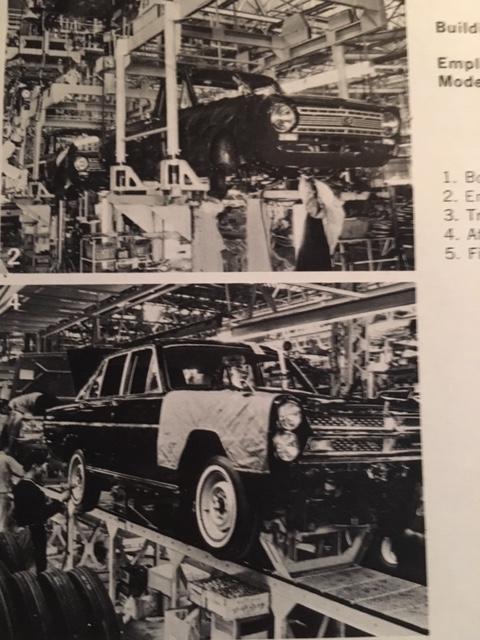
3 pointsMy 73 has plugs on top, and open on the bottom. Both sides. I tend to agree with the production hoist / trolly theory, it looks like they would be in the right place for balance.
 3 points
 -
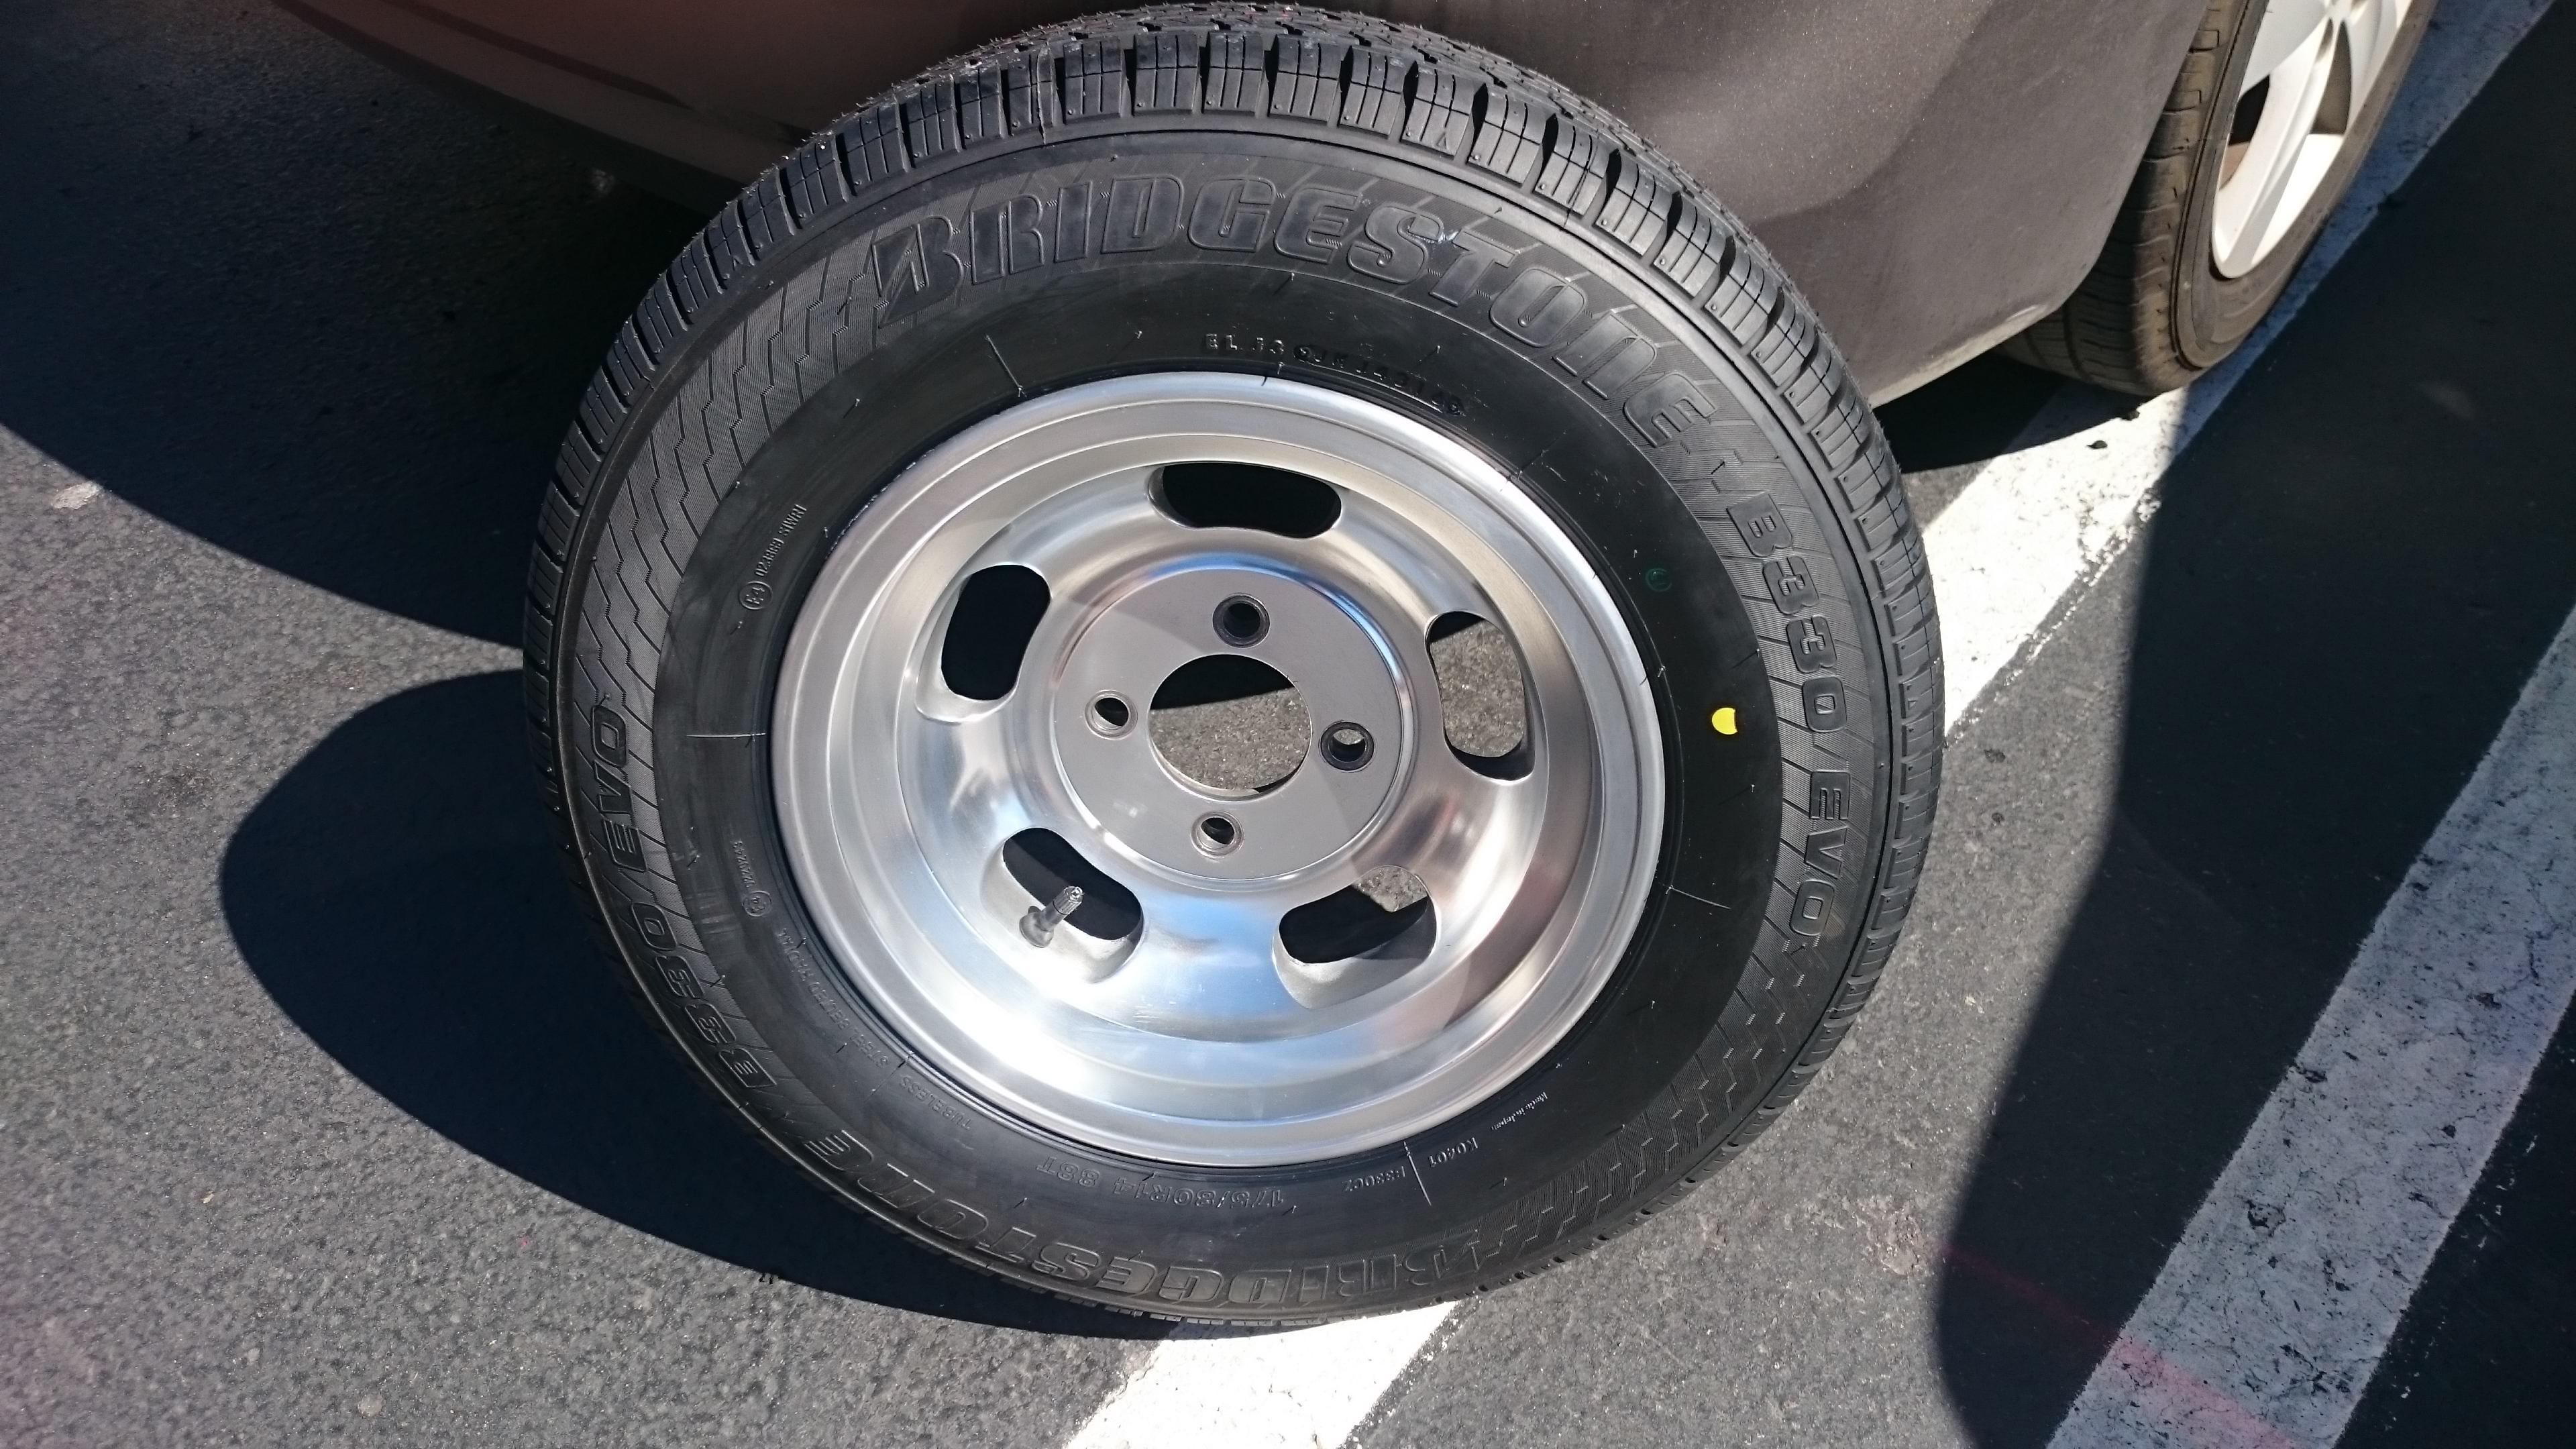
2 pointsFor those that are curious, when I purchased this Z new in 1973, it had Bridgestone RD150 175SR14 tires (per the original spare Motorman7 has just cleaned up). In my desire for authenticity, and since Bridgestone no longer makes the RD150, I started searching for any Bridgestone tires of the correct original size. Bridgestone does not sell that size in the US anymore, but they do in Europe and Australia. (B330 EVO 175/80 14 models) I contacted several sellers in the UK, but none would ship to the US. Finally found a seller on the eBay UK site, who would ship from France! Only took a couple of weeks to get here. I have the other two at my home in N. California, and will be taking them to Motorman7 in a couple of weeks. In my signature block below is the car in 1973 with those beautiful shinny wheels and the RD150 175/80 14 tires:2 points
-
2 pointsGot two of the Bridgestones mounted, 175/80R14's. That's pretty hard to find.
 2 points
 -
2 pointsMeaning that this response is, in a nutshell, almost everything one needs to navigate the world of electronic diagnostics. No need for a manual. Wasn't trying to insinuate that the response was too lengthy. Sent from my N9130 using Tapatalk2 points
-
2 pointsWater in the bottom of an underground tank can get stirred up while the tank is being filled. If you're fueling your car at the same time, a small amount of water can get pumped into your tank along with the fuel. I'd try a bottle of Heet and see if the problem returns. Another possibility is a rust hole in the top of your tank. A bit far fetched but I've seen it in the past. 240260280 has some good ideas too. I'm going with fuel because it was the last thing you did before the problem started.2 points
-
2 pointsGave up on these rivets a long time ago. Now I install steel 10-24 riv-nuts and black oxide truss head machine screws. https://www.mcmaster.com/94779A620 Never lose the pins, panels are held down tight. Works great for black interiors, I guess you'd be painting heads for other color interiors. Black on white or blue or tan would look cool though wouldn't it? Yes you have to drill out each of the 5mm holes to whatever size the riv nuts need but once you do it you'll never baulk when you have to remove a panel to do any modifications (which we never do, right?)
 2 points
 -
2 pointsHarbor Freight in Palm Springs? Probably one in Mar-a Lago for the "Beast" when it needs some Schina valve caps.2 points
-
1 pointMotorsport has joined forces with KONI to create an exciting new product, one of the most requested upgrades for early Z-Cars we've had, to replace (and improve upon) the long-departed Tokico HP & Illumina Adjustable Struts. Completely new, constructed specifically for 70-83 Datsun 240Z, 260Z, 280Z, & 280ZX, these externally-rebound-adjustable, twin-tube low pressure gas-charged KONI Sport (Yellow) Struts are designed for use on both stock & modified street cars, as well as autocross & track day cars. Built to give a good balance of street ride quality and handling at the softer end of the adjustment range, the KONI Sports can easily be tuned up to nearly double the rebound damping force for more aggressive control needs: simply open the hood or rear hatch and turn the KONI adjuster knob. Not only can you tailor the struts to your local road conditions (and to your taste), you can also quickly and easily change the settings for a blast at a weekend autocross or mountain run, then easily re-set them for a relaxed ride home. Whatever suspension behavior you need is literally at your fingertips. Also, if you race on different tracks and race conditions, the adjustable damping gives you an edge in setting up your car specifically for any track or autocross course. Koni believes they will work great with Eibach Springs, and will be fine with even lower springs, as long as a proper bump stop is used. Let us know if you have any questions, James@TheZStore & I will get you an answer. The first shipment, for 70-8/74 240Z & Early 260Z, is expected to arrive in the U.S. this March. We expect to receive the 9/74-78 Late 260Z & 280Z Struts 3-4 weeks later, and then the 79-83 280ZX Struts/Spring Seats 3-4 weeks after that. To reserve your set from the first shipment, the Pre-Sale is on now at https://www.thezstore.com/page/TZS/CTGY/classic20b041 point
-
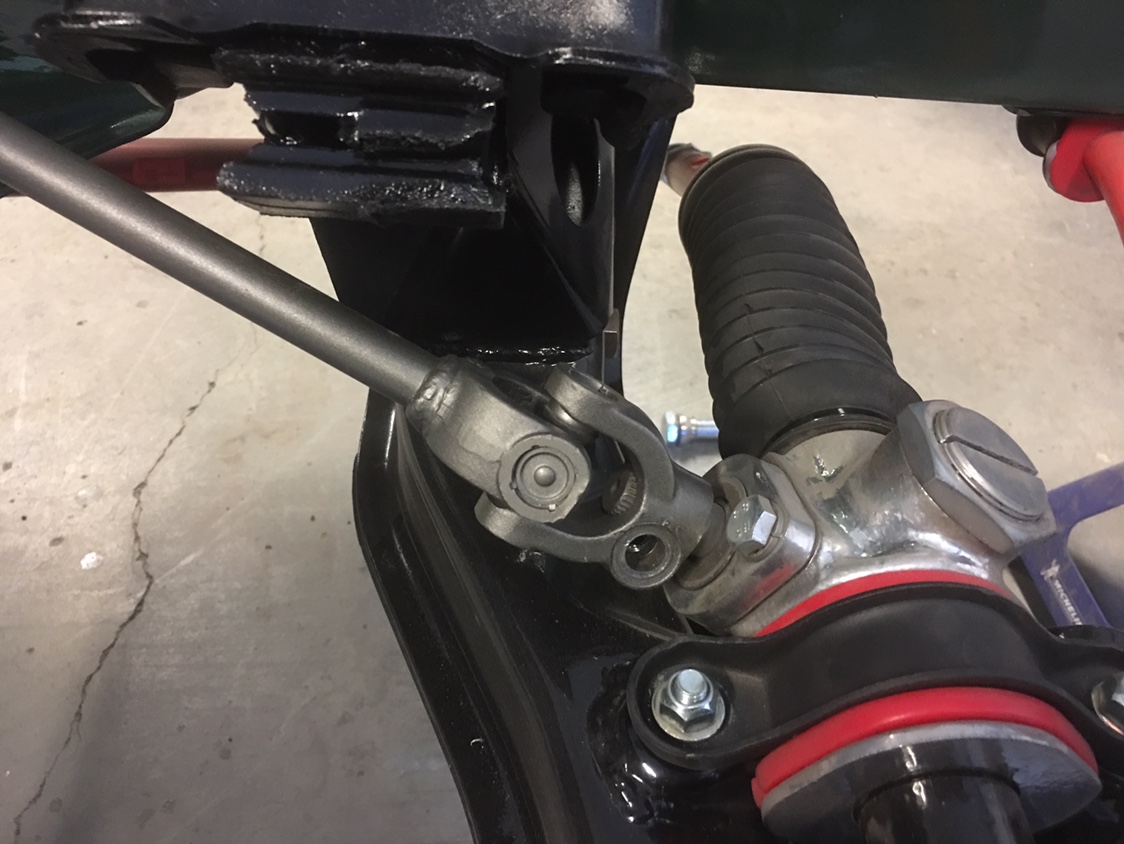
Crisis averted, lesson learned, idiot badge earned... Rotating the steering rack solved the issue!
 1 point
 -
1 pointThat is exactly the reason for the test I described. In this case, I chose a location in the middle of the circuit. If the first part of the test fails, the problem is between the key and coil. If the second part fails, the problem is between the coil and ground.1 point
-
1 point
-
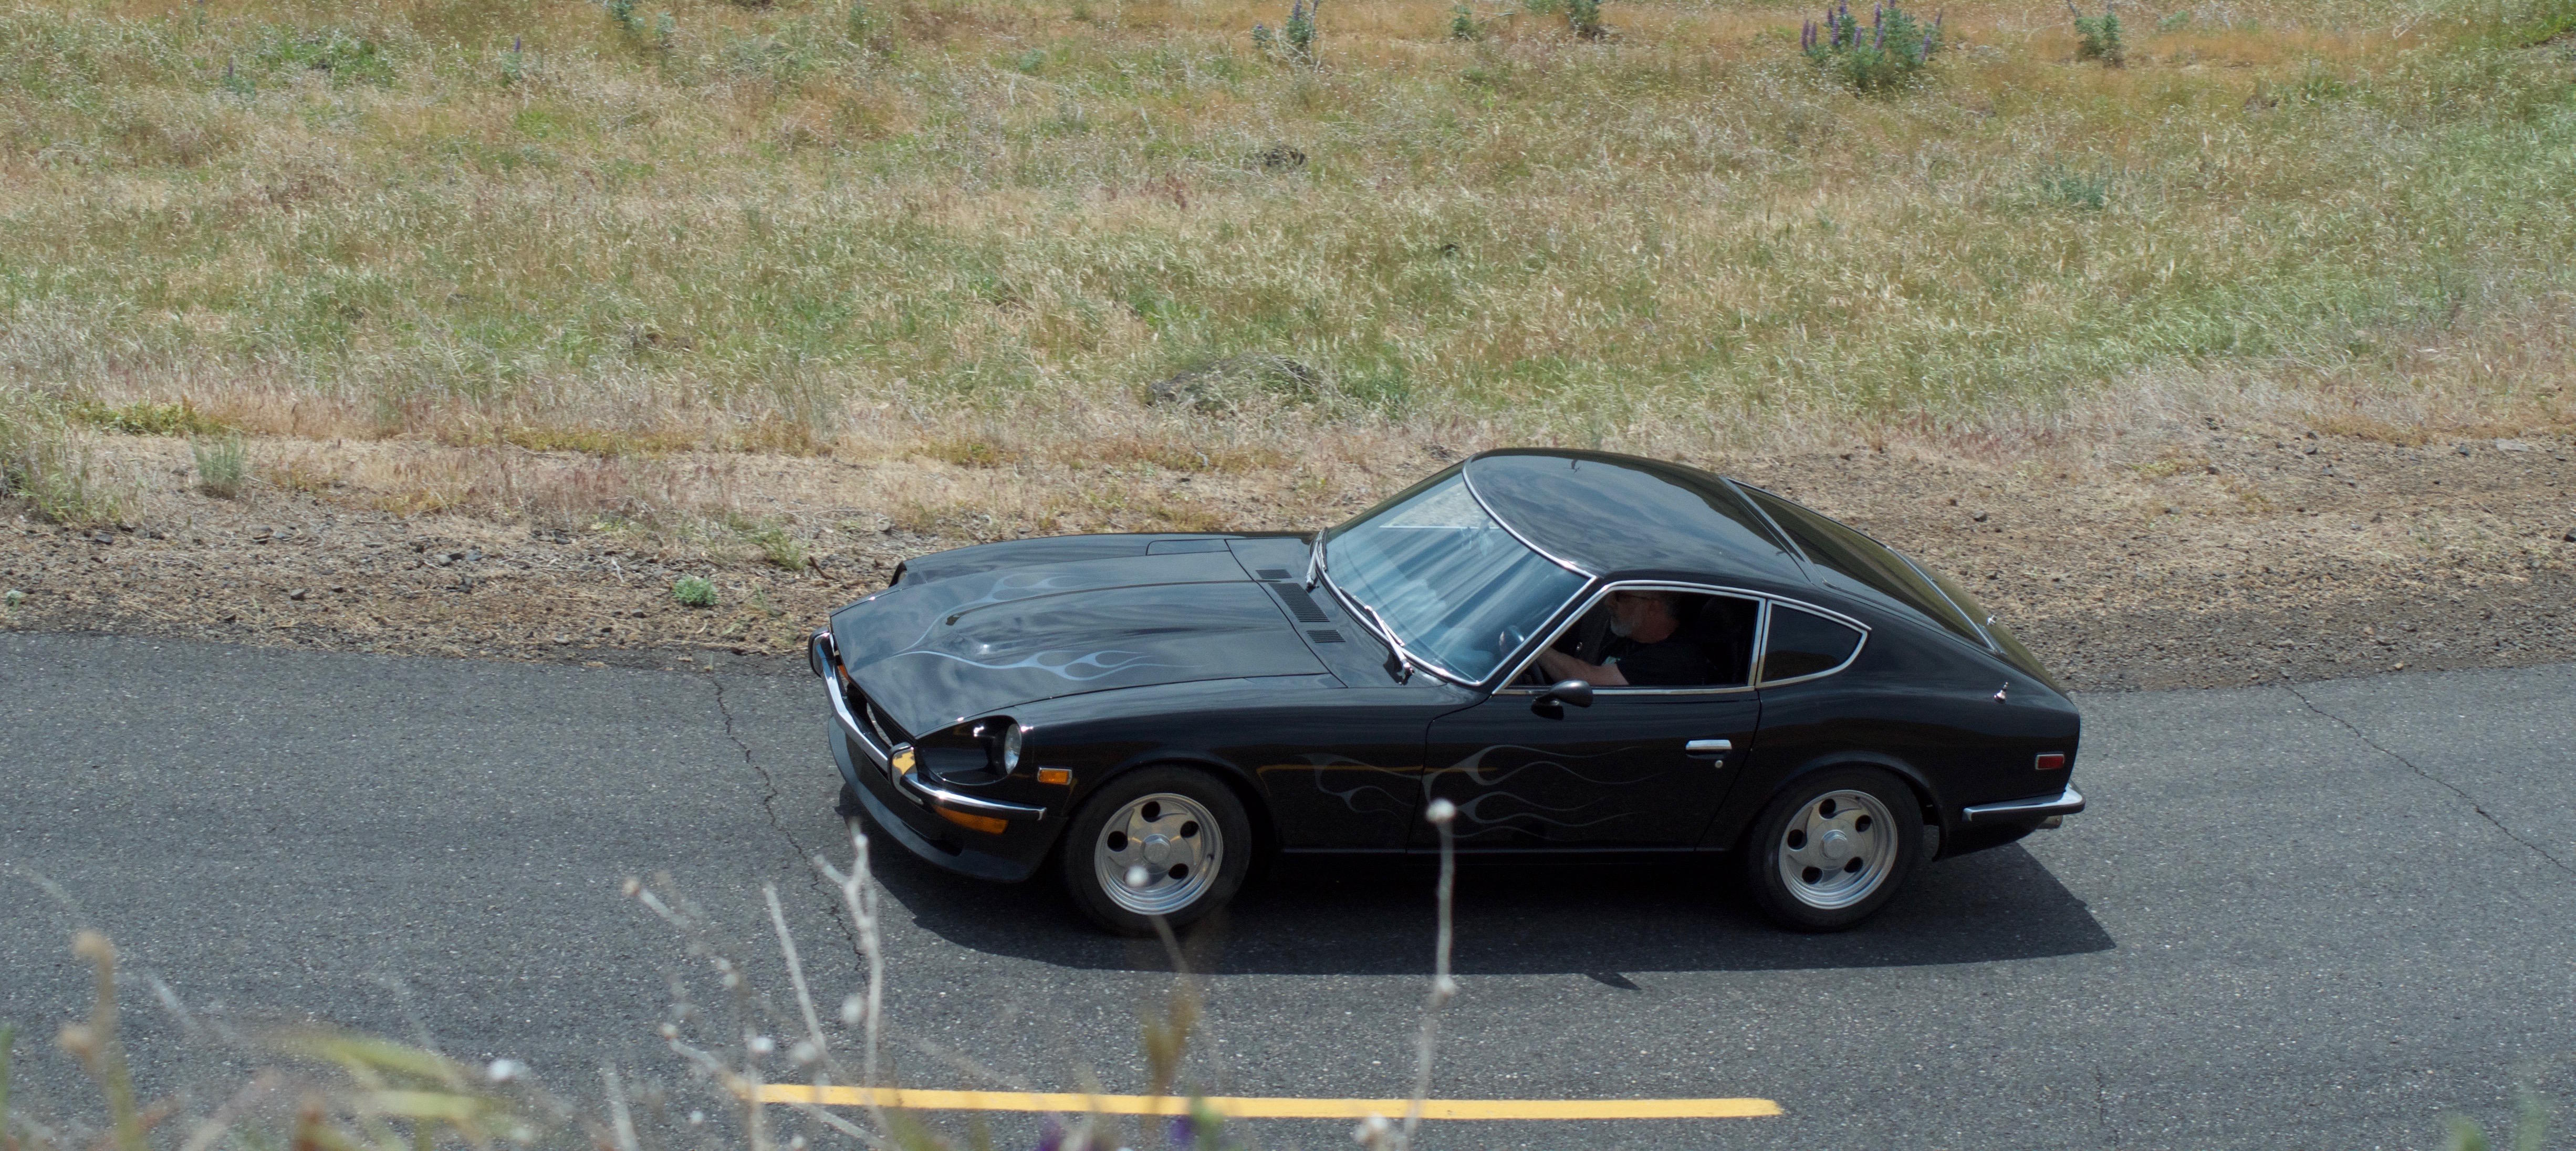
1 pointFun video, but after listening to the song, I'm kinda glad he wasn't driving a 6-speed. ? A version with subtitles would be interesting. Dennis1 point
-
1 pointFirst, what model Z do you have? Is it a North American, European, or JDM model? Here is a general test. If you have a digital voltmeter, put the positive lead on the negative terminal of the coil and the negative lead to ground. With the key on, it should read 9 to 12 volts. Have someone try to start the car while you are watching the voltmeter. If the voltage does not fluctuate significantly, you lost your trigger for spark. I'm not sure what distributor you have or what ignition source you have for your test right now.1 point
-
Failing Ignition module can spontaneously cause loss of ignition (look at tach to see if it drops instantly when coasting). Usually they start working again after the circuit cools down. Failing capacitors (condensers) can short out their connected ends when failing. Usually they start working again after the circuit cools down.1 point
-
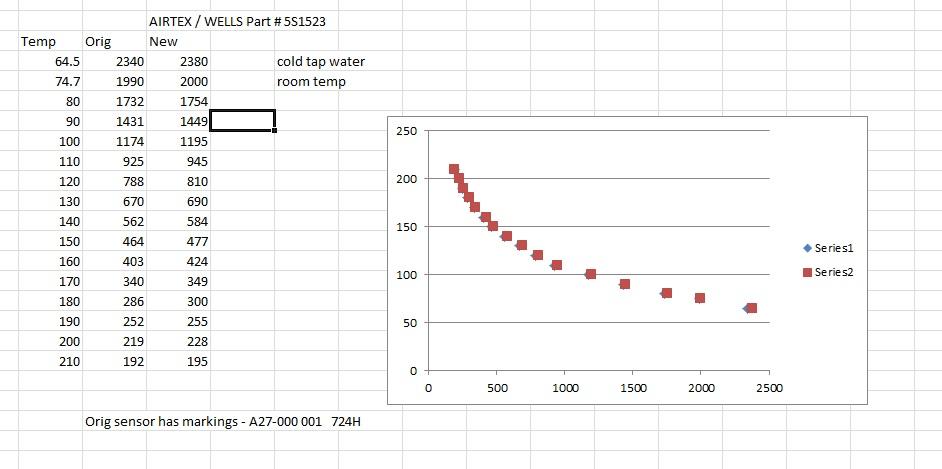
1 pointMy original temp sensor was looking quite ragged around the edges, so when I adapted that 260 thermostat housing to my 280, I also took the opportunity to replace the temp sensor with a new one. I bought a new sensor off rock auto and to confirm that it had the same characteristics, I compared it to my original on the stove in a pot of water. I just wanted to be sure. They were slightly different, but well within the accuracy limits laid out in the FSM. Here's my "test rig": And here's a summary of the results:

 1 point
 -
1 point
-
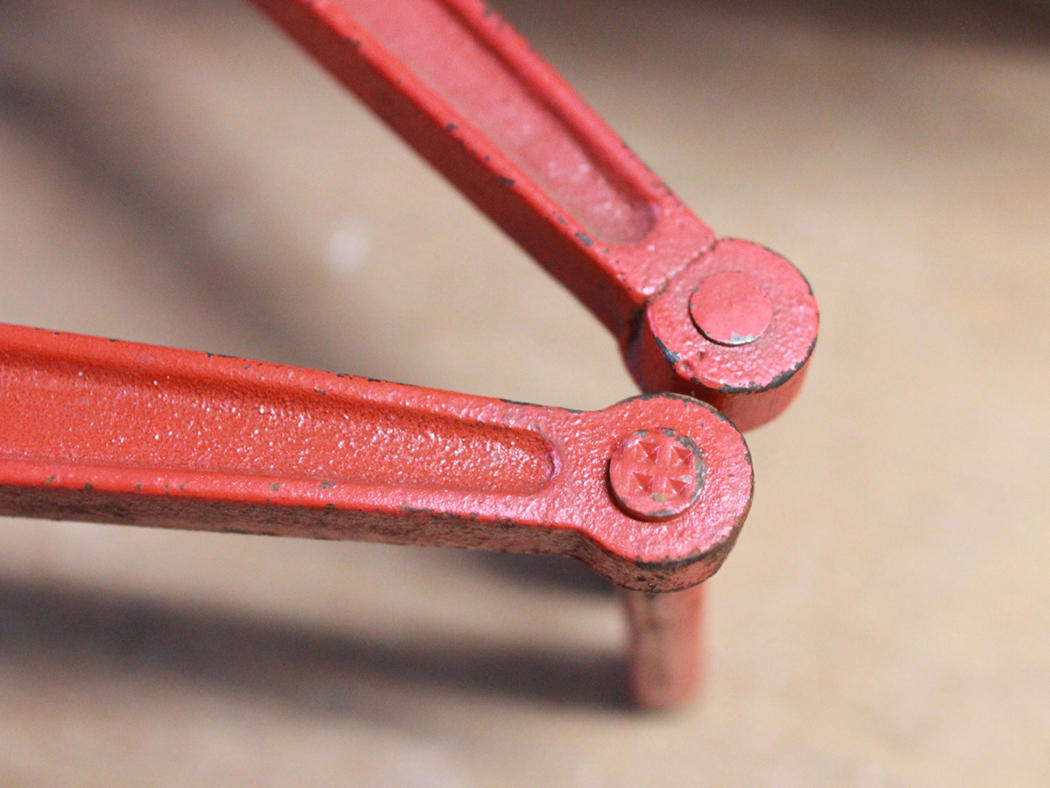
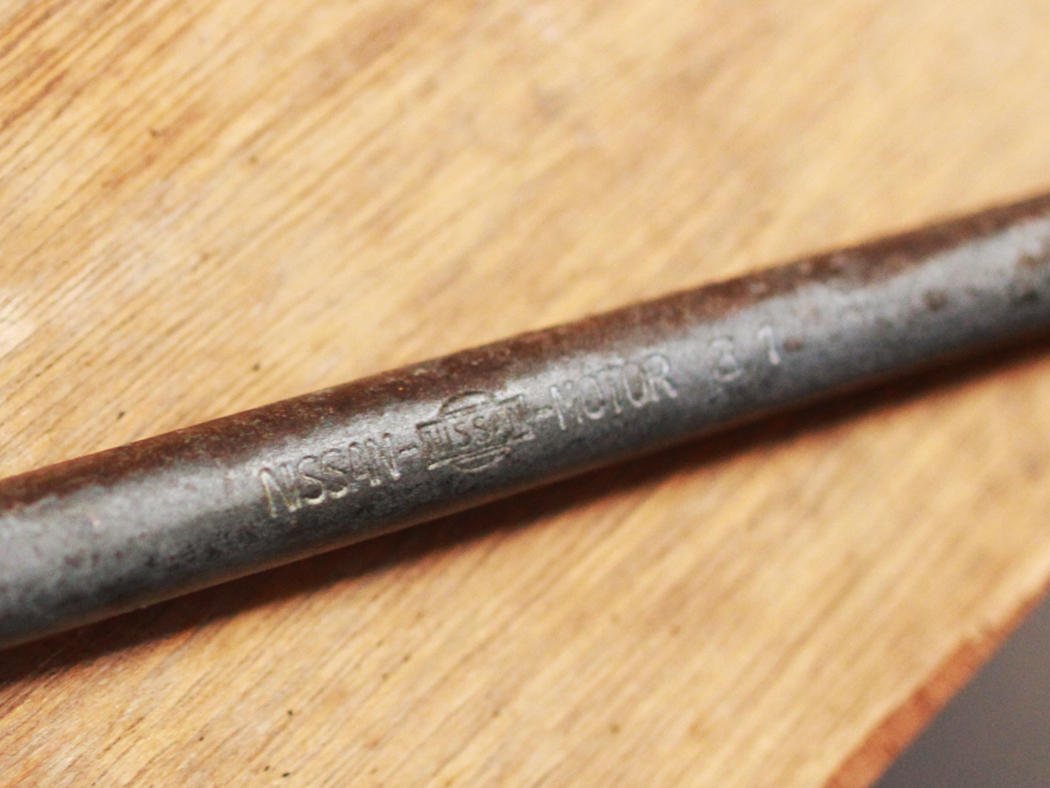
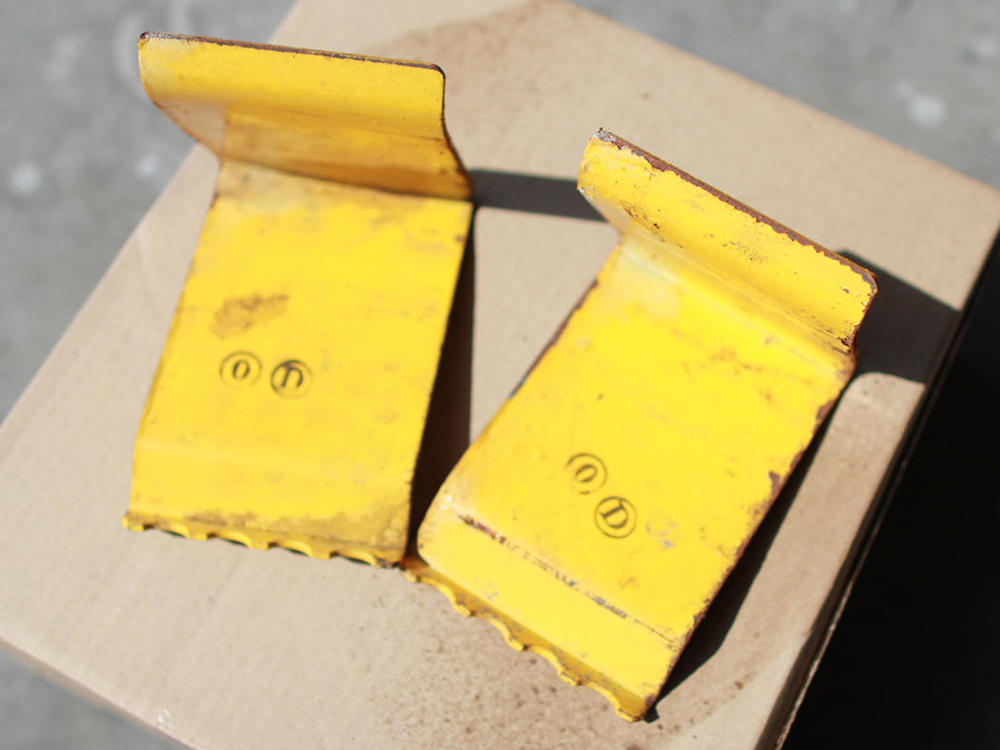
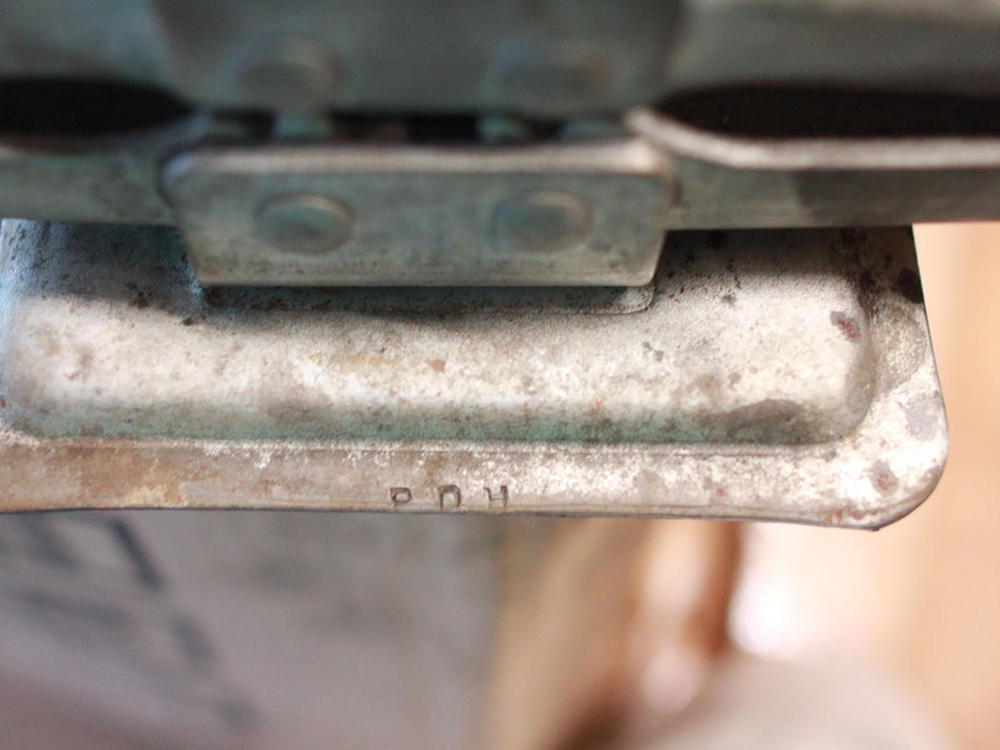
I noticed this difference between the jack spanners I have. The top one on the first picture is early fabrication. The later spanner has a '3' in the casting

 1 point
 -
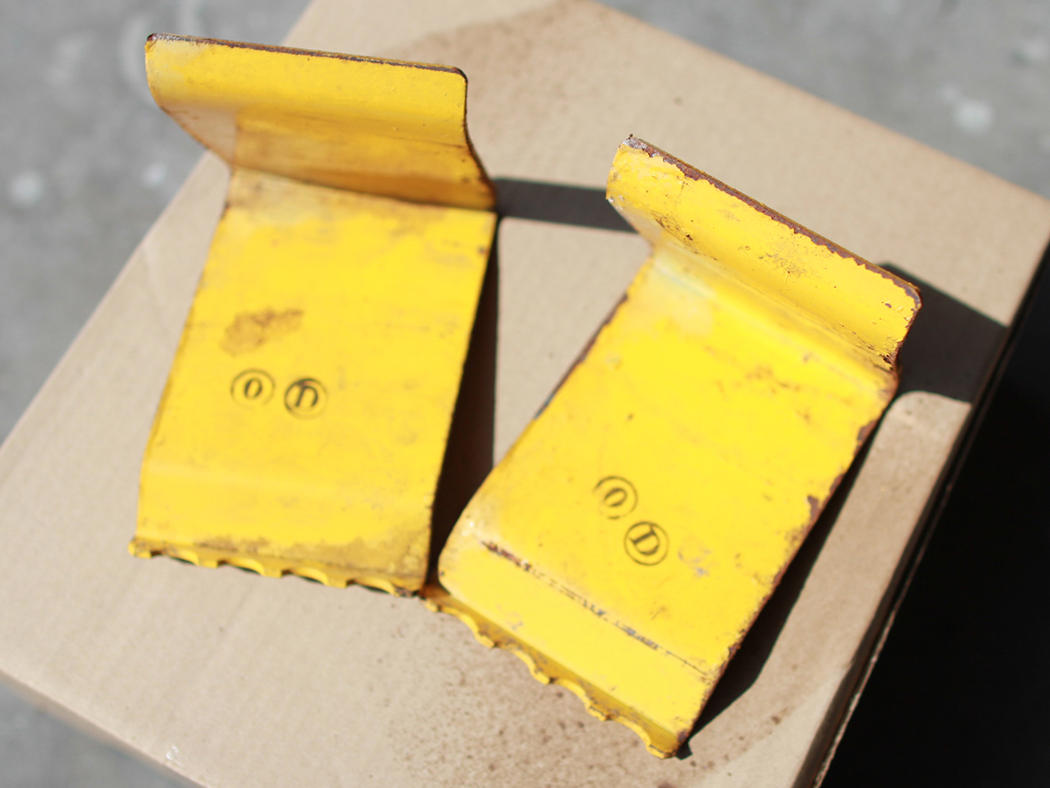
I finally took some pictures of what came with 26th:
 1 point
 -
Just wanted to follow-up, as the engine is idling smoothly now. Turns out the front-carb nozzle was quite stuck as well. The main problem with idle was that I'd managed to completely back-off the rear throttle adjusting screw while trying to balance carbs (with both nozzles stuck). By turning rear throttle-adjust clockwise a few turns, the idle smoothed-out considerably. I'll need to go through the carb-balancing again. By the way, the default mixture adjustment of 2.5 turns down seemed OK for the front carb but seemed to be way (2+turns) off for the rear (as indicated by a Colortune). I'm not sure whether to worry about the apparent lack of symmetry.1 point
-
1 pointCharles, I remove the springs, leave the nylon wedges in place. Plating leaves a residue on the nylon which I scrape off. Springs go on a wire to not lose in the process, insert after the nylon wedge is clean, add the New bumper from 240zrubberparts and done. Jim1 point
-
1 pointNo apology needed. And you're correct. No harbor Freight in Palm Springs. I have to leave town to shop at one. I can relate to going stir crazy on a rainy day. The rain here last Thursday wiped out the only three roads leading out of town to the interstate. Nine inches of rain locally. Stay dry! Dennis1 point
-
1 pointI'm saying that for MIG you should use the CO2 / argon blend. For TIG you should use 100% argon. And also just to be clear... That applies to steel welding only. When you get into the non-ferrous stuff, the rules change.1 point
-
Never thought of that. (not sure if I've ever seen that) Would only be an issue for the back side. Maybe I'll hit it with some gloss clear just in case. Wouldn't hurt and would actually make it easier to clean Sent from my C6902 using Classic Zcar Club mobile1 point
-
Technique is pretty old school. No vapor blasting here. For the Back side which was pretty caked, I attached an old wire wheel from my bench grinder to my Makita angle grinder. It worked great. Plenty of power and RPM's. It cut through the corrosion pretty quick without eating up the aluminum. Then I Used my cordless drill with the little conical wire brush attachment and got the crevices. For the front, I used small wire wheels on the slots. Then I used sandpaper, then polishing compound, then Mothers Power Ball to finish out. I used 220 grit on the road rash that was on the lip. Otherwise it takes forever to smooth things out. Then I used 500, then 1000, then 1500 grit on the entire front of the rim. I sanded mostly in a radial direction. Then used the Dark Gray polishing compound with polishing wheel attached to my $18 Harbor Freight 3000 RPM corded drill. After that I went over it again with the finer white polishing compound. After that I used the Mothers power ball along with the Mothers polish and then wiped clean. It takes about 2 hours per wheel going through the whole process. Also use the sandpaper and polish on the slots. So, that's it.1 point
-
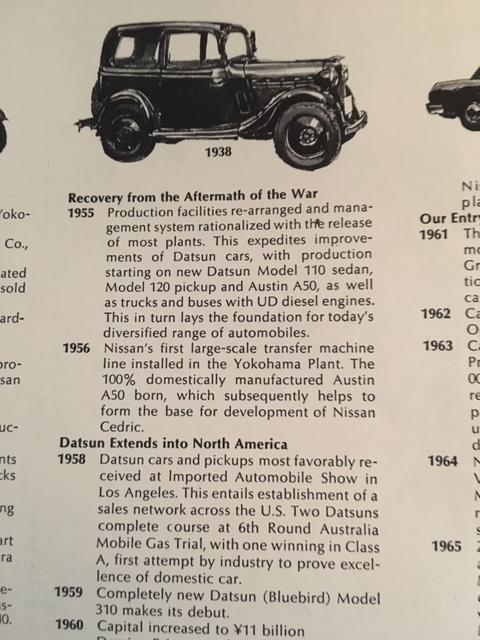
I does look like 1955 was a new start for the company. Perhaps they started a new numbering system at that time, after recovering from the war devistation.
 1 point
 -
1 pointThanks. I put a lot of bubble wrap in to protect it and hope the new owner receives it in same condition and is really pleased with it over the years.1 point
-
1 point
-
1 point
-
Webers are way over my head, duh. A slingshot is way over my head. The perfect screwdriver...
 1 point
 -
1 pointI've done that with whole cars. It's always fun to see how long it takes for her to notice the additional car at the shop1 point
-
btw: This is the perfect screwdriver tip for Webers, etc!
 1 point
 -
Thanks for the confirmation Kats. A very lucky find indeed. The only booth with any Datsun parts (most are Ford and Chevy) They had a few drive train parts and misc hardware. Now to clean it up and place it in it's rightful spot in my car. Interesting to see if the date code holds true in prior years as you speculated. Need to find some older cars with jacks?1 point
-
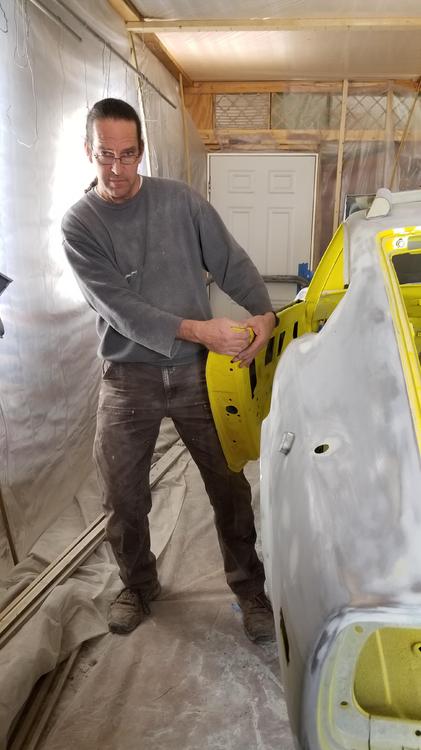
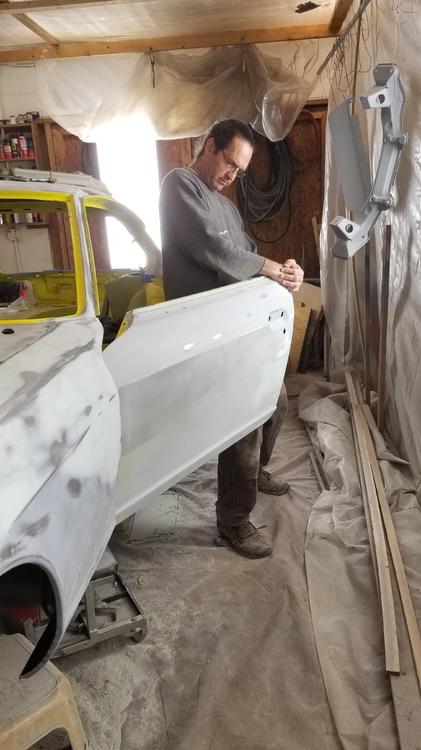
1 pointSomeone PM'd me with this: "Hi Charles: A while back you mentioned that you had, on occasion, resorted to twisting a door as part of your panel alignment strategy. I can see an element of usefulness to this, because it seems like it would permit moving the bottom (or top) of the door inboard or outboard at the rear without disturbing the front edge quite as much. On the other hand, using shims at the hinge-to-post mounting point looks like it would move both the front and the rear edge outboard by the same amount, meaning that the door-to-front fender alignment would be affected. Also, shims will only move the door outboard. Can you tell me a little bit about: Why you decided to try twisting the door. How you did it. How you think it worked (i.e Did the door's box structure twist, or did the front wall of the door distort where the hinges mount?) How much movement you accomplished at the bottom (or top) of the rear of the door. Any cautions that need to be observed?" So this was my reply, it occurred to me it might beneficial to others so I copied it over to here: Why I decided? There are actually body tools available to do this. They fasten into the door latch so you can twist a door. I could get three corners of the door right but never the fourth. How you did it? So I set the front two corners of the door properly. If I need to shim the hinges, I do that. Then you have one of the rear two corners that line up. So If depending on which way you have to twist it you brace your leg against the door and pull with your hands. I am sure if you got too rowdy you could crimp the door somewhere. This door is a 280z door, so it is stouter than the 240z door. The drivers door was 3/8" or more proud of the rocker panel when it was flush at the top. After a couple of tries at twisting, it lines up really nice. I haven't seen any unintended consequences of this technique. I suspect you could twist a door 1/2" or more if necessary but that door would be pretty far out. I tape some shims in what ever location is flush so it makes it easy to repeatedly check when the door lines up on all 4 corners. Does that make sense?
 1 point