Leaderboard
-

AK260
Free Member6Points999Posts -

inline6
 Subscriber
 5Points1,263Posts
 -


Zed Head
Free Member4Points18,921Posts -

jfa.series1
Subscriber3Points2,707Posts
Popular Content
Showing content with the highest reputation on 07/28/2021 in all areas
-
@ownallday - you’re most welcome. Keep this thread up to date so that we can see how you got on. On my brother in law’s TR6, being push rod, the cam cover breather is like a steam train chuffing away and it made me cough when I had it unplugged. Now if a car ever benefits from a catch tank it’s that one!!!! I’m surprised you’re getting large blow-by from the top of the engine. I’ve found on mine the engine block breather is normally the one with more output. And I have pretty good rings with 205psi dynamic compression. One tip, I used 15mm copper pipe inside the I think it was 16 or 17mm hose from the cam cover breather to make sure it stays in the shape I want and doesn’t crush around the bends when it heats up. It was a female dog to get in even with silicone lubricant so you can always try 10mm copper pipe. The key thing is to ensure it doesn’t crush on the bends or change shape and foul itself against other engine bay parts. Another trick (if you’re not bothered about the exact shape / routing of the pipe) which I have used to GREAT effect on the fuel tank breather that does the crazy 180° turn is to place a 15mm pipe bender spring permanently in situ inside the 16mm hose - it will never crush!! 15mm Internal Pipe Bending Spring https://www.amazon.co.uk/dp/B00NW4NJAY/ref=cm_sw_r_cp_api_glt_fabc_V3G163TST9N5H9N8MJEQ?_encoding=UTF8&psc=1 @Dutchyhawkeye - glad to be of service sir! [emoji12]3 points
-
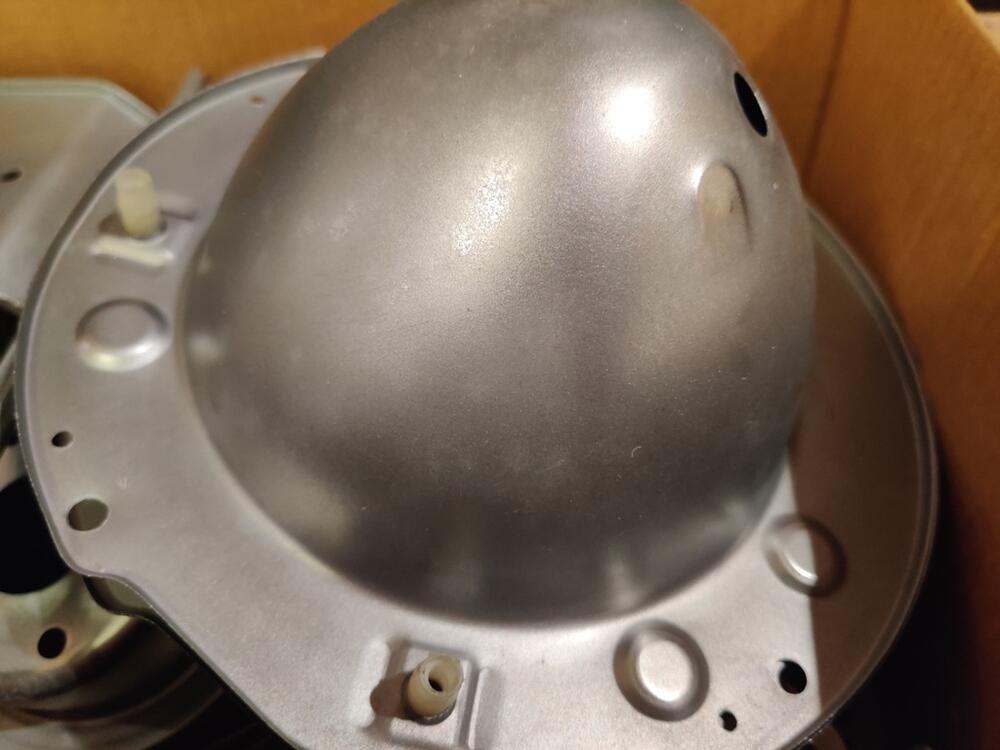
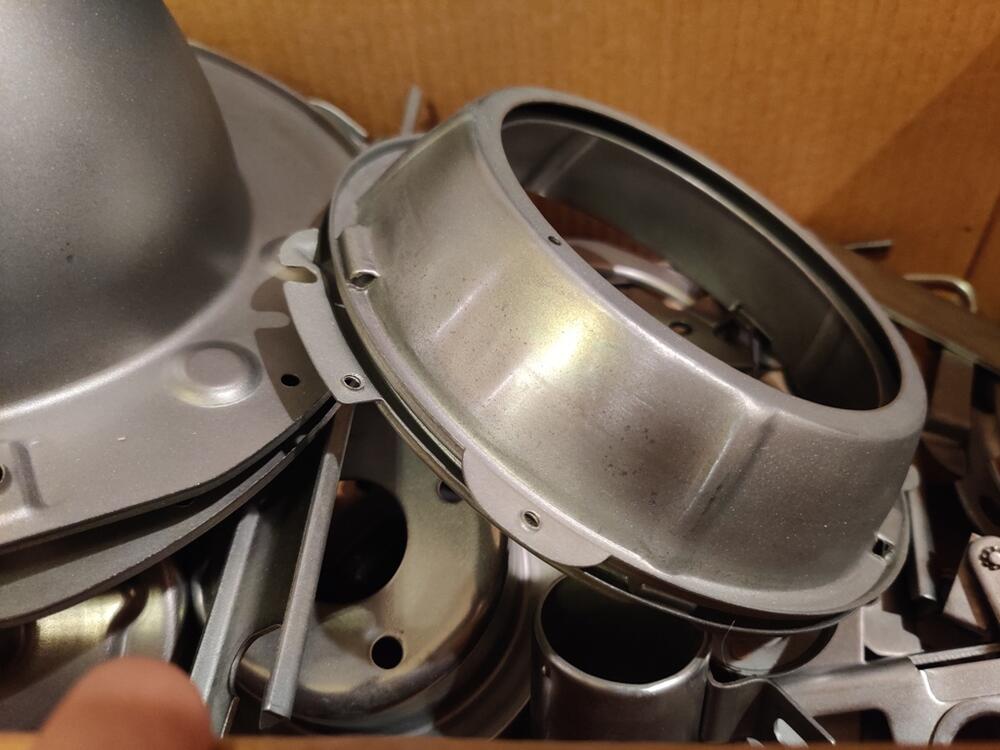
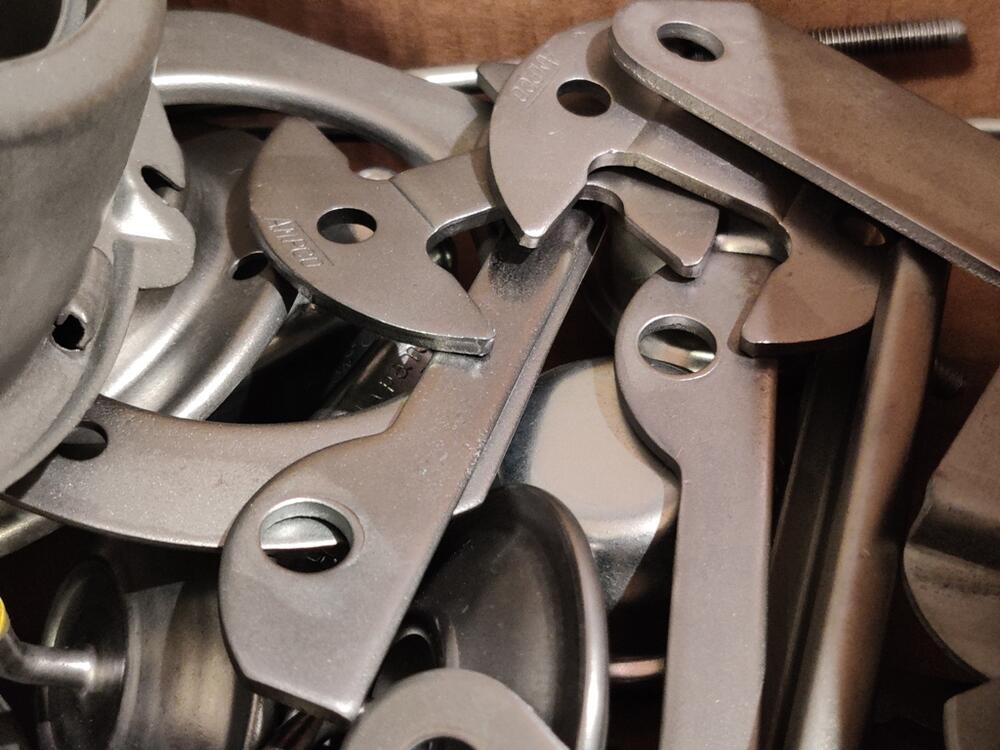
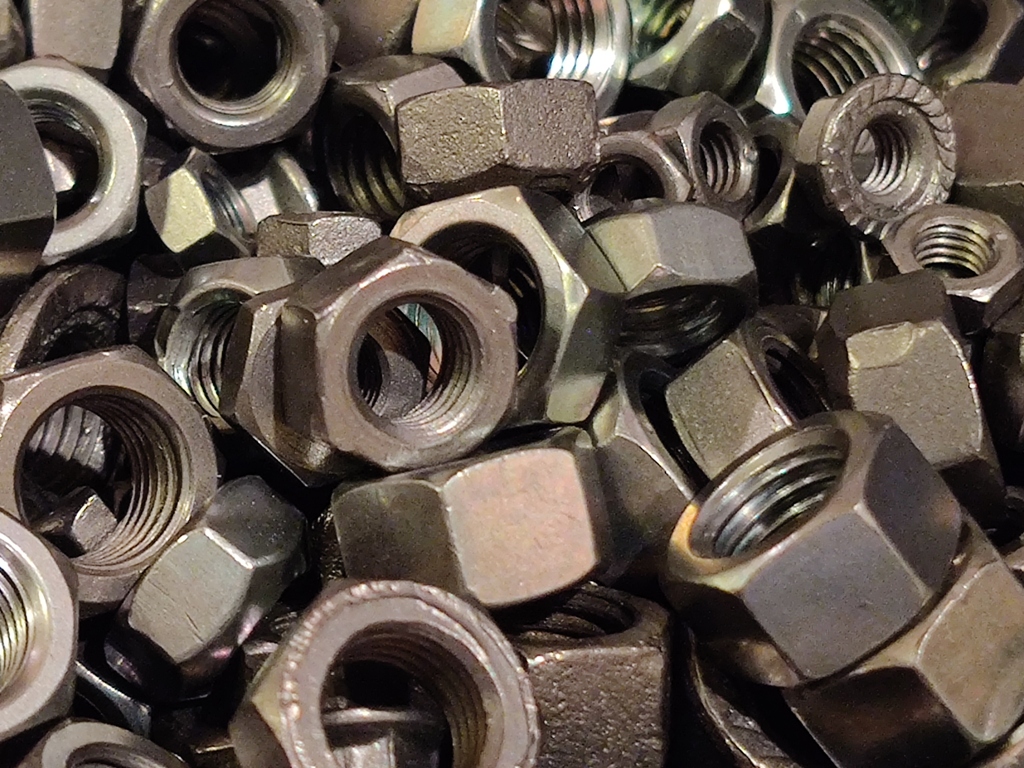
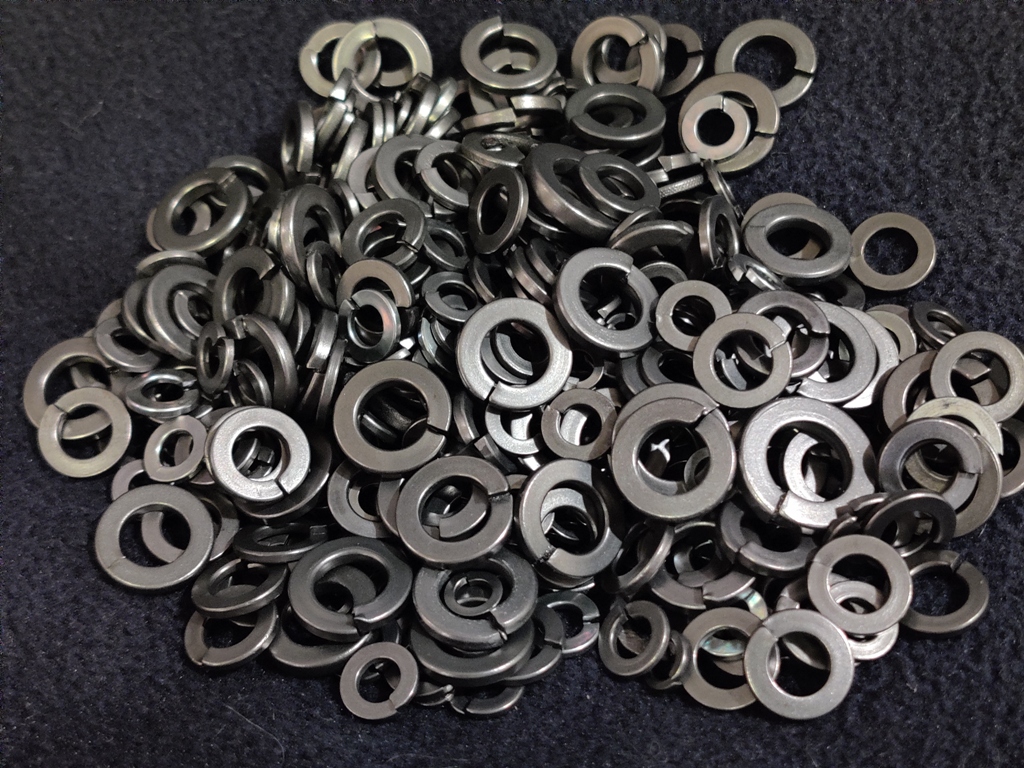
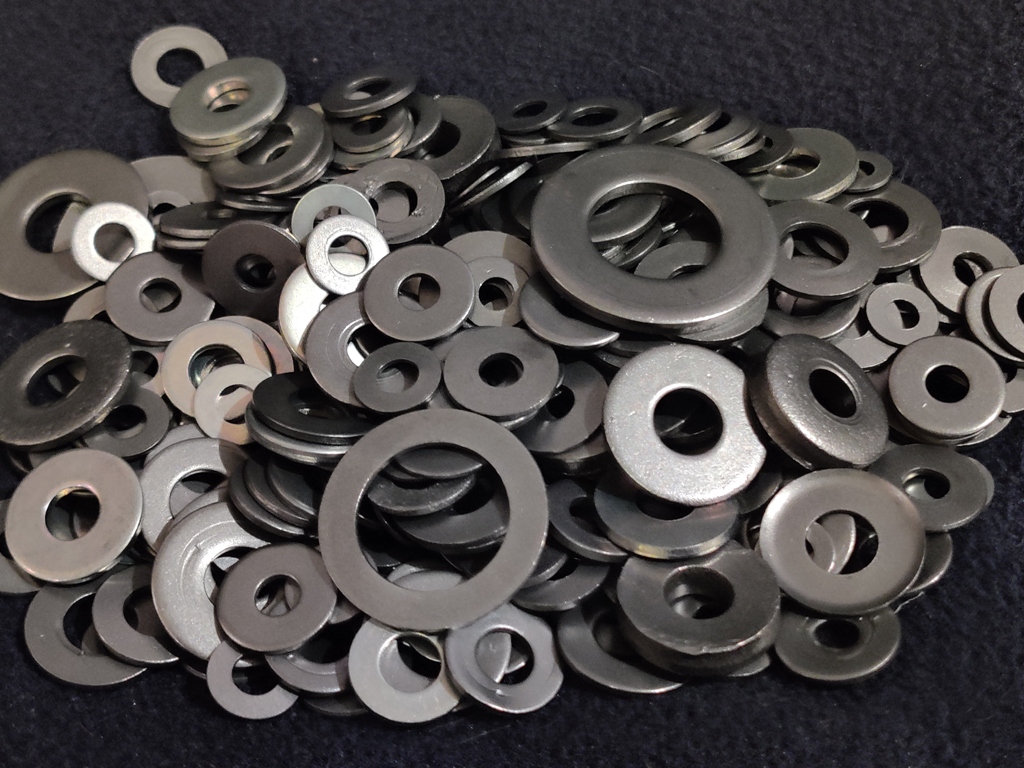
It has evolved some, and now it consists of: Using these glass beads from Northern Tool and Equipment, important for size of grain, and bead blasting at 90 psi with a 1/8th inch nozzle to remove all rust, and to establish a consistent finish. I use one of these baskets and find that putting a variety of hardware (big and small) is great for trapping the parts in place so I can blast them without them flying around too much. For large parts, you don't need to use the basket, and you can then go back over them with the pressure at 50 psi to put a smoother, easier to "second stage prep" by hand, finish. For all hardware (bolts, washers, nuts, screws and odd small bits), I go straight from glass bead blasting to tumbling in one of these vibratory tumblers. I now use a stainless steel media (bought from Southern Shine Tumblers on Facebook). See pic below. It consists of tiny little bits of stainless steel that are good at getting into tight spaces, like between threads, phillips head recesses, etc. And now I use it dry. I was using water and a bit of citric acid, but I think that is best for doing brass shell casings. I was fighting keeping the parts from starting to oxidize/rust, and have found that the media works better and faster dry... to put a nice finish on the hardware. Time in the tumbler is about 2-3 hours. For large parts that I can't tumble, I use a Dremel tool and the little wire wheel brush attachments after glass bead blasting. For final, more consistent finish, I follow wire brushing by hand rub the large parts with #0000 fine steel wool. Doesn't take a lot of work by hand, but the combination of using the Dremel followed by fine steel wool by hand does end up taking some time. The glass bead finish can be altered on aluminum parts, by the way. It can look really nice, if after going over it once with 90 psi, you lower the pressure and go over the part slowly. Extending the distance from the gun tip to the part also smooths out the finish, giving it a nice satin look. I am still experimenting, with some aluminum parts, but a once over with 90 psi to clean followed by a once over with 50 psi achieves a really nice finish.
 3 points
 -
Sounds like something on/in the coupling sleeve and hub gears. Could be a chunk stuck in the teeth or a broken tooth. The shafts and main bearings are all shared between and the gears themselves are constantly meshed so a gear problem should be heard all the time. Only the coupling sleeve and hub meshes when you select a new gear. Although, there is a needle bearing under each gear that might deflect under load. Others have more transmission experience. Seems like you'll need to take it out and apart though to know for sure.2 points
-
 2 pointsZ Car Depot has my latest parts order in the mail, so I expect to see the package on Thursday or Friday. A guy needs a good distraction to reduce the leftover stress from work. That meant spending yesterday evening in the garage to clear out room for the Quickjacks, and moving them into the garage this evening. I did the grand unboxing, performed the required RTFM, watched a few YouTube videos on Quickjacks, and set about the execution. Since I'm not in a rush, I only worked on the ramps this evening. The hoses are connected, and the cylinders have been pressurized. No air leaks detected. Tomorrow I hope to finish putting the quick disconnects on the long hoses and pump. Maybe I'll even get to bleeding the system. We'll see.
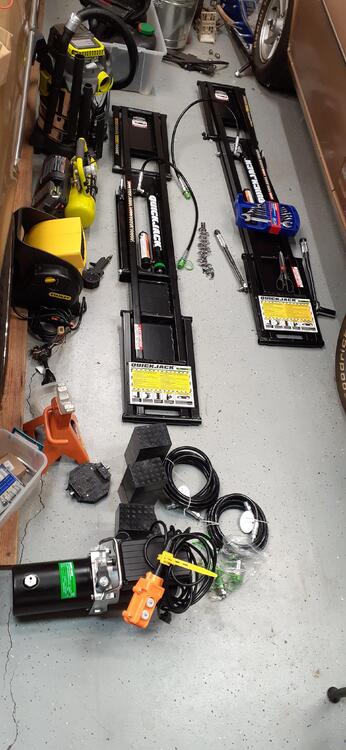 2 points
 -
When you jump it you're putting outside power directly to the cable ends. Kind of sounds like dirty cable end to battery post connections. When the current from the starter motor (lots of amps) hits them the corrosion heats up and expansion opens the connection. Then it cools down and closes and will pass enough current to run lights and things. Very common, many starters have been replaced because of it.2 points
-
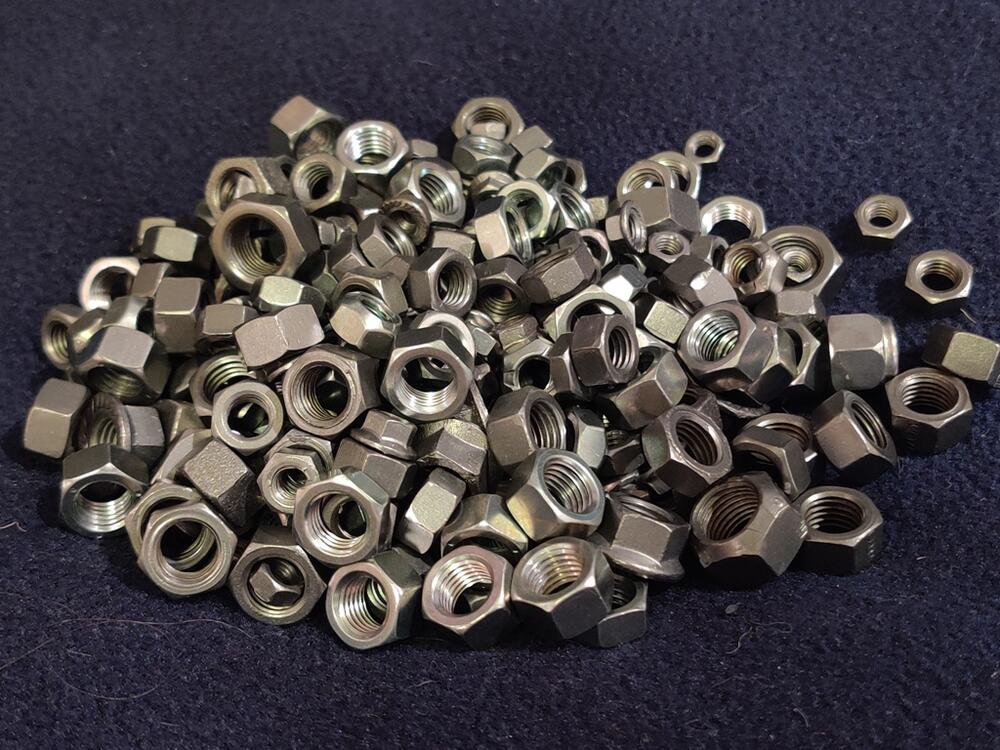
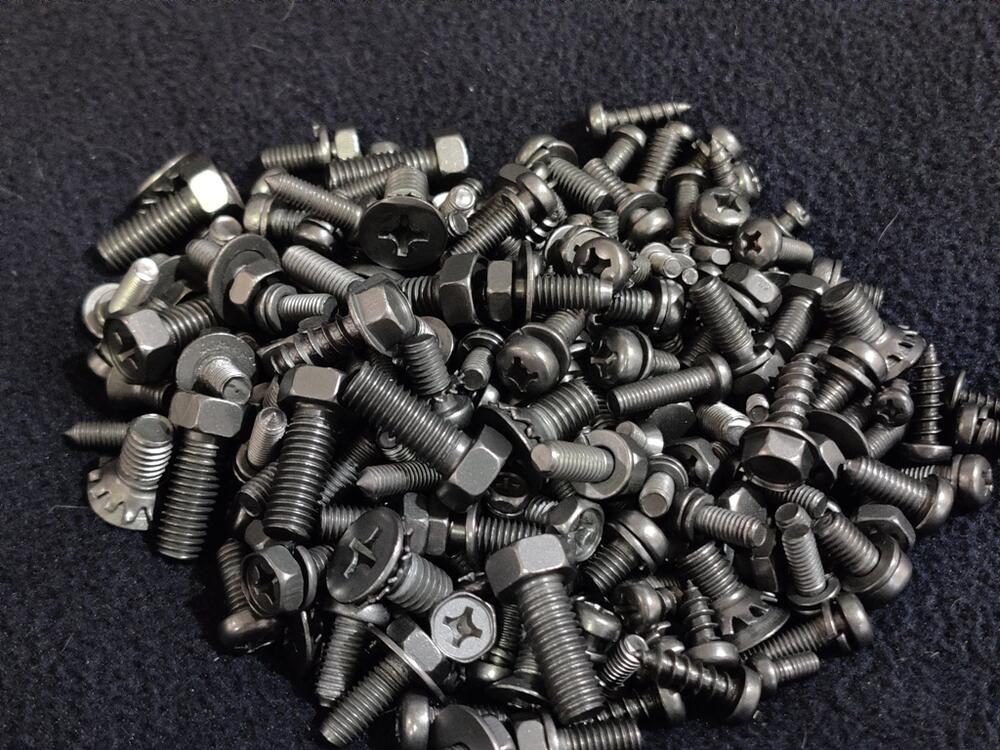
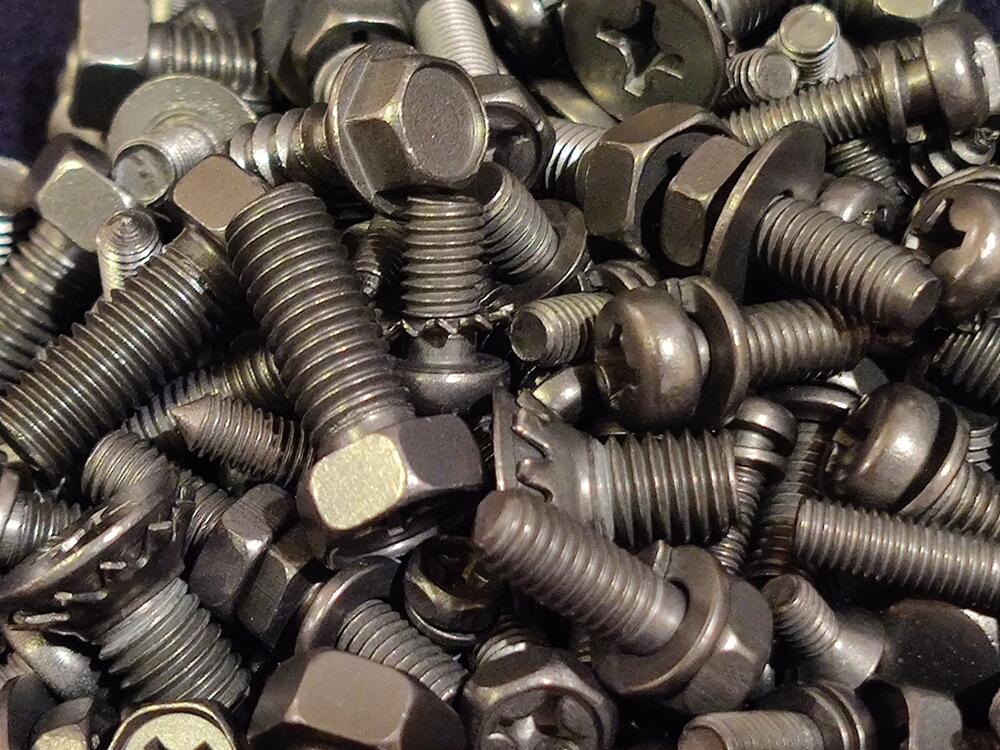
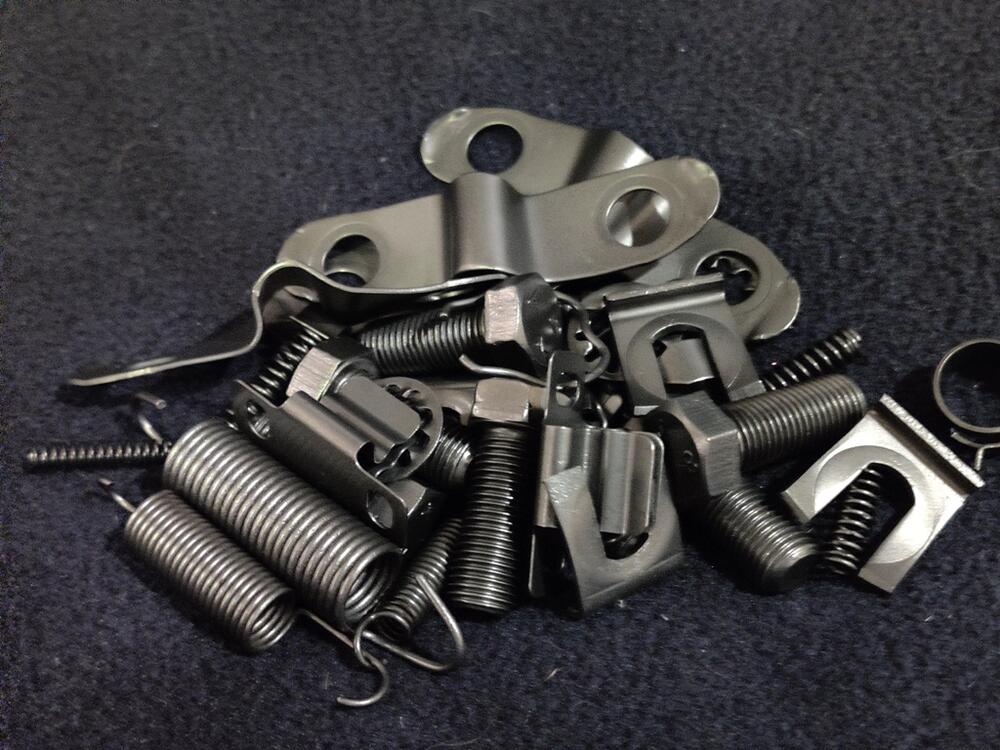
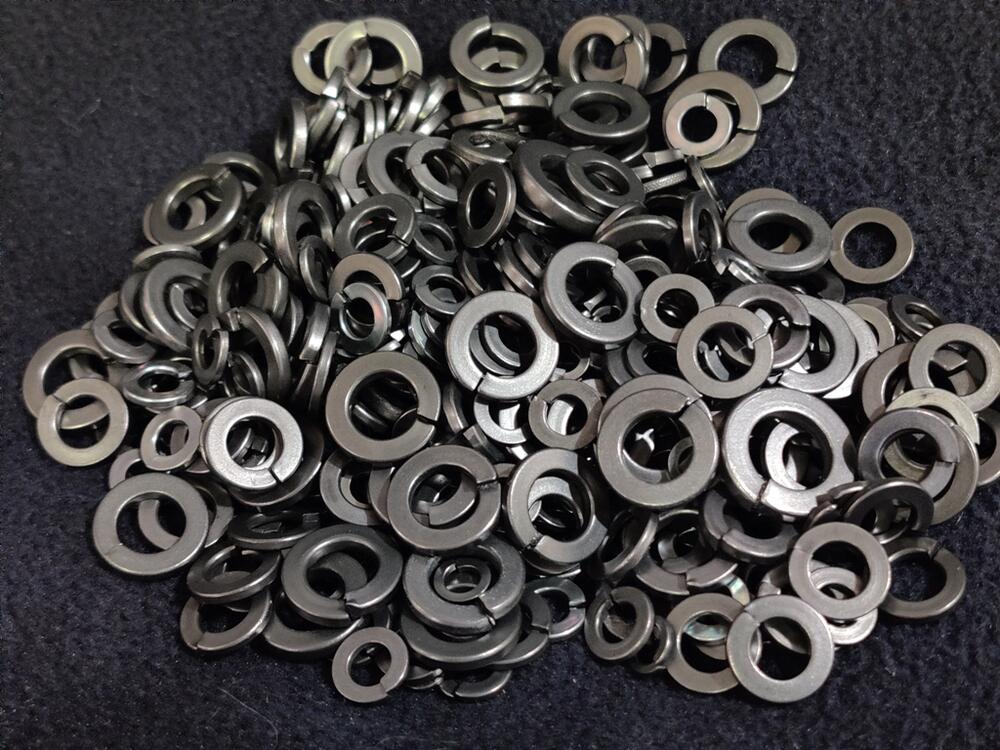
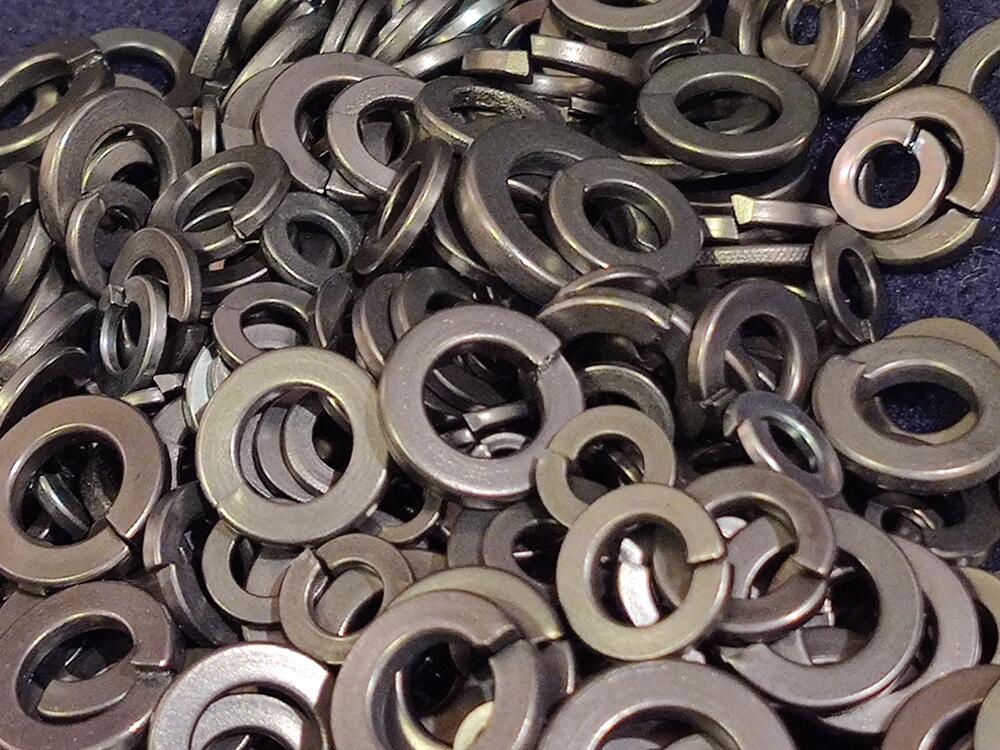
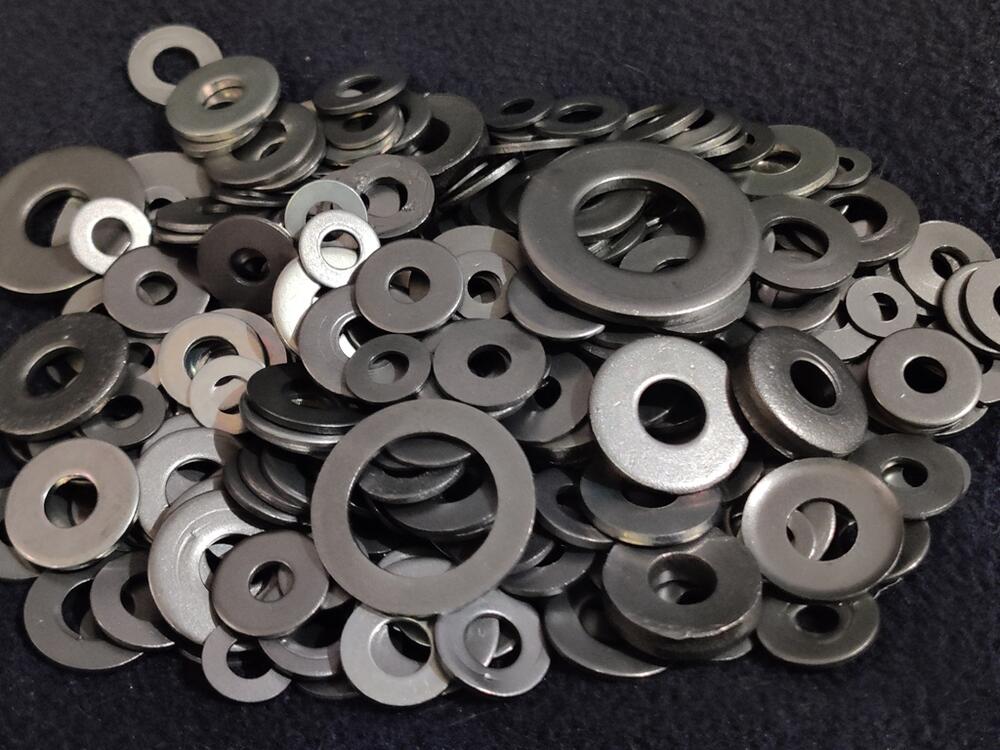
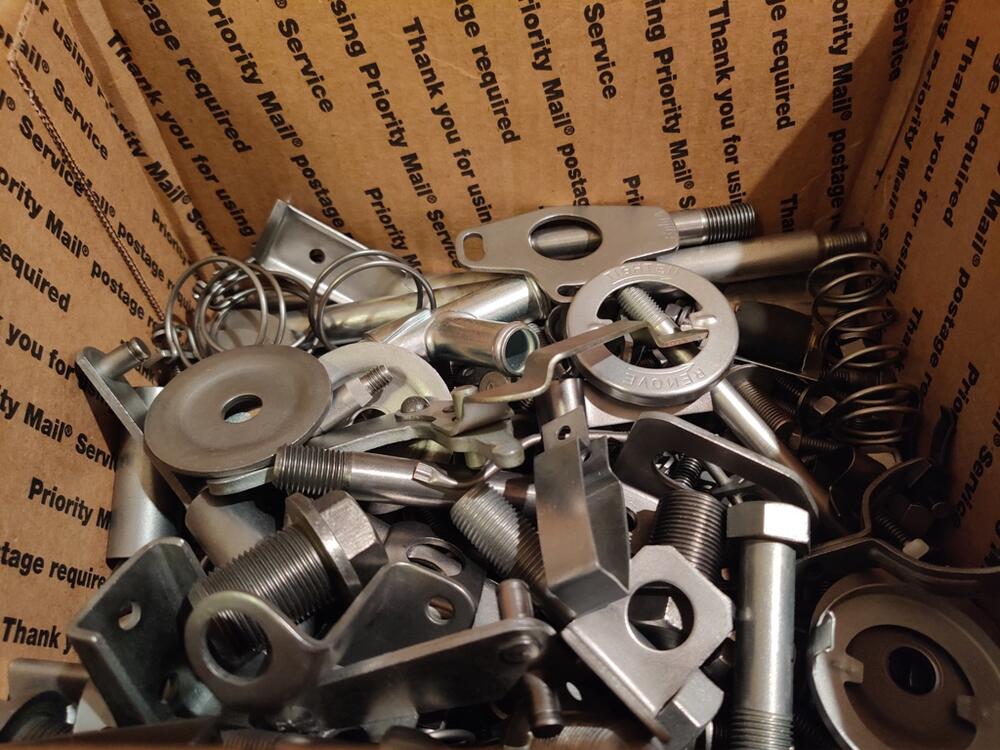
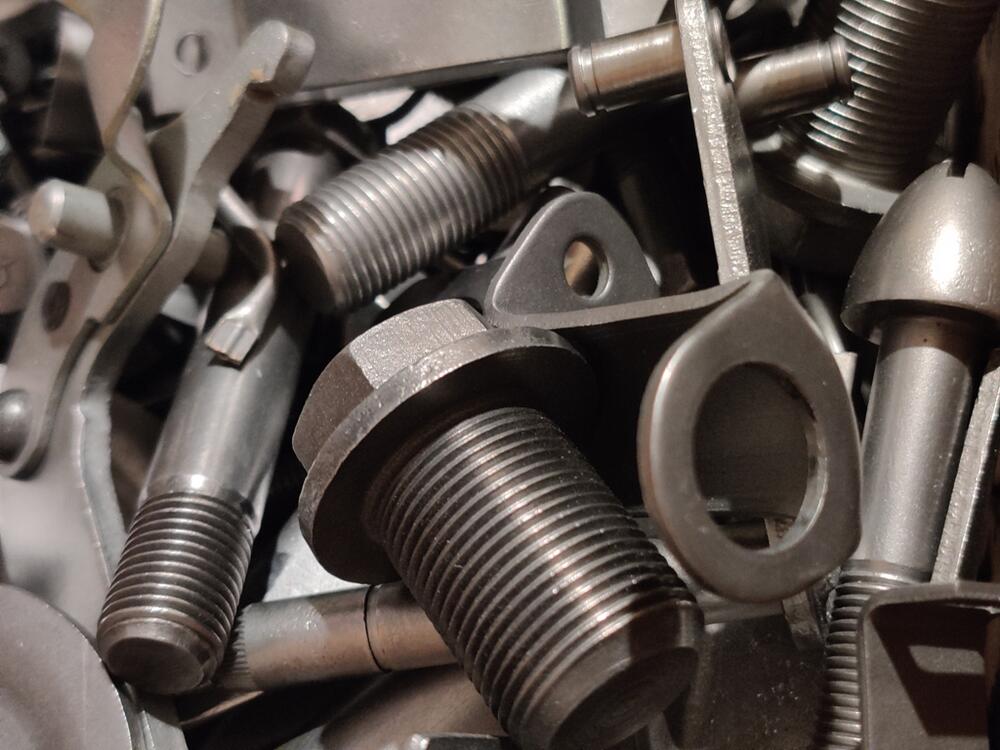
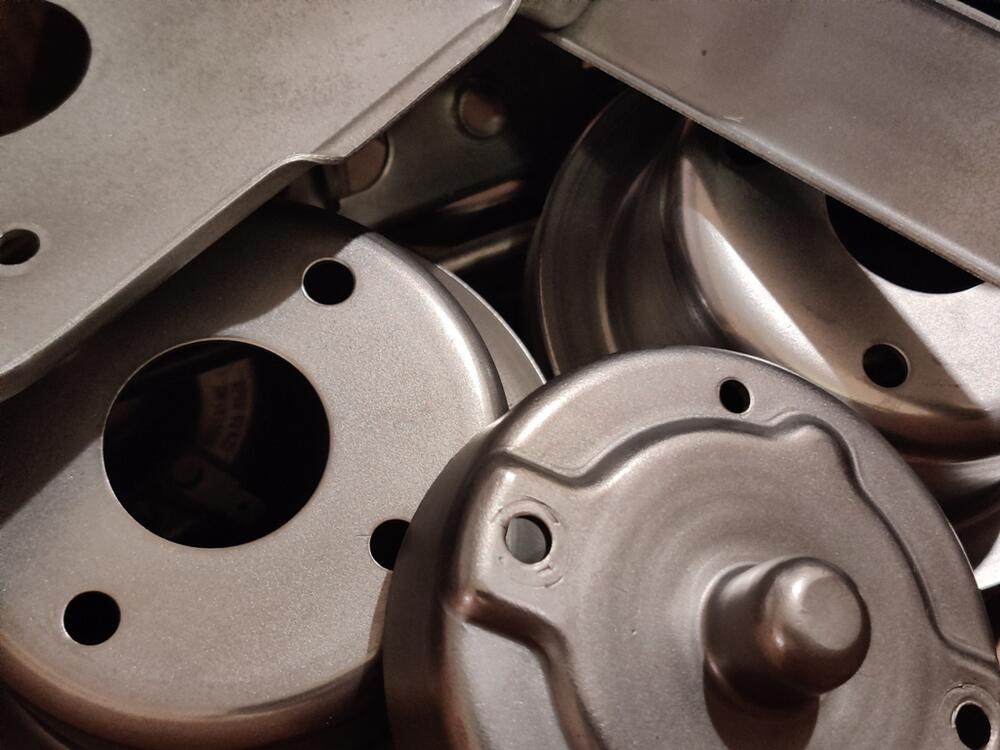
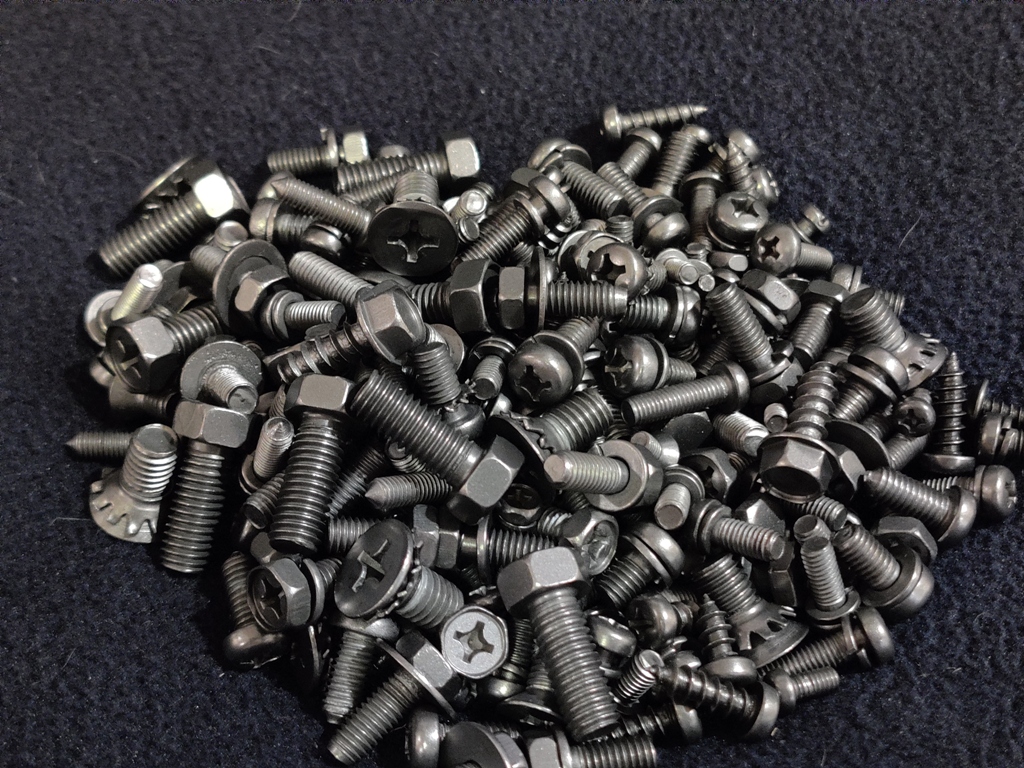
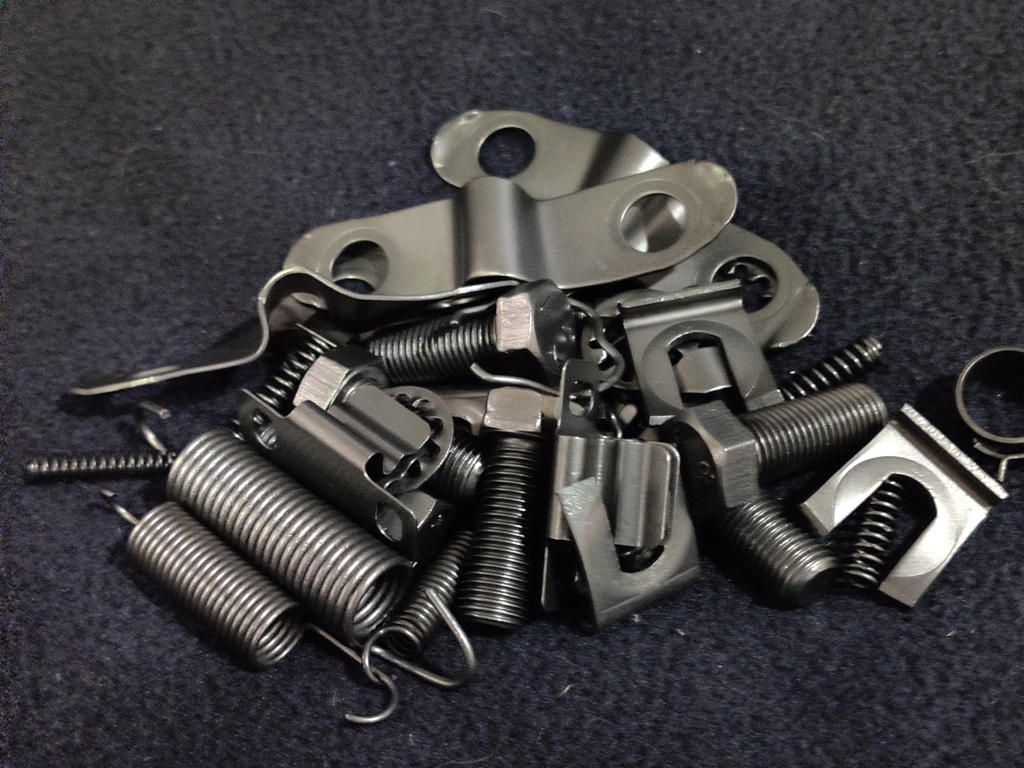
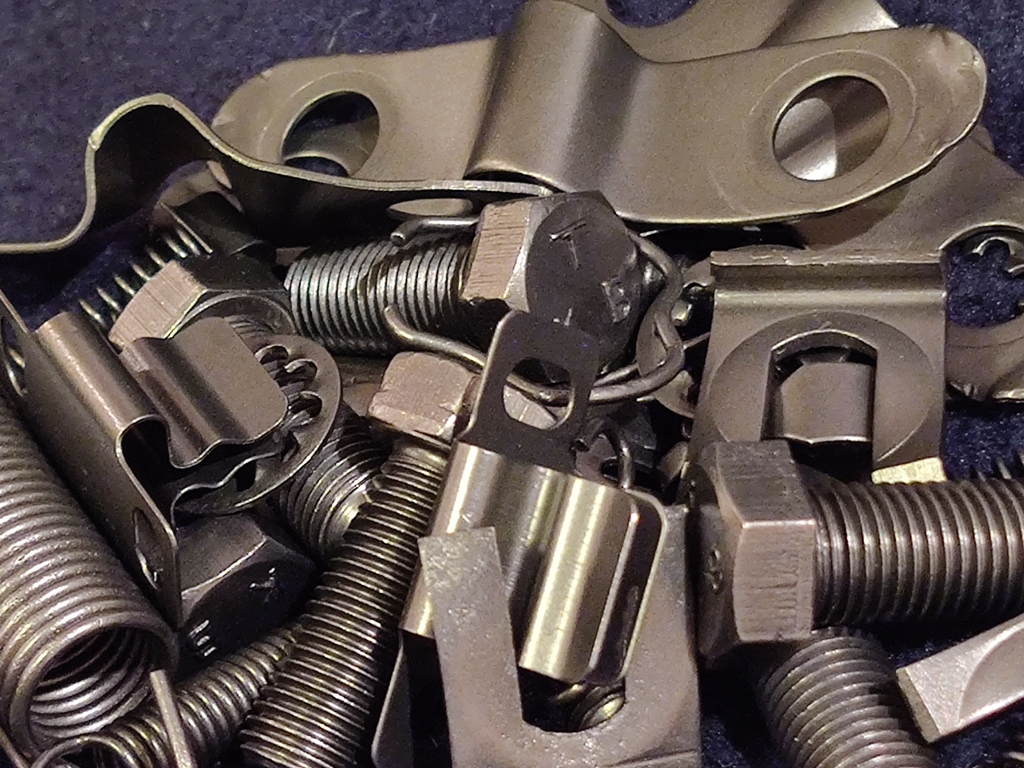
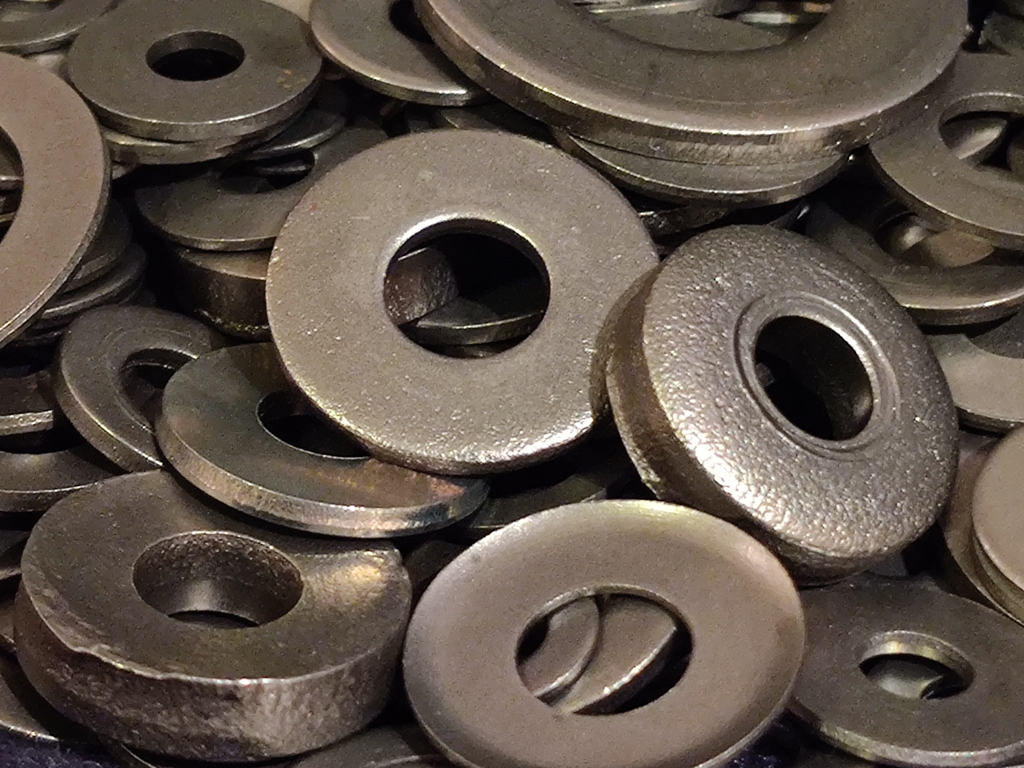
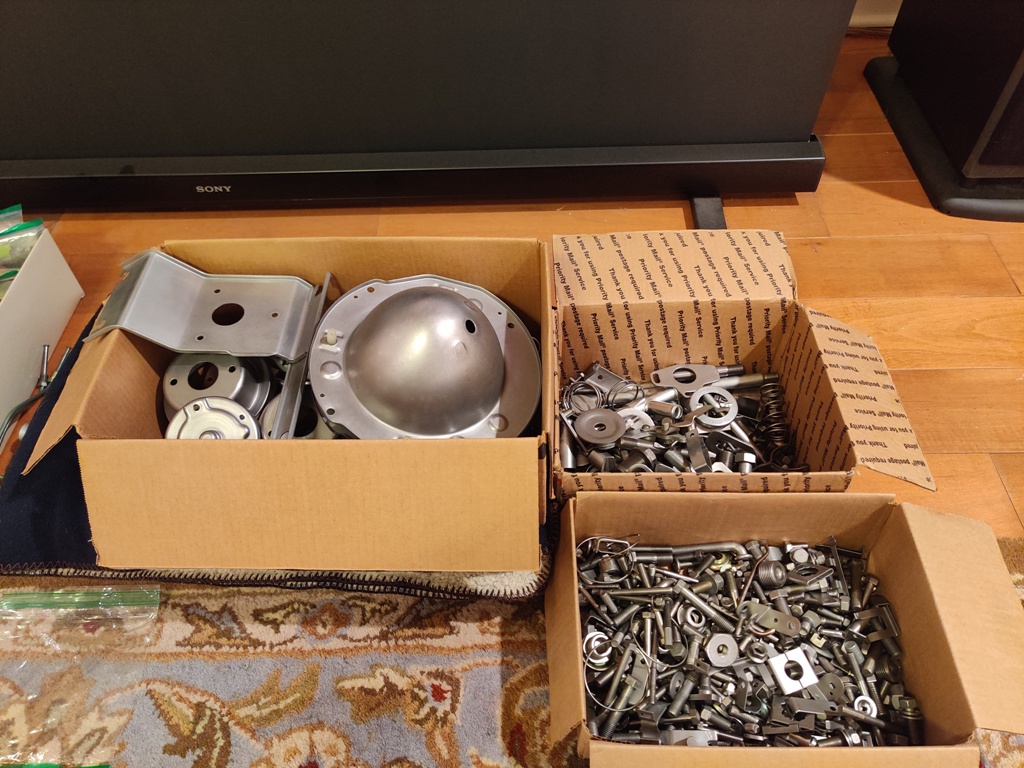
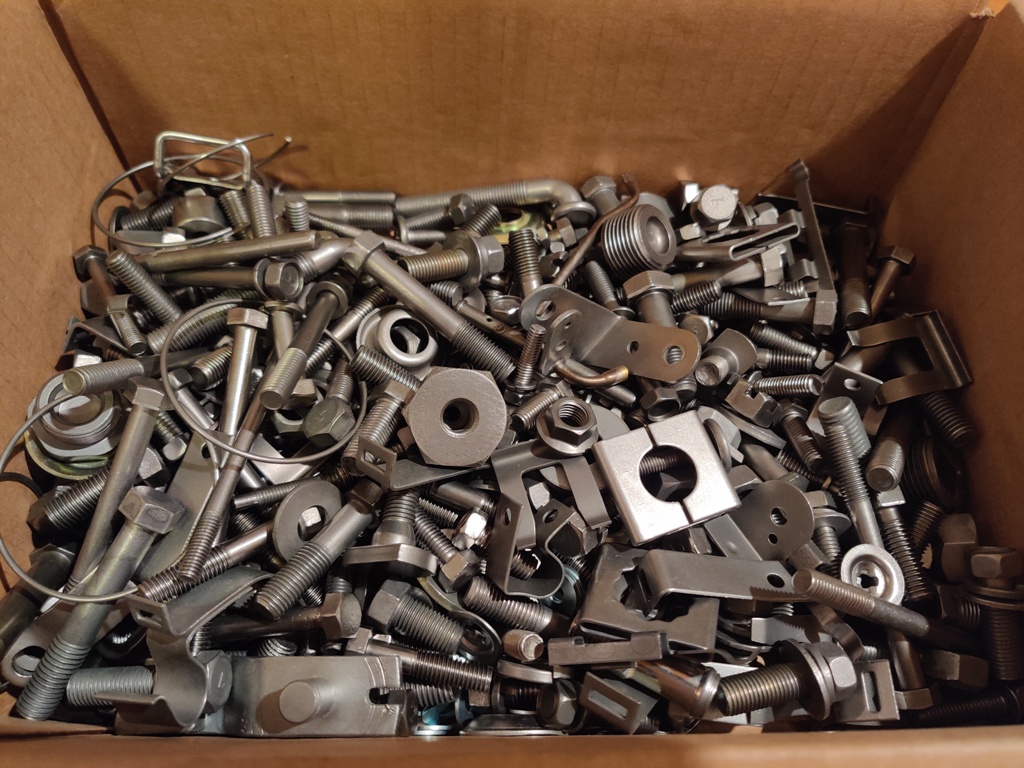
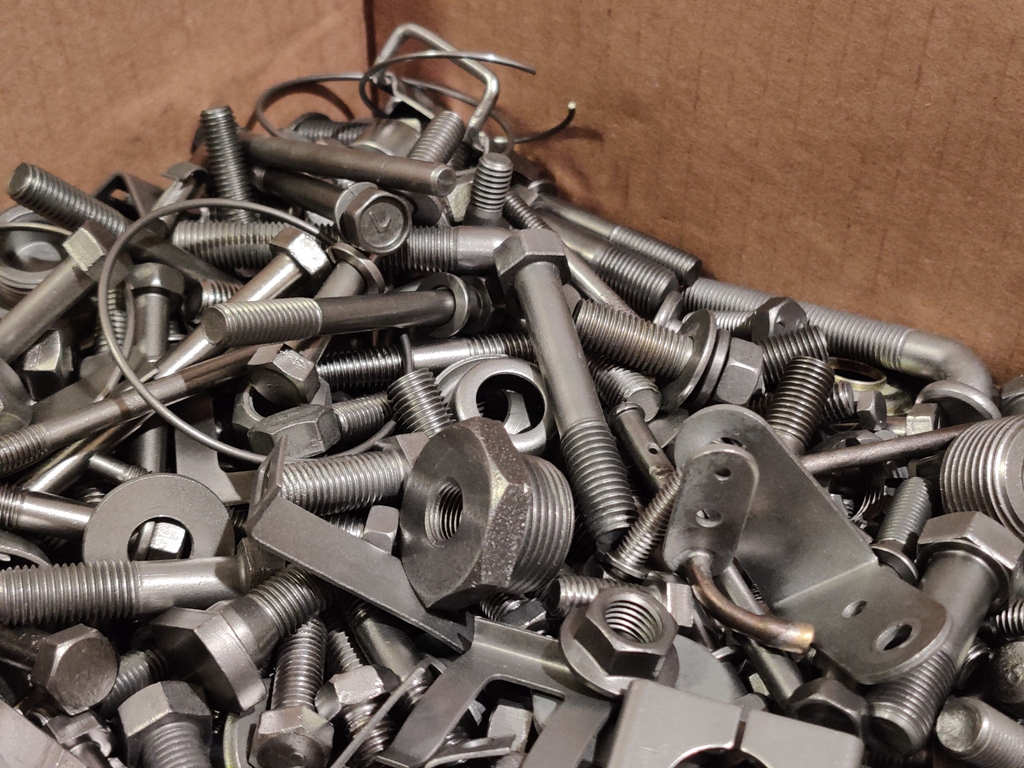
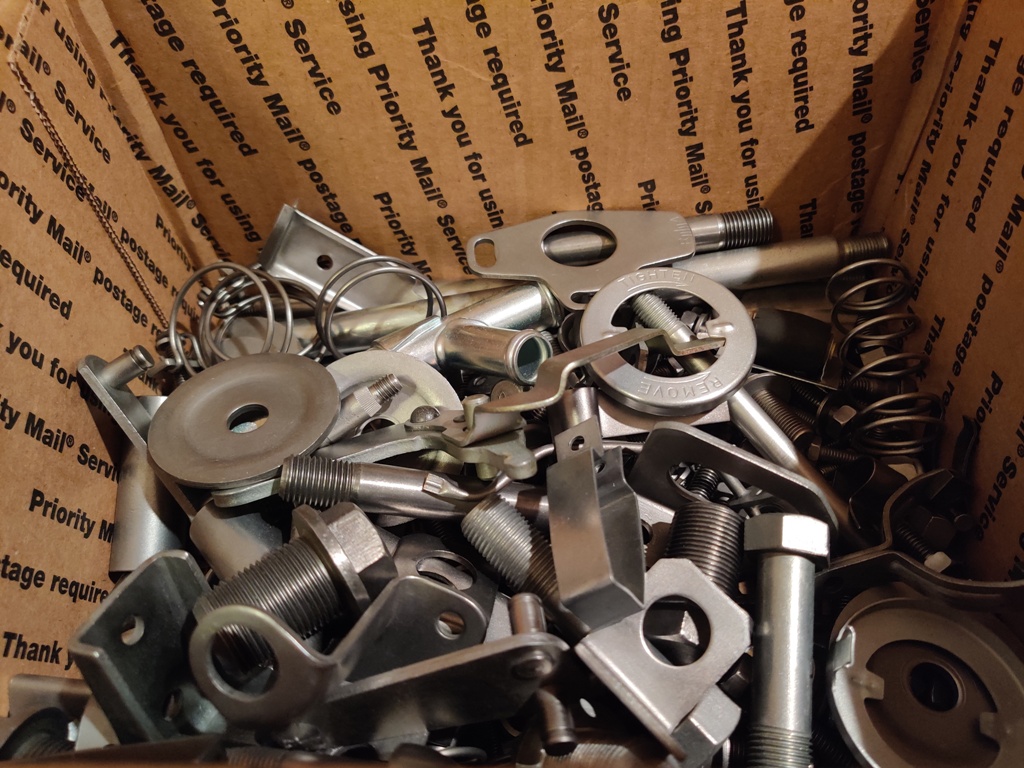
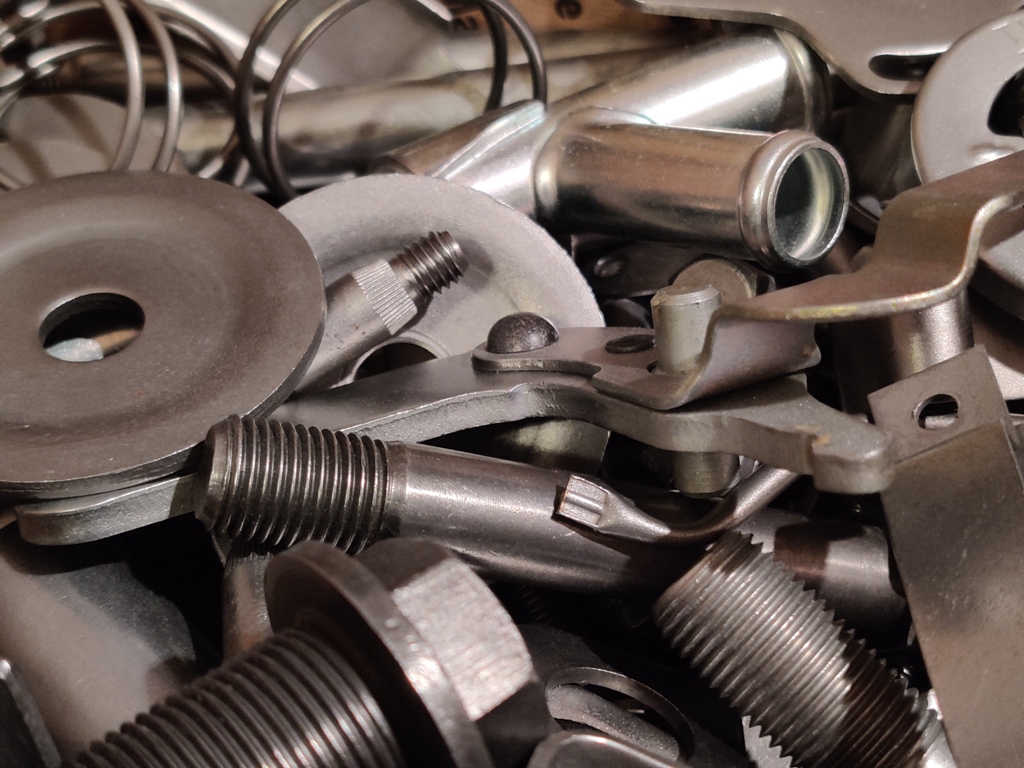
Prepping hardware... Will it ever end??????????? 🙂 Only a vague idea if this is good enough. Perhaps, some of it is overkill. Thanks for the guidance about prep level on the hardware. I have probably been going overkill on some. I hope I can finally send everything off in a couple of weeks. A lot of the larger stuff (wiper linkage, hard lines, etc.) is not shown here:


 2 points
 -
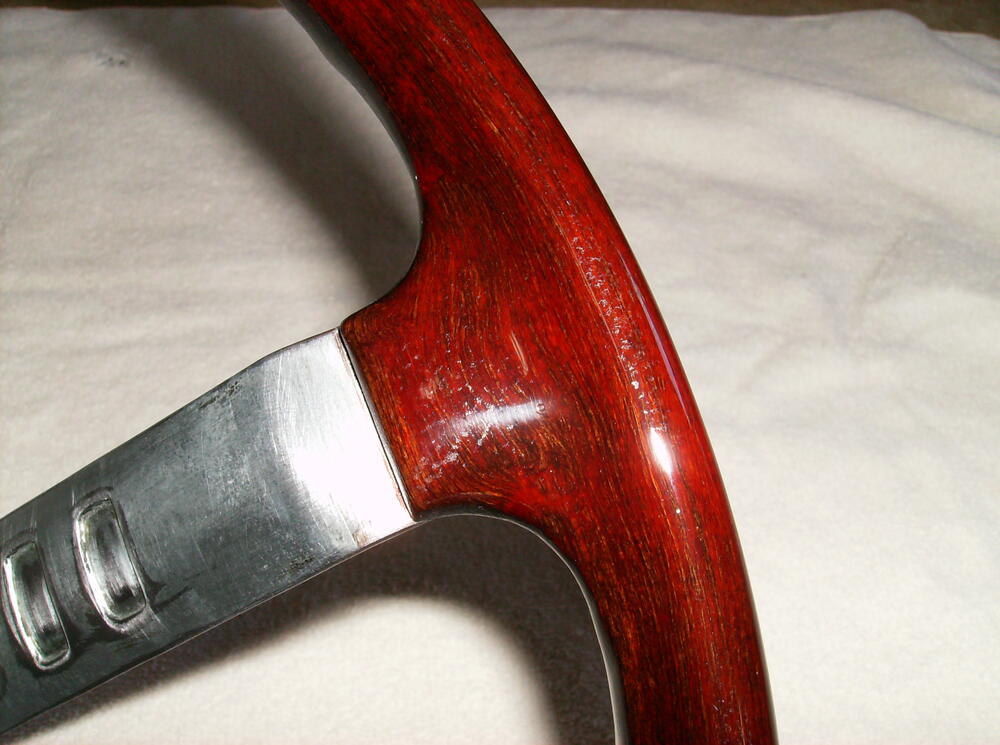
2 pointsHere's a couple of close-up pics of my wheel in process some years ago, one with it stripped and one with it stained and topped with a coat of clear lacquer. The preferred clear coat today is usually spray polyurethane. I used a hand-rubbed oil base stain.

 2 points
 -
 As I look back over this thread we should have asked you for a picture of the broken handle so we could have helped you better.1 point
 -
 Good discussion. Not to highjack the thread but with an EFI system would you just get rid for the PVC valve (put a bolt to fill the PVC inlet on the intake manifold) and route the crankcase vent line line directly to the catch can? Also my pipe exiting my block (on my rebuilt engine) isn’t held in the block by anything. How is the pipe fixed to the block? Here’s a pic and video. https://youtube.com/shorts/nb9W3agy6zI?feature=share Sent from my iPhone using Tapatalk1 point
 -
 1 point
 -
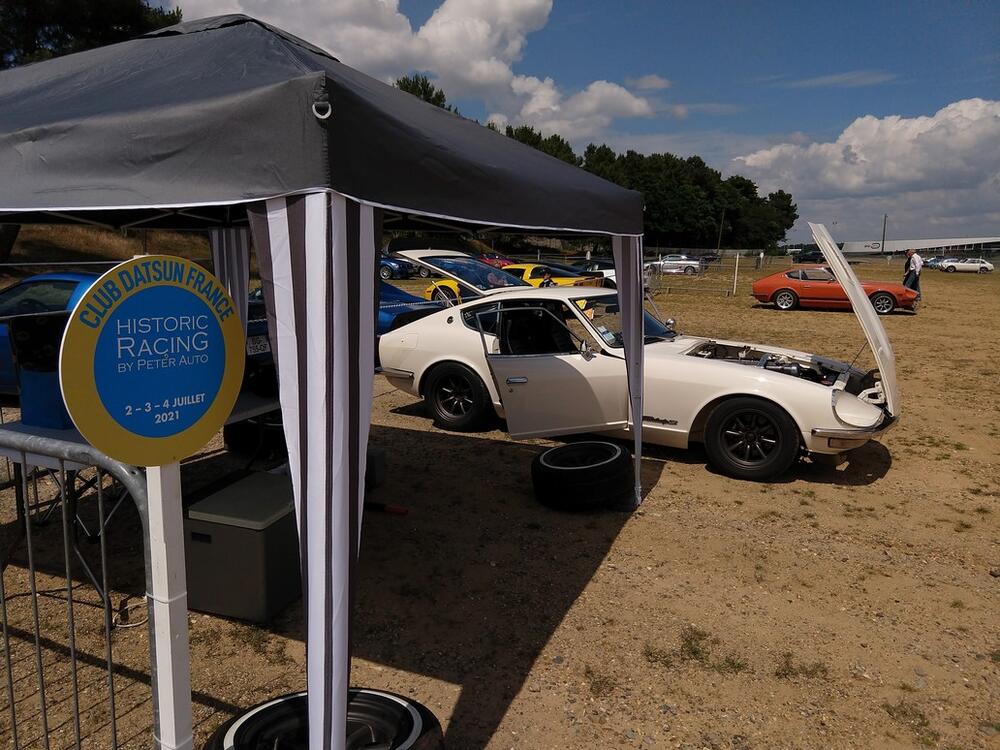
 So, in early July and under this summers' typical weather so far, our national French club assisted with Peter Autos' Historic-Racing Le Mans Bugatti and were allowed several track sessions each day.....who could resist ? Please bear in mind that I haven't driven my Z on a circuit since 2009...and that the engine is still limited to 4500rpm and so lacking a LOT of horsepower and this wet session was undertaken on Toyo R888 semi-slicks ! Enjoy and have a good laugh on me at the end. Apparently there are more videos to come earlier in the weekend.....watch this space ! ps the real action starts at 4mins at the beginning of the pit straight - the first out lap was (always in every session) driven behind the safety car : https://www.youtube.com/watch?v=l58MRgoGIjg Many thanks #DavidDonné for the filming and editing.
 1 point
 -
 Ok, thanks, I will be setting up similar to yours then, I went ahead and ordered another catch can to hopefully match my engine bay nicely. Thank you for all your input. When I had the breathers on you can actually see more blow by coming from the valve cover breather which I thought was odd. Hopefully the addition of a catch can helps reduce the amount of blow by though and fumes and overall no more burning engine bays!1 point
 -
 1 pointExcellent thanks for the follow up. I ended up straying far away from my original plan. Went and got a bigger cam, FAST efi, and totally rebuilt the bottom end along with the head. I ended up with the Fidanza flywheel and stock Excedy clutch.1 point
 -
 1 pointI bought an off-the-shelf flywheel from Rock Auto. Took it to my local machine shop with the diagram in Post #3 of this thread. It has a real nice feel and combined with a 3.90:1 diff, really good off the line butt dyno.1 point
 -
1 pointSometimes the wire colors on switches will differ from the wire color on the harness. For the wires you have left, here is what I suggest you make a chart like this so we can help you figure out where things go. List Wire color, including the color of the stripe Connector type: spade/bullet Connector gender: male/female Wire Origin: Dash harness/turn signal switch/headlight switch1 point
-
Thank you sir. The catch tank has two inputs (one from the crank case and one from the valve cover). The output is on top where the filter is. But unlike adding a filter to the actual engine block breather, the oil / vapour particles hit the tubing and the tank first before trying to come out of the vertical exit (i.e. the filter) so it doesn't create a mist under the bonnet. Have a look at this - its pretty close to what I have. https://www.ebay.co.uk/itm/1737273624041 point
-
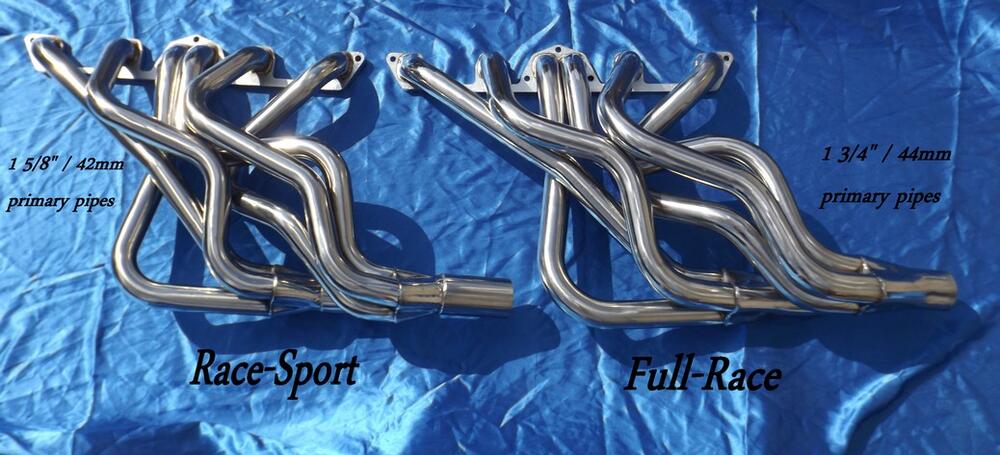
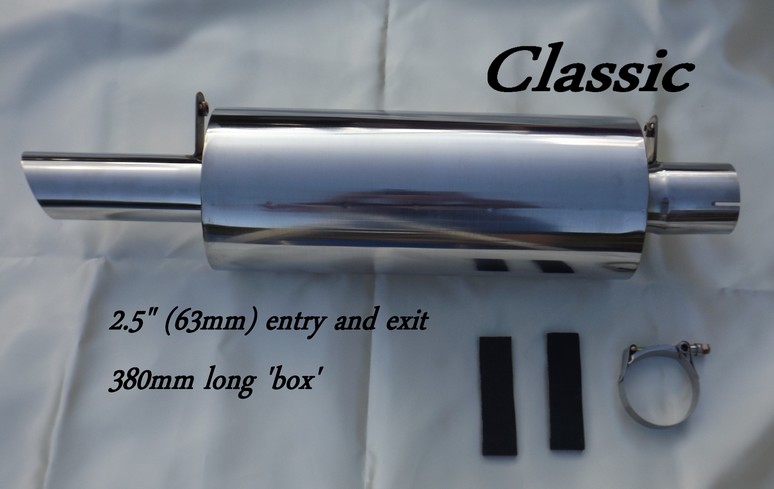
1 pointThis is my Full-Race (same form as the Race-Sport but larger primarys), line and Classic muffler. So, in early July and under this summers' typical weather so far, our national French Z club assisted with Peter Autos' Historic-Racing Le Mans Bugatti and were allowed several track sessions each day.....who could resist ? Please bear in mind that I haven't driven my Z on a circuit since 2009...and that the engine is still limited to 4500rpm and so lacking a LOT of horsepower and this wet session was undertaken on Toyo R888 semi-slicks ! Enjoy and have a good laugh on me at the end. Apparently there are more videos to come earlier in the weekend. ps the real action starts at 4mins at the beginning of the pit straight - the first out lap was (always in every session) driven behind the safety car : https://www.youtube.com/watch?v=l58MRgoGIjg Many thanks #DavidDonné for the filming and editing.
.thumb.JPG.c09f883decb84593e2c798aa9912ba81.JPG)
.thumb.JPG.8f99d8e73349603d6c7ecc9057629c93.JPG)
 1 point
 -
 Looking forward to seing it on BaT within the next 12 months...1 point
 -
 1 point@Wally There is a guy on Facebook that offers this as a service. Its not cheap, but the photos look good. Links below. https://www.facebook.com/Datsun-240Z-Steering-Wheels-100916391333259/ @Patcon @Captain Obvious Are there any common challenges or problem spots to look out for when refinishing? And does this faux wood refinish like real wood? Looking for a used wheel to put on my 280z, but 100% of the wheels I see up for sale need some TLC.1 point
 -
Thank you sir - the wiring has been cleaned up further since then 😛. That's a great catch tank! Well Mr. Dutchie Hawkeye, you're spot on with that cable being in the wrong place under normal circumstances. BUT, the dizzy shaft is perfect. The 123 Ignition has a slightly strange config and you may not have seen on one of my recent posts where I mentioned this strange thing and how I blew up my muffler by having the timing something like 270-280 degrees out - by not looking at the rotor and wiring up the cap as you imagine it should be! On the 280zx dizzy the rotor would point to the rad panel at TDC. 123's points to the fender, hence what you're seeing.1 point
-
 I run this baffled catch can, https://www.ecstuning.com/b-ecs-parts/ecs-tuning-baffled-oil-catch-can-8oz/003779ecs05-02~a/ It is configured as your #1 setup, works great. @AK260, beautiful engine bay!1 point
 -
Sorry to hear that! Must have been very scary!!! Glad the car is fine. I hate those filter type things as they invariably get “wet”. Here’s a photo of my set up (except I now run an airbox). If you look bottom left you will see my catch can. It’s a 0.3l cheap eBay one with two inputs and one output. The best catch cans (unlike mine) are baffled. The top of that filter can sometimes smell eggy - you can always route a pipe away from the top to somewhere in the engine bay where it doesn’t matter. Also note the home made heat shield that works amazingly in keeping the carbs cool and diverting any fuel leakage / spit back away from the hottest part of the exhaust manifold.1 point
-
1 pointThe wheel rim is a type of resin that has wood fibers impregnated. A good way to clean it is a soapy solution in the kitchen sink and VERY GENTLY rub it down with a fine steel wool. You don't want to damage or remove the wood fibers. Strip the spokes and hub to bare metal and finish out as @Patcon mentioned.1 point
-
 1 pointI used a satin black on the spokes I lightly sanded the rim and restained it then some spray can urethane1 point
 -
 1 pointThis is an extreme example of the single mass (light) flywheel noise - https://www.youtube.com/watch?v=3vUdmshAsYM&t=20s I've heard shaving down the OE flywheel can weaken it to the point it may shatter if done improperly - is this true?1 point
 -
 1 pointNever heard that before. Get your OE one cut and lightened. Thats the cheaper route.1 point
 -
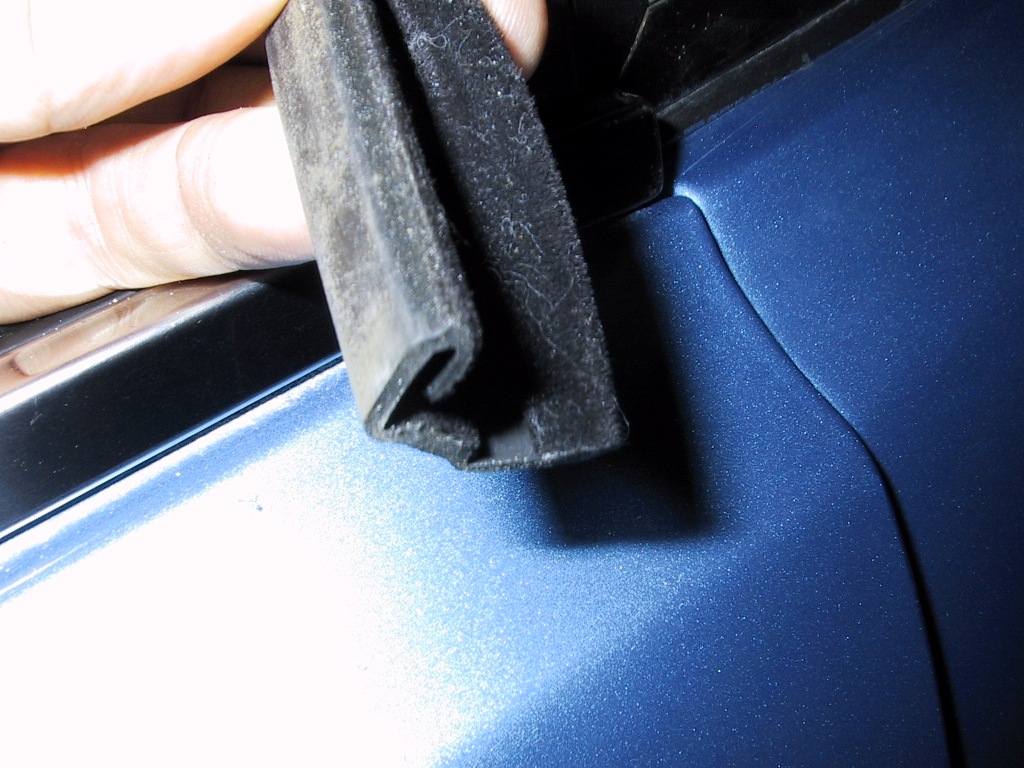
 1 pointIt's actually felt-covered rubber. Perhaps your felt wore off. I got mine from MSA recently at the same time I got a weatherstrip kit.
 1 point
 -
 0 points


.JPG.2b43a77ffd2672d21dfe46454c83c30e.JPG)
.JPG.54f4bcf92e79da7be7aa77f855cfbdb1.JPG)