Leaderboard


 Subscriber

Popular Content
Showing content with the highest reputation on 05/03/2022 in all areas
-
3 points
-
2 pointsI think the holes in the thing are slightly offset so you can't get the bolts back in if you put it in wrong as well
 2 points
 -
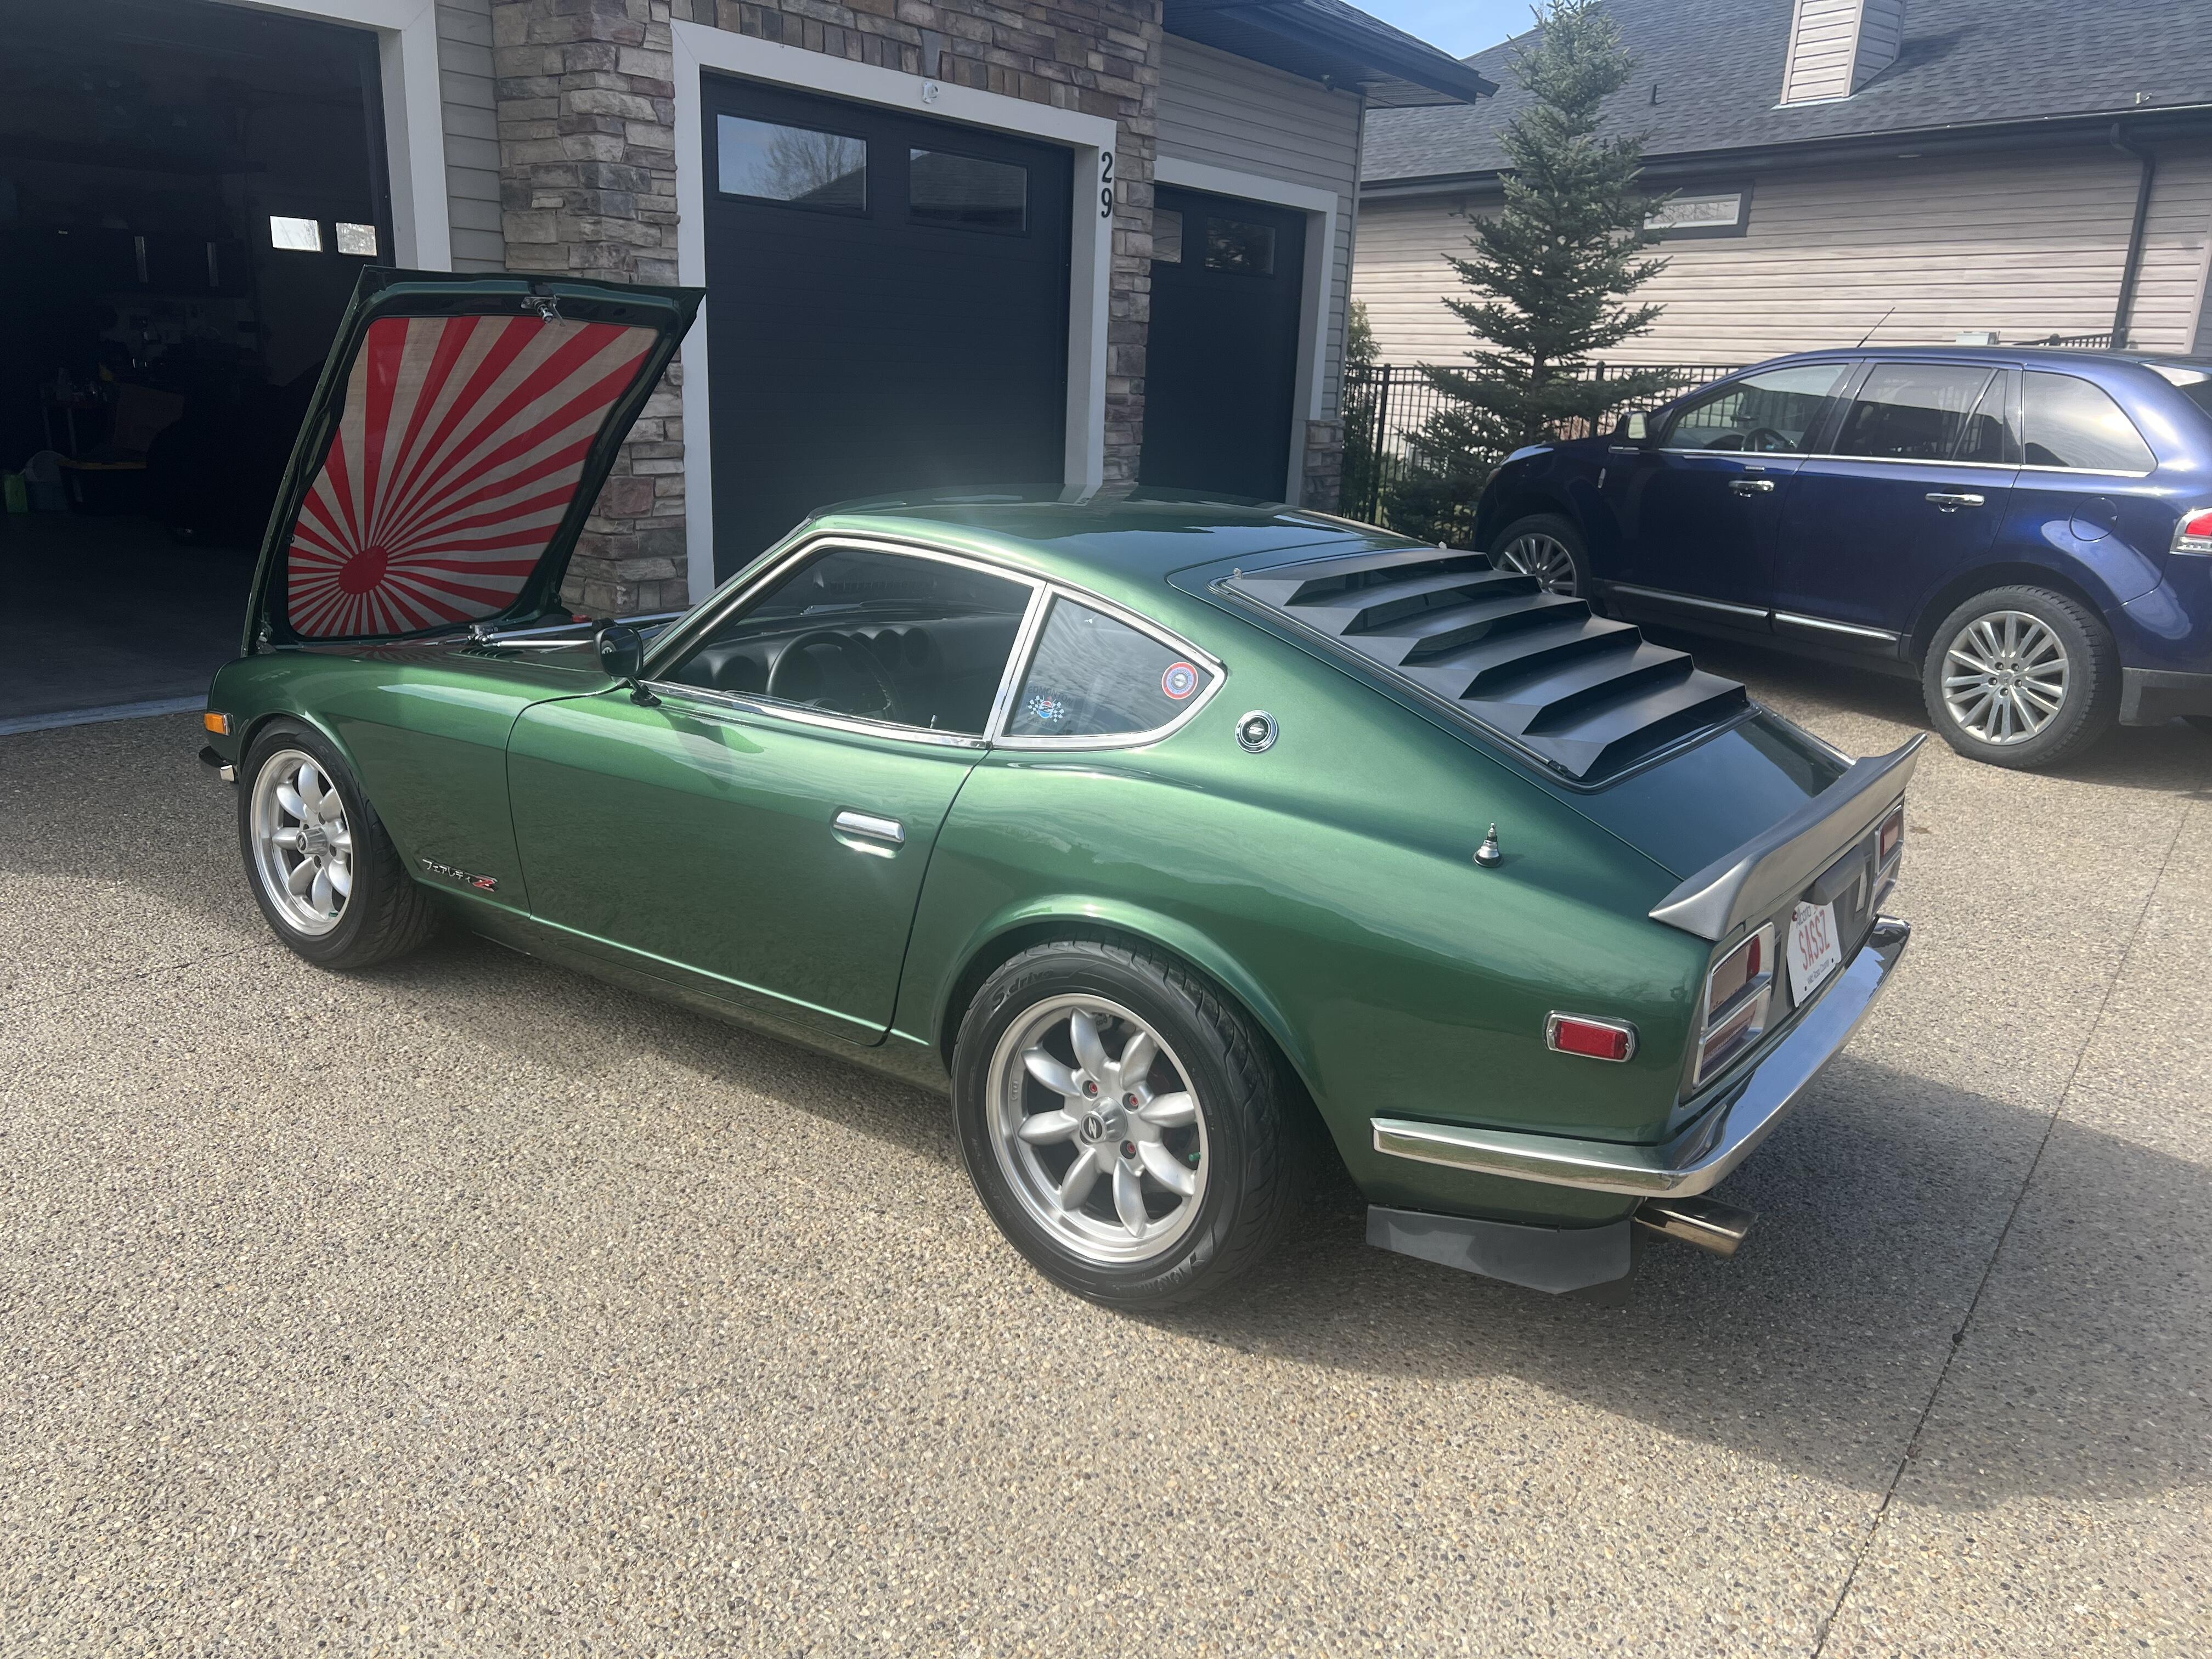
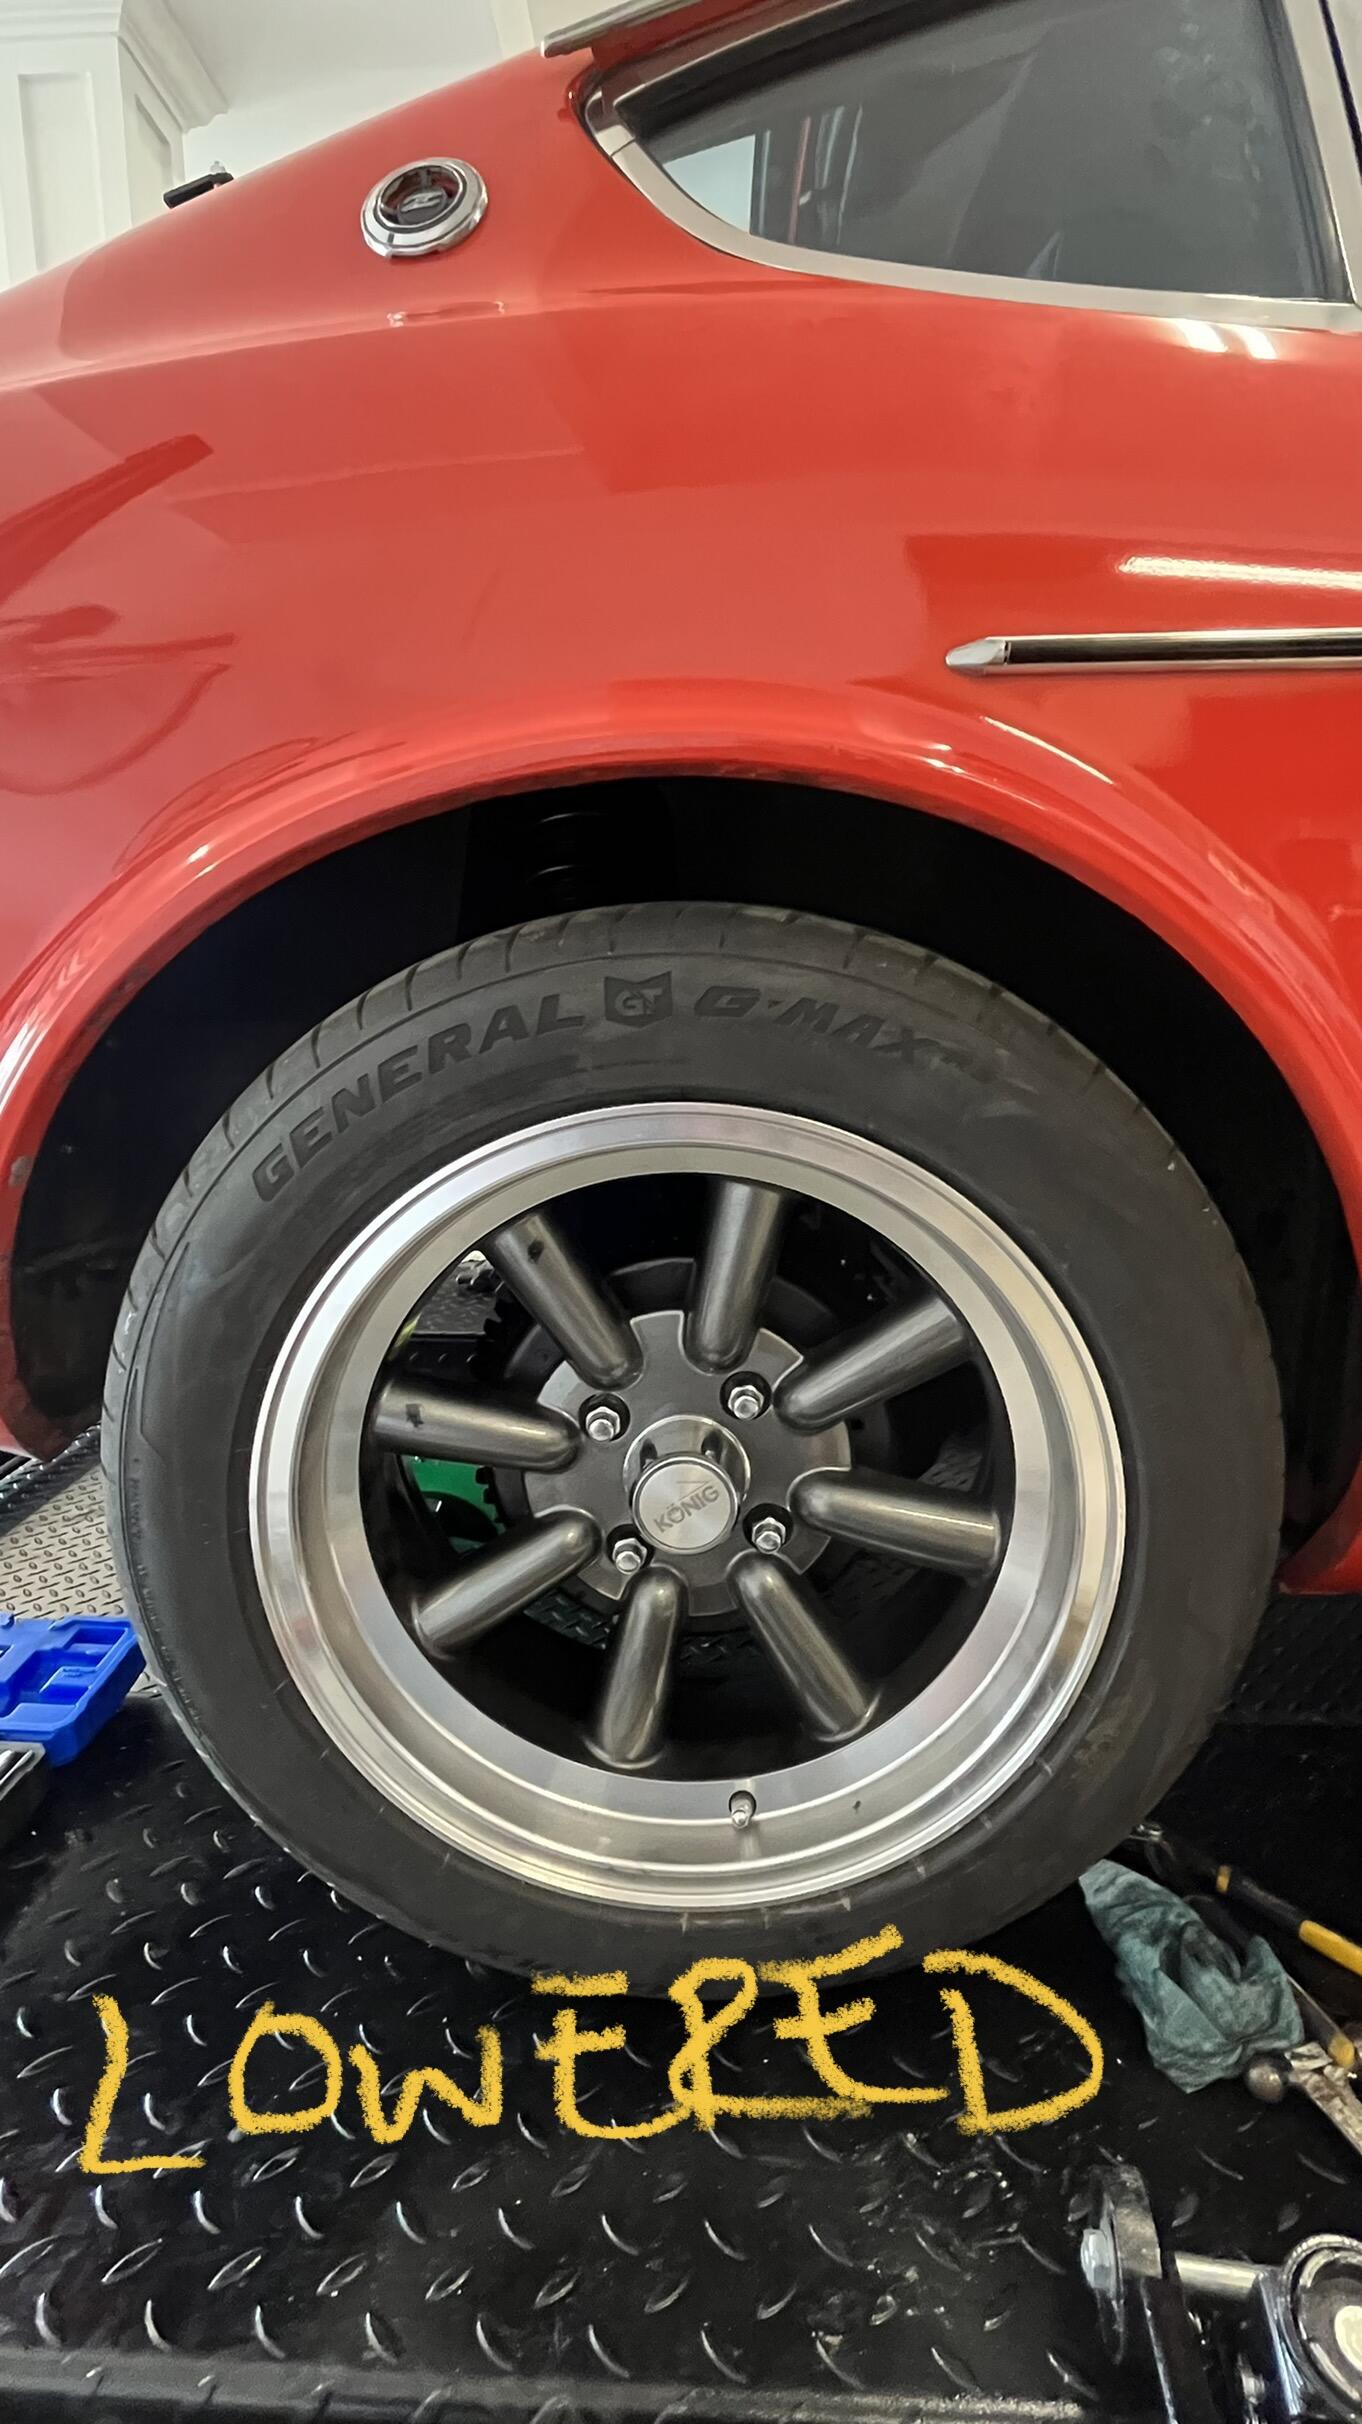
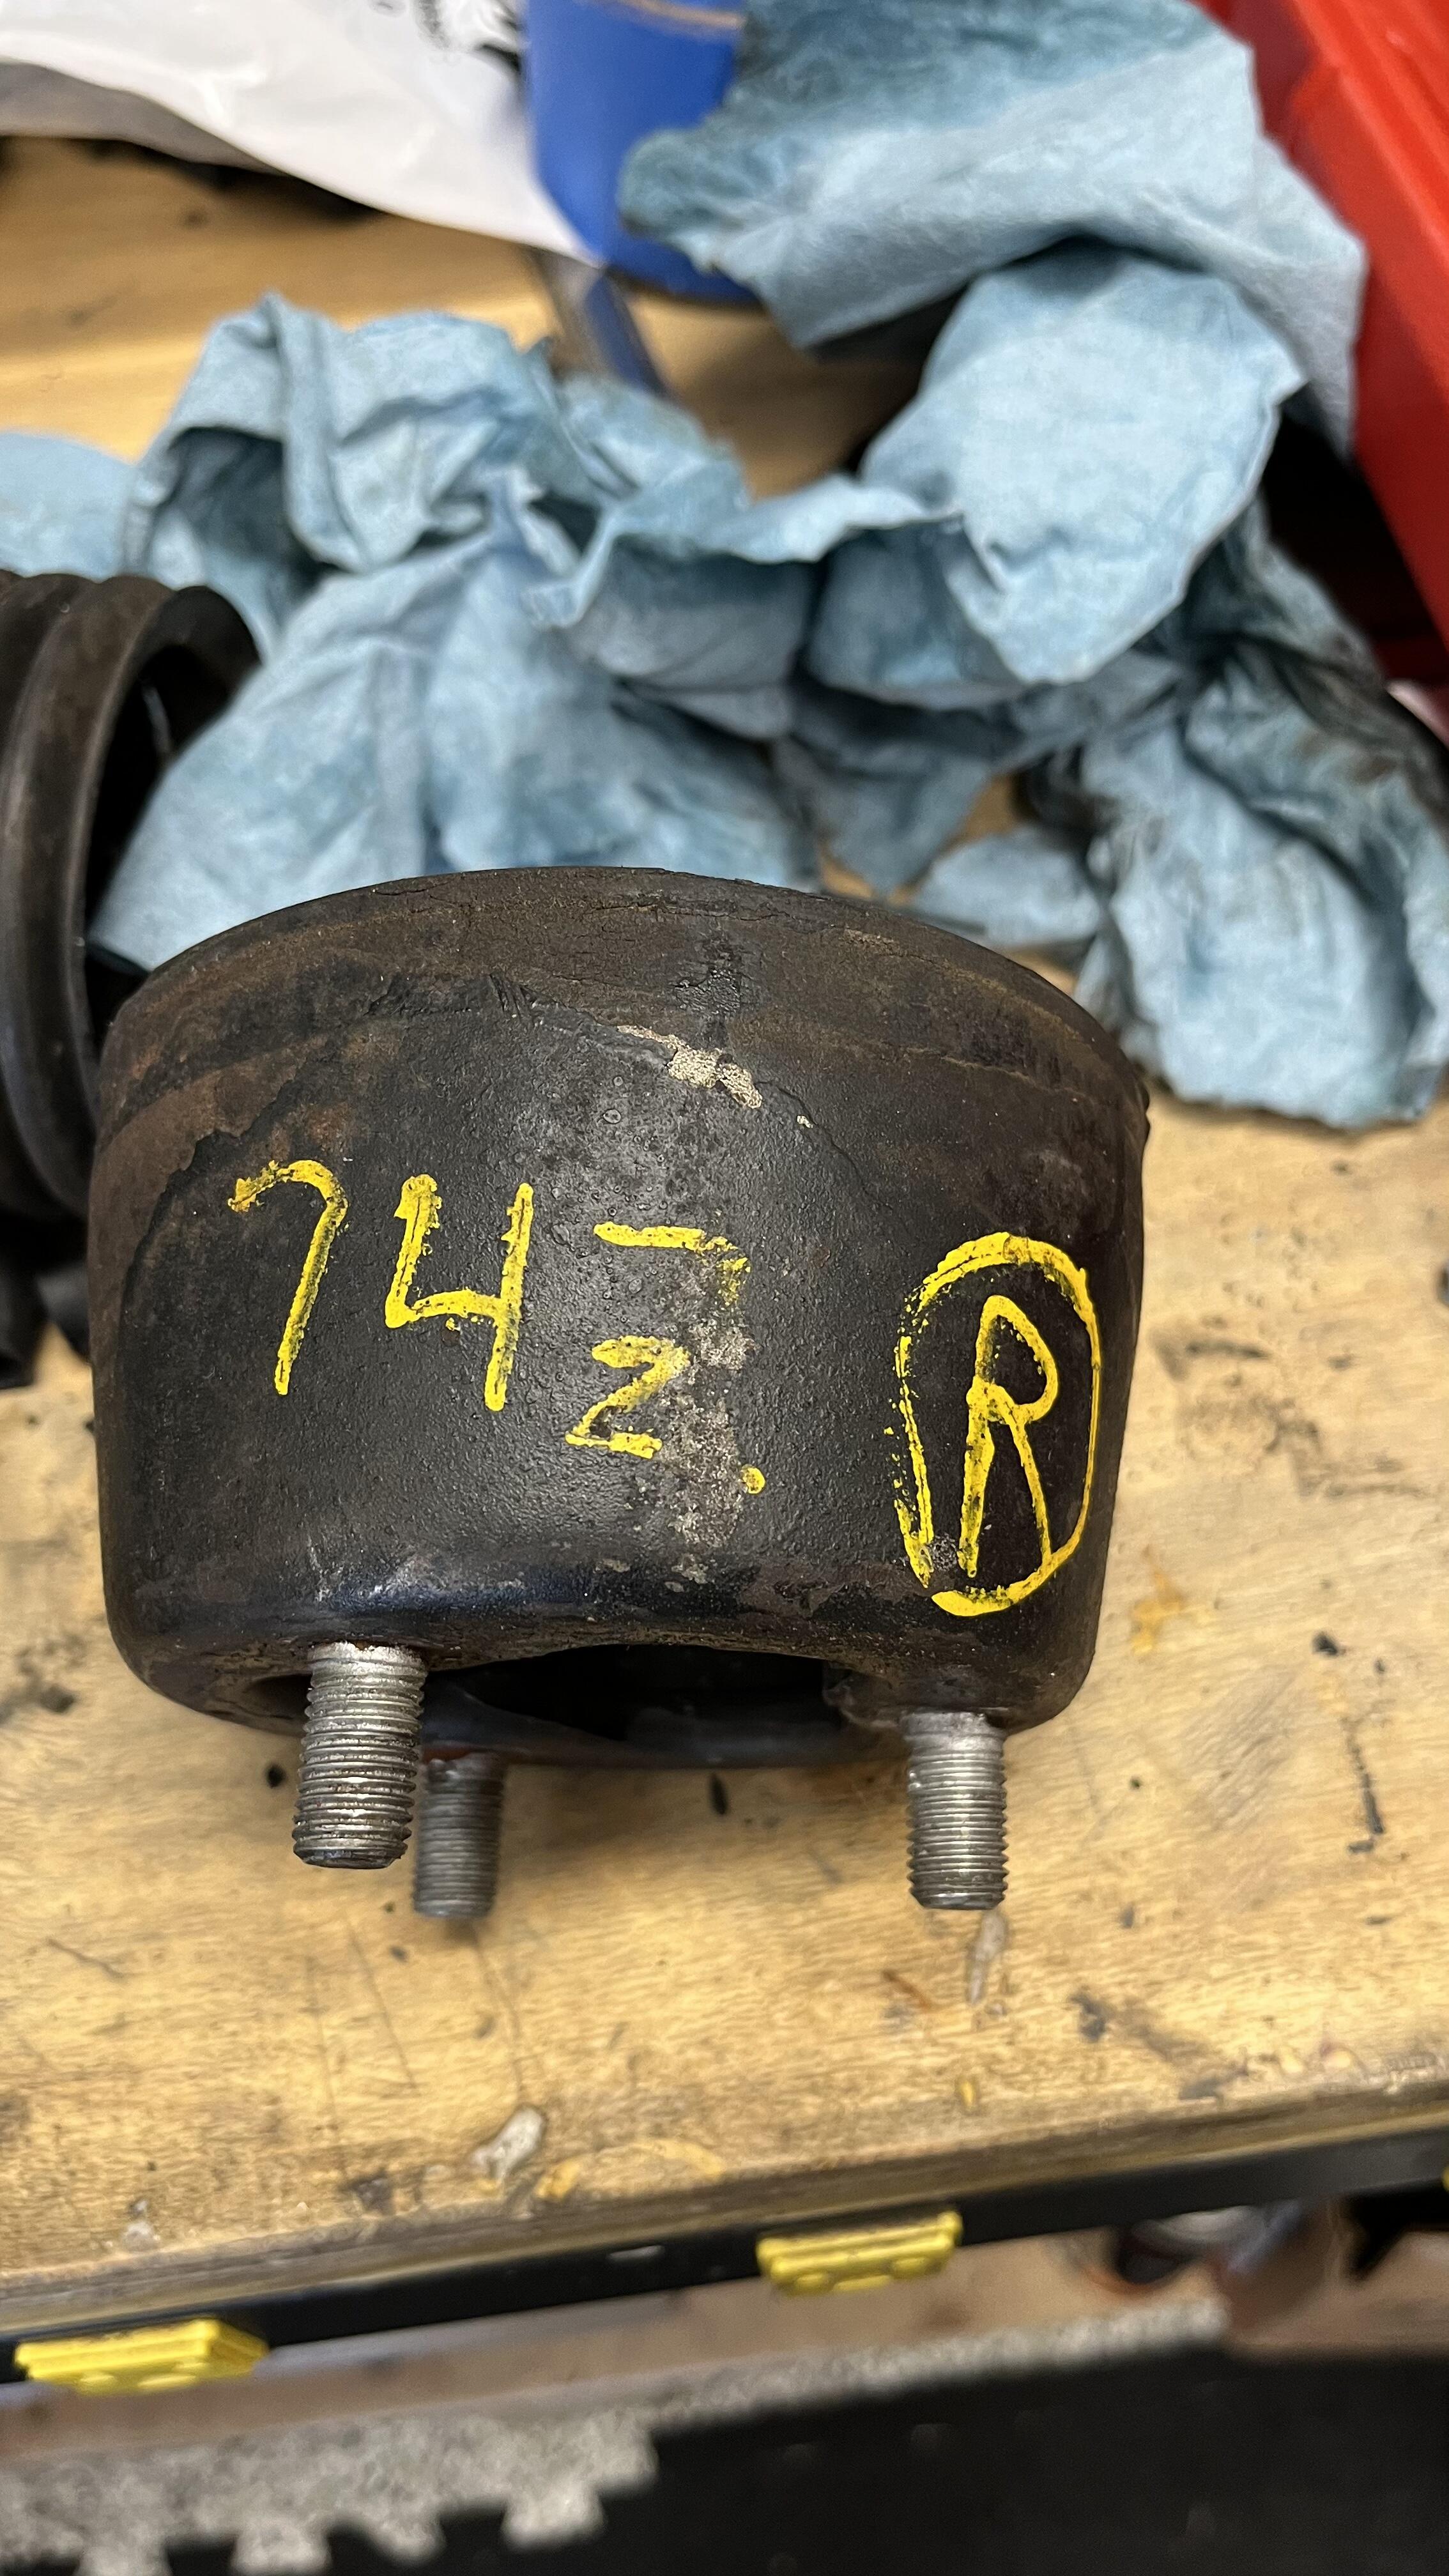
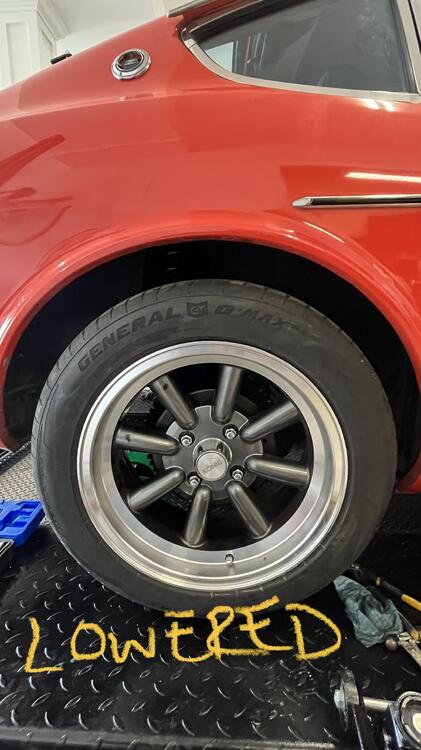
2 pointsSo removing the rear spring was uneventful. No helmet required. I got one side compete today. When I pulled the old spring and shock off I found an insulator from 260z. The only reason I know that it is because it has yellow writing on from what would be a salvage yard and said “74z. R” see pic. Height difference seems to be about 1 1/4” lower. Looks better, another 1/2” would have been perfect. I have Eibach springs, and a 240z insulator. See pics below. I think once the car rolls a bit it will sit lower. It just came off a jack so the wheels are still canted inwards. Also got the half shafts greased up used the Captain Obvious “grind” method. Thanks CO!


 2 points
 -
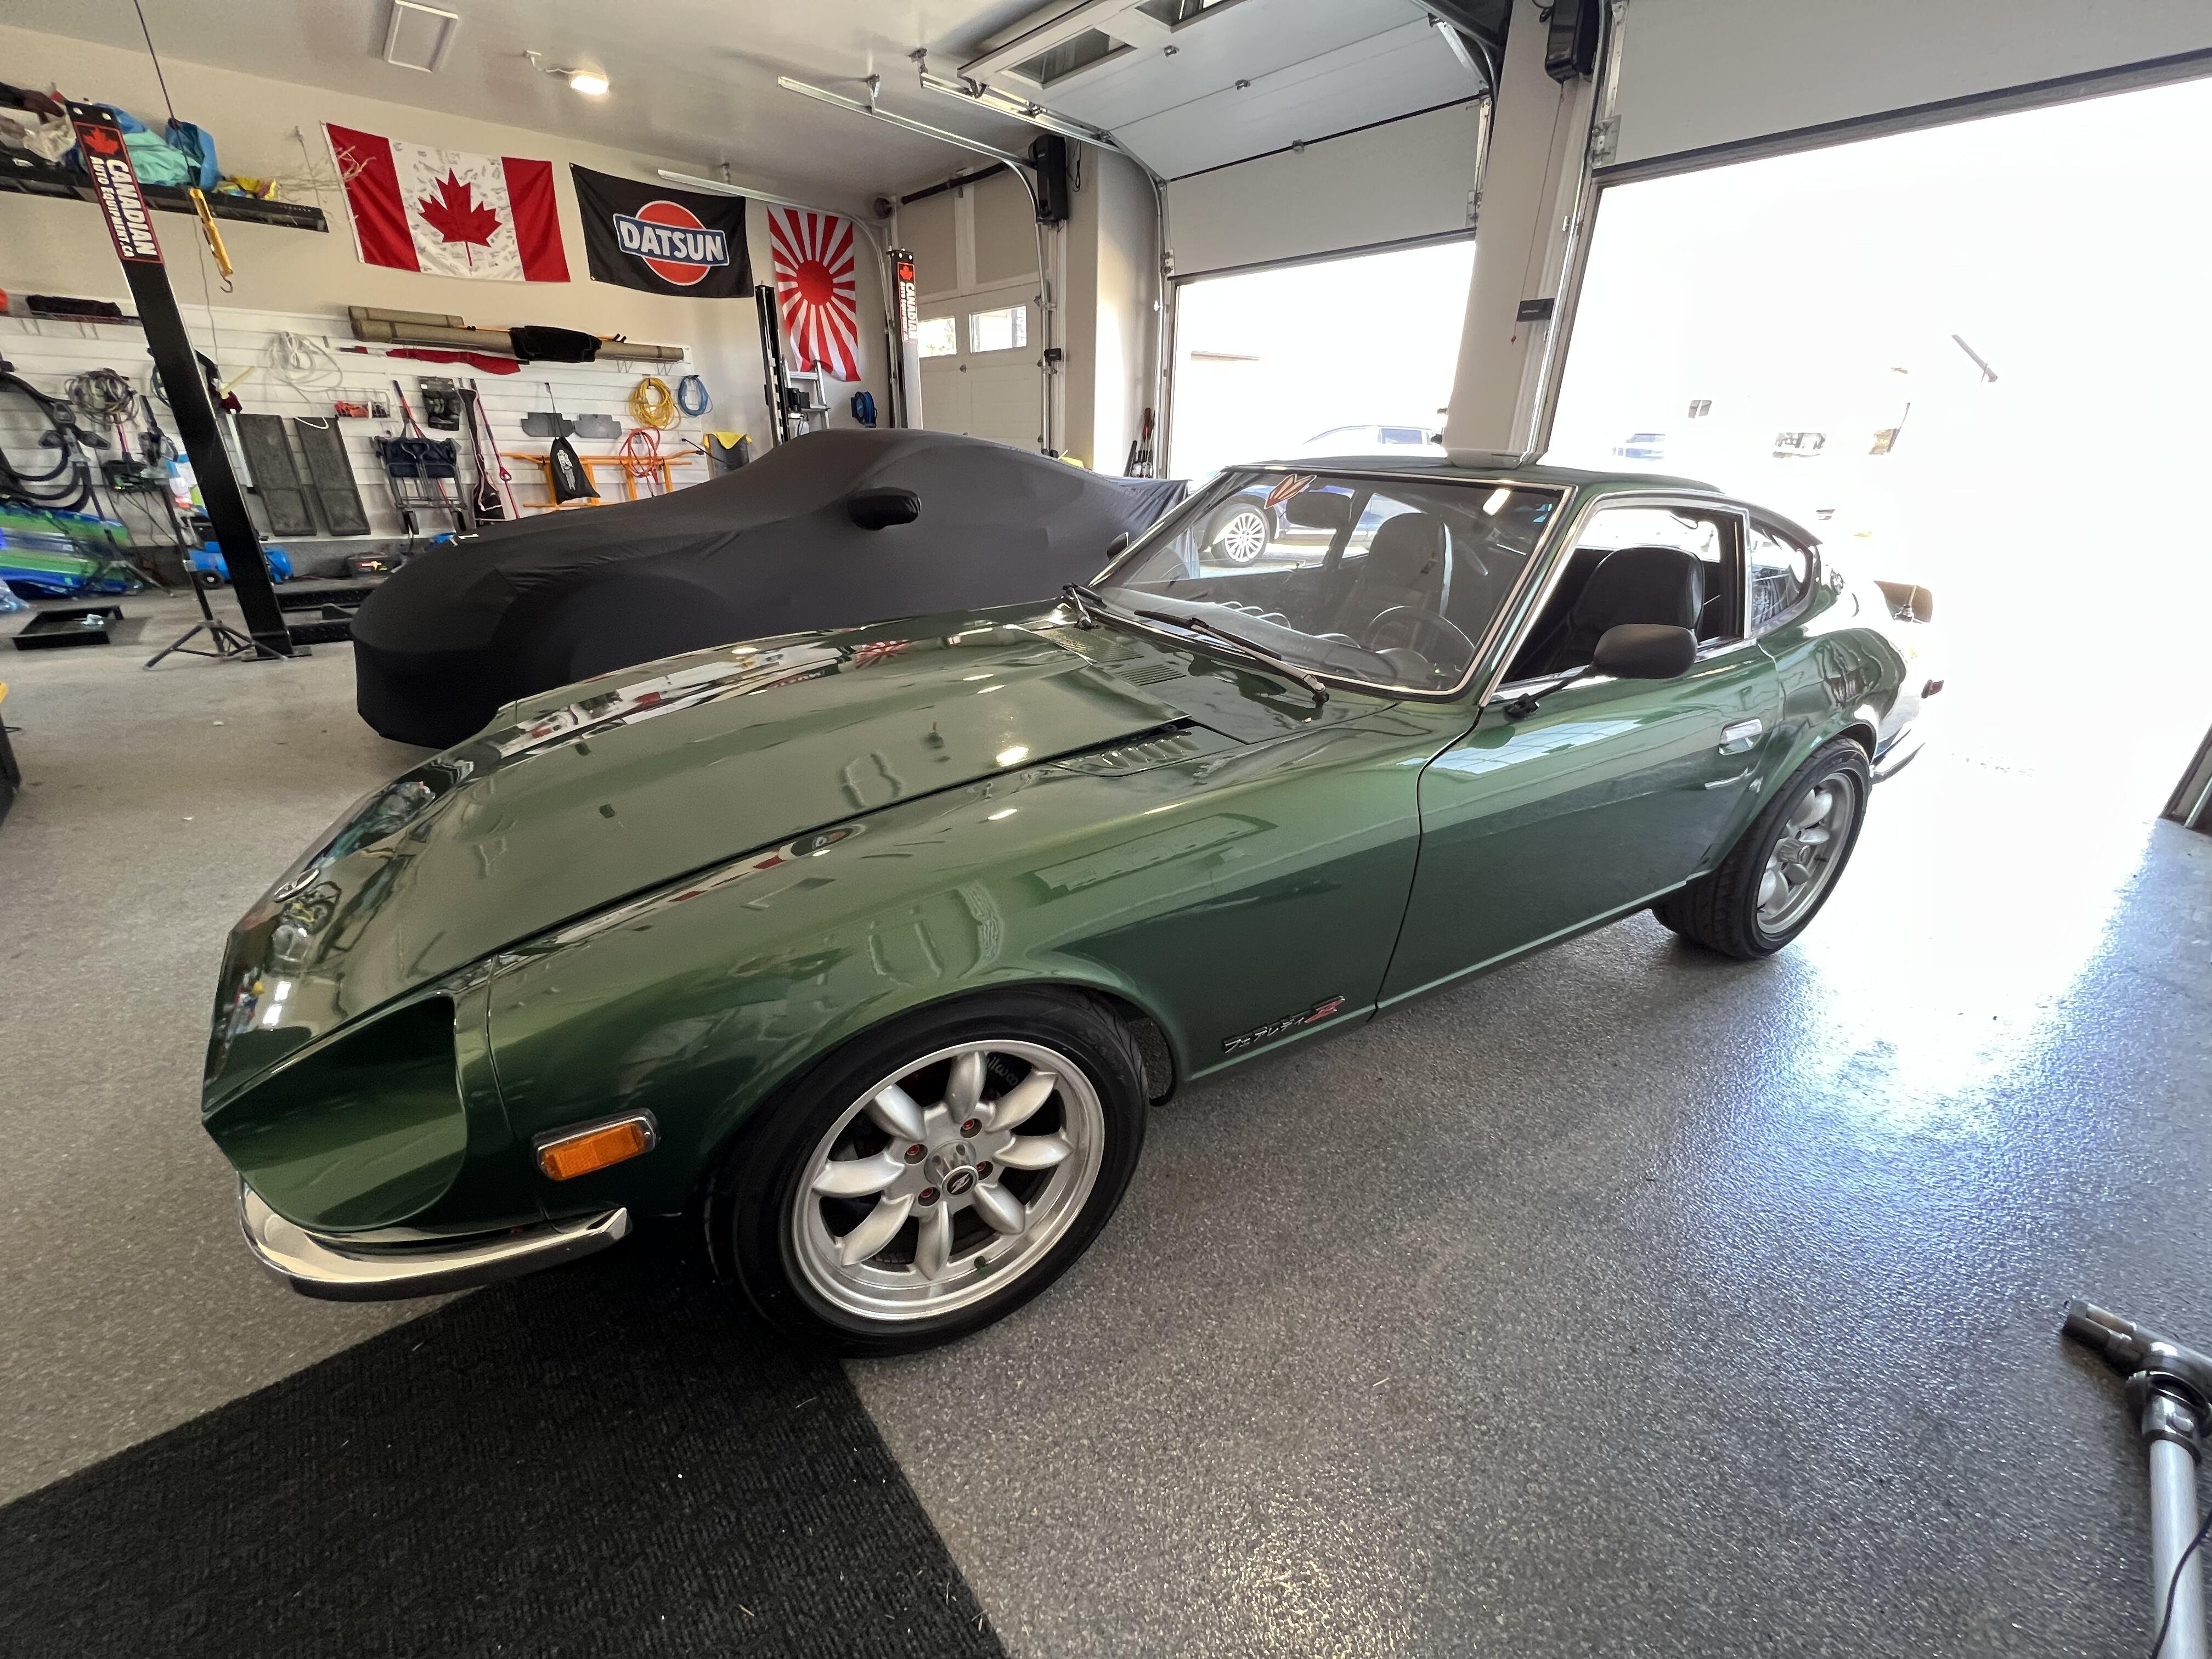
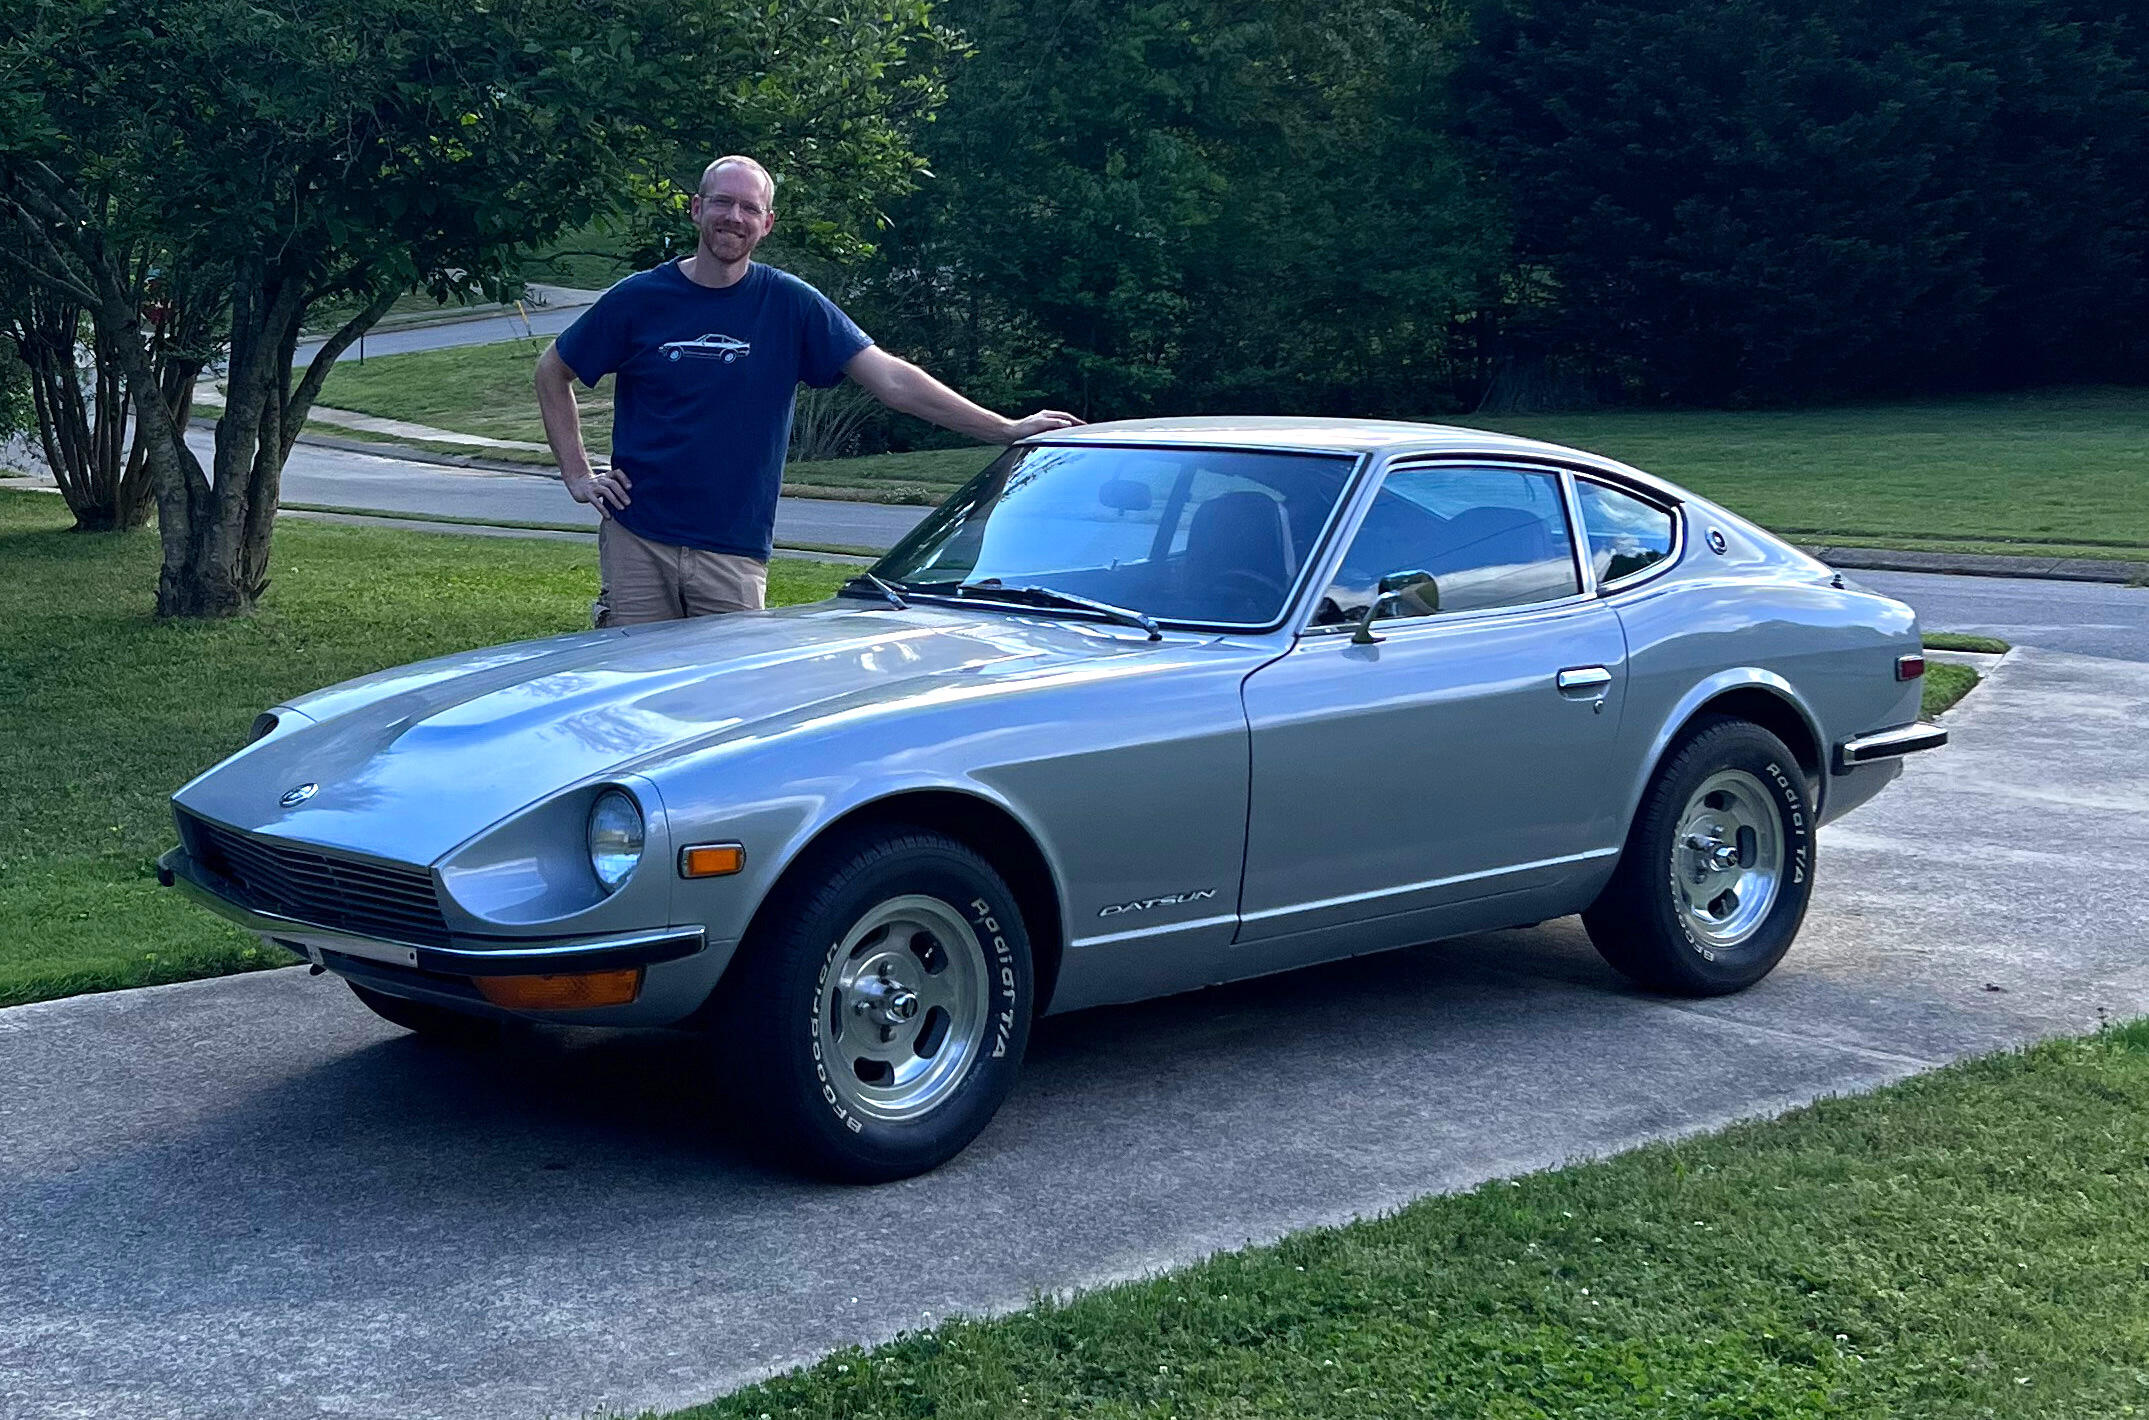
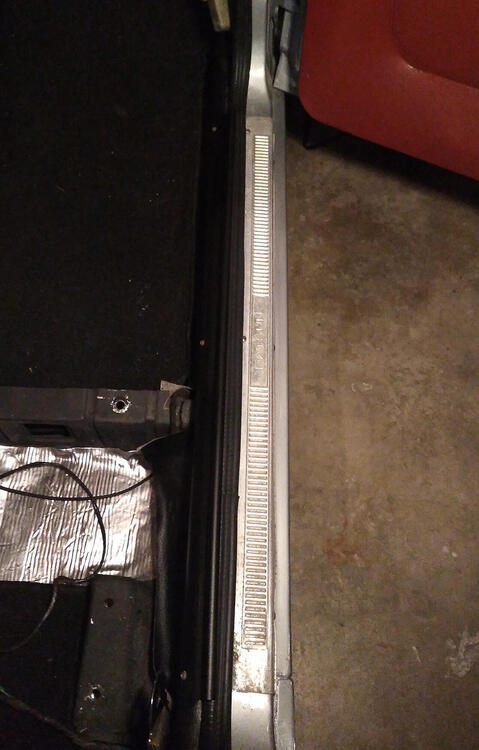
Some more progress, some with pics and some without: Seat belts bolted in. I have some M3 x 0.6 screws on order for the mechanism covers for the seats. Carpet-style dash cover added. The guy who was going to sell his crack-free dash backed out, so I'm going to have to go to Plan B (or C or D). New handbrake boot installed. Found the shift pattern emblem for the top of the shift knob, reattached. Realized I connected the wiper motor arm 180 degrees off (it's nice when the wipers go DOWN when activated), fixed. Driver's door adjusted. It took a really hard slam to shut before; it's better now, though still not as good as the passenger door, which is 100% PERFECT. Need a bit more love. Inner and outer door sills on (thread here) I did my best to clean the outers, but they still have some "patina." I'm OK with it for now. Still working through some electrical issues, as detailed in this thread. Drove it around the neighborhood last night, and it's like a different car compared to when I first got it back on the road in mid-2020: Then, it could barely make it up the (shallow) hill in front of the house, and it was misfiring all over the place, no brakes, etc etc. Now, it brakes and turns very well, and has only some slight misfiring when warmed up, all of which I'm hoping to dial out when the Colortune arrives and I get it timed perfectly. And once I get all the lighting operational, it will be fully road-worthy. So excited. Finally persuaded my wife to take a pic of me with the car. Here's your intrepid scribe next to the car that will have been in the family for a full 50 years come October:
 2 points
 -
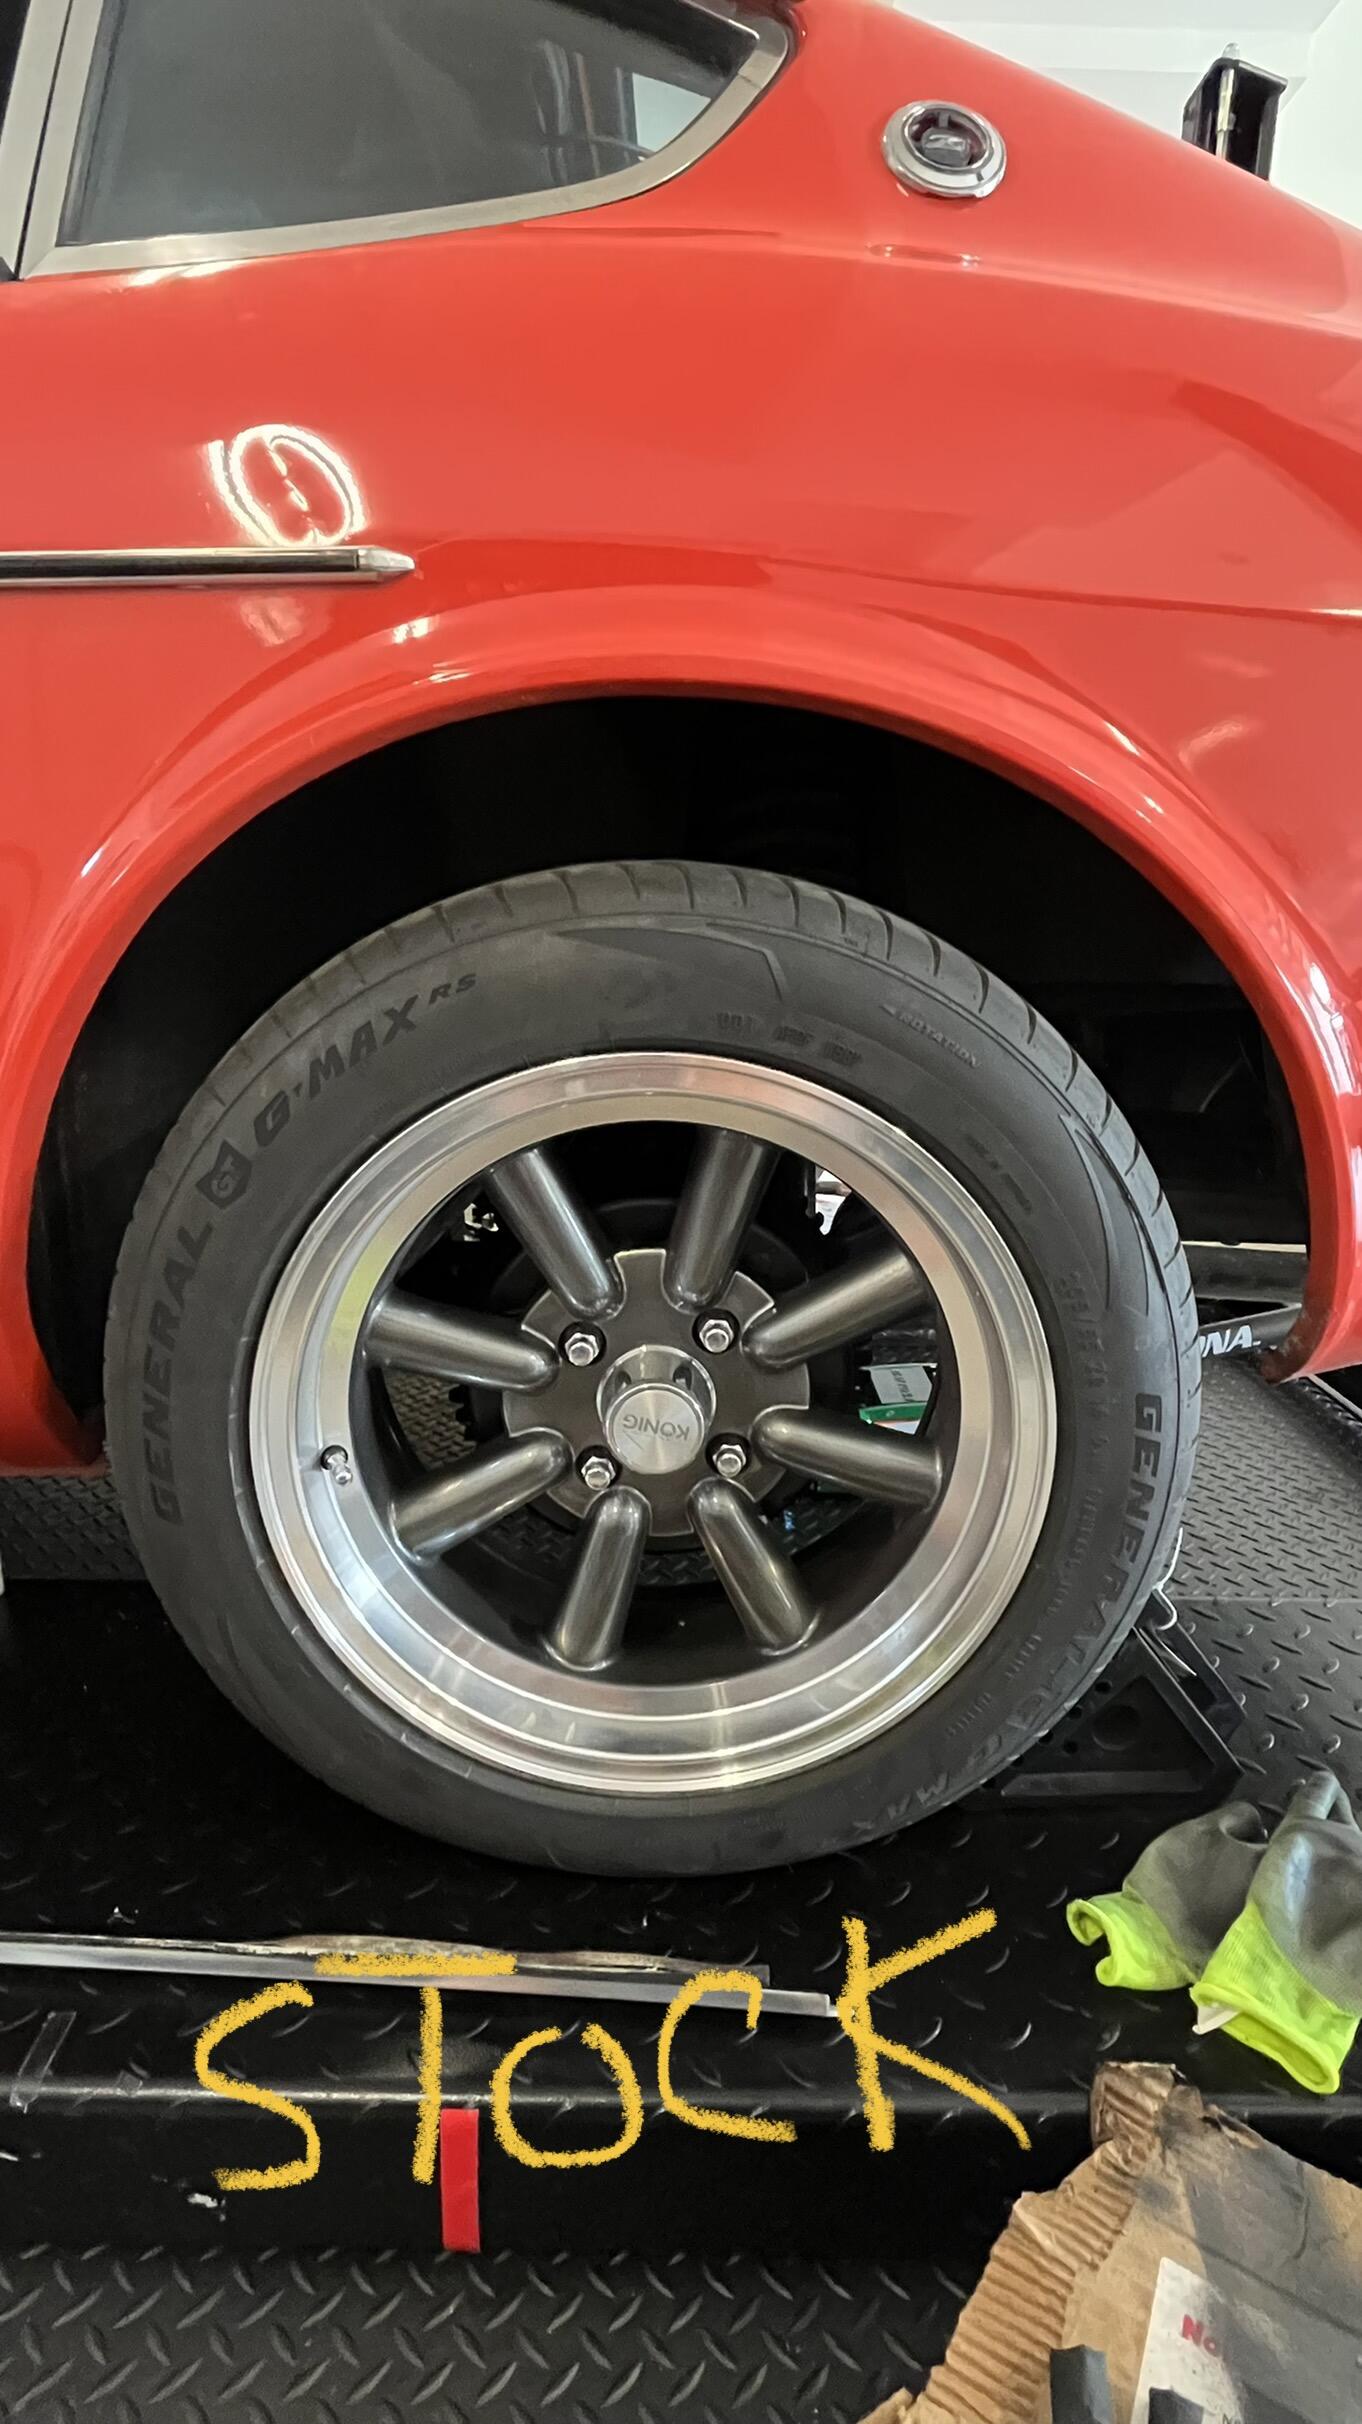
1 pointThe correct bolt pattern is ... 4 x 114.3 I would give 16 x 7" wheels serious consideration, tire selection is much better than 15" Most people choose the wheels first, then look at tires. A great tire size on 16" wheels is 205 x 55 x 16. Very close to OEM diameter and no rubbing.1 point
-
1 point
-
Check out this book it has some interesting insights. https://www.ebay.com/itm/275245952328?epid=102900406&hash=item4015efed48:g:EKkAAOSwxidiRwqX1 point
-
1 point
-
1 pointInteresting Kats. I got fairly familiar with kanji when I was looking at period magazine articles for the csp website. I had to look at the kanji (sometimes with a magnifying glass as the print/paper quality in the 1960's wasn't great), work out how many "sub kanji" are in it, as it could be a combination of "sub kanji" all with a differening number of strokes per "sub kanji" . There was a great website (not there now) which listed these "sub kanji" by the number of strokes, and you ticked what you worked out and hopefully end up with the correct kanji in the magazine. E.G (if my memory serves me well) 可 is made of two "sub kanji" the square and the "J" with the top line. Both are written in a particular stroke order. Sorry, there probably is a better/correct way of saying this than "sub kanji", but I was looking on my own, ploughing through 70-80 thousand kanji... before running through Google translate in a curtailed way sometimes. Alan kindly gave me a sticker of this which is proudly on my RS30. About fuel if I remember.. The left image faces out, whilst the right faces into the car as its applied to the glass.1 point
-
You should also consider cleaning the hazard switch in the dash, as some lighting power goes through that switch as well. Very similar type of switch and cleaning method as you have now done with the combo switches. Might still have a short somewhere though if the fuse is popping. Looks like you are making good progress though.1 point
-
1 pointThe defogger switch is just a normal SPST switch, so that part of it is no problem. No resistors or anything else unusual. Just a switch. The only thing that would concern me is how much current can that defog switch deal with? I don't think I would want fog light current going directly through that switch. I'd want to use a relay between the switch and the lights.1 point
-
Double check the voltage for the parking light circuit at the headlight switch and check both wires for voltage to ground. The 72 FSM identifies the wire for the parking light circuit as being green/blue. Note that this is the dash harness color. Some vendors would use alternate colors within a component such as a switch or fuse box. For instance, the wire coming off the parking light fuse in a 73 fuse box that I have handy is green/white. The color is different in the dash harness.1 point
-
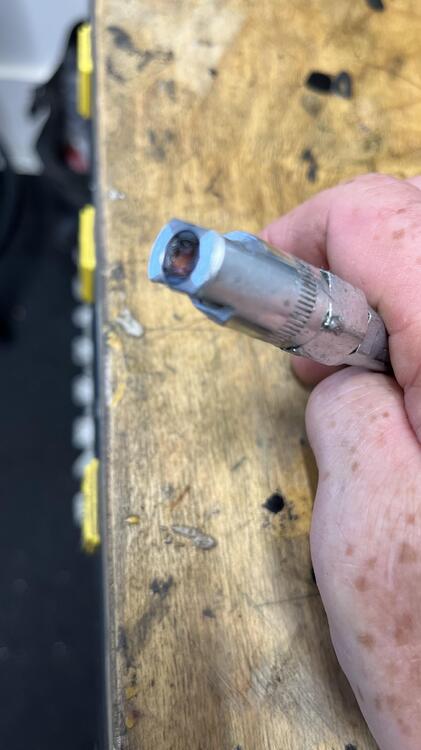
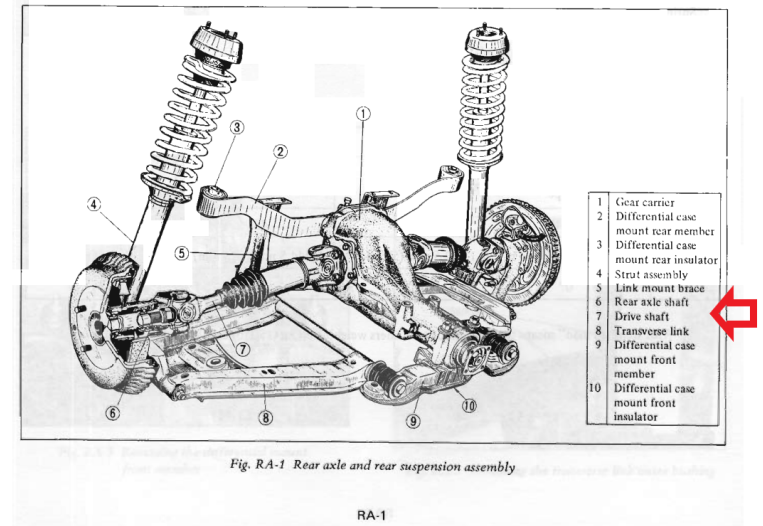
1 pointThe picture I used was not from Z Car Depot but their part may very well be from the drive shaft. I think they called it a propeller shaft yoke. Anyhow, Jeffrey, you're on the right track with Terrapin.1 point
-
1 pointDecoding and extrapolating, it looks like you want the side aka "half", shaft parts. "Drive" shaft in Nissan FSM terms. I'd get them from Terrapin, they'll be correct factory made parts. ZCD might not know exactly what they're selling. Z Car Depot does a surprisingly poor job of describing some of their parts, for being a specialty Z car store. It's not a place to go to learn the terminology. Easy to see how 26th-Z could get side-tracked. https://zcardepot.com/search?q=yoke&type=product
 1 point
 -
1 pointFunny, but I just noticed that 26th-Z actually described and showed the same part that you said you needed. The DRIVE shaft is the half shaft. The main one down the middle is called a propeller shaft. Not clear what your picture is of. Is it from one of the two on the sides or the one down the middle?1 point
-
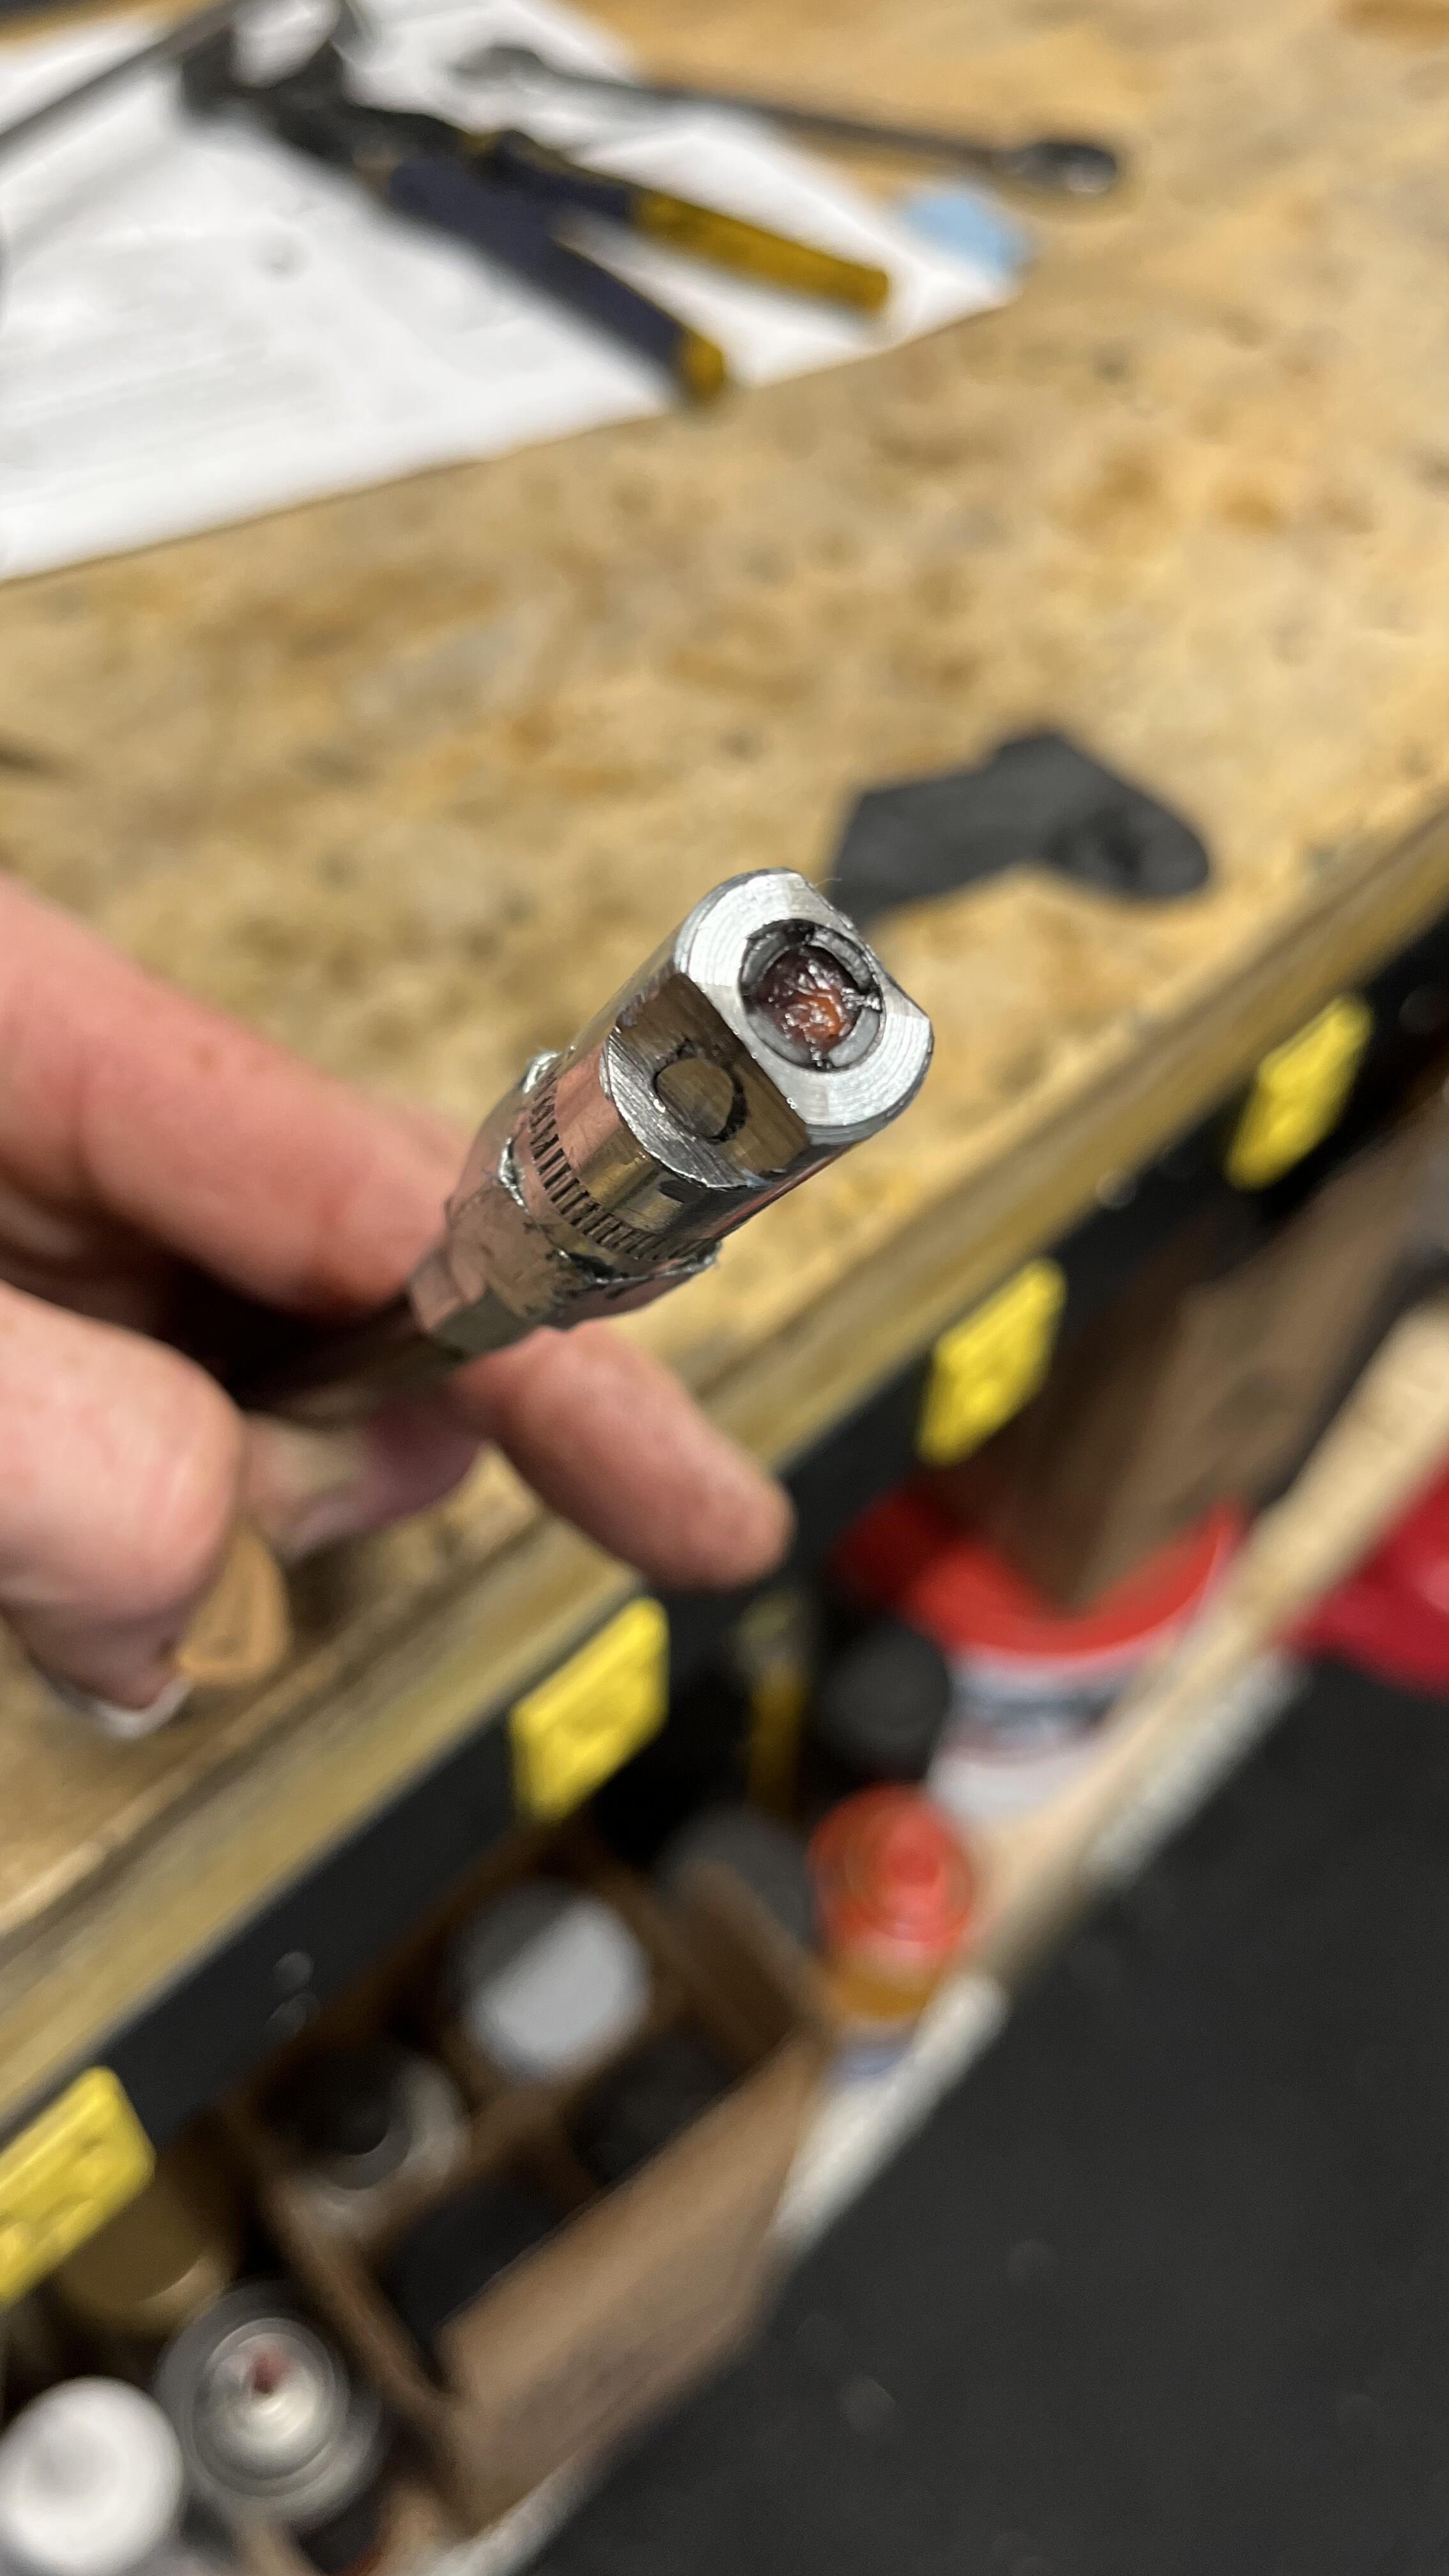
1 pointThis will be my second solution if grinding the fitting doesn’t work. Good advice on the good search. I can see the conversation now! “Who was googling “grinding nipples, or greasing nipples”. I have a 15 year old, so it’s no out of the realm of possible. Sent from my iPhone using Tapatalk1 point
-
1 pointI have a number of fenders, most have some rust issues down near the bottom mount by the dog leg. If you only need a front top half I should be able to help. Shipping is farther from me than Jim2^^, so if he has one that would be less expensive to ship. If not then let me know and I will provide pic's and info.1 point
-
Oh, in that case... I think I would buy the 240Z parts you were looking at - and use a 240Z Koyo radiator. That's what I'm using in my turbo-swapped early 260 (which has a 240Z style core support - they changed that design with the late 260Z->280Z). Great radiator even with A/C running in Phoenix and I daily drive Goldie. That's if you can't find a 280Z front end to remove from another shell. From the pics, you could use a bit more than just the core support.1 point
-
1 pointBoat storage places wrap boats. My brother does his every year for winter storage. Might be a good option but you won’t be able to get in or out of the car and that will be a problem for the trucking company. They typically want a operational car that can driven on and off the ramps. Unless you car is a contours vehicle I wouldn’t worry about it. It will be fine. A few days in the weather won’t hurt it. Sometimes the medication can be worse than the disease. Sent from my iPhone using Tapatalk1 point
-
1 pointI absolutely 1000% agree with @26th-Z!!! Do NOT do that, you will not like the results.1 point
-
1 pointWax it good before it's loaded and wash it when it gets there. You are asking for buffing damage to ship it covered. Also the paint is much less tolerant of damage than fiberglass would be...1 point
-
1 pointI learned that pulling my race boat to Kentucky one weekend. Dulled the gel coat along the lines. Not too much trouble, just had to get it buffed out. $200? and it was good again.1 point
-
1 pointMy experience with car covers on open trailers is that the wind will billow the cover and cause it to rub / slap against the paint. I wouldn't recommend using a cover for that purpose.1 point