Leaderboard
.JPG.cfcada9cf1c1b502df3f5f2f2ca3ff36.JPG)


 Subscriber
Popular Content
Showing content with the highest reputation on 08/13/2021 in all areas
-
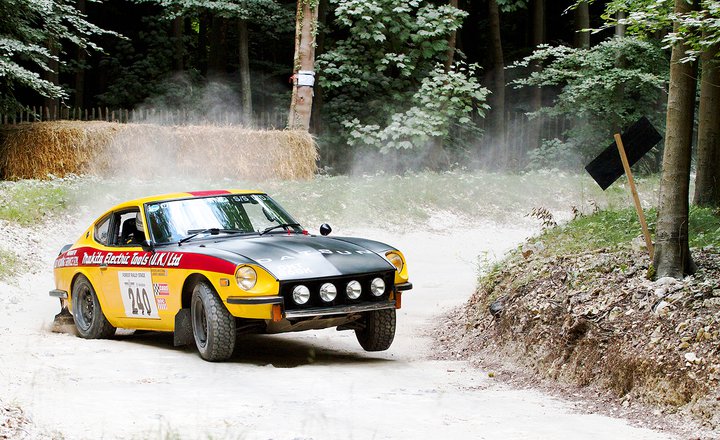
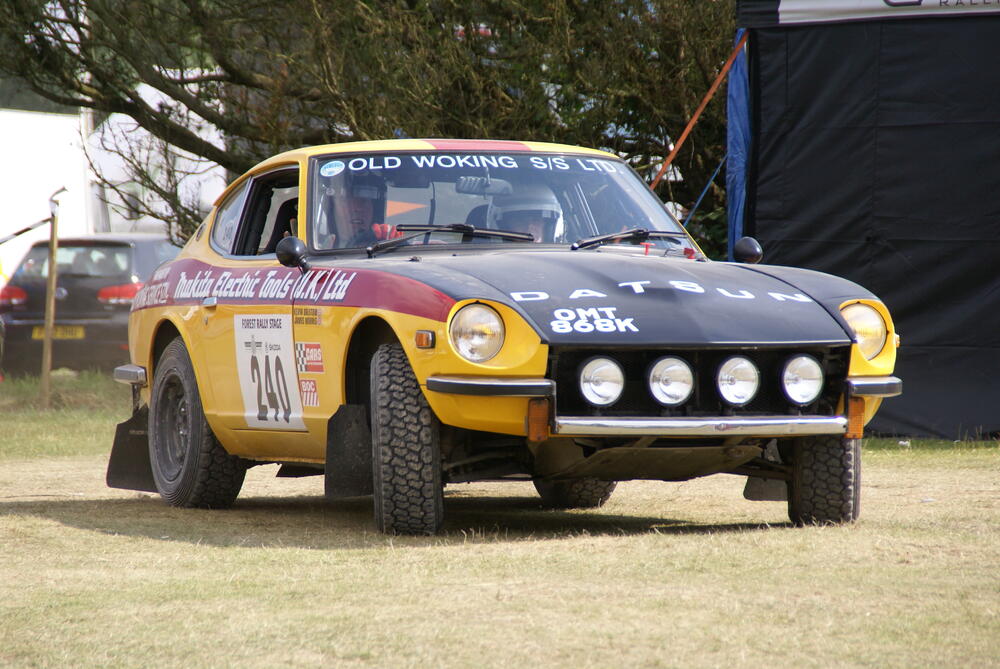
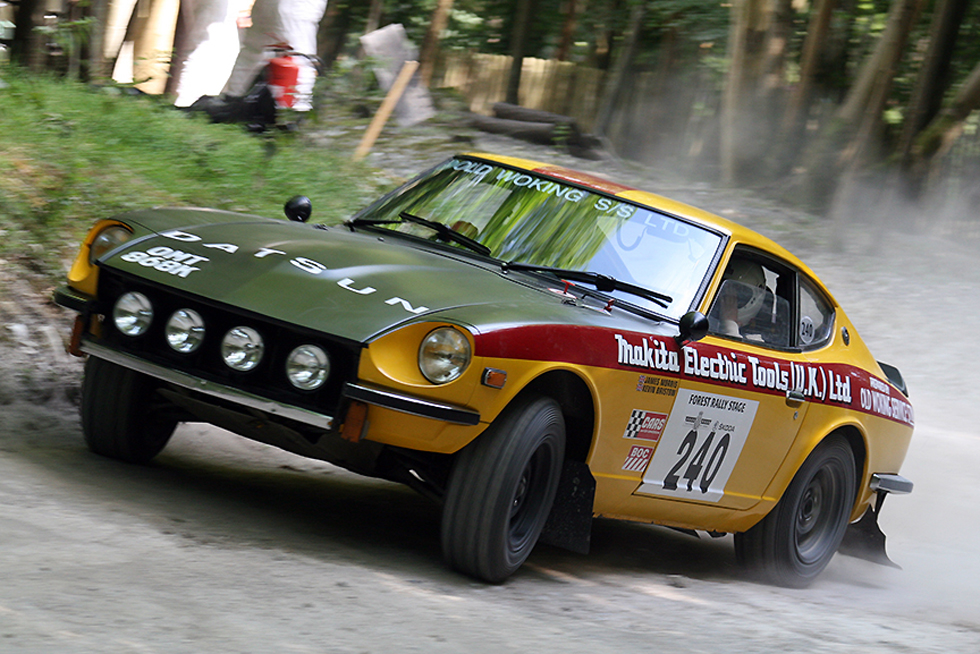
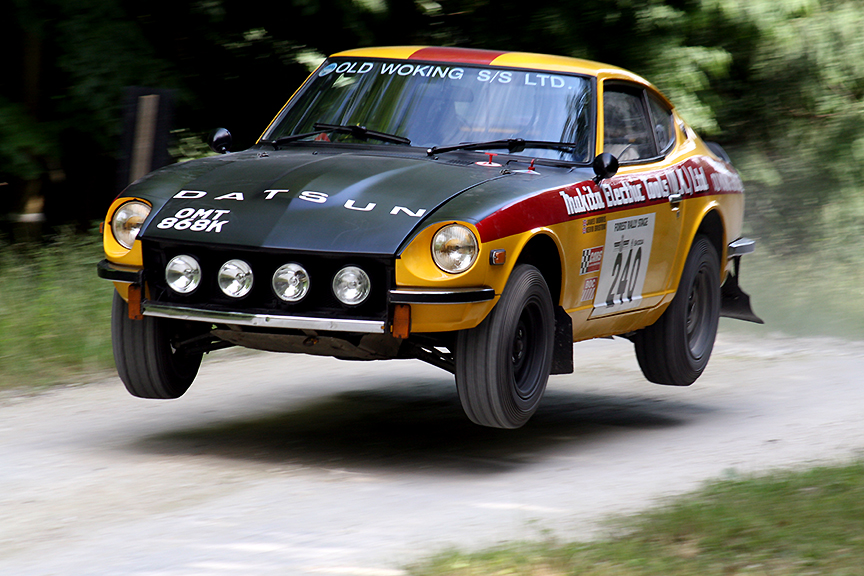
4 pointsHere's a great shot - by pro photographer Dan Redrup - at the same event. Kevin is a past British Historic Rally Championship winner in this car:
 4 points
 -
Sex? Have you ever climbed into the back of a Z? One would need to refer to the Kama Sutra to evaluate which positions would work.3 points
-
3 pointsHere's an example of the simplest - non-Works - solution, on my good friend Kevin Bristow's historic 'OMT 868K' car at the Goodwood Festival of Speed Forest Rally Stage back in 2011. The bumper is cut into three and the centre section 'dropped' via the addition of vertical brackets. Fairly easy to do, and this style was used by privateers in period so there's an historic link which satisfies certain regulations when necessary:
 3 points
 -
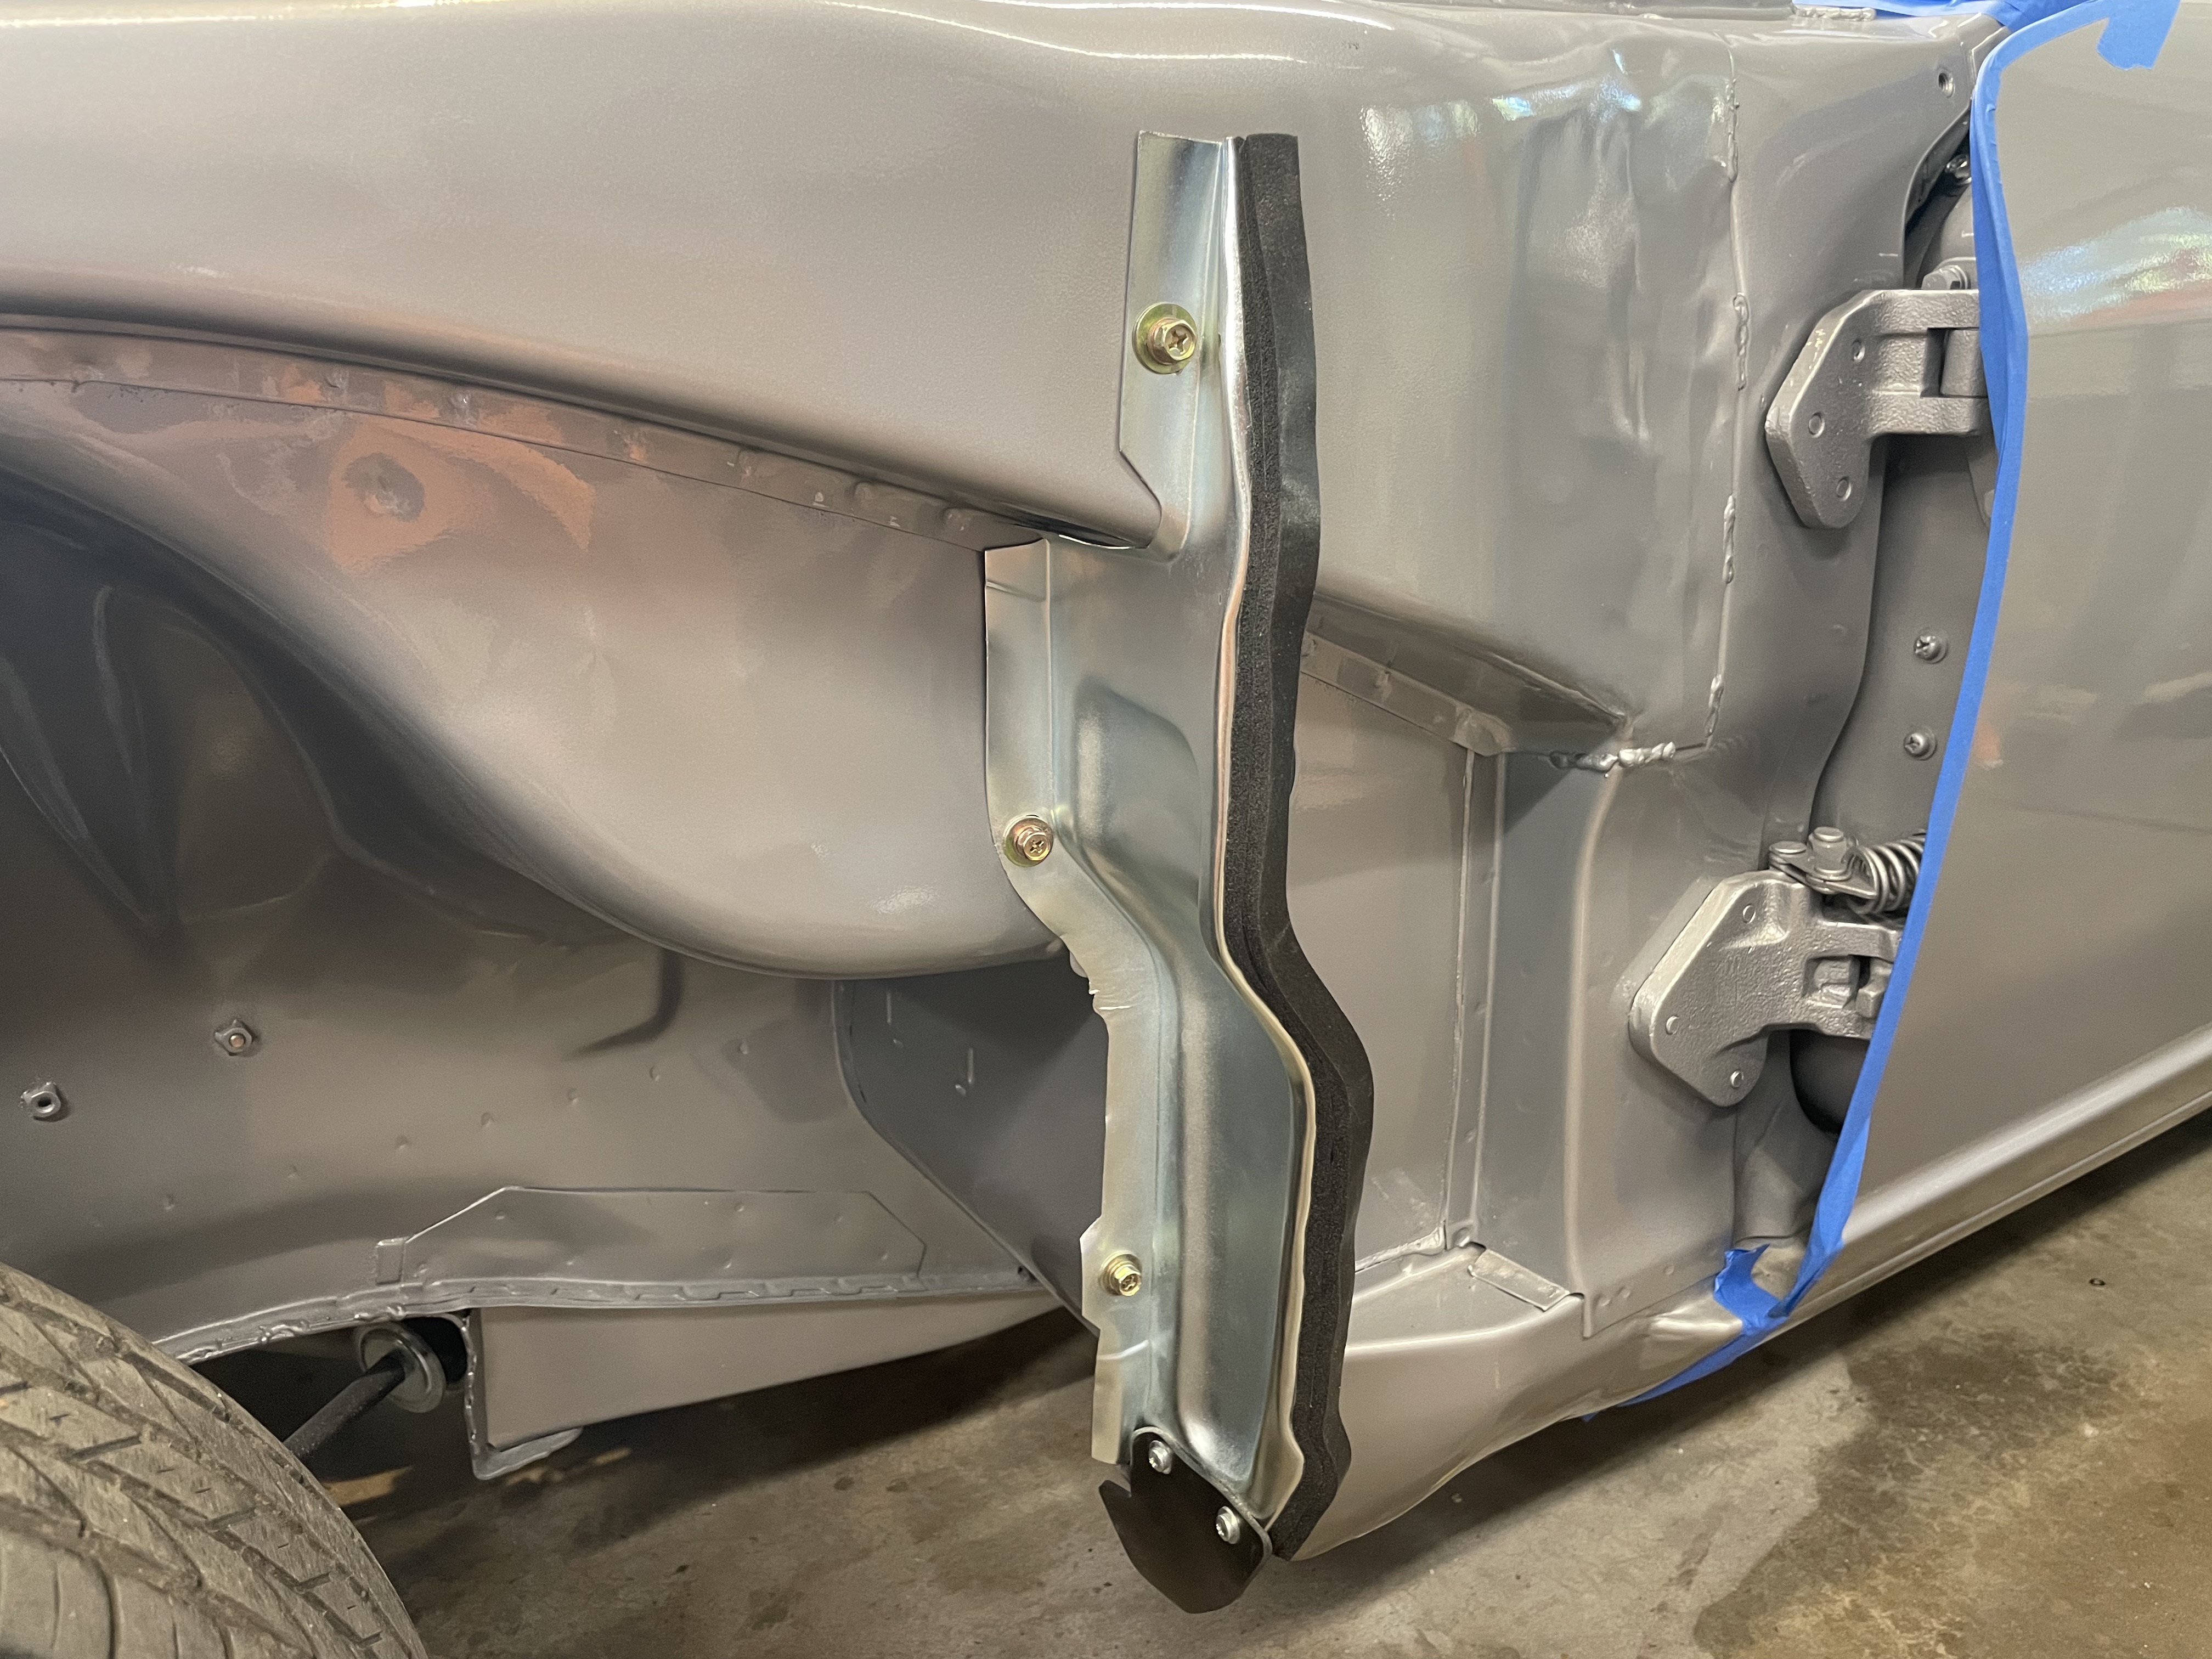
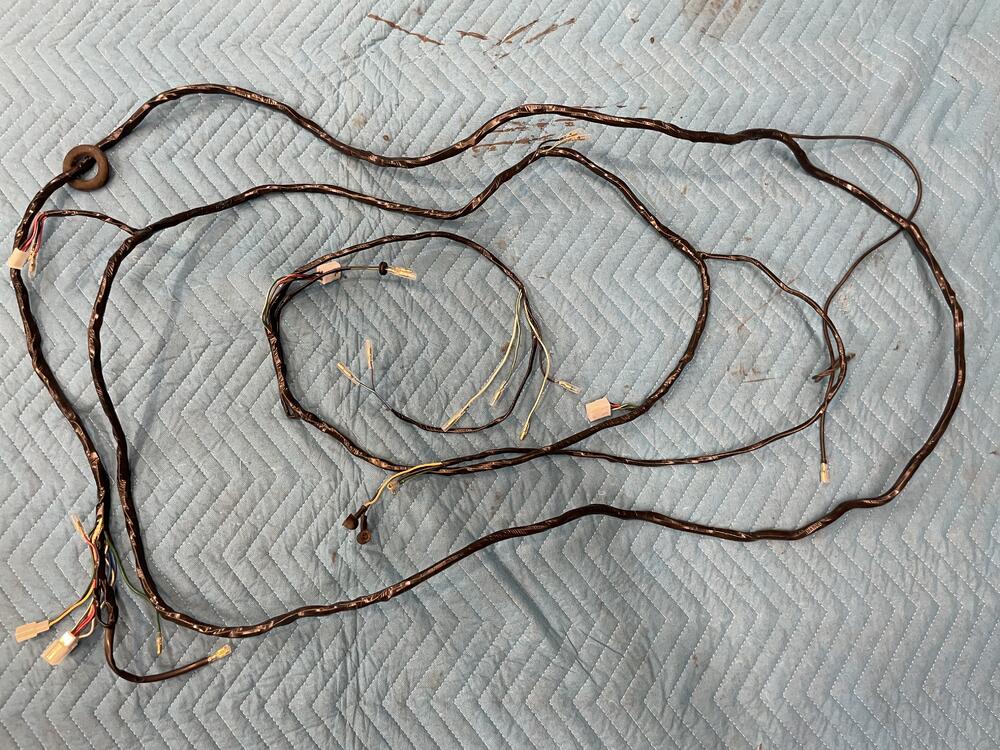
3 pointsFew smaller details completed tonight. Finished up the interior harness rebuild and installed the inner fender splash shields. Replated in clear zinc (I know, they should be body color but couldn’t bring myself to paint them) new hardware, foam, and lower mud flap.
 3 points
 -
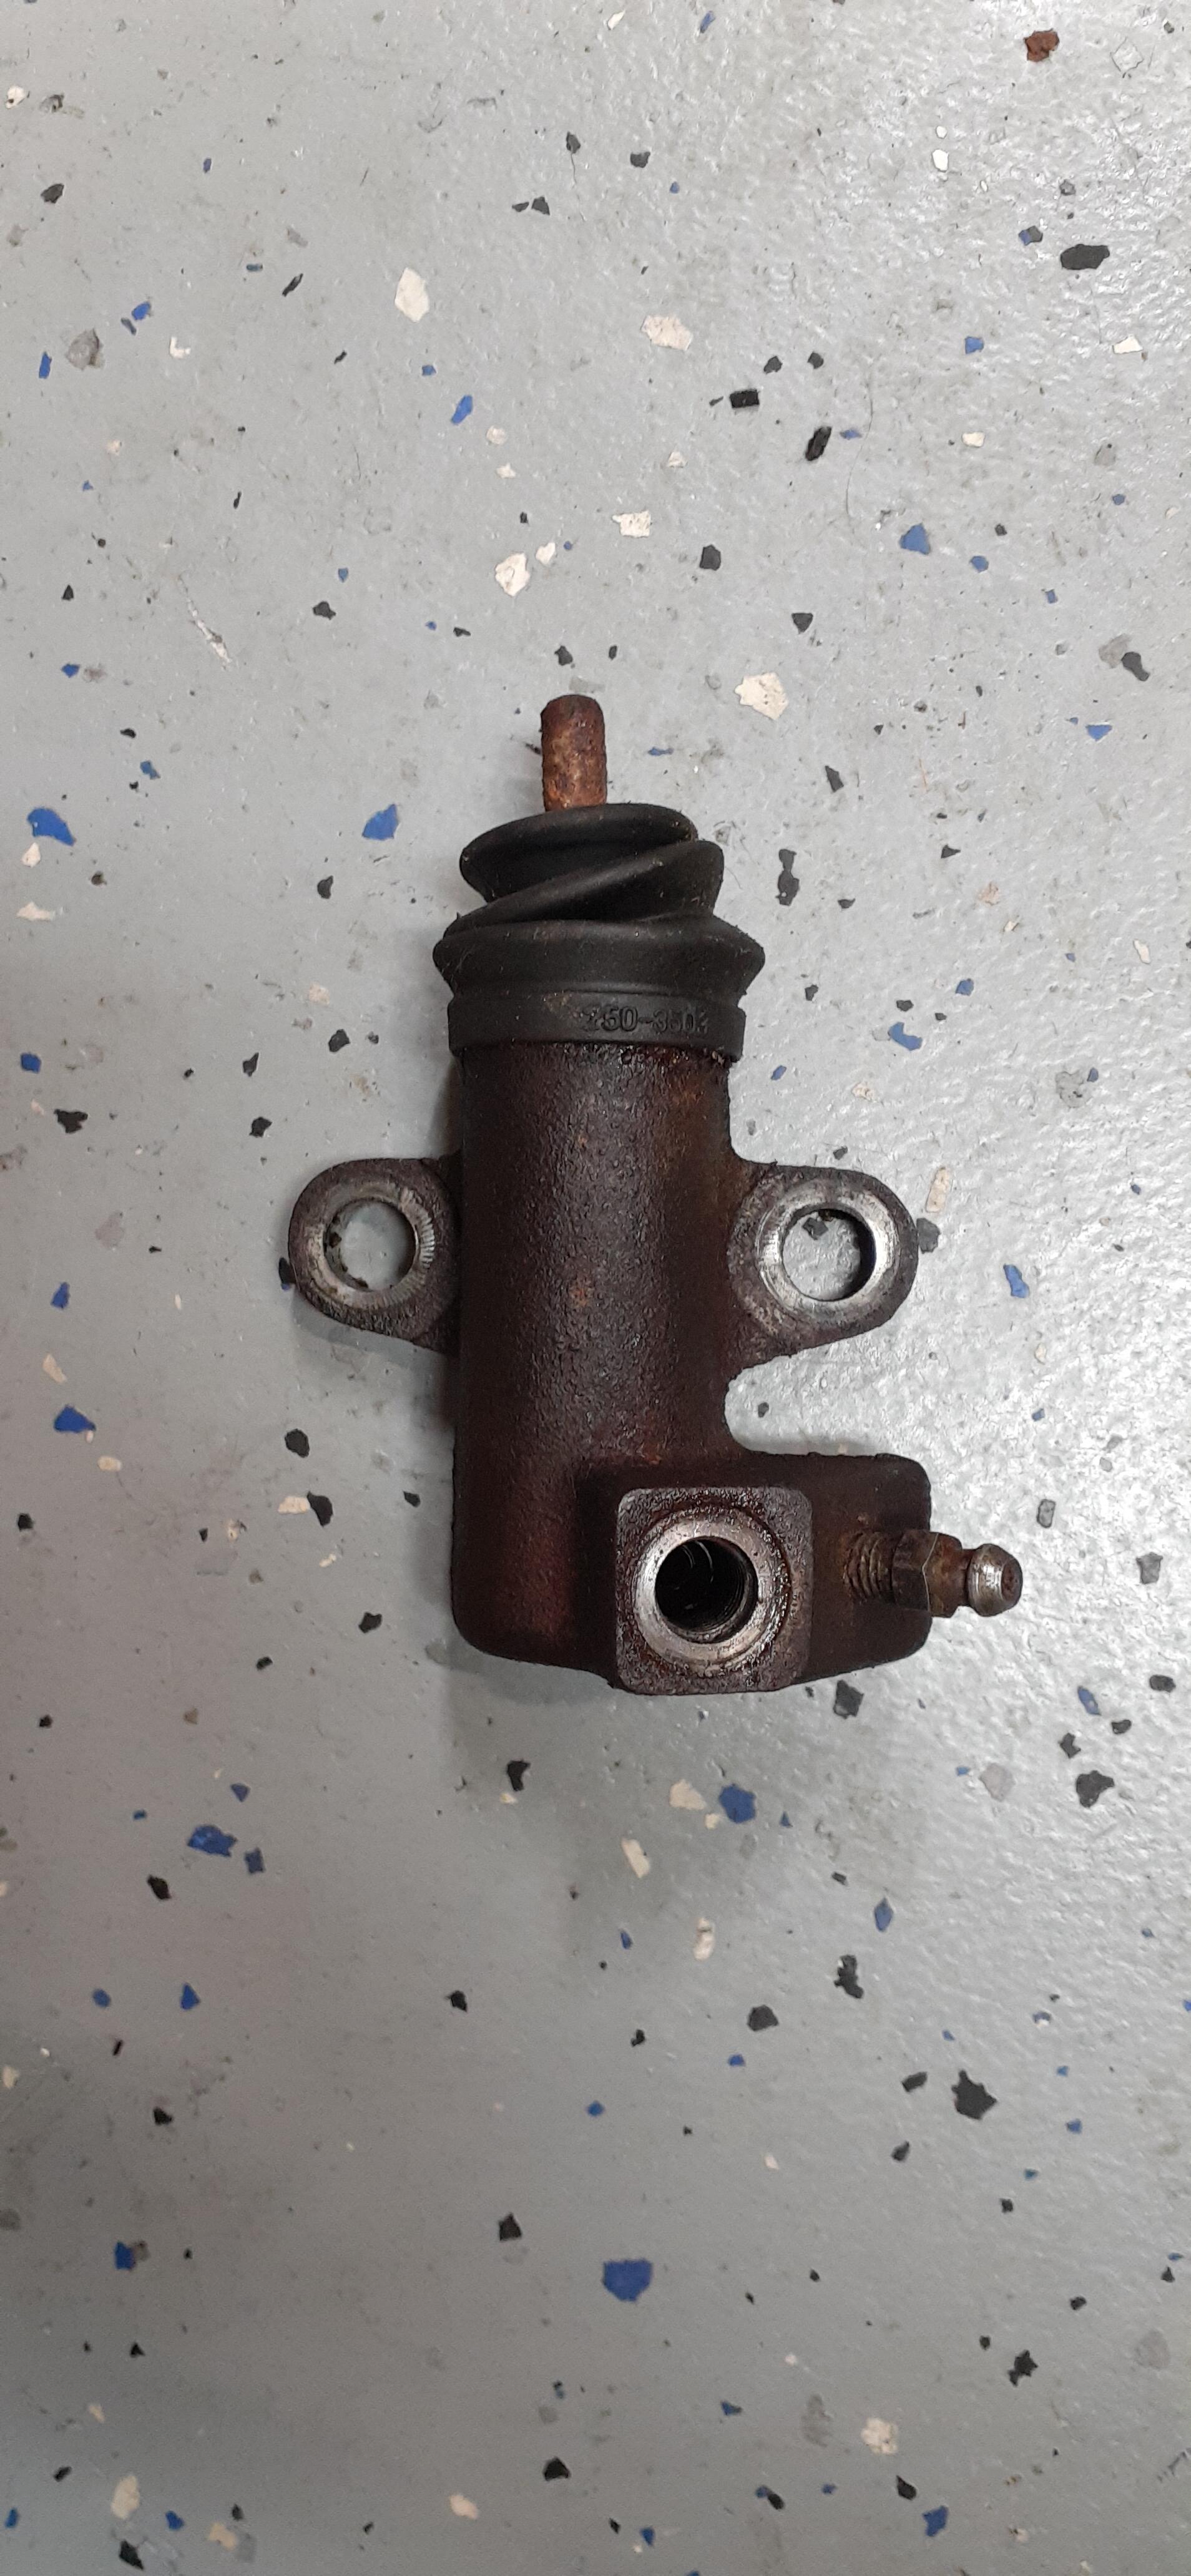
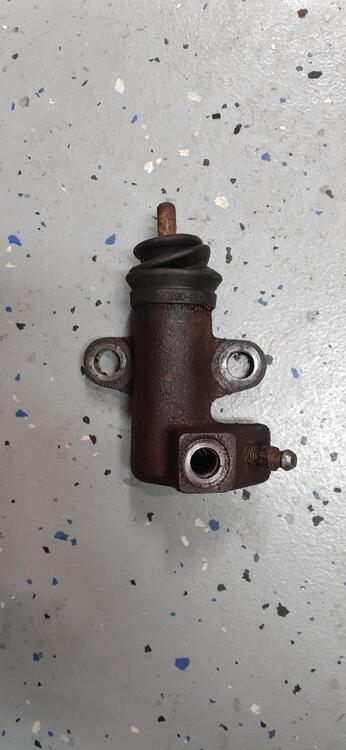
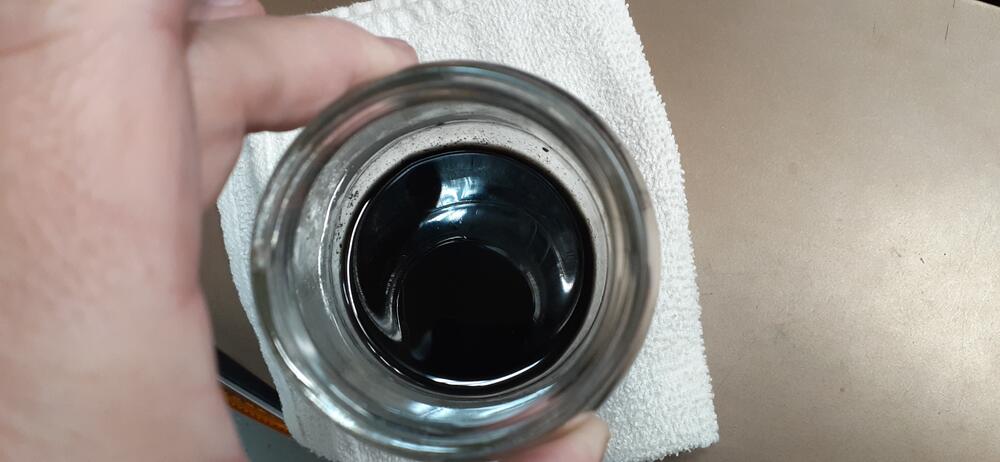
3 pointsI received the master and slave cylinders today, so I decided that would be on this evening's agenda. I used my master cylinder fluid removal tool, known colloquially as a turkey baster, to remove the remaining fluid from the clutch master. The fluid was approaching vantablack in coloration, though it was still reflecting some light. I then decided to move to replace the slave cylinder. I put the car up in the air with the Quickjacks. I can't say enough good things about them. I slid under the car to evaluate the task at hand. I grabbed my wrenches and bleeder bottle and set about trying to pull any fluid through that I could coax out. Of course, none came out because no one was depressing the clutch pedal. Okay, so then I broke the connection loose at the soft hose. For this, the 17 mm banjo wrench I grabbed could not get a good grip on the nut on the hose. Fortunately, I managed to use a conventional open-ended wrench without rounding off anything. The bolts holding the slave to the transmission did not put up a fight, and soon I was able to remove the old, grungy slave cylinder. It was on there for 27 years, but I did not drive the car very often since 2002, and none at all since 2010. However, brake fluid is not too kind over the years, especially when it is probably the same fluid that was put in 27 years ago. Assembly was the opposite of disassembly. (Thank you, Haynes manual.) It was a little tricky to get the slave lined up over the bolt holes in the transmission, but that's more a function of a shoulder punished by years of American football and rugby. With the slave cylinder in place, it was time to go after the master cylinder. With the car up in the air, it was pretty easy to tackle this. I broke the hydraulic line free, removed the clevis pin from the pedal, and removed the two nuts holding the master in place. I adjusted the arm in the new master to match, got fork in the arm in place around the pedal, and replaced the nuts. Next came replacing the hydraulic line, and I finished off with reinstalling the clevis pin. I'll get the wife to help me with bleeding the clutch on Saturday morning when the temperature in the garage will be more to her liking. The nice thing is that I got another thing crossed off the list without adding anything more to the list.
 3 points
 -
2 pointsFor those of you who will be at ZCON 2021, after the NY reveal of the new Z on August 17, Nissan will be taking the car on the road...to arrive in Colorado Springs to be shown on August 20.
 2 points
 -
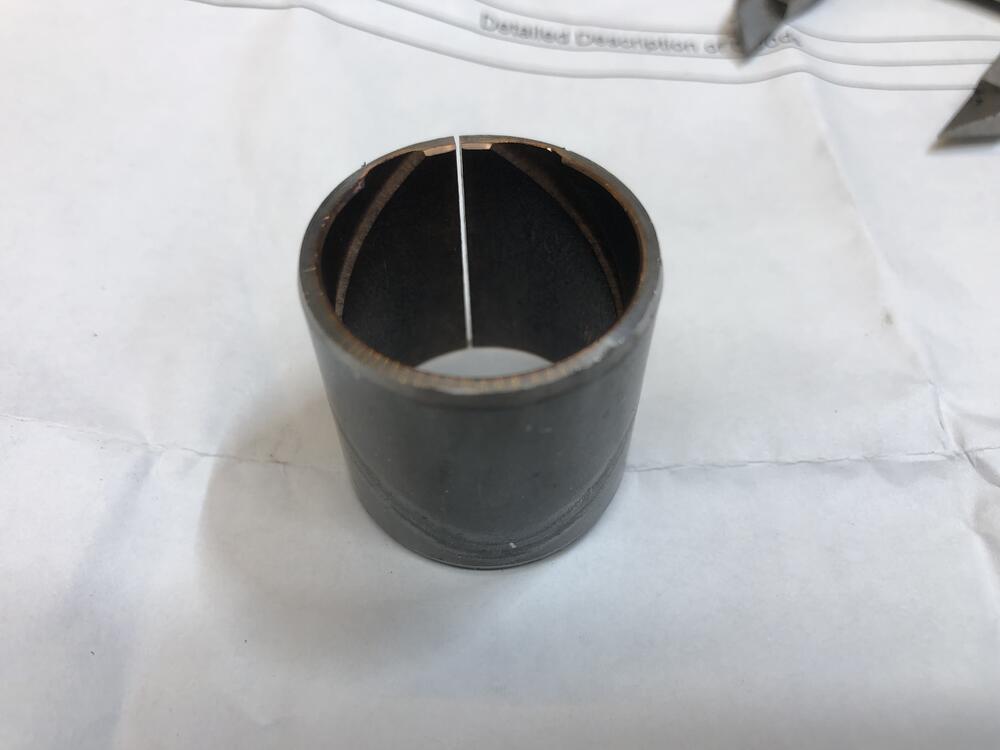
2 pointsWell an interesting little something showed up in the mail today. This is neither of the above mentioned possible sources for raw materials. This is a real Nissan part. What I did was search for the part number of the right hand longer bushing (48128-78500), rather than the number for the shorter left side that always wears out. Easy to make something shorter….. I got one, let me see how many more are actually available before I reveal my source No sense gets hopes up too high.
 2 points
 -
I would think more along the lines of it being damaged and owned by someone with a small budget. Maybe a tree fell on the hatch/rear panel. Owner: "Dang it! A tree hit my car. Can you fix it?" Body Shop: "Yeah, but it will cost $5,000" Owner: "No thanks. The car's only worth about $1,500. Let me find some sheet metal and junk parts and see what I can do with it."2 points
-
2 pointsI am indeed working on a replacement set of air cleaner hardware. It is not a perfect replica, but is 100% strong and functional as the original. The parts that show (wing nut and cup washer) as close enough to “correct” that most won’t notice without detailed inspection. I have a couple of sets made up if anyone would like to acquire one, let me know2 points
-
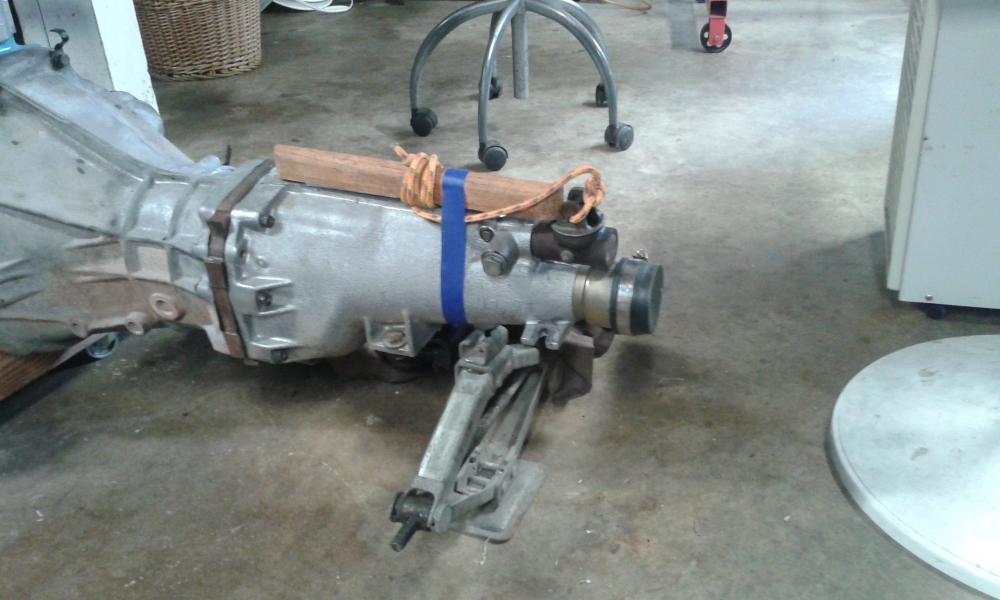
2 pointsSorry I'm late to the party but if you ever have to do it again. I've always gotten lucky and pulled a rope with a wood "handle" up through the hole in the tunnel as the transmission goes further back. Then tie it off when it's level and let the wood hold it in place until I can get the transmission mount mounted.
 2 points
 -
2 pointsHere is a quick sketch of the air cleaner assembly on my 1970. Hopefully it might help with your search for hardware.
 2 points
 -
2 pointsAs CanTechZ mentioned above, you need to put the air cleaner into the cover section before you slide the cover into place. The trick is that the M8 bolts that clamp everything together are "long wing bolts", not wingnuts onto a threaded shaft. That way, the bolts are not in the way when you slip the cover into place... They are kinda half hanging out of the cover portion. Slip the cover/air cleaner combination into place, and then twist the long wing bolts to hold tight. I thought someone fabricated their own version of those wing bolts? @zKars maybe? Seems like the crafty kind of thing he would do.2 points
-
1 pointI’ve been working on my air cleaner box for a bit and finally got to paint. I didn’t get many good before pics. This one is shortly after starting stripping. The box was more rusty than the cover. I’m “probably” not going to go as crazy on it as I did the lid, but I tend to not be content until things look satisfactory to me. After some primer and some sanding. After some more primer and a couple coats of paint. Wasn’t that pleased with it so I wet sanded it and covered it again a week later. A little better, but I may hit it again after another block sanding in the future. I did paint the box too and the charcoal/evap canister bracket. The box is very pitted but mostly where you can’t see it. I did fill some areas that can be seen. Sent from my iPhone using Tapatalk1 point
-
1 pointProbably nothing to do with Datsuns. However, a previous owner may have had a shaved head and given out daisies at the airport back in the day 😉1 point
-
1 point
-
I think Zed and Dave answered your questions, but just to add to trivia info. The 240mm and 225mm are the same weight 23lbs in all the 240Z, 260Z and 280Z/ZX. That is not the case for the 720 truck. It has a much heavier flywheel and a very wide ratio gearbox. The 225mm clutch and pressure plate will work on the 240mm flywheel, but the 240mm clutch disc and pressure plate will not work on the 225mm flywheel. Most parts suppliers have the later 280ZX 225mm or 240mm pressure plate and clutch disc, and I believe you will have trouble finding a 225mm flywheel. Most suppliers will give you a 240mm flywheel simply because it suits both sizes and is the same weight. If your old pressure plate was the original type then you have the original 240Z throw out bearing collar and you will need to find one to suit the 280ZX pressure plate. The bearing on the collar is the same dimmension through the 240Z to 300ZX.1 point
-
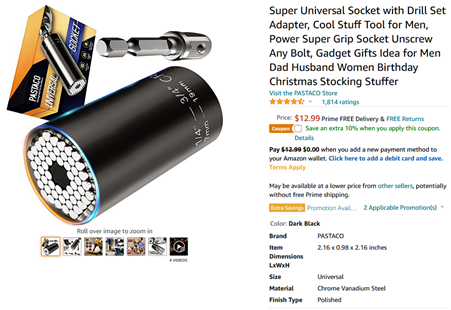
1 pointThey also sell hardened cone shaped sockets with teeth. You hammer it onto the wheel lock and it bites into the nut to allow removal. I'd be a bit worried about grinding flats as you don't have a lot of space to work with before touching the wheel. I'm assuming you are trying to save the Chromodora wheels.1 point
-
I really can't wrap my head around why someone would do do such a thing. No visibility, and no practicality. I think they might have been trying to make the z look like something it wasn't seeing as they changed the taillights, too. Or maybe they wanted privacy in the trunk for... sins. Sex or bootlegging, maybe.1 point
-
1 pointGrind 2 flat spots and you take it of with a spanner.. (open wrench) simple..1 point
-
Because they are stupid. Over the years I have seen some pretty weird stuff done to Z cars. Like the white one posted here from Faceplant Marketplace with the hatch sealed up and the rear window completely covered. Imagine having to work on the inside of the taillight panel.1 point
-
Hmmm. Well, I thought I put a link when I commented earlier today, but I guess not. I just now added it to the post.1 point
-
1 pointgot a welder? Weld a nut on the end of it, then use a regular breaker bar.1 point
-
I sent the guy a message on eBay and he sent back a picture of the VIN from the firewall. Says that he thinks something rubbed on the ID plate and wore the paint away. He doesn't know what happened with the door. I suggested that he join CZCC and discuss but I think he's just a guy who came across a Z and is flipping it. You can kind of hear it in his video. Anyway, it looks legit, I think. The interior looks in great shape for a sun baked part of the country.1 point
-
1 point
-
1 pointI just did this a couple months ago. It really helps if you have another person. I left a floorjack w/ some wood on the bottom of the oilpan, then lowered the motor till my pops and I could slide the transmission right into place. Last time i did it myself and chewed into the input bushing a bit by using a bolt to pull the motor and bell-housing together. https://www.classiczcars.com/forums/topic/63795-shifter-rattle/?do=findComment&comment=618934&_rid=296131 point
-
1 pointI would do poly for the steering rack as those take a beating. The new poly ones are kind of a pain to seat, but once in, they hold the rack tighter. I don't see any tears on the crossmember bushings, so I'd leave the stock rubber in place. It's easy to do that one later if needed.1 point
-
1 pointI have clear memories of a '66 LeMans with a 389 and a fried clutch. When I started it in gear, the clutch held and it would go, and I could shift without using the clutch. Had to be crafty at stoplights, though.1 point
-
1 pointThat is normal. Nissan calls the transmission mount the rear engine mount. The engine weight is not centered over the two front mounts. Holding up the back of the engine is one of the more difficult things to do when removing the transmission. People use a cable on the hood latch (bad idea) or a block of wood between the valve cover and the firewall (still bad), but a jack under a block of wood on the back of the oil pan is probably best. Use the car's scissor jack and you'll be able to adjust the angle when you install the transmission. Probably why most people install the engine and transmission as an assembly, but forgot to mention that. And, even worse, if you didn't slide the transmission under the car before you installed the engine, you'll have a hard time lifting the car up with the engine in, balanced on a scissor jack. There are other work-arounds but the tilting unbalanced engine is normal.1 point
-
1 pointI would have stuck it in a baggie with a bit of orange peel. That would rehydrate the dried out weed, giving it that “just right cured and ready to smoke” texture.1 point
-
1 pointTrailering my Z from GA. My best friend, roommate at OTS, best man at my wedding and Godfather to my two kids lives in Monument so I'll be crashing in his basement, he's even got a spot in the garage for my Z. My dad is driving up from NM in his BRZ and we're going to do the Garden of the Gods, Pikes Peak drive together, hope my 240 can make it all the way up!1 point
-
If you want to know why the Z32 looks the way it does, the best thing to do is go to a ZCON where Toshio Yamashita (aka Yamasan) is presenting his story of the design. If you saw the competing designs, you might say that Nissan picked well. Anyway, Nissan did have a more affordable sports car (sports coupe) at the time. The 240SX/Sylvia slotted in well to the old 240Z role except for the lack of an engine in the North American market to keep up. Of course, with the strong Yen at the time, it was about impossible to have a sports car built in Japan that was "affordable".1 point
-
https://www.facebook.com/marketplace/item/207830024528348/?ref=search&referral_code=marketplace_search&referral_story_type=post&tracking=browse_serp%3A0f775f97-ae3f-4ab3-847a-ae39c33c5061 "Pretty much complete original car" might be an overstatement, but at least he admitted it has rust! Got a kick outta this one!0 points