Leaderboard
-
Captain Obvious
Free Member4Points10,111Posts -
79 datsun28ozx
Free Member4Points33Posts -
zKars
 Subscriber
 3Points3,781Posts
 -
.JPG.cfcada9cf1c1b502df3f5f2f2ca3ff36.JPG)
SteveJ
Free Member3Points9,685Posts


Popular Content
Showing content with the highest reputation on 09/08/2020 in all areas
-
3 pointsI have the frost fighter grid on my 510 rear glass. It’s pretty tough yet thin. No problem cleaning it with a rag and invisible glass cleaner so far.3 points
-
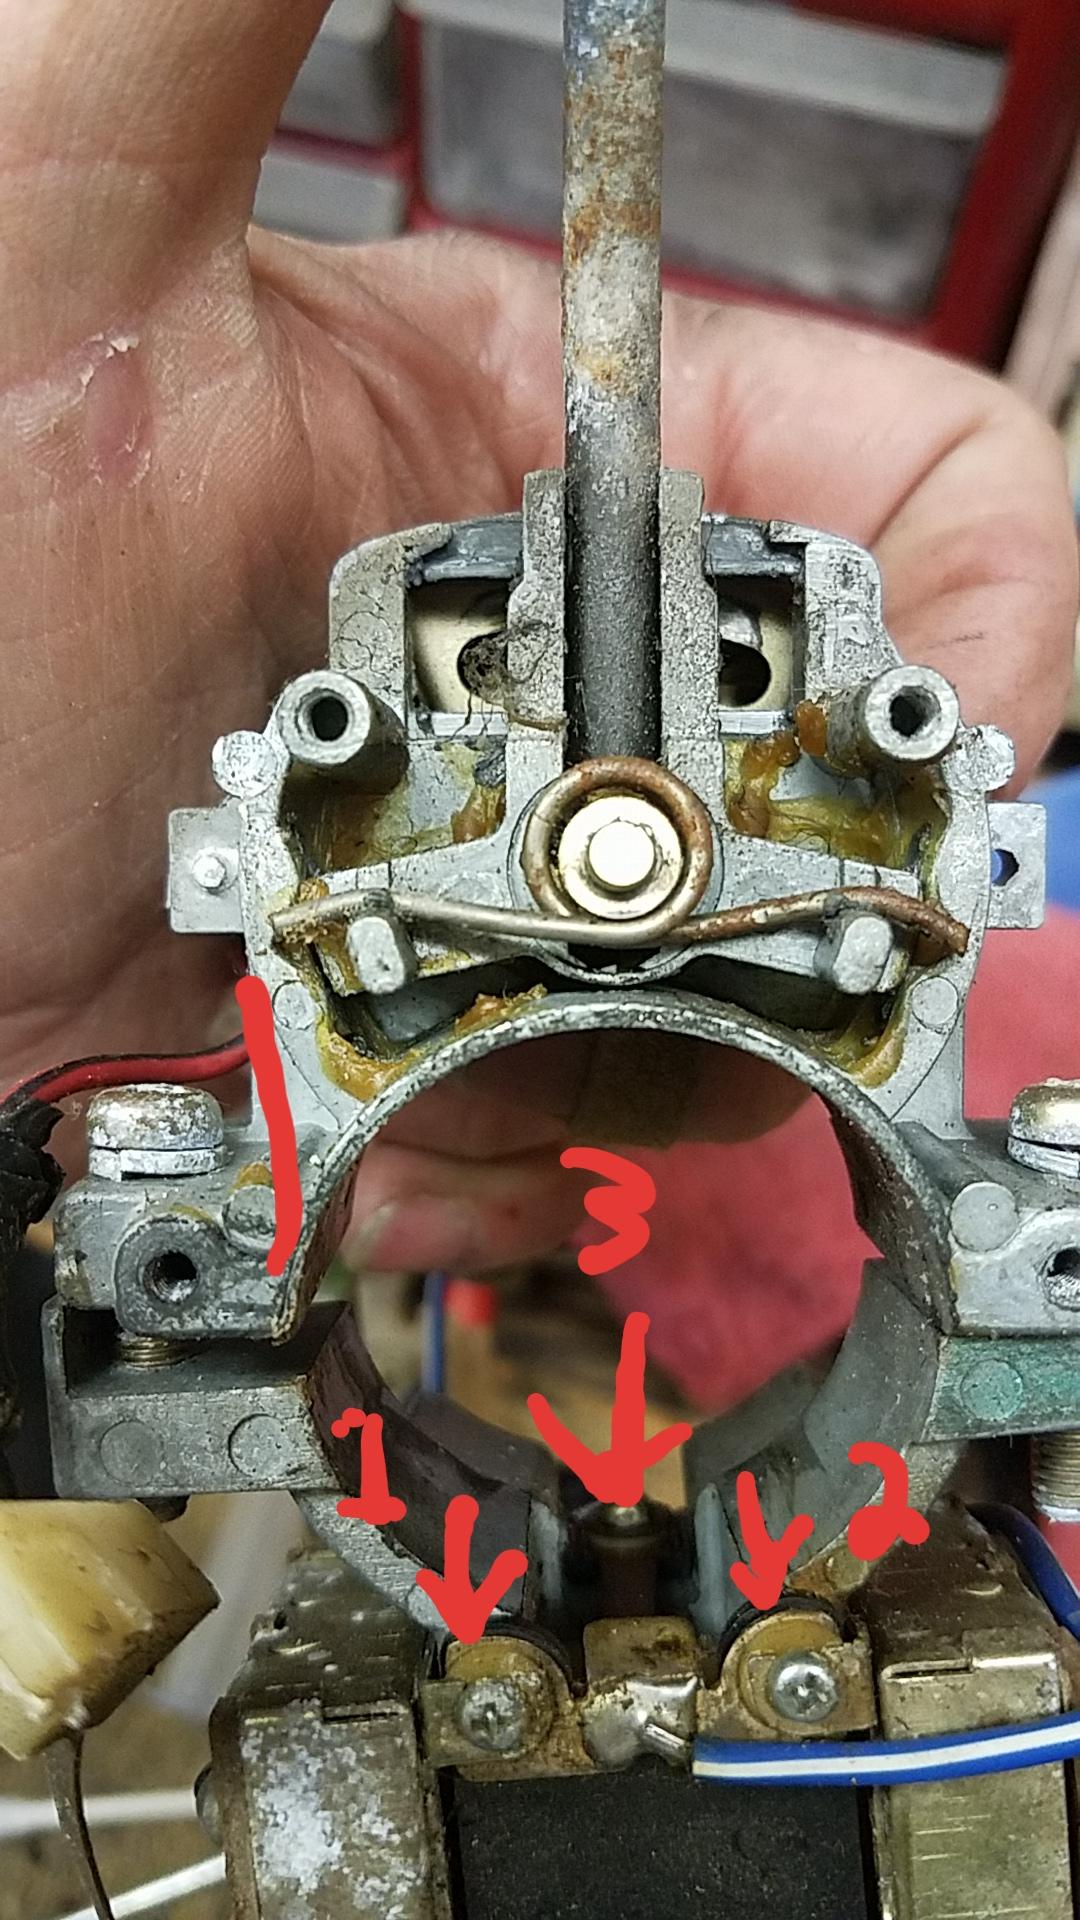
2 pointsThe extra bushing goes to the long, thin contact for the wiper washer switch... Also, that bushing has nothing to do with the headlights blowing the fuse. Your headlight contact Inside the switch is grounding out because it's misaligned. Open it back up inspect it. If you bent that "teeter" contact plate, it will go to high and hit the metal case and ground out.
 2 points
 -
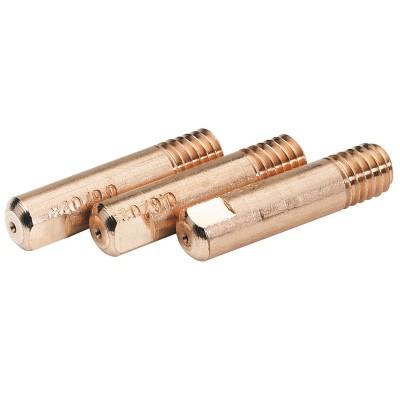
1 pointDuffy, I had a similar problem getting a vacuum signal I could use on a Porsche I own. All those throttle plates opening at once creates a heck of an atmospheric drop. I ended up using a mig tip to mitigate the vacuum drop. It wasn't heavenly, but it made it more tuneable. For reference, this is what a MIG welding tip looks like. It's simply an obstruction with a small hole in to modulate changes in vacuum, and anything could be used (aluminum rod with a drilled hole, a carb jet, a drilled plastic BB, etc). In a way, it introduces a 'lag' or slowdown of changes in vacuum, so you get a sort of averaging effect. Much better than having the MAP sensor report every peak and valley in the signal, and having the FI trying to keep up with that.
 1 point
 -
1 point
-
1 point
-
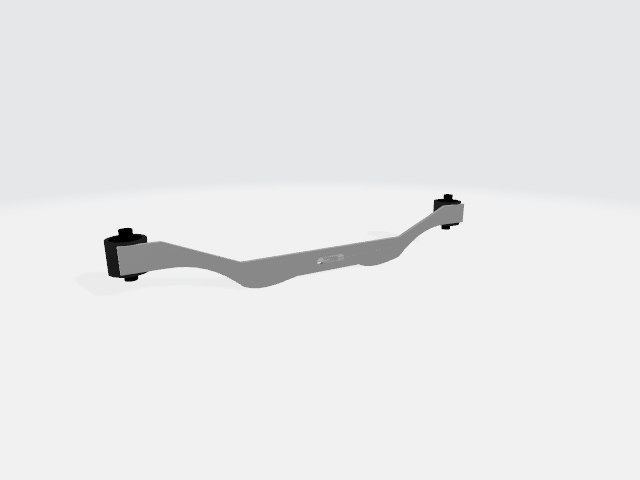
1 pointmost of the parts i've been building in fusion 360 then adding details and textures and such in blender. if anyone wants the part models i can post them here, they are .FBX1 point
-
1 pointin the end I hope this to be one of the most accurate 3d models, and it will be available to anyone on this site.1 point
-
1 point2 ohms per inch X 34 inch per line=68 ohms per line, 16 lines in P = 68/16= 4.25 ohms, 12v/4.25r=2.8 amps,2.8*12=34 watts. Think I did that right sound like enough power to warm the glass. can you check on this captO oh and the stencil lines are about 50% wider than the orig at least from what remains. the stencil is for 1/16. My plan is to remove the hatch for better access, then do one line and confirm the resistance. My biggest prob right now is trying to figure out how to remove the hatch by myself. maybe the boss can help, but sometimes that does not go well. maybe rig up a carrier that loops around the top and bottom and use the cherry picker to hold it while I remove the hinge bolts.1 point
-
1 pointI would think you want it clean to start just to avoid chaos looking lines.1 point
-
1 point
-
1 point@ea6driver glad I was not the only one. :) thanks for the link. This forum has been great for keeping me on track as this is the first classic Z I have owned and the first restoration of any kind. Have learned so much over the last year thanks to everyone here. Sent from my ONEPLUS A3000 using Tapatalk1 point
-
1 pointThat was lifted from frost fighters website. Apparently there is no residual material after application---only the lines. A purpose built grid that matches in lengths, spacing and element thickness should be as close to original as one is probably going to get and in my mind would likely be a better performer than a mix of old and repaired segments or a new conductive grid with irregular thickness (hence resistive) properties. I appreciate your "do it myself" approach and applaud you for it. My only intent here is to see if there is interest in a quality one source solution that virtually anyone can purchase and install with a minimum of hassle and a maximum of performance.1 point
-
1 pointDave, Late to this discussion but--- I made readings from a NOS hatch glass with horizontal defroster grid that I was fortunate enough to find and purchase recently. Using the 200 ohm setting on the VOM 1.6 ohms was the resistance value measured. I've thought in the past when S30driver and I were discussing this that we might reach out to frost fighter and see if they would consider a purpose built replacement grid for our Z's that would exactly register over the original element lines. Since almost all defrosters on our cars are non-op and that no source currently offers replacement hatch glass with the lines, there might be enough of a market that they would go for it at some price point. I'm reluctant to utter that iffy phrase "Group Buy" , but pre-sales might provide leverage as an inducement to them.1 point
-
1 pointGood to know that I'm not alone. I was under the impression that I was the only one who found it impossible to decipher instructions like that. I wonder if people in other countries have the same problem. I think those icon based instructions were supposed to make them easier to understand in all languages. I think they've done just the opposite.1 point
-
1 pointAgreed. I enjoy making little stuff like that that I get to use. You might not have the right size tubing to use, but you've got a lathe. Just drill out the end of some solid stock and oval-ize it. With a few crude calculations, I think you could get close on the first try and then hit it on the second or third. If you've got tubing close to the right size but a little small, you could bore it out. And then to make it looks "proper", glue on an old screwdriver handle* on the other end. Or turn a nice wood handle on the lathe and use that. You'll be the envy of all the other Koni-ites. * You know the one... The one that's all rounded off and is pretty much useless as a screwdriver. Heat up the metal until it melts the handle a little and then yank it out. Haha!!1 point
-
1 pointUnobtainium This is about as close as you will find: http://easternbeaver.com/Main/Elec__Products/Connectors/Sealed/YPC/ypc.html1 point
-
1 pointI’m so very pleased to hear a very experienced person also did this!!!! #metoo!!!!1 point
-
1 point
-
1 point
-
1 point
-
And as an American who risk his life to fight for my former country, my family and I thank you from the bottom of our hearts. It's a debt that we can never repay in full. All we can do to show our appreciation is to better ourselves as Americans by giving back and never forget the sacrifices that so many made in pursuit of our freedom. My respect to you and all those who wear the uniform. Thank you Mike for the kind words. Have a great Labor Day! Sent from my SM-G975U using Tapatalk1 point
-
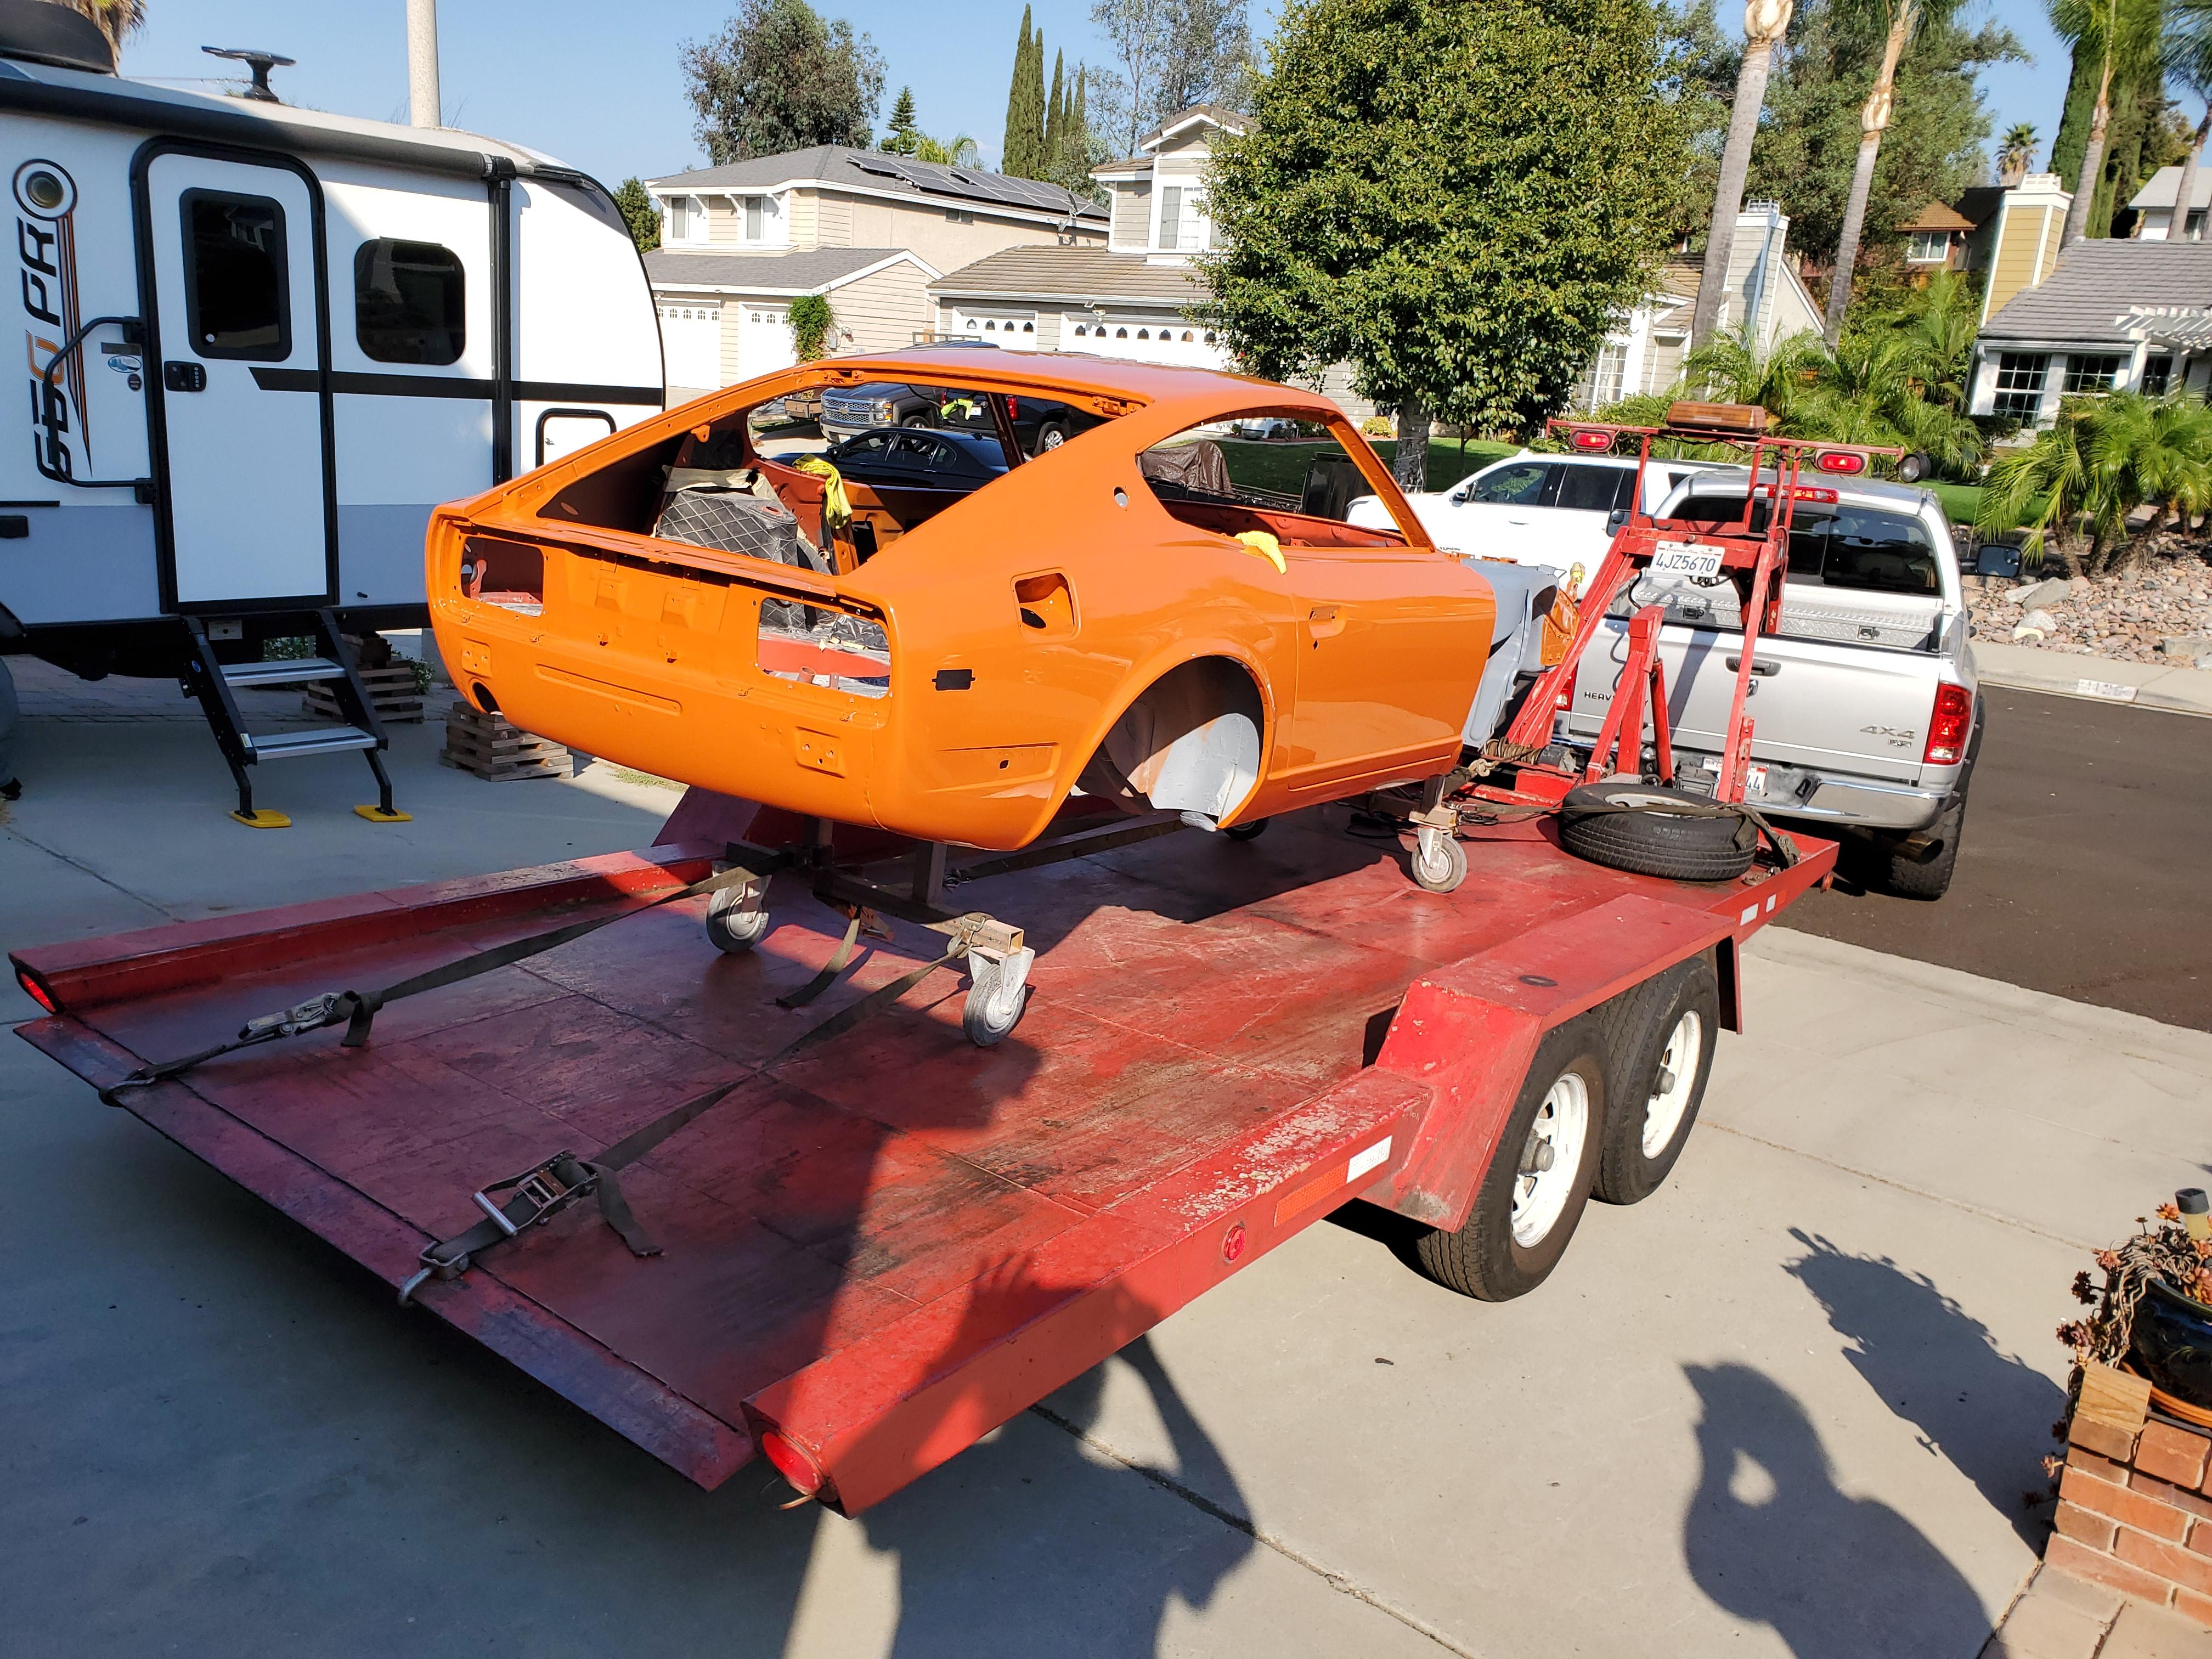
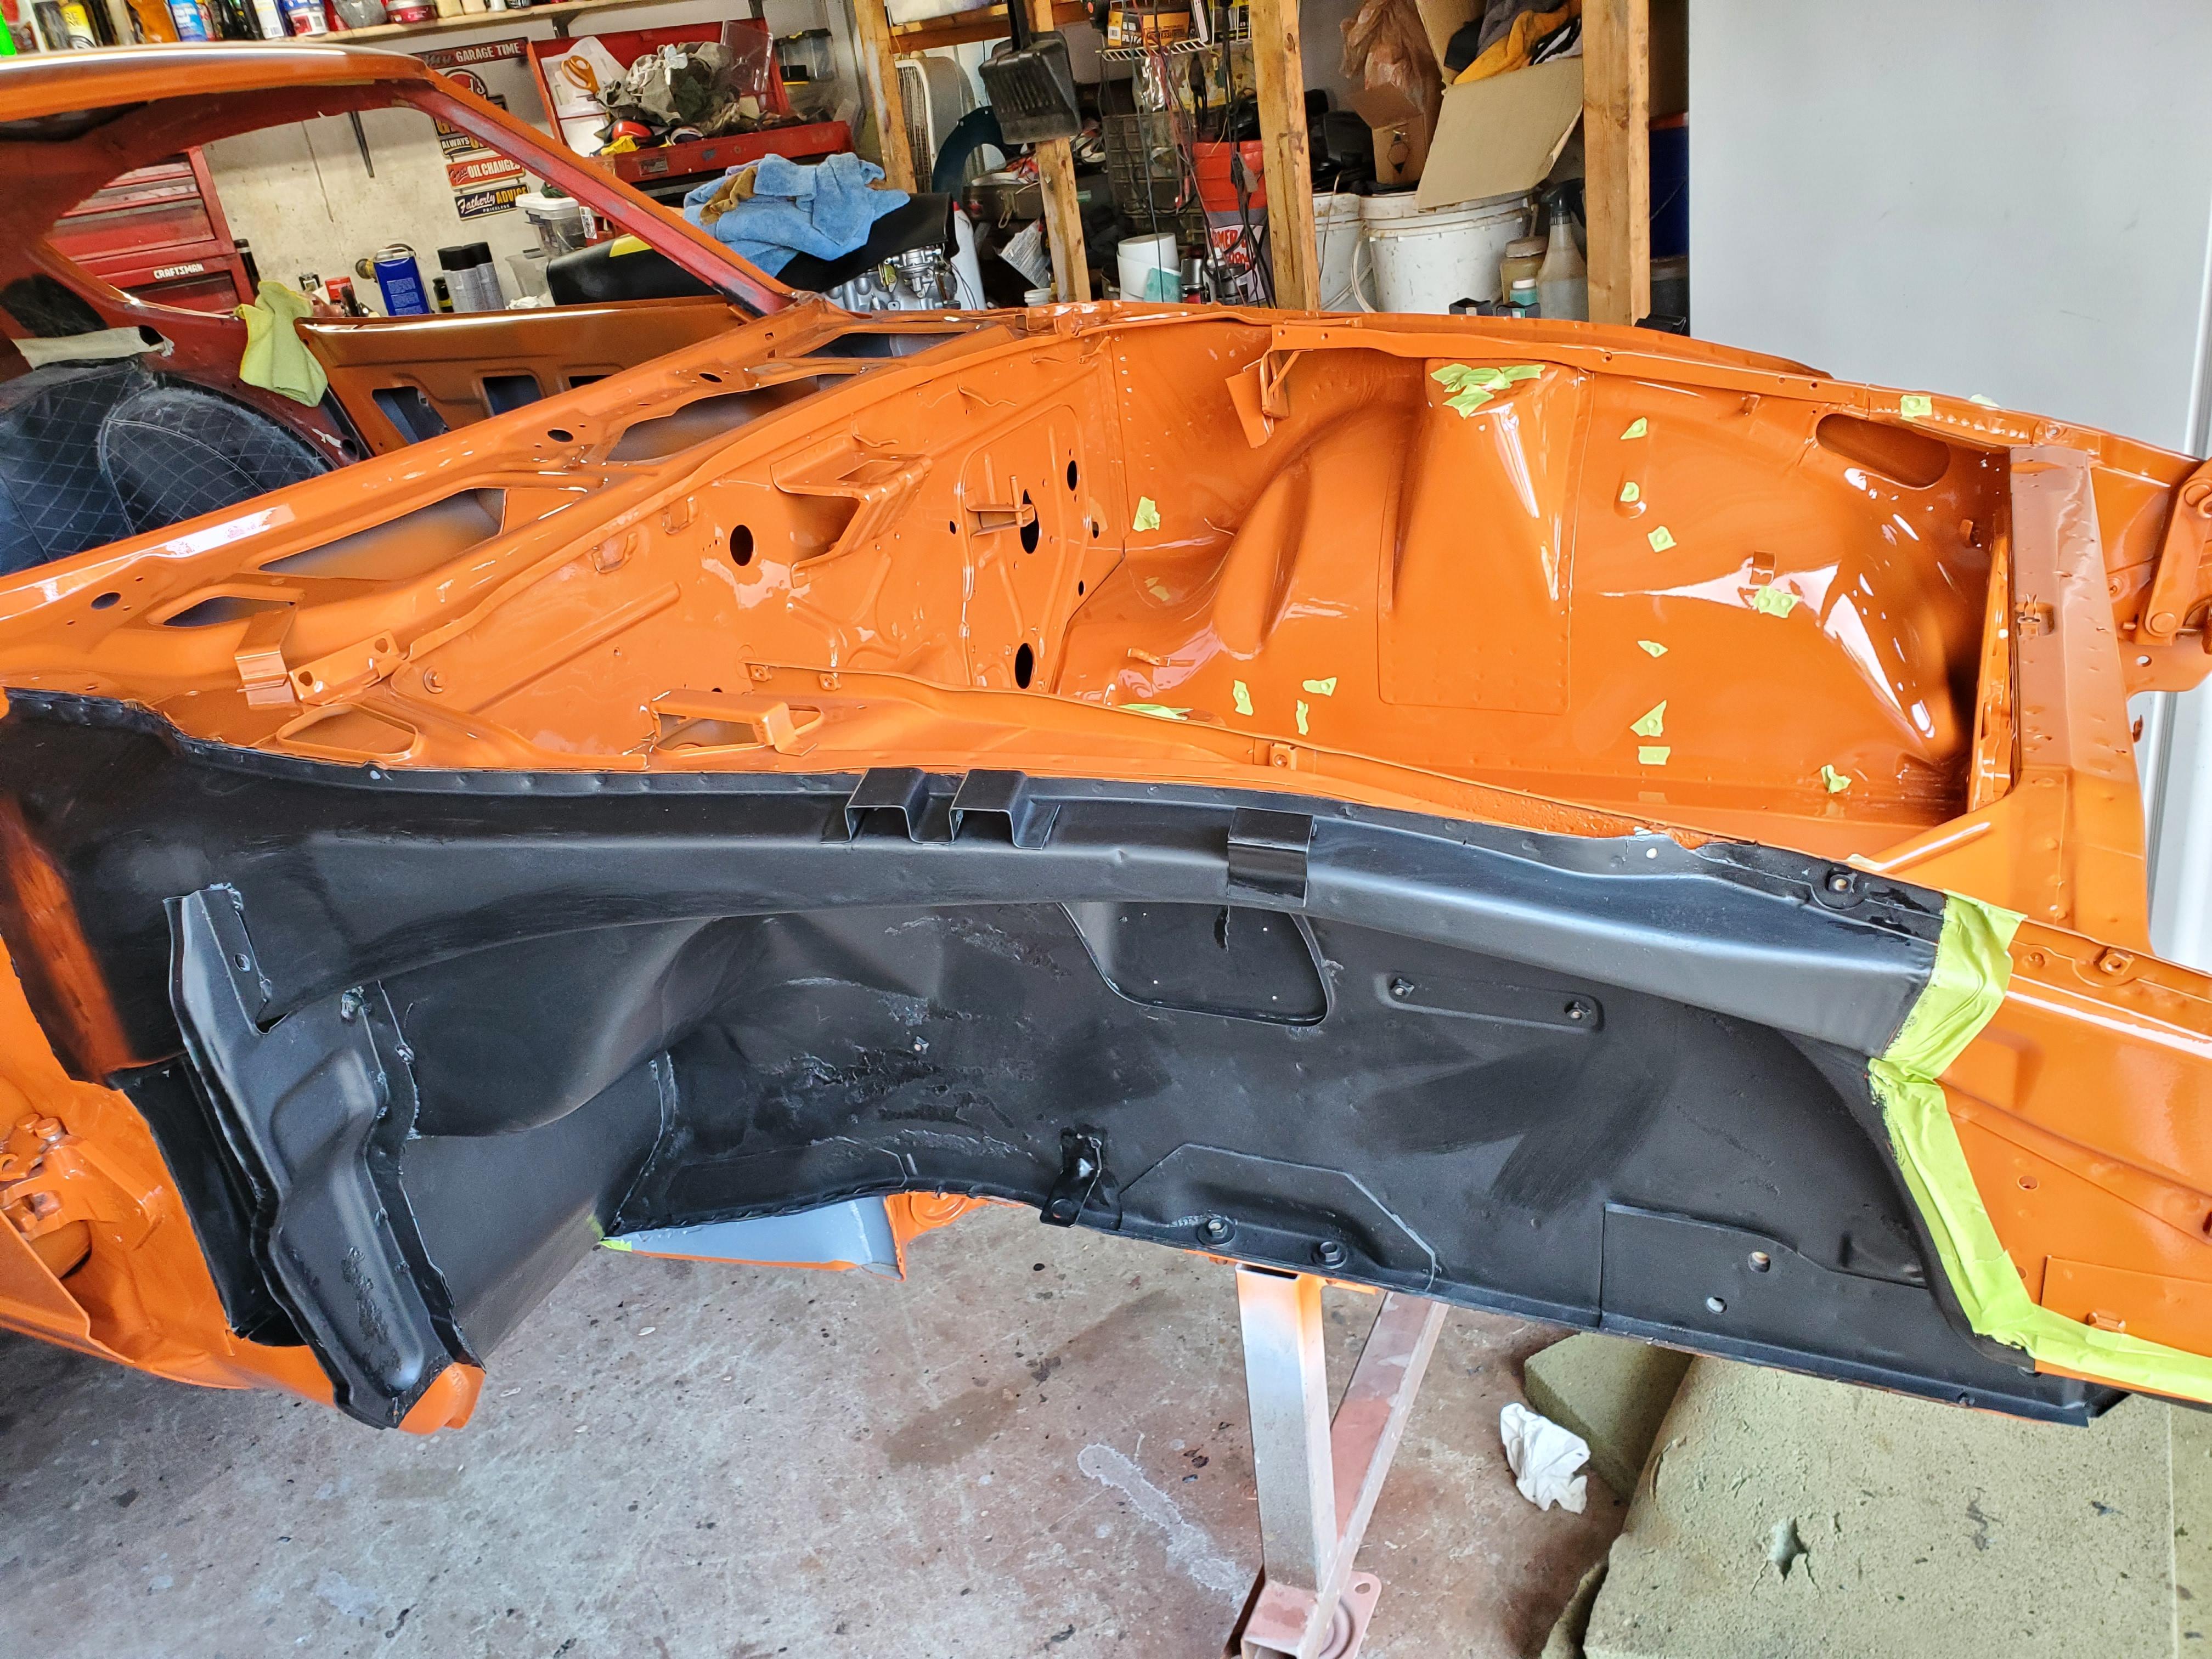
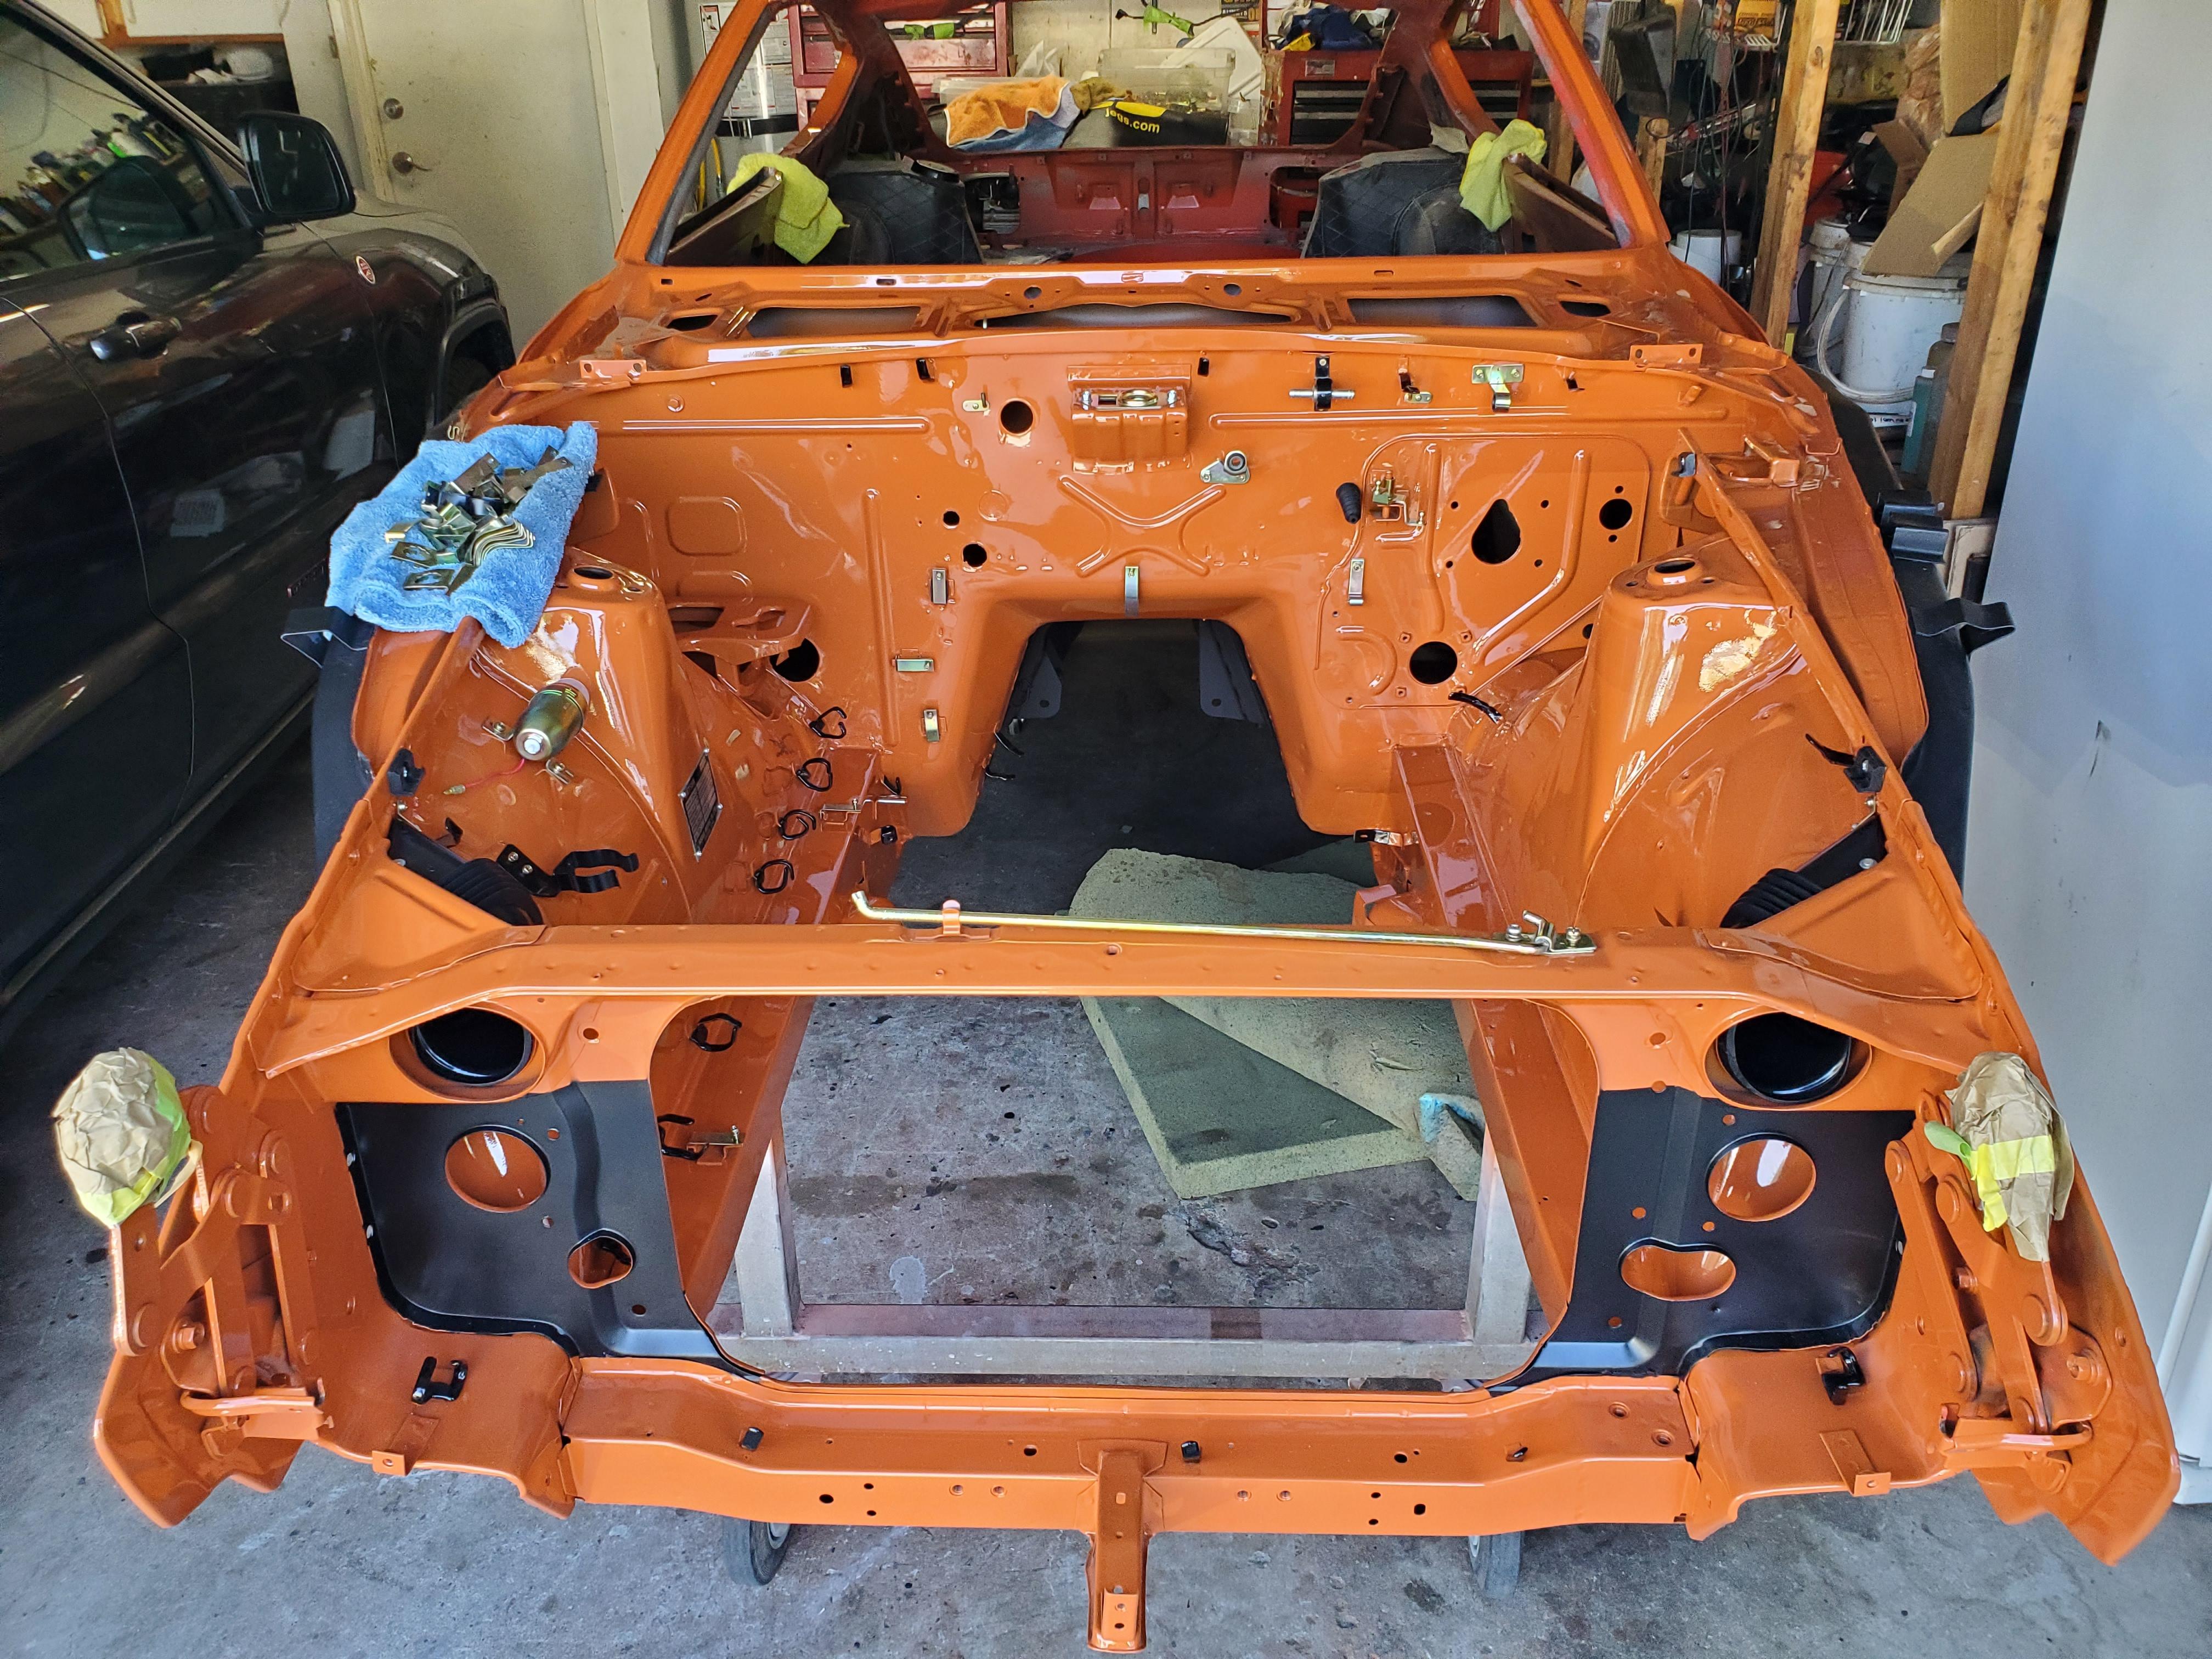
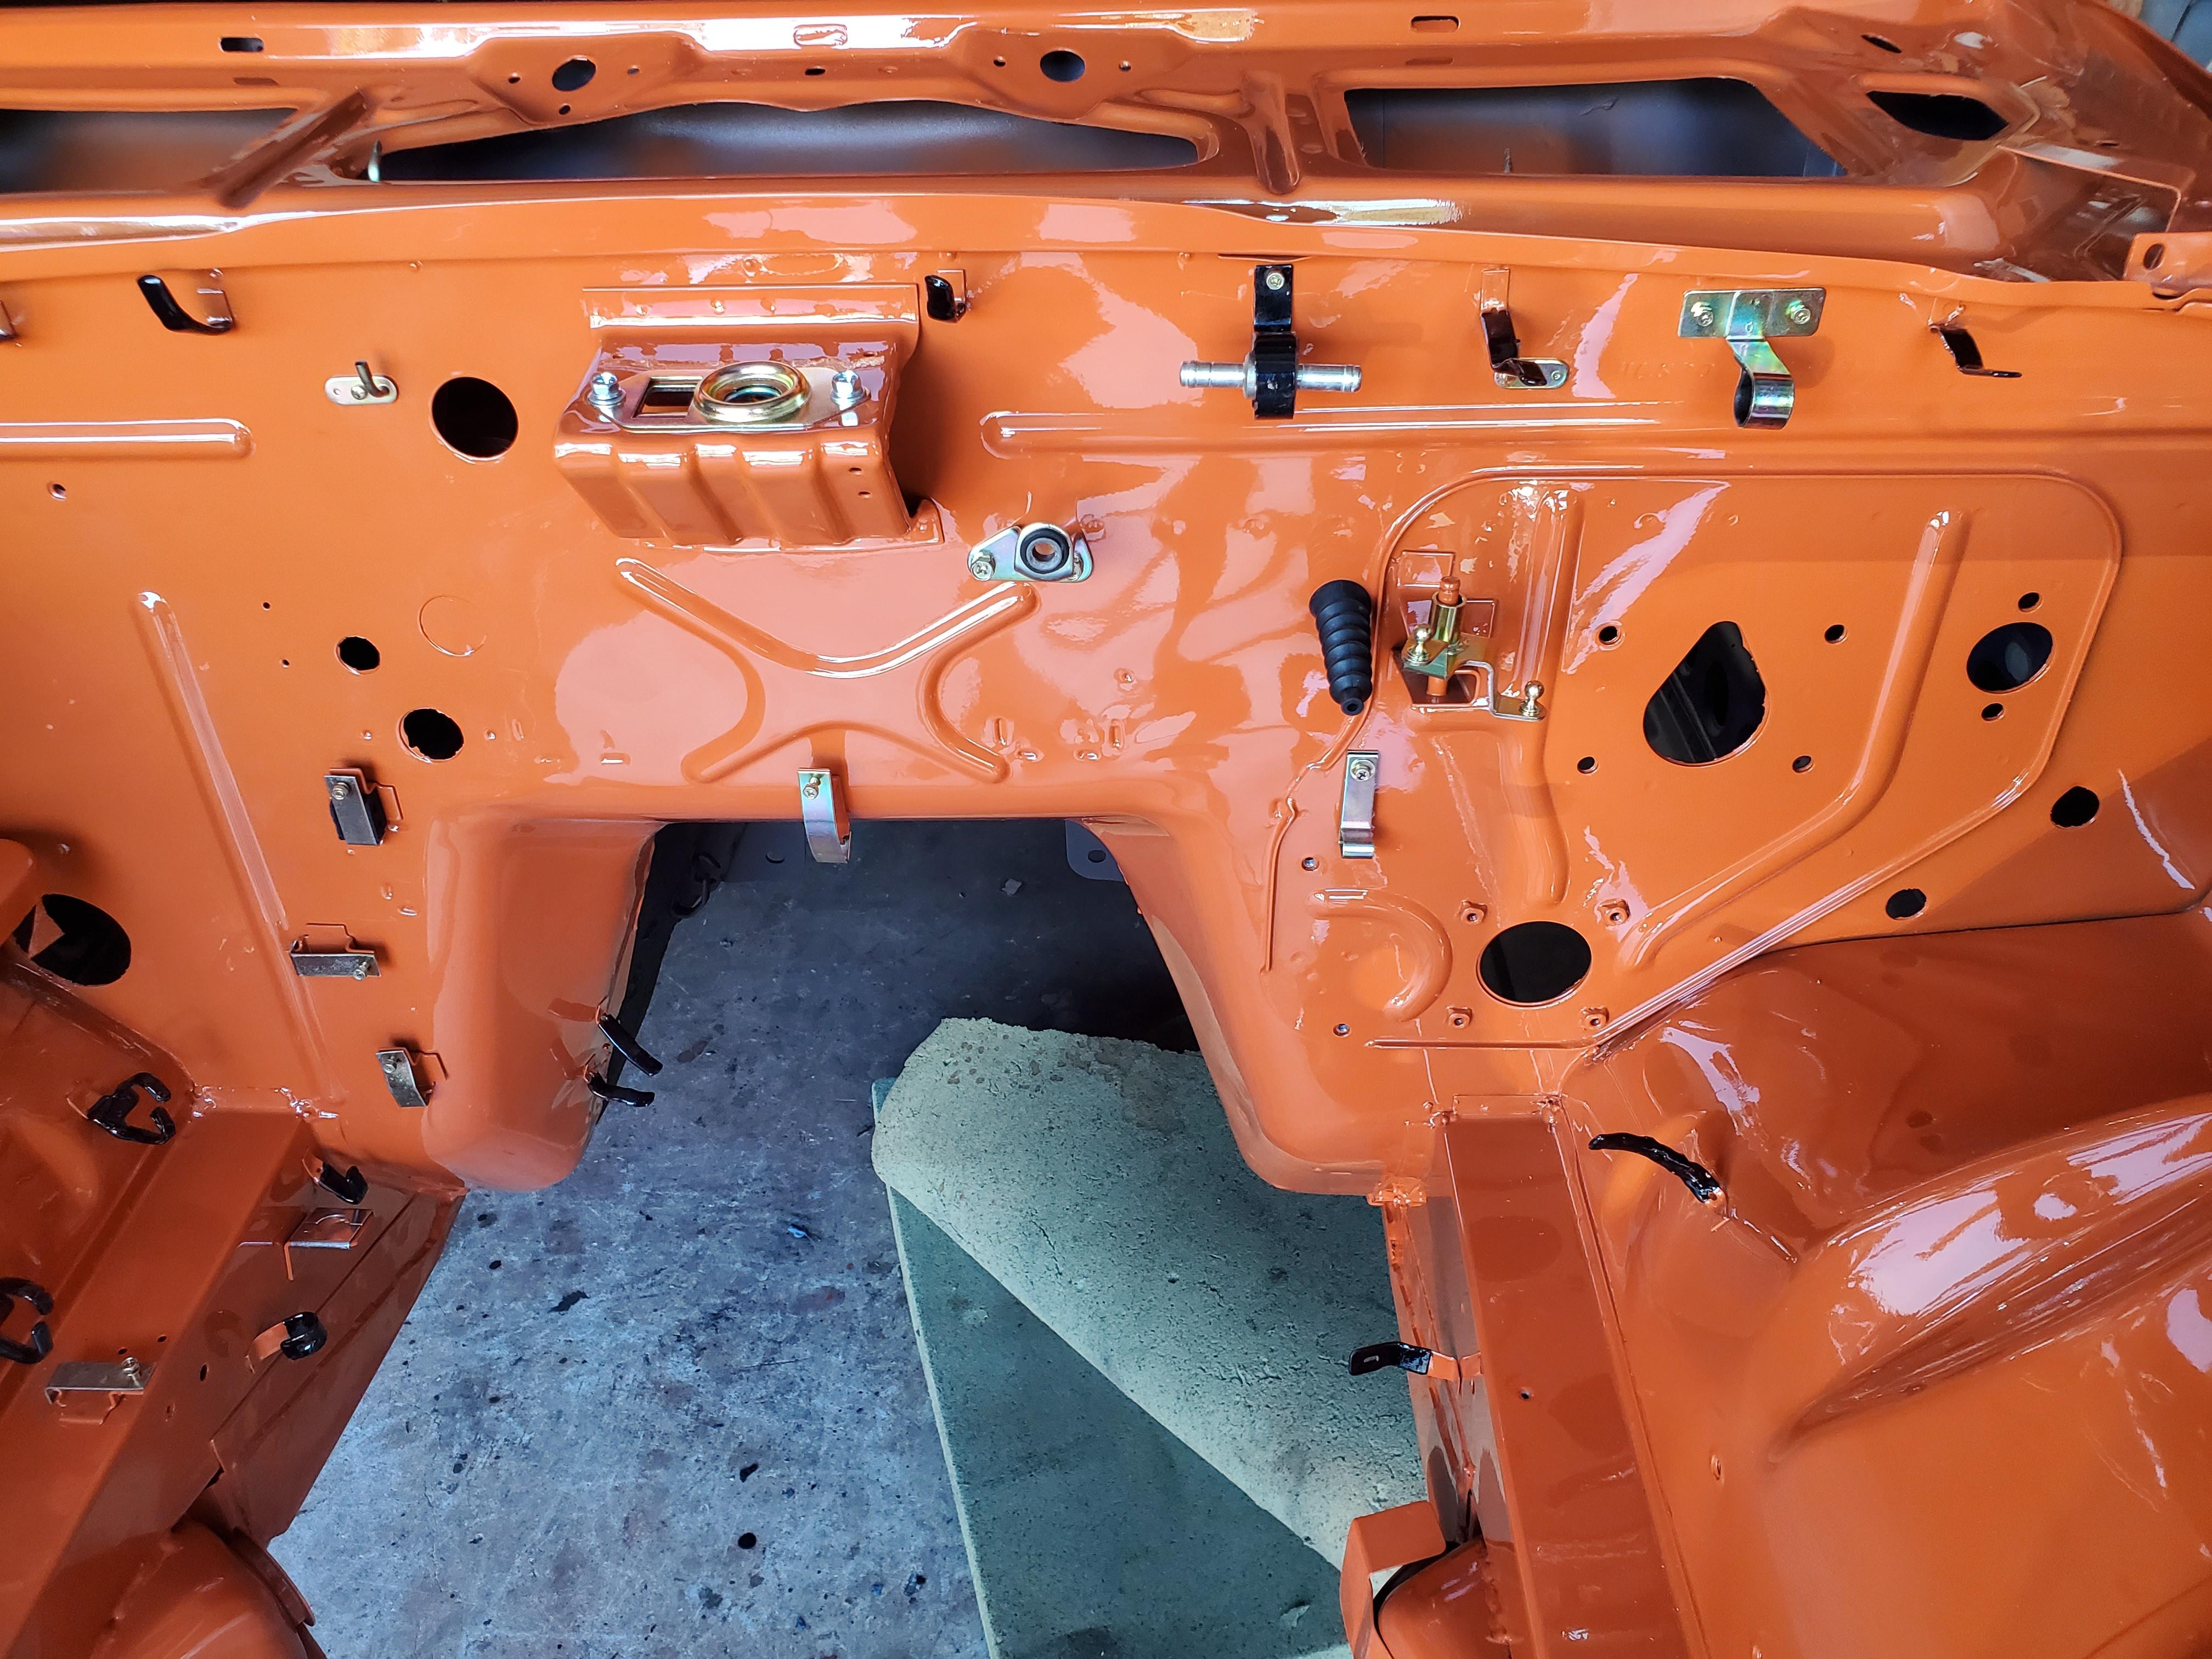
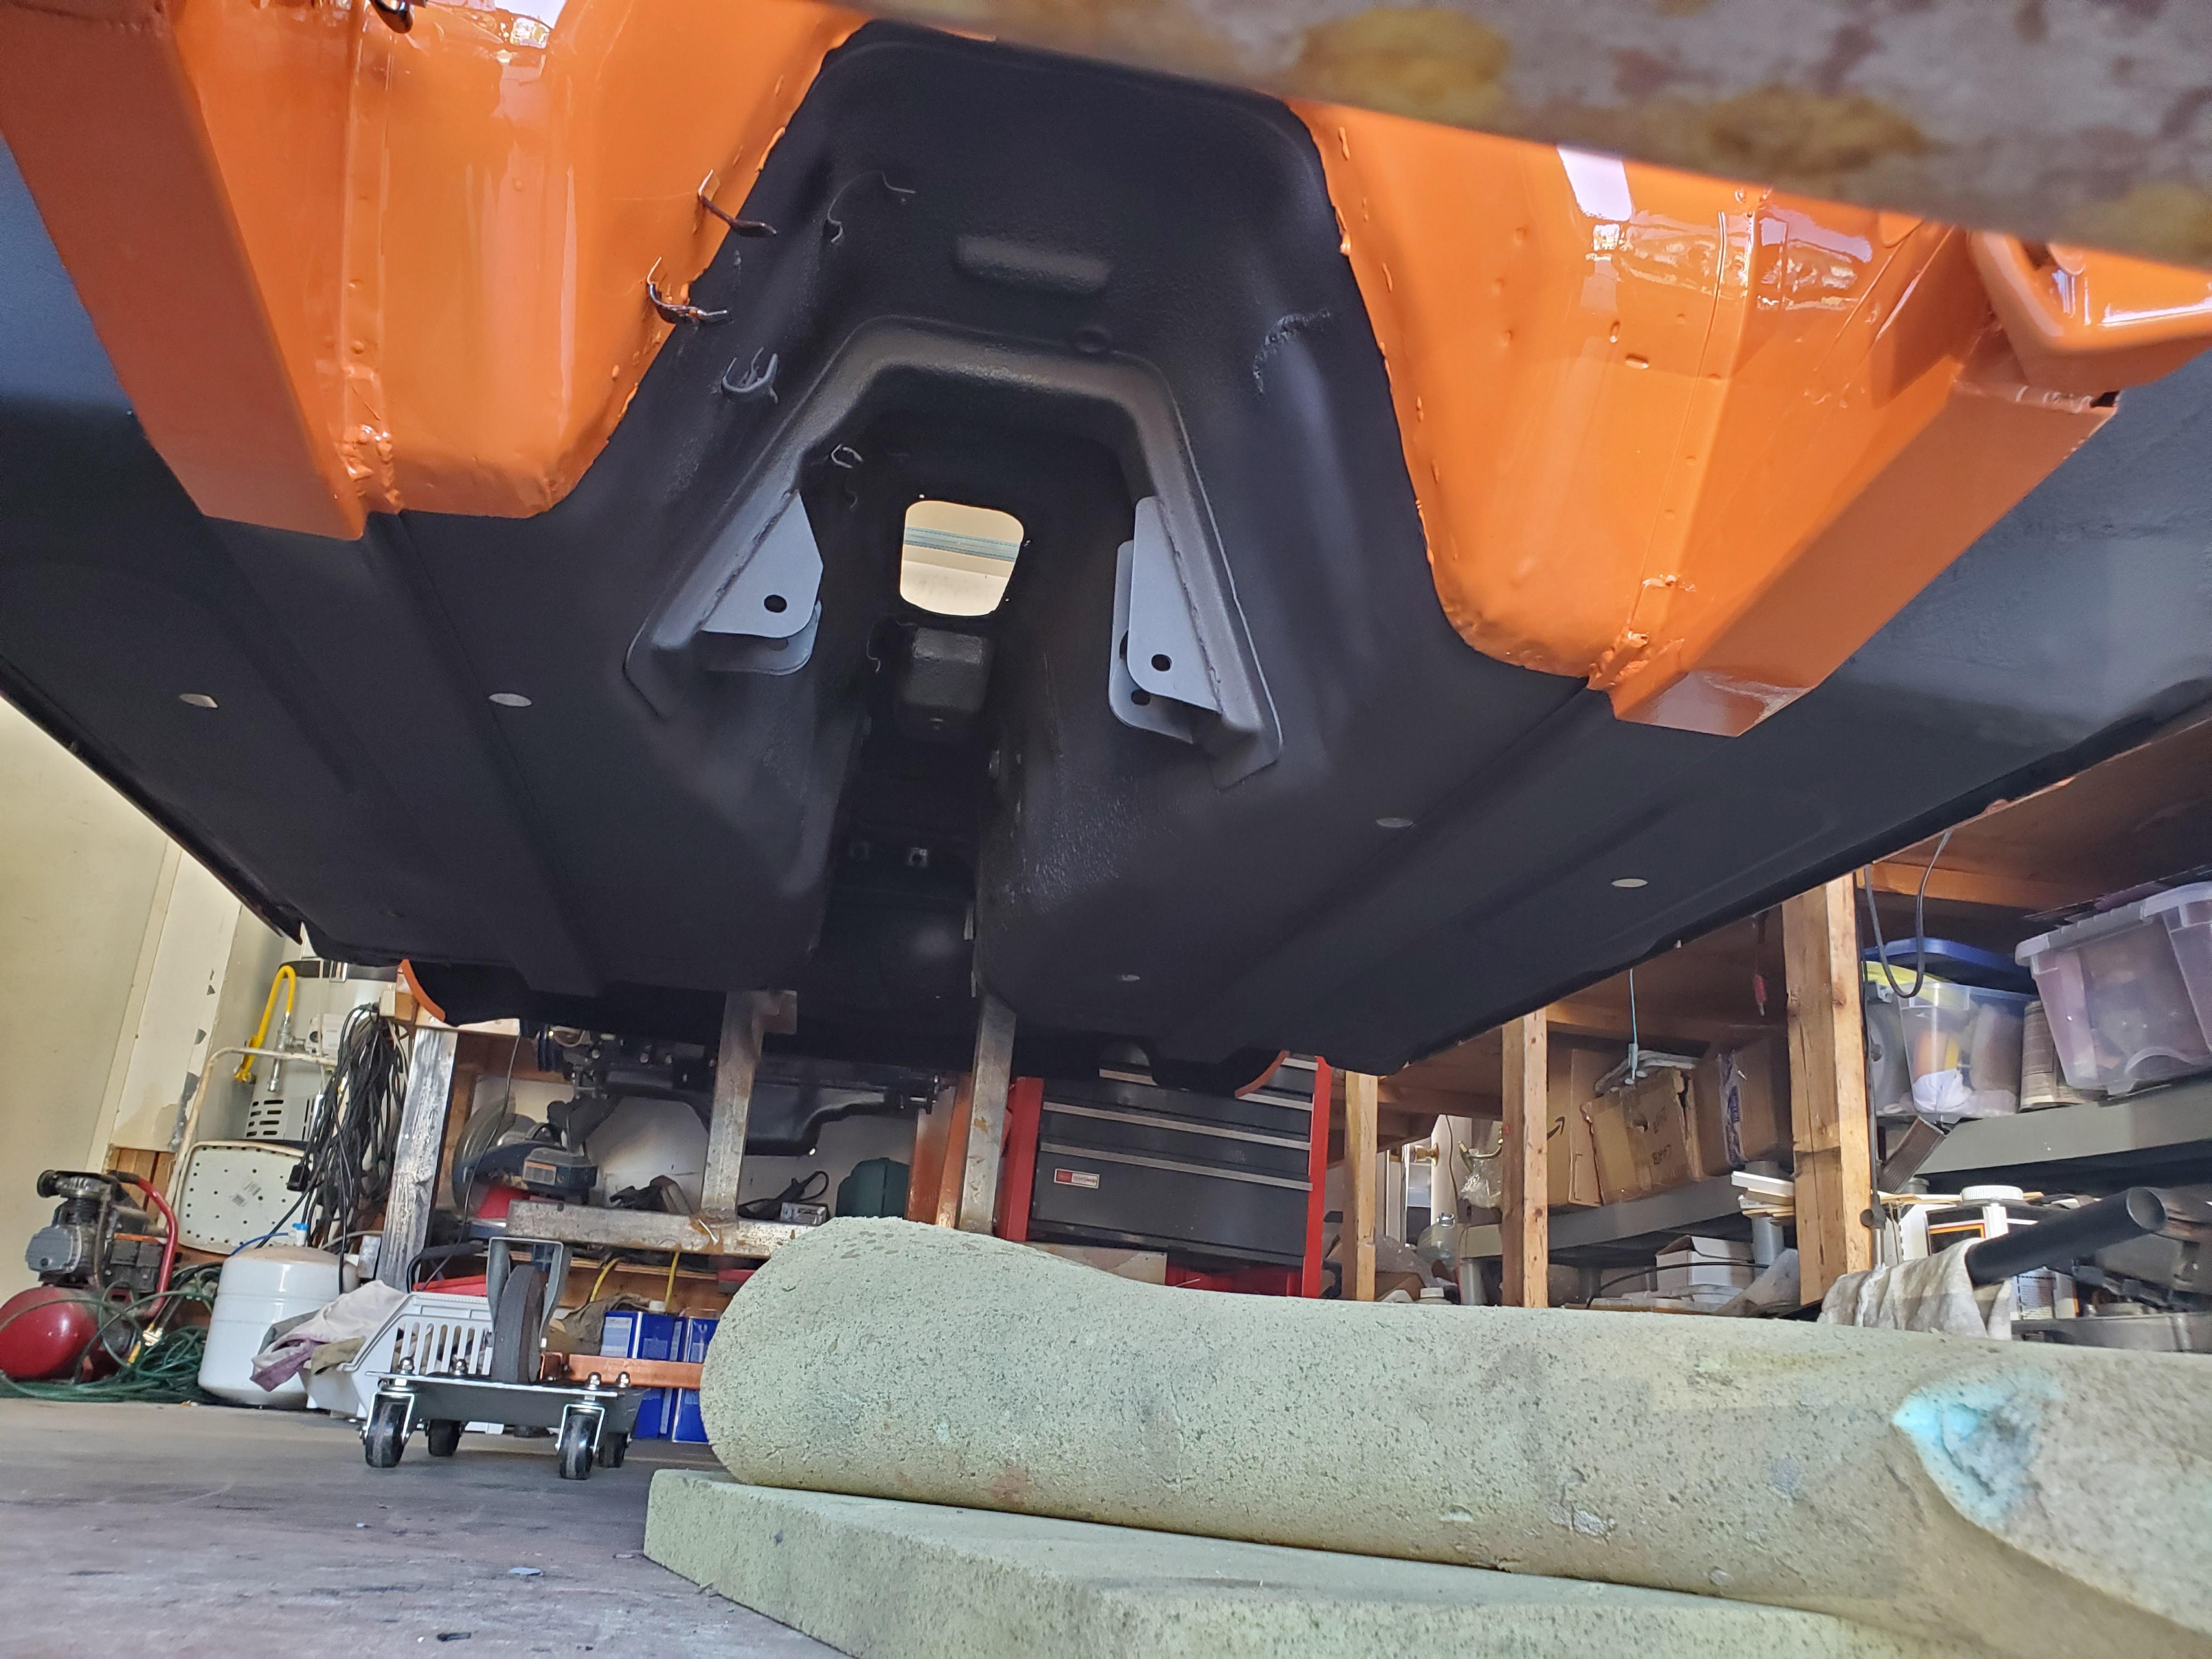
1 pointCar arrived Friday from Miguel. The paint work is amazing as always. Since it has only been around 110 degrees F here in San Diego, I decided to do a little work on the car. Got the underside painted with POR-15 and then added a little undercoating. Painted the forward radiator supports, rear vent holes and the wire tabs. Started installing a few components that were ready to go. My son is going to lend a hand tomorrow so should be able to finish up the brake and fuel lines and install the suspension. She's looking pretty nice!

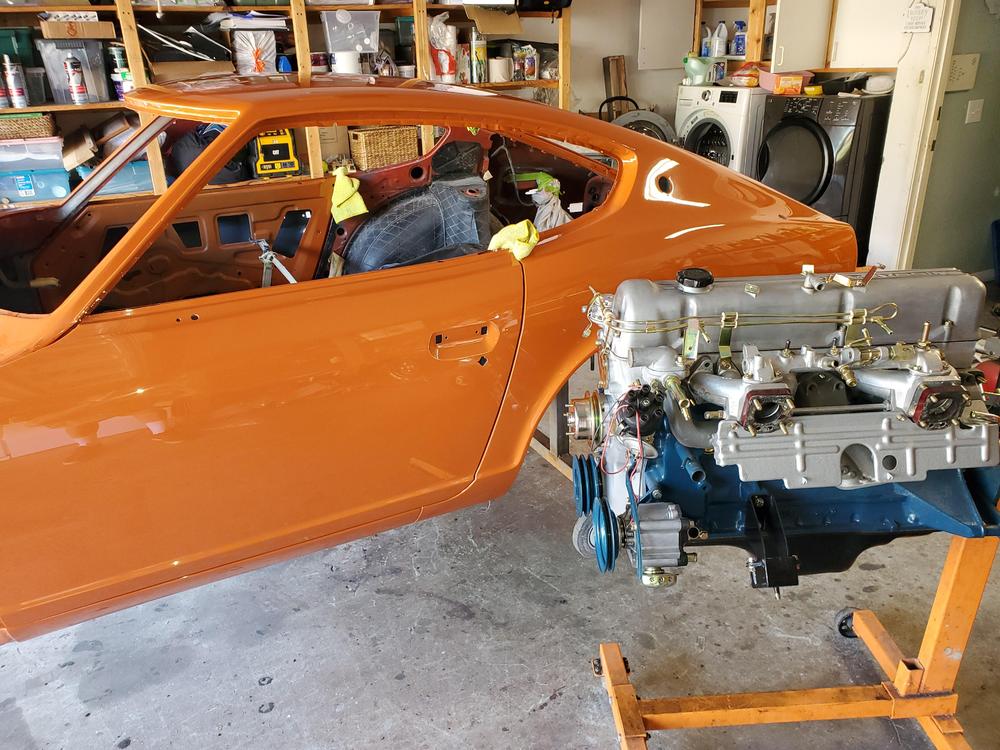


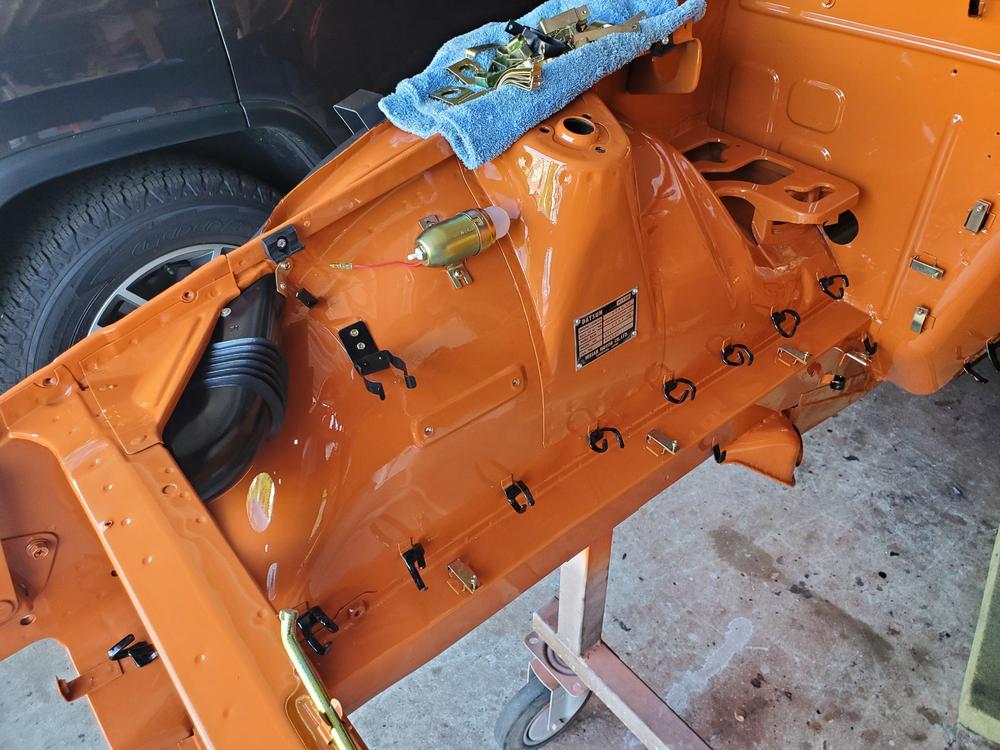
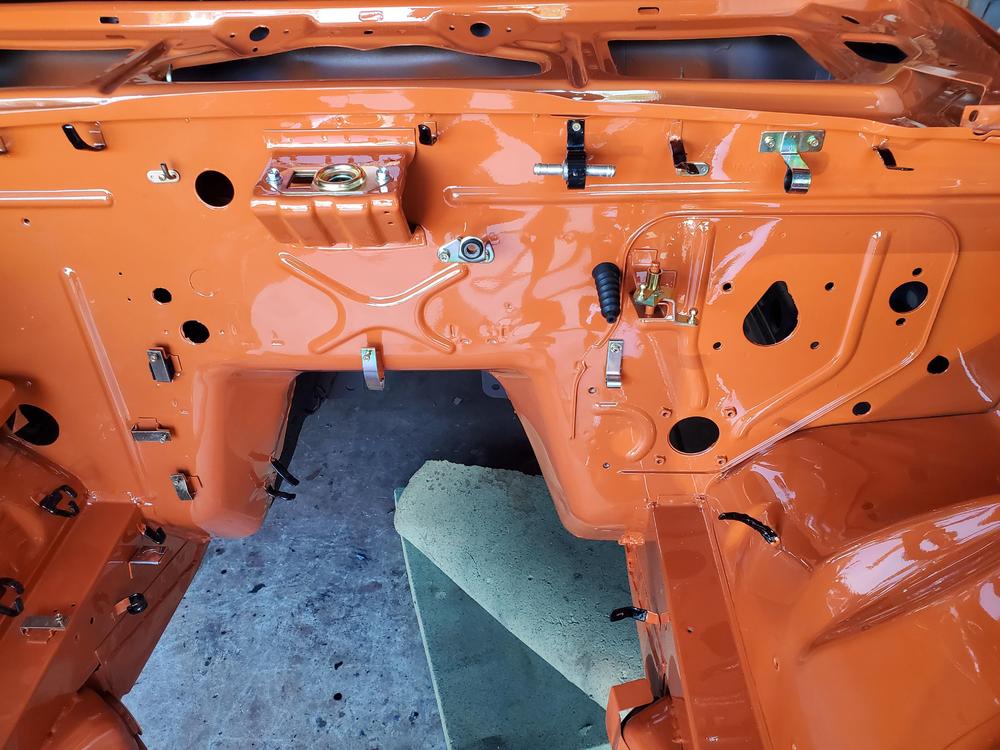
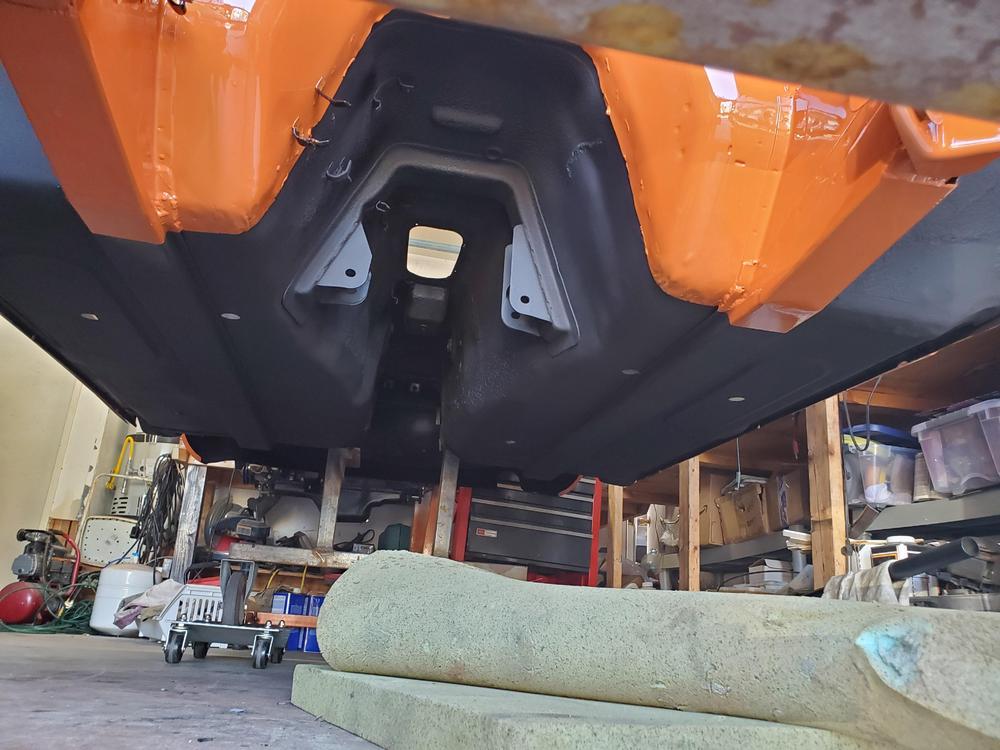

 1 point
 -
1 pointHi Dmuzial, I have a 78Z manual, and had this same problem about a year and a half ago....actually started a thread in the Engine and Drivetrain section since I originally ran across the problem when installing the diff...you can see it here: Lots of good responses to my questions by the forum members. Bottom line was that some of the drawings in the FSM were copied from previous year models and are incorrect. Like you, I initially installed the bar with the bushing cylinders aft of the mustache bar (per the FSM diagram) only to discover that I couldn't get the forward diff mount to line up correctly. It all worked out good once I reversed the bar so that the bushing cylinders were forward. Love this forum...never fails to get you back on track with whatever Z problem you're tackling at the moment!1 point
-
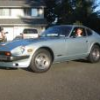
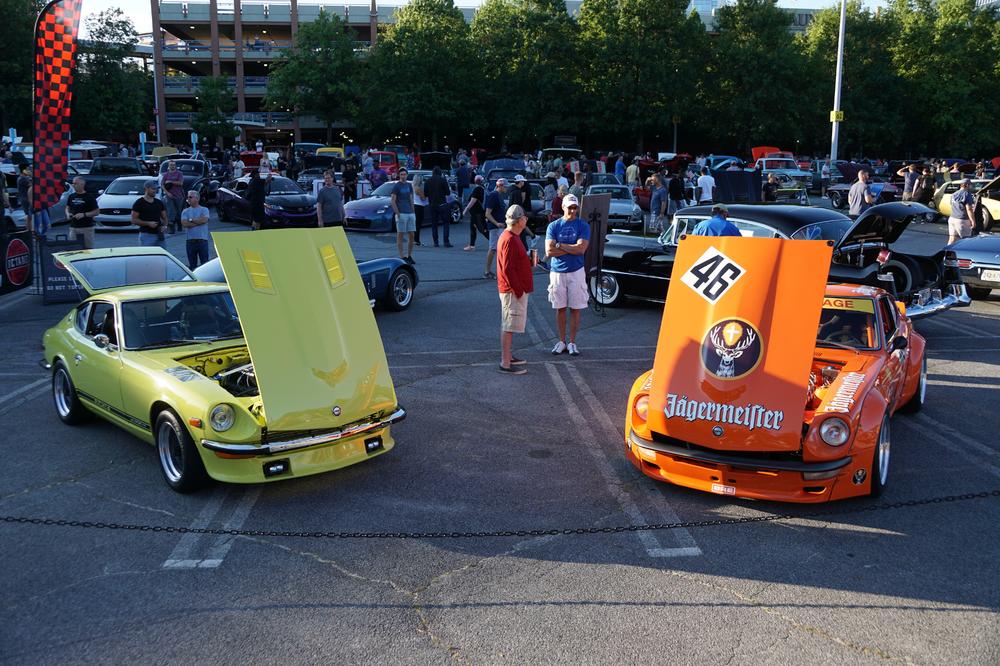
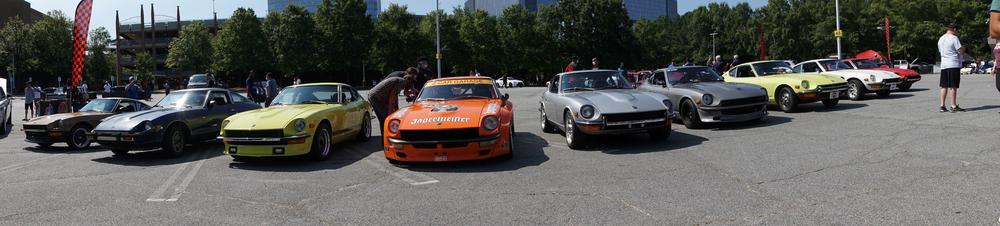
So, the local Caffeine & Octane decided to feature Japanese cars among others in the main lot. (It's not unusual for 2500+ cars to show up monthly.) Several Z car owners signed up and parked in the lot. Afterward, we also did a group photo with the Z owners who stuck around.

 1 point
 -
As a Marine Vietnam veteran(1966-1967) I honor your father. Peace to you my friend. Can't wait to see your restoration. Cheers, Mike1 point
-
1 point
-
1 pointGood call! I bagged and labeled all of the parts from the old cartridges since they are all the originals from factory and someone mentioned those are supposed to be rebuildable (you know, in case I have unlimited spare time in the future and need some thing to keep busy ? )1 point
-
1 pointI'm for keeping the new Z fossil fuel burner with an option of a twin turbo. Nissan should learn a lesson from the 2nd gen Acura NSX. It was intended to be a V-10, but went into production with a V-6 and electric motor assist, losing it's soul in the process. It's indeed a technical marvel and strong performer on paper but since 2016, less than 2000 have been built. Not really a marketplace success for a flagship model.1 point