


Leaderboard
-

wheee!
Free Member10Points4,607Posts -
grannyknot
Free Member9Points5,158Posts -

Lancerz280
Free Member6Points7Posts -

siteunseen
Free Member5Points15,115Posts


Popular Content
Showing content with the highest reputation on 04/15/2020 in all areas
-
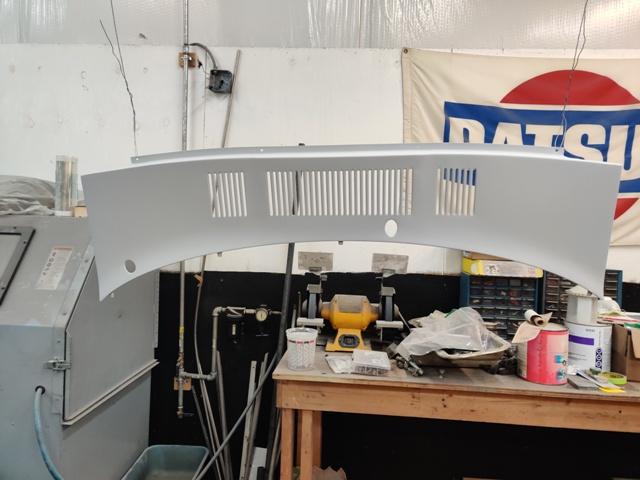
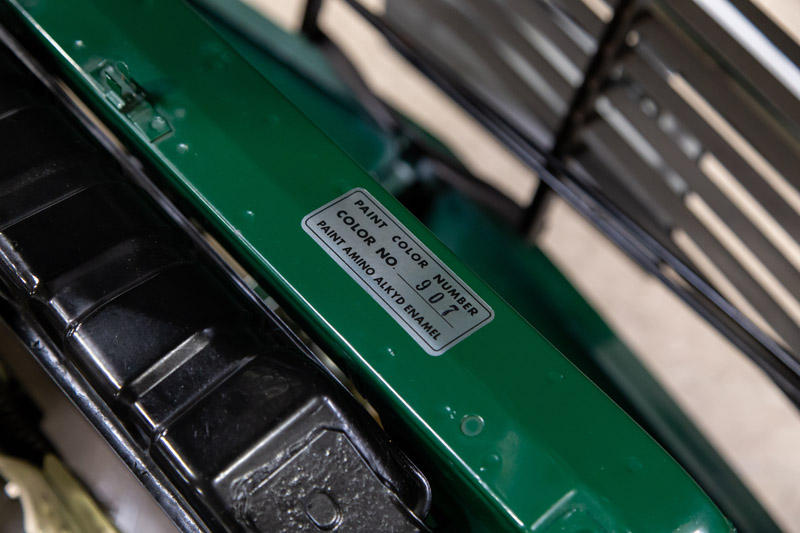
5 pointsSo, I have decided matte. Gloss is nice but the period look is cool. This is before I sprayed the surrounds matte. The centre panel is matte. Sent from my iPhone using Tapatalk5 points
-
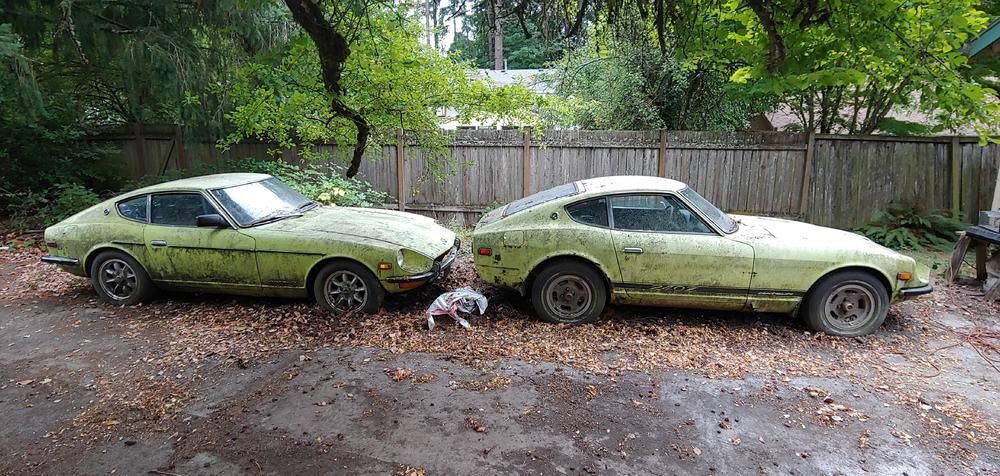
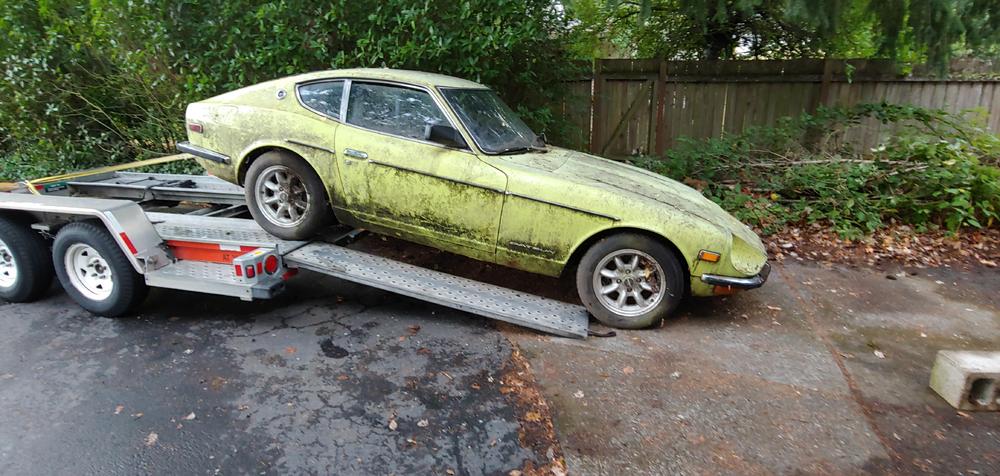
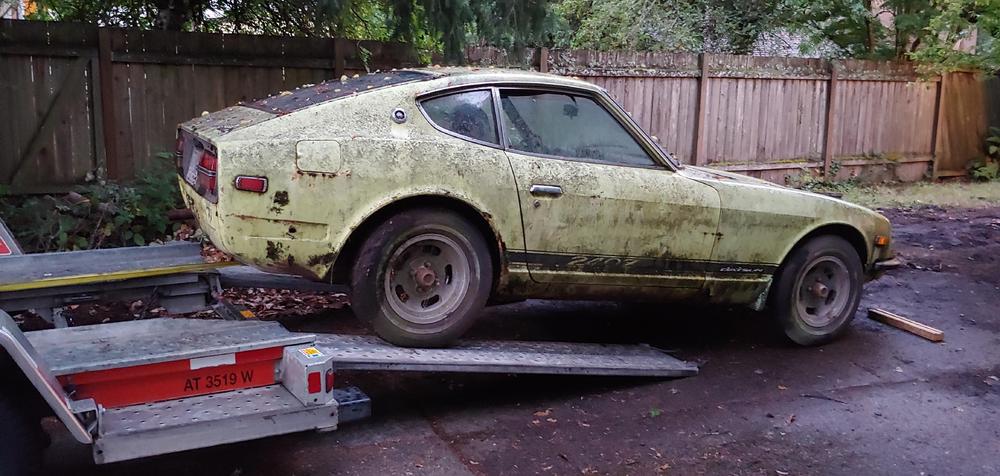
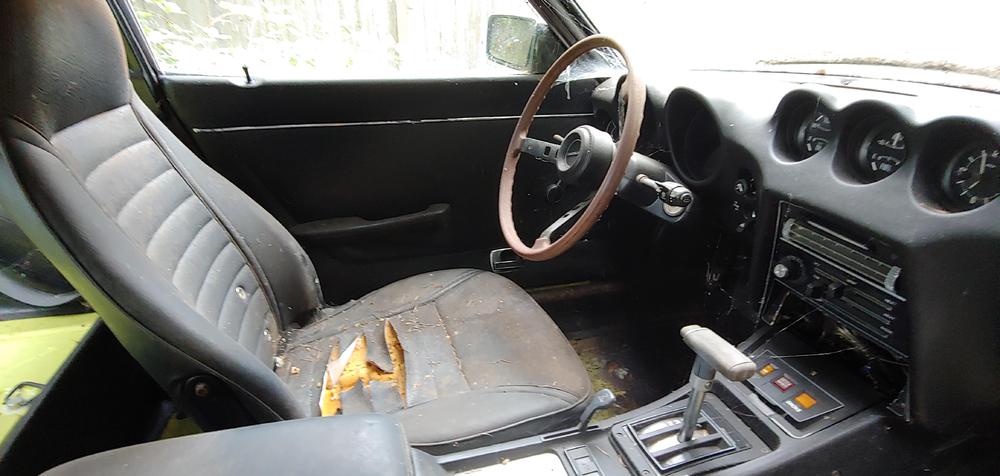
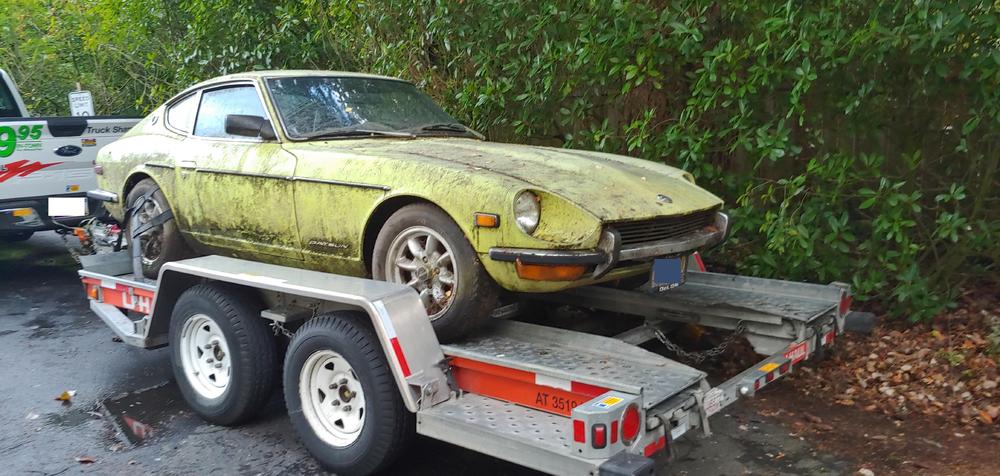
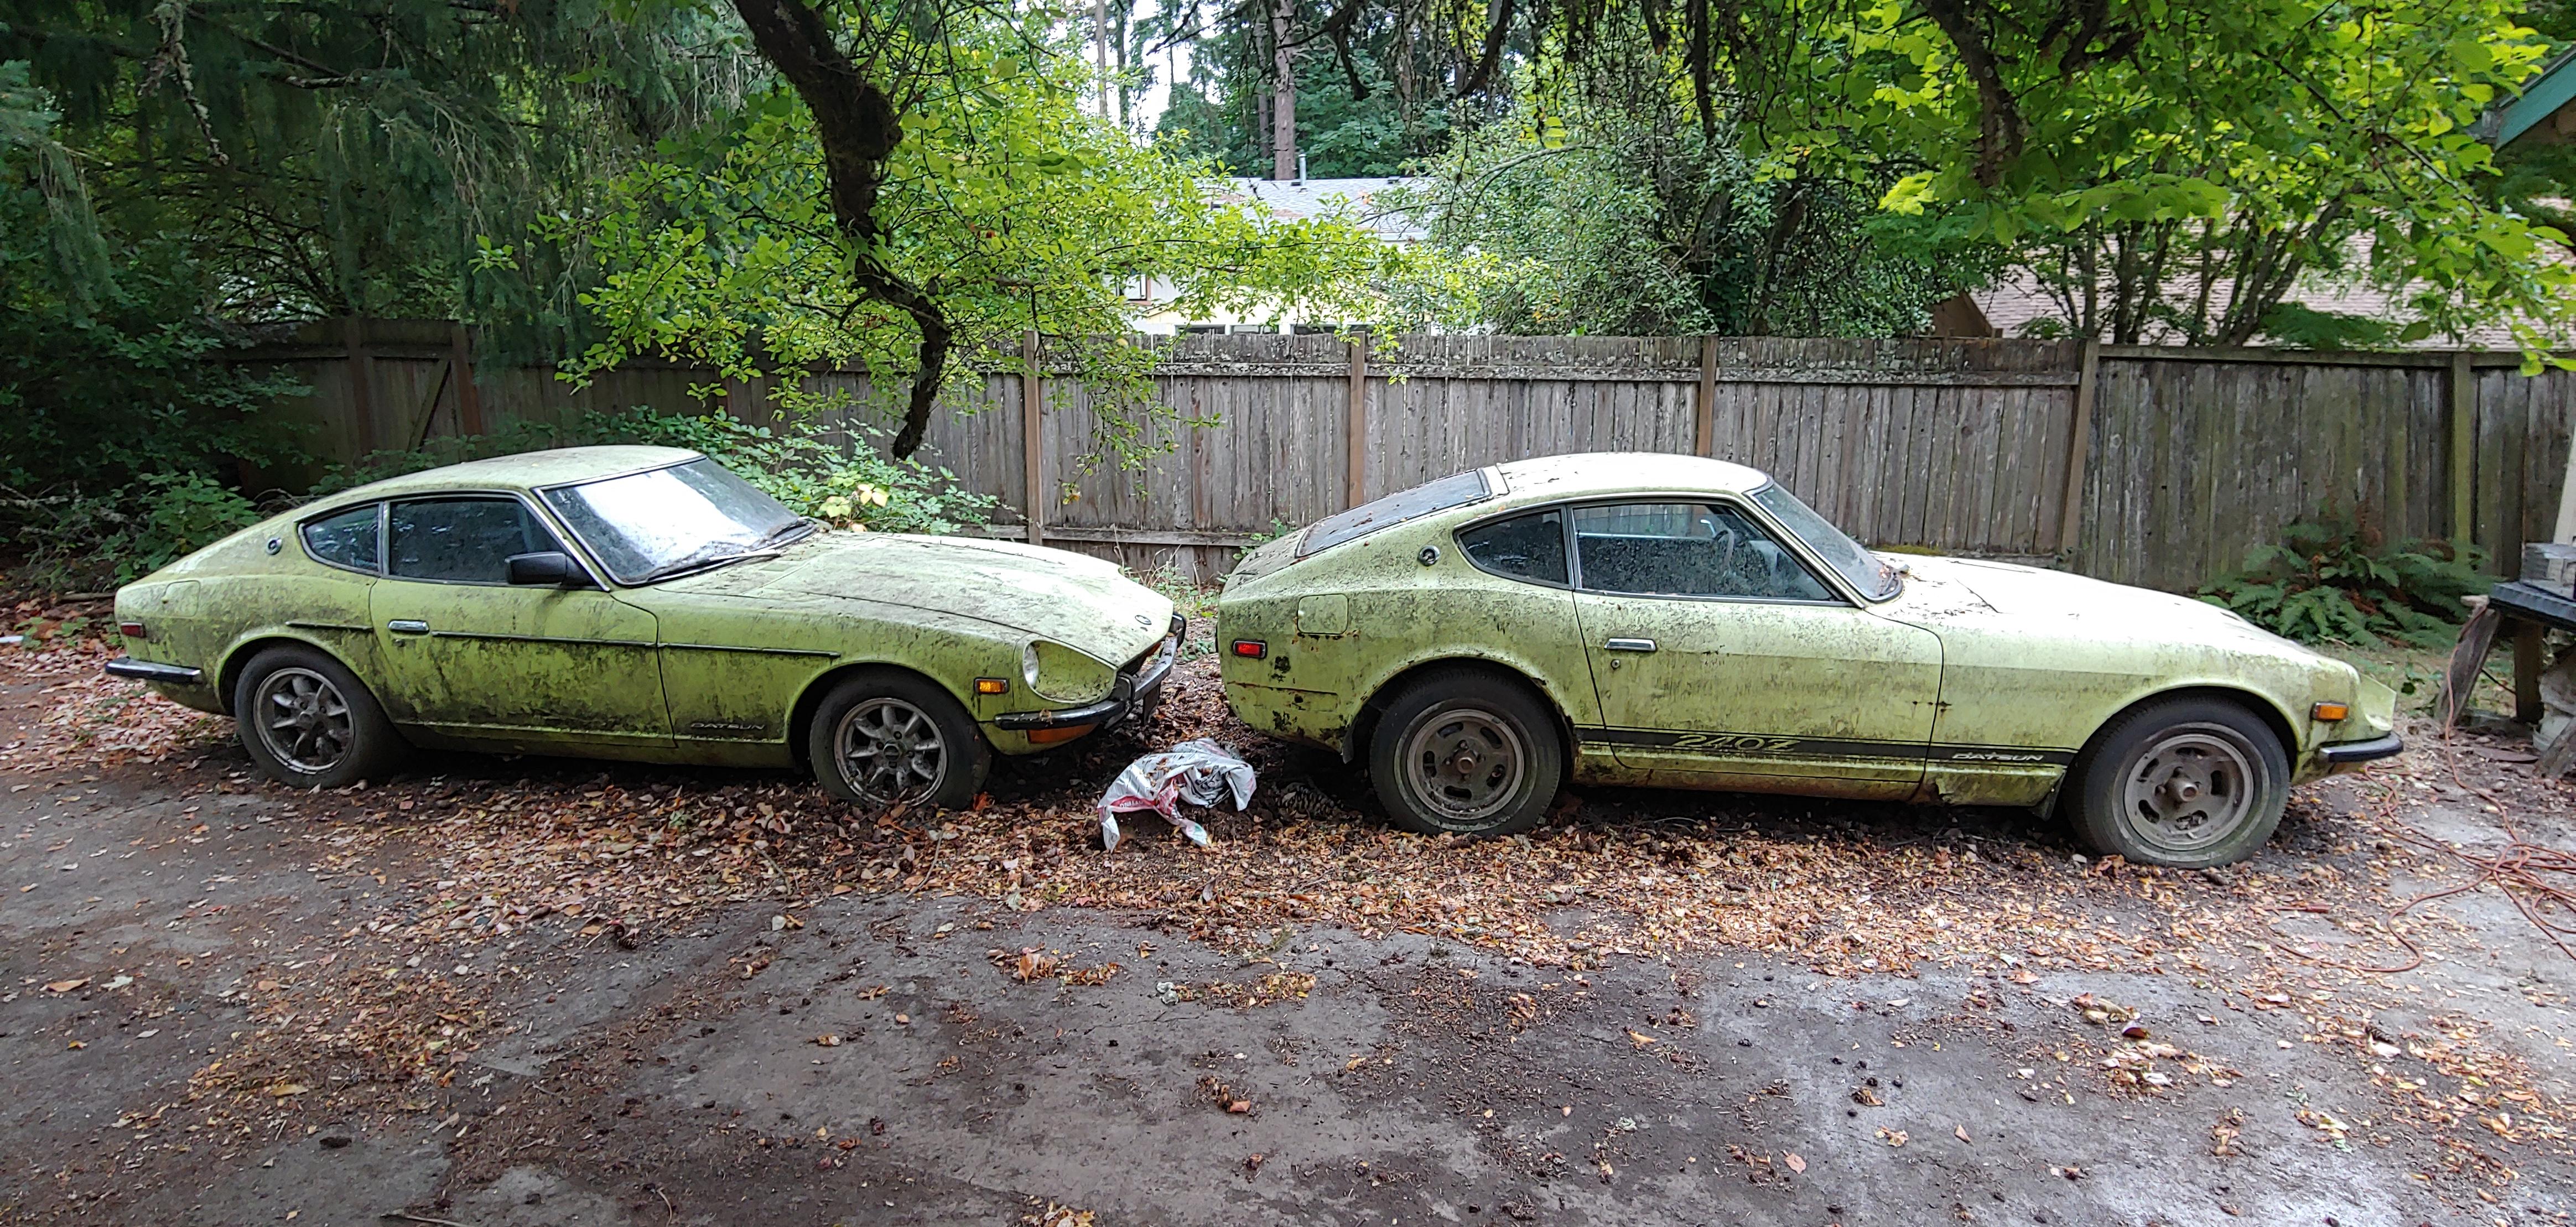
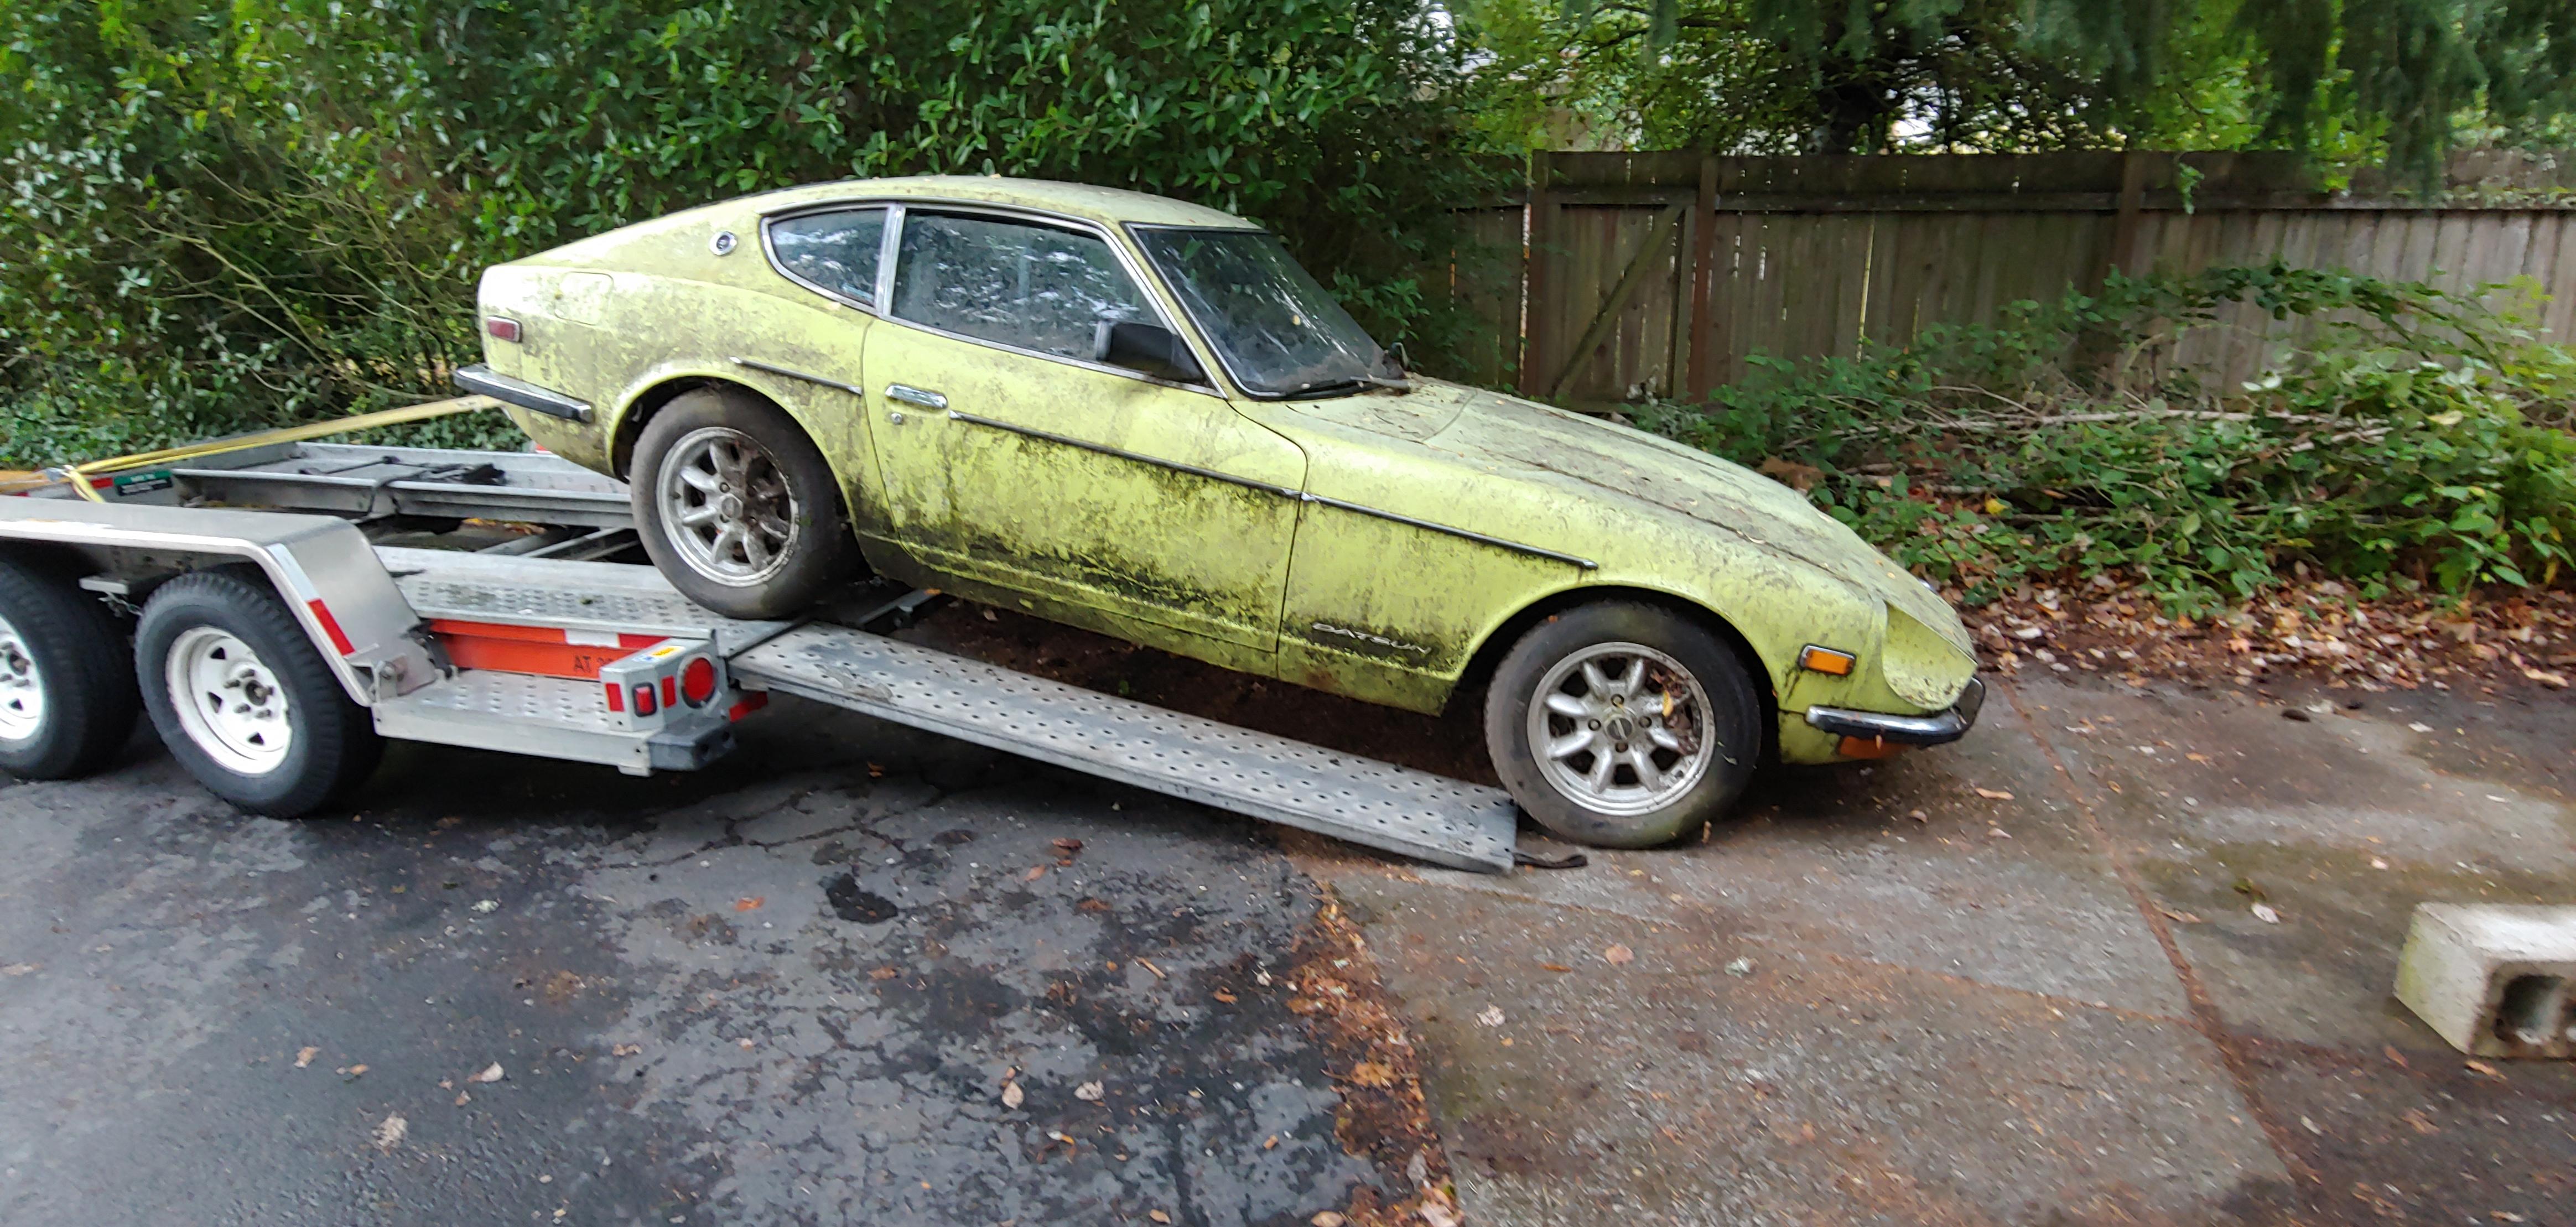
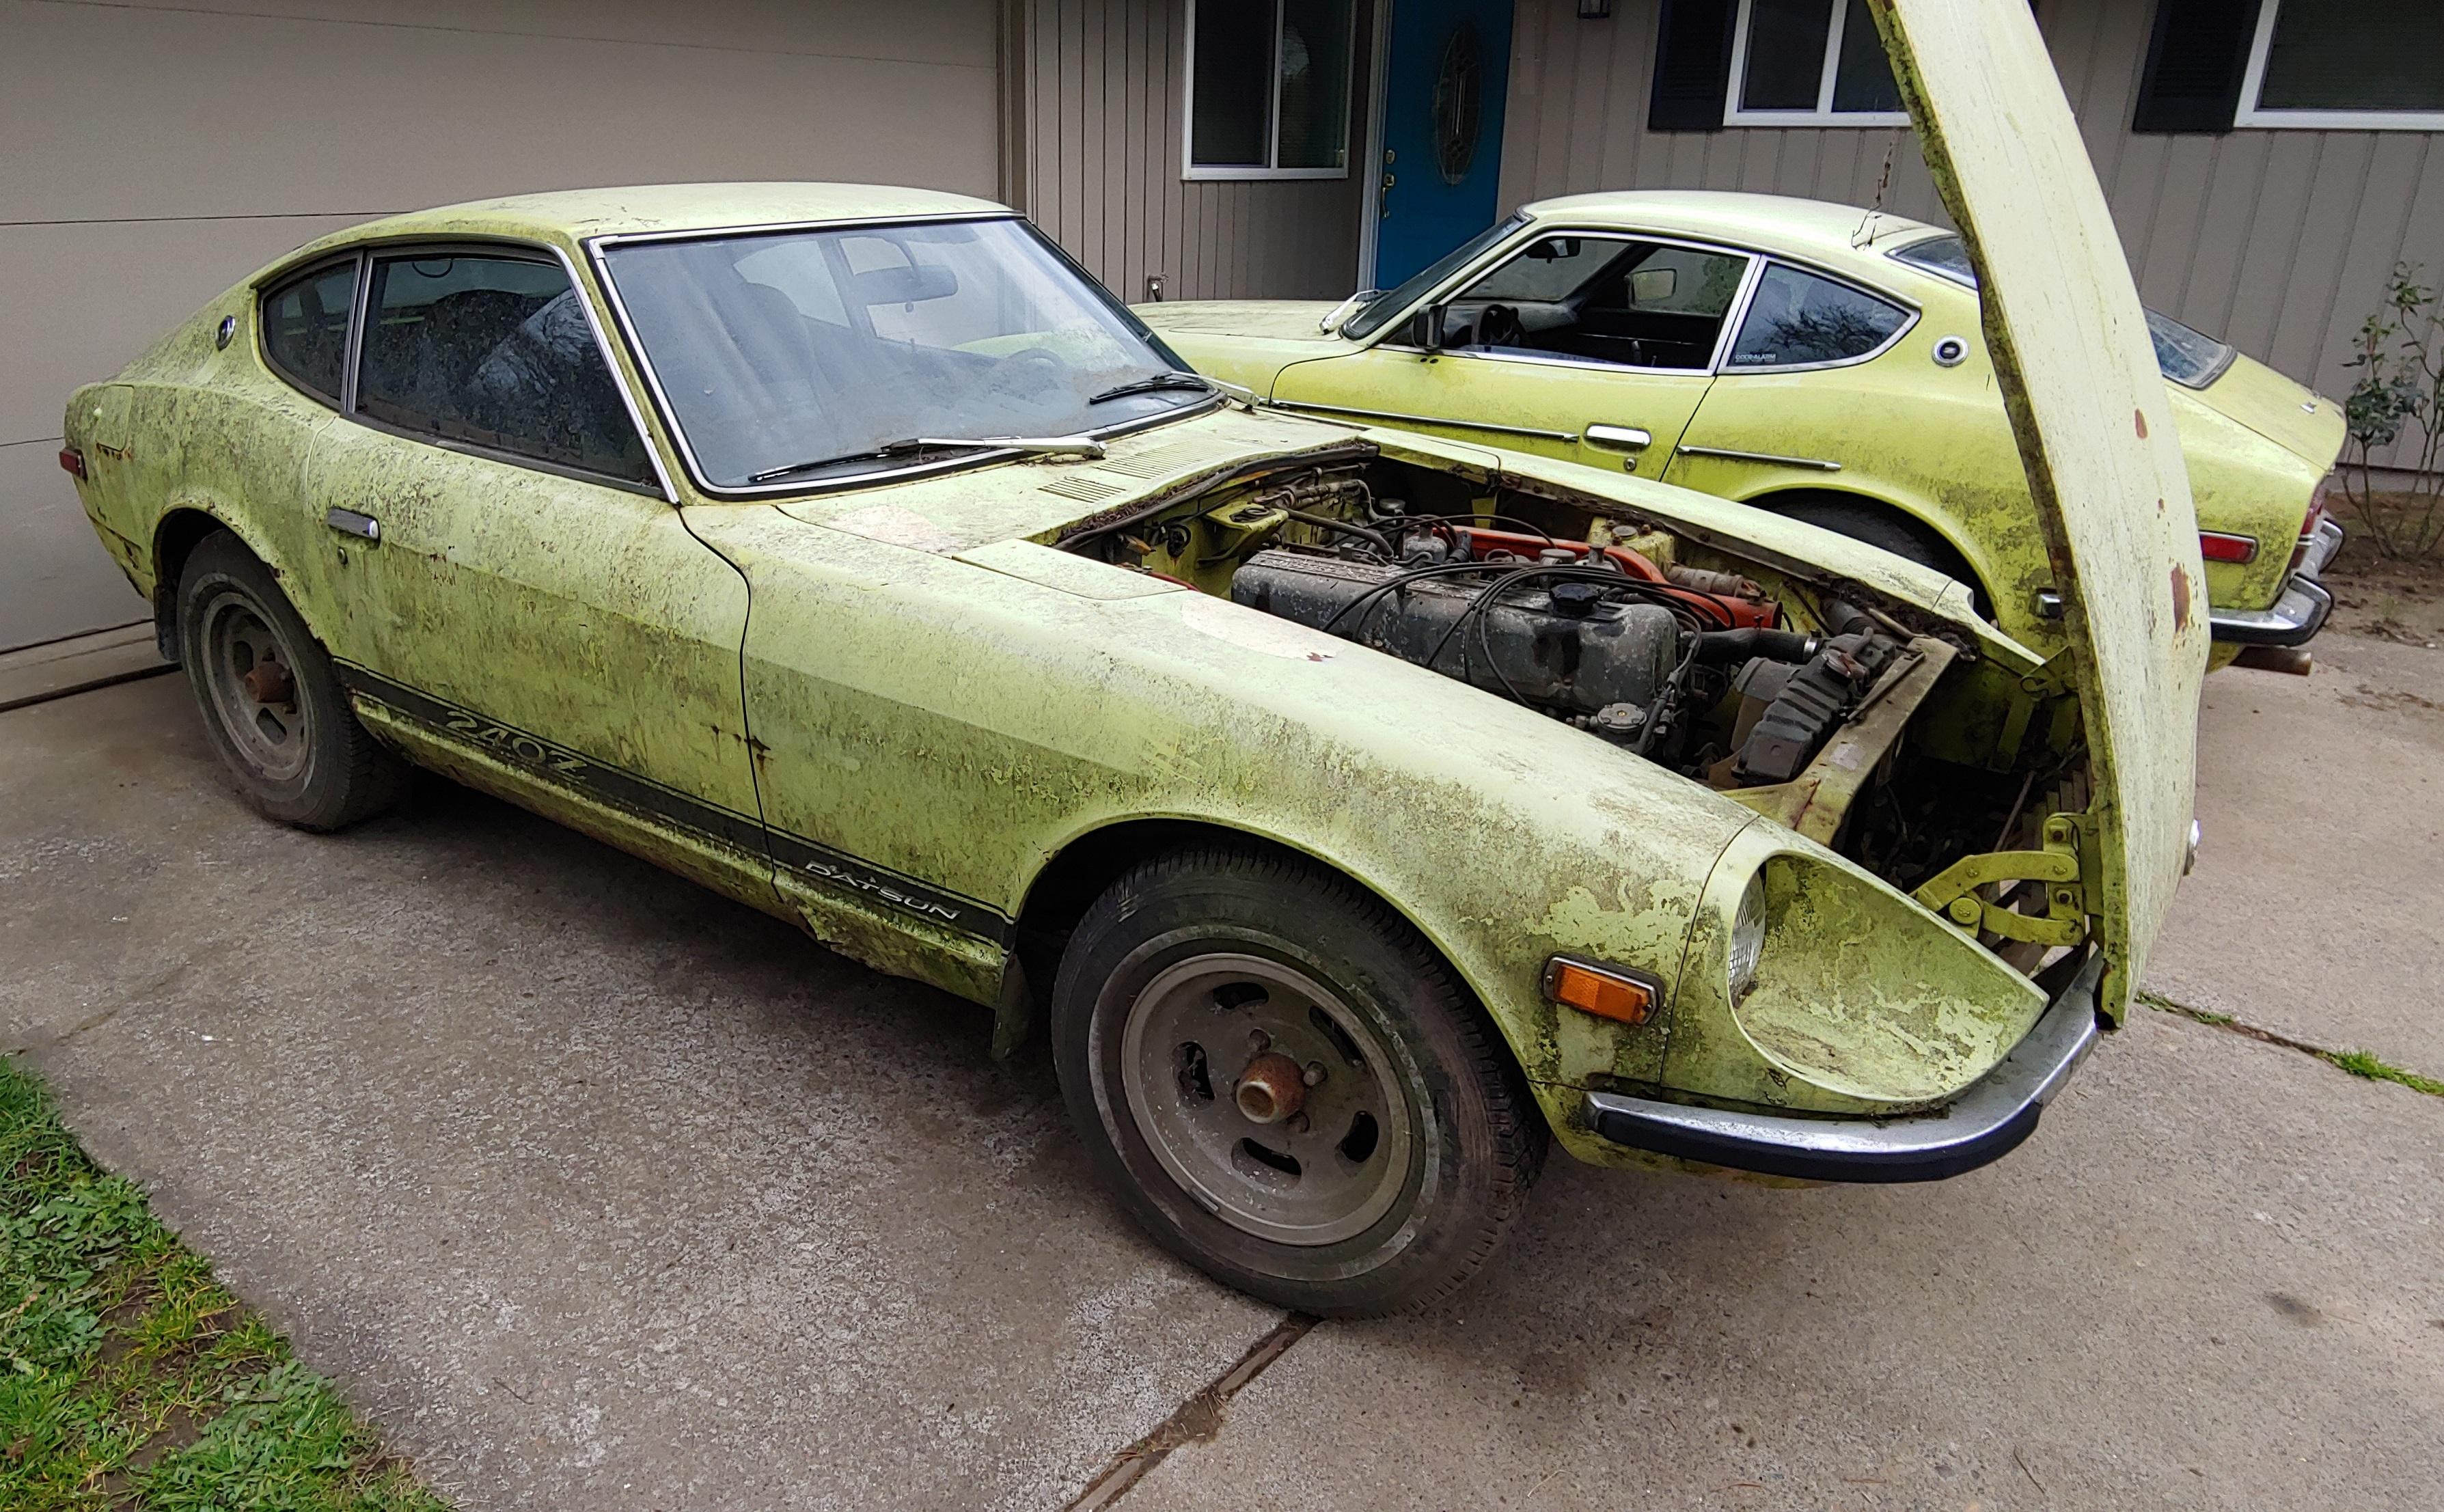
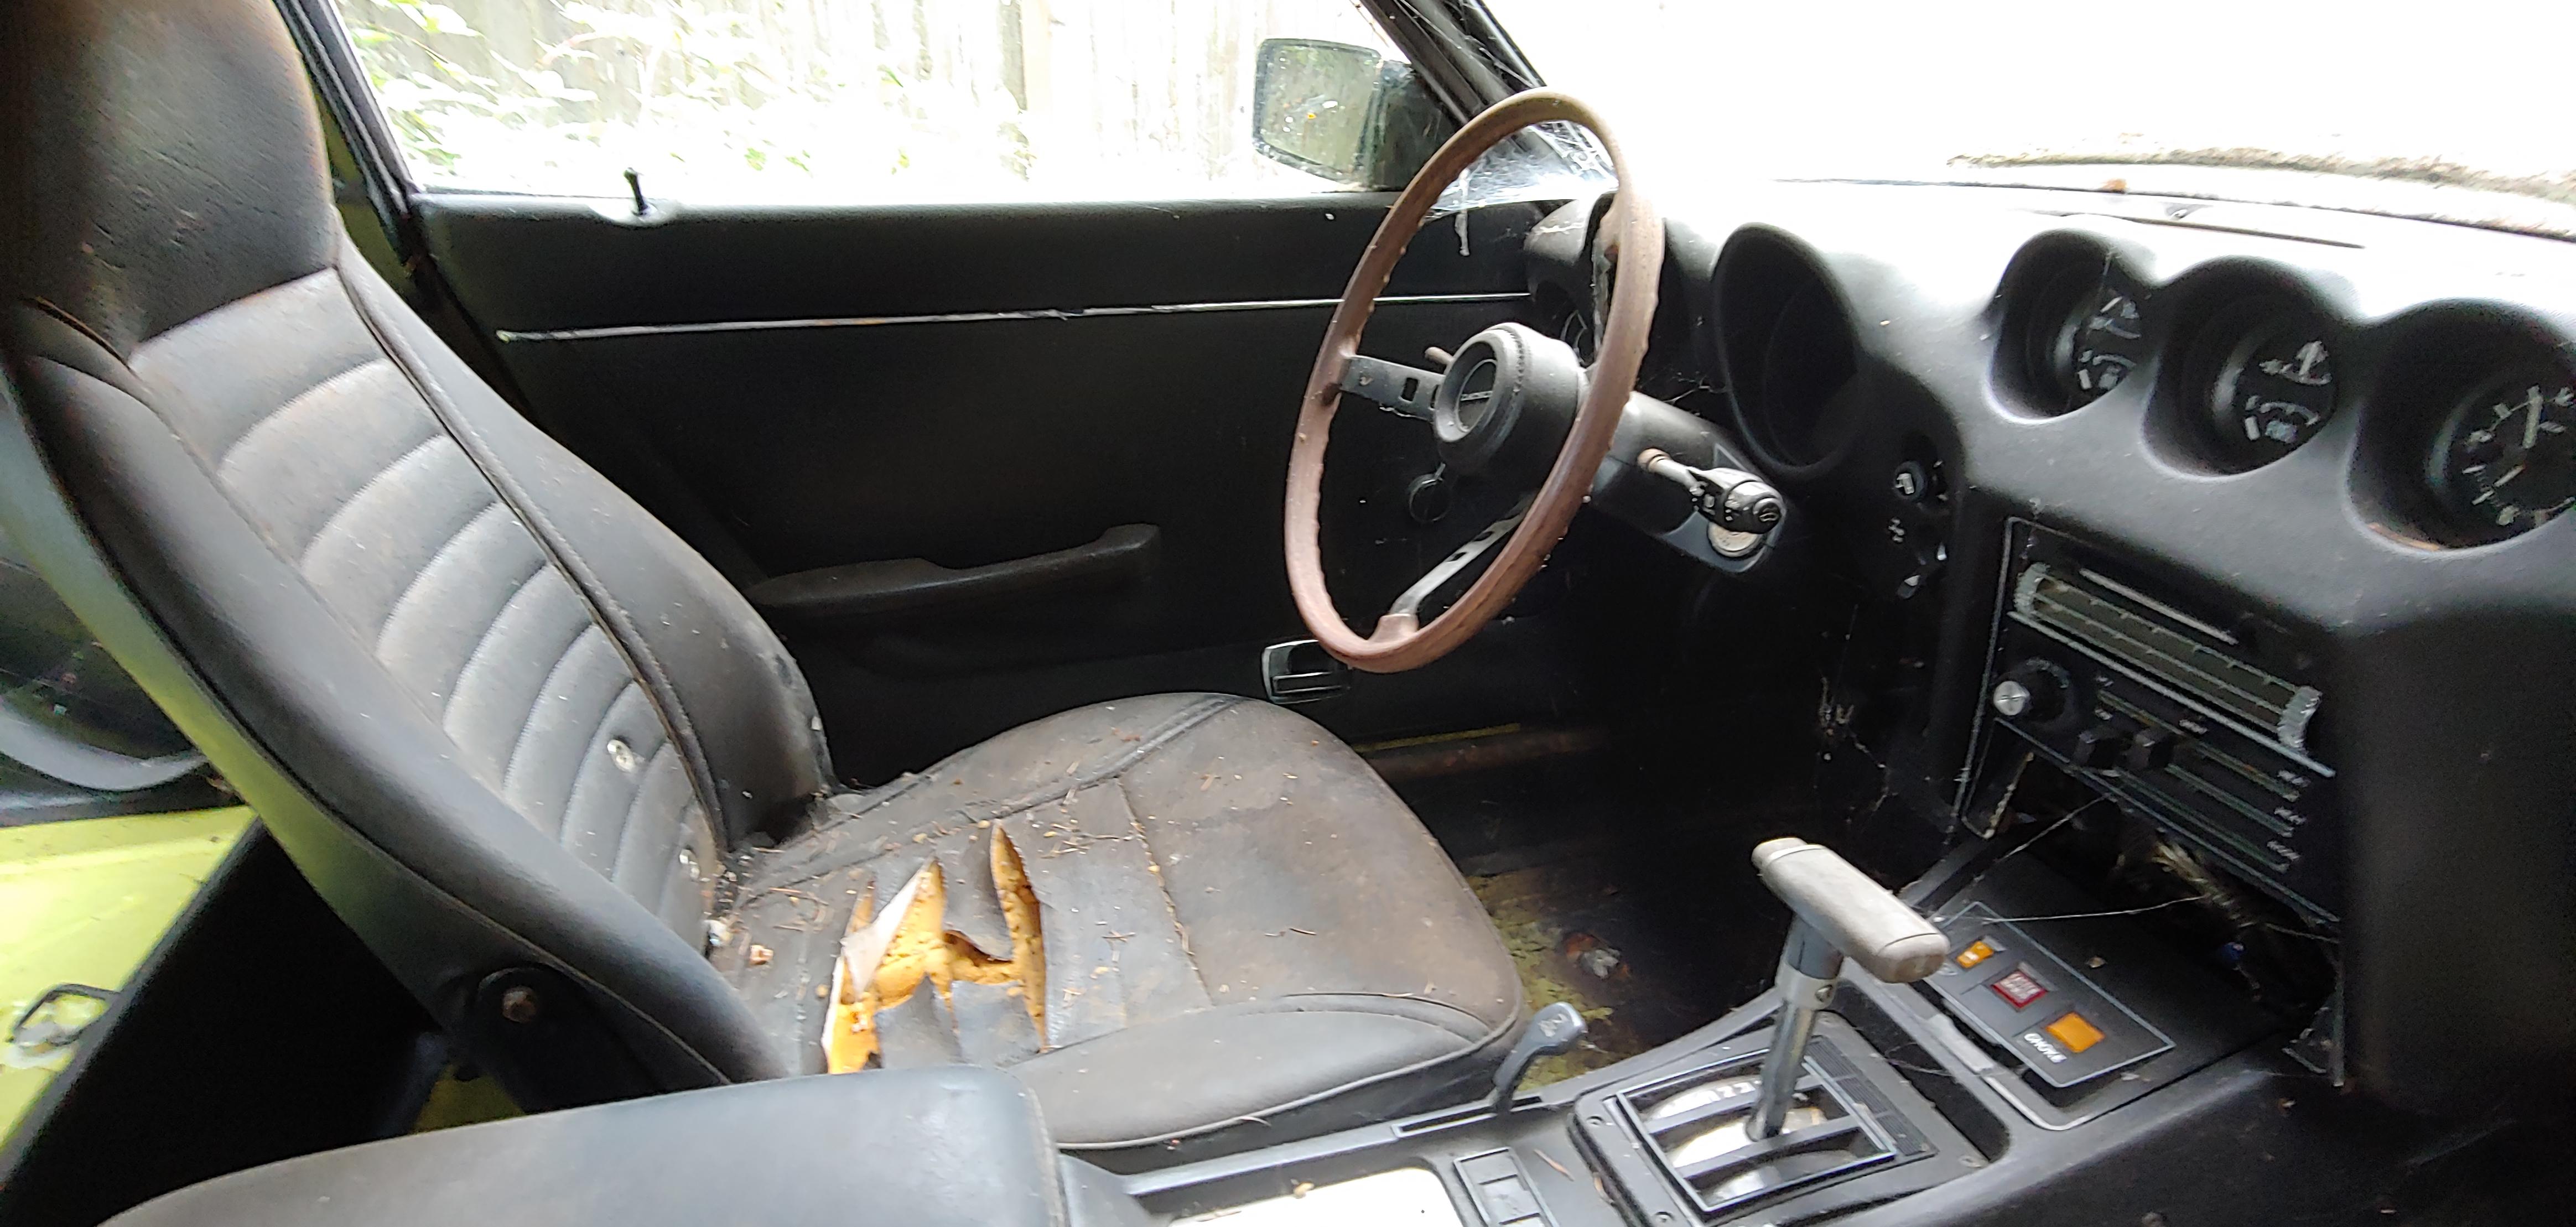
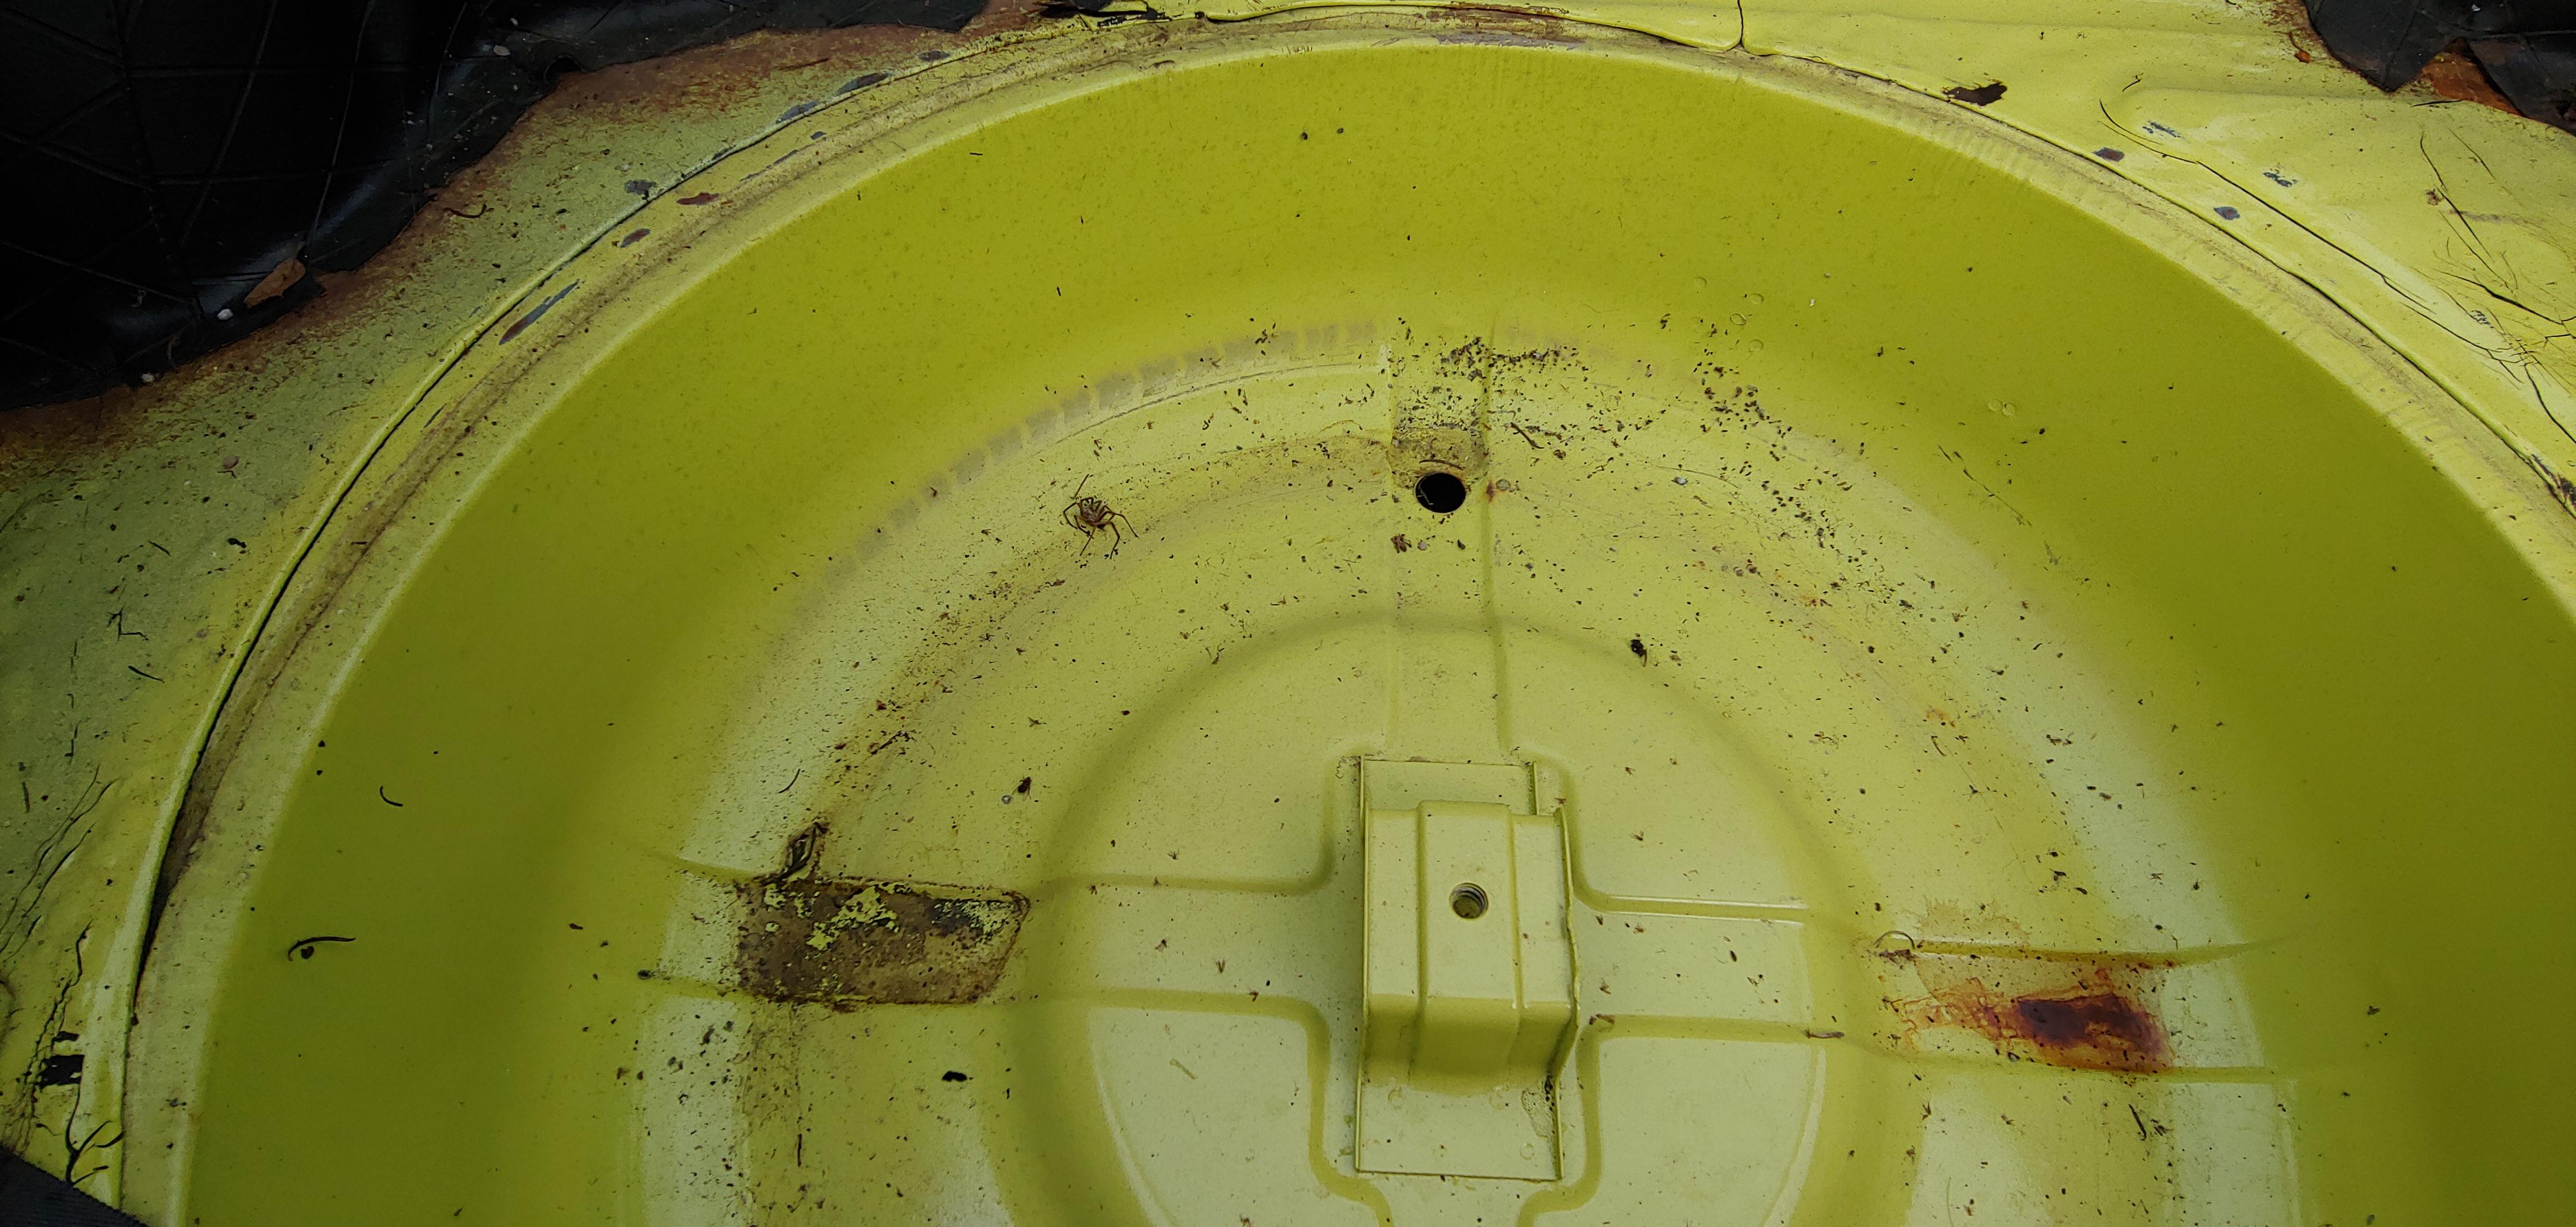
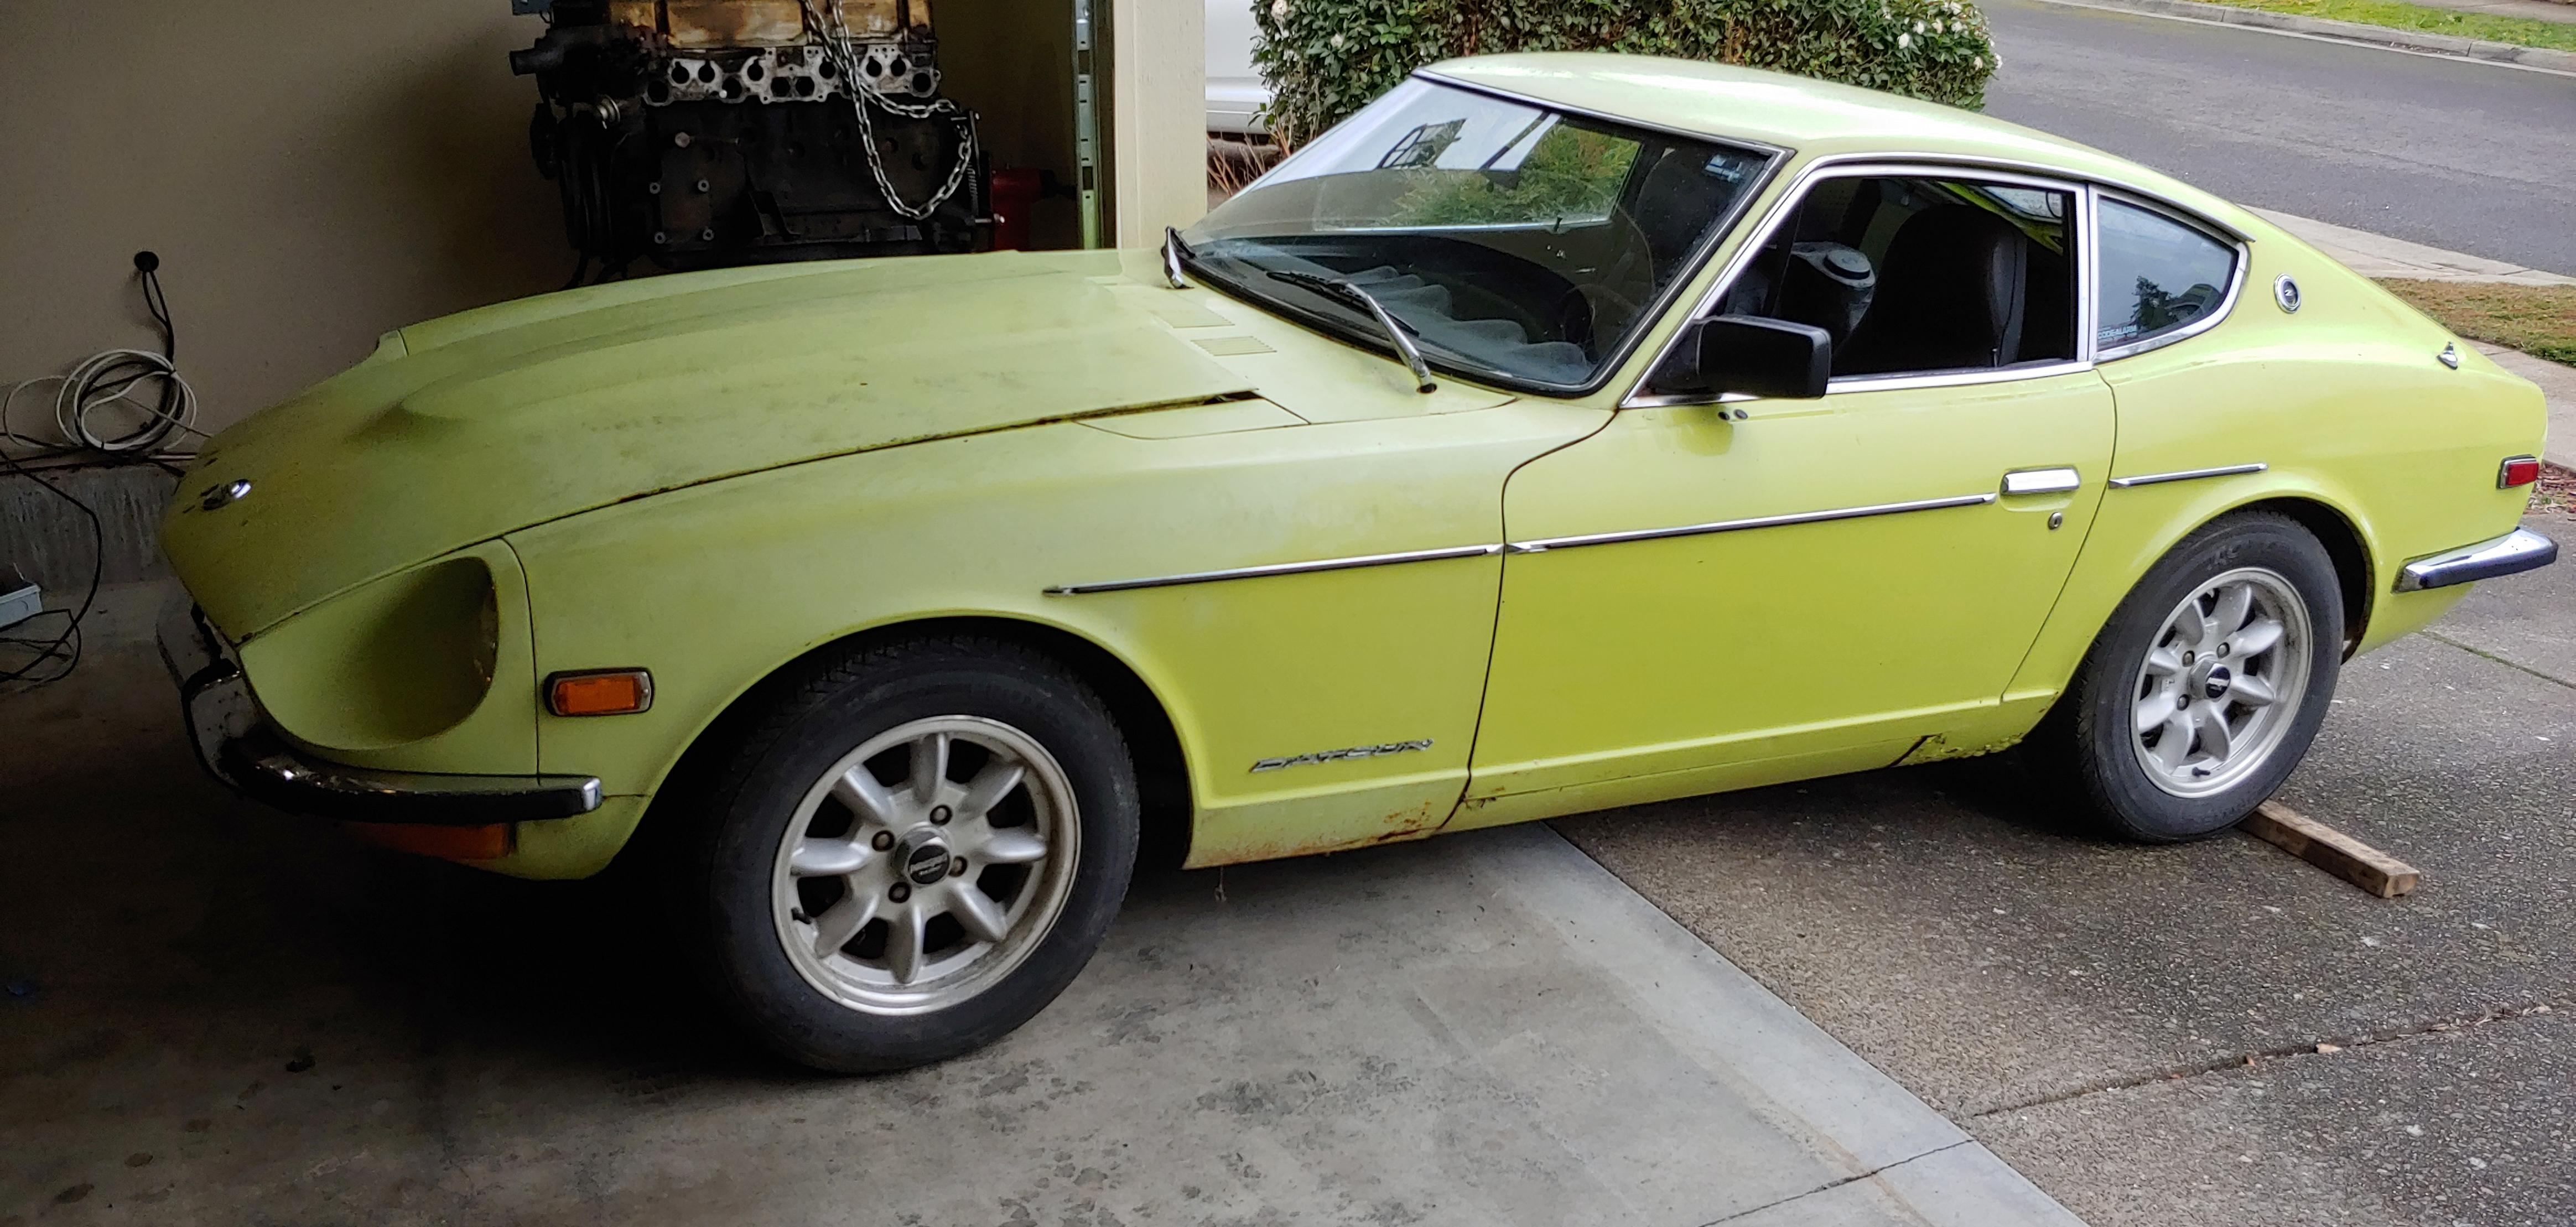
3 pointsSister 1972 240z cars. I have been in contact with the previous owners for about half a decade. They decided to sell to me recently. ? Serial Numbers are only a few hundred apart. Restoration in progress will be posted to instagram at @240zisters


 3 points
 -
3 pointsNice, are you also going to post the restorations here on this forum? Not everyone does the instagram/facebook thing.3 points
-
2 points
-
2 pointsI will post updates here if people would like. There are 2 of us working on these currently. We hope to make good progress this summer.2 points
-
2 pointsHere's a good read, a few different shades but a lot of info. I used Cantech Z's Duplicolor with matte clear top coat. Found in here...2 points
-
2 pointsThe finished surrounds. Without the chrome pieces obviously. Sent from my iPhone using Tapatalk2 points
-
2 points
-
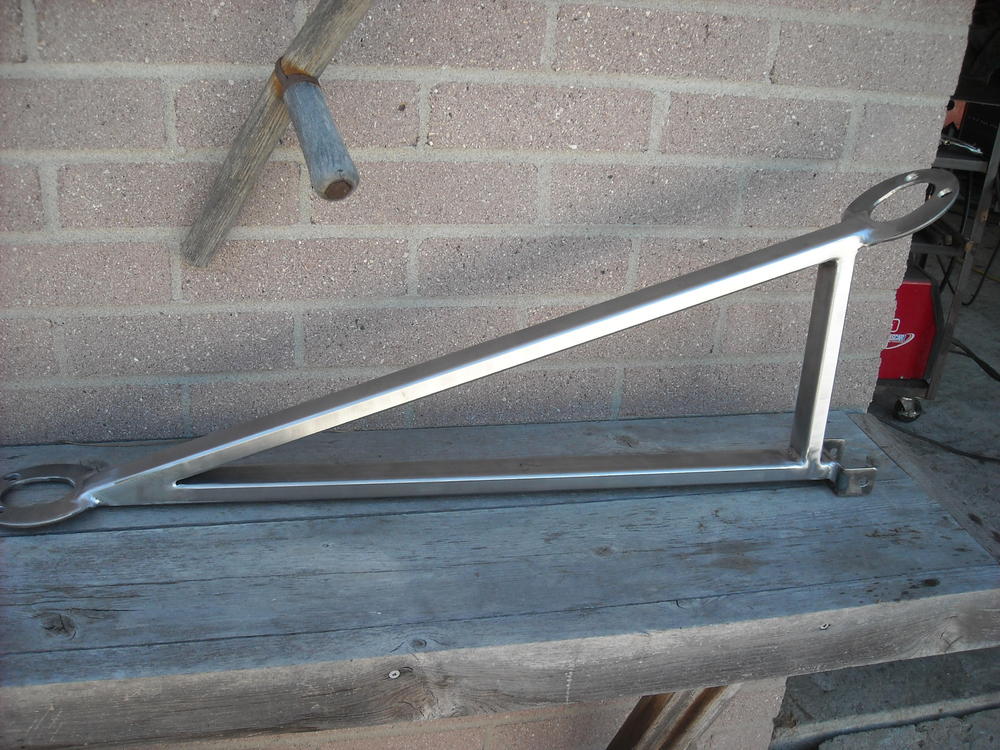
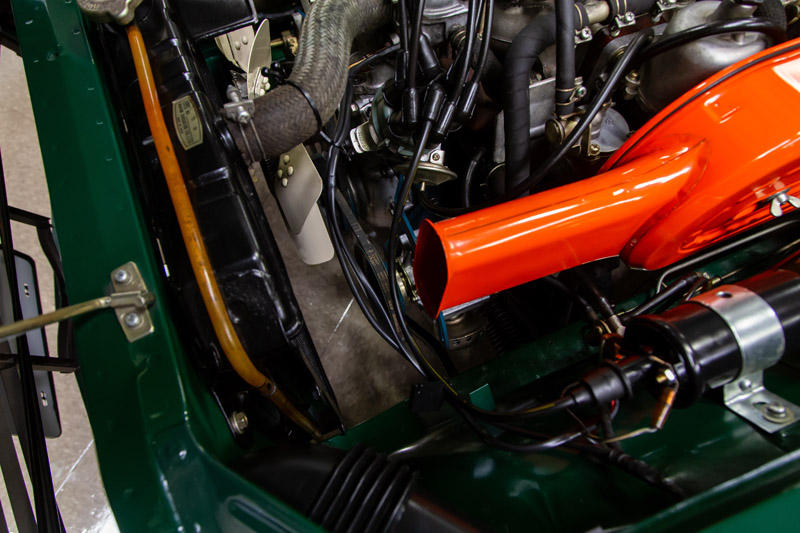
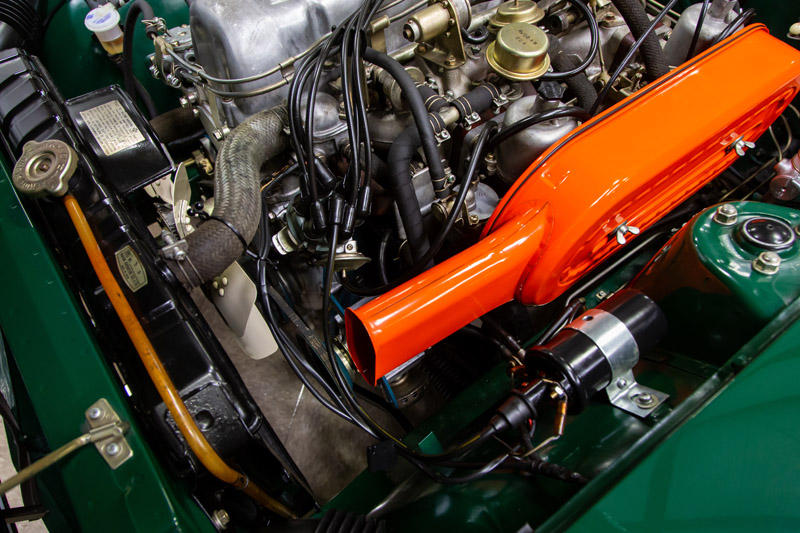
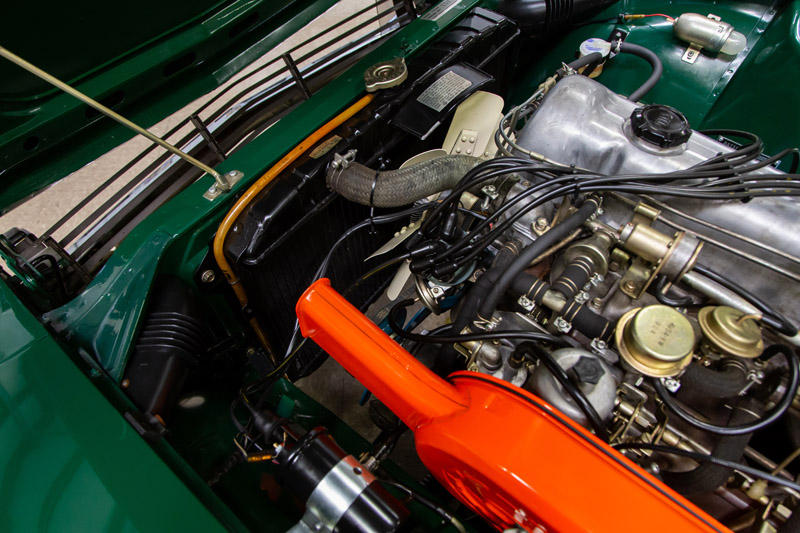
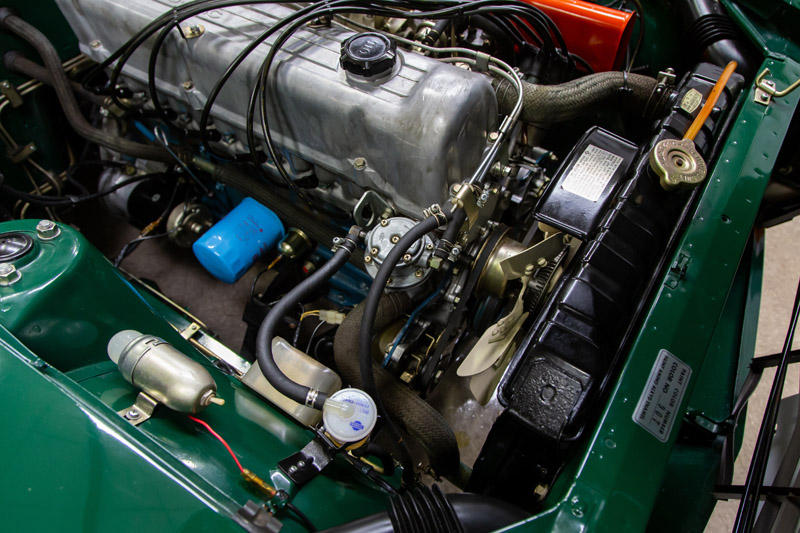
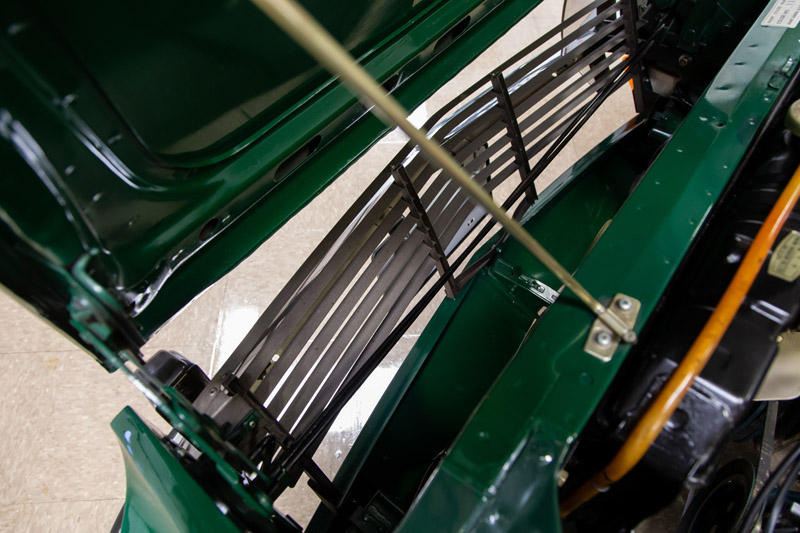
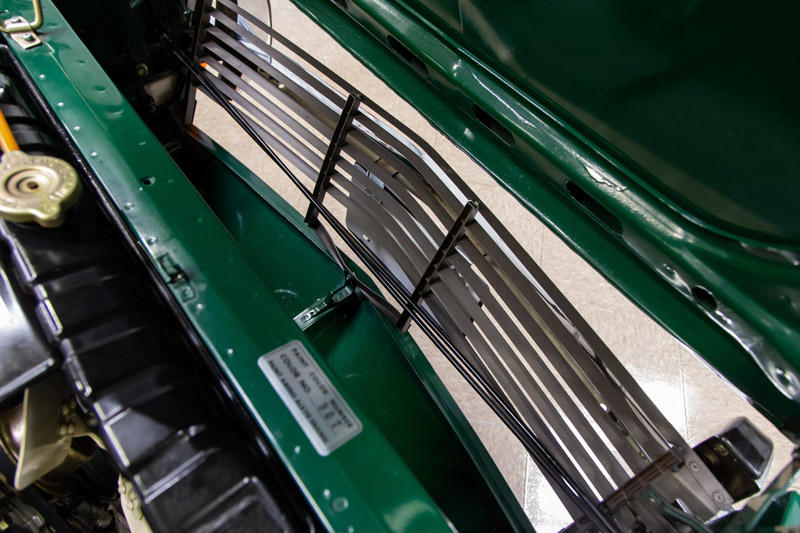
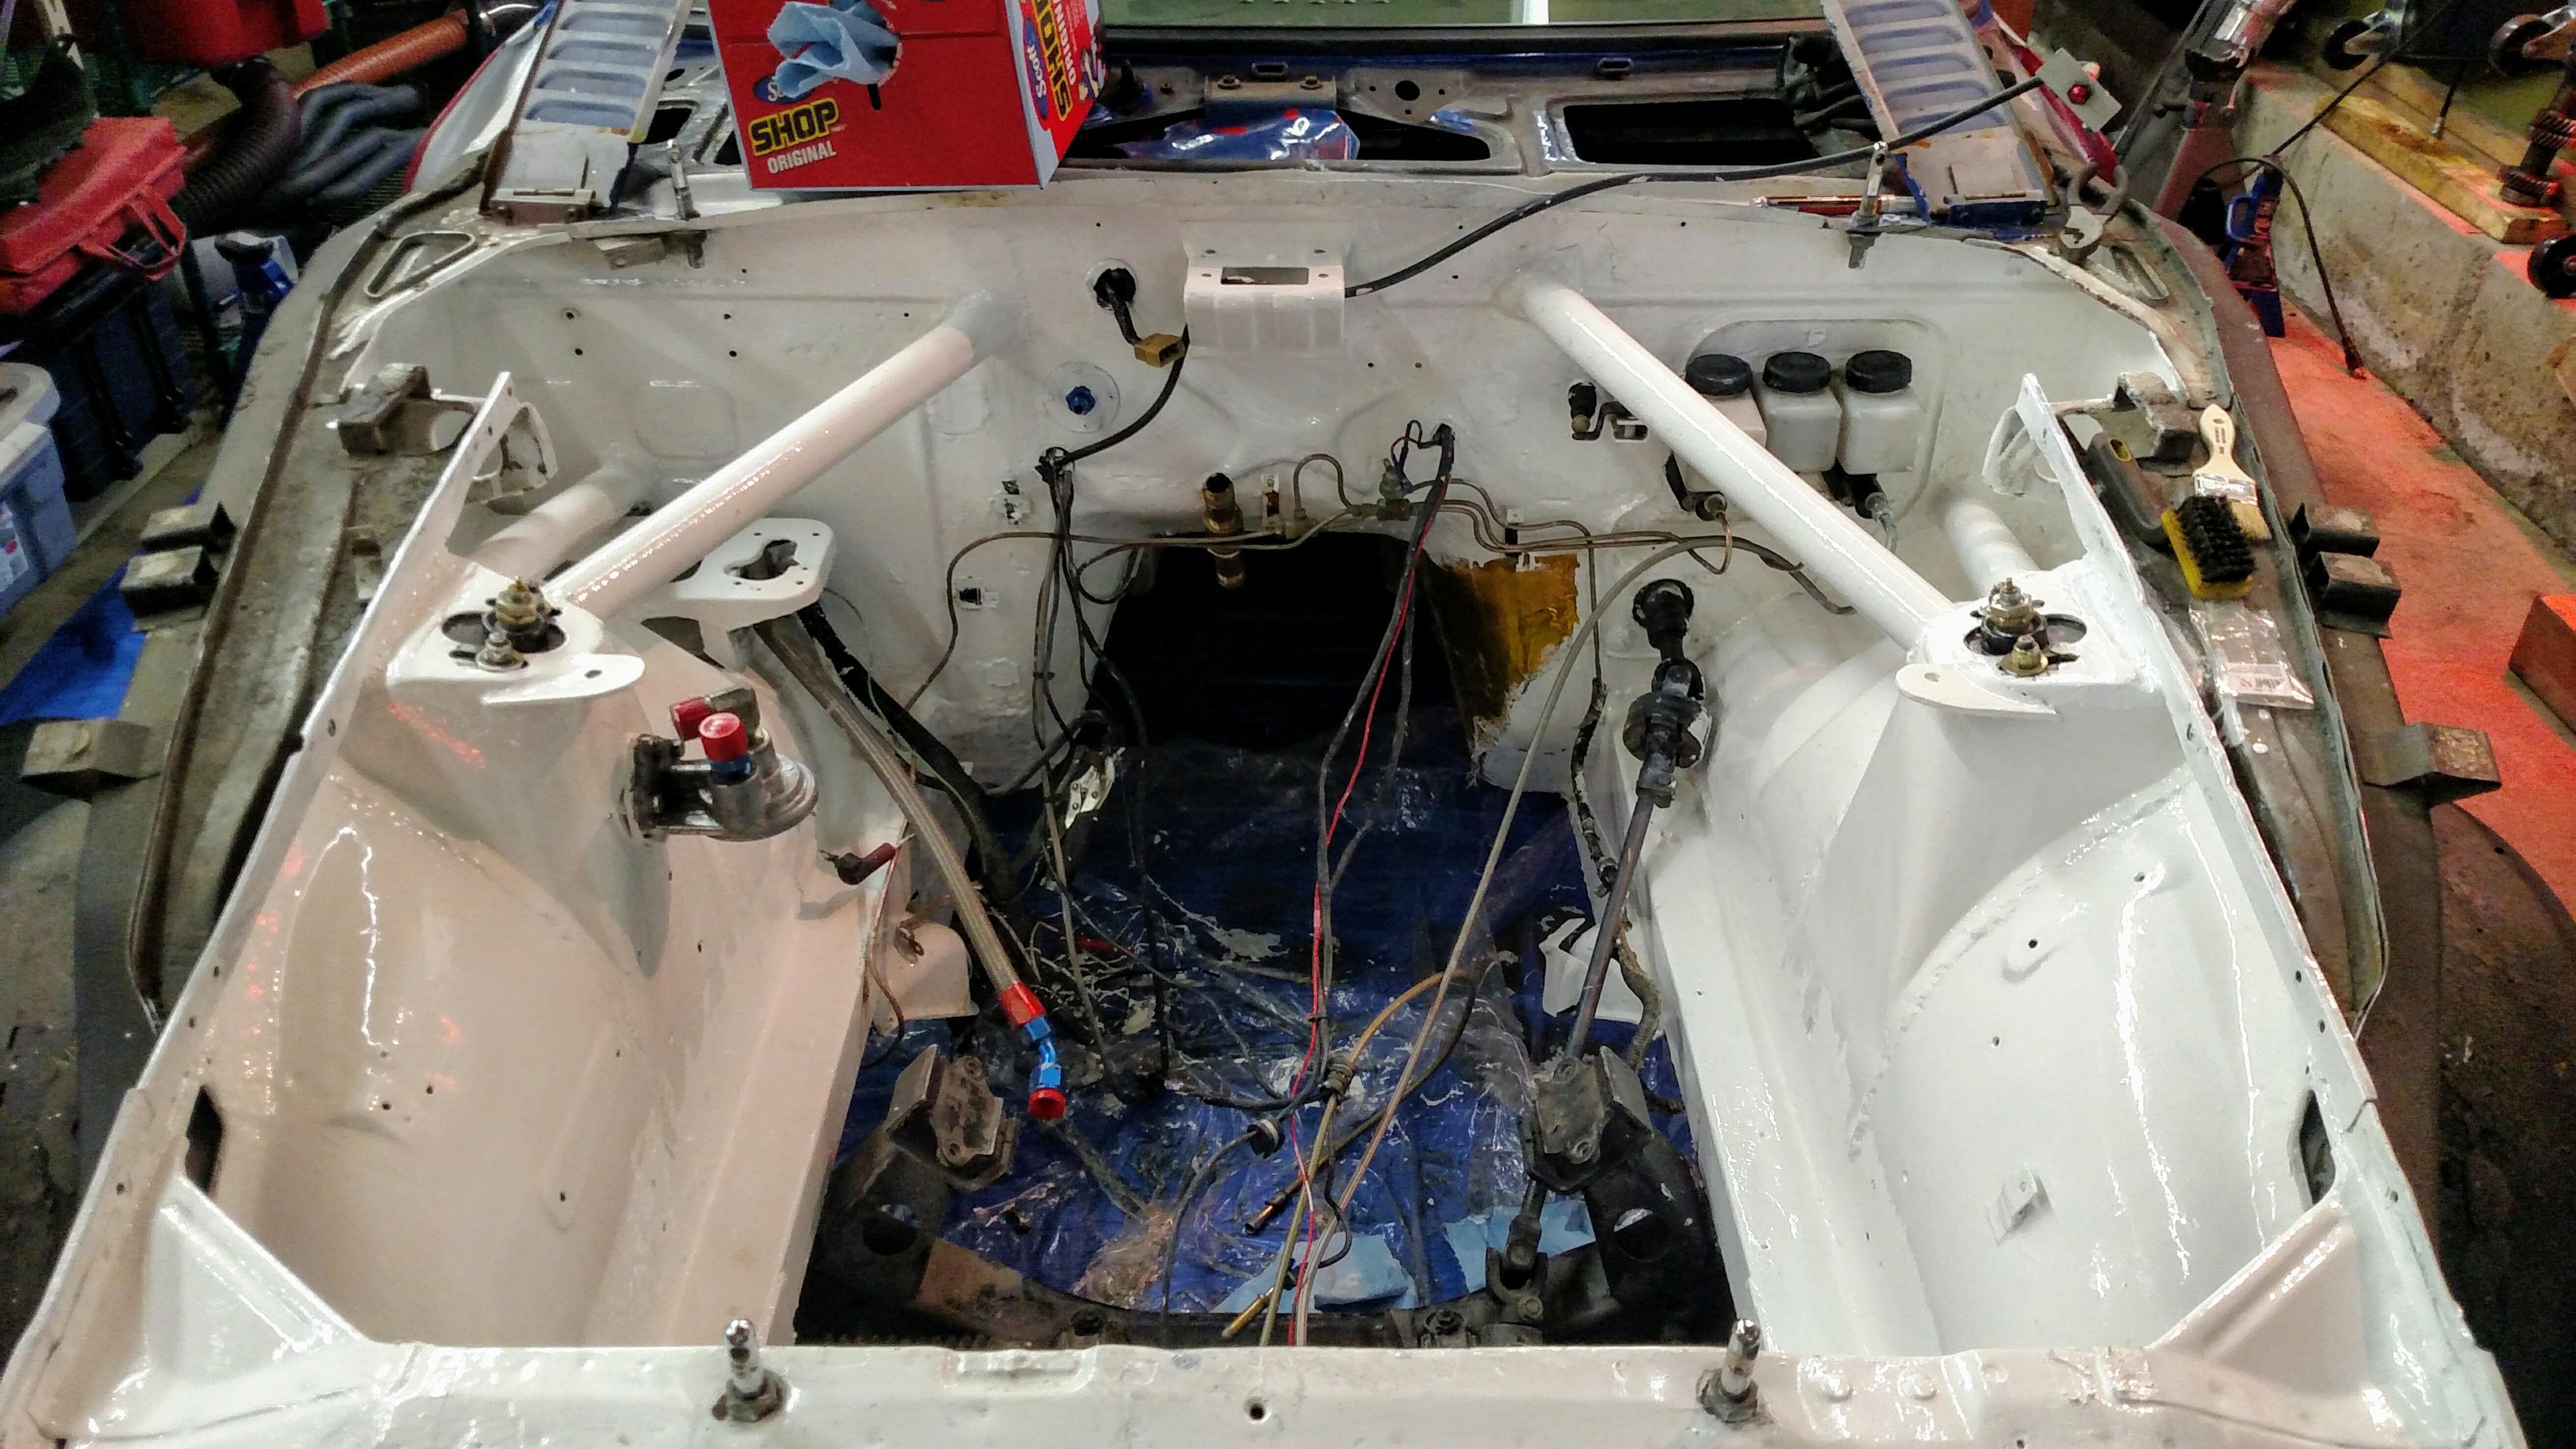
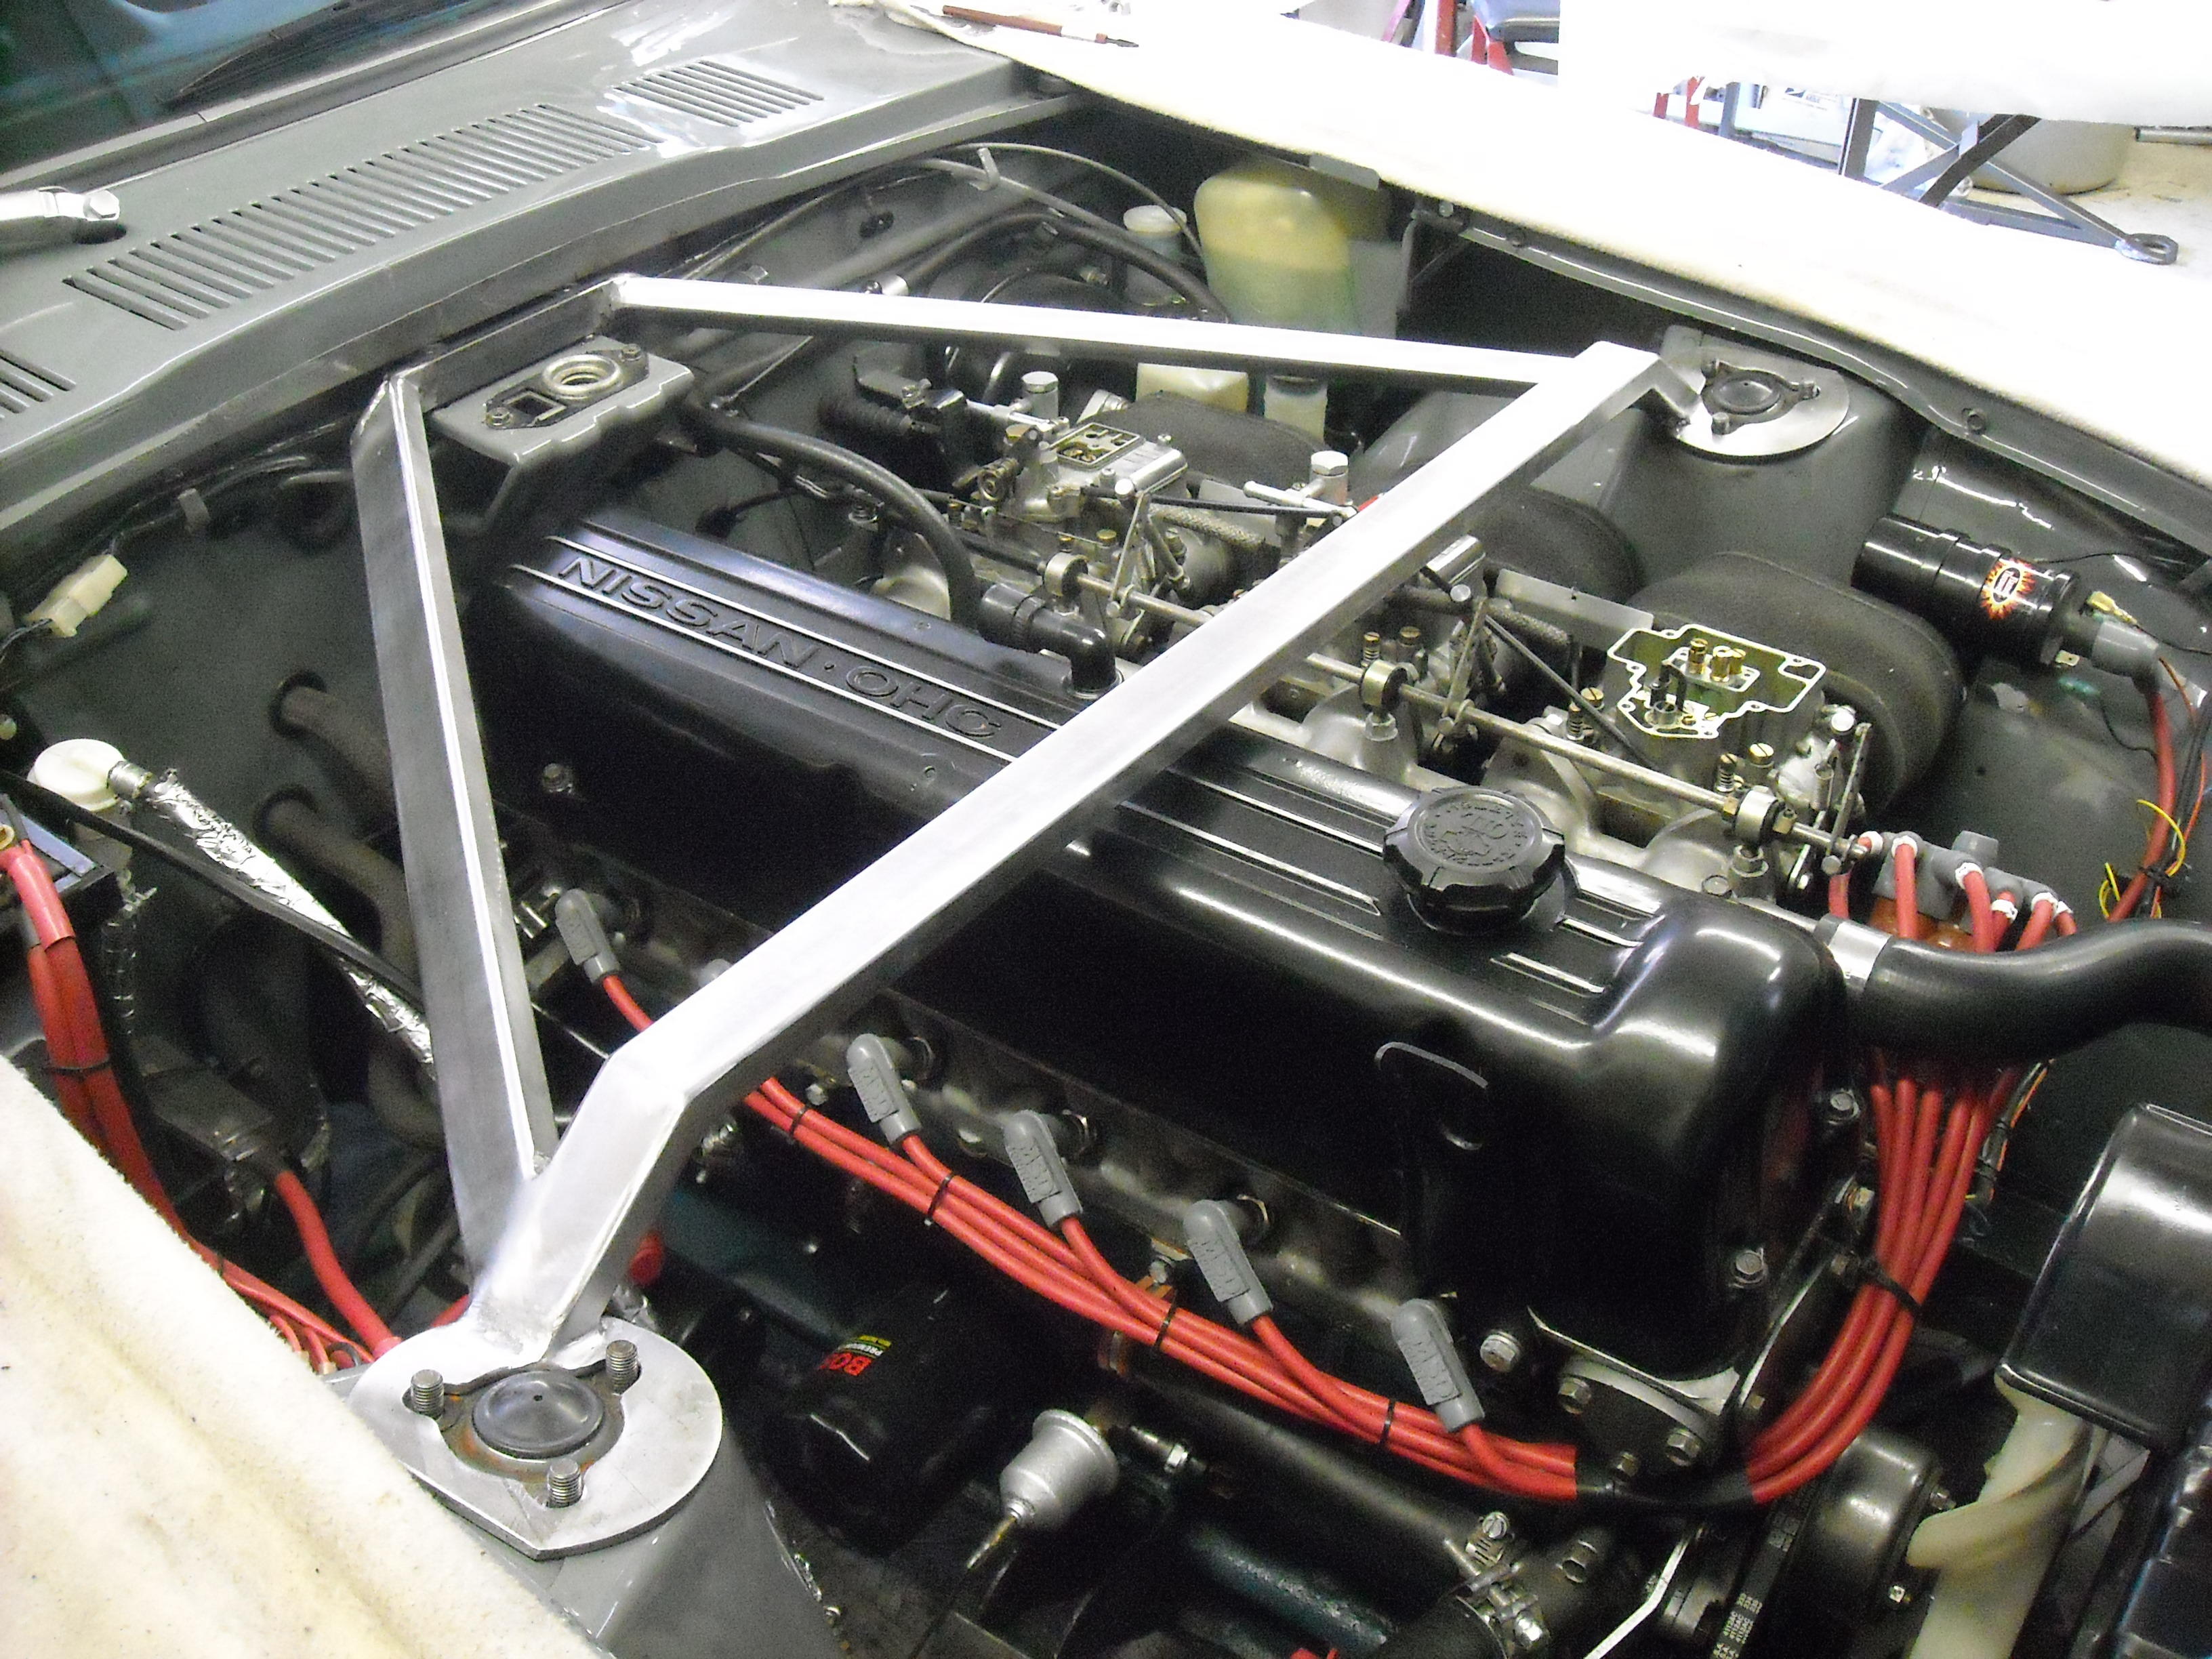
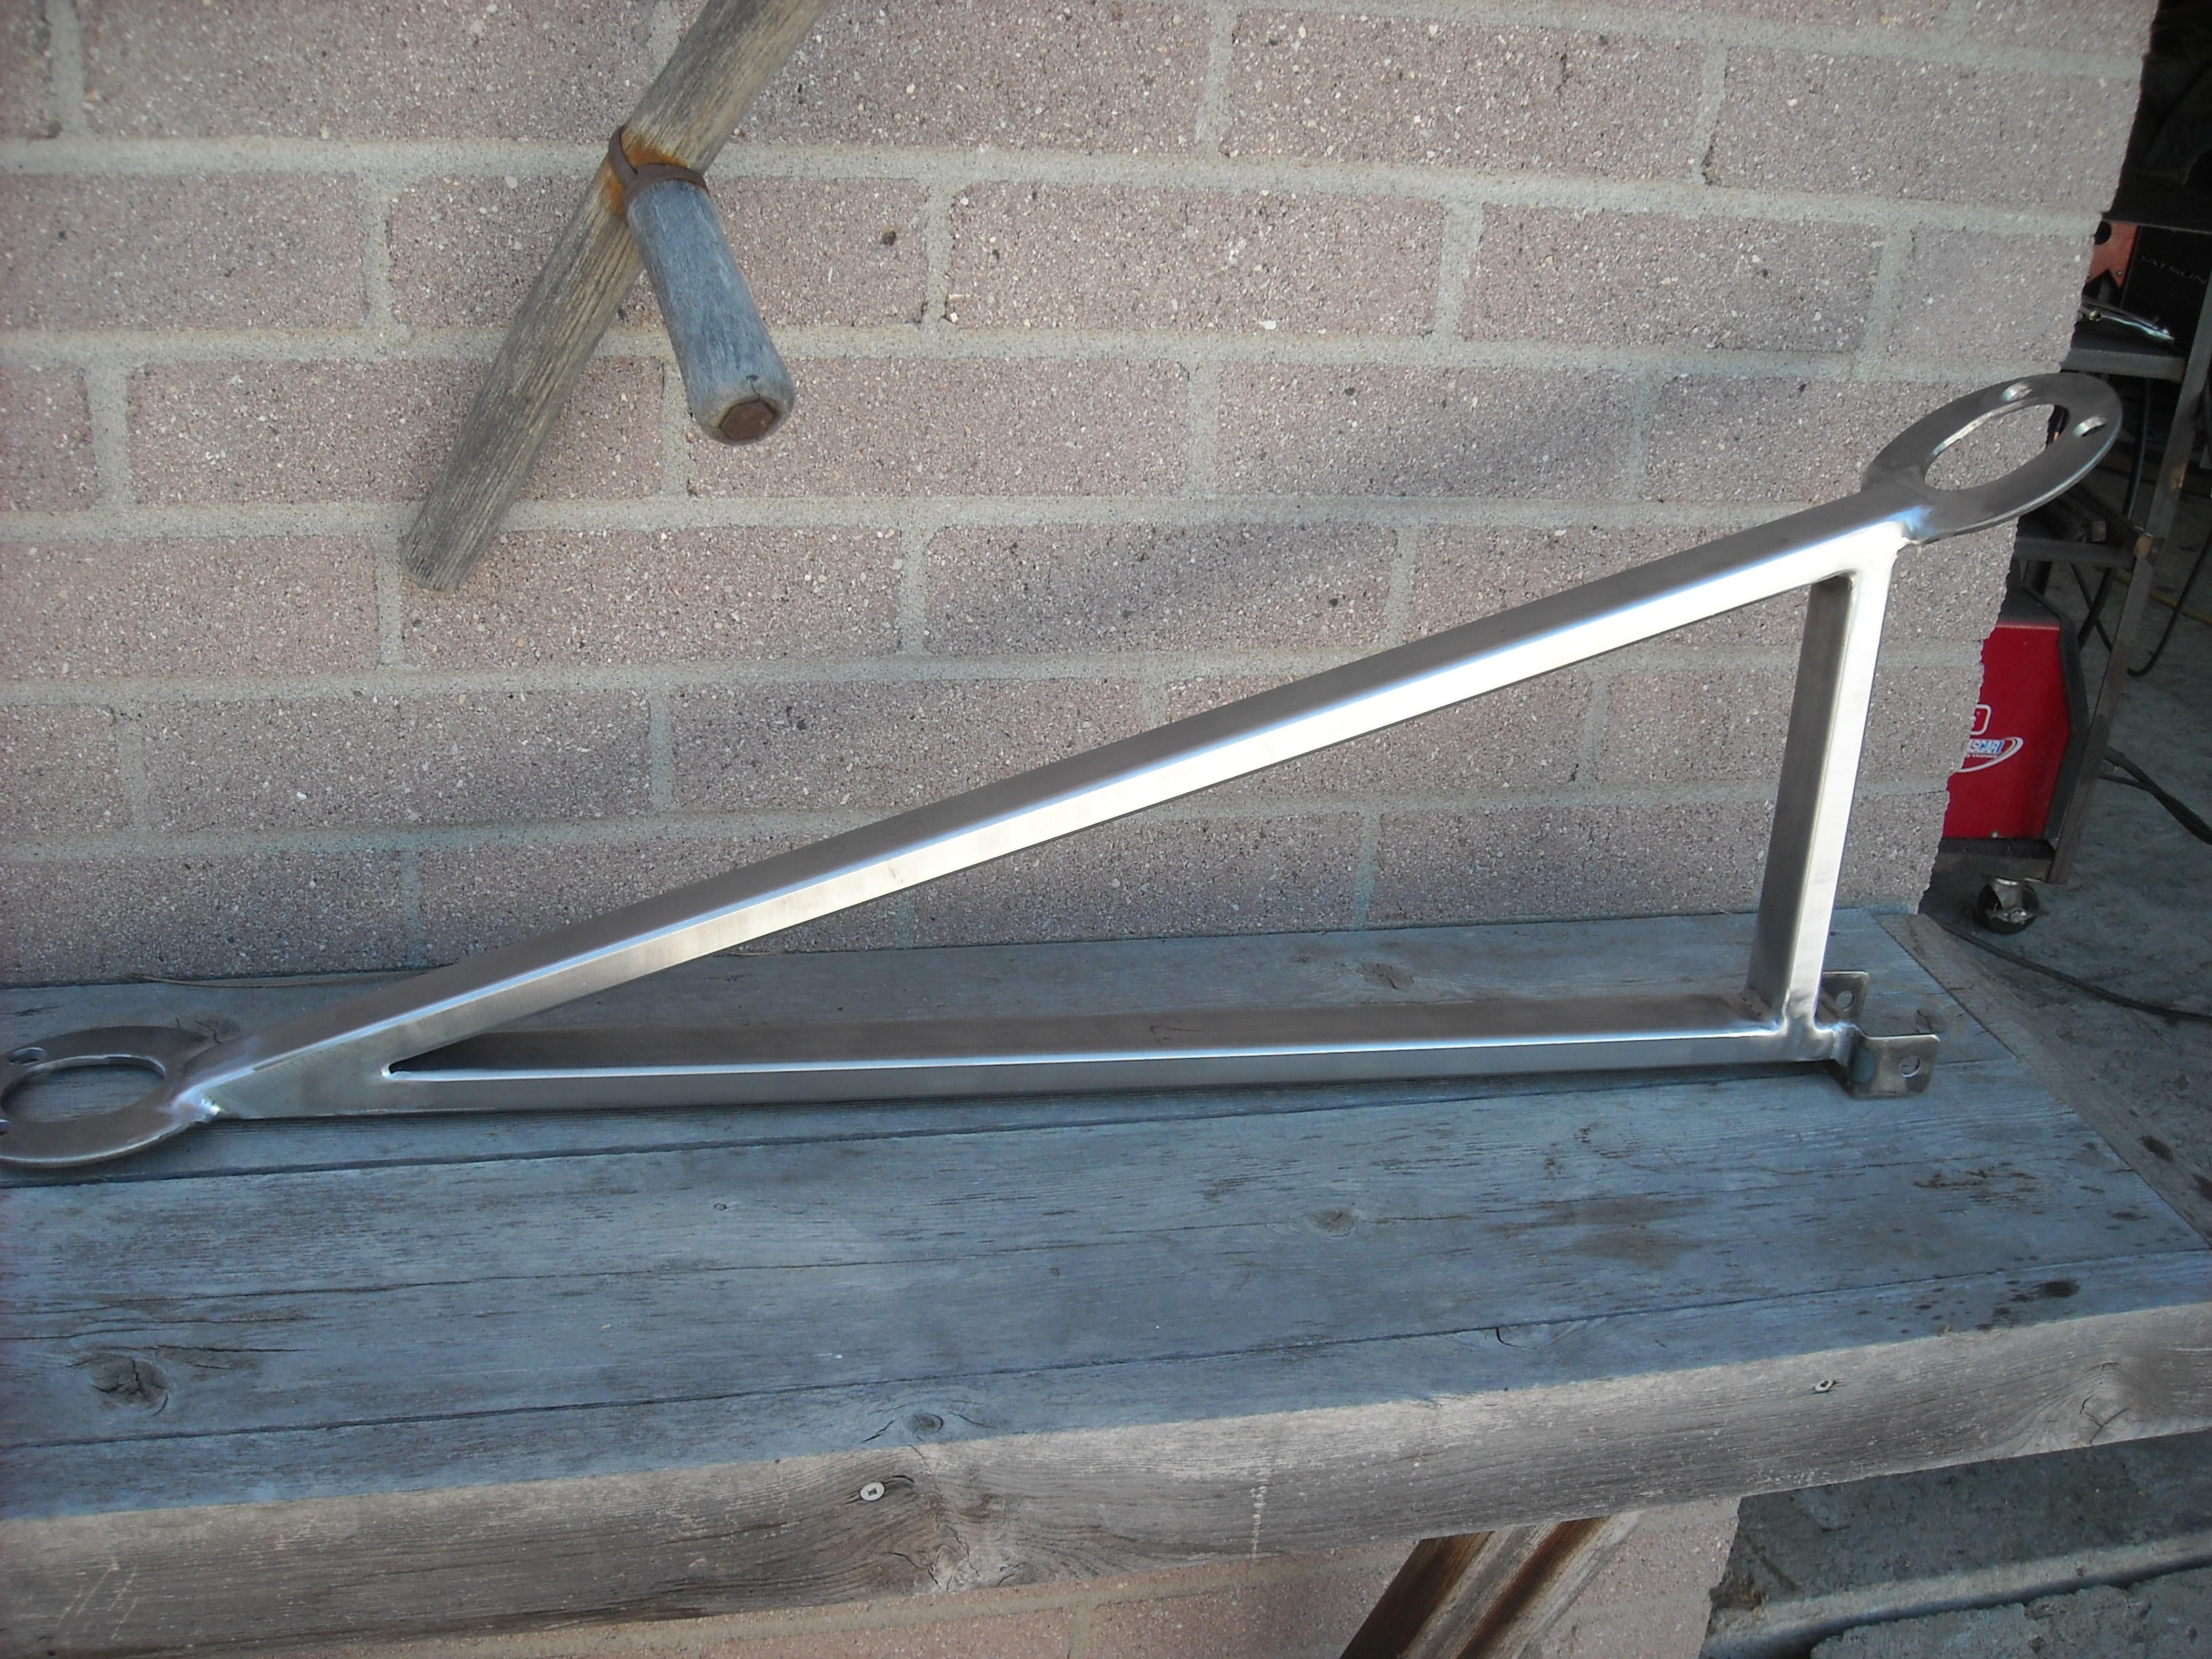
2 pointsHere's the one we have used for several years on the race car. This winter we expanded our bracing but will include the tower-to-tower piece.

 2 points
 -
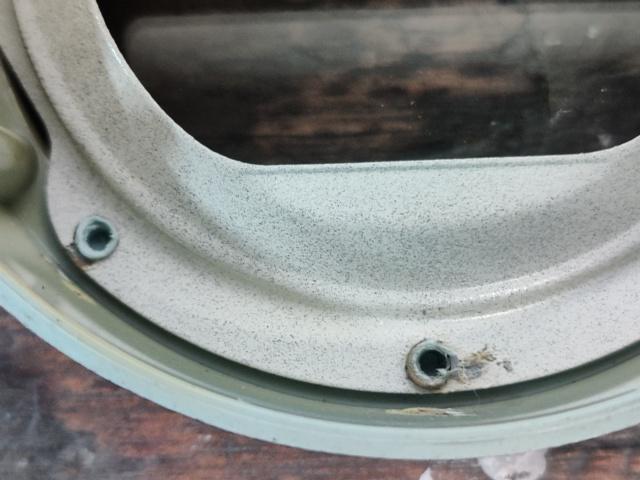
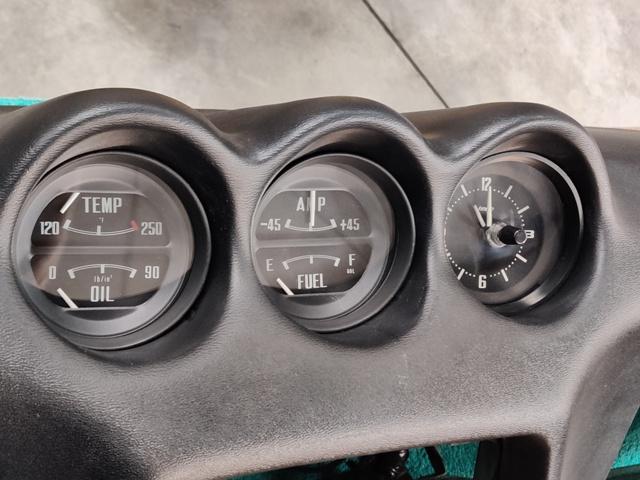
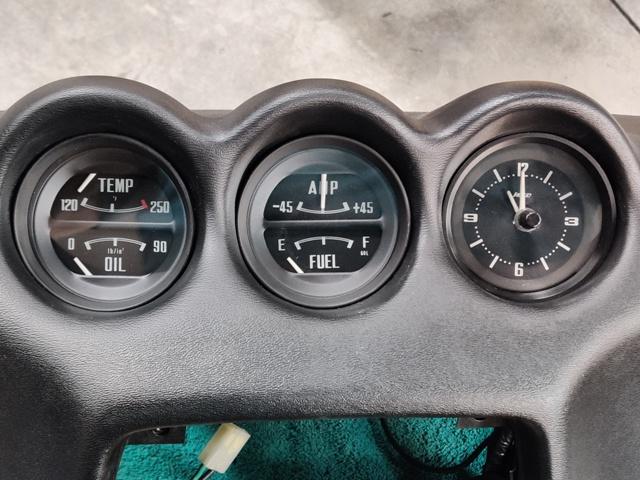
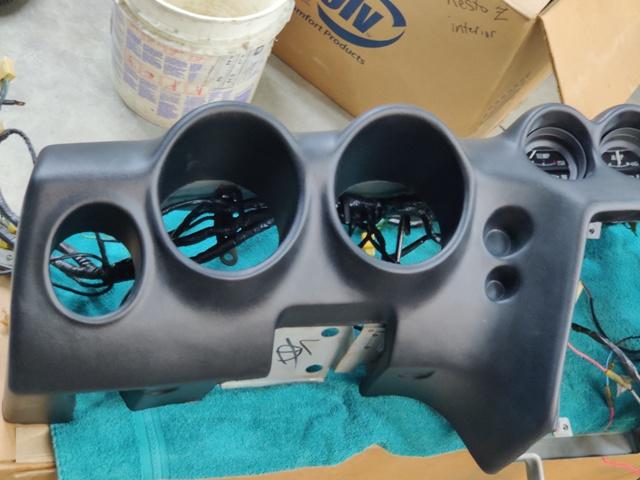
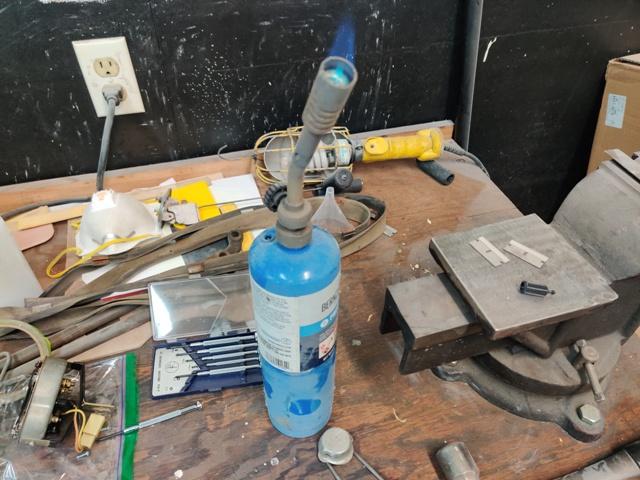
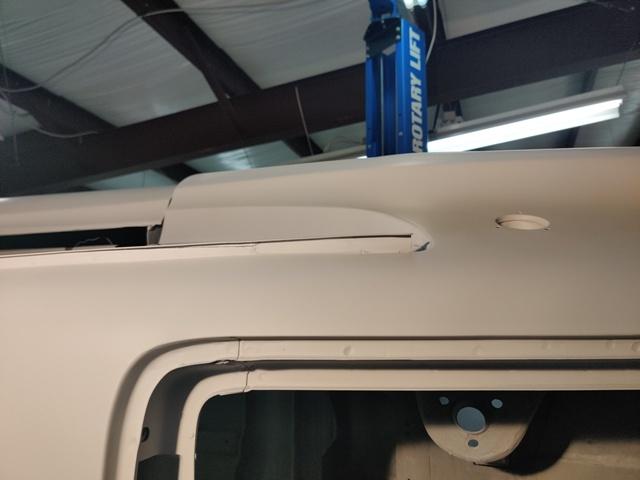
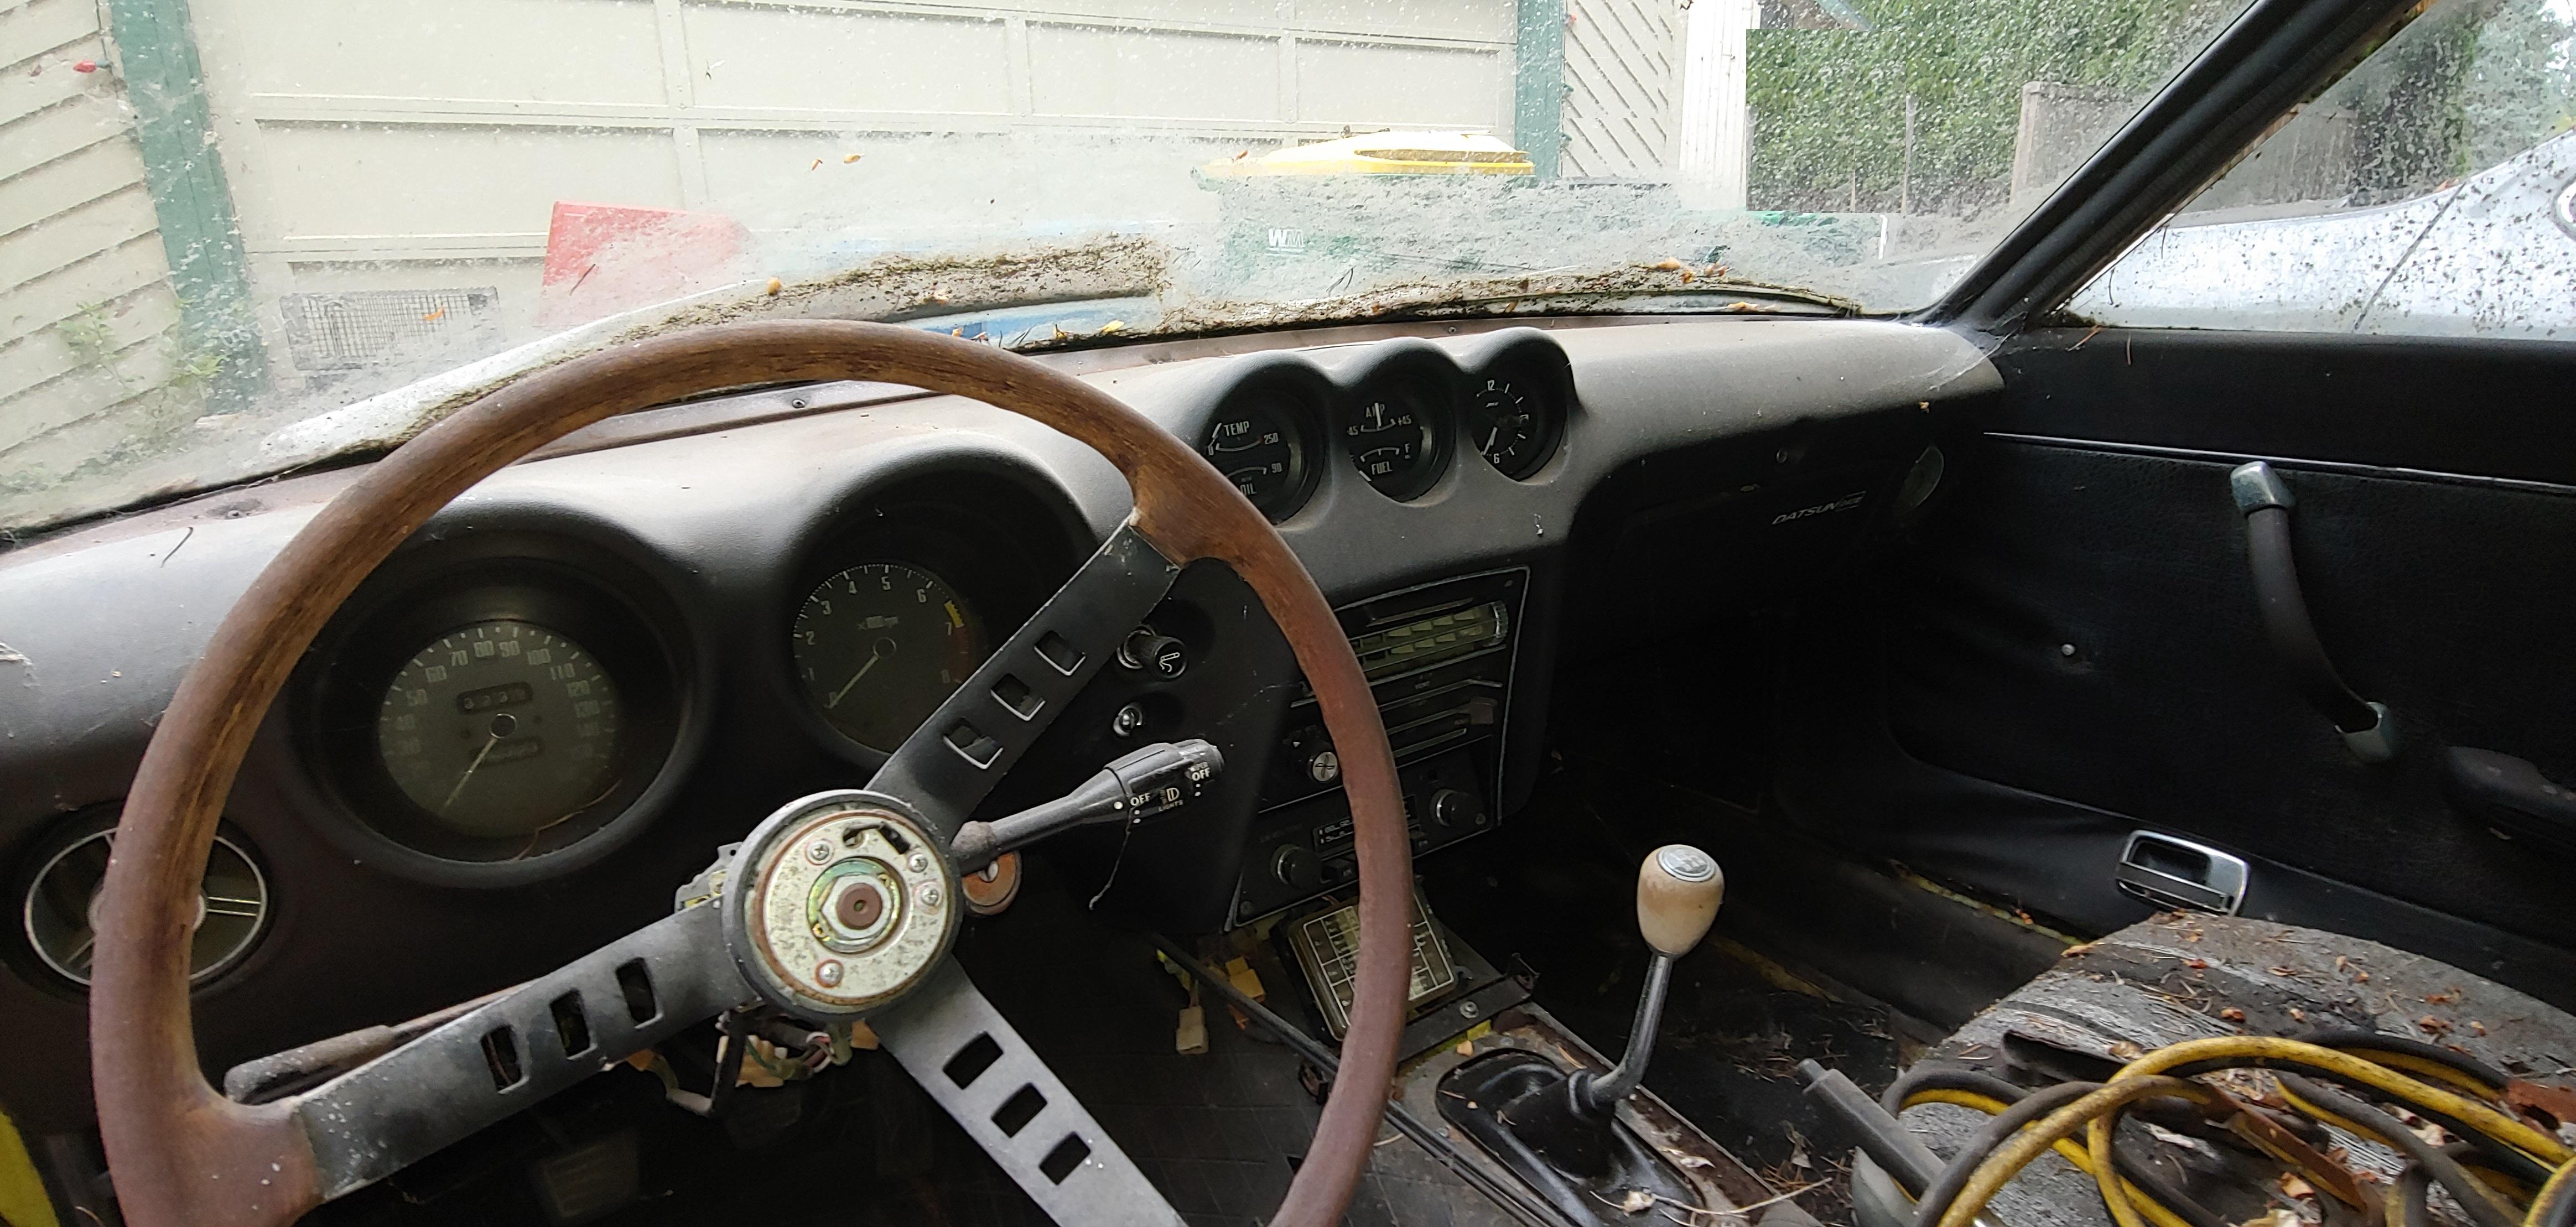
Work continues on the dash. I restored the center gauges a long time ago, but show only in a one pic a bit of what I did. Basically, the black "block out" pieces lose their coating of black paint over time (it cracks and falls into the gauge), and the lenses get dull with micro scratches on the outside surface. So, I take the phillips head screws off to remove the face. The face comes off and has the bezels or "block out" pieces attached. I break the melted plastic from the plastic posts that holds the bezels on (it is often crumbling off anyway). Then I glass bead the bezels and repaint (white on inside and semi flat black on the outside). I polish the lenses with suitable paint polish and a buffer. Then I put the bezels and lenses back in the front piece and re-melt the plastic posts (using a propane torch heated 3/32" drill bit, which displaces melted plastic from the solid post up and over the edge around the circumference of the holes in the bezel - see pics) to secure the bezels and lenses nice and tight. I top off remelted plastic with some suitable glue blobs for extra measure. And then re-assemble the front portion of the gauge to the dusted off gauge assemblies, and they are done. Next up will be the speedo and the tach.

 2 points
 -
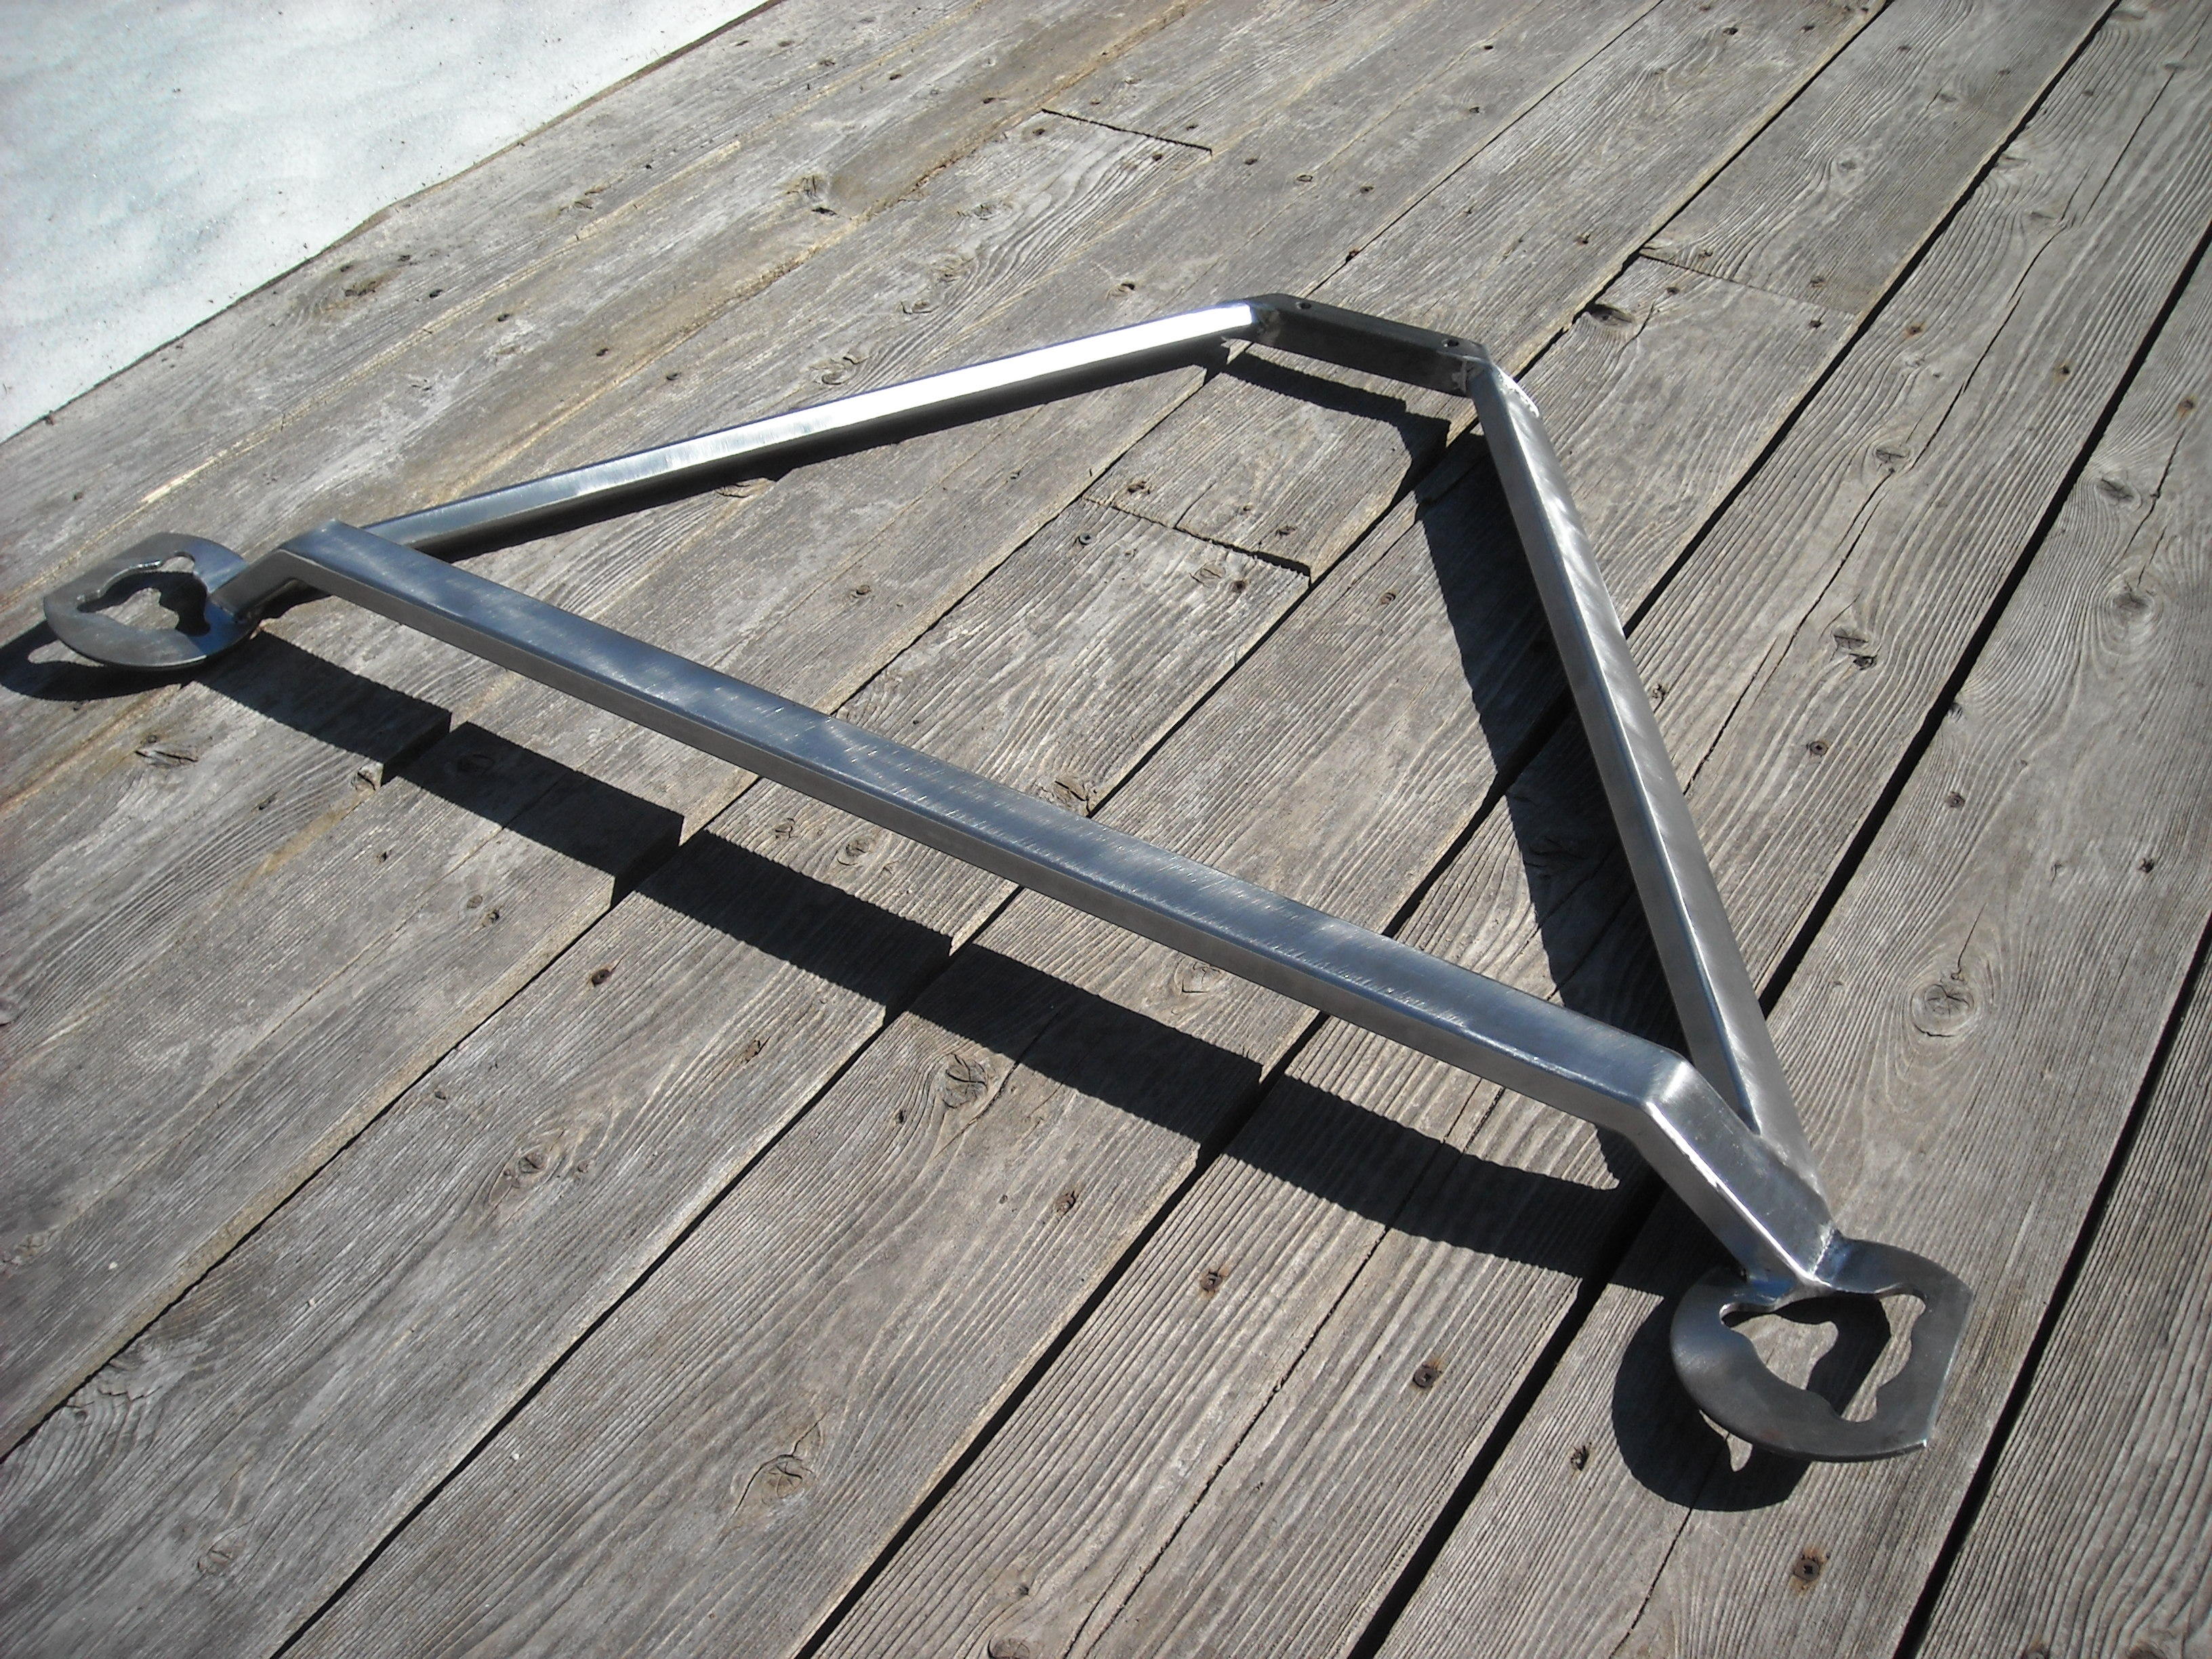
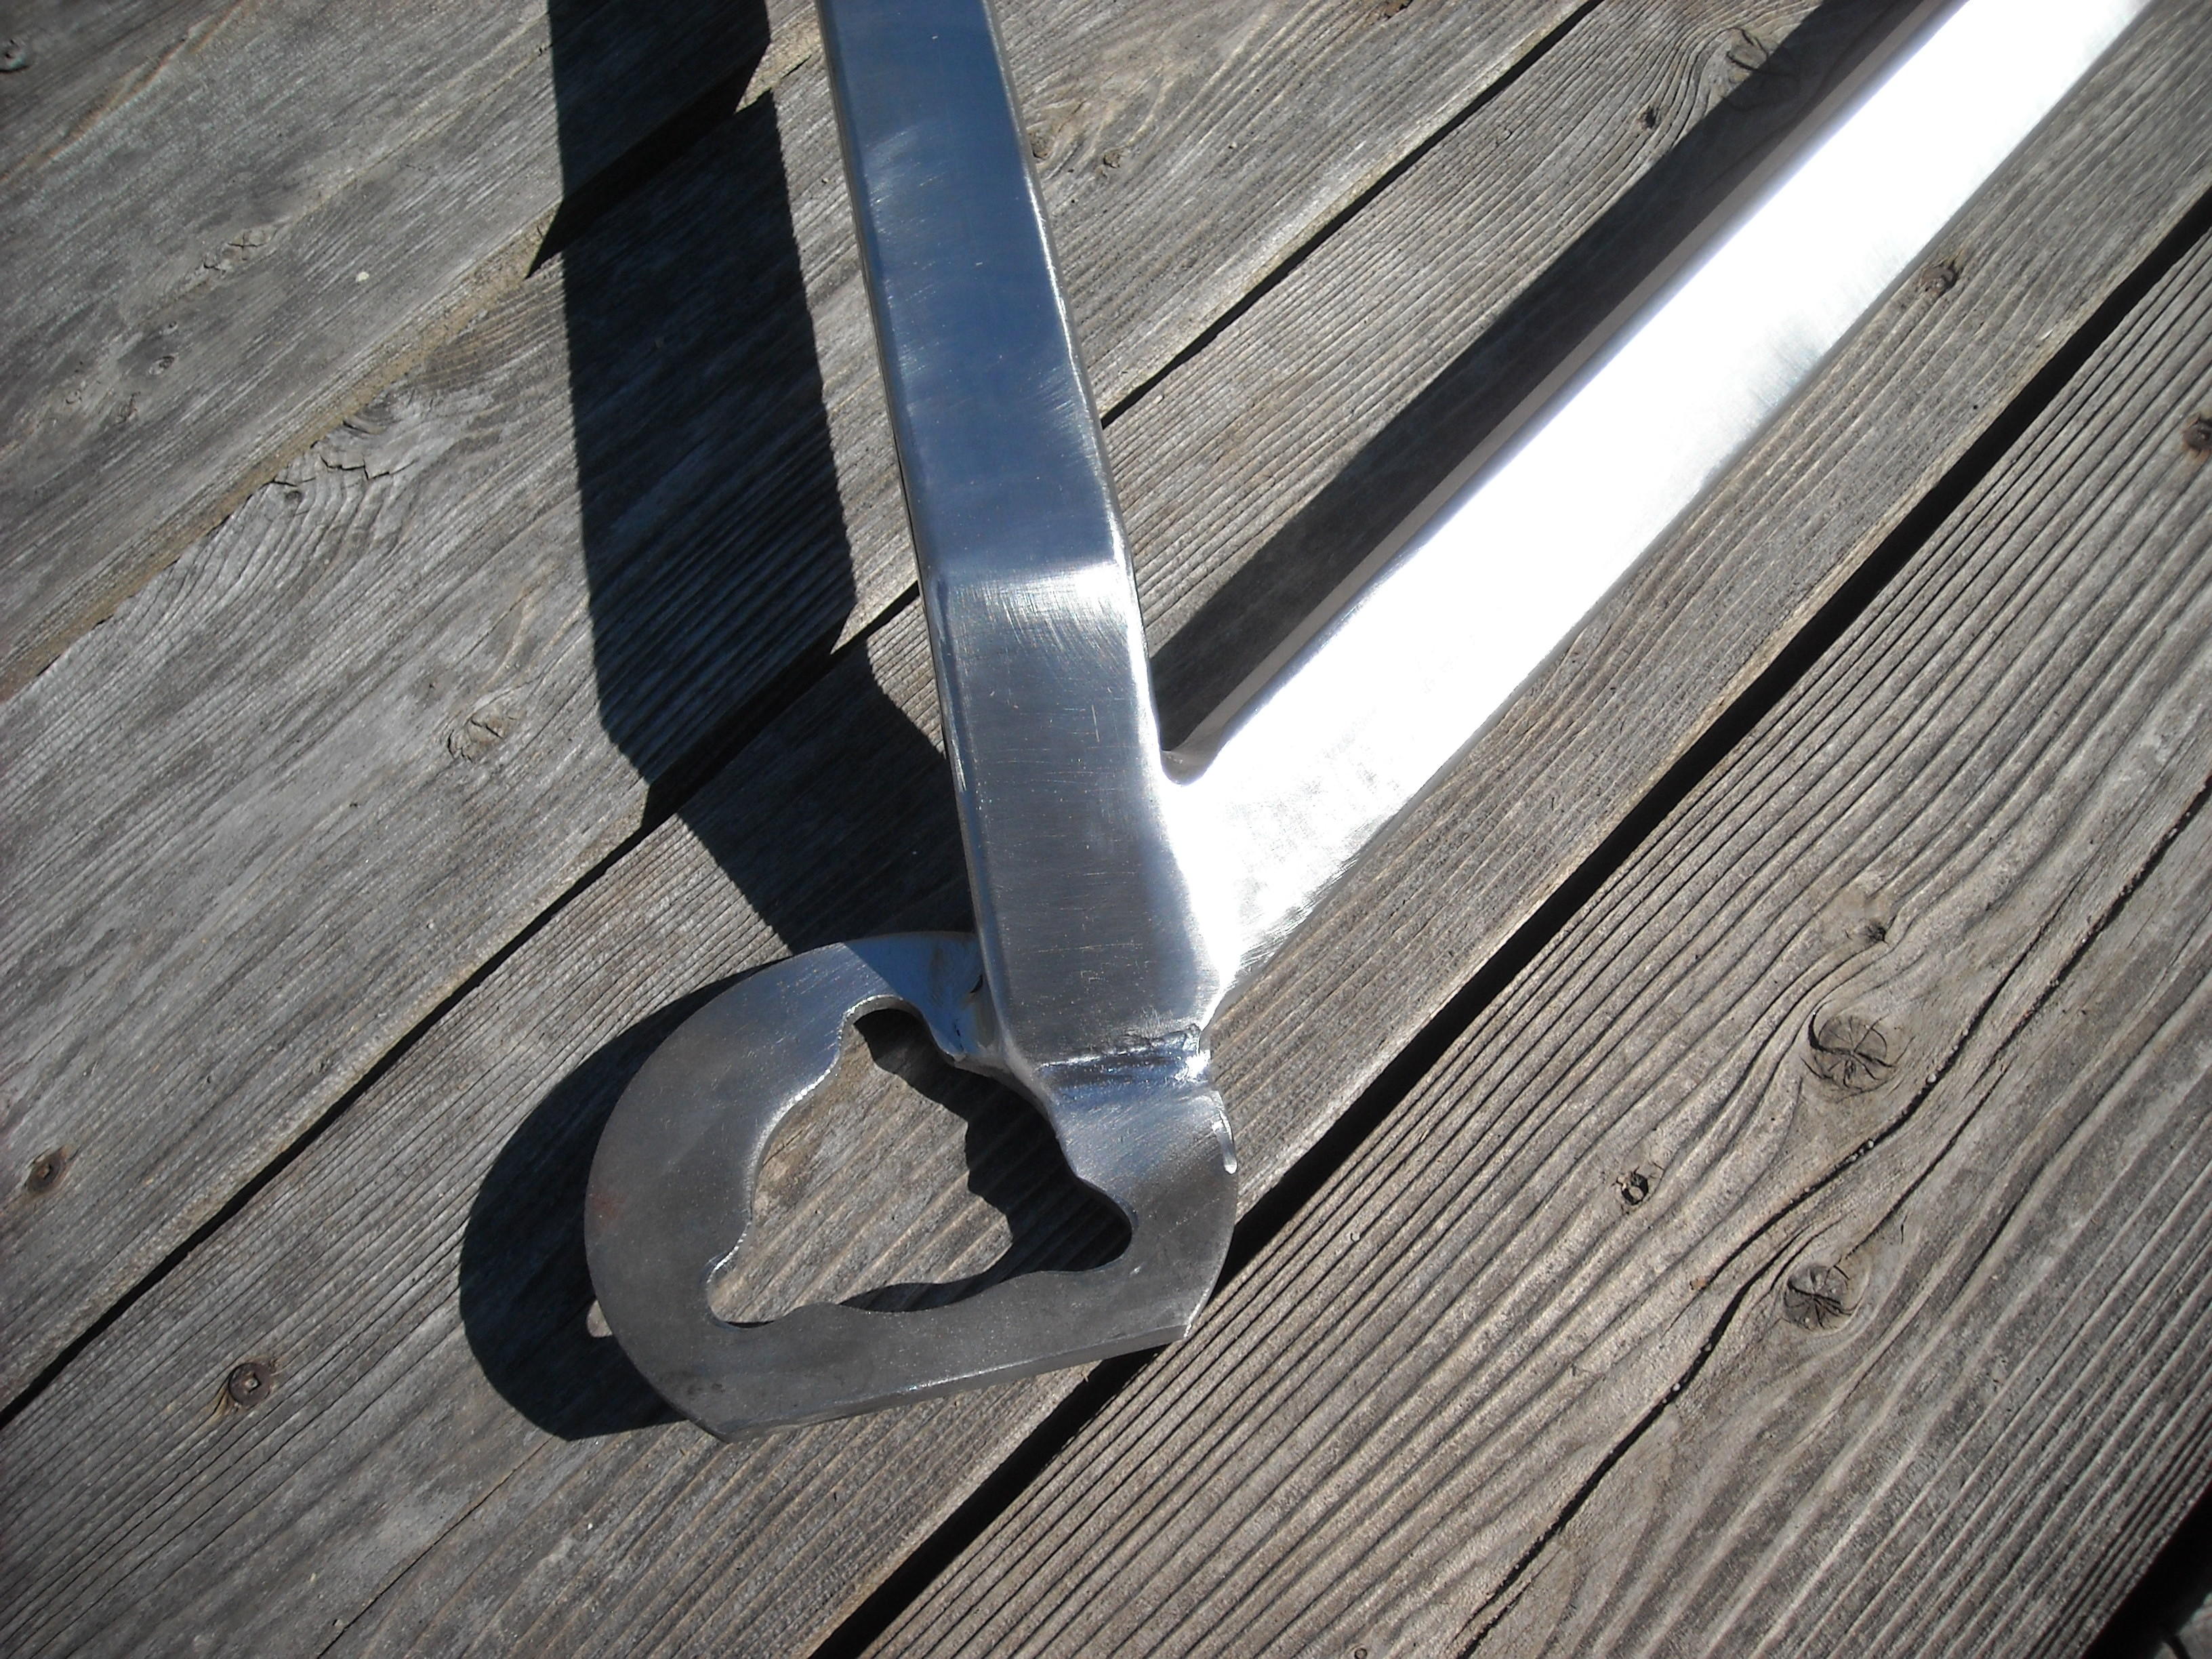
2 points2 points2 pointsHere you go, I don't care for round tube so much so this rectangle tube worked for me.


 2 points2 pointsRemove all the rear panels. Clean them real well. Spray the back sides liberally with rubberized undercoating. Hit the contact points on the metal structure the plastic adheres to. The squeaks will become inaudible.2 pointsI've had the urge to make, and at times been unable to avoid making, snarky comments to people who aren't wearing face coverings even though they are in close quarters. It feels right and wrong at the same time. People who are obviously well off and have to be educated. Only the young, pretty and vain people, worried about looking weird, or the older "don't give a crap" guys. Not sure that talking to the 70 year old people who don't give a crap will have any effect. Super-spreader! is a good one. It sounds like a funny comment. People laugh then realize... Are your parents dead? Kind of cuts, but it's true. Best used on older people without face coverings since their parents are probably in the 80% death probability group. Praying for your grandmother. Who wants to be their grandmother's killer? I asked a a young couple if they just didn't know or just didn't care. The guy tried to play ignorant. Huh? What? It was sad, seeing a grown man play stupid. The girl was young and pretty, she knew better. Killers.1 point1 pointSince I have plenty of time on my hands, I thought now is the time to add a bit of distinction to my 1970 Safari Gold 240Z. Most people add weber carbs or fender flairs. My idea is the landau top. Here is a photo of an install. Ignore the beltline molding for now, I would add the molding once I can find a manufacturer that offers one that can be screwed to the body (I do not want the stickon type). The manufacturer of the top offers one day shipping, so I will get it tomorrow and have the install completed by Saturday. I'm so excited! I'll post photos when I am done. Maybe a group buy can be arranged for other Z owners!! Keith
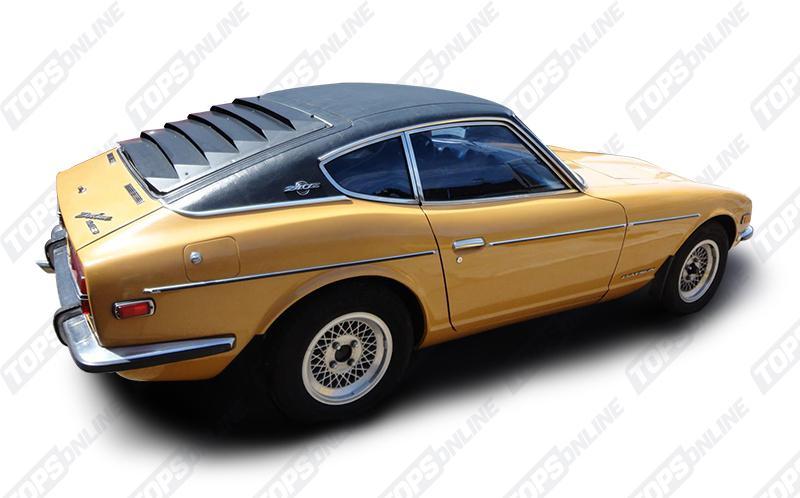 1 pointThey did clean up well, here is a picture of the automatic in my garage.
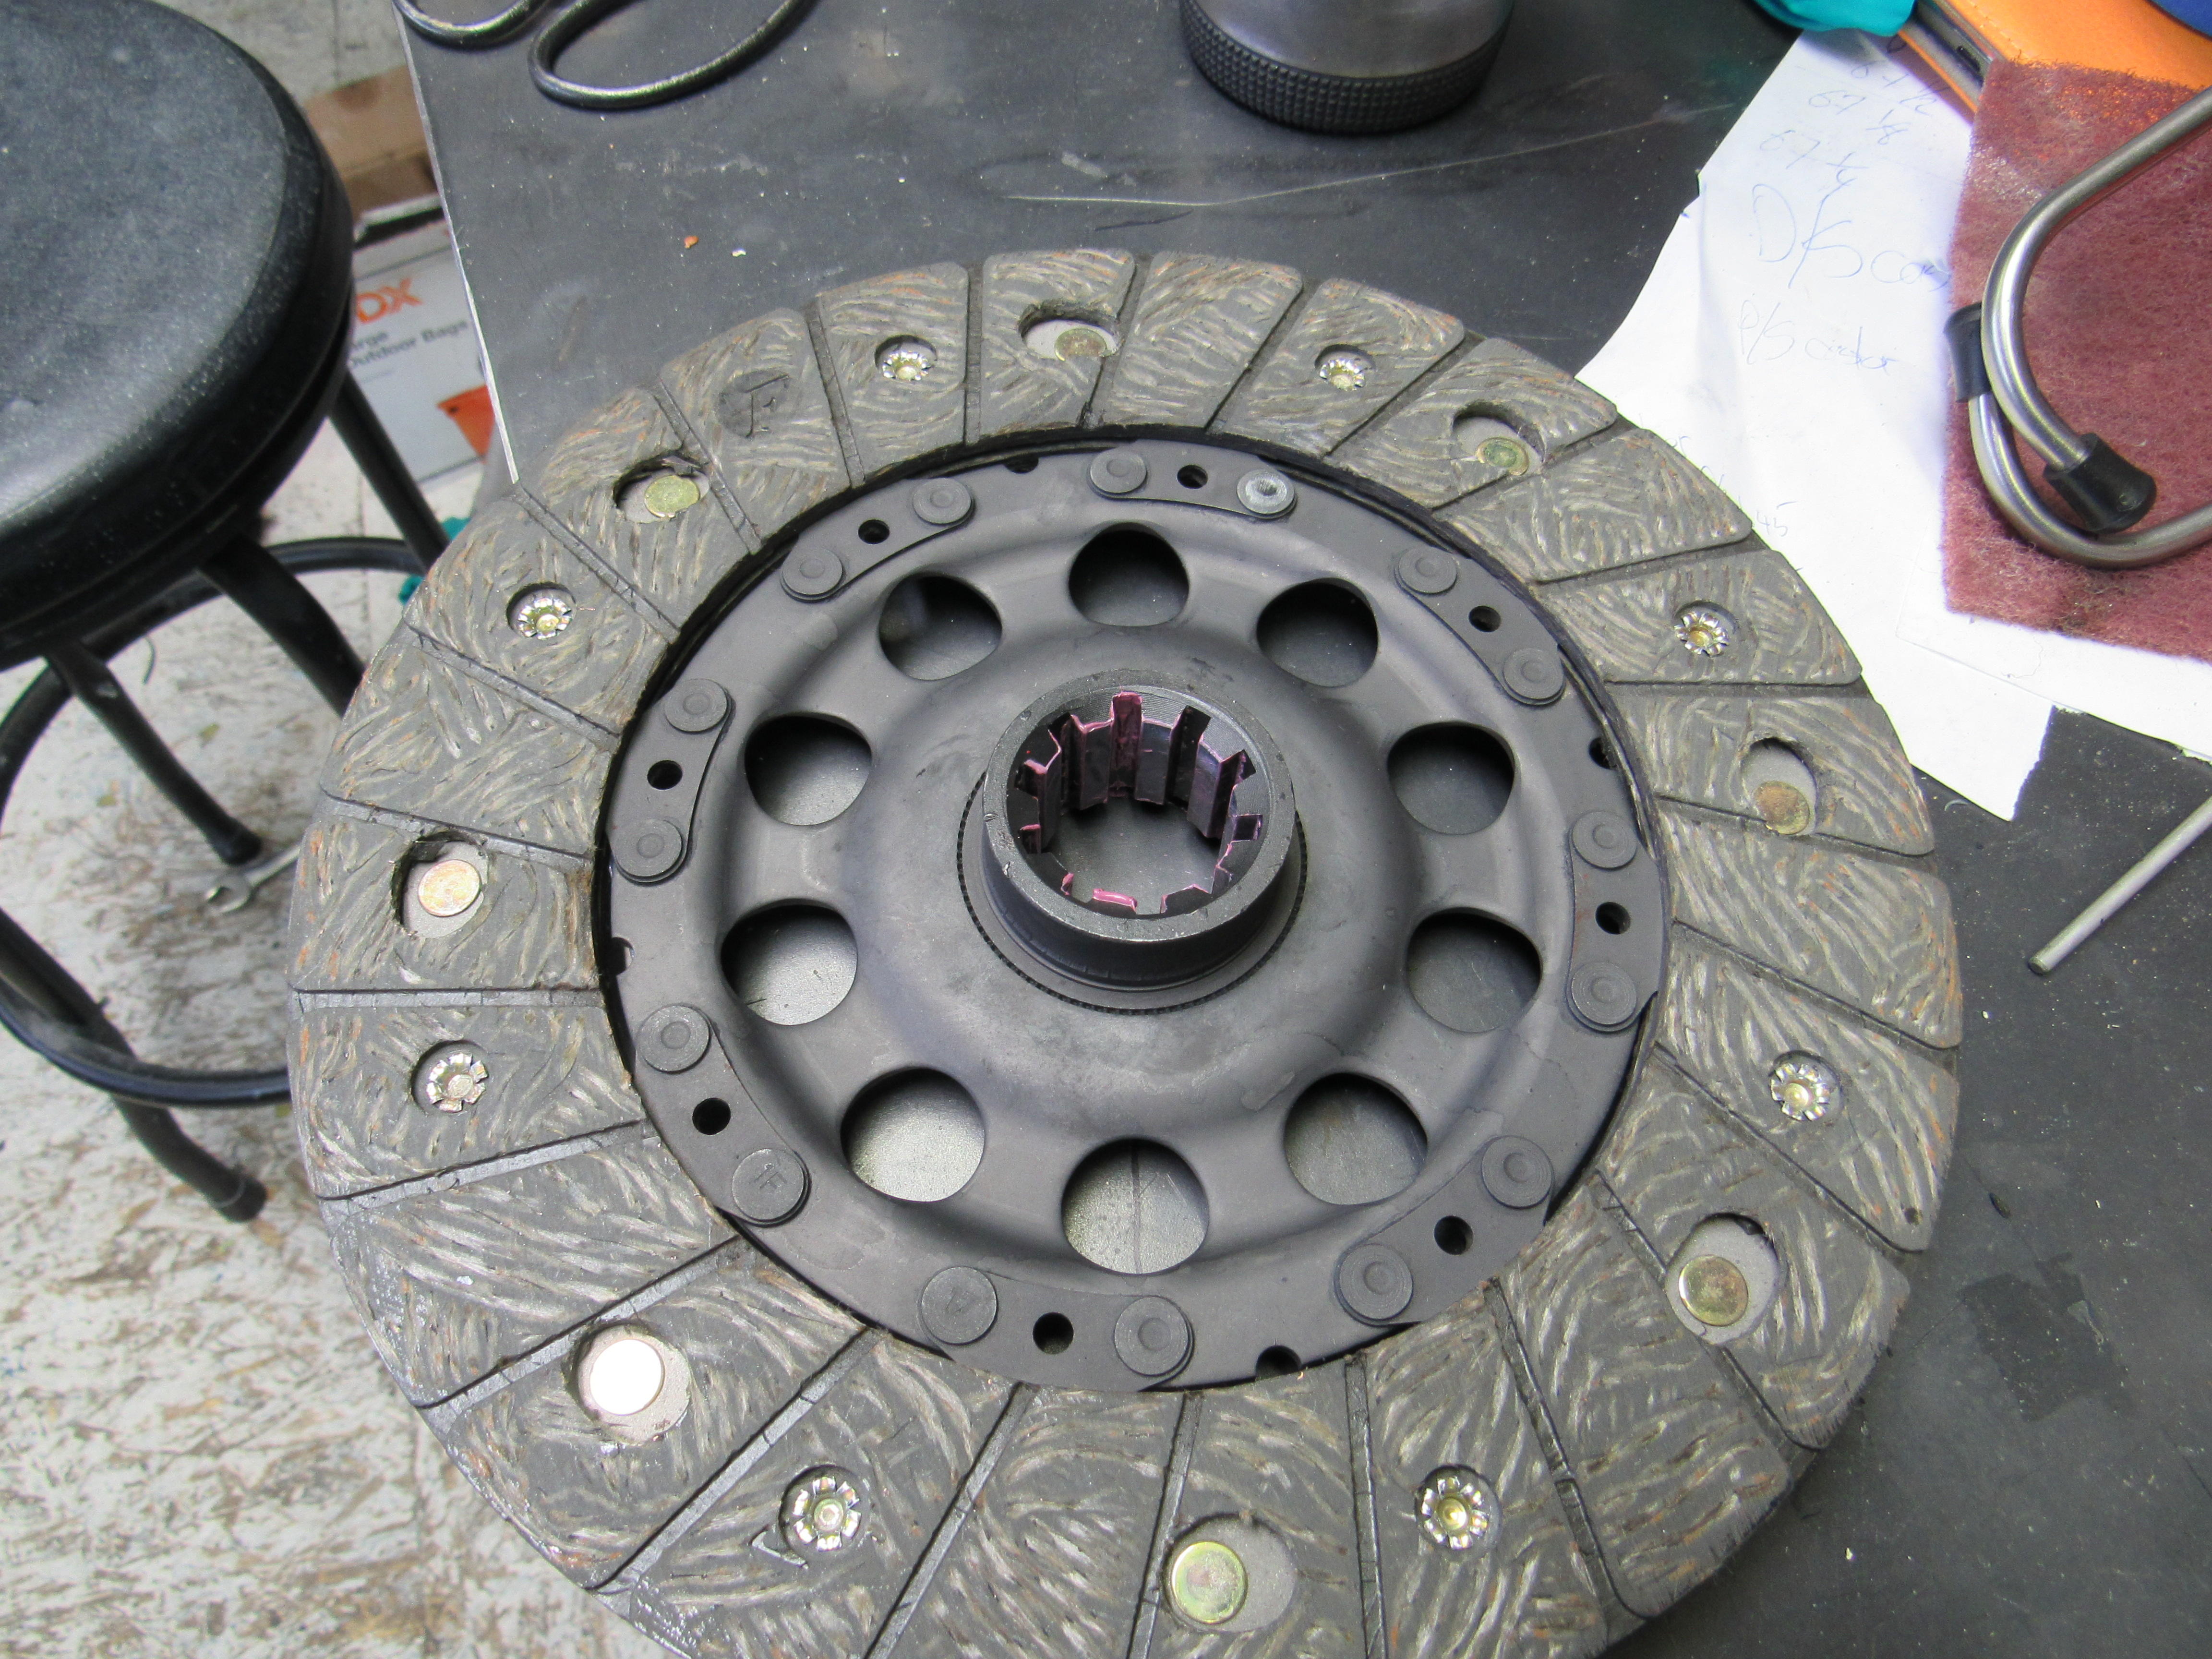
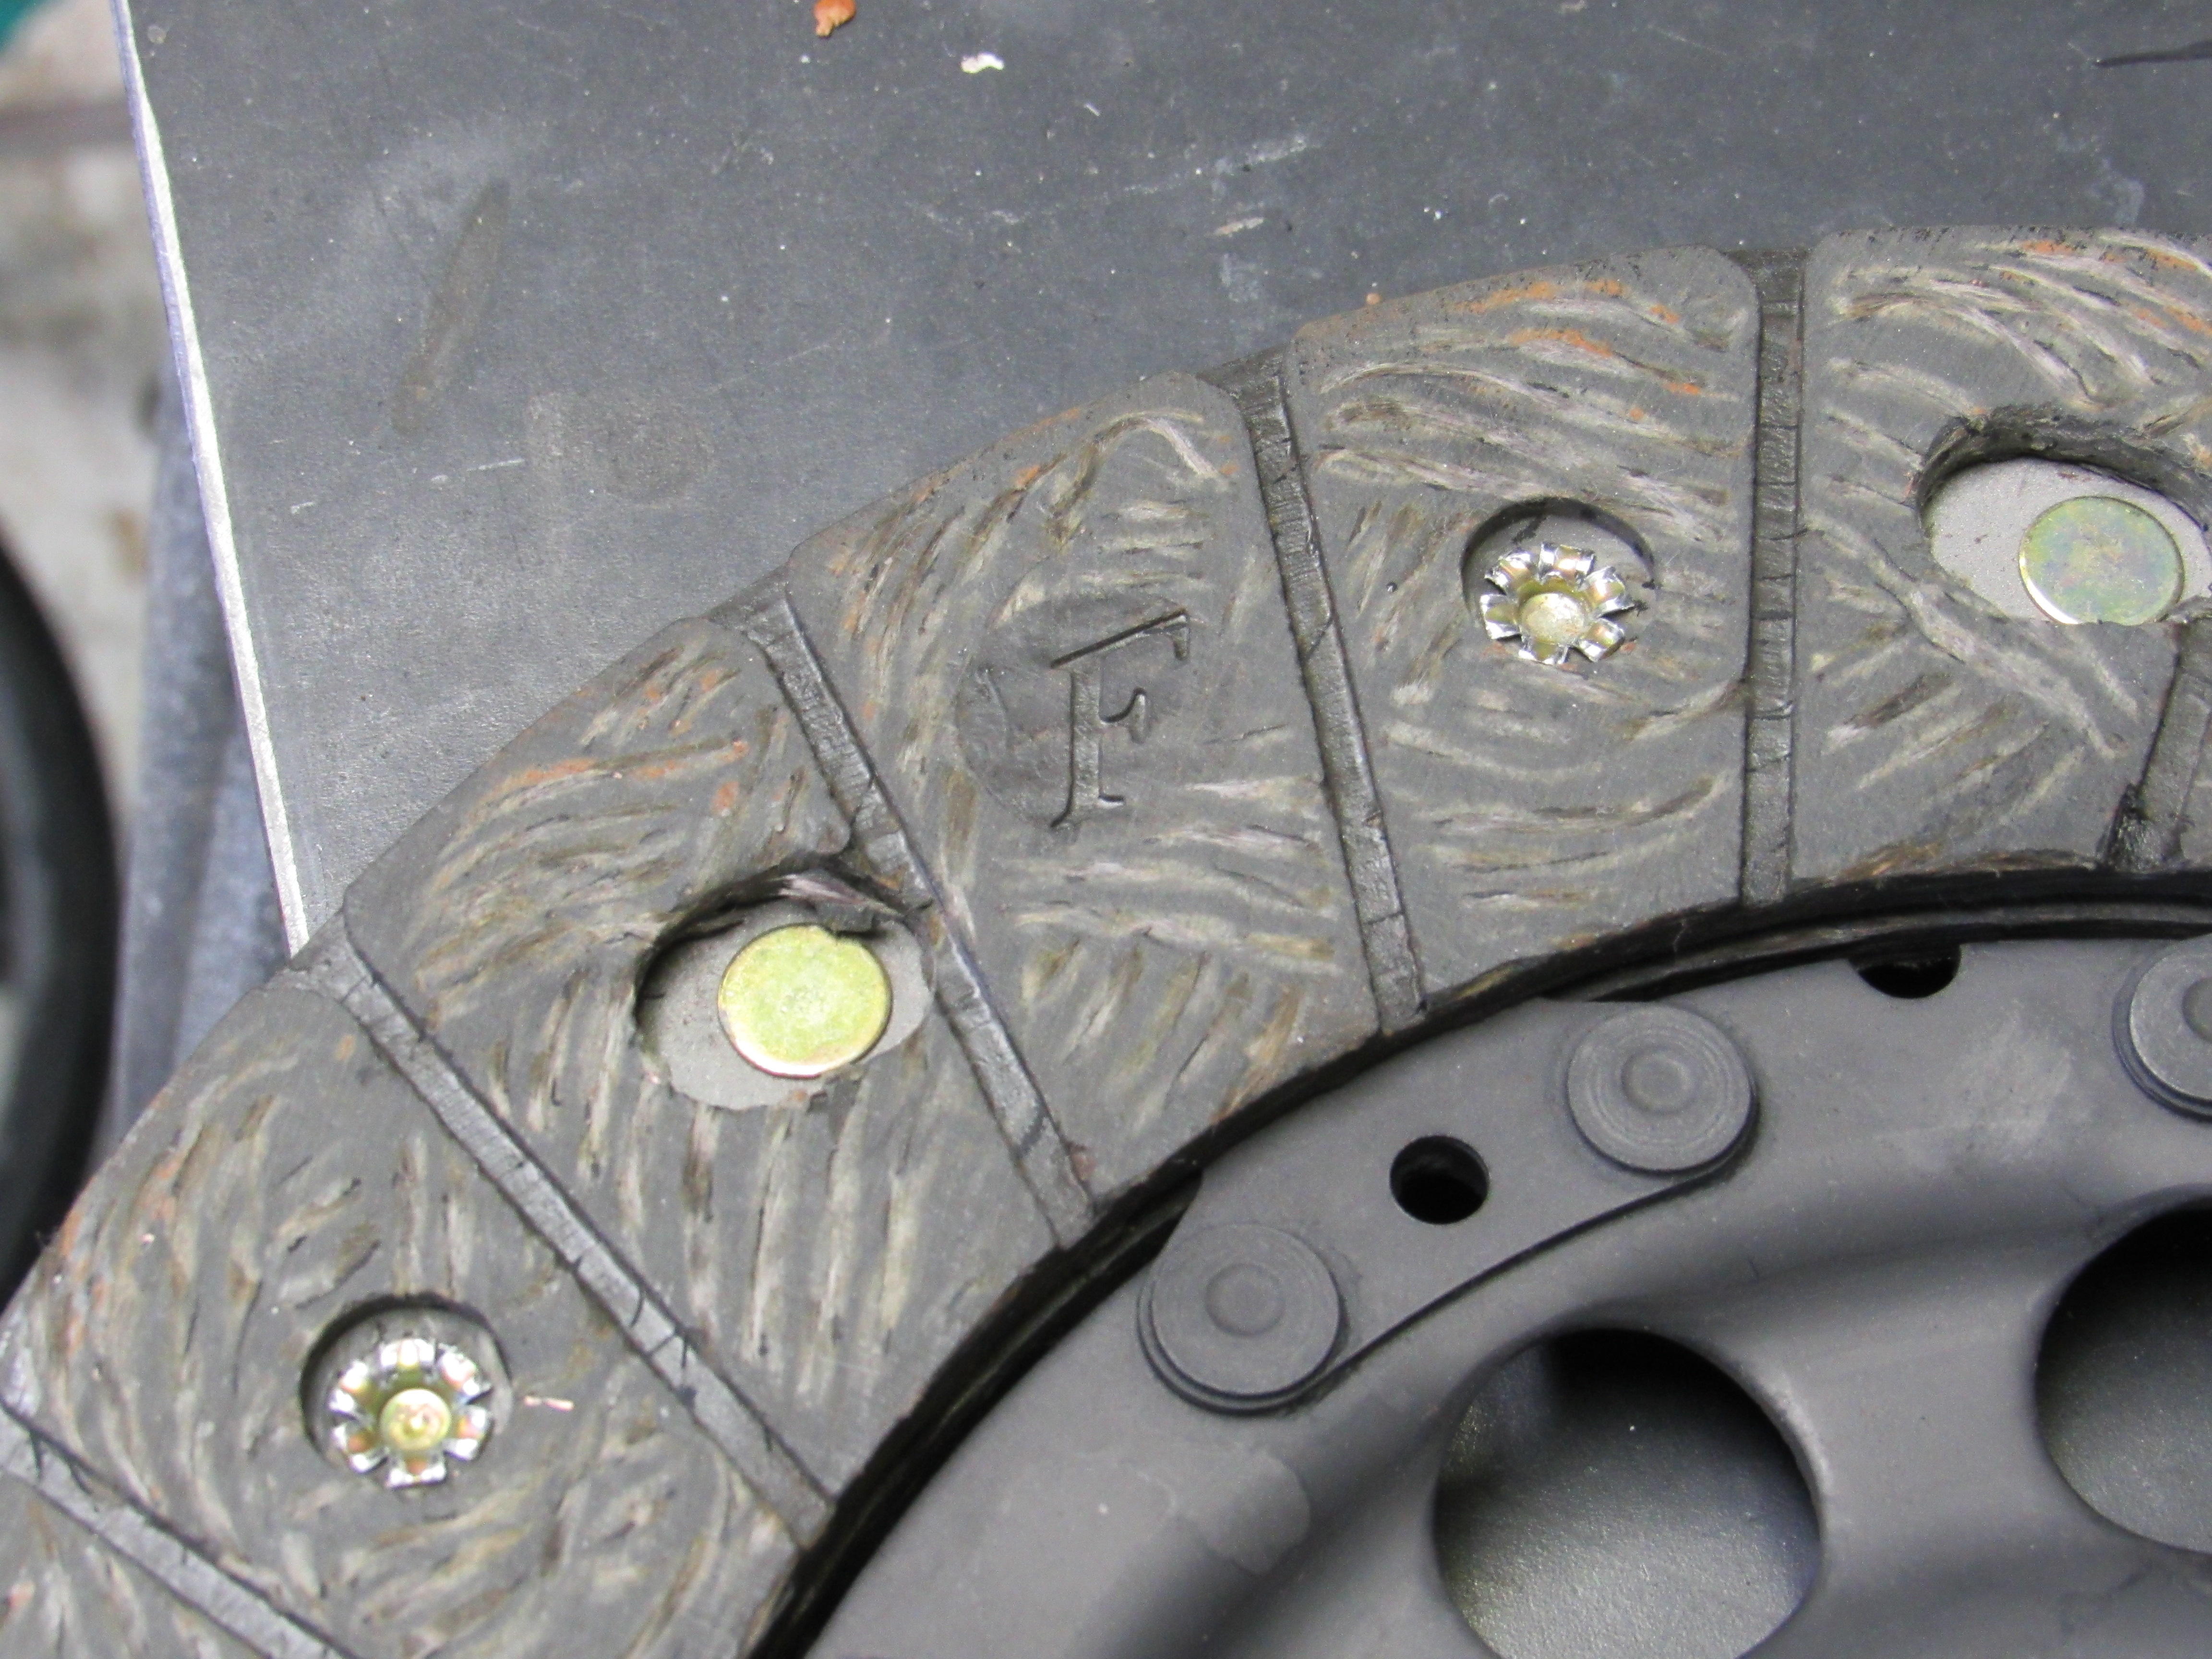
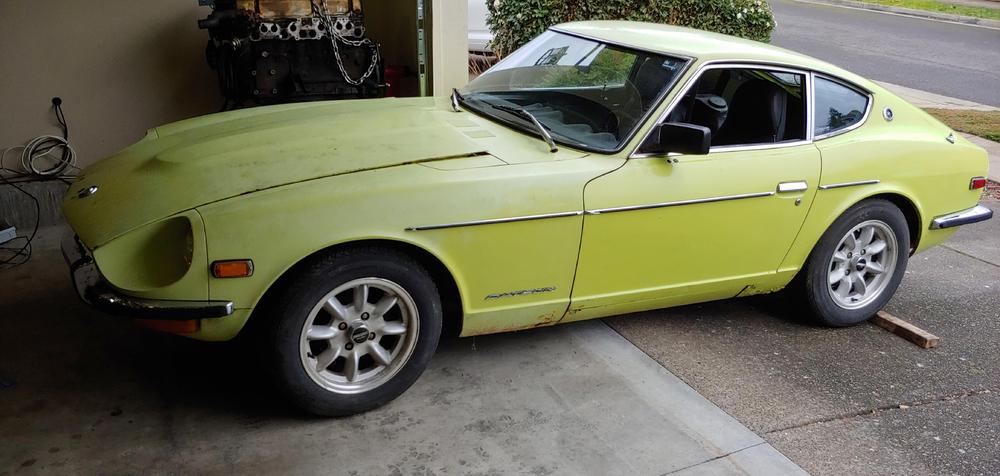 1 point1 pointThis is up next... rusted solid wiper linkage. I’ve got it apart now. Just need to make it all silky smooth again! Sent from my iPhone using Tapatalk1 pointYup, I certainly did goof up but I have a sort of plausible excuse! I installed the clutch disc backward but on one side of the disc only there is a large embossed F so I assumed that's the front, nope, that is the company logo of the manufacturer. I should have checked my pictures. But now that's it is all torn apart again I think I am going to replace the dual mass flywheel with a single mass unit, and eliminate another 15lbs. Thanks for all the help guys.
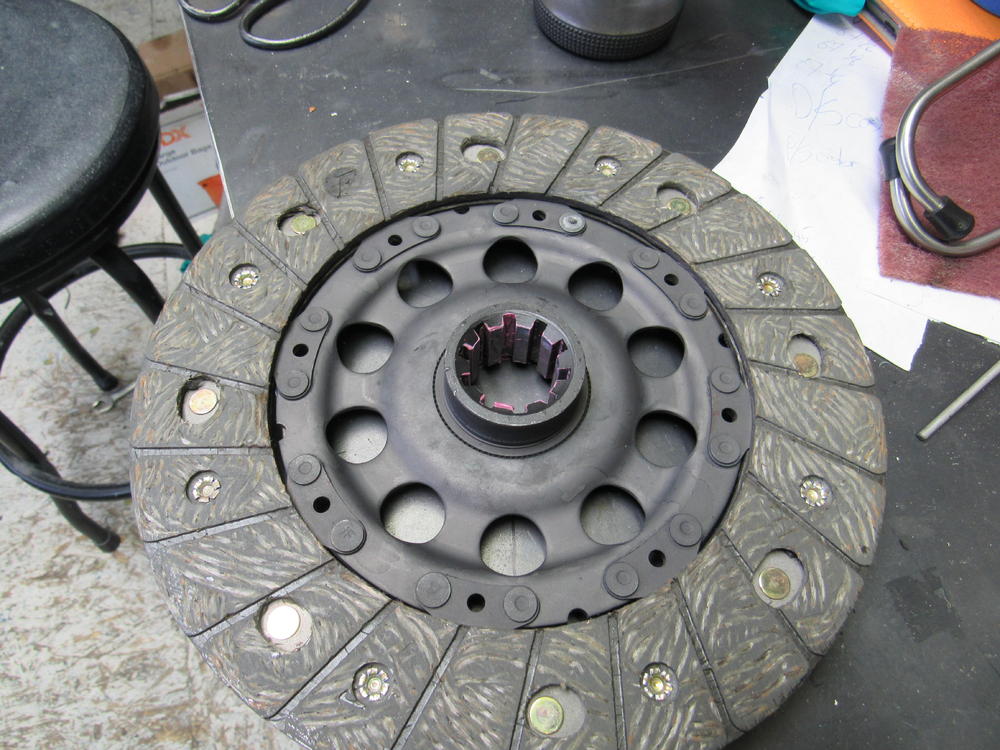
 1 point1 point1 pointMark, I used Dot5 in a number of cars and bikes over the yrs with no problems but it will dye those nice white reservoirs purple.1 point1 pointSo I had a disastrous day the other day . A spare windshield fell from my attic and hit my car on the way down the ladder . What’s this have to do with Covid19? Hagerty sent someone out to the house to write up an estimate on repairs since my car isn’t drivable right now . We are a bit paranoid about anyone coming to the house , so I had a plan to keep my distance . The guy showed up and had no mask . I asked him how was doing in the “Covid” world - I was making small talk to let him know it was on my mind . I led him behind my house to the detached garage and he coughs a couple of times and doesn’t even cover his mouth. I’m like WTF! So I called him out about it, he could tell I was pissed. He said “ it’s just a smokers hack- I smoke “ . I said it doesn’t matter , you should be covering your mouth at least . It just shows you how ill informed people are and how stupid people can be. In his case , he was just an inconsiderate arse hole . I called Hagerty and went off on the guy. Hope he gets fired .1 point1 pointGrill in matching matte graphite. Sent from my iPhone using Tapatalk1 point1 point1 pointAs long as you know the limitations. I just wanted to make sure you did your homework. As for being hydrophobic, there will always be moisture in the brake system. Hydroscopic fluid suspends the moisture while hyrophobic fluid does not, meaning that the moisture will settle and sit in the calipers. They should be bled from time to time to eliminate the moisture. Moisture at the calipers not only boils very easily, but it can corrode the pistons.1 point1 pointDot 5 synthetic for the win! No paint damage from the three gallons of fluid I spilled! Sent from my iPhone using Tapatalk1 point1 pointAbout 2 weeks late with this one. As a CPA I guess you are in Tax Day Shock - oh wait, we all have 60 day extensions!!!1 point1 pointI was very pleased with how well my solution worked. I don't do a lot fabricating, so I was flying by the seat of my pants. JB Weld is great stuff when used in the right application.1 point1 pointIt's been my suspicion all along that the reason everyone wearing a mask (of some sort) was played down by the Feds was they knew of the extremely limited stock and the panic that would ensue. Imagine, if the Feds had said, Everyone has to mask up. It would have been uglier than it already is. However, looking at old photos of US cities in 1918, I found one of a man boarding a streetcar in Seattle. Everyone was masked in bandanas and the like. No N95s back then. The caption stated that no one was allowed to ride without a mask.1 point1 pointSteve - thanks for your comment and link. I actually have the two brackets I requested but the studs were broken off on both. Your link inspired me to salvage them by grinding the heads down flush and then popping out the remaining stud. Now to follow the rest of your link with replacement bolts. Jim1 point1 pointOne more thing. Those fingers are actually all part of one single sheet of steel. Called a diaphragm spring. It can break and shift, not moving the plate anymore. But if the fingers aren't even the pressure plate assembly is probably broke. Details don't matter much. But they're fun. http://www.tpub.com/basae/90.htm
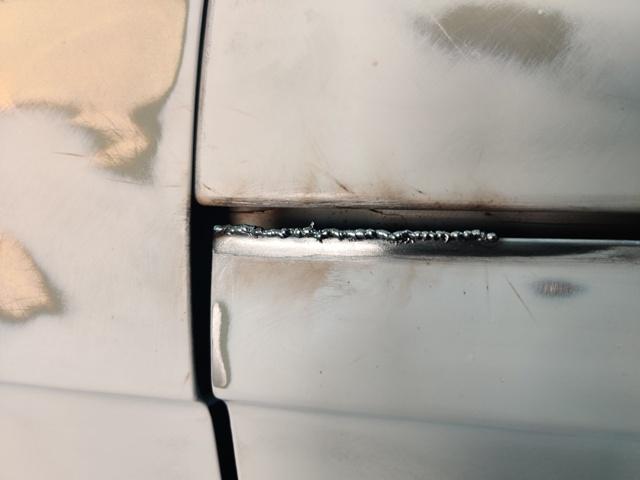
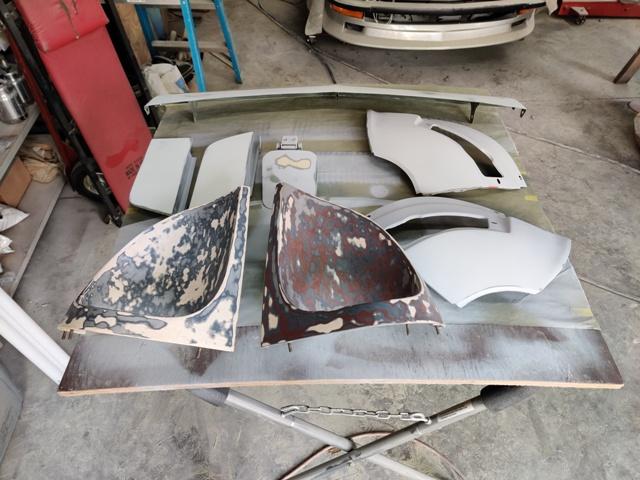
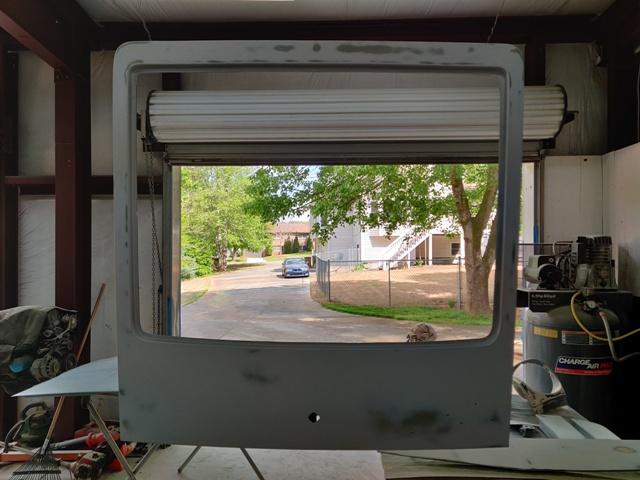
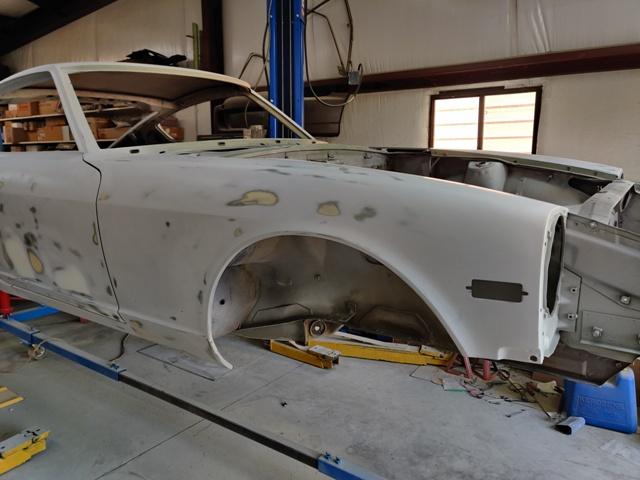
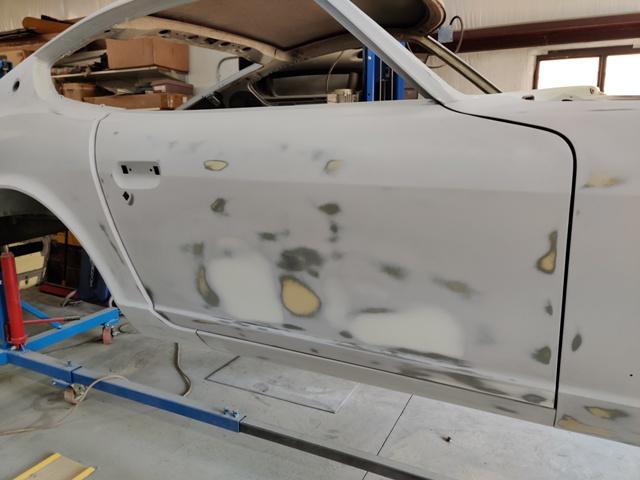
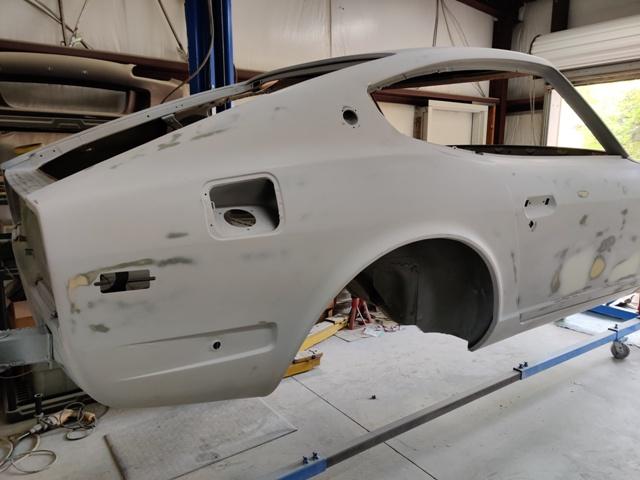
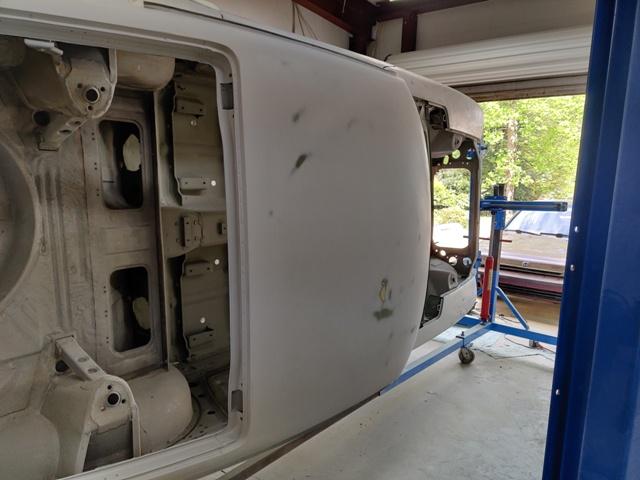
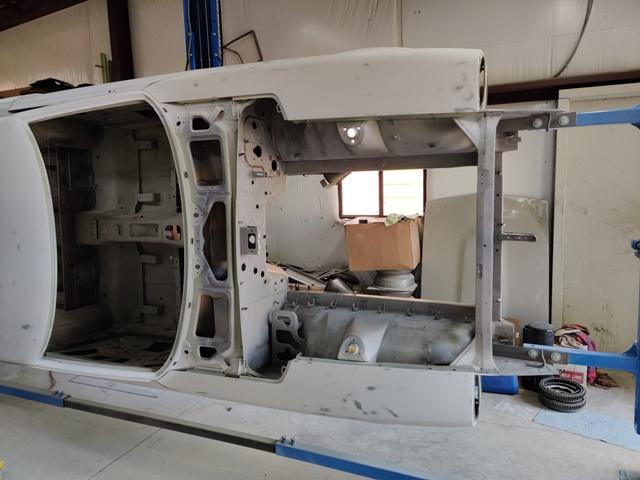
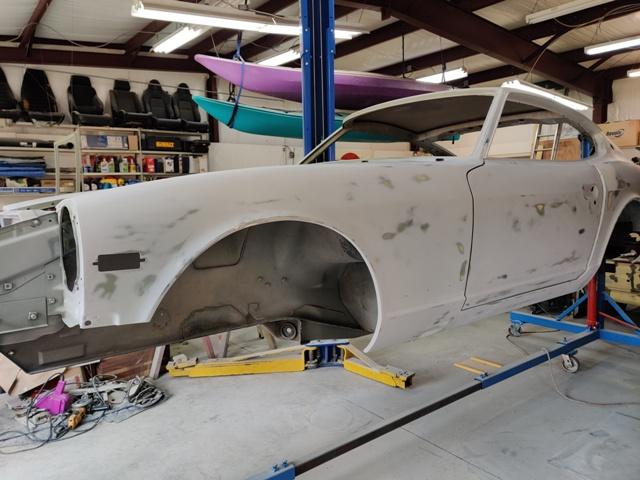
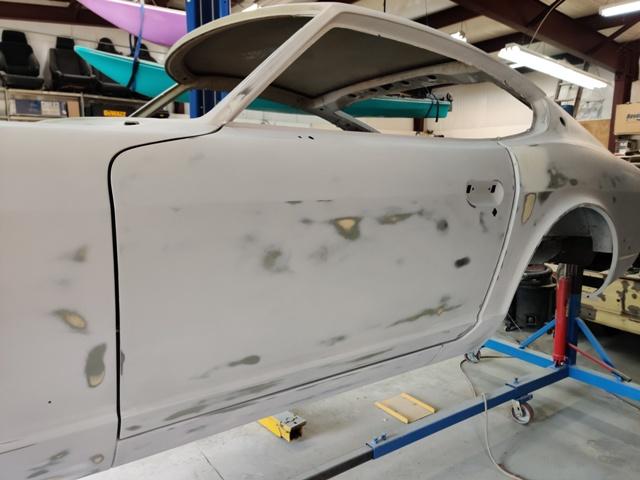
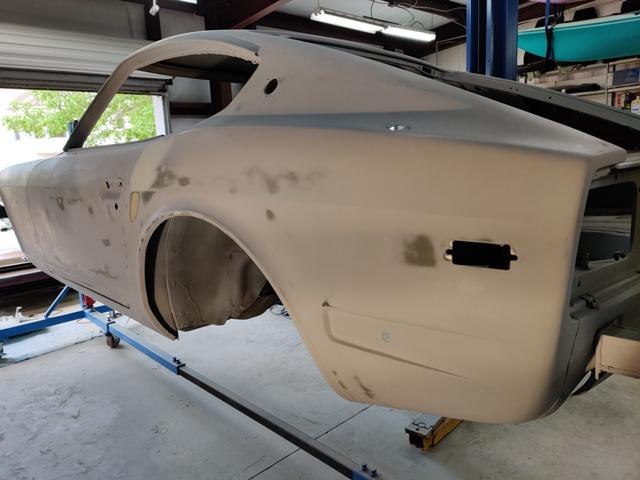
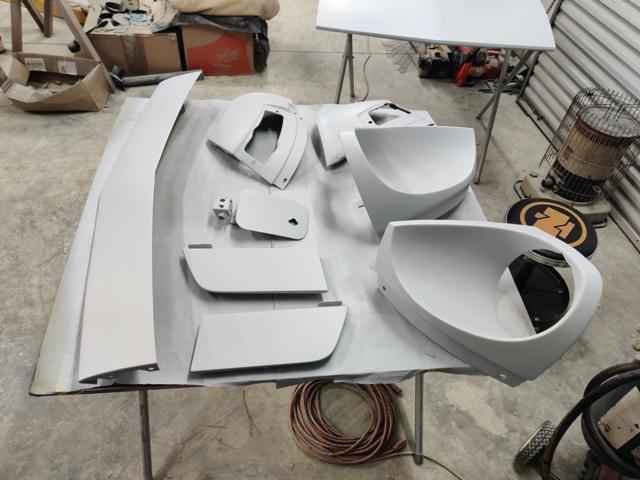
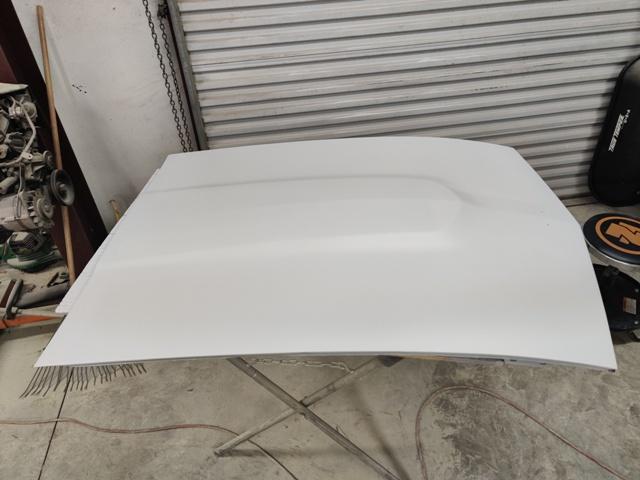
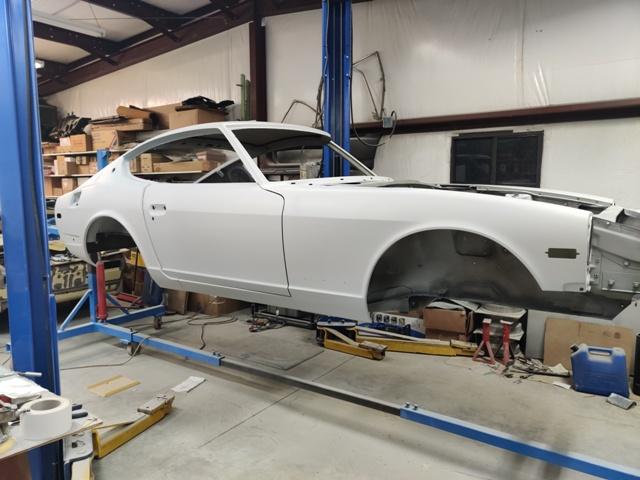
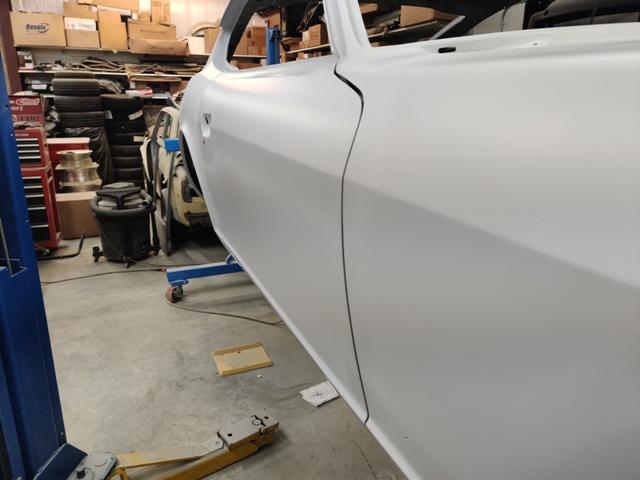
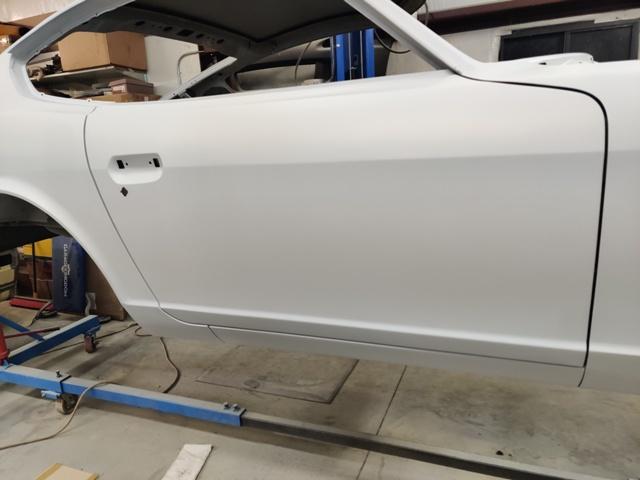
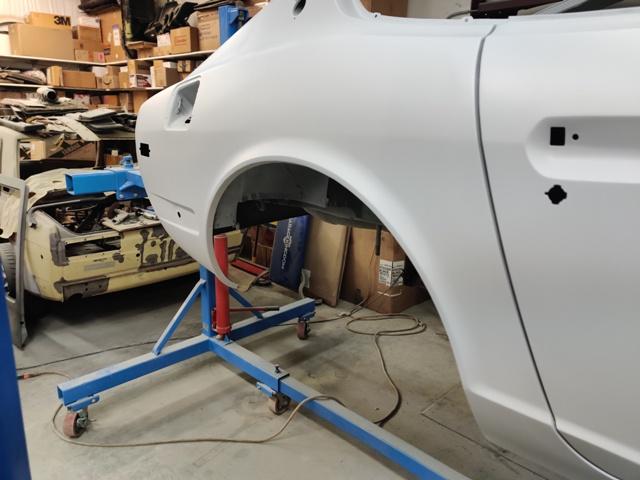
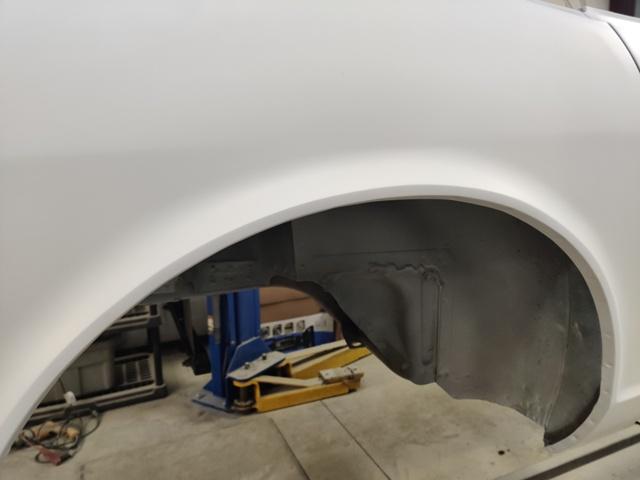
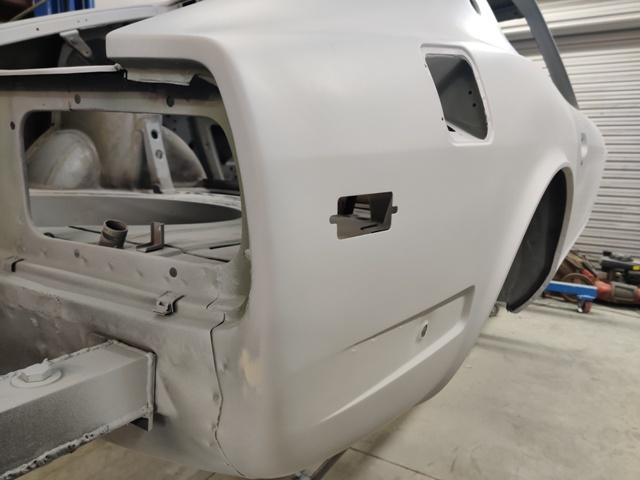
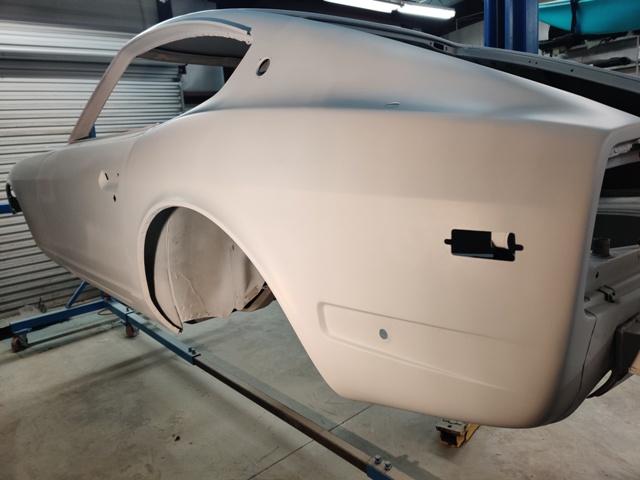
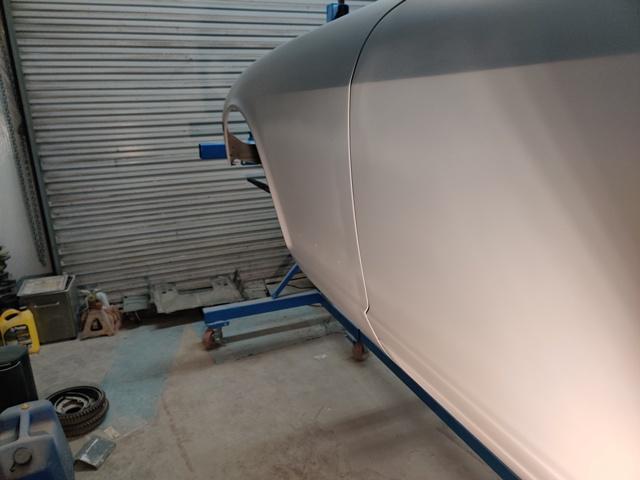
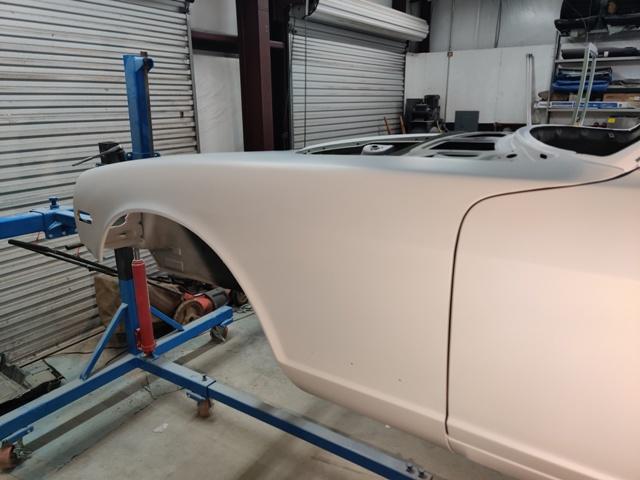
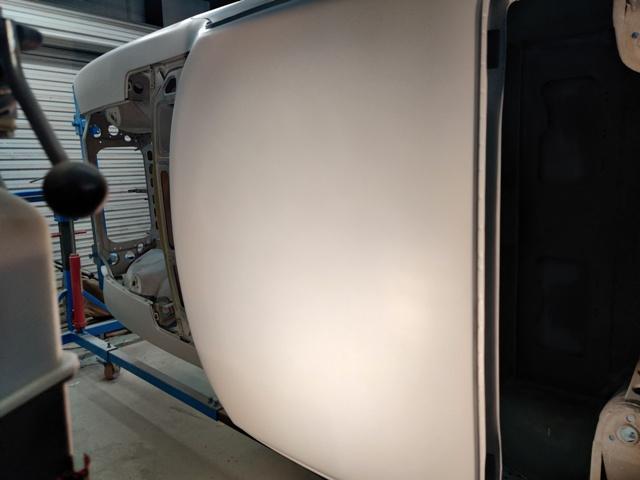
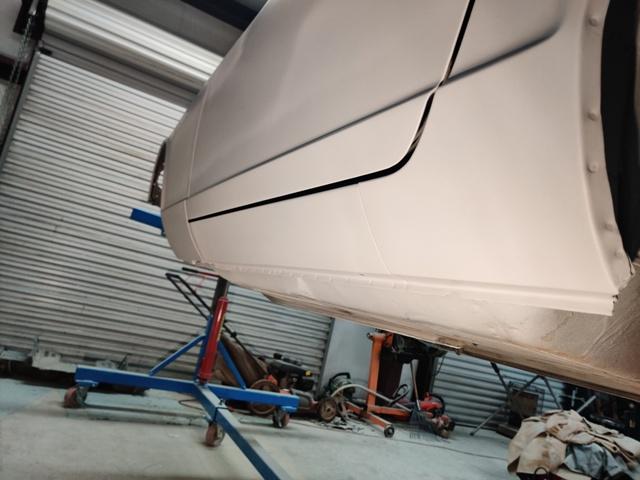
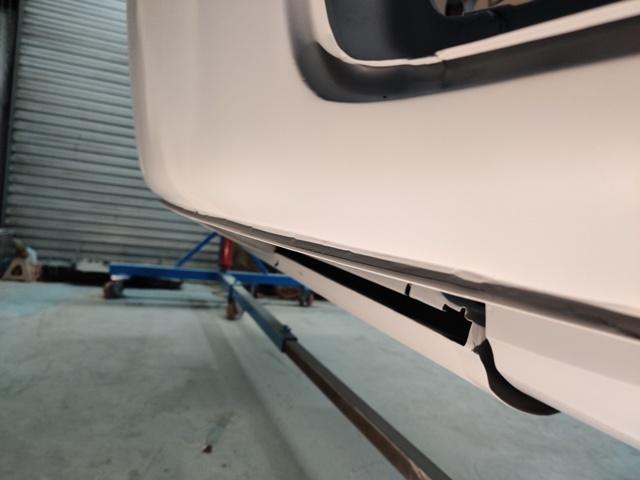
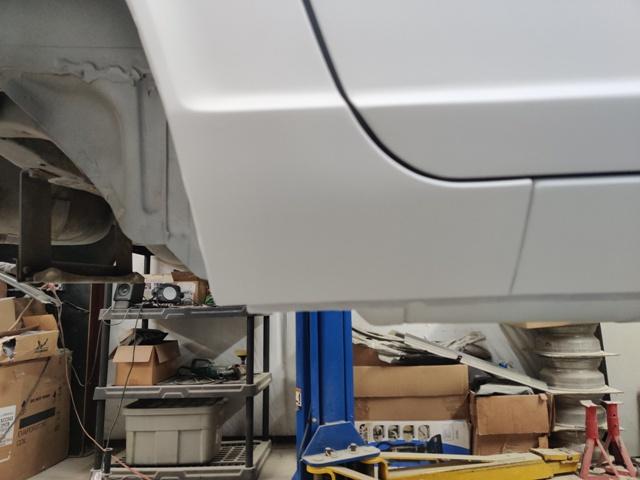
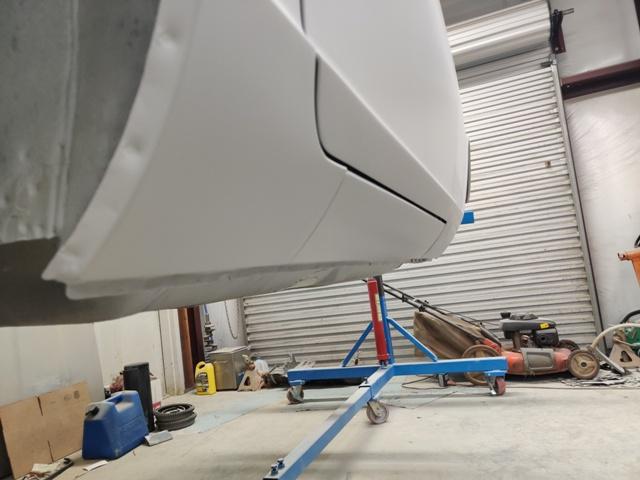
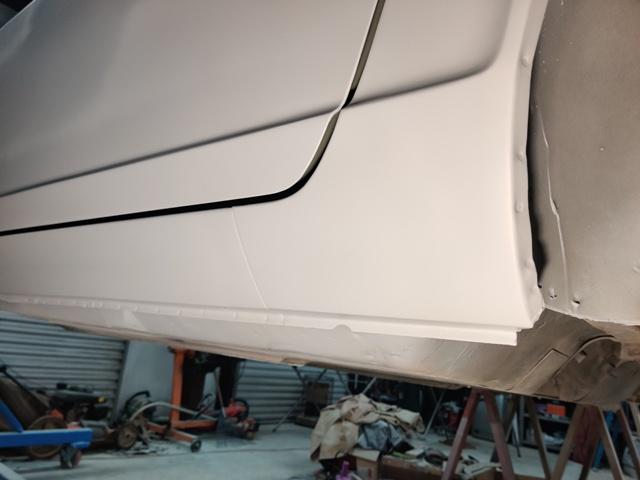
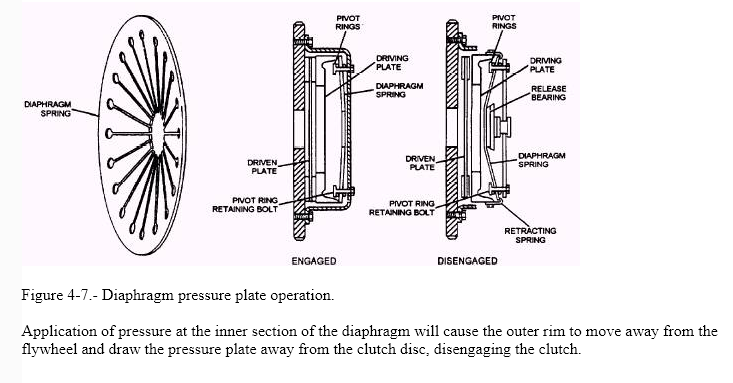 1 pointI am not prepared to accept that conclusion at all without further investigation .... I can offer the following: I have several NOS parts, never installed, and in factory primer, that I will measure this weekend. (Fenders, rear quarter, inner rocker, inner wheelhouse that I will re-measure and post here. I also still have a door skin that I just removed from a 72 as well. I can't do it until the weekend though so please be patient ....1 pointI agree with grannyknot....post here too. Looks like a challenging restoration. You are very brave on the rusty one.......my favorite color for a Z!1 pointMeticulous measurements, backed up by supporting info re panel originality and paint application, so pretty hard to argue with. I am inclined to agree, then, with your conclusion that the factory panels appear to have been made from 0.8mm sheet. That sits right in the middle of the spec range for 22-gauge. How do we reconcile this with @ConVerTT's values of 20-gauge for the door skins?1 pointWhen a joy flight goes wrong. https://www.theguardian.com/world/2020/apr/14/man-accidentally-ejects-himself-from-fighter-jet-during-surprise-flight1 pointI assumed the pilot coughed.1 point1 pointFlying car video. https://autos.yahoo.com/watch-suzuki-swift-straight-road-142700483.html1 pointIt is really past time for an update... 35 pics of body work follow - a lot of work to resize and upload and format ?. As always, clicking on the images gives you a large version. Passenger side door (upside down - front door gap to fender is the vertical gap) - cleaned of primer, and touch up weld to fill gap (center pic): Fiberglass headlamp housings had not been primed yet - they were just sanded down. You can see the original primers that were used, first red, then dark grey. Following shows after guide coat and sanding of the two coats of high build primer. I broke through in lots of places. The panels were not nearly as straight as they needed to be. I switched to a higher quality, fine body filler for the areas that needed it, like the passenger door: Again, and I can't stress enough, if you want to spend less time and less aggravation on body work, spread your filler across large expanses of the panel (even the whole panel) instead of a little bit here and a little bit there like I always think I can get away with. Left rear quarter panel, one of the straightest panels on the car, needed some filler in places at this "late" stage of the game. Imperfections of literally a thousandth of an inch can be seen when looking at a glossy panel. Using proper sanding technique is also very important to achieving a panel without waves. 3+ more coats of high build primer applied over the weekend. Places that I knew were not 100% right got an extra 1-2 coats, for a max of 5 in certain areas. I am hopeful that guide coat and sanding process will get me where I need to be, but I suspect that the car will still require another round of primer and sanding after this one is worked down. Body lines are kept really sharp at this point in the game. They can be softened and made consistent later. The body line above the rear fender appears to be a bit light to me, indicating the area is a touch low. We'll see how things take shape (or don't) as the next round of guide coat and sanding progresses in this area. Damaged rear edge of rear quarter panel looks much better now: Door gaps (to fender, to quarter, to rocker, etc.) and alignments of all panels have to be done before you get to this high build primer stage. You can't be yanking and tweaking metal now. I am letting the primer dry for a week so shrinkage can occur. I may leave it for two weeks, and then do the guide coat and sanding process. Plenty of other work that can be done in the meantime.
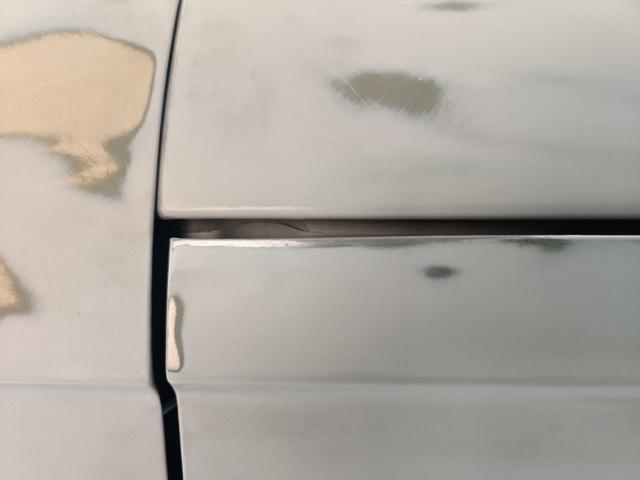


 1 point


Important Information
By using this site, you agree to our Privacy Policy and Guidelines. We have placed cookies on your device to help make this website better. You can adjust your cookie settings, otherwise we'll assume you're okay to continue.