zKars
Supporting Member
-
Joined
-
Last visited
Everything posted by zKars
-
Well I didn't make to the Edmonton show with the Z. Just ran out of time on Saturday solving a little ignition problem. Took the 510, had fun. Today I worked through the ignition problem. Very interesting problem and solution. I had an intermittent spark miss as you apply throttle under load, getting worst as the RPM's rise. Long story short, it boiled down to bad connections. Even though I used brand new spade connector crimps with brand new terminals and a pro crimper to connect to various spades on the ballest resistor and terminal strips on the coil terminals, they were making poor connections when pushed onto the terminals. The fix was stop using them and go to soldered on ring terminals on the coil posts, and soldering on wires to the ballast resistor to completely remove the use of the spade connectors. They seem to press on tightly, but if you wiggle them once all the way one, they are NOT tightly connected. And they get worse each time you disconnect them. These are terminals purchased from Vintage Connections. They sell two qualities of the female 1/4" spade connectors. One are made of thin brass, the other is much thicker and stiffer, BUT they latch SO tightly that you pretty much can't push a 4 or more terminal connector together with pliers. The thinner ones are great, BUT if you mate them more than once or twice, they FM side loosen up and the connection goes to pot. Both have their issues. Along the way I also discovered two, yes two bad NEW mechanical fuel pumps. At one point I was wondering about fuel volumes under load and if that maybe part of the "missing" problem, ie going lean. I had installed one of these "tin can" style replacements that I foolishly bought a while ago, when I first got this thing running again. Maybe it is as bad as they say, I think. So I recently bought a GMB brand pump that looks like the original, so I put it on. It worked for about 10 min of test and tune driving. Suddenly the car wouldn't restart. As I was in the throws of solving ignition problems, I was about to light a fire under it all, wonder WTH could possibly be wrong now. It usually starts instantly with the slightless touch of the key. So I take a hose off of one carb, and crank the motor. Not even a dribble. You've GOT to be kidding me. Take the hose off the pump outlet. Still not even a dribble. So I put the tin can back on. I leave the hose off to see what it is doing. Well it's dribbling, but sure as hell not pumping properly. Ok, that's it, off it comes, both go in the scrap metal bin, and I pull out my NOS Kyoto or whatever pump I've been hoarding and bolt that on. OMG that thing pumps like a freaking fire hose. I'm still stinking of gas from the bombardment. So, DO NOT use that tin can thing (didn't we already know that?) and don't bother with the $37 GMB pump, it's trash too. I'll have to take it apart and see what ripped. So today's lesson? Even when you have a bunch of NEW parts, no matter how carefully installed, don't trust nothing. And now I can go for a decent little toodle around town this evening and get some proving miles on this thing and GET IT SOLD.
-
SEM vinyl dyes are another approach to the problem. They can be customs mixed by a paint shop to match pretty much anything.
-
Heat is to ensure adhesion. It helps with conforming it to tight radii as well, Without a perfectly clean pristine metal surface, I find this B-Quiet Extreme doesn't adhere well without heat. On a hot day with a roller it's pretty good, but a little heat gun ensures a forever bond.
-
The right price is a tough call. Aim high, wait, lower the price, wait, repeat might work. I also feel that emphasizing the basic 'good' in the advertising, like rust free, straight, length of ownership, and having a very thorough set of photo's that back up the quality and details will help. Other than that it really is just waiting for the right buyer to show up.
-
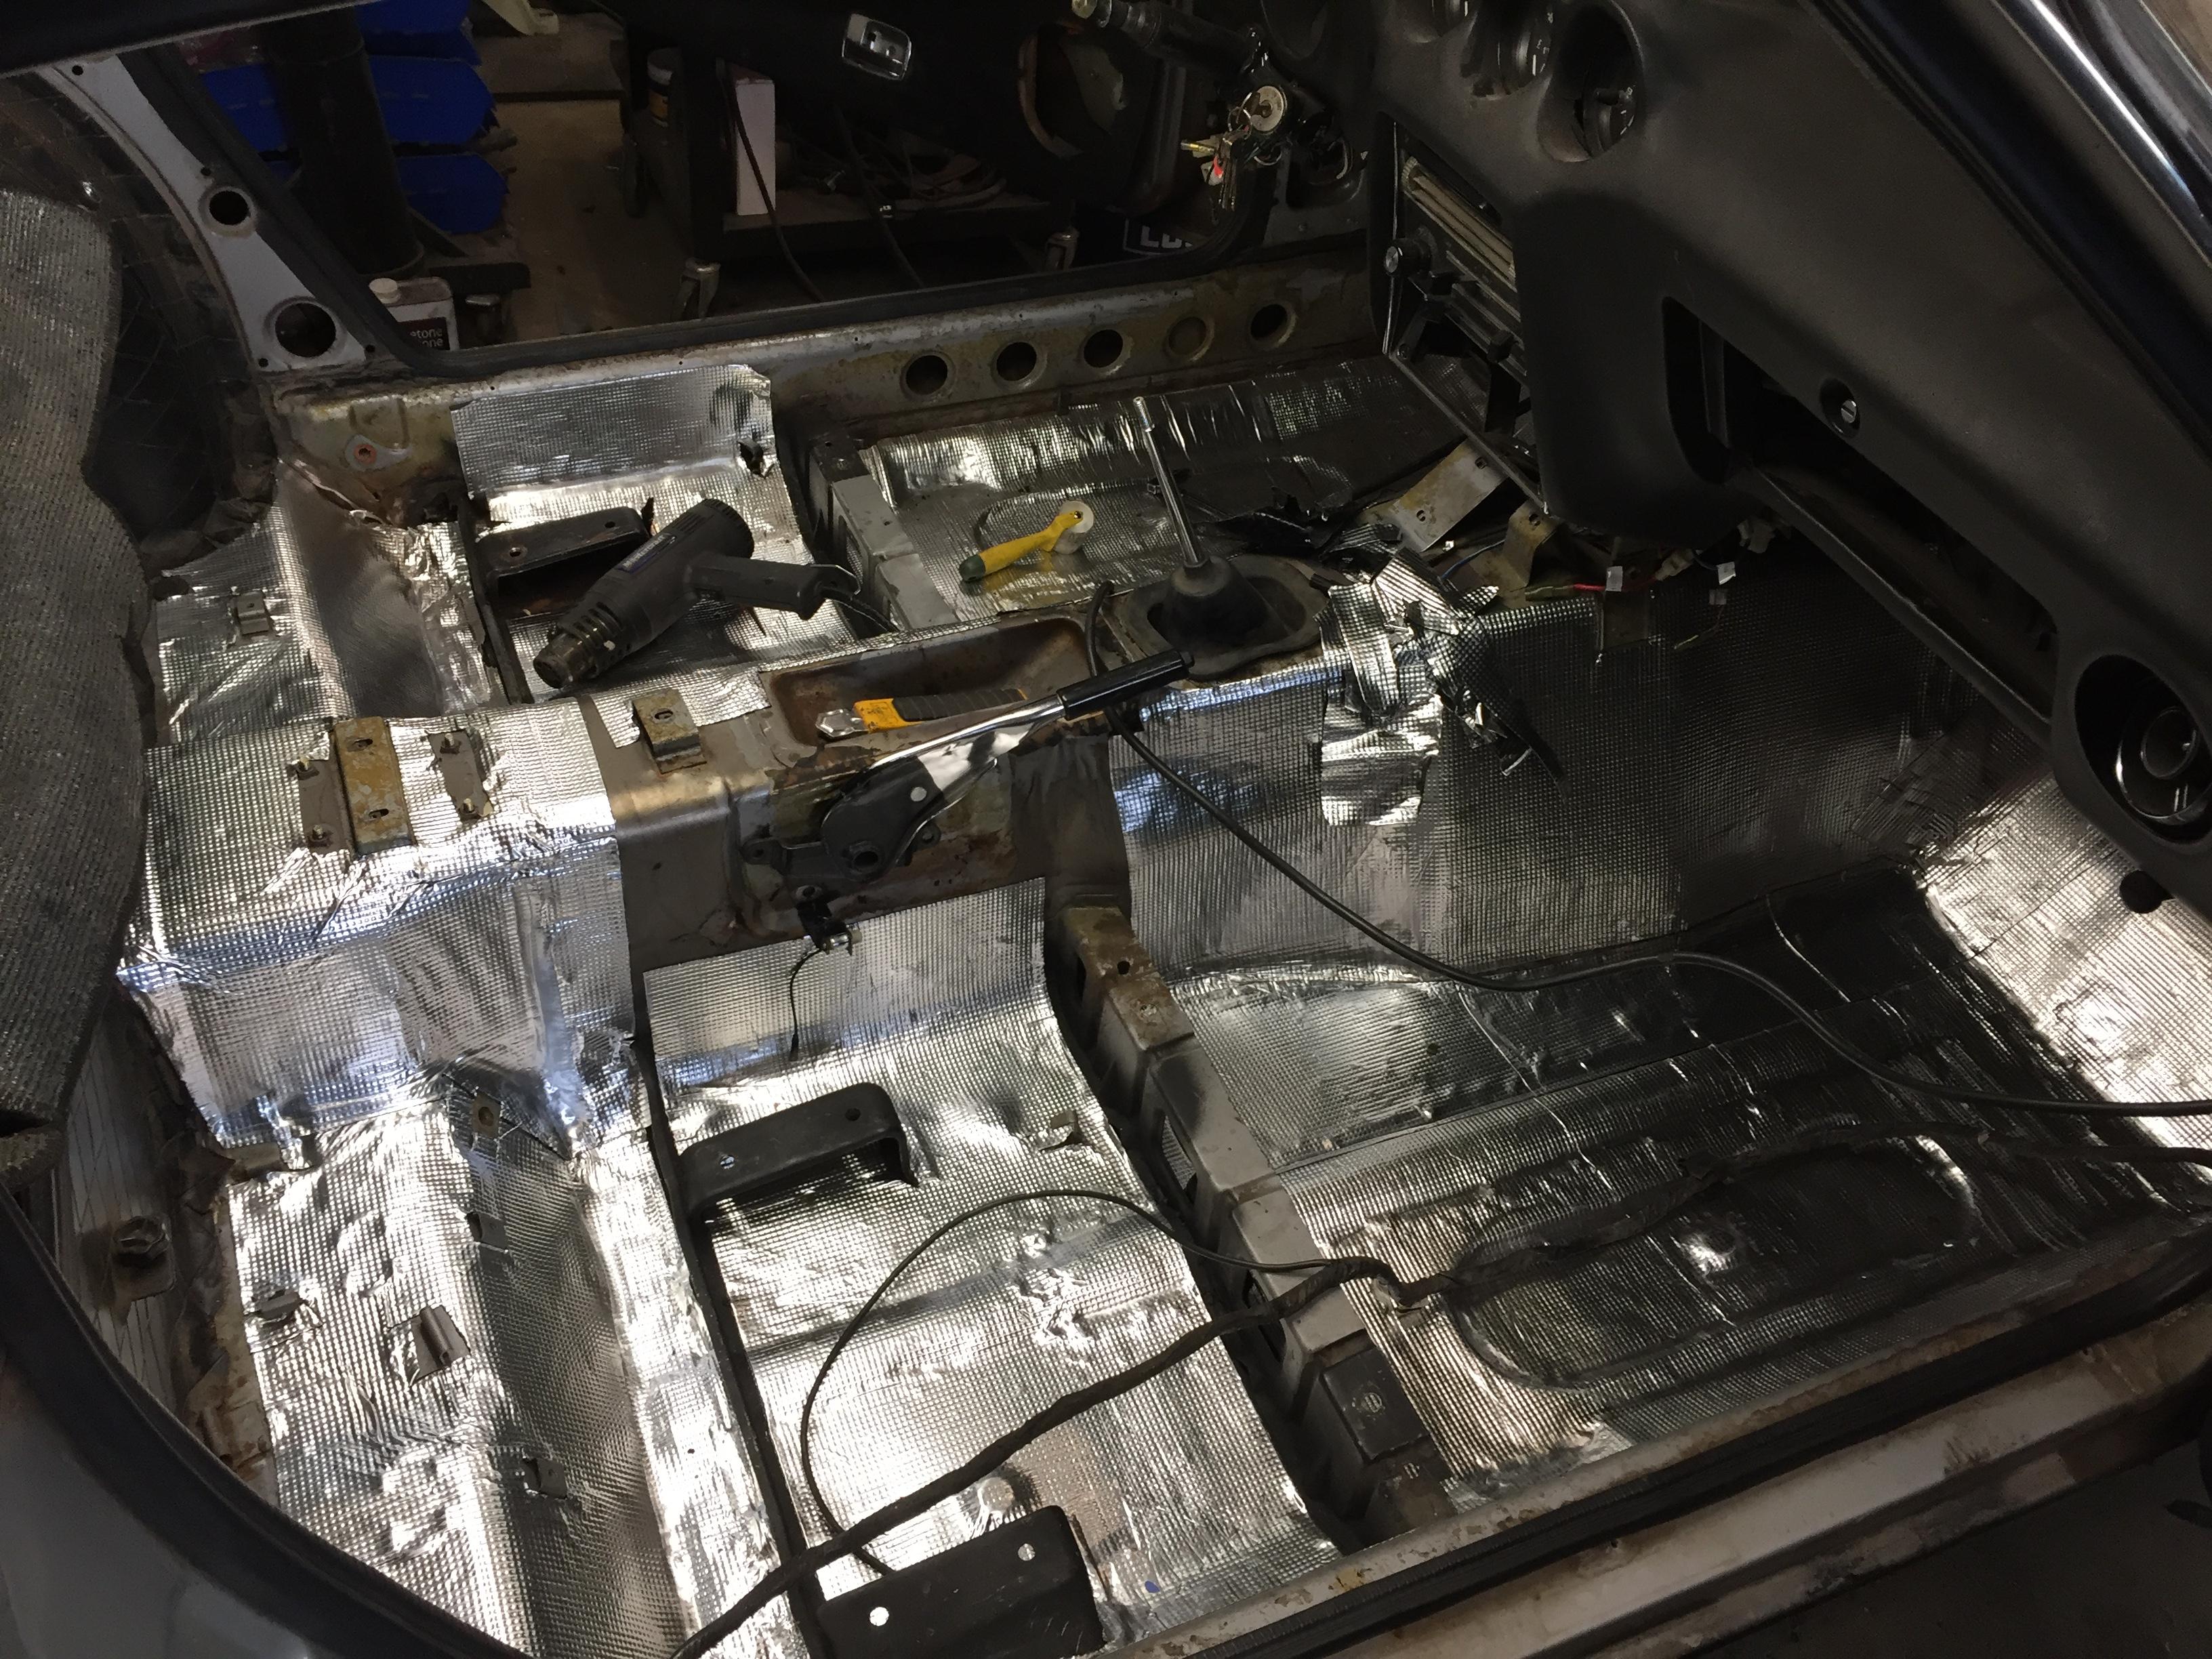
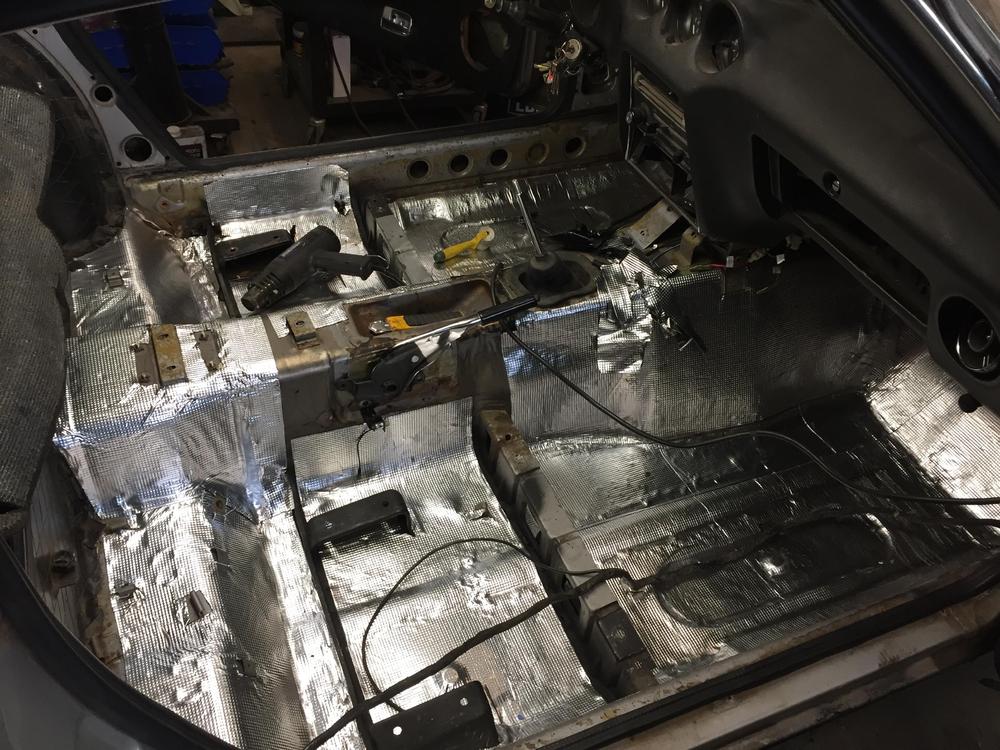
Shiny Silver floors. Also flat, strong and waterproof.
-
Those three pads have a bit of rubber on them and support the underside of the fender top. It prevents the oil canning that occured on earlier cars when you lean on the fenders. The front one seen here that sticks outward quite a bit are not present on earlier cars. Not sure of the change over date.
-
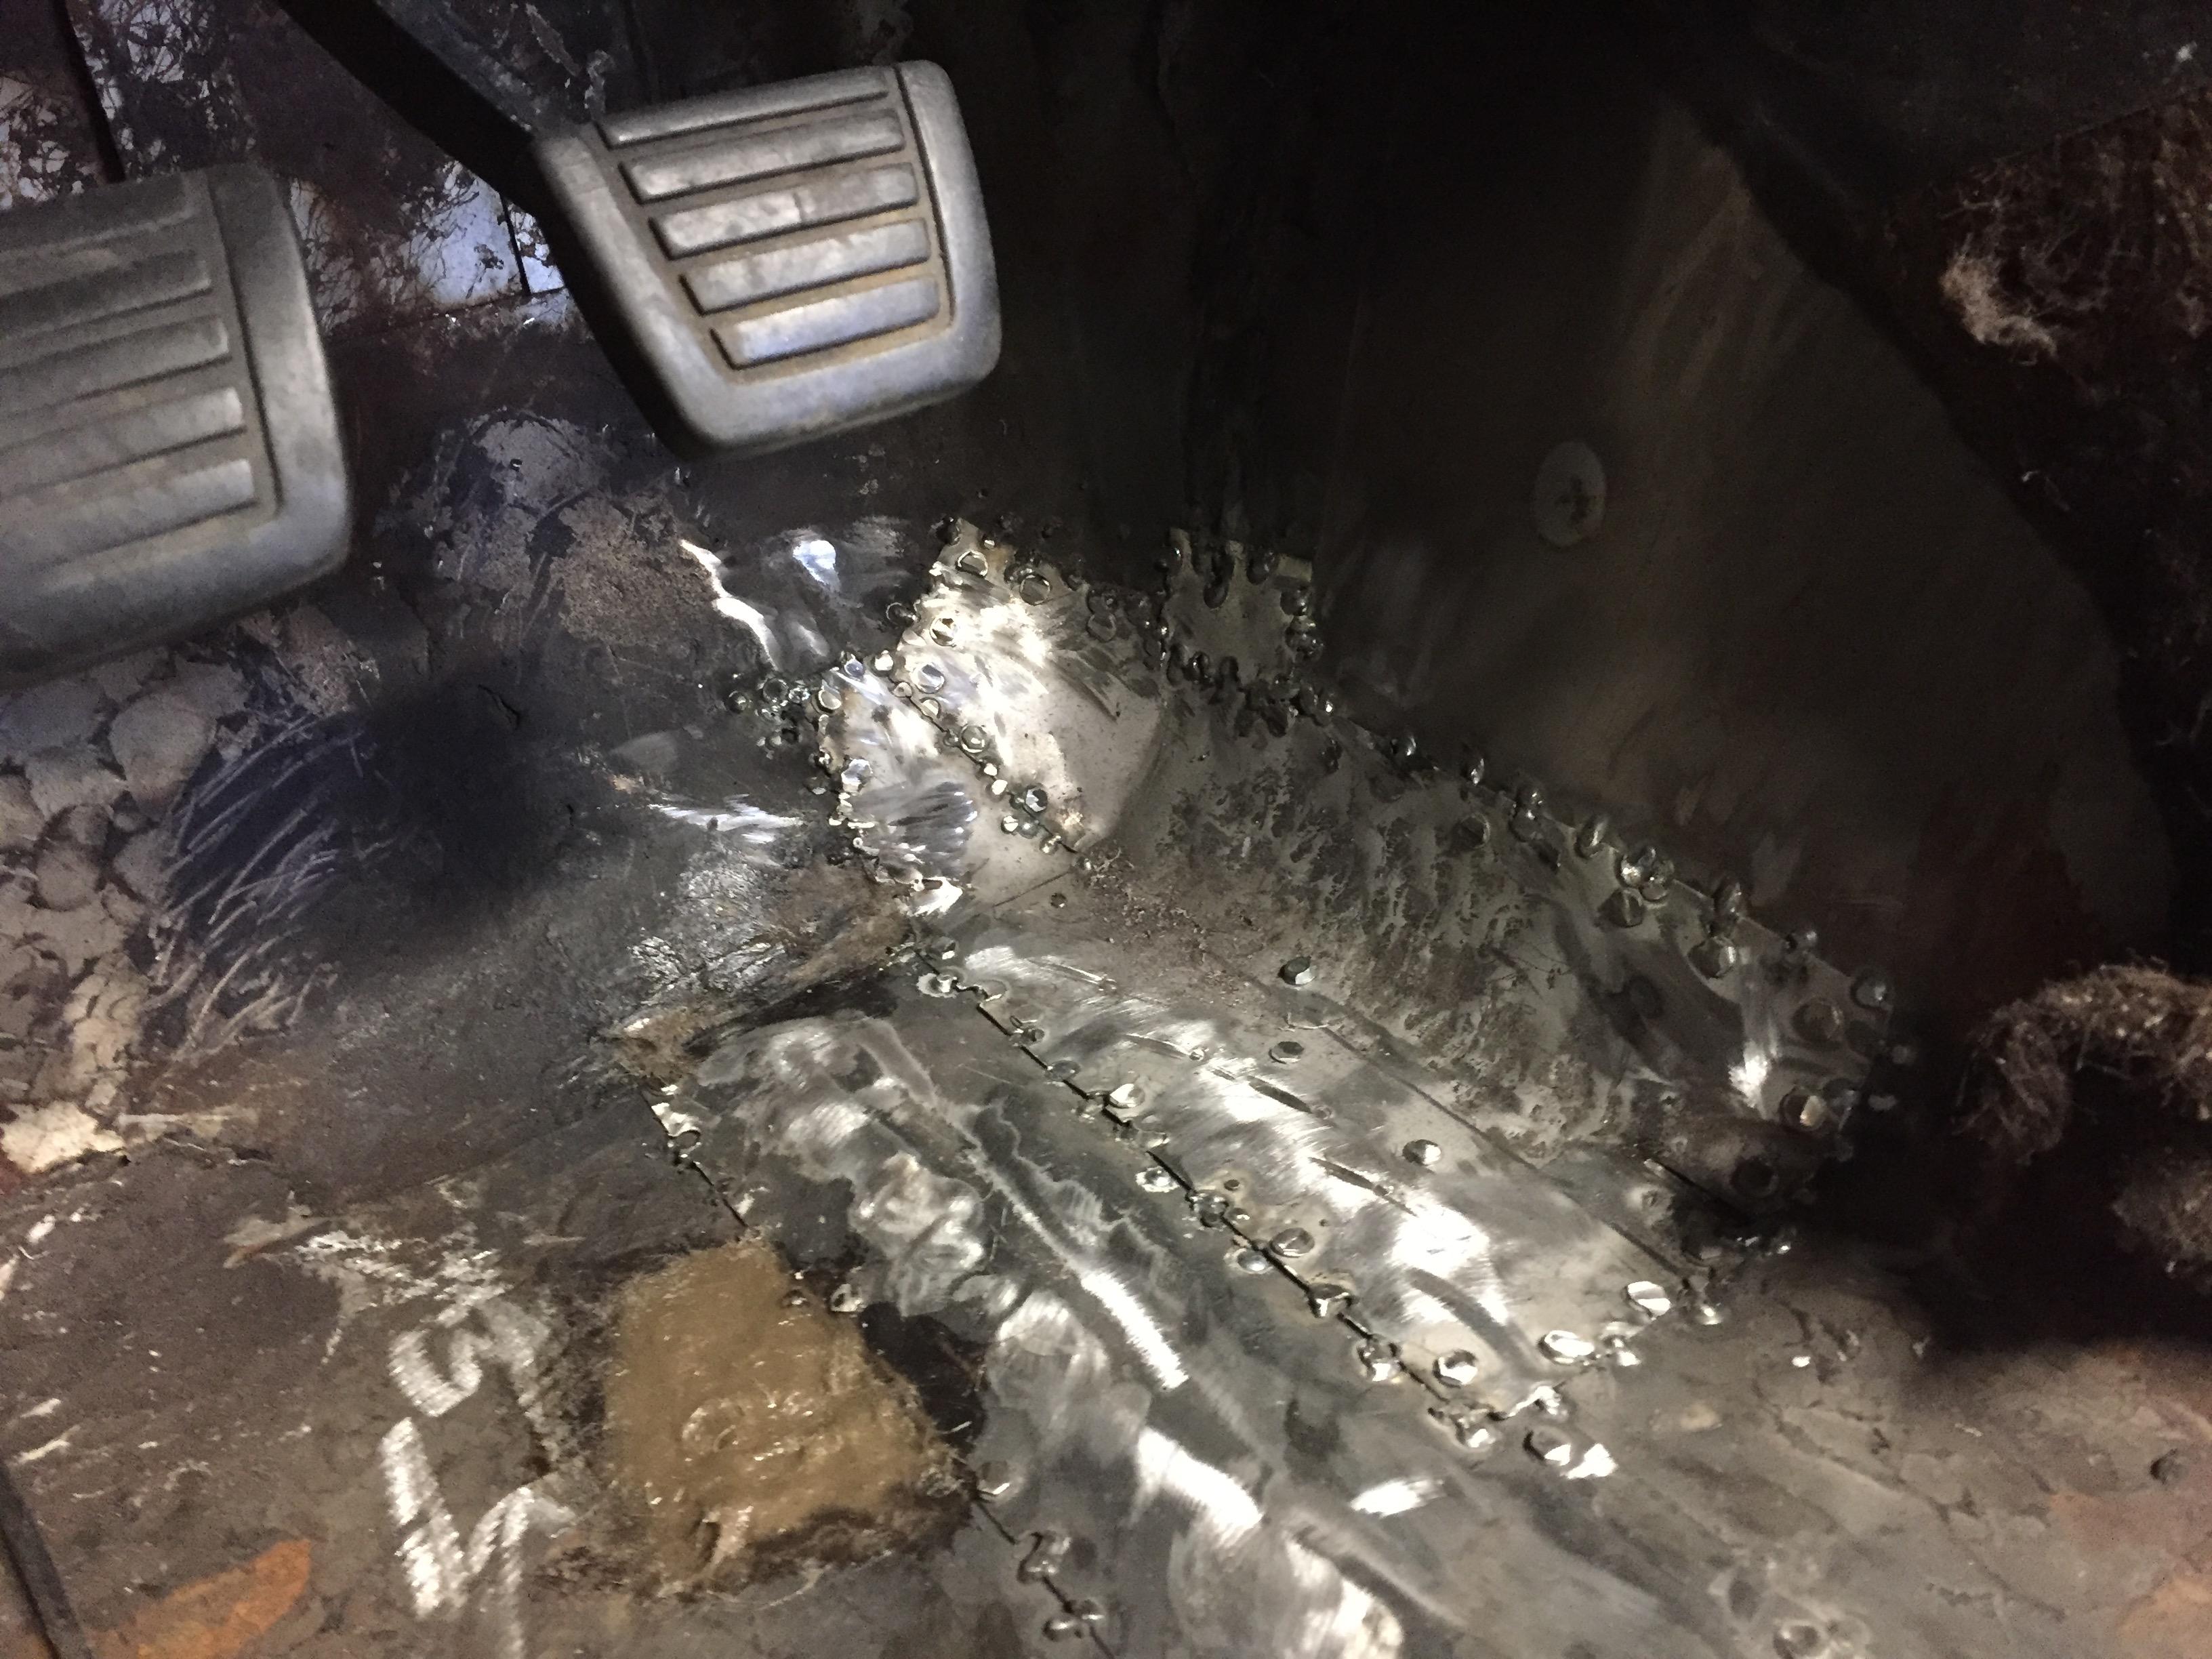
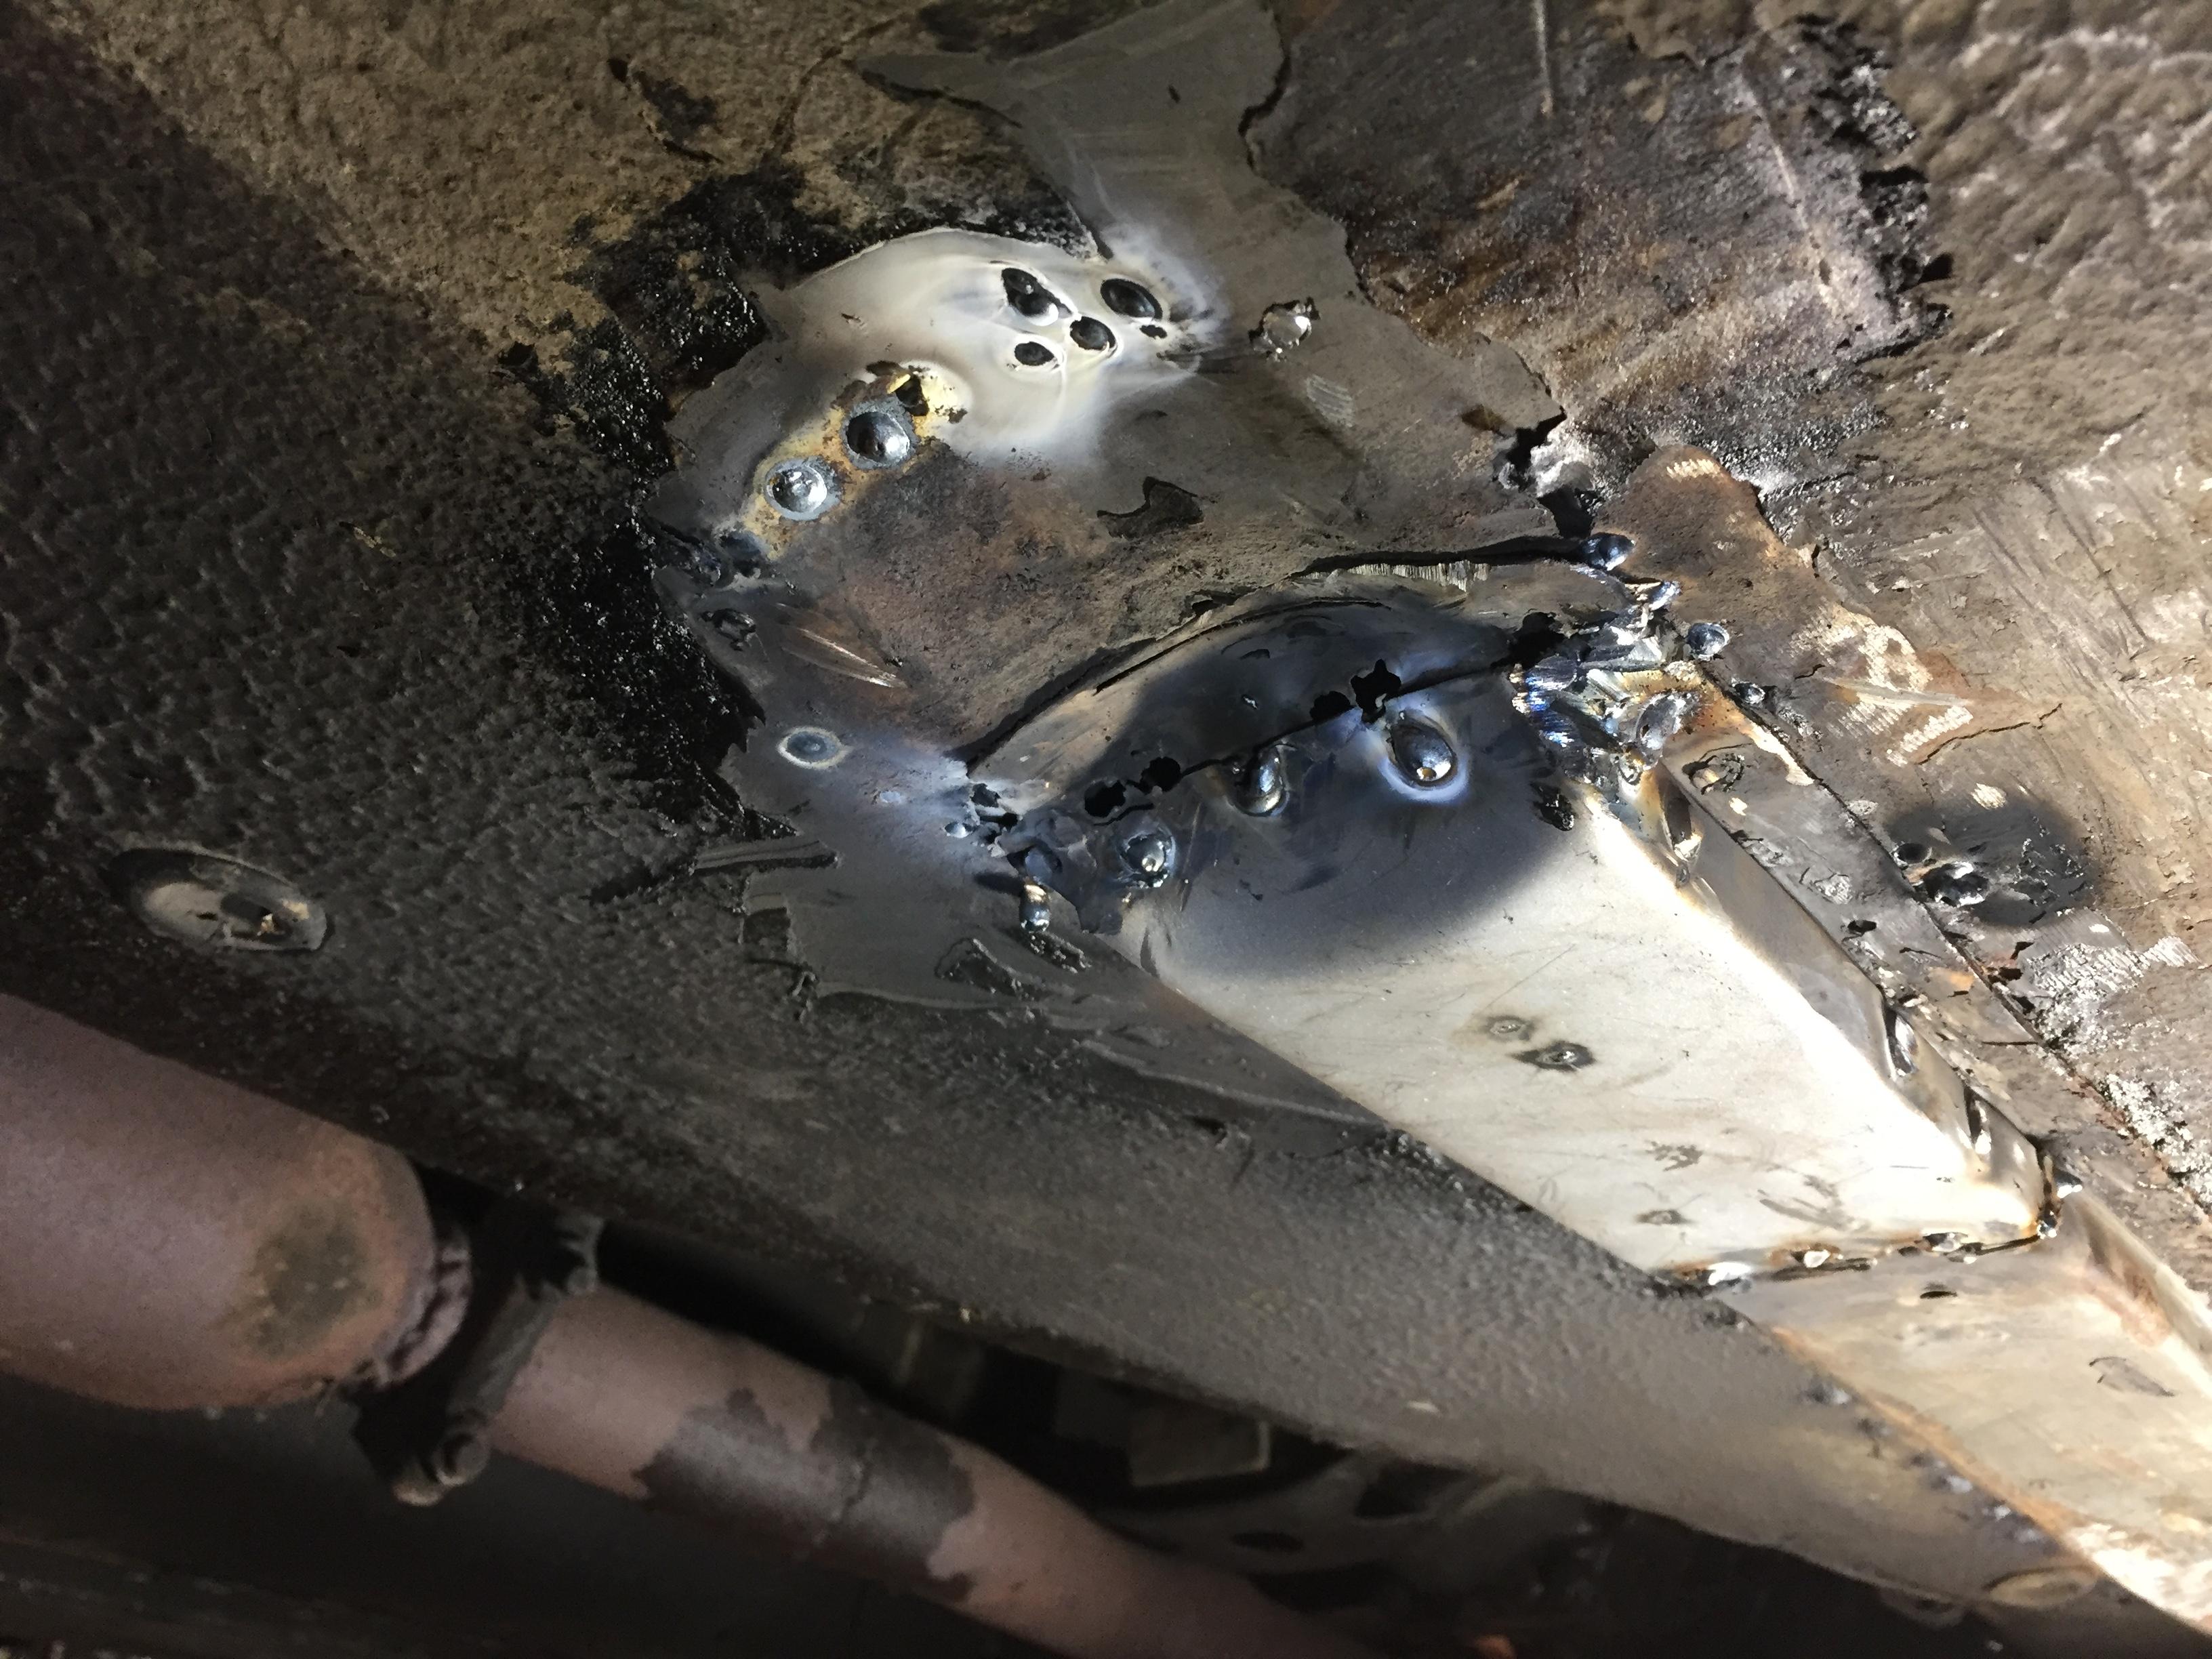
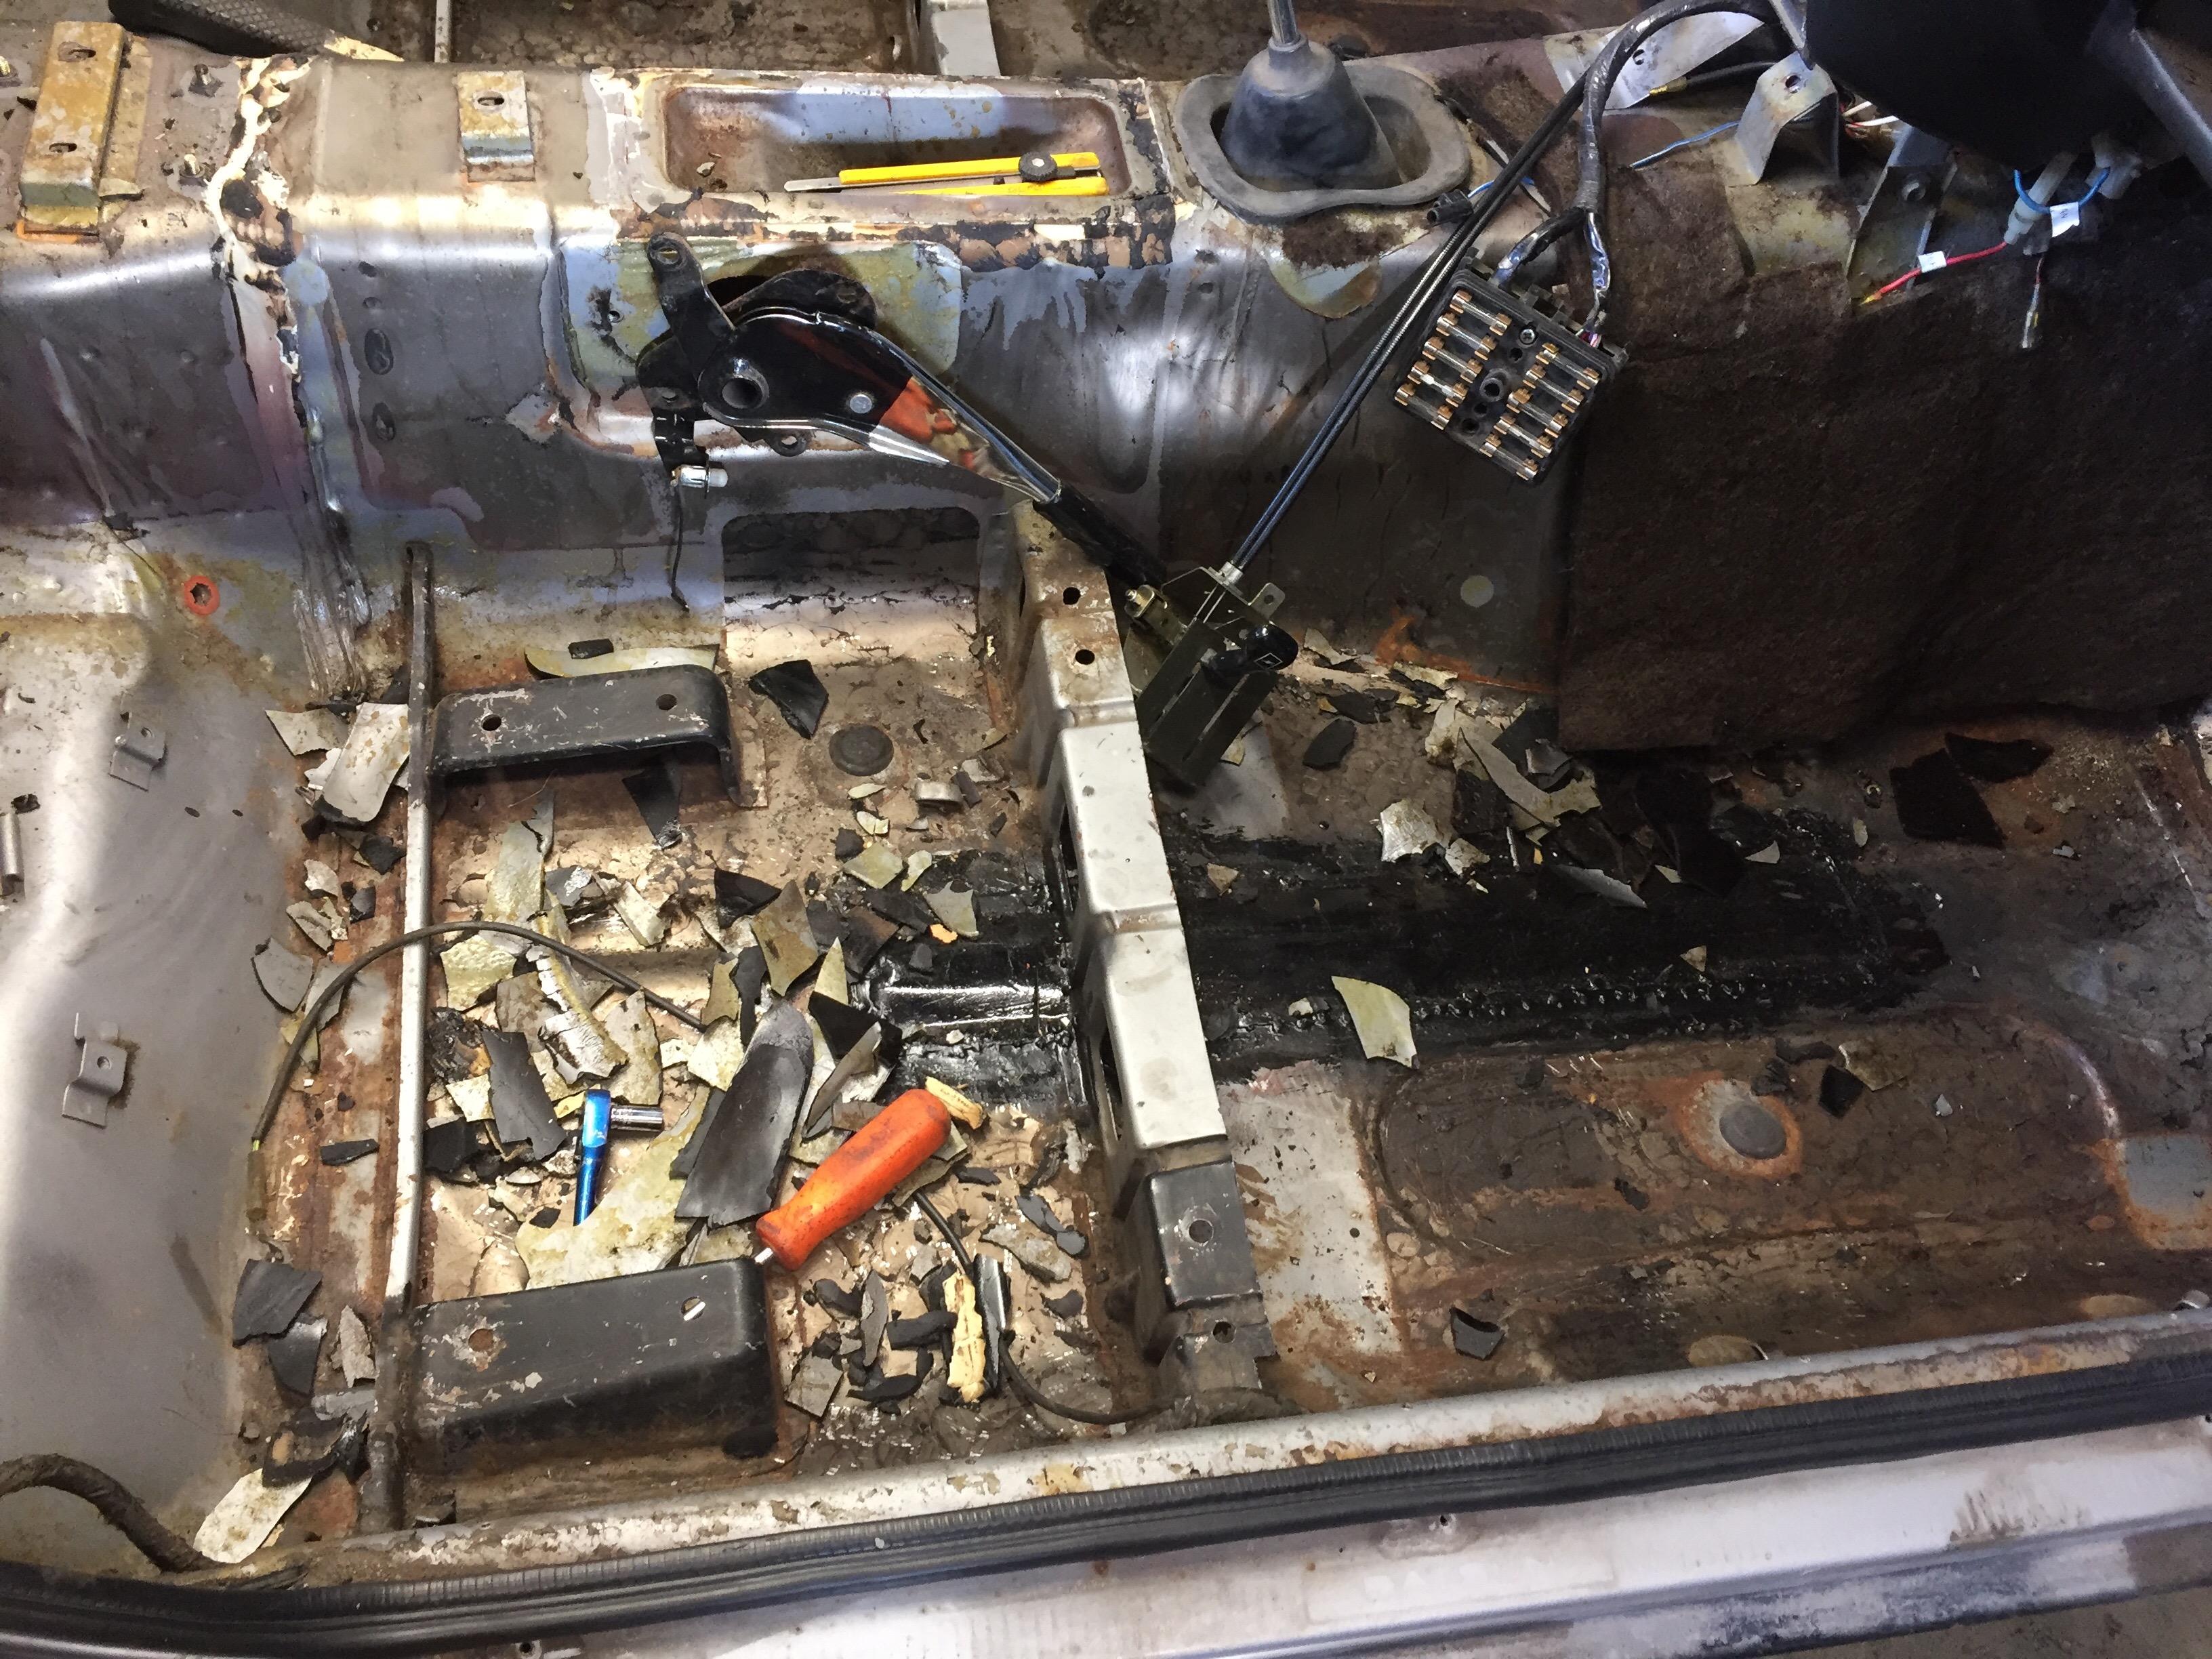
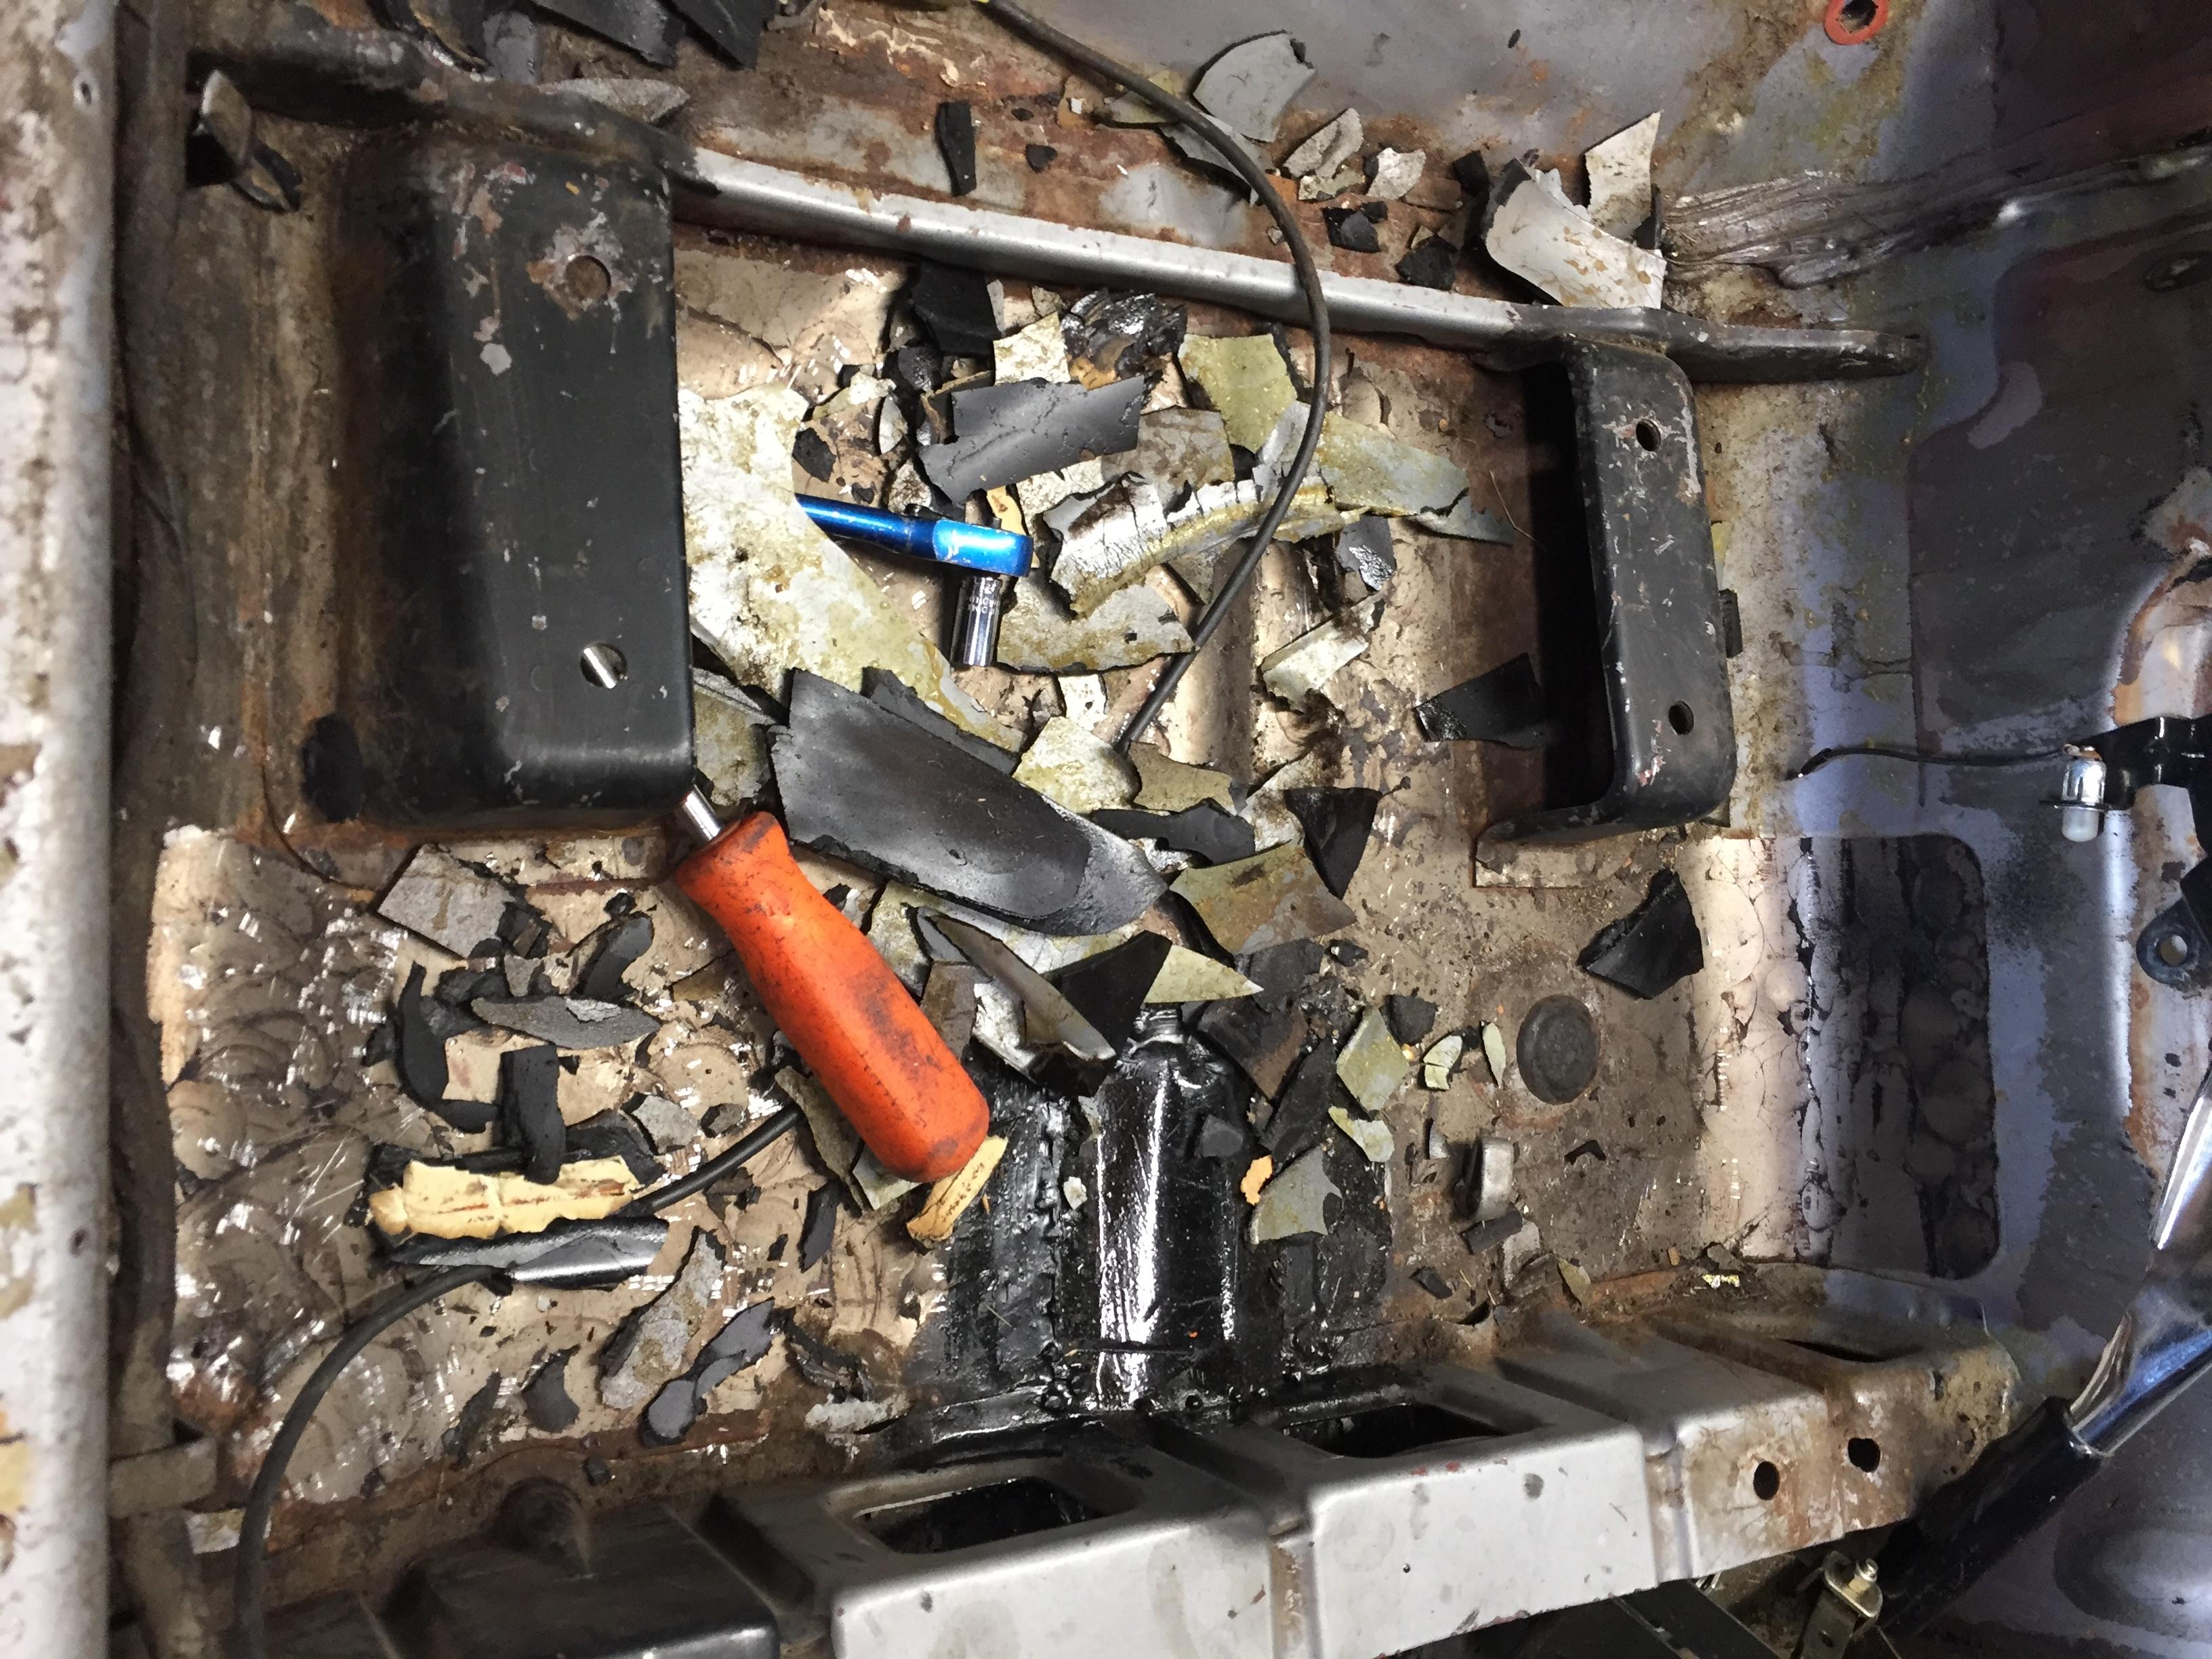
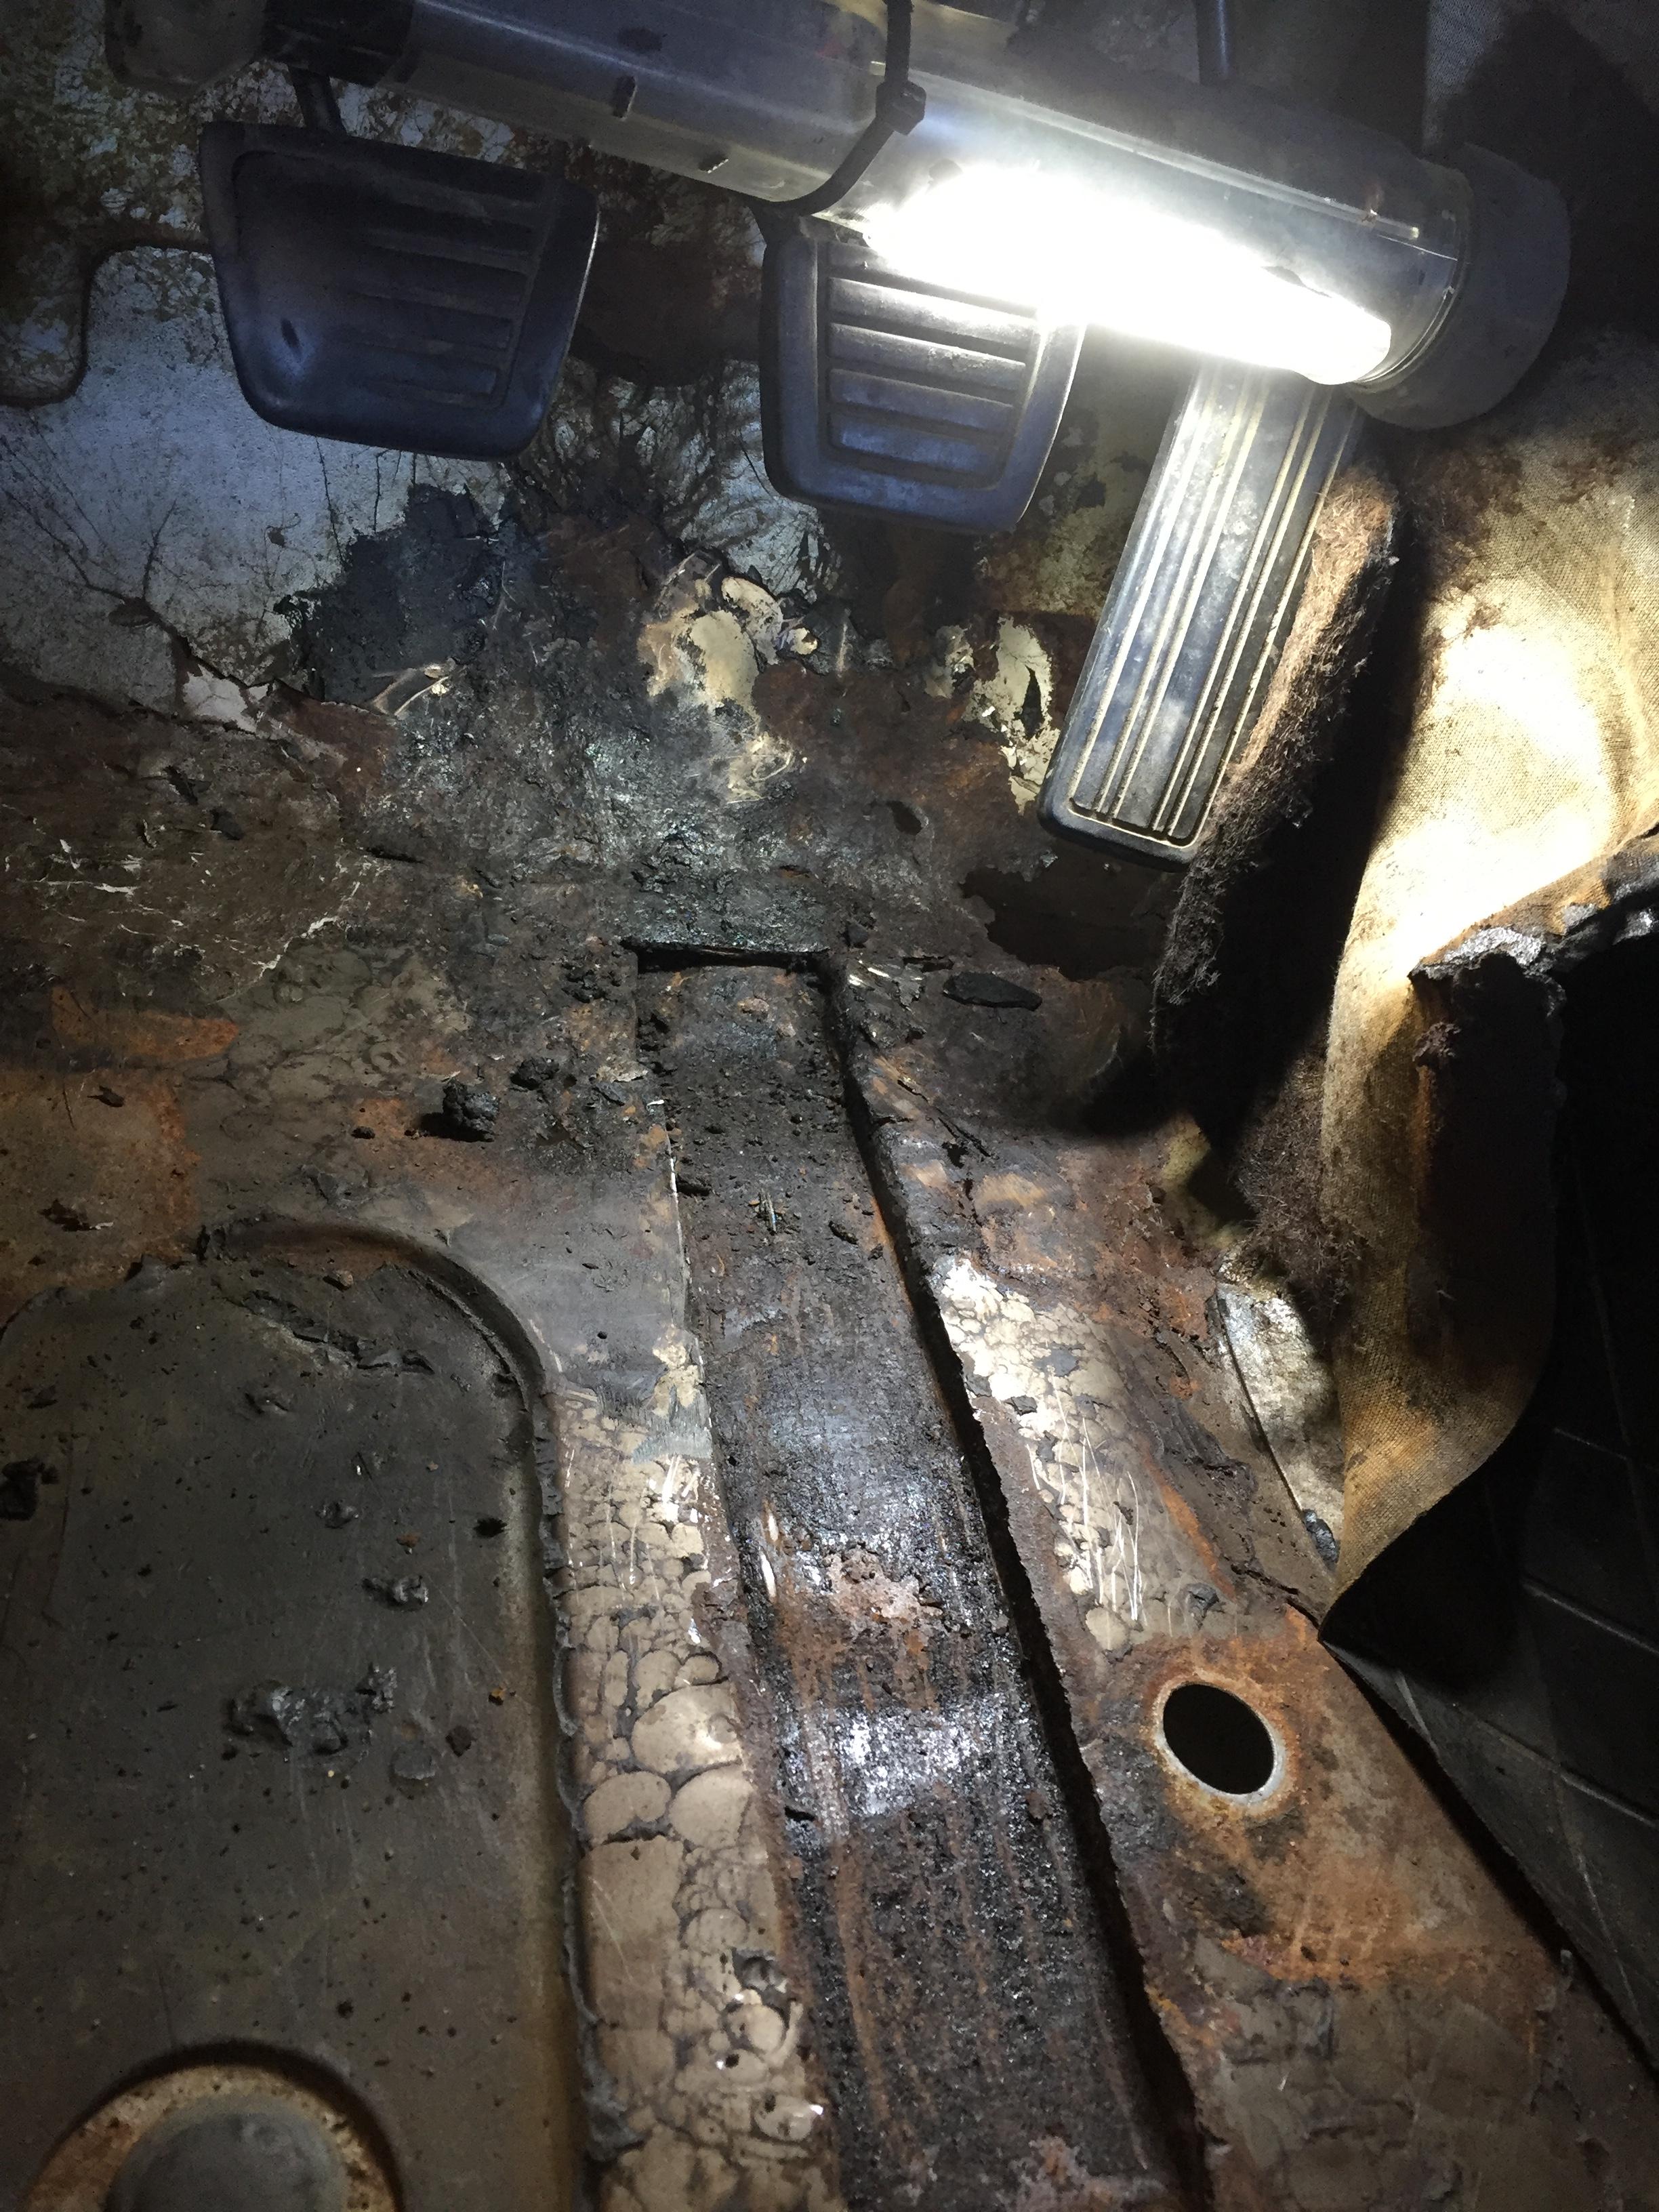
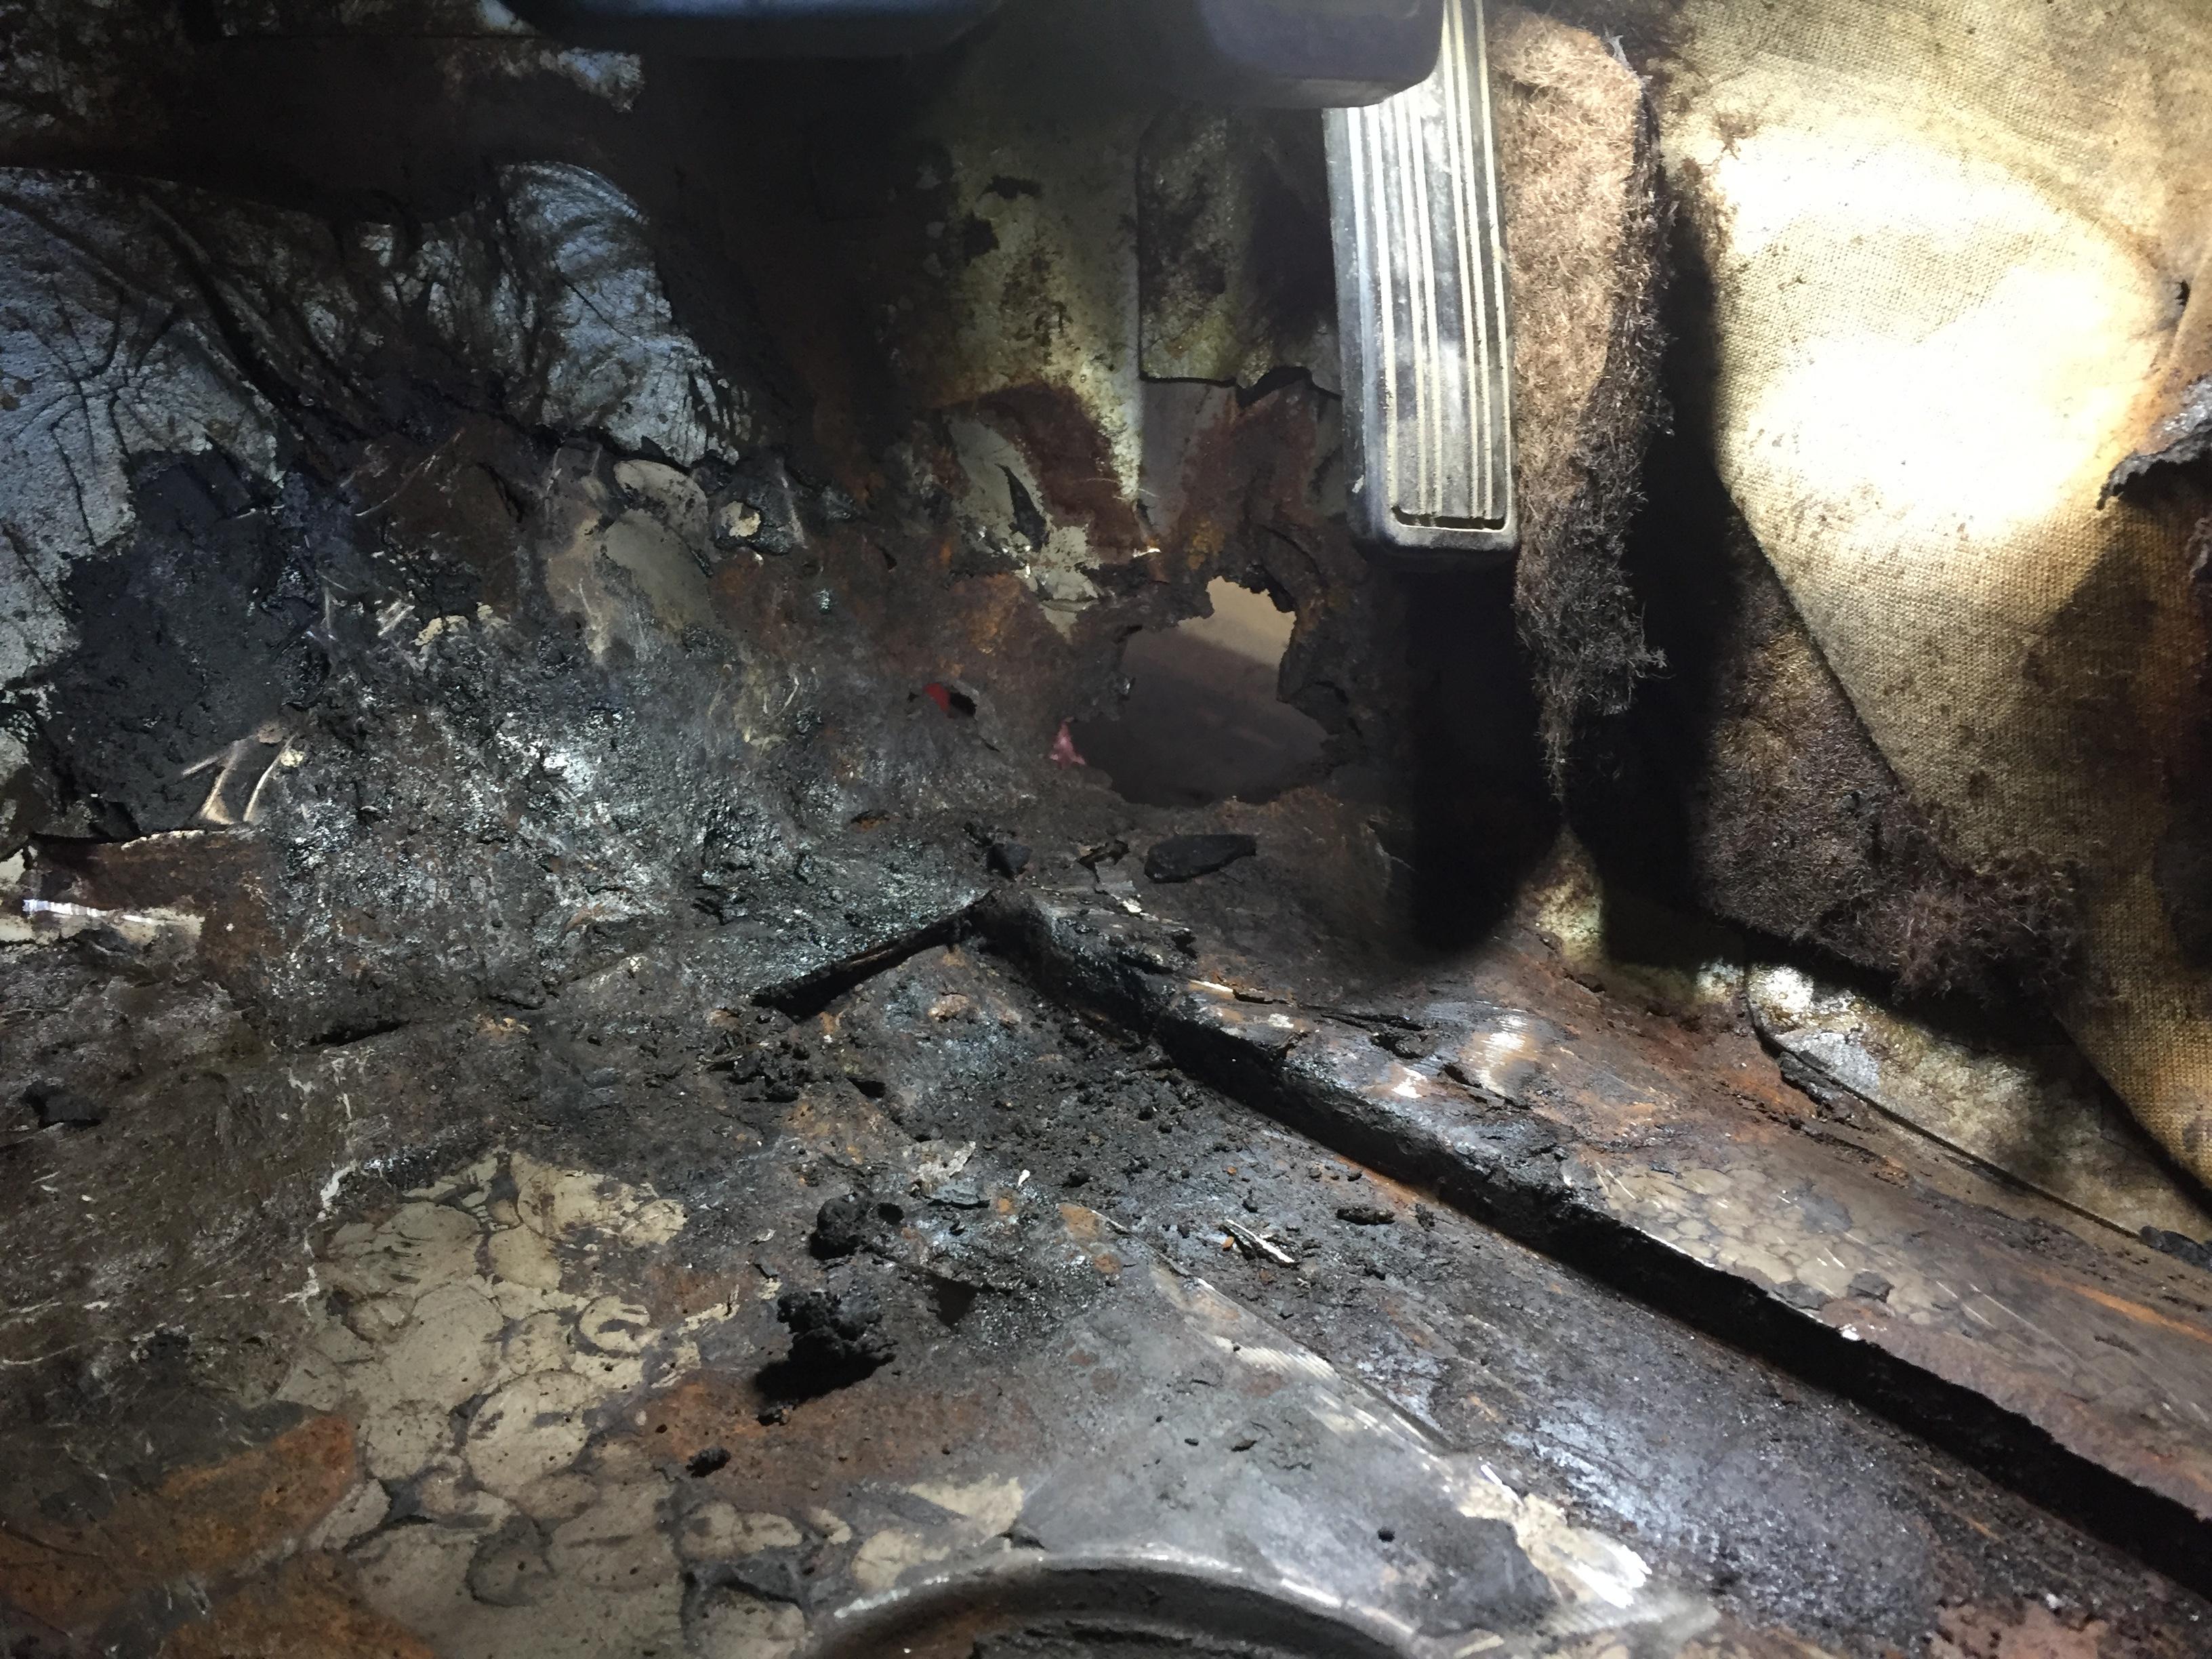
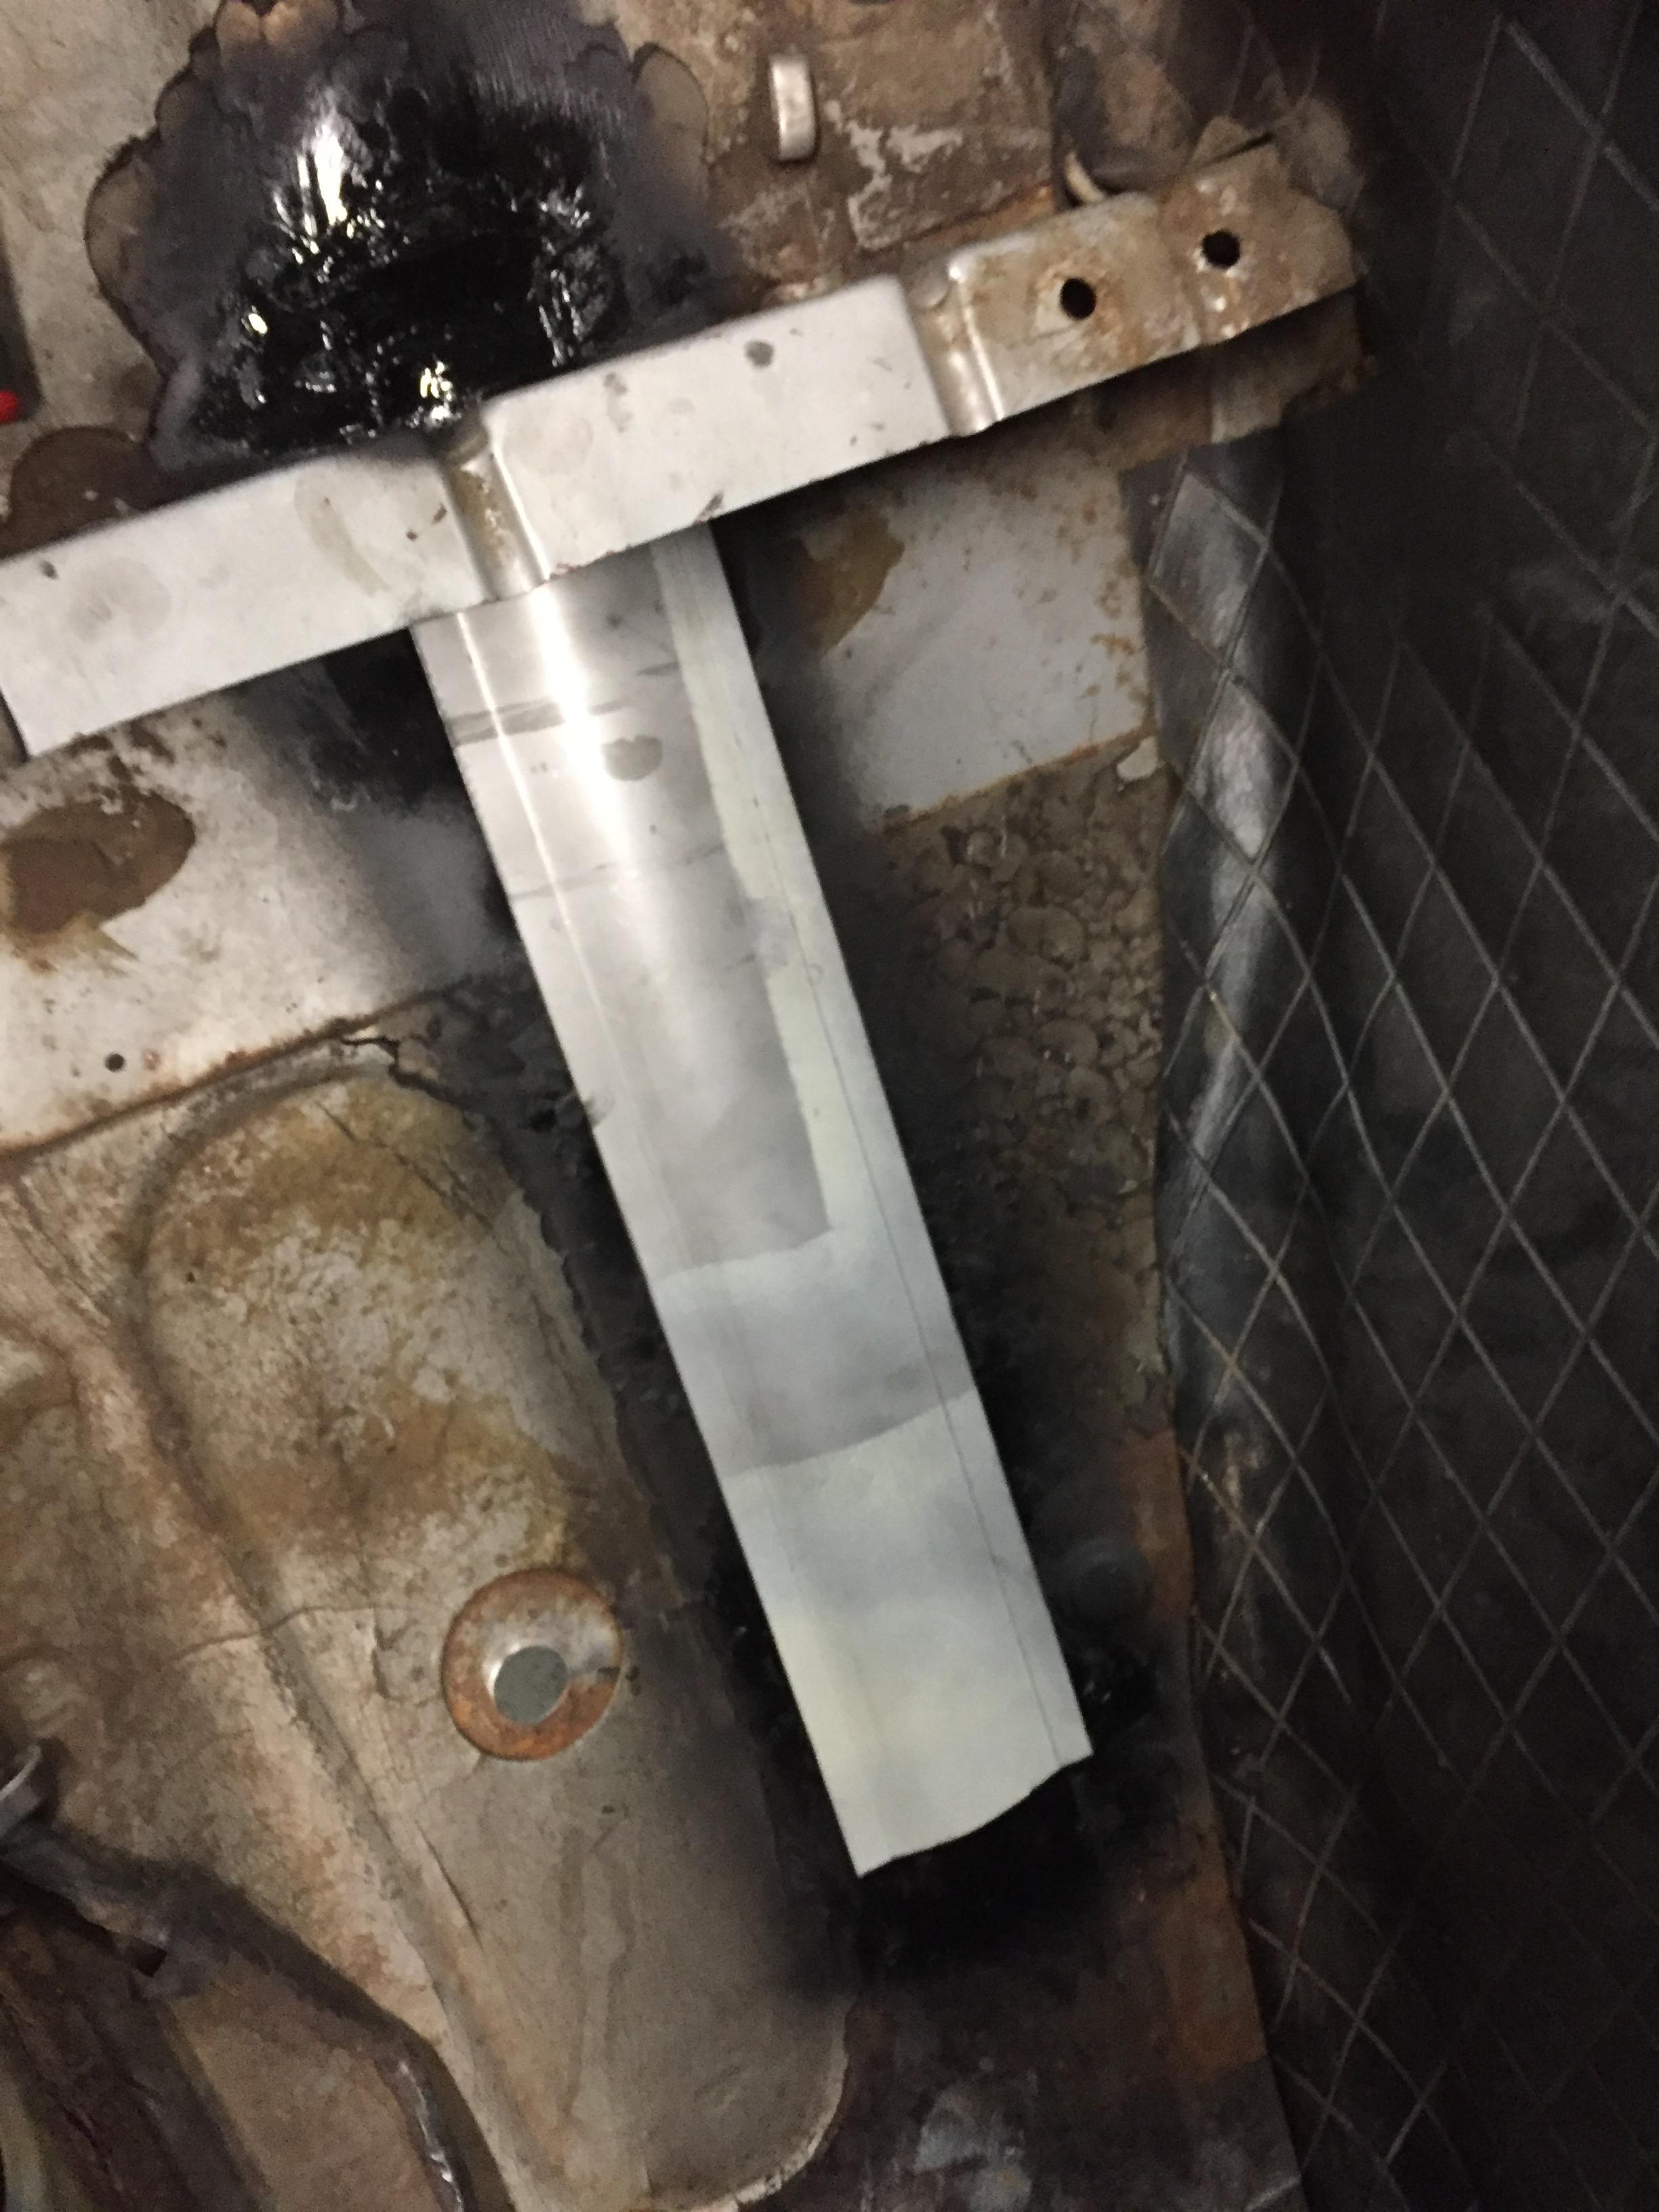
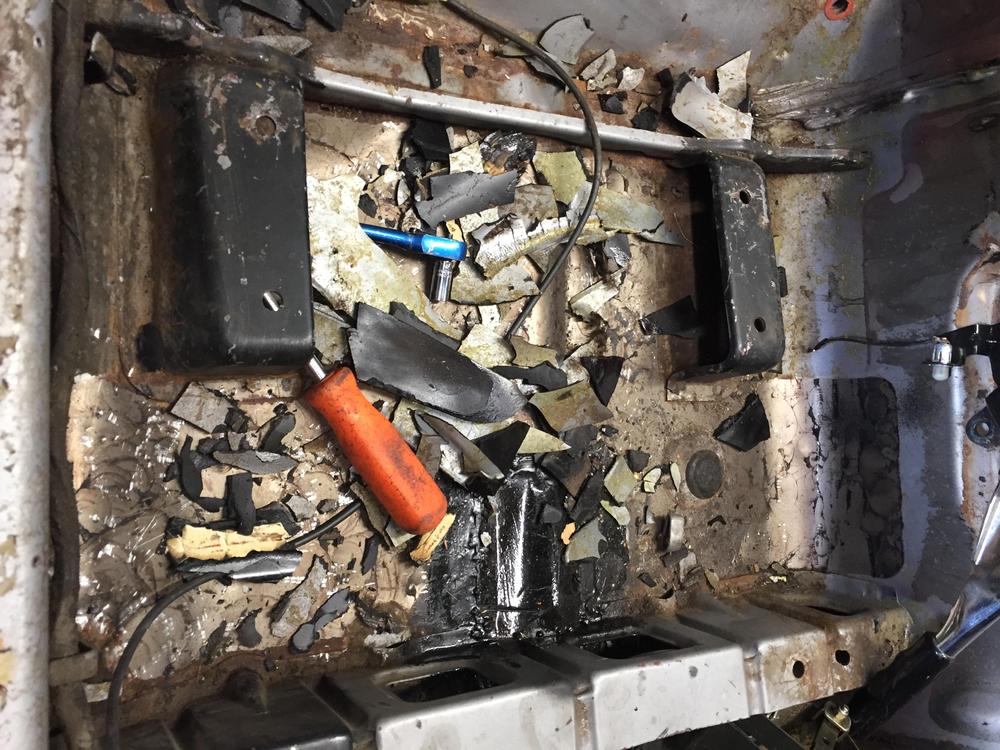
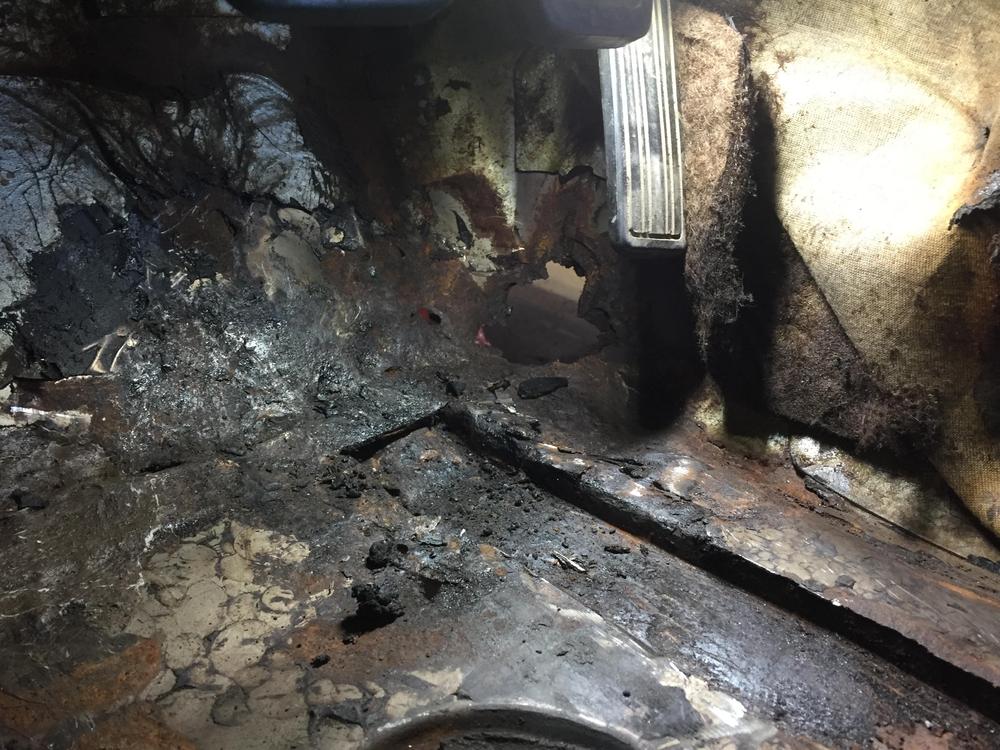
More progress. As Wheee mentioned earilier this is turning into a build thread. I decided to investigate the pushed up floors and bent/caved frame rails, and to uncover what the PO had done to fill some holes. Turns out the floors are actually in pretty good shape! I was able to "massage" the floors back down to be flat-ish, and repaired the frame rail bumps and caves. There are only a few small actual holes in the floor around the gas pedal and a both outer corners of the floor/firewall bend. Other than the top of the drivers side frame rail that had to be replaced, it was a pretty easy job with a few patches and welding a couple of plates. The PO had literally FILLED the inside of the frame rail with thick tar like undercoating as the top metal was peeled right off. here is what I found after mining a lot of tar with a torch and a scraper. Having the top peeled off like that make flattening the frame rail a piece of cake! Just hammer/dolly it down flat. Most of the mess on the floors you see here is old tar. Cleaned up, other than the hole in the corner, it was just fine. Here is the holes and top of the frame rail are patched. The inside was pickled with phosphoric acid and Eastwood internal frame coating. The patch on the frame rail has the same domed top as the original floor. The passenger side was much better. The frame rail was fine except for the very end. I used the same approach as the driver side to straighten the frame rail. I cut windows in top where the worst dings were, and punched the dents out downward. Then I made the same domed cap as the driver side and just covered it all. i also removed all the old sound deadening tar mat. Naturally, the floors where still pretty well bonded, but the trans tunnel tar mat was COMPLETELY separated from the metal. It was firmly attached to the jute mating however... Now to re-coat the floors, new sound deadening mat, and put it all back together. Plan on driving this thing to the Edmonton Z club show this Sunday. This should encourage buyers now that it is running, strong, and licensed. Any rust you see is just 'surface' rust. The dark stuff is remains of the tar mat. Notice even the top of the rockers is near perfect.




-
I'll let you know the total shortly. Let's take this to email please. z240@shaw.ca
-
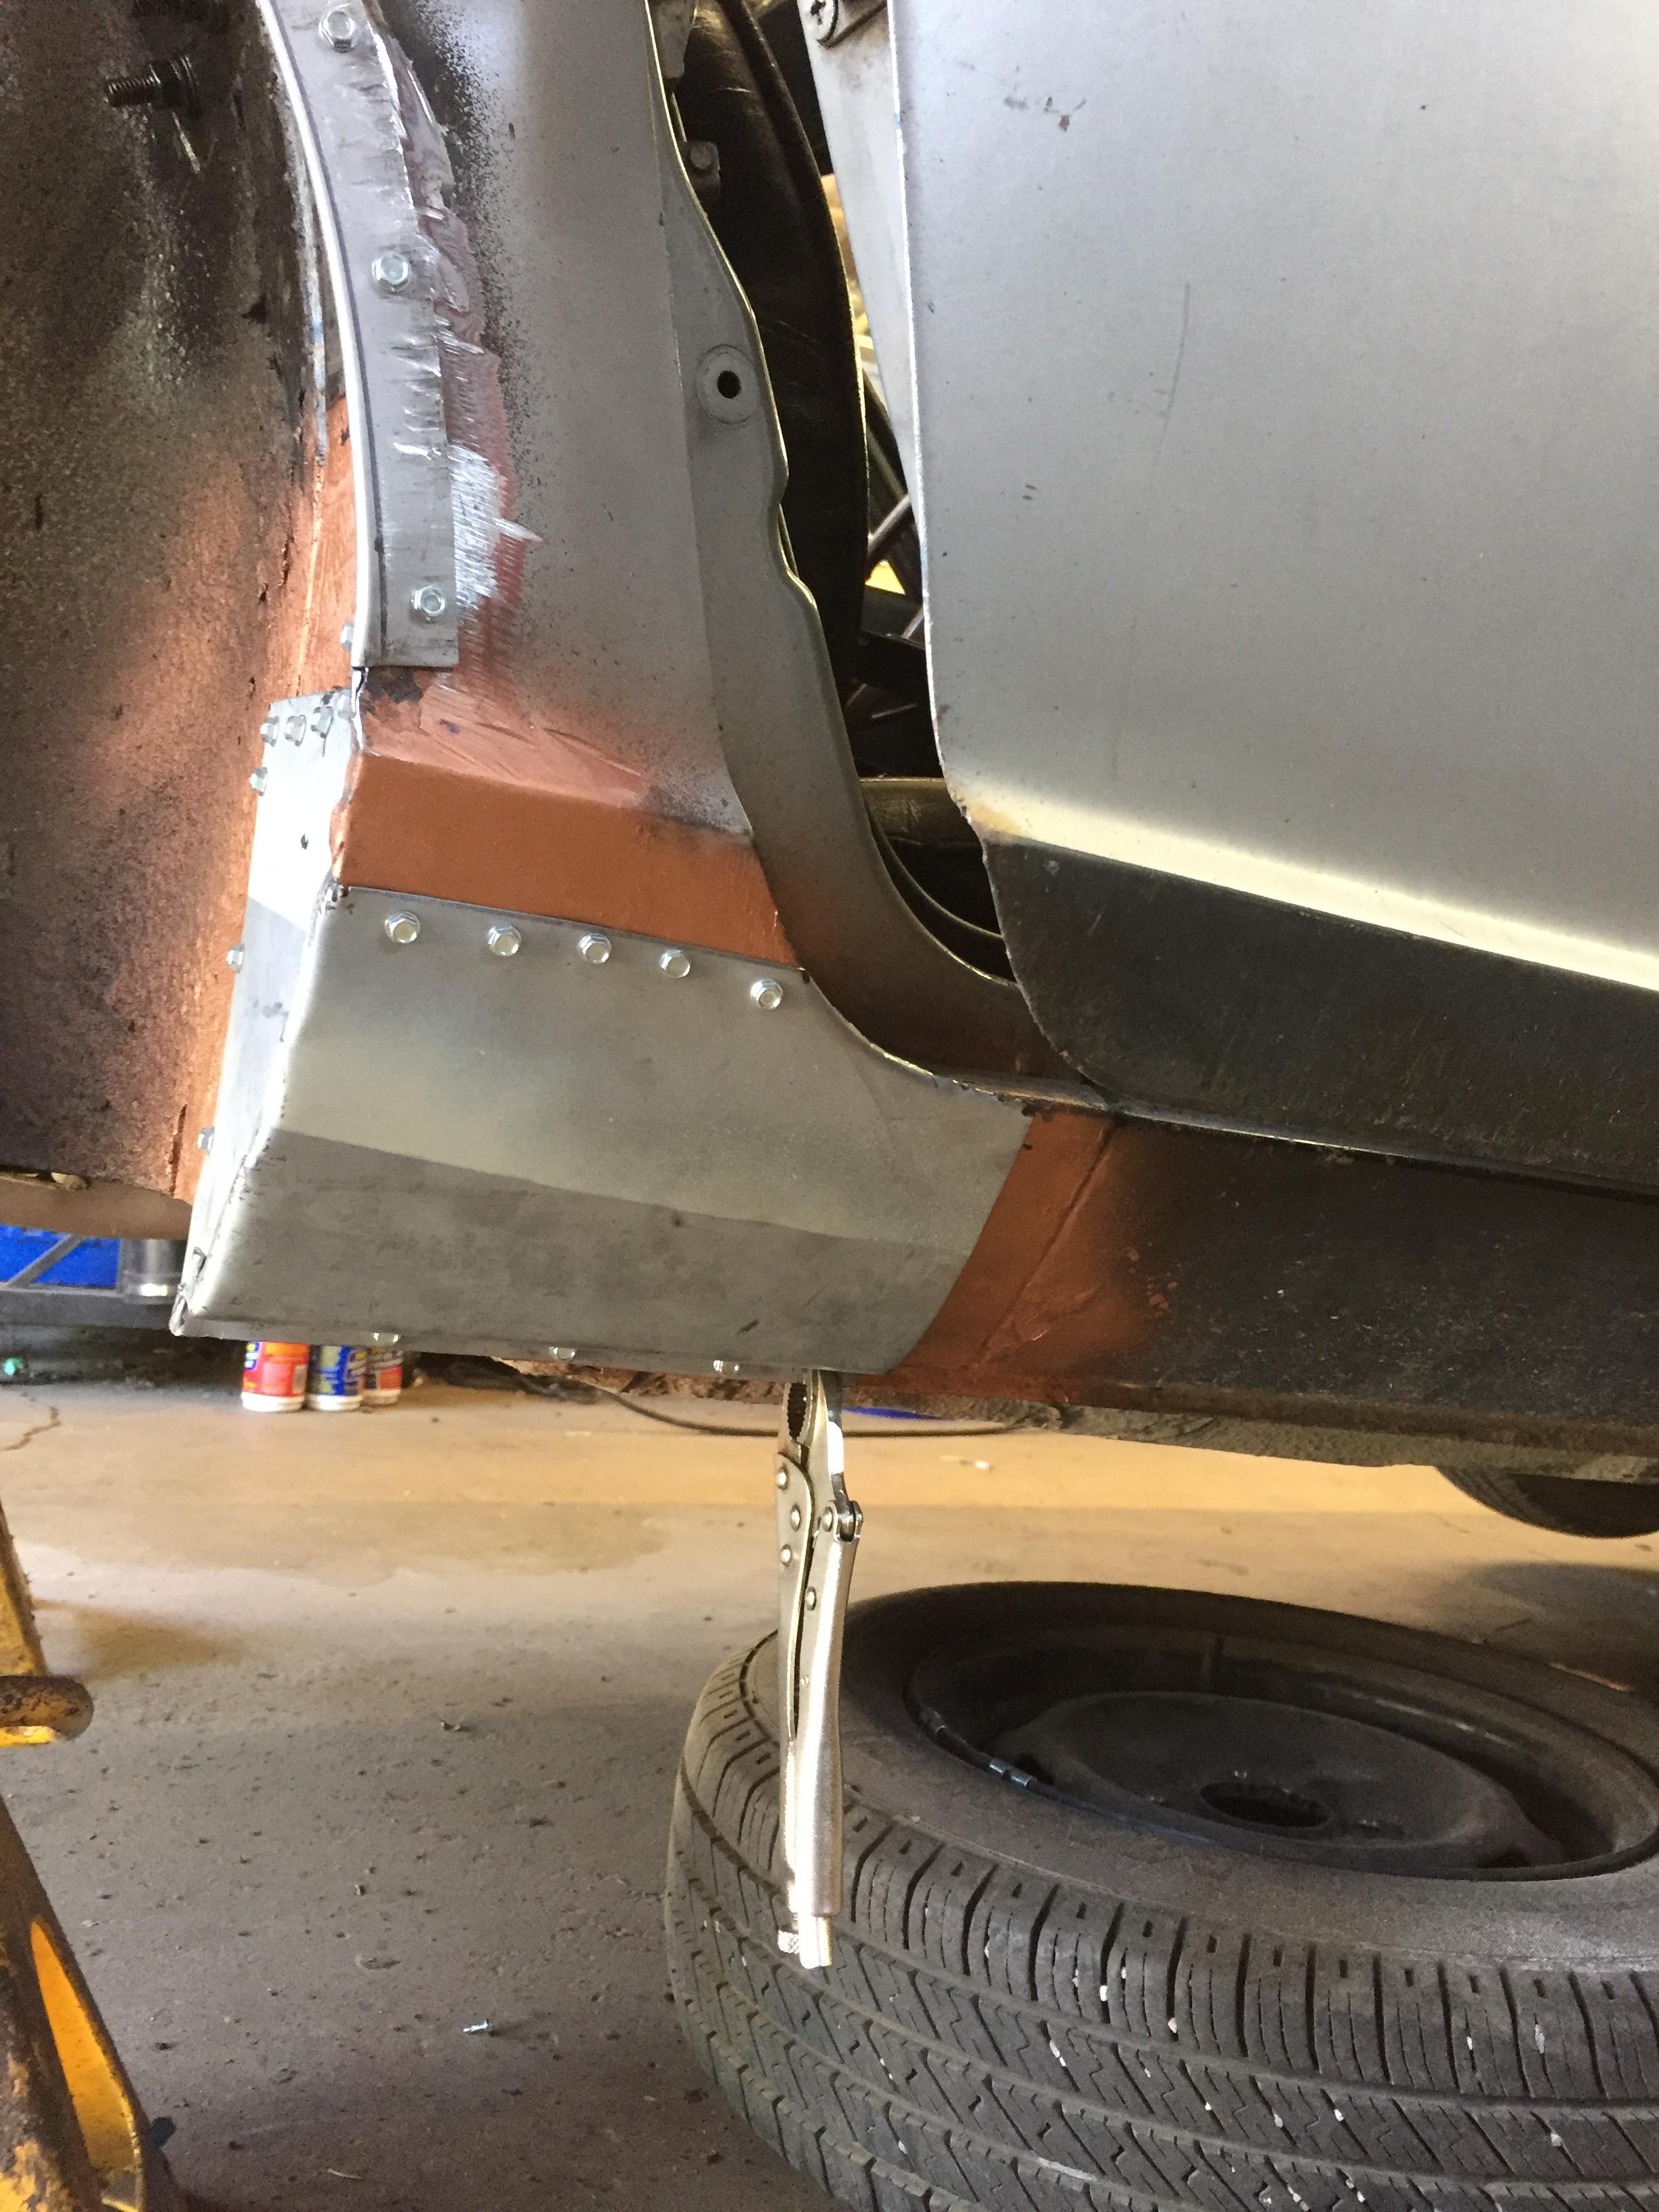
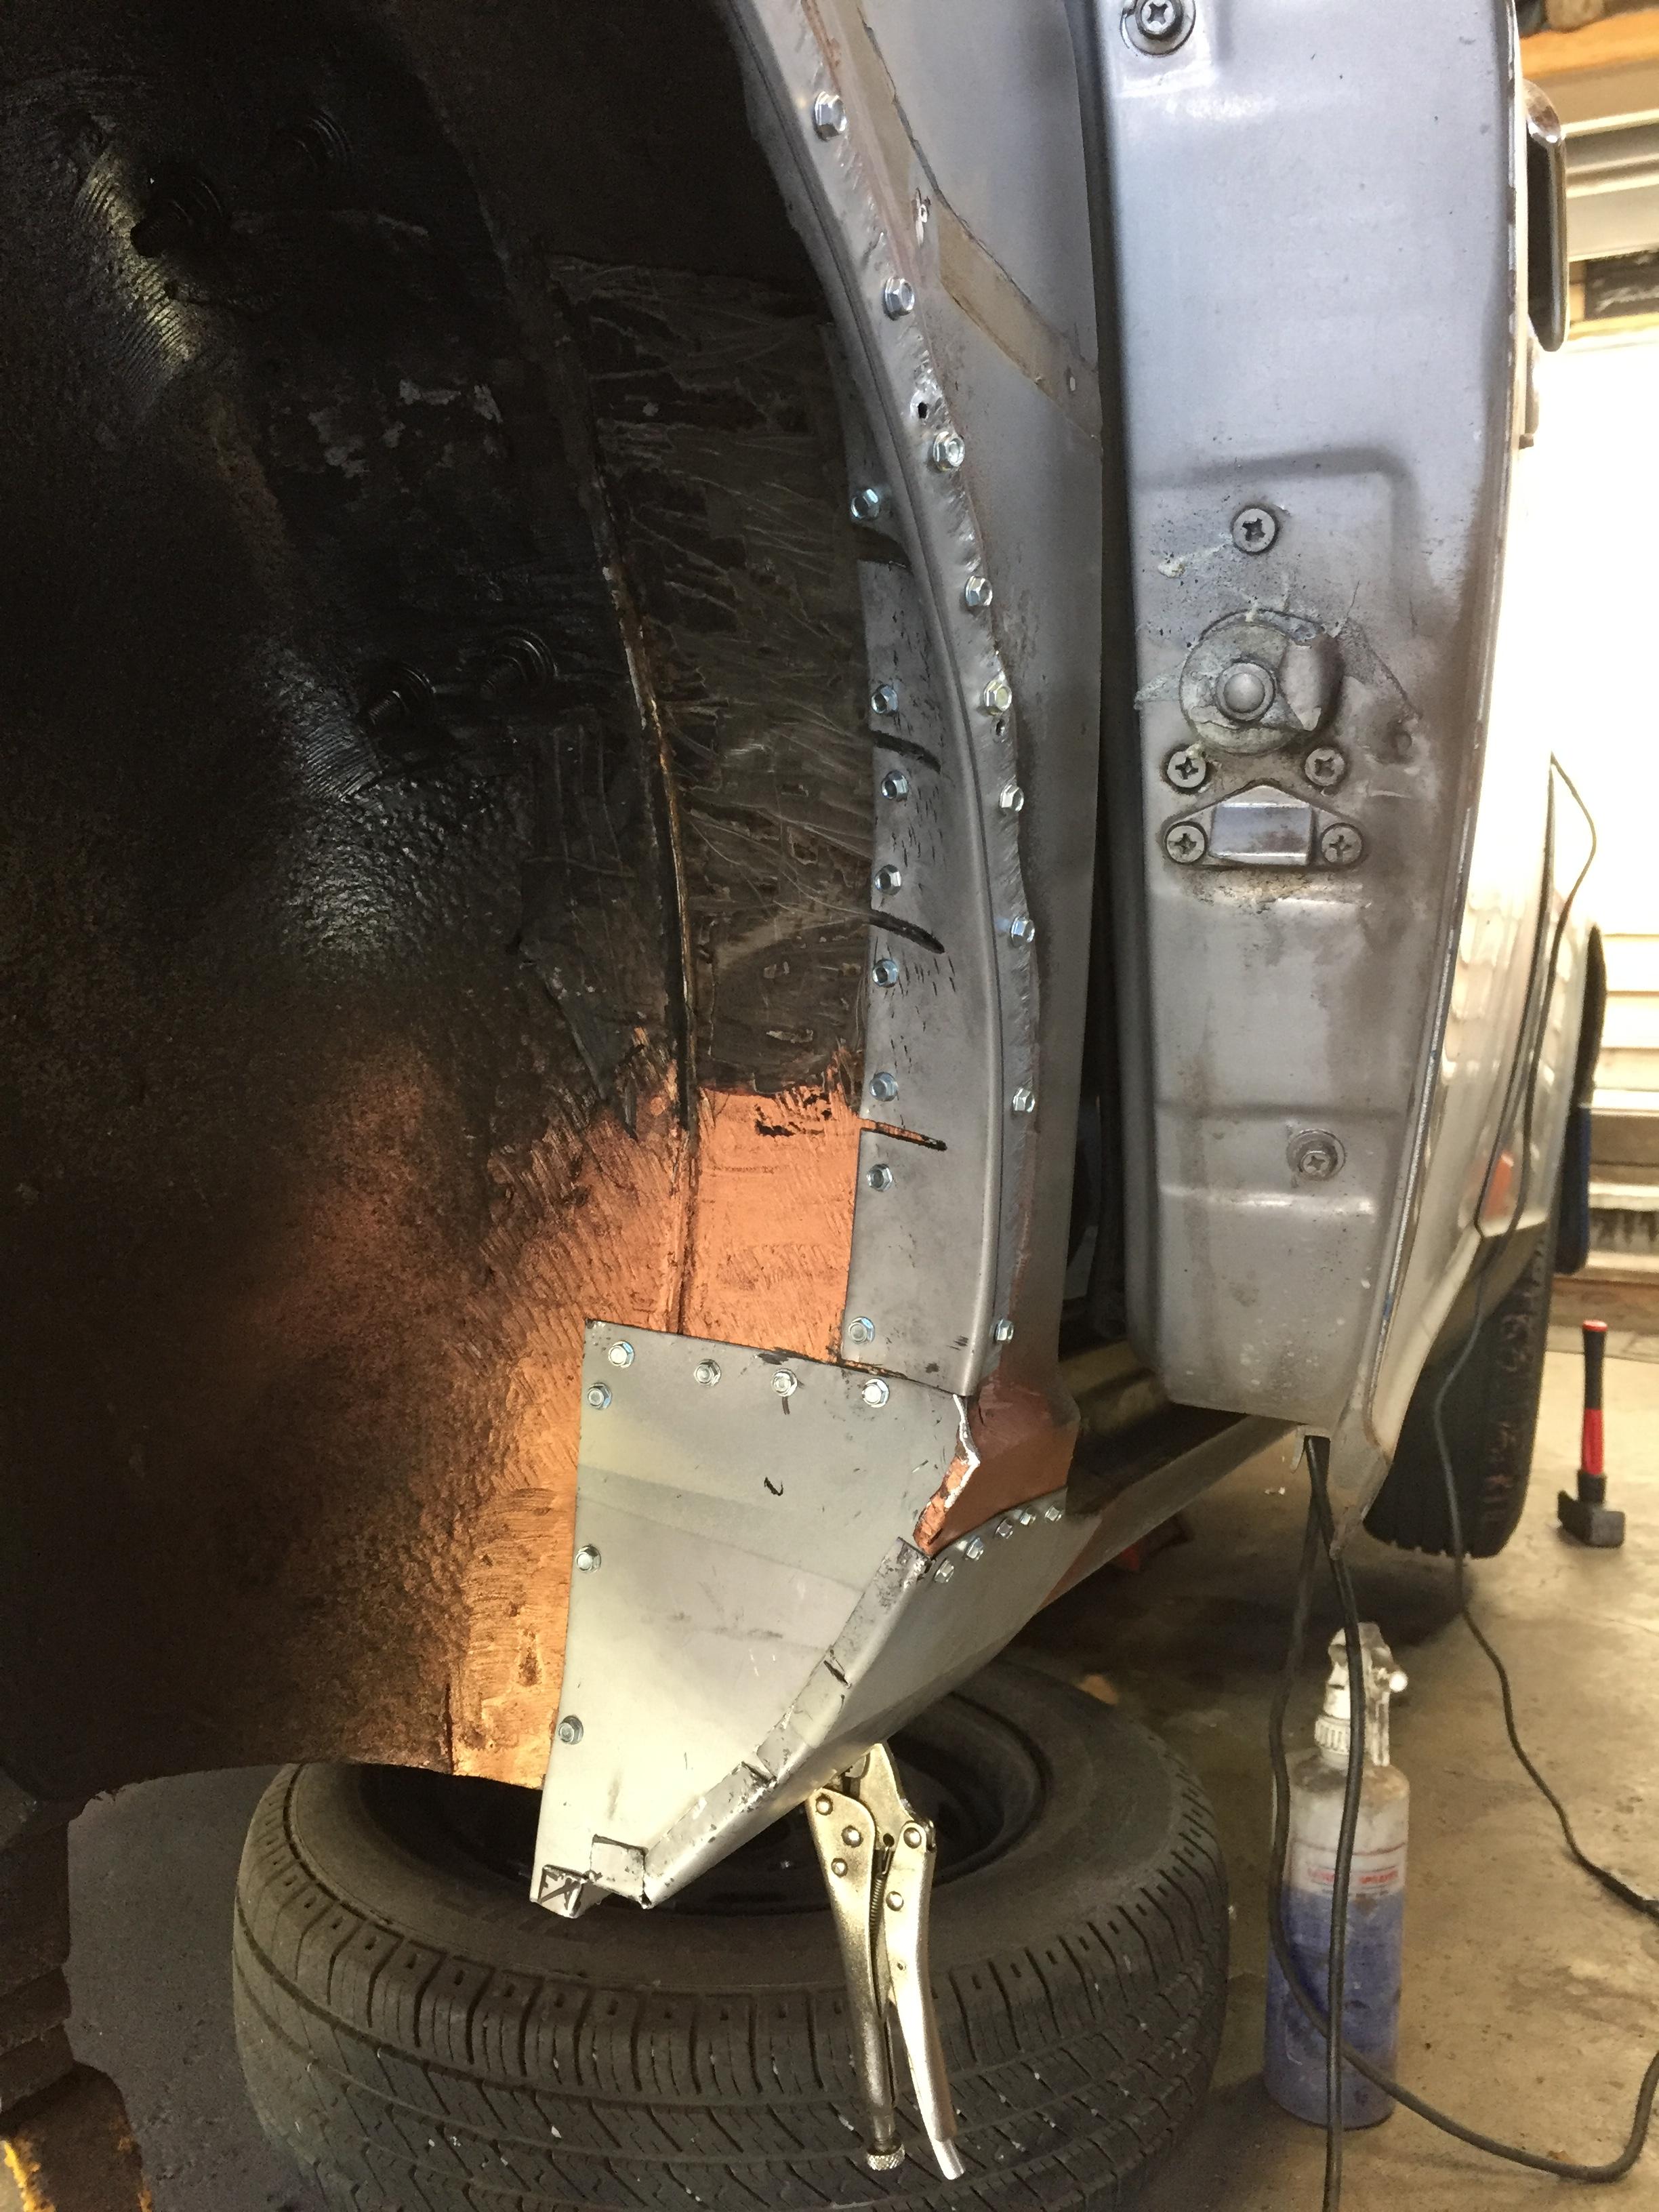
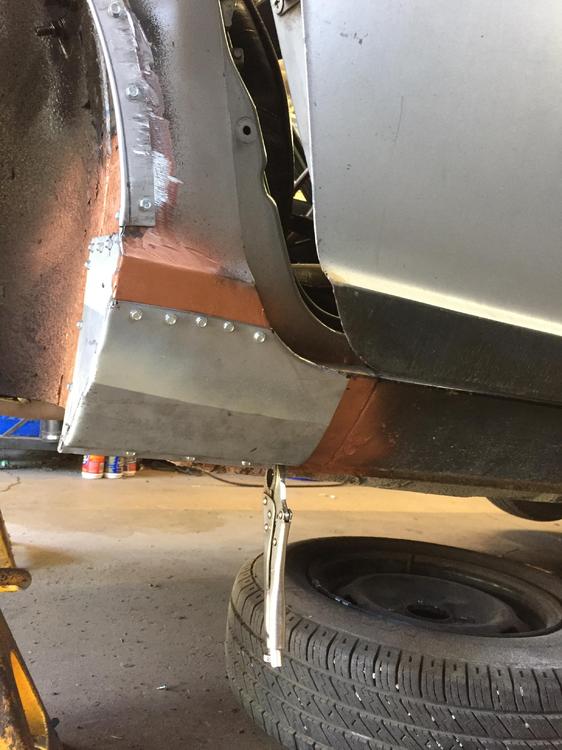
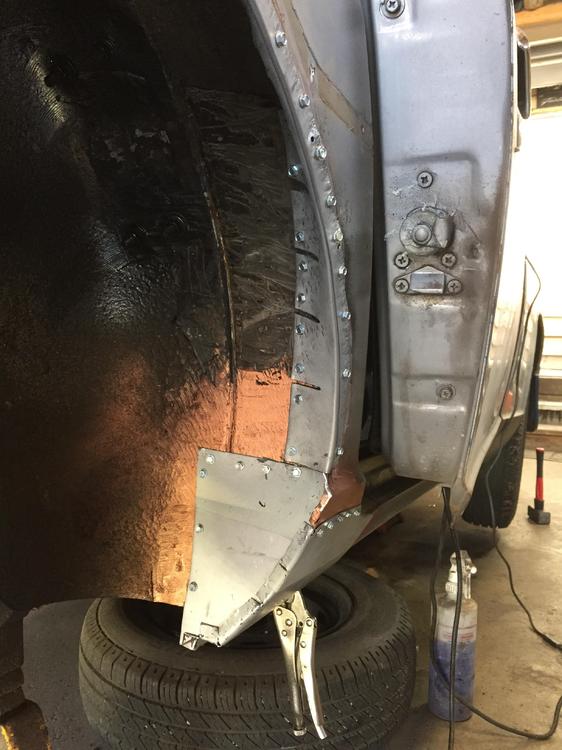
Well the car is up for sale locally on kijiji for the last couple of months, and I've been steadily "improving" it while I wait for a buyer. I've fixed the major holes around the rear wheels wells. The intent here is to plug the holes to the interior to make the car safe to drive and get it to pass inspection. I want to get the car running, safe, registered and insured so the new owner can take it on and make it what they want. There is enough "missing" from the rear arches that they become candidates for a set of ZG flares just to cover the functional repairs. I've replaced the door and hatch weatherstripping with used pieces I have to seal out exhaust. Couple of small rust holes in the floor boards to patch Hopefully with it fully functional, more buyers are going to be interested. The screws attach the panels, then the heads are ground off and spot welded. This leaves the SS screw holding it together and spot welded tight. Wish I'd taken pics of the at strip that fits the curve of the wheel well. Made with a shrinker/stretcher. Screw it to the outer surface, then slight and hammer it to fit th inner curvature. Maybe you can see the four holes in the wheel well inner where a long-gone roll bar was located with 5/16 bolts. Now they have 4 carriage bolts/washers in them, sealed in with undercoating. Note the fancy slightly used tires. 185/75-15. These are fully safe and functional and replace the ancient winter knobbies the car came with. All with minimal cost. $160 for four and 15/each to install/balance. Props for gooddealtire.ca in Calgary.
-
Well the car is sold. Well SOME of the car is sold. I have sold the shell and basic suspension to a new friend in Edmonton. The other goodies will grace other cars in the region, or maybe 3798 will stay closer to home a wear a few goodies until that original patina. Or how do I get that stroker into a certain 510 I know? Hmmmm
-
If you can't find one closer, I have a spare ring here. New inner shift boots are cheap from MSA or similar.
-
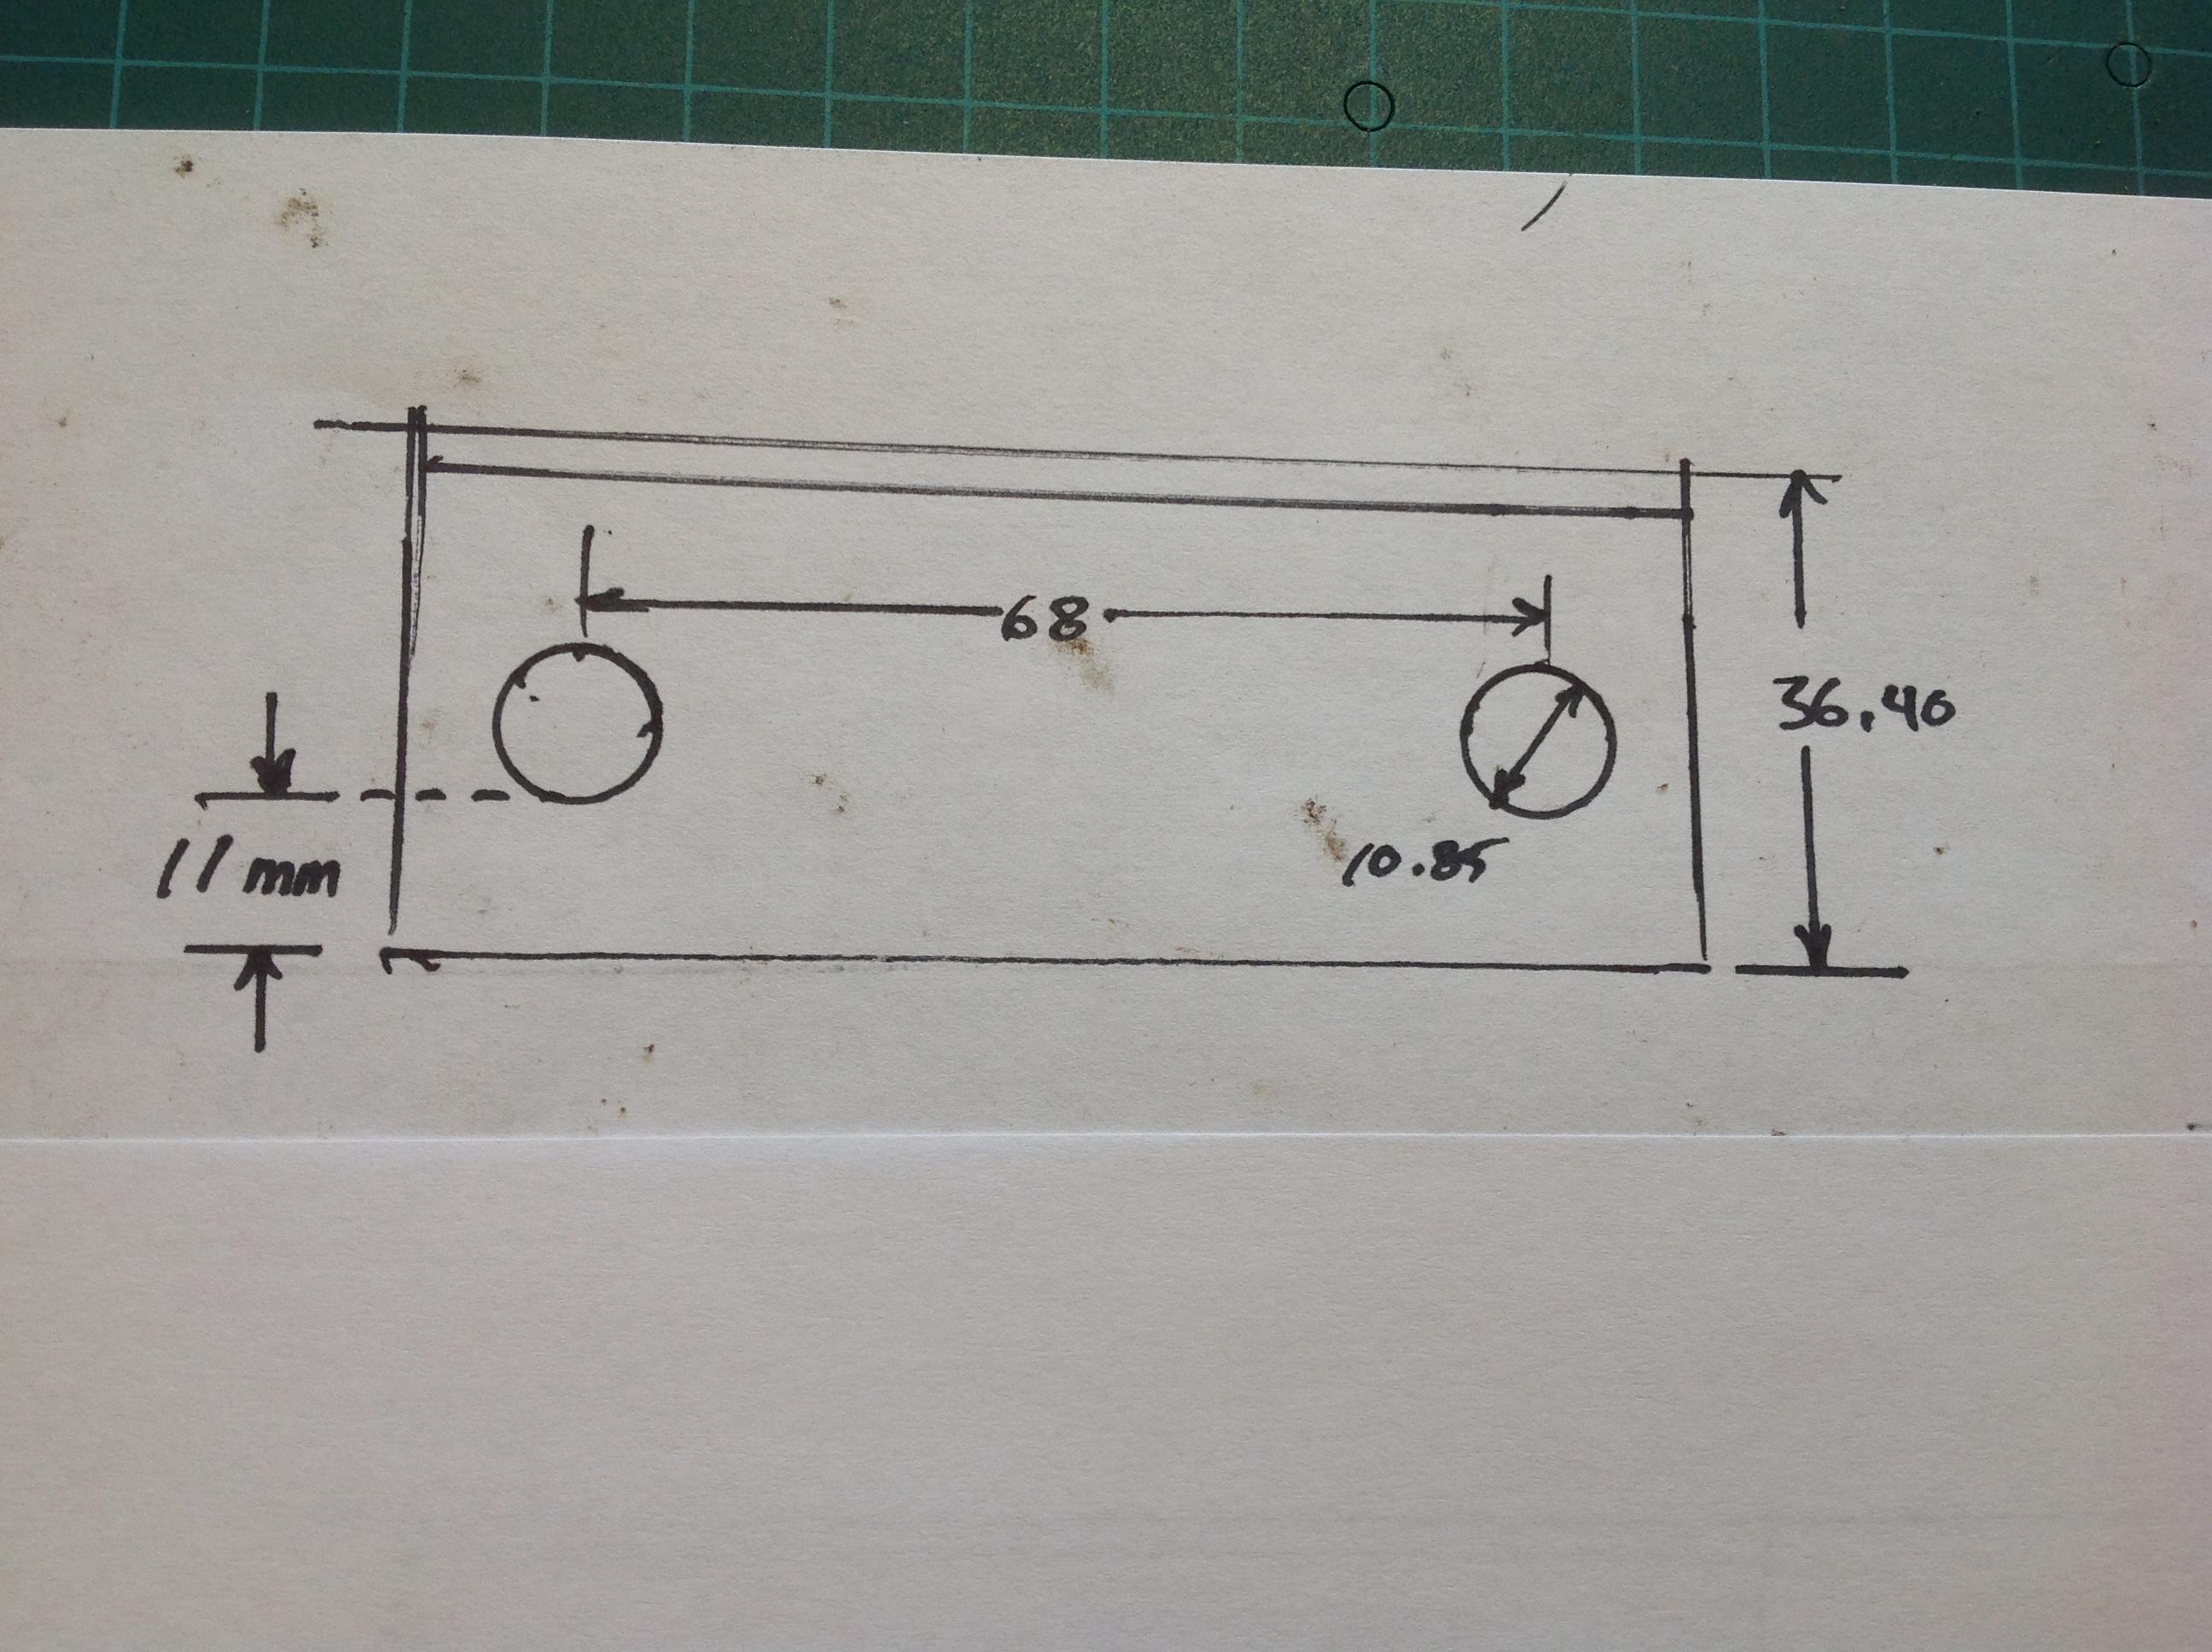
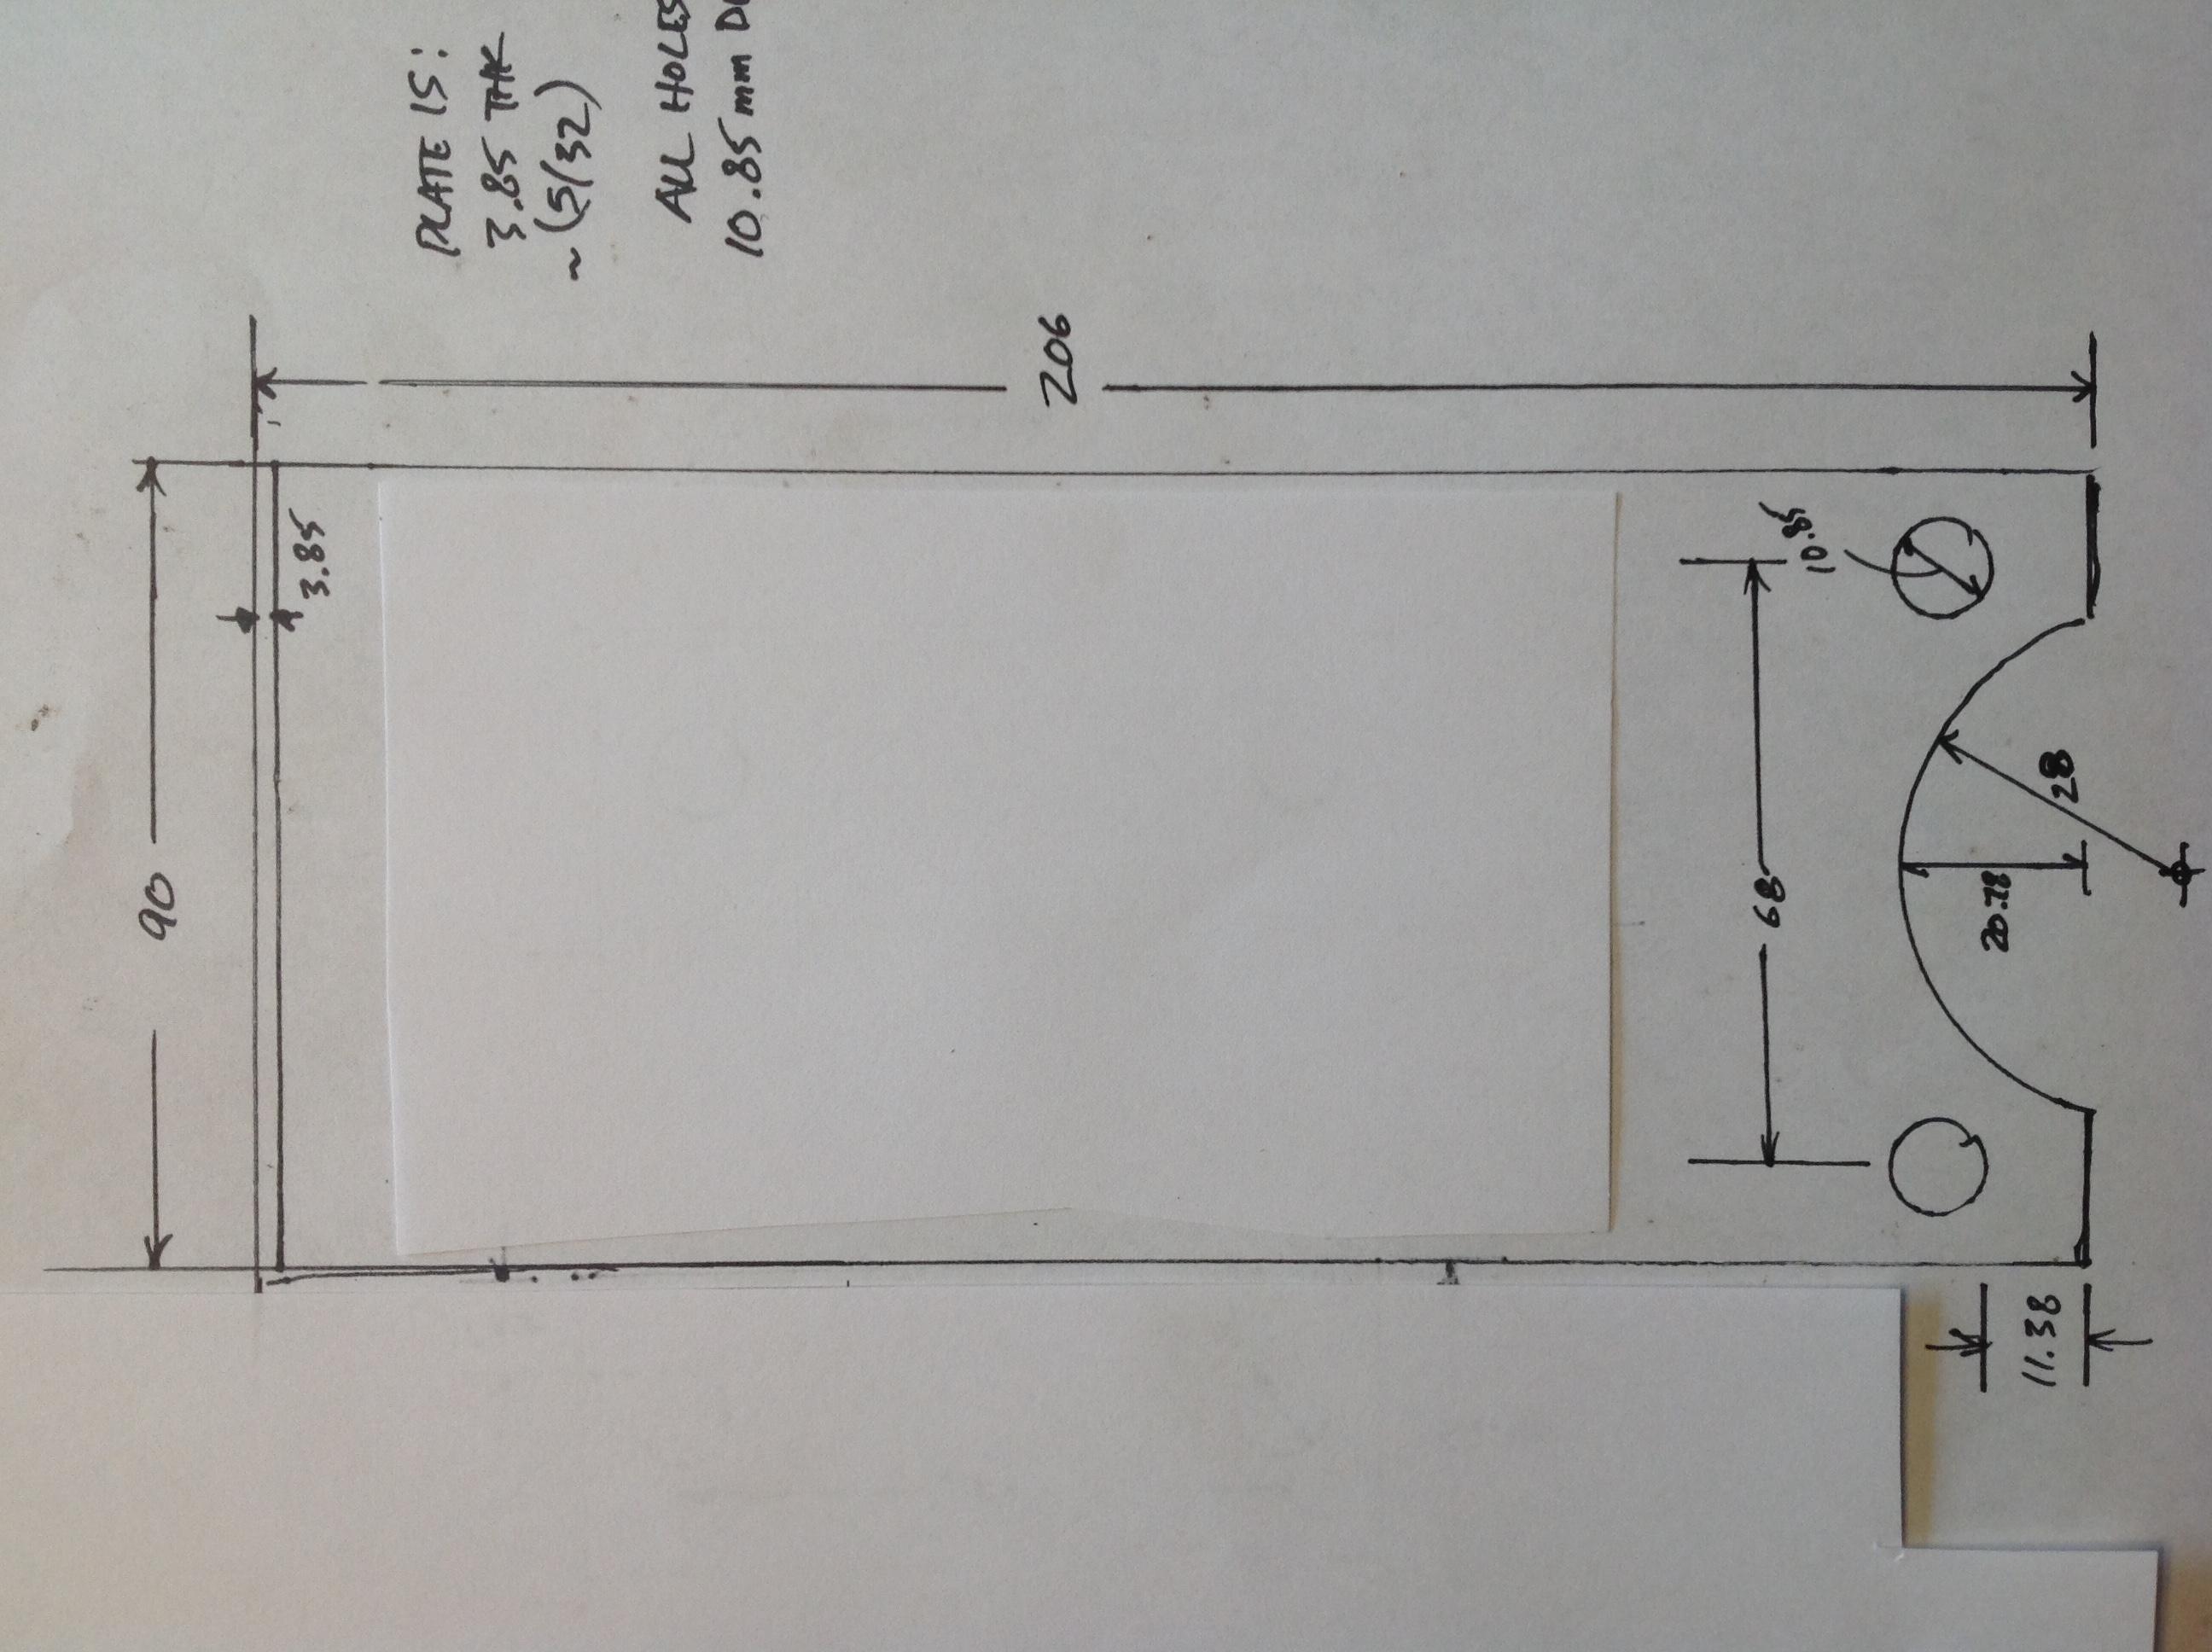
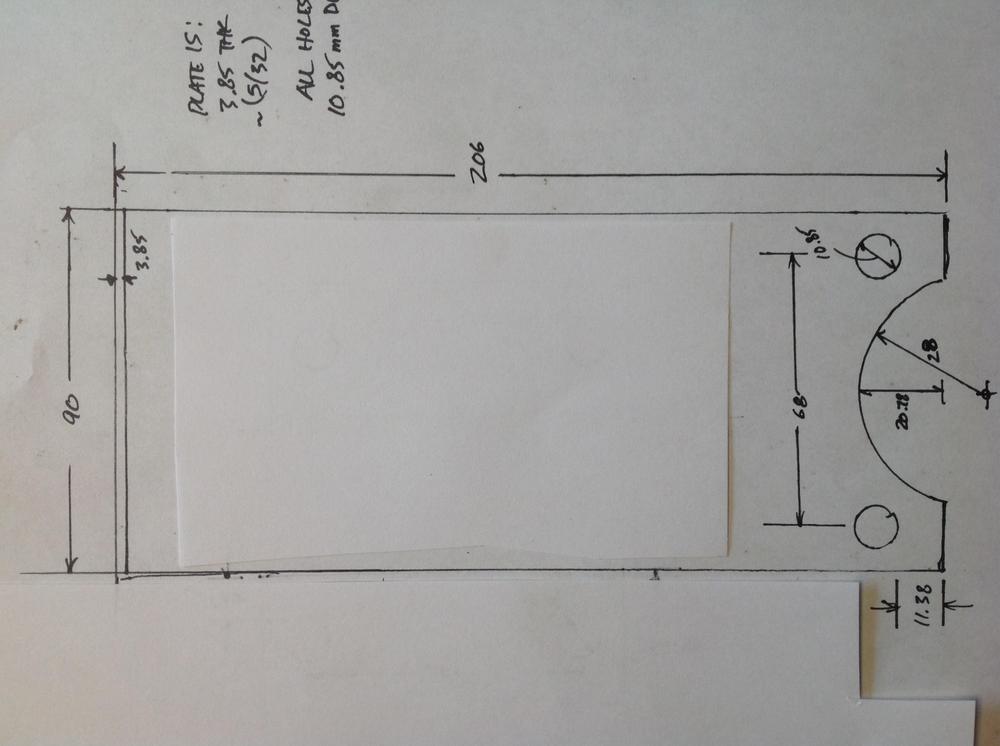
Basically its 206 x 90 x 36.4mm Holes are all 10.85. 7/16 bit would be fine, bit big... Both sets are 68mm apart, centered across the width. The size of the radius cutout is not critical, just have to clear the curve of the bushing pocket on the bar it bolts to. And before you whacko's ask what's behind the little paper slips on the drawing, it's not dirty. They cover up bleed thru marker lines from the other side. I'm saving the forests by using both sides of the sheet. yay me...

-
The stock one is 3.85mm thick steel. Very hard to drill, not just mild steel. Doodle coming
-
Making them would be easy, but you must make them strong enough. The top bend must not unbend easily. I can certainly provide measurements. Since Mr Wheee offered first and you no longer need the pedal (the only reason I jumped in there anyway), I take my proper place in line.
-
I also have lots of those link bars and gas pedal assemblies as well. Let me know Another option is to get the Suspension techniques rear sway bar kit that comes with a fresh set of those uprights with the extra holes for the sway bar mounts. BTW they are the same for all S30
-
The machining operations to create them are straight forward. The 'value' comes with material selection, proper hardening and coatings. Don't discount the consistency and dimensional repeatibility/accuracy benchmarks either.
-
Ok, that's the last time I post anything useful for you bunch of jokers.....
-
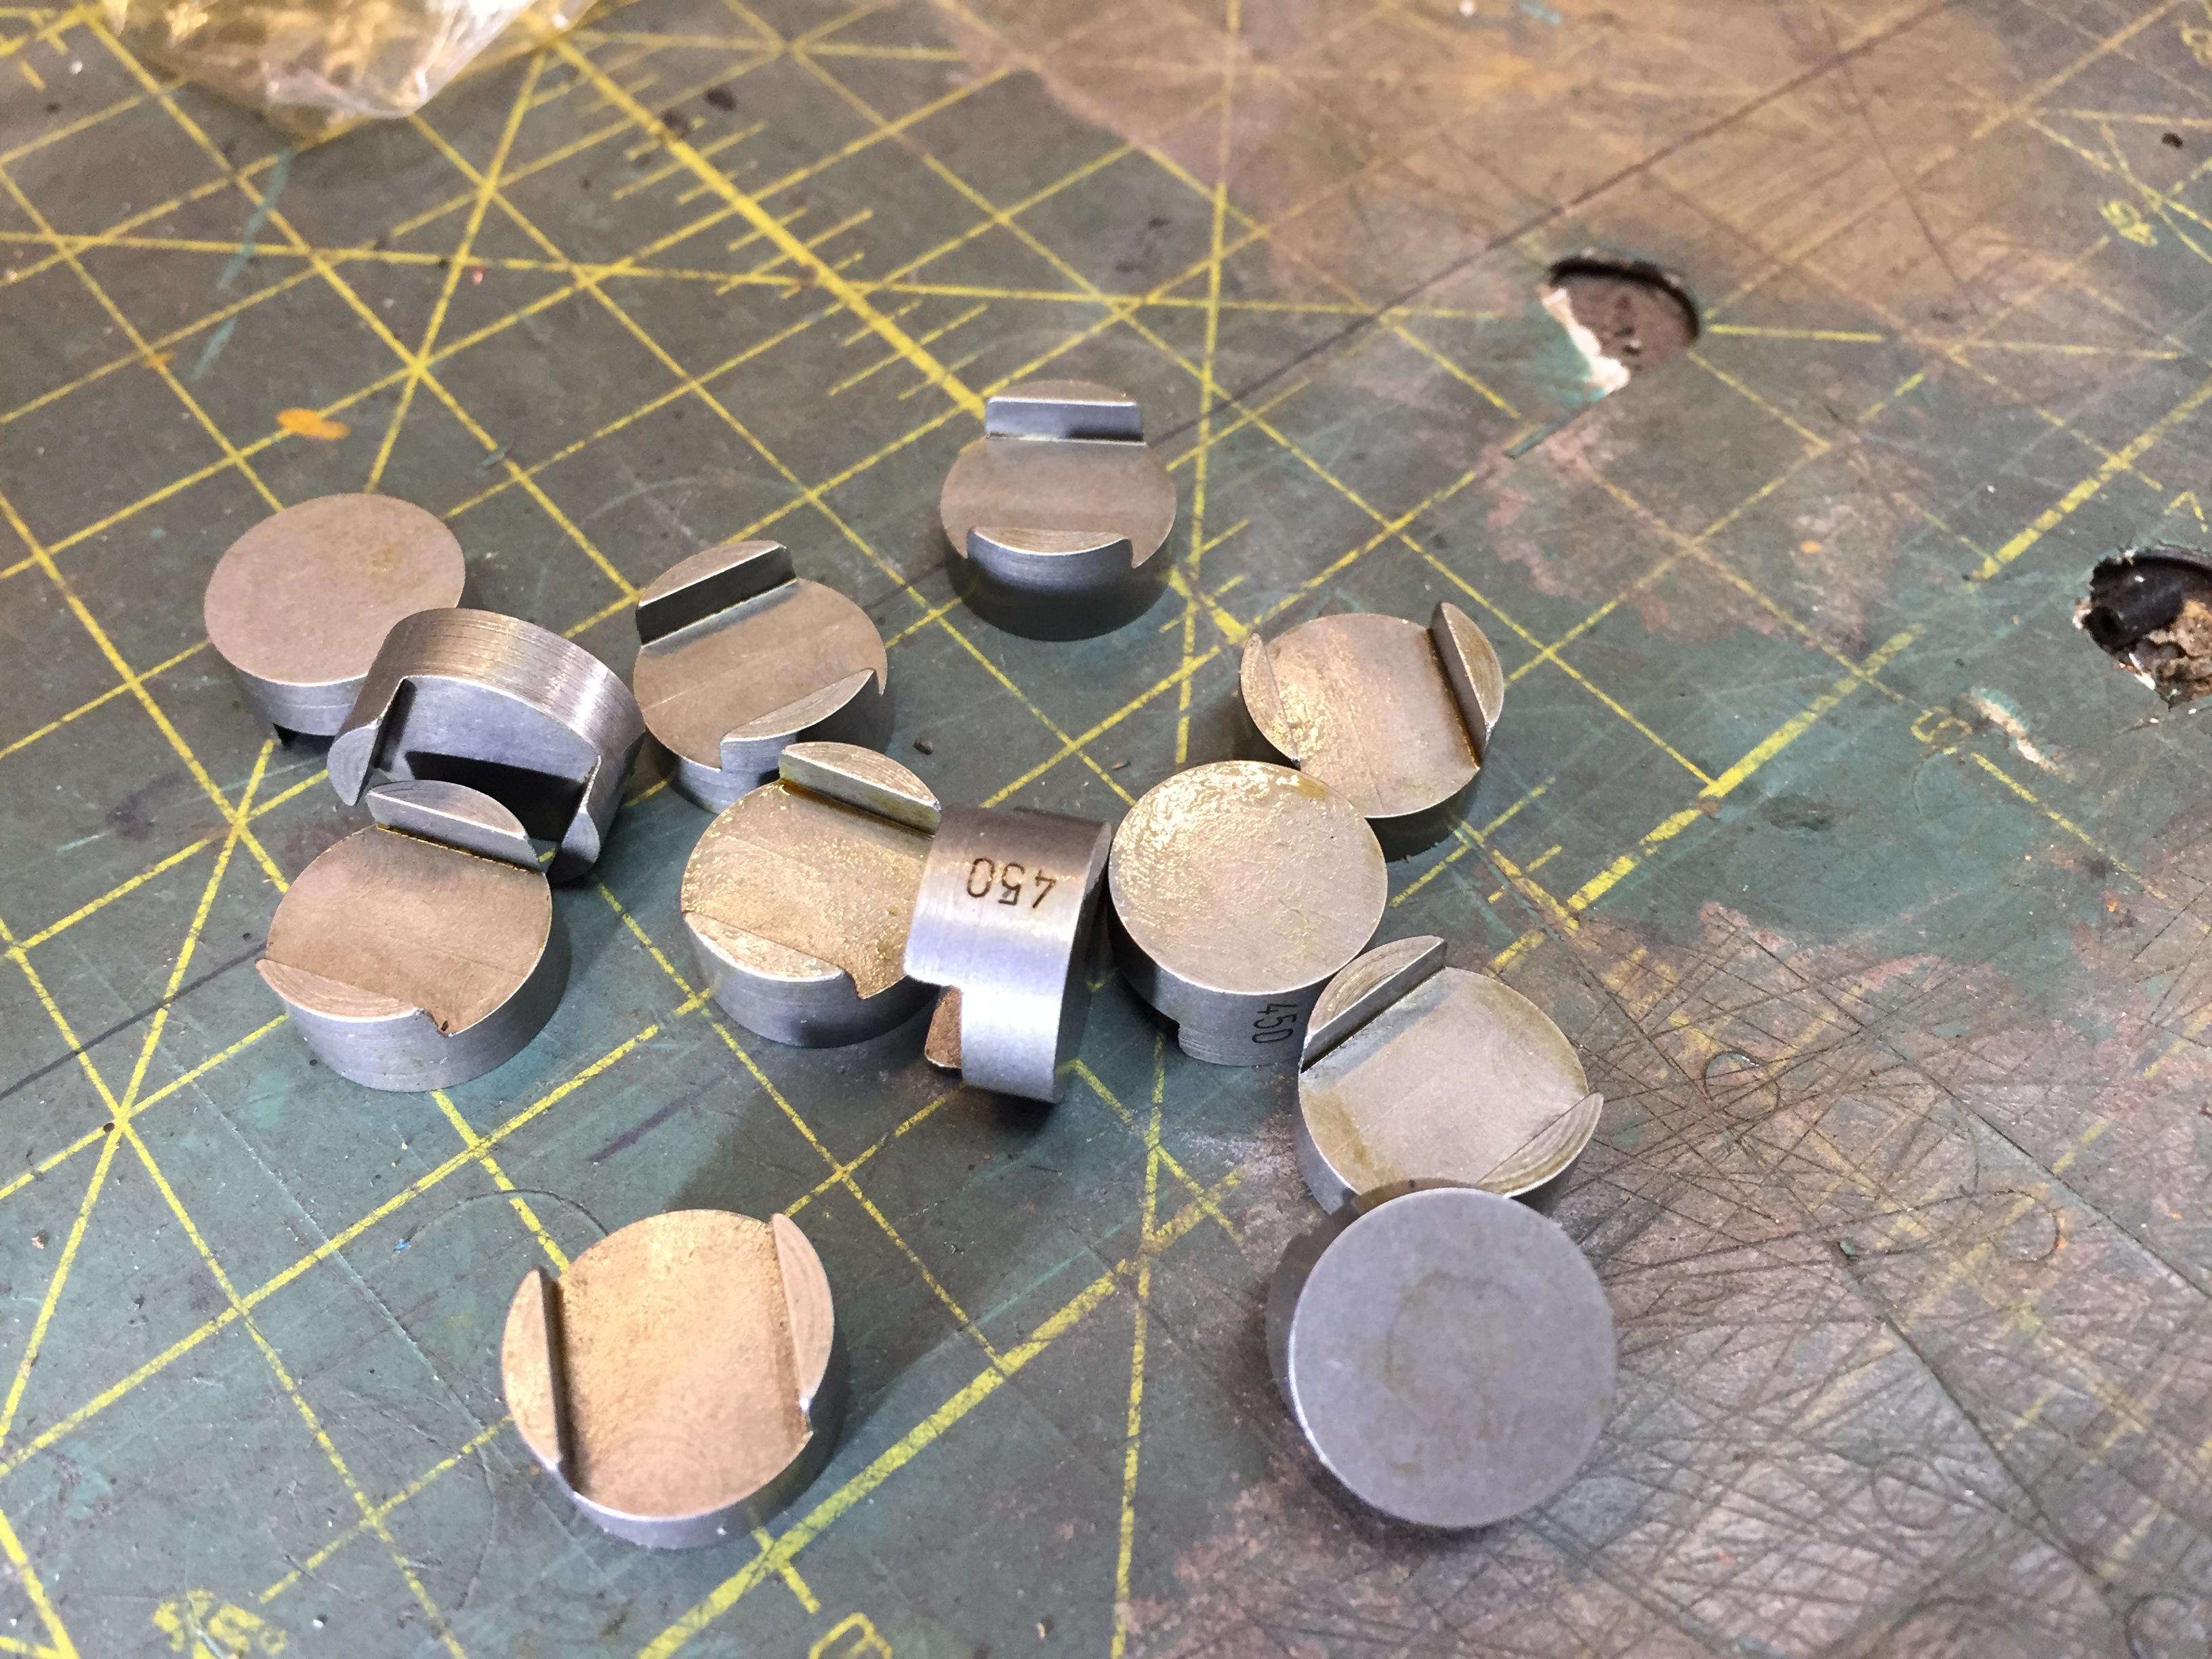
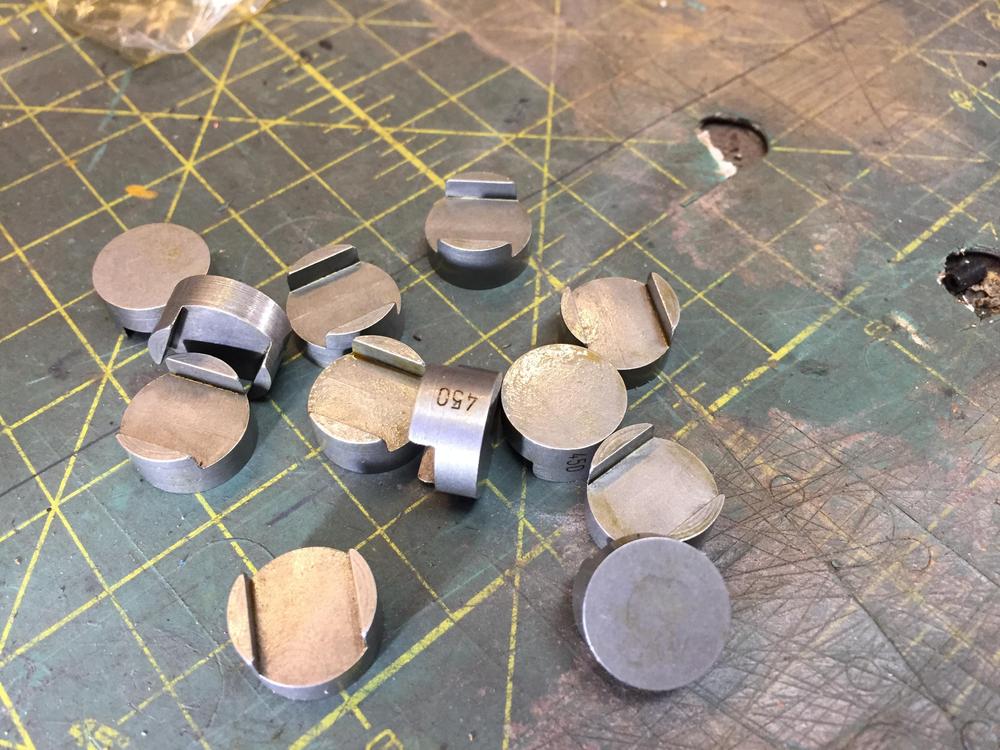
Someone on hybridZ from the UK mentioned a source for lash pads from a company I had not heard from before. They are Precision Shims from Australia precisionshims.com.au They have both flat bottom and recessed bottom (like stock) lash pads in any thickness. They have stock thicknesses in 0.5 mm steps, but will make you any thickness. They make shims as they call them for many many engines. They even have the size printed on the edge! Now the best part. Price. They are $9 AUS each for the flat bottom. For Canadians, this is fantastic, as the dollar is near par with Auzzie land. In fact I had about a 1% advantage in exchange rate on the day I bought some. US folks will win even further with a 30%+ advantage. Anything Datsun I can buy from Australia is an easy choice. Datsport for 510 stuff like weatherstripping, is another favorite. Chris Bullen the owner was great to work with and very responsive. Shipping was fast (about 10 days) and three sets (36) in a padded envelope was $30. Highly recommended!


-
They are M4x0.7. Long black and flat/oval headed. Maybe 25mm long. Philips drive
-
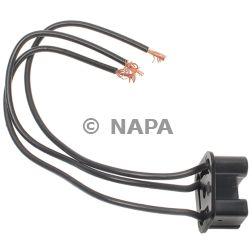
I suggest just getting a new headlight connector pig tail and splicing it on. I see billions when I google headlight connector H4. Every generic auto parts store, ebay and amazon has them by the boat load. Just one example http://www.repairconnector.com/categories/HEADLAMP-CONNECTORS/ I believe this connector style Actually has the stock style FM connector pins. I have a few of those somewhere. Search for either H4 or 9003 style connectors
-
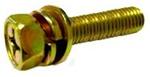
Clipsandfasteners.com. search for M5 SEMS M6 SEMS Etc....
-
-
Flat tops got to the place and reputation for three reasons. IMHO 1. Complexity. When they wear out, and they all do, rebuilding them was difficult. Kinda the same, keeping them in tune was also tricky. 2. Availability of the earlier simpler round tops. Why bother when something simpler and better is available, barring some polution law in your kneck of the kwoods that made you do it. 3. Rebuild kits were NLA for a long time. MSA has them again, I bought a set. I have a bushel of flat top cores if someone is wanting some.... Crickets...... I have previously expressed my admiration for the design of the flattops. While I threatened to build a set and show the na sayers some time slips, well, you know what happened. Too complex, time consuming and there are these fantastic folks at ztherapy....
-
-
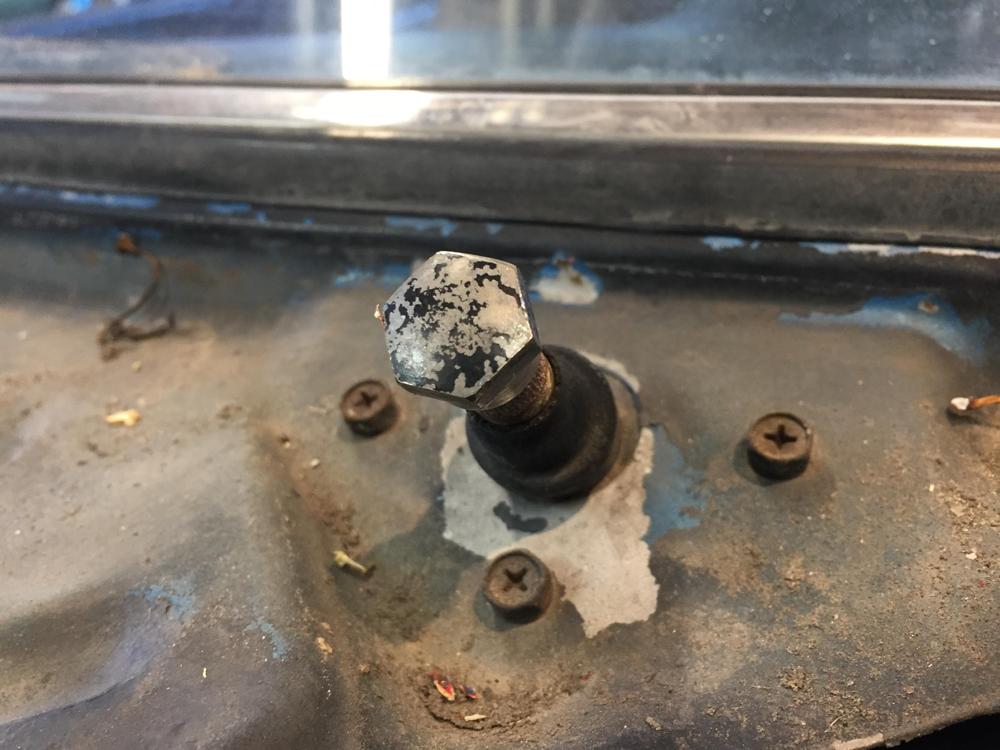
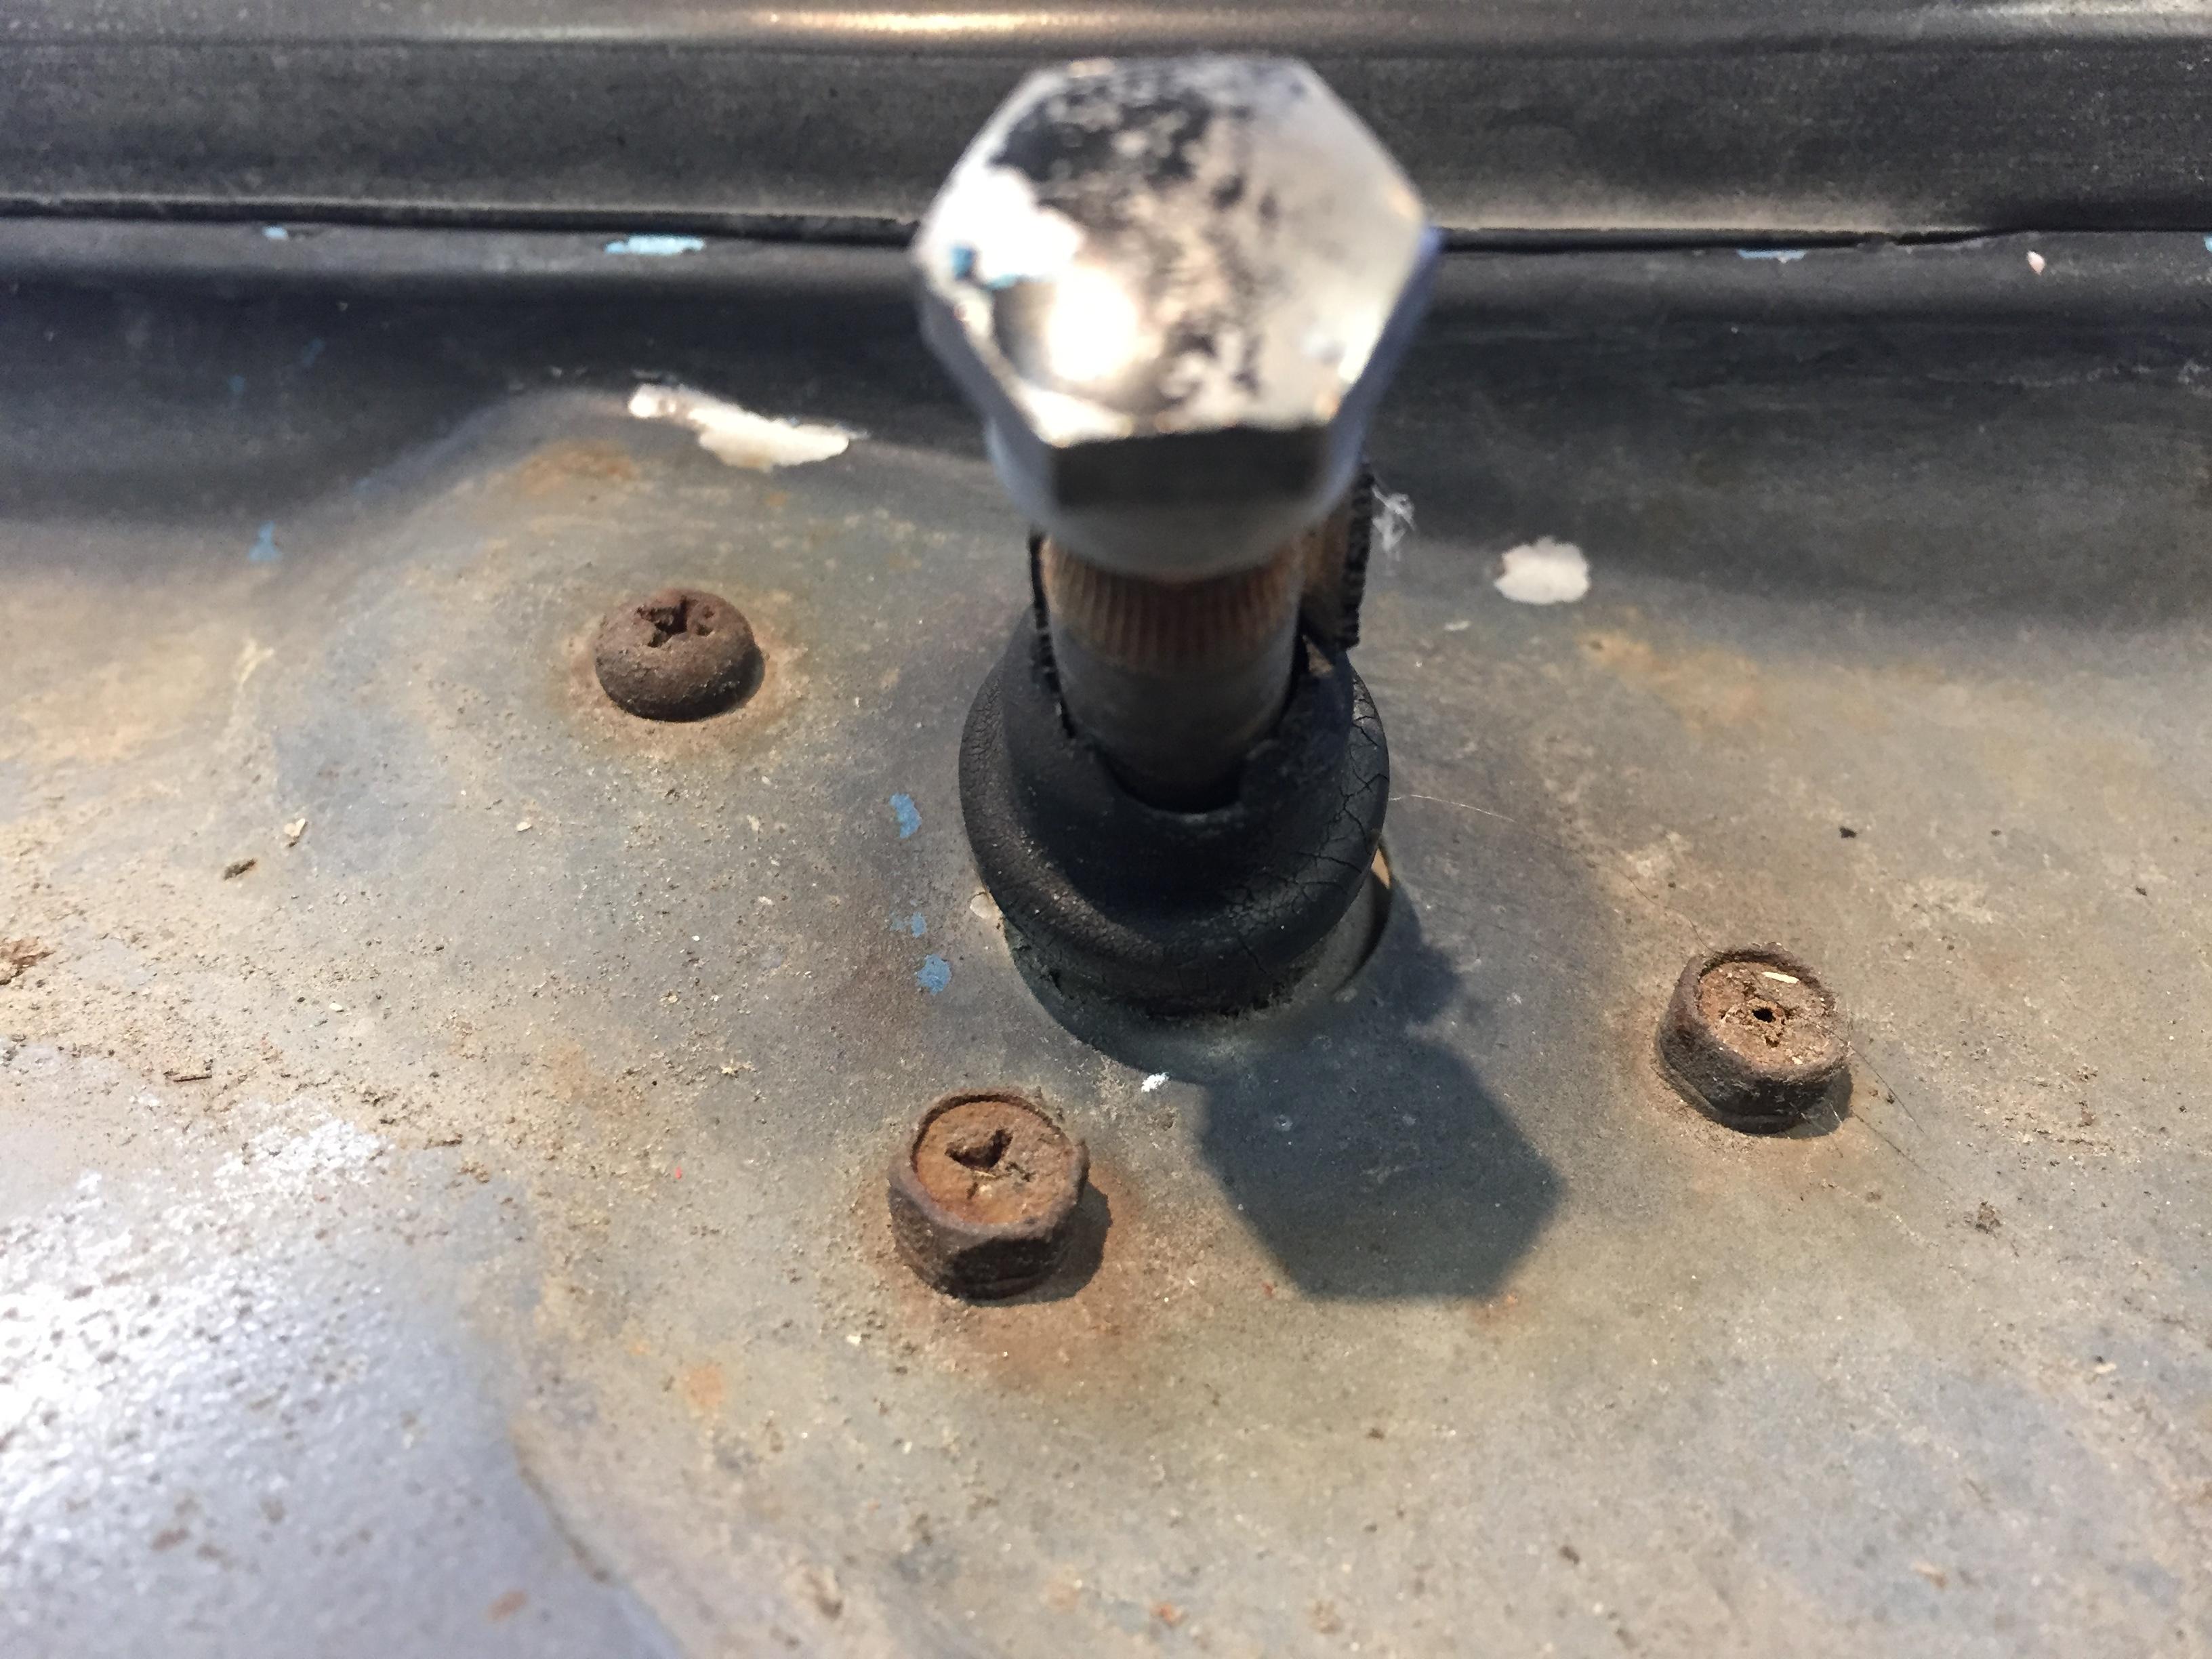
Good morning. I'm in a mood of distracted boredom, and thought I'd start a rousing games of "why'd they do that?", 'they' being the factory. I have noticed on more than a half dozen odd Z's that I would say are relatively unmolested, that the six bolts that hold the wiper arm pivots to the cowl are quite surprising. Five are identical, one, the same one on every car, isn't. Here we see on the left side, that the inner, rear fastener is a round headed machine screw, bereft of even a lock washer, while all the other five are nice hex SEMS bolts with the expected lock washer. All are of course M5x0.8 thread. Right side, all is happy with three matchy matchy. As those of you who have had the pleasure of removing this lovely flock of fettid fluffy fasteners have experienced, it is not enough that 4 out of 5 of the bolts snap off, but you have to resort to vise grips to get that lone round headed bastard, rendering its head beyond repair for future use, causing all sort of consternation and wringing of hands. This was recently observed on 3798 (pics above) and on a 73, VIN 127xxx. Can't say for sure what other years I've seen, but a good sampling. Let the speculation begin. Why in the world would they use one odd bolt in that group of six in such a systemic way? I think the assembler was a clever prankster, and revels in the joy of imagining the future angst he/she will have caused. Well congratulations. It worked.