zKars
Supporting Member
-
Joined
-
Last visited
Everything posted by zKars
-
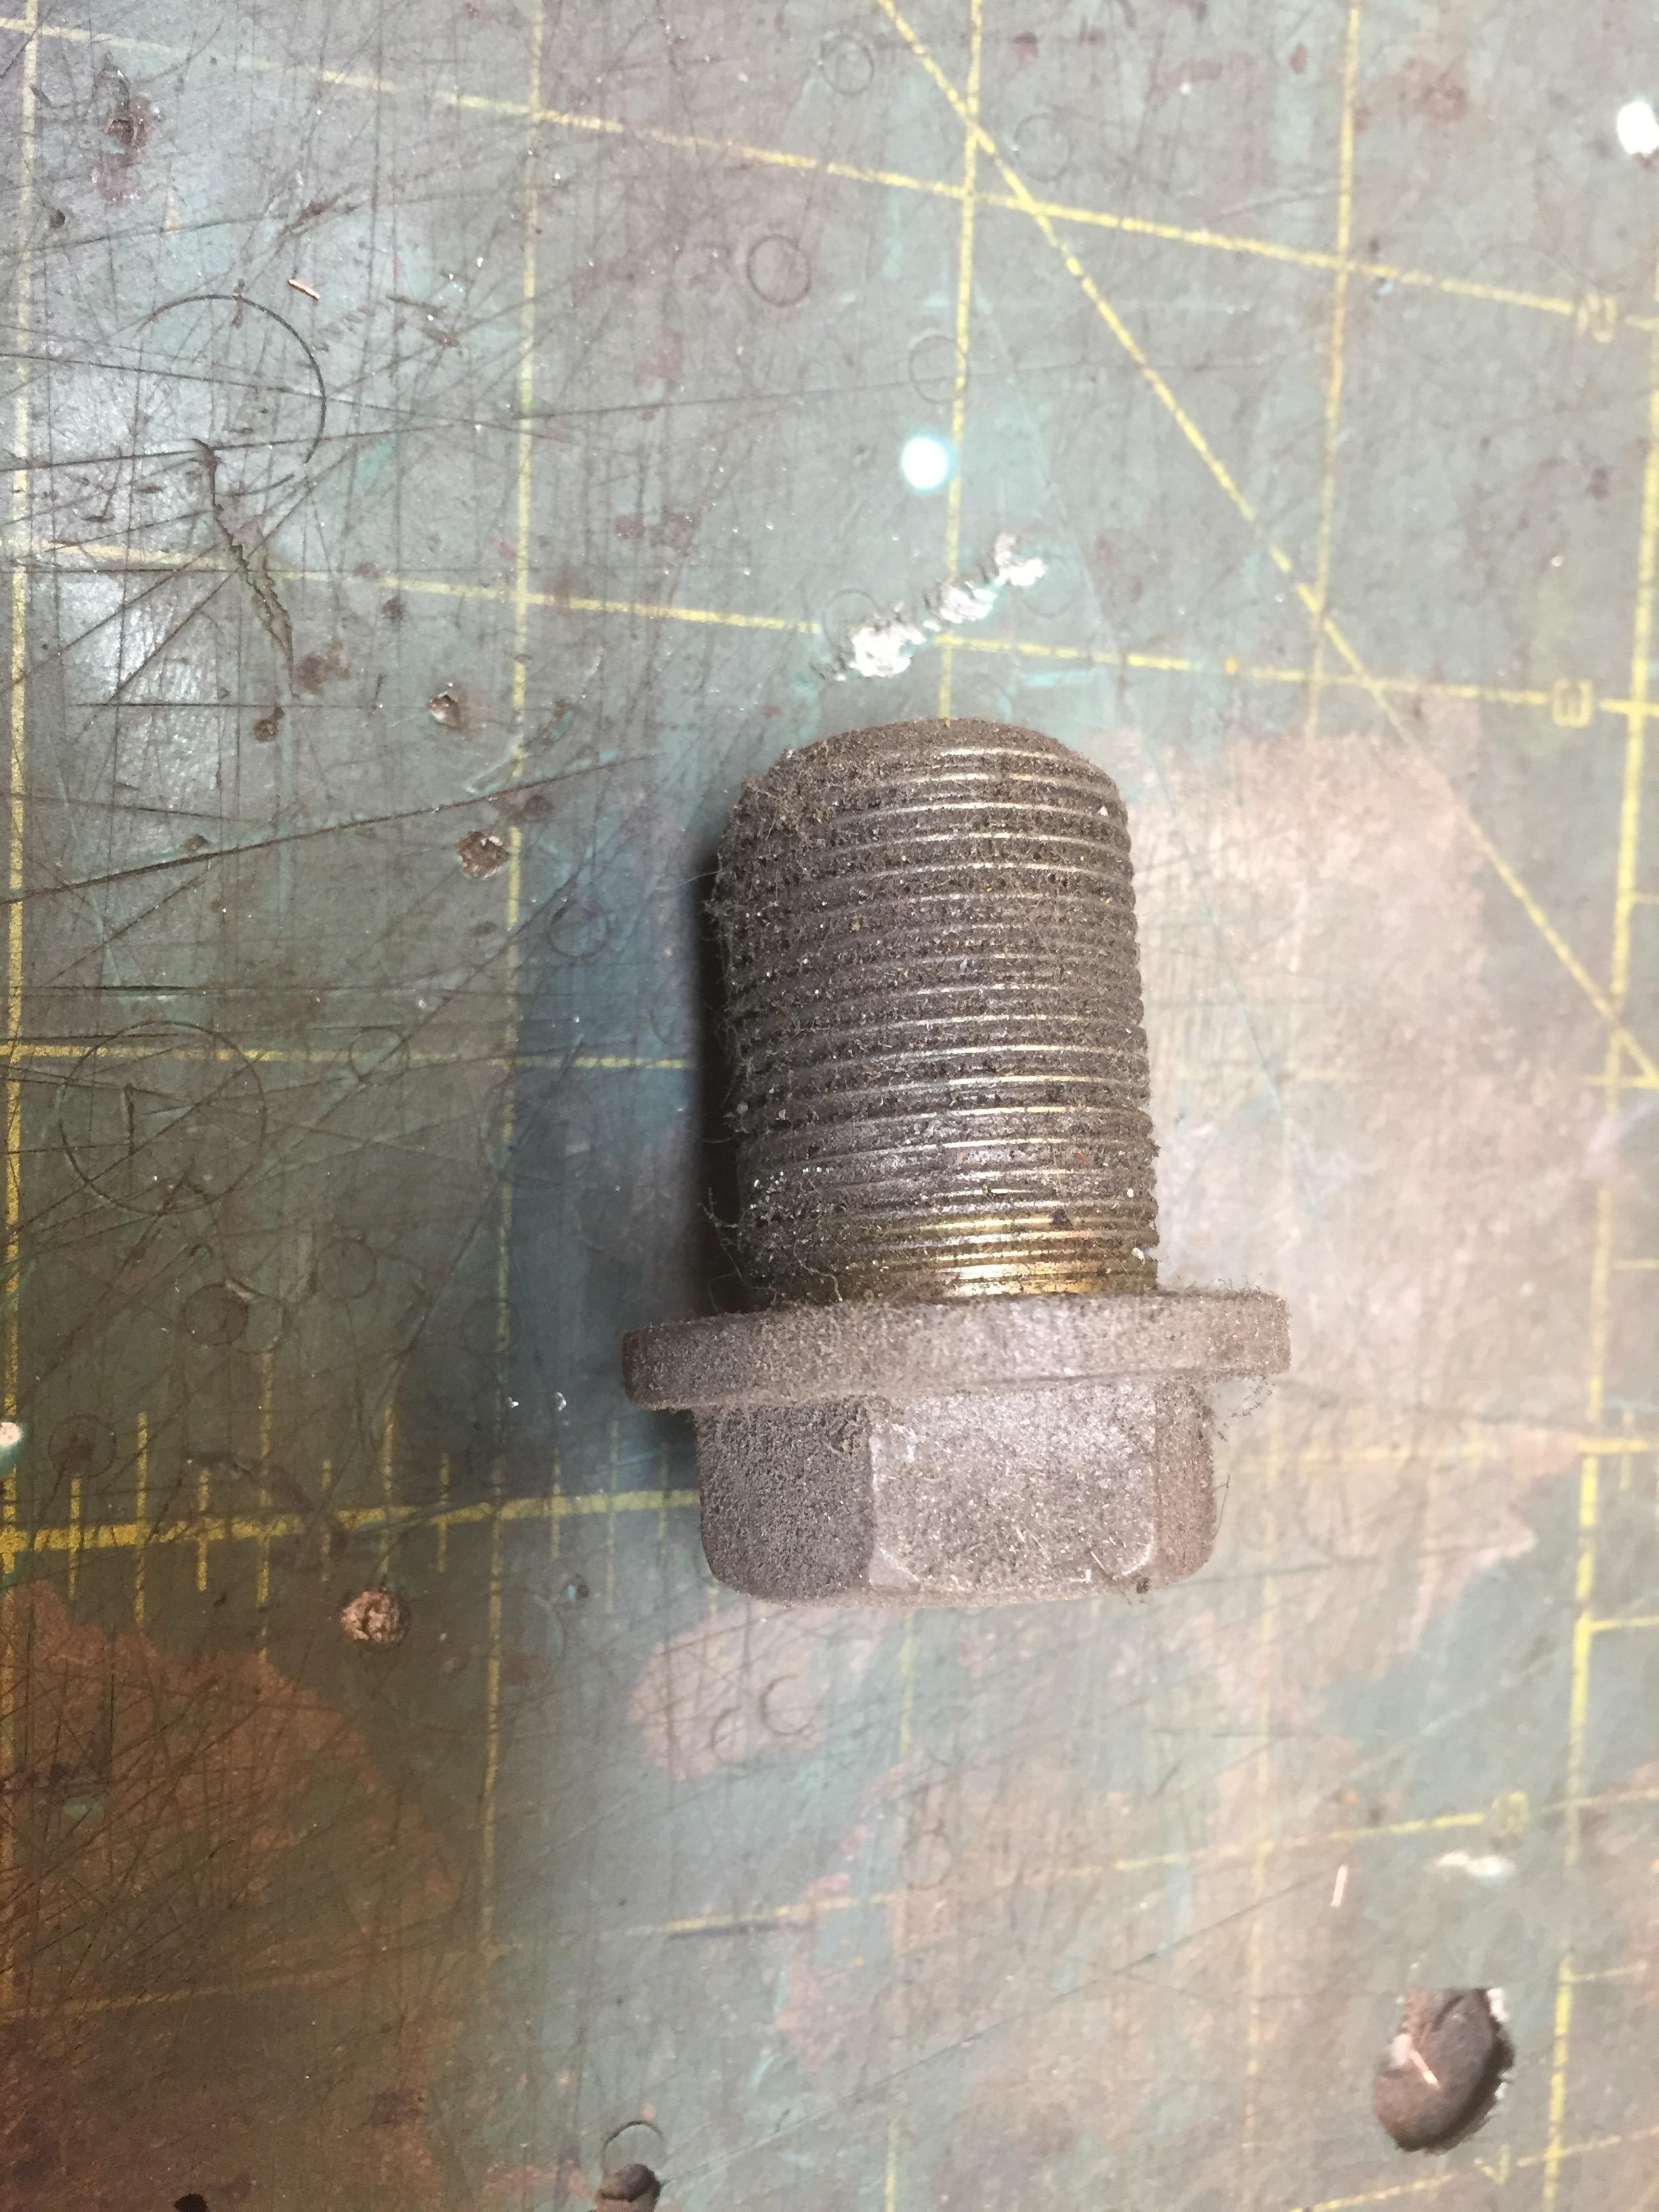
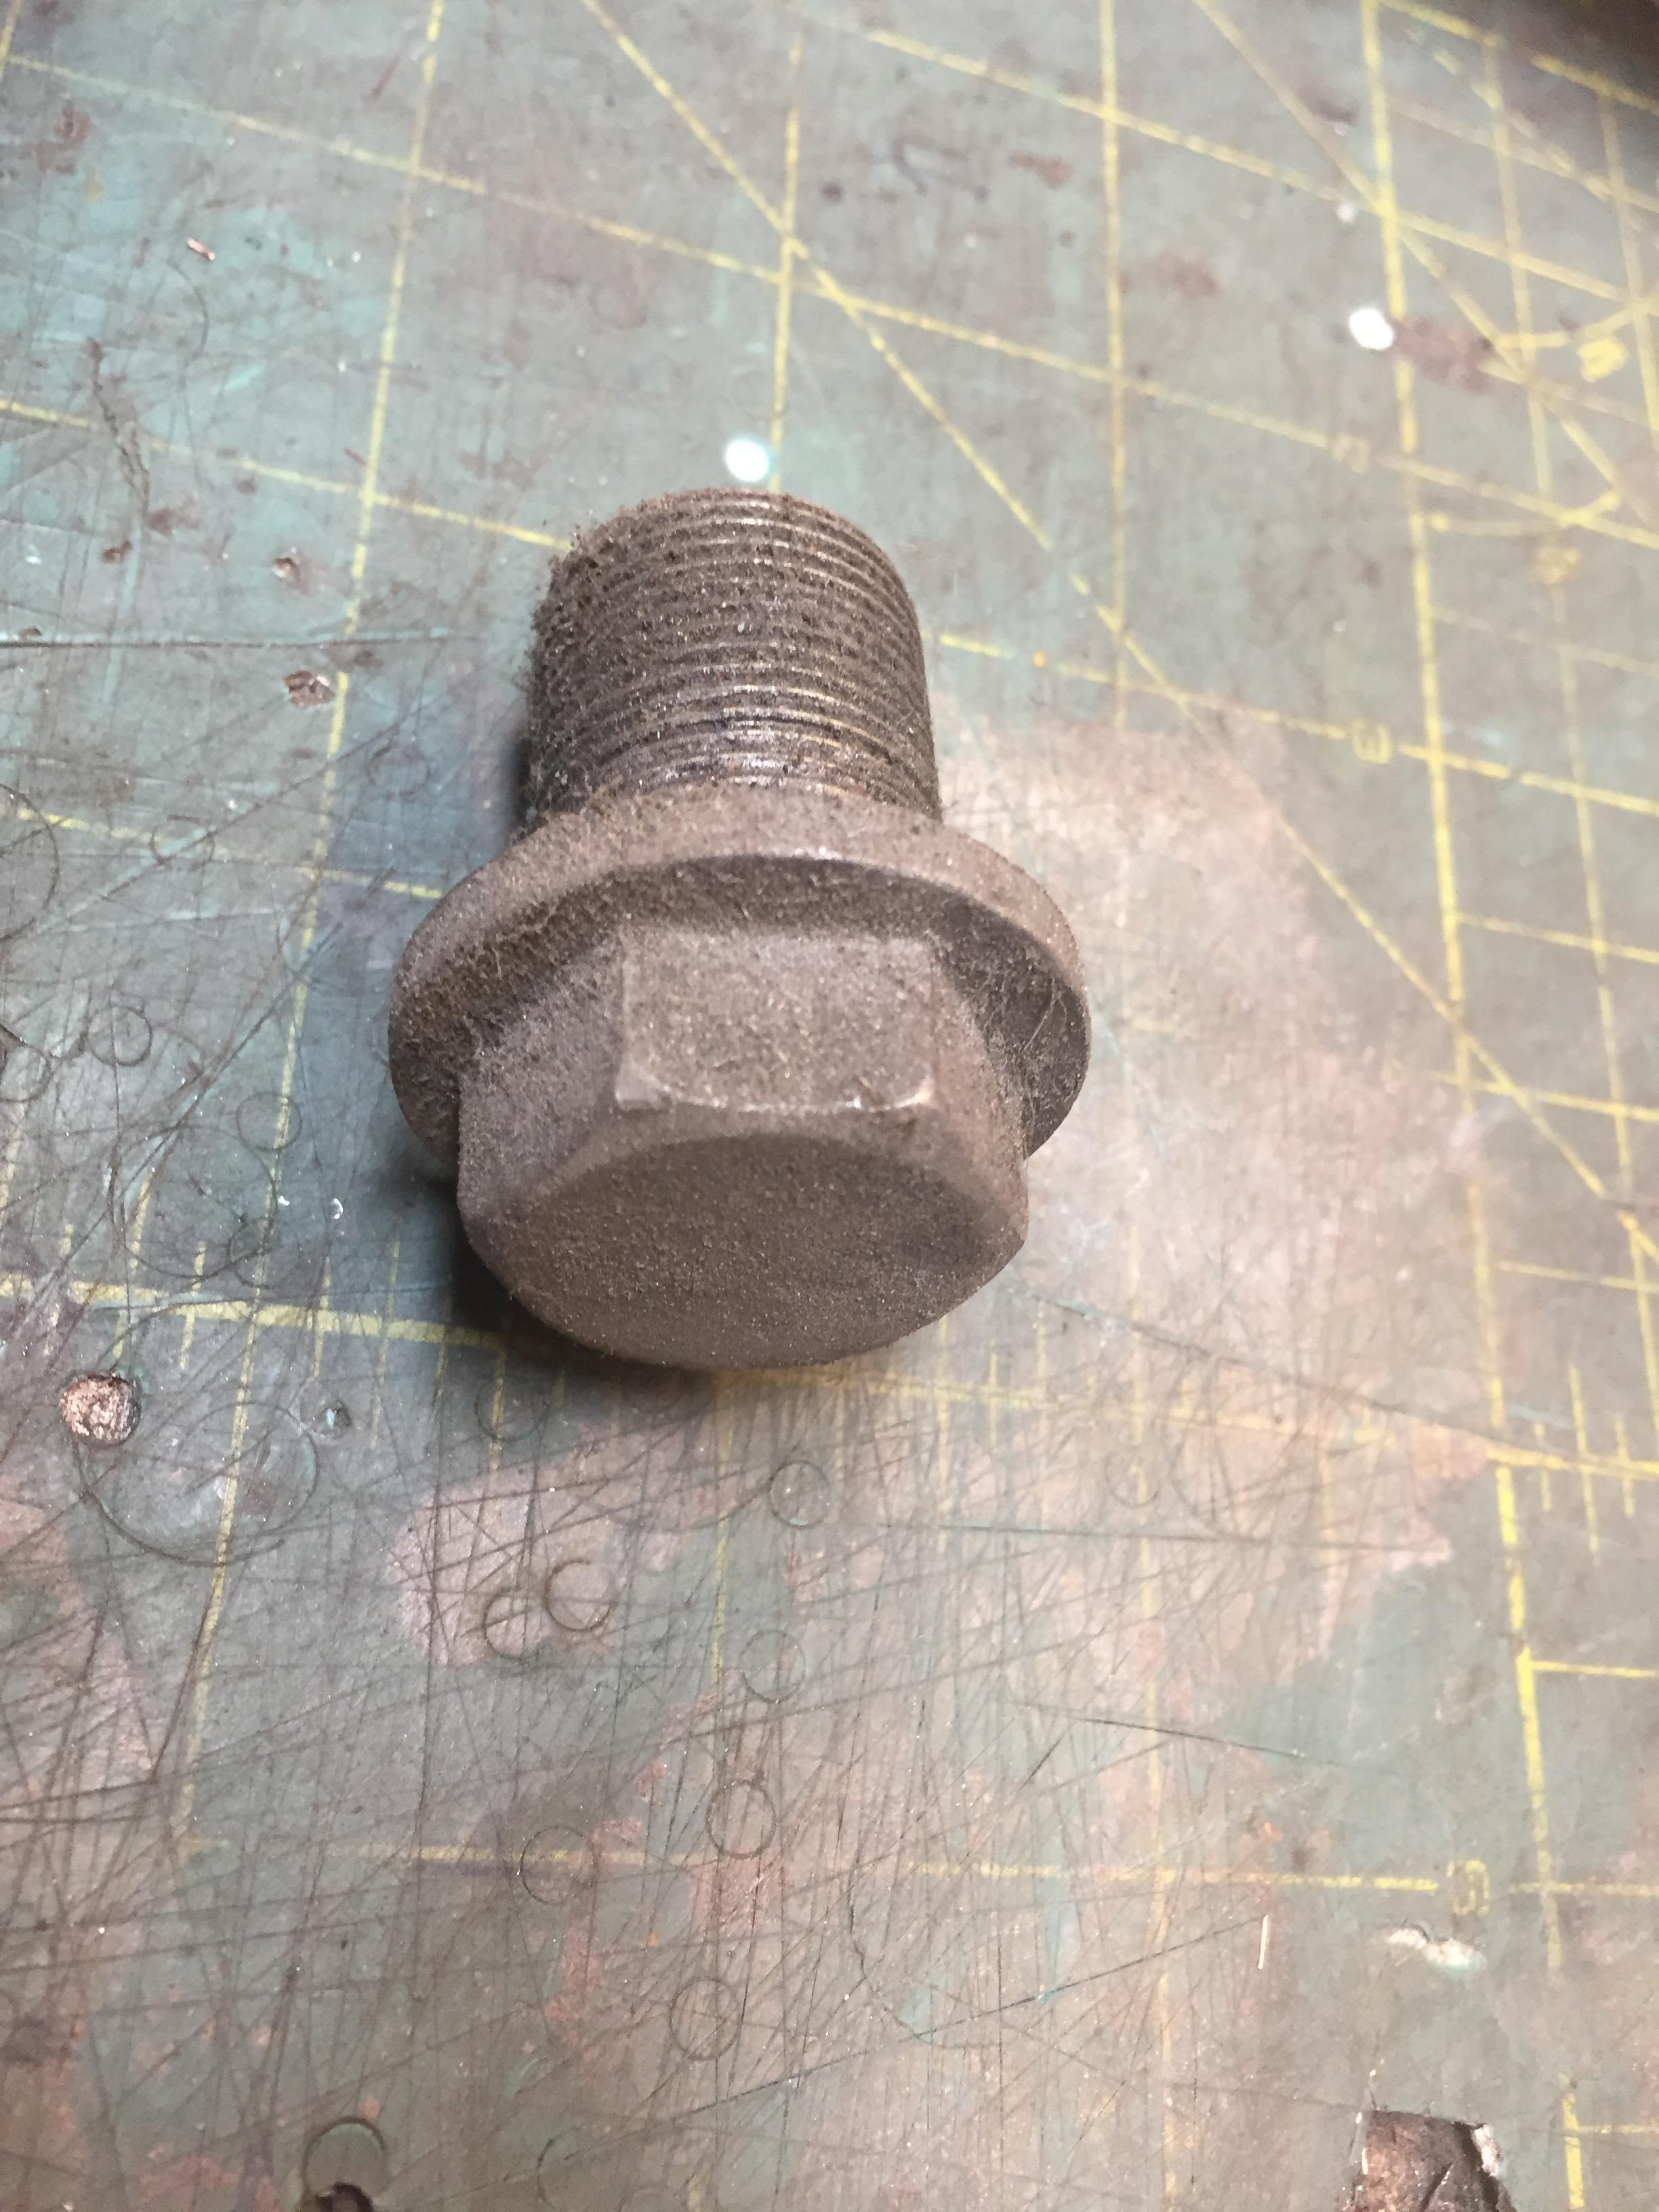
They are 30mm long. The heads are kinda unique, 24mm socket.


-
$300 bucks for a set! Holy cow that's crazy. I can sandblast mine and have them yellow zinc plated for $20! Wait, $1200/4, I get it..... Never mind..... I'm heading back to the junkyard to get more of these....
-
Charles, measure the diameter of the wire and add that to the post. That's enough info to get a close enough replacement from someplace like McMasterCarr.
-
I snagged a set of those bolts from a wreck the other day if you can't find yours. They are M22x1.5 and NOT easy to find as a generic bolt. There is a biga$$ flat washer and star lock washer that goes with as well. PM me or email at z240@shaw.ca
-
The antenna is mint. And it's the ultra valuable 73 model. ...
-
Classic Instruments SN38 can be built either 0-90 or 90-0. It's an arm style sender. Having a reversed 0-90 just means full = empty, empty = full. At least it bang on at half a tank! Hahahahaha
-
-
I bought SS hoses from several sources over the years and NONE of them have the correct (I thought it was 17mm??) hex that seats correctly in the retainer bracket. Close, but no cigar.... Brake or clutch
-
I found this stuff at the local auto parts store. 2" diameter heat riser piping. Accordion stretchy hose.
-
I've ordered the tanks-inc pump. Great feedback about your pump's performance in low fuel Steve. It has a small baffle tub and a sock - like thing on the inlet so it should be ok in all but near-near-near zero fuel situations. Actually my favorite way to be caught in the "Im out of gas again!?!?!?! Nooooooo" situation is to have everything going fine, then start going up a hill.... That last quart sloshes to the back, and the damn car dies; half way up said hill; and funny thing you can't push that Datsun that is now blocking traffic on the busiest freeway in town up that same said hill and out of the freaking way...... because you're on a hill !!!! Arghhhhh". I'm moving back to southern Saskatchewan where there are no hills. Or trees. Oh right, the point of that copious rambling. Going to mount the pump in the BACK of the tank rather than in the middle. Going DOWN a hill and running out of gas is actually fun.
-
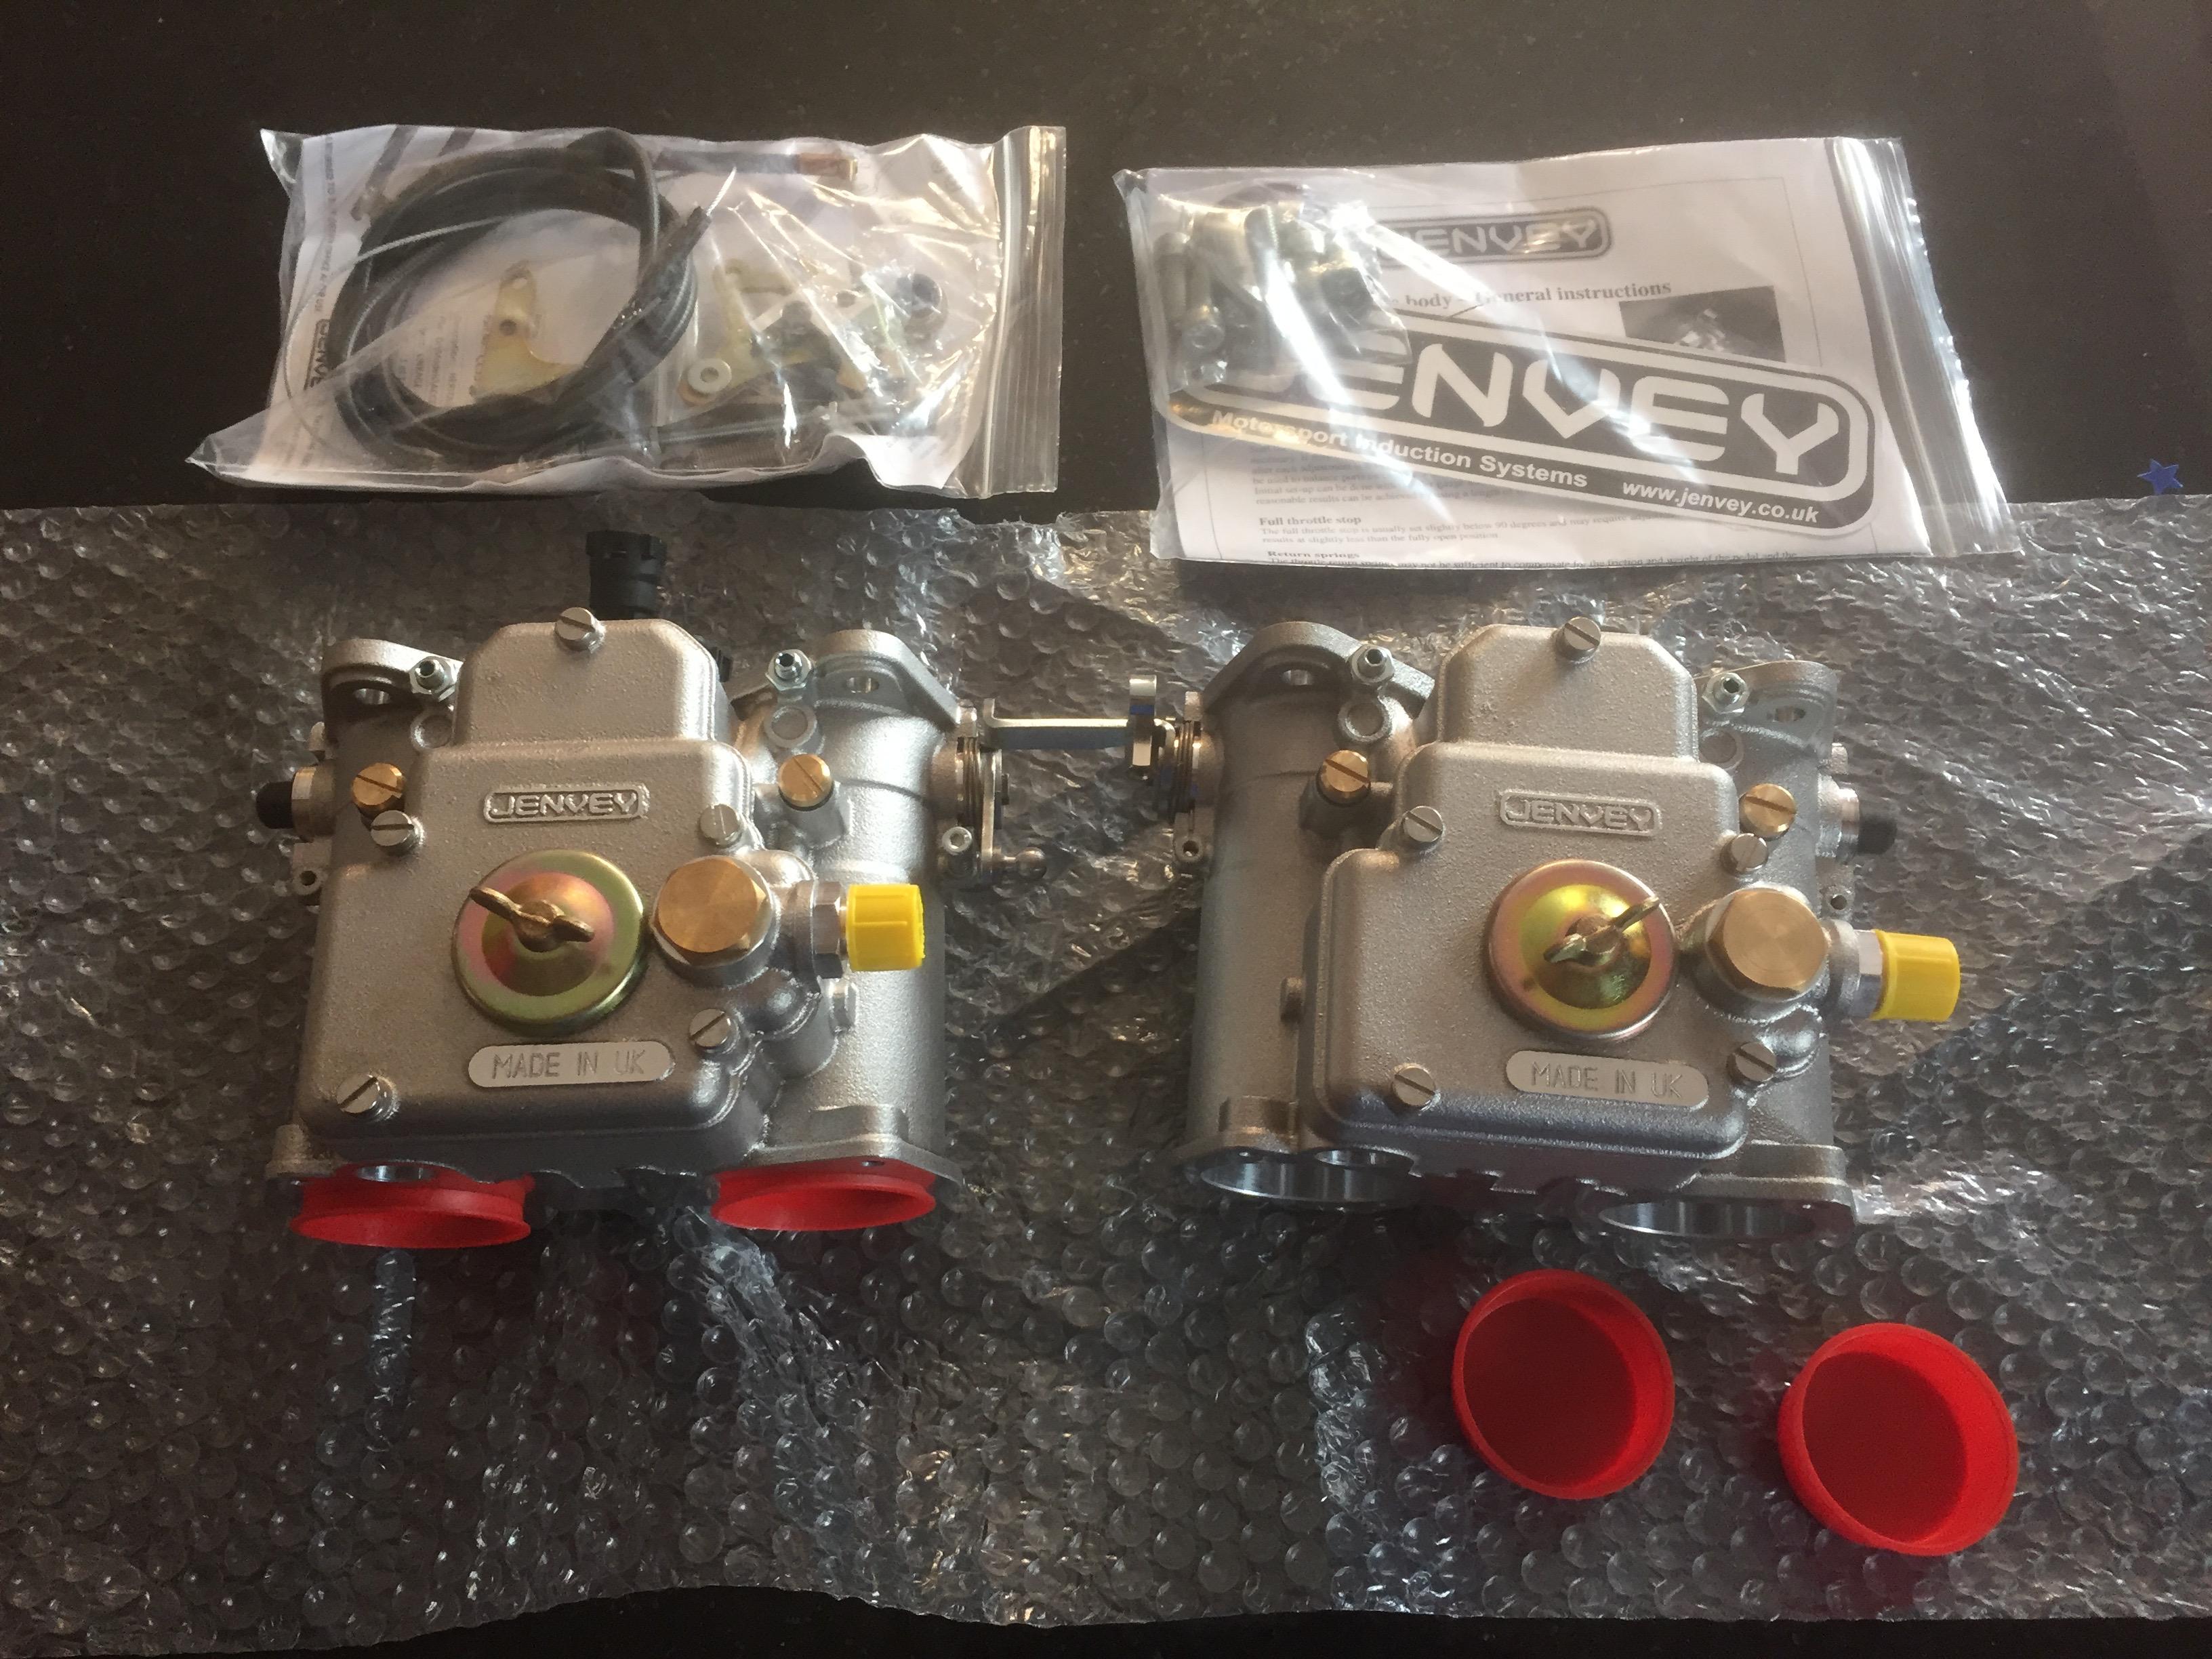
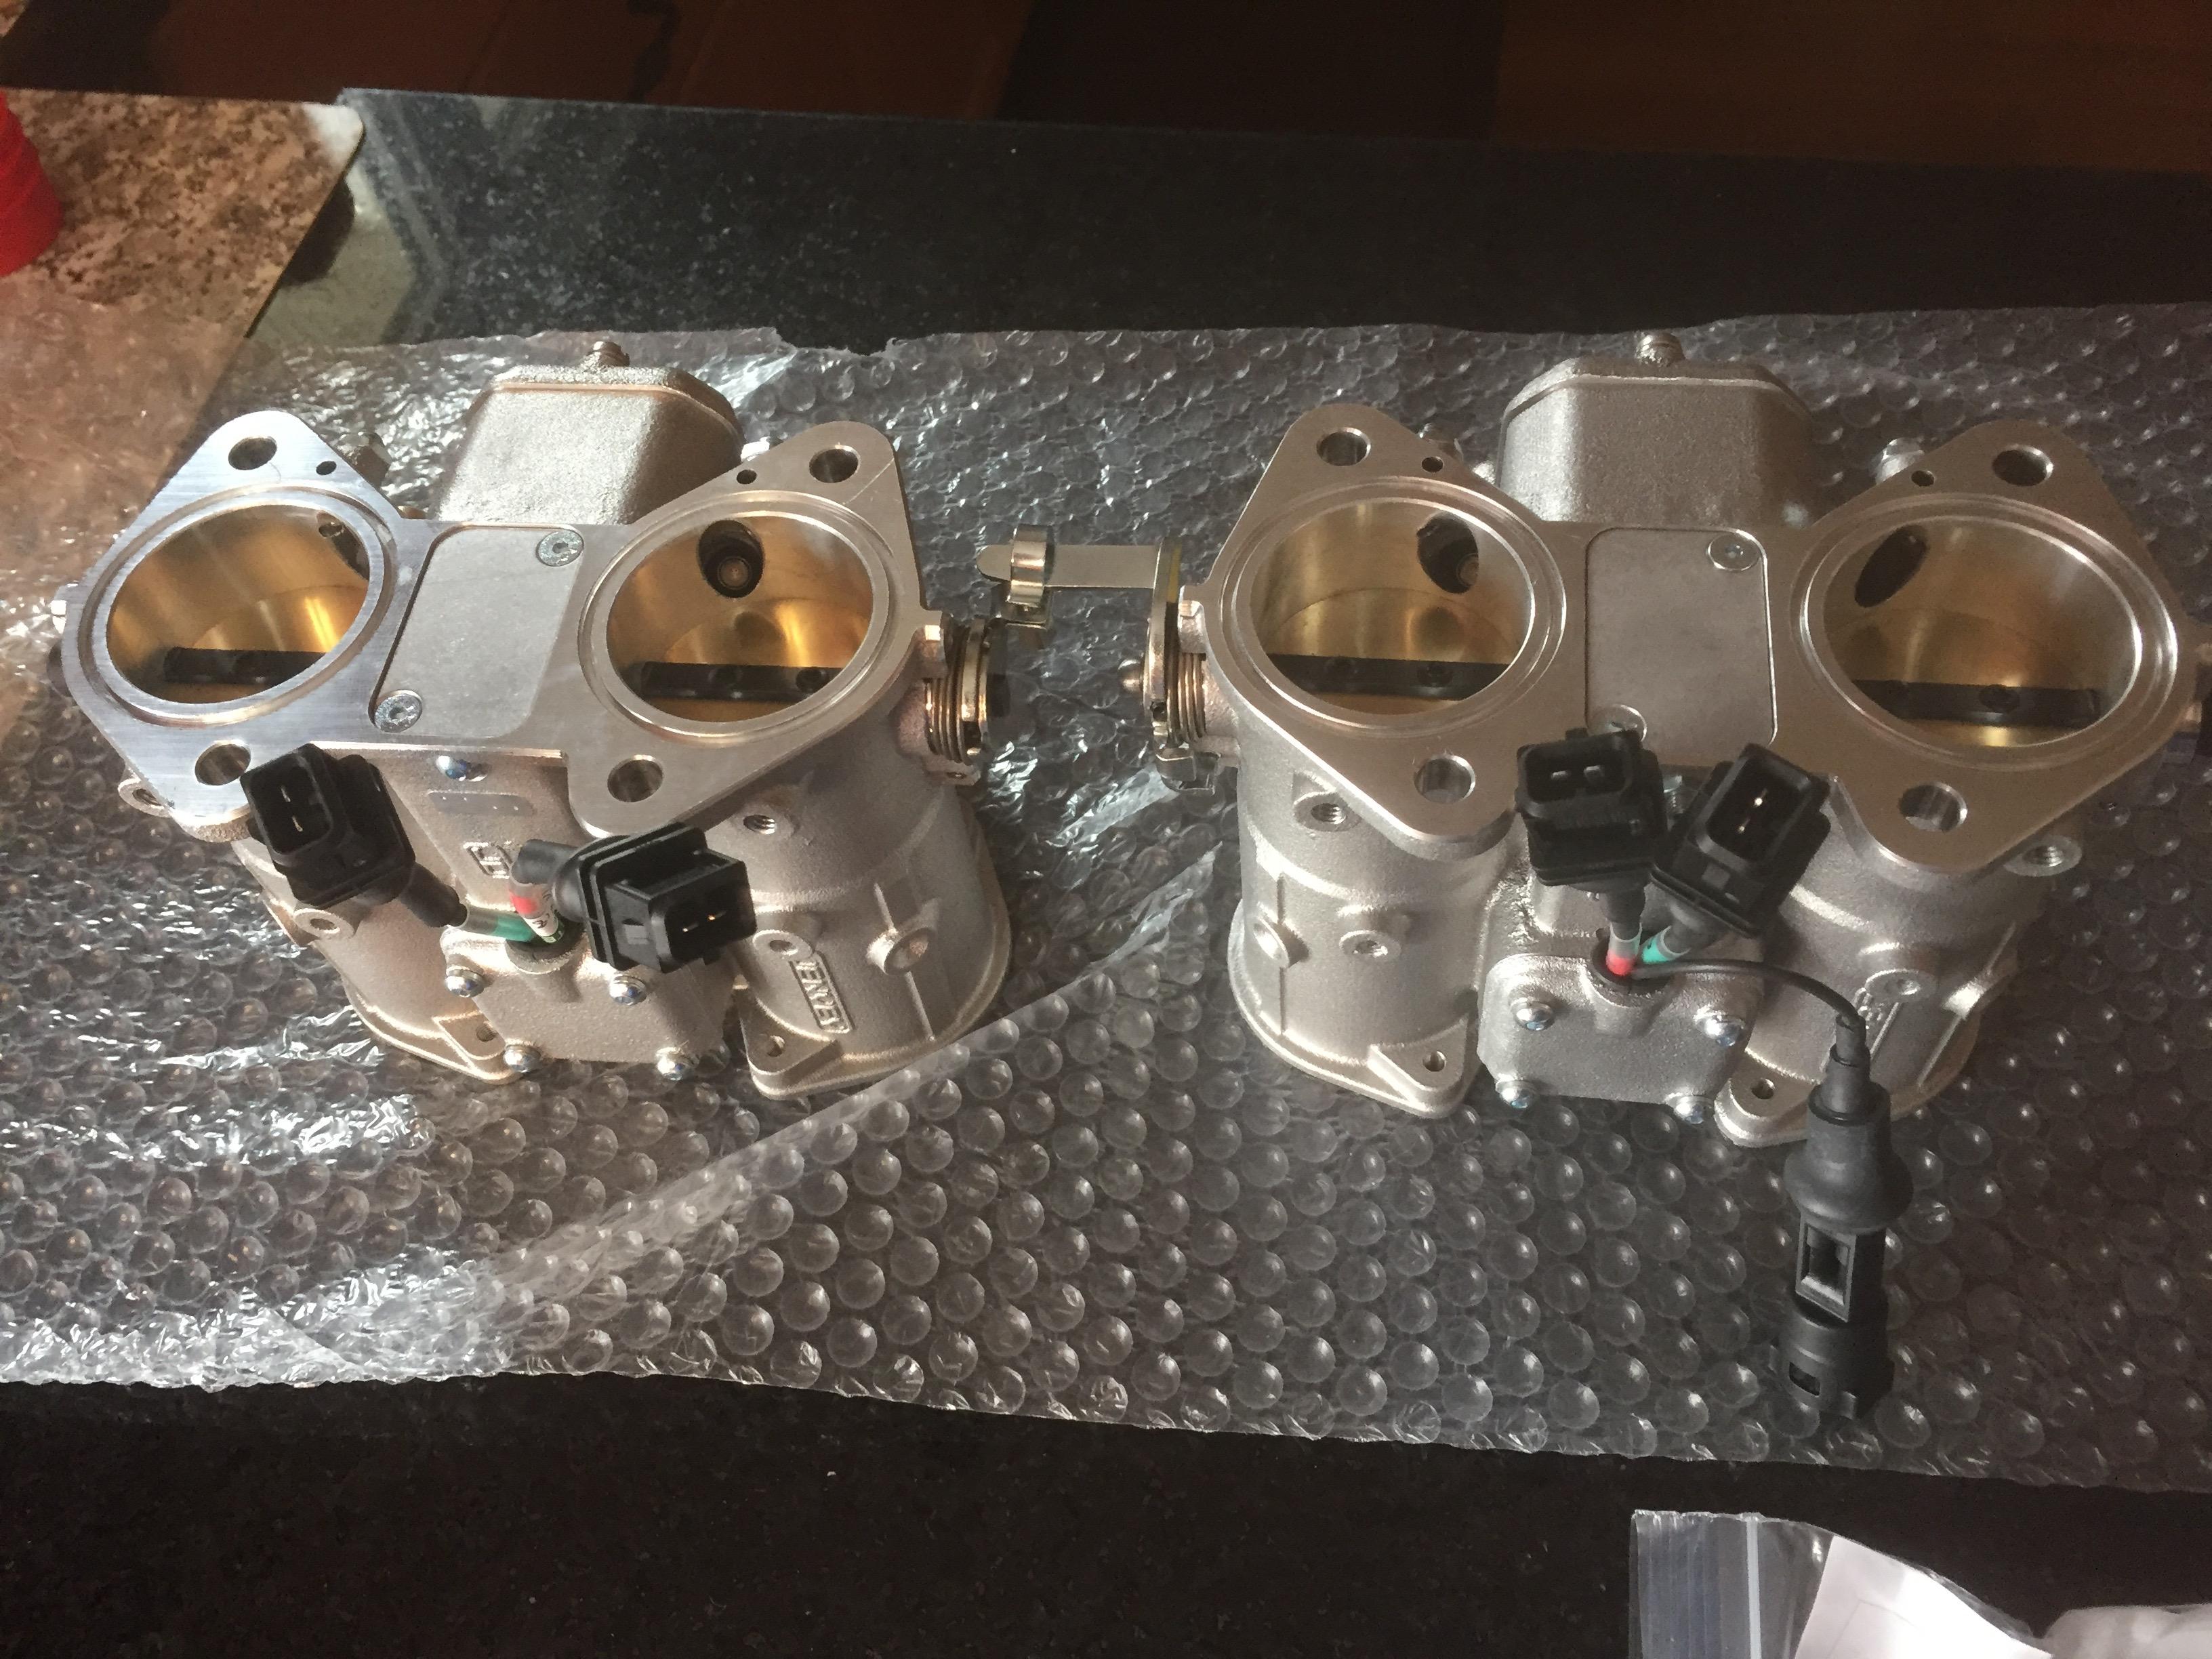
Four banger. Can't afford three of those Jenvey TB's. ;O
-
Richard, I will indeed be using your services regardless of which system I go with. This does l'ean' me in the haltech direction ? You mention the 6 cylinder preference, and reading the webpage it clearly best for 6, but there is a statement in the 'Engine Suitability" section that says 'basic 4 and 6 cylinder engines' so it will be fine regardless, and would suit whatever I do in the future.
-
This will be a discovery trip for all of us. I'll keep the thread populated as best I can. EFI fuel supply is the next topic. Many options are available, but there are two main competitors. 1. External swirl pot with internal EFI pressure pump, fed by exisiting low pressure carb pump. Two pumps, lots of connections, extra can to mount and hide, not ideal. Something like this. http://www.burtonpower.com/efi-fuel-pump-and-swirl-pot-assembly-wfp600.html 2. Install an Internal hi pressure EFI pump. Quiet, cool running, just one pump, but need to add some baffling or swirl pot and of course cut up a good tank. Definitely the cheapest solution but requires the tank be modified. Have lots of tanks to hack up. Will also install modern fuel level sender at the same time. TanksInc.com has a good option. http://www.tanksinc.com/index.cfm/page/ptype=product/product_id=84/mode=prod/prd84.htm Holley just came out with a fuel tank "mat' (HydraMat) that covers the bottom of the tank and soaks up fuel like a sponge. Any fuel in the tank is soaked up and available to the pump. The ultimate in anti-slosh, anti-starvation device. Not cheap, but an excellent solution for putting efi pumps in non-or minimally baffled tanks. https://www.holley.com/products/fuel_systems/hydramat/hydramats/
-
Knowing my luck, I'll STILL have vapor lock...
-
The EMS is a bit up in the air. Mega Squirt is good, but there are others that do this well as well. Most of local support (other fools who have done this before) have used MegaSquirt, so that's the likely choice. SDS is based in Calgary. They are tempting too, but not as versatile. My friend with dyno that will tune it is a Haltech expert, so that may win. We'll see.
-
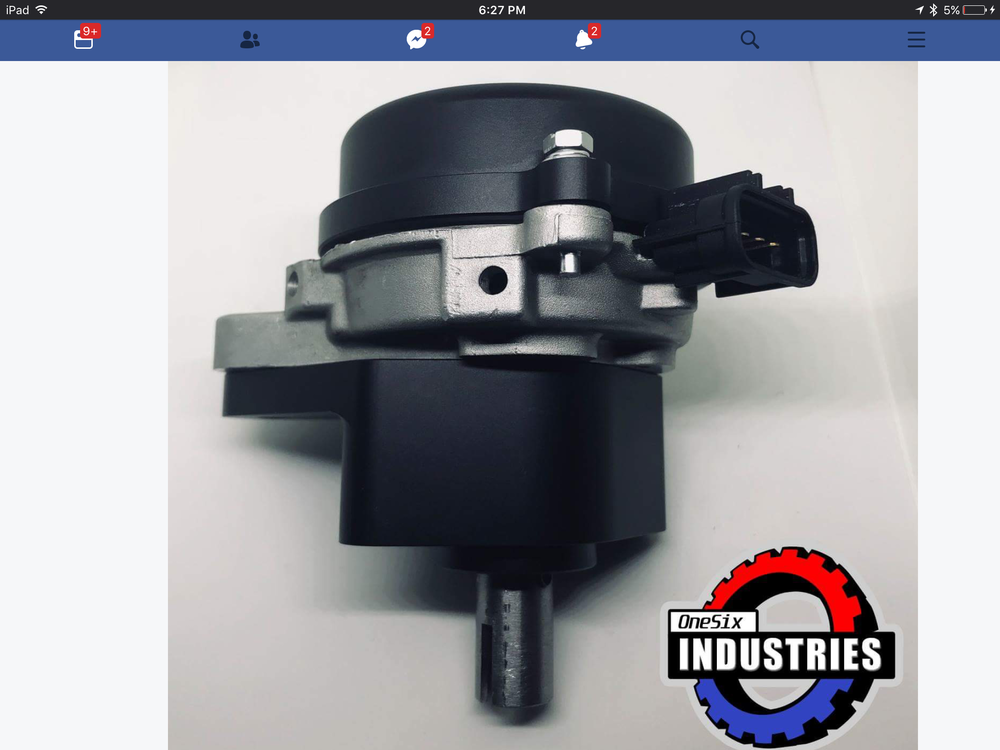
On the other side of the motor I plan to tuck a set of LS Coil-on-plug coils and time it all with a OneSix Industries new distributor replacement 'Crank Angle Sensor ' that has a pair of trigger wheels for full sequential injection. No holes barred, this thing is going modern. I may have to glue a dizzy cap on it to keep the old look going. Bad enough to do COP on the plug side. https://www.onesixindustries.com/products One might this a bit pricey, but once again the Canadian - Aussie connection wins as it is $400 AUD, which is actually just under par with CAD, so I win! Any of you yanks can cash in even better with your 35% advantage.
-
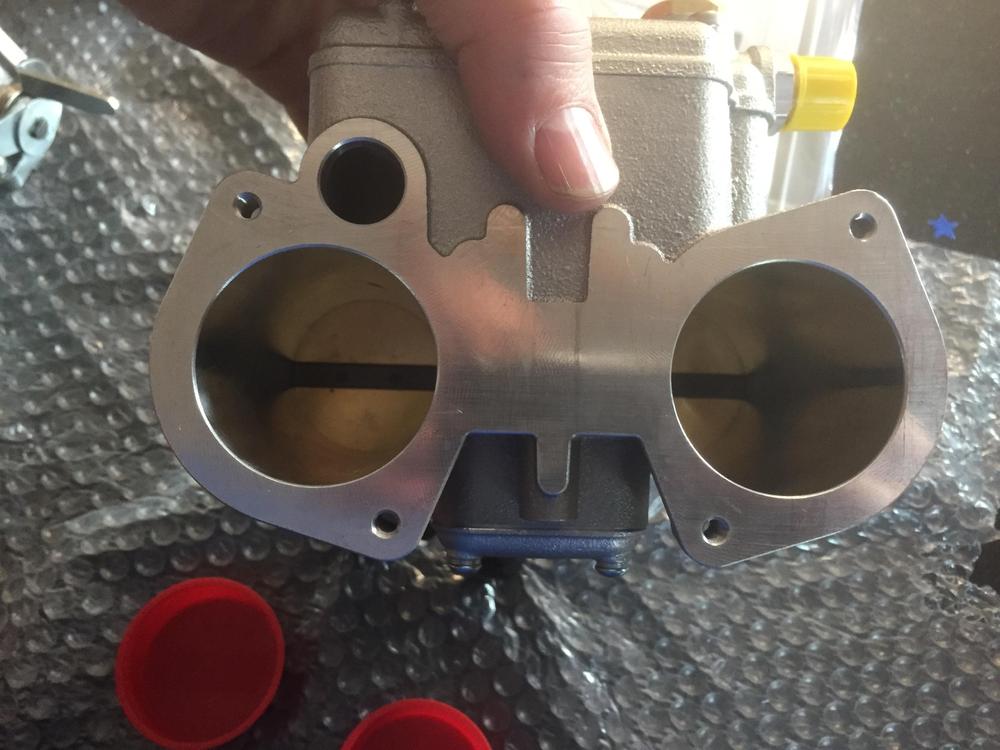
Well I decided to jump into the EFI game with both feet. Here is what changed this "old school" boy's mind. Weber look-a-like throttle bodies with built in injectors and TPS. Jenvey Heritage Throttle bodies is what they go by. I get the old look I can't seem to do without, with all the modern advantages of EFI. You may notice that there are only two, and this is a Z forum, but as most of you know there is 510 lady in my life that I'm currently enfatuated with. I can always buy another one if I ever come to my senses. These are 45mm with 350cc/hr injectors. Should do. https://www.onesixindustries.com/products


-
I suspect many of us have this problem, or are about to have it. What causes deterioration of this rubber part? Heat? Well not engine or exhaust levels, just ambient exposure based on where you live. UV exposure? Nope, pretty dark up in there. Mechanical stress? That thing is in compression a huge amount of the time and under tension almost never. So what's left? Front ones might be prone to some twist and eventual tear if your steering bearings up at the top in there are seized so you are turning the rubber. I think it's just time that eventually lets whatever environmental factors that eat rubber to finally weaken it to the point of failure. A bunch of my joints are getting prett creaky after 61 years too.. When I got my coil overs done, the company I bought them from insisted I send them my insulators so they could 'modify' them to work with their upper mounts. Turns out they only drilled the D hole out a bit and cut away some extra rubber around the edges, but what got me was, I didn't get the ones I sent back. I marked them. And shortly two of them failed just like this while hanging around in the shop on jack stands. Enough whining today....
-
https://www.customautotrim.com/body-side-moldings/body-side-moldings/chan75/83/
-
This has been discussed here before do some searching. There an outfit that still makes it, just can't find my link right away. It's something obvious like body molding.com or doortrimstuff.com or something. Maybe trim-guard.com?
-
There is an easy mod where you use a Timesert thread adapter to enable you to thread in mechanical adjuster posts instead of the hydraulic ones.
-
I would just fix your current damper. damperdoctor.com
-
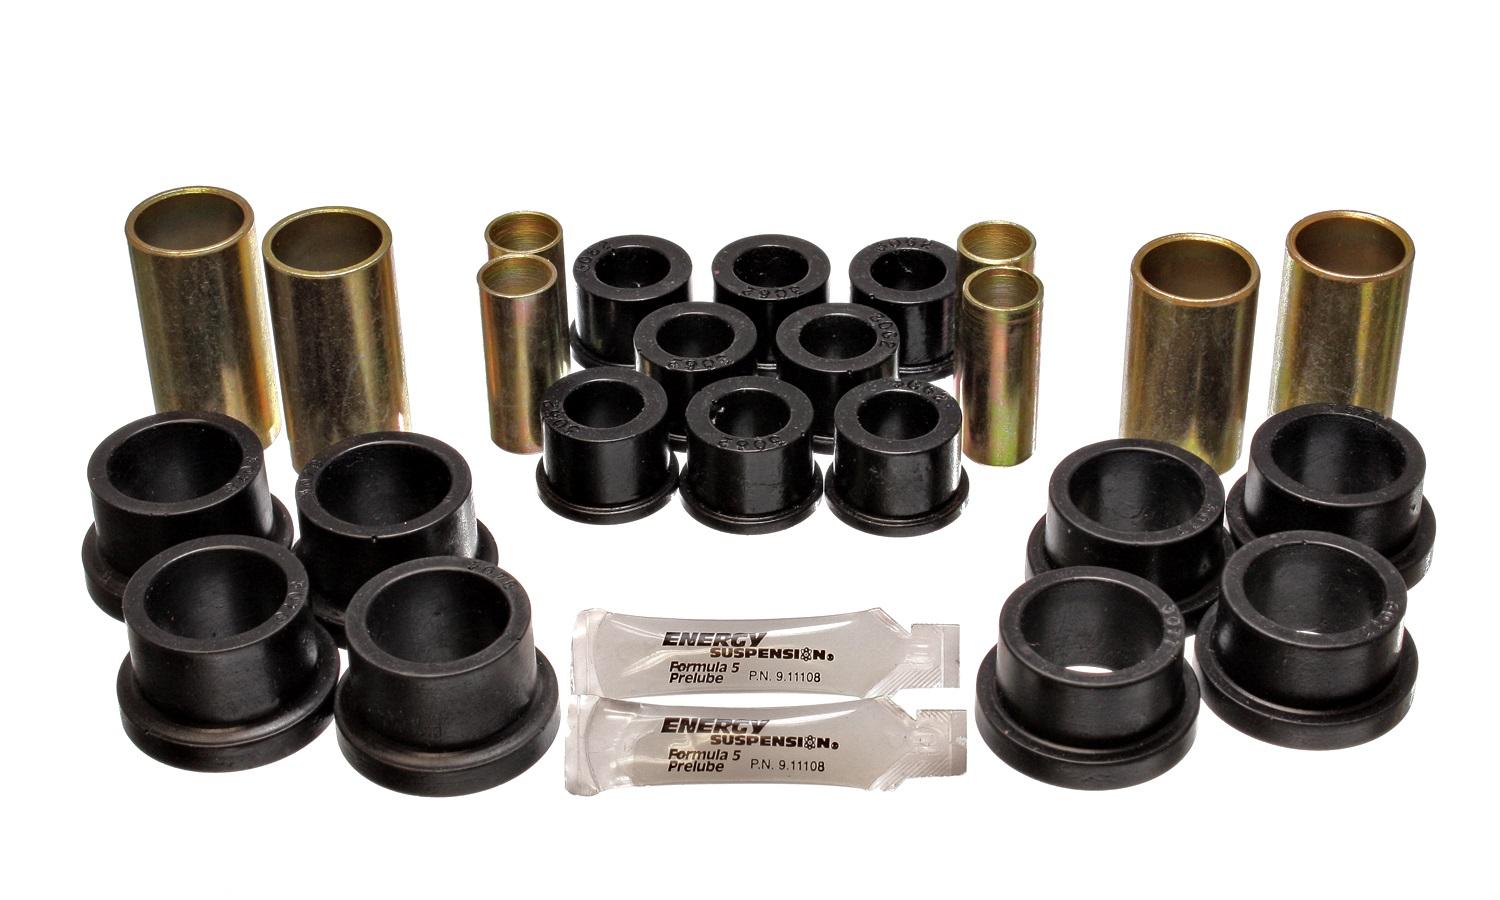
Perhaps I have an insite. Fact. He had a set of poly bushings installed. If you have done this job, you will remember that the inner and outer half of each of the pairs of outer rear control arm bushings have a thin lip on them. Here is a picture of rear control bushings from energy suspension. The outer set is in the center of the picture. When installed that thin lip would visible/present in that gap, unlike stock where the inner bushing is completely different and has no lips. That's what is damaged in his picture, part of the lip is gone. Does it matter? No. If the pin bolt is properly torqued, the inner metal tube in the control arm is locked to the face of the strut where the pin goes through. Since the control rotates with respect to the strut at this point, that lip can get damaged. Does not matter. As long as that horrible sticky grease the bushings come with is generously used on the spindle pin, it will last for ever.

-
https://midwestcontrol.com/shop/DMCBH-5?search=Ball joint M5 They have several styles and they fit on the stock 8mm ball ends. I've used them to create custom throttle solutions for triples and cable throttle replacements for SU's and triples. Unfortunately they don't have anything with M4 threads like the originals, so you have to buy M5 threaded rod and make up completely new rods. You could fill the M5 threads in these ball ends with epoxy and re-drill and tap to M4 I suppose if you just HAD to use the stock rods.
-
Not sure if you know him. I'll PM you his name. He's not a member here.