zKars
Supporting Member
-
Joined
-
Last visited
Everything posted by zKars
-
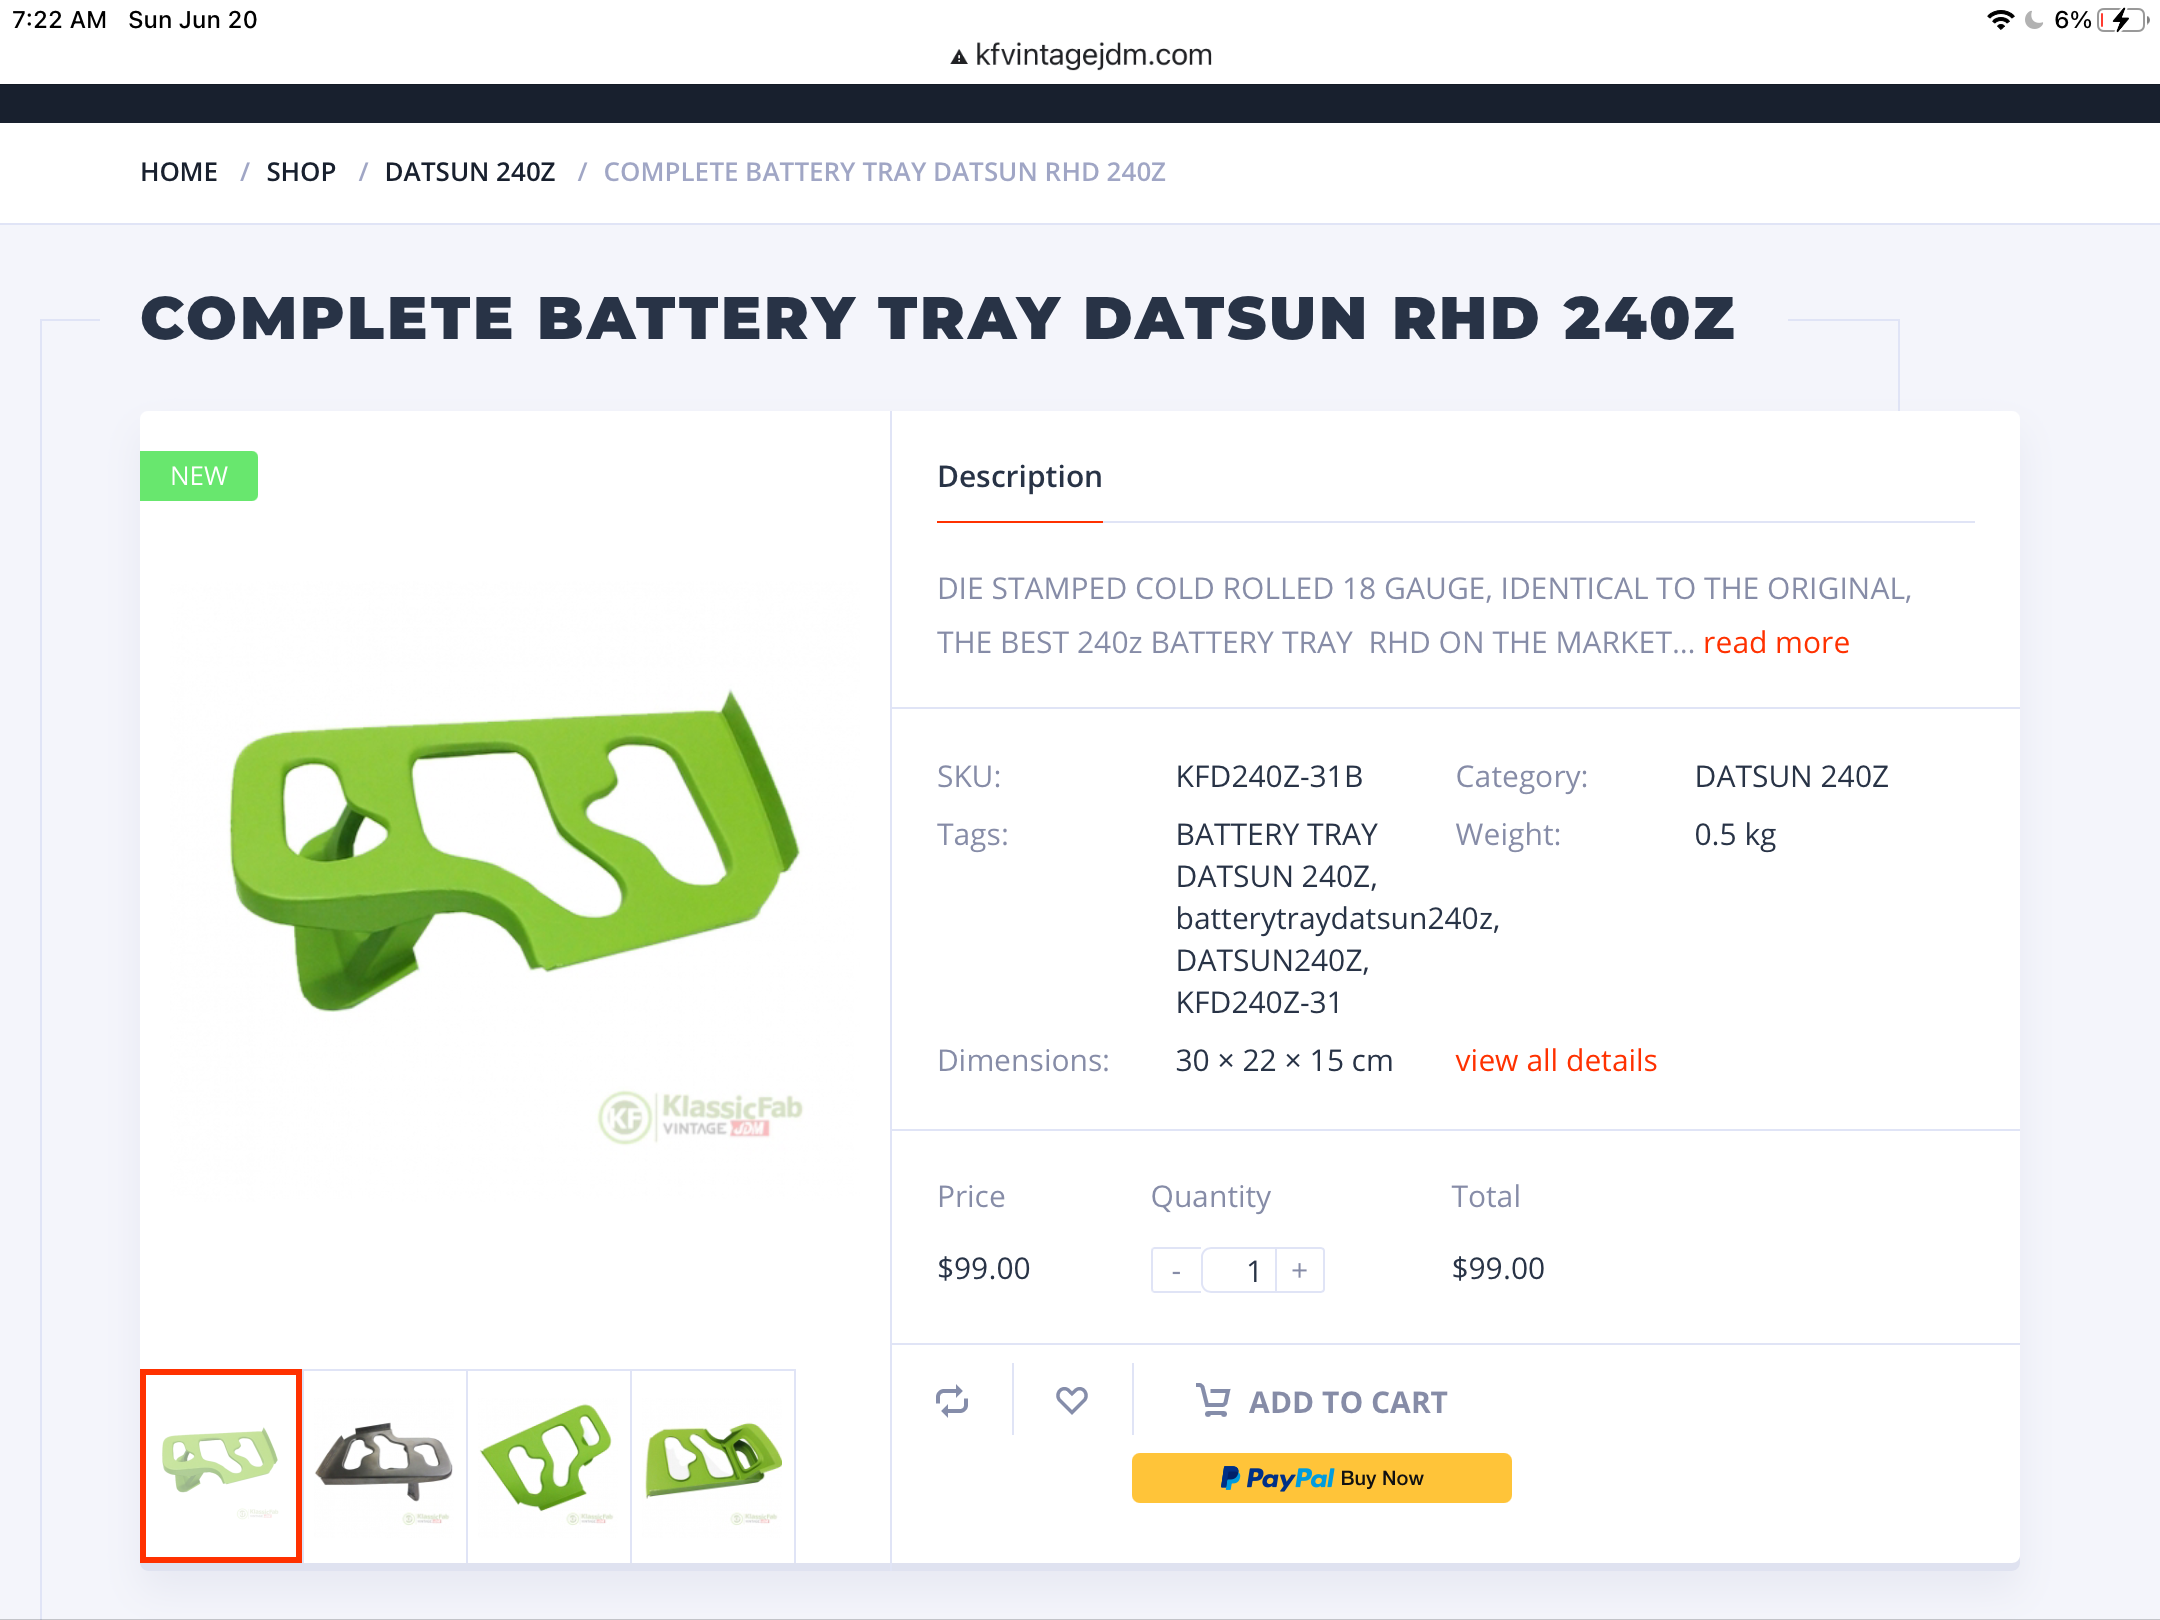
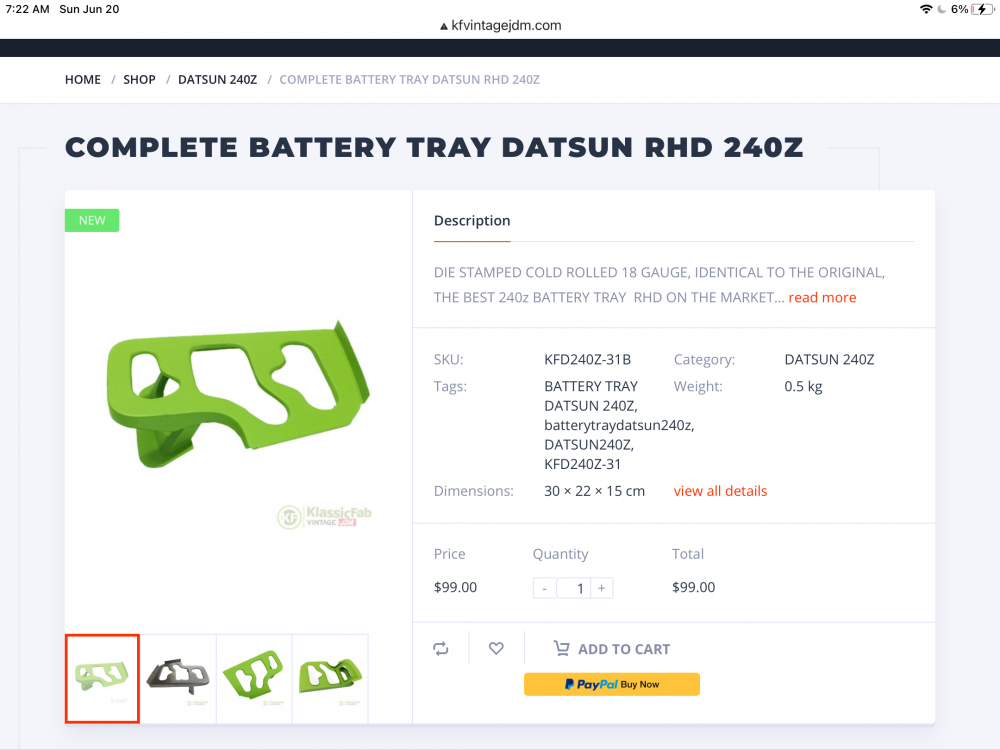
Excellent work all around. There is a particular joy in creating something from essentially nothing but raw materials. I use M5 rivet nuts for my tray removal function. Once you buy a decent rivet tool to set them, they are cheap and easy. I use them all the time for things like replacing all the silly plastic push pins that hold in the plastic interior panels. Just to help everyone down the line, don’t forget our friends at KFVintage now have a new battery tray at a very reasonable price.
-
Guess it’s official. https://gmauthority.com/blog/2021/06/2022-nissan-z-to-be-unveiled-in-august-as-chevy-camaro-and-corvette-rival/amp/ “The 2022 Nissan Z sports car will make its official debut at the New York International Auto Show in August, the Japanese automaker confirmed this week.“
-
Speaking of center finders, here is a new cool tool of that ilk that appeared on the ol’ FB feed today. https://www.centerquic.com/?fbclid=IwAR2qYZtaqWD0fYPMFBh5QQUuivk6HbW9_4nqL0SCk1PHutx-C6B4nT2LYQ8_aem_AZBxVPZMyQBRqlSeY_76rQlEL4s4Lbpu5c3QIw0Efp9DDIcEwJj3dOuf_5xhVlkR5e5Yxr72CvqgWUDoomgqObEK5WAORsFvh2zrzCo13nXQgt05YdcFxIWGmVjZMtXM92Y $168 USD. To click or not to click “Purchase now”…
-
Diff wise, it helps if (for the lower one) you have the "outie " style as far as getting a wrench on it to take it out, as it points at the transverse link bar. What really matters is to put the one with the magnet in the bottom hole. That and having it fit and not leak..... As to what is "correct" factory wise, I leave that to the historians. Transmission wise I usually see an outie on the fill hole and innie on drain hole.
-
Having the luck to look at many of these, I have seen some from the later 280’s that DO have clips in them. Now as to why anyone thought you might need them, I can’t imagine. Assuming they are not bent or deformed or twisted, they snap on VERY firmly. About the only problems I’ve had installing them stems from a fresh paint job where too much paint thickness on the gutter pinch weld. I am fairly confident that the factory would not spend extra money on these if they hadn’t had reported issues that these clips addressed. I can go look if any of the rails I have contain these clips to show what they look like. And here is my hot tip for drip trim removal https://www.classiczcars.com/forums/topic/65066-new-way-to-remove-stainless-drip-rail-trim/ .
-
Entire thread is tongue in cheek I assure you. I cannot always be counted on to do the right thing, but in this case, I know what to do. And in this case it involves charging my customer a nice markup for new bolts.
-
I’m totally doing this! New bolts are a fortune! Thanks!
-
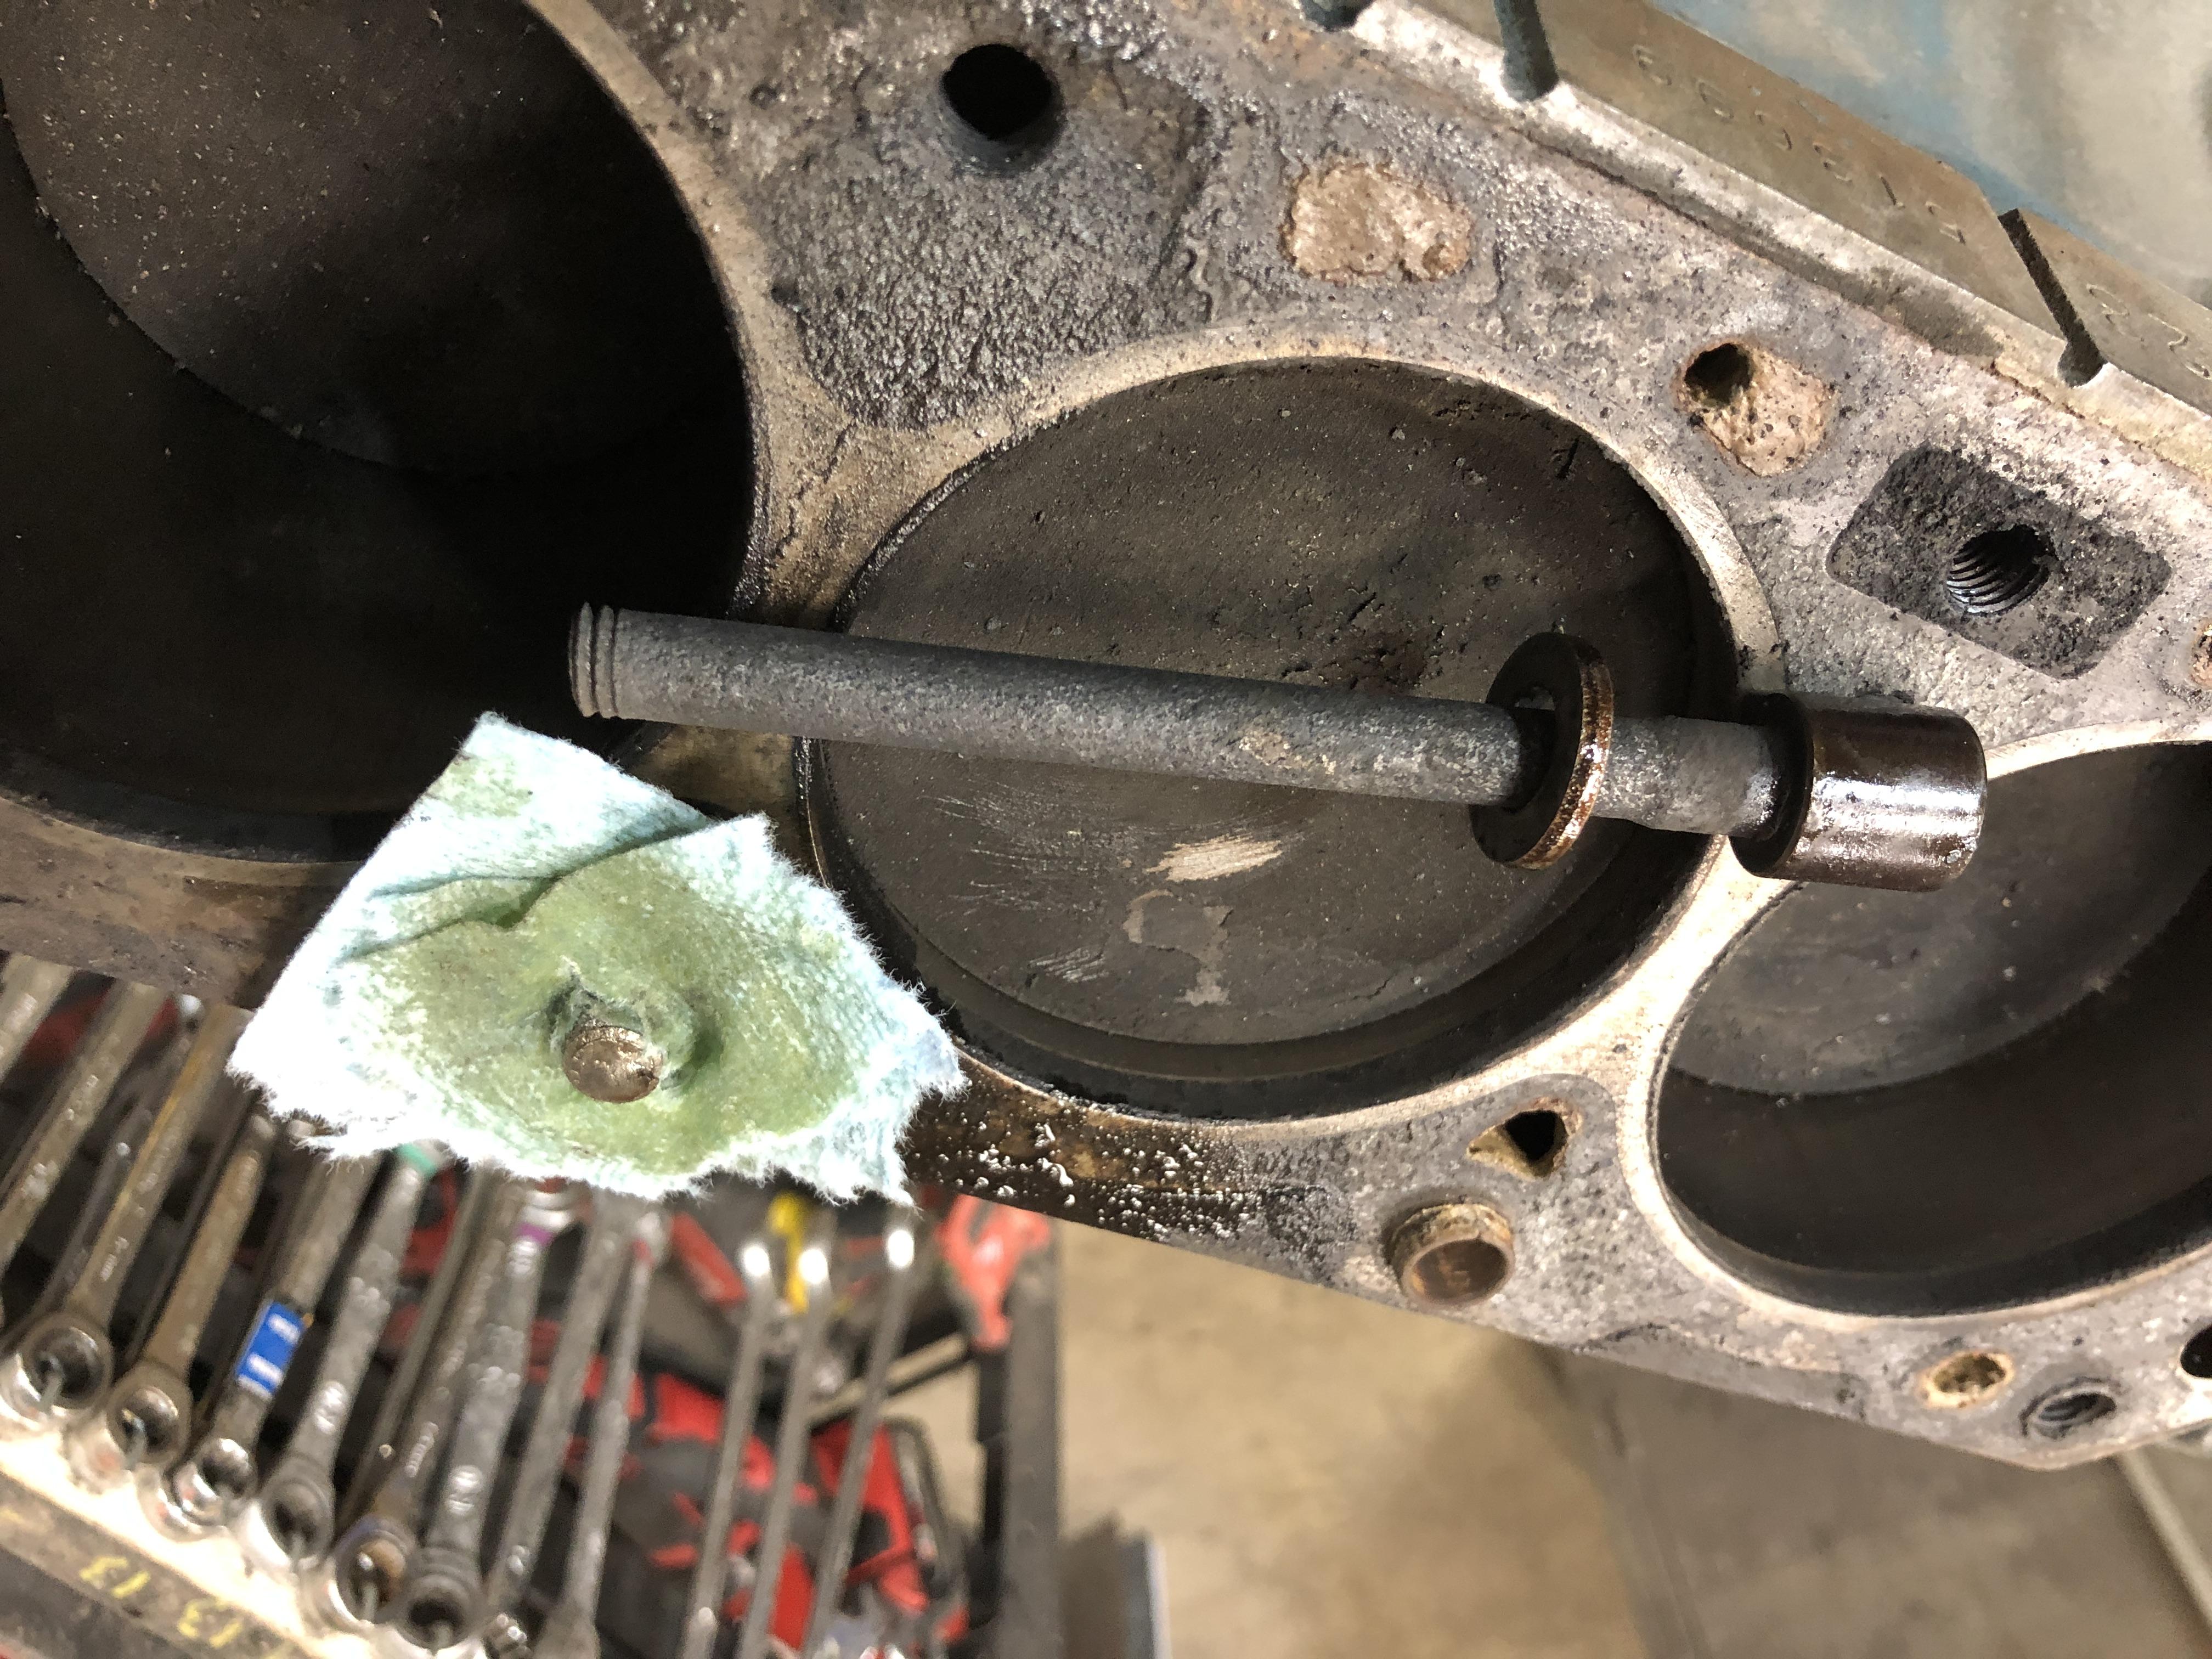
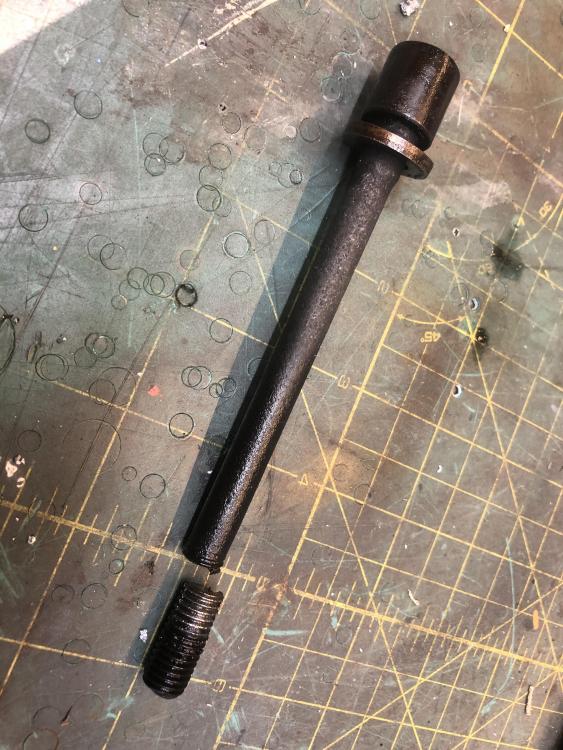
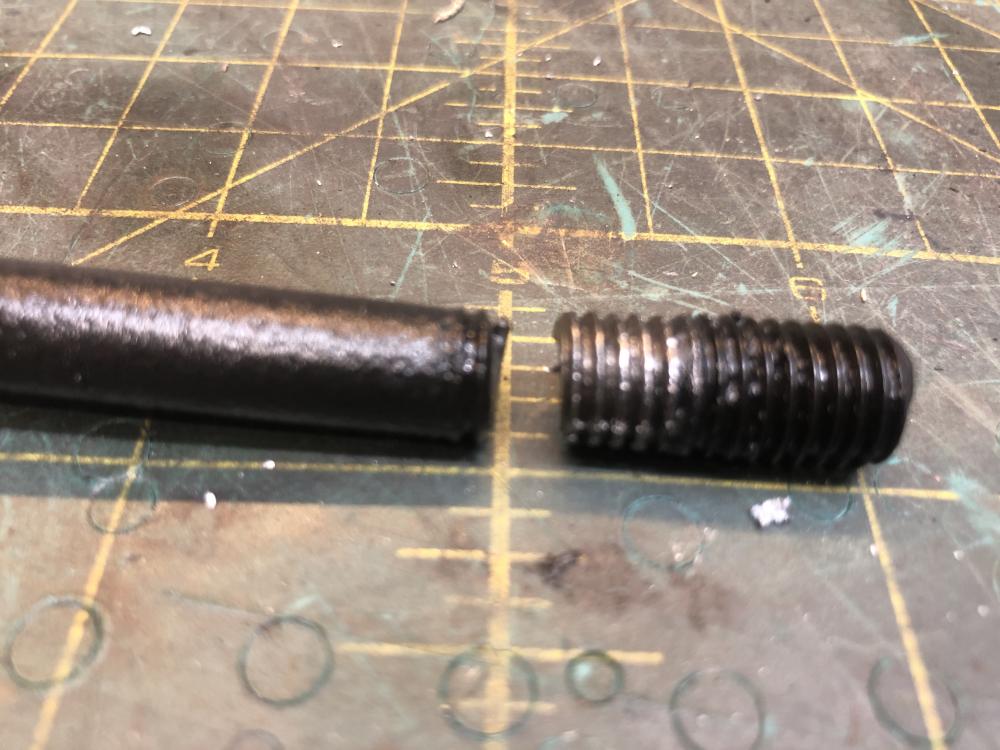
And today, the final stage of my birthday present, I was able to put a vise grip on the stub and easily break it free then unthread it by hand. Yahoo! It never goes this smooth.... What do you think? Buy new head bolts or just re-use the old ones?
-
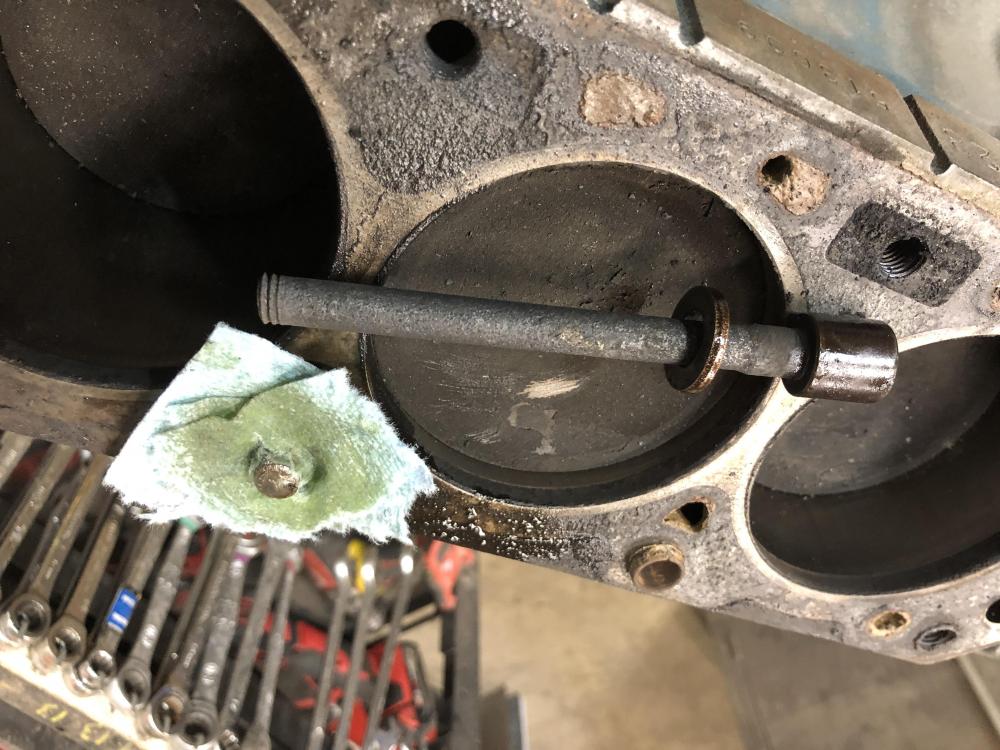
So I wire brushed the stub clean and set up a rag pad around it to hold penetrating oil and let her sit for 24 hours with hourly application of more weasel squeezings....
-
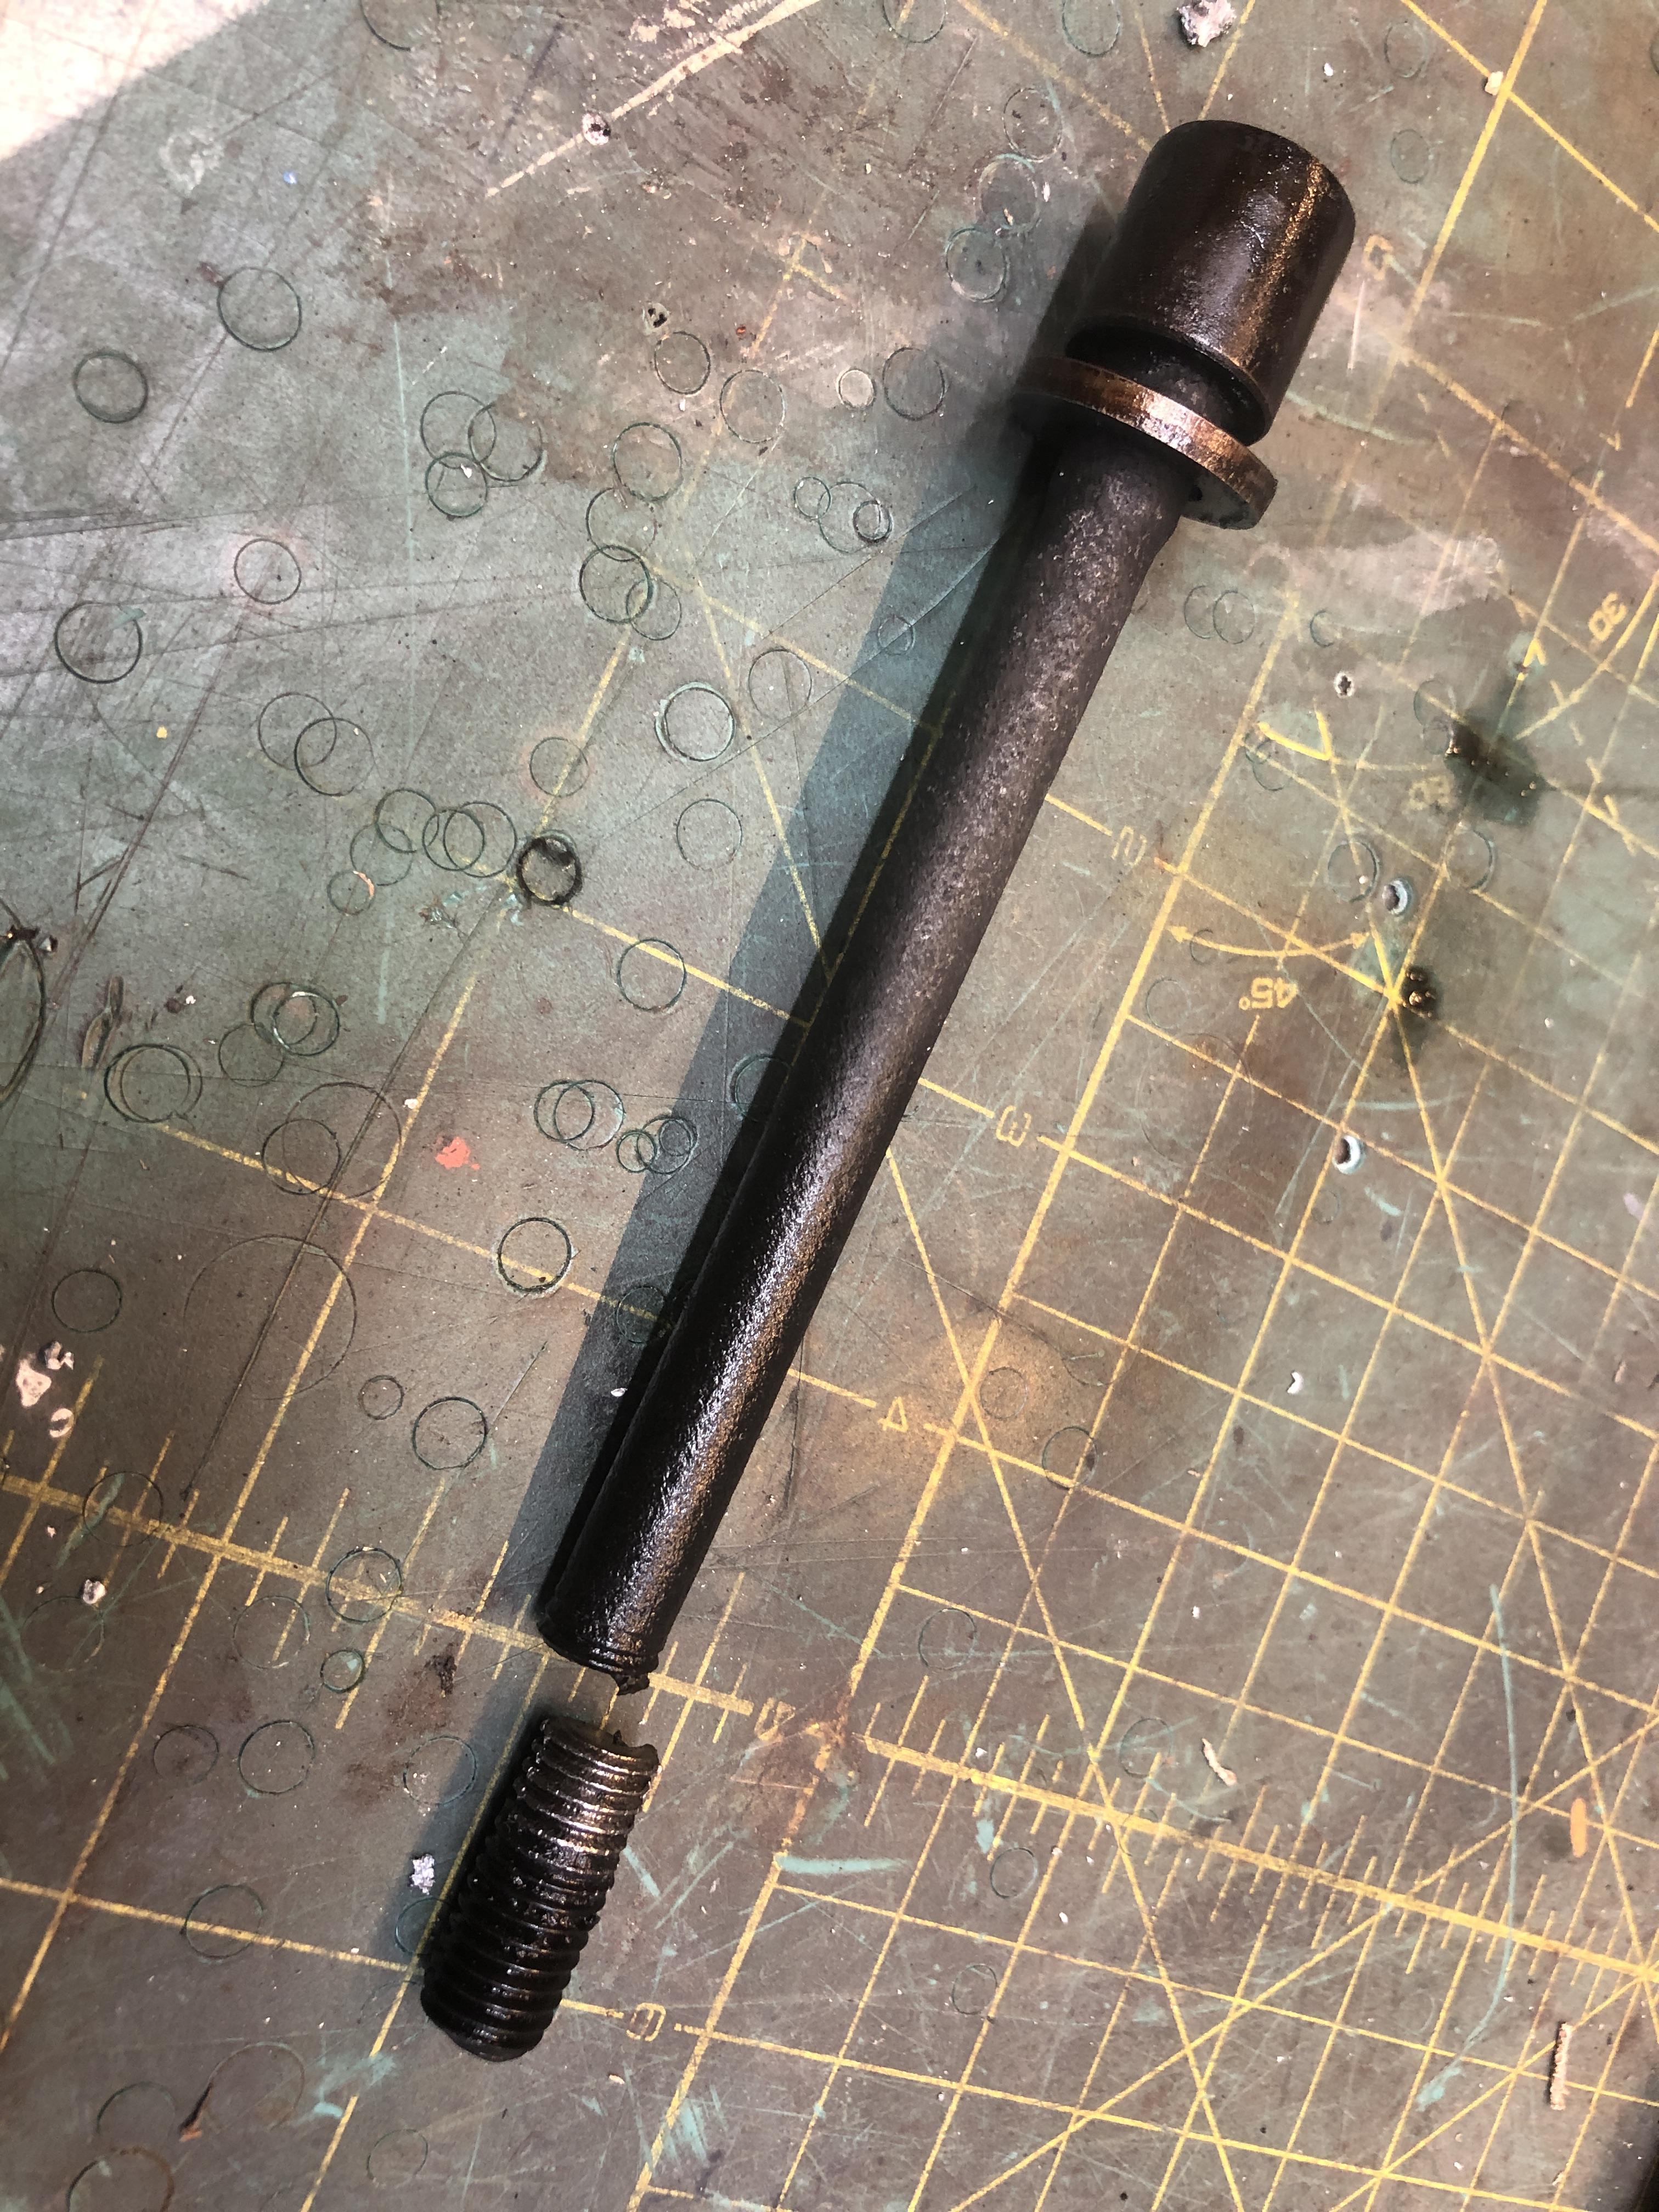
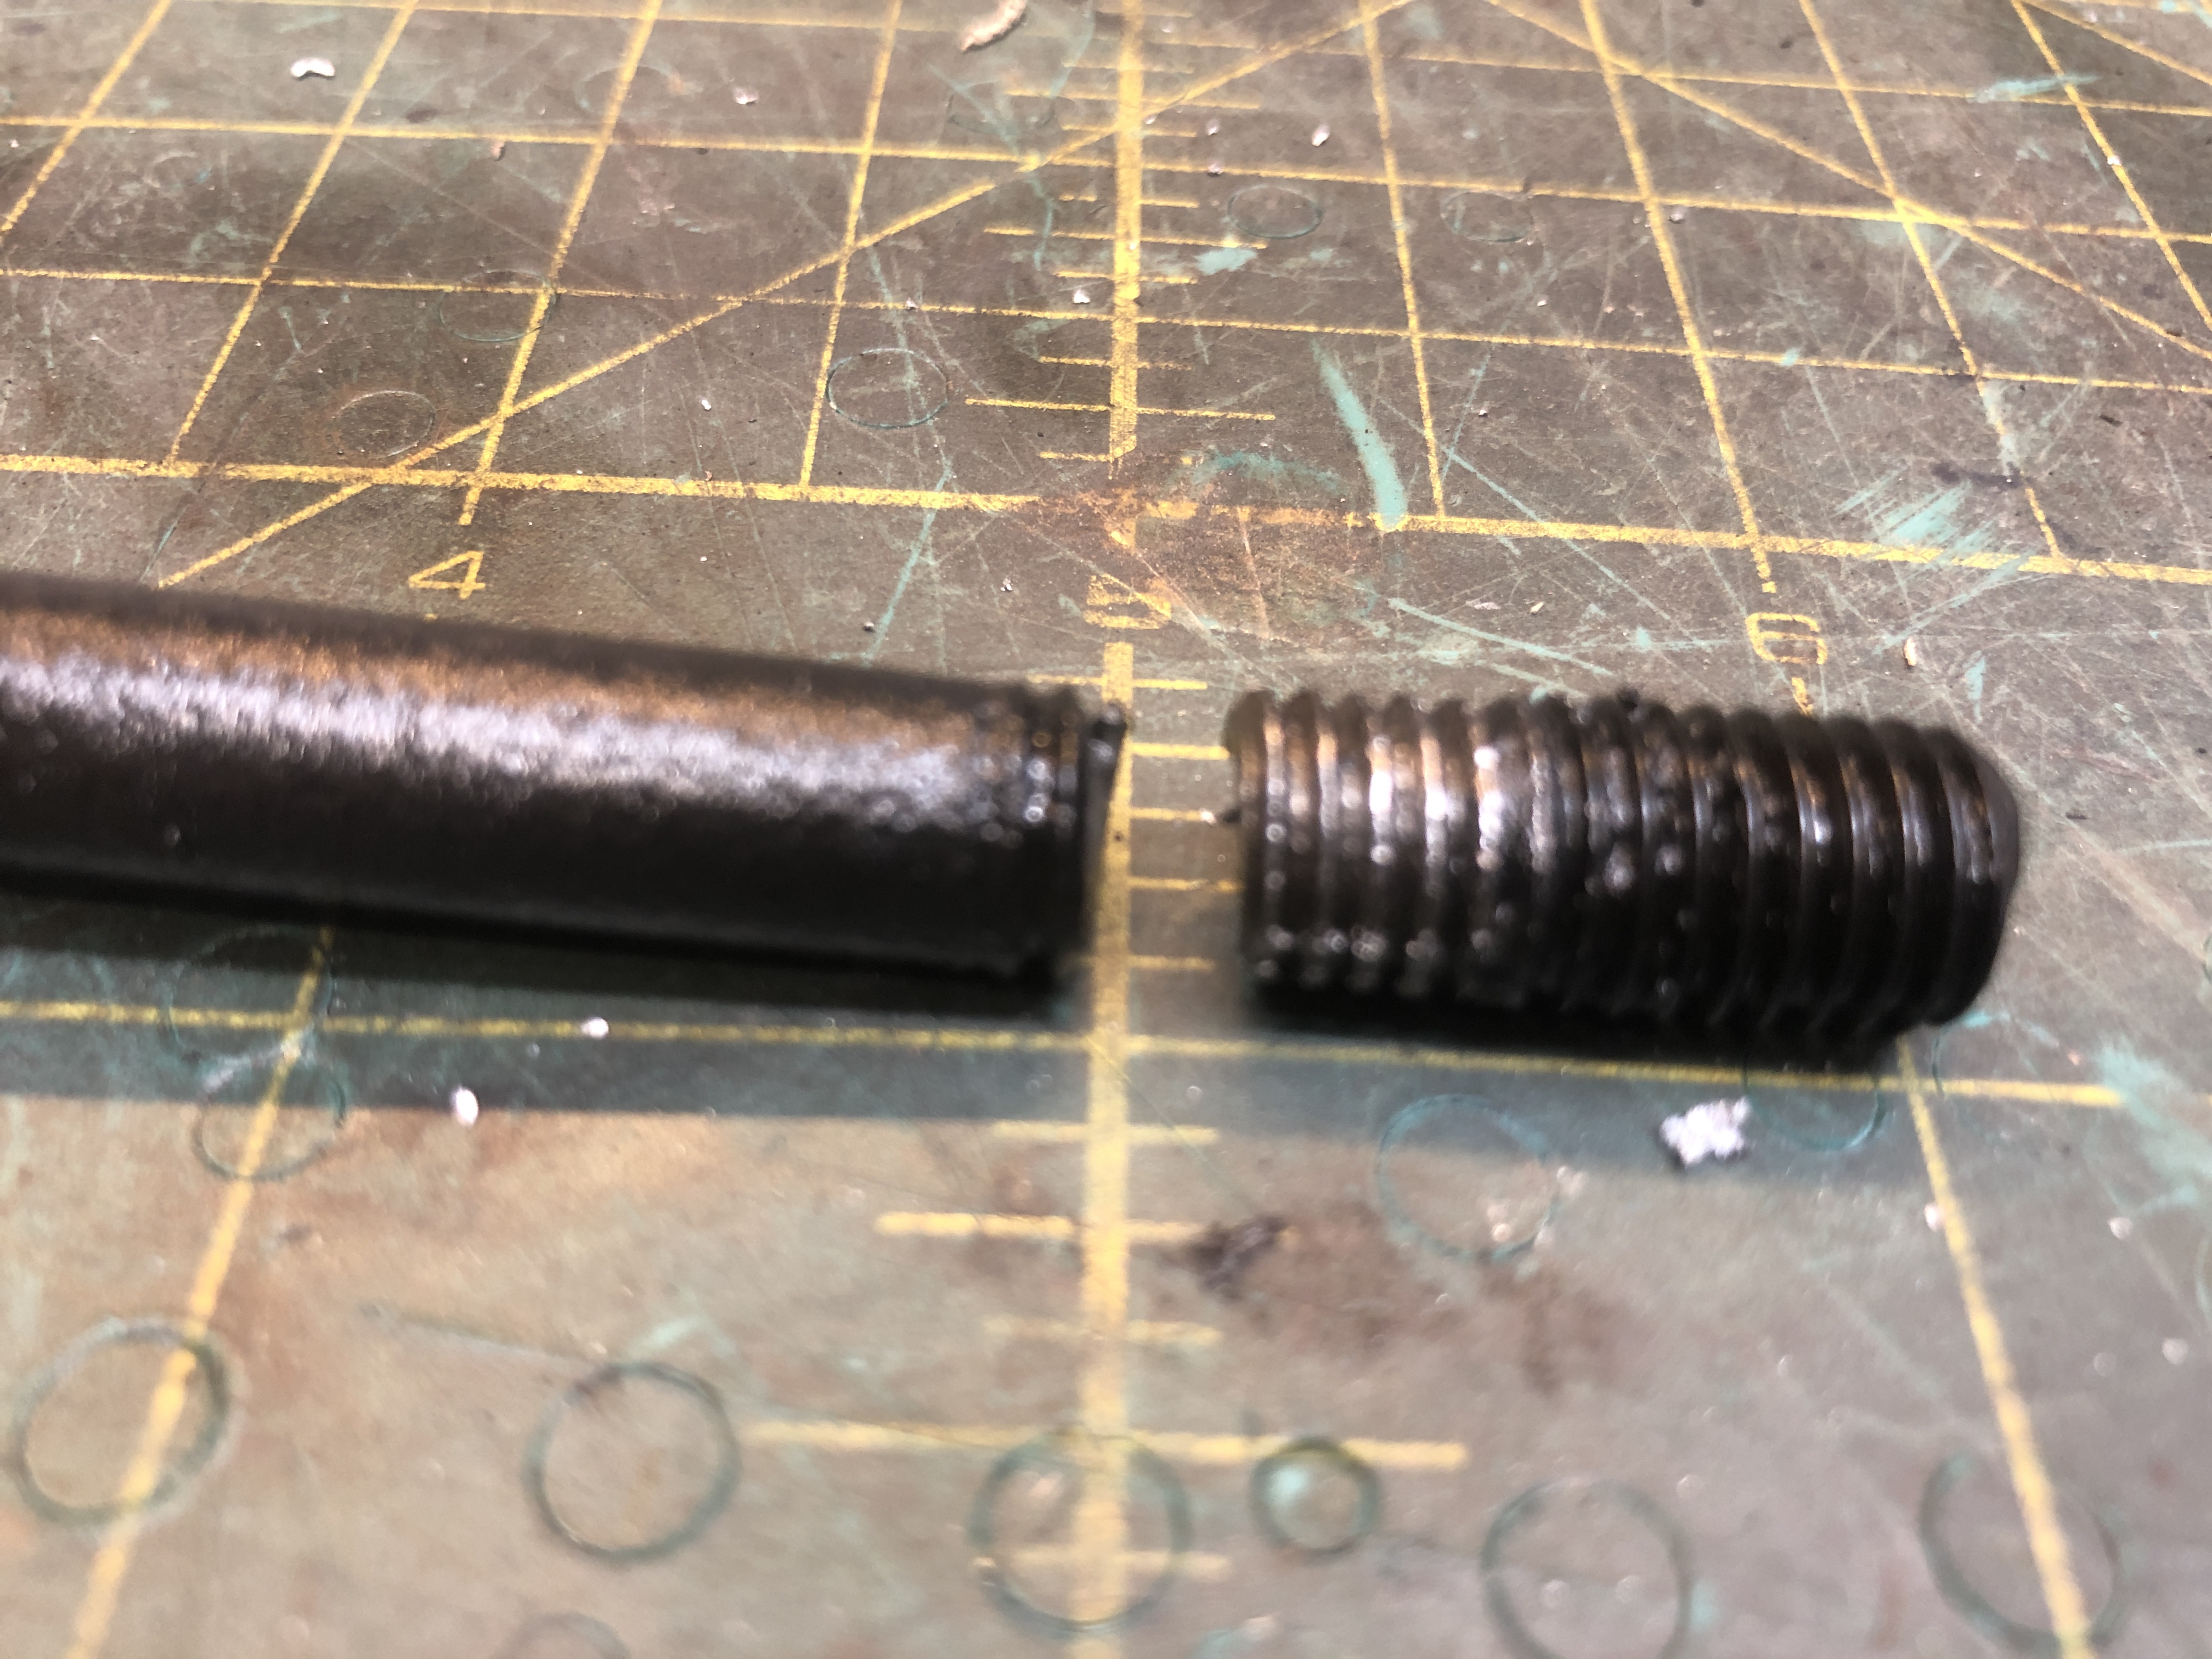
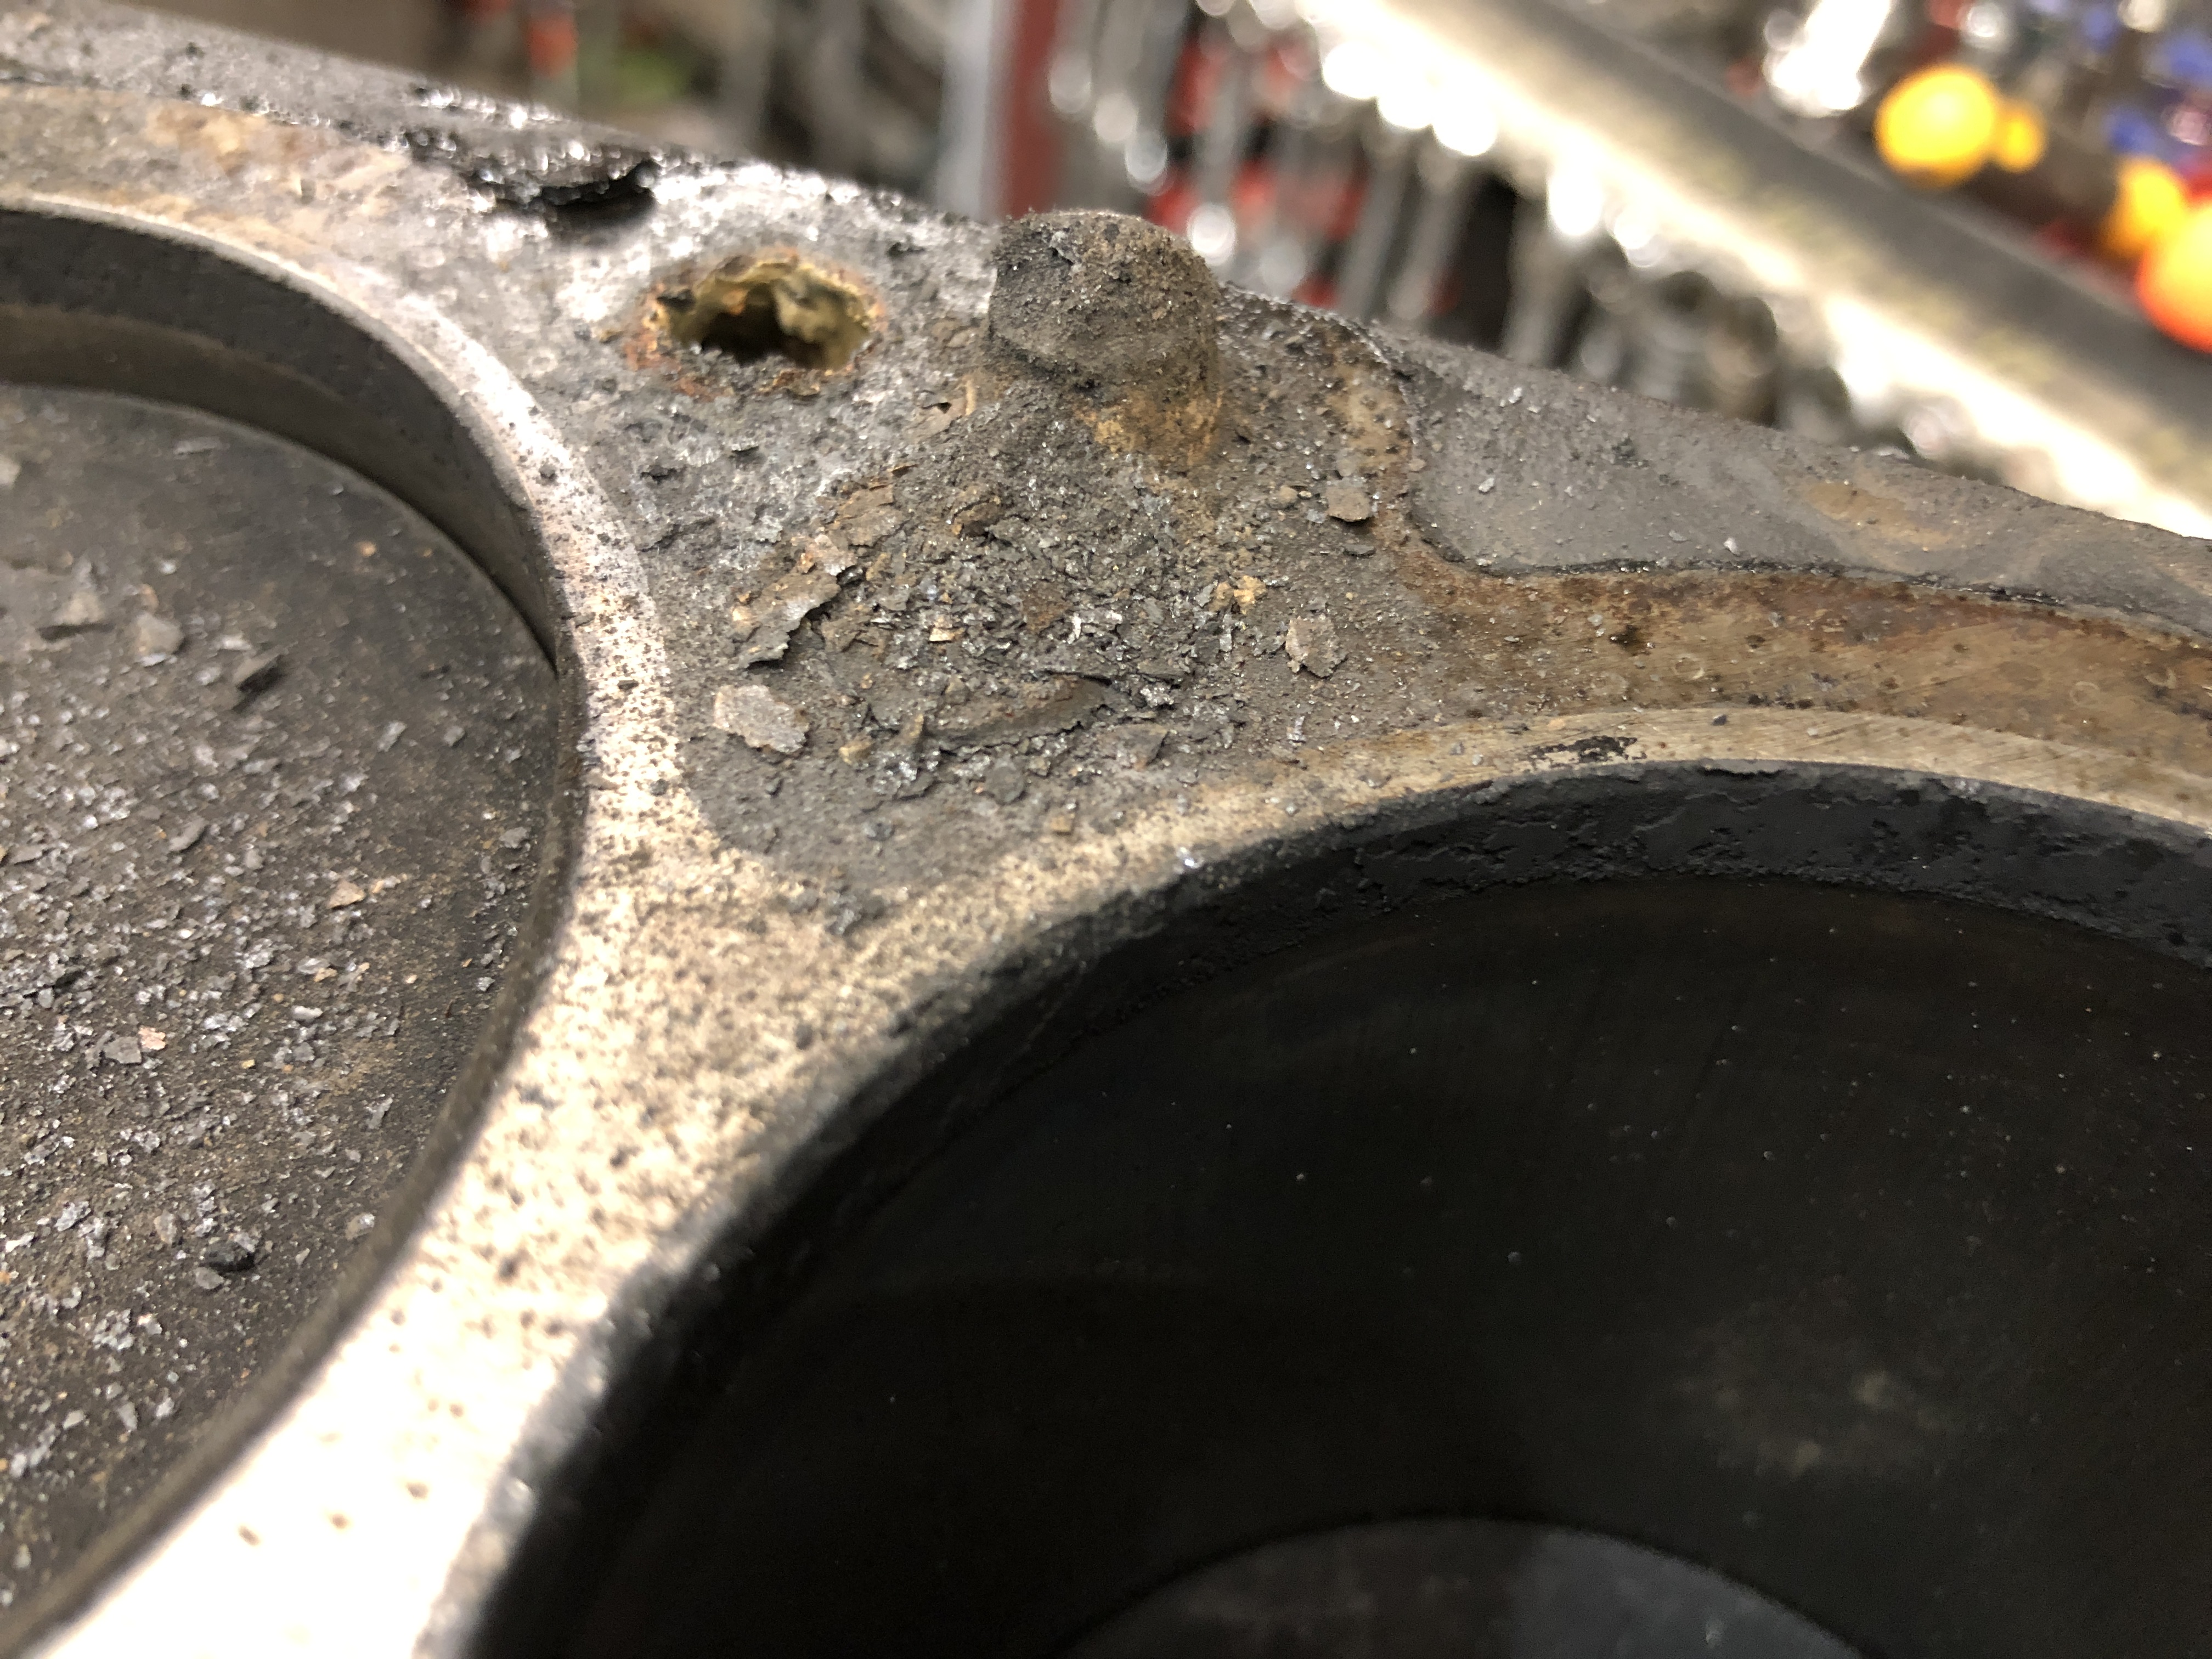
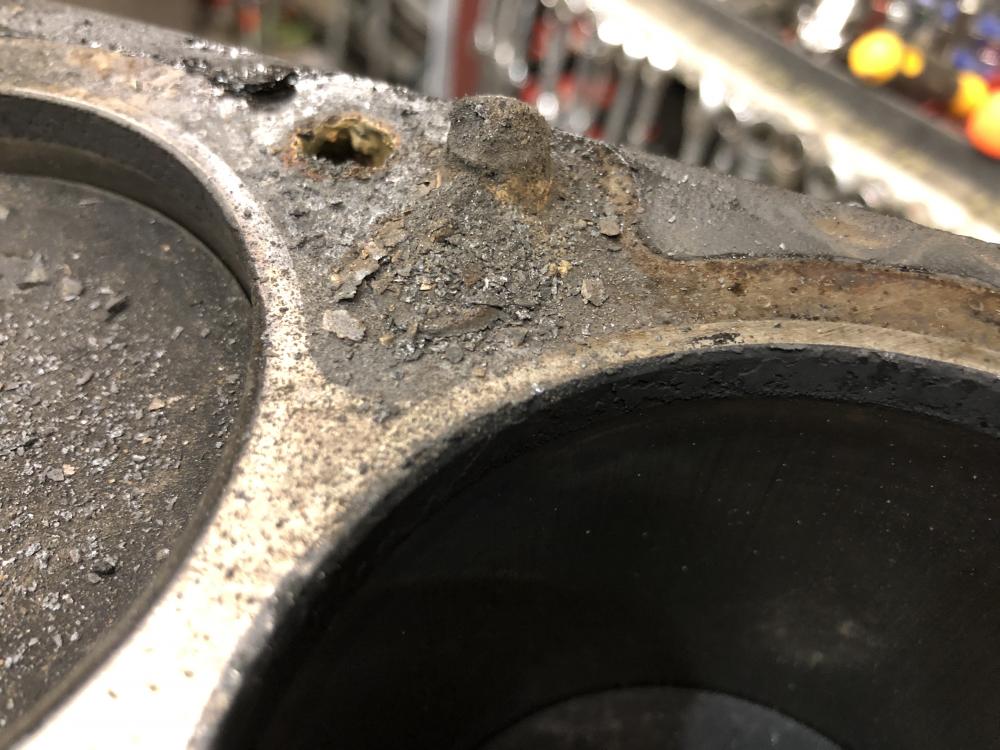
It is common I have found to struggle with the removal of two particular head bolts. Left side, #4 and 5 from the front. Coolant seems to get there and rust them into place. So the recent engine (N42/N42) needed the head off, and sure enough, all were easy to break free, but #4 was a struggle, and #5 broke. Here we go again. Took the head off, and found stage one of the birthday present. The bolt broke a good 3/8” of and inch above the block! Yahoo! Look at the crud around that bolt. The head gasket was mostly eaten through here. Old engine, old coolant.
-
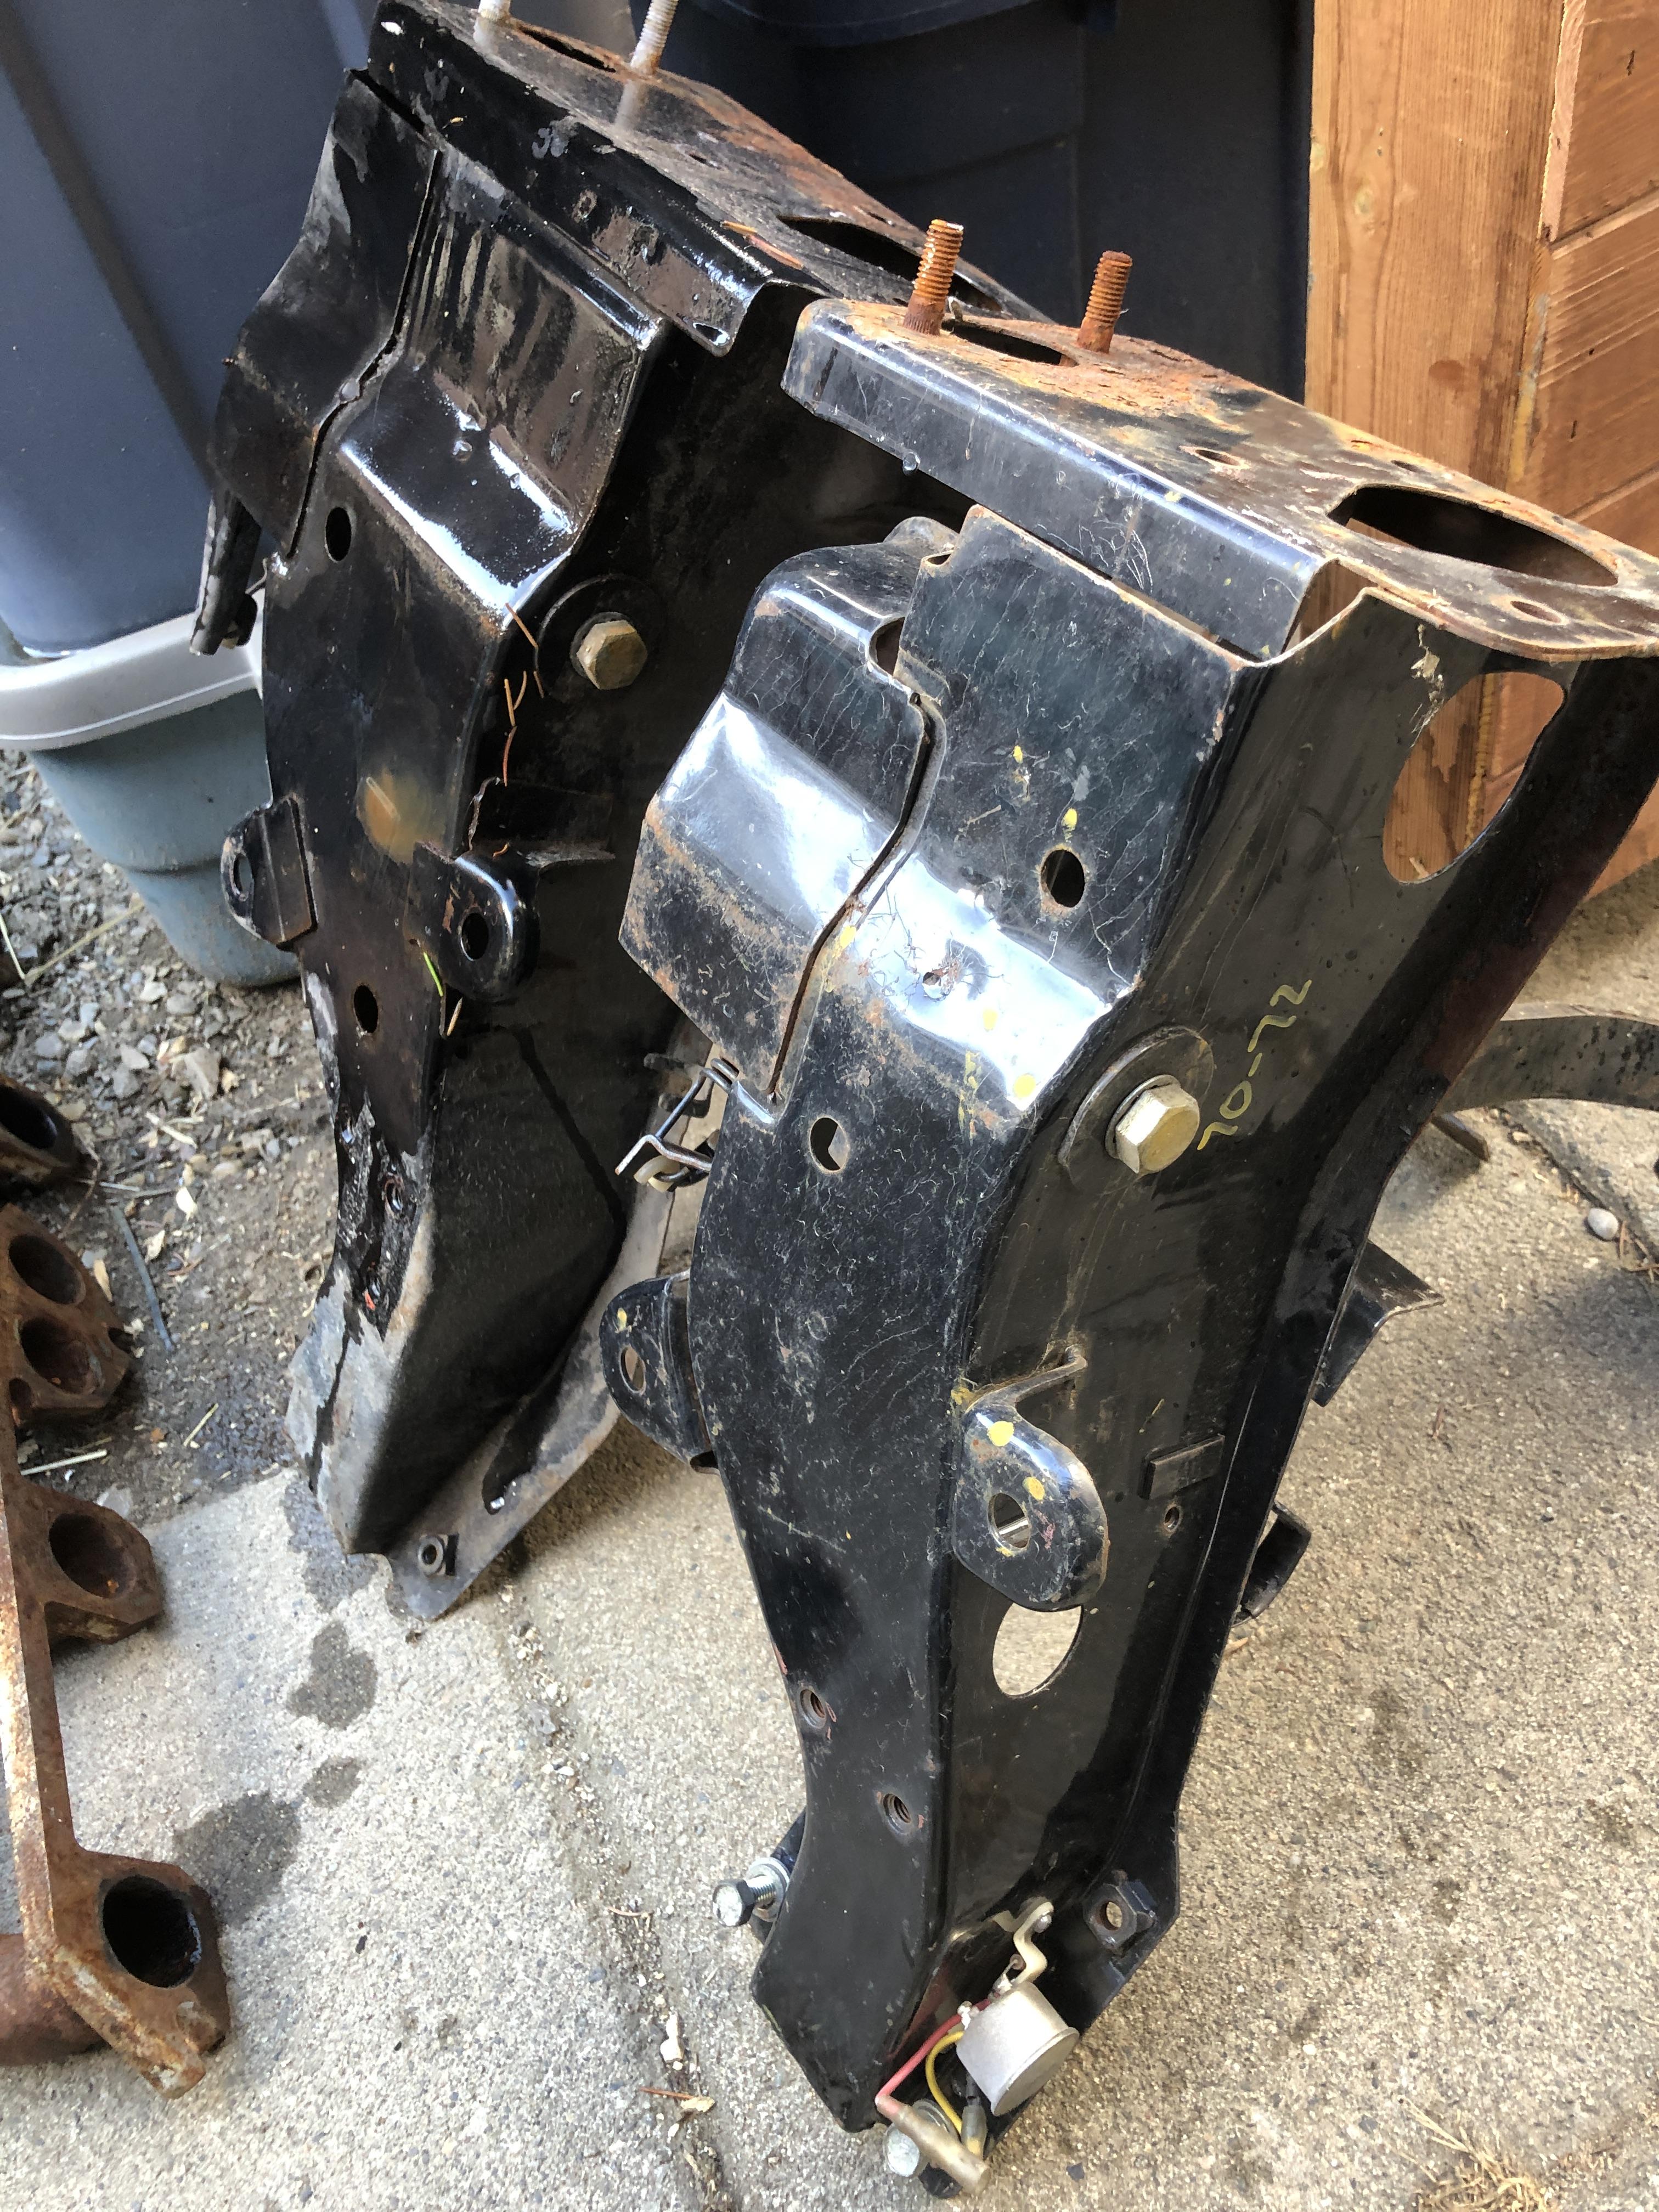
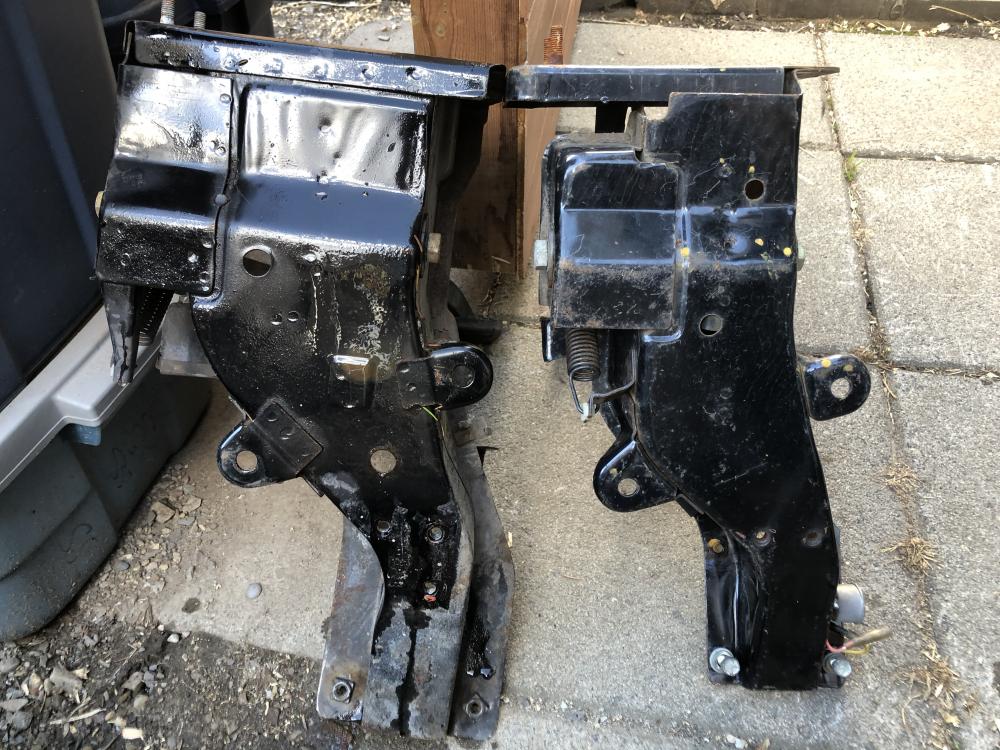
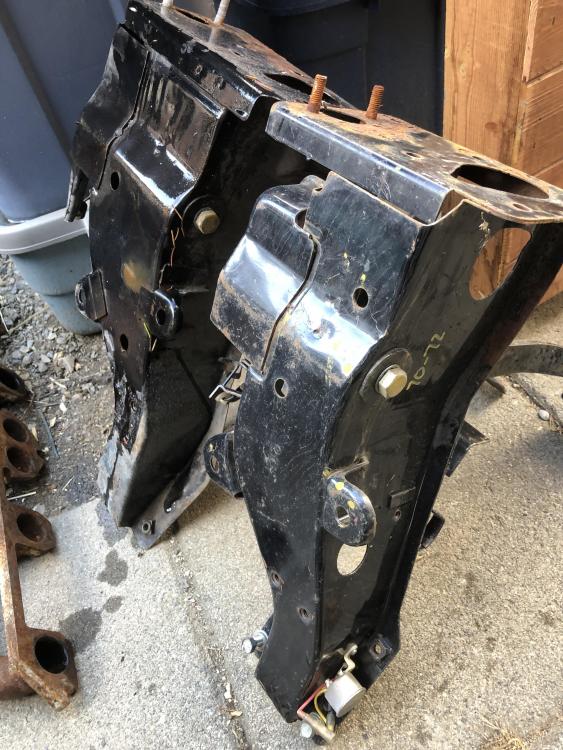
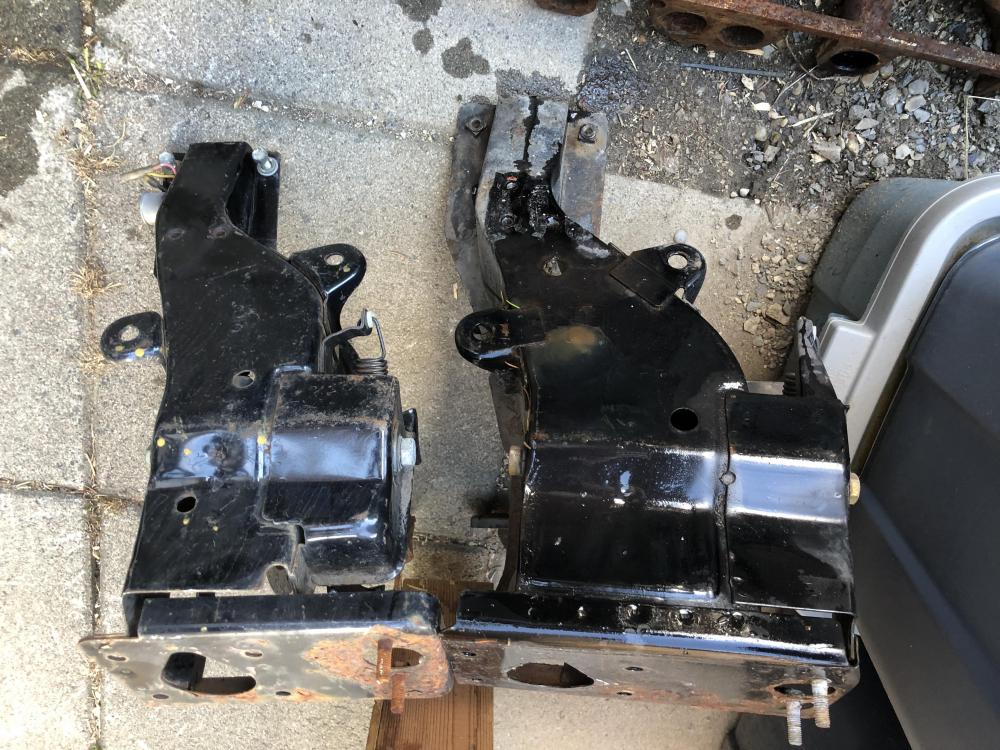
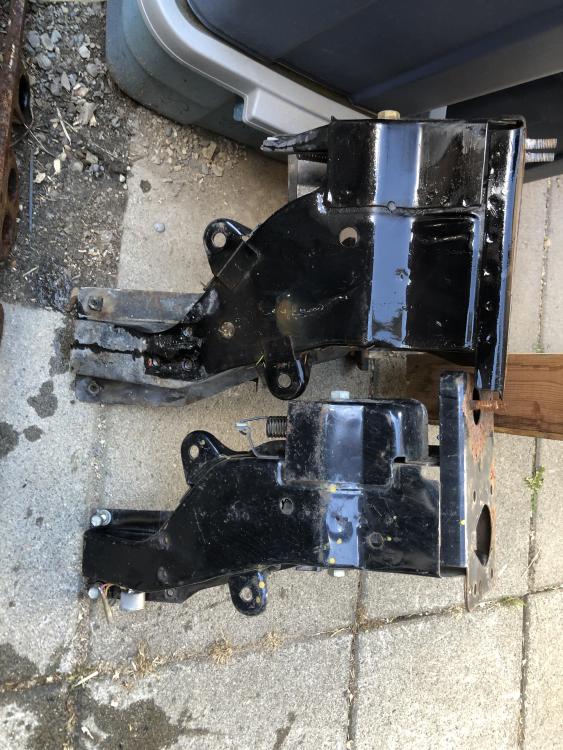
The pedal box is from a 75. No changes on this piece in the 280 year range that I’m aware of. Maybe check the parts fiche to be sure, but can’t think of anything 77-78 specific that would affect it.
-
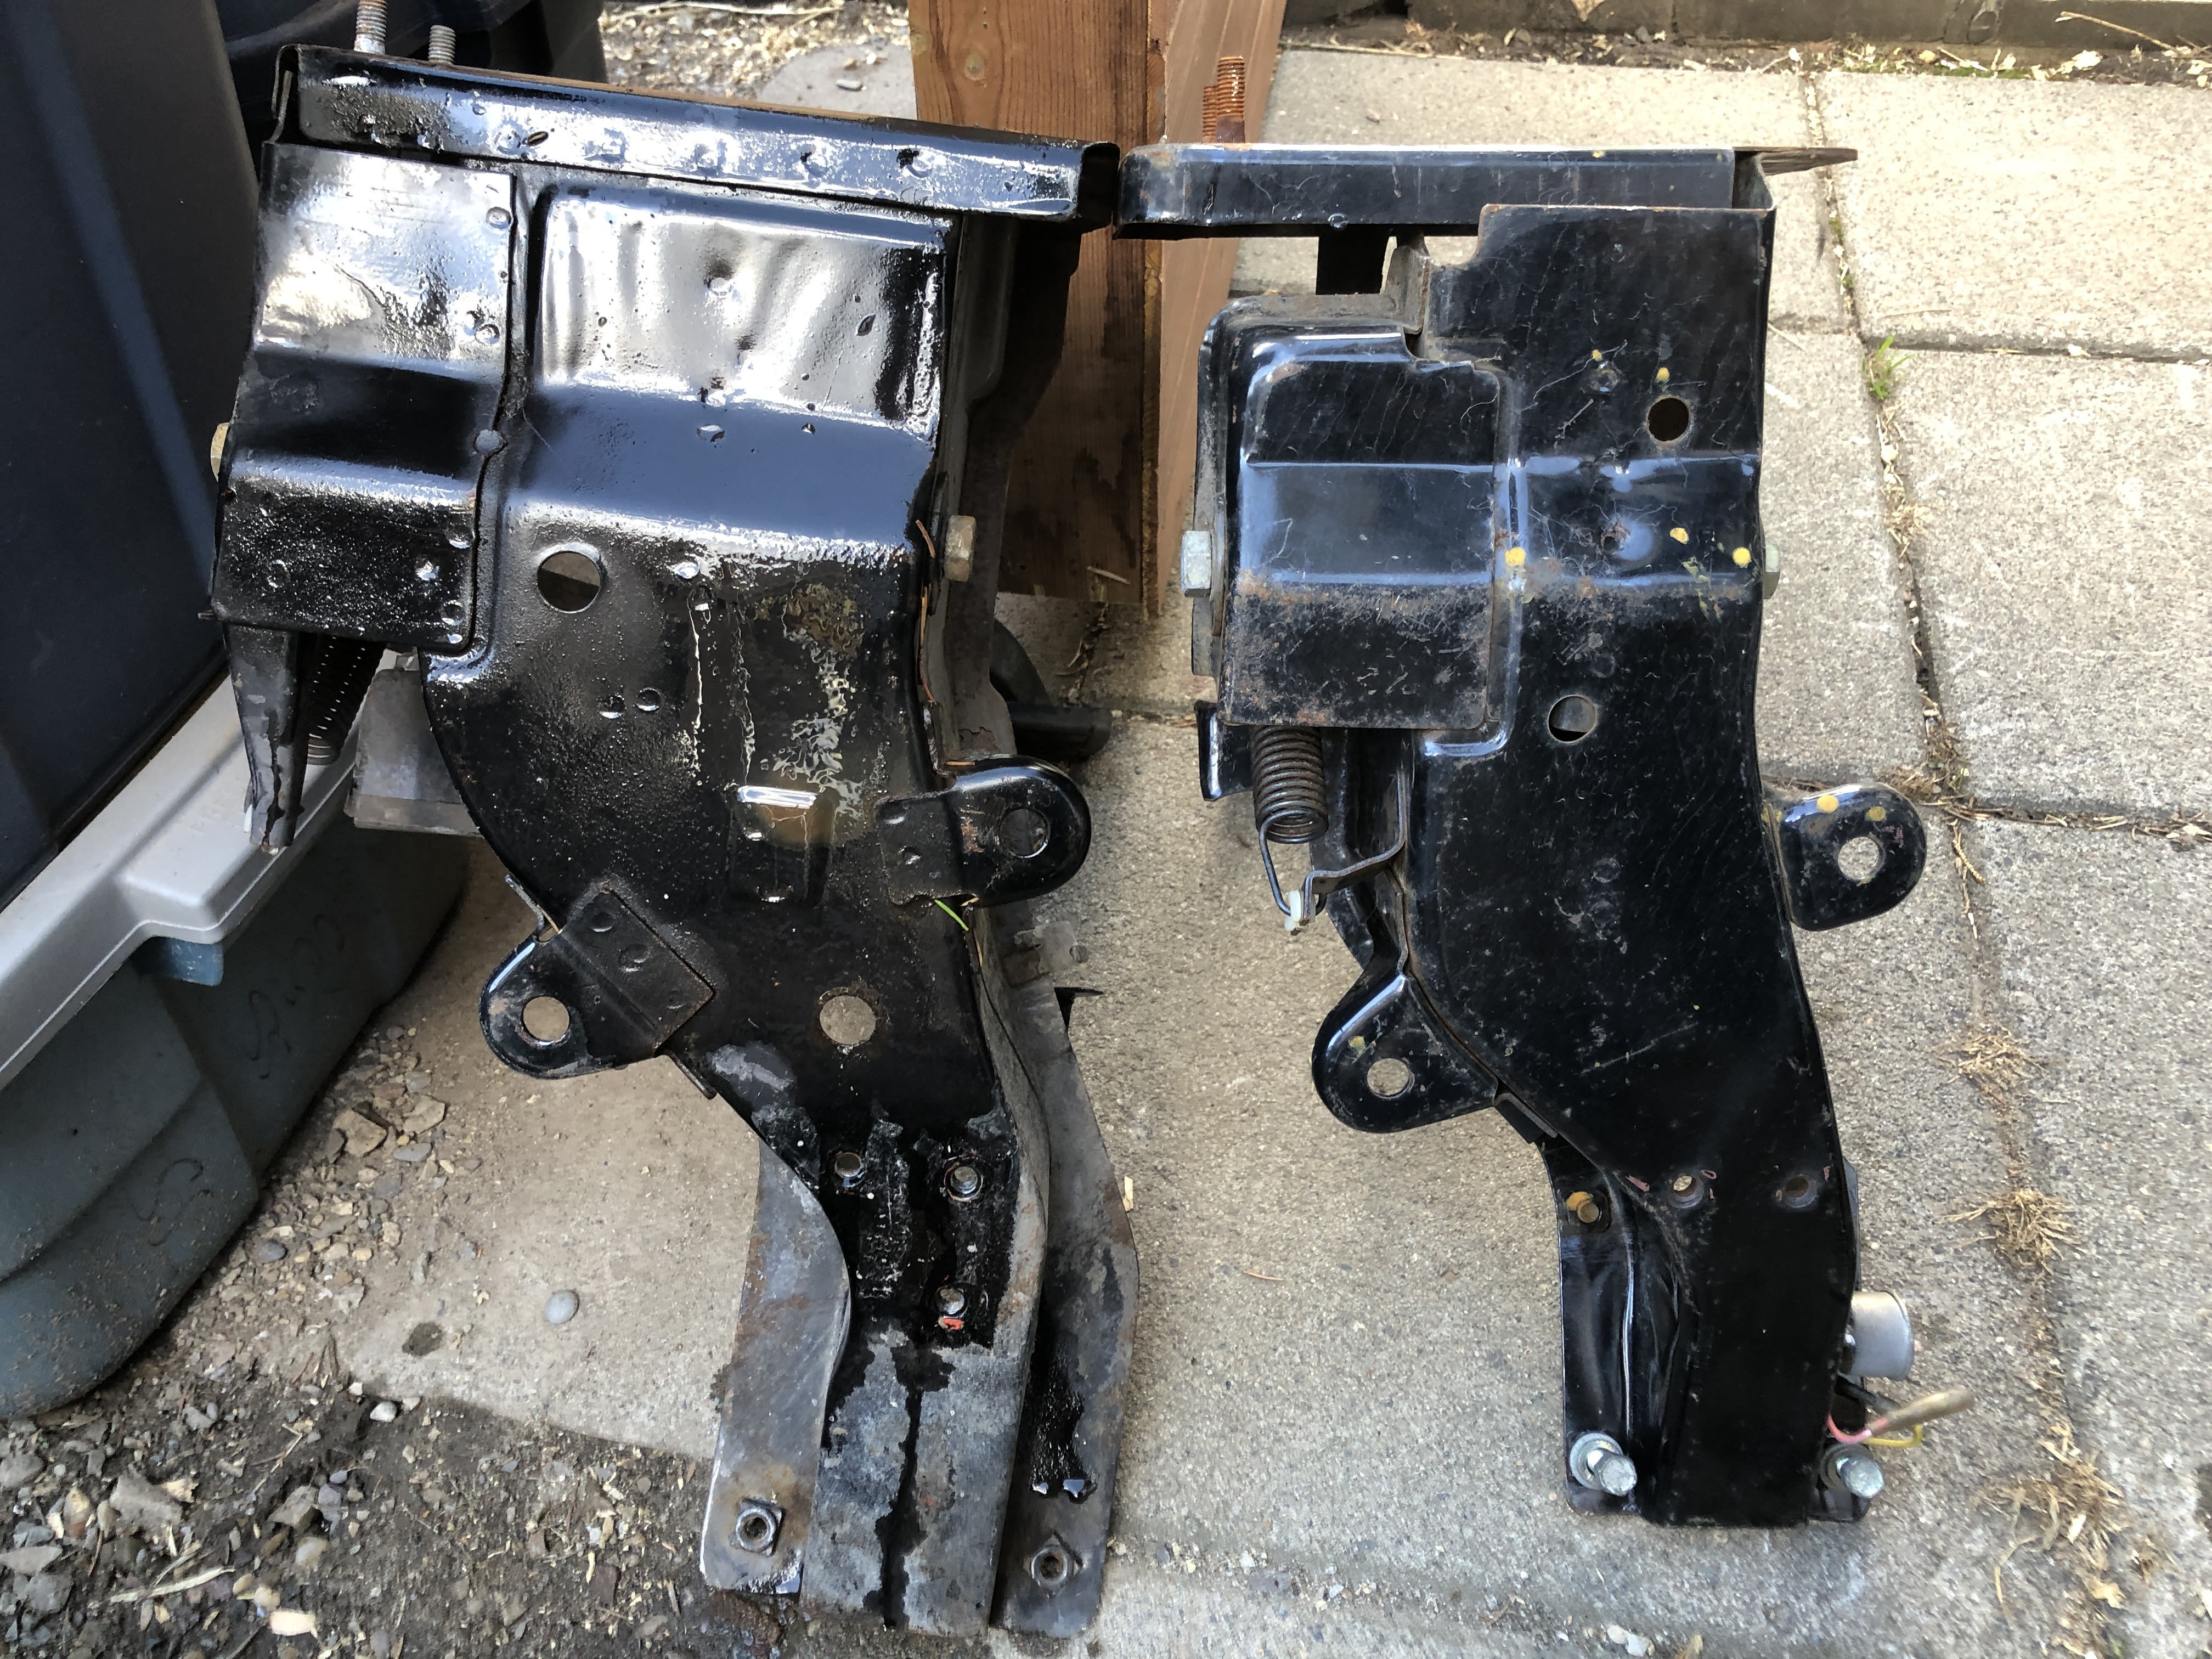
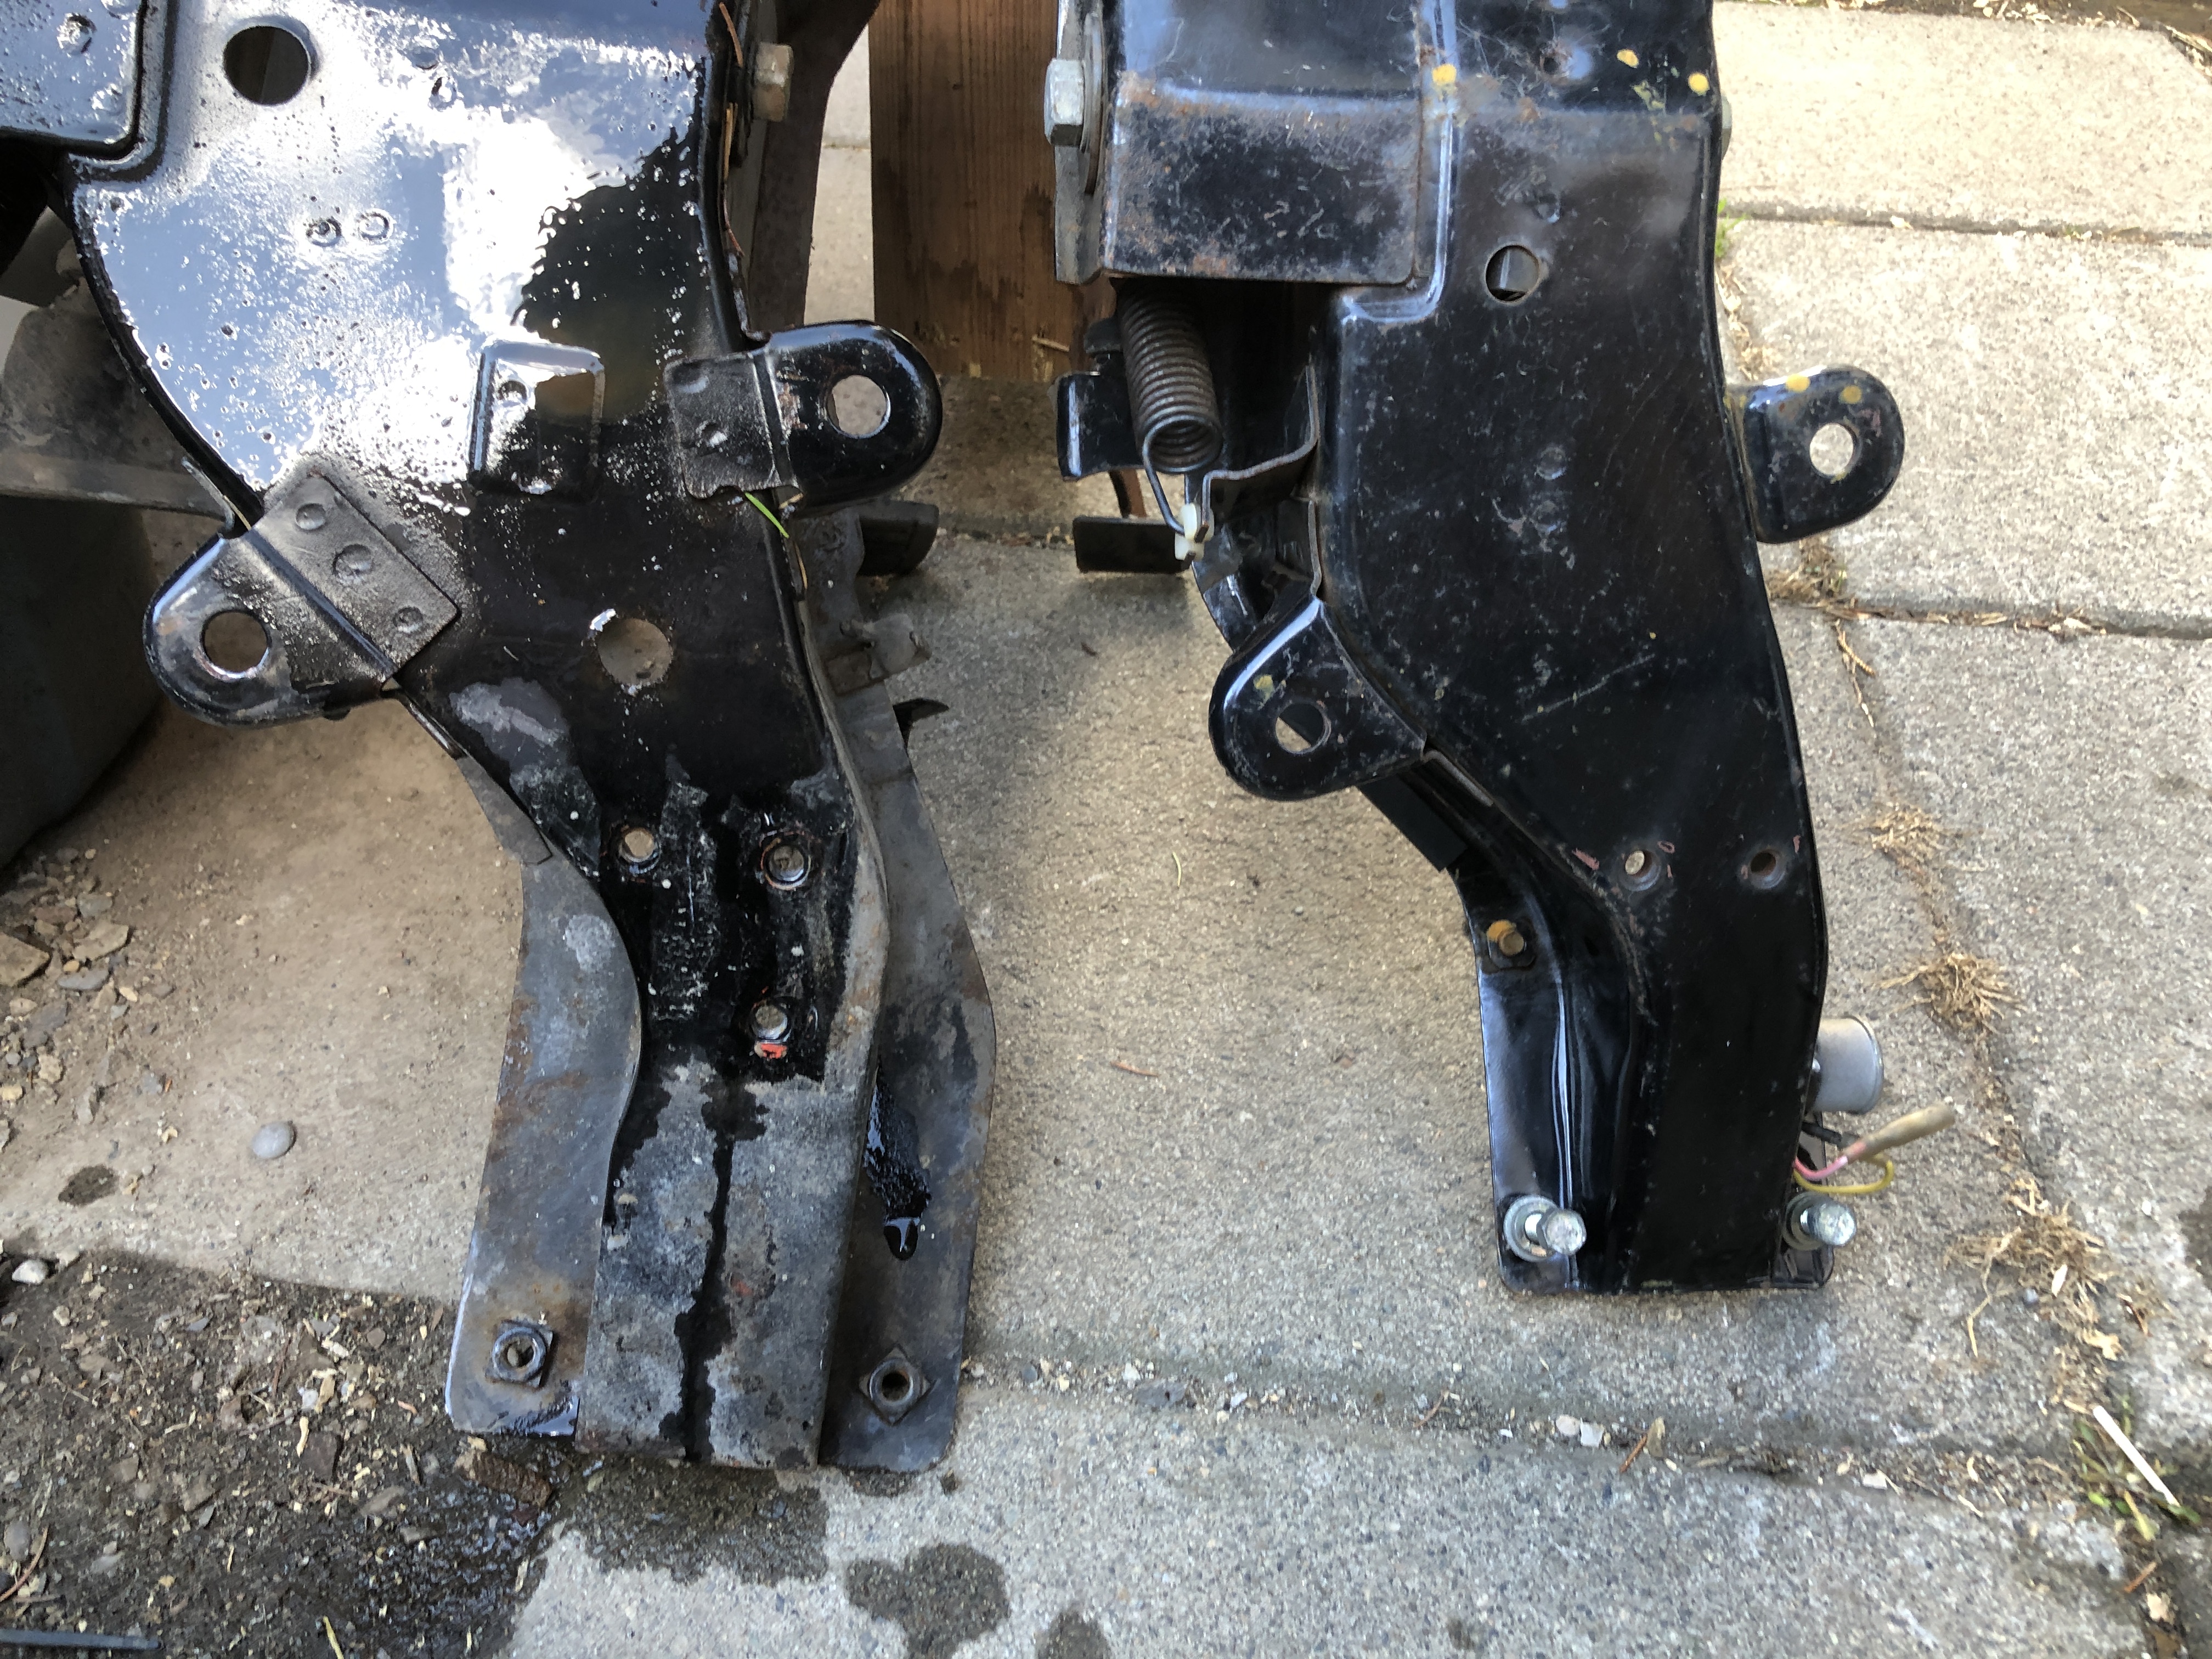
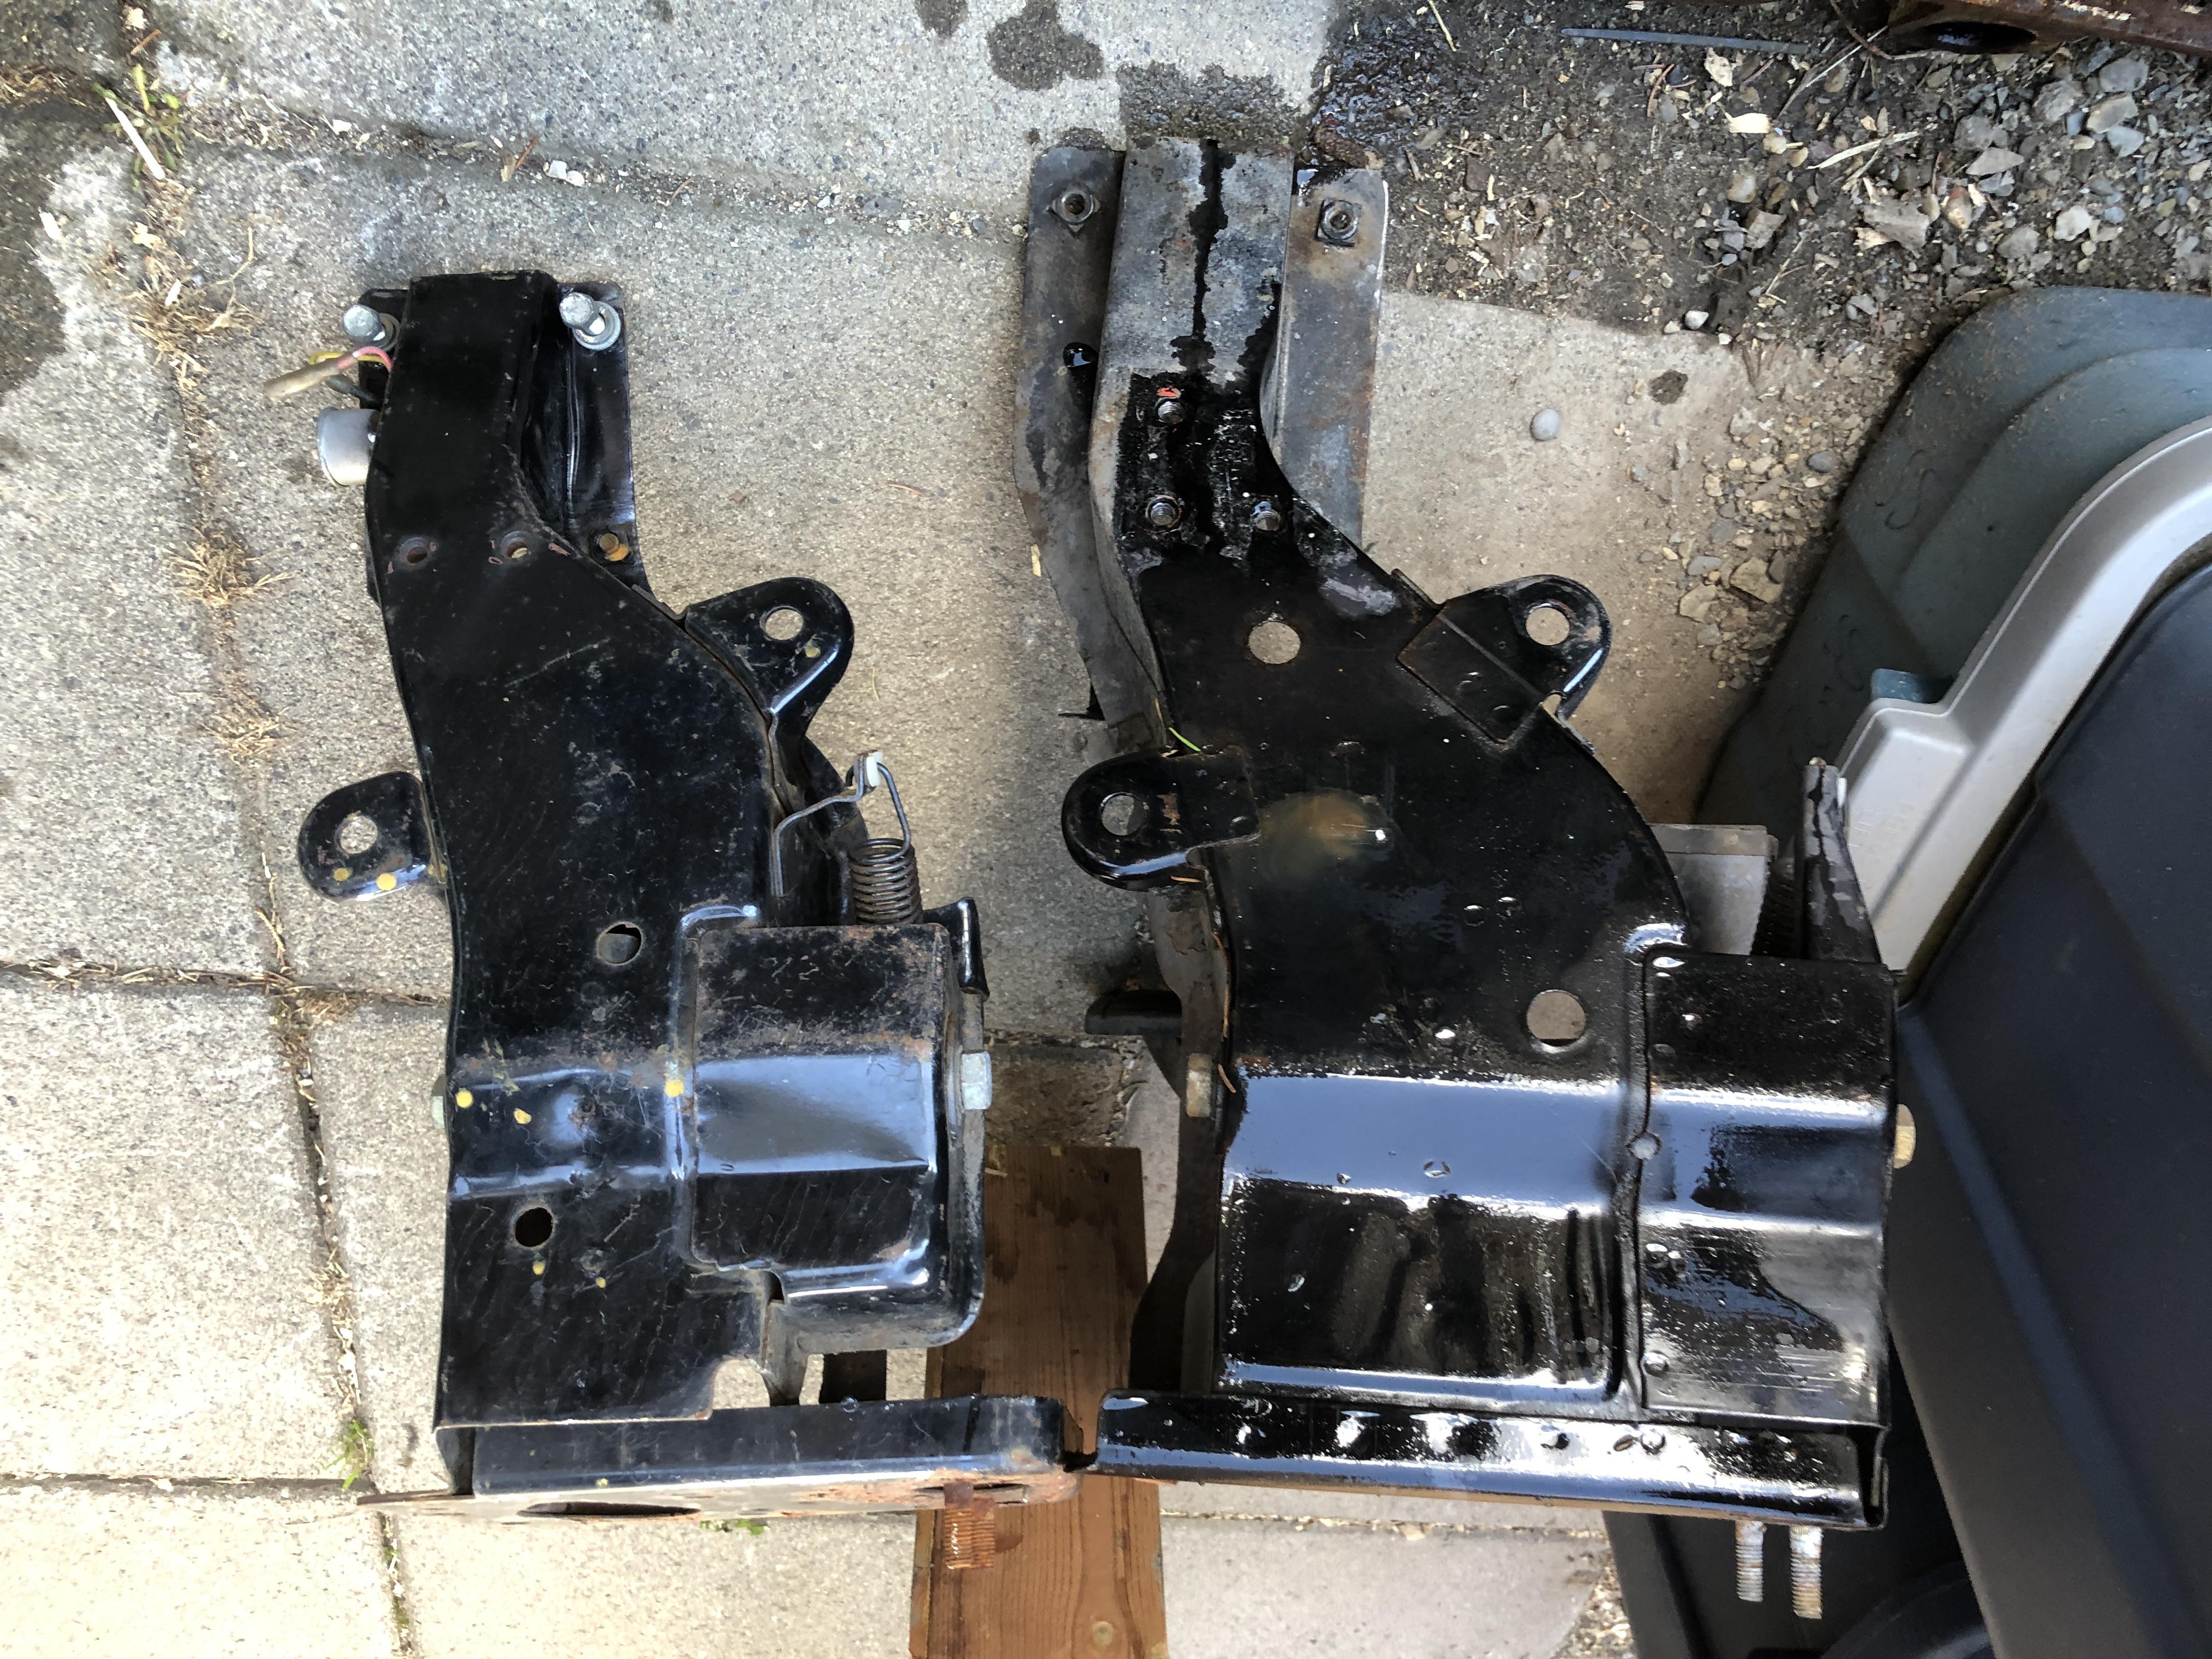
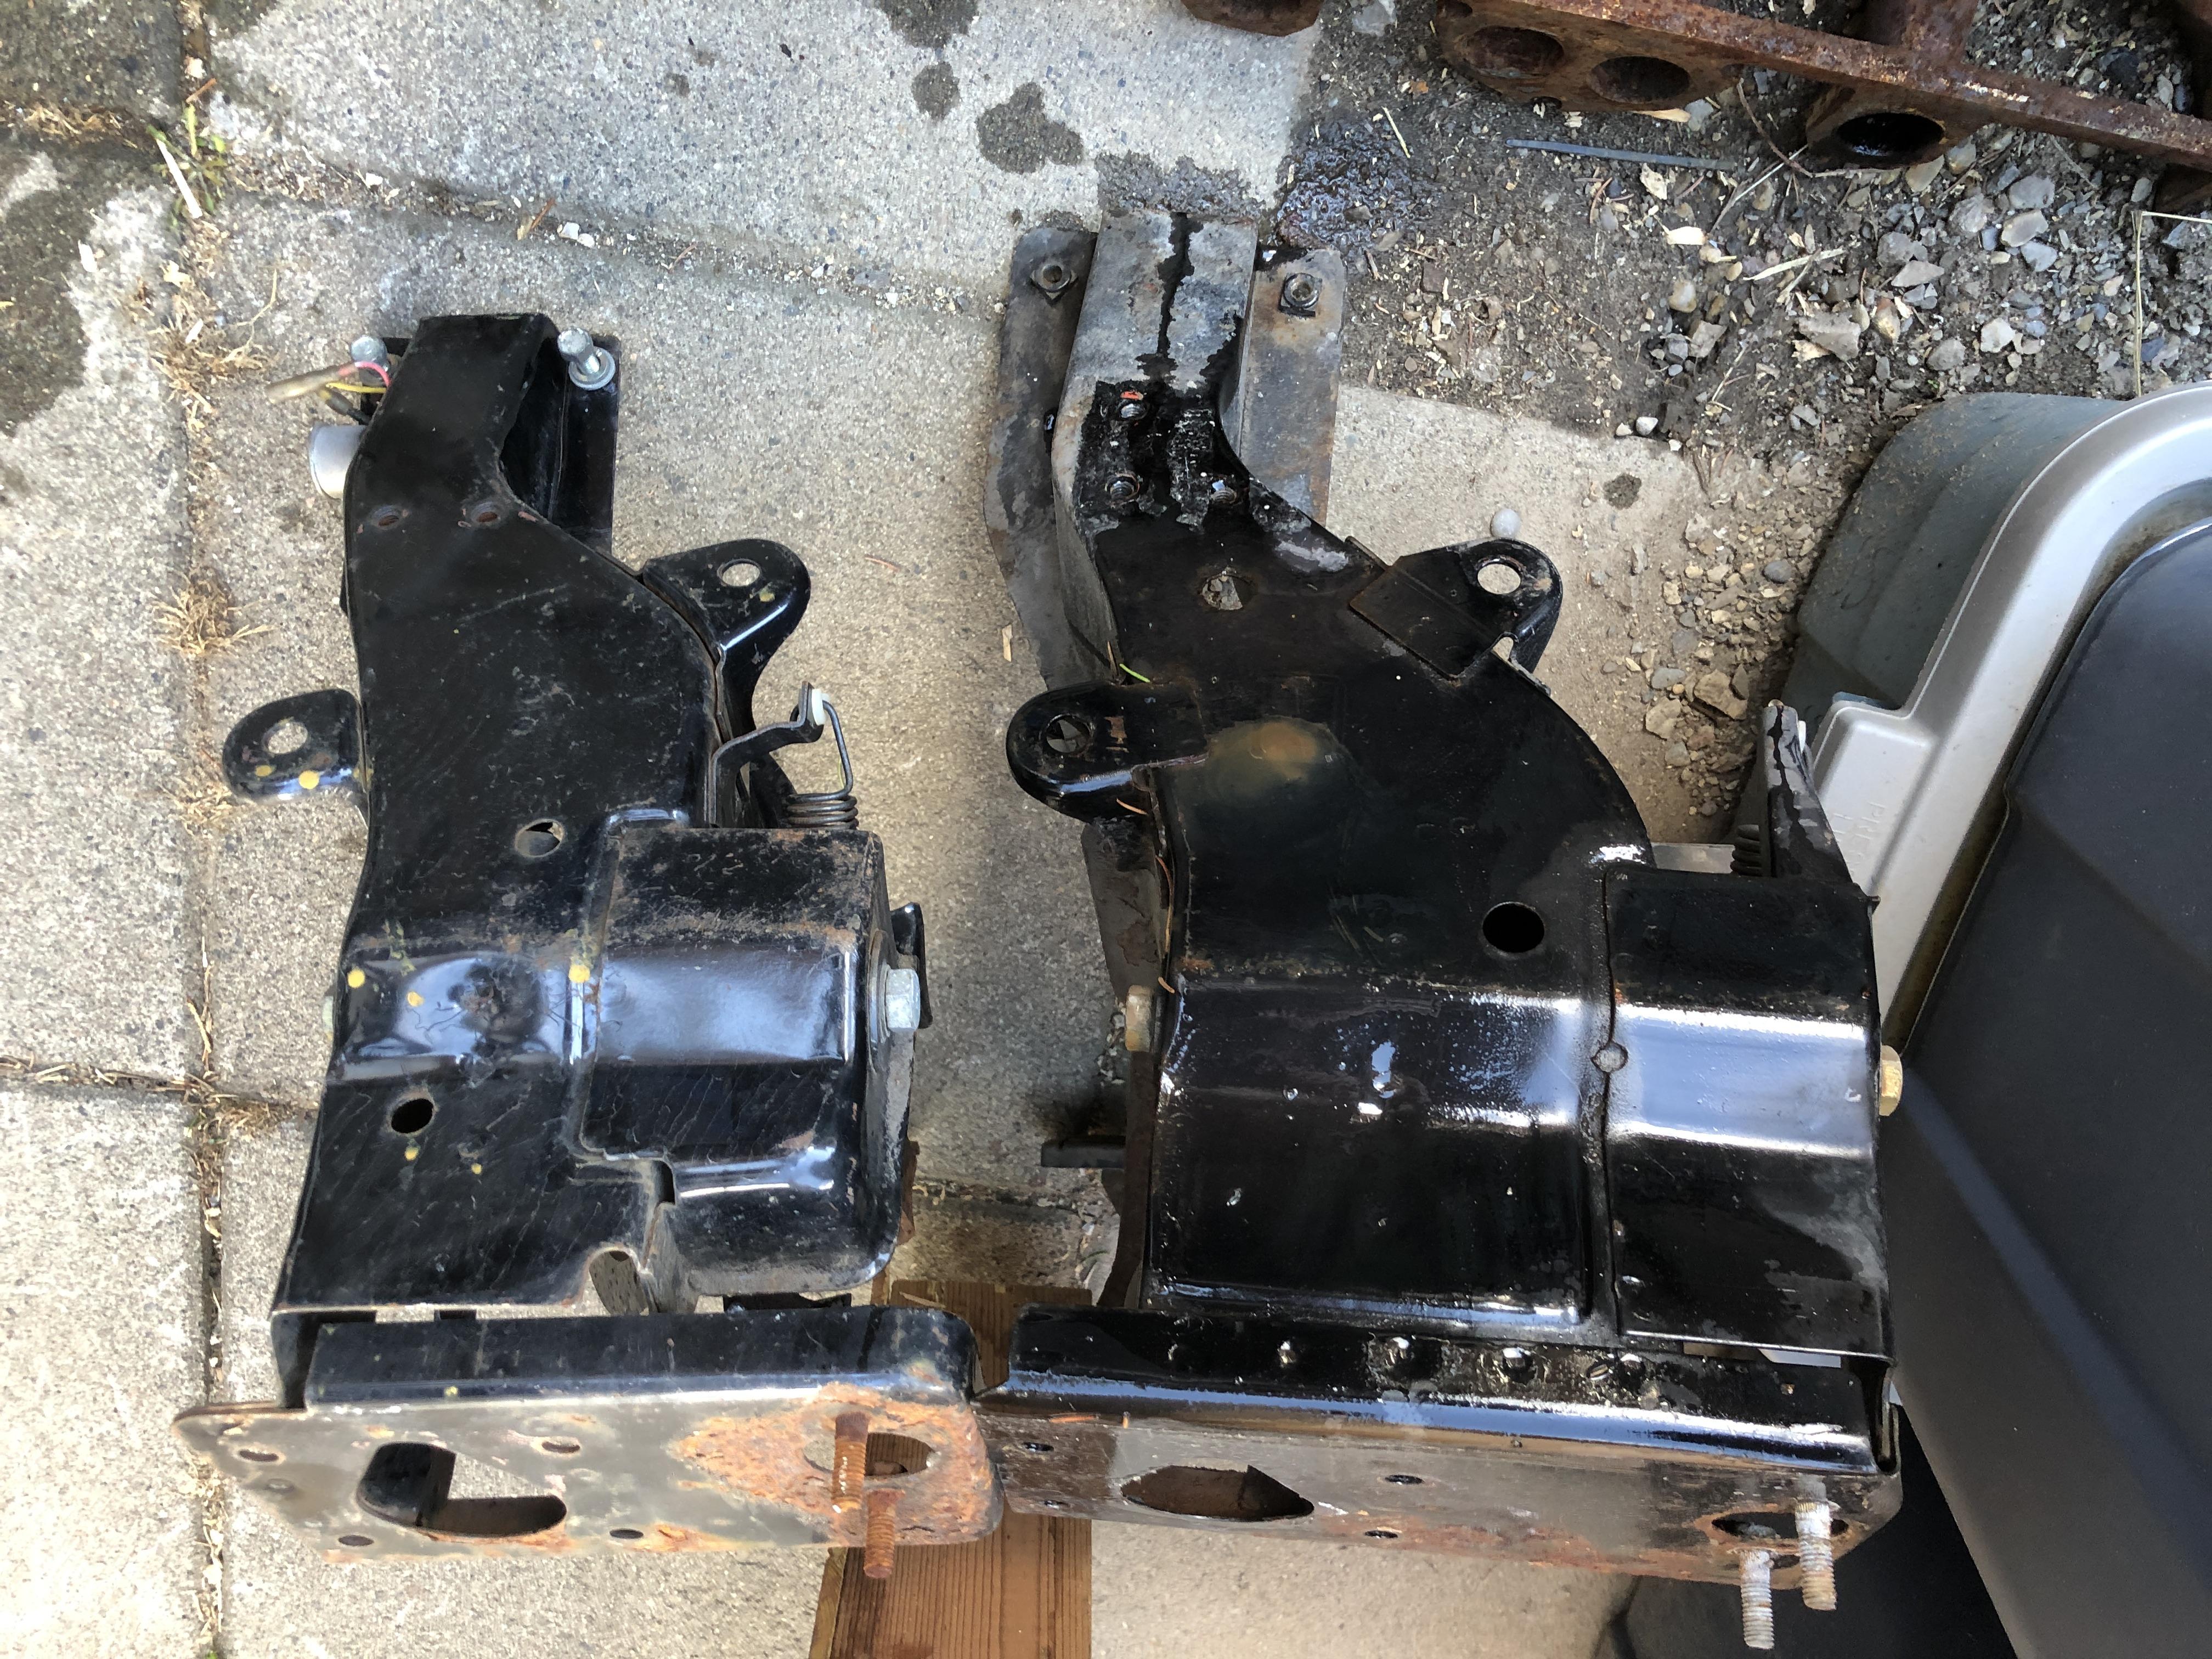
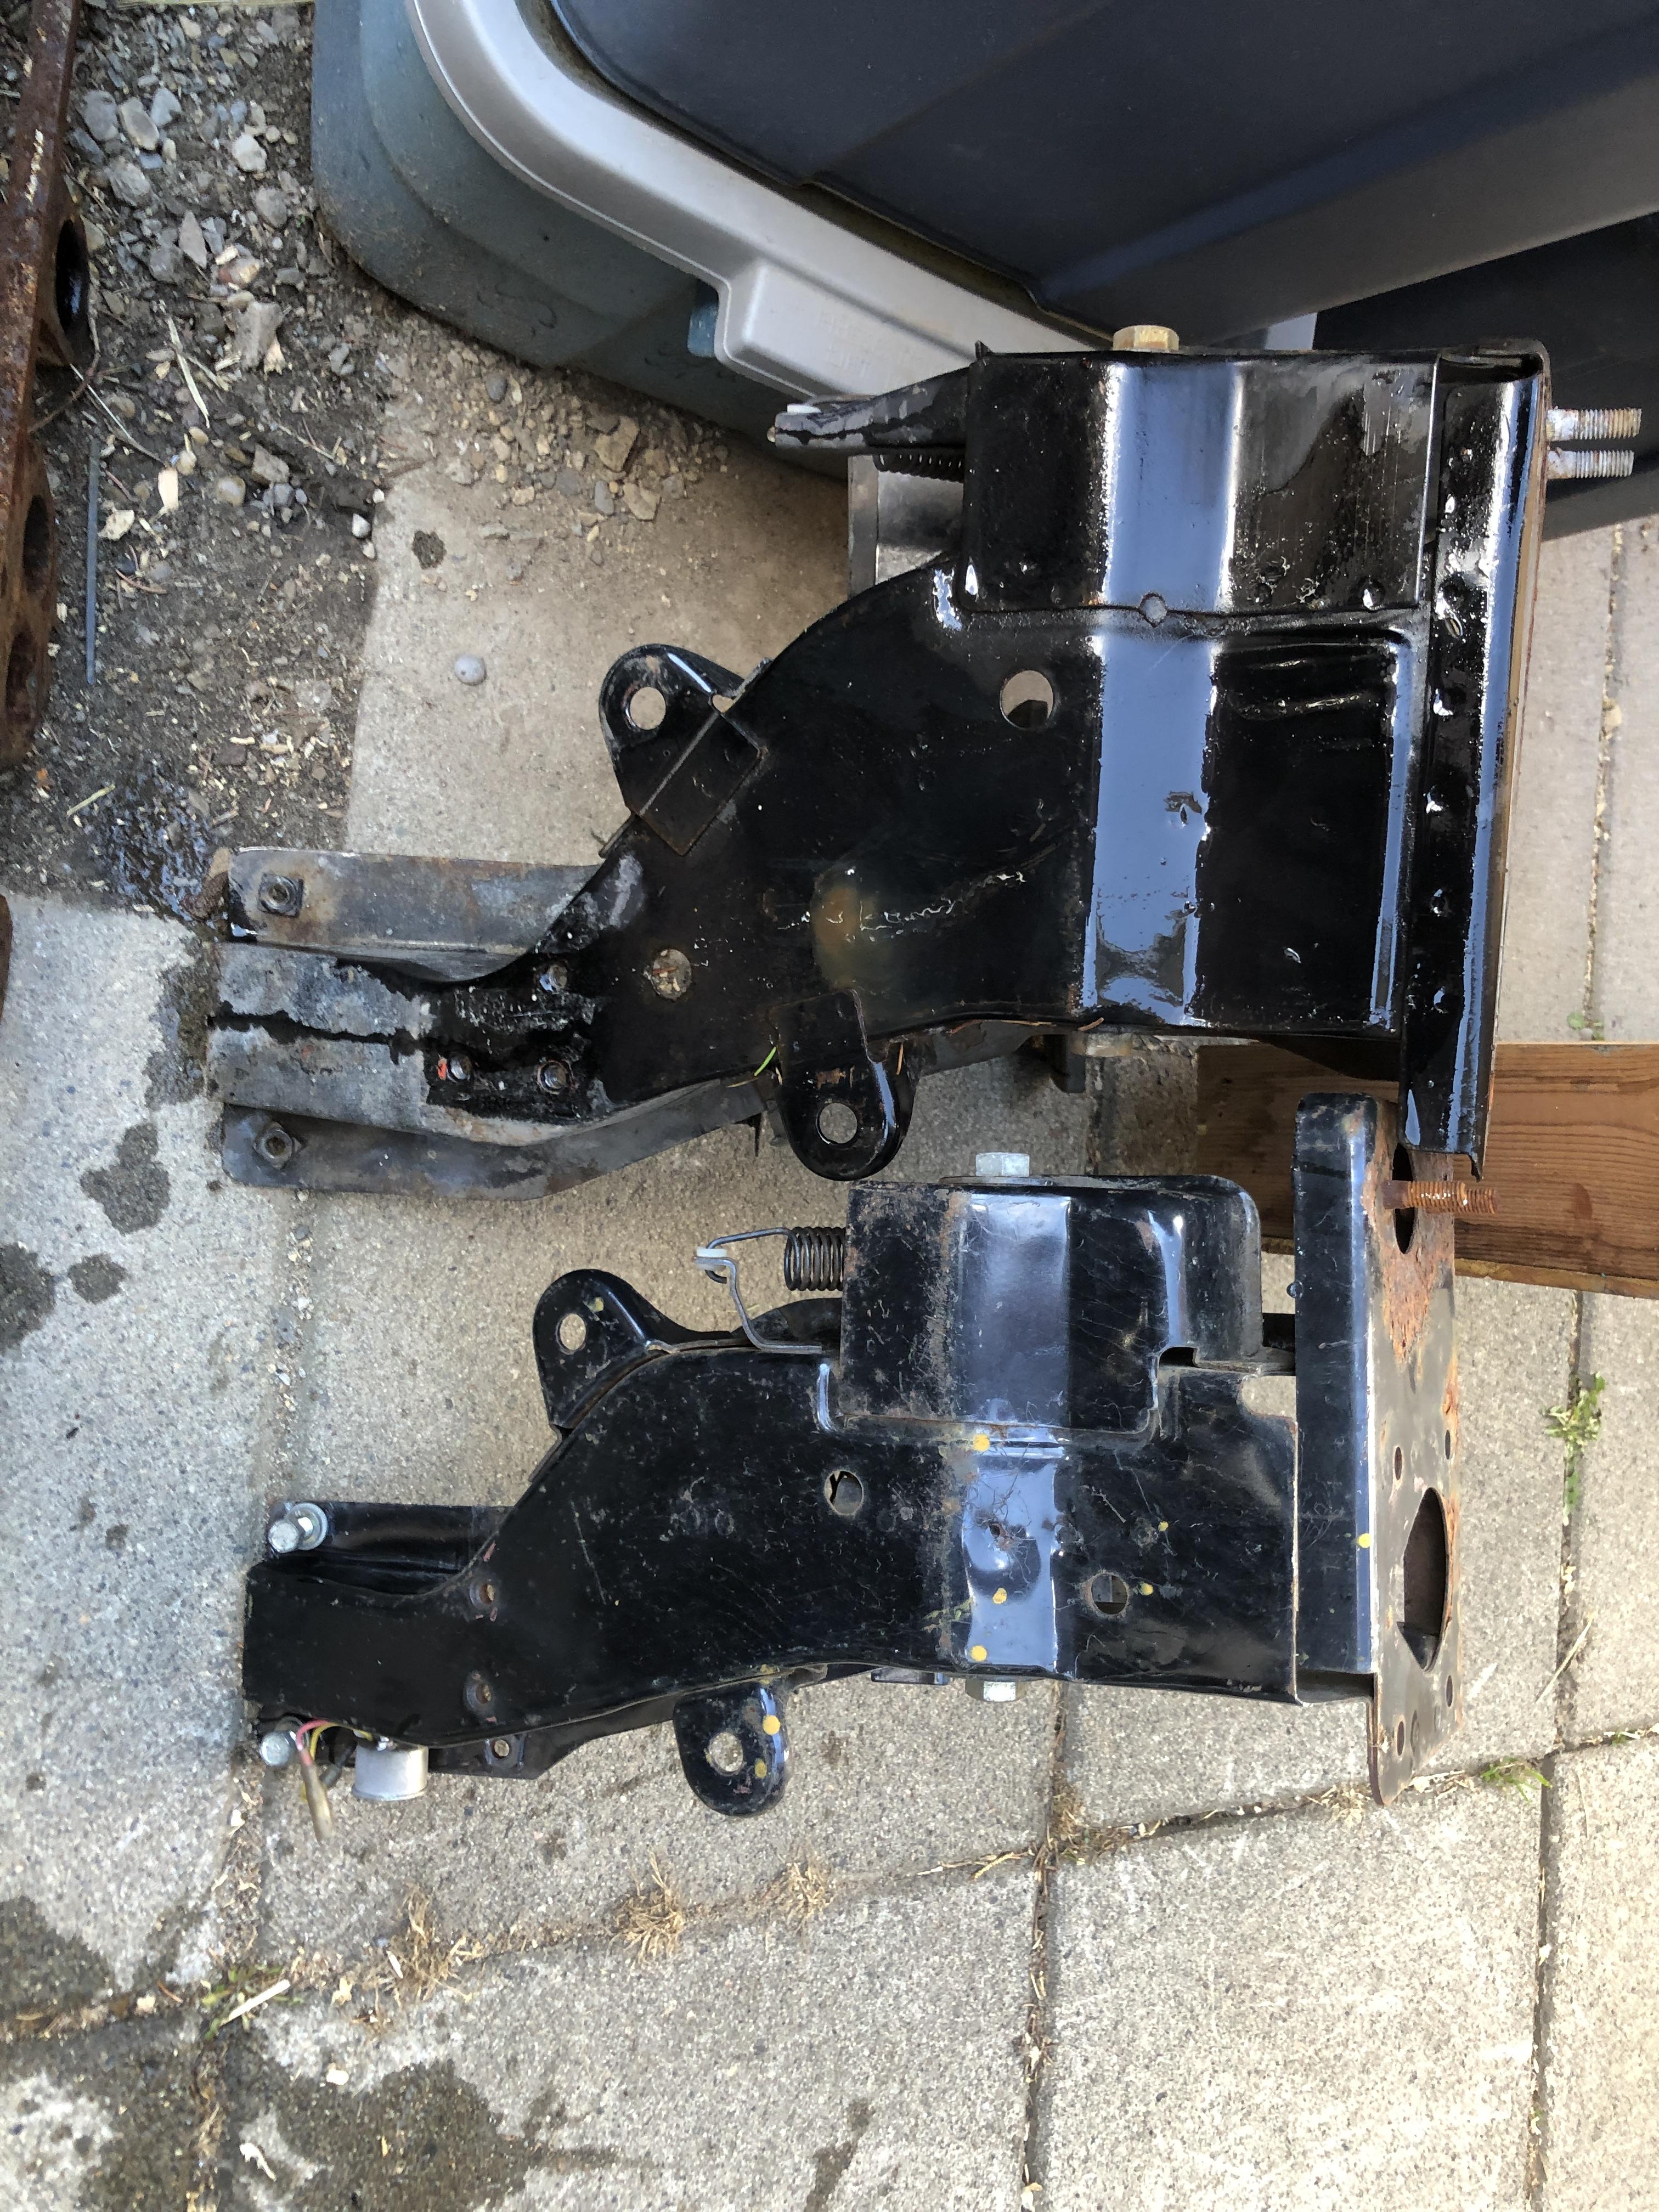
Here are pics of them side by side. 280 box is obviously wider (larger booster), yes two holes under the dash at the front vs 4. 280 box is also deeper from fire wall to dash mount. The two tabs that stick out the side look about the same.




-
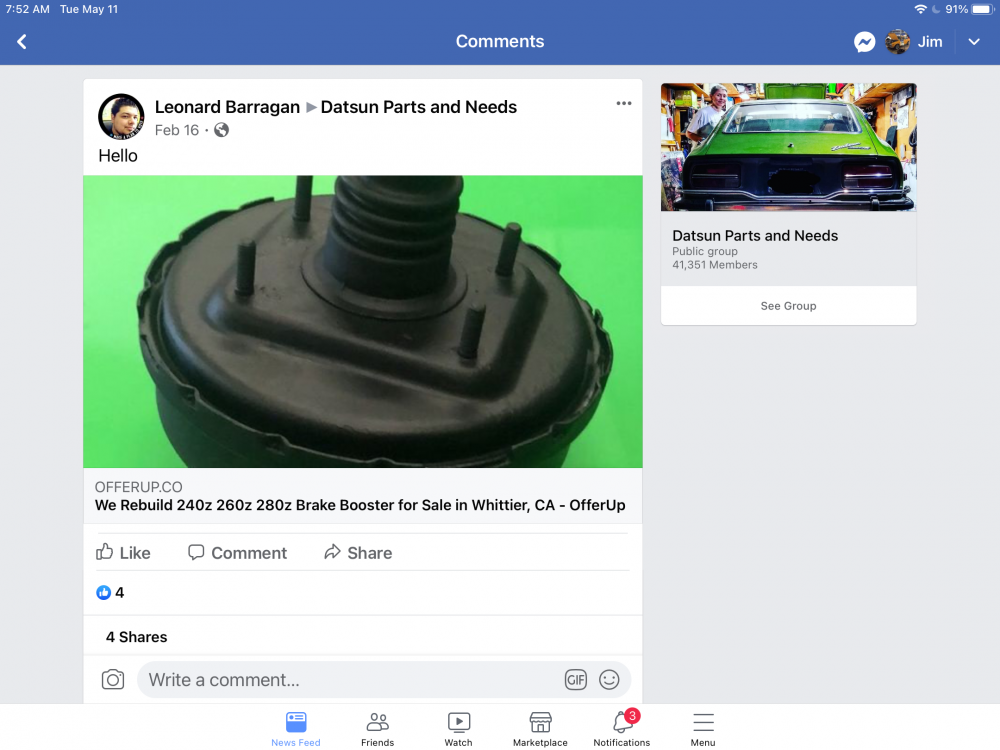
I’ll put the two side by side and post a picture and you can decide. My guess is there is enough dimensional difference that it would not be worth the effort. What exactly is your problem with the current setup? There is a booster rebuilder somewhere in the US that can make your present booster new again. Search for “Brake Booster rebuild datsun” MSA and probably Zcardepot sell alternative boosters. Even going with a more aggressive pad compound (hawk or porterfield has some options for stock brakes)
-
Did you find a wing bolt yet? Can you measure the one you have pls?. There are two different lengths, and if you have the later flat tops and its matching “larger” air cleaner, I think the bolts are shorter than the earlier ones. Send me a PM and we can take it from there.
-
Yes there is supposed to be a little rubber pad on there.
-
And because looking at orange Z pictures is never boring... https://bringatrailer.com/listing/1971-datsun-240z-165/
-
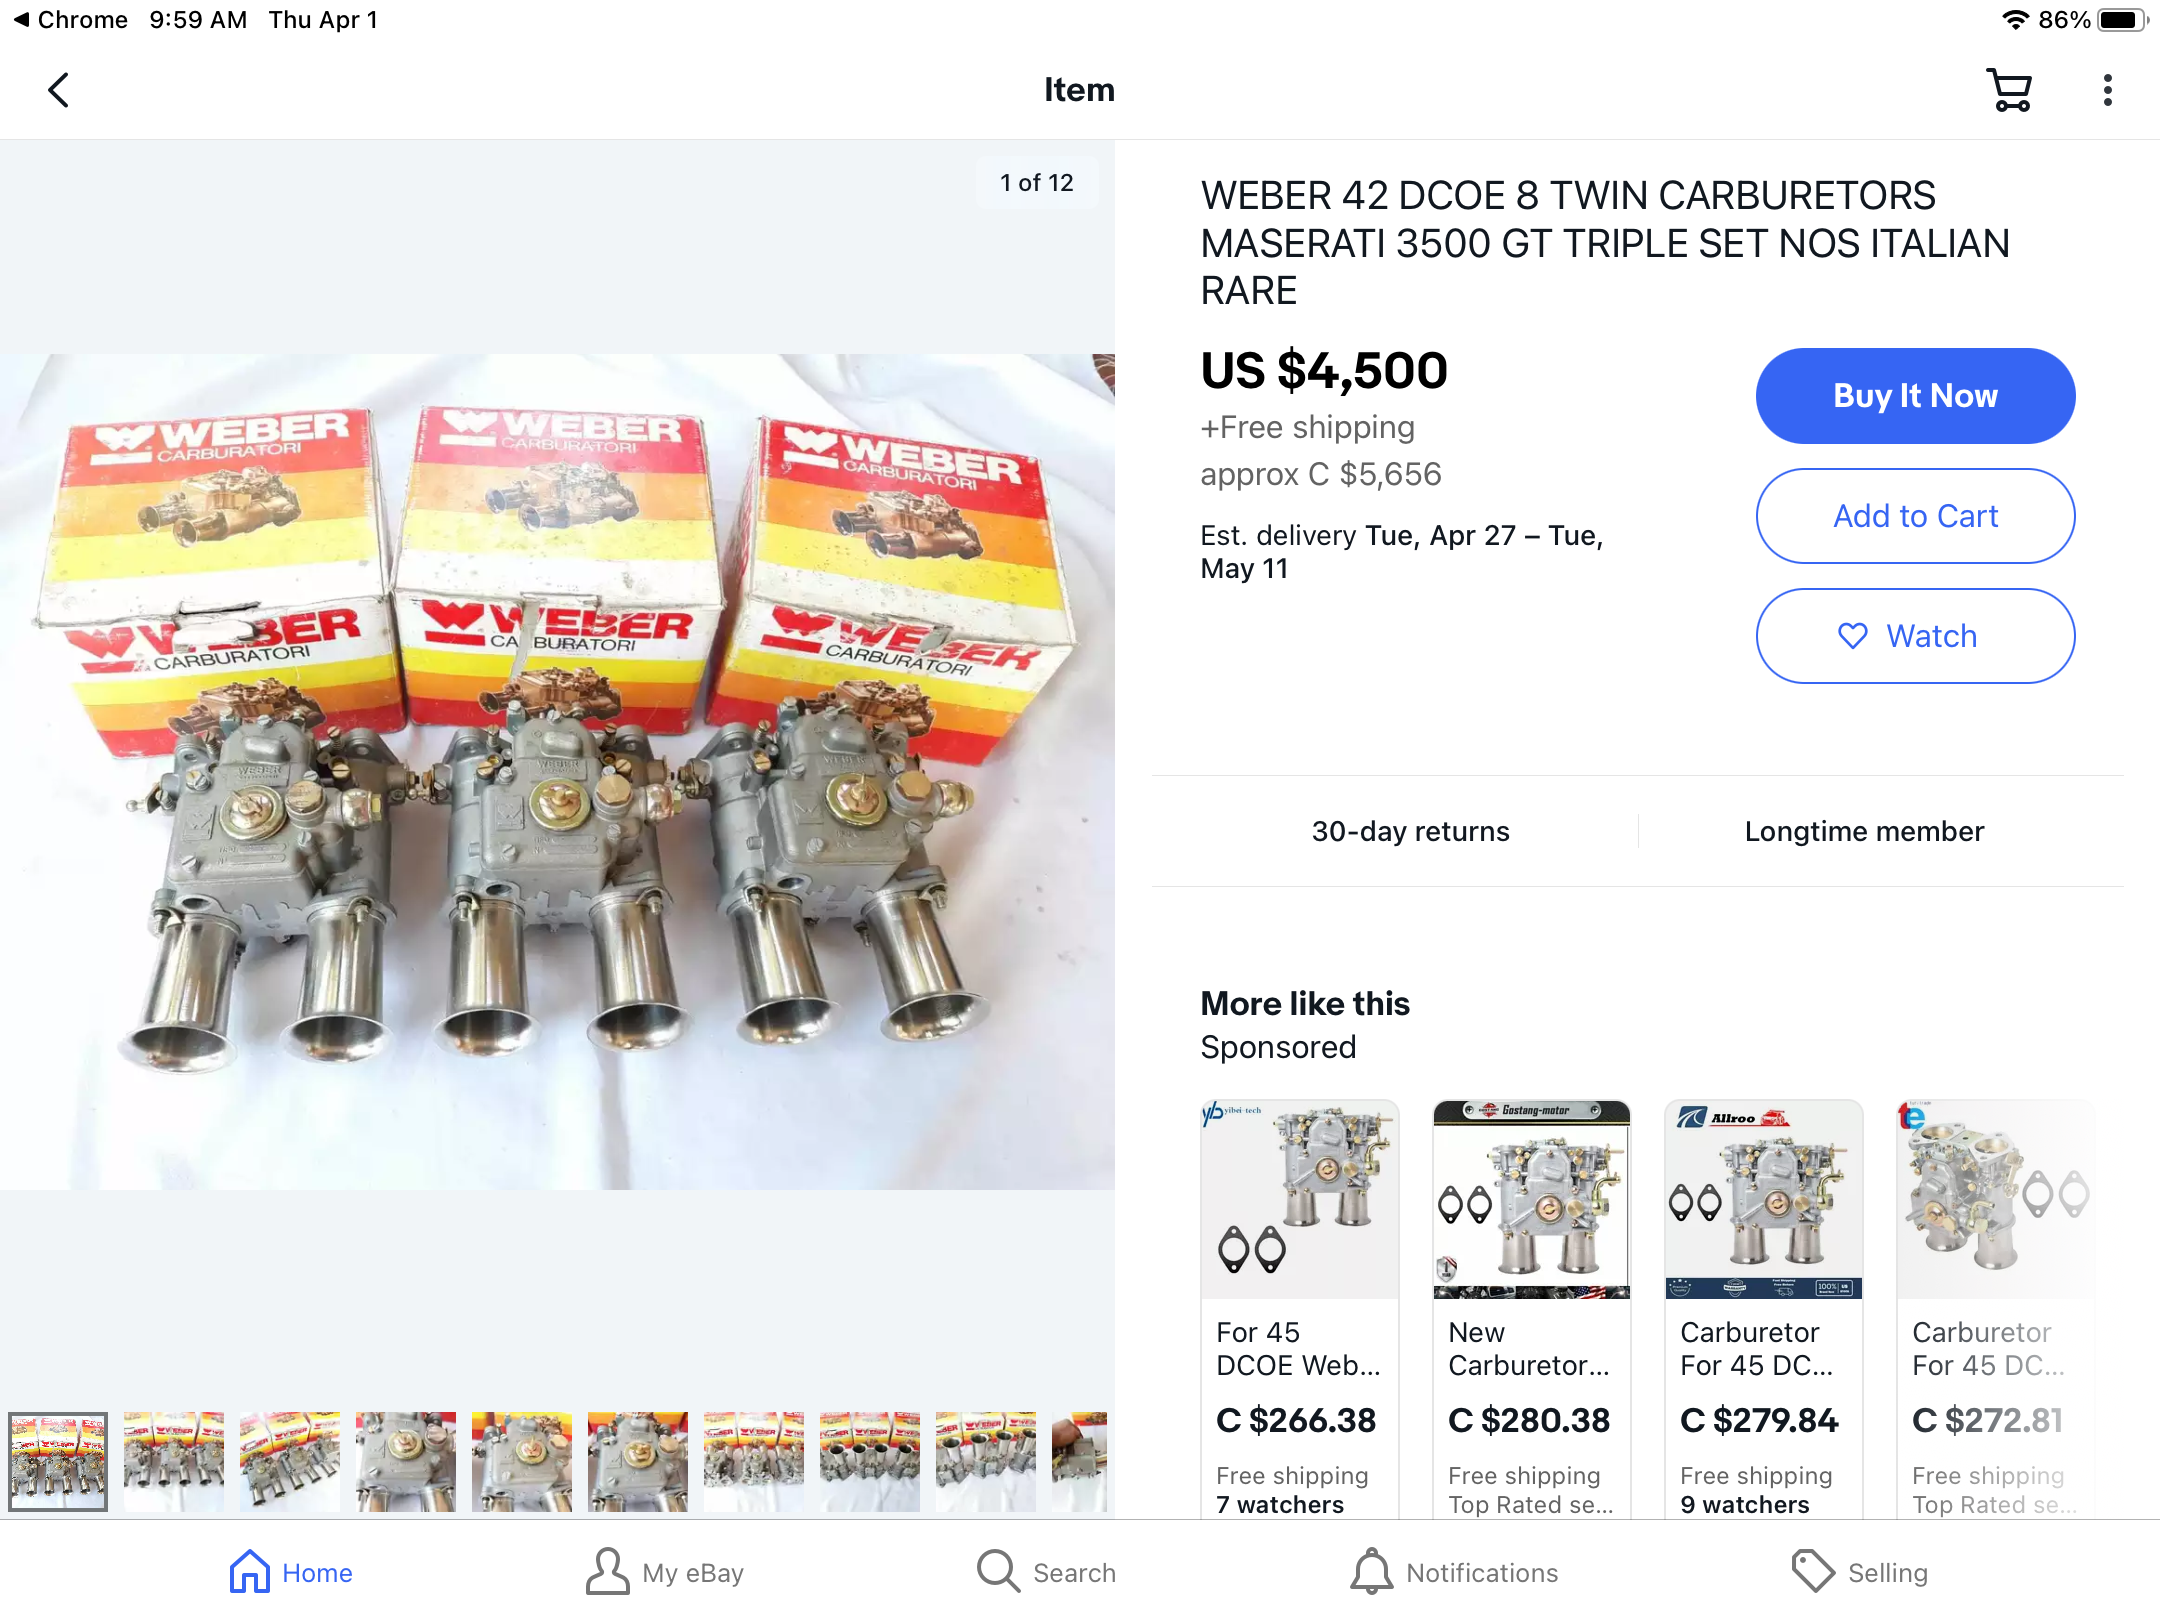
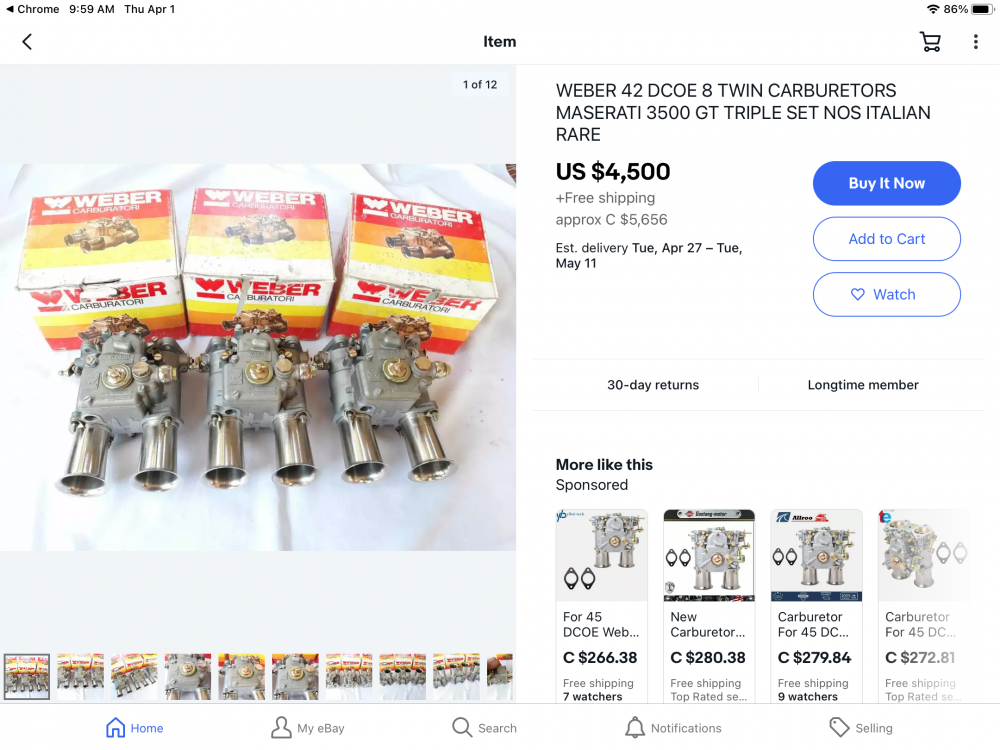
When you google them, they are associated and spec’ed to ridiculously expensive exotics Ferarri, Mazeratti etc. Hence their crazy value. Quite rare and quite valuable. $1800 would be a steal. Ebay has a new set at the going value, no intake etc.
-
This has been an area of annoying persistent leakage for me in the past. Now I always use a sealant on both sides of the gasket. The ones I get in most gaskets sets are thick and hard as a rock, no way they are going to seal without some help and perfect surface prep. I hate drilling and extracting bolts like that, but there may be enough meat there to go up to M8 if things go sideways.
-
Yes, without a reverse lock out port to poke a 1/4 socket extension and air hammer into, that thing is a witch to remove. I built a crazy complex U shaped thing to push them out, worked ”ok” but tough to get all the angles right. Dang wedge pins can be very tight. Drilling an access hole then NPT plugging it after would be my goto solution, but not everyone is comfortable doing that.
-
See “Peachy”
-
The 75 rack moves 1.51 inches for one pinion revolution. Feel free to convert that steering angle any way you like.
-
When I get a free day (2025 at the rate I’m going) I’ll measure my vast array of steering racks and let you know! At the very least, I have a known 75 rack that I can measure and tell you about. I don’t understand rack and pinion ratio’s anyway. One turn of the wheel produces a certain amount of rack movement. No ratio of nothing.
-
These do two things. It raises the effective top of the strut hydraulic top mount inside the isolator. It does thus give you an inch of addition compression stroke. The other thing it does is eliminate the rubber in the stock isolator. I’ll bet that really softens the ride, wouldn’t it? Where is that tongue in cheek icon when I need it? The thing it does NOT do is give you an advertised “softer” ride. IF you are bottom out the shocks due to lowering springs, it gives you another inch of compression travel so you MAY not get that great jolt when that happens, but that’s it. Overall, I bet you get more road noise and vibration when driving without the upper isolator rubber. Just my impressions from what I see.
-
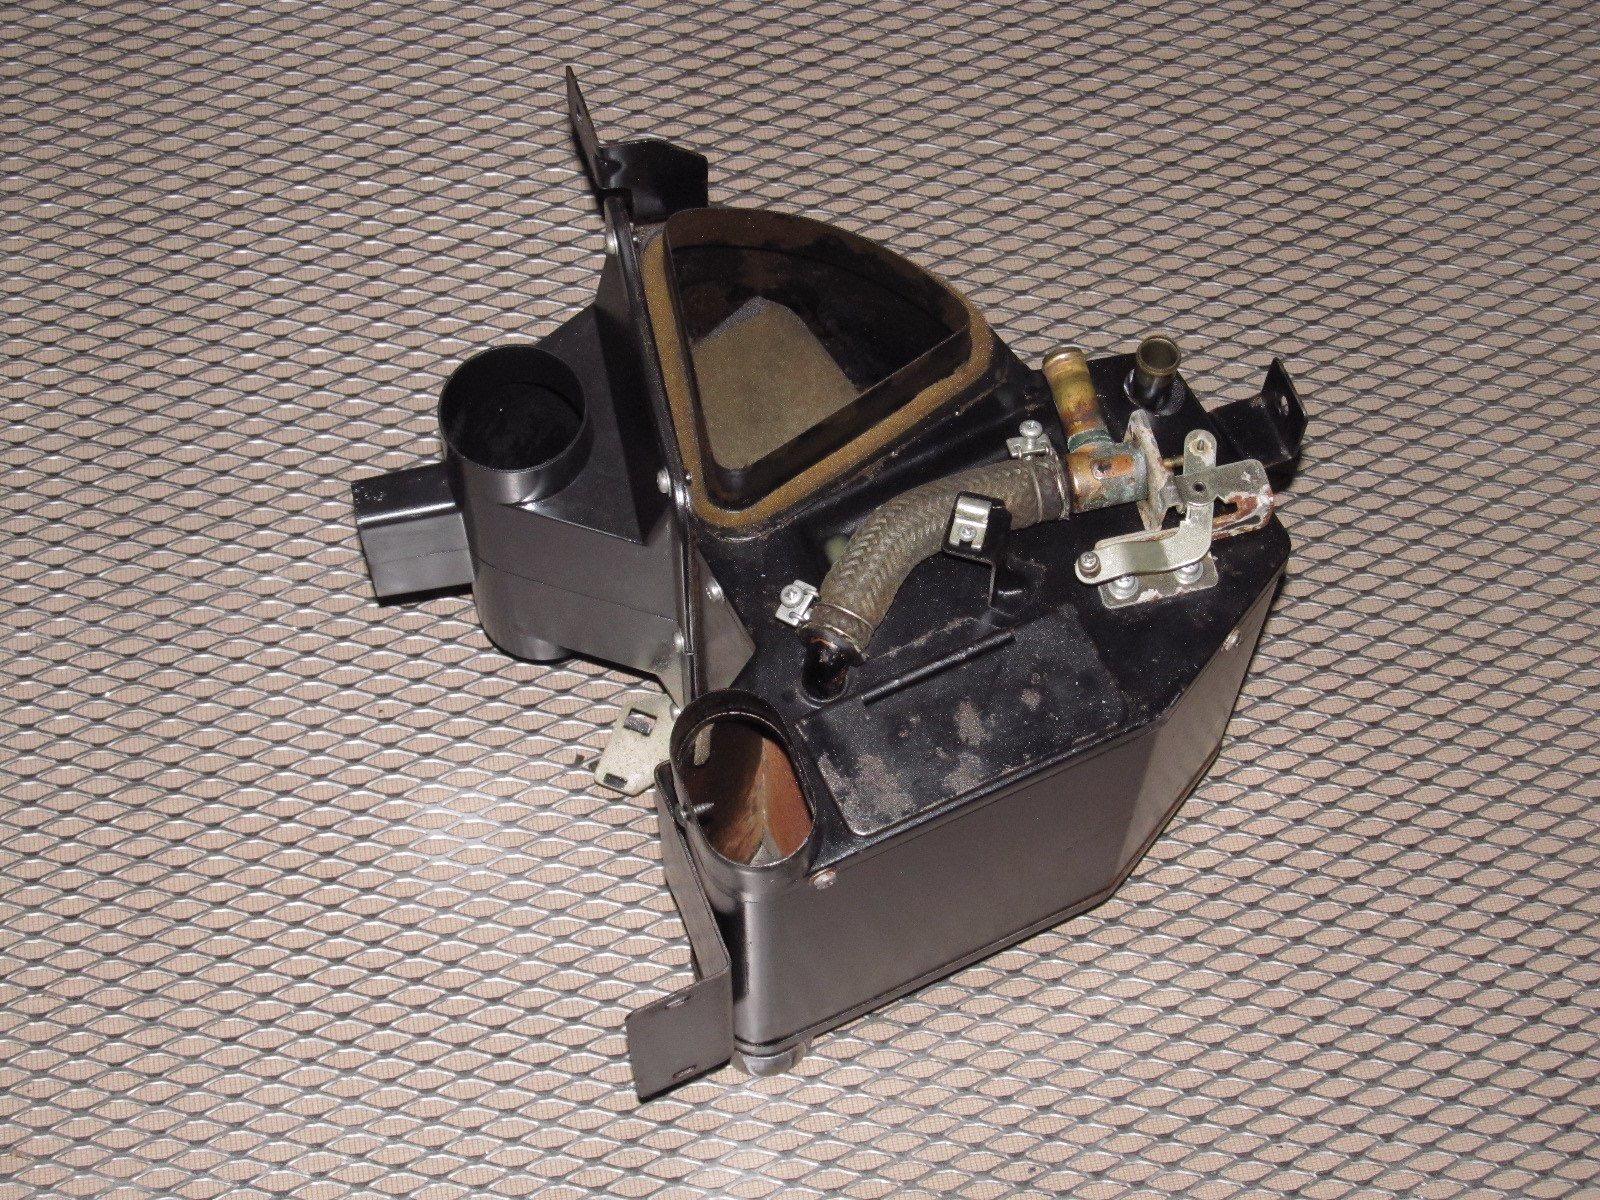
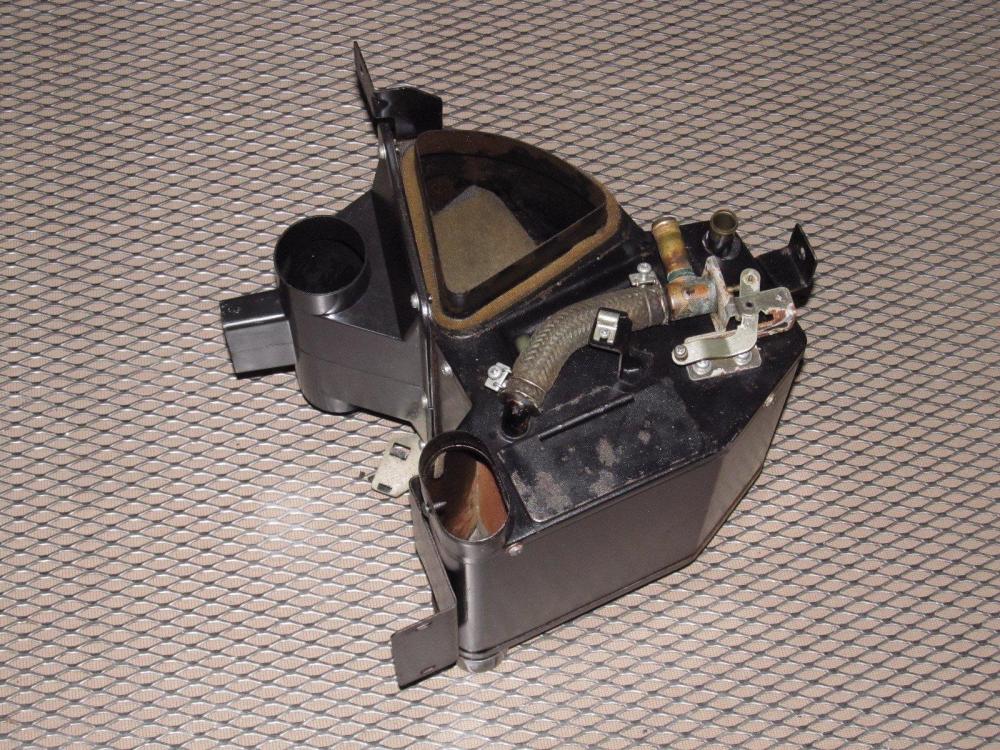
Its part of the front of the 240z heater box that sits behind the center dash vent that directs vent air forward and to the two eye ball vents on the ends of the dash. Doesn’t exist on a 74-78 260/280
-
https://www.thezstore.com/page/TZS/PROD/30-8062