Leaderboard
-
conedodger
Community Member109Points13875Posts -
Patcon
Supporting Member22Points11538Posts -
Zed Head
Community Member18Points19985Posts -
jfa.series1
Supporting Member15Points2816Posts



Popular Content
Showing content with the highest reputation since 09/09/26 in Posts
-
I have been very pleased with Hagerty! Good coverage and cheap. I have 3 cars with them and should have a couple more in a few years. If I could have nothing but classic cars, I would5 points
-
5 pointsHey Everyone! I finally got my hands on another Z after foolishly letting my 2 previous ones go. Just had my 1977 280z delivered from California this weekend and it did not disappoint! Was a bit nervous as I bought it sight-unseen, but was relived that, like the seller stated, it doesn't have any rust! While it by no means is perfect, it's perfect for me. I'm excited to enjoy it for the remainder of the nice weather in the Midwest and look forward to tweaking it and making it my own. I'm certain you'll see a bunch of questions pop up from me over the next months and years so I appreciate all the help ahead of time!5 points
-
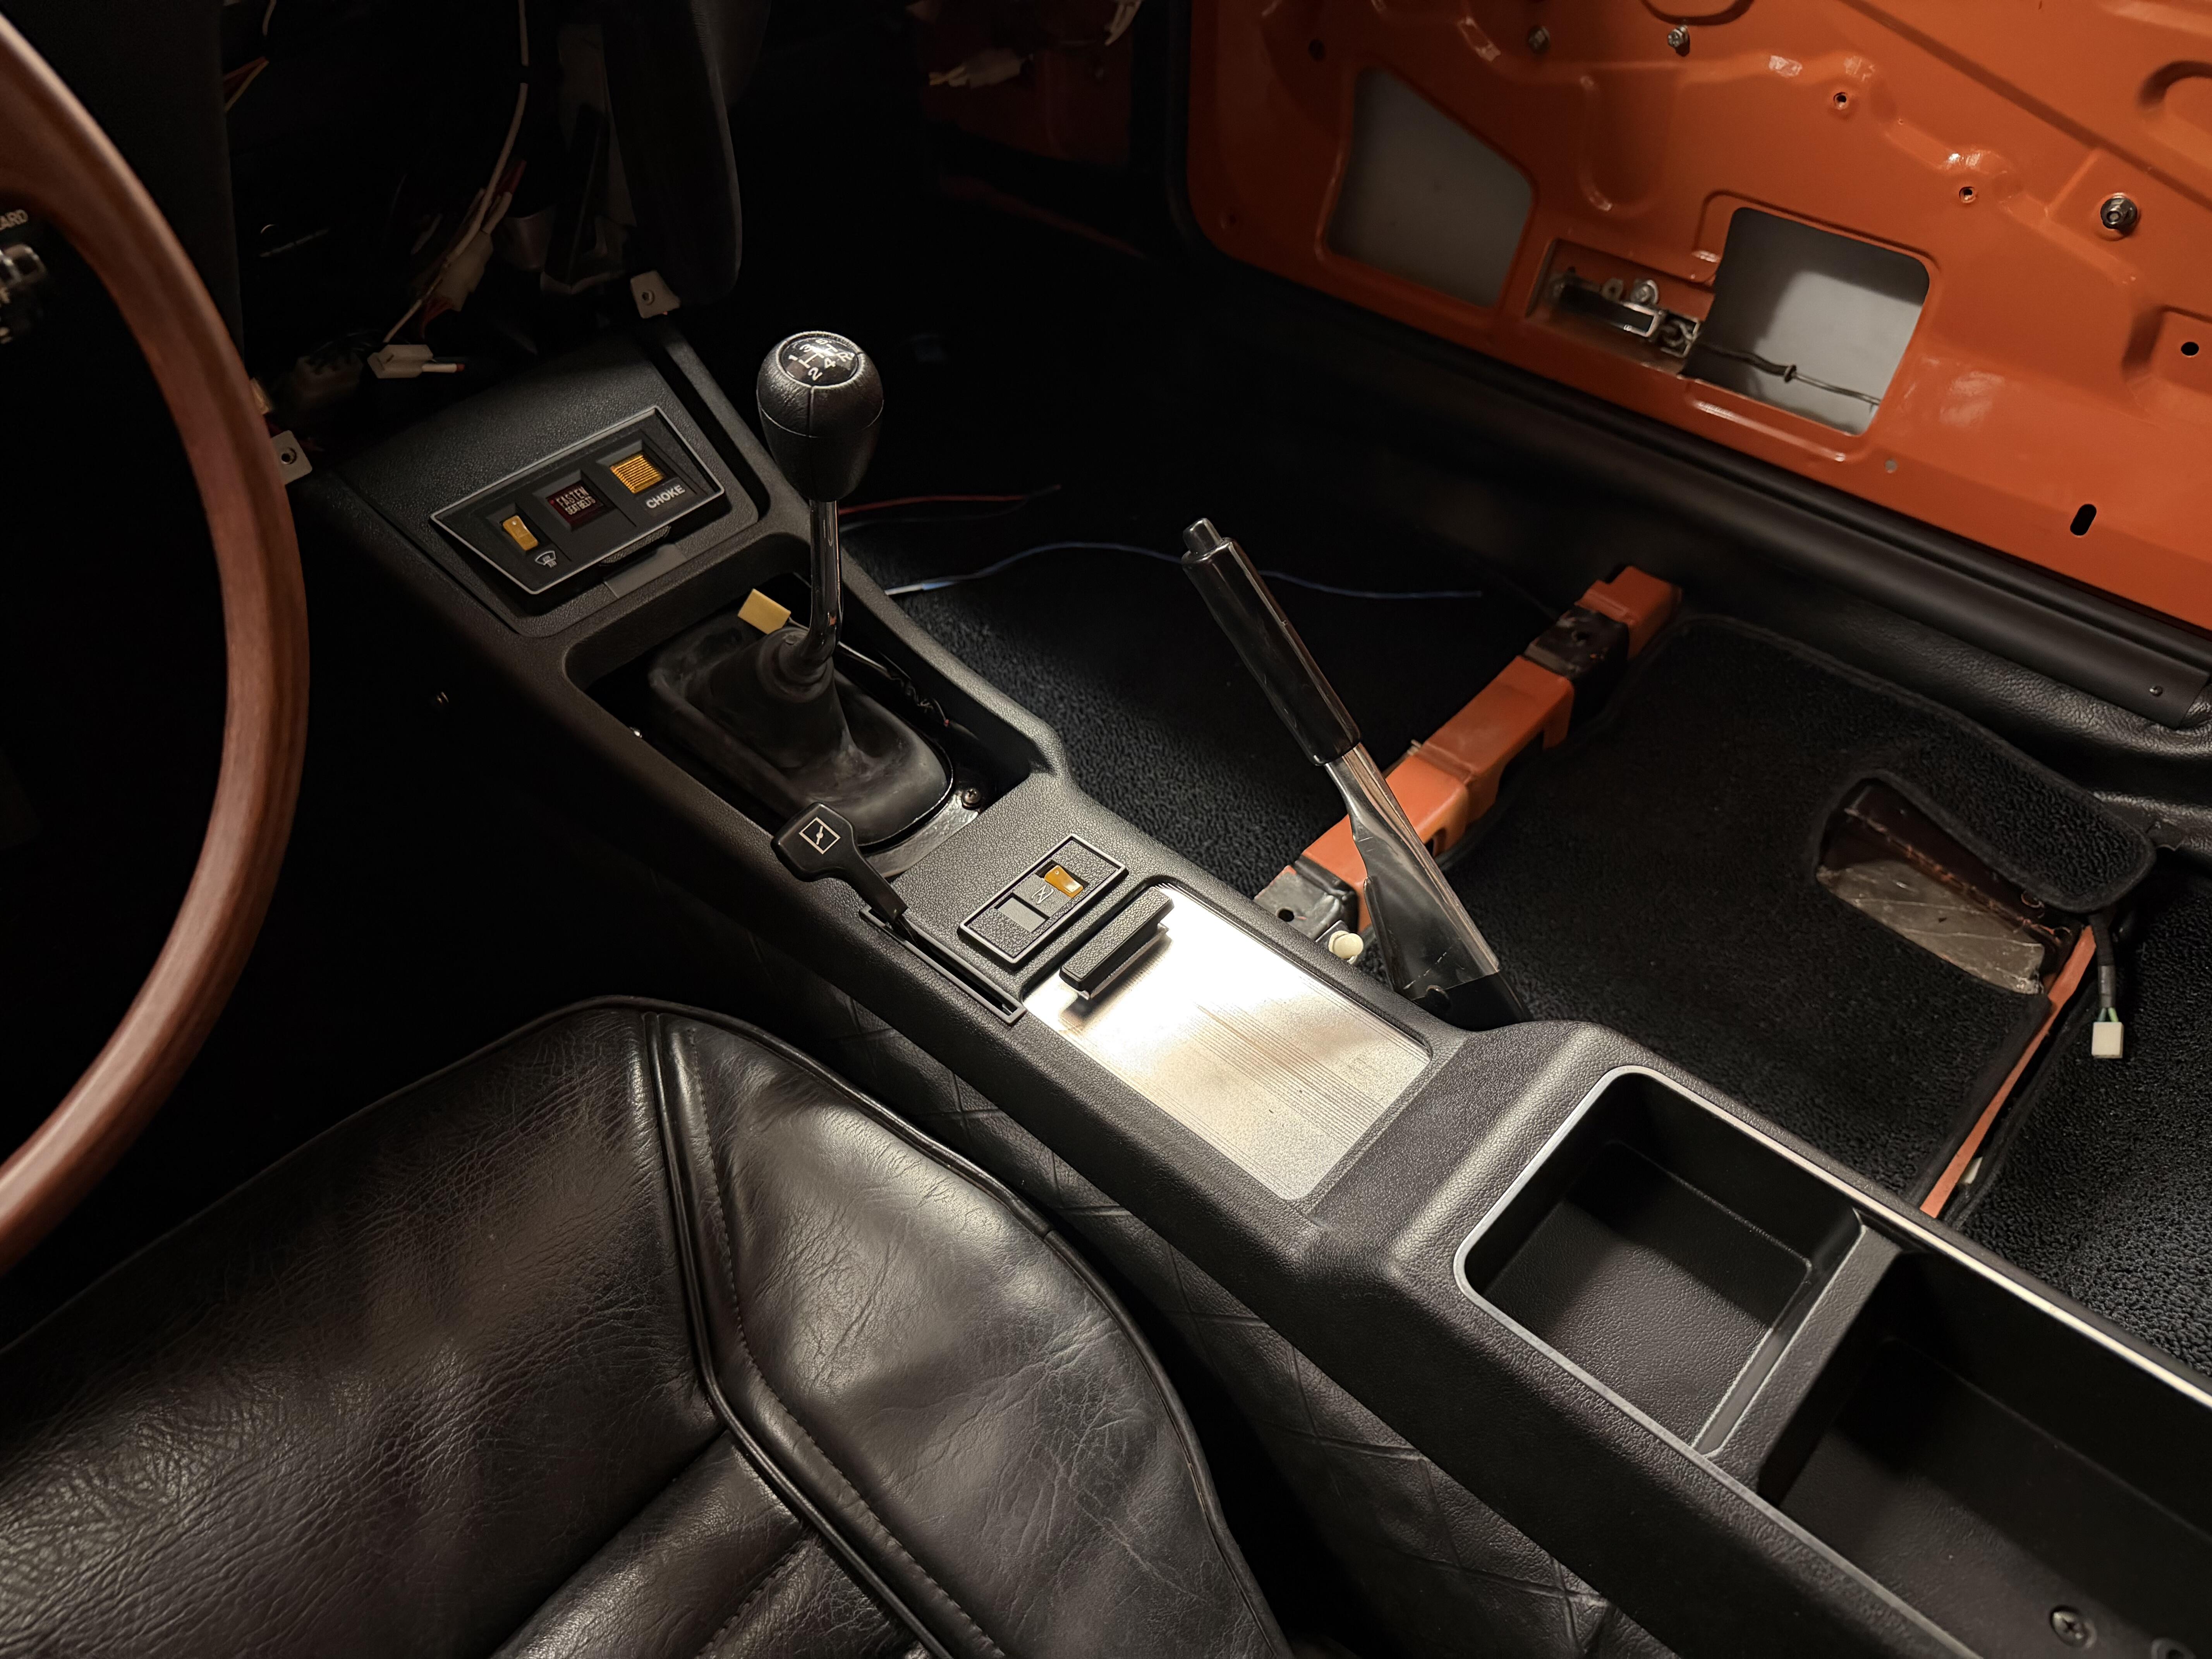
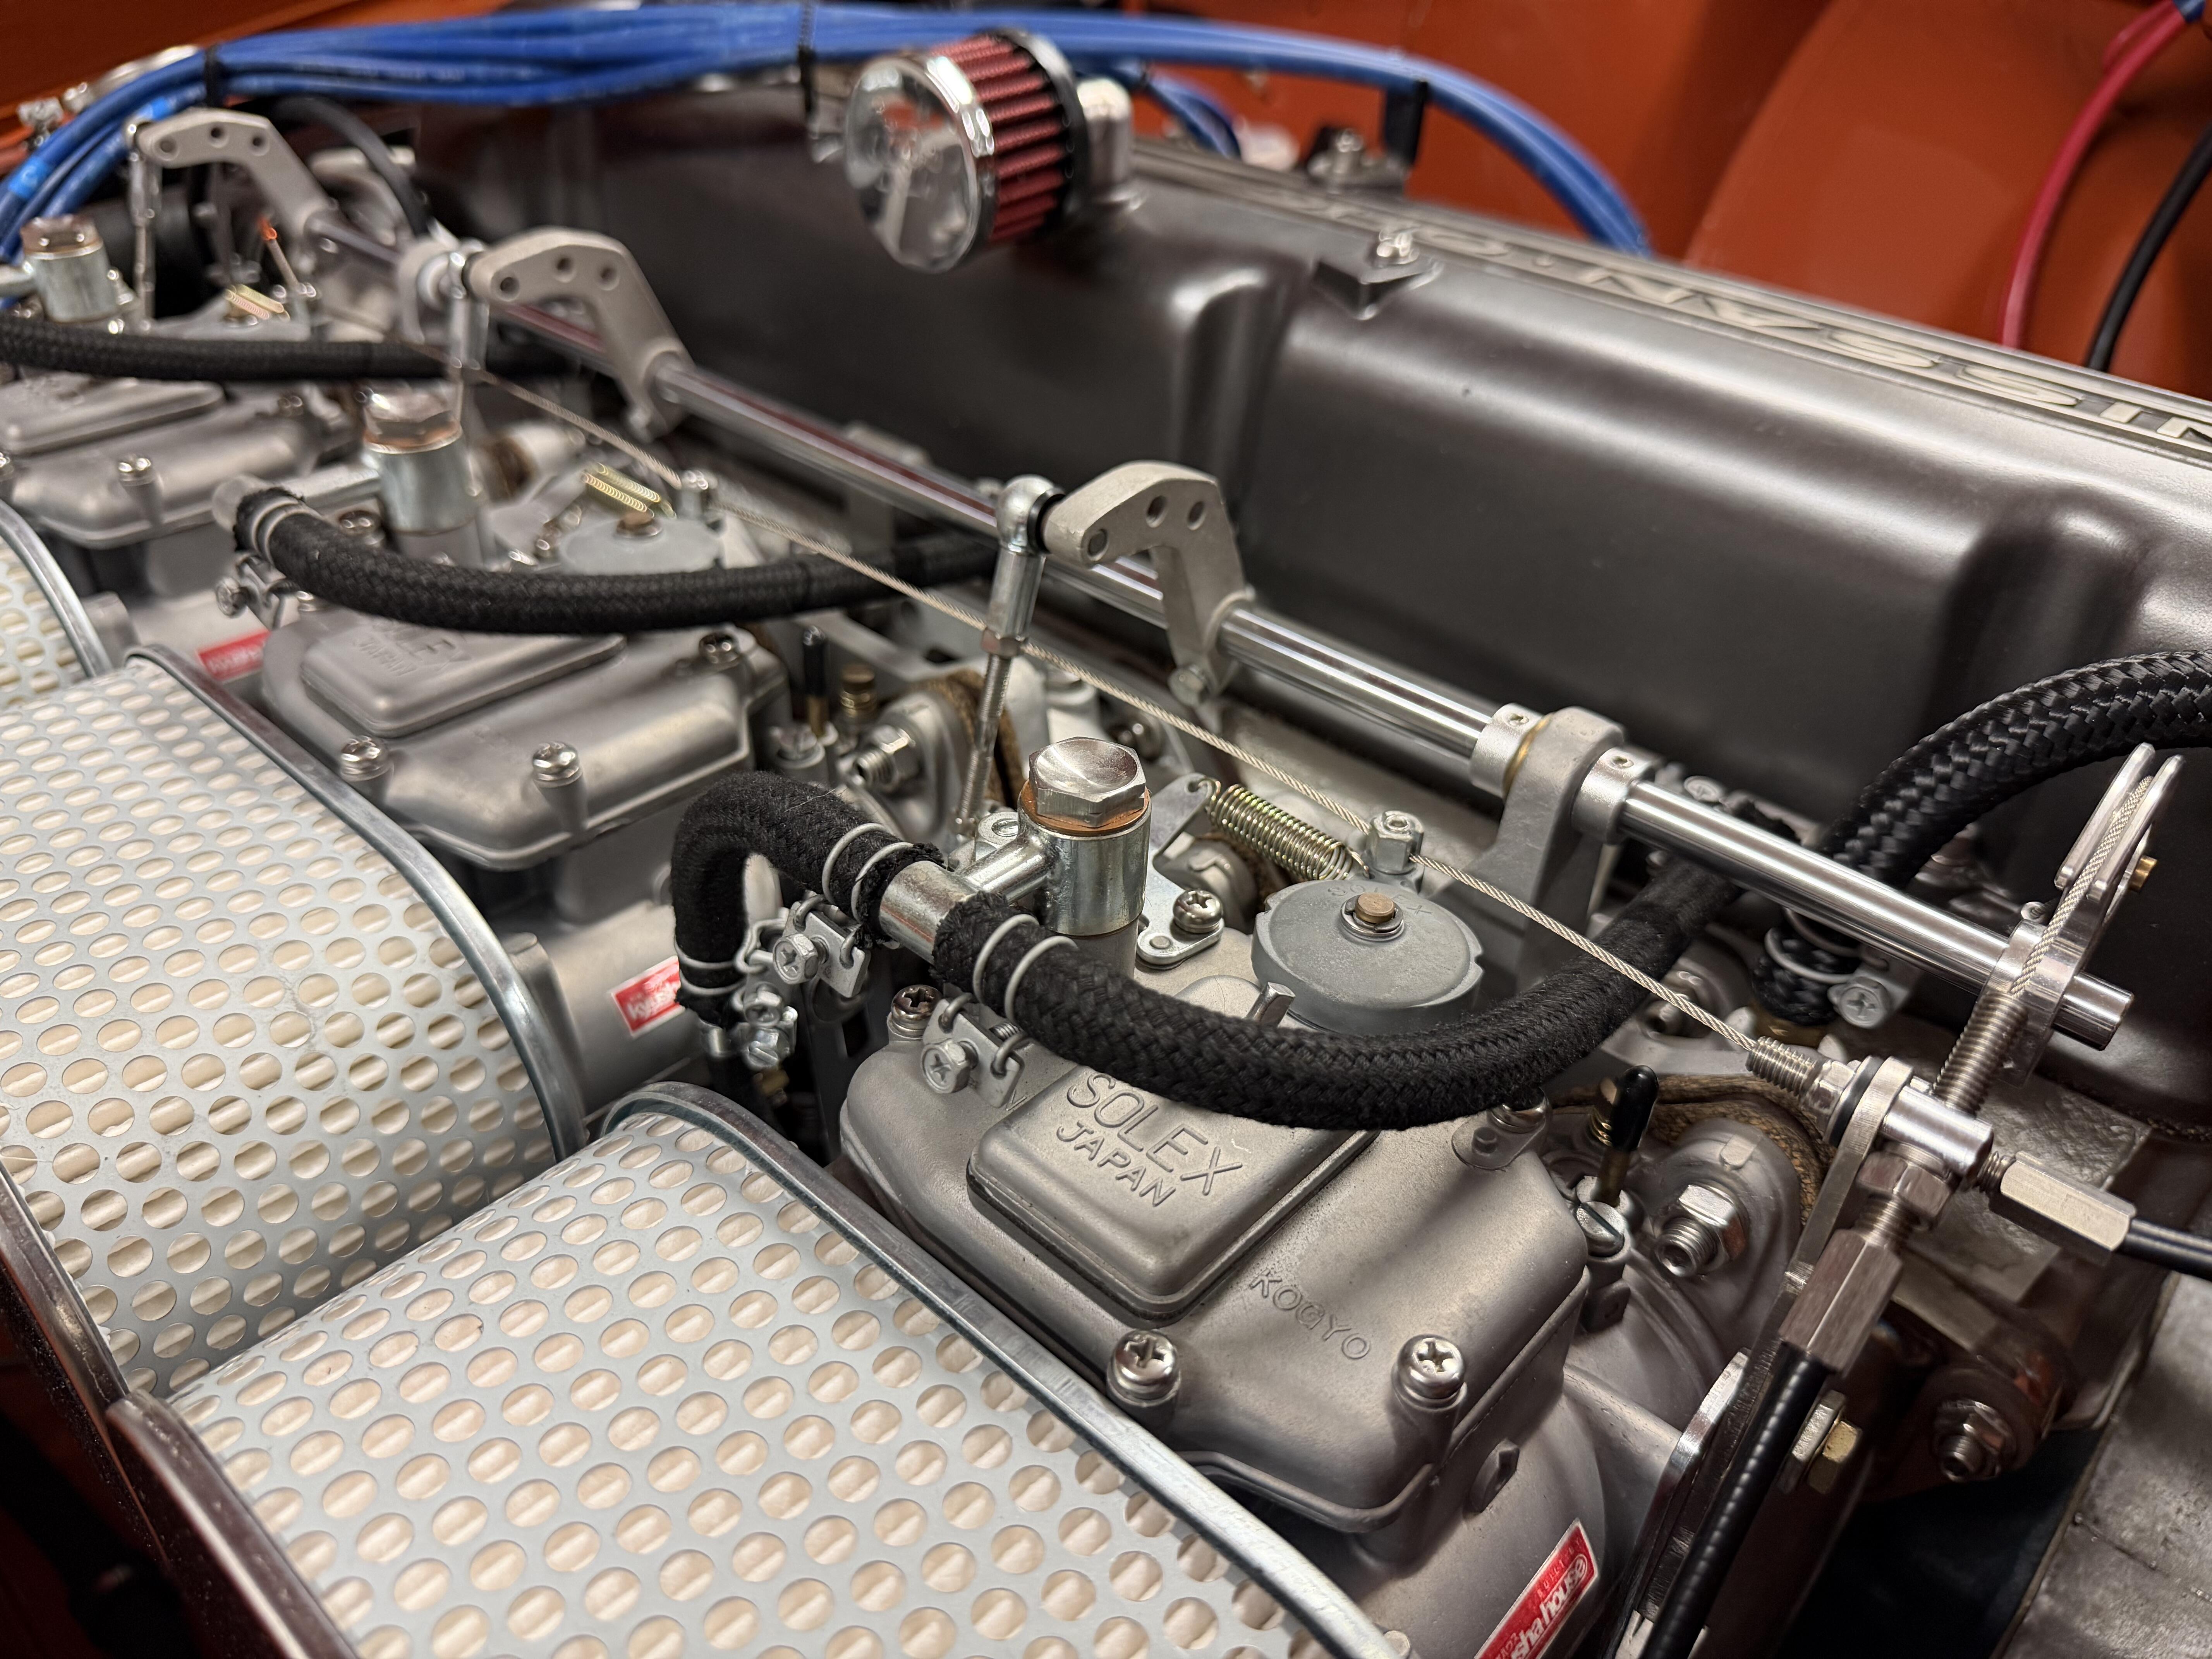
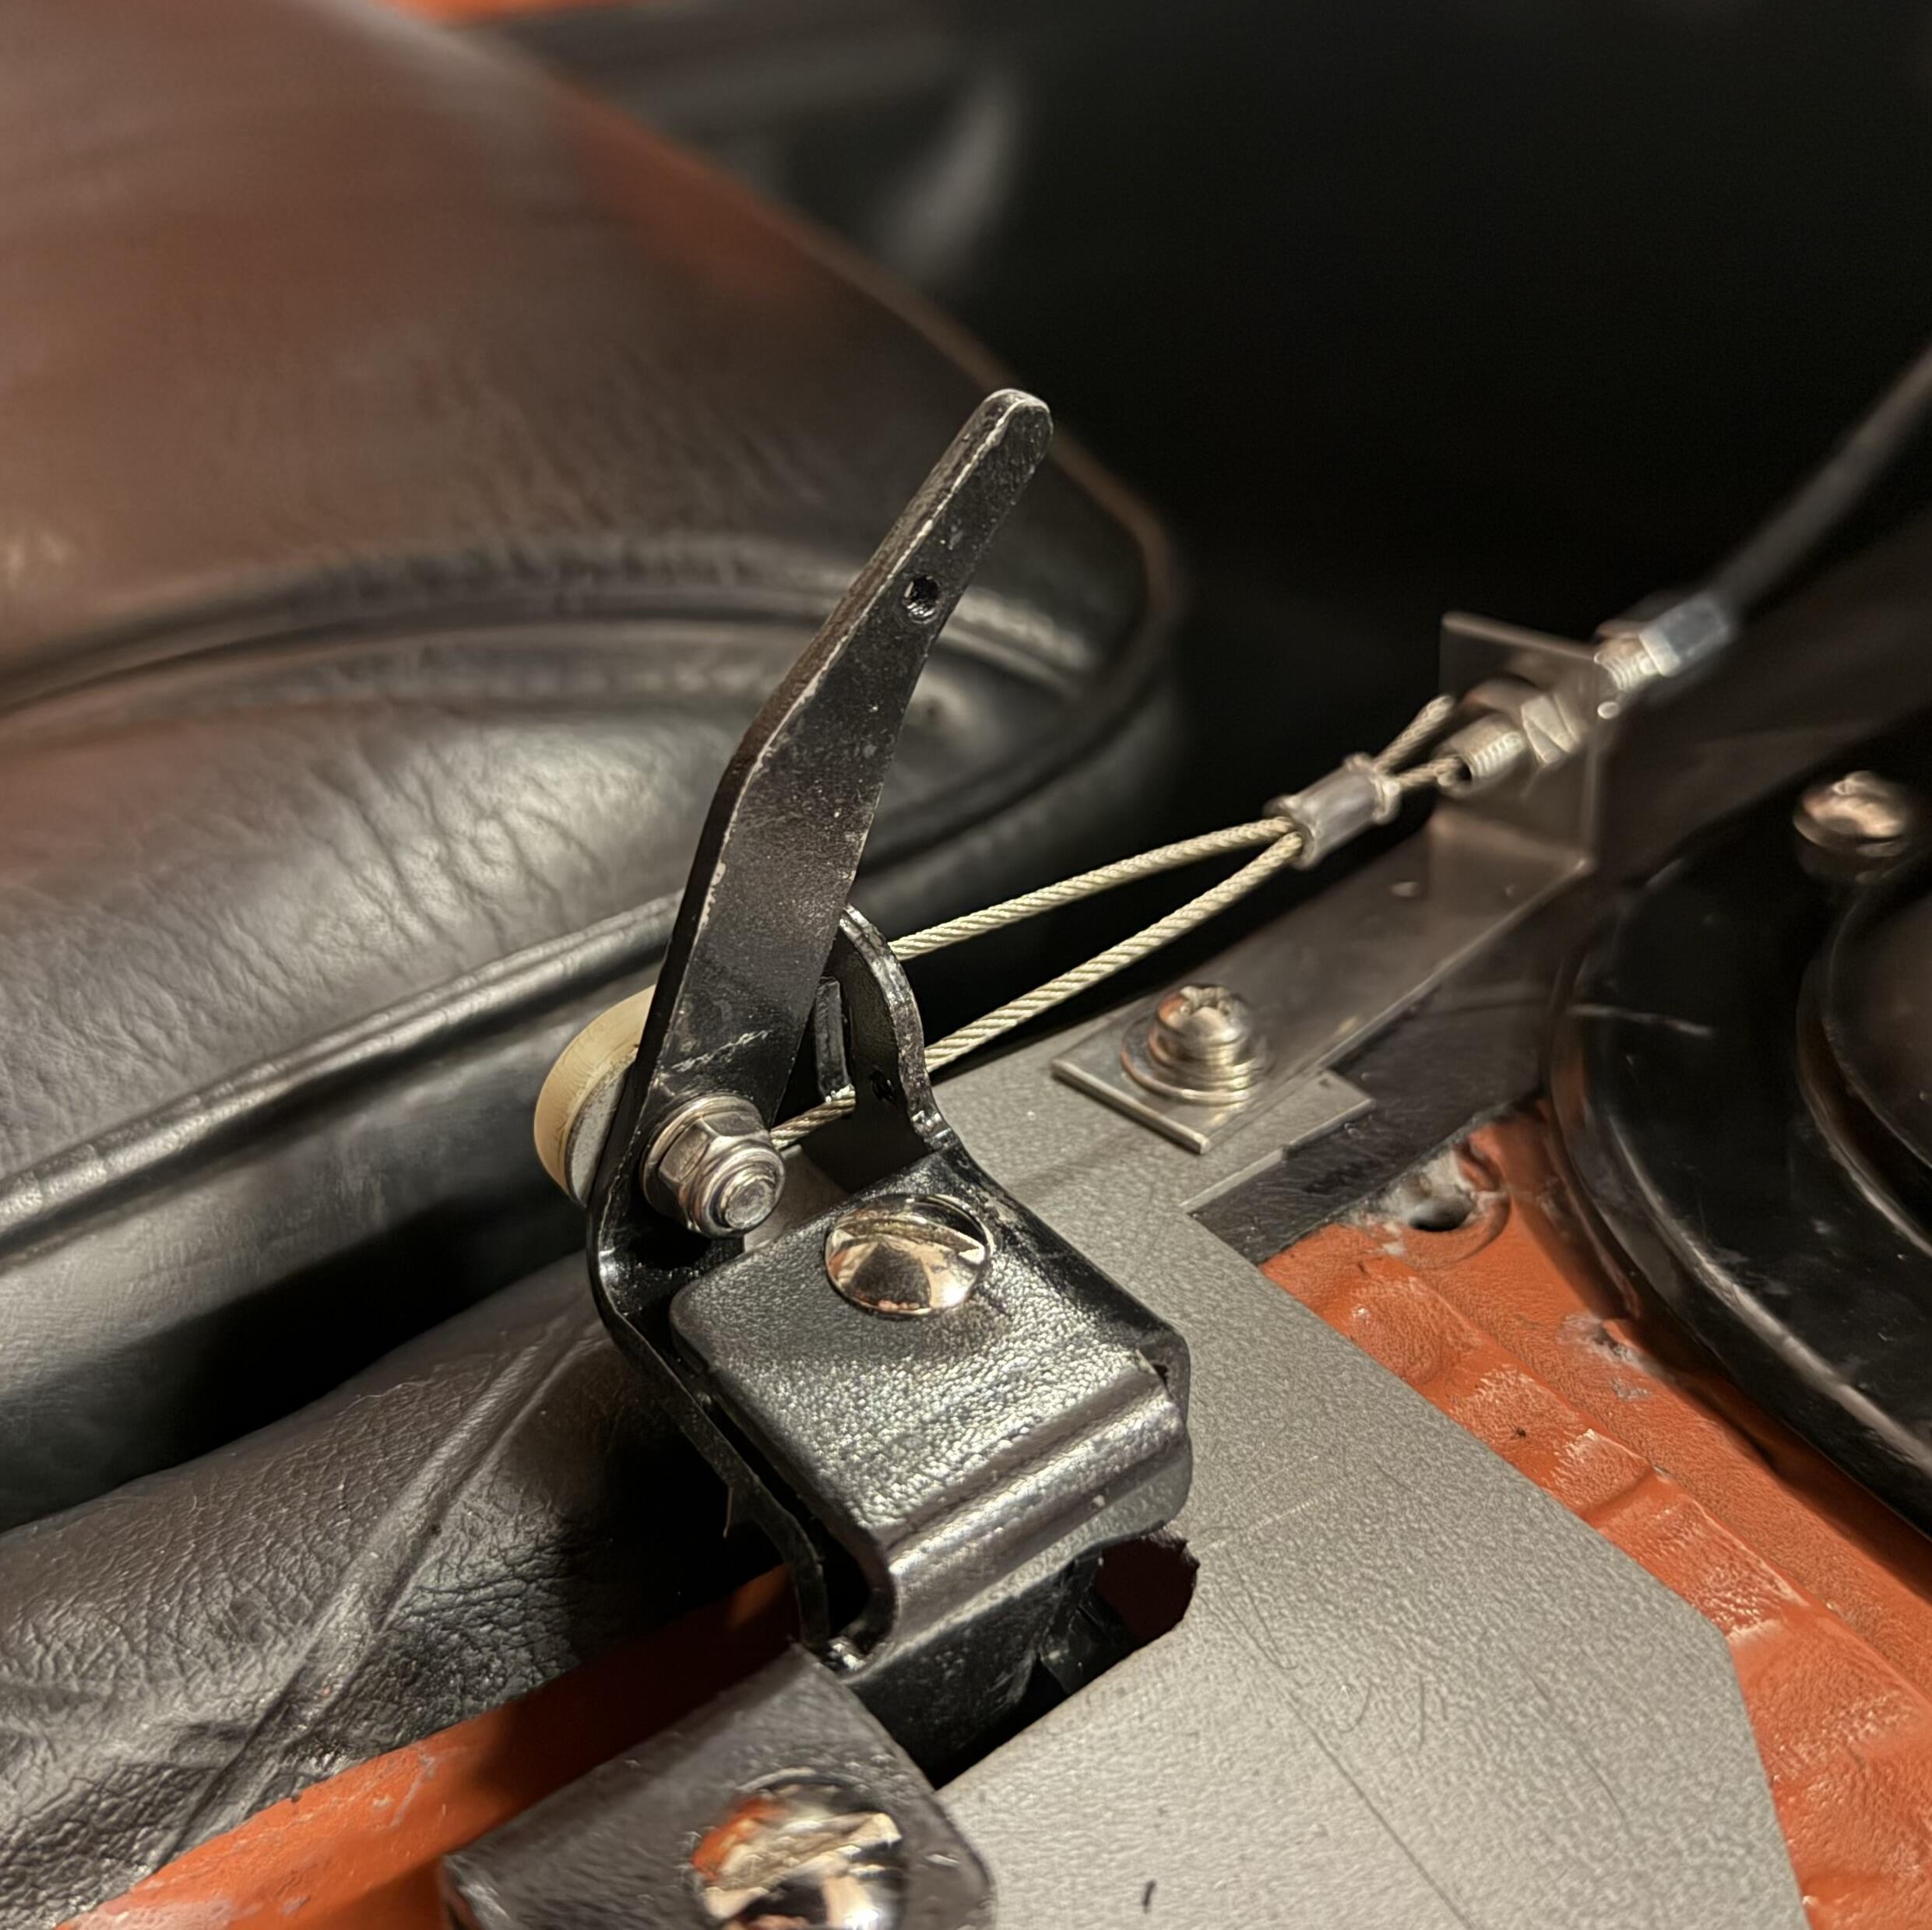
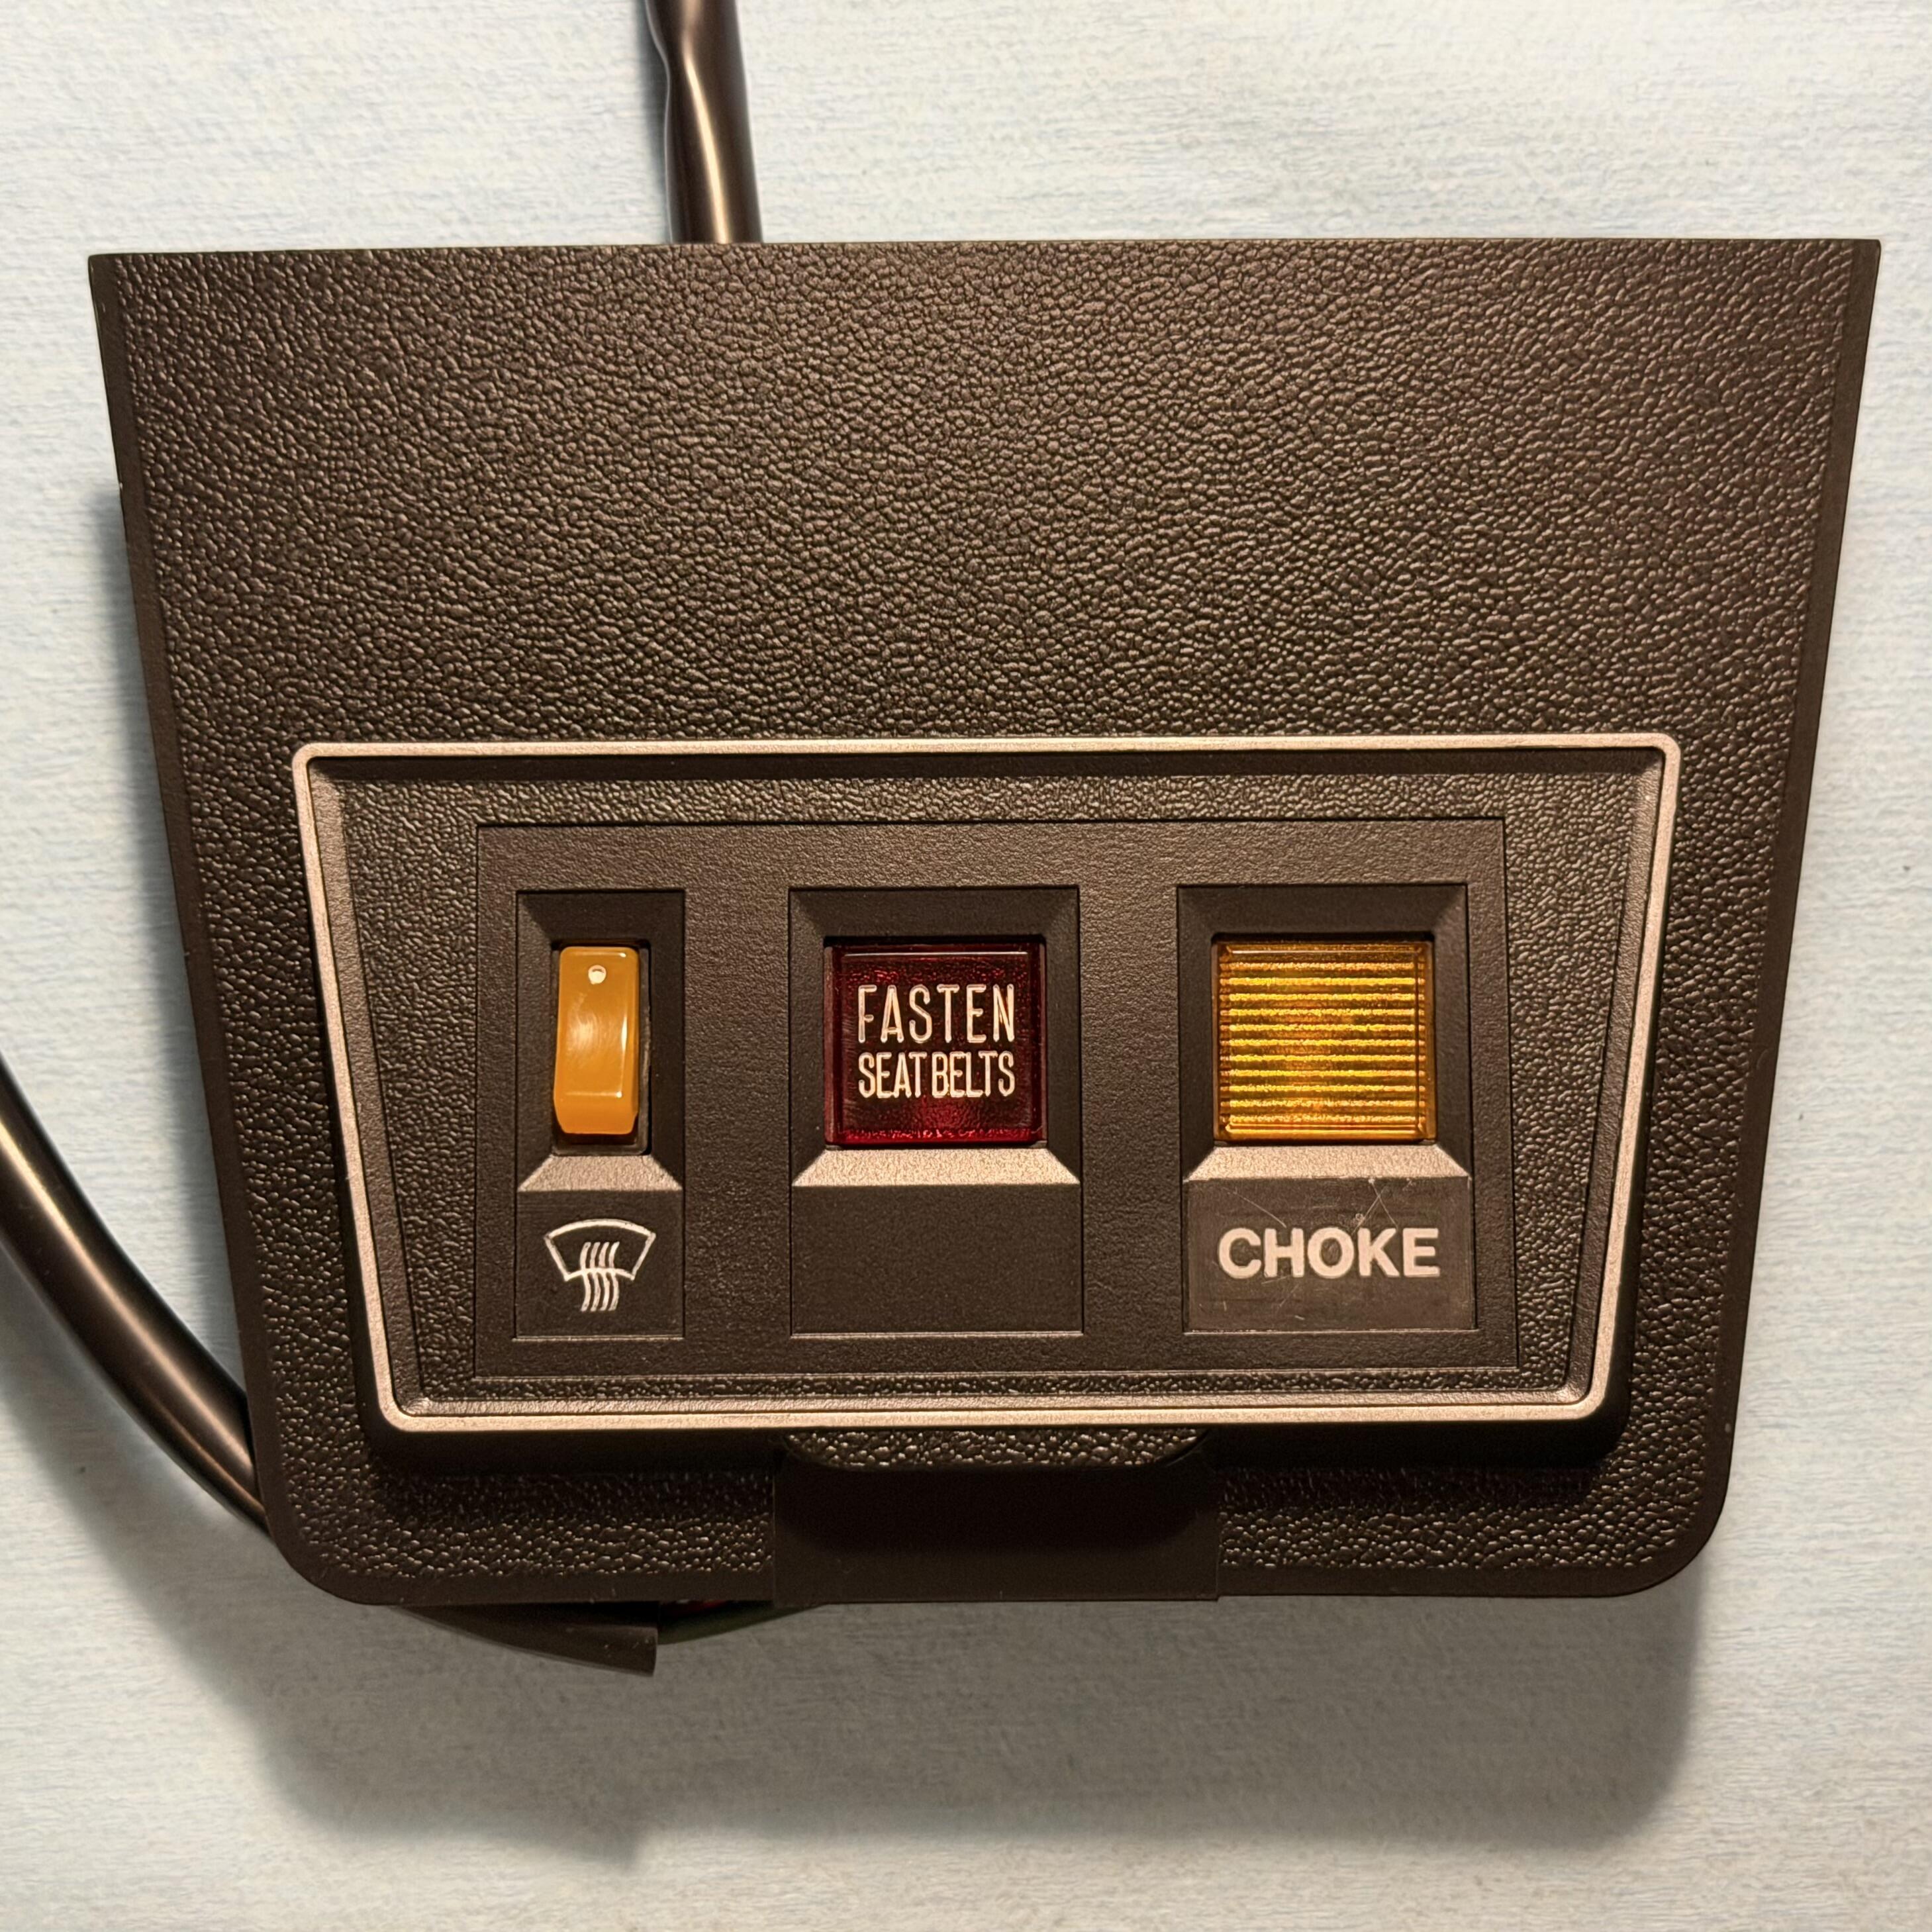
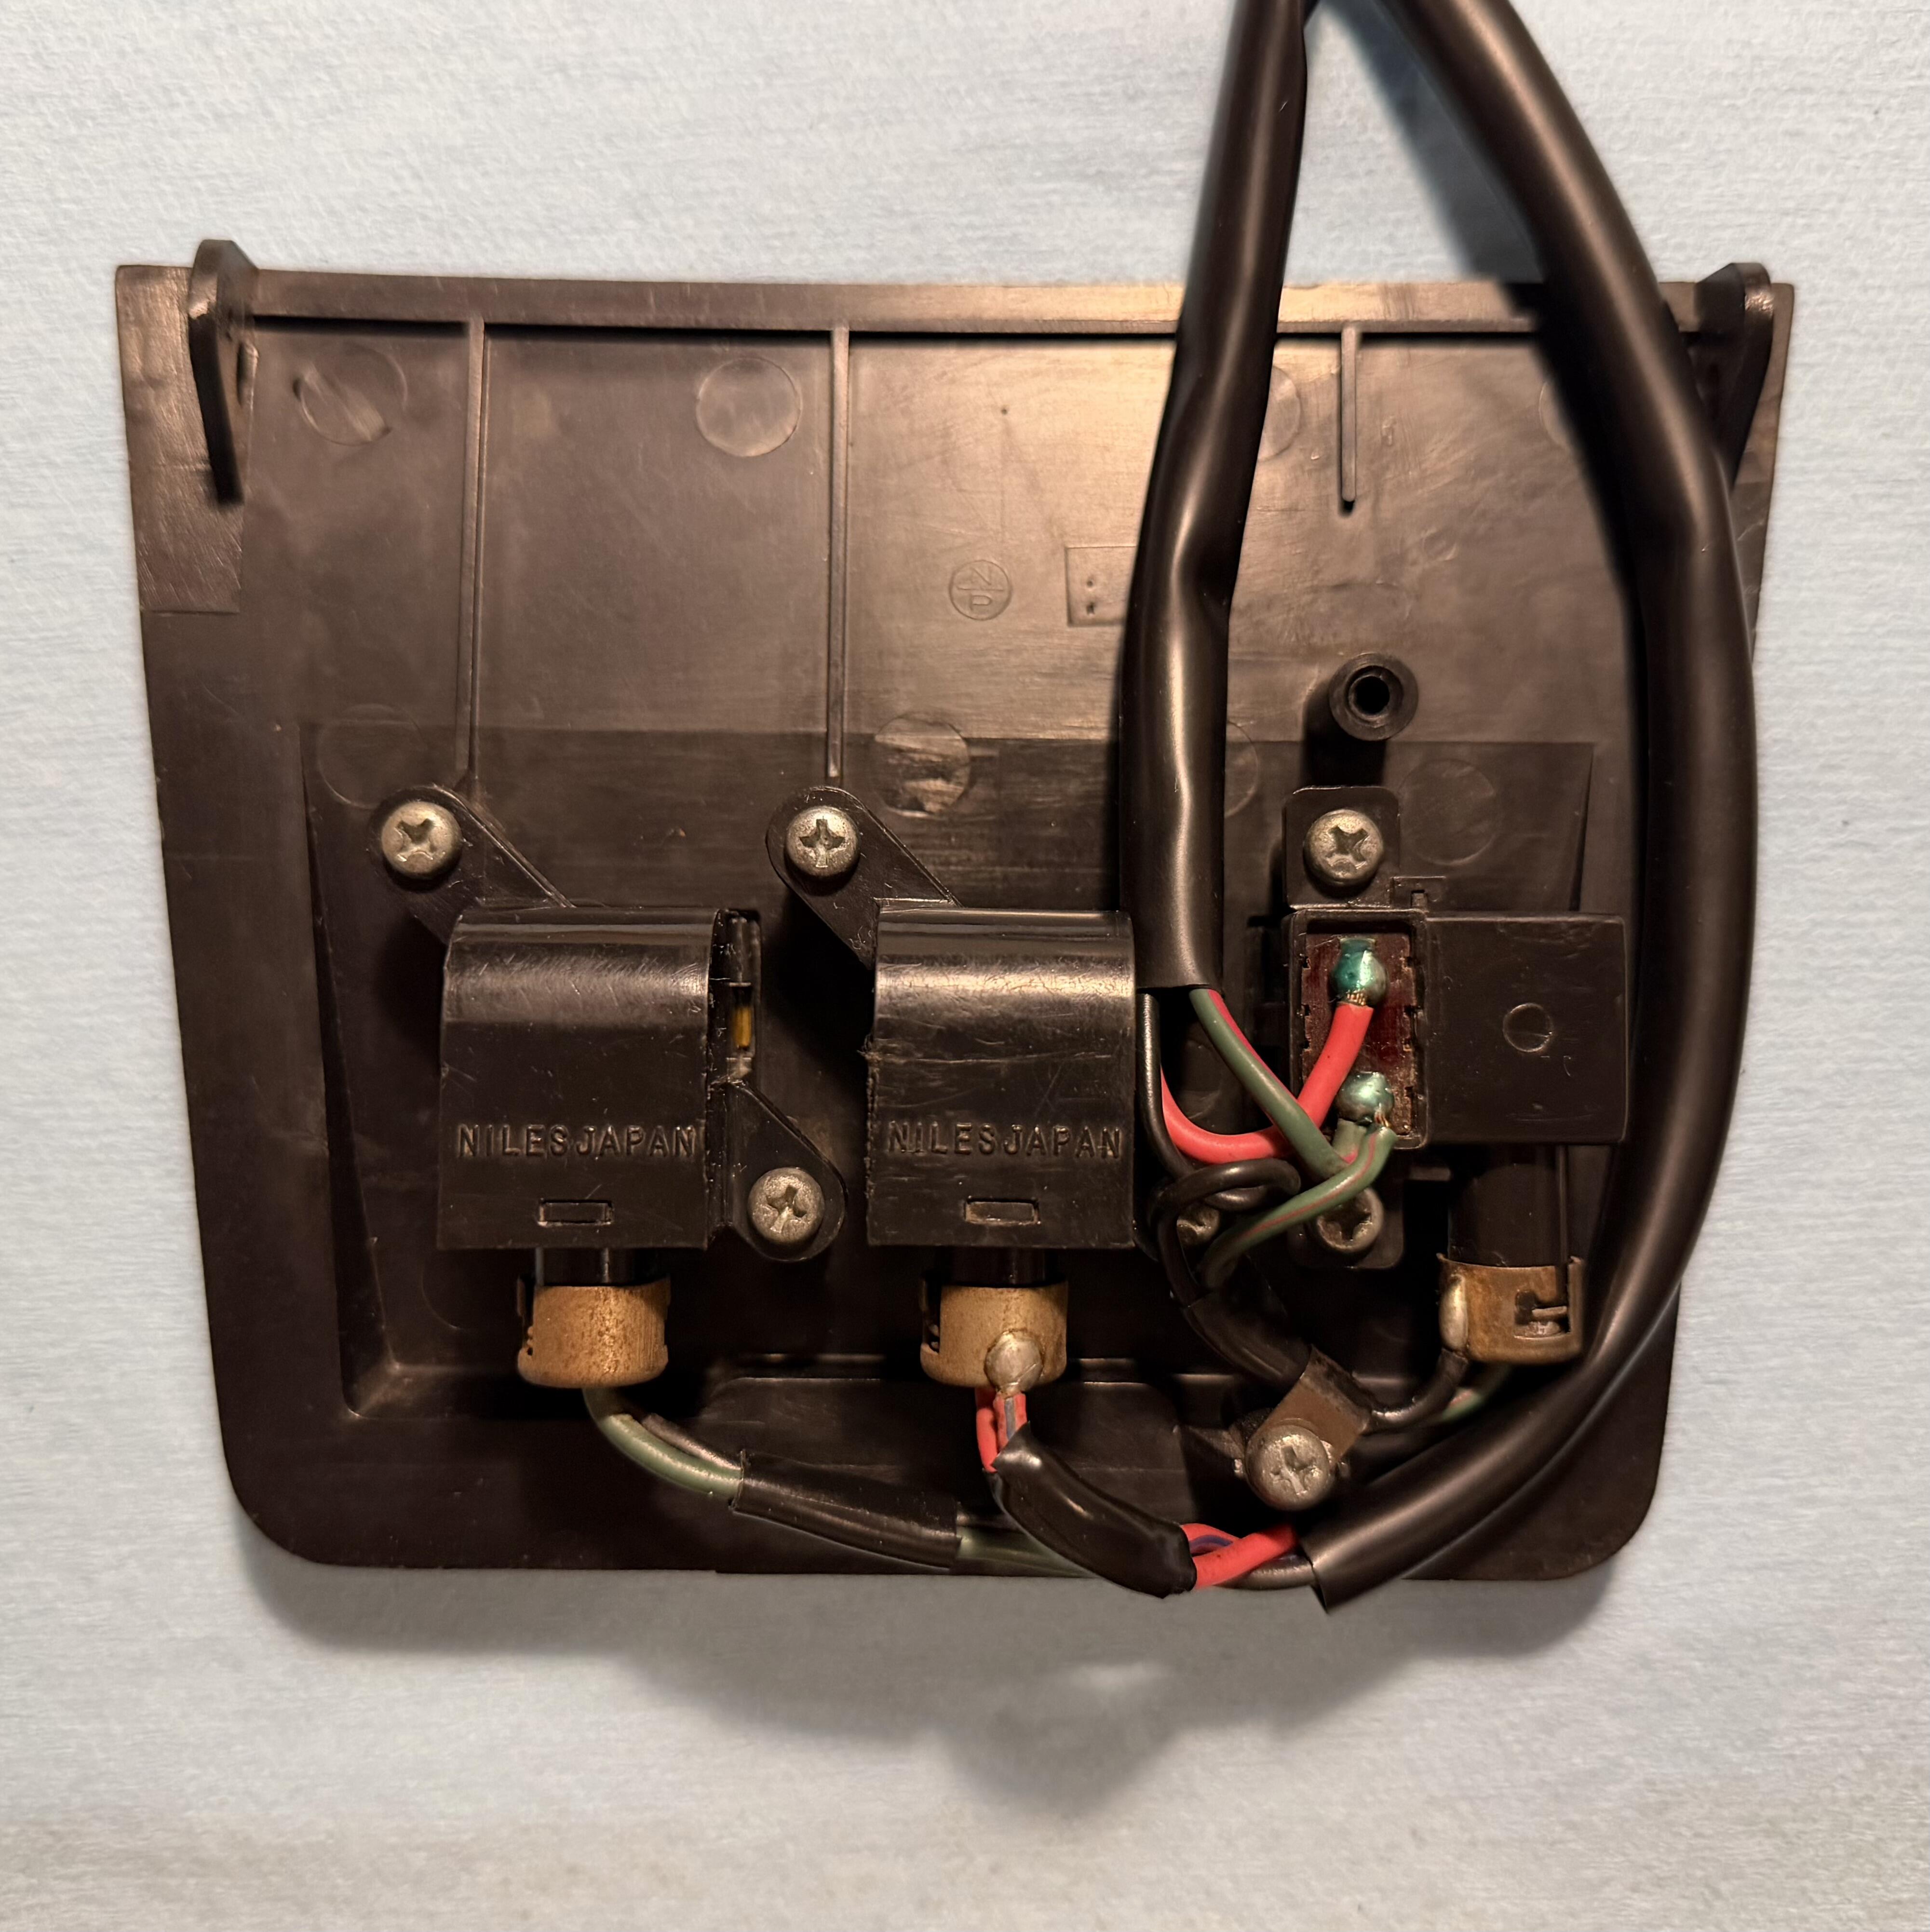
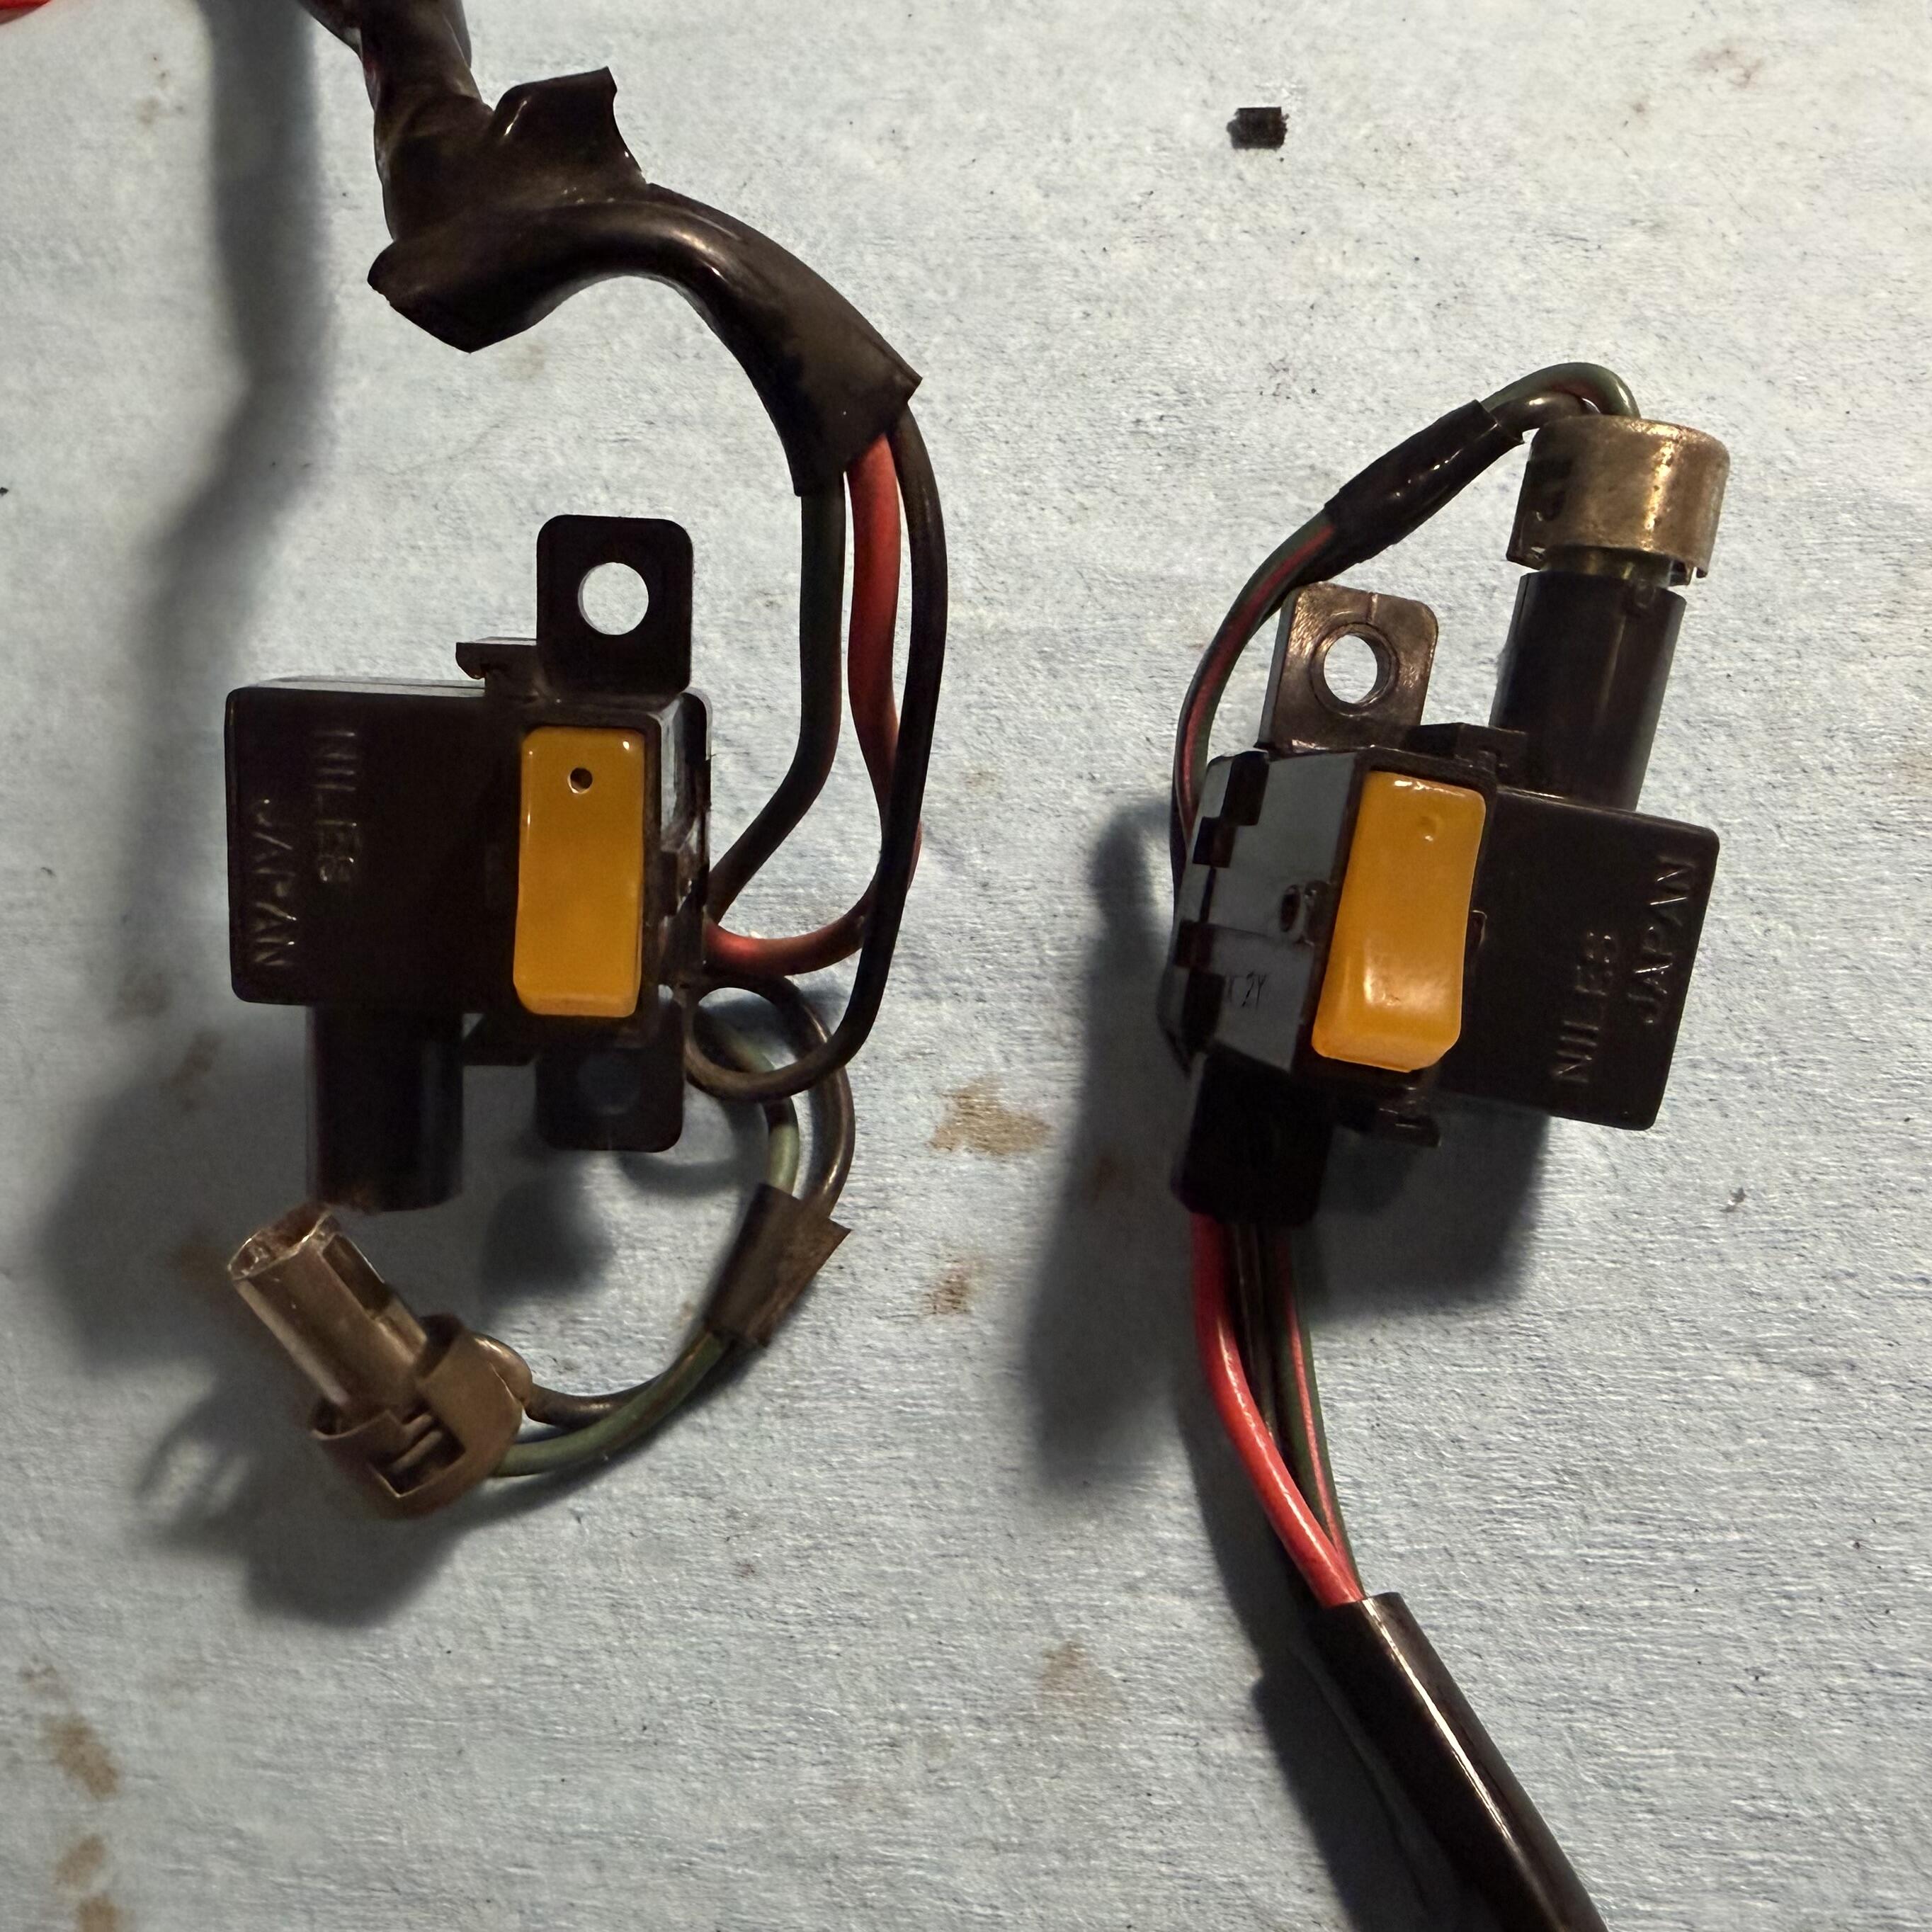
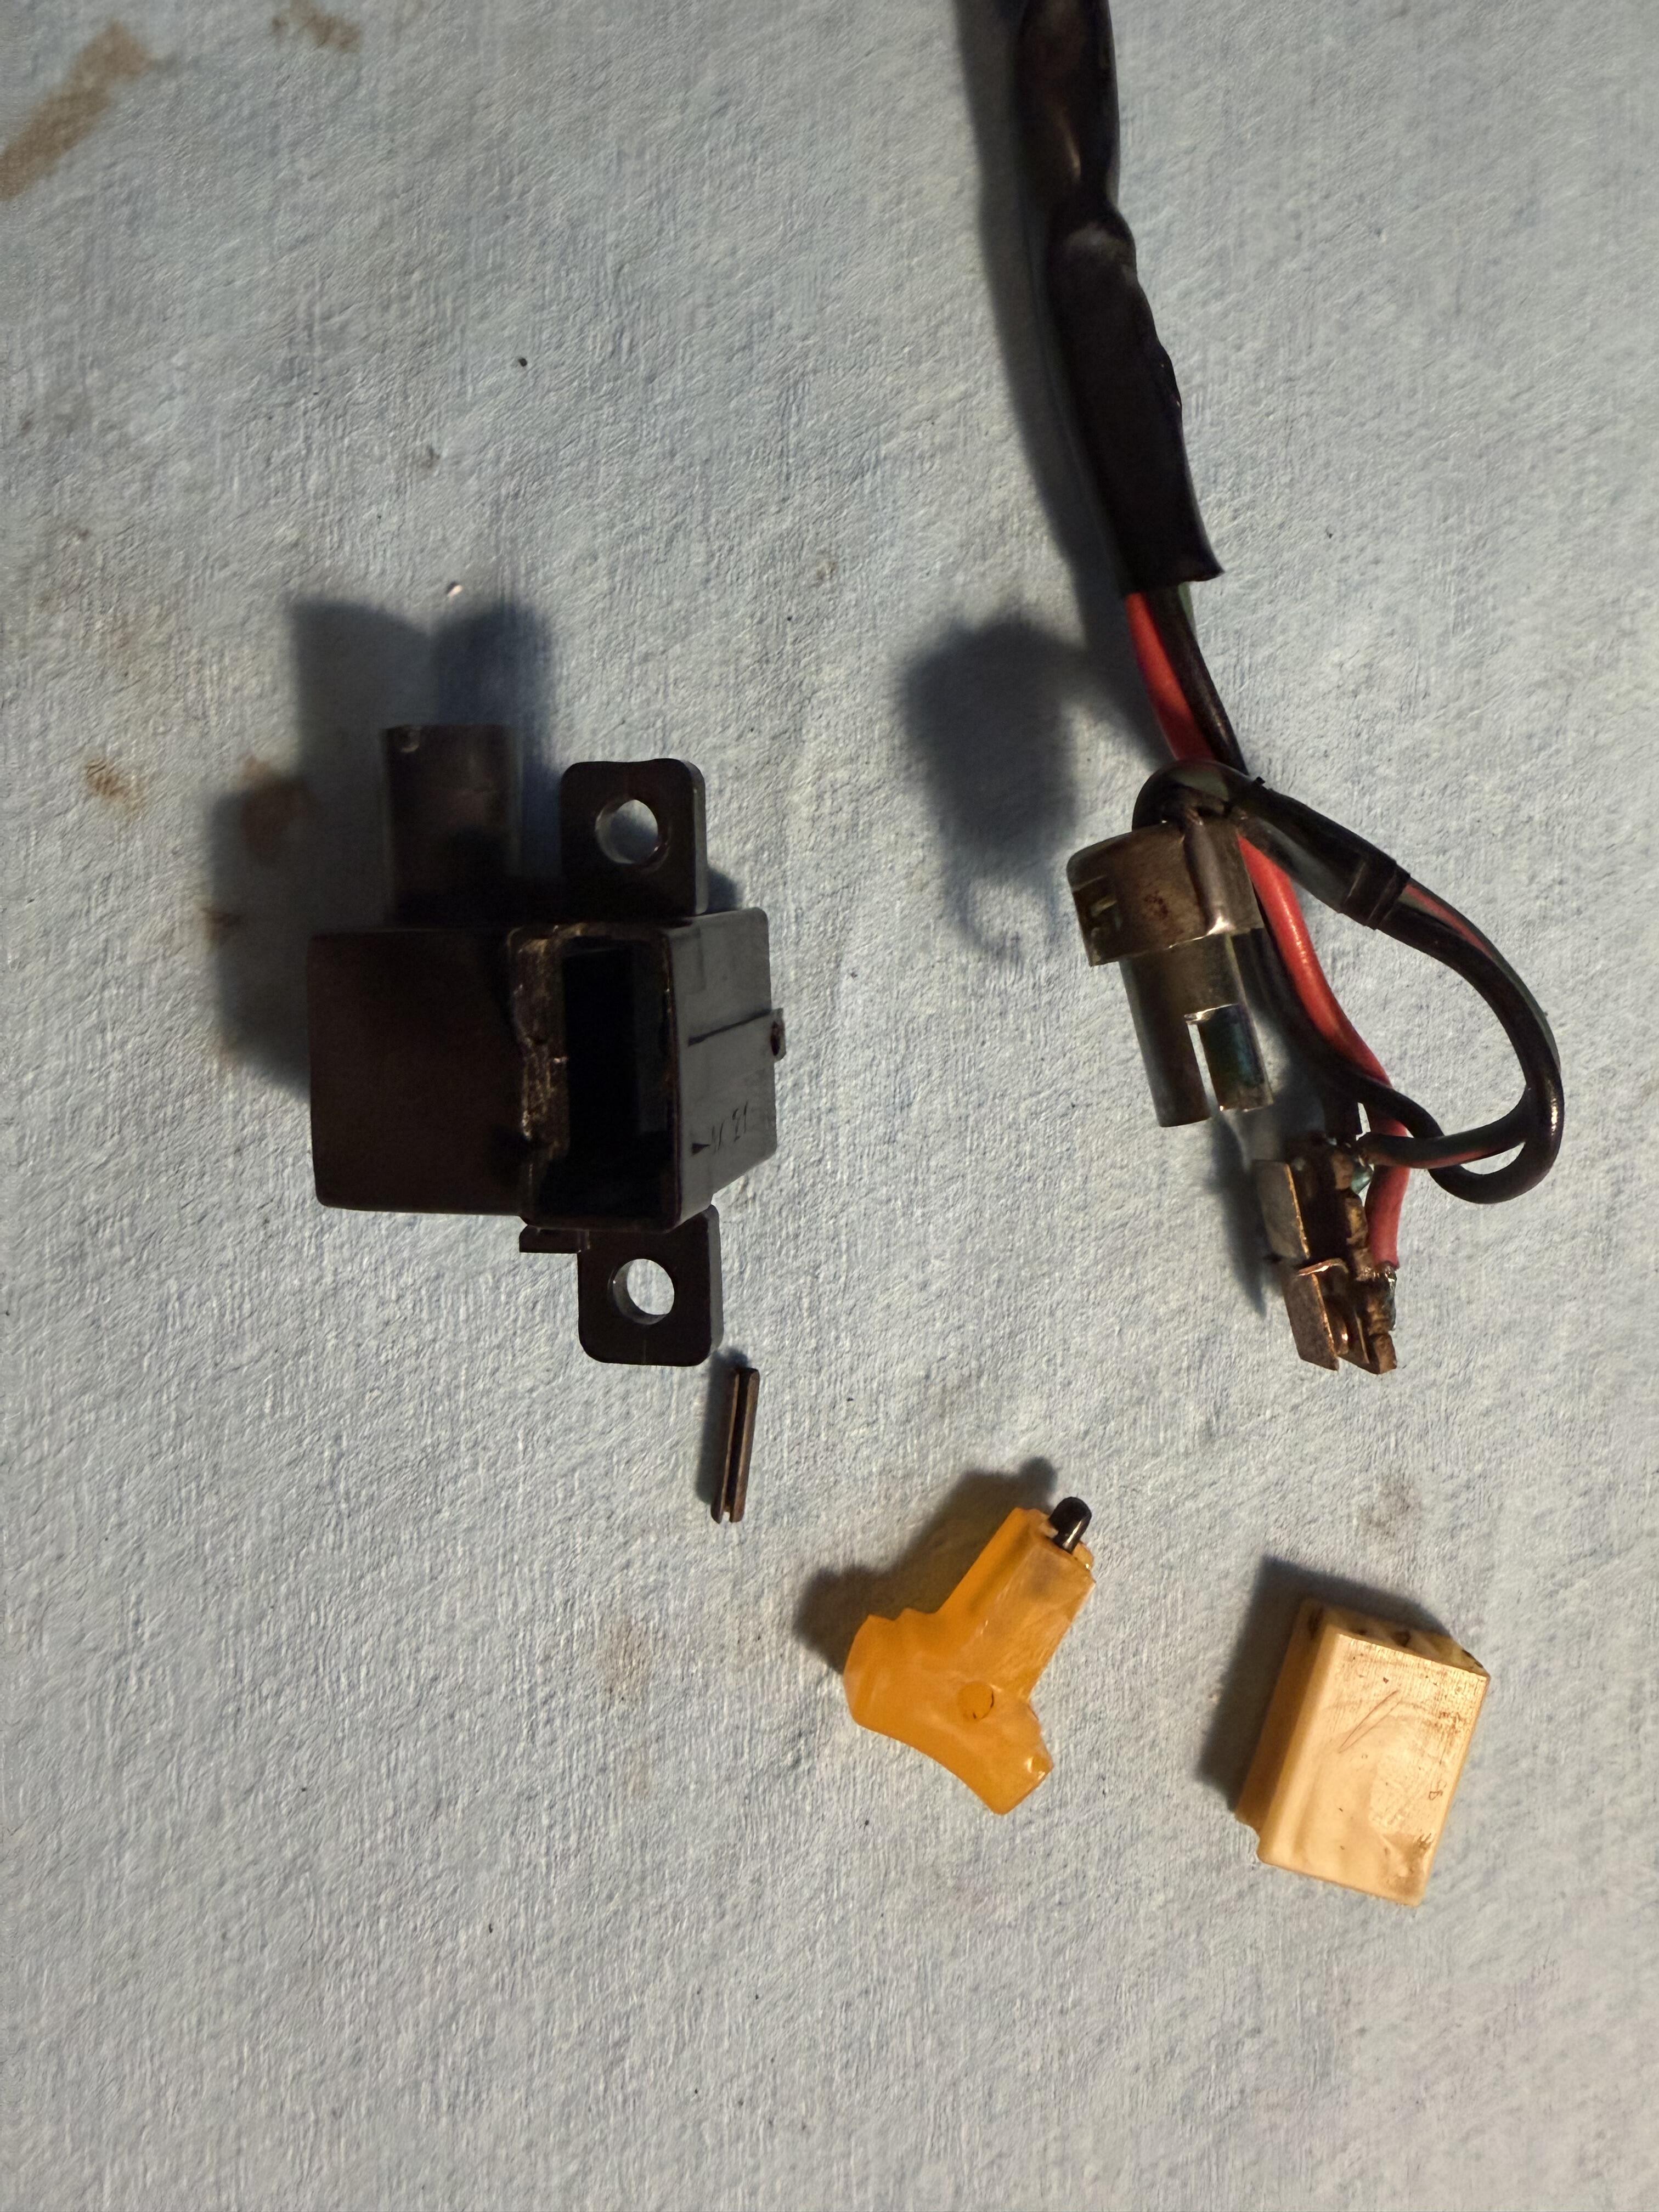
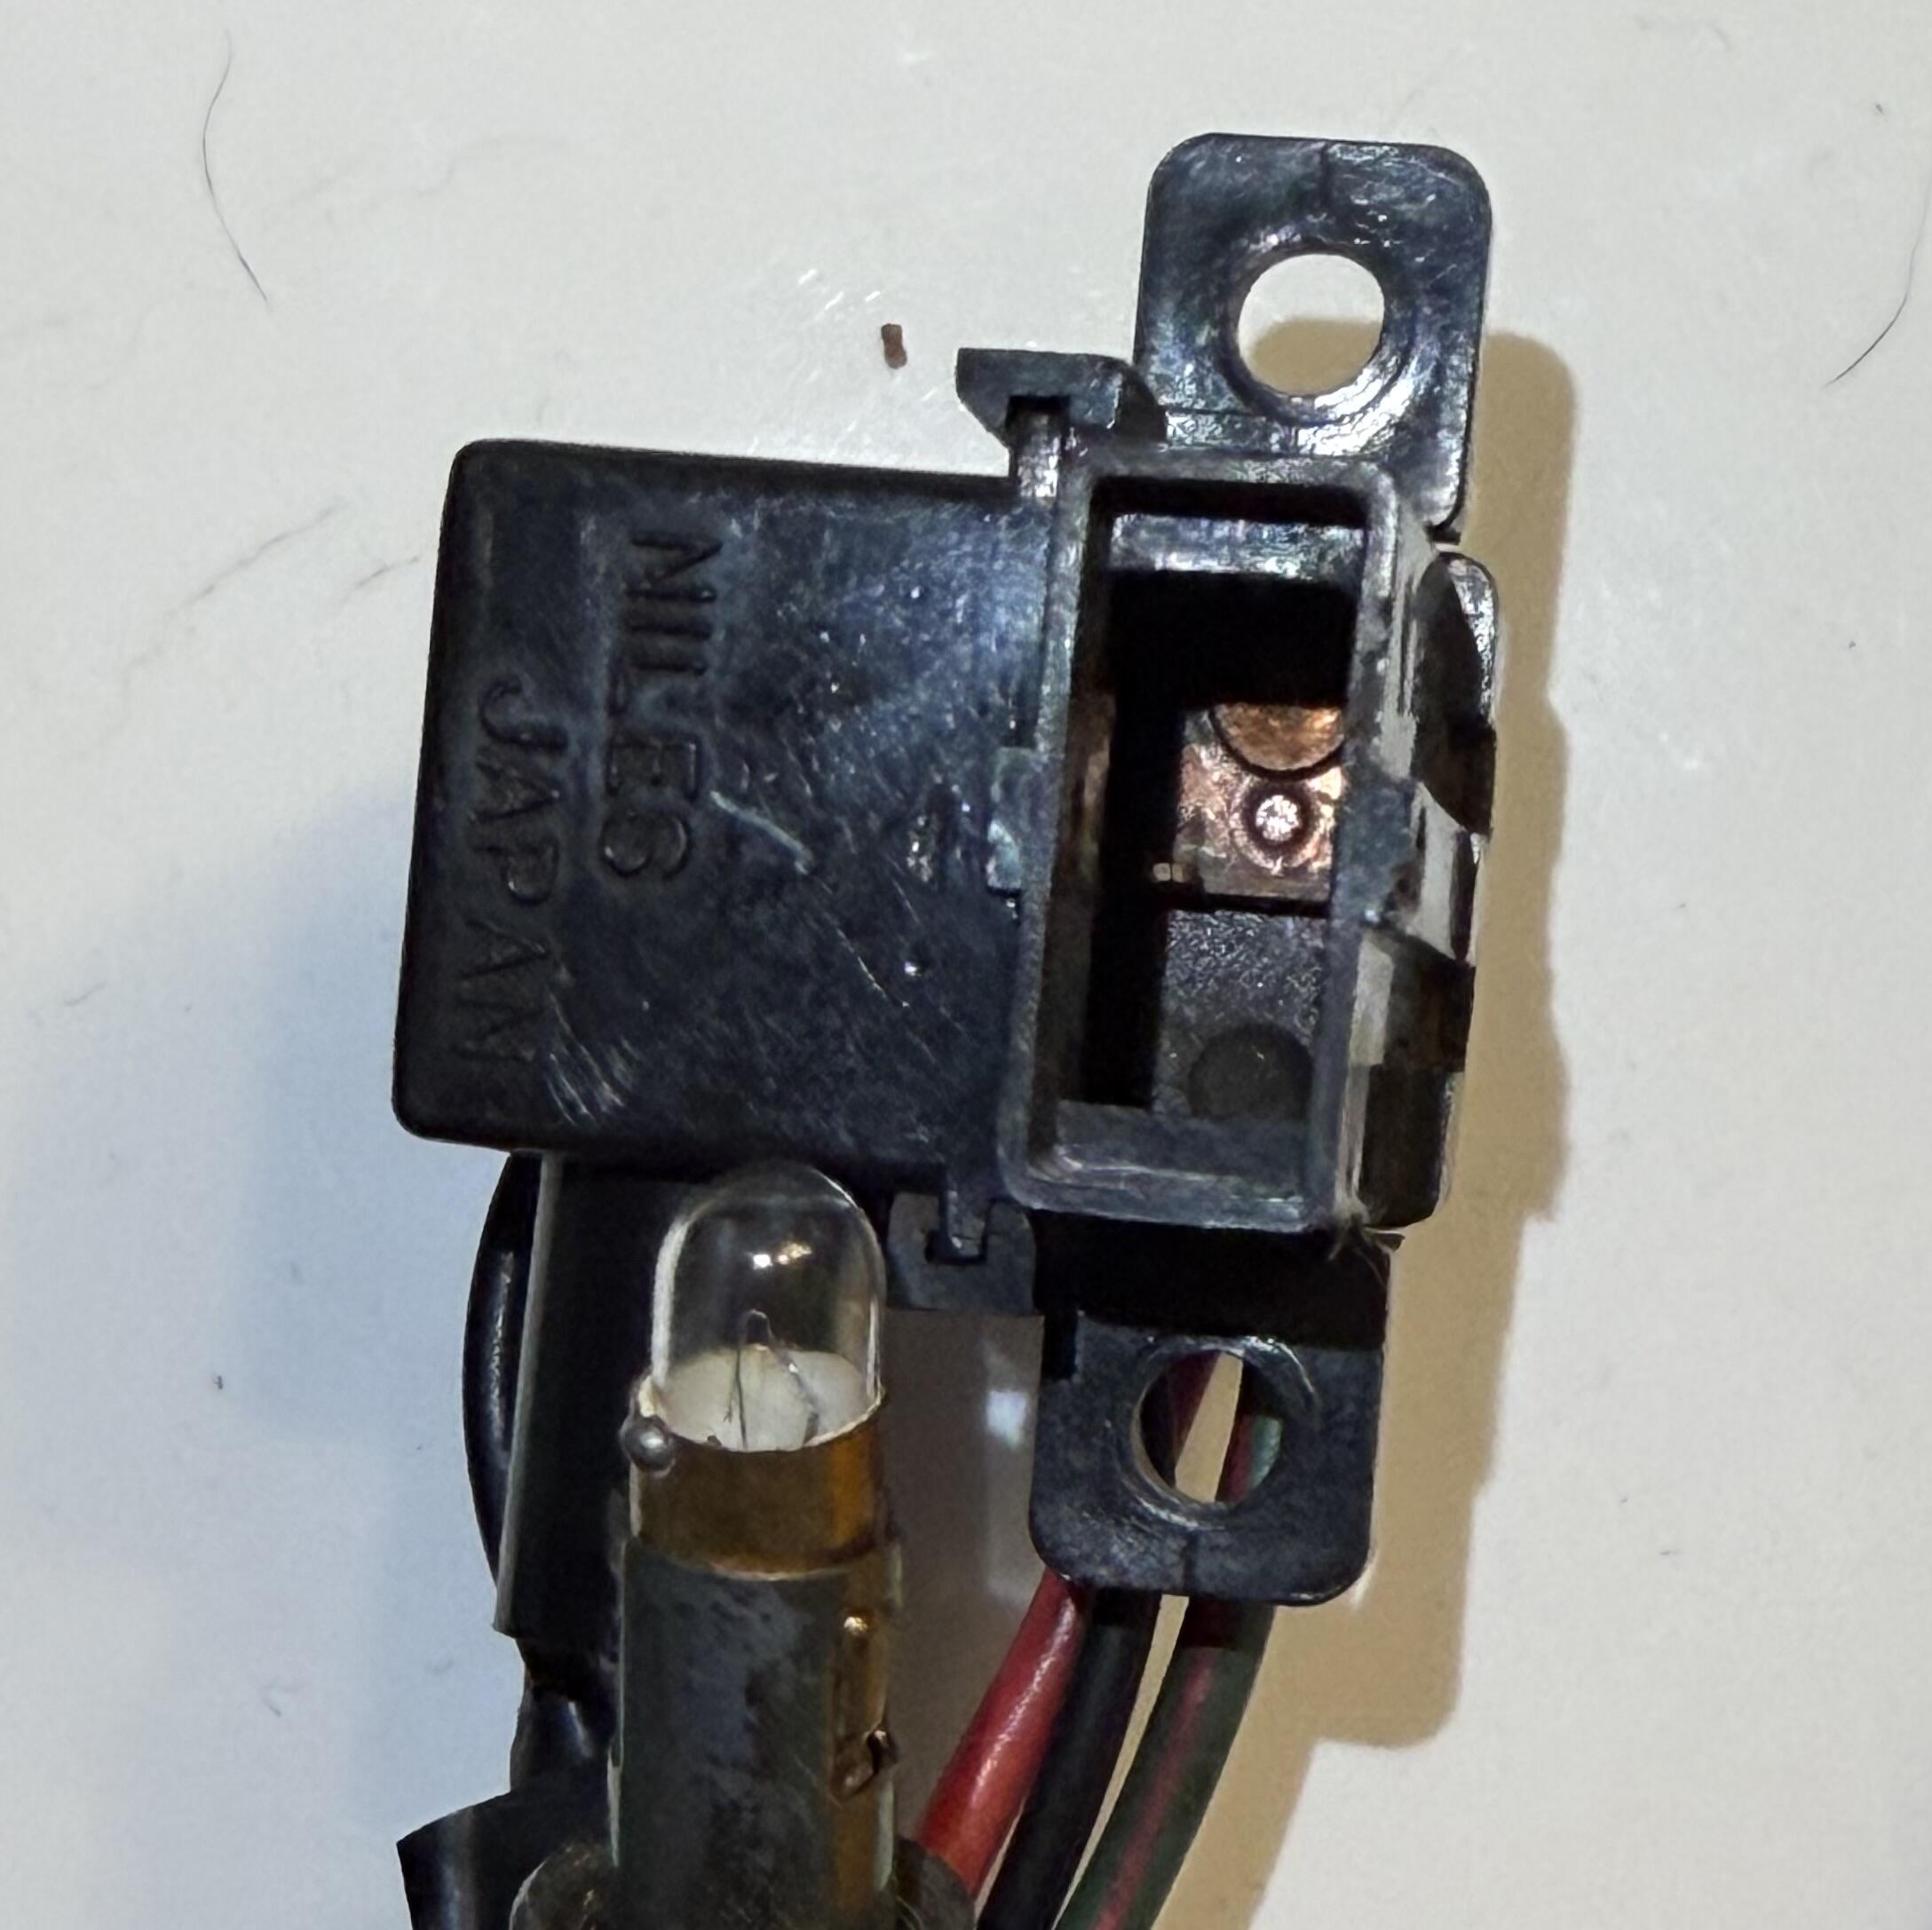
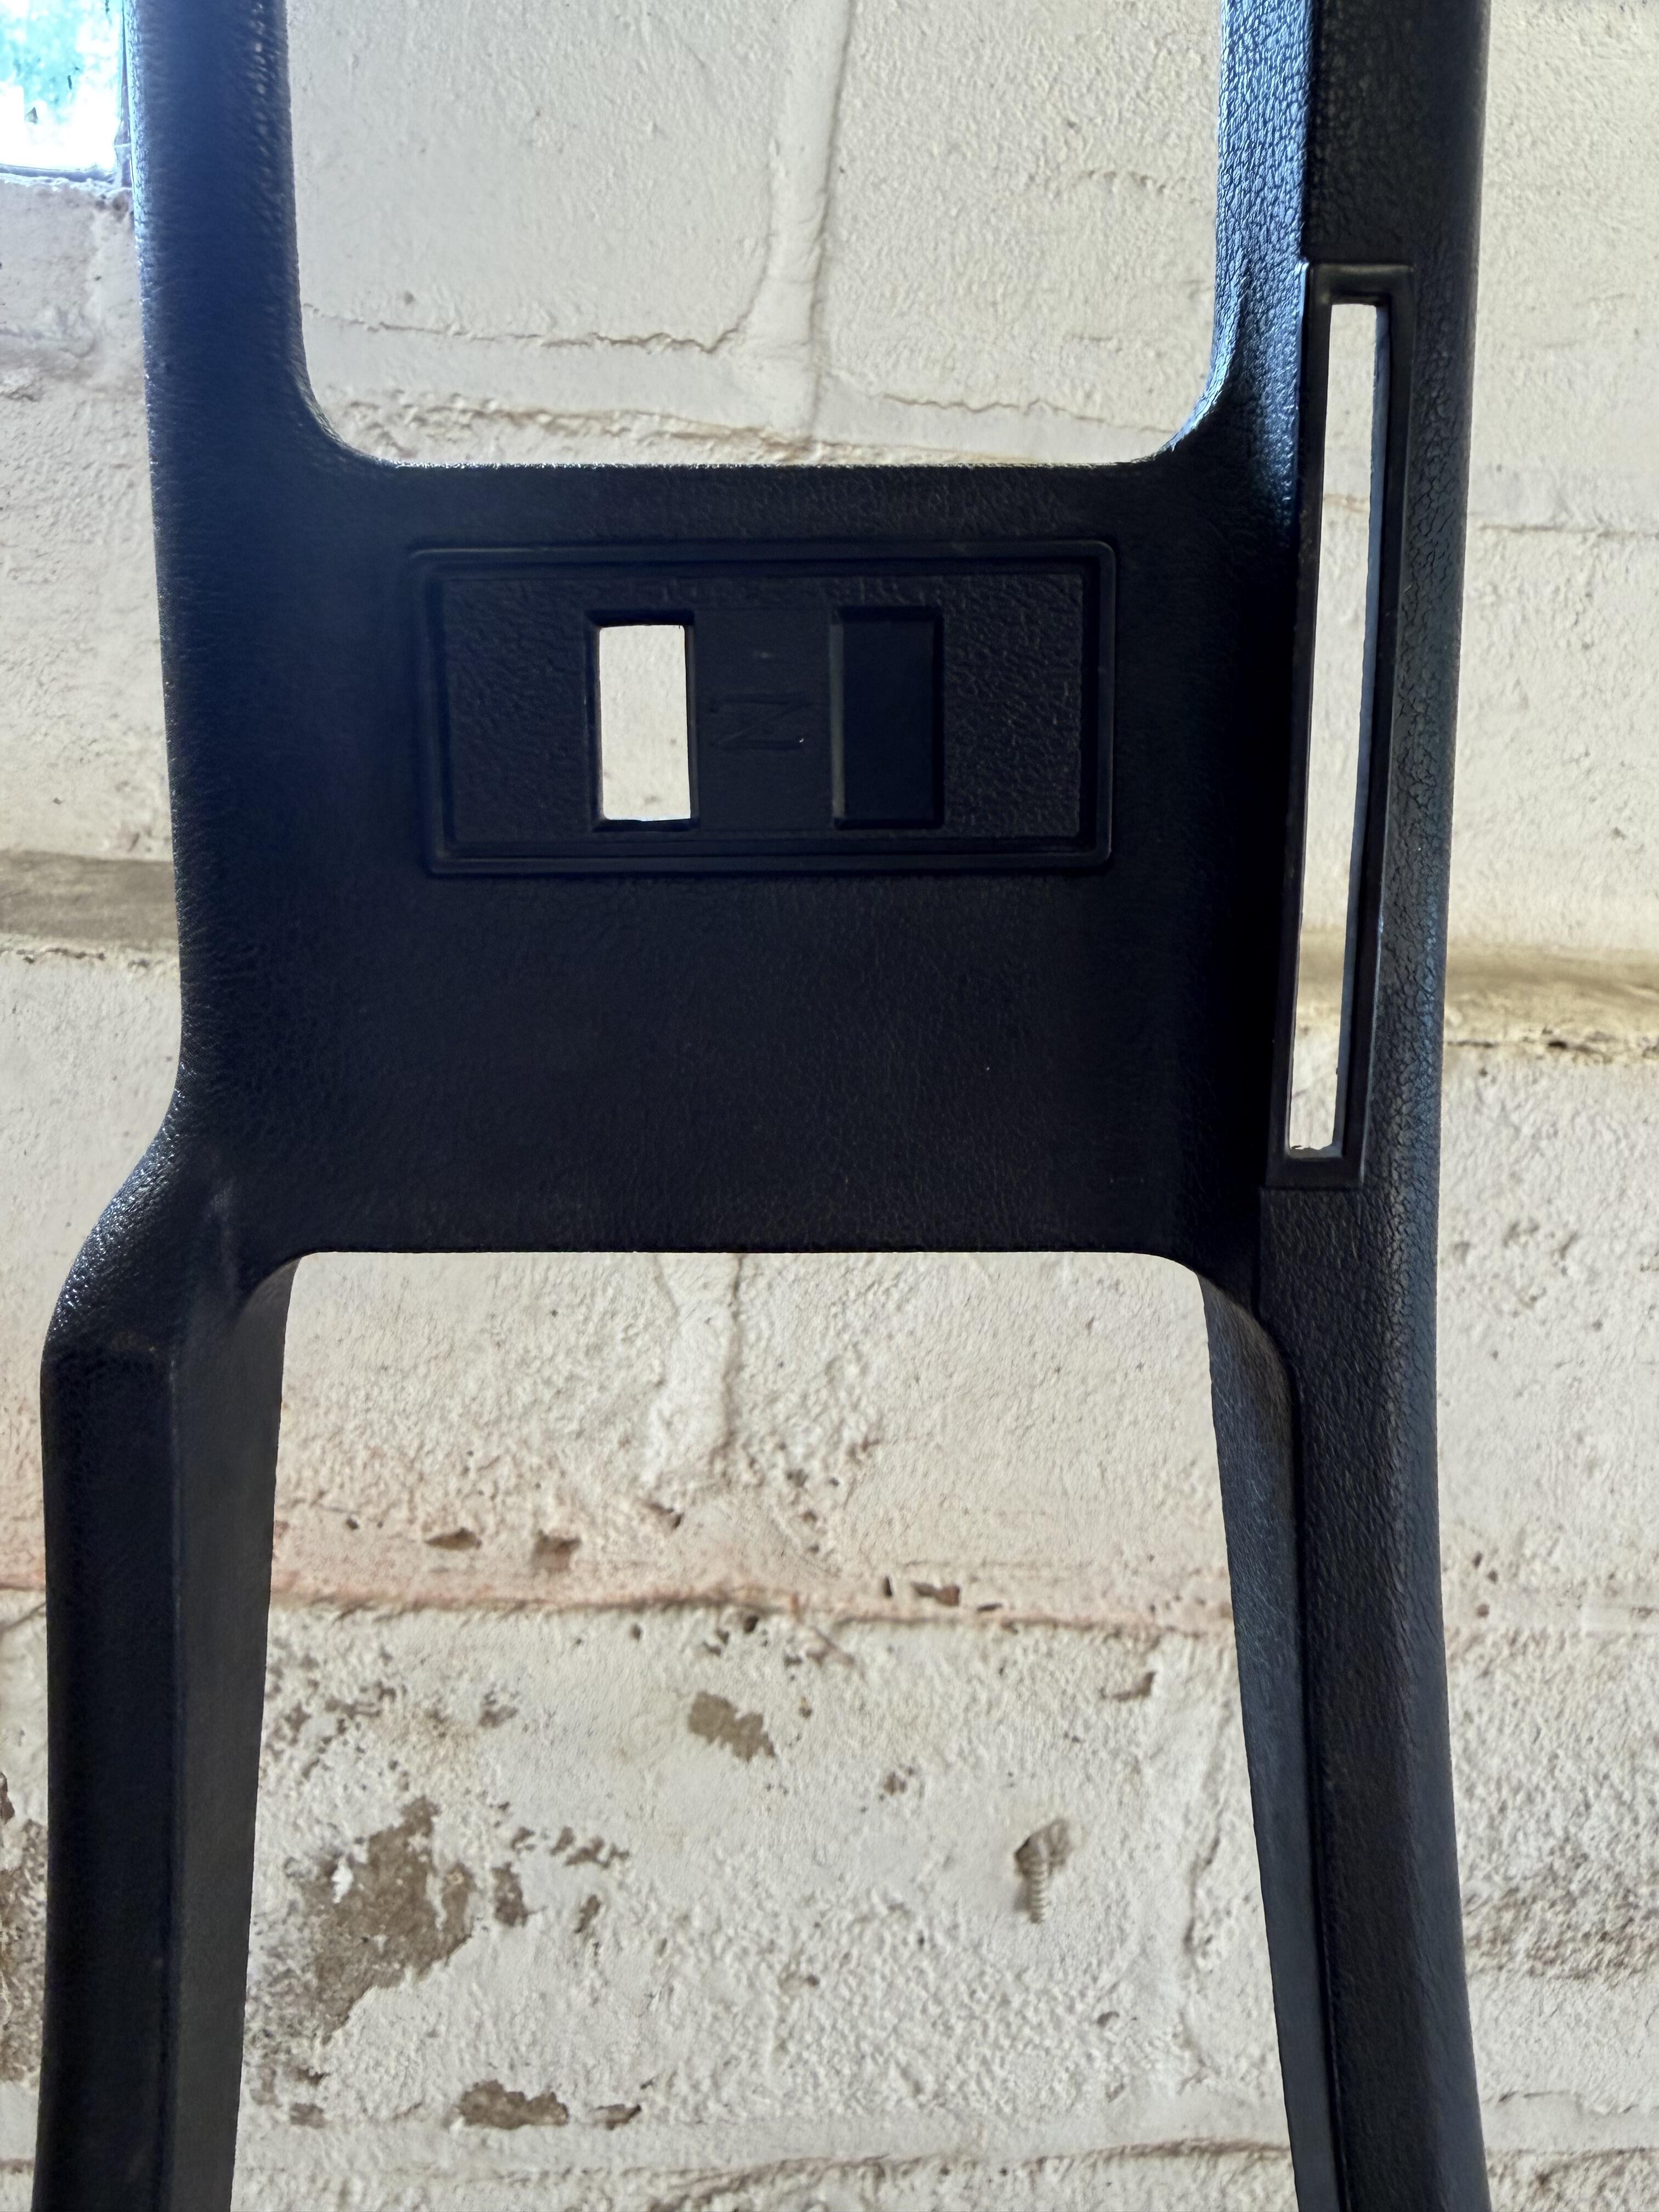
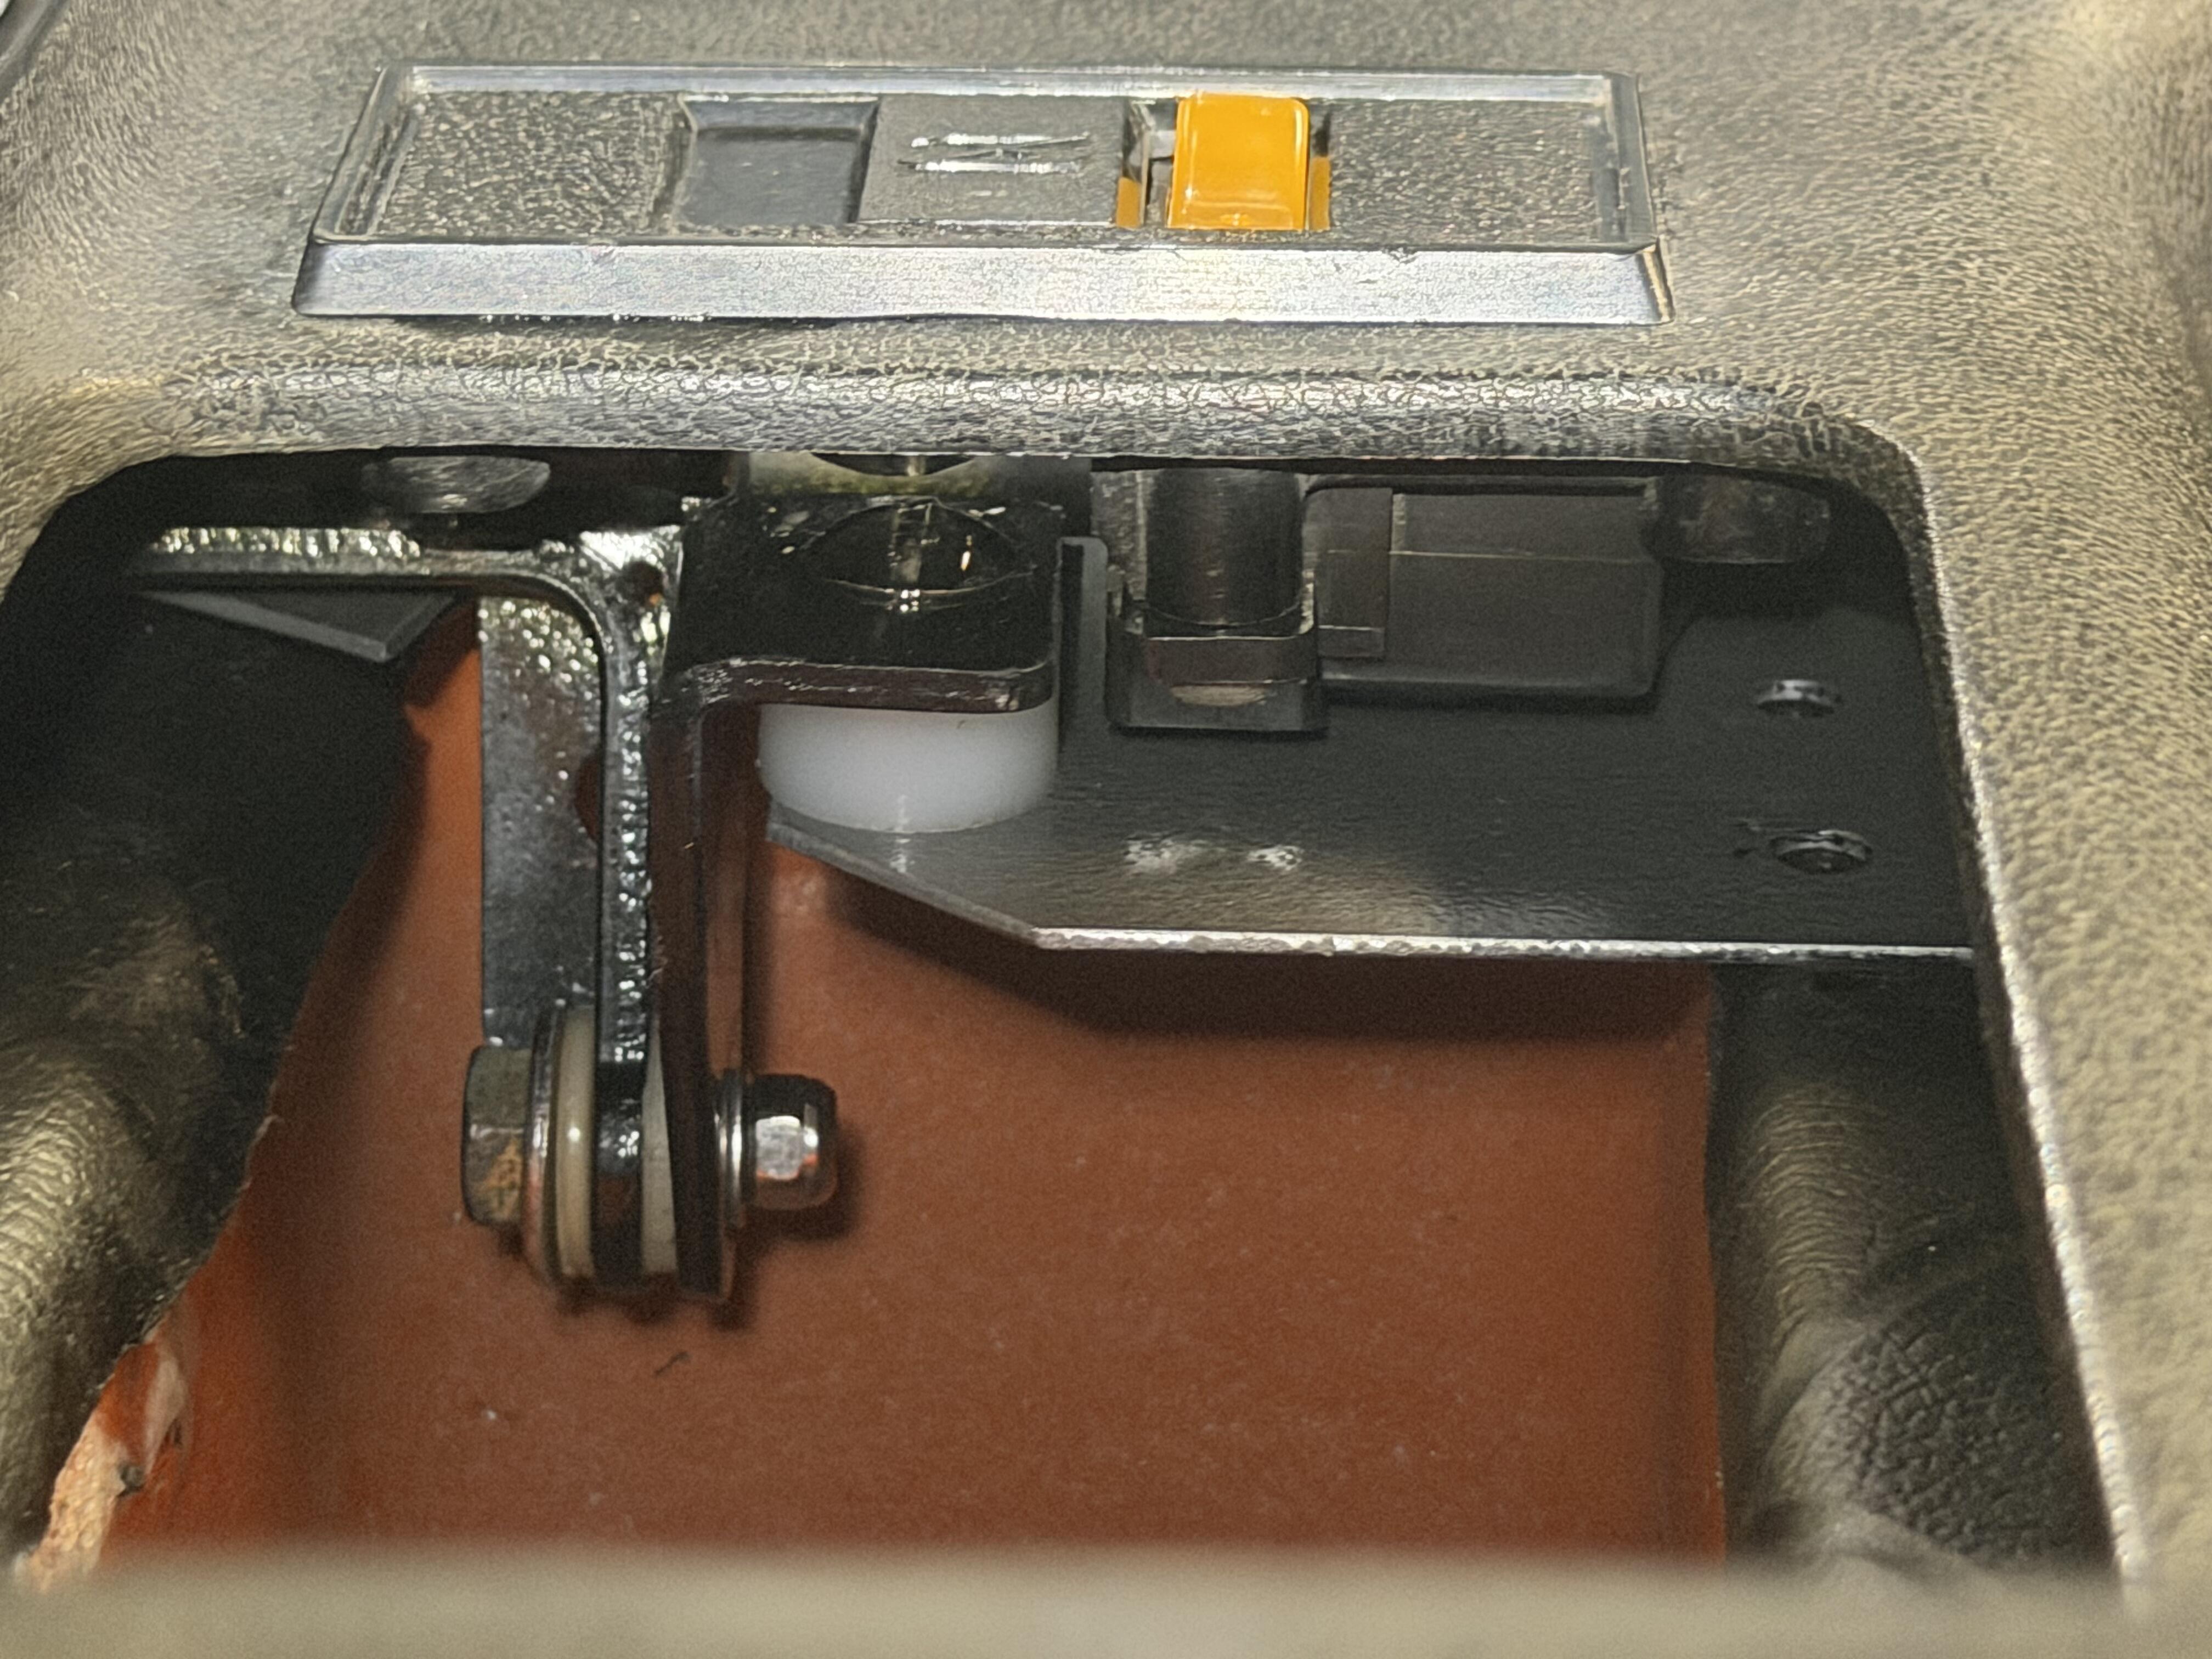
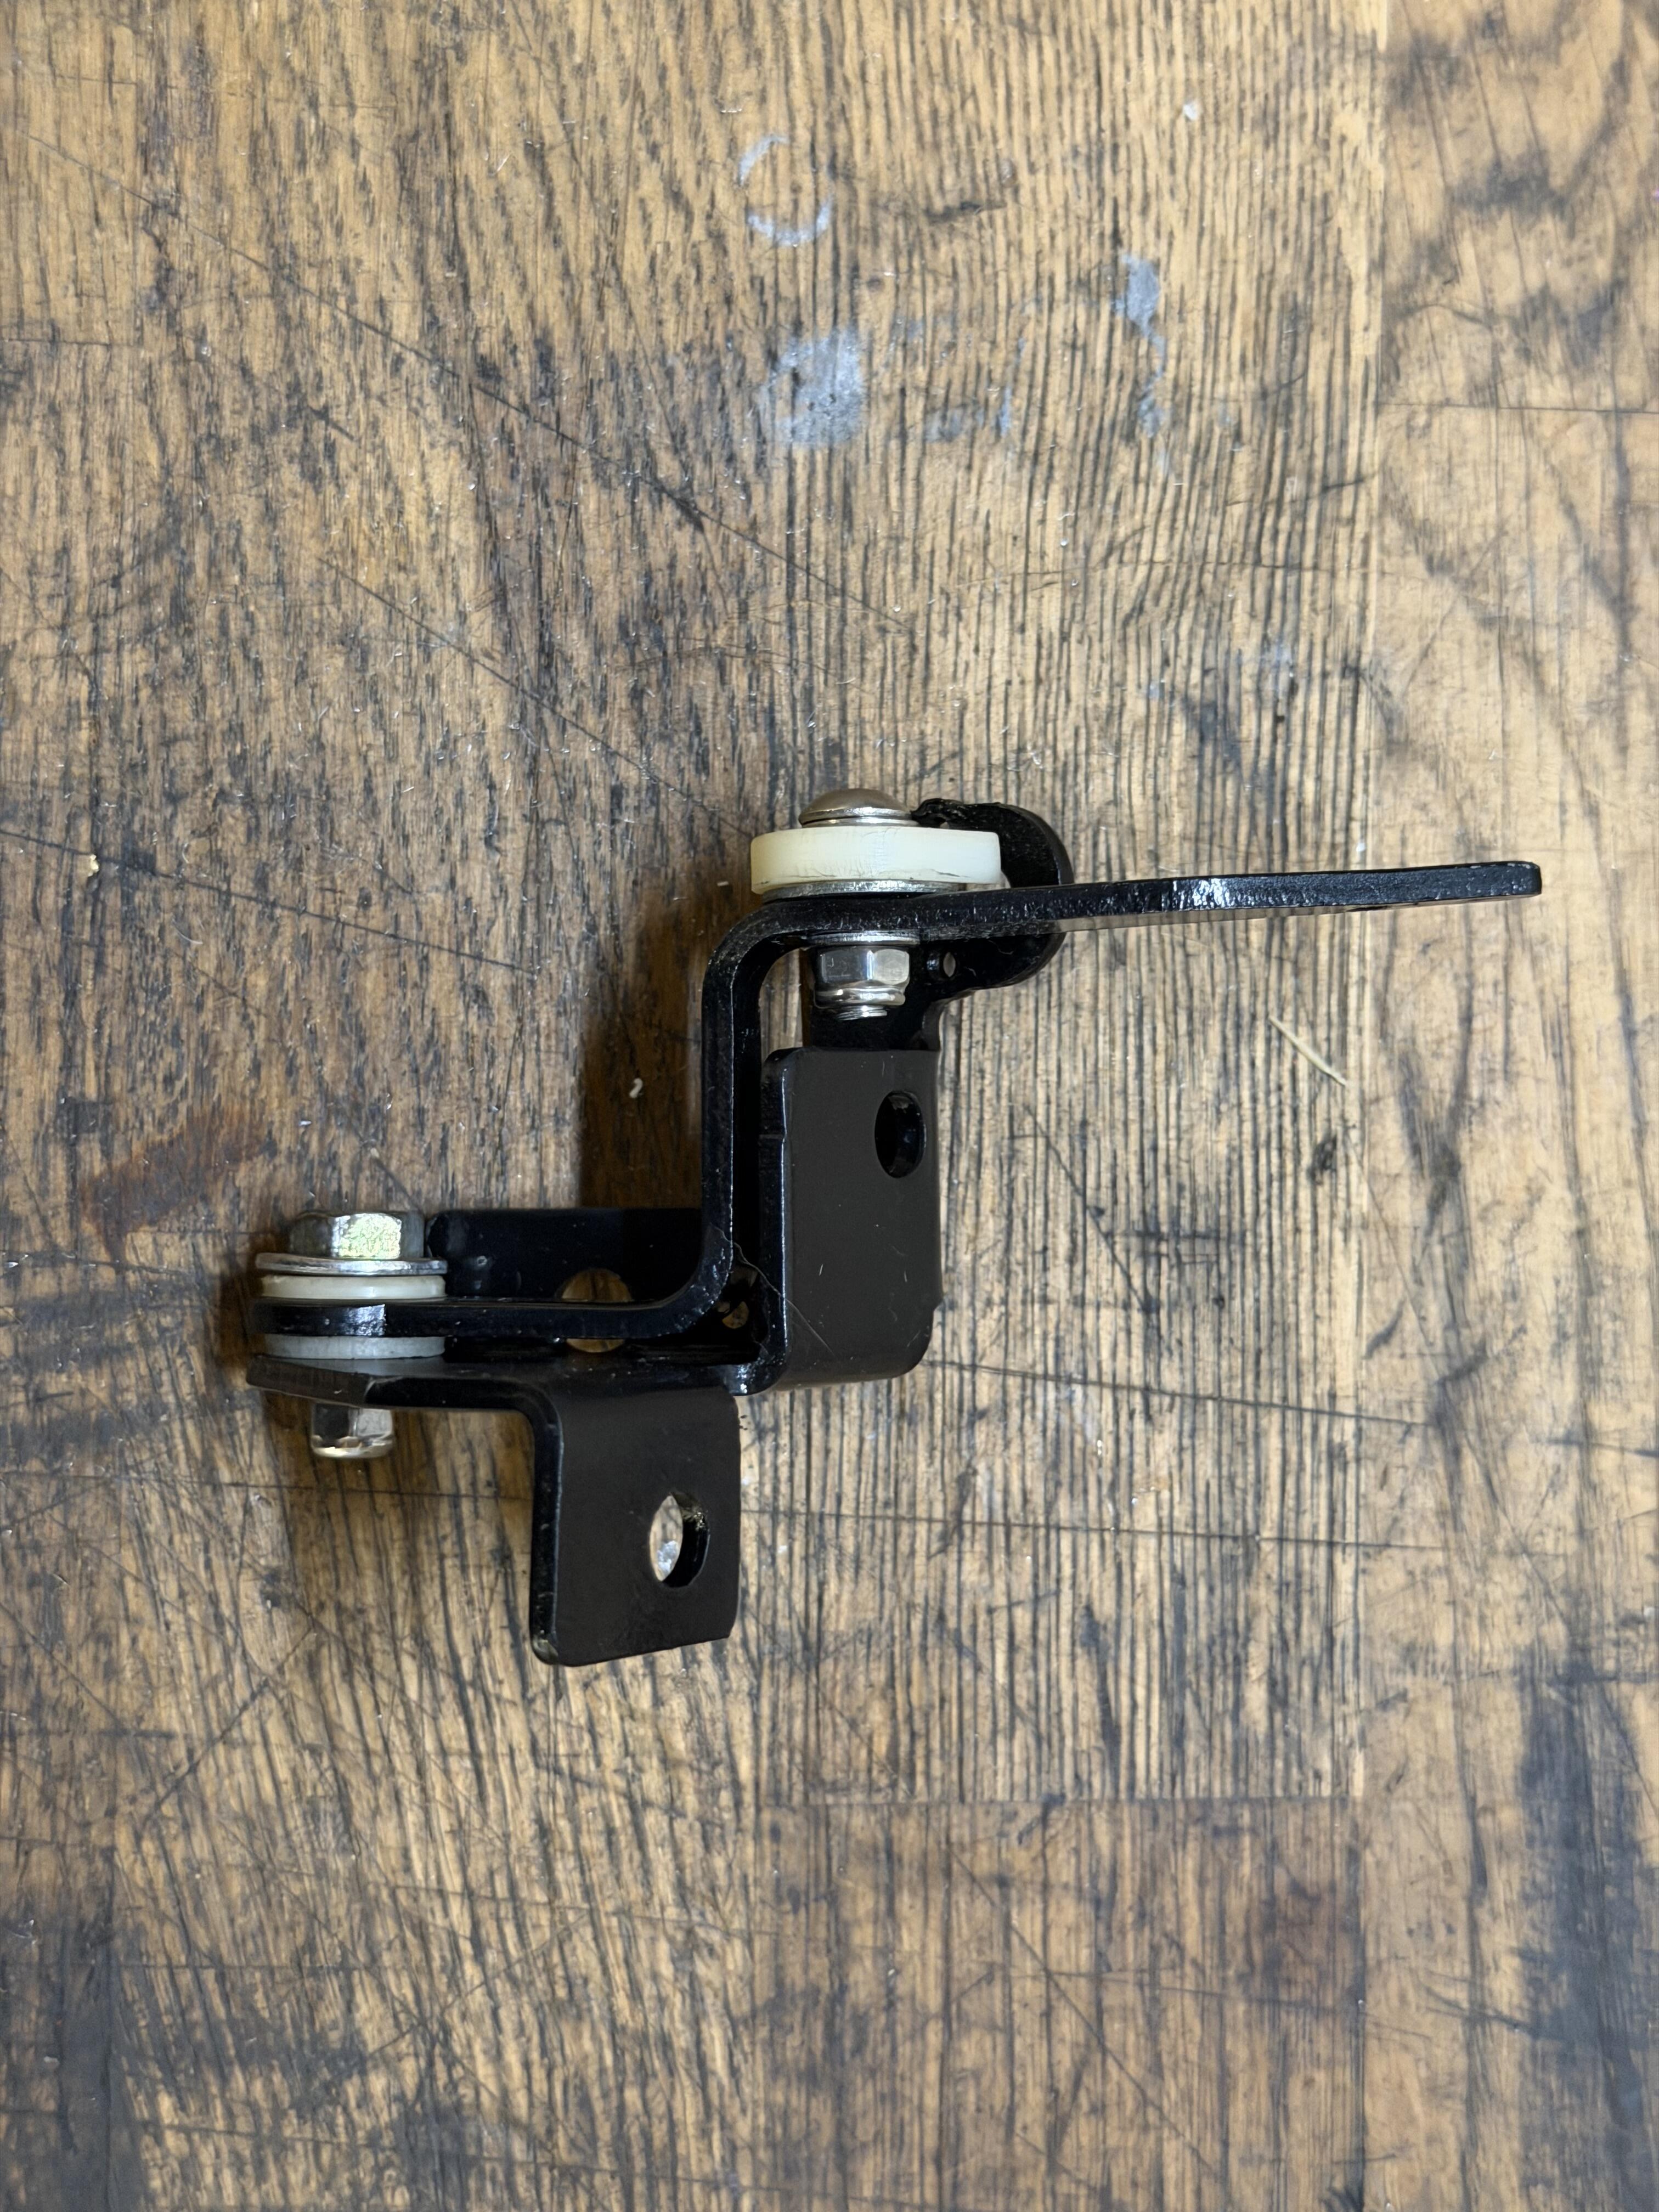
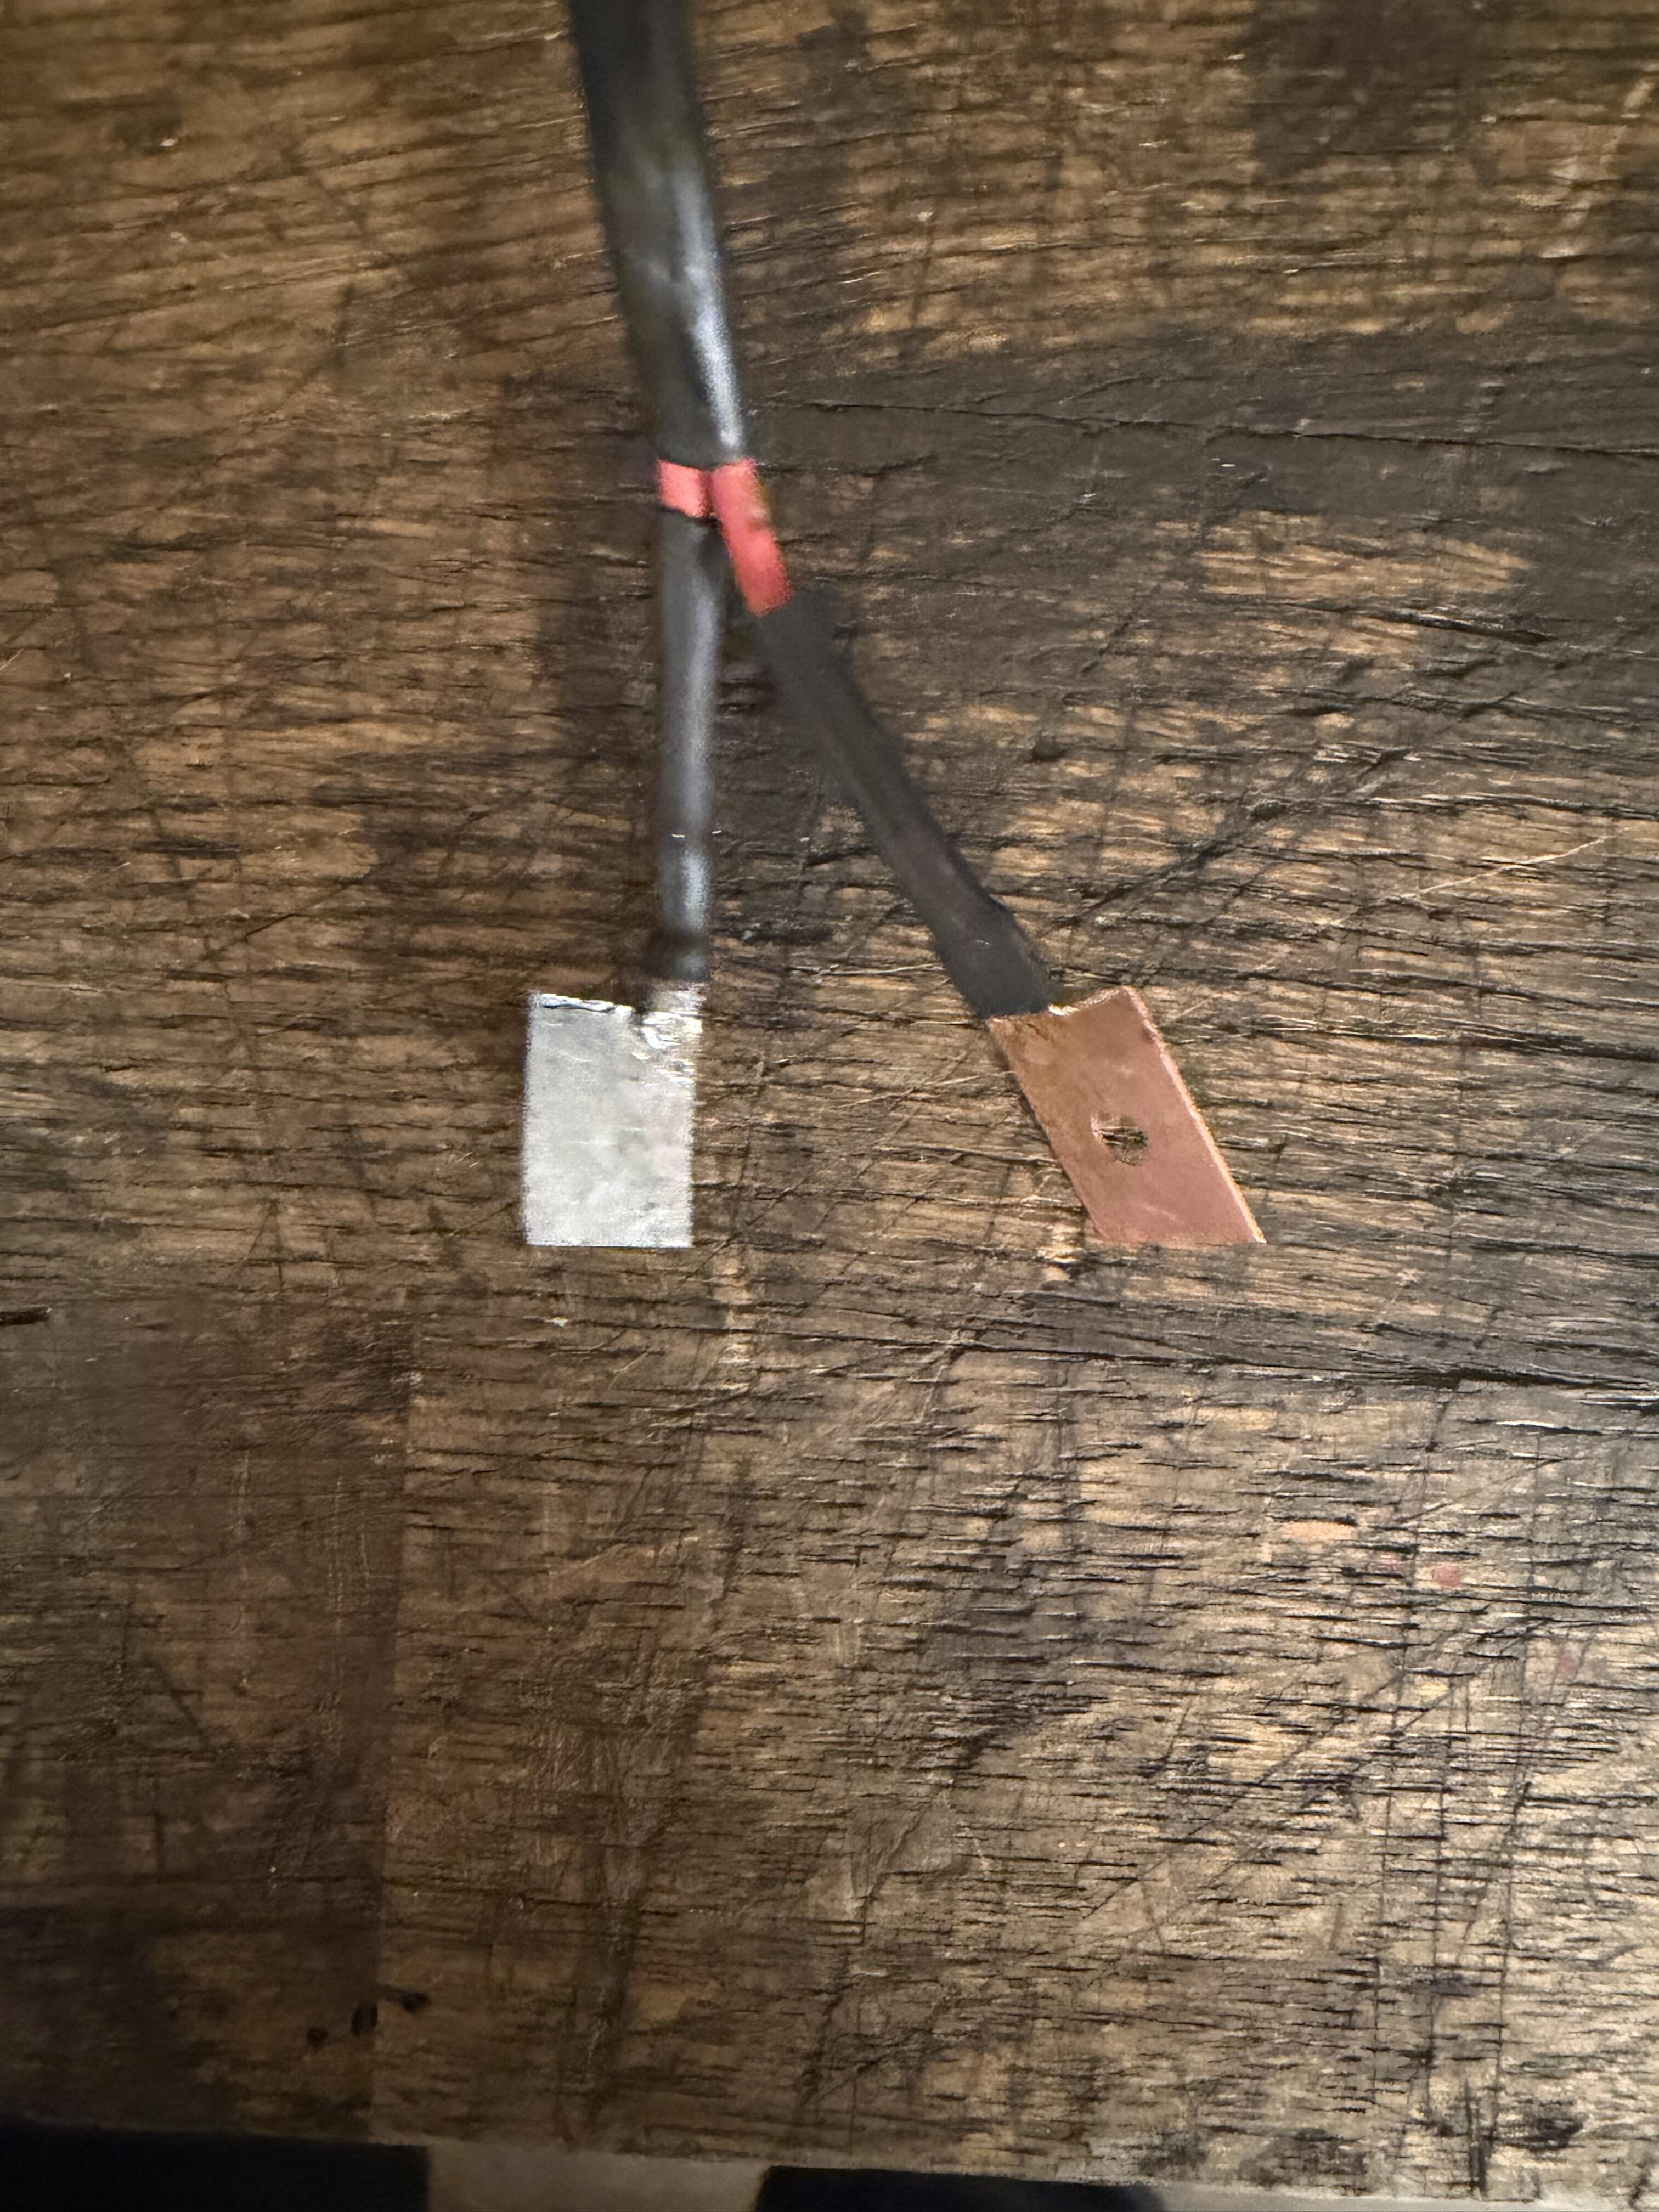
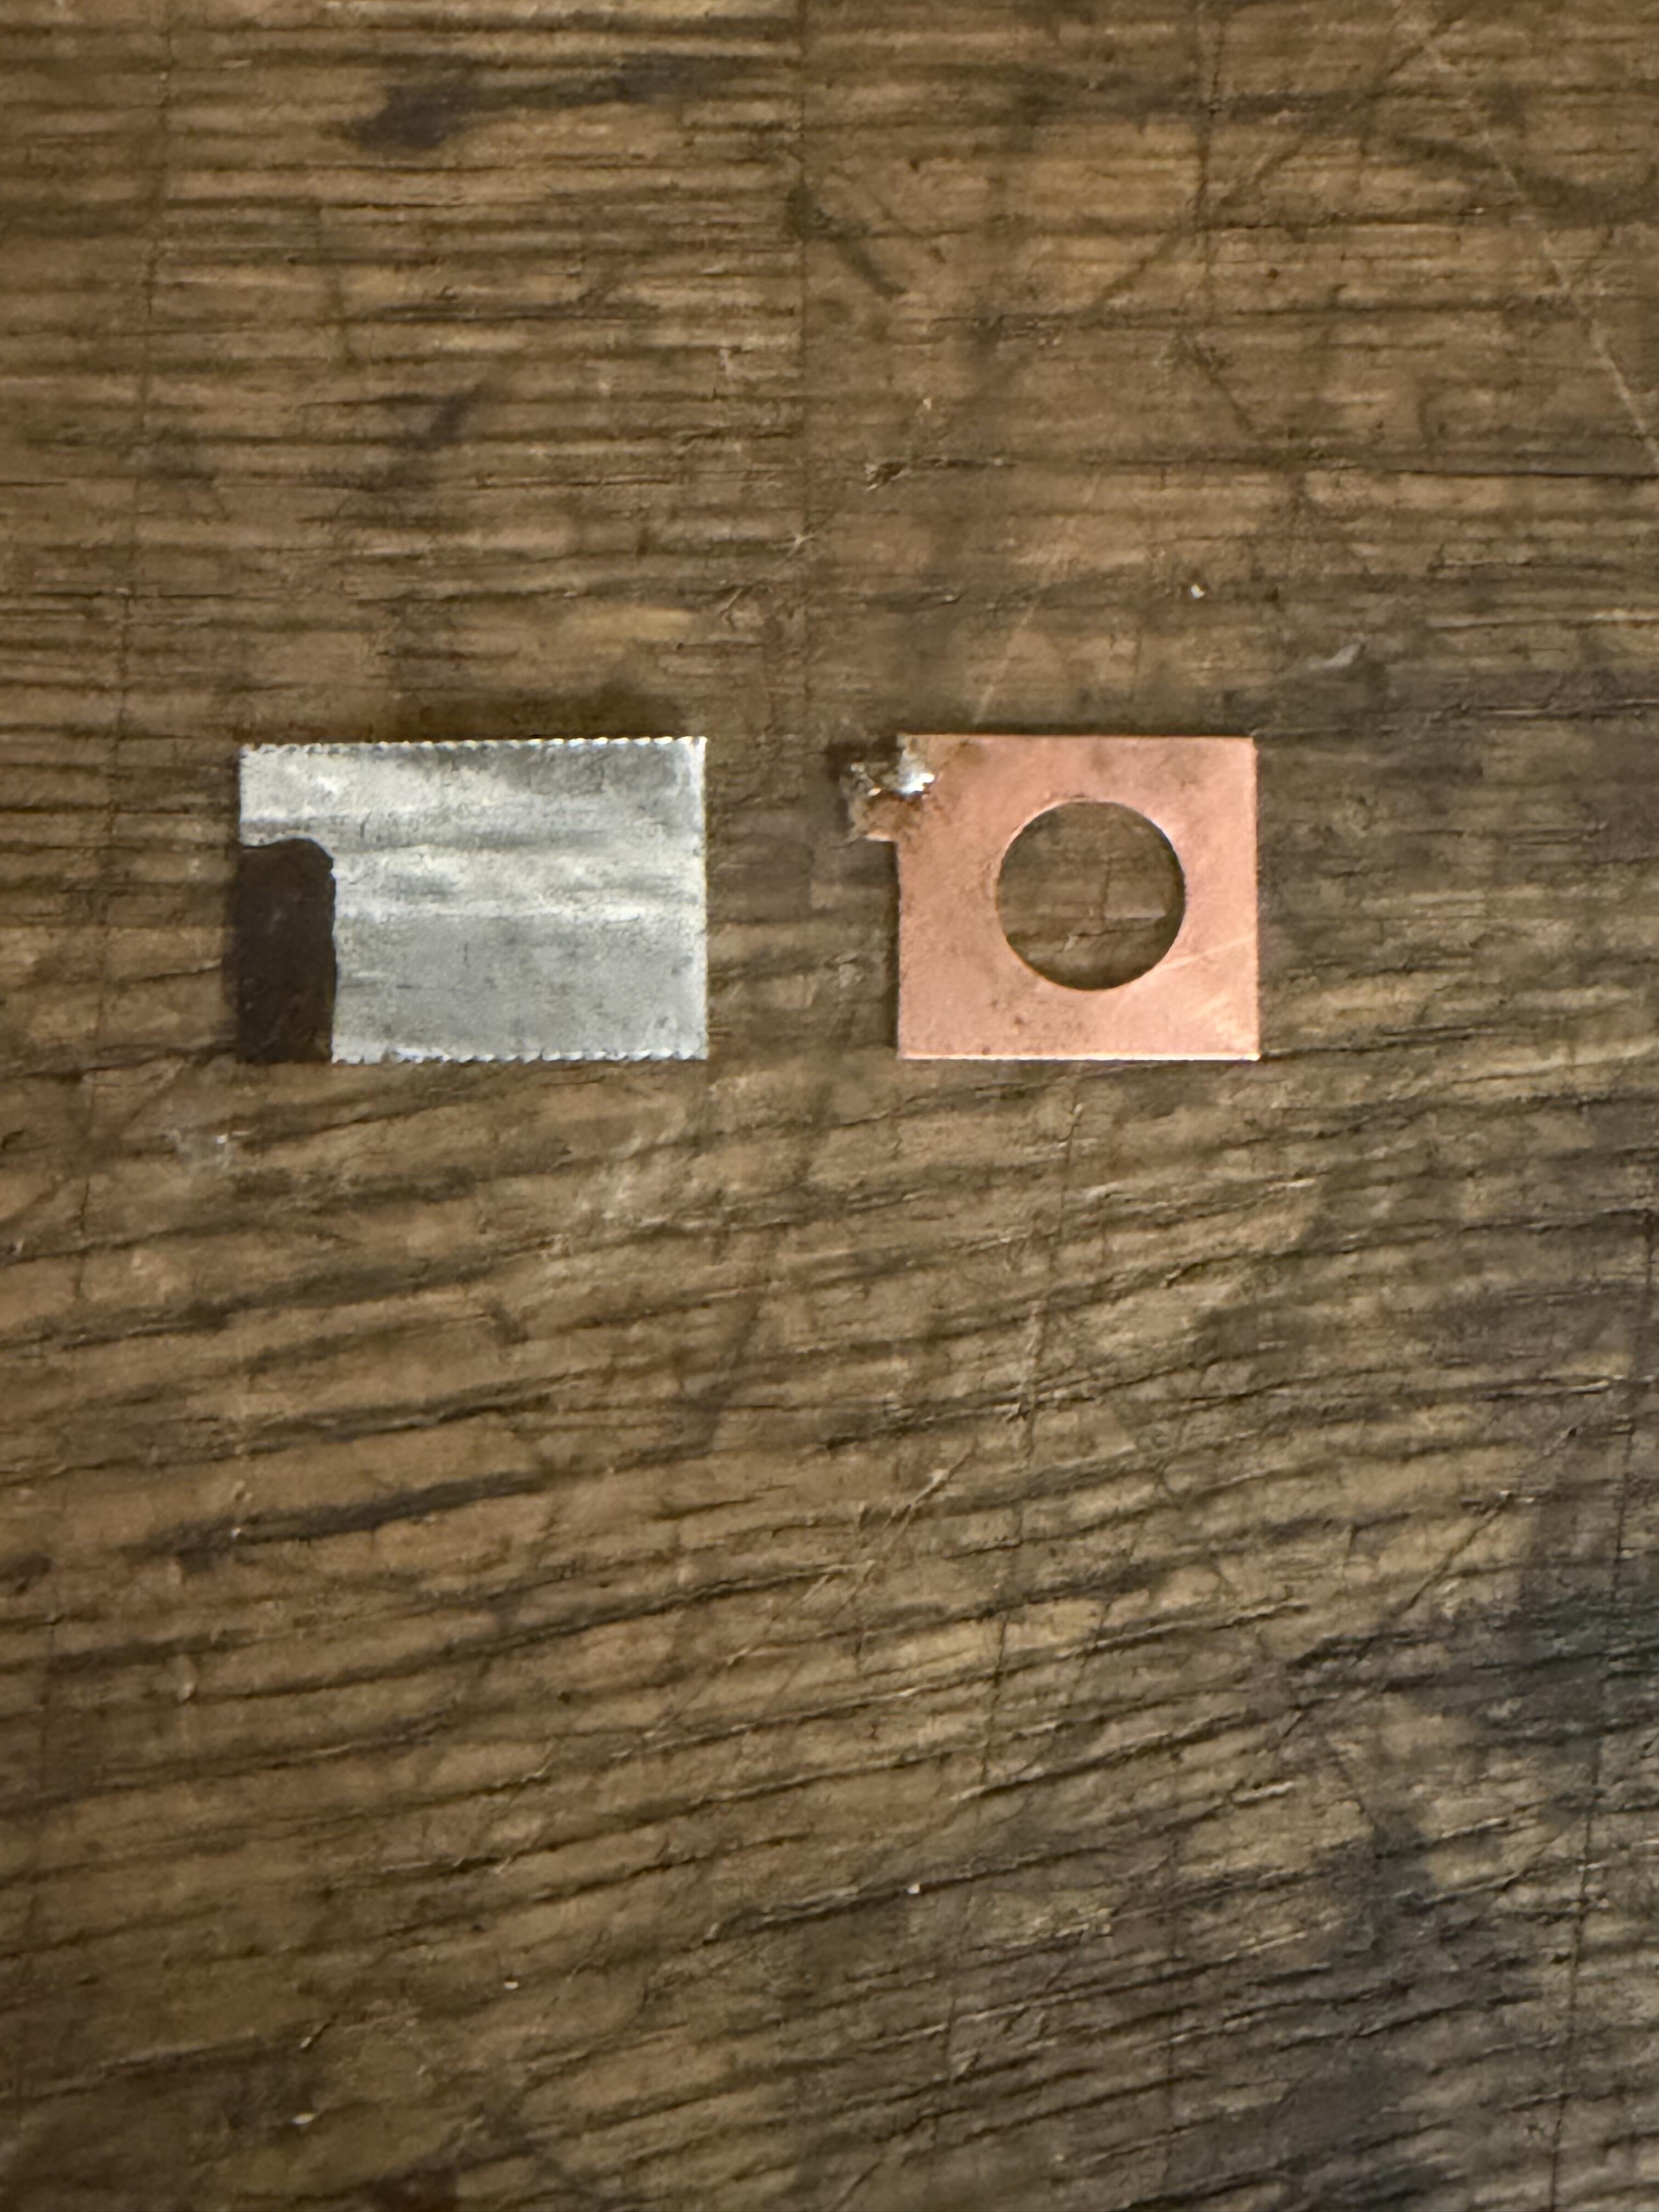
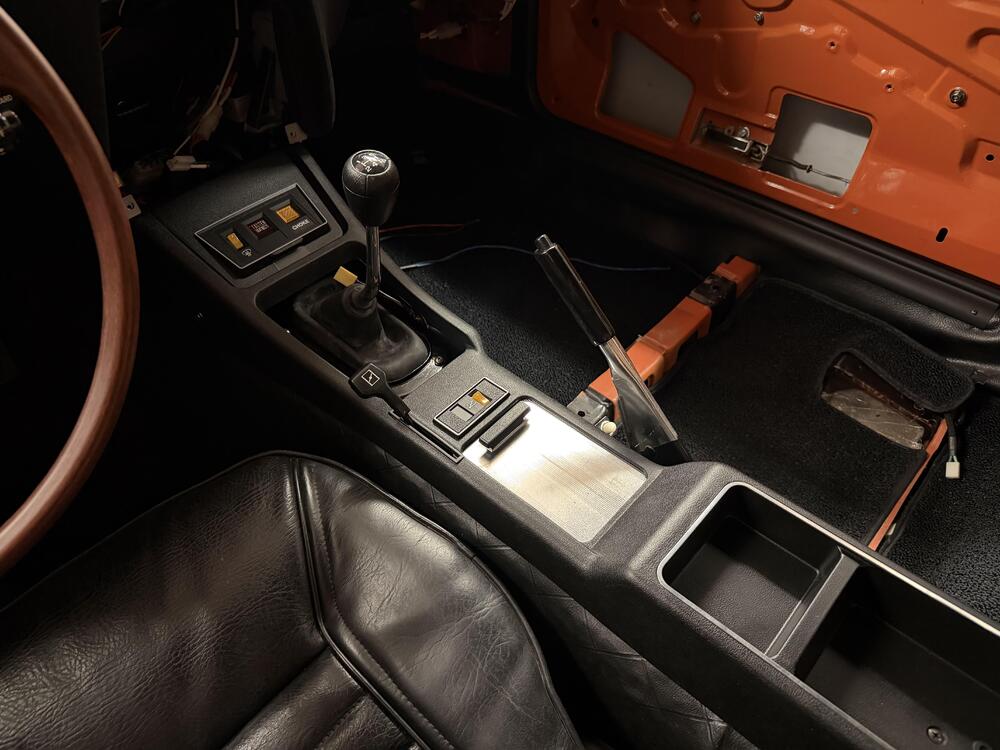
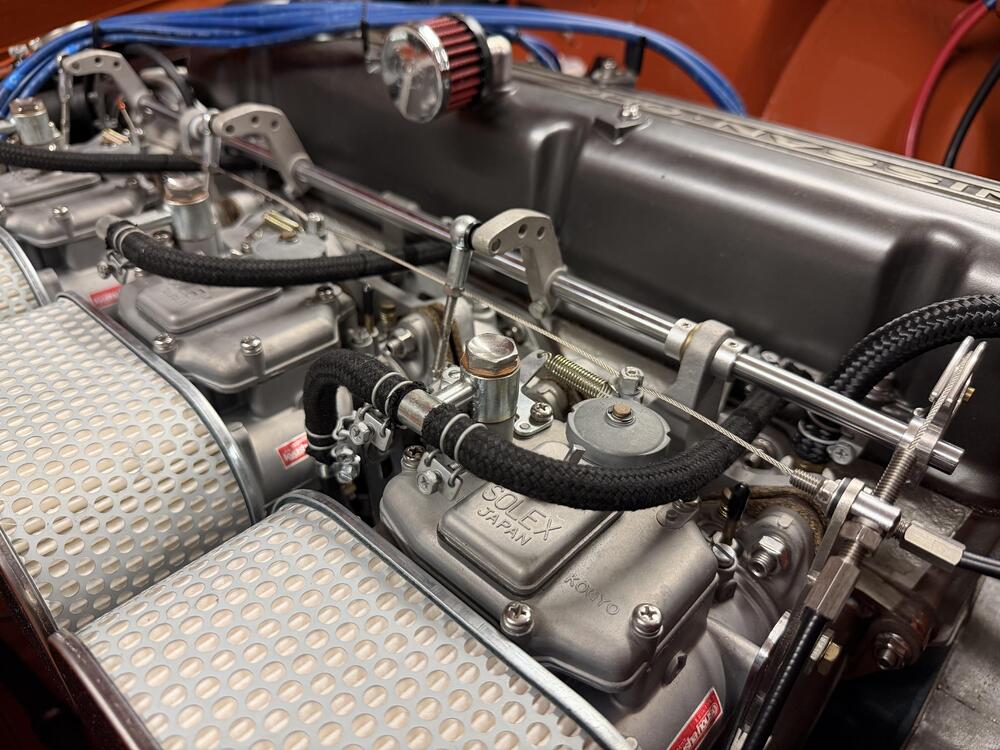
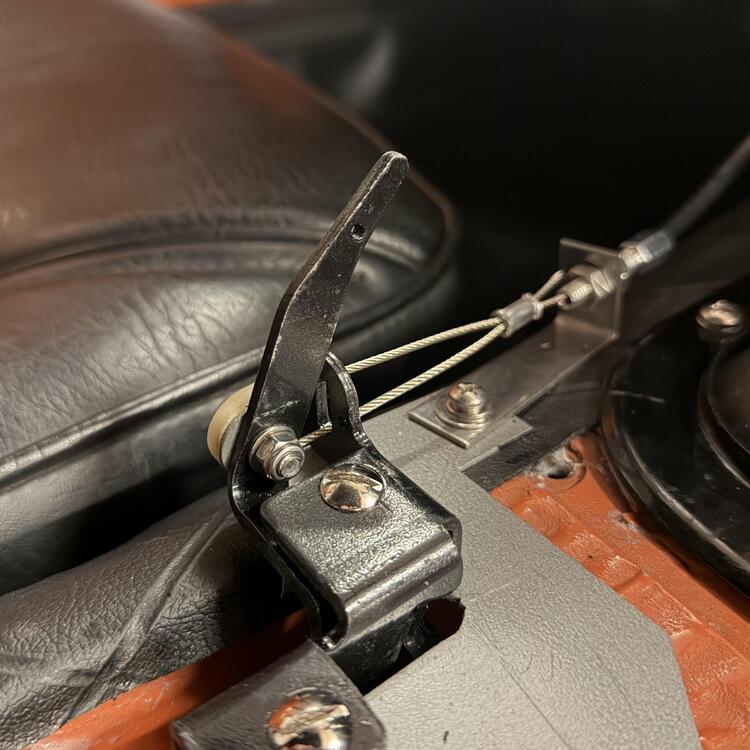
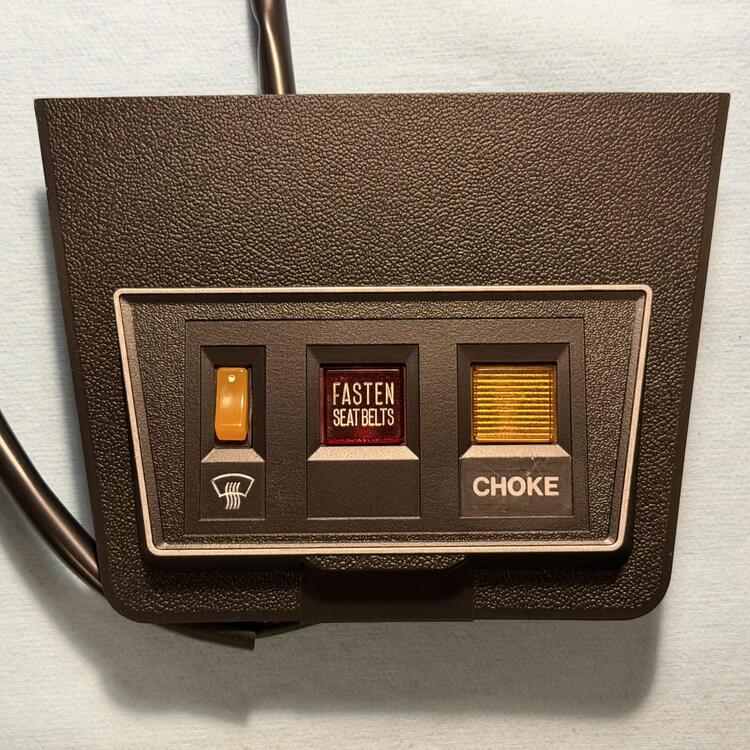
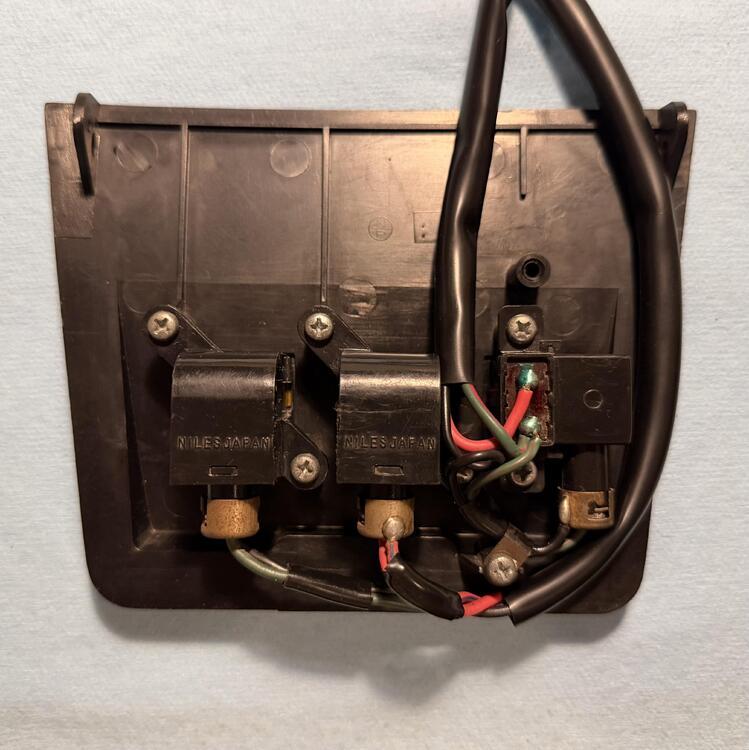
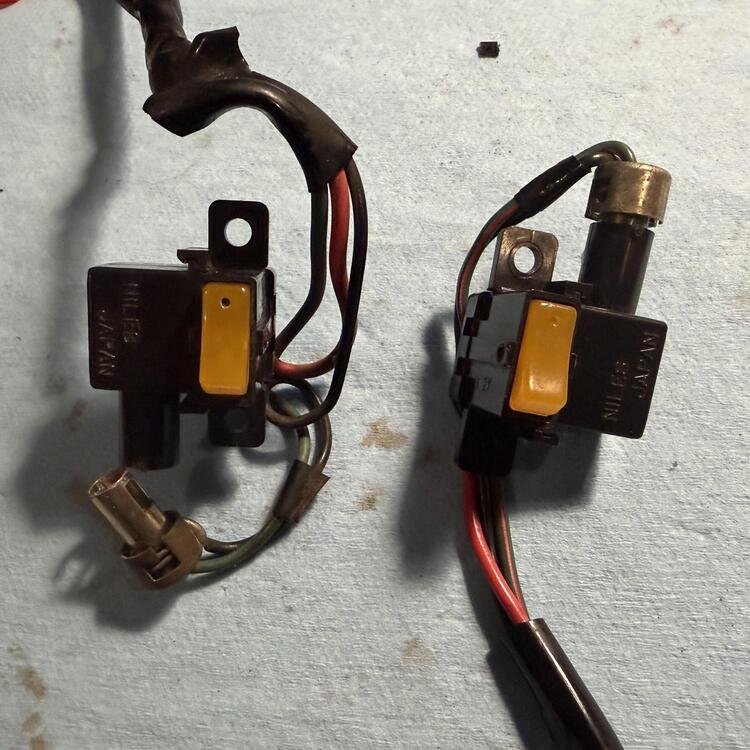
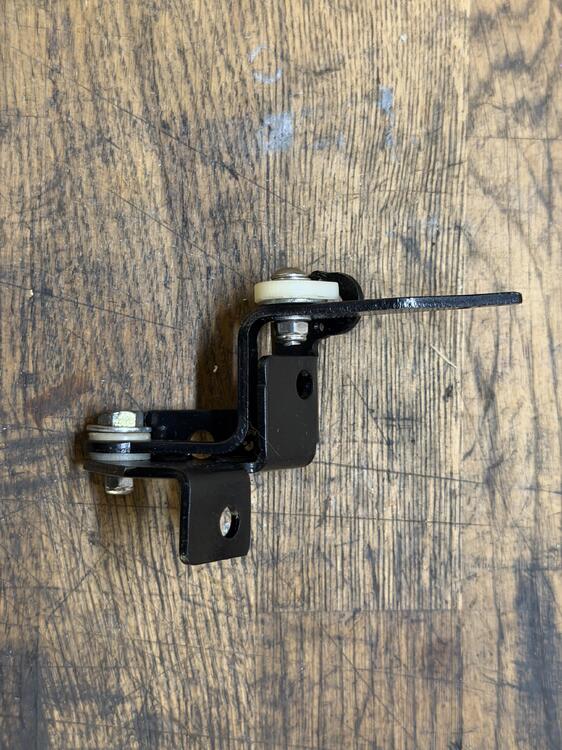
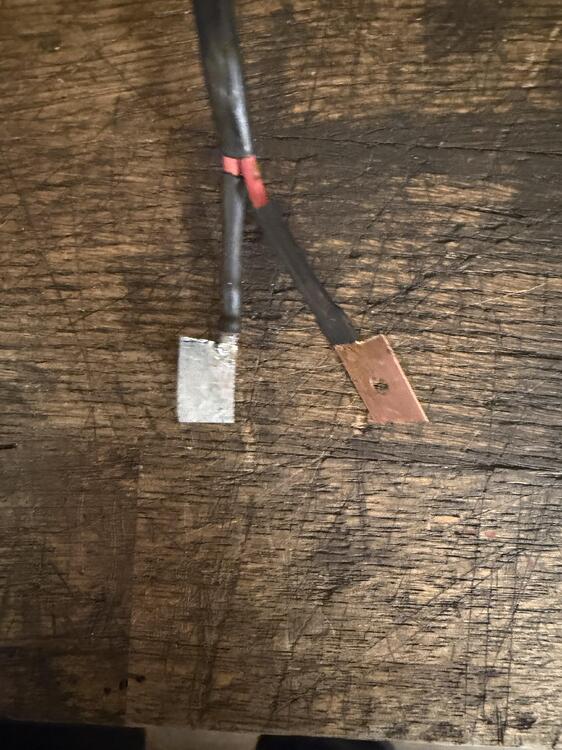
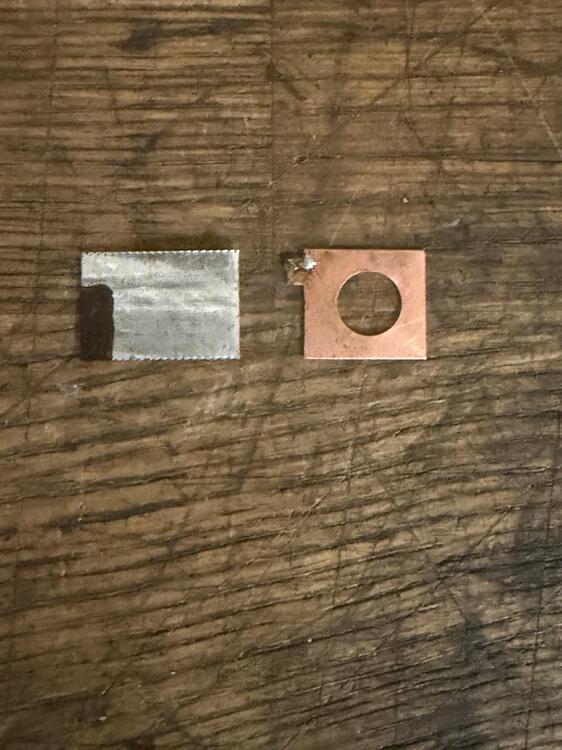
4 pointsI finally got the center console in today. I had to repair a crack in the right rear corner, but that was no big deal. Some superglue, some JB Weld for plastic reinforced with fabric, some putty to fill what pits the super glue didn’t cover, and it’s nearly invisible. I sprayed all of my interior plastic with SEM Landau Black, and this piece came out the best. Other than the steel trim ring around the trays in the back, I used chrome paint pens for the silver trim. It looks okay. I kind of wish I had gone with silver leaf, but this is probably more resilient. The defrost emblem is done in white nail polish. I just masked the “choke” label. All of the hardware is new. The ash tray was surprisingly easy. The rail was pretty corroded, so I cleaned it up and sprayed it with zinc paint, but the cover just needed a polish. All of the switches were much less clean, so they were disassembled and cleaned up. I had to fabricate a terminal for the choke lever switch because it had snapped. I used a tab from some HVAC duct that gave me the same reading on the ohm meter as the original piece, so should be fine. I don’t know why the original had a hole in it, but it works without. Speaking of switches, I also made myself a switch for my fog lights and mounted it in the console between the ash tray and the shift stick. I used a junked defroster switch I had replaced with a better unit, so it wasn’t a problem experimenting. It has to go in upside down so the light doesn’t hit the choke lever, which meant inverting the guts. Basically I just popped the bottom out of the switch so the mechanism was reversed and put the button back in up side down. There was some cutting and filing involved, so do do this with a switch you care about. The console already has bosses and a hole for a switch like this, I just had to cut out an opening in the trim plate glued to the top of the console for the switch to poke out. The only issue is I don’t have a ground wire for the light, so I’m going to have to make a mini harness that will splice it into the ground wire for the defroster switch light. I think it looks great. The only thing I would change if I could is to make the switch green instead of orange. The other modification I made was repurposing the choke cable for the starter valves on the Mikunis. I doubt I’ll ever use them, but it’s nice to have the lever actually do something. I used a mounting plate for the lever because I didn’t want the console to crack, which meant a lot of fiddling to get things to line up and clear each other. I will need to make a new bracket for the throttle and choke cables now because the angle isn’t quite right. The fuel lines are also closer than I would like. I have around 3mm of clearance, so I’ll put sleeves on the cable between the starter valves just in case. There’s probably something I can do to raise the cable more, but that will take some thinking I can’t handle right now.
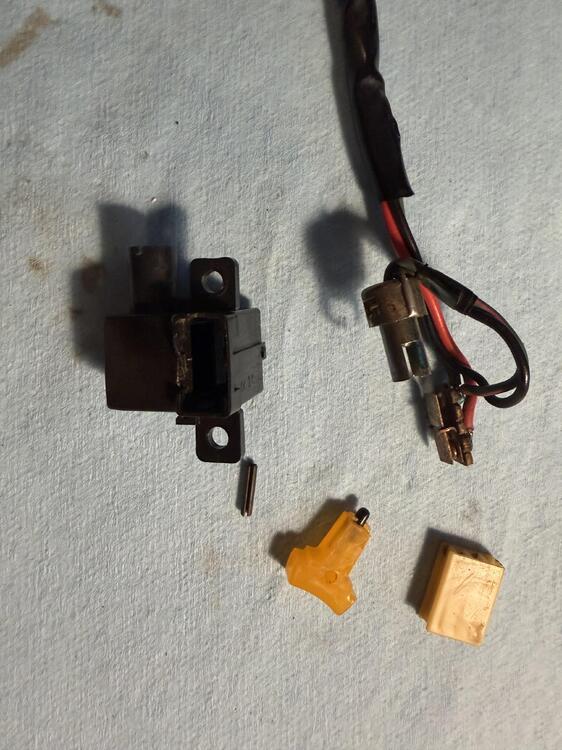
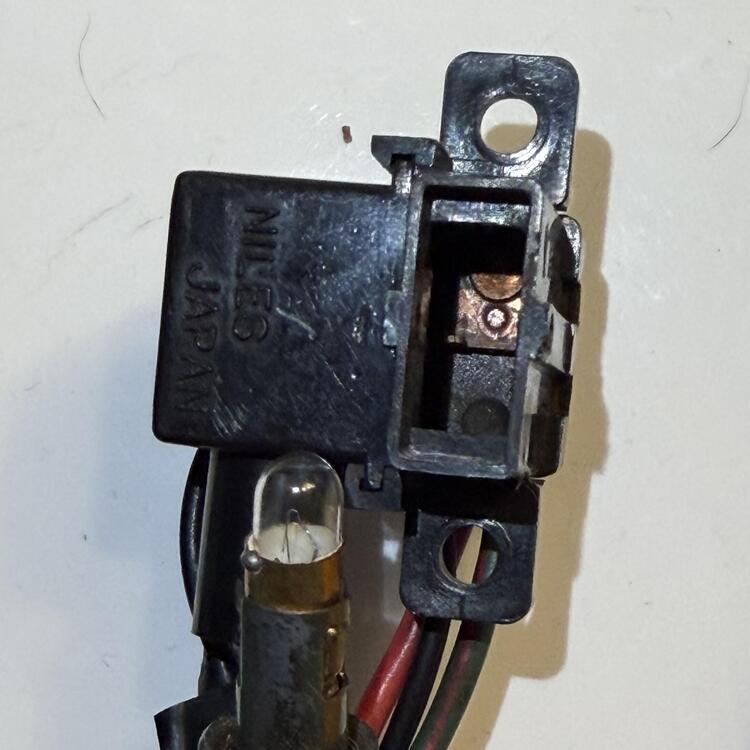
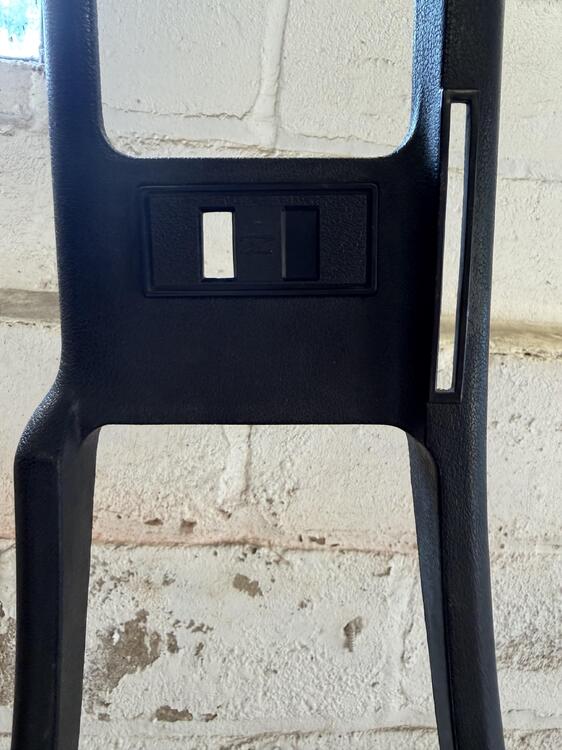
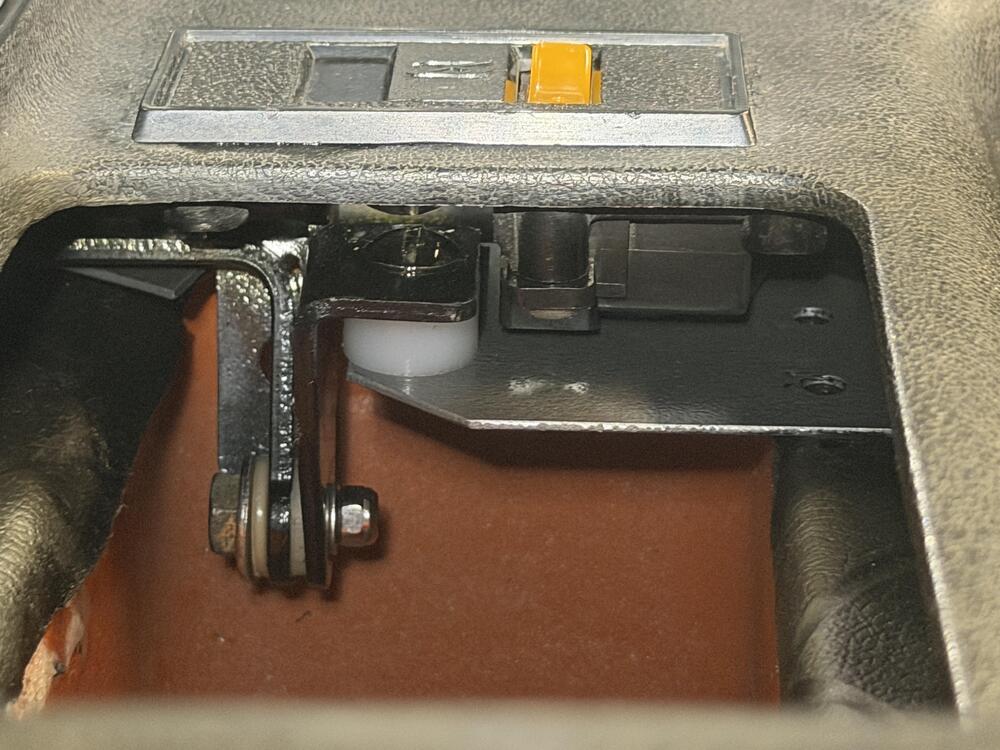
 4 points
 -
4 pointsHey Everyone! I wanted to share a new microfiche/resource sharing website I've been working on. A couple years ago I bought a full set of microfiche slides for the Datsun Zs and scanned them at my local library. I wanted a more easily searchable database of parts and the ability to add things like torque specs, notes, or references. The result is at the link below! Still a work in progress as I still need to verify and clean up the information and number callouts for about 80% of the diagrams but the site is functional. If anyone has ideas on what they'd like to see added in the future feel free to comment or send a message through the contact page! Thanks for looking! https://datsunresource.com/4 points
-
Don't lose those shims. I could not get my brakes to not squeal until I found an old crusty set of factory shims like those. None of the tricks/fixes worked.4 points
-
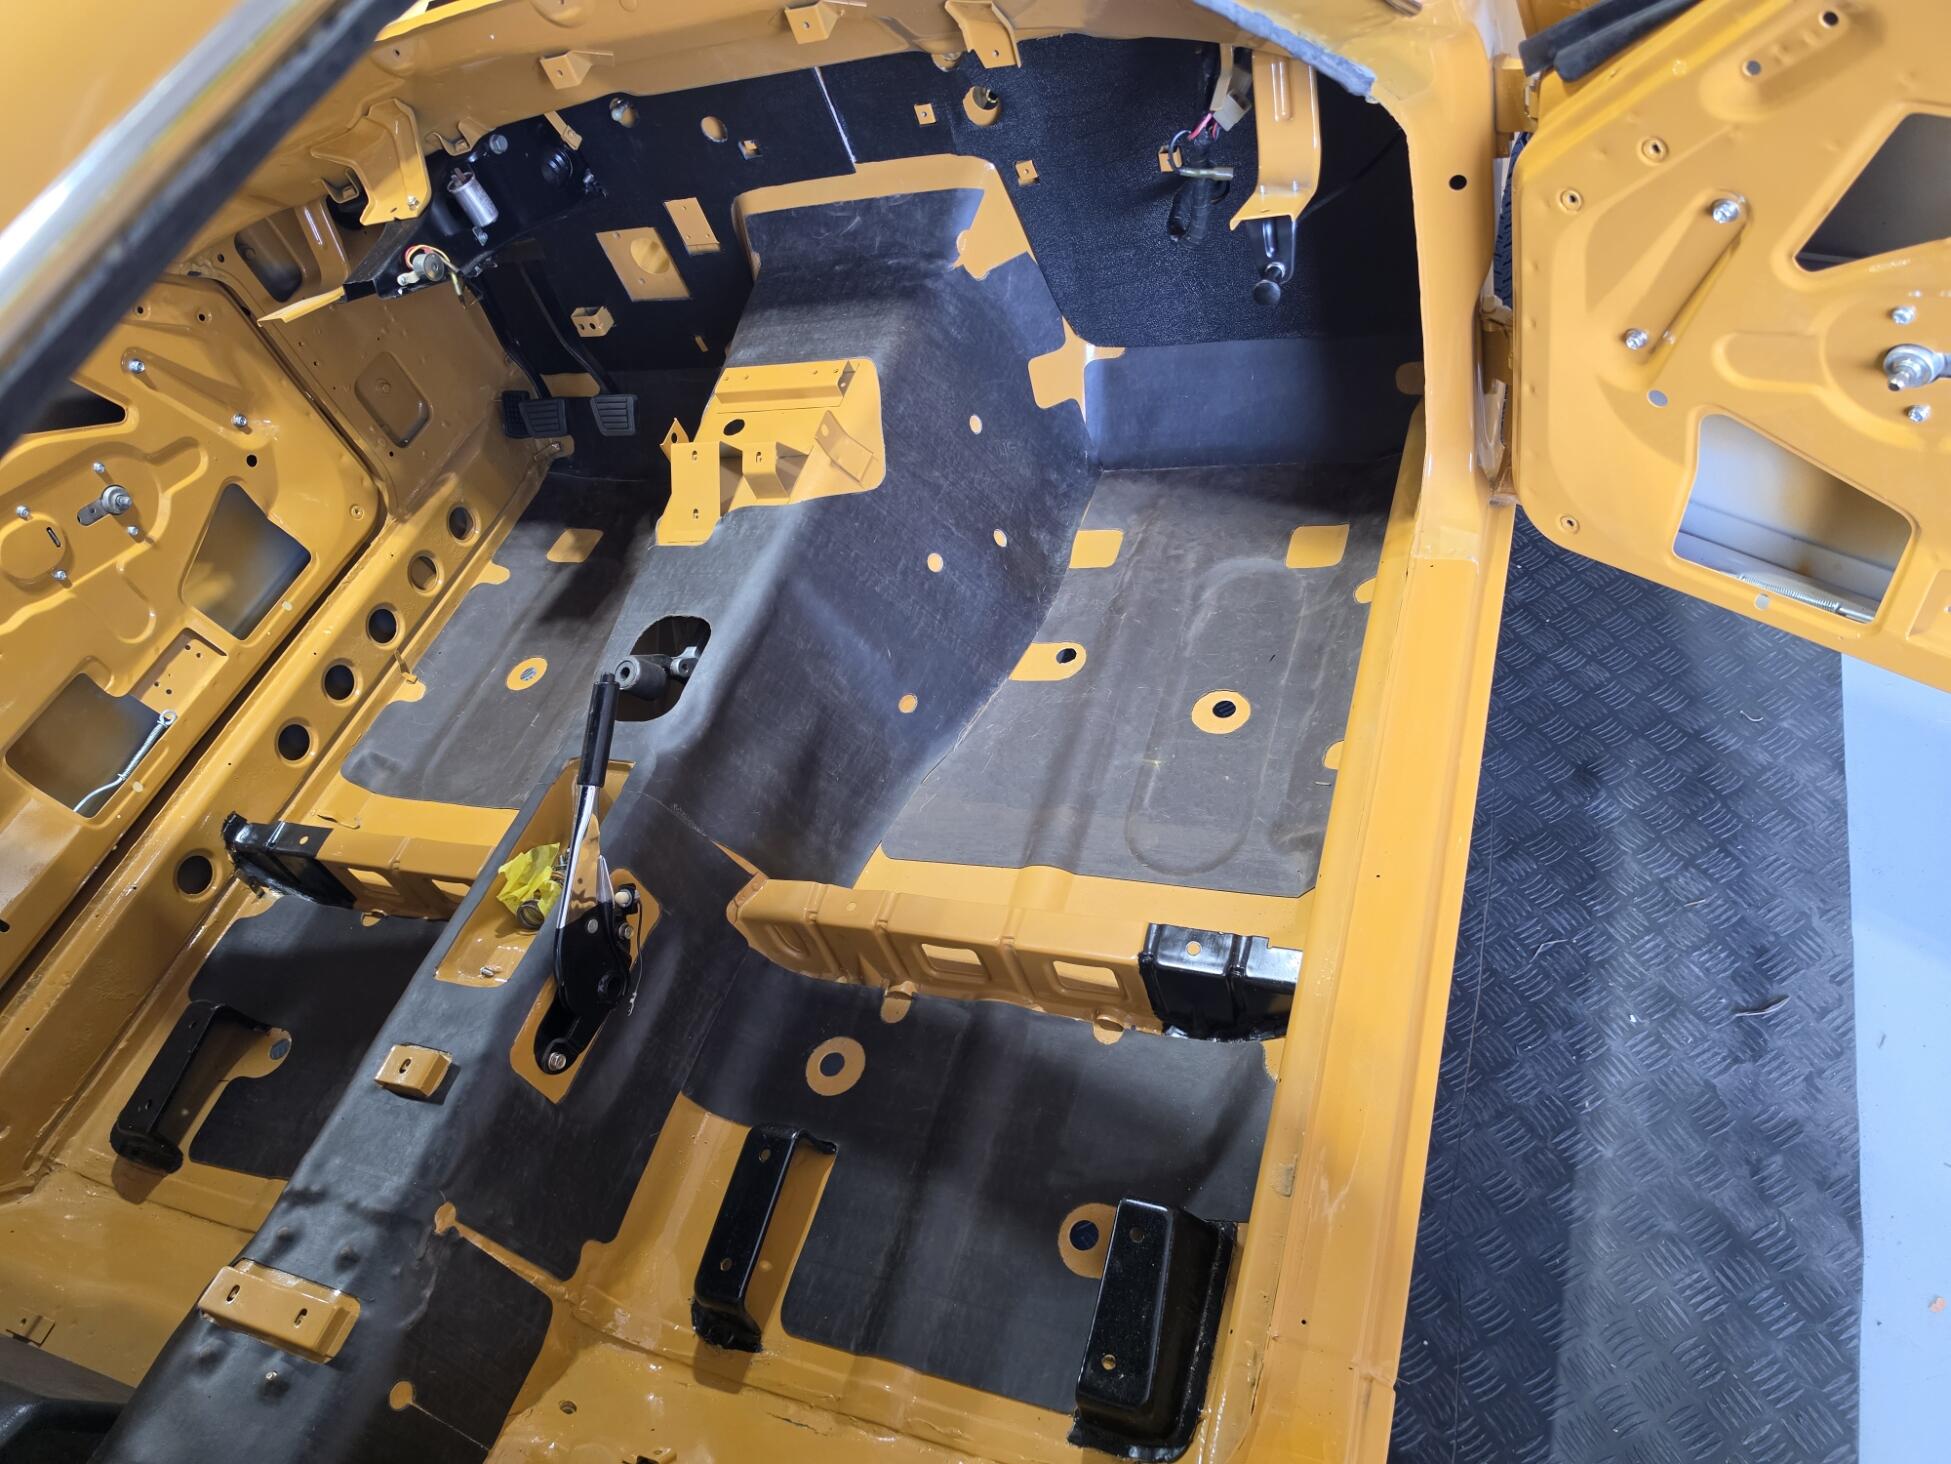
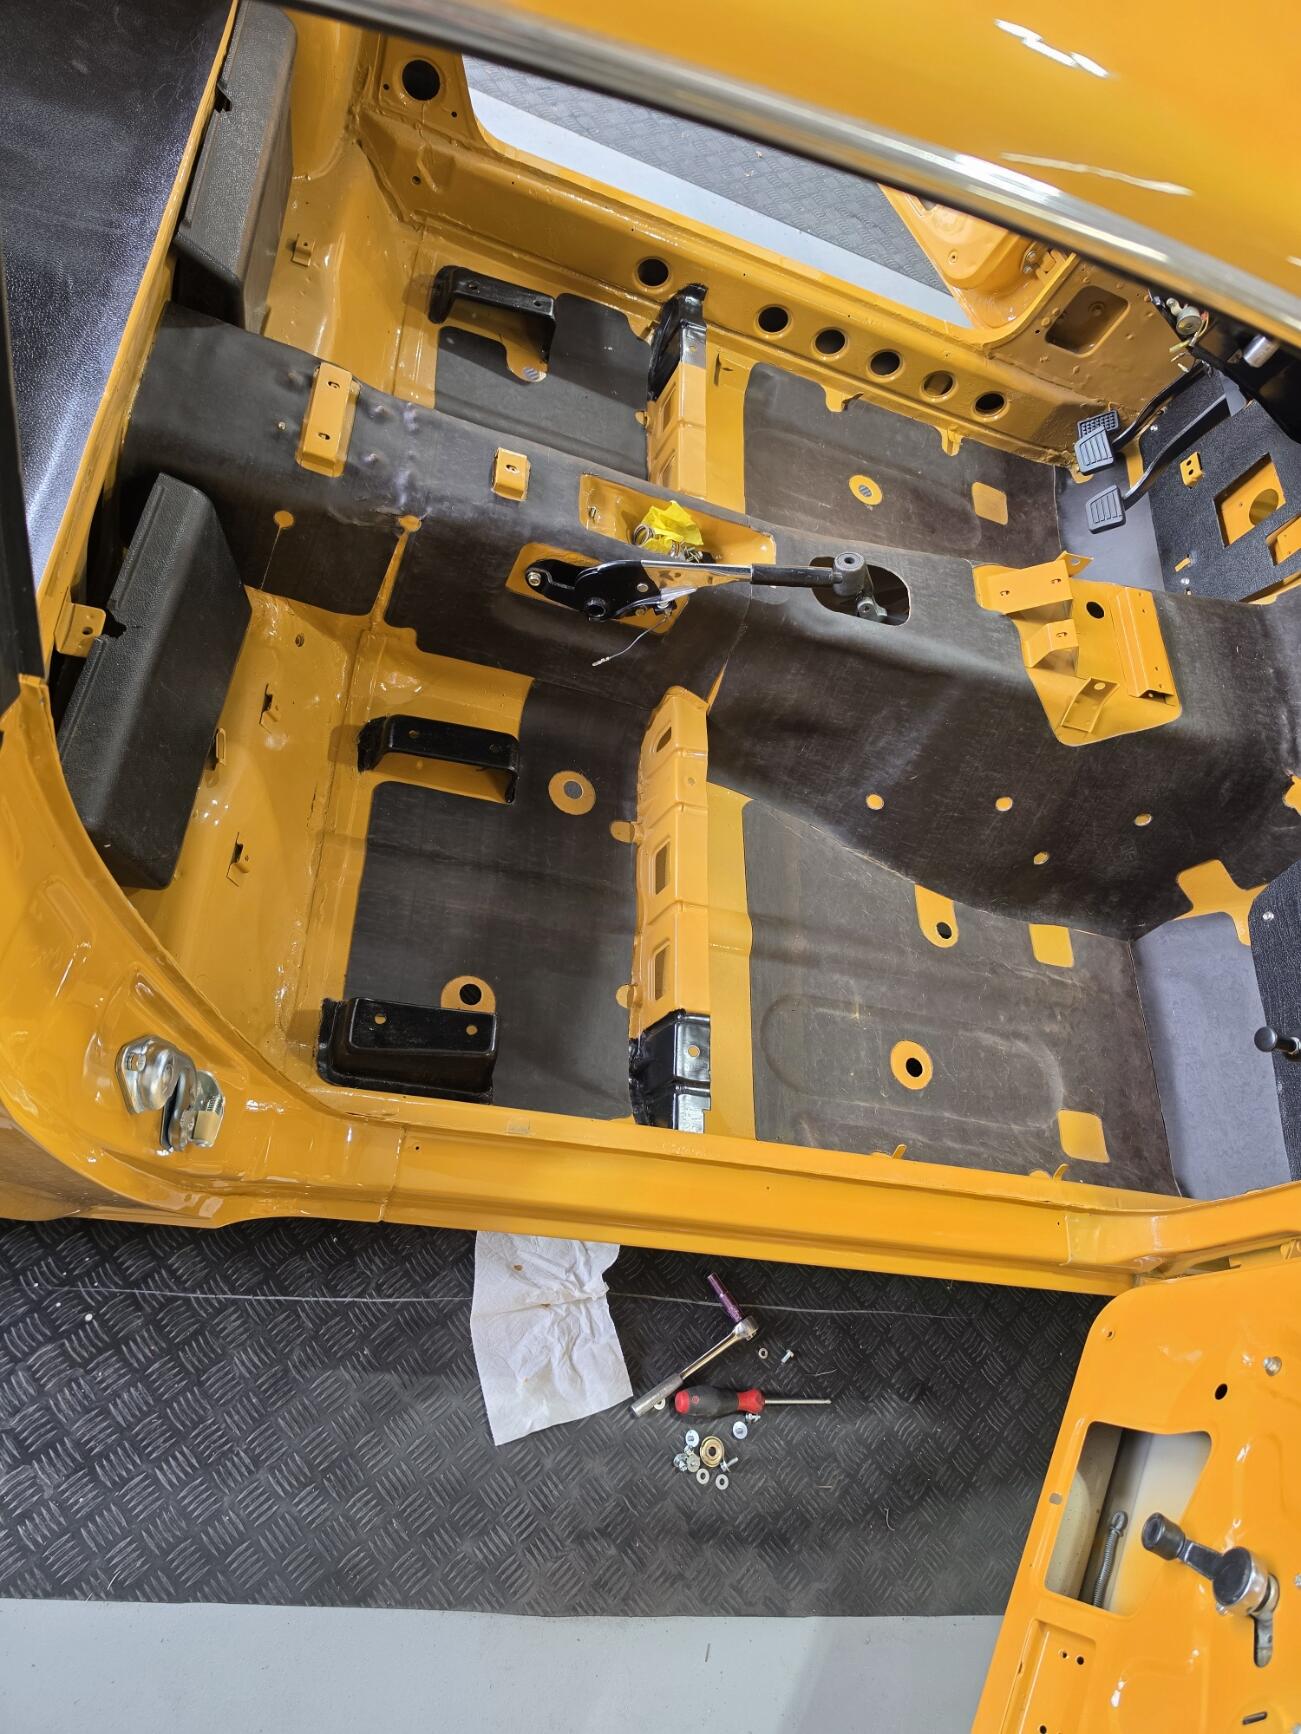
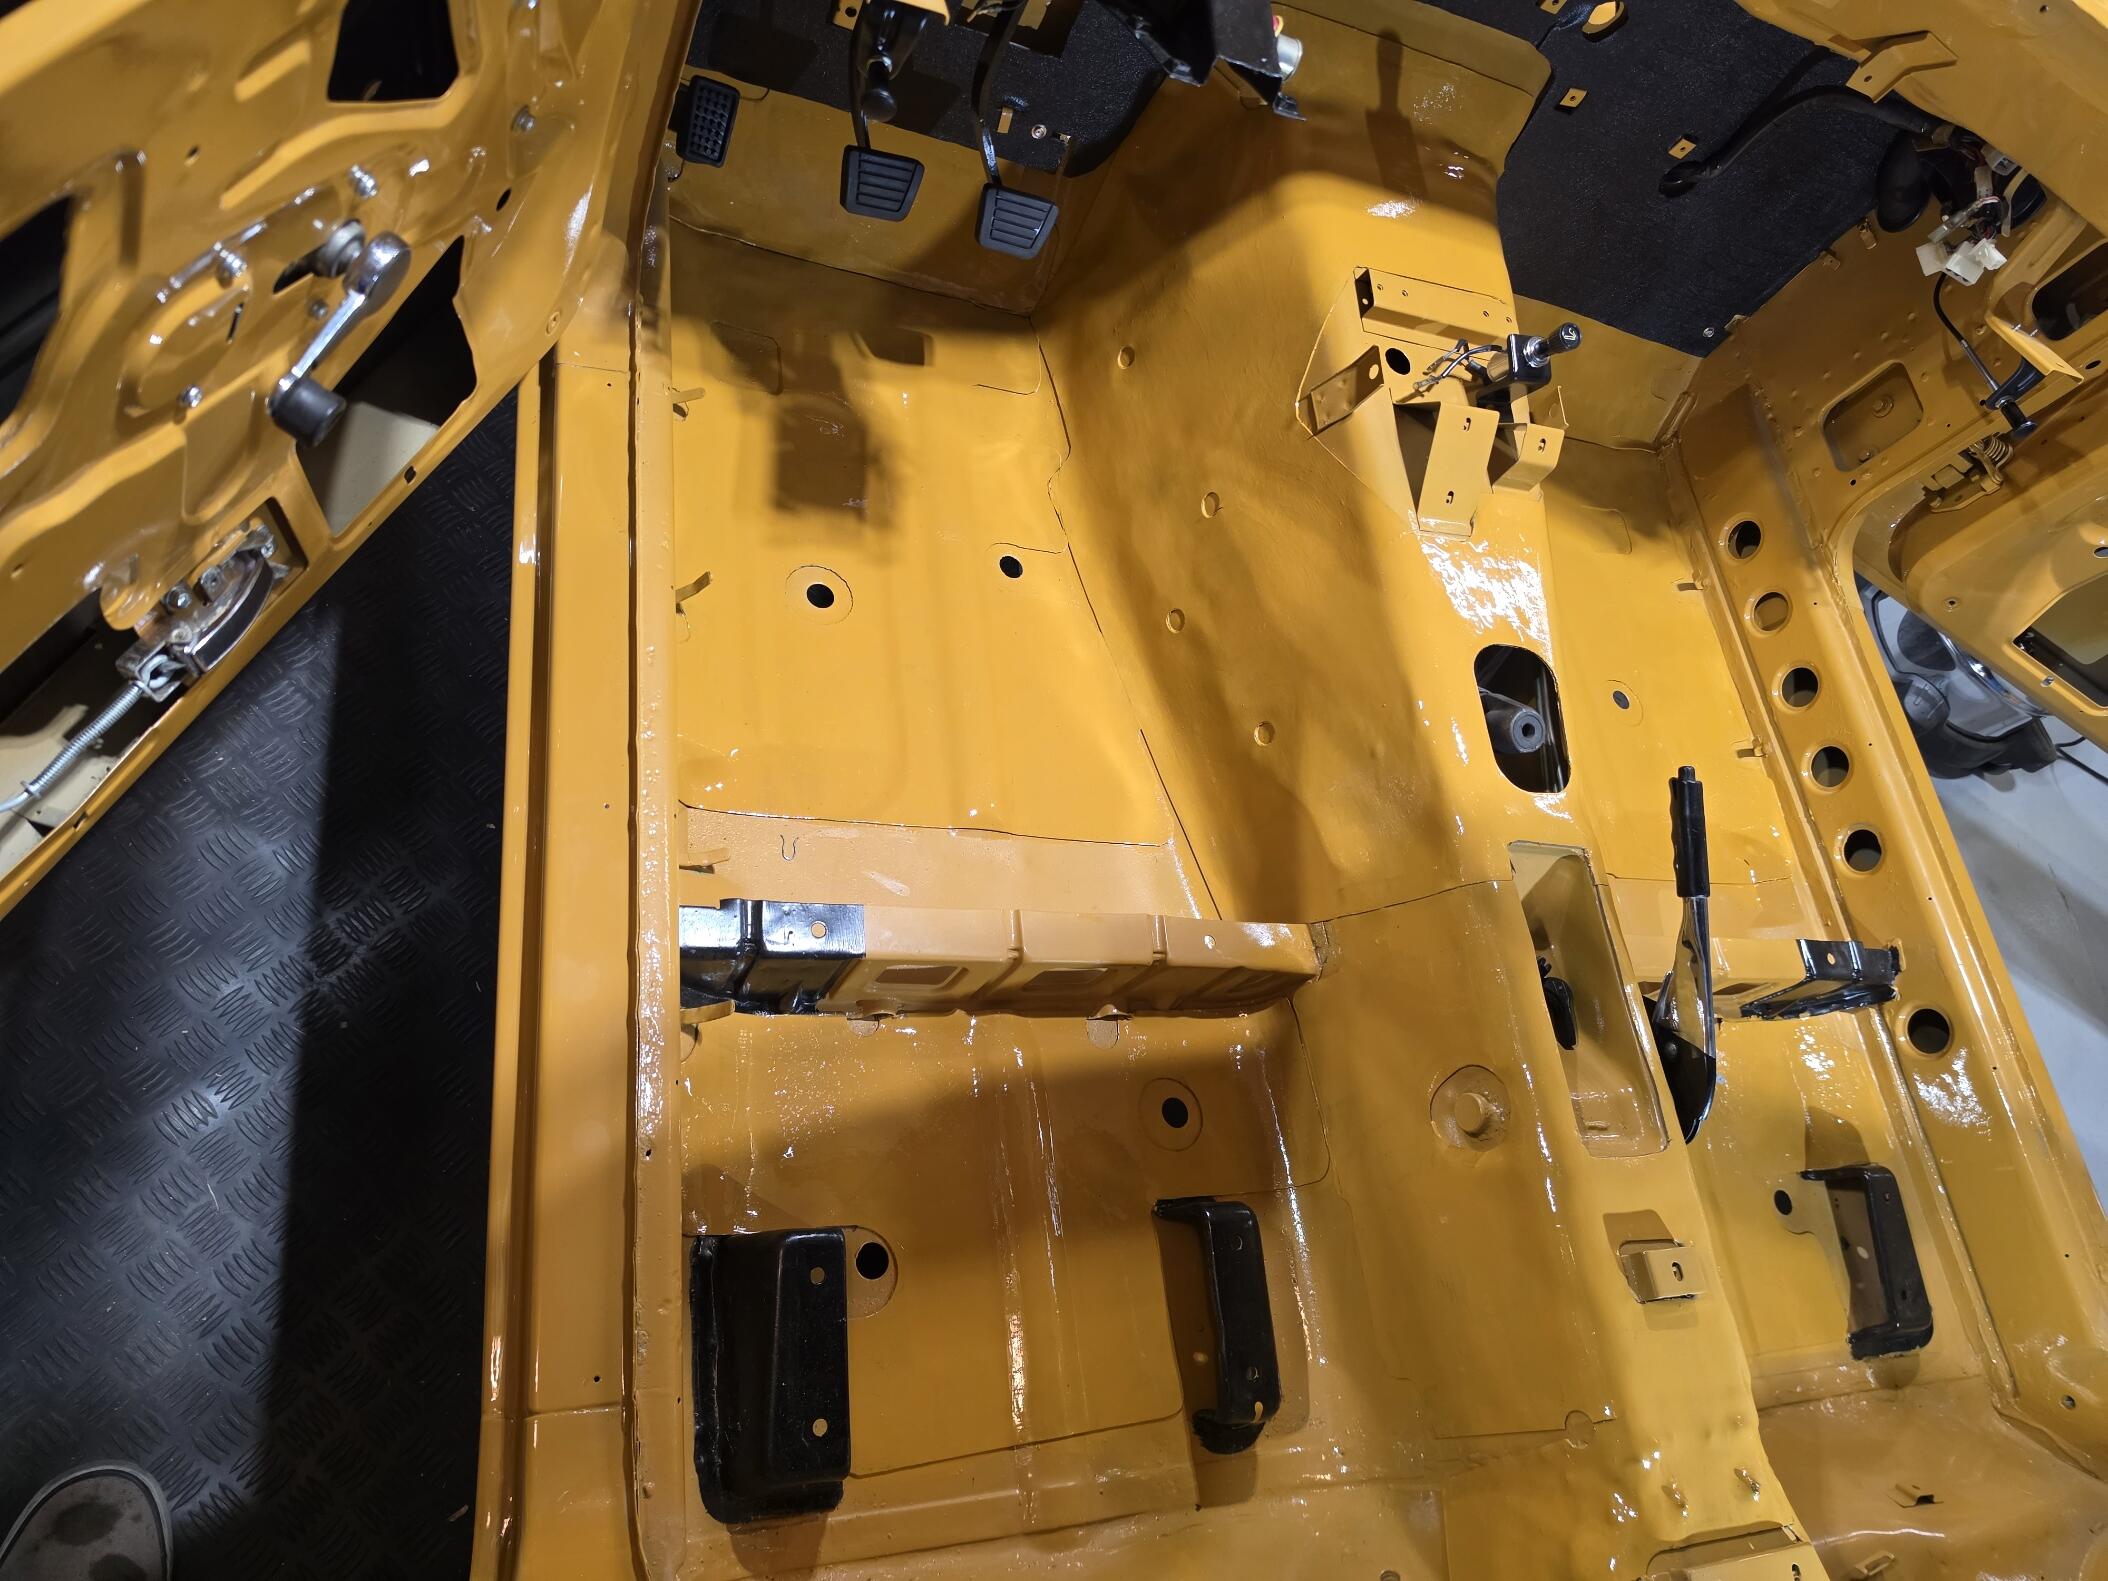
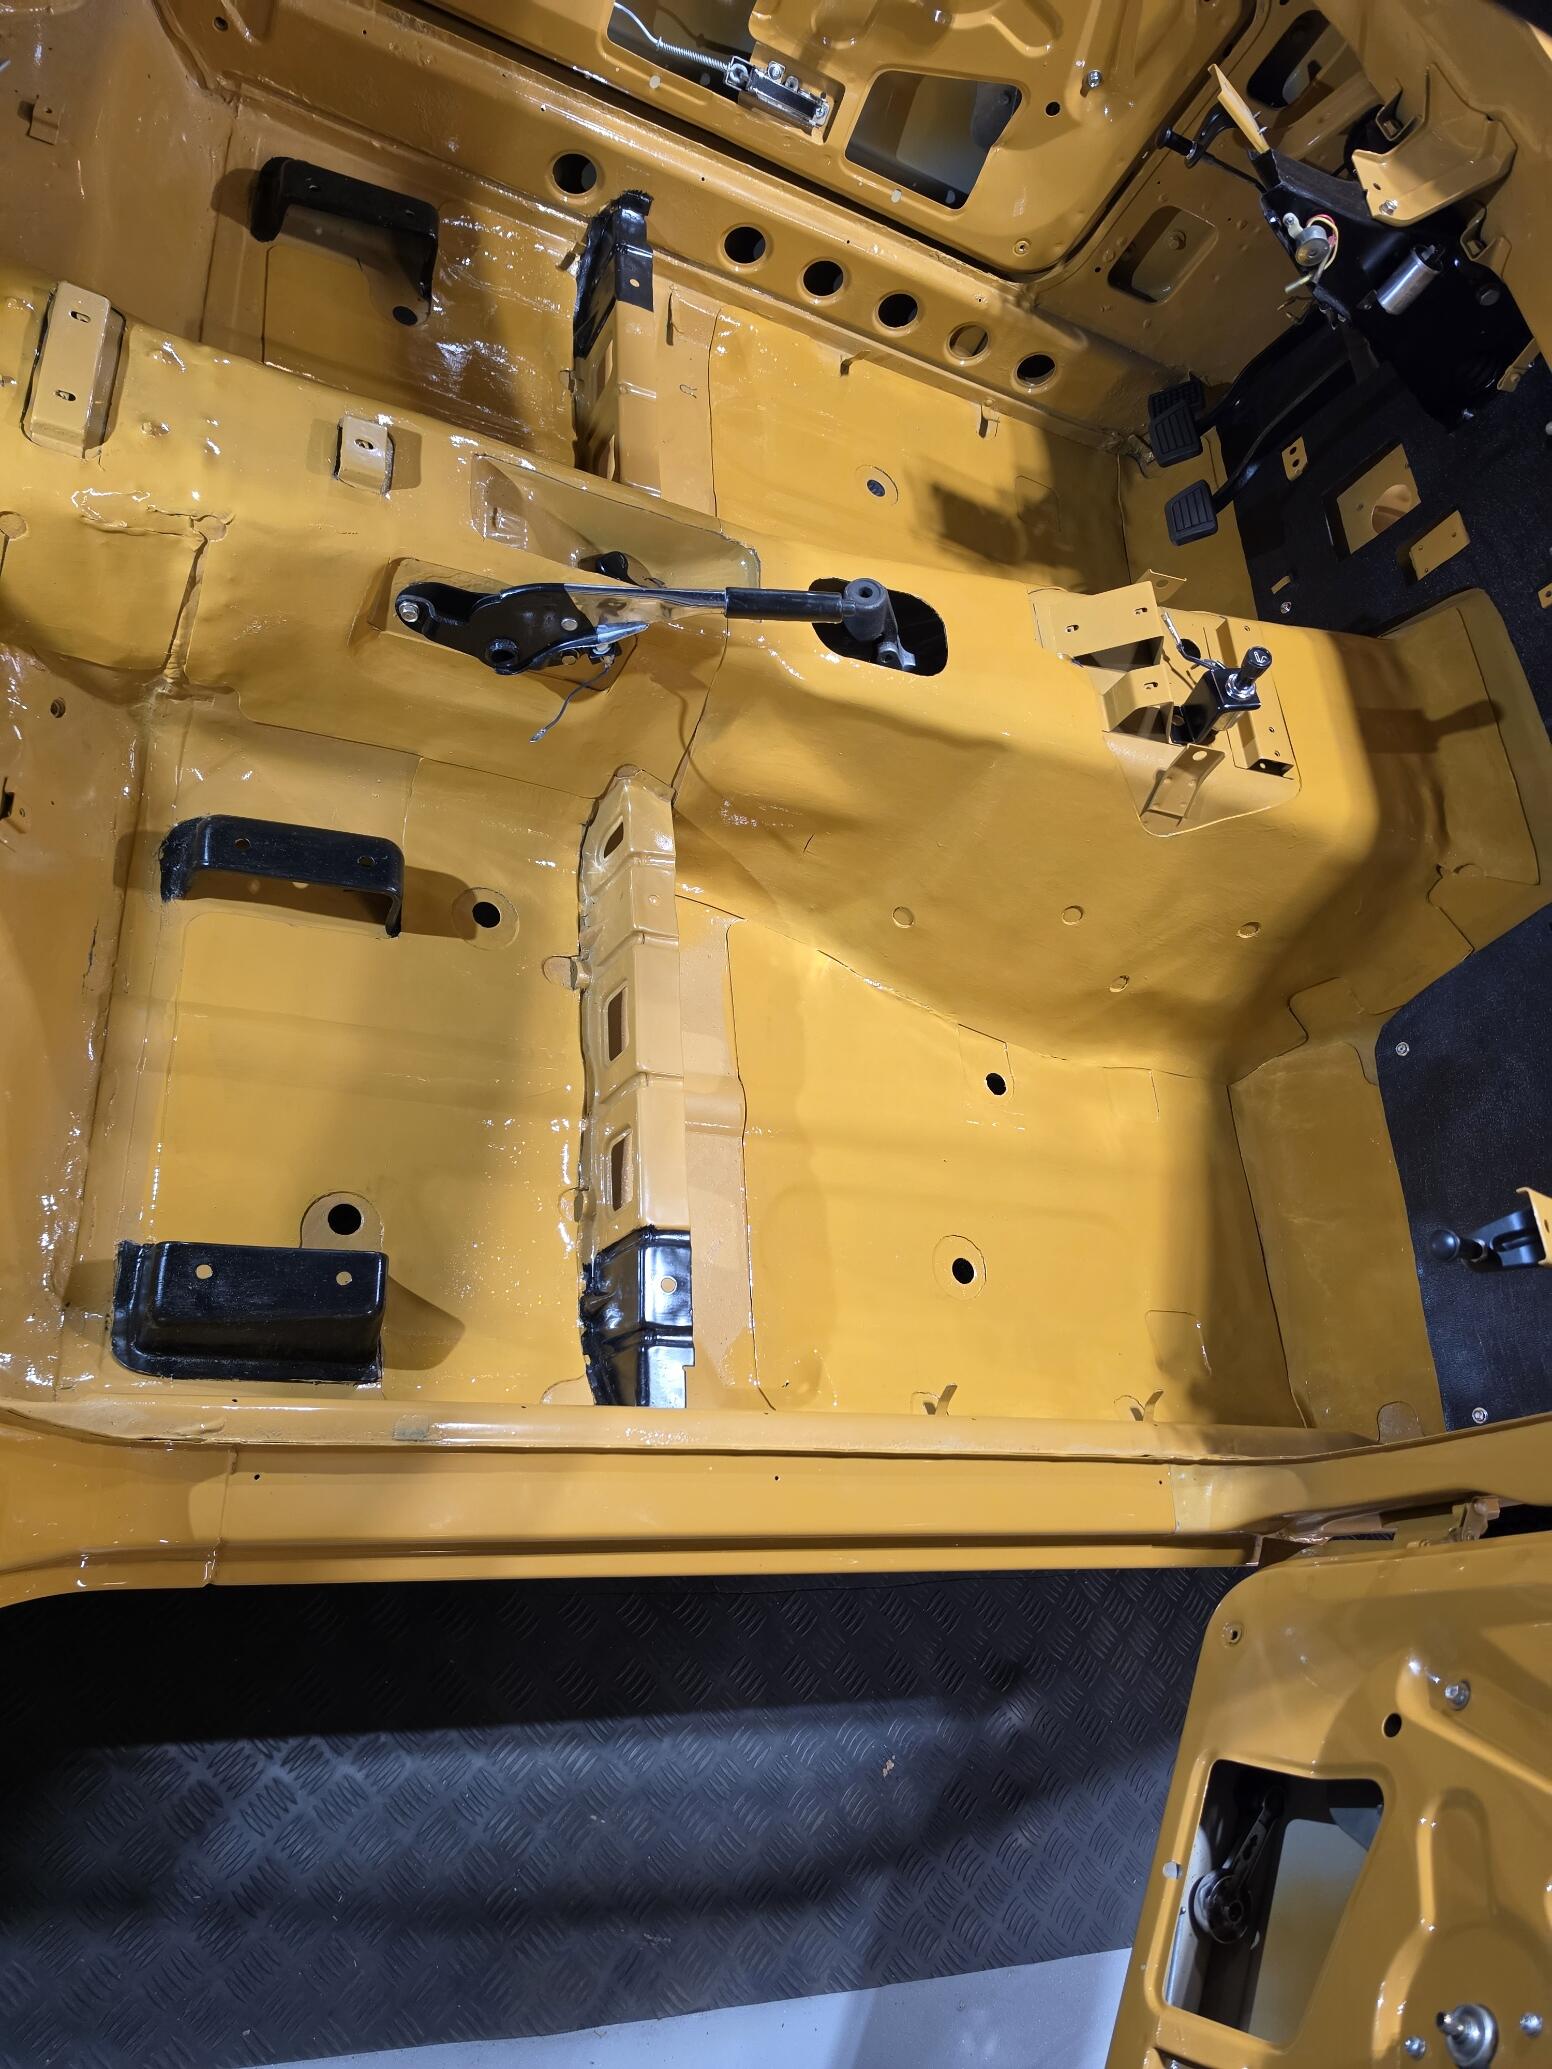
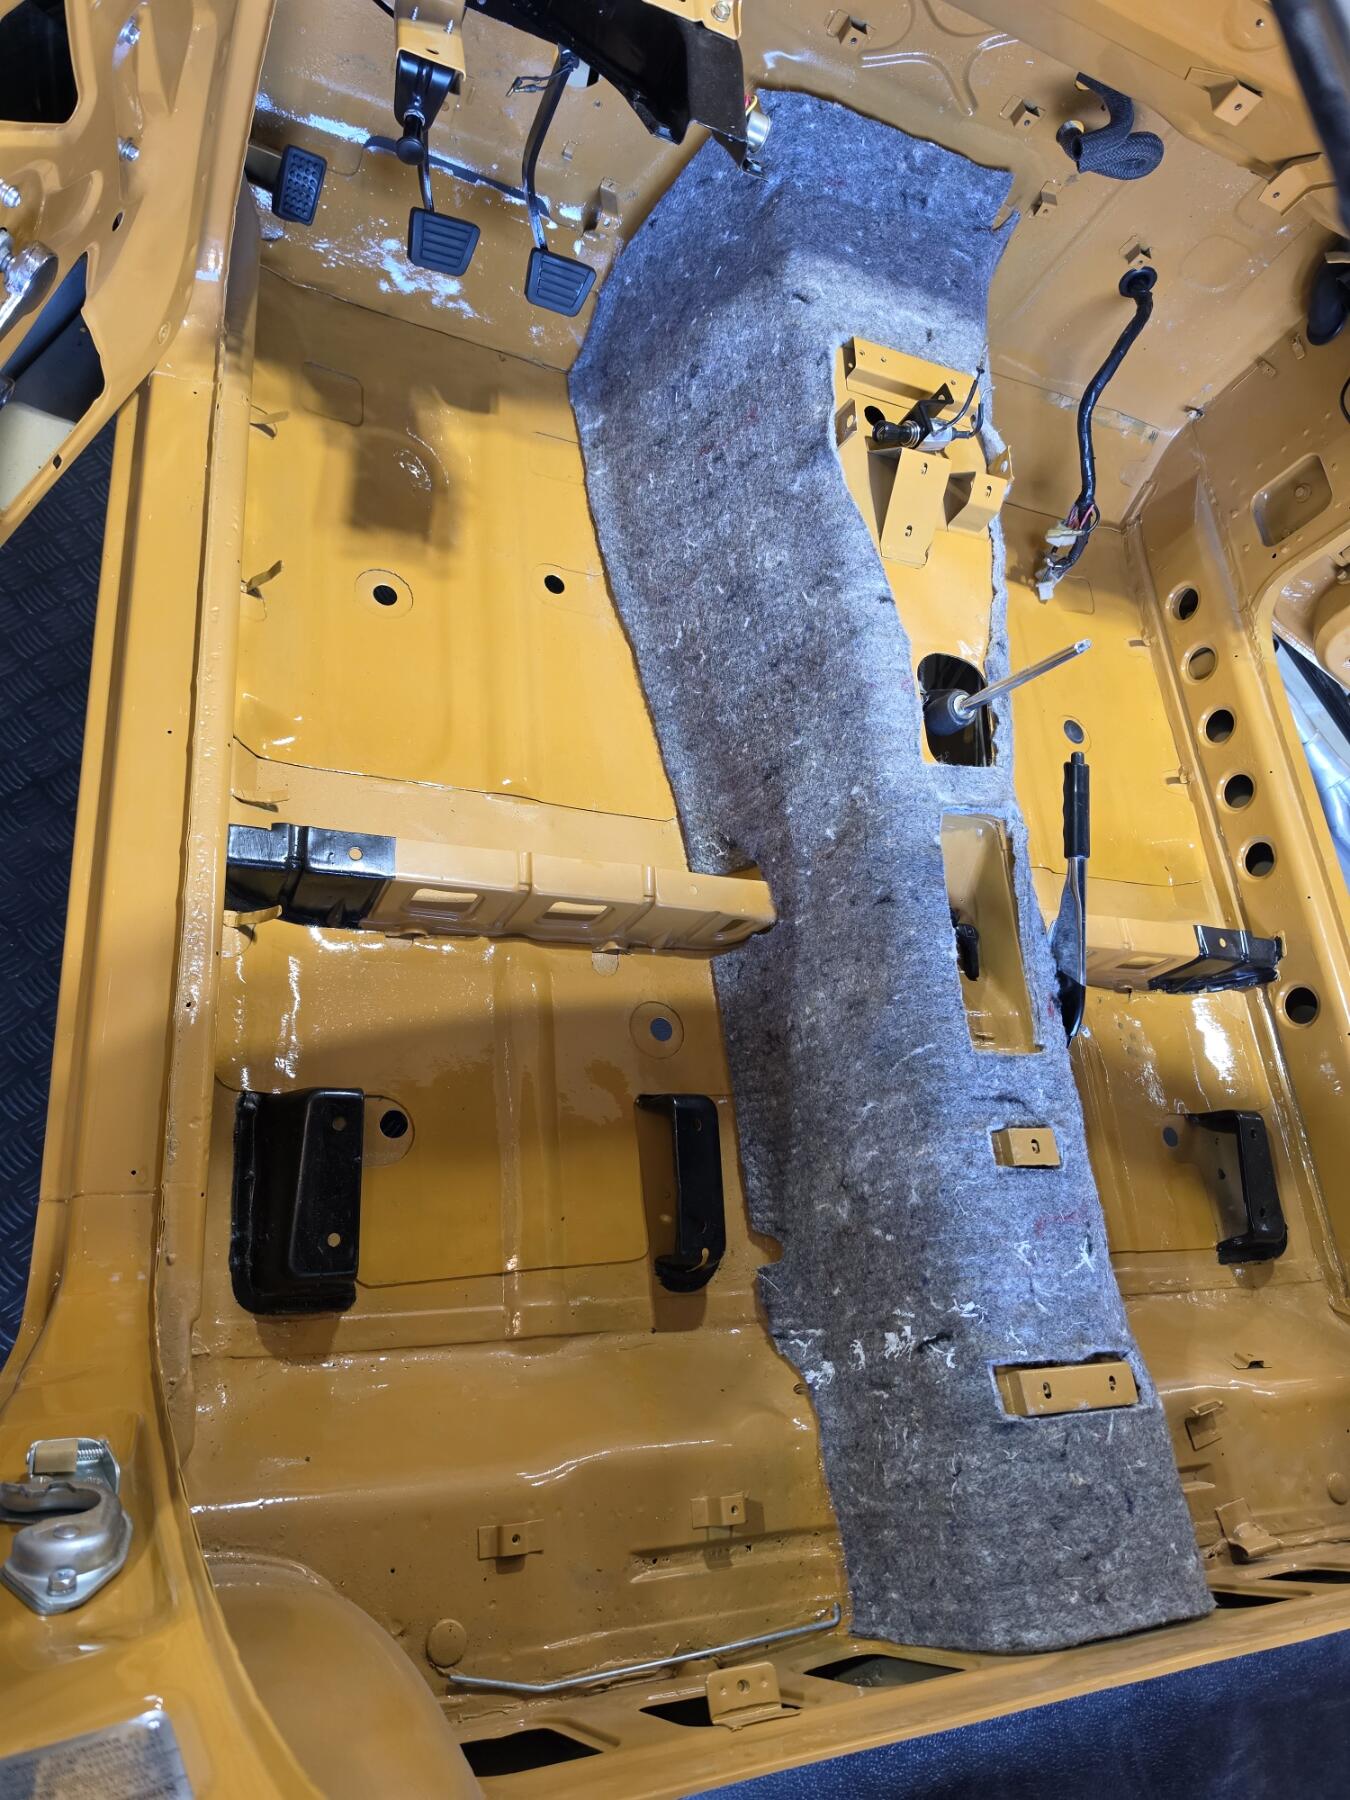
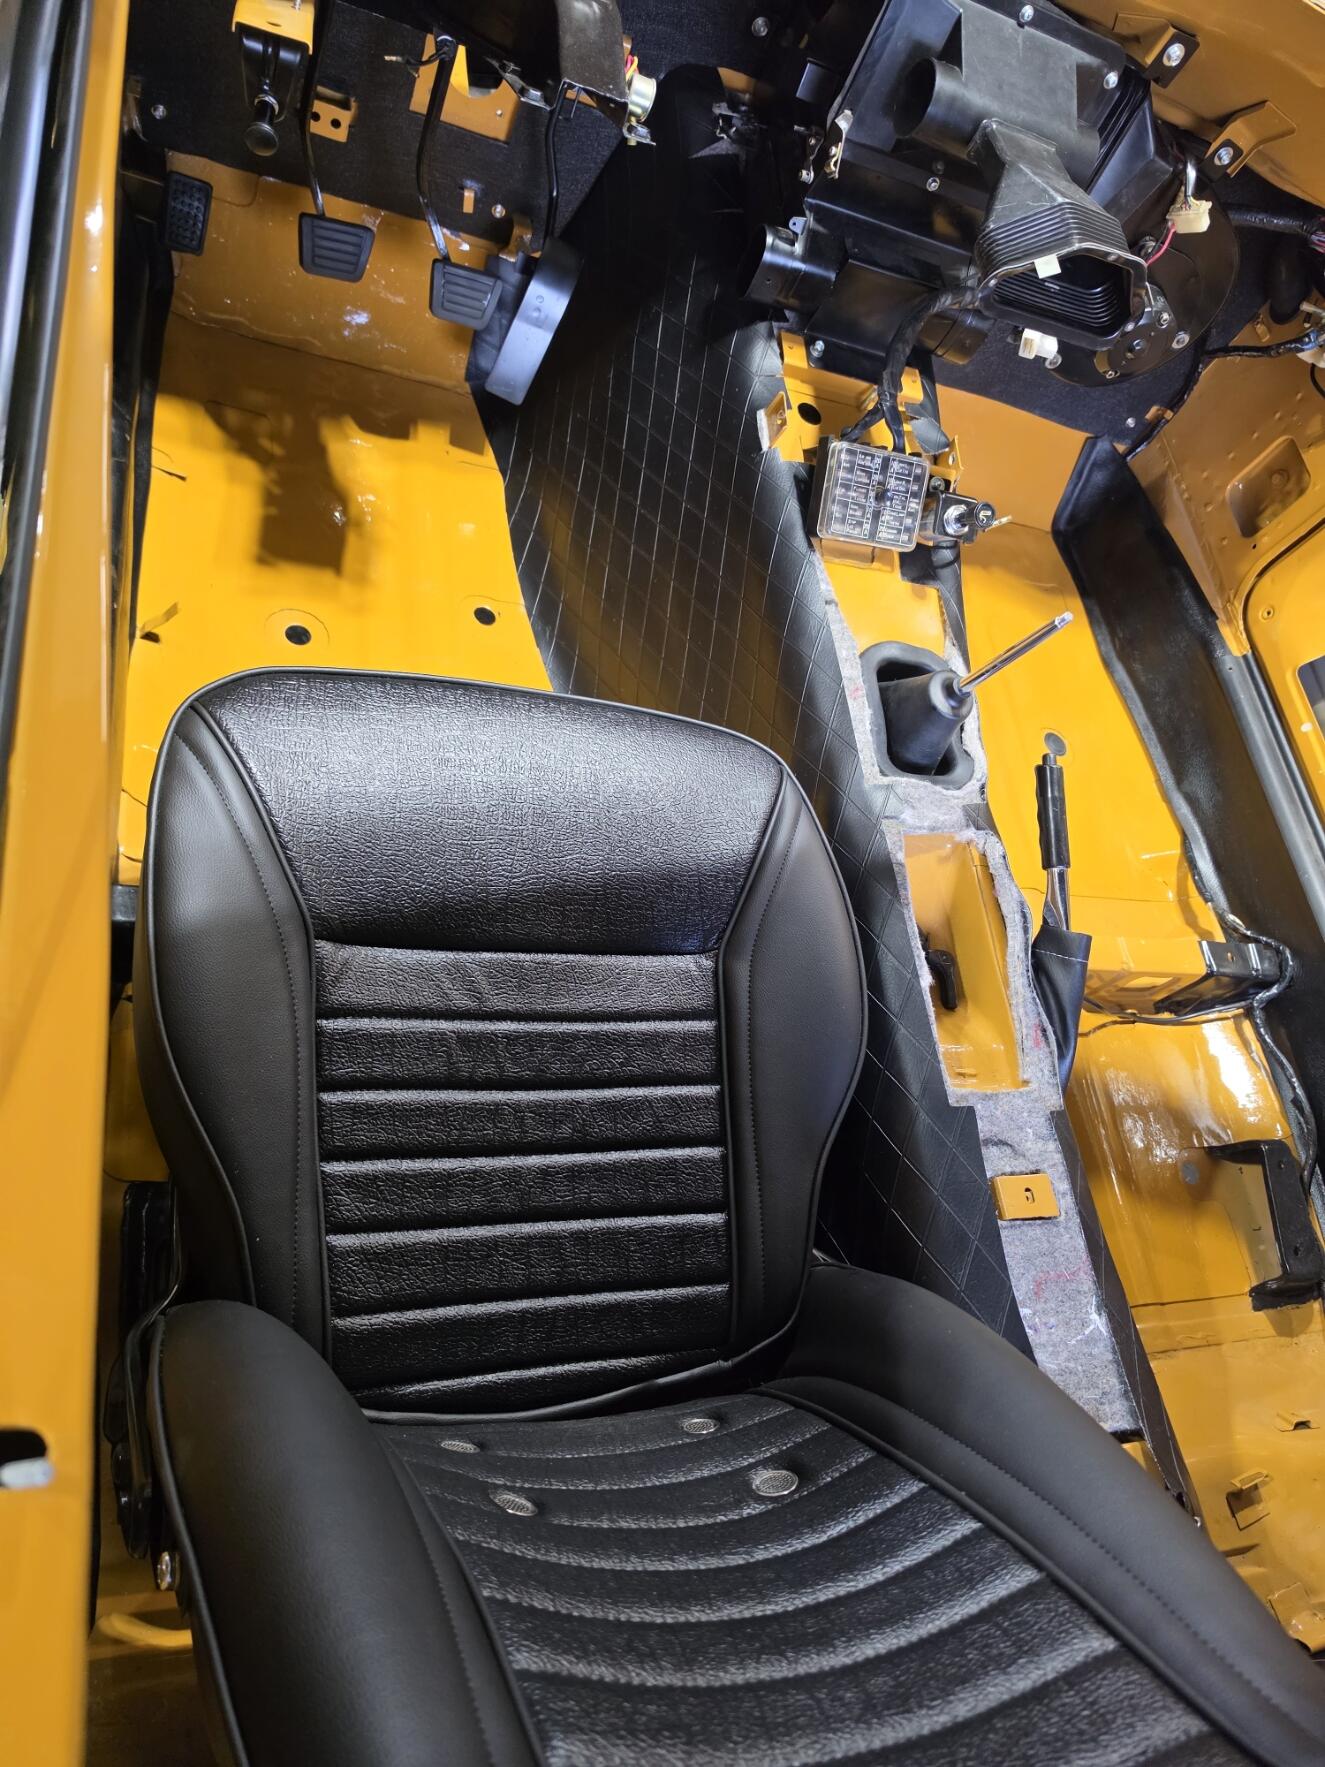
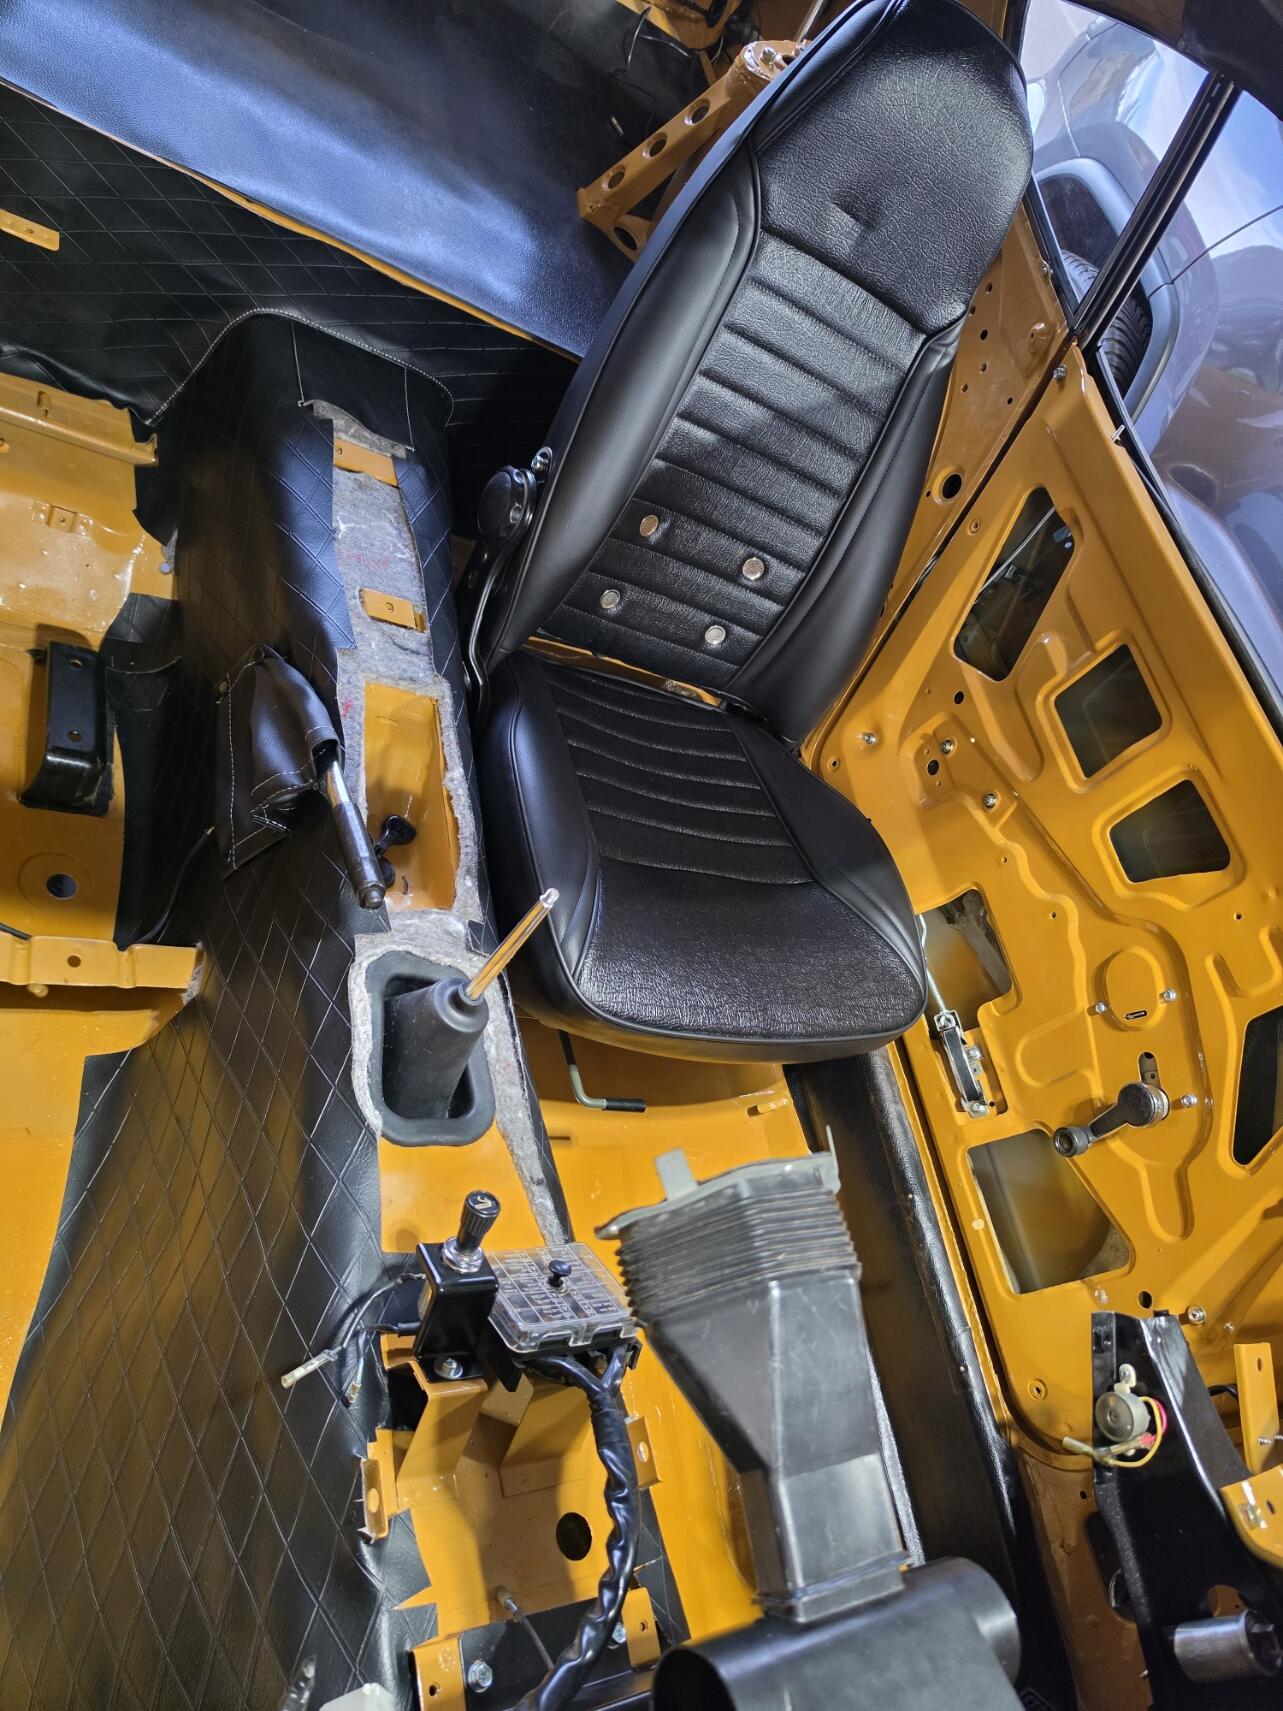
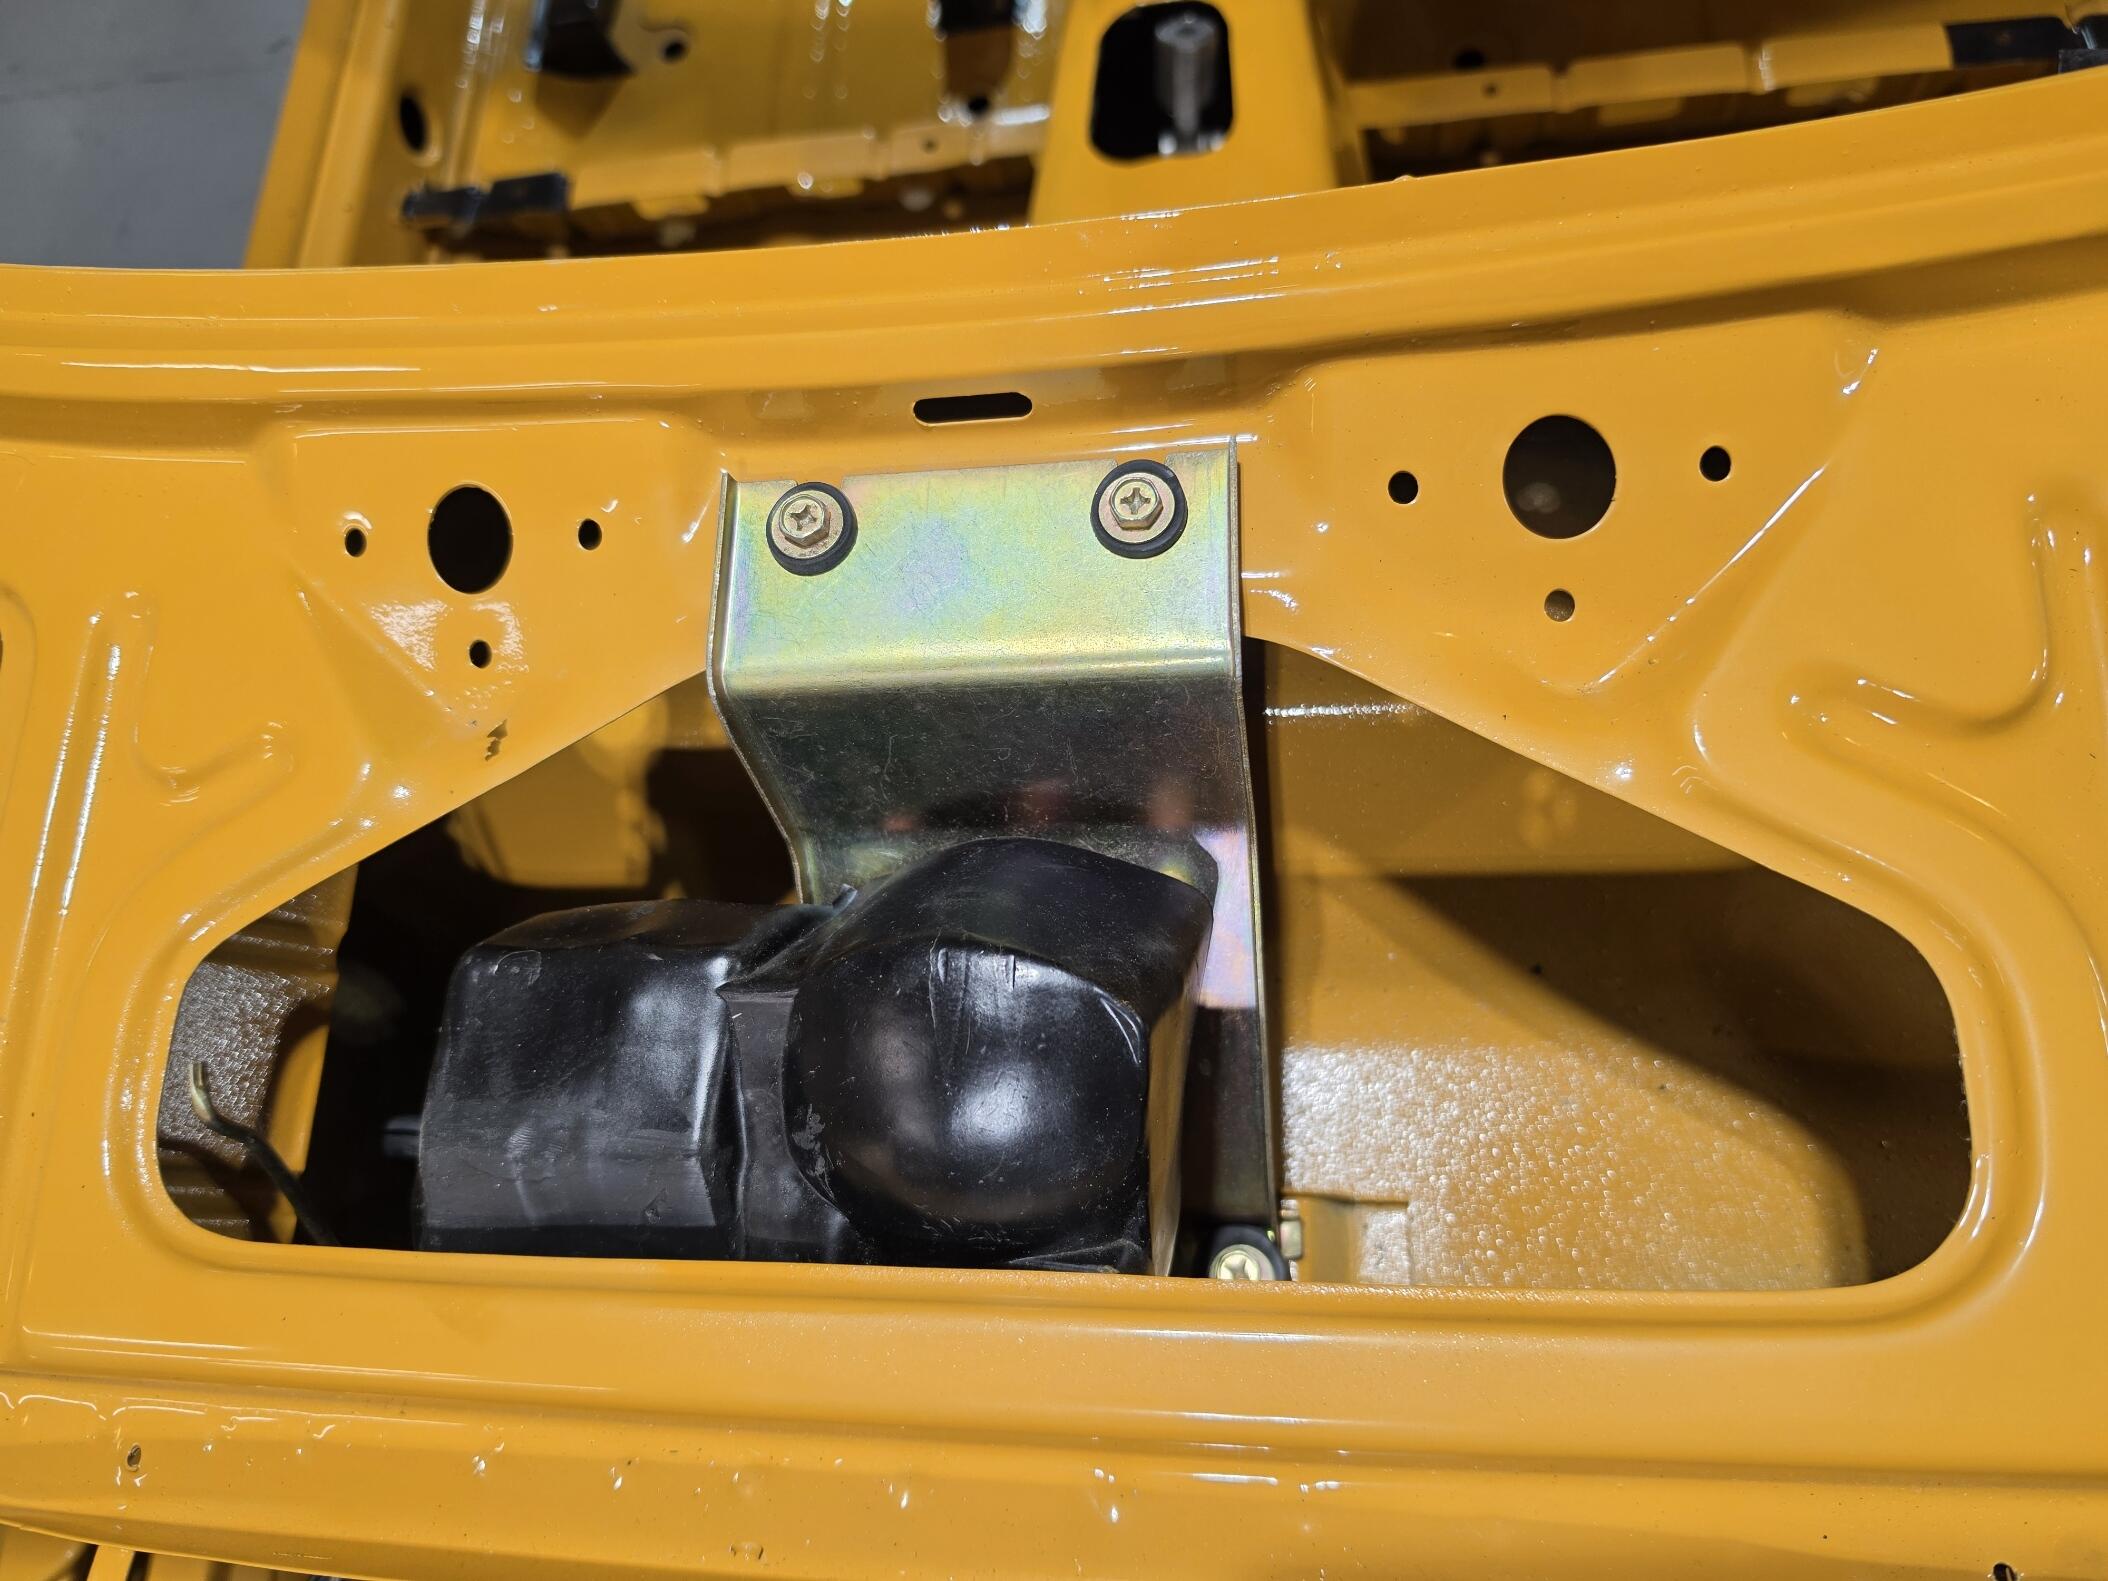
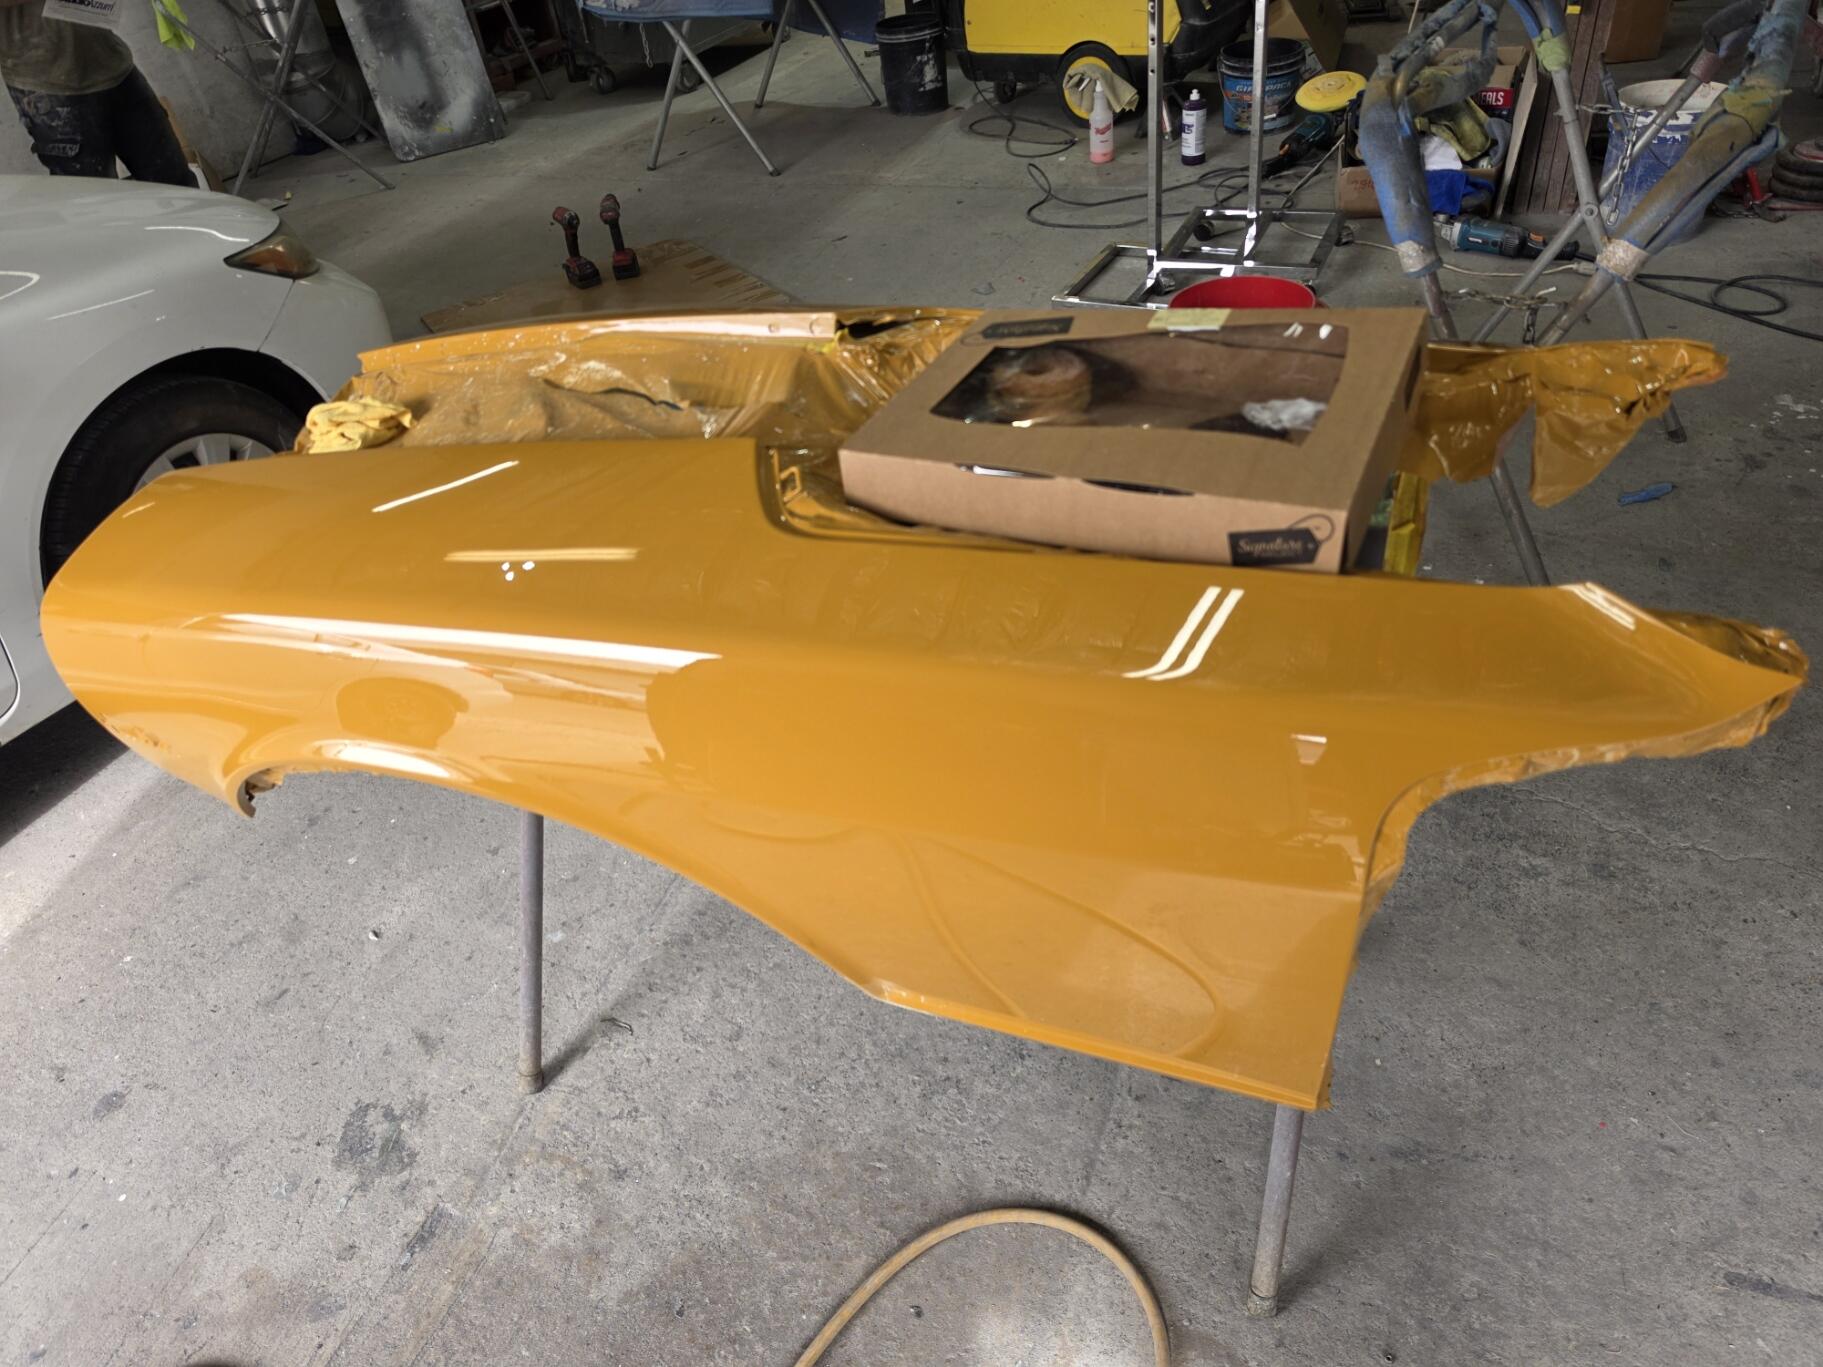
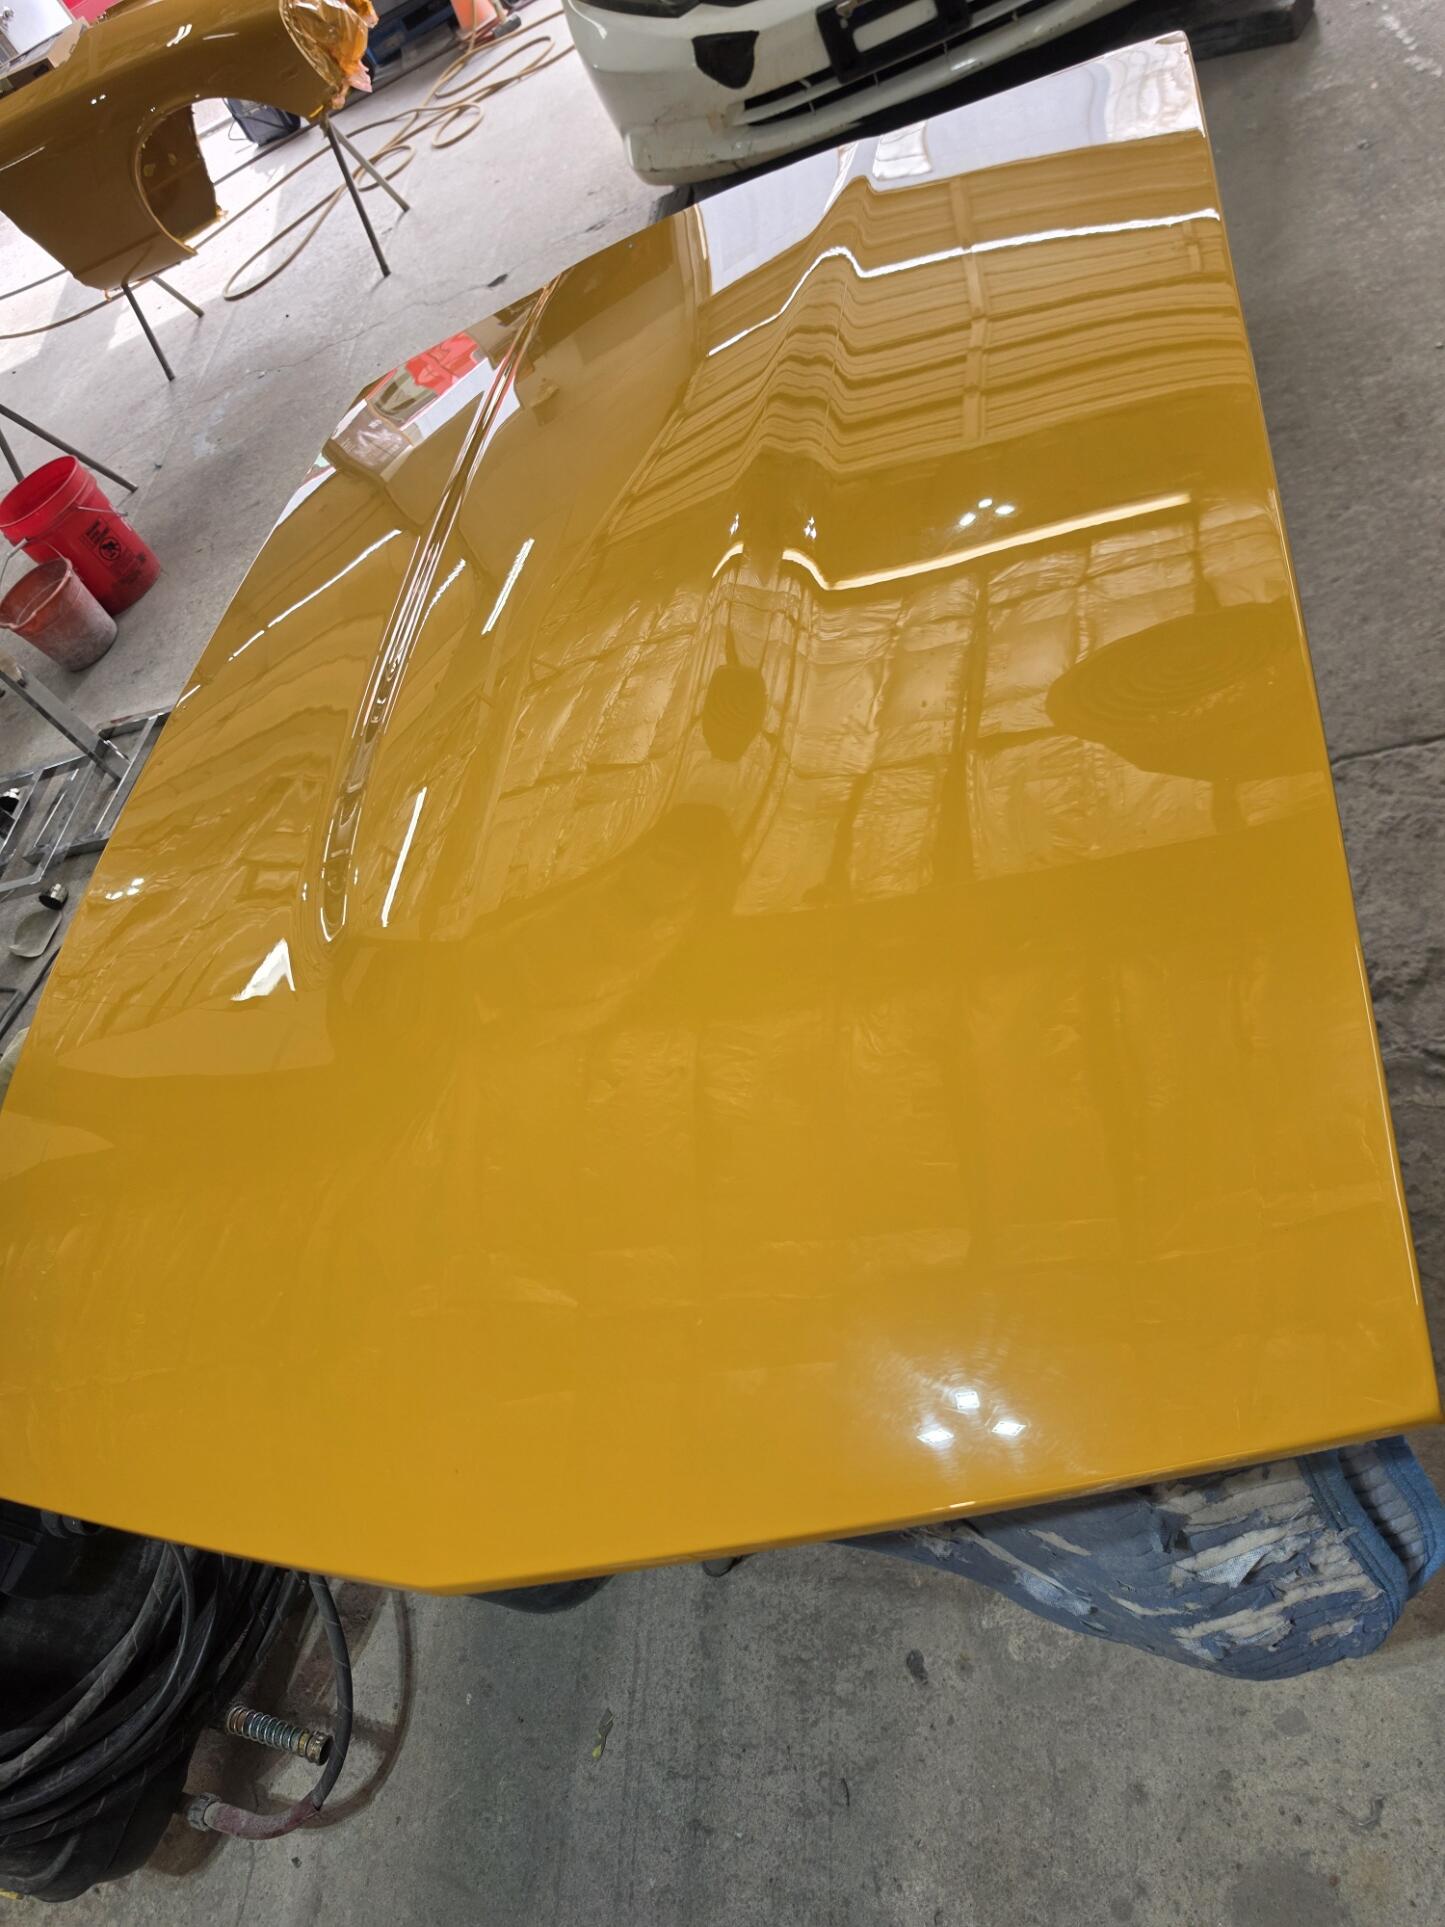
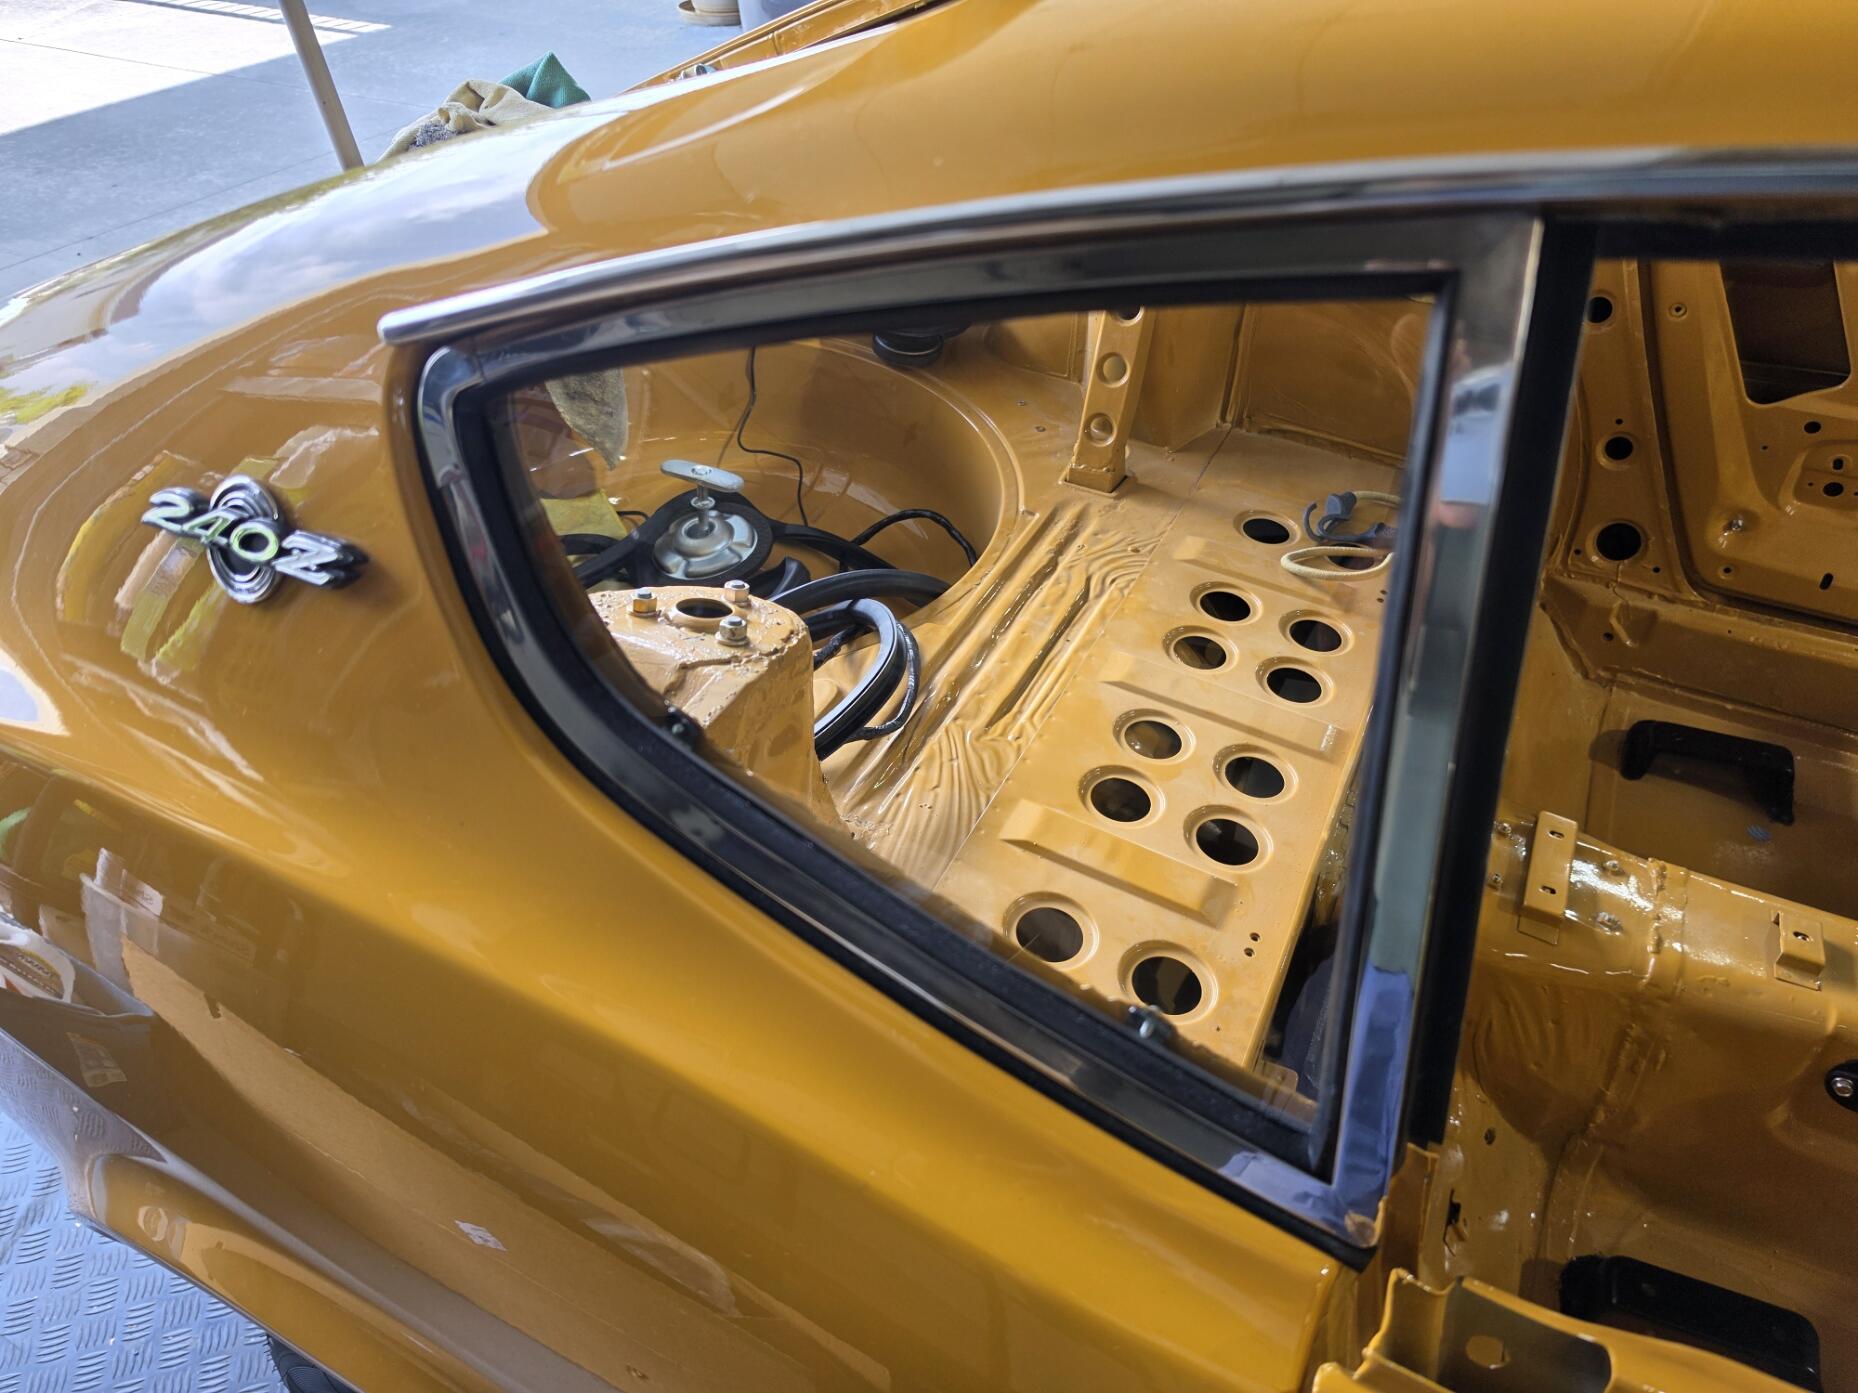
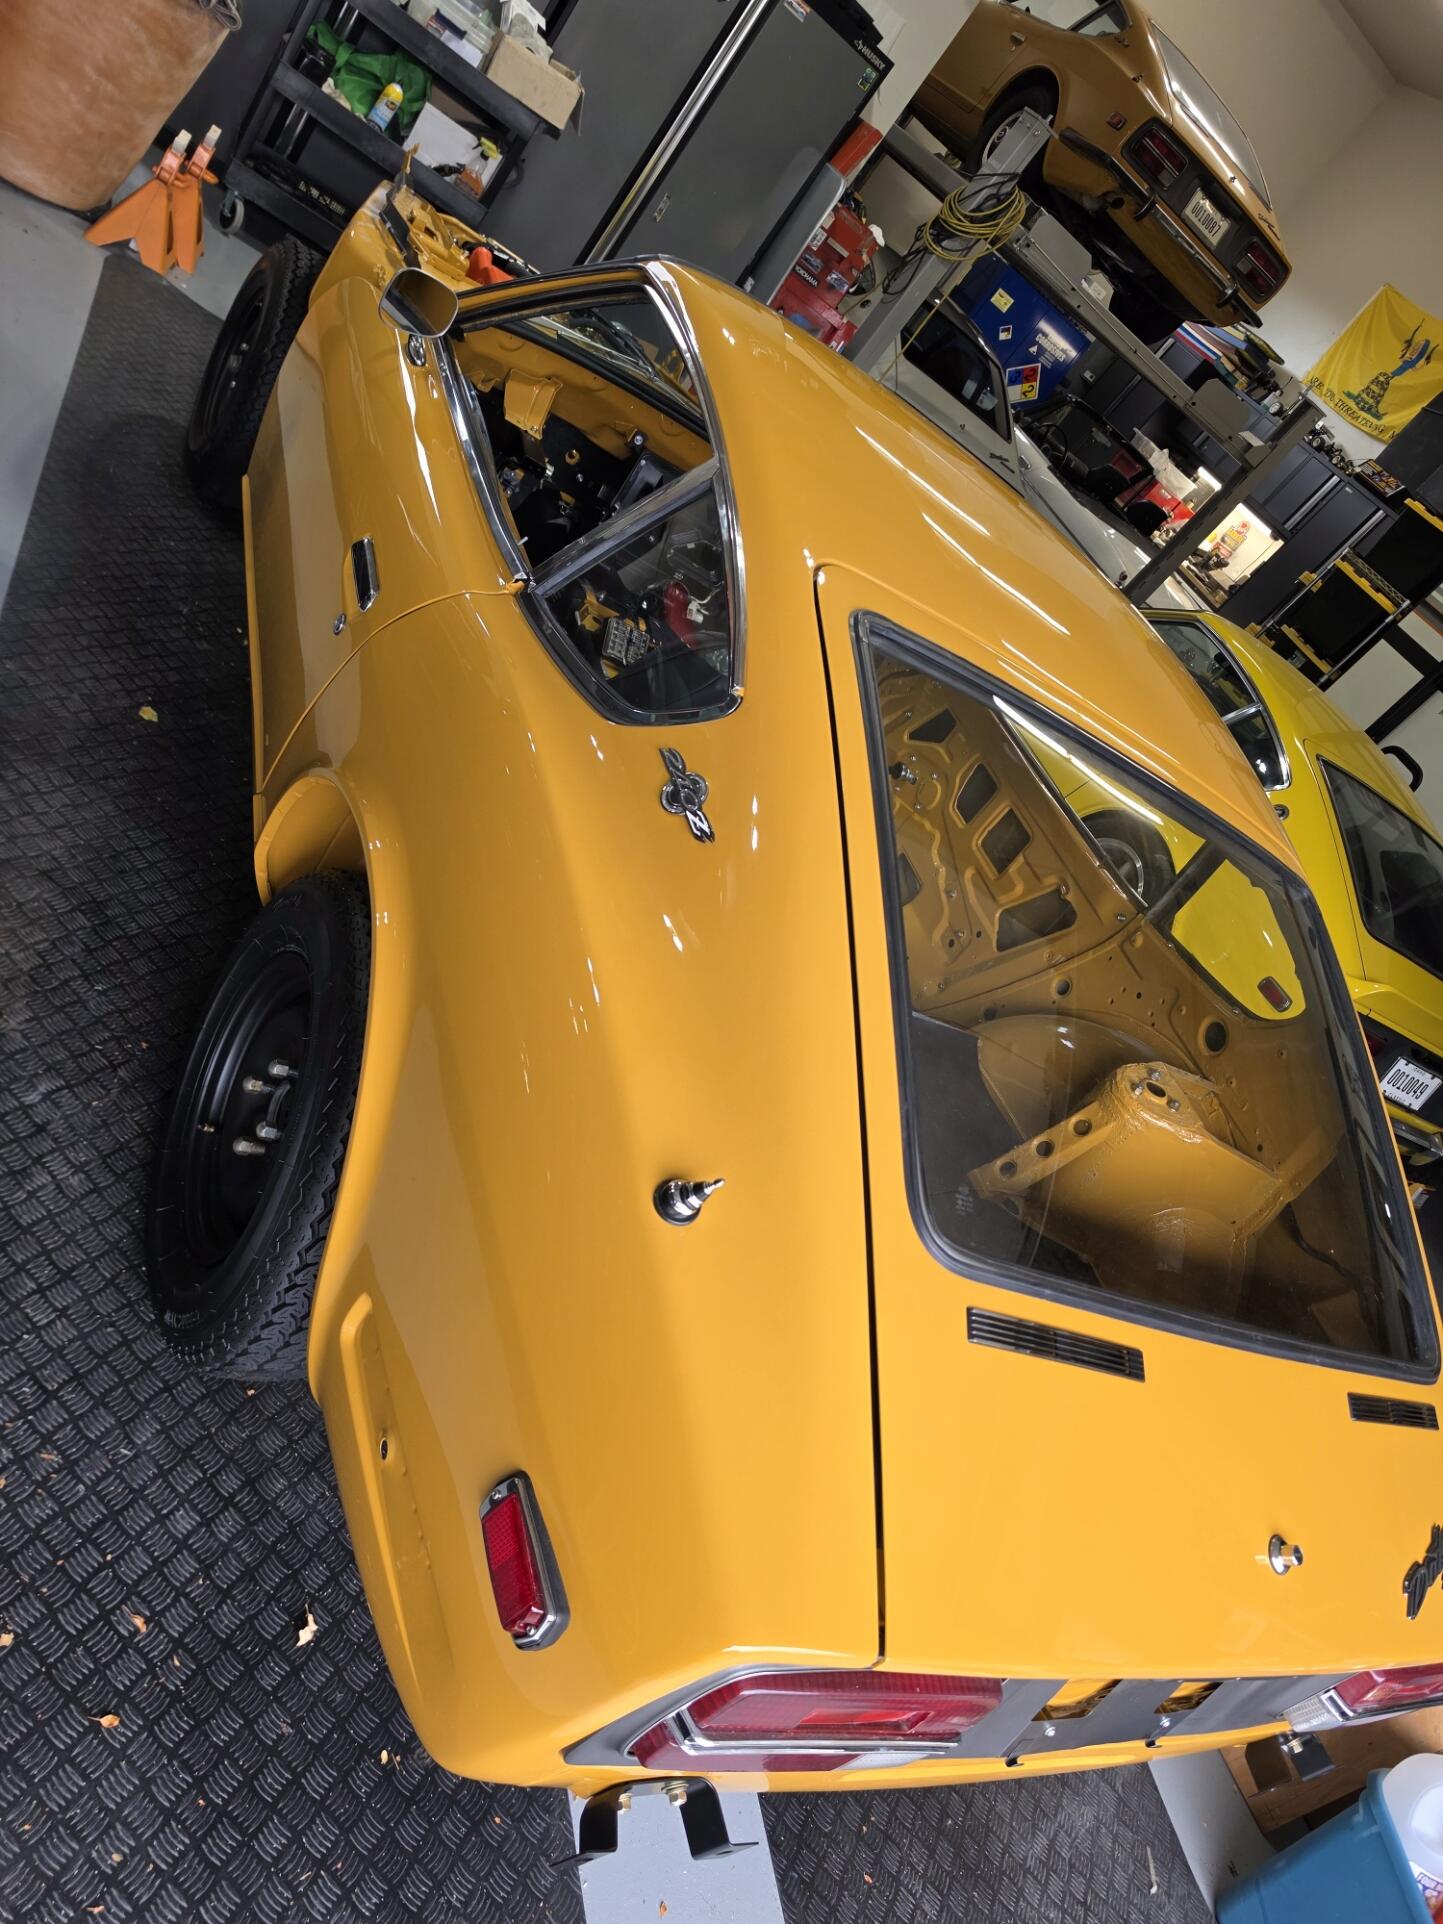
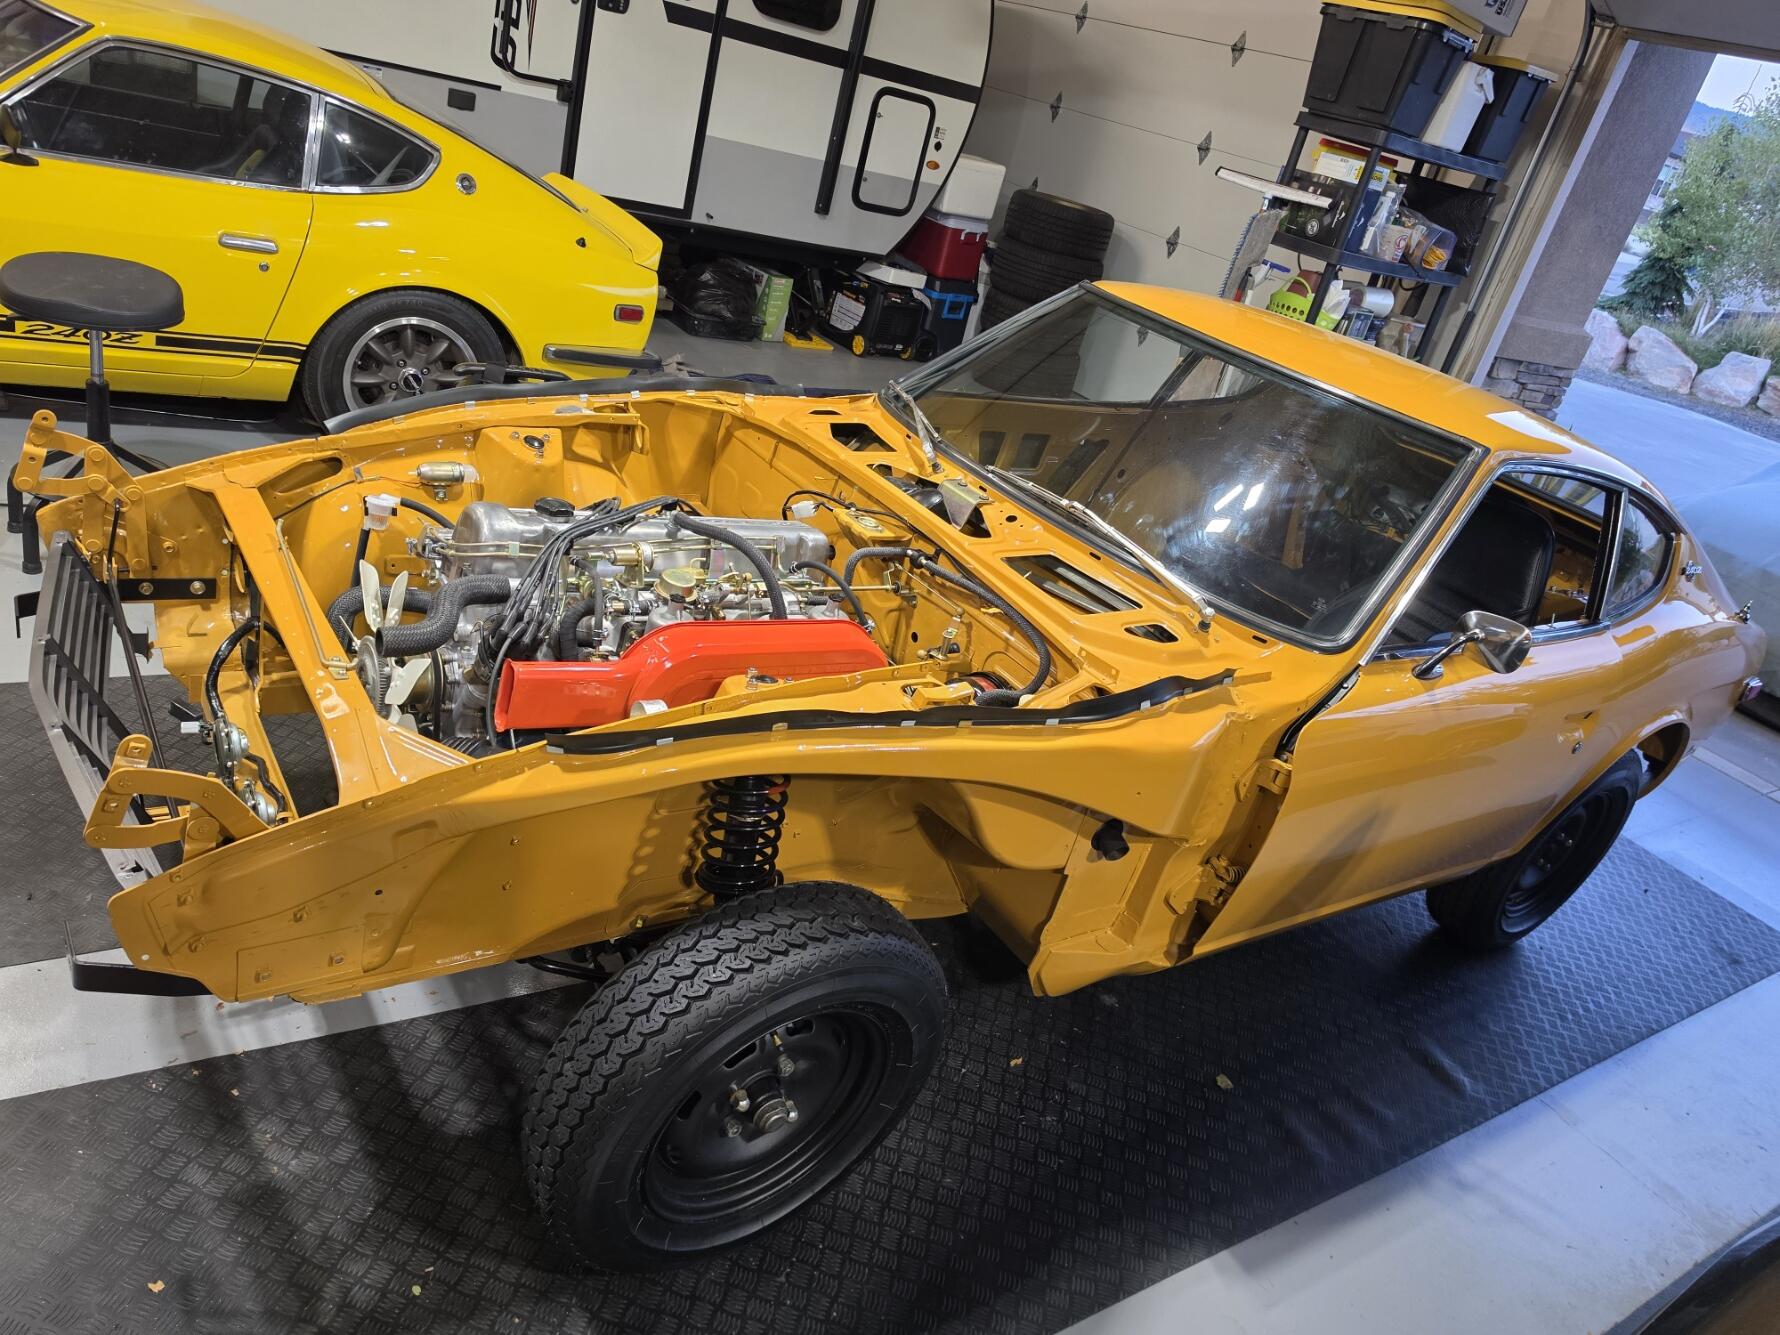
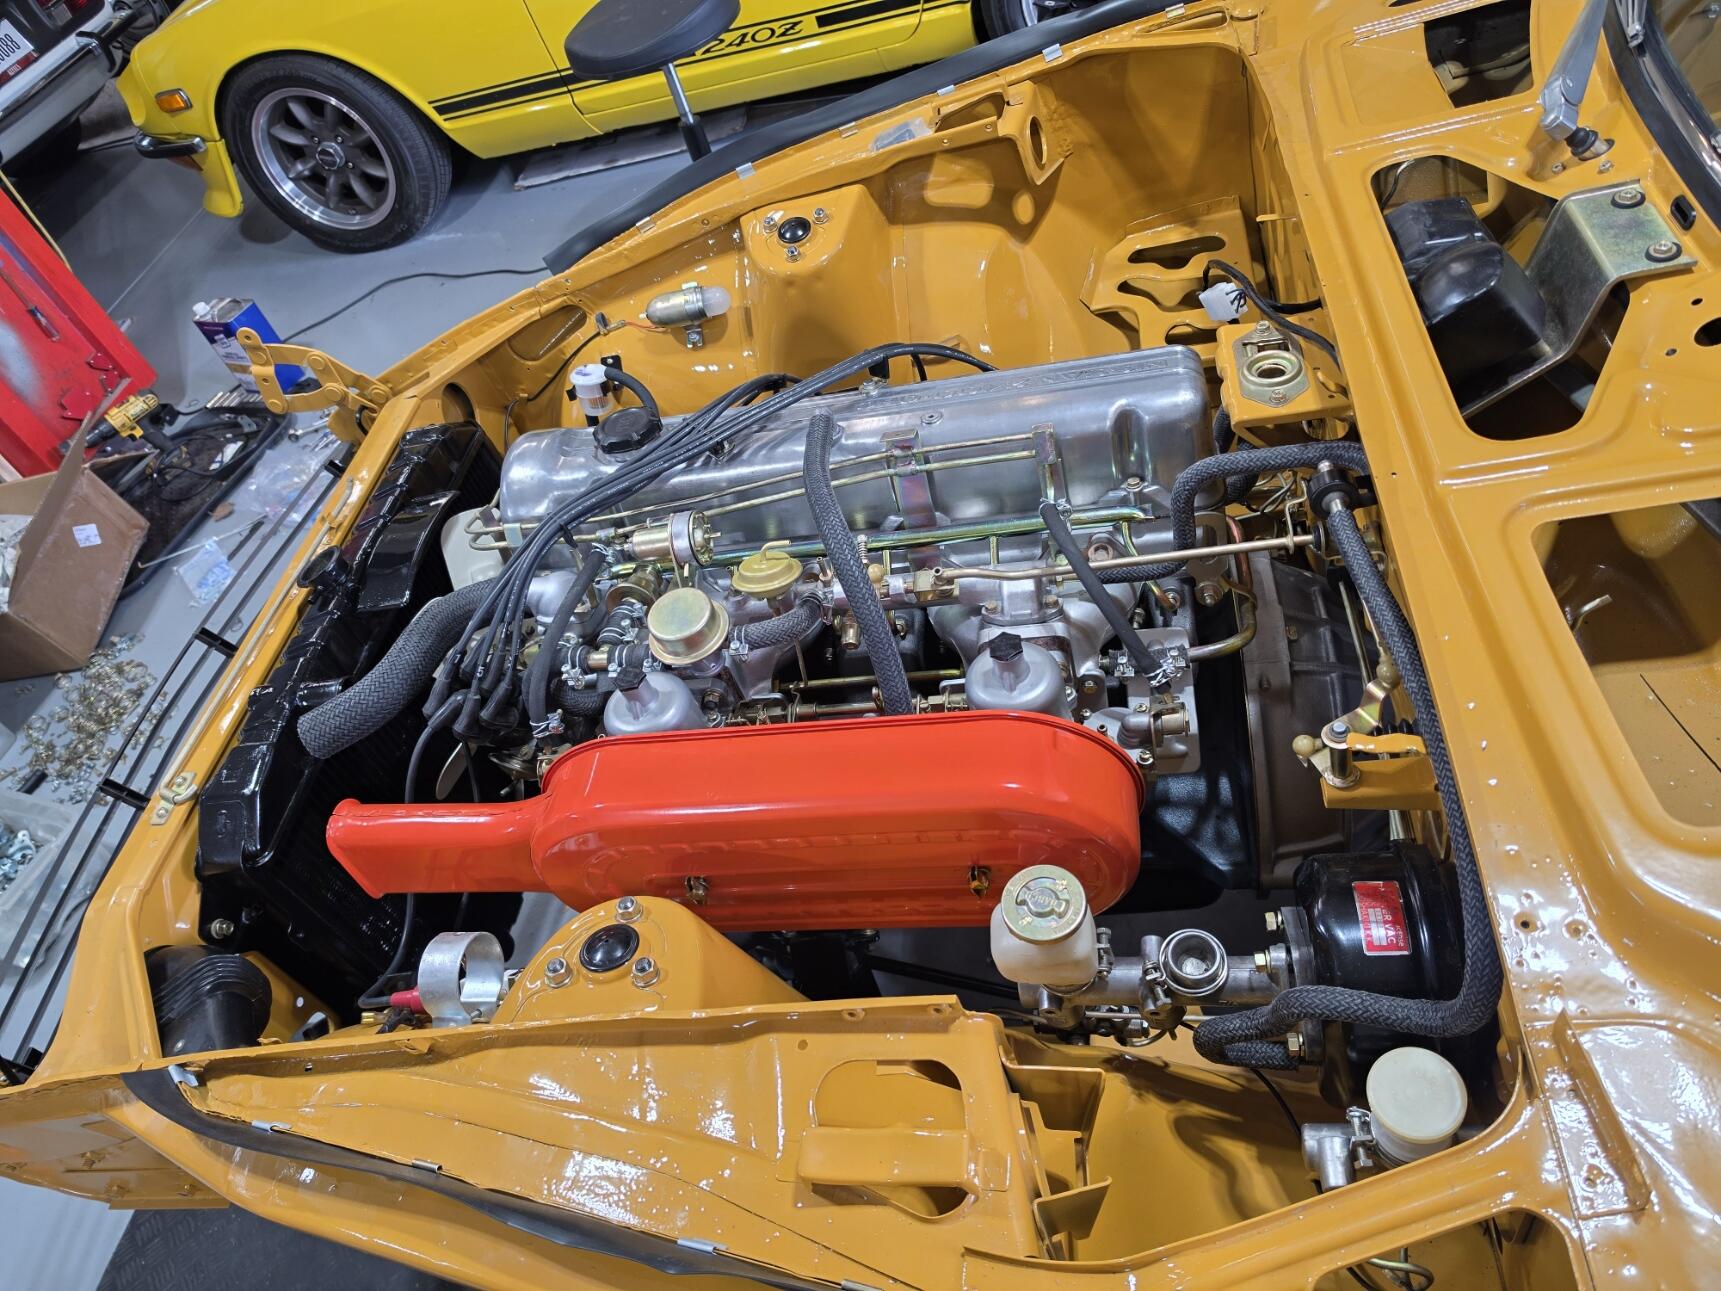
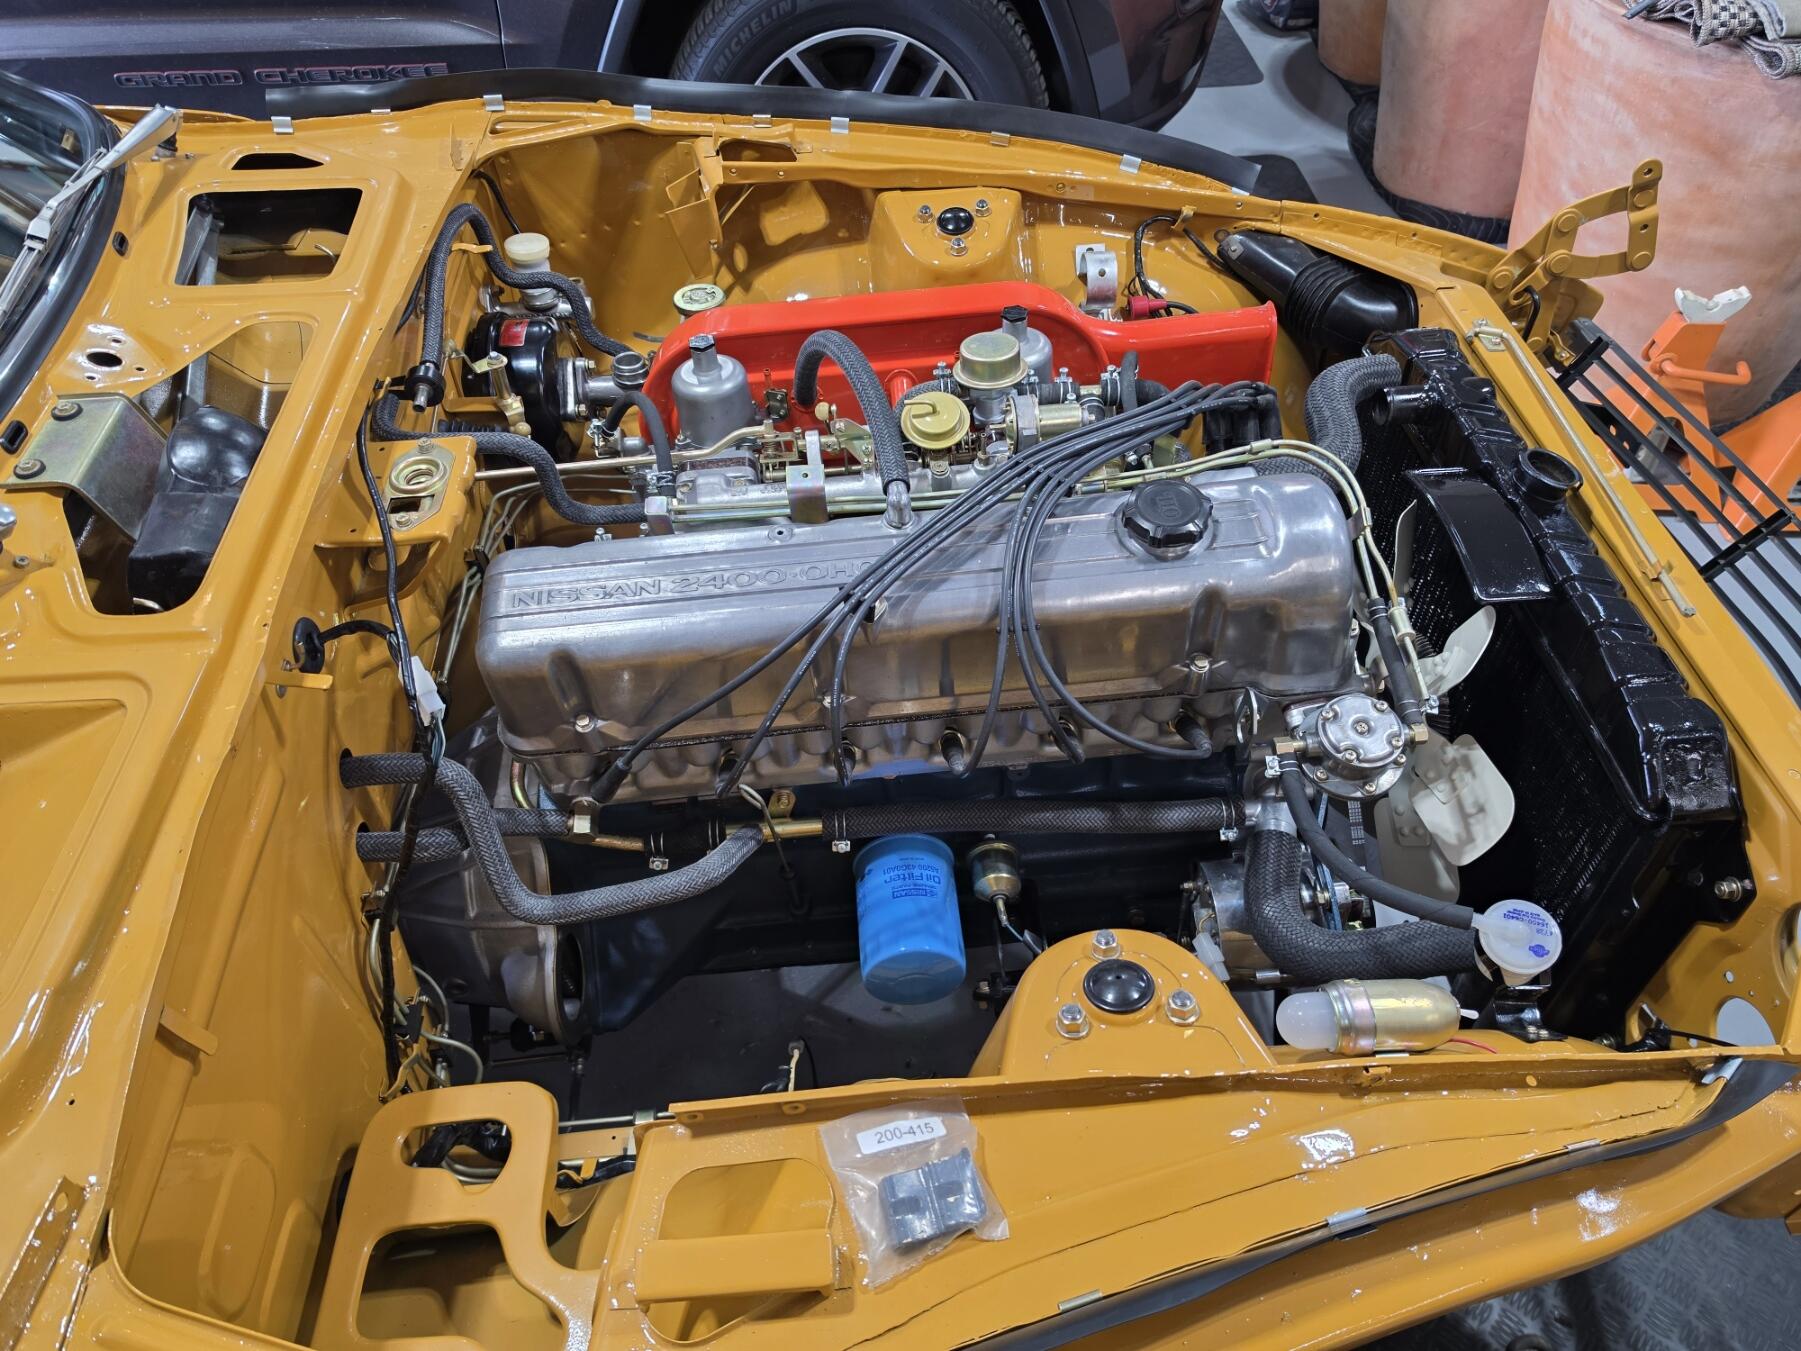
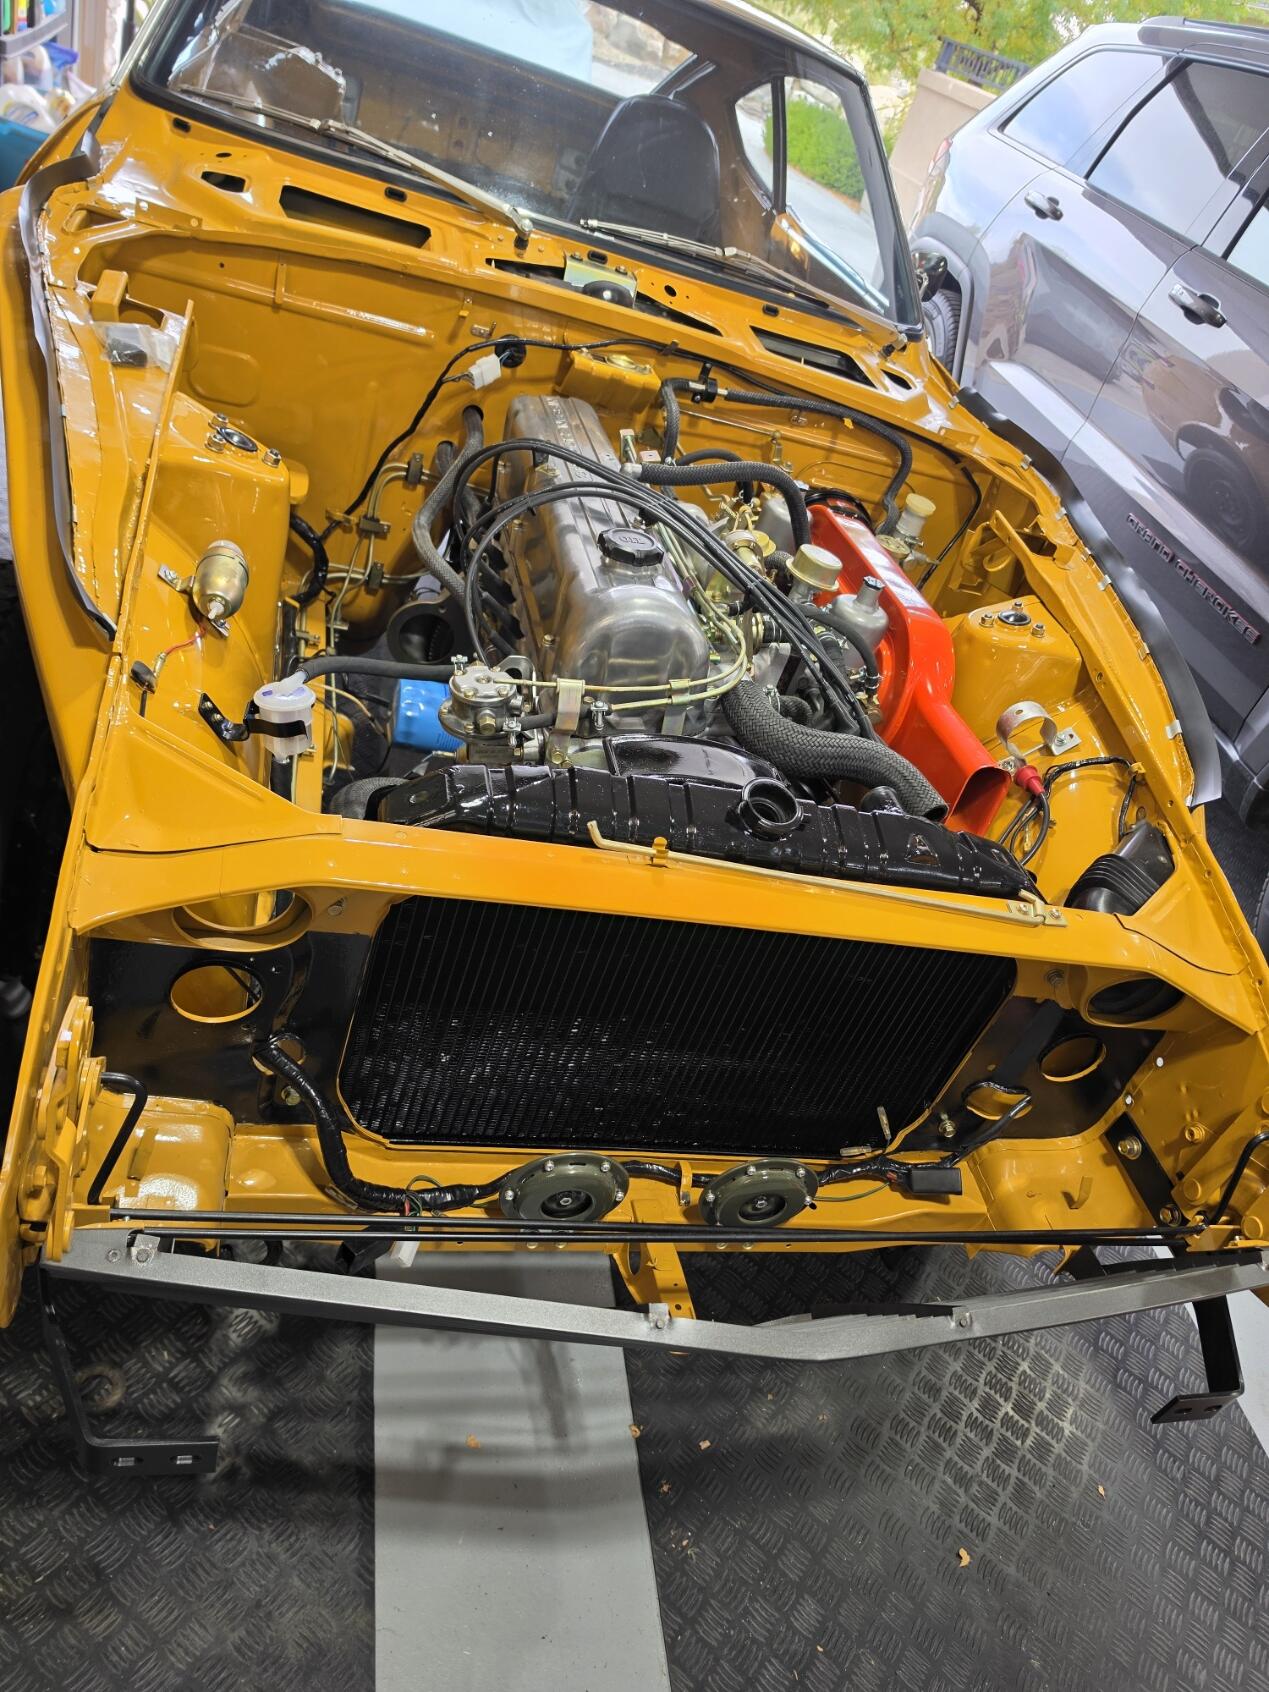
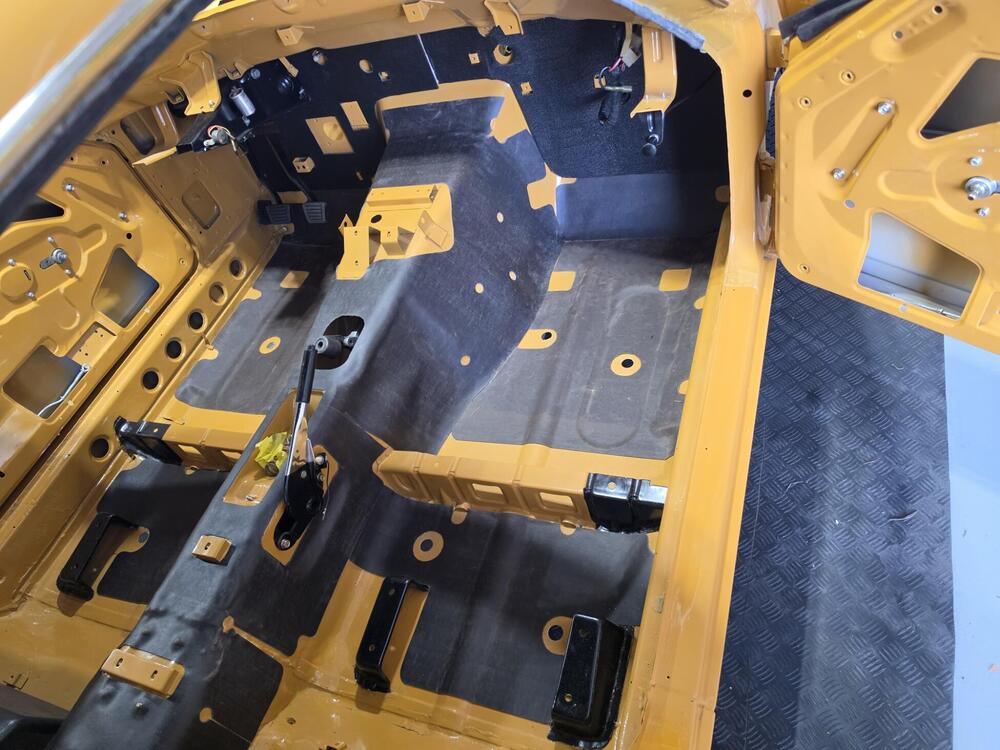
4 pointsI should probably post a little more frequently, so here is a fairly large picture dump. Things are moving along smoothly. I am hoping to be complete by the end of October. I have been adding items to the engine bay here and there, but am focusing more on the interior now. All the glass is in as well as the door handles and lock mechanisms. I thought the fenders were done, but Carlos says he has a bit more to do on them. Will add the dash and the remaining exterior body parts after ZCON.
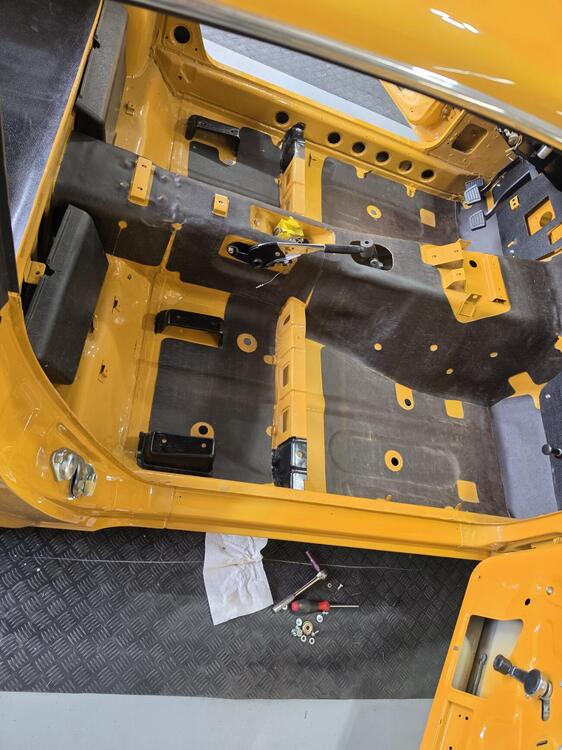
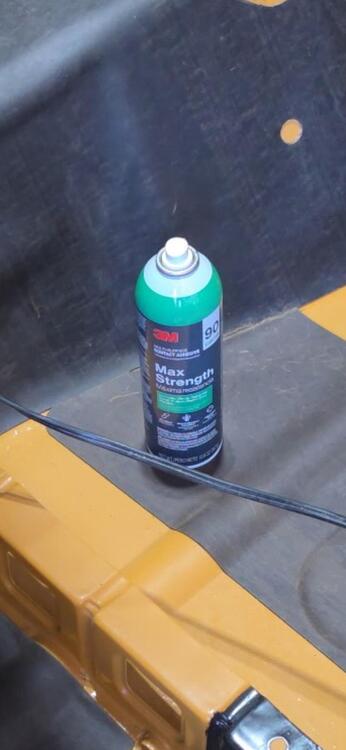
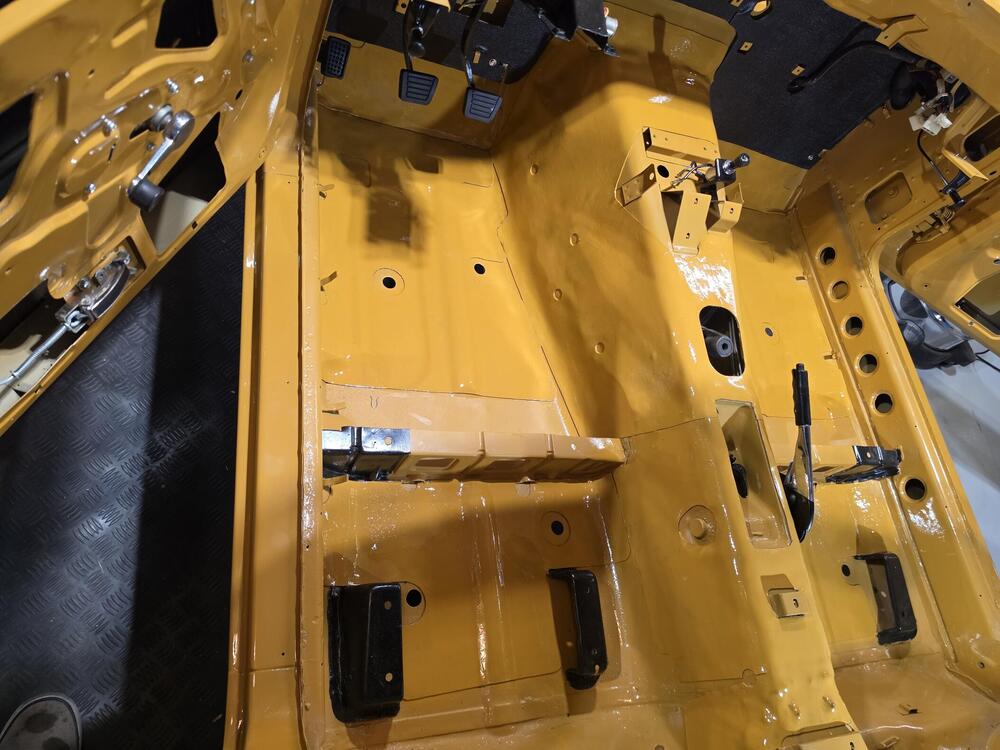
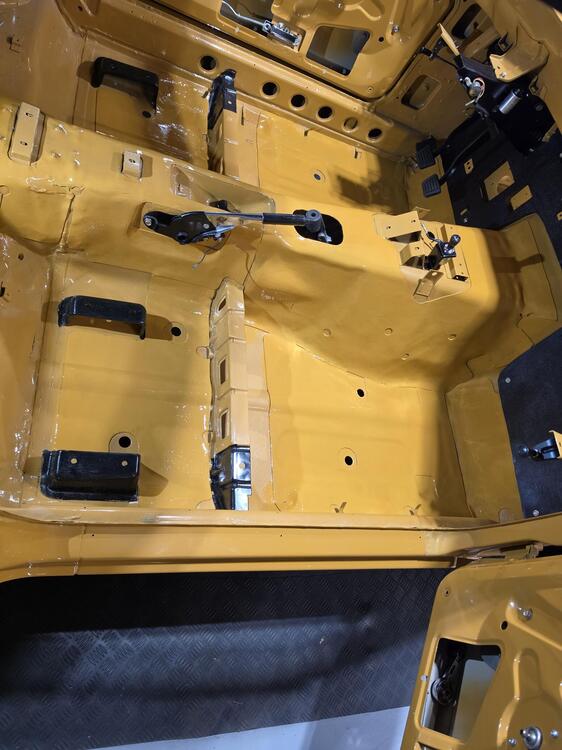
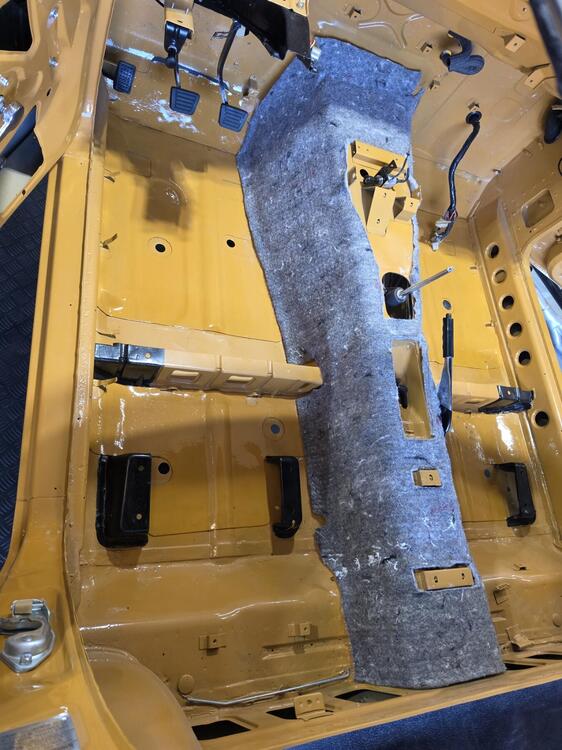
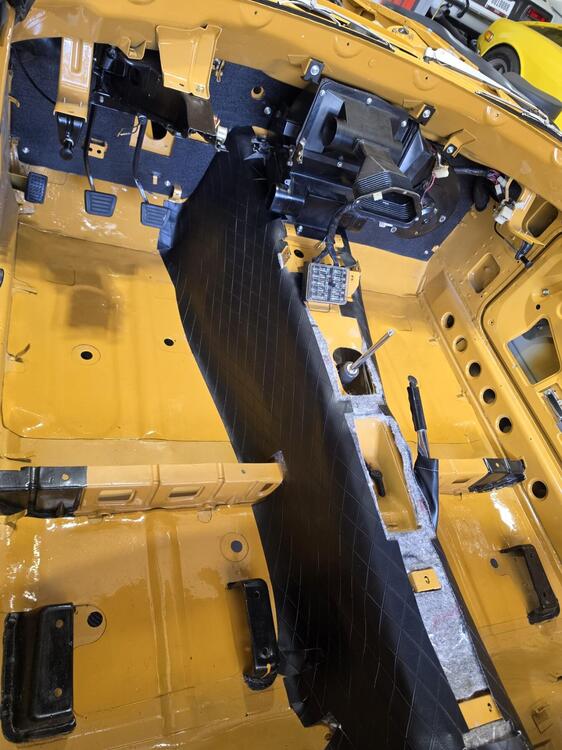
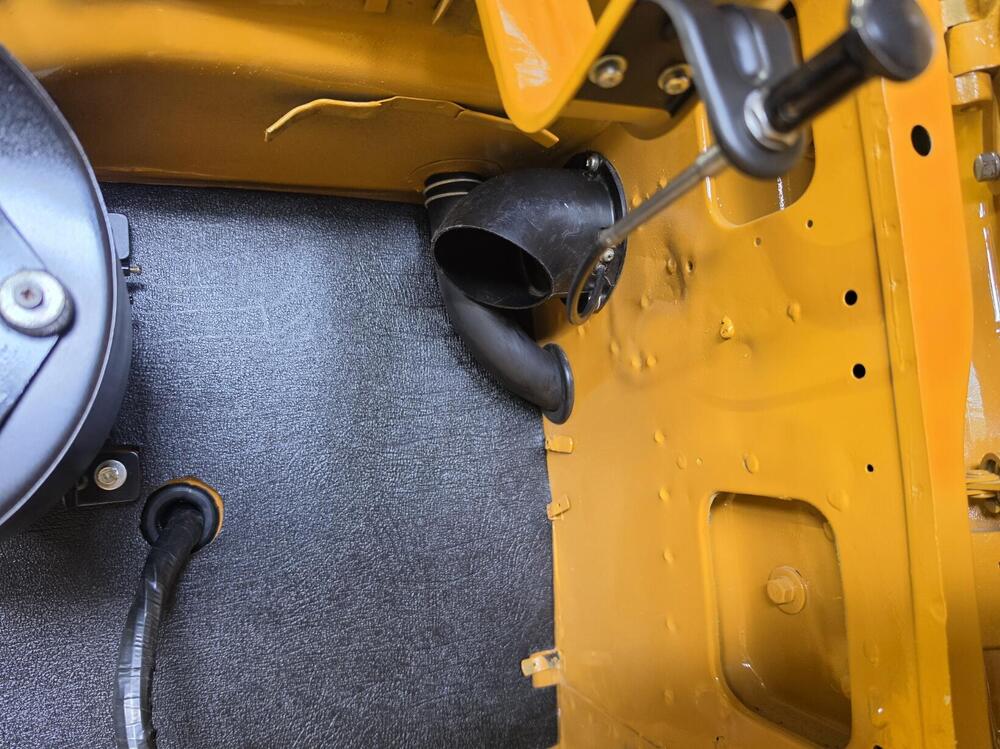
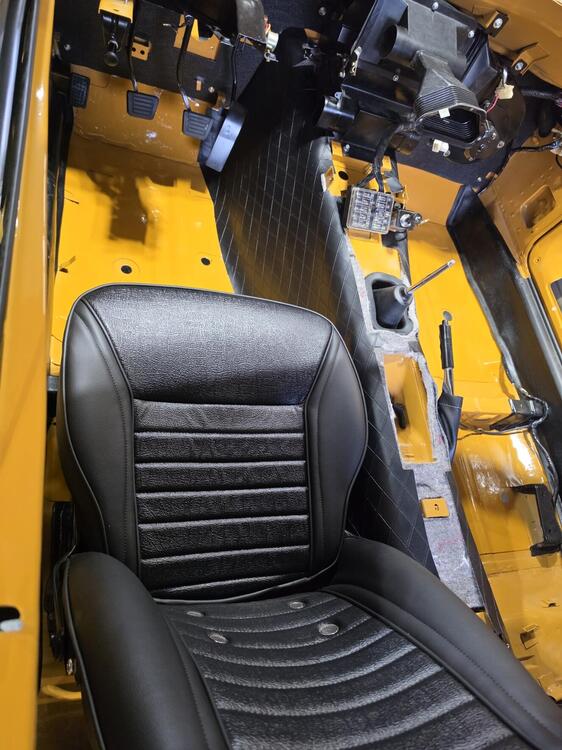
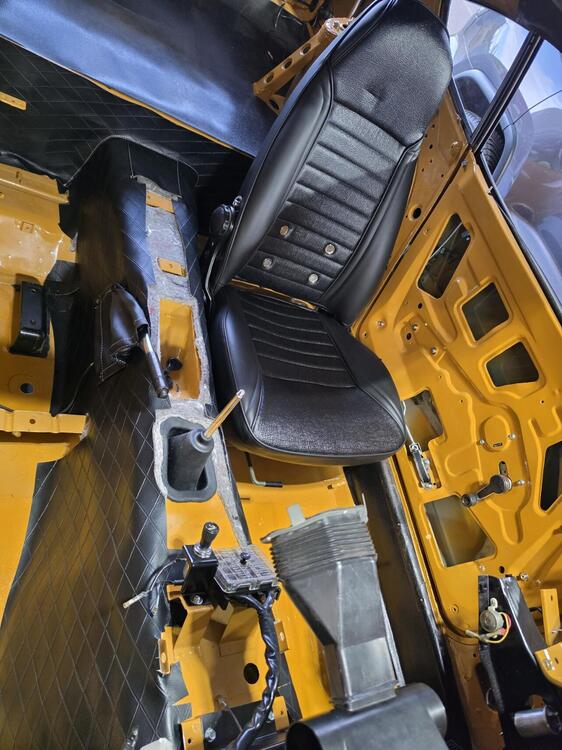
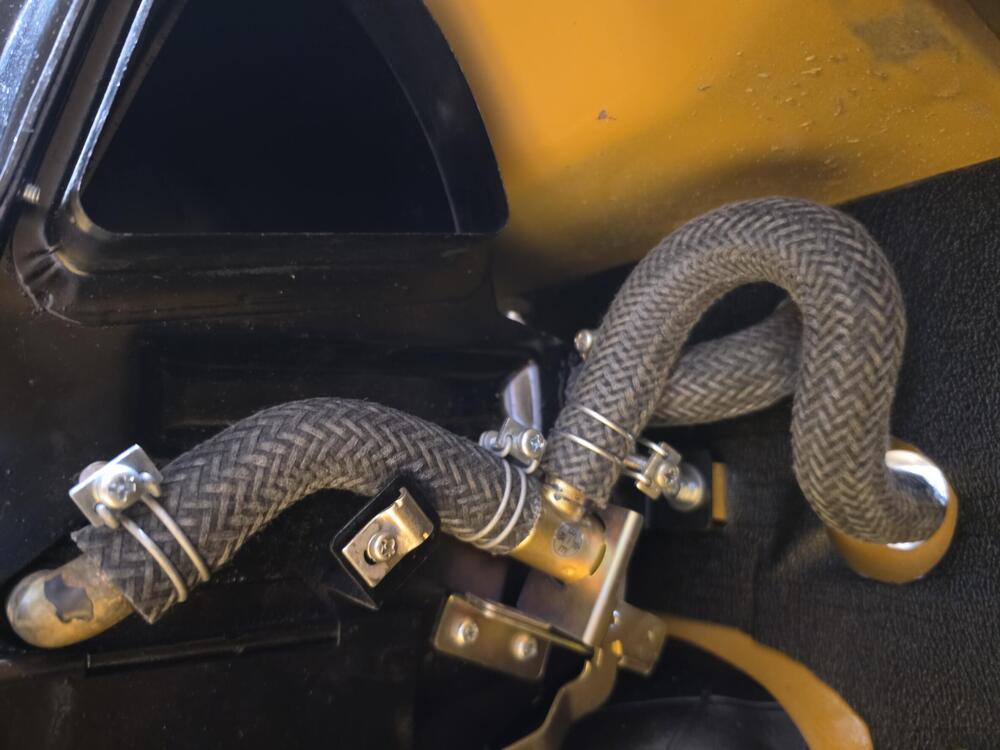
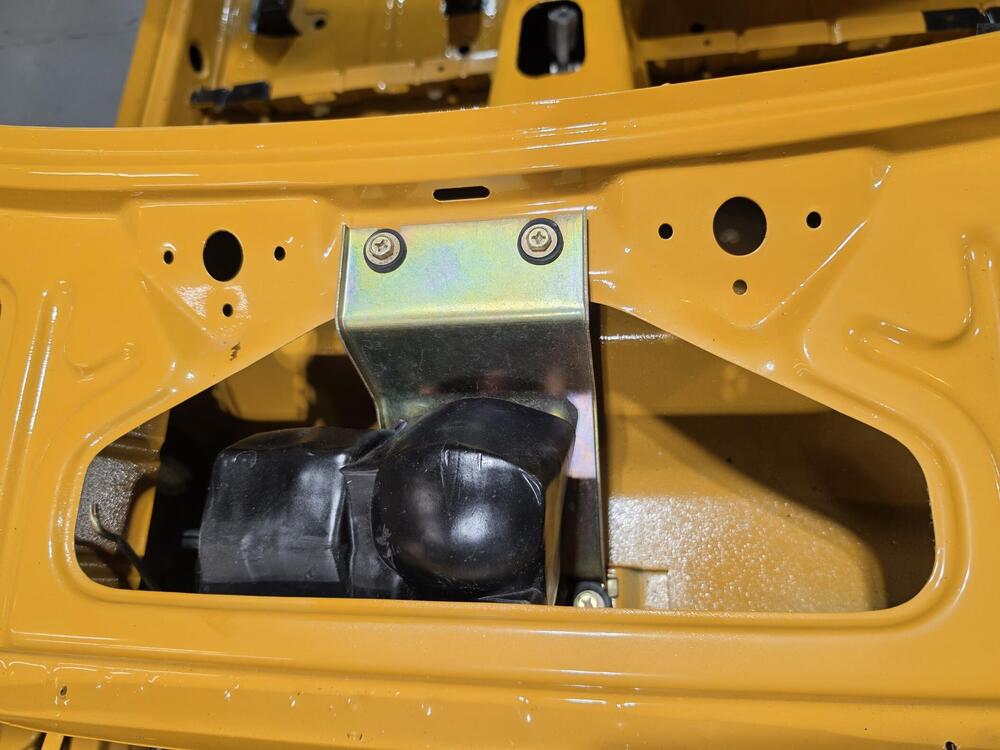
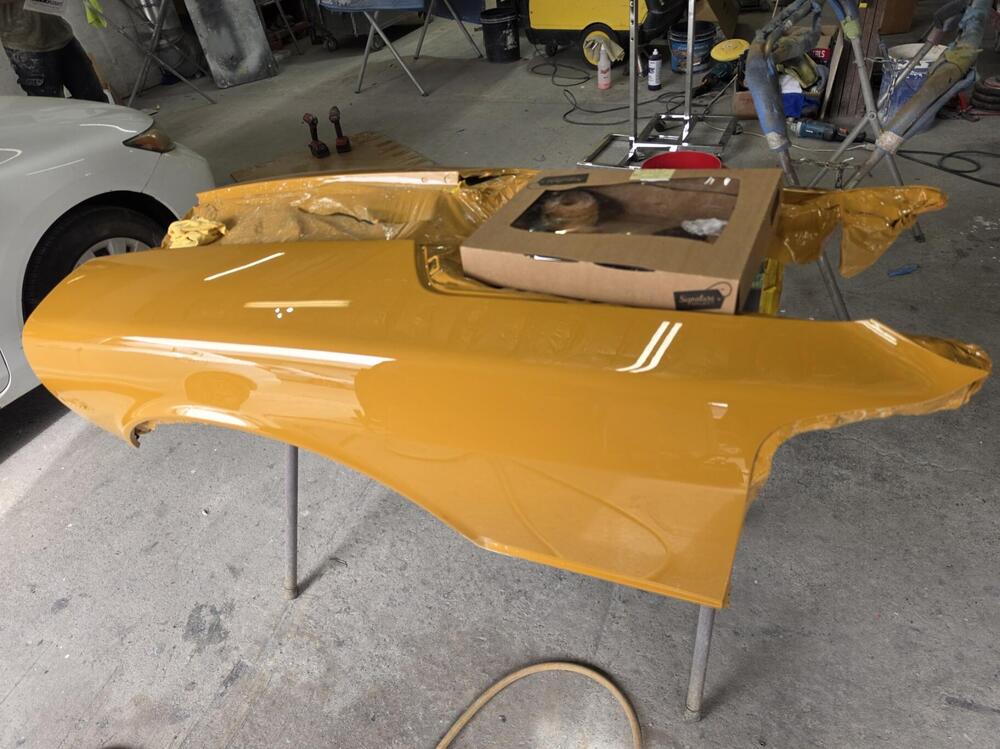
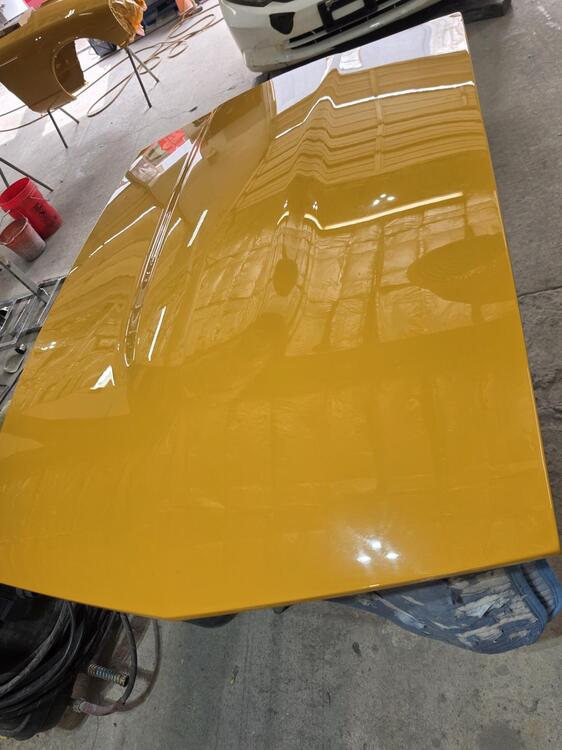
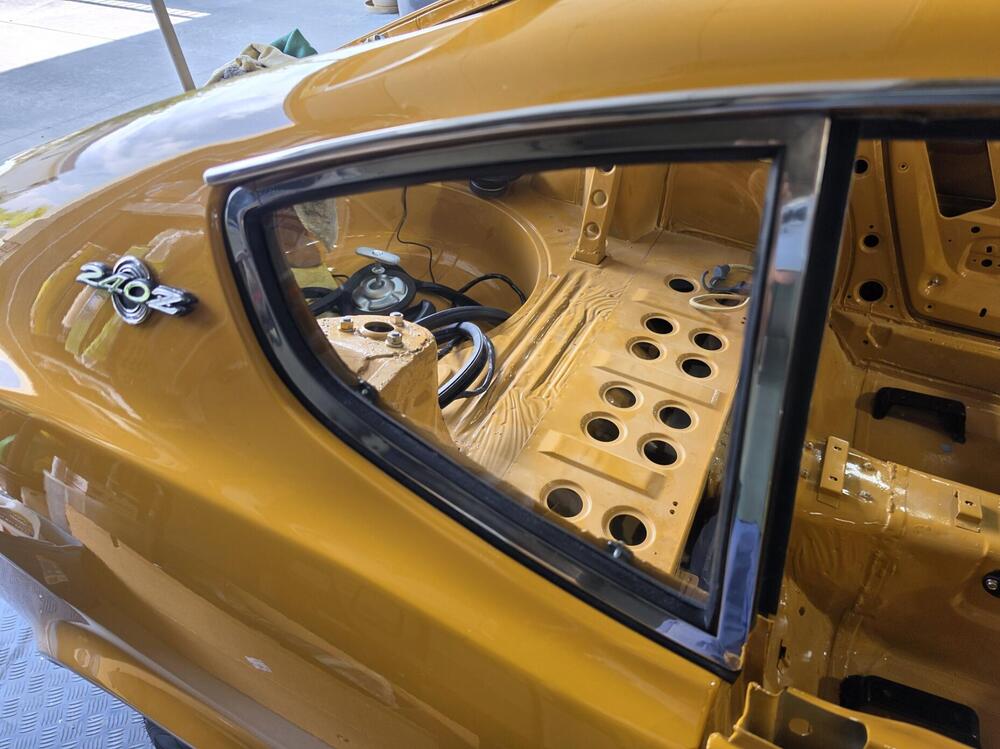
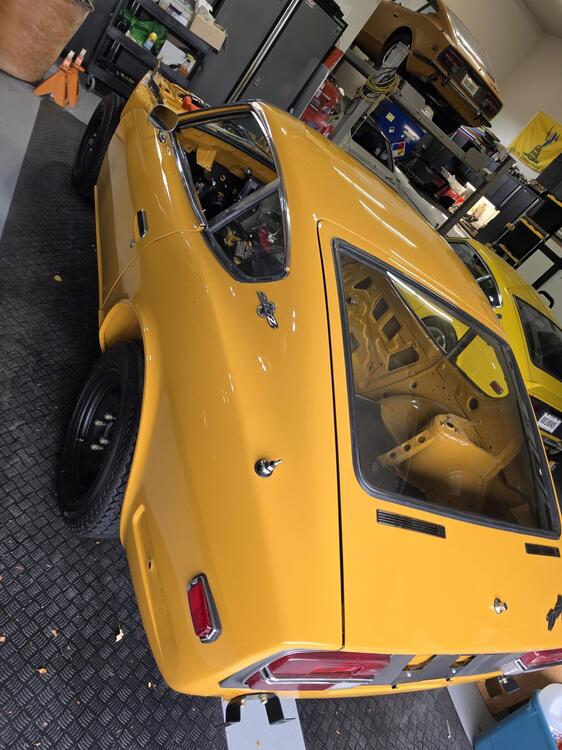
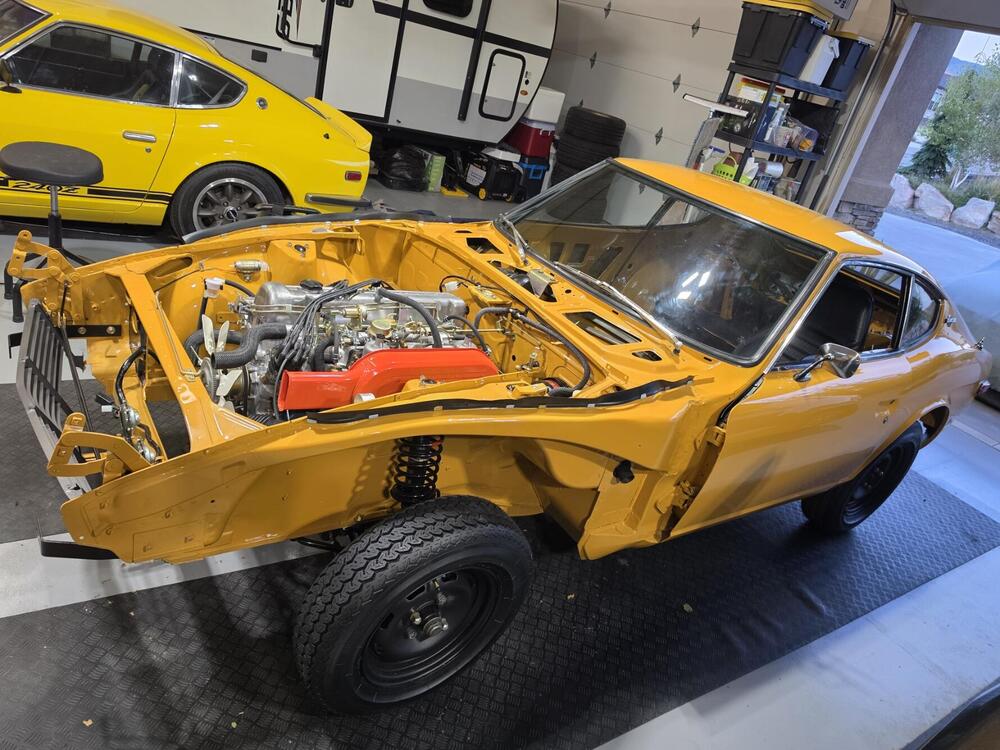
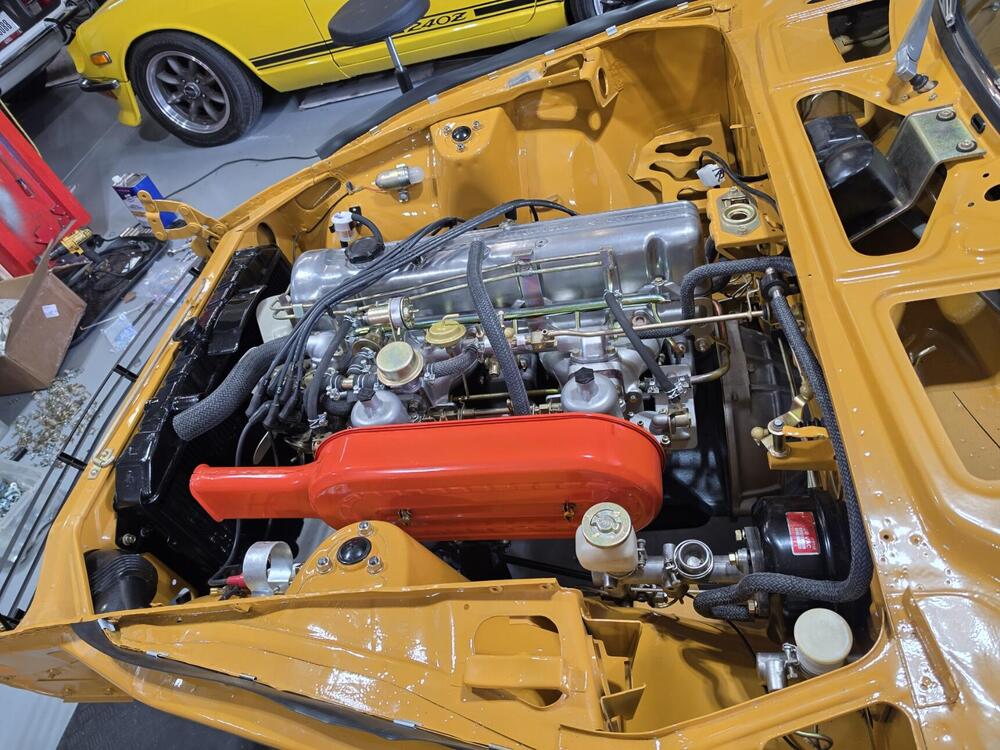
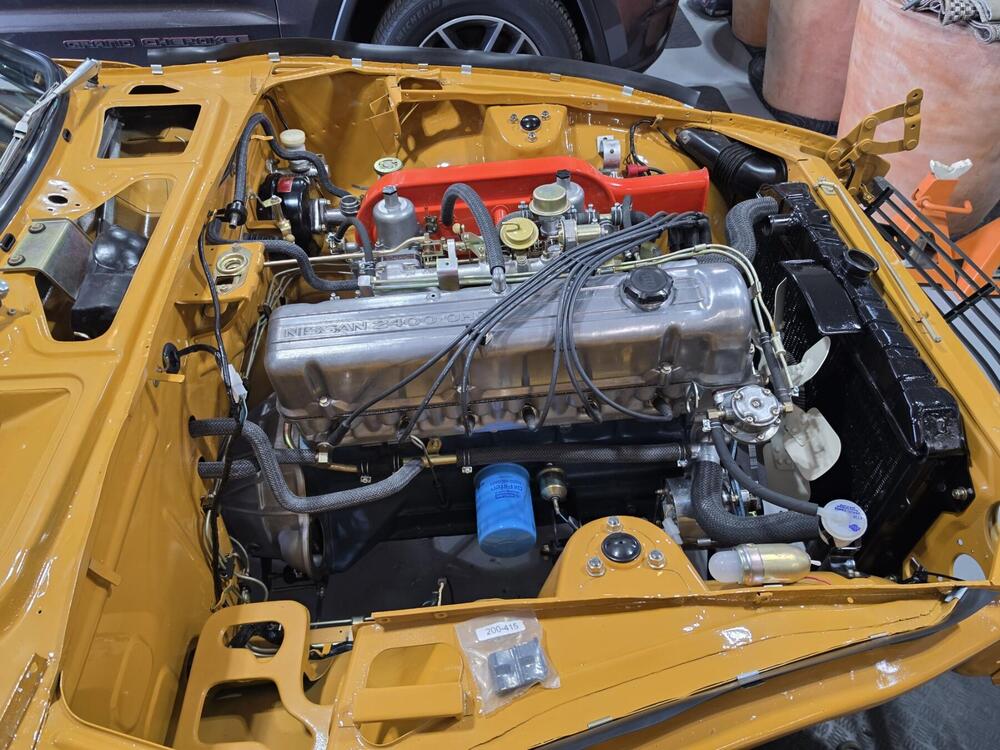
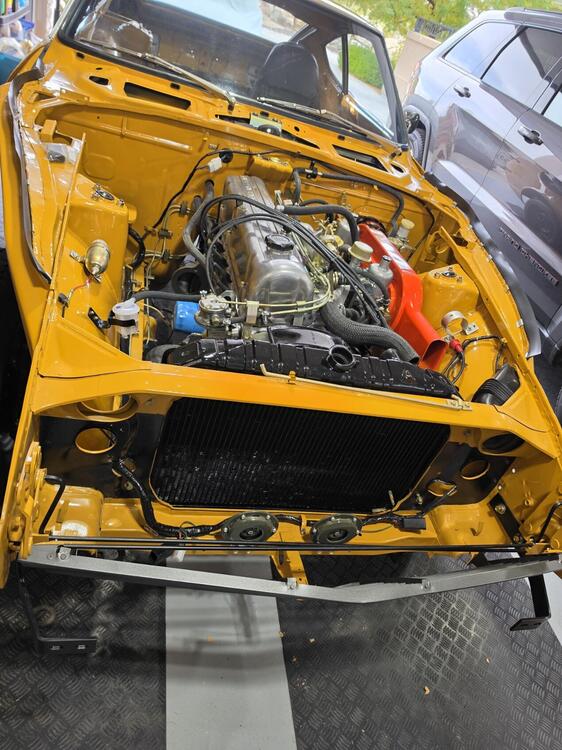 4 points
 -
What are your plans exactly? Is it mainly for looks? Are you planning to race the car? Are you having problems with the current brakes? A lot of the rear-disc conversions are mainly aesthetic. They look great, but they don't necessarily perform better than a properly working set of original drums. You'll find plenty of posts claiming a huge improvement after fitting rear discs, and that may be true. But often the improvement is simply because the original drums were worn, seized or badly adjusted. Unless you're going to a significantly larger brake setup, the difference may not be as big as you'd expect. I'm not a big fan of rear-disc conversions myself. The main concern is brake balance between the front and rear. The original system was designed and tested as a complete system, so I'd be cautious about judging a conversion based on a few hard stops in a parking lot. Brakes are a pretty important safety system! If it's mainly for aesthetics, the 280ZX rear setup is a fairly straightforward option. The 1979 to 81 rotors fit the 280Z four-stud hubs after removing the backing plates. You can also use the 1981 to 84 Maxima brackets (P/N 44155-04S10), or aftermarket adapters if they're still available. The 280ZX calipers have an integral handbrake mechanism, so with some fiddling you can use the original 280Z handbrake cables. A couple of things to note with the Maxima brackets and 280ZX calipers: you need to dismantle the stub axle to install the brackets (aftermarket brackets don't need dismantling the stub axle), and the calipers need to be swapped side-to-side. The 280ZX calipers sit behind the axle, while on the 280Z they'll be mounted in front. So the right hand "R" caliper goes on the left and vice versa. Otherwise, you won't be able to bleed them properly or use the handbrake mechanism. You can buy kits to do this and that would probably be the easiest way to go, but more expensive. There are other combinations of this set up out there. The 1985 to 87 Maxima calipers with the 1982/83 280ZX rotors and a custom bracket where also common. These are all what they call Stage 1 disc brake conversions. This setup is often paired with the Sumitomo S12+8 four piston front calipers. These were used on various Toyota 4Runner trucks and bolt straight onto the 280Z using the original 89mm mounting spacing, and pair up to the original 280Z rotors, although some backing-plate trimming is required. With the larger front/rear setup, I'd also consider upgrading the original 7/8" master cylinder to a 15/16" 1979 to 81 280ZX unit with p/n: 46010-N4700 for exmple or a 1" Wilwood. Otherwise, you may end up with a very long pedal due to the increased fluid volume required. There was some forum thread about the 720 truck (1981 to 86) long ago mentioning the 15/16" MC with p/n: 46010-F2700, but I'm not sure if it fits the booster.4 points
-
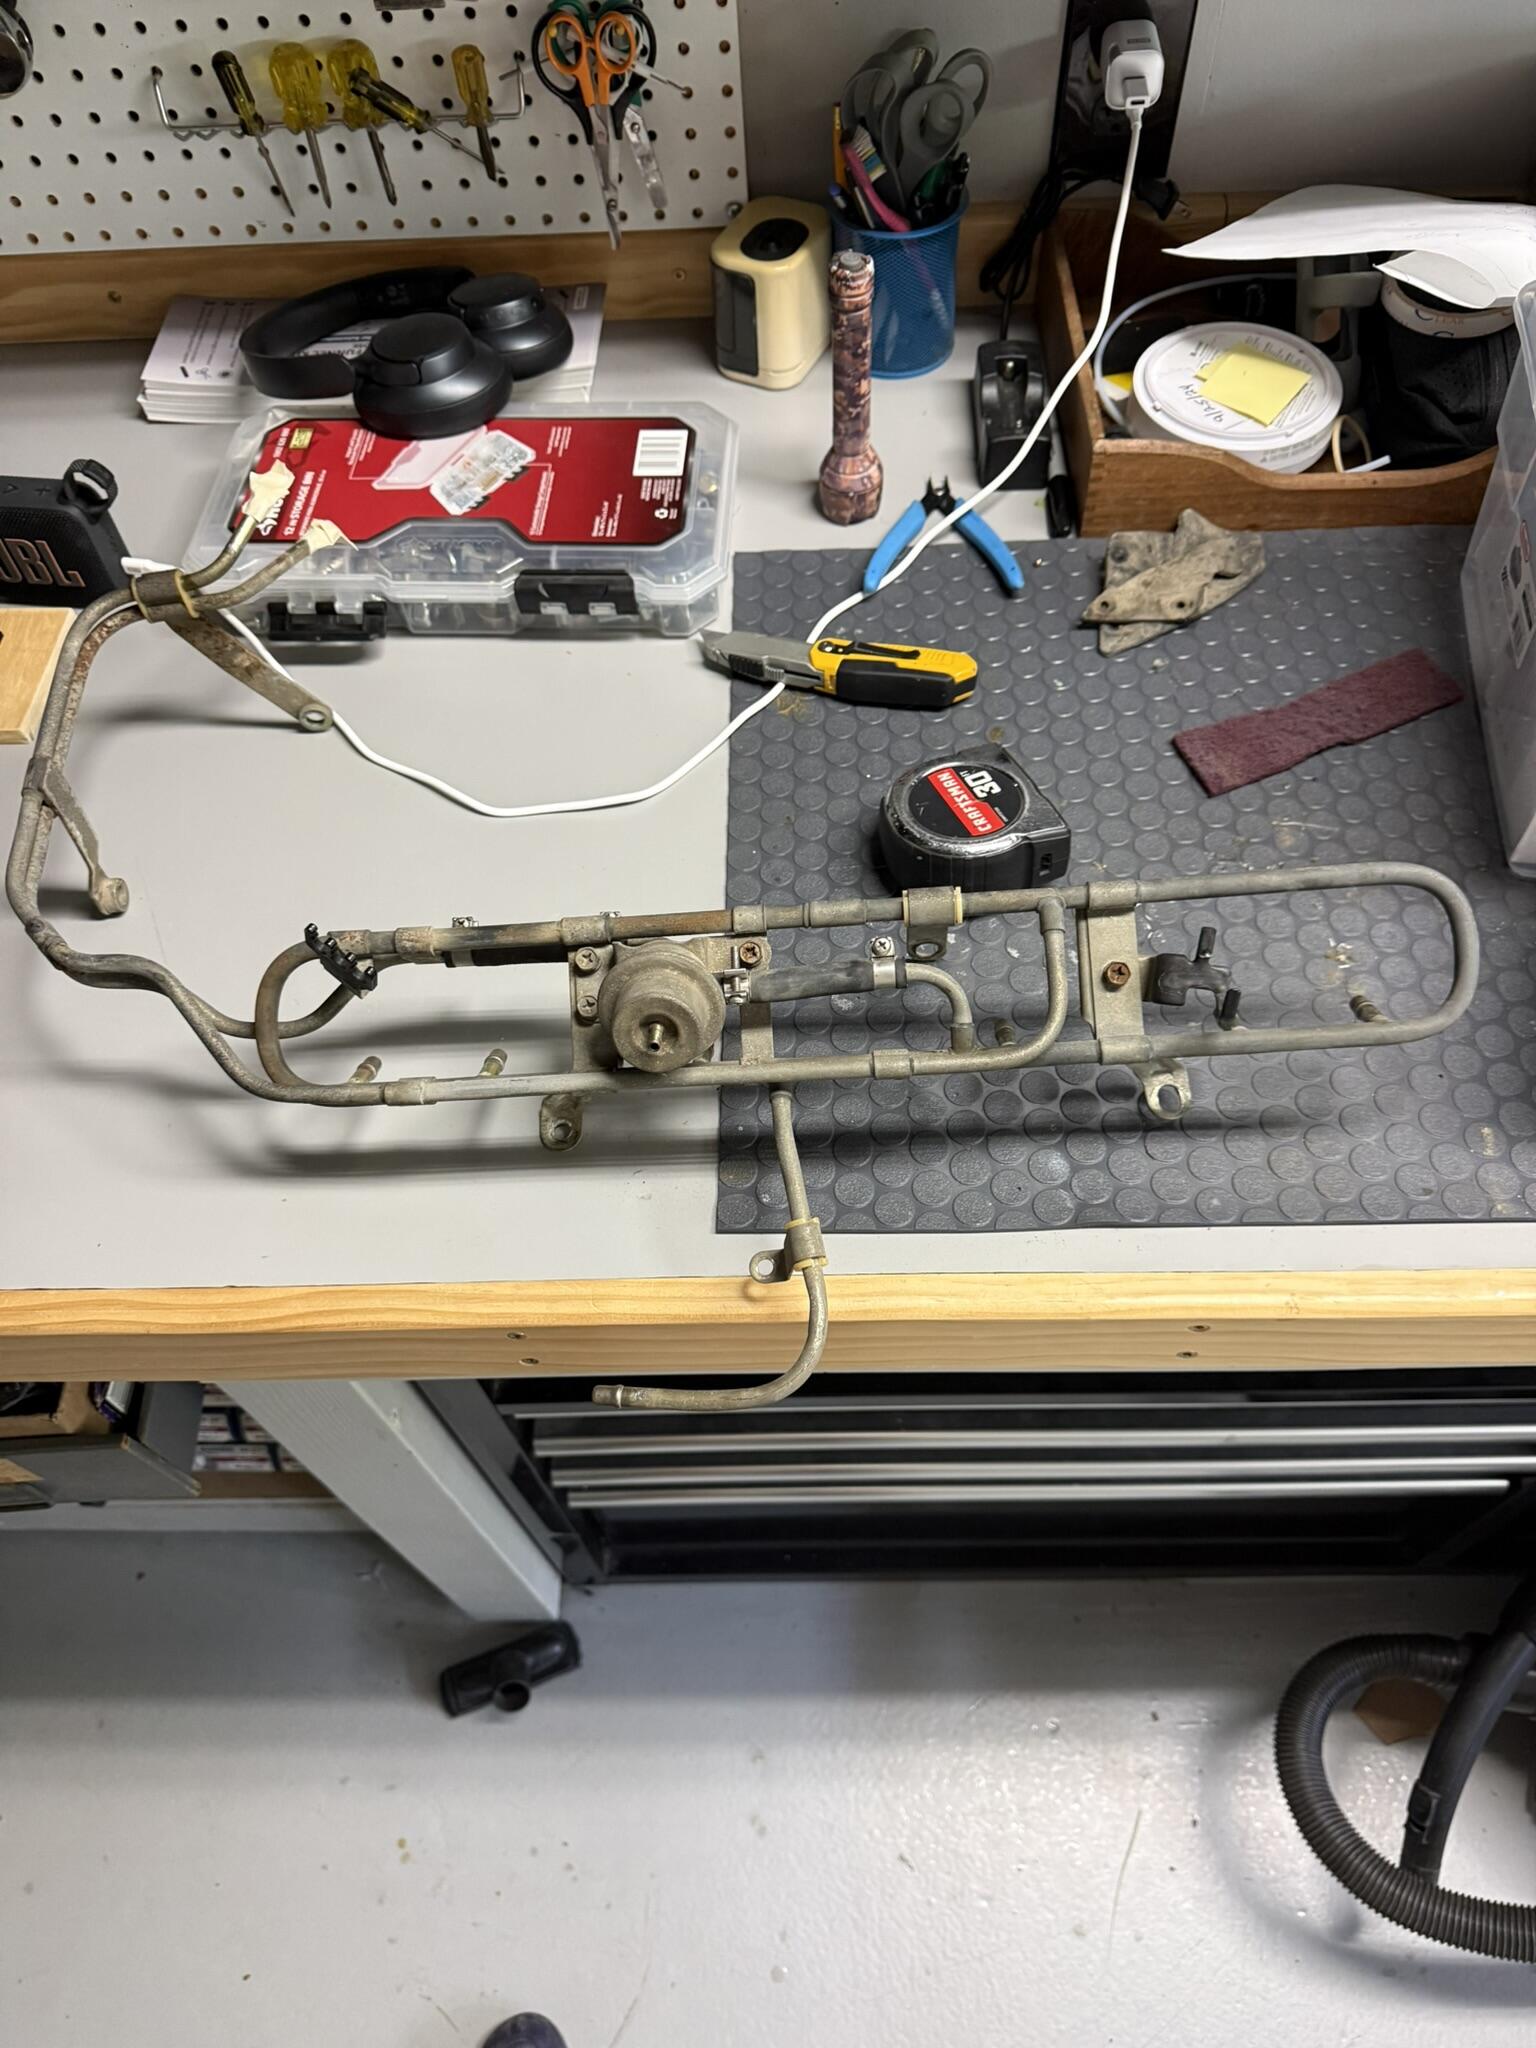
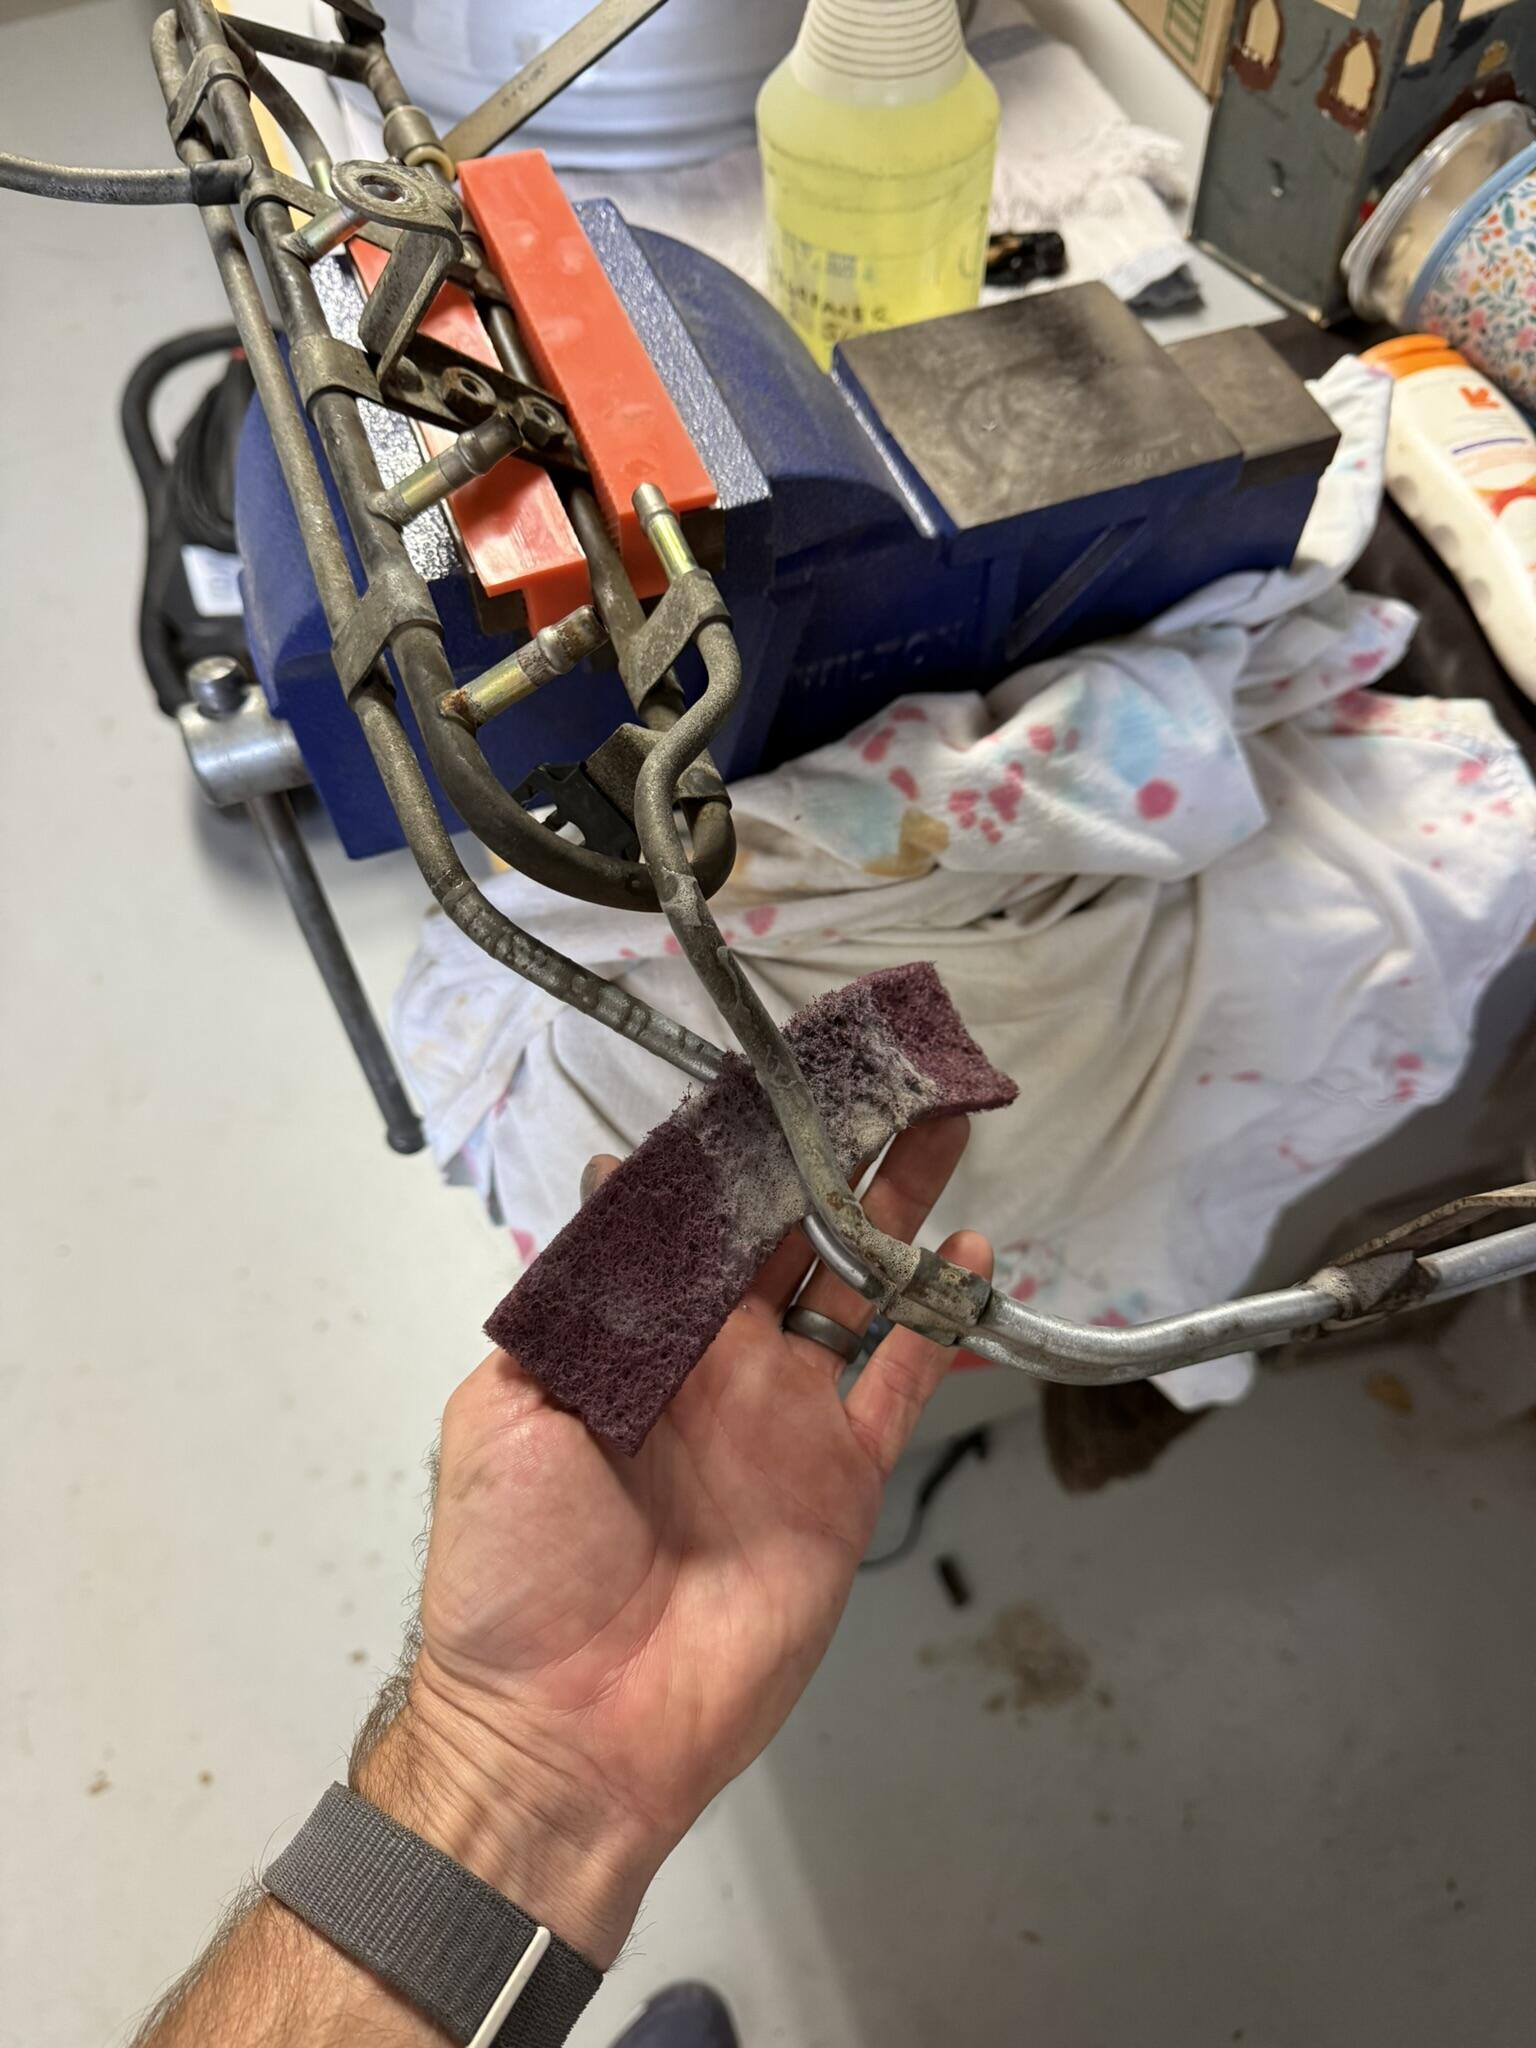
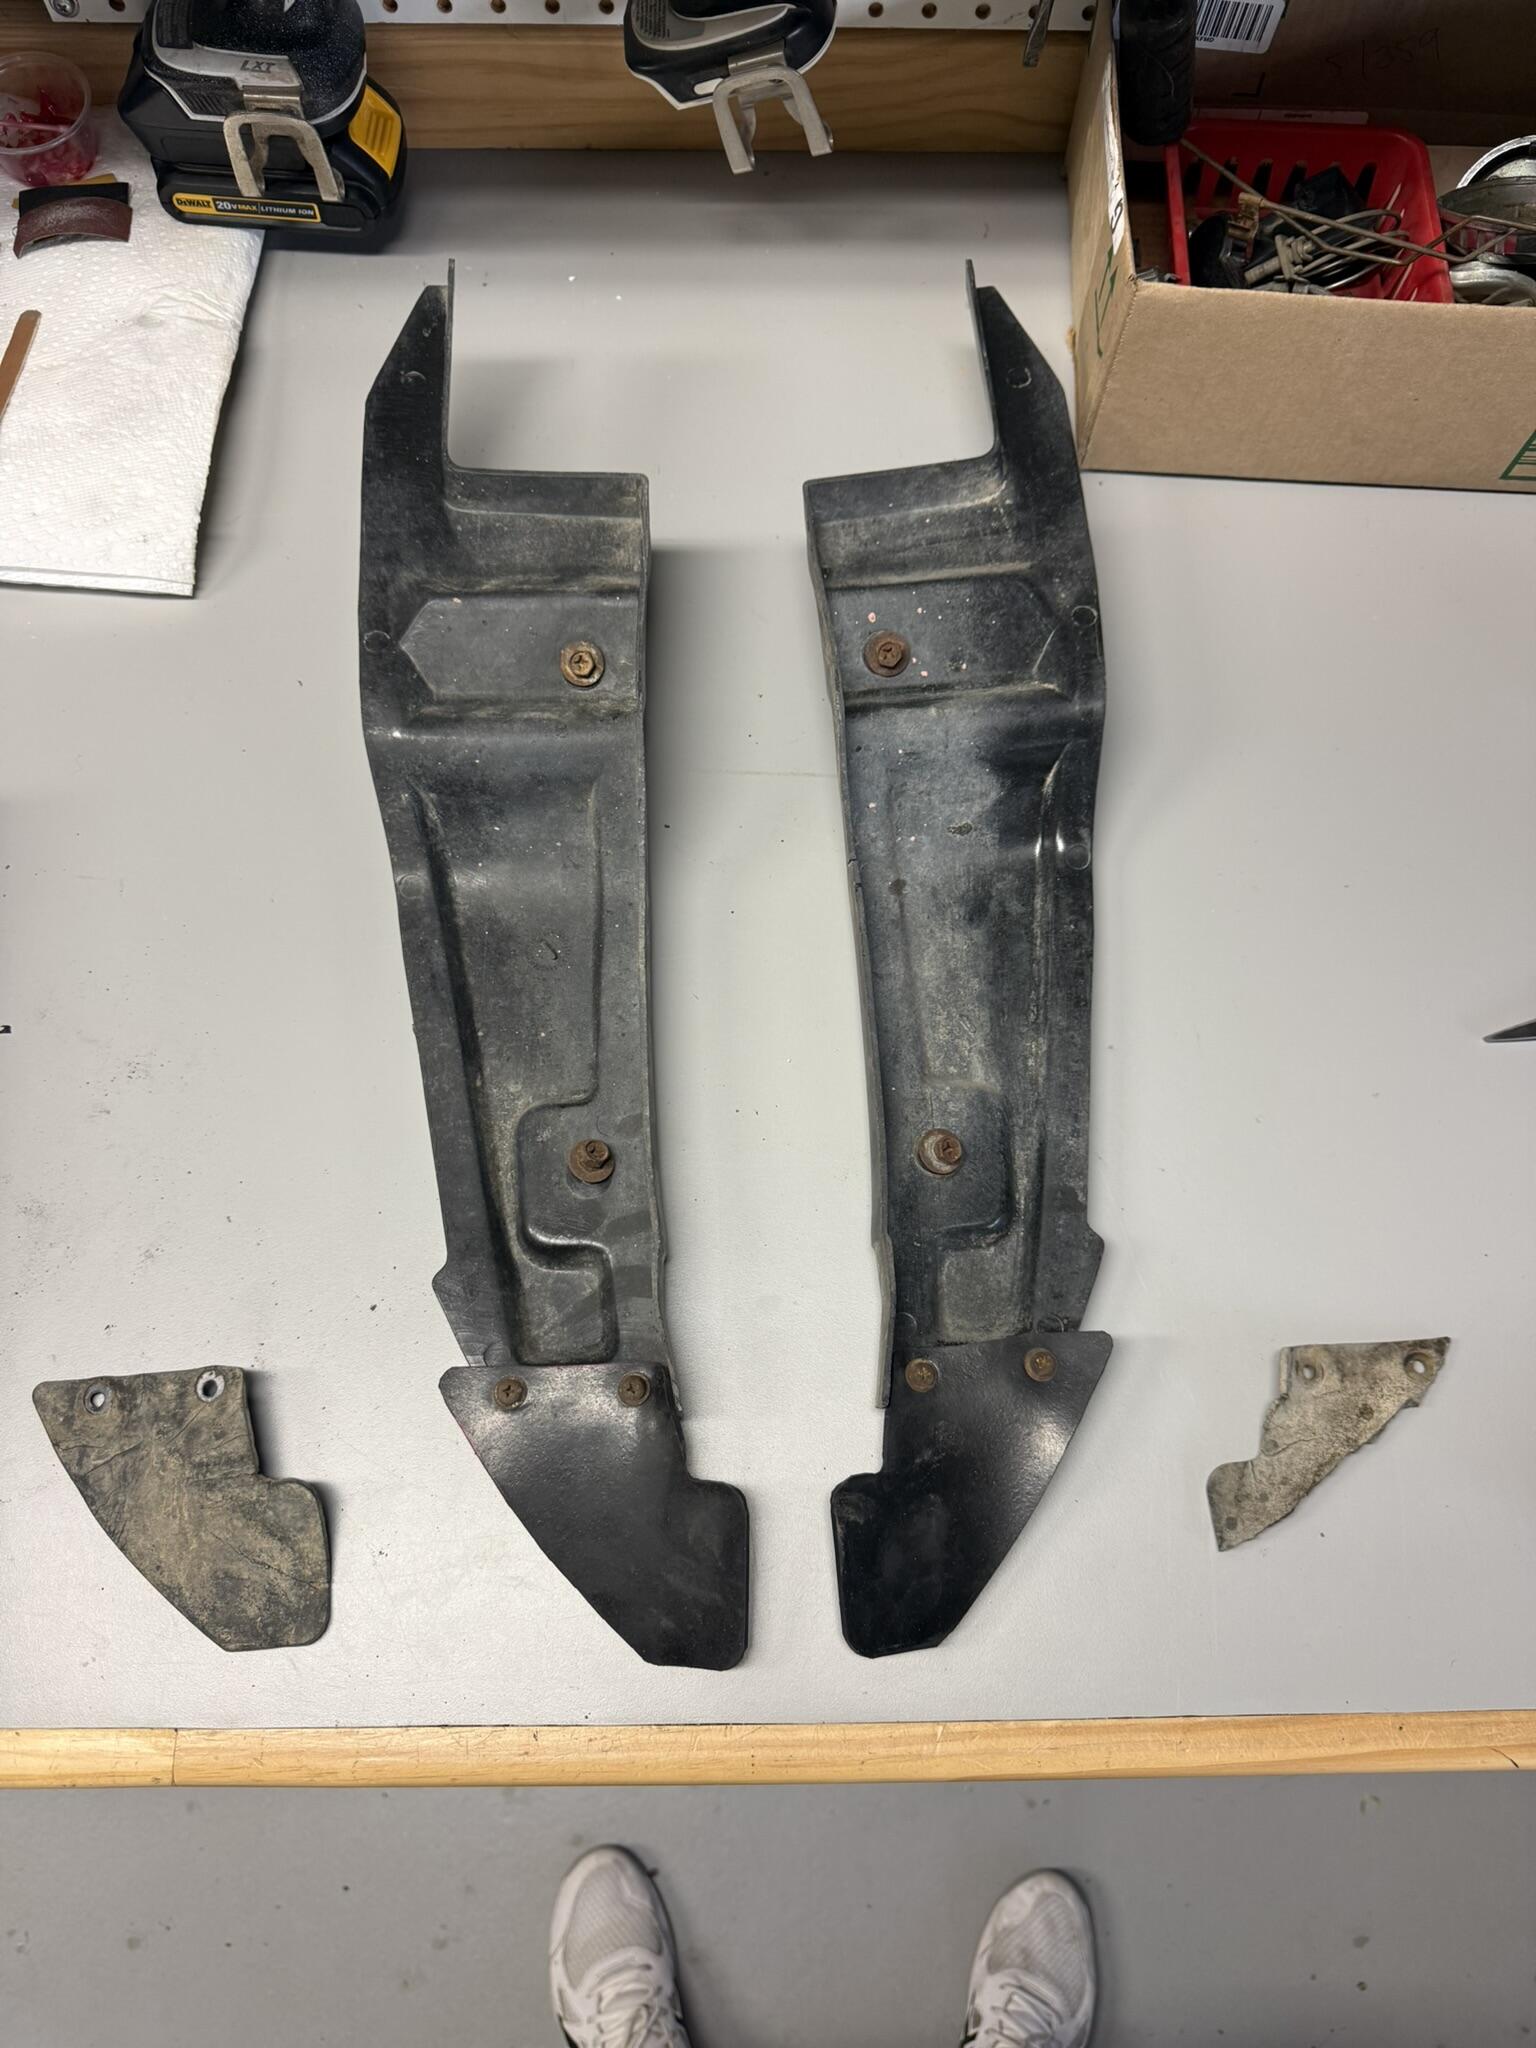
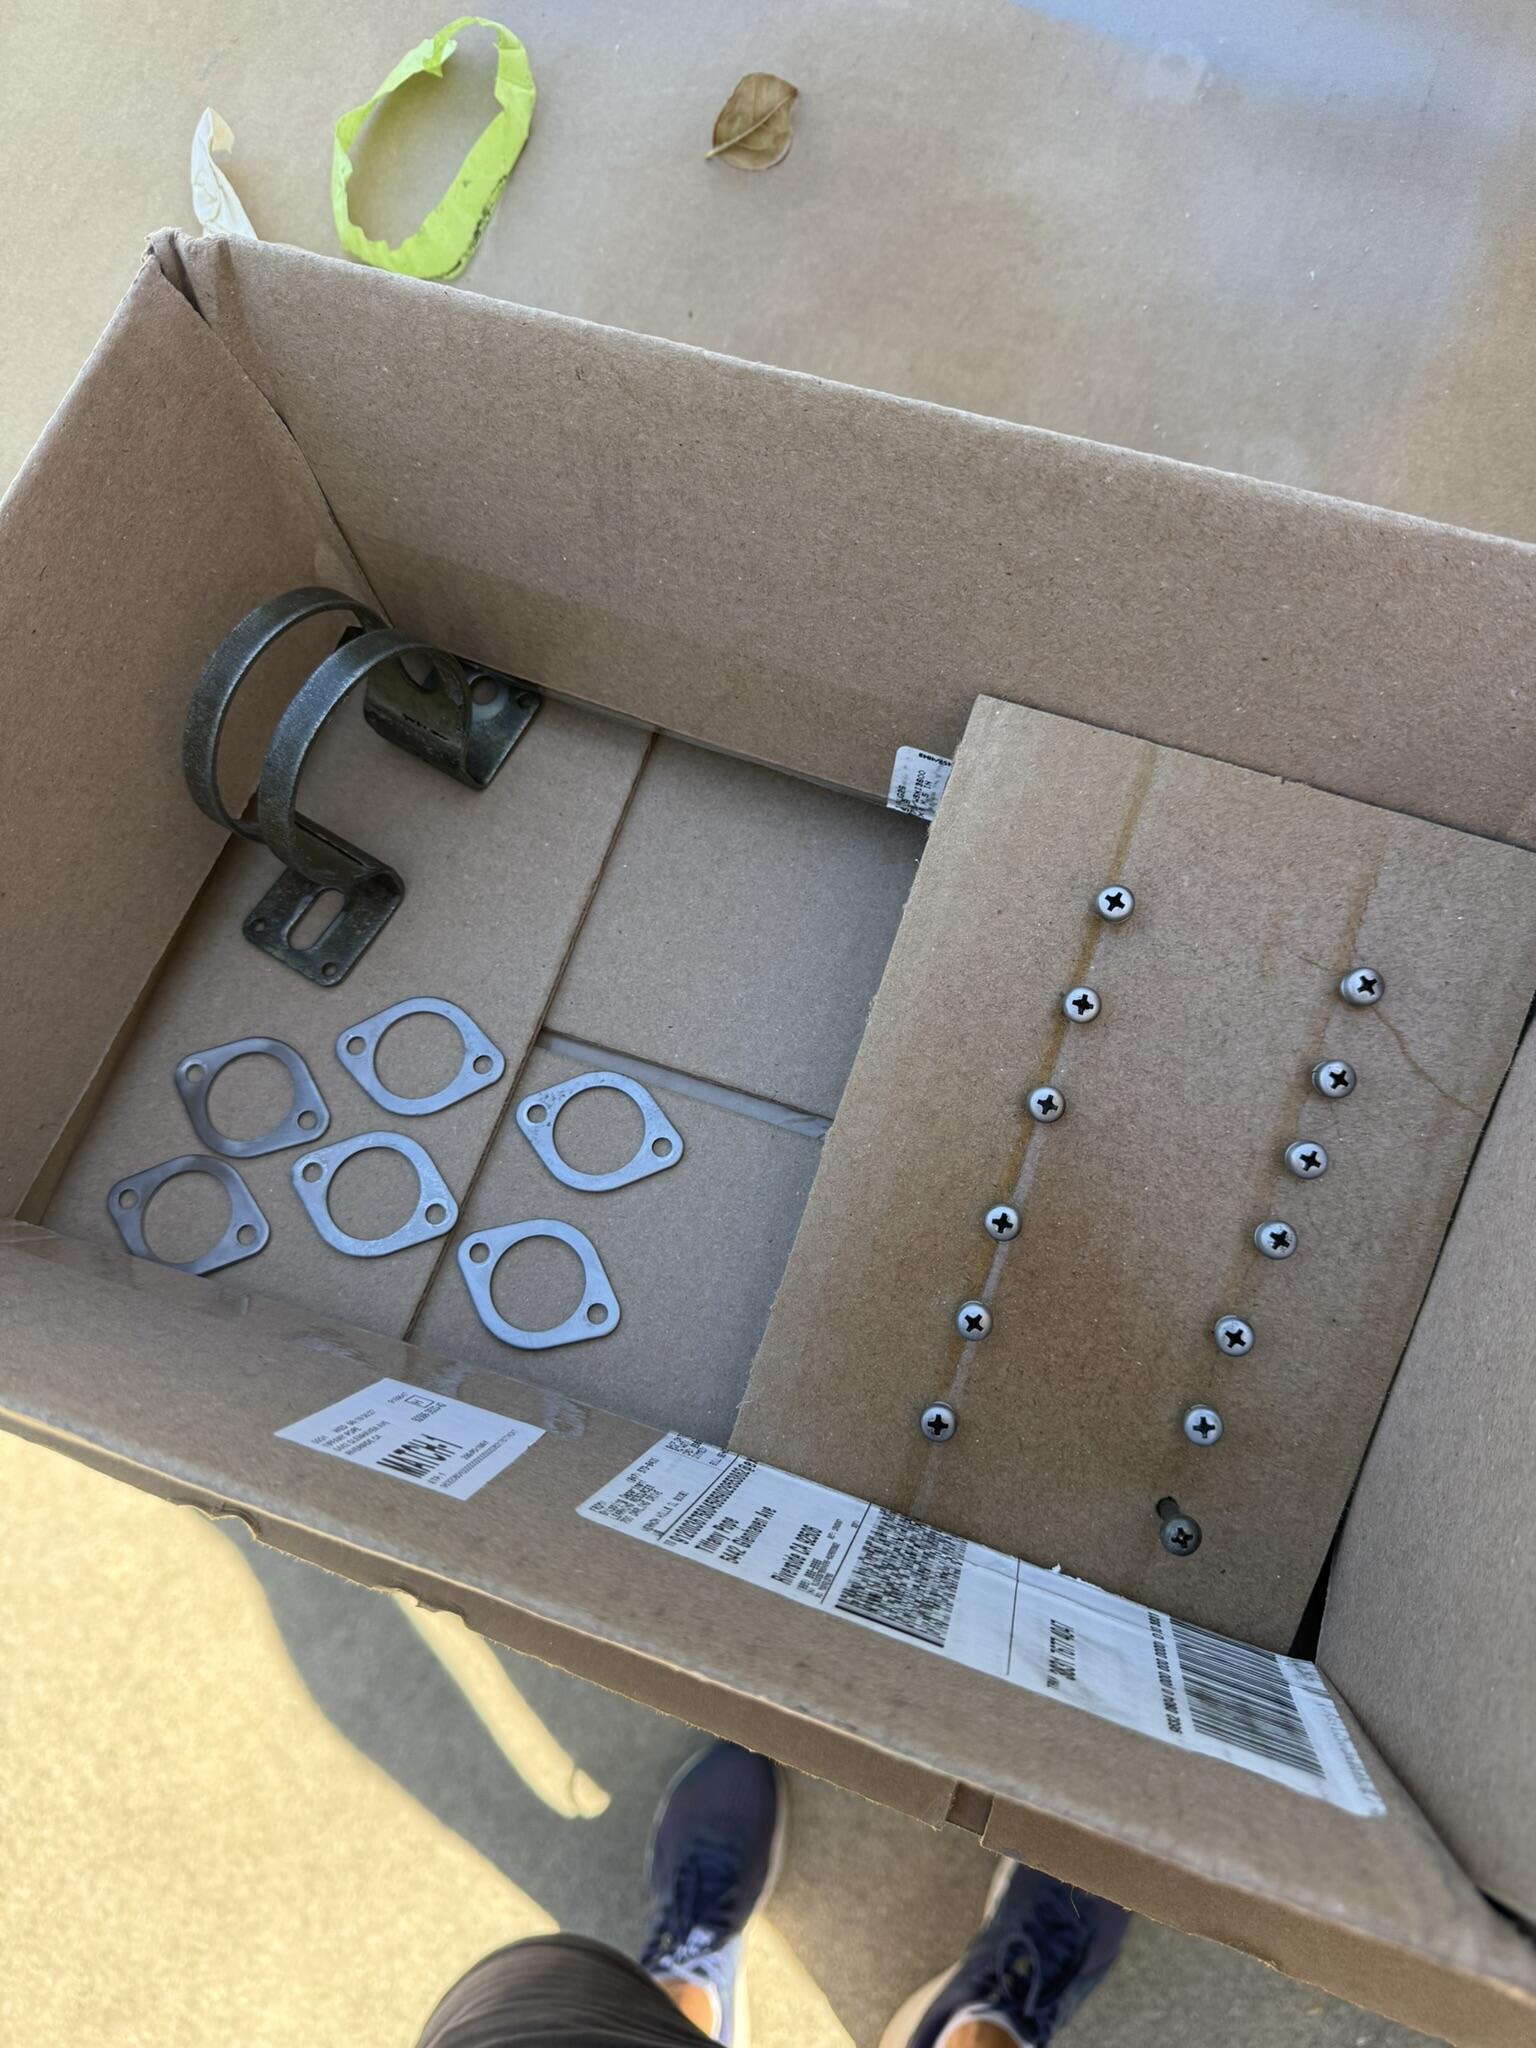
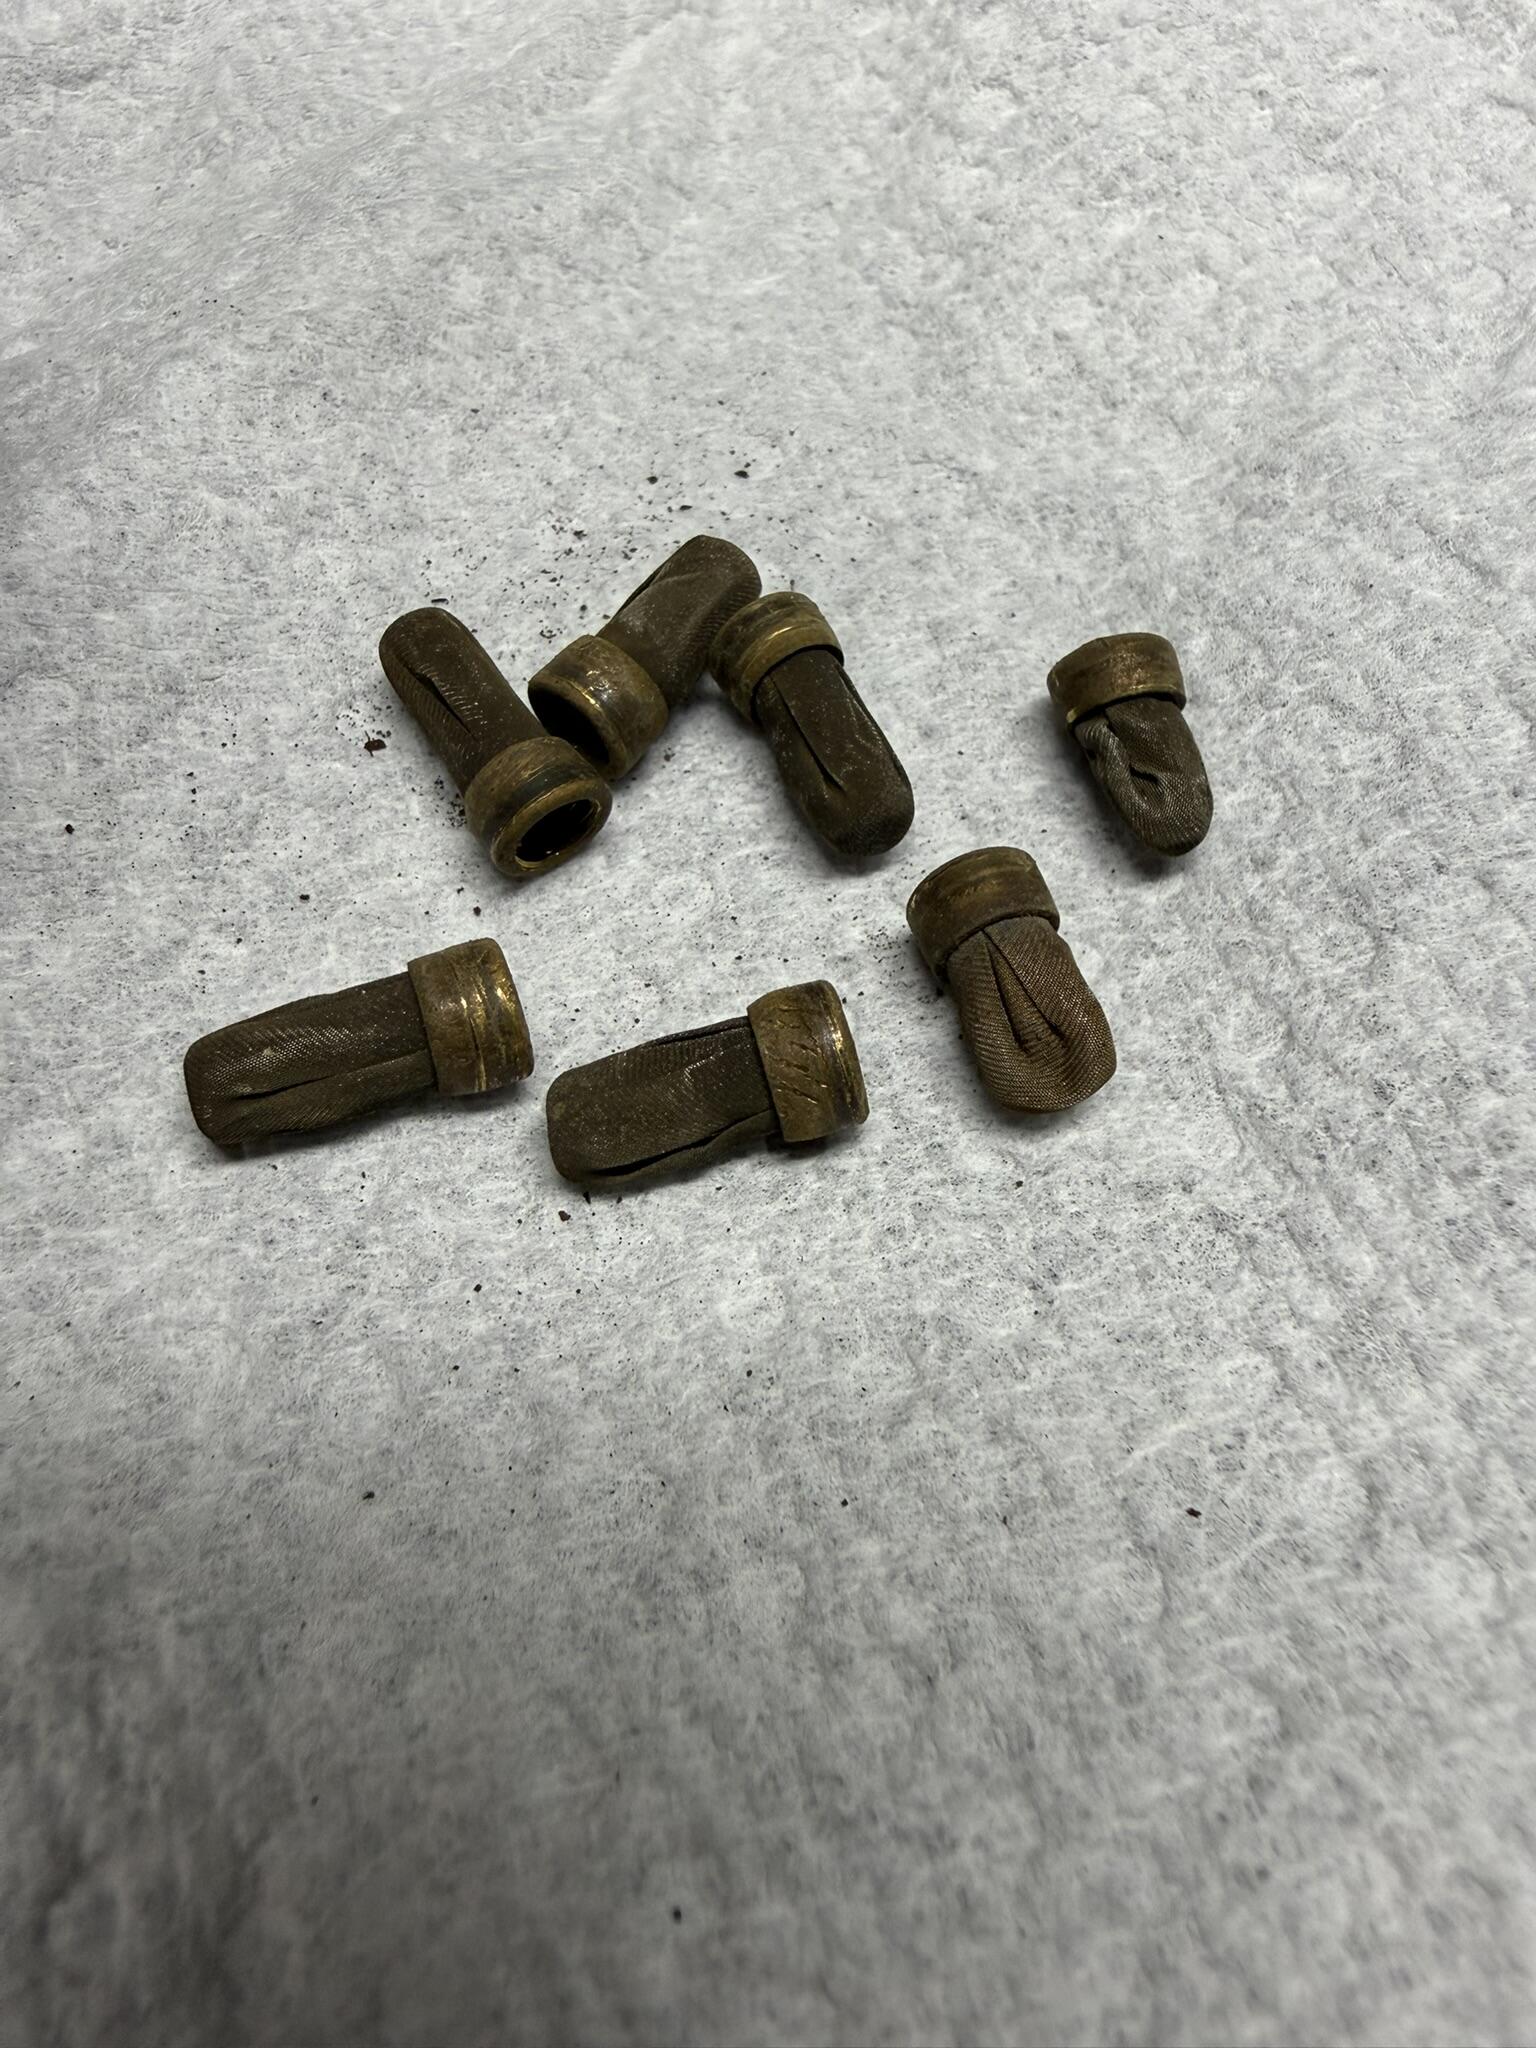
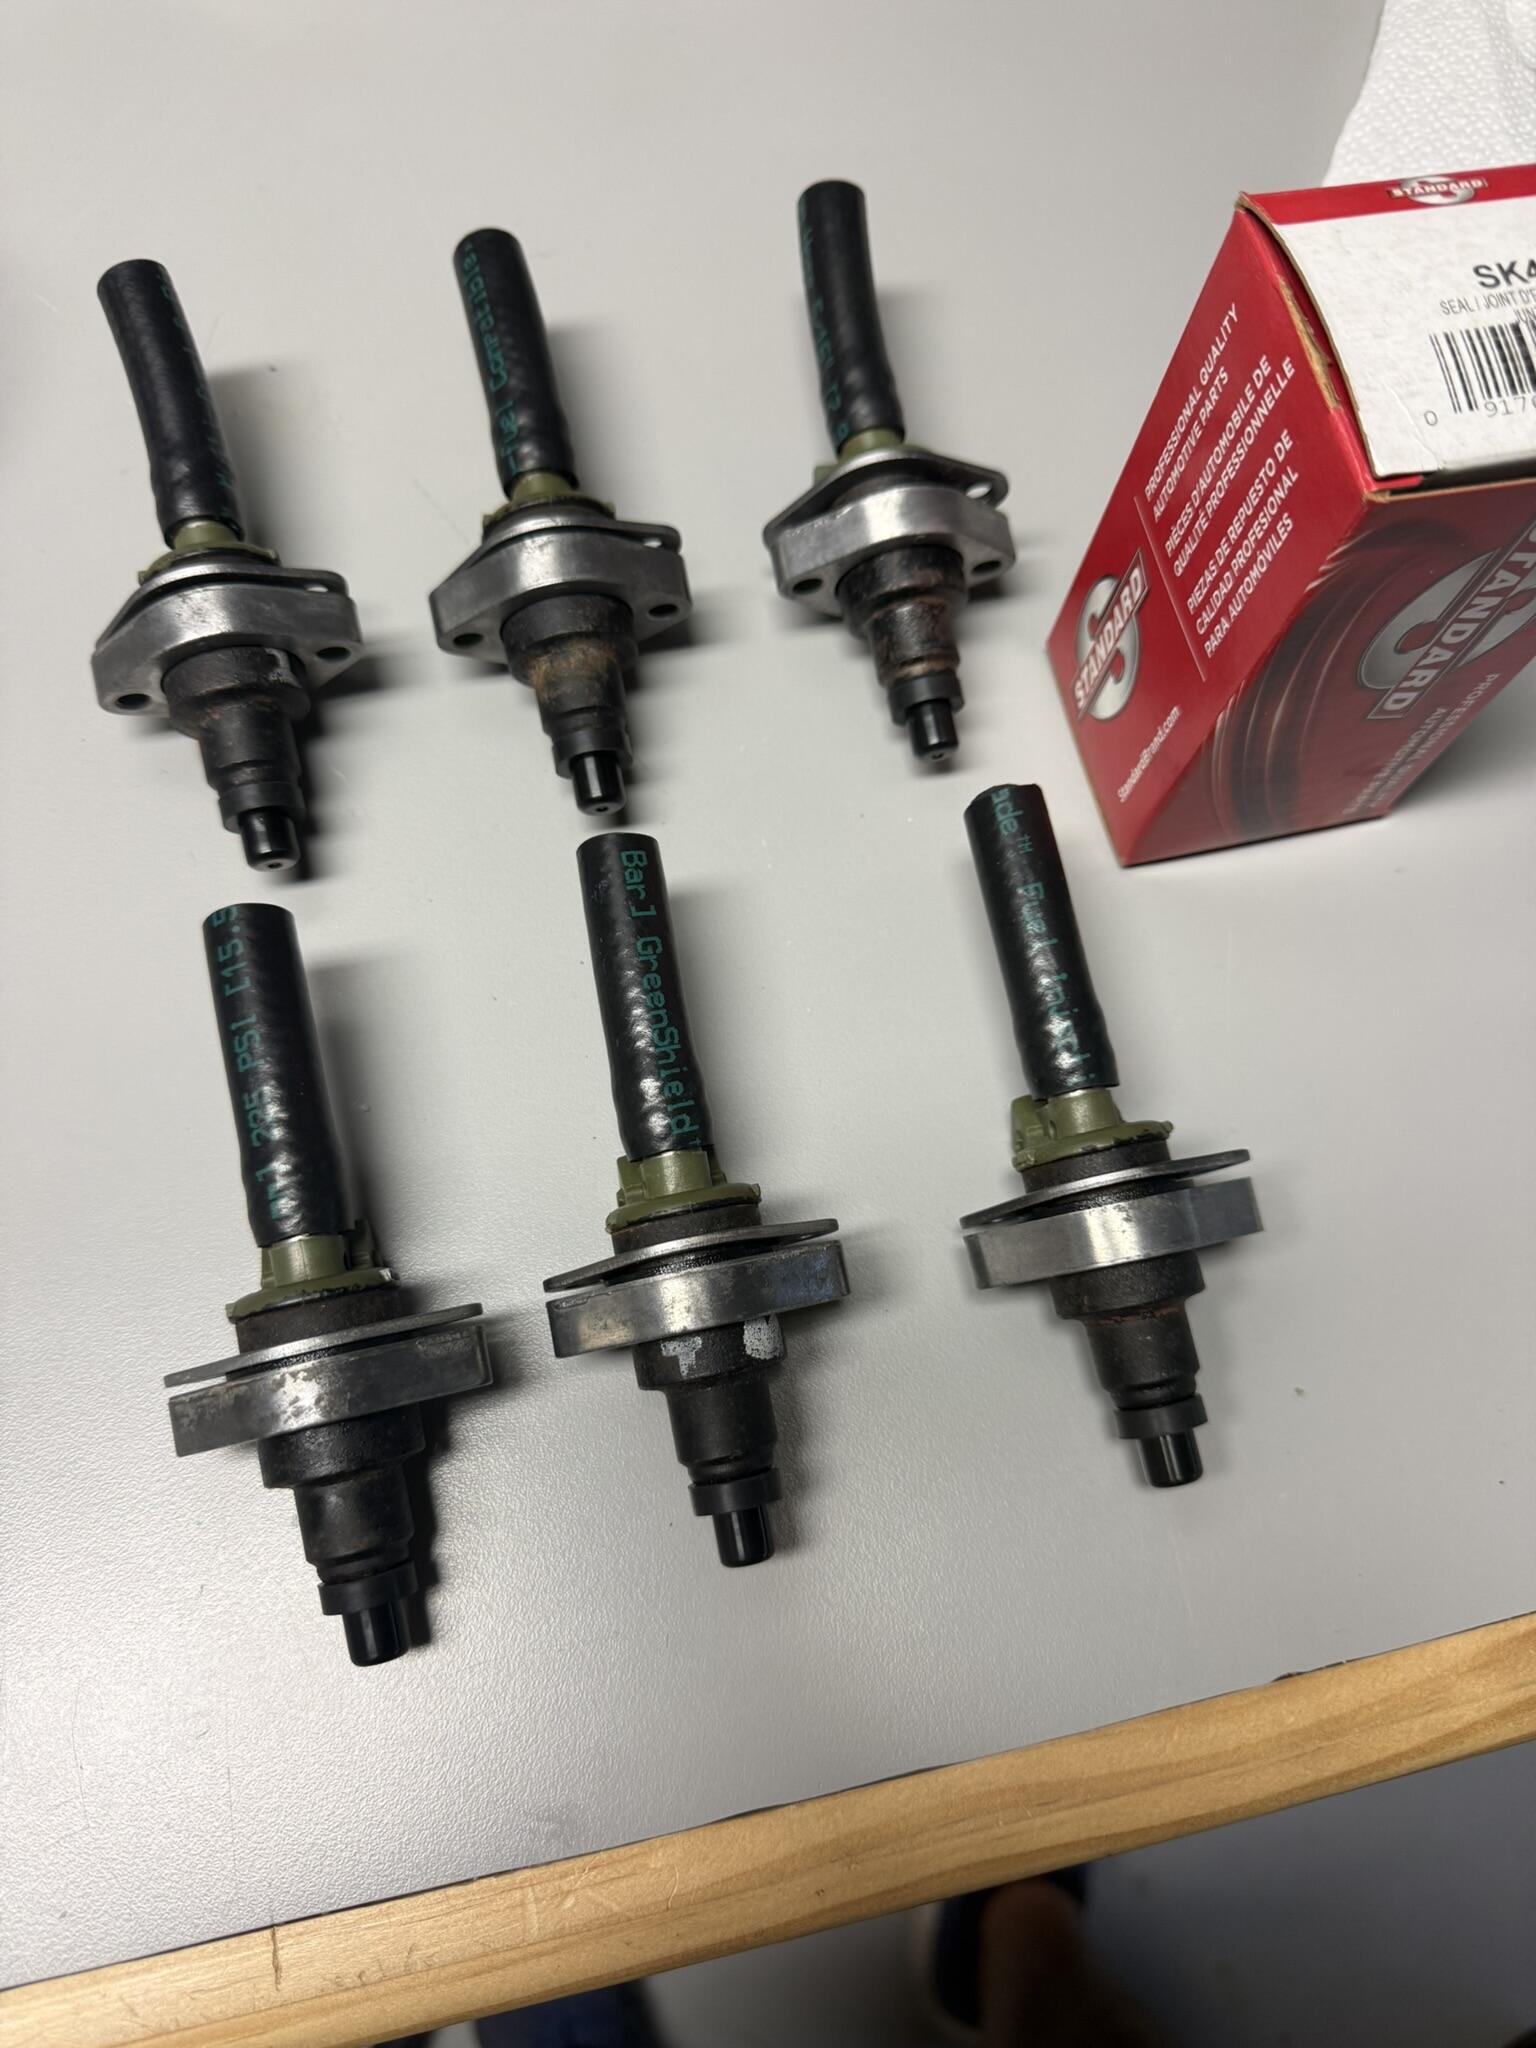
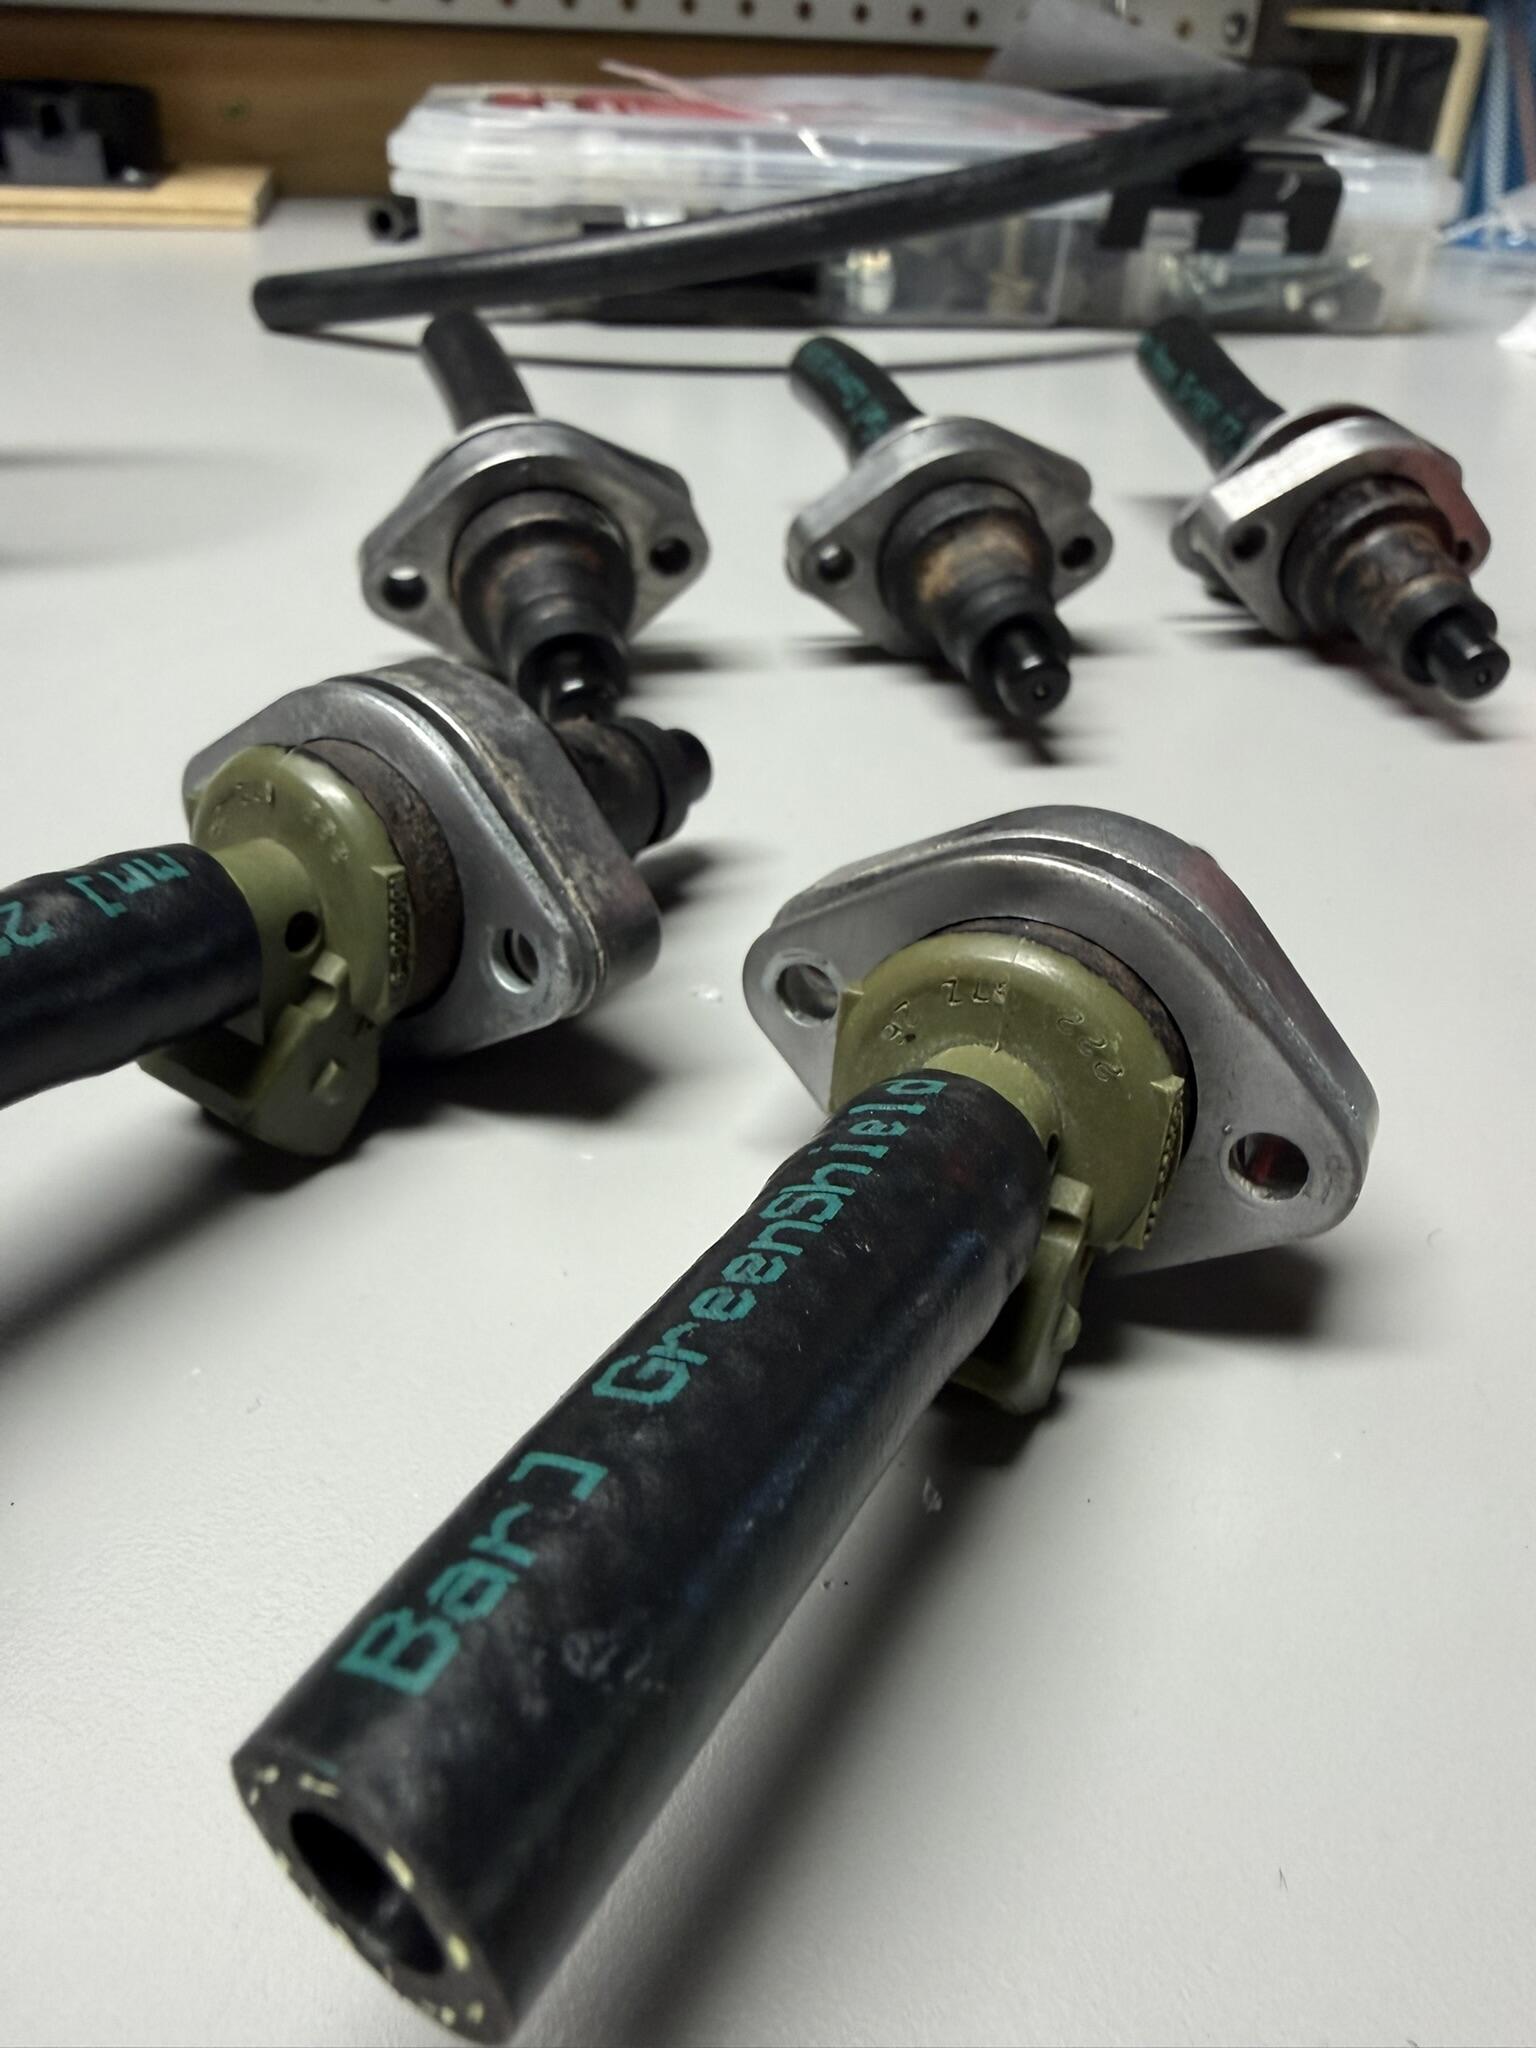
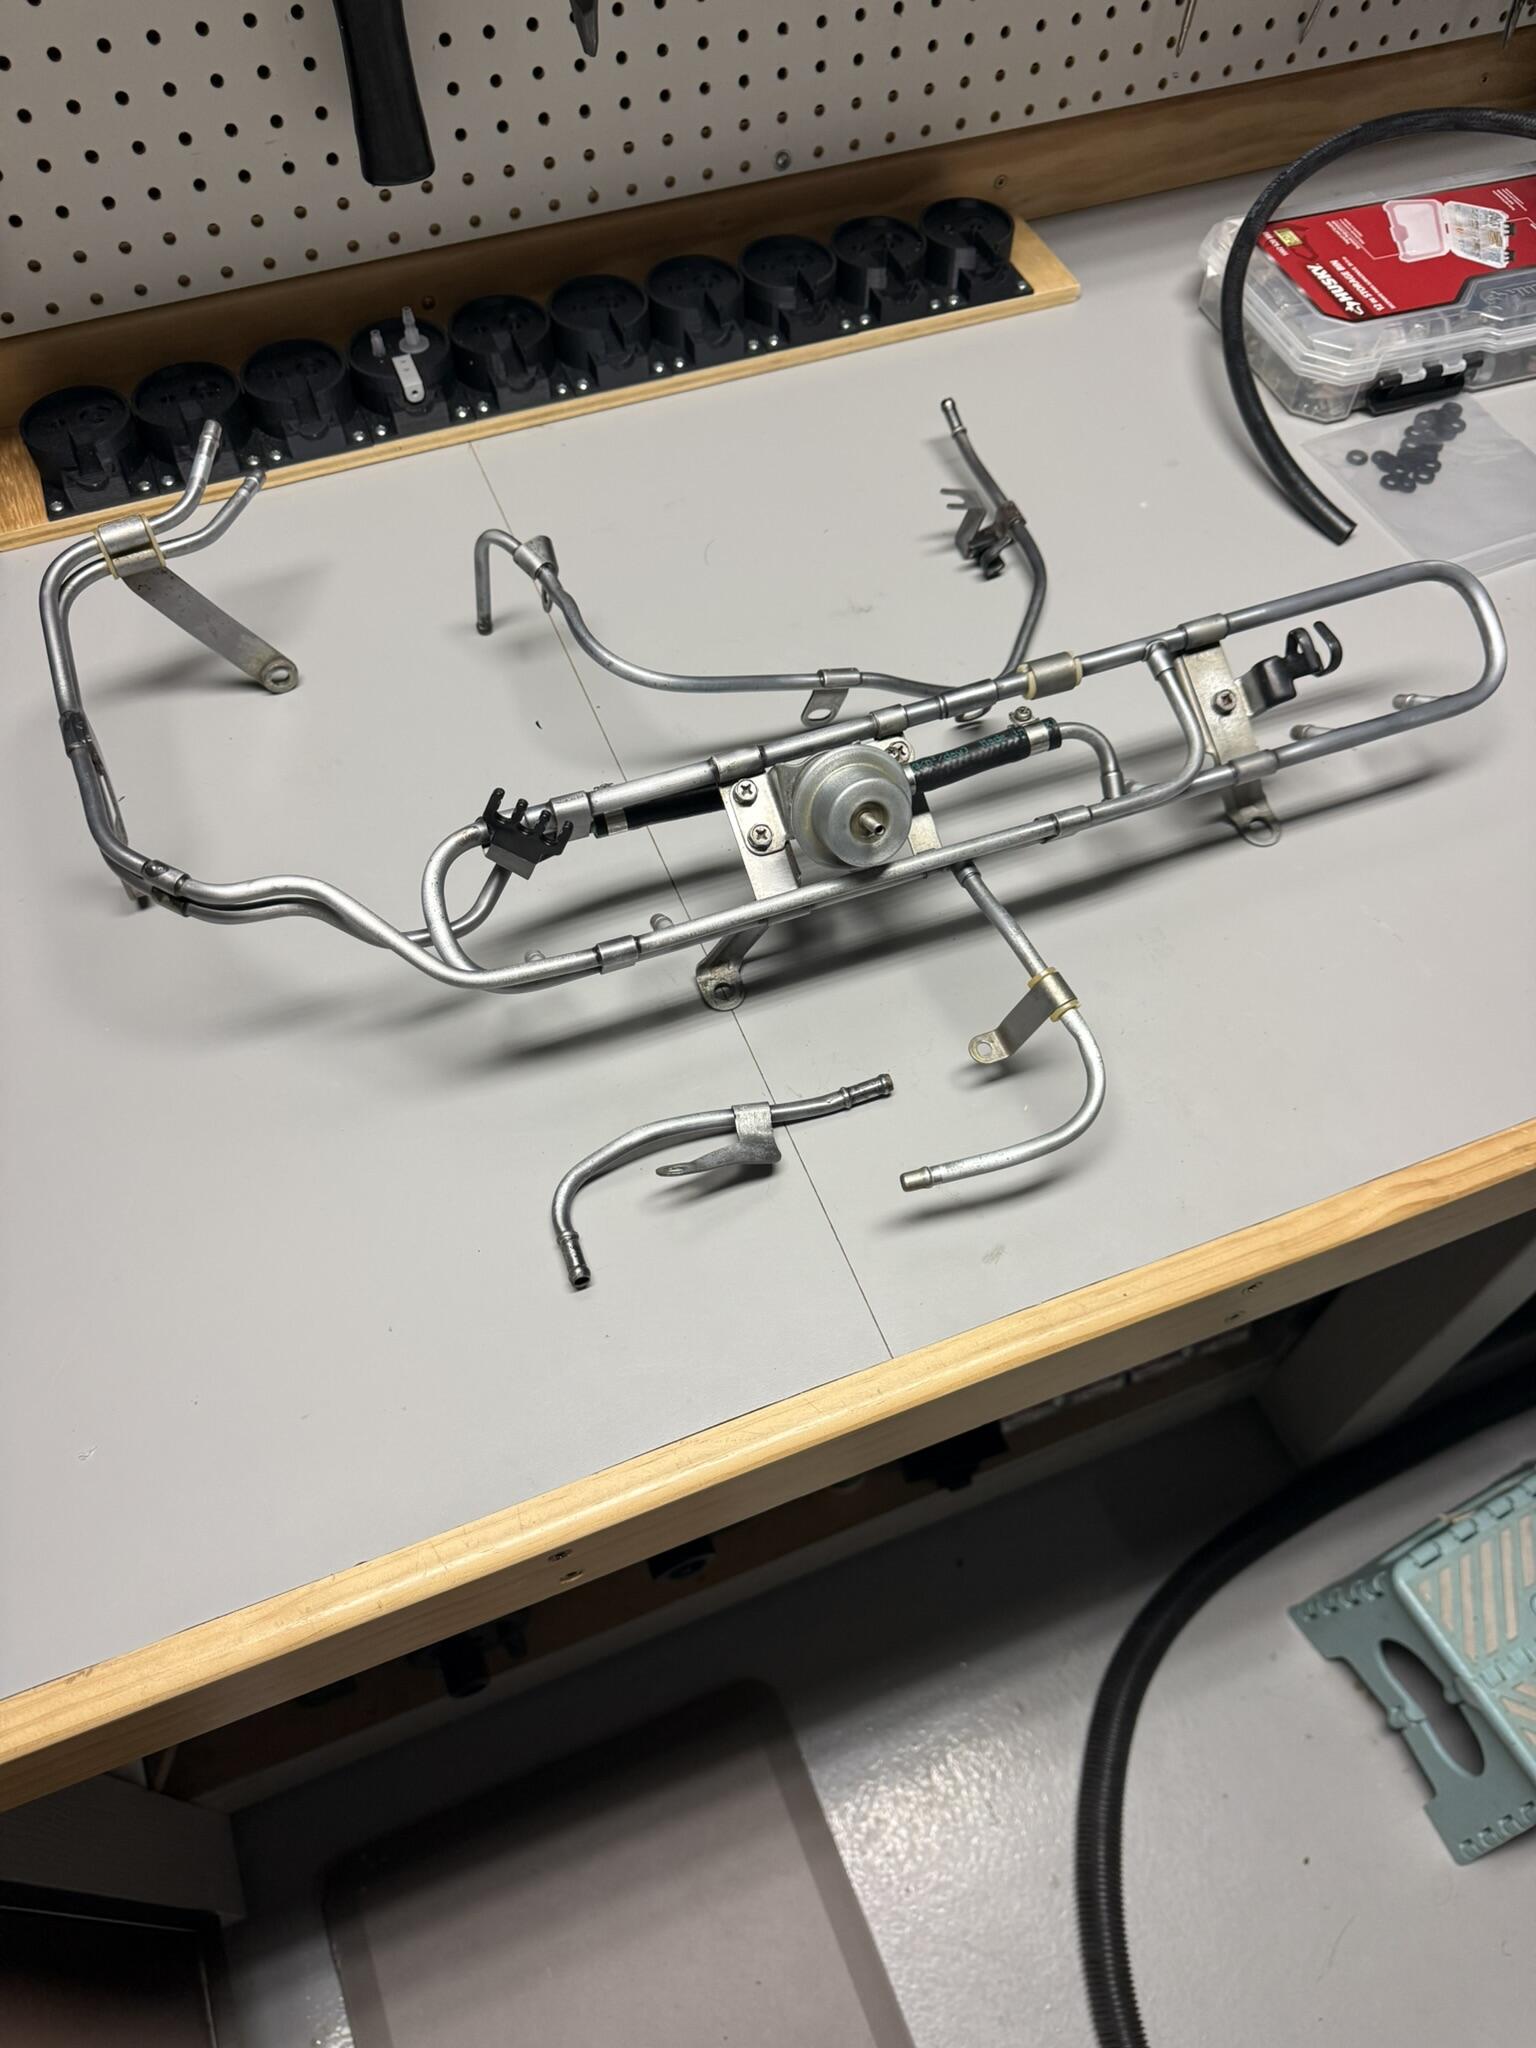
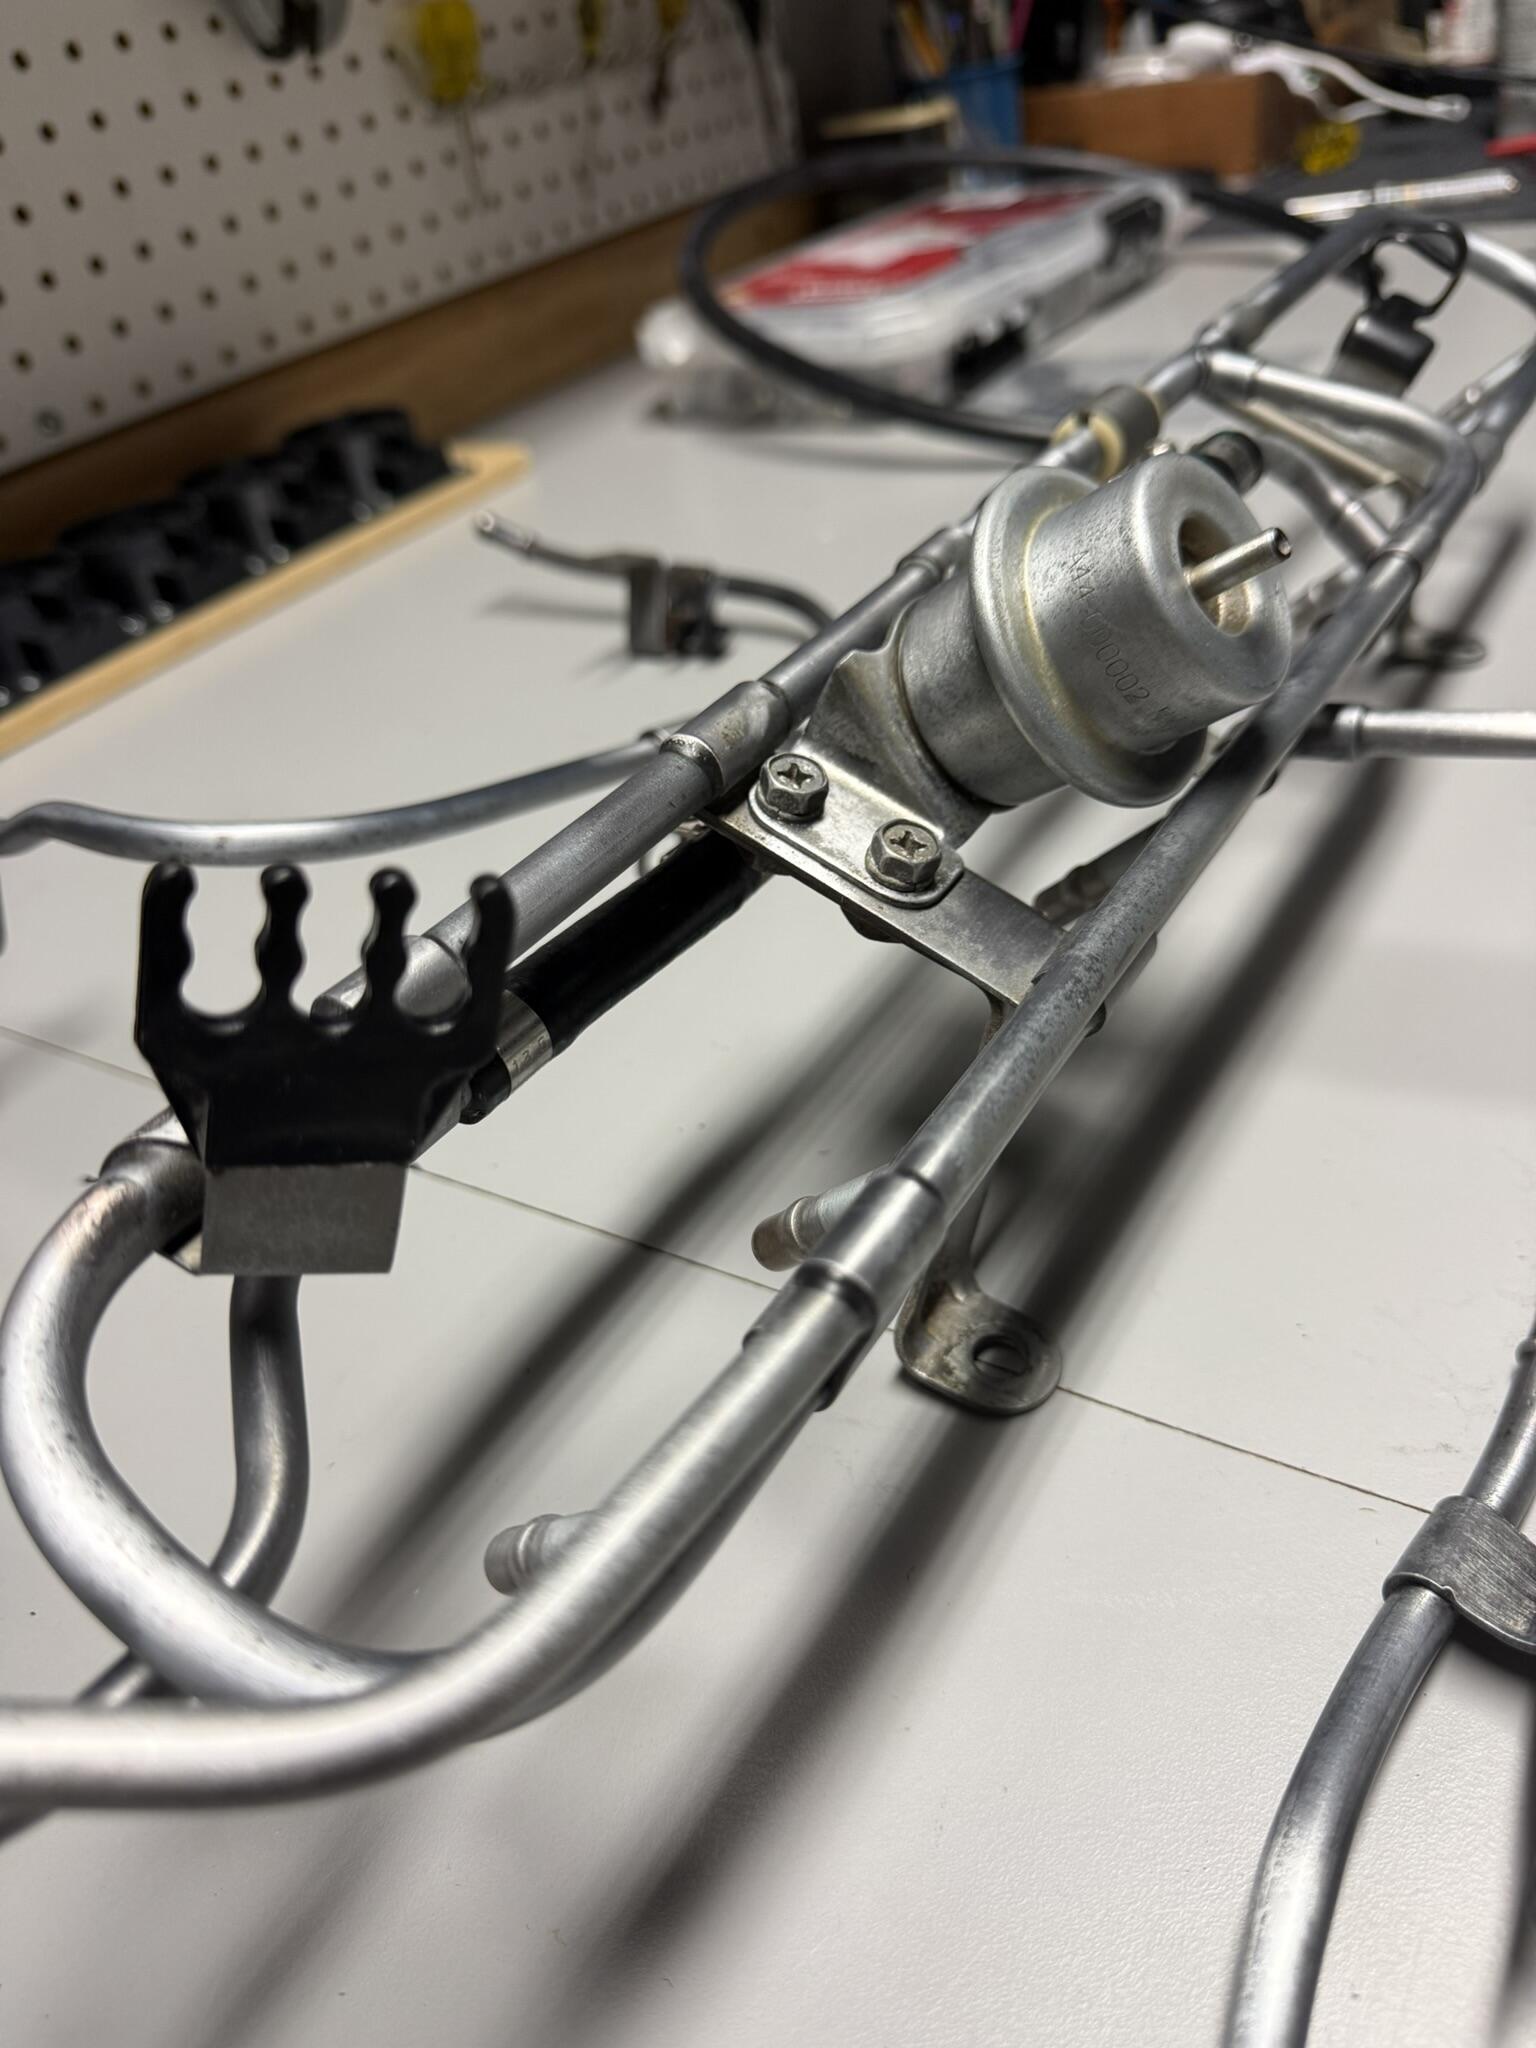
Another little update by way of pictures. I believe I have everything in place to begin re-assembly. Everything removed has been degreased at a minimum, and in some cases more than that. One of those "while I have it off the car it sure makes sense to refurbish it" situations. Anyways, I'm happy I did it. Again, balancing time with results. She'll never be a show car, but with minimal time and effort, I can make it look 80% better at basically zero cost🙂 Here we go... Here's the fuel rail before, exactly as I removed it from the car. Crusty and oxidized... Mounted it in a vice, cranked up some tunes, and scrubbed away with some degreaser and a scotch brite pad. A perfect afternoon task... I had 1 can of 2K matte clear left over from refinishing the wheels and opted to use it on the fuel rail and coolant lines. They came out great, and the 2K should keep them that way. Again, while I have em off the car, why not spruce them up a bit. I know it's a slippery slope, but trust me, there's a limit to how far I'll go...😉 Shiny😎 I did the same thing to the injector hardware because I had more paint than i knew what to do with😅... Speaking of injectors, here they are. Assembled and ready to be installed. New seals, hoses, and pintle caps. All serviced and confirmed good by Jim at injectorrepair.com. I also polished up the aluminum injector holders because why not... Here are the injector filter screens that were replaced, plenty of debris and varnish it looks like... I also replaced the bottom rubber pieces on the inner fender splash shields. Ready for install... More to come. Stay tuned. Also an interesting fun fact, I've been following Leno's law 2.0 here in CA. It's looking promising (which is shocking), and if it does pass, this 78 would be smog exempt. I won't hold my breath, but who knows. I'll prolly end up getting it smogged anyways before the law takes effect next year, which will at least allow me to know it's running right. Thanks for following along this far👍
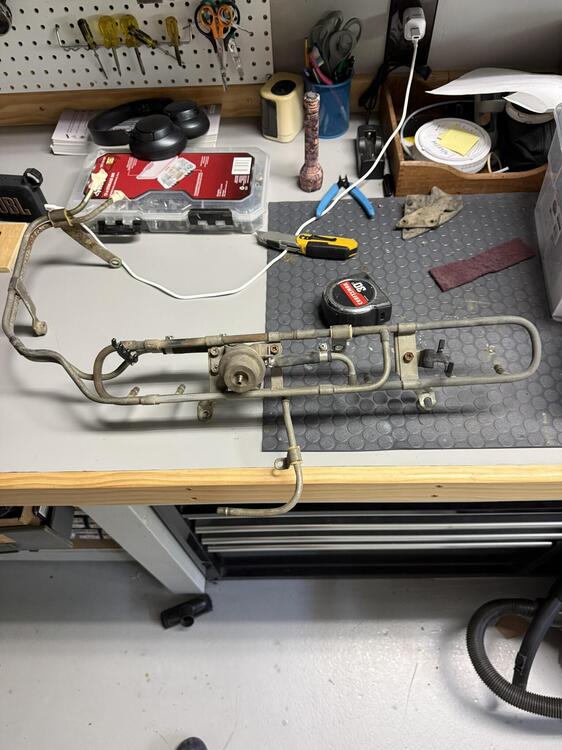
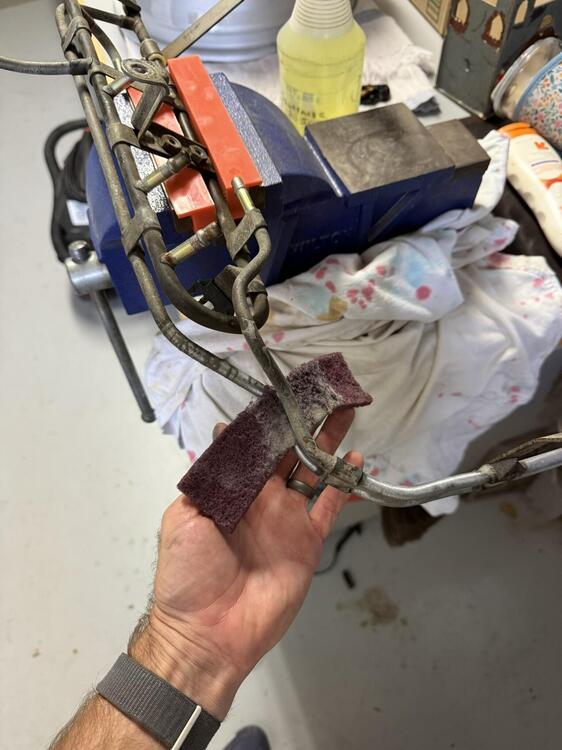
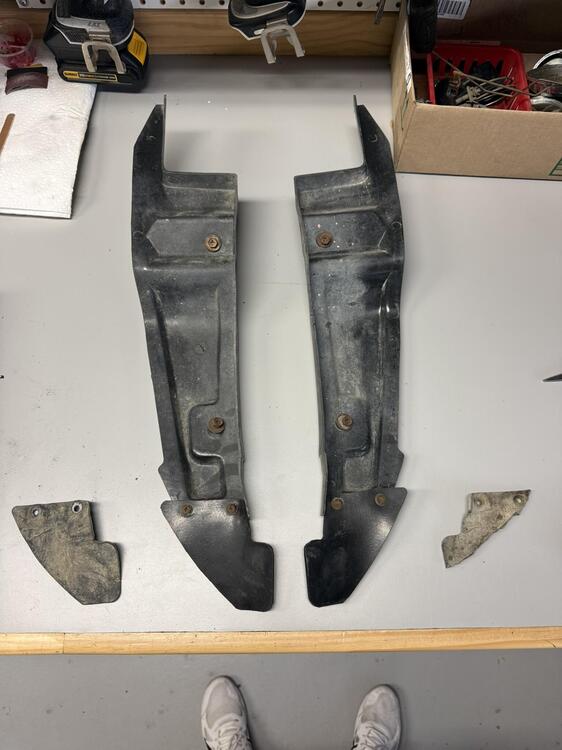
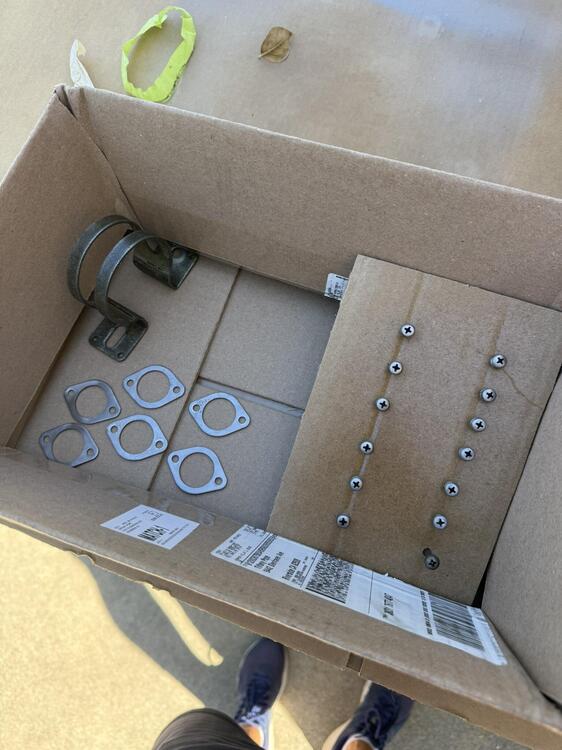
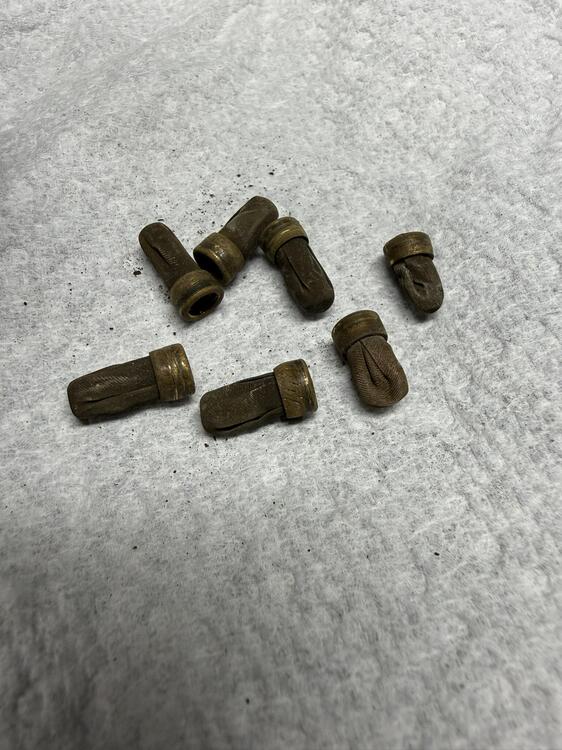
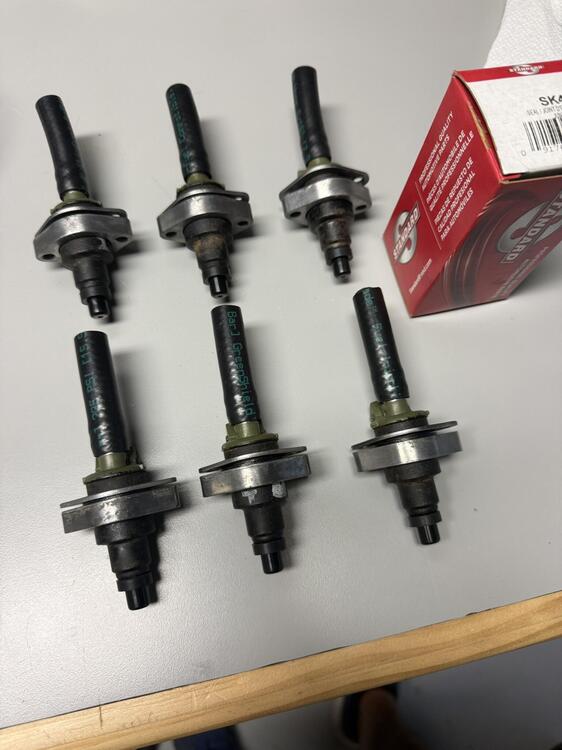
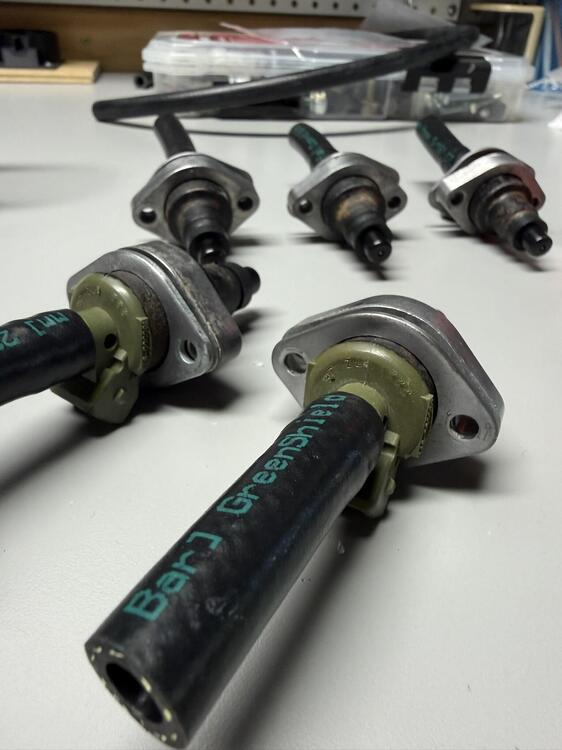
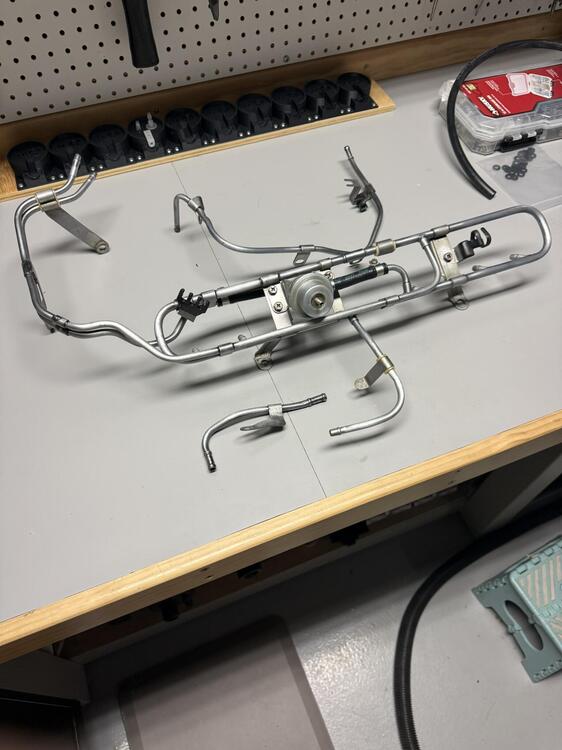
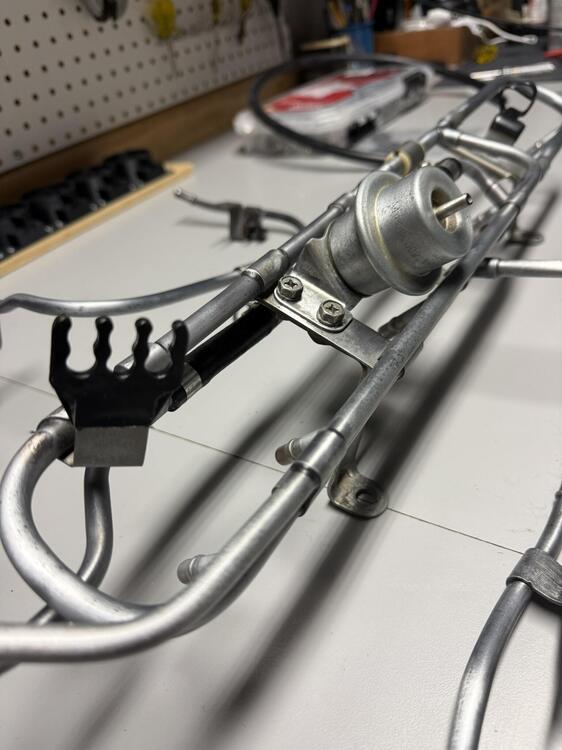 4 points
 -
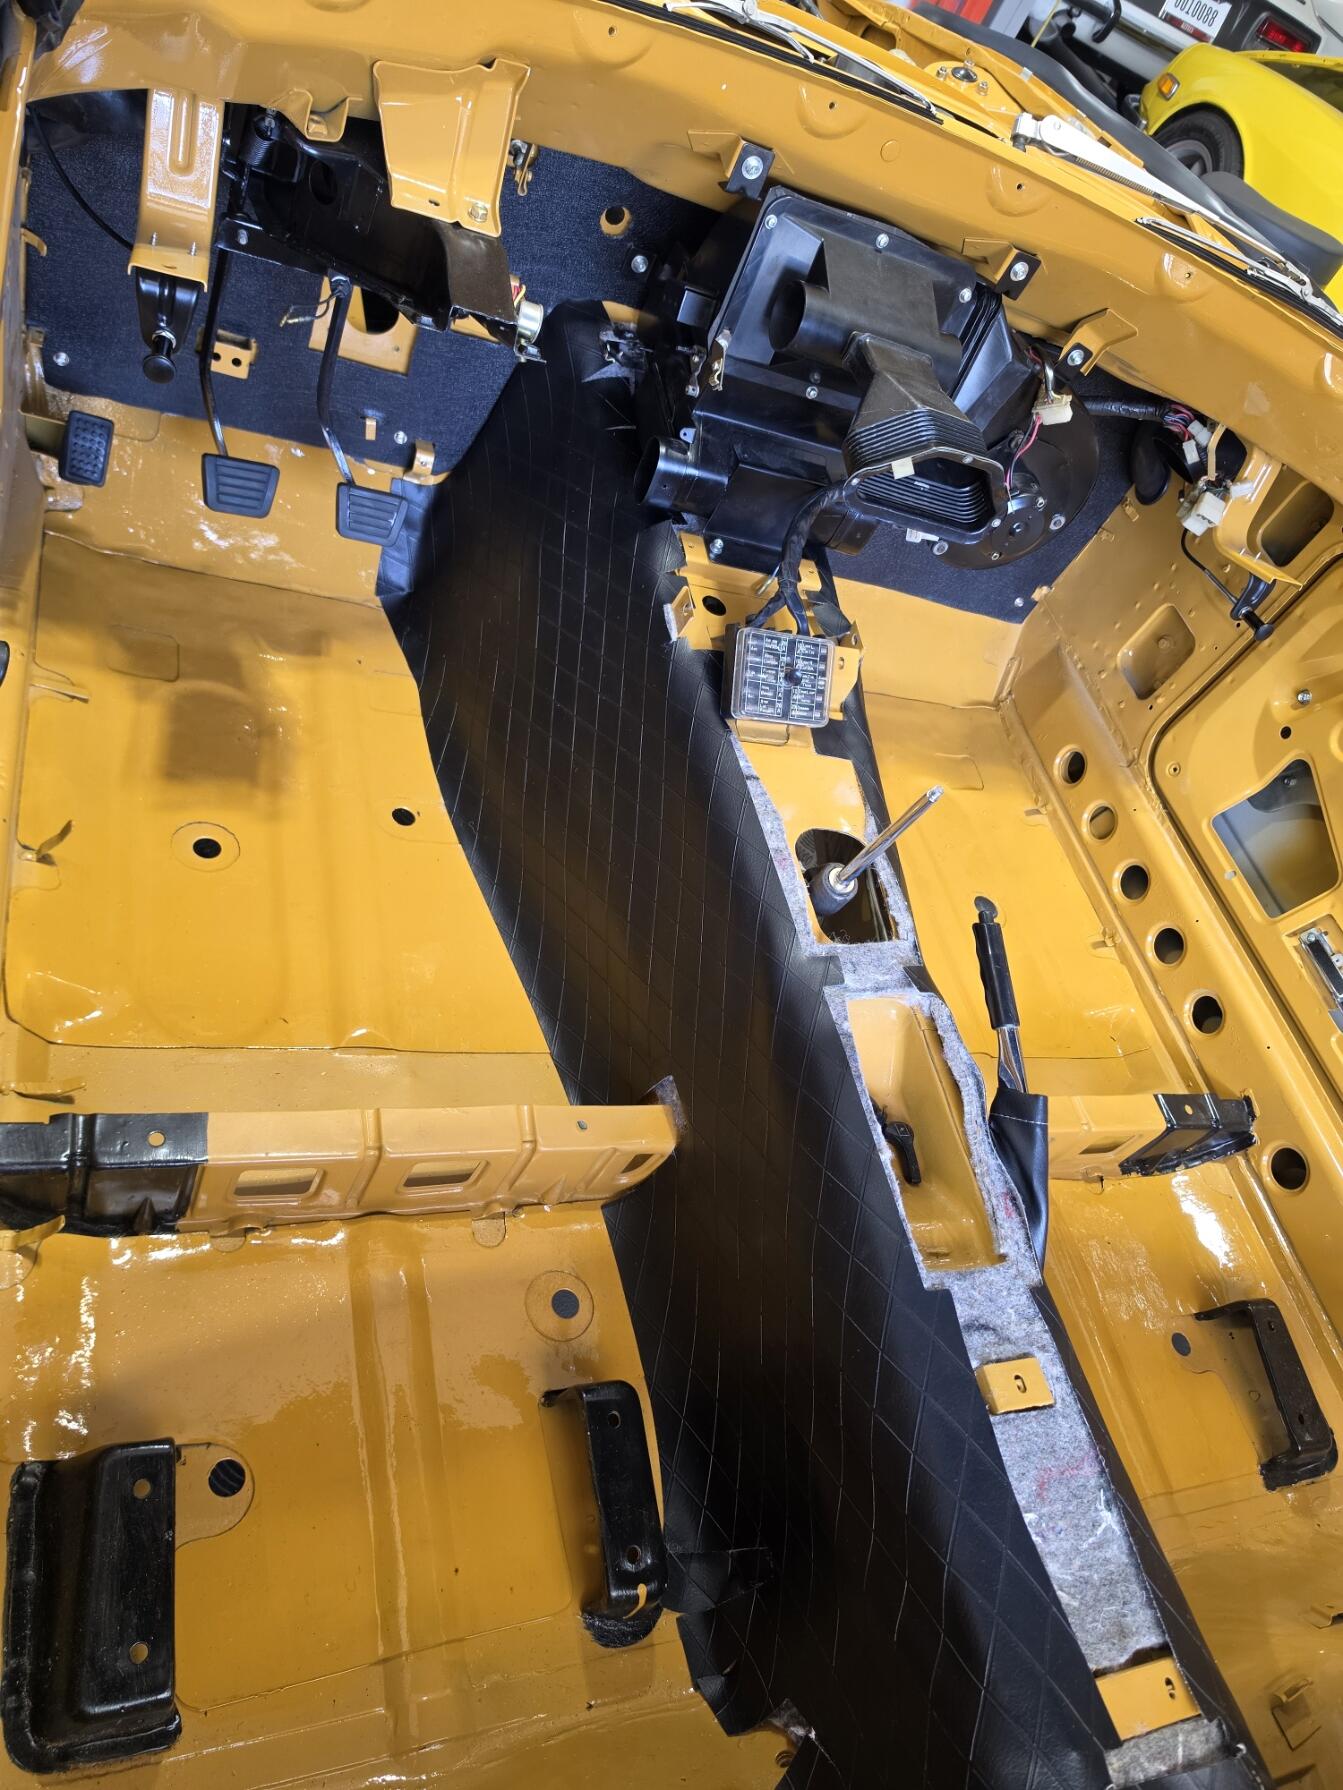
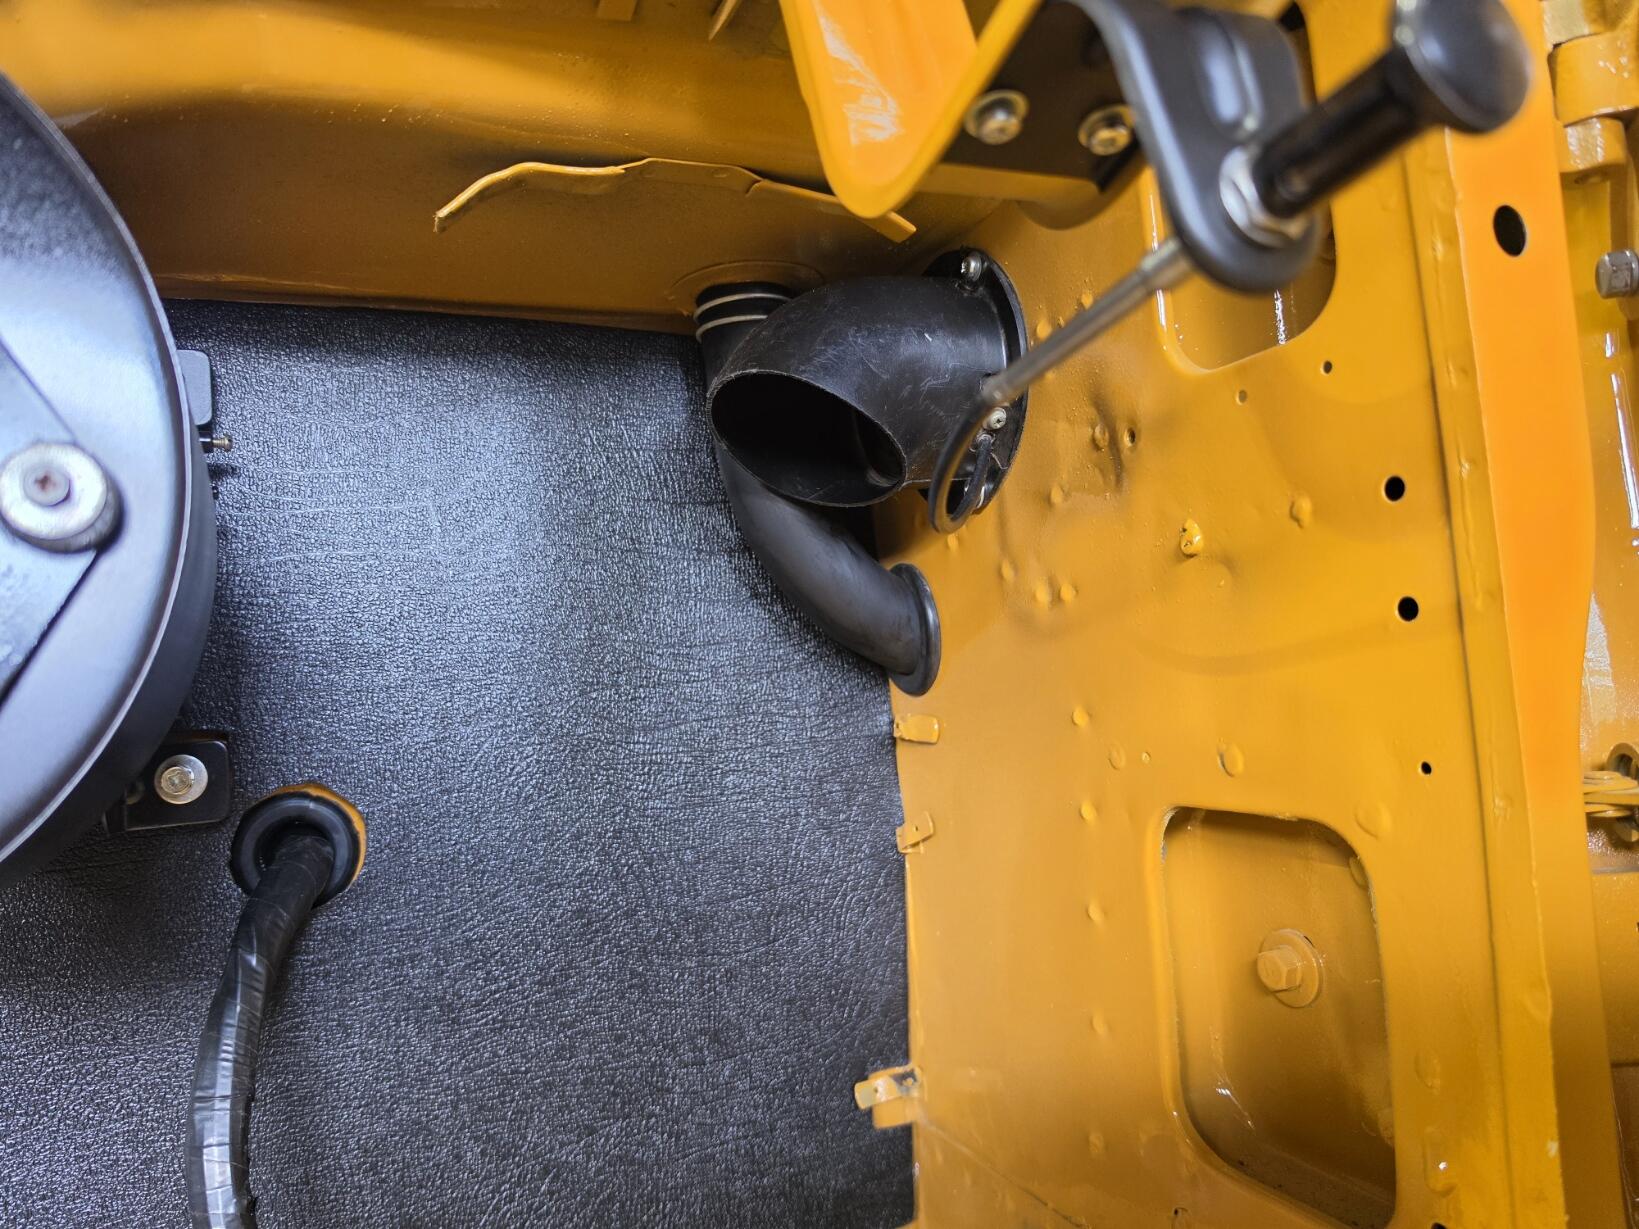
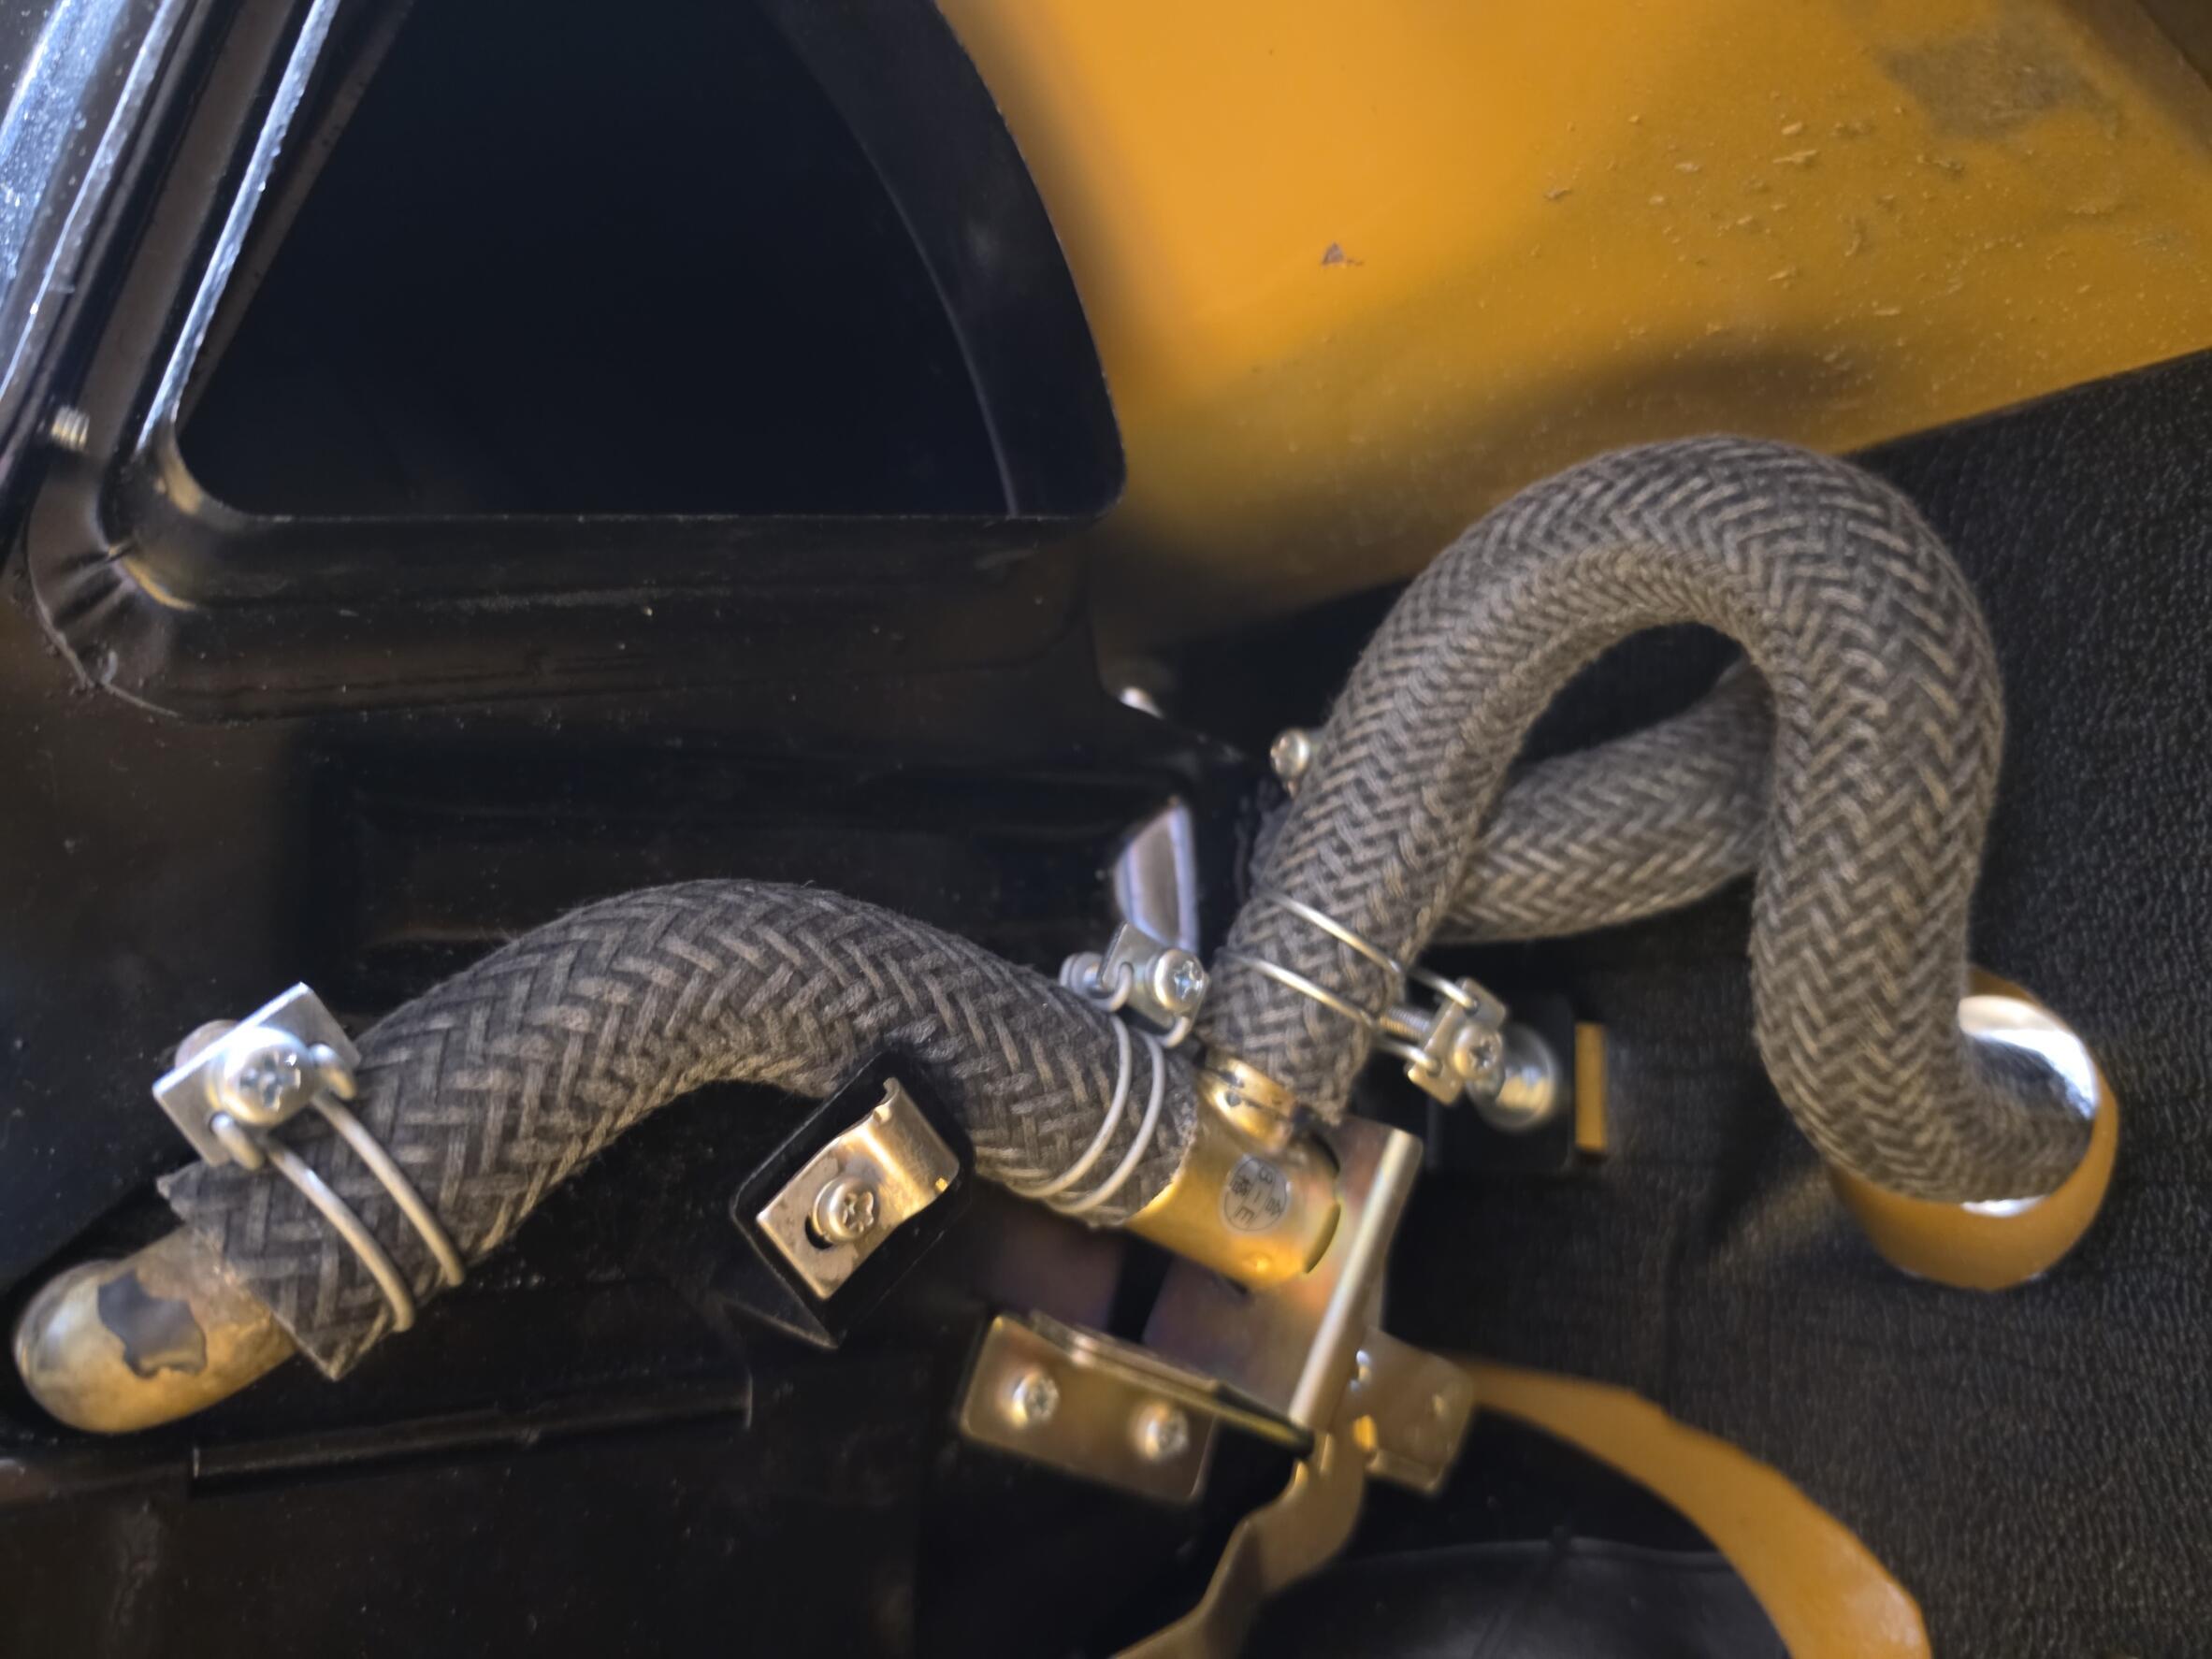
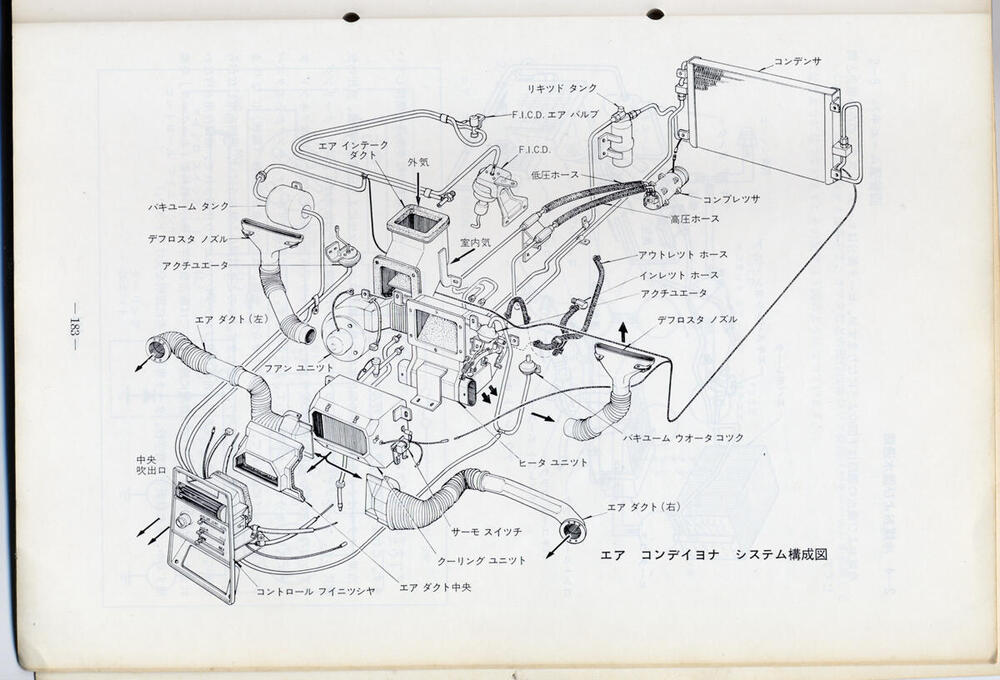
4 pointsJust in case you haven't seen it, here's a factory document showing the system as fitted to Japanese (RHD) variants. You can see the hose and grommet that go in your drain hole:
 4 points
 -
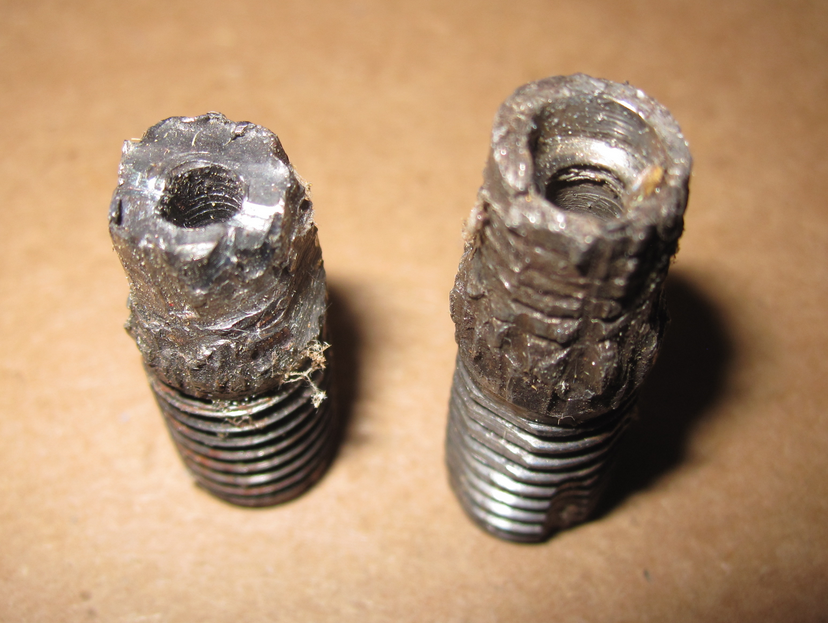
3 pointsBroken bolts fix. Ended up being able to remove both the broken drill bit and the easy-out. Decided to finish drilling out the stuck bolts and tap a M12x1.25 (original bolt was a M10x1.25). Had to enlarge the bolt holes in the link mount brace to 1/2 inch so everything aligned. Suspension back in place. Thanks to everyone for the support.3 points
-
I bought a hand-operated transfer pump so I shouldn't have any trouble putting in the 1.5 L of Redline MT-90 when the engine and tranny assembly is firmly bolted into the chassis. Thanks, all, for the warning about tranny tail leakage as it's not mentioned in the FSM that I have.3 points
-
The alternator came with an 800 number to call and unbelievably someone answered right away on a Saturday afternoon. He said the 2-pin readings were normal but the power pole resistance to ground meant it had a problem. Said send it back to z store.3 points
-
I wouldn’t advise filling the trans before installation. Plenty of opportunity to do that while putting the cross member and shaft in.3 points
-
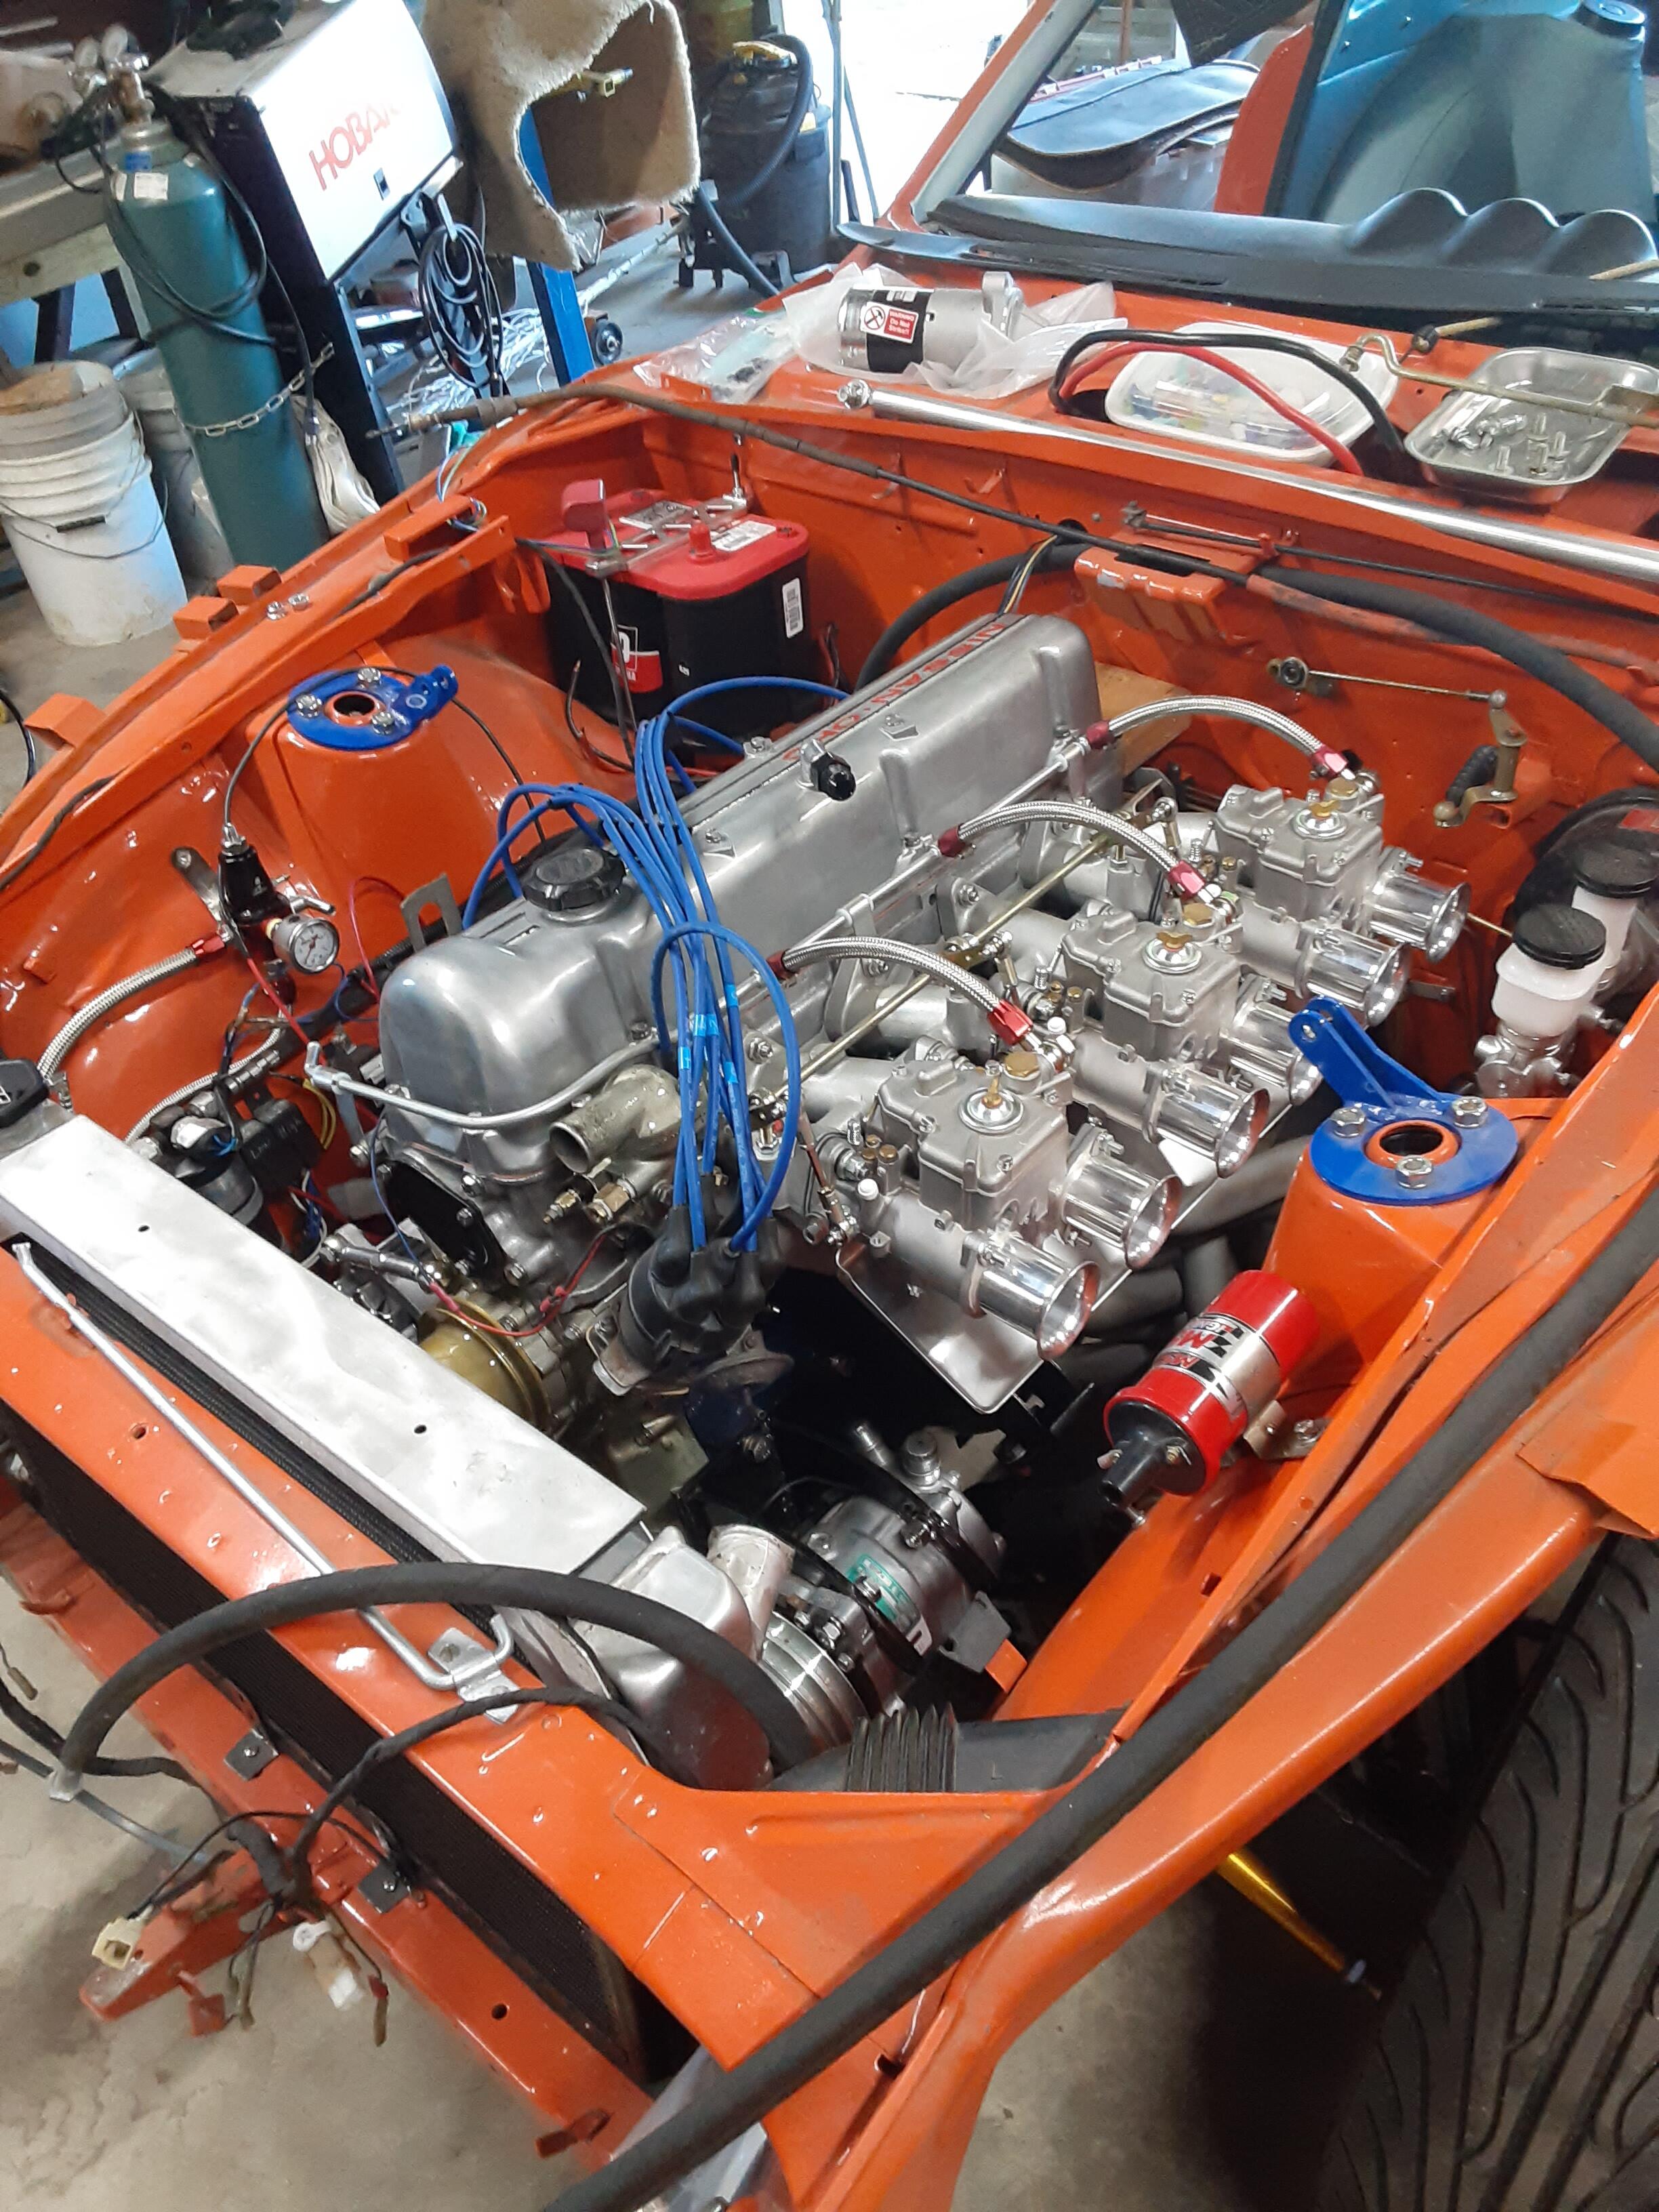
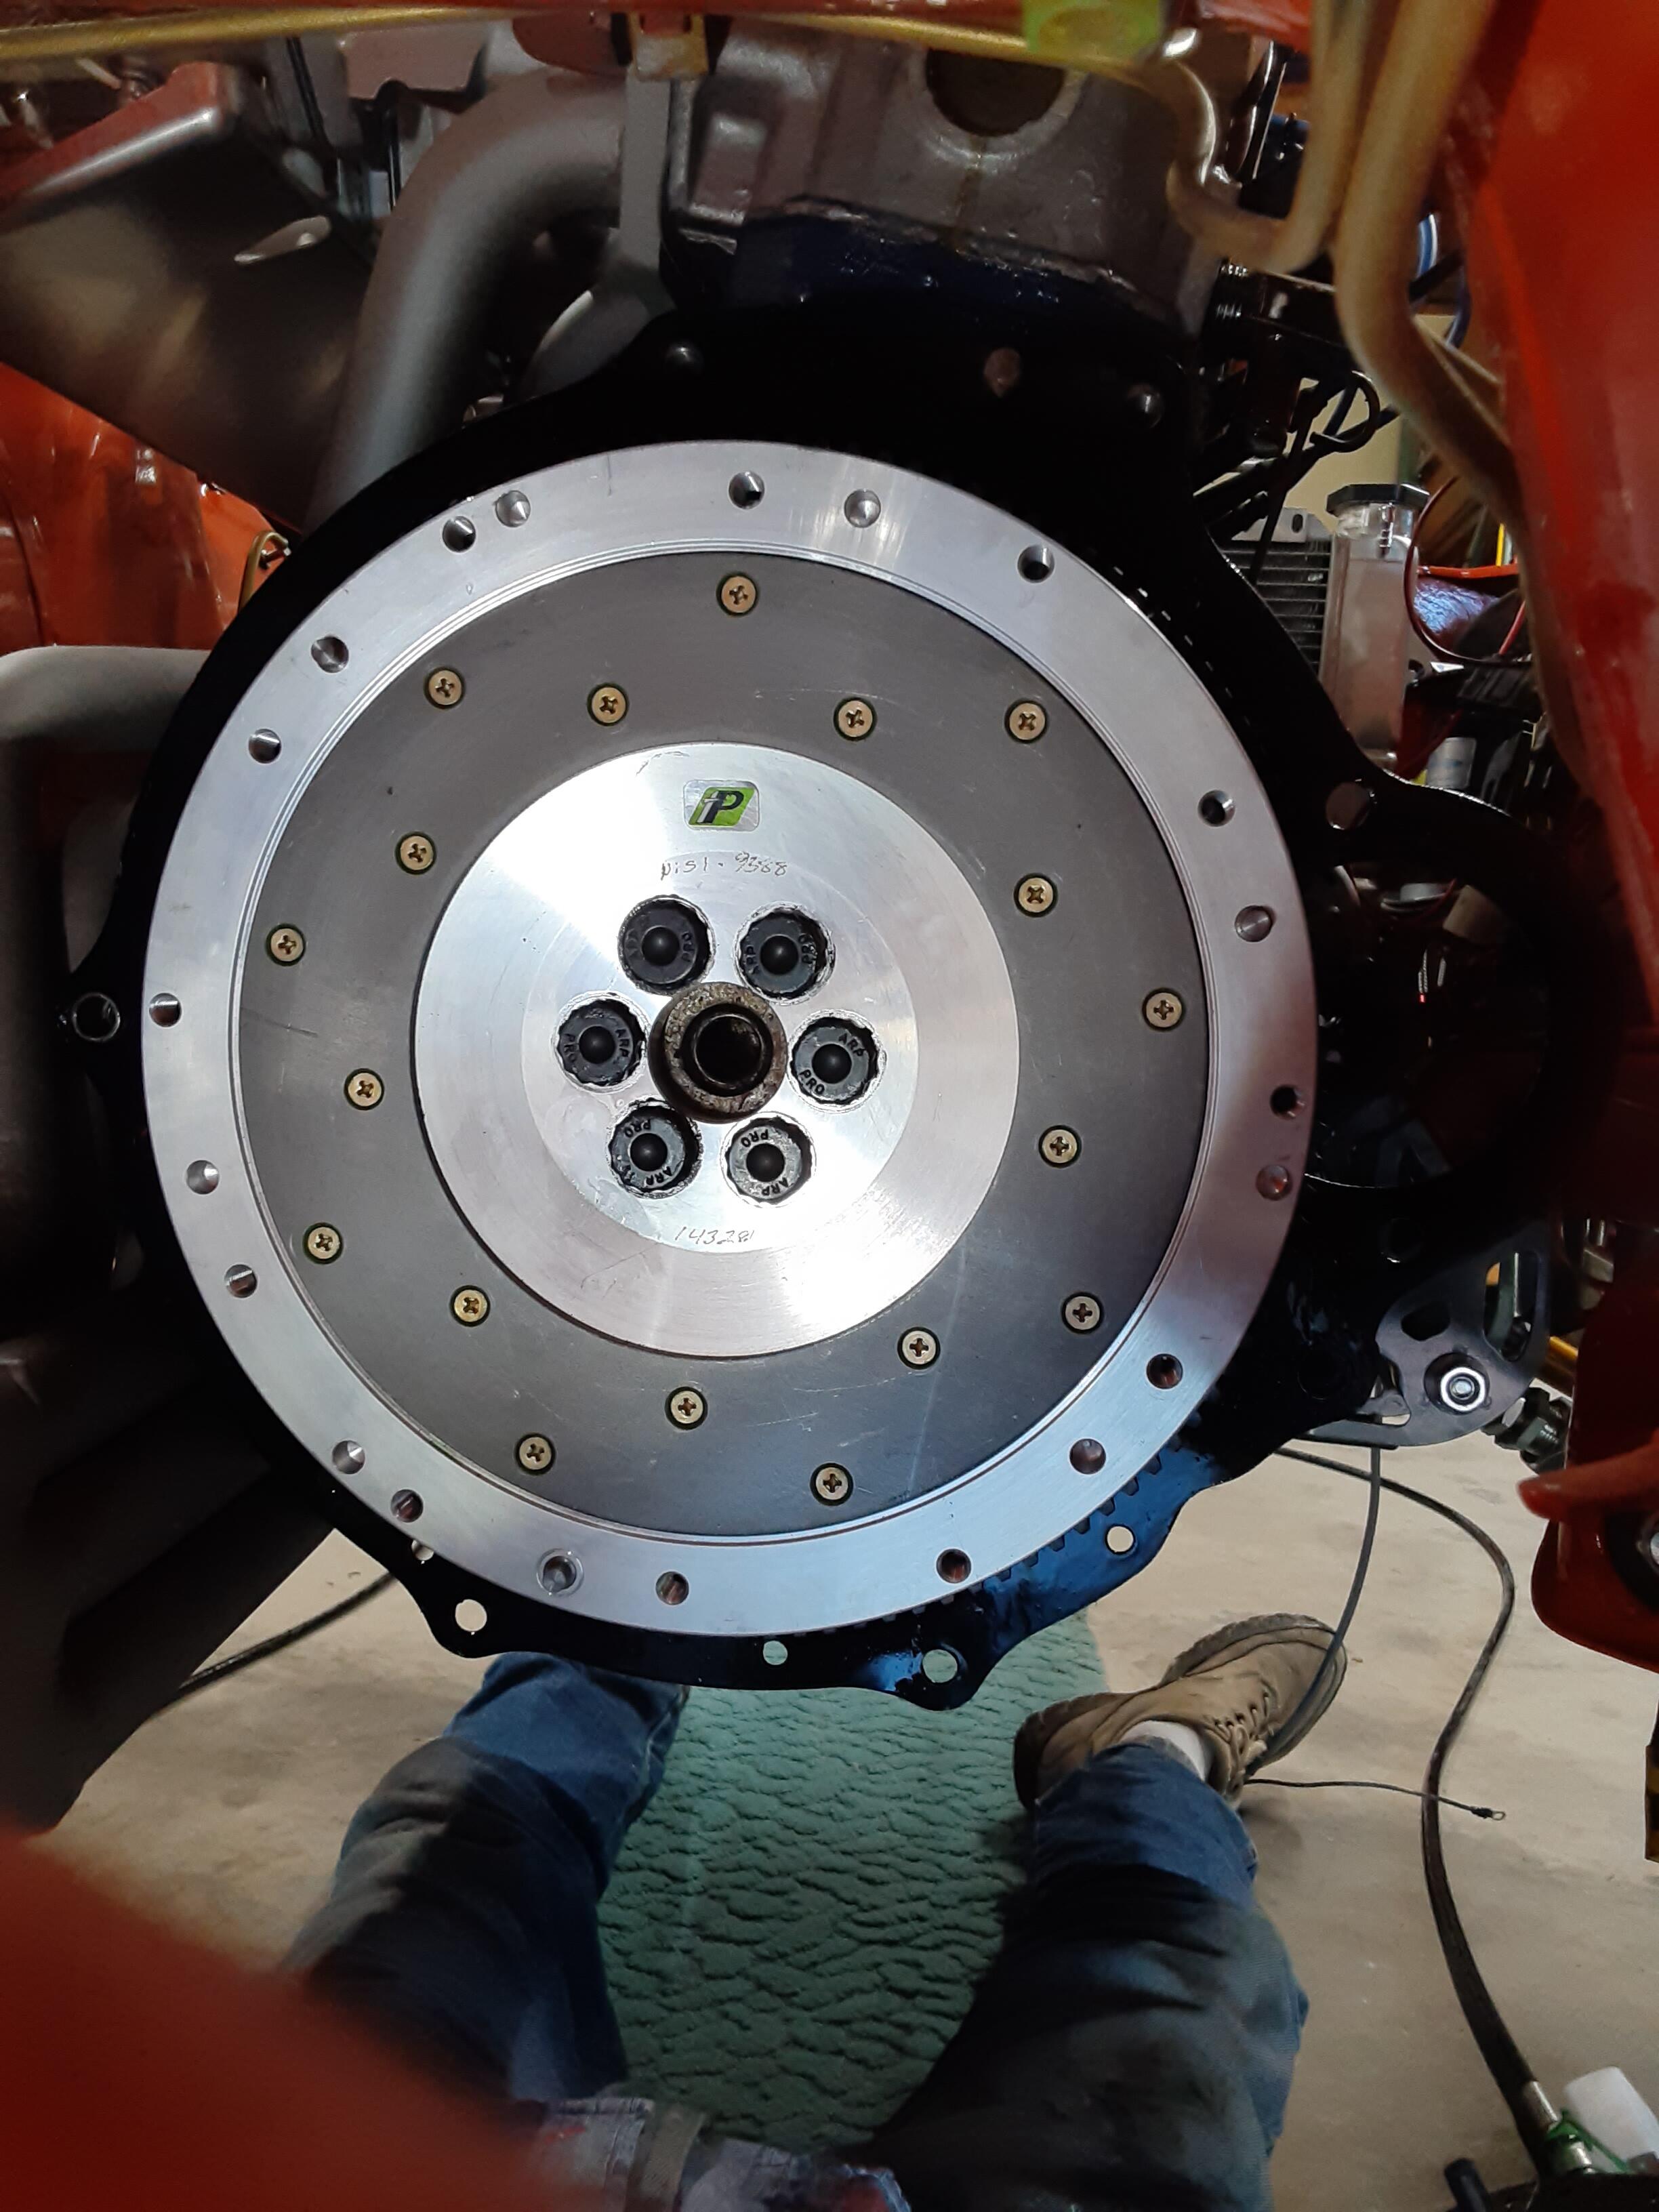
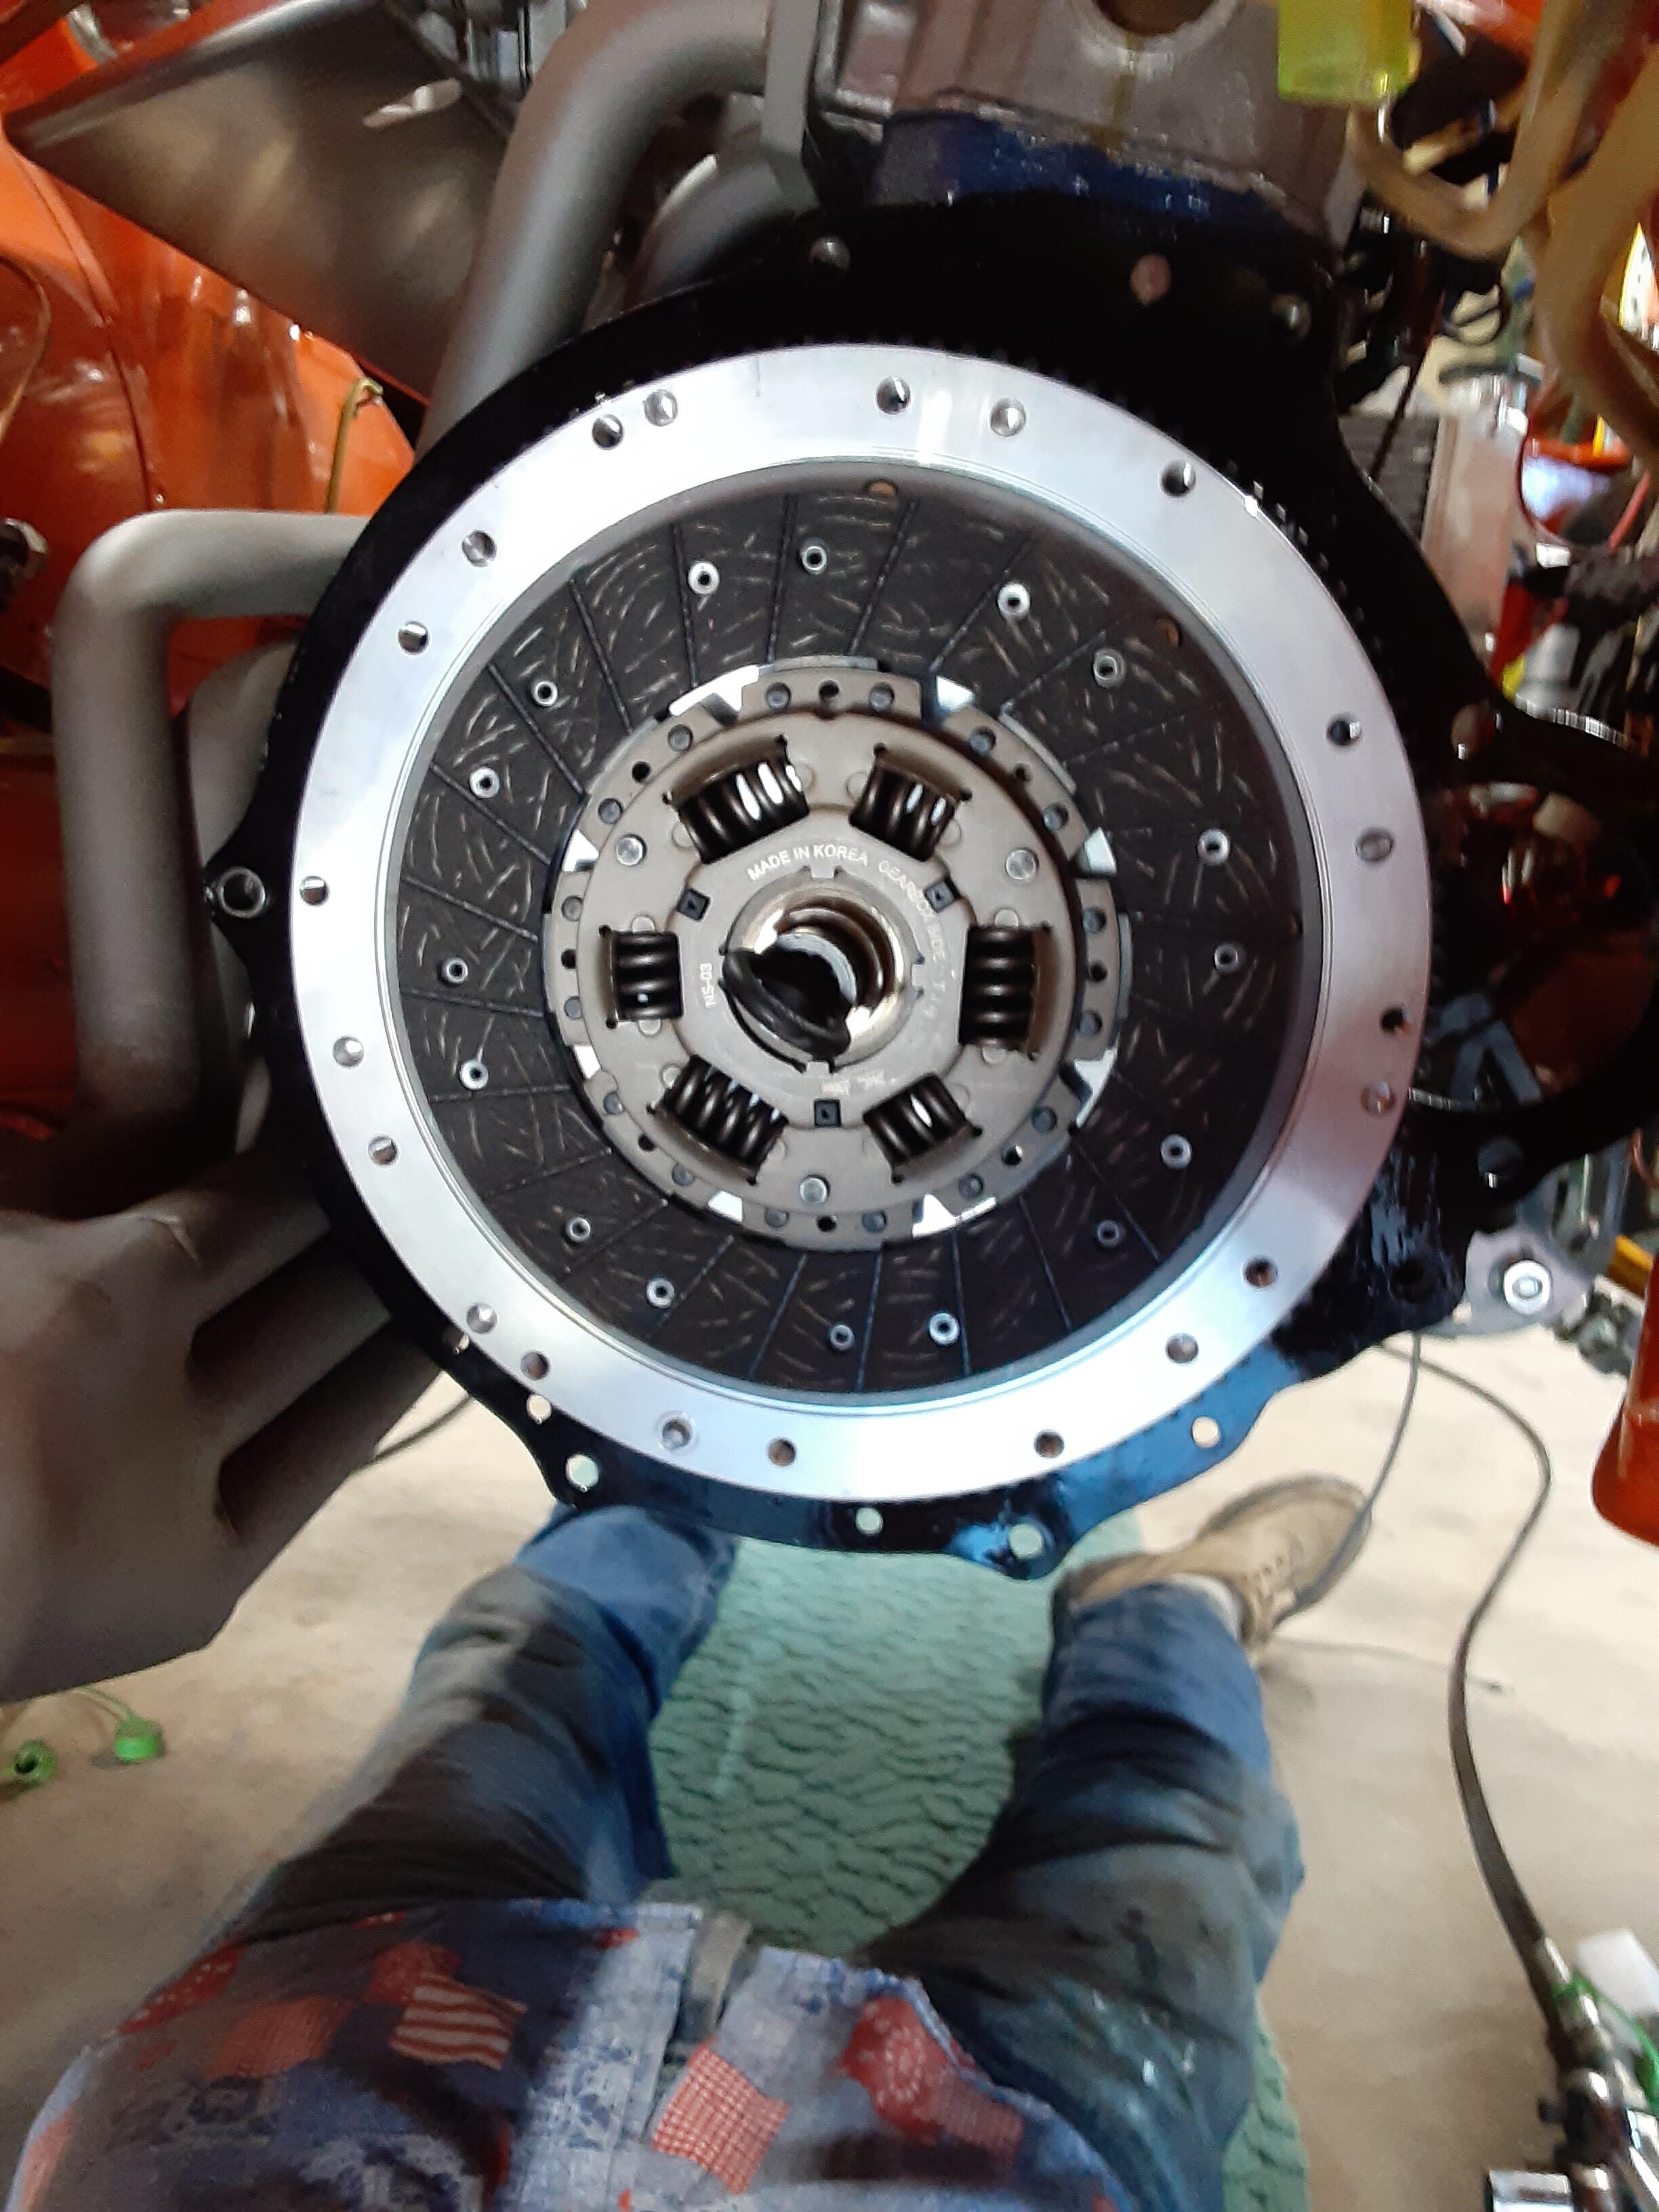
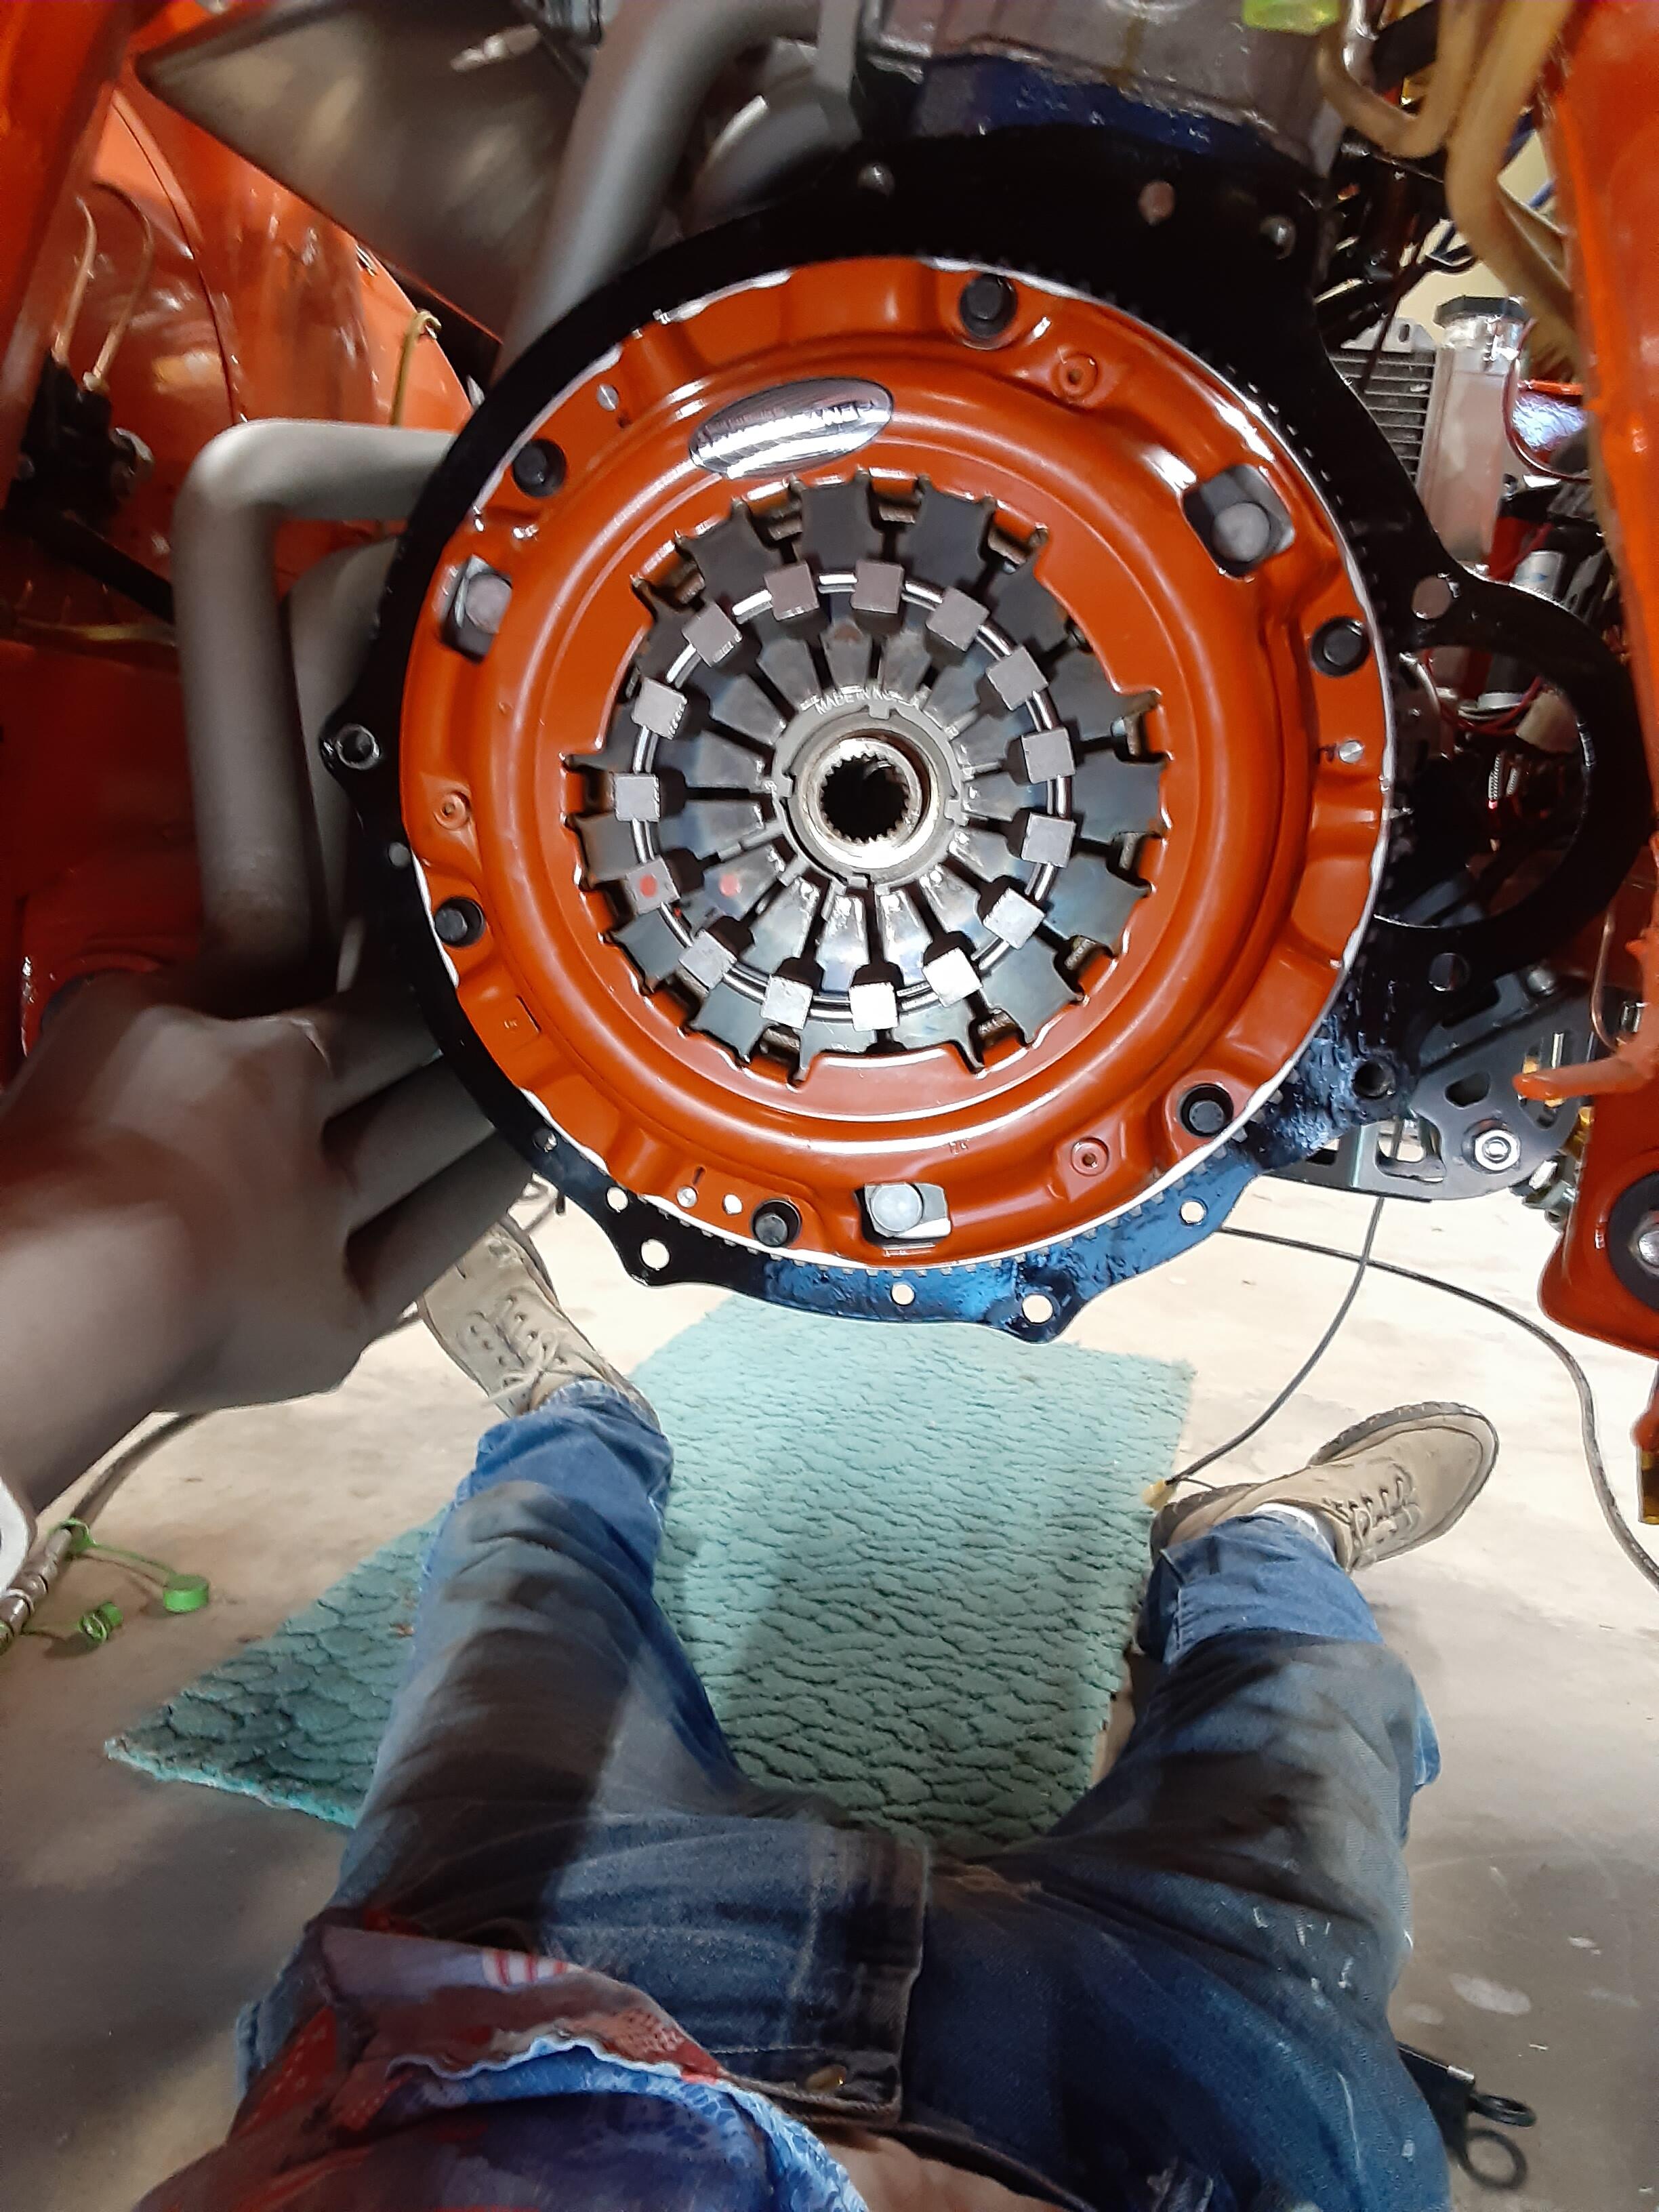
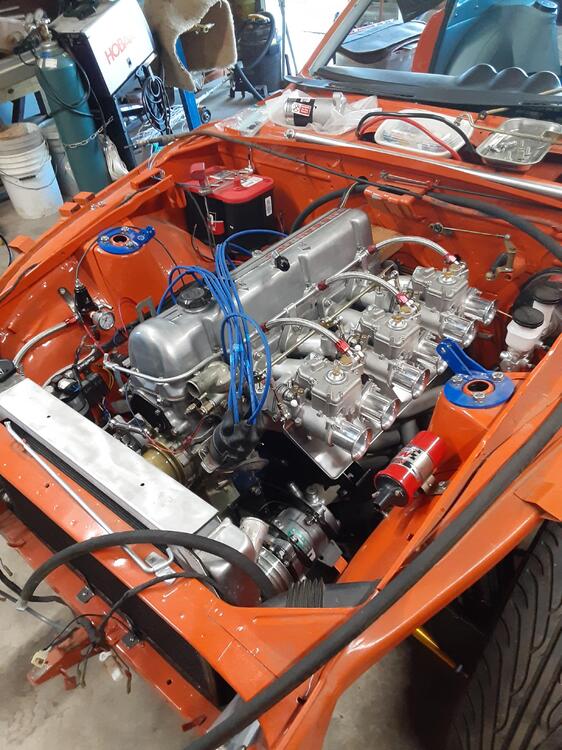
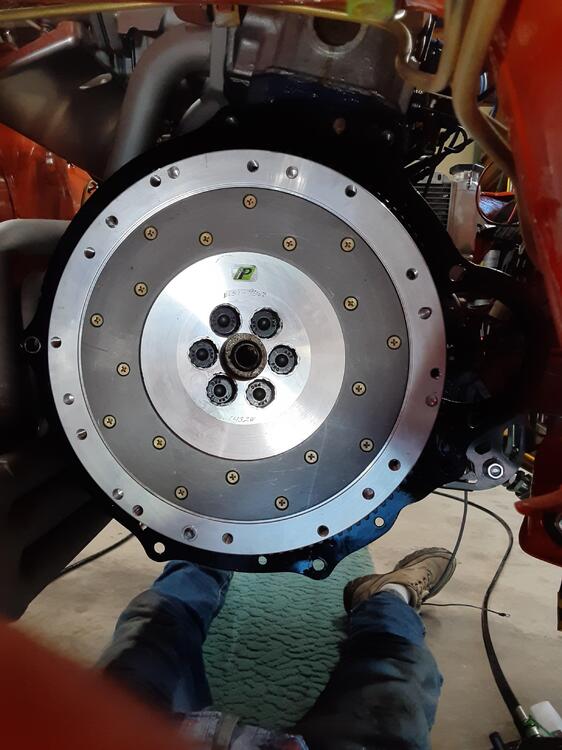
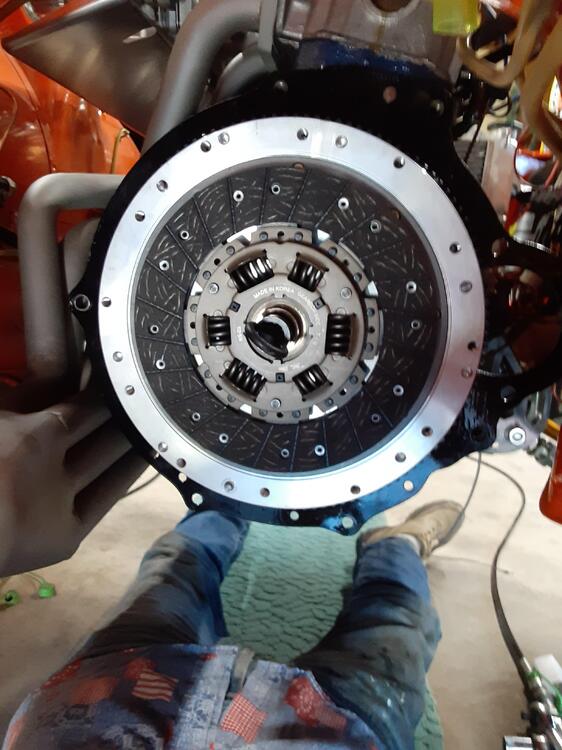
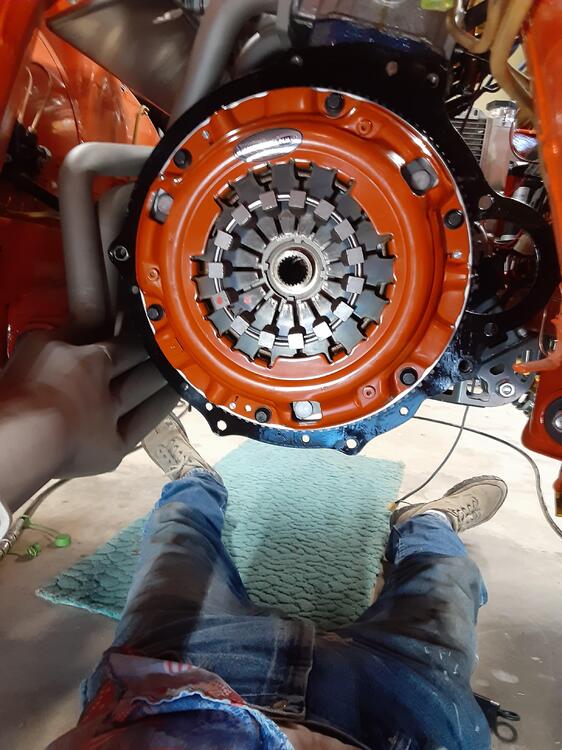
After around 15 years of restomod work, I finally got an engine back into my car. It's a 3.1 L stroker. Oh, that looks so good to me. Next, I added the Findanza flywheel, clutch disc and Centerforce II pressure plate. Woohoo!! Feeling omnipotent, I tried putting in the 5-speed tranny and discovered that there is not enough clearance between the 6-into-1 header and the tranny tunnel to allow this to happen. I'd have to remove (and then reinstall) both the exhaust and intake systems to open up the space, so I reluctantly decided to remove the engine and attach the tranny to it off the car. Because I removed the original engine and 4-speed tranny as a unit when I started this project way back when, I should, with the help of an assistant, be able to put the same size assembly back into the car. Indeed, that's what the FSM says to do. So, a bit of a setback, but it's all good, right? Unfortunately, I then discovered that one of the two M10x1.5 holes in the tranny bell housing where the starter motor attaches is stripped. So now I'm cooling my heels waiting on a threaded insert kit to arrive. At least it gave me time to remember that I needed to put oil in the tranny: Redline MT-90. Better to do that off the car than have a Doh! moment and have to crawl under it to complete that task. Now to blast and refresh the drive shaft.
 3 points
 -
As a follow up, I have been using this booster on the road some and it definitely works. So it seems the refurbishment was a success3 points
-
3 pointsDepending in the condition of your tanks, there's nothing wrong with having your radiator re-cored. Then too, its all about the skills of the shop doing the work. My OE two-row became troublesome after just a few years of ownership and after several repairs I had it re-cored to a three-row. Still running it today with not a single repair and it holds up well to Texas heat.3 points
-
3 pointsYour Nissan paint code 214 was used from 1974 through 1978. Here are the manufacturer paint codes. Take this info to an automotive paint store and ask them to check their computer to see if they have the formula on file. Some paint stores can make up a rattle can while liquid paint may only be available in a quart size or larger (big $$$). As an alternative, contact a touchup supplier like this one to see if they can match your color. Touchup pint is usually available in small brush on quantitites. https://www.automotivetouchup.com/
 3 points
 -
3 pointsI got the car out for a longer drive today and this exhaust is impressive. It sounds super refined and makes no obtrusive noise at cruise... you can listen to the stock radio comfortably. I't really throaty under acceleration and it appears to have made a decent power improvement, probably mostly due to shifting at 4500 vs 4000 where the old exhaust started to lose is composure. It's really nice at idle and growls under full throttle... really does sound like an OEM component (no popping, no drone, engineered sounding "ping" to let you know it's there. Happy endings are the best!3 points
-
3 pointsI would imagine it was a matter of cost, weight and complexity (both in hardware and in fit/no fit building and ordering). The struggle in keeping weight down for some markets was something chief engineer Hitoshi Uemura often mentioned in his stories about the creation of the S30-series Z, so it may well have been a key factor. Nevertheless, the aircon-related details were built into every bodyshell, as well as the basic design of both RHD and LHD heater/fan units.3 points
-
I was going to comment this as well. Aside from leakage out the rear ( 🫤 ), the level/angle of the unit may result in over/under fill. My 2-cents.2 points
-
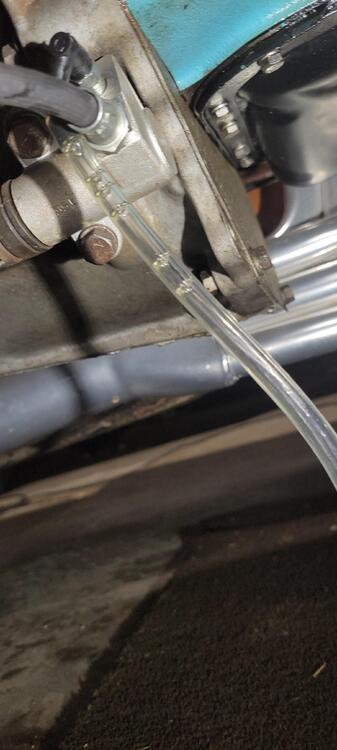
2 pointsI messed with it for a minute or two. Not done yet though. I'm going to pull all the old out and replace. $5.99 a quart for dot 3. It had air in there..
 2 points
 -
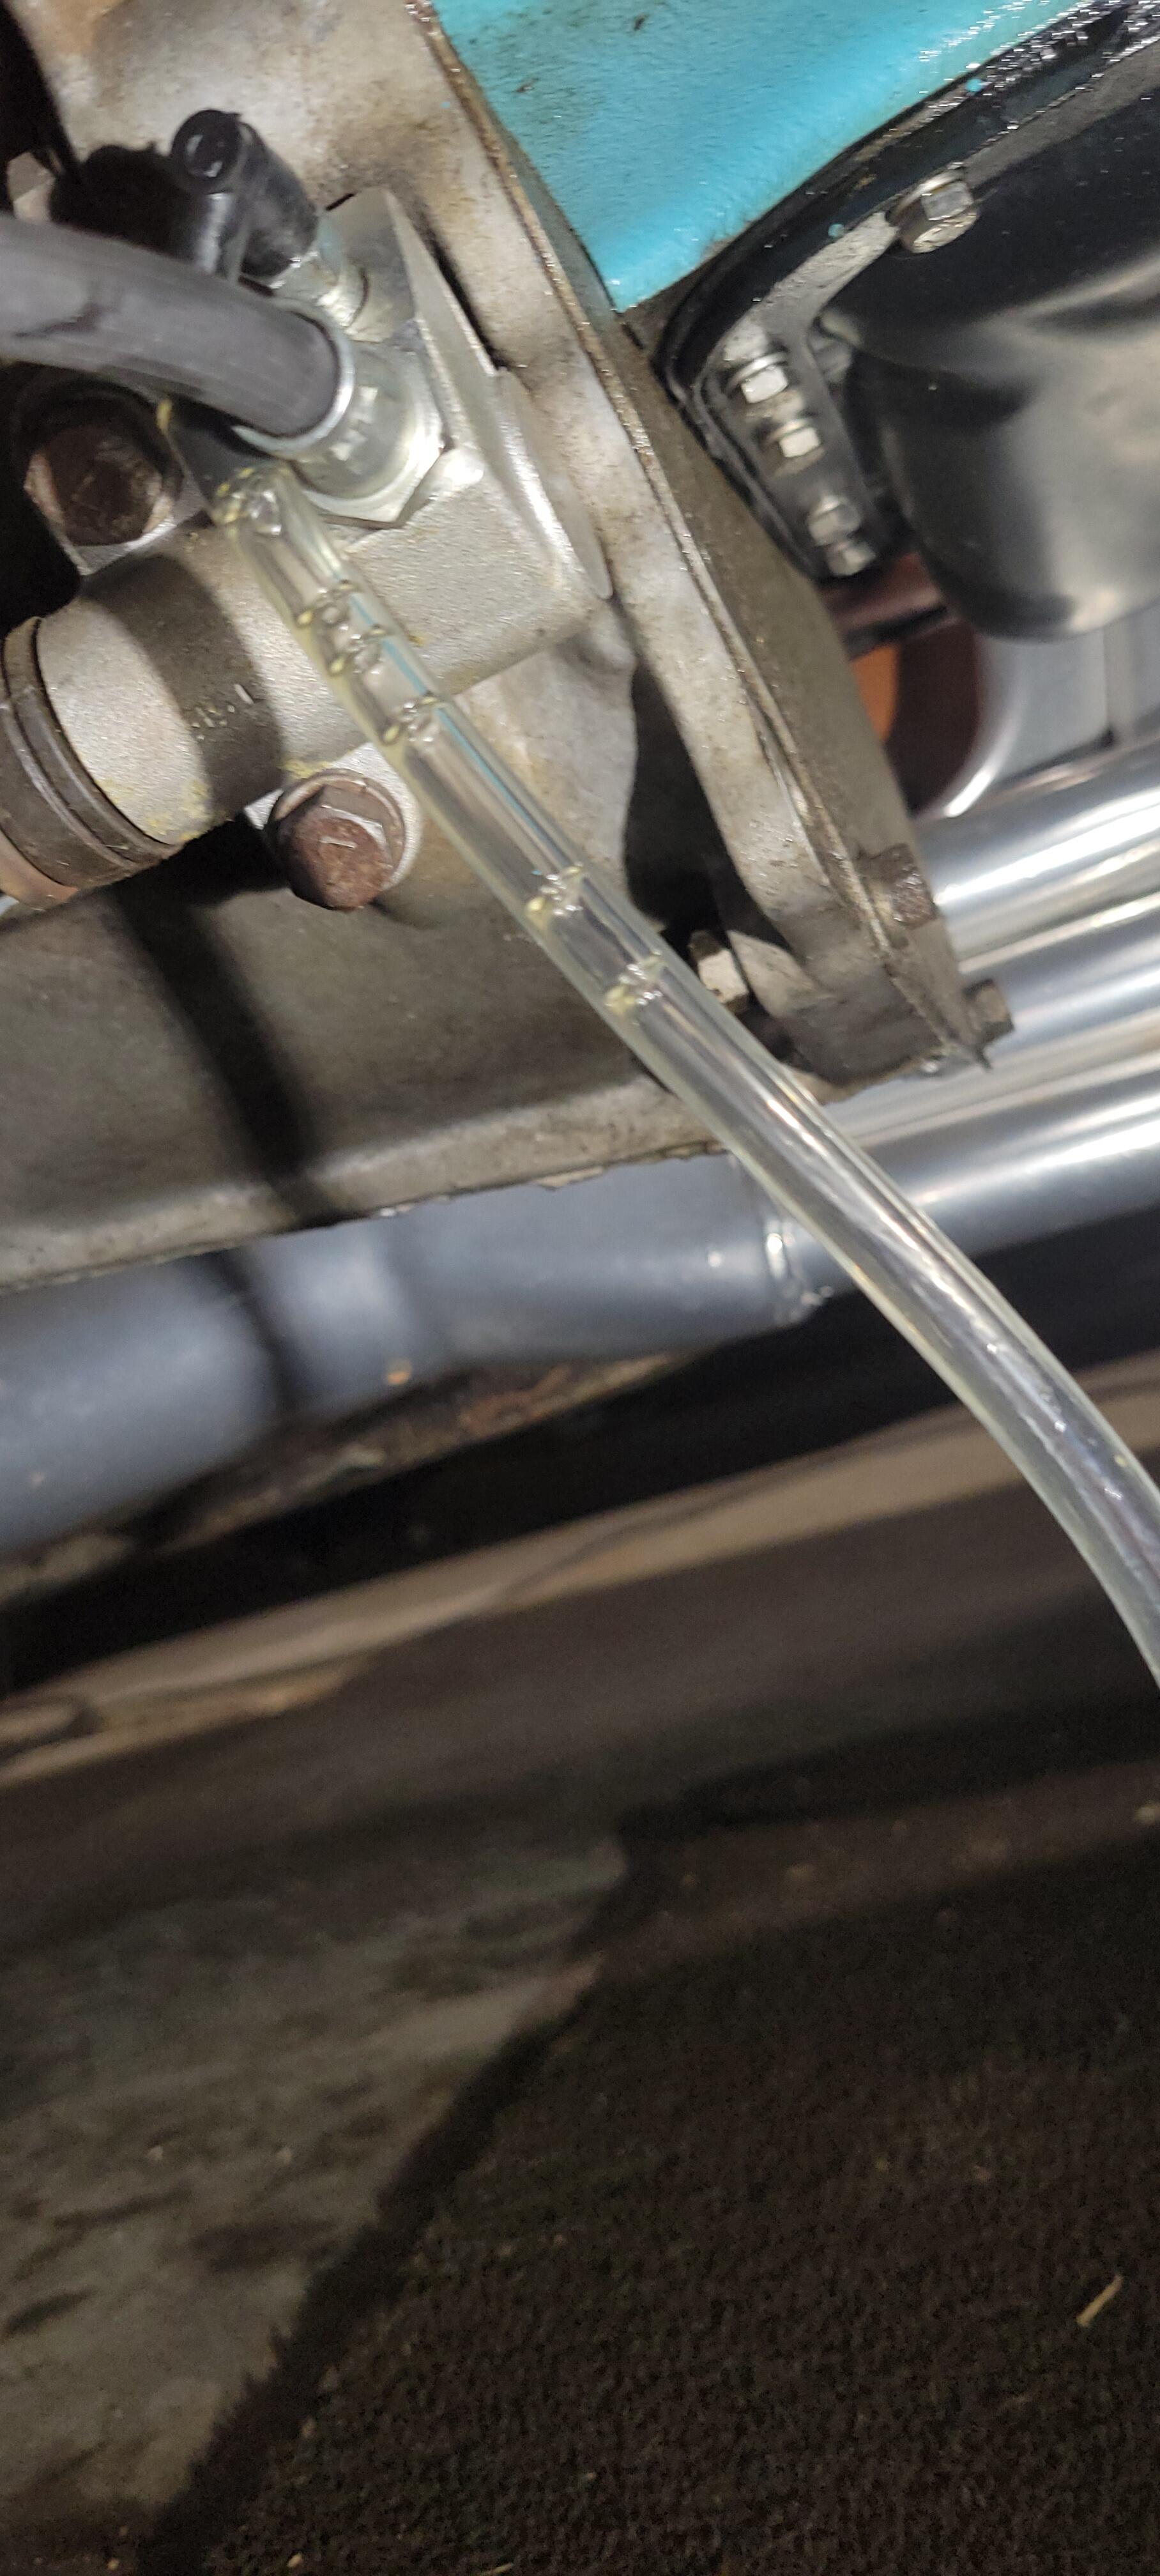
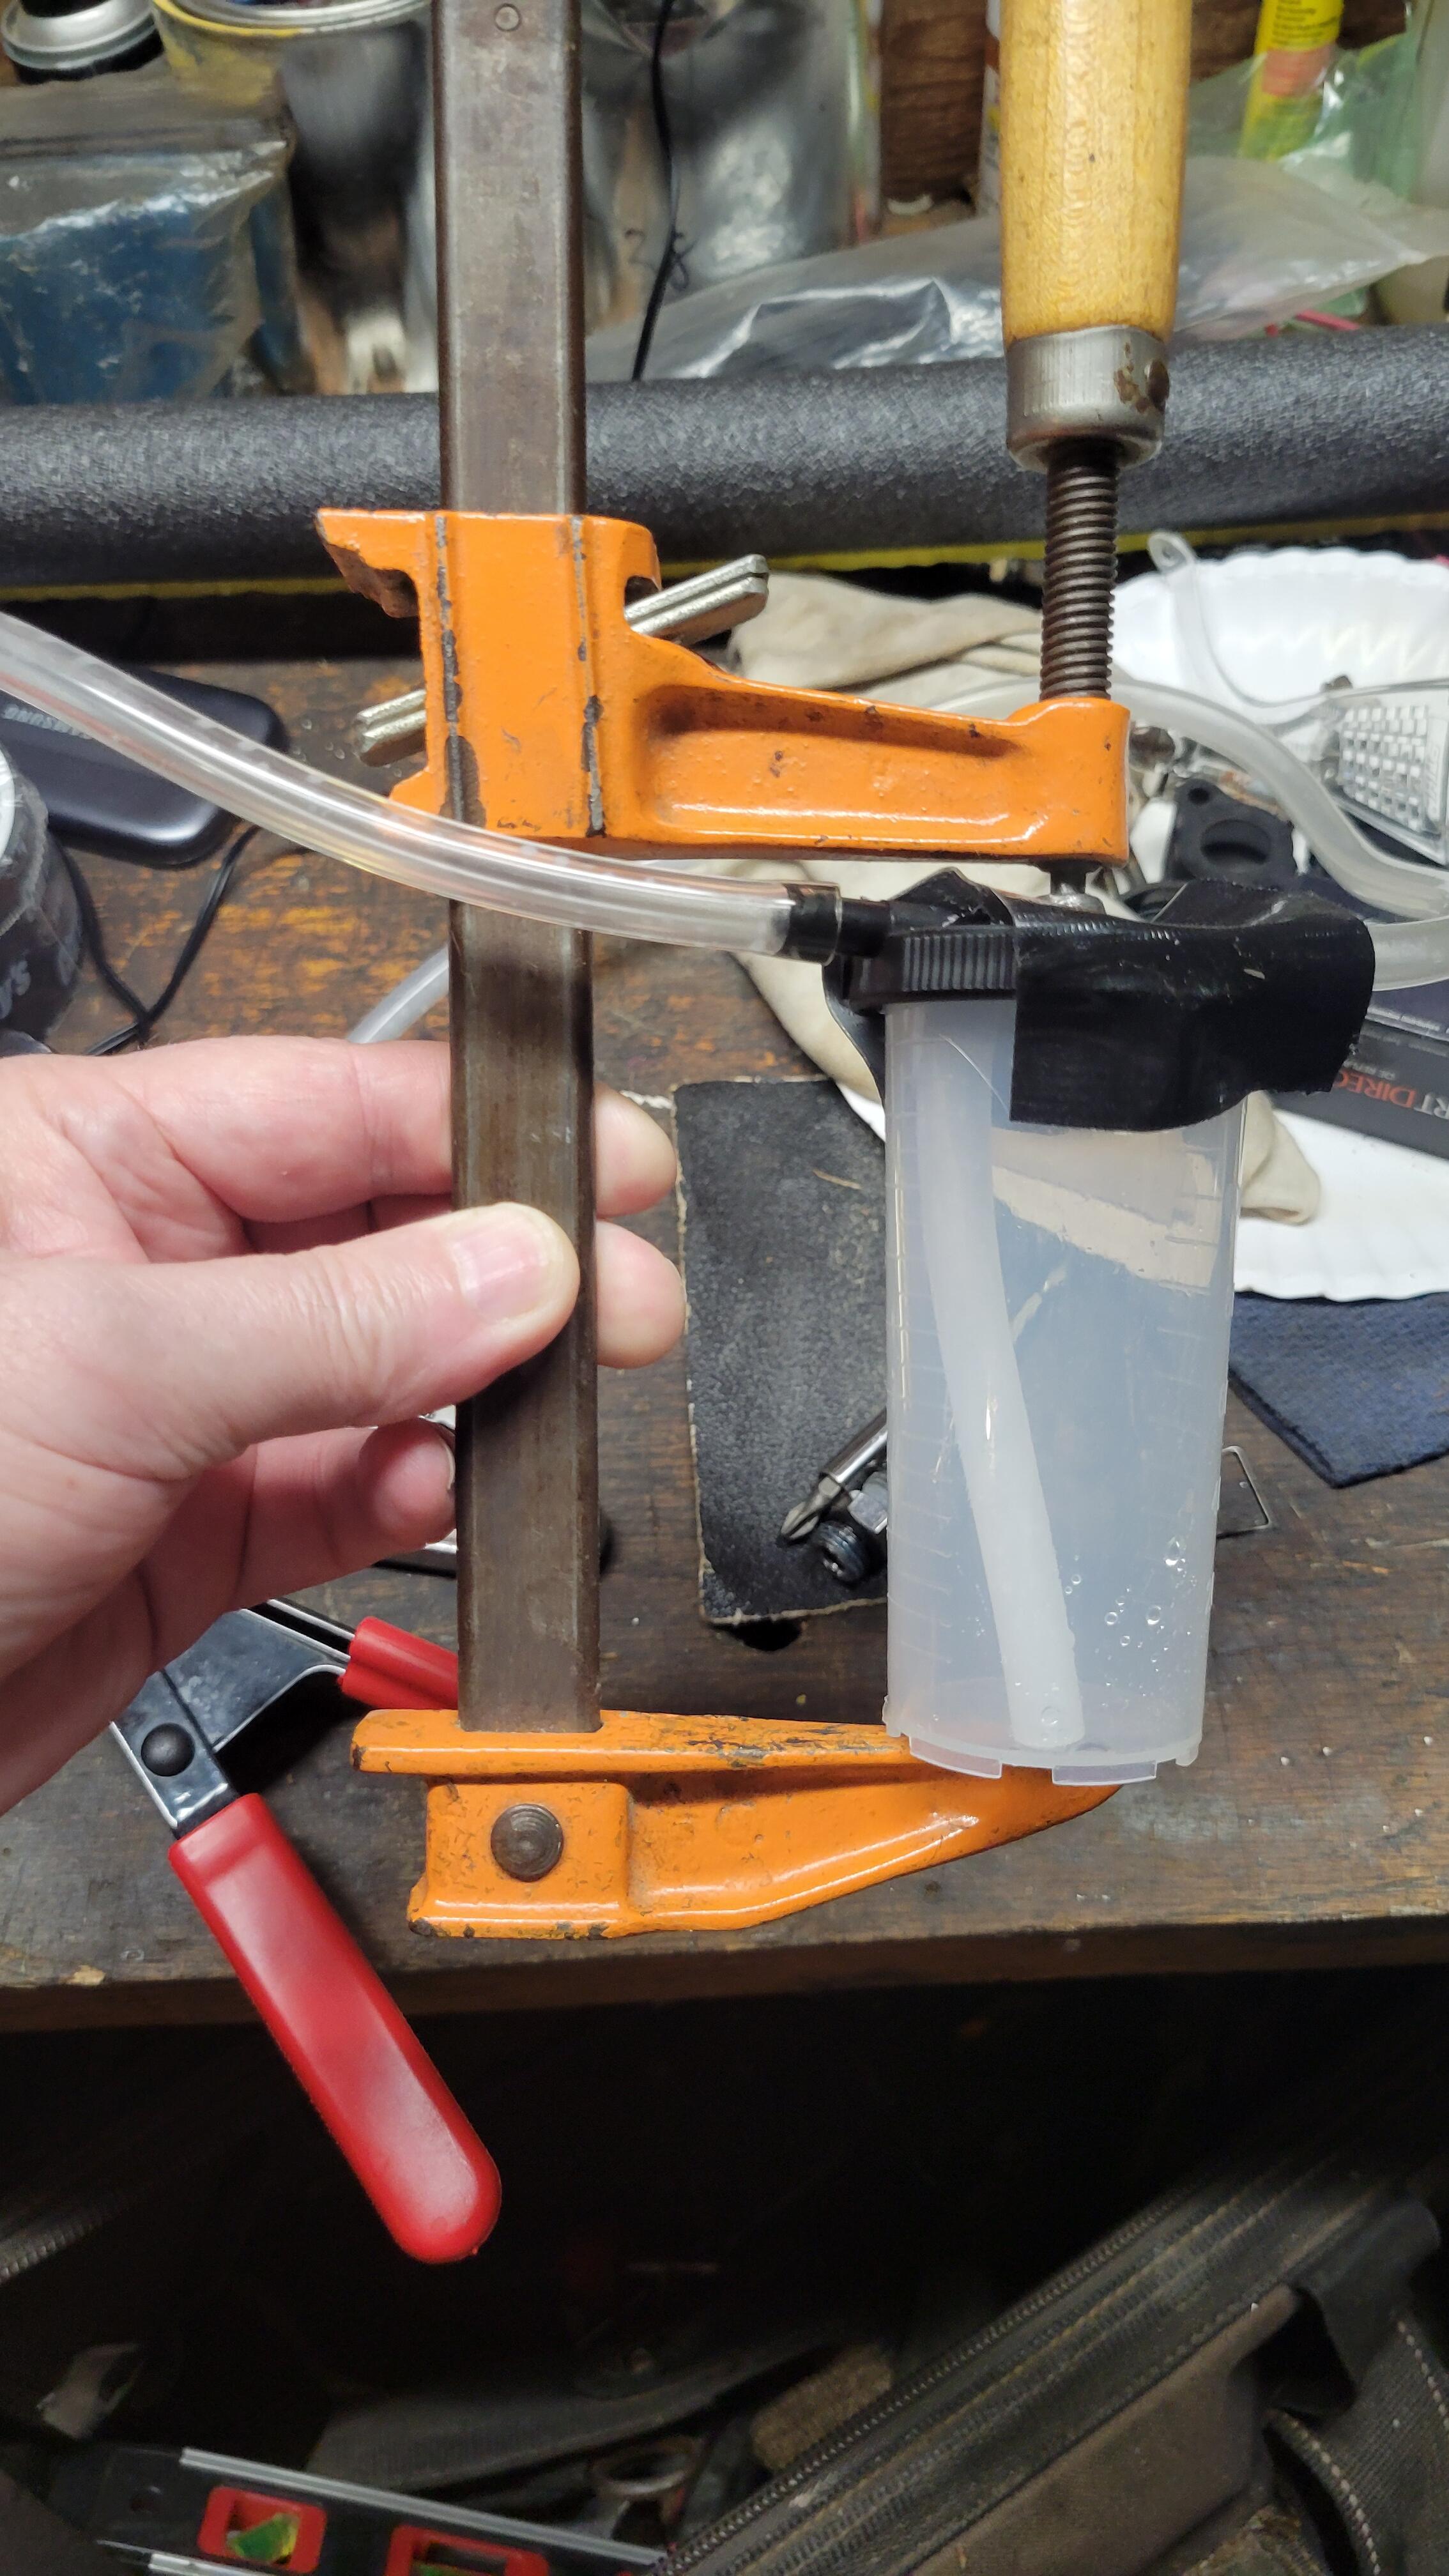
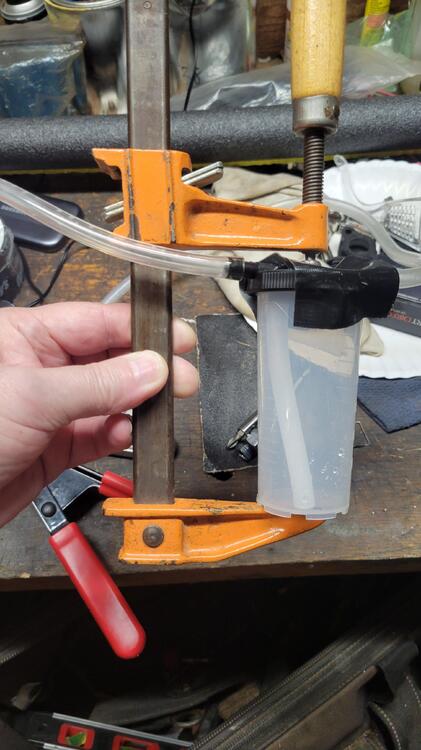
2 pointsI put those self bleeders on my 280 in 2011. Can't remember why I didn't use them on the 240 in 2015-2016? I've used a contraption I came up with when I realized the cup wasn't holding the vacuum, too small of an oring wouldn't let it seal. Messing with brake fluid on 54 year old paint freaked me out when I found a small drop by the inspection lid above the brake stuff. I had driped a little refilling the clutch master. Washed that whole fender down with Dawn soap and water. Staying away from the 240, I've done my beater D21 pickup with good results. My shade tree correction for the crappy oring not sealing was a wood clamp.
 2 points
 -
2 pointsA little of both. Never really did a good job bleeding the clutch when I did all the work to it years ago. Now I bought this POS Harbor Freight 1 man pump and the weather is finally tolerable enough to get out of the A/C and do some things. The dog can only walk so much, he's getting old.2 points
-
2 pointsIs there a problem or are you just looking for a reason to work on the Z?2 points
-
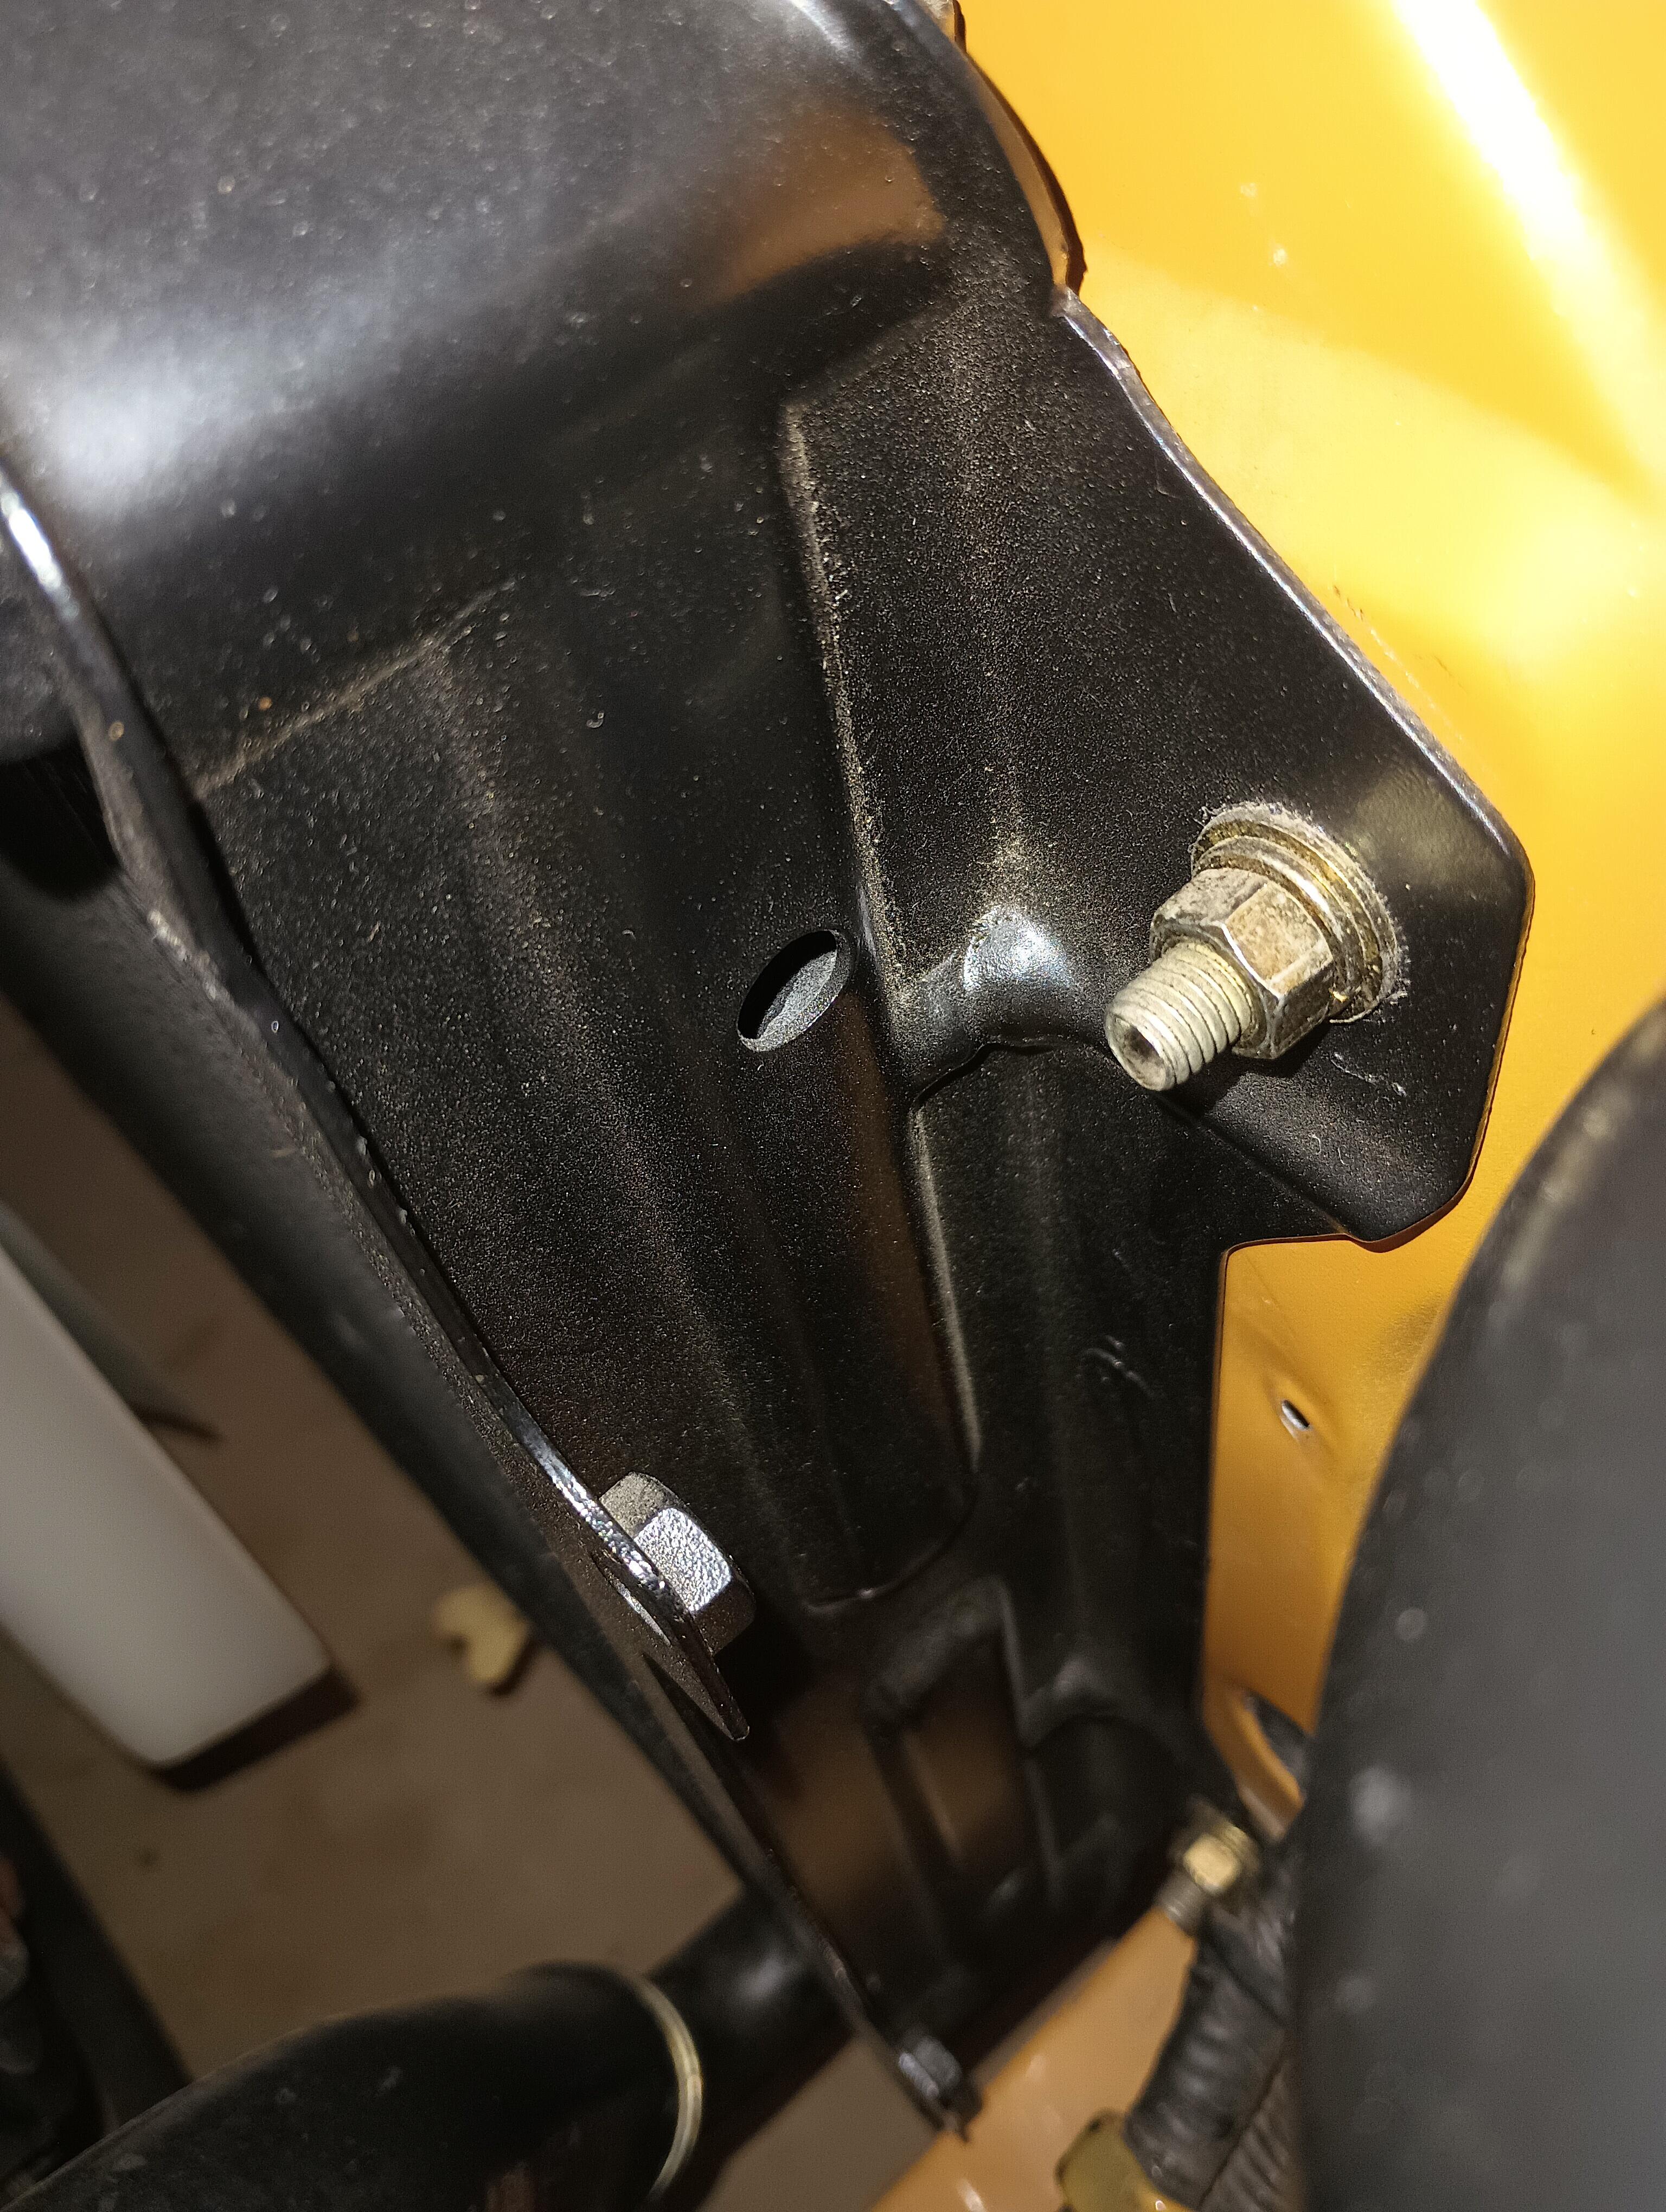
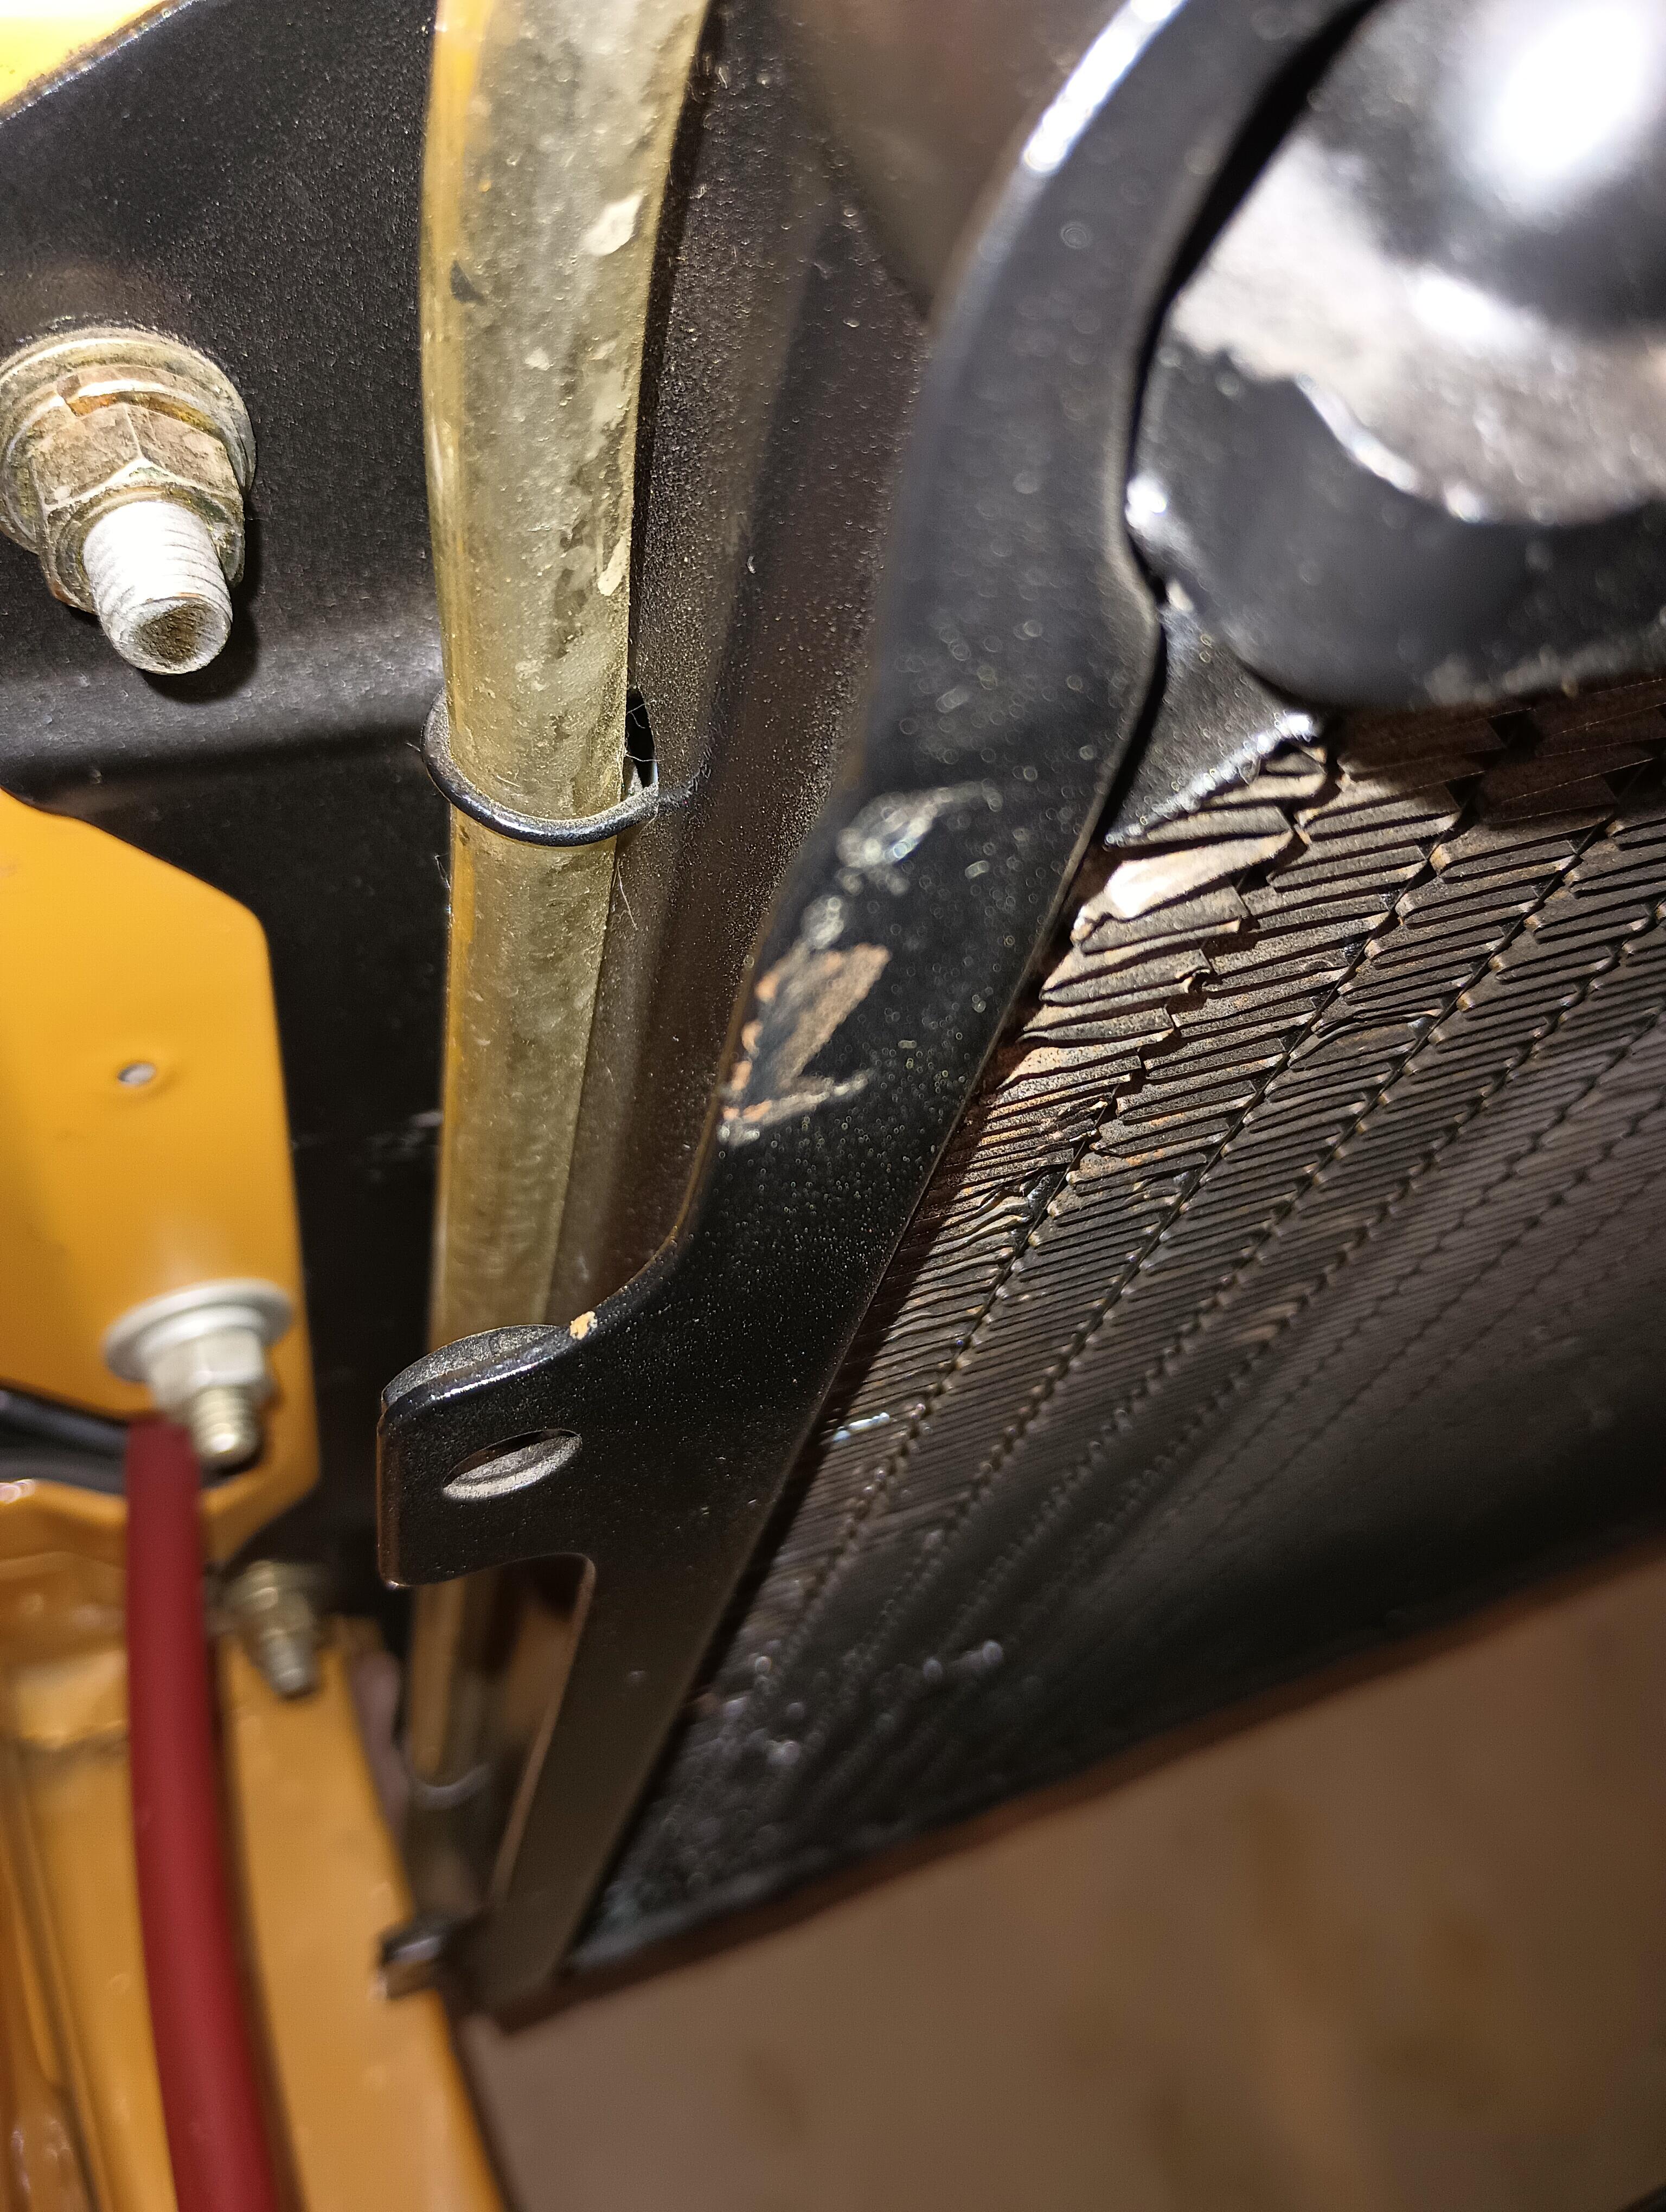
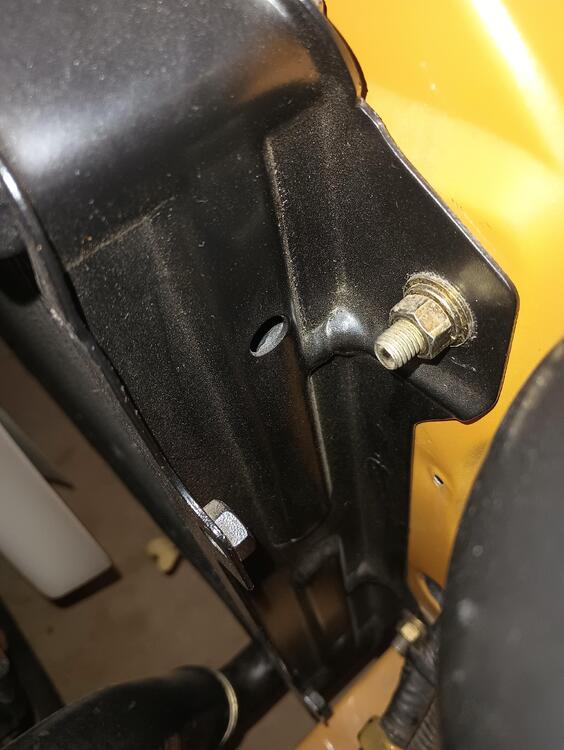
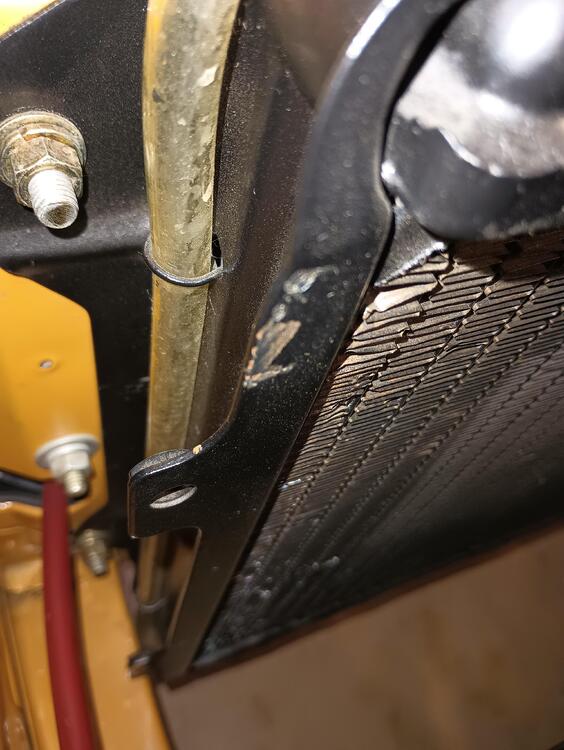
2 pointsThis is the right side showing a round hole, another one down low. These are tha same on the left side with the hose. This is my OE radiator frame.
 2 points
 -
2 pointsI just wanted to THANK all the ZCON attendees for bringing the CLOUDS and a bit of RAIN to Arizona! (Oh, I should probably thank that hurricane in Mexico too...) We haven't seen either in quite some time. Plus, it saved you from the 100 degree heat that still persists here in Arizona in SEPTEMBER.2 points
-
2 pointsWell, that took a lot longer than I thought, but alls well that ends well. I got a new MC from ZCar Depot (the cheaper of the 2 7/8th options). This one has reversed reservoirs from the one that came with my car, but flex lines from California Datsun worked great. Did bench bleeding, installed, bled the corners... brakes kinda work, but not really. tighten up rear wheel cylinders, do the whole thing over again (tried different angles when bench bleeding, for example). Checked for reaction disk having fallen. tried adjusting the setup with the pedal. everything I could think of, but still only felt solid when pedal is already half way down. Probably everyone knows by this time what it was, but it took me a long time to think of it. the MC that came with the car basically had the piston cup right up against the end of the cylinder where it fits into the booster. The new one, upon removal and examination, sits about 1.1-1.2 cm further inside the cylinder. so the pushrod wasn't even contacting it until the brake was half way down. Took out the pushrod, extended it (seemed to be pretty extendable, but a little worried I didn't keep unscrewing until I knew how long it was in there. felt solid anyway). et voila! brakes are firm. Went for first "joyride" in 8-9 years. all of 3 blocks away before I turned around and came back. the shock bump stops crumbled to dust and I'm still waiting on new struts from MSA. Don't want to hit any bumps too hard. Now for a nice water free wash.2 points
-
2 pointsYep, two circular clips to secure the overflow hose. One about 1 1/2" below the top tank, one about 1" above the bottom tank.
 2 points
 -
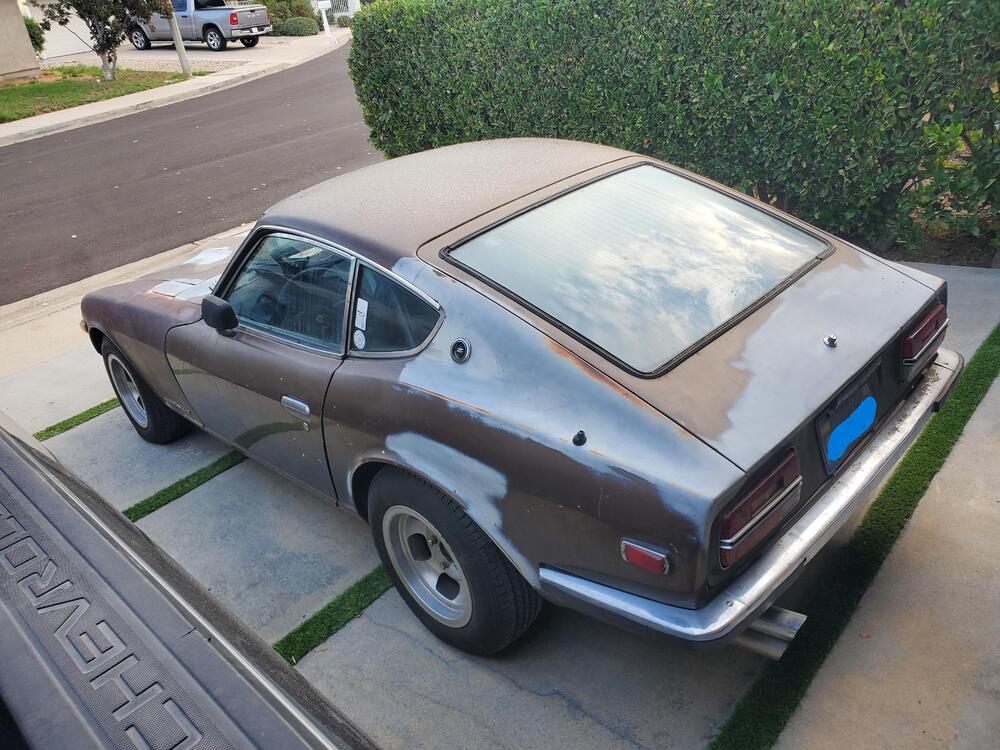
2 pointsHello forum members; I'm Allen from Thousand Oaks, CA. My background is mechanical engineering specializing in system dynamics and controls. Some of my favorite memories are from the time that owned my first car, a 1979 Datsun 280zx. I recently purchased a project 1971 240z that I plan to do a complete restoration on. I will greatly appreciate any help the classiczcar community can provide and plan to post updates on my project as progress is made.
 2 points
 -
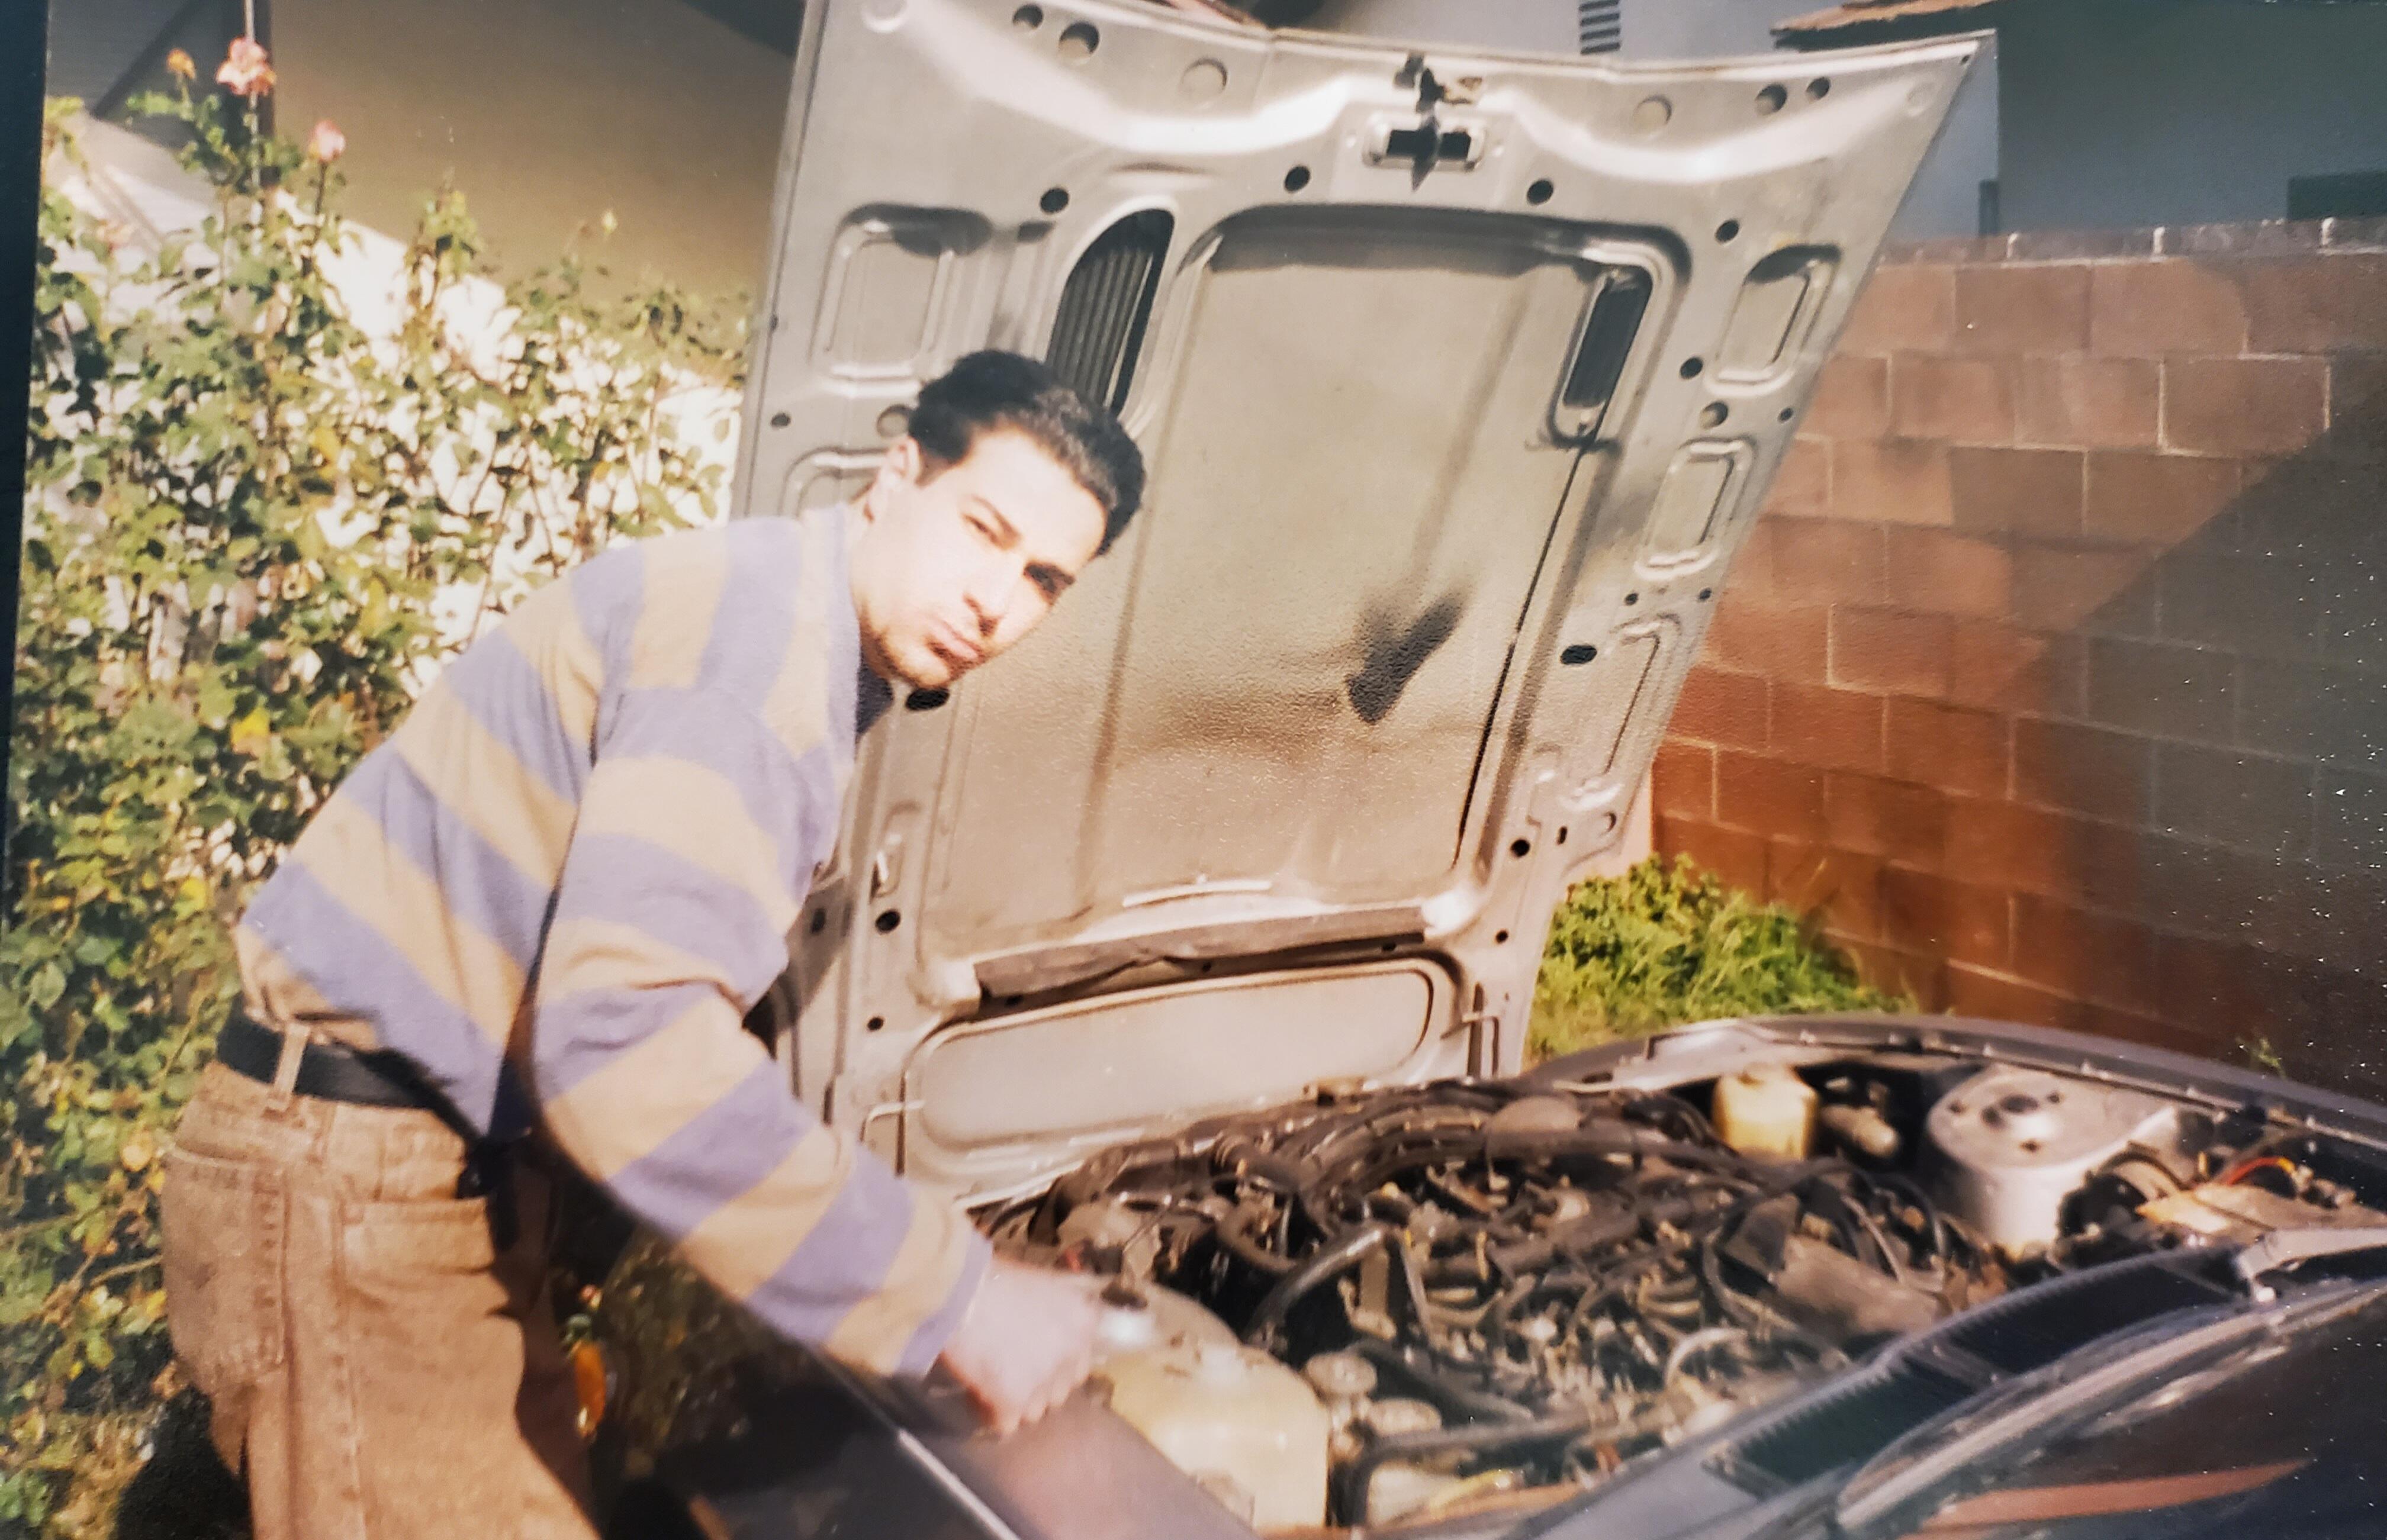
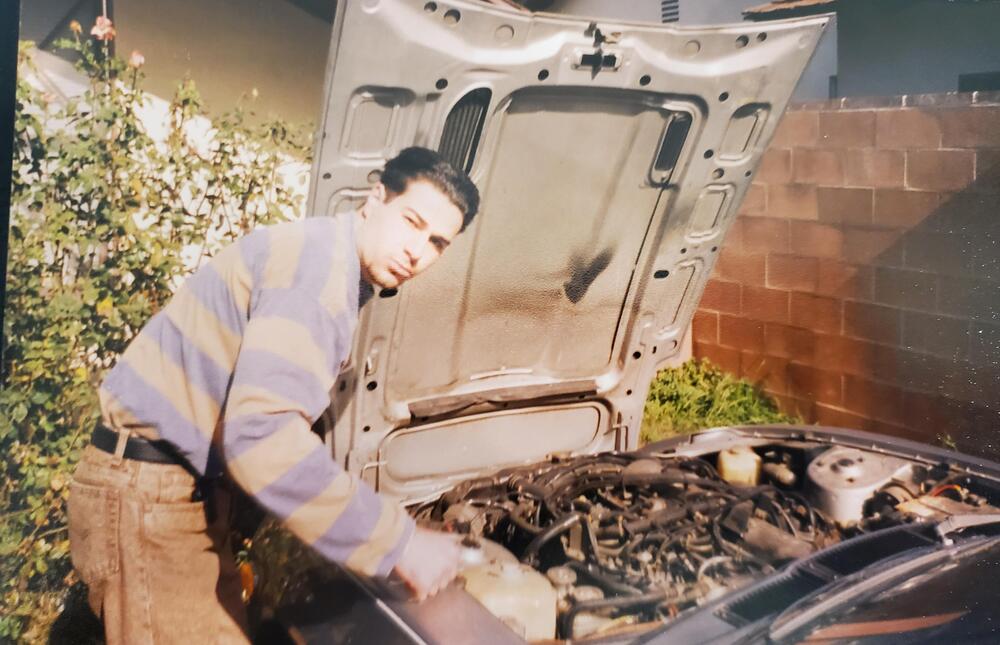
2 pointsThank you all for your comments. This is the closest picture I can find, circa 1989. An 18 year old with 20 years of experience as a mechanic.
 2 points
 -
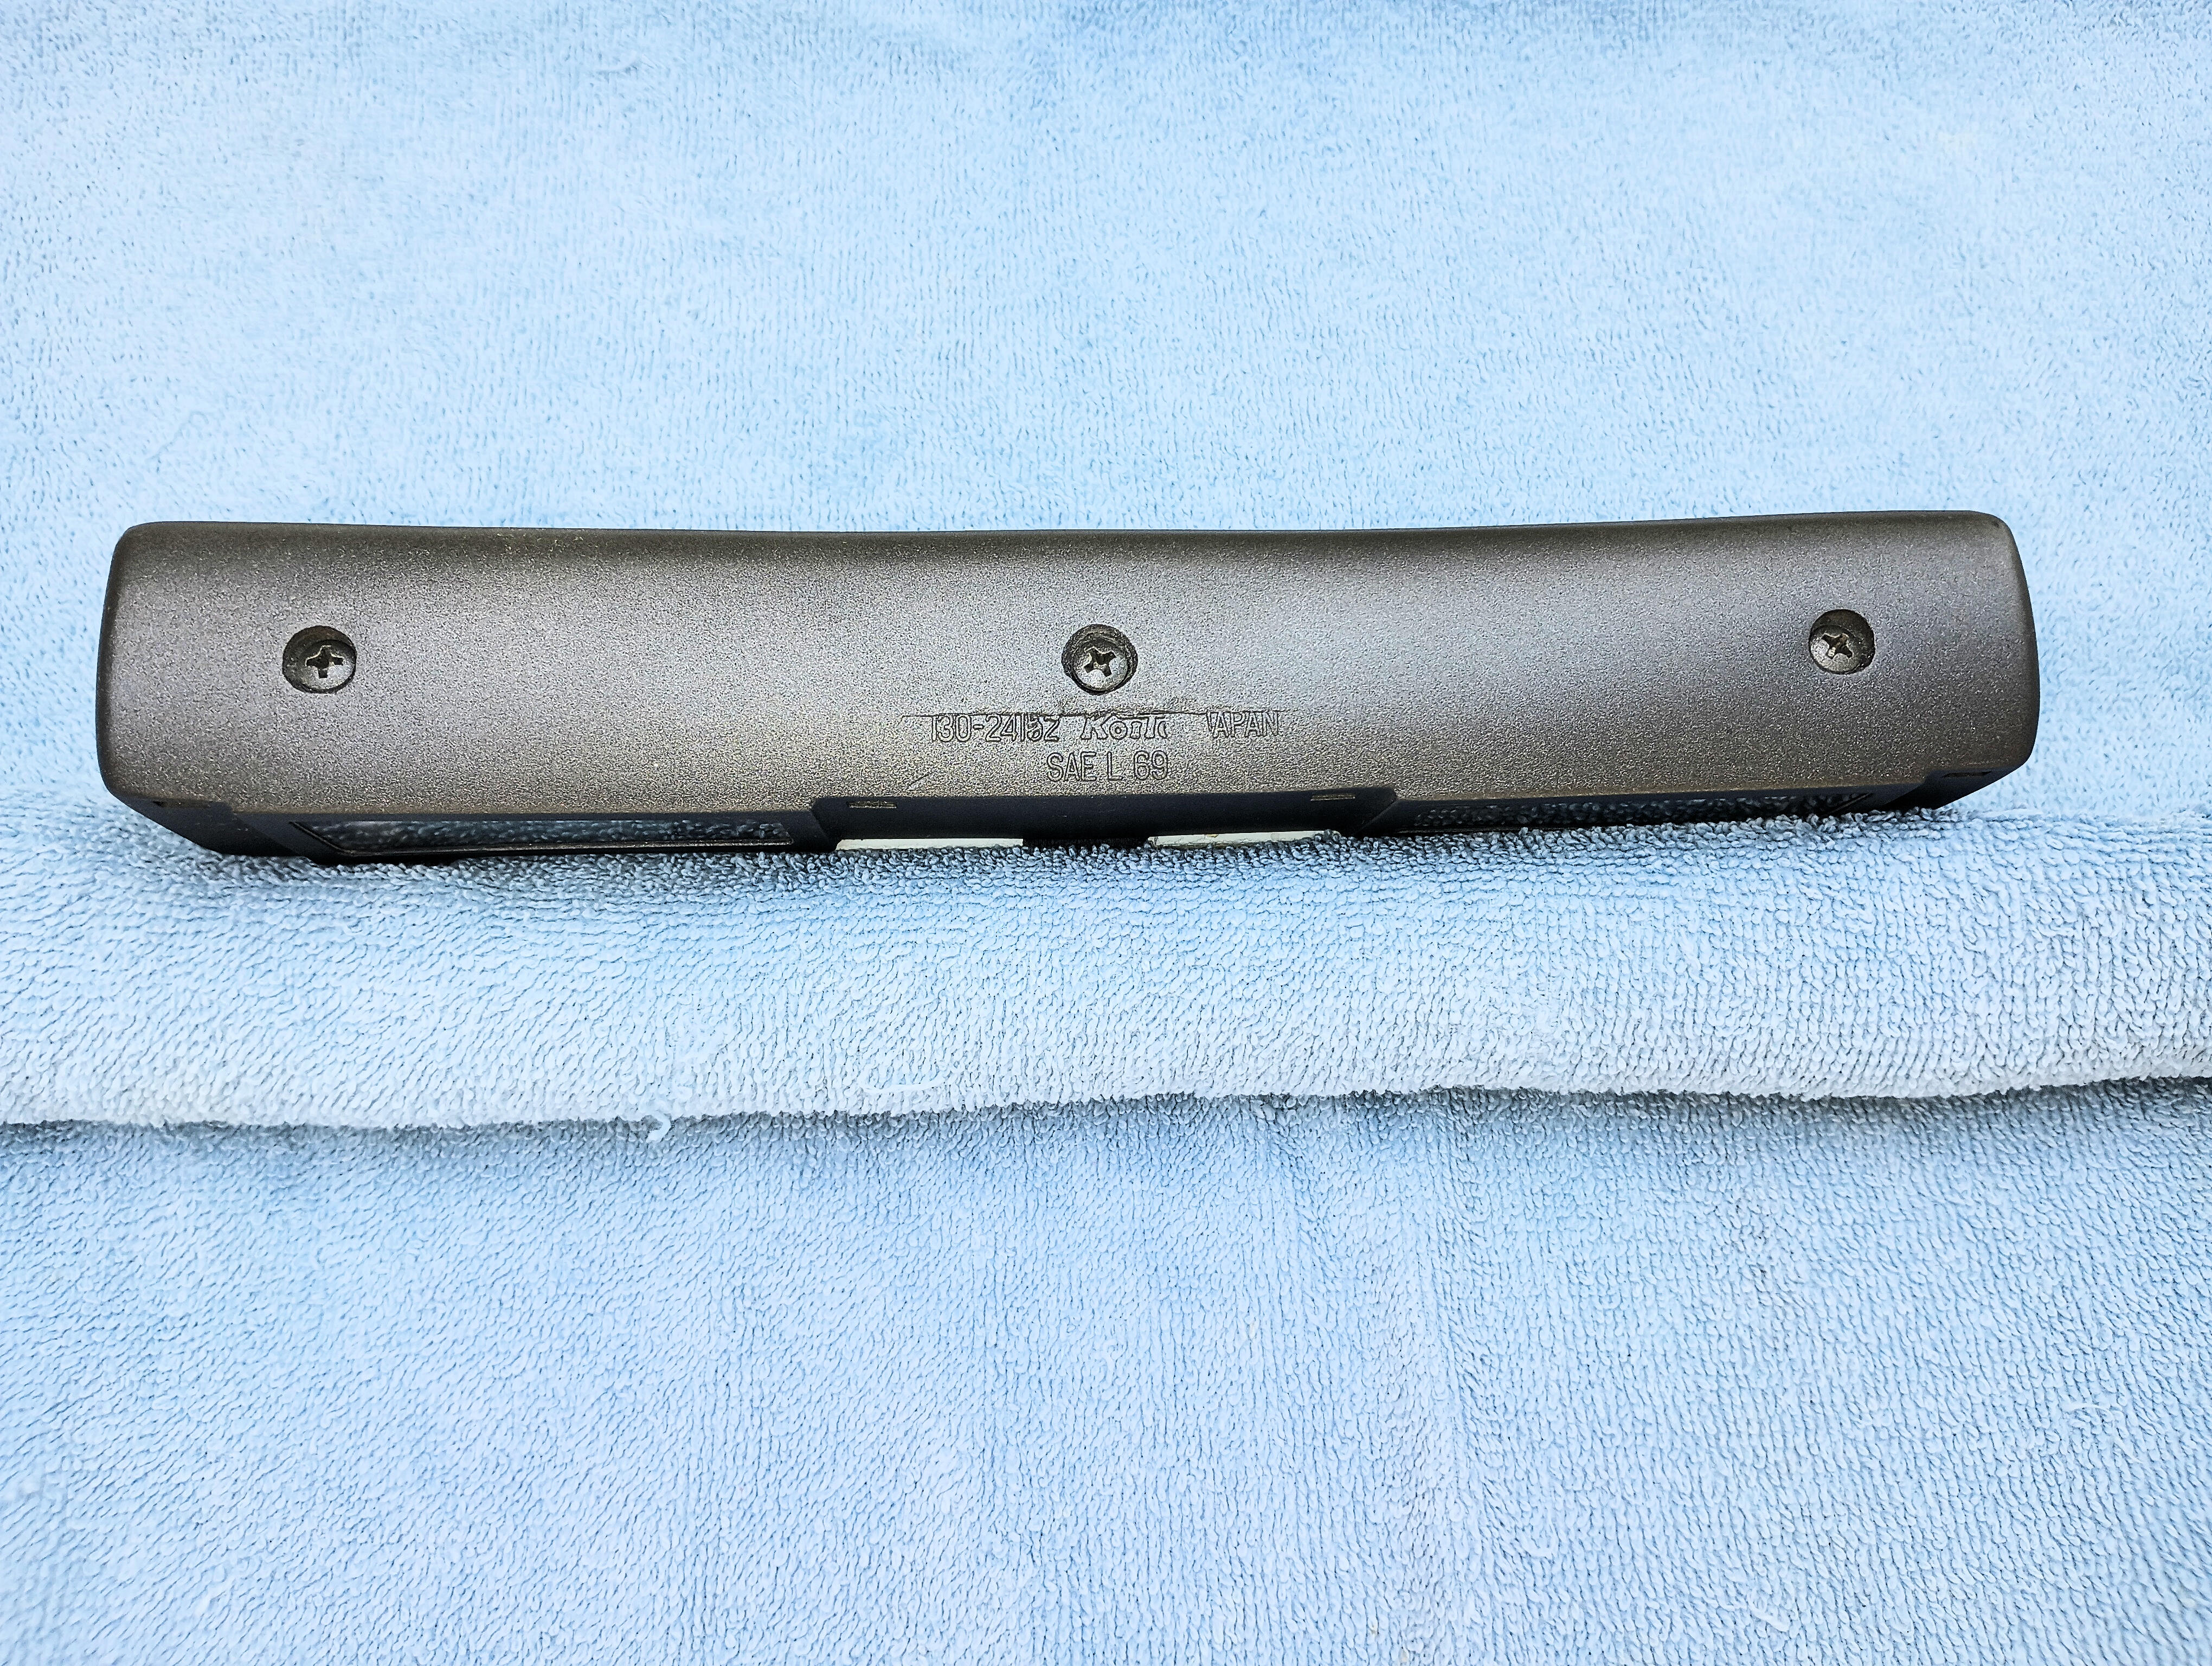
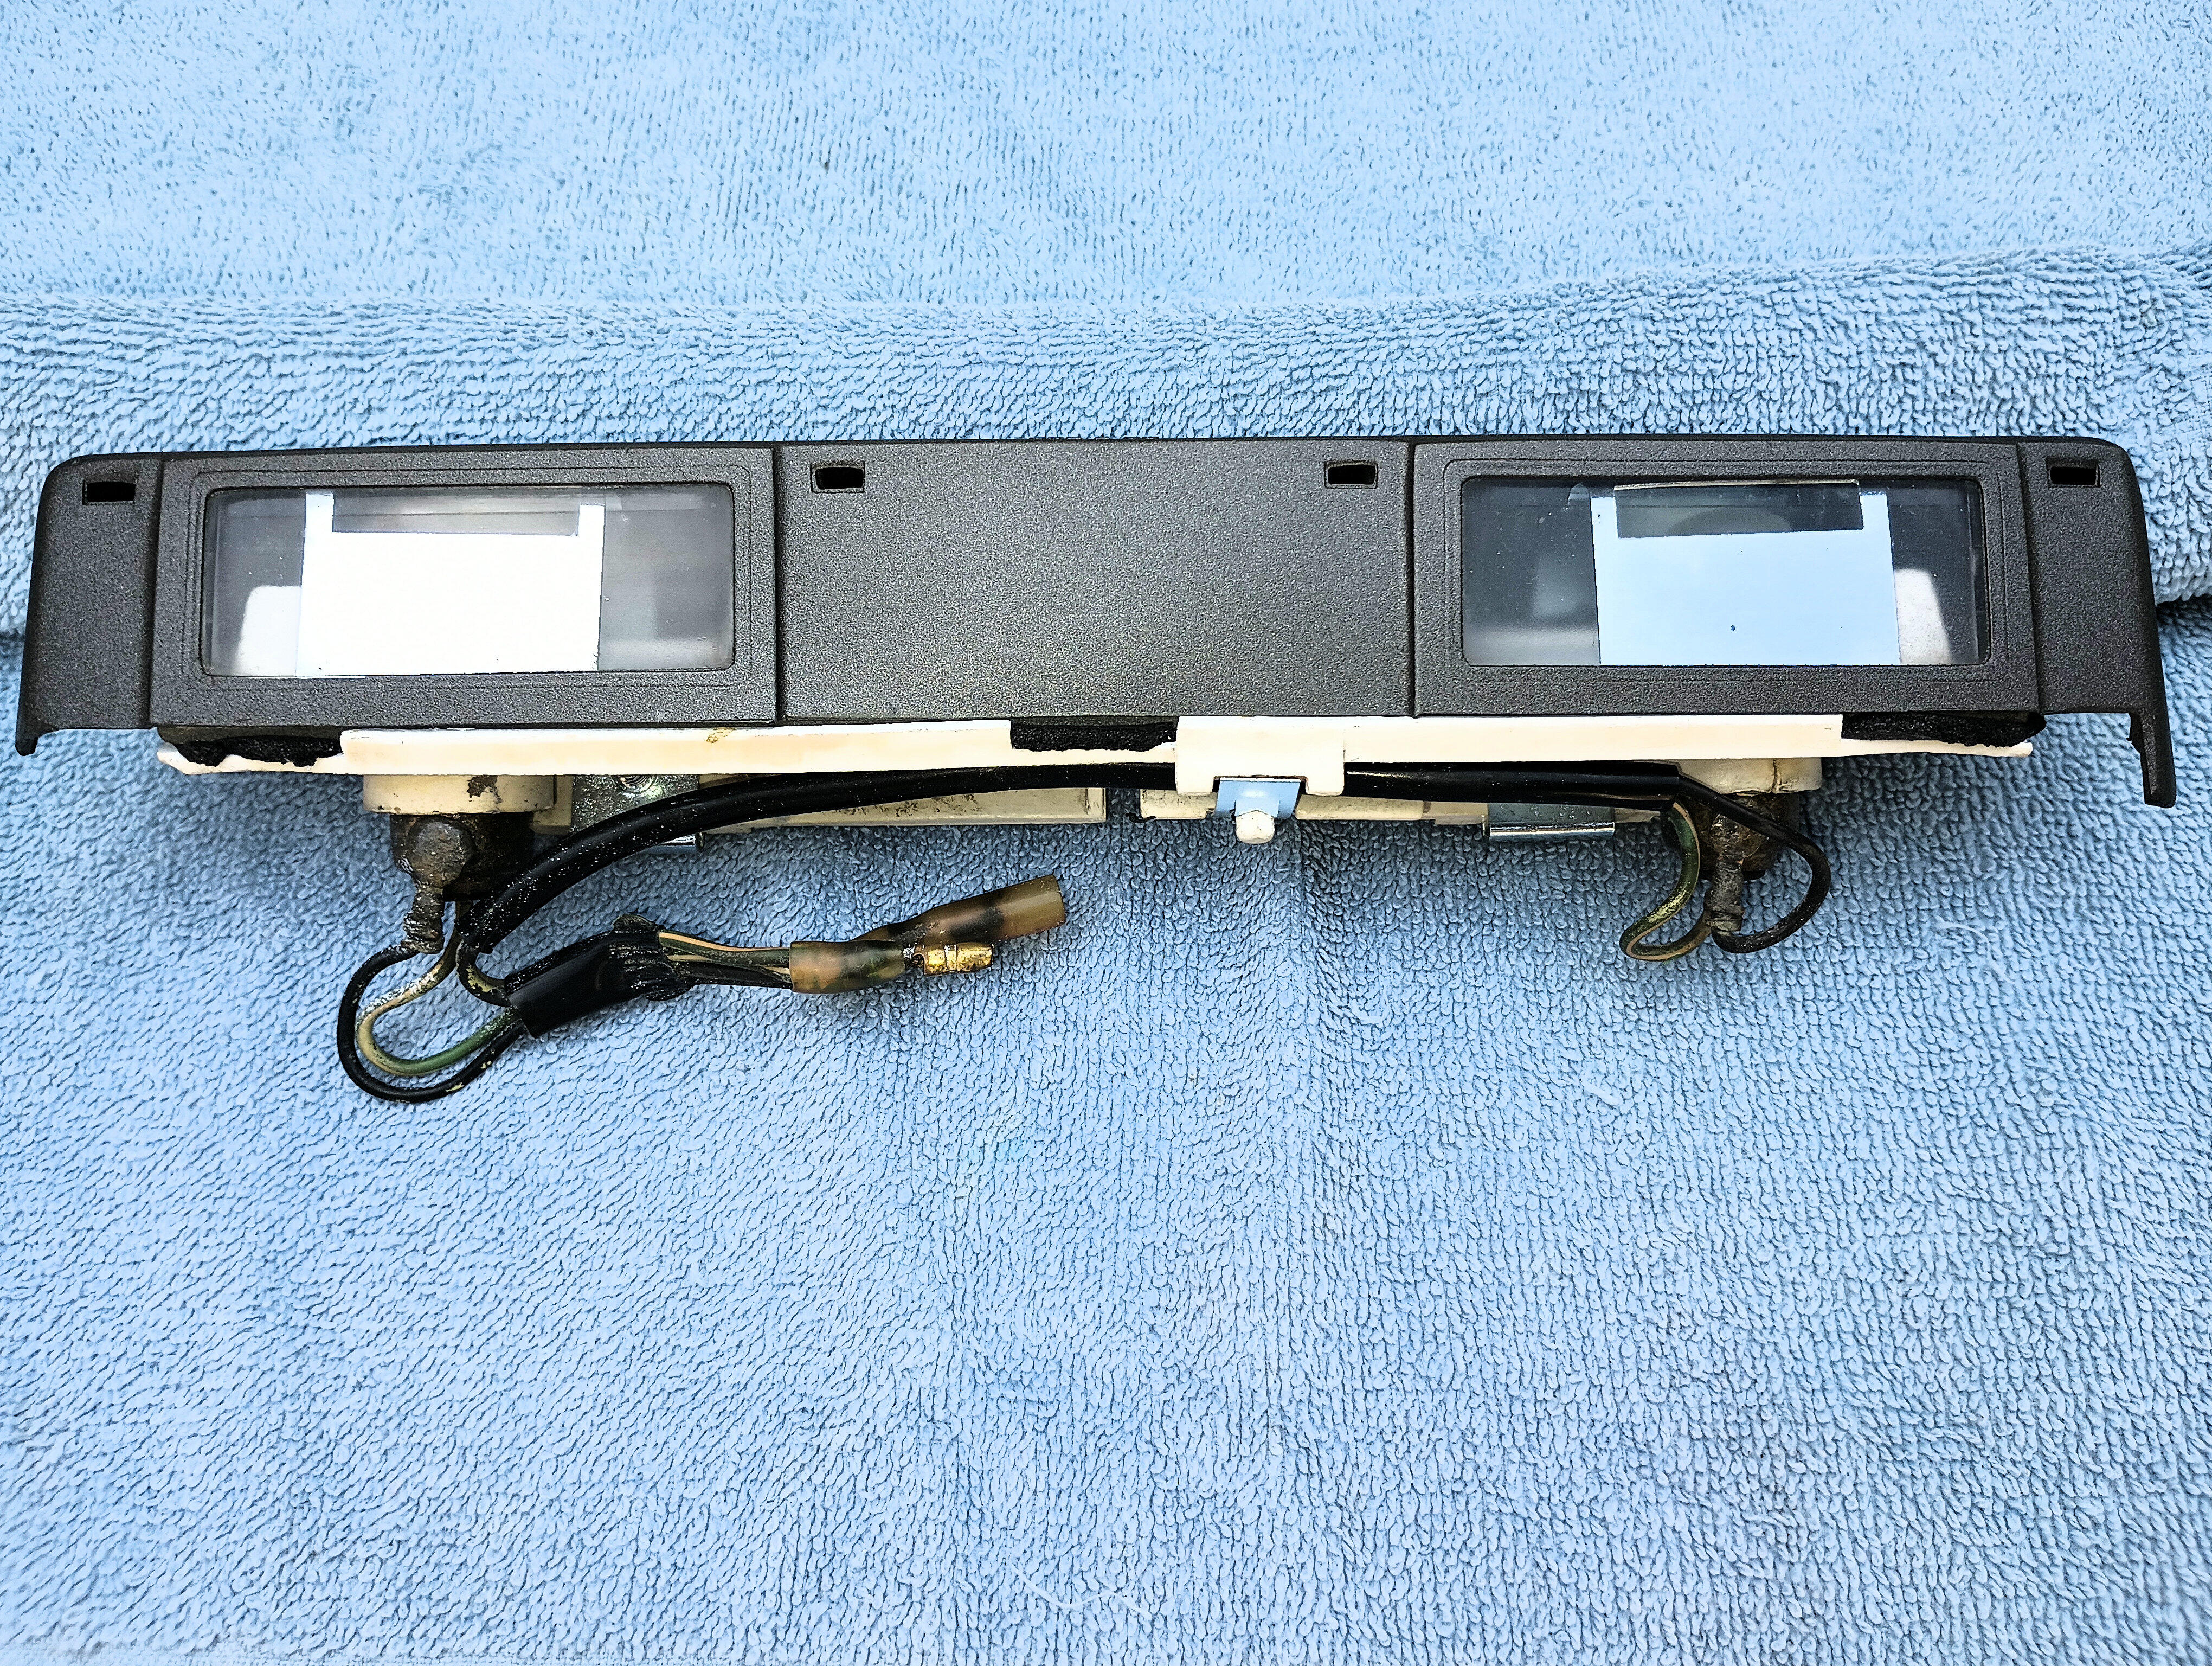
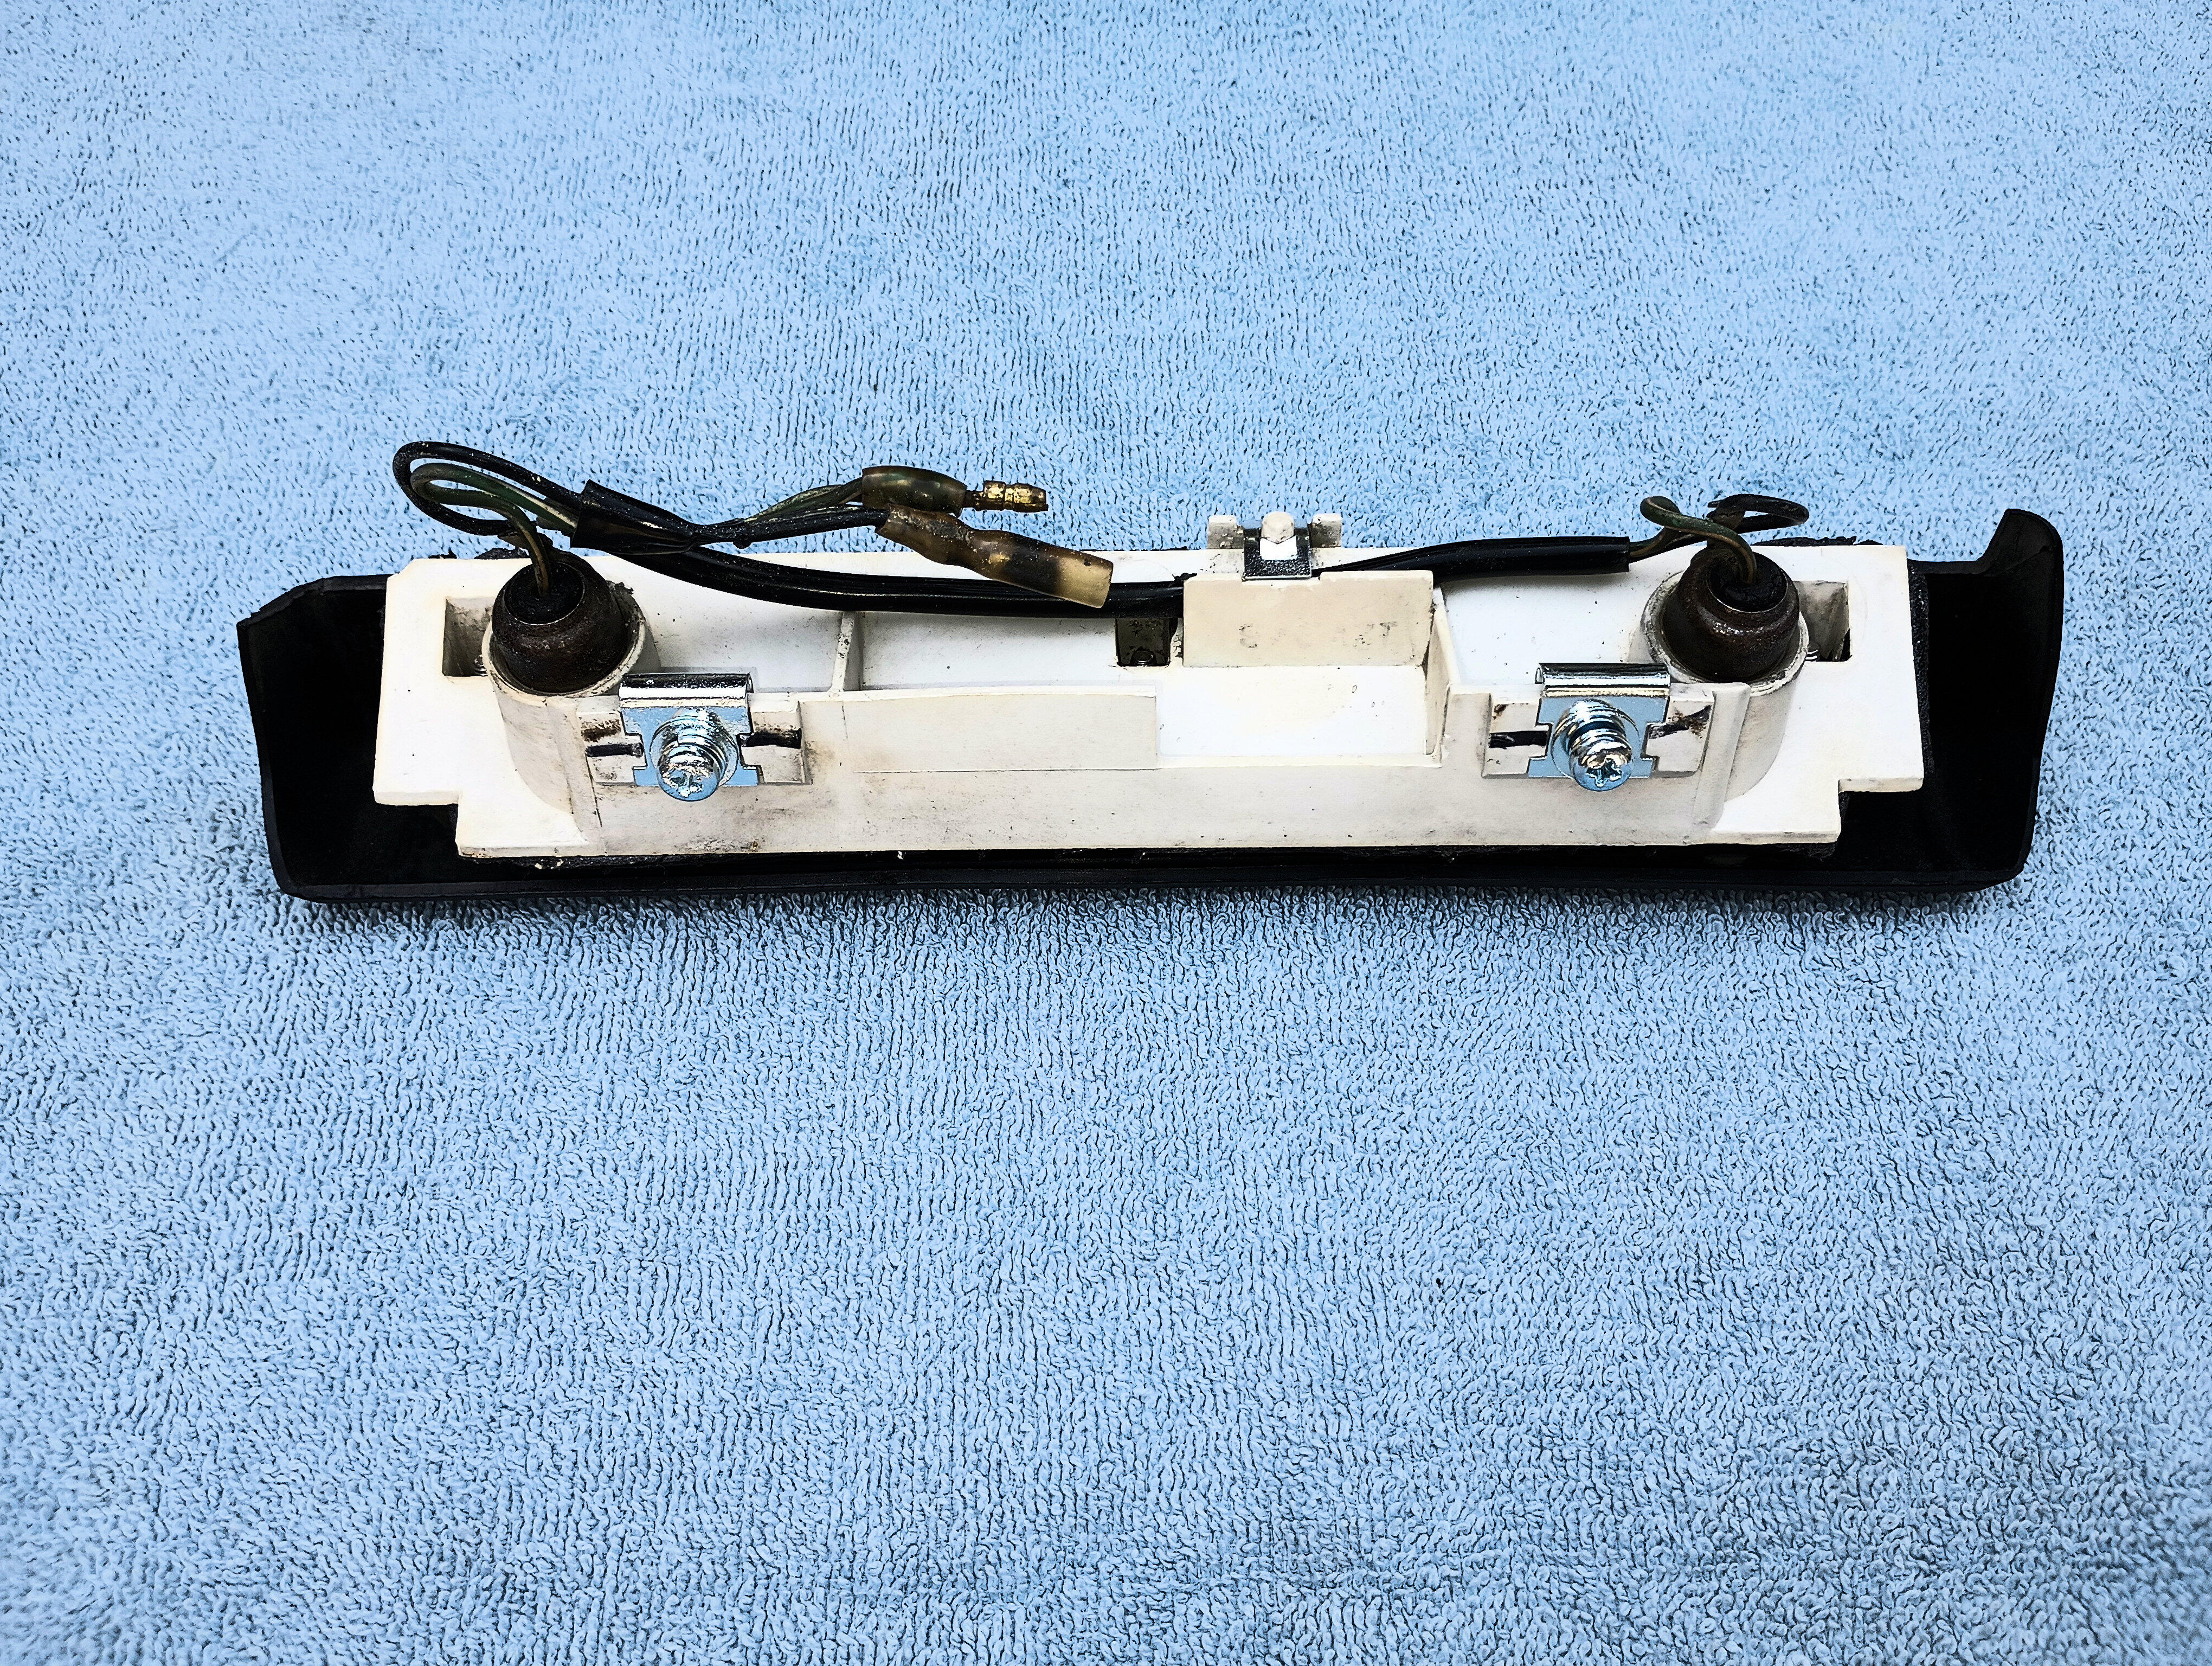
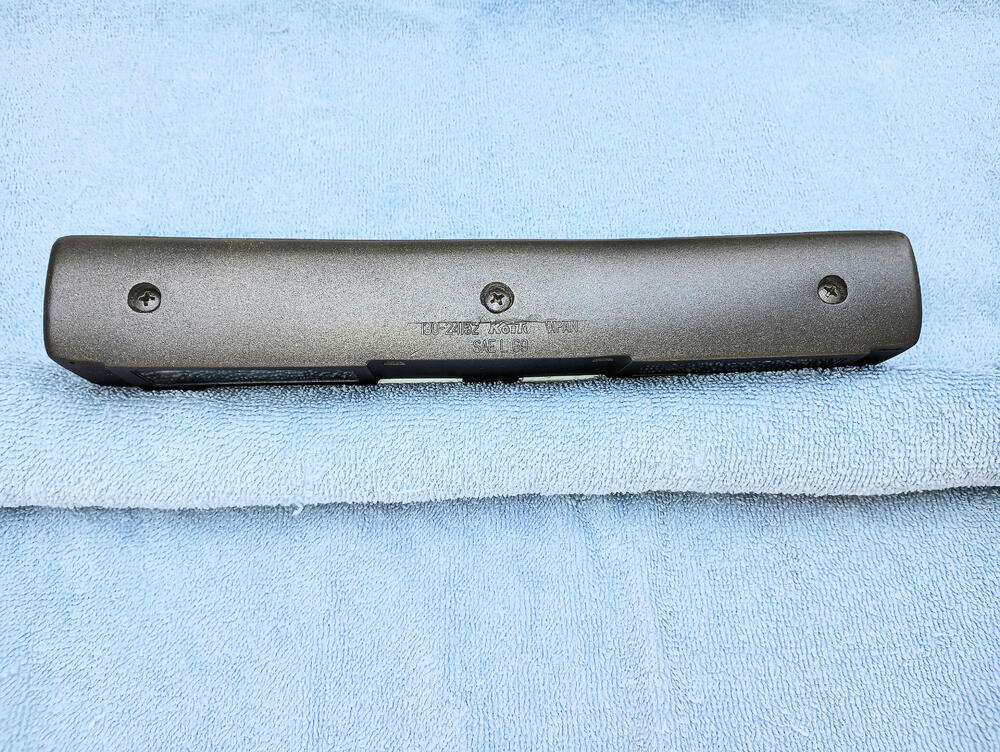
2 pointsRefurbished 240Z license light. Disassembled, cleaned, refinished in the original factory grey, fittings and internal diffusers replated in clear zinc, new screws and nuts for the clamshell, new gasket, perfect lenses, new white LED's. Tested and ready to install. $150 includes standard domestic shipping. Payment via PayPal or Venmo. PM if interested, thanks.
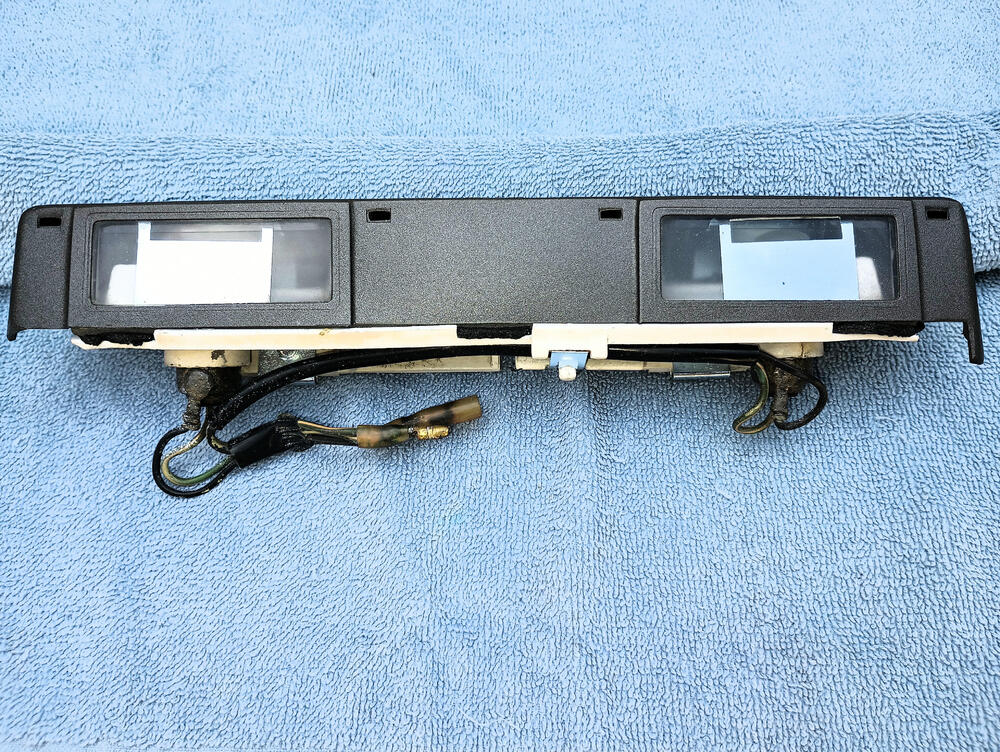
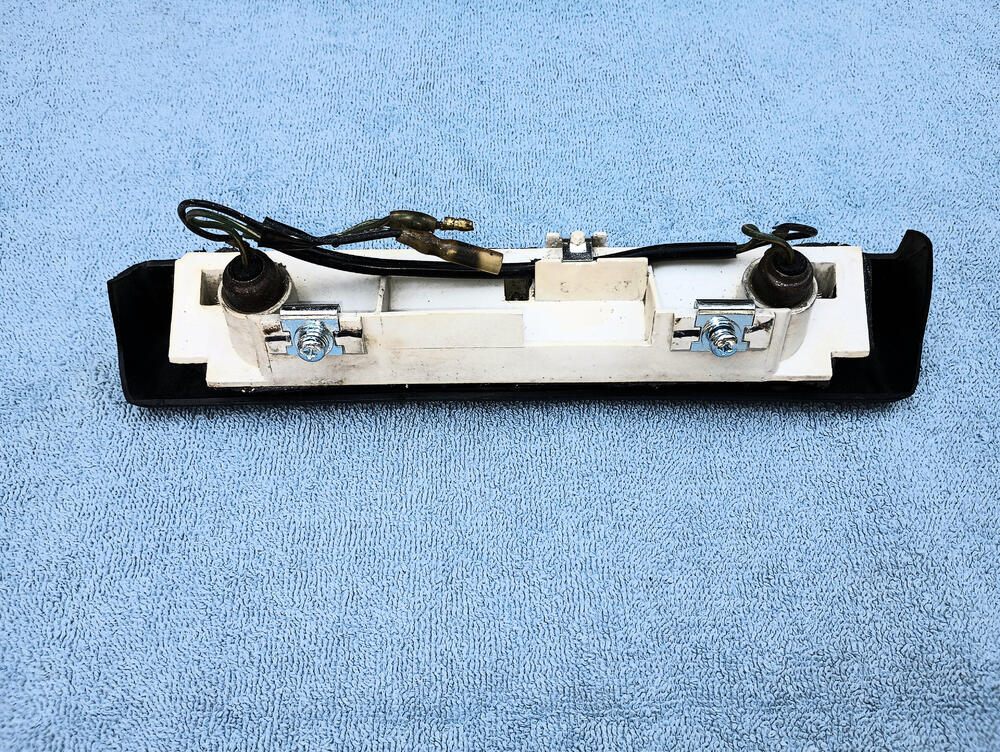 2 points
 -
2 pointsCool video from Hagerty at the Juncheng manufacturing plant making classic car parts including the 240Z (about 11 minutes in).2 points
-
2 pointsNo charge indicator light. What is the voltage at the battery when the car is running? I'm wondering if there might be an issue with the internal voltage regulator. Remember that new does not always mean good.2 points
-
2 pointsActually if you suspect an air leak, replacing the rubber lines would be a good start and could alleviate the need for a check valve in the engine bay. If the rubber lines are allowing air in, they can allow fuel out in the future.2 points
-
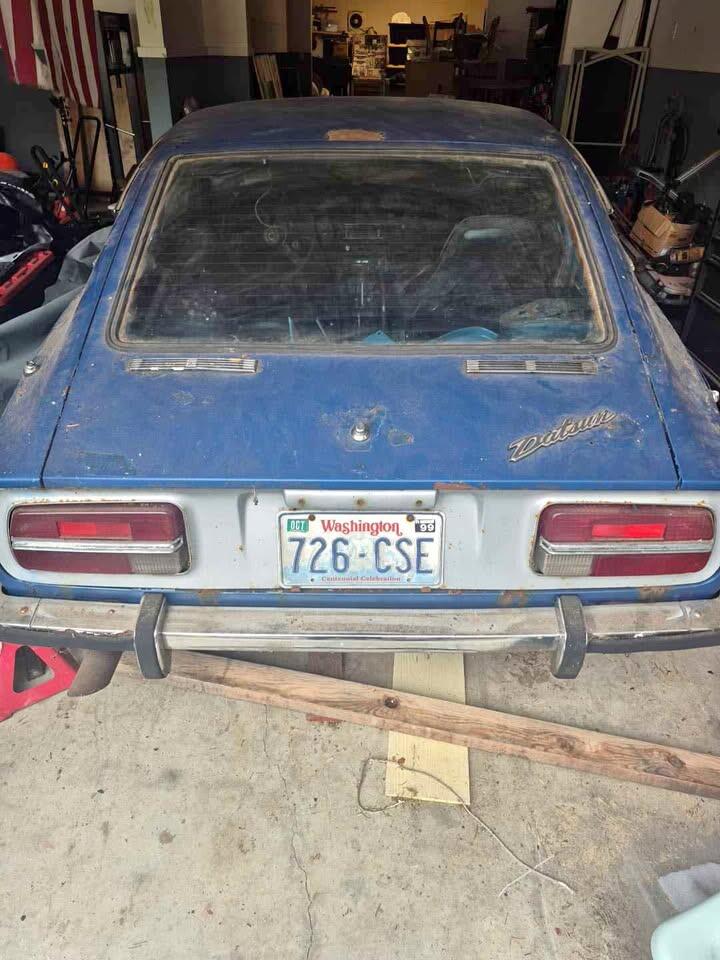
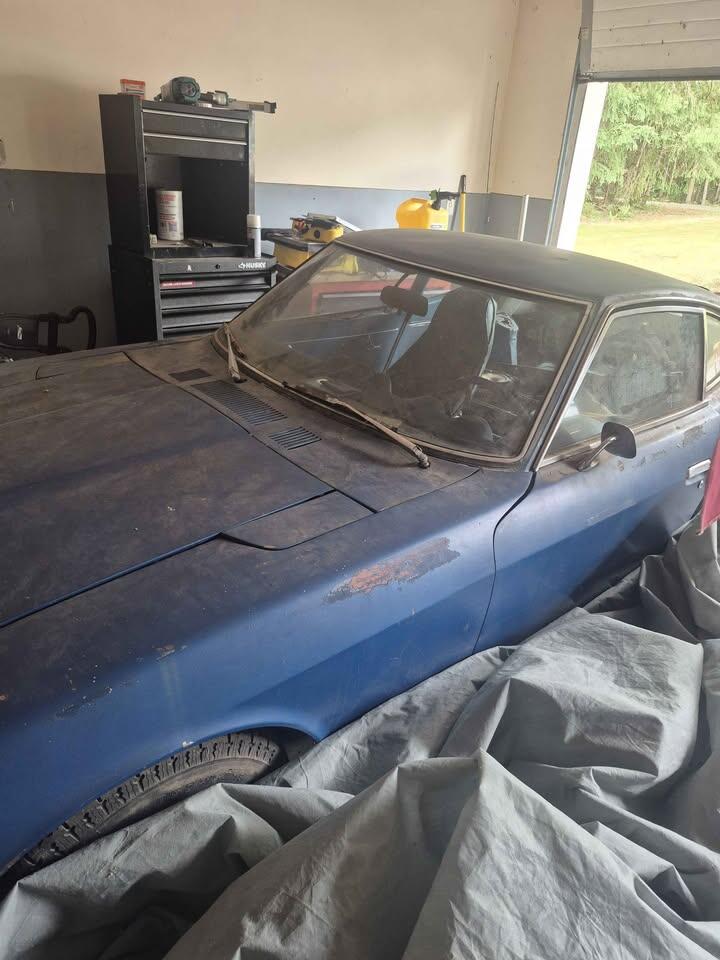
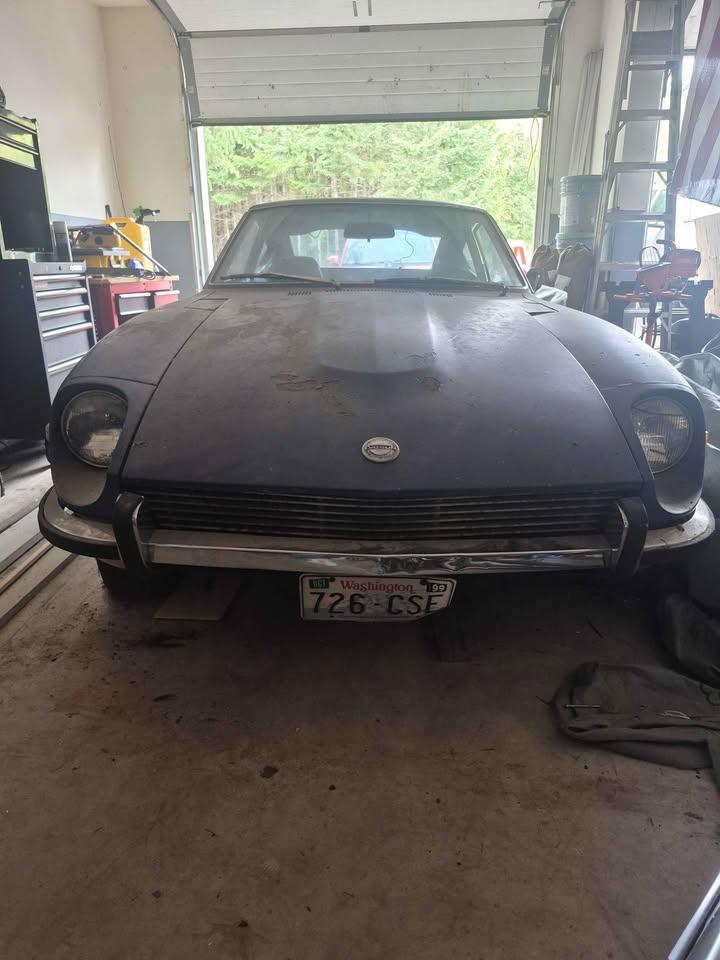
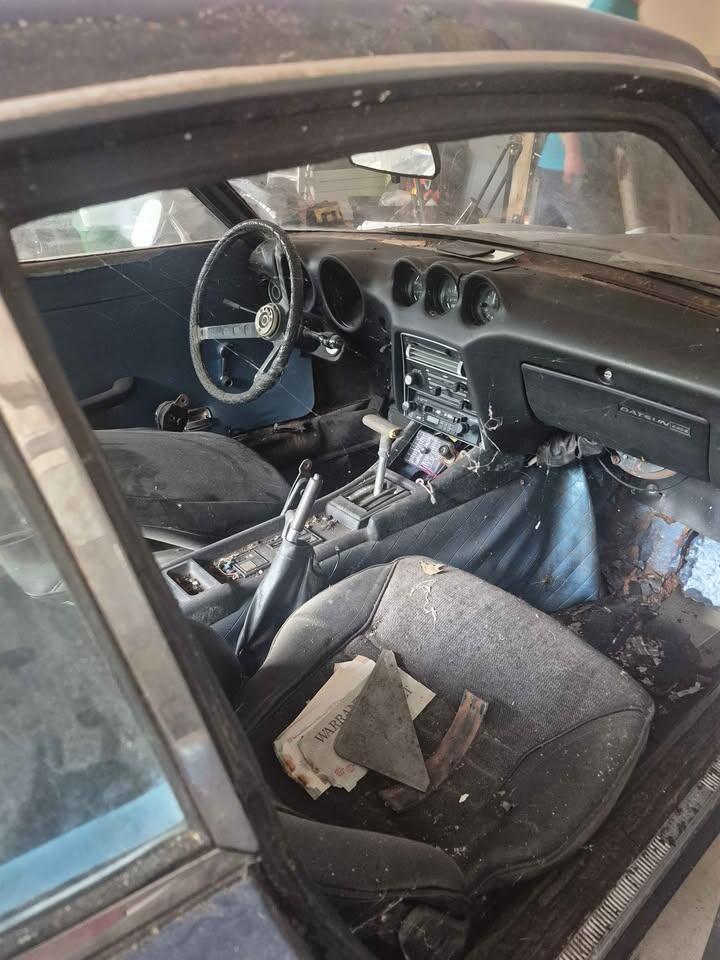
This is on Facebook in Shelton WA Will not last at that price. $3K
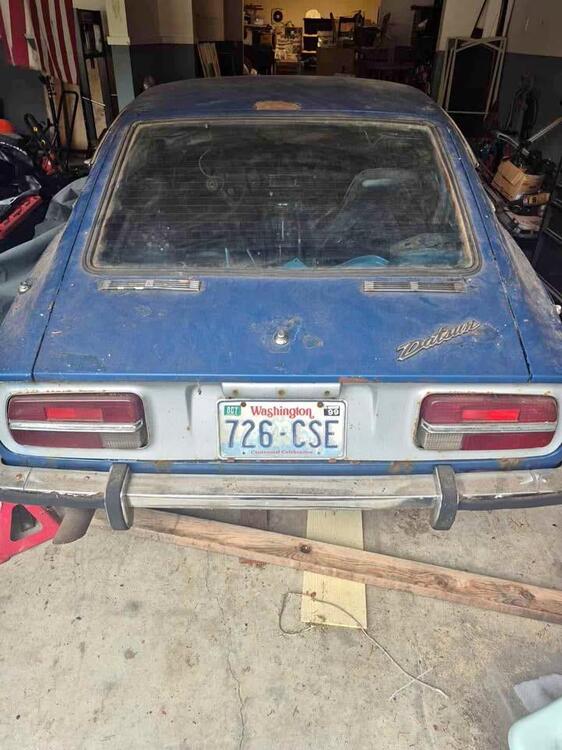
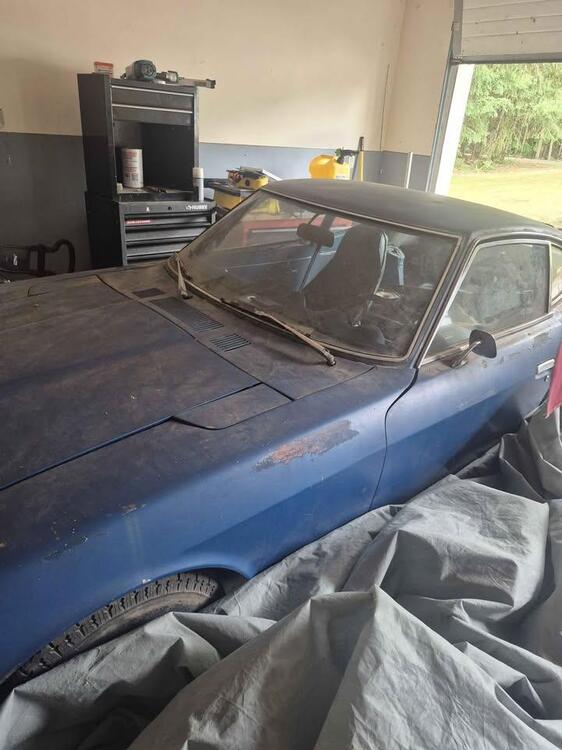
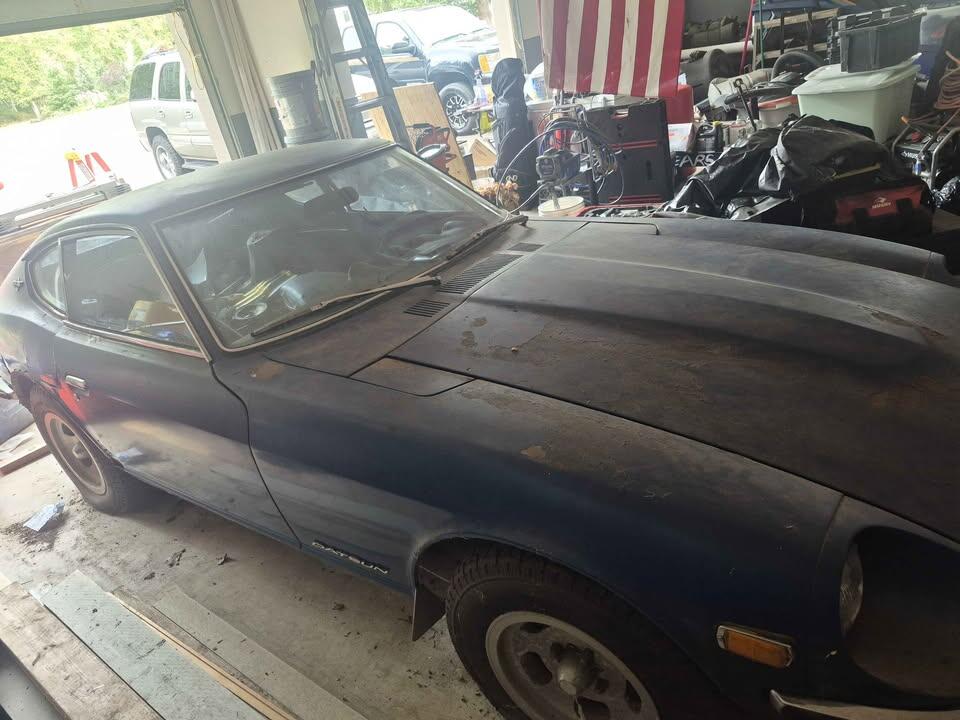
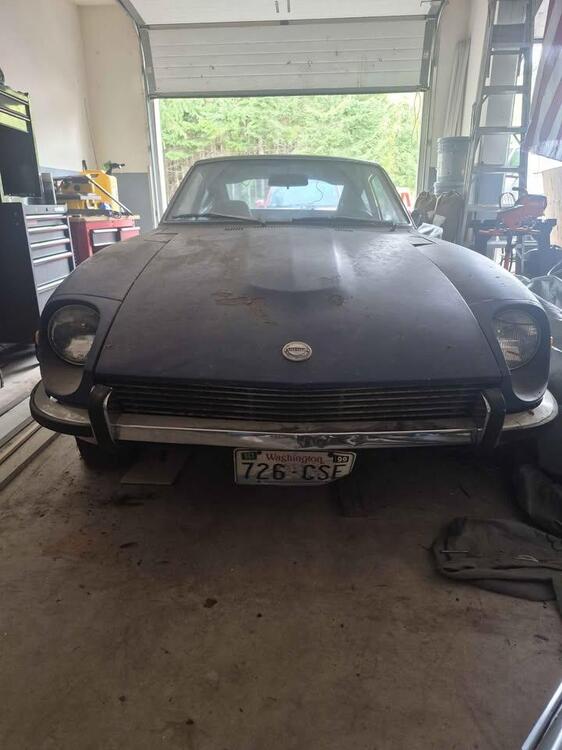
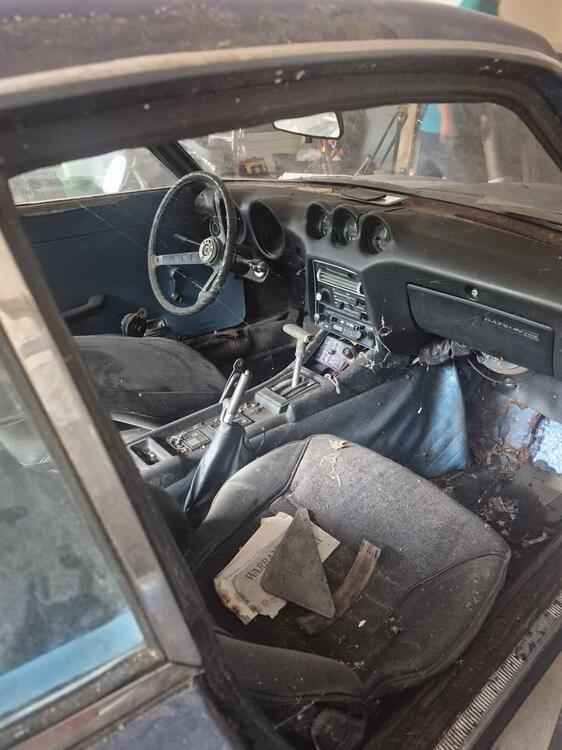
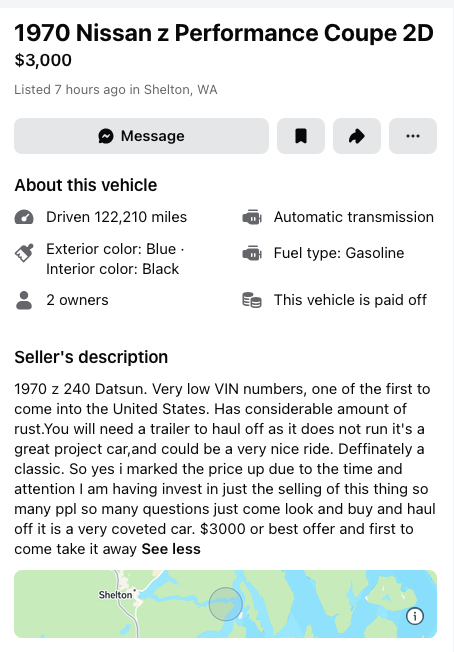 2 points
 -
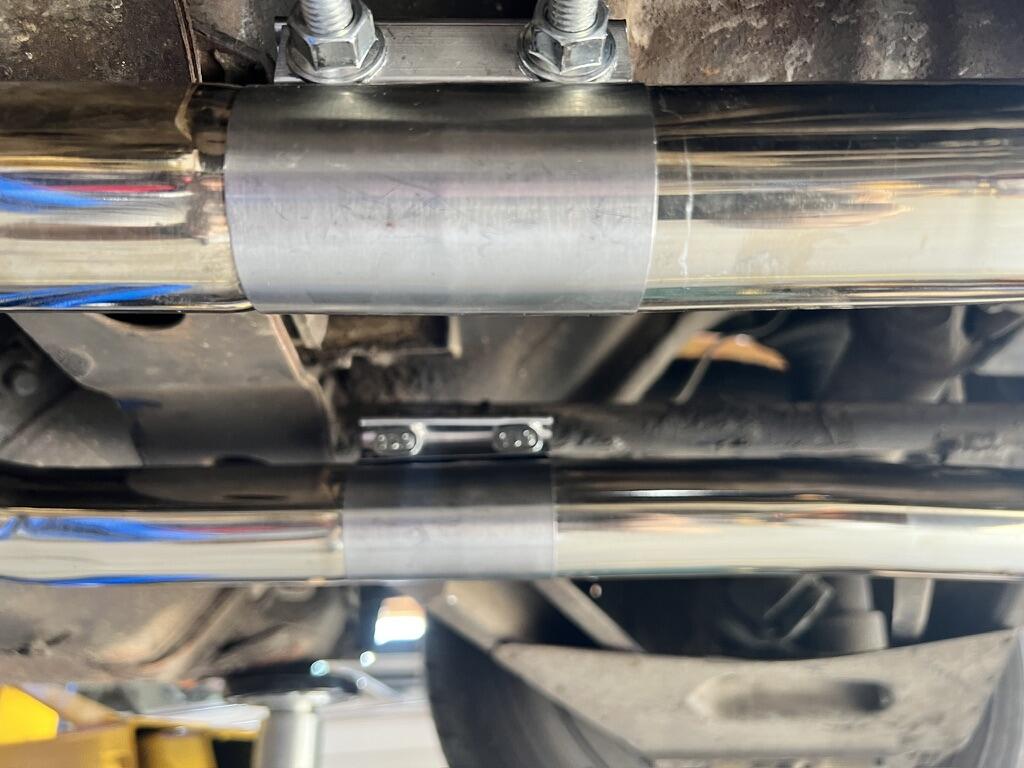
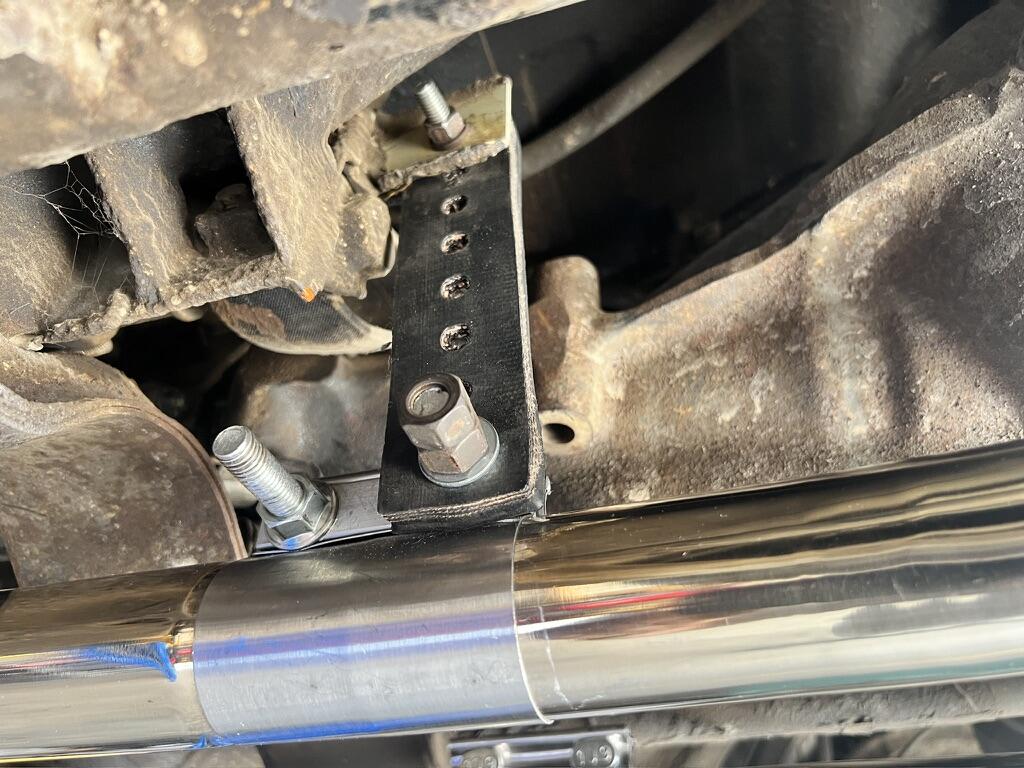
2 pointsI launched the supplied hangers and went with some 304 Stainless sleeve clamps... this worked much better than I expected and the resonator and exhaust sections are virtually welded. The old clamps allowed some flexing of the joint and it leaked almost immediately. RC is getting this feedback as well... I used a rubber mount attached to the factory '73 exhaust support... all very solid and muffler is hanging in the proper place from the factory hangers. Completely leak free and solid now. Overall I'm delighted with this exhaust and these clamps make it perfect...
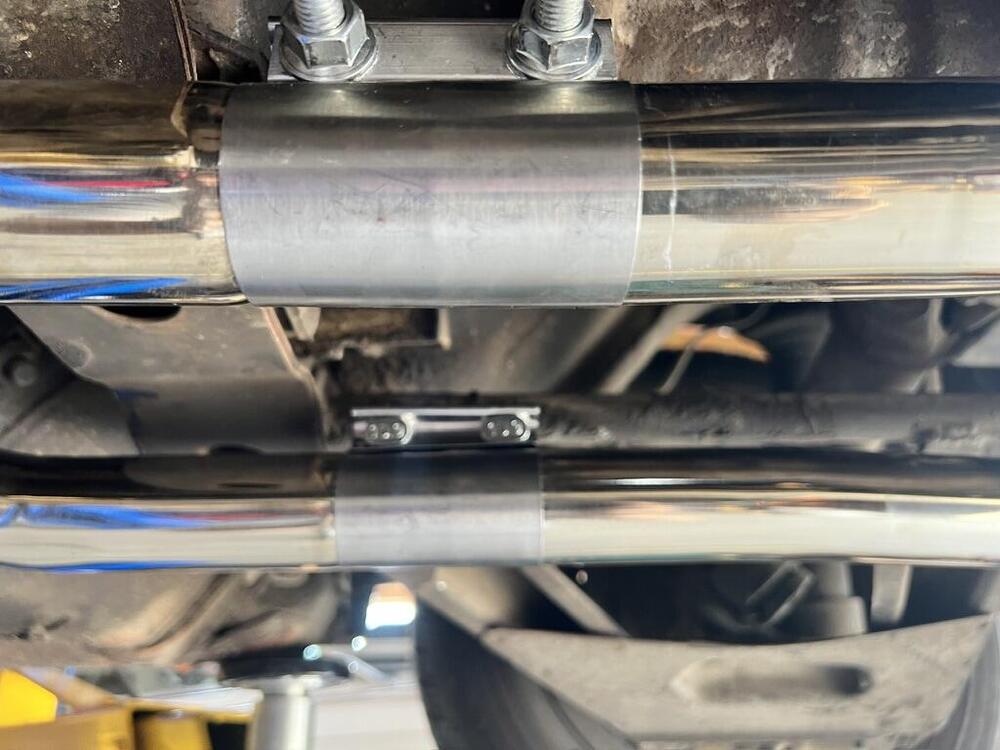
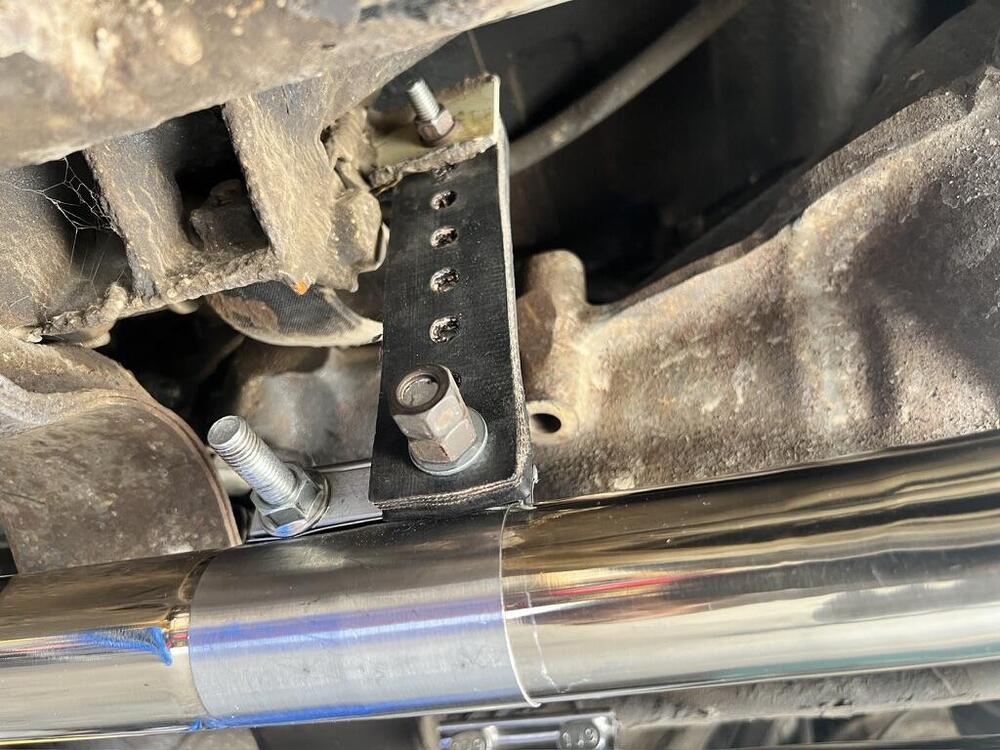 2 points
 -
thank ya👍🏼 Yeah, still planning on smogging just to see the numbers so I can know if it’s running right and if all my various fixes worked. But after that, yep, I’ll be getting hagerty insurance and she’ll be smog exempt. Can’t believe that actually passed🤯 I’ll take it. Yes, starting jan 1, 1981 and older is exempt as long as one of the conditions you mentioned are met.2 points
-
Opened just fine for me on my end.2 points
-
Found this. It would be funny if it weren’t tragically true!
 2 points
 -
2 pointsYes, you can get a better response for your ad with photos. Since this thread is already in the classifieds, you can just respond here with the photos.2 points
-
I hang my head in shamed for use of the lowly zip tie in this application. At least I’ve never melted one. Yet…..2 points
-
2 points
-
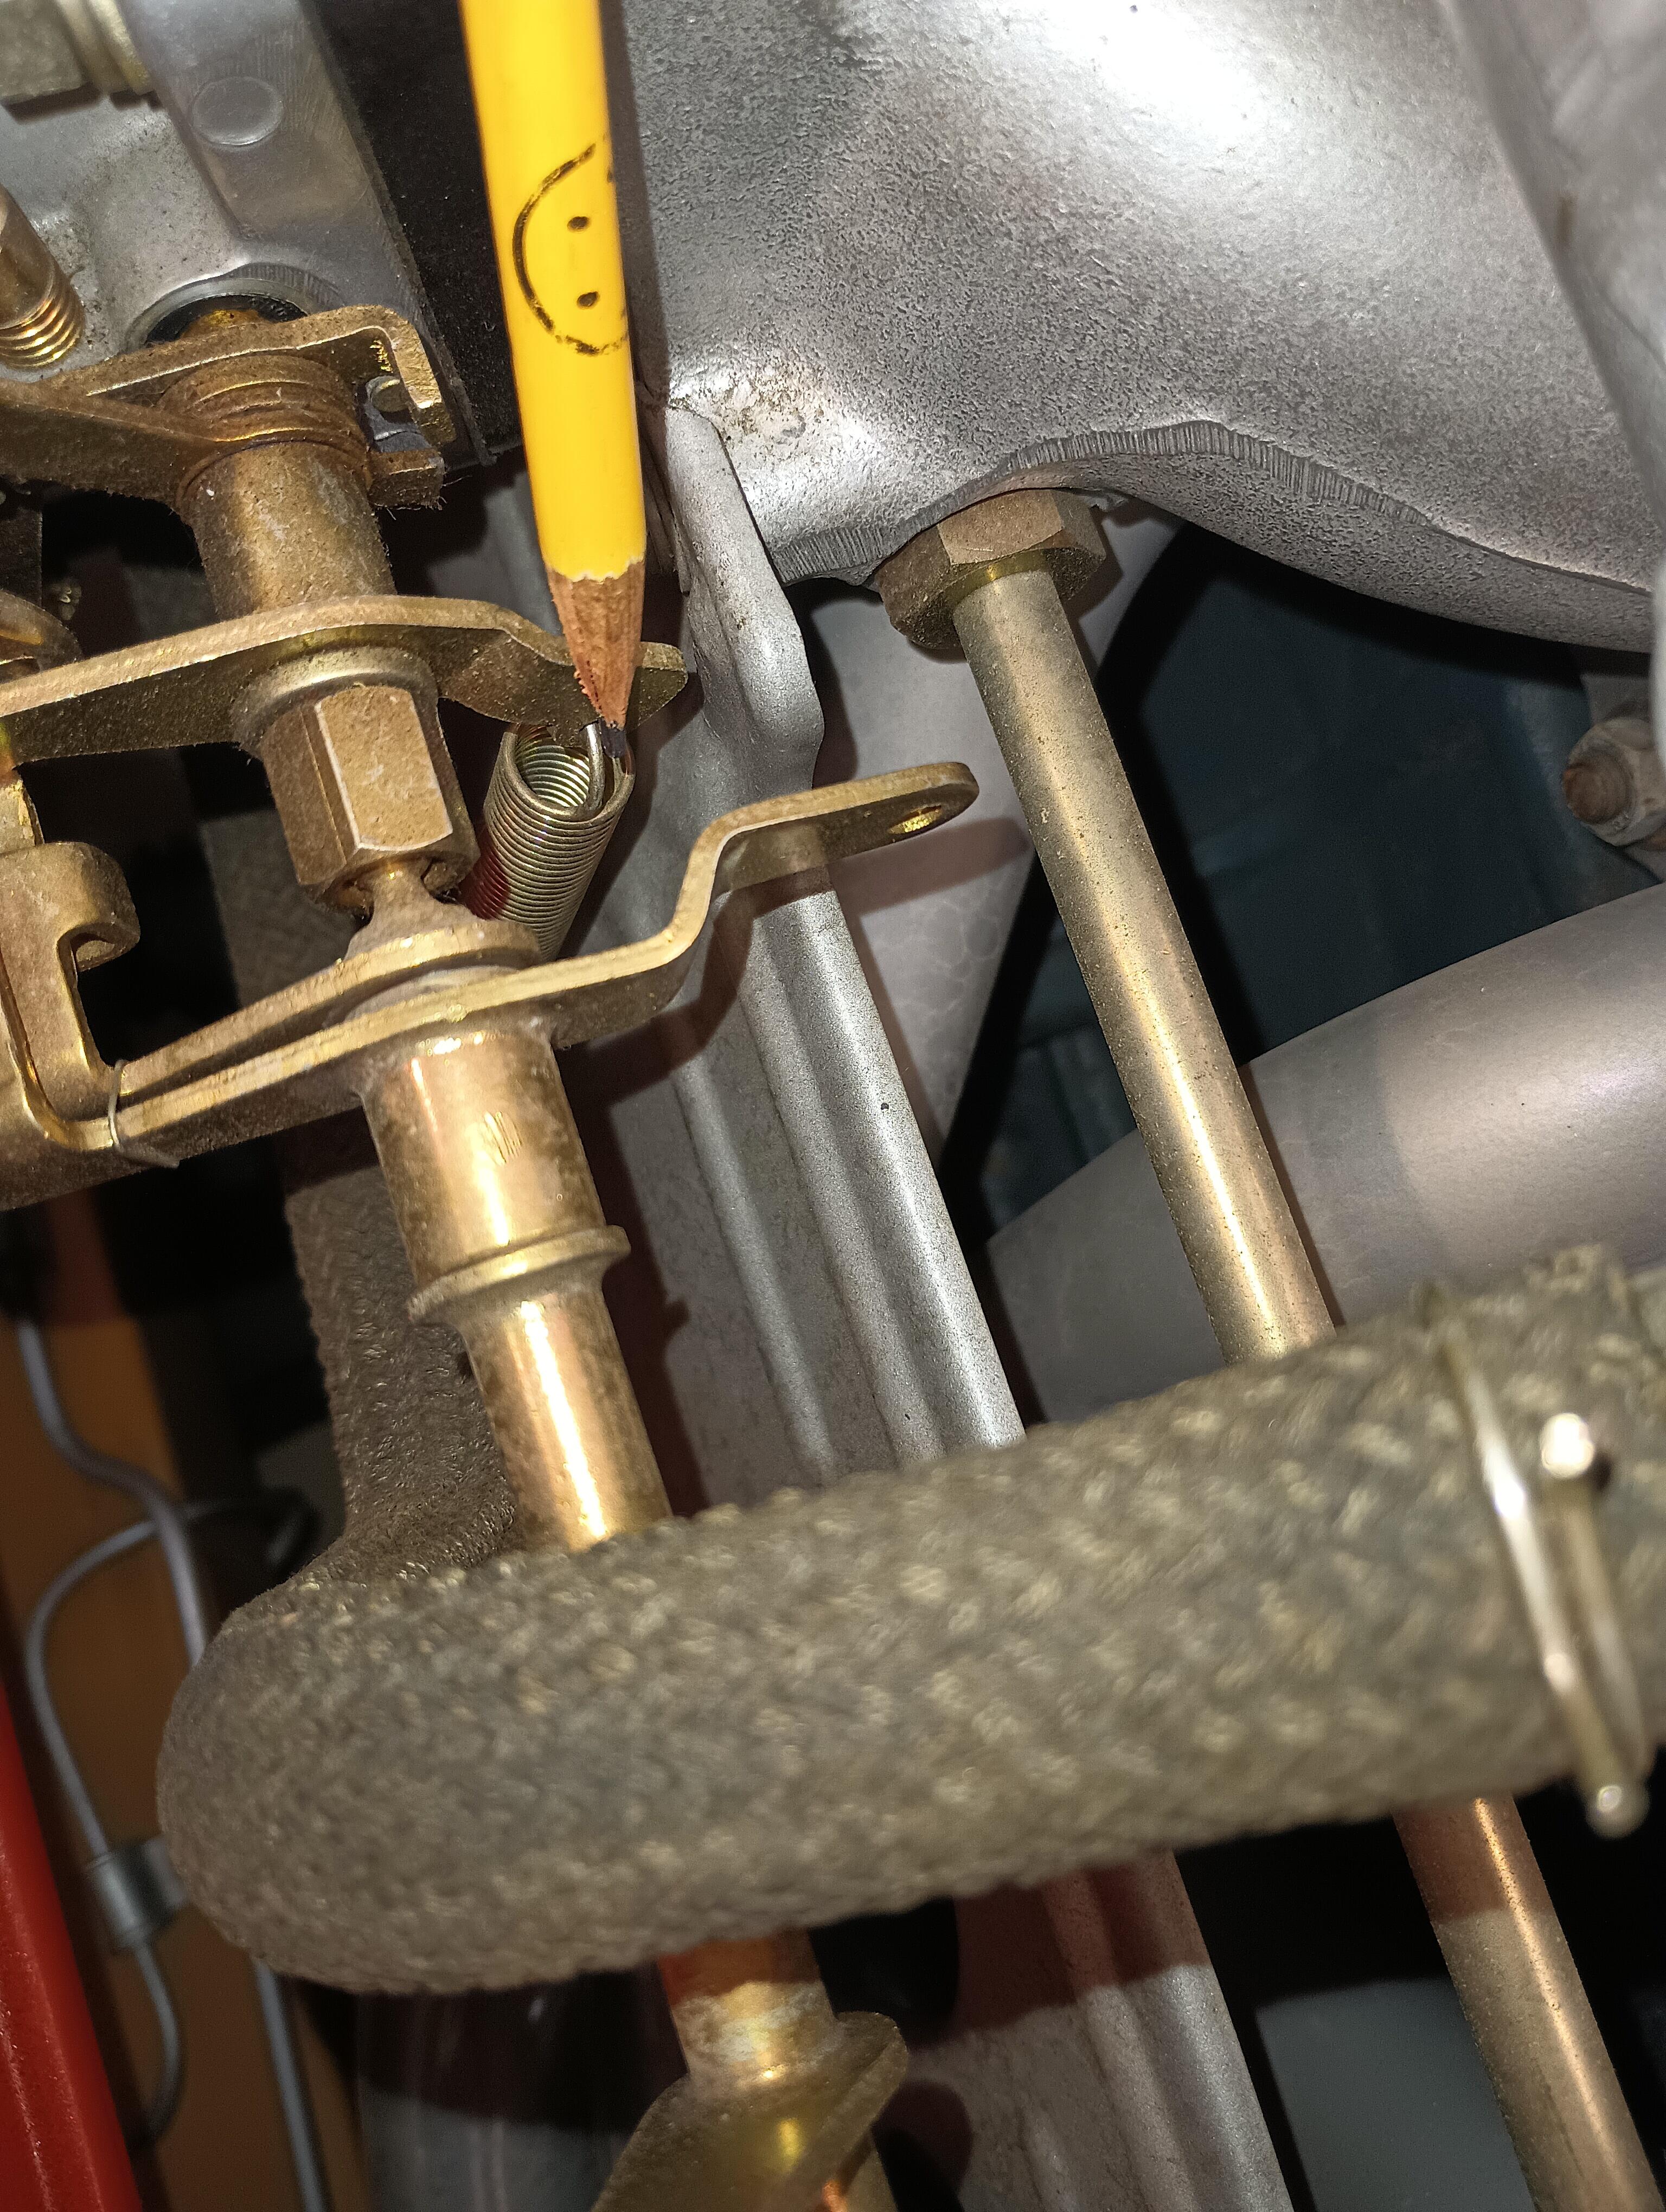
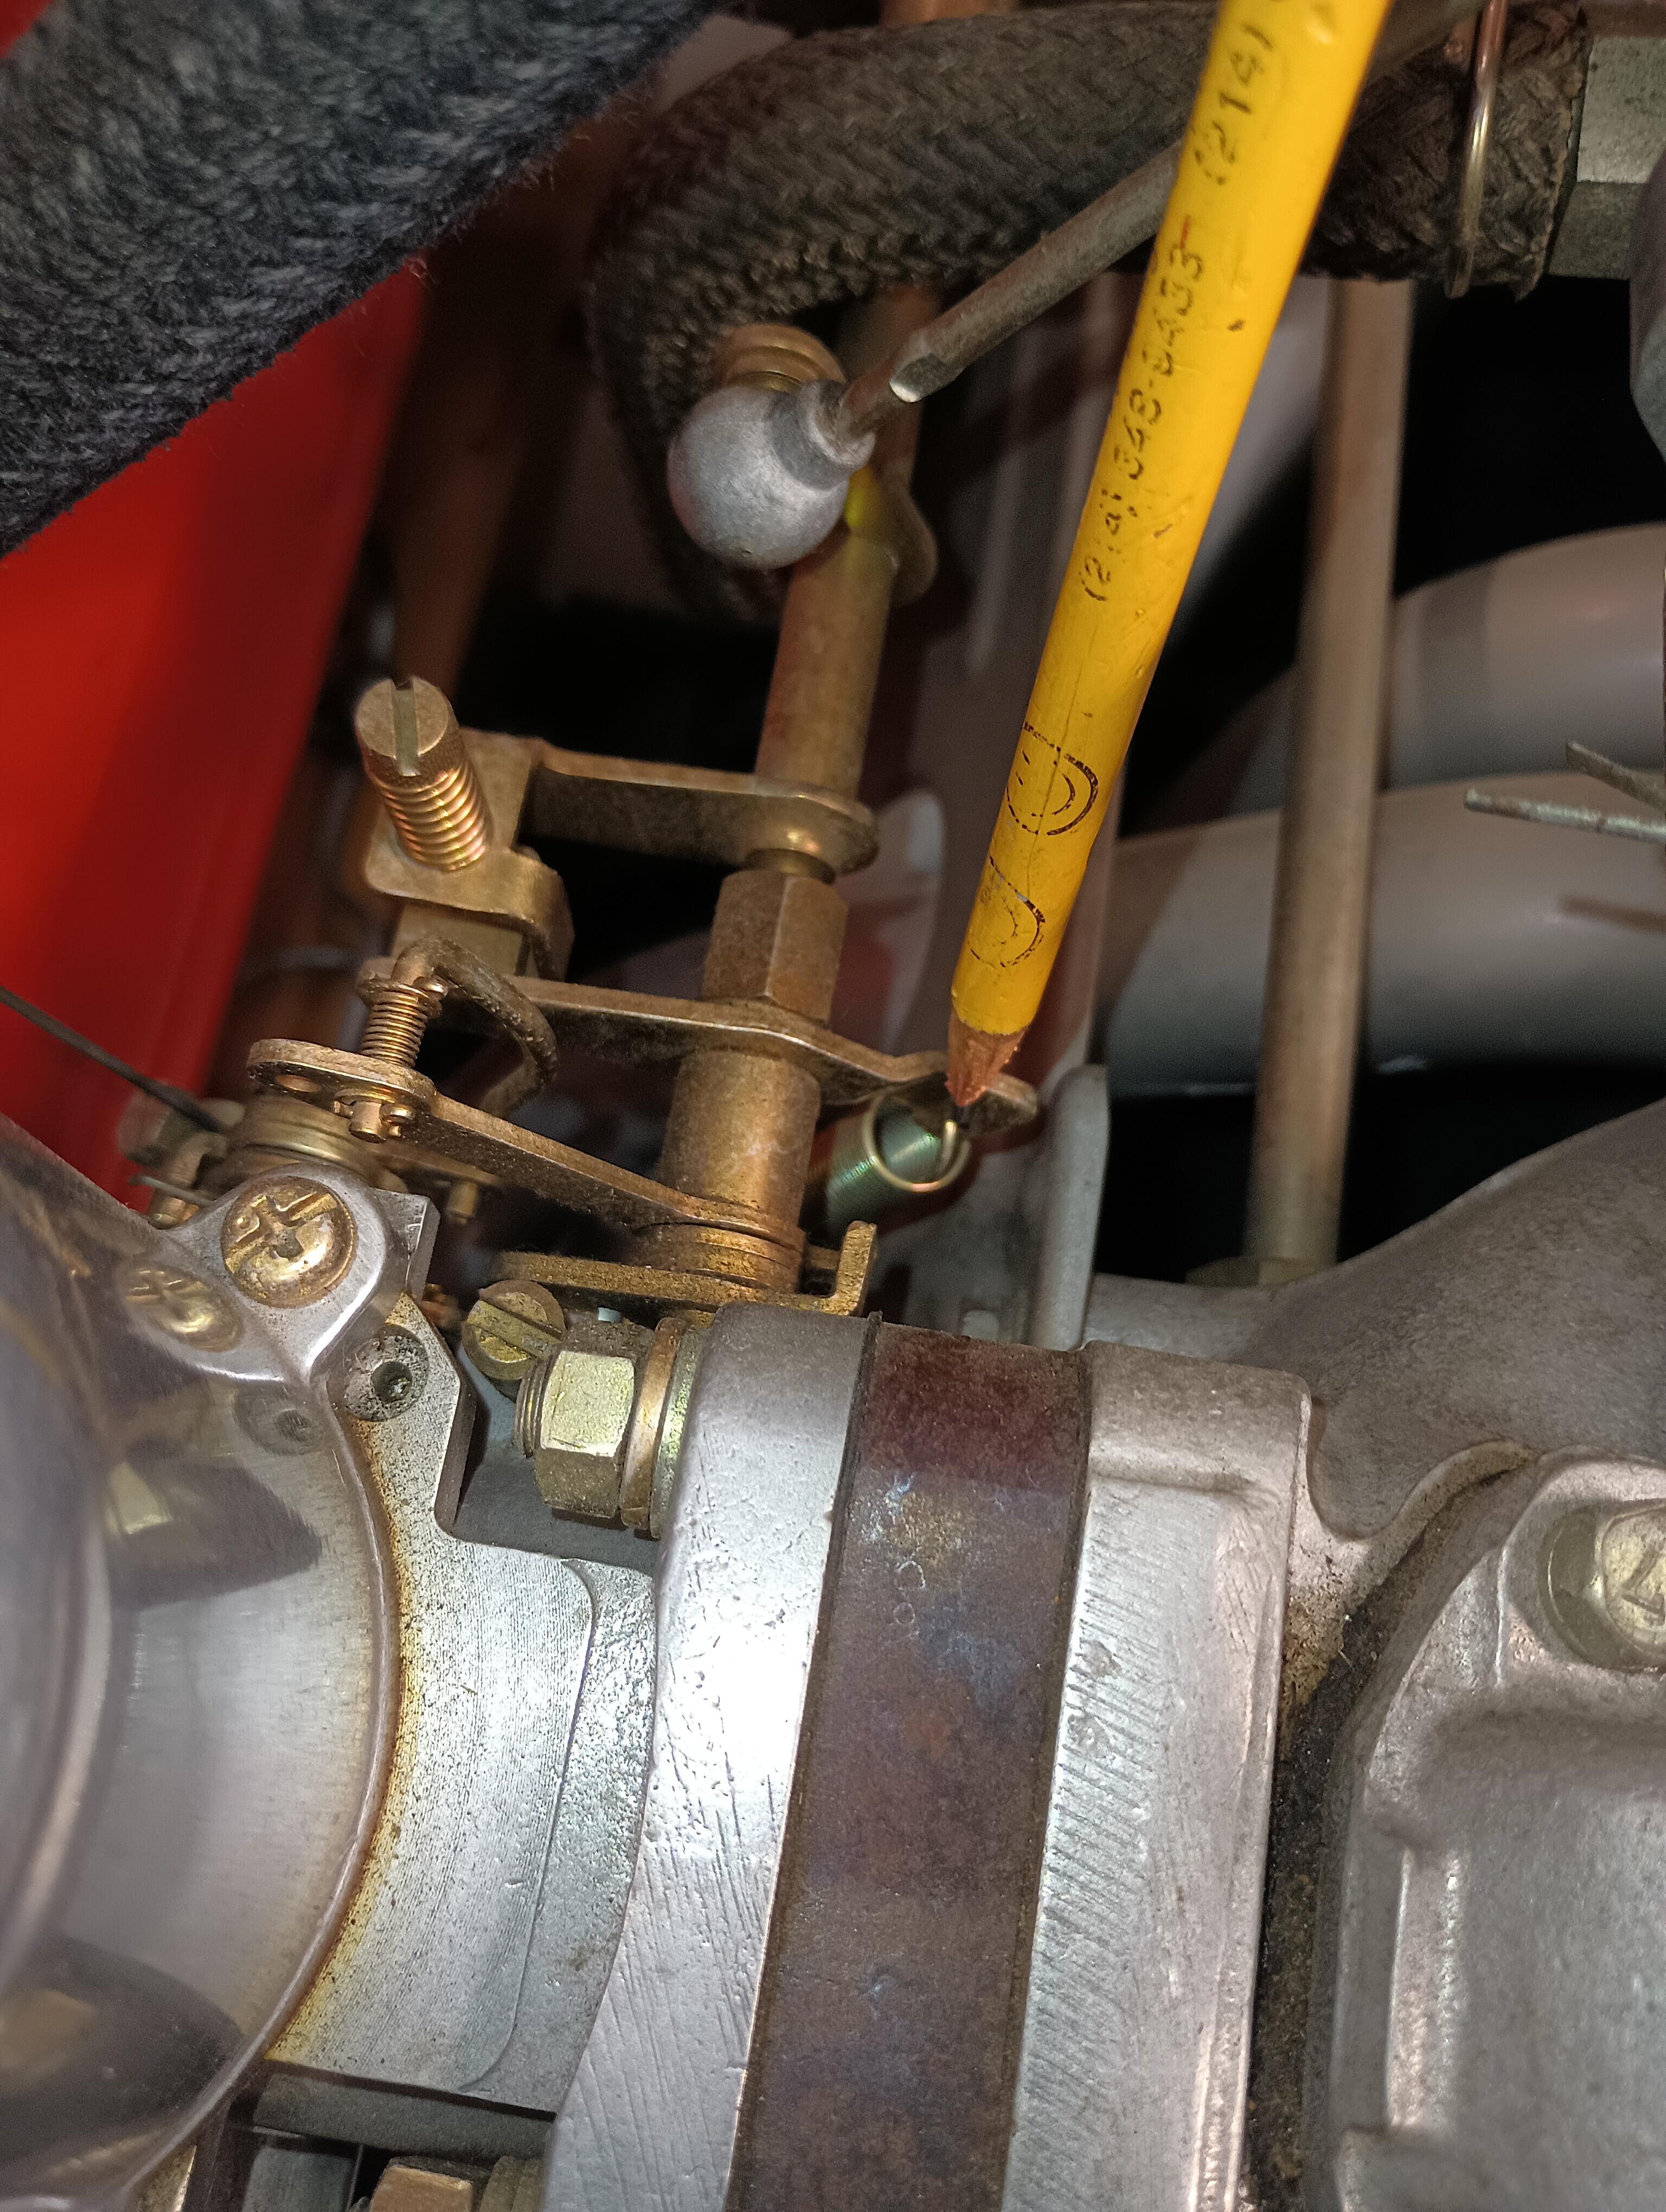
Jeff, I am running my OE 4-screws, here are the locations of the return spring connections (yellow pencil): Front carb . Rear carb
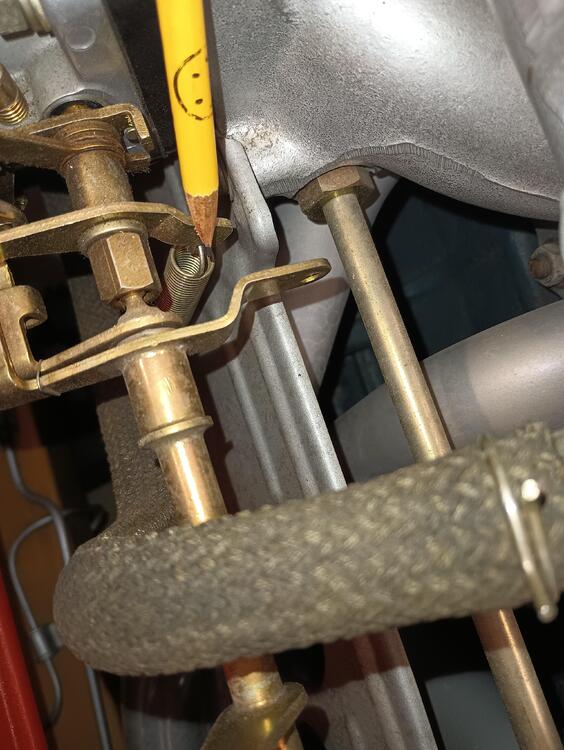
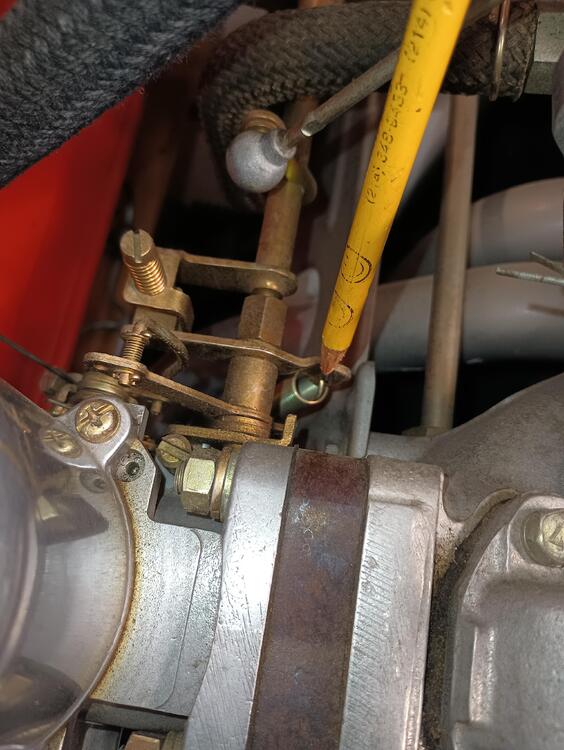 2 points
 -
2 pointsSounds like the not uncommon lean air-fuel mix. For whatever reason - changes in fuel, degrading electronics, etc. - the EFI systems don't work the same today as they did then. The fix is to add resistance to the coolant temperature signal that the ECU uses. Where to find a potentiometer is, somewhat ironically, more difficult in today's Amazon'ed world. Radio Shack and Fry's stores are not around anymore. Blue wrote up a nice description. It's pretty simple, and you can test it in the engine bay before making it permanent. https://www.atlanticz.ca/zclub/techtips/tempsensorpot/index.html p.s. make sure to set the AFM back exactly where it was.2 points
-
About time they moved that cut off date!There can't be enough vehicles of that vintage on the roads to make a difference2 points
-
2 pointsIt's the drain hole for the factory air conditioner that was never offered on the Export market cars, only on Japanese domestic variants.2 points
-
I agree with Patcon, it will definitely buy you some time. How long depands if you keep it dry, it could last for years before you need to seriously think about replacing the floors. Just be careful when cleaning around the pinholes. Those pinholes are the result of rust creeping through the metal, so the surrounding metal can (most likely) be very thin in places.2 points
-
2 pointsThat was much more help than I got. I hate to see when a company has 95% of a great product, but fails at the critical step of making their customer successful. This is a fairly premium product that is worthy of some attention, but without your own lift or professional installation, I couldn't recommend it. Having said that... it rips and exactly what I was looking for! Not boy racer, no fart can, no louder is faster, just a really sorted sounding OEM like system that really emphasizes the character of the 240z. I'm delighted with it. Frank2 points
-
2 pointsTook my wife out for lunchtime z ride and a thorough test drive with lots of bumps and twists... not only does this exhaust sound authoritative and OEM quality, it fits tightly and makes no contact with the chassis under any load I've found. Very impressive piece of work RC. The muffler section should have about 2" more on the mid-pipe ends so the mounts line up like they intend. I also recommended some installation instructions or pictures at least to help guide people to a happy customer category... it would be fairly easy to install this poorly and end up unhappy. I'm passing those two comments along to Max at RC with praise for quality, service, sound/performance, and the overall experience. Frank2 points
-
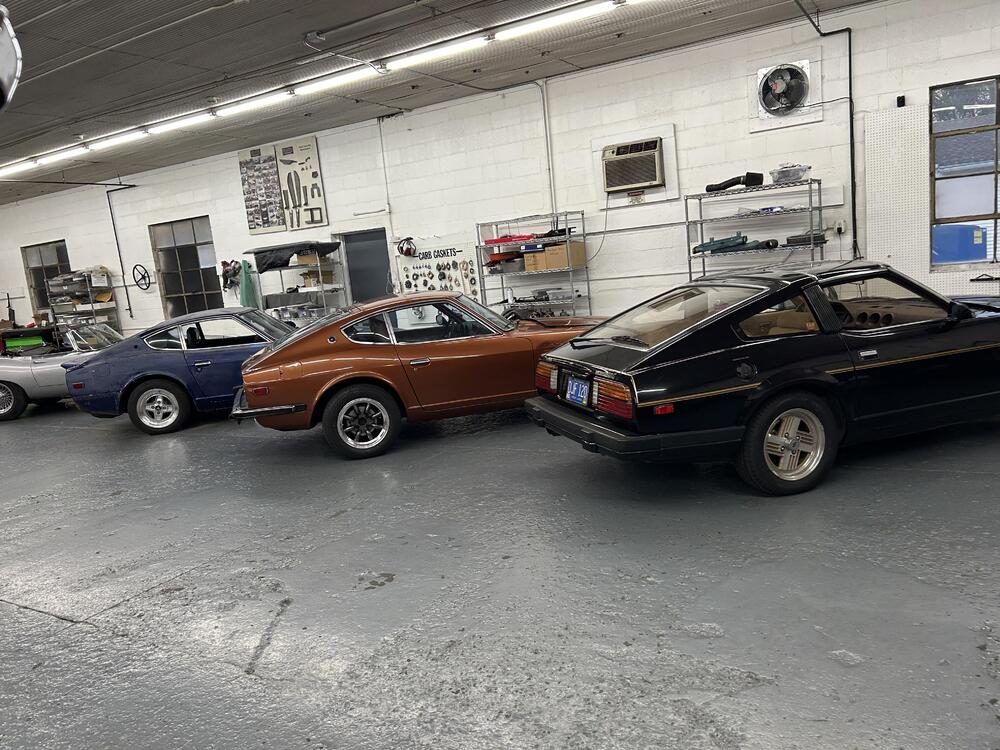
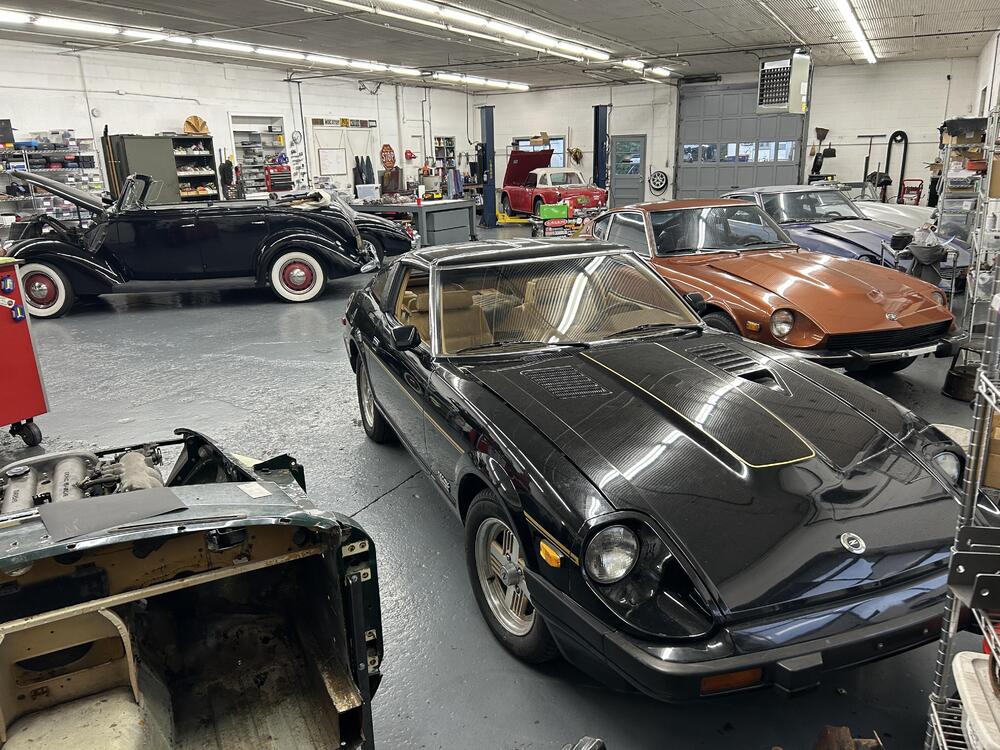
2 pointsHi everyone. I own a classic car service/restoration shop in Michigan called Eclectic Motorworks. As the name implies, we see quite a variety of classic cars. Our business has traditionally been about 60% British, 15% German, 15% Italian, and the remaining 10% American and Japanese (mainly NA/NB Miatas). But in the past few years, we're seeing more Z cars. We currently have a one-family owned 260z, a 280z, and an original owner 280zx Turbo in the shop. All have been parked for many years and are in to be put back on the road (our most common service for many cars). I've attached a couple of pictures of the cars lined up in our service bays. We have an in-house chassis dyno (Dynojet) and we will dyno tune each car when the time comes (we've already had the 260 and 280zx on for some preliminary rough tunes). Anyway, we have been having a little trouble getting some parts and information for each of these cars, so I joined the forum so that I can get some of the detailed knowledge about the cars as we're making them roadworthy again. We really strive to fix everything properly and usually to the way the factory did it so that the next person who works on it can understand it. Thanks in advance!
 2 points