Leaderboard
-
Patcon
 Subscriber
 9Points11,142Posts
 -
AK260
Free Member9Points999Posts -
conedodger
Free Member8Points12,513Posts -
inline6
Subscriber7Points1,282Posts


Popular Content
Showing content with the highest reputation on 01/24/2024 in all areas
-
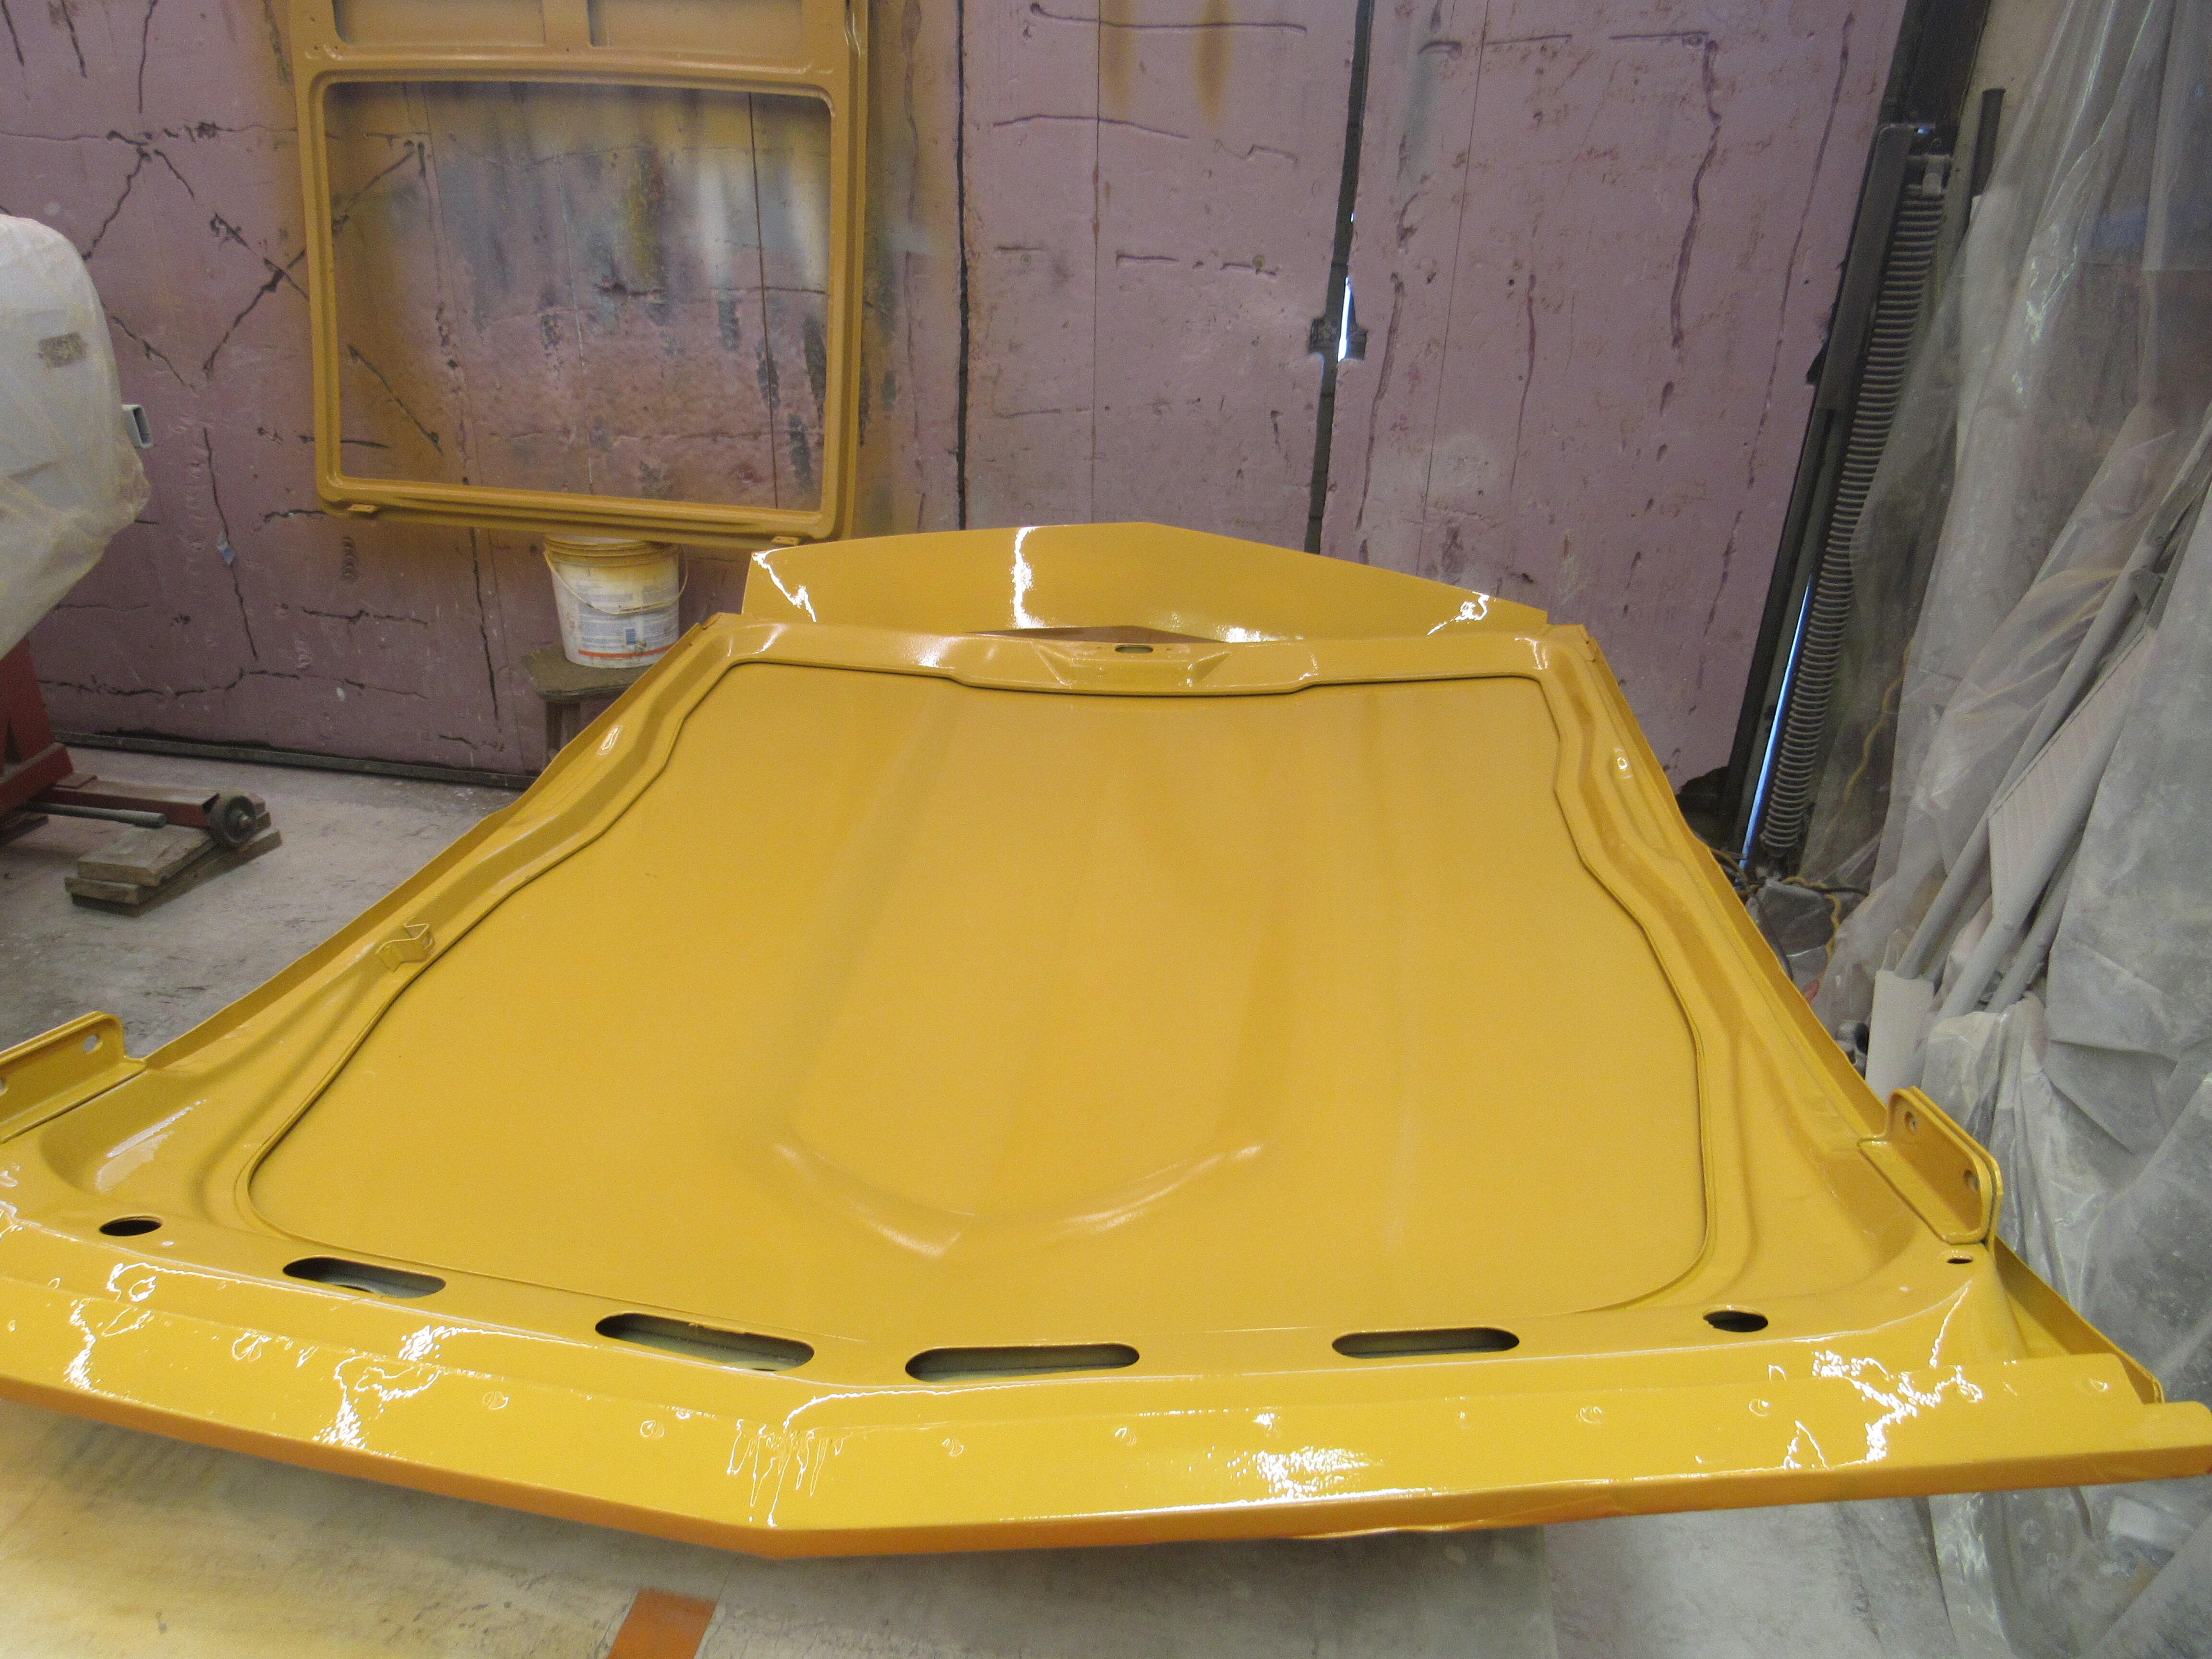
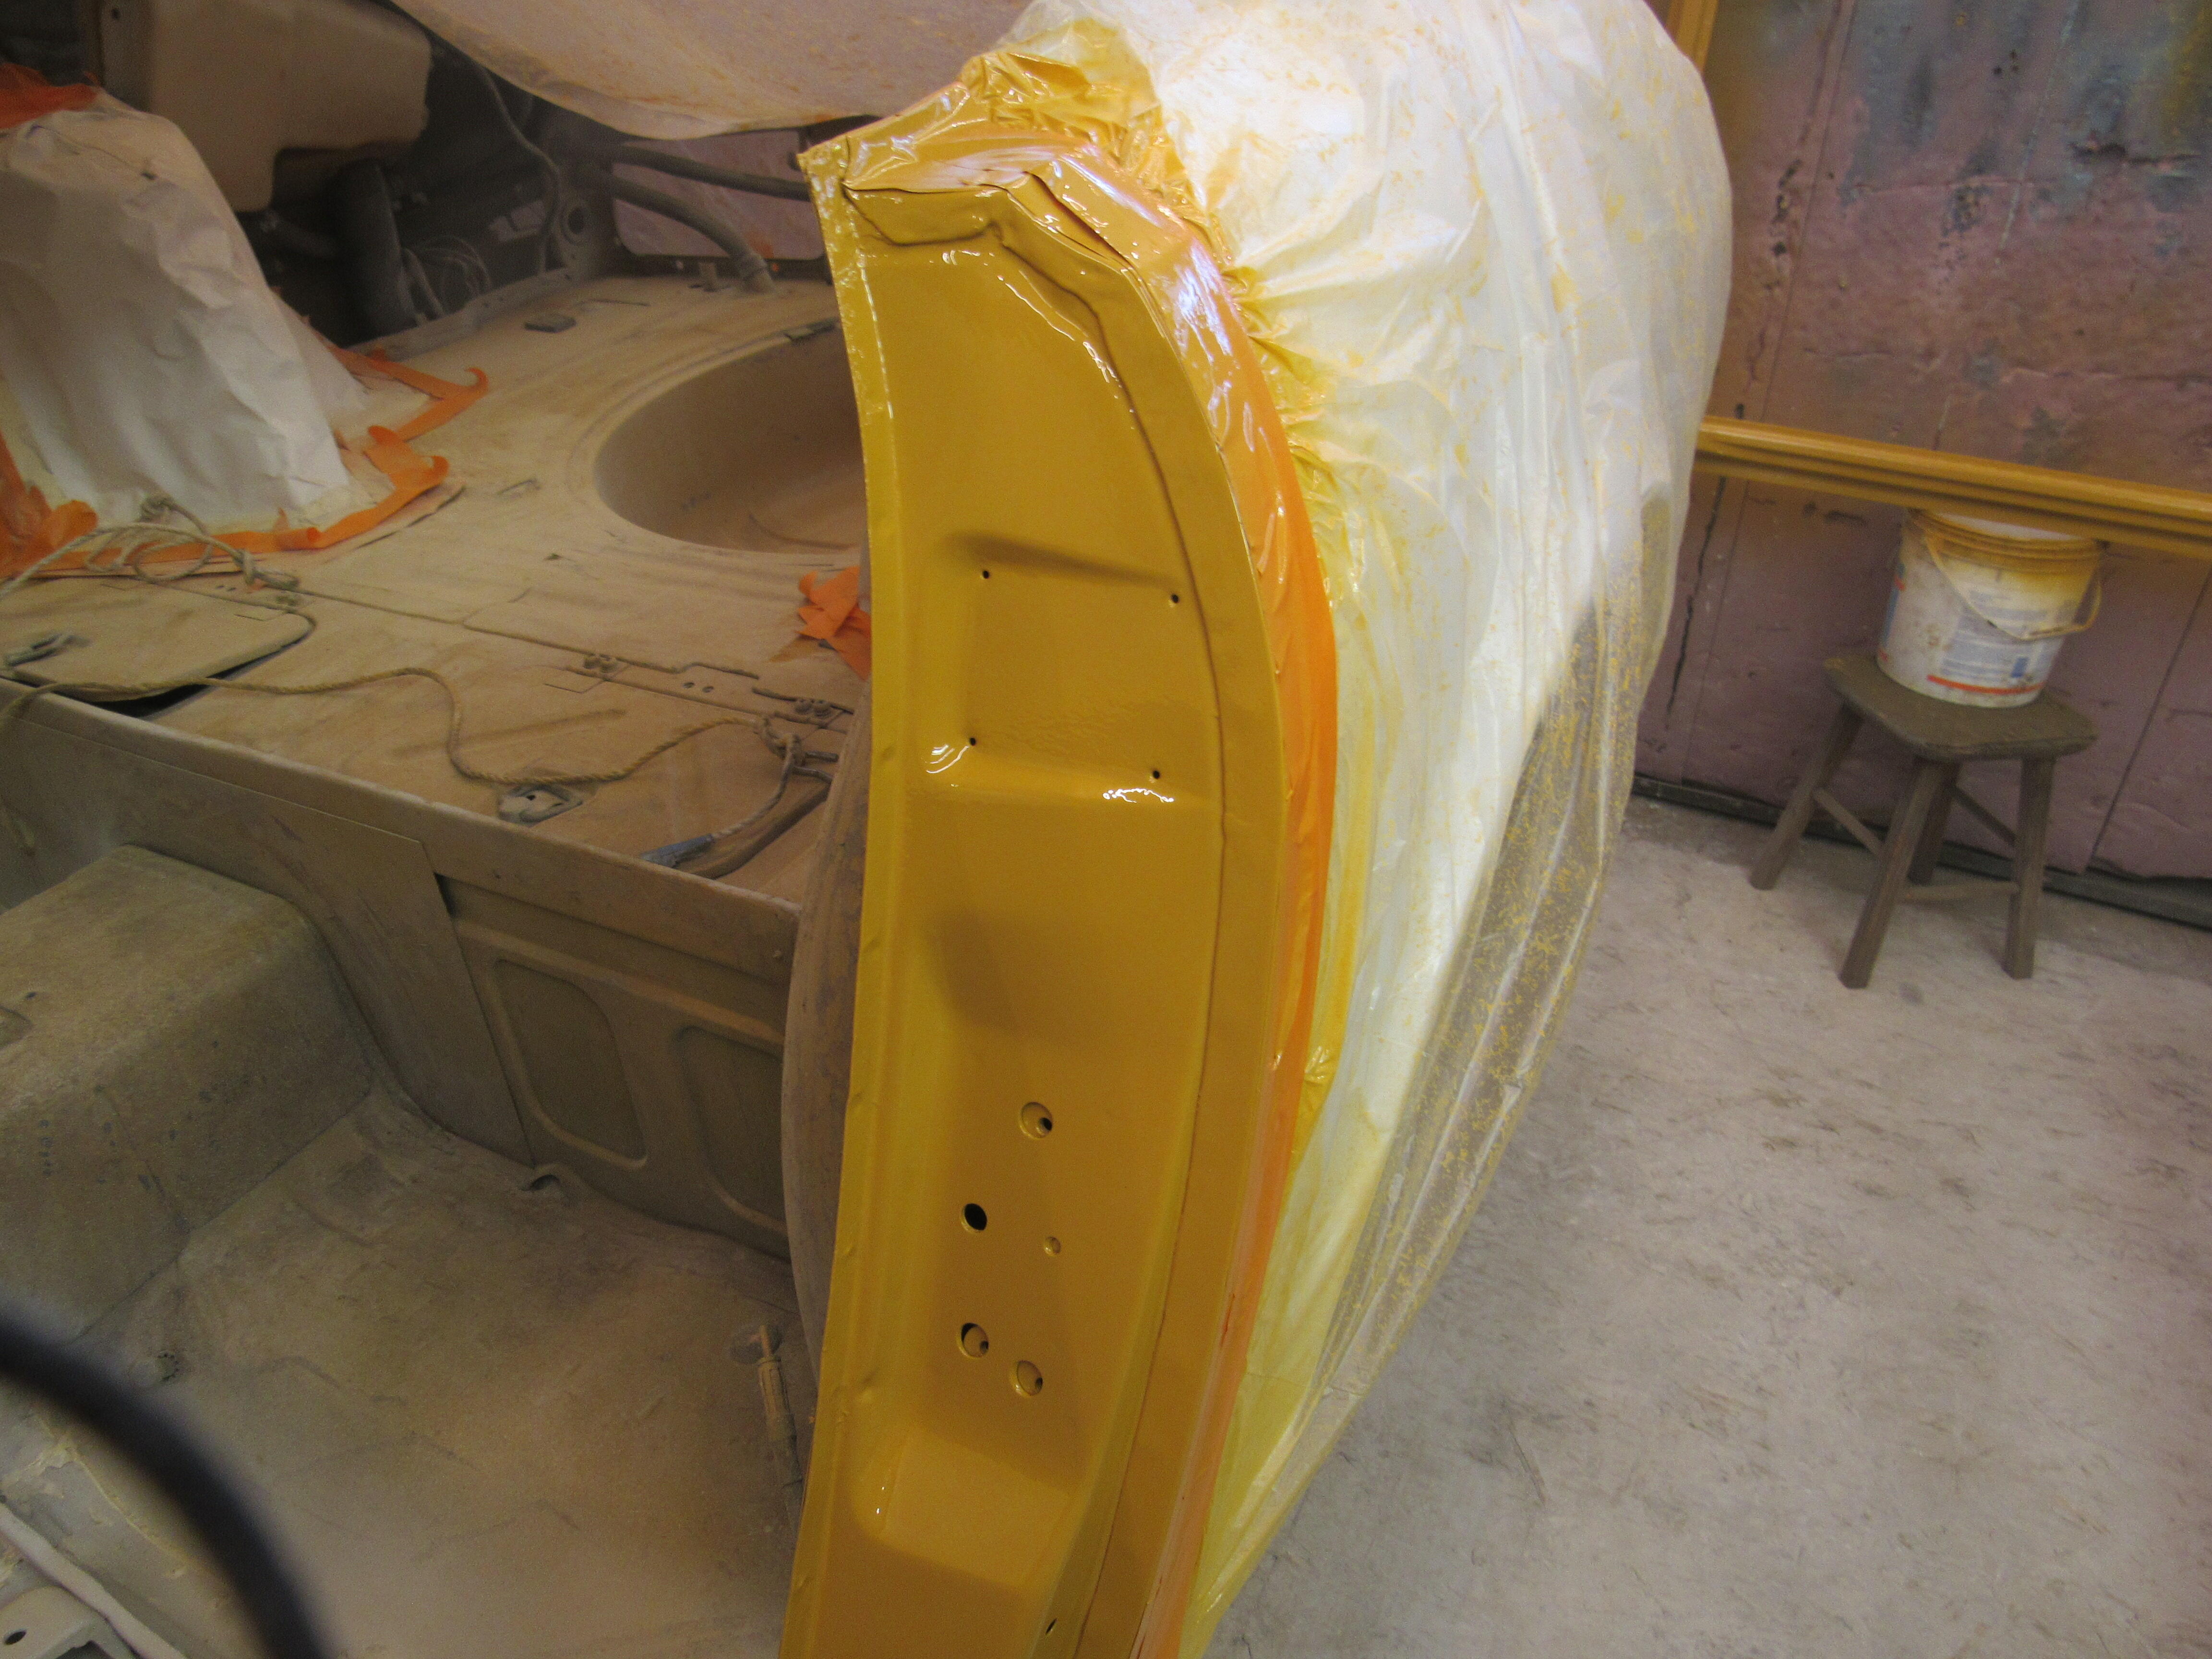
6 pointsI usually wet sand down to 800 grit before paint but recently I was reading a thread on the autobody forum, this guy was having problems with with adhesion of the paint to primer. He was also sanding to 800, so this time I just wet sanded to 600 and so far it's looking good. I was afraid I might see some scratches but nothing is coming through. I started early this morning taping everything off so I could paint and clear the engine bay, underneath the hood, hatch and door jambs. Later this evening I'll removbe all the masking and let it cure over night. There is always a little ridge of clearcoat when the tape is removed so I'll sand that out before painting the exterior. Nice to finally have some colour in the shop again!


 6 points
 -
4 pointsThe compatibility charts are designed for stock replacement. They don't account for things like using a hotter or colder plug. Amazon gives the incompatibility warning when I look for H4 headlight housings for a Z car. However, I can assure you that H4 housings worked in all of the Z cars I have installed them in.4 points
-
@Patcon - good plan. I’m documenting it on the UK site but I’ll start a different thread here and put the same info in. Different thread so as to not hijack the OP’s one and to have a separate one related to the R200.3 points
-
@AK260 Be sure and post up your experiences. Either in this thread or a new one. This is a topic that could use fleshing out as so few people have attempted this rebuild3 points
-
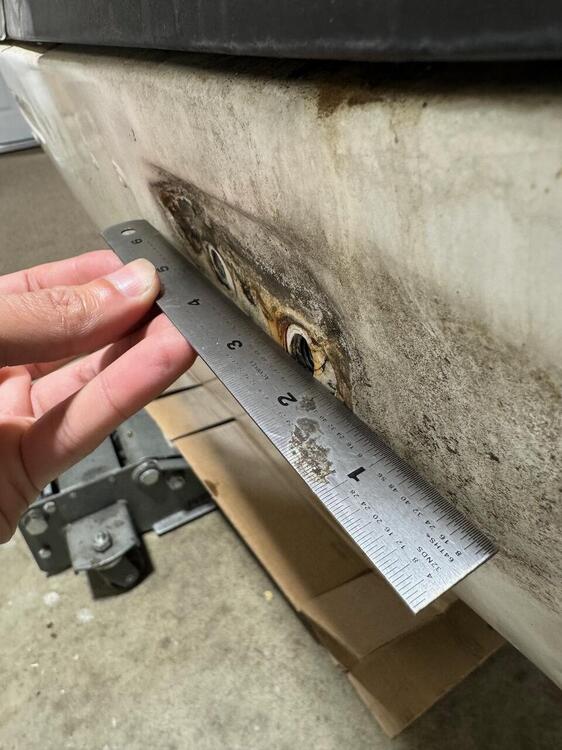
3 pointsGot a clean bottom 😉 ... a few more sessions and she'll be clean! And she's surprisingly not horrible ....
 3 points
 -
3 pointsBy the way, not an expert, but I don't think that spider gear lash matters much. You want to put your indicator on a ring gear tooth and move the ring gear back and forth to see how much lash there is between it and the pinion gear. . . .3 points
-
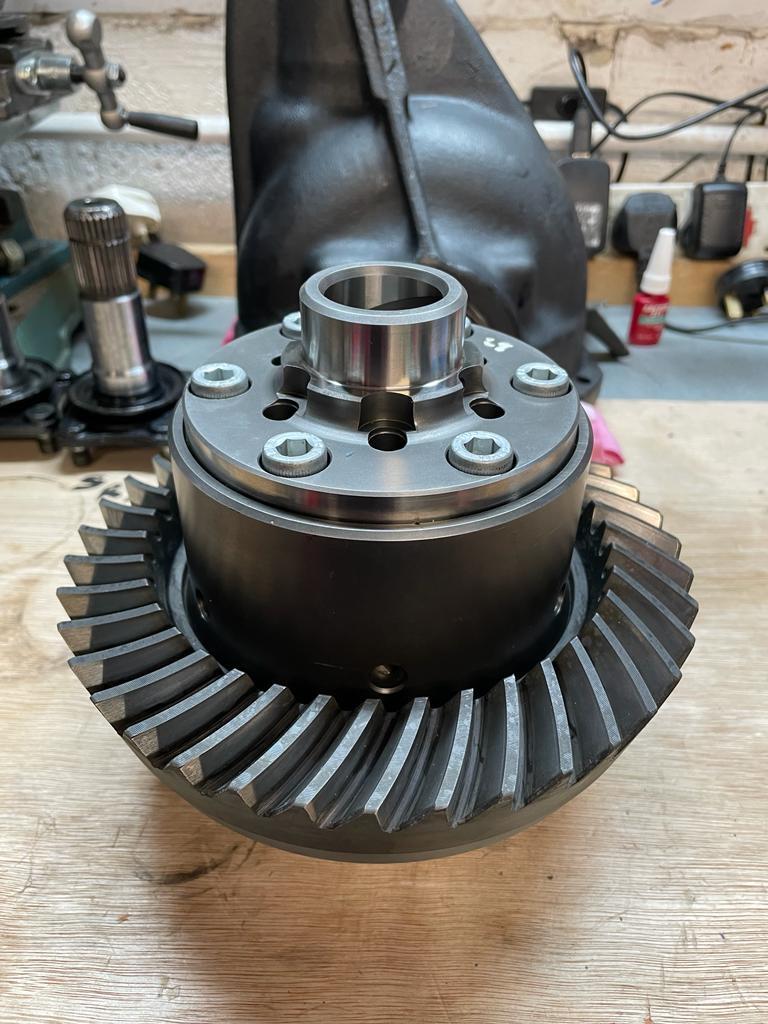
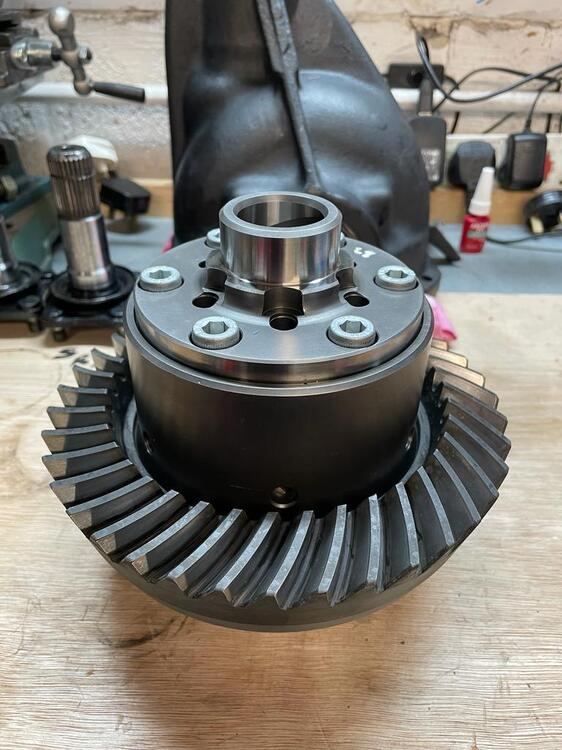
2 pointsPulled the ring and carrier. both side bearings rolled smoothly and seemed to be in perfect condition. The races looked shiny and felt buttery smooth. Rotated pinion and it felt smooth with no clicking or other oddities besides that slight binding point. Looked closer and the idler/pilot bearing @inline6 mentioned indeed is defective. About 1/3 of the rollers on that bearing were not spinning/rolling but just sliding across the bearing surface. I still can't justify why backlash went to zero from this... Bit the bullet and called a very well-known differential shop in PHX. They said they could take care of it and would look it over and give me a quote. Judging by the problems some forum members have been having rebuilding diffs, I decided I don't think I want to go that route. If I had more time, I would as it does look like a great learning experience. I will let you all know what I am quoted, and what the failure actually was.2 points
-
You could probably also link to the UK site in your thread2 points
-
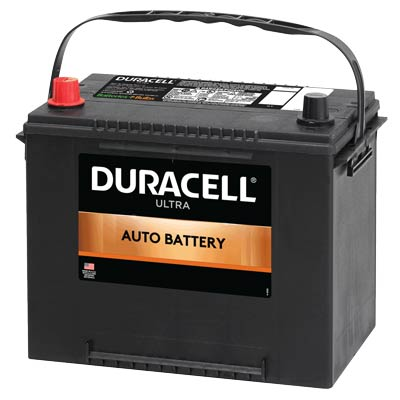
2 pointsThe Walmart Group 24F I purchased in 2011 held up for 10 years! But... that was then and this is now, no telling who is making them at this time. Watch the warranty period on your candidates, I think the Duracell is only 24 months.2 points
-
Excellent! That’s great news and makes it easy. A very capable buddy of mine is building mine and this is how far it’s got last night! Although we’re not touching the pinion. I was thinking of building a jig for my R200, to hold the carrier assembly at the bearings in order to spin / test / adjust run-out. But it doesn’t sound like I need to. I’ll check with him to see if mine is as tight as yours. Been stalking your progress with great interest - especially as someday I will likely buy the Kameari gear set and build into one of my spare diffs. What is disappointing is that we need to shim 0.3mm and 0.26mm and in the UK you can find really thin 0.01mm up to 0.05mm shims, then 0.5mm and increments of 1mm but nothing in 0.05mm increments past 1mm. So we have to shop from the US. [emoji20] Or get some laser cut as the postage/import duty costs are silly!
 2 points
 -
2 pointsSearch Group 24F….Costco and Walmart are readily available, Yuasa and Nissan OEM are harder to source. Keith2 points
-
2 pointsDoes the ring gear move freely without holding the pinion flange? Might be that things got so hot that a carrier bearing race walked outward. That would tighten up the lash as the bearings are tapered roller bearings. Onw trick for installing new carrier bearings is to put them in the oven and drop them over the nose/mount/whatever while they're hot, instead of pressing them on. Since you have it out you might as well remove the carrier and see if those bearings are fully seated. You can reseat them with a drift/punch on the race.2 points
-
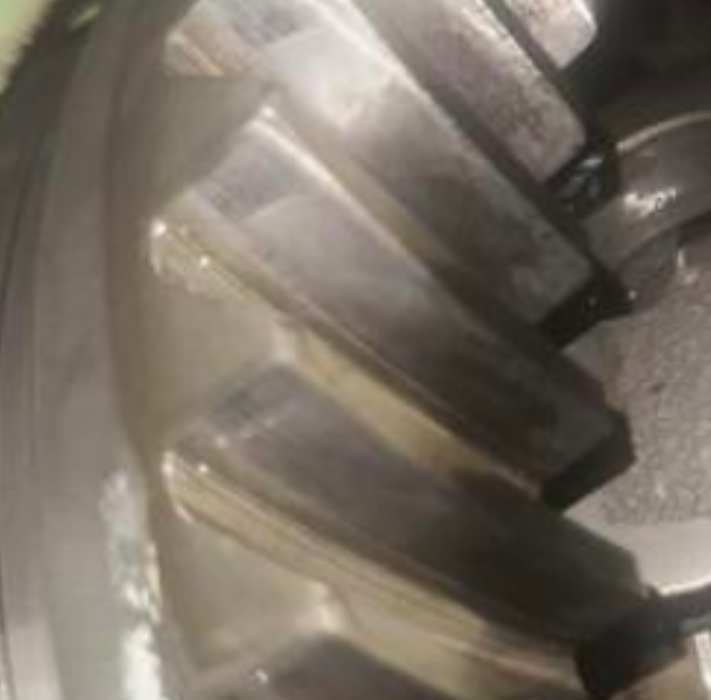
2 pointsCould be bearings or it could be gears. The pattern on the teeth looks good, but probably shouldn't be seen so easily. Looks like wear, you might take a really close look at individual teeth faces. If that's where the noise is coming from then you might need to move the OEM gears over to the CLSD carrier and give it a full rebuild. Regardless I think that the CLSD portion is probably fine. Differentials can survive and function with some pretty bad looking gears. If it's not too noisy with a full oil level, maybe just drive it and see what happens.
 2 points
 -
Go to a dealership and act like you want to buy a car. That's where I get all my pens.2 points
-
2 points
-
There is a spec for runout on the crown gear in the factory work shop manual. Pretty easy for me to check. Regarding the securing of the crown wheel, the bolts were very tight, meaning no slop when securing the crown wheel. And the gear was a tight fit on the carrier as well. I actually had it clocked a touch and couldn't spin it while on the carrier - I had to slide it back off and re-align and slide it back on to get the crown gear bolts to align. I will measure runout before long and post it here.2 points
-
Ps. Here is a great write up on the R200 conversion by one of the UK members: https://zclub.net/community/index.php?threads/r200-diff-quaife-atb-lsd-conversion.27184/1 point
-
1 pointGood info. I personally use a group 64 in my Zcar and 91 ford truck. 2 years ago I was taliking to my local repair shop and was told barreries are only lasting 3 years at best?? Wow I can remember just 6 years ago I replaced my OEM Motor Craft battery in the truck and I had 7 years on it....times are changing.1 point
-
Good call, but mine is more of a history of my car, not sure it’s ideal for searching on a specific topic I guess, hence my thoughts about a specific R200 / Quaife one here. But for now, here it is, starts on post 419, “The year of the Derrière”!! https://zclub.net/community/index.php?threads/from-smoker-to-sssssmokin’.23533/page-211 point
-
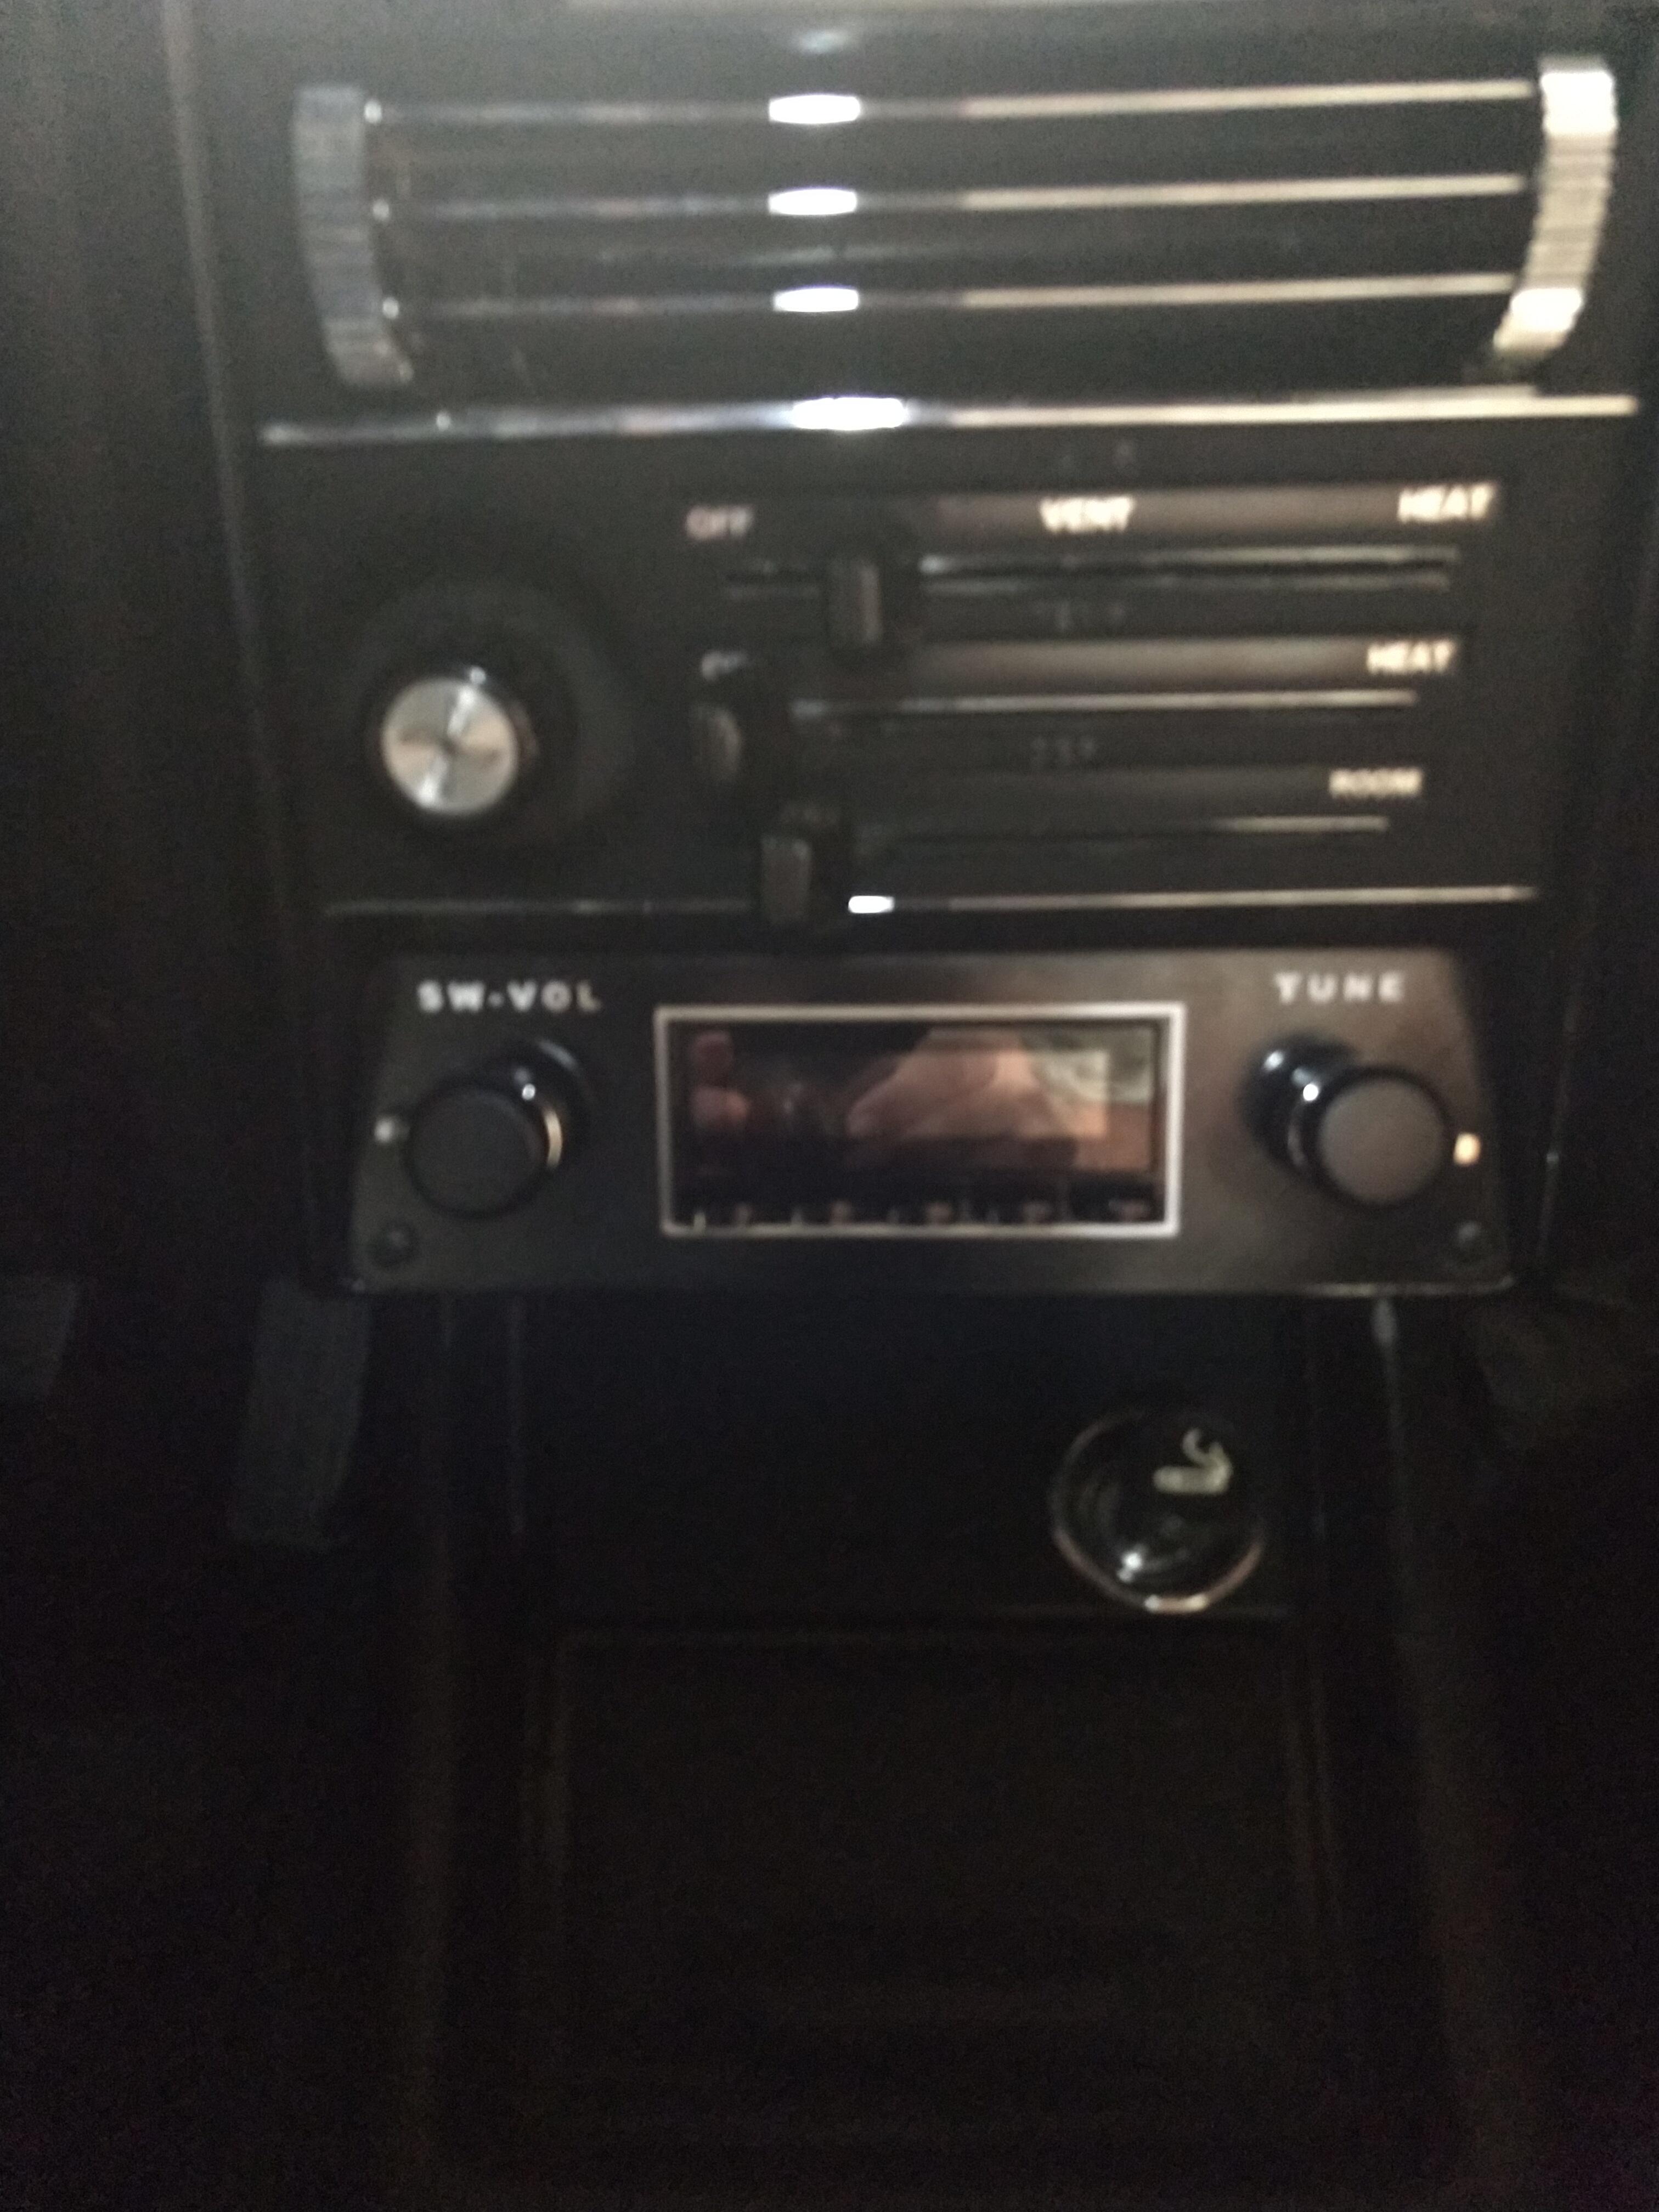
1 pointYou are right on that one! In my '73 I removed the tail light access covers (flat) from the rear panel and enlarged the holes to accommodate some 6X9 speakers. Had to remove the outer pins on the back panel so that I could slightly flex the panel so the speaker magnets would not be touching the tail light bulbs. I mounted my Sony TC-30 cassette deck on a slide off bracket on the vertical wall behind the passenger seat. This had better access to the cassette player from the drivers seat. Took a way different approach for my current '71 car. RetroSound in dash bluetooth radio and this week I scored a used 6X9 speaker panel that thezstore used to sell. This way I keep the stock taillight cover panel to go with the car if I ever sell it. I then conned a friend into 3D printing a radio cover plate that looks closer to stock with labels.
 1 point
 -
1 pointIs the head thread pitch/thread length identical for all s30 heads? If they are different, then my guess is that would be the cause. Regarding NGK plug part numbers I found the bpr6 to be 7133 and the bpr7 to be 5534. Just putting this in here in case people look for those NGK part numbers in the future.1 point
-
1 pointGroup 24 batteries are standard. That puts the positive terminal under the inspection door where it belongs. Amongst other reasons, I think the most important reason for keeping it this way is that you should pull the negative terminal off the battery any time you are trying to disconnect the battery for replacement, removal, or servicing the electrical system. I won't put a Group 24F battery in my Z cars, especially after I had a mishap from not securing the battery properly. I also suggest getting a battery with a flat top if possible. I'm pretty sure that the stock battery bracket would work better. I will probably test my theory in the next month or so. Batteries Plus carries this Group 24 battery. It's more than the Walmart batteries, but I found the Walmart batteries to be hit or miss when I use my battery testers. One holds up fine after 2.5 years, and the other registers replace now, though it still has enough power to turn the starter and fire the car.
 1 point
 -
1 pointI understand. The three shops I recommended have very good reputations1 point
-
I believe the resource section has templates for them except maybe the floor mats. Unless I forgot to post my tunnel templates?1 point
-
1 pointI damaged an R180 differential years ago, and it had the same symptoms you are describing. When I would try to turn it from the front flange, it was harder to get turning initially than my good R180. And, I could feel the "bumpiness" as I rotated it, though it was slight. It would lessen if I rotated it quickly. Rotate slow, and it would be very noticeable and even hang up a bit. This behavior wasn't present on the good diff. If I recall correctly, I damaged it by replacing the front seal (behind the front flange) and then torqueing the pinion nut to what felt like 100+ ft lbs... because I didn't have a torque wrench, or some other stupid reason. I knew nothing about the importance of setting the correct preload on the pinion bearings. It's been many years now, so I don't recall how long it took before the noise showed up and I pulled the diff out to examine. It exhibited very much what you describe. I ended up selling it the way it was - it had value because of the unique 3.7 ratio that it was. At any time in your possession, did the front pinion nut come off and get put back on?1 point
-
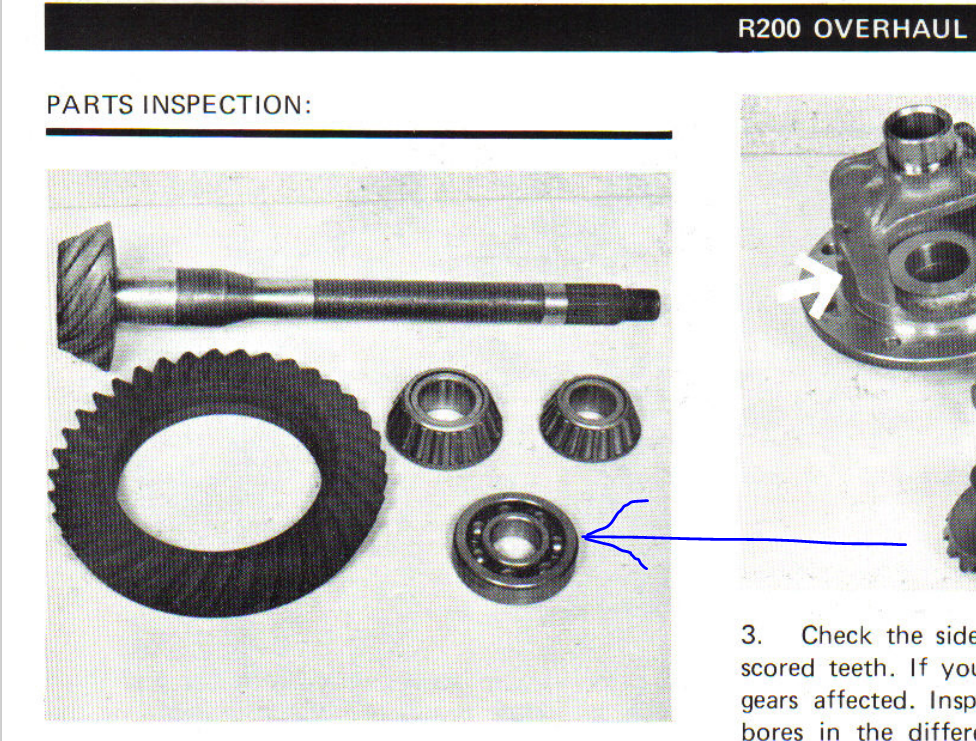
1 pointIt is the front-most bearing on the pinion gear - in the nose of the differential - blue arrow. Also, note that this manual has been added to the resource section a couple of days ago:
 1 point
 -
1 point@Zed HeadFantastic idea! Maybe that could be. Is the race apart of the diff housing or the bearing itself? I want to take things apart, but I am waiting to get that gear marking paint first. I want to get documentation on what the wear patter looks like before things come apart. Just so I have all the details. That Idea does make sense, as the zero backlash issue just seems so weird to me. Taking this one step at a time slowly, so as not to shotgun buy. I would say that the gear moves freely with some force with no weird binding points. However, I noticed my open diff spins easier comparitively, so definitely some problem somewhere. @Patcon Do you have any idea the amount of $ they would charge? I seriously am warry of shops from here on out, whether "datsun specialists" or not. The same datsun shop that blew this diff also blew my engine due to not torquing the cam sprocket when replacing a cam. Sprocket came off and pistons met valves. I only took things to them as a last resort for my engine and they blew it... literally... lol. This diff took things to the next step in my trust issues. @inline6 Thank you for the detailed advice. I am just learning about the realm of differentials. They don't seem too complicated, just a very exact science like you mentioned with the pinion depth and bearing preload. Something I would like to avoid, but I never have backed down from a challenge yet. Can you describe to me which one is the pilot bearing? I can't seem to locate it in general diagrams.1 point
-
1 point
-
1 pointI have been rebuilding an R180 and have learned a few things. Regarding backlash, I don't have to hold the pinion gear. All I do is fix the magnetic base and arms and dial gauge so that the motion of the rod on the gauge, when rocking the carrier, is vertical to a gear tooth. You don't want the dial gauge motion to be at an odd angle to the motion of the gear. Moving the rear carrier assembly by pushing on the gear teeth of the crown gear is easy, and the free play as the gear teeth smack into the pinion gear is very easy to measure. So, you have none... that is odd. Differential problems more often occur with the front bearings. That said, don't go taking everything apart to investigate. If it was me, I'd double check the lash measurement first. If still zero, than I think I would assume that the pinion gear has moved toward the crown gear, from some kind of change (damage) one of the bearings on the pinion gear. Pilot bearing would be the first from a probability standpoint. The front and rear pinion bearings are very beefy. That said, I would not remove the pinion nut or disassemble anything relating to the pinion. I would remove the carrier from the case, and then spin the pinion gear to check for bearing noise. It should be quiet. If not, then I'd suspect the pilot bearing. Very important - Troy Ermish recently told me that he never takes apart the pinion gear/bearings... ever. The reasoning is basically that it is exceedingly difficult to get the pinion gear set correctly when replacing the bearings. Part availability is a big reason for not messing with it. If it was me, and I confirmed noise was coming from a bearing on the pinion, I'd disassemble the pinion (hydraulic press work) and check the pilot bearing (after removal from the pinion gear and case. When you have just the bearing in your hand, you'll be able to confirm if it is bad. Before the next step, I'd put just the carrier back in the case, tighten everything down and check that there is some load (preload) on the bearings. Then spin the carrier by hand to check for noise from the side bearings. Depending on what you find there, side bearings can typically be replaced without additional issues/consequences. Back to pinion. Remove the carrier from the case as you are done with testing that. Then, I'd put the pinion gear back in with the existing gears and spacers, etc. And I'd spin the pinion to check for bearing noise from the front and rear pinion bearings. If they seem fine, then I'd invest in a new pilot bearing, install that, and follow the instructions VERY carefully for setting pinion bearing preload. When that is within spec, I'd install the rear carrier, and check back lash. Use all the stock shims everywhere they are - change nothing. If the lash is within spec, I'd proceed with checking the wipe pattern. That should look good if you don't replace the pinion bearings and use all the same shims/etc. If that checks out, then install the diff in the car, put oil in and test drive. If you still have a problem, I'd recommend looking for another R200. Carriers, (your LSD unit) can be swapped to other differentials with relative ease. Of course, if you have gotten to the point of needing another diff, then checking out the LSD thoroughly before you swap it is ground you should have already covered as well.1 point
-
1 point
-
1 pointWell, you answered one of my questions. You still have the noise on a cool differential. I wouldn't get rid of any CLSD r200! If even for parts in the future. If it was me and I could afford it, I would find a rebuilder to go through it. Especially after reading inline6's thread on what he's gone through trying to do his. Call Rebello, zcargarage or Datsun spirit for a price or a recommended shop to do the work.1 point
-
So here is a question I’m wondering about. How do you centre the crown wheel onto the Quaife? I’m pretty certain the Quaife is machined to tighter tolerances, so while the 10 bolts centre the crown wheel, I can’t imagine tightening bolts alone does a perfect job. And the other questions are: will it have material effect on the leashing with the pinion gear? If so, is it possible to measure / adjust any run-out when mounted into the case?1 point
-
1 pointBut I would still check the gaps with a feeler gauge to be certain they are all the same. I’m sure they will be but always good to be certain.1 point
-
1 pointHi Zedyone - -WOW! "Subsystem Manager for Propulsion” on the Artemis Crew module (that is still Orion right?) . Congratulations: that is a huge vote of confidence from both your Technical and Management chains. I’m sure you will do an outstanding job. (although it can come with an increased level of stress). Also great write-up on keeping that 53 year old Z on the road. Lots of useful information there for all of us.1 point
-
1 pointAFAIK, the rear trim panel on the earliest S30's didn't have removable taillight access covers at all and, when those covers were eventually introduced, they were flat. I think that what you've got in your car is, as you say, taken from a 260Z. All of these interior trim panels are tricky to remove and replace without causing them damage. Also, the Z arrived just at the time when owners were being introduced to higher-quality home sound systems. Many (if not most) Z owners decided that they wanted an aftermarket sound system with stereo and a tape player, as well as something better than the single, small, lo-fi speaker. I expect that a lot of side trim panels got cracked in the process of getting access for wiring and speaker installations. I also think that a lot of rear trim panels got butchered when the owner or installer decided to get creative in order to make big speakers fit.1 point
-
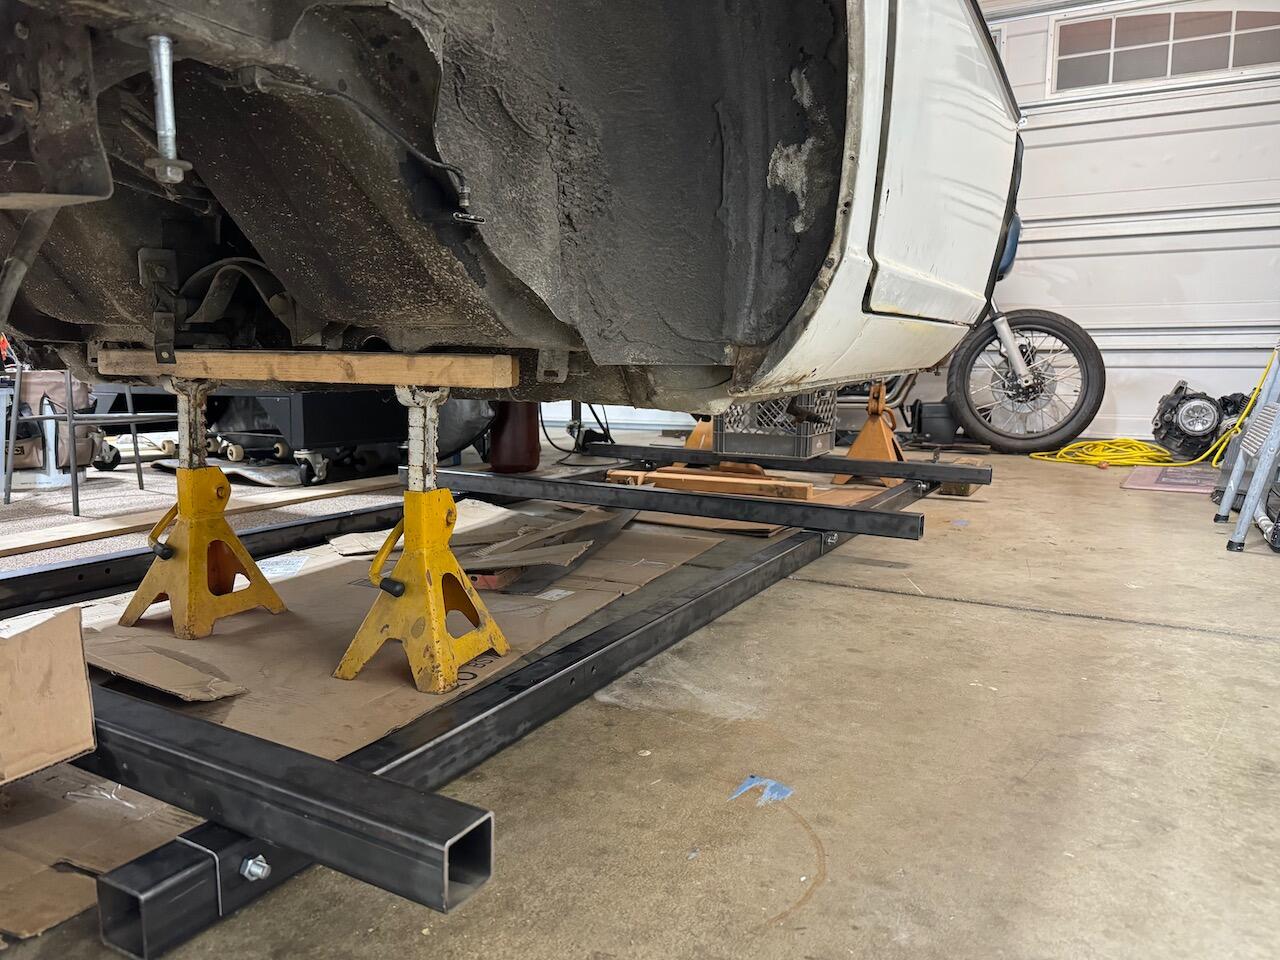
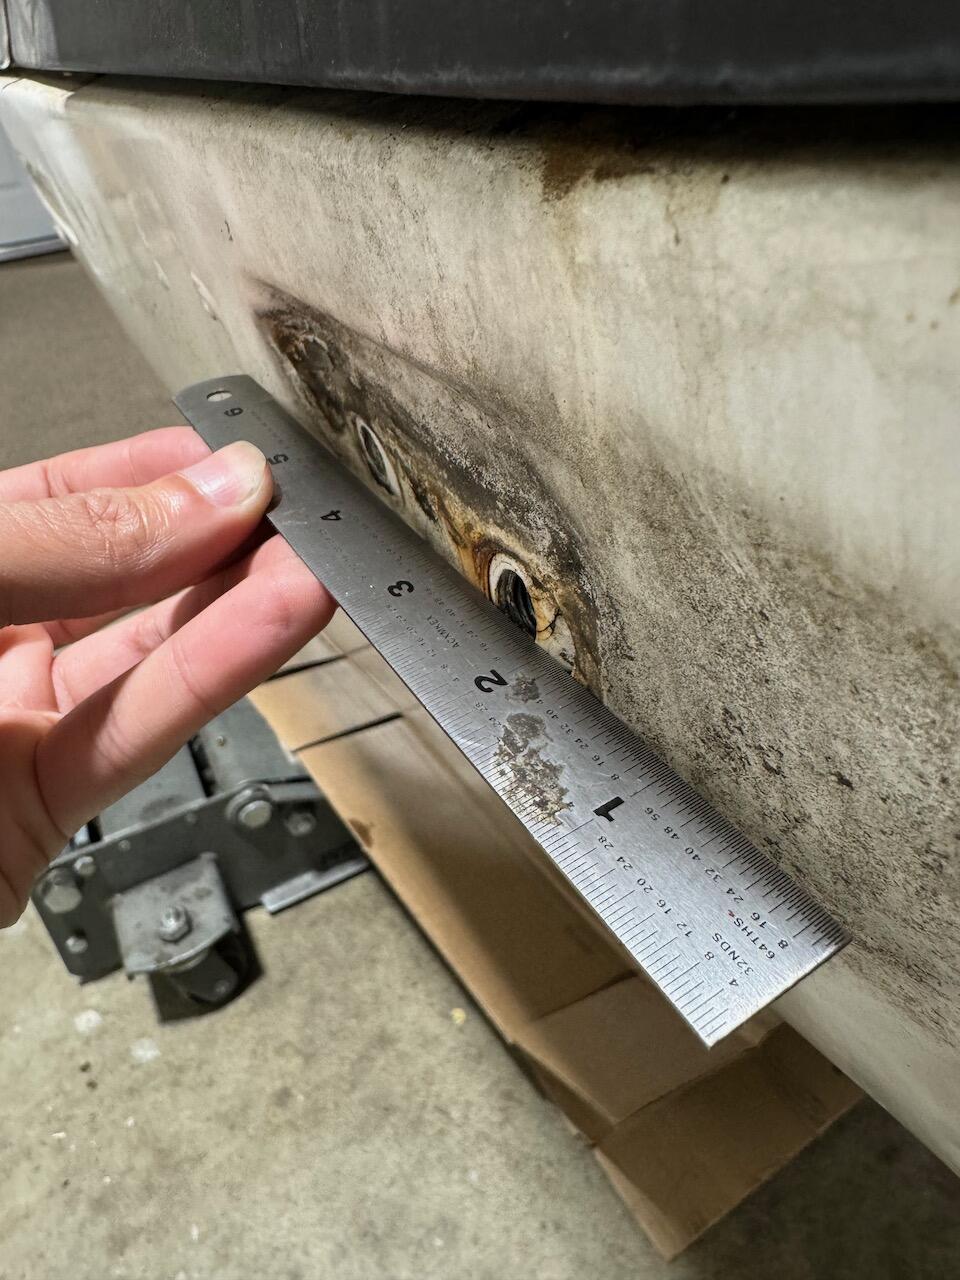
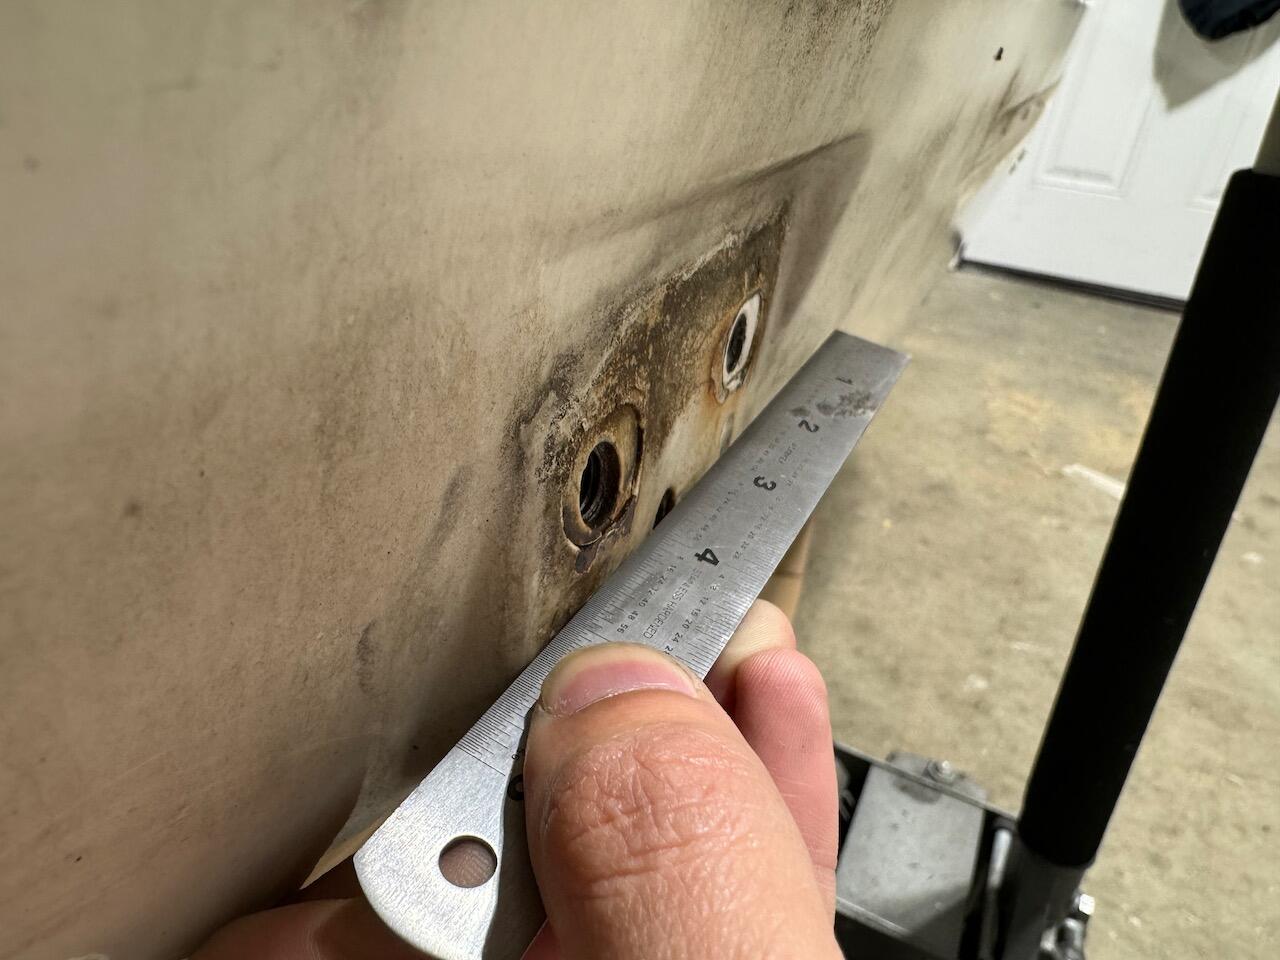
1 pointI didn't feel comfortable removing front frame rail // firewall on a rotisserie and not having it flex into a weird position. So I've been working on a jig. design courtesy of @ConVerTT 🧙♂️ I noticed that the rear bumper mounts holes are not flat and both outer bolt holes are kinda angled in toward the center of the car, is this normal? Anyone have a photo? Happy New Year Yall 🙂

 1 point