Leaderboard
-
Captain Obvious
Free Member9Points10,081Posts -
.JPG.cfcada9cf1c1b502df3f5f2f2ca3ff36.JPG)
SteveJ
Free Member6Points9,646Posts -
zKars
 Subscriber
 5Points3,770Posts
 -
Yarb
Subscriber4Points1,935Posts


Popular Content
Showing content with the highest reputation on 09/21/2023 in all areas
-
We had a case here recently with high RPM misfires that turned out to be a poor fitting distributor cap that must have been moving around at higher vibration levels at high RPM’s. You could wiggle it with your hand, wouldn’t seat square and tight. Replaced it with a new cap and viola as they say, revs to the moon with no mis-fire. Ignition systems rely on a in-spec gaps and fitment, any “Extra” energy lost with a too large gap (or inconsistent gap) and resulting spark, results in a weak plug spark and mis fire.3 points
-
3 pointsRight. When you blip it, fuel pressure should spike up. But revving and holding probably won't raise the pressure much. Maybe a little, but not much. And as for holding pressure on the system.... There are two things. First, on the supply side, there should be a check valve screwed into the fuel pump the hold pressure towards the rail. And second, on the return side, the fuel pressure regulator should hold pressure in the rail. The exact pressure number on shut-down is a little fuzzy because of the timing of events, but it should be "non-zero" and probably "between 15 psi and 25 psi". We could get into the reason why it's hard to predict on engine shut-down, but it's academic and probably not necessary for what you're working on.3 points
-
I have to admit that I do a lot of random searches and try new things for two reasons: I have learned a lot from this forum and Zcar.com, and I want to give back. I like researching the obscure. You should have seen it when I was trying to track down a replacement alternator for my friend's 2.4 turbo swapped Datsun Roadster. From starting with a Google search and pictures of the Nippon Denso alternator that was on the car, I found that the 85 Toyota Tercel, 85 Toyota Van, and the 85 Isuzu I-Mark had similar alternators. I even managed to find a replacement plug for the back of the alternator. Some of the tools and gadgets I suggest come from watching mechanics on YouTube. They have some great toys. My wife has all but stopped questioning any of my tool choices because she has figured out that I can justify pretty much all of them. Anyway, I've met some great people from this forum in person including @Captain Obvious, @Yarb, @siteunseen, @jfa.series1, @240260280, @Patcon, @Zup, and the list goes on. I'm getting a lot out of @Mike's hard work.3 points
-
Steve, I want a copy of every site on your favourites list, it must be a thing to behold. You consistently come up gems that I've never seen before, and once seen I have to have it. Are you getting a commission from Amazon?😁3 points
-
I thought of another mis-fire problem and the solution. Like Mark, it was related to the plugs. I used, and still use, NGK BPR6ES plugs. The issue I routinely run into with them, is that the end of the plug where wire snaps on, is threaded on to the plug, and is often loose. Several years ago (2015), a random issue with mis-fire throughout the range dogged me for a year or better, and when I finally discovered that one of the end caps was loose on a couple of plugs. Tightened them up, and the mis-fire went away. The BPR6ES-11 plugs that also spec'ed for 280's with EFI, don't have the threaded end cap. I described this WAY back in 2015. The thread lionk is below if you want to see pics. EDIT EDIT : just doing a bit of a good search. NGK plugs BPR6ES #7131 have the threaded caps, #4008 have solid caps! Jim, stop buying #7131 BPR6ES plugs you old idiot! BTW, Don’t order the Denso #4008 plugs by mistake. They are NOT the same….. Just saying…..2 points
-
Haha, Fahren is german for "driving". fährt = "drives". So it means "Jeff Turner drives Nissan". But as a funny coincidence "einen fahren lassen" = let one rip 😂2 points
-
@matt90gt, A lot of folks search the forum as you well know looking for problem solving clues. By chance did you have an opportunity to go back and edit your strategy for the vacuum canister. Reason I mention is it’s human nature to not read the entire thread. I know I’m guilty of that myself. Thanks for the input and welcome to the forum.2 points
-
Great stuff! Funny though, (in my immature 13 year old brain) this me chuckle :
 2 points
 -
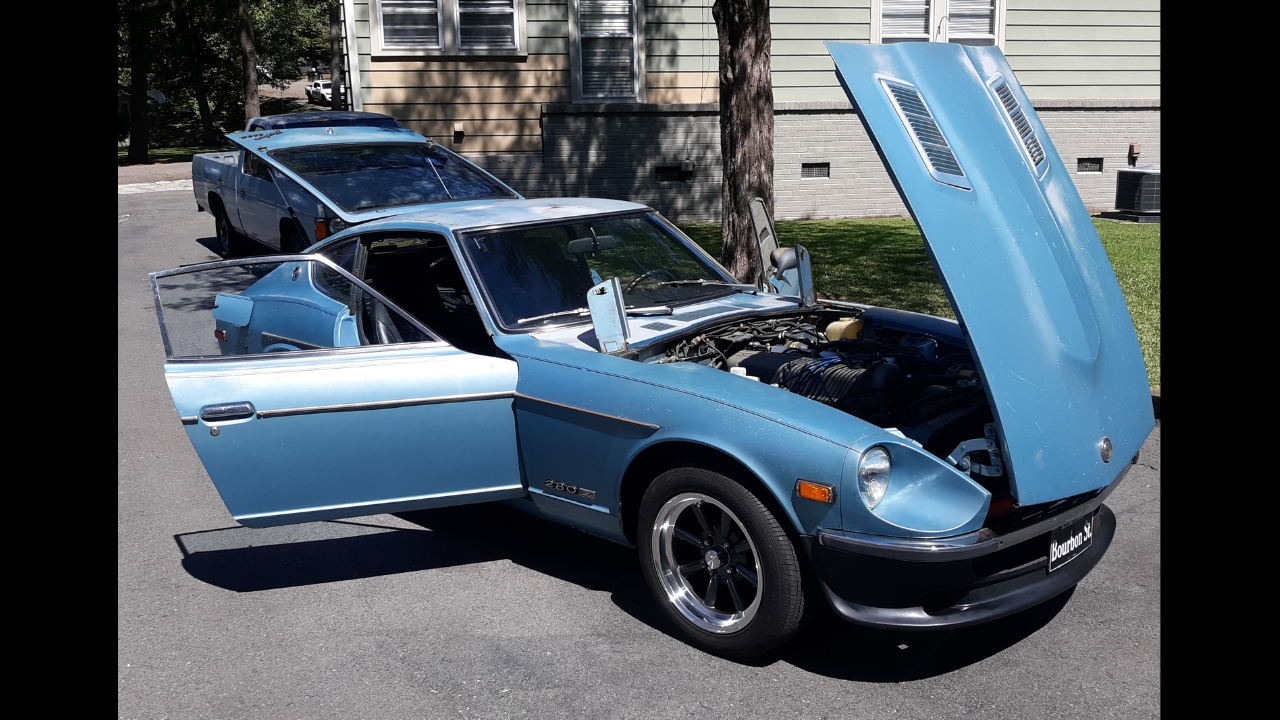
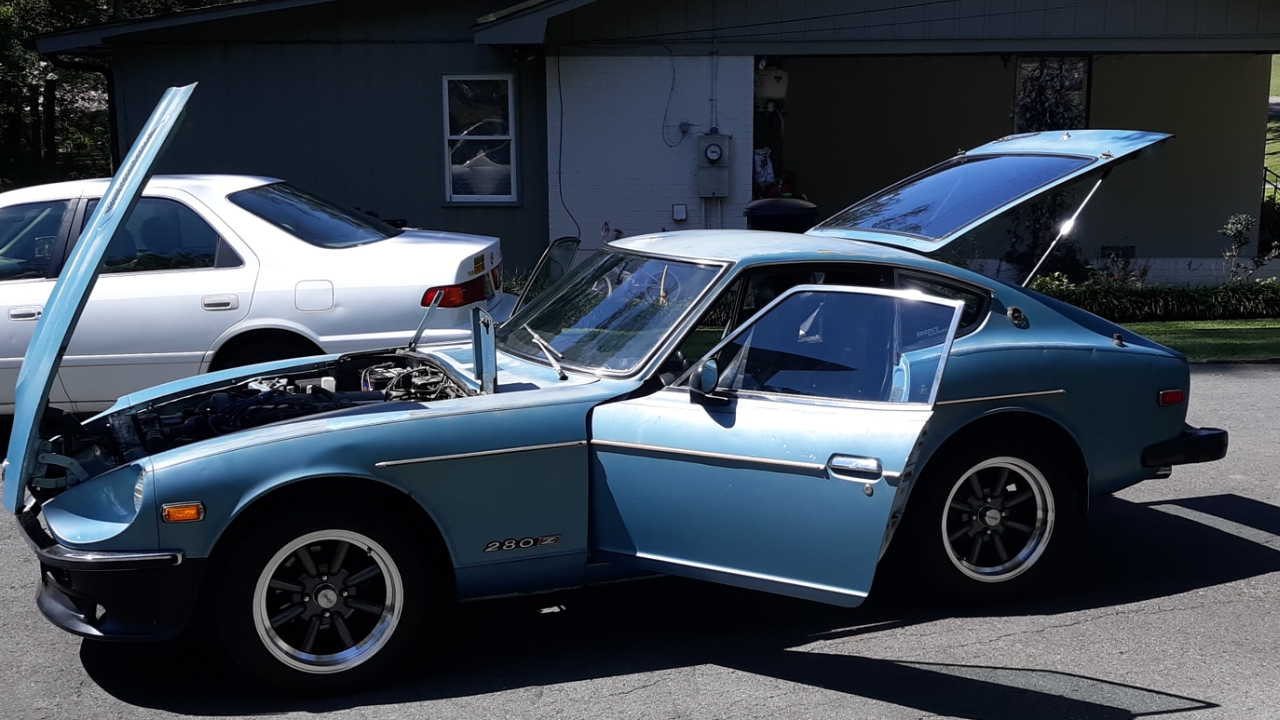
It looks like I will be busy under the 280Z this weekend. I just got a deposit to sell my daily driver, so I need to get my Z reliable enough to drive to work for a while. I still need to get the new exhaust finished, drop the trans and replace the rear main seal, trans output shaft seal, speedo cable seals, and go through everything else that might need attention. I haven't driven it much at all in the past 13 years. Wish me luck.1 point
-
Dog's in good health just older and tired BUT the ride to the other side of my small town in the Z was so neat and funny. He sits so low in the seat all that people see is his head which is 2 eyeballs a nose and ears. He has huge ears and they were flying around like a hairless duck. 😄 It was great. I did loose a front centercap though. Crossed a few train tracks at a good rate of speed so no big deal. Can hardly wait to get him out more now the sun has set away from here. What a miserable summer we all had.

 1 point
 -
1 pointwell decided to try my JY find, a literal pick up off the ground, anyway I was able to open up the inside to a nice fit with a step drill (rubber was pretty hard, but it worked ok). then used a saw to open up so I could just fit around the harness without all the drama of trying to fit stuff thru. This will probably work to my advantage on the sizing as well since it seemed just a bit to large for the 2.5 hole, so the kerf should bring it down some. I can widen the kerf if needed. I can always glue it back up with the kerf pointed downward on the final install. There are some rubberized super glues that work well to glue it shut after test fitting. a little silicone and some harness tape should make for a fine water proof seal.1 point
-
You could clamp off the return line coming out the bottom of the FPR to raise fuel pressure. That's how I found out mine was lean and then added the potentiometer to add fuel through the coolant sensor.1 point
-
The rail is two piece. I installed a new FPR when I got the car running years ago. After encountering drivability issues I let it sit. So while it's not new, it probably has less than 2 hours run time on it.1 point
-
The second vapor canister? no, I cut it open for my knowledge.1 point
-
1 pointI’ve got a full set from my 280 when I did the disc conversion. Send me a pm if you need something.1 point
-
But with no load on the engine, it really doesn't (shouldn't) take a lot of throttle to get the RPM's way up sitting in neutral. Point is... Sitting in neutral there won't be a lot of change of manifold vacuum at any steady state RPM level. And because of that, steady state fuel pressure should be about the same. You should see a small increase in pressure as you raise the engine speed, but not much. You'll see a blip nearly to 36 psi when you goose it, but steady state should be about the same regardless of the engine speed assuming that speed is constant. Does that make sense?1 point
-
Thanks for the quick feedback. I will put a vacuum gauge on it next time I have a chance. Should the fuel pressure gauge fluctuate when you rev the car or does it not respond that way or that fast?1 point
-
The symptoms of breaking up worse under load do make me think of an ignition related issue. Your different colors on the plugs might be a tuning issue as well, but load dependent misfires would have me looking at ignition stuff first. Plug wires arcing to ground somewhere, or coil wire arcing over to someplace it should not be going. Have you put in new cap/rotor/wires?1 point
-
1 pointNot sure it really matters, but I think the 55425-N4300 is the strap for the 280's with the R200 diff. if you've got a 240, then I believe you want the 55425-E4100. My measurements indicate that the two straps are different lengths.
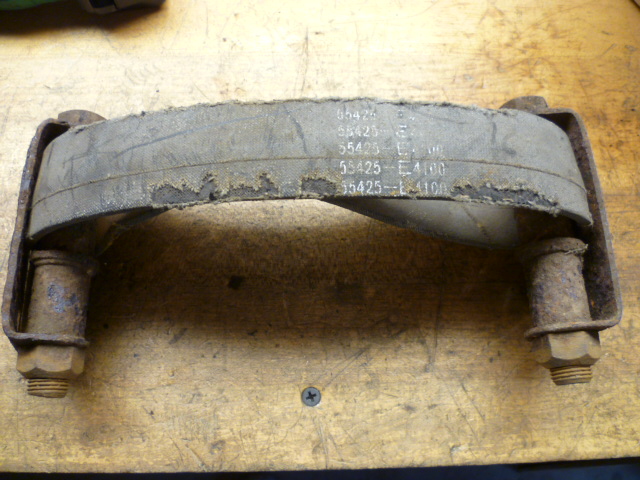
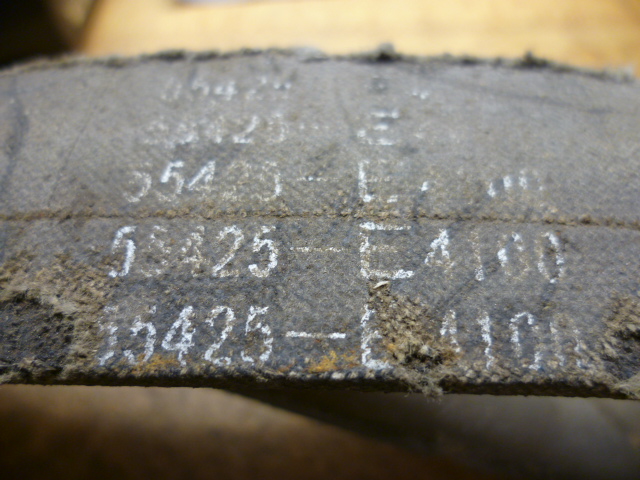 1 point
 -
You're welcome. Now that we're out of scorching hot weather around here, I may see about doing the fan swap in the 260Z. I can shoot video of it, too.1 point
-
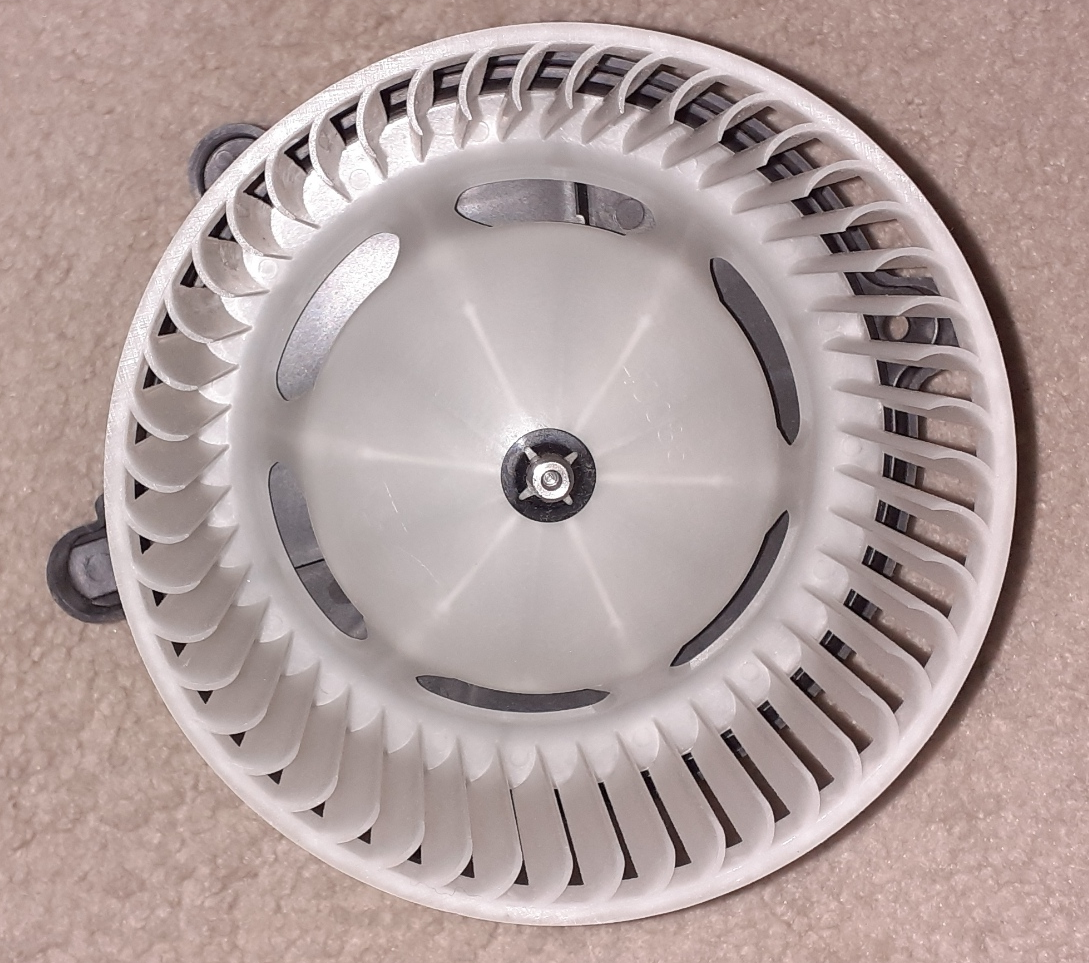
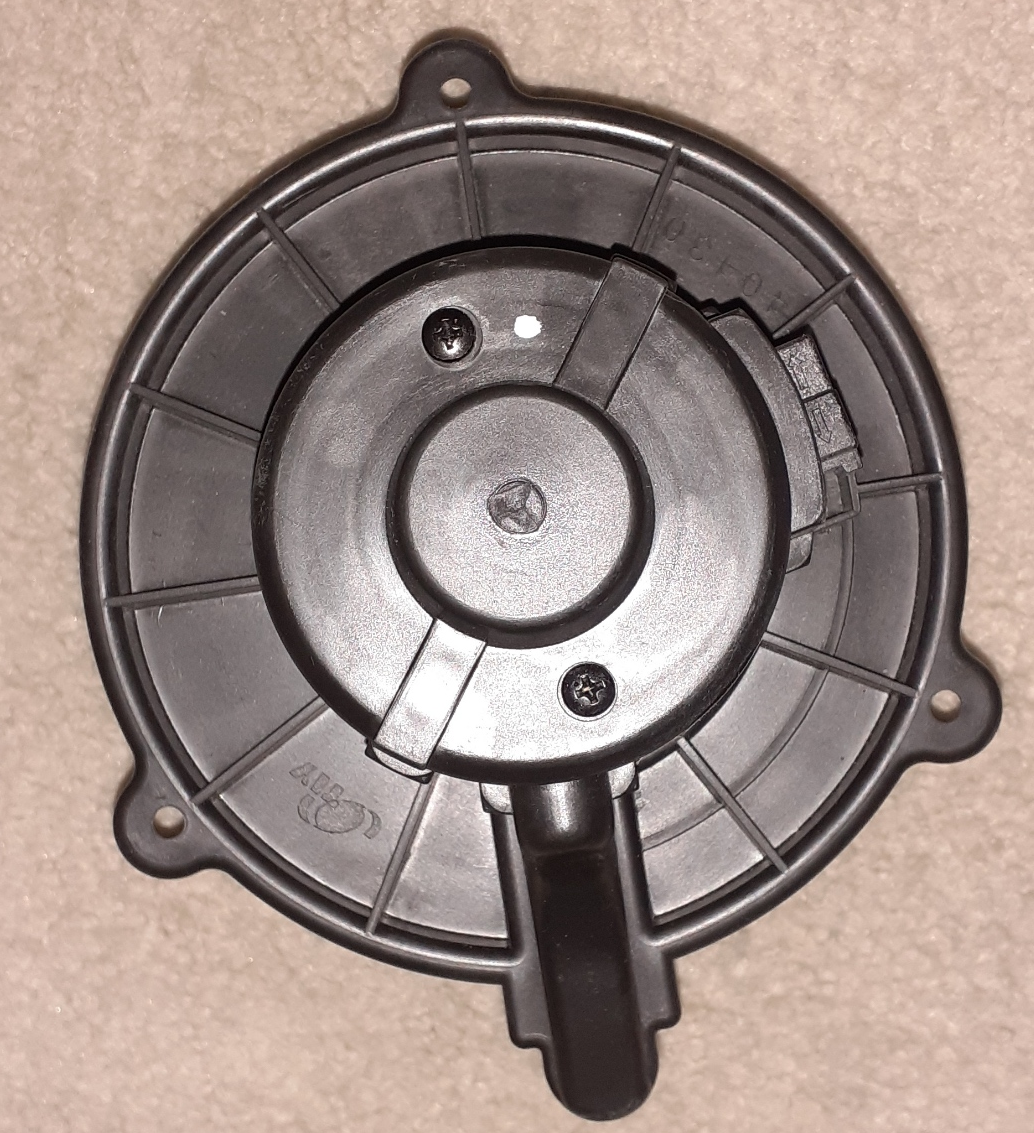
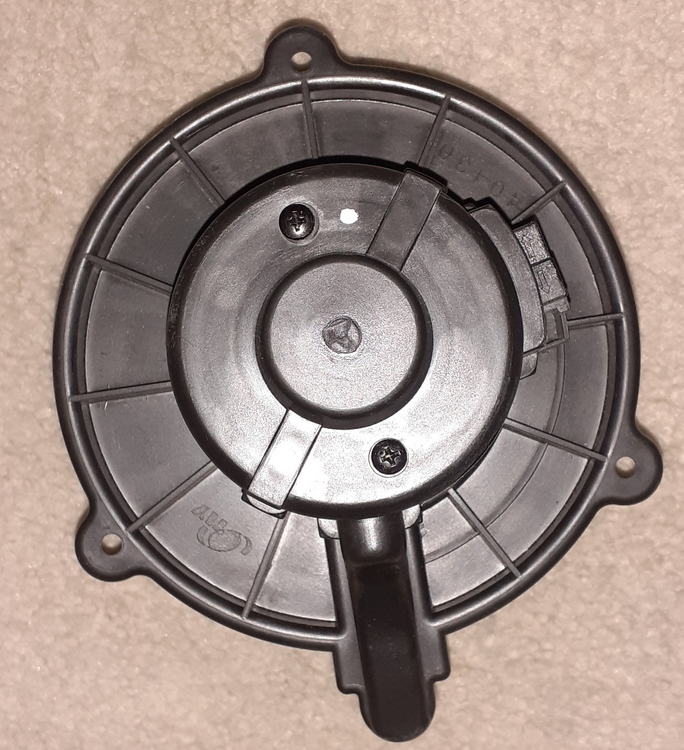
So I finally remembered to look at the VDO PM9196 that I have waiting to go into the 260Z. I already put one in the 240Z without trimming. I guess I'll find out if it's different with the 260Z. As I mentioned before, the holes need to be enlarged to line up better with the 240Z housing. The squirrel cage measures 5.75 inches in diameter. Side view Outside

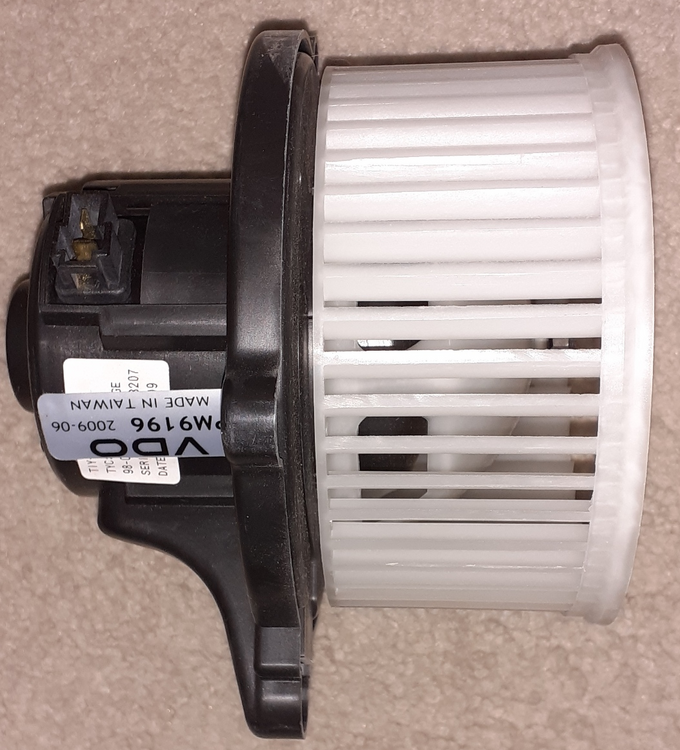
 1 point
 -
Well, you don't want the original motor OR the original squirrel cage. That's the point. With the Kia blower both are an upgrade. I've never seen a Kiz squirrel cage quite like the one you've pictured though... The stock foam spacers have to be removed. I've done a few of these swaps since I did mine originally and I've ALWAYS had to trim the hole in the blower box to accept the Kia squirrel cage. If you do it properly, all the stock material can go back if anyone decides to return the blower to factory parts. Note that the mount holes on the blower may not line up exactly either, but they're close and plastic so it's easy to modify. As I've said a BUNCH of times: The stock duct system in the Z SUCKS! The Kia blower helps because it uses brute force to increase the airflow. (I also have the great fortune to have the Hayhurst designed Ultra Heaven Center Ductwork replacement, so I have incredible airflow, but he never produced these for sale...) When you're trimming the hole, do it a little at a time. You're going to tilt the squirrel cage in - NOT DROP IT IN STRAIGHT - so the trimmed hole doesn't need to be a perfect circle AND/OR the exact diameter of the Kia squirrel cage. I wish I'd made a YouTube video of how I did mine... Mine was the junkyard find all those many years ago, I daily drive Goldie in Phoenix Arizona (anyone sick of hearing me say that yet?), I demand that my A/C works at it's peak (Raised in Idaho, never got used to the Arizona heat) - the Kia Blower has never failed me.1 point
-
1 pointI had a friend sit on each front corner as I tightened the bolts.1 point
-
For cleaning the contacts where the fuses go, look for small bore cleaning brushes. I like the ones with the 1/4 hex end for using with a drill or hex screwdriver handle. https://www.amazon.com/Variety-Stainless-Twisted-Cleaning-Corrosion/dp/B09P5237JH Make sure you have the negative of the battery disconnected before attempting this.1 point
-
1 pointIf I remember right, the hinges really need to rotate a little bit not just go straight down. I do agree though, loosen them slightly have someone force the hood down as far as it'll go . Extra if you have it and tighten them up while reaching through the grill opening1 point
-
1 pointThis. If your hinges are kind of worn, pushing down on the front of the hood while tightening is the only way to fix that problem.1 point
-
1 pointWhen I reassembled my car, I regretted not starting with the inspection lids first. It just seemed like the best place to start as I had to go back and adjust the fenders afterward. MTC1 point
-
1 pointMy experience is having one guy pushing downward as far as you can and the other tightening the bolts.1 point
-
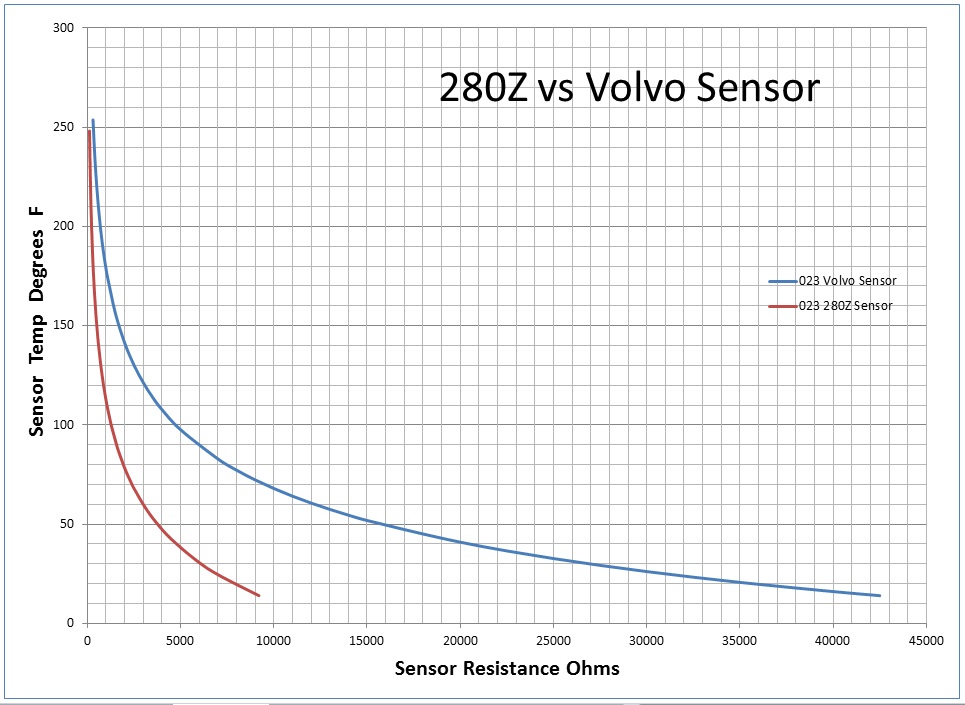
Here's a chart comparing the 023 (Z sensor) and the 028 (Volvo sensor). If you do some water bath testing on either sensor, let me know how the testing compares to the chart:
 1 point
 -
A sincere thanks to all of you who have made positive contributions to this post...Terrapin Z is shipping me the parts I need...and as usual, I have learned something more about our Z's that I didn't know before...this website continues to be a gem for researching all things "Z"...I am always quick to recommend this site to any Z owners I meet that aren't already aware of it. Now...on to the next problem!1 point
-
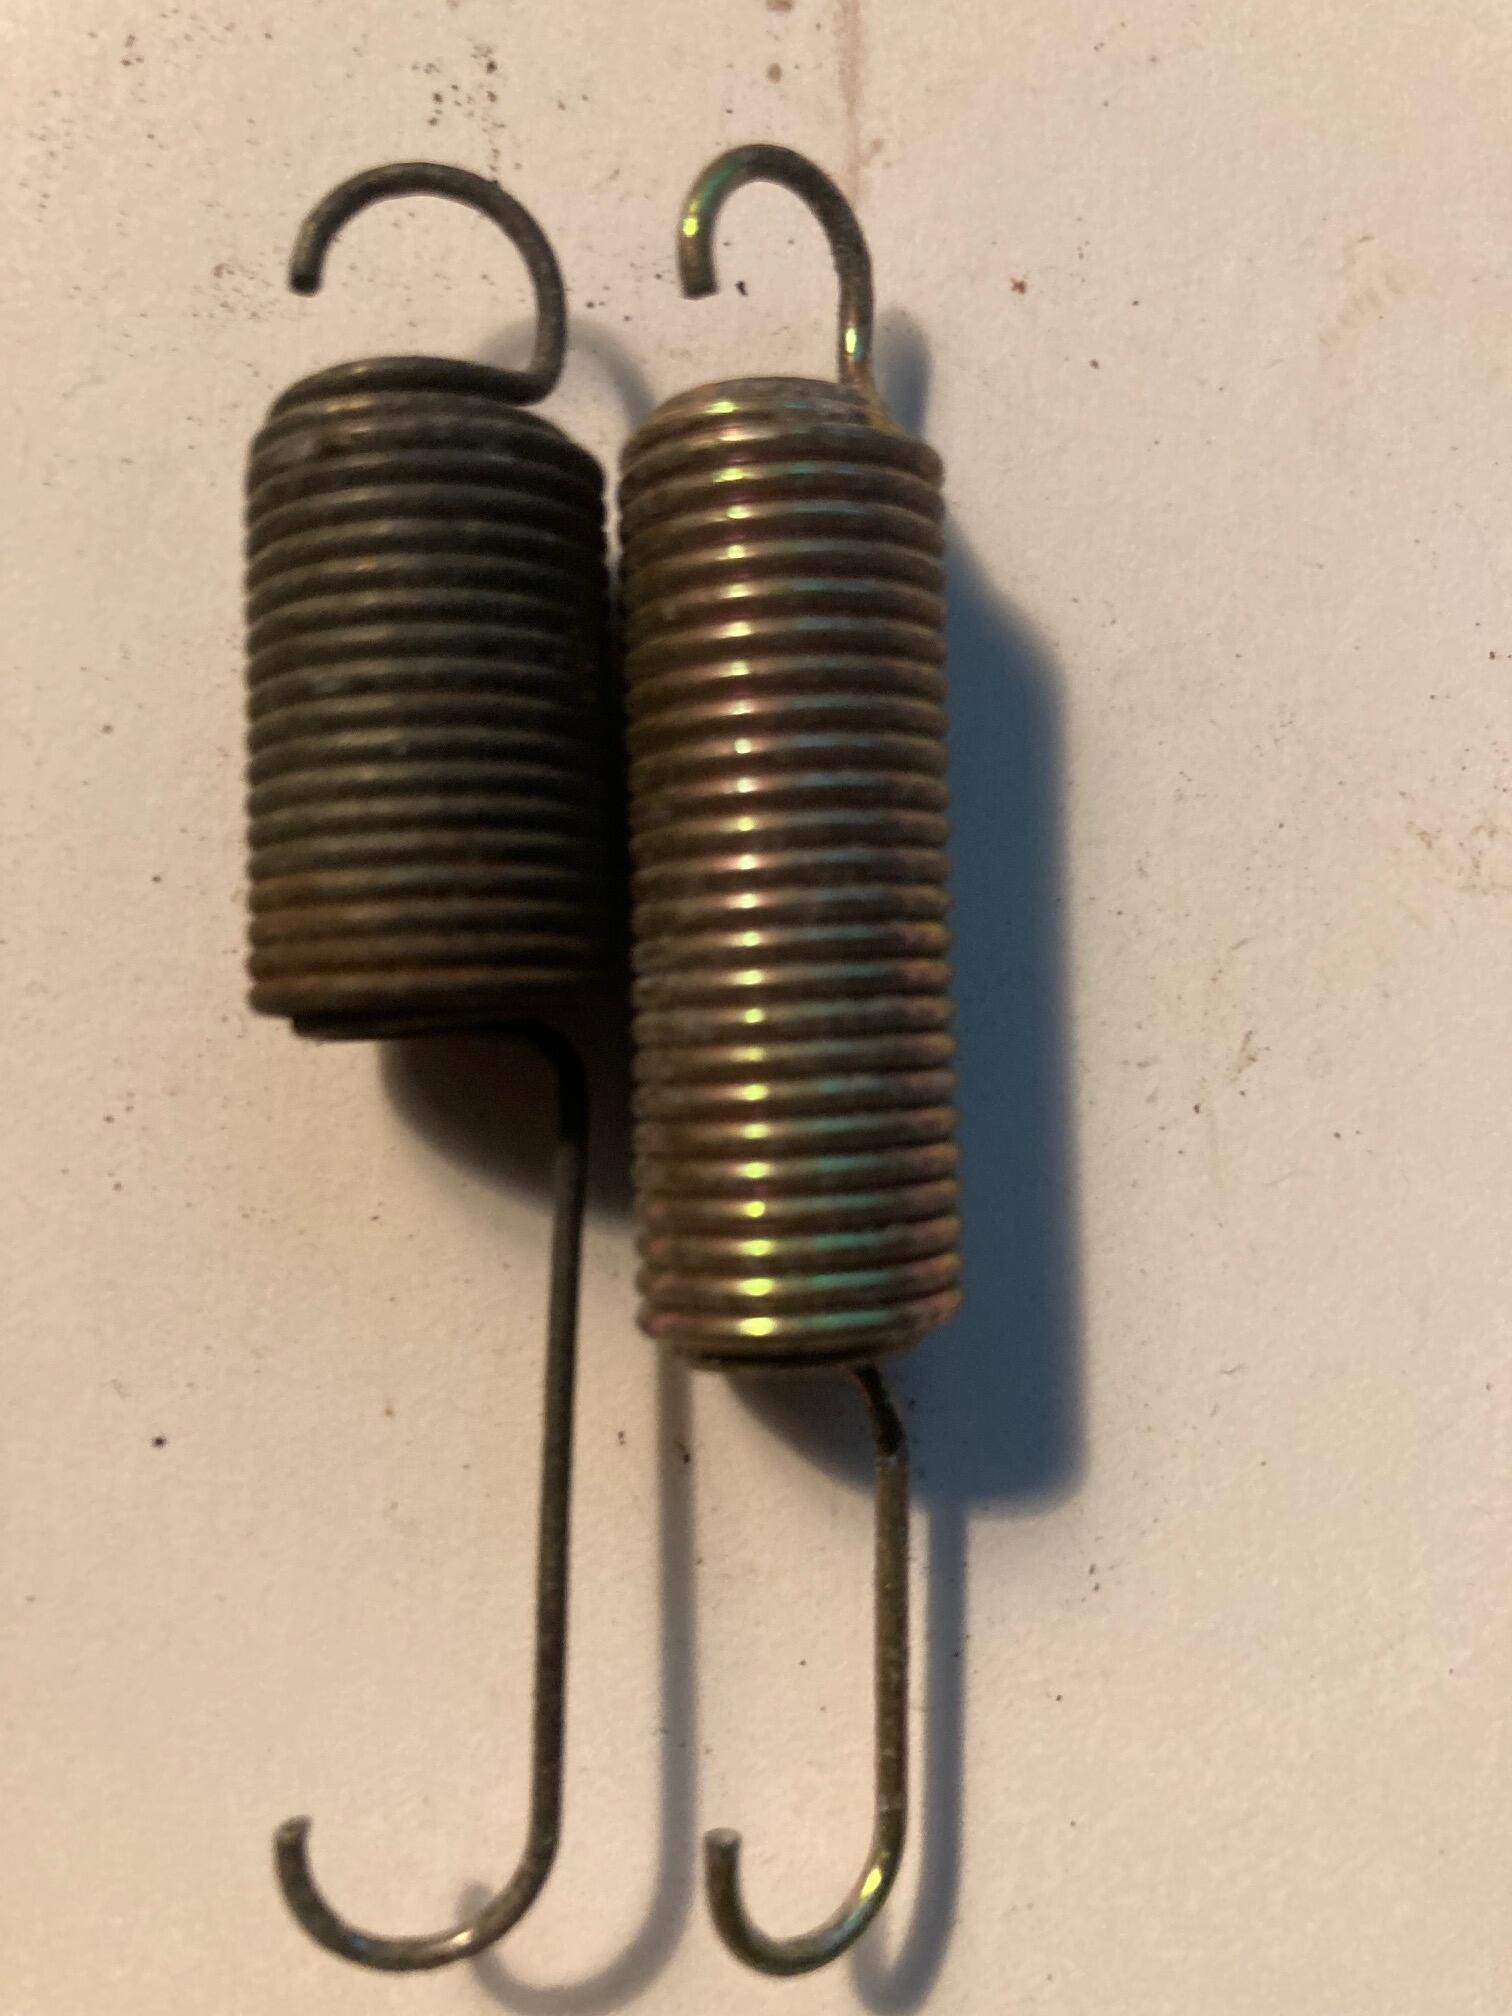
Interestingly enough, the springs are the same length overall but the 280Z spring as a longer wound section than the ZX spring. I am sending the 280Z spring and collars to ea6 as they are all in better shape. I assume the tension on the spring is different too, with a longer wound area. Of course the English language has two definitions for wind and wound "I will wind my watch until it is wound all the way" or "The wind sent a shard into my arm and I now have a serious wound" WTF!!
 1 point
 -
1 pointHey guys, I was thinking about drawing up some Datsun Specific instructions for these. Is that something anyone would be interested in? I started modeling some reference 3D files for my own sake. Can anyone confirm this is the stack up for the fronts?
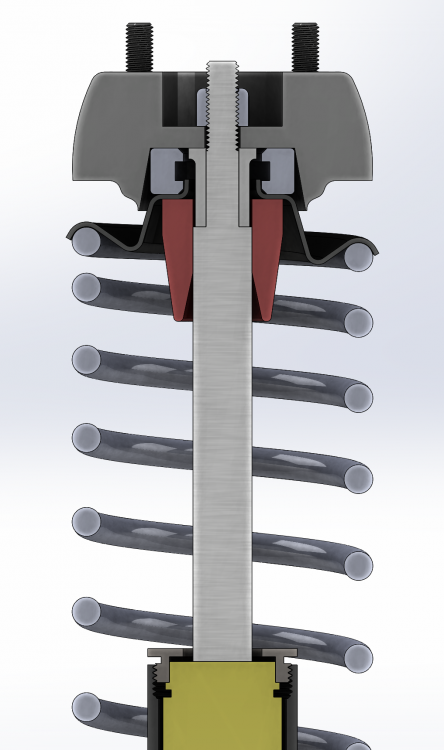
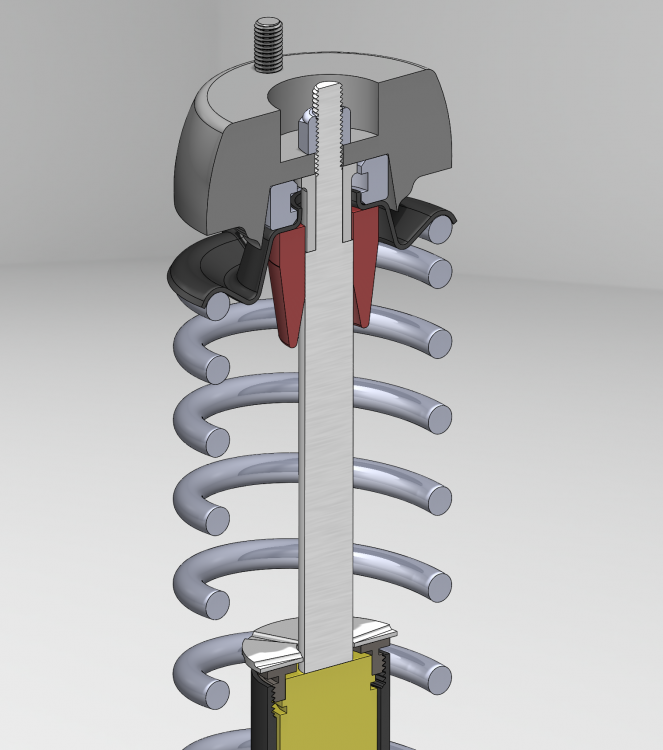 1 point