


Leaderboard


Popular Content
Showing content with the highest reputation on 03/31/2022 in all areas
-
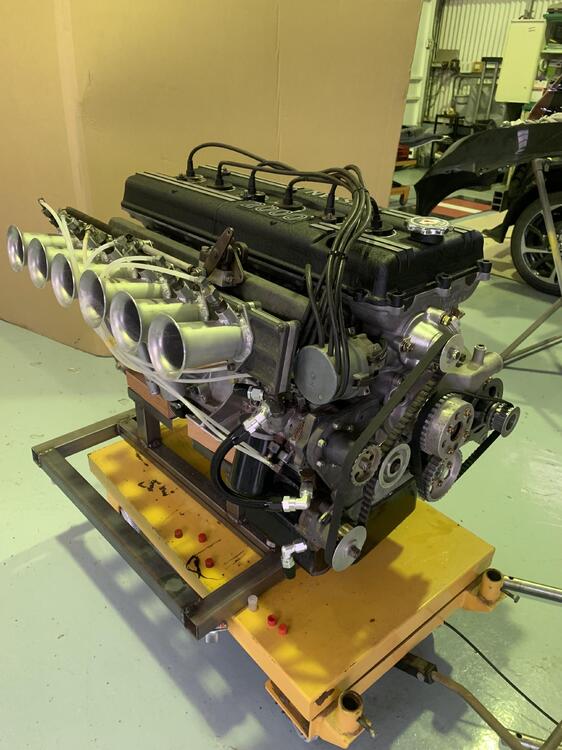
5 pointsThanks xs10shl, this is a great work and I am sure this log will be a nice instruction guide for everyone who need to install the system into a Z432 , probably for GTRs ( PGC10/KPGC10/KPGC110) too . Ignition management is a key of those cars , no more new parts from Nissan today , and there is no singles part which is interchangeable with a stock L-series engine system. Even if someone has a complete , perfect S20 but without working ignition system ,it will be sad for the car and for the owner . Or like this , I am a bit fool for S20 even if it doesn’t sit on a car . Just looking at the machine, I can spend whole day of my life . Except Alan ,I don’t think we can explain about this engine. This is probably a pinnacle of existing, working of all the S20. I will report when this engine starts fire up in a car . Kats
 5 points
 -
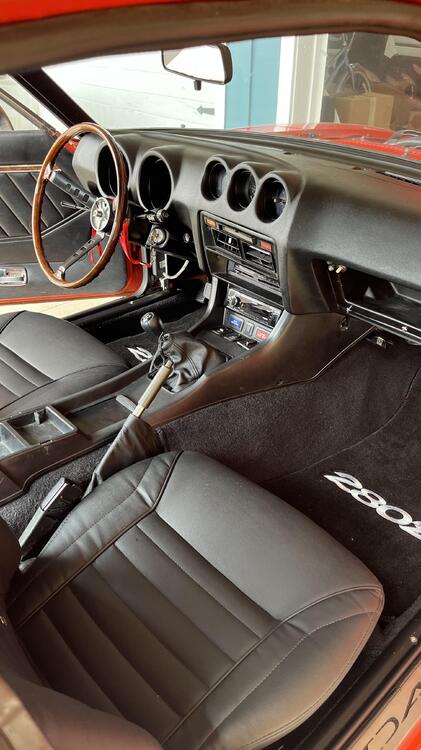
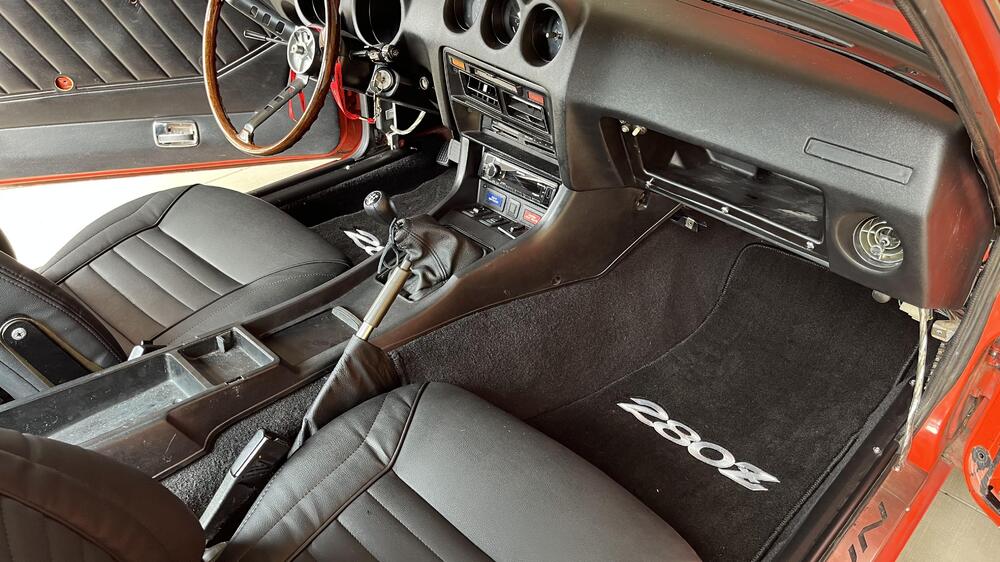
4 points4 points2 points2 pointshttps://zcardepot.com/collections/charging-starting/products/alternator-100-amp-high-output-240z-260z-280z-70-78?variant=19277663174769 I have used 2 of them with no issues. They work well with the stock belt.2 points2 pointsI can do the same thing when looking at the Rb26 in my Nissan Stagea (260rs). I have been fascinated with the RB26 for 20+ years and I just like looking at the engine in the bay at times.2 points2 pointsMaking progress on the interior. I decided to go a different direction due to the challenges of a custom interior. I don’t have the proper tools, experience and skill to do it right. I decided to buy an ACC molded carpet kit from Rock Auto. I’m pretty impressed with the quality. Way better than the MSA kit I was going to work with . It took time to get this new kit in but I’m very happy with the quality and fit. It’s cut pile, with a molded rubber backing and the a layer of jute matting. It comes rolled up so I set it out in the sun for a few hours to work out the kinks. The install was time consuming…three days to get it all in. The reason is you have to make all the cuts for the transmission, ash try, seat belts etc. Getting all the bolts for the seats, seat belts, rocker trim and so forth takes time. You also have to cut out the larger section where the HVAC section is. You have to trim slowly a bit at a time….fit, trim,fit, retrim for every section. You finish each day with sore hands and maybe a few finger cuts. It’s a bit messy too . The jute matting it very stout and hard to cut. The key is take it slow to get everything fit. It’s sitting pretty good, right now but a few days in the heat will help out. Take a look.!
 2 points2 pointsI started a discussion earlier regarding the felt washers needed when rebuilding the wiper assemble. One of you suggested McMaster Carr industrial felt. That's what I ended up doing. They came out good. Not sure how long they will hold up but they're a lot better than the worn ones that were in there. Unfortunately, I had to buy a 10' strip of it. I ended up using about 6". It's 1-1/2" wide and 1/16" thick. If anyone needs a piece, let me know and I'll mail it to you (no charge as long as it can fit in a business size 9" envelope. Oh, BTW I soaked mine in oil before installing them.2 points1 pointWas just cruising the Datsun Classifieds on Facebook and came across this guy who has 9 Z's for sale in Nevada. Might be worth taking a look if your in the market. the listing is 9 hours old. https://www.facebook.com/groups/464479646940228/user/100079971070123/ https://www.facebook.com/commerce/listing/1219698785231132/?media_id=3&ref=share_attachment
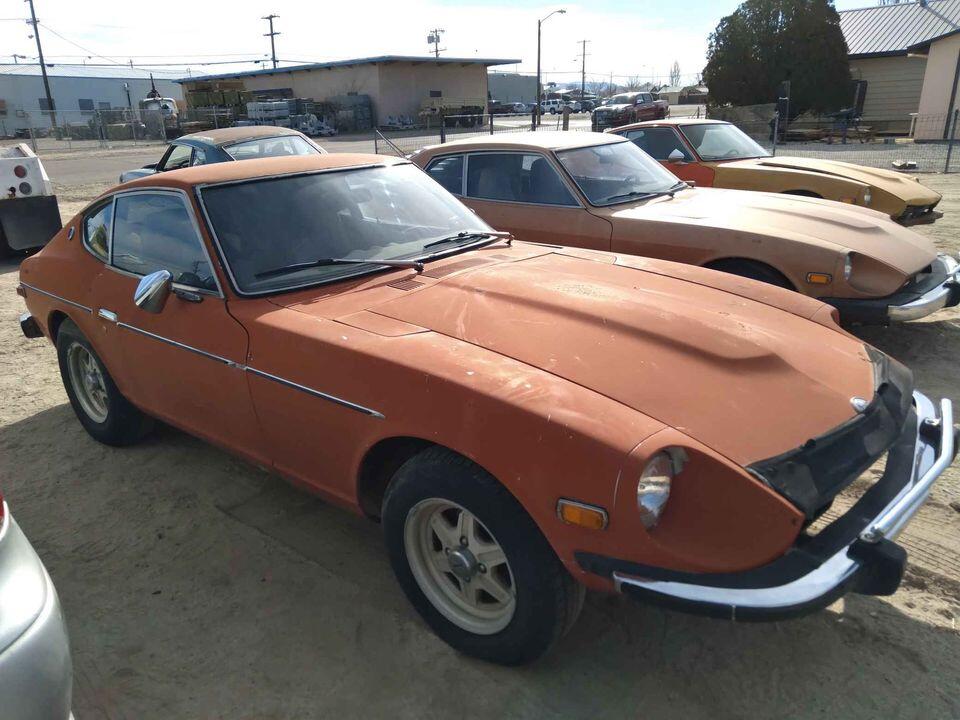 1 point1 pointMarshall guitar amp , is not it ? Both volumes are set maximum , I think I am hearing Hard Rock guitar solo ! Kats1 pointI think that it already has a draw-through turbo. Don't know much about it but I found an old thread showing a similar setup on an L4. Edit - it's in @Racer X 's neighborhood. He probably knows about those old turbo kits too. https://ratsun.net/topic/57895-datsun-510-l20-looking-for-turbo-kit-for-it/
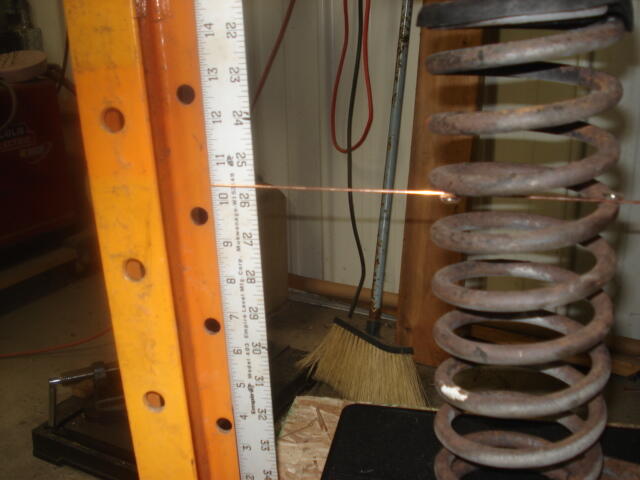
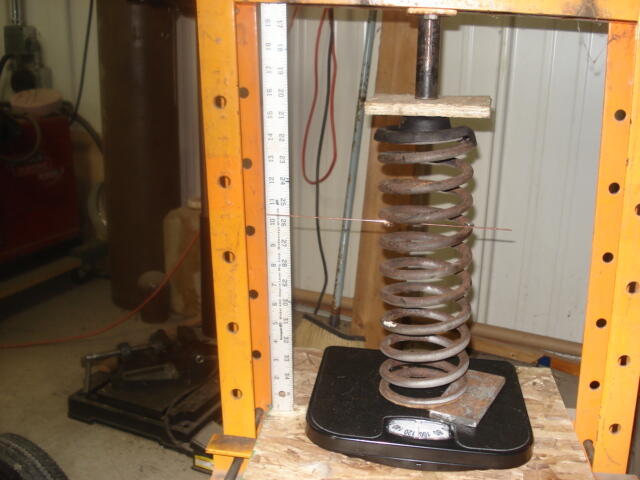
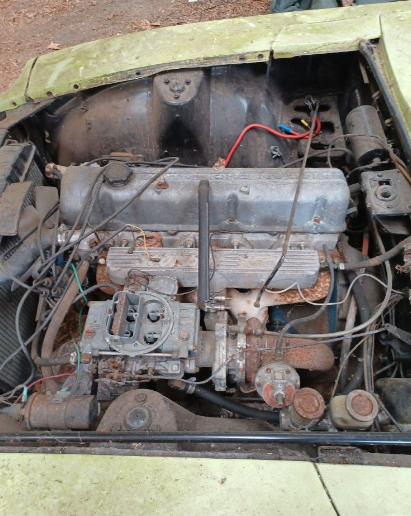 1 point$2k '72 with some spare parts. Holley carb on whatever engine is in it with maybe stock manifold and head piled in the back with a manual transmission of some sort. Doesn't say anything about title probably doesn't have one like most. https://offerup.co/PskQcoiHQob If I were smart I'd get the 240 and the turbo ZX and for $2500 I'd have the start of a turbo 2401 point1 point1 pointNow that’s the type of posts we like helping fellow members. Kudos my friend.1 point1 pointGot the car registered today, big milestone….last time it was registered was 24 years ago. Sent from my iPhone using Tapatalk1 pointThe entire car appears to be held together by blue paint. Unless it has four wheel steering, that left rear wheel as seen in the original ad might indicate a problem. No cracks in the dash cover. Check that, there is no dash cover. As a "parts car", what might it be worth?1 point1 pointI wrote the above procedure for testing spring tensions a few months ago. I finally got around to taking a few pics of the set up in case the written procedure wasn't clear.
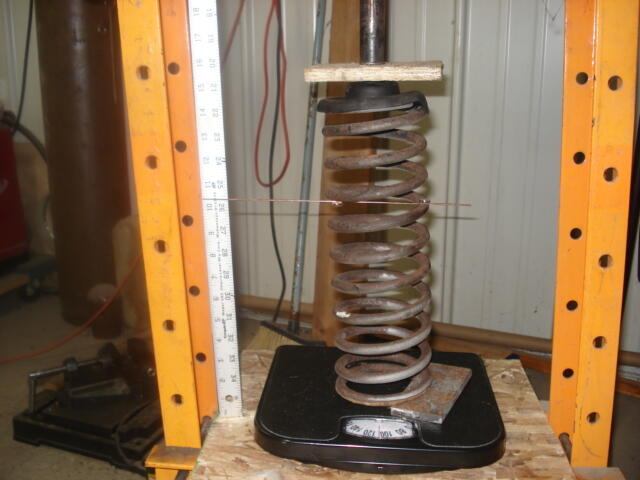
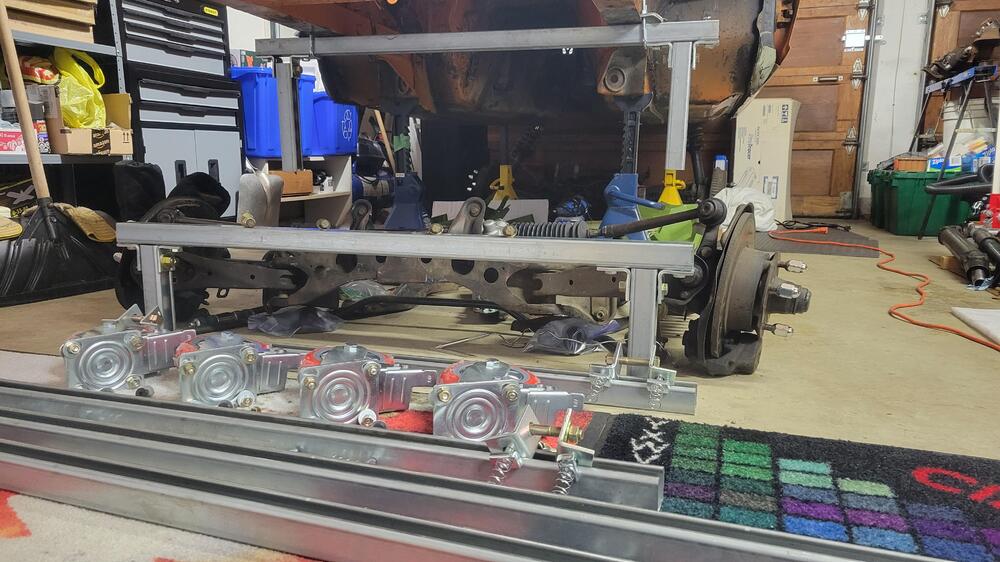
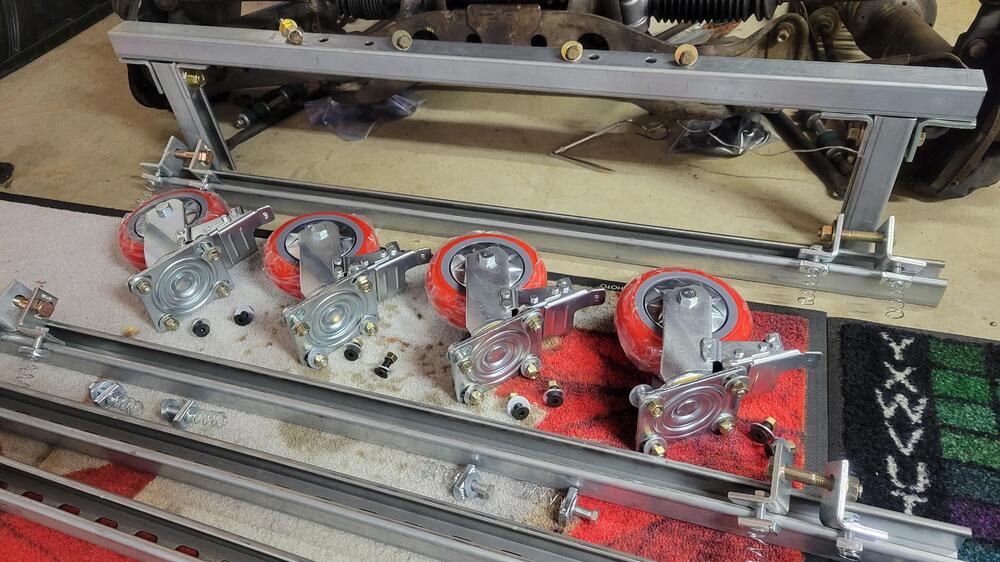
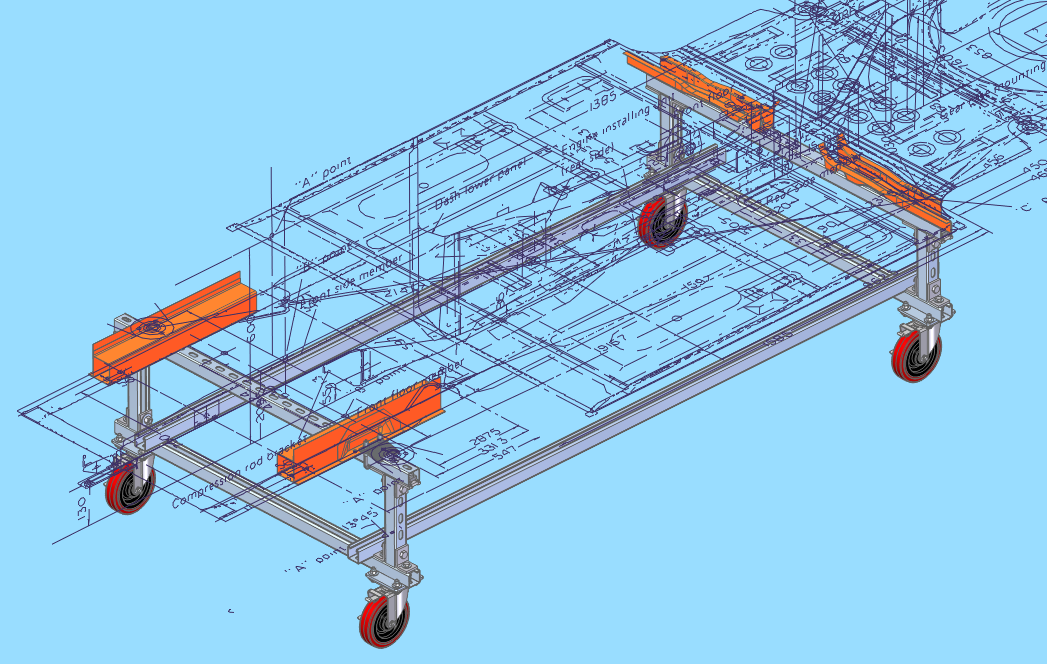
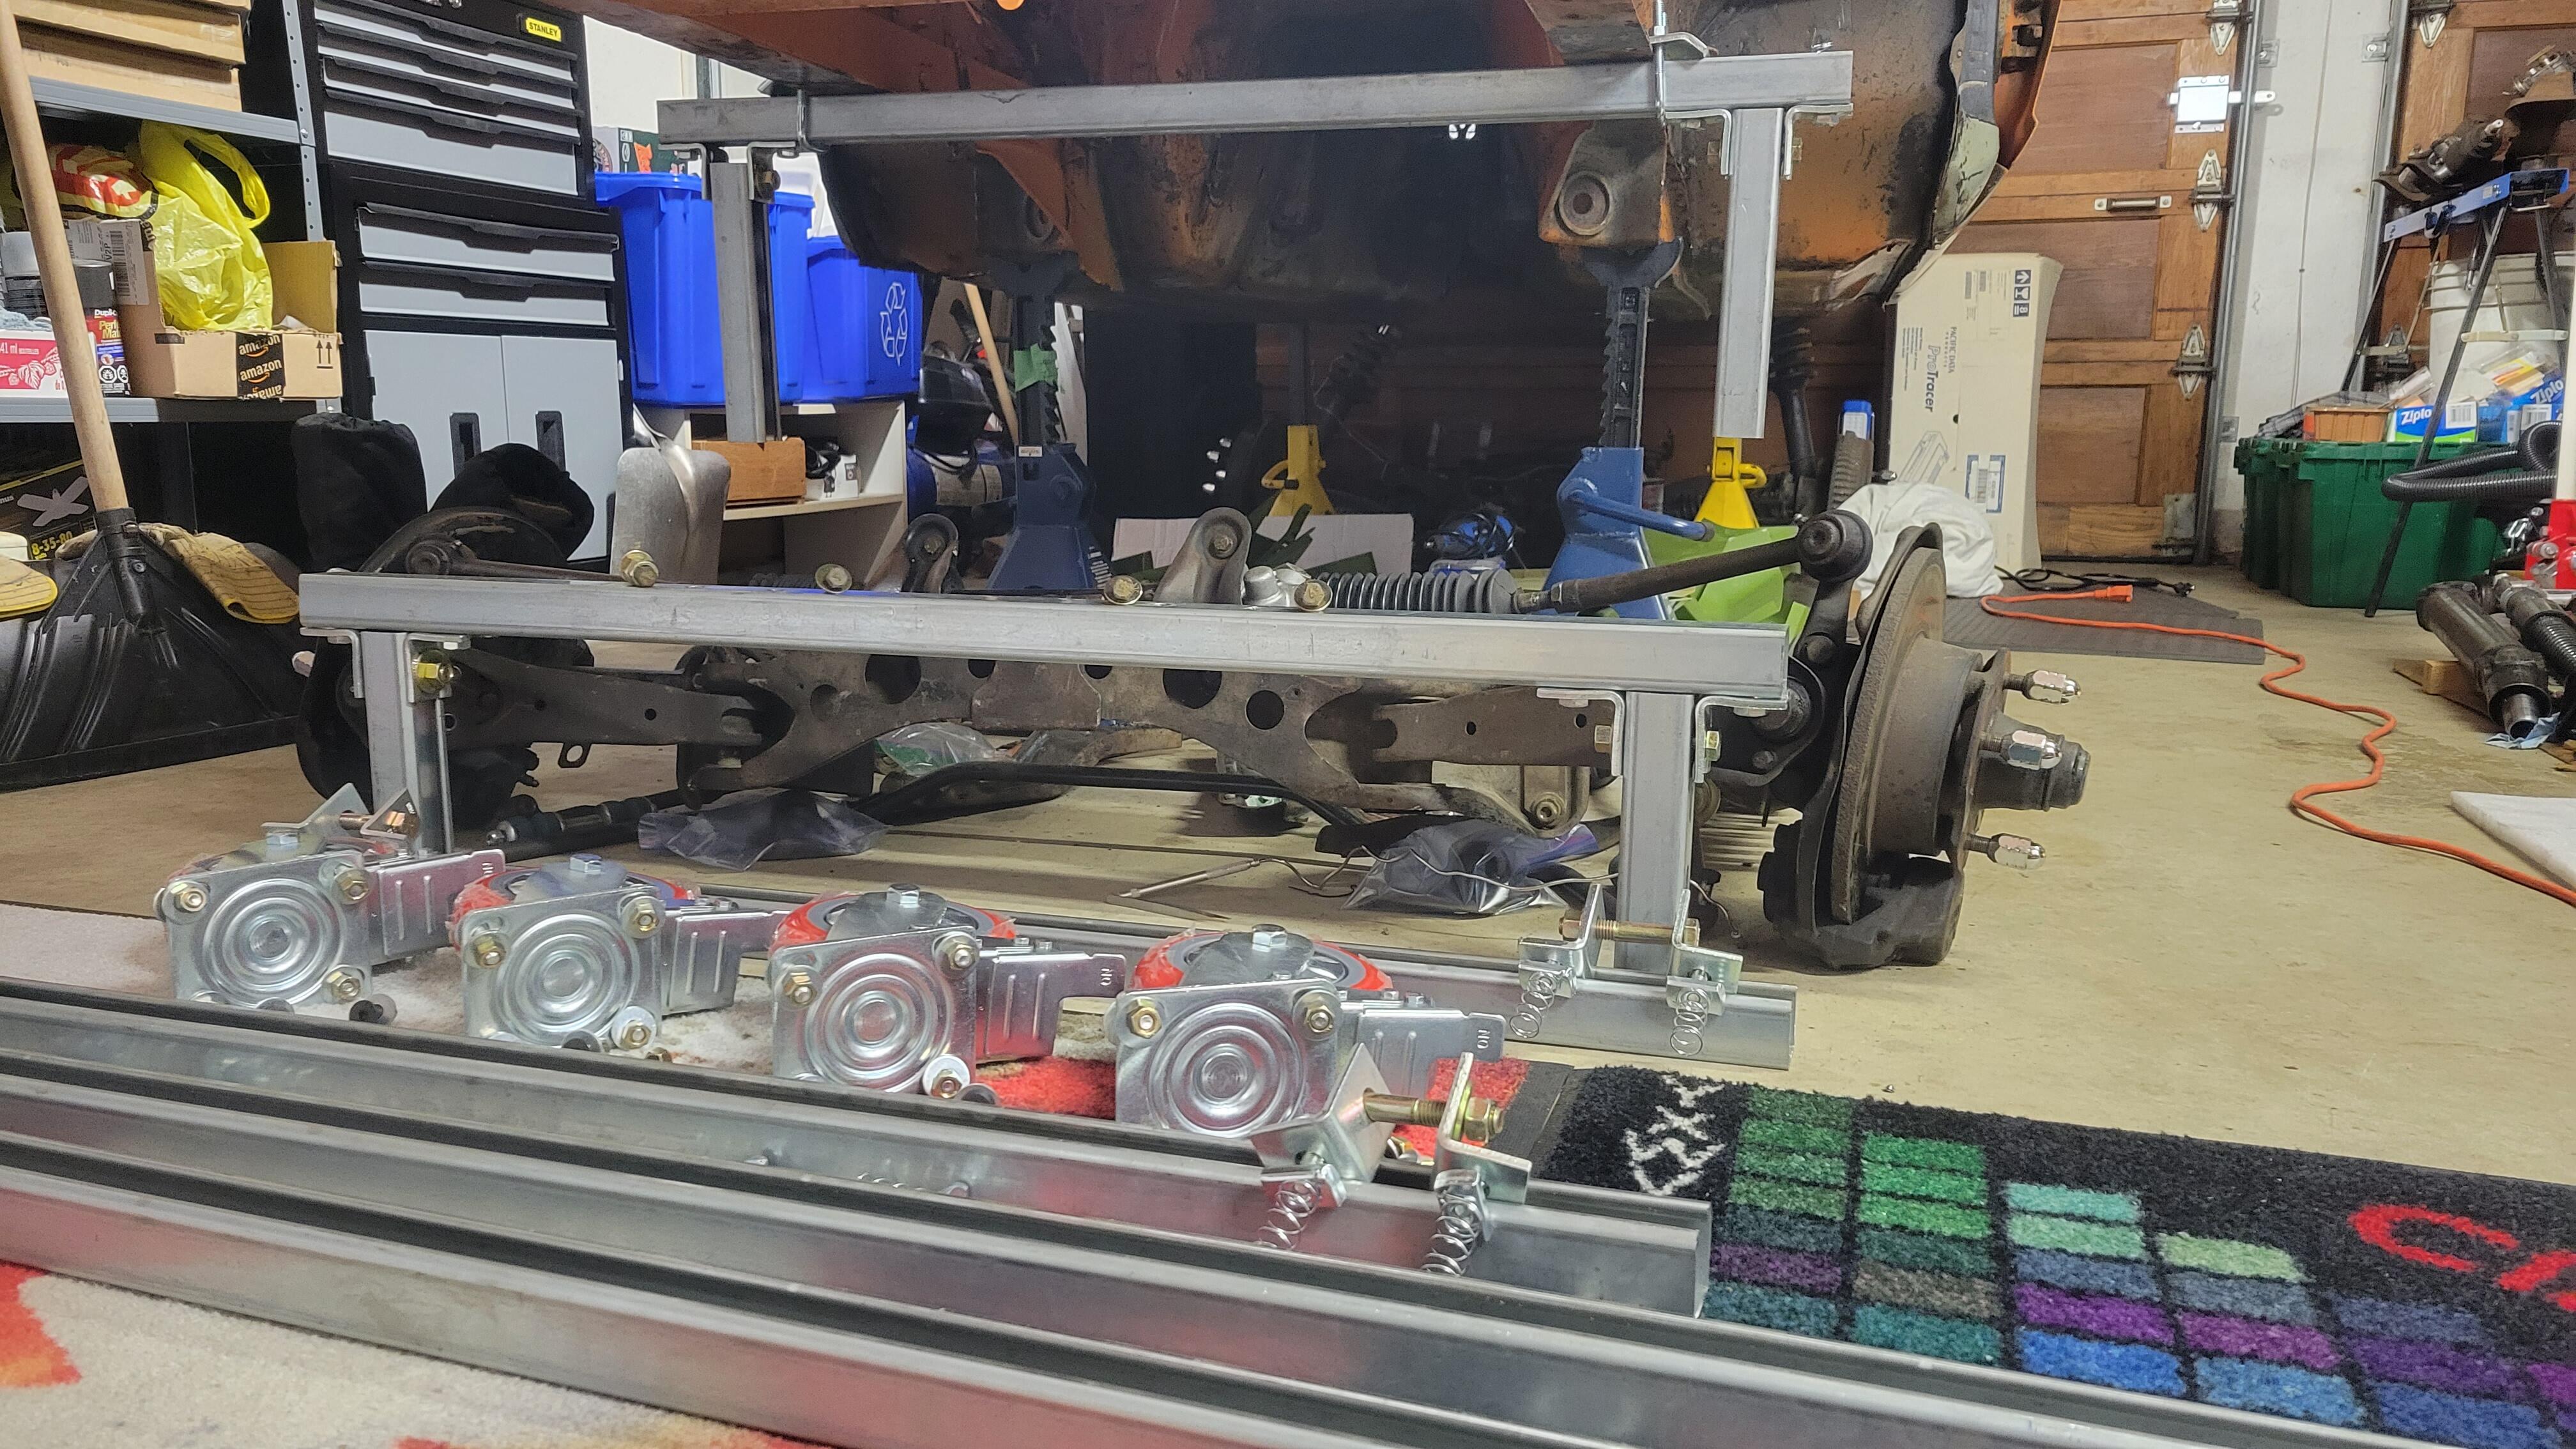
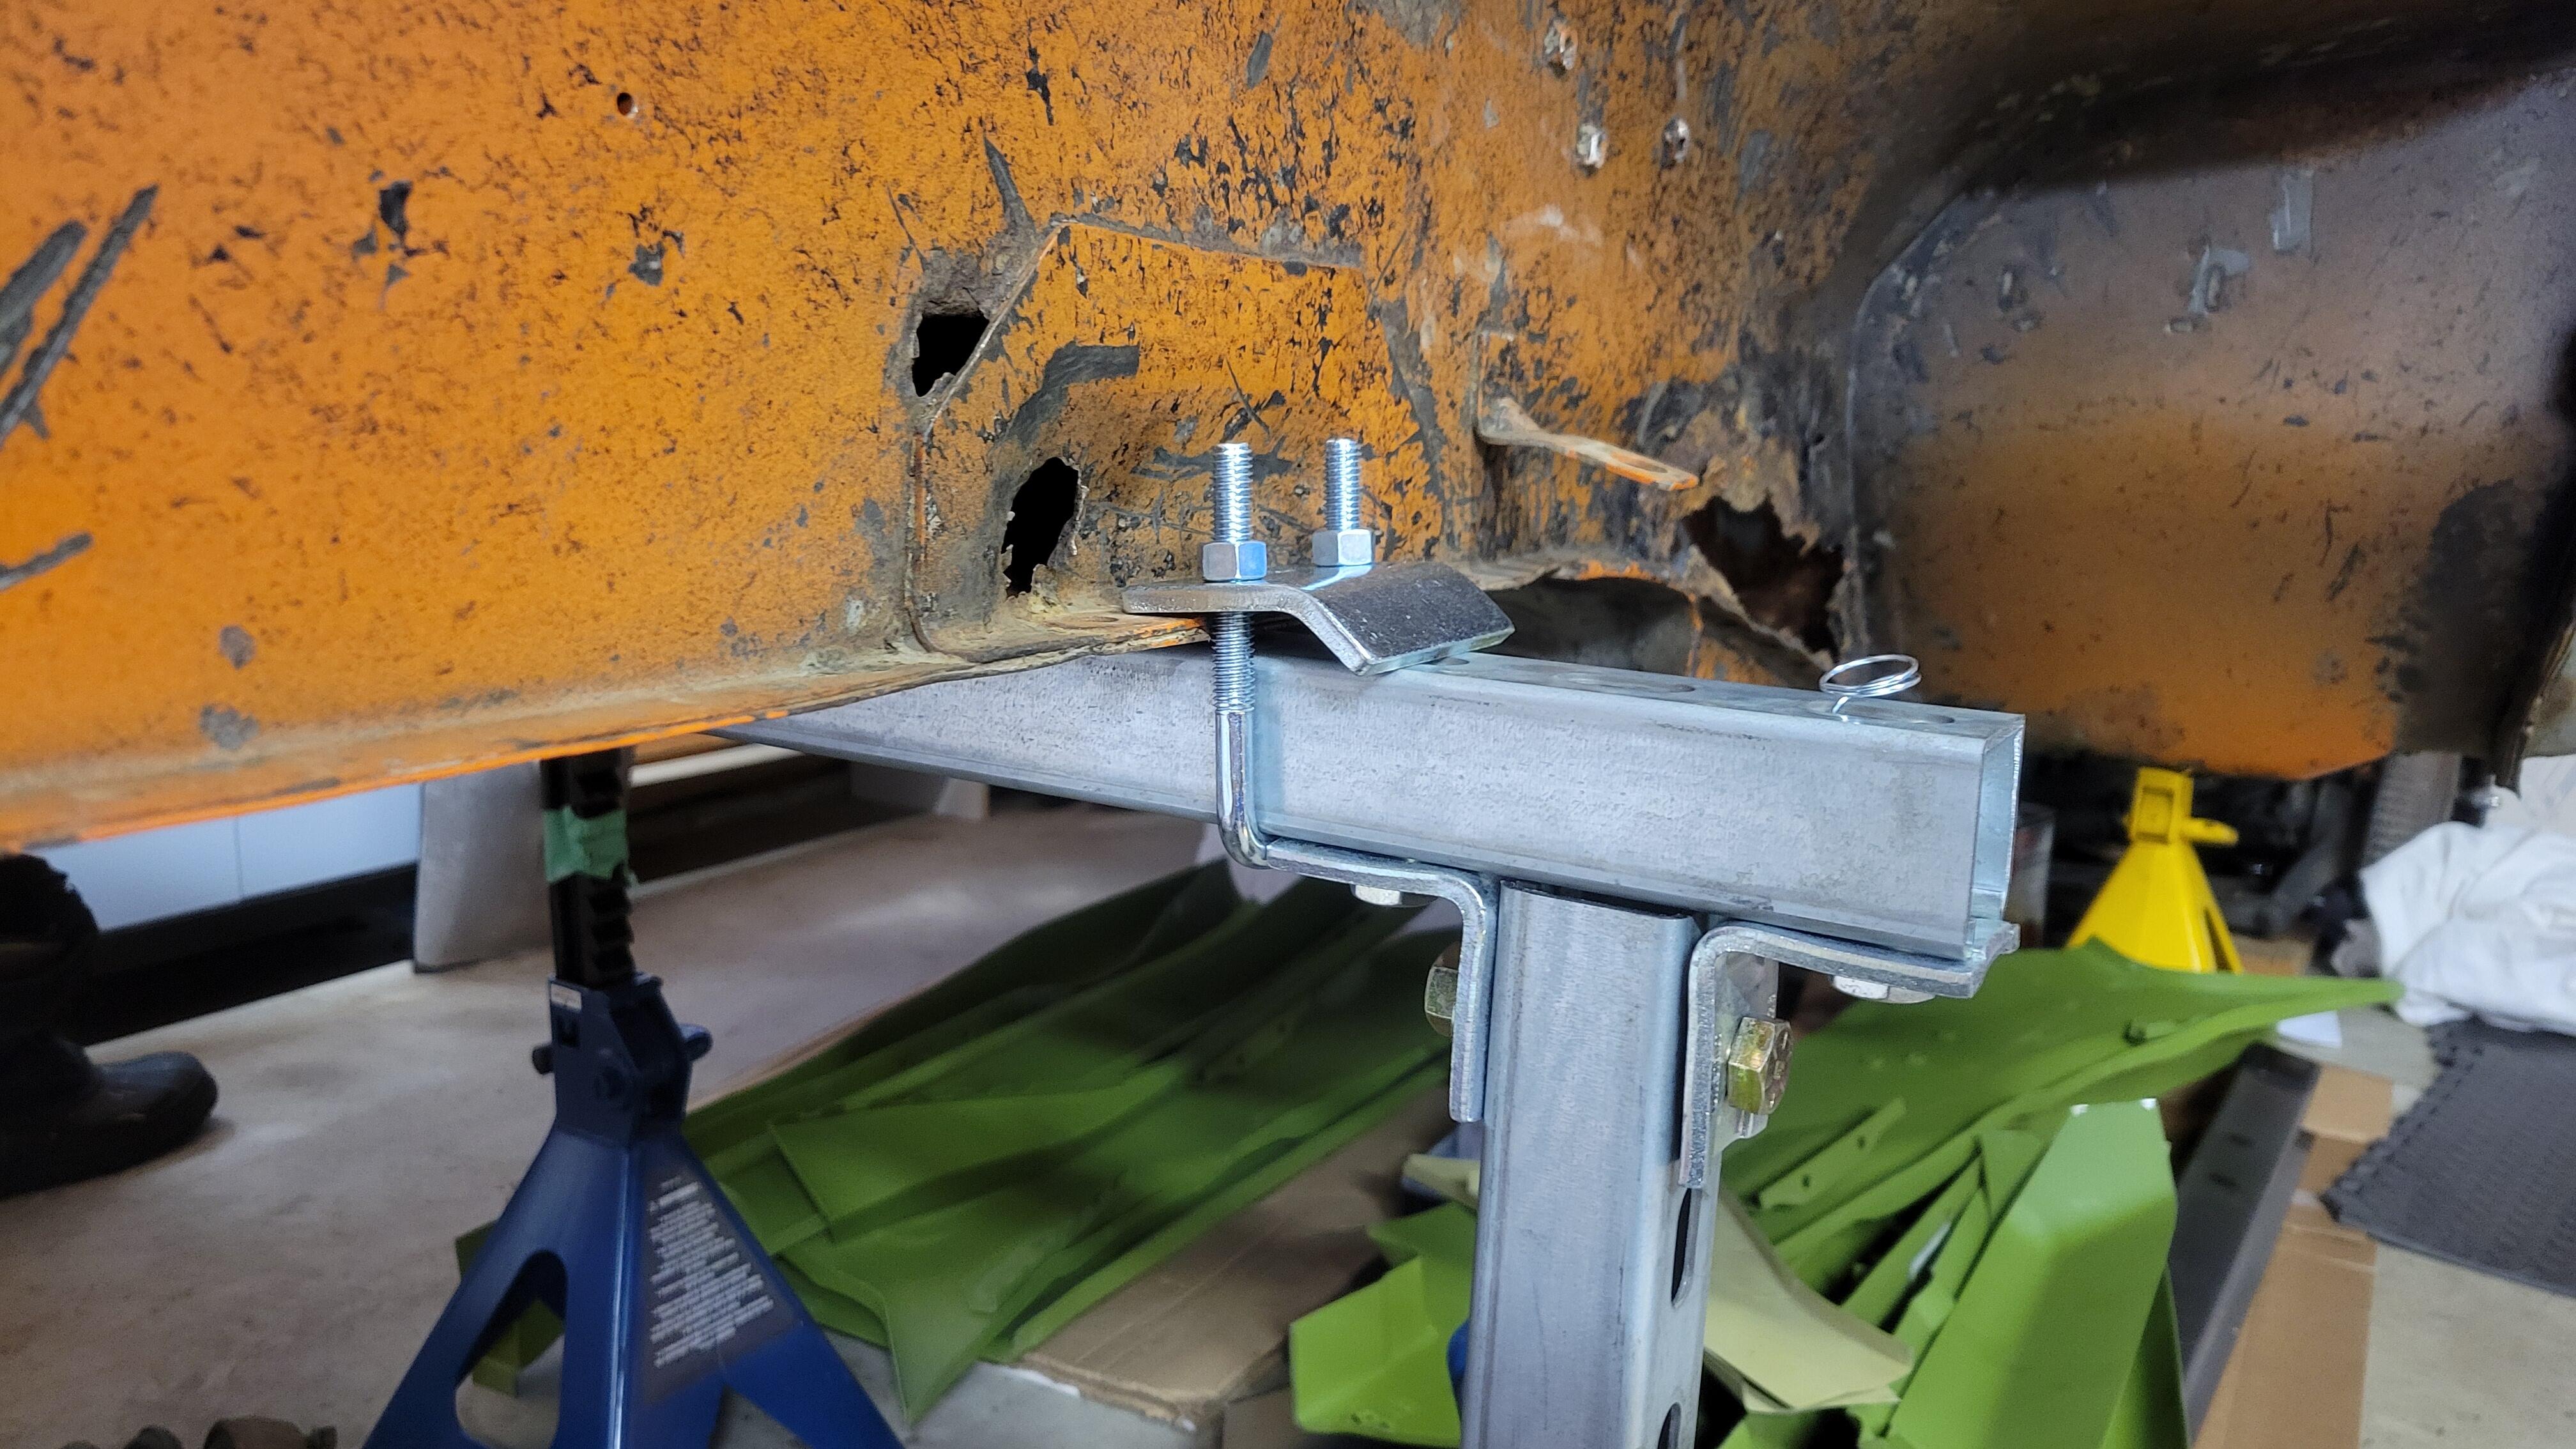
 1 pointHere's a lot of reading on the GM mod I found. Hope you find something? https://www.google.com/search?q=240z+gm+alternator+classiczcars.com+&client=ms-android-americamovil-us-revc&source=android-home&source=hp&ei=M6VEYp7zMMSfkPIP_9ifcA&oq=240z+gm+alternator+classiczcars.com+&gs_lcp=ChFtb2JpbGUtZ3dzLXdpei1ocBADMgUIIRCgATIFCCEQoAEyBQghEKABOgUIABCABDoQCC4QsQMQxwEQ0QMQ1AIQCjoOCC4QsQMQgwEQxwEQowI6CAgAELEDEIMBOgsIABCABBCxAxCDAToFCC4QgAQ6CwguEIAEEMcBEK8BOgsILhCABBCxAxDUAjoRCC4QgAQQsQMQgwEQxwEQowI6CAgAEIAEELEDOggILhCABBCxAzoLCAAQgAQQsQMQyQM6BQgAEJIDOgYIABAWEB46BQgAEIYDOgUIIRCrAlCXDFjjngFgyasBaAFwAHgBgAHfAYgB-hSSAQYwLjE4LjGYAQCgAQGwAQA&sclient=mobile-gws-wiz-hp1 pointShhhh…keep talkin like that they won’t stop coming down here. Housing prices are crazy already and rude drivers aren’t welcome. Sent from my iPhone using Tapatalk1 point1 point1 point1 pointTo elaborate, the black/white wire should be on the anode side of the diode, and the white/black wire should be on the cathode side.1 point1 pointHappy anniversary James! Let’s see. Mrs. Racer 1.0, 3.5 years. Mrs. Racer 2.0, 25 years and counting. 1972 Camaro 45 years. 1971 240Z 35 years. 1972 240Z 30 years. Still have the cars, and Mrs. Racer 2.0.1 point1 point1 pointI will be sending my shell to the body shop soon, so I have been designing a support frame with casters that I can attach to the bottom of the chassis. I will use this to get the shell onto a deck truck for transport, and to use during the reassembly process. It is similar to what @inline6did, main difference with mine is that it is a fully bolted Unistrut construction, as I have no access to a welder at home. Here is an image of the final concept. This morning I finished doing some pre-assembly, test fits and checks for any missing any hardware. So far it has gone together without issue, kind of like the Meccano set I had as a kid. Here are a few pics, I will be completing this project over the weekend, and will post pics with it fully installed.
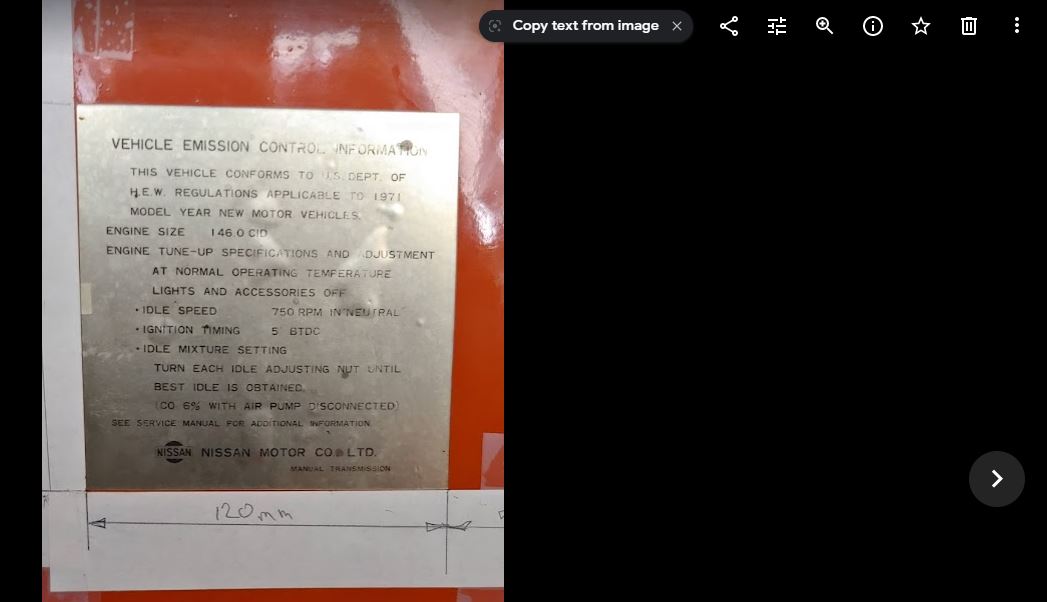
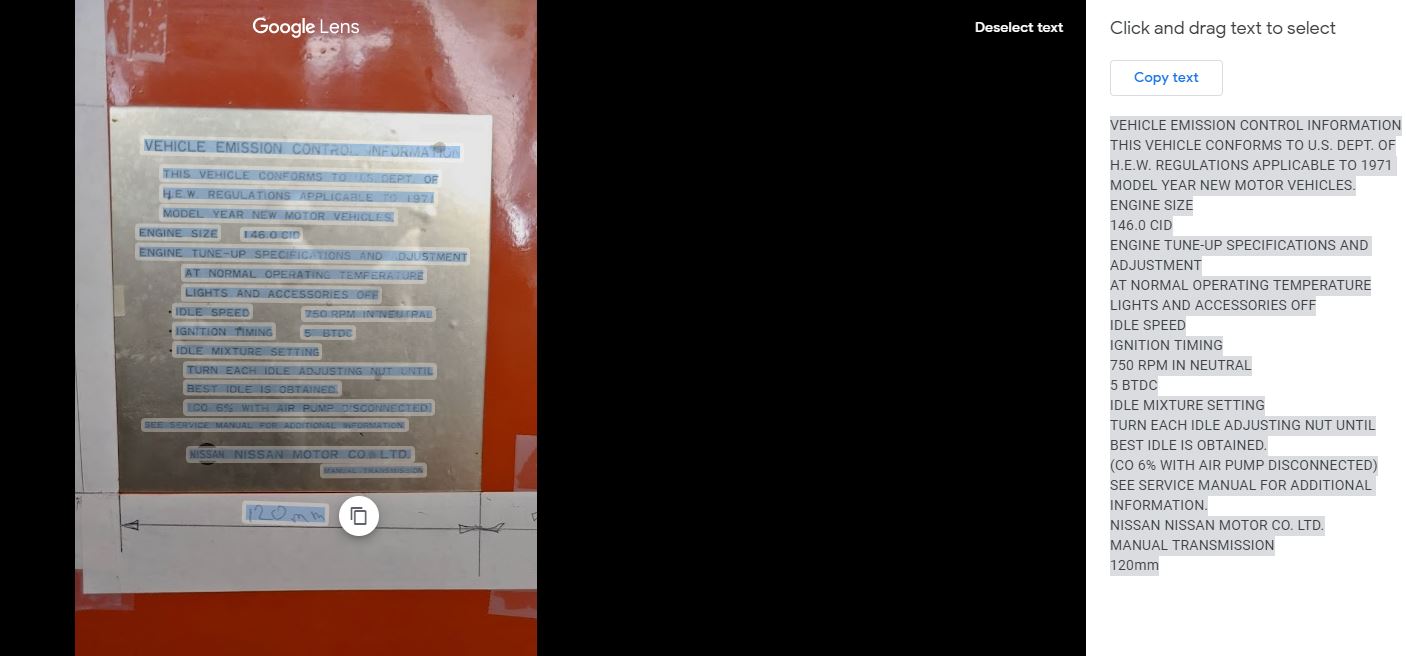
 1 point1 pointWhile reviewing the pictures I took of my decals on my computer using Google Photos, I noticed a button on the screen reading "Copy text from image". It's only there if the picture has text. So I clicked the button and found that it uses Google Lens to select and copy the image text to your clipboard. I was very surprised at how well it worked on an image that had glare on it. I will have to learn what else Google Lens can do. This would be very useful to extract the text if you were creating your own decals.
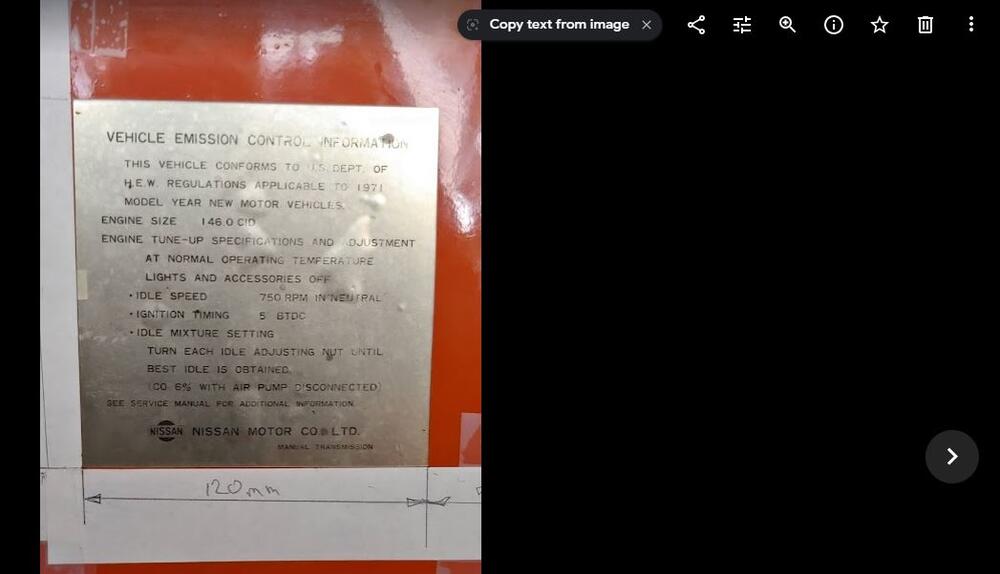
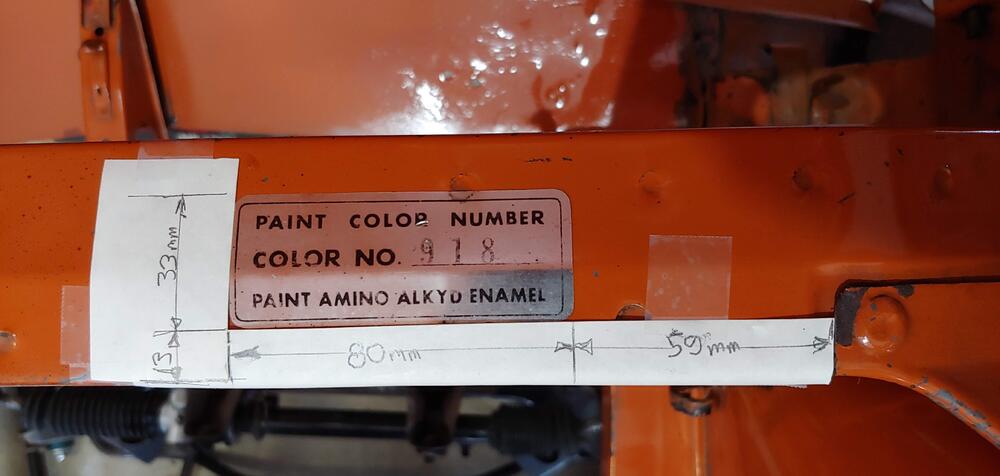
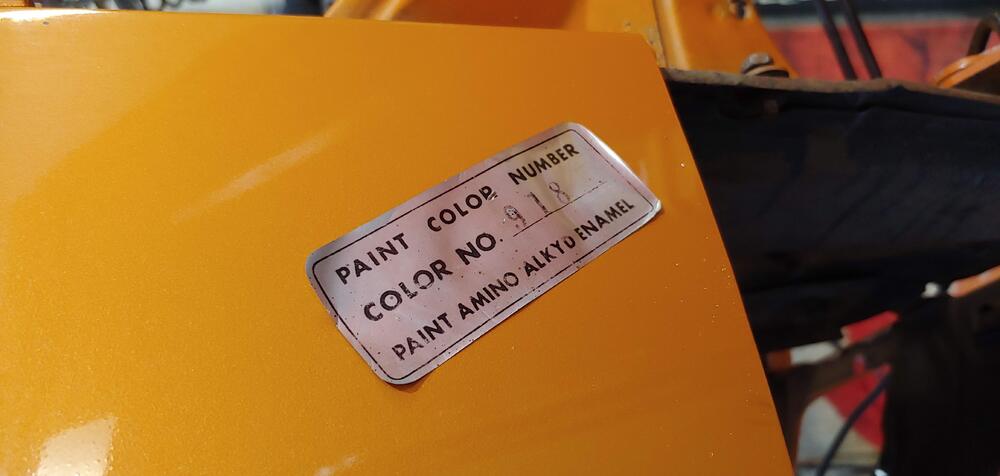
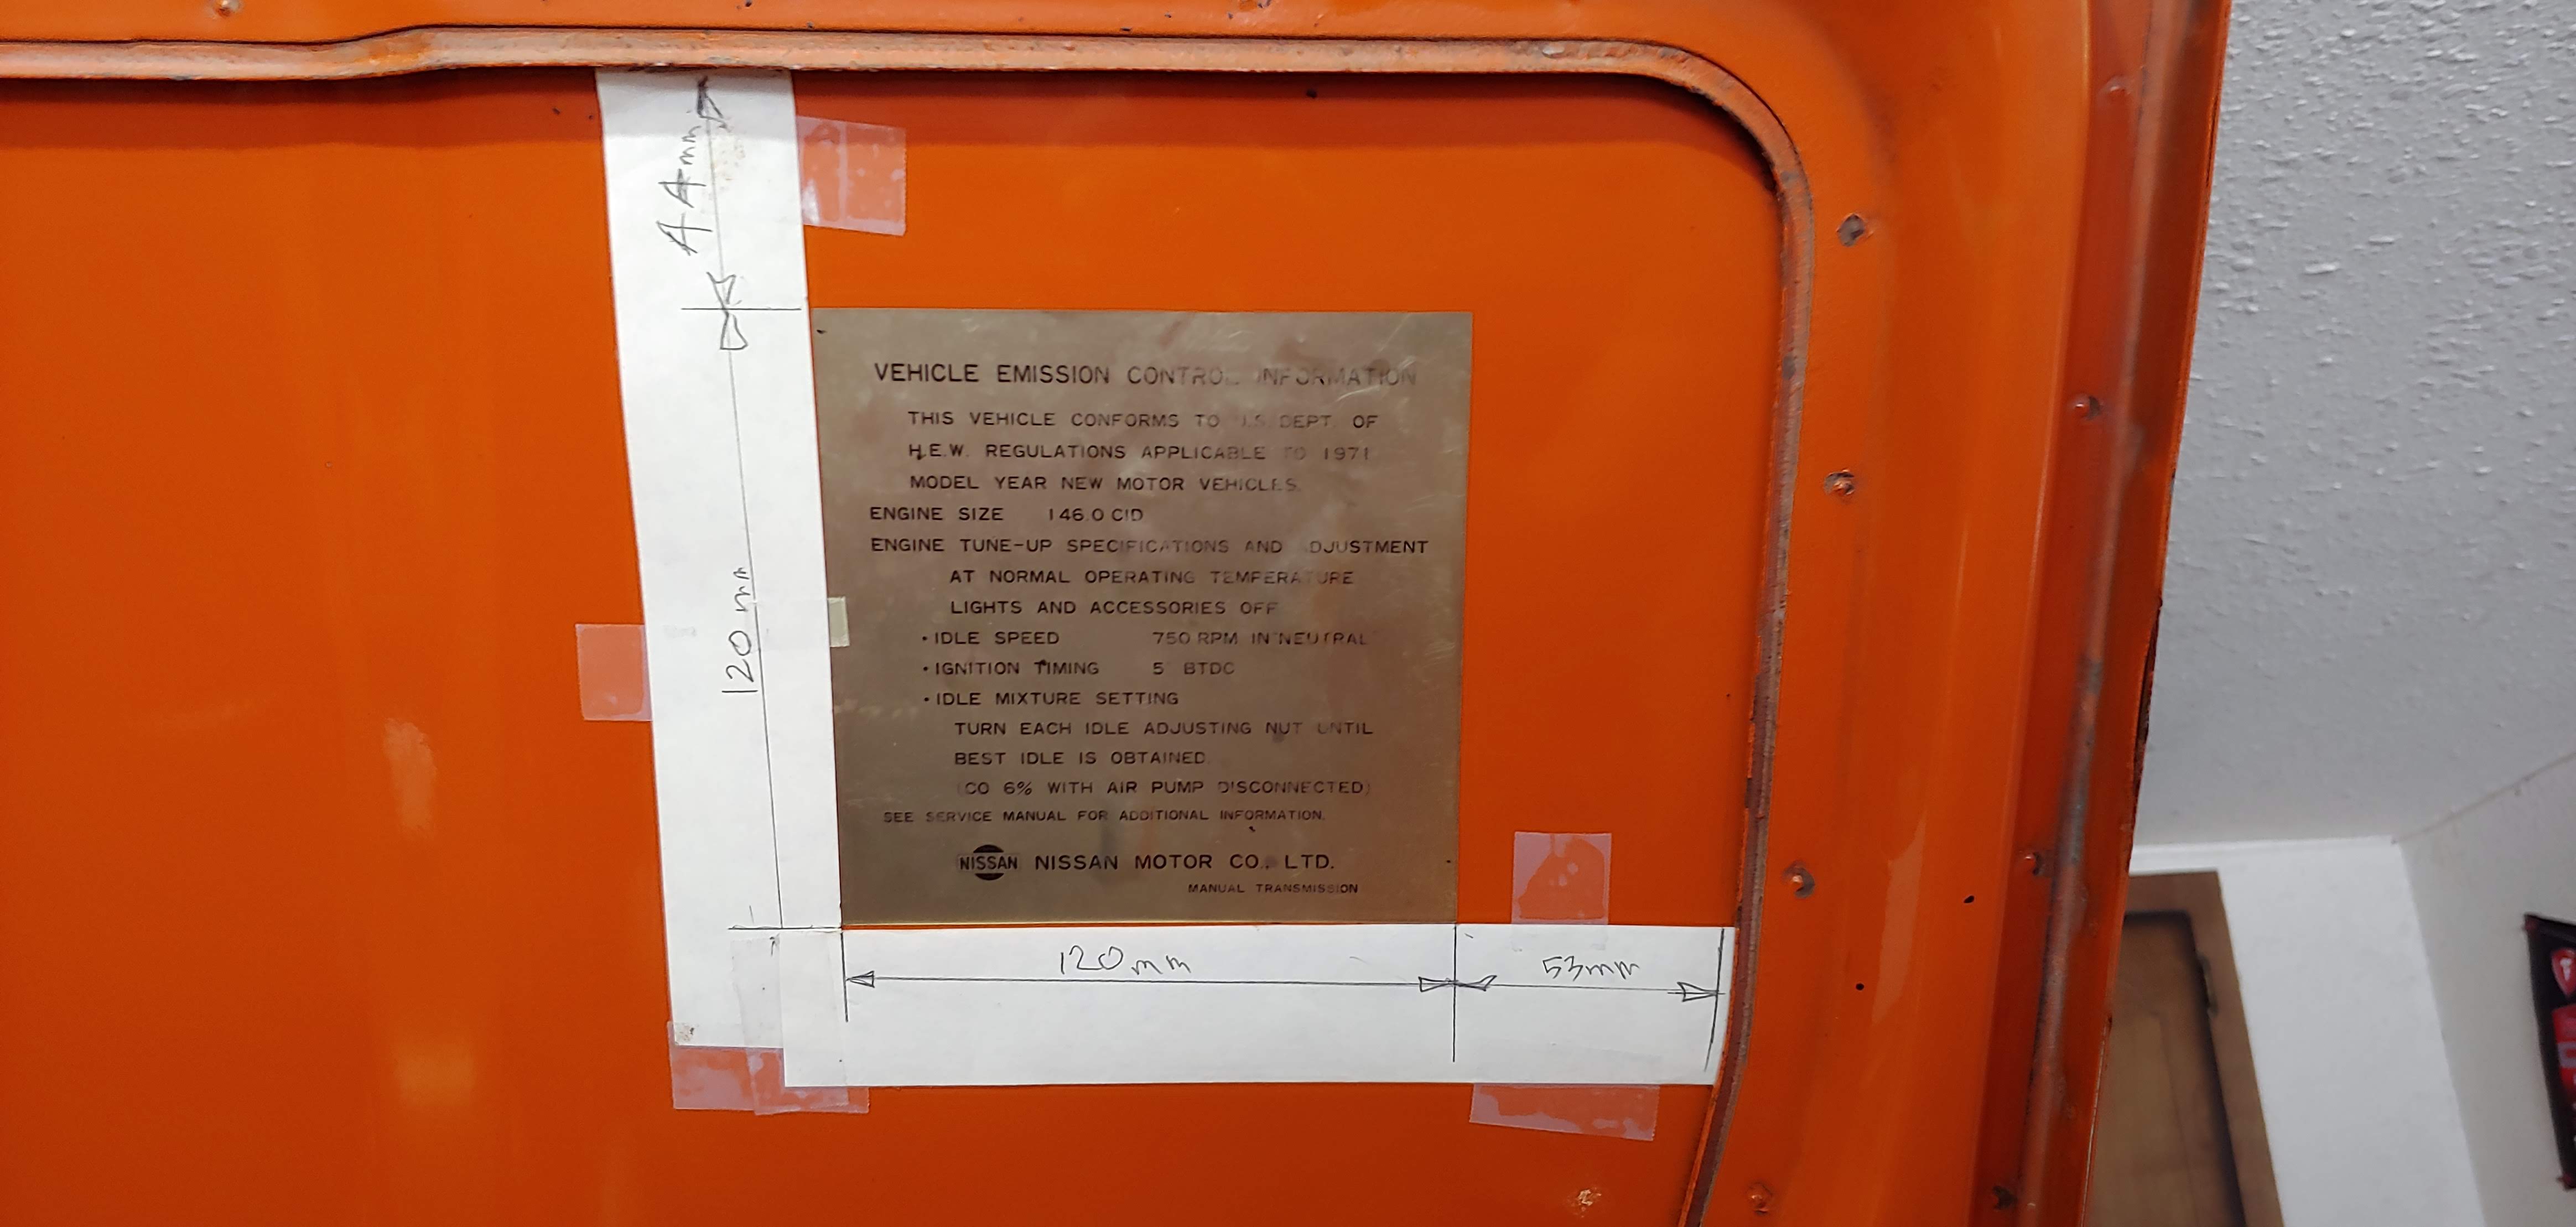
 1 point1 pointHappy to report that the emissions decal also came off with no damage.
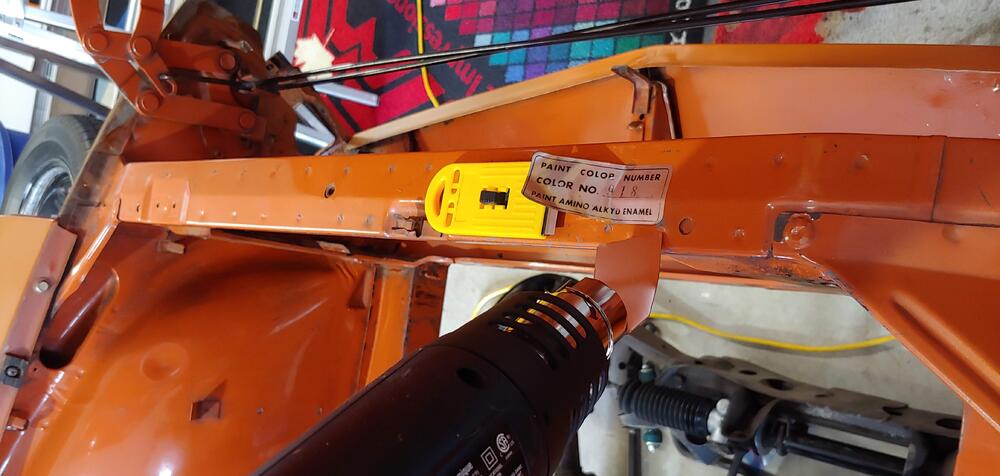
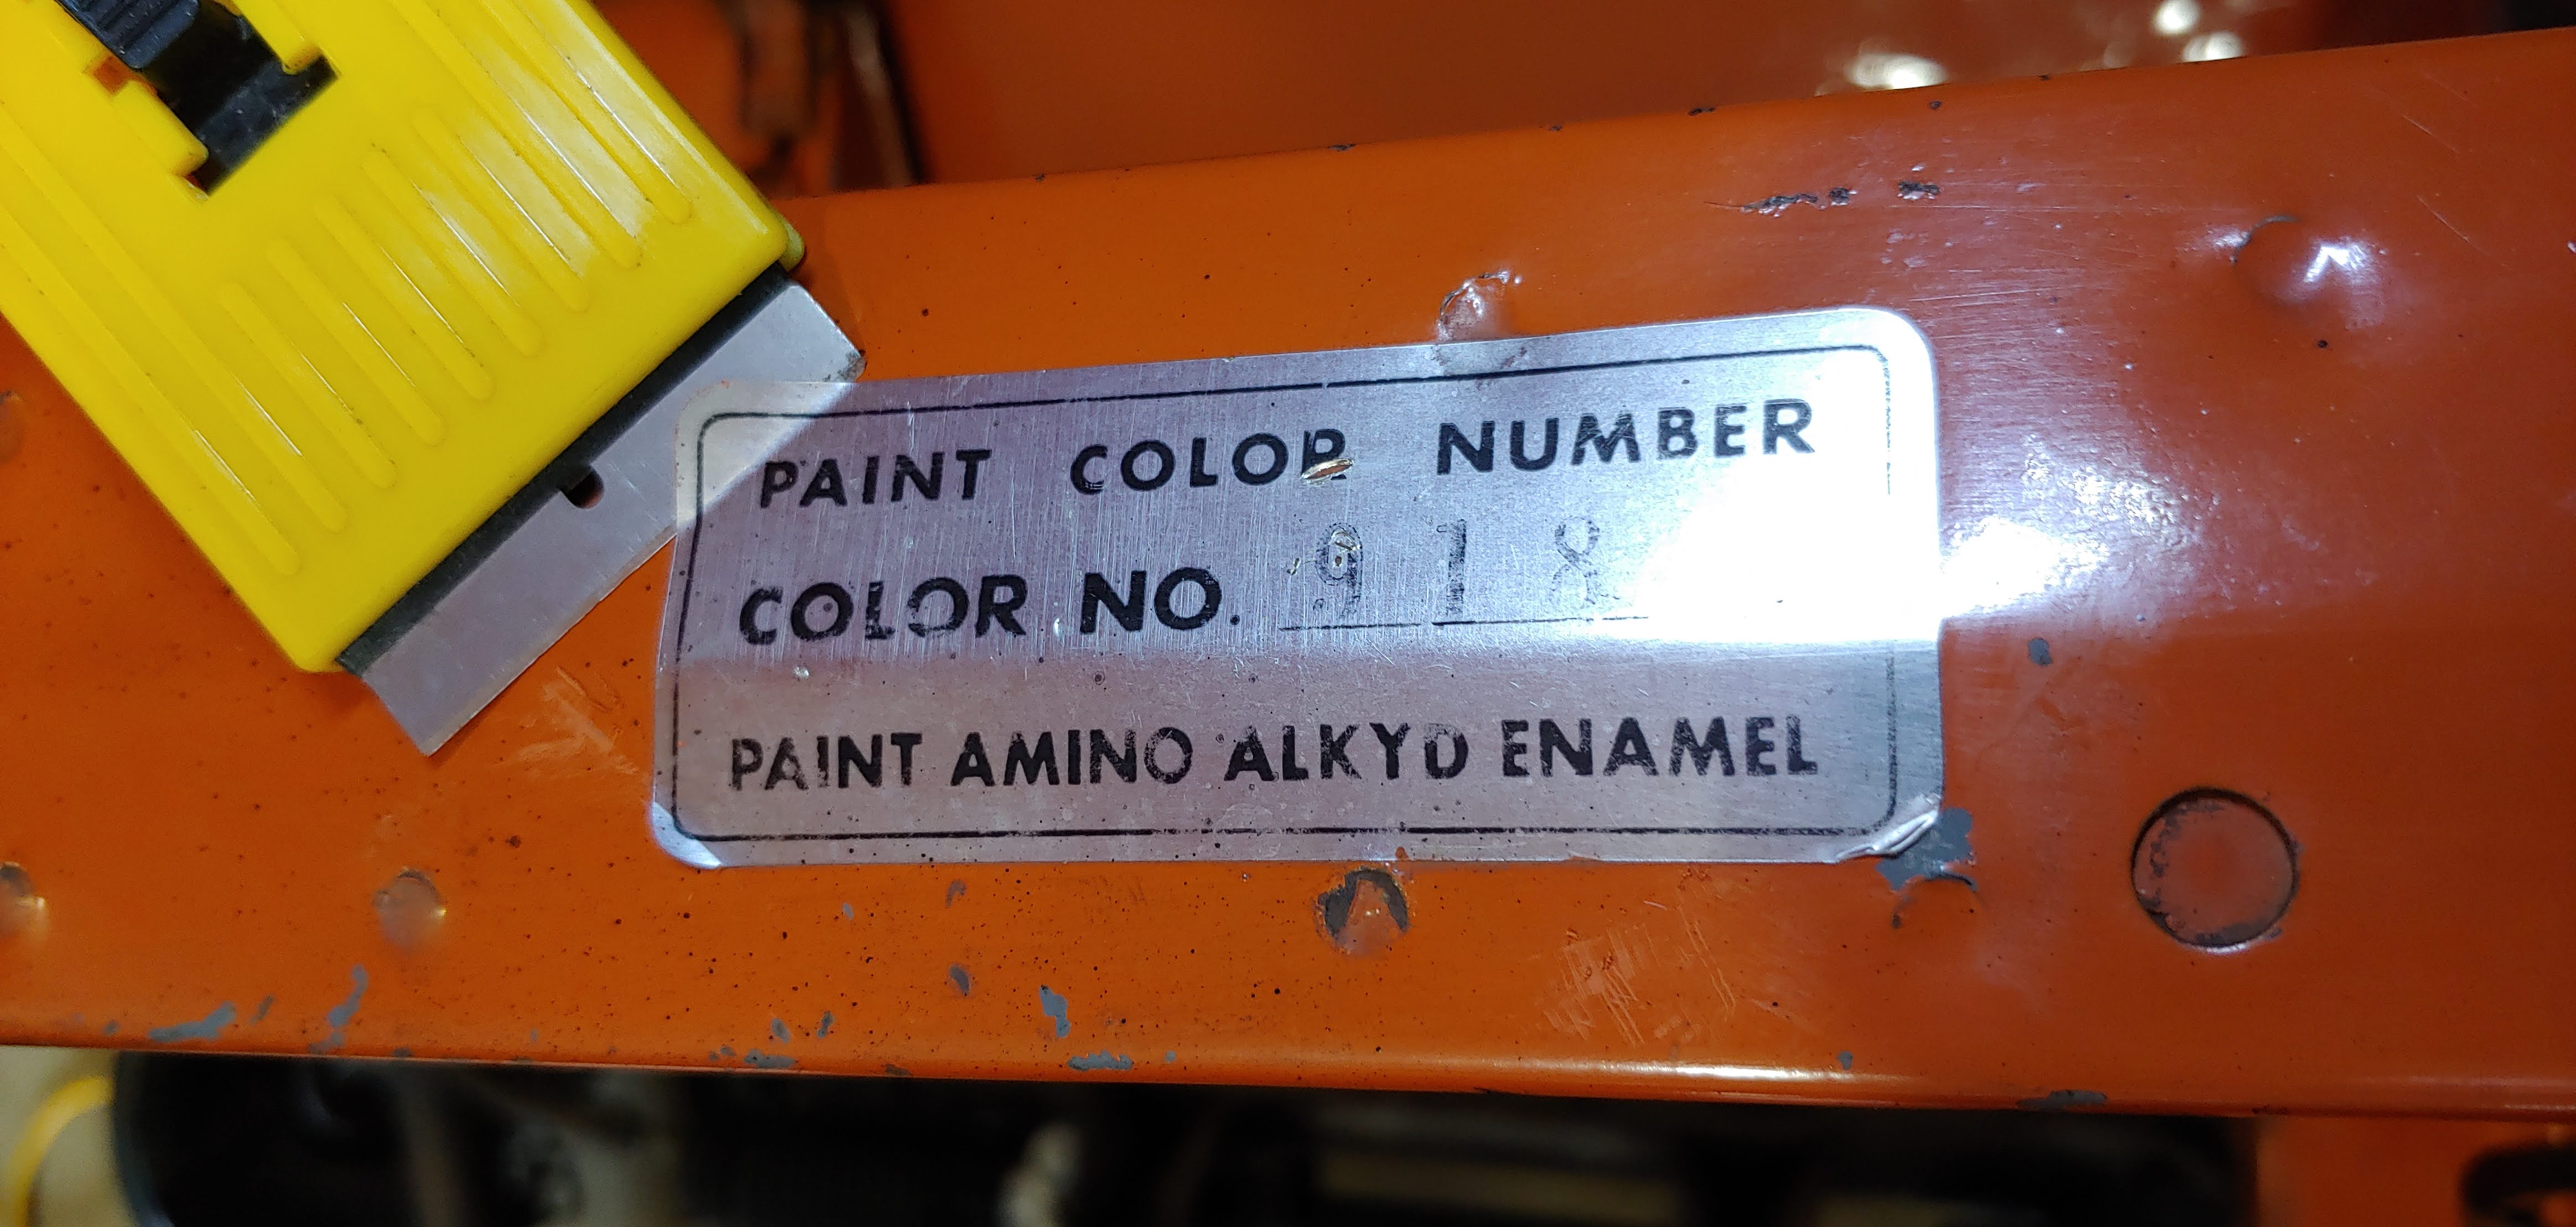
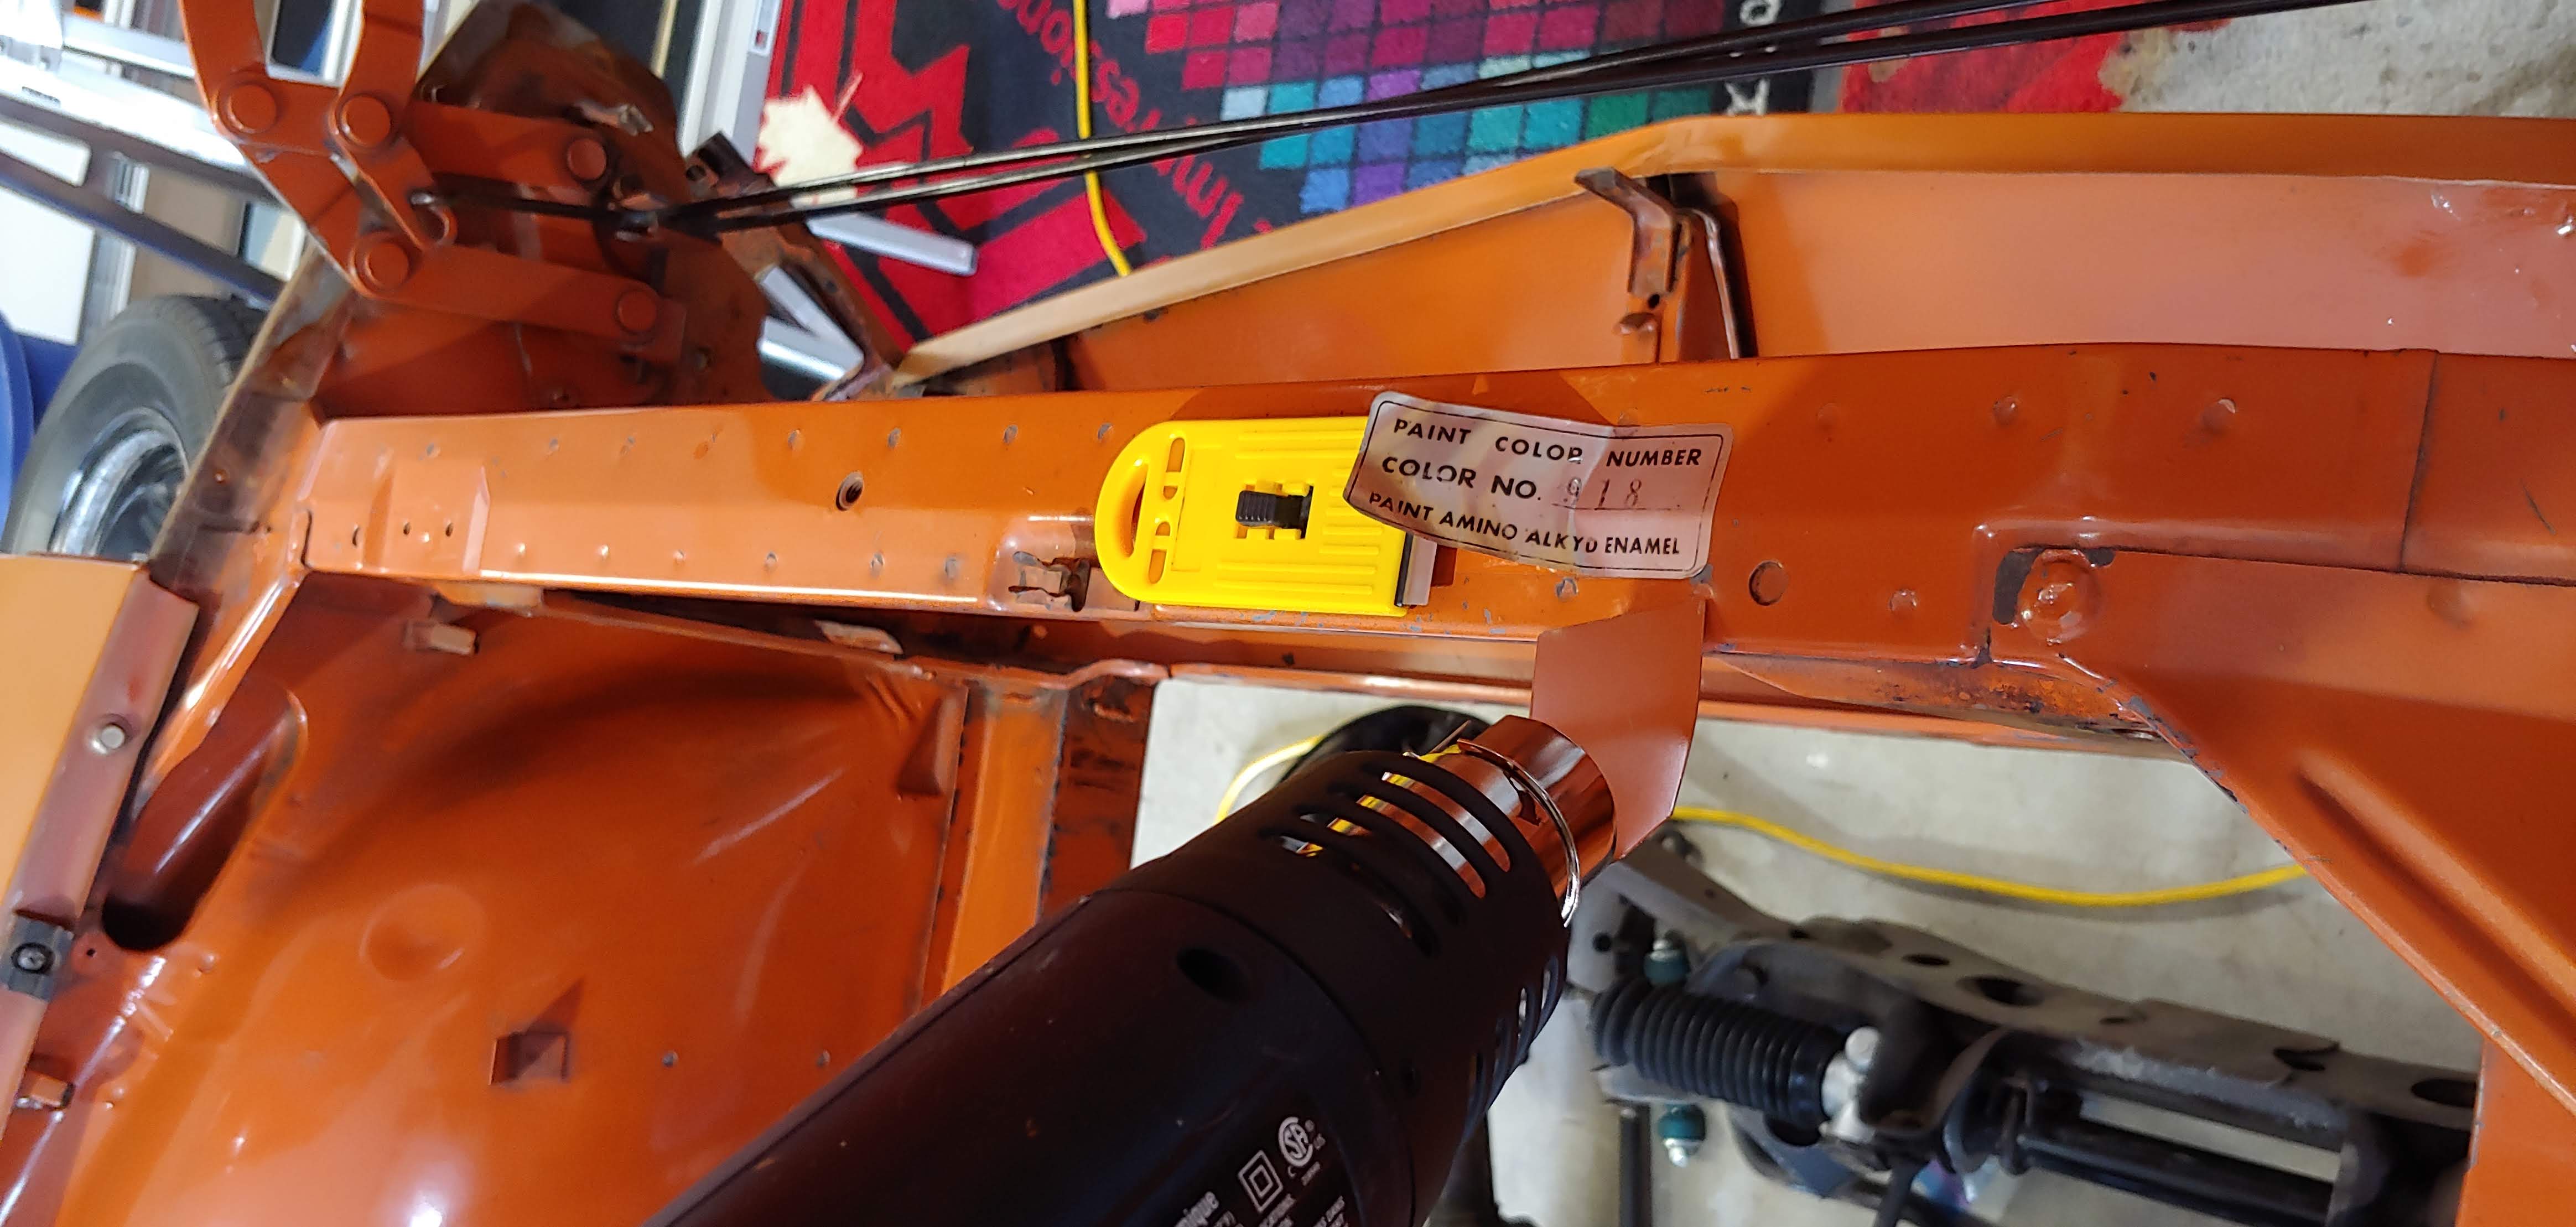
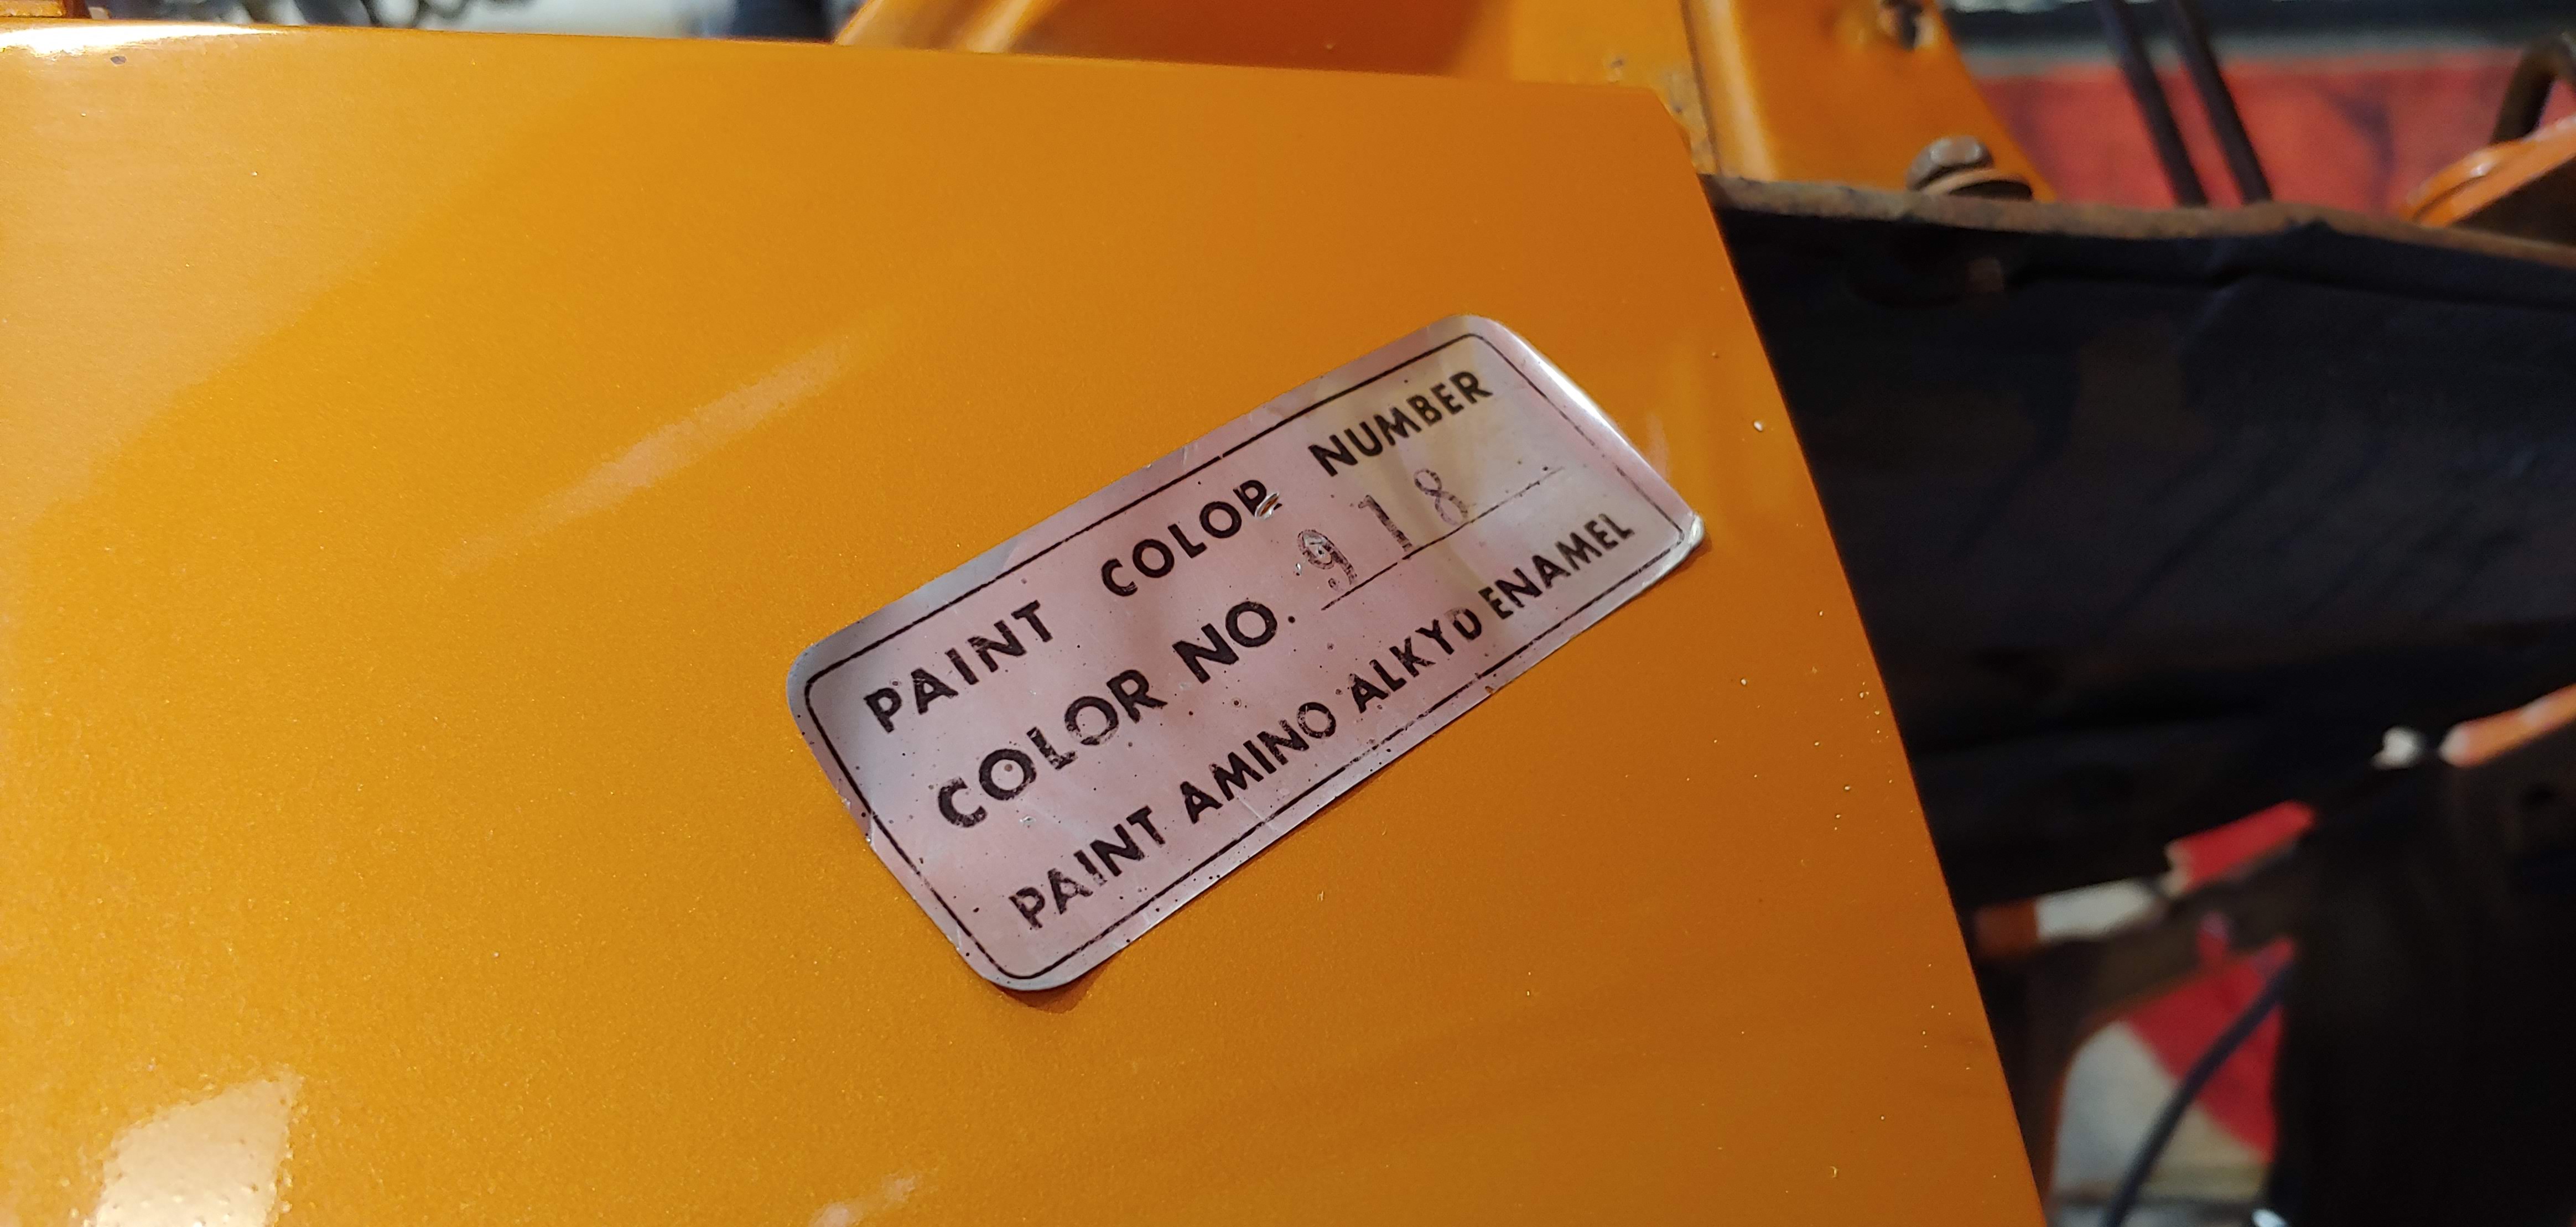
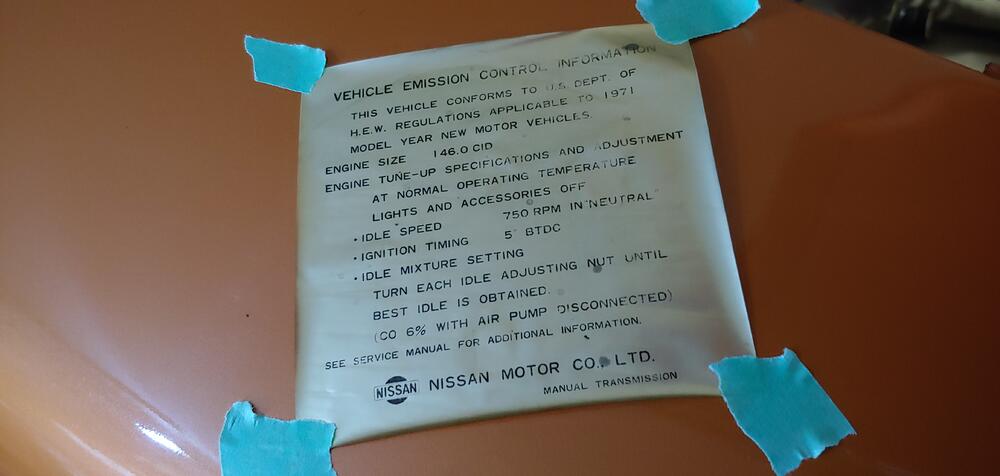 1 point1 pointToday I started removing decals in the engine bay. The emissions decal under the hood and the paint code decal from the upper rad support. So far I have removed the paint code decal successfully in one piece. Has anyone reused these decals, I was surprised that this first one came off so good. Before I started I took a couple of pics to document the size and original position. To remove the paint code decal I used a razor blade and a heat gun (on low). First lightly heating the whole decal and then carefully using the razor blade to lift one corner. Then applied more heat and used the blade to continue lifting until I could hold the corner by hand to apply light tension and use the blade to aid in lifting. I stopped every few minutes to re heat and in about a half hour it was off. Hopefully the emissions decal will come off this nice as well. Even if I don't end up using them, they will be good for reference.
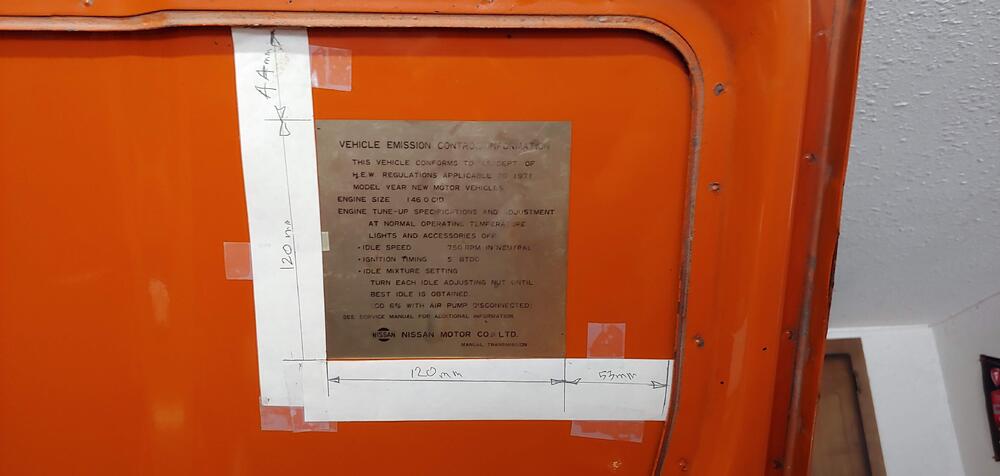

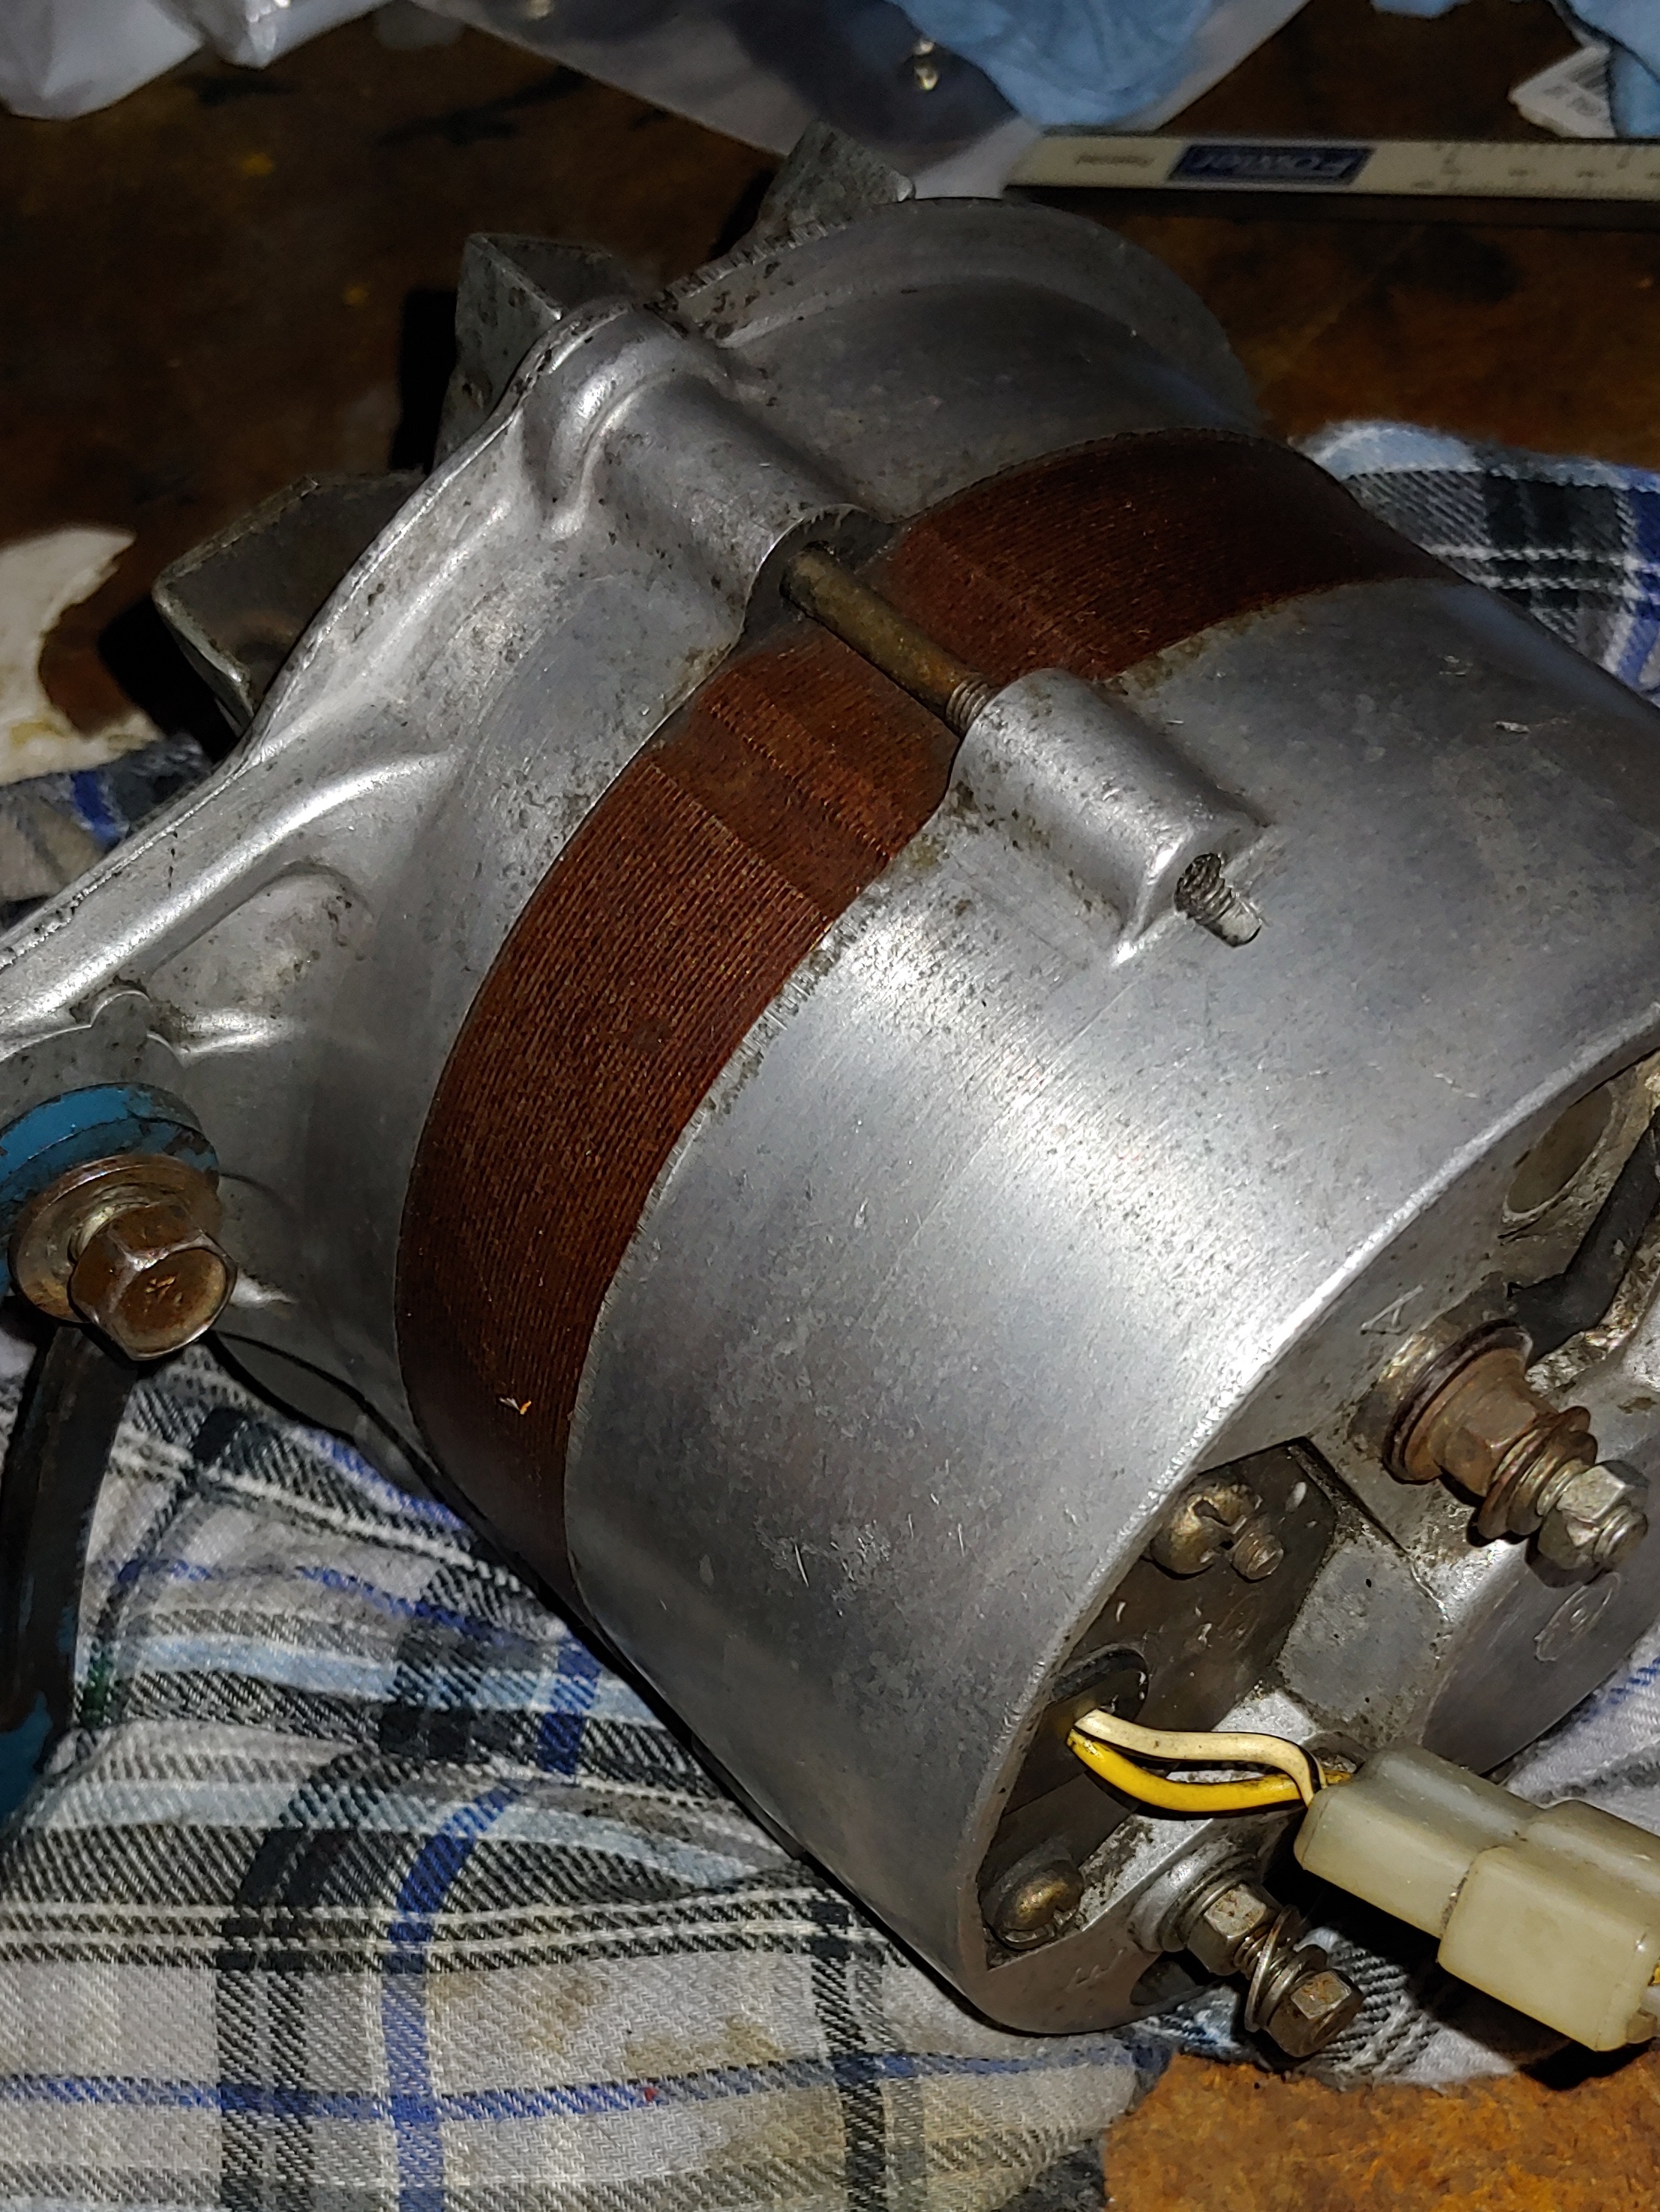
 1 point1 pointThe openings outside the diode packs at the rear of the alternator look similar to a grapefruit cut in half exposing the sections of the fruit.
 1 point1 pointIt is kind of burgandy-ish. I've always called it reddish brown.
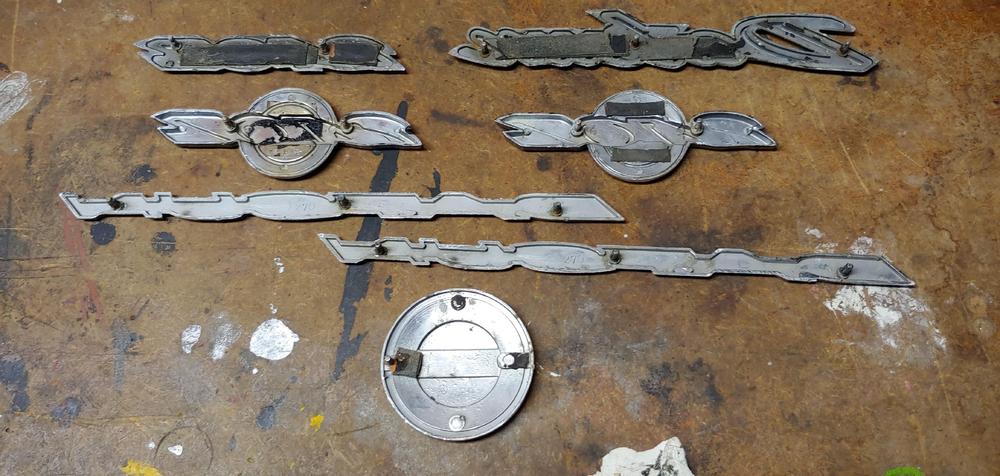
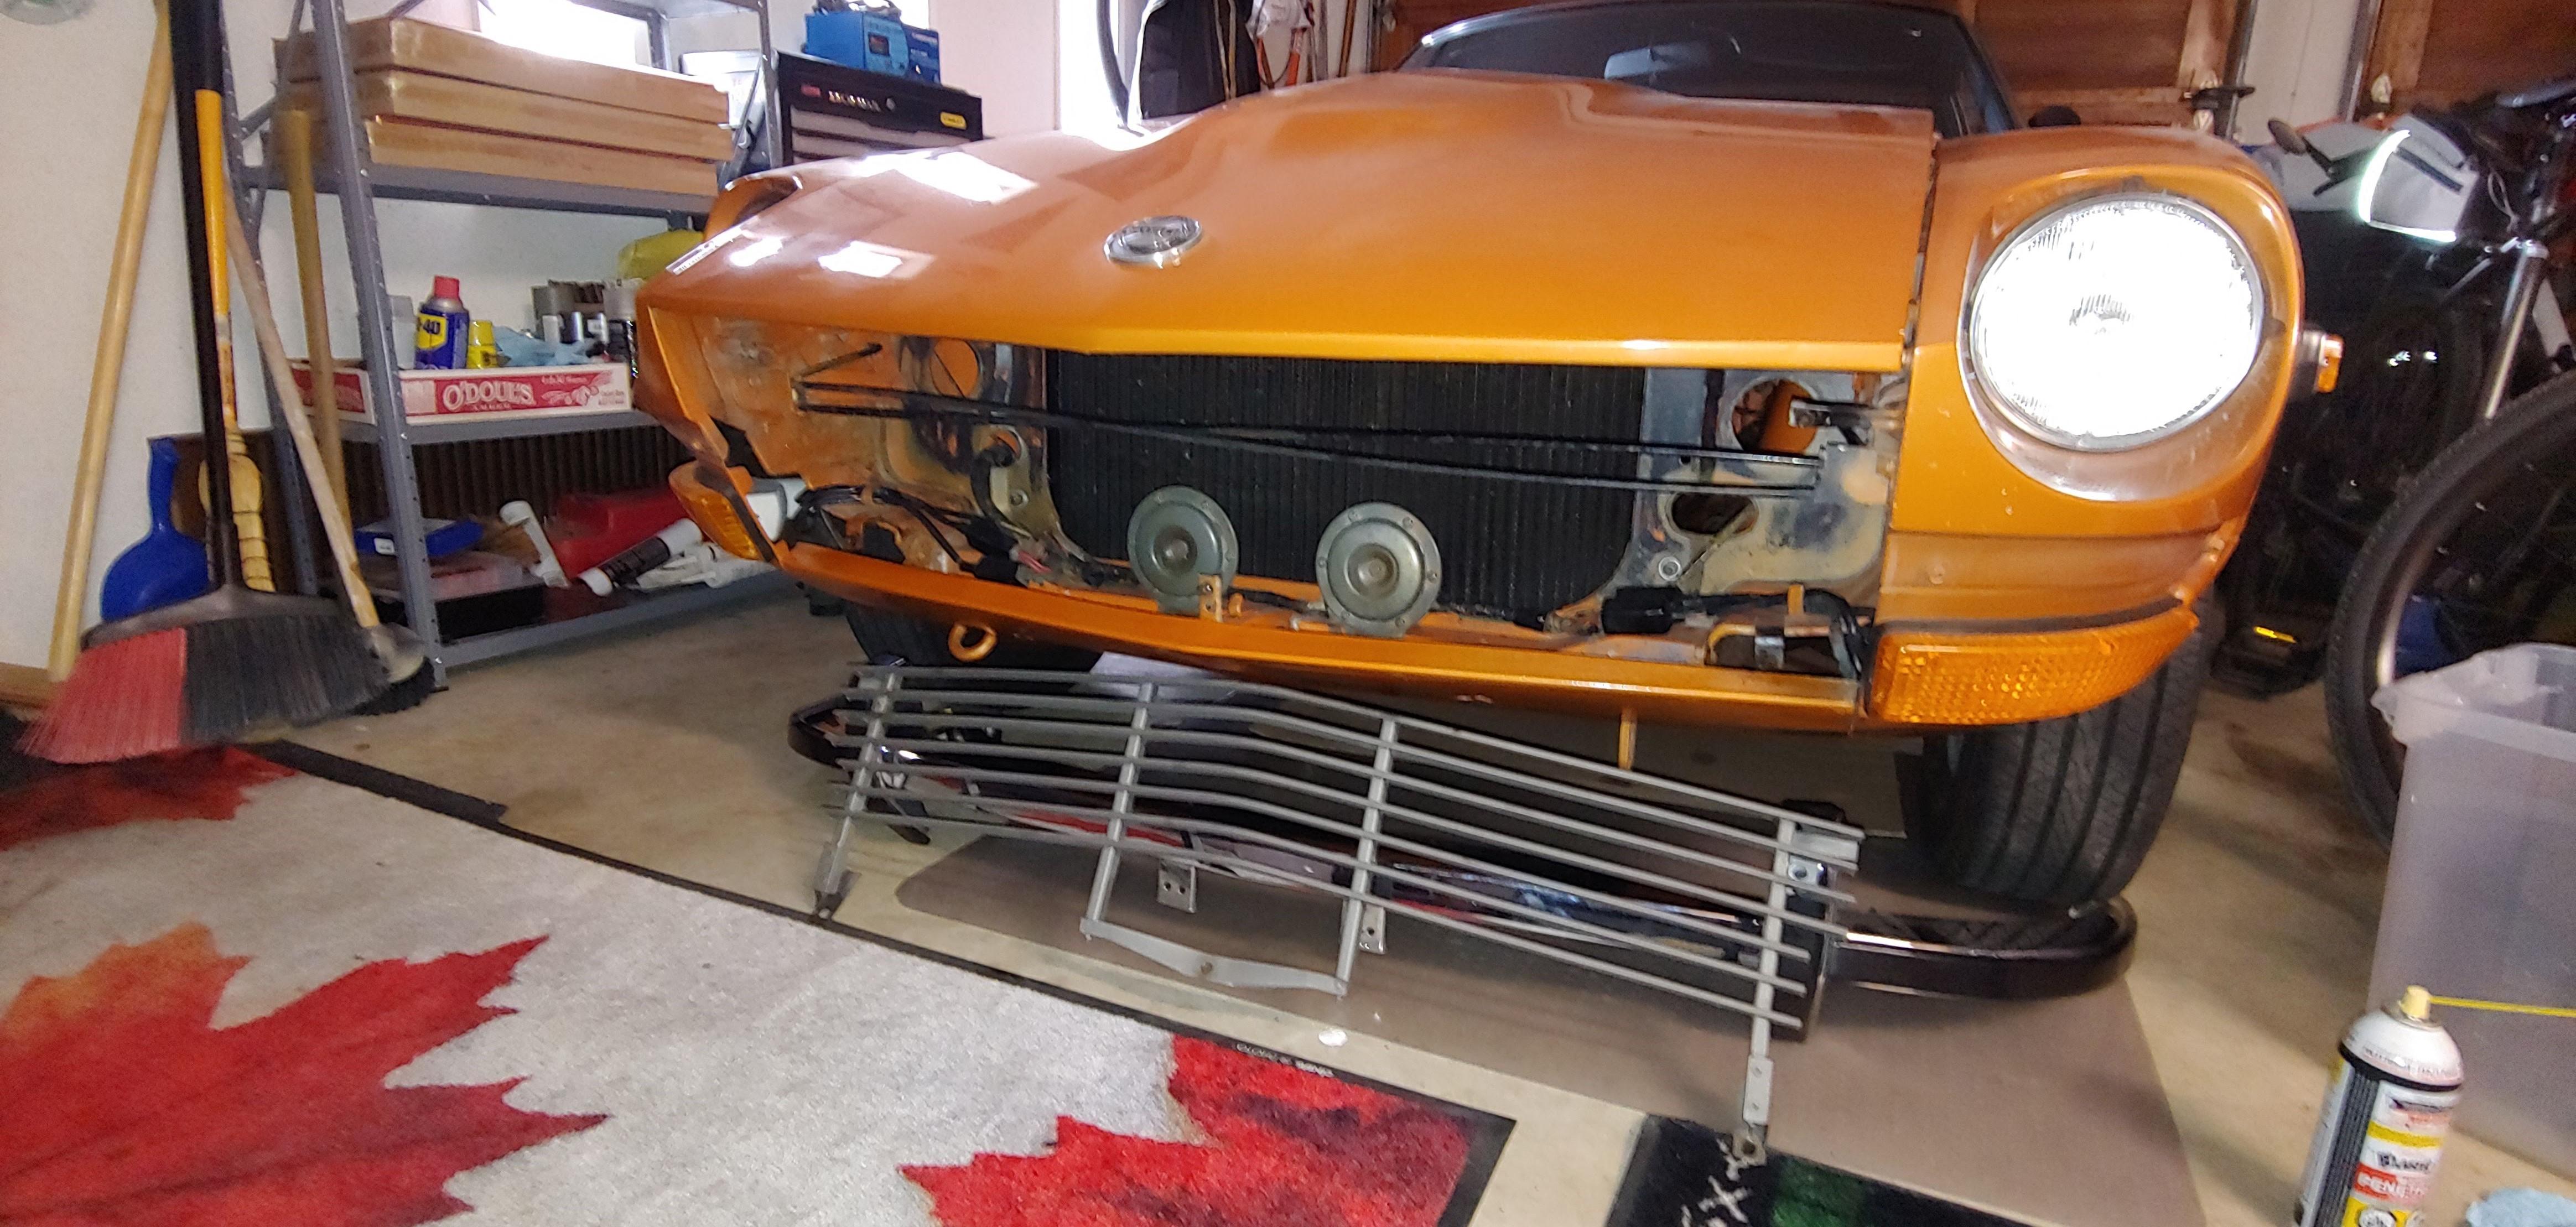
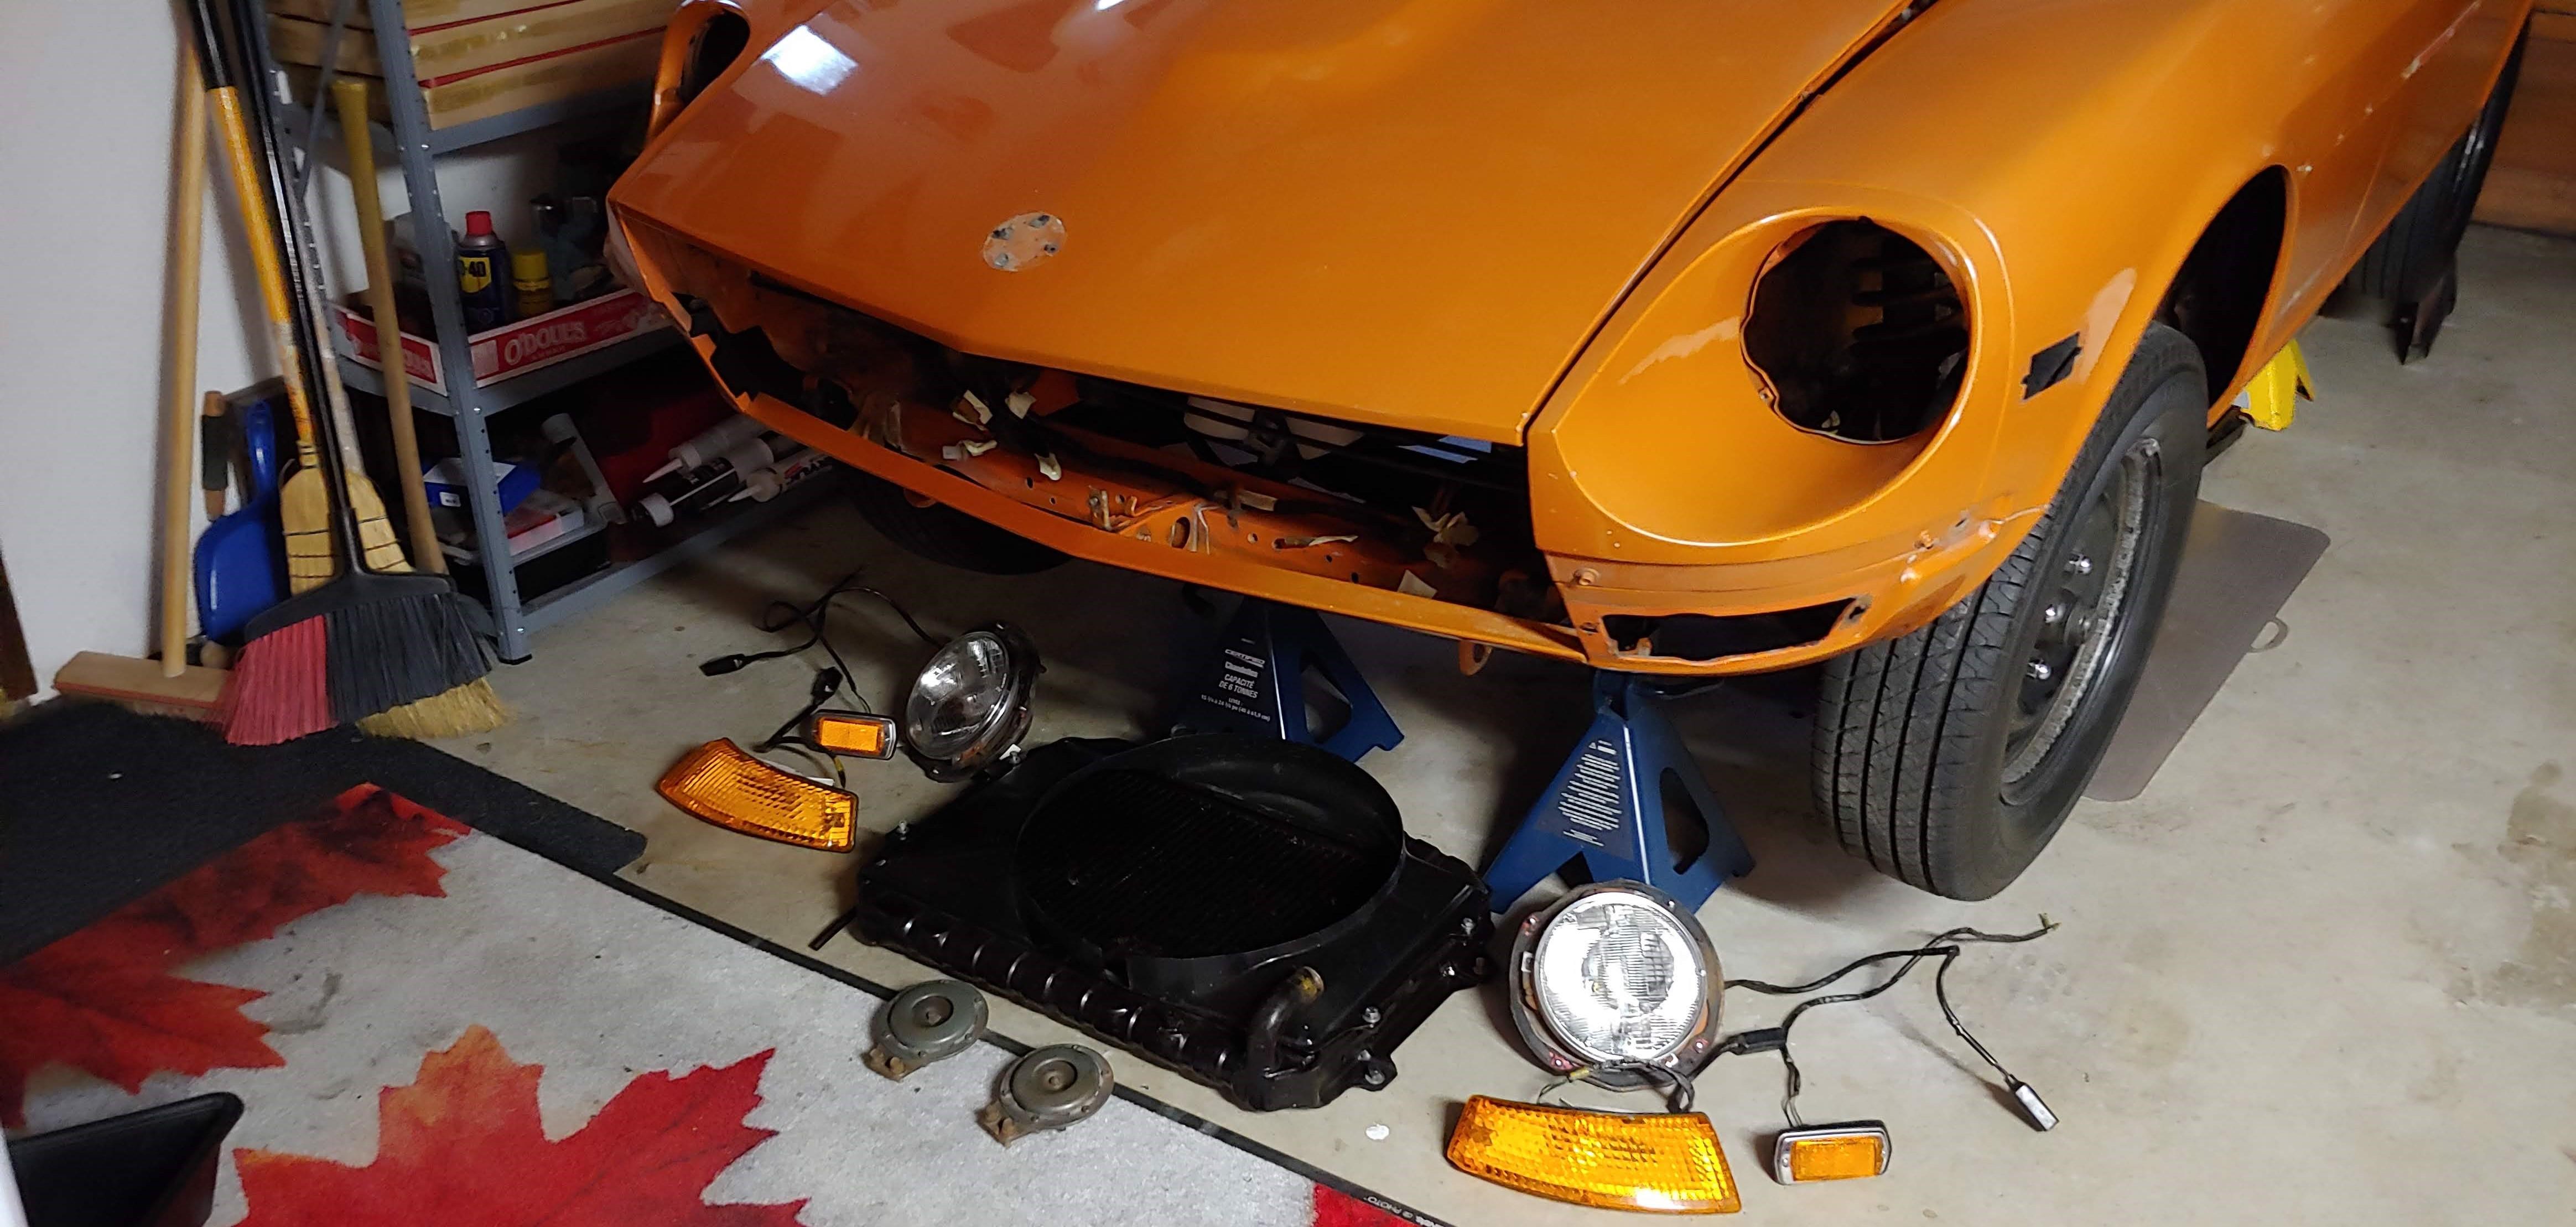
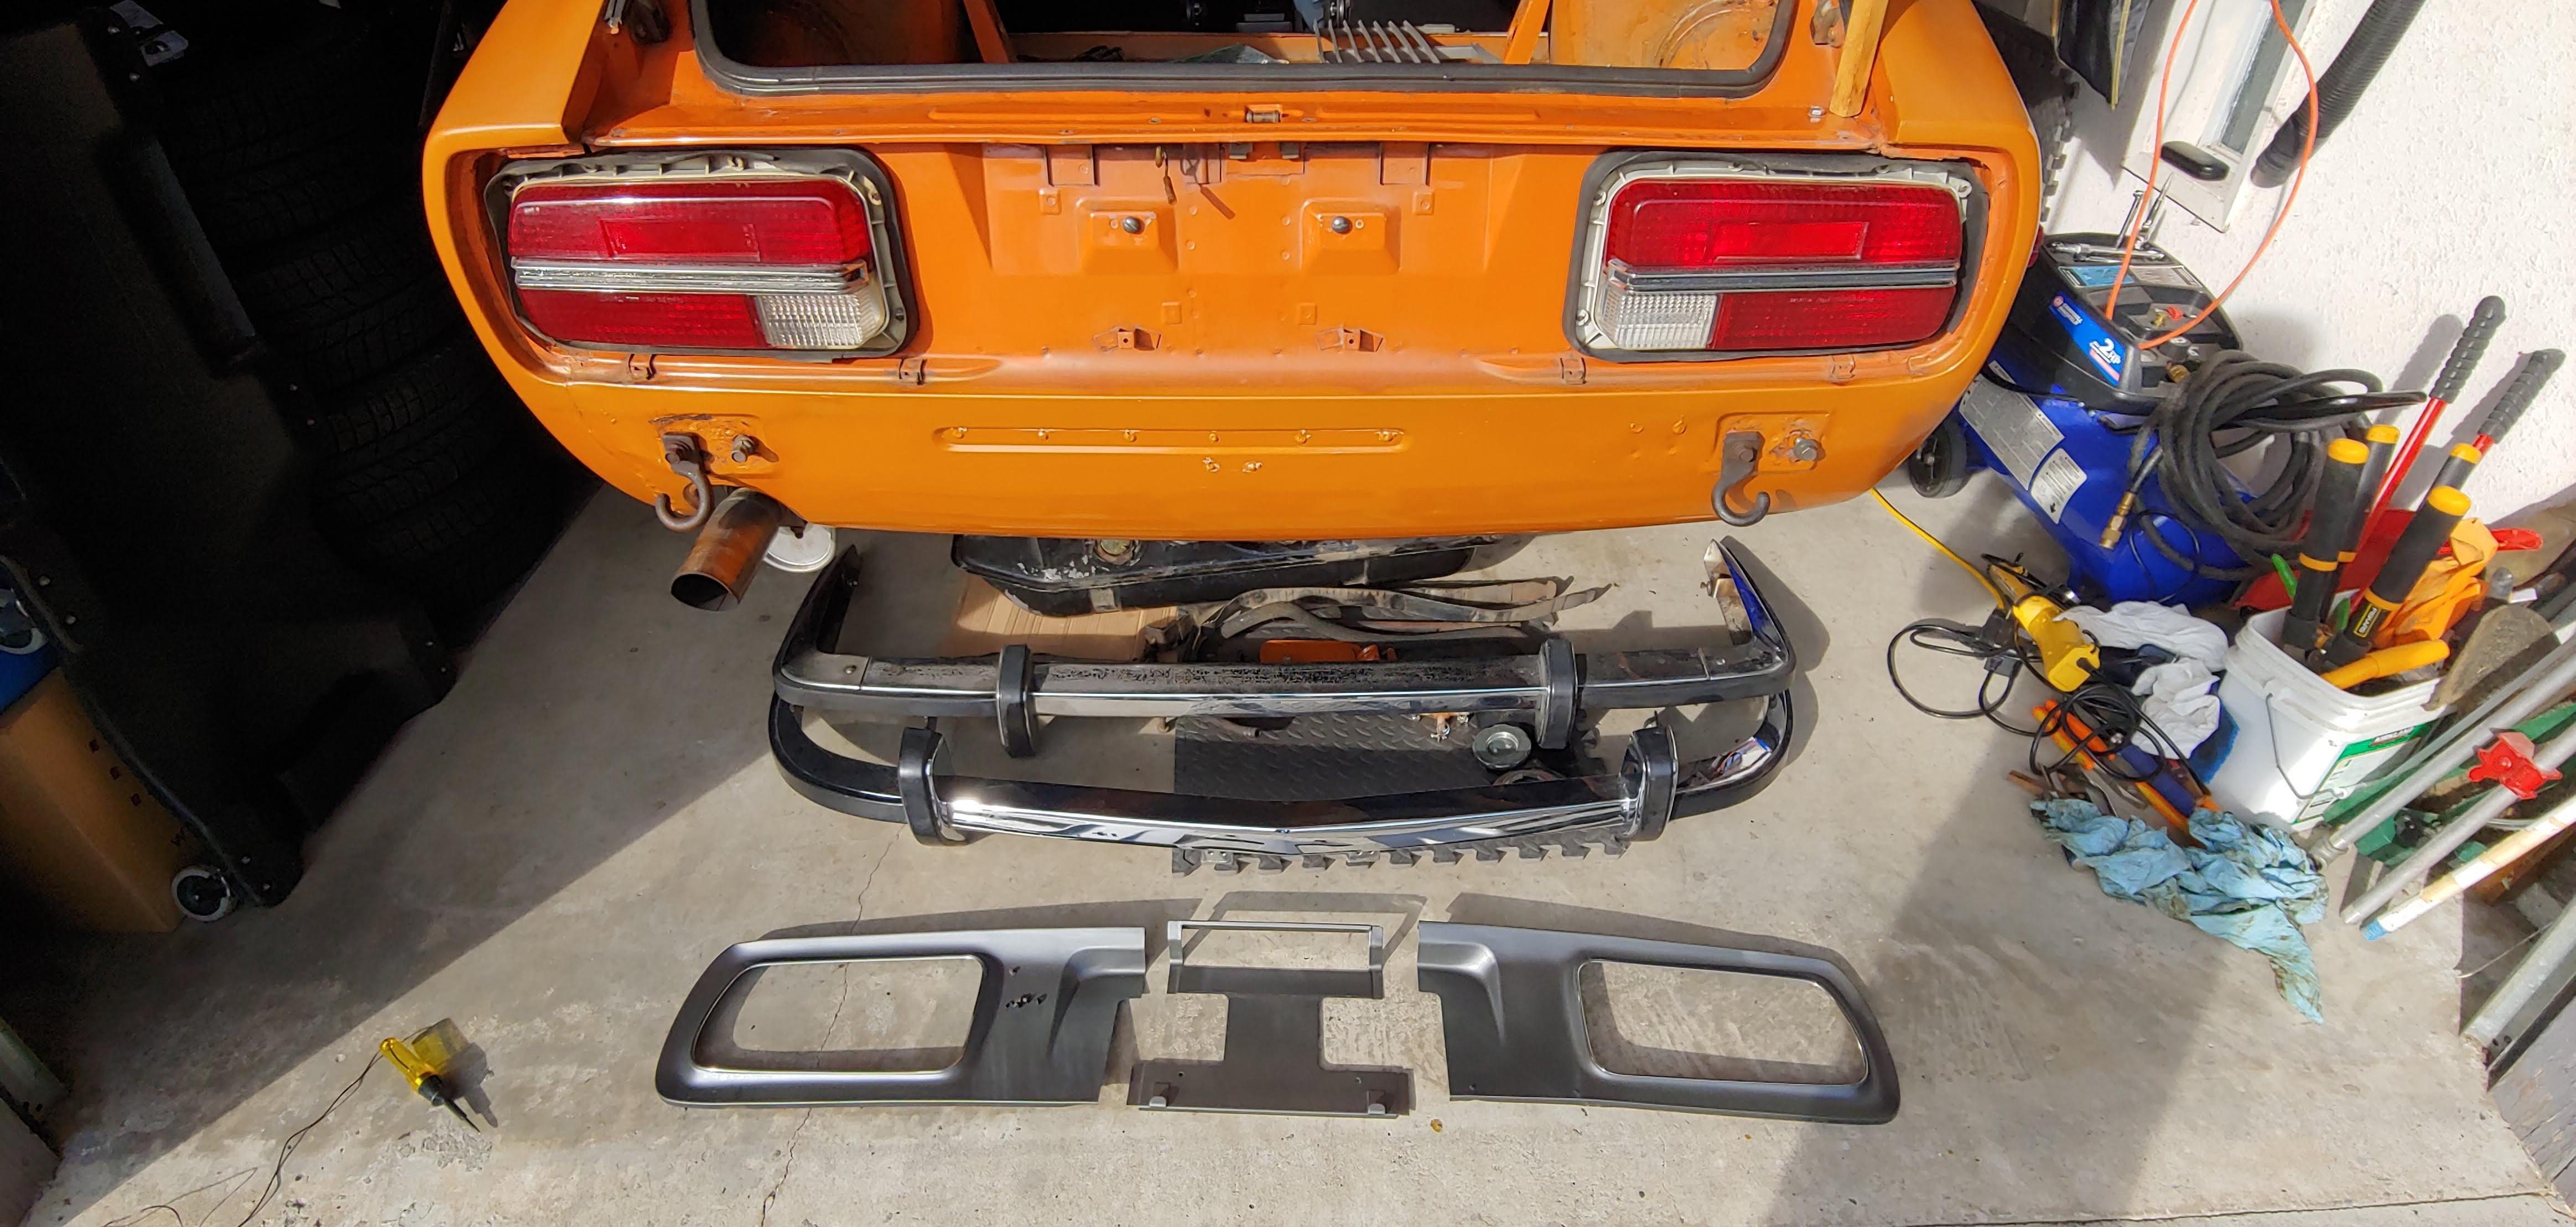
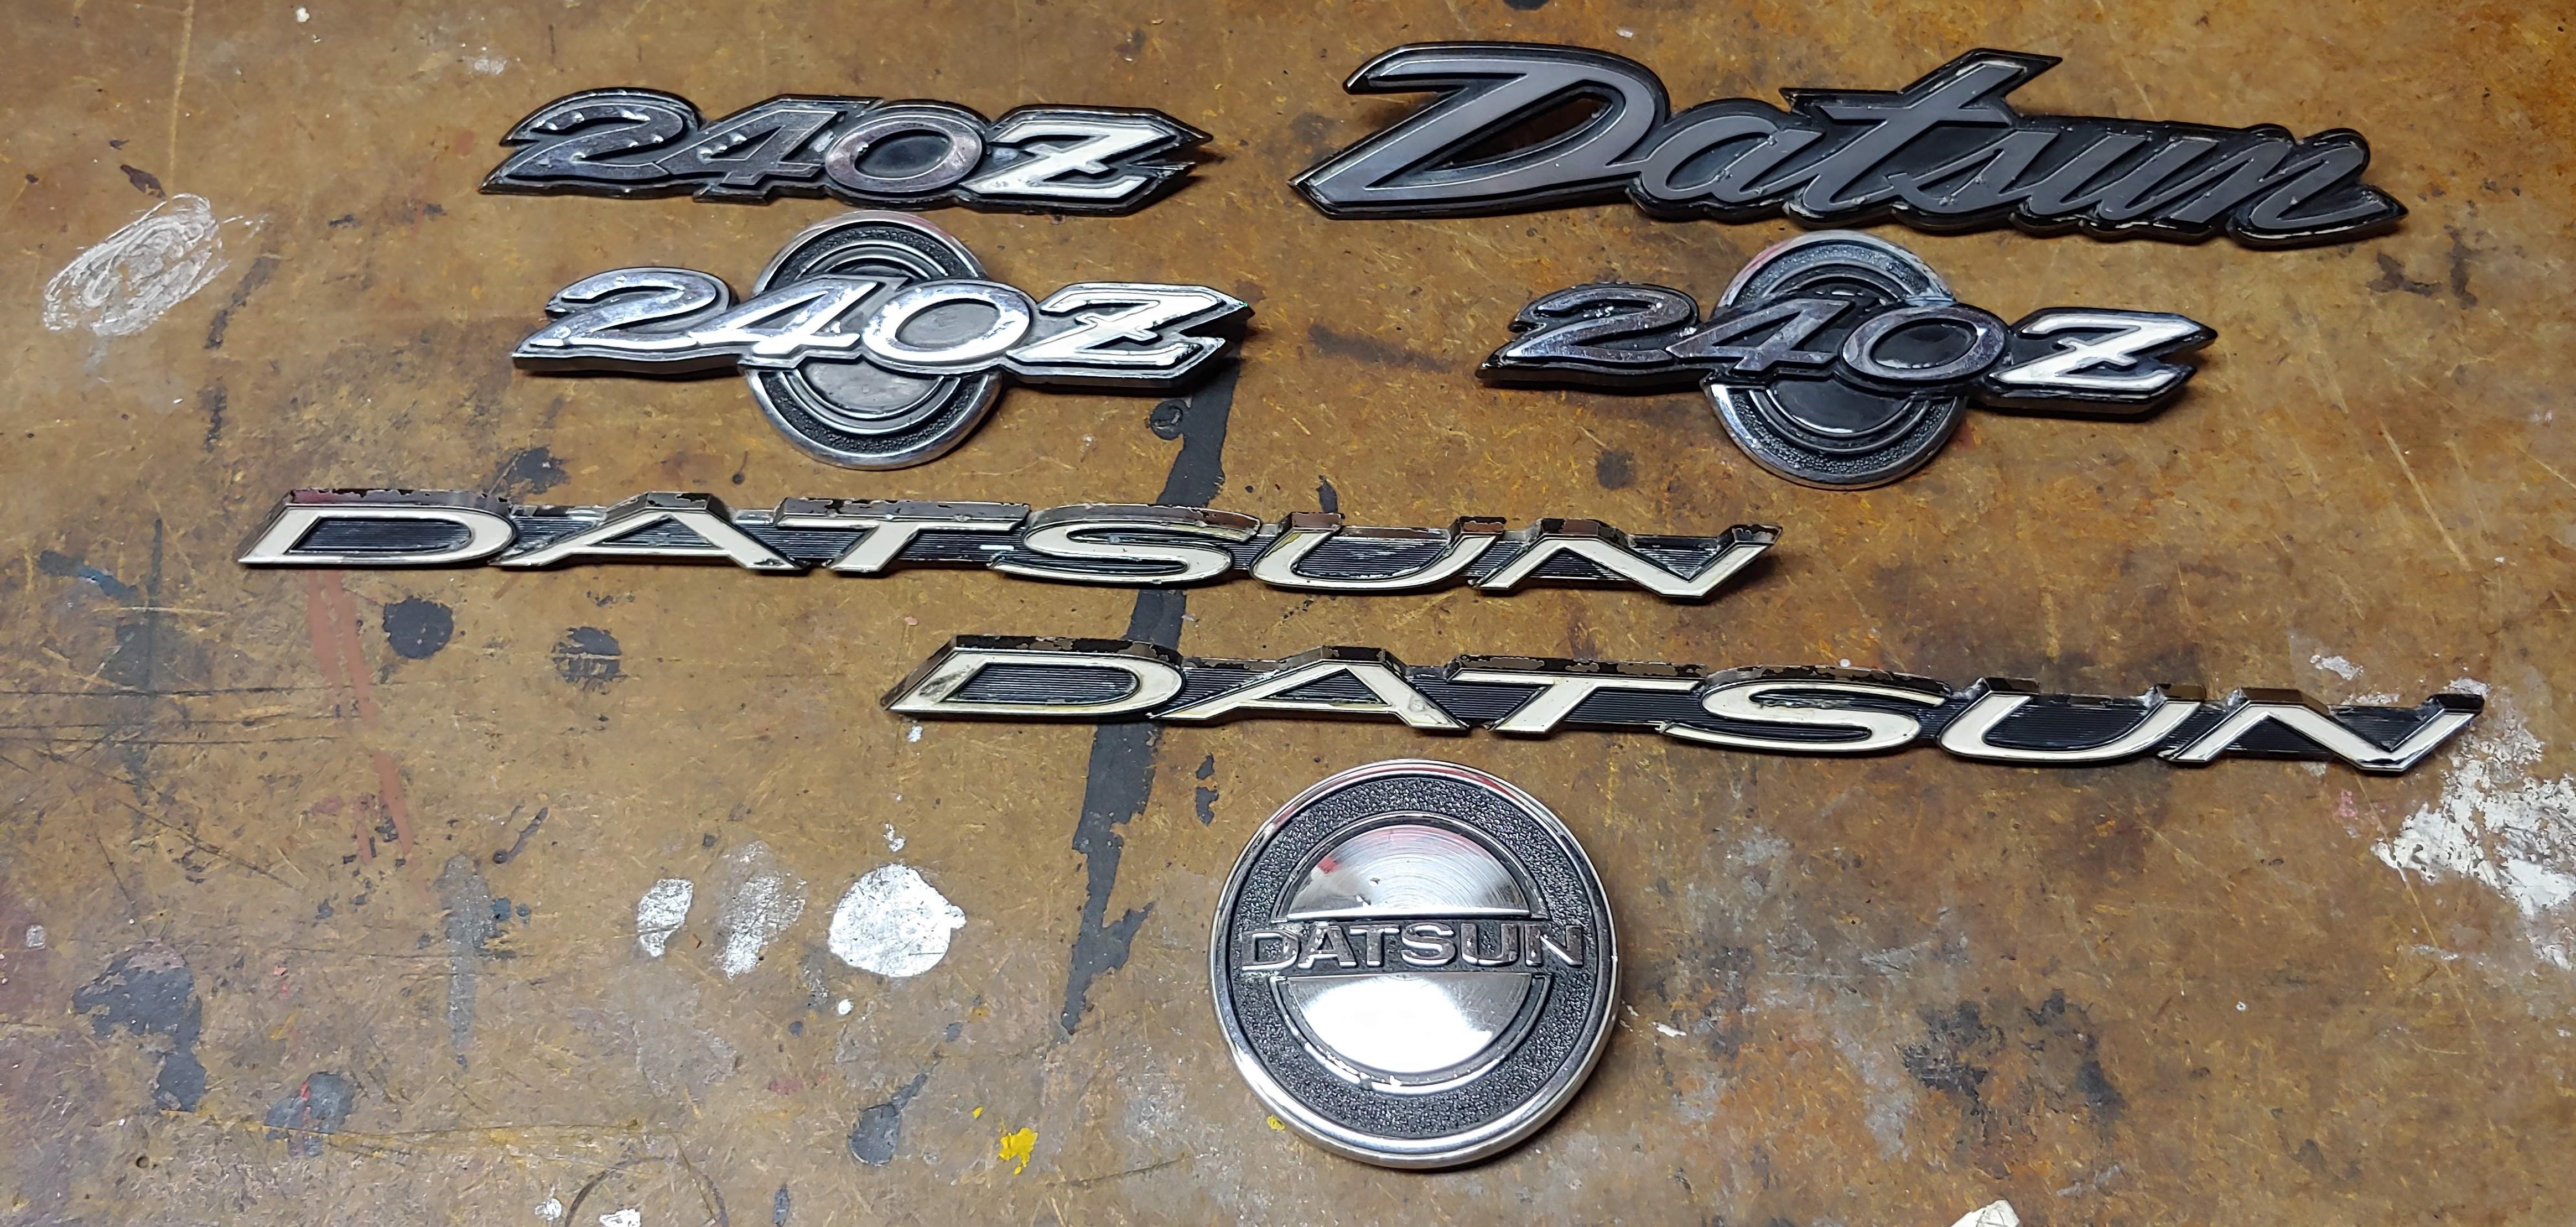
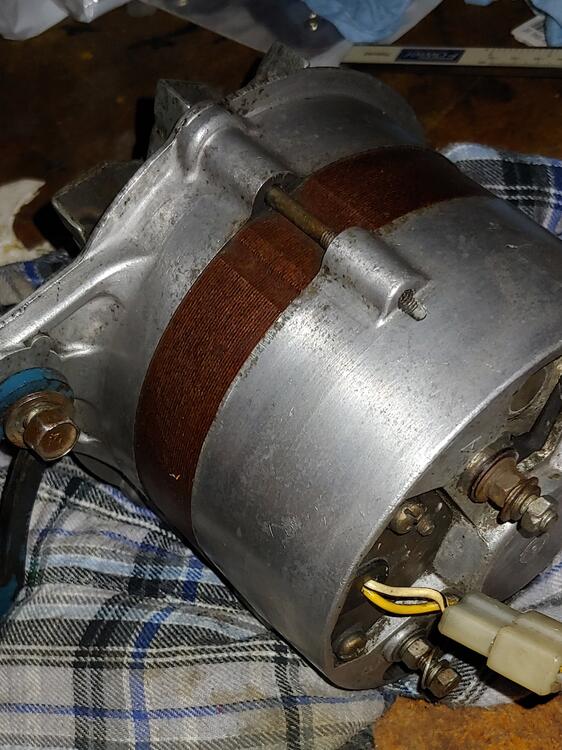 1 point1 pointSlowly making progress over the last couple of weeks, removed front and rear bumpers, grill and all lights, horns and tail light finisher. Also drained and removed the fuel tank and removed all emblems. Drained coolant, removed fan shroud, radiator and battery. So far no parts have been harmed and no stripped fasteners. Wick Humbles book has proved useful. This would probably have been less that half a day for @motorman7. Lol Happy to report that all of the emblems are metal originals, not the later plastic replacements. No posts were broken during removal, I did find that the front hood emblem was missing one post and had a lot of double sided adhesive tape keeping it in place. I used a flat putty knife to remove them.
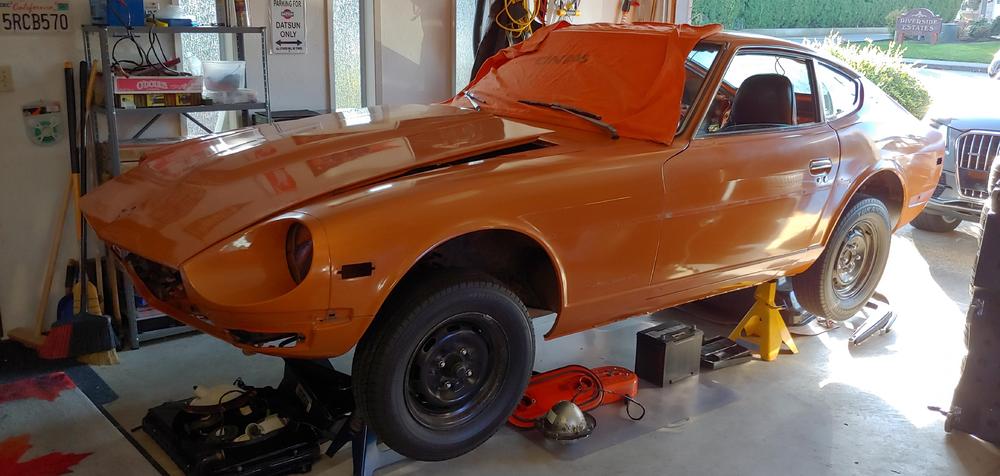


 1 point1 pointGood news to report, my Samurai sold so I now have the room to start disassembling my car, and no more excuses not to start, LOL. The first order of business was to document the existing condition. In a addition to taking countless pictures I shot several videos of the exterior, engine bay, interior and chassis. Hopefully these will be a help when it comes time to put my car back together. It's amazing to me that no matter how many pictures I take to document things, I still manage to miss things. For those you are interested, I am posting the videos here. Just a warning, I will not be responsible for the time lost if you watch them. They are quite long. Exterior condition; Engine bay condition: Interior condition (1 of 2): Interior condition (2 of 2): Chassis condition (1 of 2): Chassis condition (2 of 2): Oops this is 1 of 2, don't seem to be able to delete a video link here is 2 of 21 point


Important Information
By using this site, you agree to our Privacy Policy and Guidelines. We have placed cookies on your device to help make this website better. You can adjust your cookie settings, otherwise we'll assume you're okay to continue.