Leaderboard
-

CW240Z72
Free Member8Points229Posts -
Captain Obvious
Free Member6Points10,081Posts -

Av8ferg
Free Member4Points1,538Posts -
Patcon
 Subscriber
 4Points11,142Posts


Popular Content
Showing content with the highest reputation on 08/31/2021 in all areas
-
6 pointsFirst print complete. A little tweaking on the hole spacing and it should be good. I need to double check that the overall height isn’t an issue for the console.

 6 points
 -
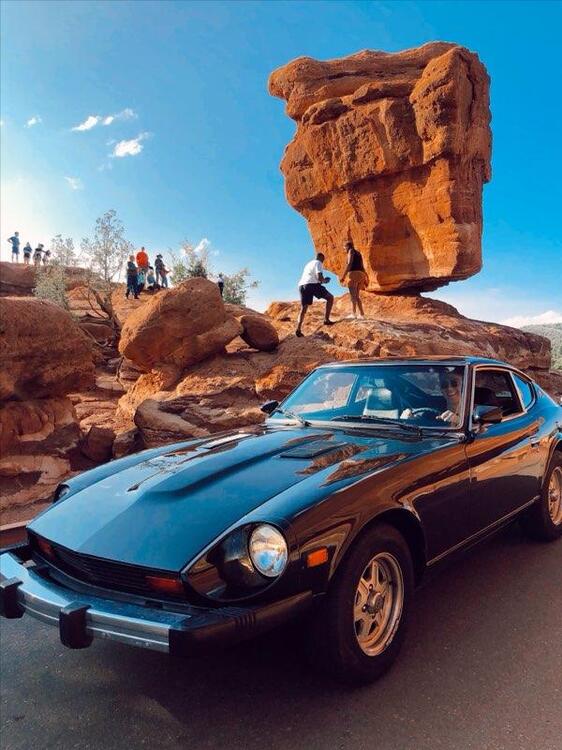
3 pointsInterestingly enough, I packed so much stuff to do in Colorado that there wasn't much time left to develop a haze. I think I made it to just two brewpubs the entire time I spent there. Something had to give. Haha!!3 points
-
3 points
-
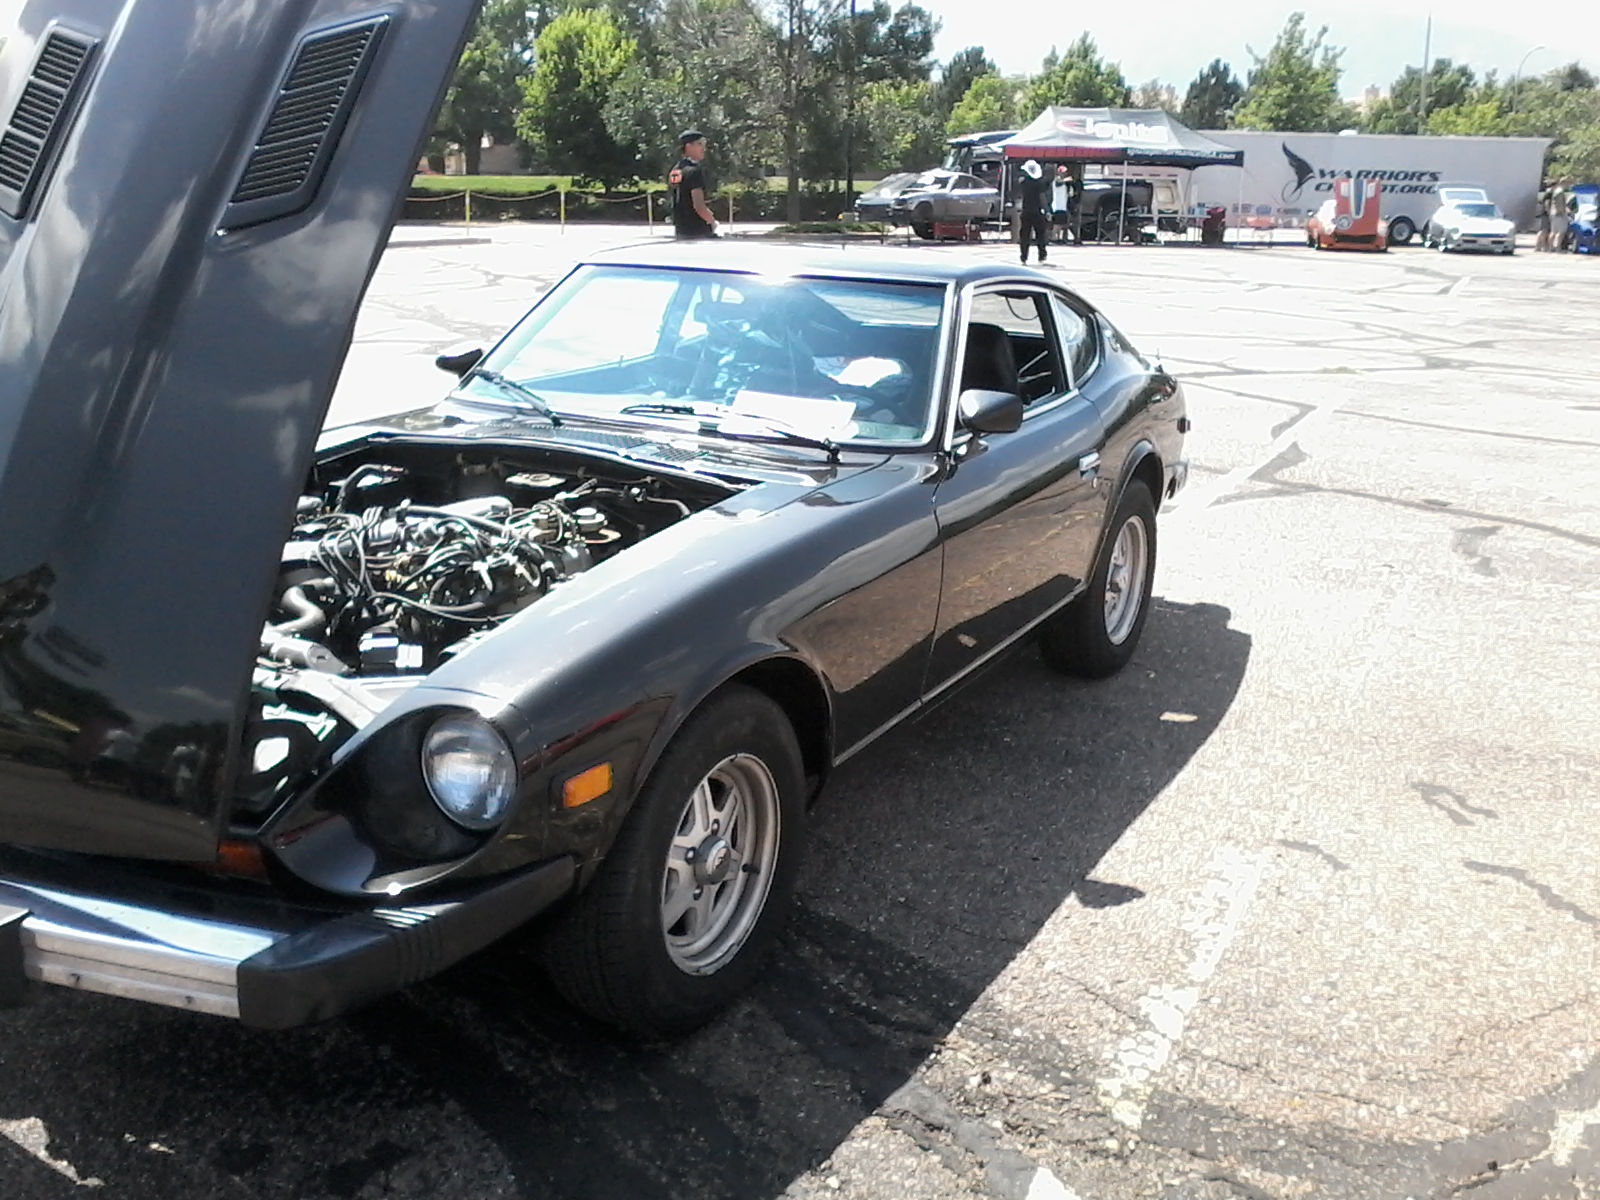
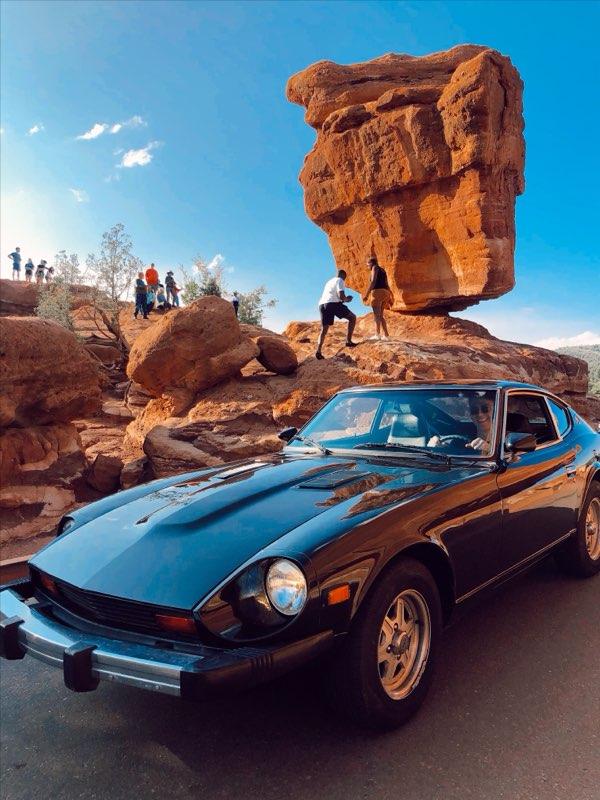
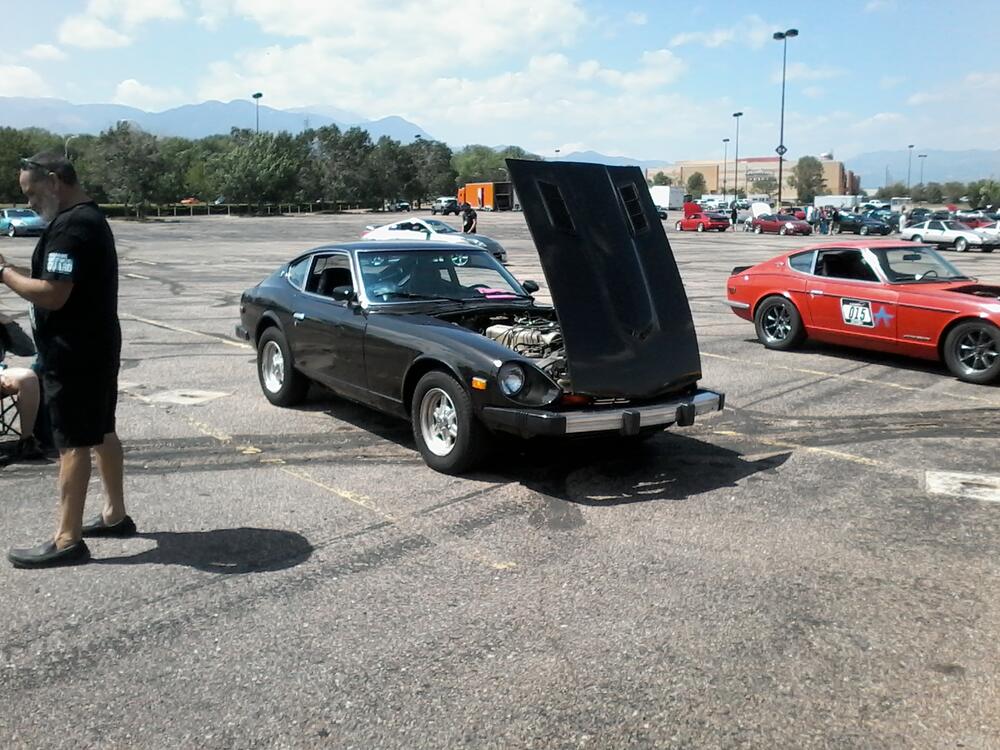
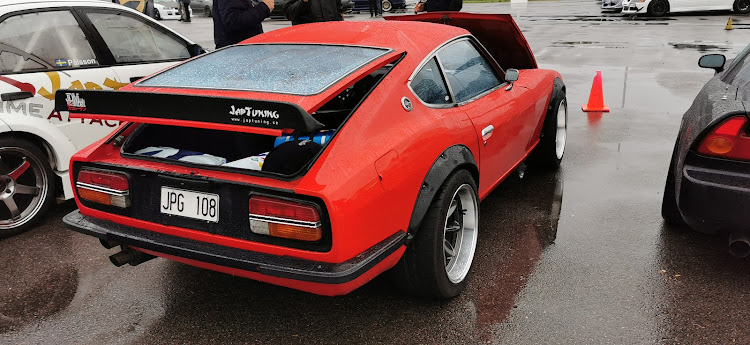
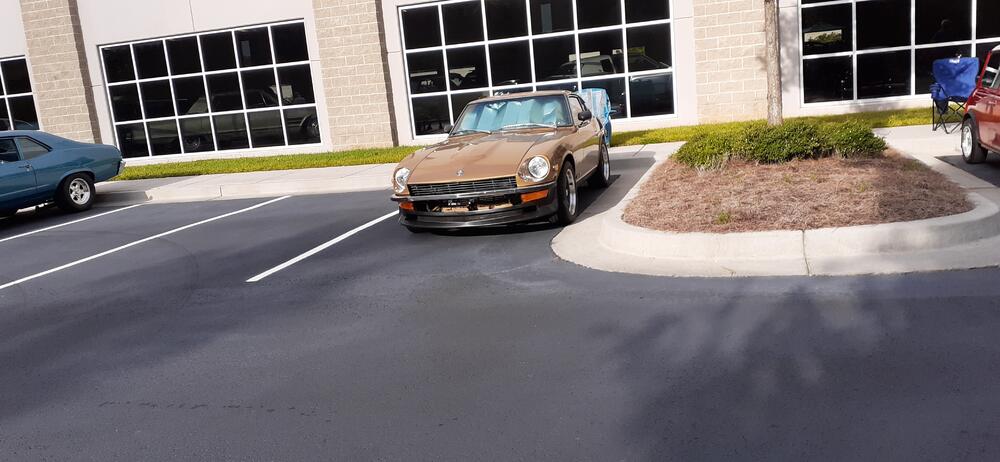
2 pointsHey! I remember your car! Snapped a few pics but my pictures don't do it justice like your pic at Balanced Rock I'll just blame the camera. Or me. Or both. Welcome Aboard and the first step at kicking an addiction is to admit you have one. But I don't think there is a soul here that really wants to kick it....

 2 points
 -
Here’s some more pics and a link to a lot of photos of the Swedish jdm scene. https://photos.app.goo.gl/ABFdrQKXeDiJuXFq5


 2 points
 -
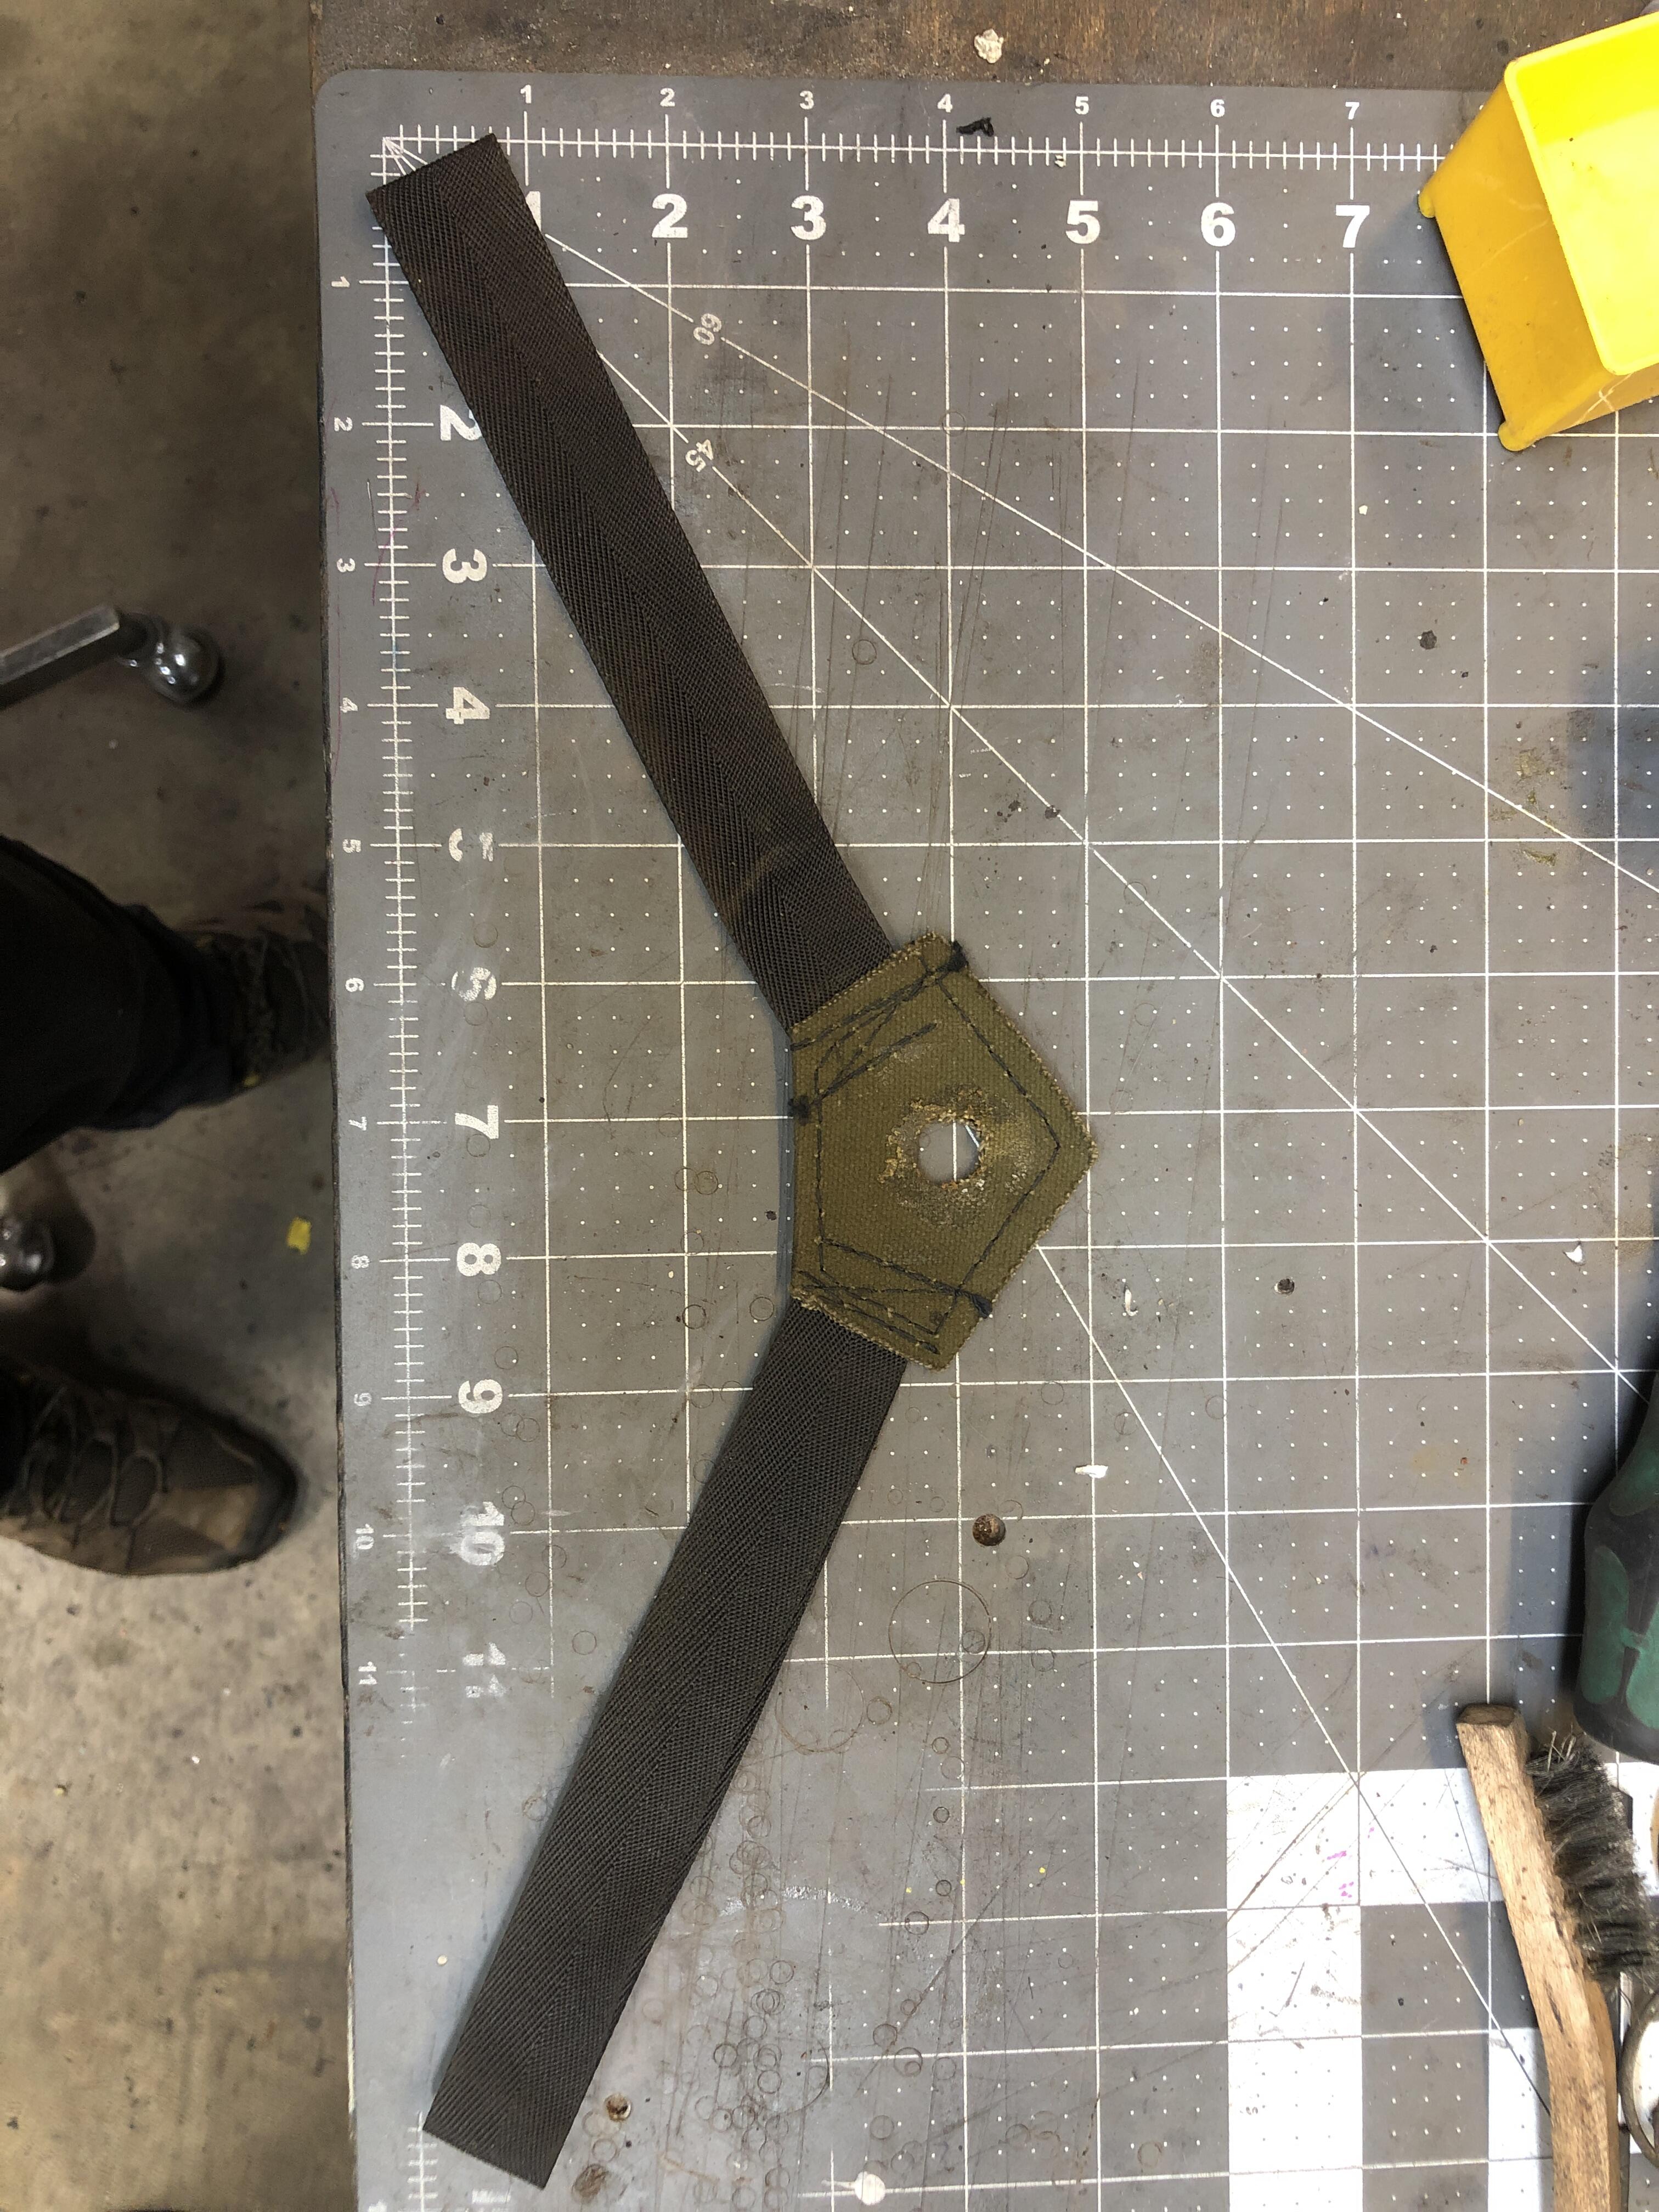
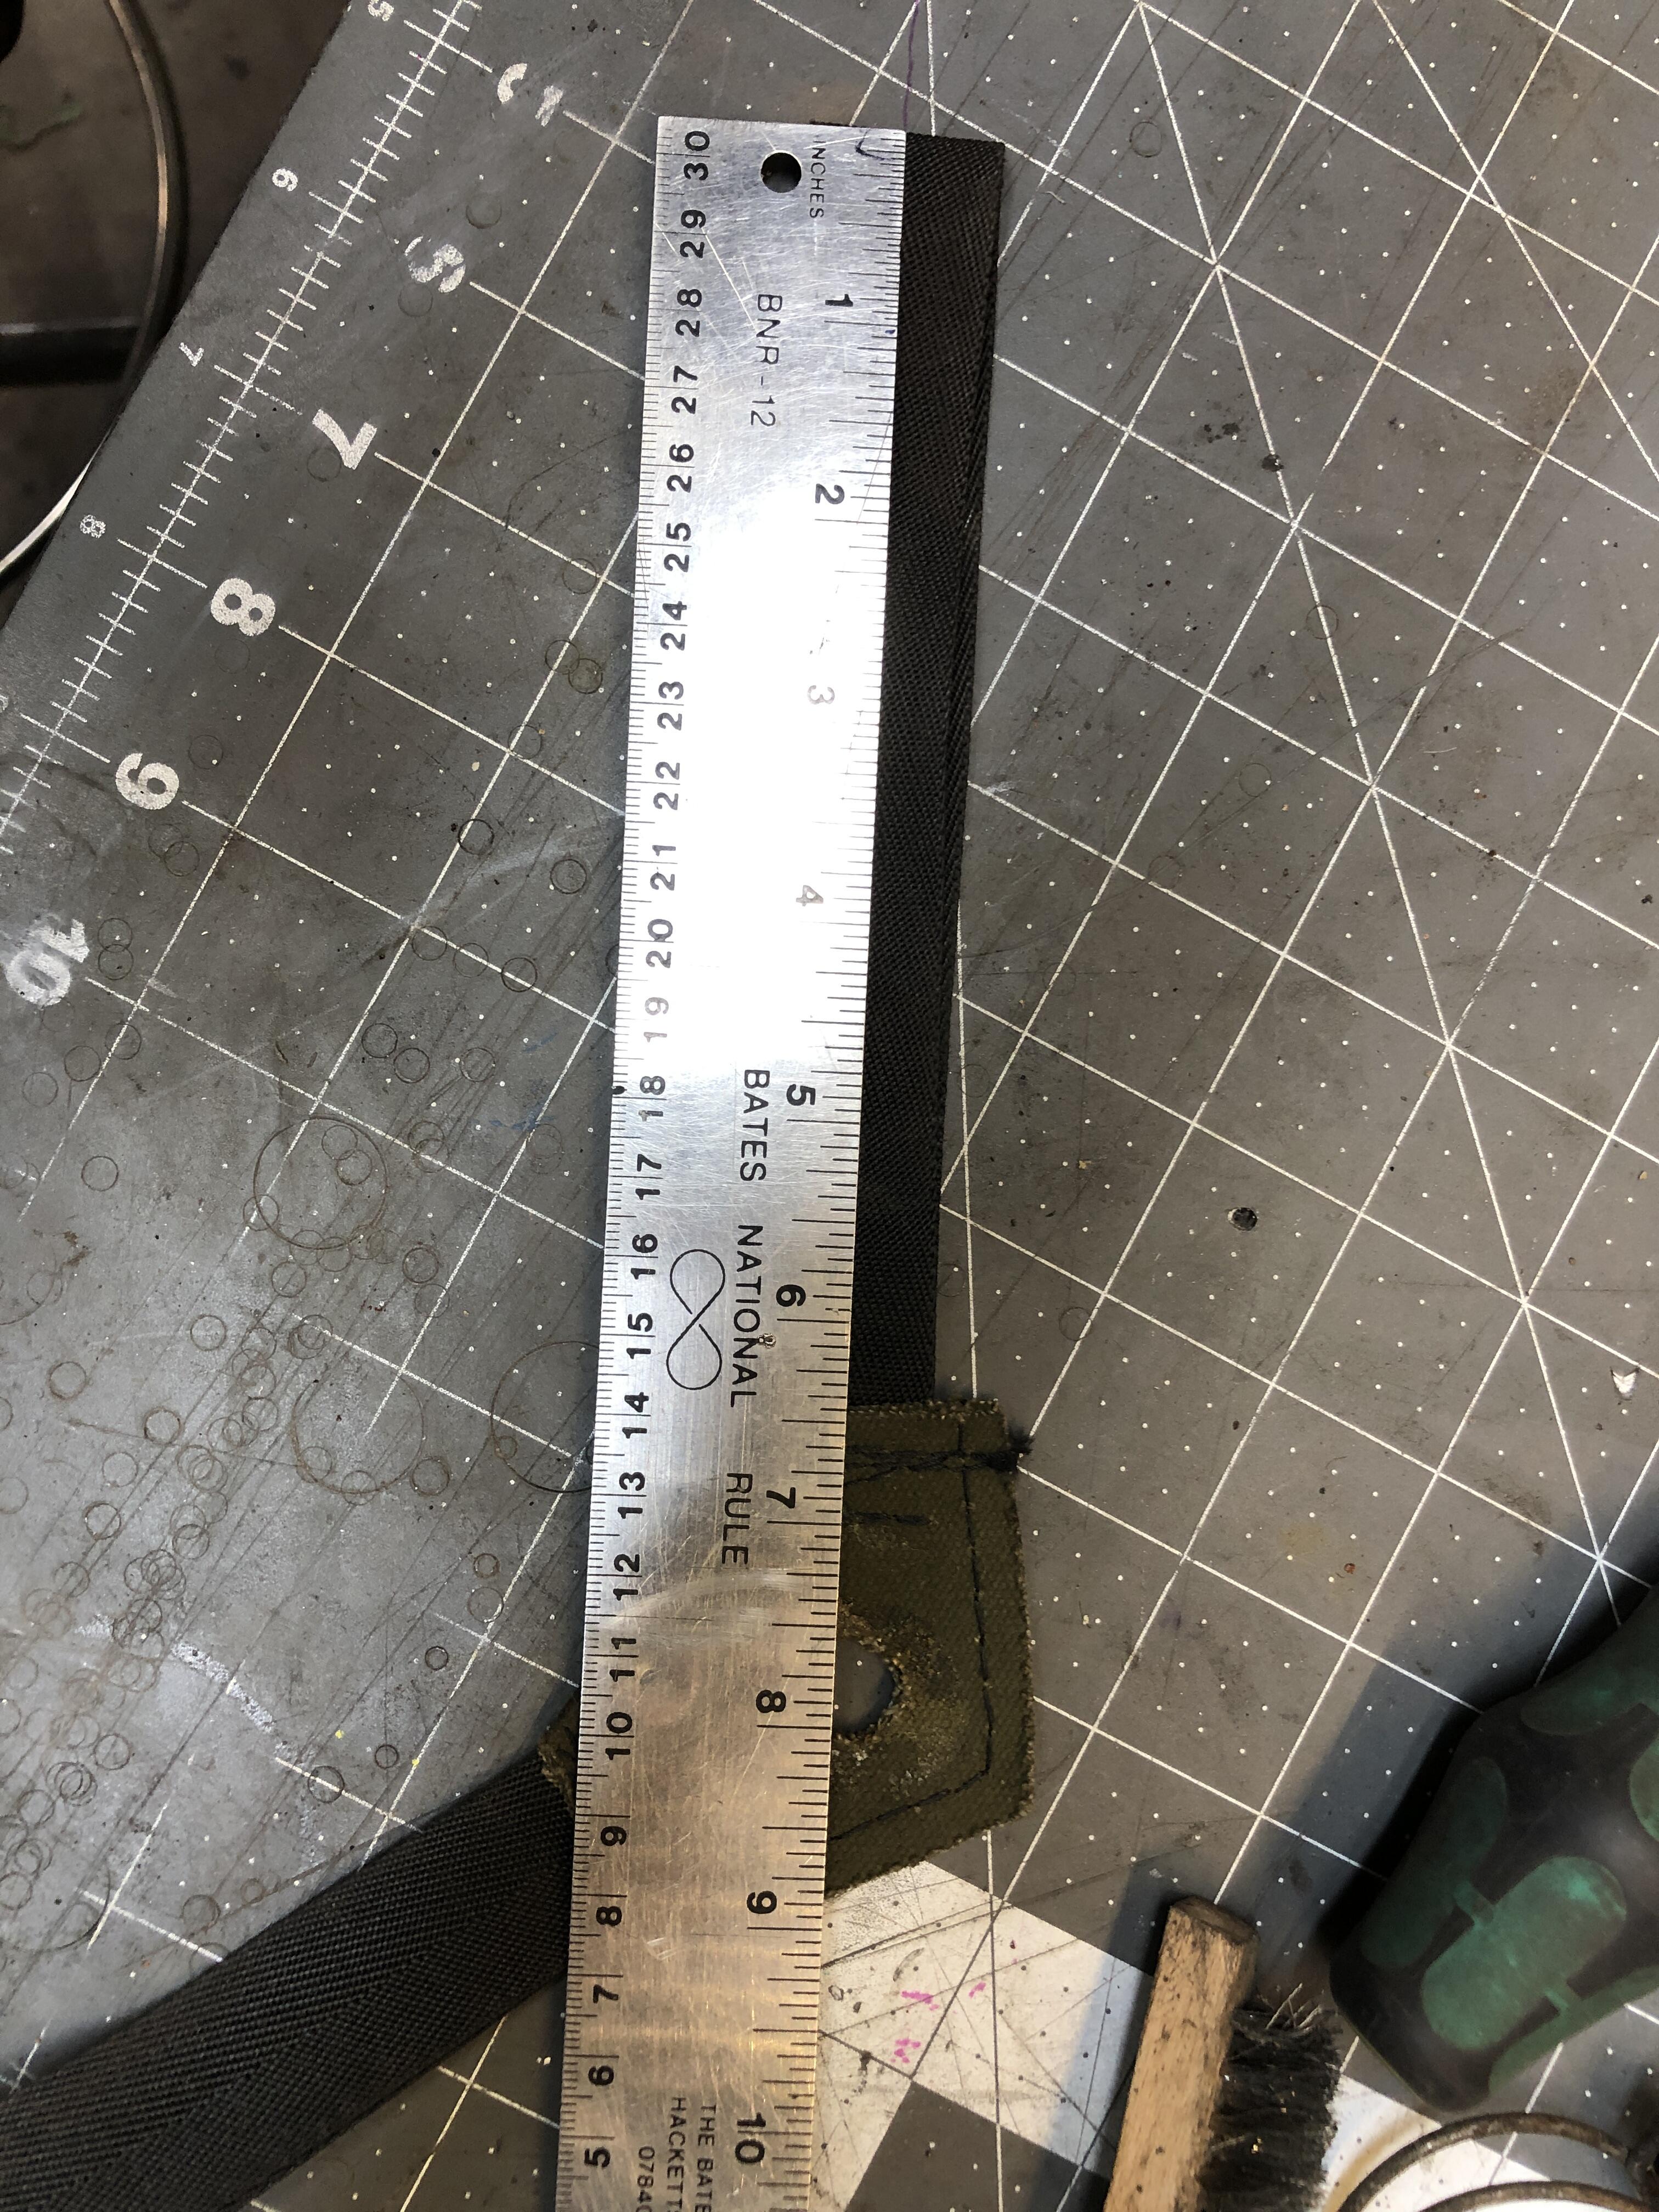
These should give you all the measurements you need to recreate one. Sorry for the washed off numbers on my cheap cutting board work surface. The last one at the bottom edge is 15

 2 points
 -
2 points
-
2 pointsSprings have shipped from another vendor, that was the last piece before the build back. Making progress while I wait. Busted surface rust and got the front valance removed today. Sanded and painted the front frame crossmember. Parts are littered all over my garage. Sent from my iPhone using Tapatalk2 points
-
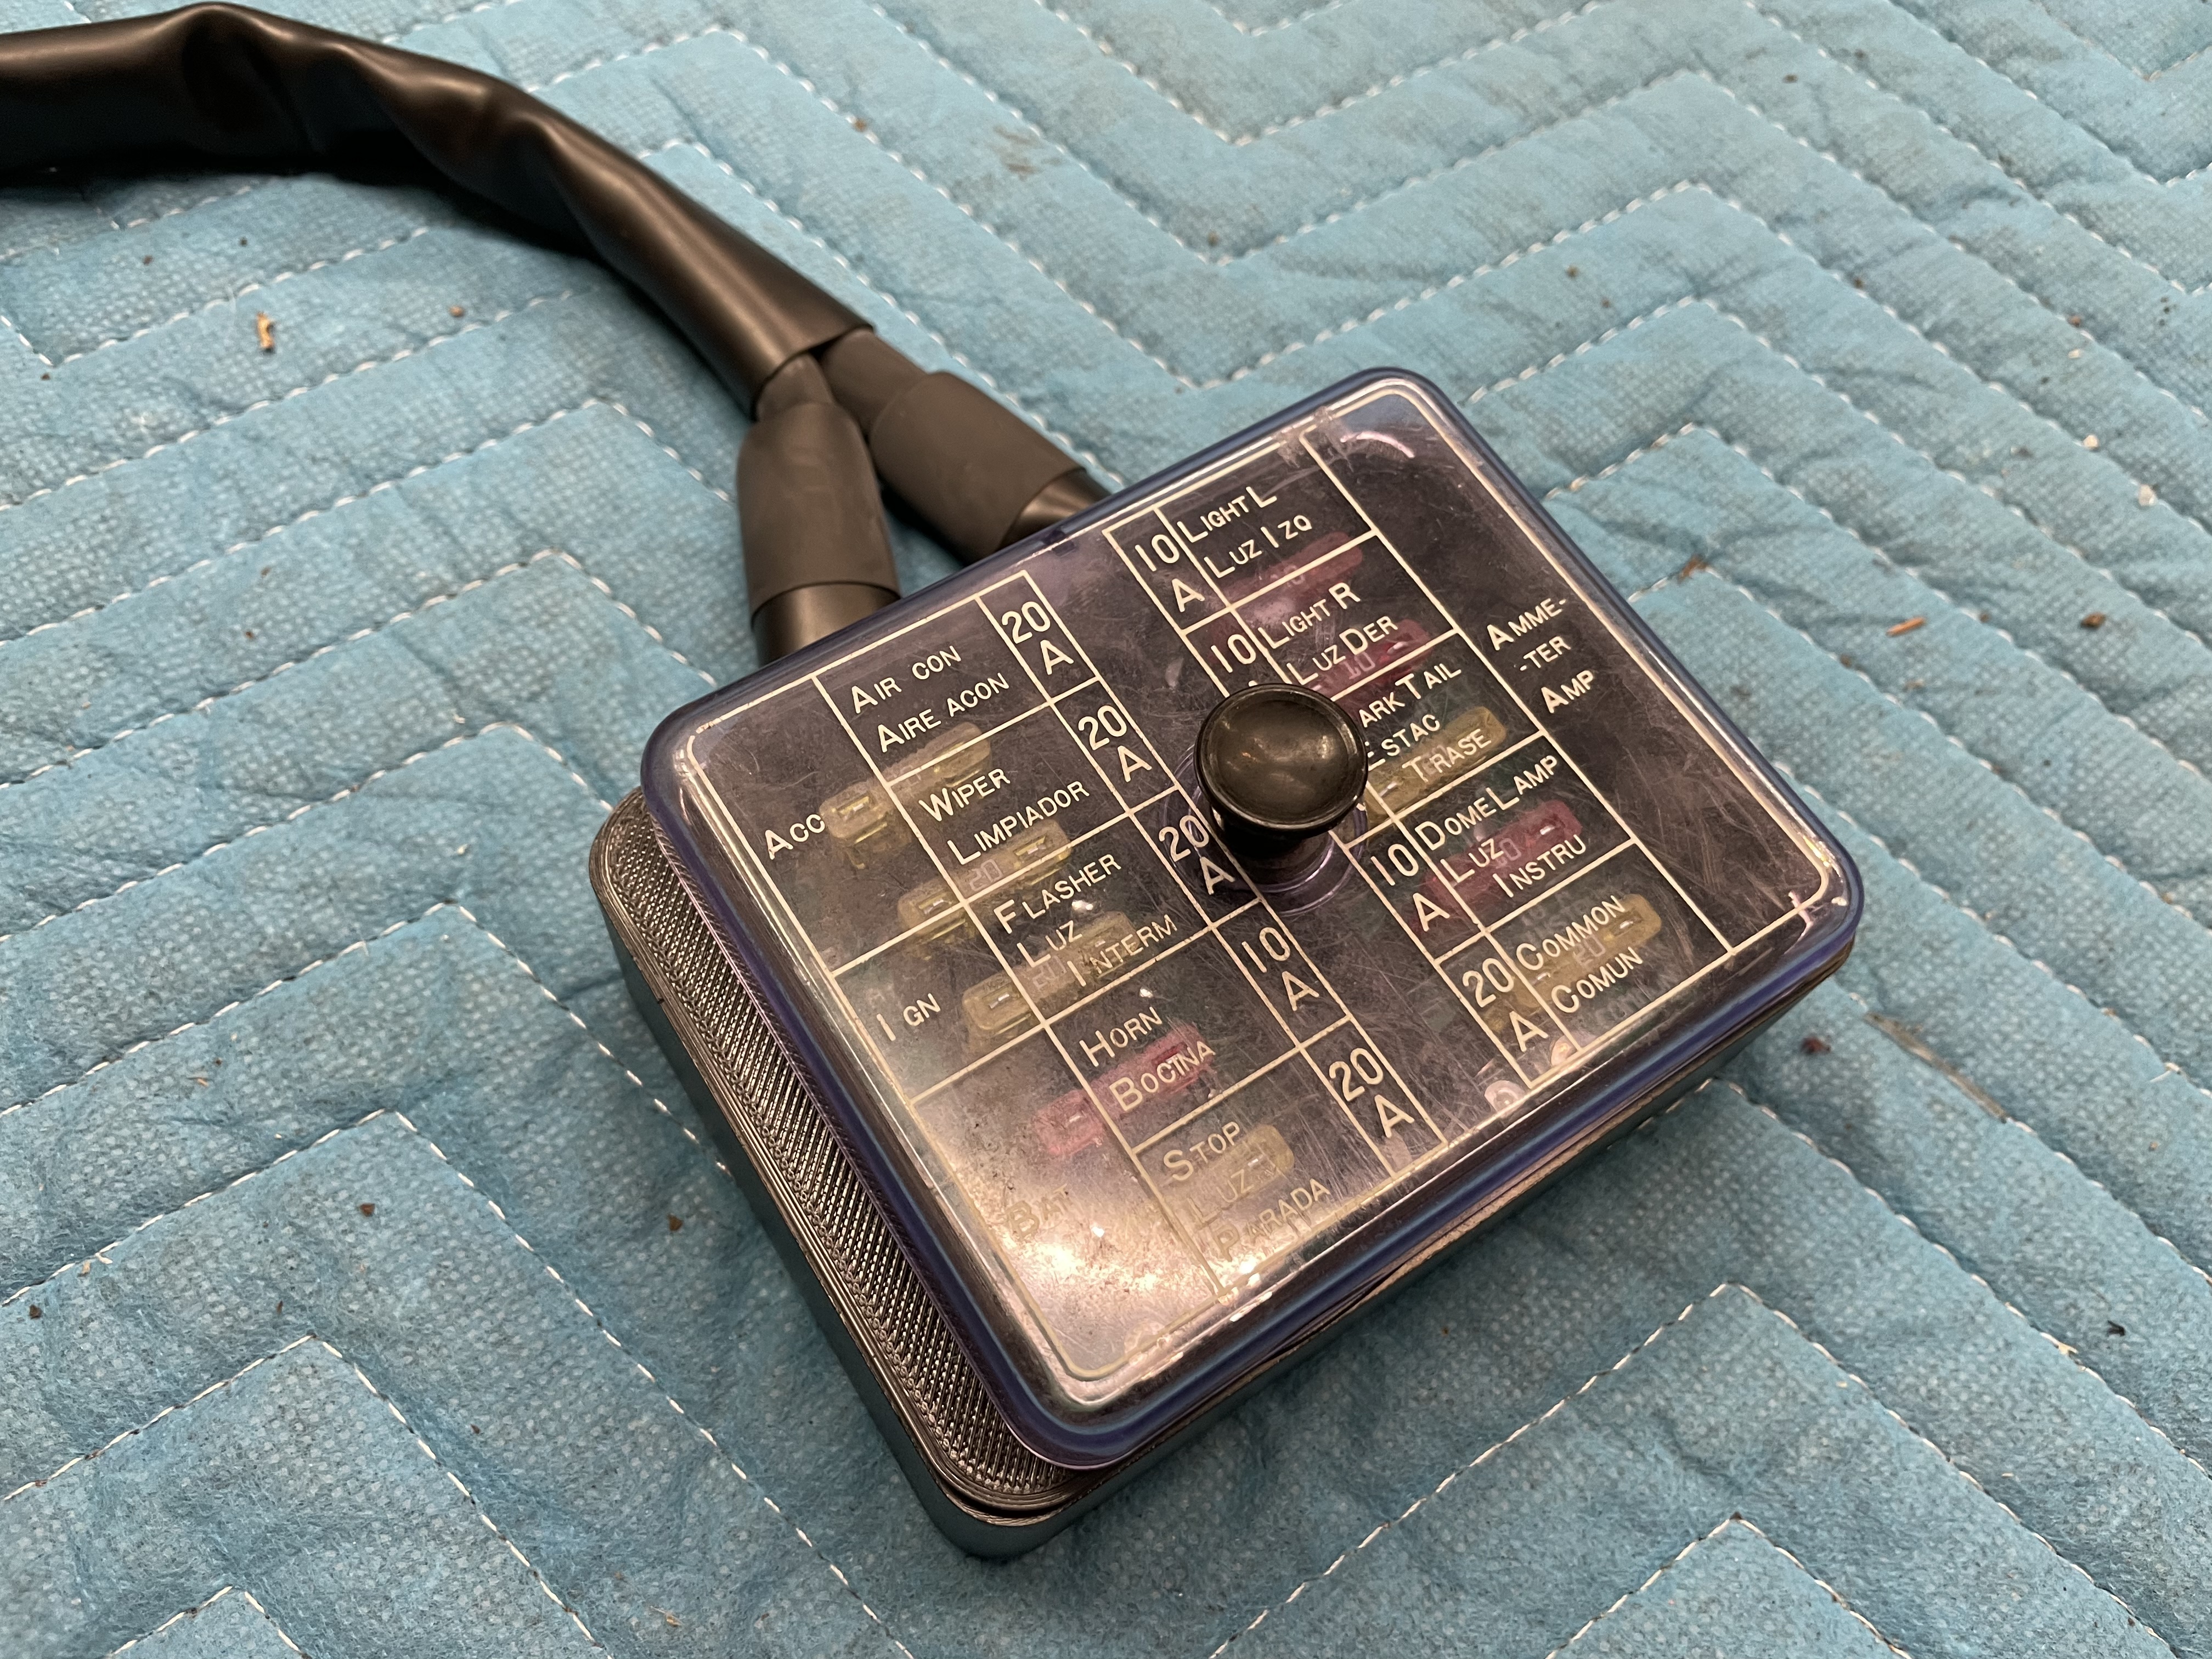
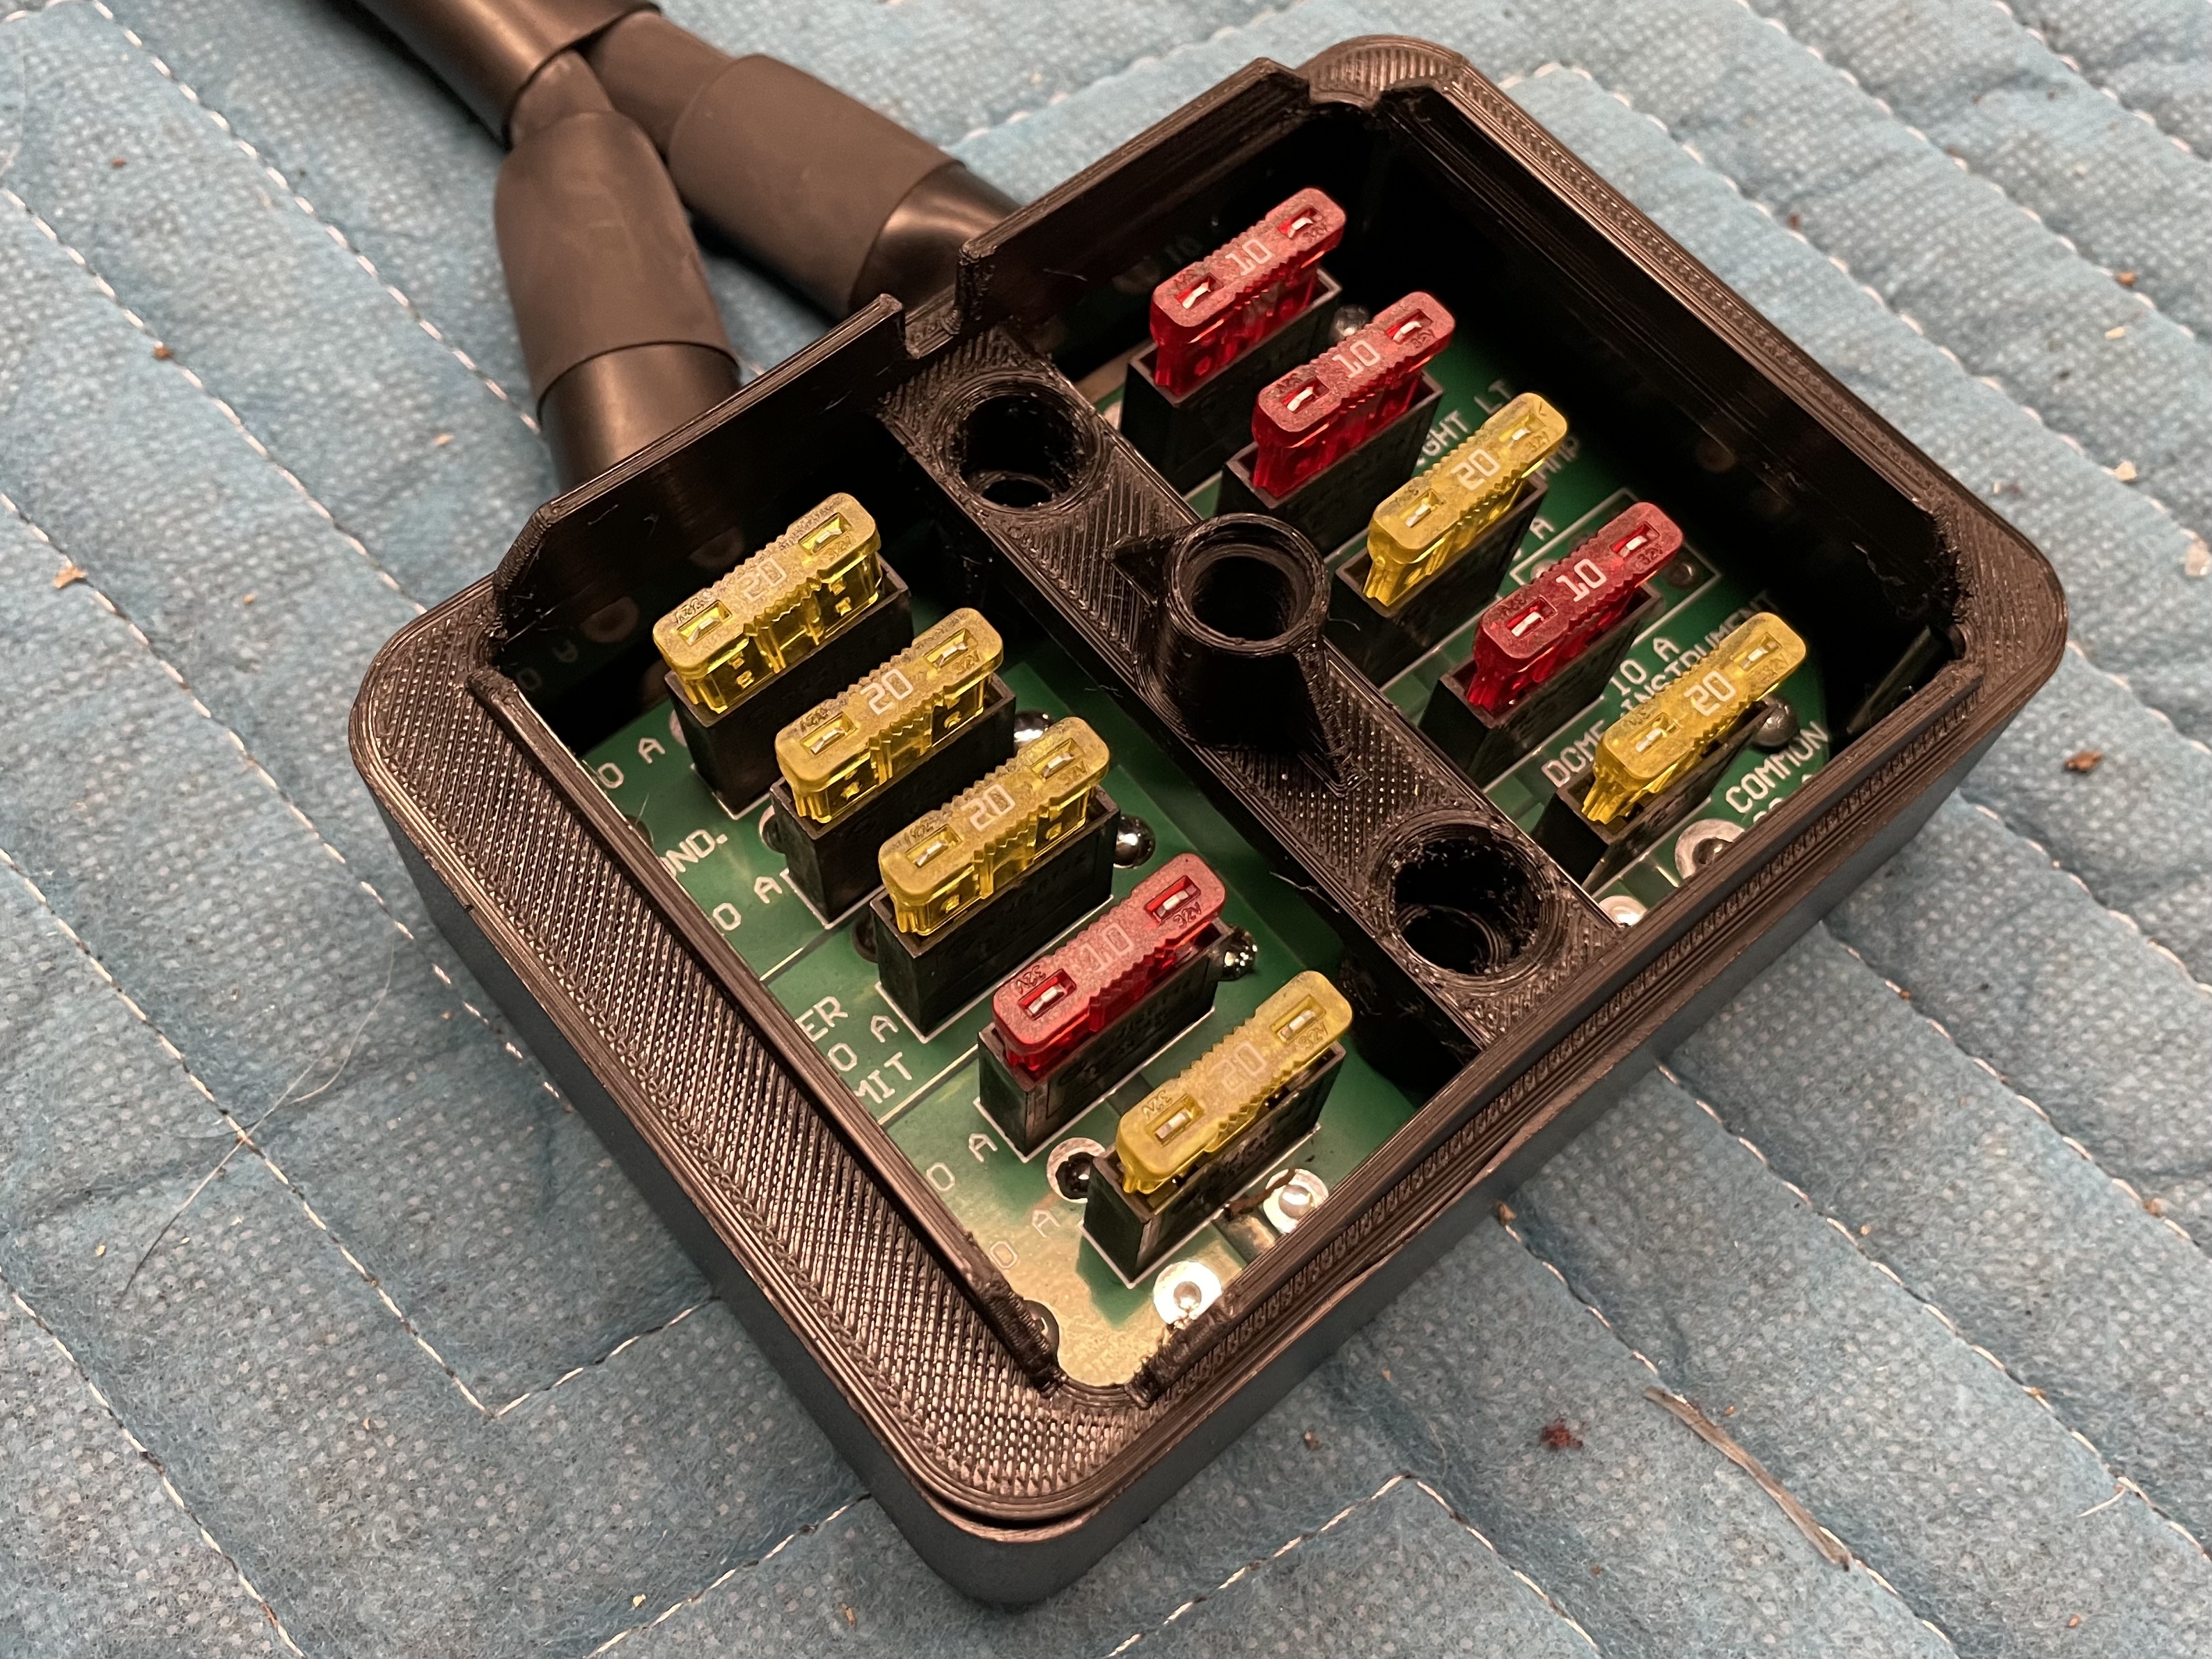
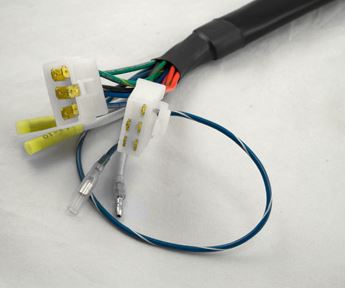
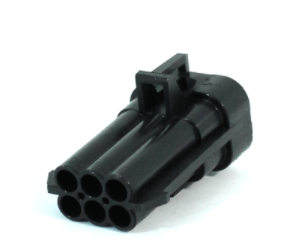
2 pointsSide project I’ve been working on during the dash rebuild on the Z is upgrading the original fuse box. I went ahead and ordered the blade style of fuse box offered through MSA. This upgrade as been discussed in other threads on this forum, one topic being the connectors used on the new fuse box. Looks like apart from the bullet style connectors used, I’ll end up having to swap out the other ones for the correct ones used originally on the car. The 6 pin plugs use the latching style of connection. Fortunately Vintage Connections offers the correct non-latching connectors to mate up to the existing harness. Not a huge deal, but details like that would drive me nuts. They also offer the correct blade style connectors needed to swap out the two crimp-on connectors also supplied with the new fuse box. The other topic discussed about this fuse box is the fact that it’s physically larger than the original unit, so much so that the factory cover will not fit over the box. Again, not a huge deal, but I want to make any update on the Z to look as factory as possible. As an attempt to fix this, I modeled up an adapter plate that can be used to mount the original cover to the new fuse box. The idea being I could use mount the adapter to the new box through the mounting screws, and then snap the original lid to it just as the factory did. It will take a few iterations of tweaking the part, but with a personal 3D printer updates are easy to test. I’ll report back once/if I get a design that I’m happy with.

 2 points
 -
1 pointHello, My name is Seyler from Colorado, and I am an S30 addict. I am glad to finally be here, as I now own my first S30, a Black Pearl. While I have fed my addiction on my own for some time, I know I will need help to manage my addiction. I only hope to be able to pass along the help I receive to those who will also need help with their addiction in the future.
 1 point
 -
1 point
-
1 pointI'm no expert, but I might suggest a 3-pin connector to go to the fuel pump (then exit the cabin to connect to the fuel pump) rather than drilling an extra large hole for the 6-pin connector. Also to move the gauge away from that harness - you really don't want to have to look behind your shoulder to check the fuel level (i know, it's only a schematic, not a detailed where is it diagram)1 point
-
1 pointI watch the numbers to see the trends, so accuracy is not super critical. And, in the big scheme the overloading of the hospitals would be pretty hard to fake. Those people aren't lying when they say there's no room left. I don't think that refrigerator trucks for the dead bodies are being borrowed for media hype either. Idaho is way up there on the "you're on your own" scale and the governor is asking for help. That's a sign. https://ktvz.com/news/ap-oregon-northwest/2021/08/31/idaho-governor-calls-in-help-amid-surge-in-covid-patients/ https://news.yahoo.com/texas-officials-asked-5-refrigerated-010202435.html https://covidactnow.org/us/texas-tx/?s=224011661 point
-
Ok, was planning on making one but then realized thezstore sell it (Seat Belt Holder) for like $8 so just ordered one. definitely cheaper than trying to make one myself.1 point
-
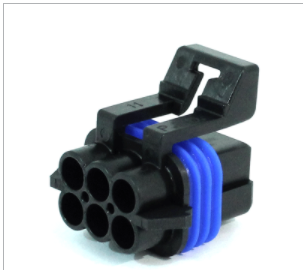
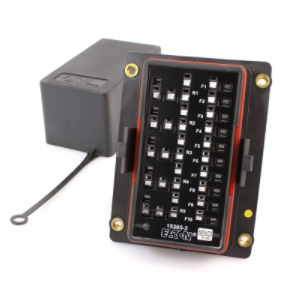
1 pointThanks! I originally started by using the factory layout in my first draft, but then the more I removed, the less it made sense. I would have one switch all alone in the middle of my wires 😄 I grouped up similar items in this recent draft, for which I might do main connectors between. Thats right, the goal is to use modern relays and connectors wherever possible. For instance, the hazard switch is a 6 pin old white connector. I'll cut this off and use a a Aptiv connector combo like this: Some items will require me to re-use the old plug or find a remanufactured plug if mine is too cracked. Such as the Shunt. The plug goes directly into the box itself. For the fuse box, I am leaning towards the Eaton Bussman box: It can hold 10 fuses and 5 relays. It uses the micro fuses which I like much more than the chunky style. I will probably need more fuses, but I can buy a second one if needed. They're small 🙂 The relays that fit into this box are nice and small as well: But for larger items like the main power relay, headlights, and fans, I will use a beefier unit in the engine bay. In addition, there is alot going on in the FSM wiring diagram that doesnt pertain to my non california spec, manual, US car. So taking out those plus things I dont want like: Nuetral Swtich, BCCD selonoid, all air conditioning condensor items, cold start valve, interlock relays, auto antenna, seat belt switches, rear defogger, and buzzers. It will help going forward with less clutter. And lastly, that colored diagram wouldve been amazing a week ago 😄 I will definitely be using it as a reference going forward. I need to go through and proof read my diagram again anyways.
 1 point
 -
1 pointSuch a complicated topic that has so divided people and created a host of conspiracies theories. There is some much crap to wade through to find understanding in this. If you remember the former defense secretary Donald Rumsfeld he had a famous quote which is fitting, called: “knowns”. We still have known unknowns and unknown unknowns with this virus. Here’s how I break it down. Keep it simple and apply Occam’s Razors when you have so many knowns unknowns and unknown unknowns. 1. Conspiracy theory’s have been rampant because we have censoring, censoring people and ideas is the leading cause of conspiracy theories. We need all voices to be heard in the public forum EVEN when false. Let the professionals discount them but when you silence them their words gain traction . 2. I believe vaccinations is the best road map to get to this behind us. It’s a tool and not the solution. Solution is natural immunity. The vaccine could save your life and help you develop a natural immunity to variants. We need to minimize the damage and death until we get more natural herd immunity in the population. With natural immunity you’ll have a defense against variants. I don’t think your need boosters once your body has a robust immune response the to SAR-Cov2 virus. The unvaccinated might fare far worse with a wild variant because they don’t have any immune response to put up and the next variant could be more deadly. A person with an immune response might just feel a little ill and need a few days off work . I was vaccinated with the Pfizer vaccine, got both doses. 4 months later I got Covid. It was mild and minimal symptoms BUT I was highly contagious which is where there is a threat to others not vaccinated . I’ve been way worse in my life, this was a 2 out of 10 for me as far as severity. Bottom line: I trust the scientists, doctors and Heath care providers I , don’t really trust much of what is said by the federal government because many politicians are more concerned with self than the county so they like to spin things that protect them even at the expense of others. In this case the government is doing what they think is best but ....government isn’t good at most things so a “C” is acceptable to them. We still have unknown unknowns and as months progress things will change and we’ll will get more knowns until then I choose to trust the people that spent all their life studying virus and have a PHD over some blow hard on YouTube that thinks the vaccine or The virus is a hoax. Off my soap box now....there is work to do in my garage!!!! Sent from my iPhone using Tapatalk1 point
-
1 point
-
1 pointI didn't go to the invade denver event, but I was at the show on Sat as well. I was asking if you were at the show because I met a guy named Seyler* during my whirlwind trip to Denver/Co. Springs, but I don't remember where. I can't remember if it was at the show on Saturday, or up in Denver on Monday maybe. *although I thought it was spelled "Sailor".1 point
-
1 pointYour diagram looks great. Gave my brain a twist with things in different locations than the original diagrams, but who am I to stand in the way of progress. Are you creating a new diagram because it's going to be different than stock (with things like relays where there originally weren't any)? My go-to diagram for all things Z electrical related is the fantastic color wiring diagram* created by @wal280z. WAL's diagram is for the stock system and I'm guessing yours will be for non-stock? *Yes, it's 77-centric, but I start there first to get my bearings regardless of the year.1 point
-
1 point
-
1 pointOnce it ends as a pandemic, it will likely be endemic. We will have annual booster shots or not. Ivermectin is the new choice of the stupid…1 point
-
1 pointEventually, yes. After one, or both, of two things happens. As a society we all get behind a collective effort at eradicating the virus. Or, it kills off all those who refuse to get vaccinated. And like I said, or both.1 point
-
1 pointFlu doesn't do anything near to what Covid has done. It may come down to an annual vaccine, just like a flu shot. This virus is mutating, and in that respect, I don't see the pandemic ending. I'm beginning to think that we may have to learn to live with it.1 point
-
I think the 40phh is plenty big for a 2.4 liter. Especially with a cam. The 44s just gulp gas IMO.1 point
-
1 point
-
1 pointIf you go with ground control then any short circuit in the wire between the device and the control relay will power the device. If you have power supply control a short will blow the circuit's fuse instead.1 point
-
1 point
-
@adivin I recently ran into the same issue you are having. One solution is to send your existing bushings to a company in Australia that will refurbish the rubber and send them back. Here is the information I received from @EuroDat. I have not sent mine out. I was able to find another used cross member. I may go ahead and send my originals out just to have a spare set for the future. The shipping pricing is the unknown variable at this point. In australia they have a bushing service. A$ 90 is about US$65. And then you have shipping to Aust and back to the US. https://www.oldera.com.au/datsun-260z-gear-box-mount-bushes-re-rubbering-service/ Glouster is in the Hunter valley in NSW. The guys father used to make a lot of land drover rubber parts. Probably why he ha a lot of Austin and Morris parts. @eurodat Thanks again for the vital information you continue to provide to fellow Z enthusiasts.1 point
-
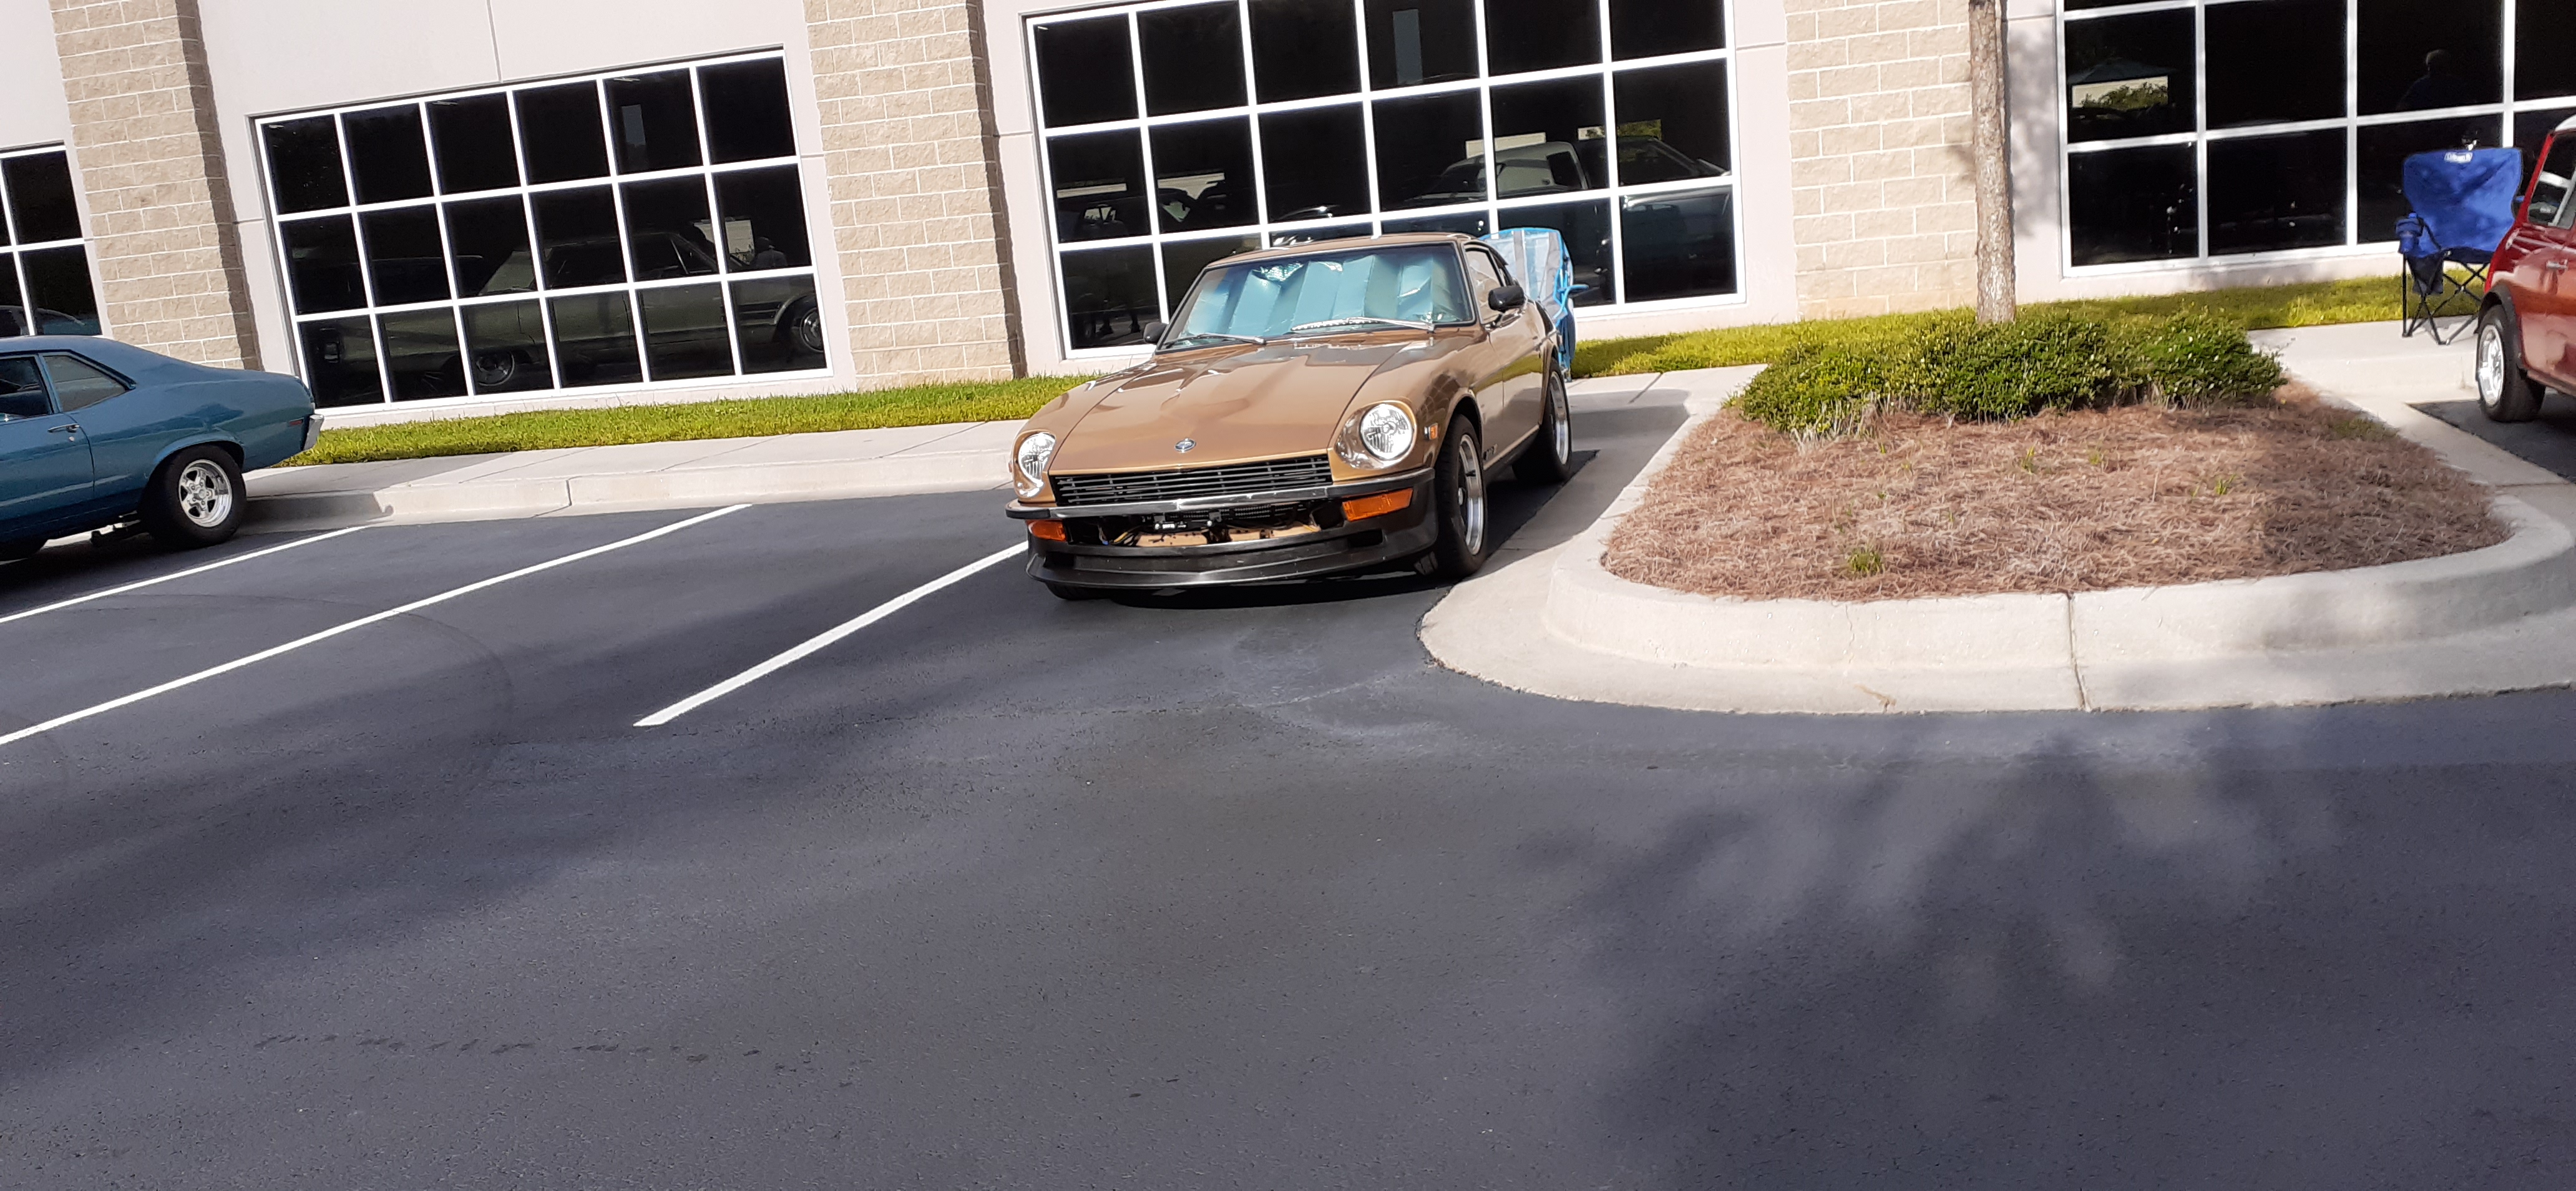
At a monthly car meet hosted by Gateway Classic Cars. It was time to pay some attention to the 260Z.
 1 point
 -
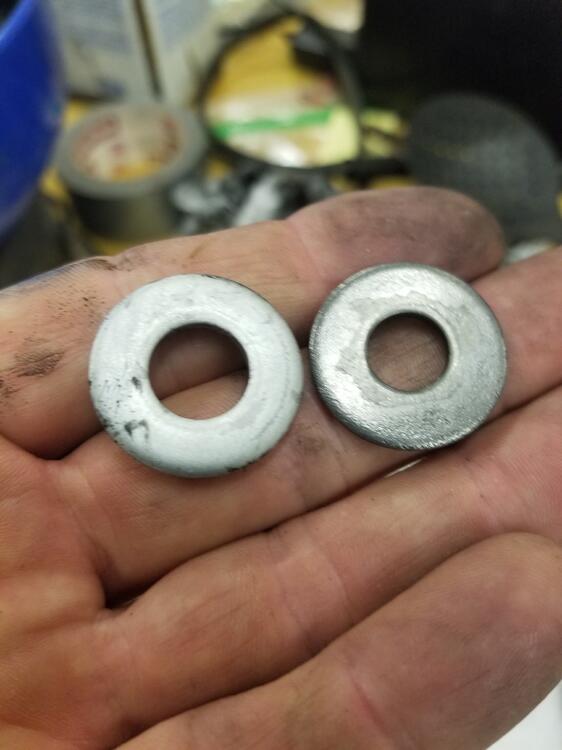
Hope you don’t mind a post and a pic inspired by you others here. Tried the drill method out on some headlight screws. Wire wheeled them then chucked them up. Used 120, 220, 400, then steel wool. Both were very similar looking before. Sent from my iPhone using Tapatalk1 point
-
1 pointGreat progress today on engine bay prep. Here’s the drivers side frame rail before...in between...and after. I used Eastwood’s 2k epoxy primer (thanks for the tip Jim) Sent from my iPhone using Tapatalk1 point
-
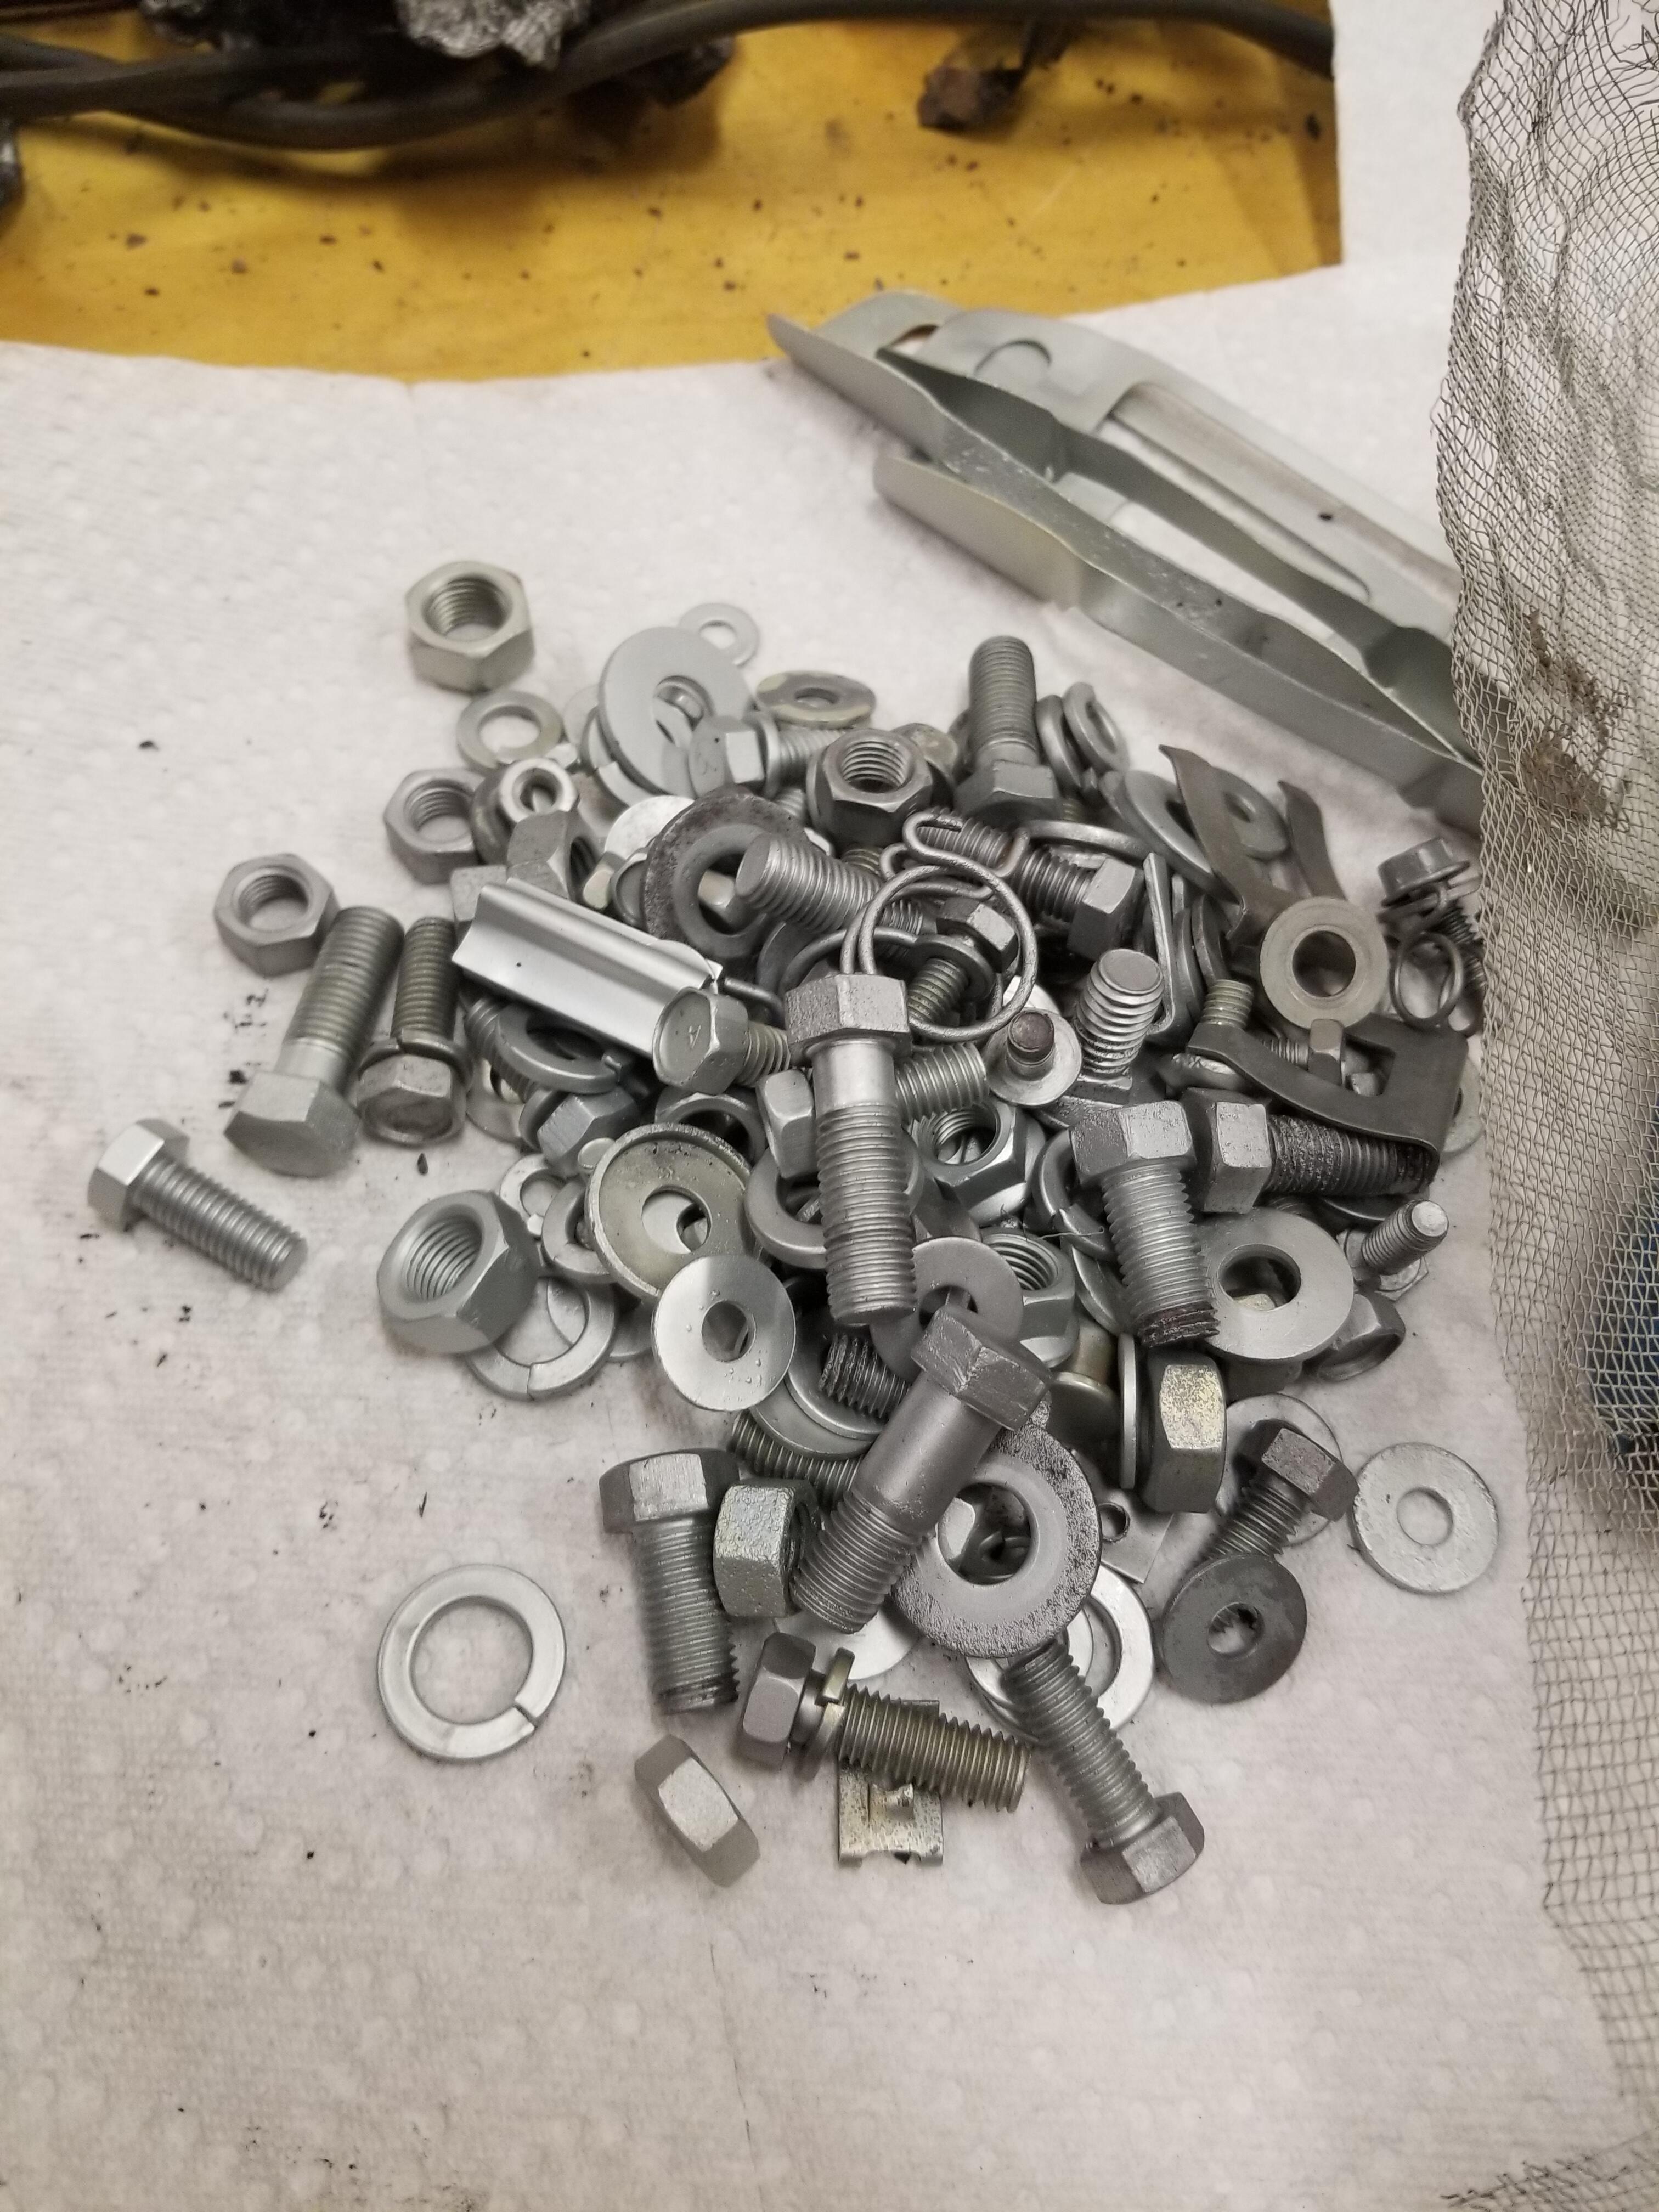
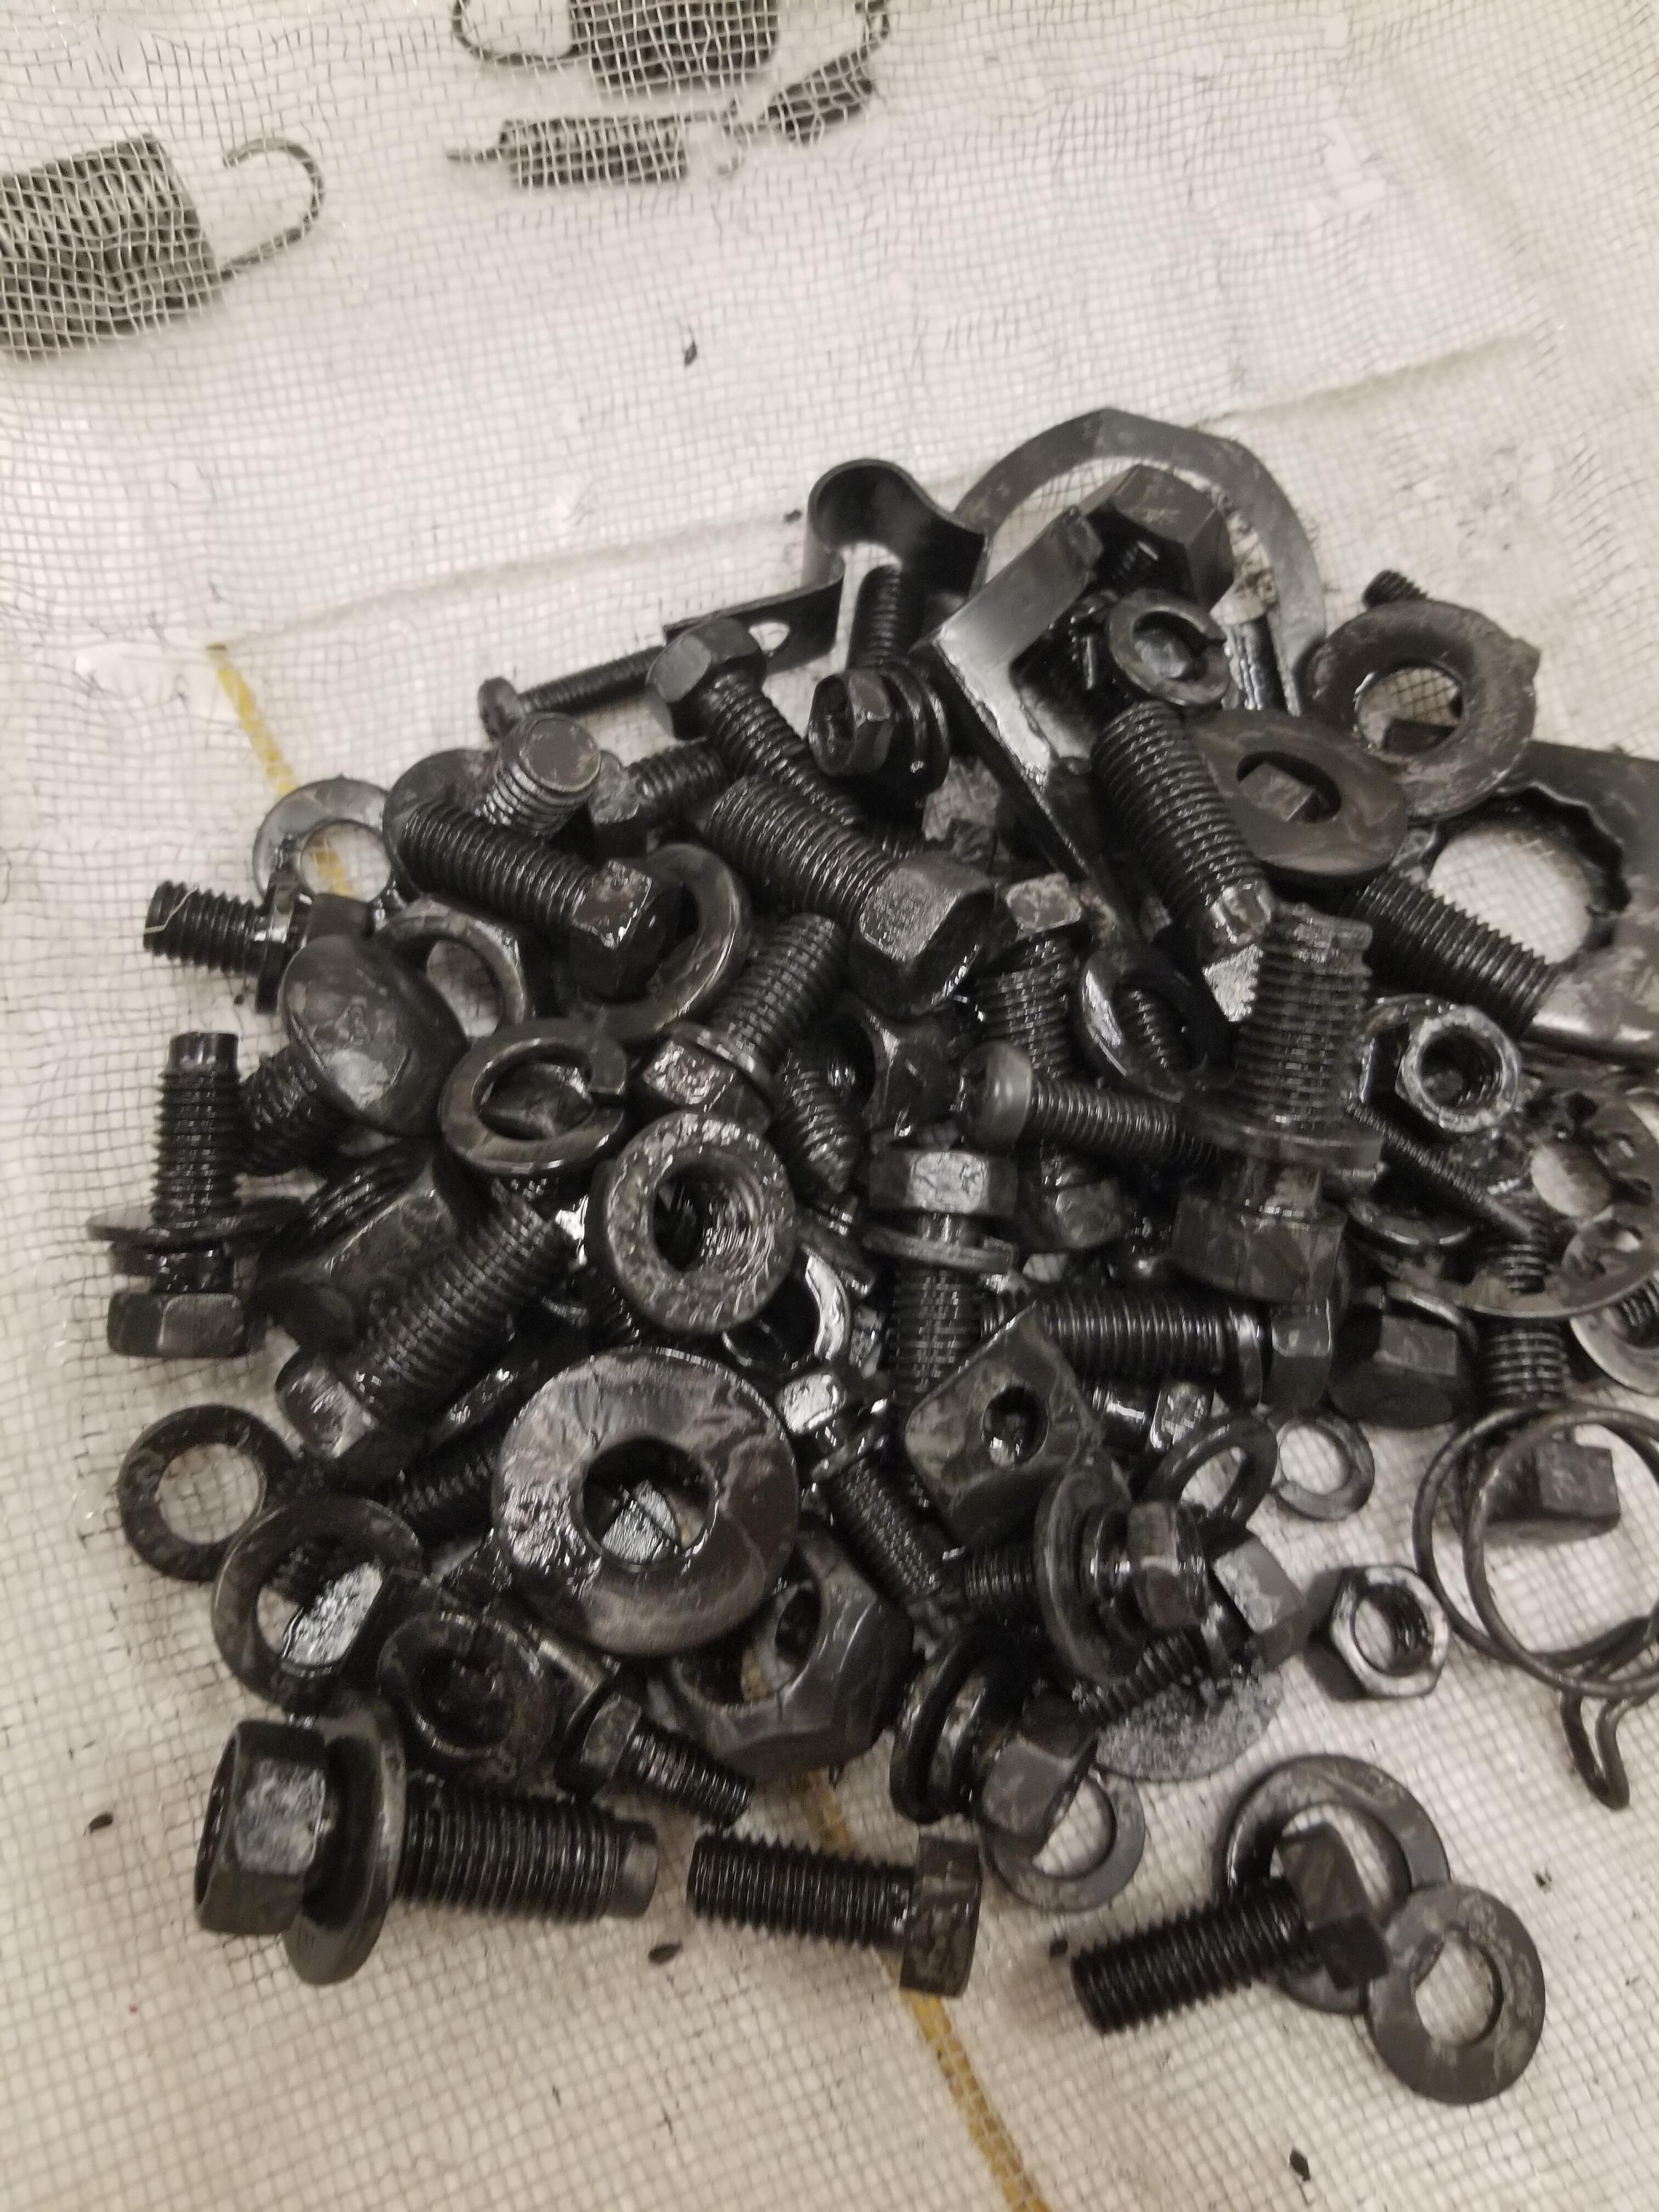
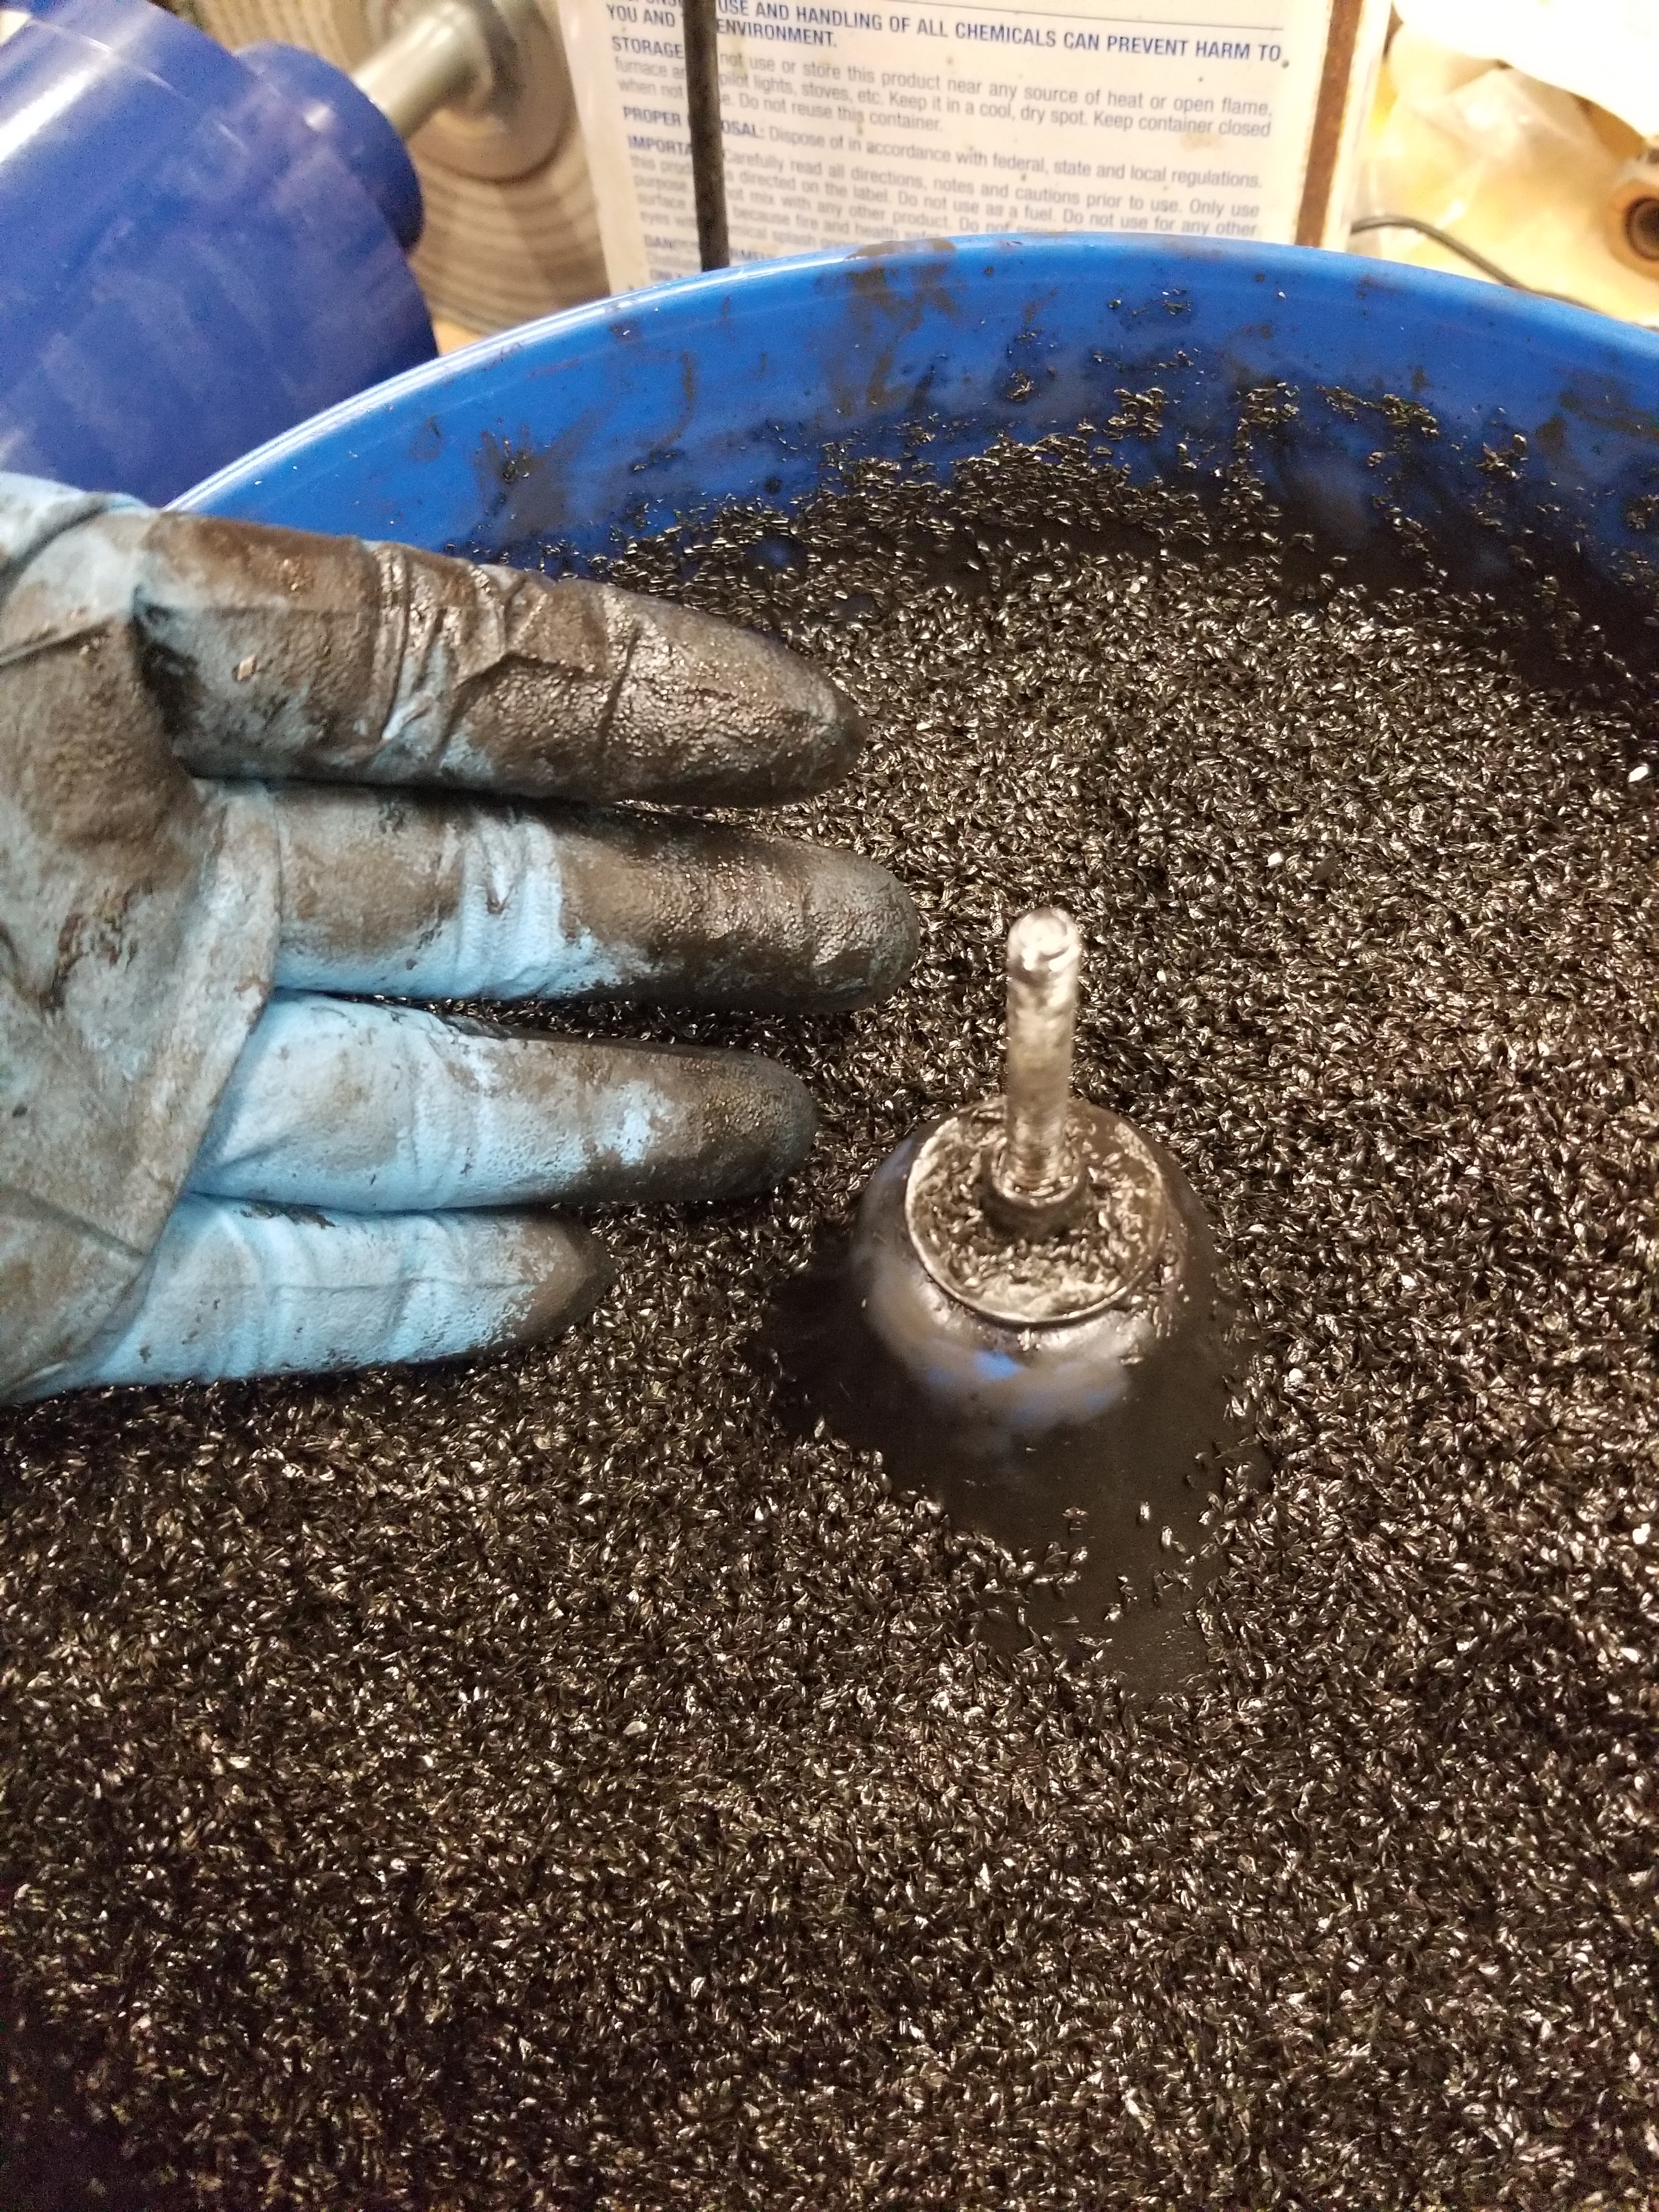
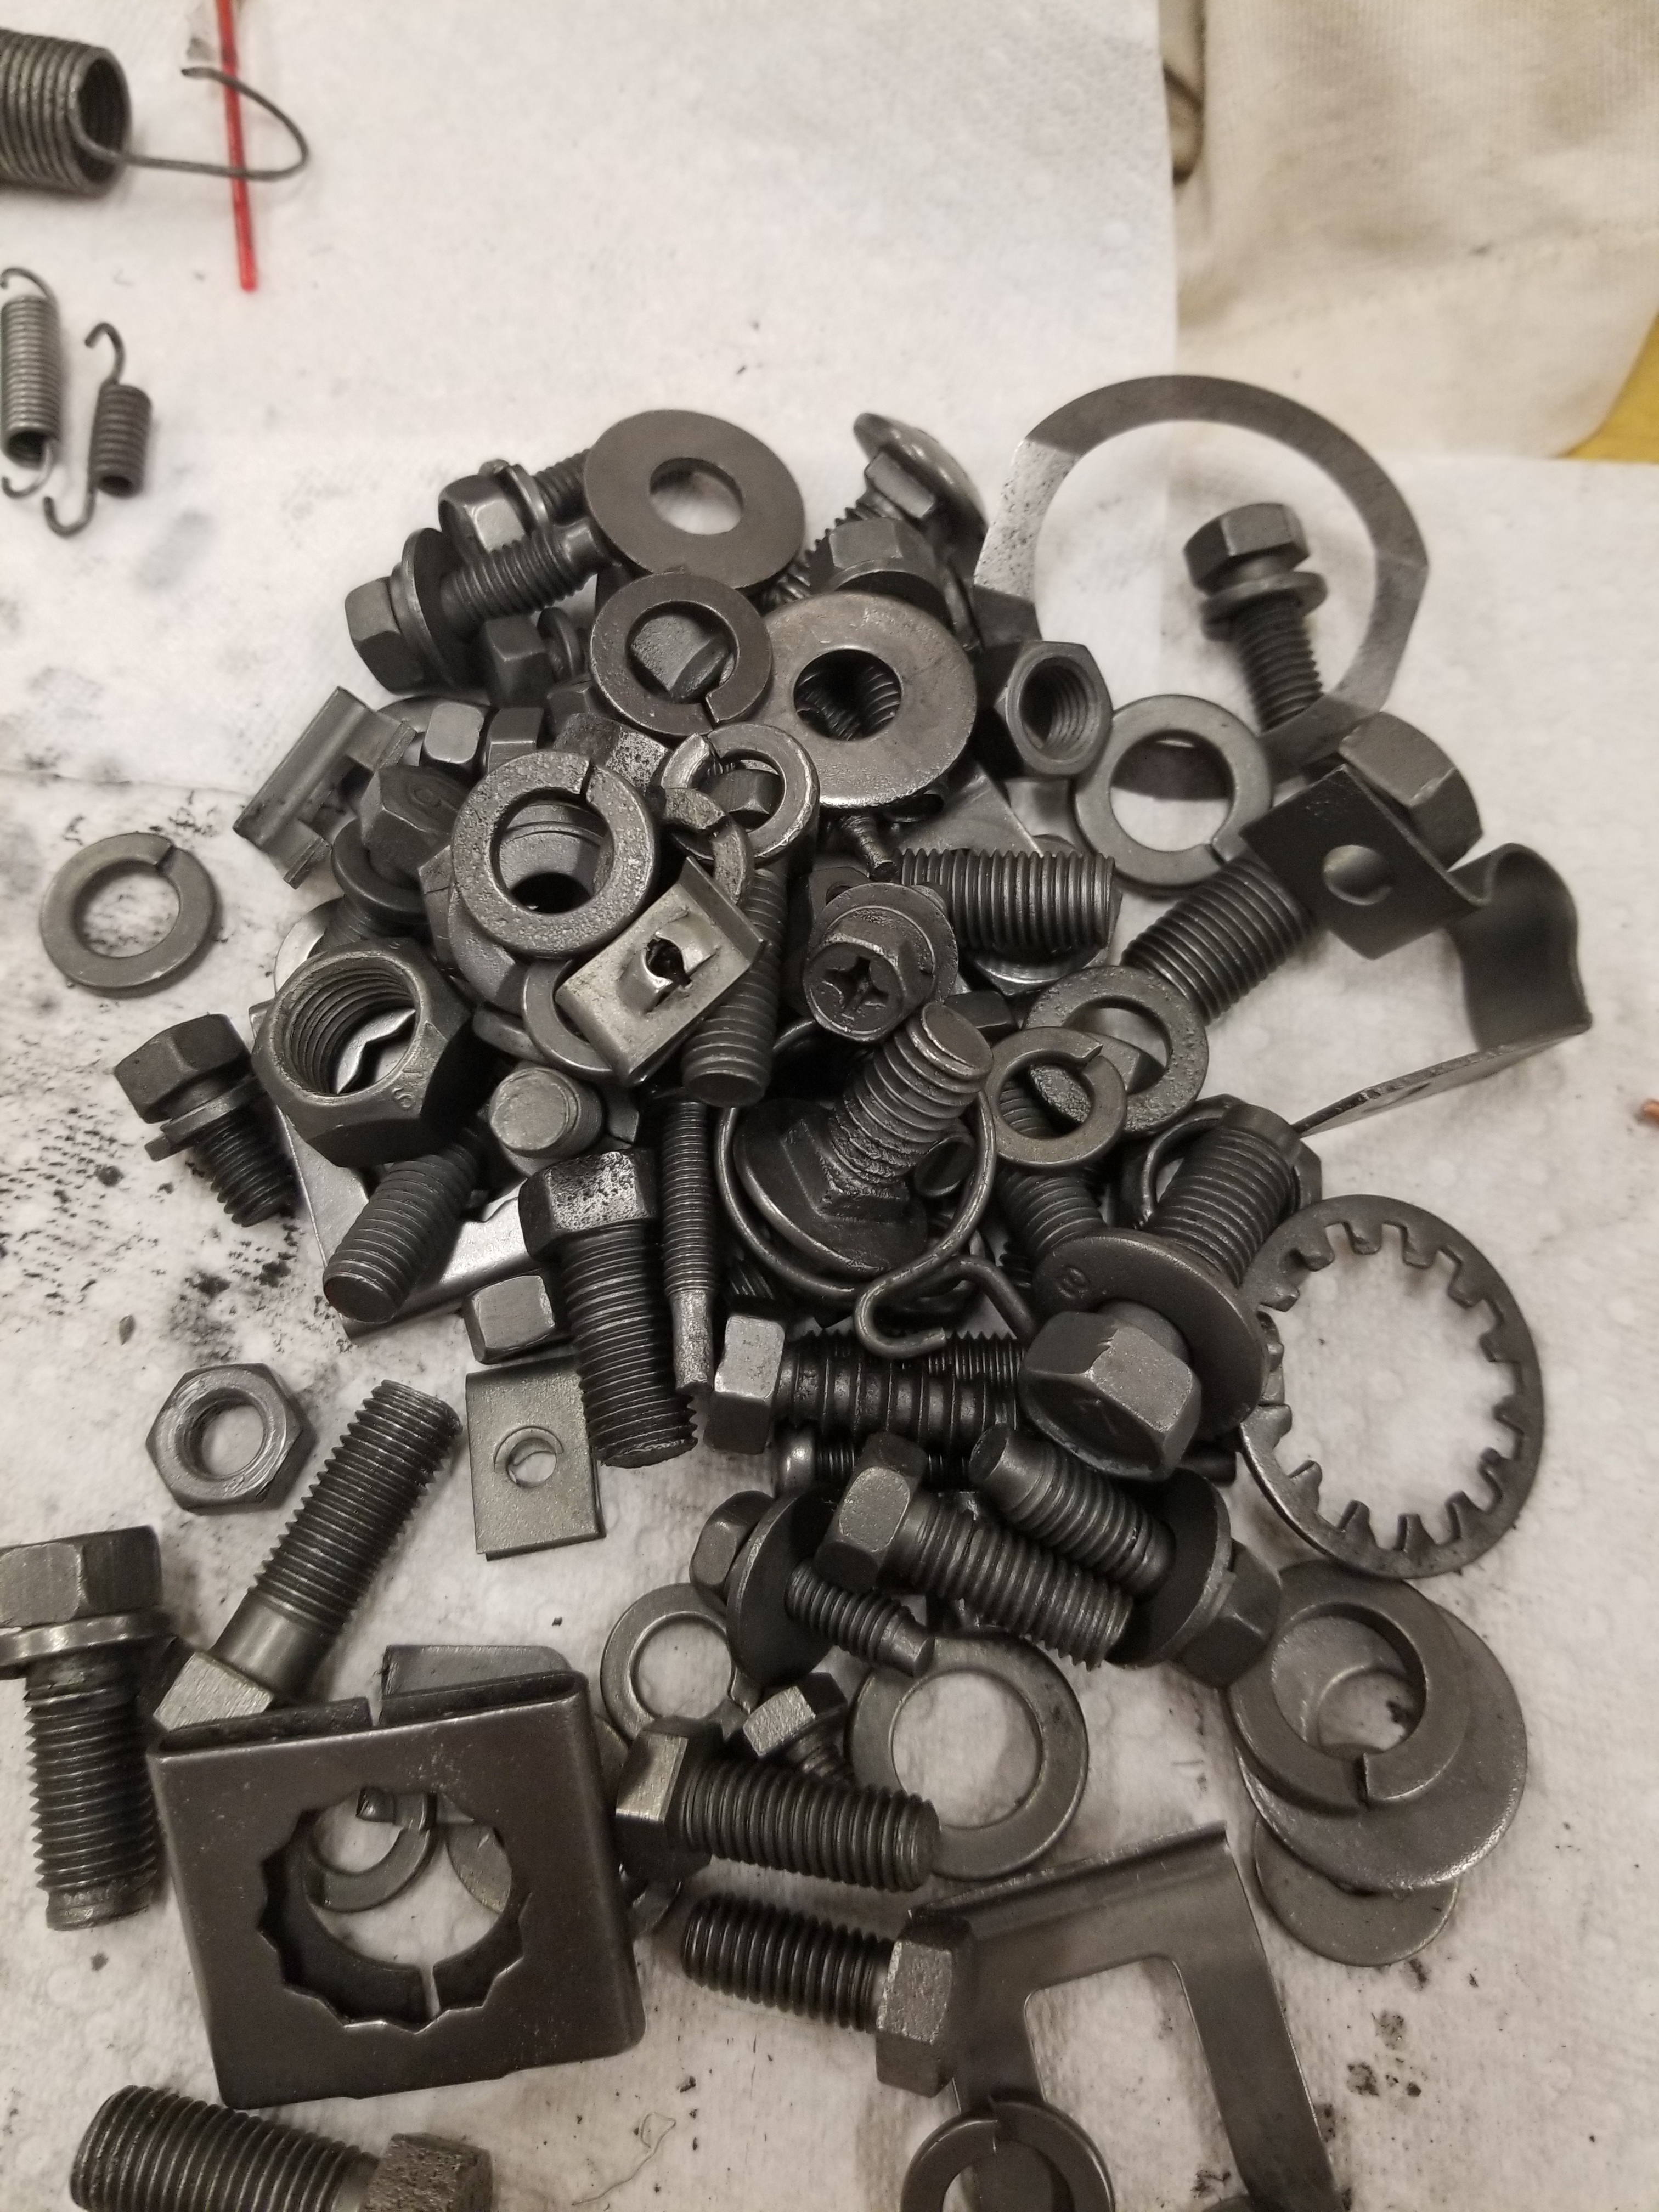
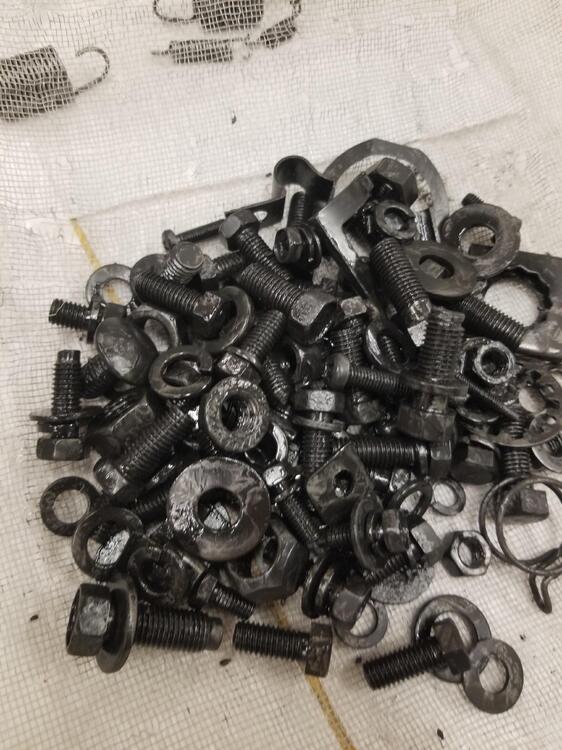
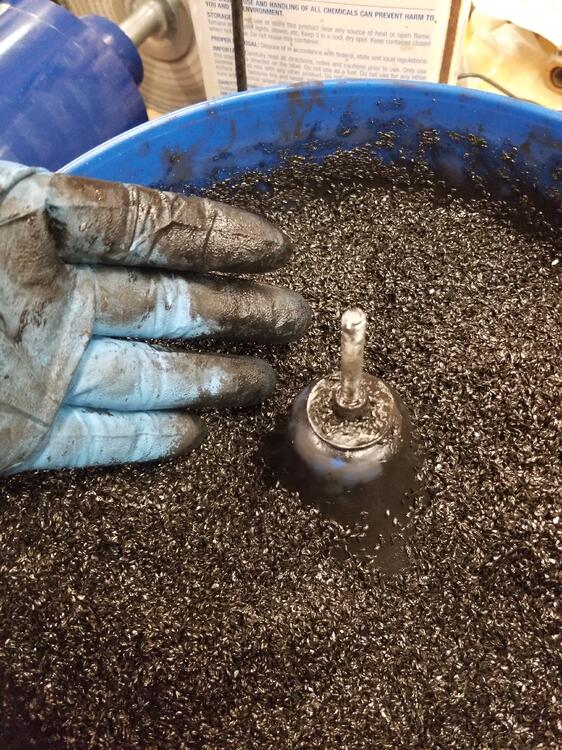
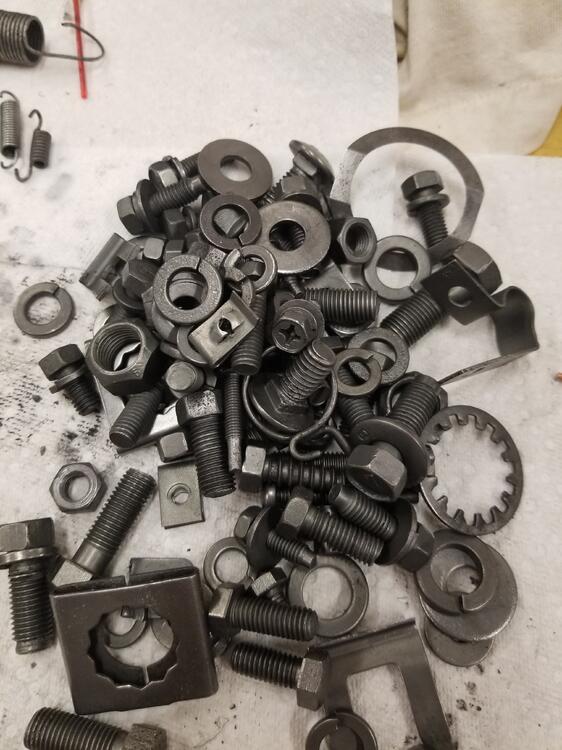
So I have been cleaning up more hardware Looks like this after the bead blasting Goes into the vibratory polisher with SS media and a little paint thinner Comes out like this After a quick rinse with brake cleaner there is a difference in sheen after polishing, although it is a darker color

 1 point
 -
Hey! I'm new here, just wondering if anyone can help? After pumping 89 unleaded fuel and adjust the timing, my car stumble and backfire when i accelerated. Before car was running on 91 premium fuel and it ran fine just a little lag sometime. Modded on car are: 44 mikuni, mild ported head, bigger cams shaft, header, 3 inch straight pipe, electric fuel pump and regulator set at 3.8 to 4 psi. One more thing some how the alternator wouldn't charge the battery so i crank the car multiple times and i could see fuel coming out on one of the mikuni. Any help well be appreciated. :disappoin1 point
-
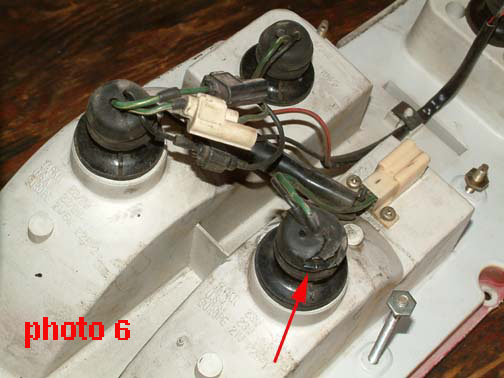
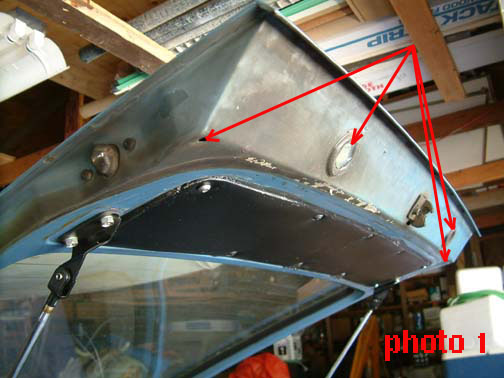
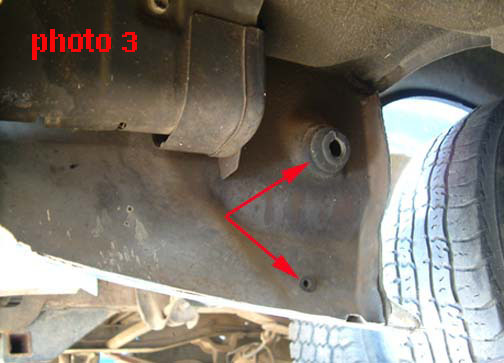
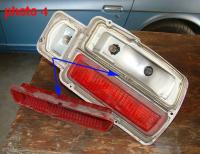
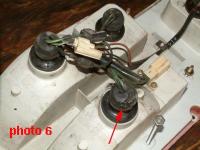
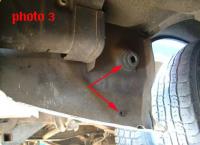
The fume problem, as most of you know, has to do with the Z car’s aerodynamics. The simplest explanation I’ve read is that a bubble of air gets trapped around the rear end of the car at speed. Since the exhaust exits back there, its fumes get trapped in this bubble. If there are ANY openings in the rear of the car, they will allow this fume-laden air into the cabin. My efforts on solving this problem were based on a lot of information gathered from the online forums. Since I couldn’t find any one, definitive explanation on this subject, I gathered these all tips into a folder and addressed them, one by one. I also discovered a few things that I did not find in the forums/archives. Two more things: 1) this article is based on what I found in my daily-driver ‘76 280Z coupe, and confirmed with a ‘75 parts car and ‘77 coupe I had at the time. I am reasonably sure most of the following information will apply to 240 and 260 coupes, as well, but no guarantees. I don’t know if any of it will apply to 2+2 cars since I have no experience with them. I don’t even know if the 2+2s suffer from this problem. 2) Everything you’re about to read here assumes a solid, rust-free car. All bets are off if you Z looks like rusty Swiss cheese. Okay, it’s easiest to break this up into seven separate areas you need to check: Firewall, exhaust system, shifter boots, rear quarters, rear deck, taillight panel and rear hatch. FIREWALL — I do not believe that I had any fumes coming through my firewall. I base this mostly on the fact that I don’t smell any exhaust or gas fumes when the hood is open and the motor is running. If you do, then take particular care to seal your firewall. The basic drill here is to replace or reseal any hoses, wire bundles or grommets where they go through the firewall. The most obvious of these is the accordion-like throttle rod boot beside your master vac. This item is rotted away on just about every old Z car I’ve ever seen in the junkyard. It’s only a few bucks for a new one and a good investment. You can also buy replacement original or aftermarket seals for everything else under the hood while you’re at it, but if you’re a low-bucks Z owner like me, silicone or another sealant of choice works just as good. I replaced the throttle boot with new and siliconed everything else going through the firewall. EXHAUST — Pretty obvious: If you have exhaust leaks, fix them. In particular, check exhaust pipe/manifold gasket and all pipe clamps or welds at resonator/catalytic converter and of course muffler. You can tell leaks either by black sooty residue or by putting your hands around (NOT on) the exhaust with the car running and feel air puffing out. SHIFTER BOOT — The main one of these you have to be concerned with is the big rubber one under the leather-like one you see inside the car. To access the rubber one, you have to take the center console off. Then you can’t miss it: it’s big, rubber, and it seals the shifter hole in the tranny tunnel from outside air. It’s not a particularly cheap item (about $40) but well worth the $$ and easy to install. While you’re at it, buy the small ‘inner’ shifter seal that seals the top of the tranny from road dirt, too. REAR QUARTER(S) — Now we’re getting somewhere. In my cars, this was a MAJOR source of fumes, especially on the driver’s side (because the exhaust system is on that side). Upon removal of the plastic interior rear trim on the driver’s side, I found one big and one small air leak. Both are under the car. To see them, get under the car and look up at the panel outboard of the muffler. (You don’t need to jack it up.) You will see two holes, one big one small. The smaller of the two at the bottom is, I think, the drain for the power antenna — which not very many Zs have anymore. On my car(s), the little plastic piece in this hole was all hardened and dangling. Replace or plug with silicon. The other hole is harder to see because it’s higher up. I have no idea what this 2-inch hole is/was supposed to be for. At any rate, Datsun stuck a rubber plug in this whole at the factory, and on all three of my 280s — it had rotted out in the middle. Since it was right beside the muffler, this is a literal black hole for fumes. Again, replace or silicon it closed. BTW, I found these holes by putting a halogen light under the car, shining straight up, in a darkened garage. Then stuck my head inside the rear quarter. Wherever you see light coming in, thats an air leak. So keep sealing until you see no light. On the passenger-side quarter, I did not find any leaks or rot in my gas tank vent hoses. If you do, then replace them. (I think a gasoline smell, rather than exhaust, would be more indicative of a leak here.) REAR DECK — This is the part of the car under the rear hatch, where the spare stows. I do not believe I had any serious fume leakage in this area, simply because there aren’t that many holes. However, on my car the grommets around where the hoses to the vent tank went through the rear deck were rotted, so I squooshed more silicone around them to make them airtight again. TAILLIGHTS AND REAR PANEL — Per suggestions on several forums, I bought new taillight gaskets and went through the laborious process of removing my taillights to put them in. However, once my light fixtures were out (there are lots of little nuts so be patient and careful), I found that original foam rubber gaskets, though old and funky looking, did not have any breaks and did not appear to be leaking. If yours are, of course replace them. HOWEVER, I did have a couple of rotted rubber thingies on the actual bulb fittings. These are the thin rubber seal things through which the wires pass into the bulb bases. When rotted, these seals DO leak air (blow through one without the bulb if you don’t believe me). If these are rotted, or the spongy gaskets on the bulb fittings where they quarter-turn into the taillight housings are gone or rotted, you can get fumes sucking in there. ALSO, the rear taillight lenses themselves leak air. They are not totally sealed all the way around, but have small rectangular openings — probably drains — at the bottom of each lens. I did not seal these on my car, but if I still had fumes after all I did do, I’d try that next. One more thing on the rear lights: the lenses are mounted in some kind of white plastic stuff that was apparently soft at the factory. On my car, this was still pretty soft — kind of like an Abba Zabba candybar — and seemed to be well sealed. But on my parts car, the white stuff was hard and the lenses were loose enough to just pop out by hand. If yours are this way, I would reseal them with silicone (except for the drain hole) and reinstall. REAR HATCH — This, in my opinion, was the main fume culprit on my car and, I suspect, most first-gen Z cars. One of the early band-aids I tried was a new rubber seal between the hatch and body. If anything, this seemed to make the fume prob worse. WTF?? So I got to looking at the hatch itself and discovered four holes in the lower edge of it (look under the rear lip when it’s open). Two are large rubber drain plugs, two are simply small half-inch holes. The driver’s side drain plug on my car was rotted almost away. I resealed it, and the other big one. I left the smaller drain holes open because, at this point, I had a sudden flash on the biggest culprit in this whole gory scenario, at least for me: the trim panel on the lower rear hatch. This is the vinyl-covered panel about 6 inches by two feet that is screwed and/or plastic-riveted to the underside of the hatch, right below the hatch release button. Please note that when the hatch is closed, this panel is INSIDE the car. I am convinced that my major fume ingress was through or past this panel — thanks to online forums for this tip. What I did, and what you should do, is remove this panel and put a piece of visine plastic between it and the hatch before reattaching. You know, clear plastic like is under your interior door panels. A vapor barrier, basically. You can do this with that 3-M sticky stuff like is on the doors, or silicon. I was so gonzo by his time that I siliconed the living crap out of the opening, the plastic, and the panel — then ran a final bead around the panel when it was reattached. In short, I made a big mess that needs to be cleaned up, but that frickin panel is SEALED. BTW, after you do this, leave the hatch open if you can for about 24 hours to allow the silicone fumes to dissipate. Anyway, that’s how I did it, and it worked. I don’t get any perceptible fumes in the car at any speed now, even with the window open. (Well, except at slow-speed decel for some reason.) My wife will even ride with me again, though I haven’t decided if that’s a good thing or bad one. Good luck! — ZHorse (John Riise, 1976 280Z) Photo captions: Photo 1 — There four drain holes — two large and two small — under the lower rear hatch. This hatch doubtless still gets fumes inside, but they are stopped from entering the car by the well-sealed interior panel and a good rear hatch seal. Photo 3 — Arrows show the two holes on the LH inner quarter panel of 280Zs. Note the larger of the two has a rotted-out center. Being right next to the muffler (removed in this picture), this hole would suck fumes big time. Photo 4 — This photo shows the drain hole arrangement in the taillight lens of a 280Z. If your bulb wire seals are funky, you can actually get fumes coming in here and sucking through the old wire seals. Photo 5 — Another shot of the drain hole on the rear lens. All three lenses have these. This photo also kind of shows the whitish, semi-soft lens mounting stuff. Photo 6 — Here’s what I’m talking about with the bulb wire seals. The arrow is pointing to, in this case, a damaged seal. This will leak air. Also check the foam gaskets where these fittings quarter-turn into the taillight housings.


 1 point