Leaderboard
-
.JPG.cfcada9cf1c1b502df3f5f2f2ca3ff36.JPG)
SteveJ
Free Member5Points9,646Posts -

Zed Head
Free Member4Points19,238Posts -

CanTechZ
Free Member4Points1,311Posts -
grannyknot
Free Member3Points5,158Posts


Popular Content
Showing content with the highest reputation on 08/16/2021 in all areas
-
3 pointsCan we get someone to upload photos after the event? Those of us who couldn't make it would love to watch from afar... 😉 Mike3 points
-
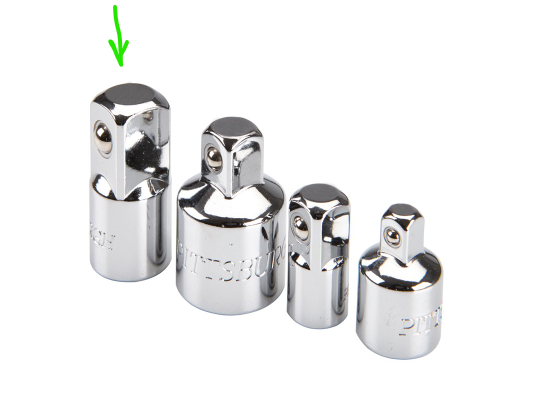
3 pointshttps://www.harborfreight.com/high-visibility-socket-adapter-set-4-pc-62851.html
 3 points
 -
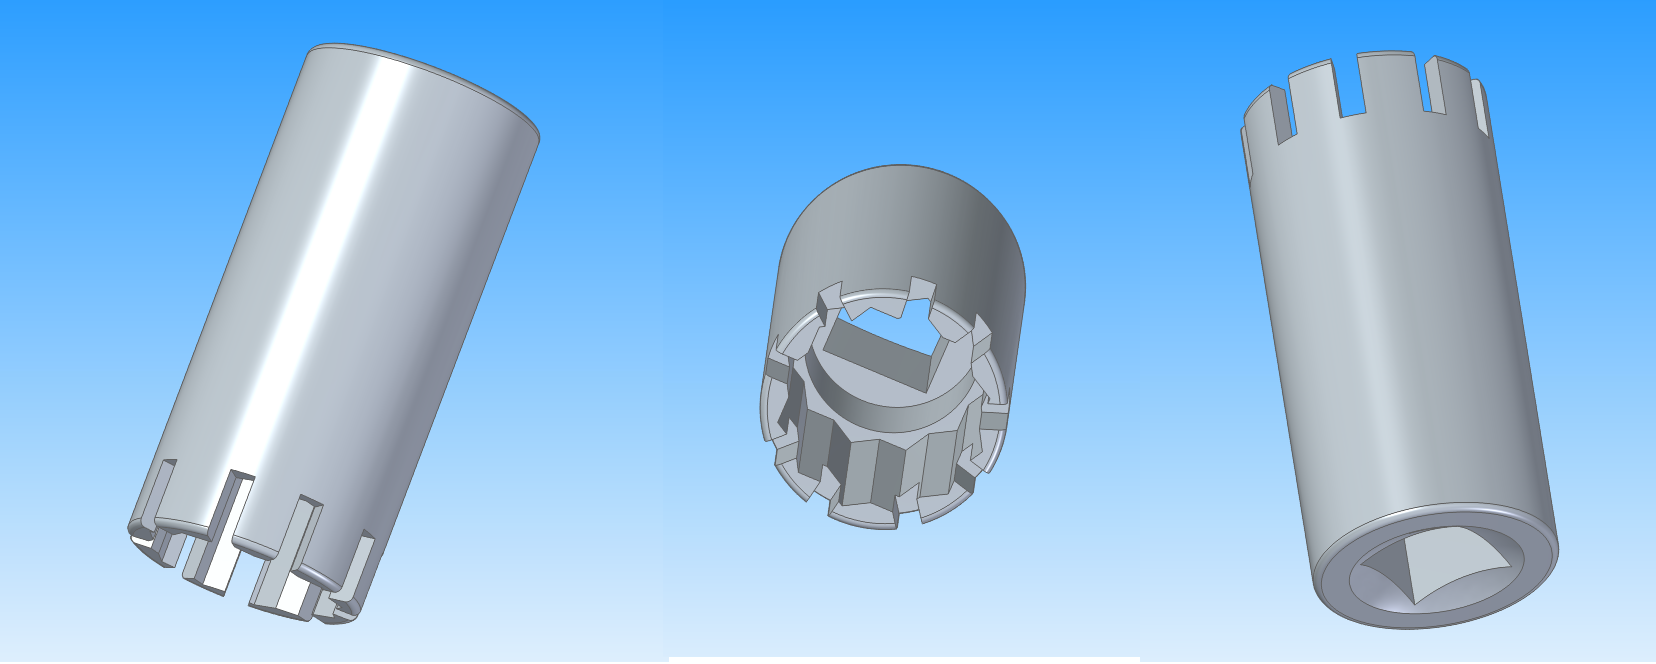
2 pointsIf you are unsuccessful with Gorilla, you could take a 12 point socket that just slips over the un-splined part of the nut and mark where the splines are with a sharpie, or transfer with some plumbers putty. Then grind/file 9 slots to match the splines. Instant key. Of course the would be a once time use tool and care would need to be taken to not use excessive force.
 2 points
 -
2 pointsI wouldn't worry too much about the rise in heat after that much idling. The carbs don't need to be connected to the cooling system. The early four screw carbs had no cooling connection. I'd determine if the dampener has slipped first before buying one. You'll need to determine the exact position of TDC on #1 cyl. There are a number of ways of doing this. A M14-1.25 bolt screwed into the #1 spark plug hole (when the piston is down) will act as a piston stop. SLOWLY bring the piston up until it bumps the bolt. Mark the dampener at the timing tab TDC mark. Turn the engine the opposite direction (piston will go down and come back up) until the piston LIGHTLY bumps the bolt again. Mark the dampener at the TDC timing tab again. Actual TDC is halfway between your two marks which should be the same as the factory TDC mark on the dampener. That's a brief explanation. I'm sure there are plenty of videos on Youtube that explain it much better. I don't see how the #4 fouled plug can be balance tube related or carb related. That's why I'd do yet another dry, wet compression test. Don't ask why, it's an ugly subject and I sooo want to be wrong.2 points
-
2 pointsIsnt that a cap you can remove maybe and there is a torx bolt OR something under it?2 points
-
2 pointsWell, looks like I’m going to make it! Mercury and Venus aligned and somehow it all fell into place with work.2 points
-
2 pointsIf they are going to modify it they are not going to want to spend as much as the guy who see's a possible original car in it, original hunters are usually willing to spend more.2 points
-
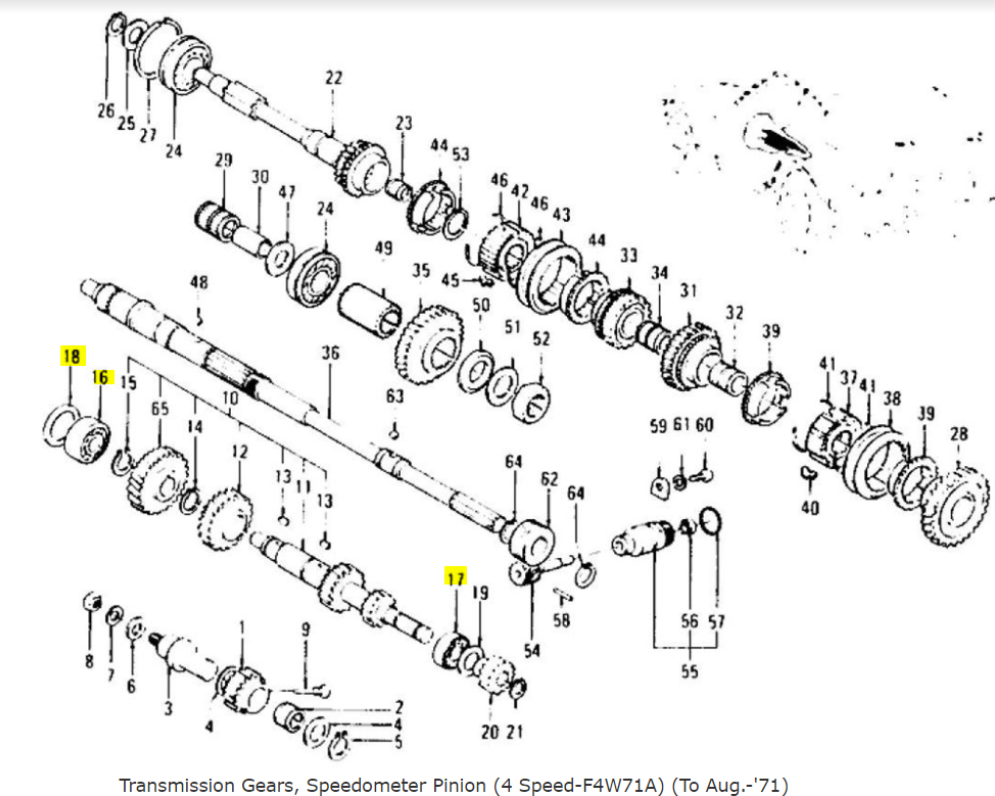
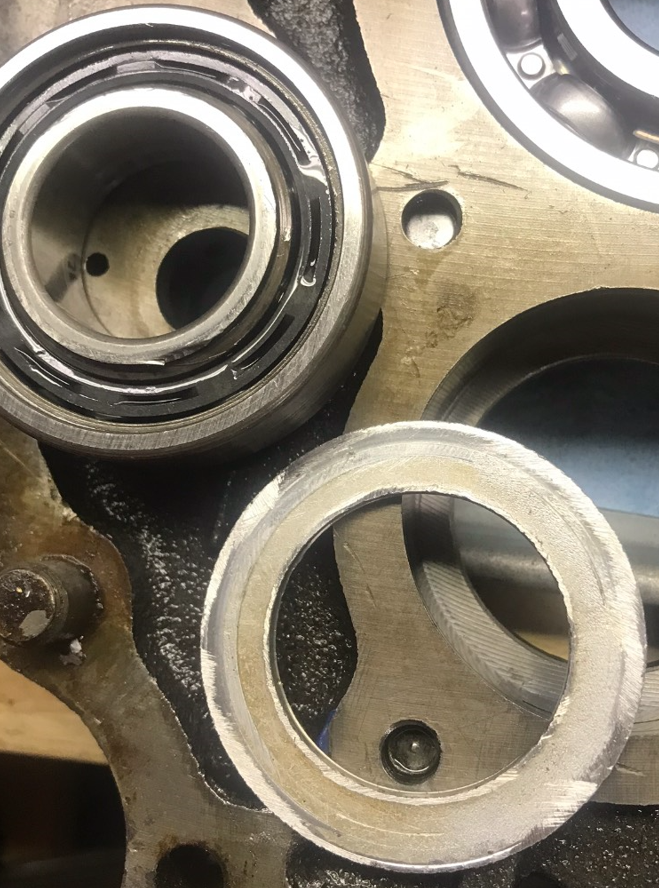
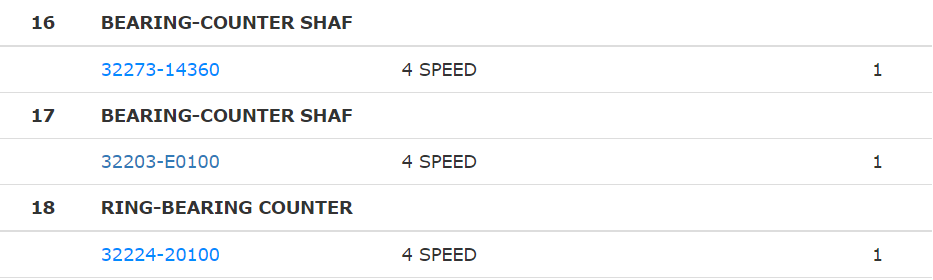
@EuroDat another question for you in the ongoing rebuild saga, item #18 below is some type of shim or spacer that goes under the counter shaft bearing in the adapter plate: I am coming up empty on any information on the OEM thickness for this shim, it is NLA. Do you happen to have one to compare or know offhand? I am pretty sure the one in place currently is not OEM, and neither is the bearing sitting on top of it (item 16), looks like a cheap replacement. Item 17 at the other end of the counter shaft on my transmission is a Nachi bearing which is probably the OEM bearing, I am replacing both with new Nachi bearings. Just want to make sure the shim is the correct thickness, mine is a rough cut piece of aluminum with measurements O.D. - 51.5mm, I.D. 34.2mm and thickness 2.65mm. Picture of the bearing and shim: Also, if it helps anyone in the future the countershaft bearings are listed as NLA but with a little digging I found the Nachi replacements: Item 16: Nachi 6205 C3 Open Bearing (25mmx52mmx15mm) Item 17: Nachi 6304 C3 Open Bearing (20mmx52mmx15mm)


 1 point
 -
1 pointWon't work as the splines are not symmetrical to act as tumblers in a lock. They look like Gorilla brand locks to me. I'd contact Gorilla and see if they can supply the proper key. At this point barring finding the right key, I'd pull the bearing nut to remove the wheel from the spindle and then drill the head off the stud from the back side. Once the head is off, hammer the stud and nut through and insert a new stud. I'd also remove all grease from the hub as there will be metal shavings in there from drilling.1 point
-
1 pointI think you have received some good suggestions on how to proceed. It might be time to start trying them out. Please let us know which method worked for you. Good luck!1 point
-
Yes, And they are in between the chassis and the steel rail for the door rubber. i believe you can take out the doorrubber there and take out the big phillips screws (they are JIS* screws but phillips gets it done) and then you can take the side stainless of the screen.. pop back the rubber in the rail and you can close the doors .. Use some plastic sort of screwdriver stick to do the stainless off the upper stainless strip. (that way you don't mess up the stainless they are hard to find in a perfect condition.) Take your time. I think it's the same on a t-bar car but i had a non t-bar car. On a non t-bar car there is a piece of rainrail attached to the rubber rail that also has to be removed before you can remove the side stainless of the screen pfff... complicated but.. made/engineered very well! Then you can .. again use a plastic flat screwdriver of some sort to pull the upper or lower strip of the screen. IF there isn't used a lot of adhesive. Use a stanley knife to cut through the old adhesive, again taking your time, you don't want the stainless to get a kink in it! (On the rear window i used stainless off of 3-4 rearwindows! to get it good) If you ever want to polish those stainless parts.. do it on the car before you disassemble, why? you will end op with spagetti stainless when you even try to polish it on a machine. It WILL fly out your hands at some point.. (NO i didn't do this myself, there where people here who done this and ended up with a mess.. there are pic's on here of it!) If you want to polish them later, cover the rubber with plastic sort of tape like the electrician uses so you don't "polish"the rubber the stainless is in! (Make a new topic for your 280zx on here! please!! 🙂 ) * JIS = Japanese Industrial Standard. (a screw that looks like a Phillips but is not, it's a JIS.1 point
-
1 point
-
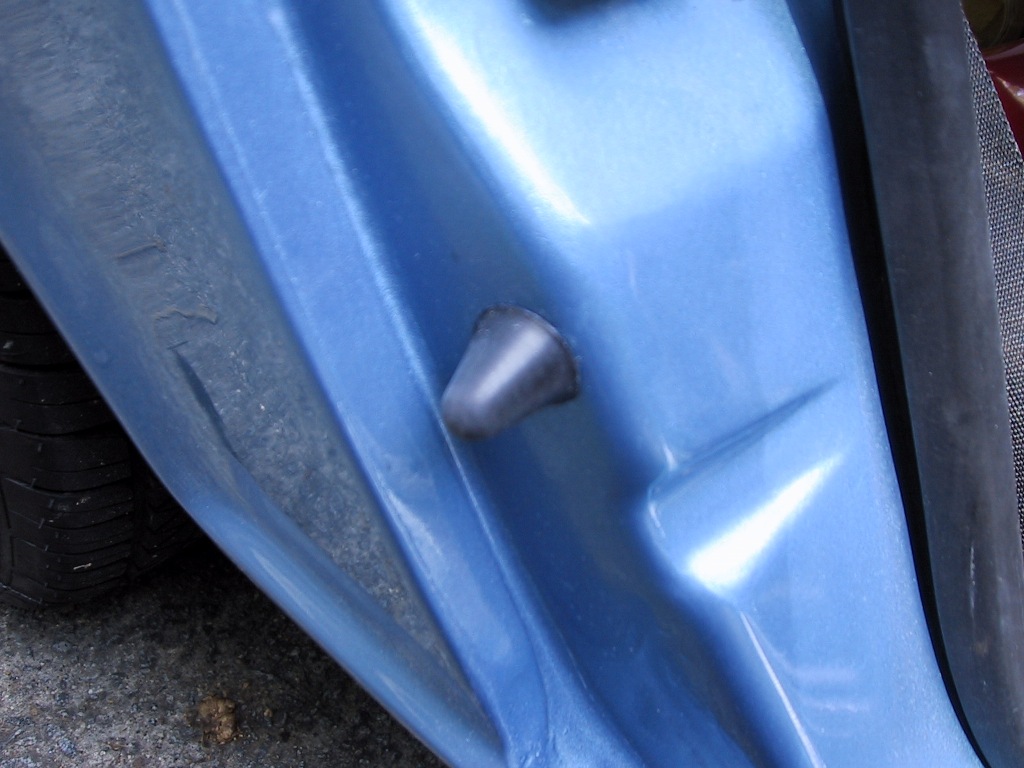
1 pointOh, it's available. You just have to know how to look for it. I just put this phrase into Google: mikew rubber door bumper site:classiczcars.com It was the second hit.1 point
-
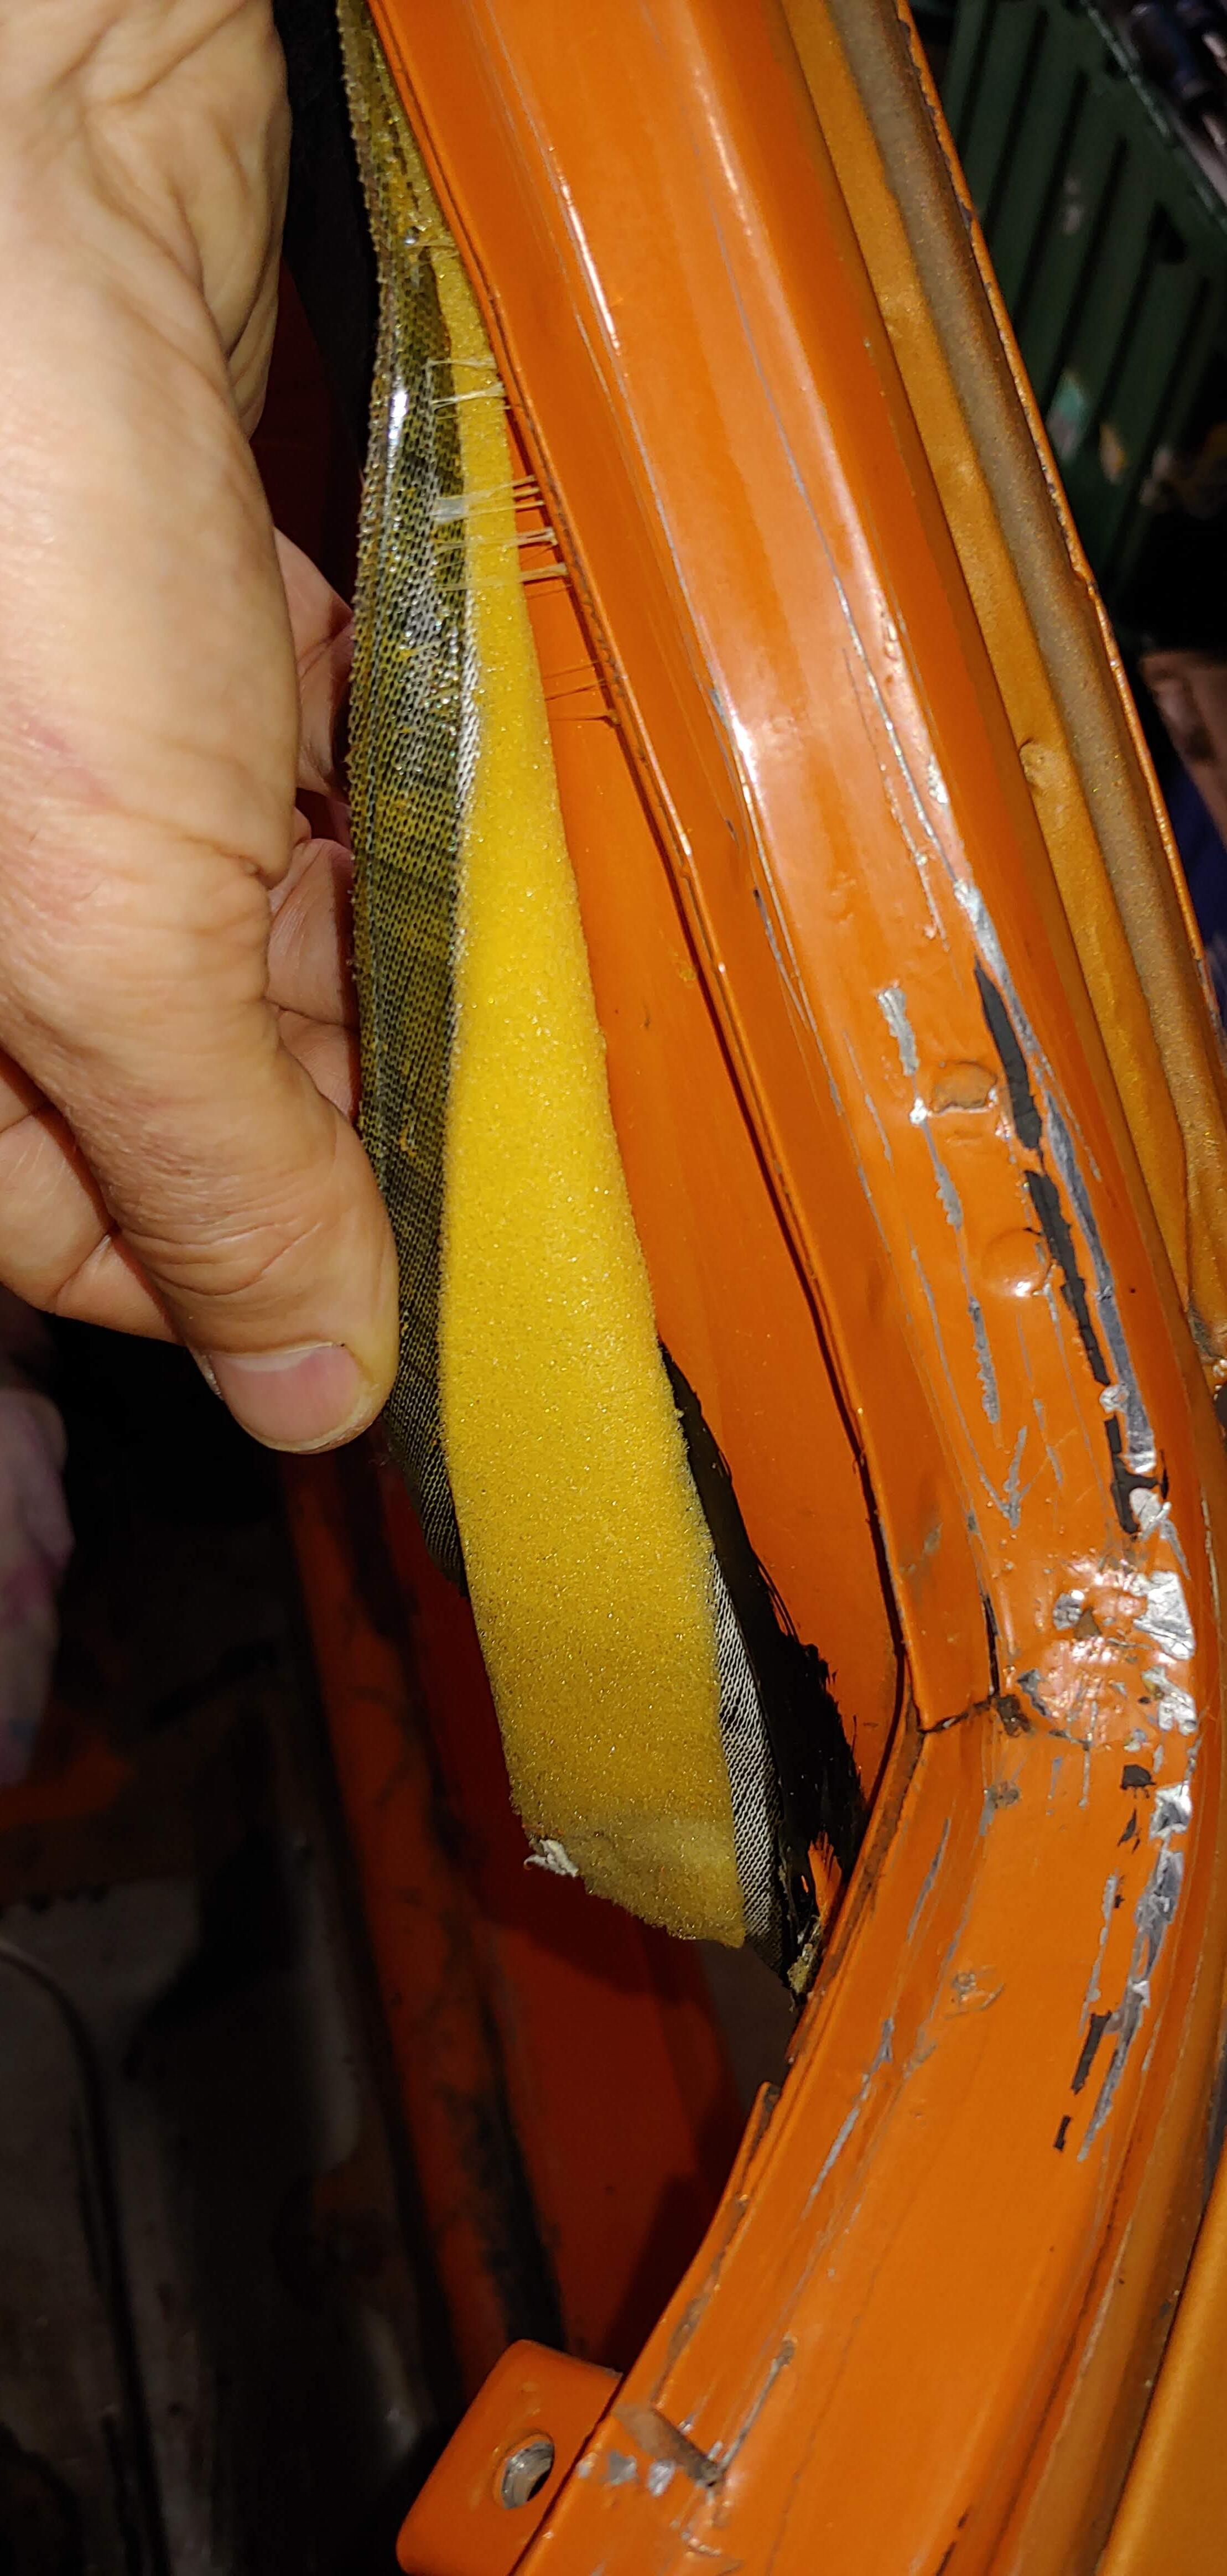
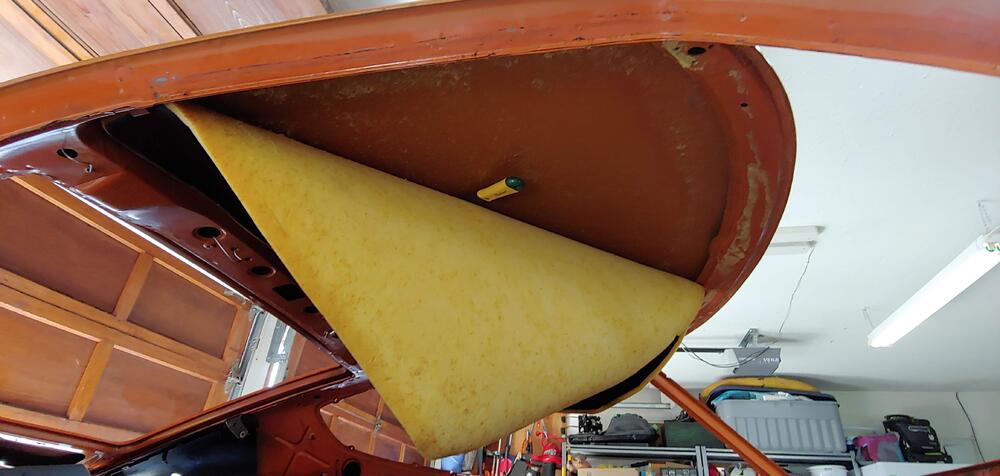
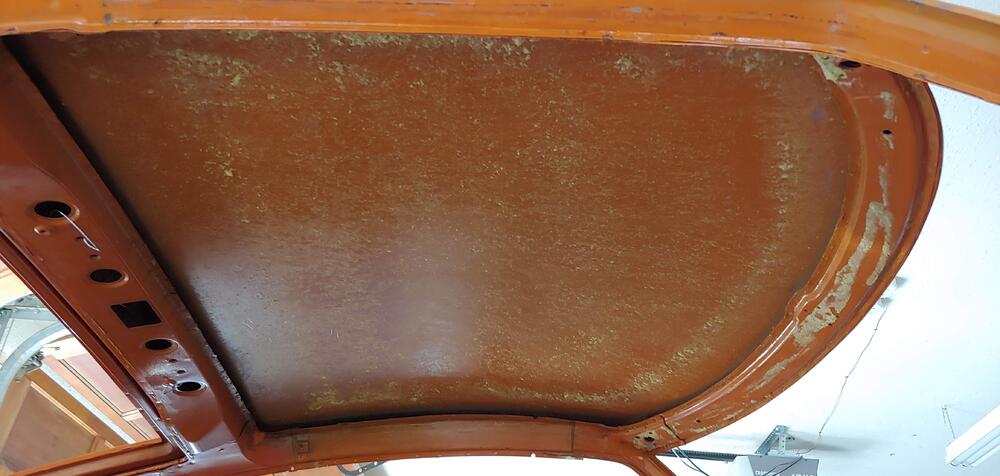
I guess your cowl was rust free but that foam was the cause of thousands of rusted out cowls, water got trapped between the cowl and the foam and it couldn't evaporate. I put 3 little blobs of RTV where the foam used to be so the cowl is still supported but there's no place for water to hide.1 point
-
1 pointAnd @beermanpetewas spot on. The tach is working again. What I did wrong was put the black/white from the ignition ON position on the coil positive. I removed it from the coil and made a jumper to go between the black/white wire and the green/white wire, and the 240Z tachometer works just fine with the Pertronix. (I put in extra words to help anybody searching for this solution in the future.)1 point
-
1 pointKeep in mind that I'm over 2 hours away, and @Patconconsiders me close by. 😉1 point
-
1 pointFinally nailed down the last detail. We are getting in Friday afternoon (hopefully in time for cocktails 🍸). Looking forward to meeting folks and seeing a lot of great cars.1 point
-
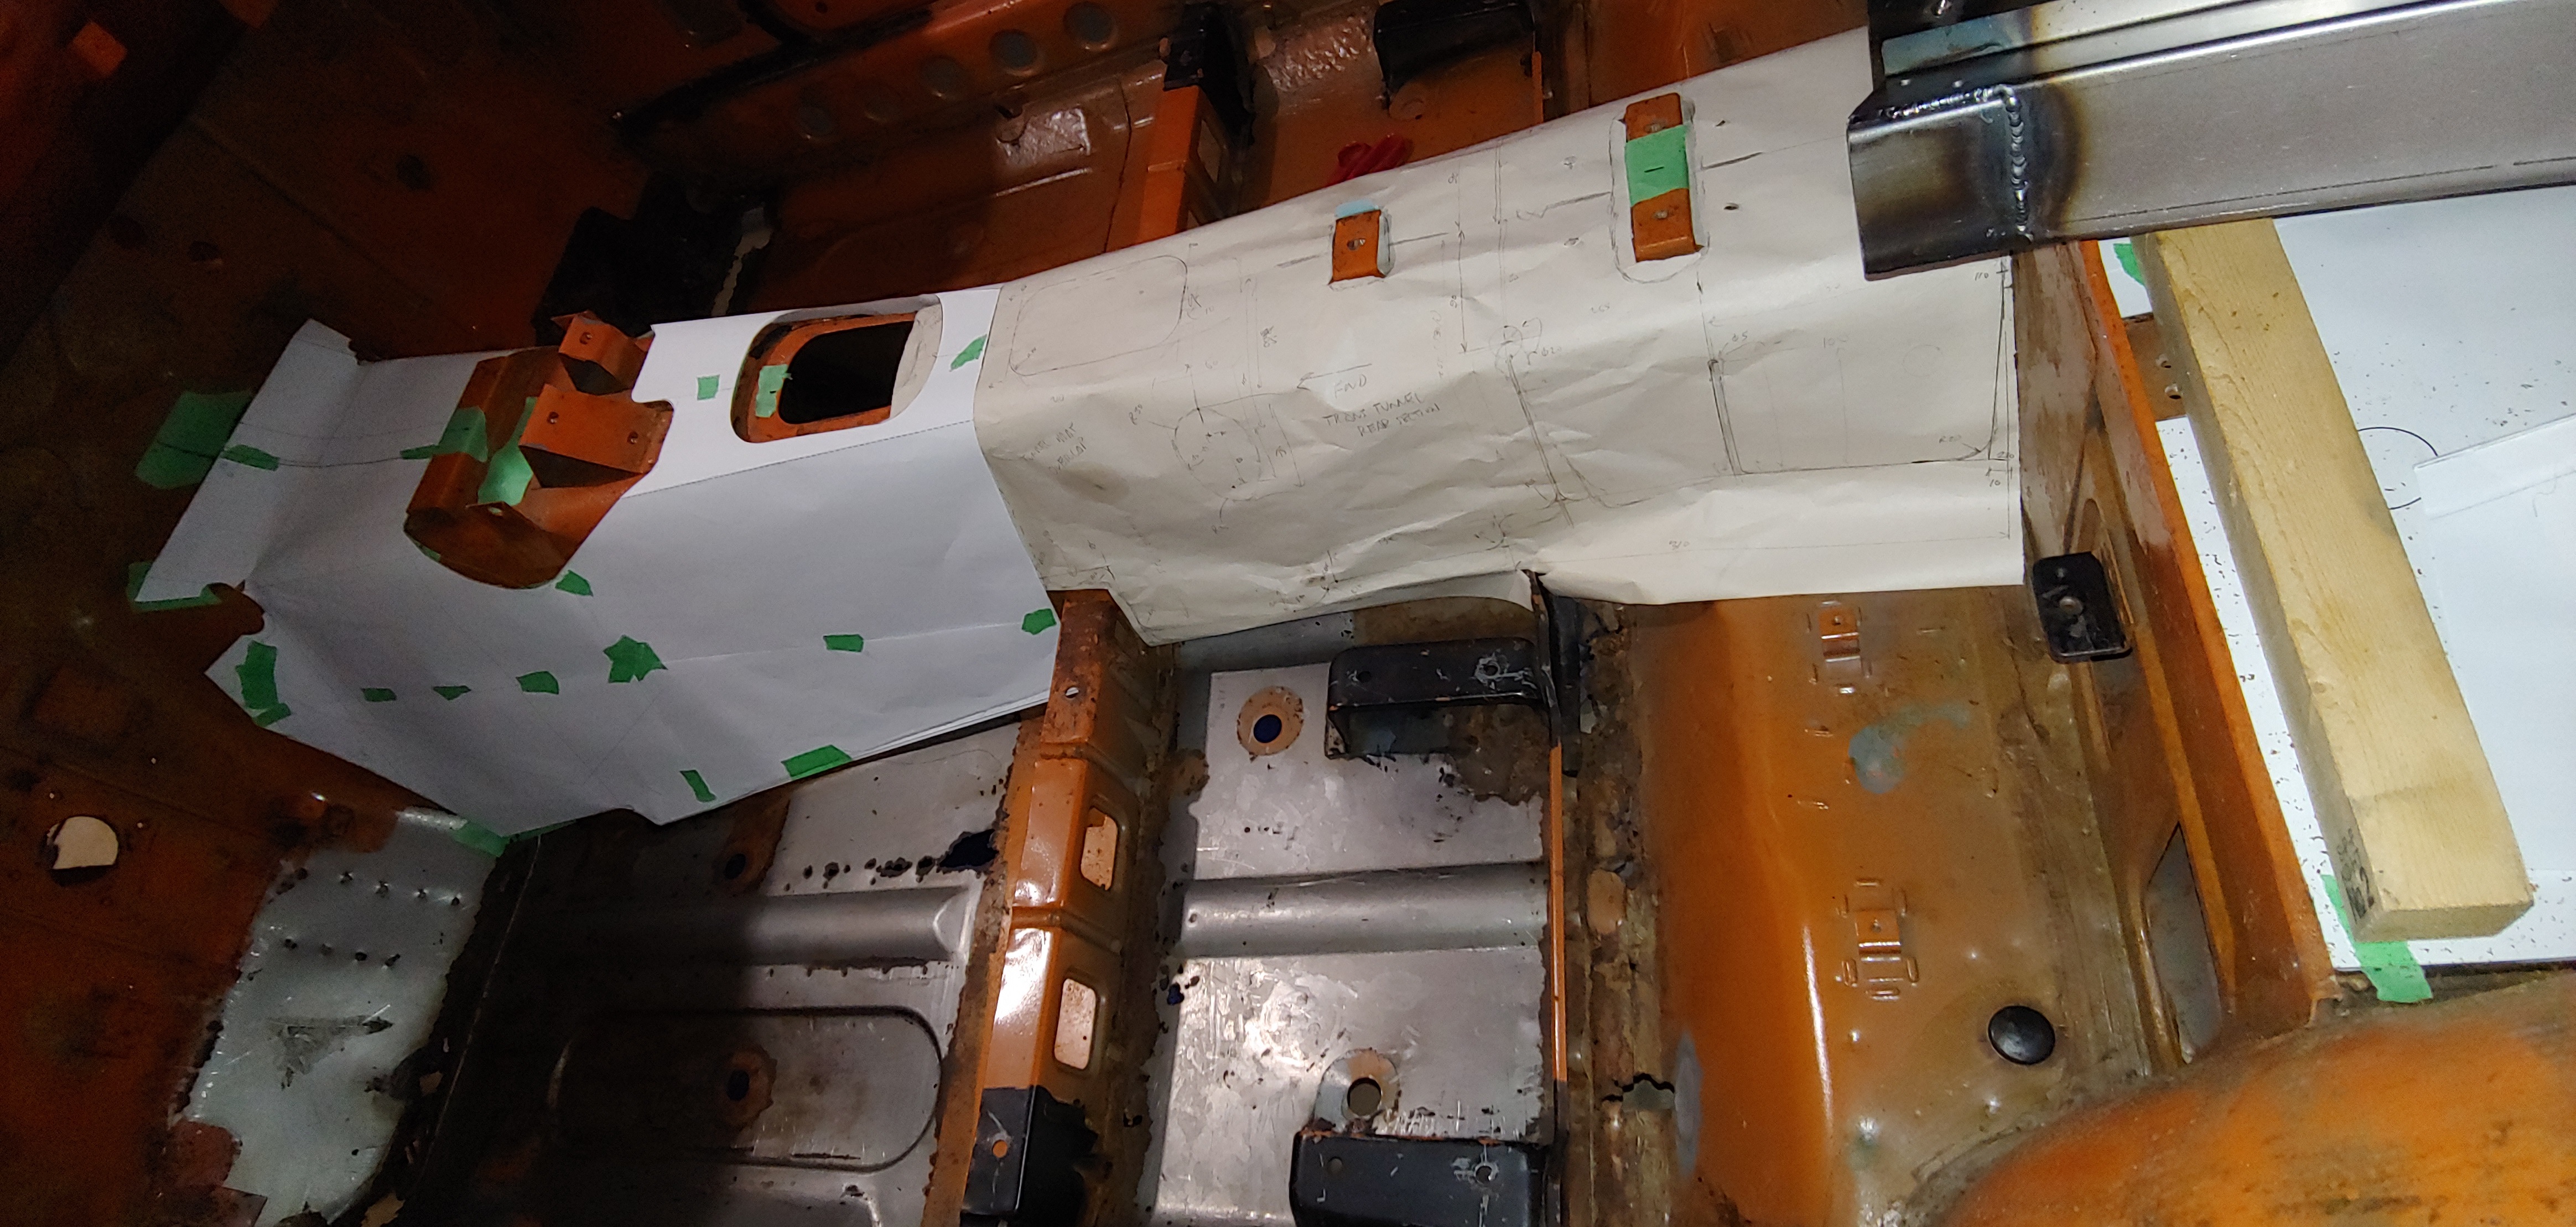
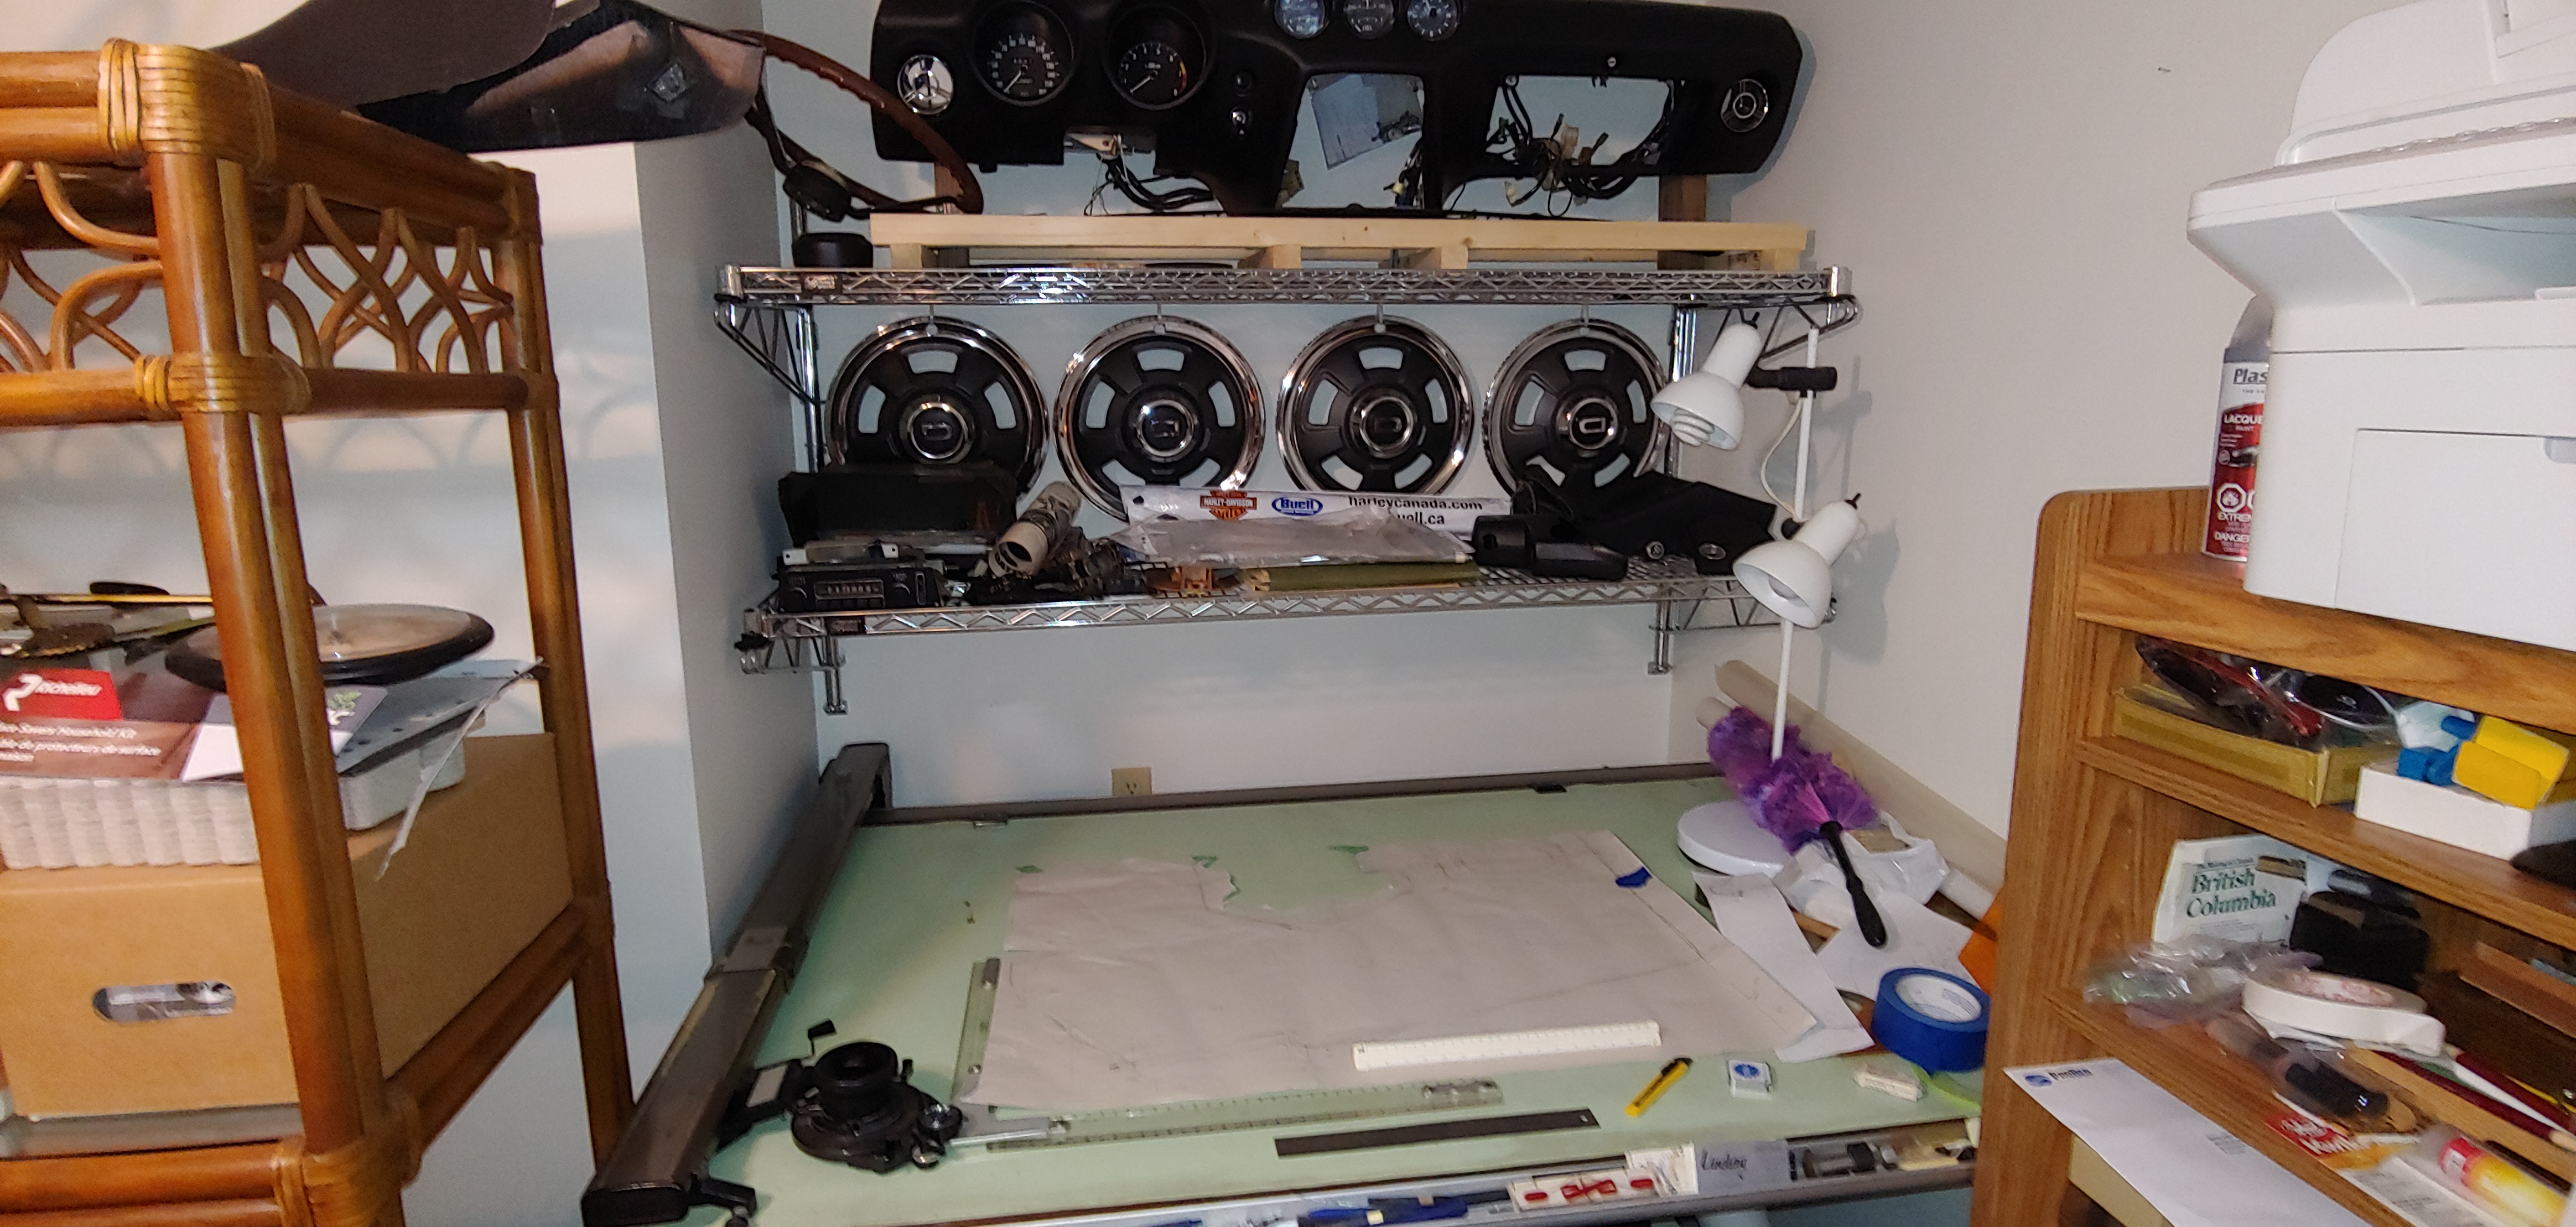
1 pointSpend much of the weekend continuing with my tar mat template project. Almost finished with the preliminary test fitting of the transmission tunnel templates. Hopefully just have to do one more round of adjustments to my cad file and then plot full size in one piece to do a final test fit. Actually two pieces, there is a front section and rear section that overlap. This has definitely proven to be the most time consuming part of the job. Luckily my drafting table and computer are in my office that is directly connected to the garage. As you can see I'm using all available space for parts.

 1 point
 -
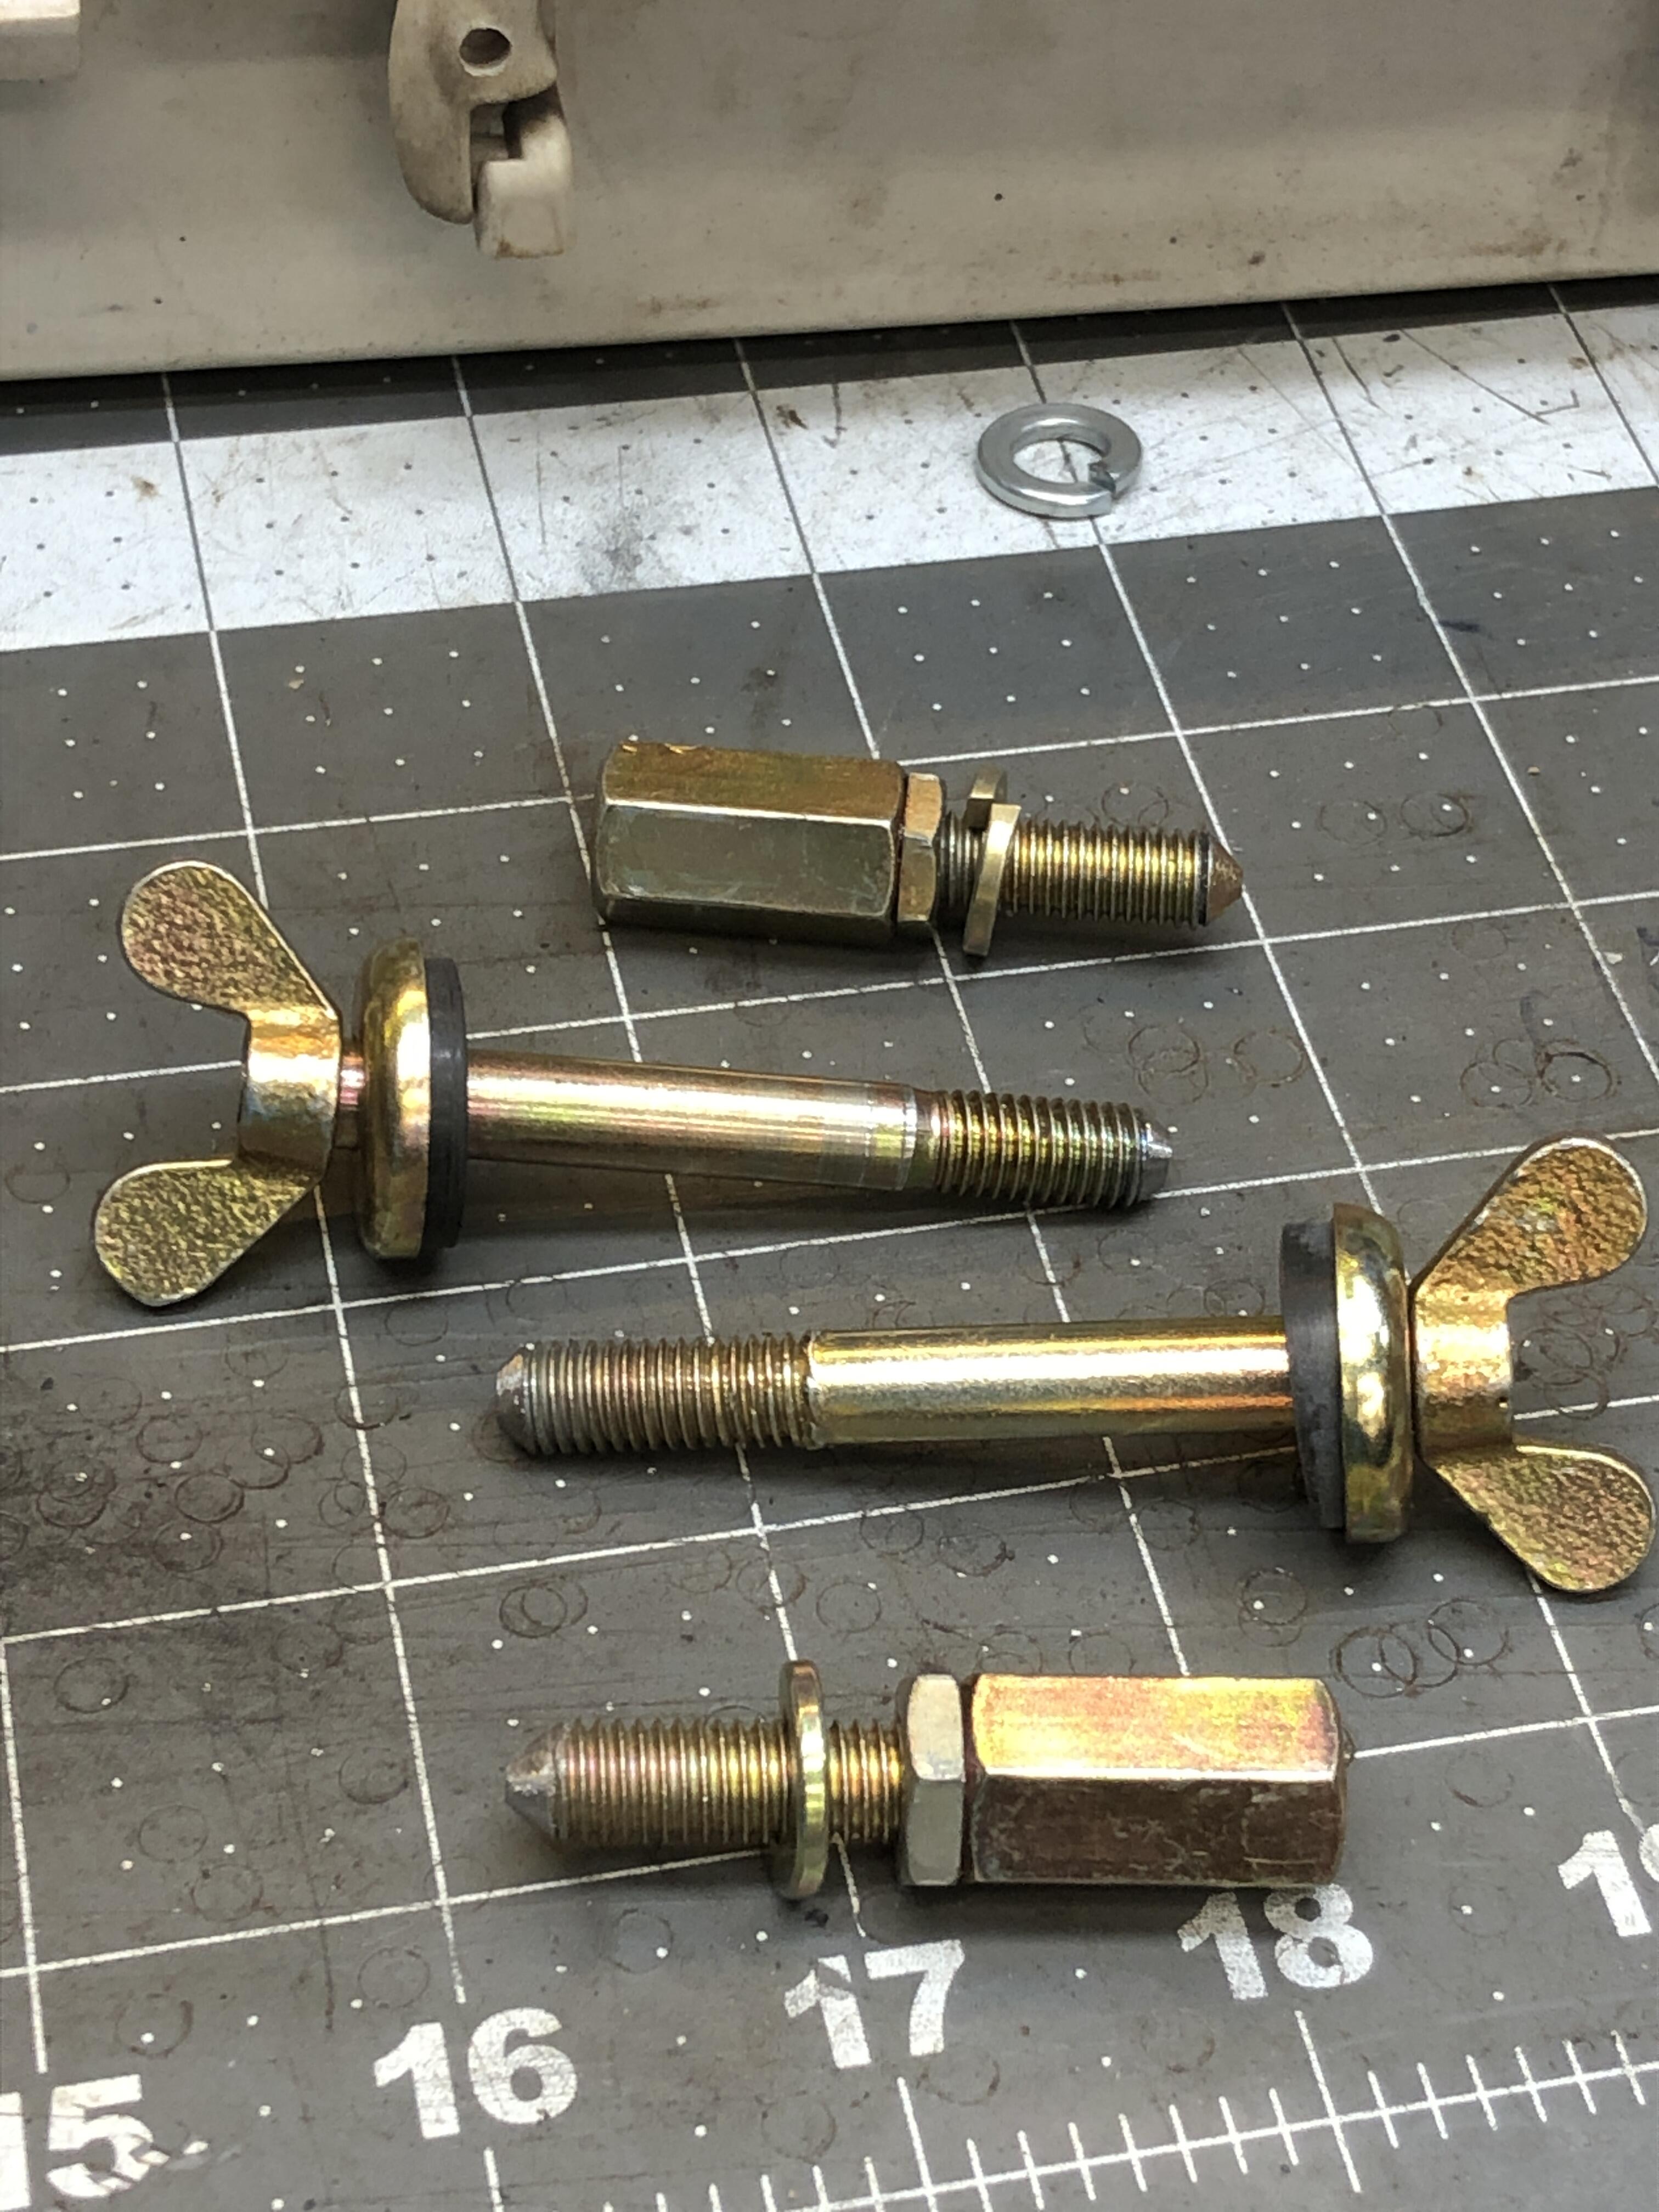
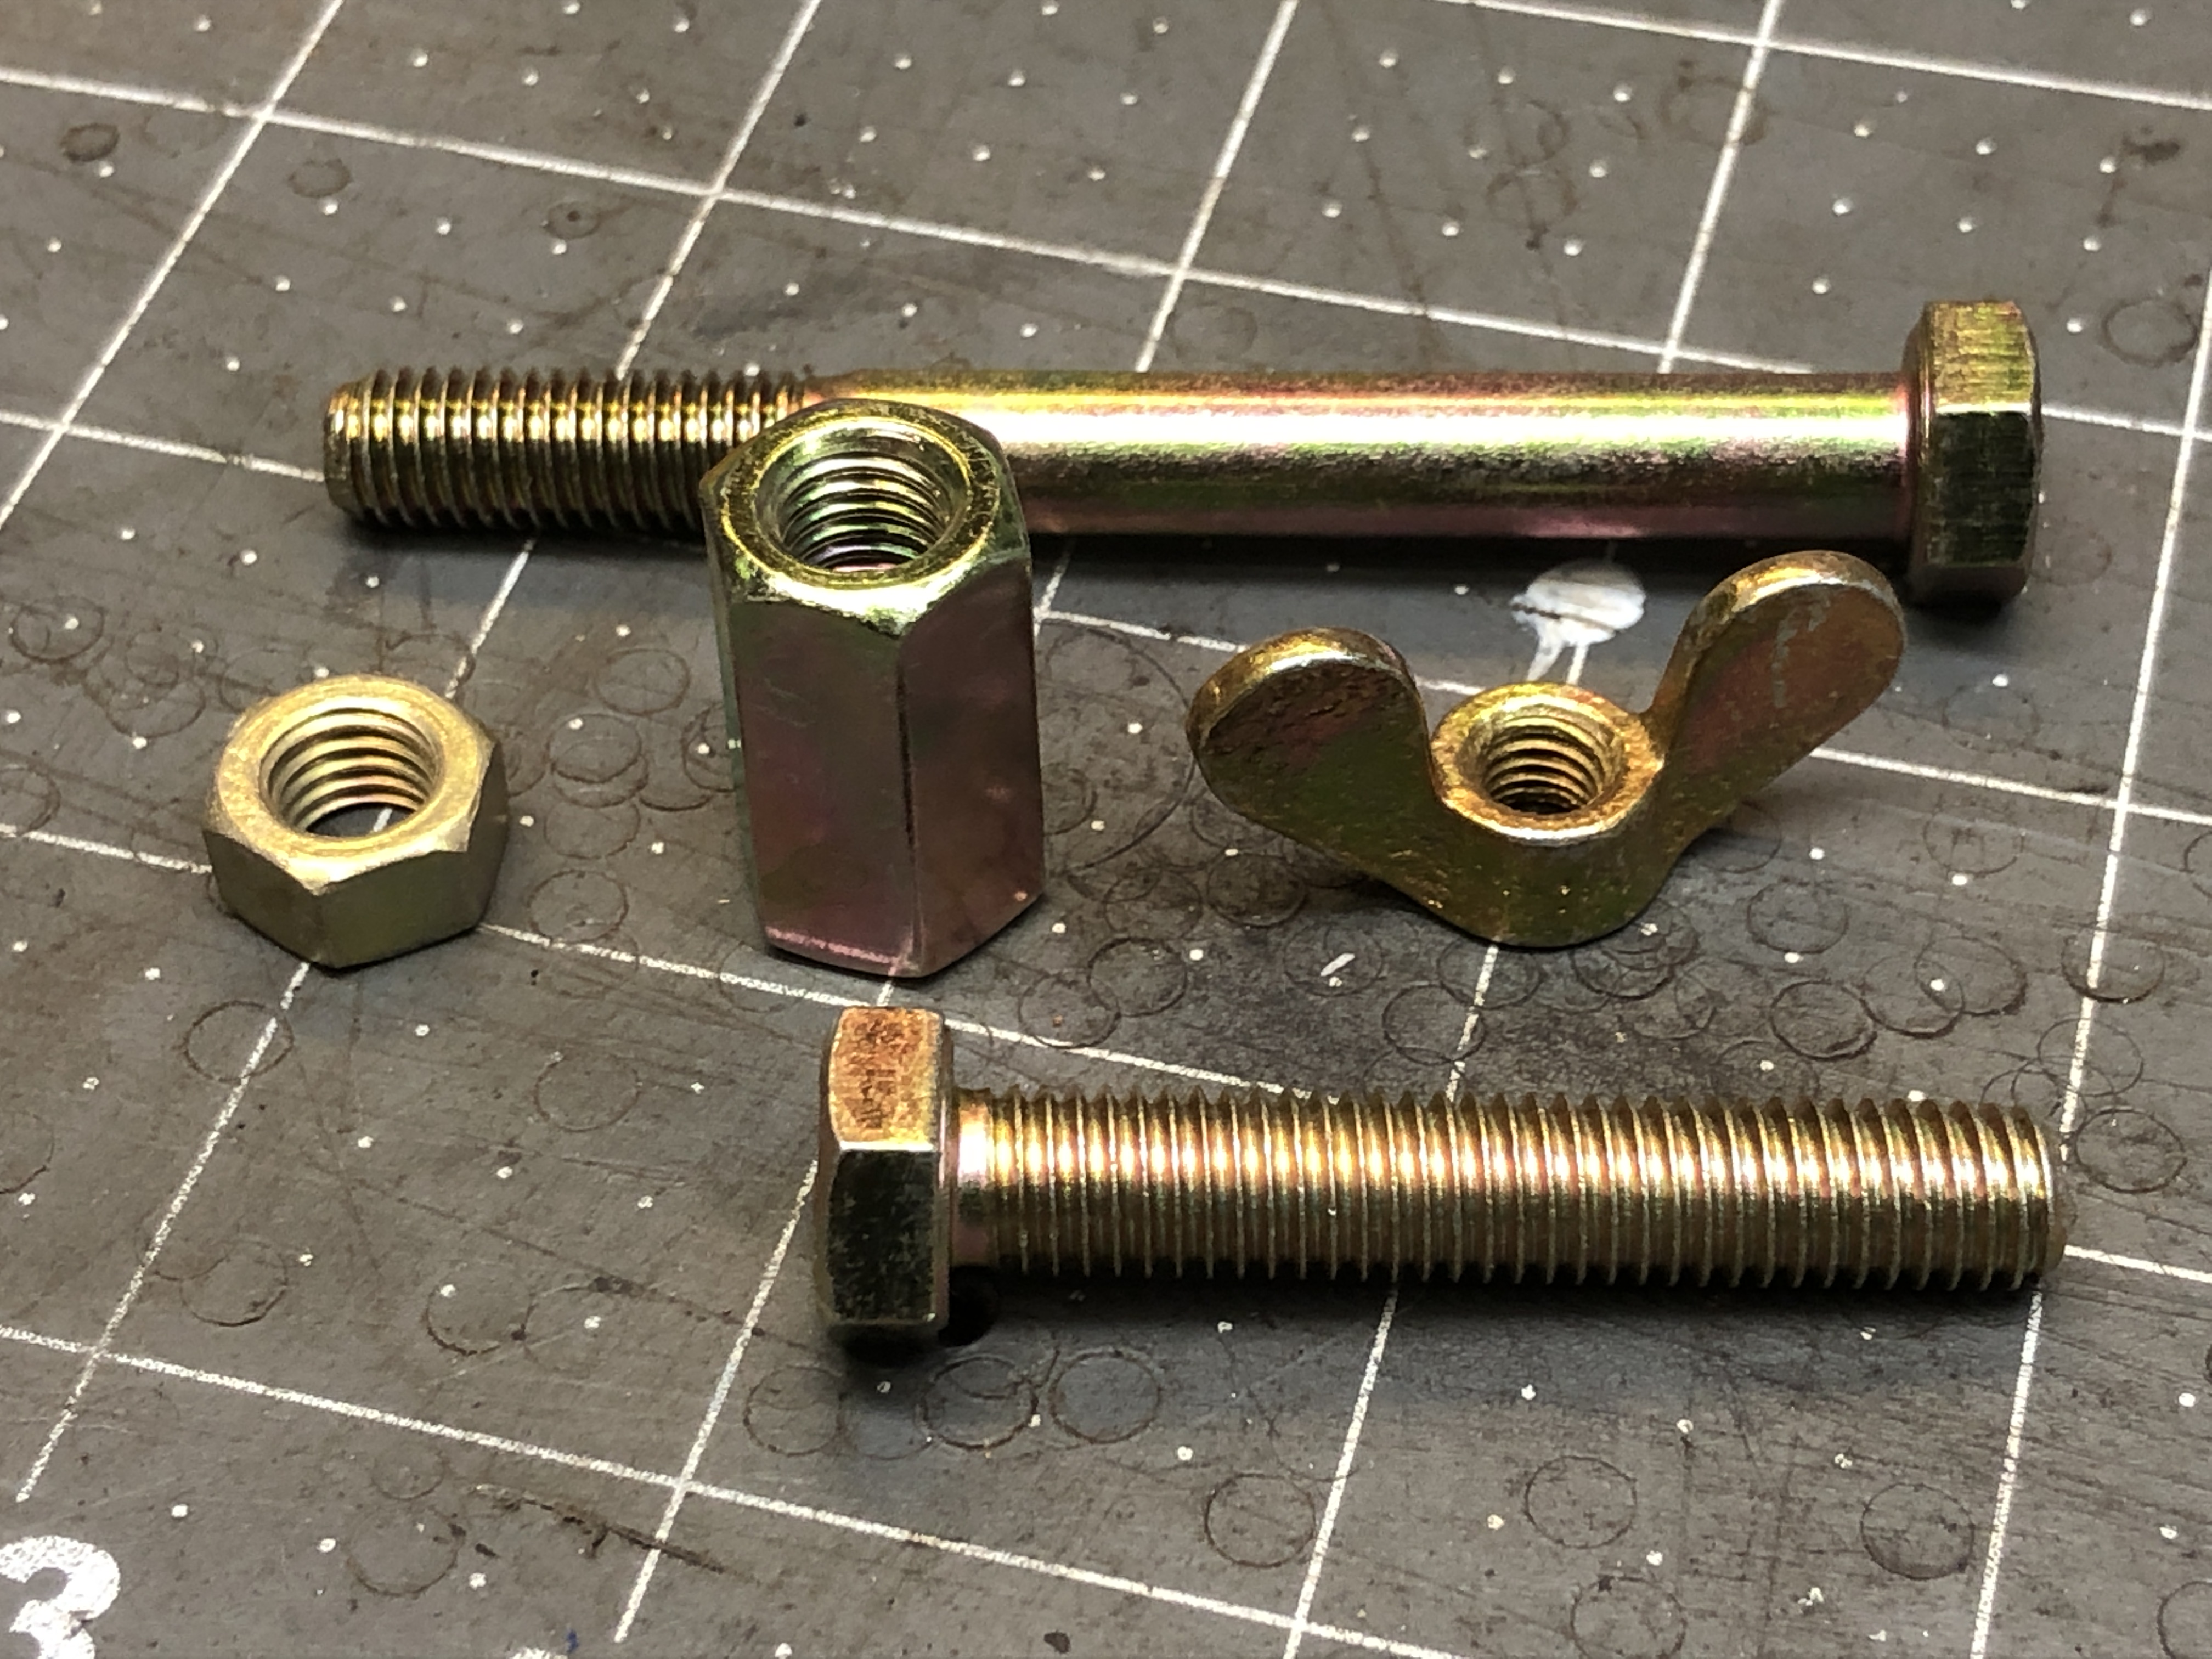
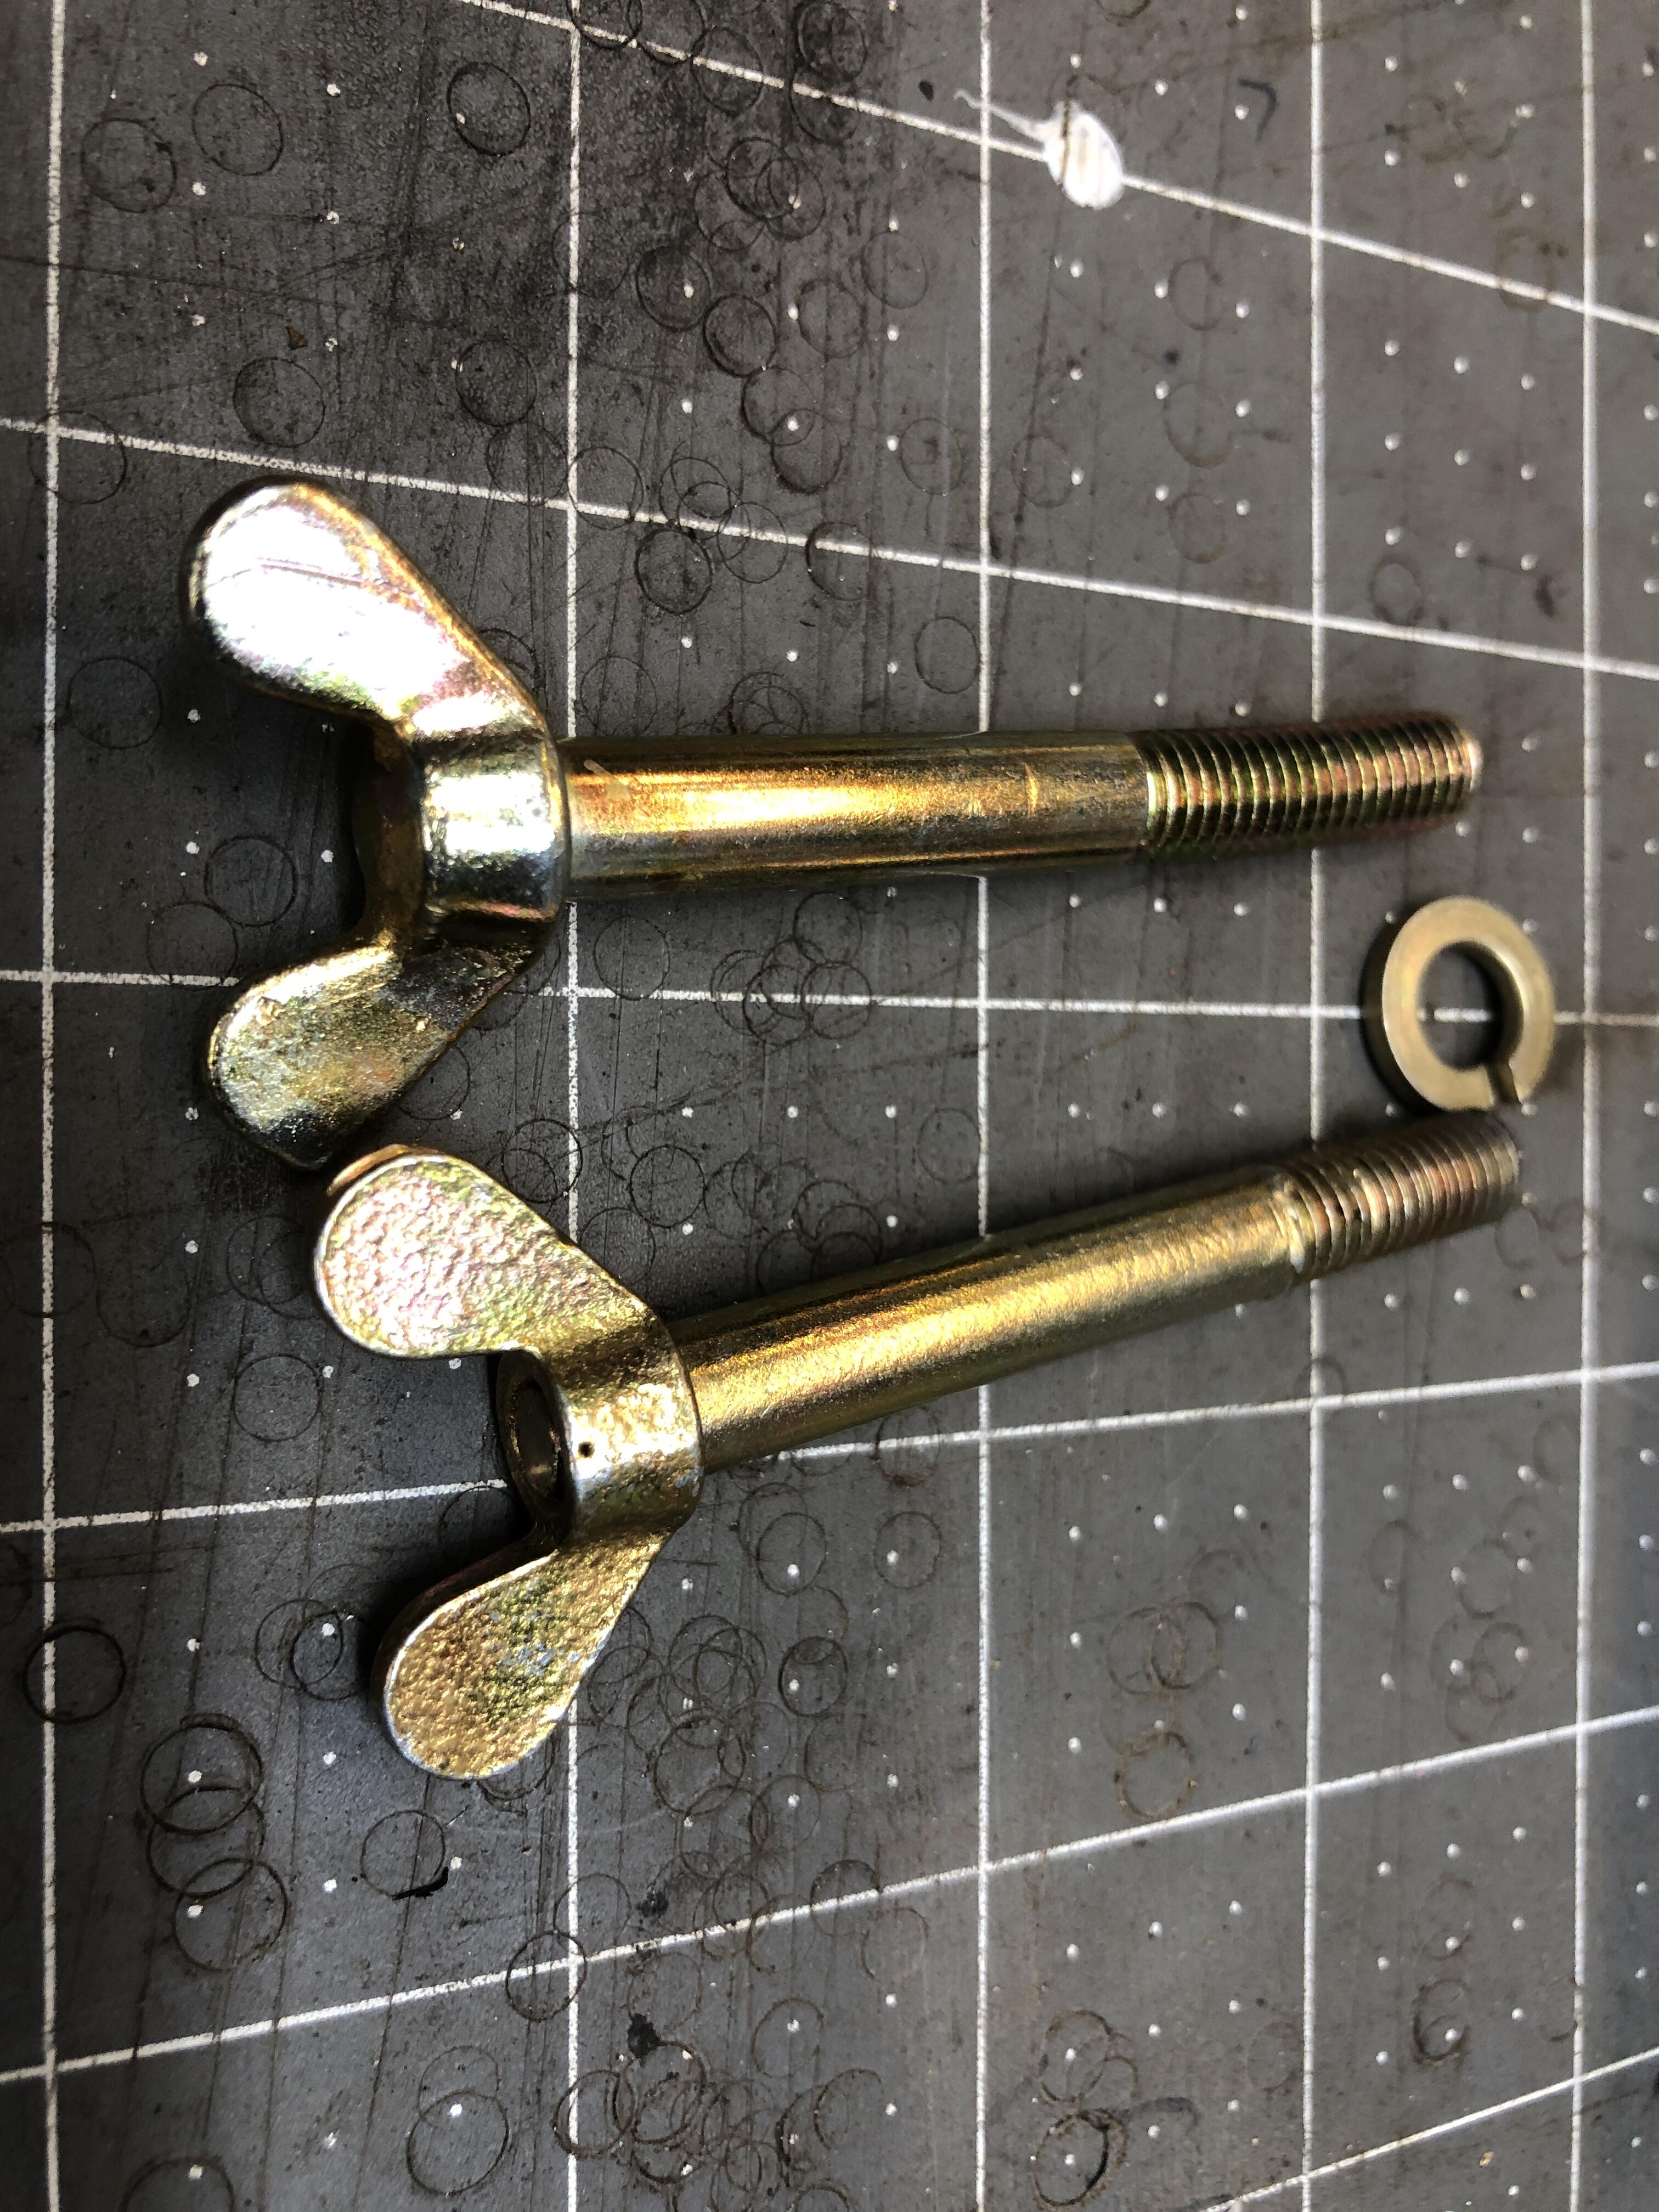
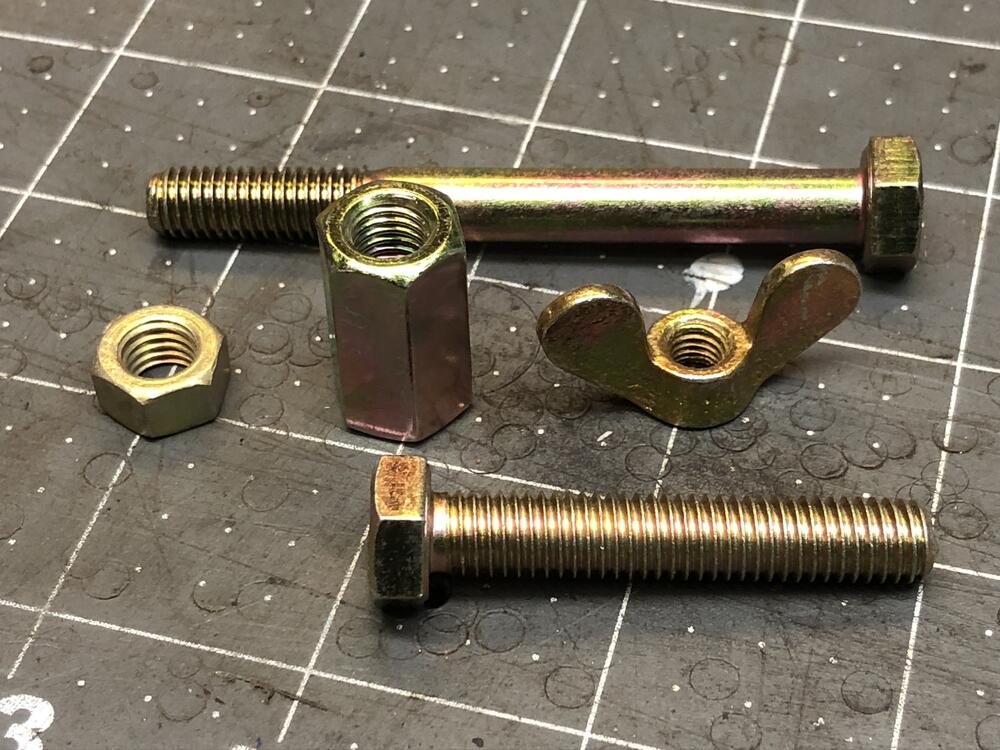
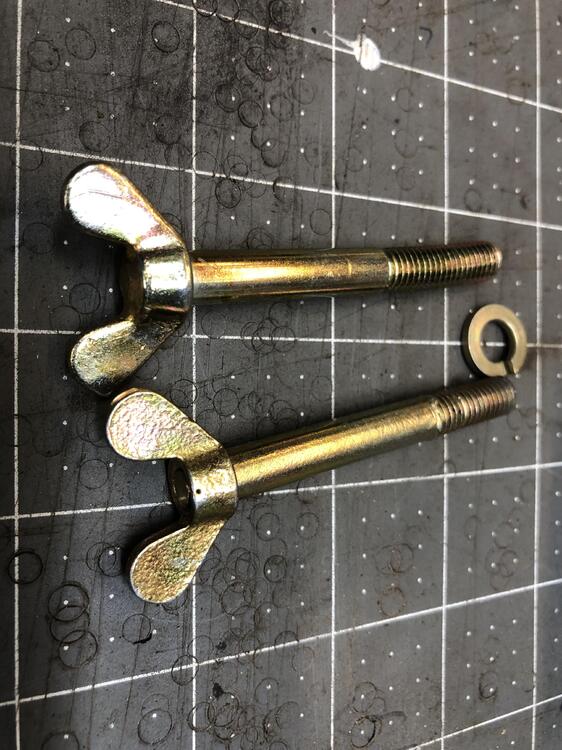
1 pointI’ve made Wally a set of my “new” reproduction air cleaner hardware. We he gets them, he can report on appearance and functionality. The hex coupling nuts I used are 13mm wrench rather than the stock 14mm, and I make them by threading in an M8 bolt and locking it in place with a thin jam nut and red lock tight. The wing bolts are made from a M6 wing nut and an M8 bolt that has the end removed and turned down and threaded for M6 to attach the wing bolt. Red locktite and torque lock it in place. My reproduction cup washer are included. These are the raw materials. Comparison of an OEM wing bolt (top) and mine. Ears are dang close to the same size and shape wize. Slightly different surface finish.

 1 point
 -
1 pointThe plan for today was to start early with bleeding the clutch...yeah, here's how that went. No fluid moving through the hydraulic circuit. Lots of time spent removing the hose between the slave and hard line. Got lots of gunk out of the hard line and clutch hose. I used air on the hard line and 14 gauge solid wire on the hose. Wrestled to get the hard line and hose reconnected. Bleed the system only to find a leak between the hose and slave cylinder. Researched the problem and found this thread: https://www.classiczcars.com/forums/topic/46057-slave-cylinder-hose-gasket/ Found my sealing washers and got everything reassembled. Got the clutch bled with no leaks. Don't you love it when a simple task takes several hours? I also replaced the old battery cables and installed the H4 housings with LED bulbs for the headlights. It doesn't seem like much, but it ended up being a long day. I decided to put off the startup until next weekend.1 point
-
1 pointFor those of you who will be at ZCON 2021, after the NY reveal of the new Z on August 17, Nissan will be taking the car on the road...to arrive in Colorado Springs to be shown on August 20.
 1 point
 -
1 pointHere's a great shot - by pro photographer Dan Redrup - at the same event. Kevin is a past British Historic Rally Championship winner in this car:
 1 point
 -
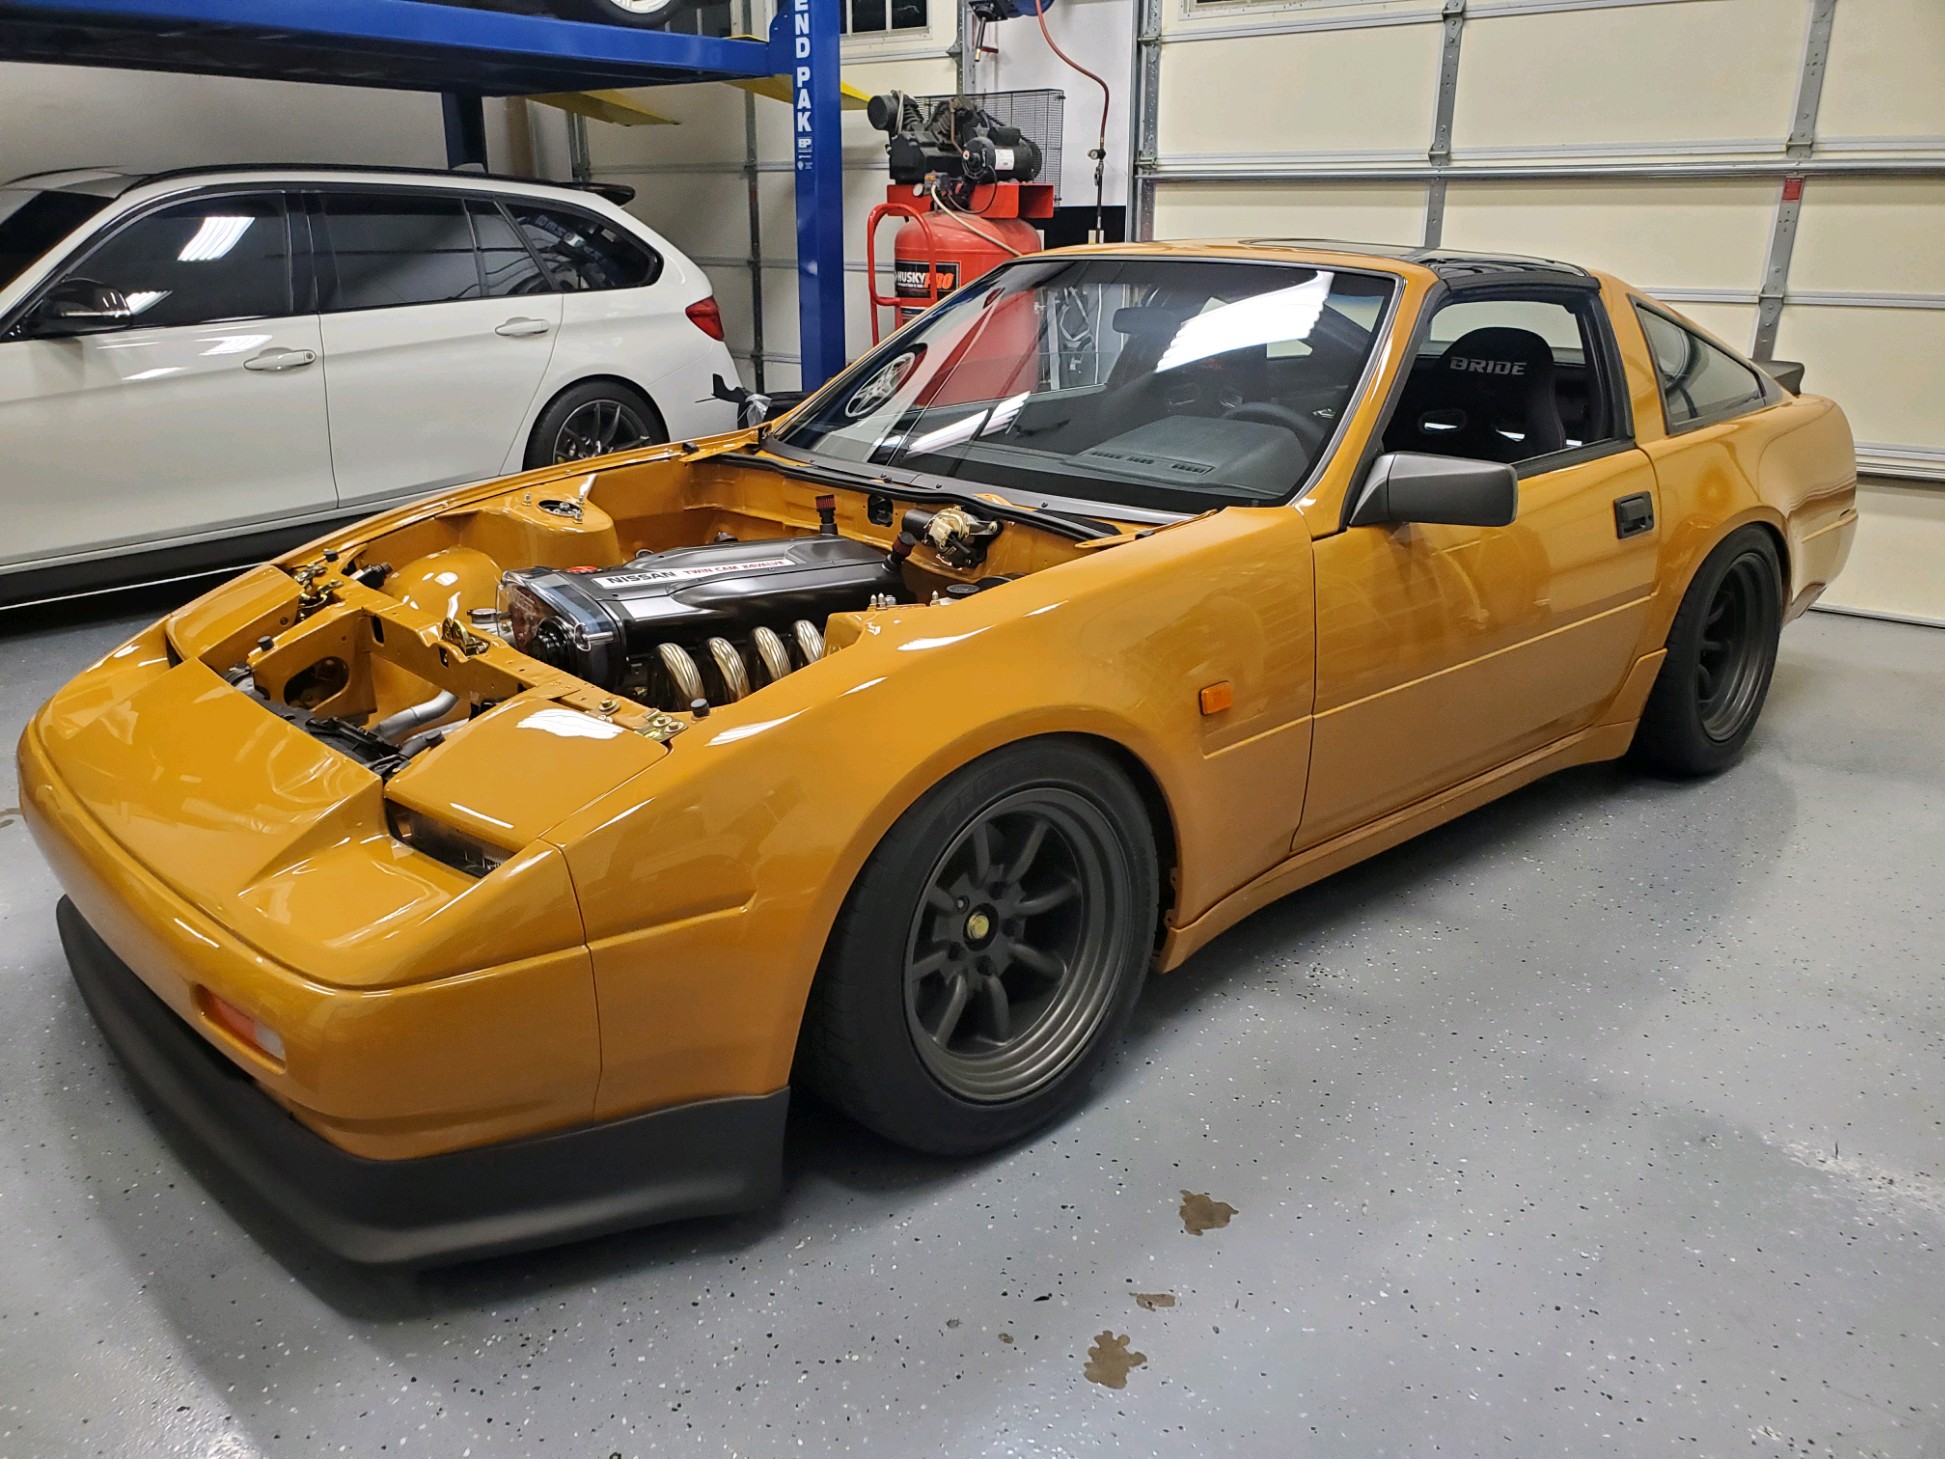
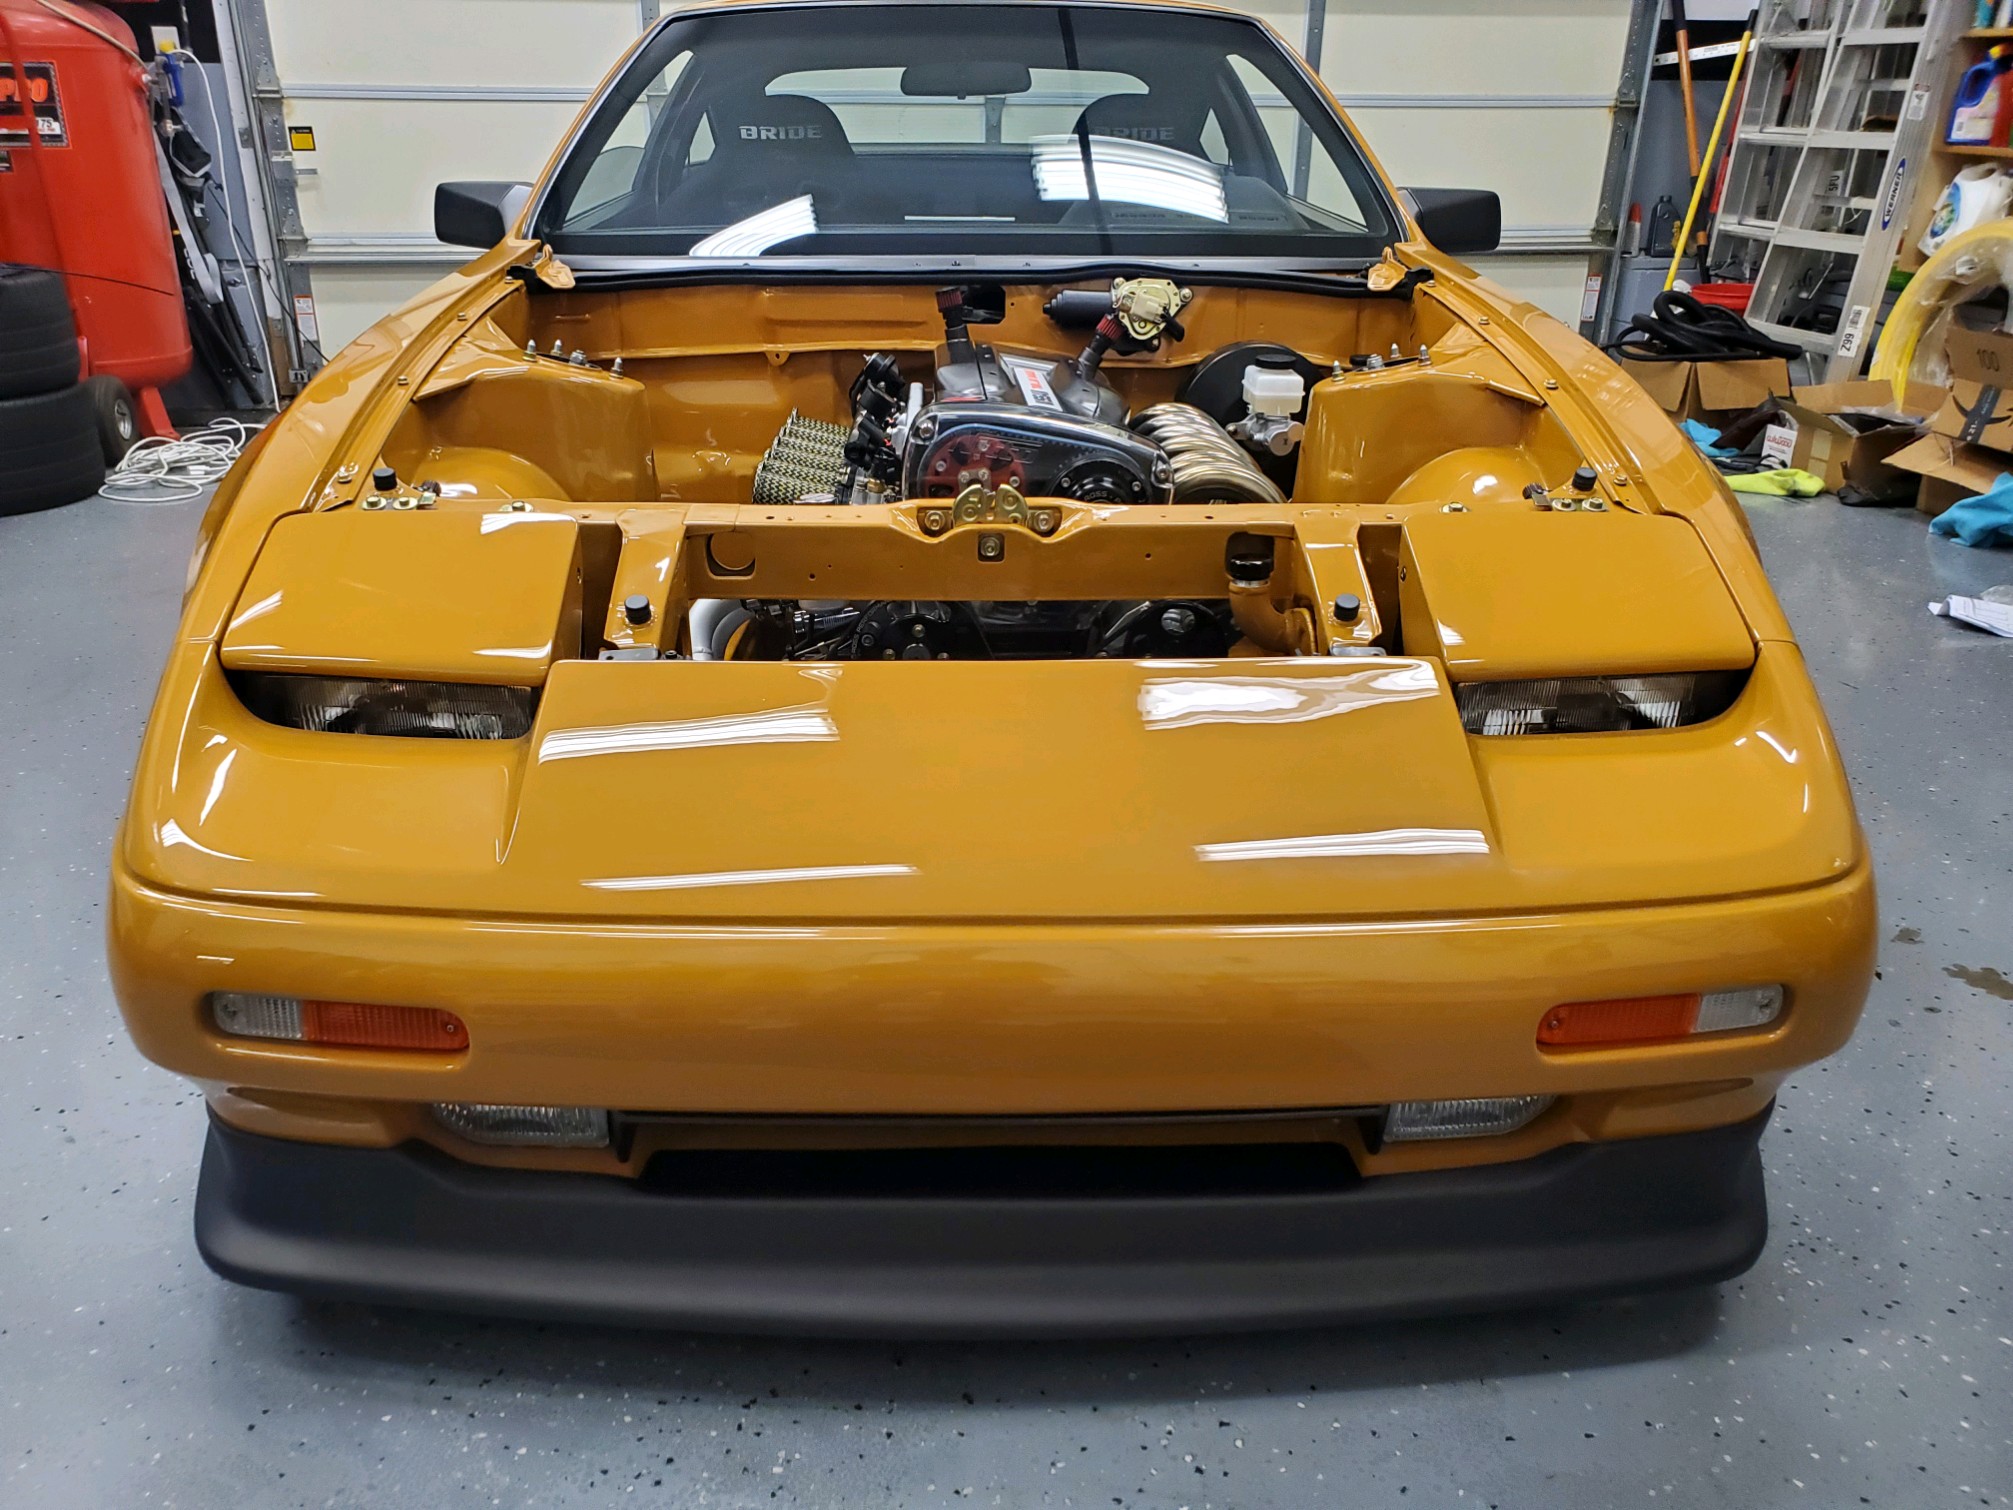
1 pointSorry Brandon….had to post this. Incredible sound…..great job on a cool project!!!! Undoubtably the best Z31 in the world!!!!


 1 point
 -
1 pointHave not posted much over the years but I am scrambling to make it. Trailering the car from Ohio. Spent 5 years working on the car with no finishi line in sight so Imma just slap it together and get her to pikes peak on her 50th birthday. Still got paint and final assembly to go. I'll not be sleeping for the next few...1 point
-
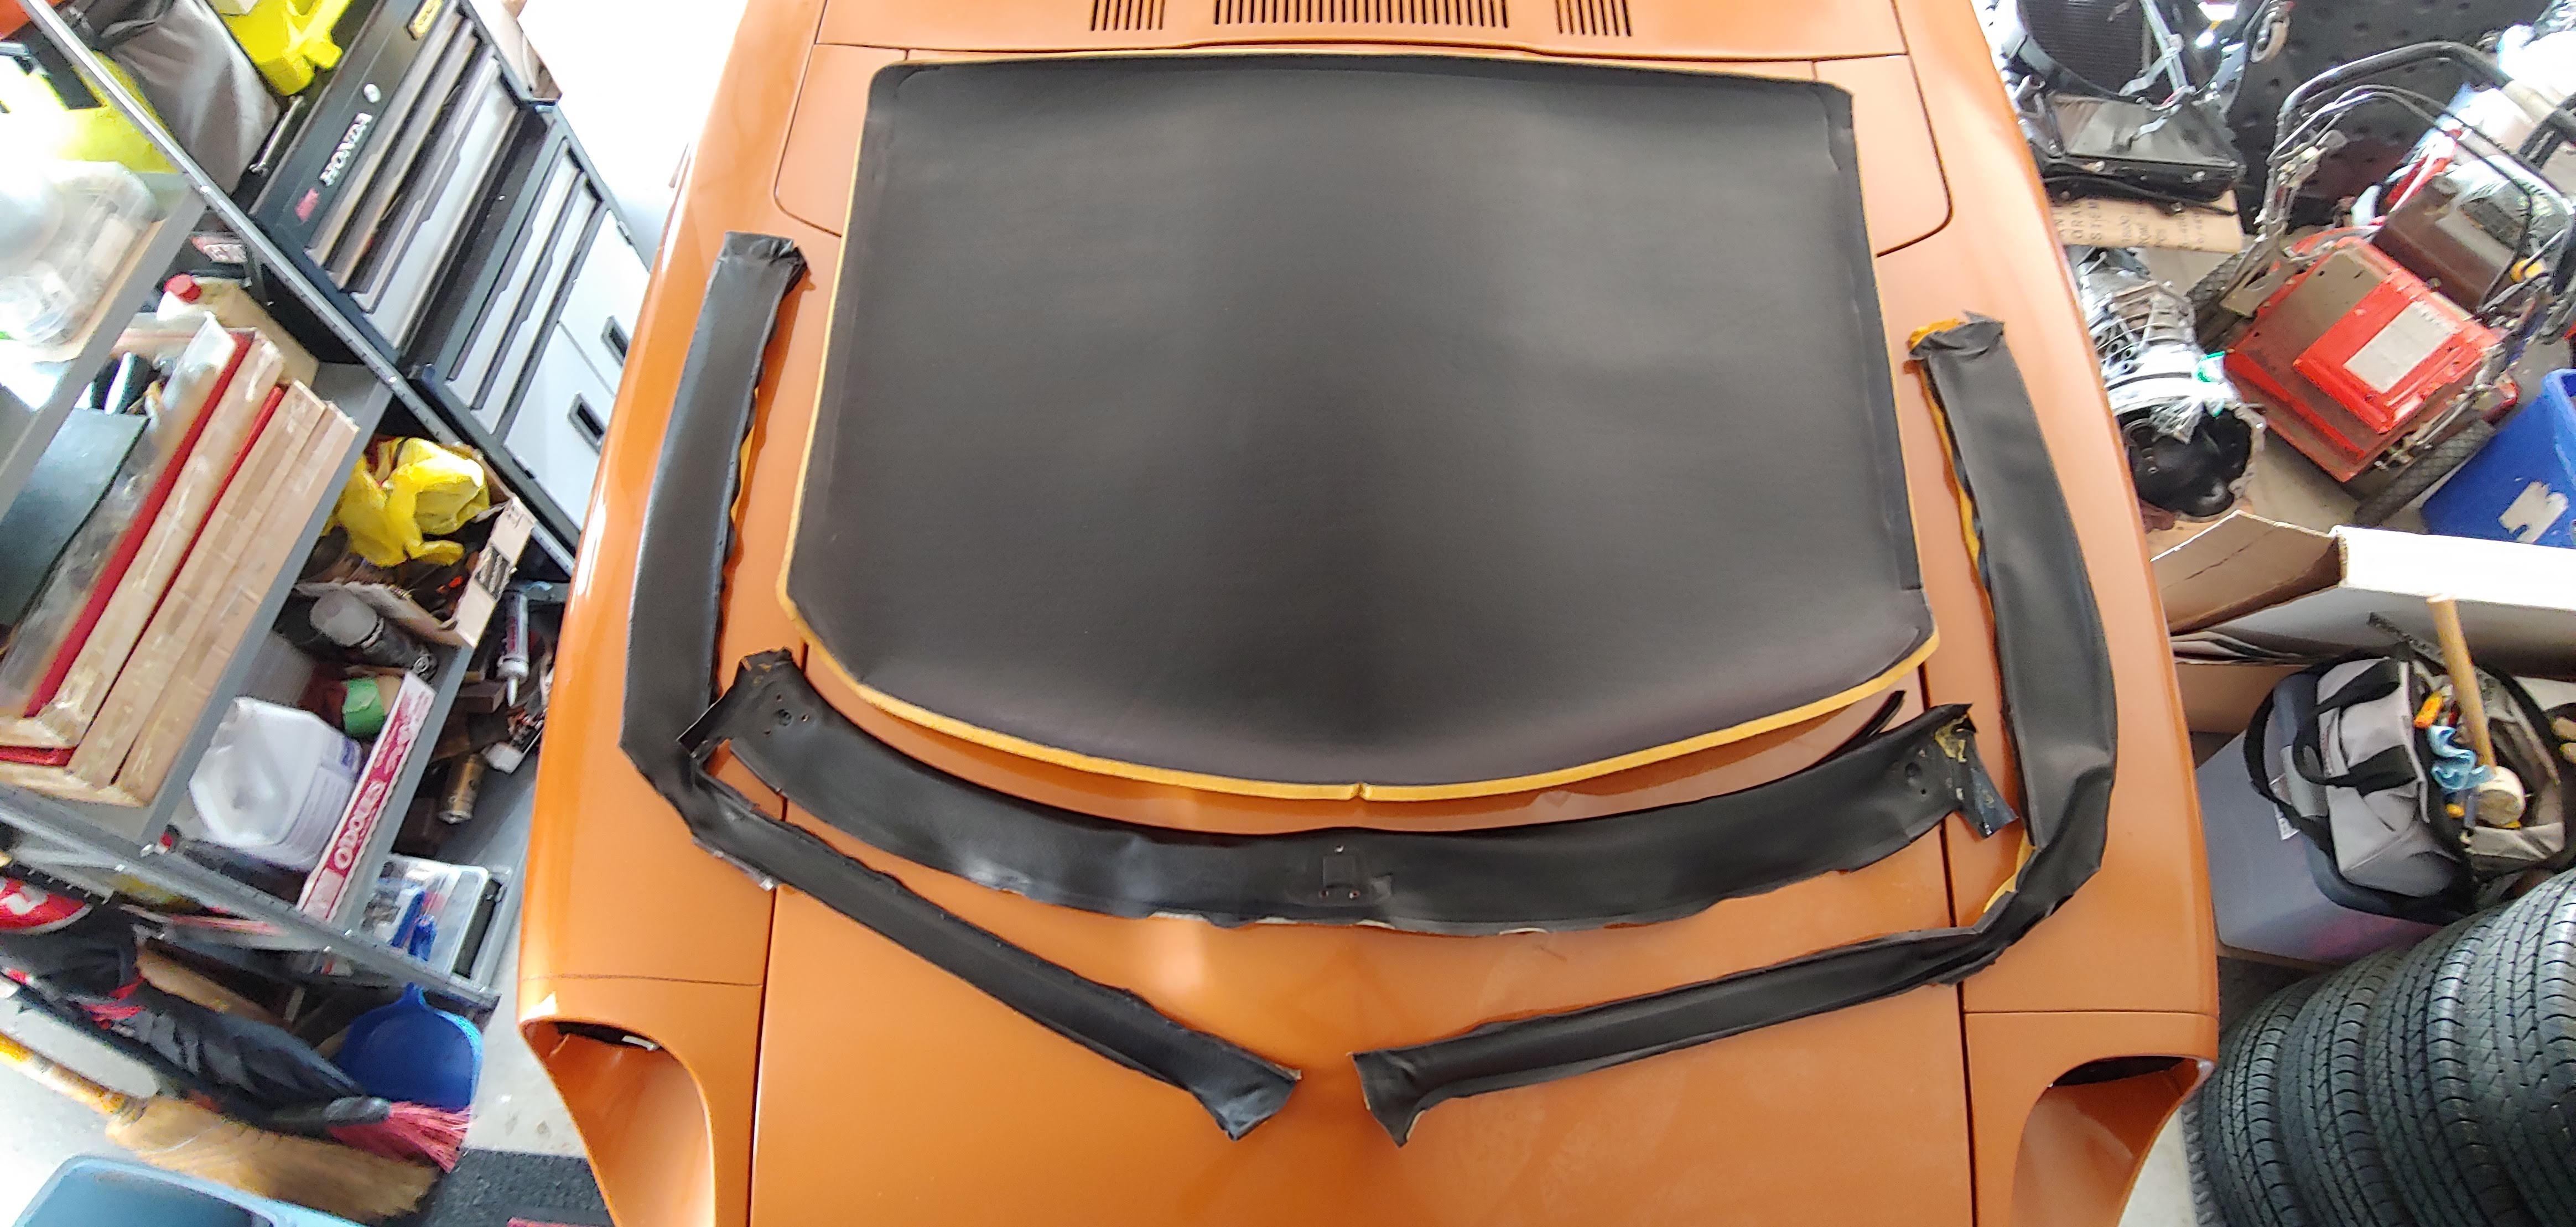
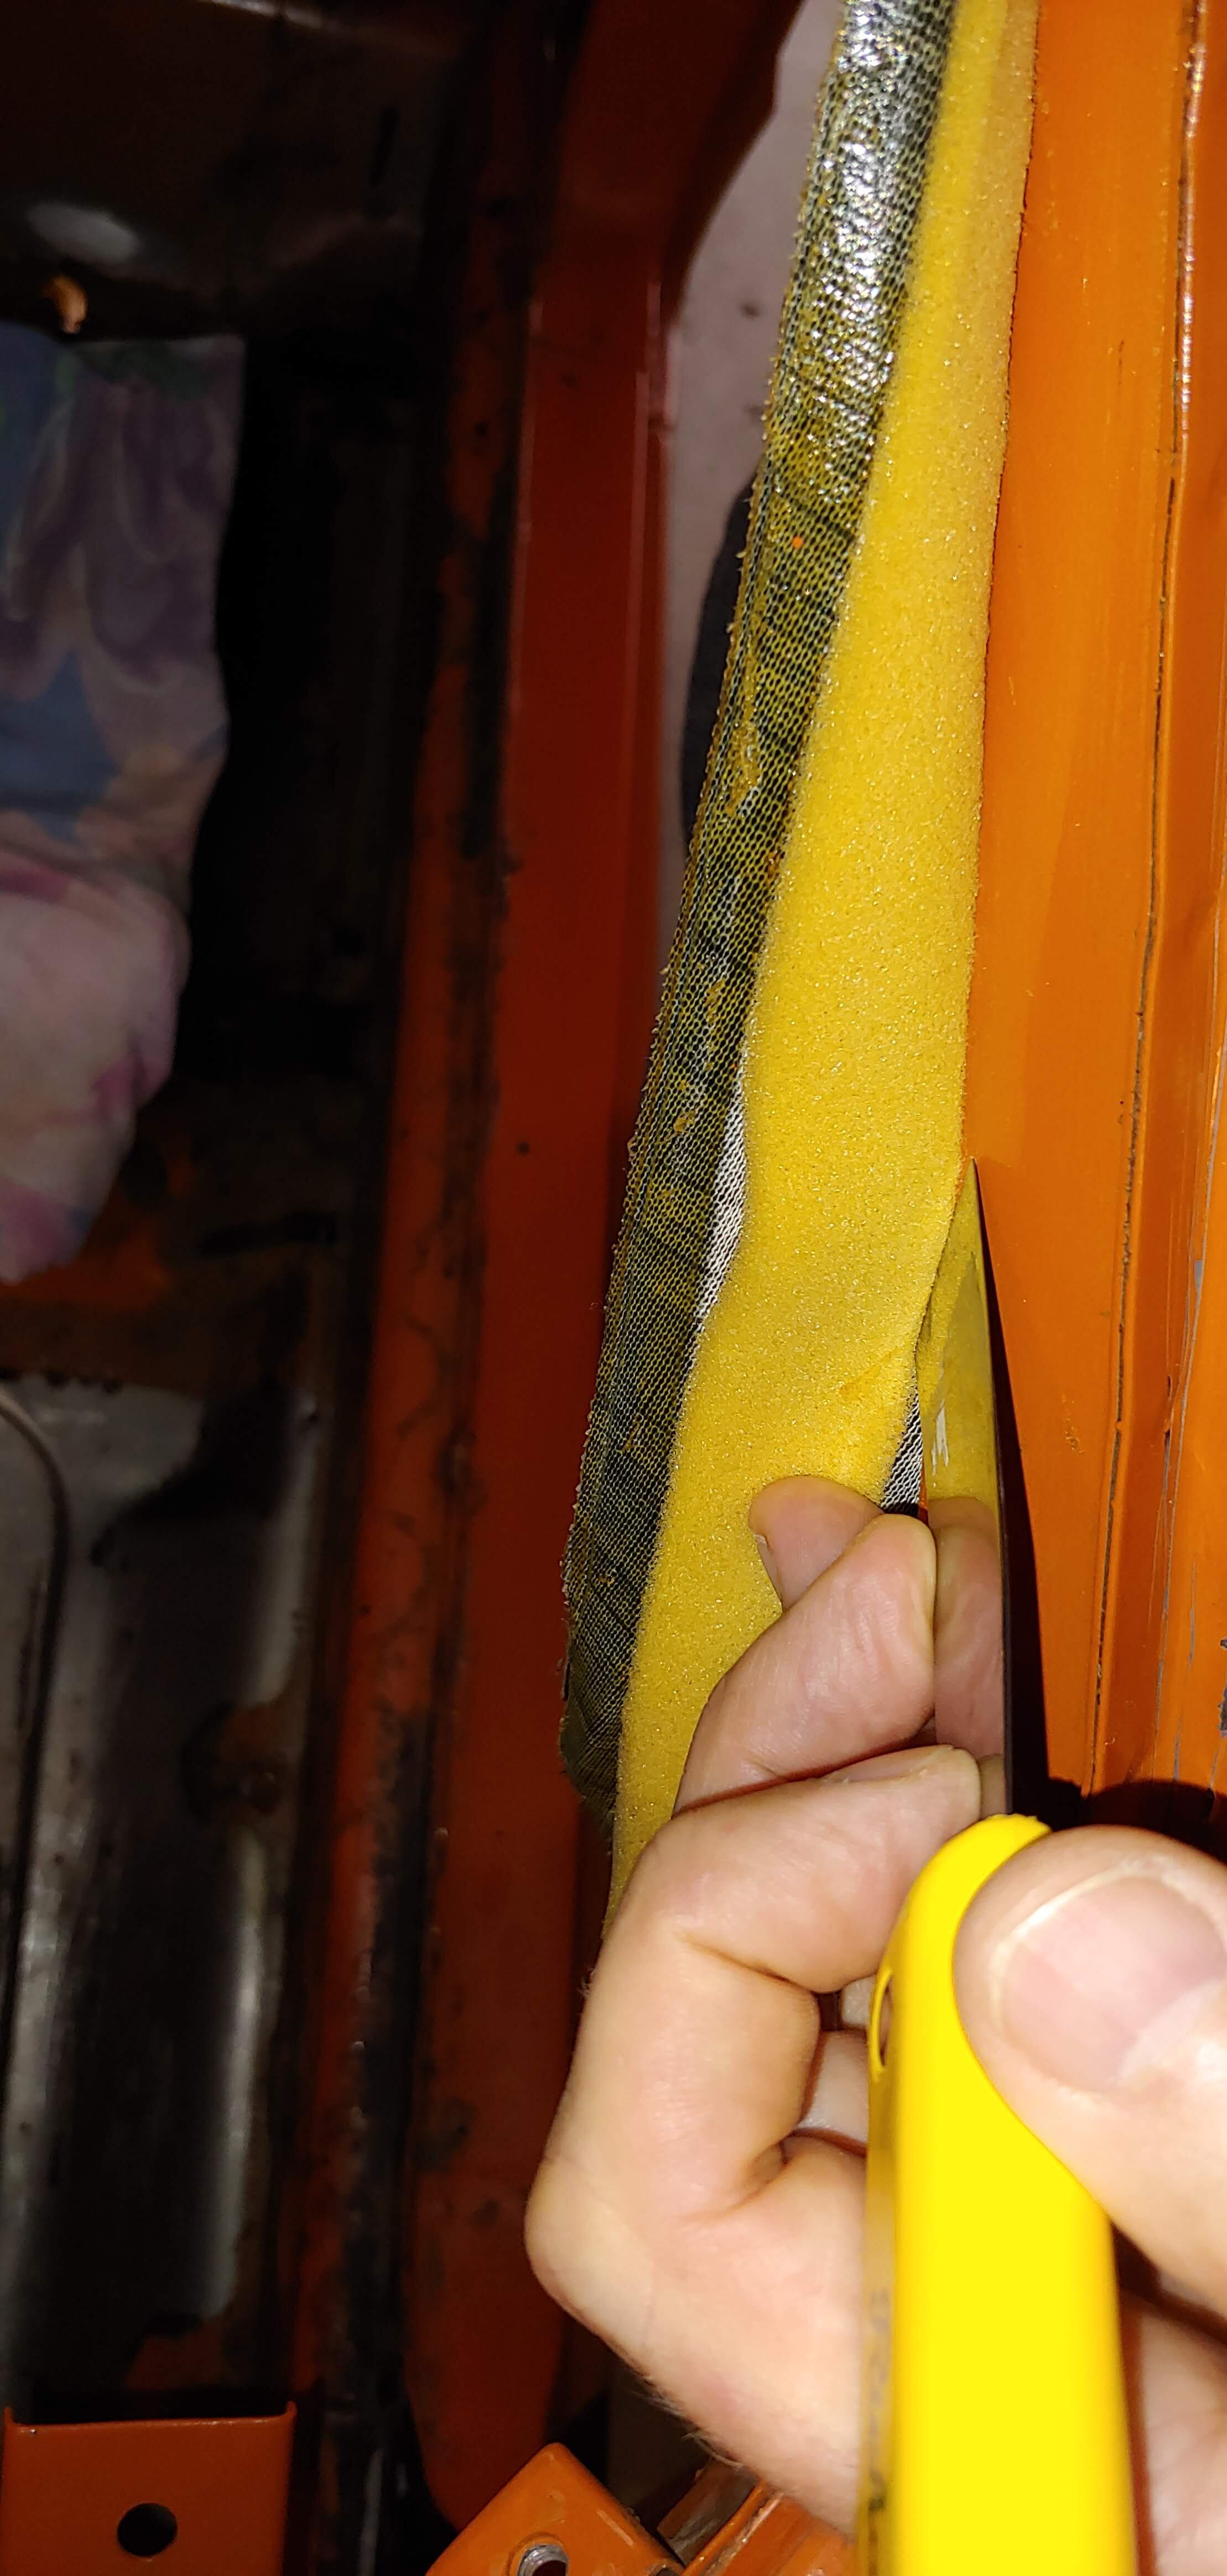
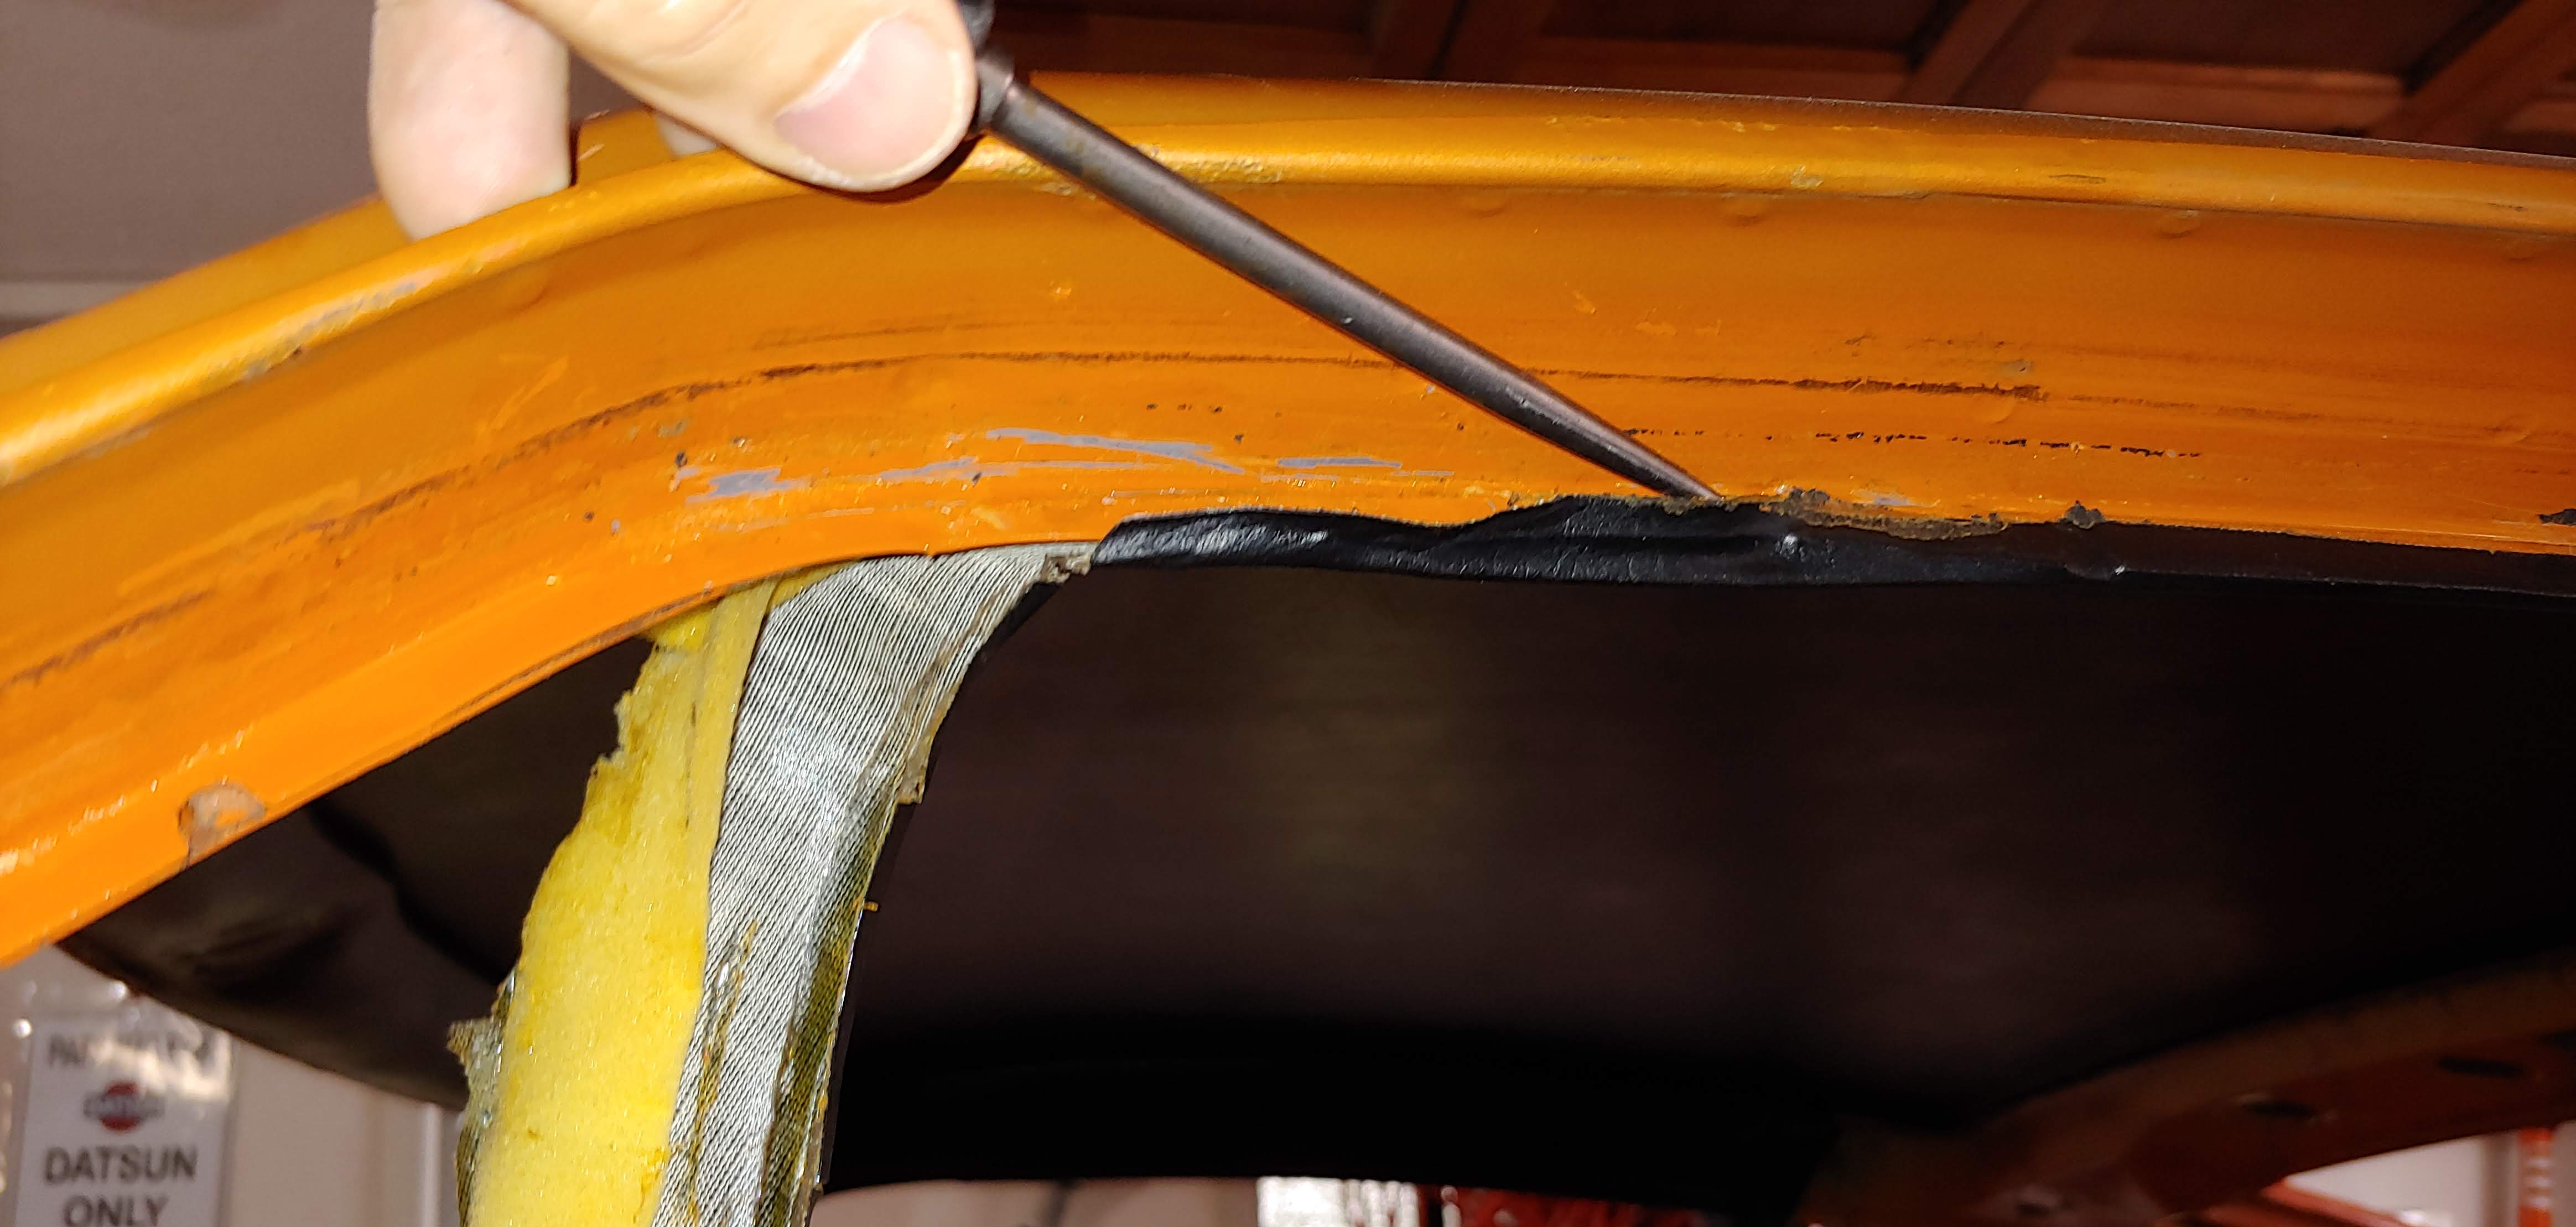
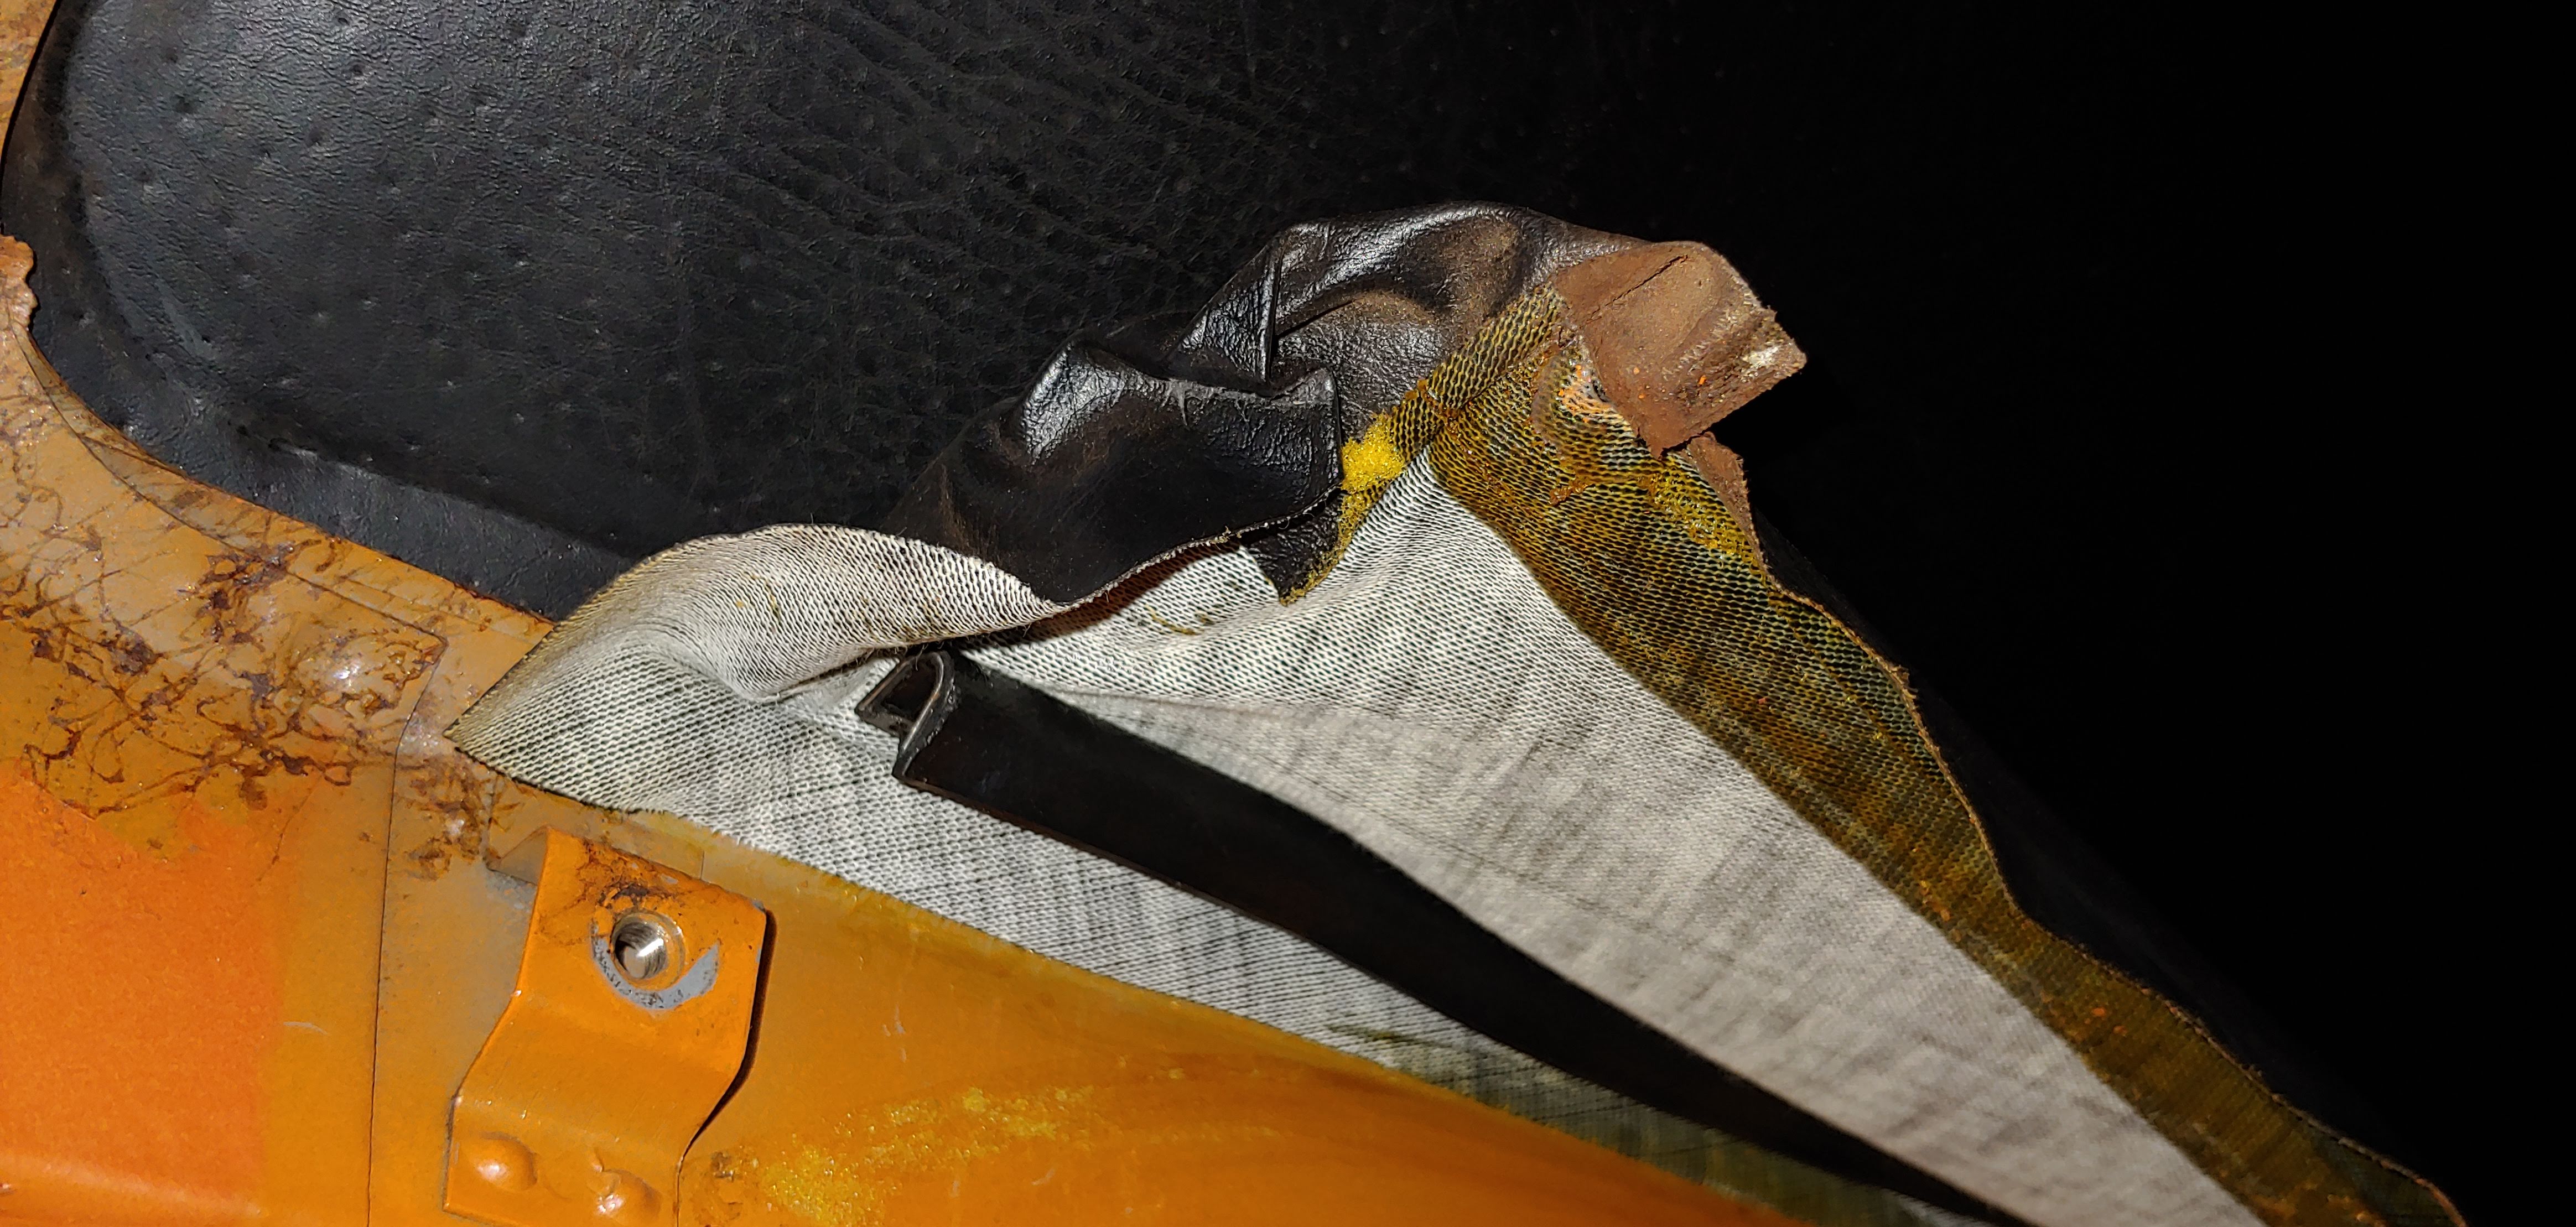
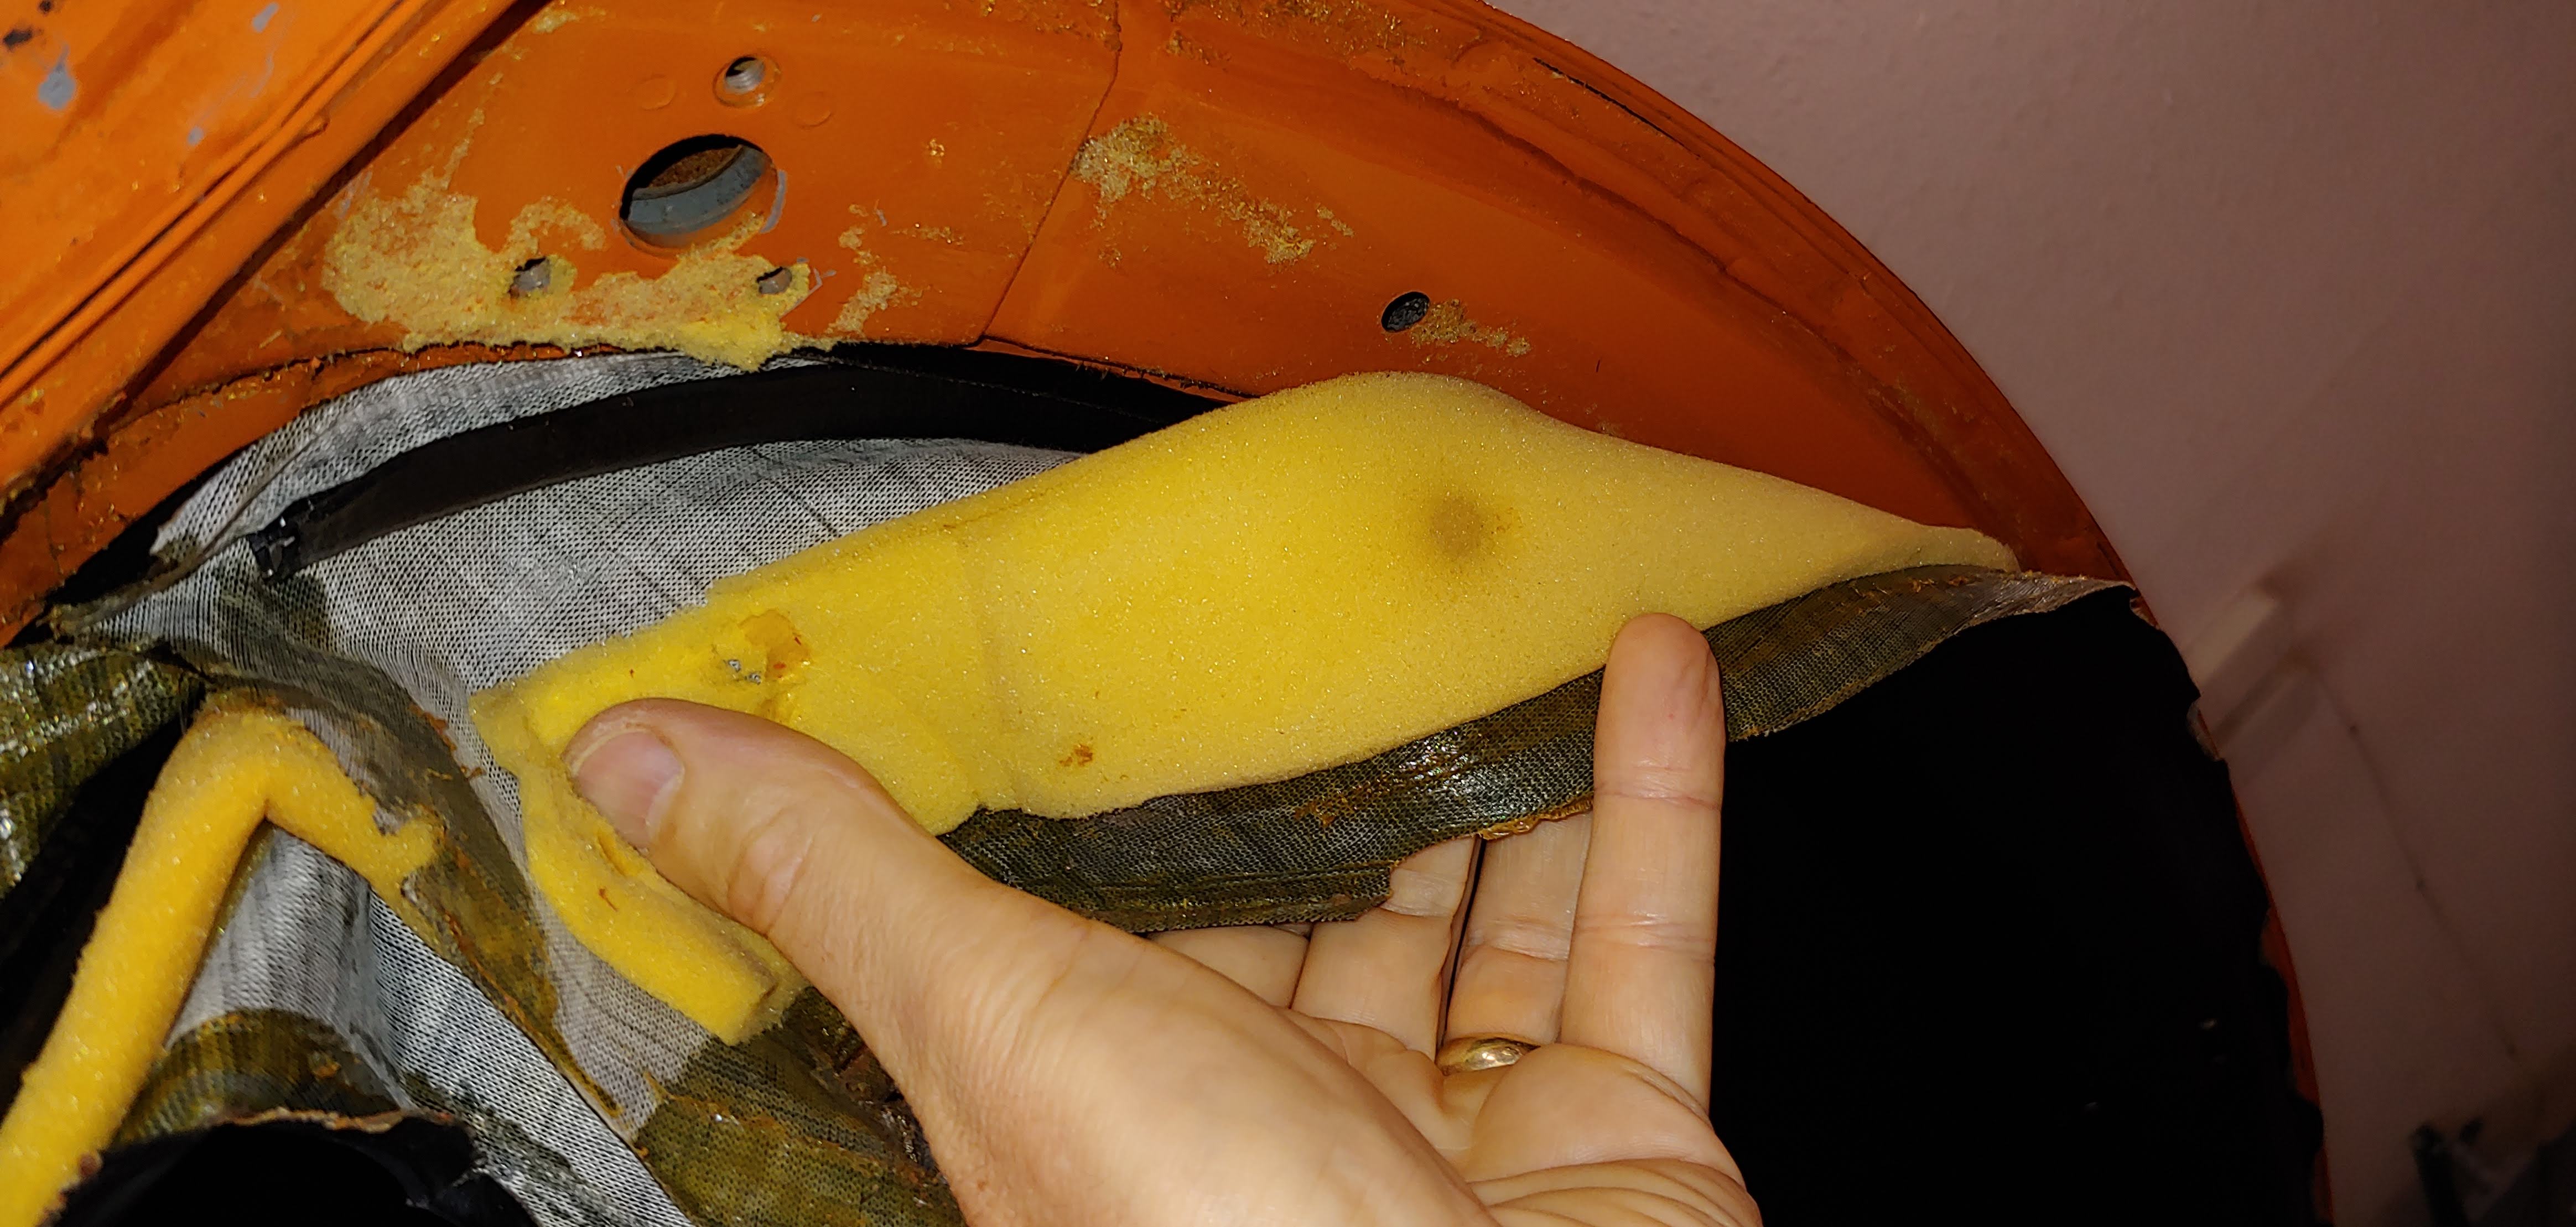
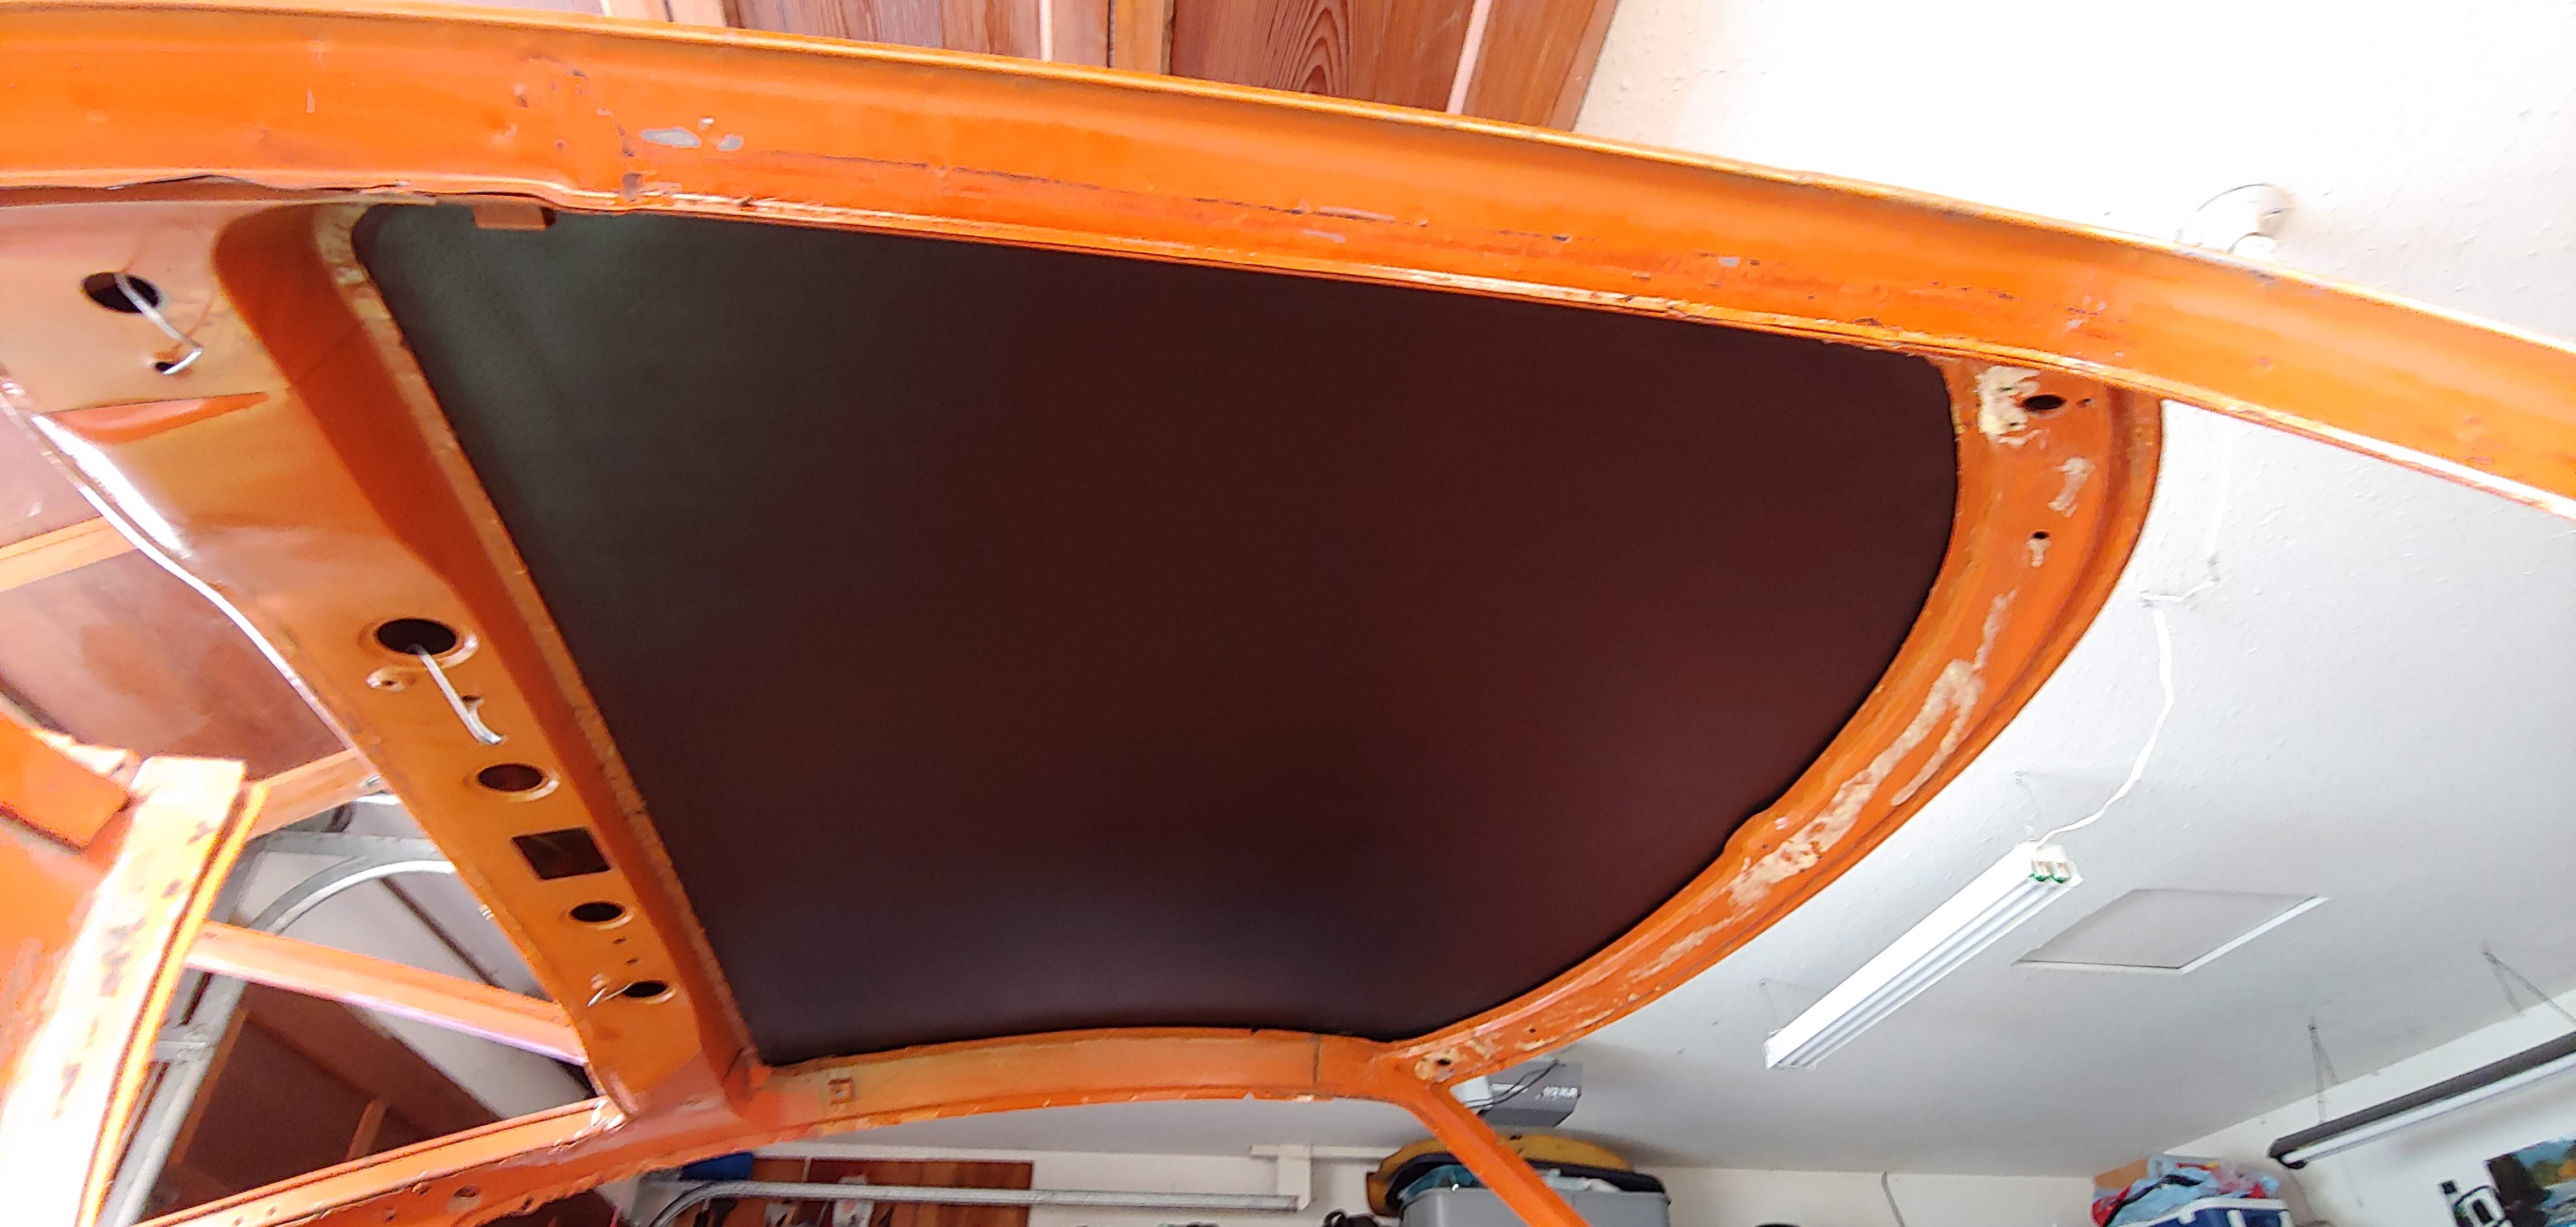
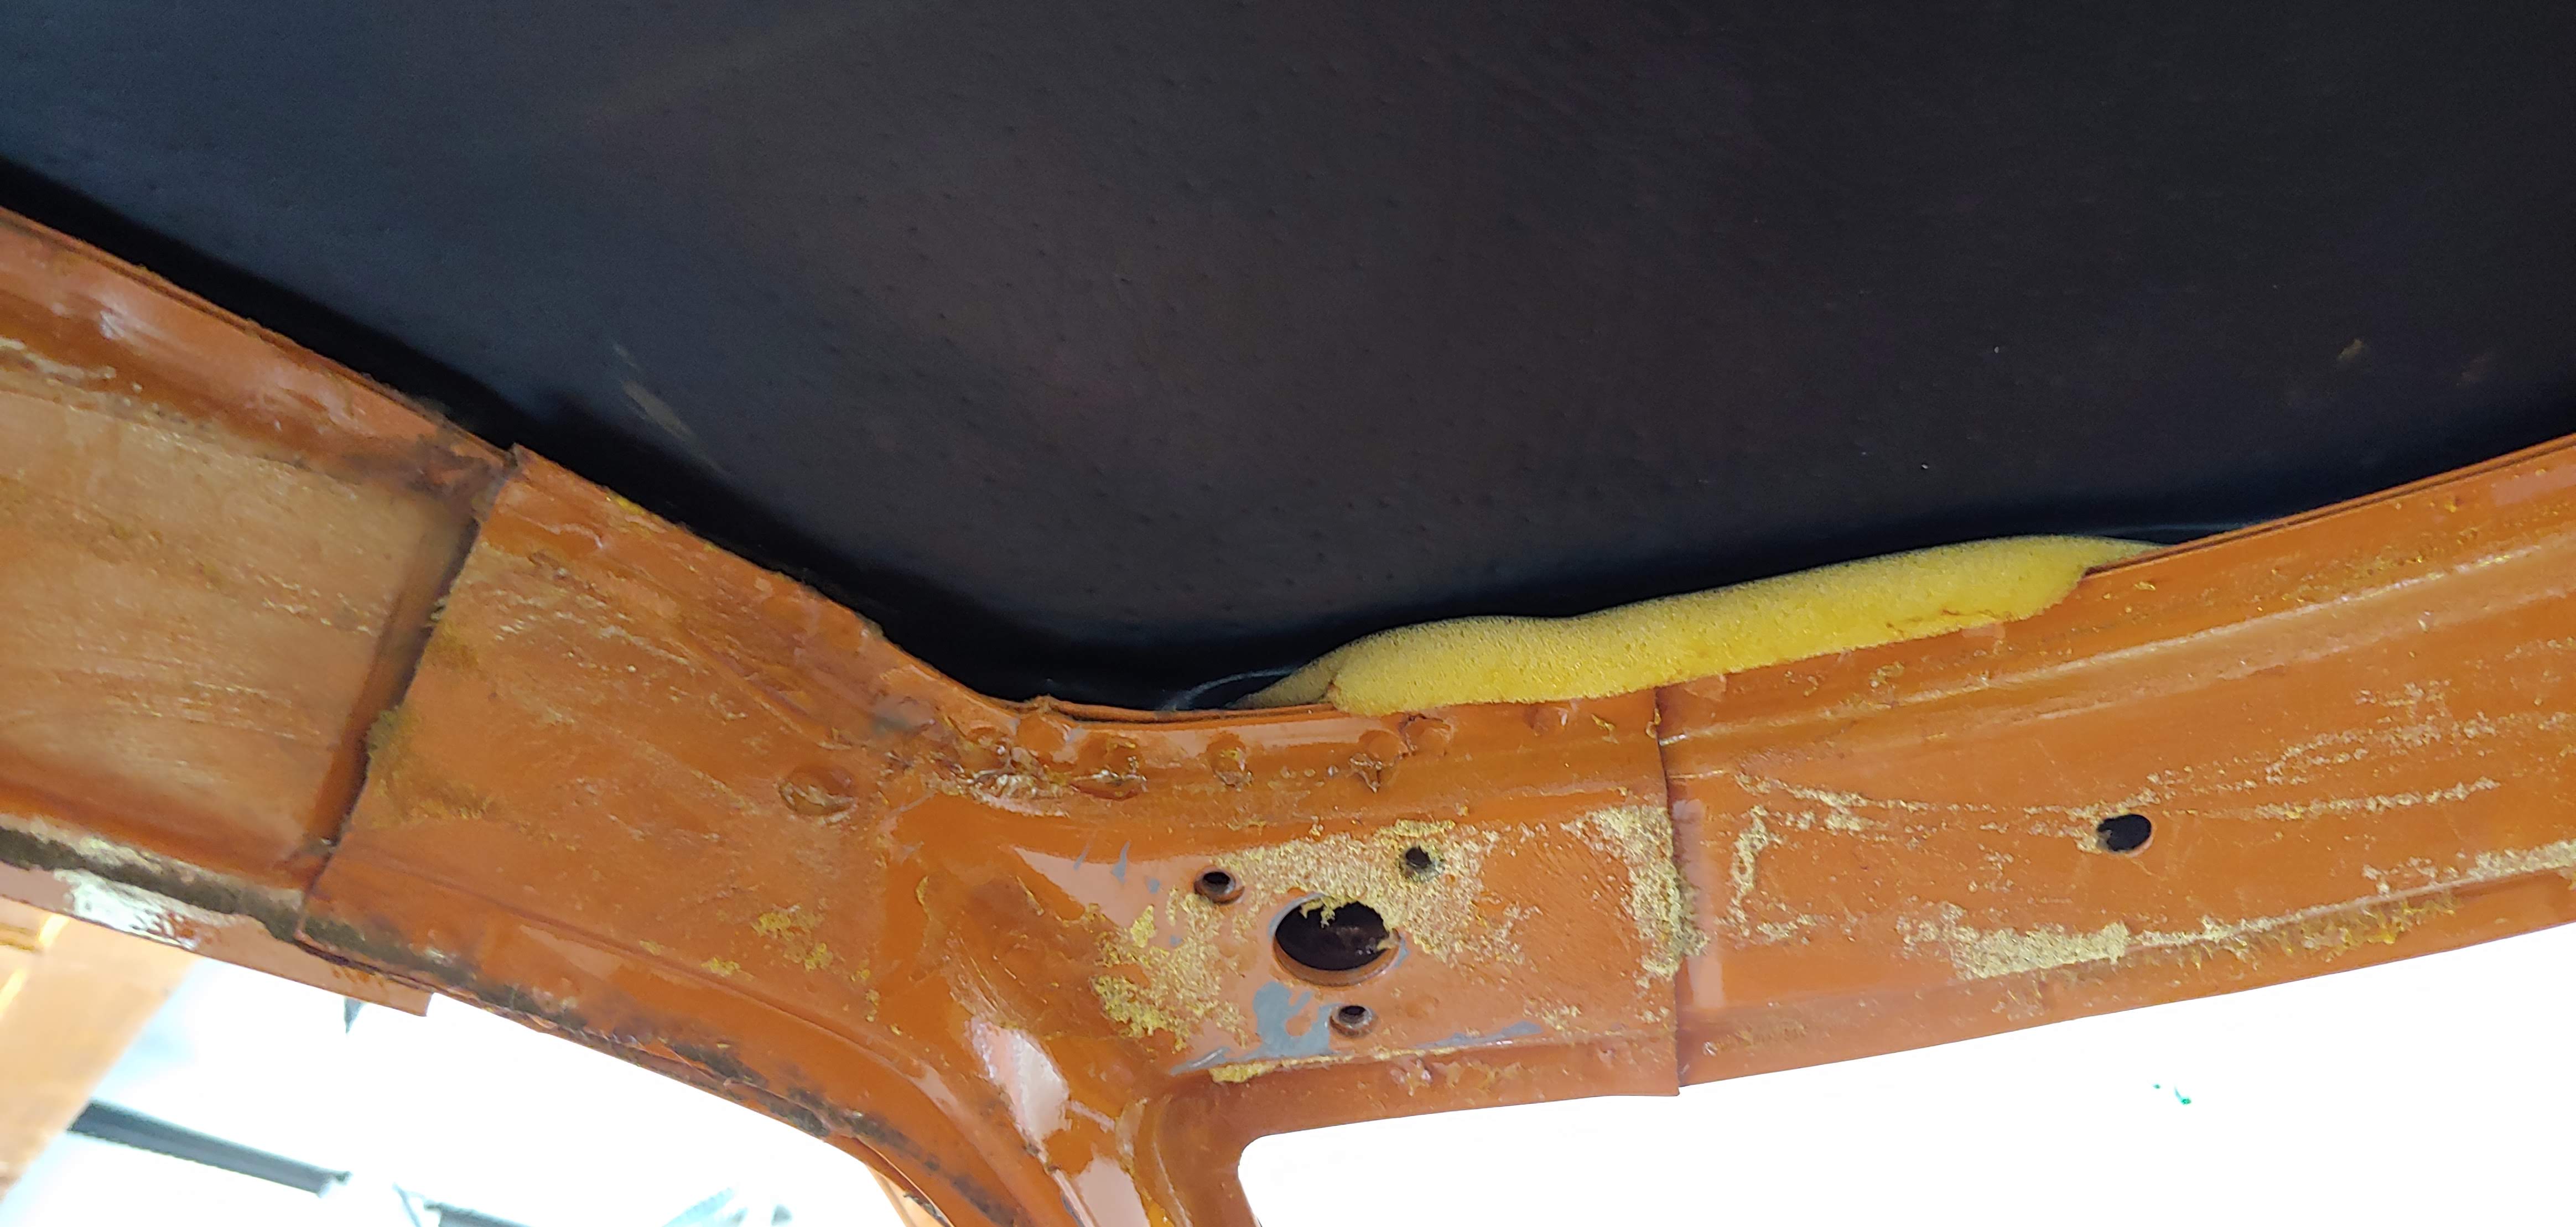
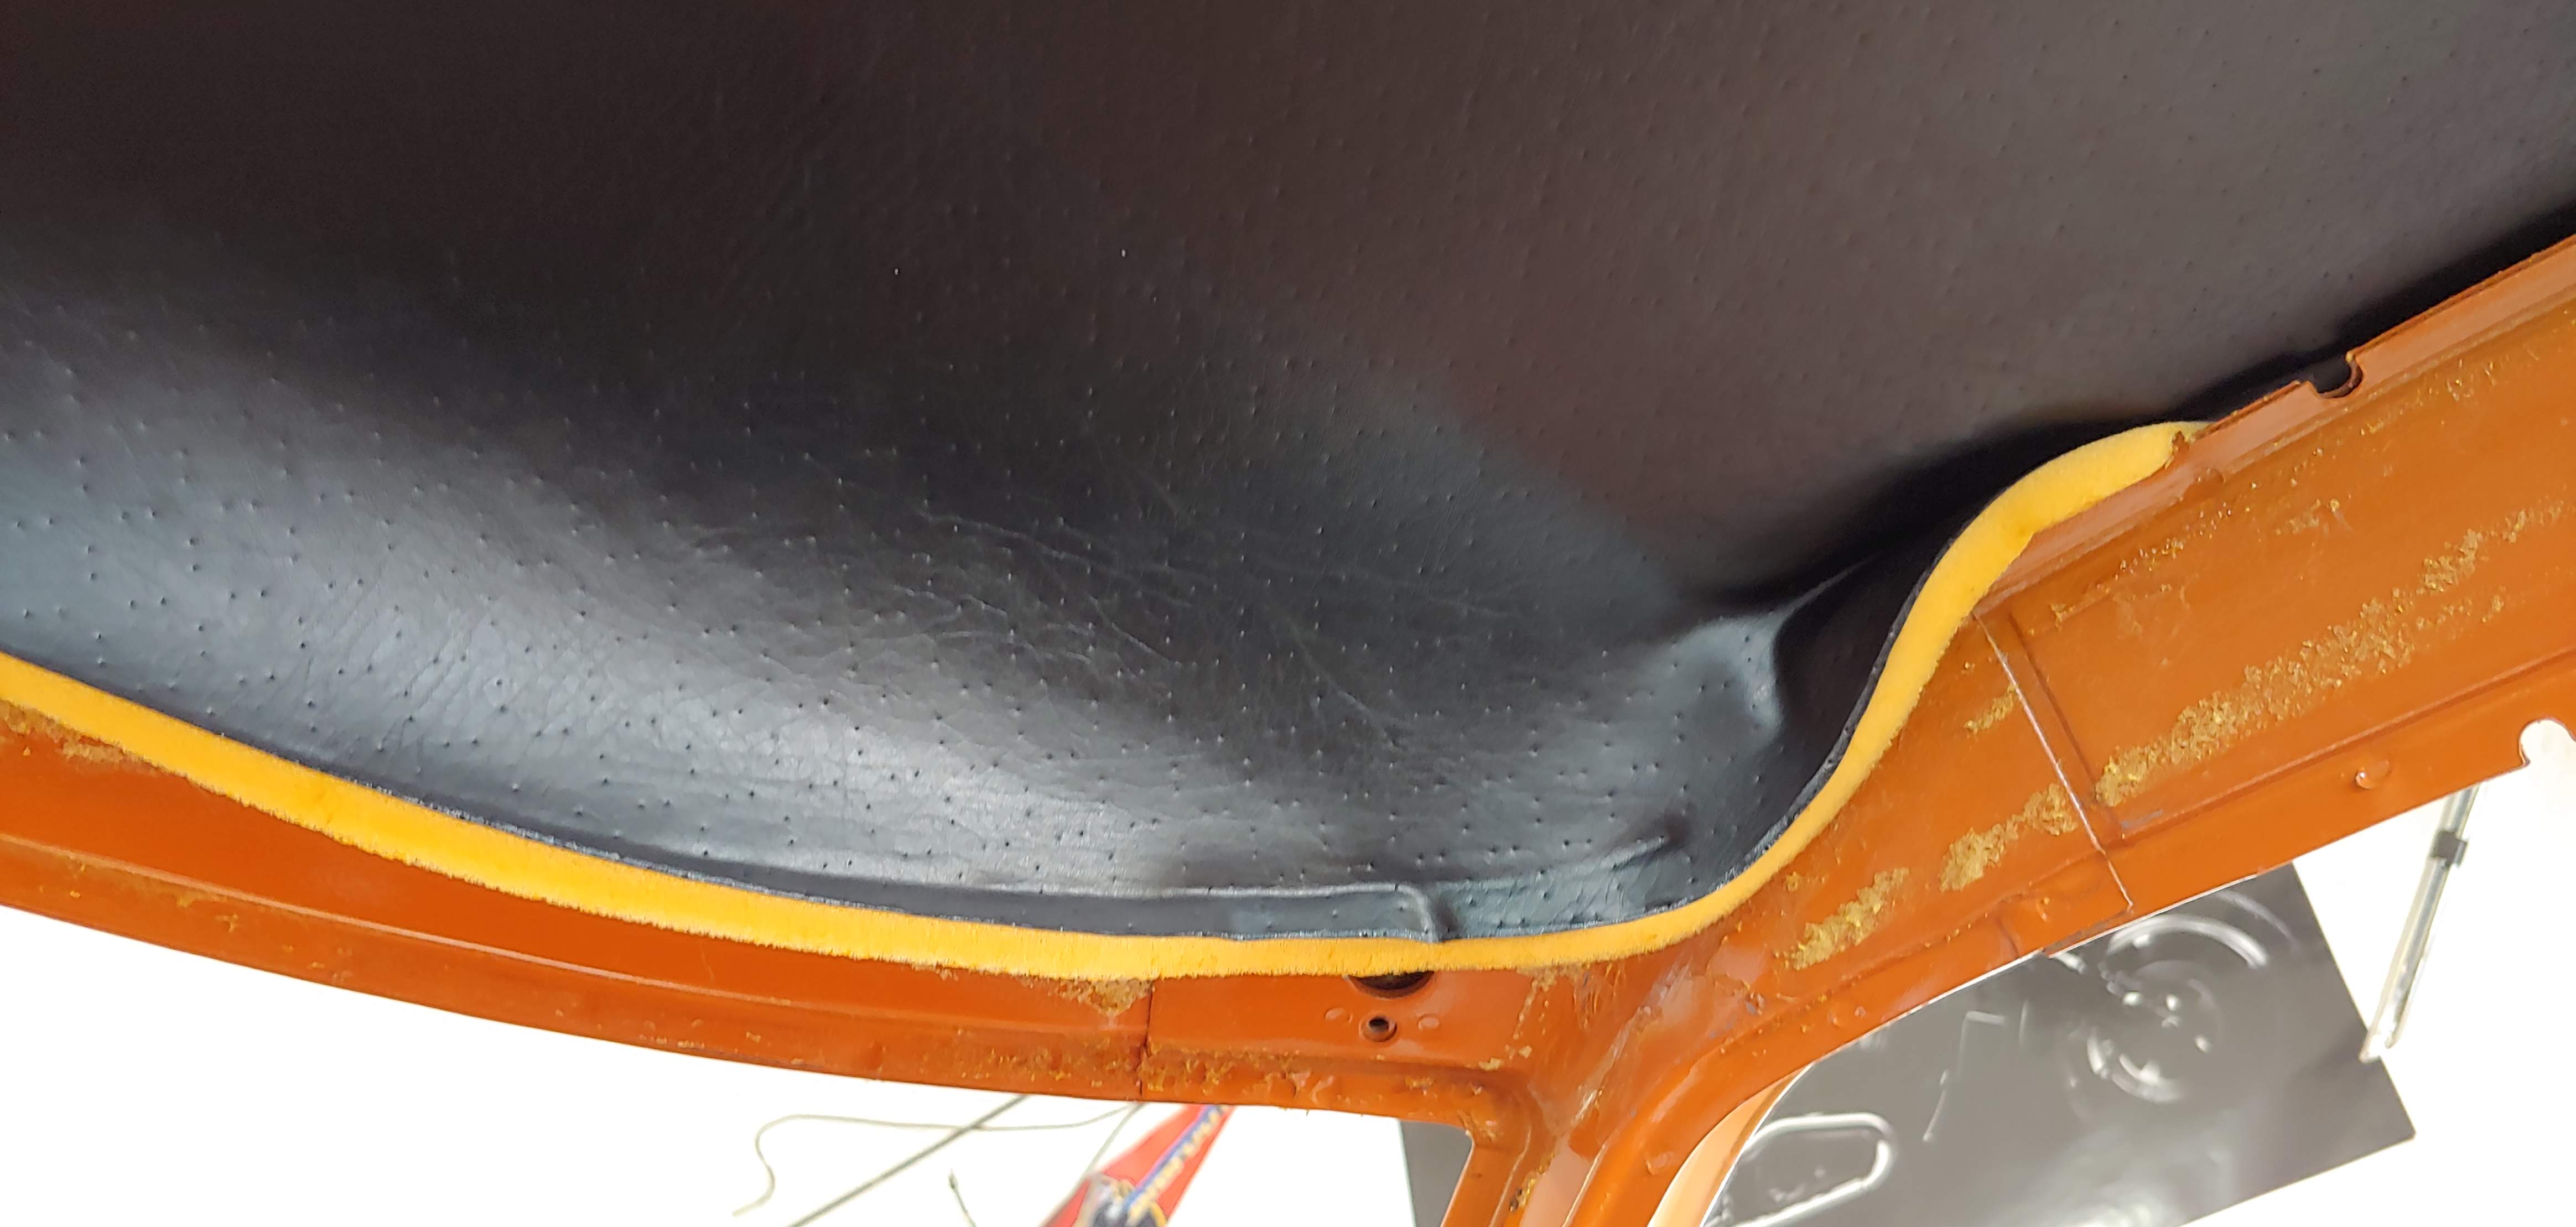
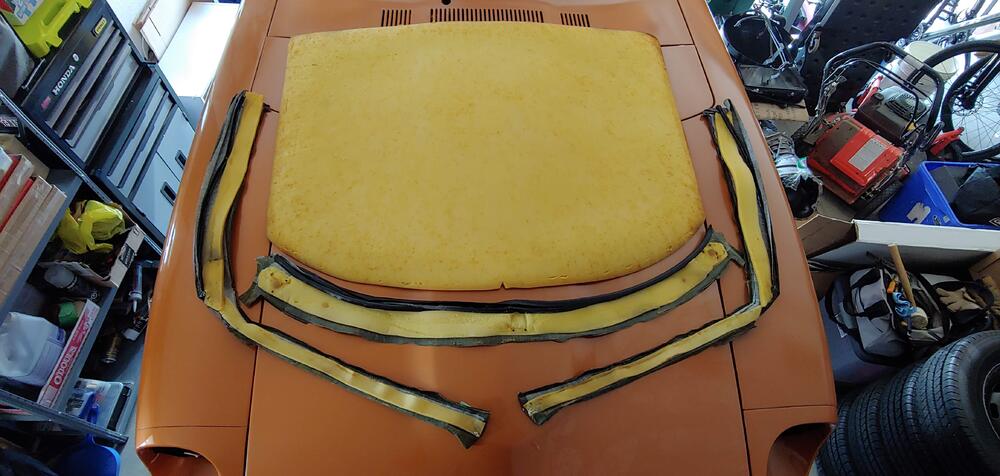
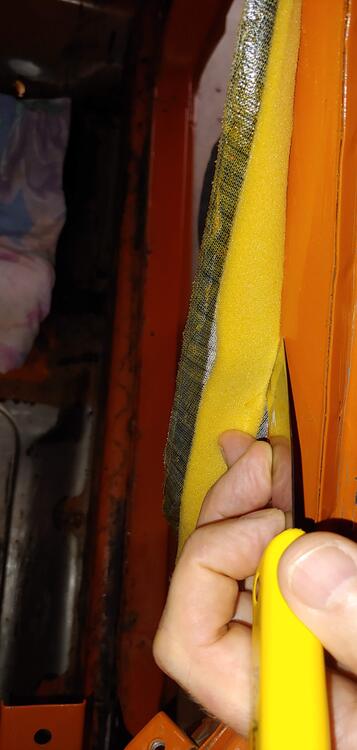
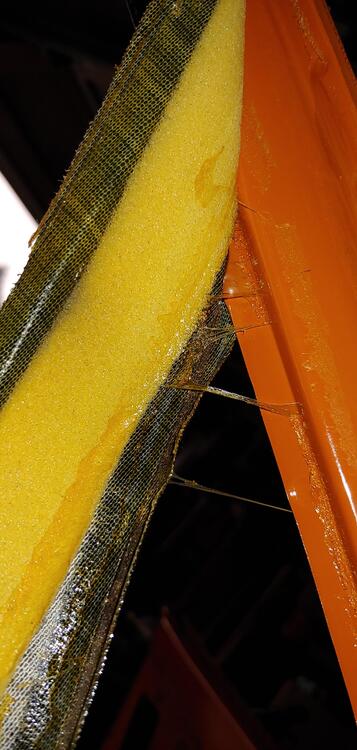
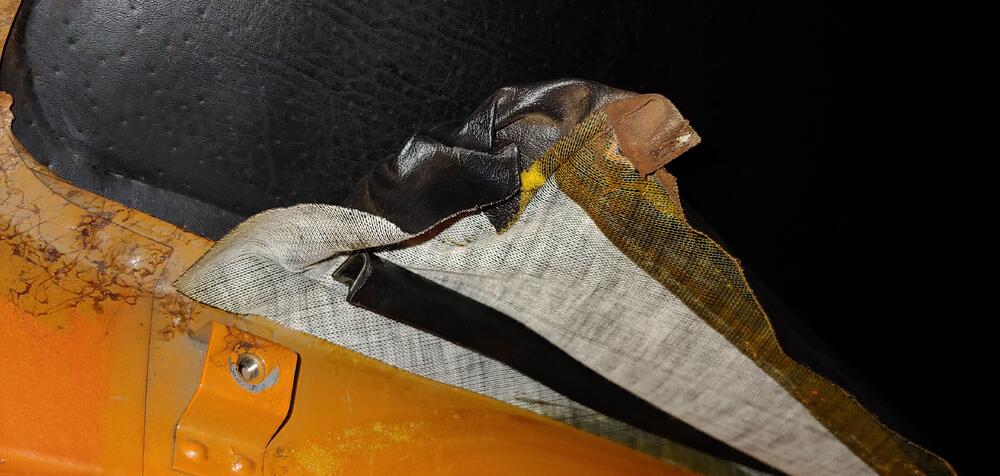
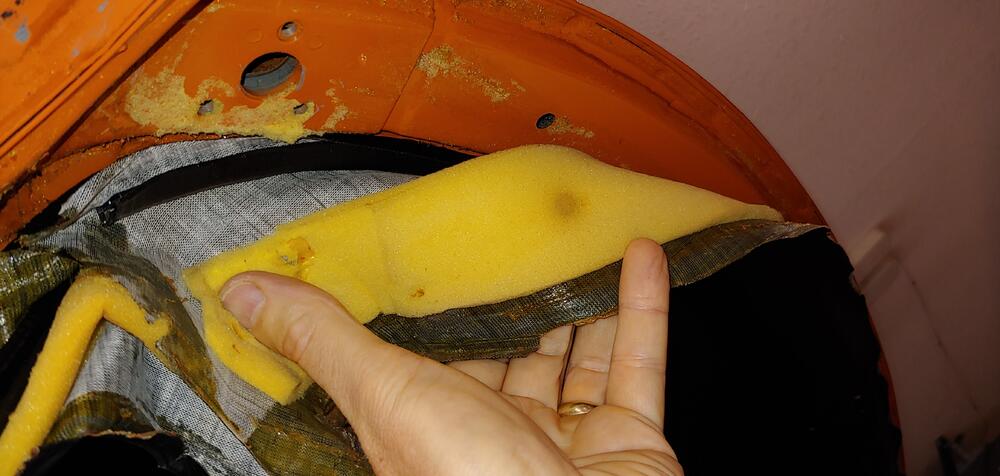
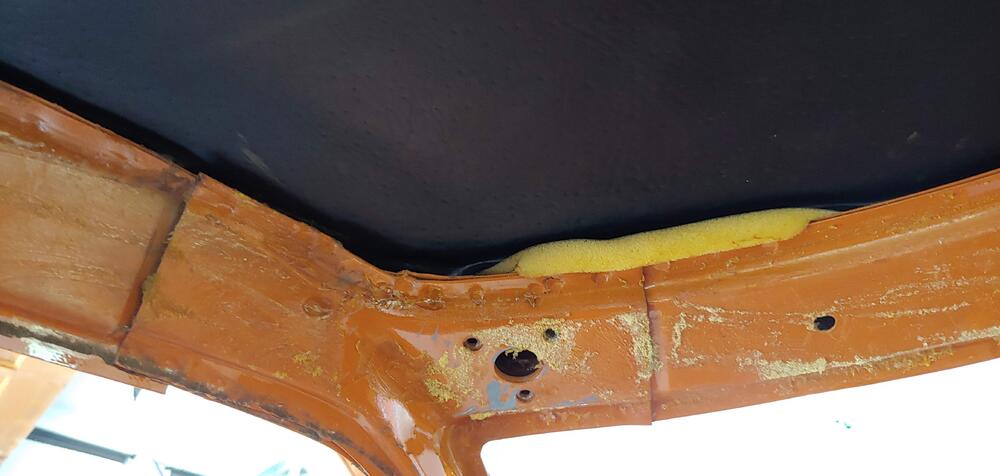
1 pointThis weekend I removed the headliner and surrounding padded vinyl trim and A-pillar trim. I had a little anxiety about doing this as they are are in very good shape. Luckily all came out with no issues and will be reusable, including the foam padding. I took lots of pictures of the joint details to help when I reinstall. Here are some pictures of my process, the only tools I used were a 1.25" paint scraper with corners rounded off and an awl. I started at the lower end of the A-pillars and carefully peeled back the vinyl exposing the foam padding. In some areas I could do this with just my fingers and other areas I had to use the scrapper to break away the adhesive as I pulled. When I got to the vinyl over the door opening I used the awl to break the adhesive as space was limited. For most of the length the foam was glued at the edges to I had to go very slow using the scraper gently while keeping light tension on the foam. There is also U shaped welting that holds the vinyl to the roof frame that had to be pulled away. After removing the A-pillar and over the door opening trim I used the same process for over the windshield opening. For the headliner I found that there was no adhesive where it tucked into the roof frame but there was a very uniform coating of the adhesive on the rest. To get started I poked my little finger in to the hole for the LH visor mounting bracket pushing the unglued edge of the headliner and at the same time gently pushing inward with the fingers of my other hand until I had exposed the edge of the headliner foam. From there I could work the unglued edge out of the frame for the full perimeter. I freed the headliner using the scraper with a short jabbing motion, keeping light pressure on the roof and holding the headliner with light tension with my other hand. I had the scrapper at about a 30 to 45 degree angle to the roof while doing the scrapping. Using this technique very little of the foam was damaged. All in all it when quite smoothly and there was very little foam reside left on the steel. It was definitely worth taking my time to be able to salvage everything.


 1 point
 -
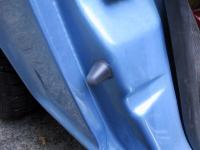
That is the mount insulator, like pictured below: https://zcarsource.com/transmission-mount-insulator-240z-260z-280z-280zx-70-83-new-oem I'm looking for the transmission crossmember bushings, like these: https://www.energysuspensionparts.com/7.1101 except in rubber.1 point
-
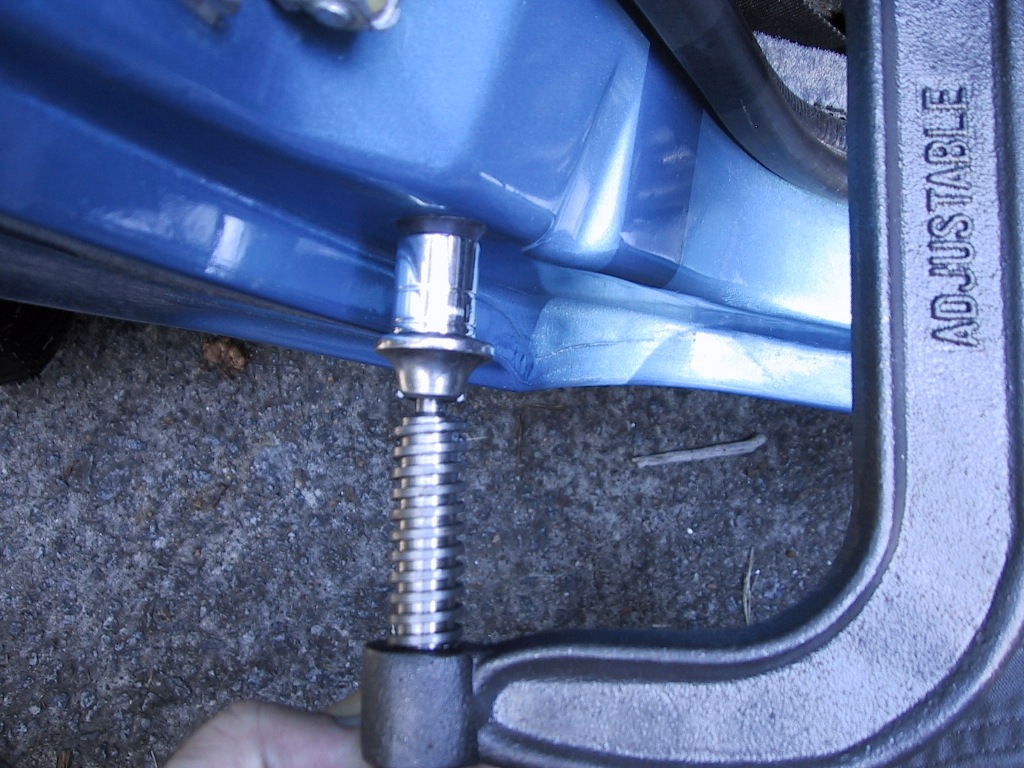
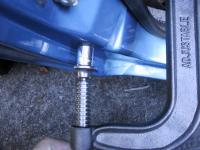
1 pointNow I know what you mean. It's not easy. After trying various techniques I finally came up with something that worked. I removed the interior dogleg vinyl trim panel and used a 6" adjustable clamp and a 13mm socket to force the bumper in. The socket provides a snug fit to hold the rubber door bumper and evenly distributes the pressure from the clamp.
 1 point