


Leaderboard
-
grannyknot
Free Member6Points5,158Posts -
Yarb
 Subscriber
 3Points1,935Posts
 -
AK260
Free Member3Points999Posts -

Av8ferg
Free Member3Points1,538Posts


Popular Content
Showing content with the highest reputation on 07/31/2021 in all areas
-
2 pointsCheck out https://www.facebook.com/Auto-Panel-Solutions-418351785395614/ this guy has many pieces that other places do not. It sticks in my mind that KlasicFab may have these also, https://kfvintagejdm.com/product-category/datsun/?swoof=1&product_tag=240z&really_curr_tax=37-product_cat I'd start with these two, I'd be willing to bet one if not both will have what you need.2 points
-
The first time I saw that 300ZX design I was blown away. It’s a beautiful car without question, but a serious departure from the previous Z designs (maybe too far). It seems Nissan got a little lost. What was once an affordable car for the masses became a car that only few could afford back then. They lost the spirit of what made the Z amazing. A simple, well engineered , beautiful car that had enough performance to wow the population. They tried to make later model of the car too plush, too many bells and whistles and lost track of what made the car great. This car to me share little it any DNA to the original S30 design spirit. Sent from my iPhone using Tapatalk2 points
-
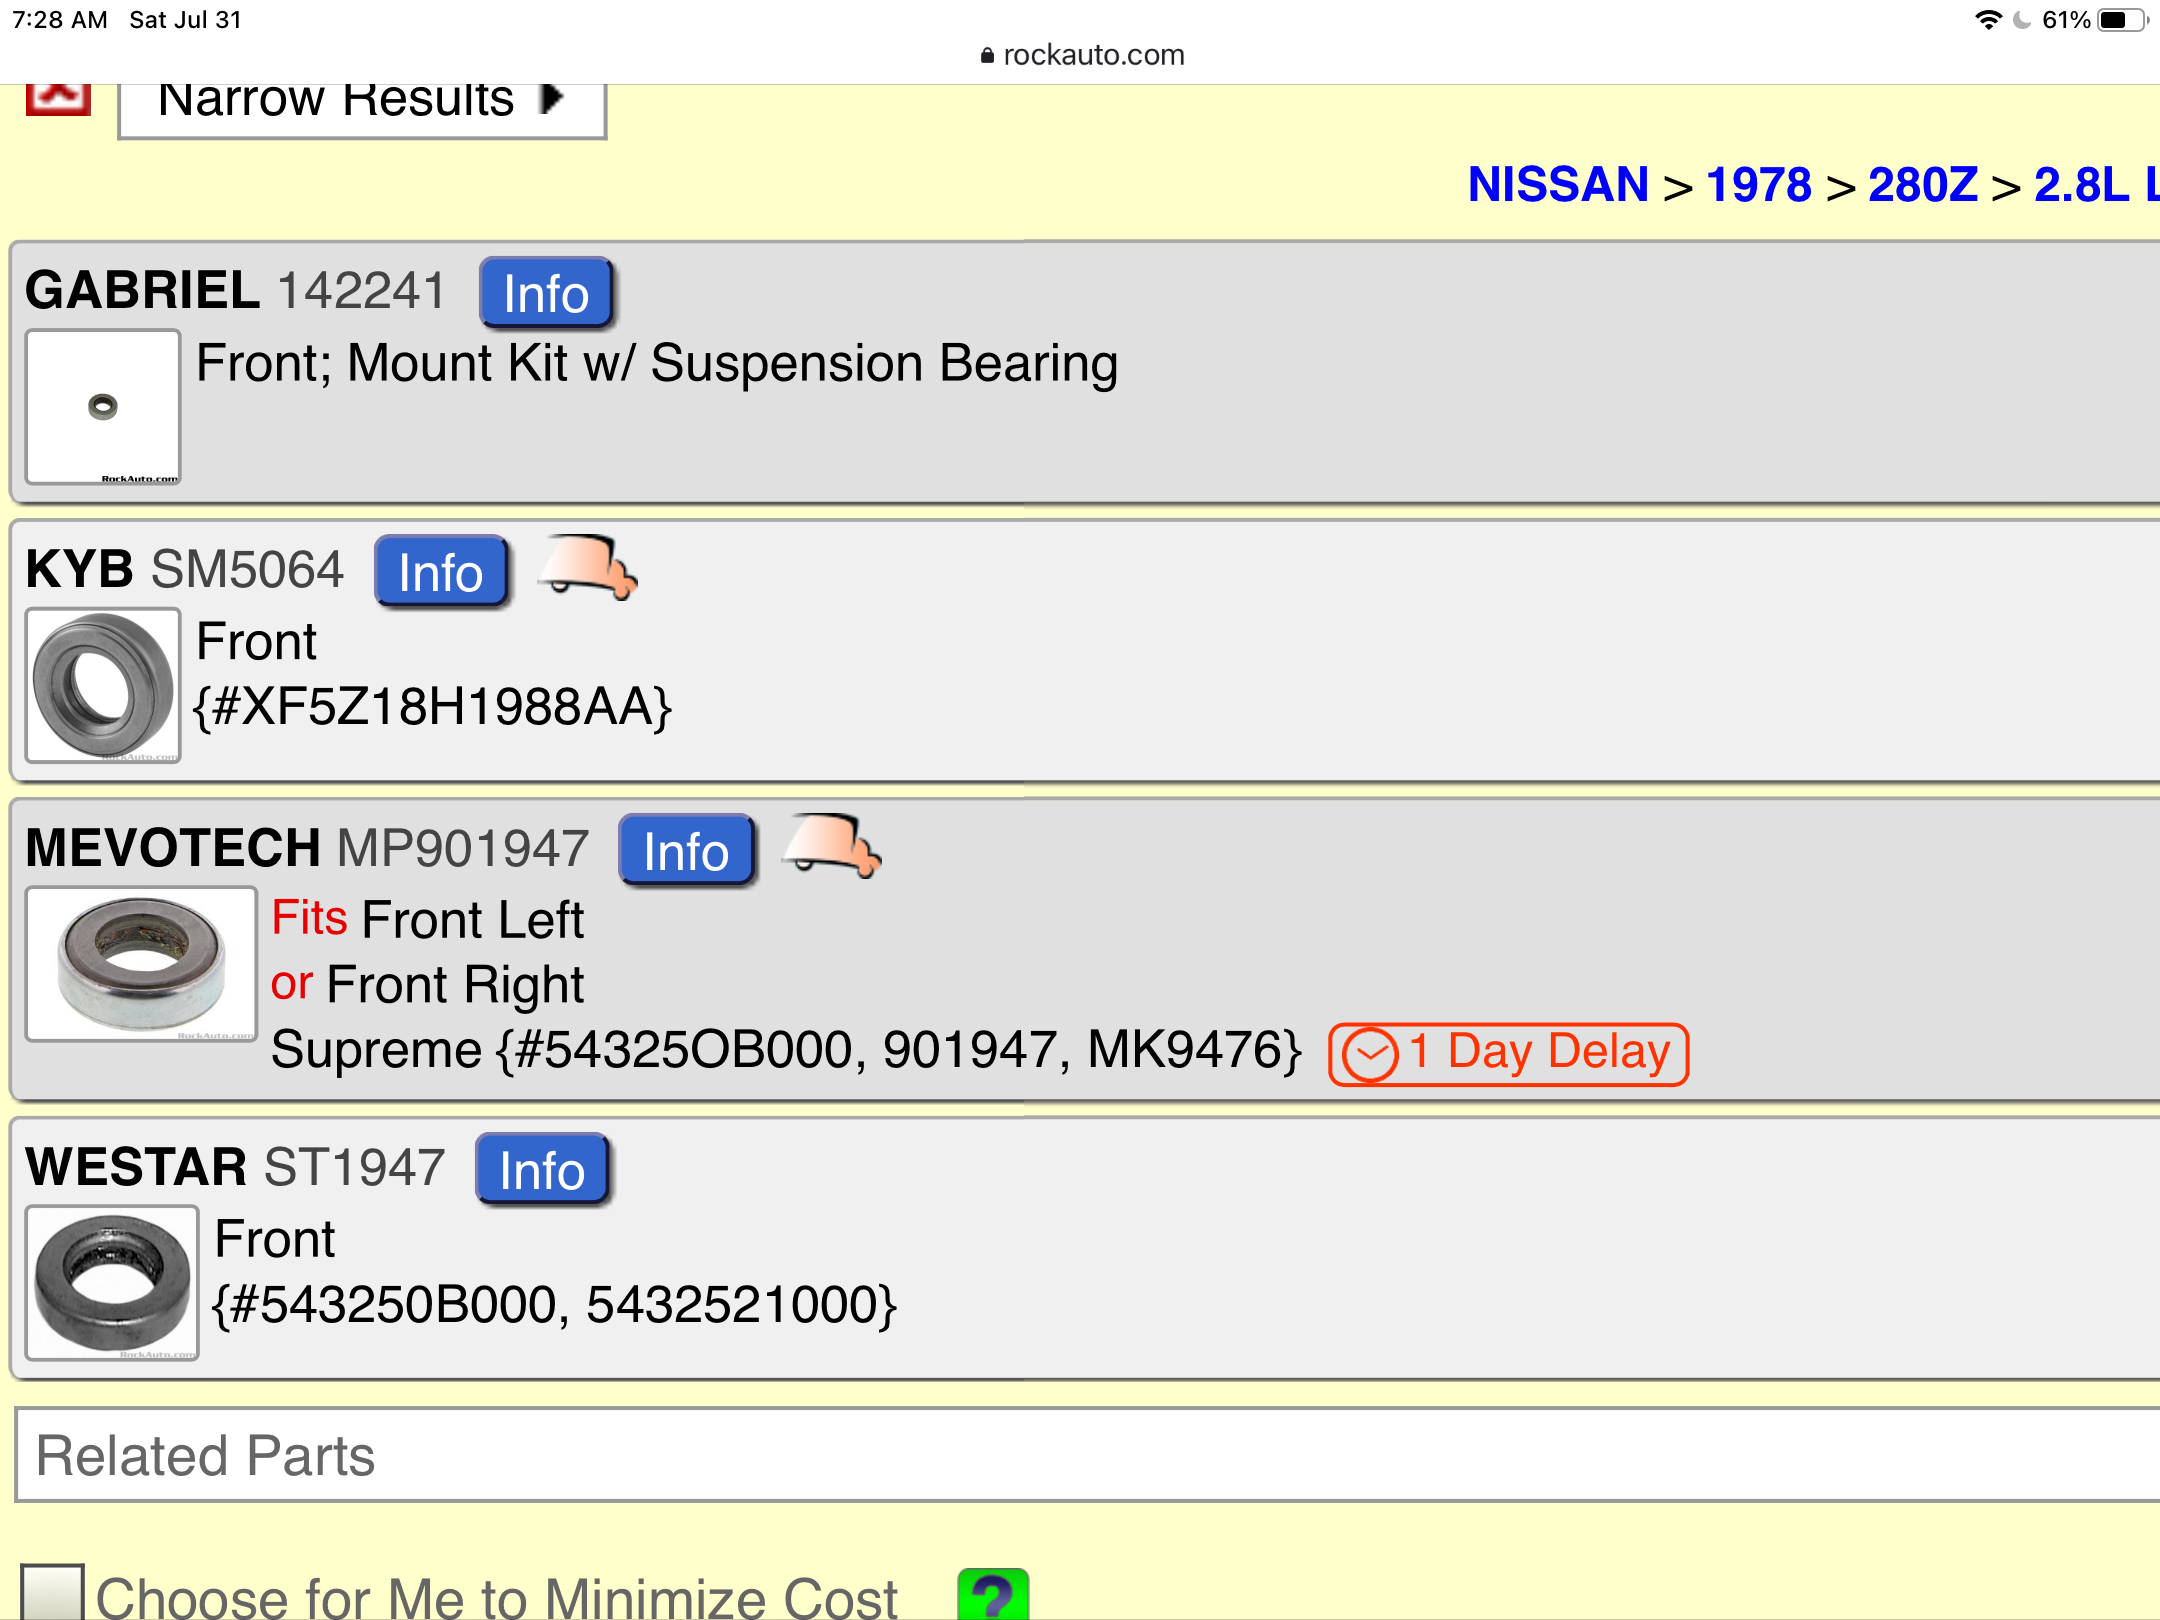
I’m far away, so tough to get them to you quick, but I have a set. Let me know. Another option is to just get a pair of the front bearings from RockAuto, and put those in the rear isolators. That is all the rubber ones really are, just substitution to fill the space in the isolator that the bearing does in the front. It will not cause your rear struts to tend to steer or anything strange. Will add about 1/2 lb of weight
 2 points
 -
2 points
-
I'm not much of a 2+2 fan but for a $1,000 that was a great buy.2 points
-
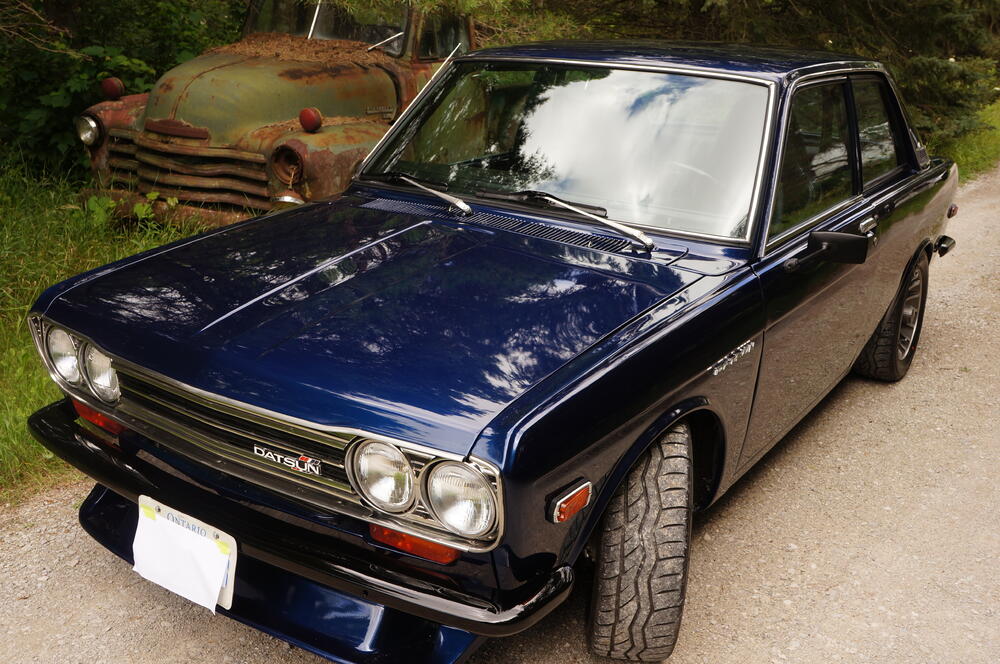
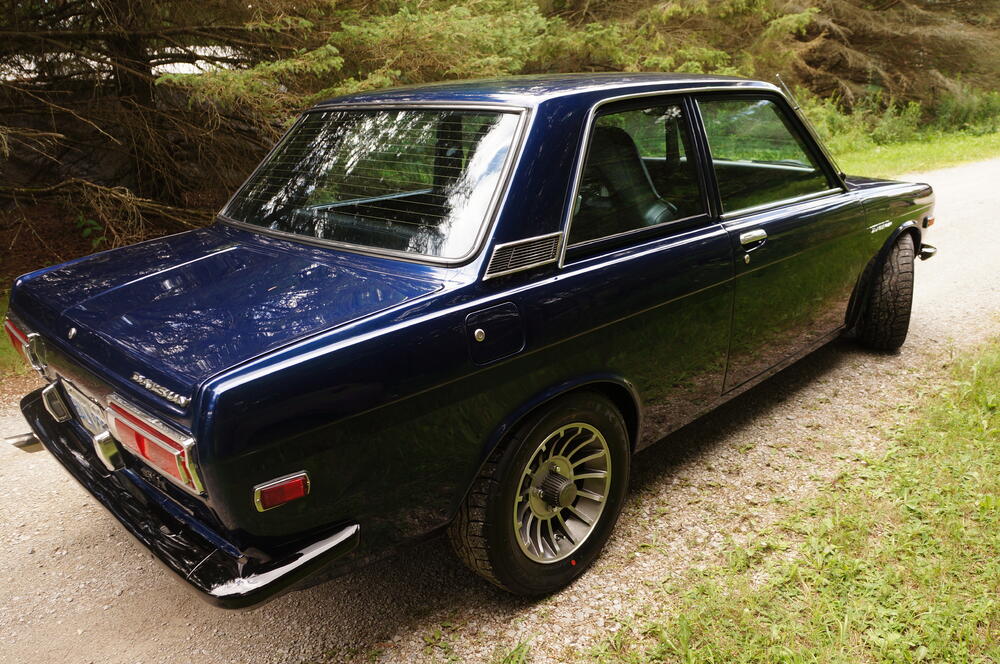
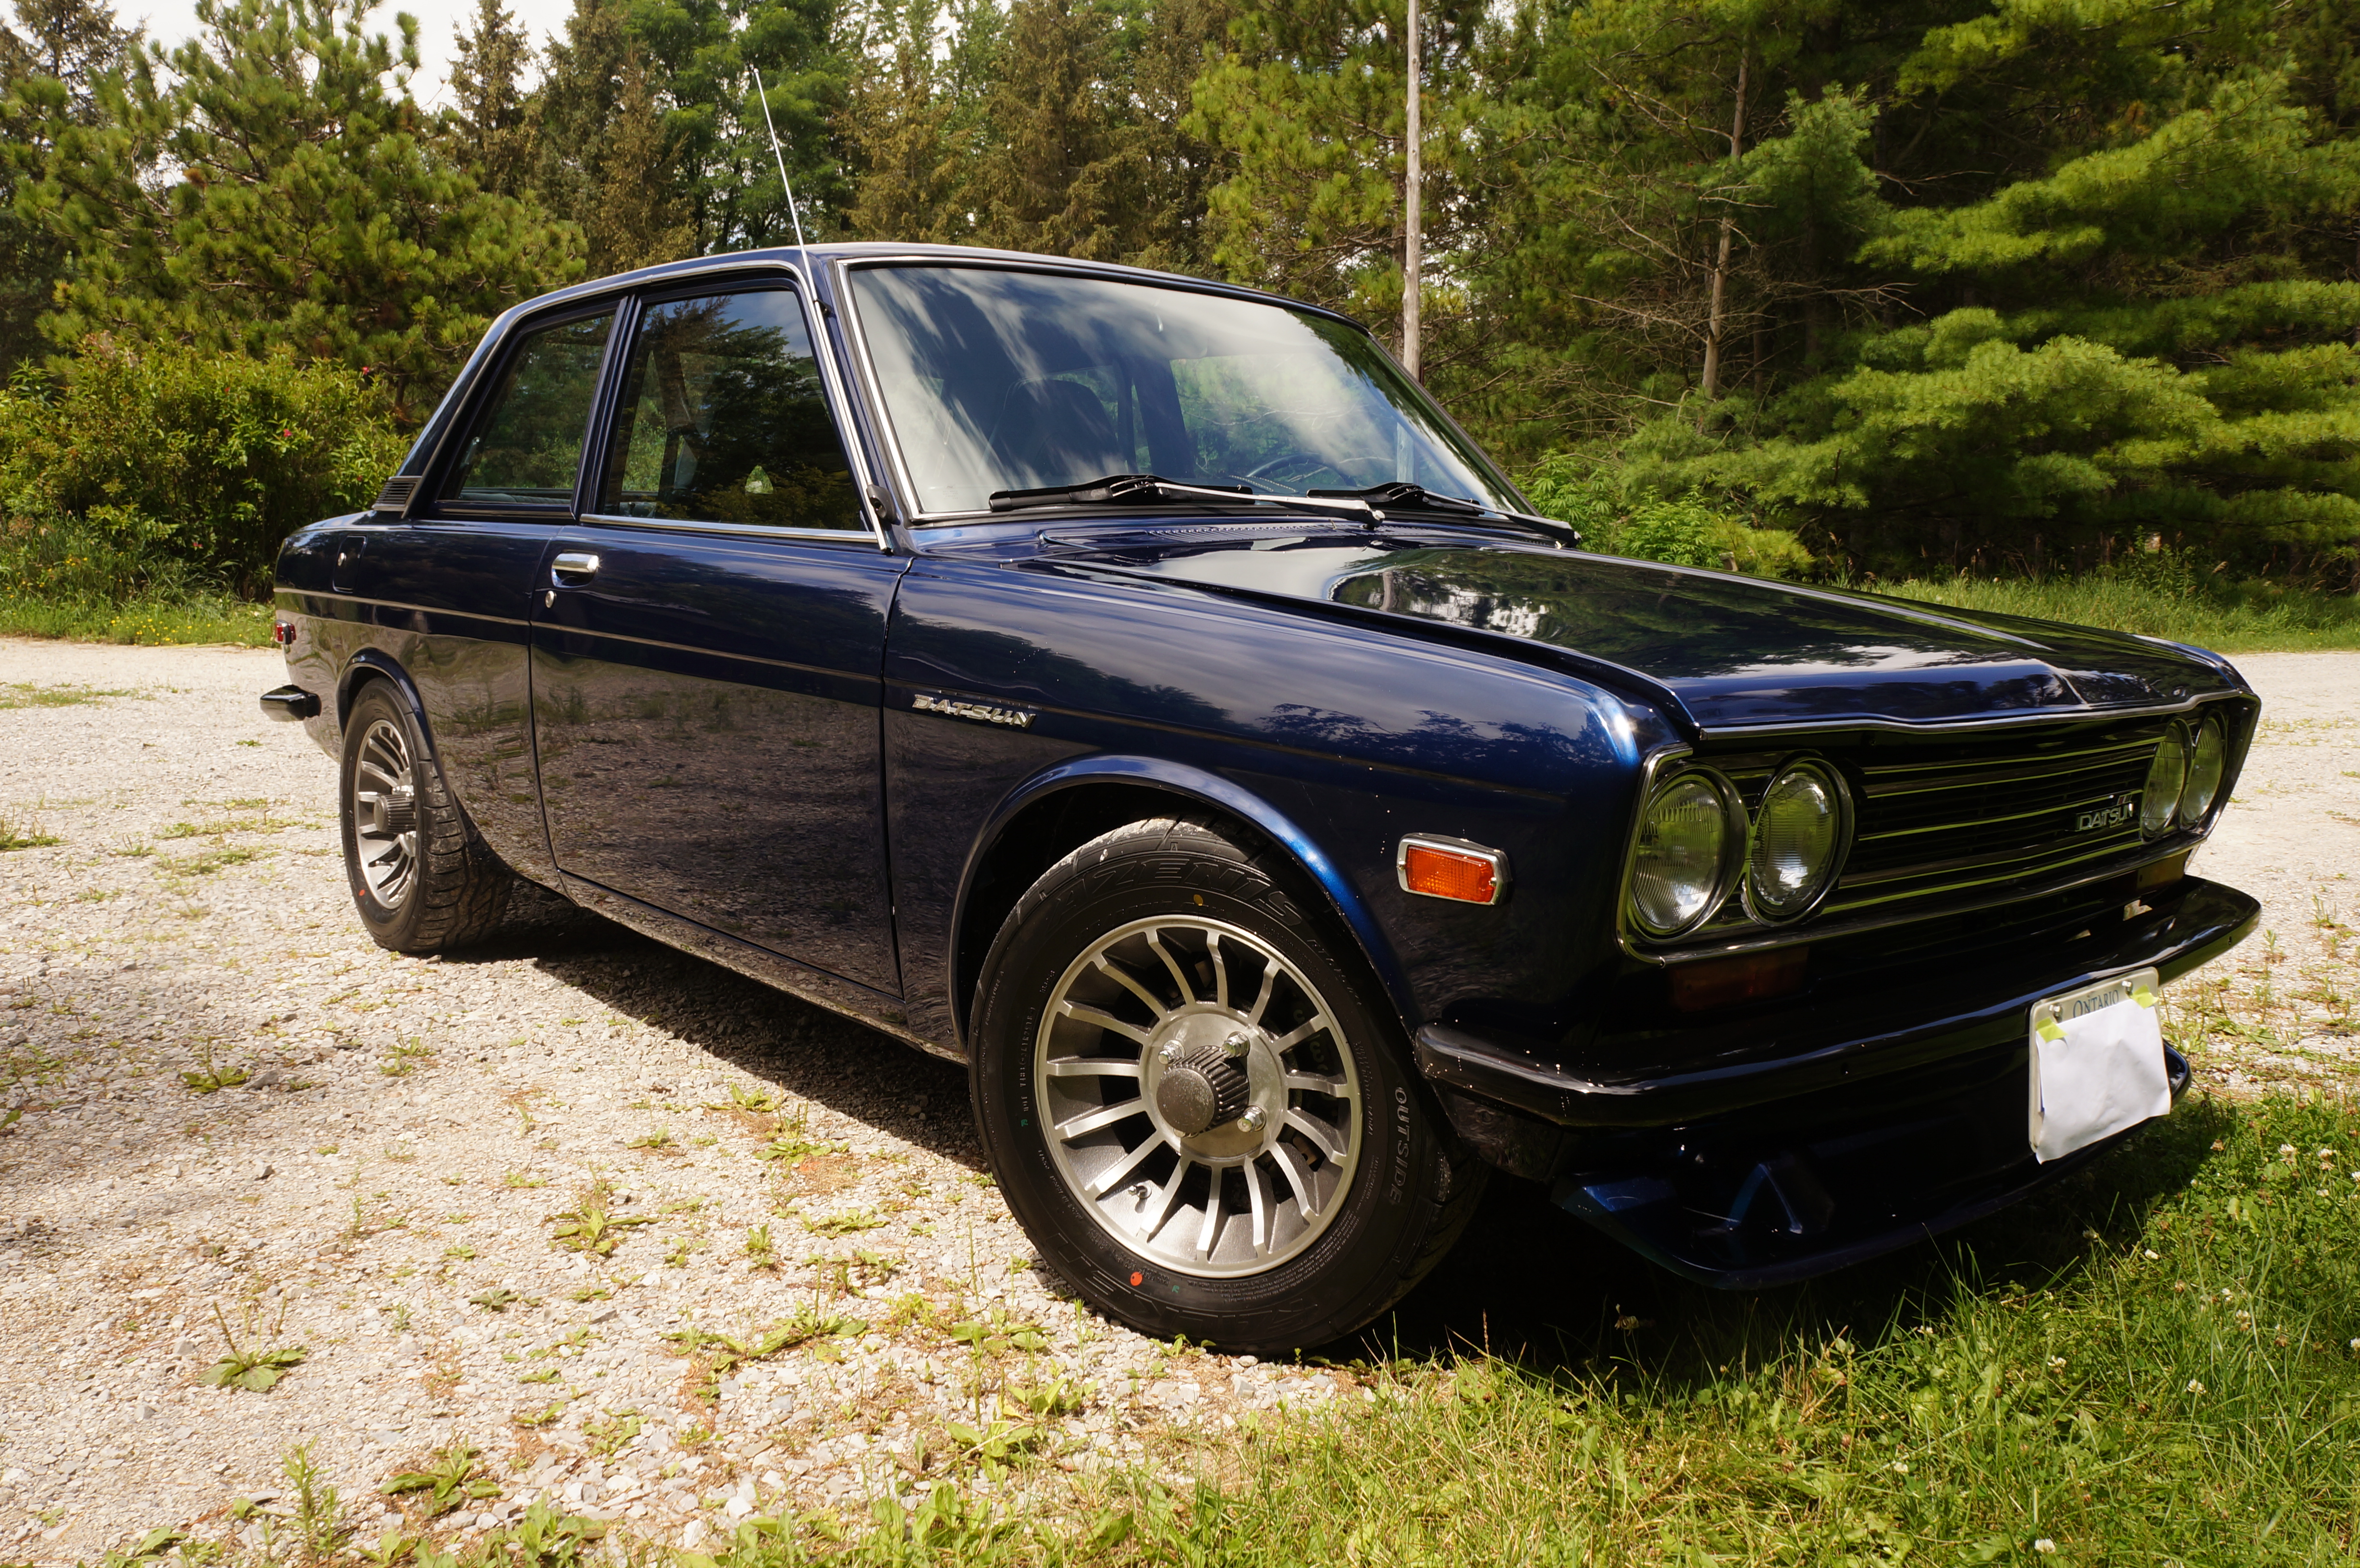
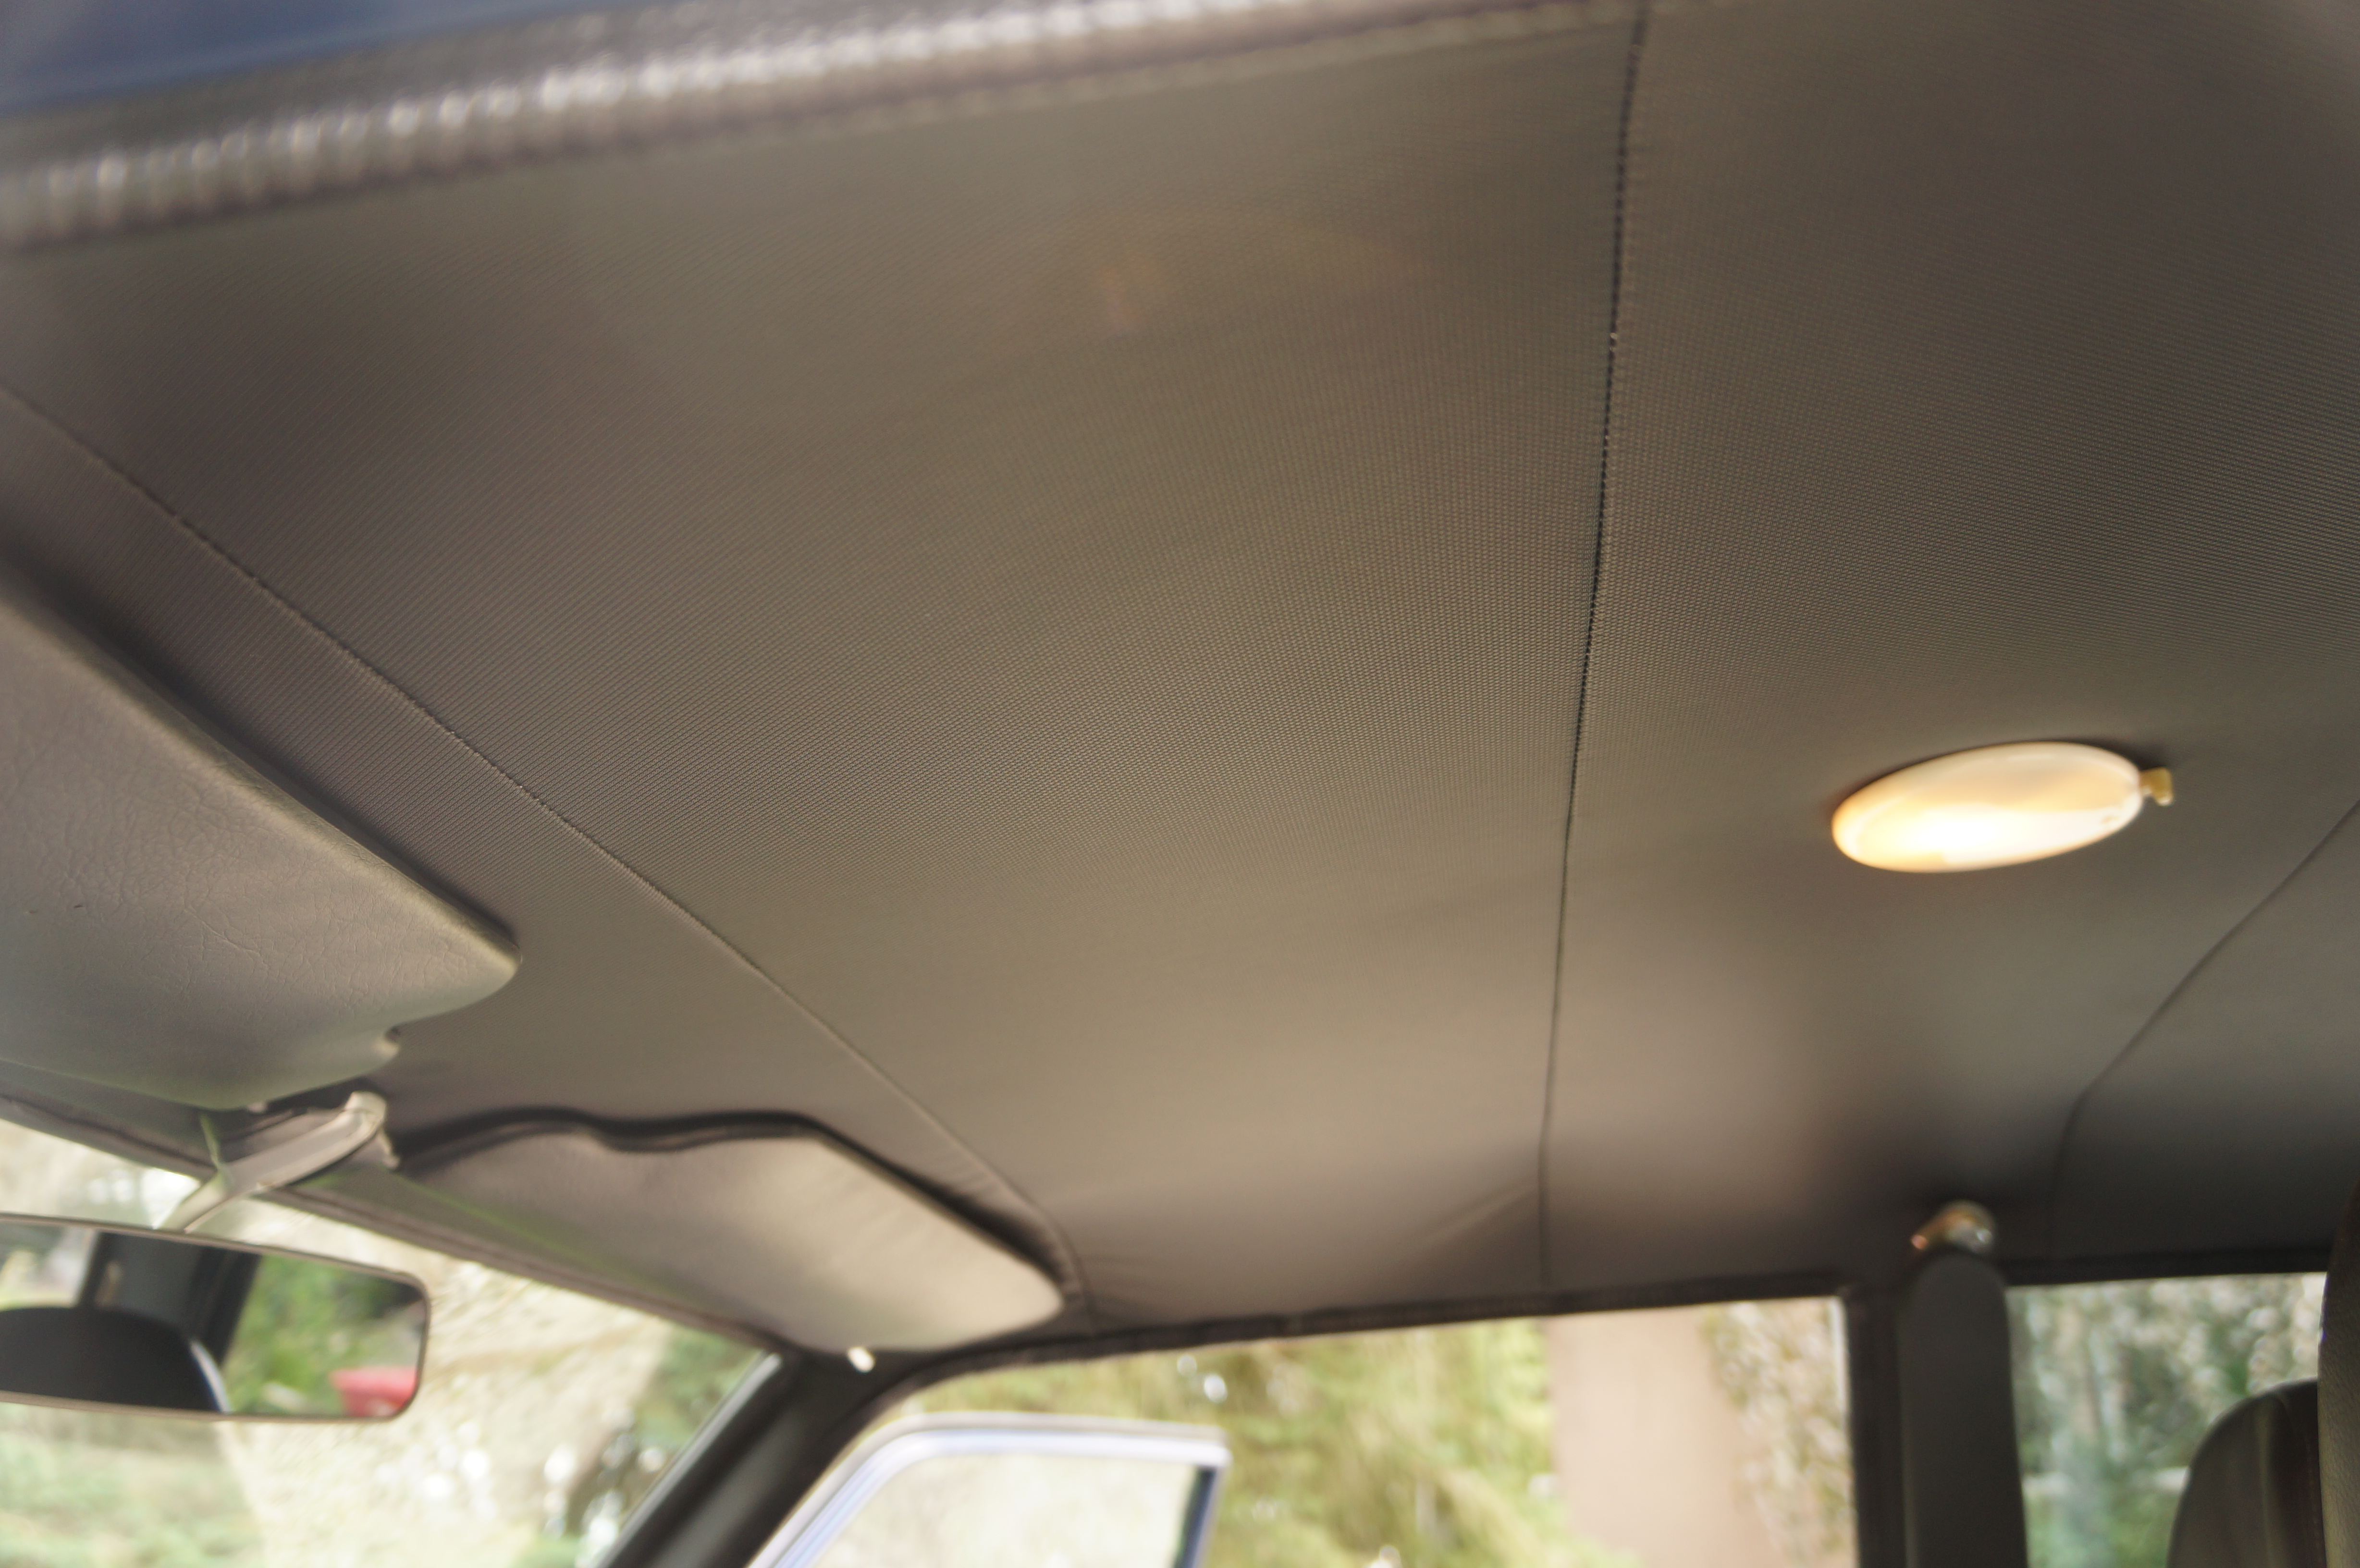
1 pointAnd she's done! Licensed and on the road and it only took 42 yrs. I'm wondering anyone is even going to notice the 240Z sunvisors, they look like they could be stock.


 1 point
 -
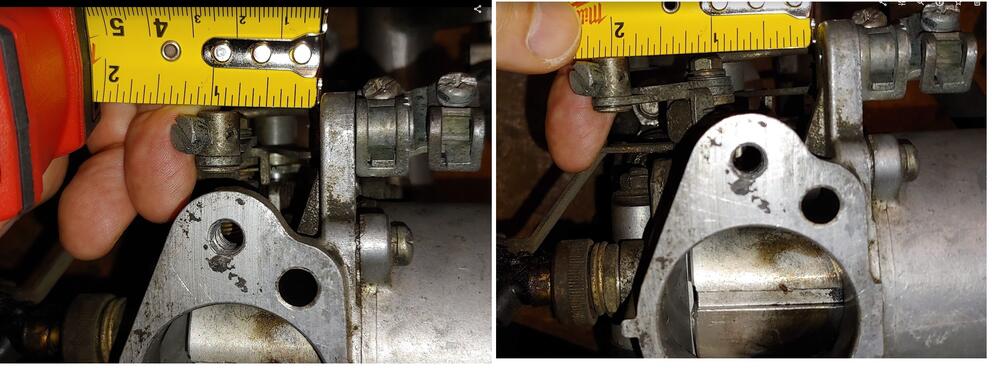
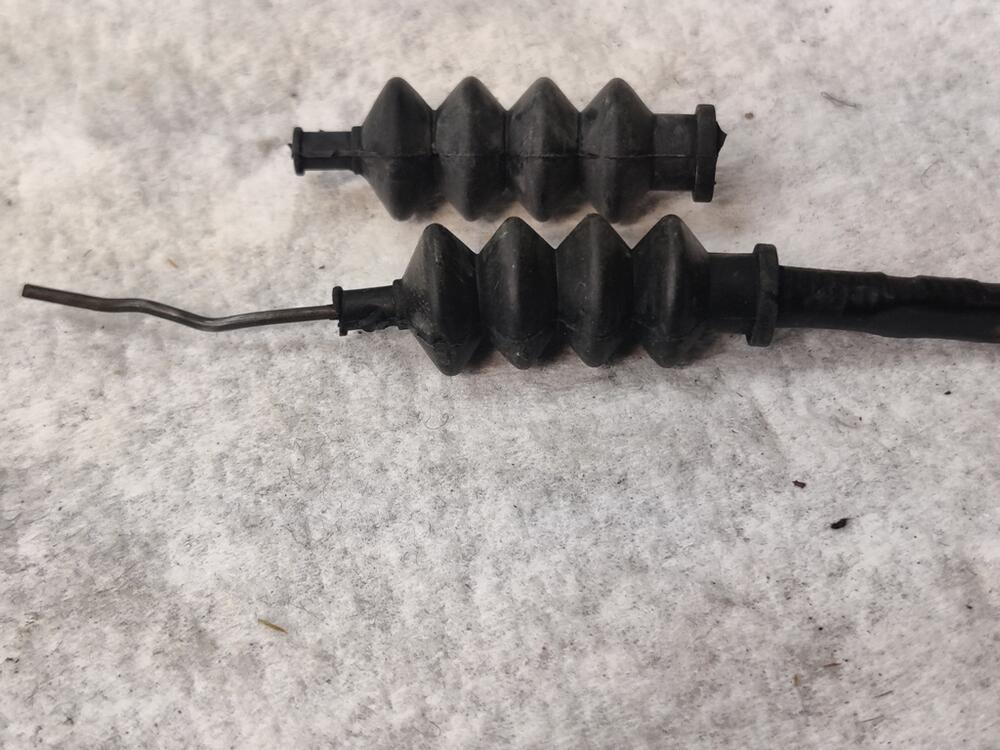
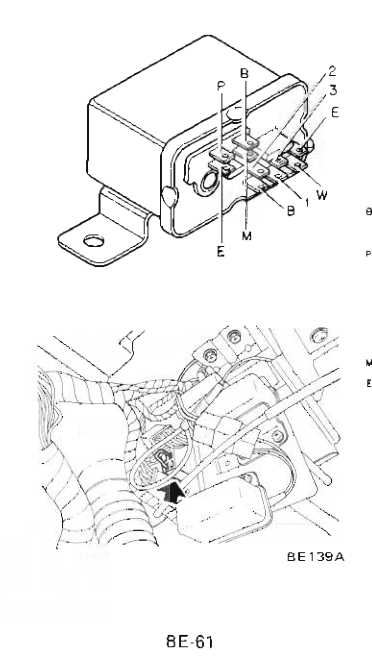
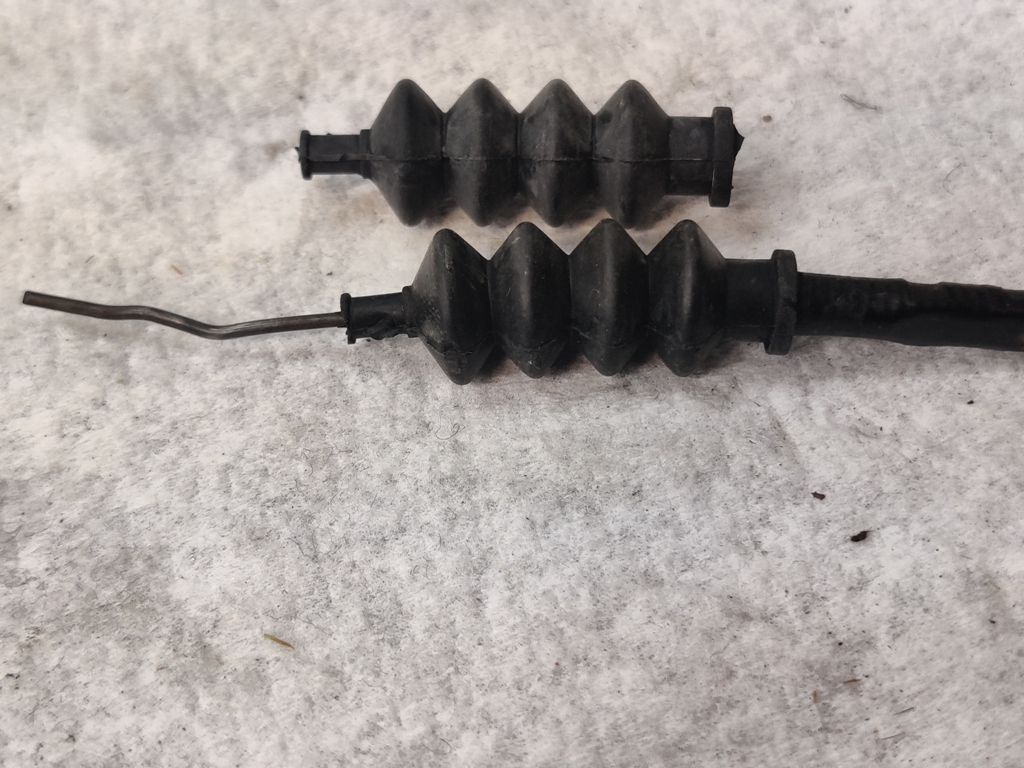
1 pointI found a pic of what I was trying to describe in my 75/76 FSM. Its fig MT-28 on page MT-8 they show two "synchronizer hubs" front is 3rd & 4th (move the sleeve one way to lock 3rd to the main shaft, move it the other to lock the input to the output no gears. there is also an illustration of the 1st & 2nd "synchronizer hub". If you look carefully at the see thru side view you will see how 3rd and 4th have an offset while 2nd & 3rd look to be symetrical.1 point1 pointYes indeed a small gap! But the gaps to the metal washers on mine top and bottom look different when the car is on a jack. One side is 10mm the other side is closer to 14mm. Probably because I was jacking under the diff. I have a ramp arrangement in my garage where the car is driven in, onto ramps when parked such that I lay under it and change an exhaust for example. The next time I’m in the garage, I will take a picture for you to show the gap when the car is on the ground / with suspension loaded up. I am so very pleased with the improvement they made to the car and have no clocks / knocks or additional noise - regardless of how hard I push the car or the state of the roads oh and it cost me less than $15. ;)1 pointI'm also of the opinion that your car did not originally have bellows, as they appear to have started for the 1972 model year in 9/71. I have never seen what are called complete assemblies (early type) offered for sale with them. Not saying there is anything wrong with adding them. Here are some measurements that might help with adding them, for anyone who is interested. The travel required for full motion of the choke linkage is 1-1/8" and the compressed length of the bellows must be 3/4" or less. This is based on open and closed measurements I just took from my carbs, and I also checked at the choke lever on a drawing from a parametric 3D model I created a few years ago. Hope this info helps anyone trying to add bellows, Cheers Mike
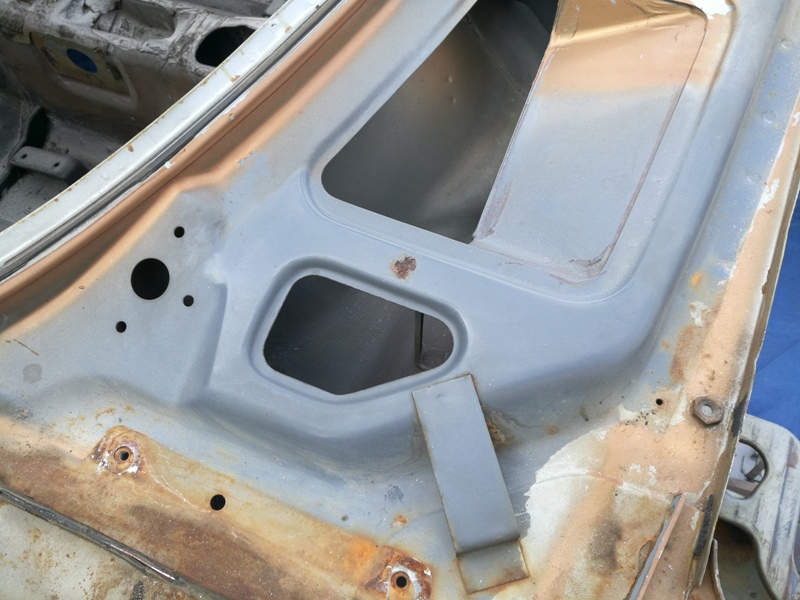
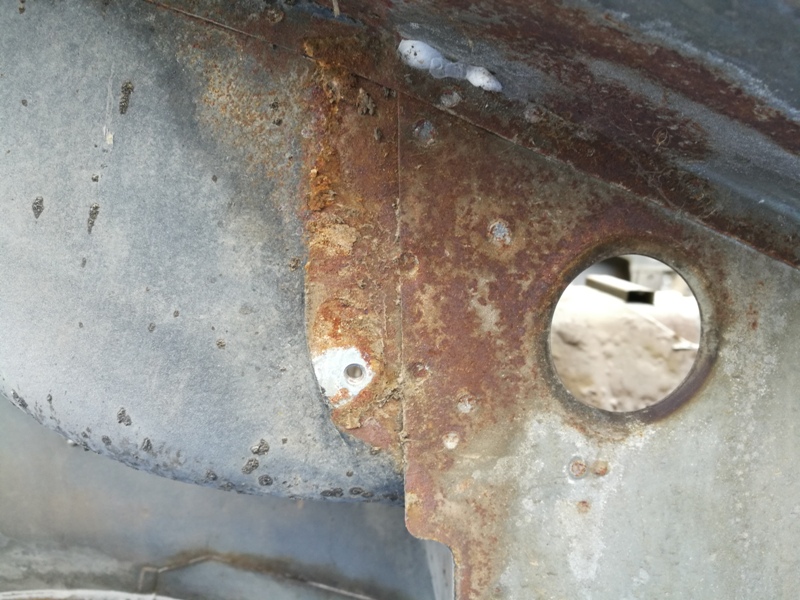
 1 pointGoogle a you tube video on using a multimeter. Your looking for how to perform a continuity test and dc voltage testing. That will give you help on doing tests. If you have questions after that post them here and we can help you with testing.1 point1 pointHave a look at this thread. Both my 12/70 and 6/71 cars had this tough, black coating applied to the bare metal before the bodies were sprayed with color. Additionally, if you look very close at the pic showing the transmission tunnel in that thread, you will see a reddish over spray that came through the shifter opening onto the black coating. That overspray... is the first coat of primer that was applied at the factory. You can see it here on the fender I stripped back to bare metal: Over this red "oxide" primer, which was sprayed over the entire top surface of the car, they sprayed a coat of grey primer before the paint: Note that this picture is of the front wheel well area where the cowl drain hose passes from the inside of the passenger compartment of the car to the outside - left hand side of the car. We are looking at the place where the fender support panel bolts to the unibody. To the left of where the support was bolted, you can see a "black" coating in the picture. To the right of where the support was bolted, you see no black coating. The support panel also had the black coating on it. The same is true for the front fender. The black coating is only on the inside of the fender, in front of where the support panel contacts the back of the fender. Those last facts are a bit off point, but circling back the thread for which I provided a link, you can clearly see the silver is on top of the black, and the black is on top of bare metal. All of this is what I provide as facts that the black coating was applied at the Nissan factory. I also have chips of the black coating which flaked off in some places. And I have sanded it in various places. So, I know it is the same stuff all over the car. No other black substance was sprayed on this car (6/71) after the original silver paint.
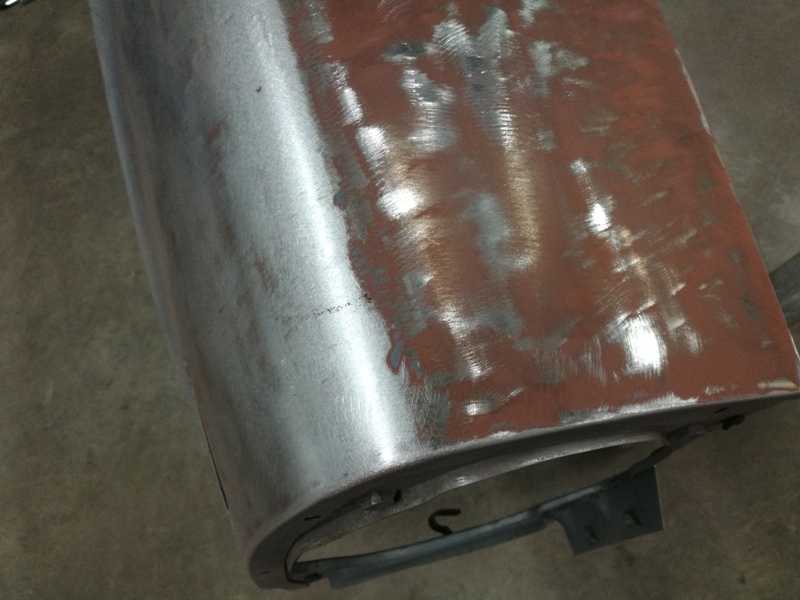
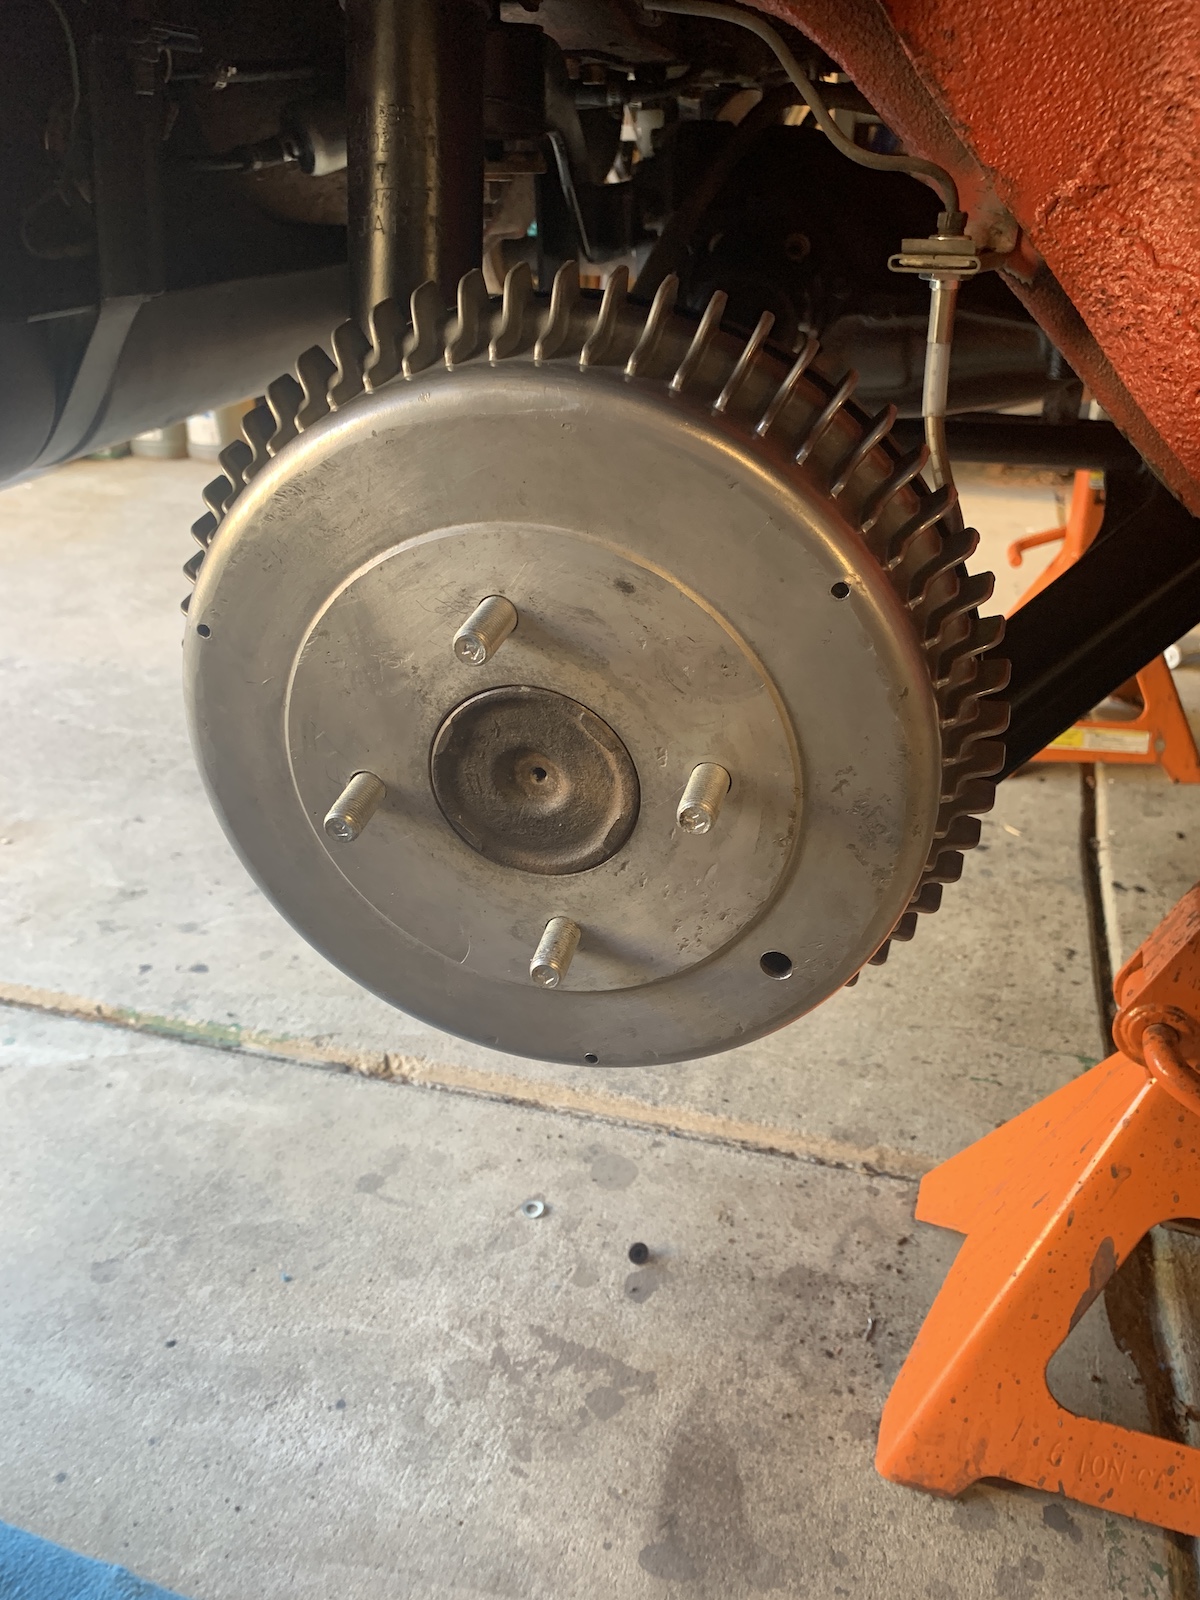
 1 point1 pointGot the rear brakes put back together. Next step is to get my wife out there to help me bleed the brakes. The new MSA wheel cylinders had a different angle on the inlet so ordered to new set of hard lines to fit.
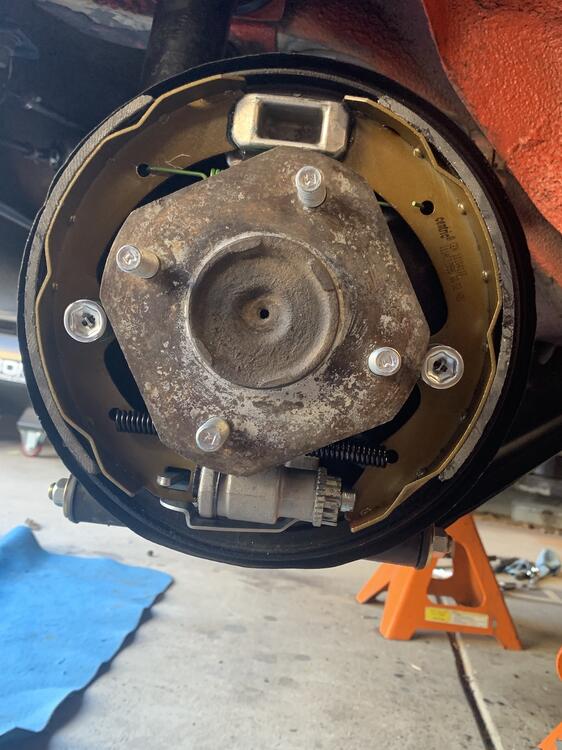

 1 point1 pointAK, I measured the distance on my 240Z between the steel washer and the mustache bar, top and bottom, and it's about 10mm. So, are you running a small 1mm gap? Just curious. My worn serrated washers have about a 5mm gap between rubber nubs and mustache bar.1 pointThanks for the measurements. The boots I have a bit small. They are not as wide at the fat part of the bellows and they are only 1.6 inches long from end to end. I put one on the cable and the id on each end is a good fit. I think it is 1 mm id on one end and it is 6 mm id on the other. Maybe the info here will help someone else, as my carbs don't utilize the later style cables with boots.
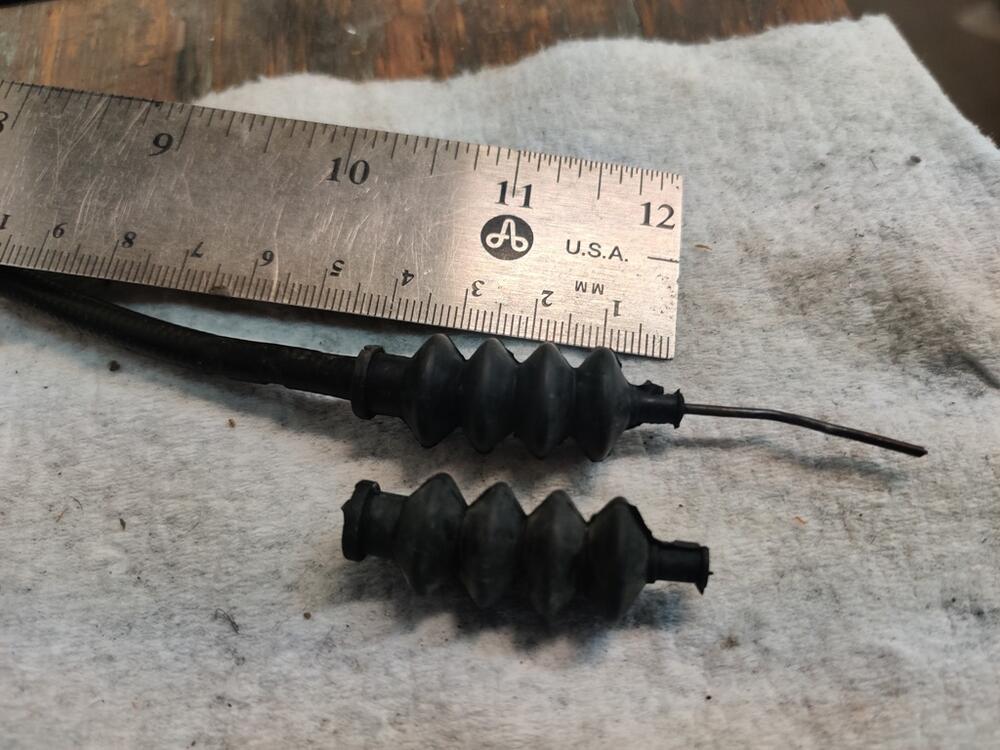
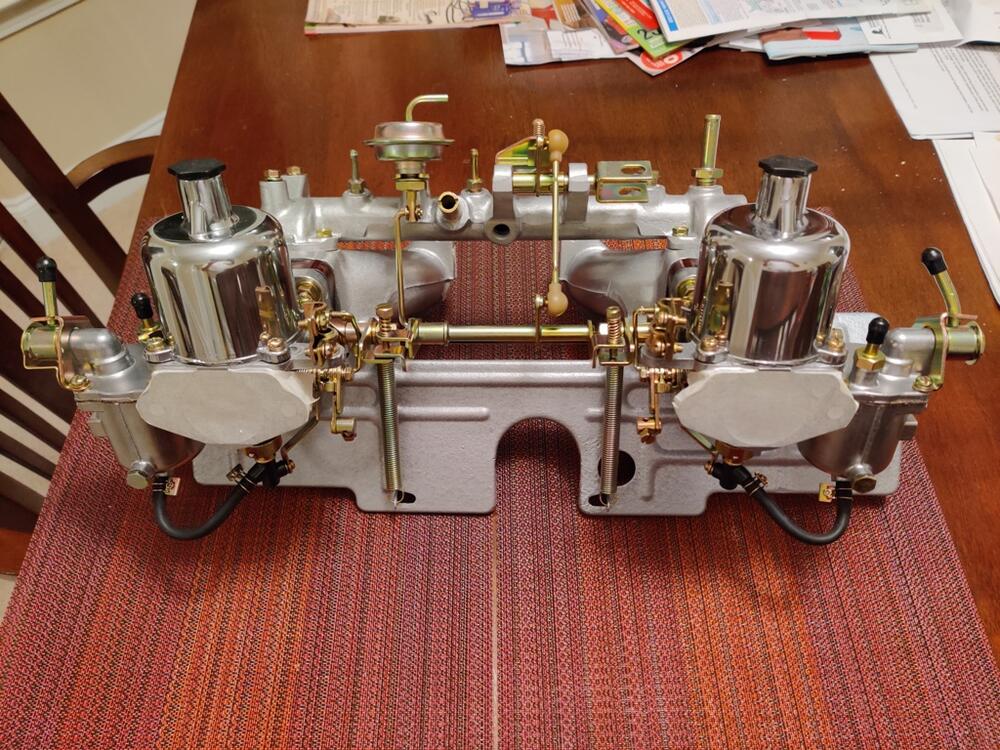
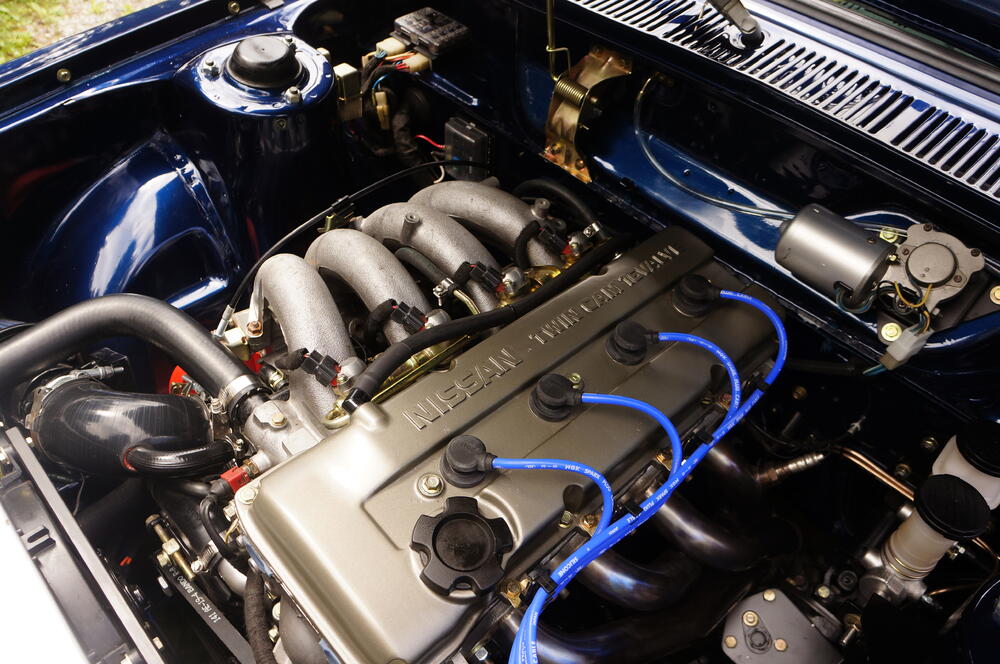
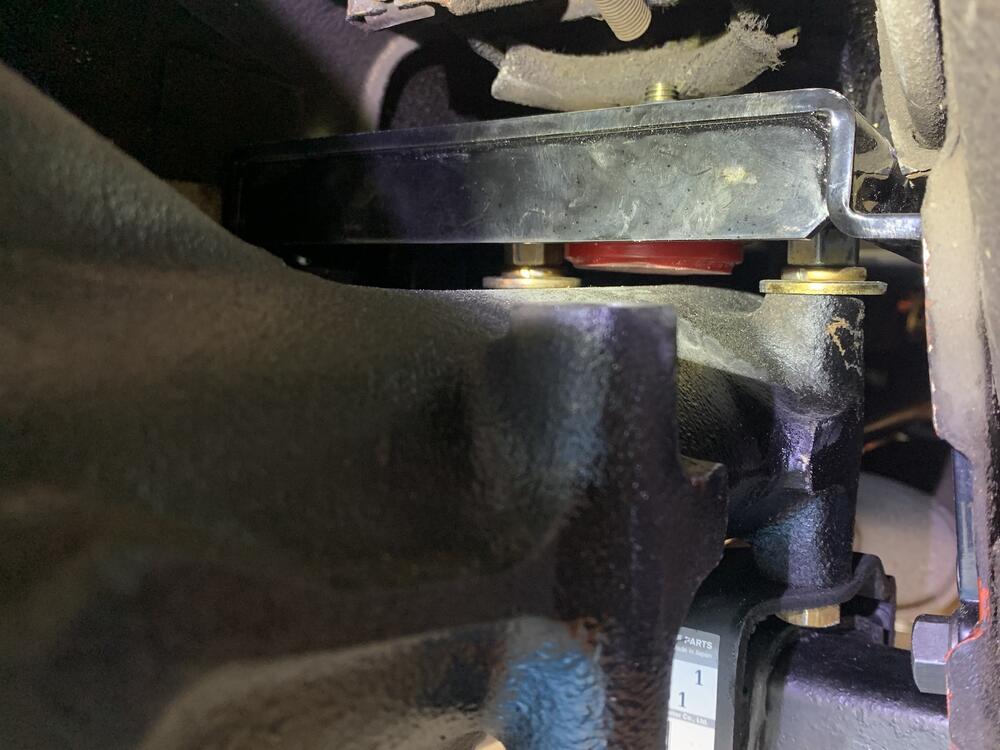
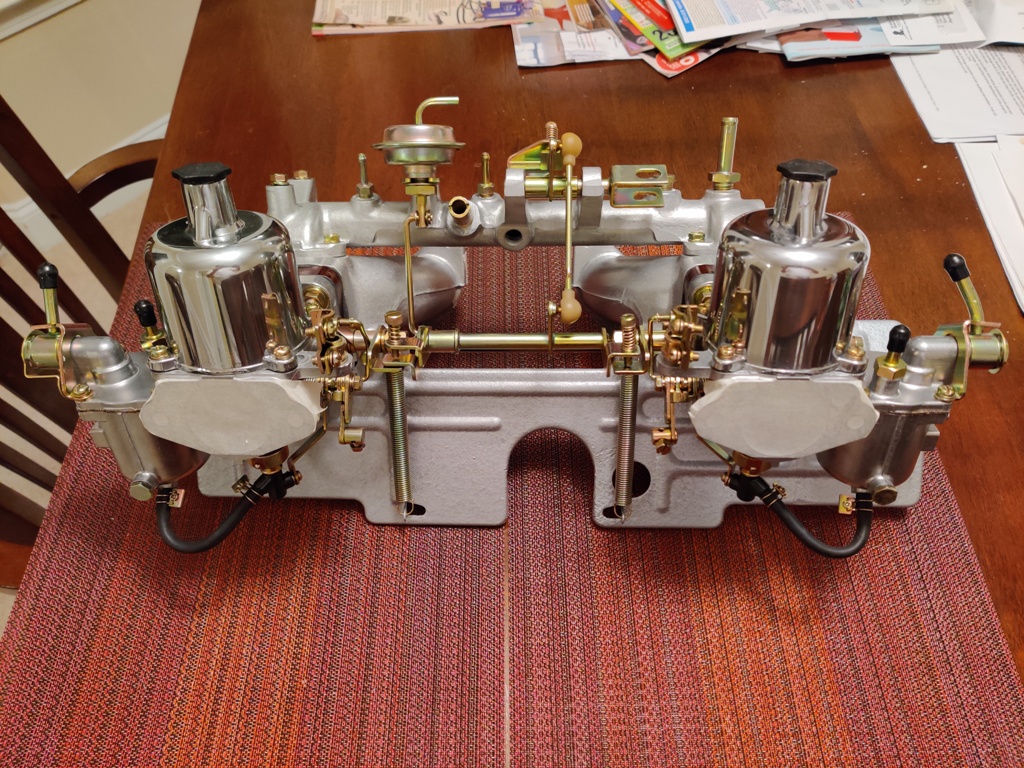
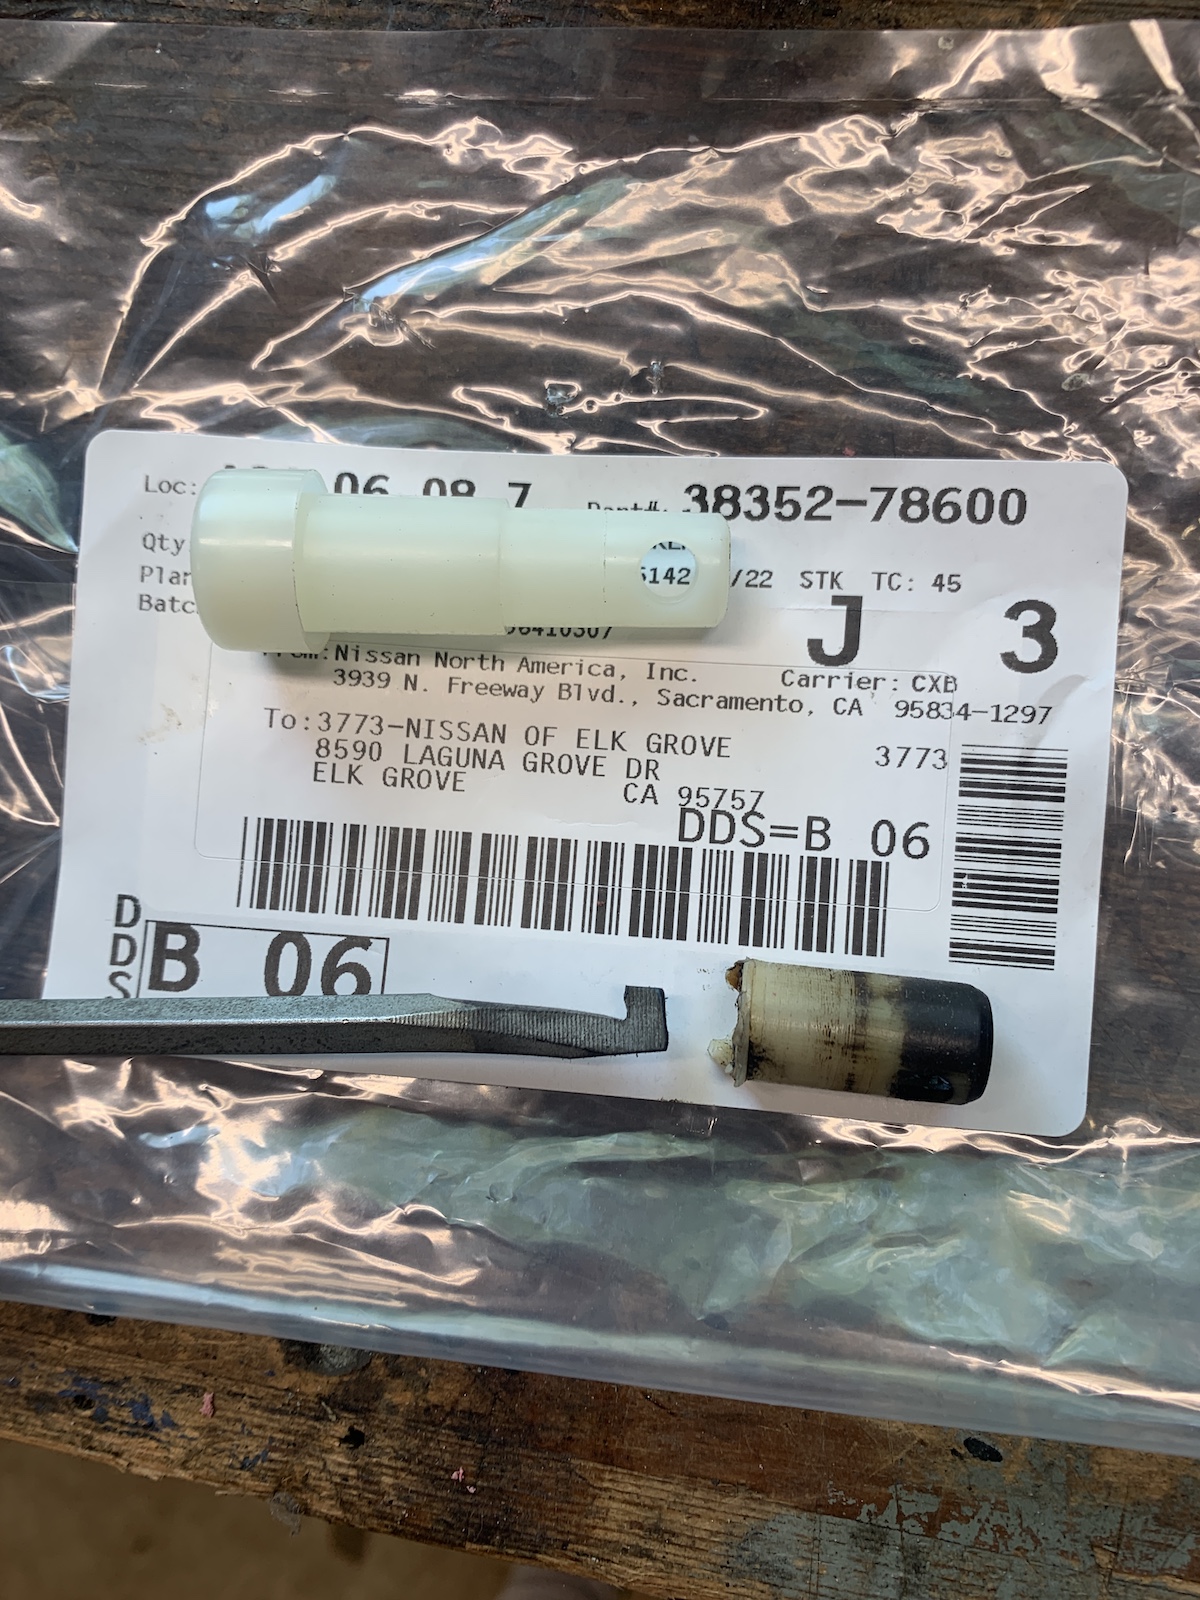
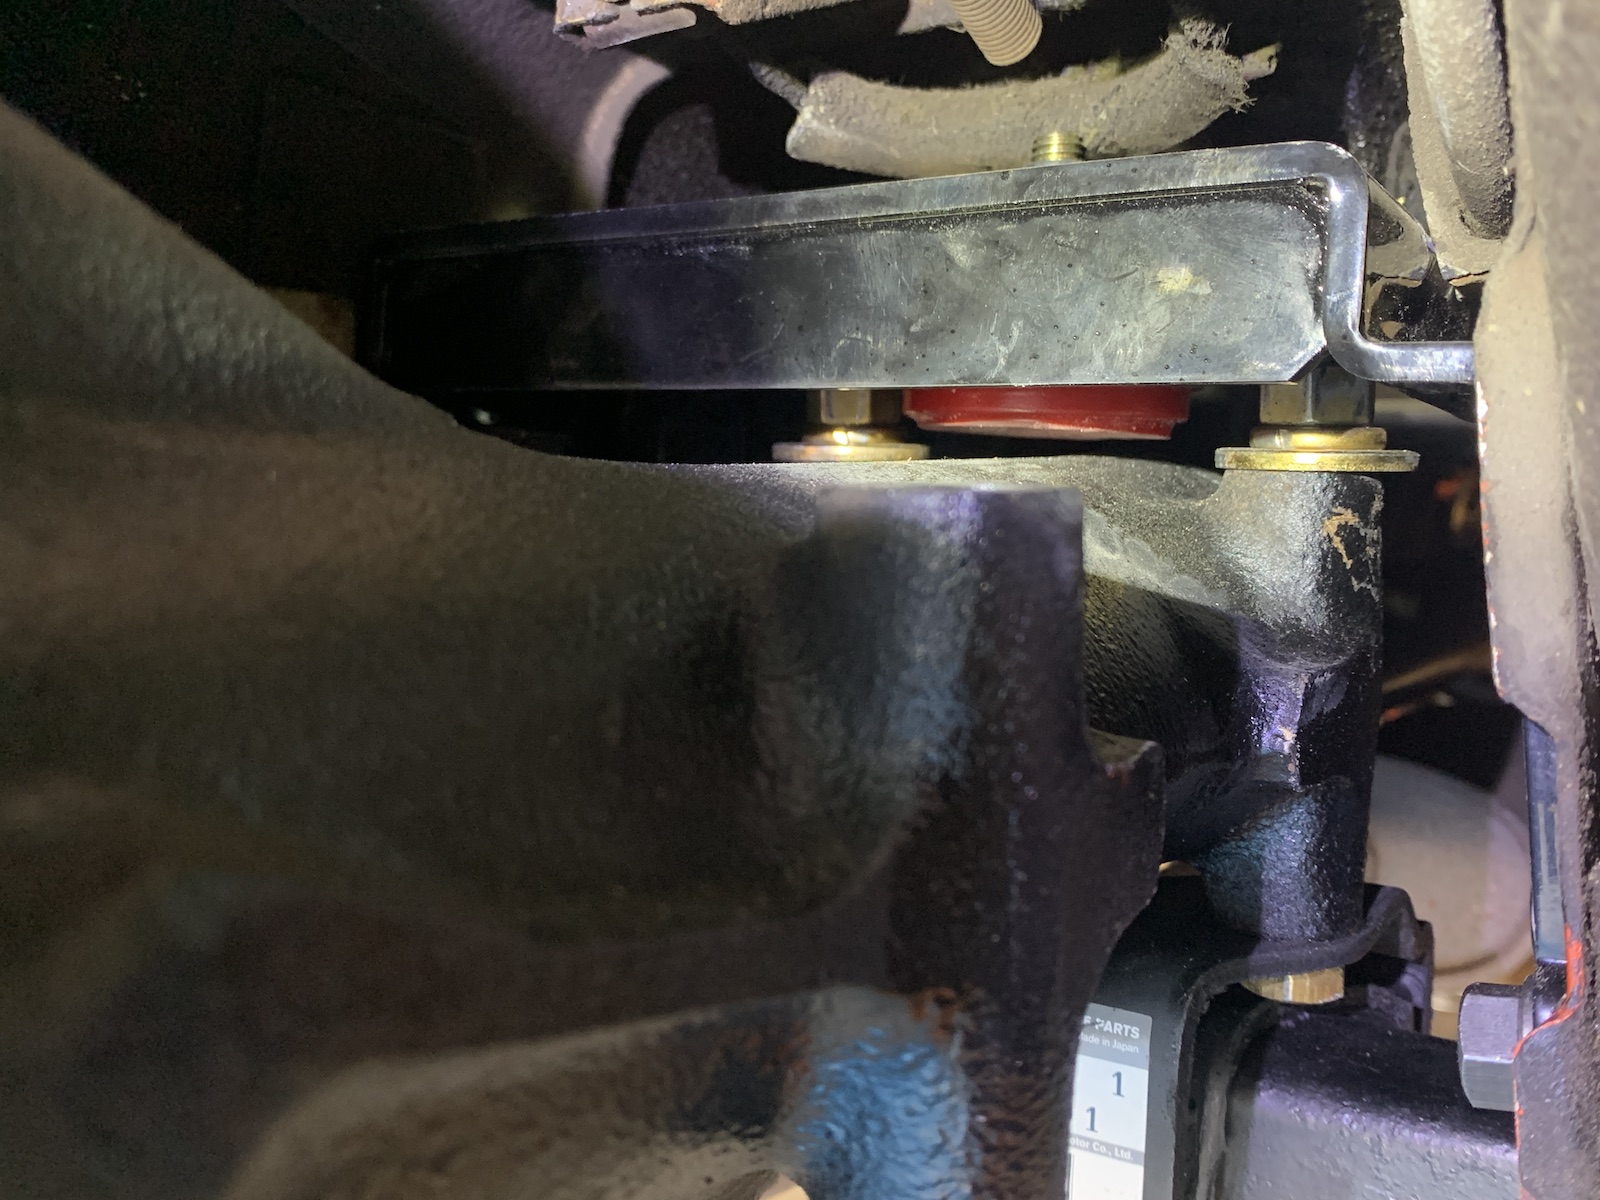
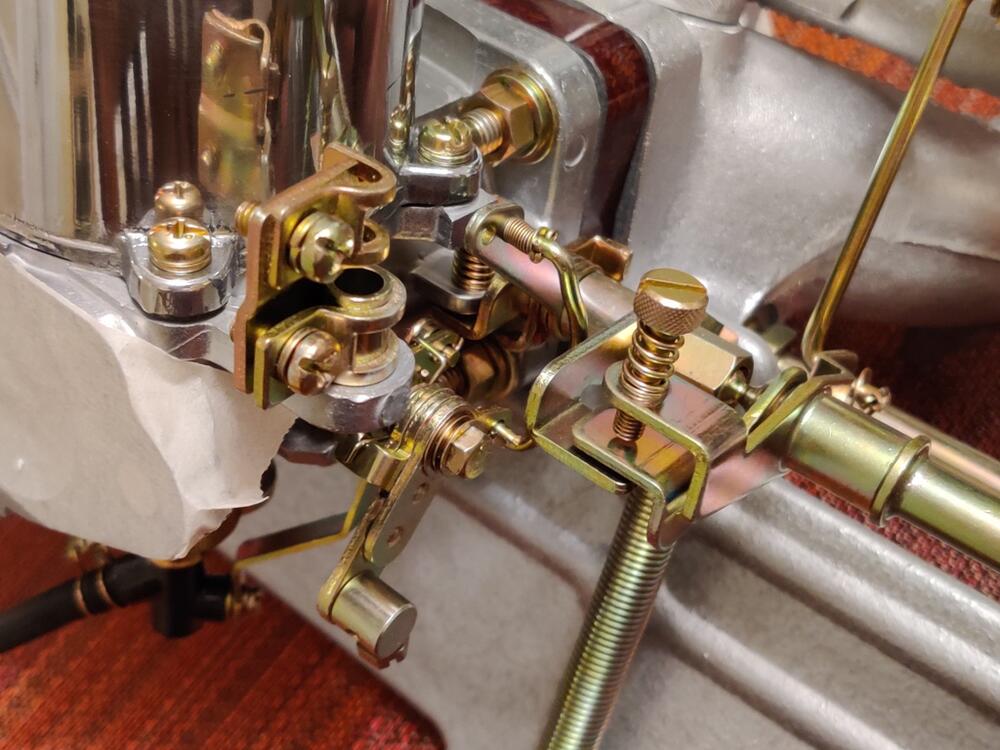 1 point1 pointThe part number is the same for both. Might want to look into getting the threaded sleeve as well.1 pointIt has been suggested before to get a digital volt meter. Still don't have one. Can't test for true voltage or resistance with a test light. Nobody can help you fix these things from a 1000 miles away if your not gonna do what they ask!!!1 point1 pointWow, that’s a big difference! That faded red makes it look like it’s covered in rust in the before pic. Sent from my iPhone using Tapatalk1 point1 pointWell, the ammeter is also held in by the wires going to it. Make sure you try this with the battery disconnected.1 pointThe amount of carbon deposits on the head and pistons on the engine I rebuilt was remarkable. I’d like to mitigate that from happening again. Those deposits, hurt fuel efficiency and create hot spots I’ve read and can hurt CR. I think I’ll probably run two small independent cans like I mentioned above and see how it works. As far as CA power problems this has been brewing for years. I have no problem with going to cleaner energy sources but they have to have replacements in place before making restriction laws. I lived in Ca about half of my life. Everything has become crazy expensive there especially electricity and water. If they went full EV they’re going to need serious power plants to make that happen. New nuclear plants are illegal the CA and they’re work hard to ban coal plants too. I know they buy much of their energy from AZ. That’s just exporting your CO2. It’s going to be an interesting experiment, glad I don’t live there anymore. Sent from my iPhone using Tapatalk1 pointGrab a multimeter and the FSM and follow the wiper motor circuit from the switch to the motor. Establish that you have power going to the switch first. A test light is not the proper tool to use for debugging a circuit. You mentioned earlier you had a working motor that spun freely. Did you try that motor?1 pointI agree that electricity is one of the biggest hurdles. California already has issues producing and transferring power. With an enormous demand added, how will that be accomplished. Definitely not hydro! The lakes are already painfully low. Nuclears out, coal, nope. Natural gas is still an emitter. Green sources are erratic and storage of excess energy is a problem. Will be interesting to see how it plays out1 pointI think the governor and his crew will be phased out long before gasoline engines in California. Here's what the plan calls for: California Air Resources Board will develop regulations to mandate that 100 percent of in-state sales of new passenger cars and trucks are zero-emission by 2035 – a target which would achieve more than a 35 percent reduction in greenhouse gas emissions and an 80 percent improvement in oxides of nitrogen emissions from cars statewide. In addition, the Air Resources Board will develop regulations to mandate that all operations of medium- and heavy-duty vehicles shall be 100 percent zero emission by 2045 where feasible, with the mandate going into effect by 2035 for drayage trucks. To ensure needed infrastructure to support zero-emission vehicles, the order requires state agencies, in partnership with the private sector, to accelerate deployment of affordable fueling and charging options. It also requires support of new and used zero-emission vehicle markets to provide broad accessibility to zero-emission vehicles for all Californians. The executive order will not prevent Californians from owning gasoline-powered cars or selling them on the used car market.1 pointI was a journeyman mechanic for 30 years, and a state certified diesel and gas emissions specialist (among many other certifications). I’ve probably forgotten more than the average shade tree mechanic knows. I am interested to see how California is going to get by without internal combustion engines. Agriculture is the state’s largest industry, with plenty of tractors and trucks. Then there is the trucking industry, and no manufacturer is currently producing all electric long haul trucks. Locomotives are another one that is going to be difficult to replace with pure electric. I wonder if anyone has worked out how they will be able to generate and distribute enough electricity to run all the cars, trucks, buses and trains. Oh, and as far as I know, no one is trying to work out how to make commercial airliners and cargo plane work reliably and safely on batteries.1 point1 point1 pointOh, and forgot to mention... Since you're trying to create a complete path that clears out the entire engine interior, that's why the two vent connections are so far apart. If they were both on the valve cover, you would set up a little circle there. And if they were both on the block, you wouldn't clean out the head area. They put one on the head and one on the block so it pulls through the entire block. On "V" style (and opposed) engines, you can put one vent on each valve cover because they are each joined to each other through the block cavity. But on the inline engines, you need one at the bottom and one at the top.1 pointGotcha. So he's assuming you (the purchaser) will do something appropriate with that crankcase vent and NOT leave the vapors in the block. @duffymahoney1 pointI run this baffled catch can, https://www.ecstuning.com/b-ecs-parts/ecs-tuning-baffled-oil-catch-can-8oz/003779ecs05-02~a/ It is configured as your #1 setup, works great. @AK260, beautiful engine bay!1 pointSorry to hear that! Must have been very scary!!! Glad the car is fine. I hate those filter type things as they invariably get “wet”. Here’s a photo of my set up (except I now run an airbox). If you look bottom left you will see my catch can. It’s a 0.3l cheap eBay one with two inputs and one output. The best catch cans (unlike mine) are baffled. The top of that filter can sometimes smell eggy - you can always route a pipe away from the top to somewhere in the engine bay where it doesn’t matter. Also note the home made heat shield that works amazingly in keeping the carbs cool and diverting any fuel leakage / spit back away from the hottest part of the exhaust manifold.1 point1 pointI modified an old screwdriver to help remove the broken off breather vent. Basically catch the top of the sideway holes and pull up. New 38352-78600 is $7 from dealer. Here's a pic of the TC mount clearance. Hard to believe the factory used a belt instead of something like this.
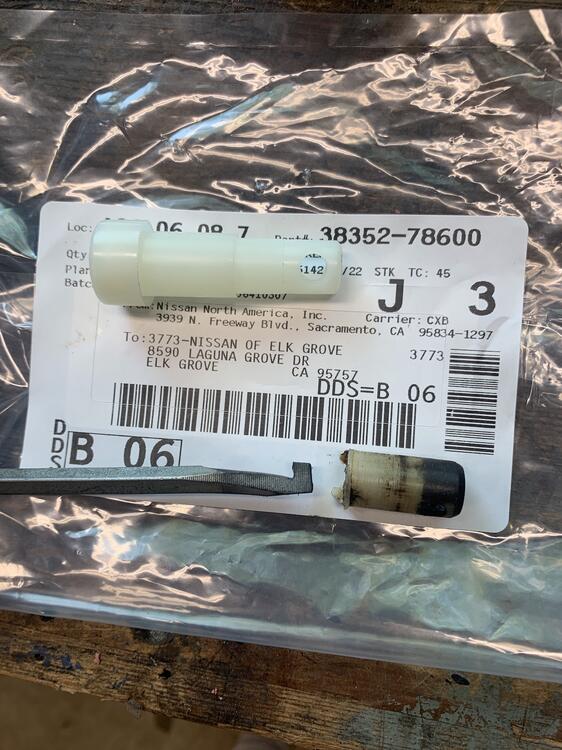
 1 point


Important Information
By using this site, you agree to our Privacy Policy and Guidelines. We have placed cookies on your device to help make this website better. You can adjust your cookie settings, otherwise we'll assume you're okay to continue.