Leaderboard
-

siteunseen
Free Member11Points15,115Posts -
Patcon
 Subscriber
 6Points11,142Posts
 -
Captain Obvious
Free Member6Points10,081Posts -
AK260
Free Member4Points999Posts


Popular Content
Showing content with the highest reputation on 10/11/2020 in all areas
-
4 pointsWell I'm very glad you're here. Not only because it helps keep you out of trouble, but also because I'm just glad you're here!4 points
-
Have you thought about trying a run with no trumpets to see what happens? It's free...3 points
-
3 pointsYeah Site.......one of my favorite Z Nuts on the forum! Until I met you at Road Atlanta, I didn’t know whether you were a BOT or for real. Keep doing what you are doing..........Happy to be your friend! Stay the same Guy3 points
-
2 pointsWell whadda ya know! I've had a lot of fun on here with you guys. Whizzed off most but helped a few too, be it cars or a laugh. One of my best buddies told me the other day I could get away with saying anything, being from Alabama and an alcoholic. What's the world coming to? Likes and dislikes...yeesh. COMMUNITY REPUTATION 3,0032 points
-
2 points
-
2 pointsIf the mixture nuts are all the way up, the needle valves are stuck open or the floats are set too high2 points
-
2 pointsI've done my time in the nightlife. Gained nothing but memories and some periodic bumps on my dingaling. I'd rather talk to you guys and gain more knowledge.2 points
-
1 pointAfter almost 2 years of slowly rebuilding the engine, I finally got my '70 240Z to start up today! This is the first time I've ever seen the car run, so I'd love some feedback from you all with more experience on how it sounds. The car starts up pretty easily, even with the choke completely disengaged. The RPM seems to drift all over the place though, so I had to keep messing with the fast idle screw to keep it around 2,000 (just above Tom Monroe's recommended 1,500 minimum). It sounds kind of rough to my ears, but again I've never heard the car run properly so I really have no idea. This was originally my (soon-to-be) father in law's car and he thought it sounded a little rough but not terrible. I messed with the timing a little bit and settled on ~15 degrees of advance, but the RPM is wandering around so much that it's hard to know if any adjustments are helping or hurting. I only got around 10 minutes of runtime today because I was running out of a gas can rather than the tank, and I emptied 2 gallons of gas in 10 minutes. I'm pretty sure all of that gas is just going back in the tank through the return line though, as there's no noticeable smoke from the exhaust. Questions: How's it sound? Any concerns from you all? Any concerns about the RPM wandering around, or is this normal for a newly rebuilt engine? I was running water from my garden hose through the open radiator. After my runs today, I just let it drain out and put on the cap and drain plug. Any issues with leaving the remnants of hose water in there? I'm planning on continuing my break-in next weekend, so I'd rather not fill it up with coolant just yet. I also don't want the thing to rust solid over the week. What are your favorite guides for setting timing? Should I try to set timing before or after synchronizing my carbs and getting the mixture set? Thanks everyone - you've all been a huge help so far! Videos: - Very first start! After a few unsuccesful cranks, I handed the keys to my father-in-law-to-be who started it up almost immediately. He claims the car remembers him. - Here's me starting it. I reved it to ~3,500RPM before I got ahold of myself and dropped it back down to 2,000 - Here's a quick walkaround of the car. I'm watching the RPM with my timing light, then bring it in closer to get some engine sound. I then walk around to the exhaust to capture that as well.1 point
-
Thanks Site! I am indeed aware of that thread and “12 second Norm” with his baby toss rings! Such a cool solution! In fact it was reading his experiences that convinced me that the SUs were the way forward for my engine. I was hovering with intent on the buy button of RHDJapan for a set of triple OERs for sometime before giving myself a slap and keeping the SUs. Interesting stacks in Zcardepot - thanks for the sign posting! [emoji106][emoji106] I will seriously look at those. Yes sir! It is free indeed [emoji1787][emoji1787] Today’s test run was with the ITGs first and then off with them and naked carbs only. What I have found, is that the reversion condition is best without any horns. But with the stock backplate only (no filter etc), I get more butt dyno power and keenness than with just naked carbs. We all know that the sharp edges of the carb cause turbulence which acts as a choke at the carb mouth. So I’m now tending toward the baby ring toss solution for best airflow characteristics into the carb as my next nearly free intake experiment. With naked carbs, the torque hole becomes more like a flat spot. Basically, I find anything sub 11 on the AFR makes the engine lose power / bog down. But anything close to or just over 11, feels more like a flat spot which I can just about live with for the scintillating top-end. But I have to get to that point with a solution that involves an air filter. At some point this year or next, I will revert back to my old header (with 21% smaller cross sectional area on the primaries) to evaluate the suggestion that I’m losing exhaust gas velocity at low revs. All good stuff gents! Thanks for chewing the cud with me and the great suggestions! Keep ‘em comin’!1 point
-
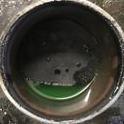
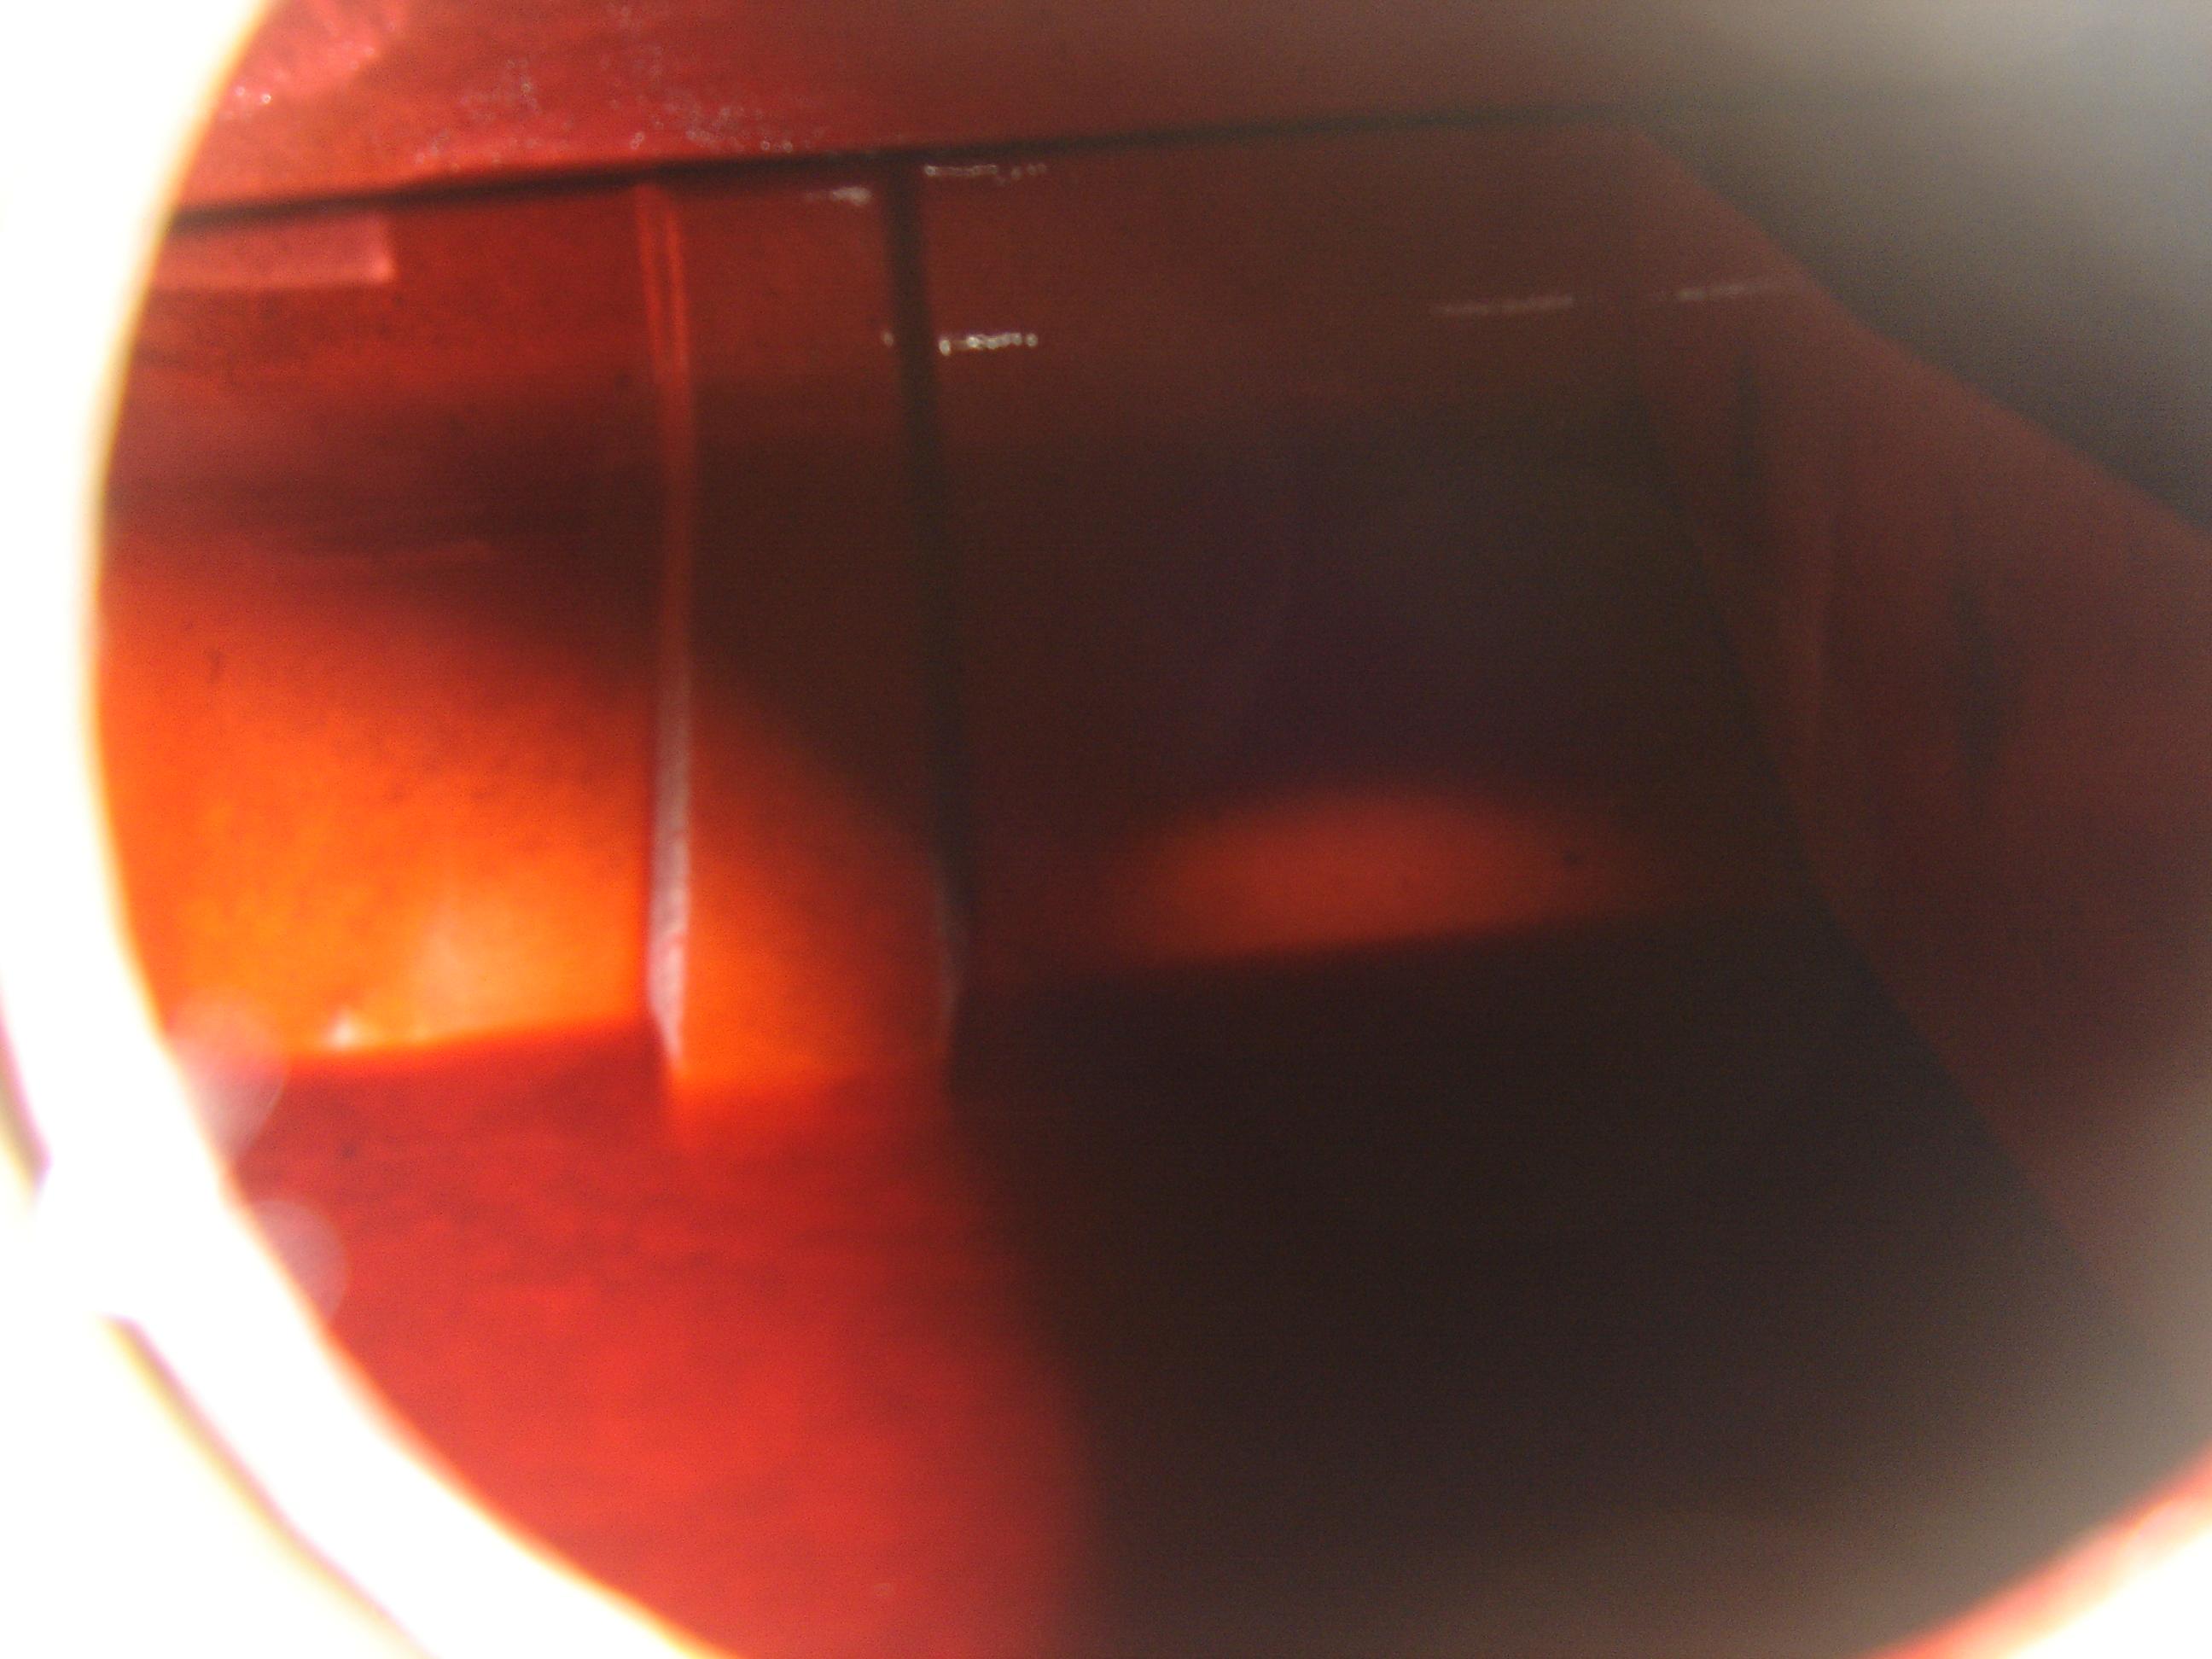
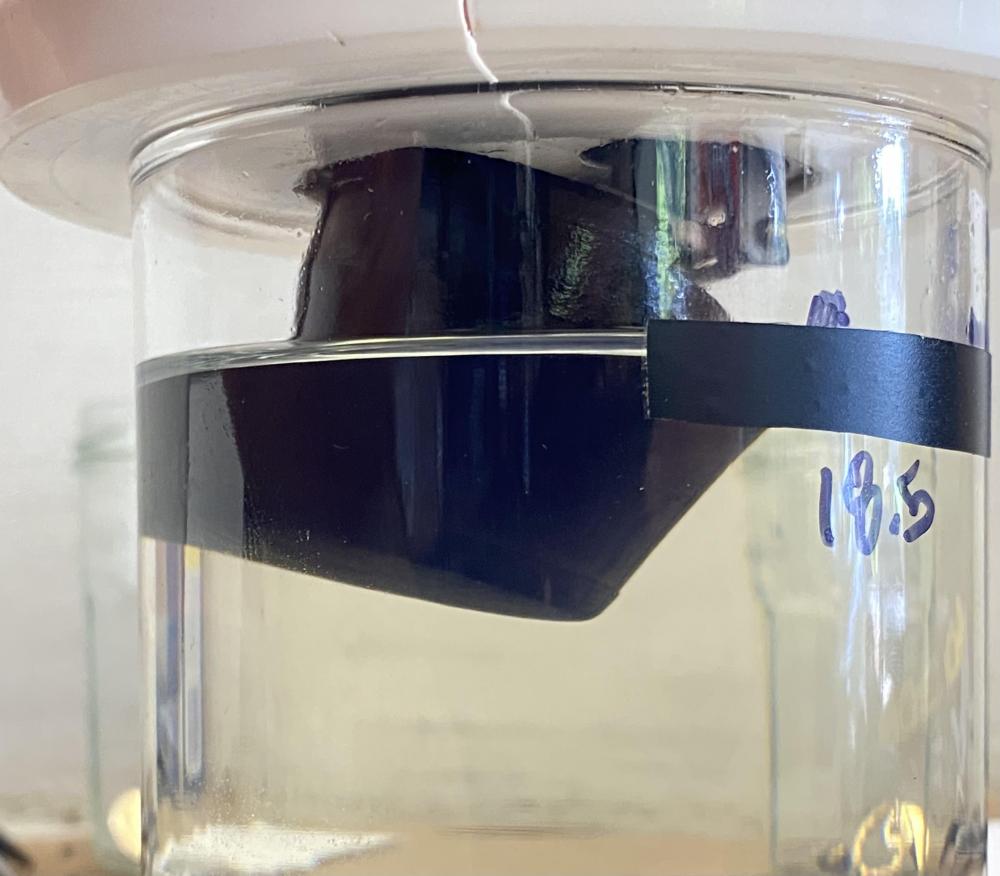
1 pointSpeaking of math escaping us, I may have inhaled too much of these gasoline fumes. Does the diameter of my measuring vessel matter? My cup is around 80mm wide, but it shouldn’t matter as long as I’m filling slow and steady right? Archimedes is rolling in his grave right now. I’ve got my tab bent really damned low and I’ve finally gotten to my 18.5 mark, but the float is pretty much topped out against the lid. Doesn’t seem right at all, and worries me that any minor variation and I’ll start spewing gasoline out of my bowls.

 1 point
 -
What about these? They're cheap enough to try. https://zcardepot.com/products/su-carburetor-air-horn-velocity-stack-240z?variant=31930200850545¤cy=USD&utm_source=google&utm_medium=cpc&utm_campaign=google+shopping&gclid=EAIaIQobChMIv4Pu66ut7AIVDY_ICh3d2QA4EAQYAiABEgID5PD_BwE Don't know if you've seen this thread.1 point
-
1 point
-
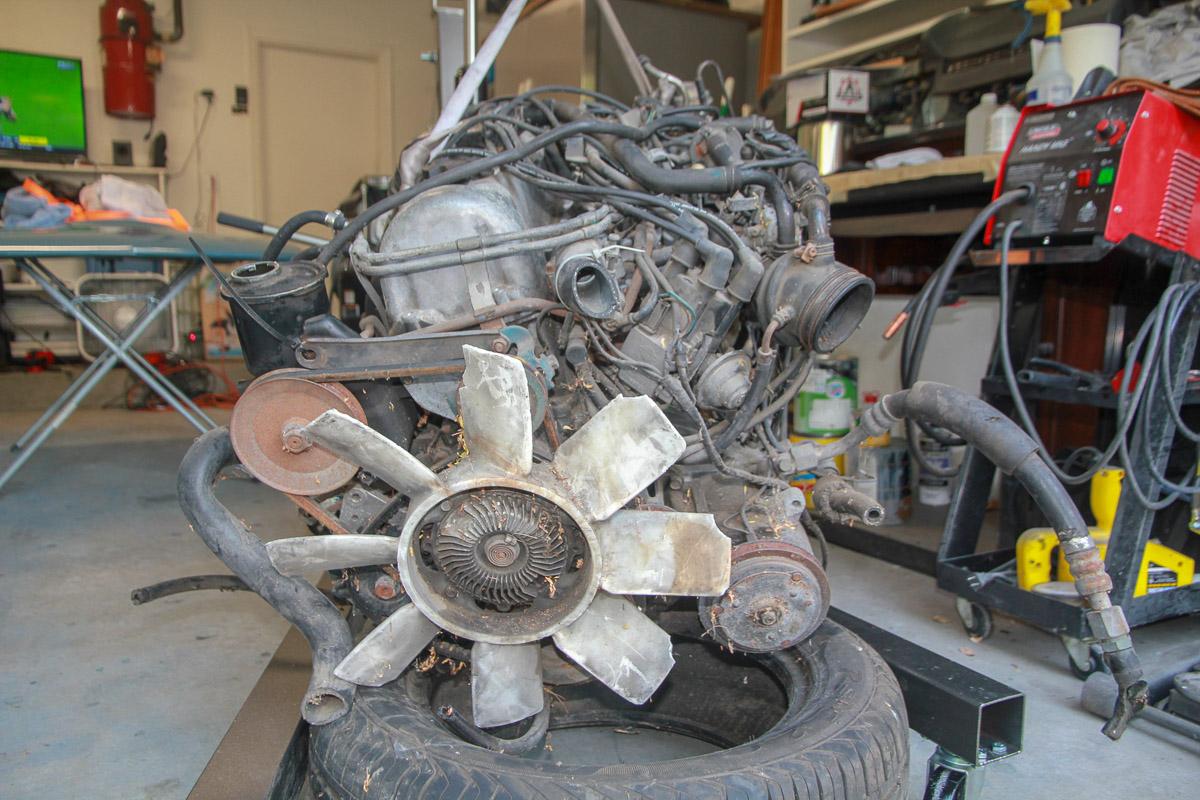
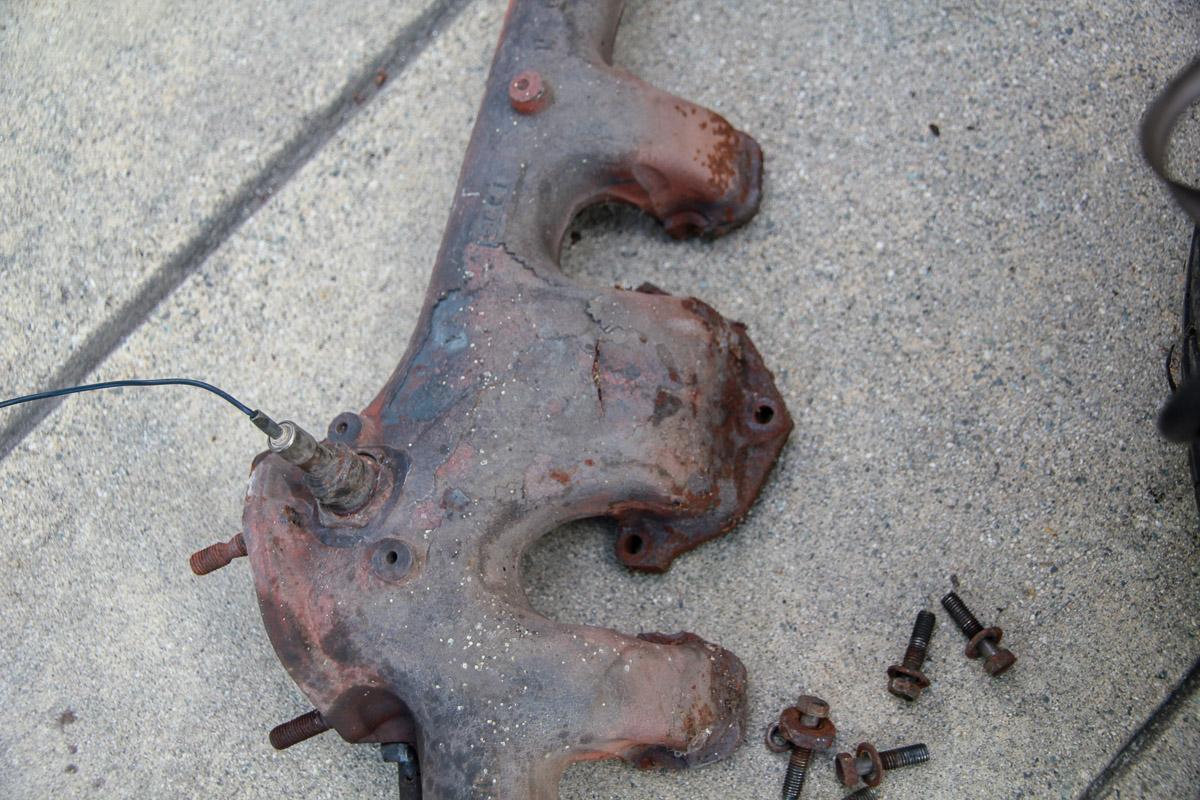
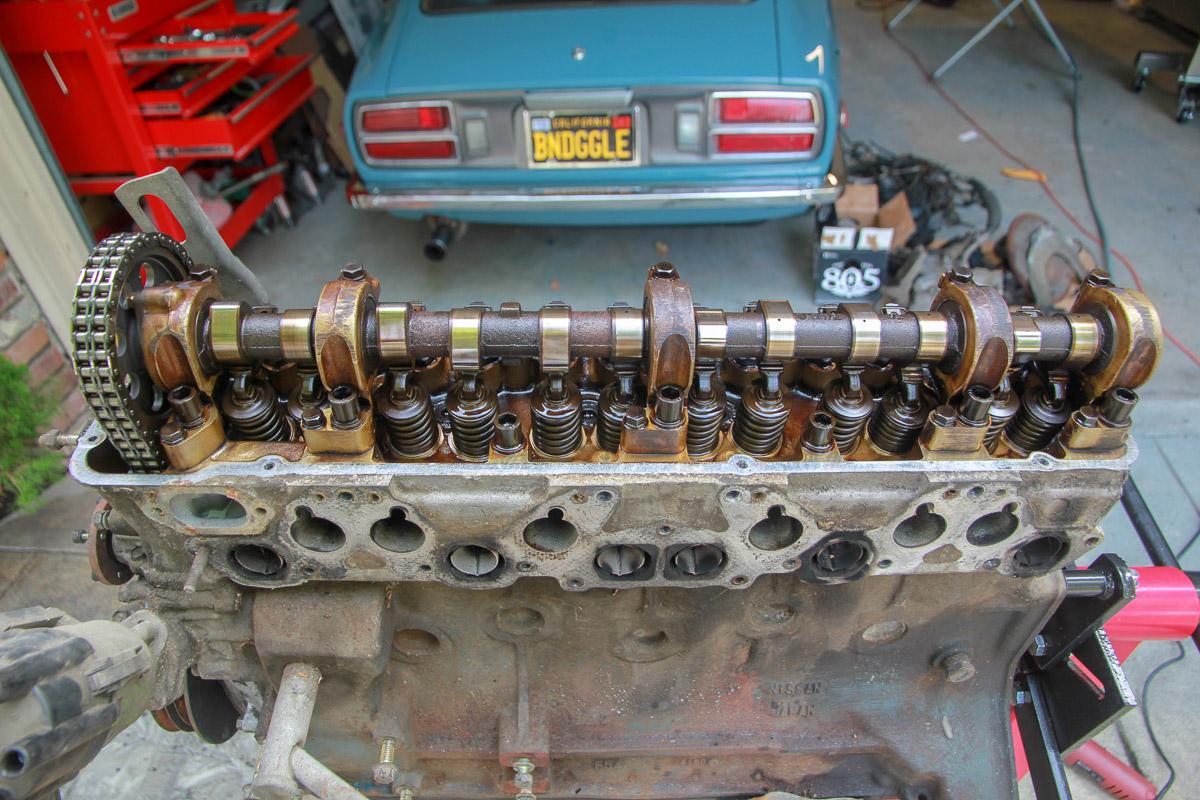
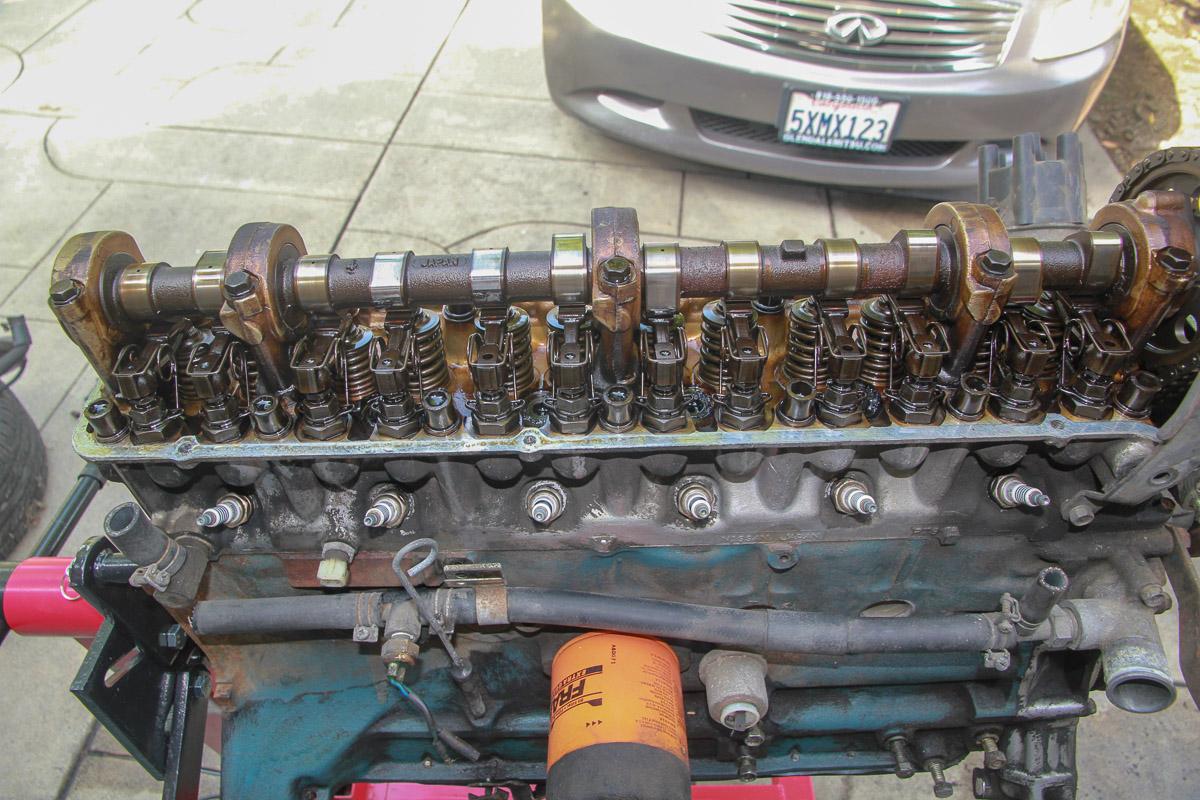
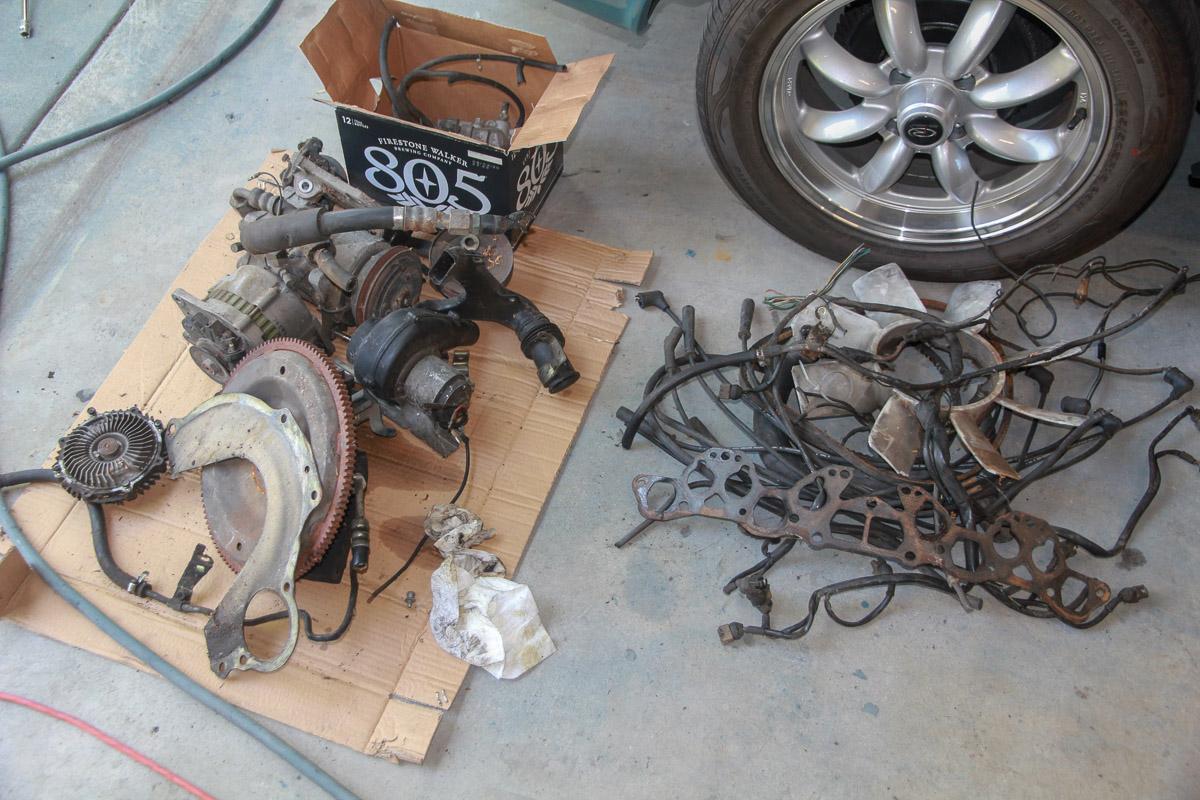
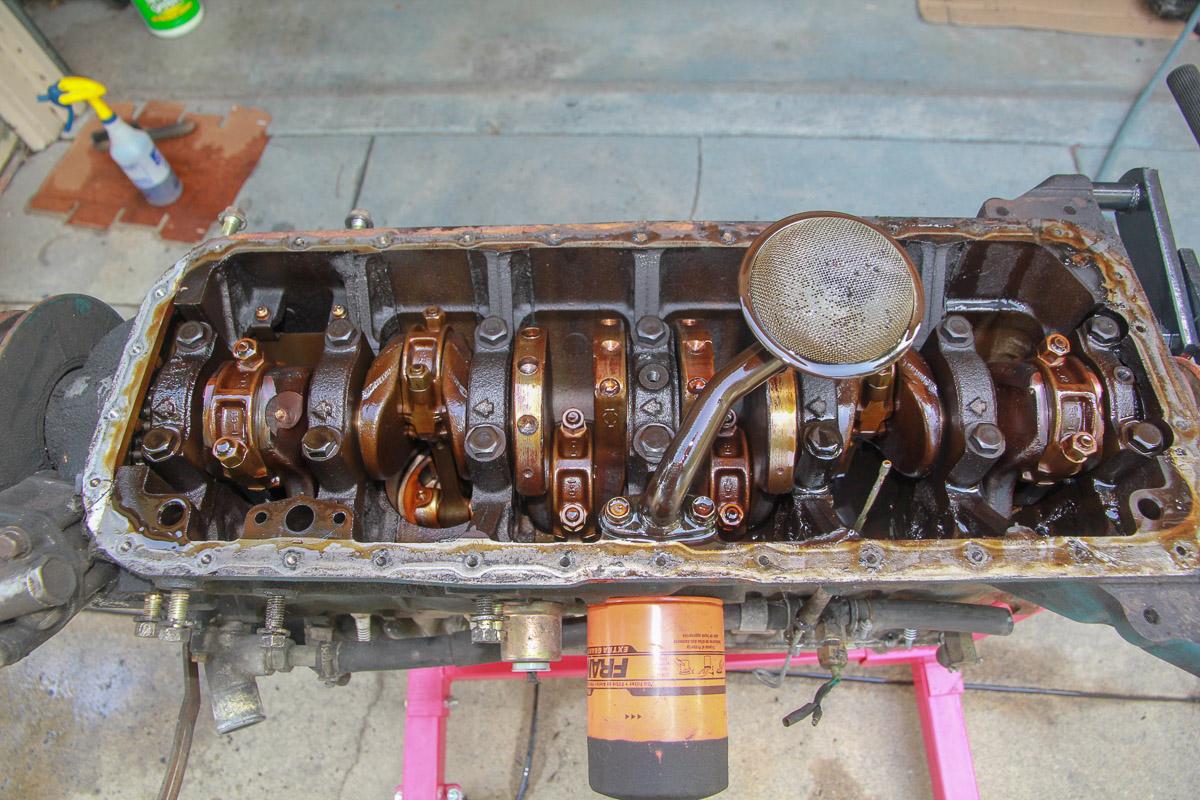
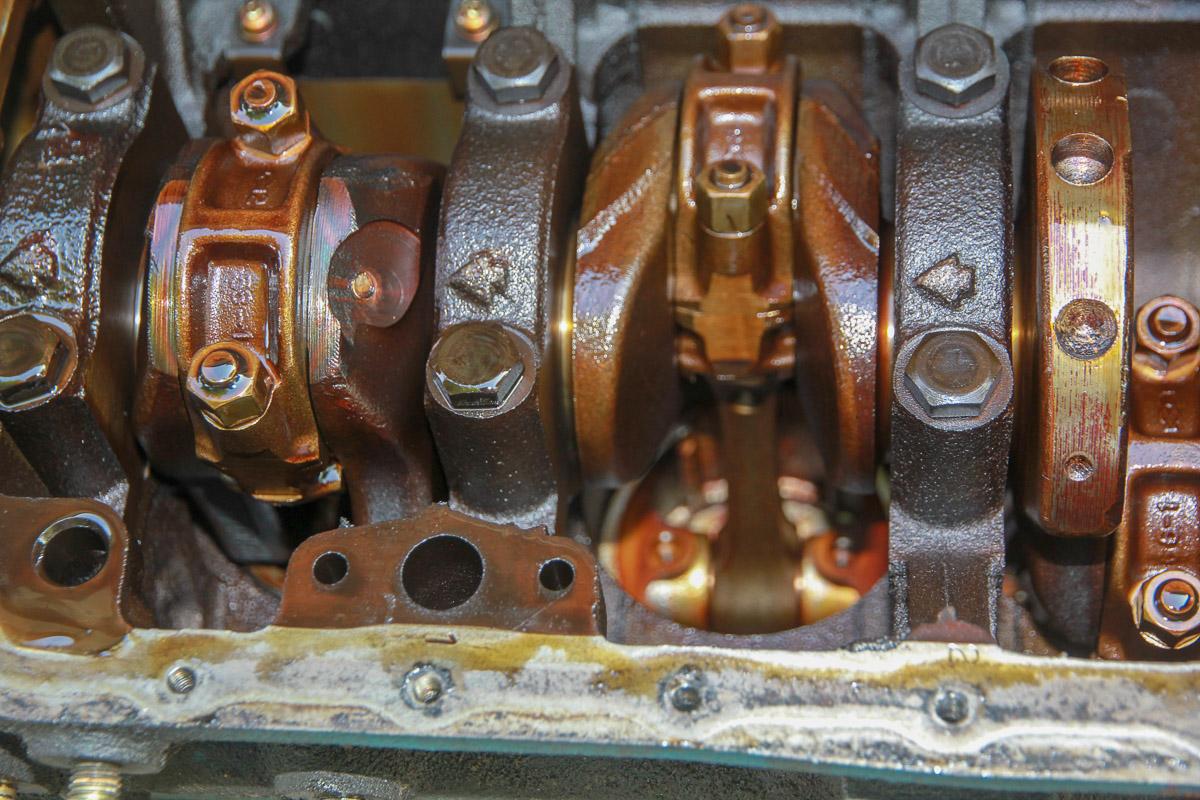
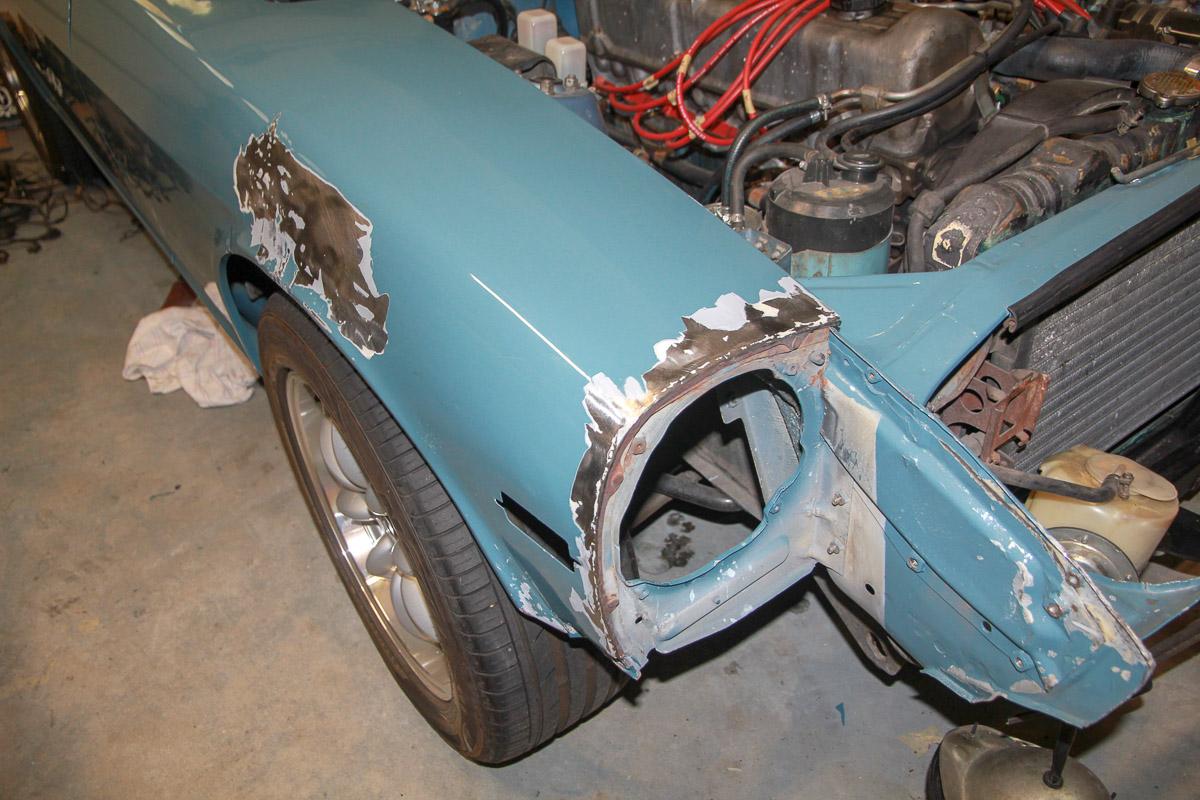
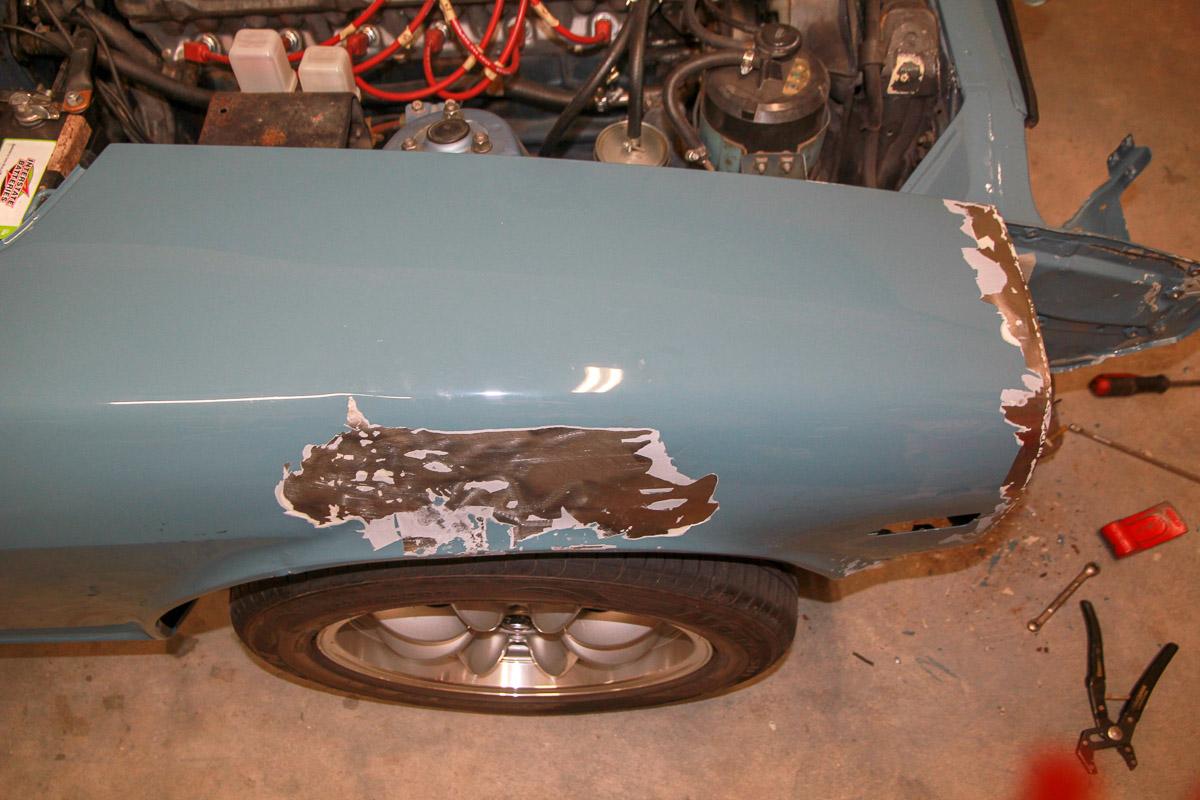
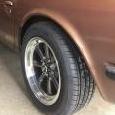
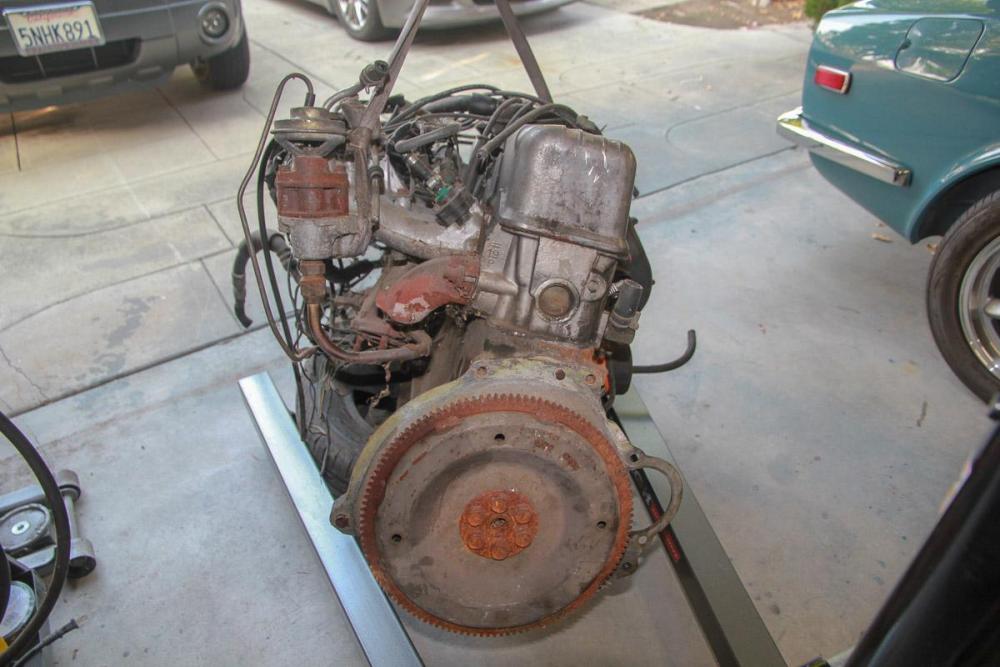
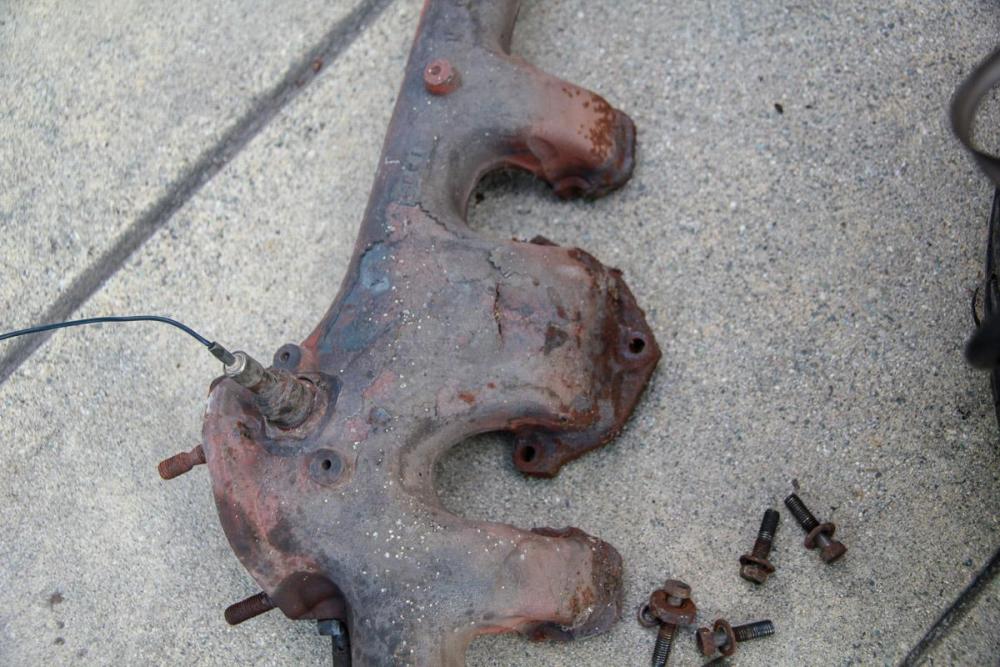
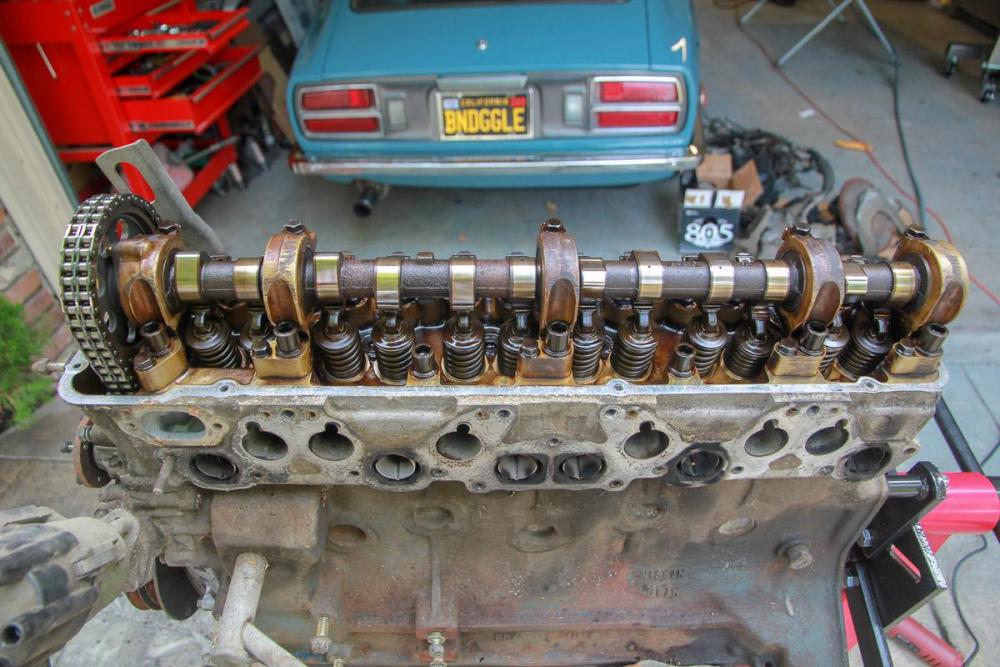
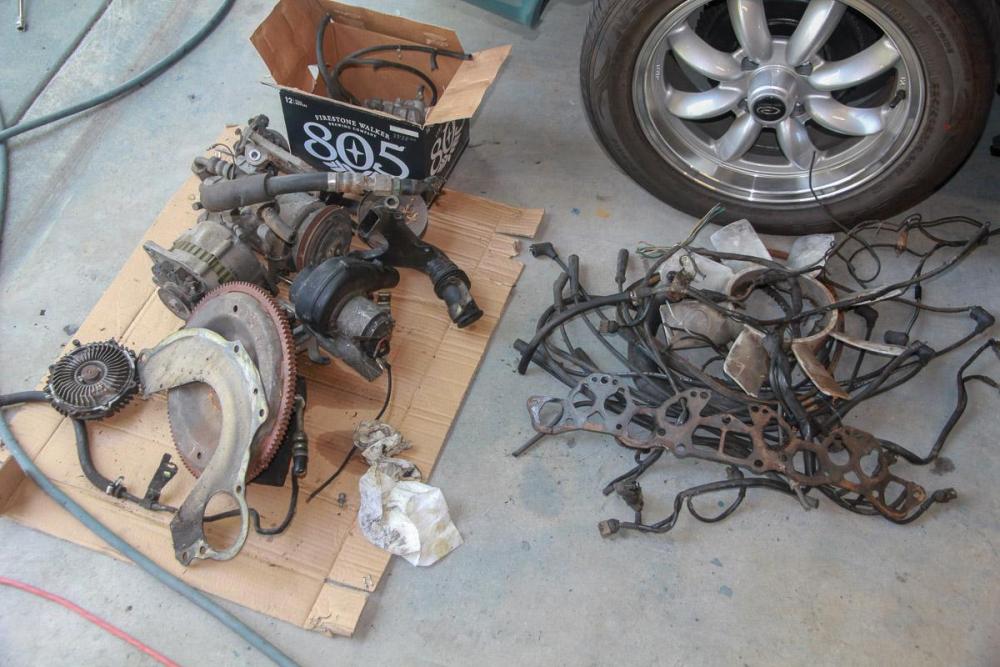
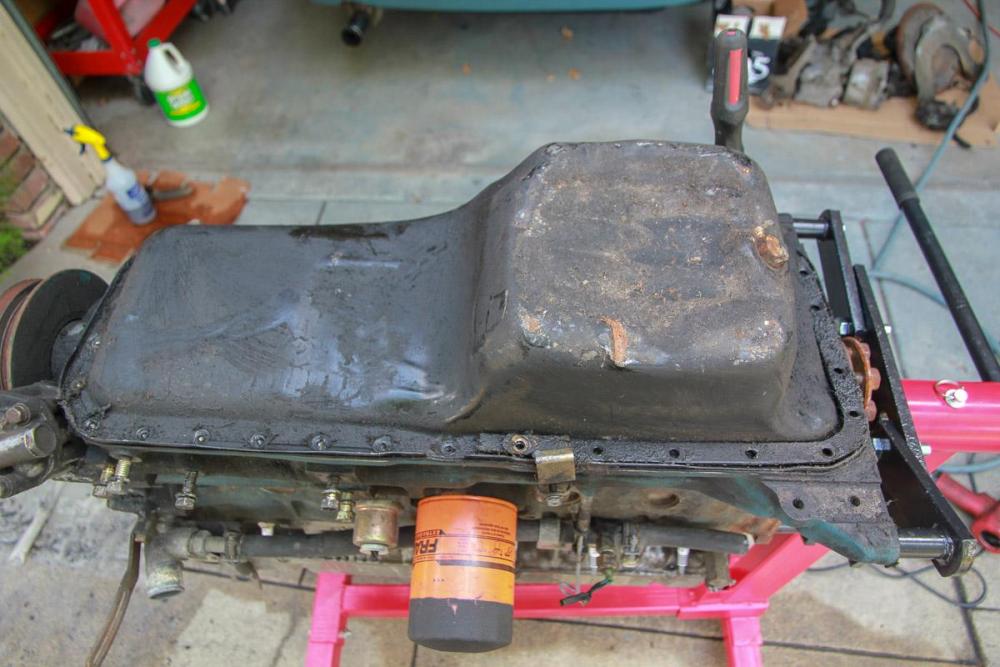
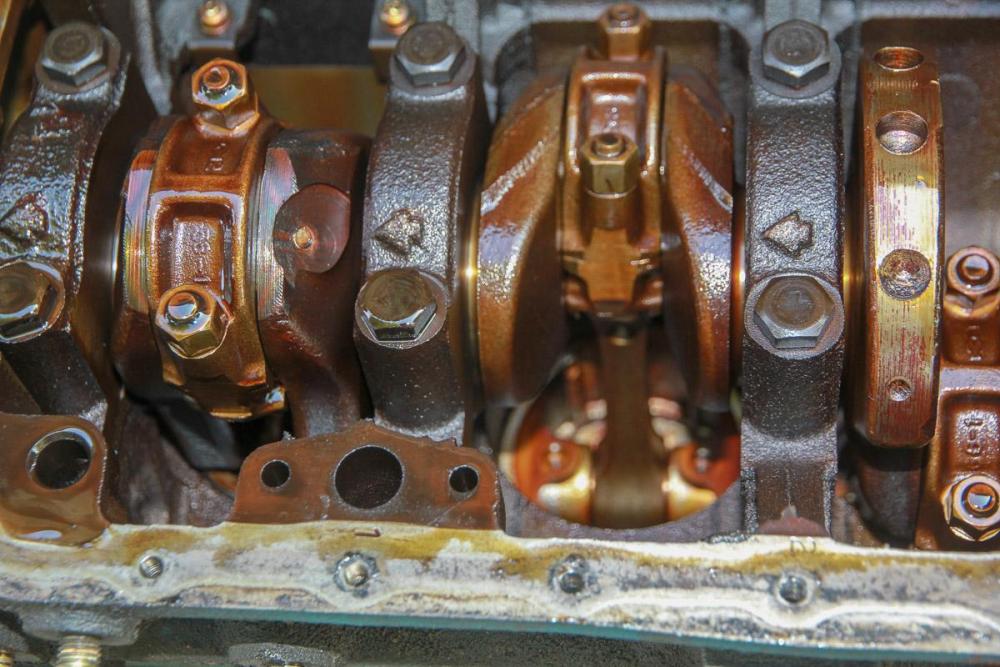
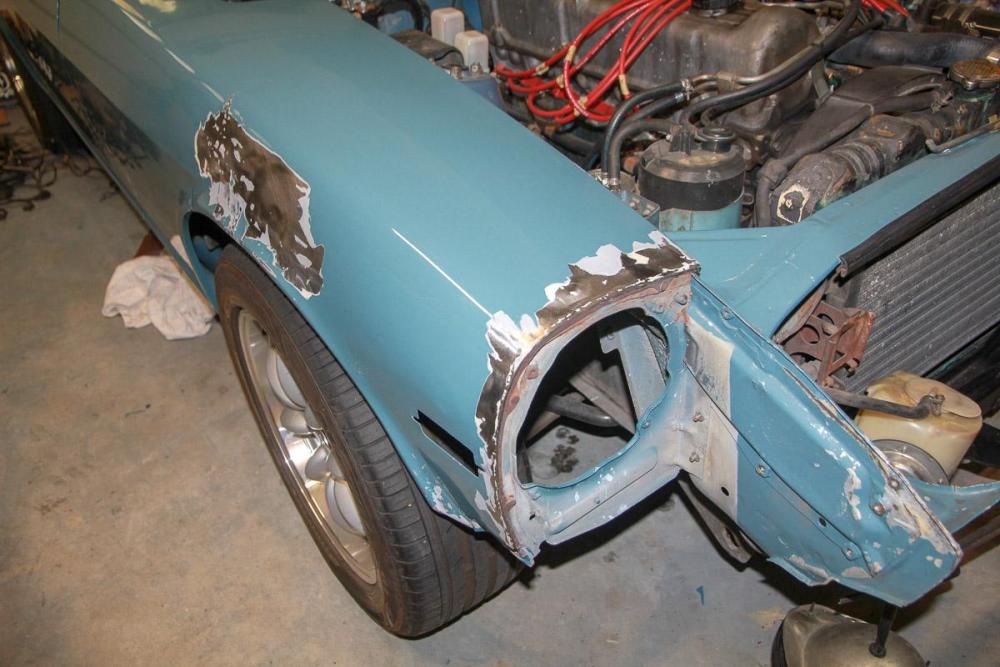
Some movement: the insurance company estimated repairs for the Z at ~$1900. After the deductible, I got a check for $900. I like knowing that I've done all the work on the car, and there's no way I'm finding a shop to repair it for $1900 (let alone $900) so it's DIY job. That check should cover parts and materials, plus labor ...at about 10 cents/hour. I got the fender support mostly straightened out and haven't given up on the fender itself. They're harder to find and none are for sale locally right now, so I'm seeing what I can do. 50/50 right now. Headlight bucket is a goner. Meanwhile, I got this: It popped up on Craigslist, was close, and low priced. L28s, like everything else, seem to be going up in value, so I grabbed it even though nothing will happen for a while. According to the seller, it's from an 82 or 83ZX that he was going to swap into his car until it was totaled (fun coincidence: the vacuum tank and thermostat housing I picked up from the junkyard a few years back came from the seller's totaled ZX). The engine sat for a couple years, but it turns over freely and has everything. I figured if it turns out to be junk, I could probably sell off enough stuff to make up most of what I paid for it. Disassembly so far has been painless. Not a single stuck nut or bolt. All the accessory pieces still spin. The exhaust manifold has a big crack, but that's the only part so far that's properly damaged. I pulled off the valve cover and oil pain and the internals I can see look good to my relatively unknowing eyes. The head looks better than the one in my own car. I have a pile of stuff here that's pulled off. The stuff on the right is headed for the trash. Most of the stuff on the left I don't really know what to do with. Is there any market or interest out there for things like an alternator, AC compressor, injector blower that aren't seized but may not work? I don't want to throw things out that are valuable (or even useful) for someone, but garage space is at a premium and I don't want to fill it with junk, either.


 1 point
 -
I wish there were old timey paper pics. I was discussing Brainerd International Raceway in the Boobs thread this morning. On another occasion, I was out in the middle of the track with my BF Mick. He was driving his 4WD truck and I was the front seat passenger. I had my Canon AE1 and a 100-300 telephoto zoom lens. I was looking at the girls sitting in the back section of the jeep in front of us when one of them started flashing me. I stared and Mick yelled "shoot pictures!" I said, I'm out of film... He said "They don't know that!" She jumped out of the back of the jeep and ran back and handed me a piece of paper with her name and number on it. We didn't spend much time together. She was crazy and I was a med student needing less crazy at the time.1 point
-
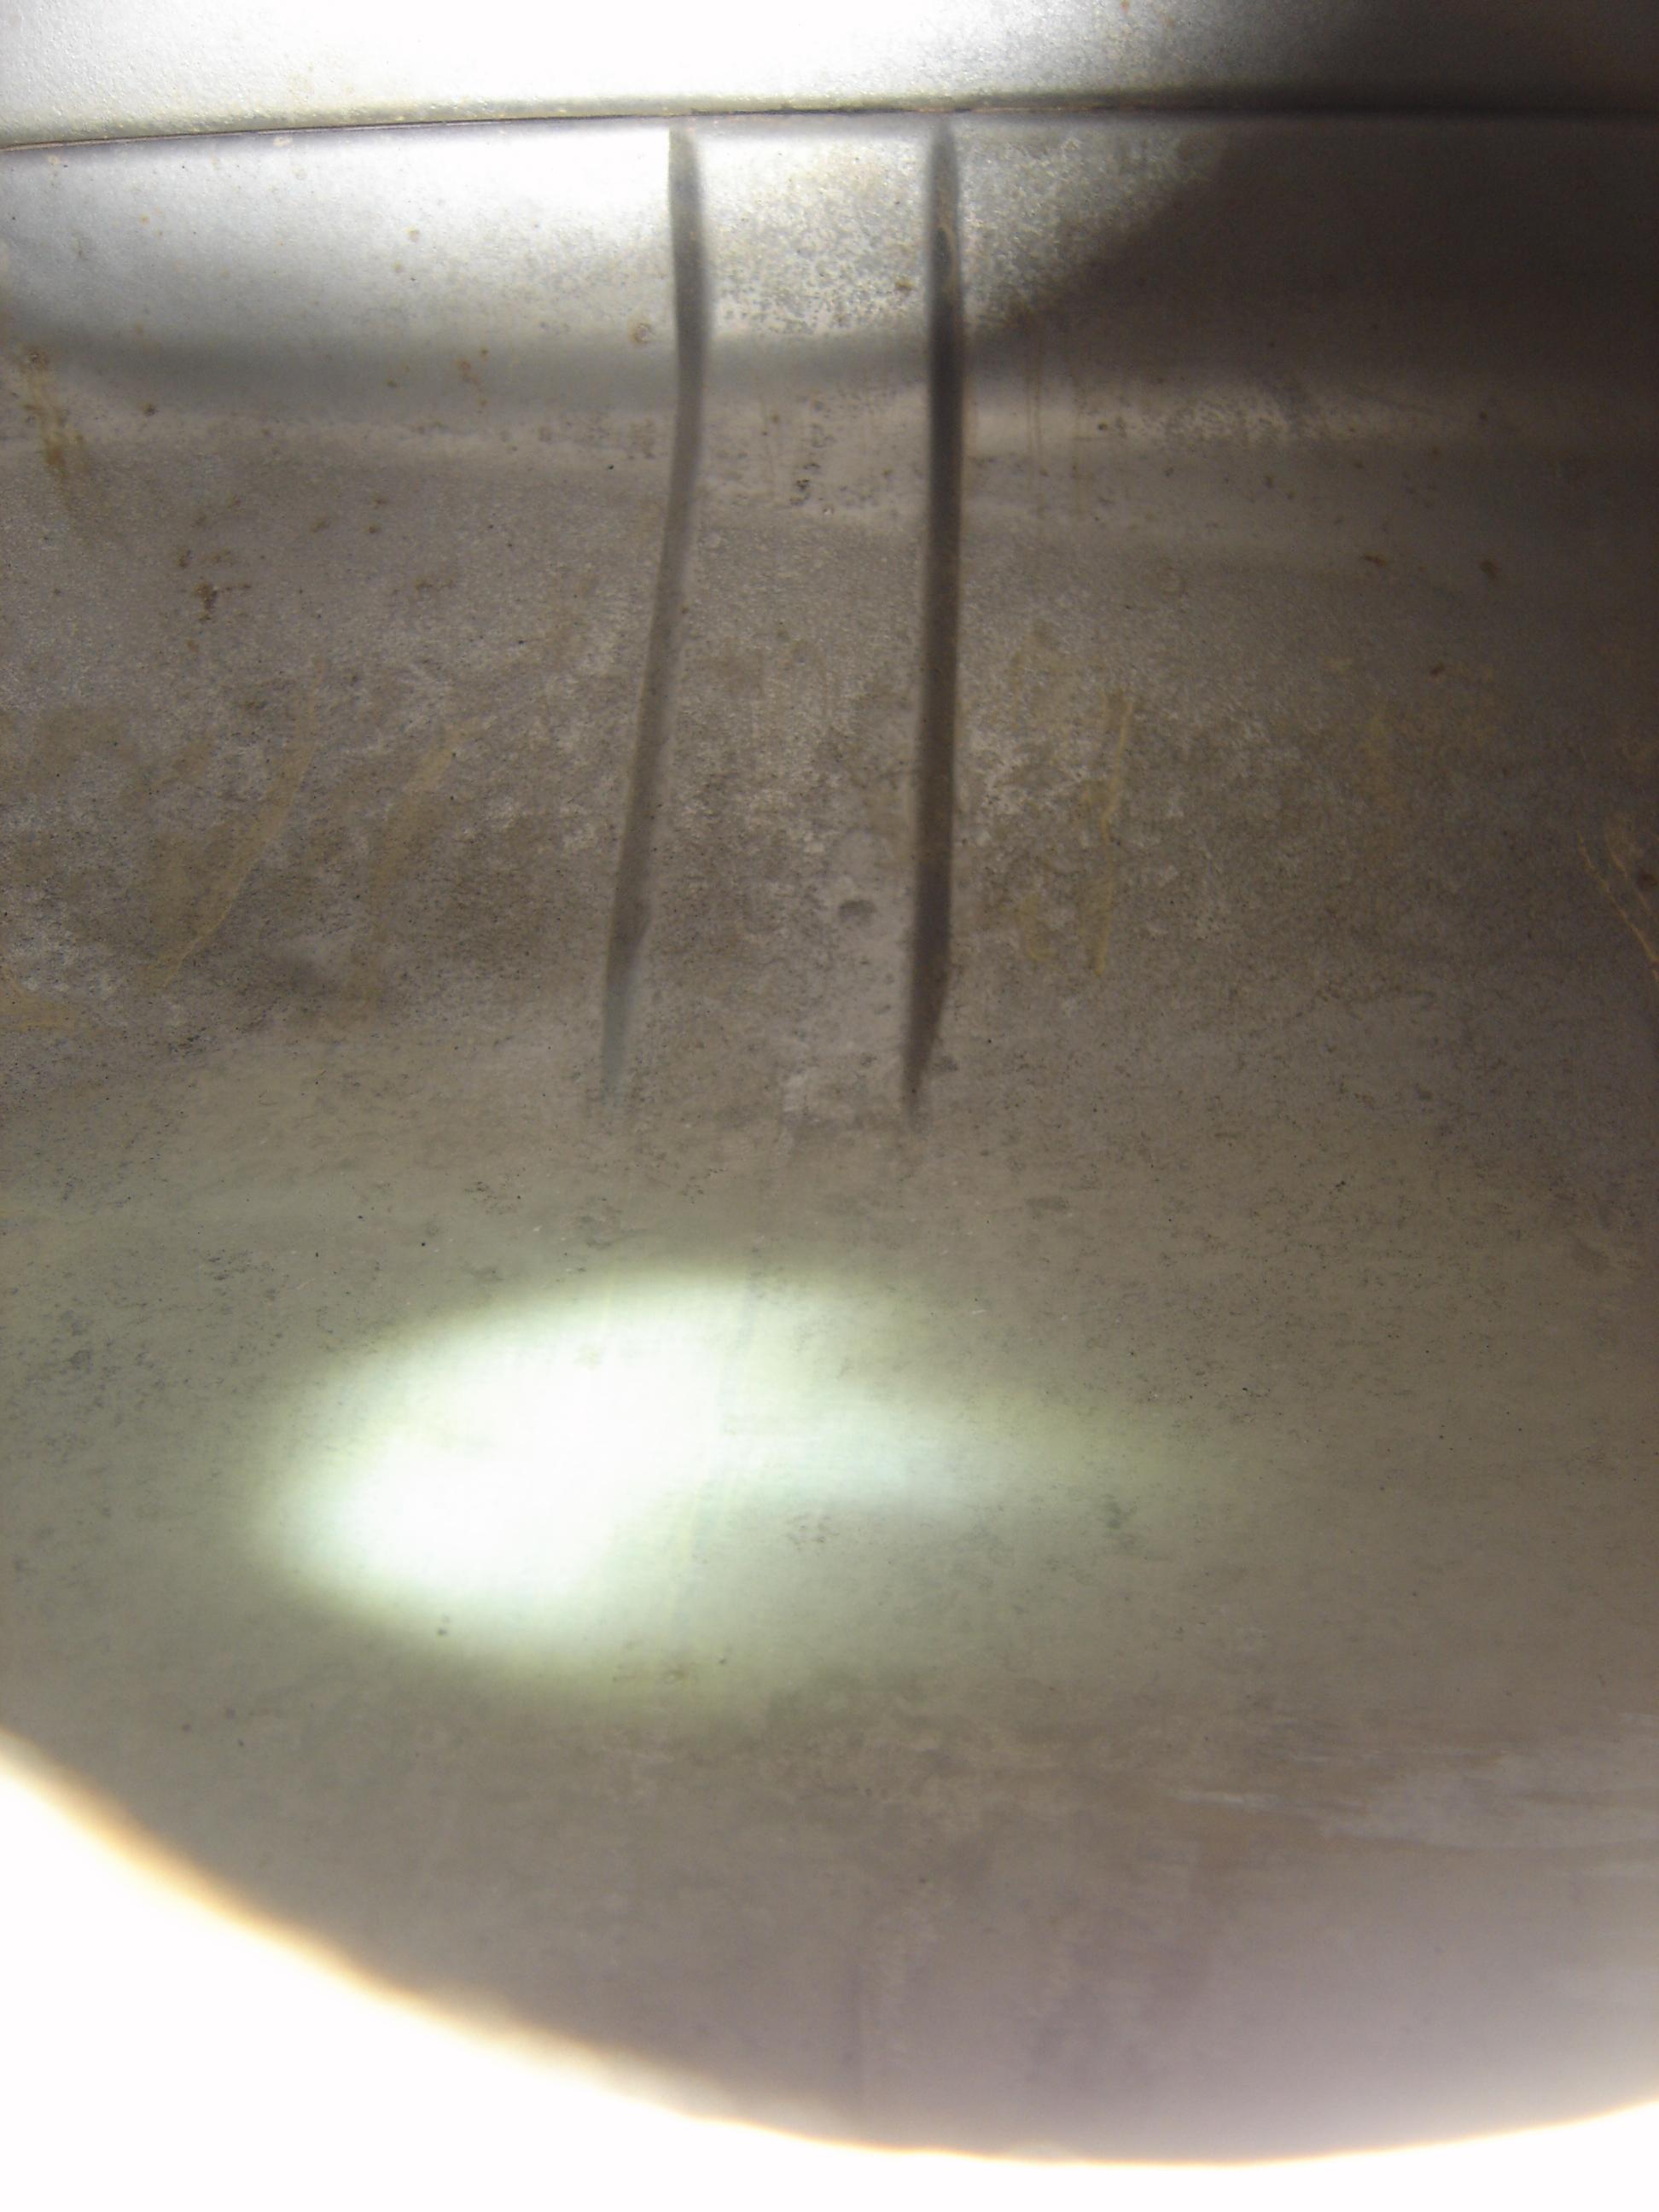
1 pointIt cost me $50 and a Saturday afternoon to do mine the way I figured from that Tech Tip I showed you the other day and after reading Red-Kote's instruction sheet. I think your's has coating settled in the bottom. At first I thought it was rust like the sides have, definitely rust on the sides. I think the previous owner had it cleaned and coated either himself or a radiator shop did it. He put it back in and then fuel too soon now you have what you seen. I bought everything at Lowes hardware but a few empty 5 gallon buckets, I get those free from work. Speaking of work. I need to go down there a an hour or two but when I get home I'll find my write up I posted for someone a few years ago and link it in this thread. Sometime this afternoon. Don't spend your $600 yet. Muratic acid and some baking soda from the Dollar Store, acetone and a quart of Red-Kote. You'll be set. Give me a couple of hours. Cliff1 point
-
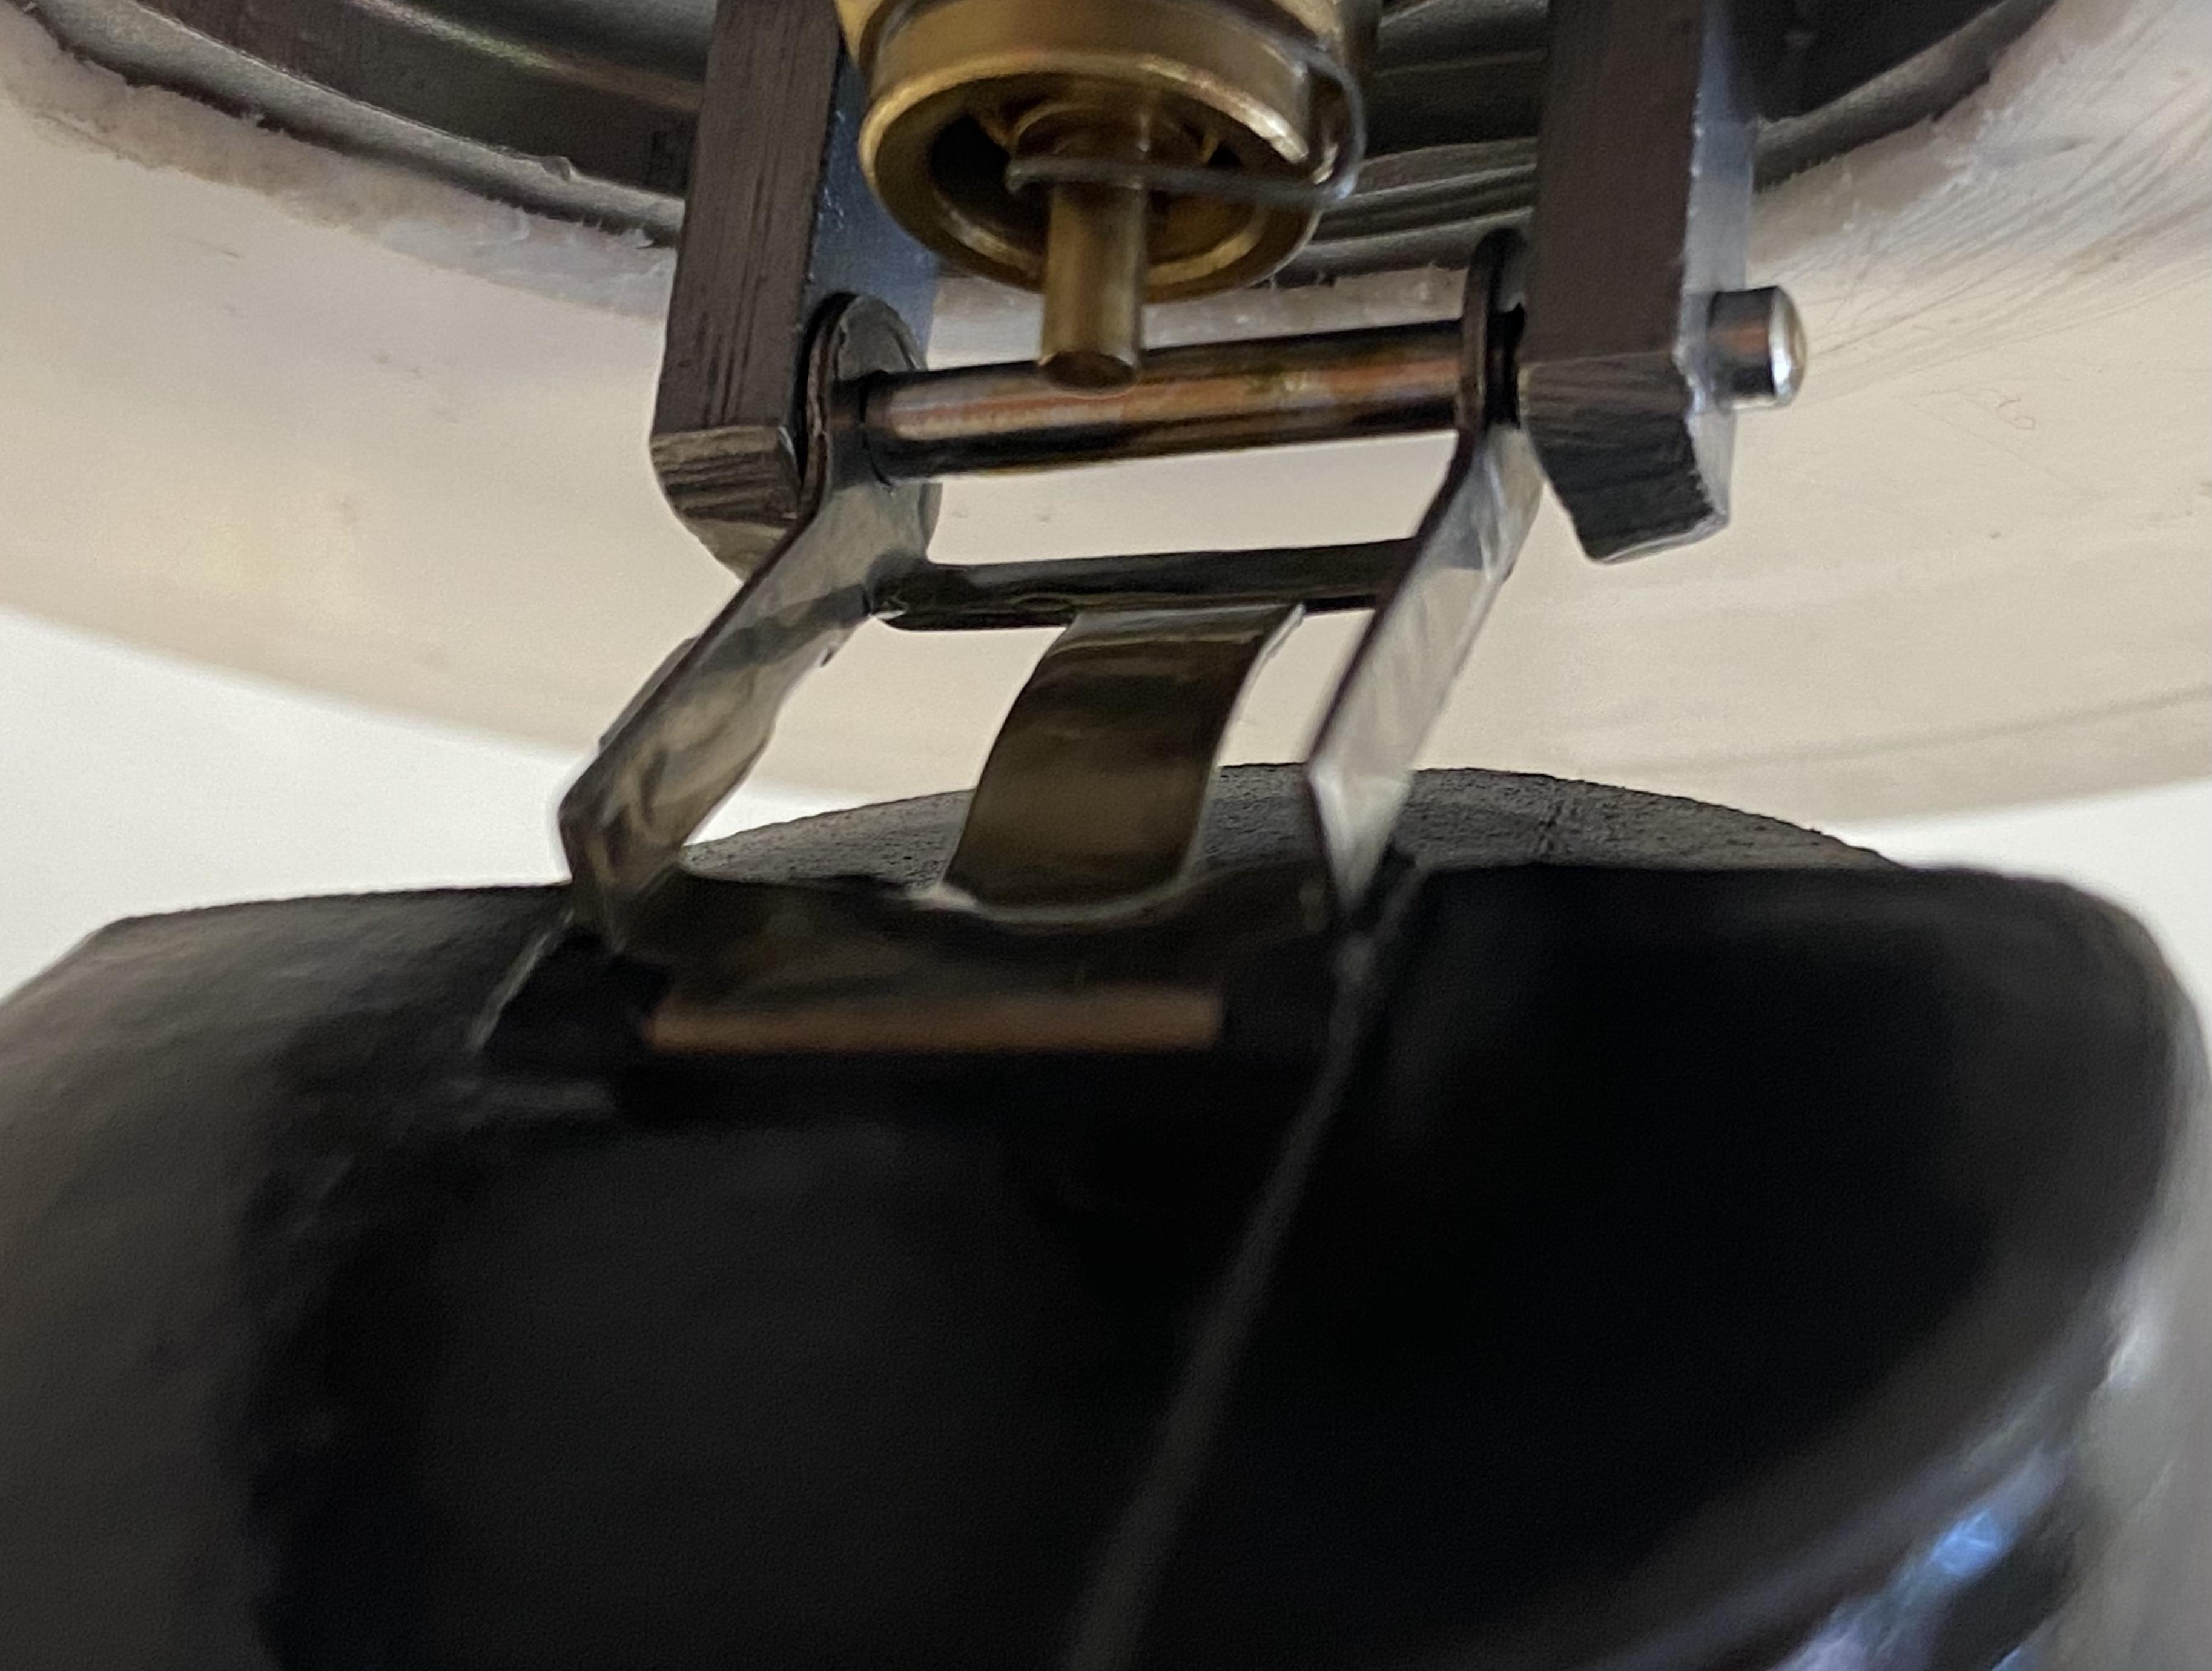
1 pointThe major concern at this time is the float levels. I'd work on that first. The needle installation looks OK.1 point
-
1 pointAfter acid and baking soda then acetone. Then Red-Kote Mine turned out good but it was very much a process thing. You have to do things in order and fast. Sometimes people get in a hurry to get them back in and don't wait out the curing time. It takes every bit of a week. I was rebuilding my motor so mine sat for a month before I put it back in. Somebody was talking a replacement tank a month or two ago that is now being reproduced. I'm thinking $600? Here you go.

 1 point
 -
1 point
-
1 pointGood pics. I can't tell if the needle depths are spot from just pics, but they look good to me. The typical mistake is that they are installed with no shoulder visible and you do not have that issue. They're at least close, so that's good. As for which needle it is, I think it's worth a phone call. Many people replace the original N-27s with SM needles. Some people end up with great results doing that and others end up running rich with the SMs.1 point
-
1 pointYes, the part number is written on the fat end of the needle, and yes you need to pull them out to read them. That said, however... I wasn't thinking you needed to go out and pull the needles right away. I was thinking more along the lines of looking at the literature that came with the carbs from the company that rebuilt them and seeing if there was a listing on there of what needle they used. Failing that, a phone call to the co. would be my next idea. As far as the installation depth goes, you ought to be able to see needle by looking down into the carb throat. Might need a little right angle inspection mirror to see deep enough, but you ought to be able to see if the needles are installed to the proper depth without too much muss/fuss. And if you can't get a good view of them that way, all you have to do is pull the suction cover off and pull the piston out of the carb for a look. Worst thing that would happen is you might have to replace some damper oil if you spill it.1 point
-
1 pointThe disable button makes the rpm raise? That is odd, it makes mine run half on everything. My easy thing first suggestion would be to poke on the floats through the fuel inlet with the red straw that comes with WD-40. They maybe stuck in the bowls from shipping dry?1 point
-
1 point
-
1 pointWell Mr Site, that is a heck of a lot of posts!! You need to drink out more often brother [emoji13]1 point
-
Paint thinner? That's what motorman7 uses to degrease old parts1 point
-
I did not know we could do member polls. Maybe I shouldn't have known. Let the polling begin!1 point
-
1 pointI've painted the compartment with the engine in place, but almost everything else had been removed -- wiring harness, intake and exhaust manifolds, and most of the hard lines (only the long fuel/emissions pipes coming in from the trans tunnel remained in place). You'll need a detailing gun to be able to work in the cramped spaces. Certain areas can't be sprayed at the optimum angle. Certain other areas (e.g. bottom of the hood latch bracket) are hard to get paint on at all. You'll need to hold the gun backwards in some places (i.e. pointed toward you). There where a few places where I began to think that an airbrush would have done a better job than the detail gun. Because of the awkward spray angles, you'll get a lot of rough-surface painted areas that will need to be sanded down afterwards to achieve a decent final finish quality. That's a lot of work. I can't see doing this job without removing the intake and exhaust --- and most of the hydraulic lines. Unfortunately, getting those lines off is something that requires a lot of care and patience. Those tiny little 'bolts' used on the clamps are often seized. You do not want to snap one off because there's little to zero chance you'll be able to extract the frozen-in-place remainder. A light-duty hand-held impact driver worked well for me on these little bolts. By the time you get finished, it will probably seem like it would have been a better idea to have just pulled the engine and removed the wiring harness.1 point
-
1 pointThat depends on what your definition of success is. If you wrap the engine well you can get away with it but in order to clean and prep the surface for new paint you really need to pull everything off.1 point
-
1 point
-
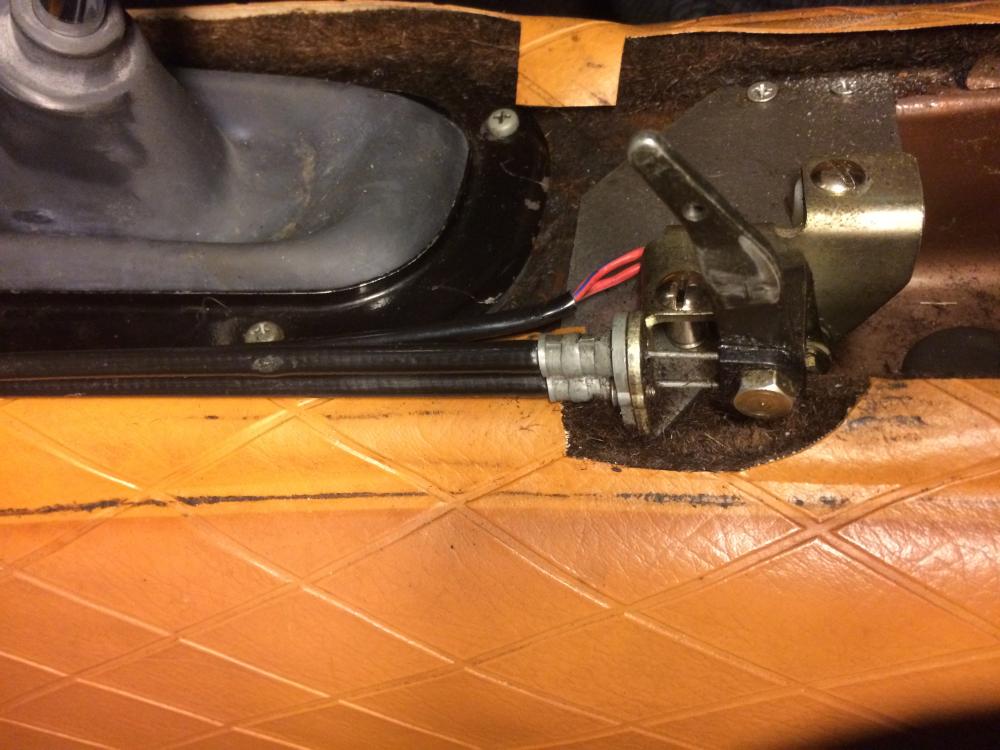
1 pointLast night I replaced the choke (cold start) cables for the carburetors. They need to slide freely and after 44 years of usage and most likely never being lubricated since new, it was time. After doing some research I found that 0.055" Piano wire is the best option for replacement as its affordable and able to push and pull, which is required. I also have more than enough left over and only paid $4.60.After disconnecting the cables from the carbs and pulling the center console apart, I removed the cables from inside the cabin, then measured the length needed. I left myself an extra foot before I cut the Piano wire. I bent it around the mounting plate and then lubed it very very very good before fishing it back into the housing and reconnecting. I'm very pleased with the results!Link to Piano Wire used:http://smile.amazon.com/gp/product/B002M3JQGC?psc=1&redirect=true&ref_=oh_aui_detailpage_o02_s00


 1 point
 -
1 pointYou omitted apologize to the baby and cough up the replacement $ to the baby's mother who will be dealing with a screaming child.1 point
-
1 pointIt is easy. Steal ring toy from a baby. Cut it in half. Glue to carb filter.1 point
-
1 point
-
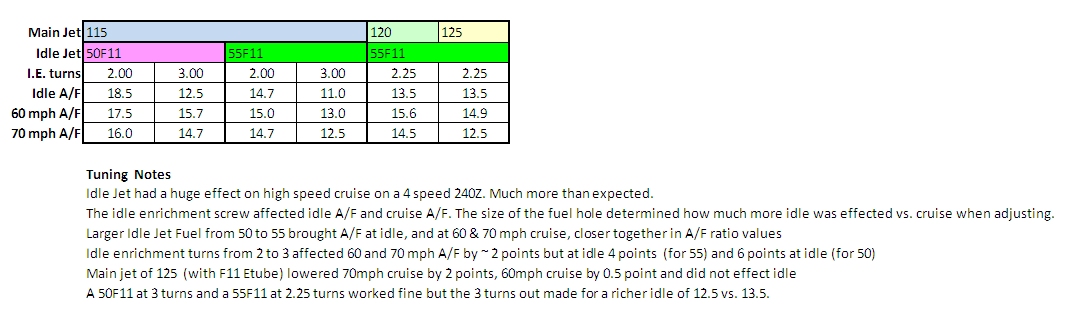
Hi Duffman, I'm not sure I understand the 16mm fuel level? On 40DCOE the passage to the main circuit is 23mm down, You will want to be ~6mm lower than this at 29mm down from the edge. At 16mm down you will be flooding the main circuit. For Emulsion tubes, Chicken man knows his stuff but at this point I would not worry about changing them. They basically are only in operation at WOT as you run up the rpms from 3000 to 7000 (unless your fuel is too high or main jet is too large). They do have a bit of an impact at high load cruising but you can tune this with the main jet a little. One other thing I forgot to address are the "other" aspects that must be correct before tuning triples: 1. Valve Lash: Engine should be tuned nicely with correct lash set. 2. Intake Manifold air leaks: Absolutely none. This will throw off any tuning. 3. Timing: DCOE's and L engines like lots of advance. 15 to 20 degrees at idle with full at 36 to 38 are typical ranges. No vacuum advance is needed. 4. Linkage: Remove all slop and ensure all three carbs open at the same time and the same amount. btw do you have a device for measuring air flow into each throat? You will need this to tune once you have the fuel level sorted. For your 40DCOE 151's you will find the Idle Enrichment (IE) screws will need to be ~ 1.75 to 2.75 turns out from full stop. These carbs have a narrow tapered needle and are more precise than early Webers that have a wider taper and seem to work best from 1/2 to 1 turn out. Here is some data I collected when tuning and changing the idle jet number of turns on a set up much like yours:
 1 point