Leaderboard


 Subscriber


Popular Content
Showing content with the highest reputation on 05/18/2020 in all areas
-
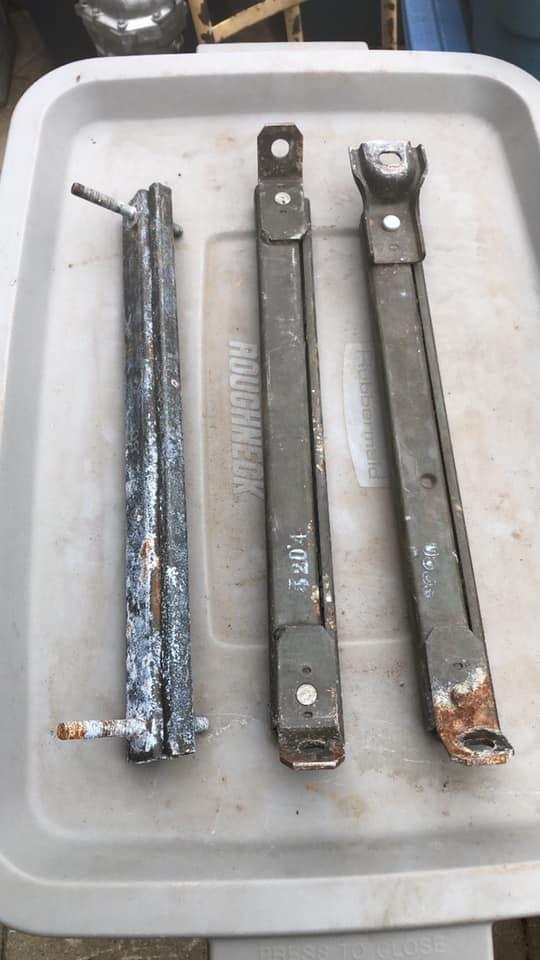
Dearly Beloved. I find myself explaining over and over again to various Z owners (all Datsun owners really) about the differences in various items and what year range they belong to. I am tired of doing so, and tires of hunting down pictures and URL's of stuff for them, and would just like to point them to a single URL where they can look up the answer to their question. What better place than our beloved CZCC forum, and what a better way to entice new members! Note this fatigue does not apply to the membership here, but mostly to the ones I try to help on that blessed piece of crap FB....... There are just SO many more soles pleading for help there, than here, I cannot but help wanting to draw them all into our little cult, er, I mean "family".... I understand this is a vast and highly detailed area of discussion, but at the very least, I would like have a basic picture library of items, one item type per thread, in a forum group I think would be aptly named "One of these things is not like the Other". For example. pictures of the three basic gas tank types, pictures of the fuel sending units from each, pictures of the three types of seat sliders, pictures of the 240, 260/280 early and late door cards (my personal bane)..... Door internal/regulator glass/frame differences, etc etc. The list is endless. I am blessed with a decent selection of many of these common items and will start this off by taking representative photos of each of the unique items I have. I will apply date ranges, and will love to have clarifications from the peanut gallery (or any fancy nut you claim represents your level of knowledge) to further refine either date application or other clarification on the topic. We will clearly label each as applying to North american, Japanese , European etc product lines, although for the beginning lets stick to the North American stuff. I suggest the new forum be in Car Talk > Z > One of these things is not like the other @mike , please chime in and let me know if you believe there is a better place or organization structure for this. Others let us know if this is something you'd like to see or contribute to.6 points
-
6 points
-
3 points
-
2 pointsLook what arrived today.... So I can ship the few I have had interest from....Pm me and we can sort out when you are ready.
 2 points
 -
2 points
-
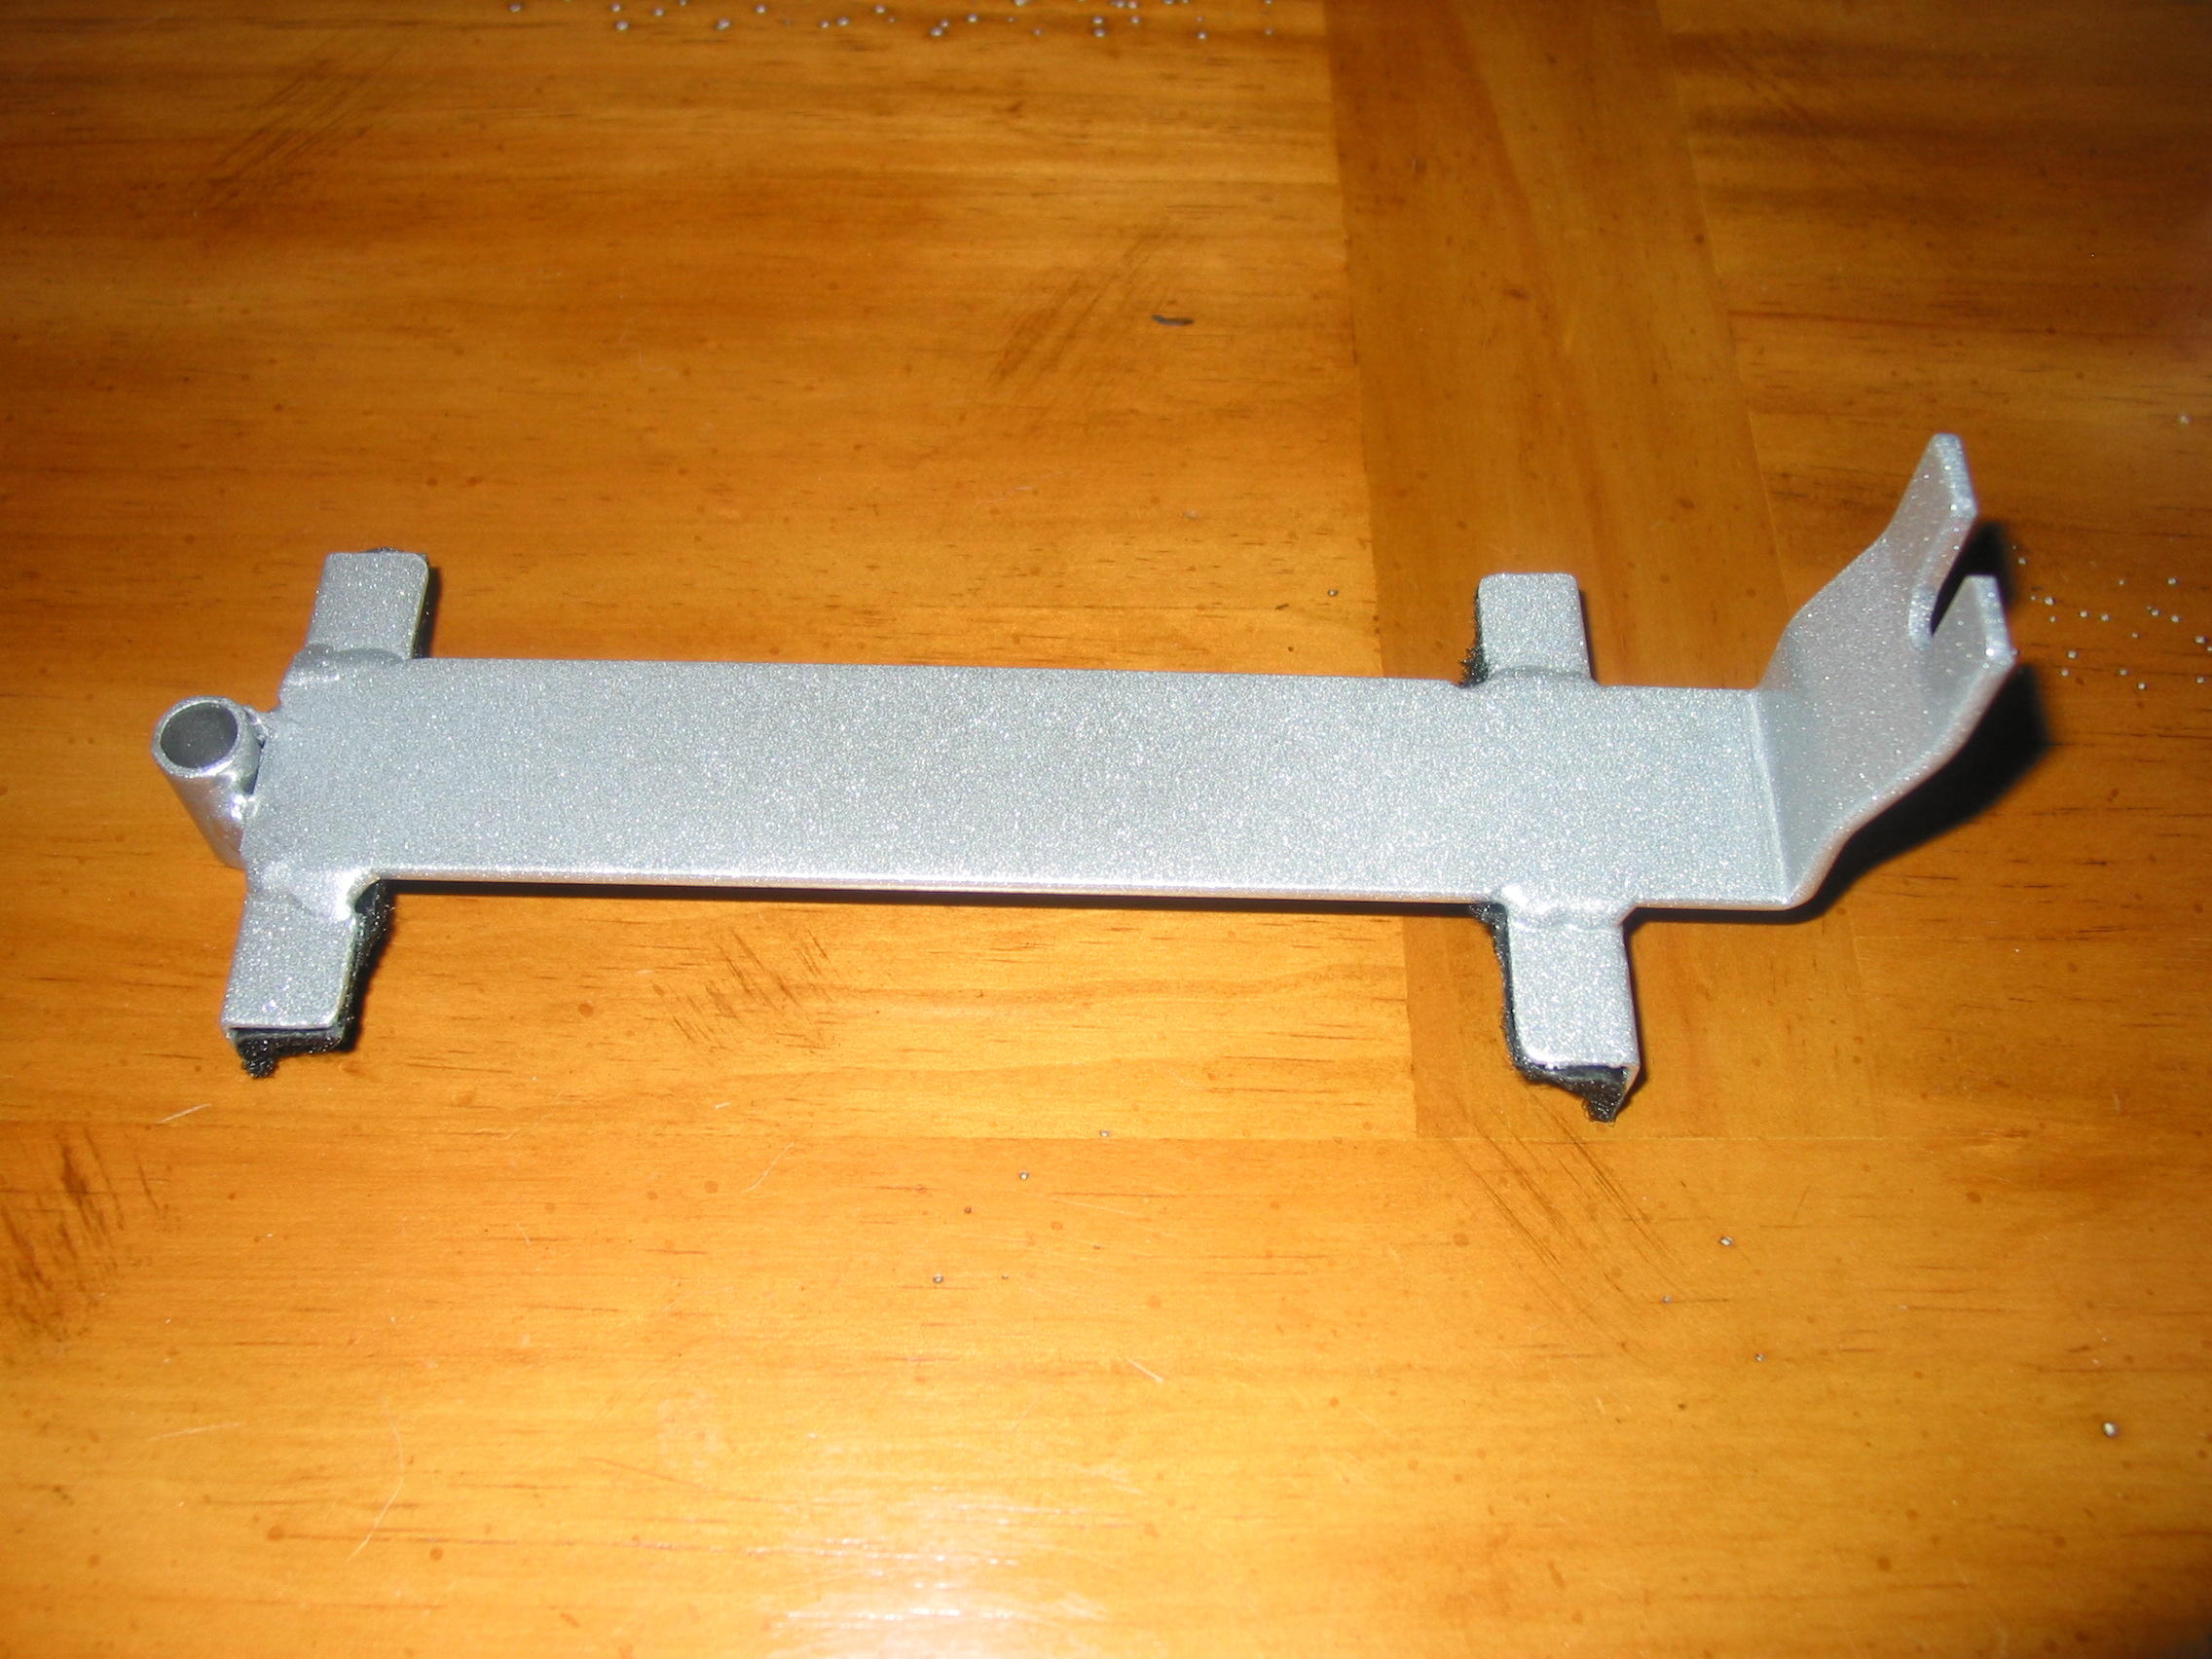
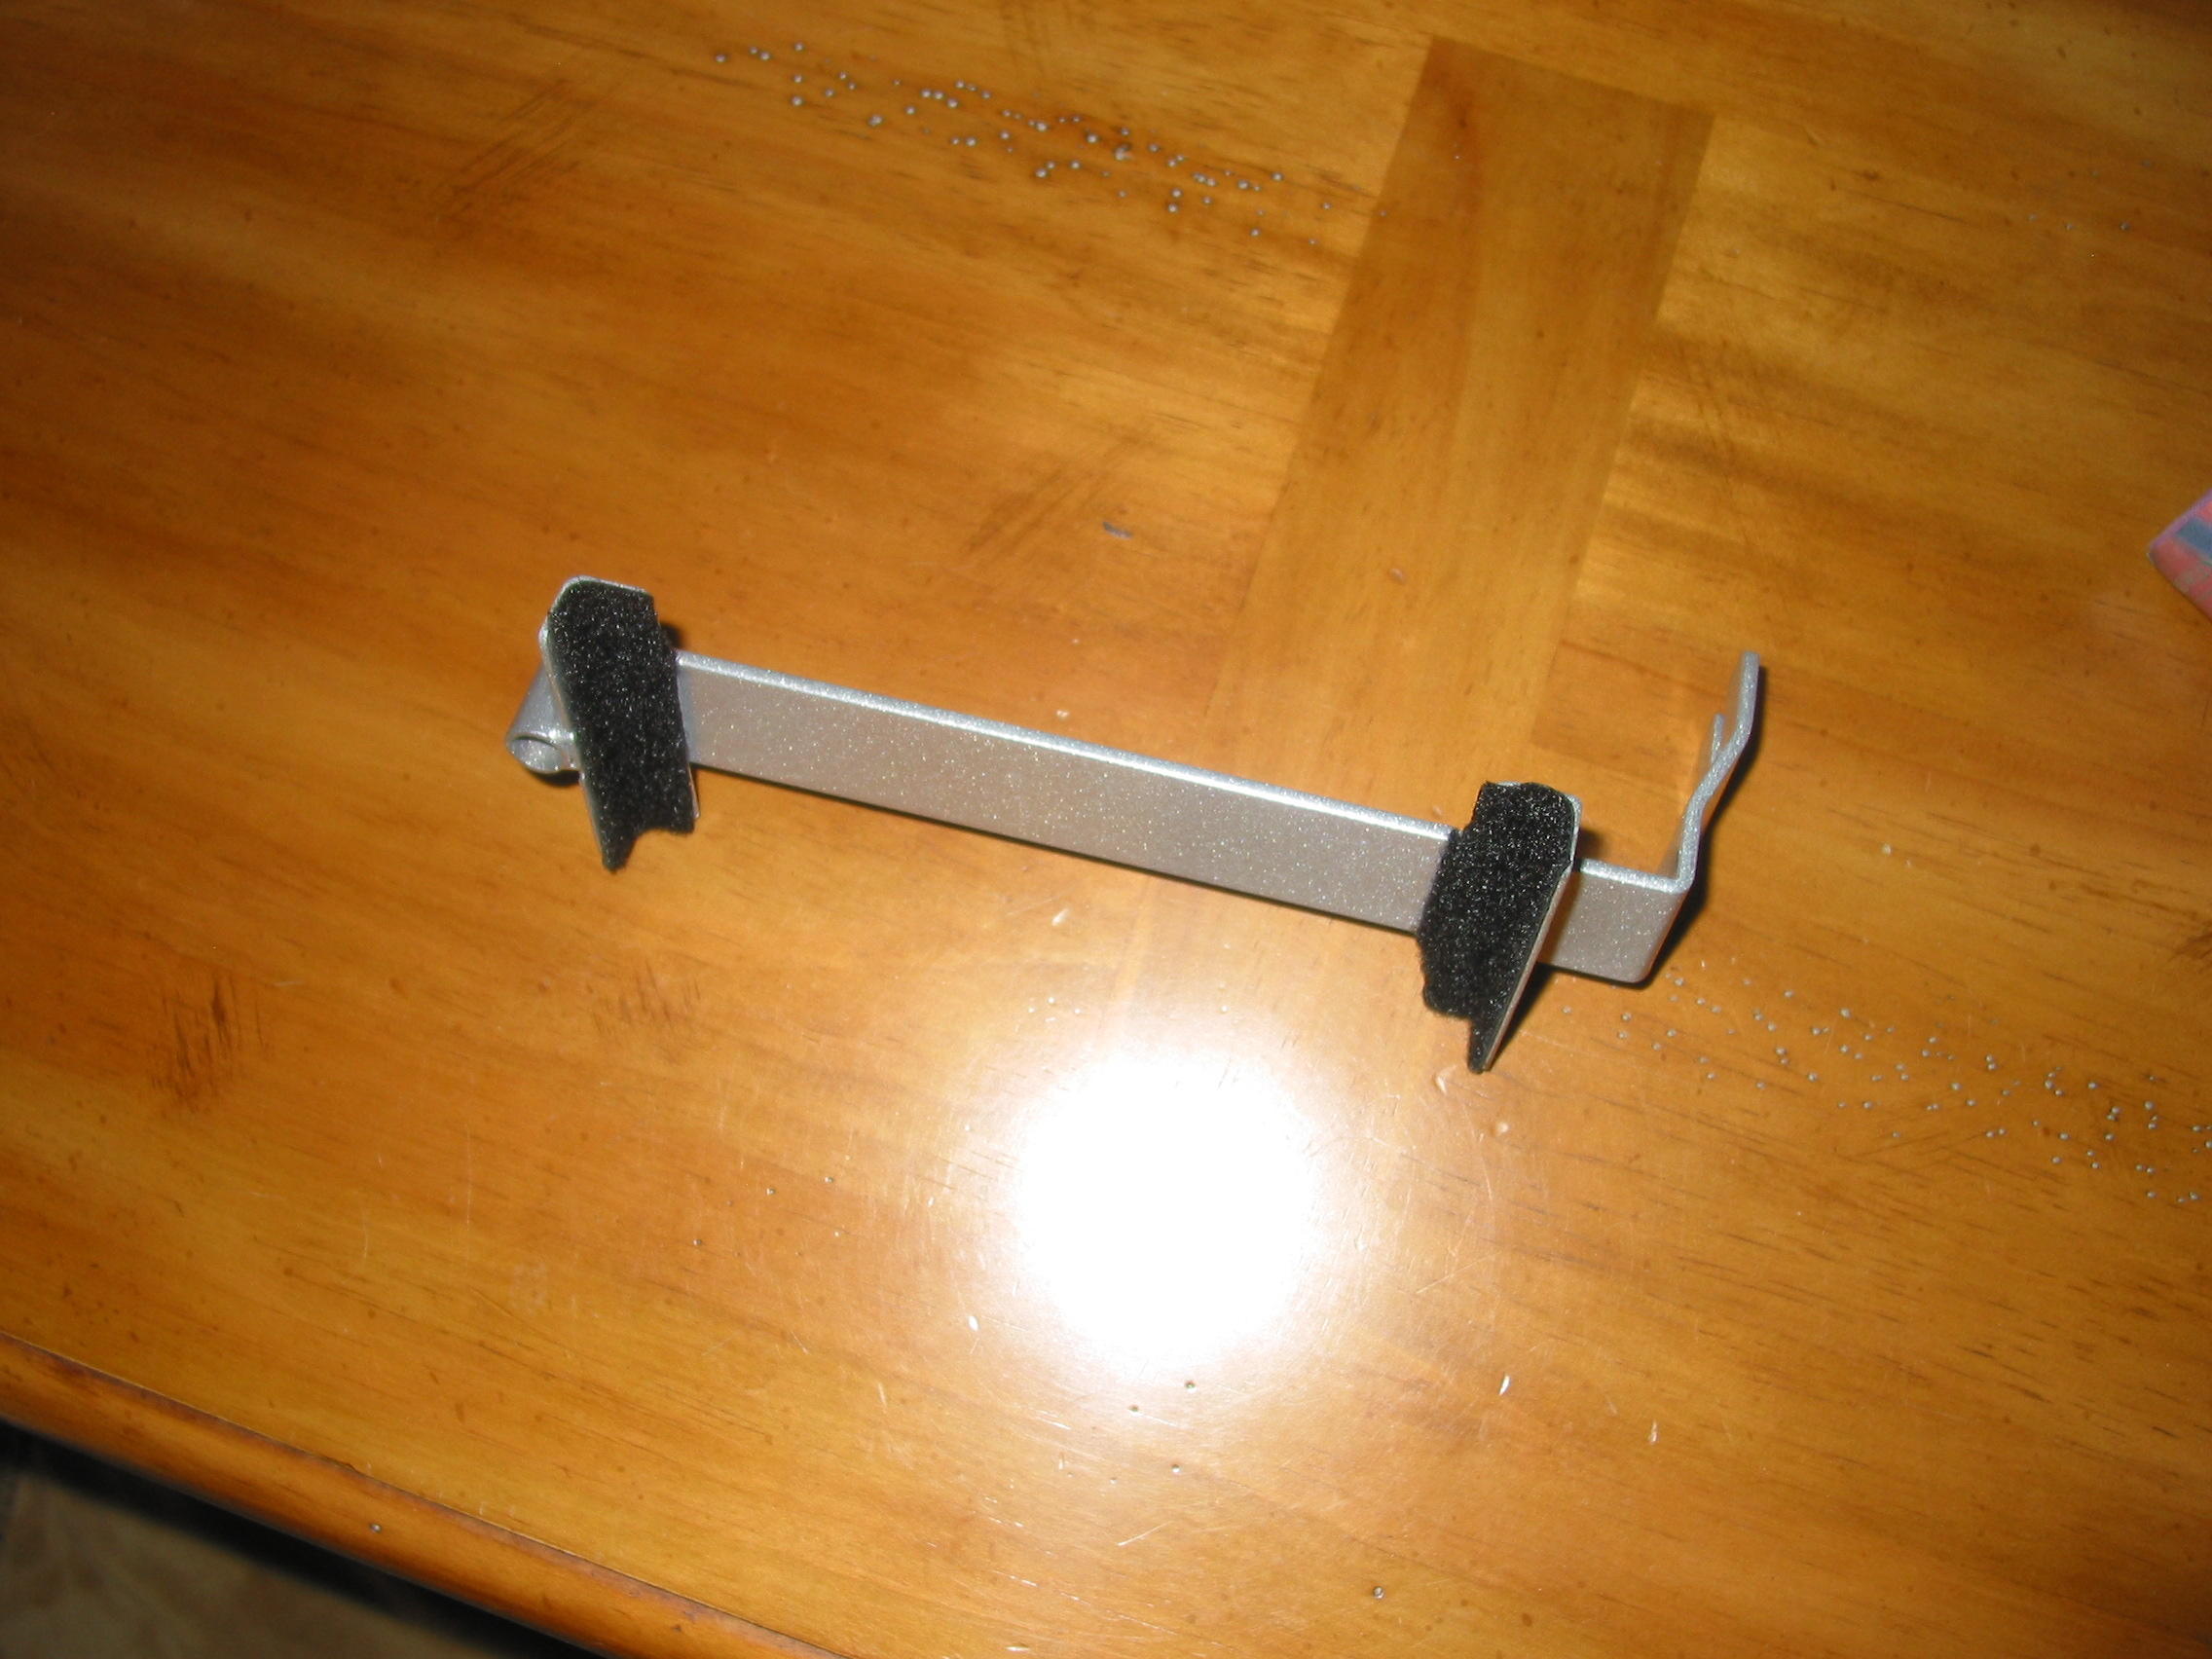
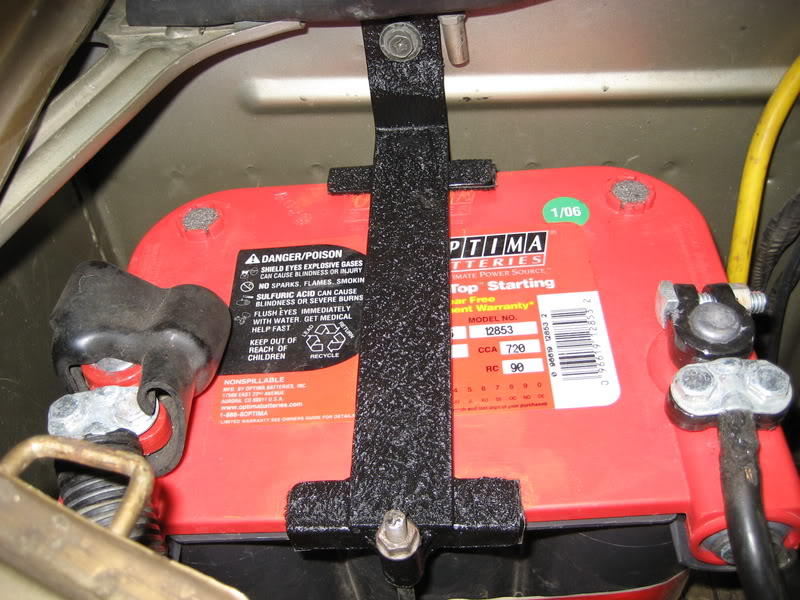
2 pointsI make my own hold down brackets. With a few bucks in metal from HD, and some work, I made this style hold down. They work great on Optima batteries, but the design can be tweaked to fit most batteries. I used some velcro as a pad where the bracket touches the battery. Somewhere on this site I even put a CAD drawing many years ago. EDIT: Here is the link


 2 points
 -
1 pointI agree completely. And there are, or used to be, other departments like the CDC within the White House administration (despite recent attacks on the CDC by White House personnel, the CDC is actually part of the administration. It's cdc.gov https://www.cdc.gov/) that are supposed to focus on those areas. All of their work is supposed to be considered by "leaders" at the top and informed decisions made based on the opinions of experts. These other organizations typically are well-staffed and funded so that expert research and opinions can be obtained in rapid response to problems. Unfortunately, I don't think that that is happening.1 point
-
1 pointAnd I got insulted by suggesting online that it was still wise to wear a mask and limit public contact. Some people might as well walk around with a sign on their back "Darwin, I'm coming home!"1 point
-
Wow, that's great. Thank you for taking the time to post this. I finally finished the wiring diagram for planned changes. In the next few days I'll be bench testing some new control circuits, and if they work, I'll start modifying the harnesses. These pics will help.1 point
-
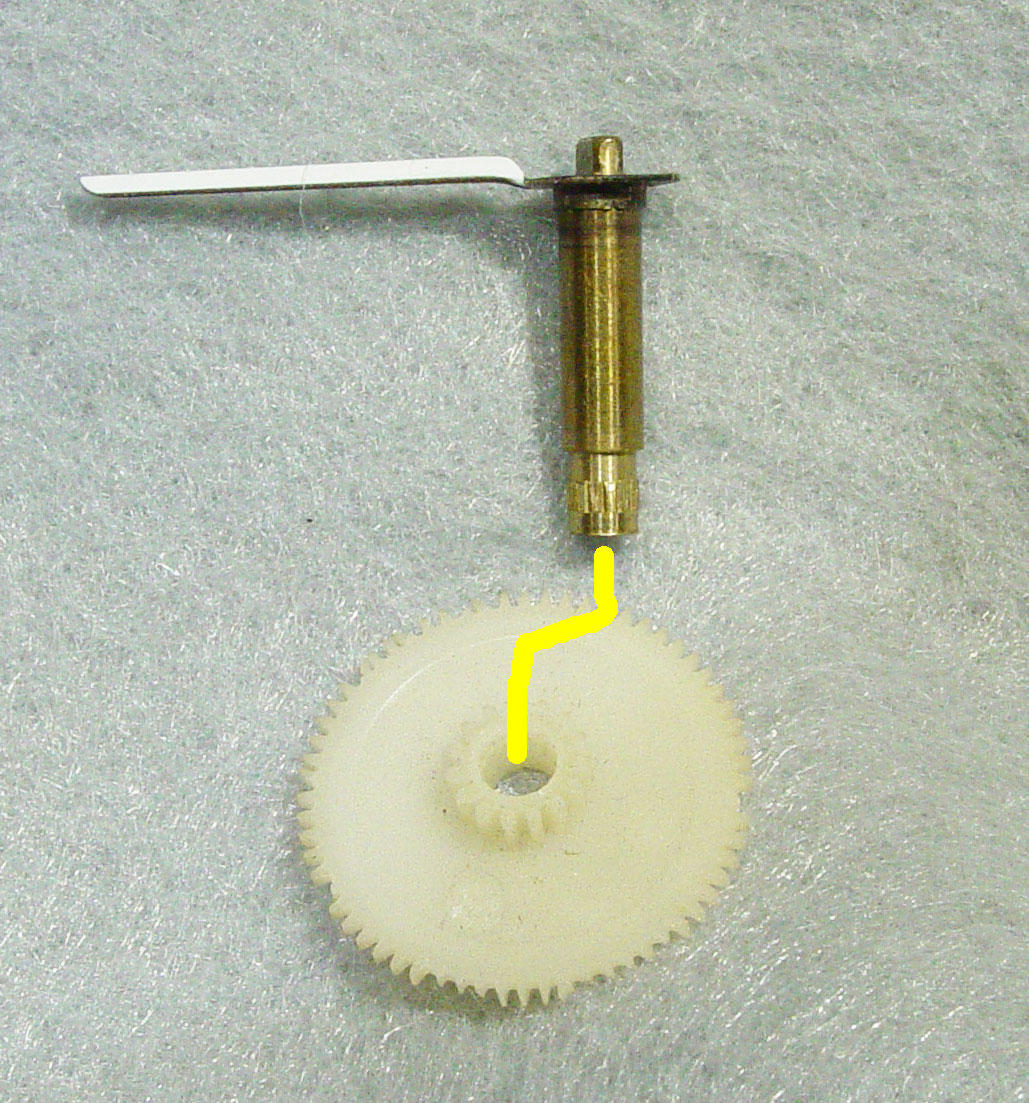
As an example, here are the three styles of seat slider. I happen to have been embroiled in this discussion recently. S30 1970-1978. North american Left, 240Z, 1970-1973 Up to 7/73 Center 260Z and 75-76 280Z. (Date range....) 8/73 - 7/76. (?) Right 280z 1977-78. 8/76- 78 Rear of the slicers is at the top of the picture. Sorry about that. 240z. Studs in sliders go through holes in seat base. Nut/lock/flat attach (awkwardly !) from underside of metal frame. 260/280 . Round headed hex M8x1.25 chrome bolts attach through slider into captured nuts in seat base frame. Notes that come to mind: Since the way the sliders attach to seat bases is different as well, I should include pictures of the seat bases, but only from the perspective of the way the sliders mount, Not the webbing, or upholstry differences. That’s another thread. I will copy of all this into a new thread In the new forum if and when it goes live.
 1 point
 -
1 pointSpeaking of the girl next door ... Guy, you should invite our gal from Hungary to pose with the wall art. https://www.classiczcars.com/gallery/image/37447-hungary-for-orange/1 point
-
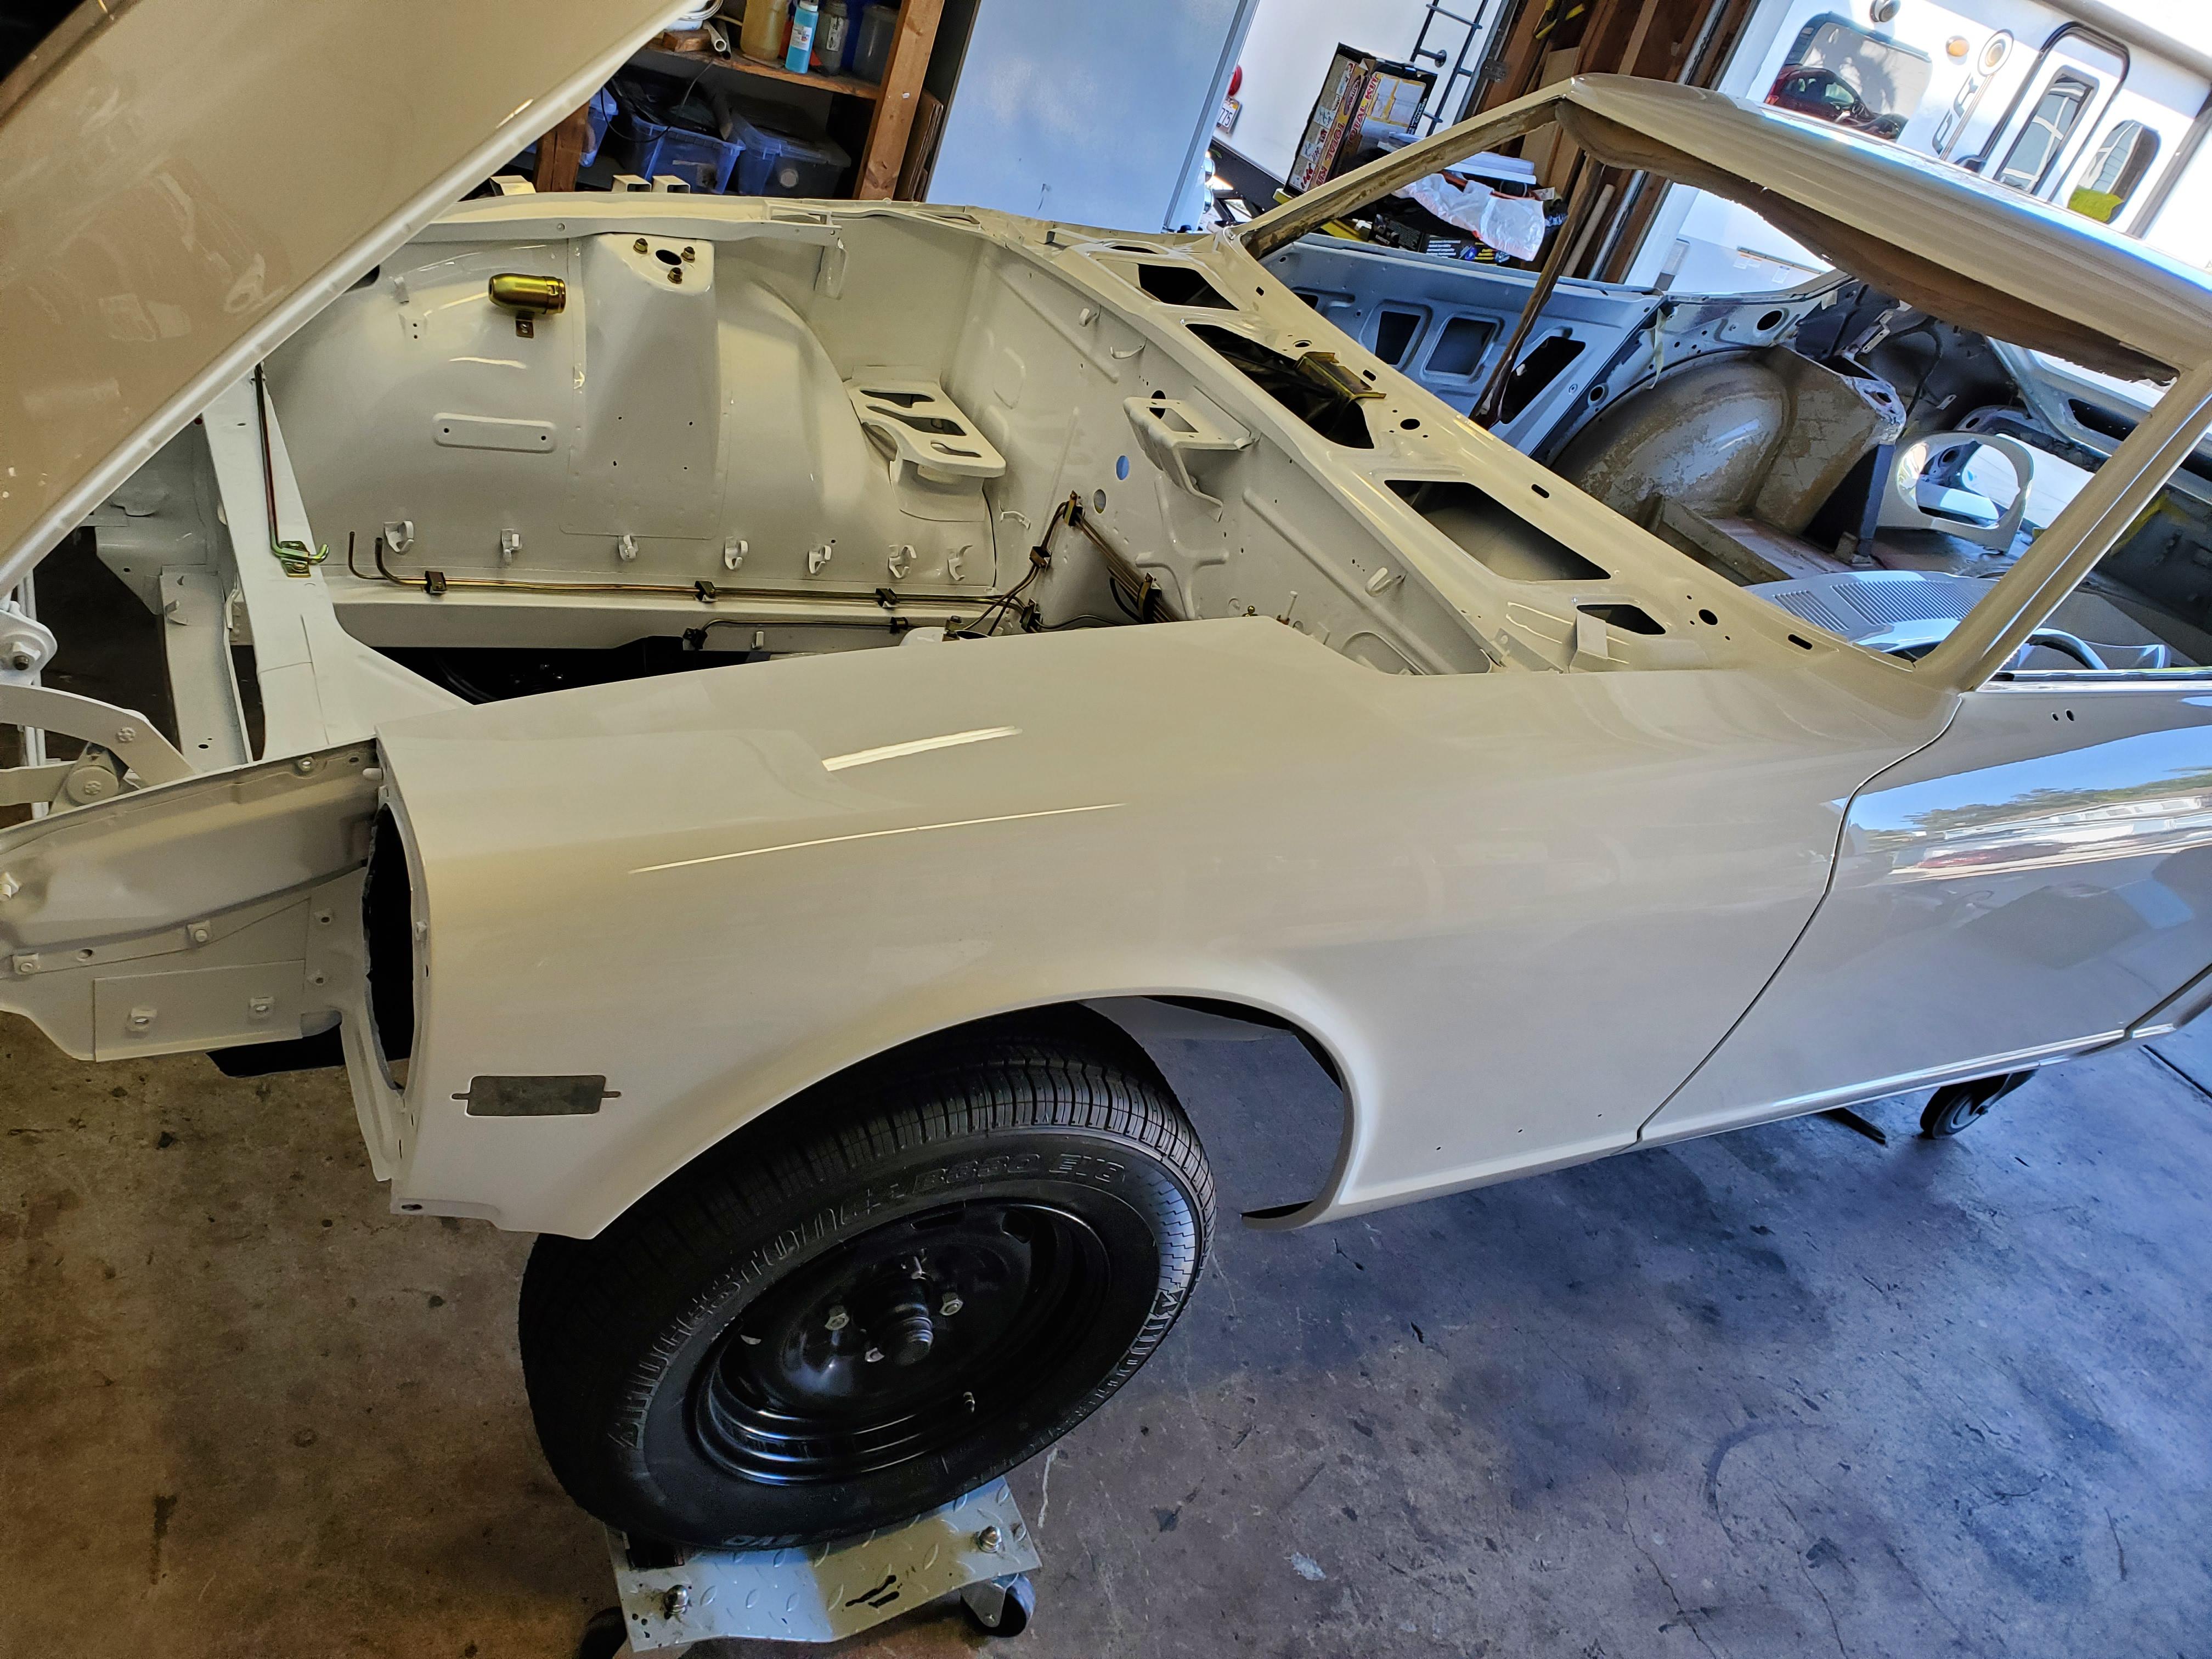
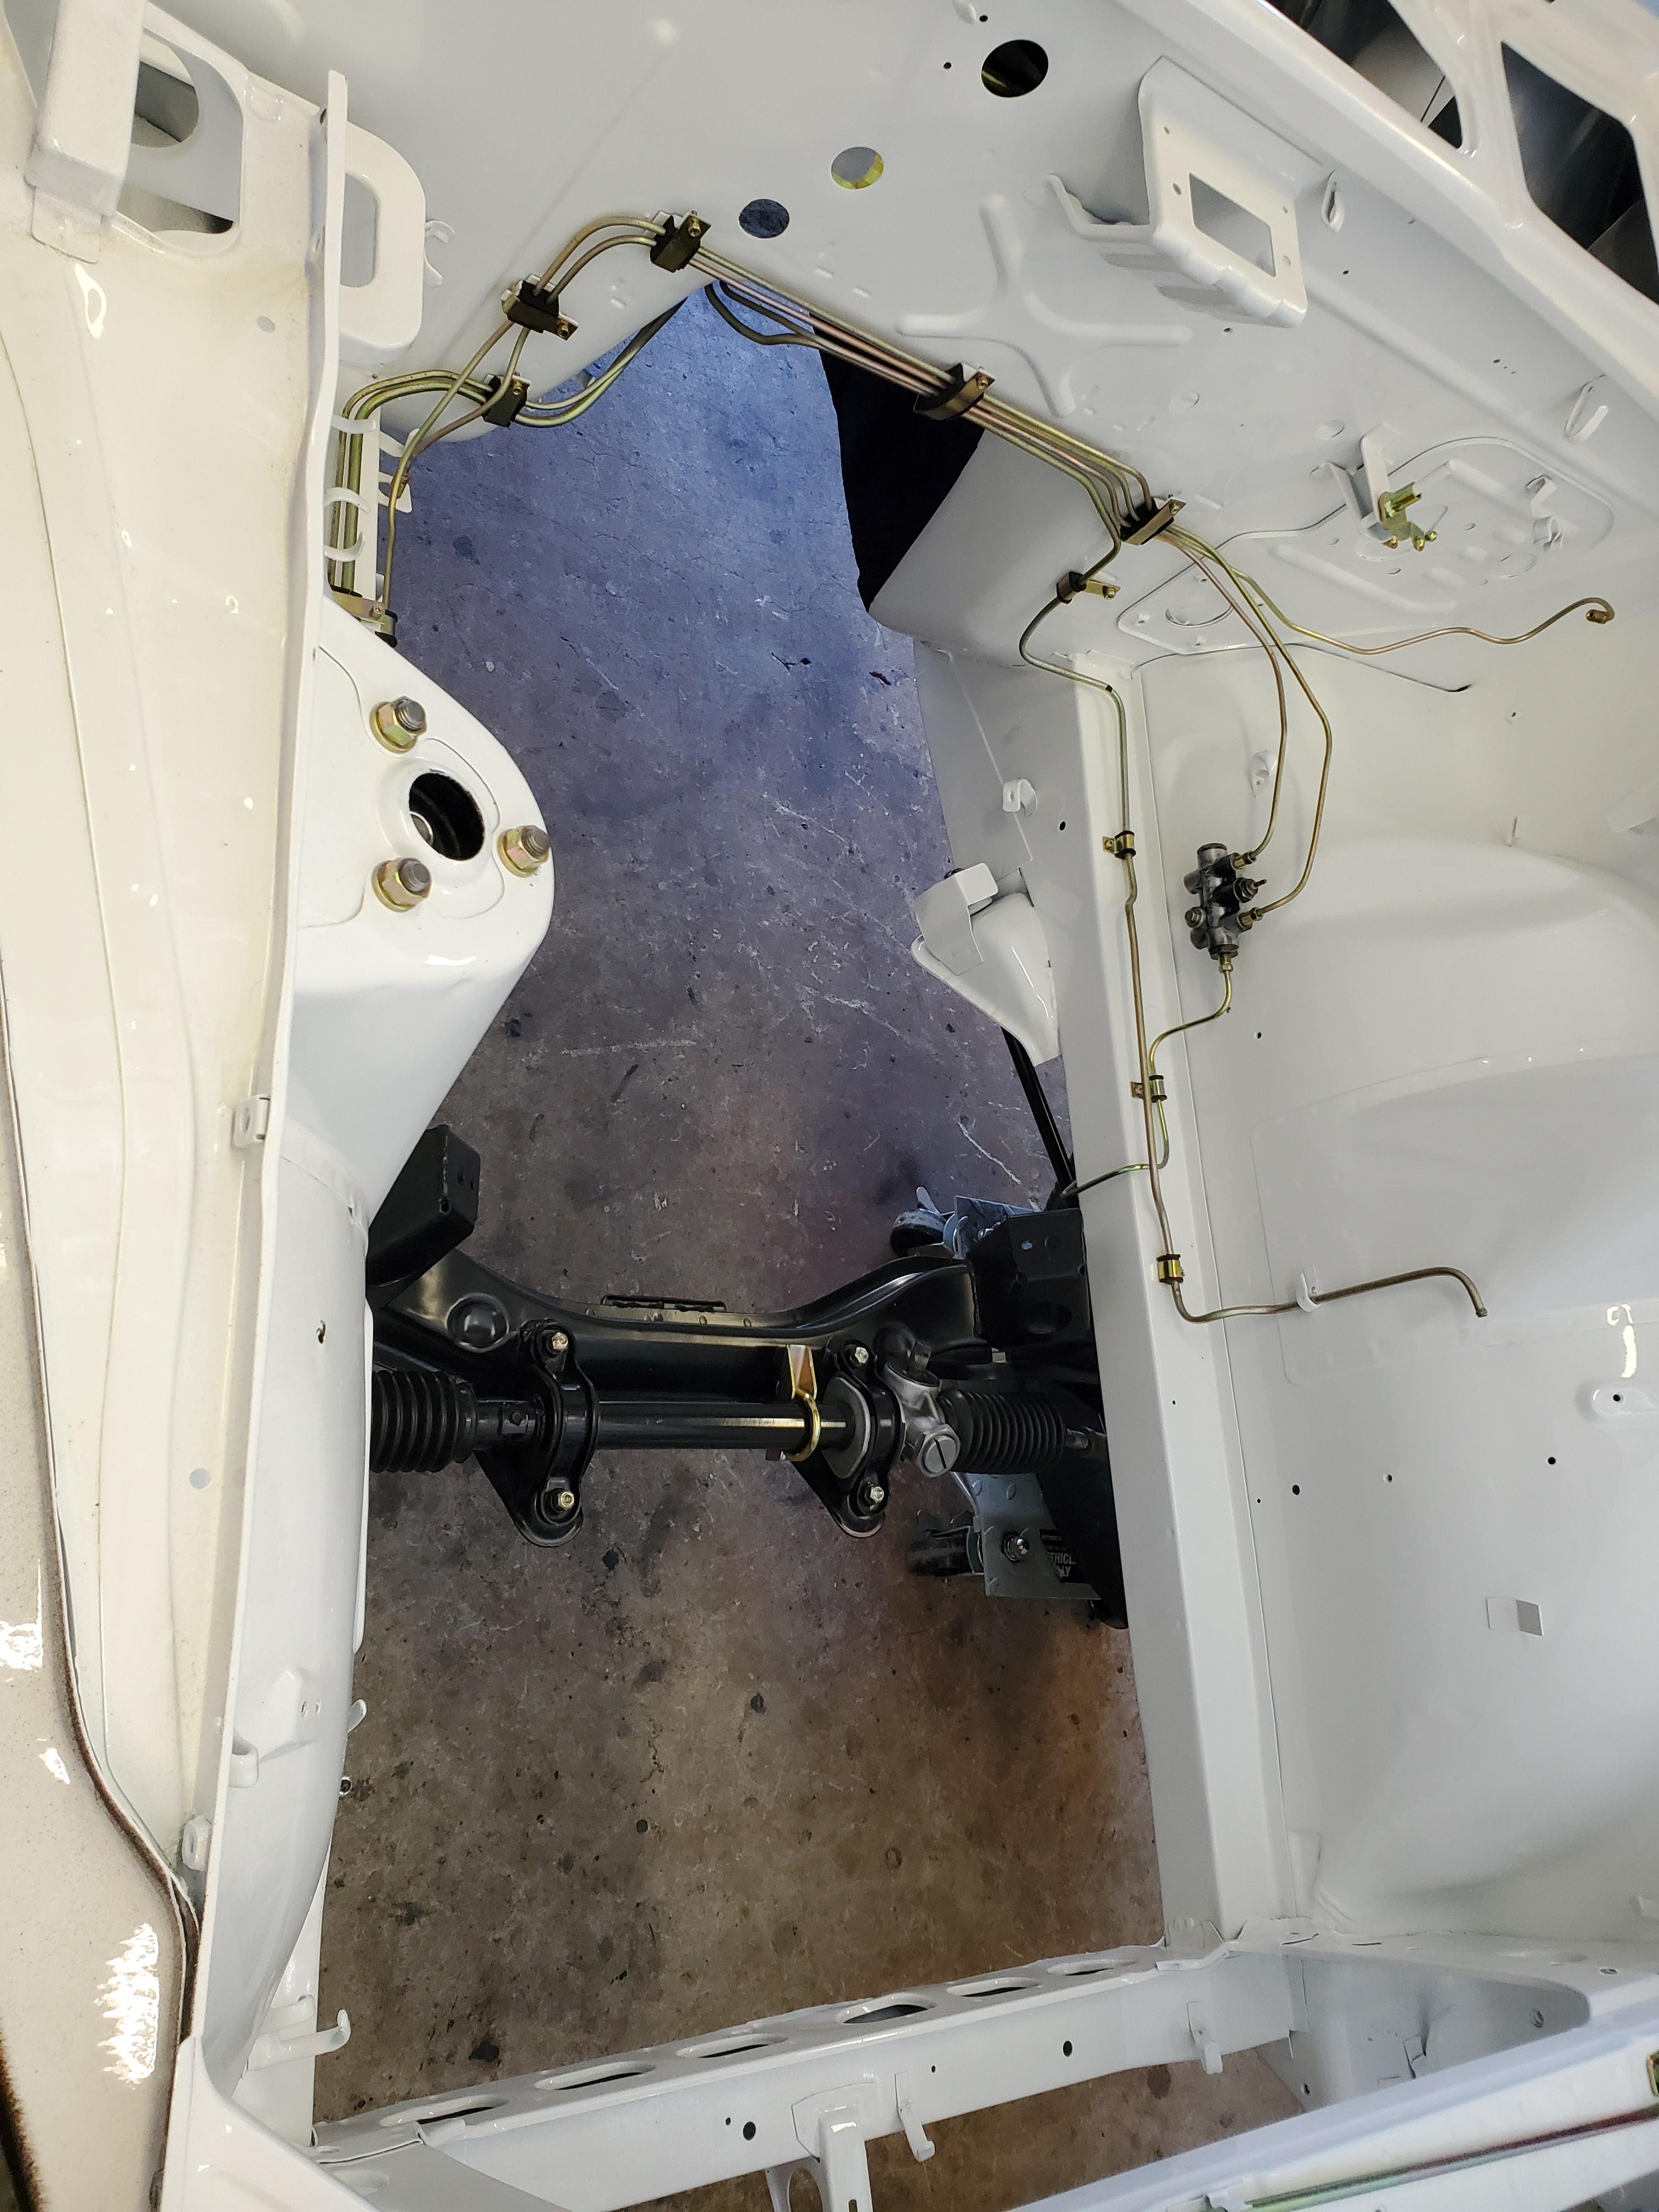
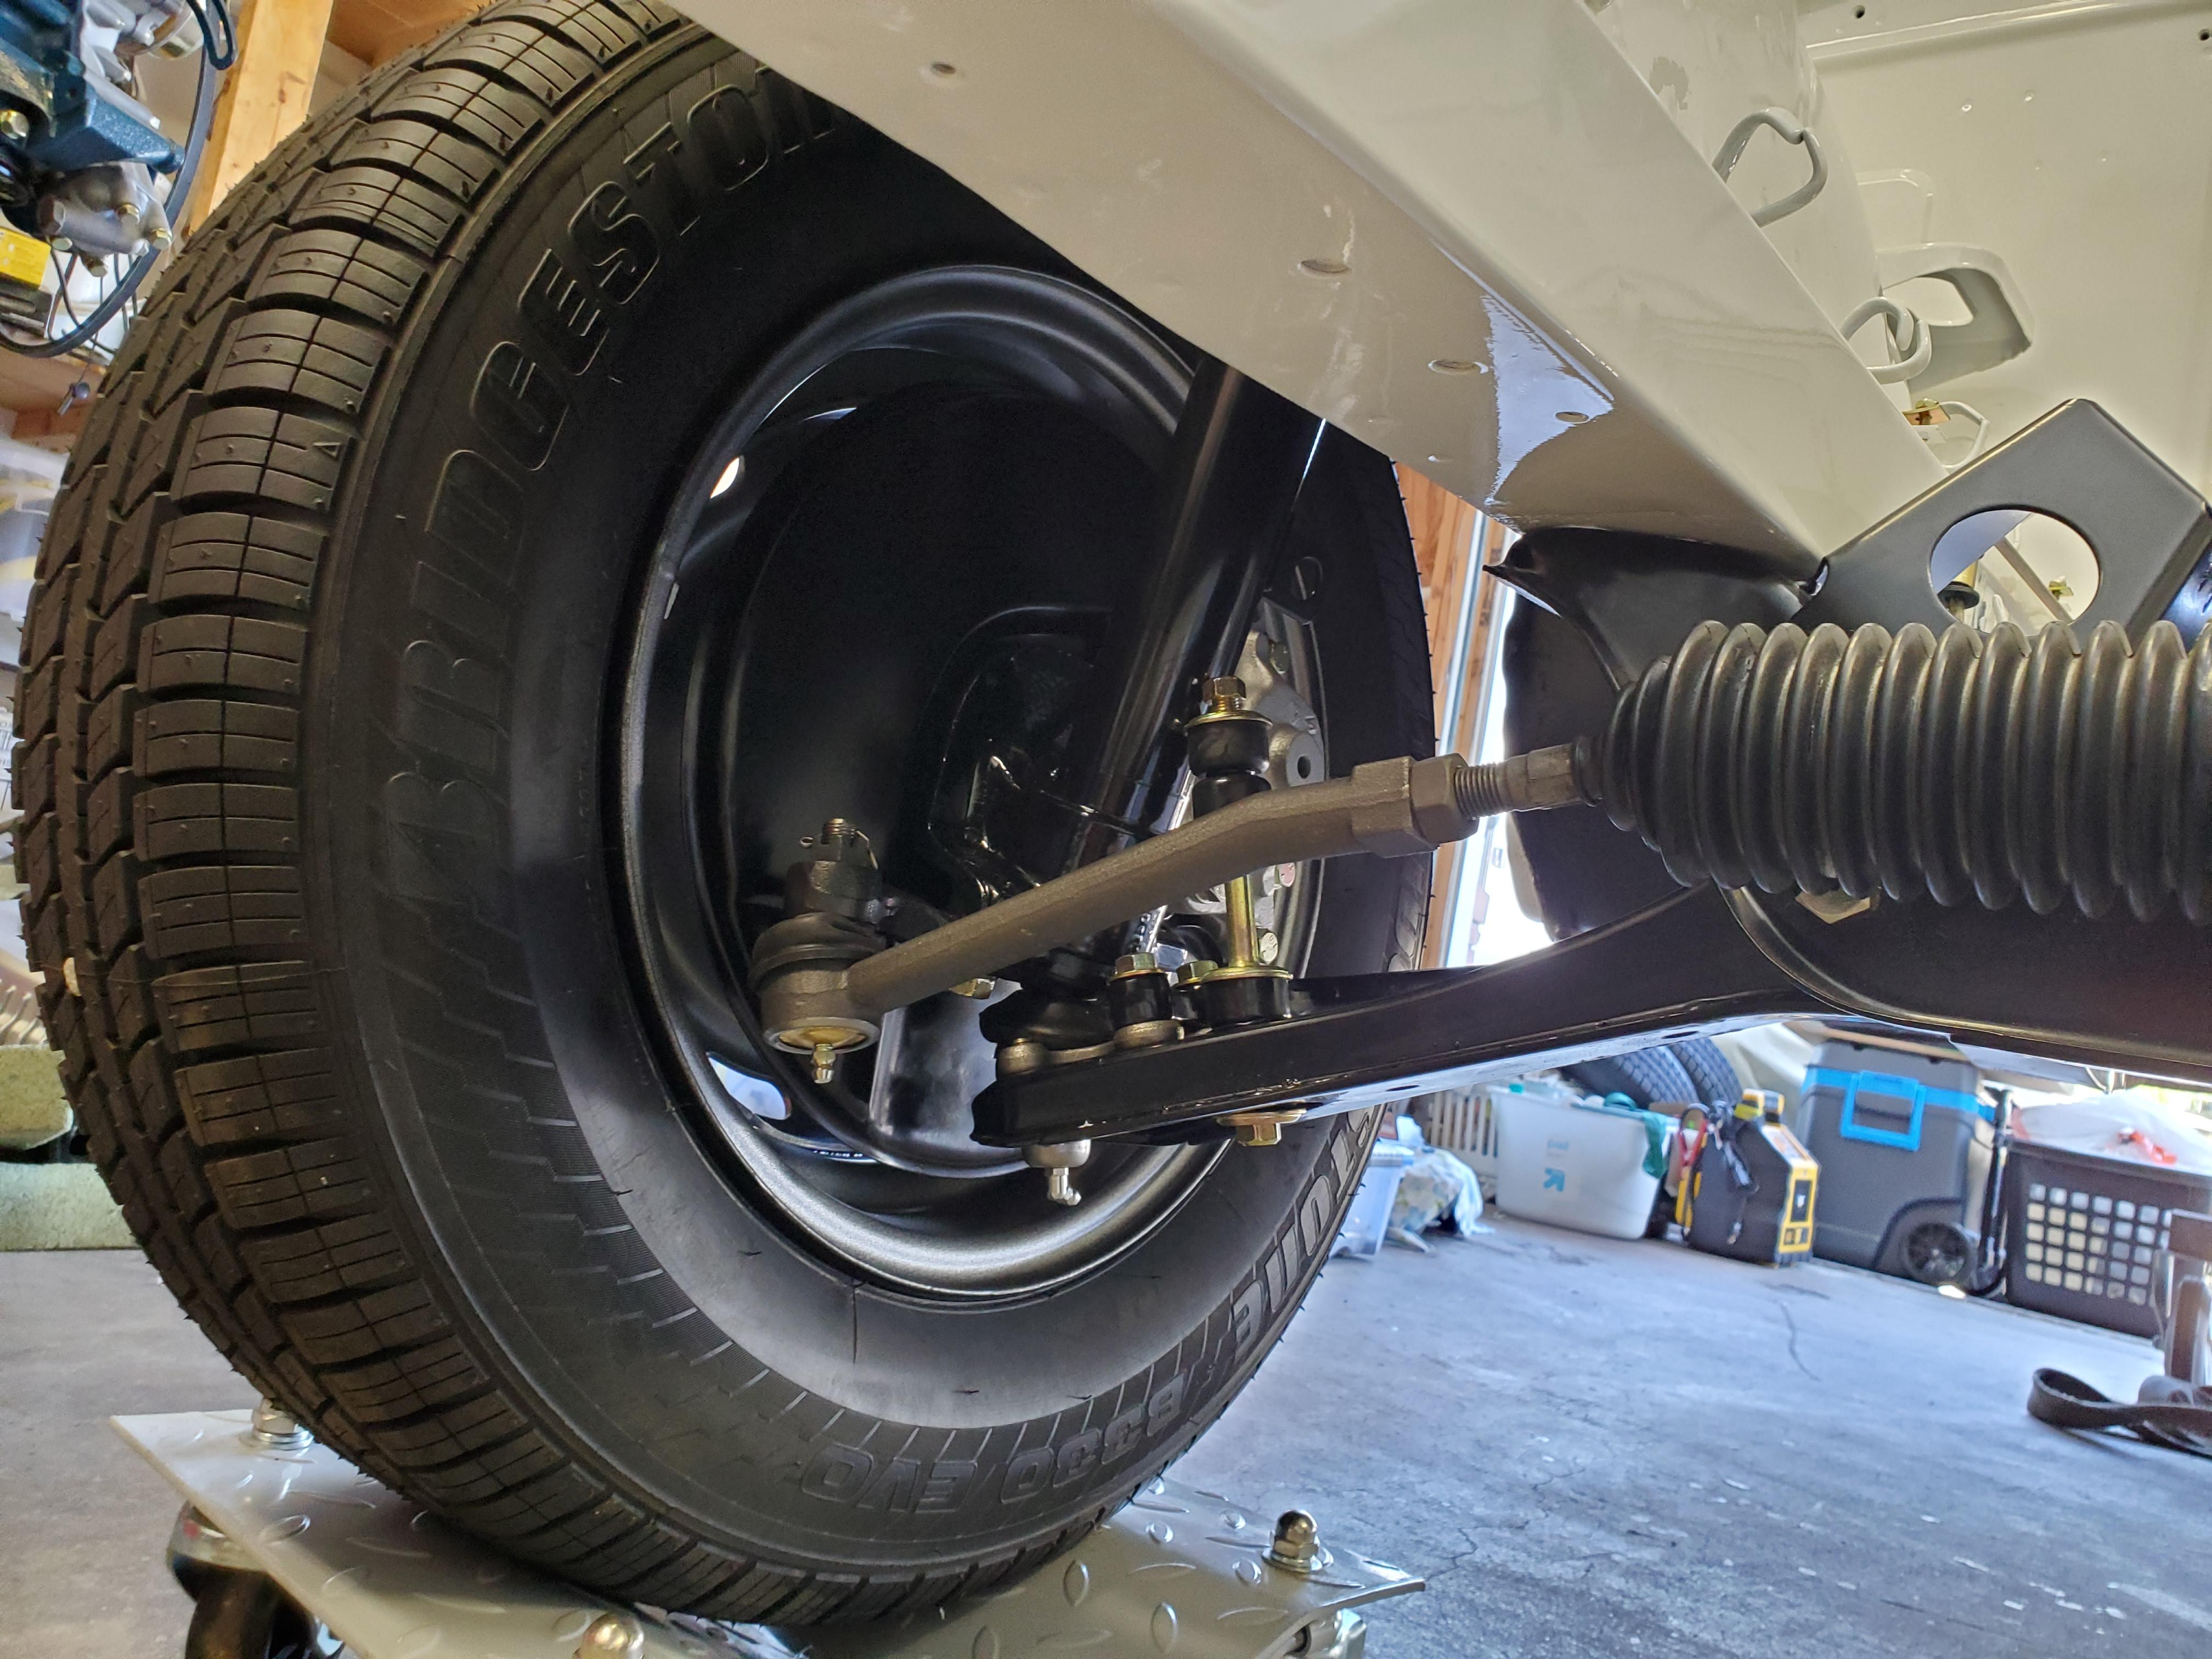
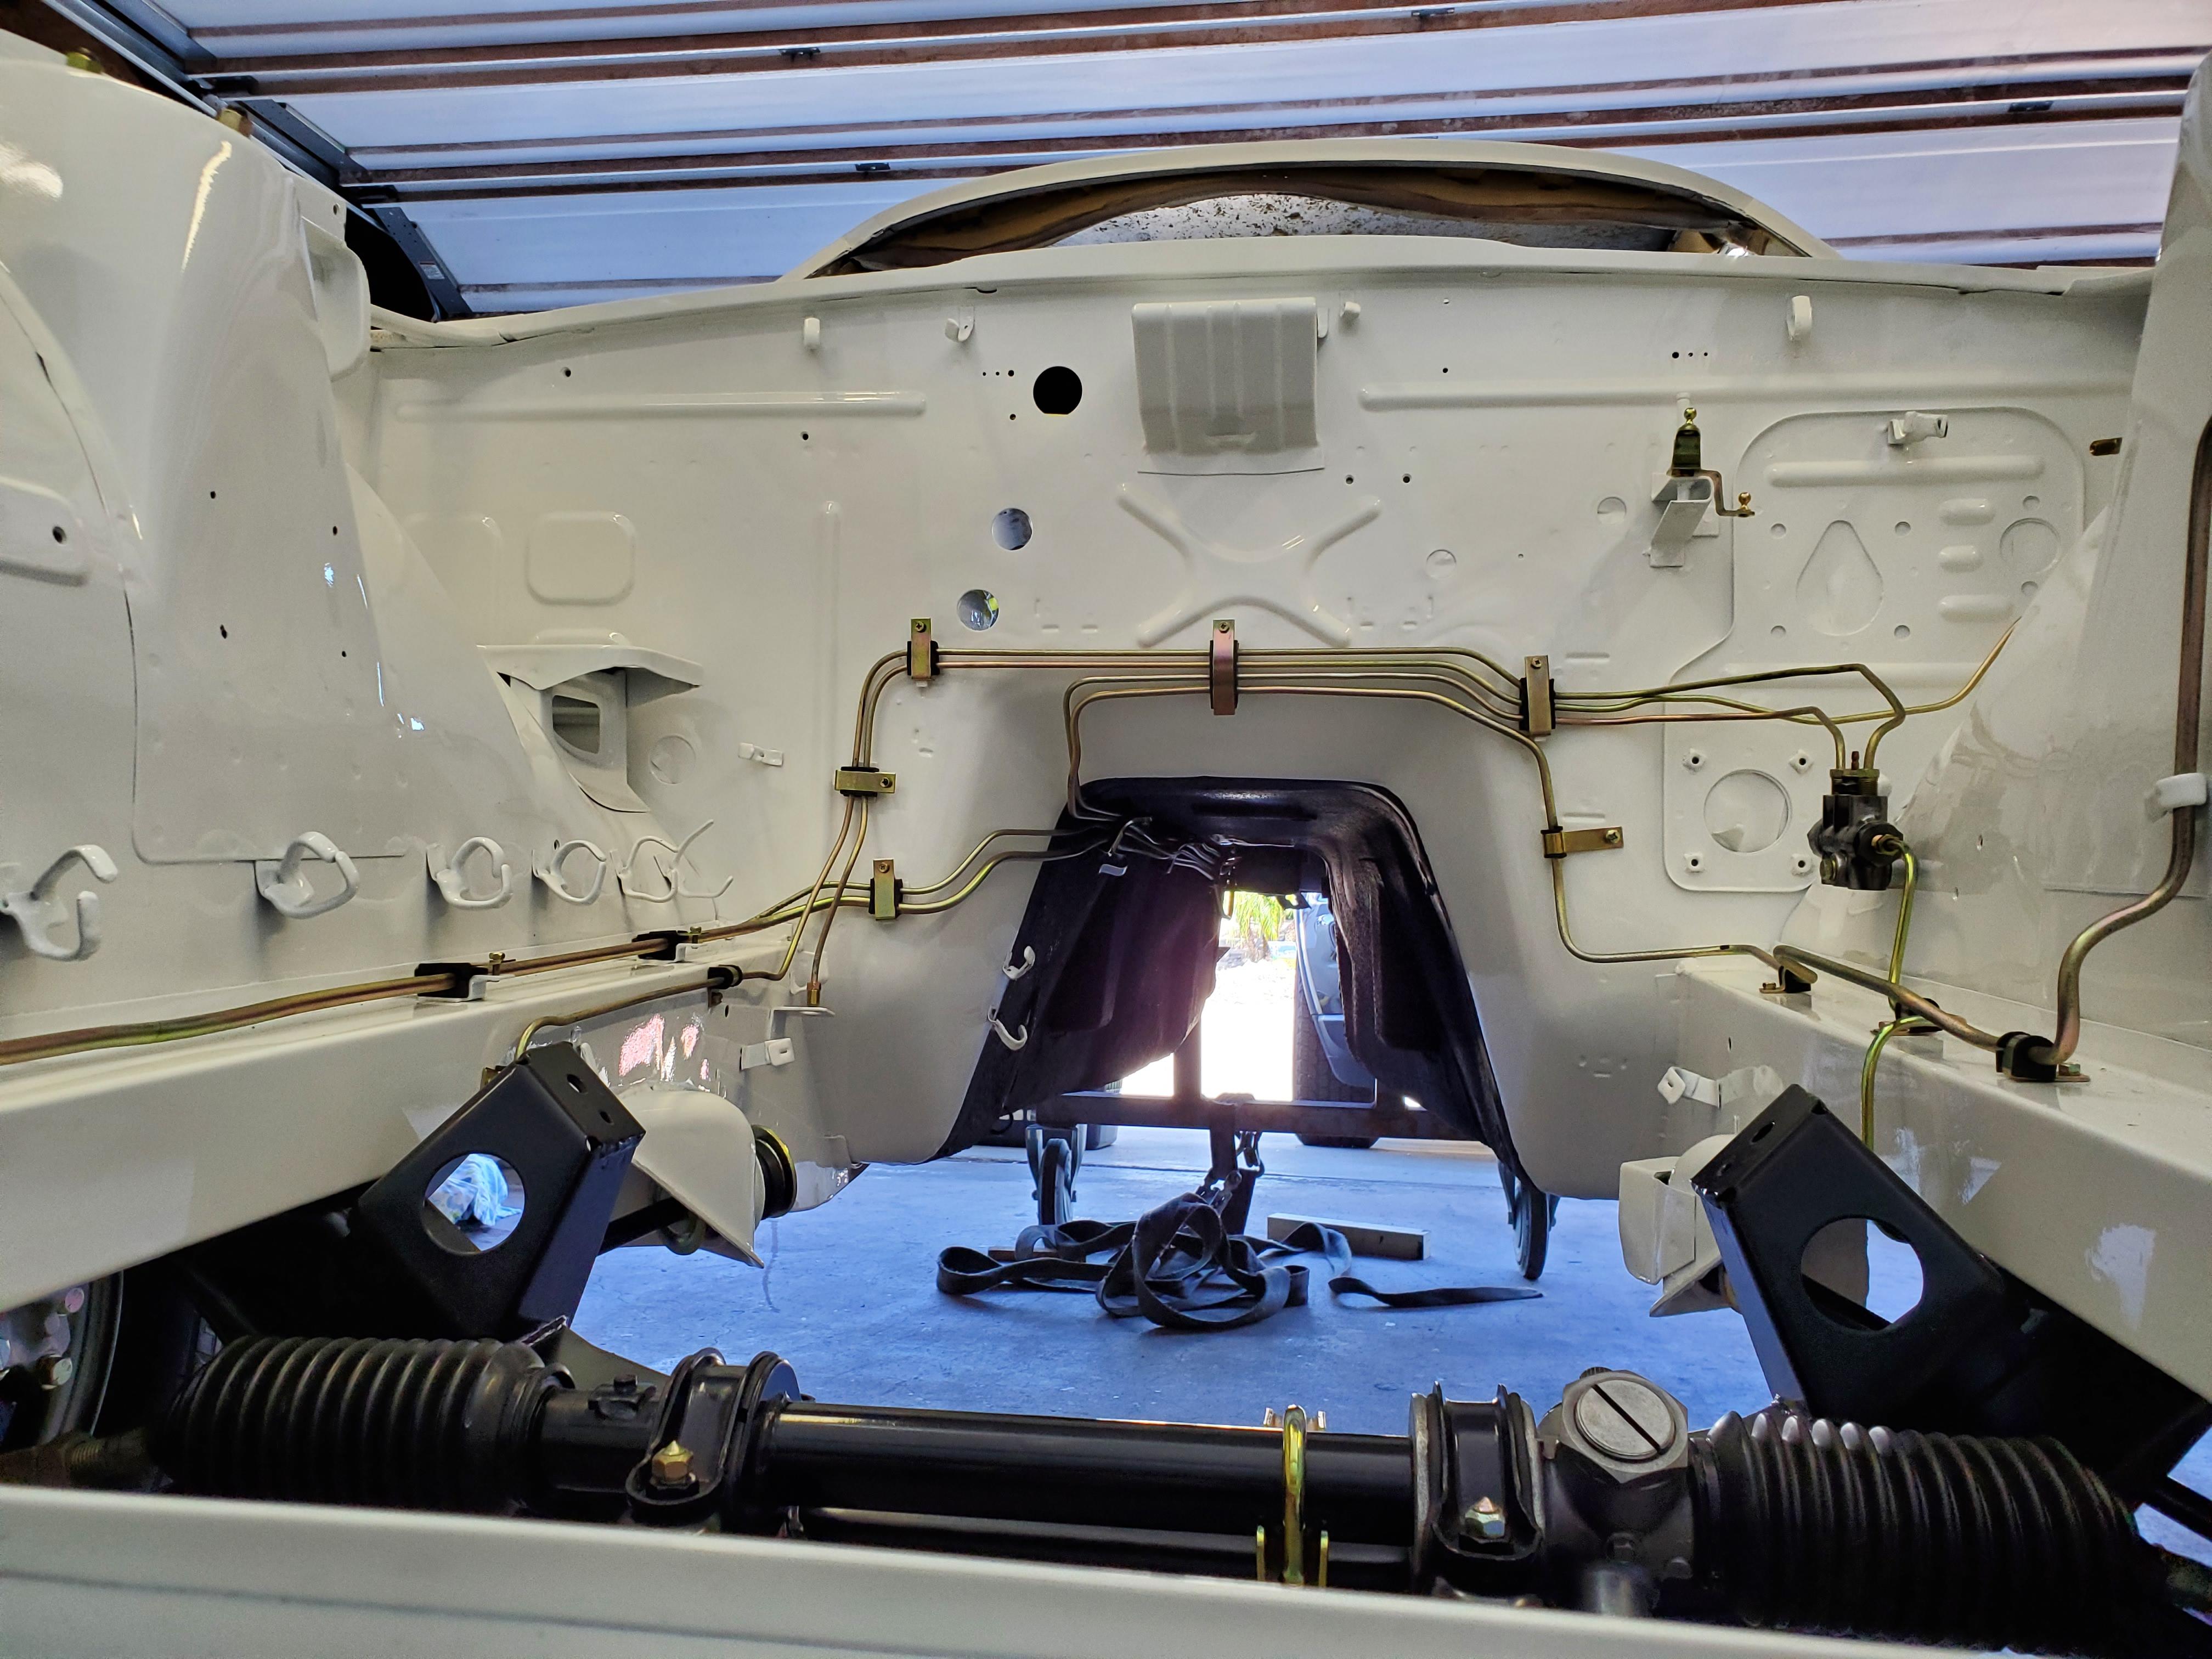
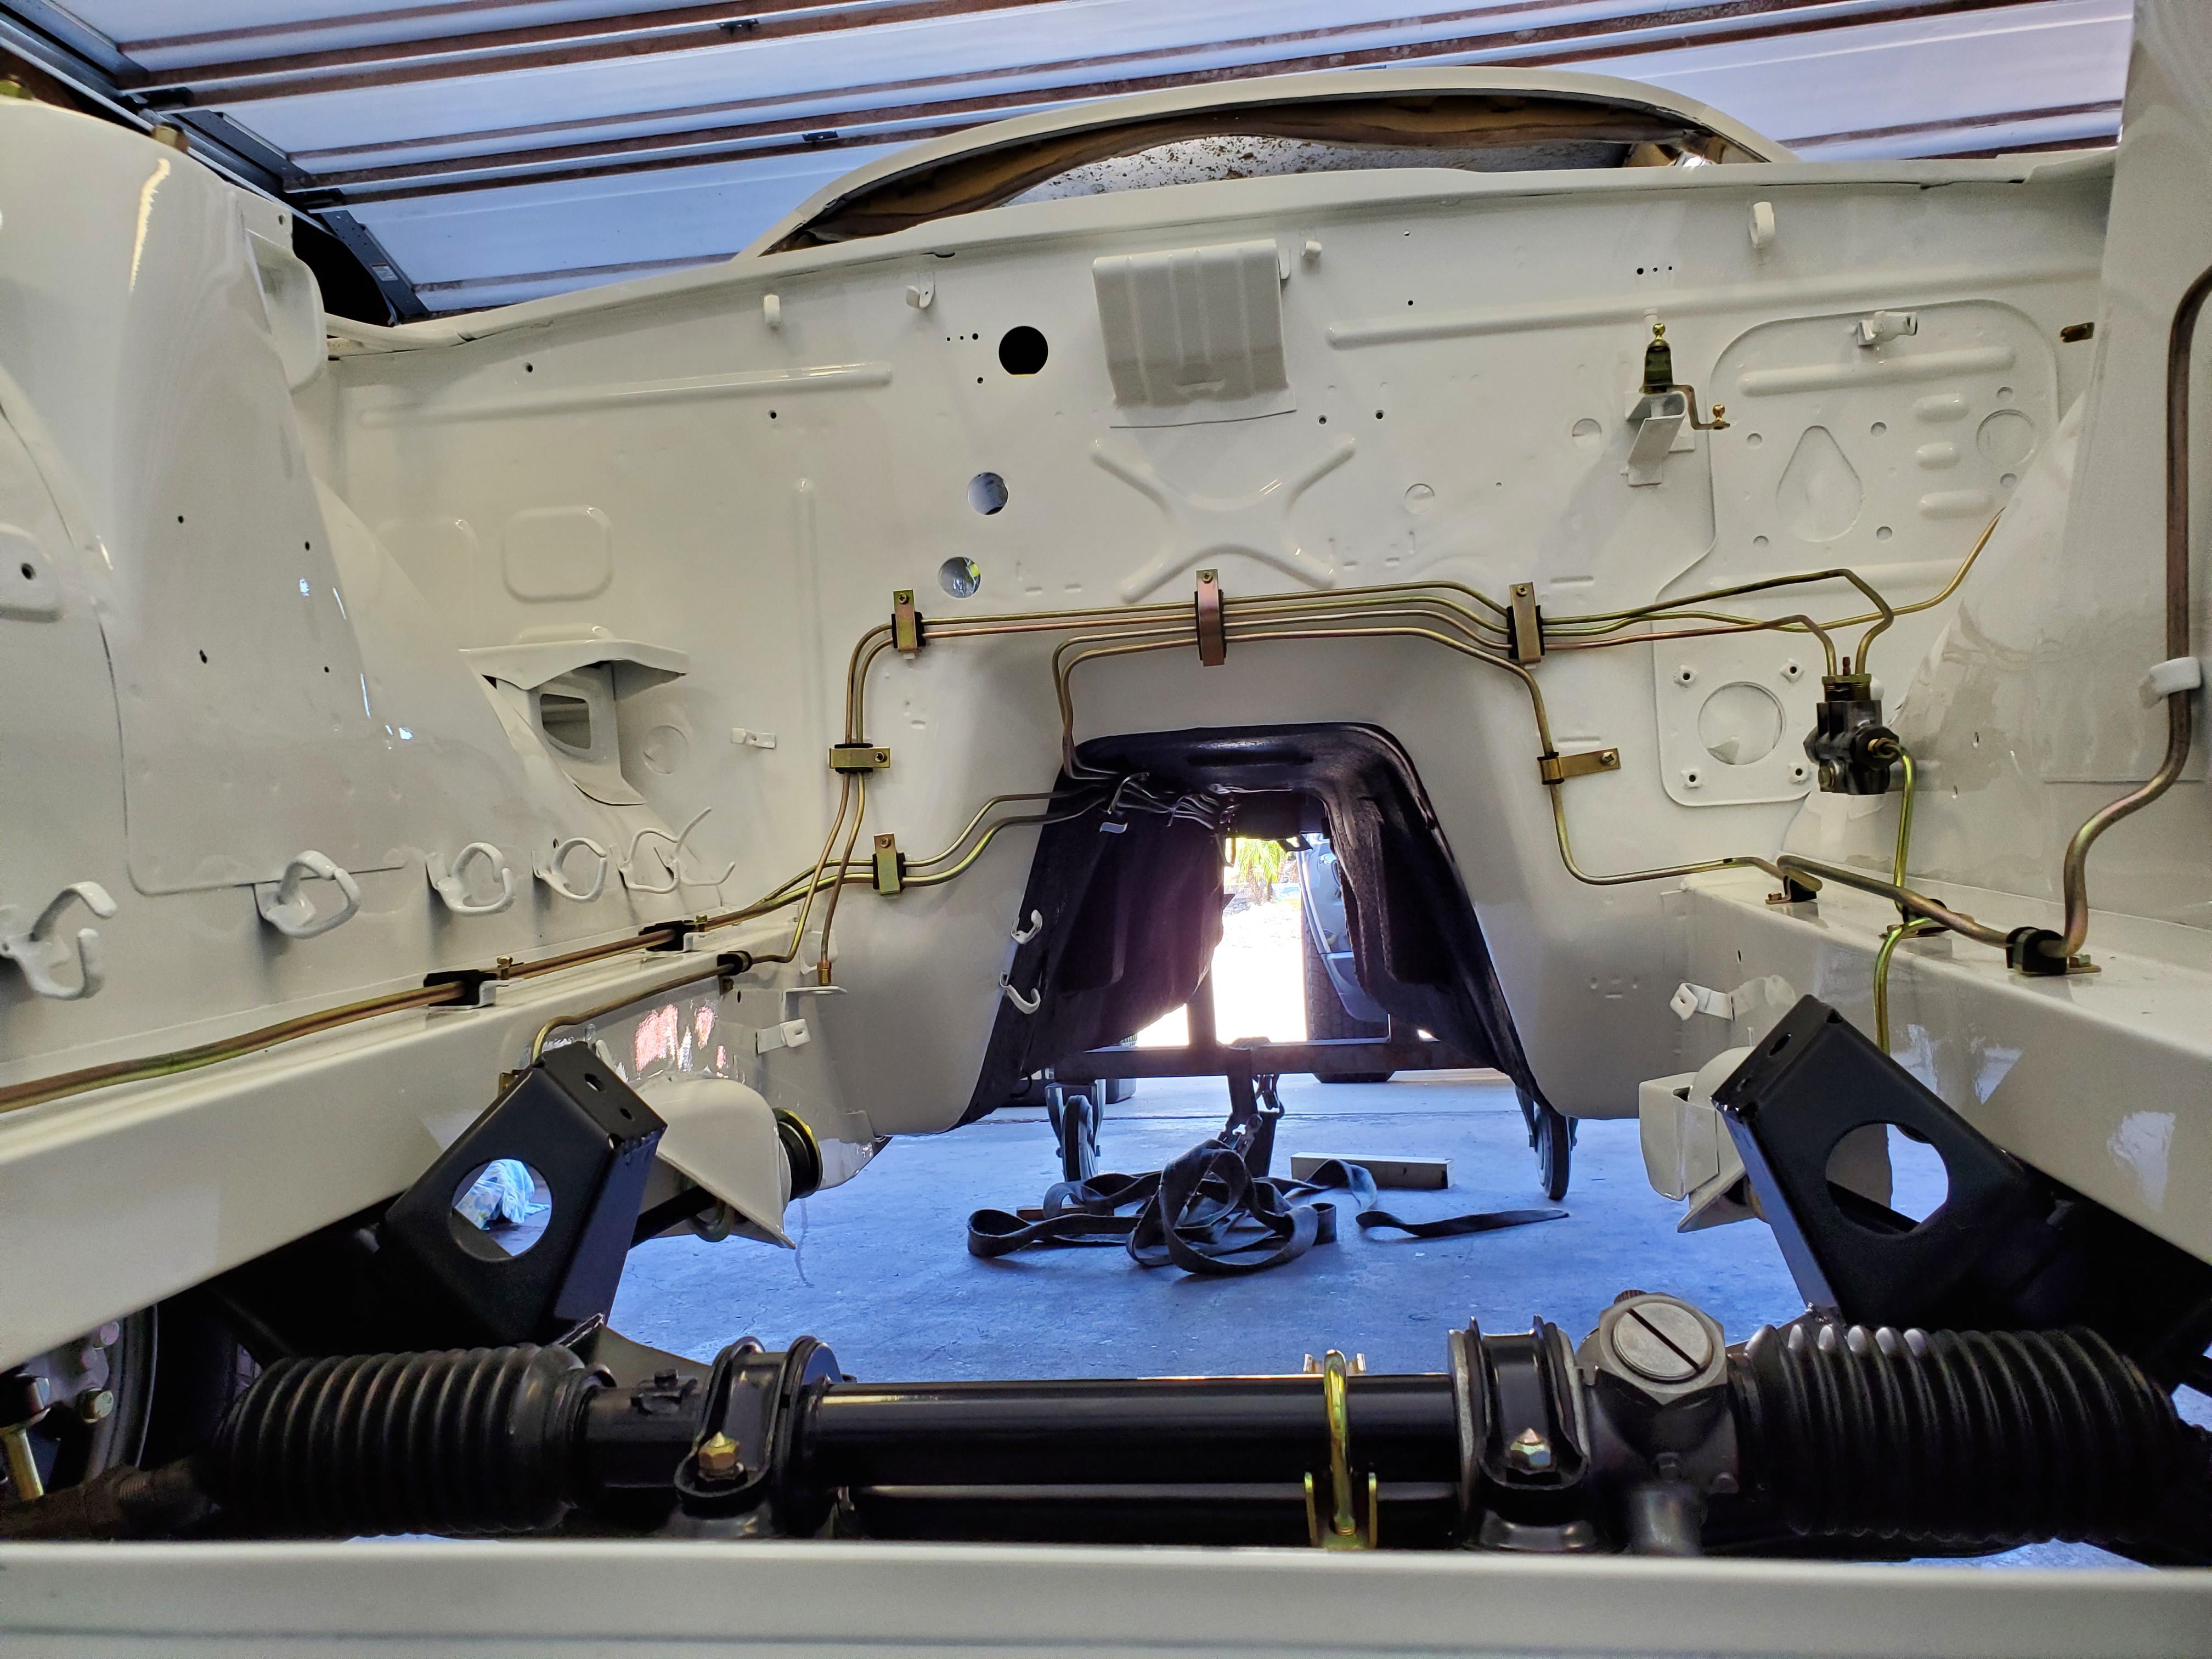
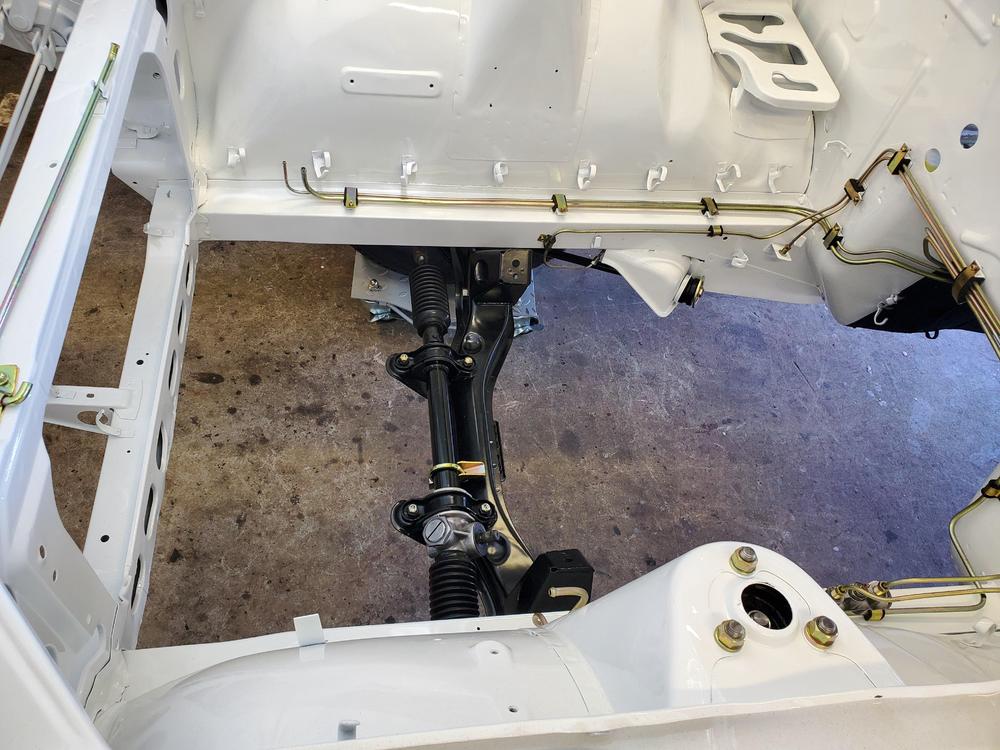
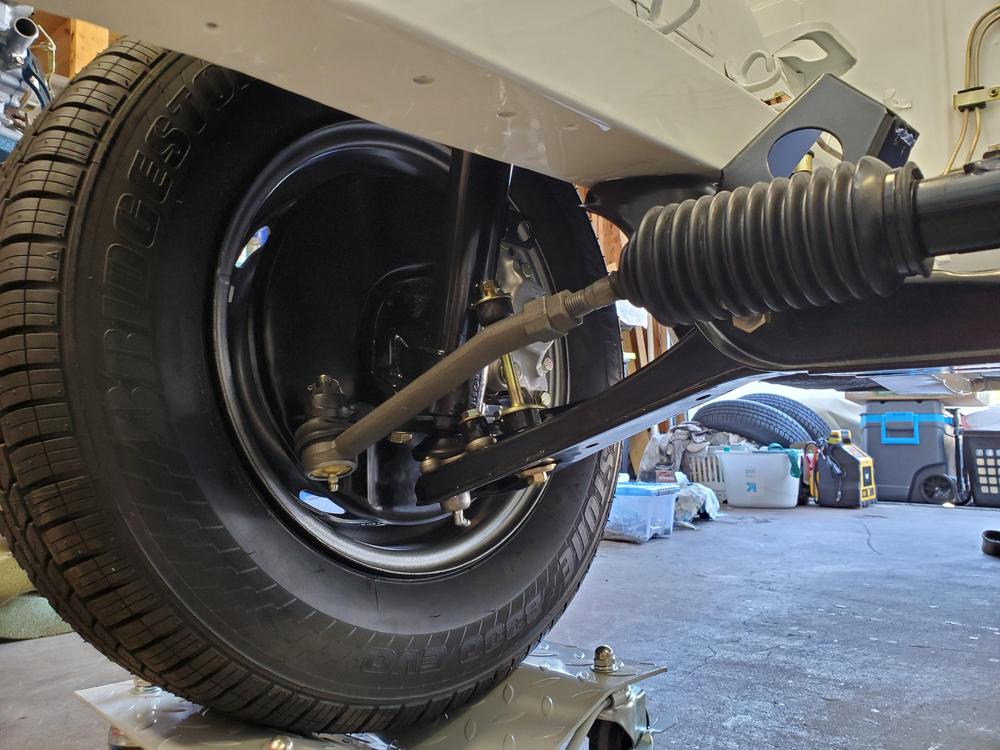
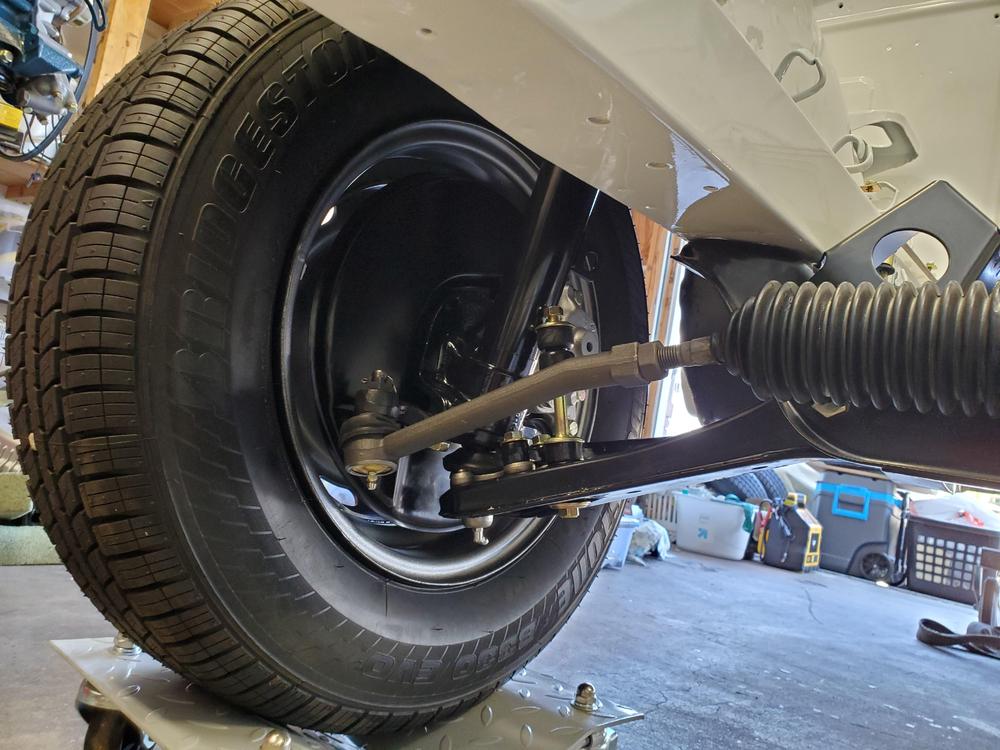
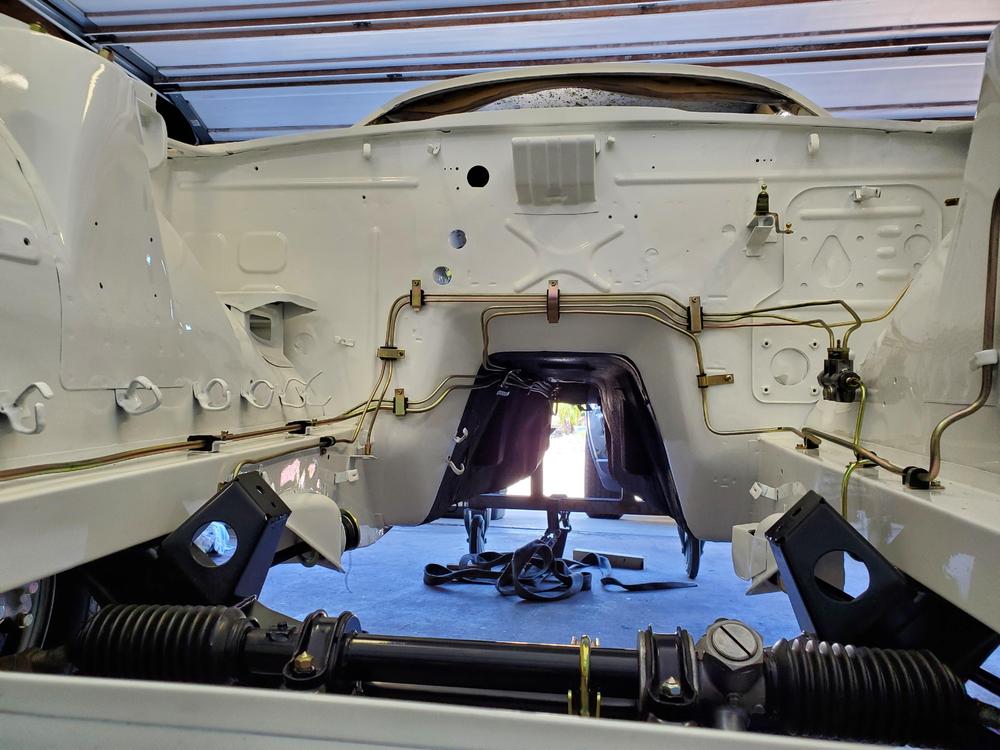
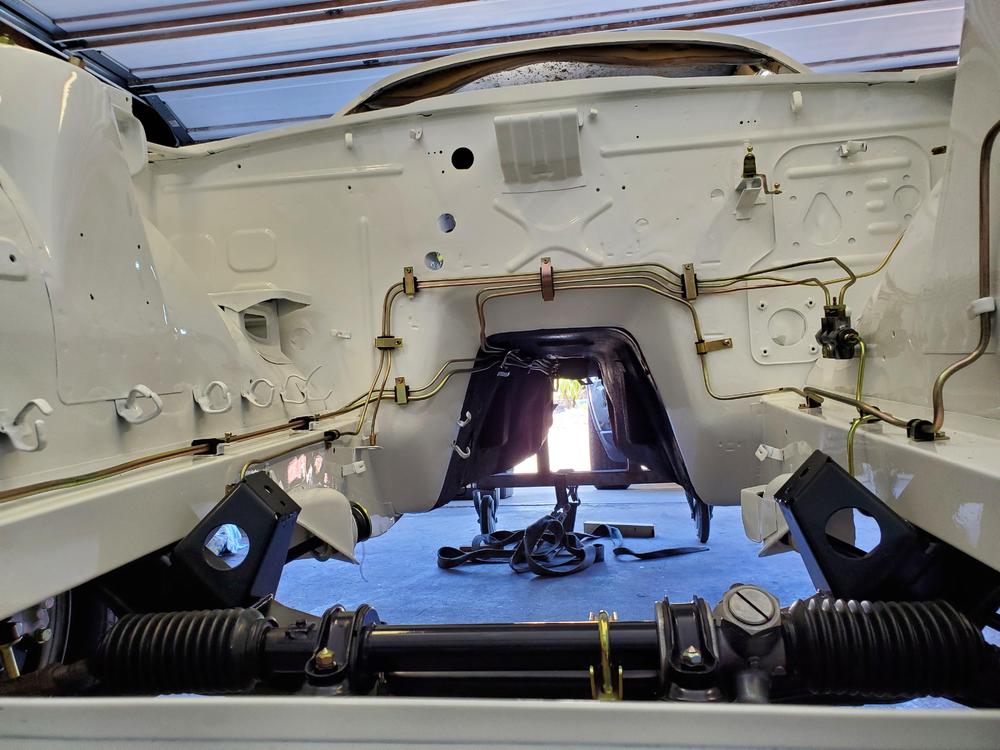
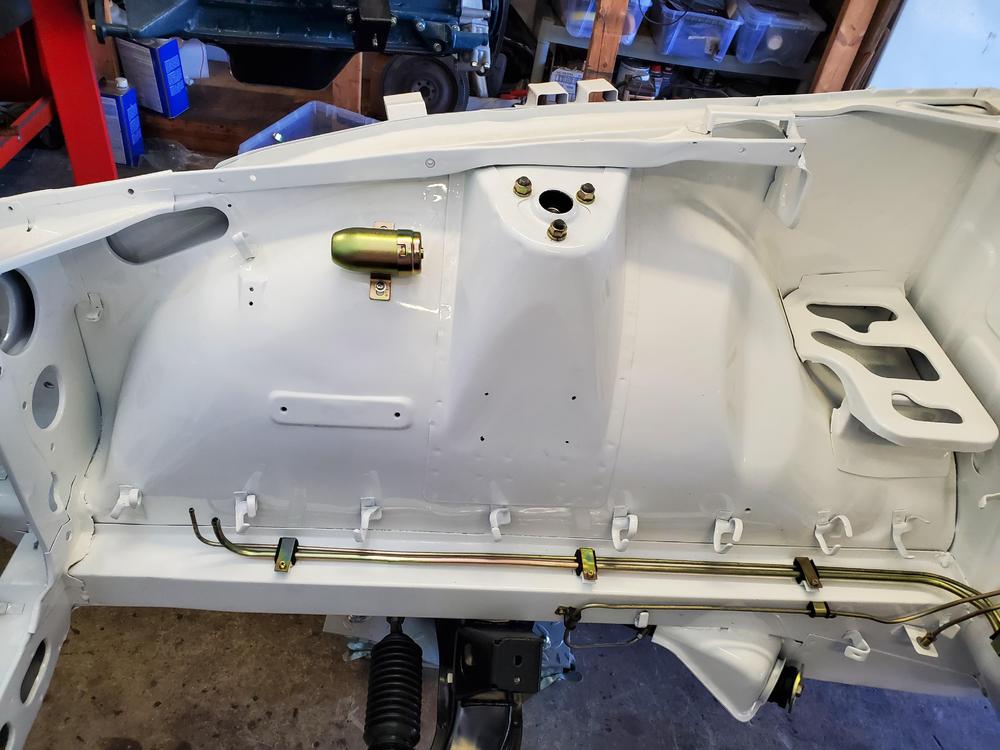
Got the POR-15 finished last Tuesday. Undercoating sprayed on Thursday. Most of the fuel and brake lines on Saturday and front suspension put in yesterday. Moving right along here. Hope to have rear suspension in on Tuesday. E-brake and smaller lines in on Thursday. Then complete engine and drive train installed this coming weekend. The more I get on the car, the more it opens up space in the garage. Here's a few pics.


 1 point
 -
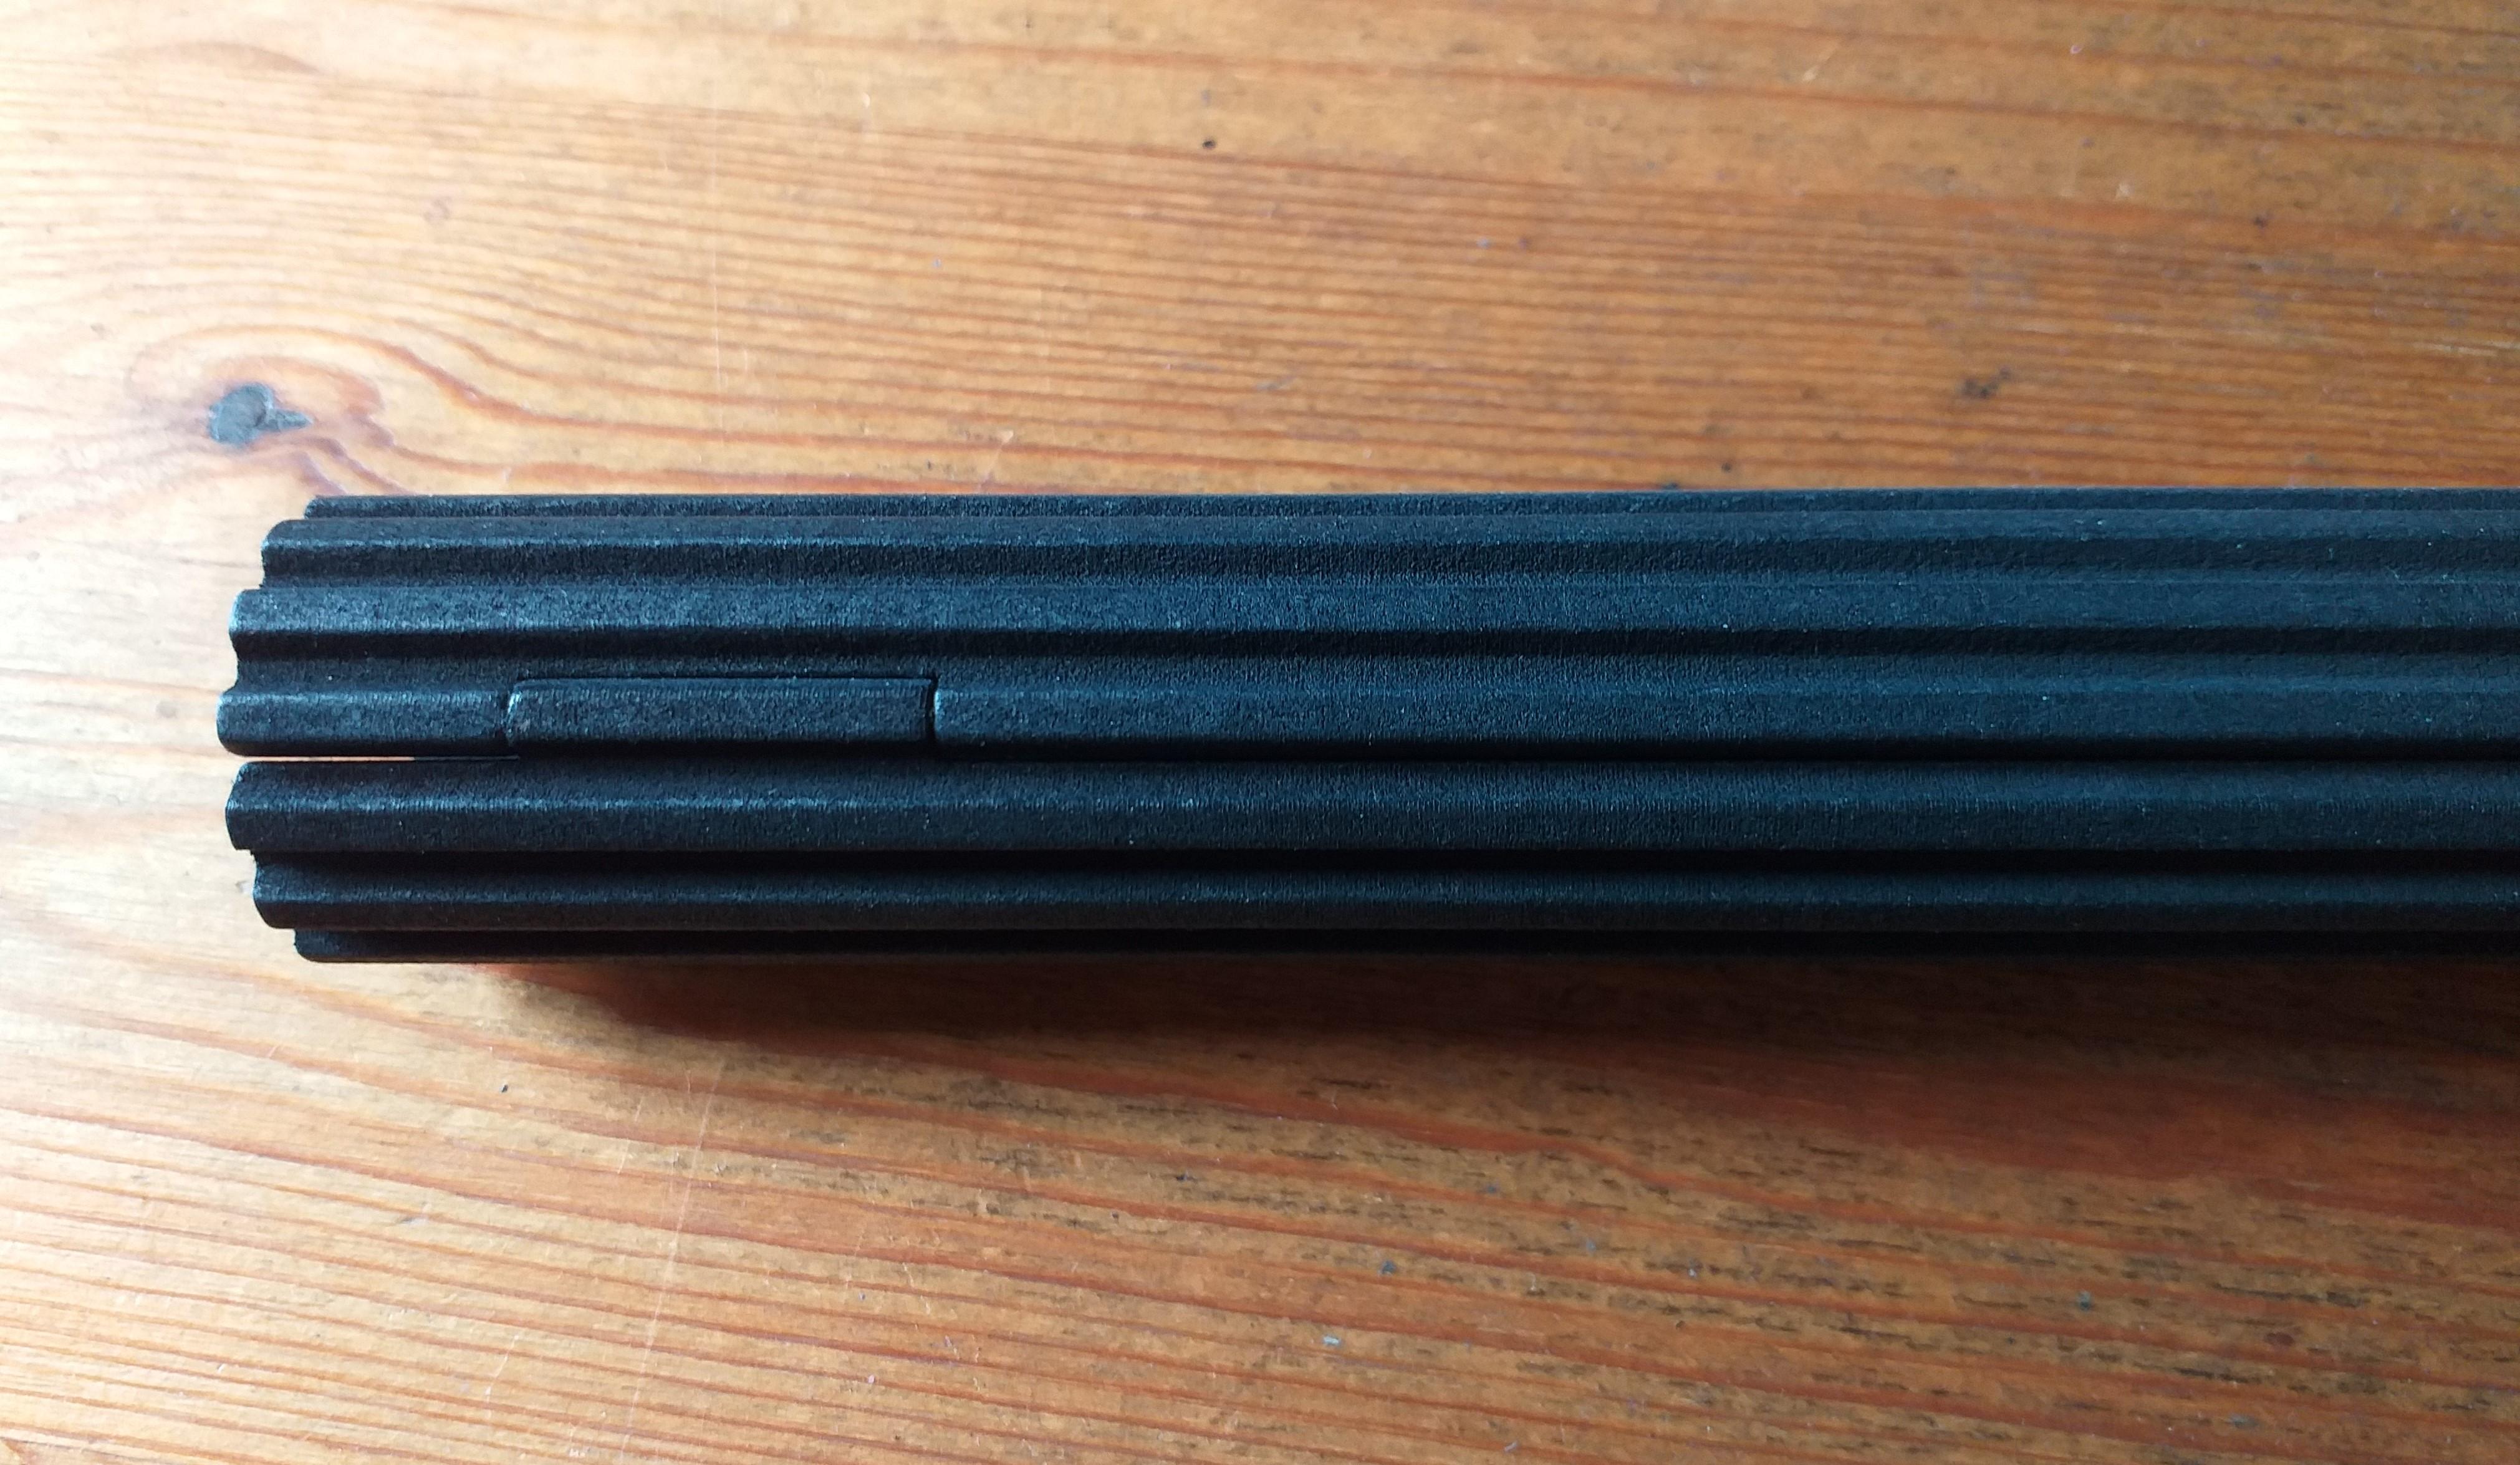
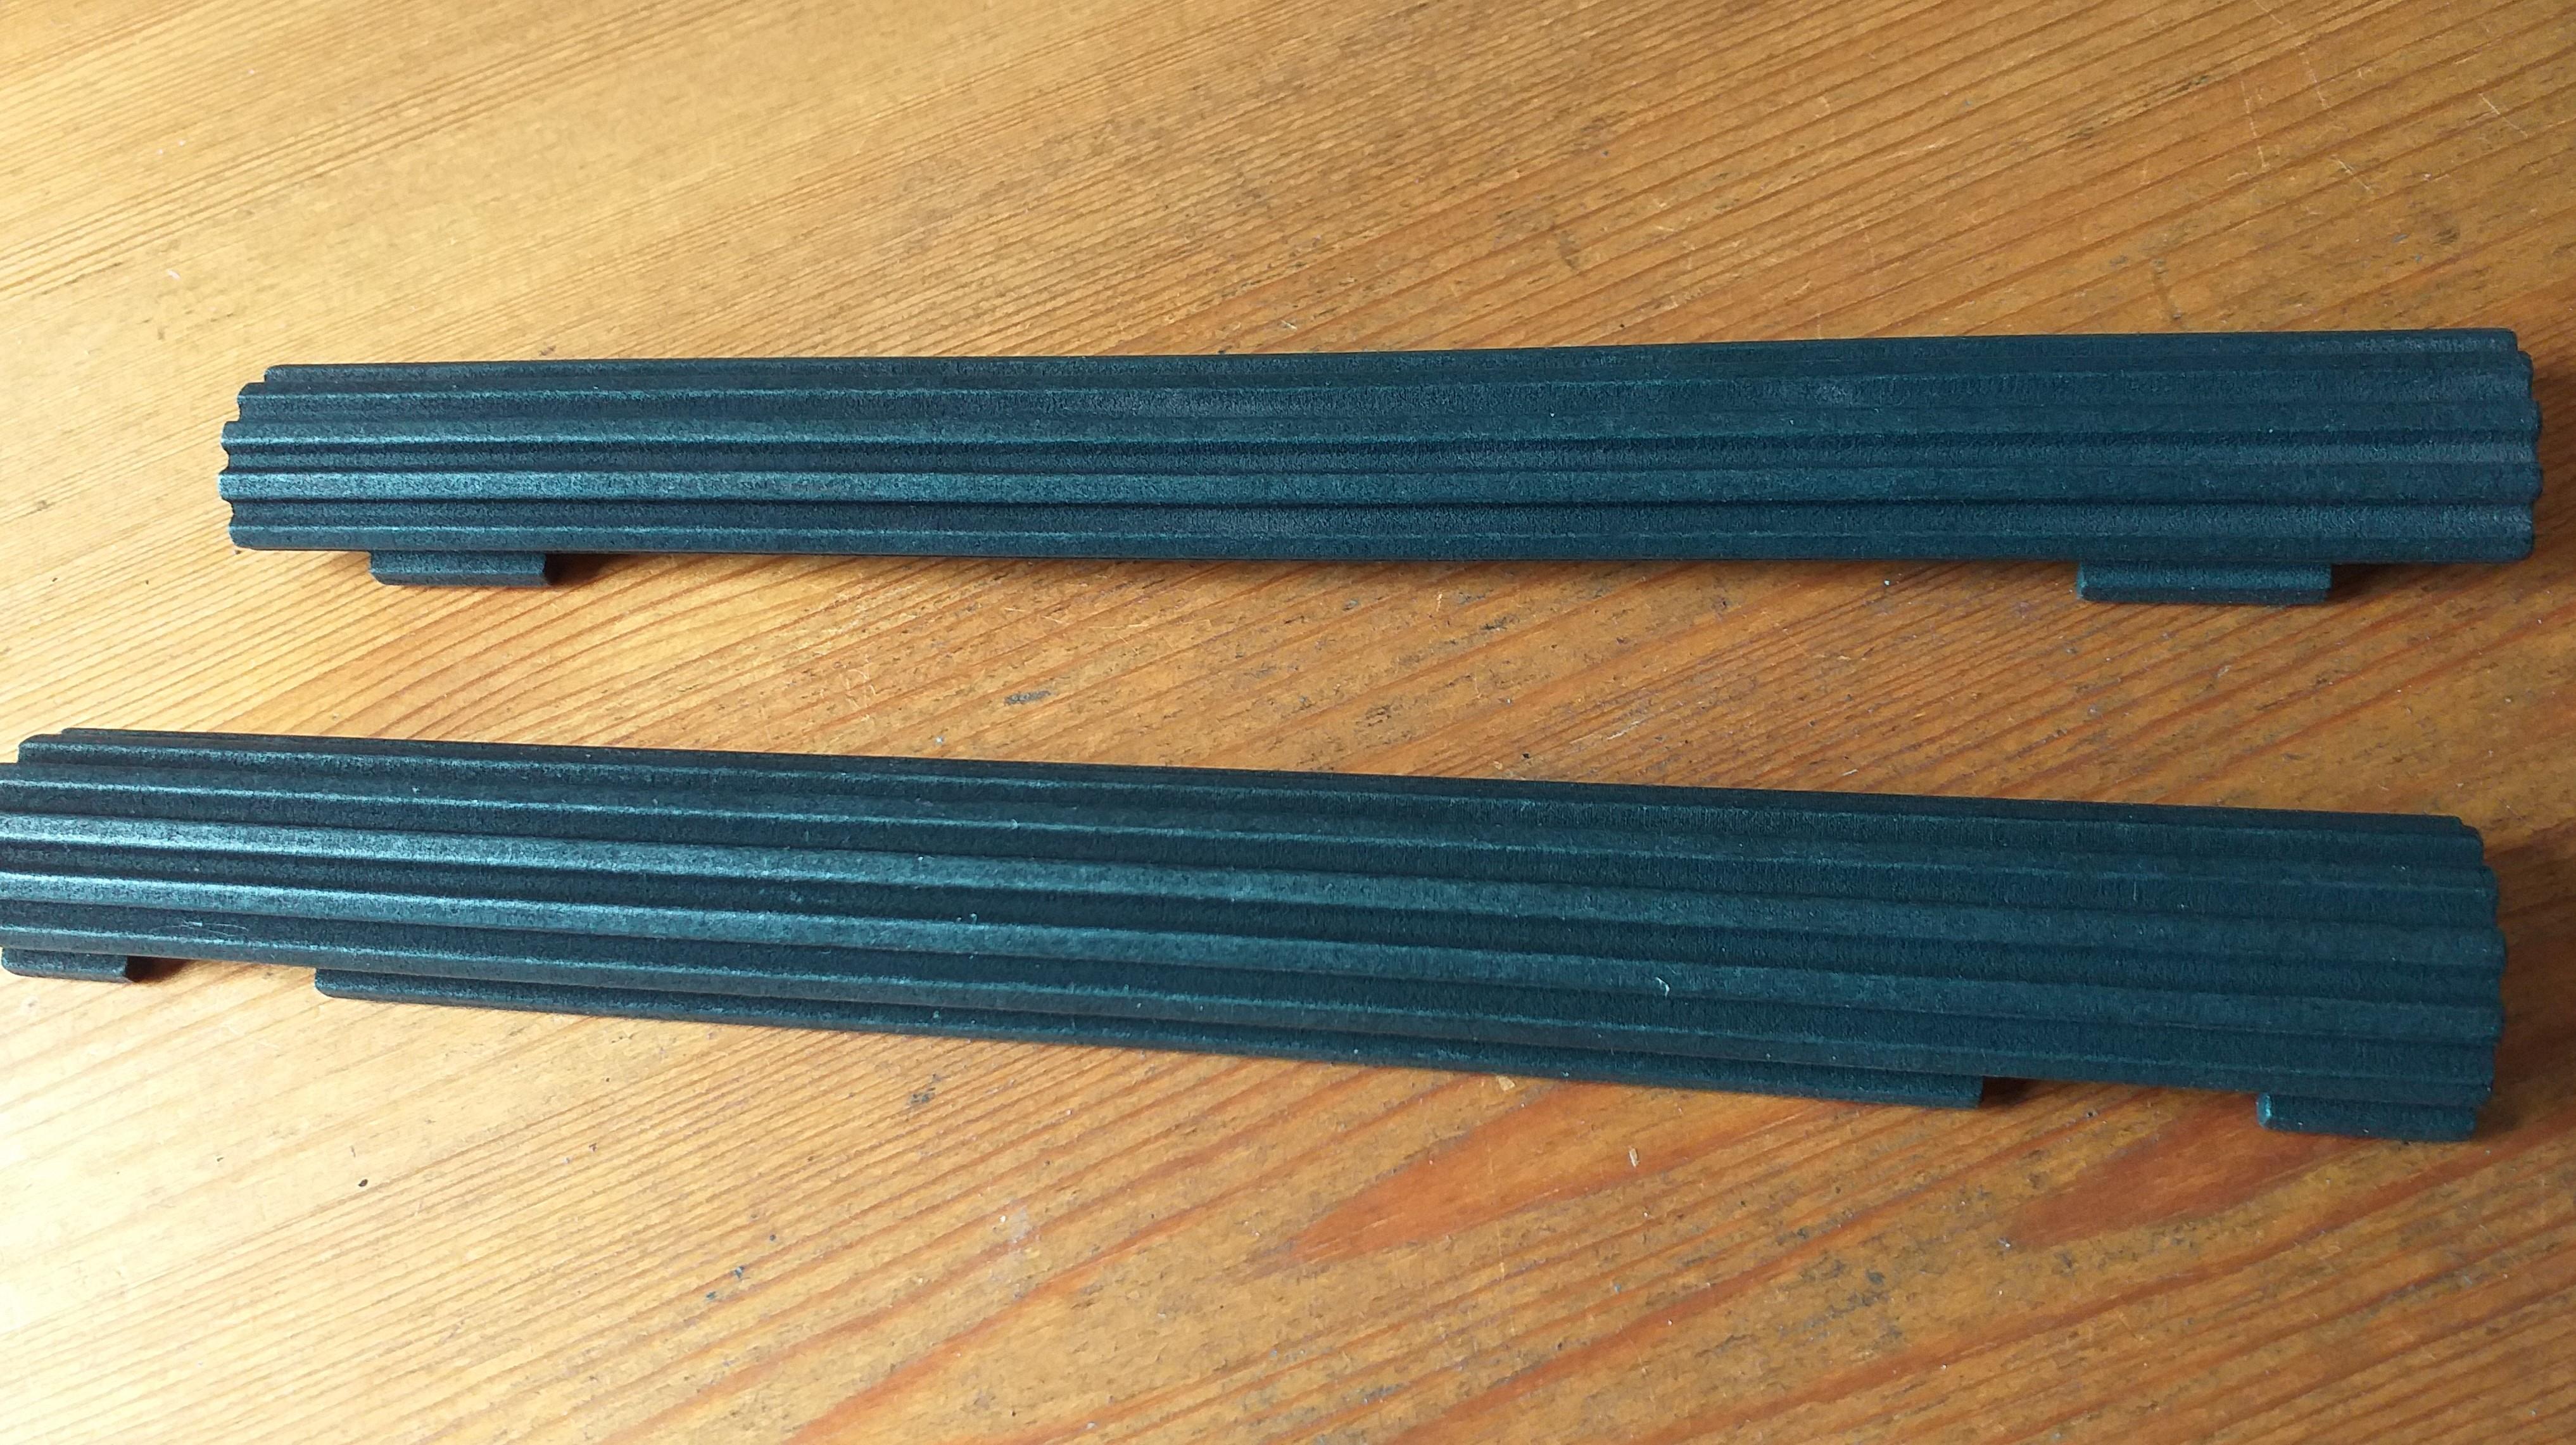
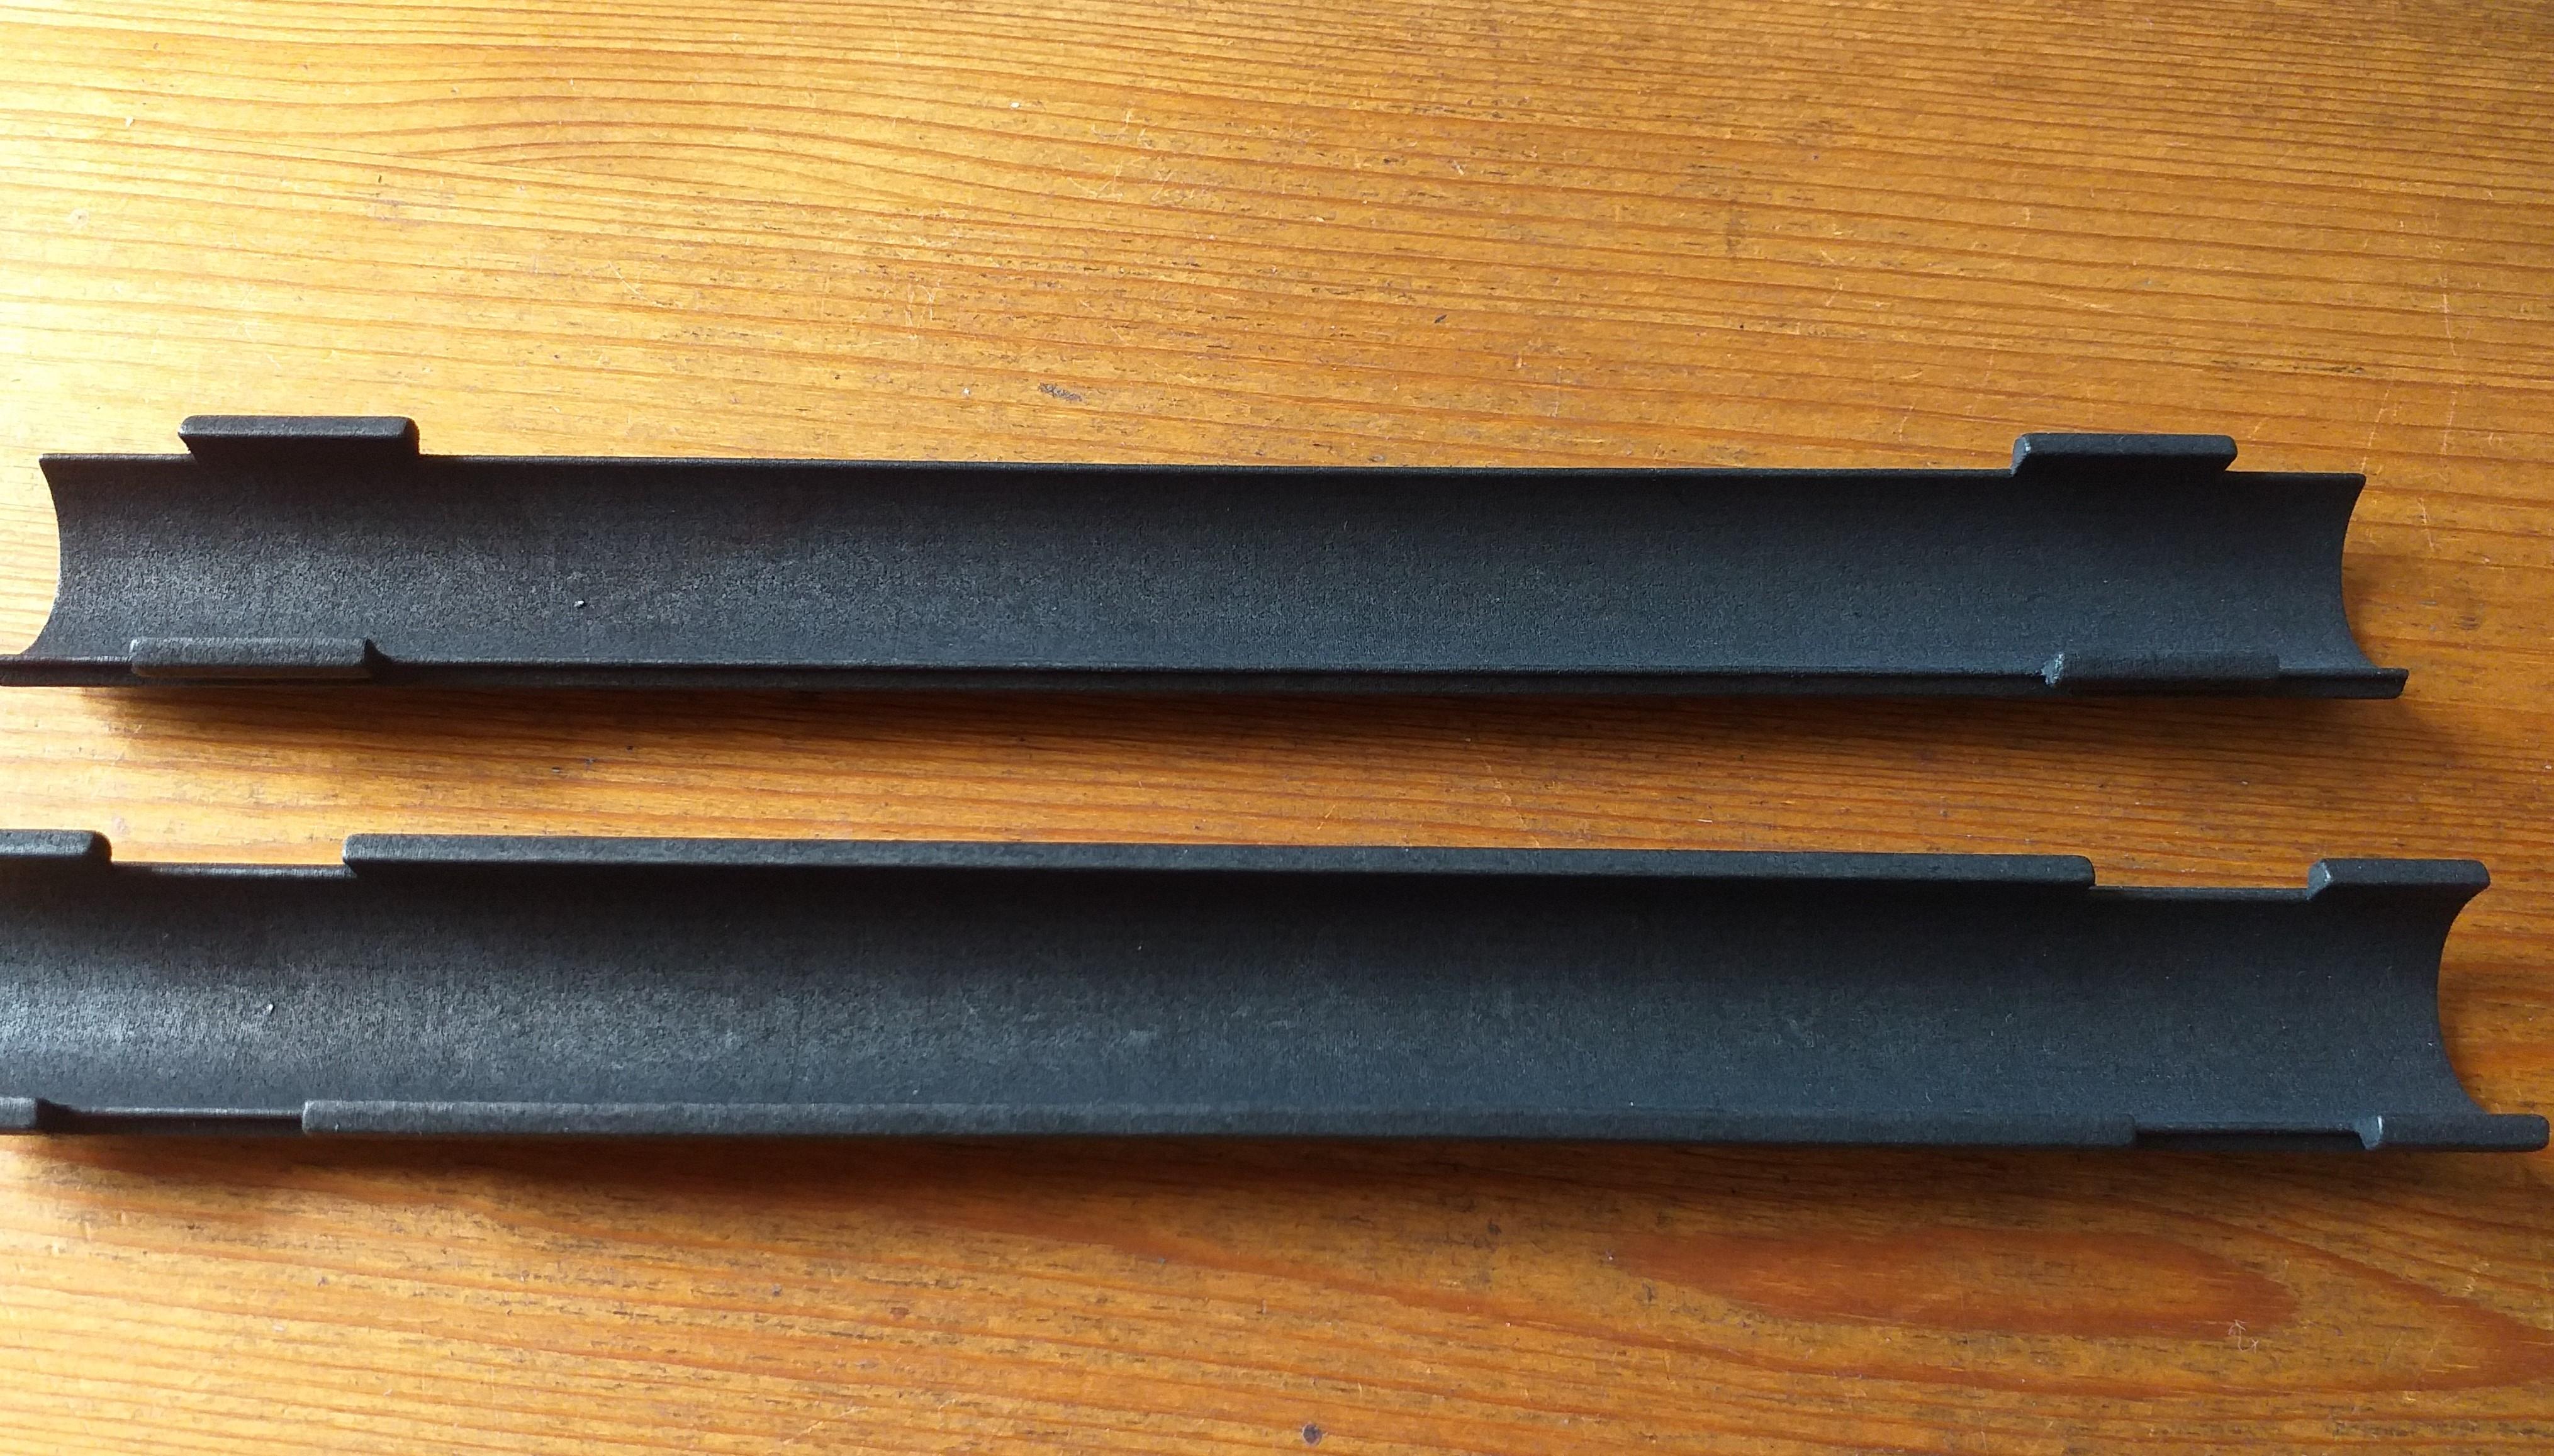
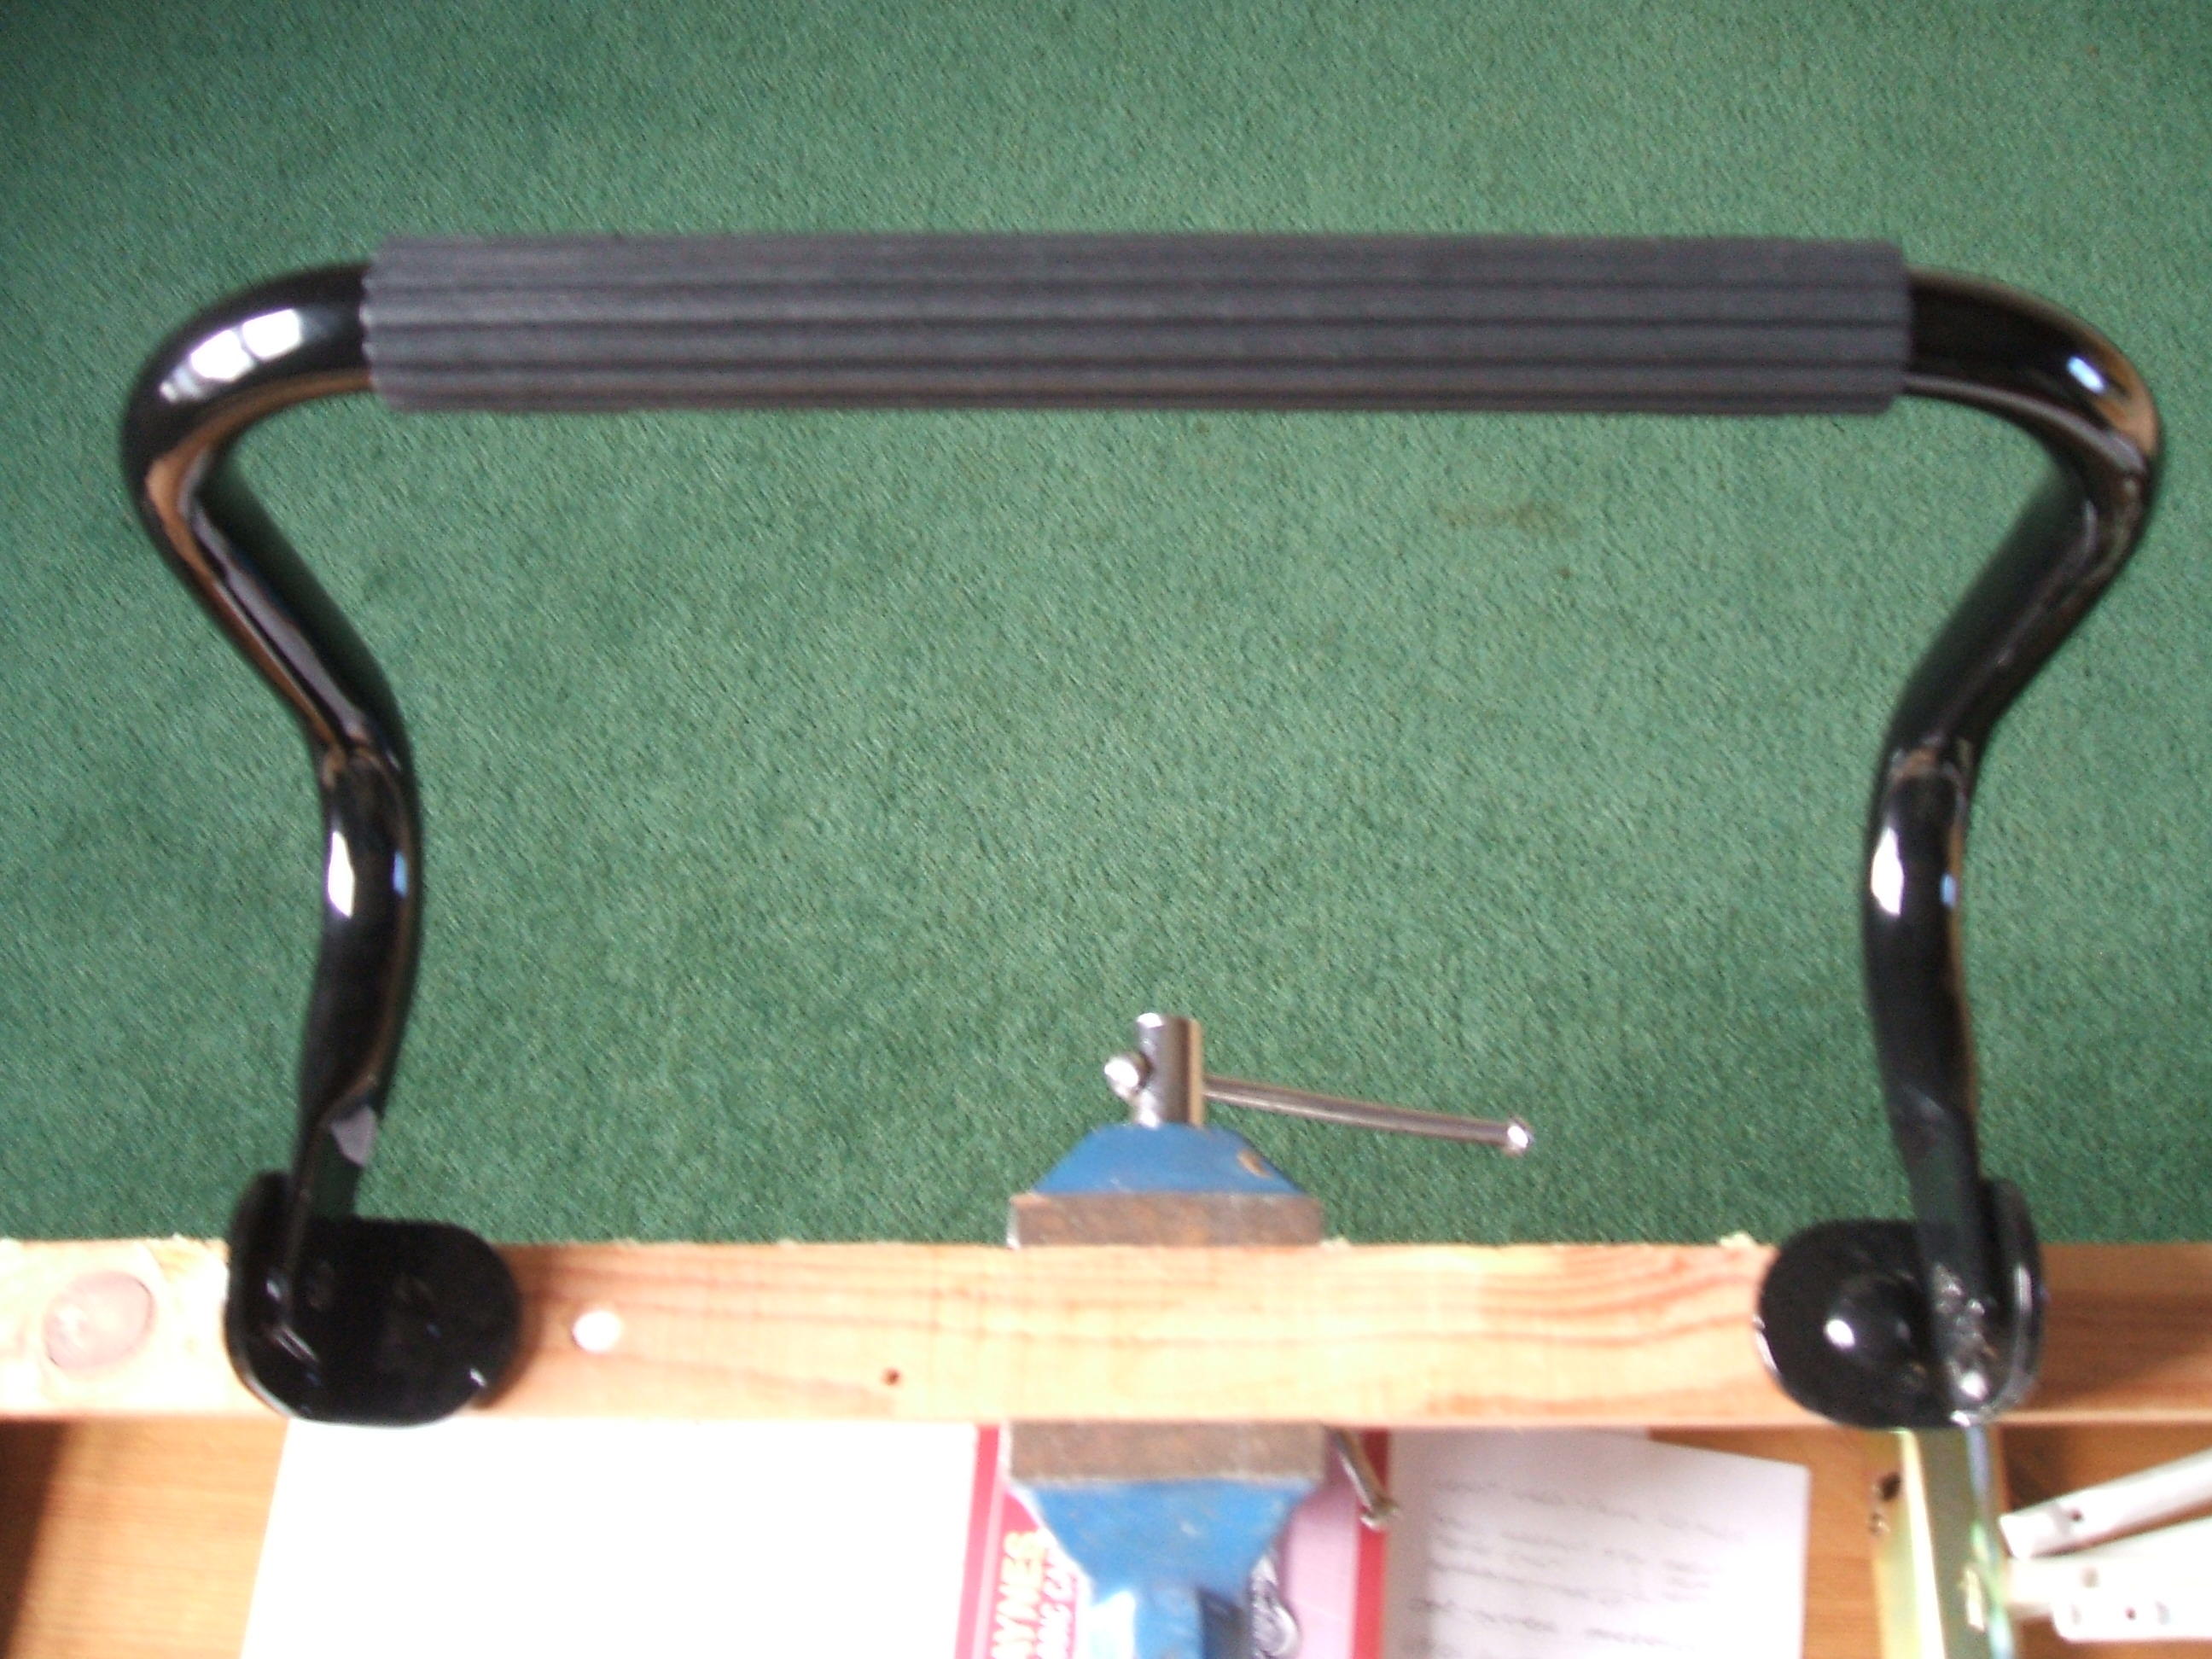
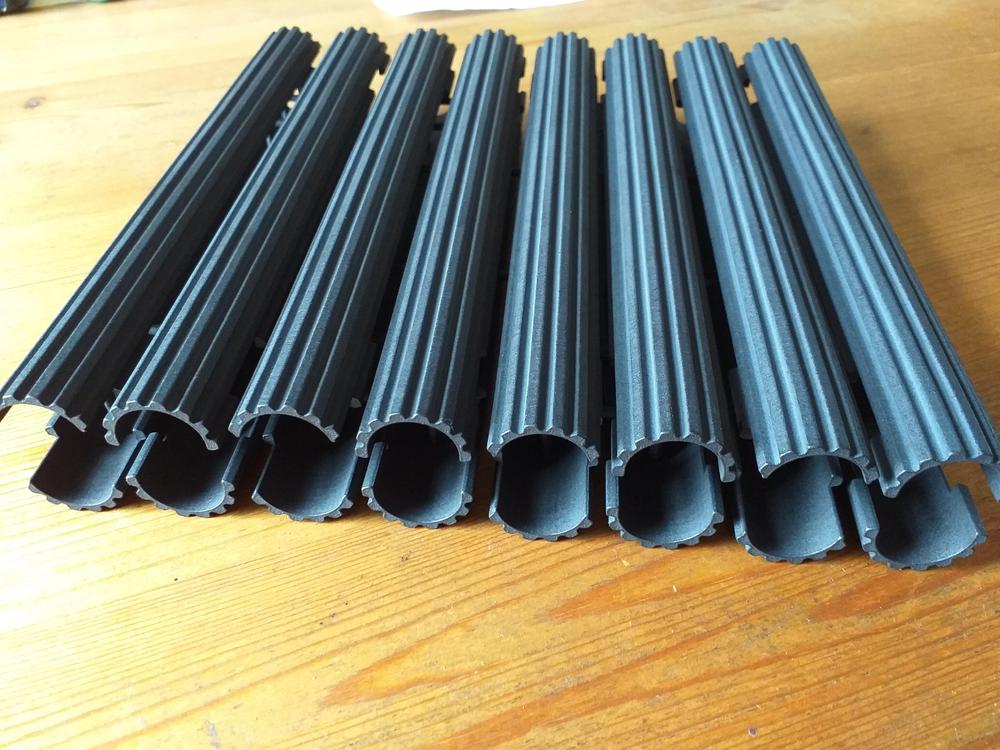
1 pointHello, This follows on from this thread; As I have had a couple interested parties in the ribbed rubber part, lets see if we can do a group buy/small production run. From the above thread; The ribbed rubber foot grip is usually ripped on on original un-restored footrest, so finding one intact is good. Sometimes the original rubber grip looks like has been put on in a hurry at production, and can have the ribs running crooked. There is a Nissan part number for this, which is NLA. There is a re-production one on Yahoo auctions, but it doesn't look right. Yes, you could use some ribbed floor matting, but the finding the correct ribs, and then they look wrong as they are designed to lay flat. Not round a metal bar of a tight radius. The effect is the ribs are too splayed. So, I had to reproduce my own, 3D printed, so it looks correct. The reproduction rubber foot grip I had CAD drawn from an original, then 3D printed in plastic. For me, the look was much more important than being in the right material, as more than likely the original was extruded. Now, most owners won't use their footrests as much as when originally fitted, as the cars/parts are much more covetted. So, yes printed in nylon, correct length, number of ribs, the correct shape and spacing. As you see I have made some castleated additon to the parts, this will help get the parts lined up and a good fit. Then will require glueing on, I can talk you through that later. Everyone thinks 3D printing is cheap, it can be for small parts, but it doesn't work for this, as the part is long, and to get 8 (16 halves) brings the build volume up and in a way to make an "Airfix"model frame so it can be actually printed. Price is $60 plus shipping. US people, its probably going to be cheaper to ship all to one person (price spread between you) and then ship internally. Shipping to and from the US has risen hugely over the last few years. I am in the UK. To happen, 8 people needed, as this is how many footrest ribbed parts are in the file. PM me, or add here.


 1 point
 -
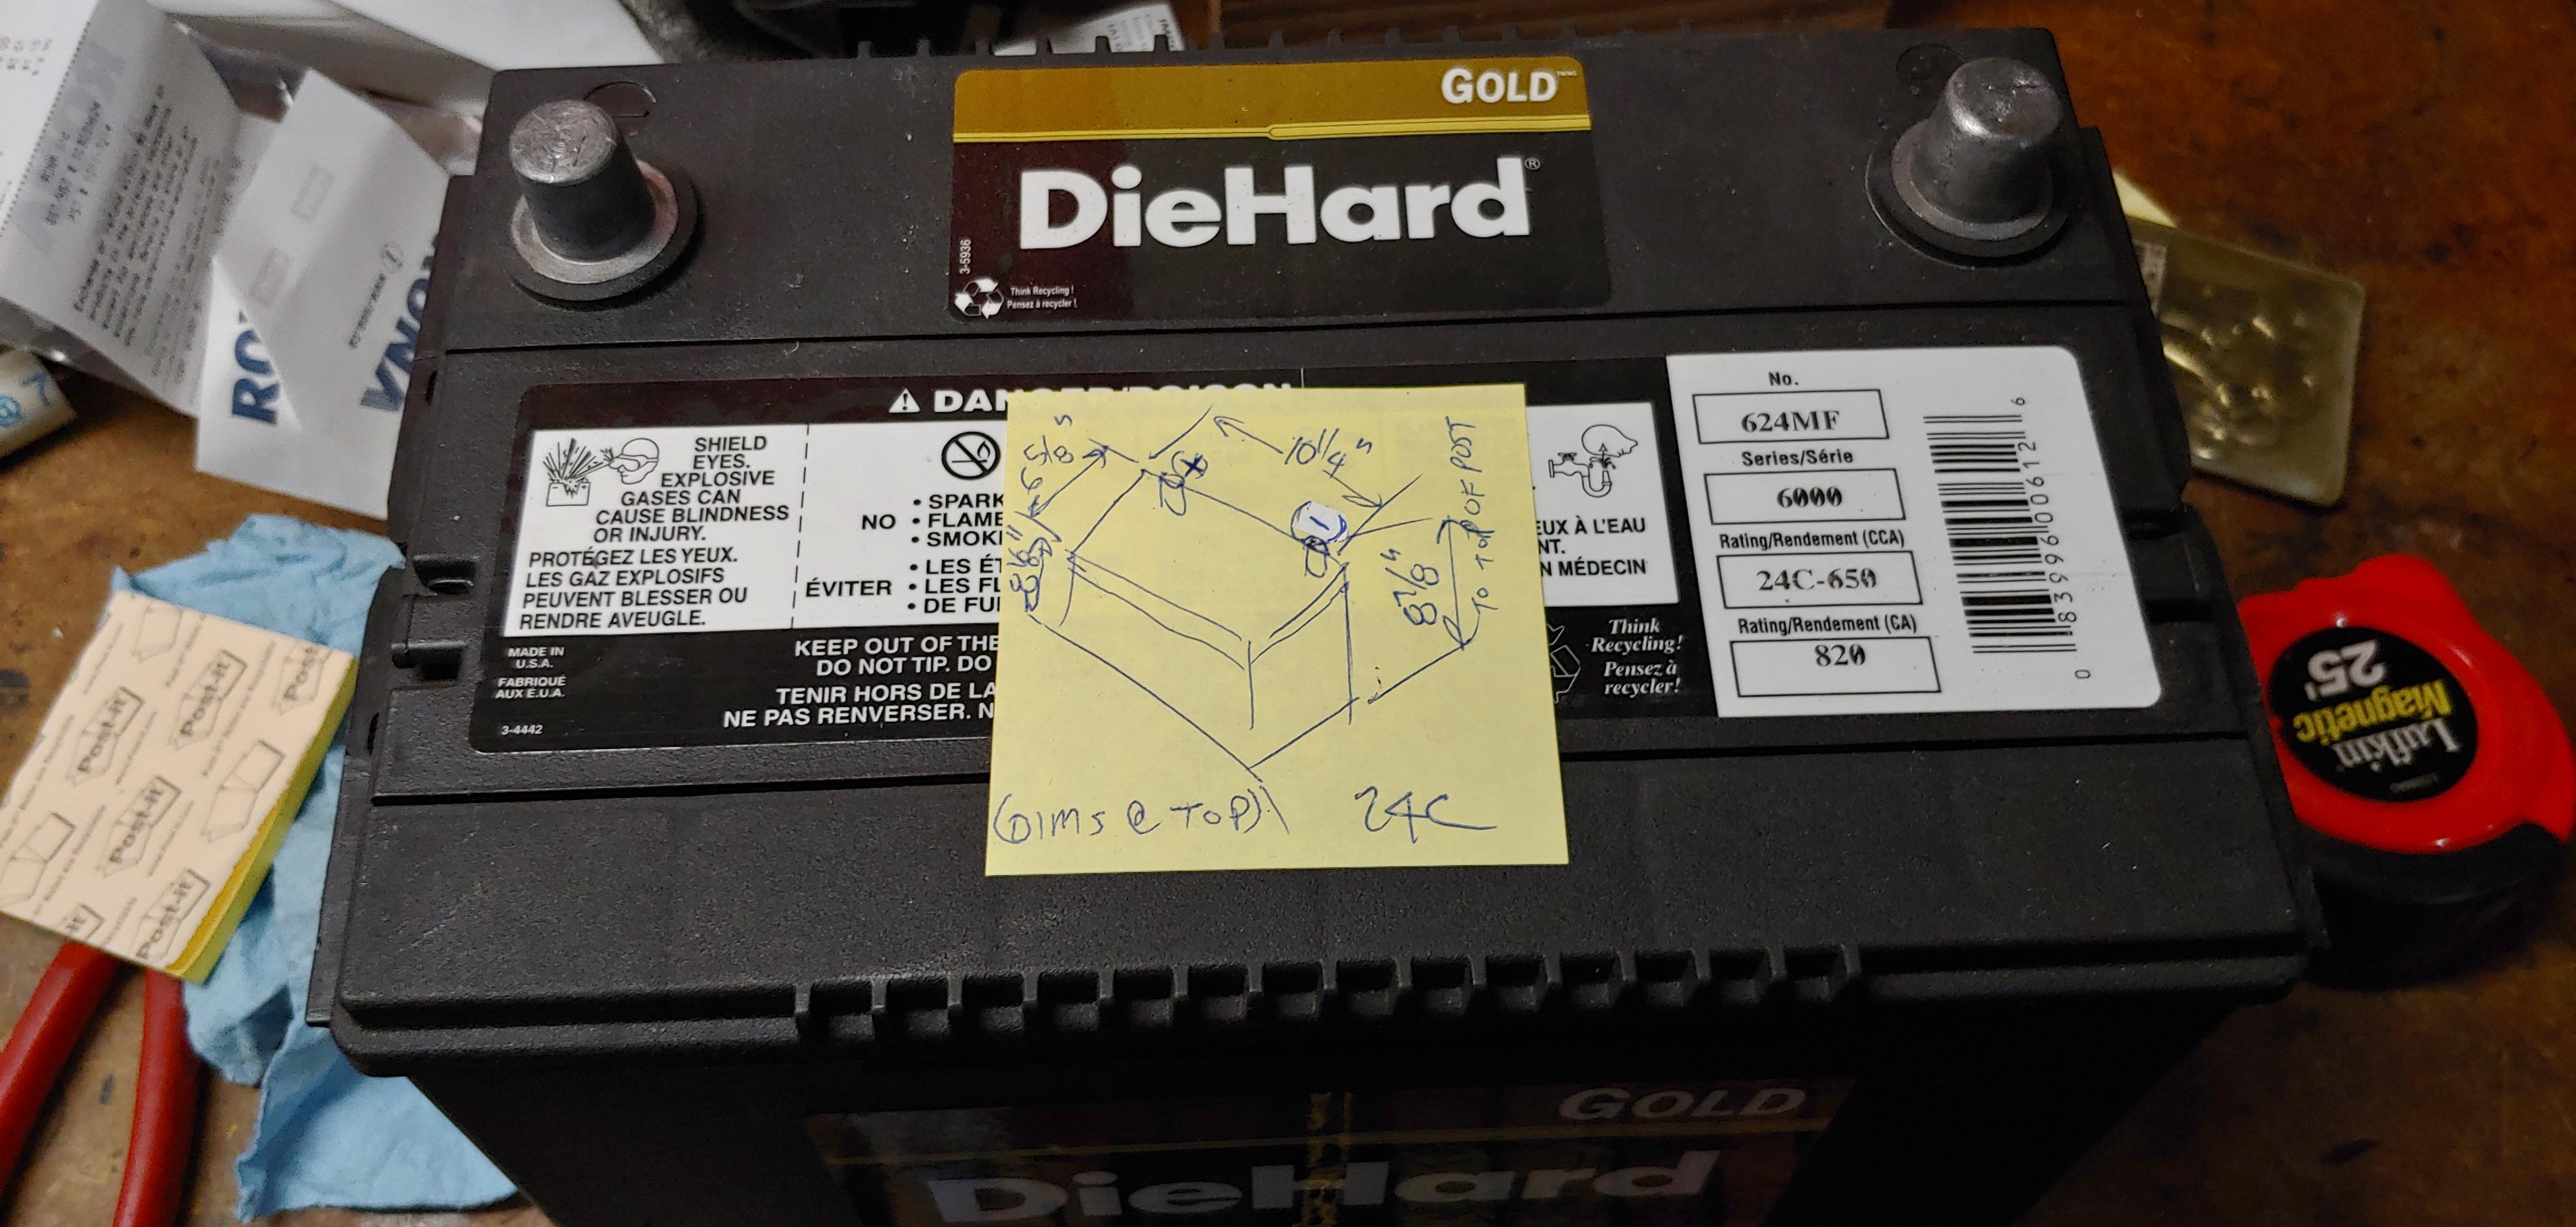
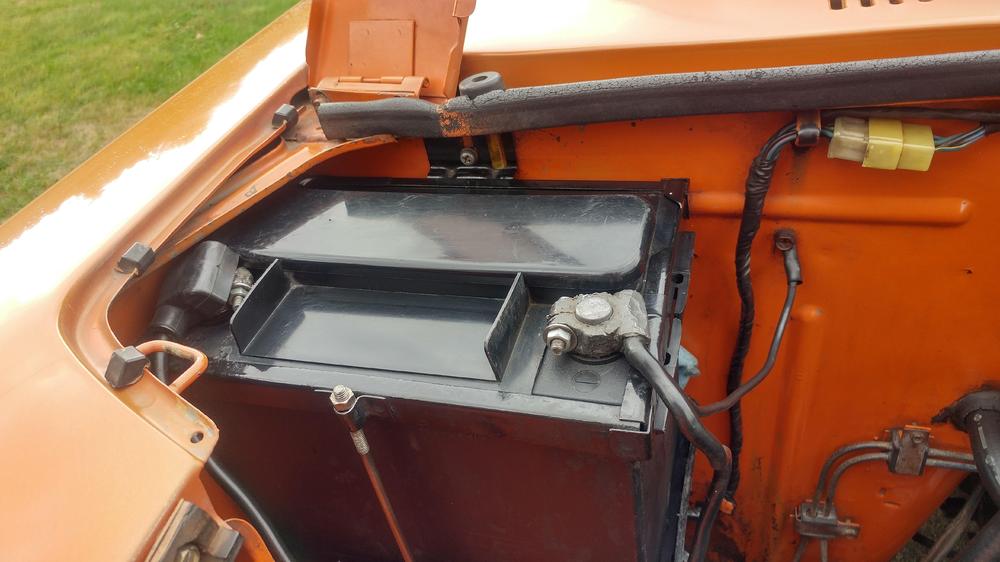
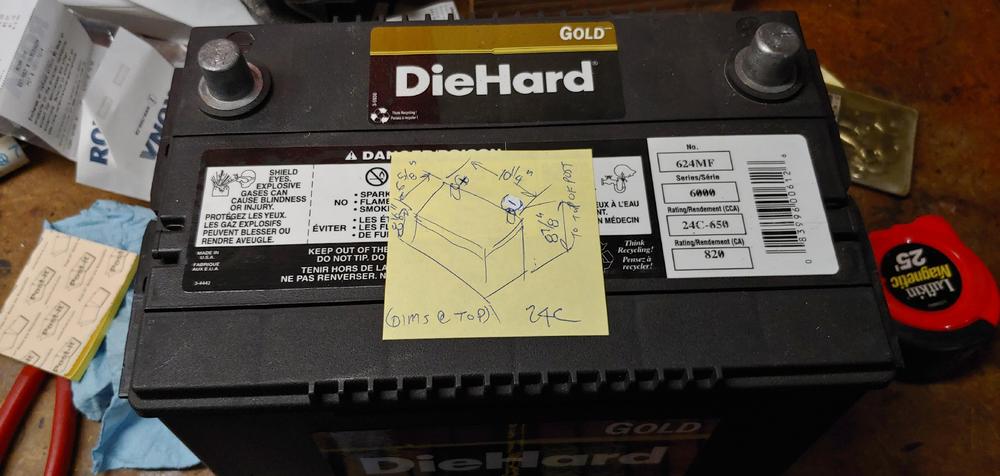
1 pointI have been using a DieHard Gold Group 24 battery (same terminal location as OEM) that has top vents but is flat on top and works with the stock cover. Like @Pilgrim mentioned to have no vents you would have to go to a gel battery.
 1 point
 -
1 point
-
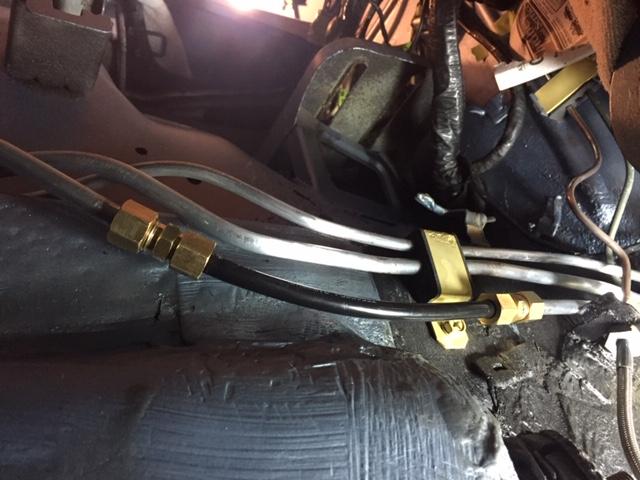
1 pointI thought I'd post an update to the "fix" I came up with for this problem. I ordered some nylon fuel line and "steel to nylon" compression fittings, cut out the corroded original piping, and installed the flex line with a compression fitting at each end. For perspective, the photo is taken from under the car looking up toward the underside of the battery tray (which you can see in the top of the photo). I was a little disappointed that I wasn't able to come up with a fix that allowed me to route the new line through the old bracket, but there just wasn't much room to work with under there. Hoping this will be safe and functional for the type of driving I do (once/month, sunny days, within the speed limit).
 1 point
 -
1 pointWhat kind of damage? They can be rebuilt. @borini63 has spare parts. I think that @zKars does also. Edit - Oops, I didn't see that SteveJ had already notified borini63. Didn't read it through the orange...1 point
-
1 point
-
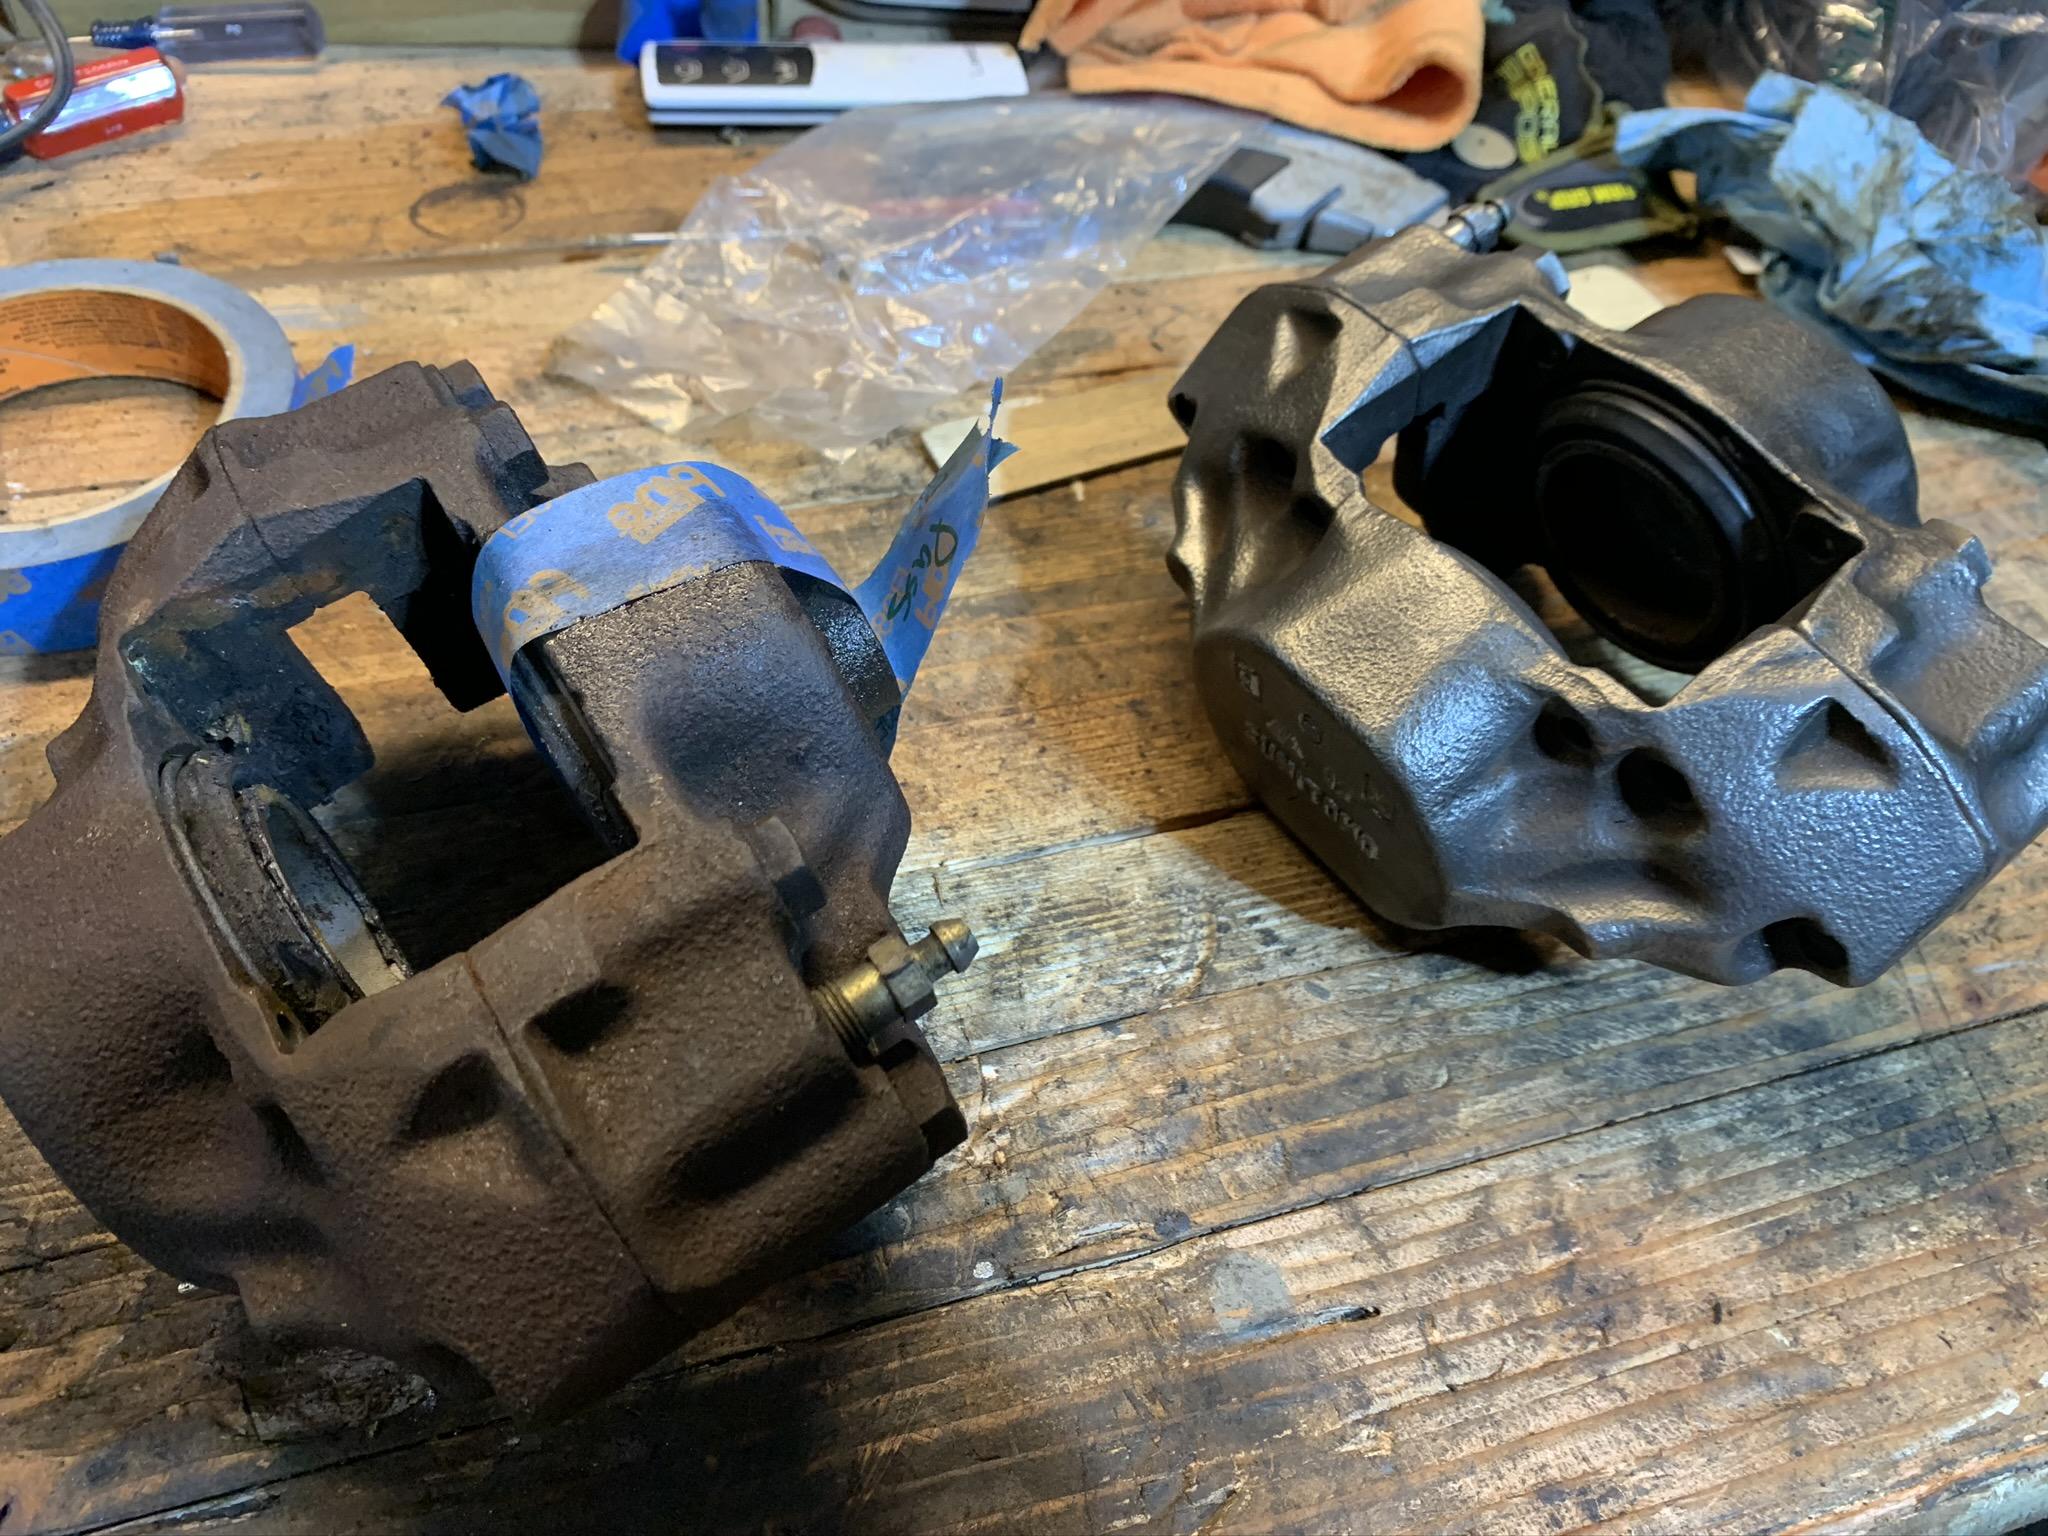
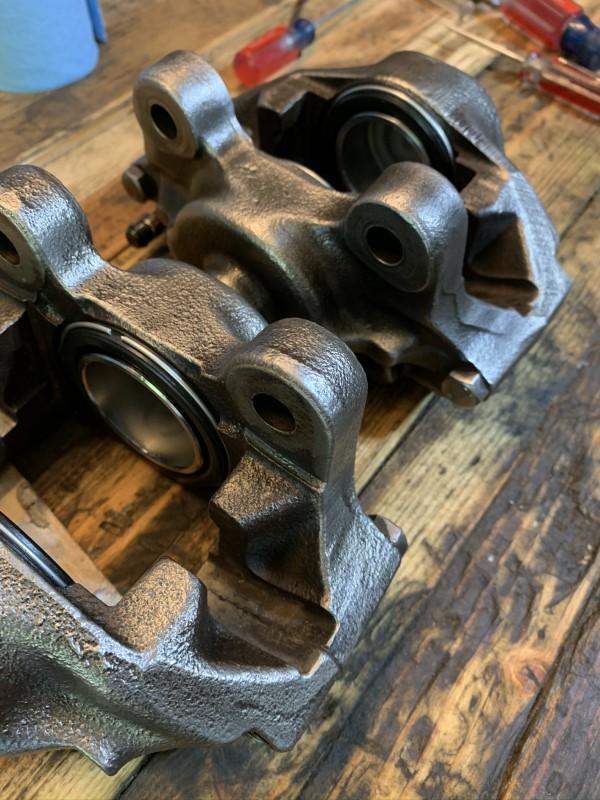
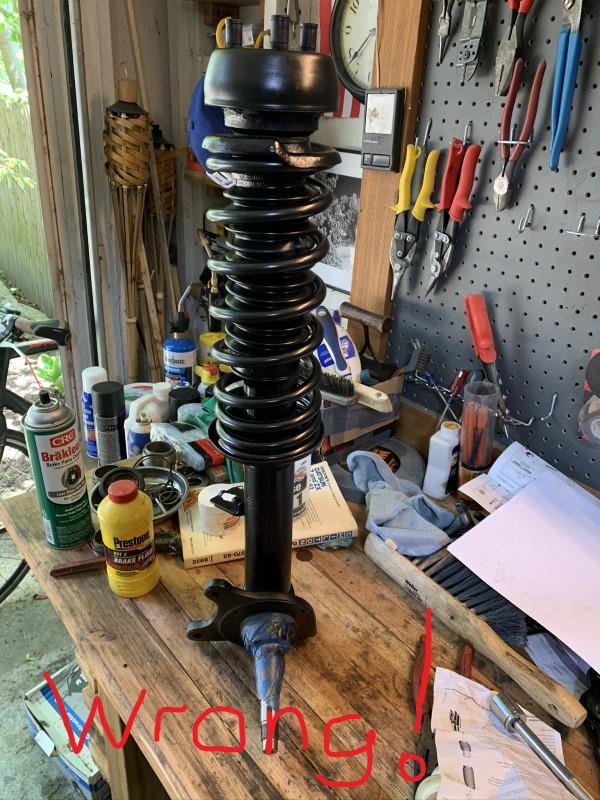
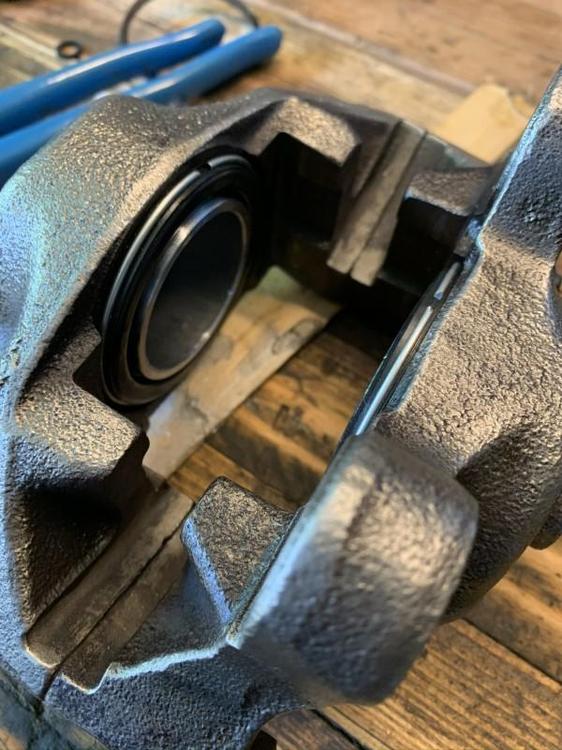
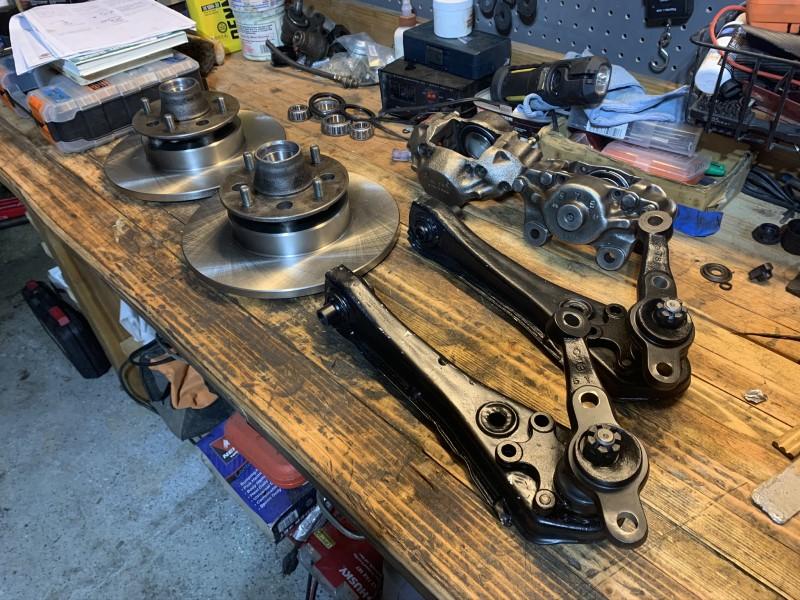
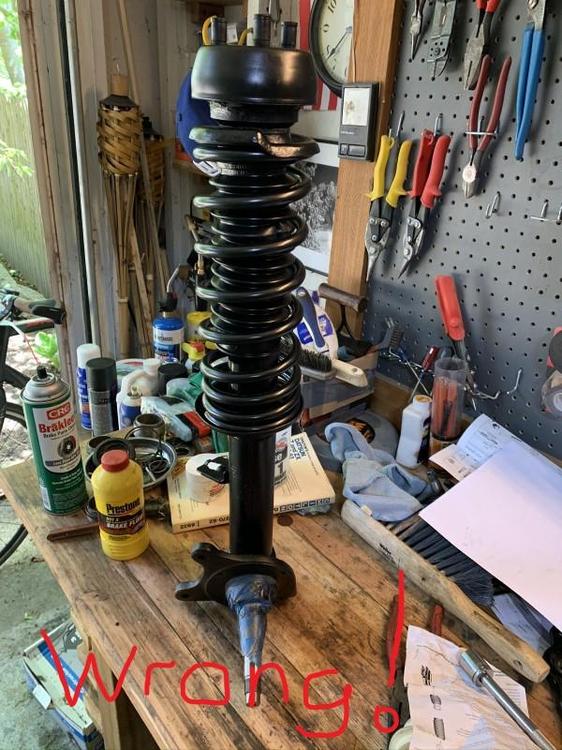
1 pointSteady progress is being made. The grease popped the stuck caliper pistons nicely. However, it then clogged up the inner passage ways. After a lot of trial and error (air and various cleaners did nothing) I was able to put both pistons half way in and grip them so they wouldn't move then I used compressed air. Few times like this and they finally unplugged. Tested with carb cleaner multiple times and saw it come out the other side. Looks like it is all good now. Next I disassembled the hubs and removed the bearings and races. Lastly shocks and struts have been replaced and I bought new ball joints. Front suspension is getting close. I was so proud of myself when I finished the first shock and strut and then I realized I put on the rear springs. Posting the picture of what it should NOT look like. I know nothing here is too earth shattering but I can't believe I have gotten this far. ''


 1 point
 -
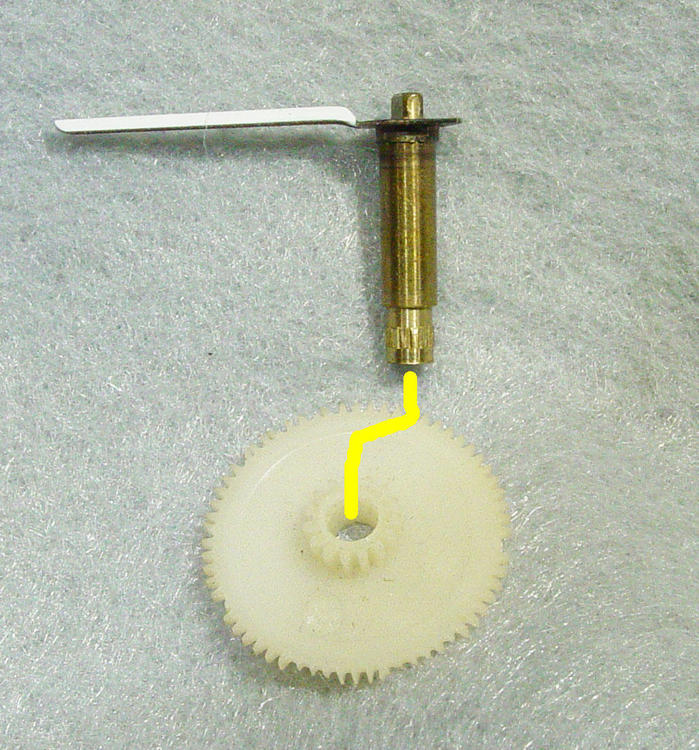
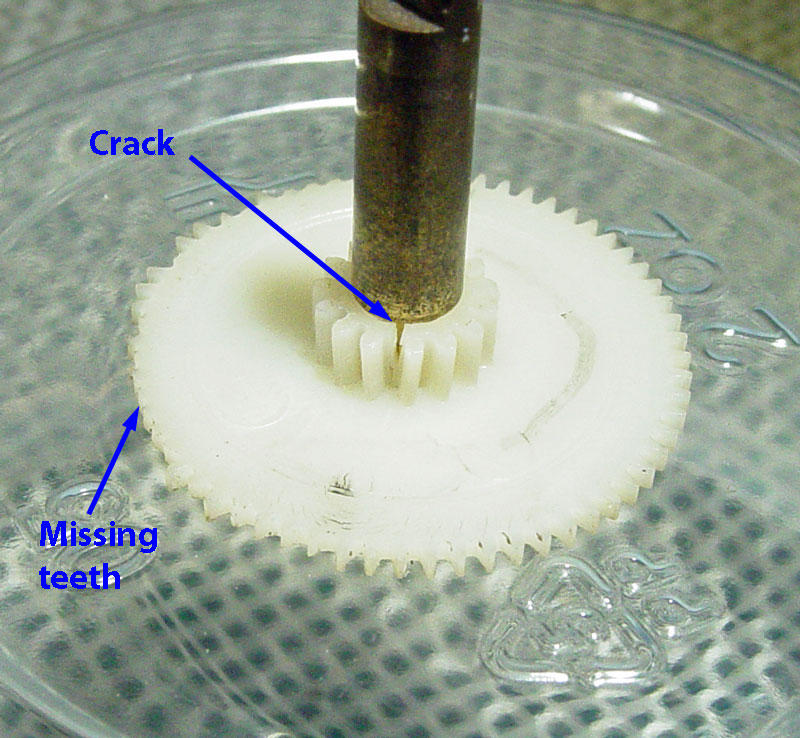
1 pointOk I have to respond again to this comment on clock hand removal. Forks, spoons, and knives are not the correct tools for the job! You may be able to get the hands off, but at what cost. I know this may work for some, but using a fork/spoon can cause a big problem . This method can cause the clock stem to come out of the nylon main drive gear as pictured. In addition, this rocking motion of the clock stem back and forth can crack the brittle nylon gear which the stem is inserted. A gear puller pulls the clock hand up while pushing down on the clock stem and doesn't disturb the lower gear. Nylon gets brittle after 40 years and if you crack the smaller gear it distorts and will not mate correctly with the adjacent gear. This is what caused the pictured gear to fail. The cracked gear locked up the mating gear and the pressure applied by the owner to set the clock time stripped several teeth from the main drive gear .There are many types of gear pullers and I have a several , but the size of my hands make it difficult for me to use so I made my own. It only tool me 10 minutes on a small grinder to make this tool. Also, cardboard is not the material you should be using against the very delicate paint on the clock face. This is uber fine very porous flat paint. What I have found best and doesn't scratch is VIVA cloth towels. This also prevents hand oils from staining the paint which is extremely hard to remove. Never use any solvents , water or IPA( isopropyl alcohol) on the clock face. Kanto Seiki changed the white paint formula over the years and it may smear with water or IPA. I hope this helps. Ron
 1 point
 -
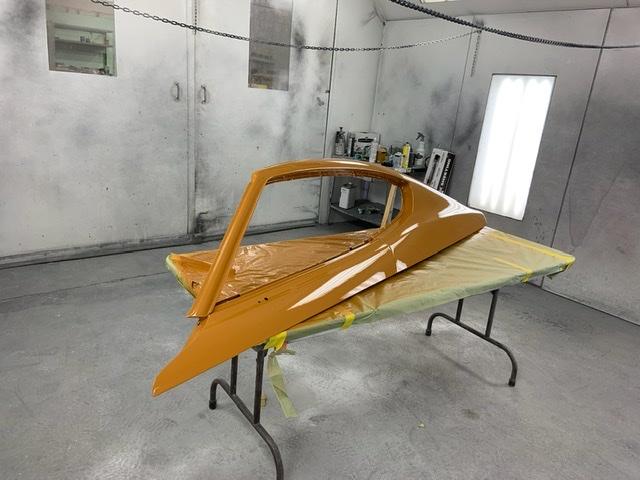
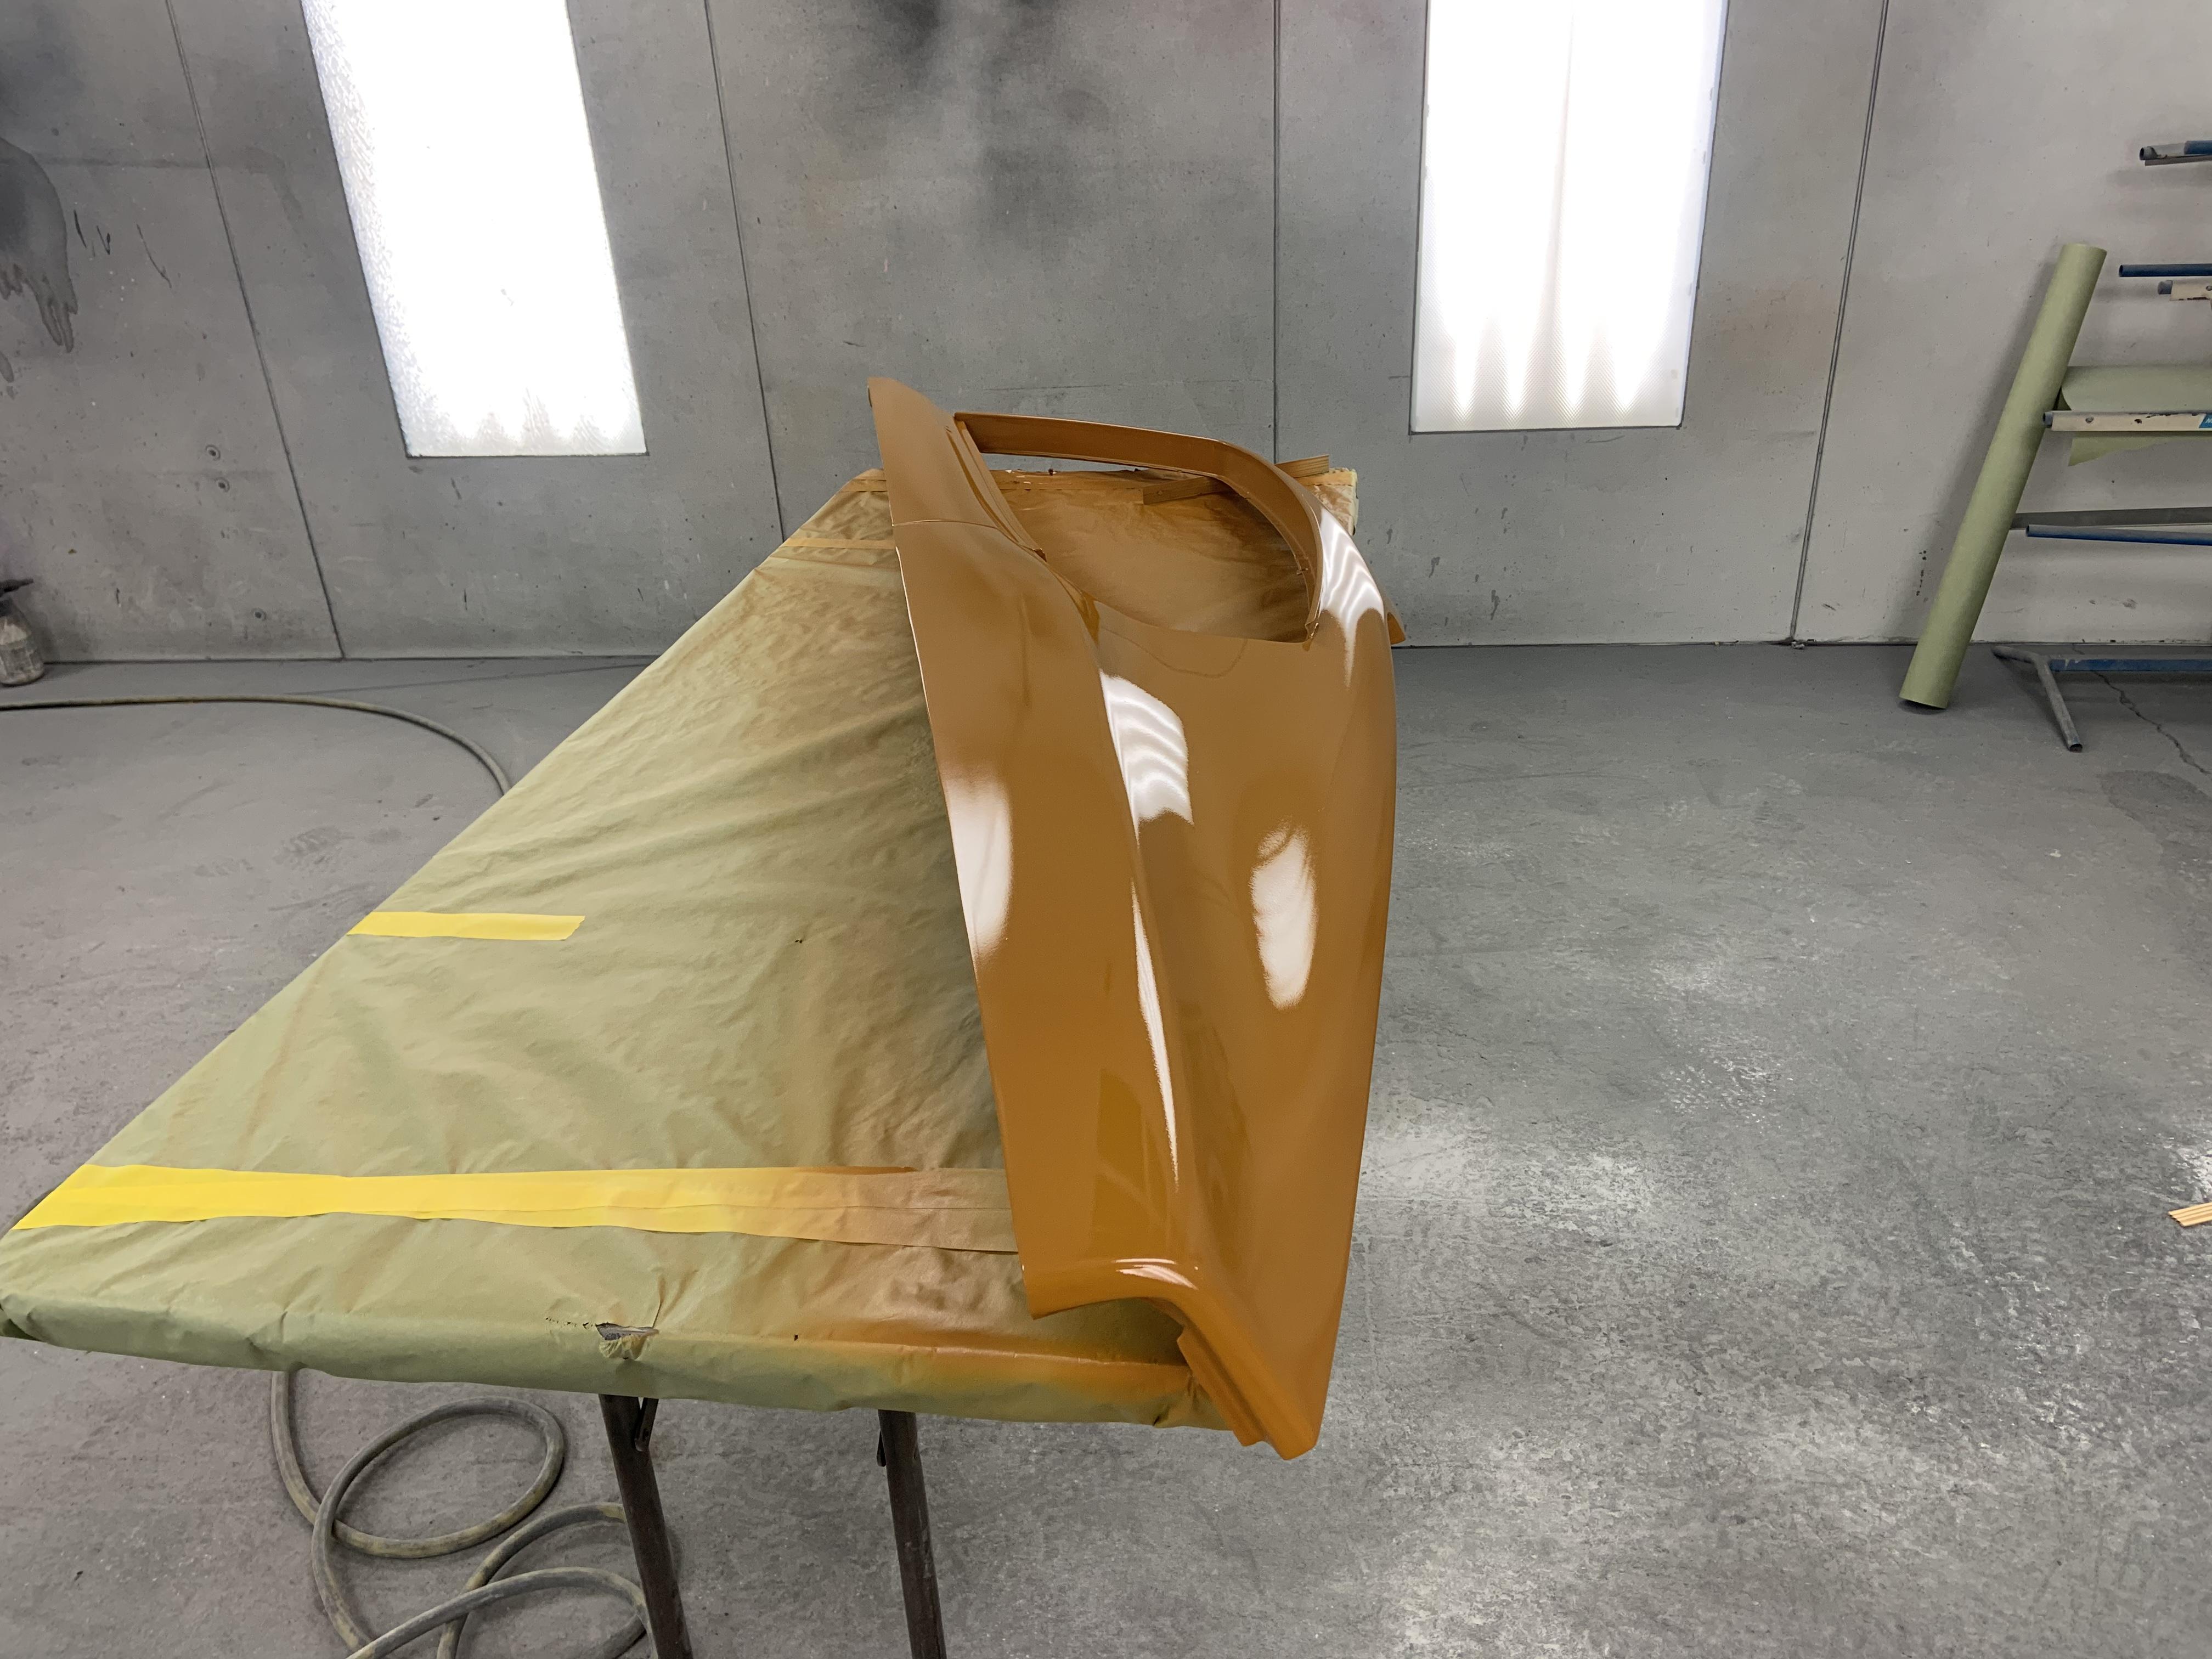
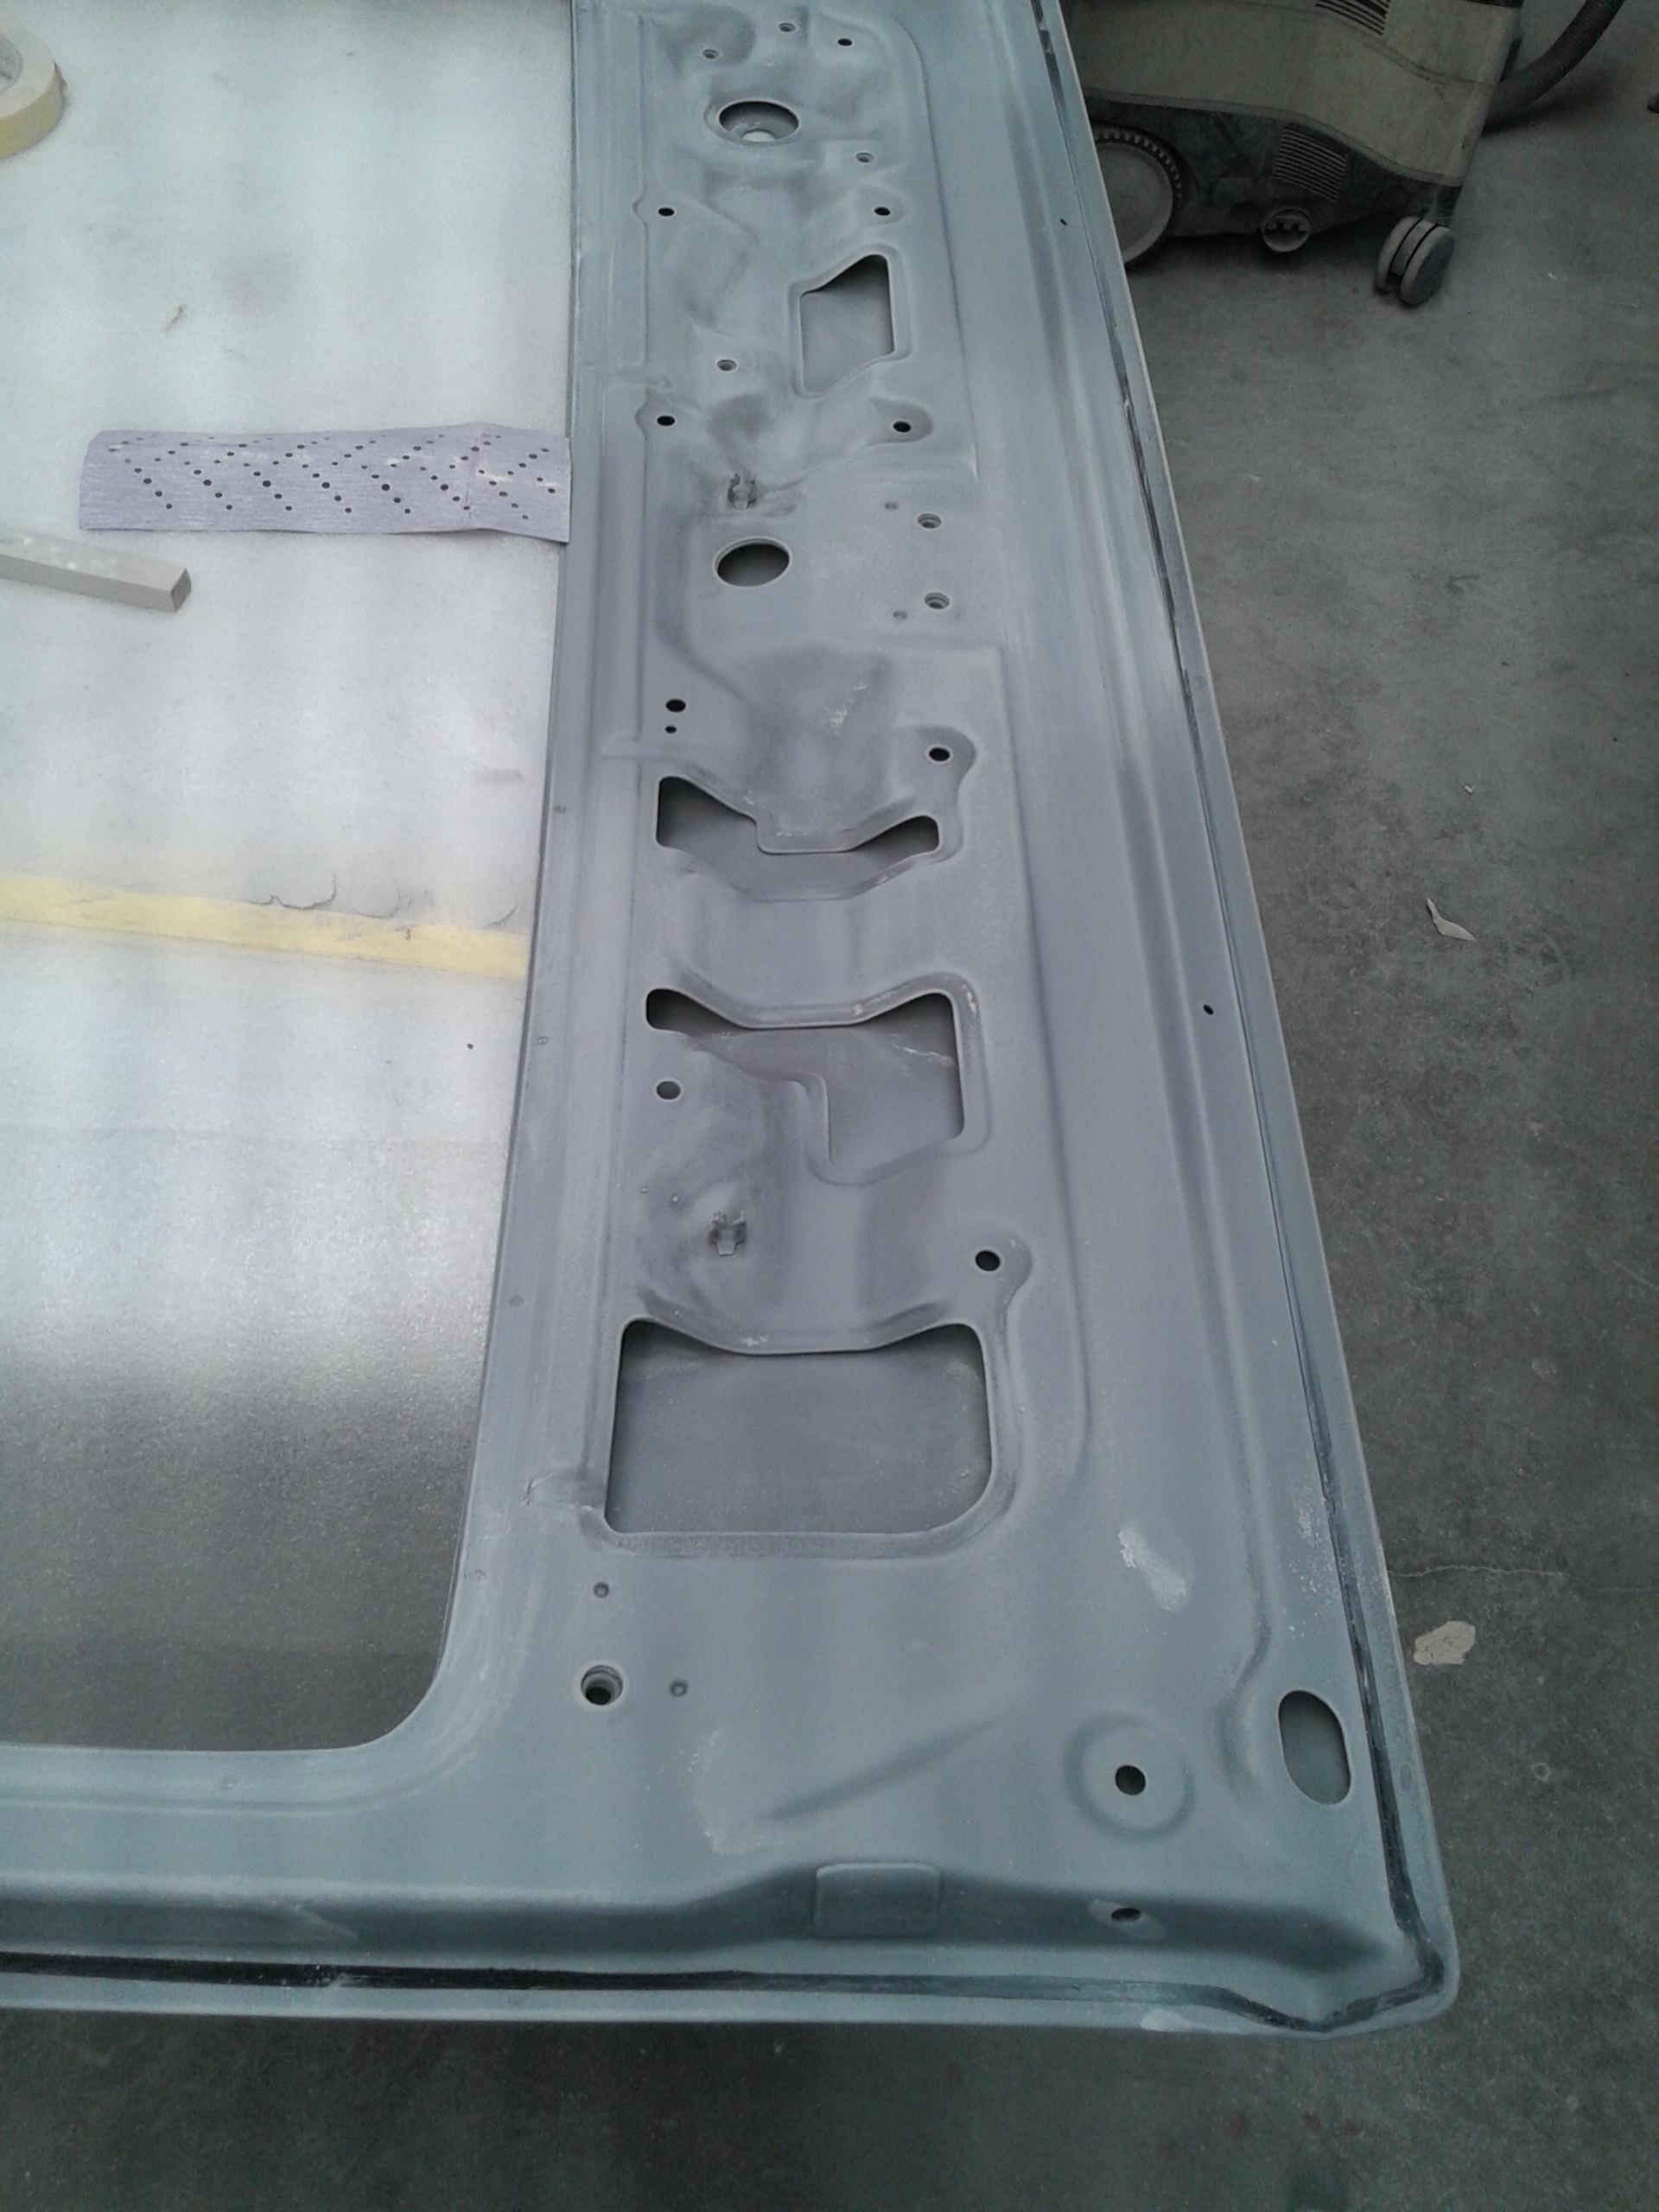
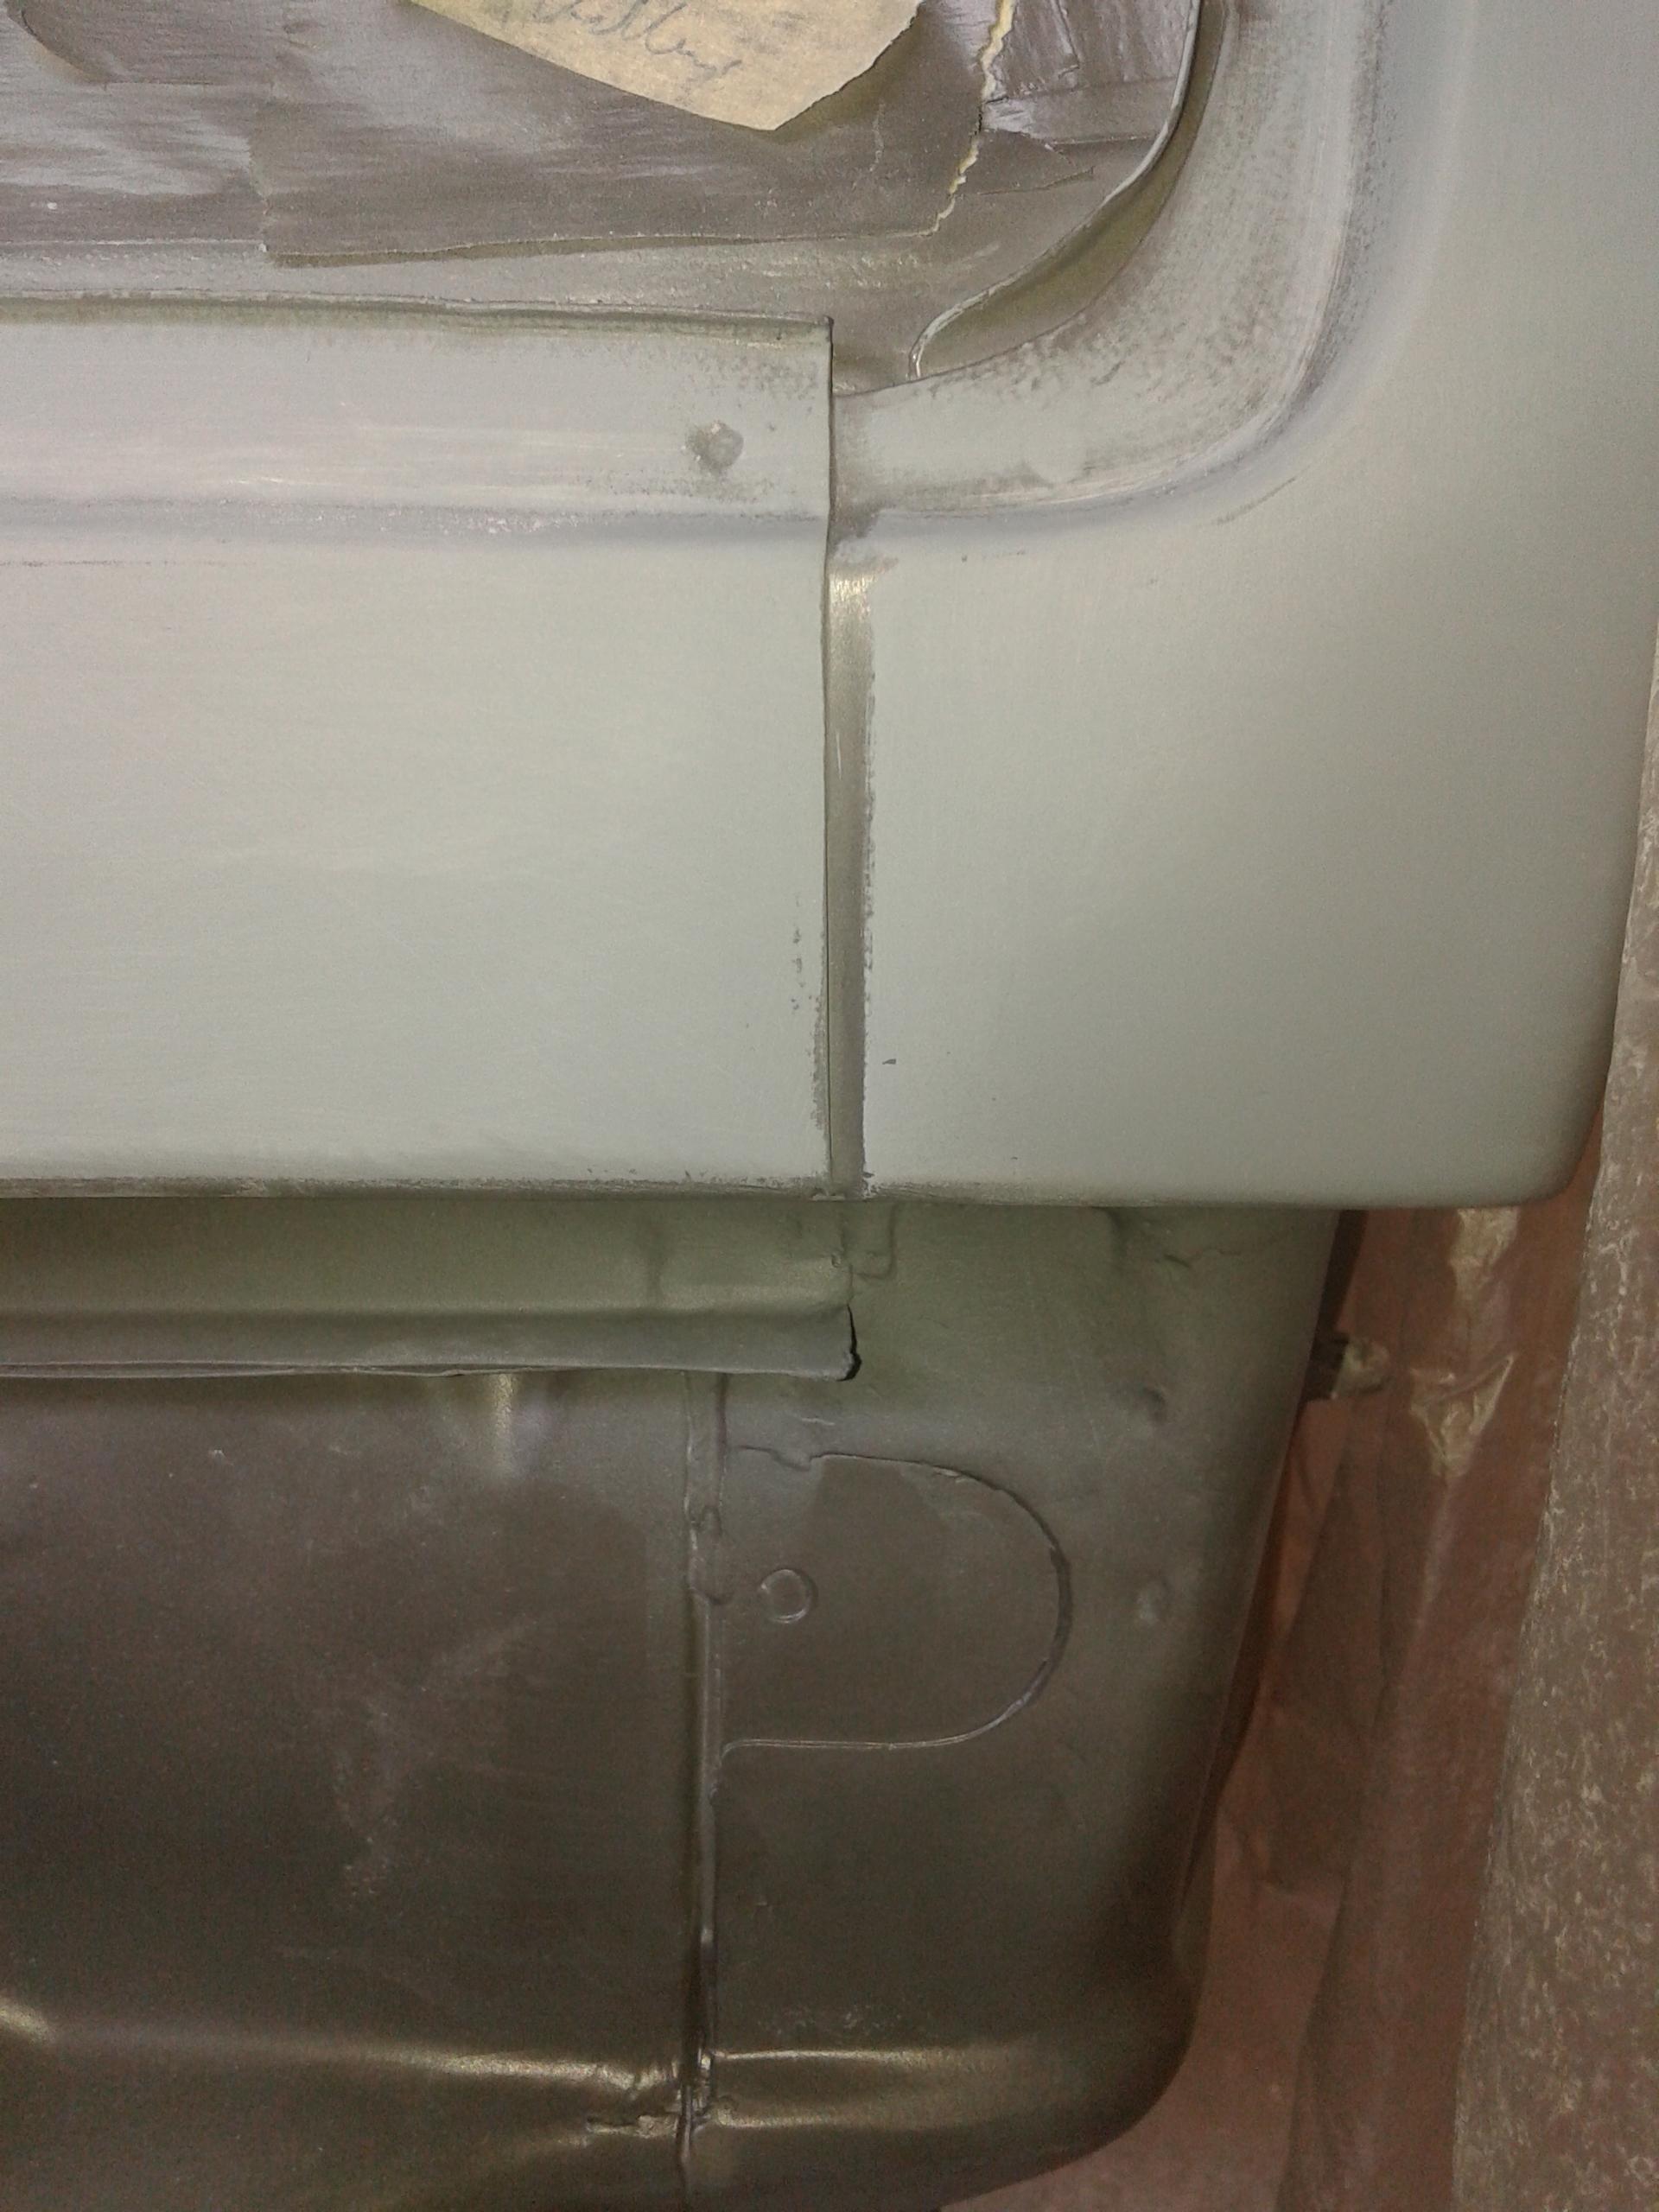
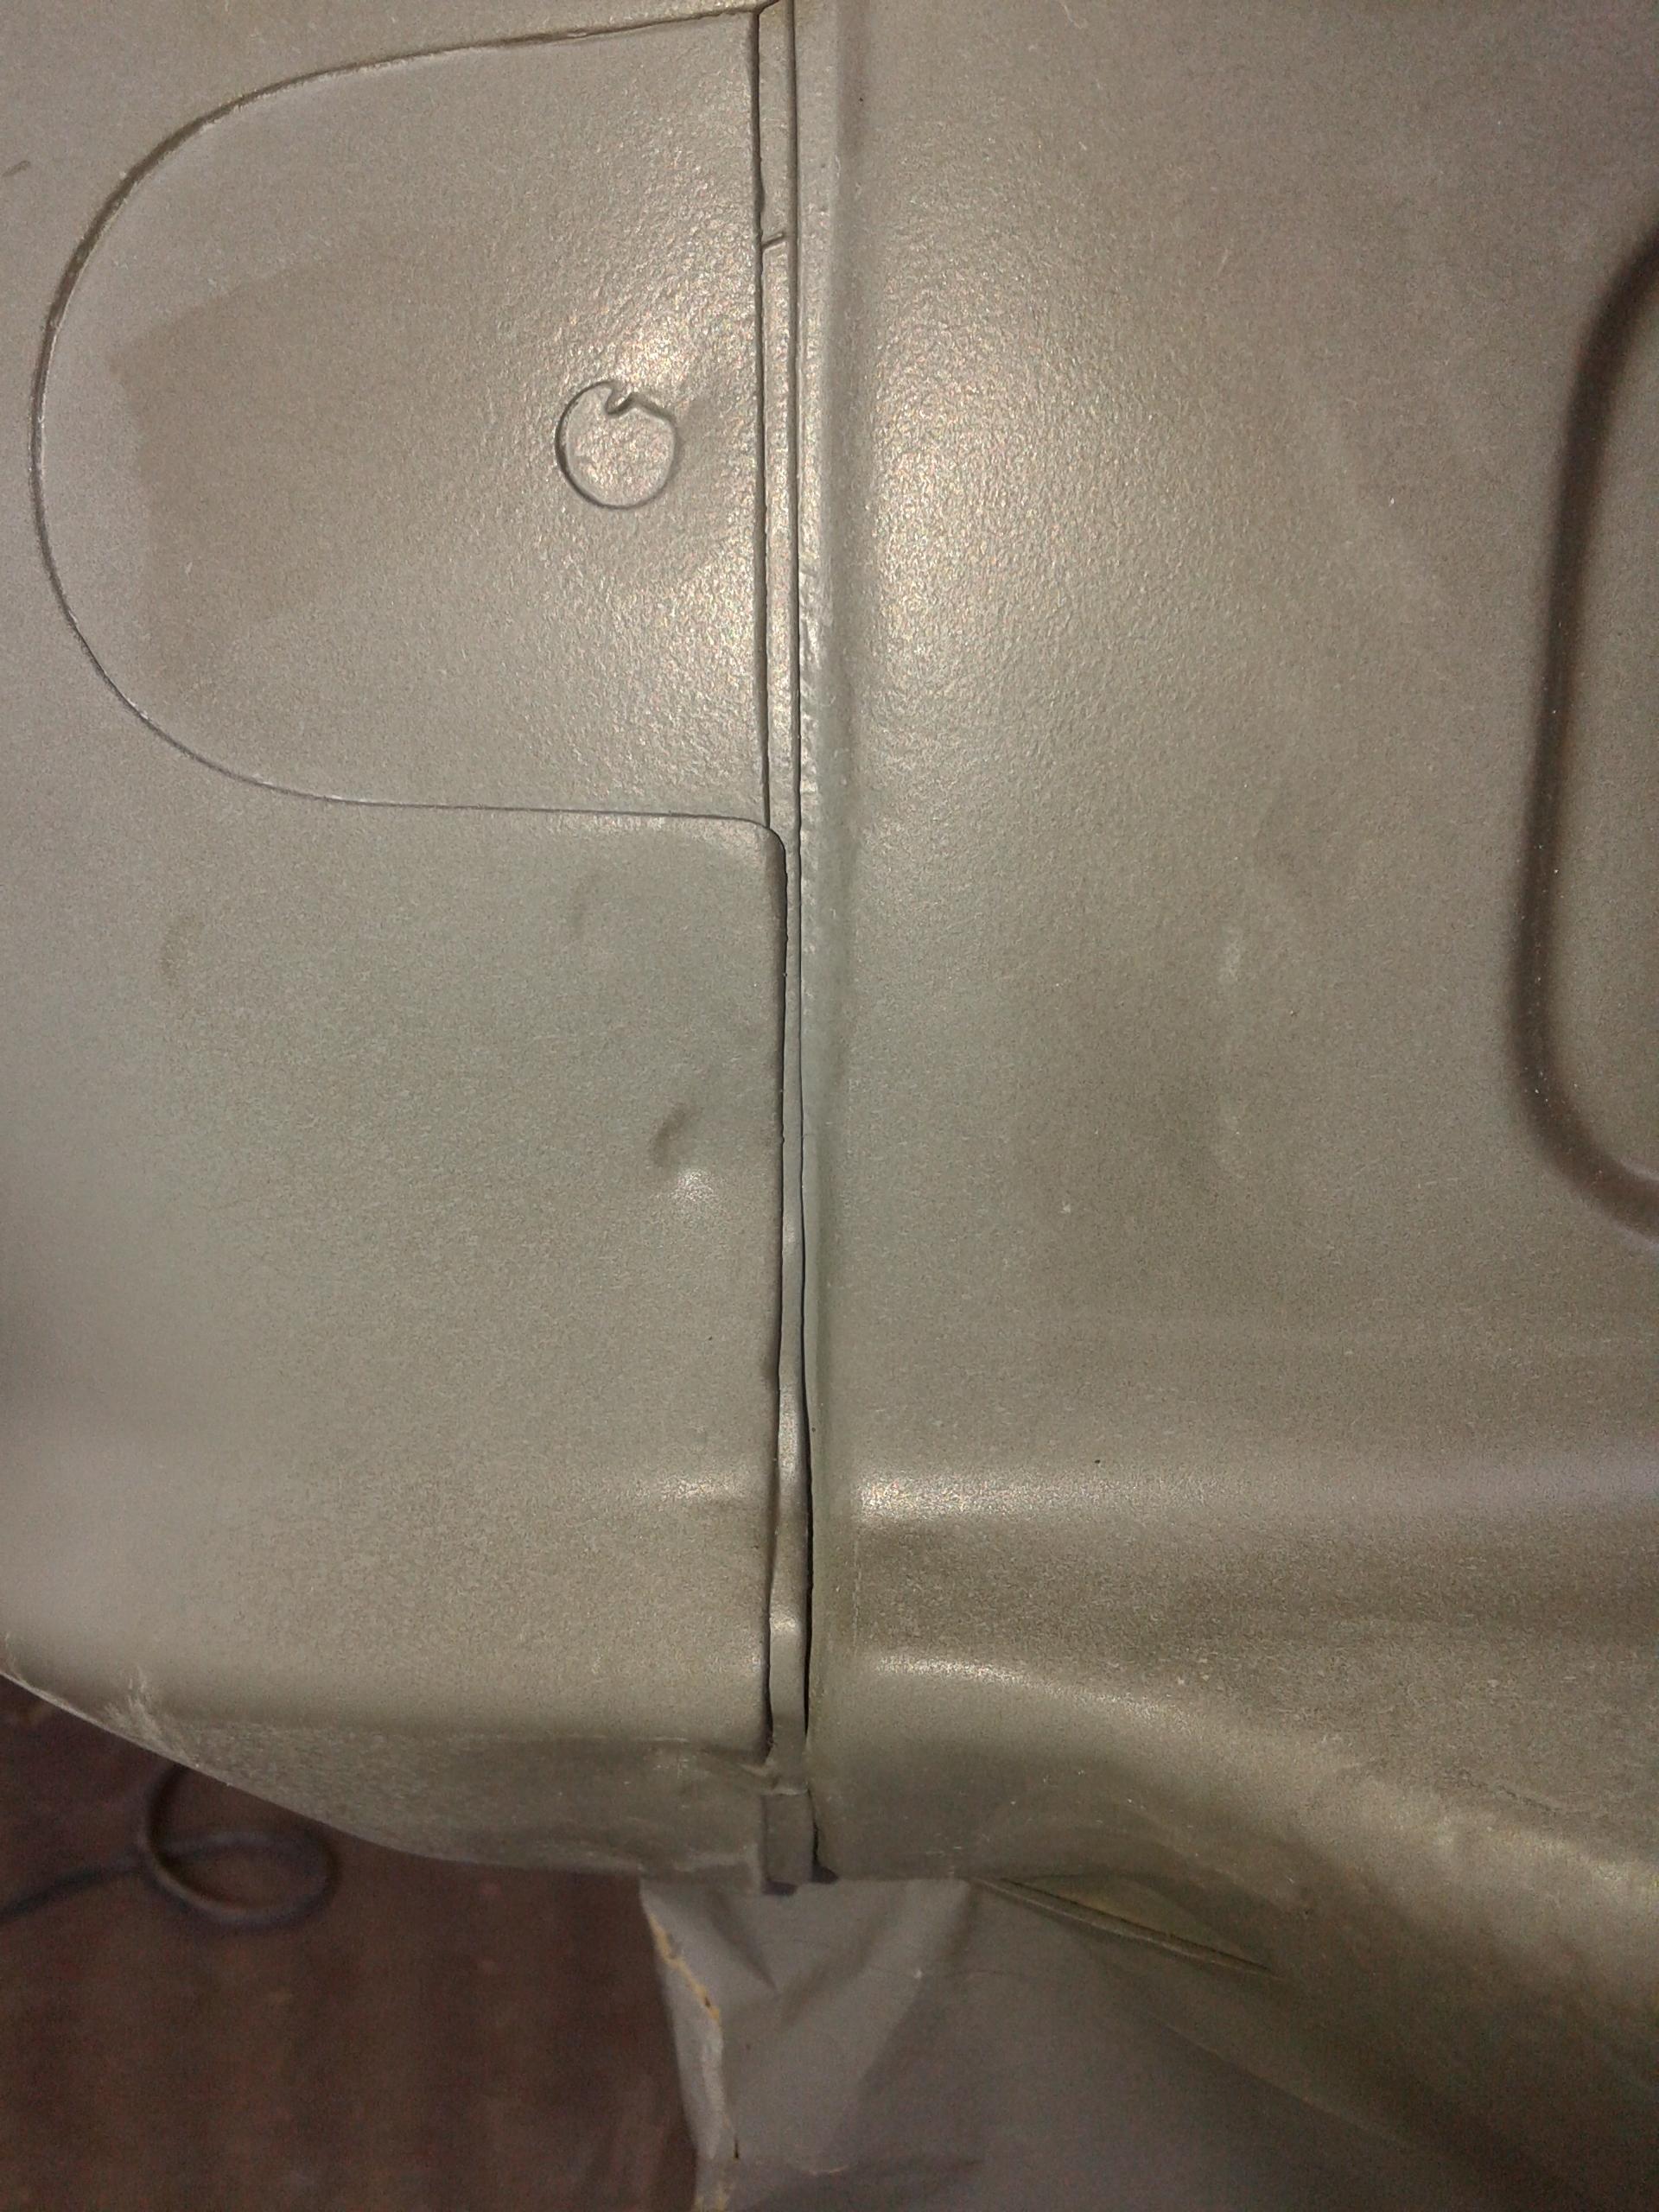
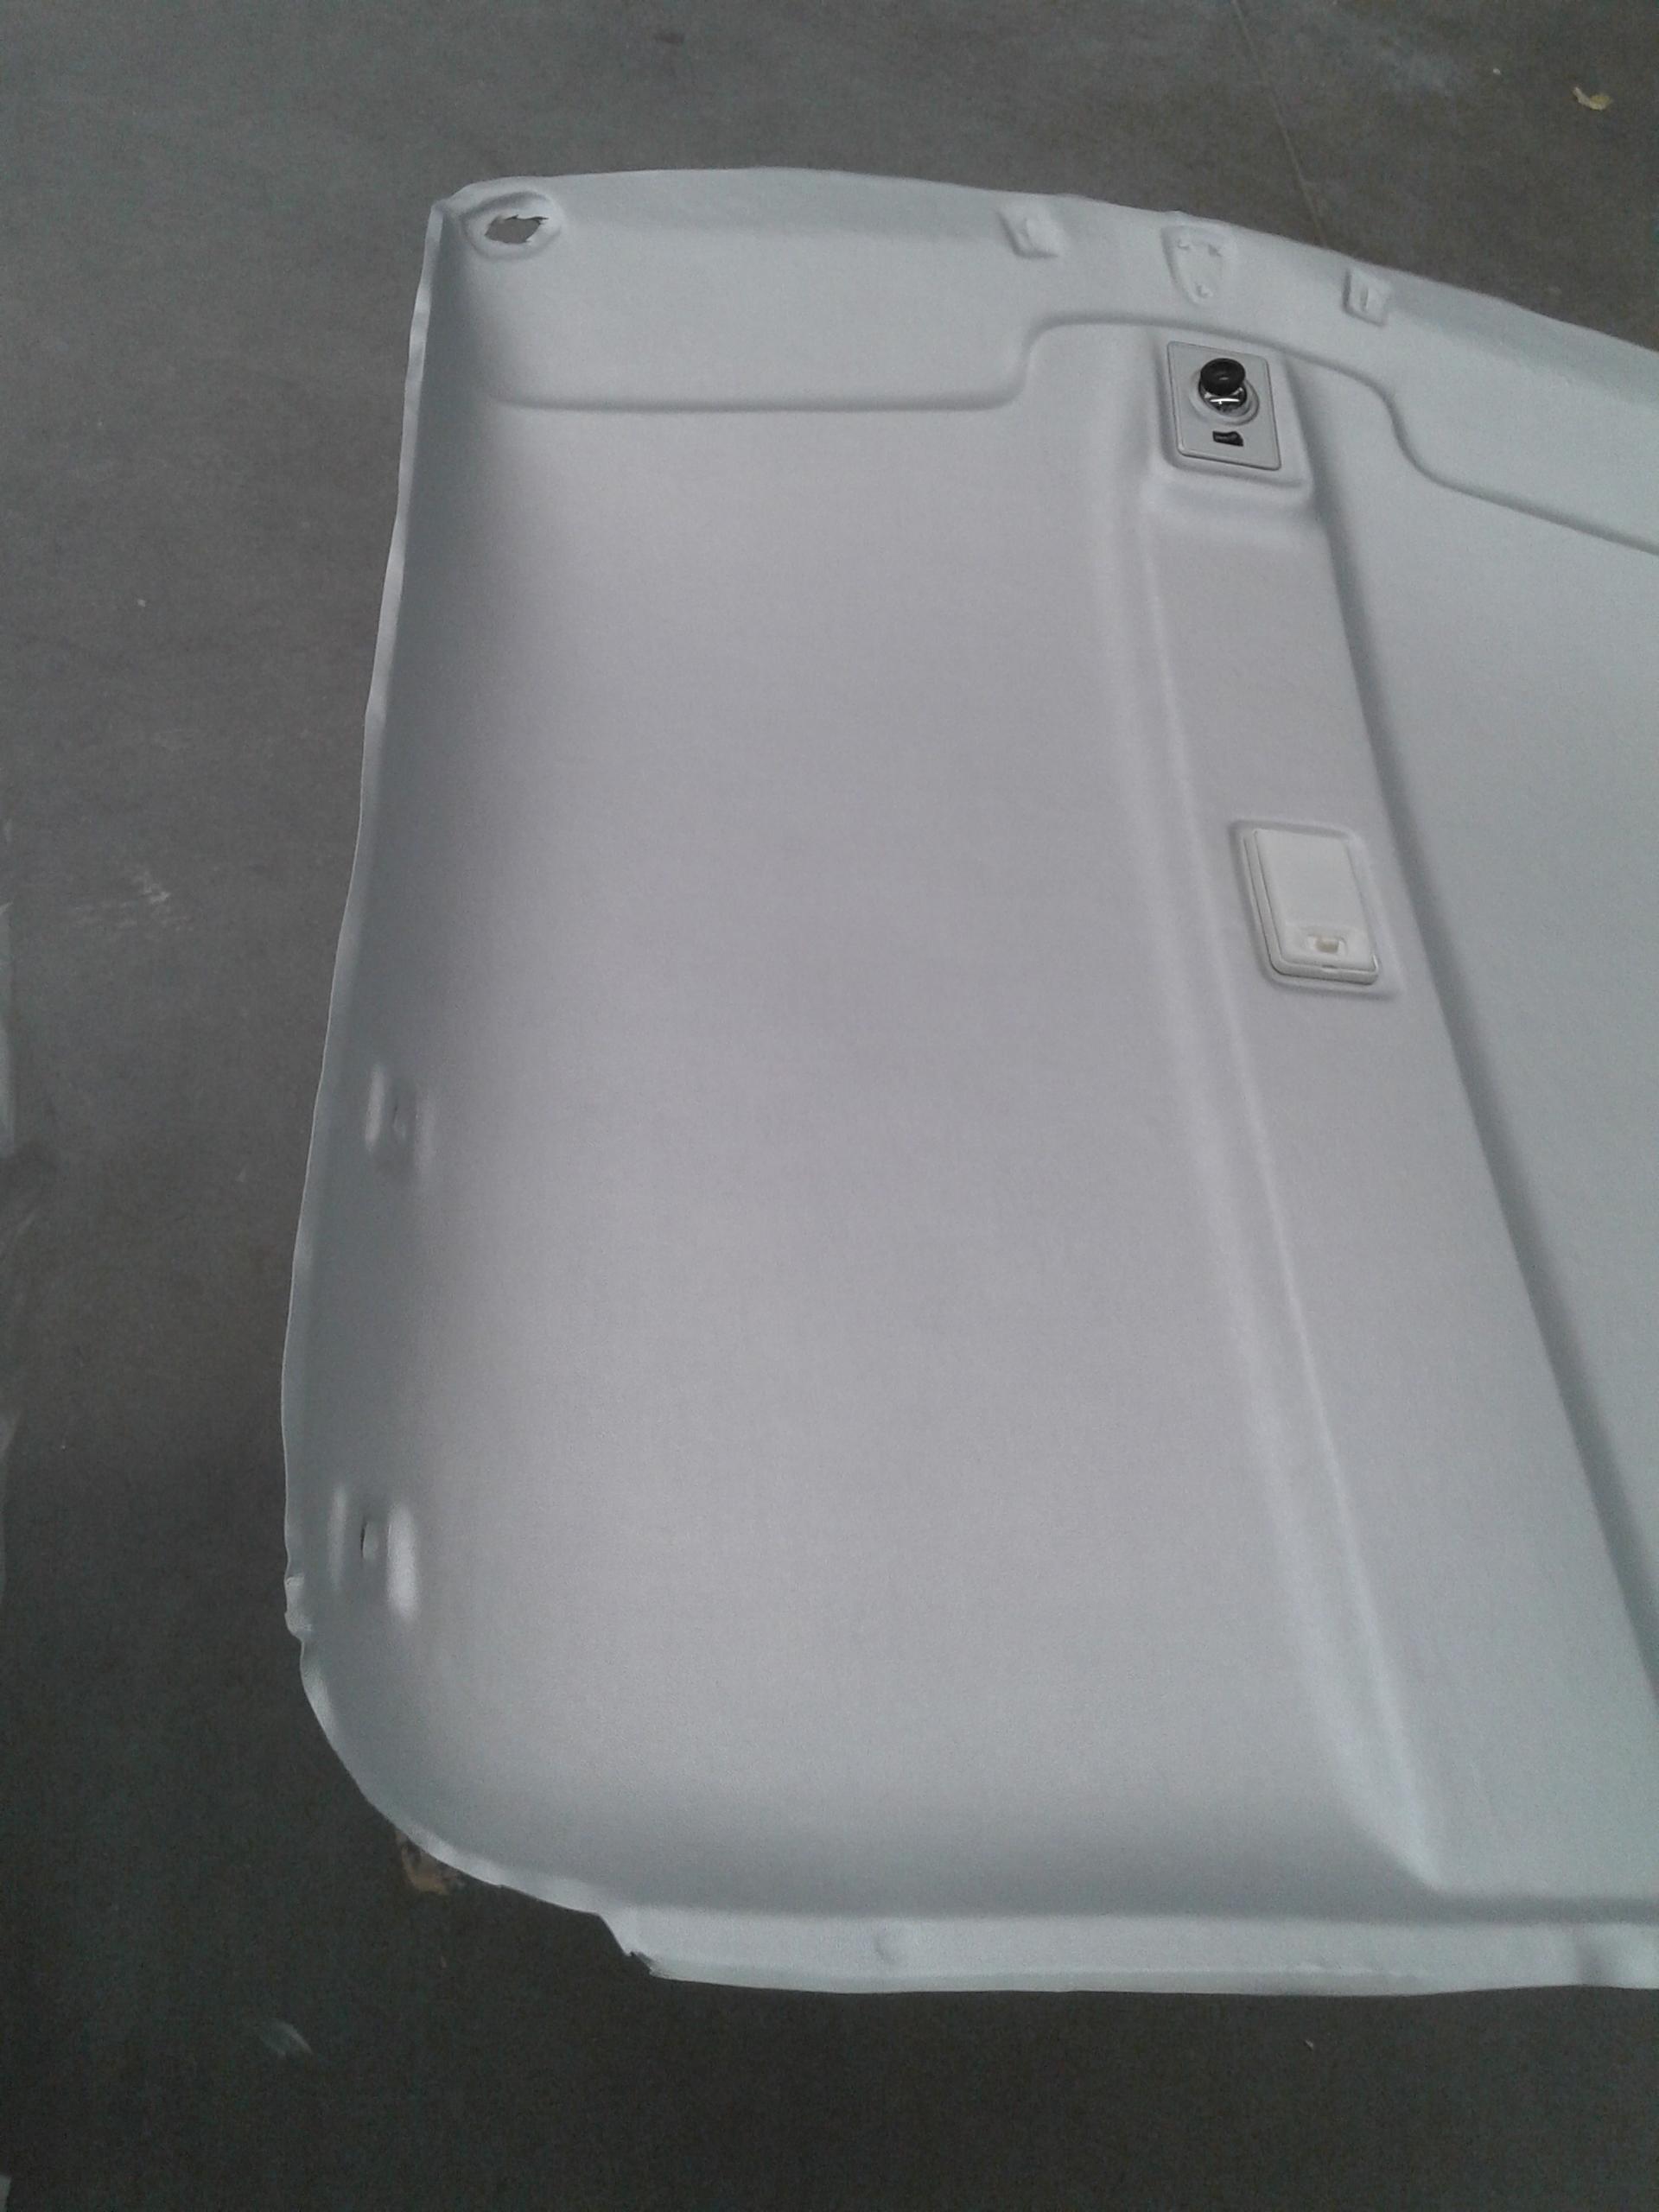
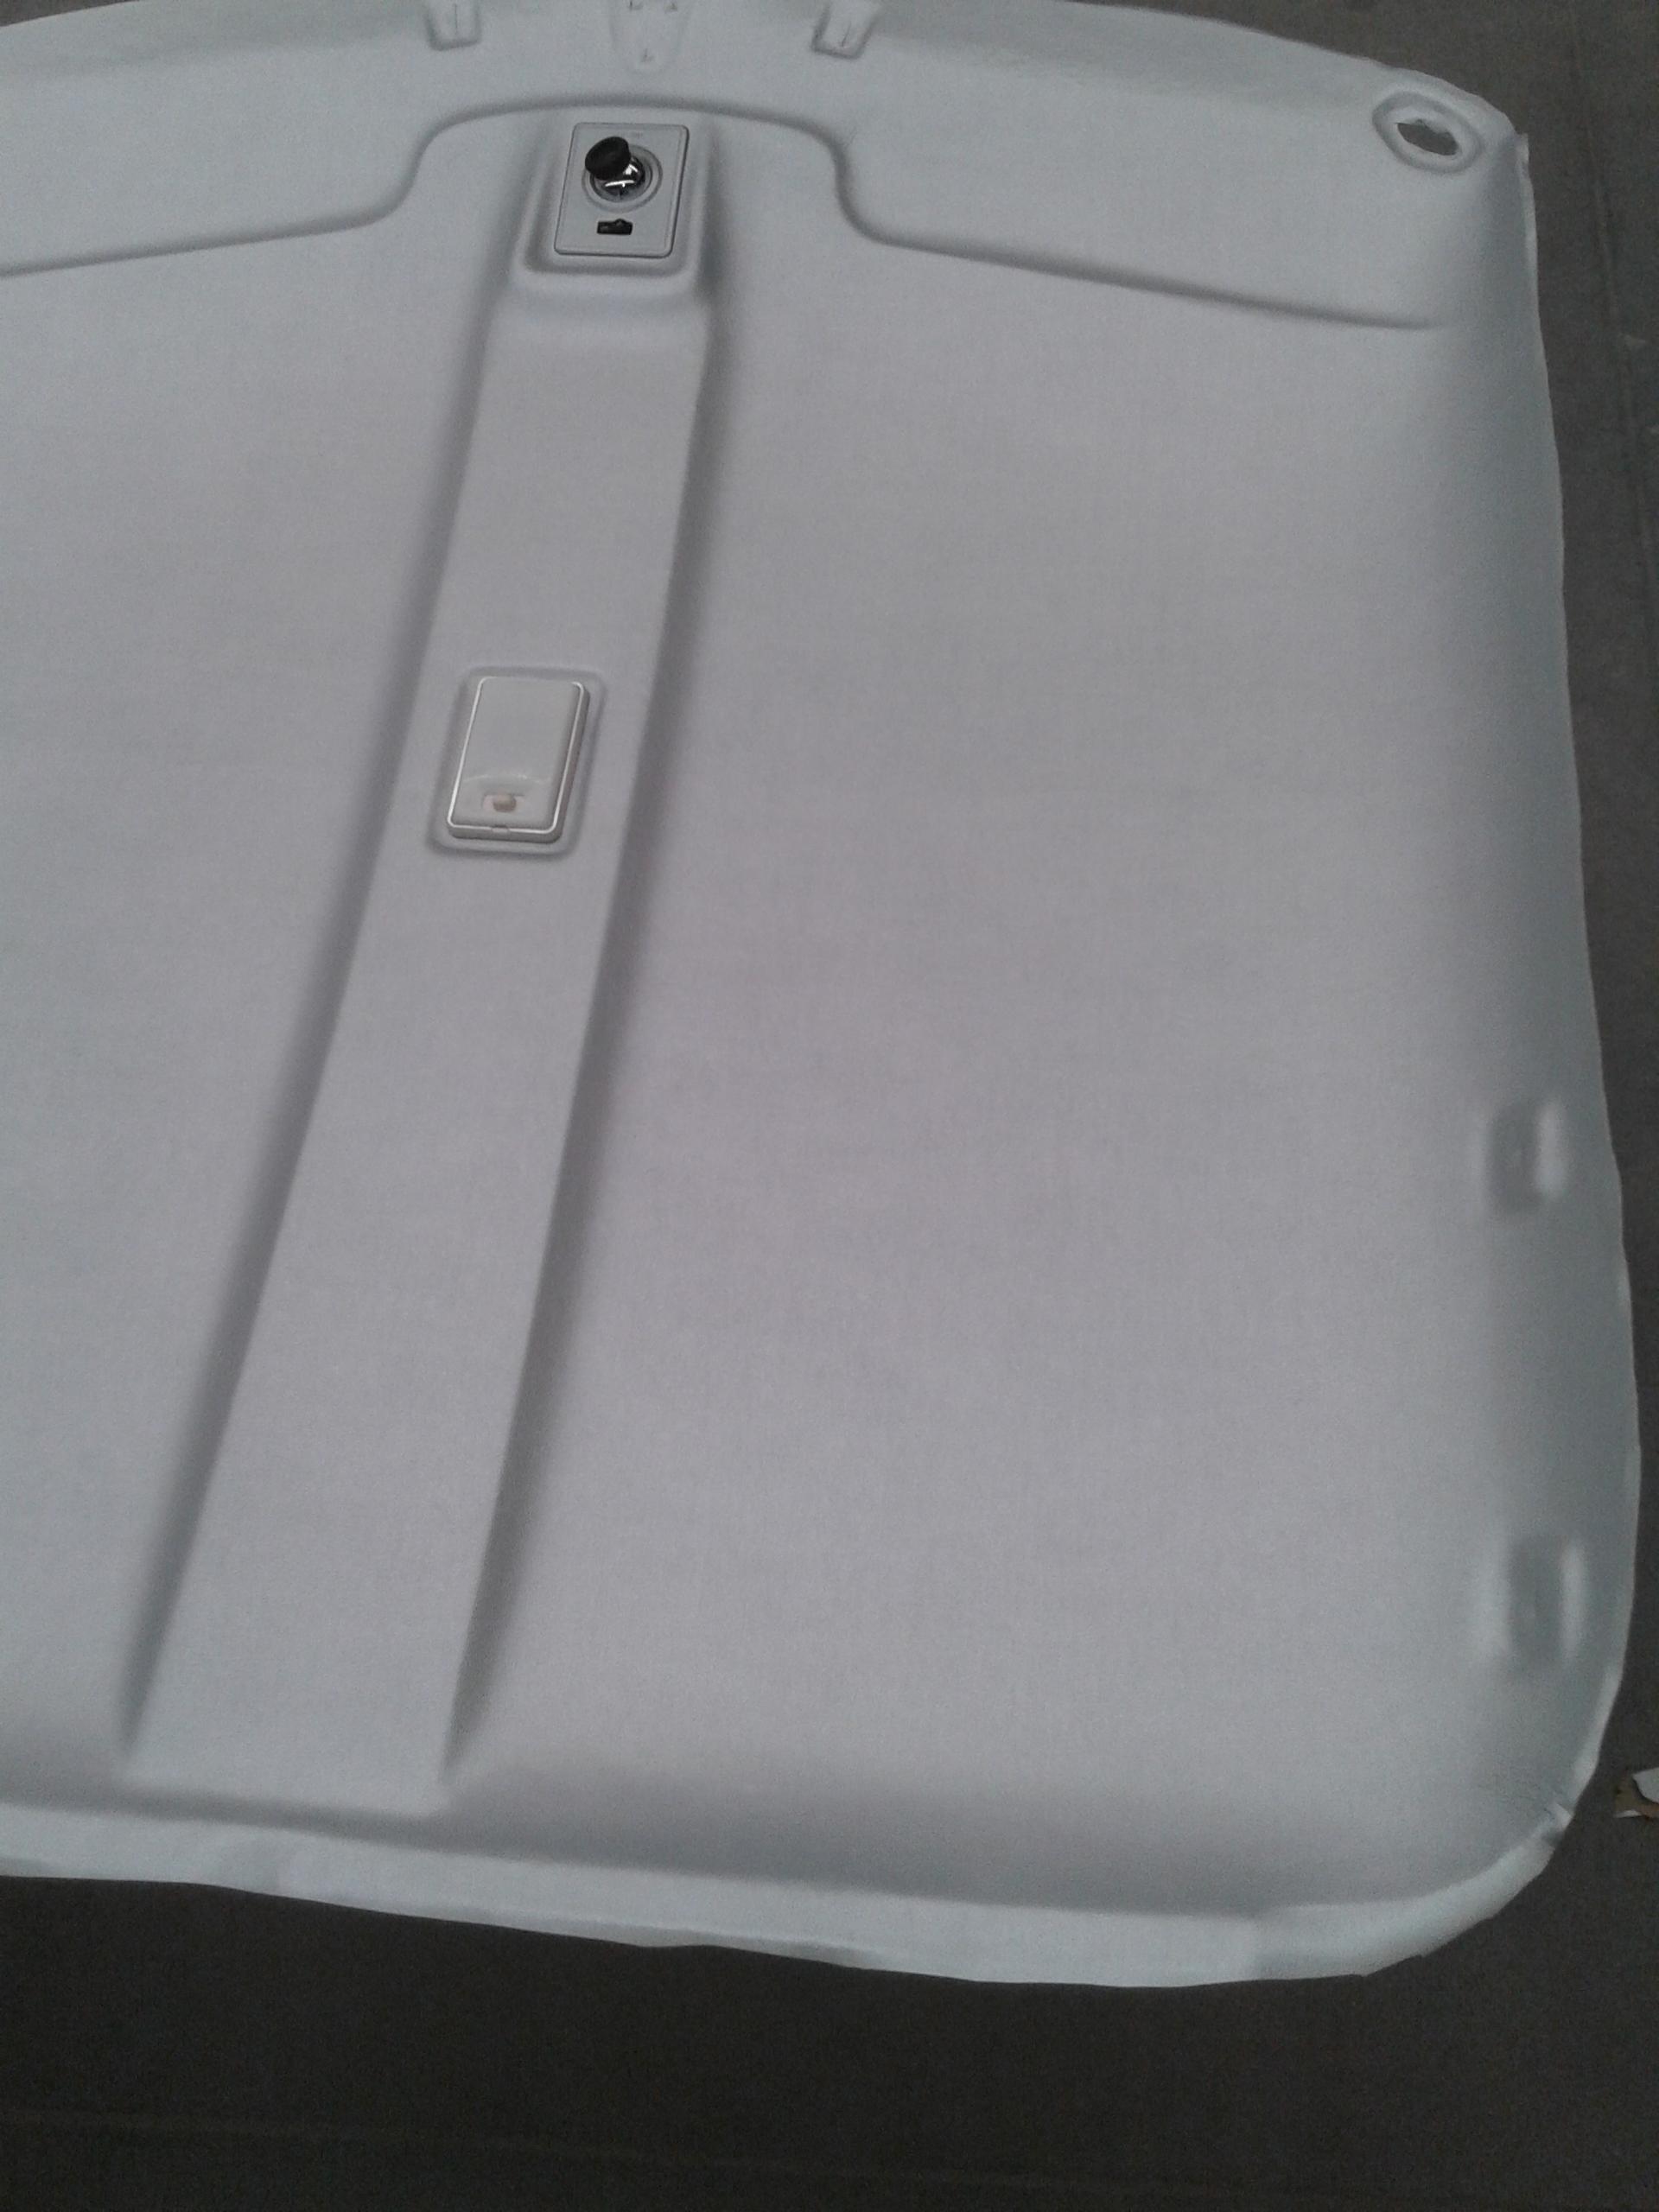
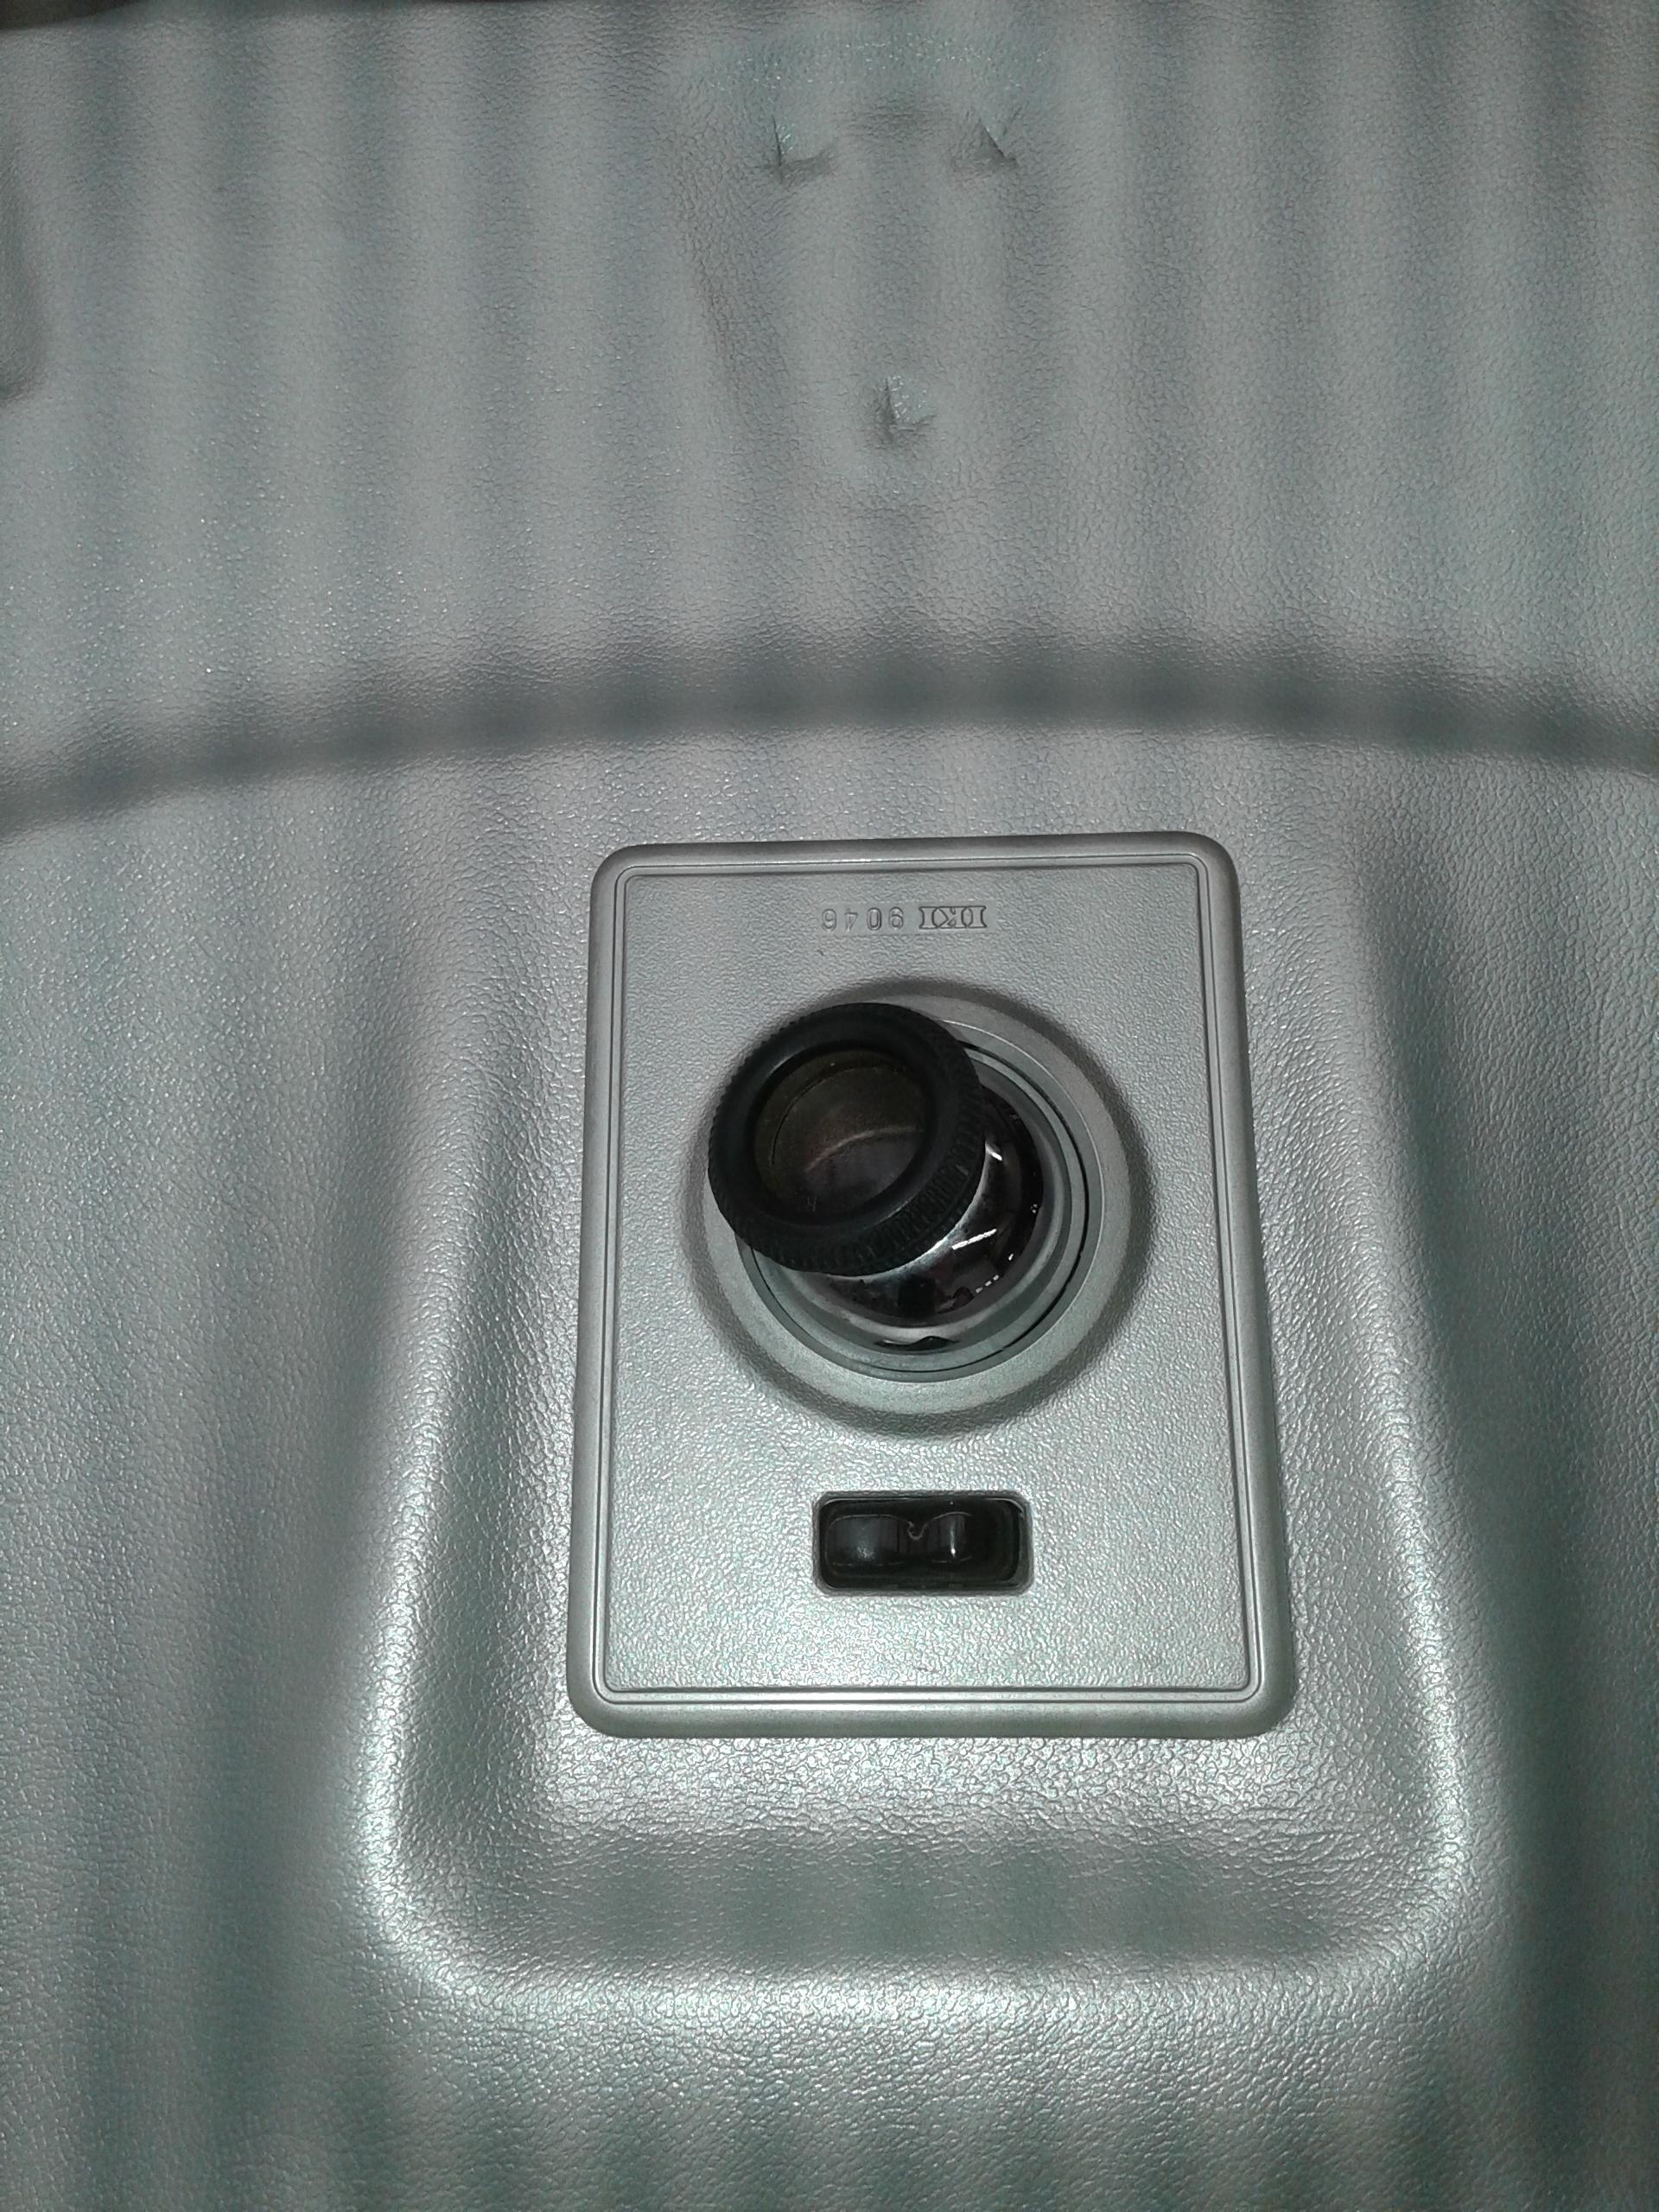
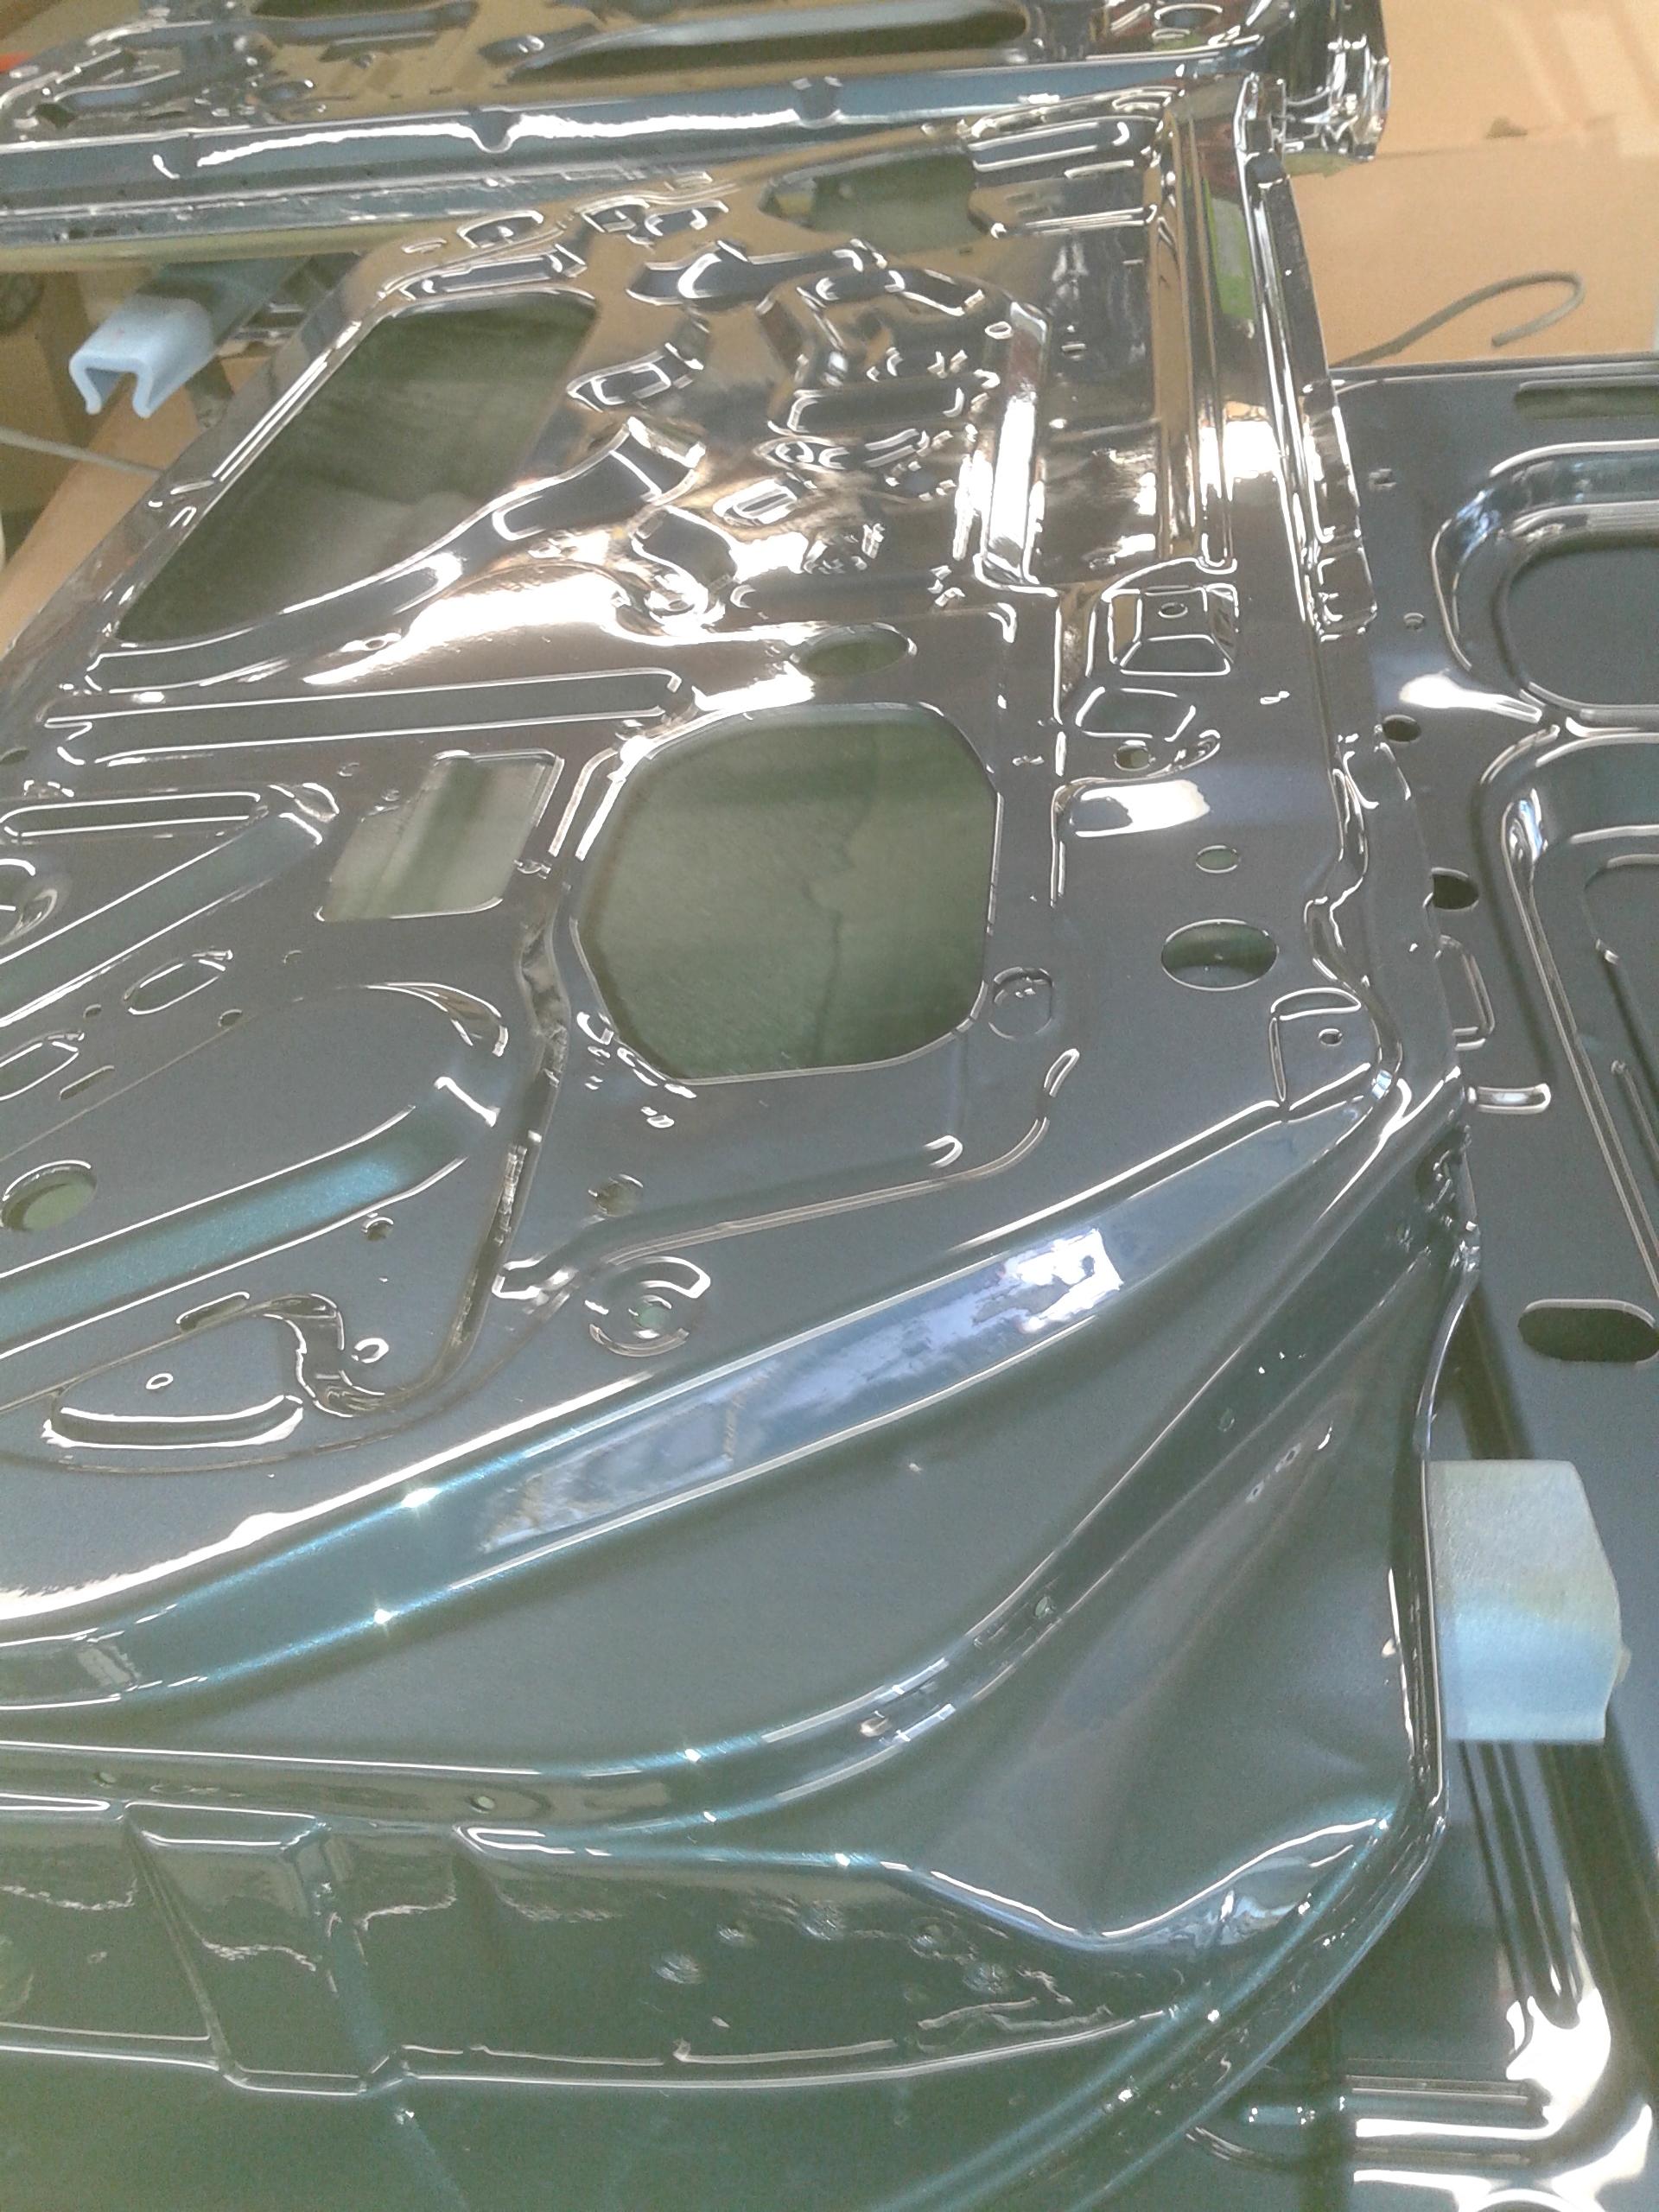
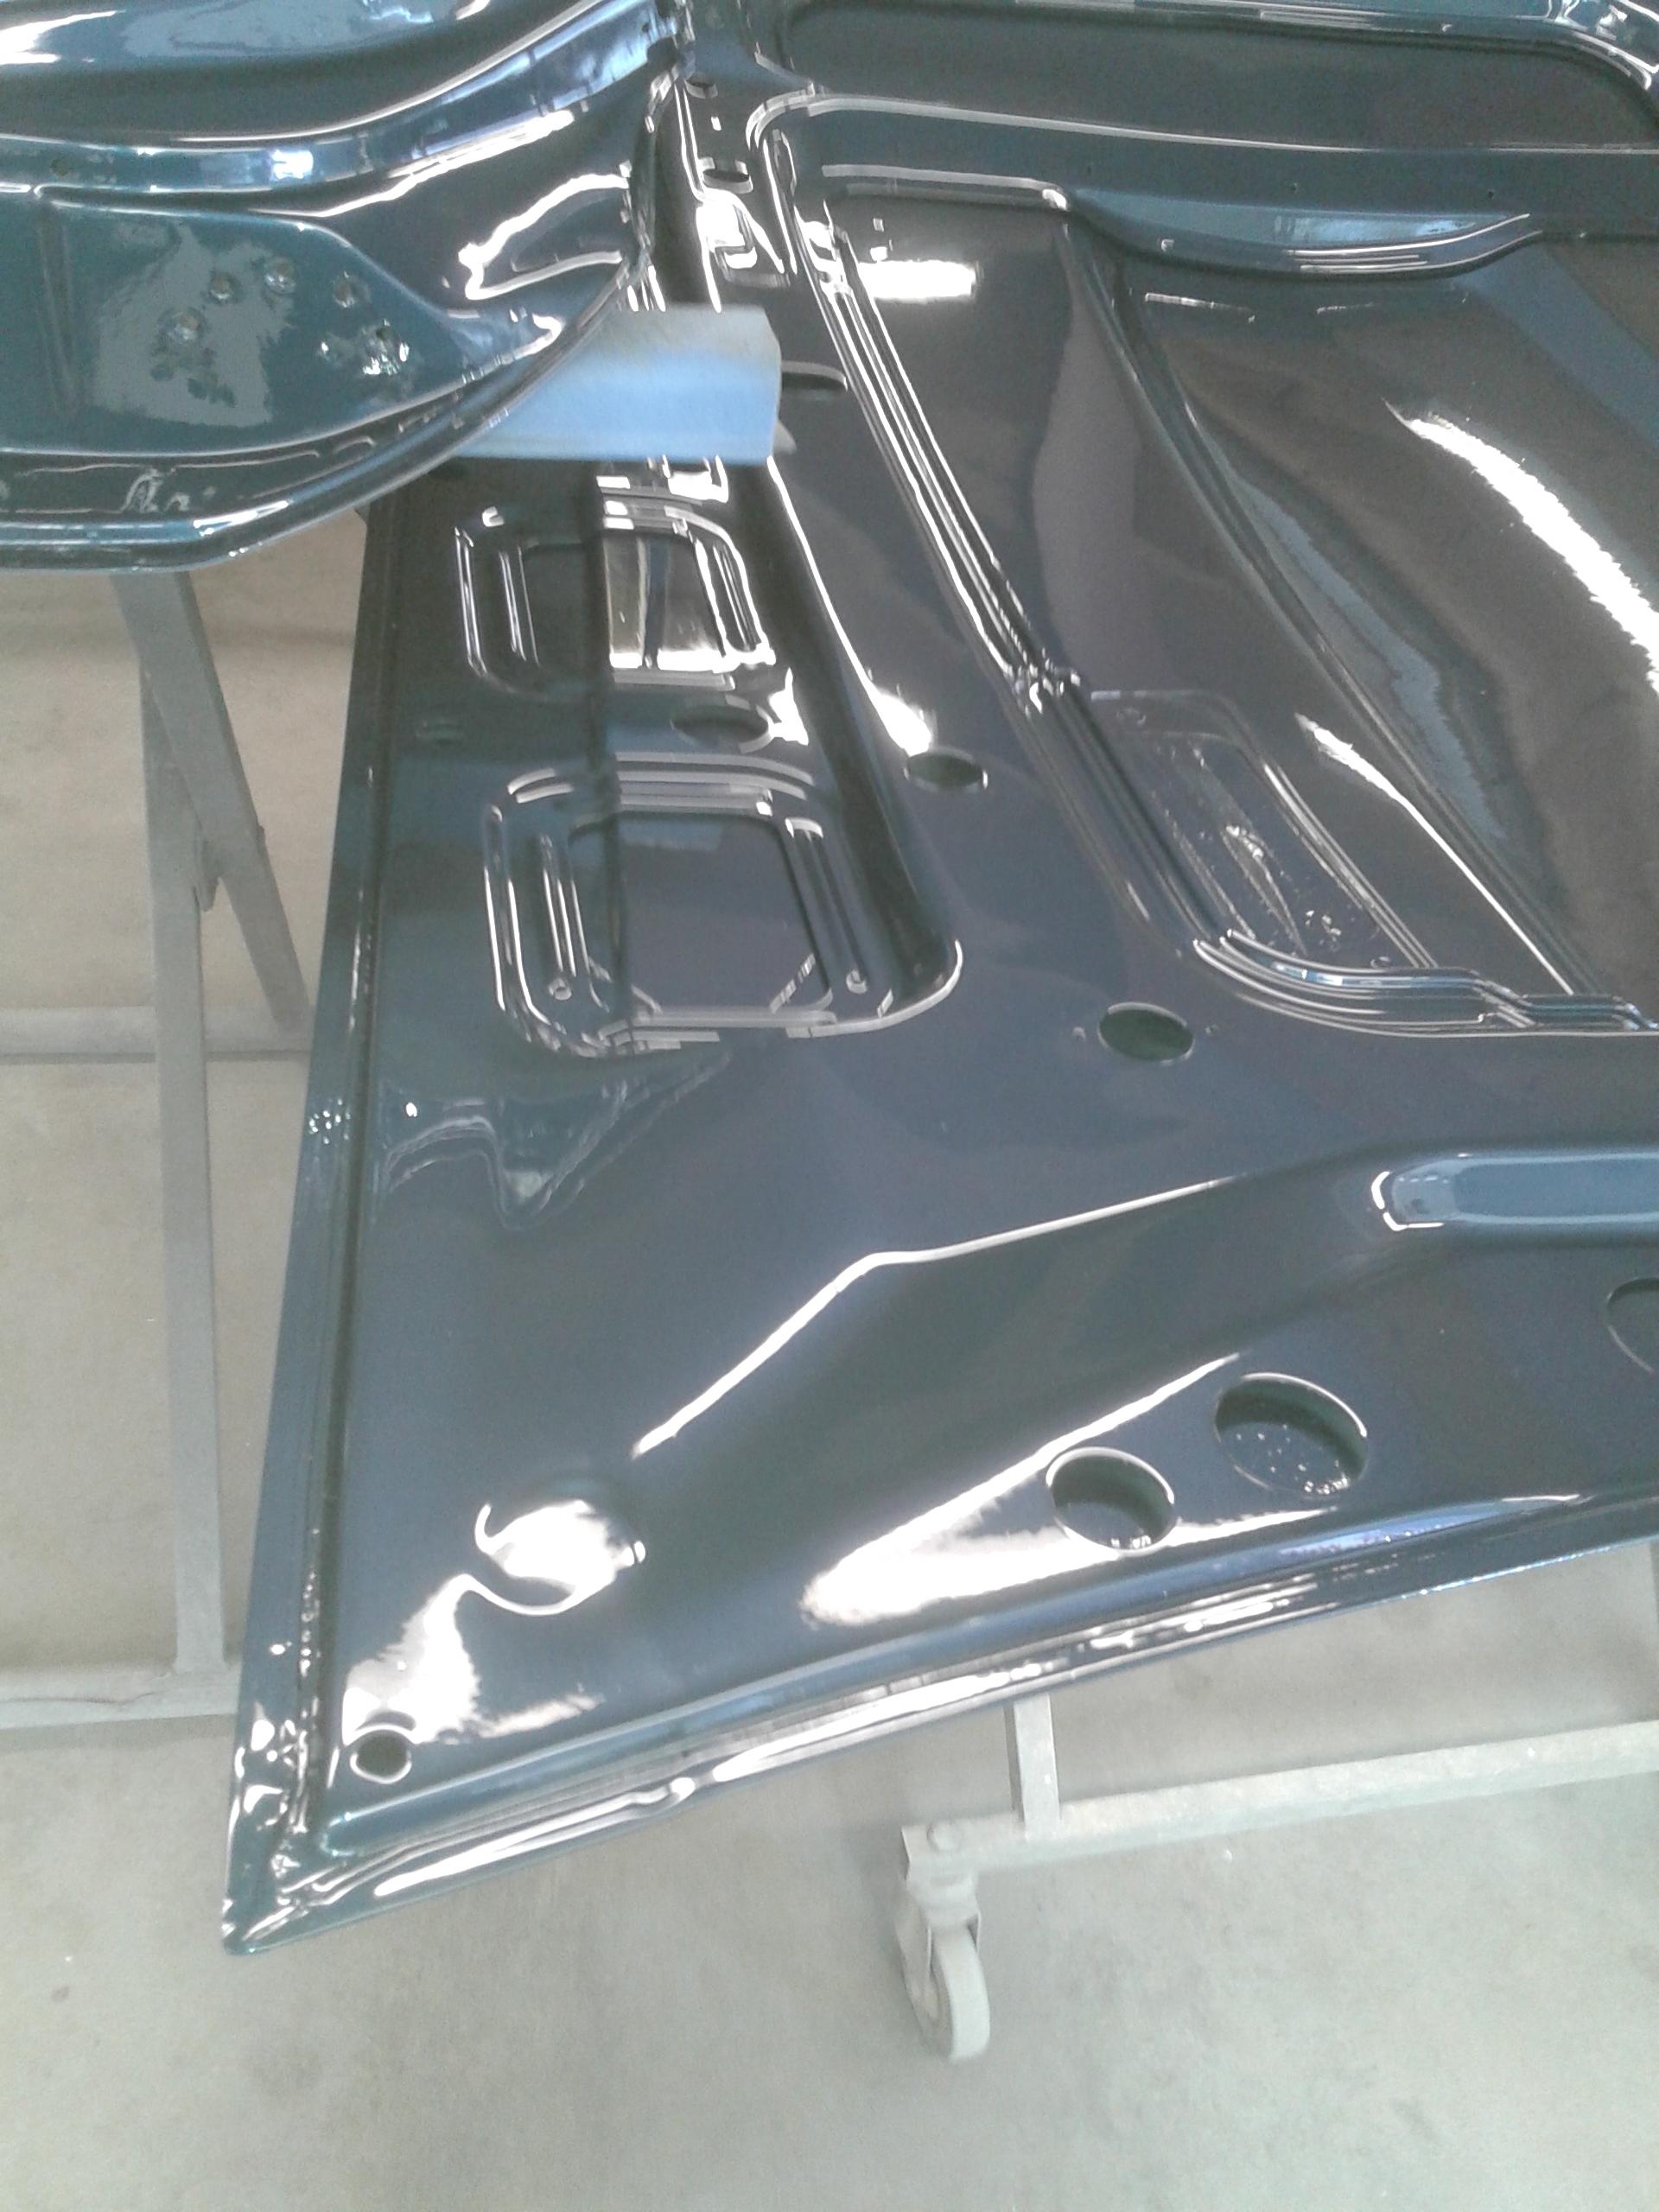
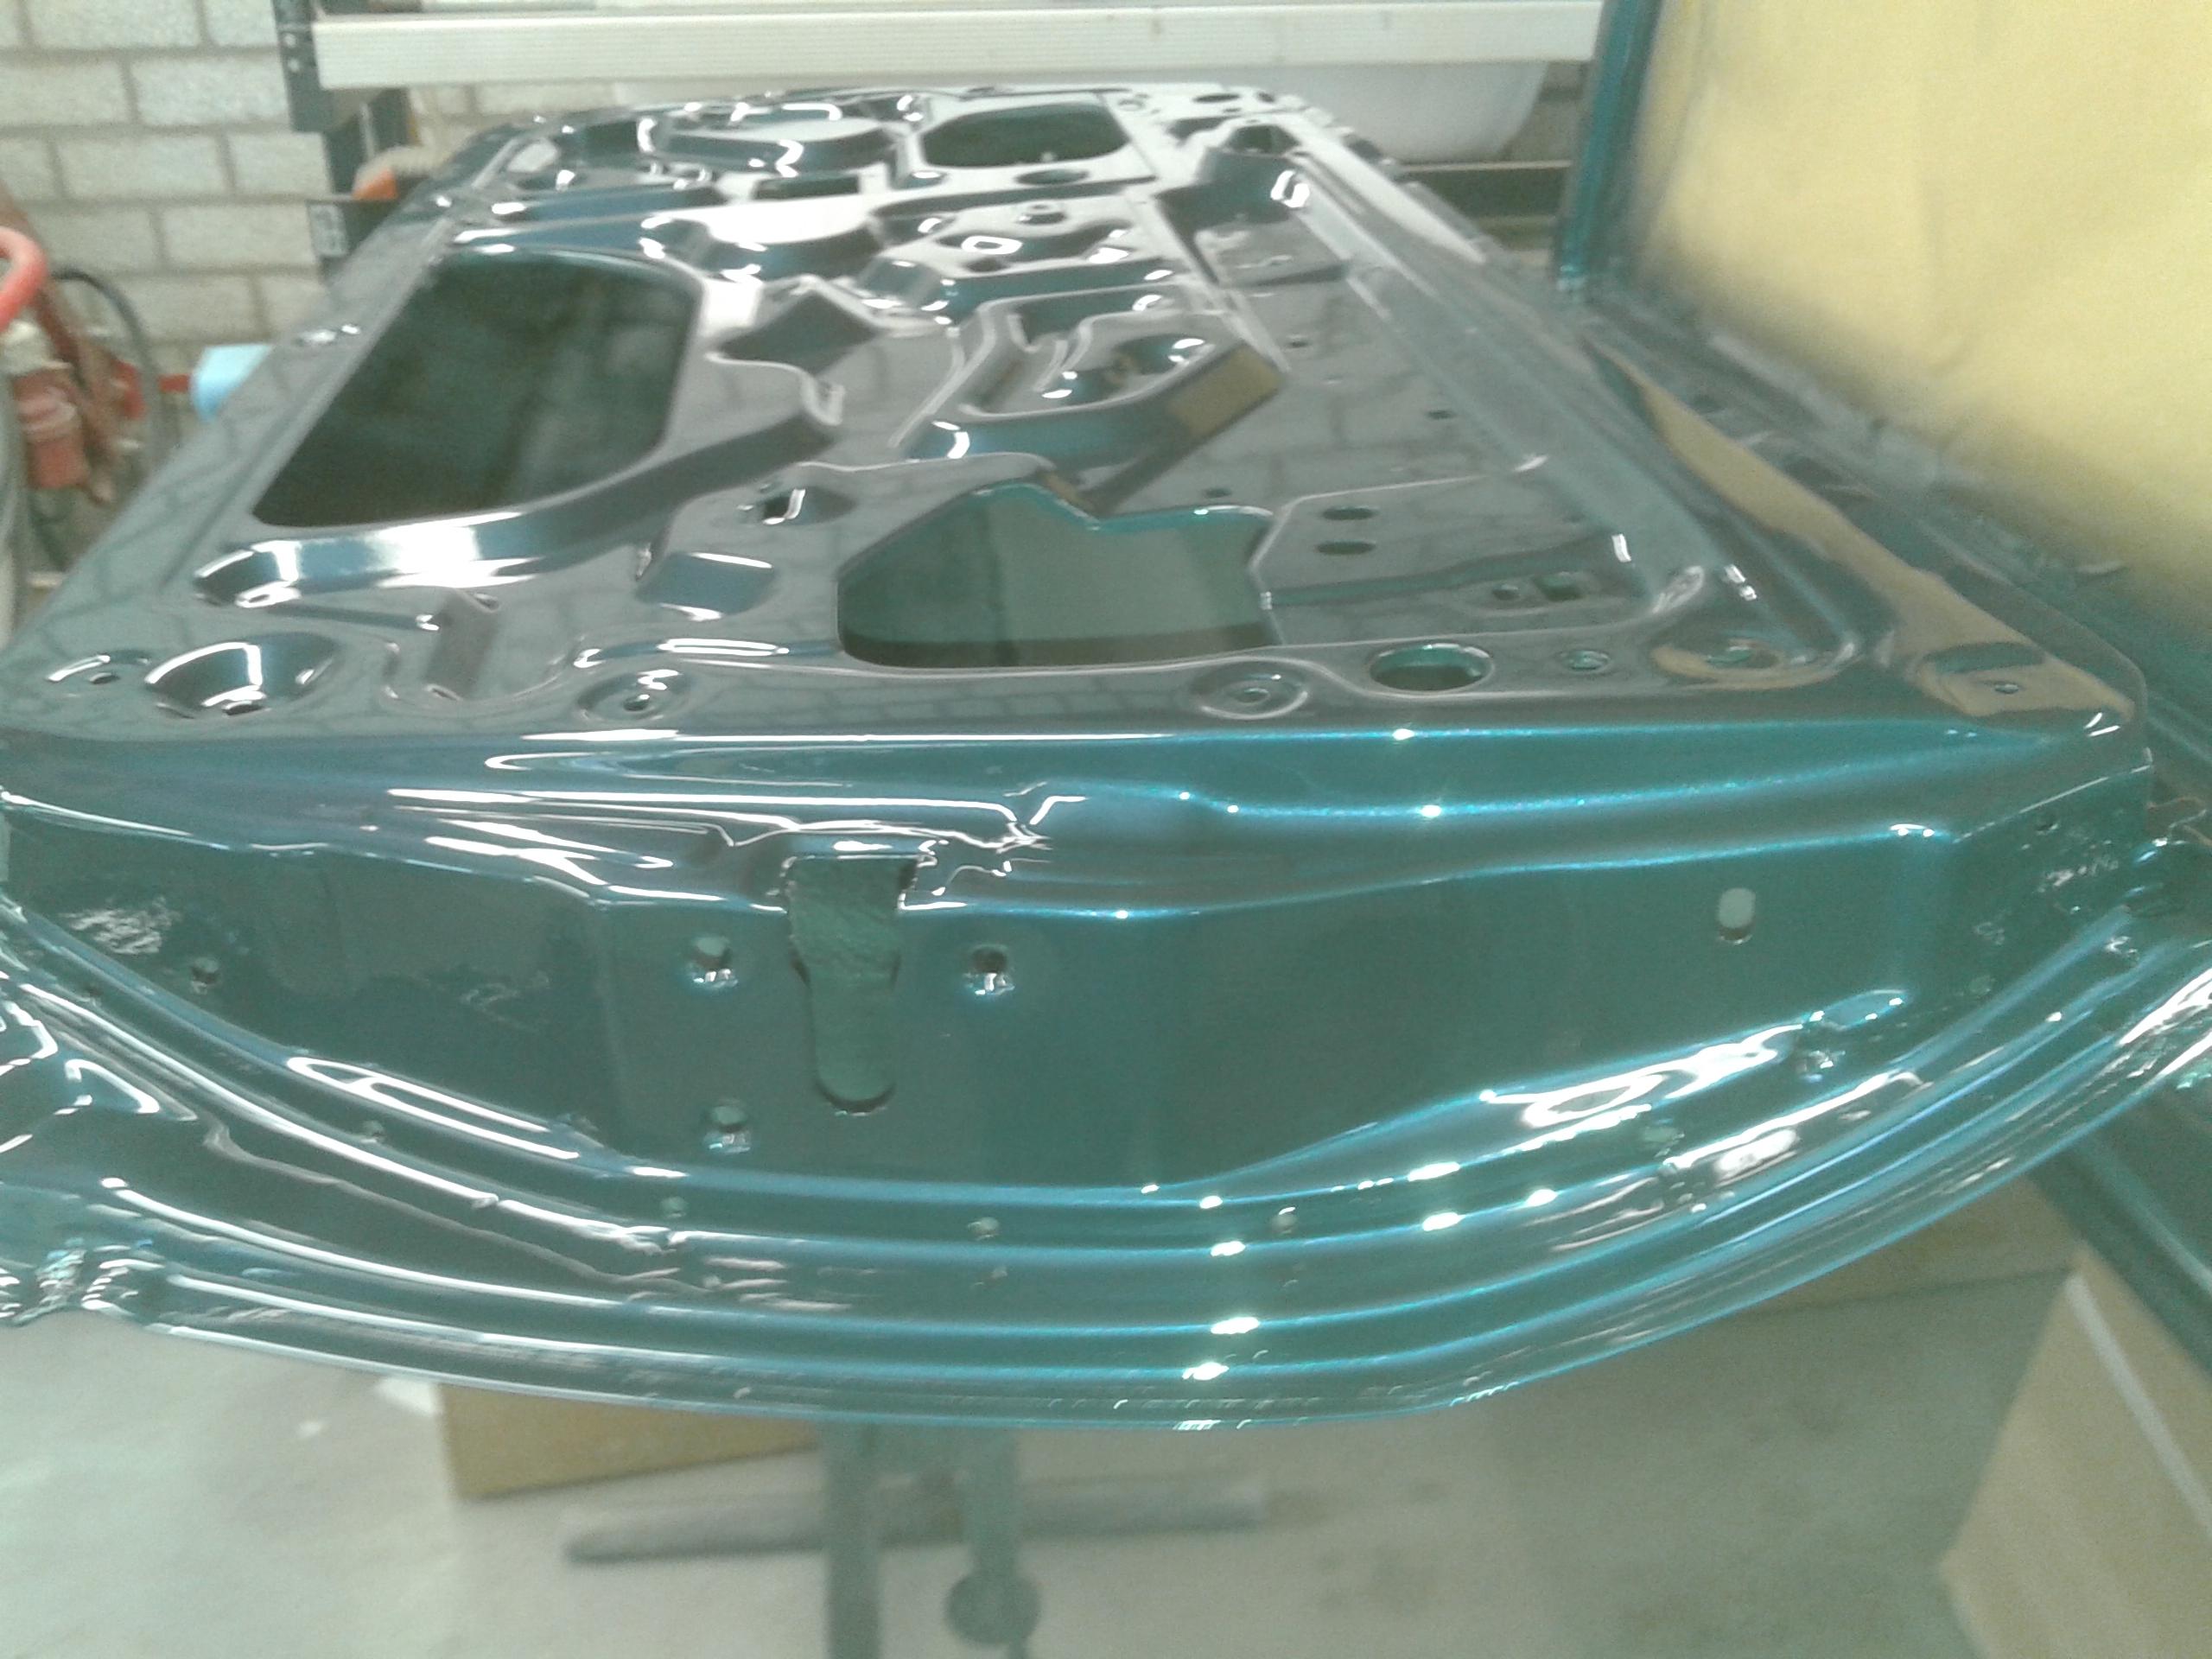
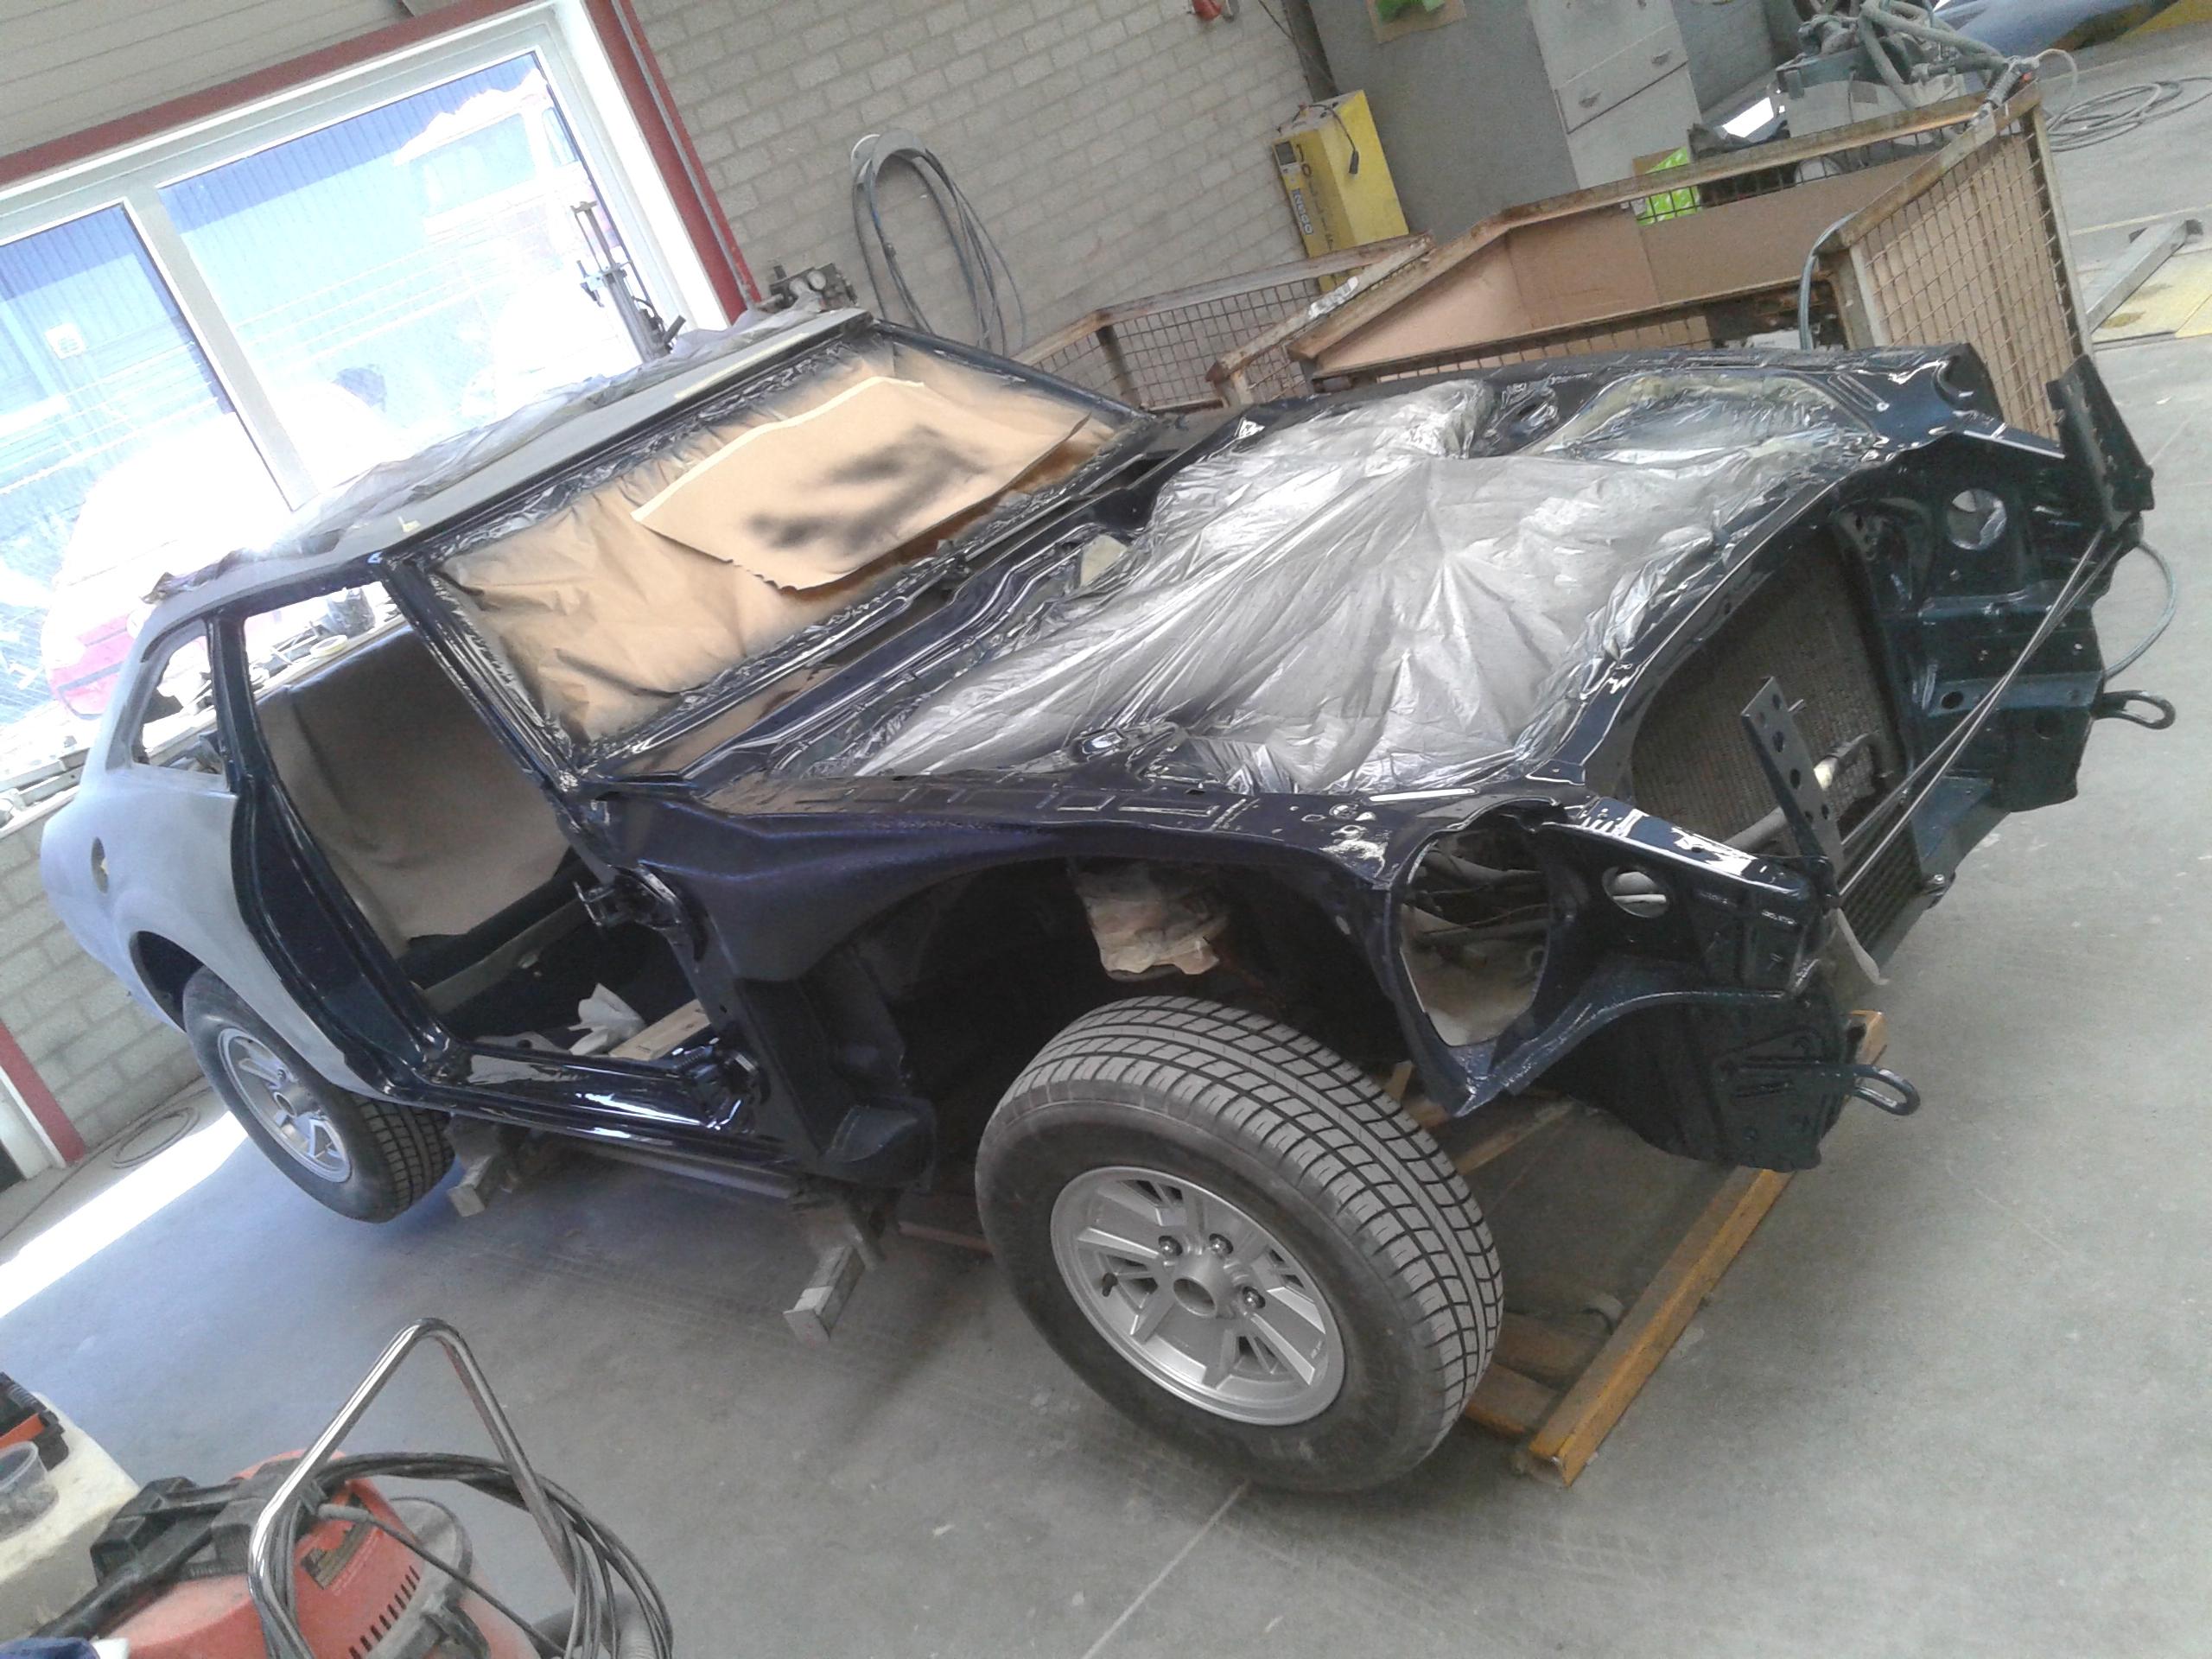
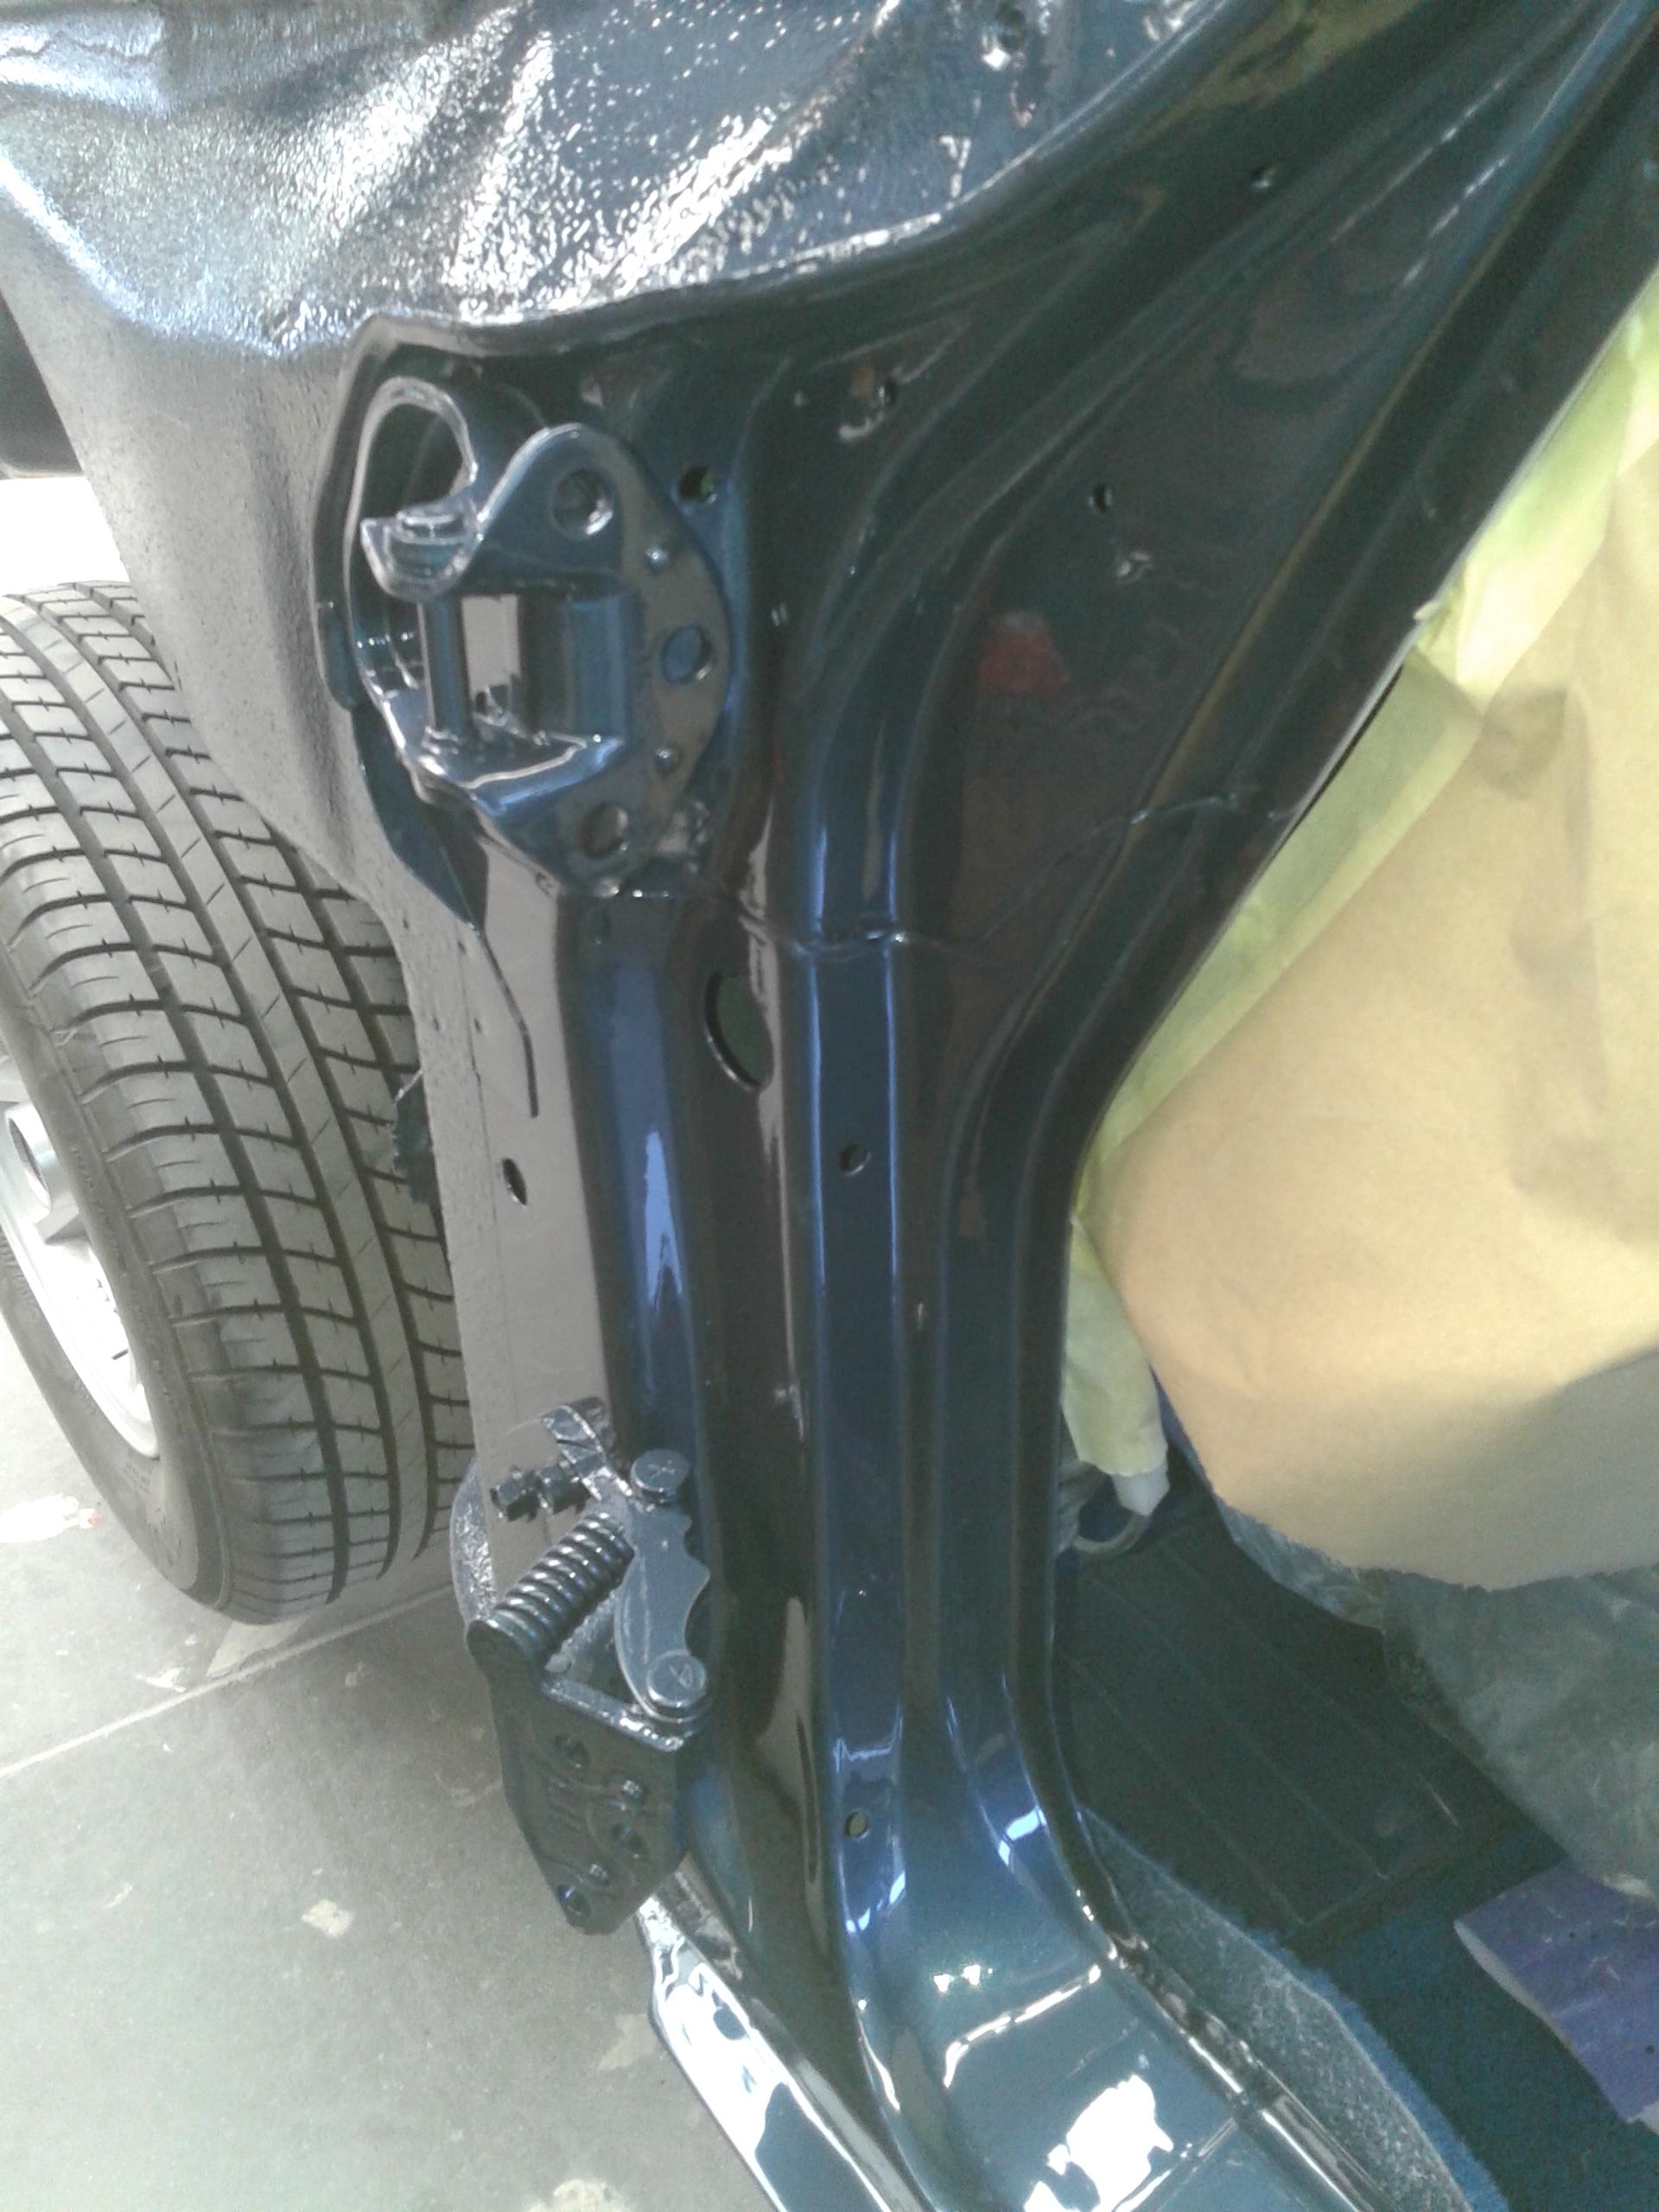
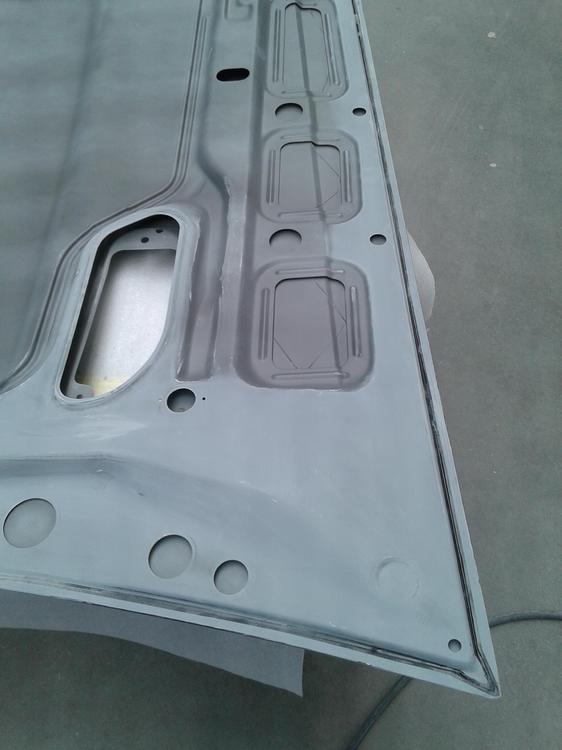
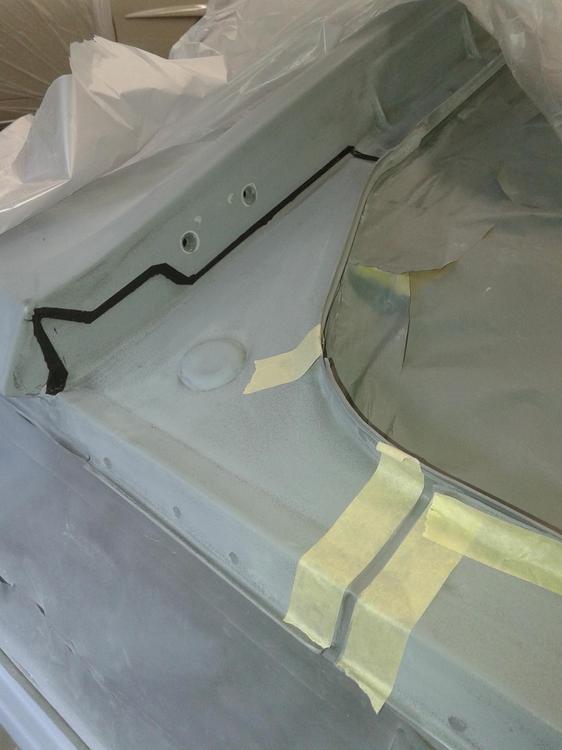
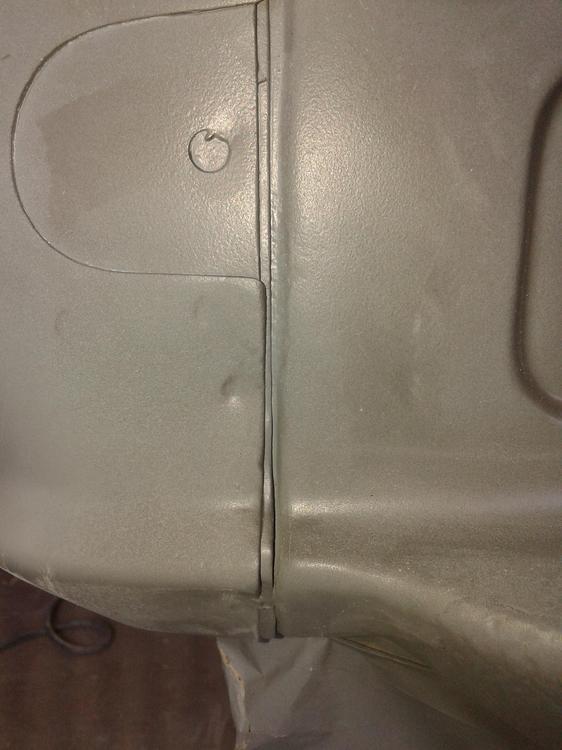
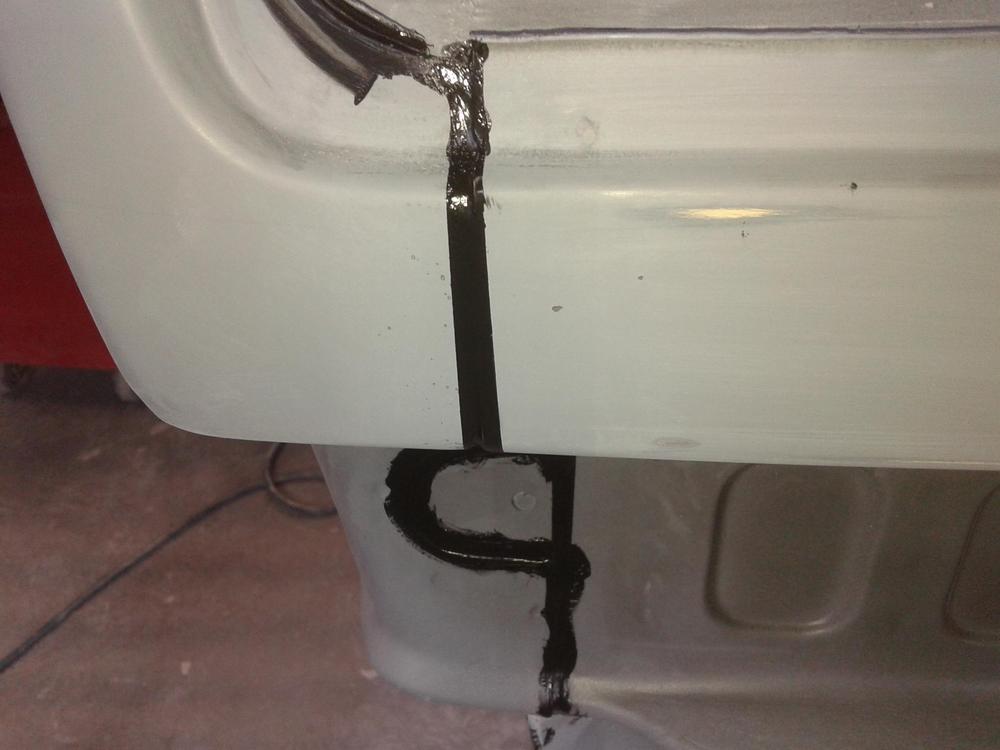
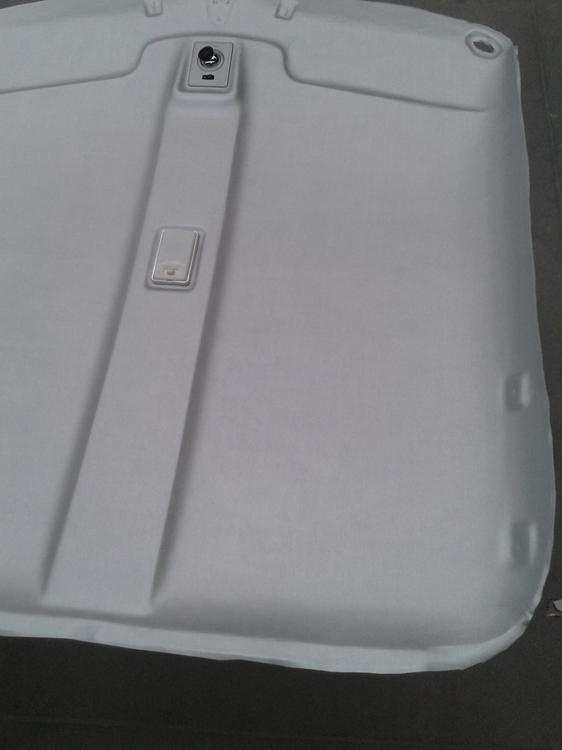
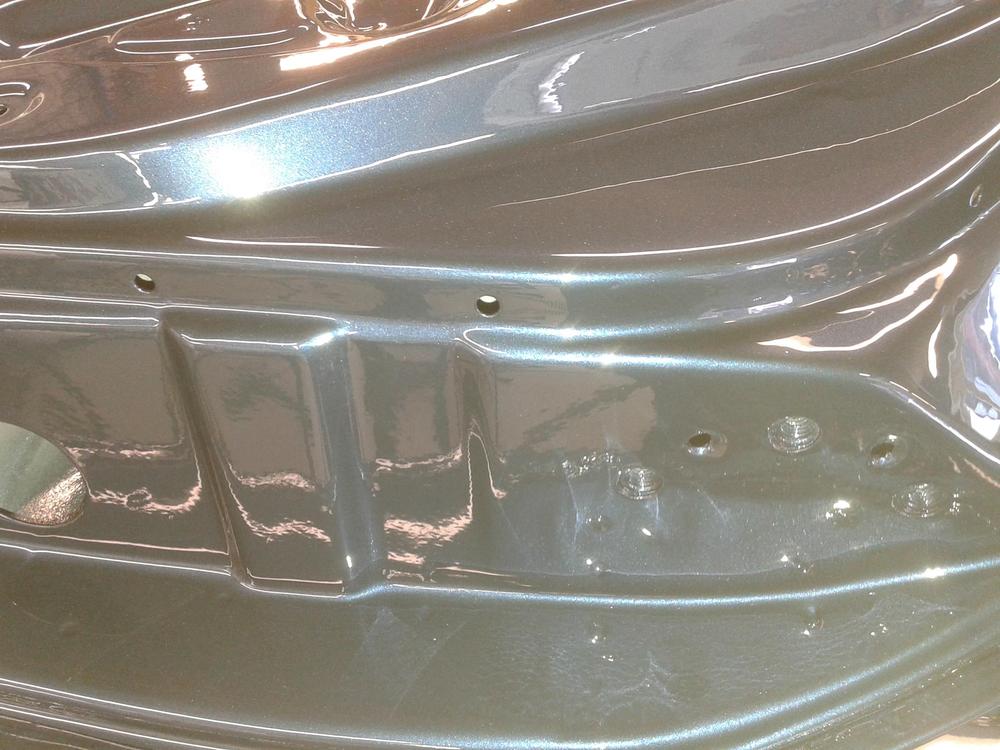
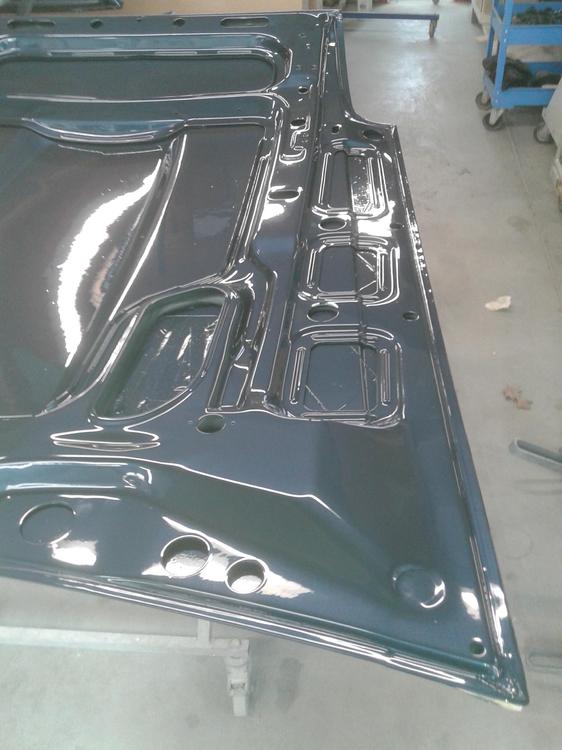
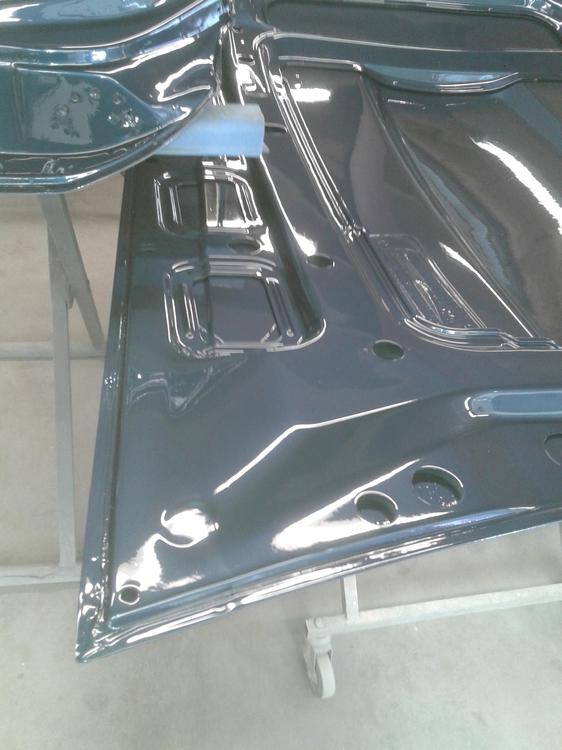
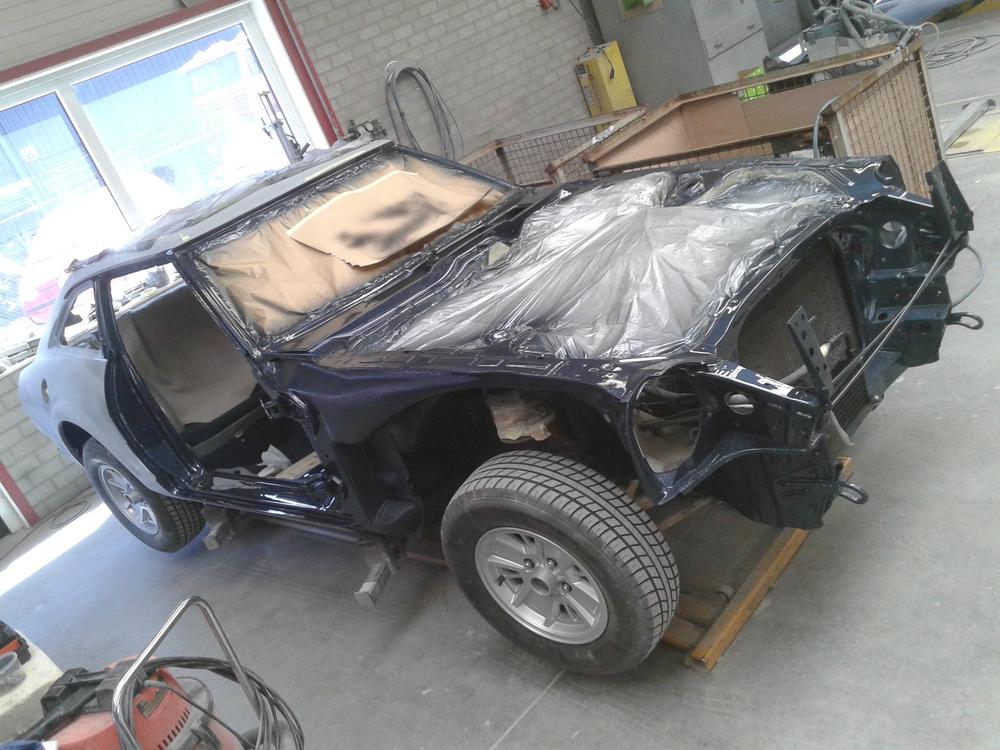
And then... Last thursday everybody waked up it seemed... There was not much work at the bodyshop so things around the 280zx went into high gear! Suddenly all the parts were sanded and ready for the paintbooth! I got excited because this was what i was waiting for, for 6 years now! The first step.. (yeah.. you can't paint it in one go if... you want to do it the right way!) Painting al the inside parts.. where the doors go.. the hood.. the rear hatch... In the last years i got a lot of comments about the color i have choosen for this project.. People whose opinion i value.. And what happens.. The day it got painted i went home because i was drained from all the work and decided i could wait to see it for another day.. (then your exhausted or what?) I decided this because i've been waiting for this for 6 years and another day more was no problem. Anyhow.. The next day i saw the car and there came some very positiv reactions to the color! I'm very happy with it. The Upholsterer called that the roof liner was ready so i was curious and got it the same day in my 300zxtt (nice weather good for a ride) Nice silver original color! (3 holes for the mirror) map reading light. Before paint we had to seal all the joints with special sealer.. Masking also took a few hours.. pff... busy with sanding also.. taking of the guidecoat.. This what it looked like unsealed.. Now.. before you think it's very dark color i must say the photo's don't do the colour justice. The name of the paint: Nissan Blue pearl Graphite.. A part of the screws and bolts were also painted.. Next week installing the doors,hood and hatch.. some sanding on the edges and ready for the big paintjob! For the color we have to wait for a pic in the sun! This car is almost black in the garage and realy nice blue when in the sun! Another pic from the doorjam. I'm now in it for about a 1000 hours of labour... (not counted them yet.. but i think i'm going beyond the 1000 hours easely.. ?


 1 point
 -
After looking around, I think I'm setting my sights on a leather kit sold by Interior Innovations for $350. I need to hold off for a few months at least while I wait to be called back to work so I'm gluing the stretch marks from the inside to stabilize the damage and adding new horsehair and padding for now. AK260, I like your interior but someone moved your steering wheel to the wrong side of the car ; ) Jeff1 point
-
1 pointSo that was "Physics" class? Potentially followed by "Pre-Med"? Haha!! What's your build month/year on your door jamb plate? If you've got a full sized spare, I'm thinking that here in the US, we could call your car a 76, not a 77.1 point
-
1 pointGlad to help. To summarize the sealant the sealant stuff... I've never seen a silicone RTV sealant that said it was recommended to be used in a gasoline environment. All of the ones I've looked at say "not for head gaskets or for contact with gasoline". And while the RTV stuff won't instantly dissolve or burn down, fall over, and sink into the swamp... You can do better. I tried that Motoseal stuff because the package actually said "Gasoline resistant" on it and I've been satisfied in those applications. I'm sure there are other options. All that said... I would NOT use the Motoseal between your carb domes and the bodies. I'd be worried that it would work TOO well and you wouldn't be able to get the domes back off easily. For that application, you want something that doesn't work "as well".1 point
-
1 point10-90 ohm (F - E) is the spec I’ve always worked with. I can test a few senders....1 point