


Leaderboard
-
motorman7
 Subscriber
 11Points2,228Posts
 -
Datsunbat
Free Member4Points68Posts -
Patcon
Subscriber4Points11,142Posts -
Captain Obvious
Free Member3Points10,081Posts


Popular Content
Showing content with the highest reputation on 02/04/2019 in all areas
-
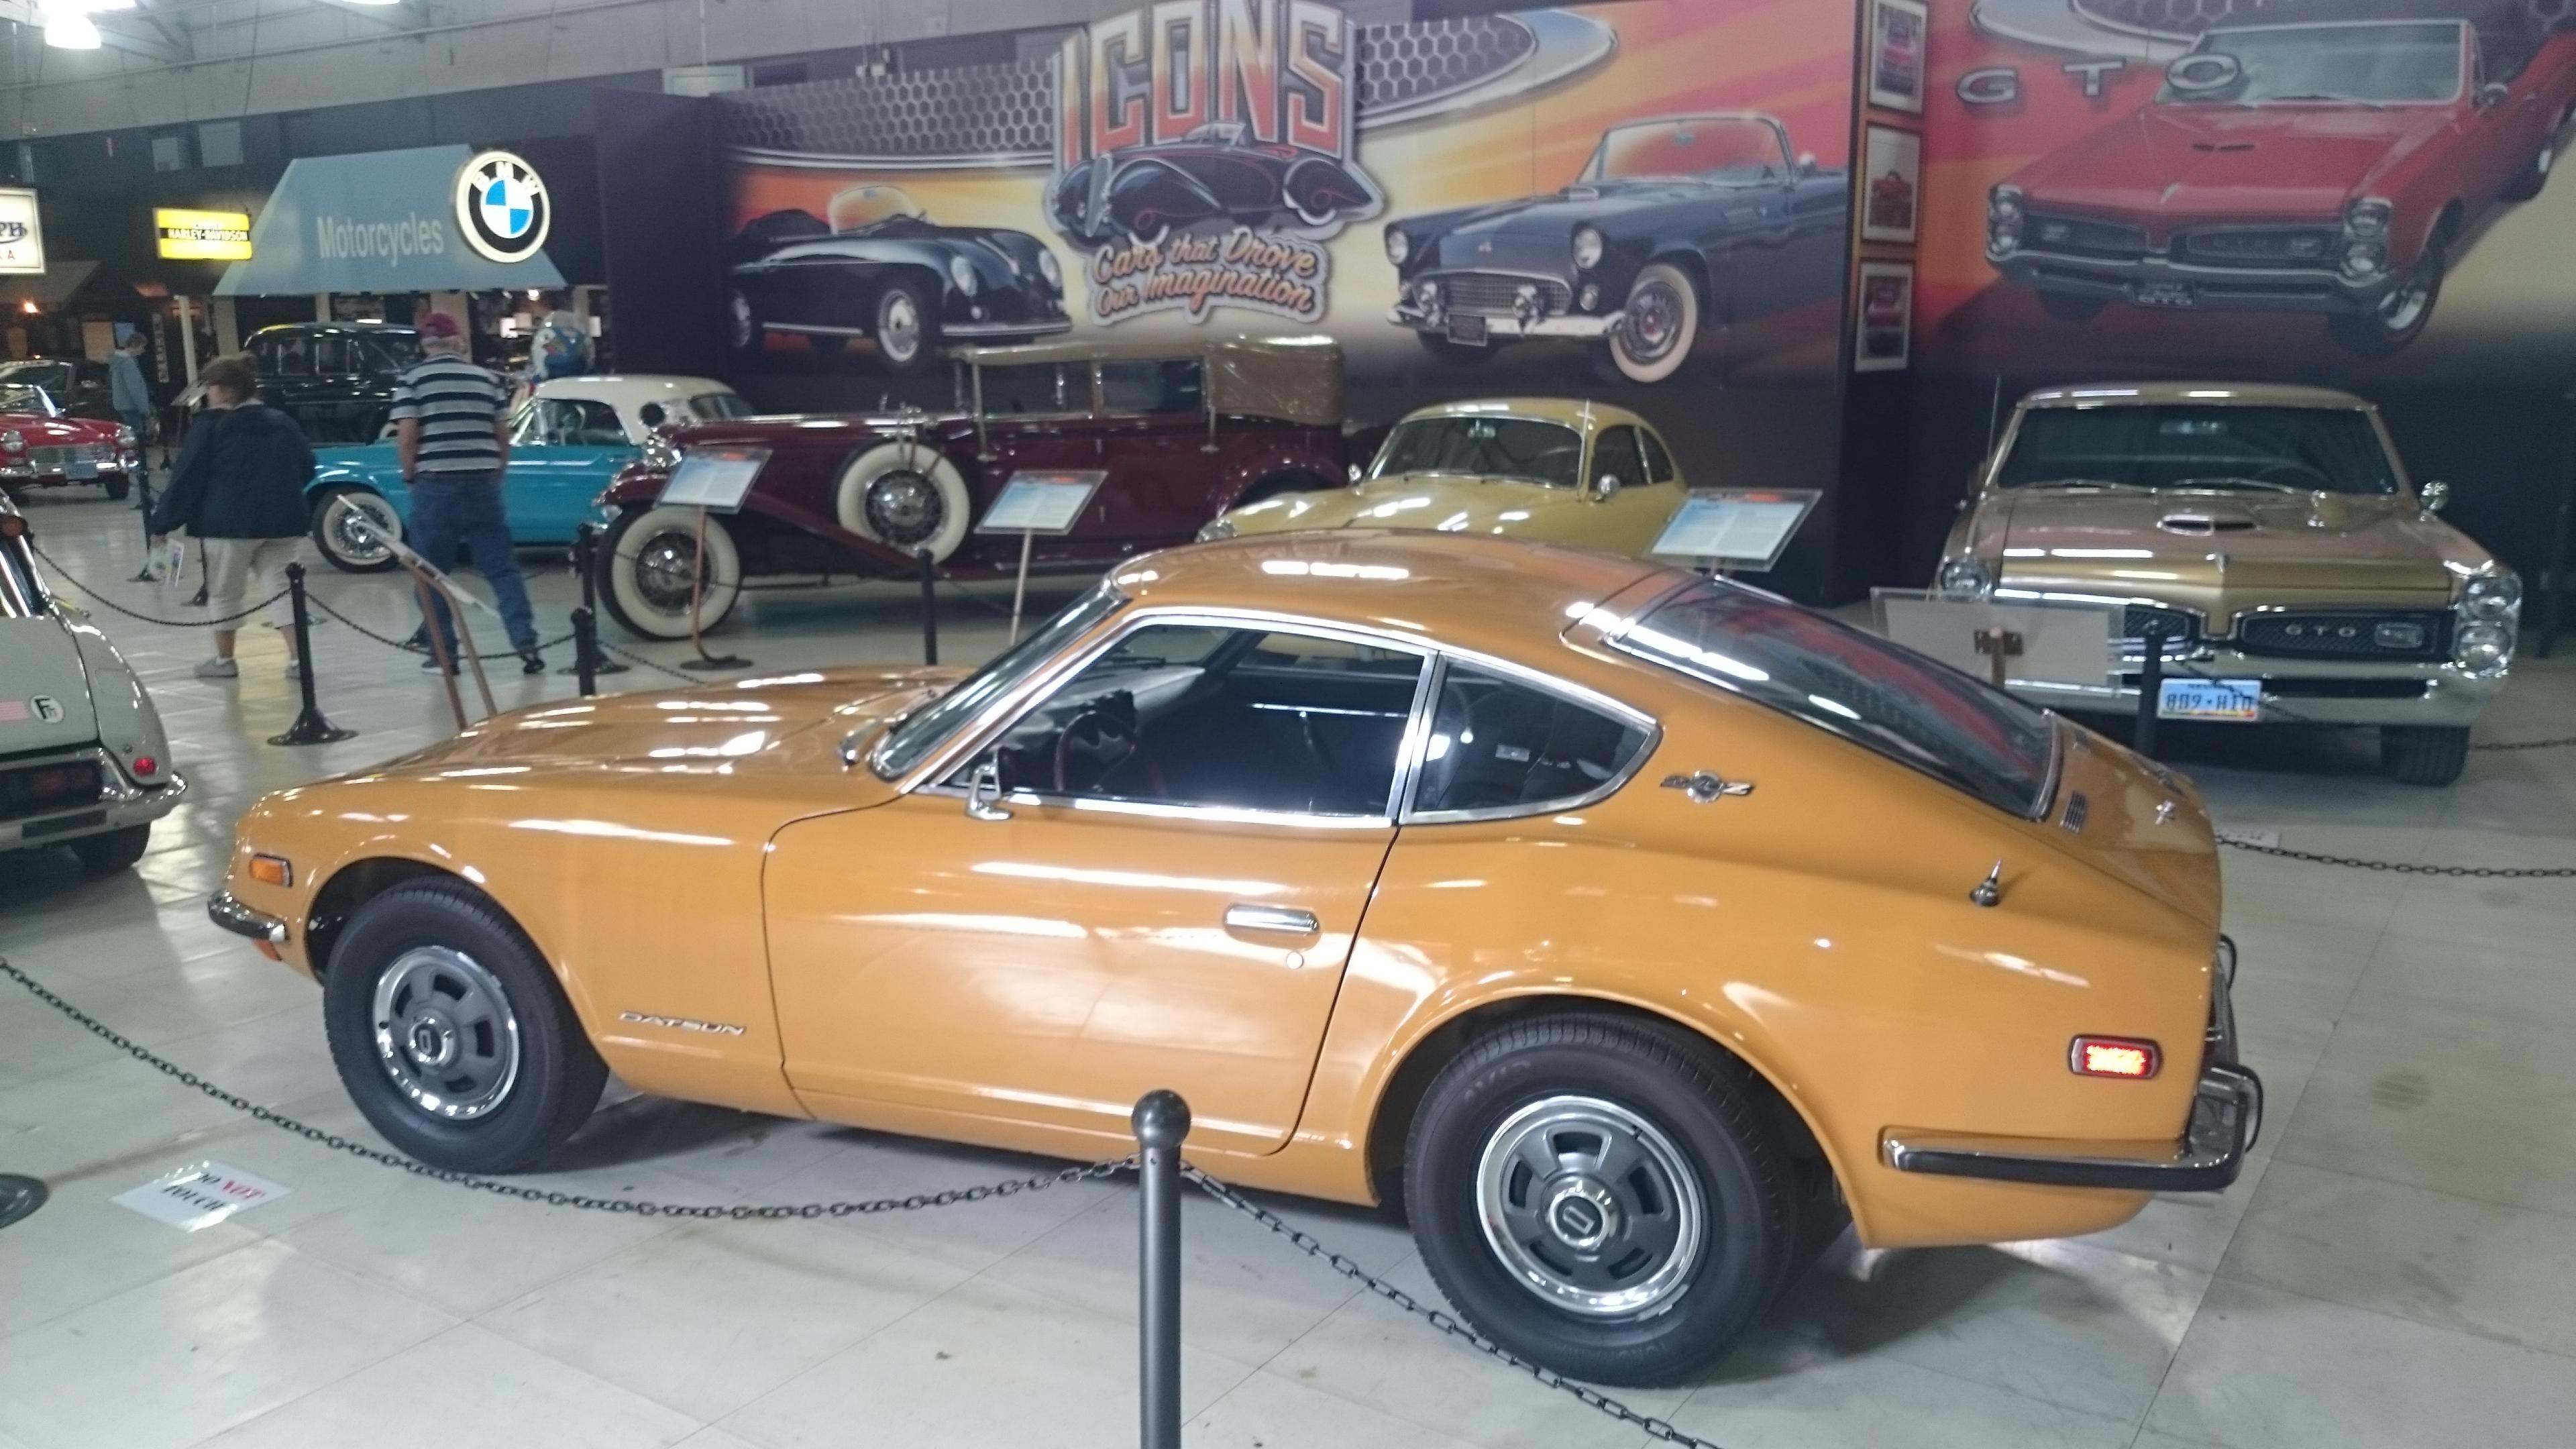
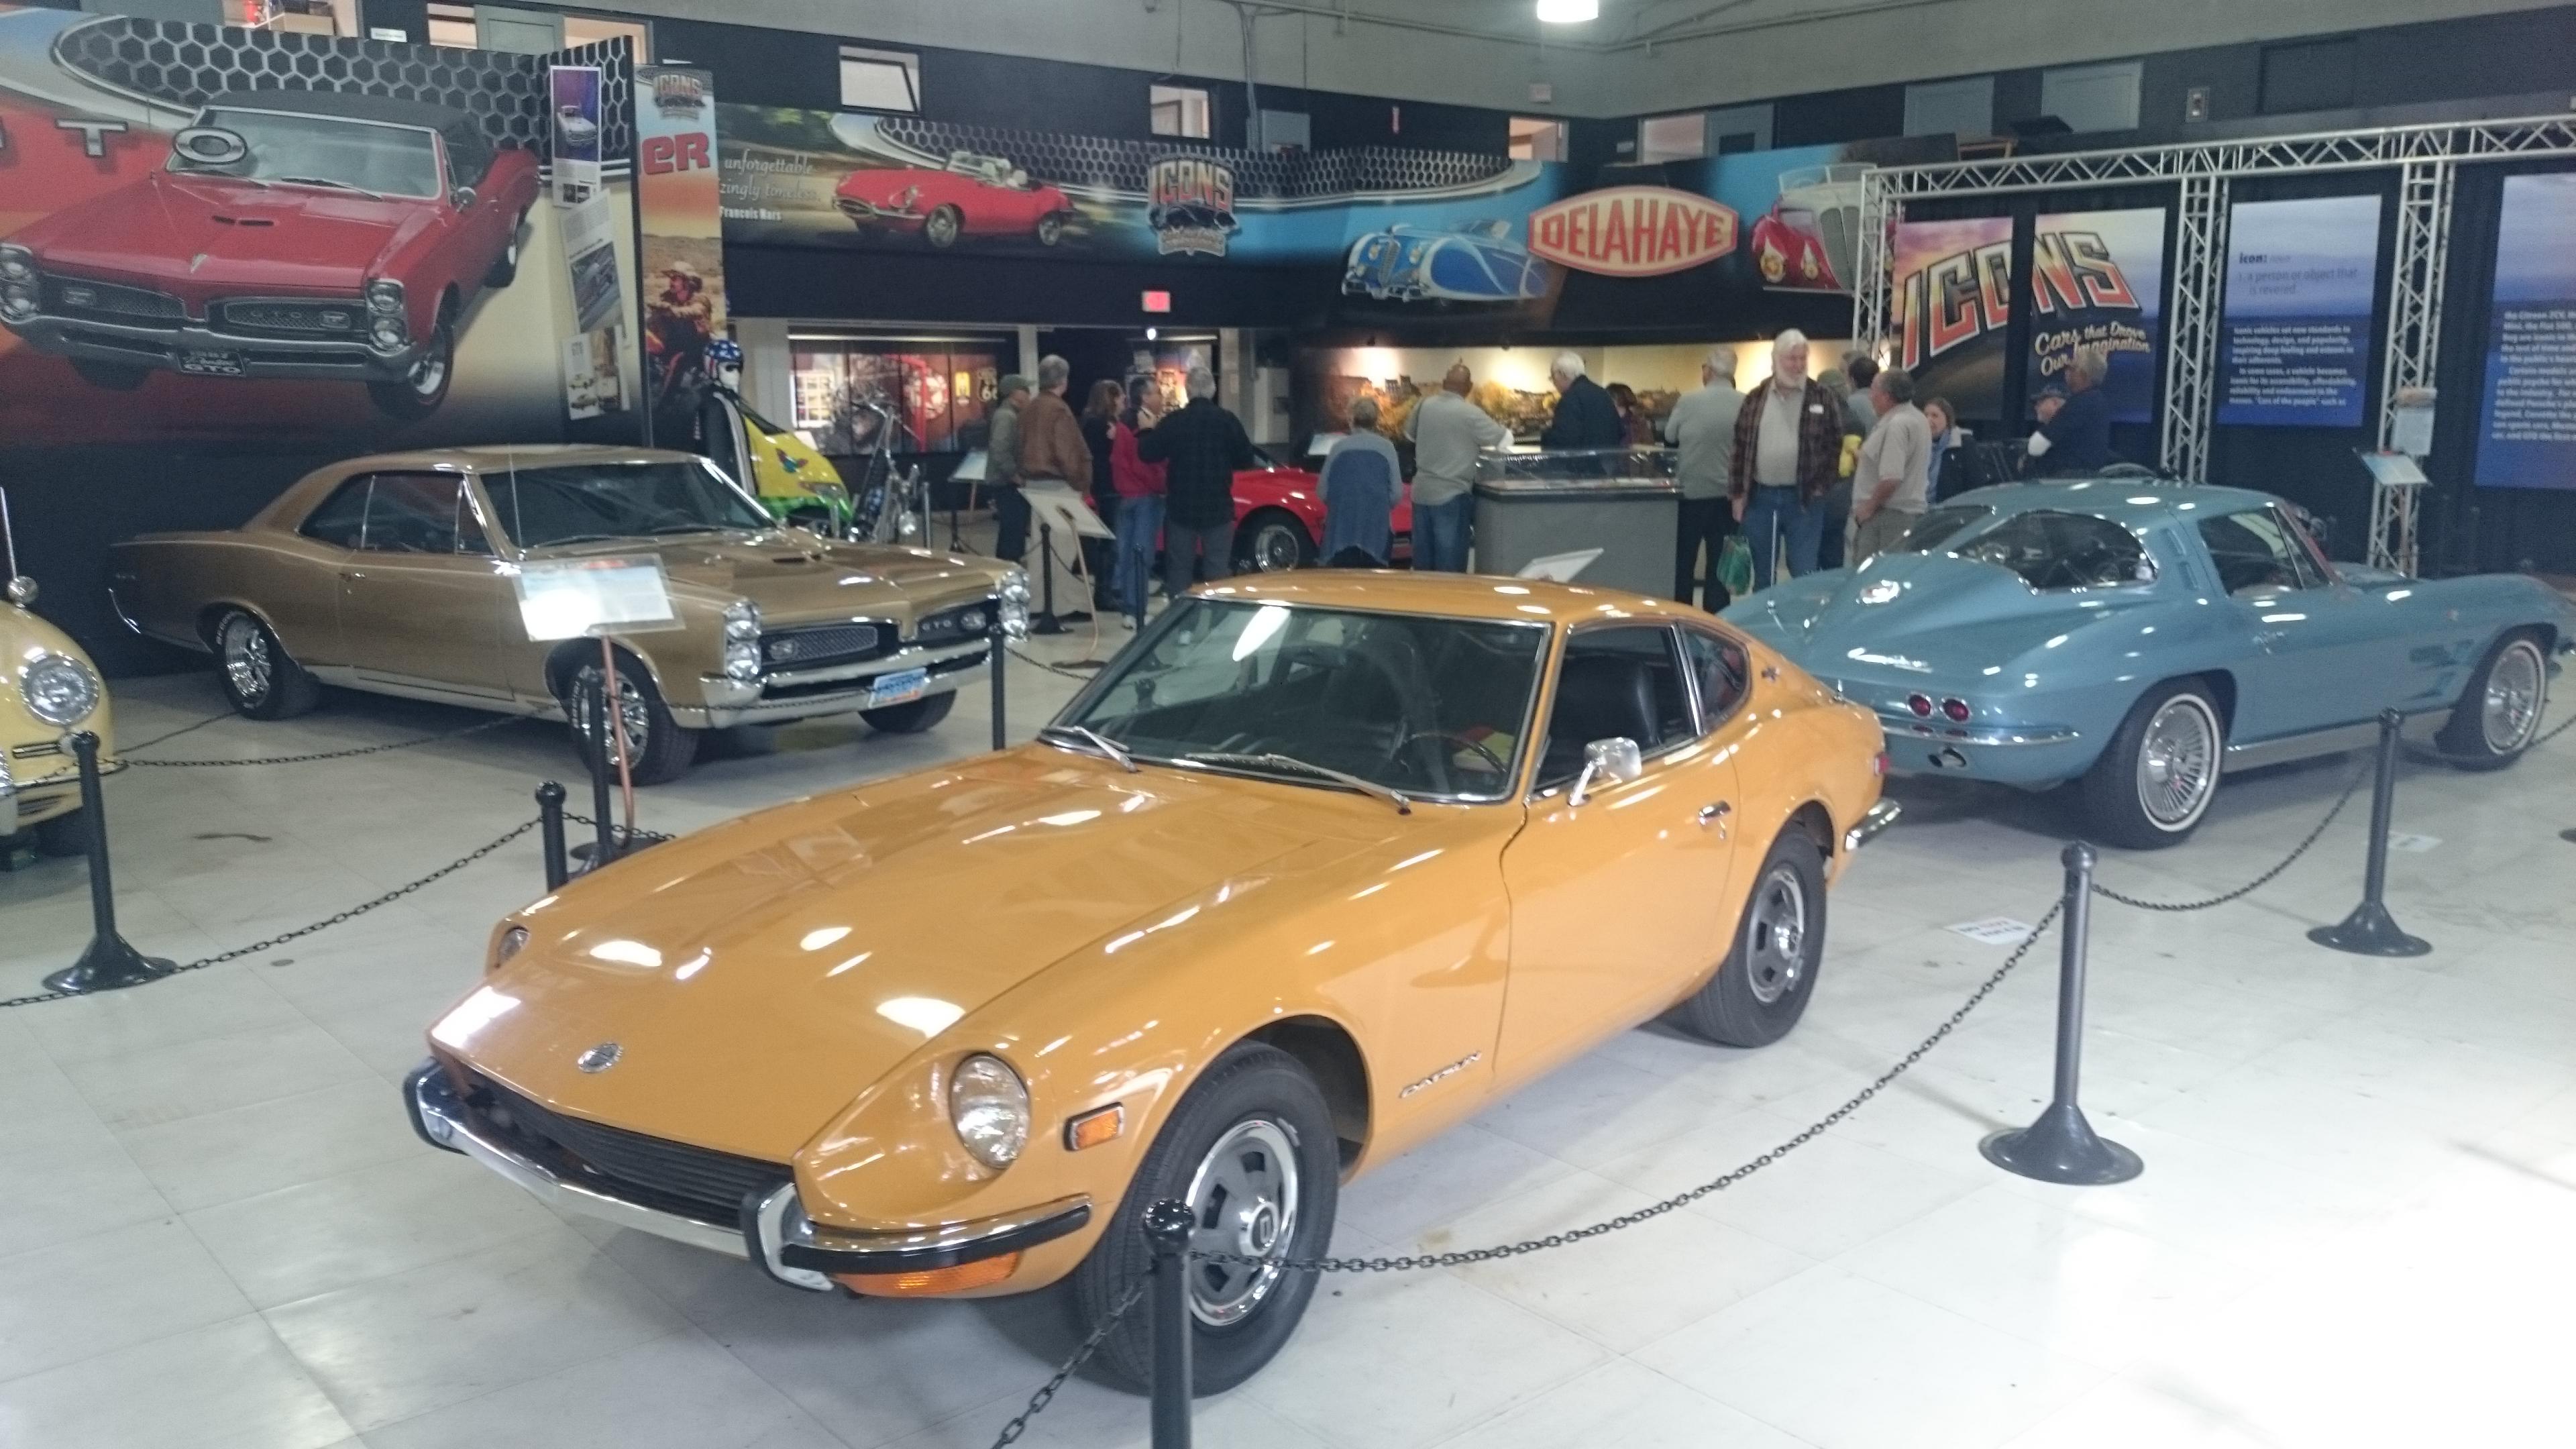
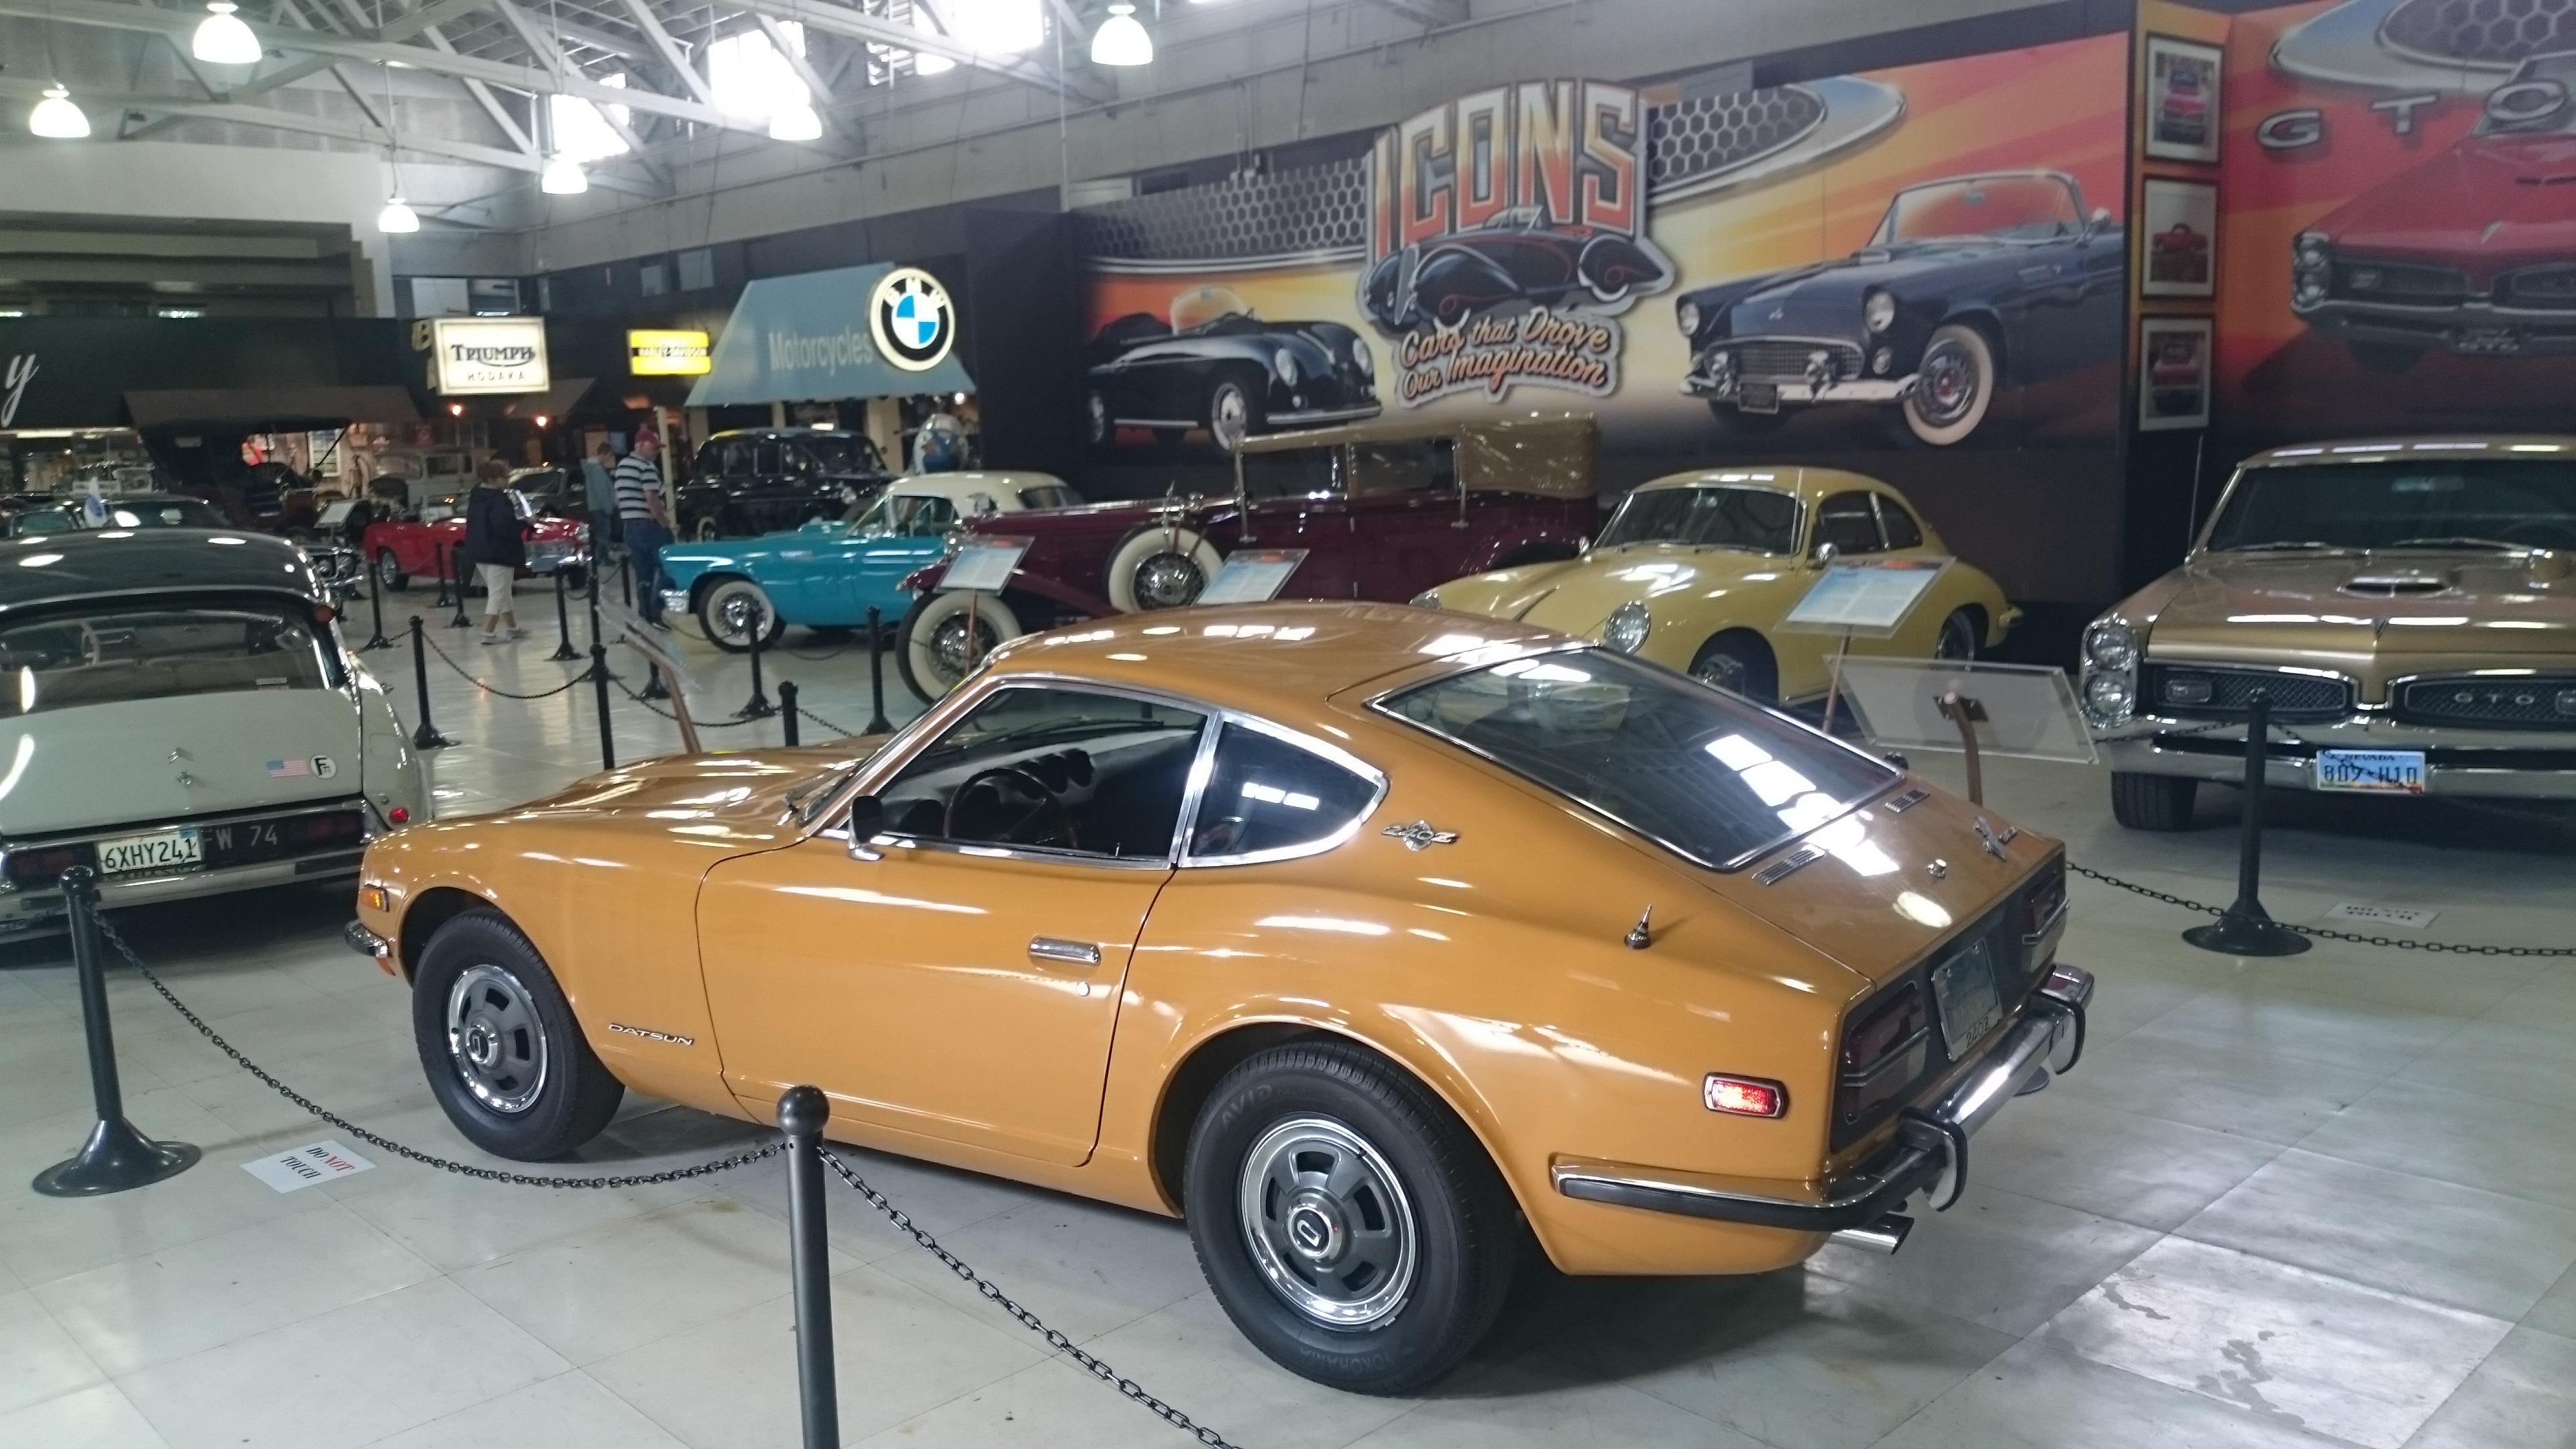
8 pointsI should update the title of this thread to 'Z cars at the Concours and Museums'. My '70 is now on display at the San Diego Auto Museum. They have an exhibit that started Feb 2, 2019 called "Icons, Cars that Drove our Imagination" : https://sdautomuseum.org/exhibit/icons The Roadster is at the Petersen Museum: https://www.petersen.org/1969-datsun-1600-roadster/ Love that free storage!


 8 points
 -
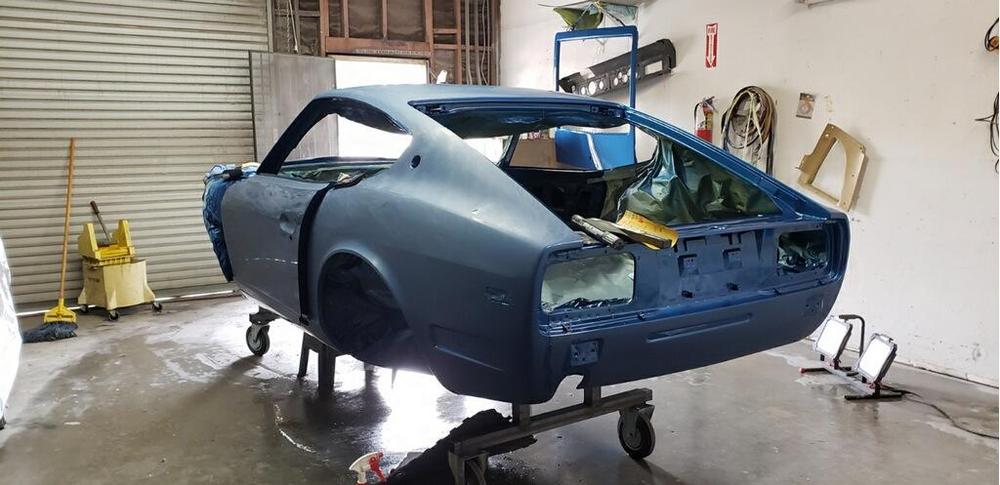
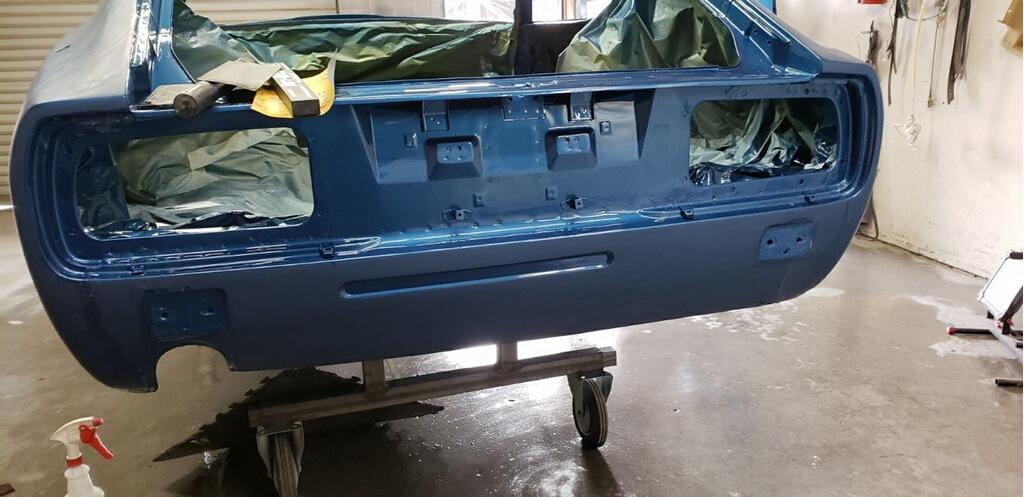
4 pointsHi everybody! Today I bring fresh news!!! During the last weekends we were working on the car…but some minor bad luck happened…we didn’t progress as we like!!! But bolt by bolt we are assembling the BIG puzzle!!! At this moment there is a willfull rubber, the one from the hatch glass…it will go directly to the litter! I bought an original in japan and I’m waiting for it! Then the doors…we didn’t finish the driver’s door because the inside locker is broken and we were unable to tune the door properly. I’m getting bored with all these tasks…only adjustments and tunning and…and…and… too much time spent on each part!!! The only goal that is keeping me excited is getting her to it’s original condition…and it’s almost done! Let’s see the photos!!! Plated and zinc parts… The fuel filter stand is originaly painted black, but I’ll leave it zinc…it’s cleanerto the engine bay…I think! New horns…before there were the giant vintage bosh… New heater grommets… Installing the door. New key lockers, new door handles, glass elevators and the main lock. This last one borke down. I suspected before the resto, that it didn’t opened the door properly! New hood handle...the previous one wasn’t original and didn’t match S30! New rubbers for hood handle and km mark. Cleaning and installing the side markers. Installed..they fit very well! And left side almost ready… Rear bumper installation! What an enormous task!!! 3 hours until the end!!! Too much parts, rubbers, guards, bolts, tune and so on…luckily everything is original and fitted well!!! All the new parts… The result before it goes to the car! Before the installation we cover the sides with sphincter to avoid some scratches! Annoying car said Mr.Vitorino... Almost!!! And here is the result!!! Seat in it’s place… With a Zelfie I finish this report… Hope you enjoyed all the results…next week some more news…I believe!!! Regards Mário4 points
-
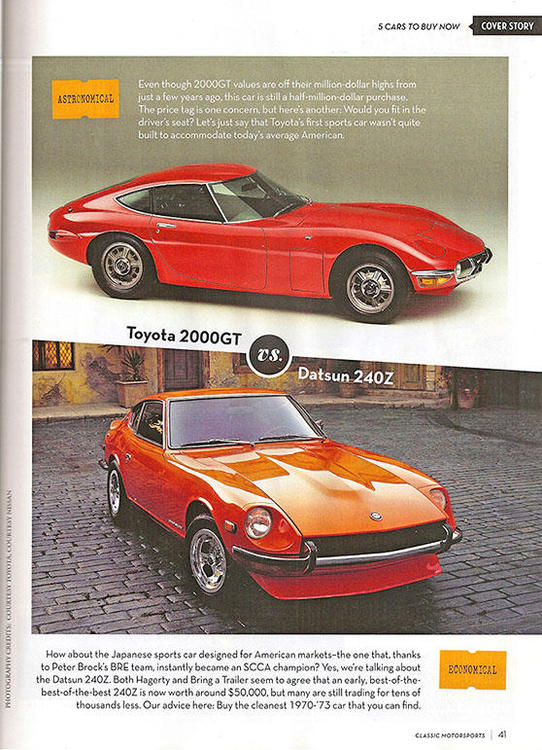
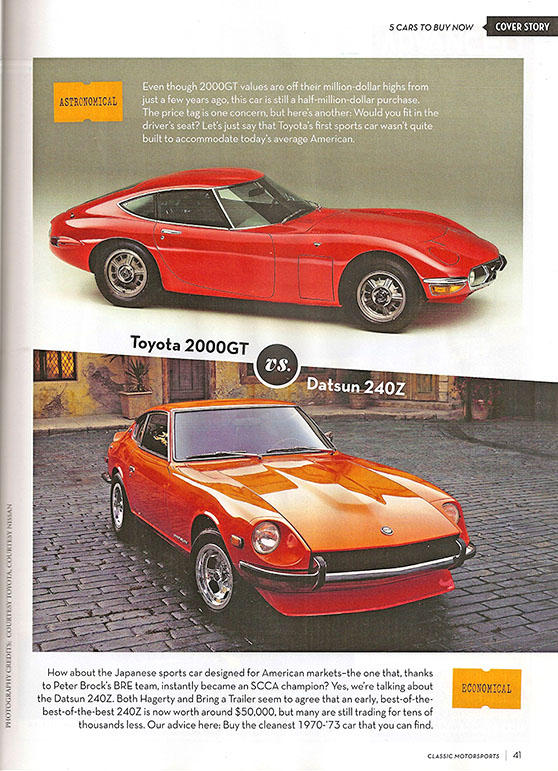
2 pointsThe cover story in the March Classic Motorsports is “Buy These Cars Now”, and among the 5 up-and-comers is the “economical” 240z in contrast to the “astronomical” Toyota 2000GT. ”How about the Japanese sports car designed for American markets — the one that, thanks to Peter Brock’s BRE team, instantly became an SCCA champion? Yes, we’re talking about the Datsun 240Z. Both Hagerty and Bring a Trailer seem to agree that an early, best-of-the-best-of-the-best 240Z is now worth around $50,000, but many are still trading for tens of thousands less. Our advice here: Buy the cleanest 1970-73 car that you can find.”
 2 points
 -
2 pointsI would suggest a 280Z. Many more and their value versus the bucks you'll spend hasn't risen like the 240s. Once you get the bumpers off they're pretty much the same body. If you plan a motor swap it's a mainly insignificant detail in my opinion. 240s have lower gearing to, you'll save some $$ with a 280 5 speed plus the r200 differential.2 points
-
2 pointsWell, that’s one restored! I added the 10g of grease to each of the ball tracks and another 30g in the top section beneath the snap ring. The manual has no info on adding grease to the boot itself so I assume that is left dry? Catches the oversling later?
 2 points
 -
2 pointsHere are some of the award links. Would be nice to have a video of the presentation. http://autoweek.com/gallery/car-life/winners-la-jolla-concours Pic # 23 https://www.lajollaconcours.com/2018-winners
 2 points
 -
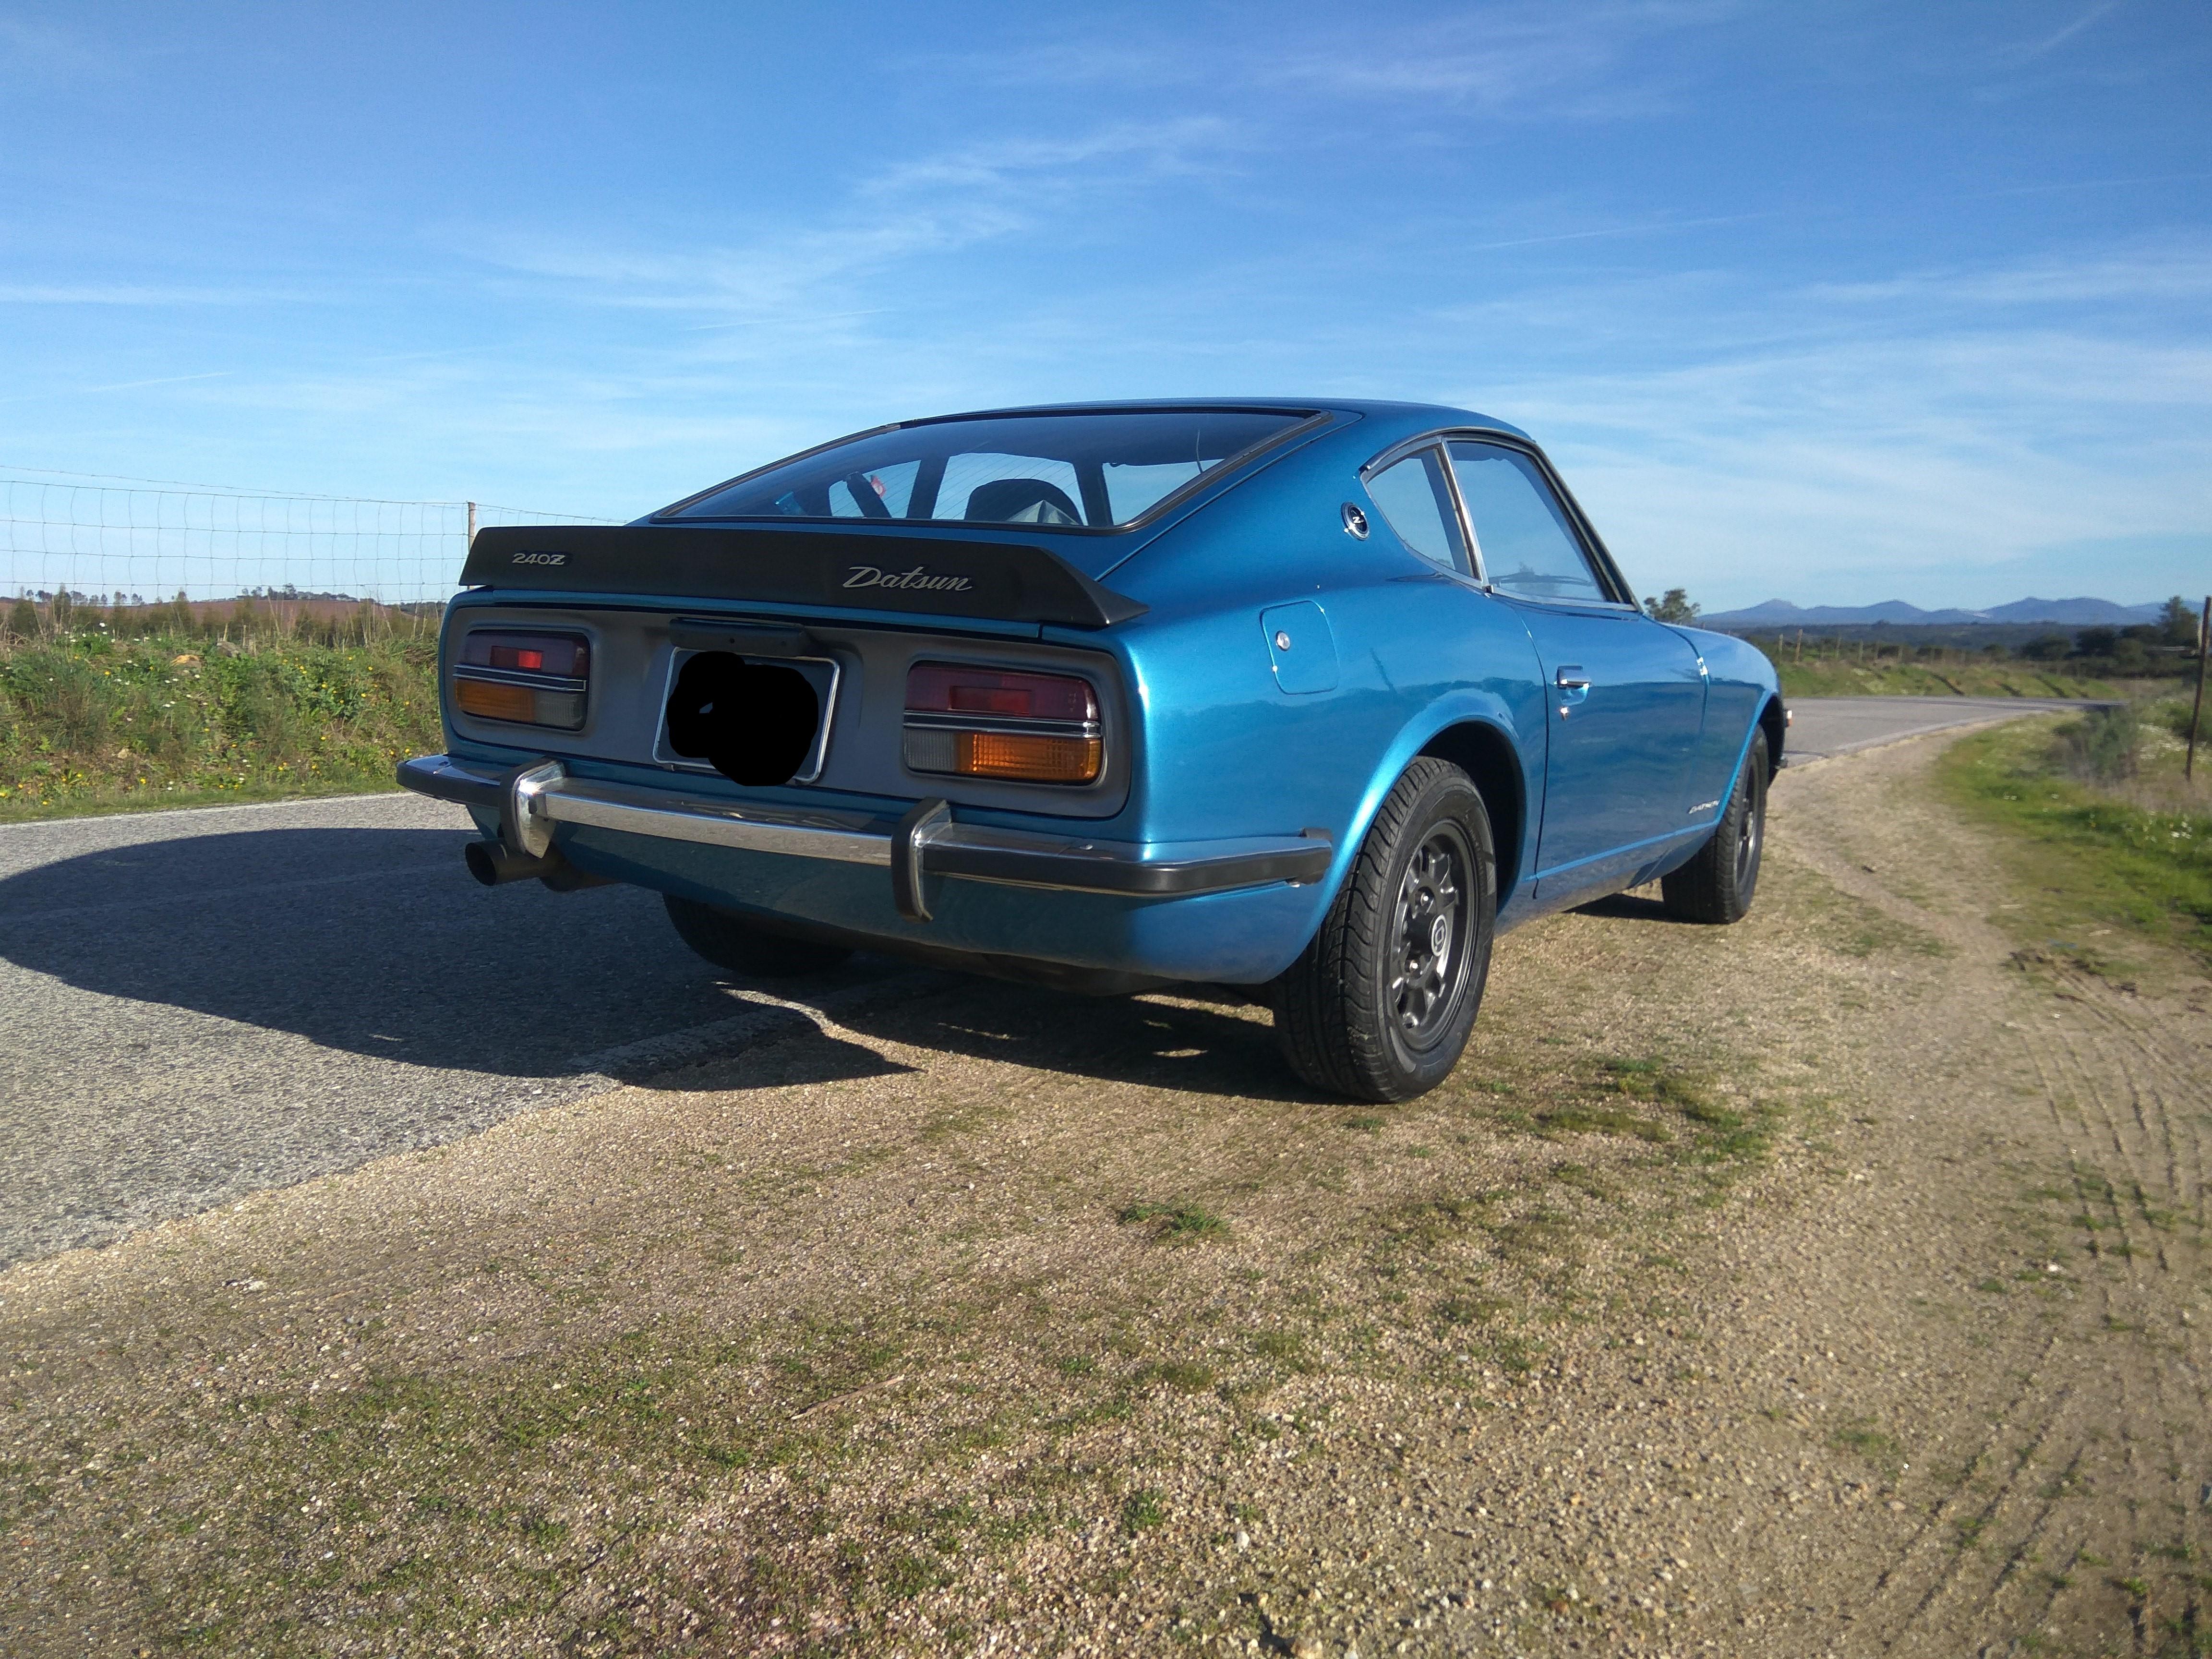
1 pointAlways nice when a 240z drops into your lap, it looks good. So you're thinking about restoring it or selling it, if you sell it as is you will get less for it than if you put in some time and money and get it running well, making sure all the lights, signals, horns etc are working properly. Also, try and find as much original paper work on the car as you can.1 point
-
1 pointAlso the 280z is already an EFI car so easier to re-power with a more modern EFI engine. The tank and fuel system is already set for high pressure and return and the electrical system already has locations for ECU power and fuel pump power1 point
-
1 pointI don't know if any don't have the license plate mounting tabs, but those tabs are a great place to mount a gopro.1 point
-
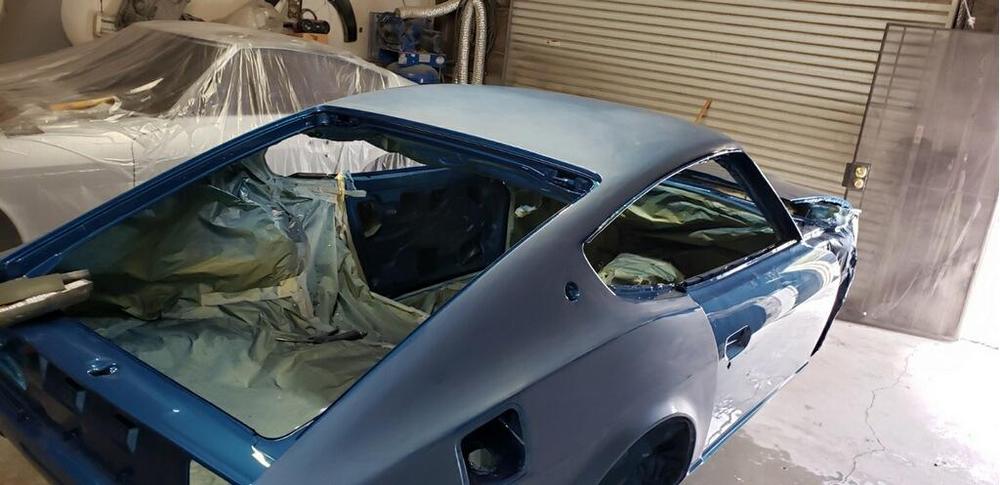
Paint (clearcoat) is finished with color sanding and is now being polished. Will pick up car this Wednesday and get this into my garage. That is when the real fun begins.
 1 point
 -
1 point
-
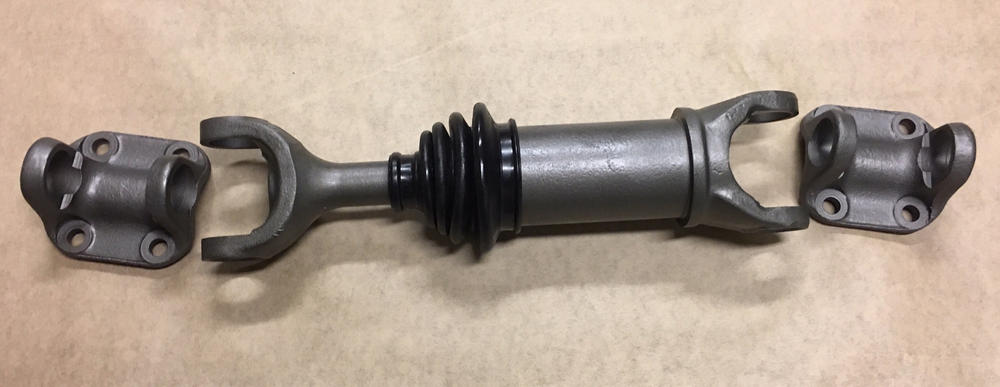
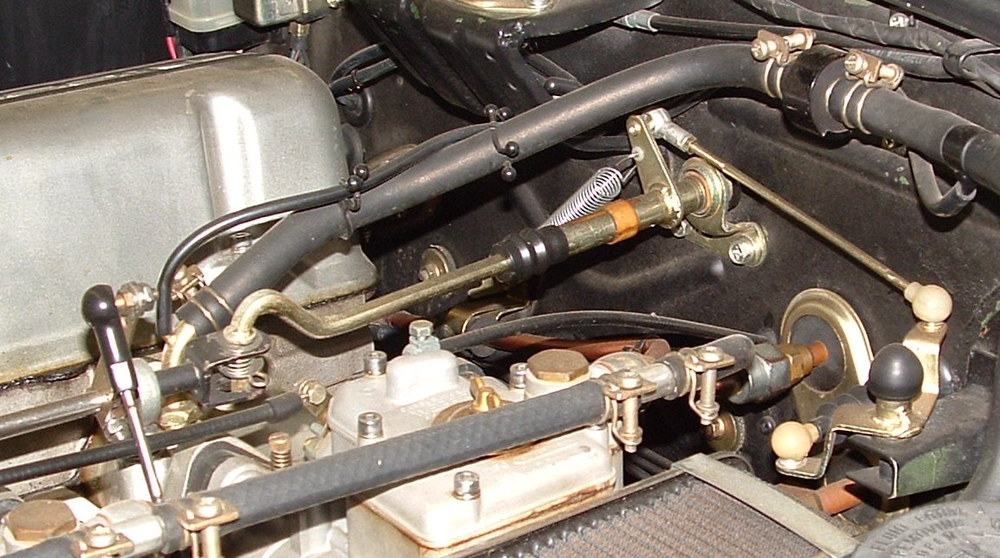
Here is an application of the 280z linkage. The shepherd's hook fits in a slot in the receiver. It can expand and contract. You can cut it to length and the end is hidden in the receiver. Sometimes you need to screw the heim joints up so that the throttle rod across the manifold is aligned with the shepherd's hook (in the photo below it looks too low) Sometimes you also have to relocate where the bracket bolts to the firewall for left/right alignment. The angle of the arm on the receiver looks nice below. You can loosen all 3 lever push arms so that the main throttle rod across the manifold can be rotated to achieve this. Attention to details helps!
 1 point
 -
1 pointI'm not sure what requisite lugs you're talking about. I do have first hand experience with some lock stuff from ebay, although since it's been a number of years since I messed with them. I'm not sure if what's available now is the same stuff that was available six or seven years ago, but back when I was doing my locks, the only locks that were being produced new were door locks and ignition locks and I they were being made in Taiwan (by ASP). I've never seen any new production for glove box or hatch locks. So back when I was doing all my locks, I purchased door locks and ignition lock stuff from ebay. Be aware, however, that there are a couple different gotchas... First of which is that the really early cars used single sided keys and all that lock stuff is very different than what was used on the later cars. I don't know what constitutes "early" and "late" exactly, but I can guarantee that my 77 is "later" and I have absolutely no experience with the early single sided key stuff. I don't know if that's a 69-70 thing, or what. Second possible gotcha is the key blank as there were a couple different blanks used (at least in the later years). By the time they got to 77 there were two blanks available which were a mirror image of each other. I'm not positive, but I believe this practice started in 74 with the 260. The third gotcha is the length of the ignition cylinder and the number of tumblers included within. By the time they got to 77, the ignition locks used seven tumblers. But some year prior to that, the ignition locks only used six tumblers. So I'm not exactly sure on what year the change went into place, but at some point, they upped the number of tumblers from six to seven. I haven't researched it, but I believe all the door locks used six tumblers even into the later years. The last gotcha is that the actuation arms on the 77-78 door locks are different than previous years and most of the ebay door locks won't work. I did a quick check and there was at least one seller that had stuff that was 77-78 specific, but the point is, if you're looking for 77-78 stuff (which I know you are not), you have one extra hurdle to overcome. So the summary is.... If you're going to buy lock stuff off ebay, make sure it uses the correct (mirror) blank. And if it's an ignition lock you're buying, make sure it has the appropriate number of tumblers (six or seven - also referred to as "short" or "long" body). And if you're looking for door locks for 77-78, make sure you get the ones with the correct actuator arm. Wow. Lots of words. Sorry.1 point
-
I have to go take pictures of the finished product, but its just a small plate on each side that covers the gap. Spot welded to the center, two bolts into captured nuts on the outer part. You only need tensile strength here, that metal is so thin (that front bar that ties it into the lower valance is needed to keep the hood from bending the crap out of it), and your rad provides 95% of the strength in this area.1 point
-
1 pointIt's a week for dispelling myths I see. First half shaft length difference, and now how grease works. I once believed that wheel bearings need to be filled with grease, including the dust cap. Have to keep grease around to replace what gets flung and maybe moved with heat and motion, right? Fill the bearings of course, and stuff as much in the cavities as you can. Tough to put in too much! At the same time I was doing more R&R's on rear bearings as well as fronts, and what struck me was the lack of grease in especially the rear housings. The bearings them selves were packed full of grease, quite often quite clean grease which I found surprising given that these were original bearings (spline nuts still had perfect factor peening). Maybe a light coat on the distance piec, but the cavity spaces are bone dry. But finally the light came on. Why in the world would you want grease that leaves the bearings with heat or centrifugal force and needs to be replentished by what's around? I cannot imagine a scenario that enables grease to move around in there and properly keep the bearings greased unless the entire cavity was packed full. Grease is actually designed to stay exactly where it is put and NOT to leave the bearing races at all under any but the most extremes of heat, up where metal starts to glow. The enemy of grease is moisture and dirt/grit/brake dust. If your seals are bad, that crap can get in there and destroy the bearing. I had a front failure due to a bad (ok, absent o-ring on the dust cap) and no wheel center caps that allowed crap to get in the bearing space and eventually lead to lock up and failure. My fault 100% as I was only putting grease on the bearings by this point,. So there IS a reason to put lots of grease in front of the spindle nut inside the cap, but it's mostly about a barrier to crap getting to the bearings. So there is no need to put grease anywhere but directly on the parts that touch and move. Once there, it does not move or migrate away. Any grease you put in that axle boot will stay right there and never contribute to the sliding joint. Might keep the boot soft and snuggly, but that's it.1 point
-
I have four 2 ft high jack stands that I use for a car that I'm going to be underneath for a while, I place the stands on blocks of wood to gain a bit more height. After the scraping wash everything down well with a strong industrial cleaner and/or paint thinner, sand down the original primer with 80 grit paper. If you don't want to go the spray gun/compressor route there are some good 2 part epoxy primers in rattle cans now. I have used this stuff a few times now and it's a quality item, https://www.66autocolor.com/SearchResults.asp?Search=2k+epoxy+primer&Submit=Submit to cover the entire bottom of a Z you are probably looking at at least 6 cans. Once you have 2 good coats of 2k epoxy primer from a can or spray gun you can do anything on top, paint, undercoat, some guys do bed liner.1 point
-
lol. ok so ordered the 280z linkage, i’ll try it out next weekend.1 point
-
The only way to know what rust is hiding is to drop all the suspension and start scraping, very often under that thick layer of undercoat that has been there for decades you will find patches of rust. That also gives you a chance to recondition all of the parts you removed. There are brushable coatings but I have never really found that they work as well as spraying, to protect the body paint you can use the 2 mil clear plastic sheeting that house painters use. Drape a big sheet over the car and tape it up along the body edge sealing the car up until you have finished underneath.1 point
-
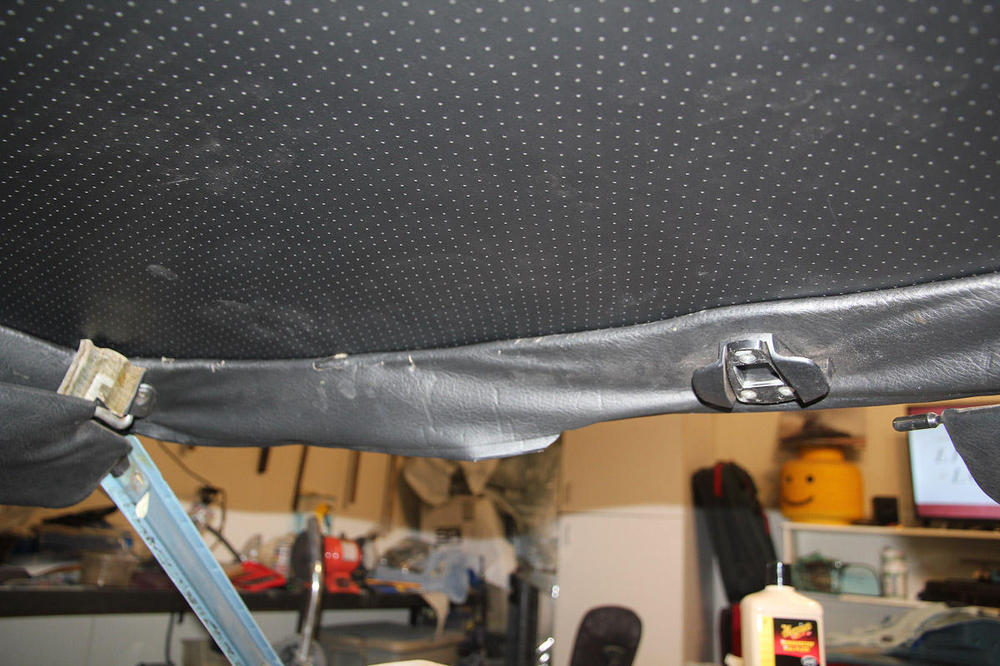
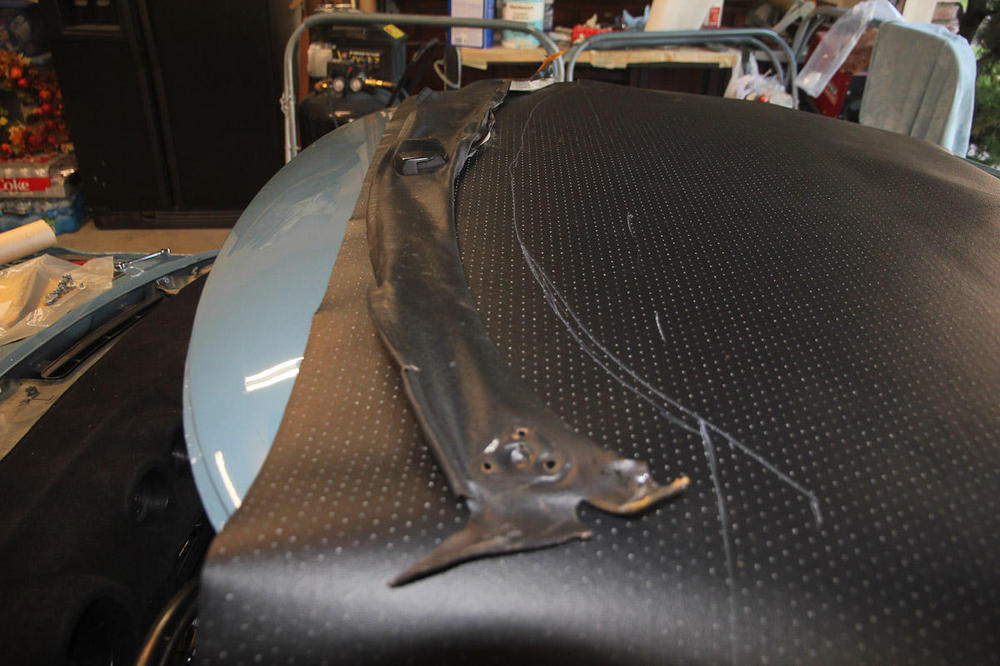
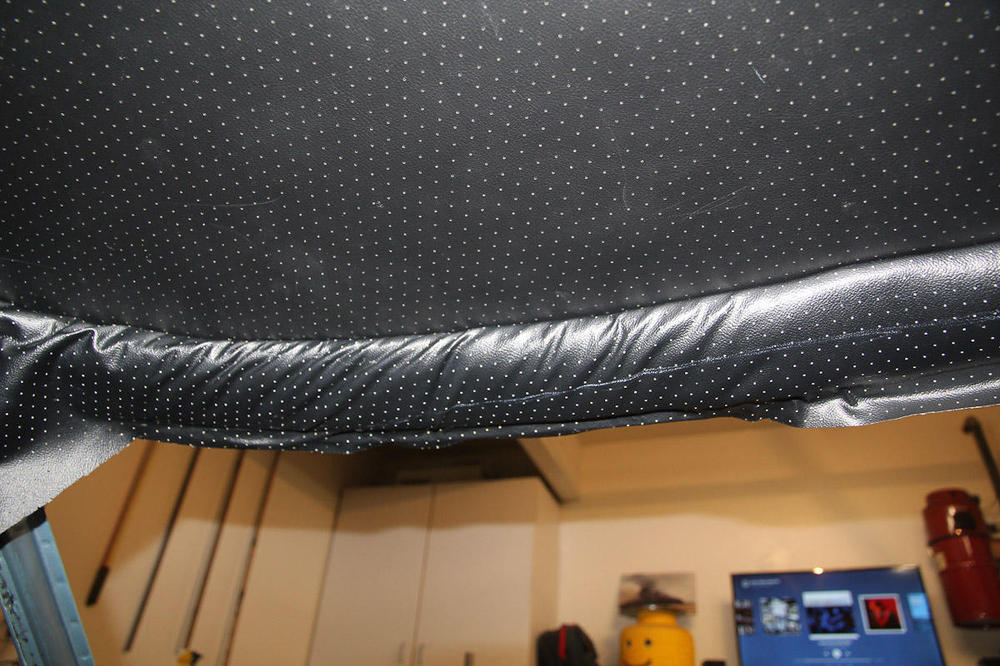
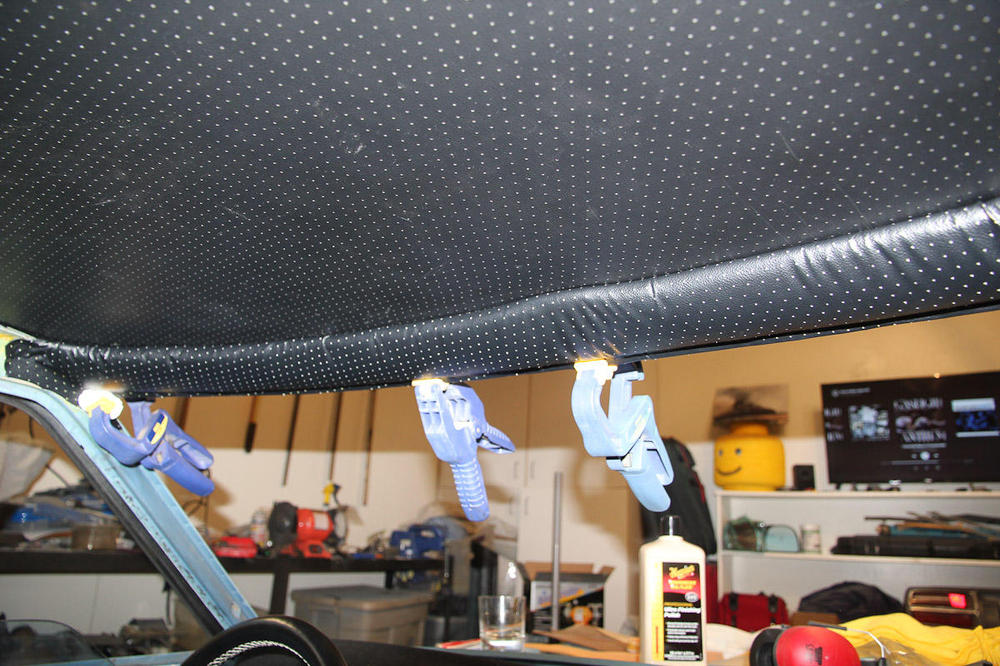
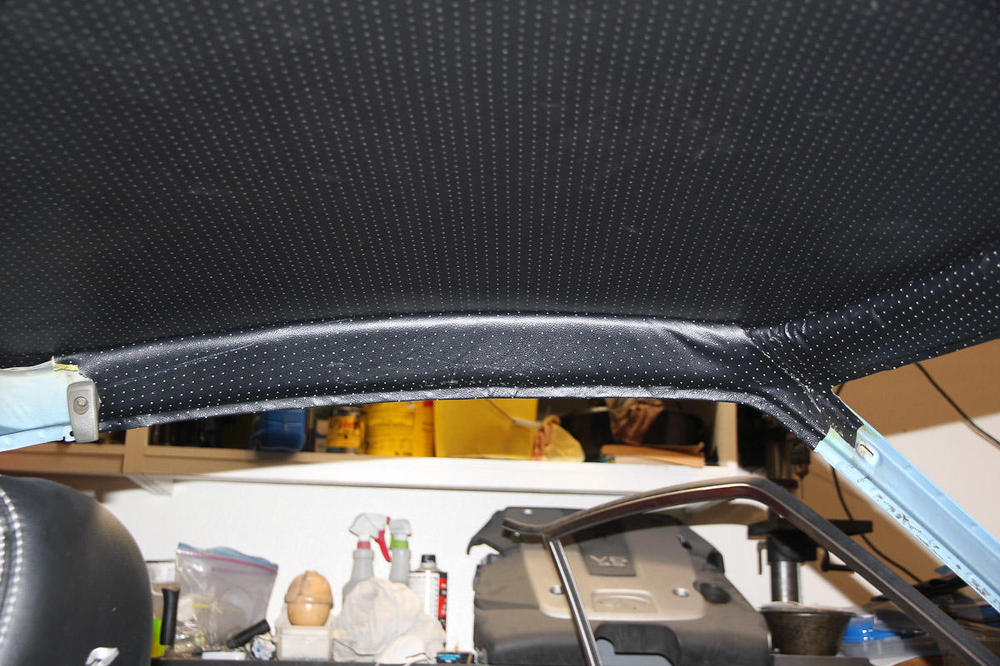
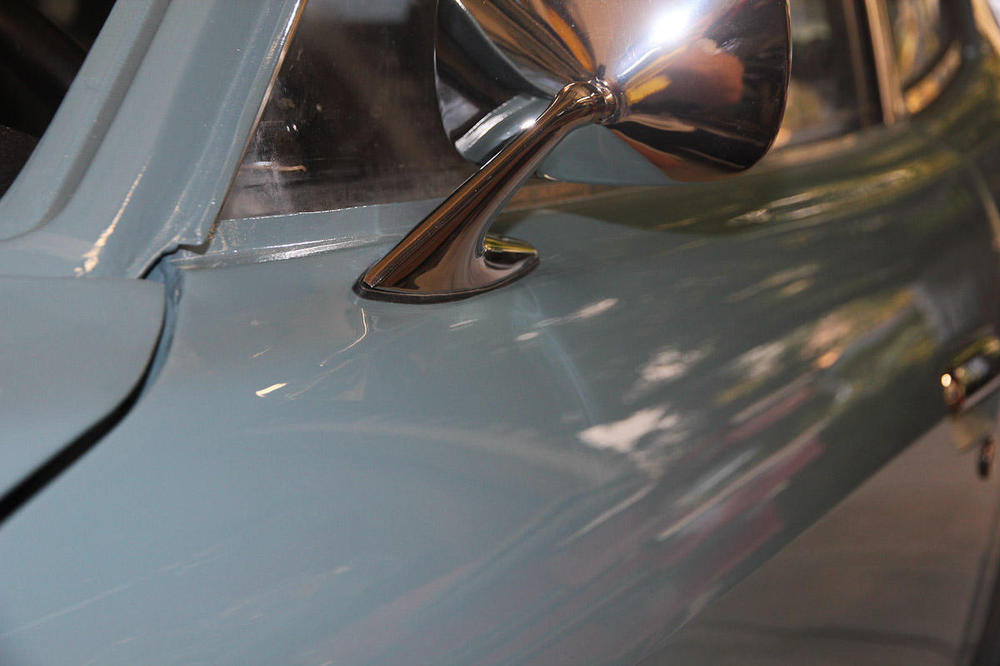
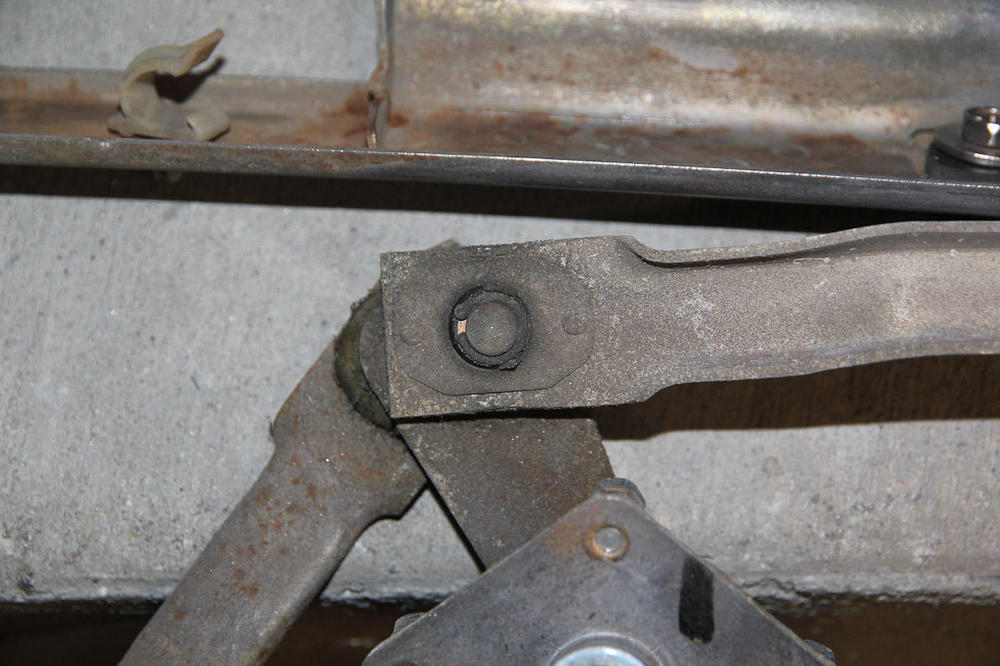
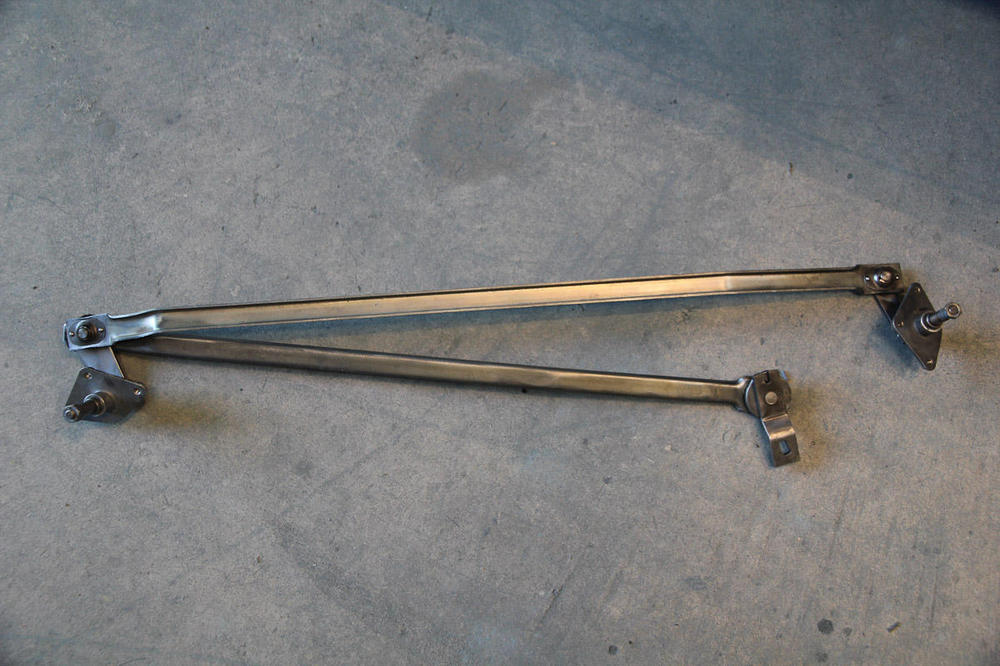
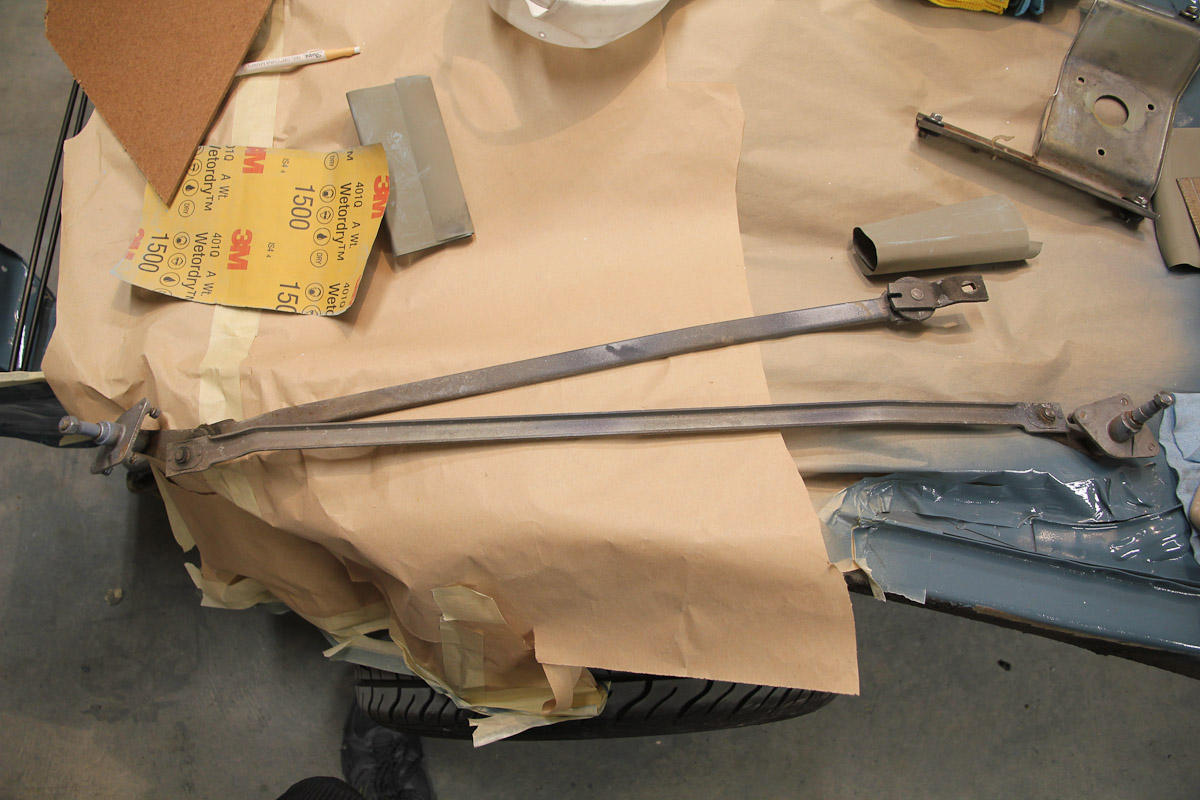
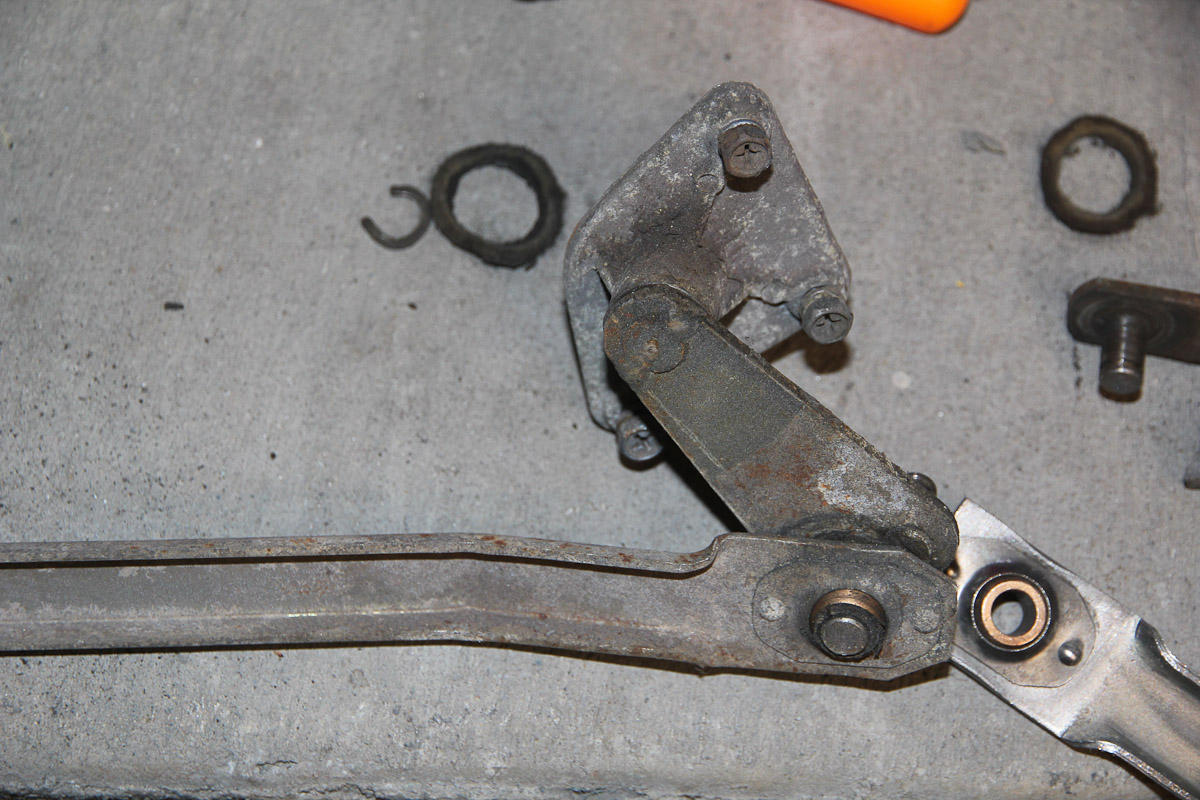
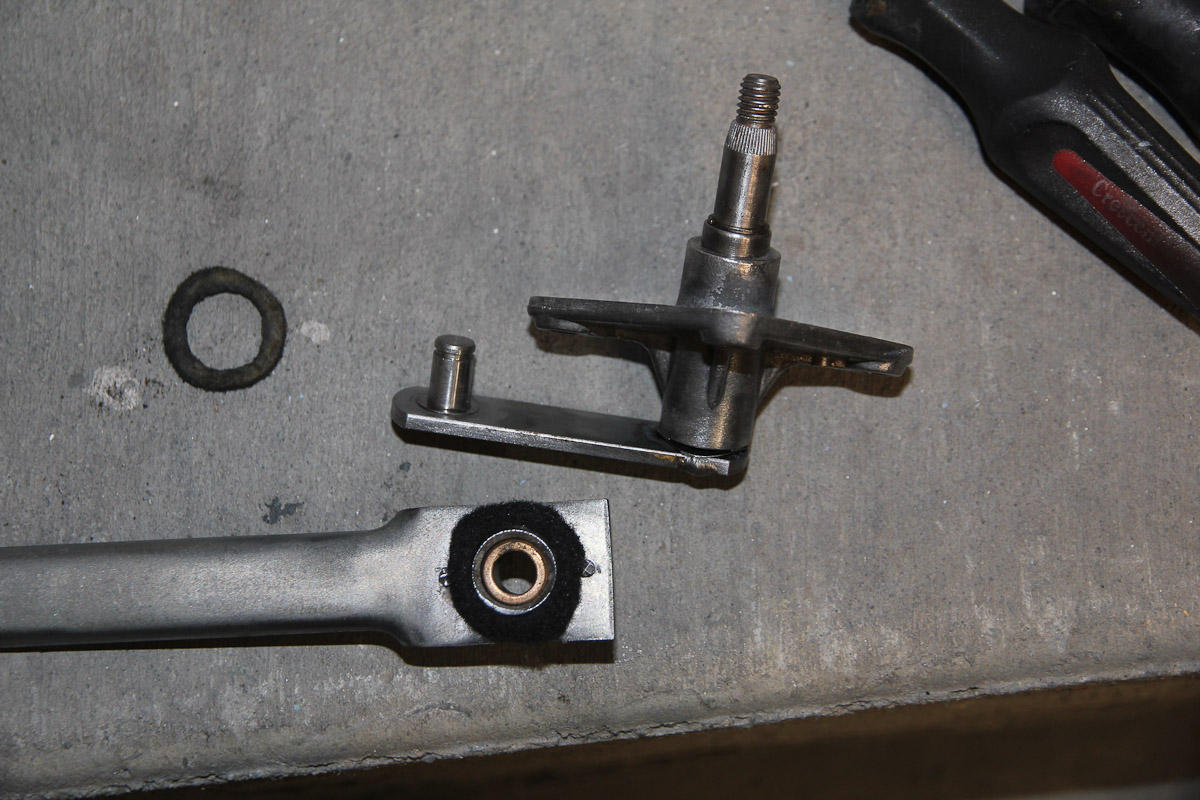
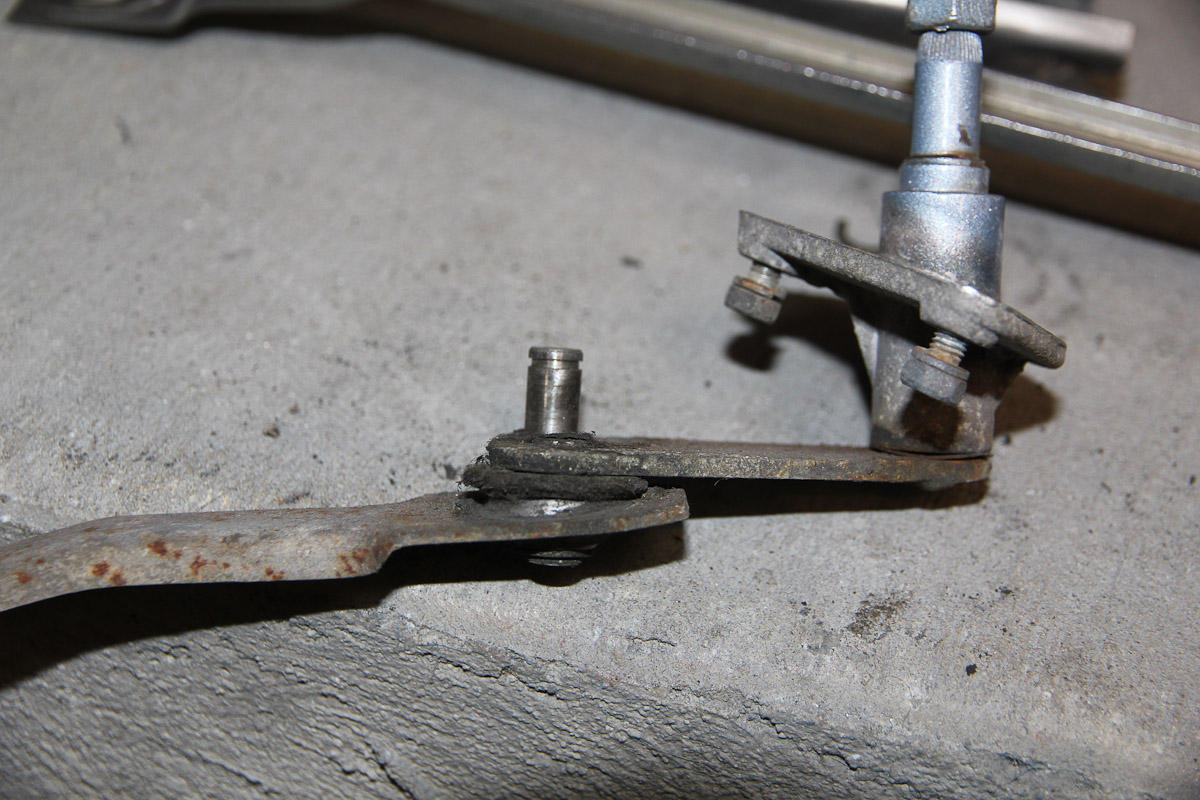
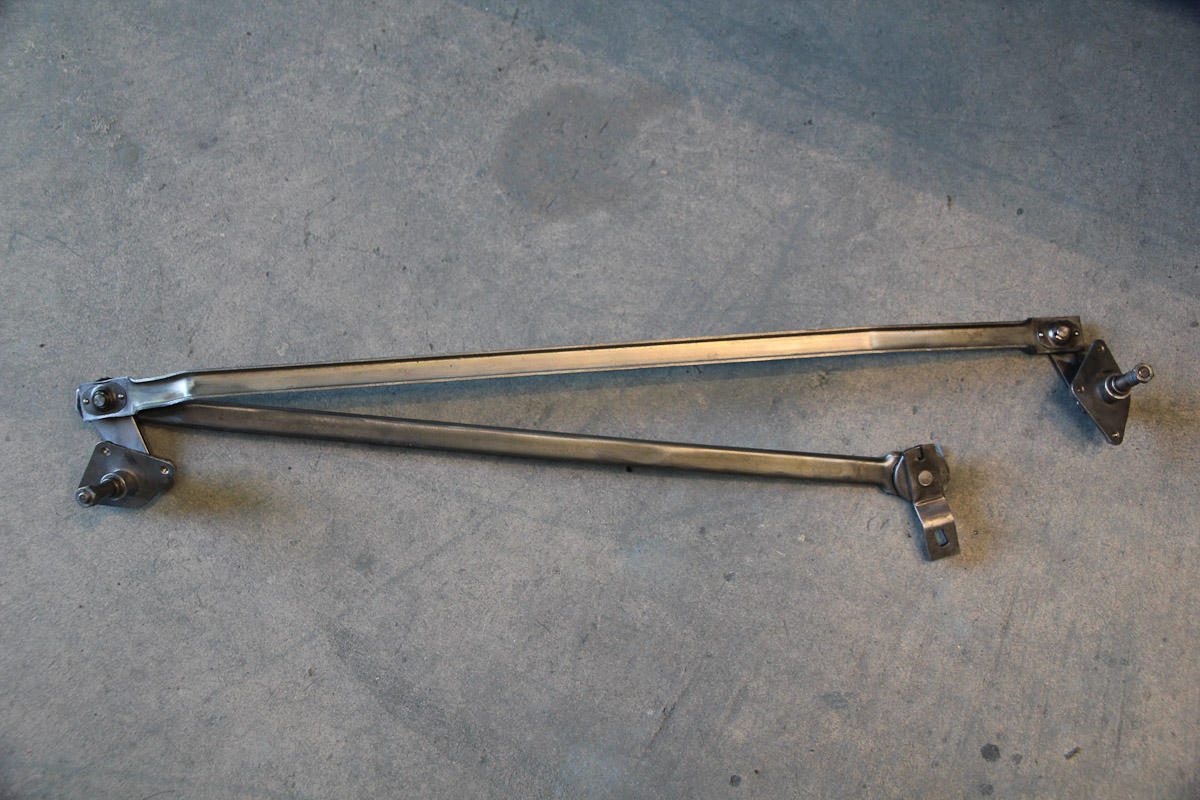
Going back in time a little bit for a recap of some of the things that happened in December and January trying to get the car back on the road. Interior The only new thing on the interior (so far) was re-doing the trim around the sides of the roof. I remember going home on a Friday afternoon and thinking "this shouldn't take more than an hour or so." Then I screwed up the windshield piece three times. I didn't get anything else done that weekend. The first time my brain short circuited and I stuck the piece on backwards. The second time, I cut it too small. The third time had too many wrinkles. The fourth time was good enough. The trim along the doors, at least, went on easier. I still need to do something about the sun visors. Rubber and Seals When Black Dragon closed down their Z store a few years ago, I bought everything I thought I might need one day. It's been sitting in a box in my office since then, and finally that decision paid off. Good thing, too, because almost every part that wasn't missing outright was long perished. Off the top of my head: there's new seals for quarter windows (body seal and door) hatch glass outer hatch weatherstrip upper door trim window glass door to fender door to sill windshield fender (these weren't even on my car before, and I ended up installing them wrong and having to cut them. Oops.) hood to cowl headlights Side Mirrors One of my Christmas presents: a new set of side mirrors from Z Car Depot. Drilling holes in my newly painted doors that I spent hours fixing...that's nerve-wracking. Measure five times, then once more. The mirrors come with sheet metal screws. That doesn't seem particularly robust, and I think contributed to my driver side door getting torn up over the years, so I thought nuts and bolts would be better. Since I could reach through the back, I again thought "this shouldn't take more than an hour or so." I'm a slow learner. Being able to reach an area and threading on nuts and washers are totally different things. If I knew exactly how long it took to get those mirrors mounted, I would be embarrassed to share it. Because they have a long base, they don't fit quite as tight against the door as I'd like, but at least they look good, even if the passenger side mirror (being flat) is basically useless. Windshield Wipers and cowl The wiper linkage was a dirty mess and tough to move. Everything was taken apart, cleaned thoroughly, and re-greased. I cut some new washers from leftover felt that I've been holding on to for about a decade (I knew I might need it some time!). While I was at it, I brushed some black Rustoleum on the cowl and the wiper motor bag.


 1 point
 -
1 point1 point1 point@qz16 Not an expert, in spite of what my best friend Jim said, but I have had several antenna apart. Your order is correct. The pronged ring goes against the inner surface of the body. The lower ring goes under the last metal cup against the metal of the antenna tube. It acts as a ground point. Hope this helps and, and please post up some photos of your restoration! We all always love seeing photos of owners efforts!1 point1 pointYeah, I get that a lot. You need a lathe, my friend. Once you get the seam opened up, the face cap just pulls off the front of the lock: And the cylinder slides out of the lock body: Here's some of those corroded crusty tumbler wafers I was talking about earlier. However, despite the way it looks, this is actually the BEST door lock I've ever opened up. In fact, I wouldn't feel bad about reusing this one if I had to: And here's a shot down into the lock corroded lock body. If you look closely you can see some grooving in the body where the tumblers have dug in: And since I had the camera out, here's how the front face keyhole cover is held on. Note the dimples in the side where it was crimped into place. It's easy to just slide it off. Maybe use a small tool to un-bend the crimp a little bit if necessary:
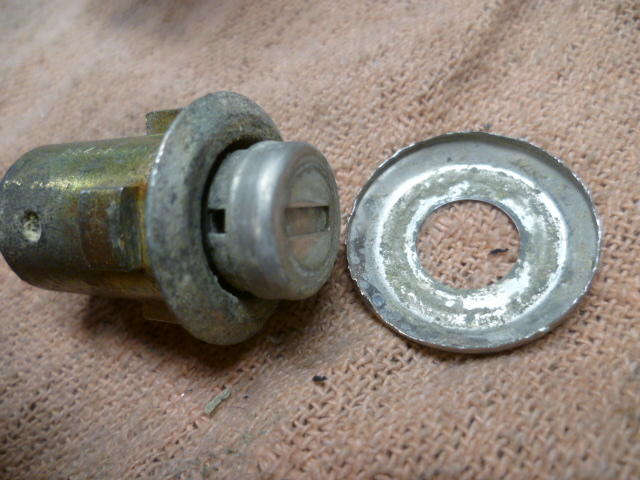

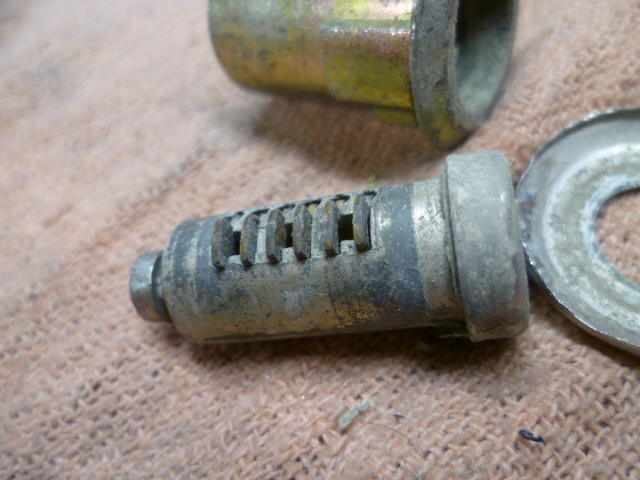

 1 point1 point1 point+1 here. I got a matching lock set without the door locks (doors were missing in the junkyard donor) and would like to have a full matching lock set as a spare.1 point1 pointI was working more along the lines of being able to combine all the locks I have to rebuild a good set of locks all keyed together. I have a few locks to work with...1 point1 pointAnd some words of experience about reusing the original locks... Every original lock I've ever opened up (with the exception of the rarely used glove box lock) has been a mess inside. Corroded. Pitted. Grooves worn where there shouldn't be grooves. Wafer / tumblers worn and sometimes bent. The pot metal they used for the lock body castings was probably chosen more for cost and it's ability to cast fine detail than it was for it's longevity. And the corresponding keys were worn as well, meaning that even replacing the wafers with new ones might not fix a sticky lock problem. The point is...... All you guys buying face cap pliers thinking you're going to open up and rebuild your original door locks? Based on my experience, you're going to find a worn, corroded, rusty, grooved, hunk of what used to be a lock. I would probably recommend buying a new set of door locks off ebay and opening them up and rekeying them to the rest of your car instead. If you can get new replacements that use the same blank as the rest of the car, then that would be a much better way to go. New versions of both the ignition locks and door locks are available. The ones you can't get are hatch and glove box, and thankfully those two usually got much less use than the doors and ignition and stand a better chance of being salvageable. Of course, YMMV.1 point1 pointHow large of a wafer kit did you source? The ASP one? I ordered the KLOM's for that reason. All of the sources I found for them online seemed to all be direct ship out of China1 point1 pointNo, the needle sits at the center point without voltage or current. I have one in my hand (and I'm not sitting in a Z...).1 point1 pointSteve.....My 73 had the two threaded inserts on each side, so all you have to do is get the proper bolts (if I recall, the ones I removed for the heavy brackets worked for the new old style brackets) and just bolt them up. You do need the two small rubber spacers and the proper bolts to bolt the bumper ends to the front fenders. The 74 may be different from the 73. Guy1 point1 pointBeen there, done that. https://fiddlingwithzcars.wordpress.com/2014/01/20/installing-the-front-bumper/ Rear: https://fiddlingwithzcars.wordpress.com/2013/06/29/rear-bumper-install-73-240z/ Brackets: https://zcardepot.com/front-bumper-bracket-stainless-steel-240z-1970-73.html Bring the car and bumper over, and we can knock it out.1 point1 pointI converted my 73 last year.....you just need 2 early brackets from MSA or Zcardepot. The early bumpers bolt right up! Much cleaner look.
 1 point1 pointMike McGuiness at Banzai Motorworks has them. His website is here: Banzai Motorworks Scroll down to part ST-13 and there it is. I purchased one from him a while back and it worked perfectly. Also, while you have your motor out for the bag replacement, I would strongly recommend cleaning out the joints that hold the arms together. They get really gummed up with old grease and dirt and this makes the wipers even slower than normal. I completely rebuilt mine when they were out and it made quite a difference in the way that they operate. Hope that helps. Mike.1 point


Important Information
By using this site, you agree to our Privacy Policy and Guidelines. We have placed cookies on your device to help make this website better. You can adjust your cookie settings, otherwise we'll assume you're okay to continue.