


Leaderboard
-

wheee!
Free Member7Points4,607Posts -

240260280
Free Member5Points4,442Posts -
Patcon
 Subscriber
 5Points11,142Posts
 -
charliekwin
Free Member5Points664Posts


Popular Content
Showing content with the highest reputation on 01/07/2019 in all areas
-
Yes, they are hard to find, I'm down to seven or eight...4 points
-
Anything you do yourself is going to have so much more "value" in the pride of ownership that small defects like yours are part of its "beauty marks" as they say. Love it. Hope mine looks half as good when I'm done!3 points
-
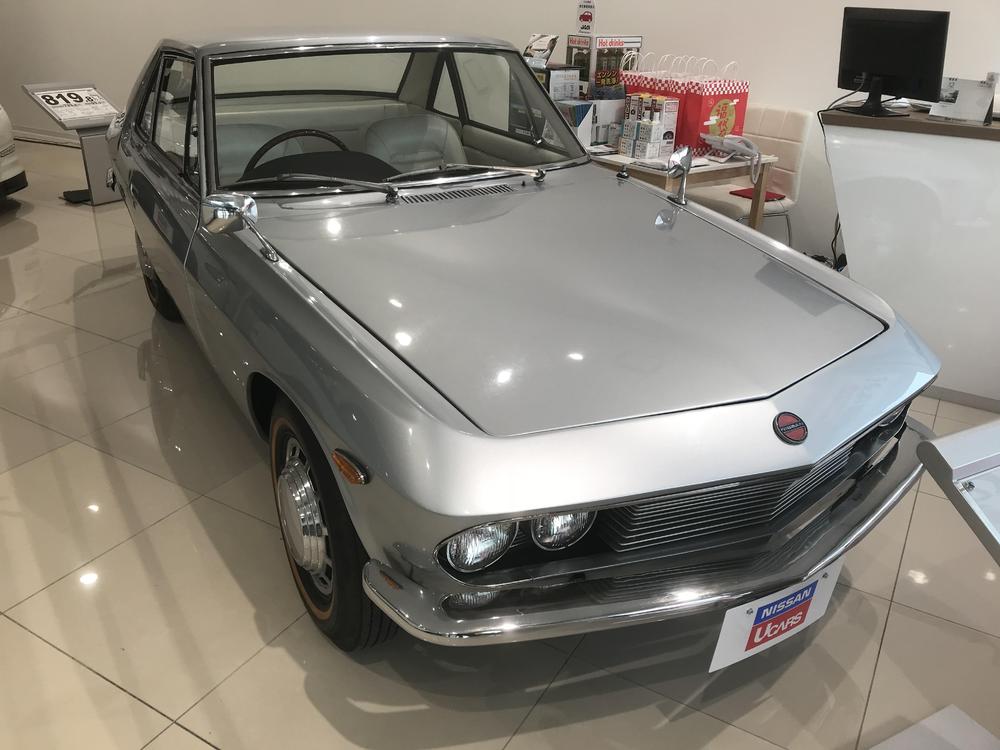
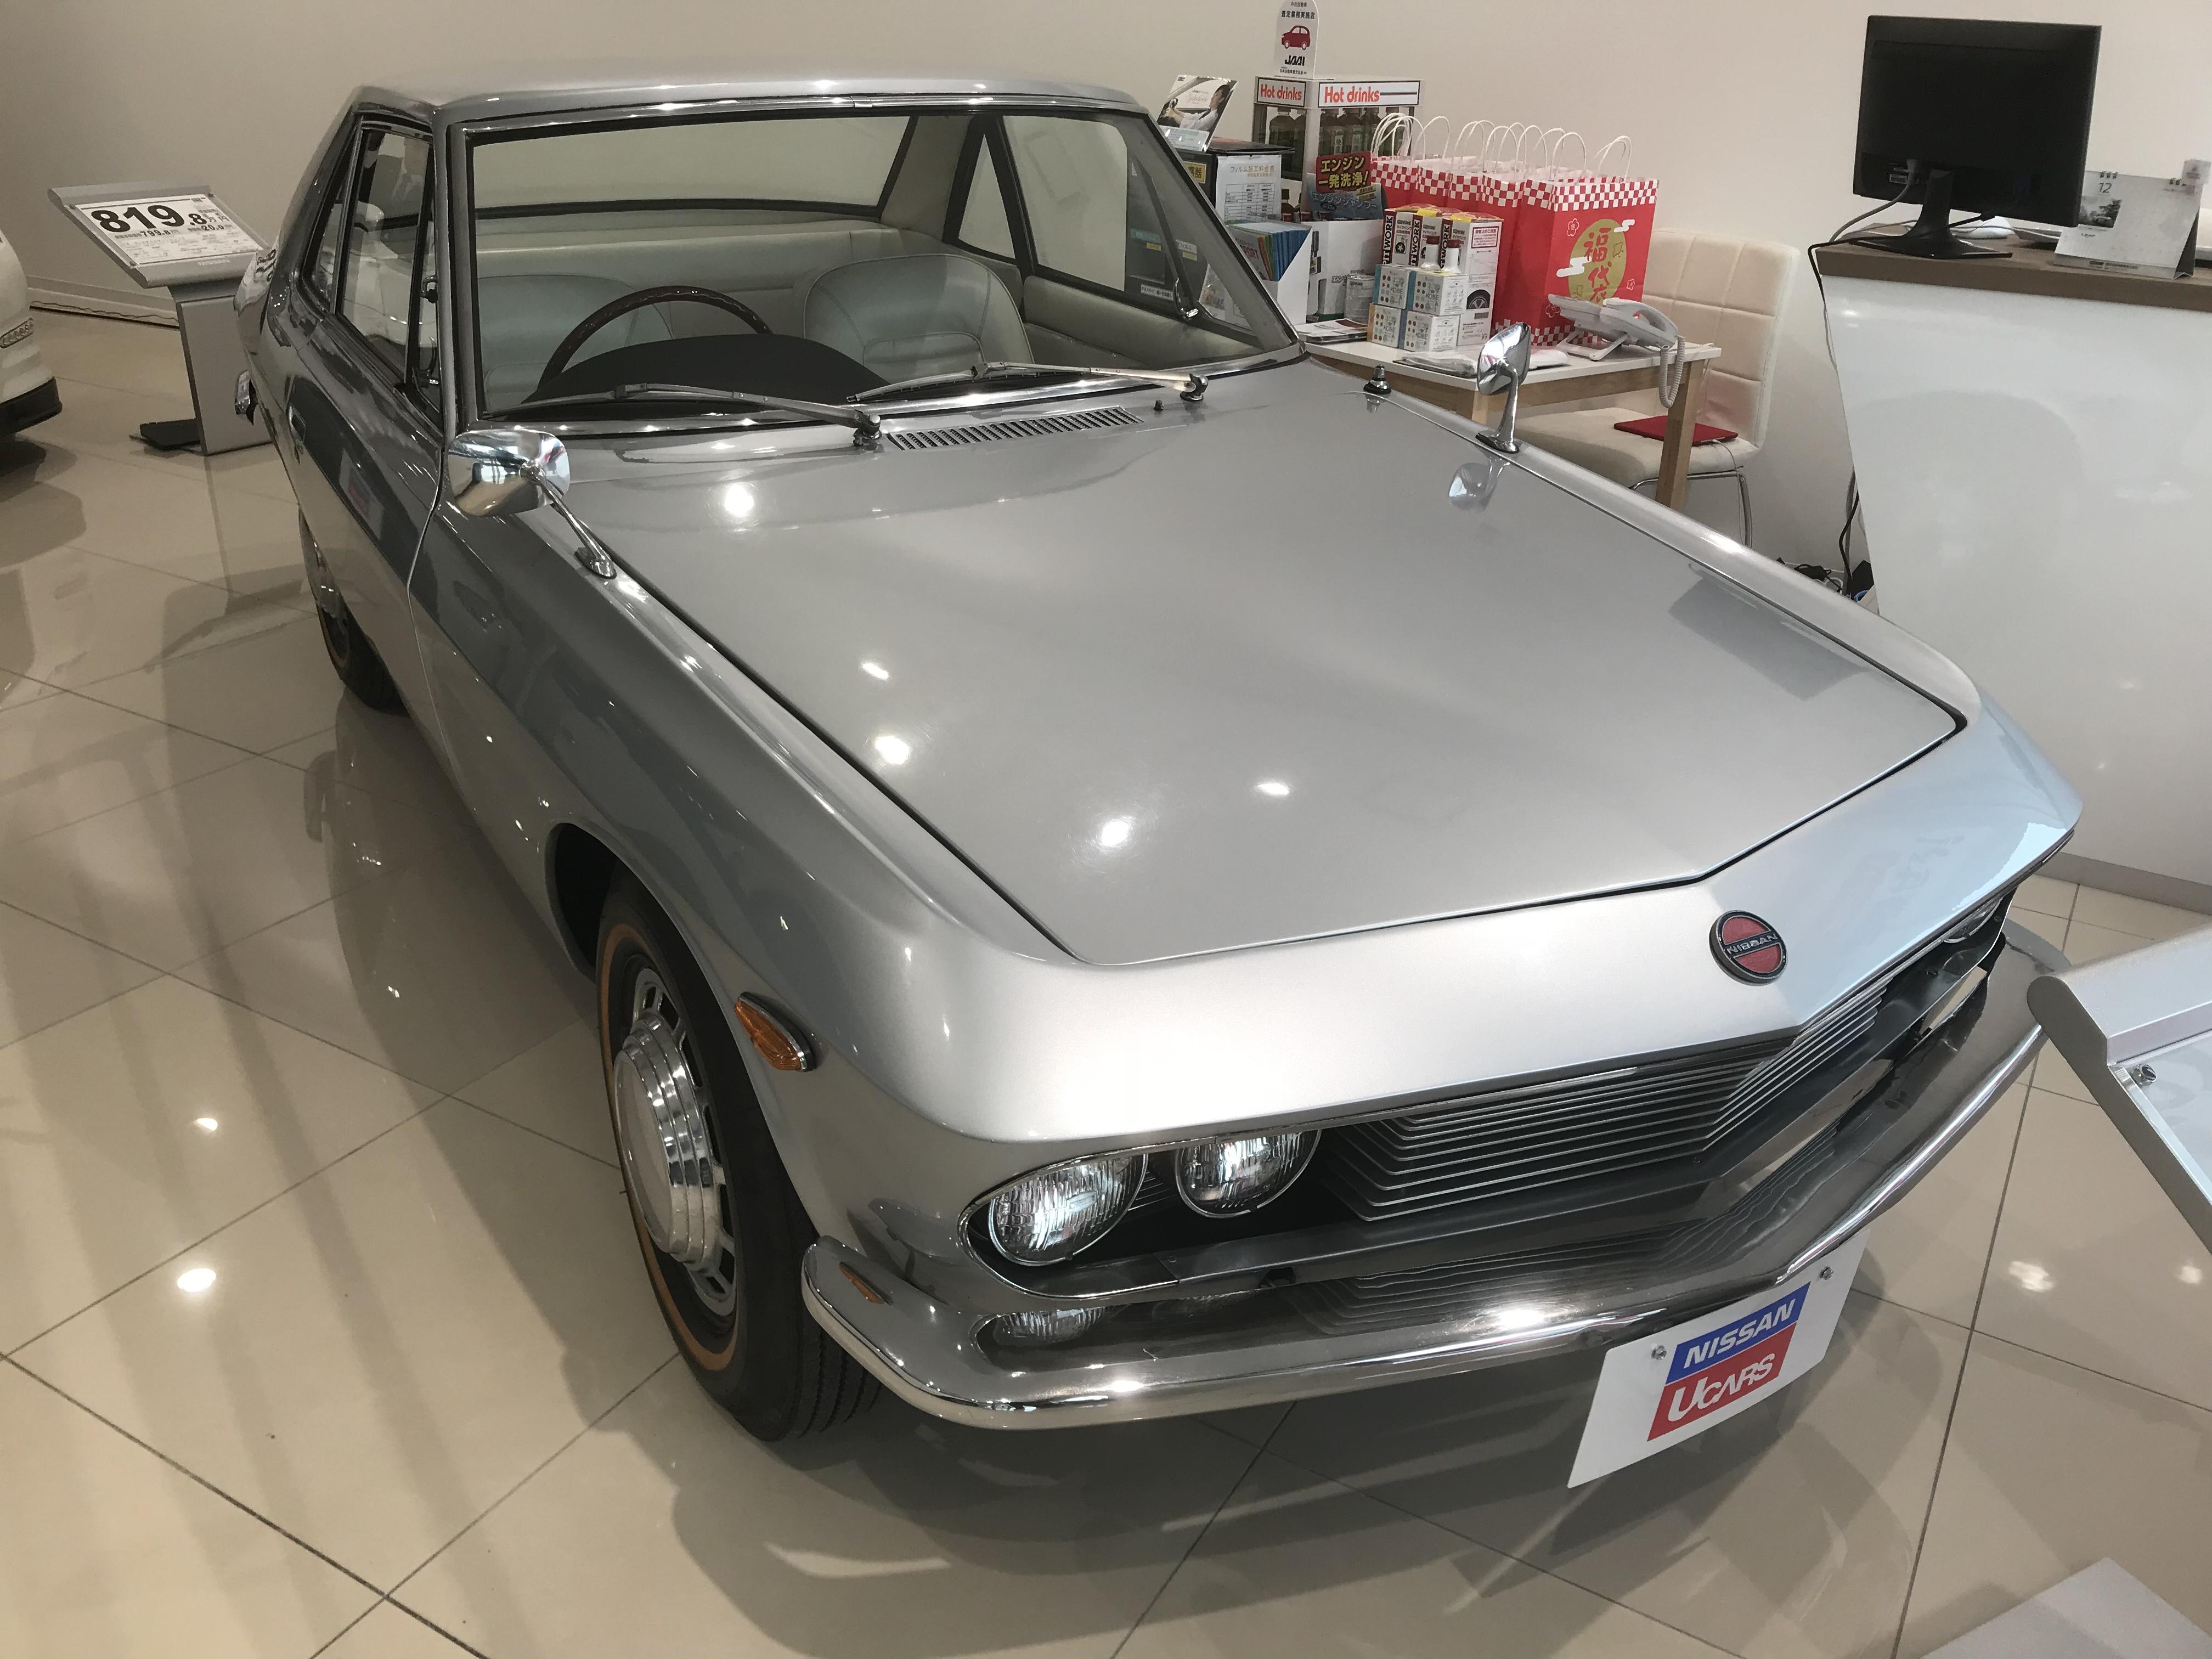
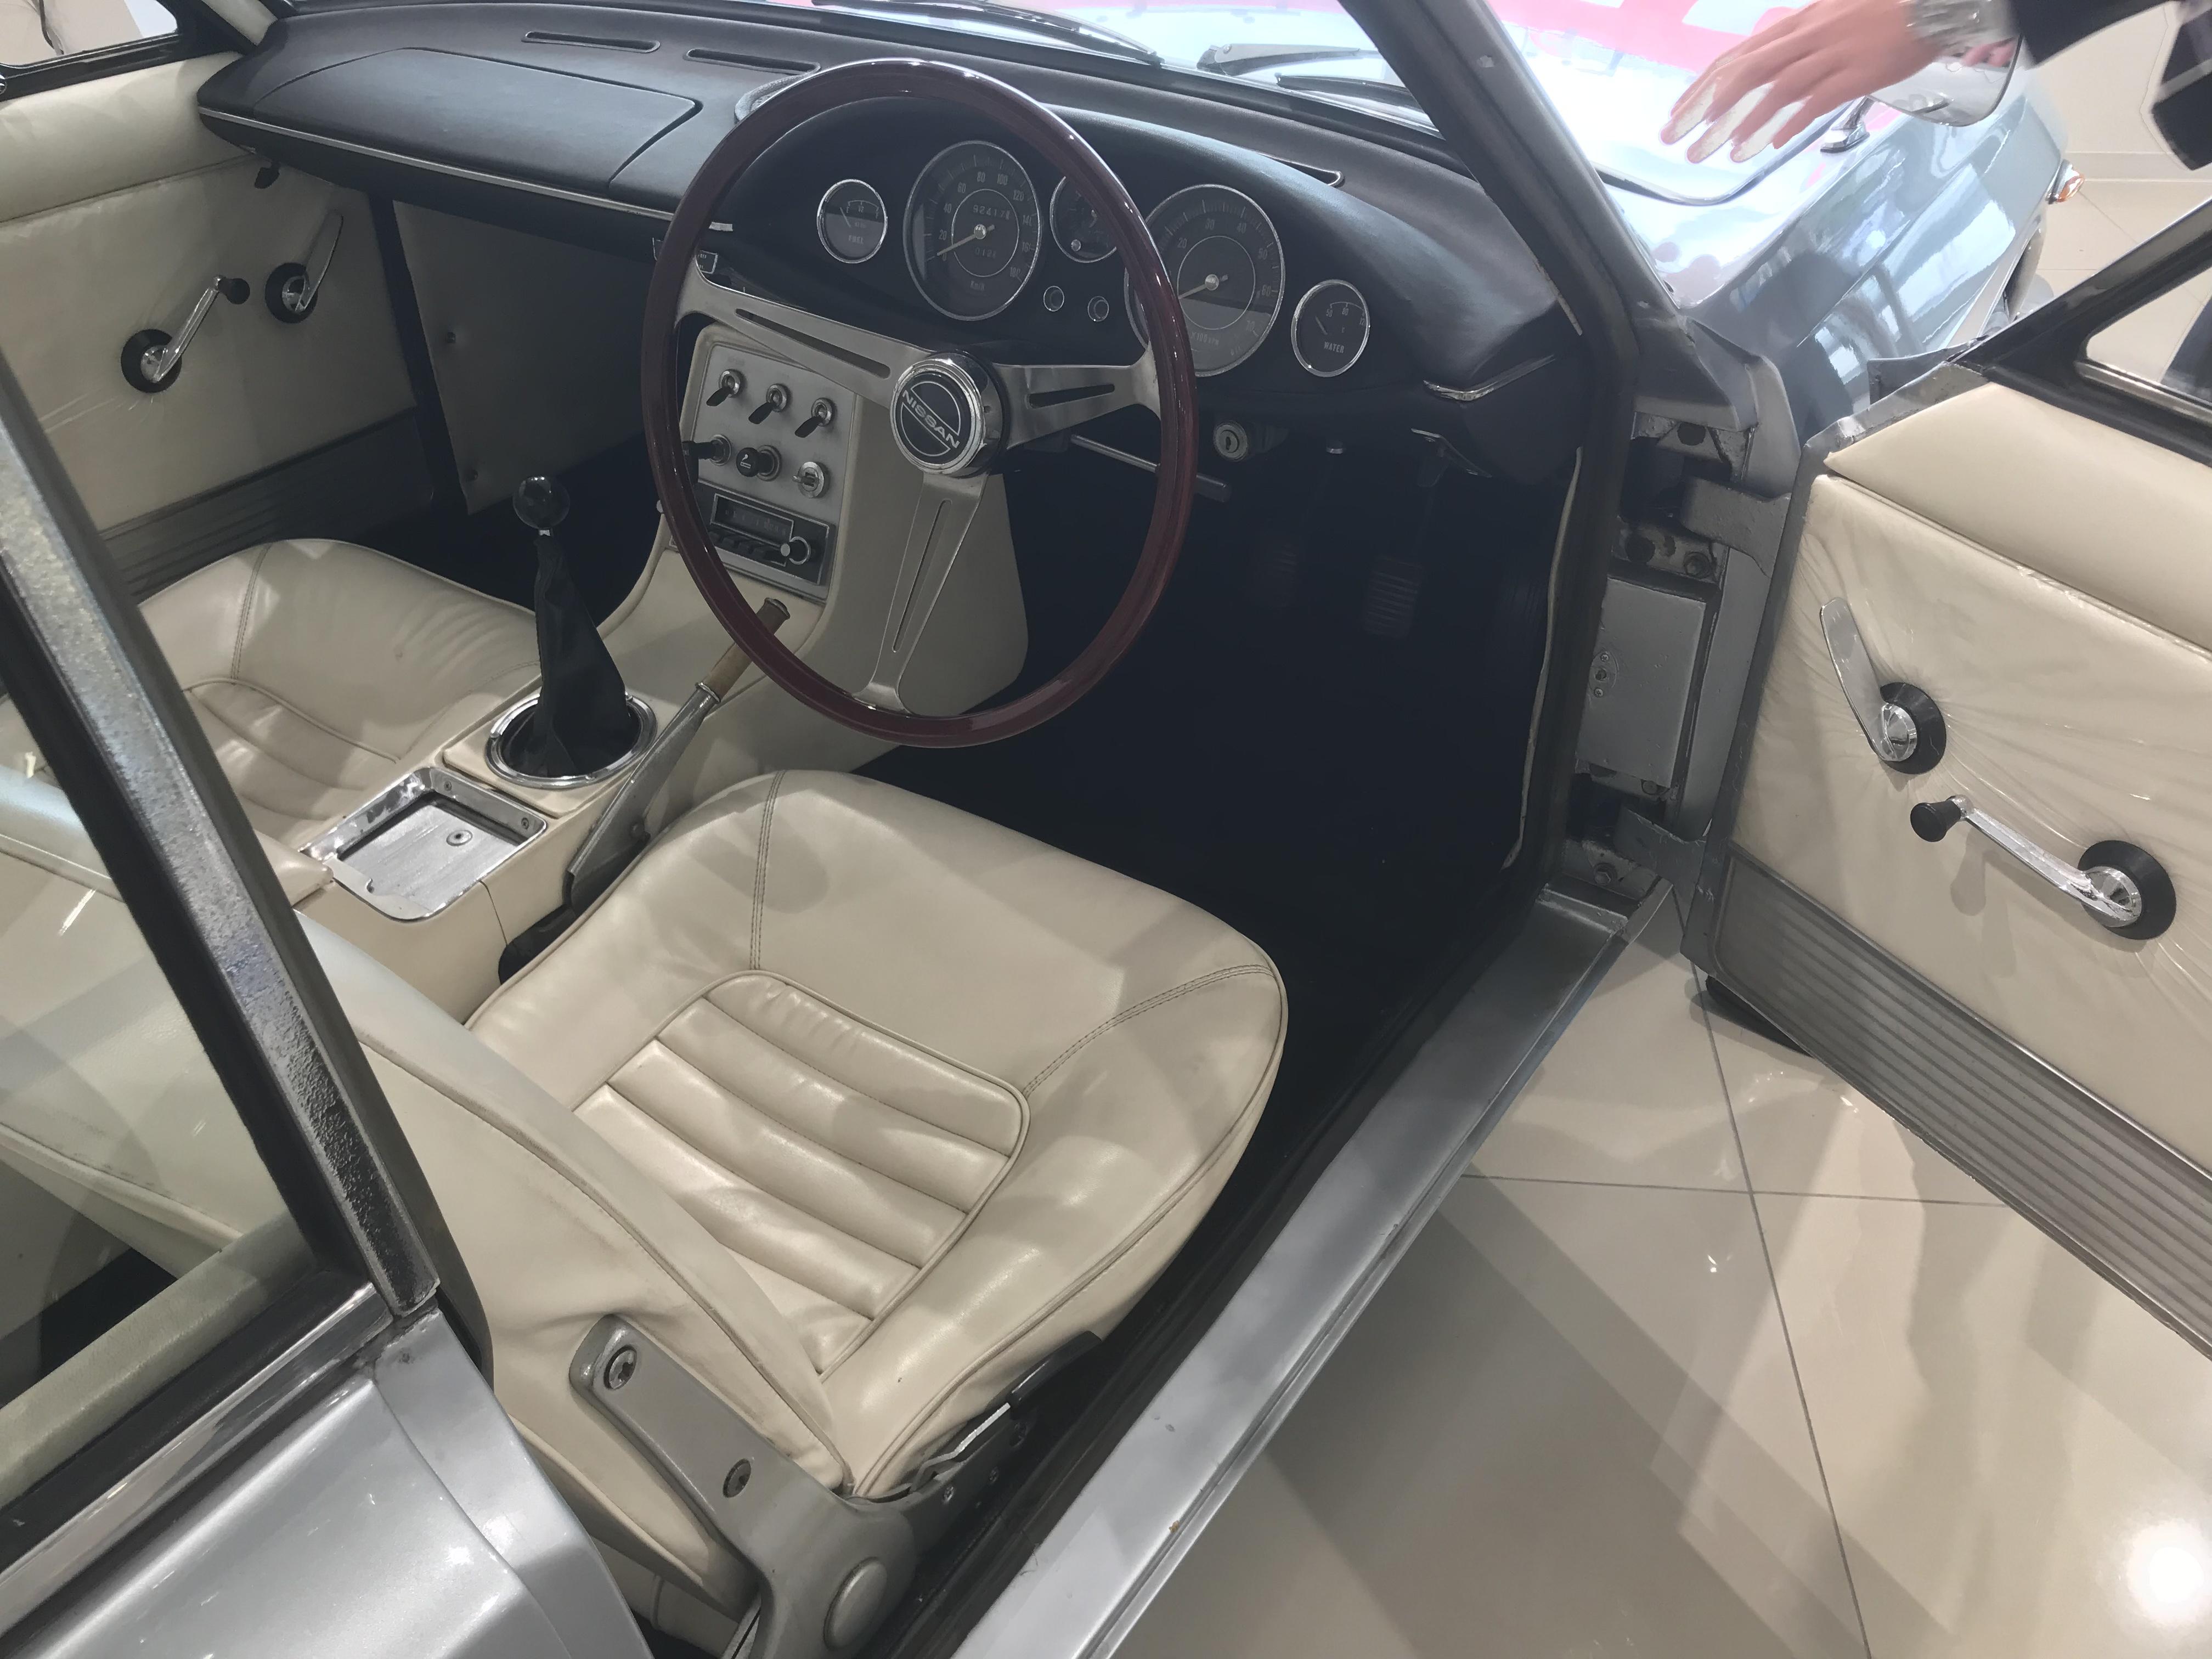
3 pointsYesterday I visited a used car dealer just 5 minutes drive from my house, I saw a Silvia which used to be in a museum next to my car . I really love this car , I sat in the driver’s seat , I felt the taste is very similar to Dino 246 , this is old fashioned but very beautiful . A small interior space and looks , and much better quality than S30 , just gorgeous! I tried to find things which are carried over to our S30 cars , yes I found some . Ian , you will love this car . Kats


 3 points
 -
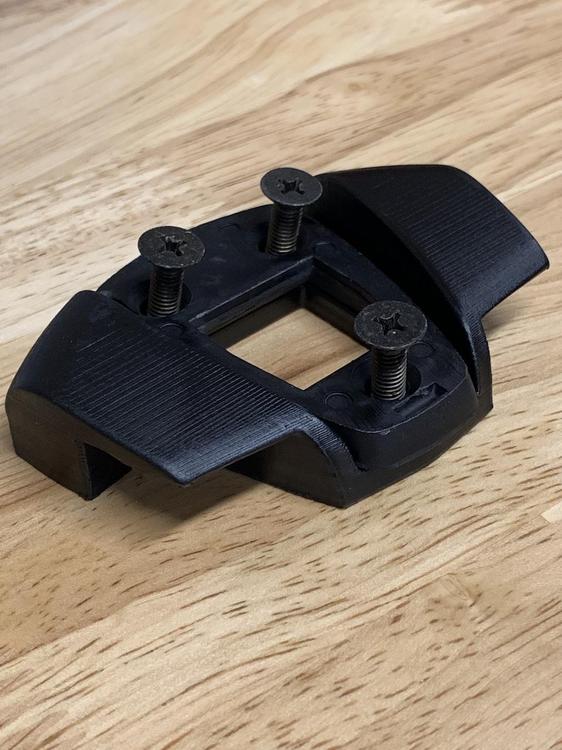
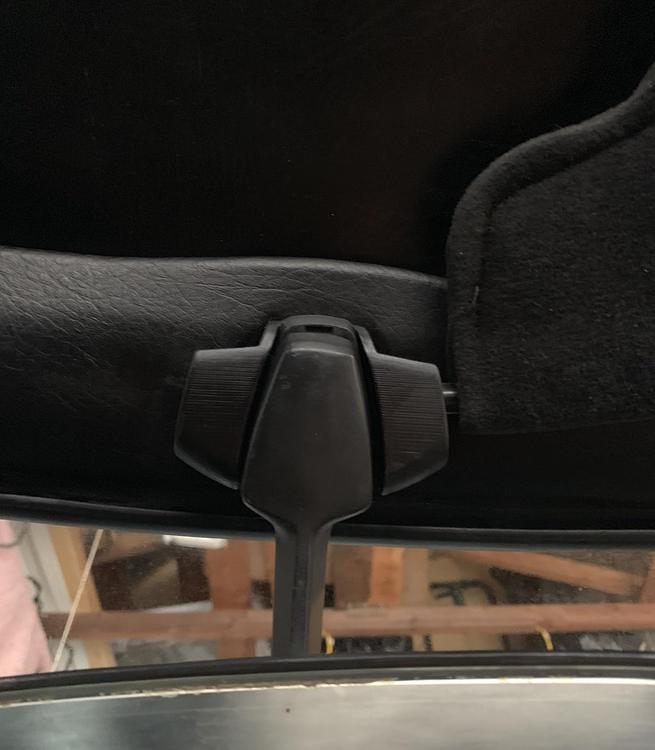
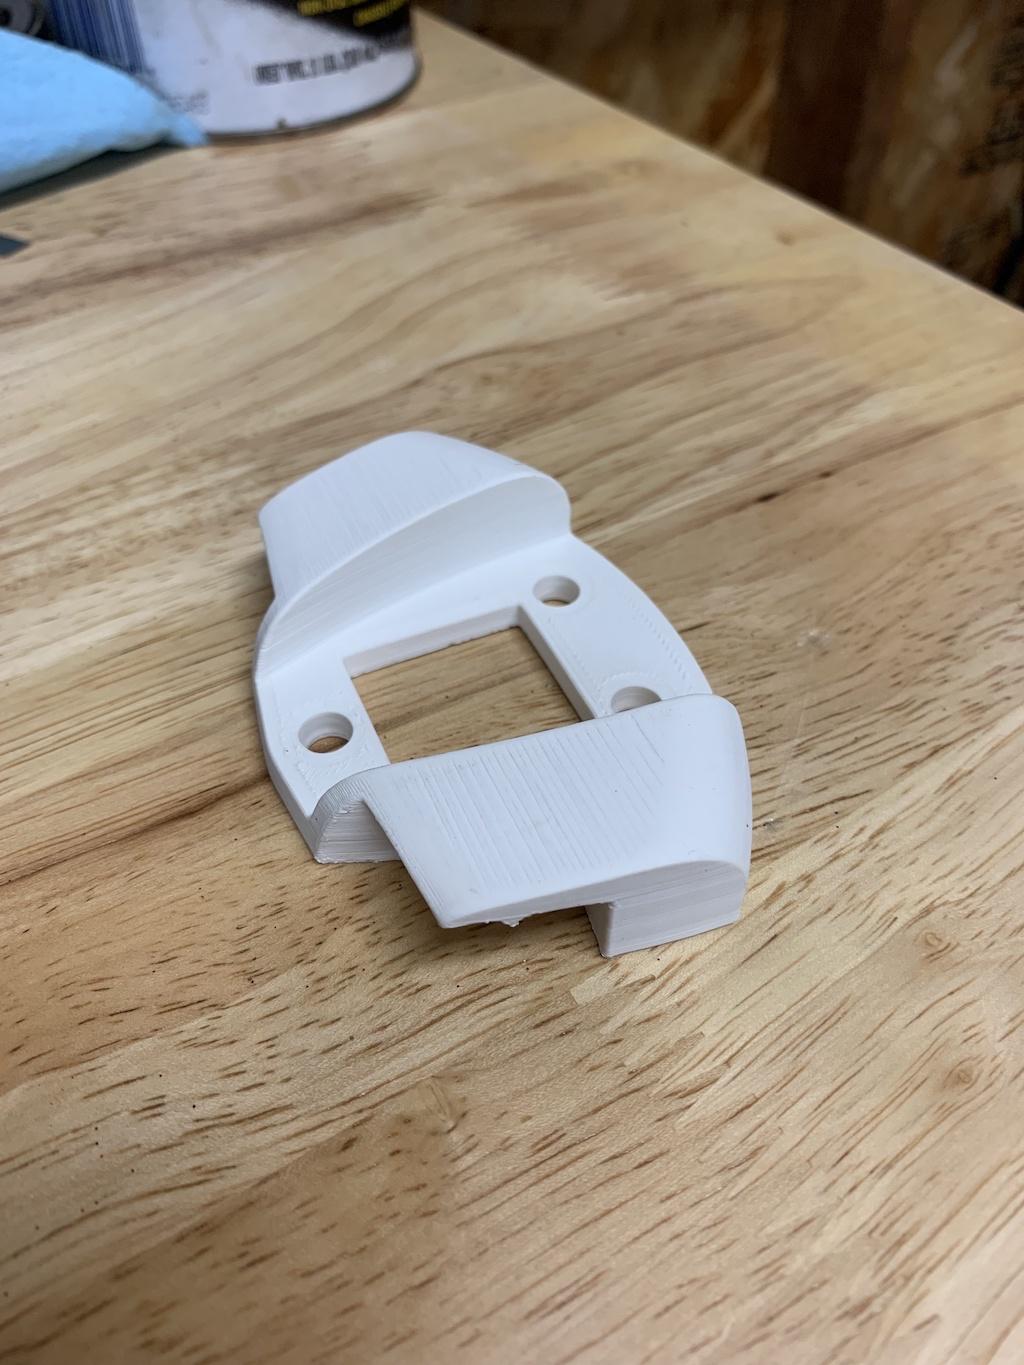
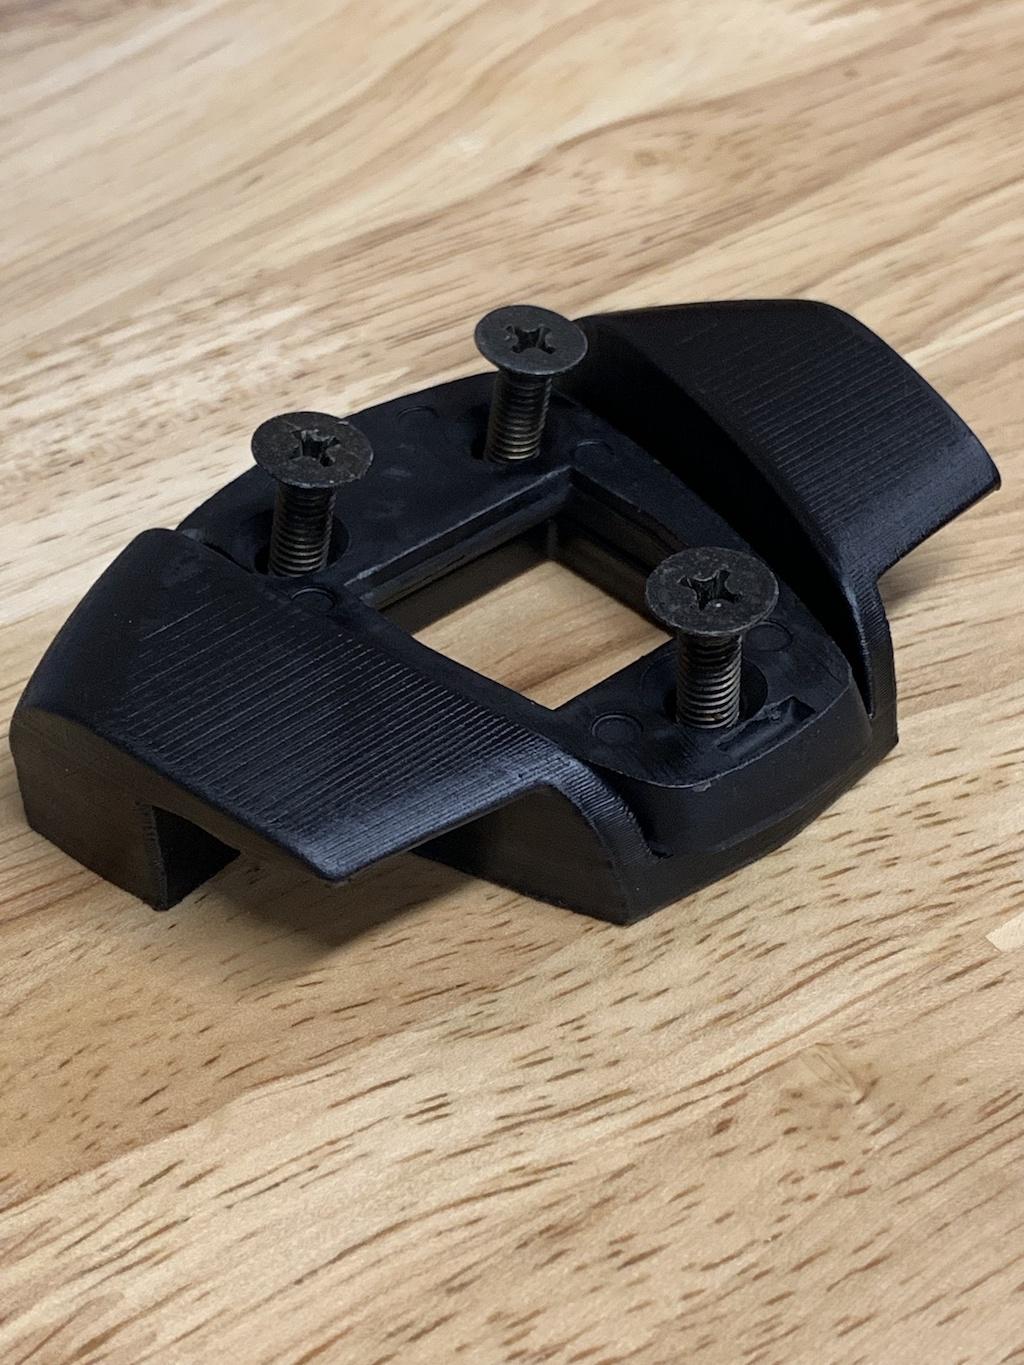
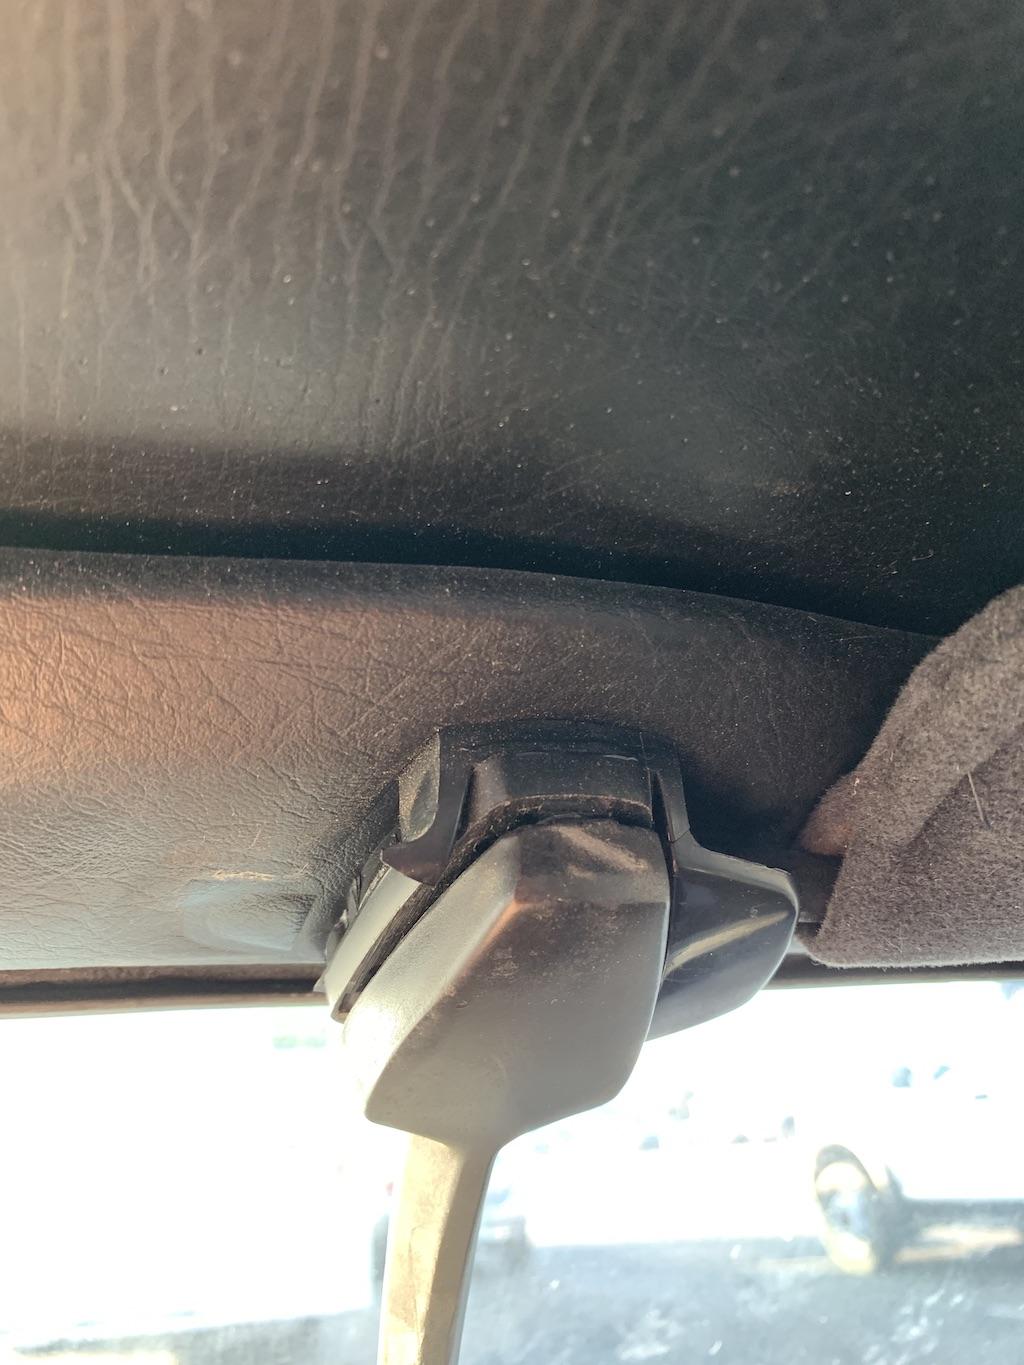
3 points3 pointsYou can fill a fuel can with gas and run a hose from it to your fuel pump to see if the problem is due to your fuel tank. This bypasses the tank. The only problem is that the fuel pump will draw a lot of fuel so your can will run empty unless you run the fuel return line back to the can.2 pointsOn a 71 240 Z I have, the piece that holds the sun visors in place that mounts beneath the rear view mirror, broke on the drivers side. It was pretty annoying having the visor flop around, and I finally took the visor off until I could locate a replacement part. Searched all over the place for another, no luck. Finally saw one on Etsy from a person who has a 3D printer named PlasticWiz, figured I'd give it a try. Removed my old one, which basically disintegrated while trying to pop it loose from the vinyl covered roof frame. Sanded the new ABS piece a bit and painted black. I suppose the "print lines" could be removed completely with a lot of work, but for this car I just wanted a functional piece. Here it is mounted ready to pop in the rear view mirror. I've never used a 3D printed part on any of my cars, but I must say this really did the trick for a difficult part to find. Anyway, just thought I'd post this since I couldn't find any recent help on this part. I may order another for my other Z just in case...


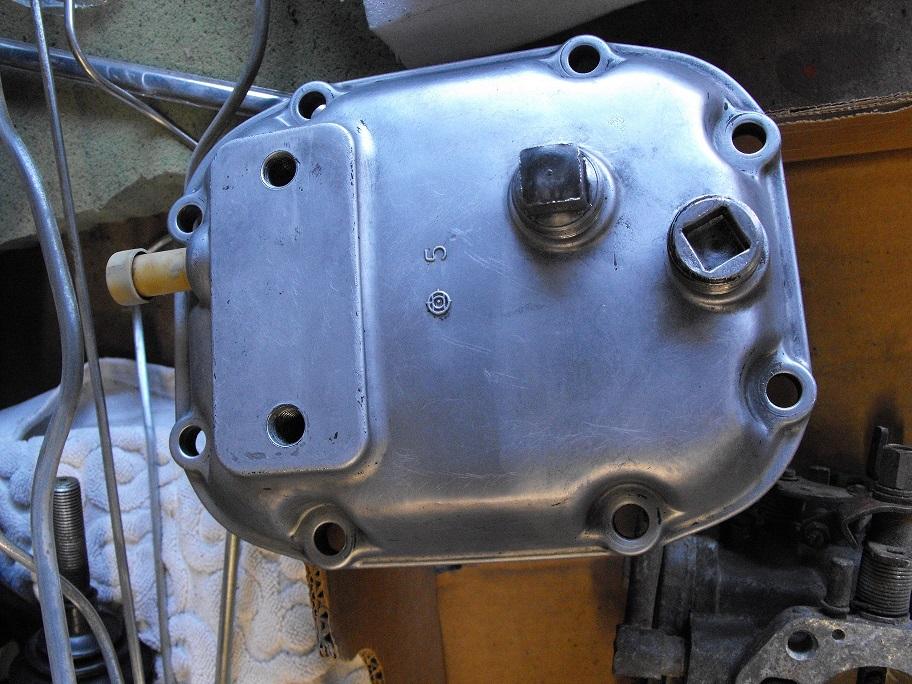
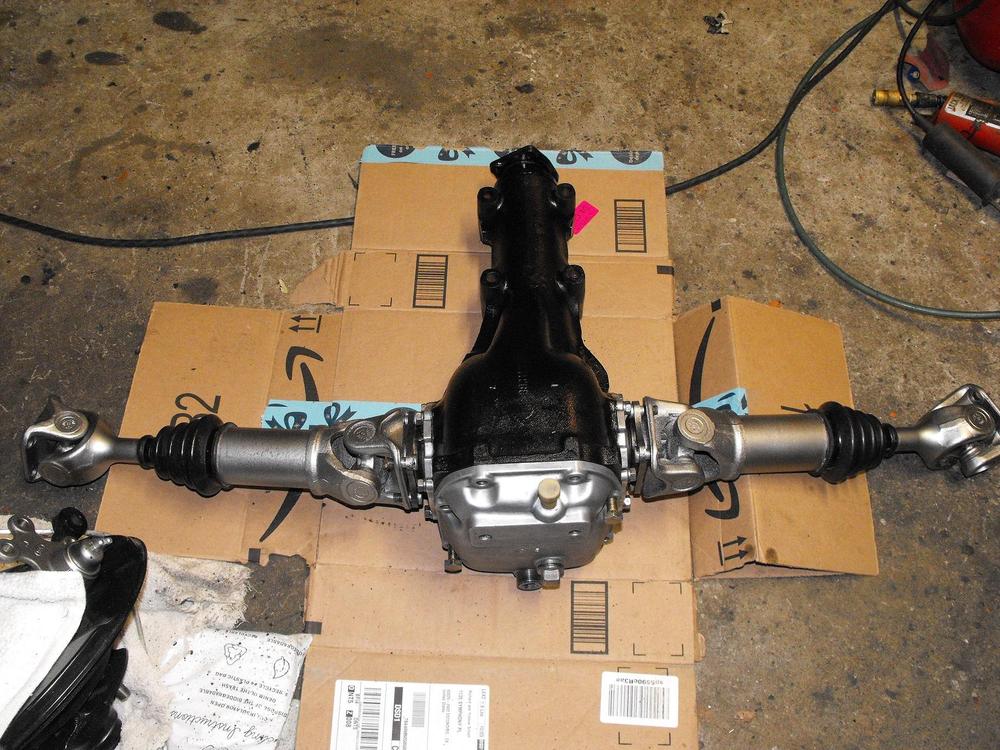
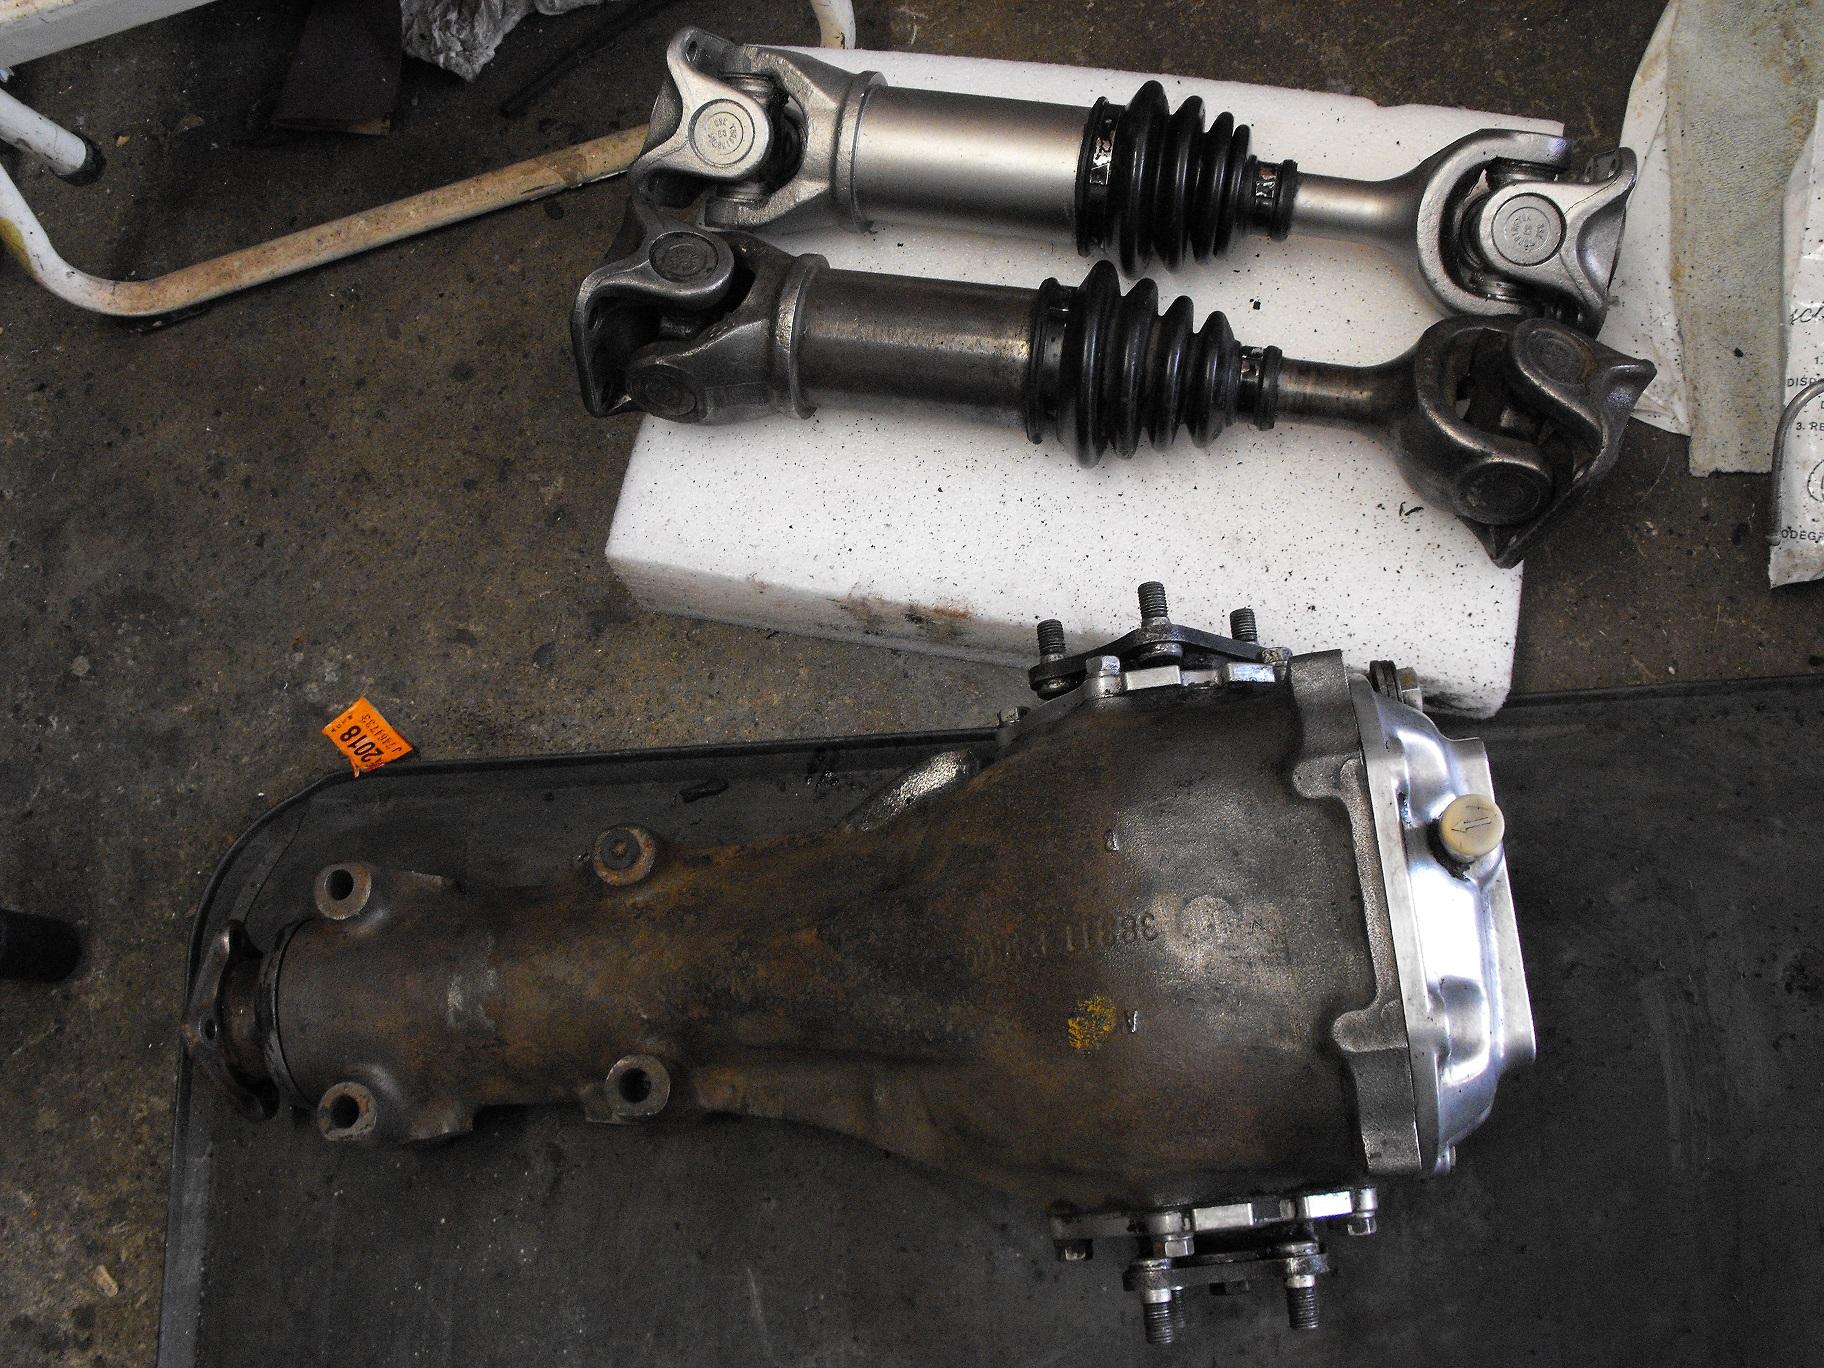
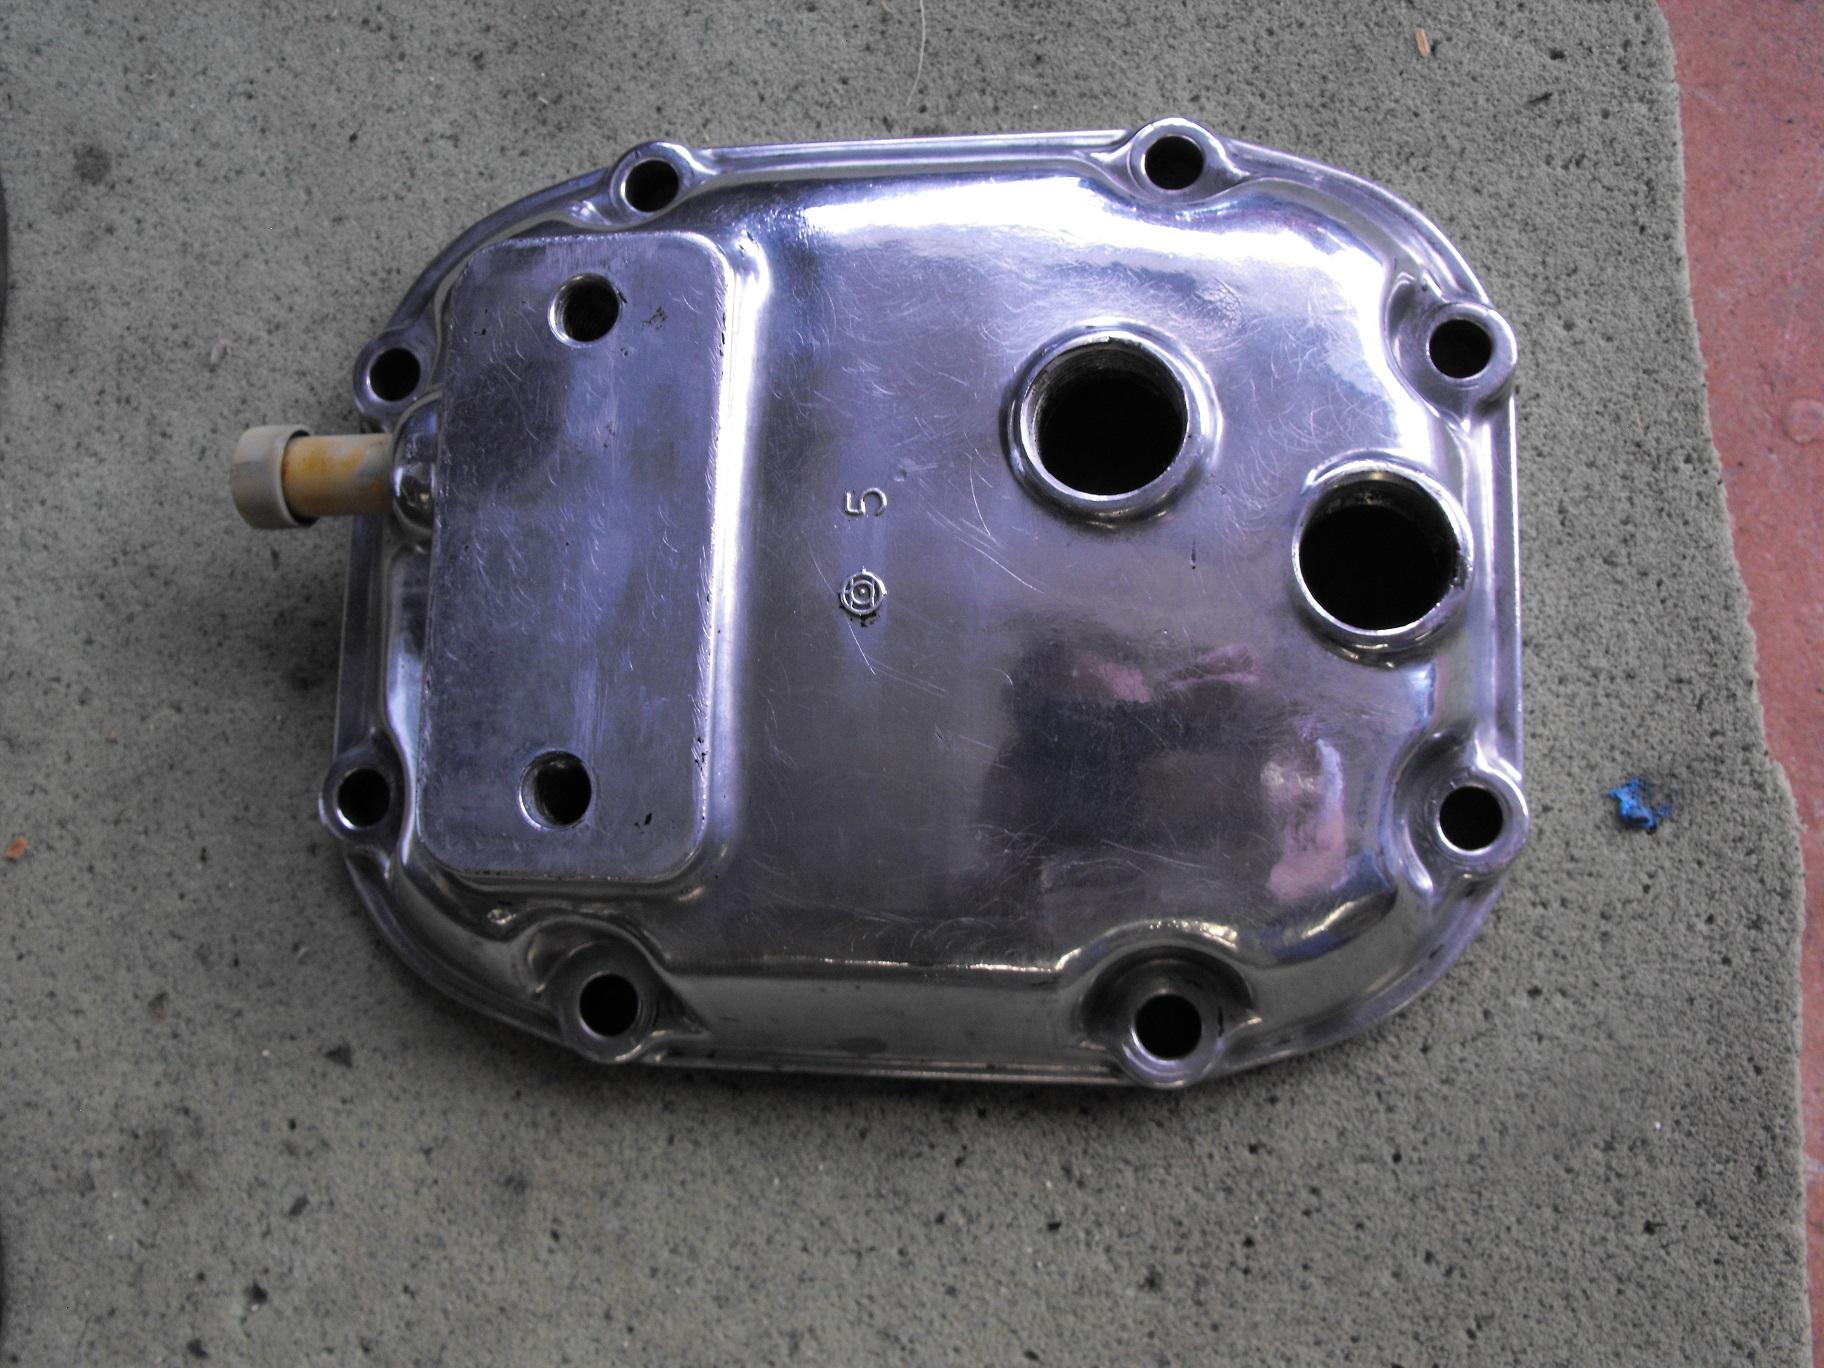
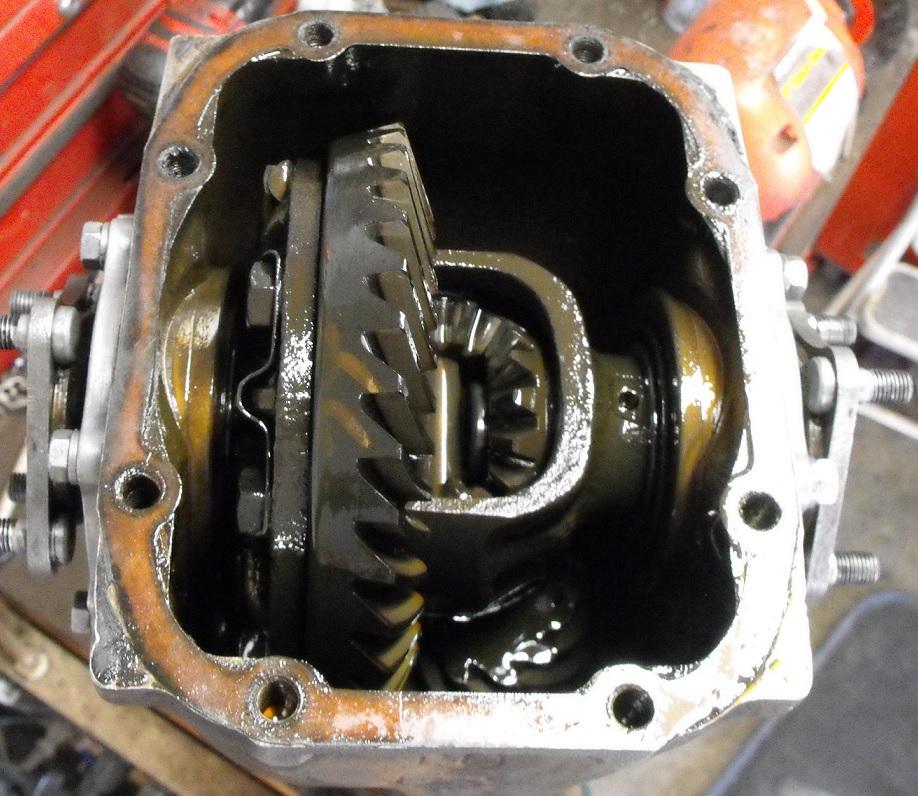
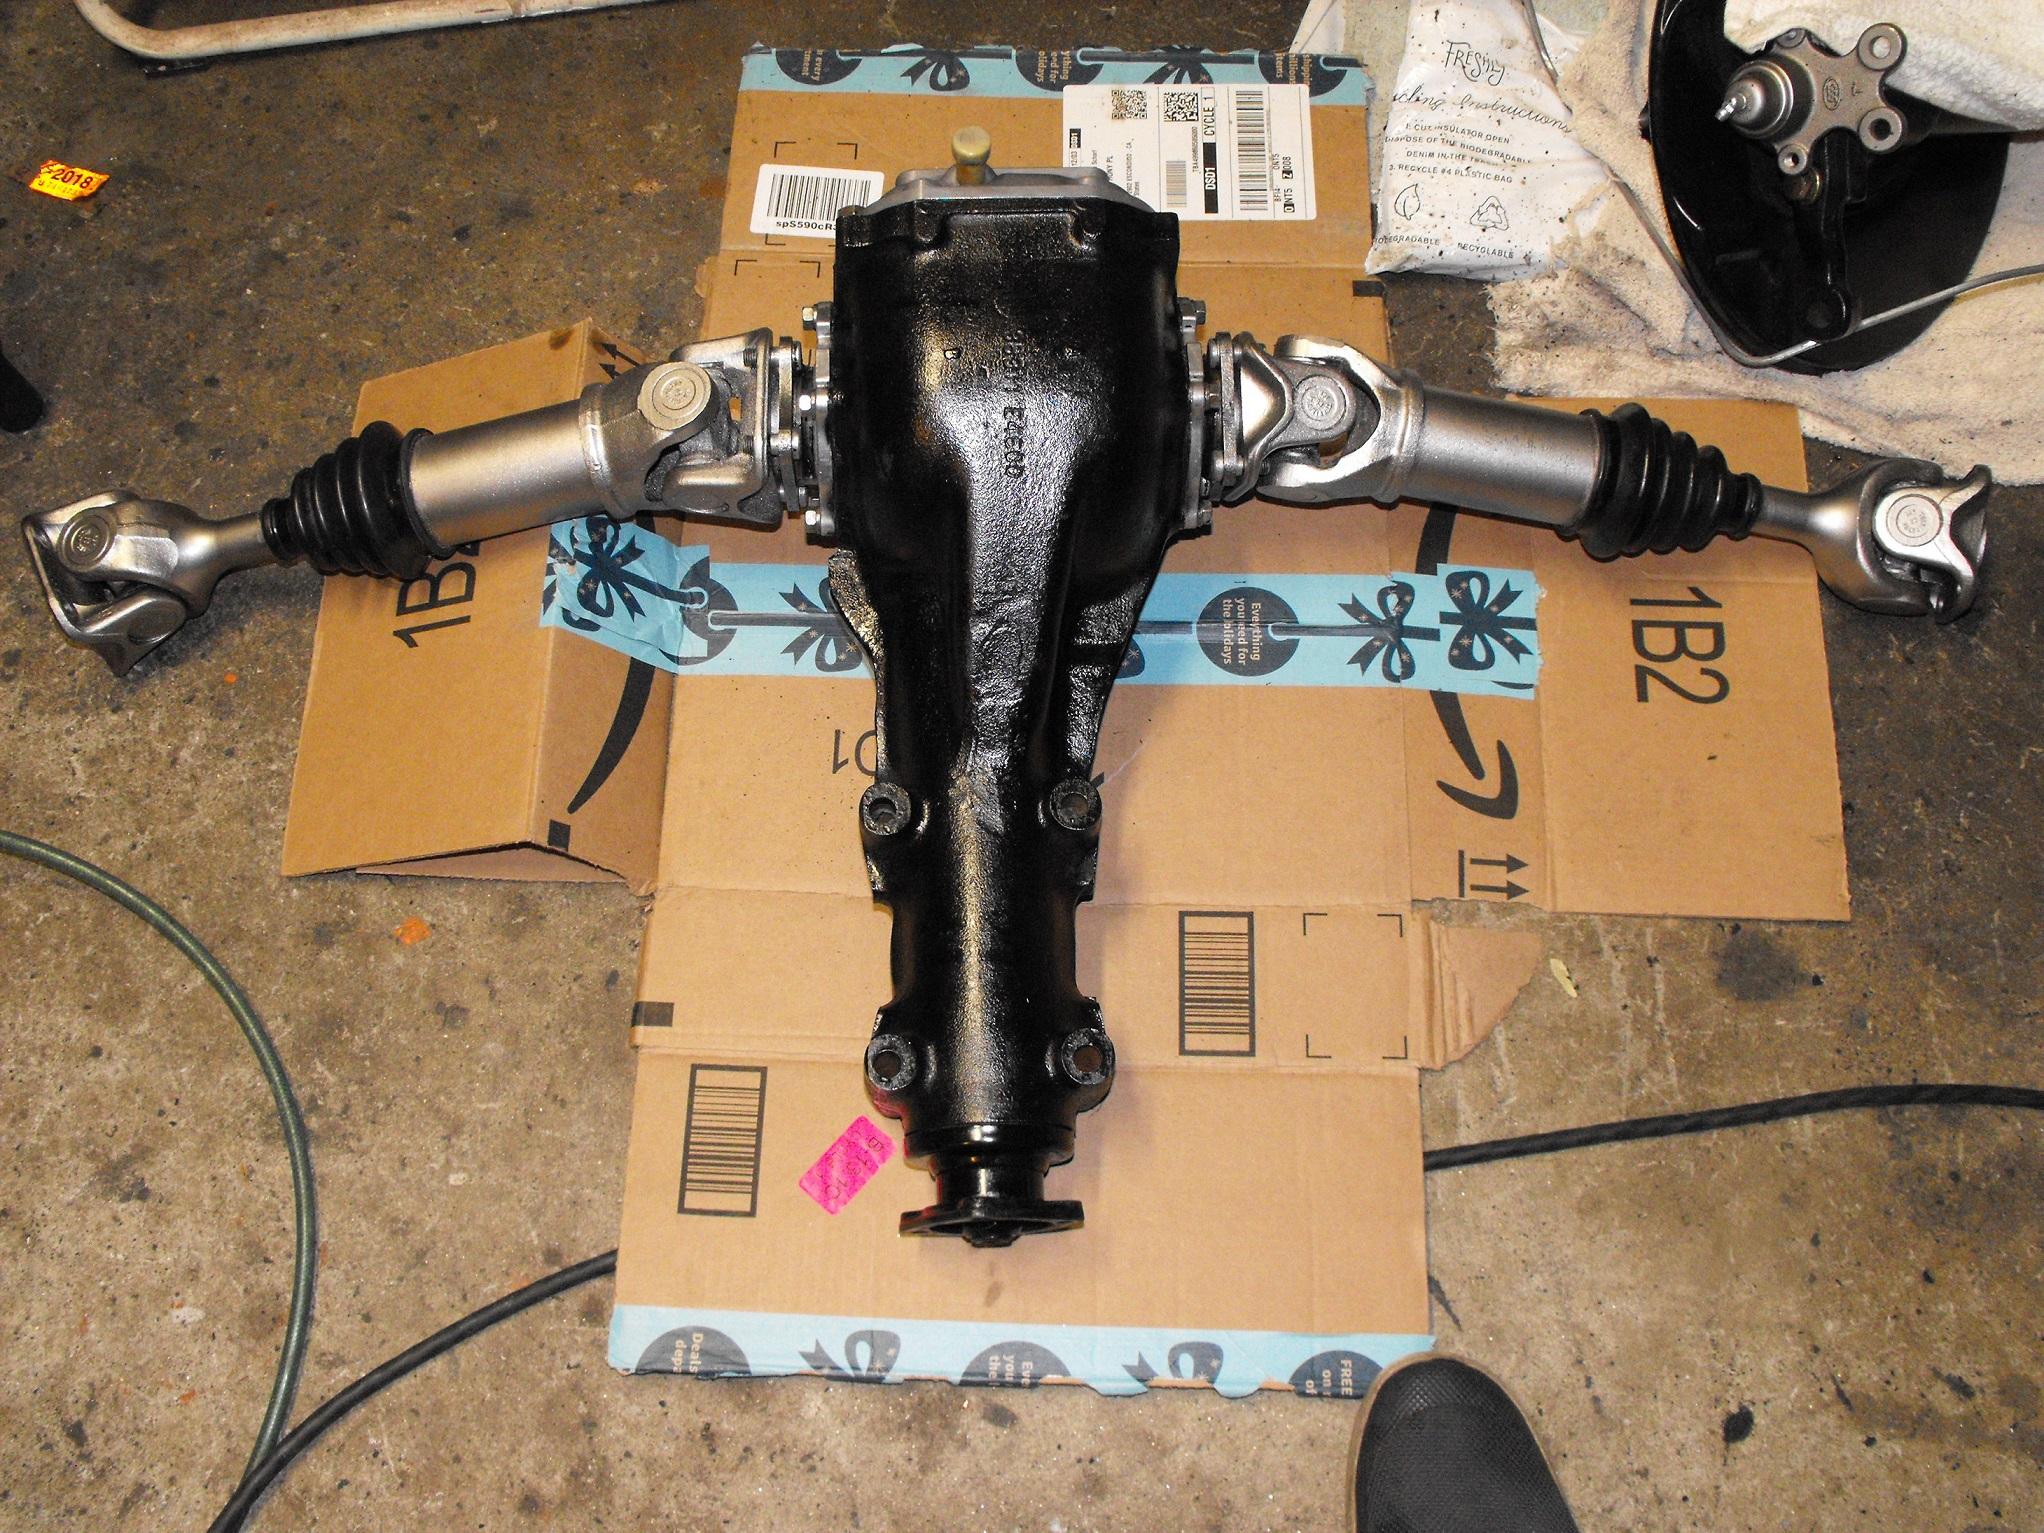
 2 pointsThanks :) I think the welded headlight buckets look a bit disproportionate when the fenders are off the car, but on the car with the hood (which is still not quite right), they look pretty sharp. Glad you like it too! I'm going to put 240z bumpers on it...once I can scrounge up $750 for a set.2 points2 pointsContinued work on the other half shaft and differential (after a short Holiday getaway). I tried to buff out the scratches off of the differential rear cover and ended up making that a bit to shiny. Sprayed it with some matte clear to tone it down a bit. Drained all the fluid out of the diff. The diff gear assembly is pretty smooth with virtually no backlash so I won't touch anything here other than put in new fluid once everything is together. I sent the diff nuts and bolts out for plating along with some of the carb parts and some of the other remaining items, so I will complete the assembly in a week or so. Loosely pieced the parts together to get an idea of what the final assembly will look like.


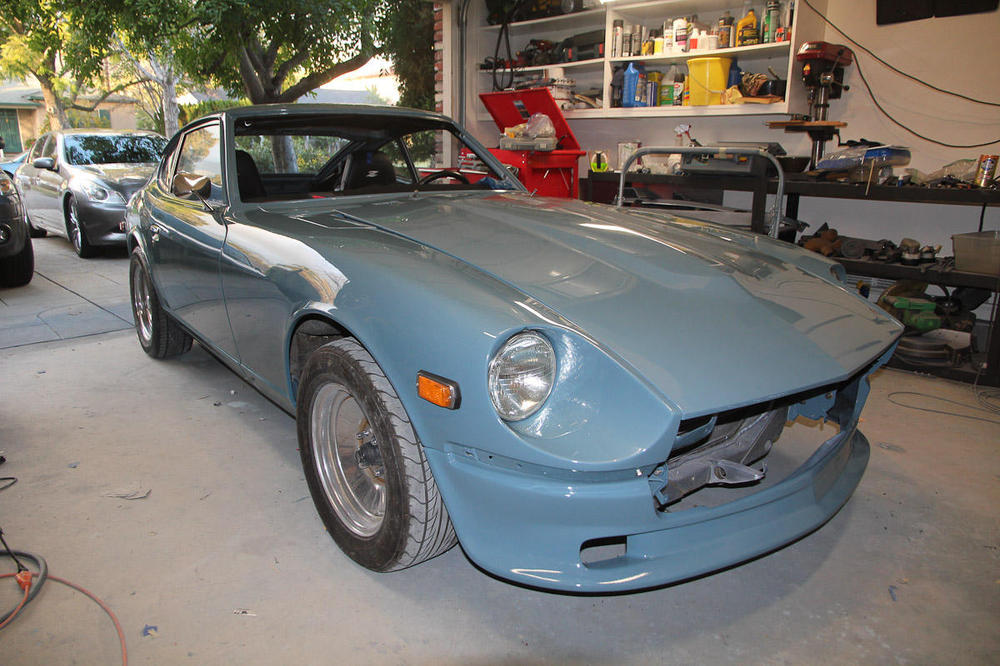
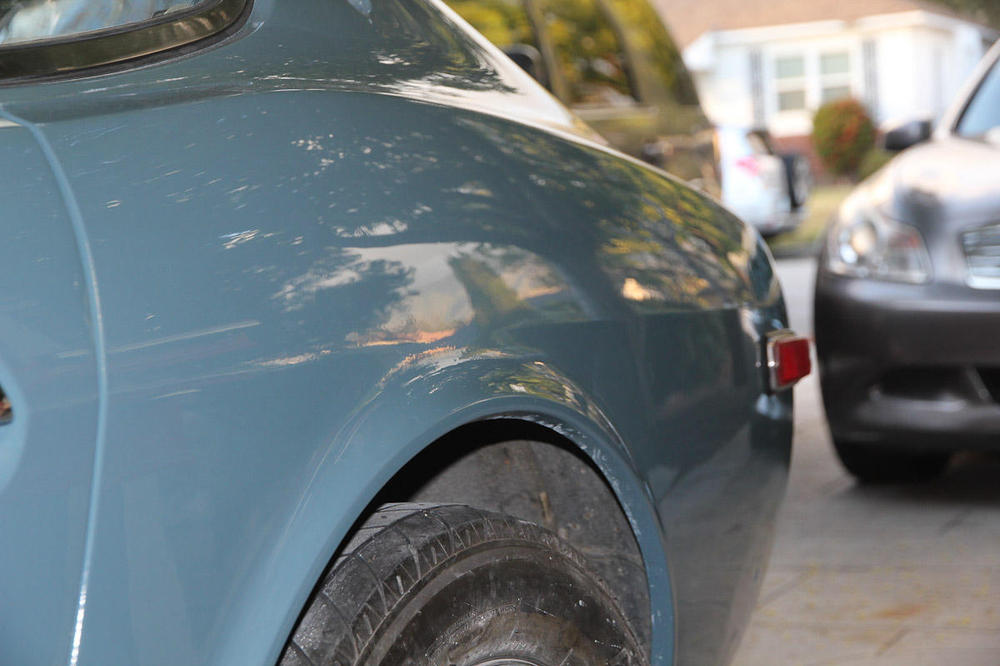
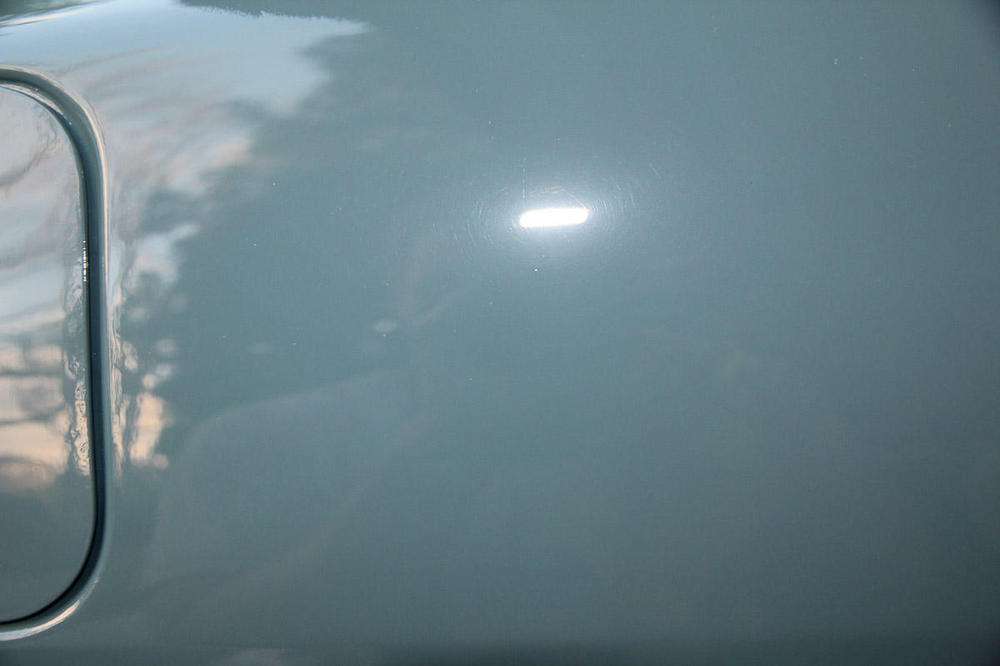
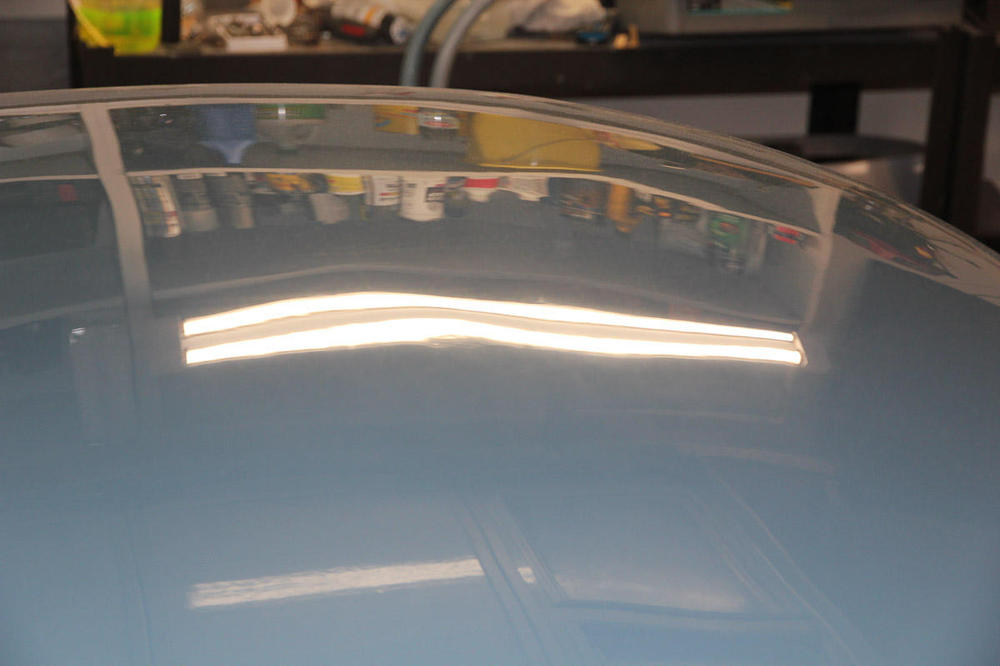
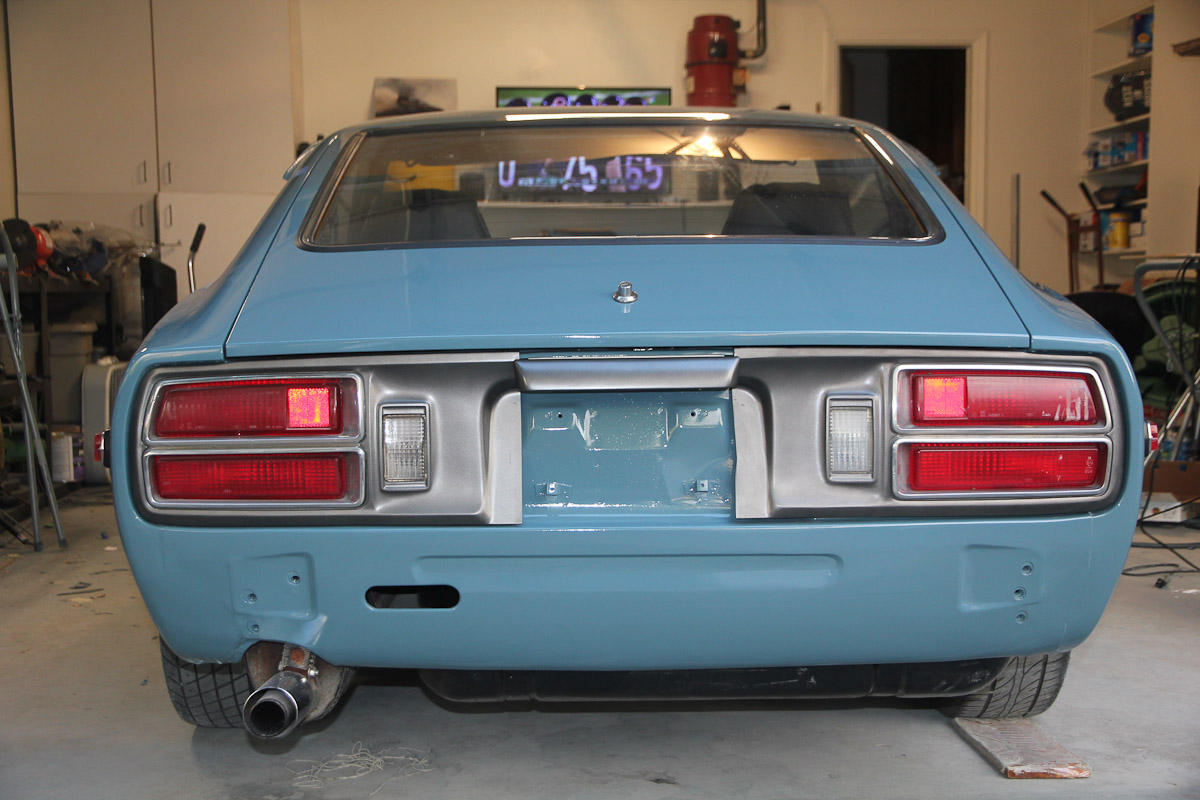
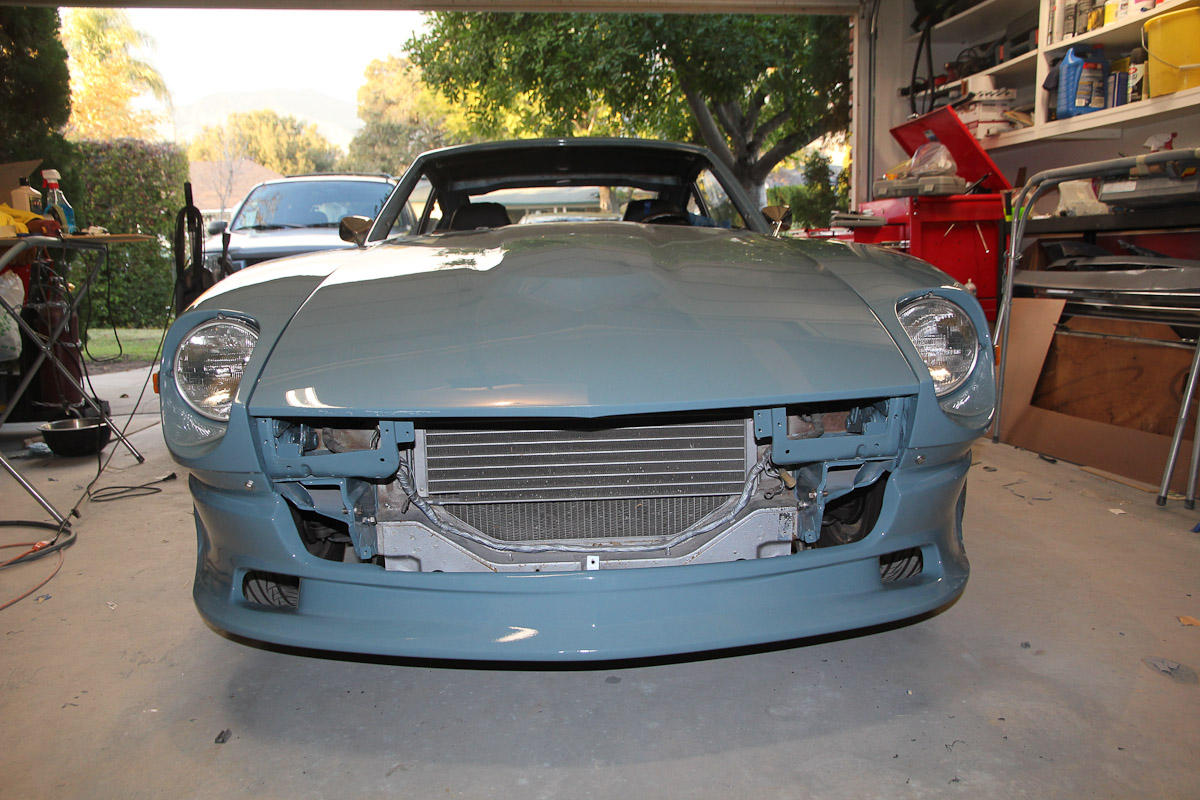
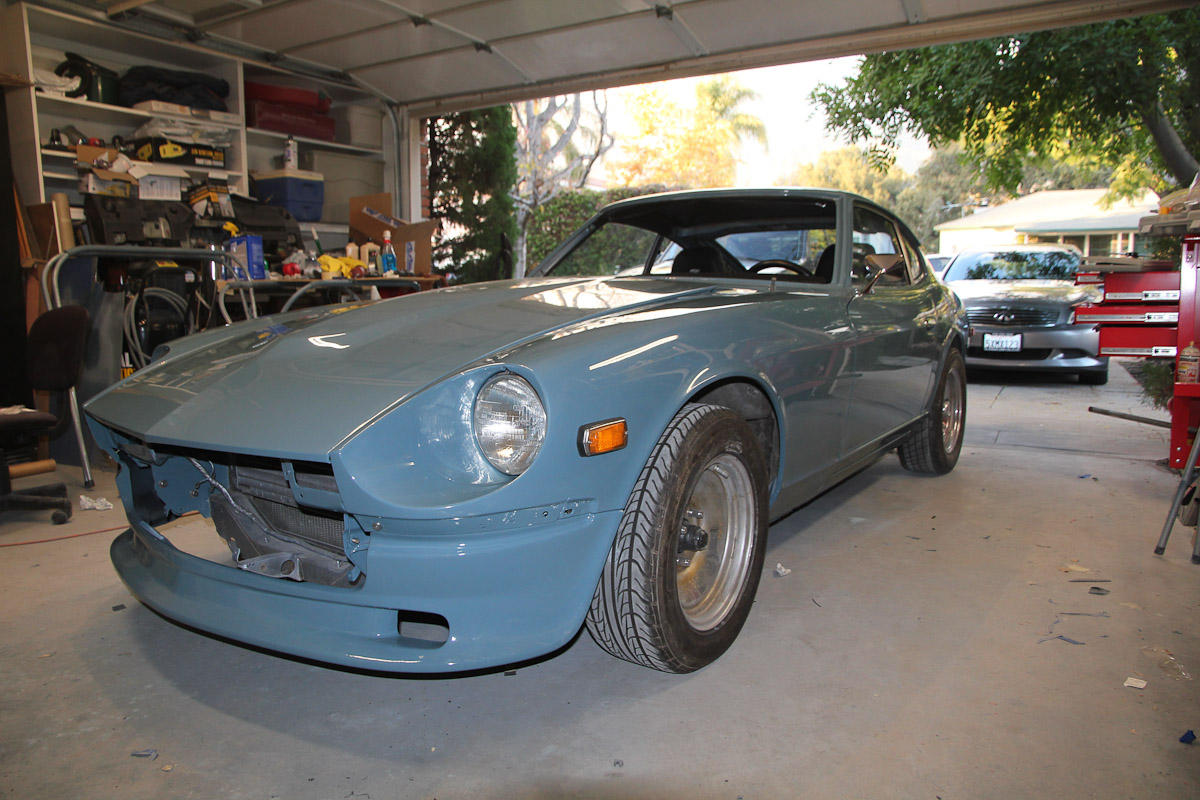
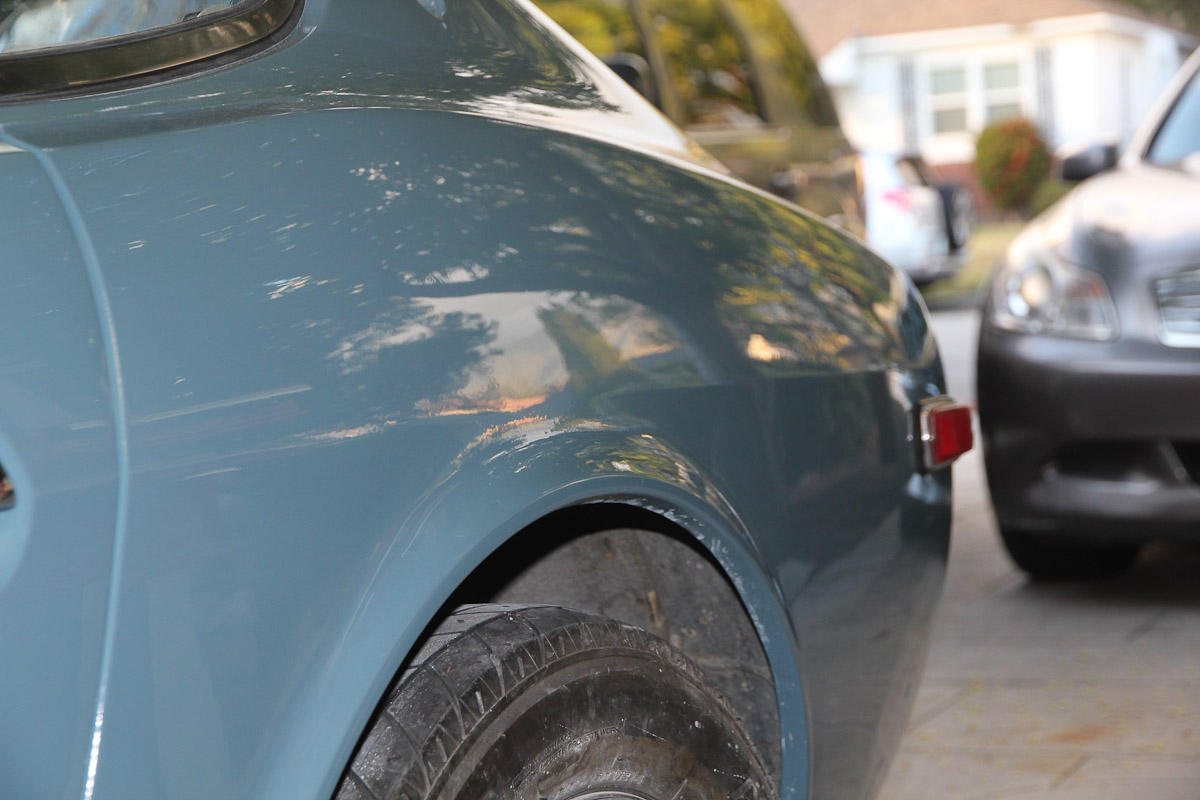
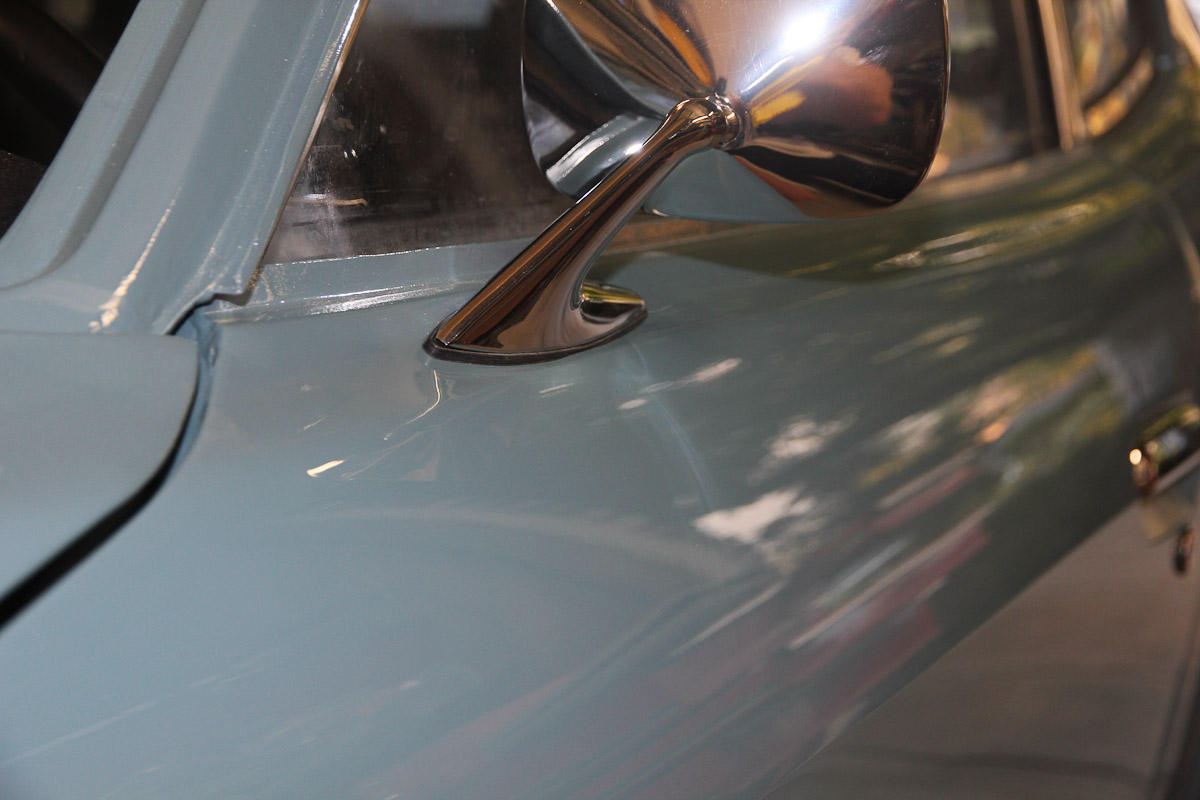
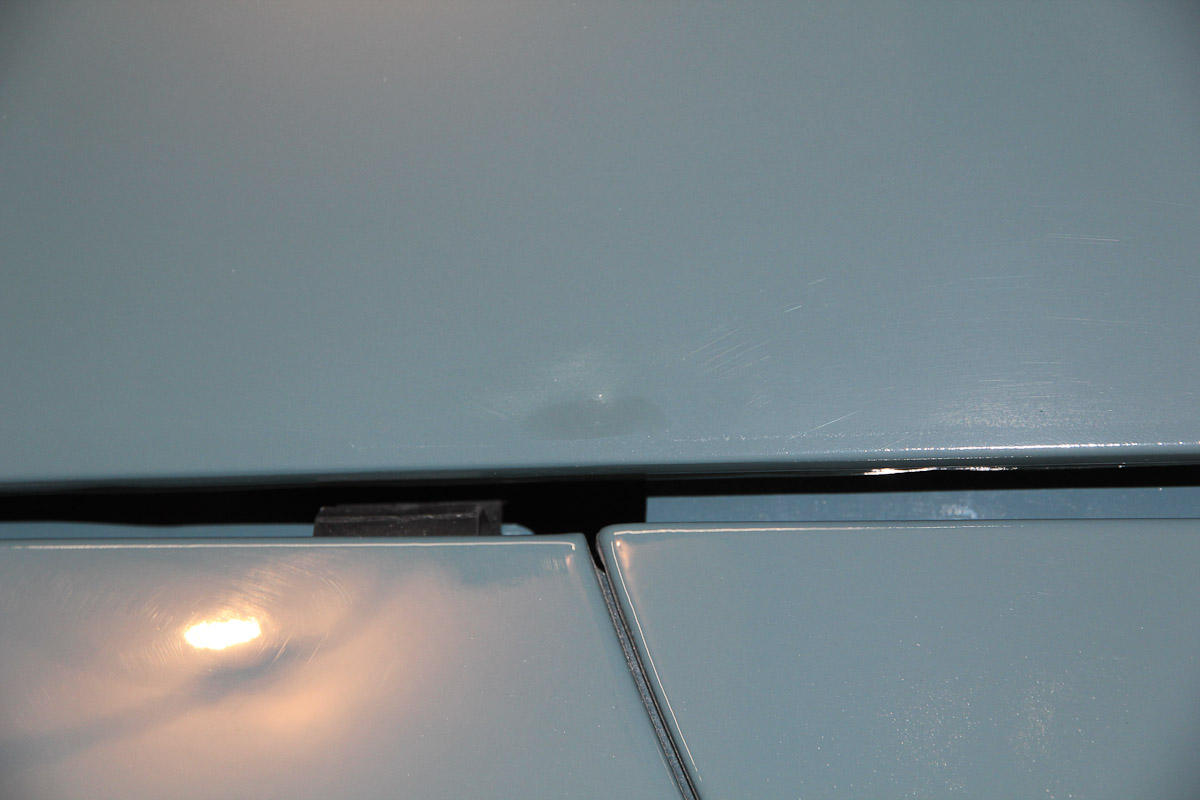
 2 points2 pointsI really appreciate this thread. I'm new to the forum, but I've wanted to own a Z since I drove a friend's '75 280z in high school (a huge step-up from my 1977 Honda CVCC :-)). My dream car is a '70 240z with racing green exterior and butterscotch interior. I've been watching this one on eBay and on another dealer/broker site. I've been texting the broker about the car. Vague about the mileage "not sure, thinks the engine was rebuilt". I'm old (and so hopefully at least somewhat wise) and I'm not stupid, but I'm definitely a newbie when it comes to buying a classic car. So thanks for your skepticism! I'm going to be reaching out to the owner directly tomorrow and try to get the truth. If y'all are interested, I'd be happy to post it here. If it isn't too good to be true, and I do end up the happy buyer of this particular vehicle, anyone know how difficult it would be to remove the aftermarket stereo and speakers and return it to stock? Jay in Northern Virginia, USA2 pointsNow that I have all* the panels on, everything polished, and a couple days to look and think at it, I figured I would do kind of a postmortem on the body work and paint, complete with an acknowledgement of all the things I did wrong. *The struggle with the hood continues. Body work first... Hits: Really happy with the way the fender and headlight buckets came out. The hatch, the driver rear quarter, the passenger rocker, and the top of the driver door all needed a lot of work, and all came out well. I was especially concerned about getting the swage line back into the rear, but that looks good. For all the problems that the hood had, that came out pretty nicely too. The only thing I think I should have done better on is a slight jog in the center line at the bottom of the bulge. Rear bumper holes are gone There were numerous dents and dings all over the car, almost all of them fixed. Misses: There's a couple very small dents that I missed. Should have been more conscientious about blocking. I didn't get the body line quite right on the section of the rear valence that I replaced, and you can see the difference in the gap on the tail light panel. The roof was really rough, and while a lot better, it's not perfect. I can't see it in the body when just "looking at it", but the distortion of the lights in the reflection tells the story here. I set myself up badly by not stripping out the headliner and butyl mat before I got started (in retrospect, probably a choice I shouldn't have made), but the roof was probably the hardest section of the whole car, and I didn't really pick up on some of the defects until it was painted an polished. More experience needed here. And paint... Hits: I painted a car in my garage. It looks a lot better than it did when I started. Some of the polished sections look really good. Misses (sadly, more misses than hits here): Dust was a problem. In some areas, especially where I sanded aggressively, there's some spots/flecks of the primer showing through. They're not noticeable from more than a foot or two away, but I know they're there. There are imperfections in the paint, and there are some scratches. I'm not sure if they're left over from blocking or from wet sanding (either from 1500 or from stray dirt/grit), but I sanded off a lot of paint and didn't want to take my chances trying to sand further. There was a high spot on the hood and a promptly sanded through the paint. I may try to touch this up. I know it won't blend well, but badly blended color will probably look better than primer showing through. There's a couple spots where something odd happened with the paint and it looks almost...cloudy/splotchy, maybe, from certain angles. A total guess on my part, but maybe there was some paint that wasn't mixed well? I haven't been able to get a good photo of it, but you can kind of see it here: Bad job spraying on a handful of panels. Most I could sand out, but some places I couldn't and the imperfections can be seen from certain angles. The edges of the hood are the worst; I mostly left them alone after sanding through early on. I might go back and try sanding some more. Even on sections where the paint is sanded smooth and the body work is good, the paint still seems like it has some texture and sometimes seems a bit flat and lacking some depth. There's two major things I will definitely do differently in the future: Better dust control. More paint with each coat. The fender I had to repaint was easily the best panel I did, and even that little experience helped. Looking ahead: I still need to paint the engine bay, which won't happen until I work on the motor, probably a couple years from now. When that time comes, I might consider fixing the roof and any other outstanding body issues and doing a respray if I think it's needed.
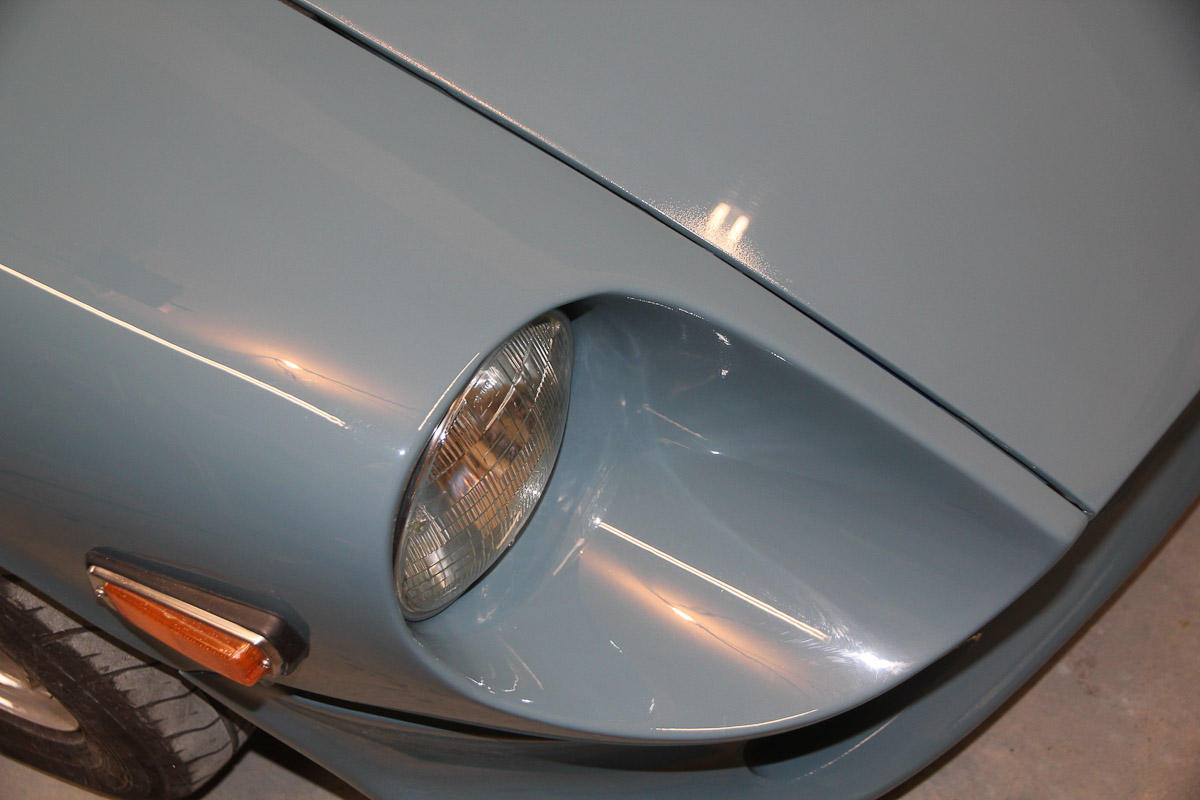
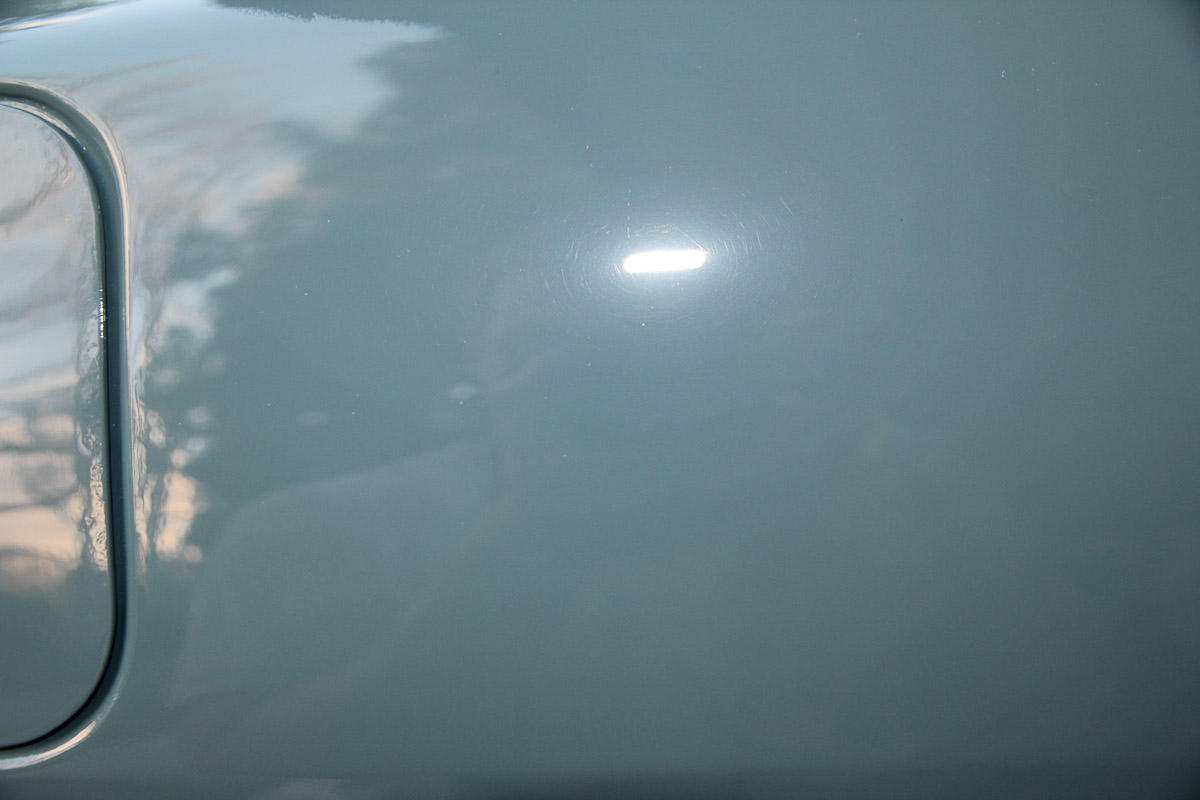
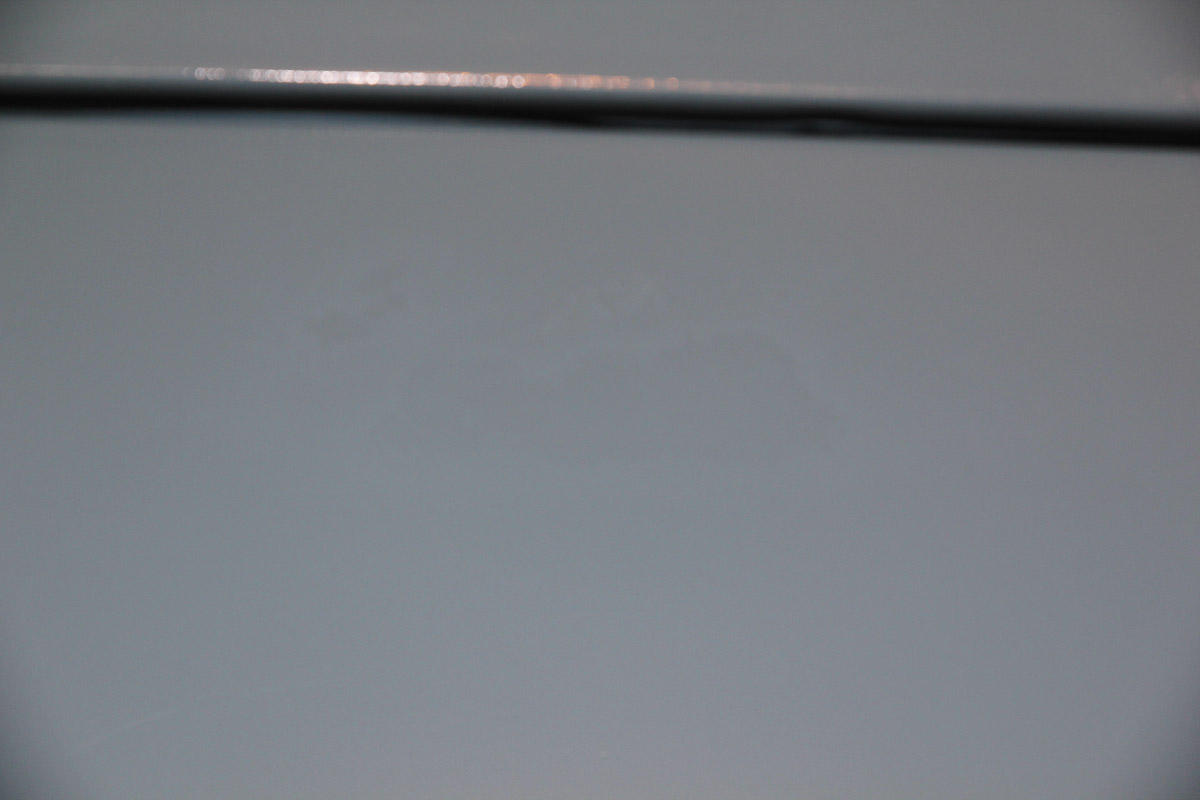
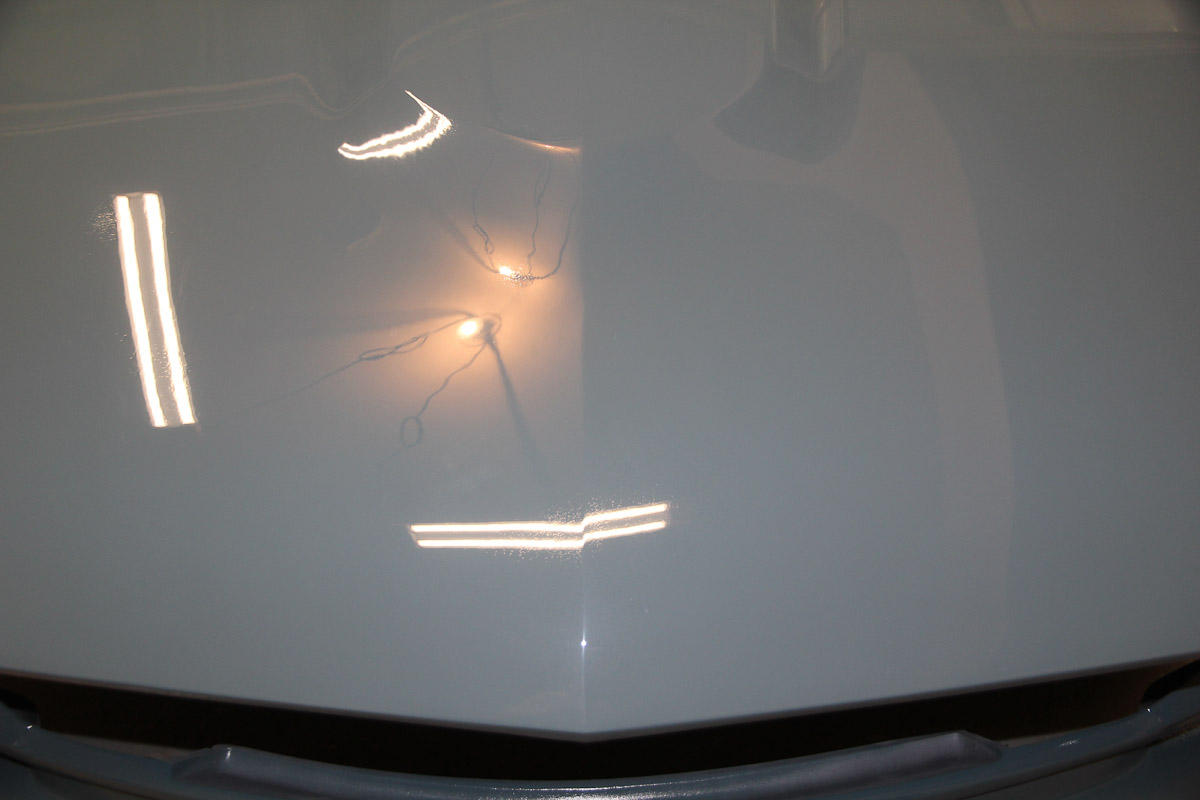
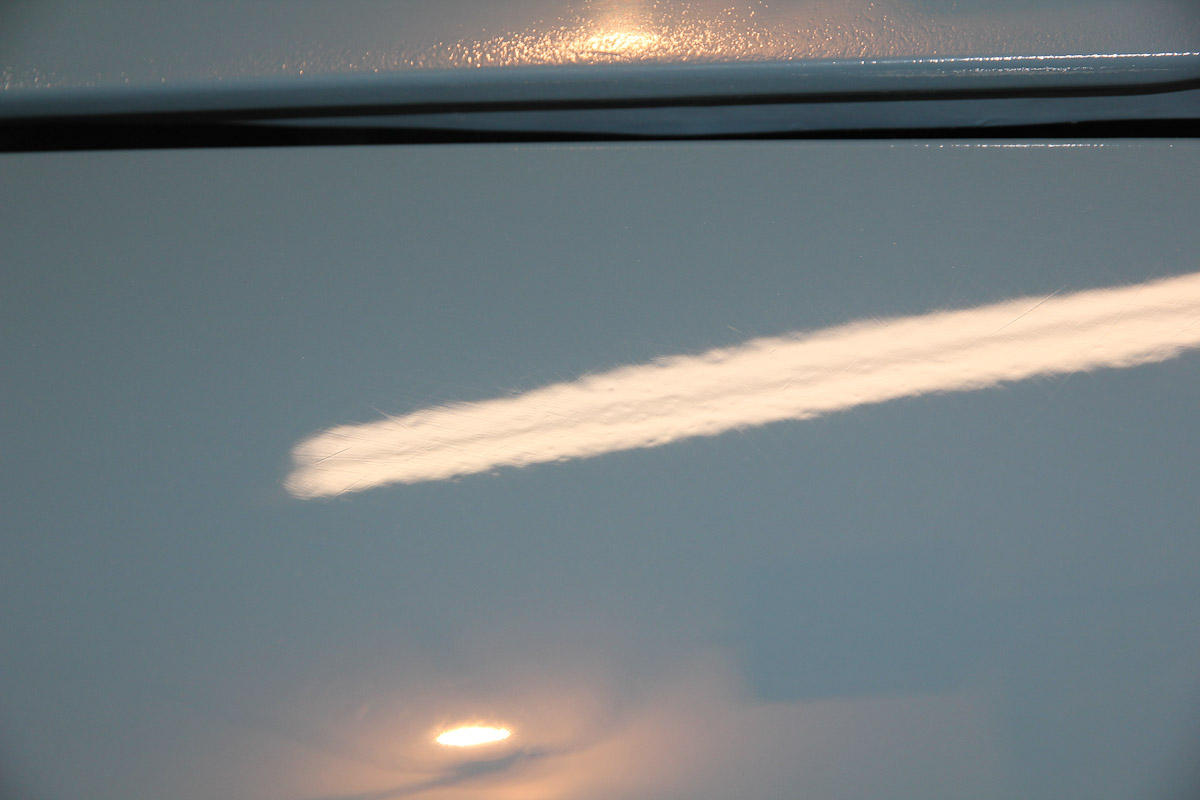
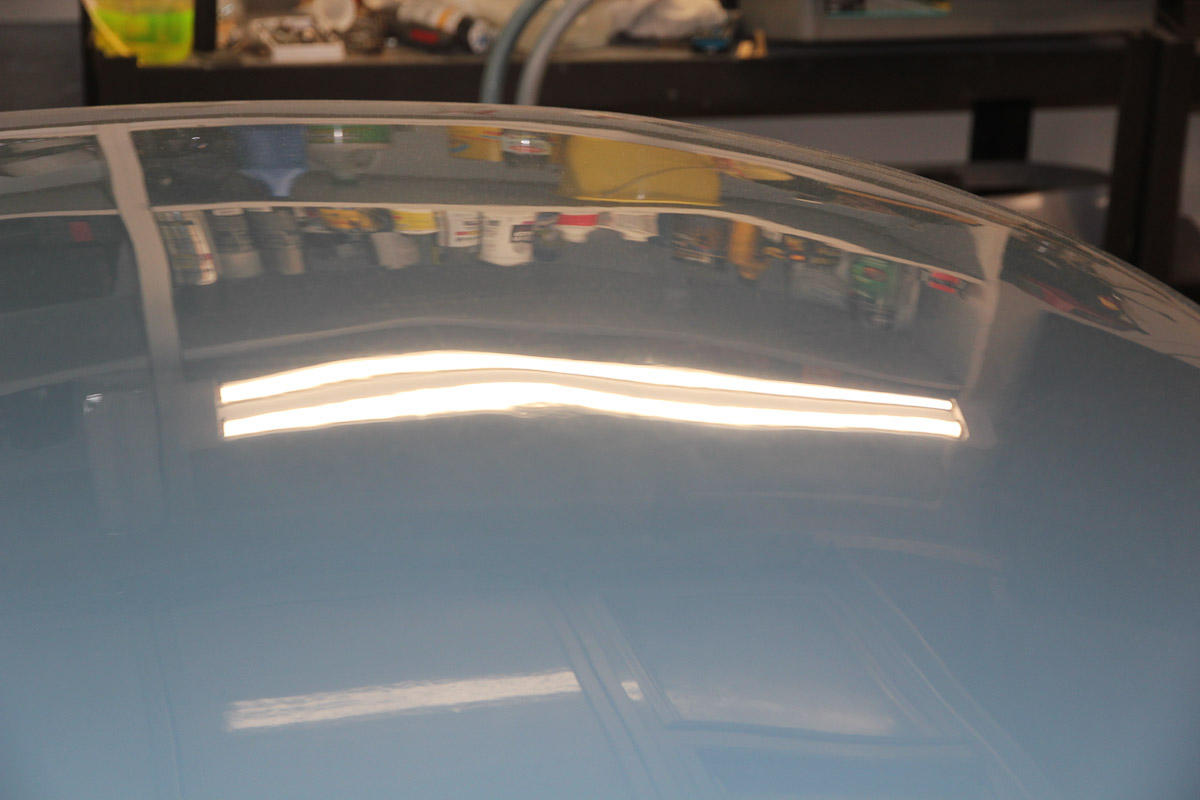
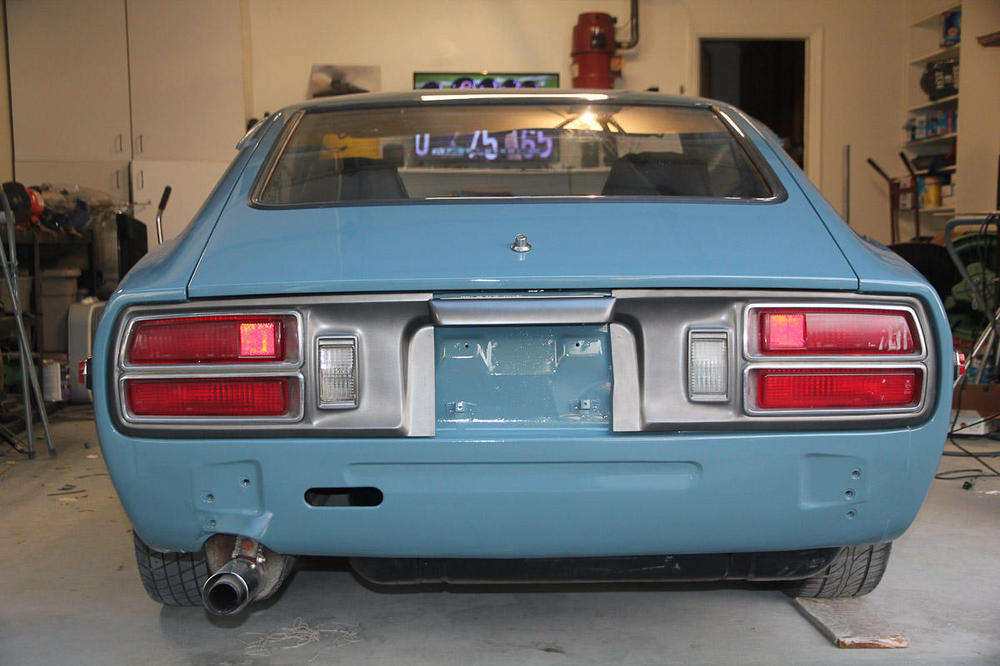


 2 points1 pointIf people knew your motivation or goal, they might be more inclined to help or even search for it with you. The random ask doesn't always work.1 point1 pointNew oil and filter then went for a 240 ride for two hours! I've only put 378 miles on it since 12/16/'16, the last oil change. Life...go figure. 280 sits, uninsured with no battery but covered inside my garage.1 point1 pointMine was given to me by a friend that welded it up. I would make it adjustable for centre of balance... mine was unwieldy at times when rotating and I had to watch out for fingers etc! The dual engine stand method works too, but I would try and build something that allowed for some vertical offset positioning. or a retail version that can be resold for minimal loss later or re-used on the next project!1 point1 pointI sprayed the front wheel wells with truck bed liner, then followed up with a light dusting of color. No problems with paint adhesion. I avoided the spraying bed liner in the shock towers as I did not want to provide a place for dirt, moisture, ...etc. to begin a build-up. The towers were done with POR-15 topped by brush-on color. Jim
 1 pointDid you press the brake pedal at the same time? There's no reason for pressing the clutch pedal to cause it to die unless you have a loose wire under the dash. The clutch system is completely separate from the engine control system. But the brake pedal does pull vacuum when you press it, and a bad booster can cause a vacuum leak. An easy way to separate fuel supply from electronics is to try starting fluid. If it starts then dies with each squirt of fluid then it's probably a fuel supply problem, either from the tank or from the injectors. If it doesn't start with fluid then it might be something like the ignition control module. I had a bad 1978 ECU in the past also. It would just die completely, then restart after waiting. Anyway, starting fluid will tell you if you have good spark and timing. Make sure you squirt in to the intake manifold itself through a vacuum port.1 point1 pointVery, very nice Kats, any Silvia (csp311 only) I love to see. It is a pity it is missing a few things, grab handles above door, sunvisors, and has Bluebird 410/411 hubcaps. But still lovely. Hopefully, the restoration of my one will be to a very high standard (it is so far with the length I am going to..) For those who are interested, this website is rather good for the design/launch/motorsport of, what could be described as Nissan's first super car. https://csp311.net/ (Oh, did I say the website is mine?)1 point1 pointI was going to respond with that very theory last night, but alas was too lazy to post... I had the same thing happen to me once before while welding up some steel pieces that were being positioned with a large magnet. The weld just popped right off!1 point1 pointSo I started to work on these panels. I tried to lay down the first bead and I was like "What the heck!" I know I am becoming senile but I thought I turned the gas on. Yeah went through that a couple times. Righty tighty-lefty loosy. All good... Maybe I bumped the regulator. I turned it way up. I can hear and feel the gas coming out the tip. Plenty of pressure in the bottle. Maybe it's a contaminant? I had a new piece of copper as a back up behind the hole. You can see it in one of the pictures. I took it out and it welded fine. Here is the catch. I had the "bright" idea to use a magnet to hold the copper piece in place. The magnet I have is a very strong rare earth magnet. You just about can't pull them off a surface with your fingers. So I held the copper back under there without the magnet and the welds were still fine. The magnetic field was doing that to the weld puddle. So it makes me wonder if my other magnetic holders affect the weld puddle too. I will have to keep an eye on that.1 pointI think you did excellent!!!! It is very challenging to paint in your garage where you are also sanding. You are making dust in the one space you don't want dust, the spray booth. I have shot plenty of panels and they look perfect. I come back in 15 minutes and there is all kinds of trash in them. Really frustrating!! I agree with Grannyknot, there are plenty of professional paint jobs out there that don't look half this good! You did really well and the next attempt at paint will turn out twice as good. In some of this, there is no replacement for hands on experience. You get a feel for what a smooth panel looks like and feels like and you get a feel for how much paint you are really laying on. Also a respray is far less work, just don't use any waxes in the mean time with silicone in them! Scuff the panels with guide coat. Fix the misc, tape and shoot. Man, I make that sound easy! ?1 point1 pointNice car! Don't be fooled by a claim of low mileage, however it's still a nice looking car. And, of course, I love the color scheme. It could use some cleaning and doo-dadding. I can see many items that have been replaced over its life. It appears to be a nice solid car. Always best to look at it before you buy it. Changing the radio back to stock is no more of a problem than it was to install the radio in it now.1 point1 pointThanks @grannyknot. I really appreciate it. I'm being particularly critical because 1) it's the only way I'll get better; 2) I've seen many instances online where people choose bury their setbacks and highlight their successes, which doesn't paint a realistic picture of what's involved in a project, and 3) I've been in my garage this whole time in a particularly harsh environment that's made me very aware of all the blemishes in my work. I'll also say that I've been moving the goalposts. My original goal, according to my own post in 2017 was: "I don't want/need a show car. I do want the Z to look like something to have some pride in, or that I could take to a Cars and Coffee without feeling the need to explain it." And by that measure, I'd say I've succeeded. But the more I worked on it, the more I felt like a show car paint job was my measuring stick, and every blemish was a failure to get there. Anyway...yes, both the hood center line and the body lines have filler on them. The sides required a bit of filler after removing the molding and welding the holes shut. I used masking tape to help keep things straight, but mostly just a long block and followed the panels. The hood was basically the same. Masking tape down the middle to set the line, then a long block following the hood contours. I never got it quite straight because the profile of the hood makes it difficult to get the tape straight. I've seen some people use a laser level. I might try that next time.The quarter required the most work. I scribed the profile of the wheel arch on the passenger side in about 8 places and transferred it to some heavy card stock (cereal boxes) to use that as a rough guide to the shape I needed to get. Then used the stud welder to pull things into shape as much as I could, then laid on body filler. I used both masking tape and a pencil line (different times, multiple times) to identify the location of the swage line. The upper portion of the shoulder was in good shape and I followed the contours of that with a long block. The line itself (and the fade at the top of the wheel arch) kind of appeared naturally. To shape the bottom half, I used shorter blocks and a Dura-block cylinder. There's generally a flat plane that extends from the wheel arch and out to the swage line or the end of the body panel, which I followed and makes blocking easier. I also picked up a profile gauge and used that to fine tune the wheel arch shape against the passenger side. And I used a metal straightedge a lot (all over, not just on the quarter panel). Both to check for straightness and on curves to compare one side to another and to make sure they're smooth by rolling the edge on the panel. I probably have photos if the wall of text doesn't make sense.1 point1 point1 point197TZ, welcome to the forum, I wish you luck on this car, looks like a nice straight car to me. Even if the engine does need a rebuild that's not the end of the world, all the parts are available, I would appreciate it if you could post up what you hear from the owner, interested to hear what he has to say.1 pointSounds like possible a fuel delivery issue. Buy a fuel pressure gauge and put it on the fuel line after the filter. Particulates in the fuel can settle when the car is off but then slowly reclog the system after a bit of time under pressure. You’ll be able to watch the pressure gauge and know what’s happening. My 2 cents Sent from my iPhone using Tapatalk
 1 pointAll in all I think you did a fantastic job, it is a better job than I have paid thousands for to so called pros. Well done, the center line of the front of the hood and the main body lines running down the sides look sharp and defined, did you do any build up of those lines with filler? If so would care to share the technique? Thanks.1 pointCap and rotor button new also? I would double check the wires firing order too. Running out of adjust on the dizzy sounds suspect to me.1 point1 pointI have some Skyline GTR Original Dealer Info releases for the first 3 years: They would look nice in that grey garage! I'm up for S30 parts to trade if anyone is interested.
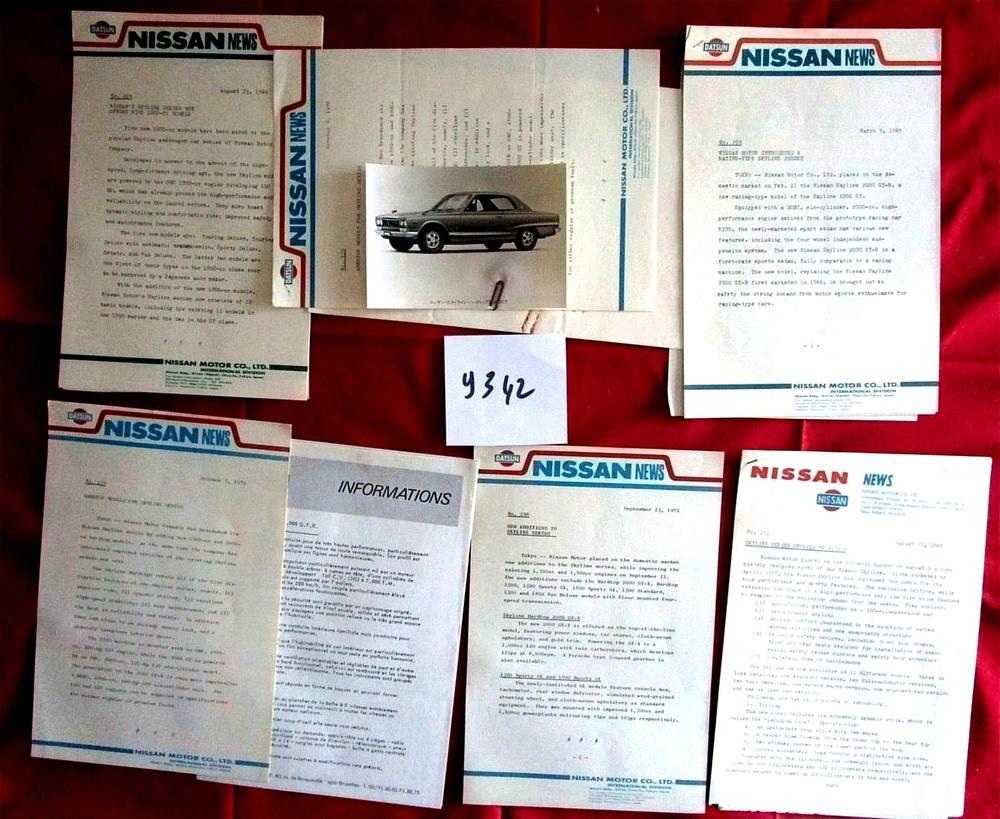 1 point1 pointDid some work on the rear end panels I want to close up the holes so I don't have the big puddle welds again. So I ma going to weld some of them smaller and some I am going to patch entirely then drill a new hole Here is the latest episode on ugly welds? It's not a gas issue and not a contamination issue. I figured it out, but anyone have any guesses? I took a grinding die and rounded out the holes and started making small metal patches. I would have finished today but I didn't do anything productive today. Cody had a great idea on how to make the patches. I took some light card stock and traced the hole onto. I cut that out then I cut a scrap of metal that is a little larger. Then I take a set of small nose welding clamps and clamp them together with the pattern on top. A 2" grinder with a 36 grit roloc and I trim them to shape. I made like nine of them late on Saturday. I have like 25 total to make!
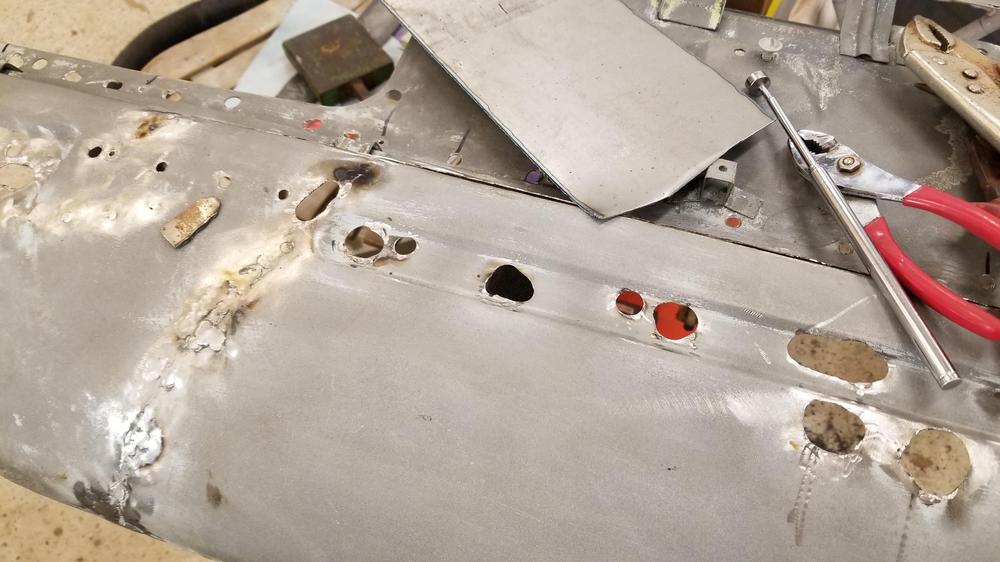
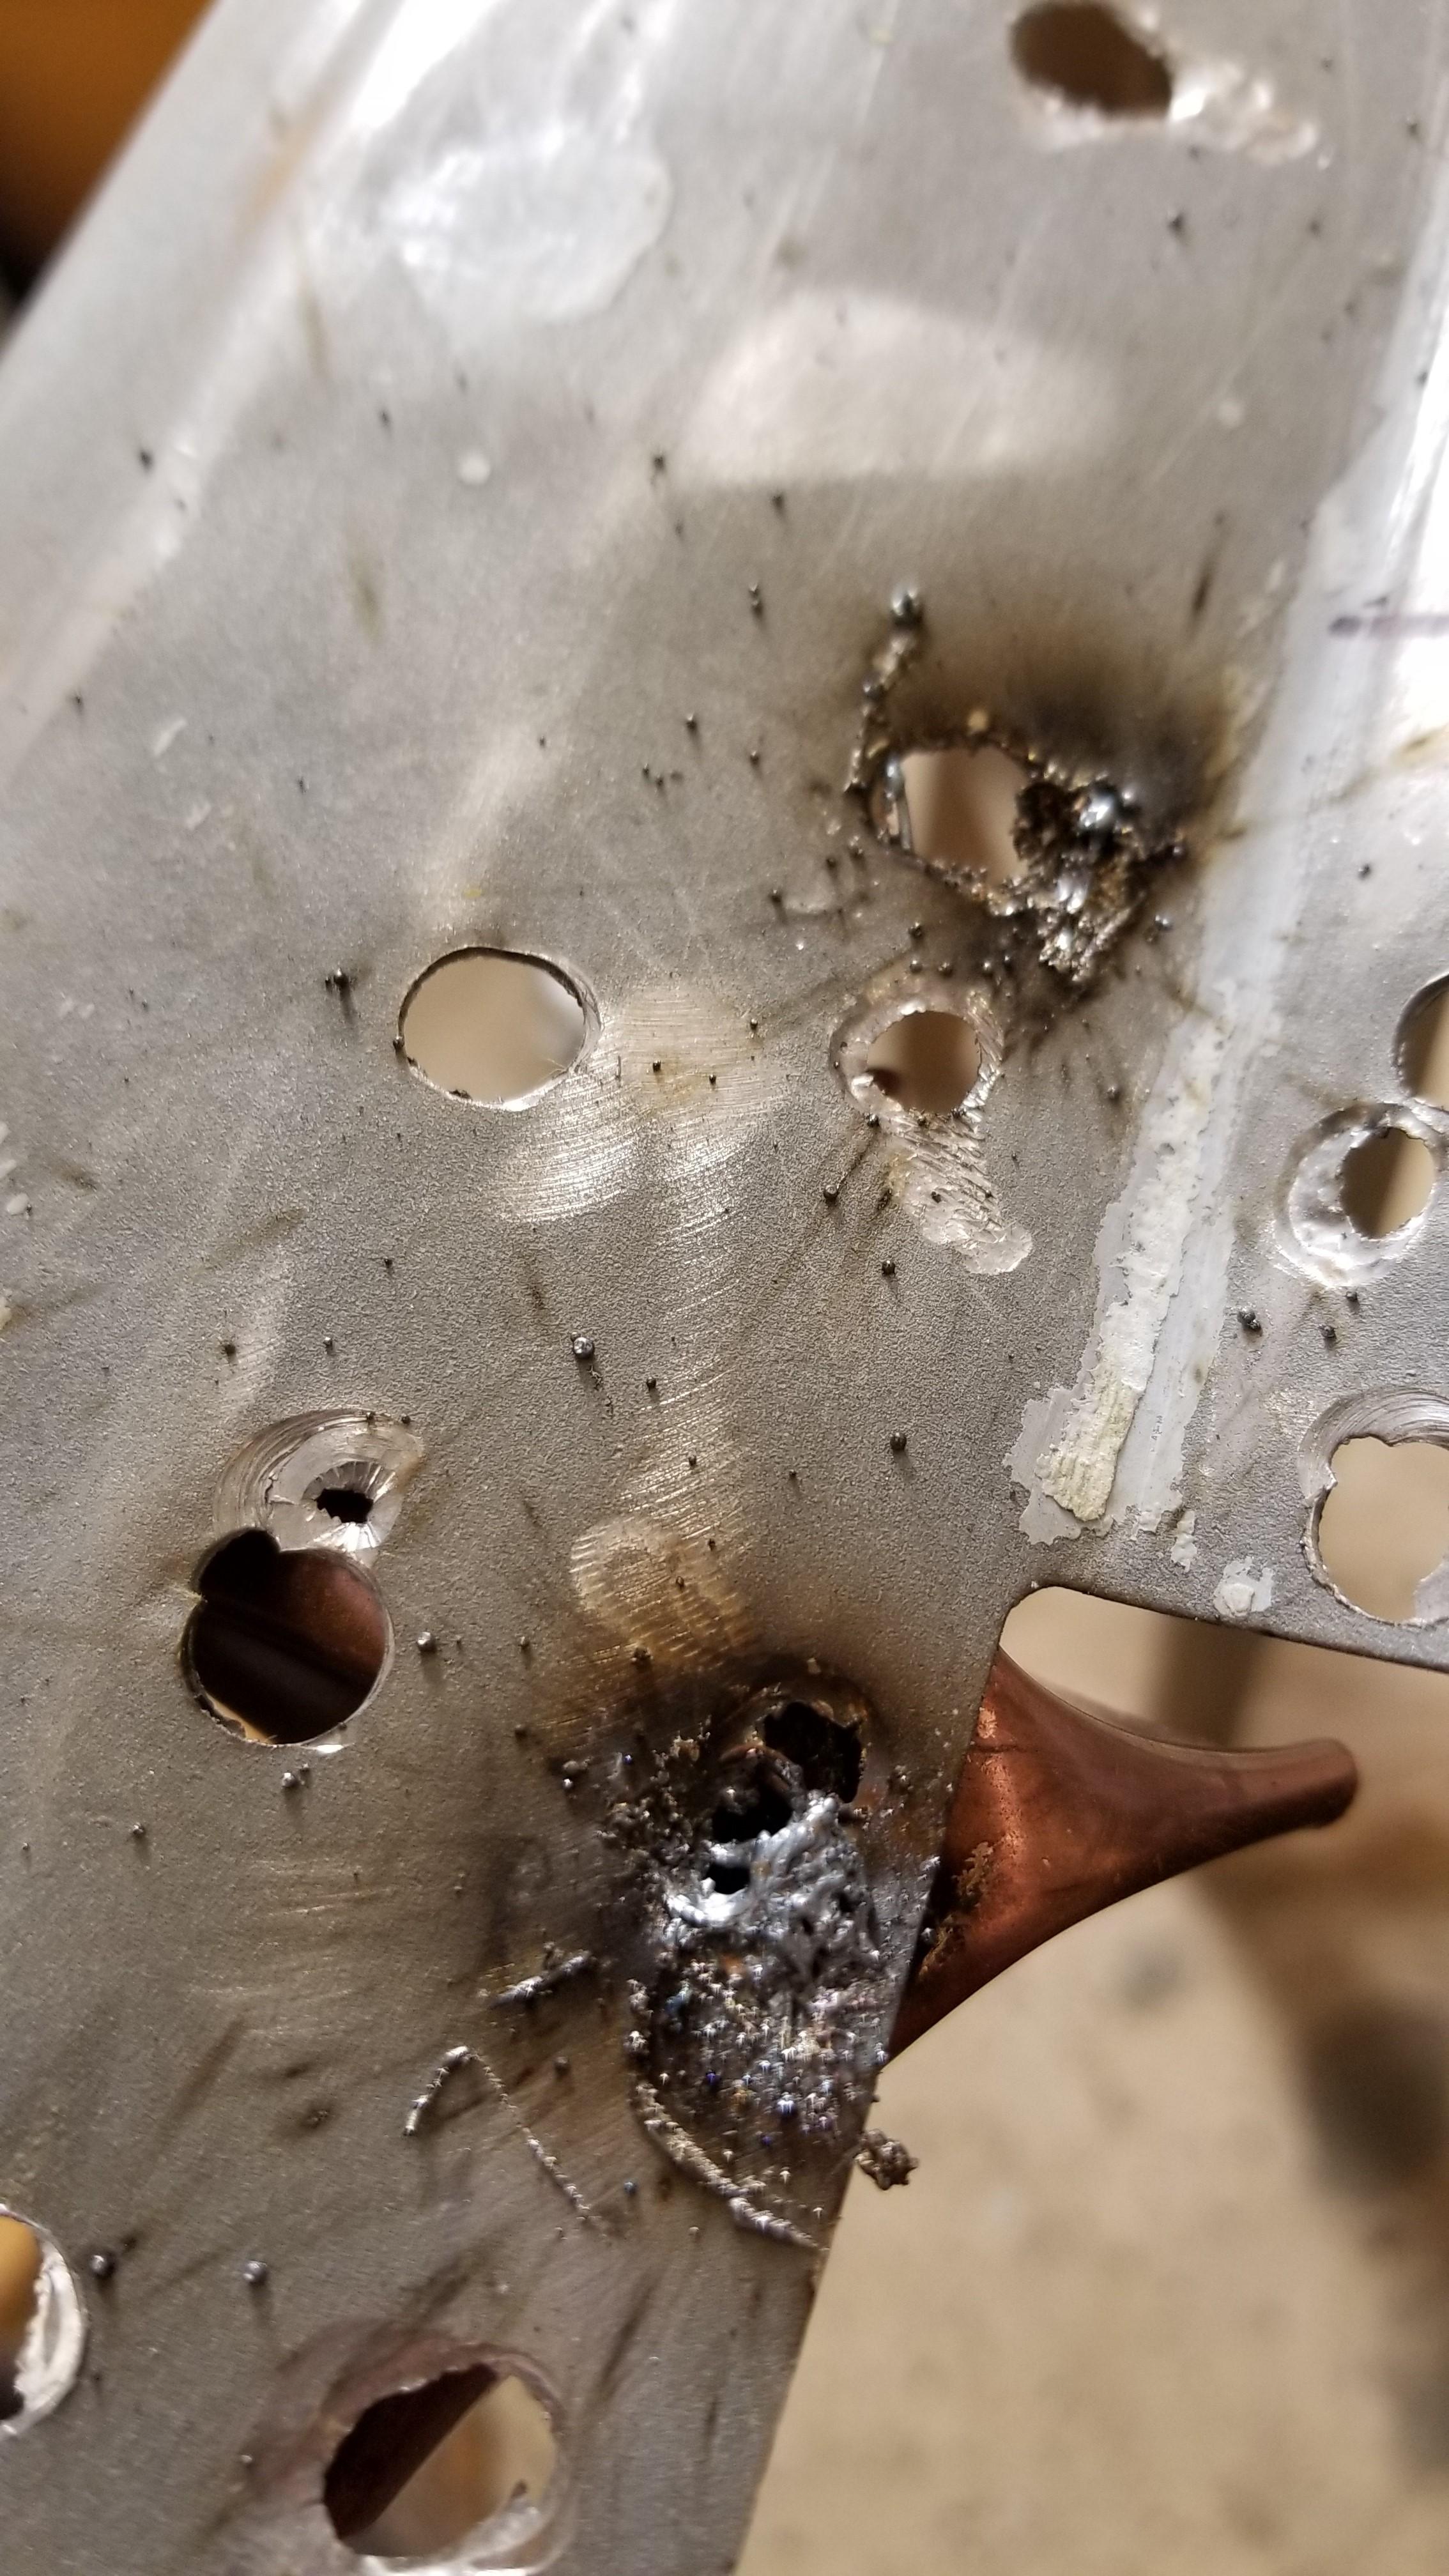
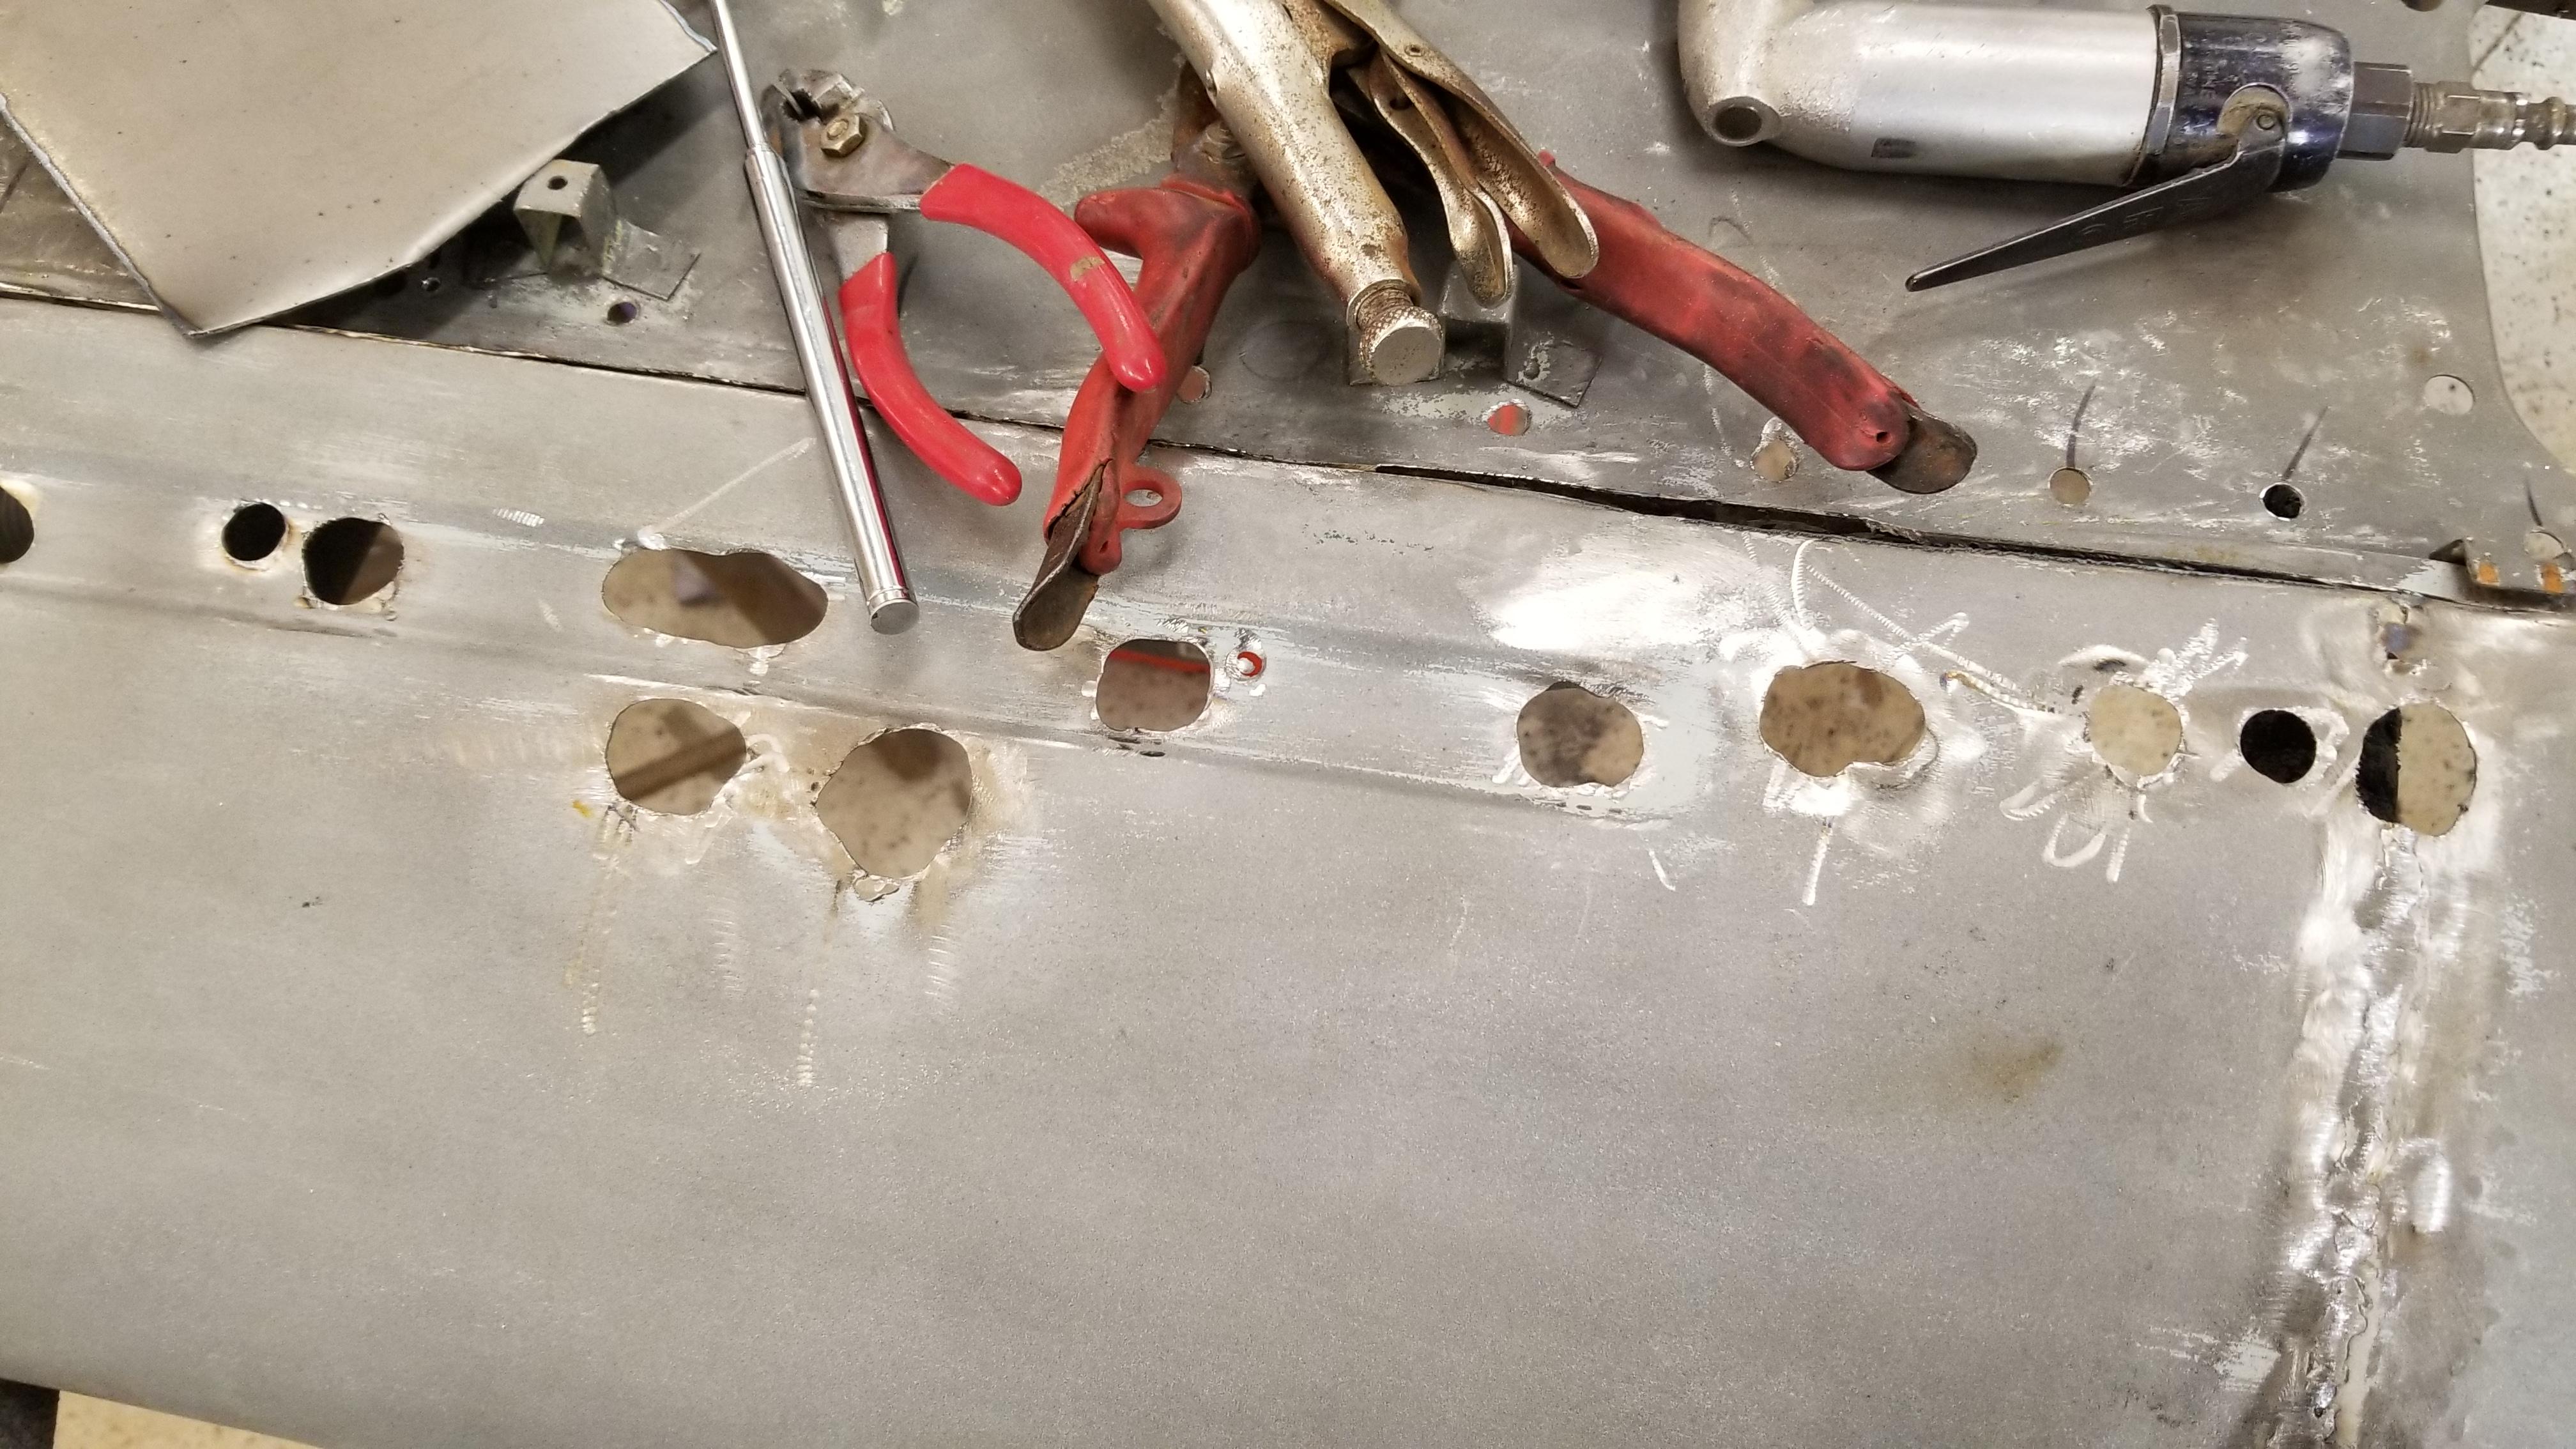
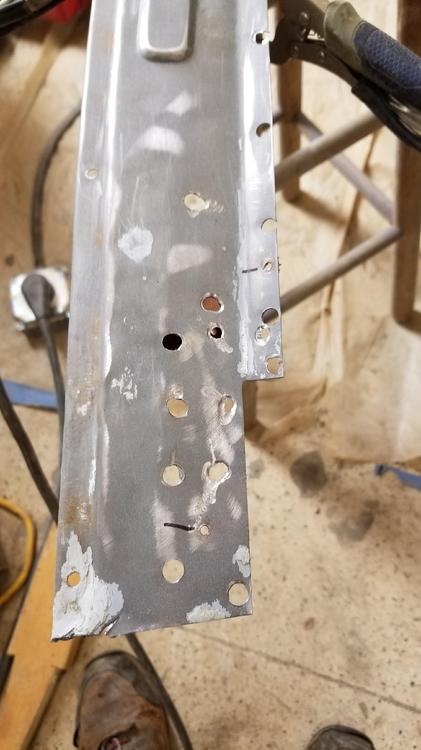


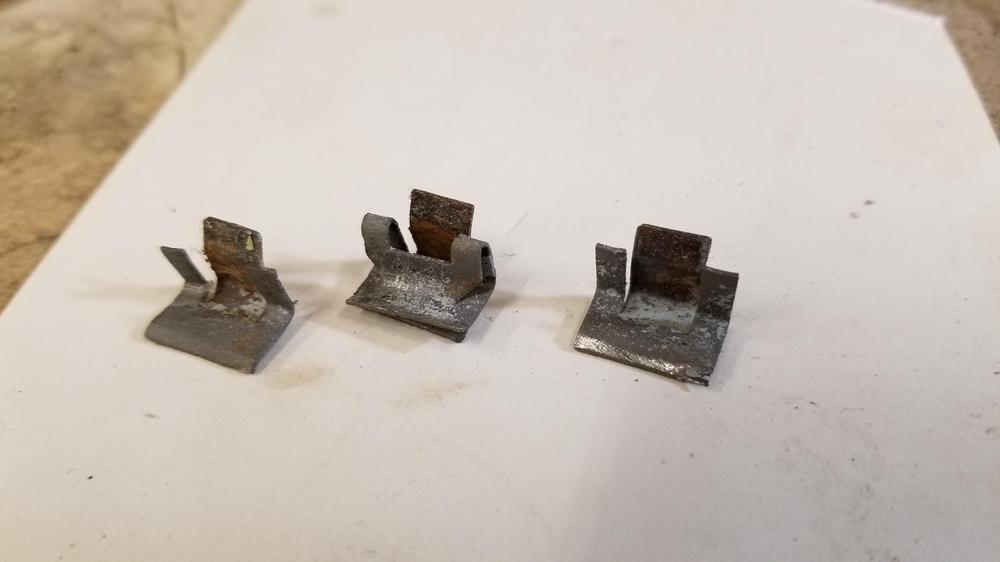
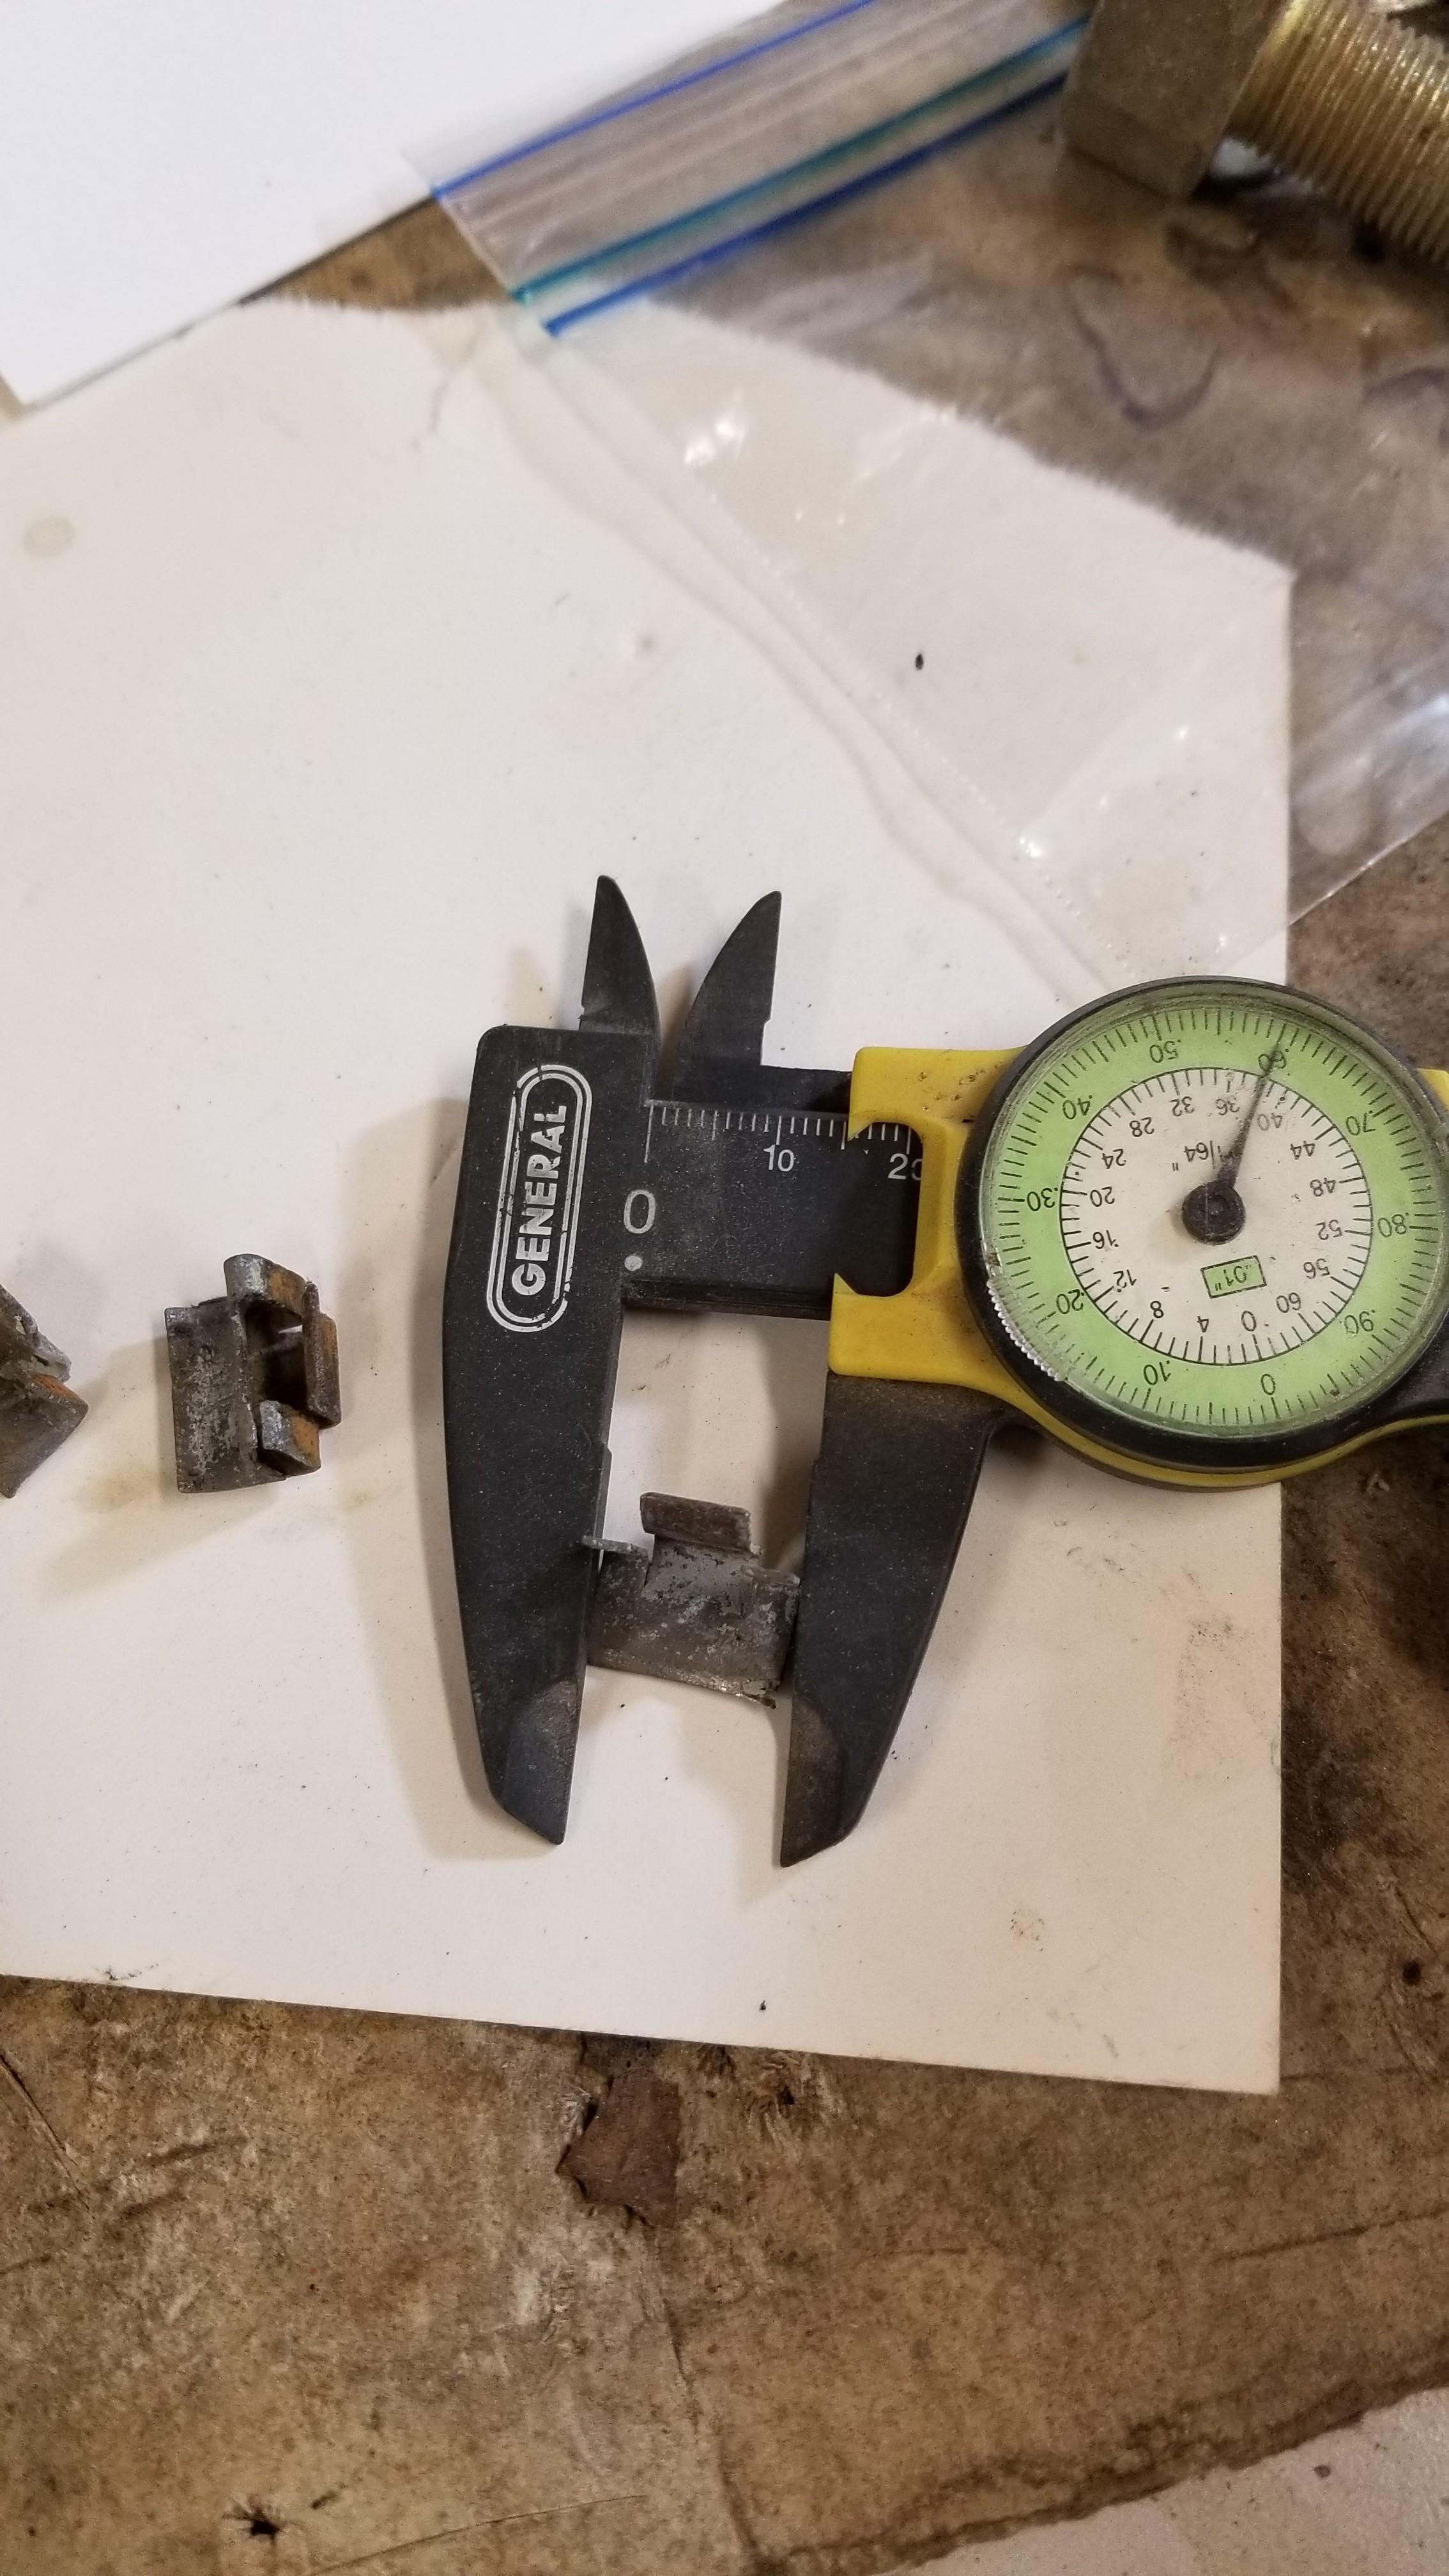
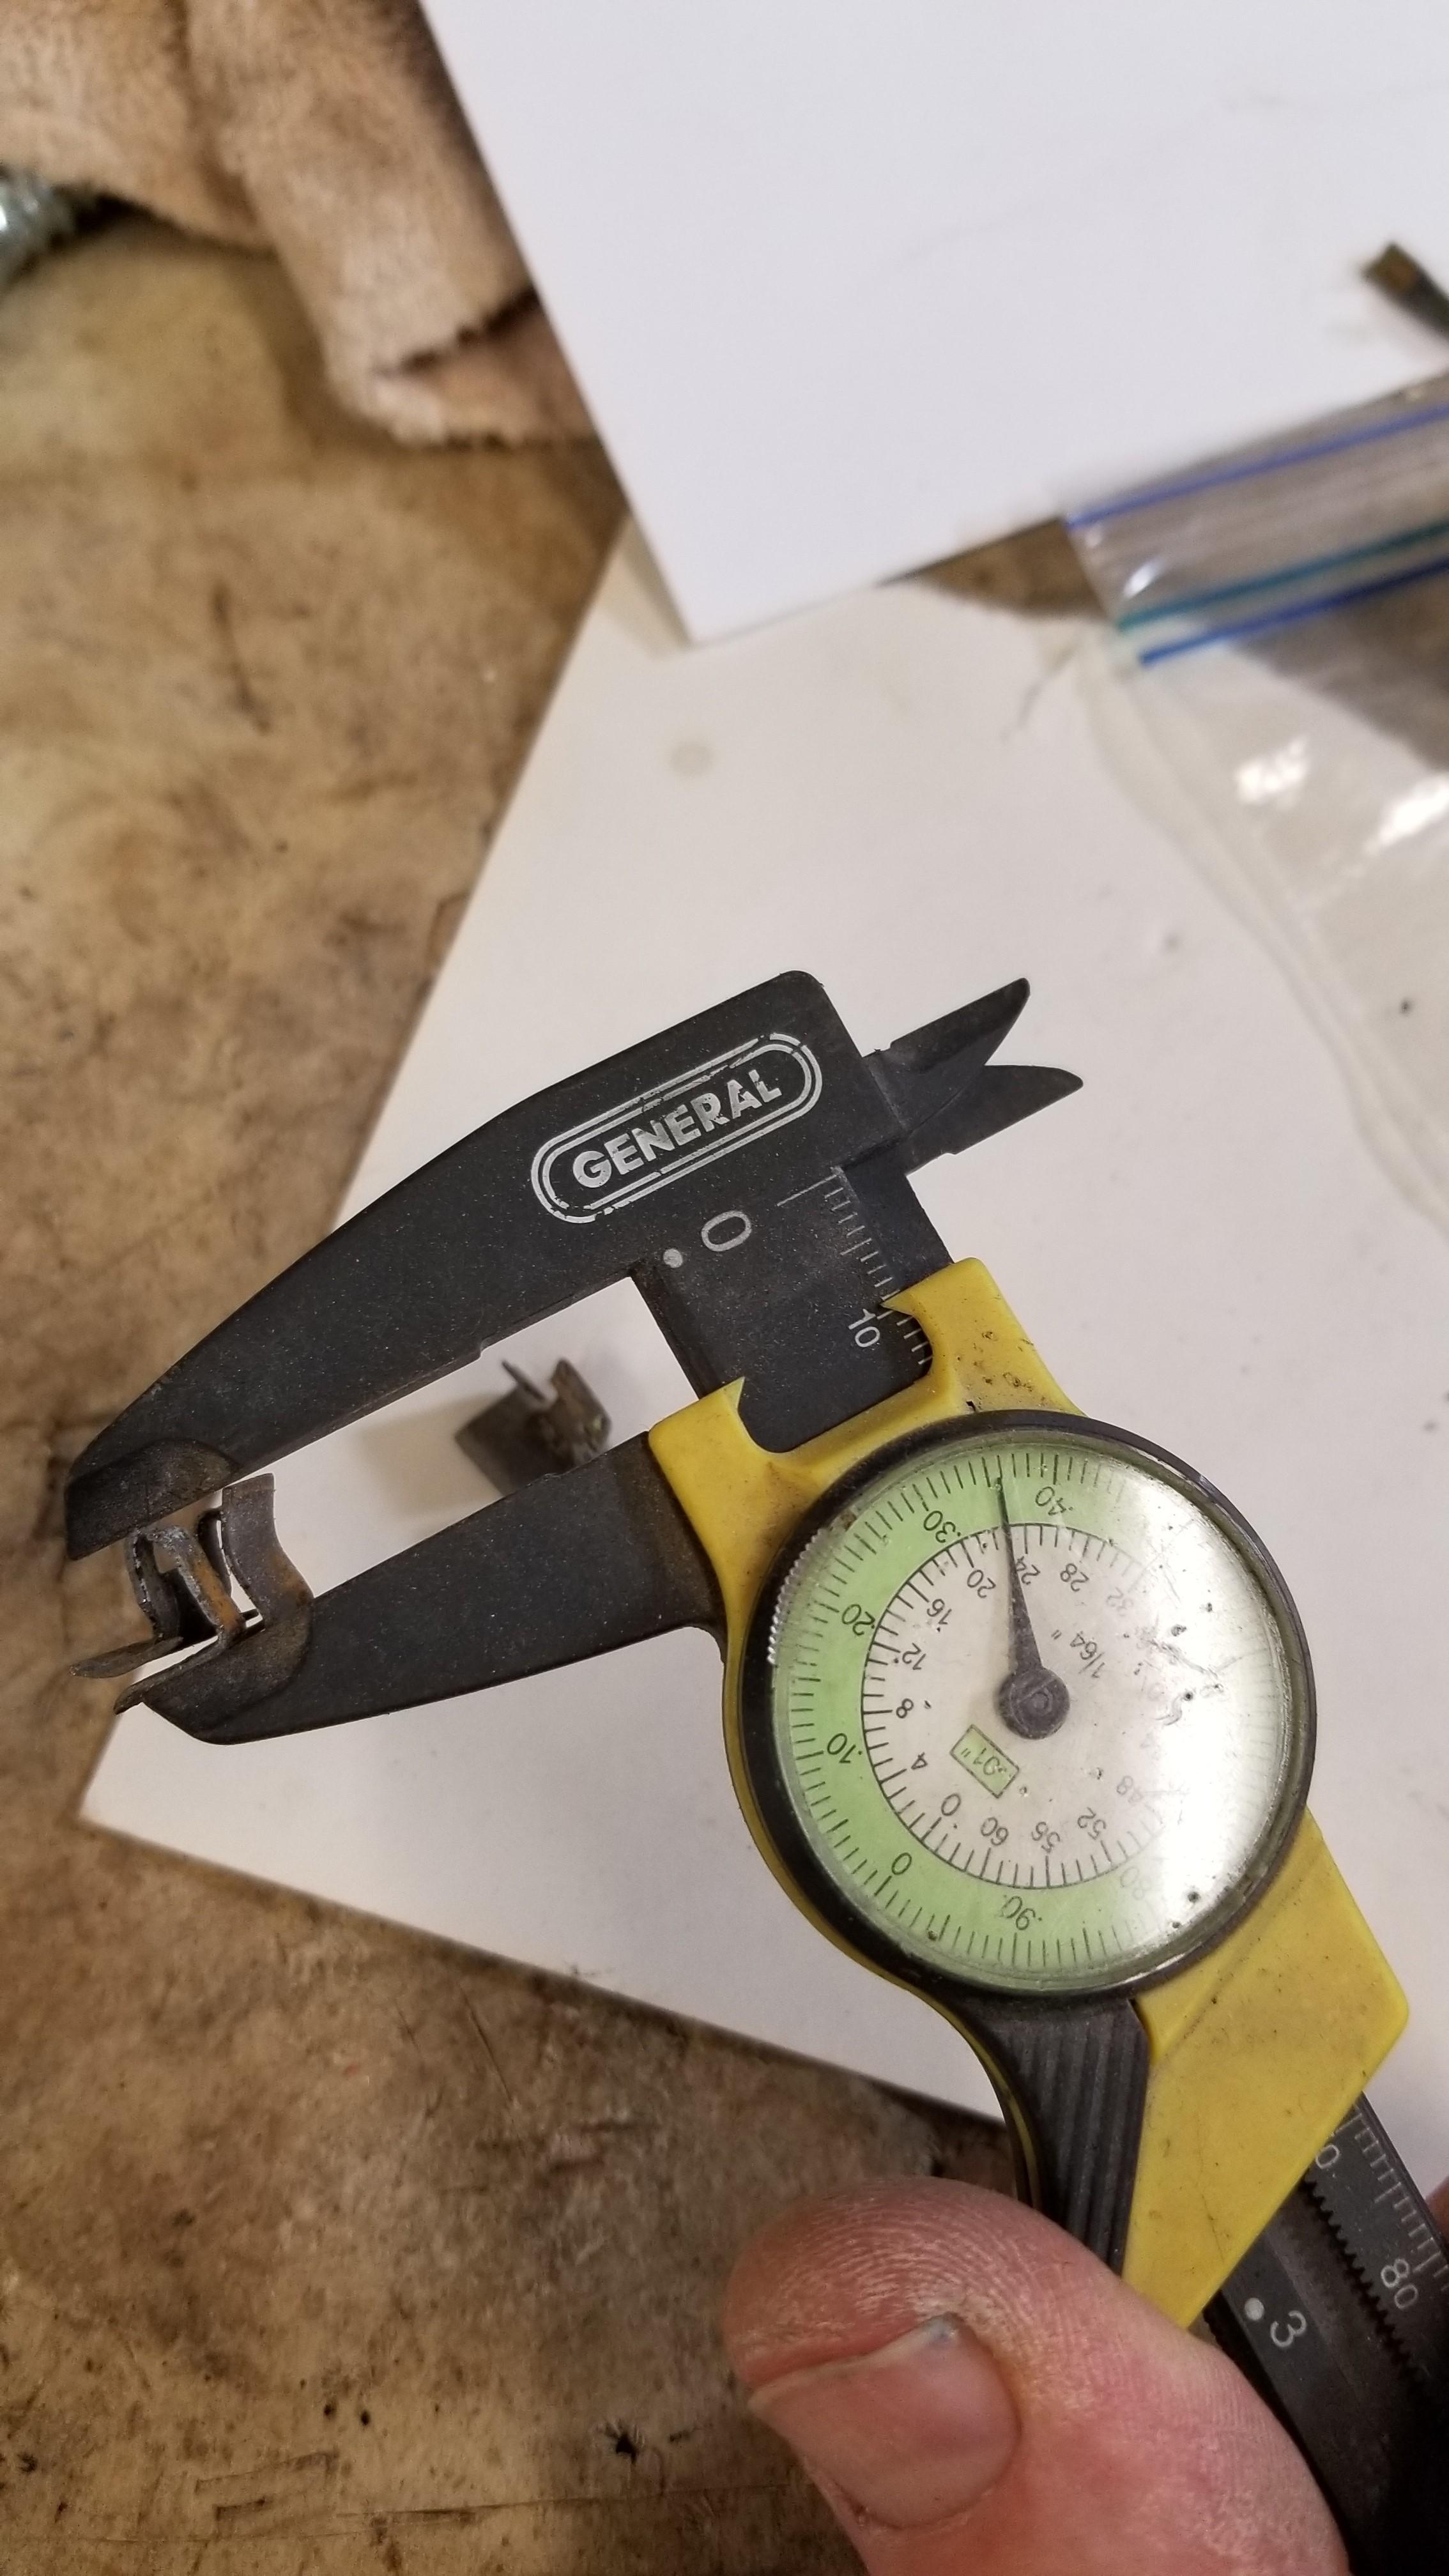
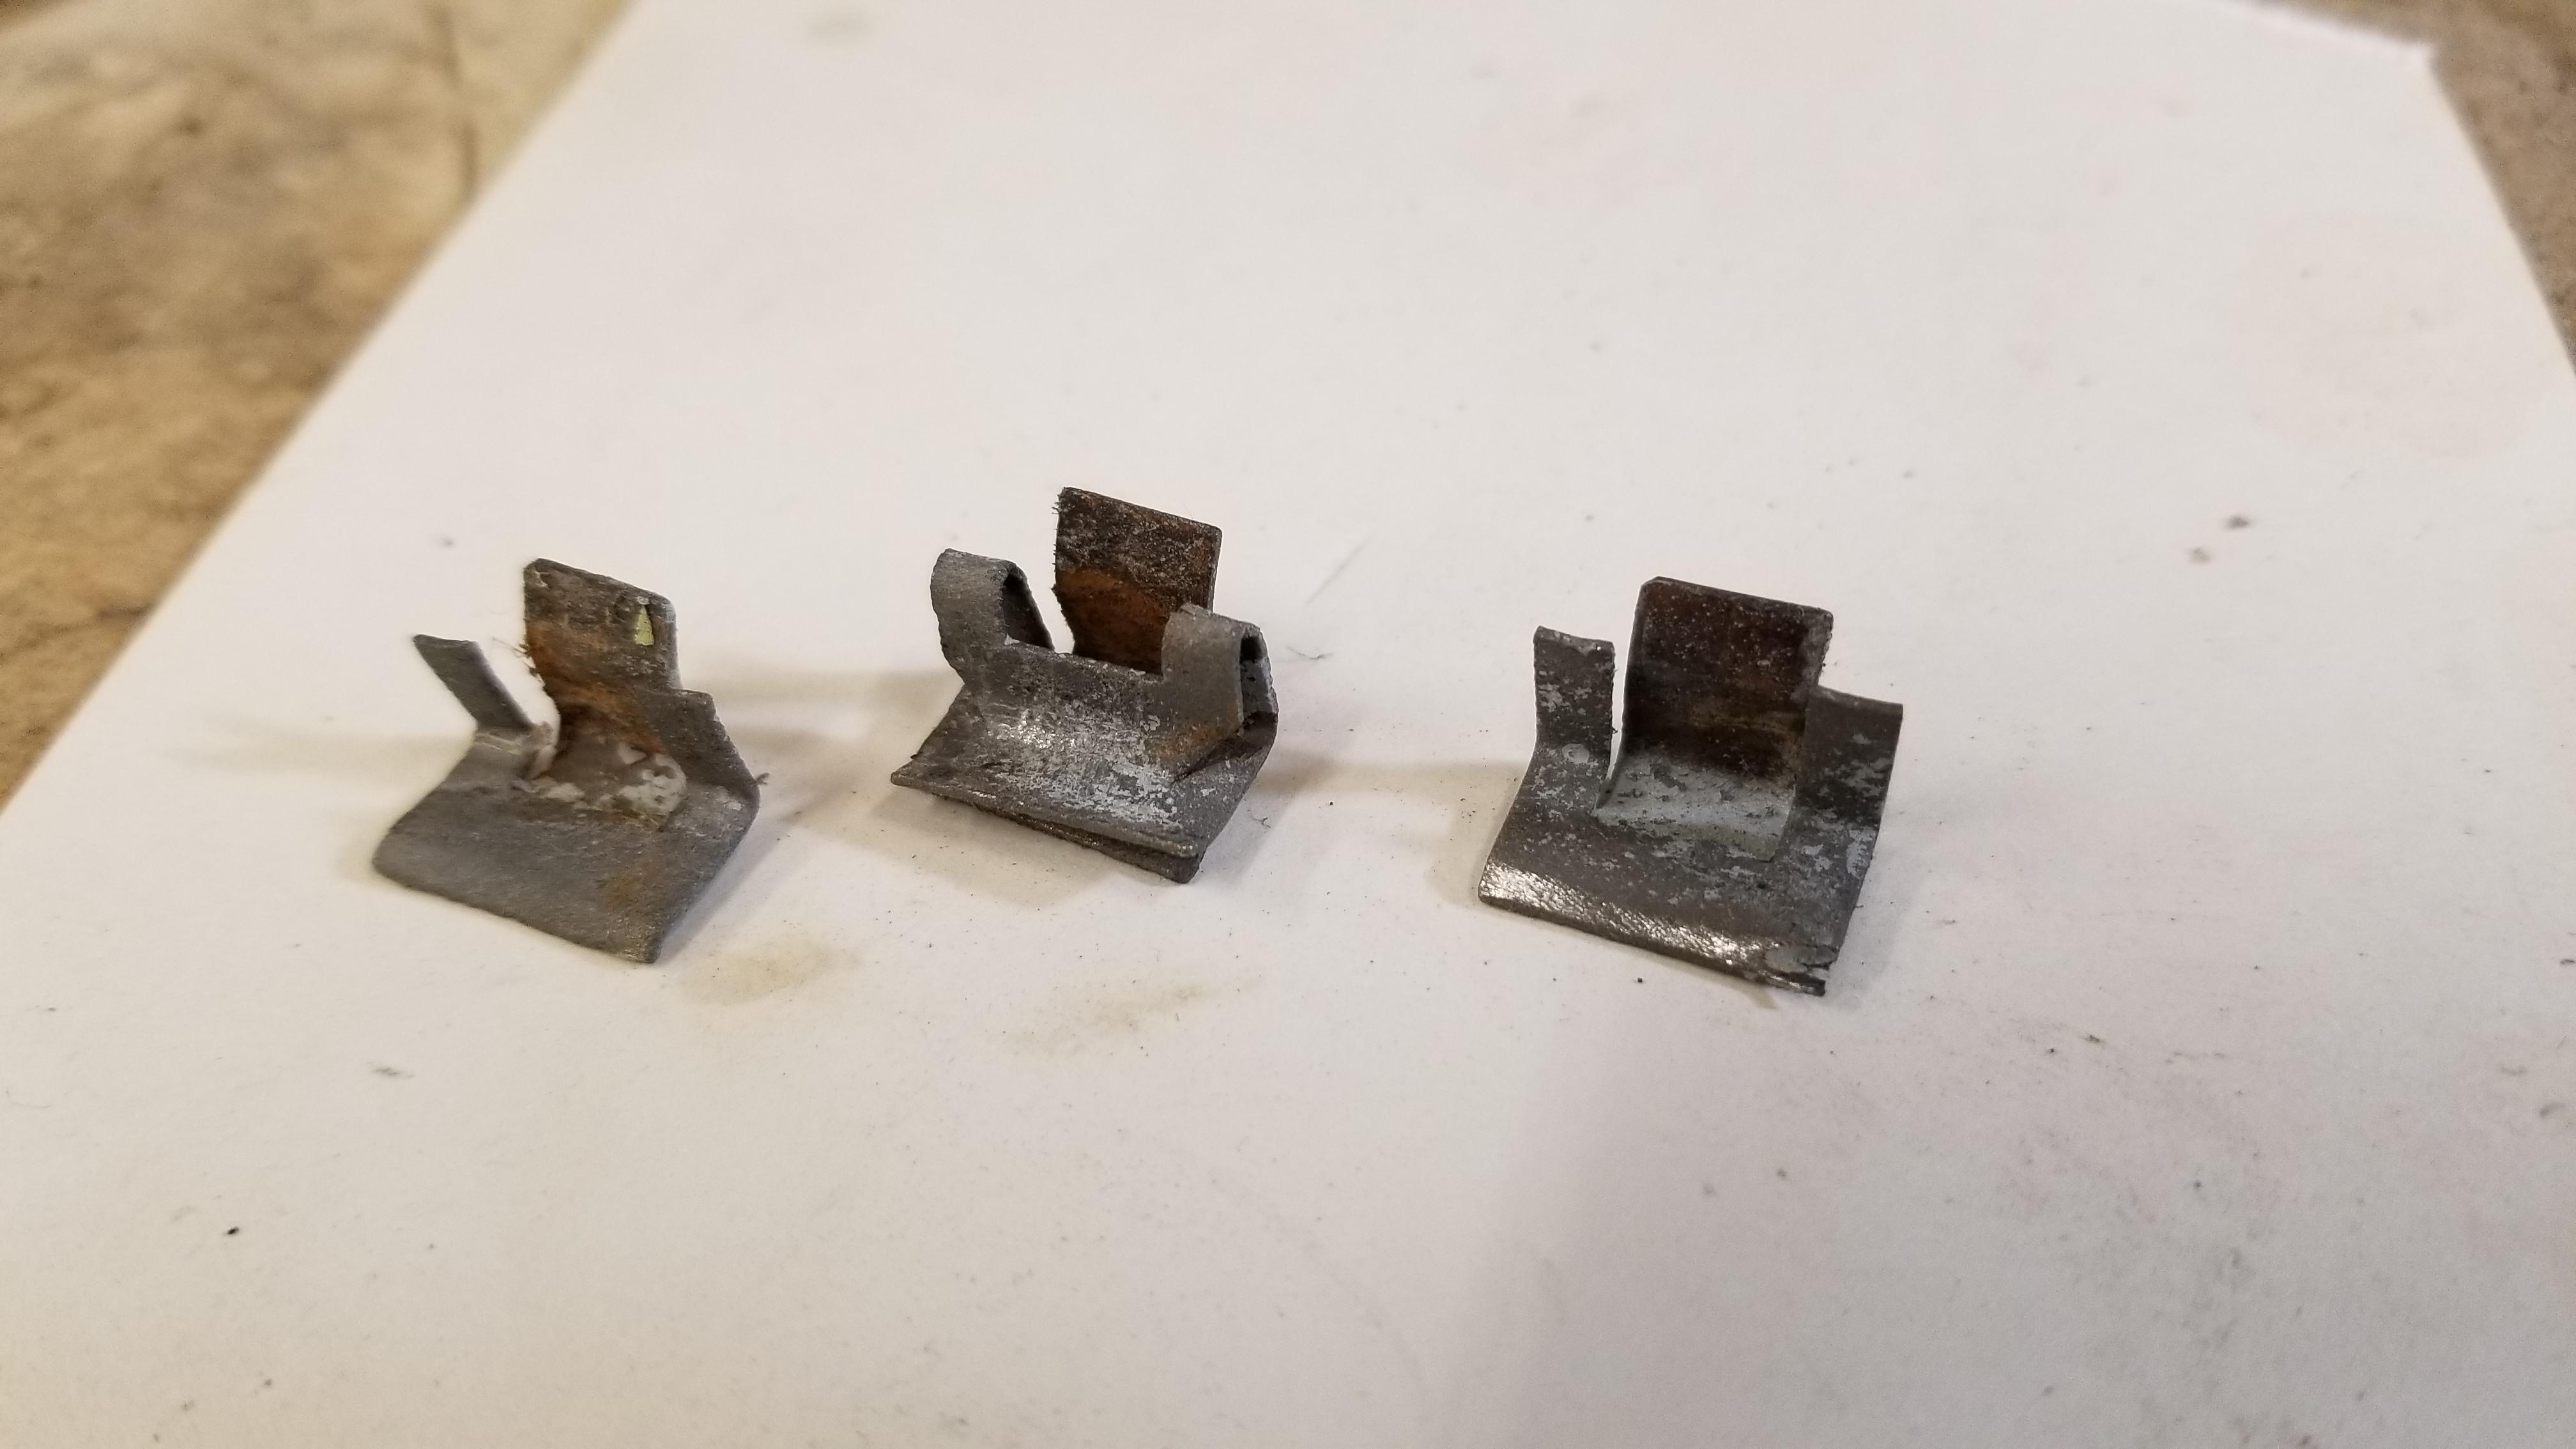
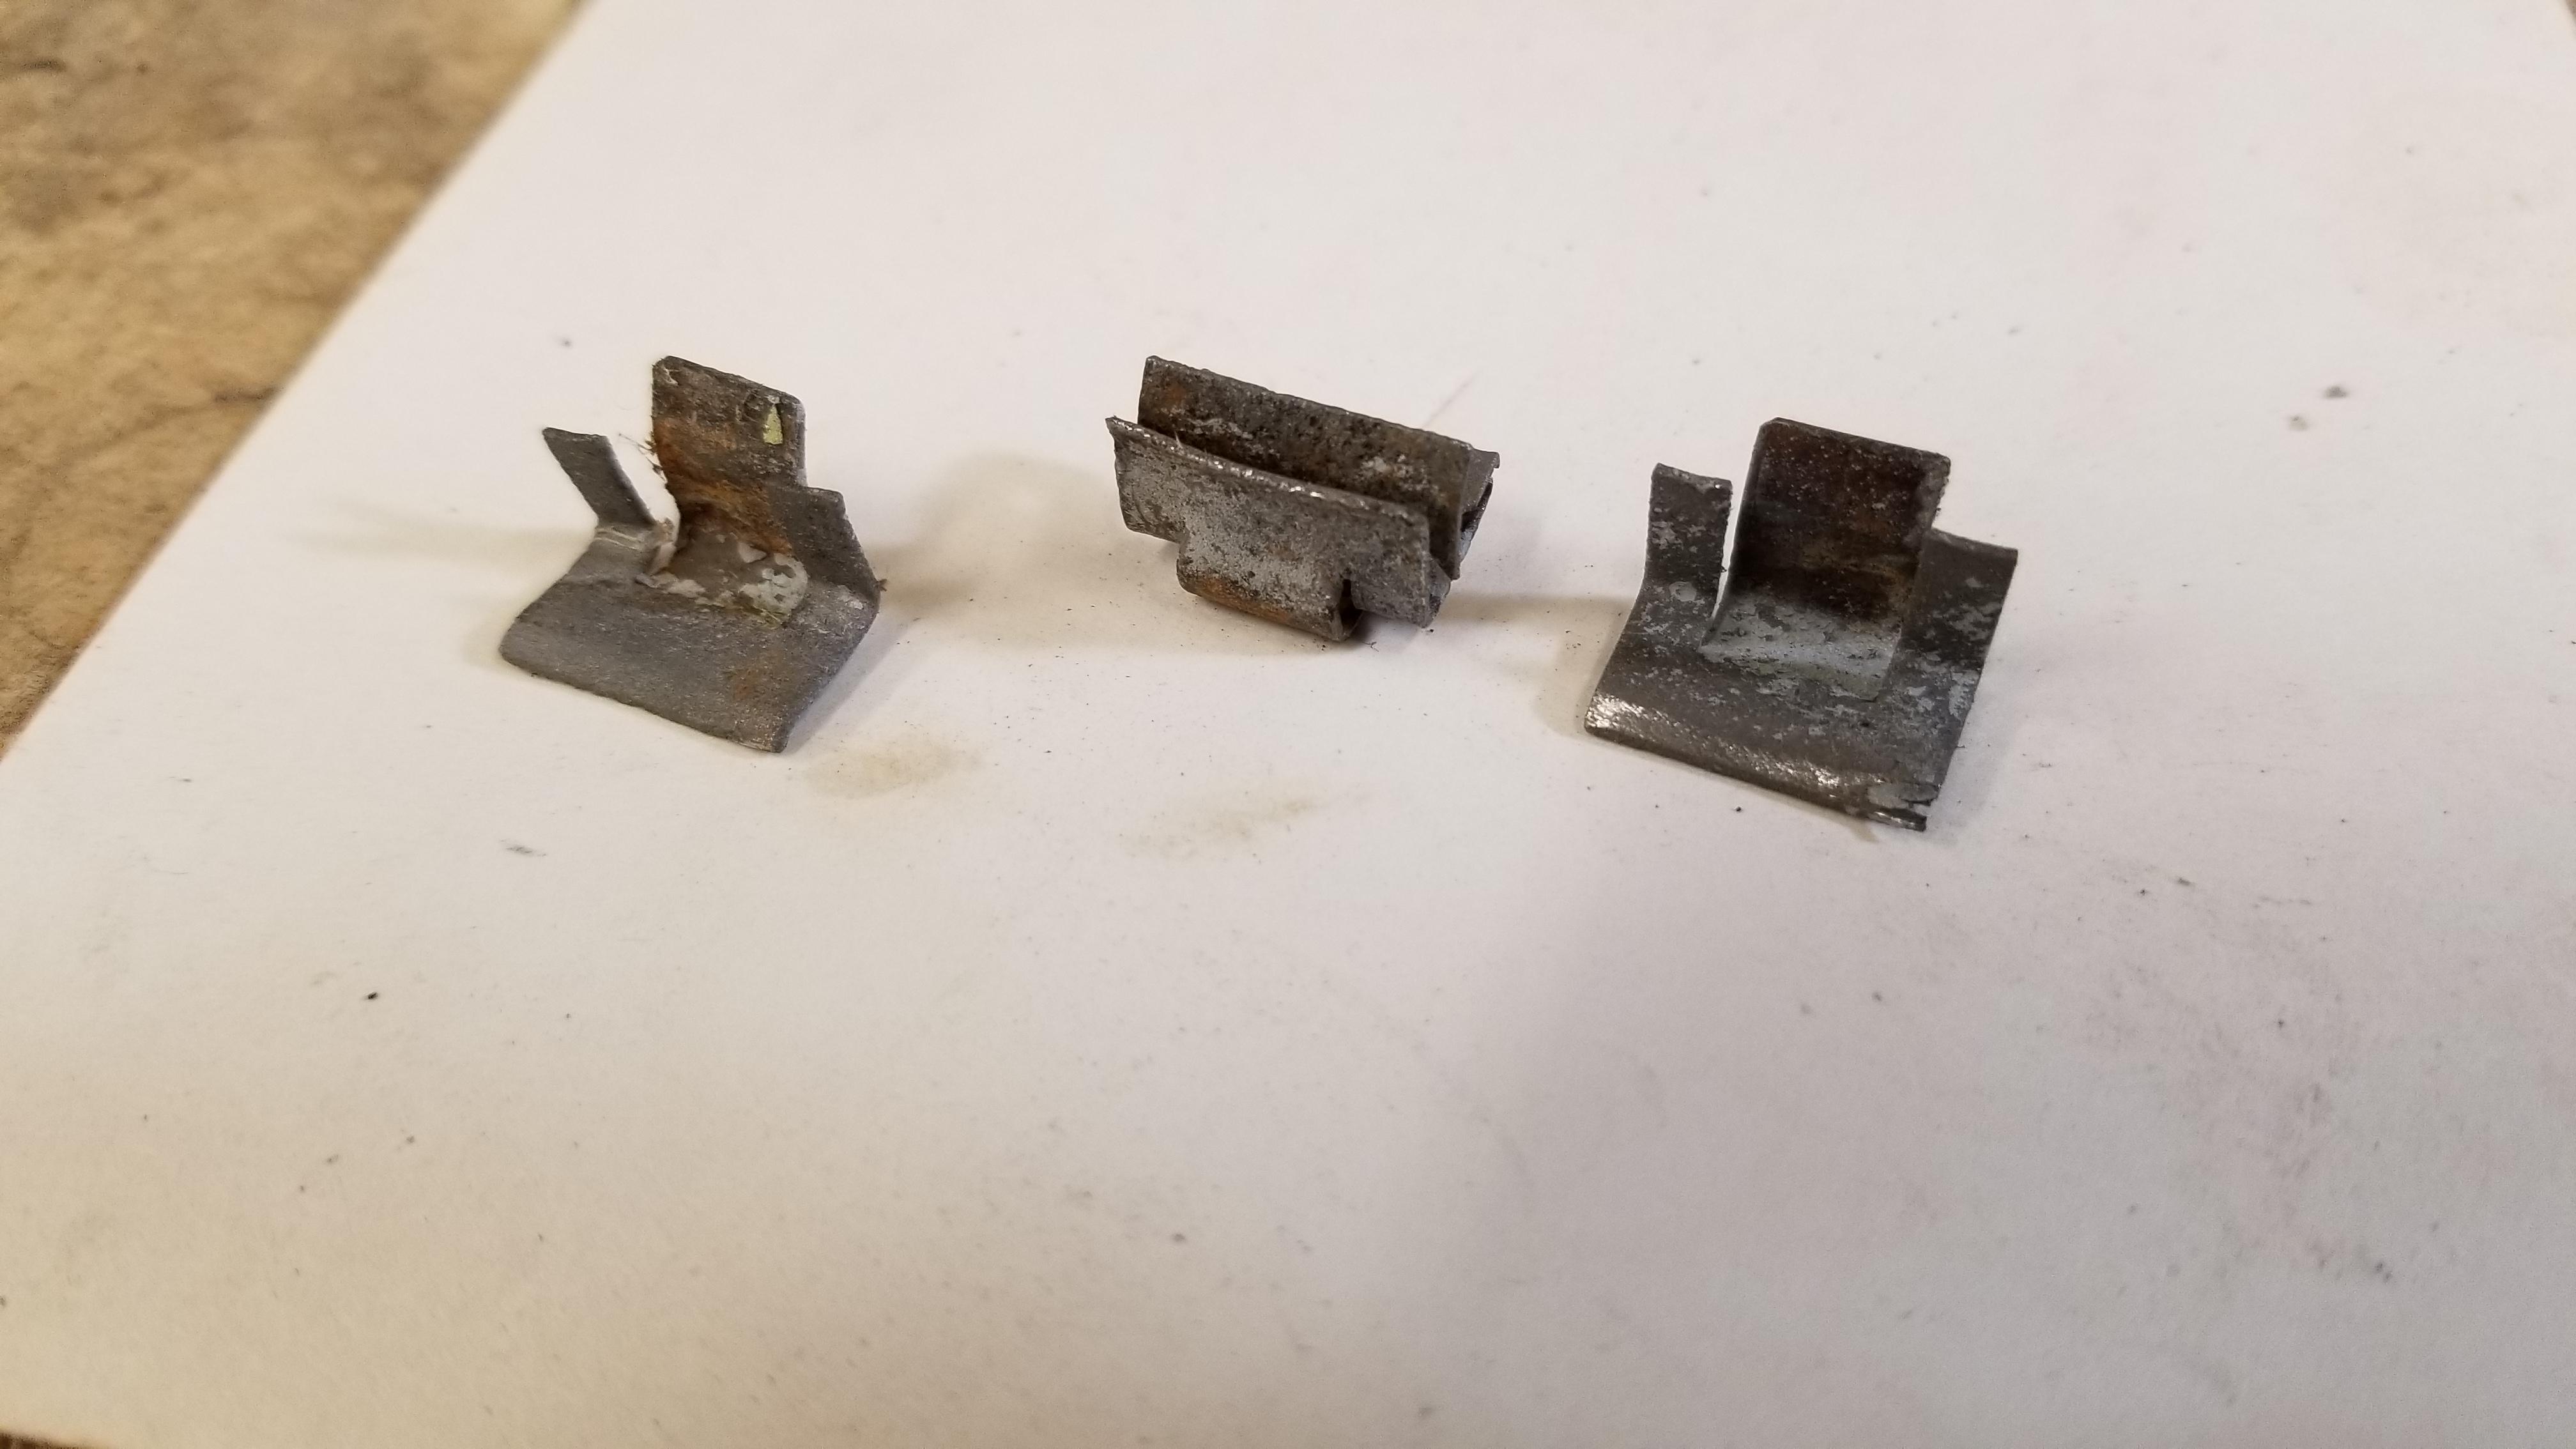
 1 point1 pointHere are some of the clips. Two halves and a whole. the whole one is cracked on top. They are difficult to get off. You have to bend the tab up some to get them off. I will prime them good before they go back on the car. Then readjust the welded tabs
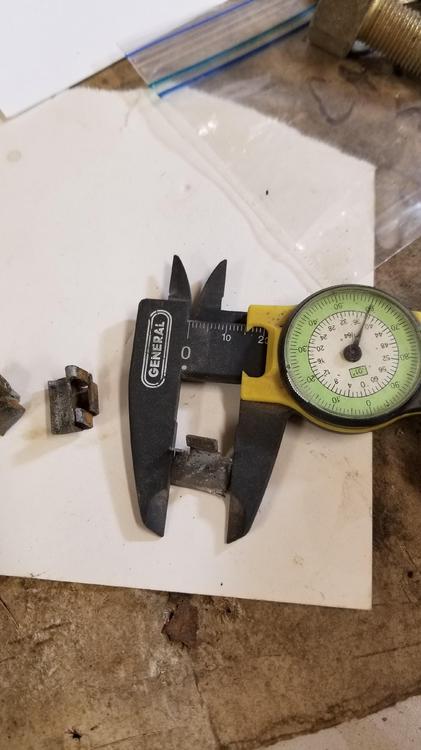


 1 point1 point1 pointGuys, just because he lists it at 54,000 mi. doesn't mean he's a scammer, BaT does exactly the same thing, they list what is displayed on the odo. So there is also a pic of the hand written service book, that could have been written by the present owner or a previous owner who may have been mistaken. Unless you have a stack of shop invoices from day one with mileage recorded then how do you know what the engine really has? It certainly doesn't look like a quarter of a million mile car.1 point1 pointHoovered another HLS30-00007 off road picture for your viewing pleasure. Note the rubber rear bumper guard, and missing "D" in hubcap These early Z photos also had similar hub caps: HLS30-00008
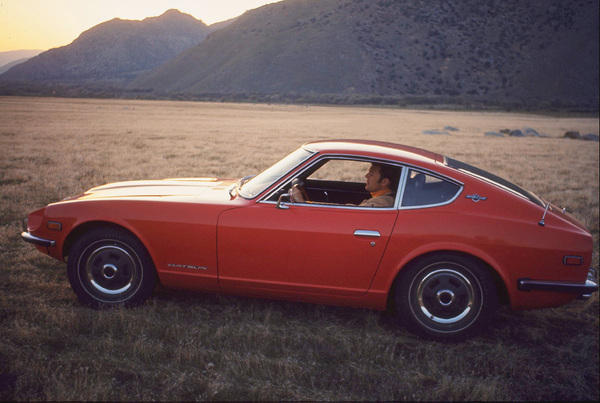

 1 pointYeah, unfortunately I've confirmed that the Smyrna accordion and fan assy is for the 240 and is incompatible with the later 260/280 system. So this one from OB won't be free or personally hand delivered, but at least I'll have one! I'm not spoiled... Haha!!1 point


Important Information
By using this site, you agree to our Privacy Policy and Guidelines. We have placed cookies on your device to help make this website better. You can adjust your cookie settings, otherwise we'll assume you're okay to continue.