Leaderboard
-

Zed Head
Free Member3Points19,235Posts -
HaZmatt
Free Member3Points566Posts -

siteunseen
Free Member2Points15,115Posts -
Zedyone_kenobi
Free Member2Points3,440Posts


Popular Content
Showing content with the highest reputation on 10/16/2017 in Posts
-
2 pointsThanks Cliff. Since you are so far away, I'll have to share them with some of my other friends......
 2 points
 -
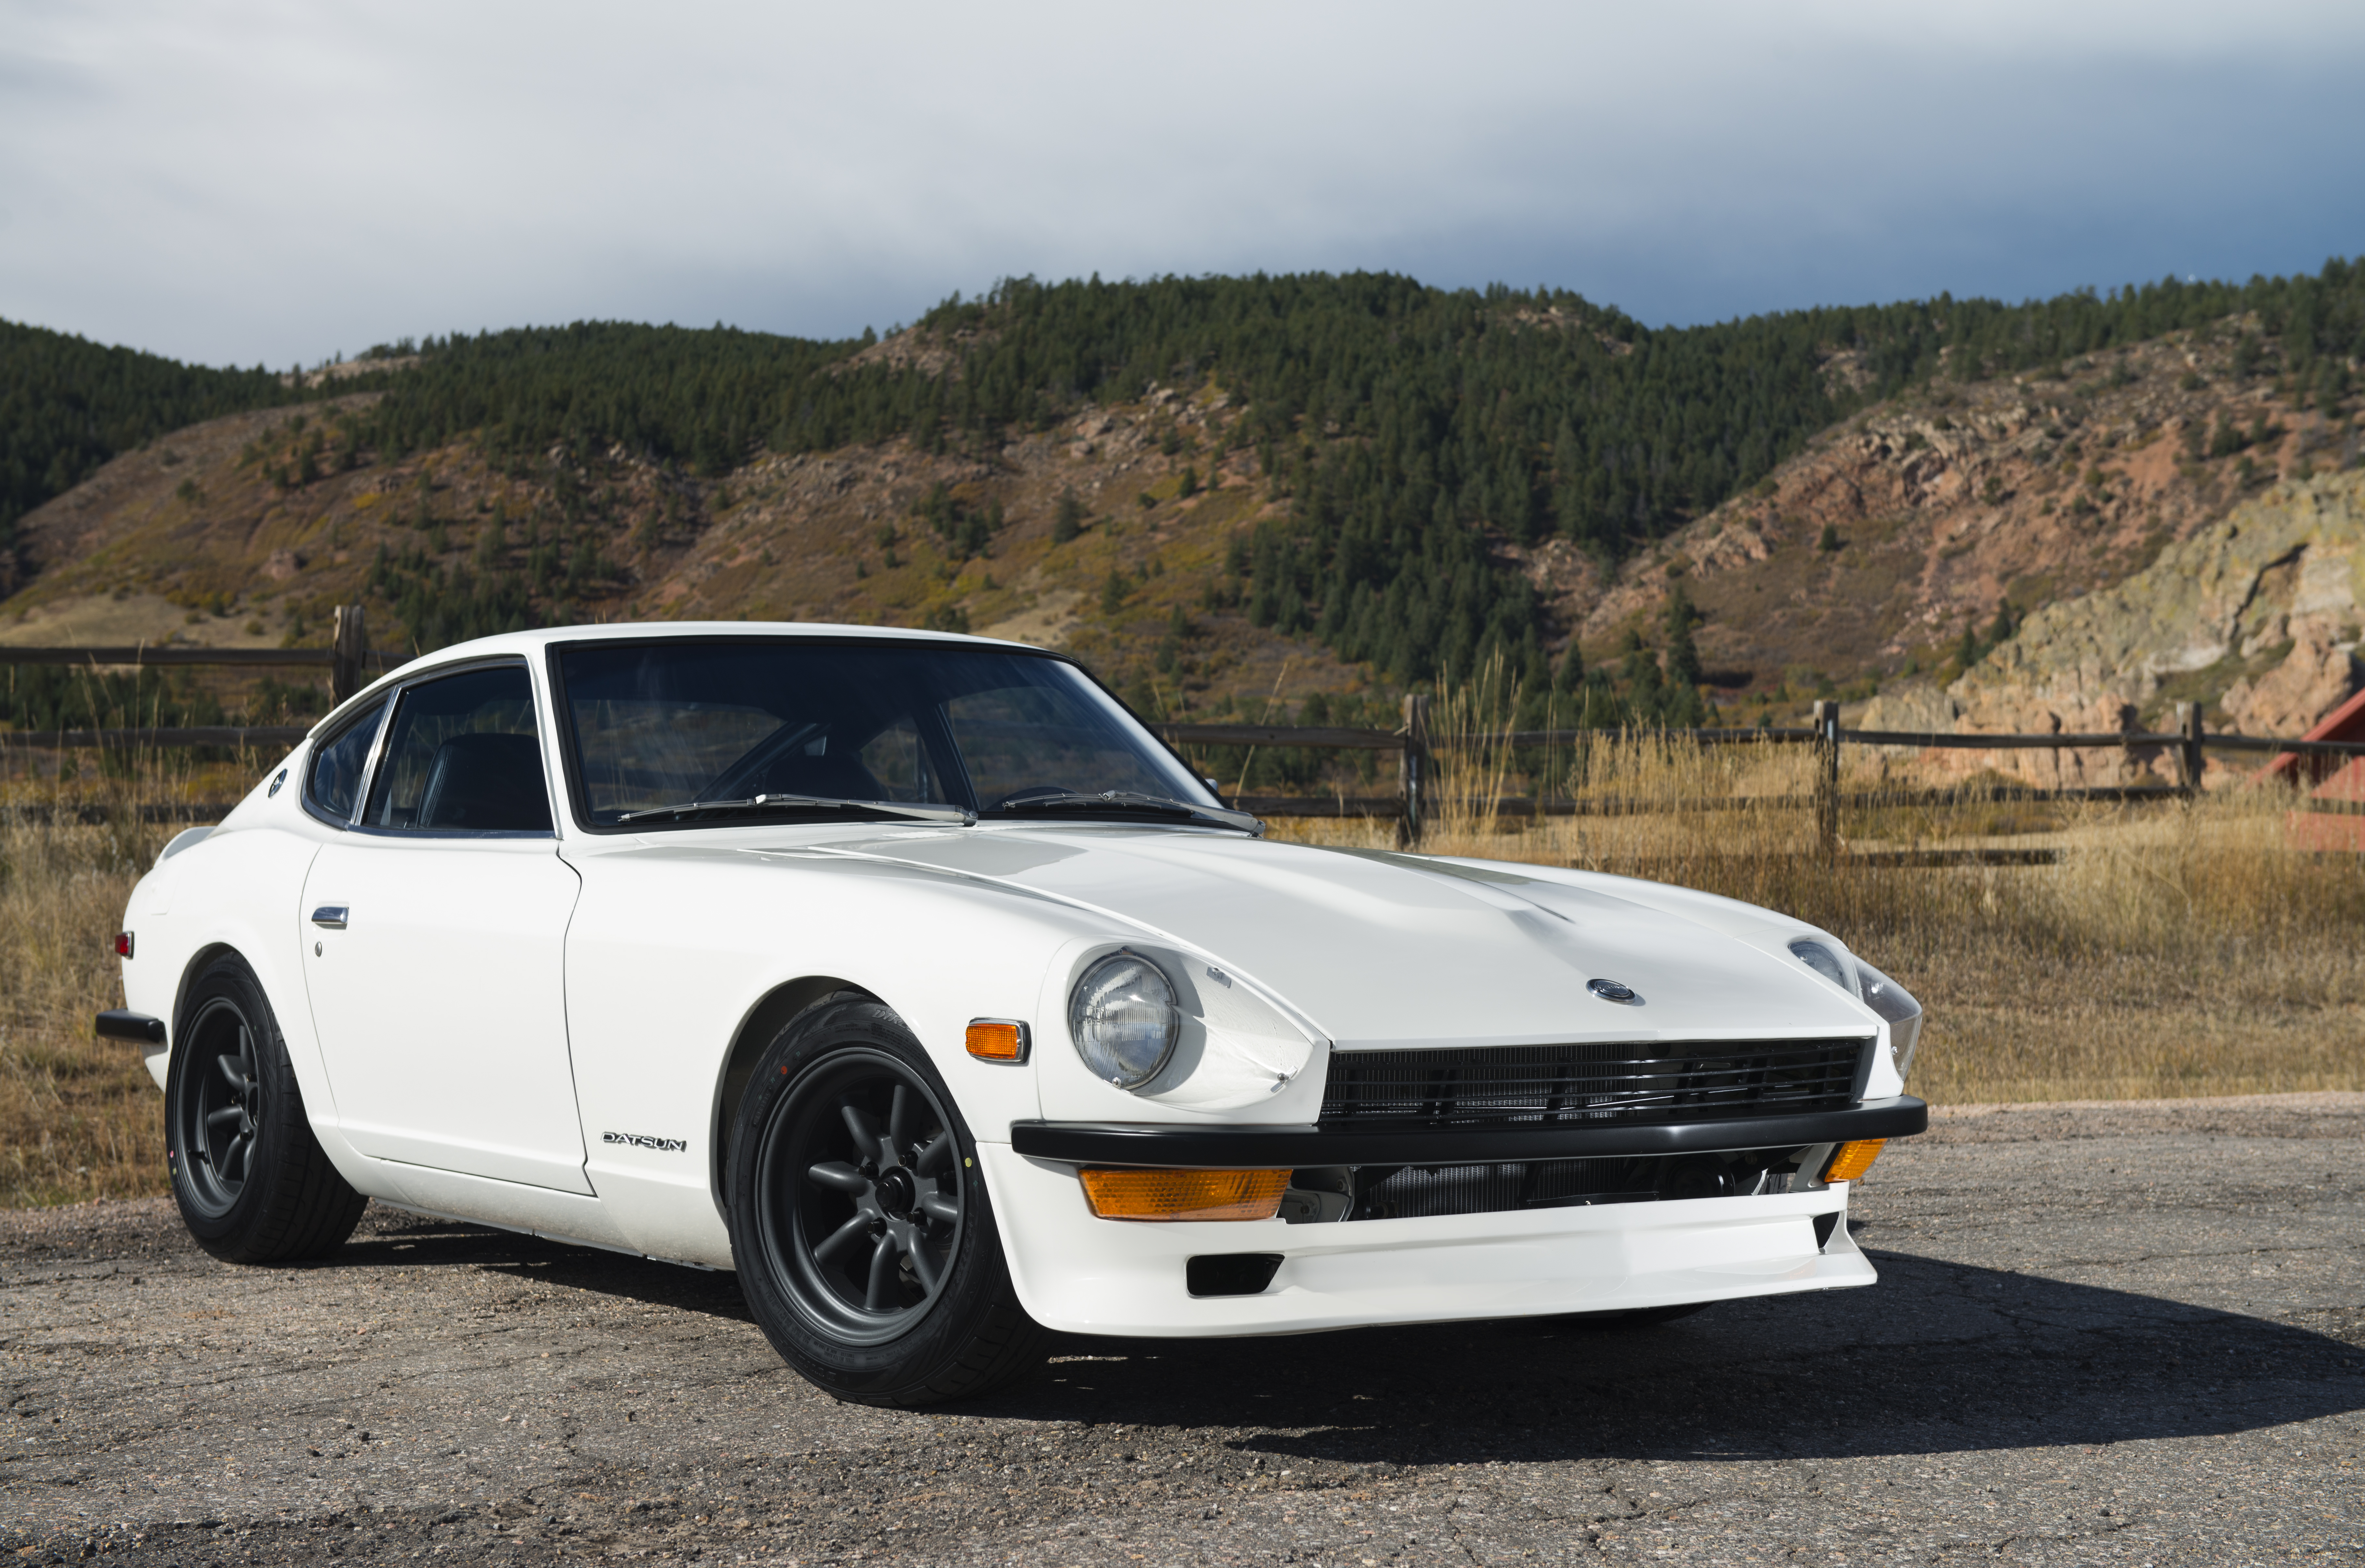
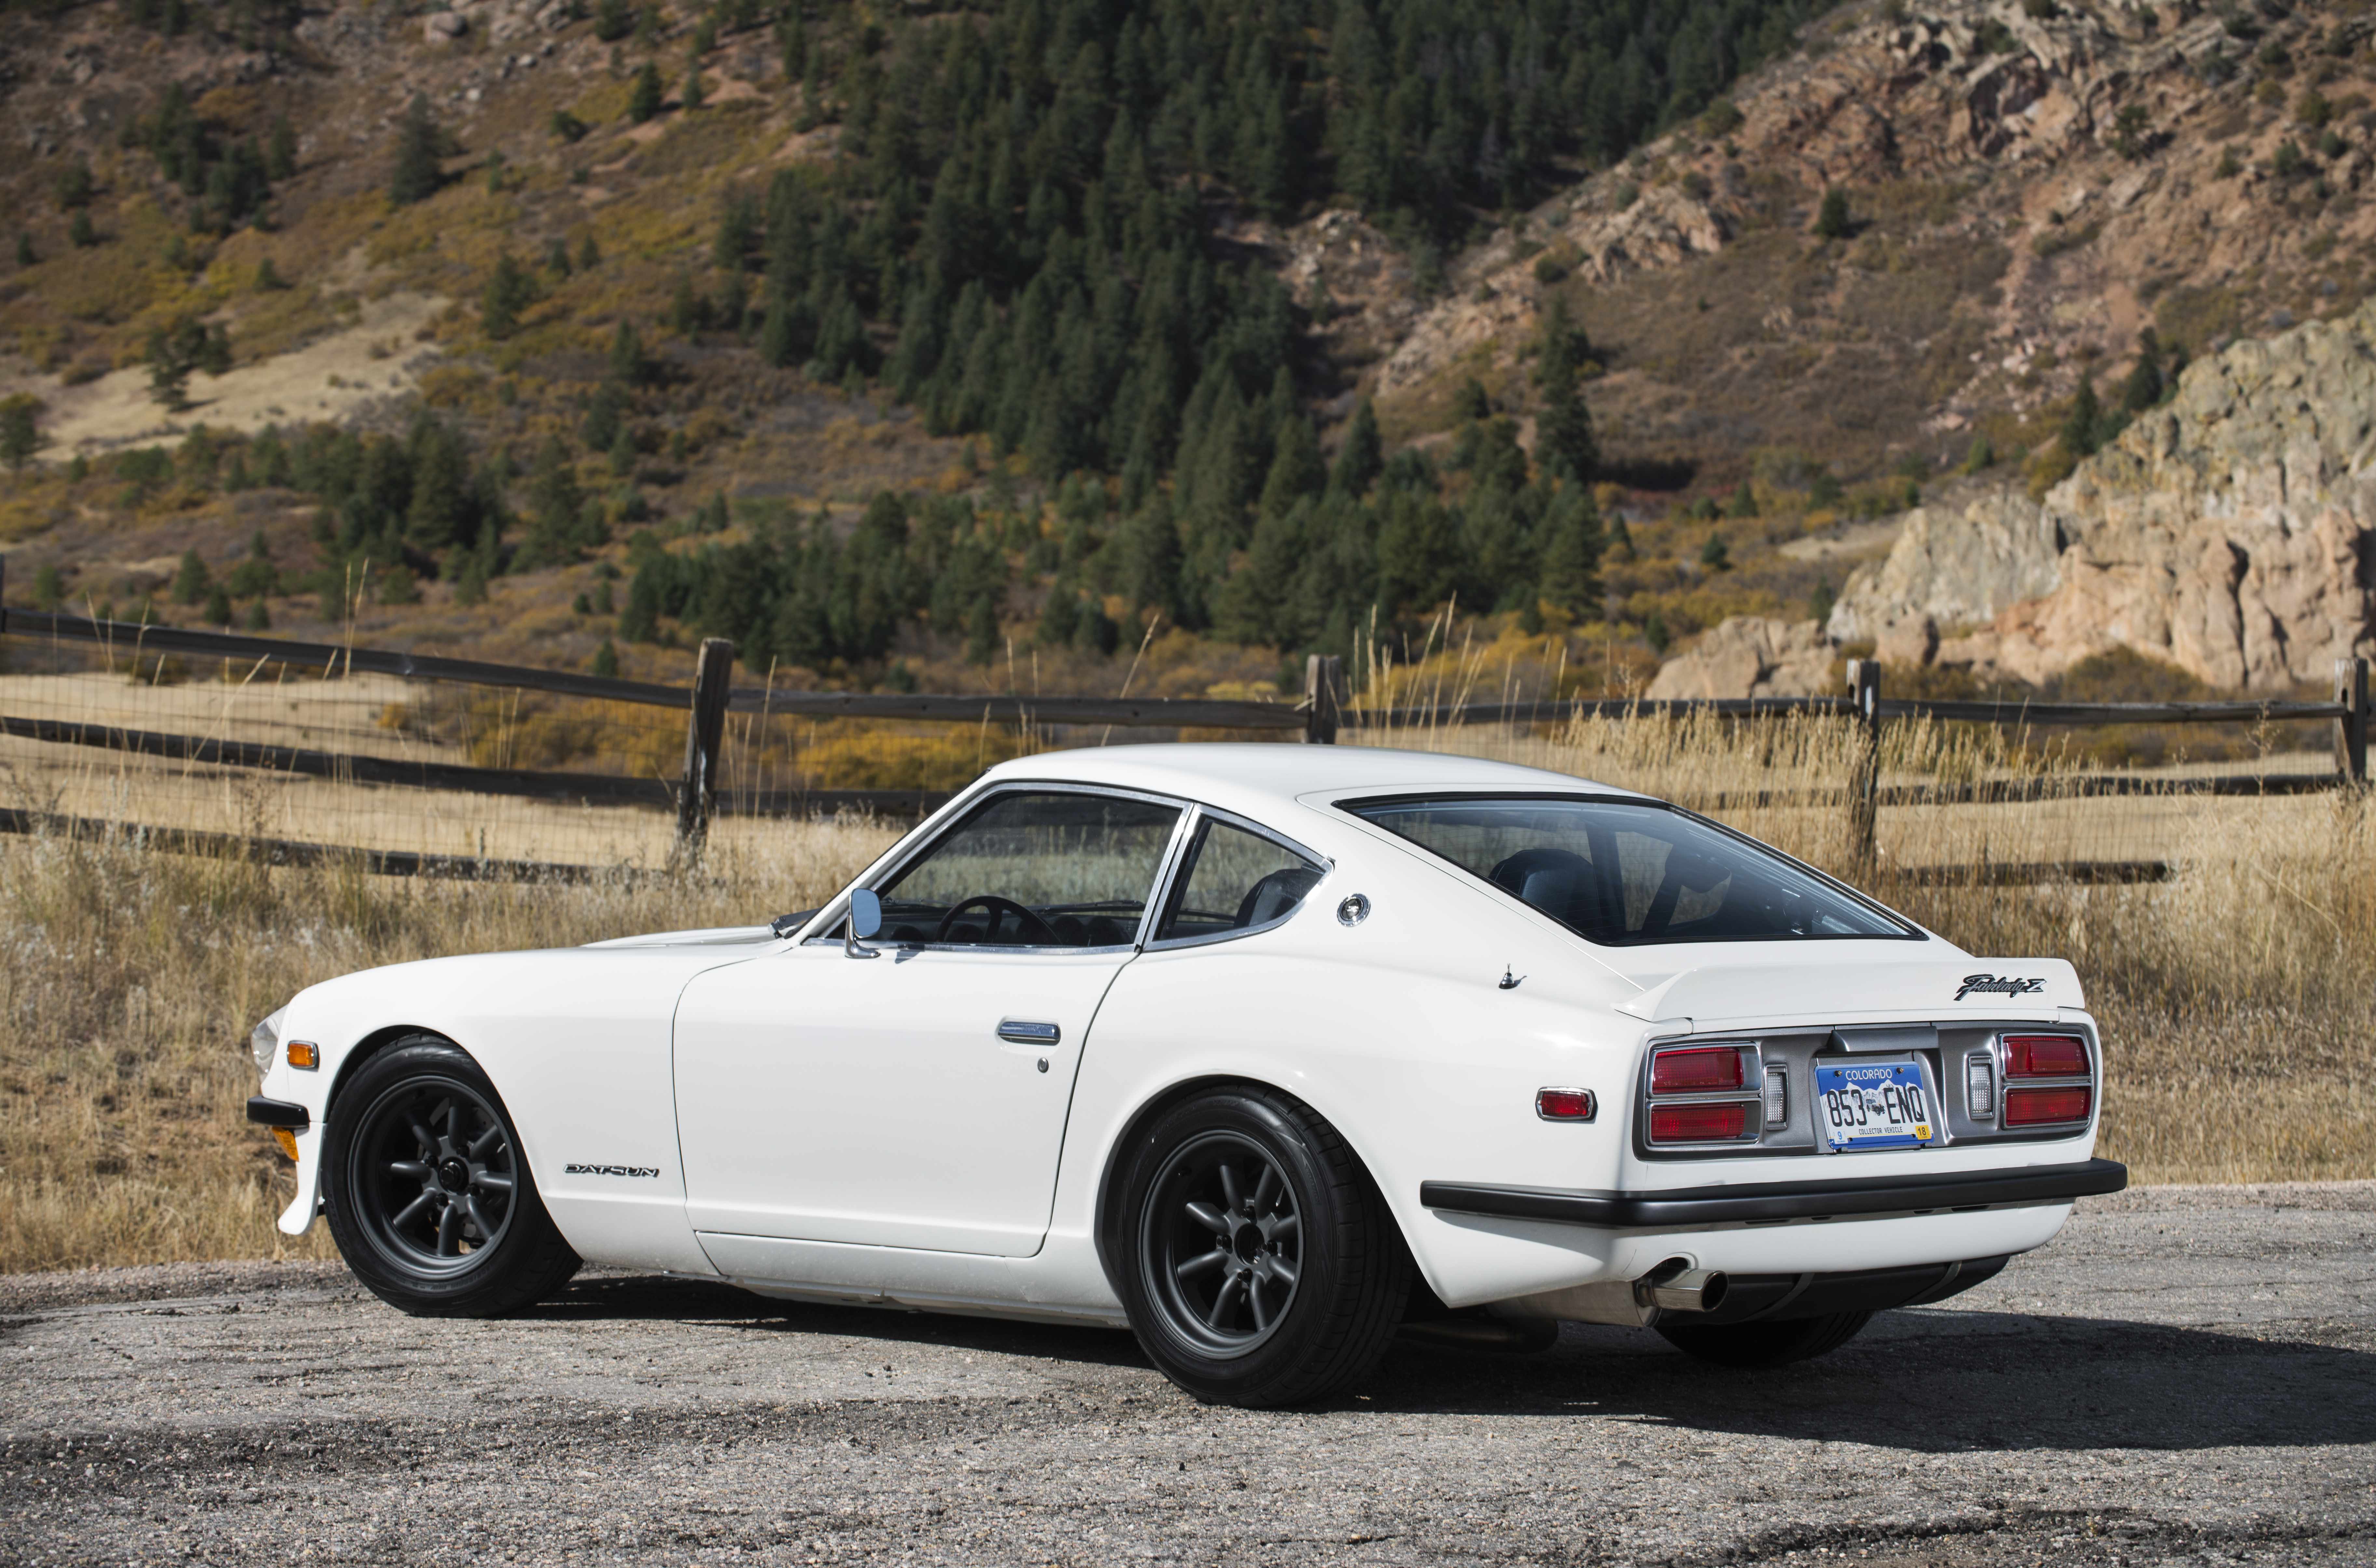
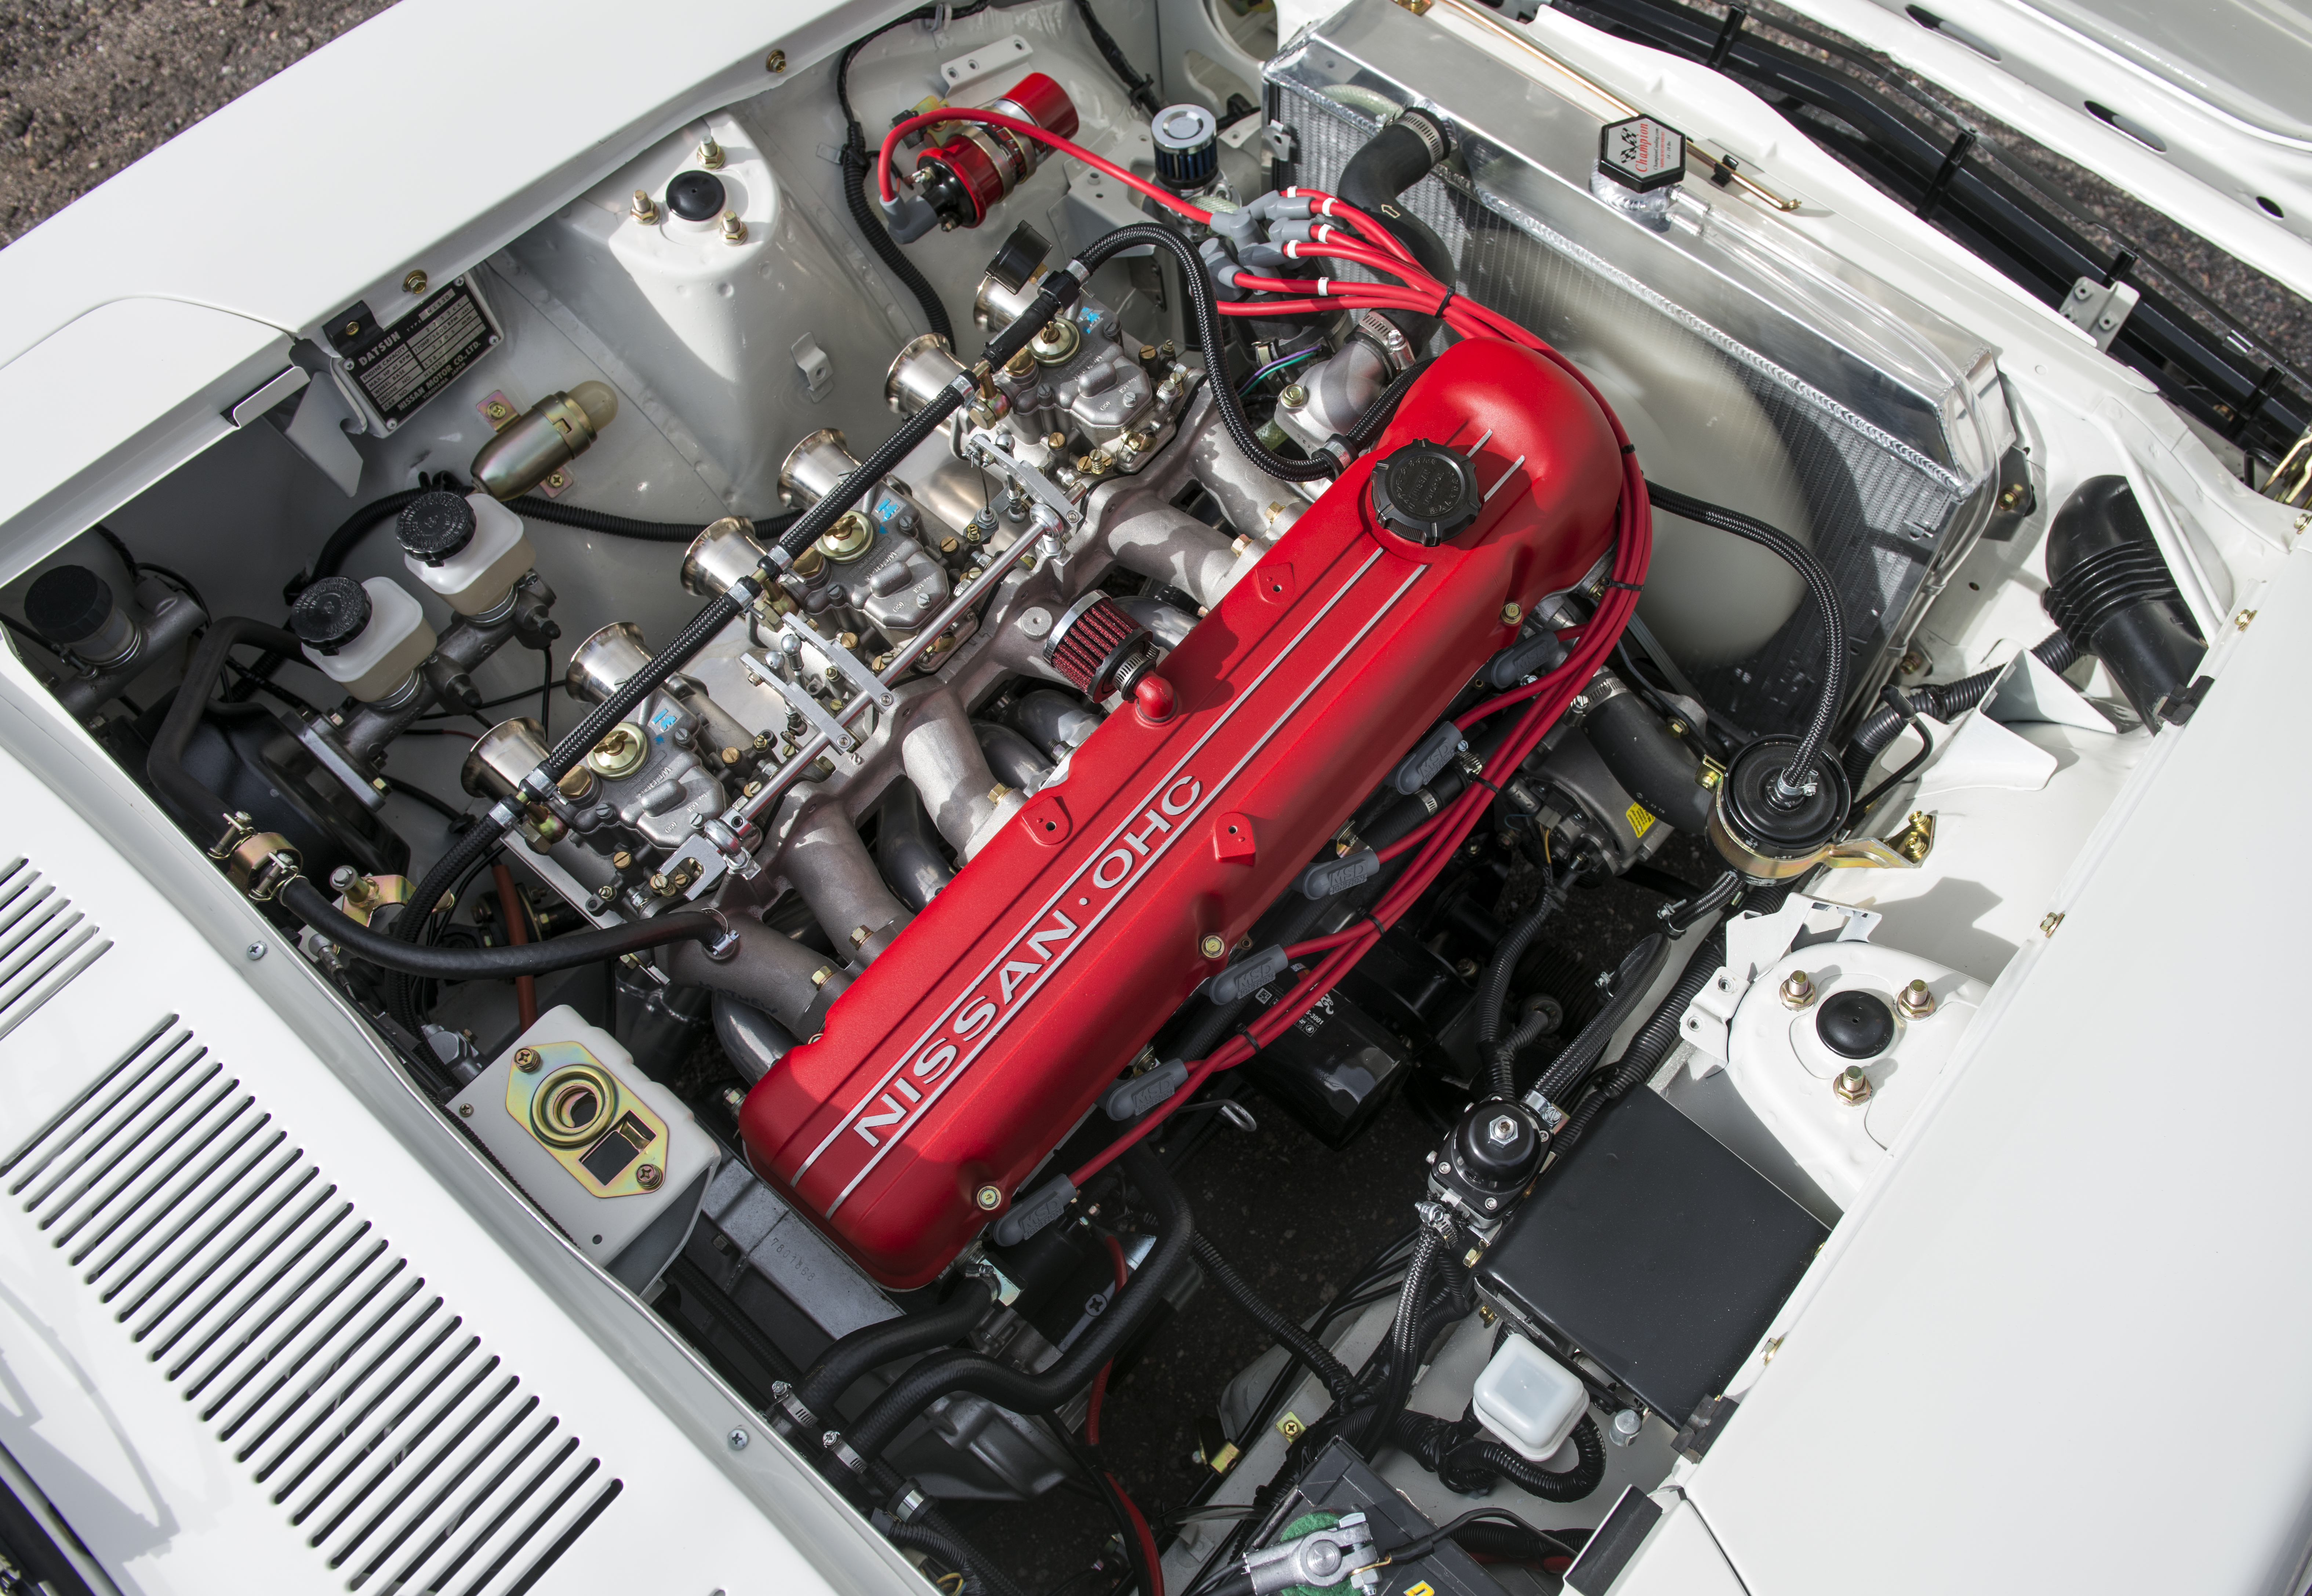
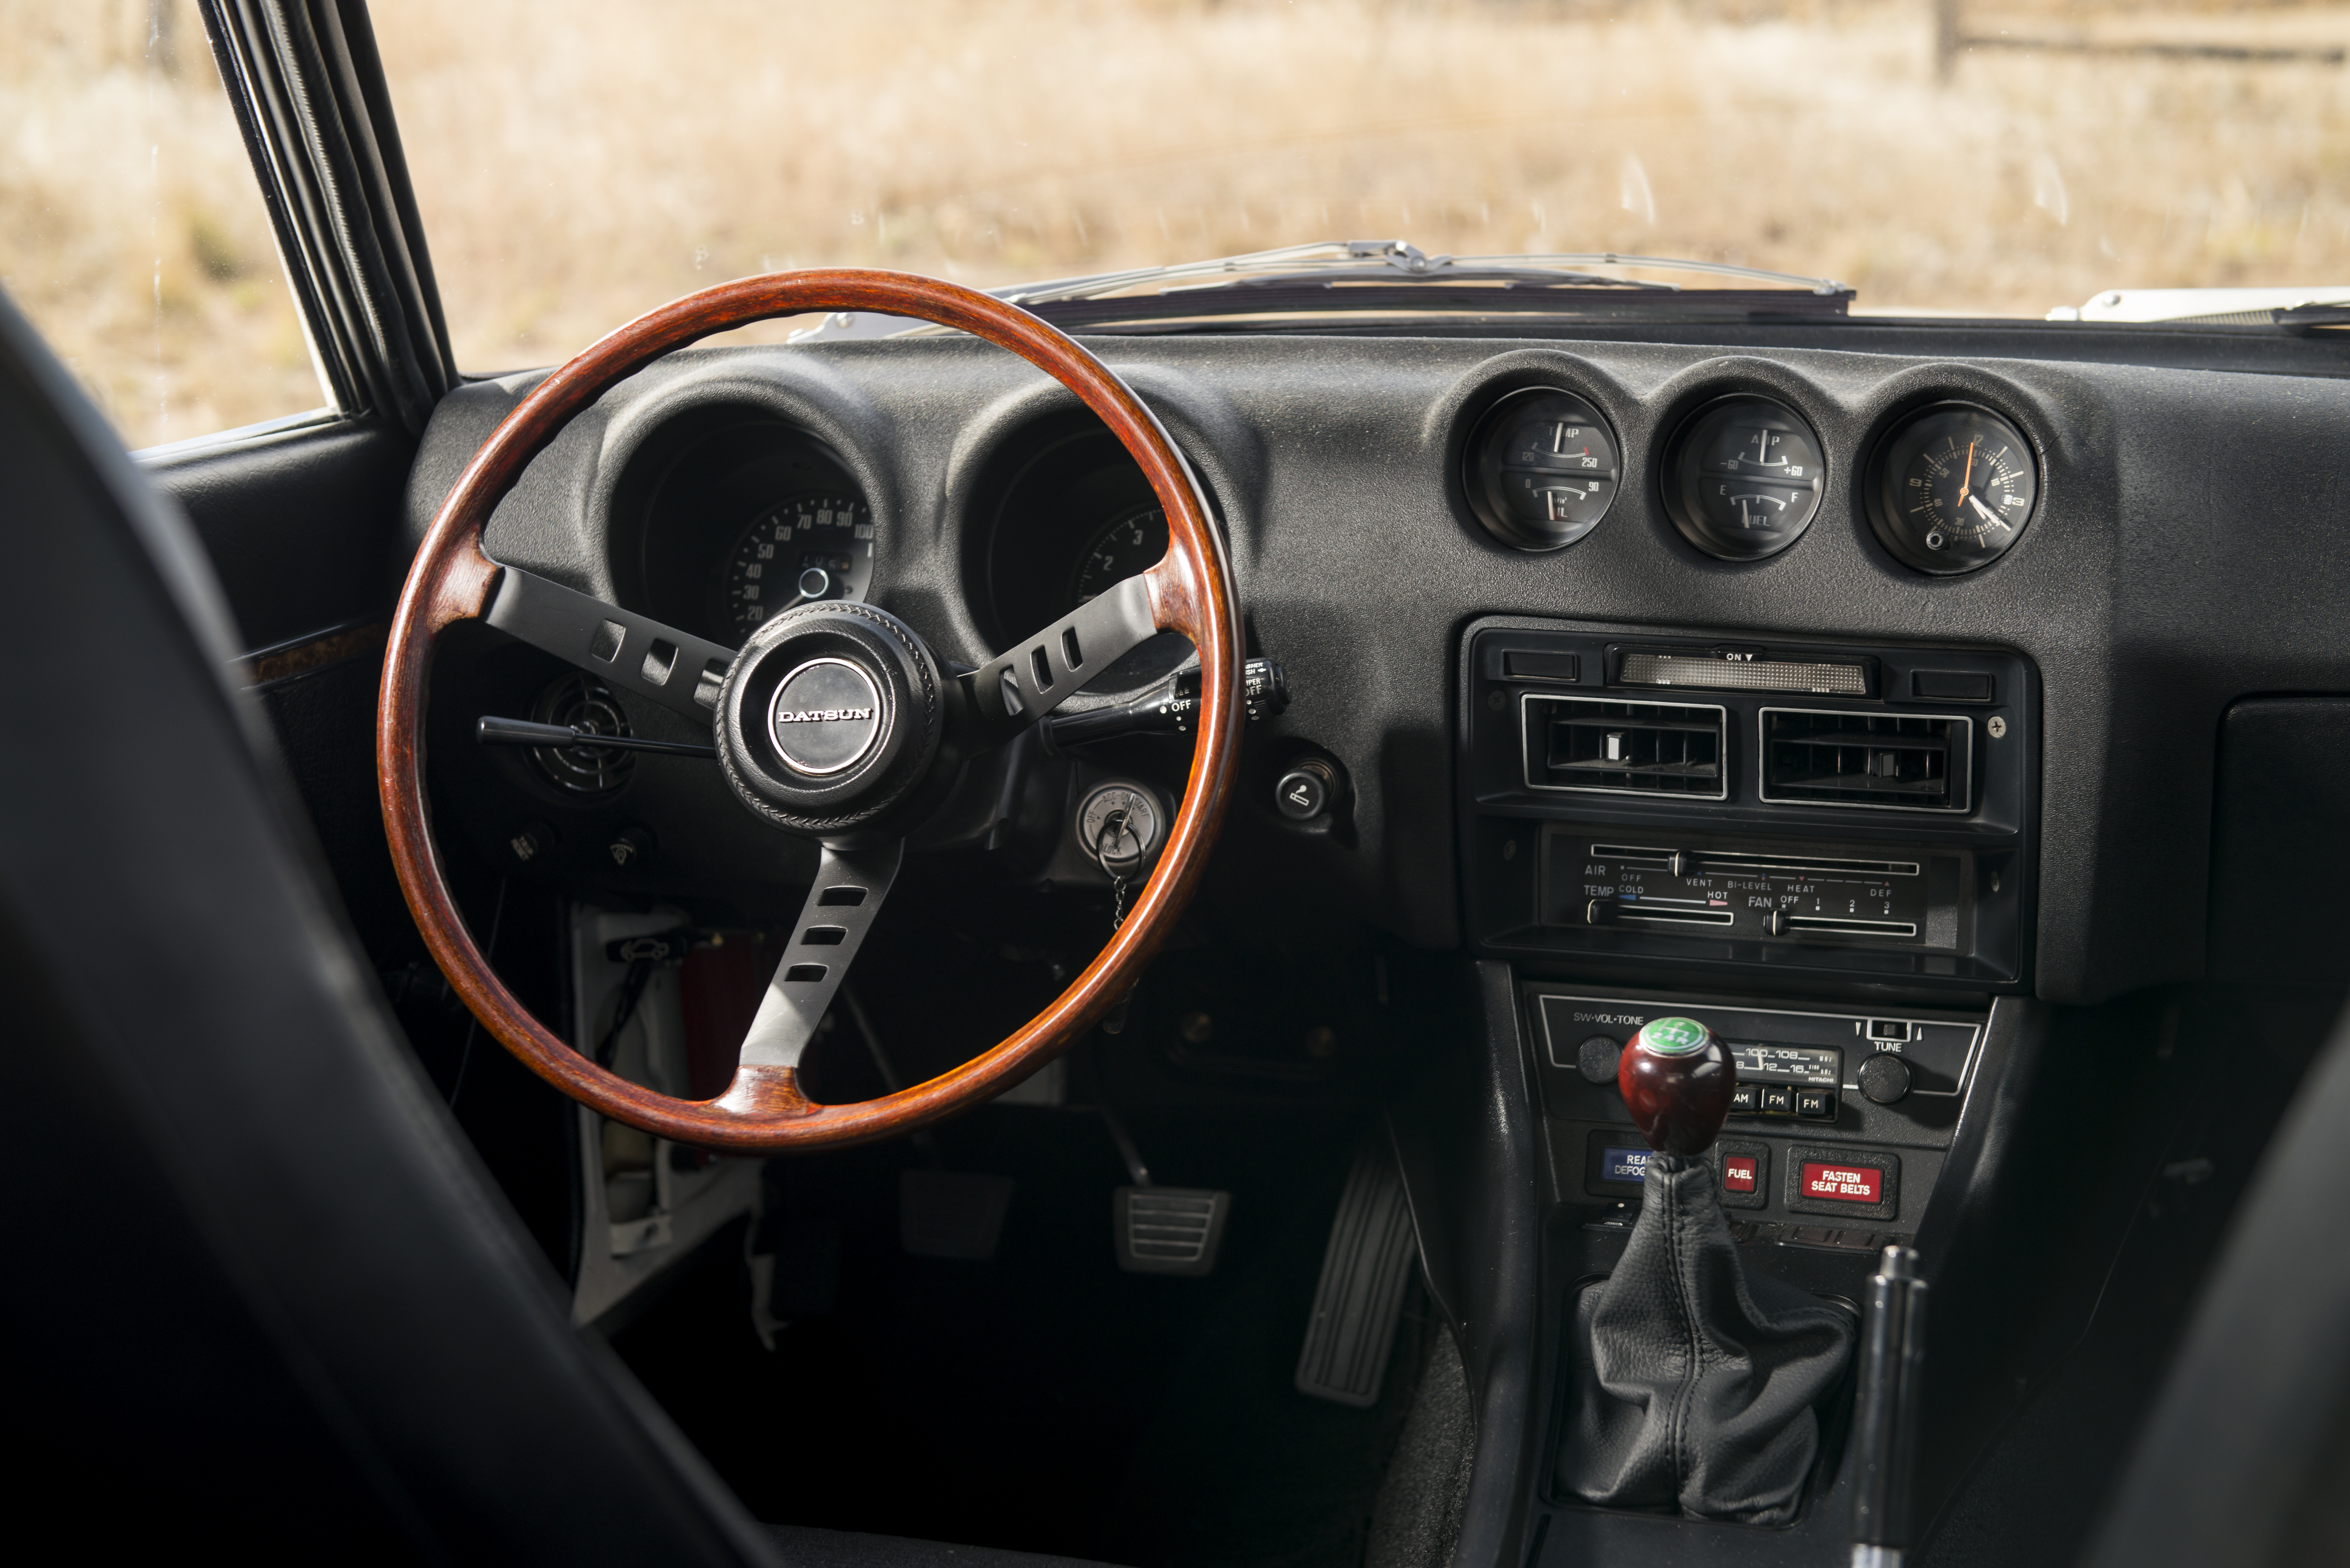
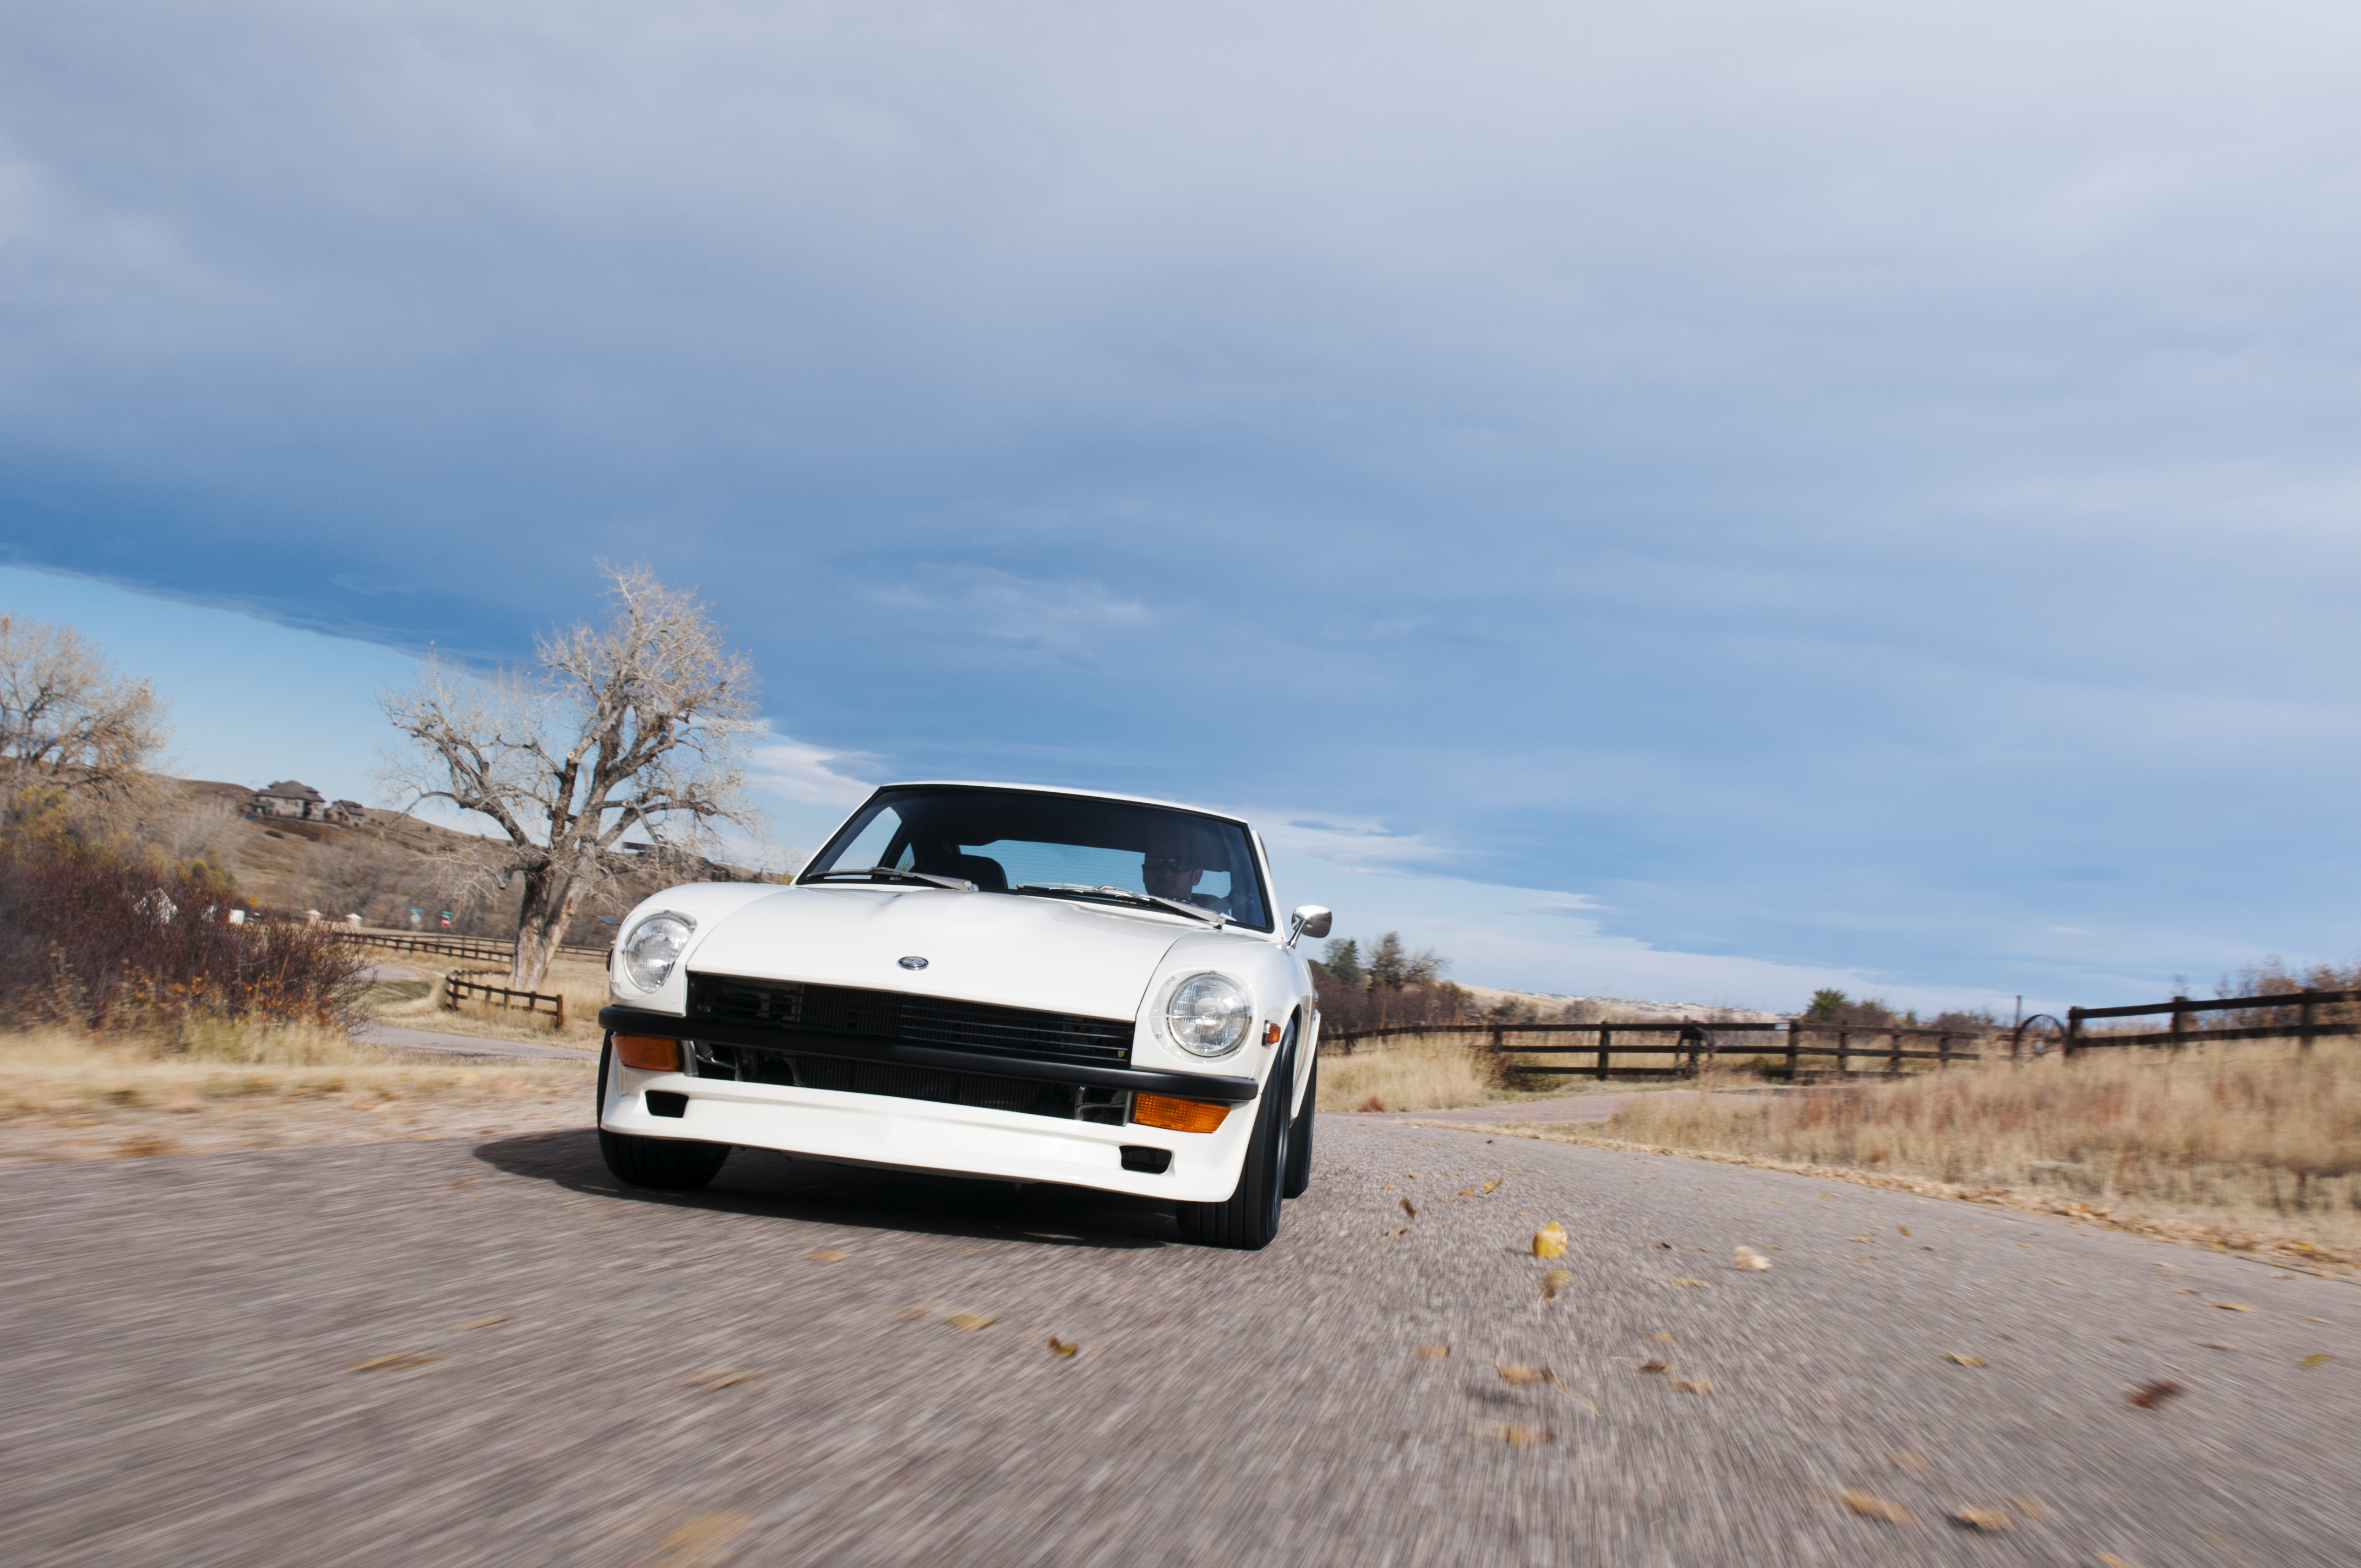
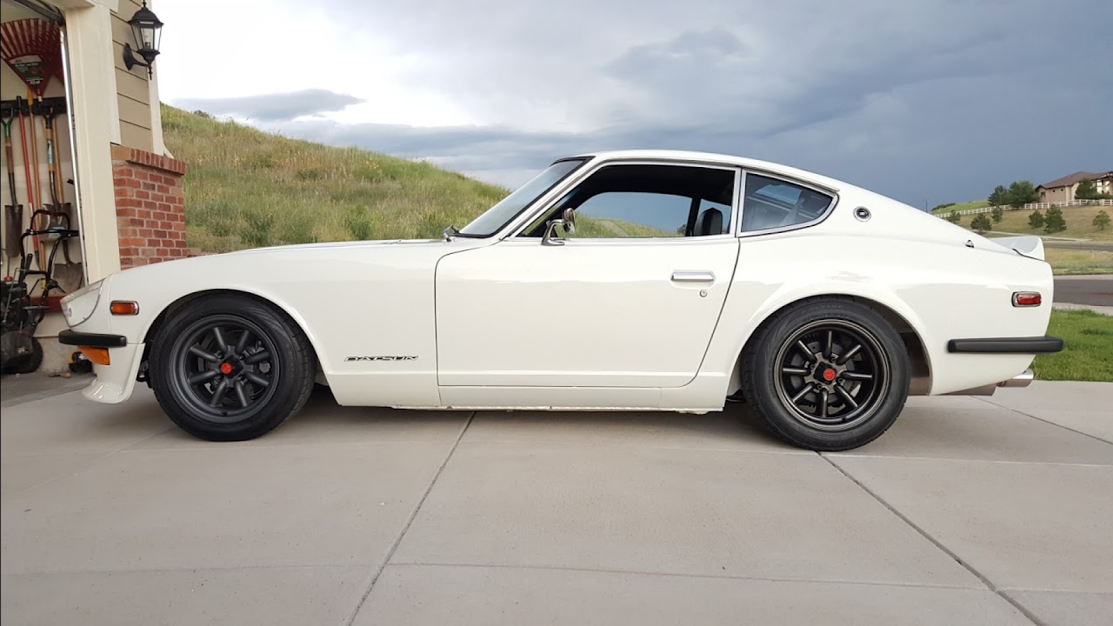
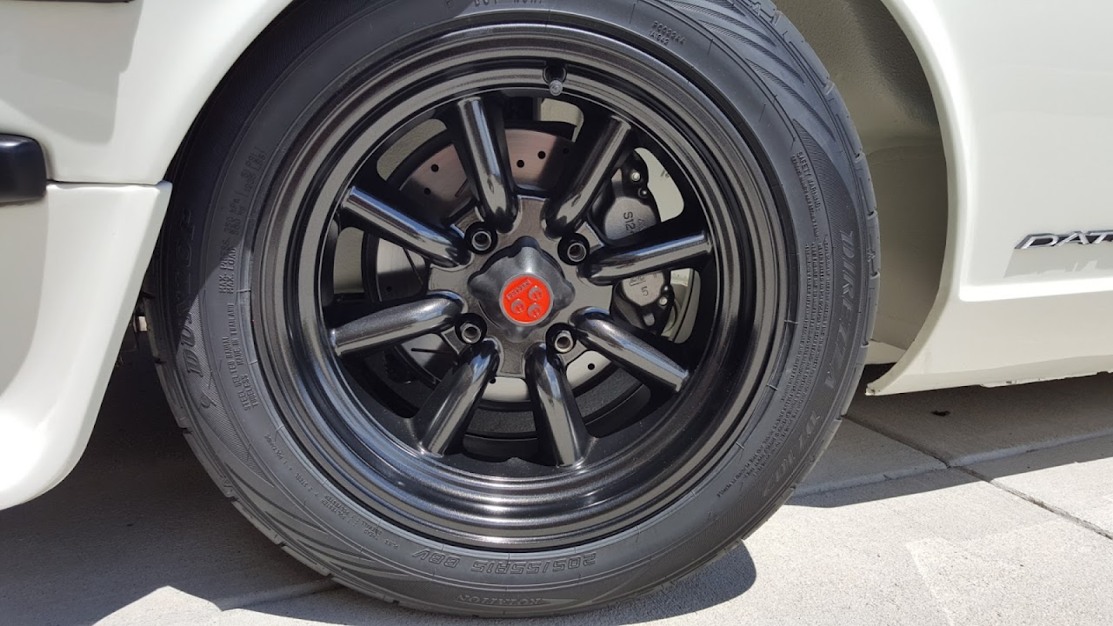
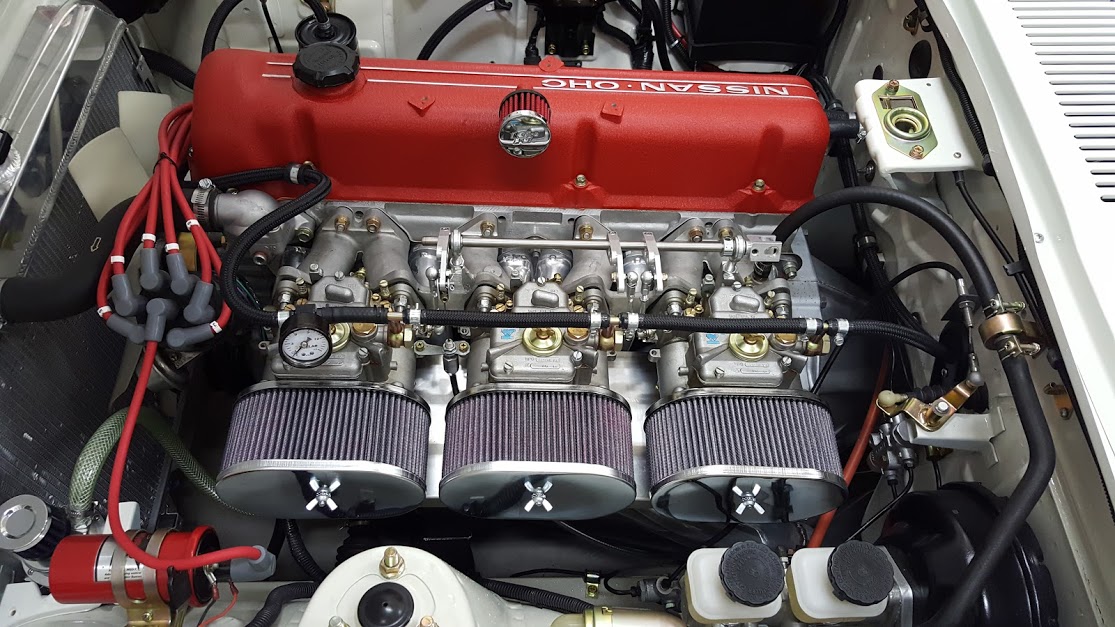
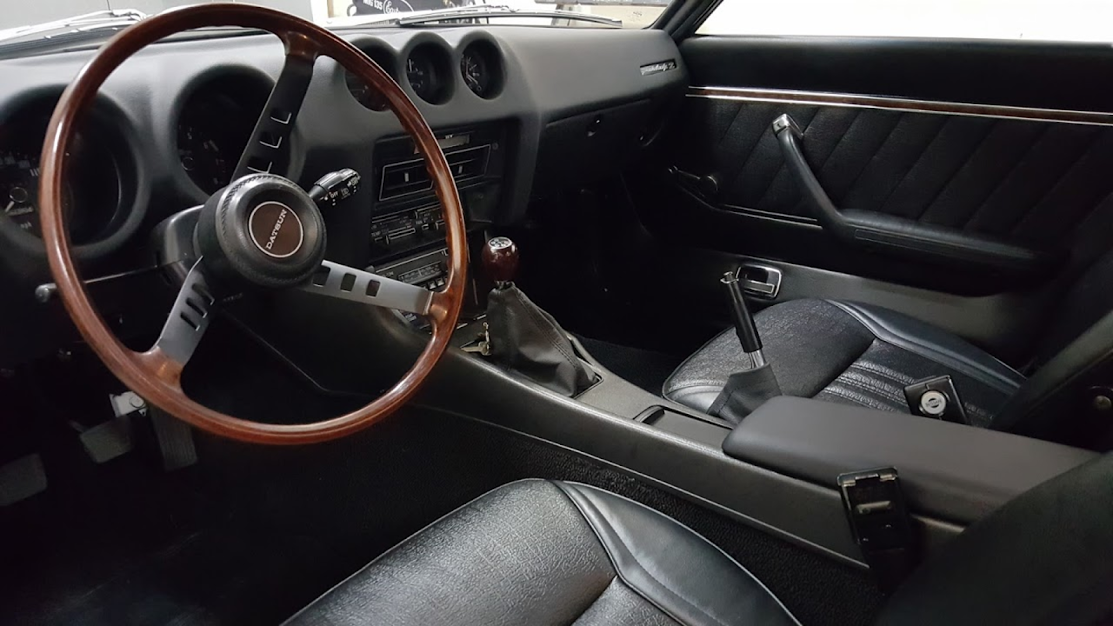
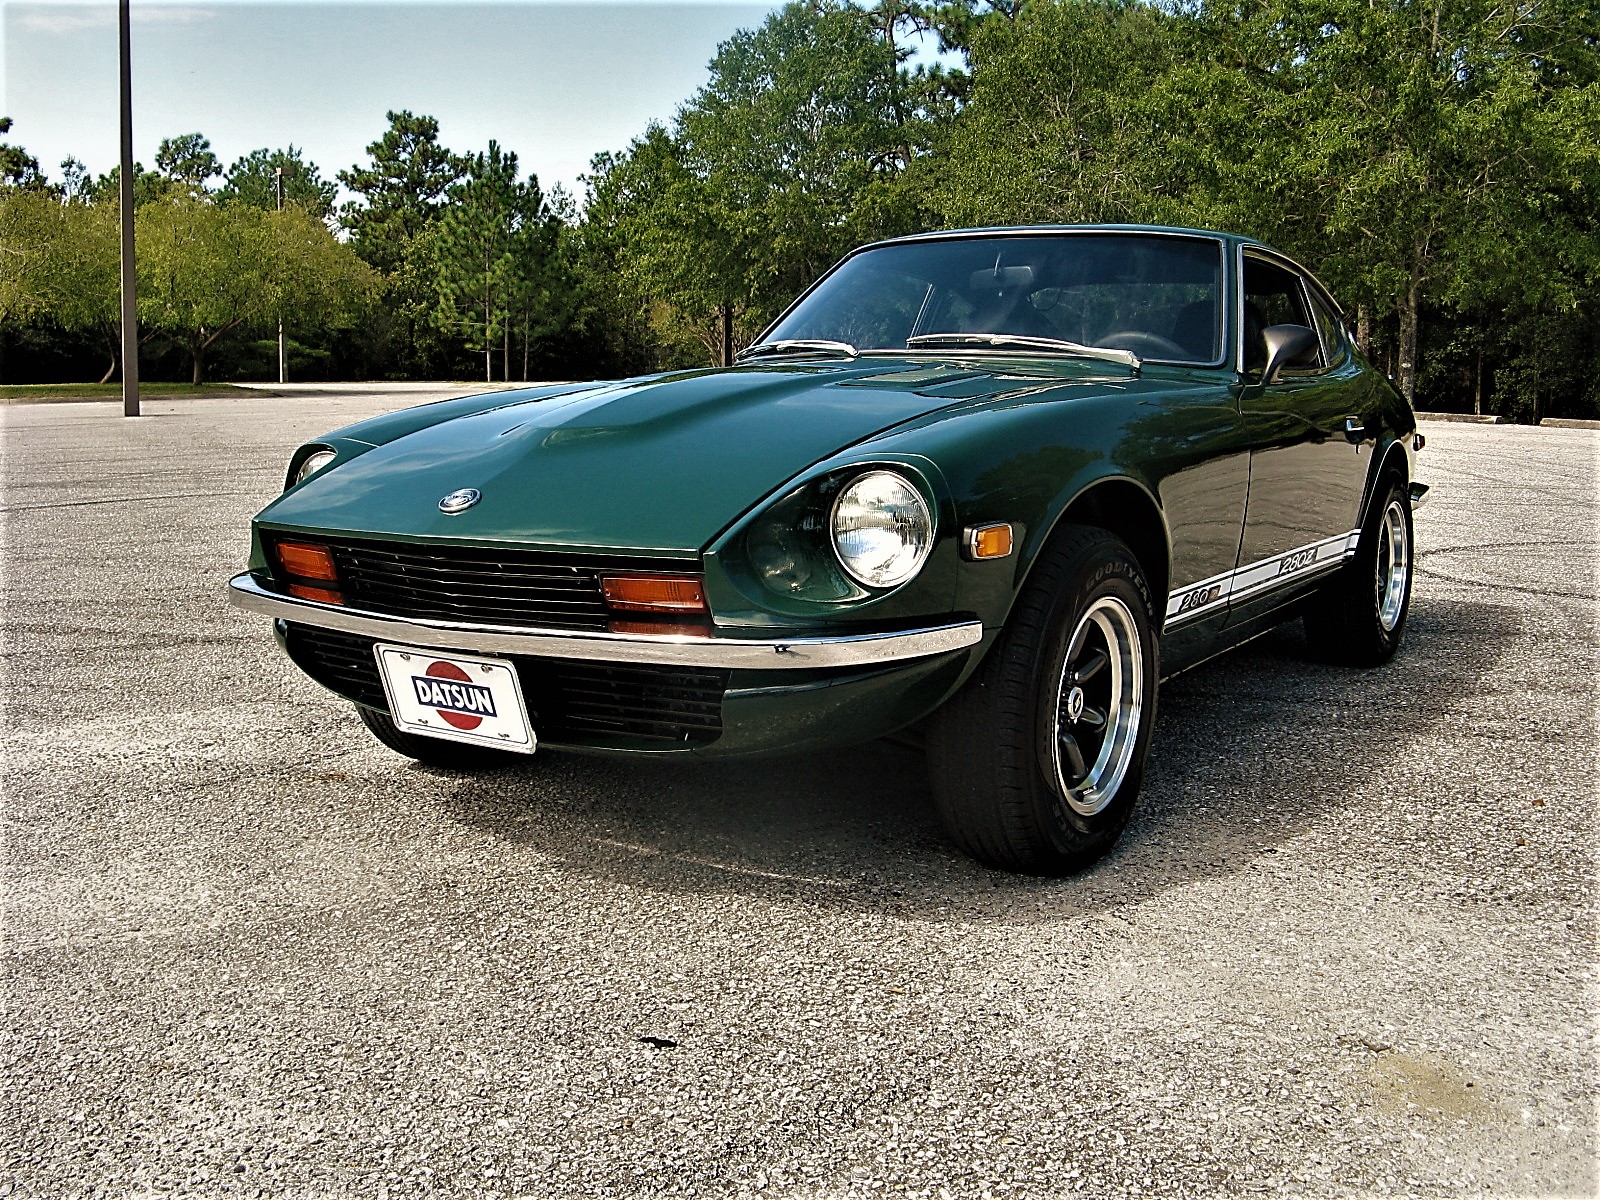
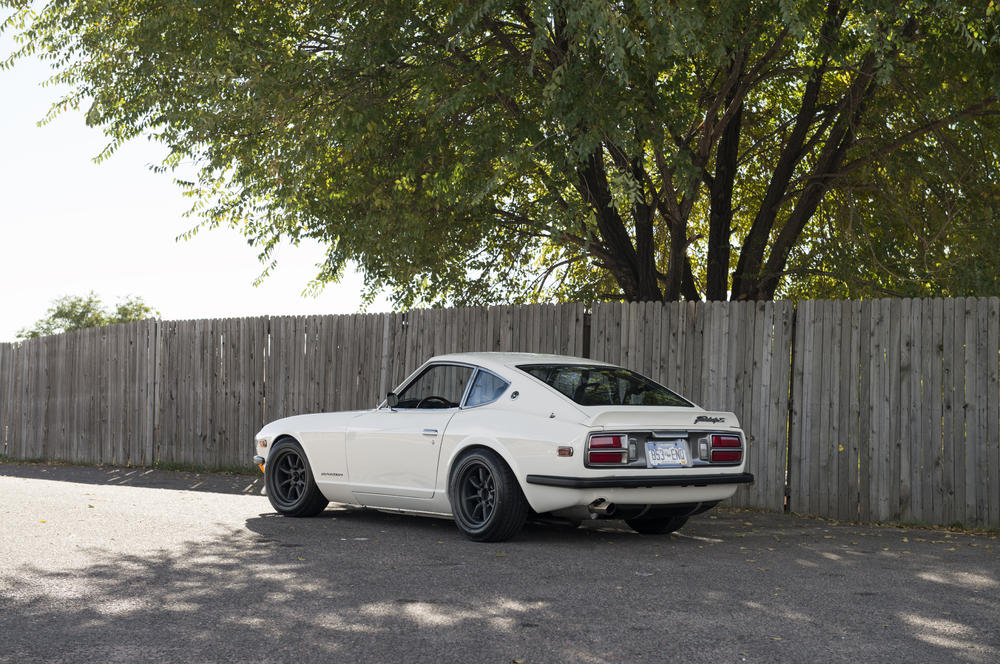
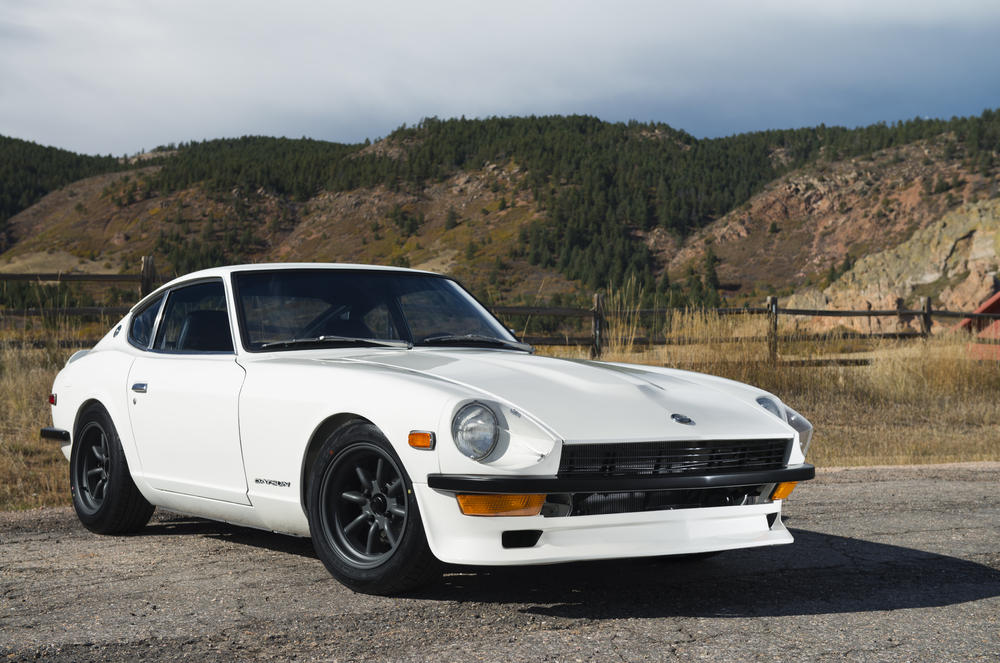
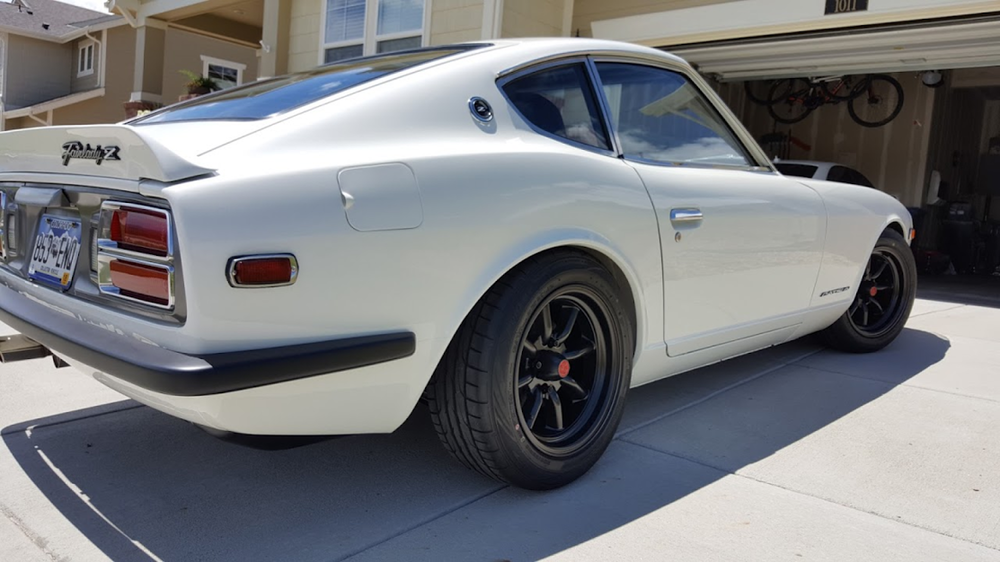
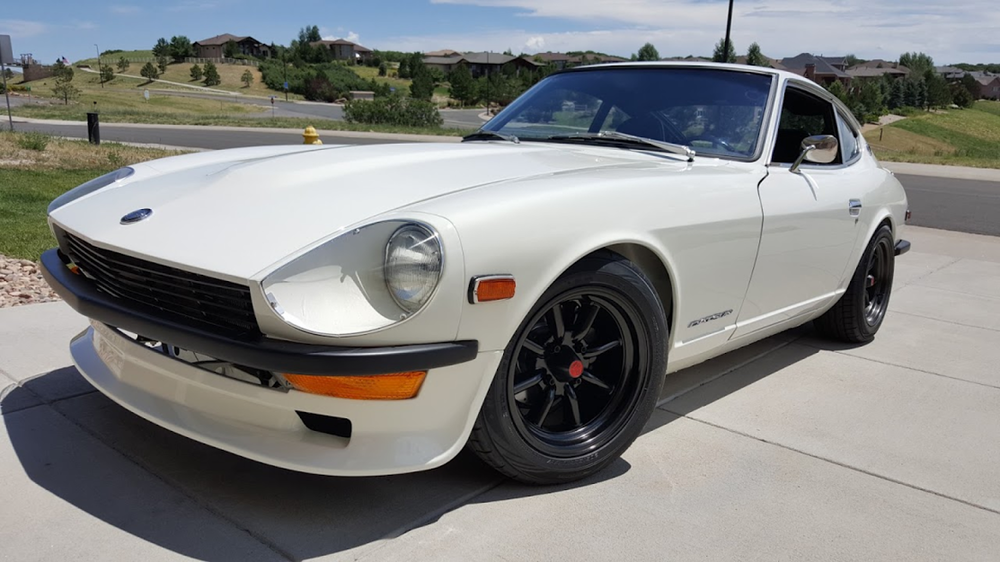
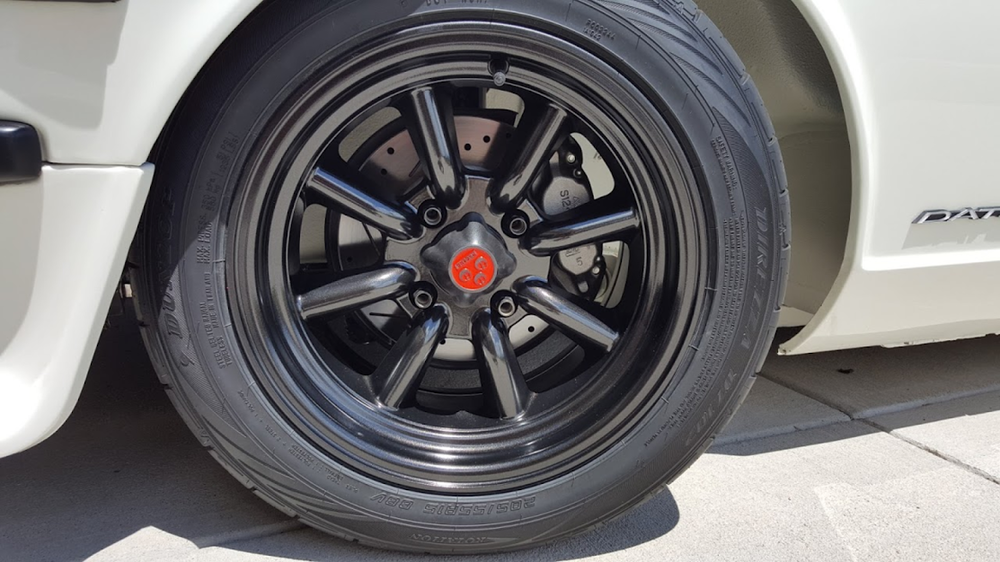
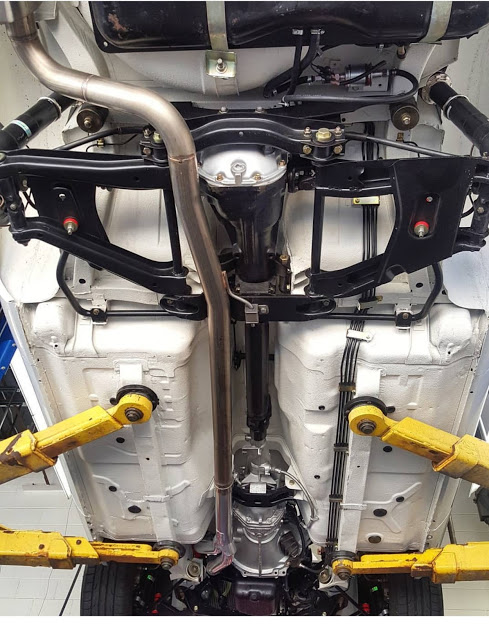
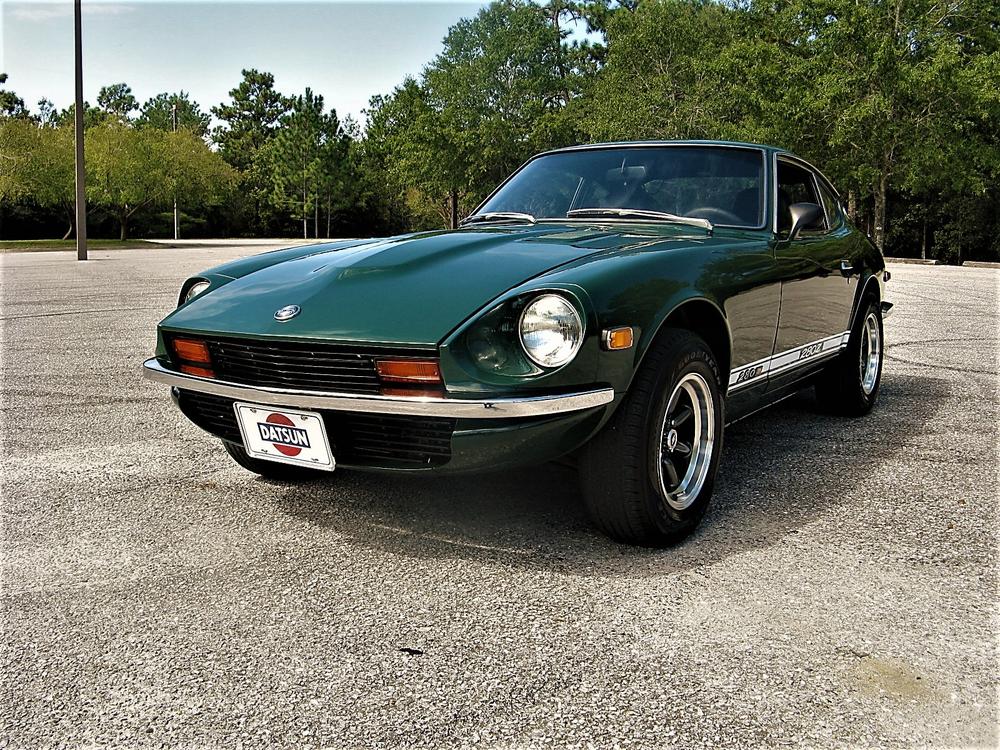
Officially now up for sale is my prized possession, my 1975 Datsun 280Z. This hurts me to write this ad but it's something I must do. I don't drive the car as much as I thought I would, and I am currently starting a new business so financially it makes sense. Before posting it up to Ebay, I figured I would list it here first since this forum has been a huge help with the build. I originally bought the car in August of 2013 and immediately began the restoration process. It was completely stripped down to the chassis, media blasted, rusted areas were removed, and replaced with new metal. The car was then sent to Emmel's Enamels in Denver where it received the full rotisserie treatment. Original Datsun color #904 base coat/clear coat was applied. Countless hours of wet sanding and polishing were done to create a beautiful gloss. All suspension, steering, and undercarriage components were blasted and powder coated semi-gloss black. Every nut, bolt, or hardware that was originally plated was sent out and stripped, and re-plated a beautiful yellow zinc. All rubber was either rejuvenated or replaced with new. Body: 240Z front valance, bumper, grille, and marker lights. 240Z rear bumper. New windshield. BRE rear spoiler. Paint protection film installed on full hood, fenders, and lower valance. Motor: Rebello Racing 3.0 liter stroker. L28 with N42 head. 89mm Cast Pistons. L24 rods with ARP bolts. Turbo oil pump. 63DI 109 Hot B Cam. Triple 45 DCOE Weber Carbs w/ K&N filters. Port and polished head. Port matched intake. 11:1 compression. Engine dyno'd at 301 hp/269 tq Wrinkle red powder coated valve cover. Datsun Spirit MSD plug wires. Datsun Spirit heat shield. MSD 6a Ignition. MSD booster 5 Speed transmission from 81' 280ZX Suspension: BC coilovers with adjustable height, dampening, and camber. Energy Suspension performance polyurethane bushings Wheels/Tires: 15X8 Rota RKR in Black magnesium painted black metallic. Dunlop Direzza 205/55R15 tires. Brakes: Silvermine stage 3 disc brakes. fully rebuilt rear brakes with all new drums and pads. Stainless steel brake lines. New brake booster and master cylinder. Interior: 240Z refurbished steering wheel. Refurbished dash (dash cover currently on). All new bulbs in dash. New carpet, seats, console, headliner and vinyl trim. Retrosound AM/FM/USB/bluetooth stereo with (4) Polk Audio 5.25 speakers. Misc. New battery, new alternator, new starter, new clutch master cylinder, Custom 3" stainless steel exhaust with Dynaflow muffler, Fuel lab regulator, new fuel pump, Skillard fuel tank straps, aluminum 3 core radiator, all new hoses and clamps. Also have original window sticker. I am sure there are a ton of things that I have forgot to mention but this car is in immaculate condition and is basically a brand new car. I have only put approximately 1800 miles on the new motor. This car is an absolute blast to drive and has no shortage of power. Cons: There are some minor flaws here and there, a couple small knicks in the paint. The chrome taillight bezels could probably be re-plated but aren't that bad. The clock and amp gauge are not working. Also missing a spare tire, but have jack and tools. This isn't a concourse restoration but definitely a 9.5 out of 10. Located near Denver, CO. Price is $25000. I am pretty firm on the price, I believe it is a very fair price for the amount of money and quality of work that has gone into this build. I will not accept lowball offers. If you are interested please reply to this thread or text/call me directly at 303-999-7109. Please don't hesitate to ask any questions. Also if there are any specific pictures you want just let me know. Thanks for looking! -Matt Please check out my build thread here for detailed pictures and complete write up. Thank you.


 1 point
 -
1 pointMy restored 280Z is for sale now. See: spies@nwflorida.net https://atlanta.craigslist.org/atl/cto/d/datsun-280/6330462965.html
 1 point
 -
Absolutely beautiful. My color too. Hope u get every penny of your asking price. Good luck. Passing this to an Austin TX contact that might have some interest. Sent from my iPhone using Classic Zcar Club mobile1 point
-
Wow, this is basically perfect in my eyes, worth every penny. Good luck on the sale, I would have bought this instead of my build if I would have known. Cheers!1 point
-
Dang! I love to watch people spend their money on Z cars! I have to spend it carefully and in secret. Shhhh, don't let my wife see this.1 point
-
1 pointwell I just finish install new hoses and antifreeze and the sensor in the upper radiator hose works great in the upper hose, on -off no problem temp gauge stays on the m letter in the gauge cycles perfect much better than the crappy radiator sensor. it belongs in the upper hose thanks for all the reply kully1 point
-
Hmmm... Similar to my own setup. I hope you get your price.1 point
-
You are definitely right. I was hesitant on using the term "resto-mod" but thats probably more of an accurate description1 point
-
Here's about the coolest I've heard so far but it's a Mazda rotor.1 point
-
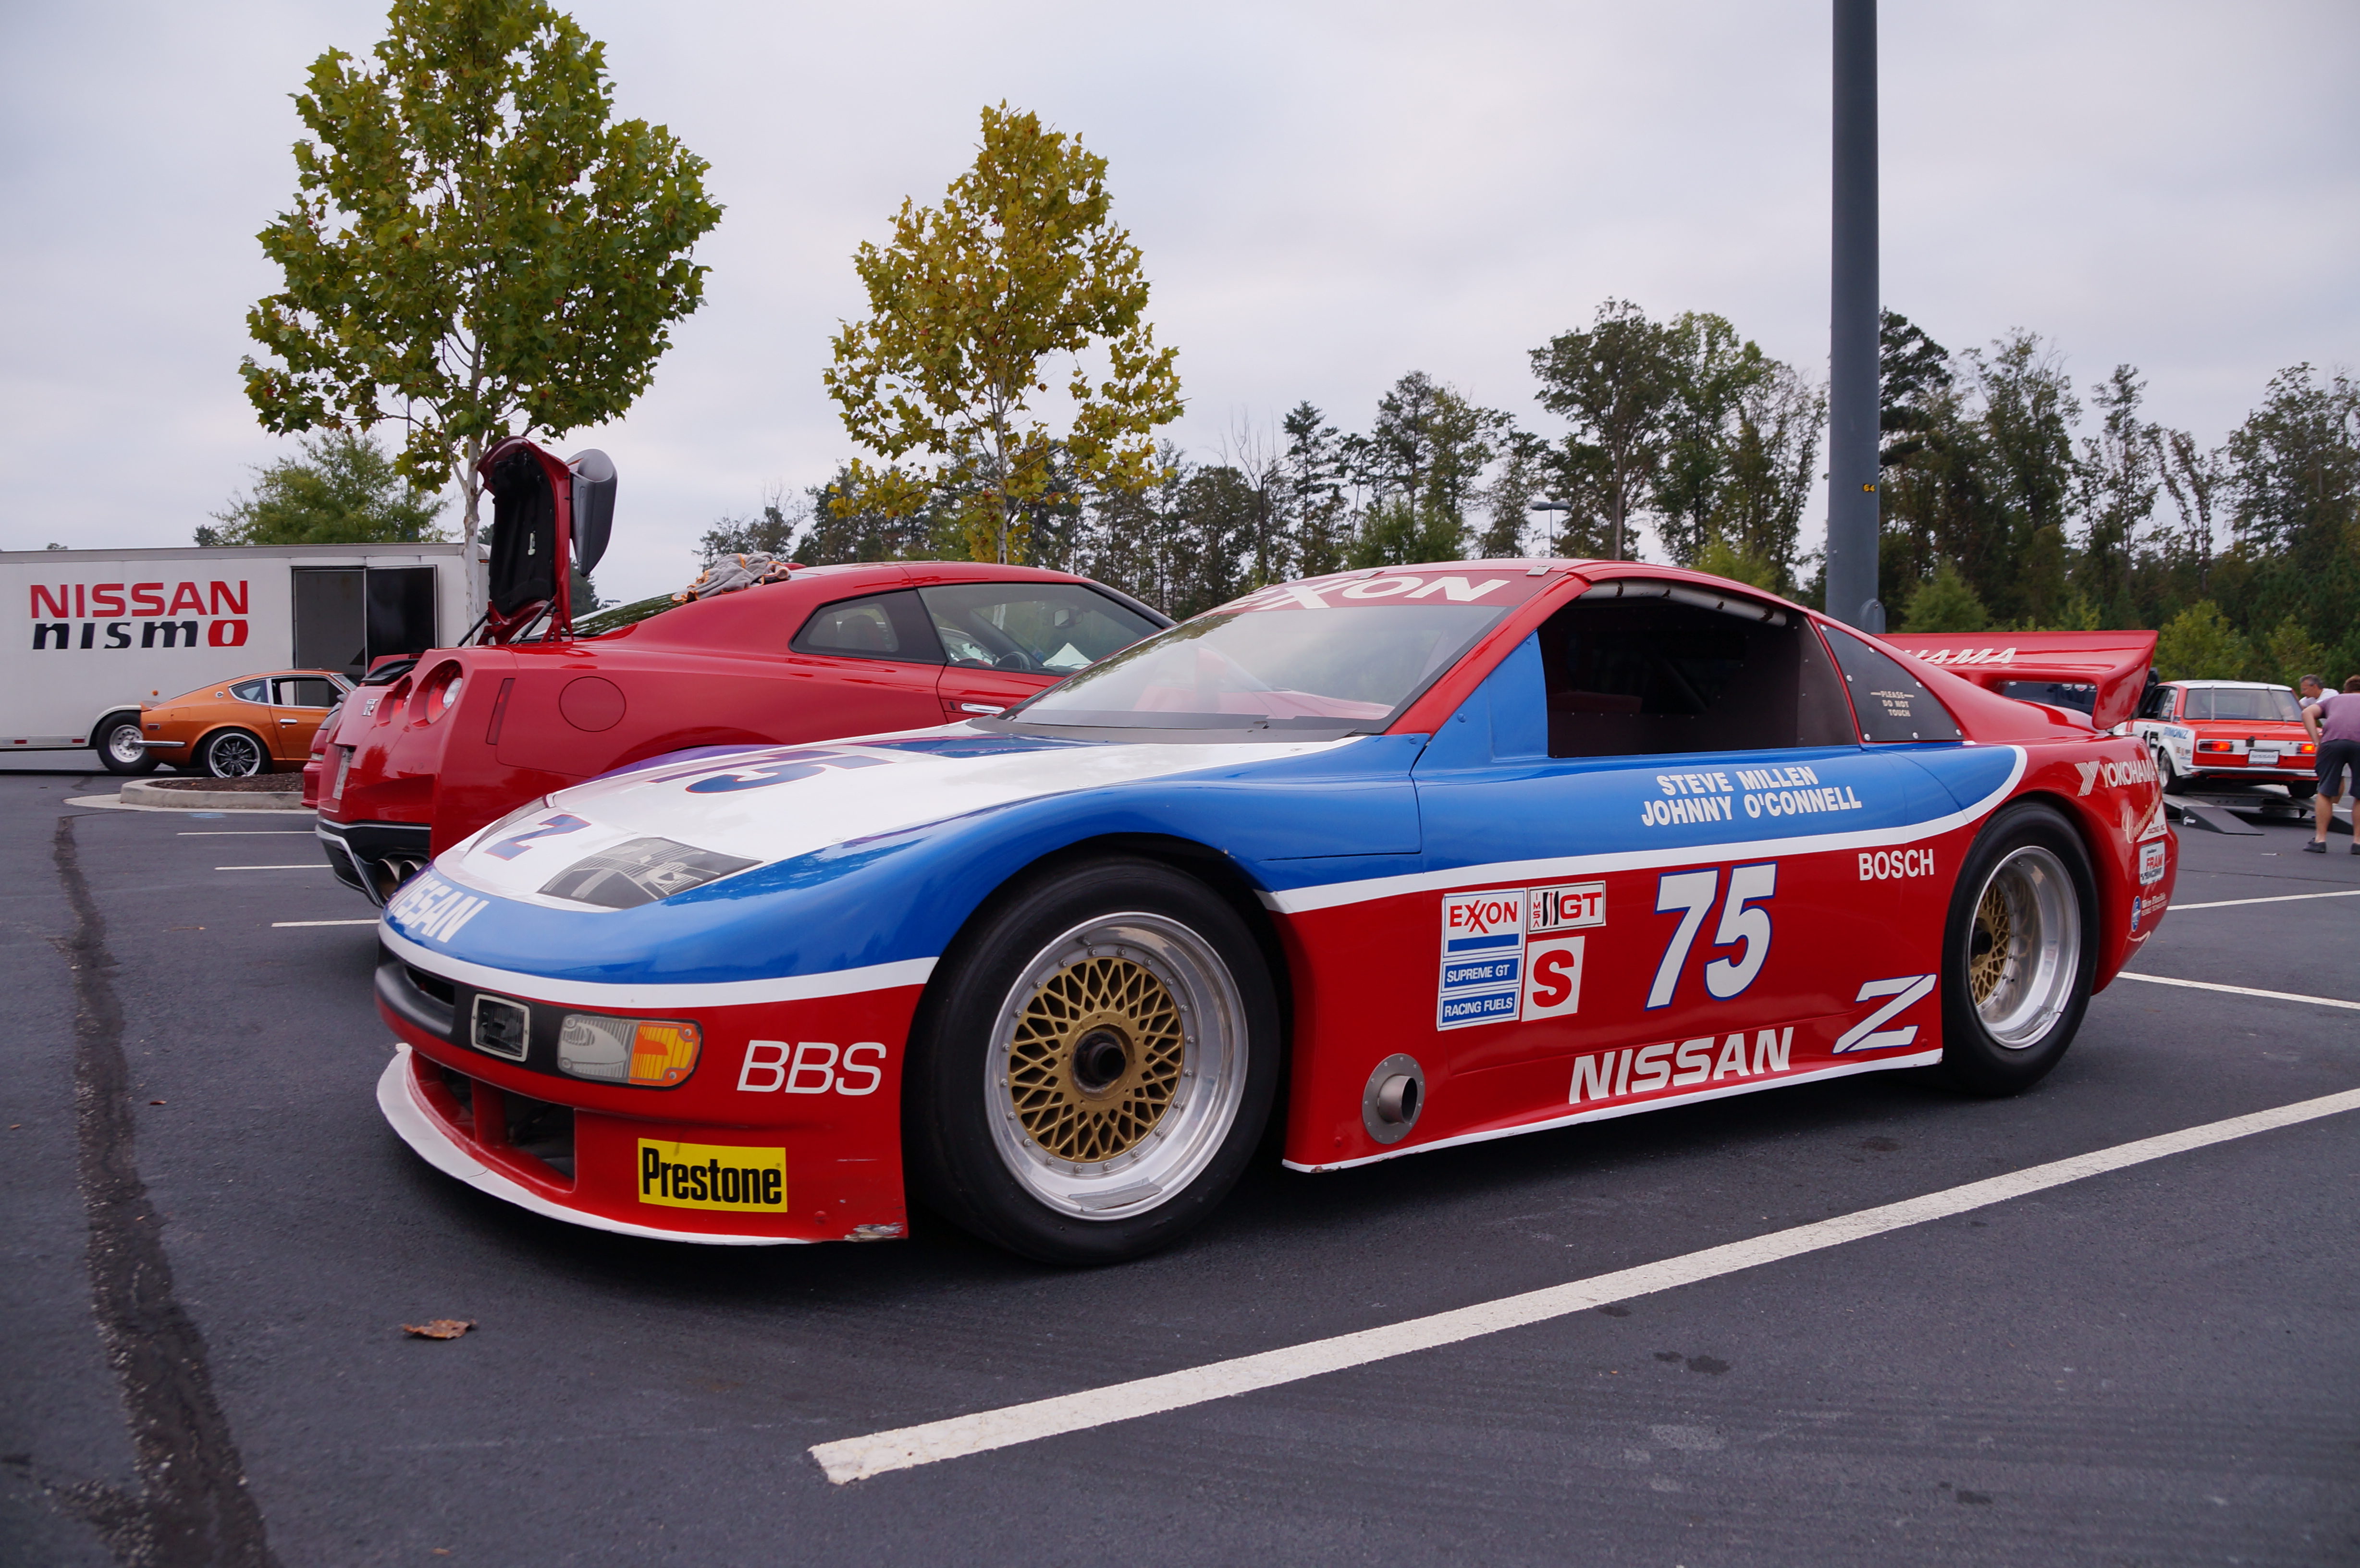
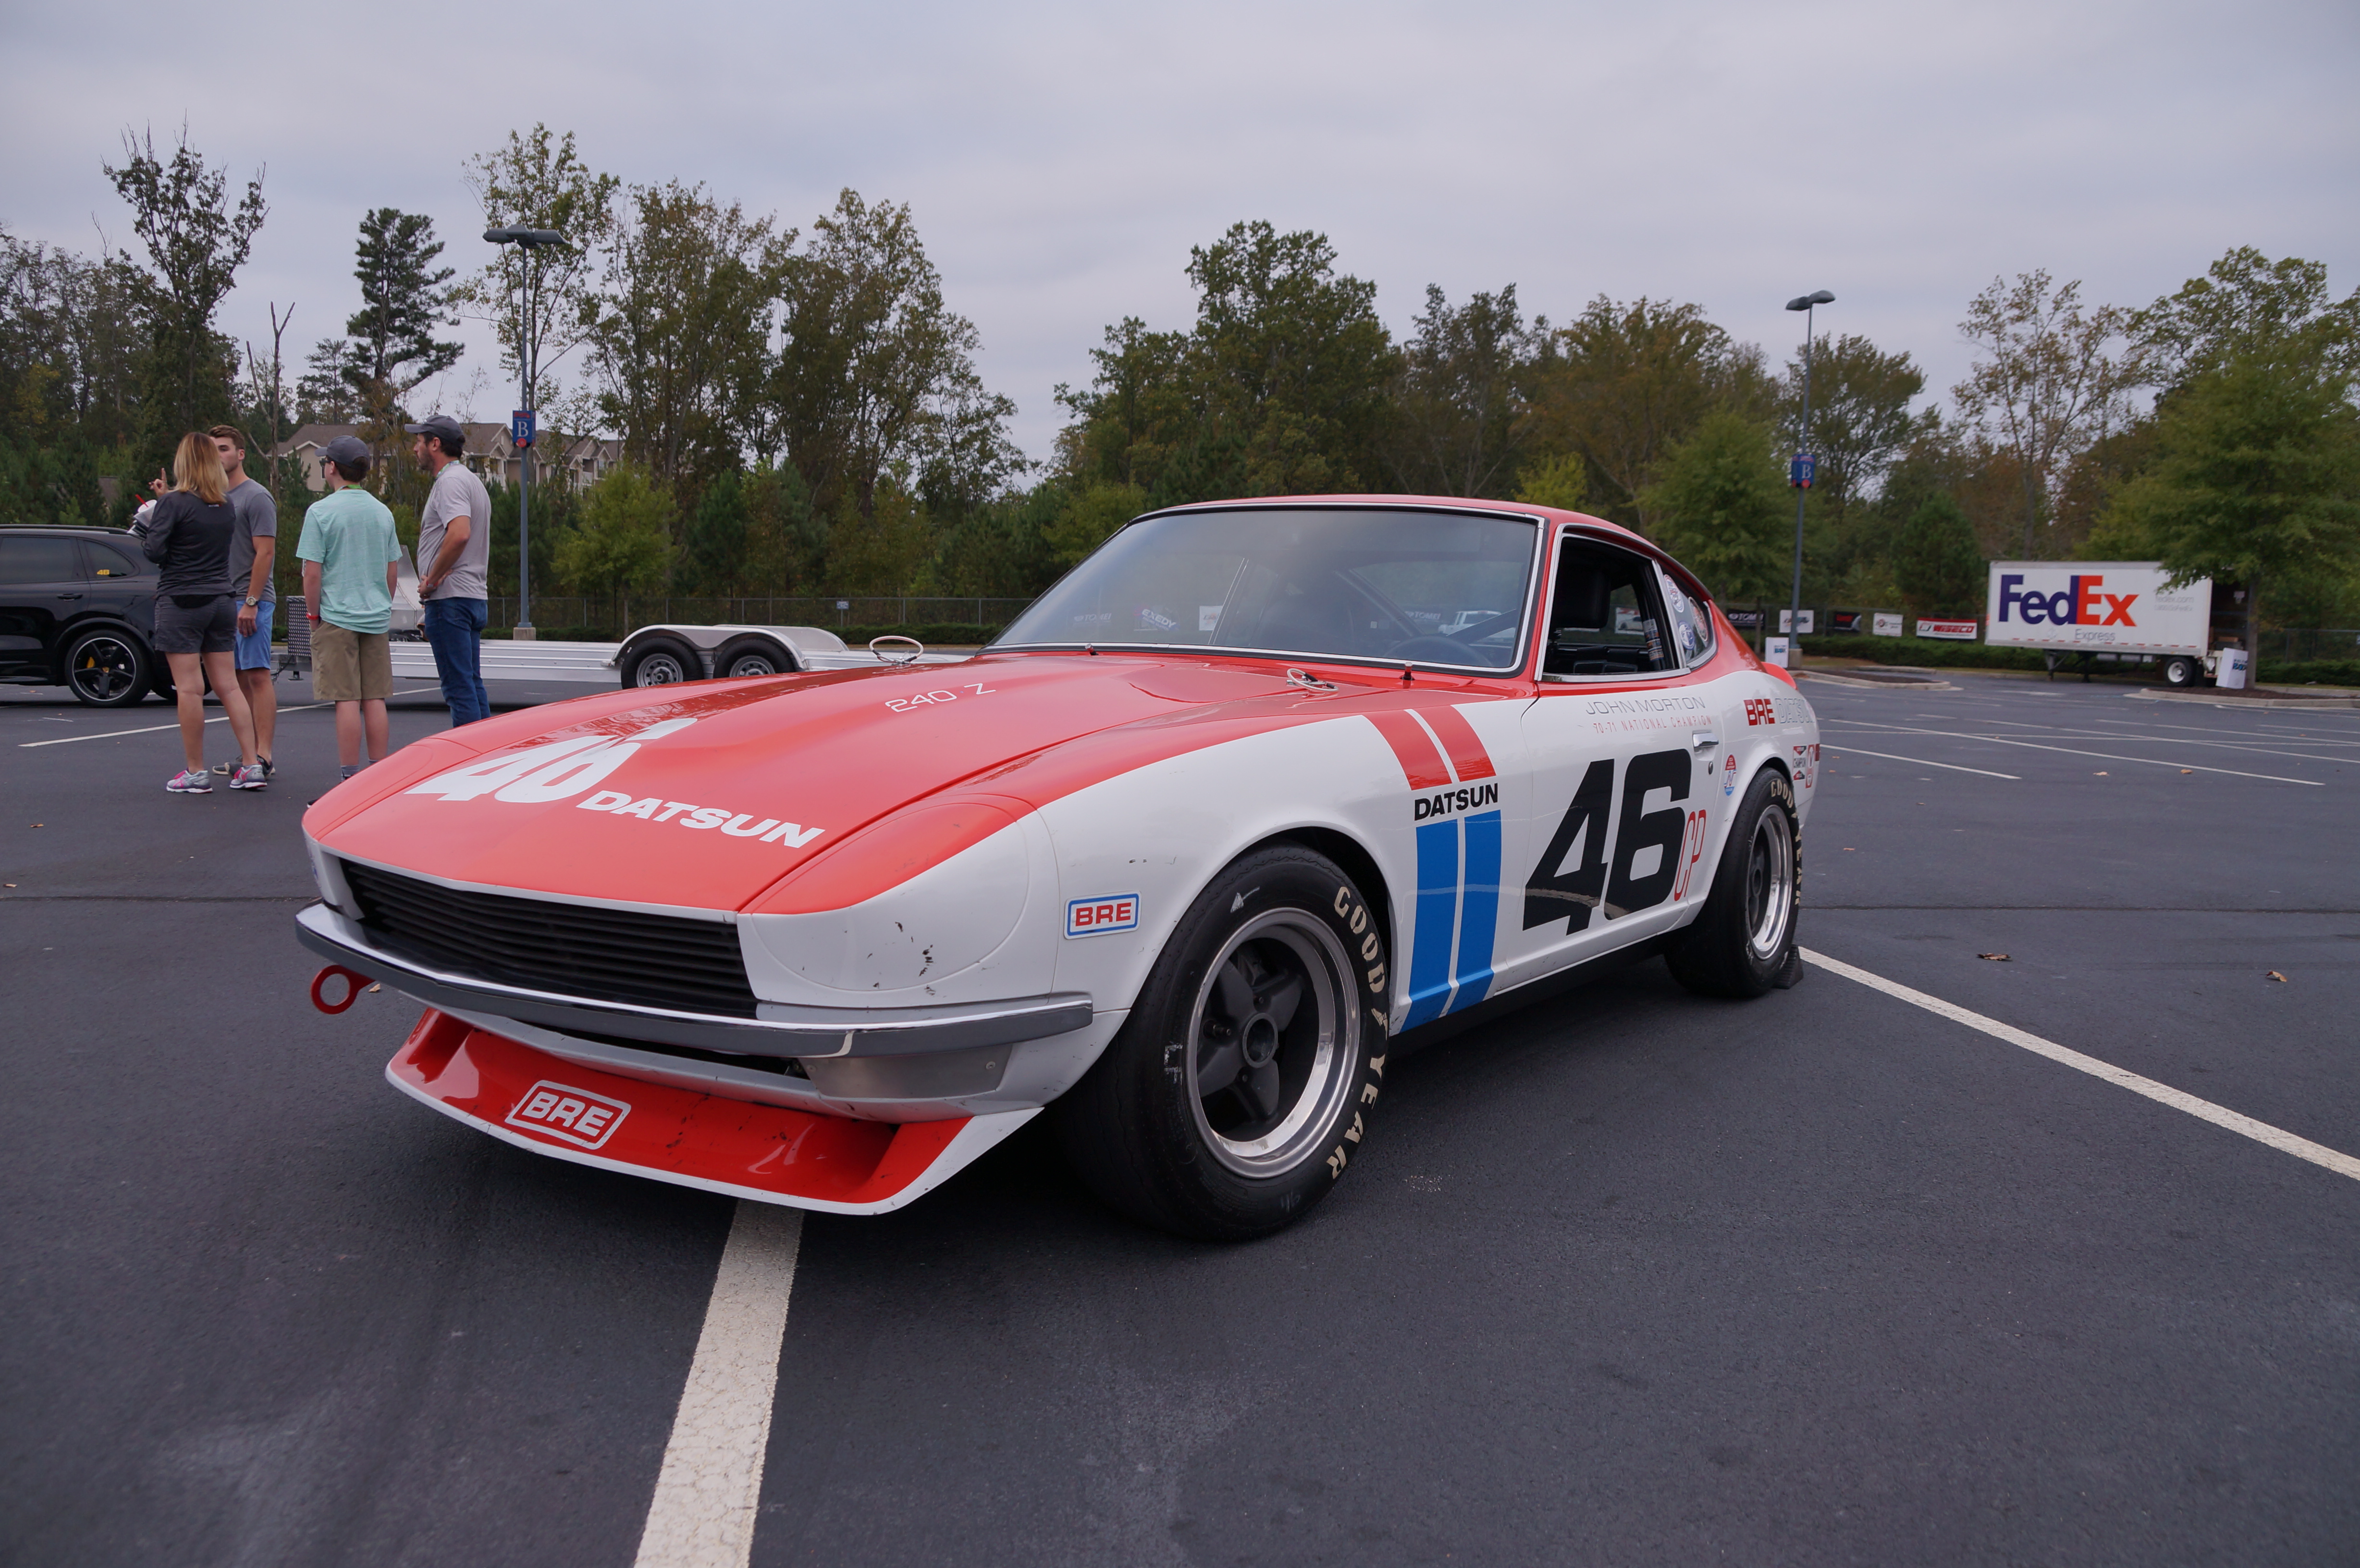
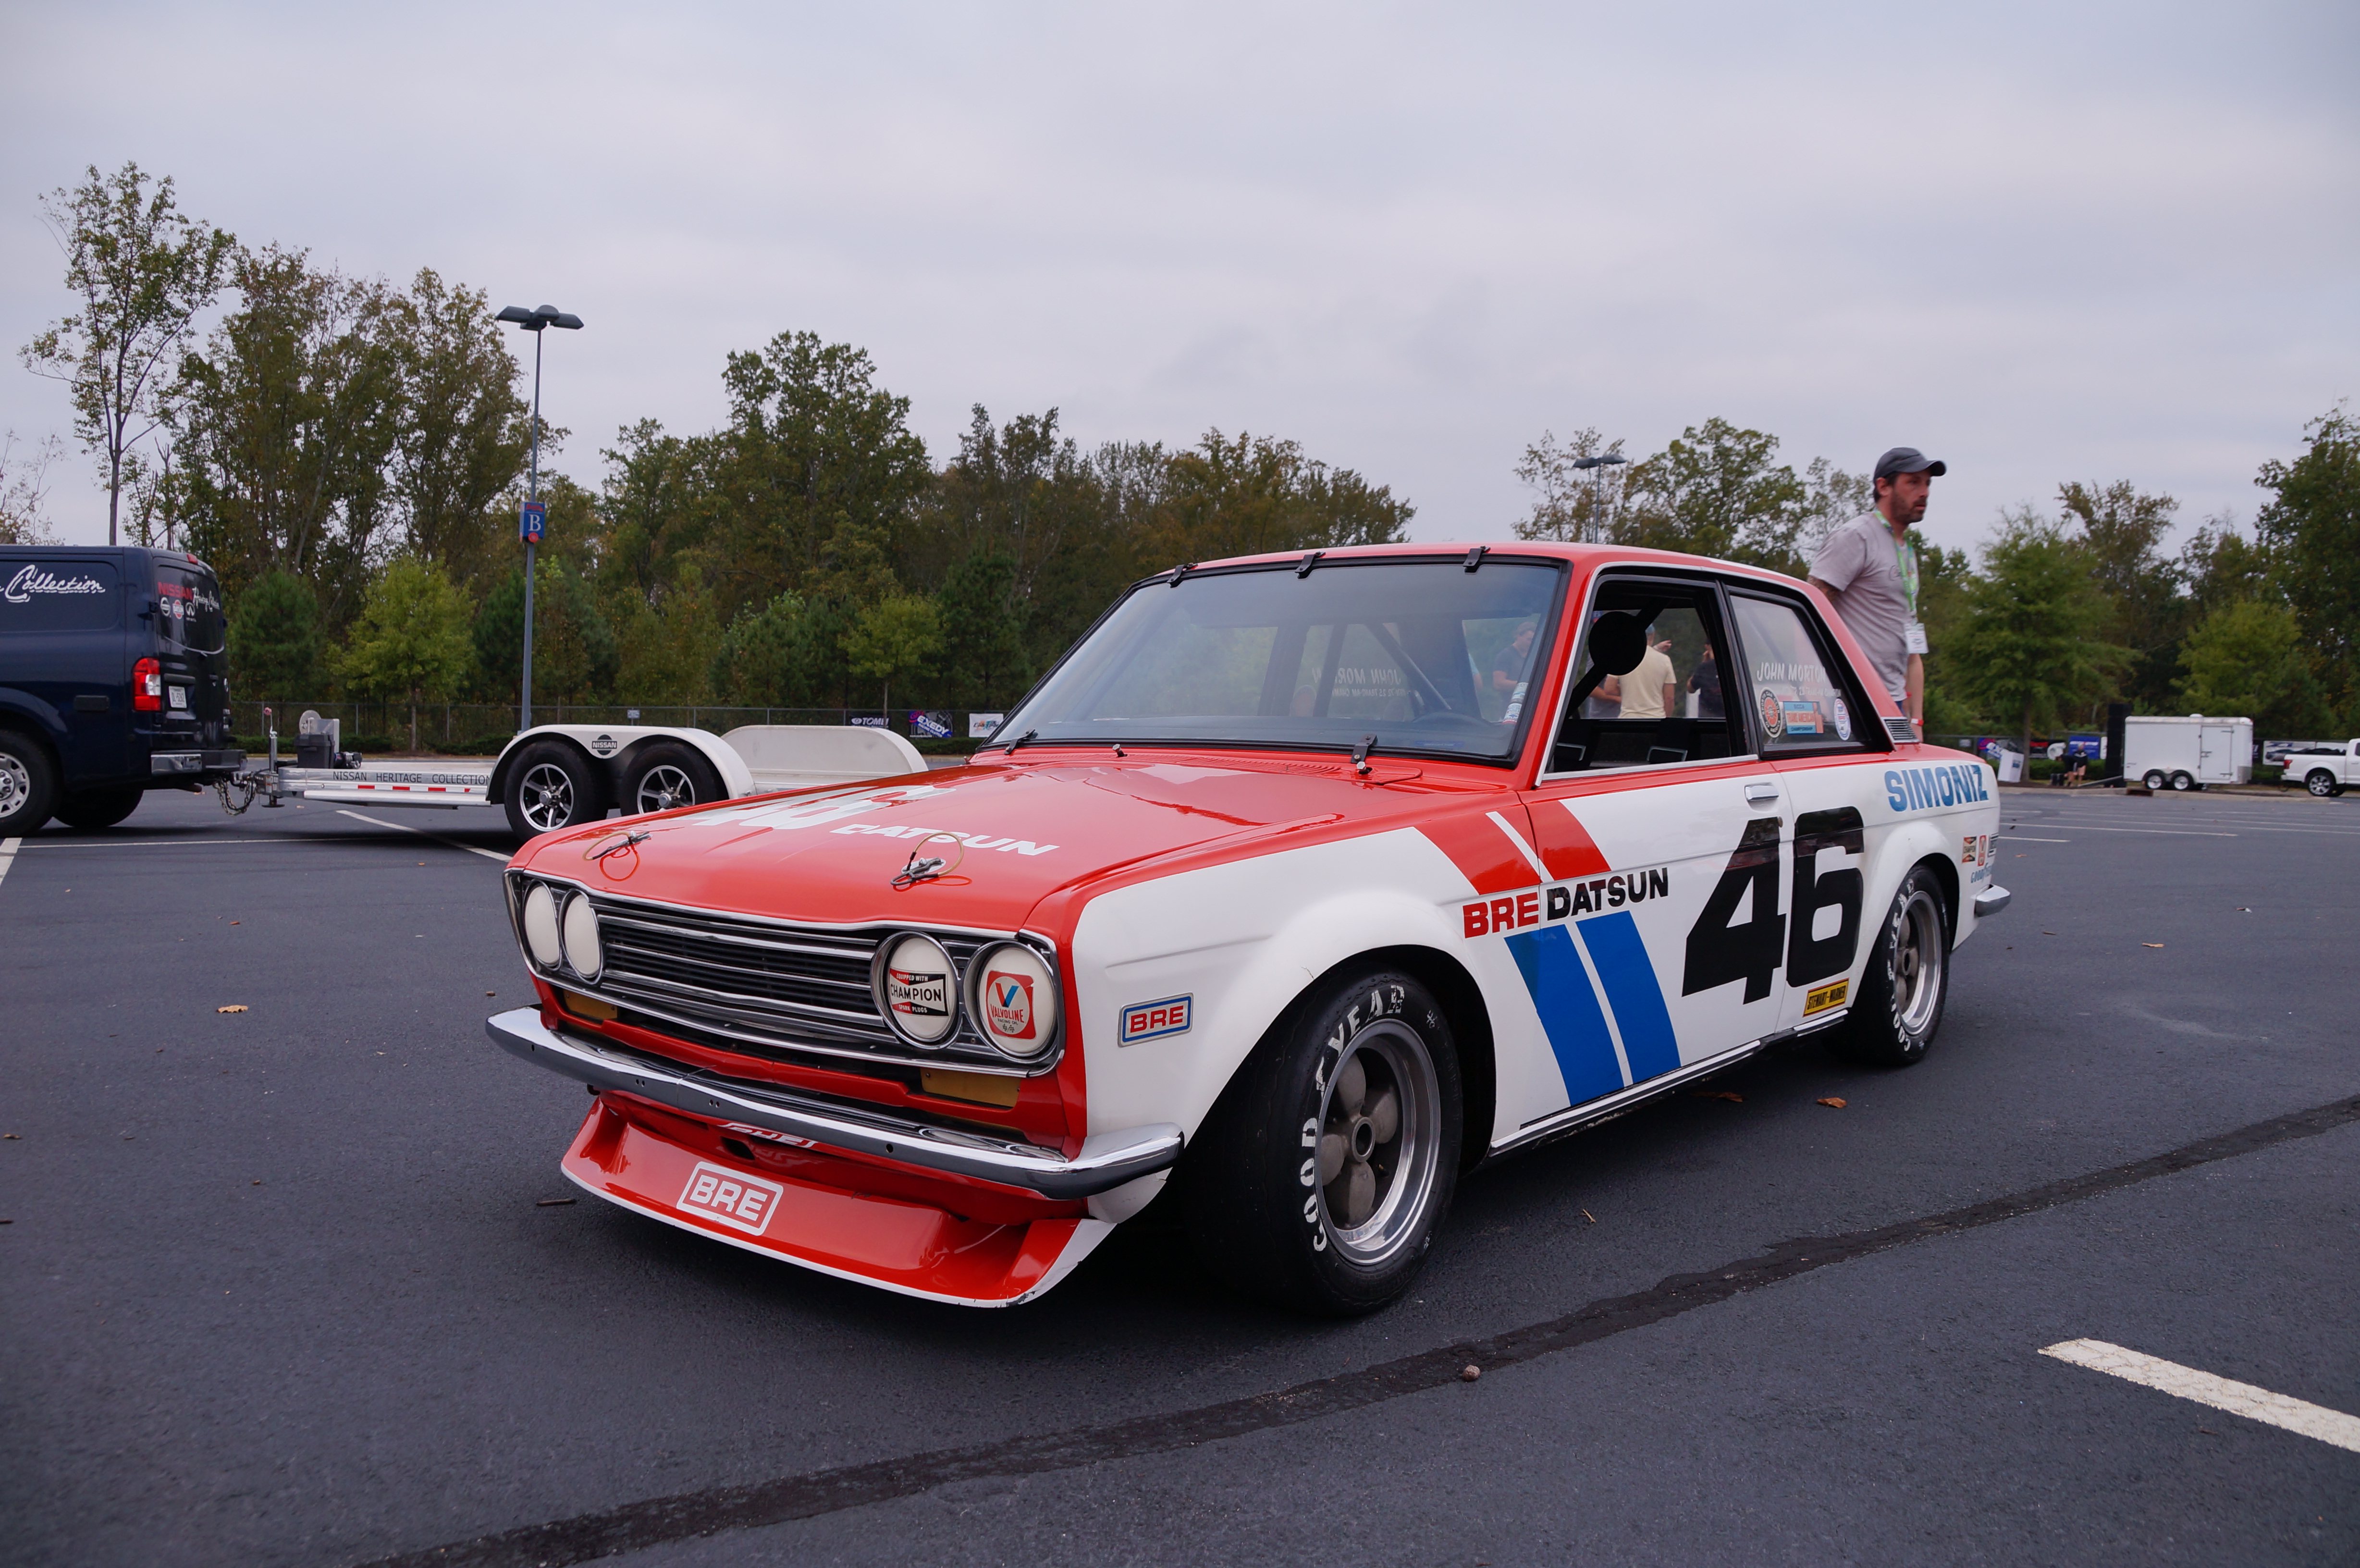
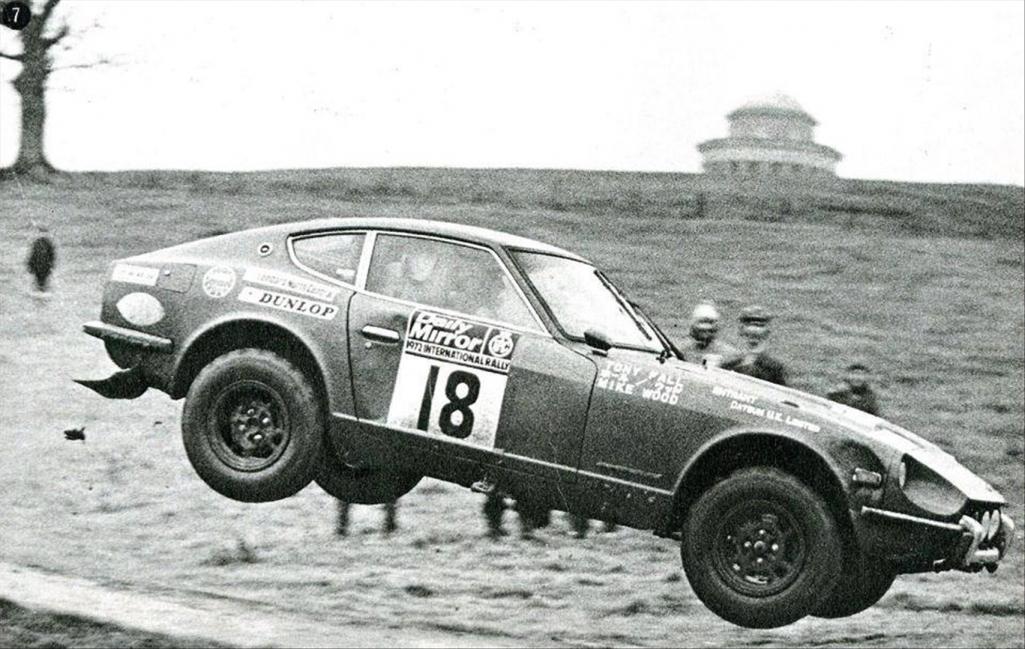
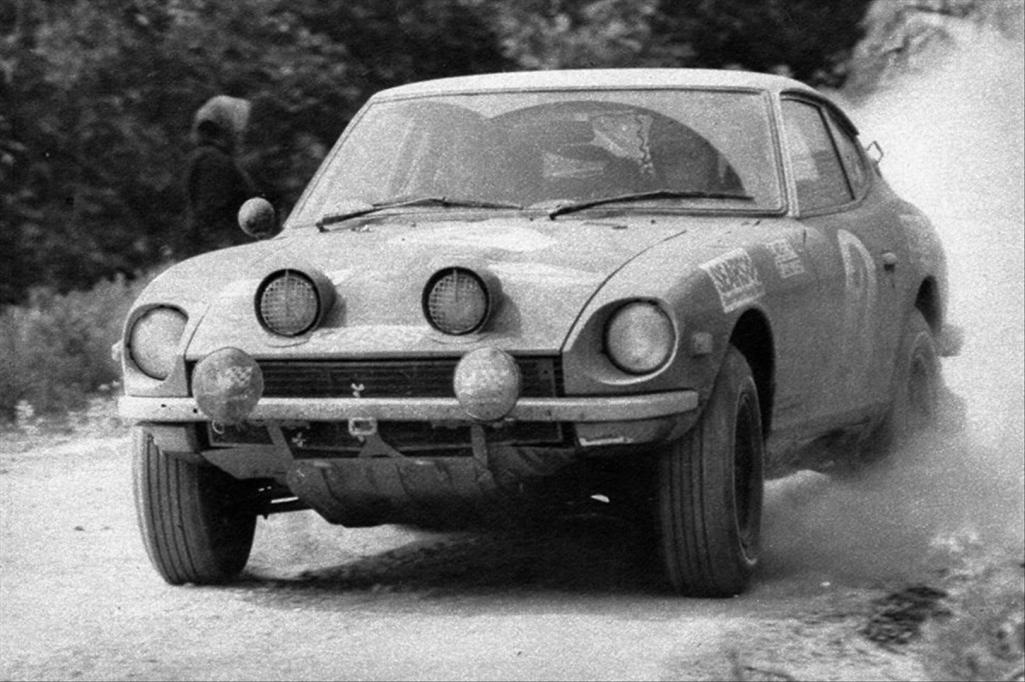
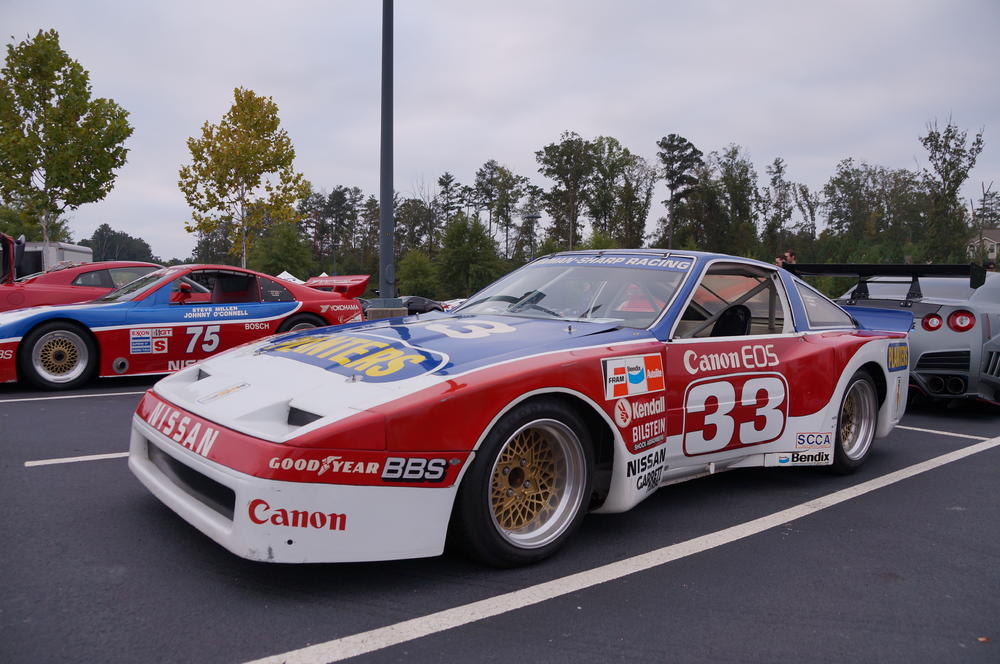
How about pictures of vintage race cars on display?


 1 point
 -
1 pointHi, thanks for the add. I have come across a one owner, '78, ~40k miles, no rust, original paint, 5-speed, 280. No dents or dings. The paint looks like it will come back with some attention. Interior is original and mint. No fading or cracks. Stored inside its whole life. Not run or moved in the last 15 years. Sorry, I don't have any pics. It seems to be for sale, but not actively listed. Any ballpark's on what it might be worth. I can see Z's have been escalating recently, but the higher prices seem to be focused on the 240's vs. the 280's. If I can get it, I will need lots of advise on how to bring it back to life. Thanks!1 point
-
Thanks. I probably never would have gone down this path if you hadn't created this thread in the first place! I was thinking that the vent grills in my car would have the clips intact, but I'd never taken a close look until I read your write-up and became intrigued. When I finally got around to it, I discovered that the clips were missing altogether (the PO had done a lash-up job, which included two-sided tape to hold the chrome grills in place). And by the time all of this became known to me, you'd sold all of your clip sets and I had to look for other options. The main uncertainty was whether the clips really needed to be made from tempered steel to work properly. Based on my what I've learned, the answer seems to be, 'not really'. My torch-and-quench tempering scheme seems to have been adequate, helped by the fact that the forming process creates a bit of localized work-hardening around the bent areas. And then, the legs of the clips don't have to spread that much when the clip is being pushed into place. In answer to your question, it probably would take me 15 minutes to make a new clip. Side business? I'm guessing there's not more than another 50 customers left out there in Z-Land, so not enough in it to be worthwhile. Maybe someone else will be interested in taking it on, though.1 point
-
That is excellent work Namerow! Now that you have the buck made, how long does it take you to make one clip? Looks like you might have a side gig there. Thank you for sharing!1 point
-
1 pointProbably my favorite build thread all time and I have plagiarized much of your work! $25k is super reasonable, would cost almost twice that much to build from scratch. Sent from my iPhone using Classic Zcar Club mobile1 point
-
Crying once again. Worth every penny and more. Good luck Matt! This will be half what I pay to restore my own... someone is going to get a great car.1 point
-
You really need access to the panel from the interior too. Your repair will last better if your filler is thinner. Hammer and dolly from the inside and outside to get it close. If the metal is stretched, heat it and cool it with a wet rag to shrink it...Close is 1/16th of an inch or less 1/8" absolute max...1 point
-
1 pointHave had my 1/1970 240Z 9 years, drove it by necessity in a heavy rain once, and twice in light mist conditions. Lately it is being driven as a DD. If it is raining I take a different car. It is very rust free, love this thing. It is always kept under a roof.1 point
-
1 pointAs long as you have not loosened the fenders or cowl then you 'll be okay, you don't have to pull the hinges unless you are cleaning and painting them, really you just need to back off the screws until you can shift things. A tiny bit snug is good so you can do a shift and it will stay there.1 point
-
1 pointYes. Do you have the metal spacer that goes between the radio and the center panel?1 point
-
1 point
-
1 pointThe white 3 pin connector provides power & speaker output. The blue wire with half the infuse connection is +12v (10a fuse), the other 2 grey wires are for the speaker output. The red & blue, if I remember right, blue is for illumination with the dash lighting, red is antenna power. Download a copy of the workshop manual which has the radio schematic in the body electrical section. You can bench test the radio to see if it is working before going further.1 point
-
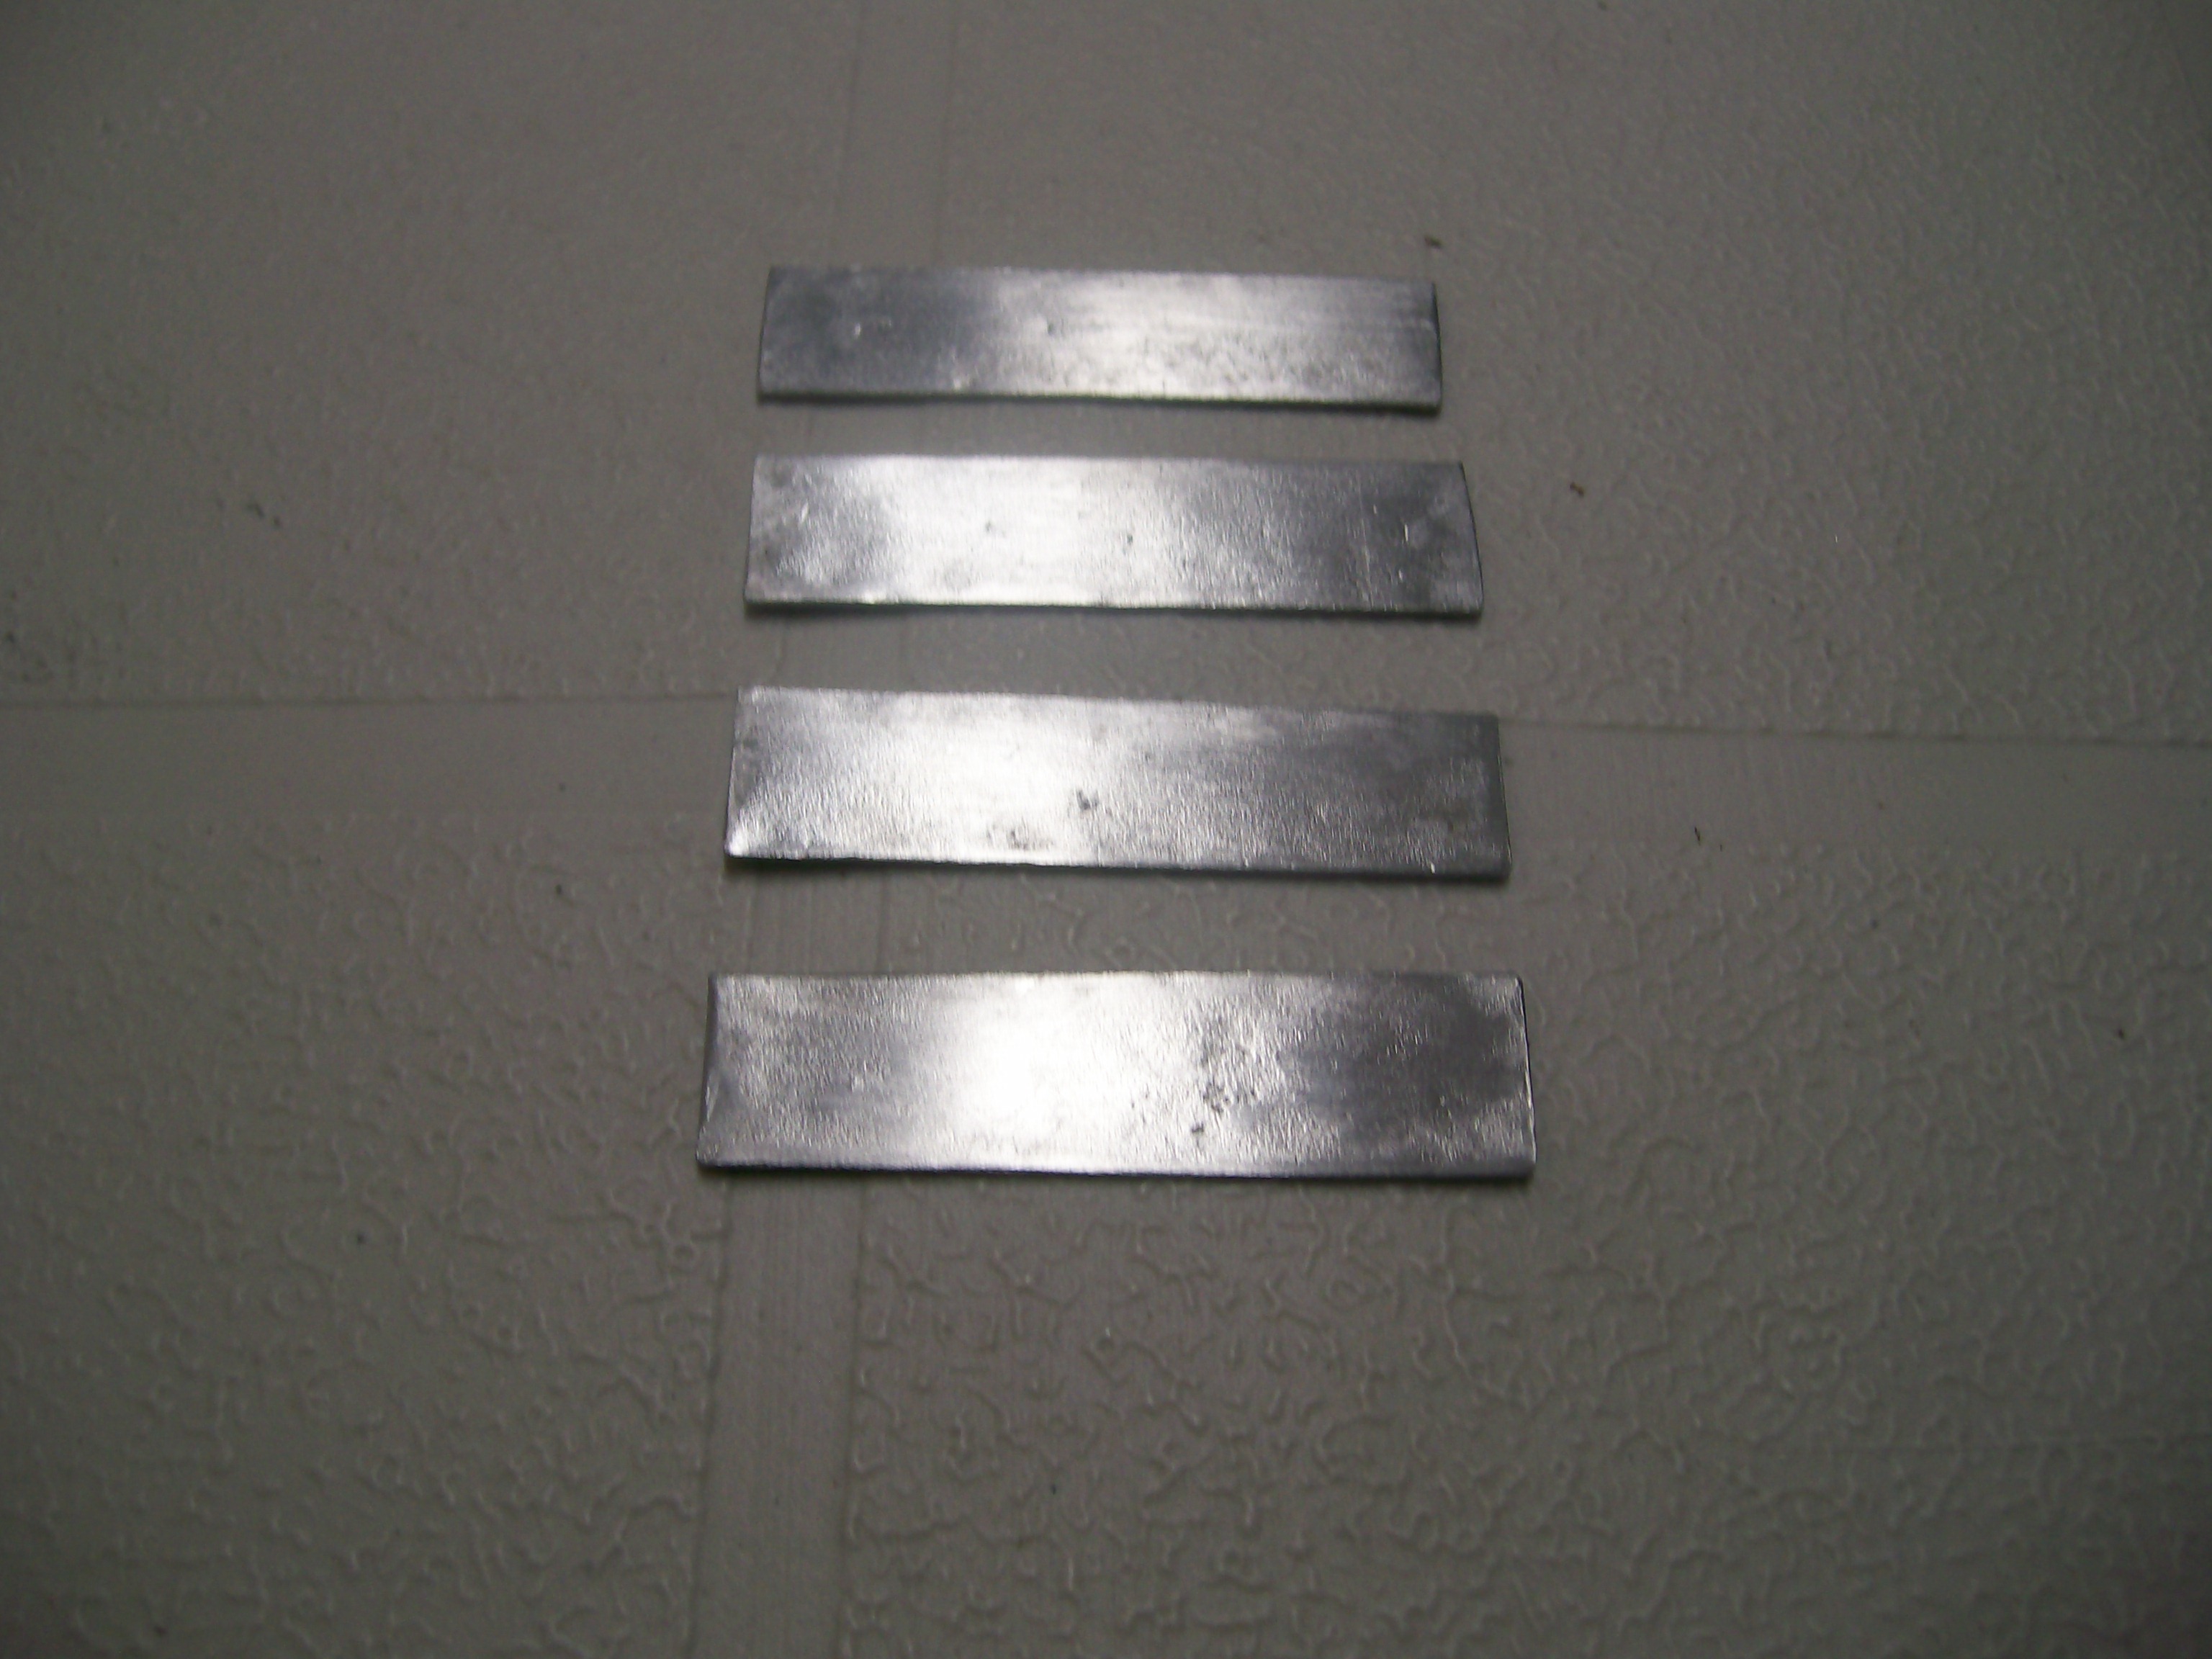
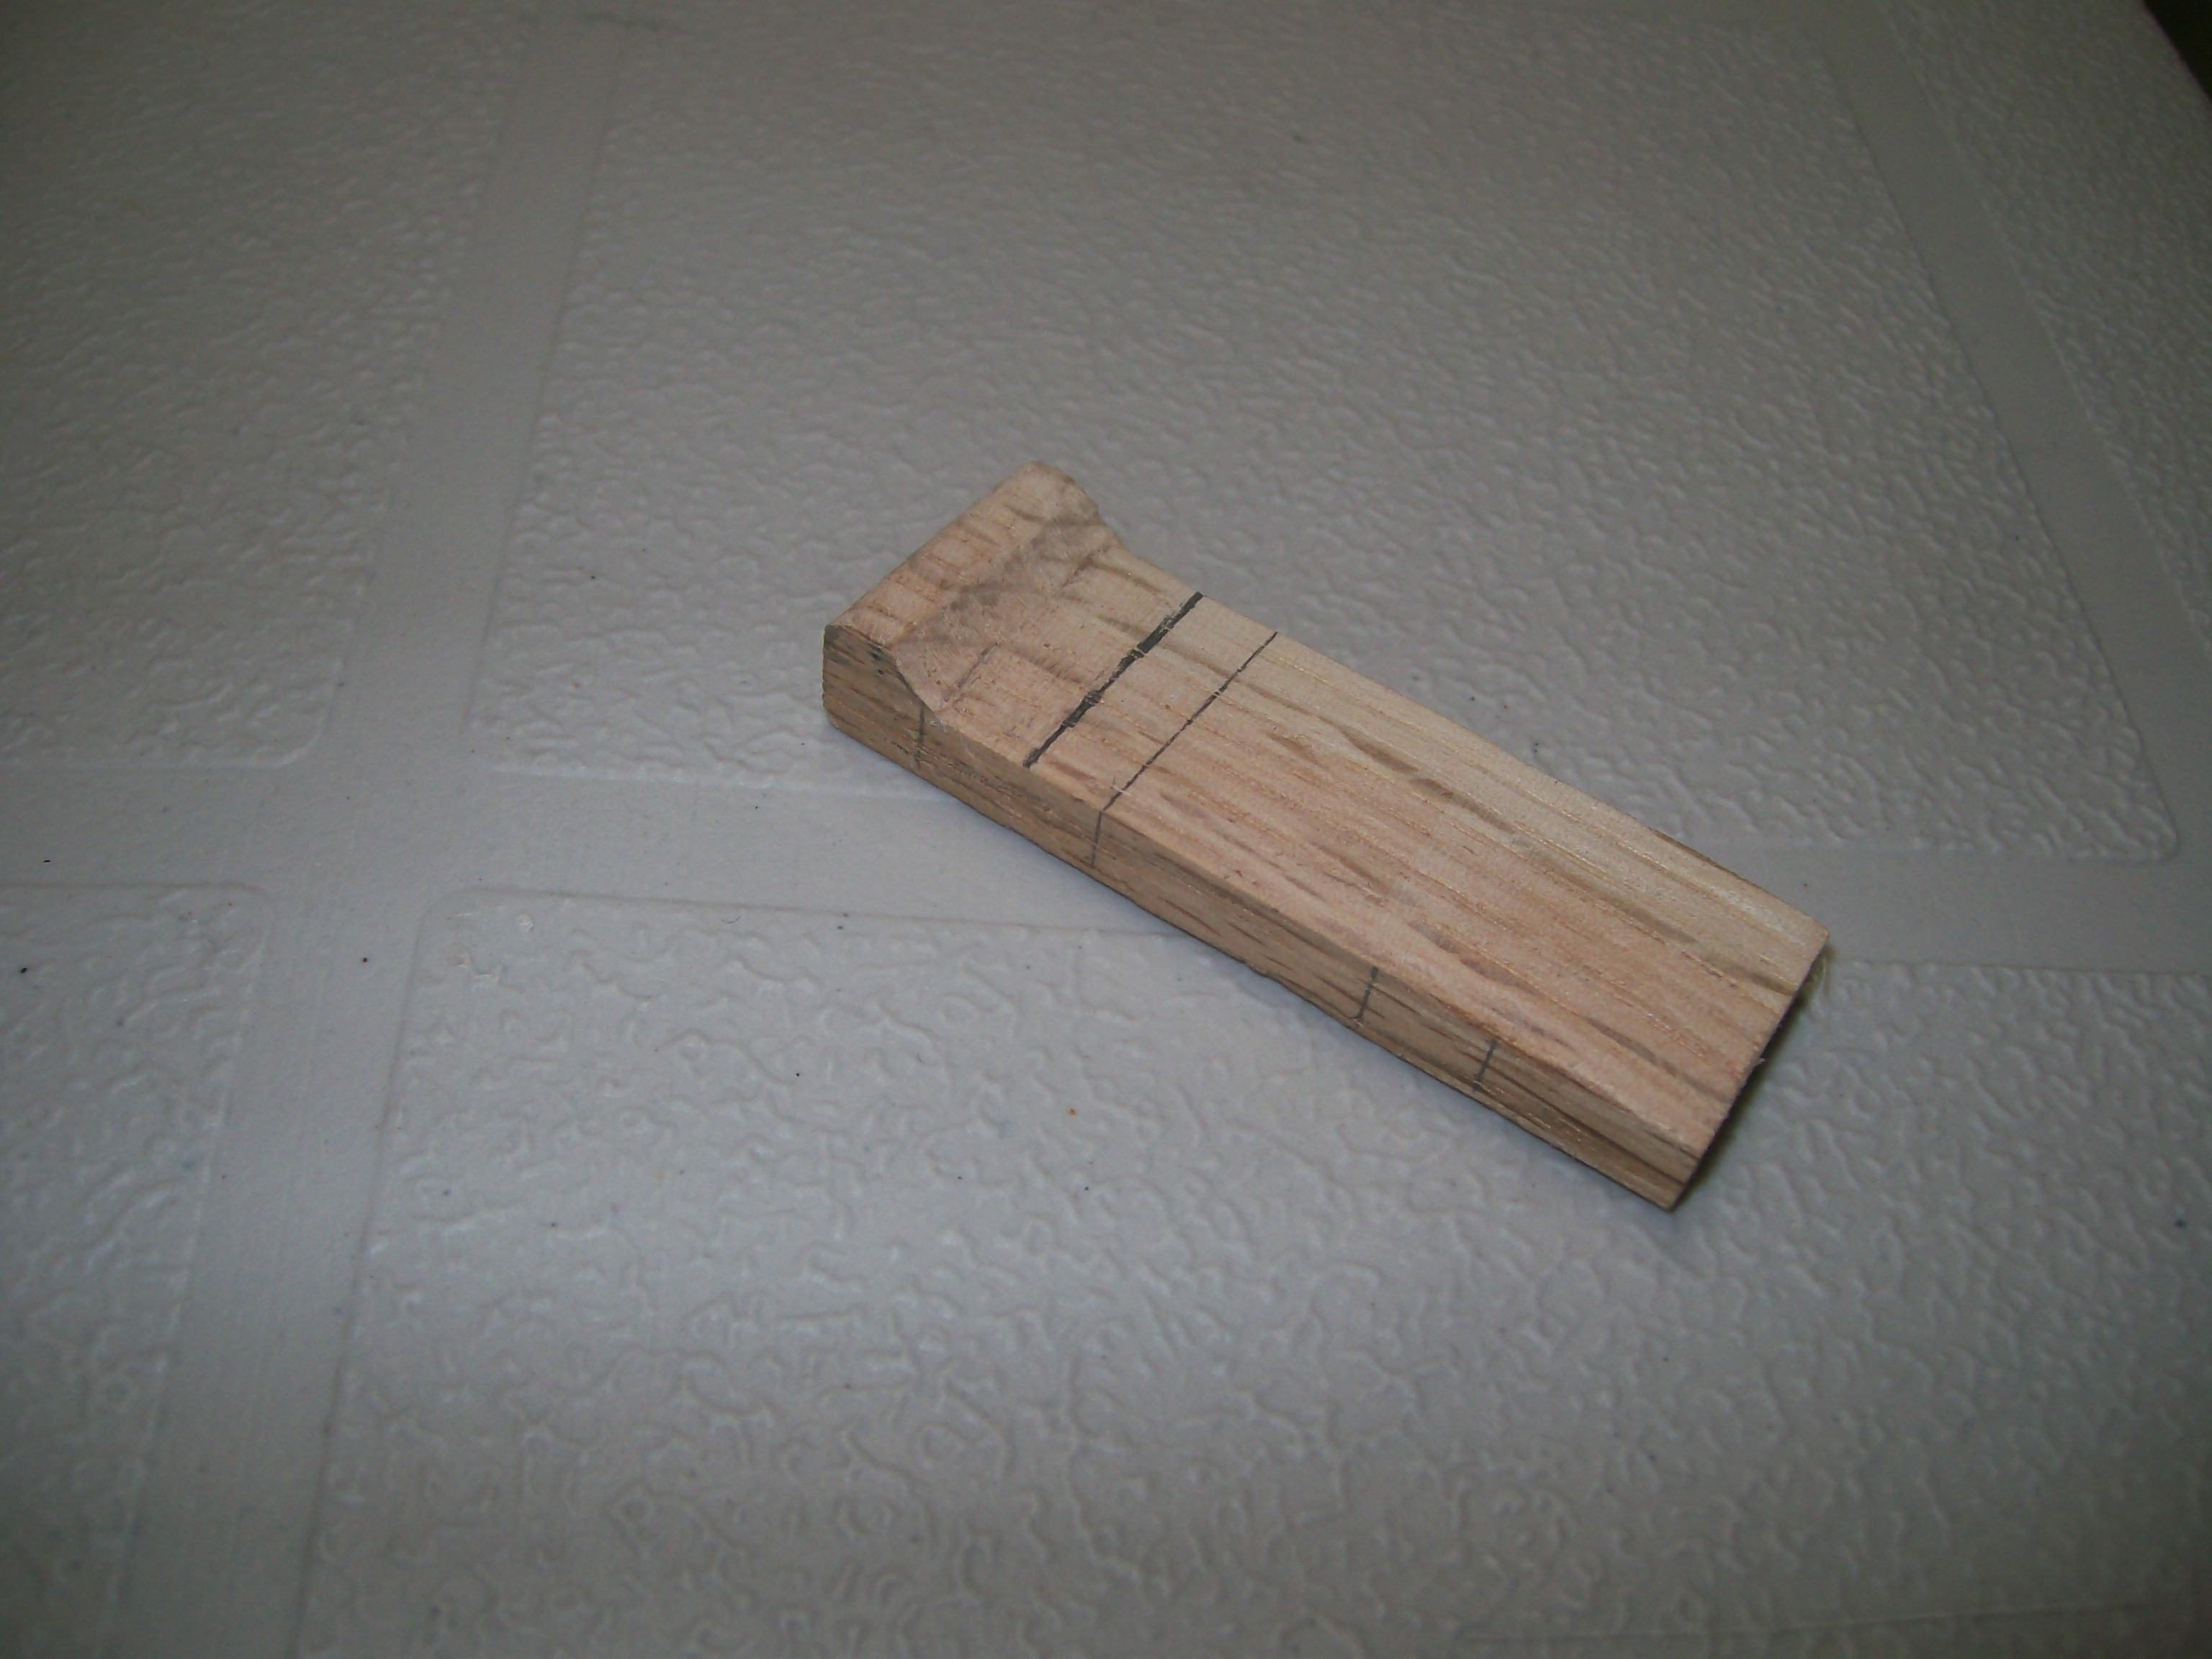
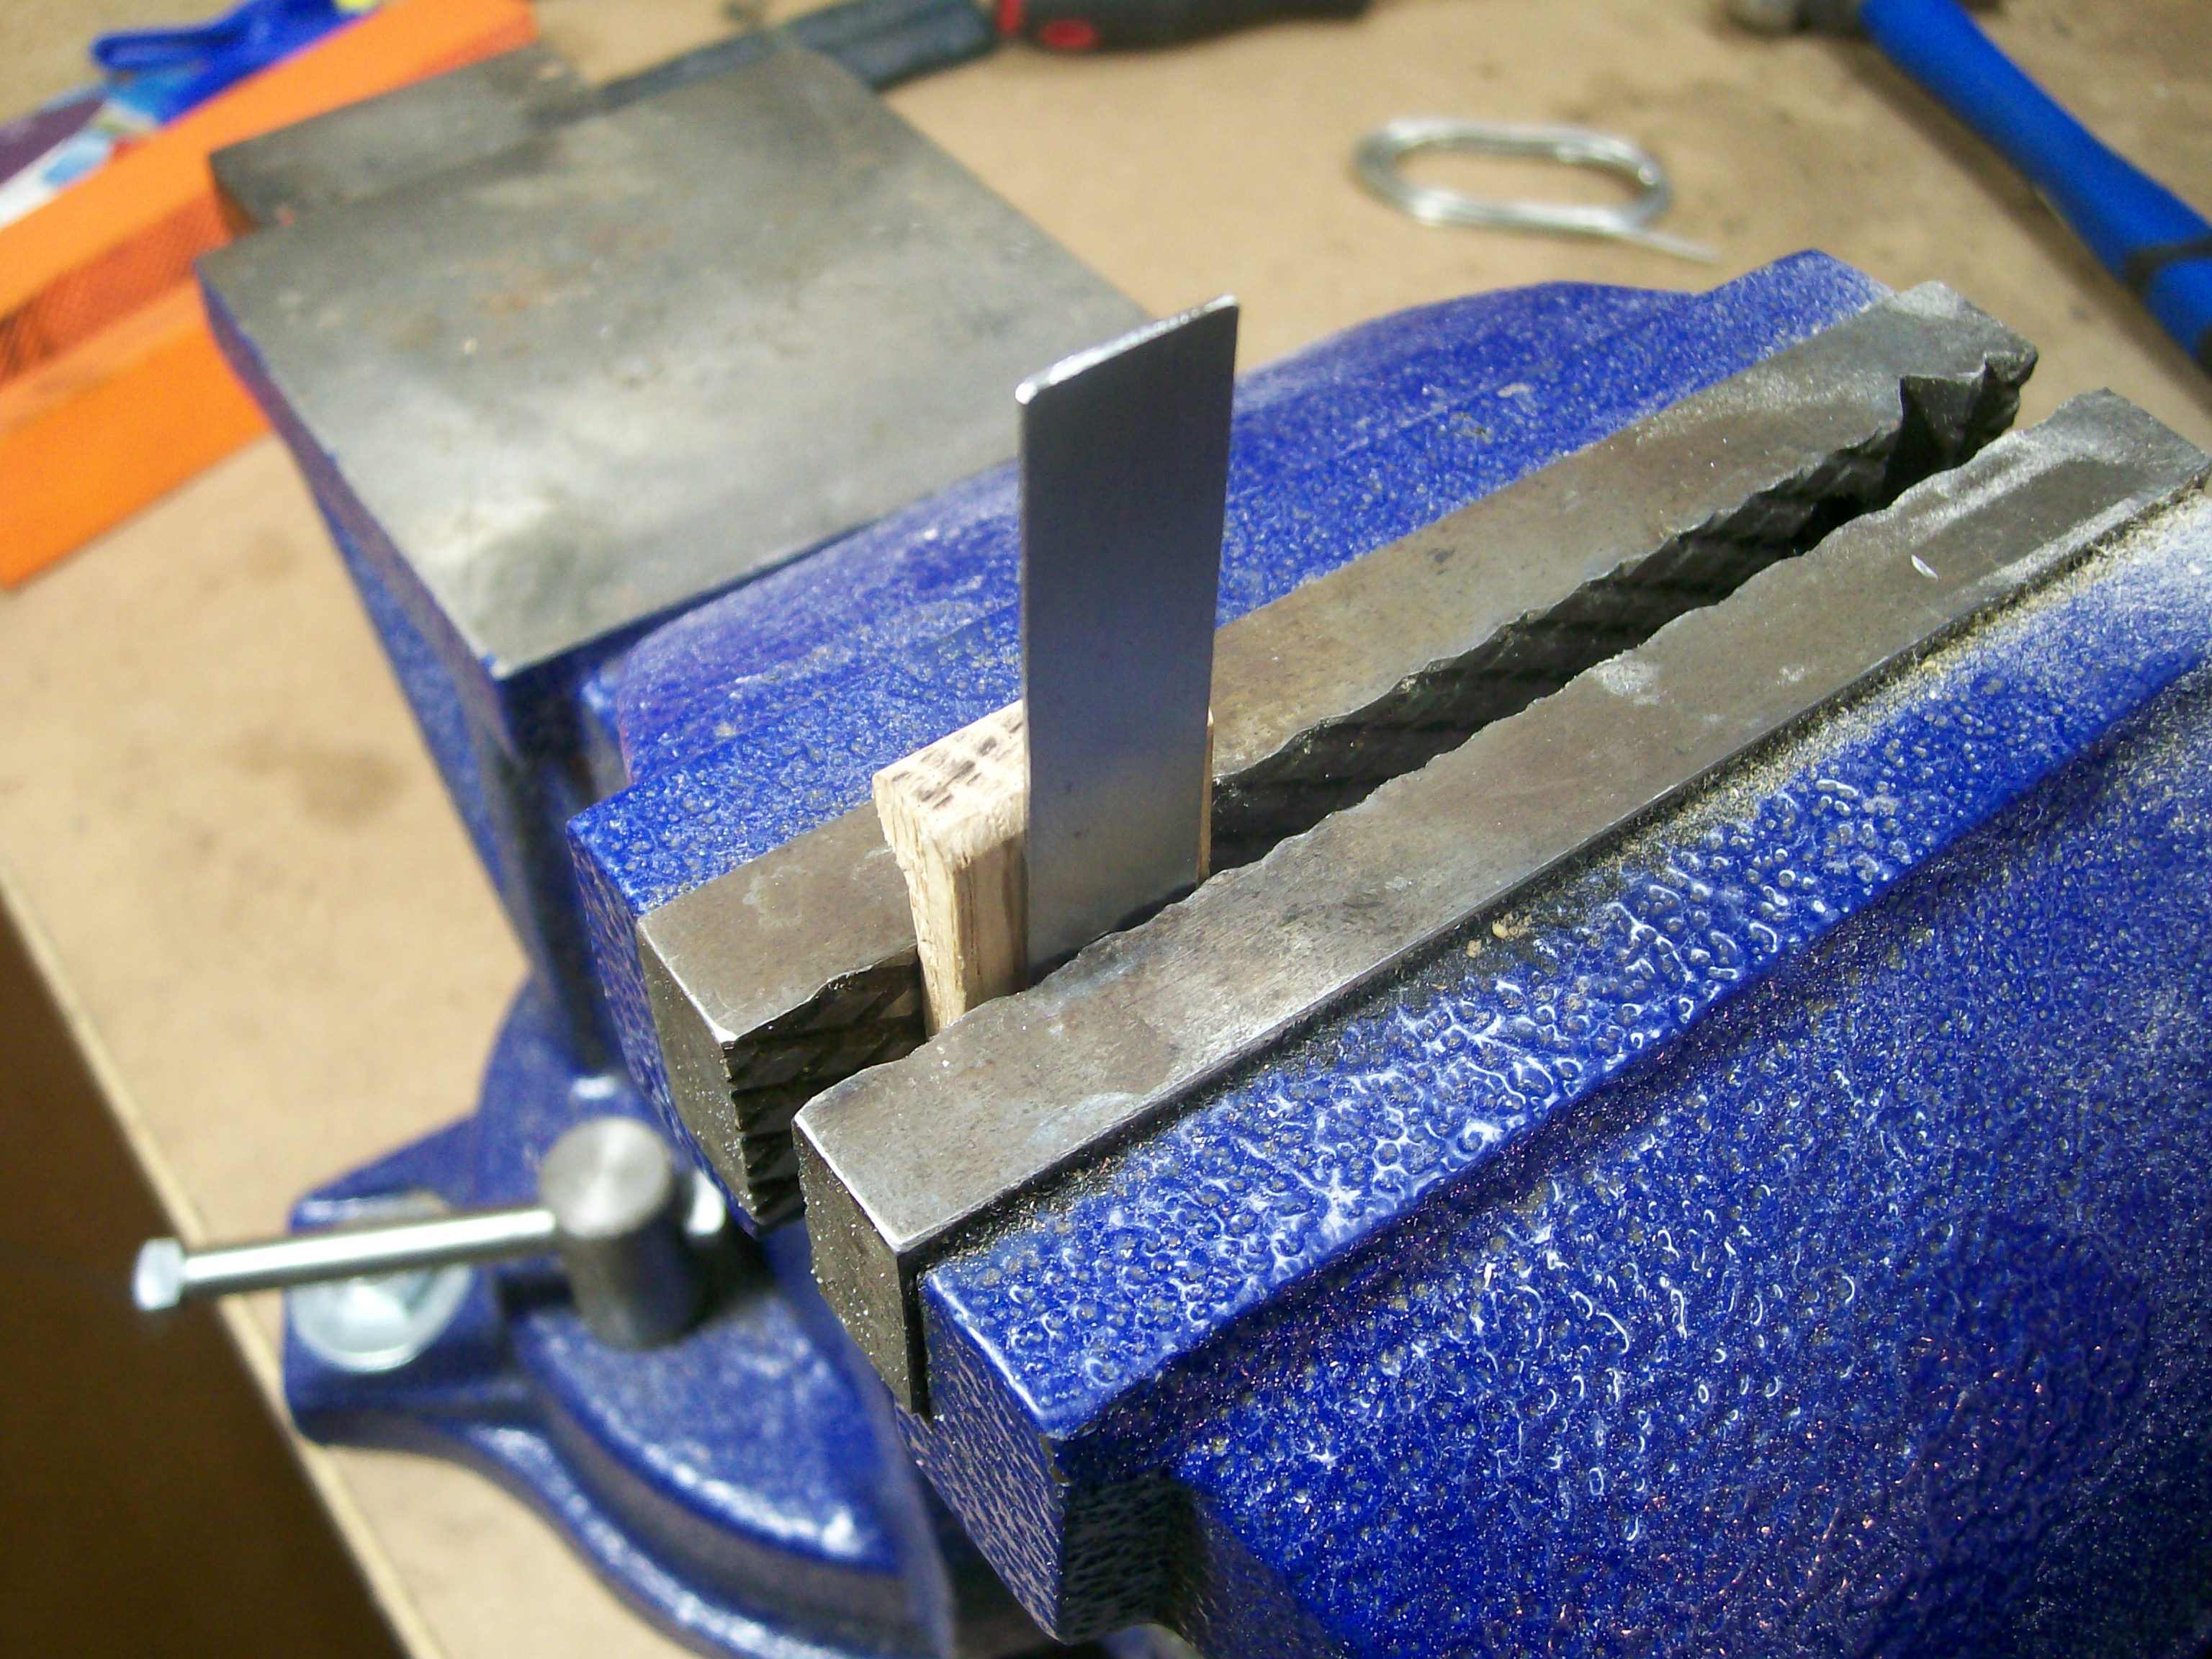
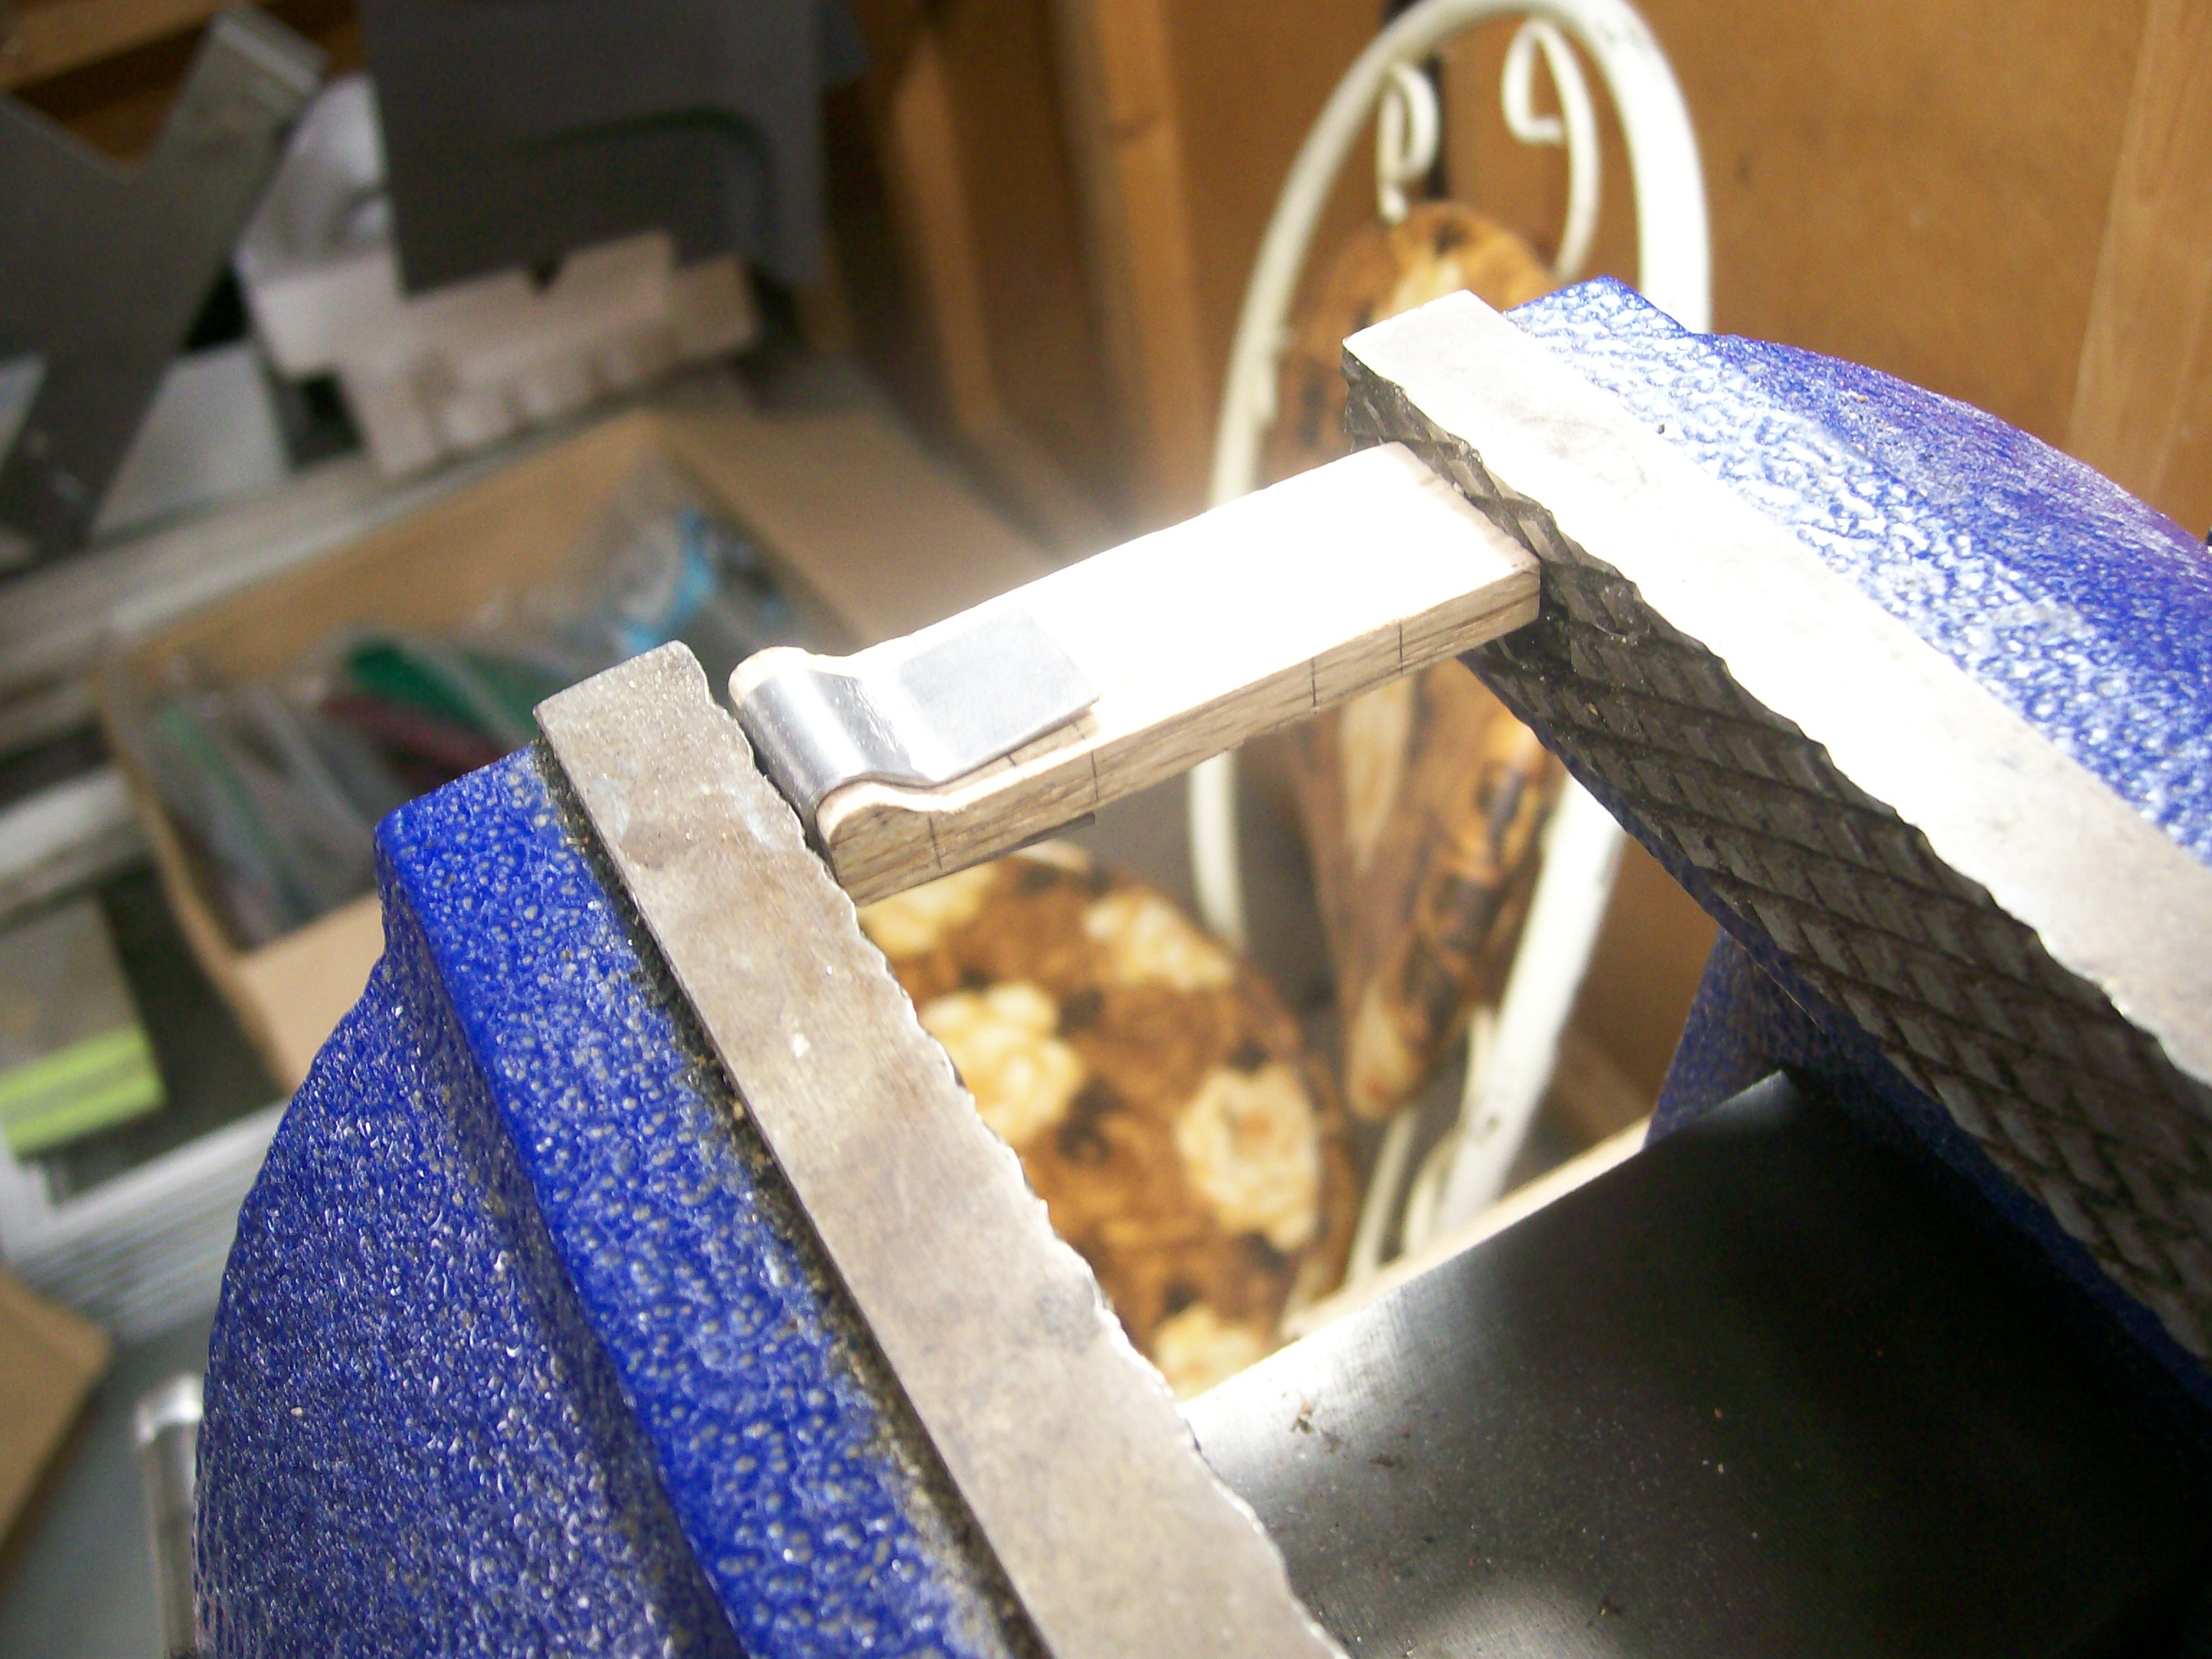
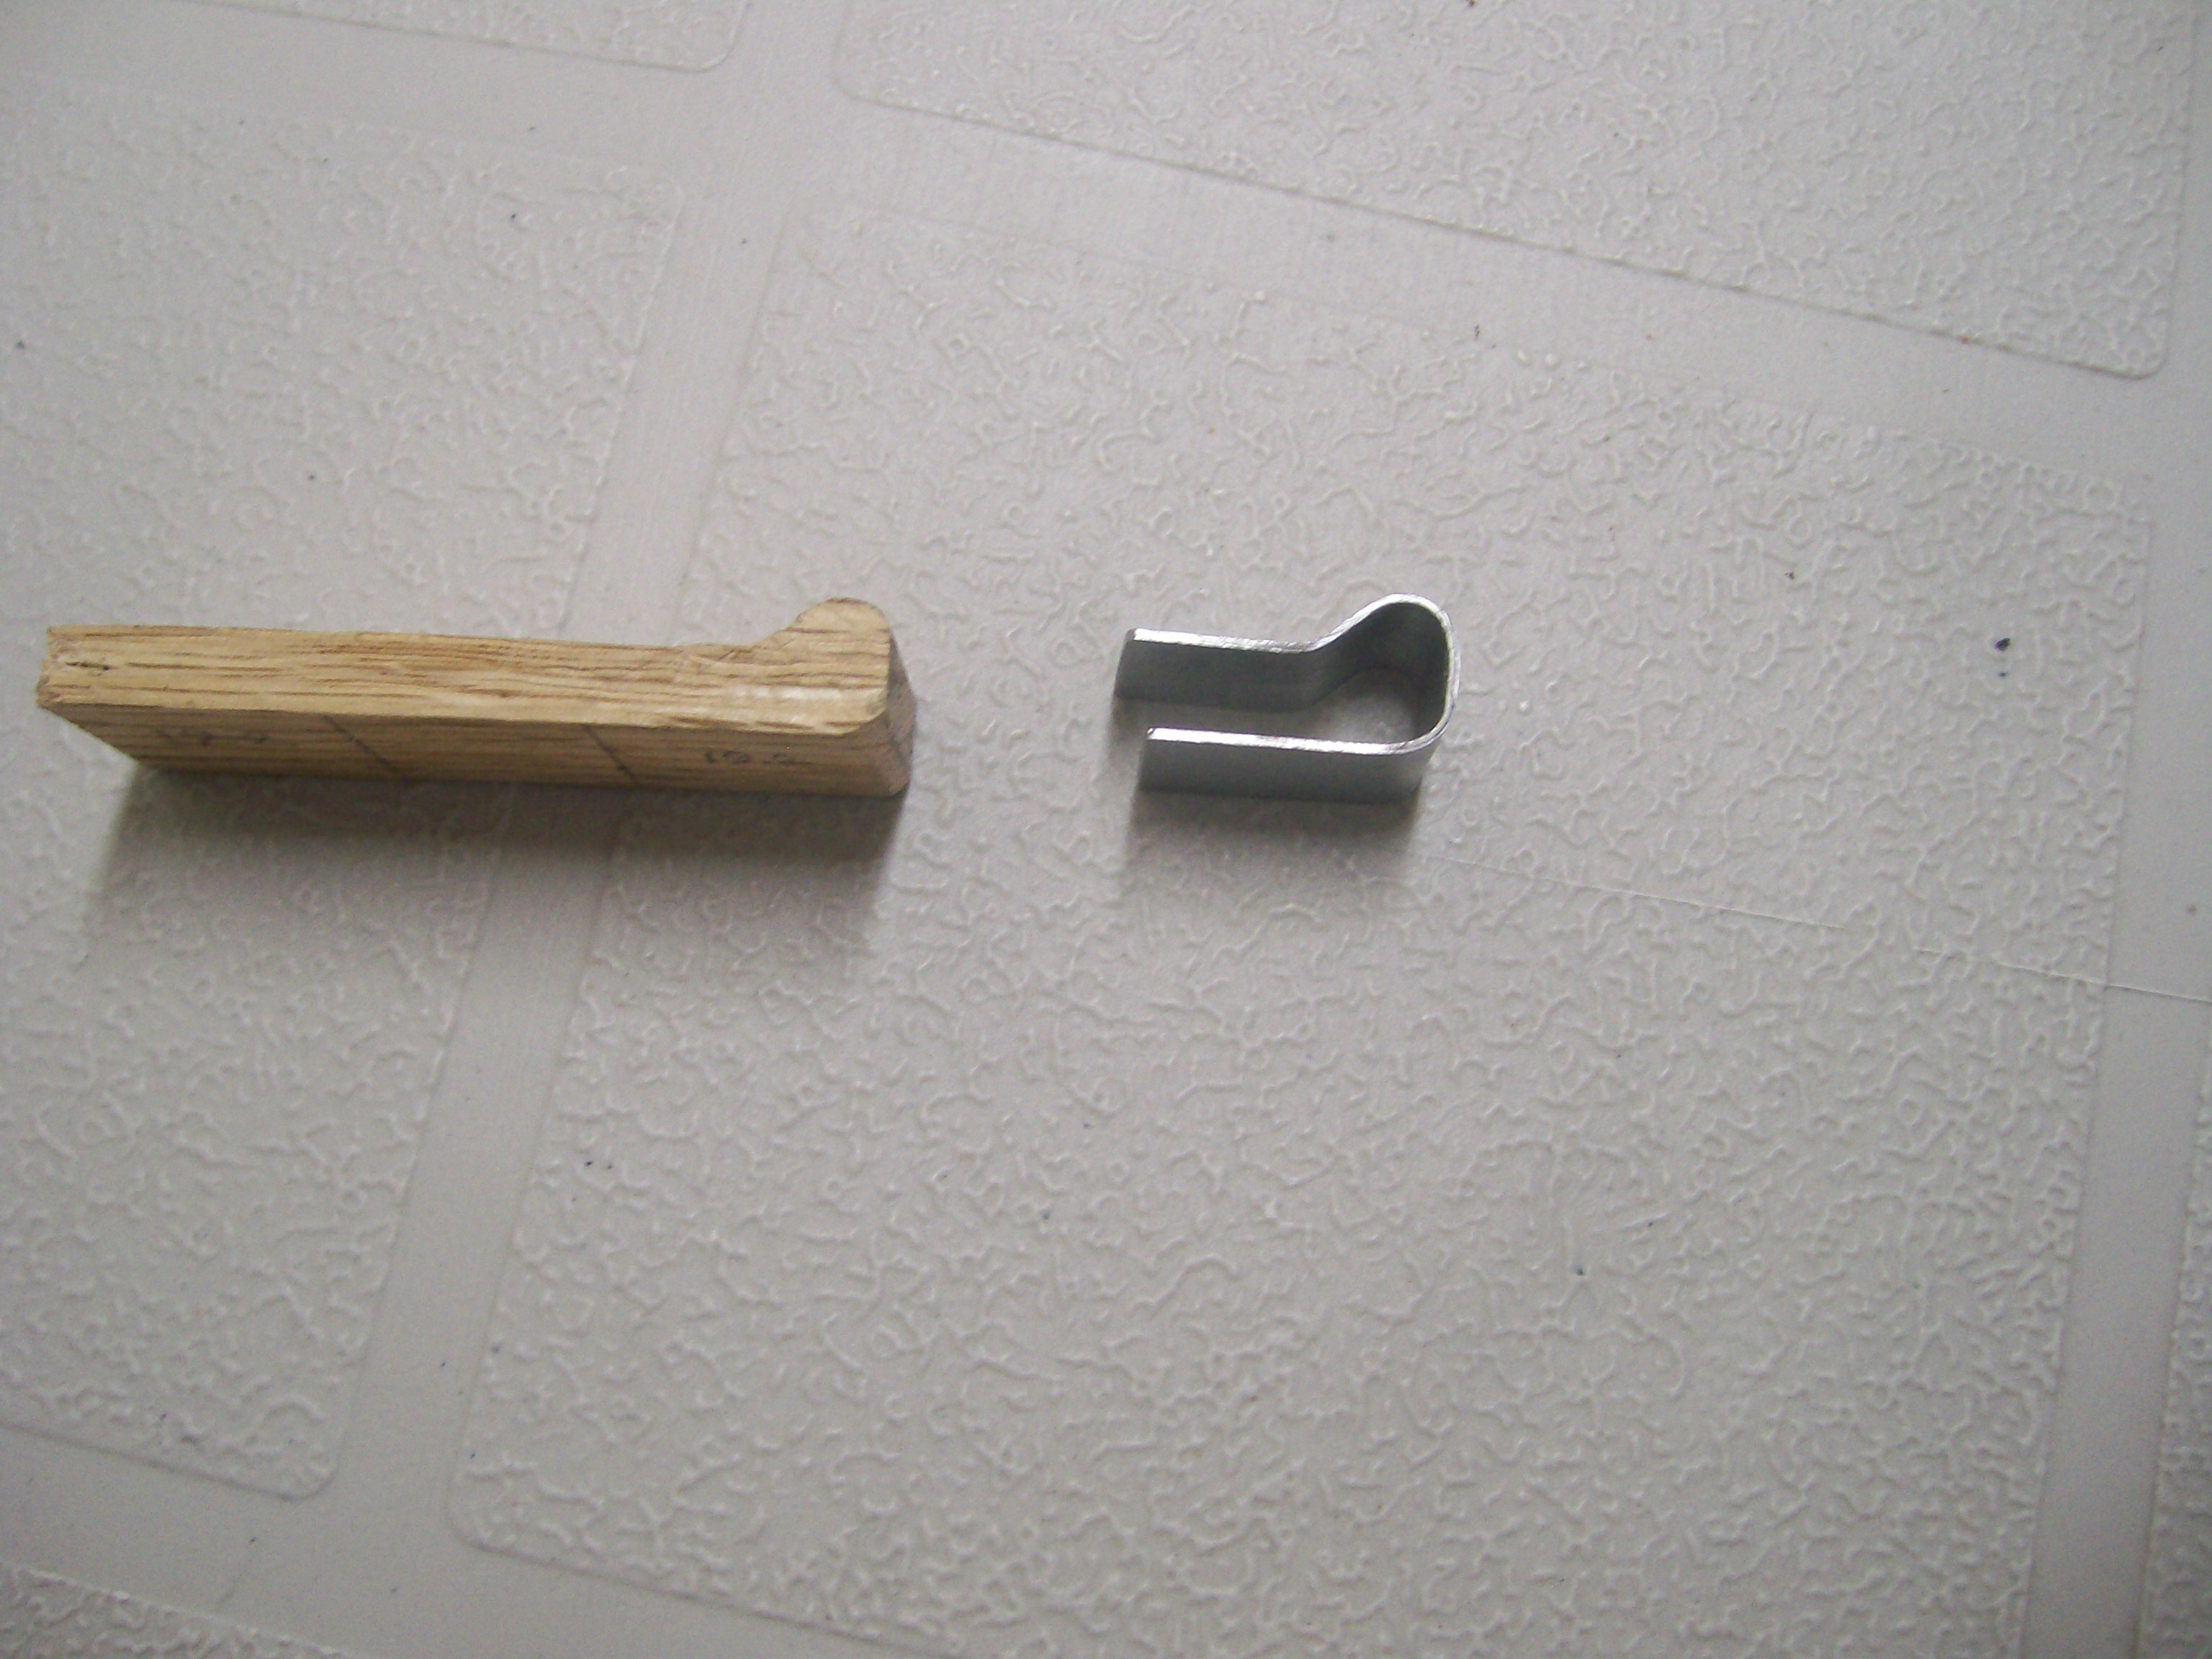
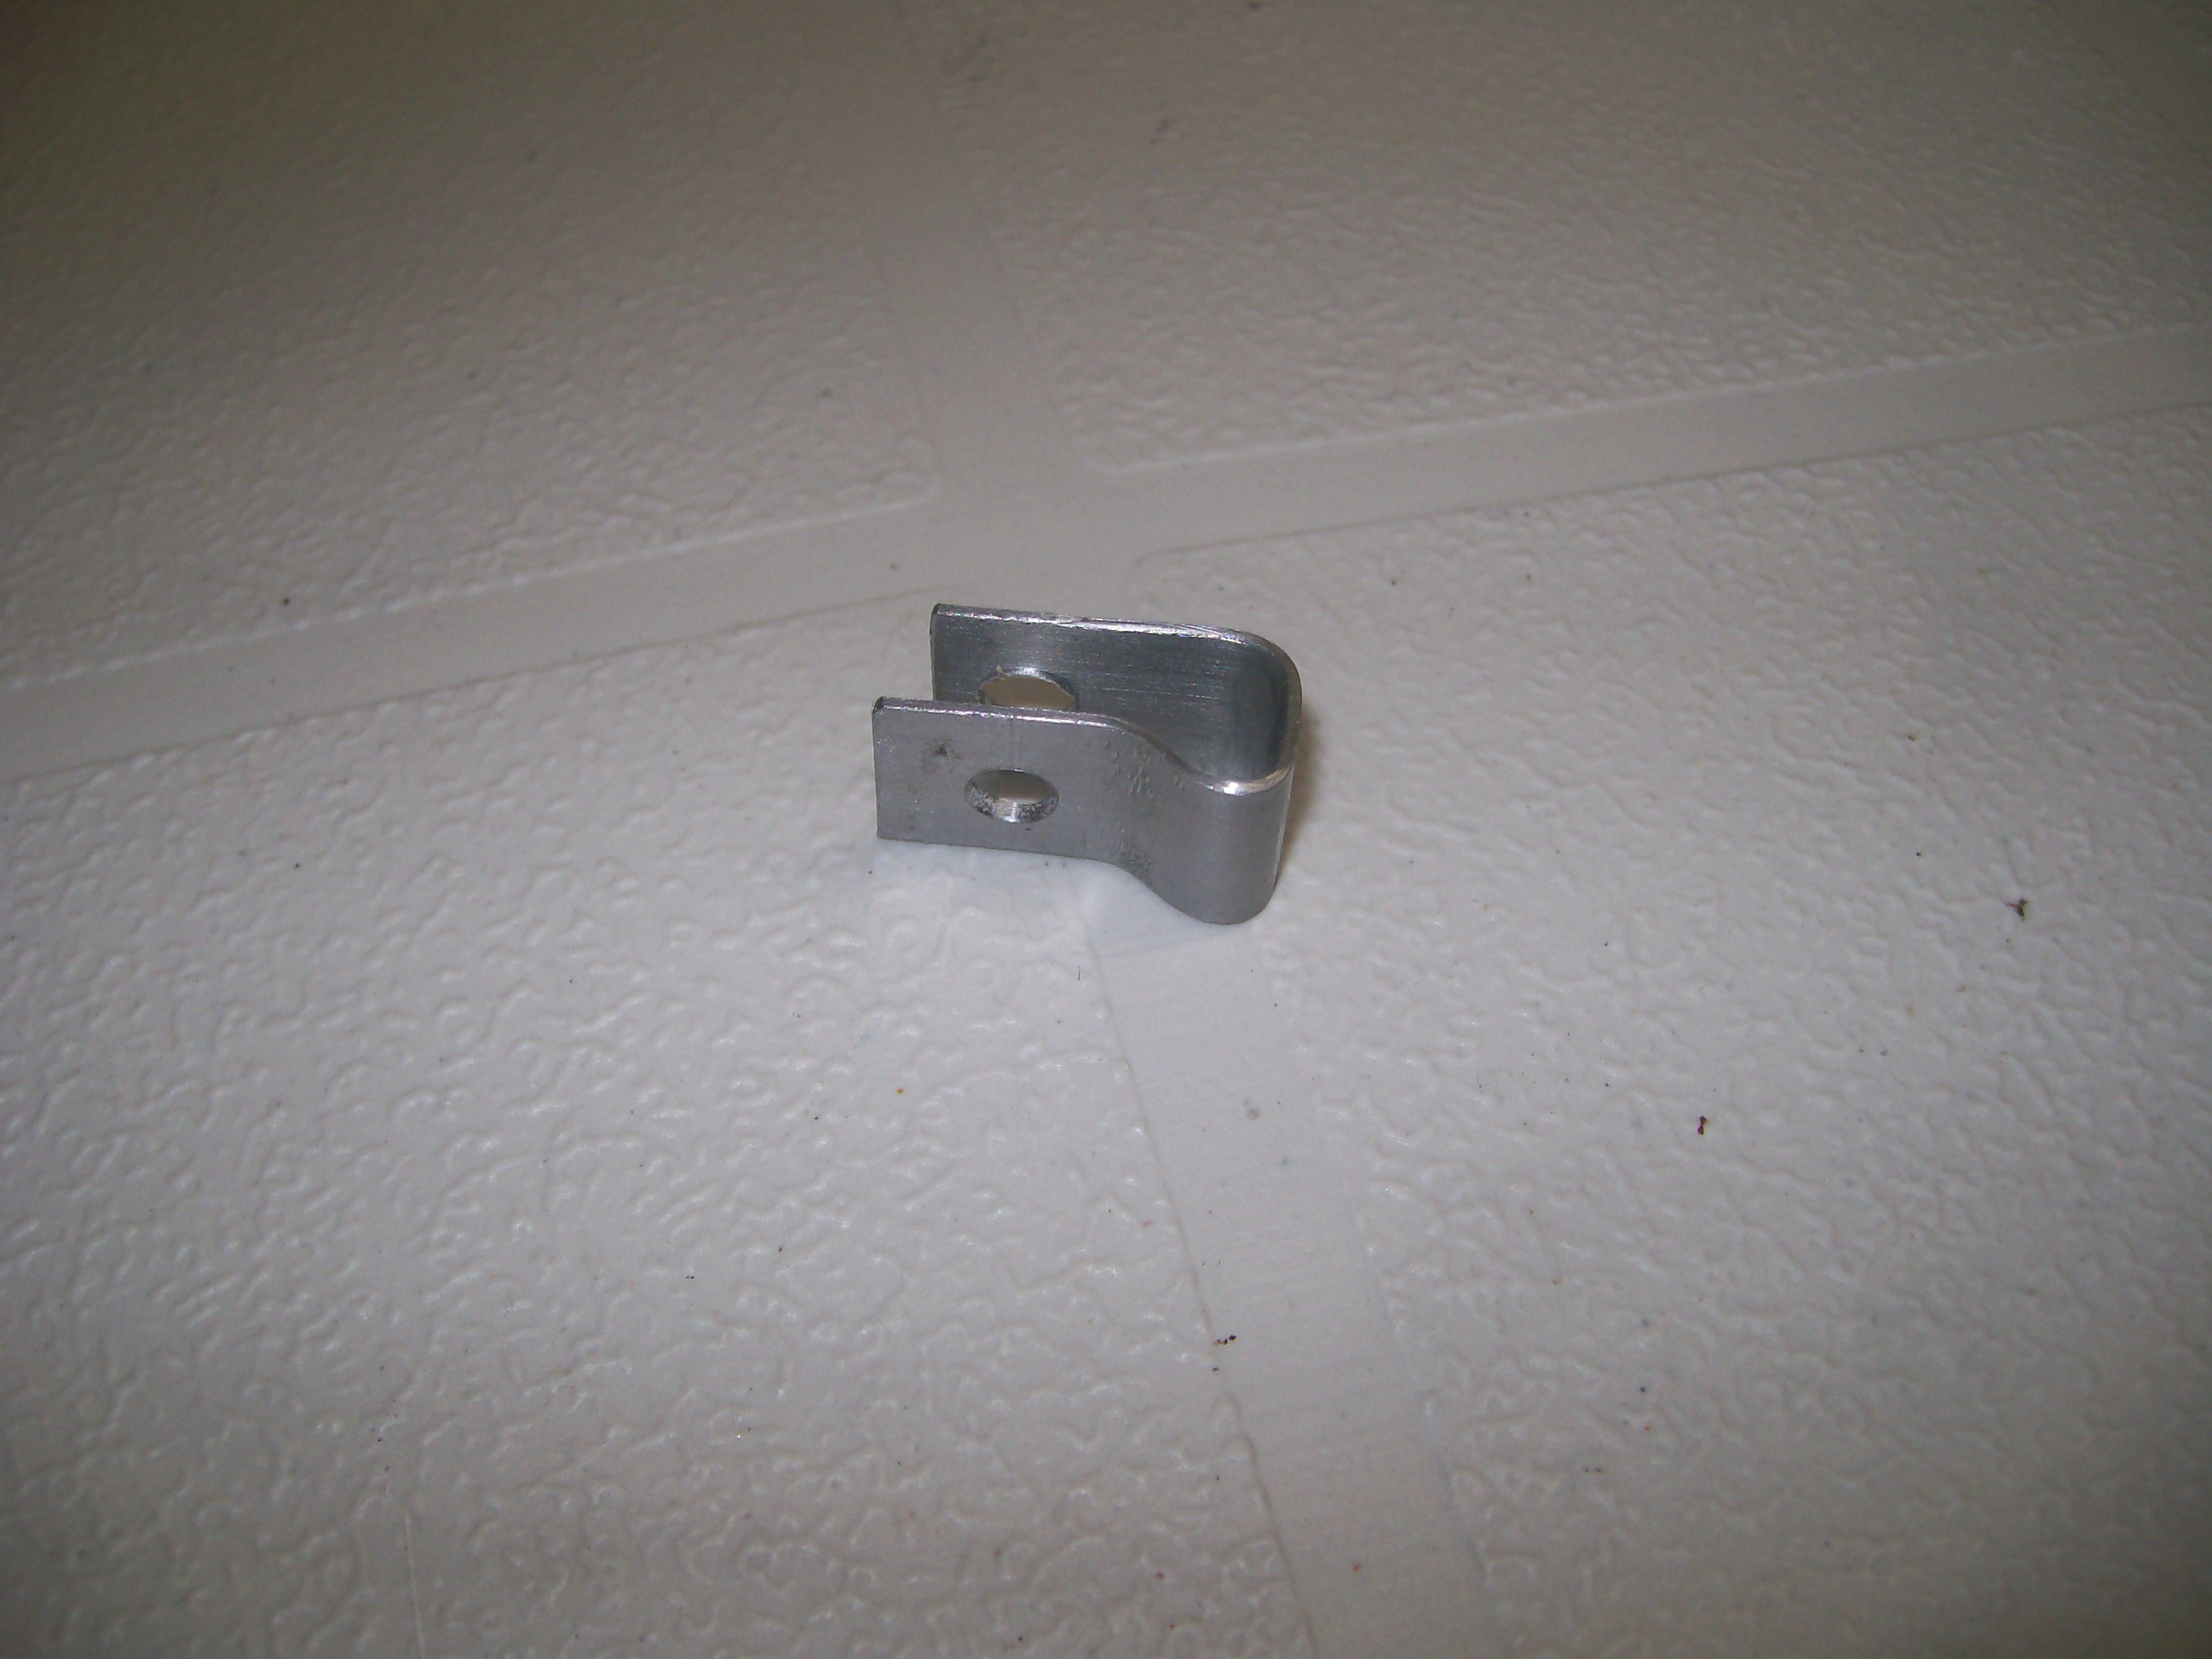
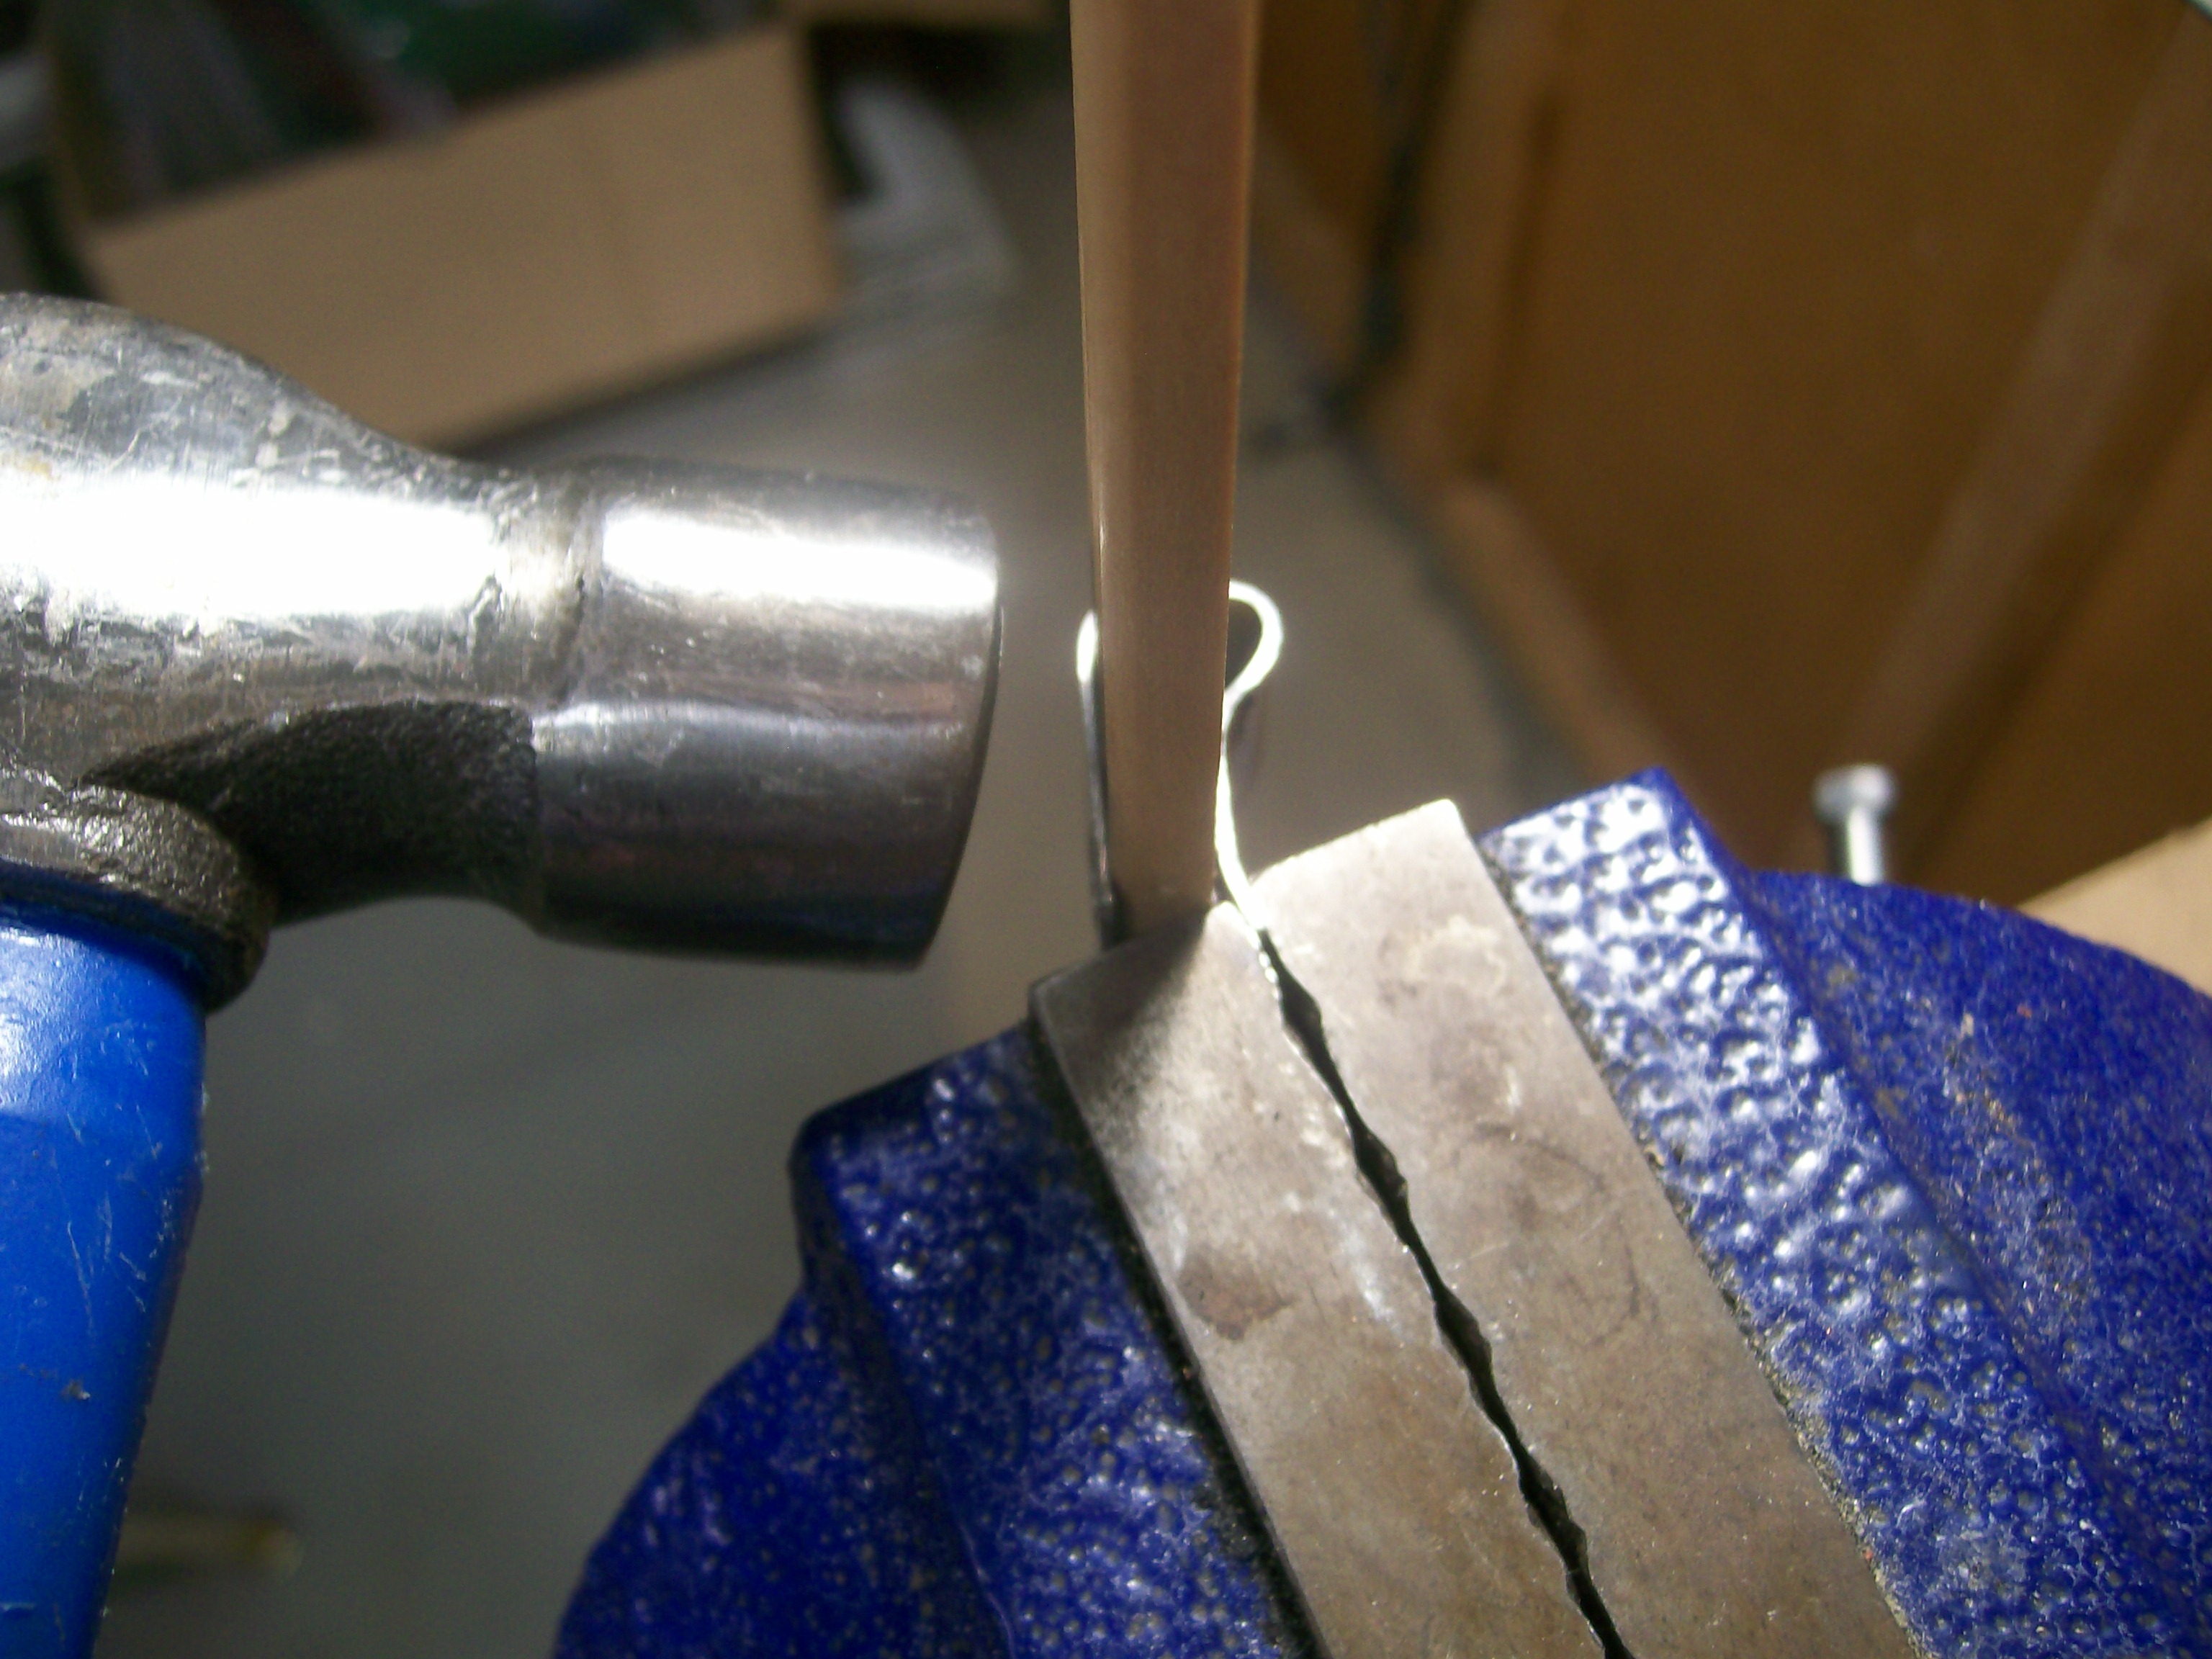
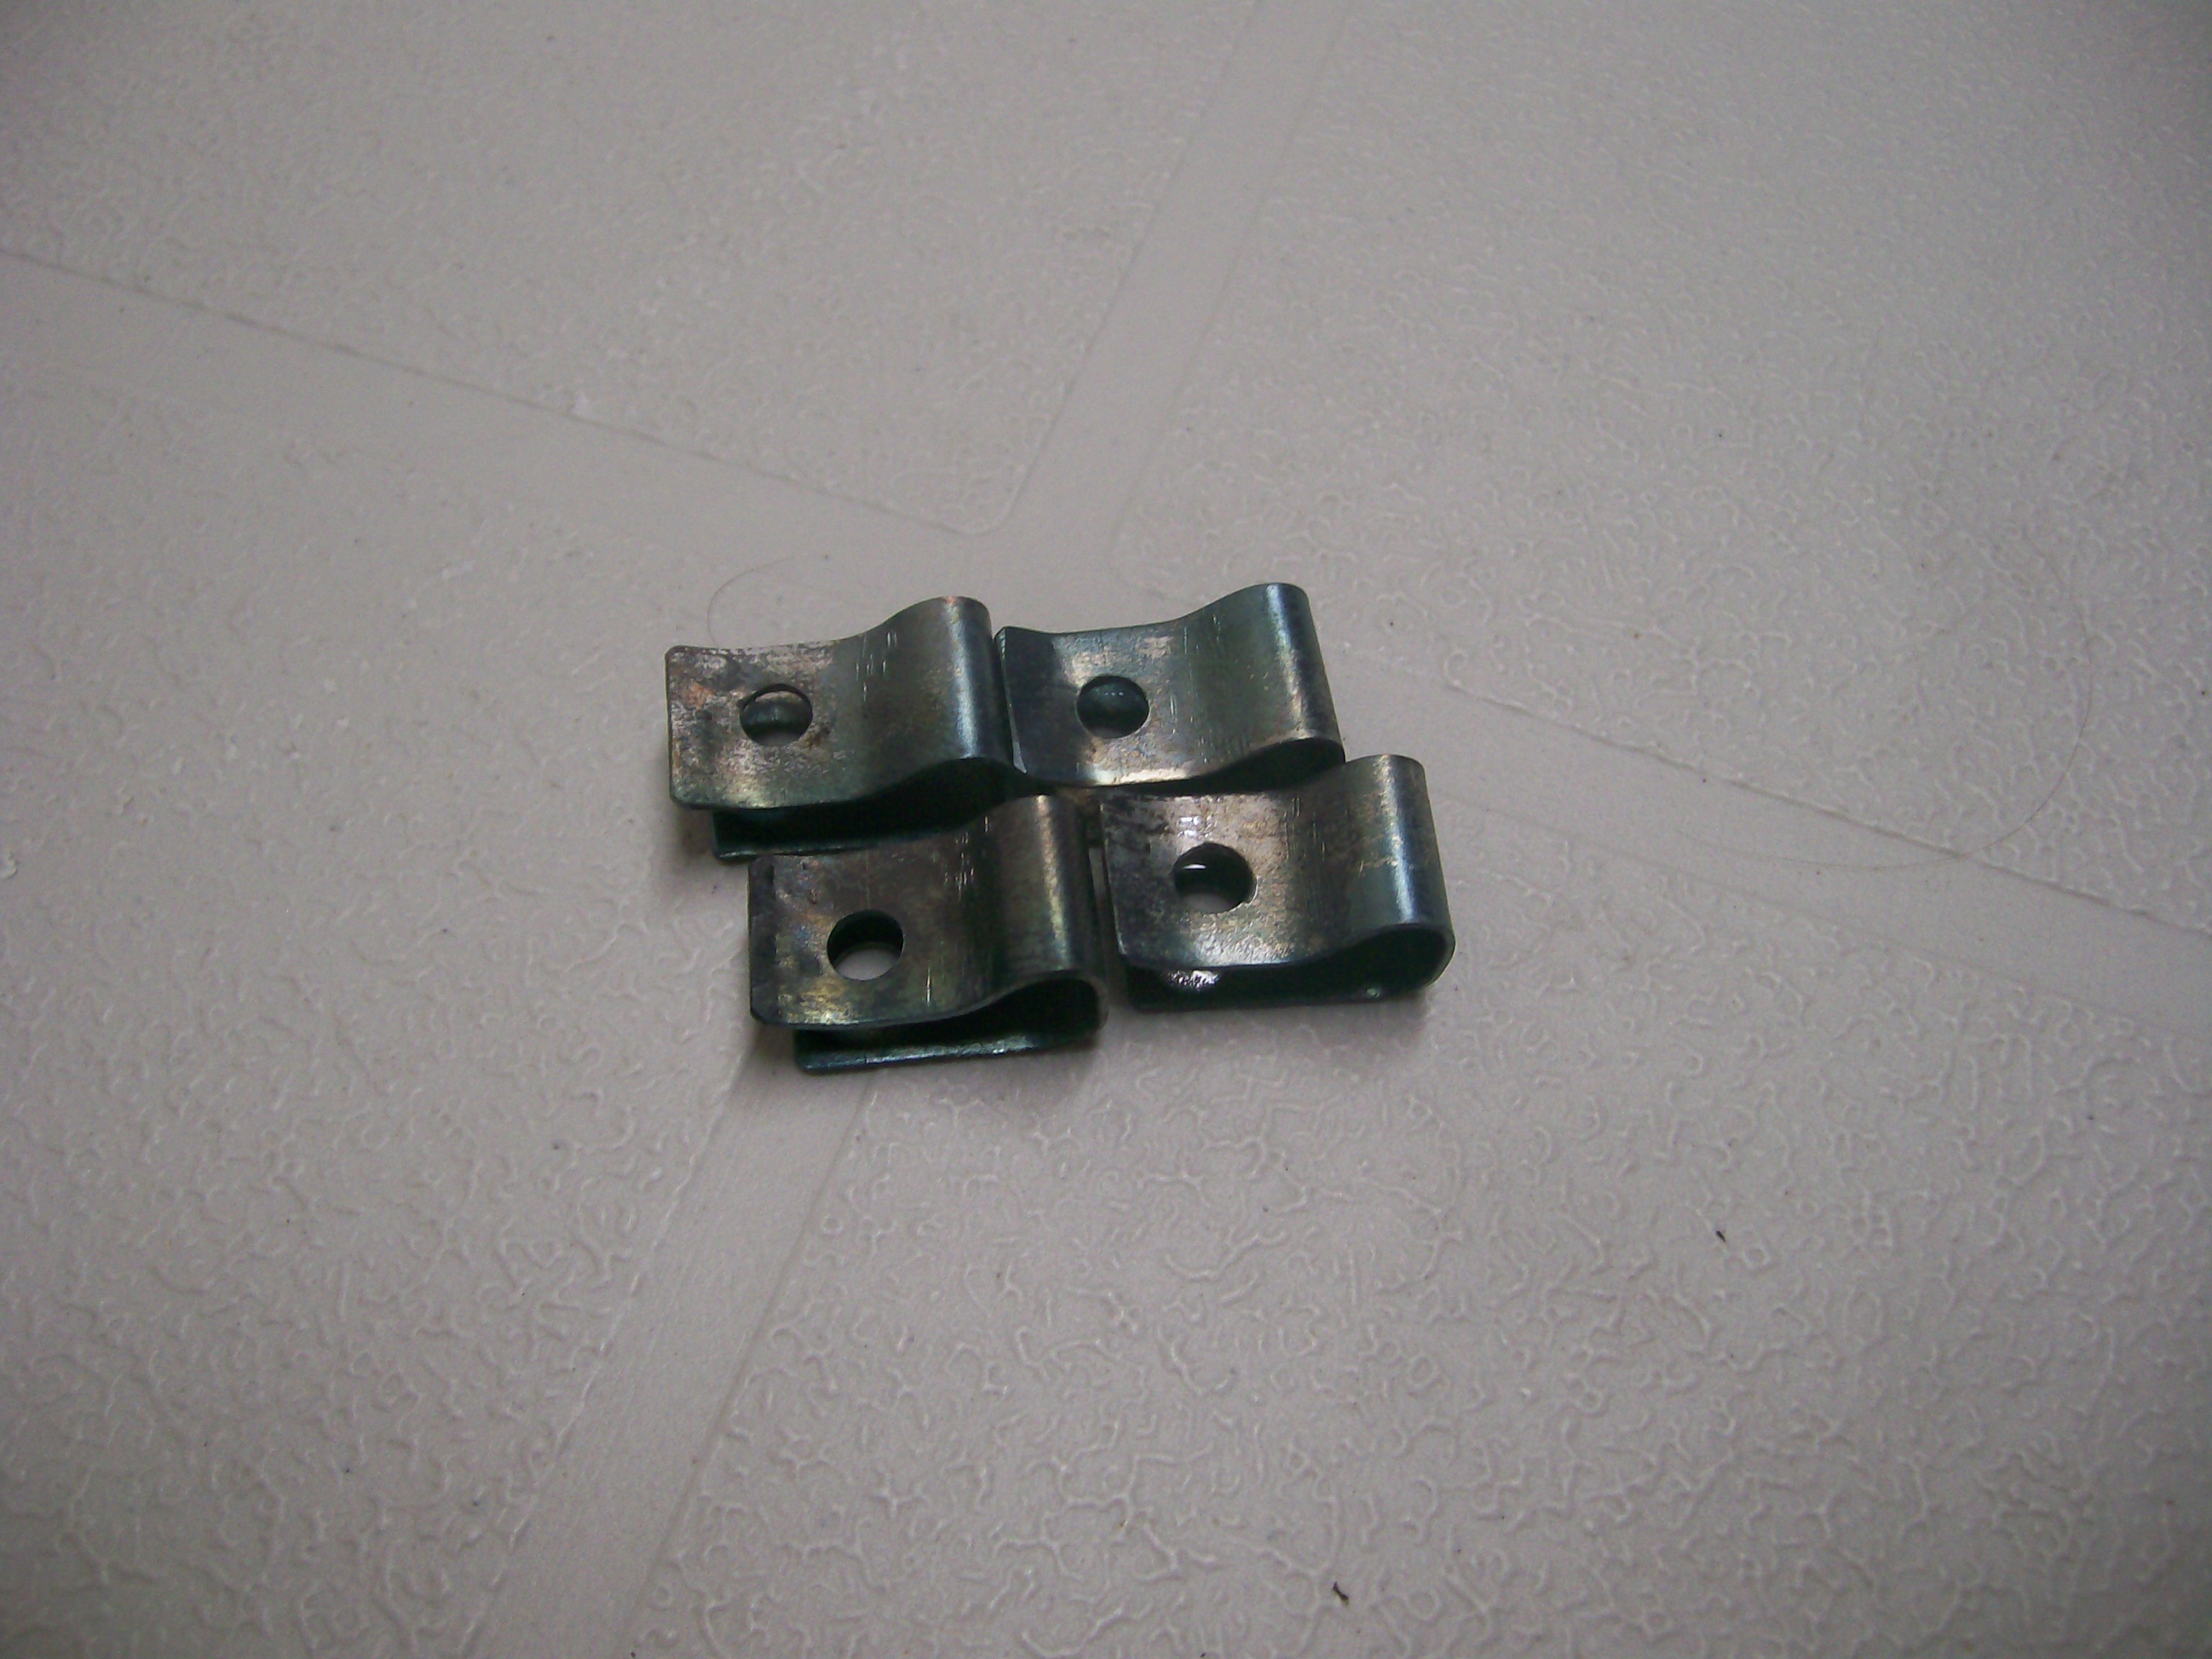
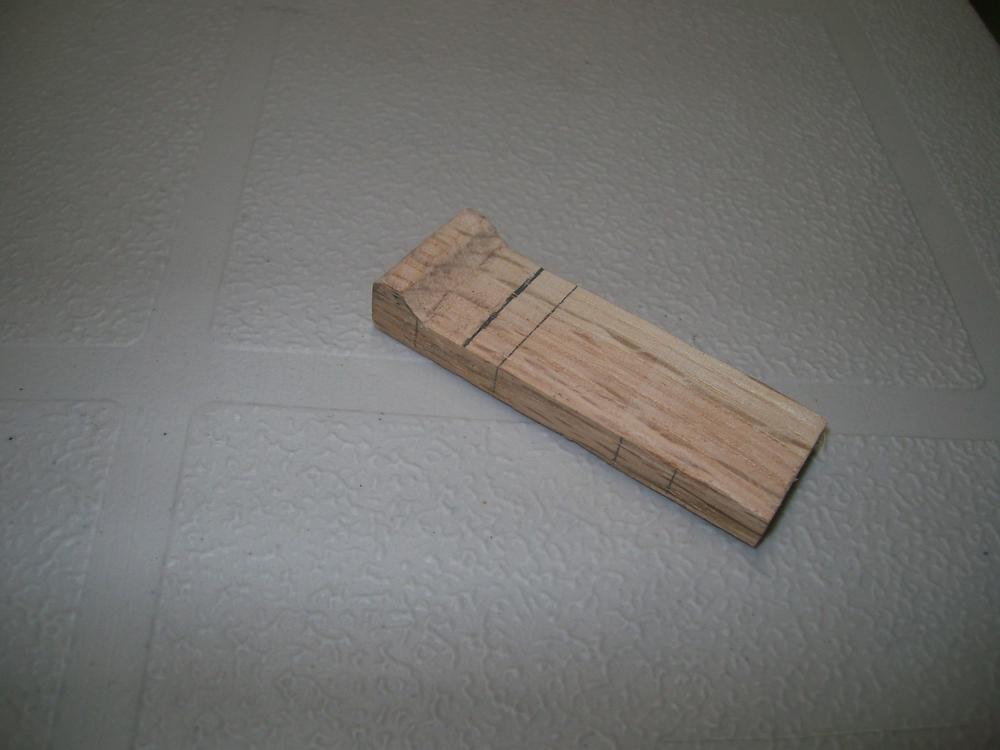
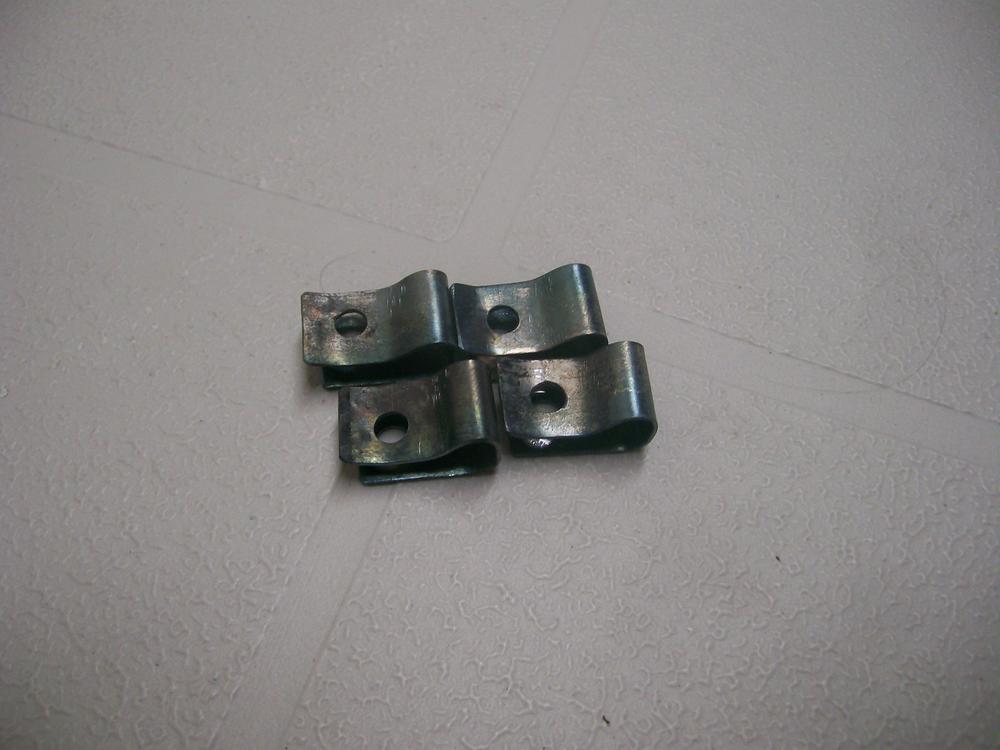
Now that Hardway has sold off his inventory and doesn't look like he's planning to commission a second run, I feel I can share my D-I-Y strategy with those of you who still need these pieces. The clips aren't terribly difficult to fabricate from sheet stock and they don't have to be made from spring steel (that comes afterwards). Here's how I made mine: 1. Using tin snips, cut 4 metal strips from 0.022" sheet (or close to that). After cutting, flatten the strips on a hard surface with an autobody hammer. Then de-burr all the cut edges with a file. x After cutting, flatten the strips on a hard surface with an autobody hammer. Then de-burr all the cut edges with a file. This had yet to be done for the pieces in the photo. 2. Fabricate a forming buck from a small piece of hardwood (softwood won't do). You'll need the buck to form the 'bump' in the closed end. The 'bump' shape is mandatory -- it provides clearance for the stamped flange that runs around the periphery of the vent opening in the hatch outer sheet metal). I used a power sander and a Dremel sanding drum to make my buck. When you're happy with the shape, mark the side edge for the location of the centreline of the hole that you'll need to drill in the clip after you've bent it to shape. x 3. Mount your buck in a bench vise, along with one of the metal strips. The vise jaws should clamp on one end of the metal strip and the buck simultaneously (keeps the metal strip in position during the bending process). x 4. Now shape each strip using, as appropriate, either hand pressure or your autobody hammer (use the flat part of the hammer for the outside bends and the 'pick' end for the inside bend). x x 5. Mark and centre-punch the hole center before you remove the finished clip from from the buck. Then, using another strip of wood of appropriate thickness as a backing/spacer piece, slide the shaped clip over the wood and then clamp in some fashion to prepare for drilling the hole. Because the hole has to pass through both the upper and lower leg of the clip, you'll need both the spacer piece and a backing board. It's preferable, but not mandatory, to use a drill press here. De-burr both drilled holes afterwards... 6 6. To finish up, give the clips a bit of 'spring tempering' by heating them up with a torch (get them just to start of glowing red) and then dunking them in cold water (sorry, no photo for this step) 7. Here's my end result... The total project probably took me 3 or 4 hours to complete (making the buck is finicky). Materials costs were ~ zero. Best part: The clips worked perfectly during the installation of my vent pieces.


 1 point
 -
1 point
-
go ahead and get the new foam and seat covers. It will grow a bit on you, but it will settle down also, I am 6'2 also and my hair just barely touches the headliner, I think it settles some after a while. You can't cut the foam down as the covers will not fit right if you do.1 point
-
1 pointI purchased this harness thinking my old harness was bad. I was wrong so I'm keeping my old and selling this one. I've cleaned all the contacts and re wrapped it with cloth tape. I added an extra ground wire because I've had problems in the past with the original ground configuration. One connector housing is slightly damaged but still works fine. Most of the terminals have been labeled. This is reportedly off of a '74 with a manual transmission. I tested it out in my car and it seems to work fine. I'm asking $95 including shipping from Cleveland, Ohio. You can take $8 off for local pickup.1 point
-
1 pointLooks like the L28 might need a lot of work before it's ready to install. The core plug in the back of the head has been removed, and I'd guess the head has been off for some reason, since it's not green. Kind of looks like somebody put the head back on the block just to save space, or make a sale.1 point
-
1 pointGood luck. Is the L24 engine out of the car now or are you still planning? How complete is the L28 engine?1 point
-
1 pointThe parts will all work together. It's a common swap. The 240Z exhaust manifold might not be the best for the L28 head, use the L28 exhaust manifold.1 point
-
What kind of fuel can you get in Germany? Part of the issue in the US is not all fuels are available in all areas of the country. Conedoger is correct the cam can mitigate the static compression number. Be sure you get the crank checked really well. They need to good and straight. Also I would balance the whole assembly, including the flywheel you plan on using. Don't put an old damper on this new engine, either get one remanned or buy a better one. Also get all your rods and crank magnafluxed for cracks. I would shot peen them too if you have anyone that can do that for you...1 point
-
I have been wanting to redo my OEM seats for while. IF you saw mine you would think they look perfect. They are not faded or torn or even the slightest bit worn. However, I have always thought the foam had given up the ghost. Come to find out the PO had the OEM seats recovered, but did not do new foam. So what is a guy to do? Well I was dead set on getting the Kameari seats for the car. They are just absolutely stunning. But something tells me that they may be a bit too narrow. Plus they are 1700 dollars plus brackets, plus 575 dollars shipping. That is a hell of a pill to swallow. I probably could have saved for it, but the thought that they would be narrow and hard to get out of gave me pause. Having narrow seats is not the end of the world, I would fit, but having seats that could cost upwards of 2500 dollars that are also narrow, is just too much of a risk. One day I may see some and sit in them and realize they are the best seats ever, but I just cannot gamble with that much money. So I had what I thought to be a clever idea. I read about that interior shop www.interior-innovations.com that some of you spoke highly of. I decided to give them a try to see what I could come up with. I picked out a leather seat cover with silver stitching and a leather shift boot to match. I will have a classic Z logo on the headrest also in silver (may have gone too far with that, but you only live once), the pic below shows modern Z. I had to photoshop this pic to show the company where I wanted the buttons exactly. I will have the OEM buttons carried up the back of the seat as shown in the picture. Overall I am quite happy with the results. I think it will have the look of the Kameari, but keep the OEM seating position and brackets and allow me to order OEM foam replacements as needed. I cannot wait to get these in.1 point
-
Well shucks, I am thrilled you have the same ones. I wanted to see a vintage Z logo. Thanks for adding them for completeness. Now if only I did not suck at photo shop. I would cut that and paste it on my image above. I am glad you like them. Is that the leather or the synthetic leather pictured.1 point
-
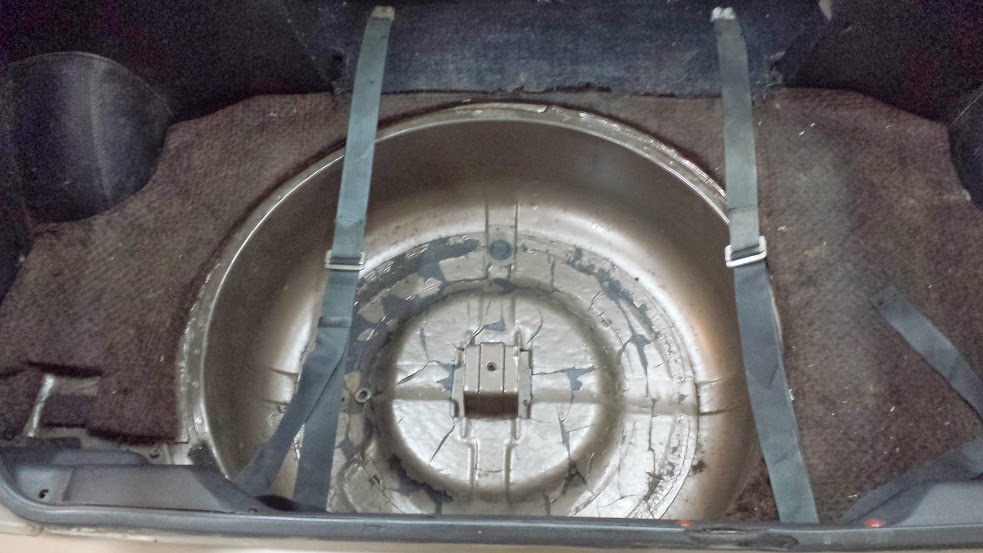
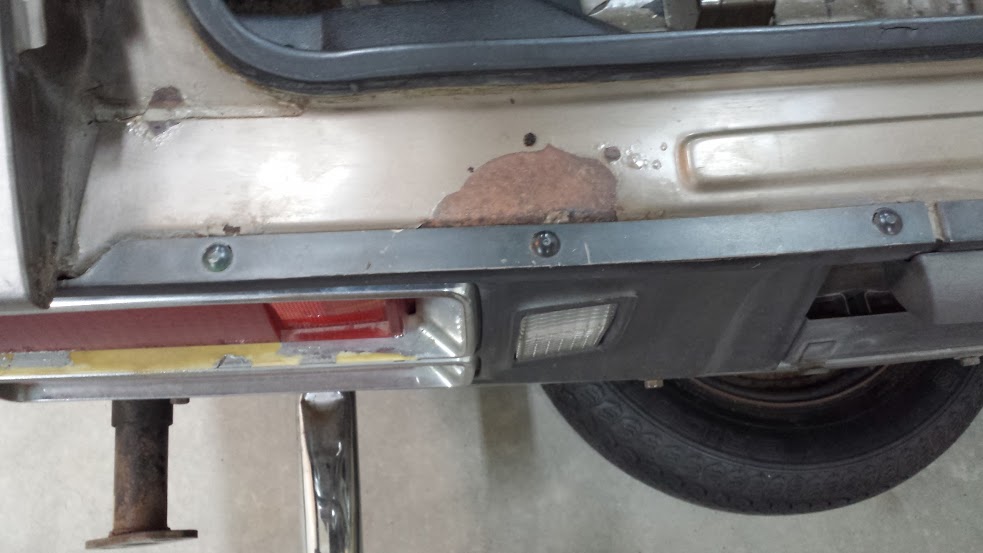
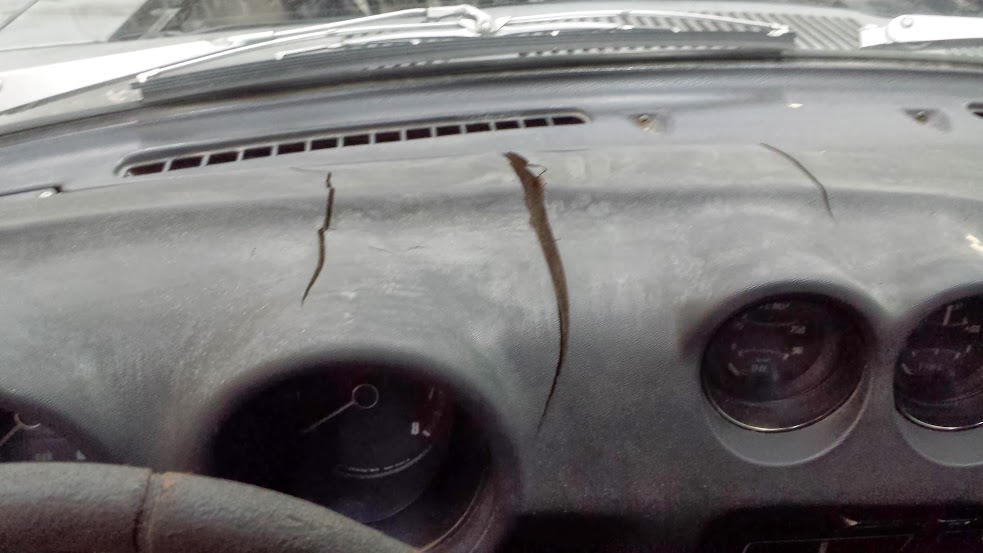
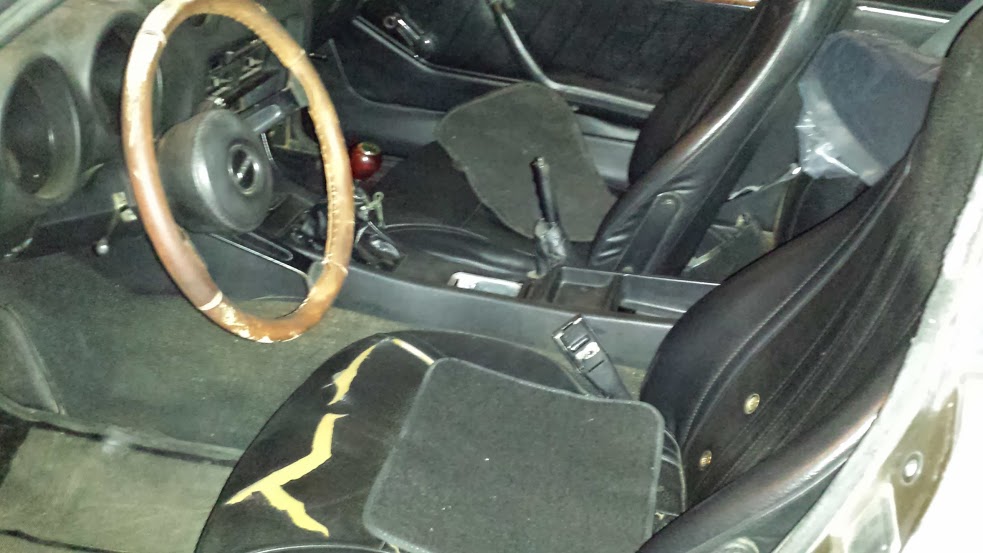
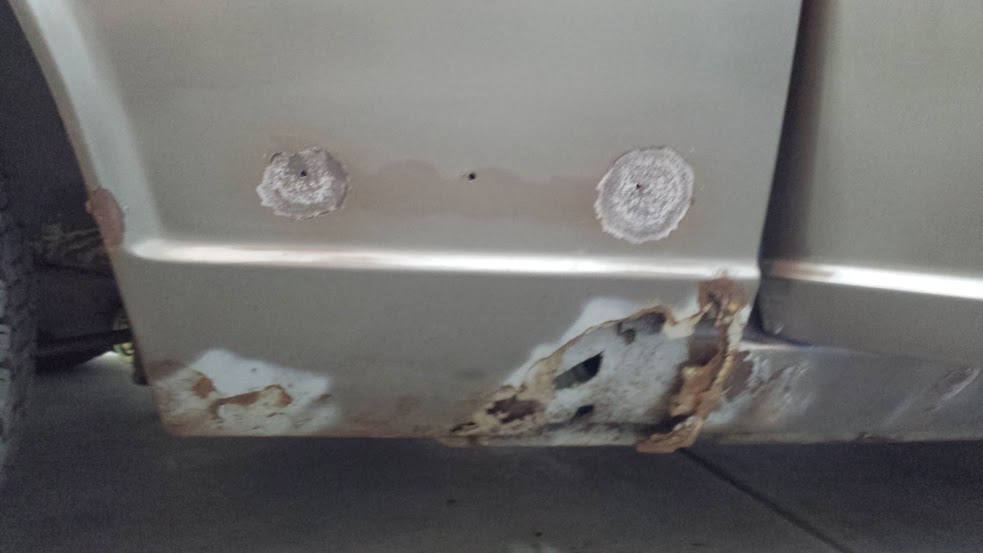
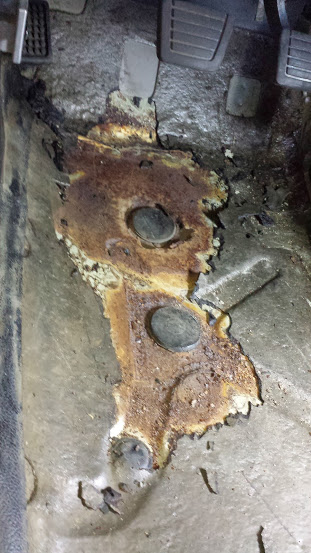
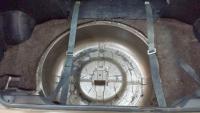
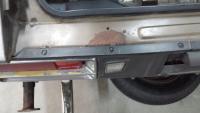
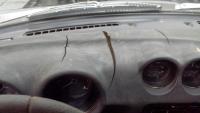
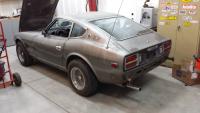
1 pointSo once I got her home I had a chance to really look her over. Spare tire area looked good so thats a good sign. Some rust on the rear hatch. Dash has the normal Z cracks. Interior is rough but complete. Also removed the rear bumper Fenders need to be replaced Drivers floor pan is pretty bad. Some more rust The drivers frame rail is rusted, both frame rails in the fender wells are rusted, the battery tray is pretty bad, and the rockers are rusted as well. There are definitely cleaner, more rust free Z's out there but it could be worse. I decided to move forward with the project and began to do a complete tear down for a full restoration.

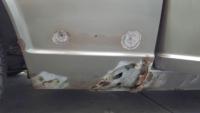
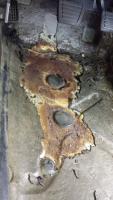
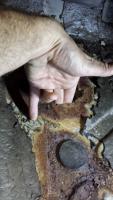
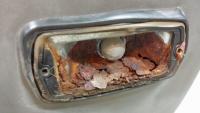 1 point
 -
1 pointJust let me know, I'm always up for a little road trip, as long as I don't have to drive in the Denver traffic.1 point