Leaderboard
-

kats
Free Member5Points2,215Posts -
jfa.series1
 Subscriber
 5Points2,733Posts
 -
Hardway
Free Member5Points1,332Posts -
txvepr
Free Member4Points71Posts


Popular Content
Showing content with the highest reputation on 02/09/2017 in all areas
-
4 pointsSince no one is going to be able to talk you out of the idea of getting a classic Z as a daily driver, I will add this. If you are going to get one, get a 280z. You can always make it look like a 240z with skinny bumpers, 240z lower valance, and if you really want to go to the trouble you can do some fab work and fit 240z tail lights. That said, the 280z is heavier so it rides a little better, interior is trimmed a little nicer, 5spd's were optional and easy to find, they are plentiful and they are usually half the price of a 240z in the same condition. I will add this, if you are looking for a classic Z driving experience in a modern day car, buy a used Scion FR-S/Subaru BRZ. I have a 2013 FR-S 6-spd manual and a 1971 240z with a 5-speed and the FR-S is really a modern day classic Z. Its light, handles super well, not the fastest thing in the world but it is rev-happy and can get to 90mph in short order (ask me how I know). Plus you have all the modern amenities and safety of a newer car. You say you have not been in any accidents in 3 years, good for you. Unfortunately and you know this all too well living in Houston, your number will come up and you don't want to be in a vehicle that you may not walk away from. Add bonuses like not smelling like gas/oil, very supportive seats, and a real trunk, the FR-S is a super fun DD. As others have said, you need to marry that girl your with. So few tolerate the smell of nostalgia (gas & oil) that vintage and high performance cars bring.4 points
-
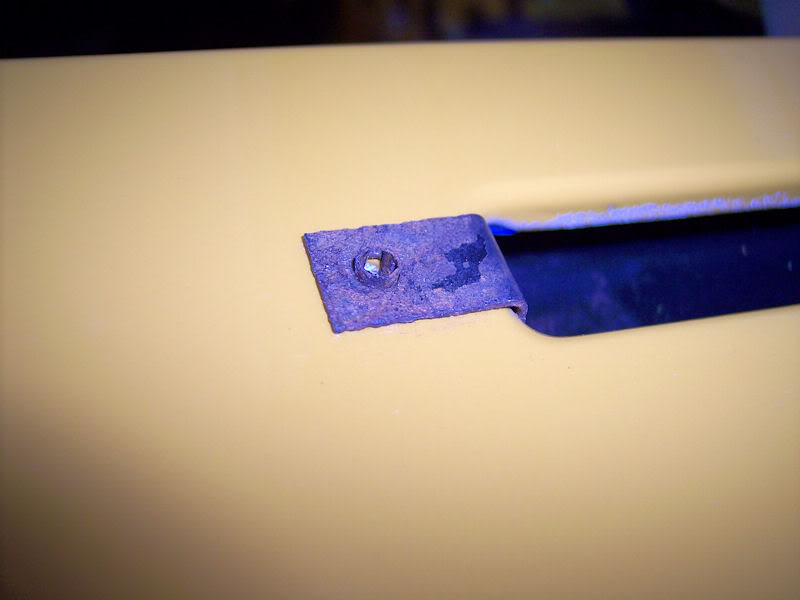
When I tore my car down, the clips were in a patina finish . I suspect they were originally unfinished spring steel. I would opt for either a gloss black finish or clear zinc since most but not all the plated items aft of the firewall are clear zinc finish.3 points
-
3 points
-
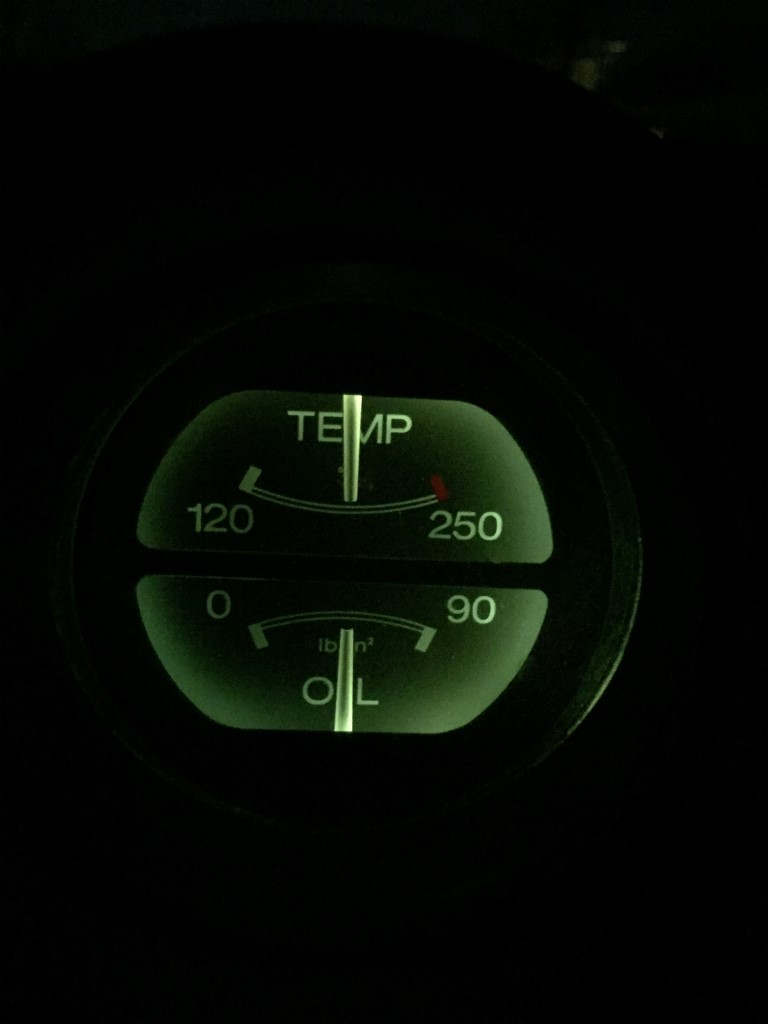
3 pointsI drive my '78 280Z everyday 40+miles. The car is made to be driven. Unless you are at the level to keep a garage 'queen' , just drive the thing and enjoy it. Fuel injection was made for reliability. Did I mention I DD mine in DFW traffic everyday, except some rainy ones? It starts everytime I turn the key, AC still blows cold(Lord, please let it last!), it has never over heated with the stock cooling system, and I still smile each time I get in it. I feel like I know every inch of it by now.3 points
-
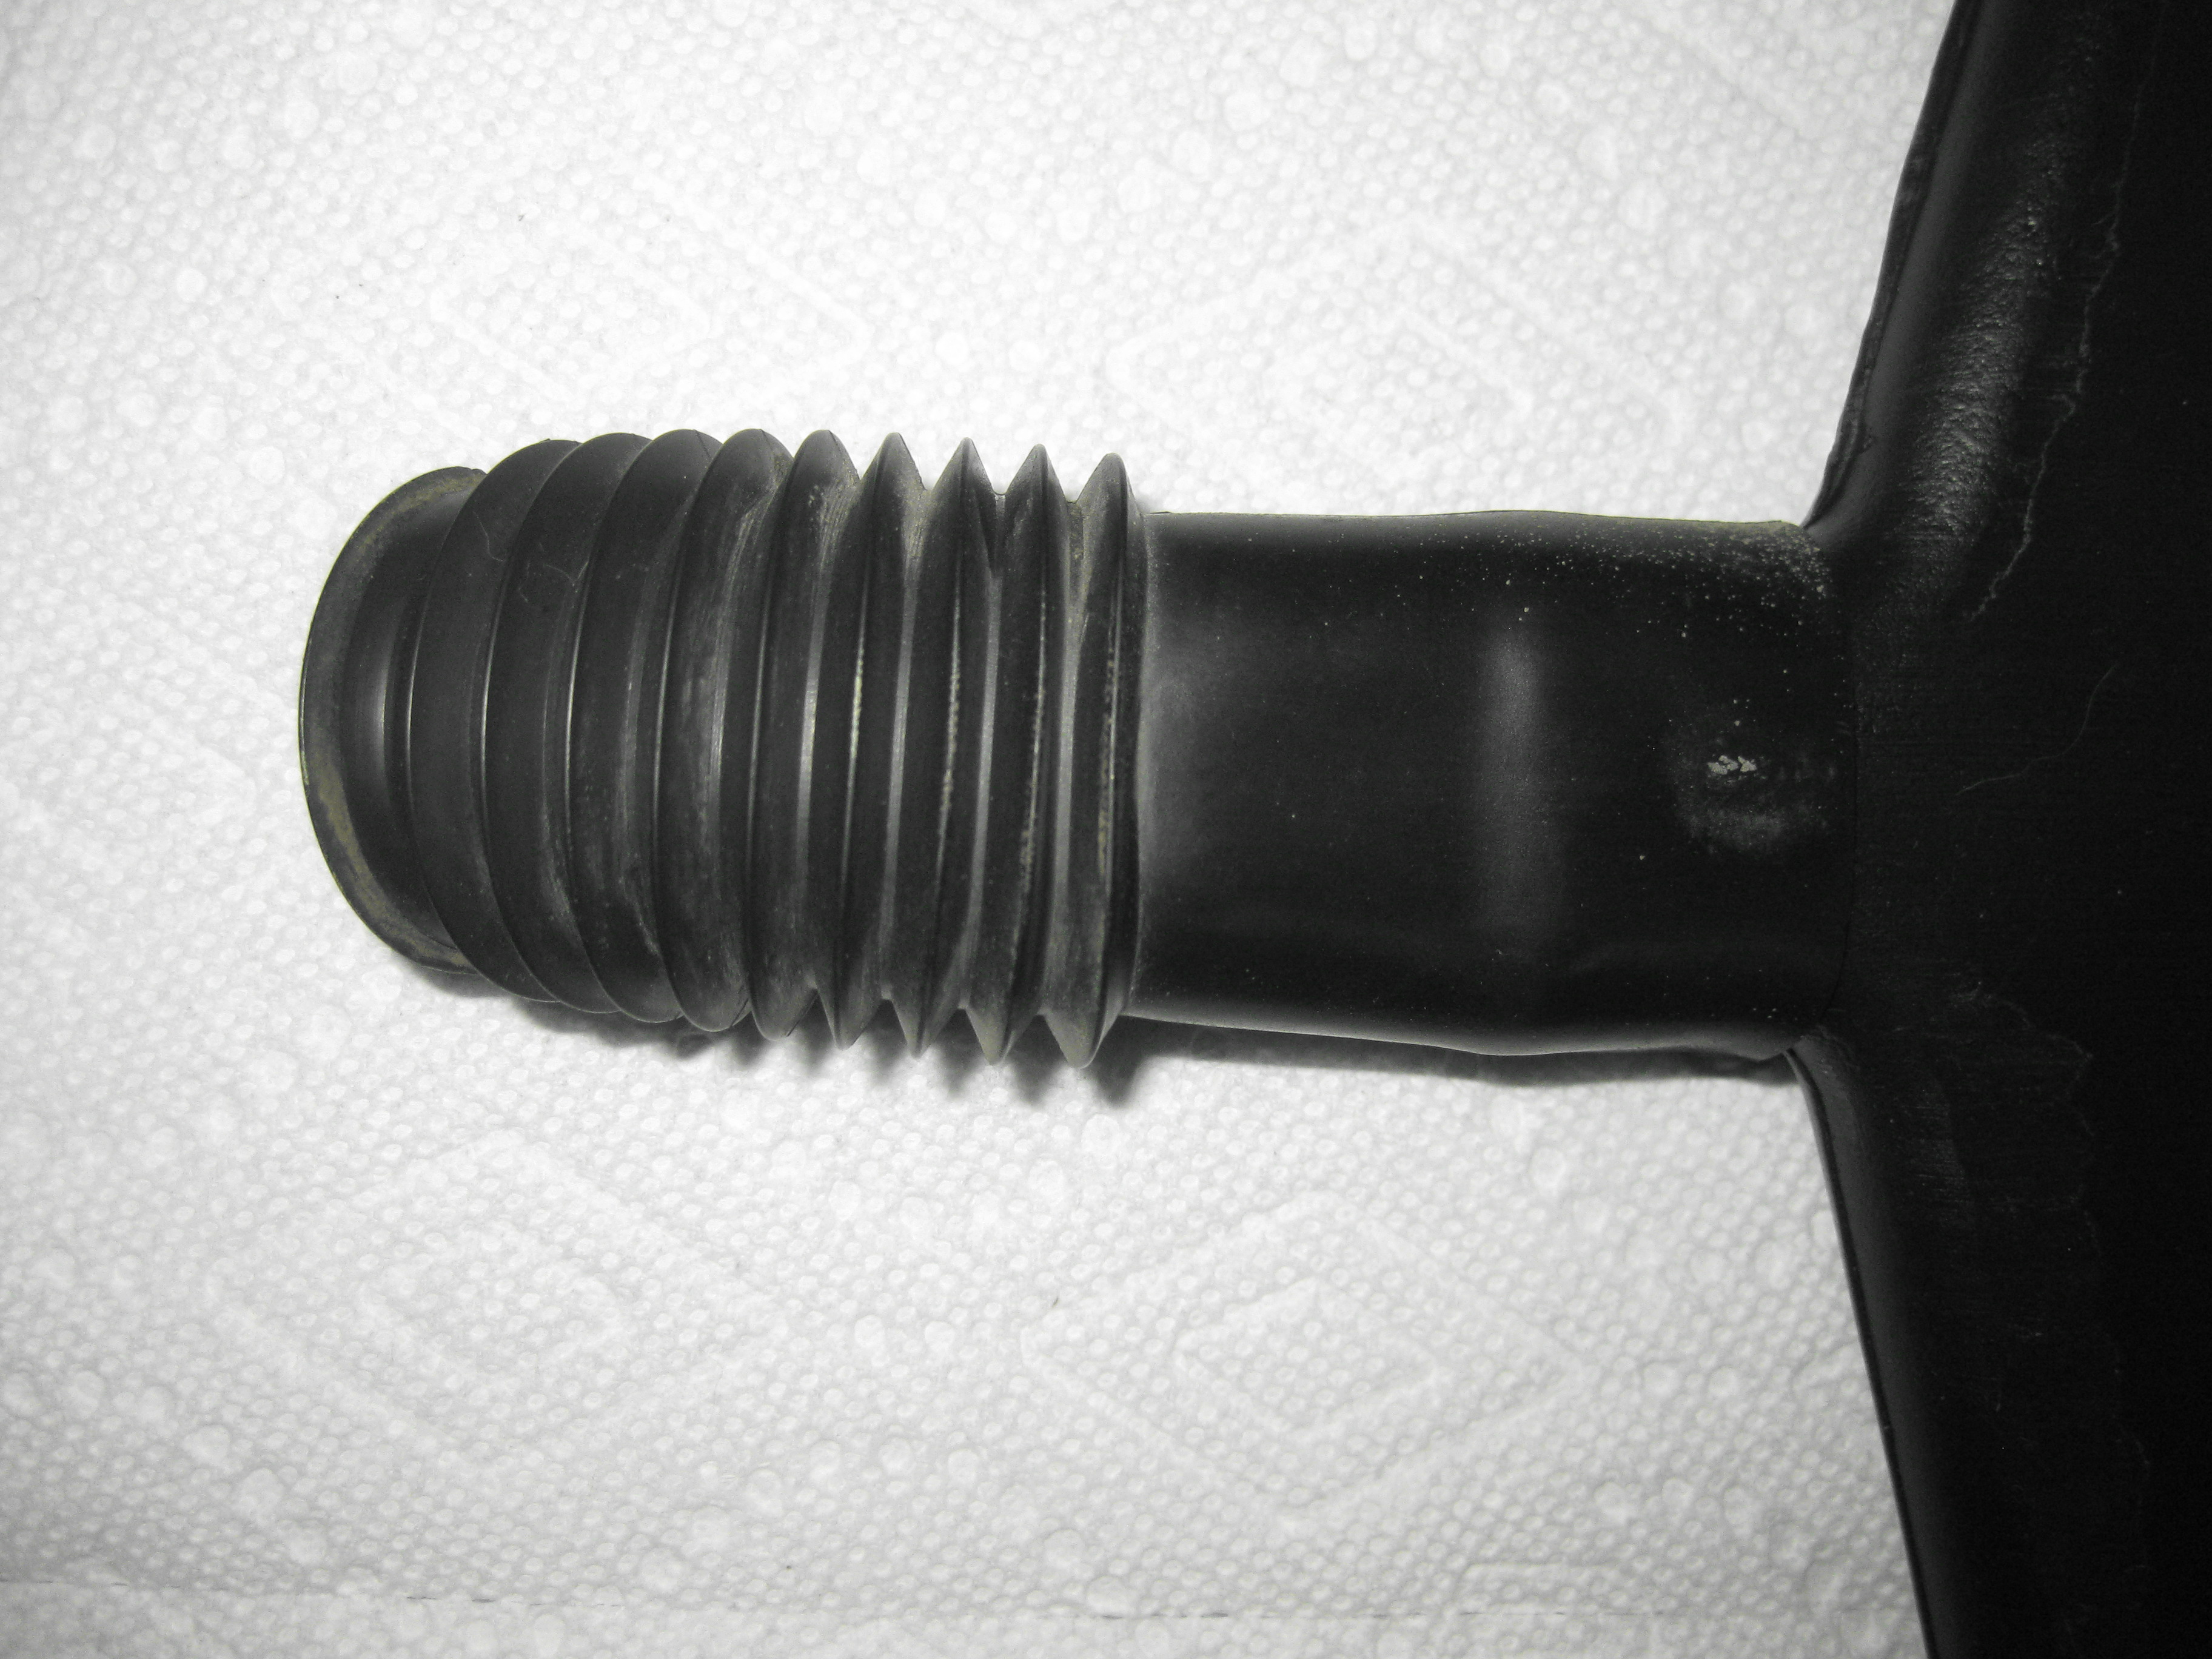
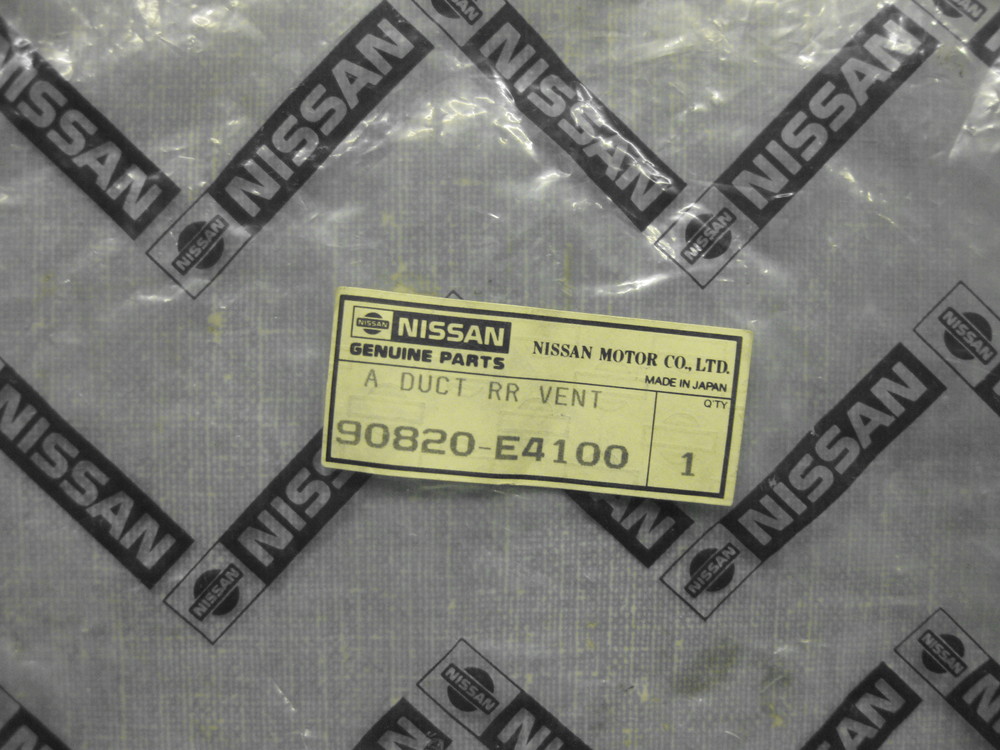
Hi Jim, fantastic! I agree drain tube , use original soft rubber one , it is very good. I too looked my spare parts , a metal crip which attaches two plastic parts is there, I confirmed, thank you. My wife said "is it for vacuum cleaner ? " I have to keep it inside my parts box ! Kats


 3 points
 -
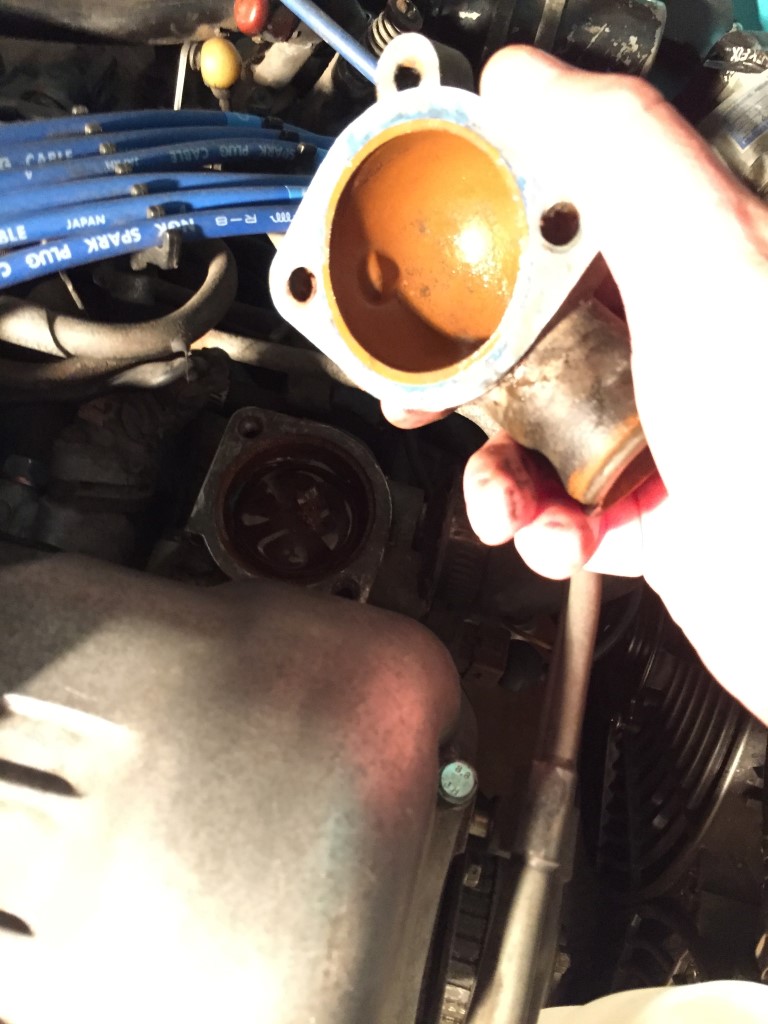
2 pointsThe "OIL" (710) cap is early original and the Elephant cap is later. It is my understanding that the symbol is that of Standard Vacuum Oil Company, a 1930s joint venture between Standard Oil of New Jersey and Mobil Oil.2 points
-
2 pointsAnother homework ! Z432 and SP/SR Roadster 's metal cap has an elephant simbol on a decal already , now I am trying to find good picture of a plastic cap for S30 in Japan from late 1969 to 1970. 1971 and later have "OIL " with an elephant simbol , that is common I think . Kats2 points
-
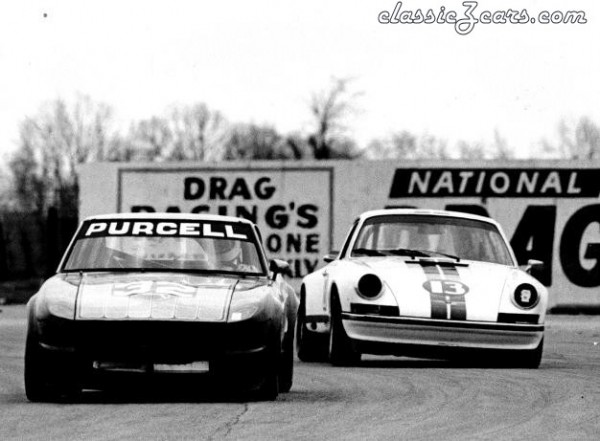
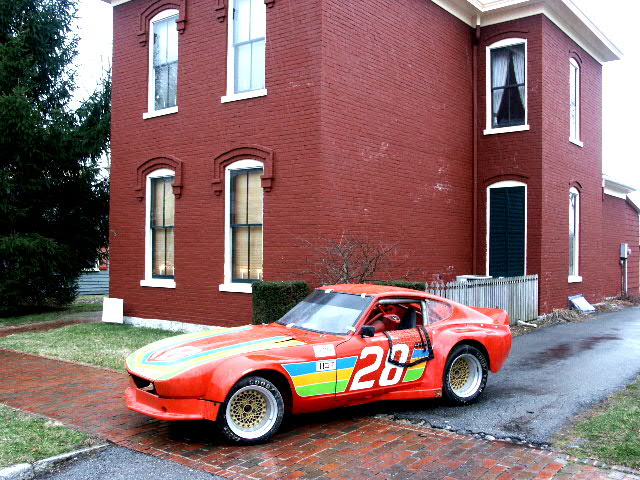
2 pointsThe first is a picture of the 00029 car in the 70's racing at Indianapolis Raceway Park and the other is in the early 80's the 00029 car in IMSA set up. The engine is out in the second photo and the springs all the way up for trailering but you get the picture. I recently tried to buy the car back with no luck. Enjoy the photos. jlp
 2 points
 -
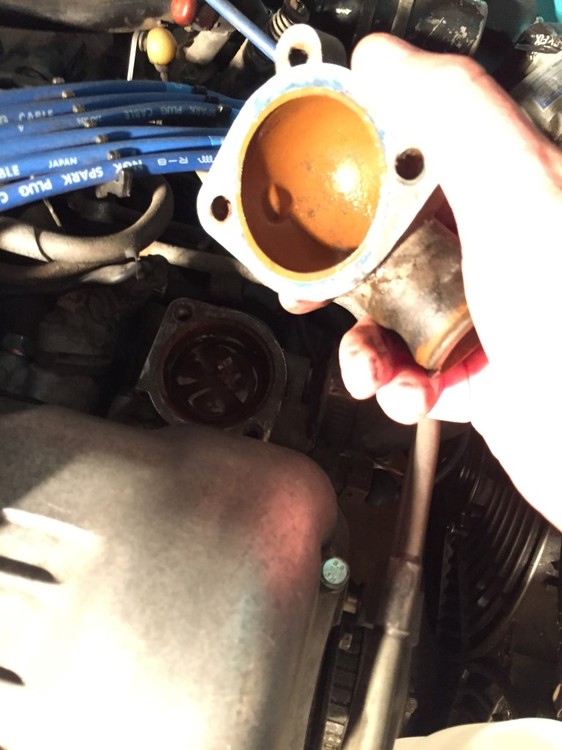
2 pointsyou guys called it... damn kid i bought it from didn't even have a thermostat installed... it's an $8 part! i know AZ gets hot, but that hot?! installed the 180 degree + gasket, took it out for a cruise and held steady around 180 degrees with the electric fans on. ran much better, heated up quicker. no leaks thanks for your help!
 2 points
 -
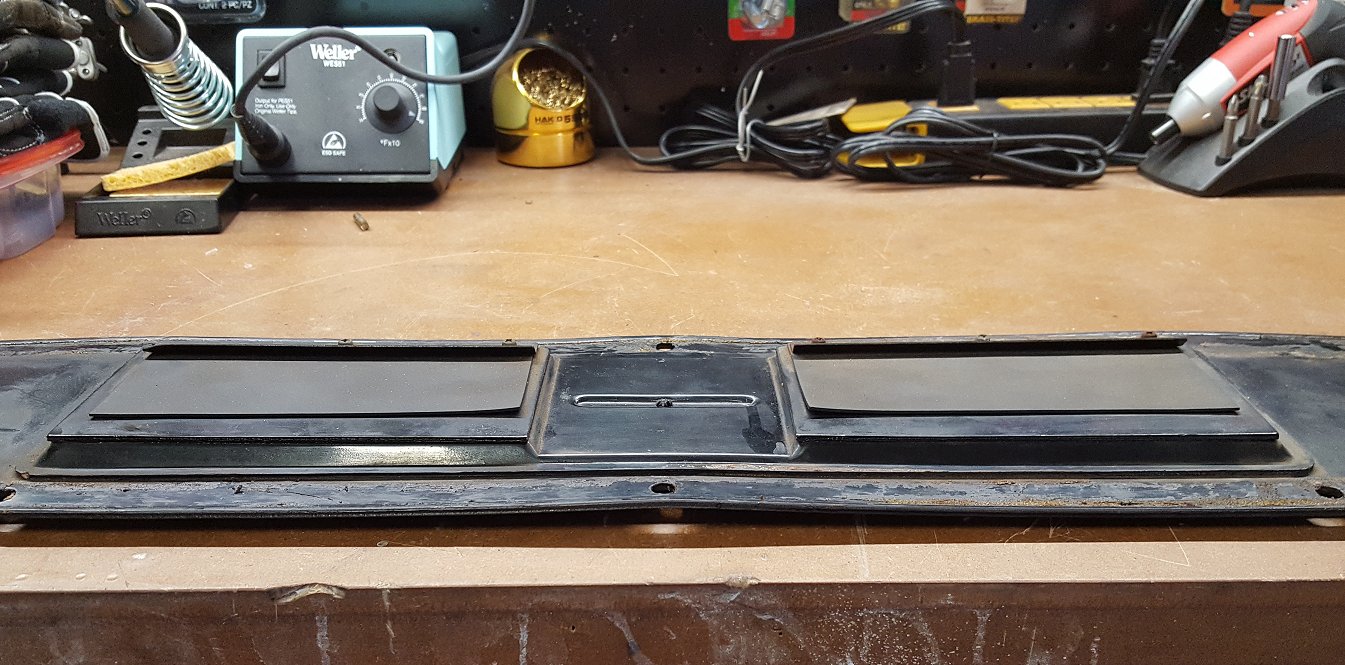
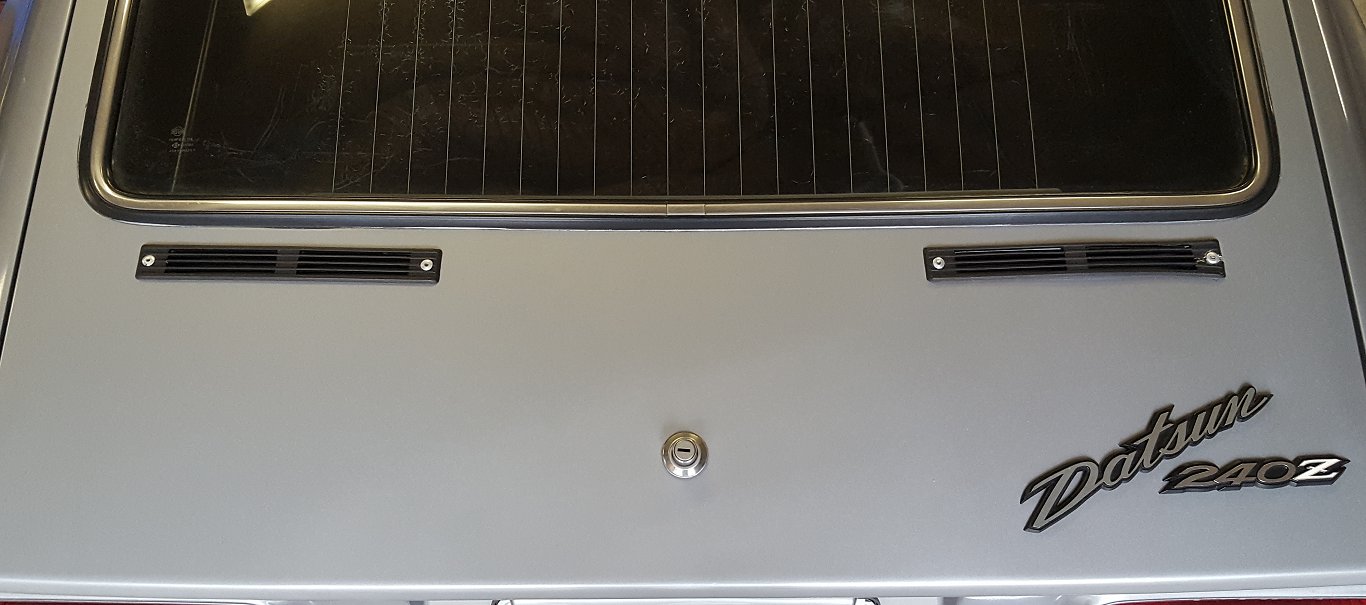
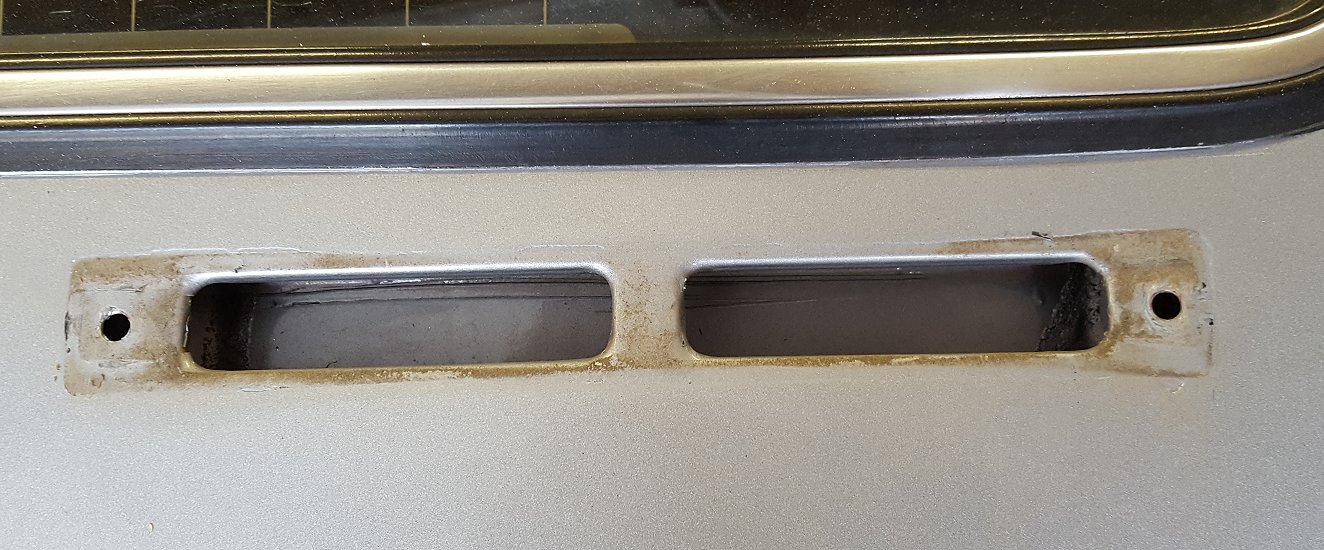
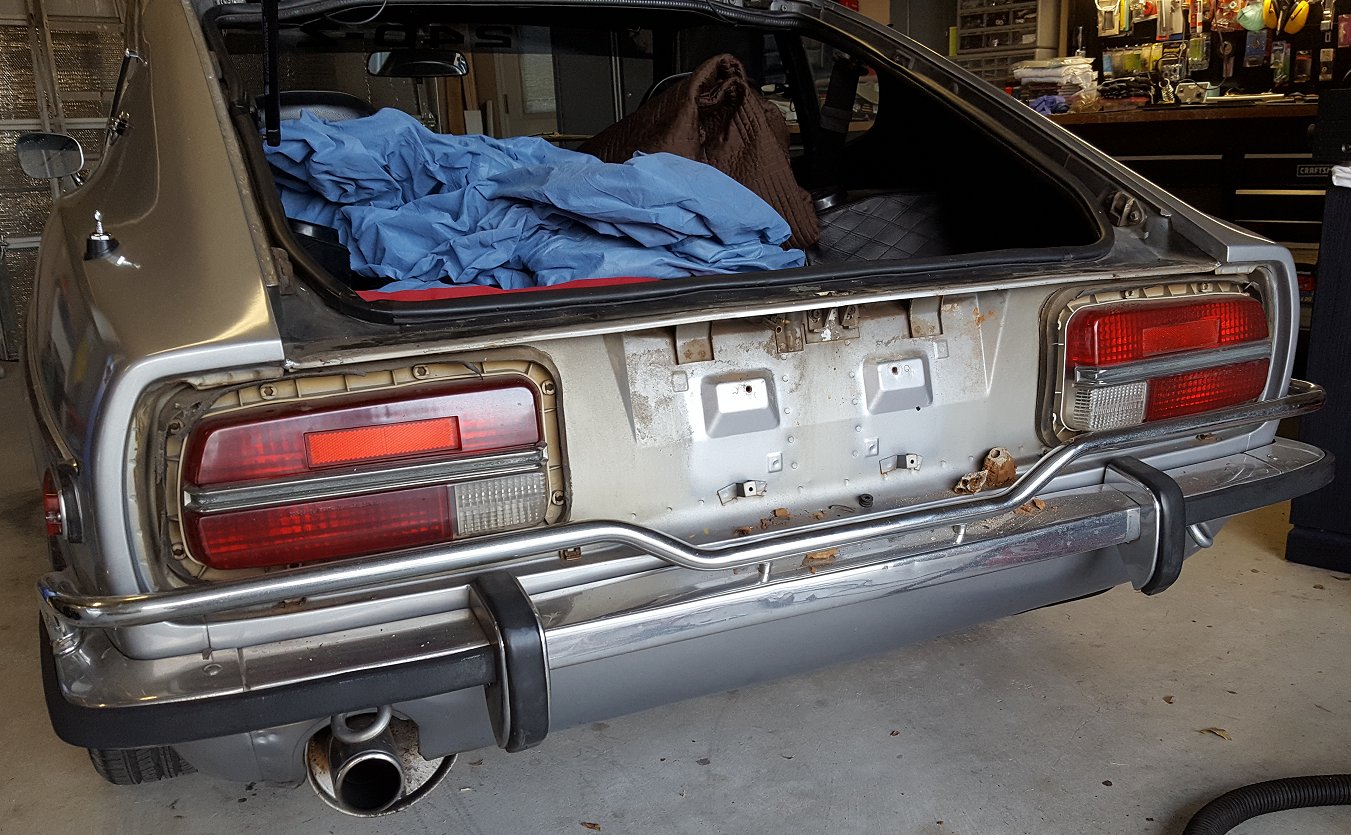
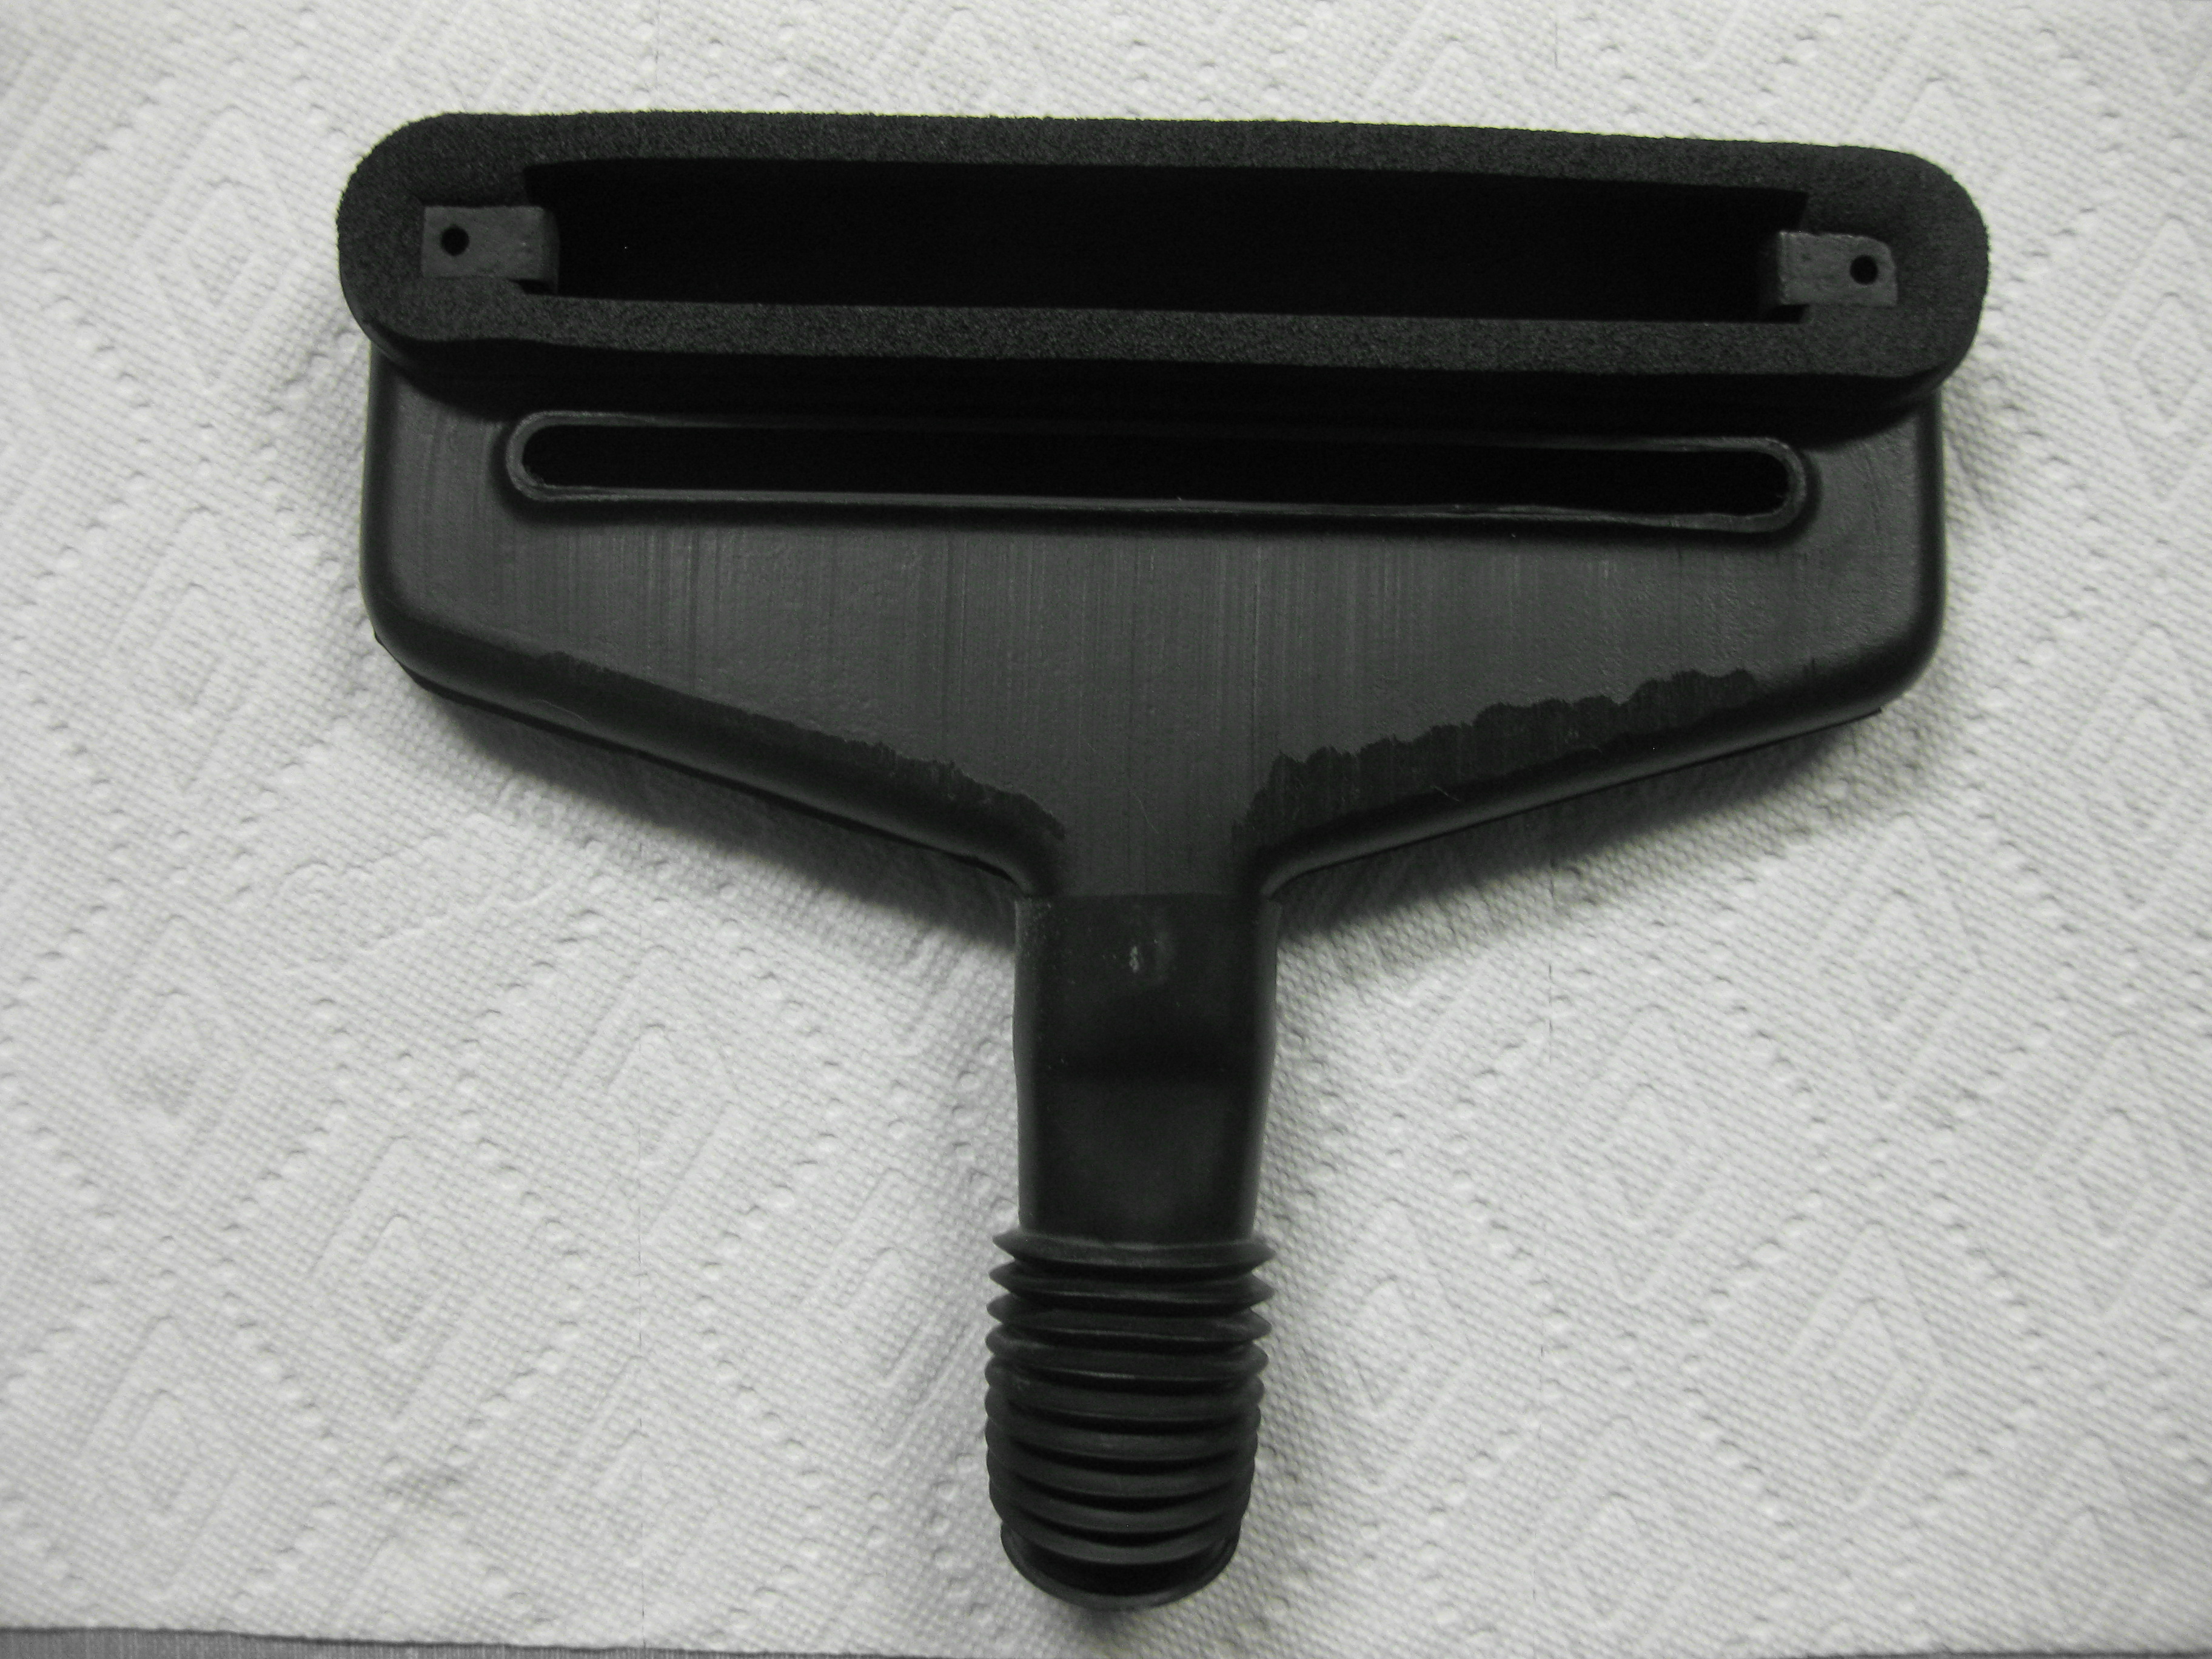
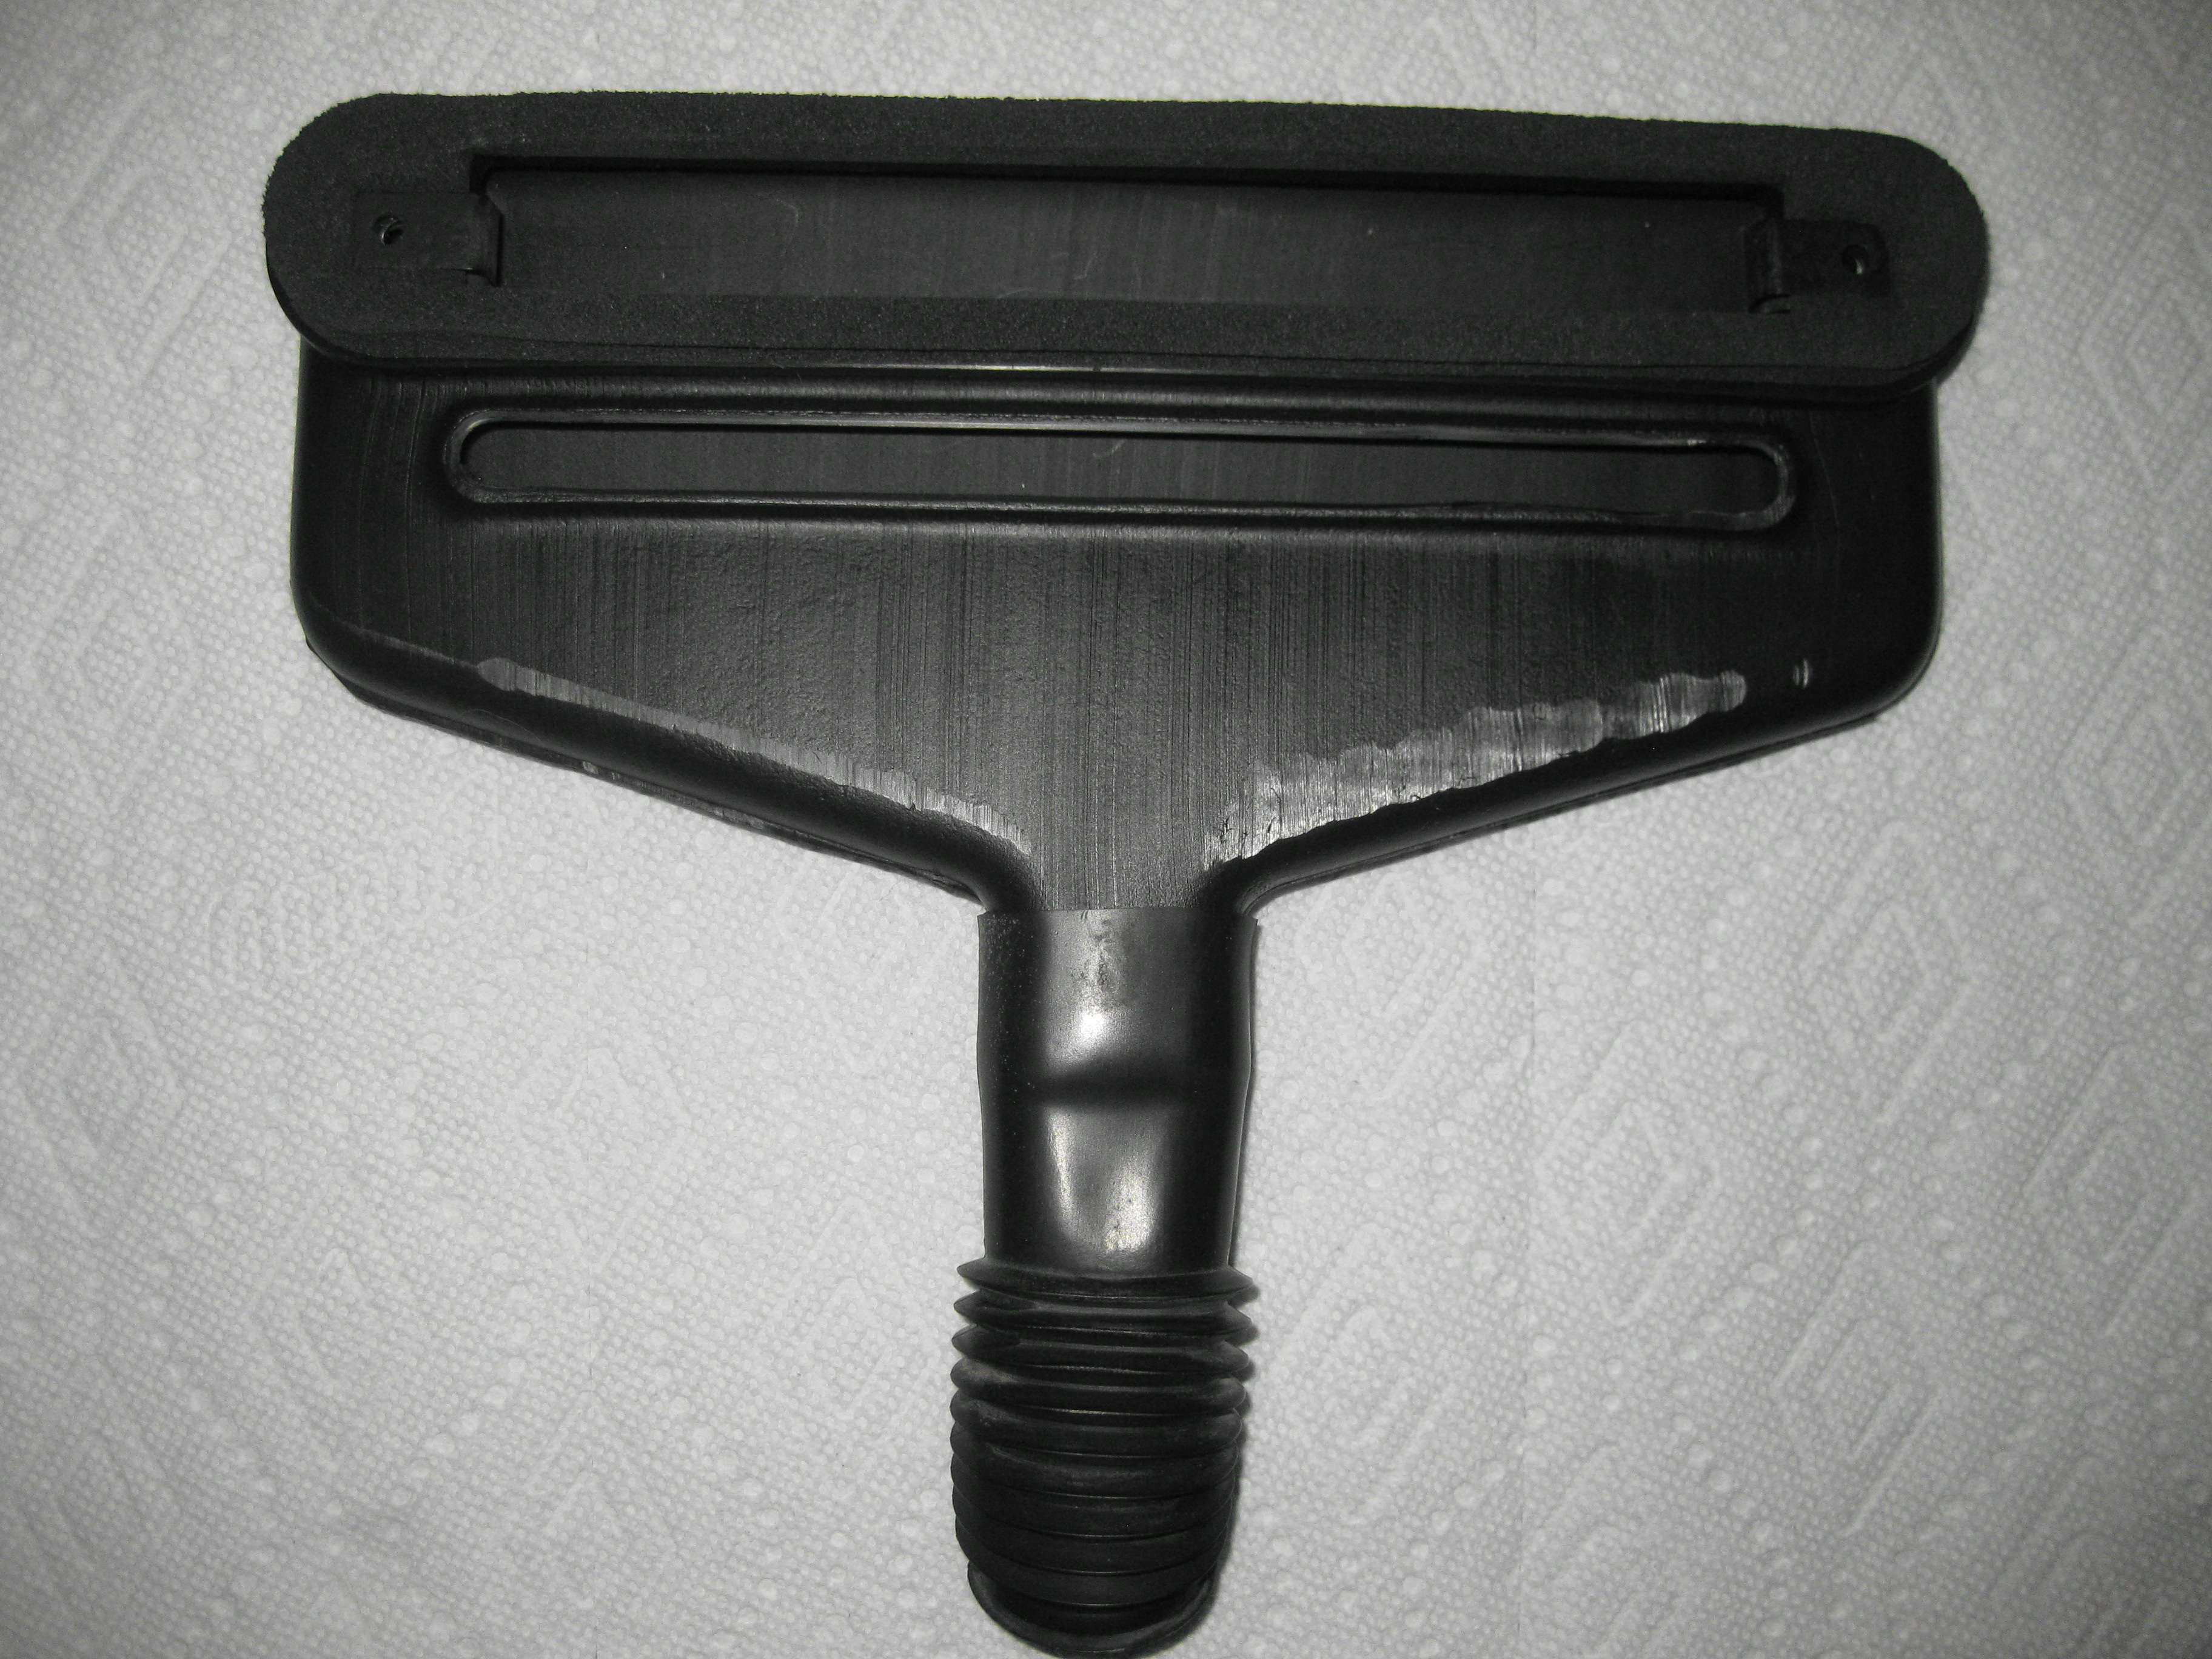
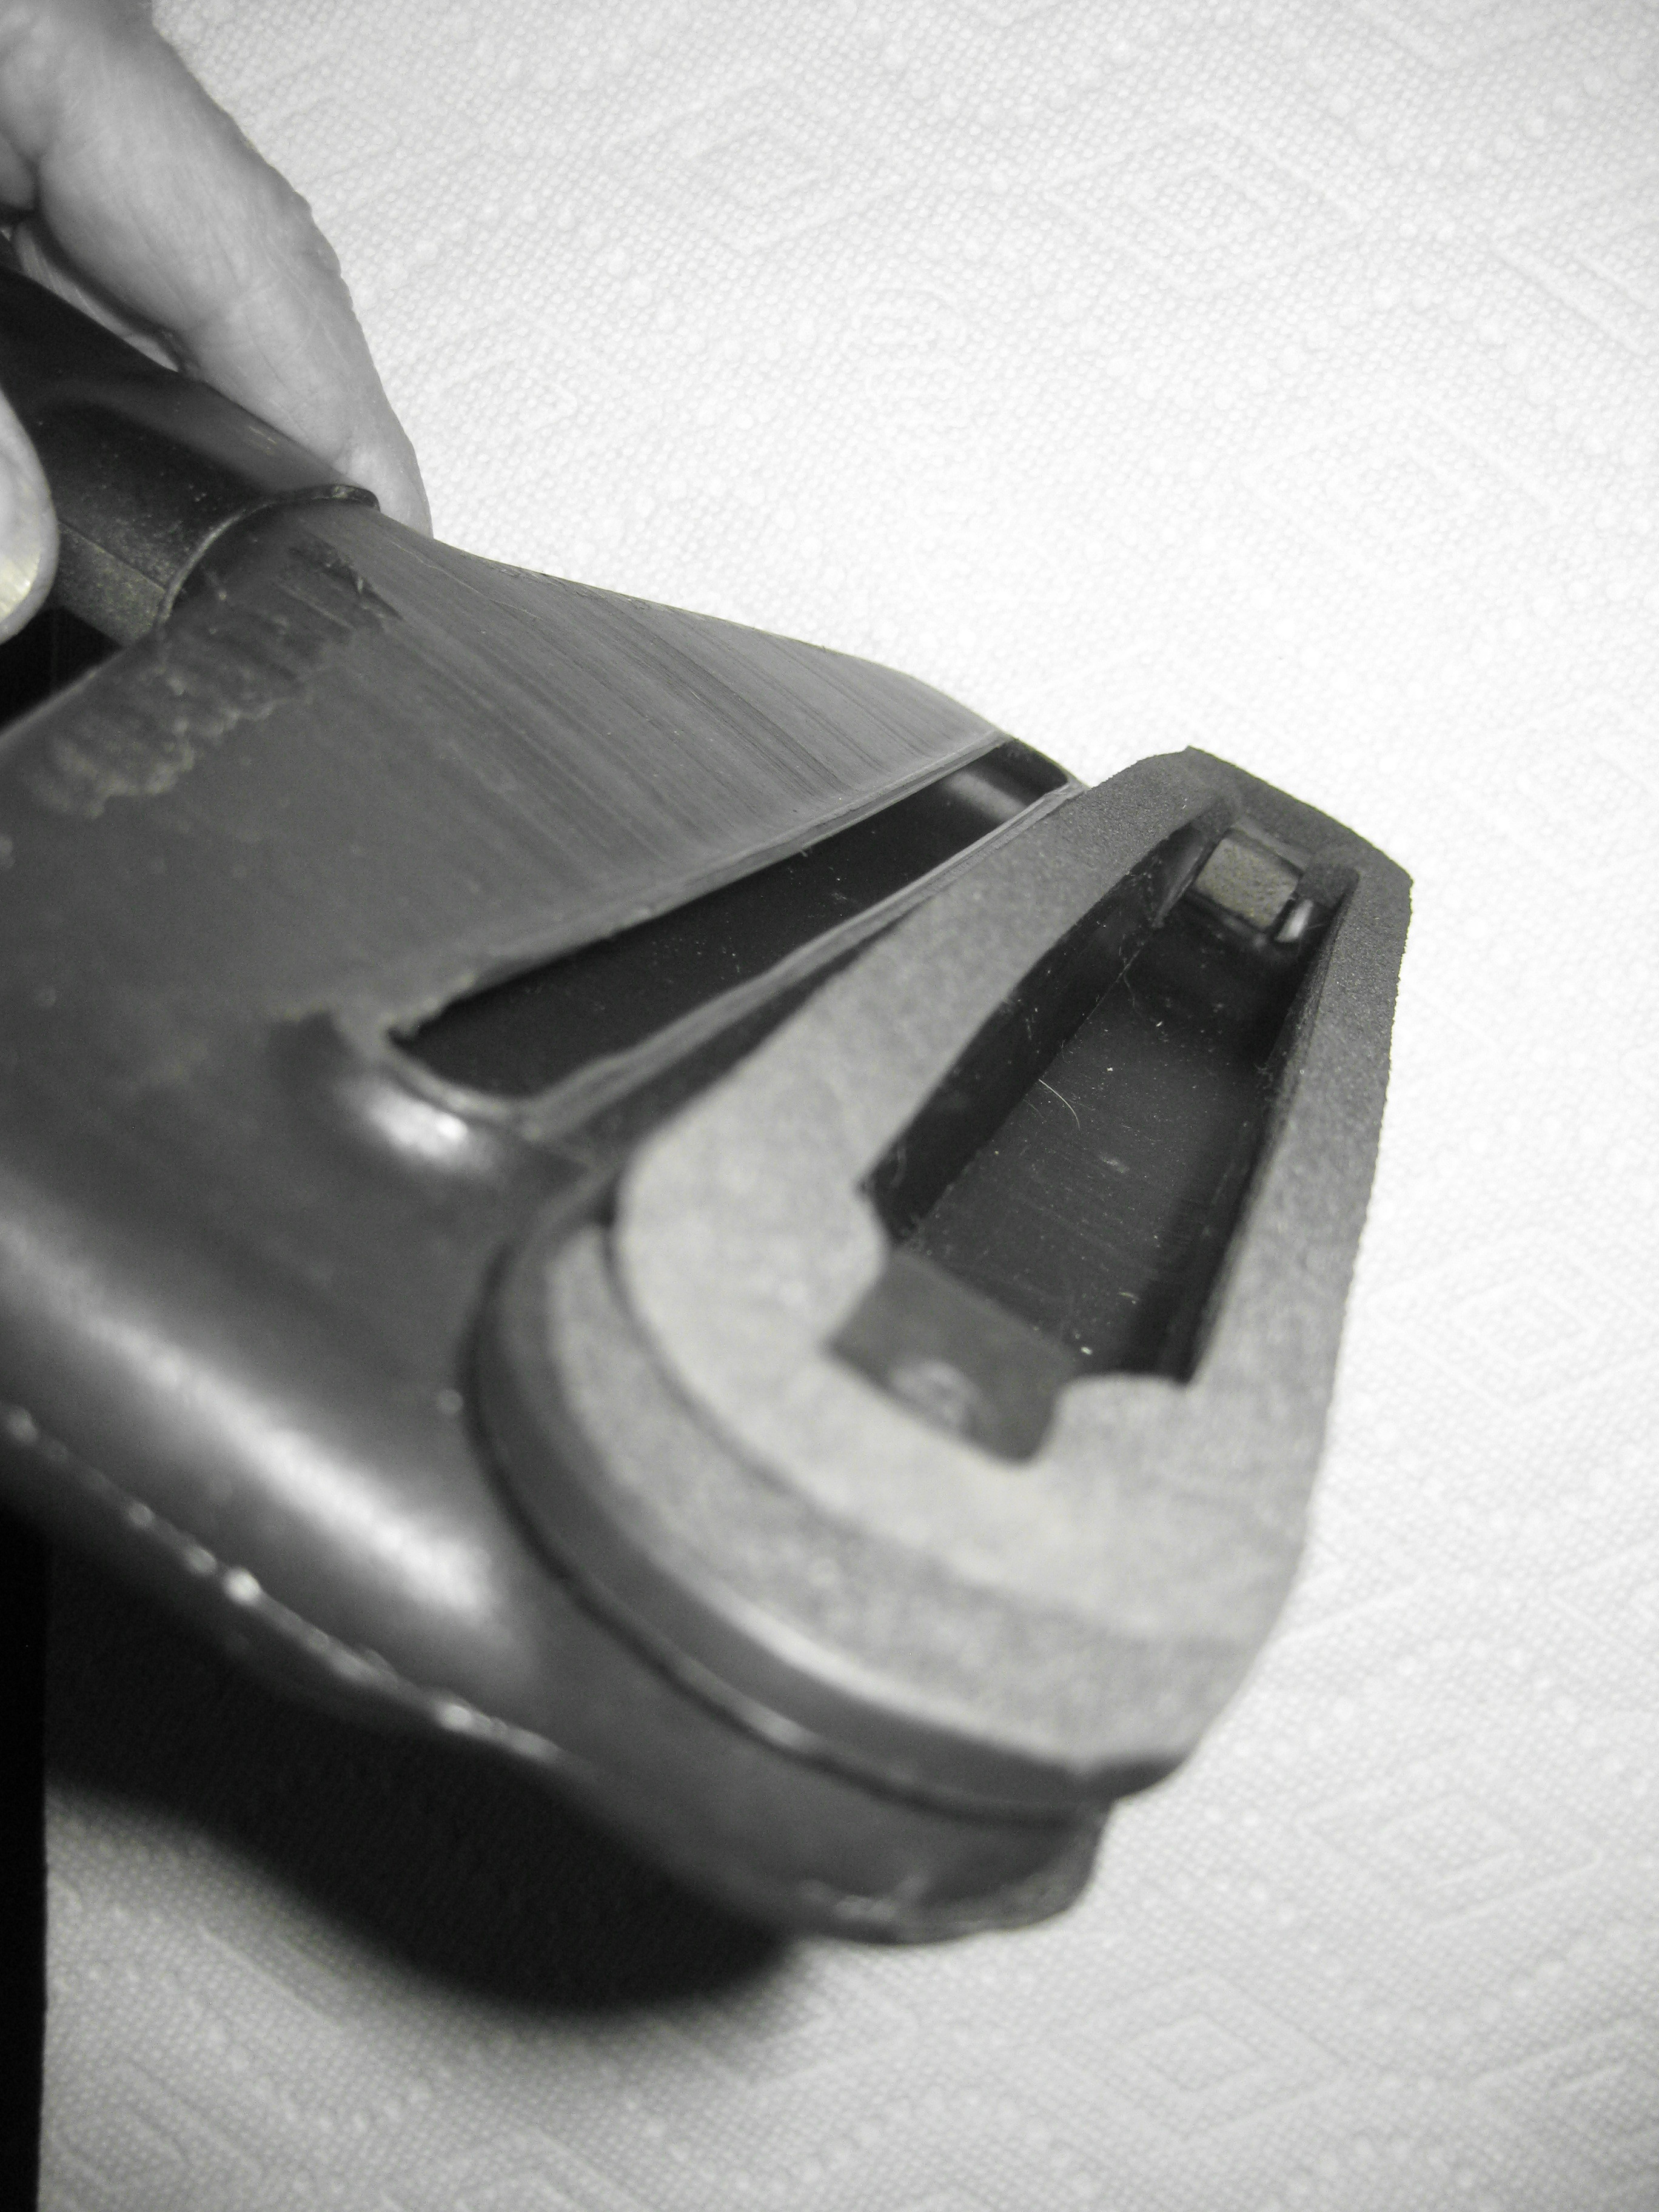
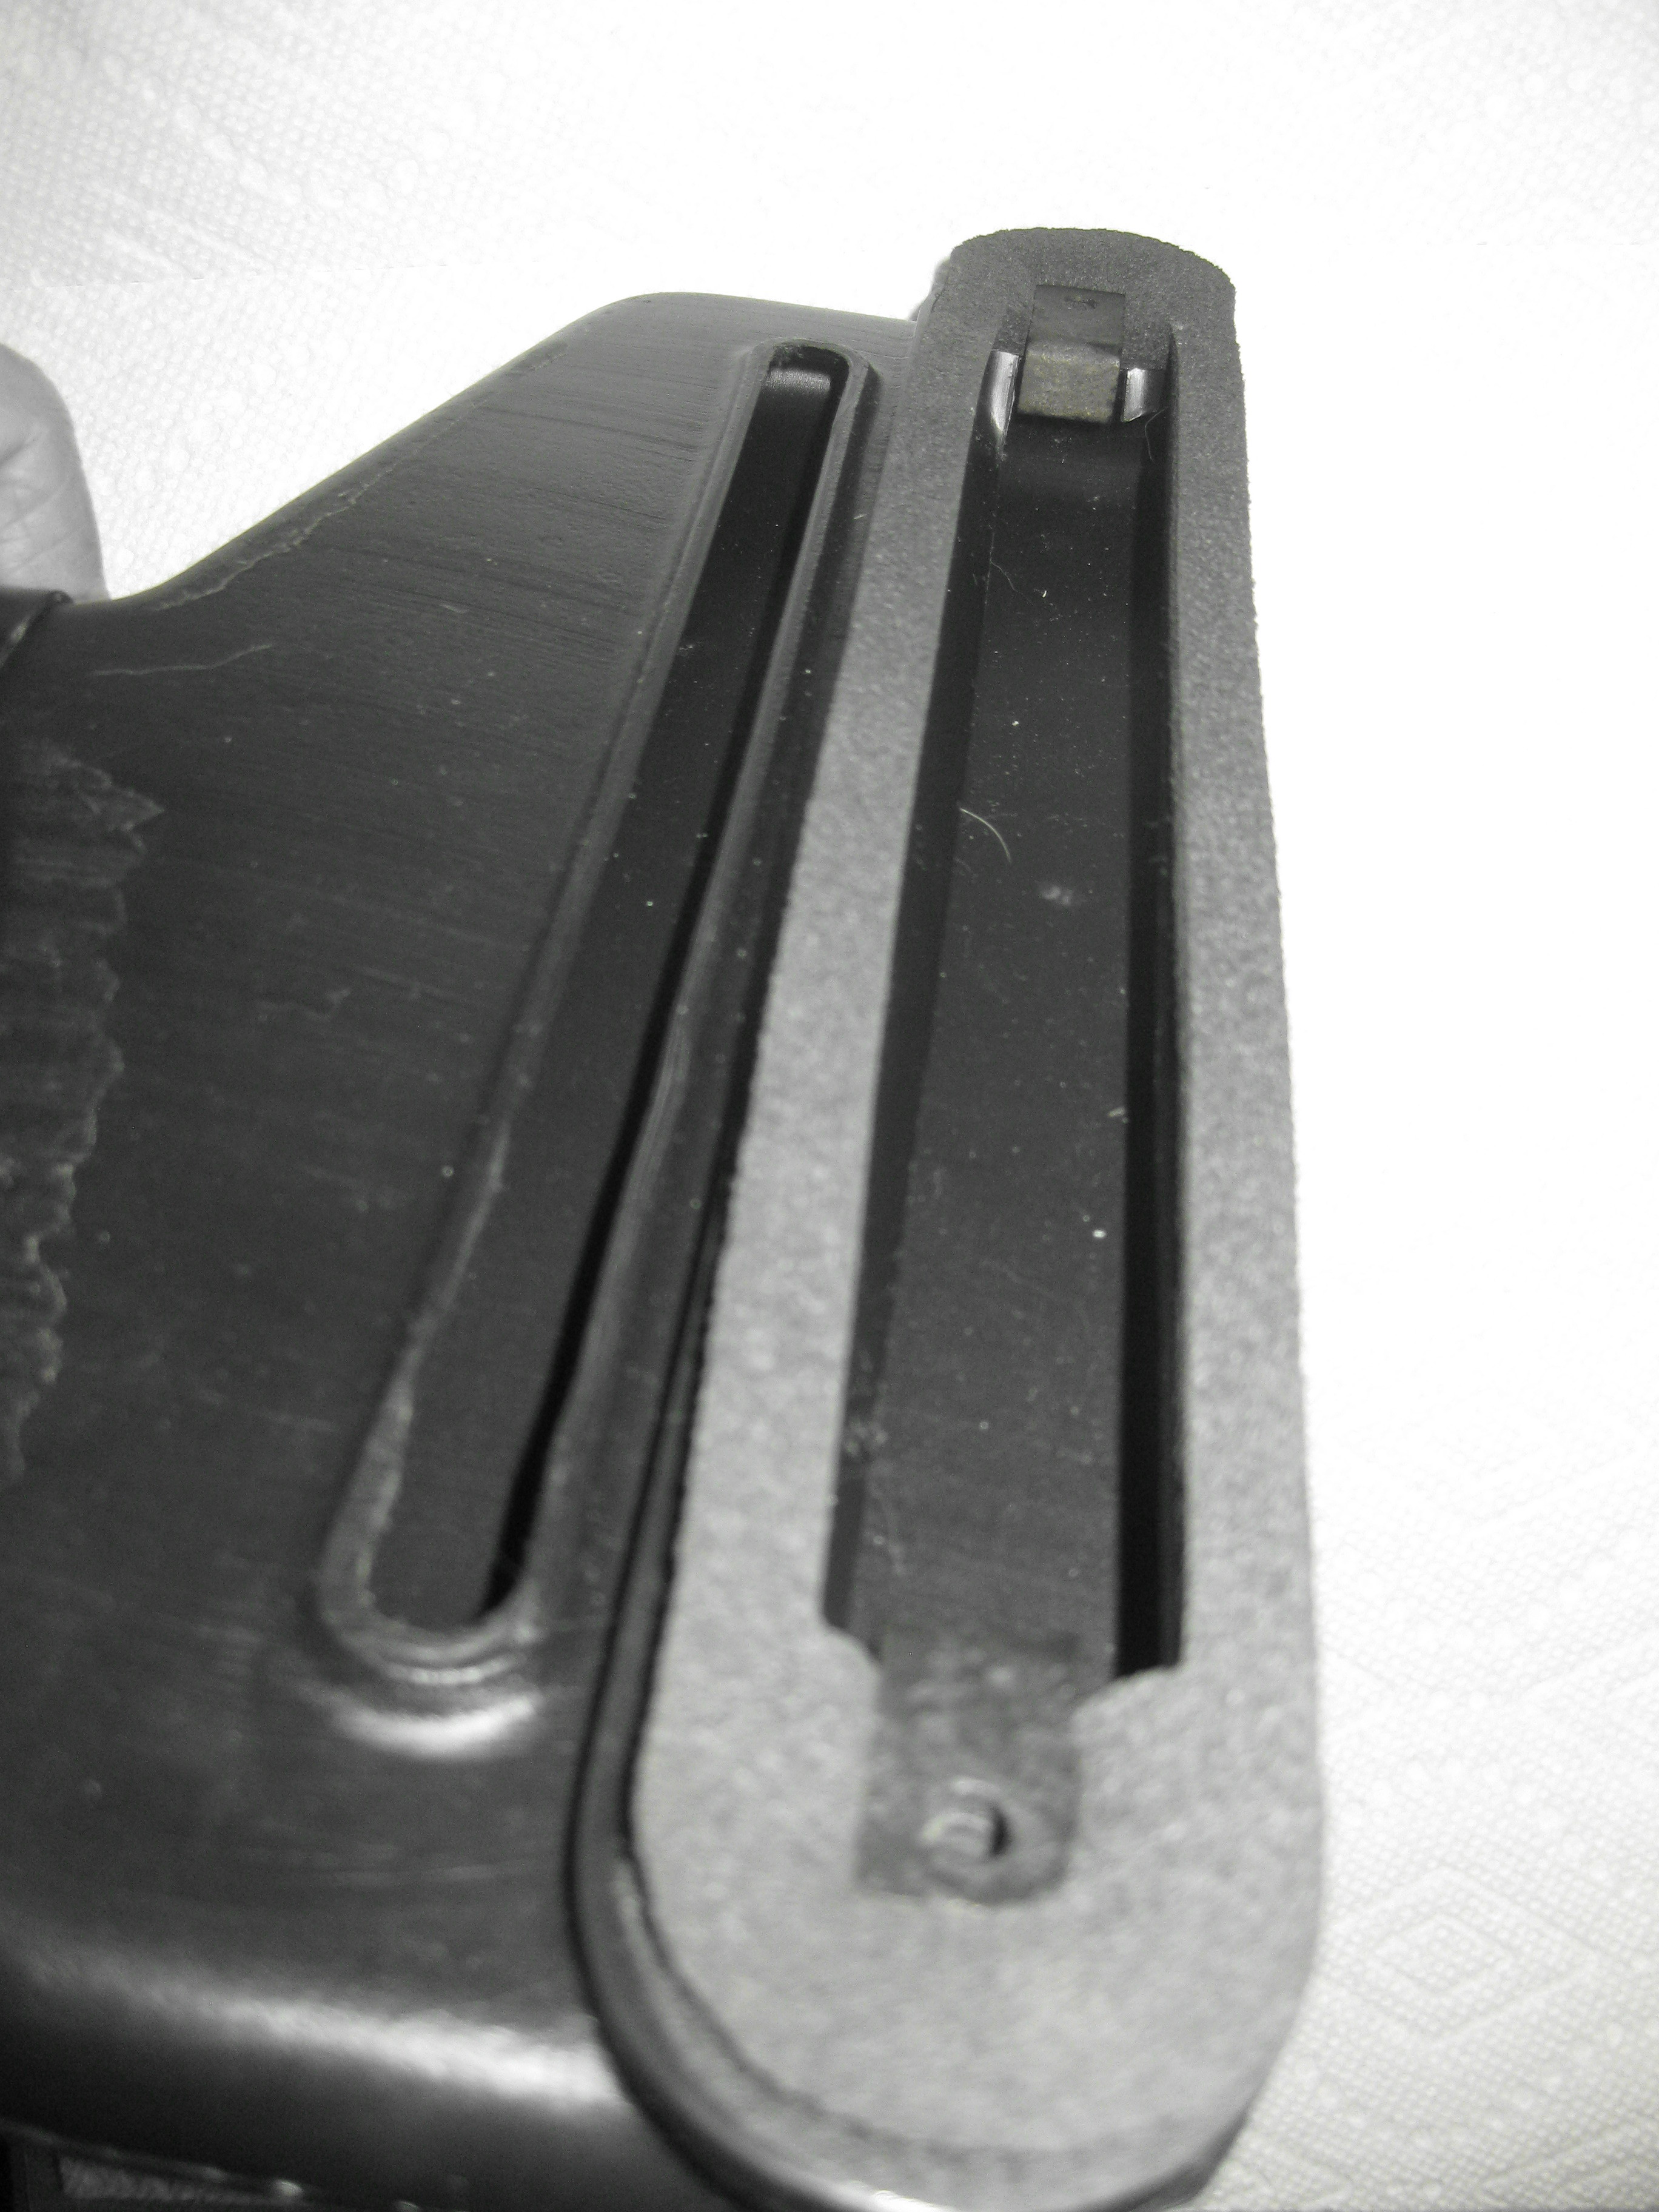
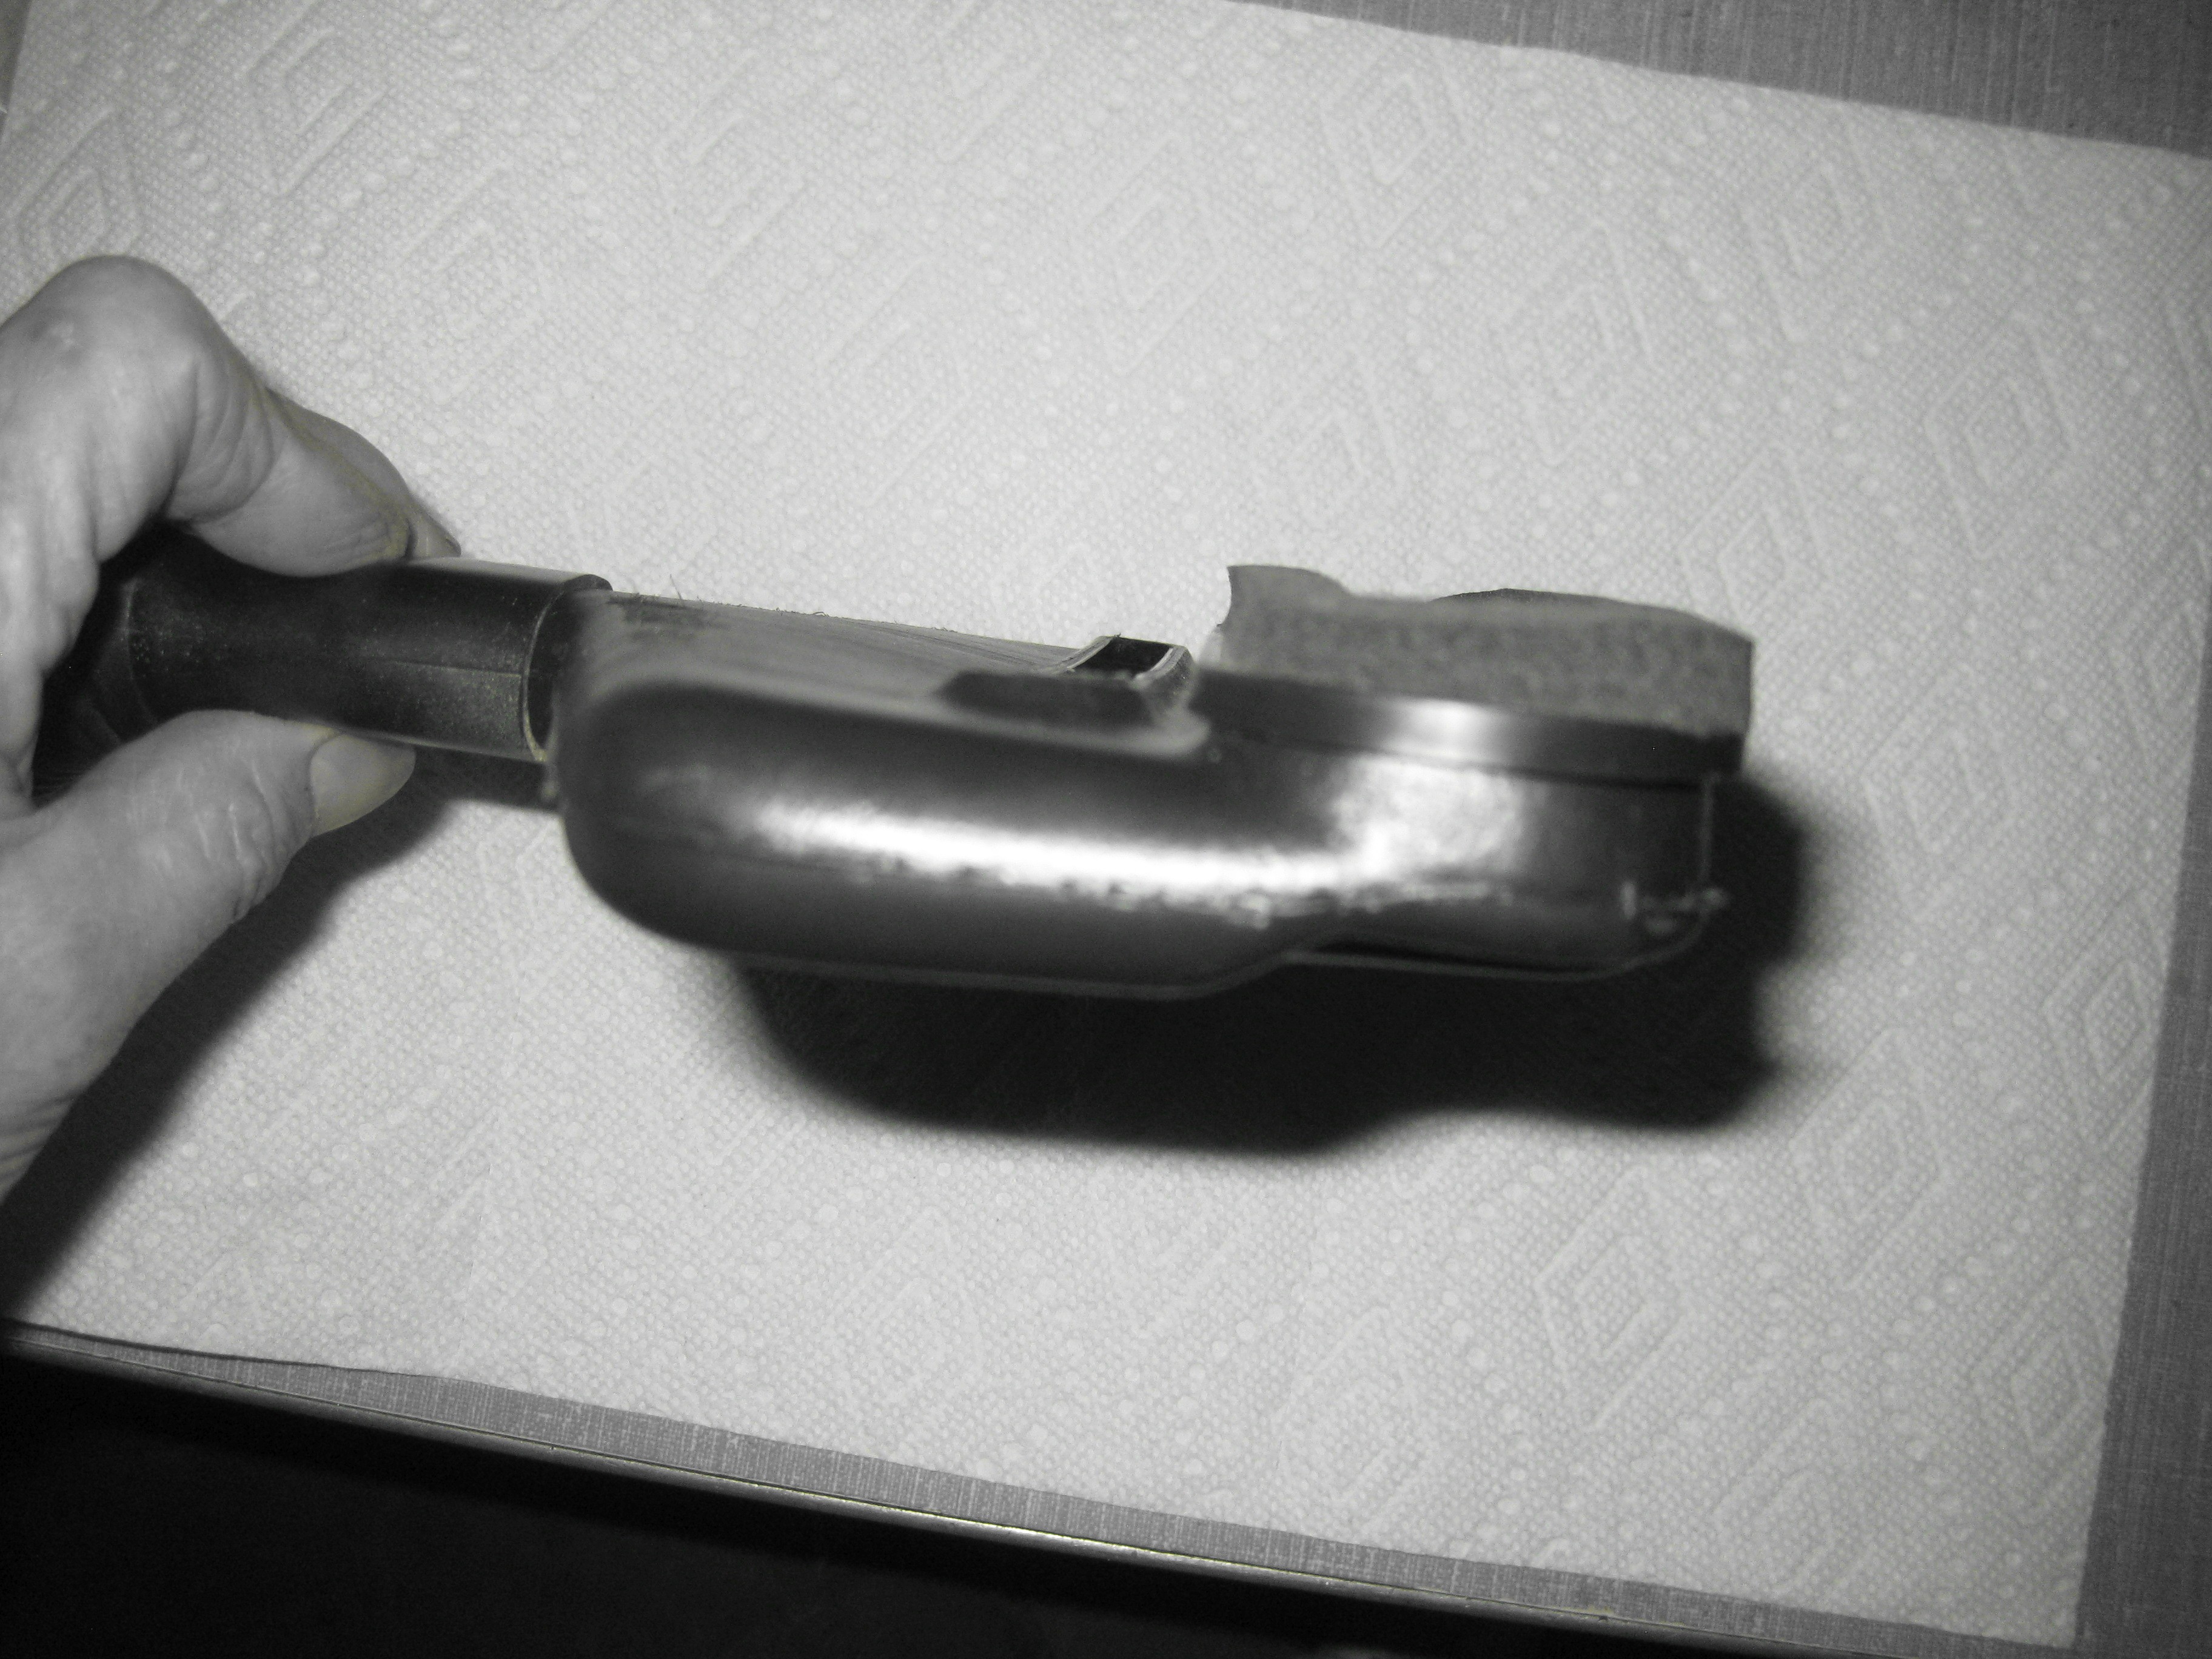
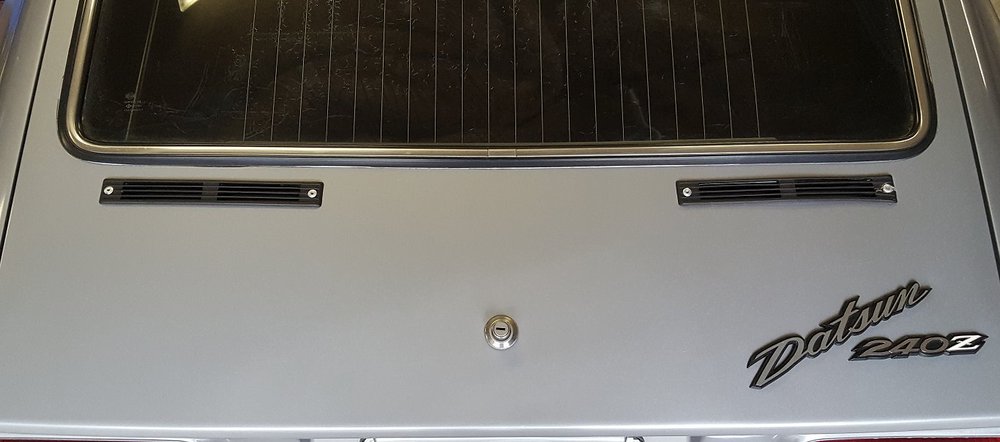
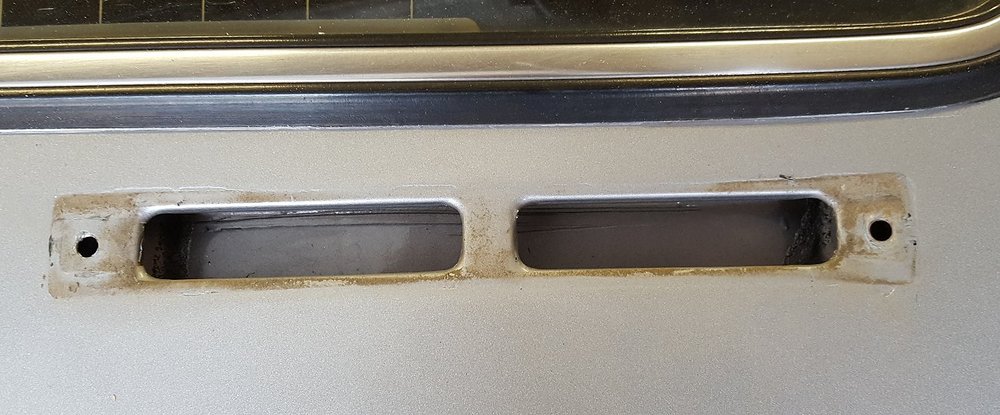
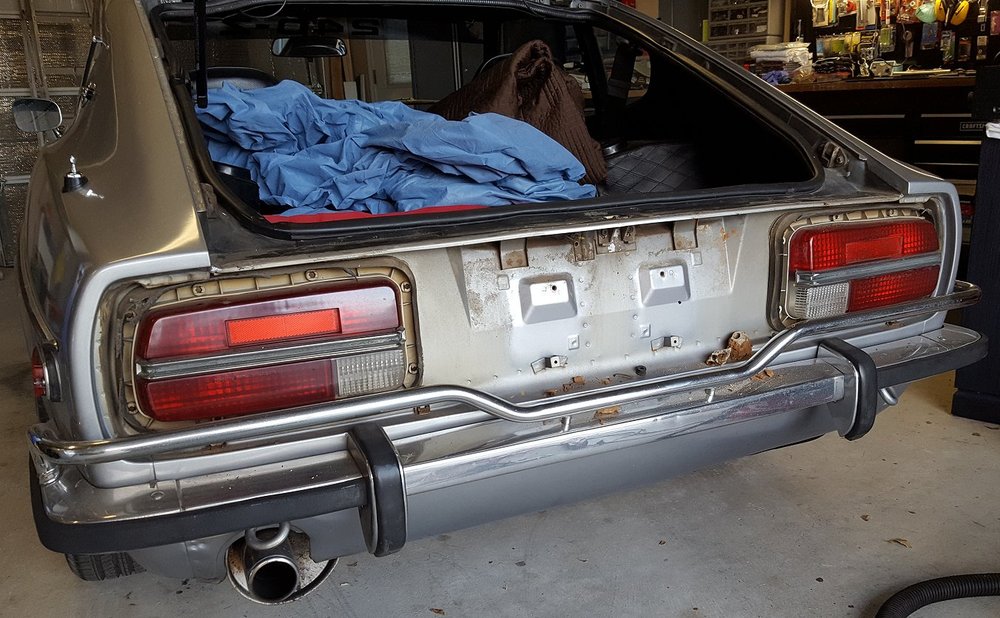
In an effort to rid my car of exhaust fumes coming in I disassembled just about everything related to the hatch vent system and removed the taillight trim panel to see what the taillight gaskets looked like. The TL gaskets are shot so I will be ordering new gaskets for them. The hatch vents were removed at some point in the car's history and re-installed using rivets which has bugged be ever since I bought it. With everything apart I realize I am missing the U-shaped clips that hold they hatch ducts against the body and the barrel clips the actually hold the chrome vent grilles. I have a good idea what the U-shape clips look like but need some measurements if anyone has one sitting around. Additionally, can someone confirm the order in which everything goes together? I think the ducts are installed in the hatch with their proper seals, the U-clip goes over the inside edge to hold it in place. Does barrel clip go through the U-clip and in to the hatch sheet metal or some other way? On the hatch duct work, my semi-rigid seals are salvageable but the foam gaskets are pretty much gone. I was planning to use some 3/8 self adhesive foam weather stripping to make a new seal. Are new ones available? If not, do you have a better idea than I have? Need to look at the rubber flaps on the inner hatch panel, I don't think they are thick enough. I will also seal the edge of the panel before I re-install it. The offending rivets holding the hatch vents in place. I already have new ones but debating on re-using some old ones I have since I plan to paint the car and would like to save my new ones for that. Pictures from Jim Arnett on the CT Z Car forums. Taillight panel off. Looks like it has never been off the car. Luckily there appears to be zero damage from contact or rust.


 1 point
 -
1 pointSince I've been a member of this forum I've read the elephant cap was from winning an African Rally but now I see that that's wrong, thanks to @kats. After reading more maybe the oil was named after the Rally?1 point
-
1 pointYou guys are killing me with all the stuff I've gotten rid of! Had one of these too.1 point
-
1 pointThose elephant oil caps are not that desirable over here, they are quite common. The OIL cap is rarer, but I've already got 1. No I'm afraid I was looking to trade a 2400 cover for a NISSAN cover, my 70 240z (HS30 00150) was probably made around September 1970, which means I was a month or 2 too late to receive the 2400 OHC cover. But since the car has the hand throttle, rear vents in hatch, and all the other early car features (71A gear bag), E31 head etc.. I feel that the 2400 OHC cover is at home in the engine bay. I am in 2 minds about giving up the "larger" NISSAN cover simply because they are quite expensive themselves. Happy to part with the smaller version though!1 point
-
+1 on spring steel with clear zinc if possible---if not, phosphorous (dark brown to black) My originals did not appear to be plated at all---just spring steel but I treated them with Ospho to try to prevent them from corroding further. That turned them the color you see.1 point
-
1 point
-
1 pointGav, were you referring to an oil cap trade for a valve cover? Let me know, I have OIL and Elephant caps.
 1 point
 -
1 pointIt should have a very slight crown to it. The entire top of the fender has a crown to it. IIRC the crown decreases as you work your way back to the windshield. Chuck1 point
-
1 pointI used that VHT Flame Proof paint in 'Aluminum'. Baked it on the grill for a while so it should be cured up fairly good.1 point
-
I was in a near death incident last year (rear ended by a semi) and if I wouldn't have been in a modern car I wouldn't have survived. I know it sounds fun, and I'm sure you've been safe and clean driving the last few years, but there are so many idiots out on the road you can't account for Get you a Honda Civic or Corolla for your DD or keep the Miata A 240Z worthy of a daily driver (engine runs like a top, all the electronics work, brakes and steering and suspension are in good shape) is probably gonna run you $10k-$12k. You spend that much on a Z and you're not gonna want to expose it to the elements DAILY that is Houston, TX Get you two cars for that price, and be safe while you do it and tinker with your new Z when your schedule allows. I think you'll enjoy your Z more when you're driving it for pleasure rather than a daily driver (which to me sounds like a beating, but then again I drive a Z71 Silverado as my daily driver) Just my $0.02, since you came and asked Sent from my iPhone using Classic Zcar Club mobile1 point
-
That's perfect, exactly where I thought they would go. Just need to find the right bolts and get em mounted! Thanks! Sent from my iPhone using Classic Zcar Club mobile1 point
-
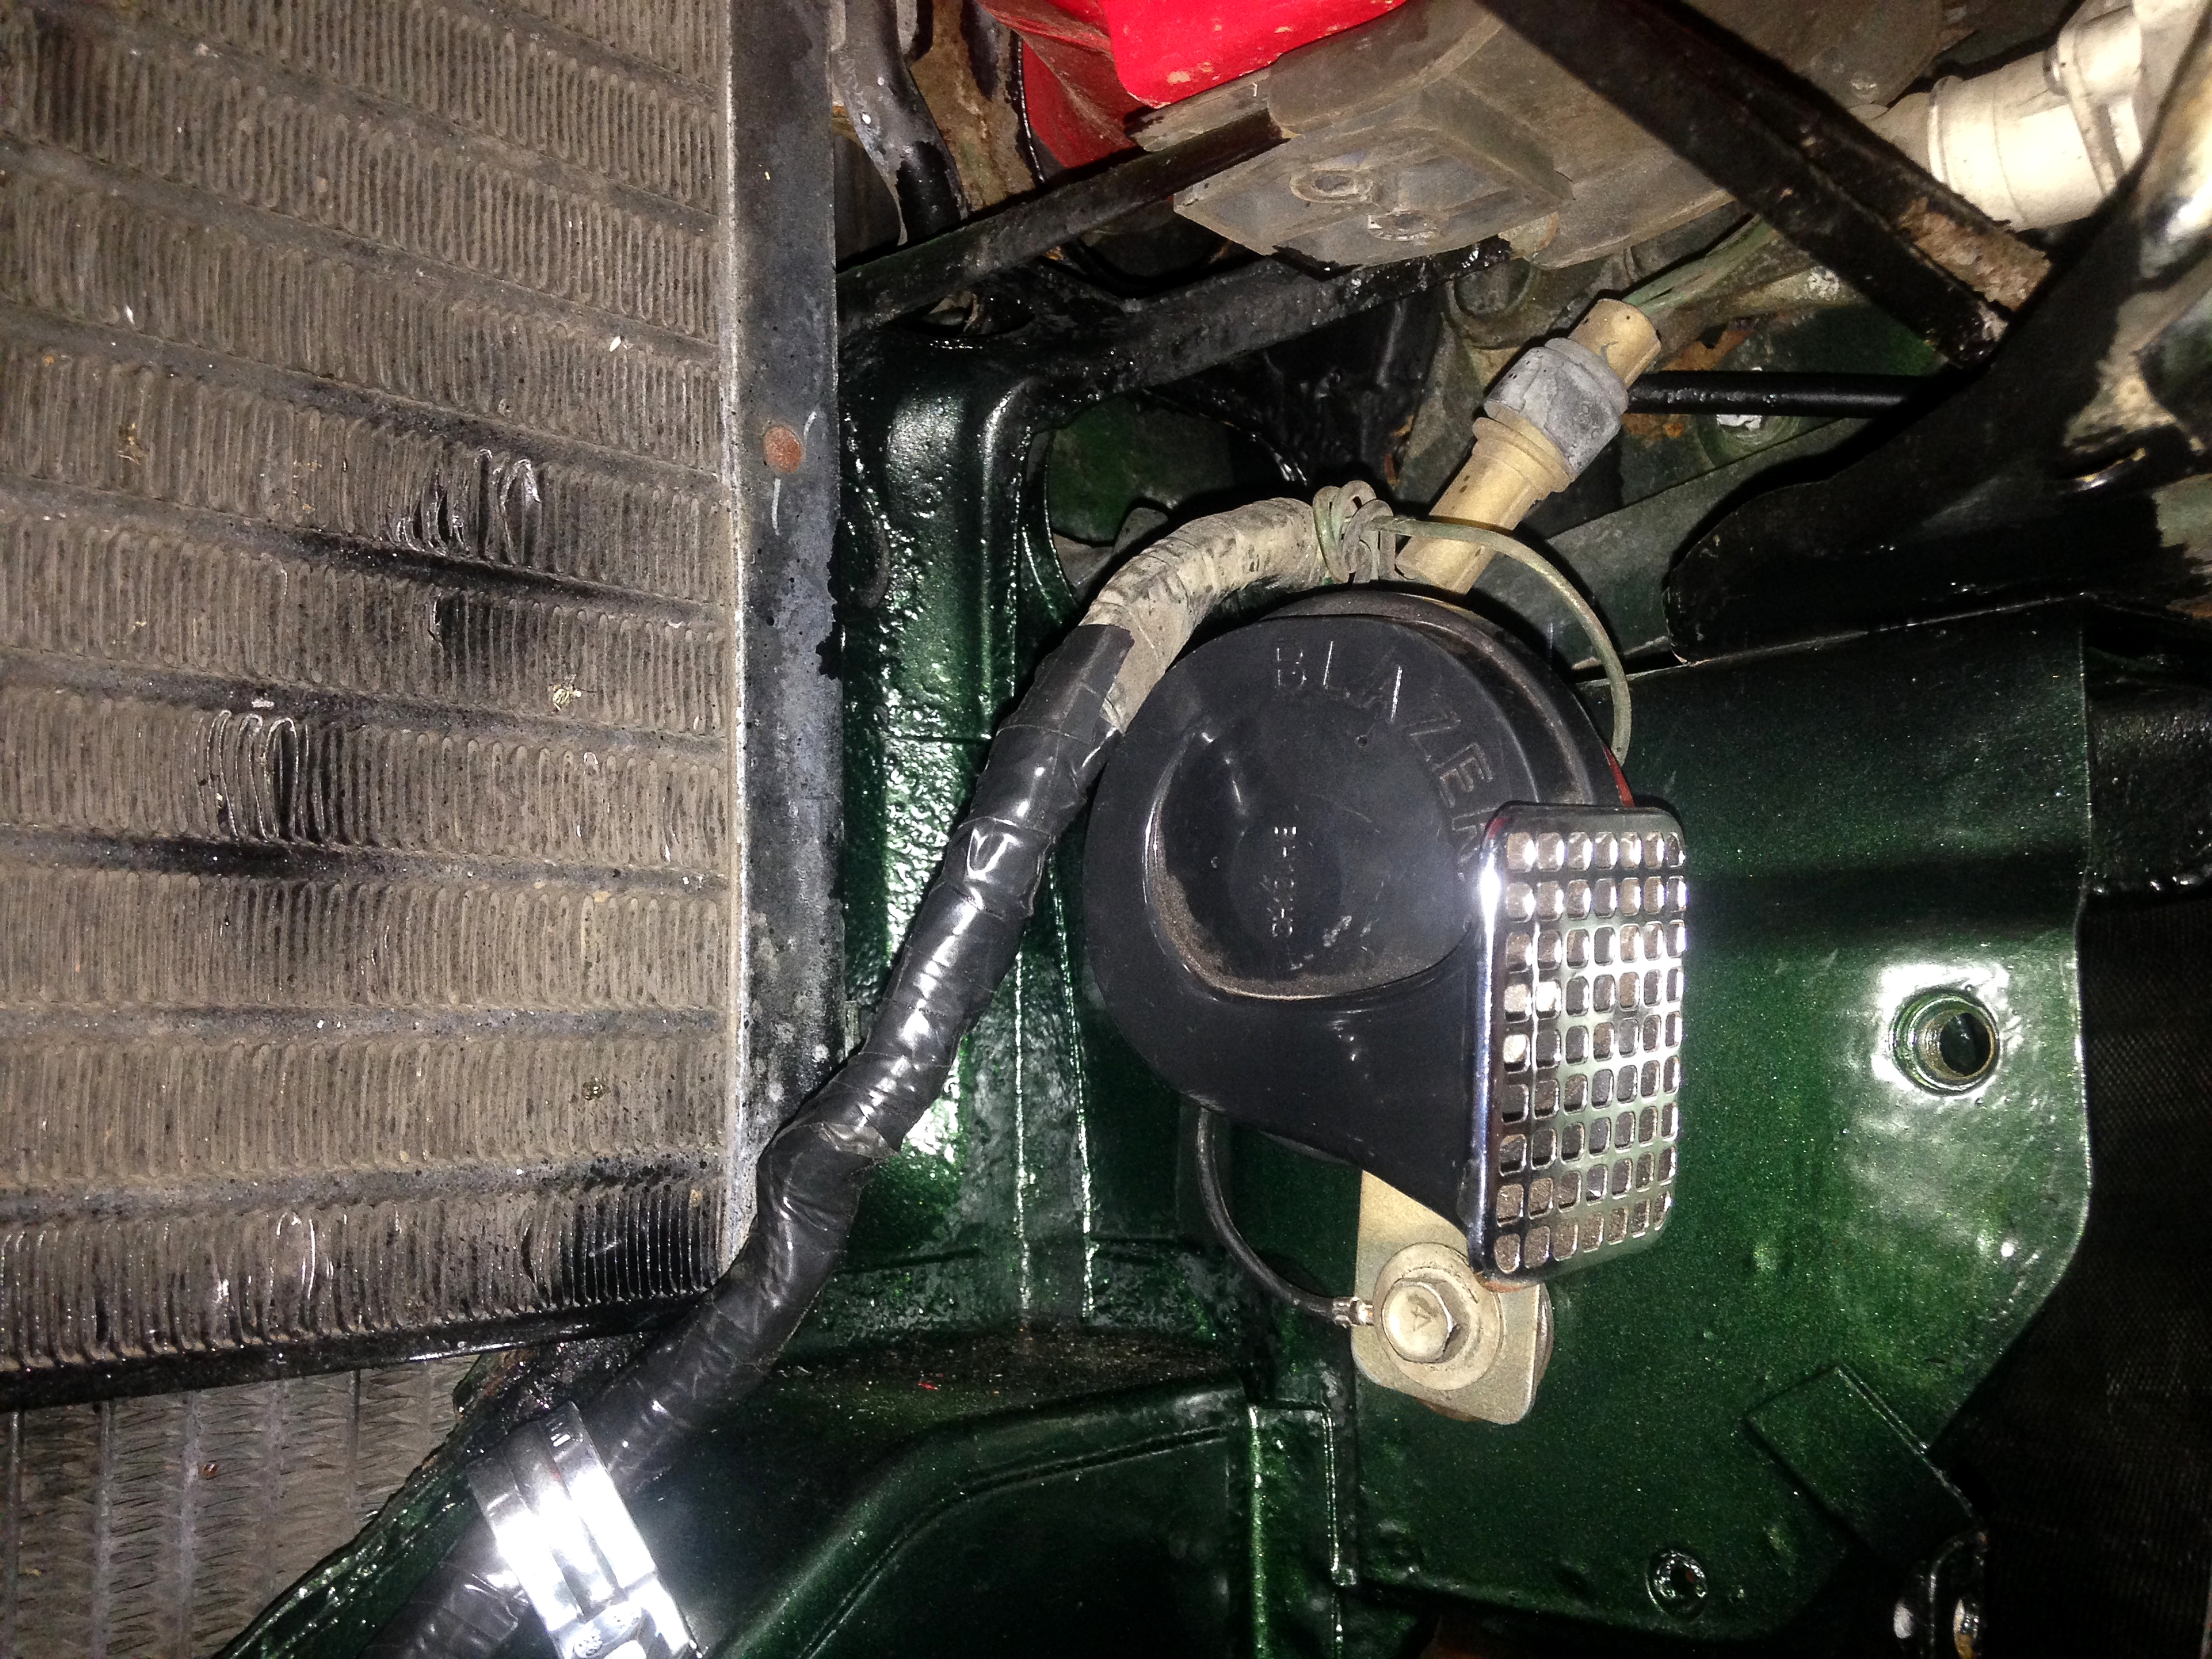
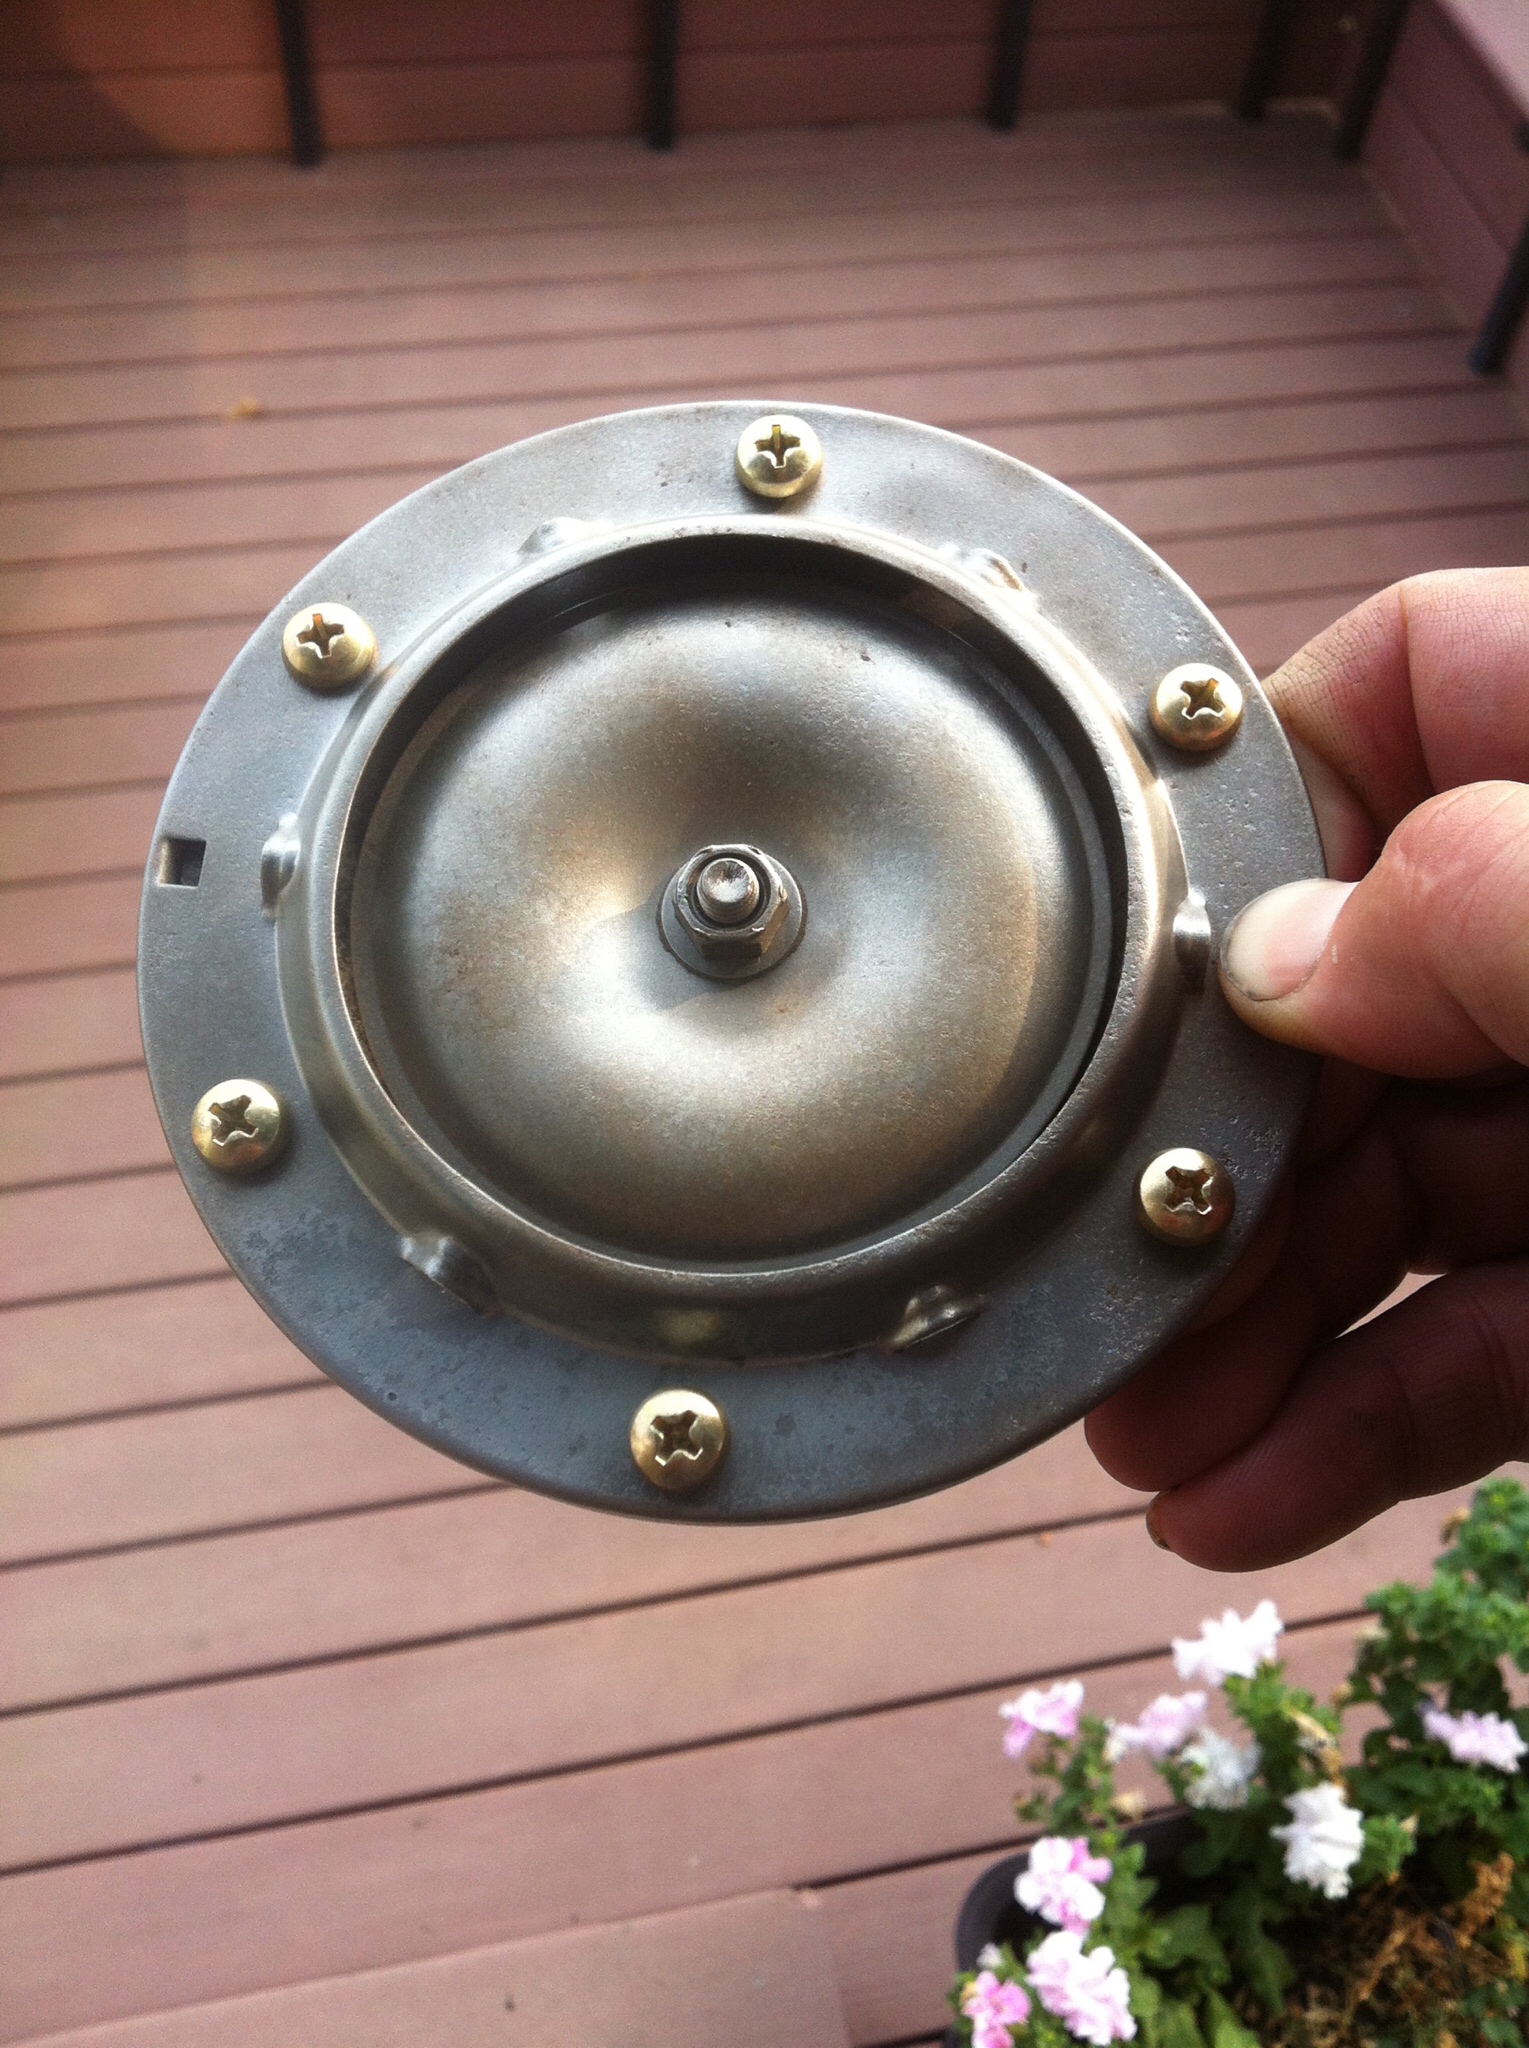
I believe that picture is the location for a 240. My 77' has them mounted higher and facing each other connected to the bumper brackets. This picture of a aftermarket horn shows the right location. A stock horn would be facing camera here. I have stock horns now, If you need a picture I can get one later.
 1 point
 -
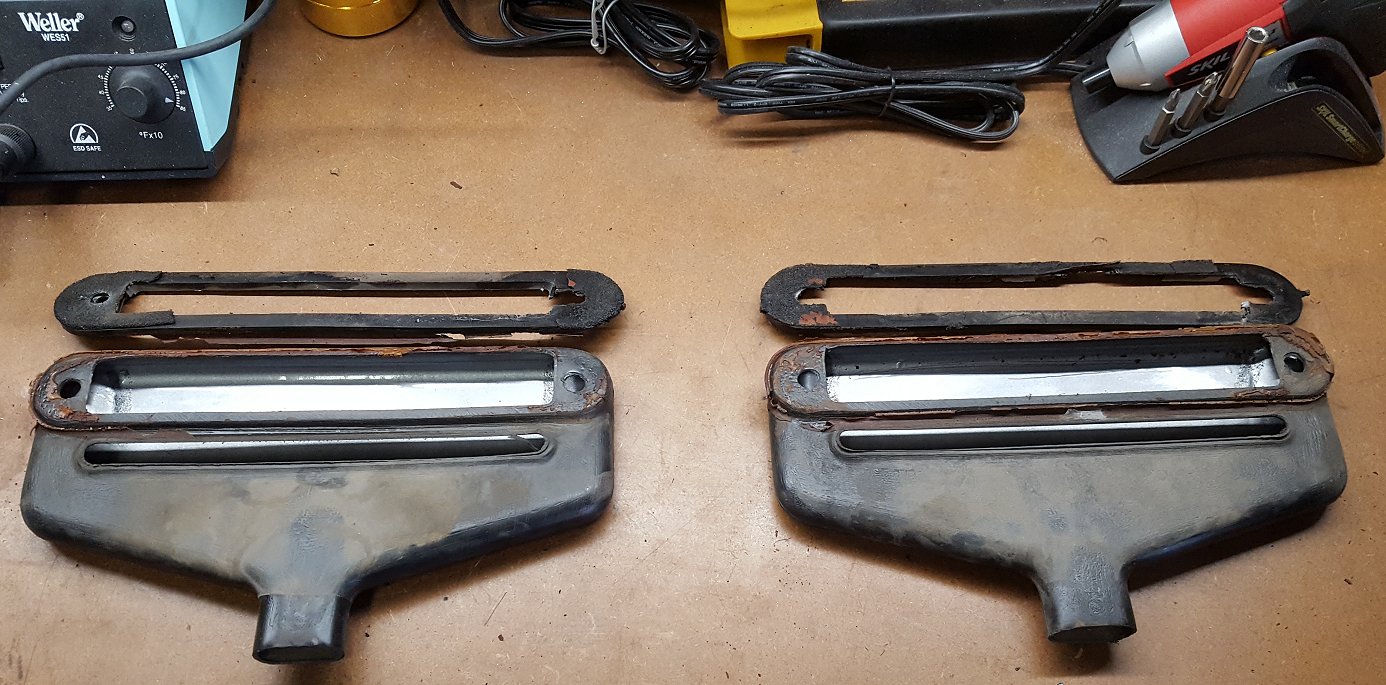
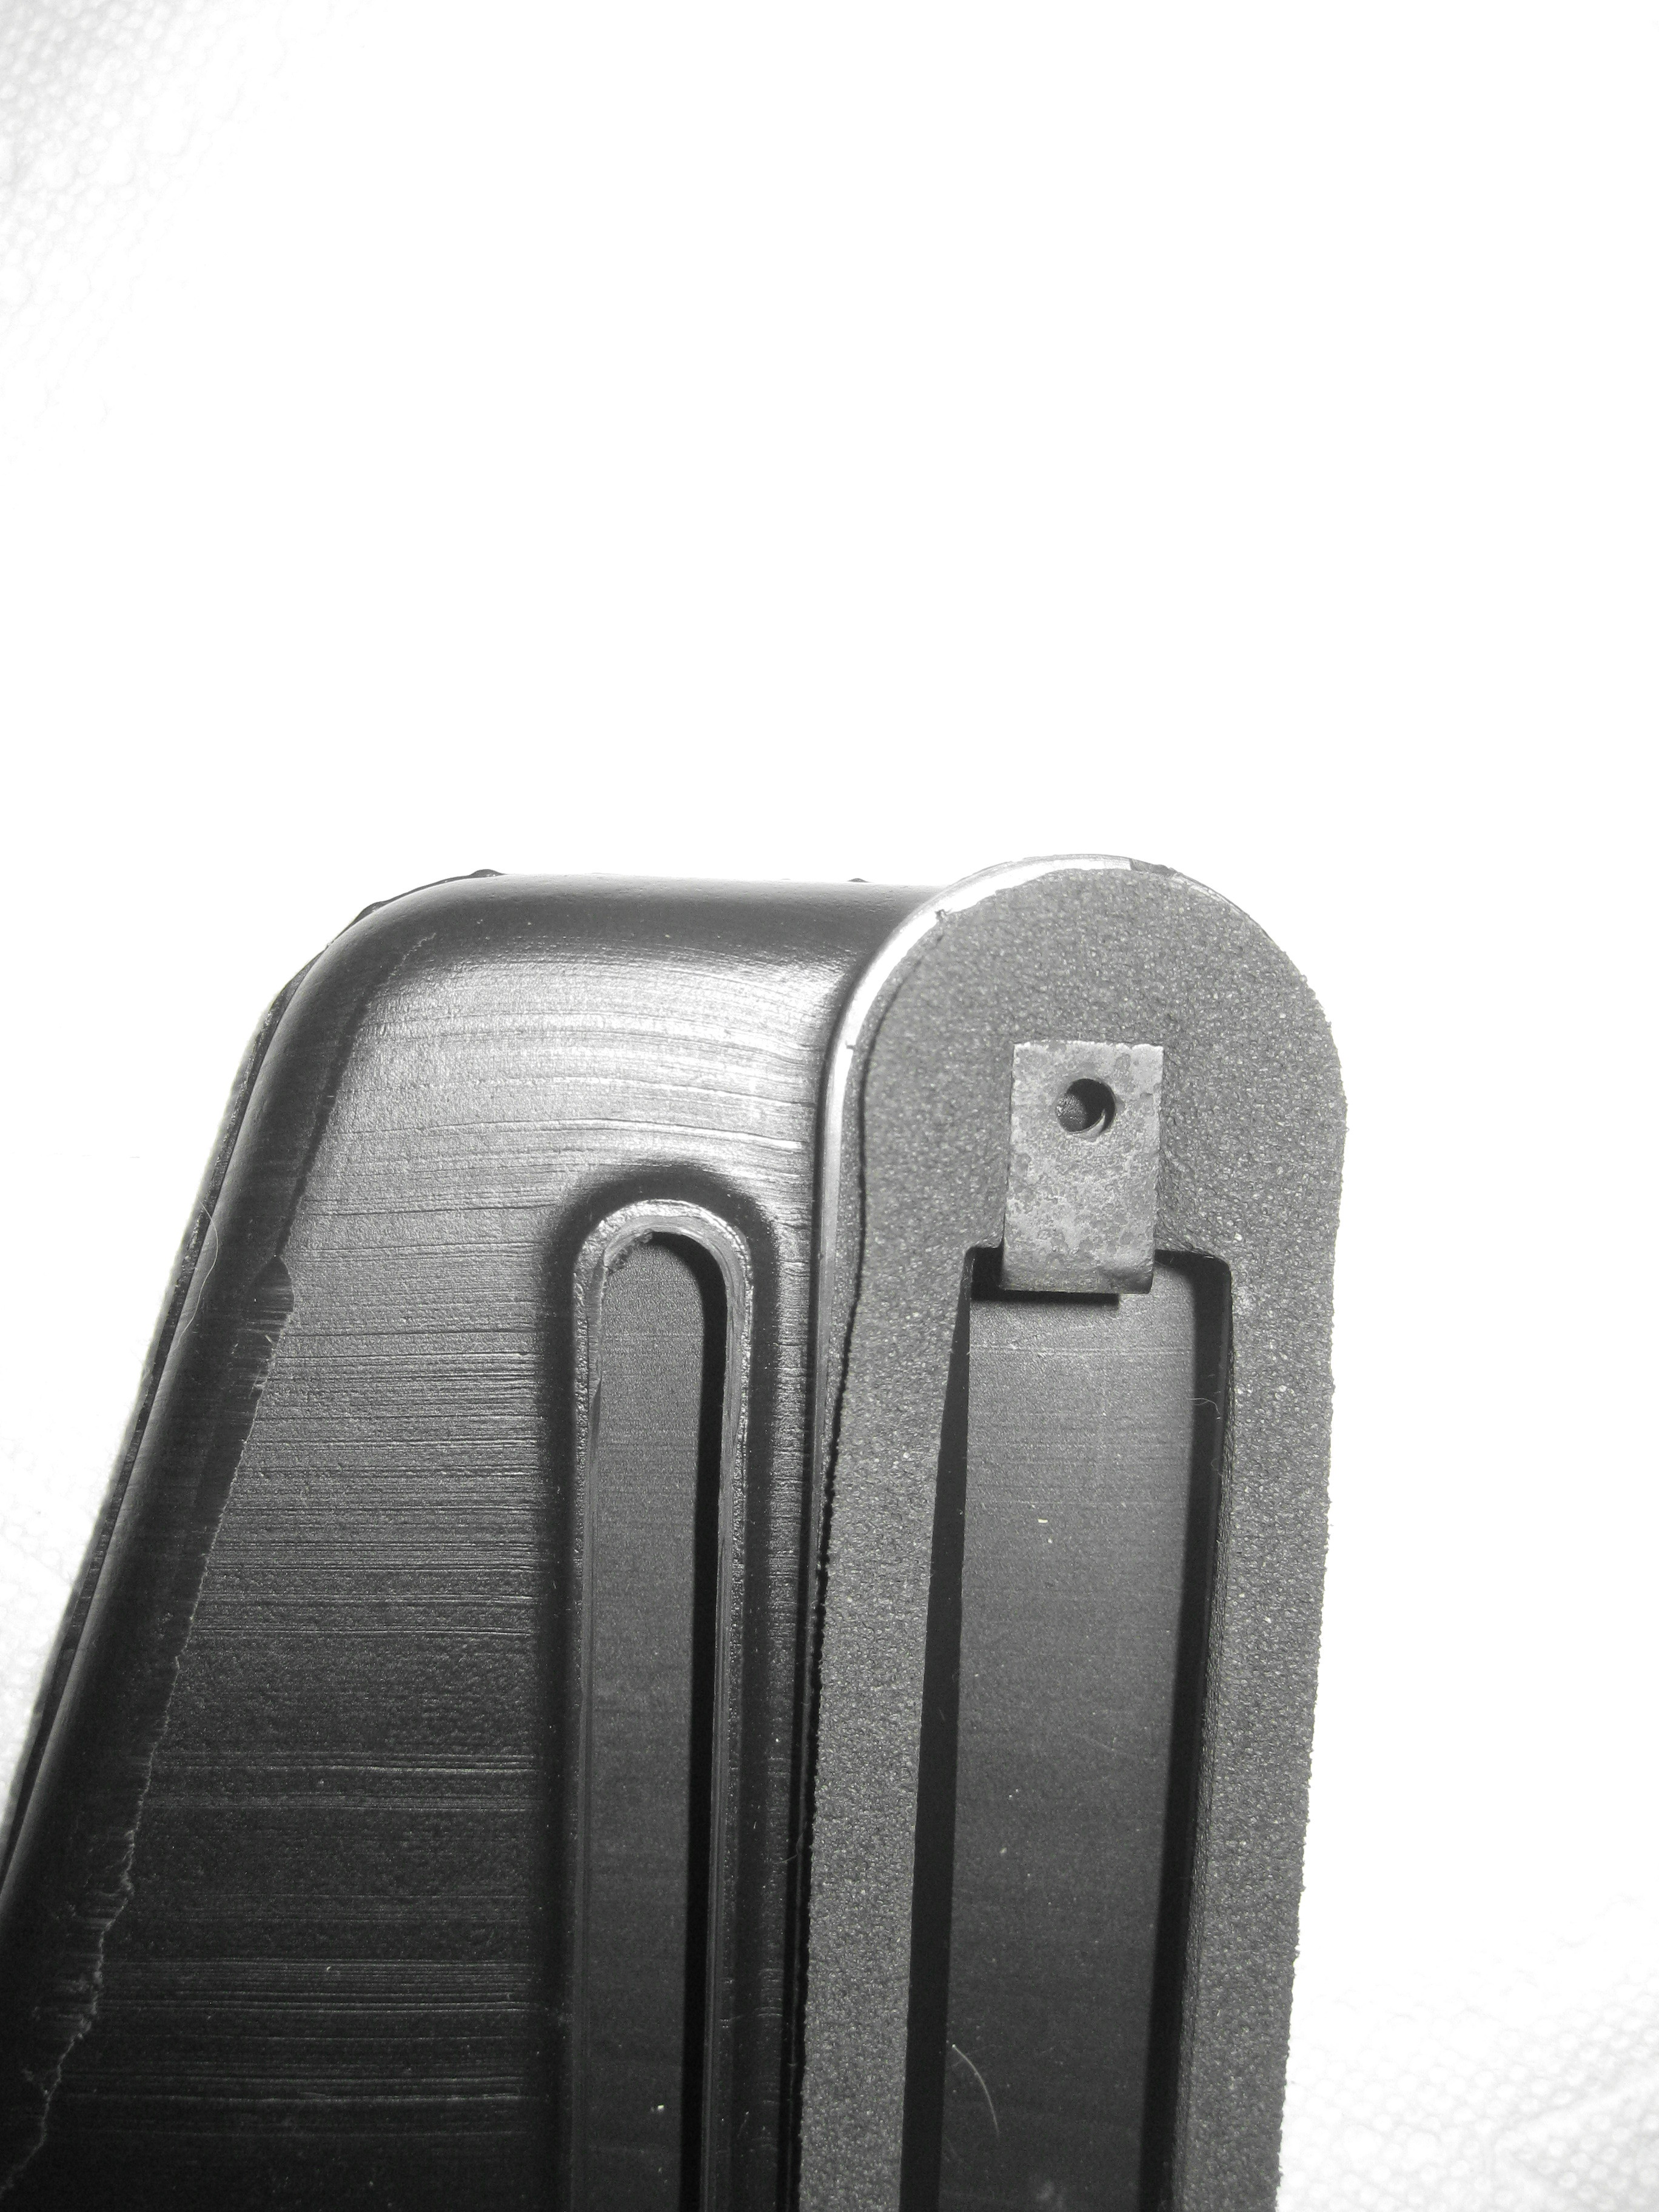
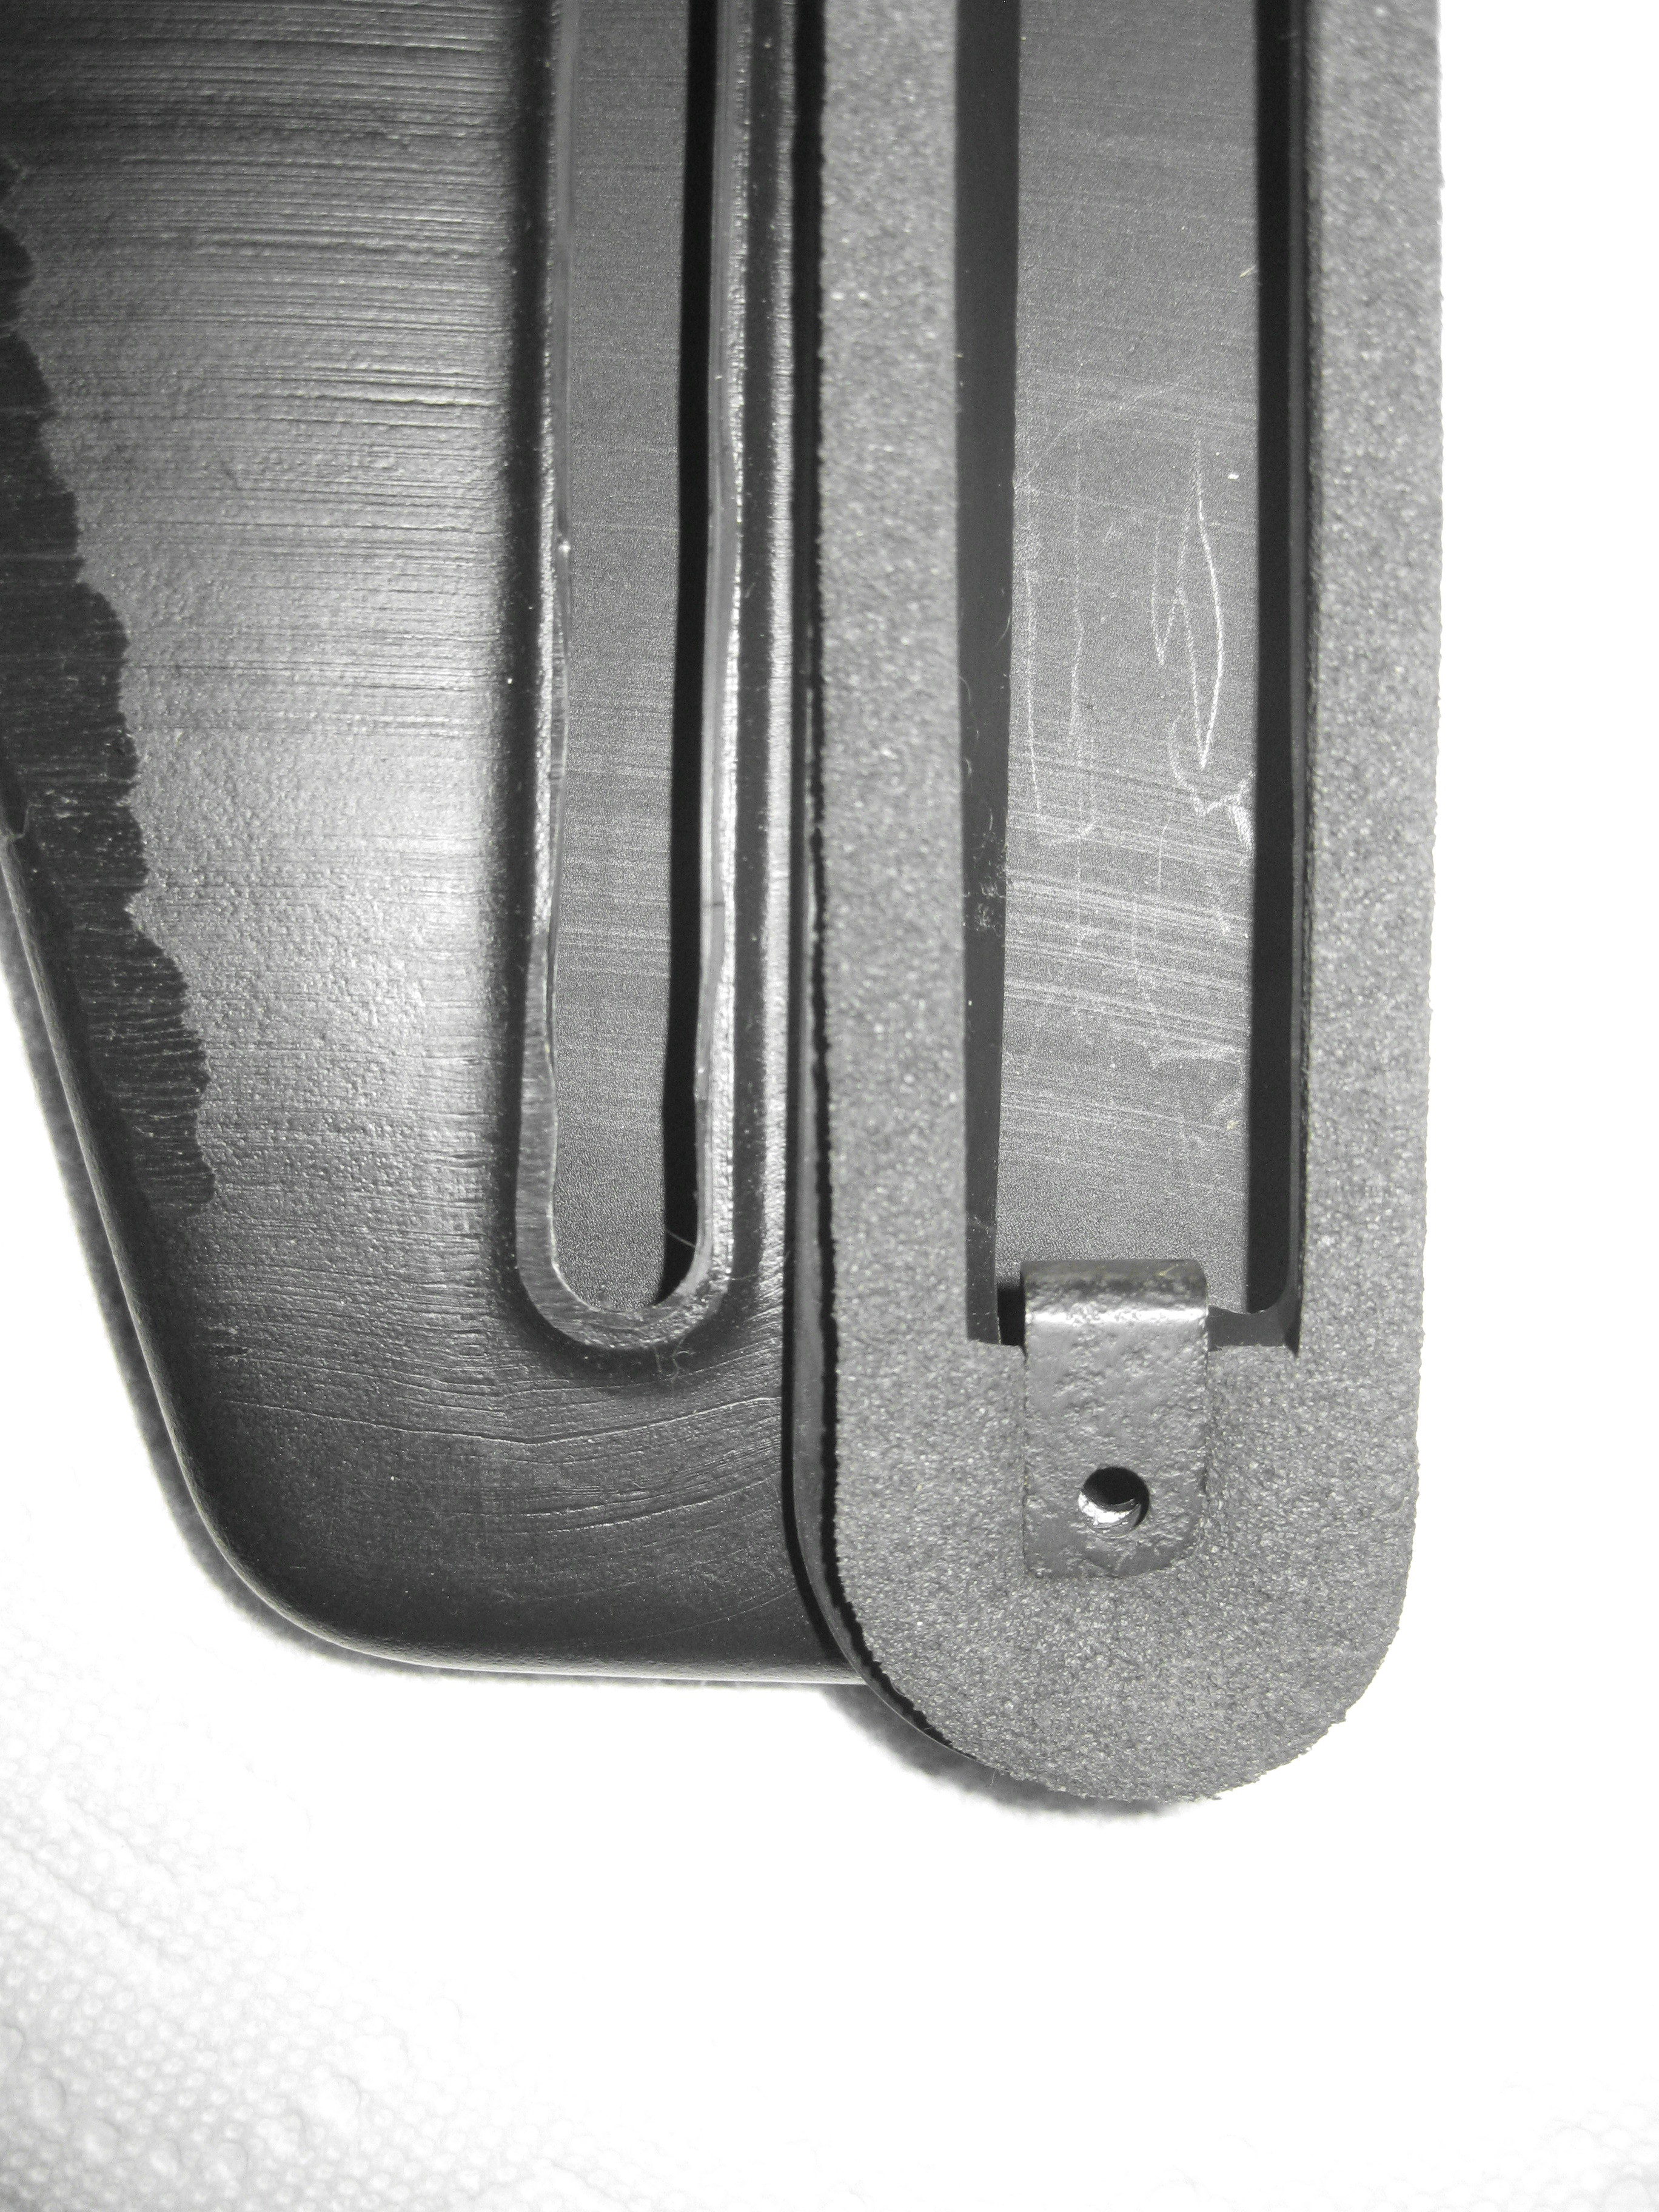
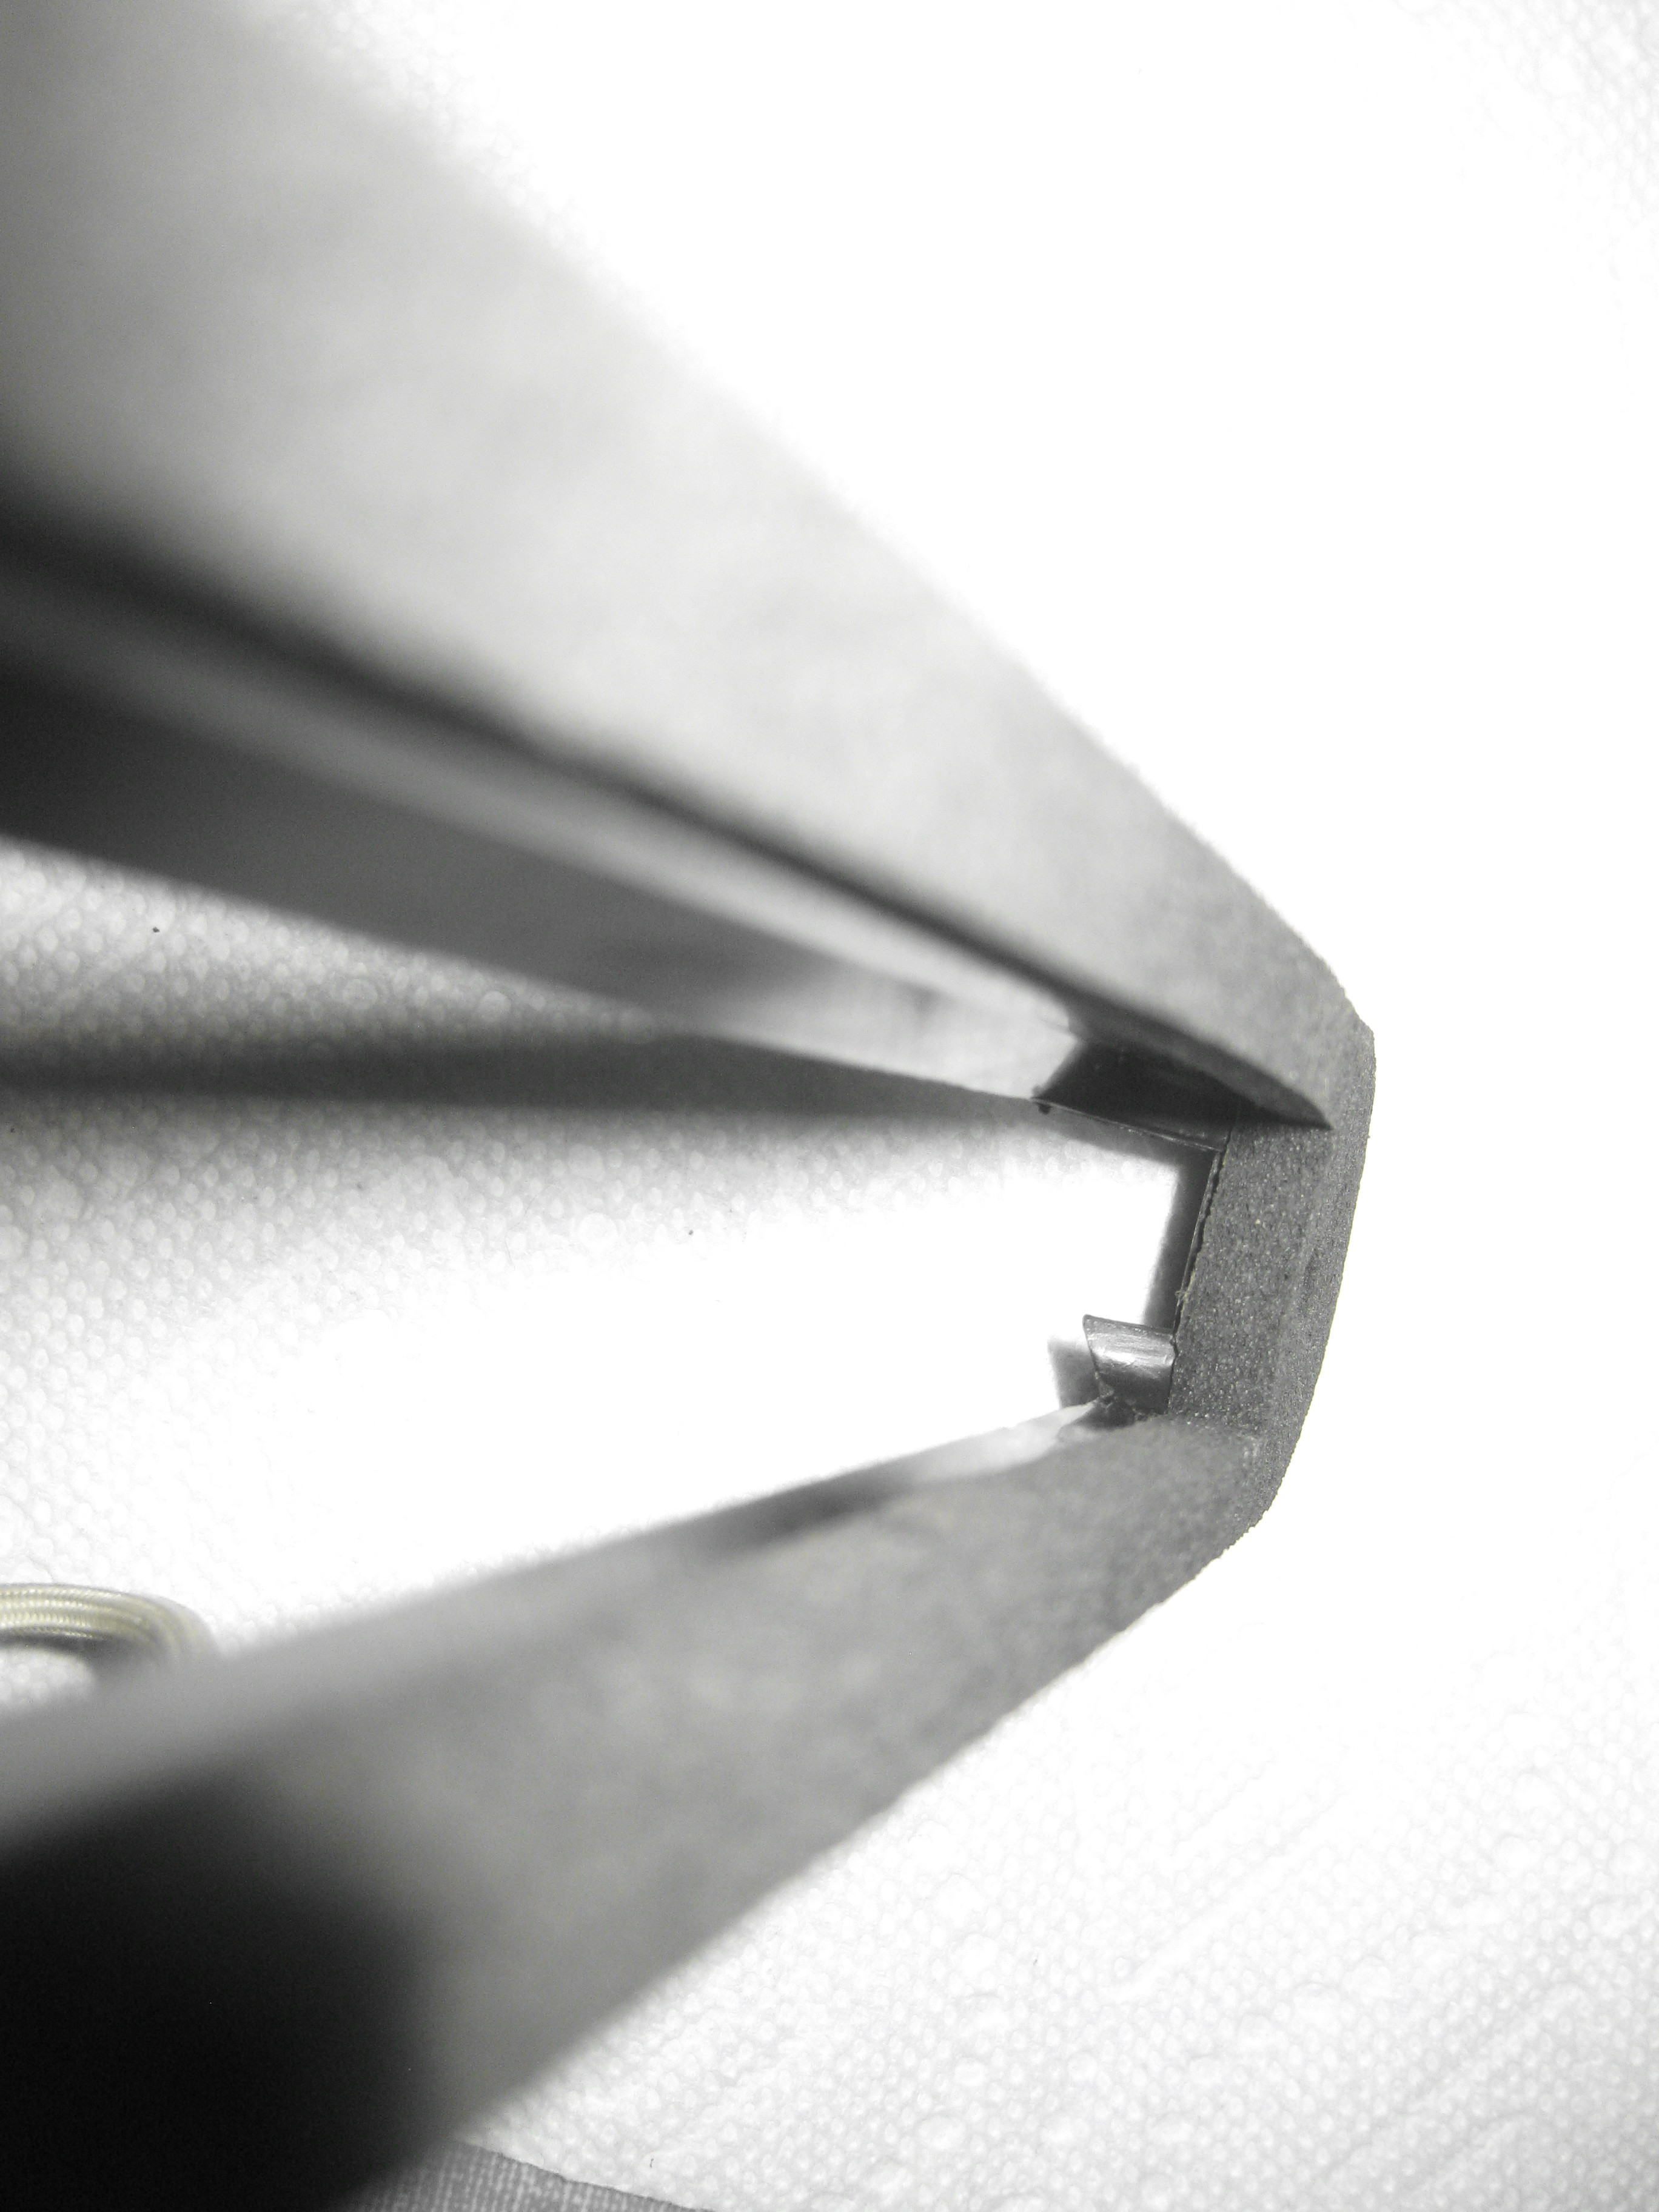
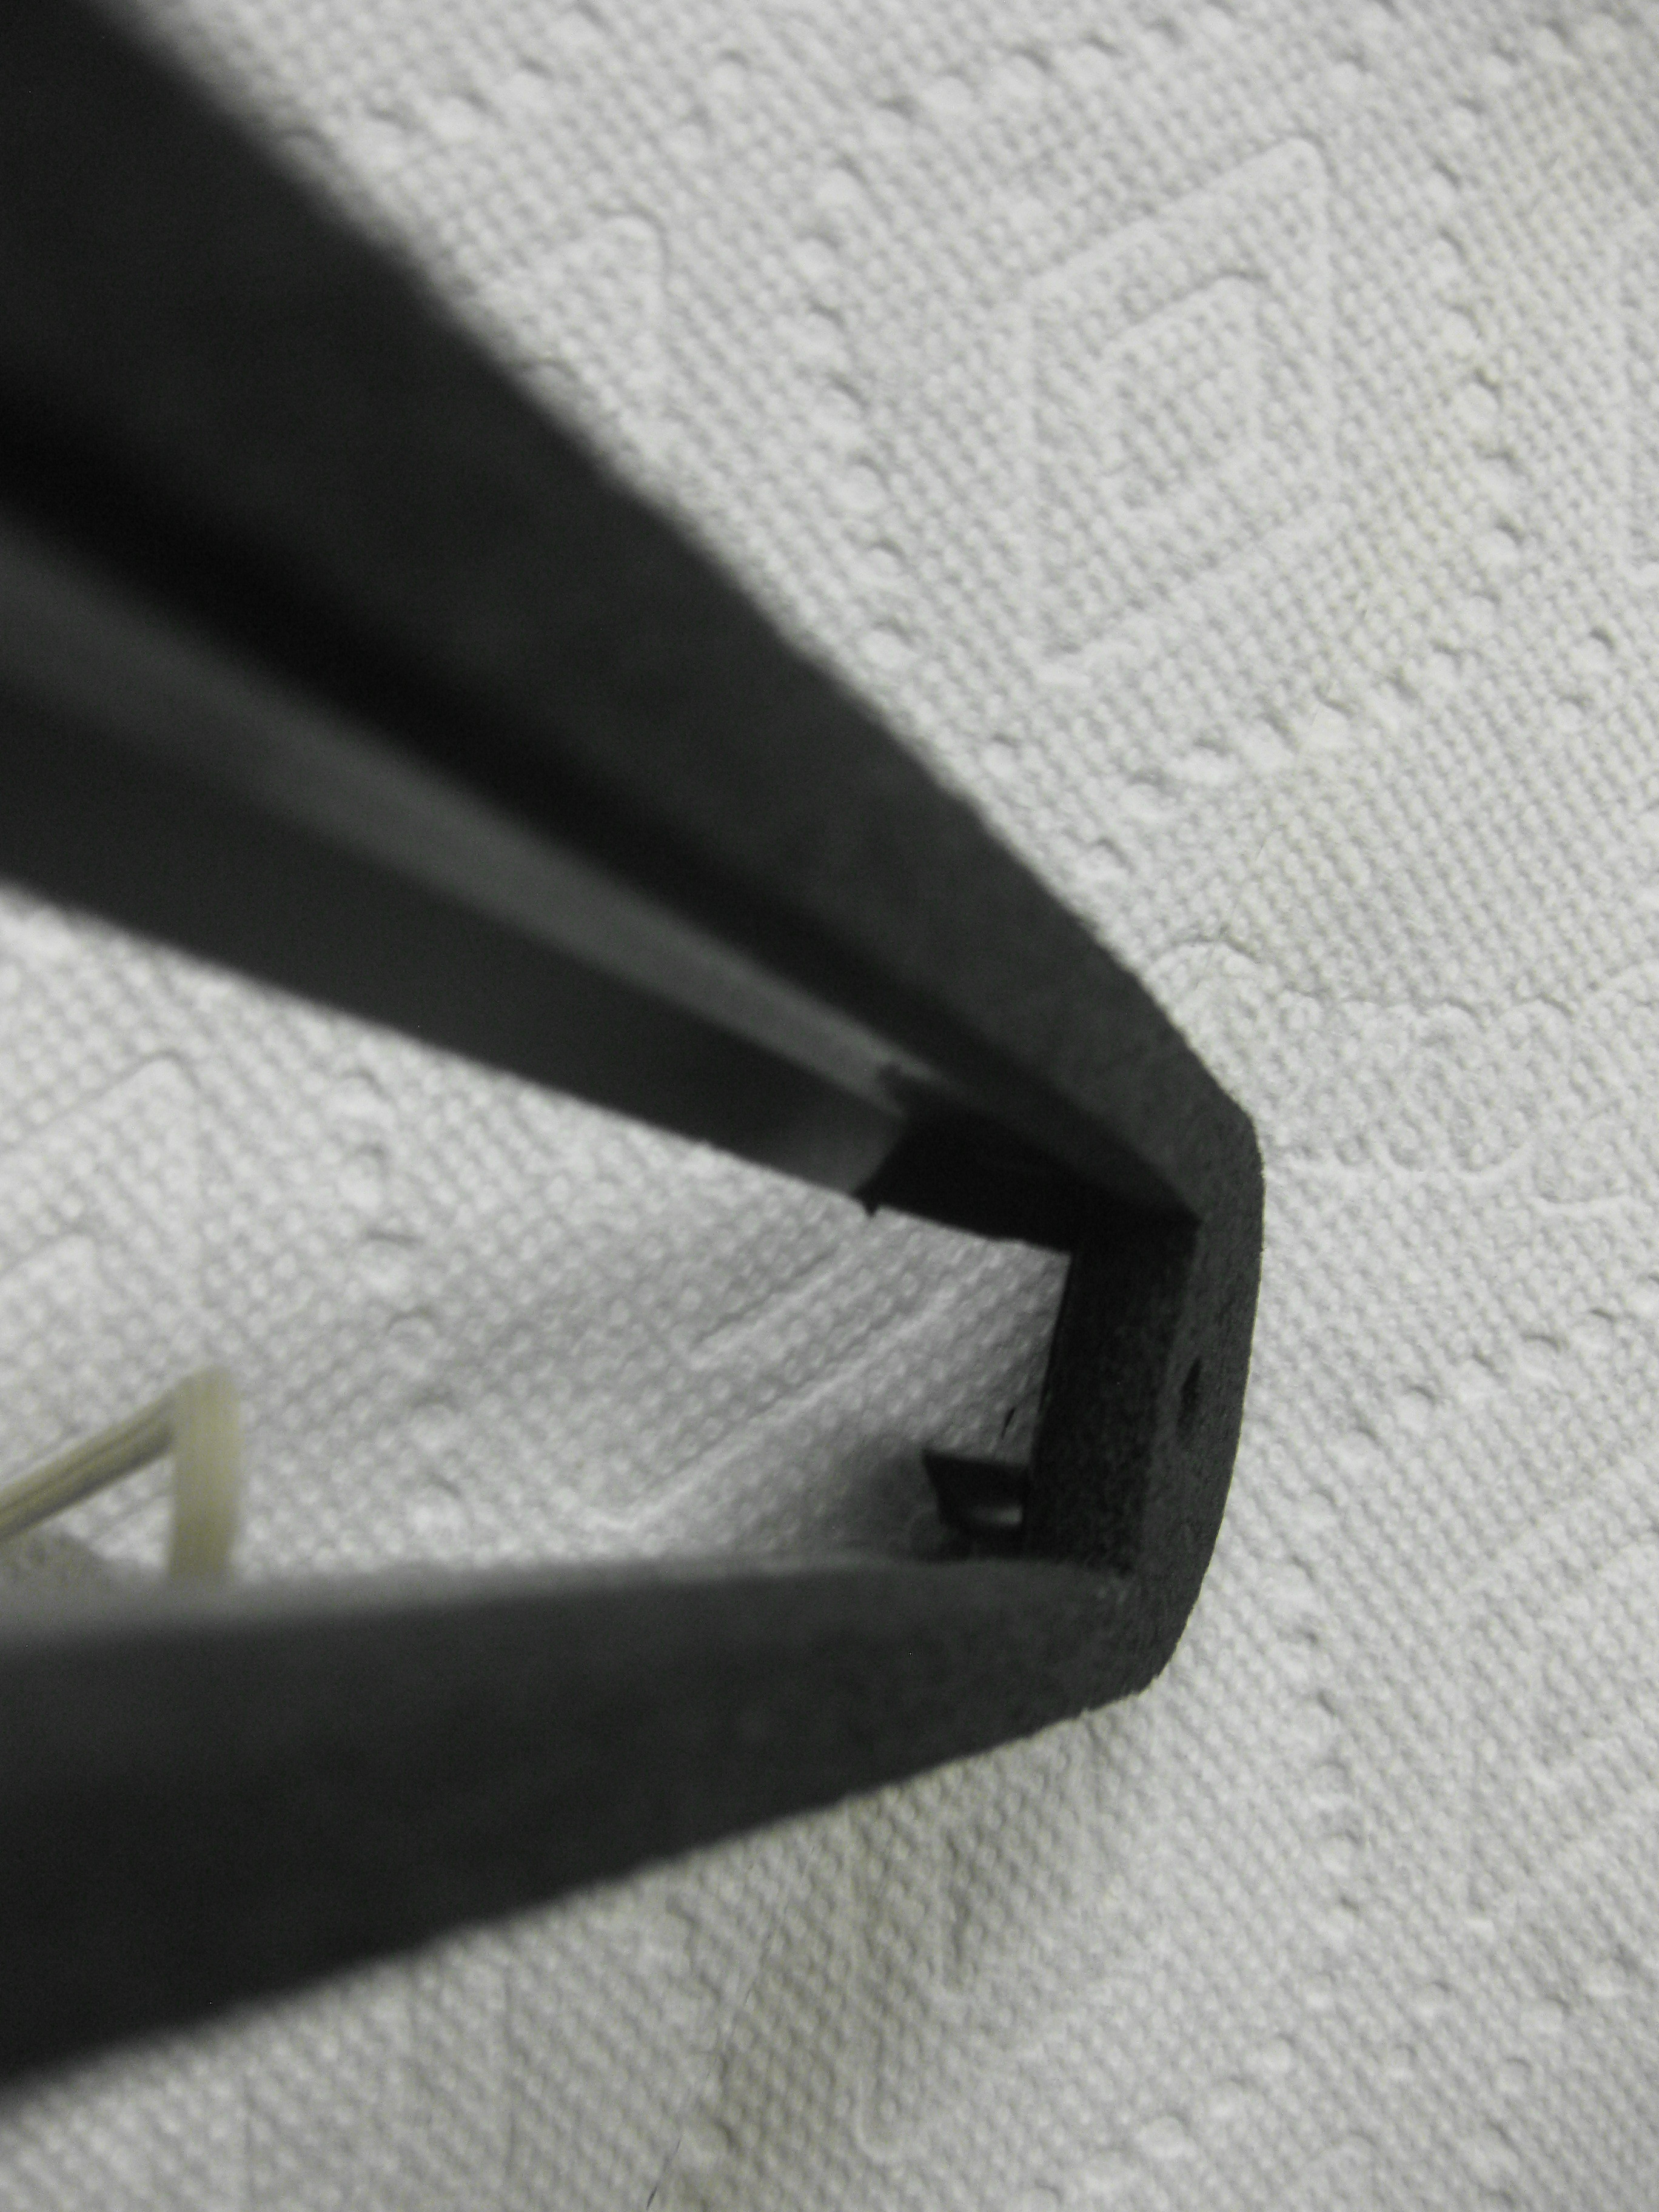
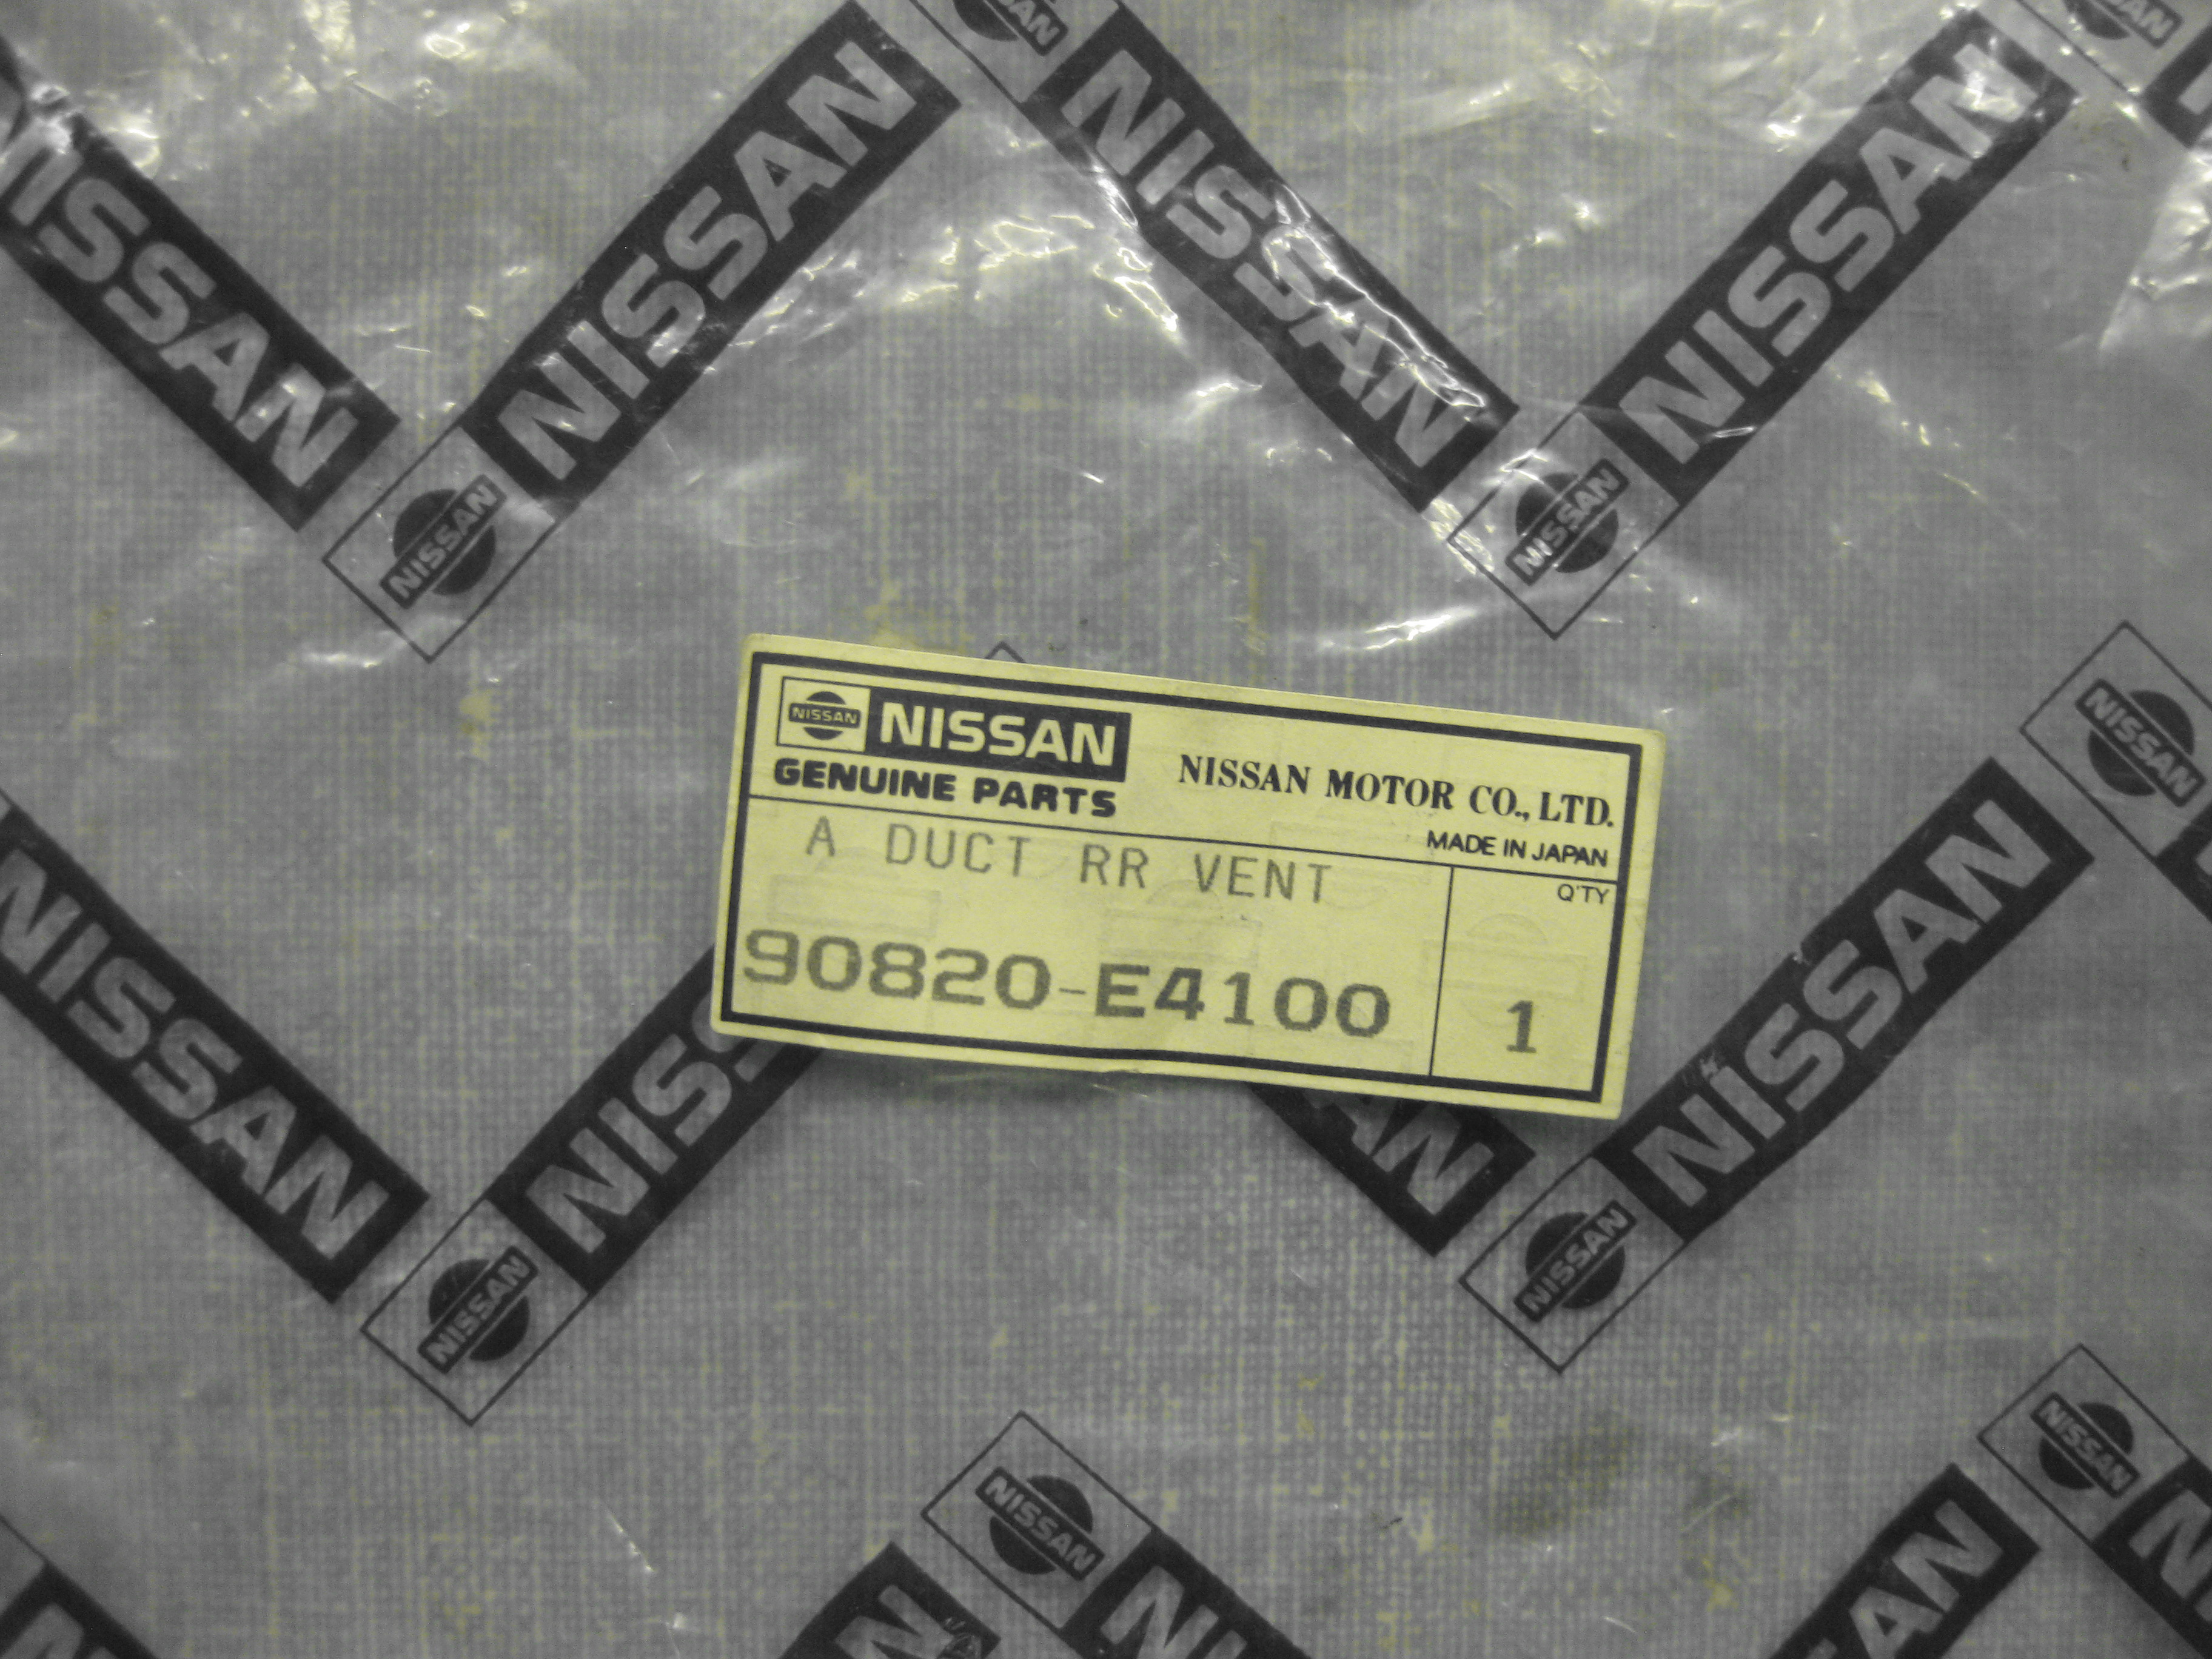
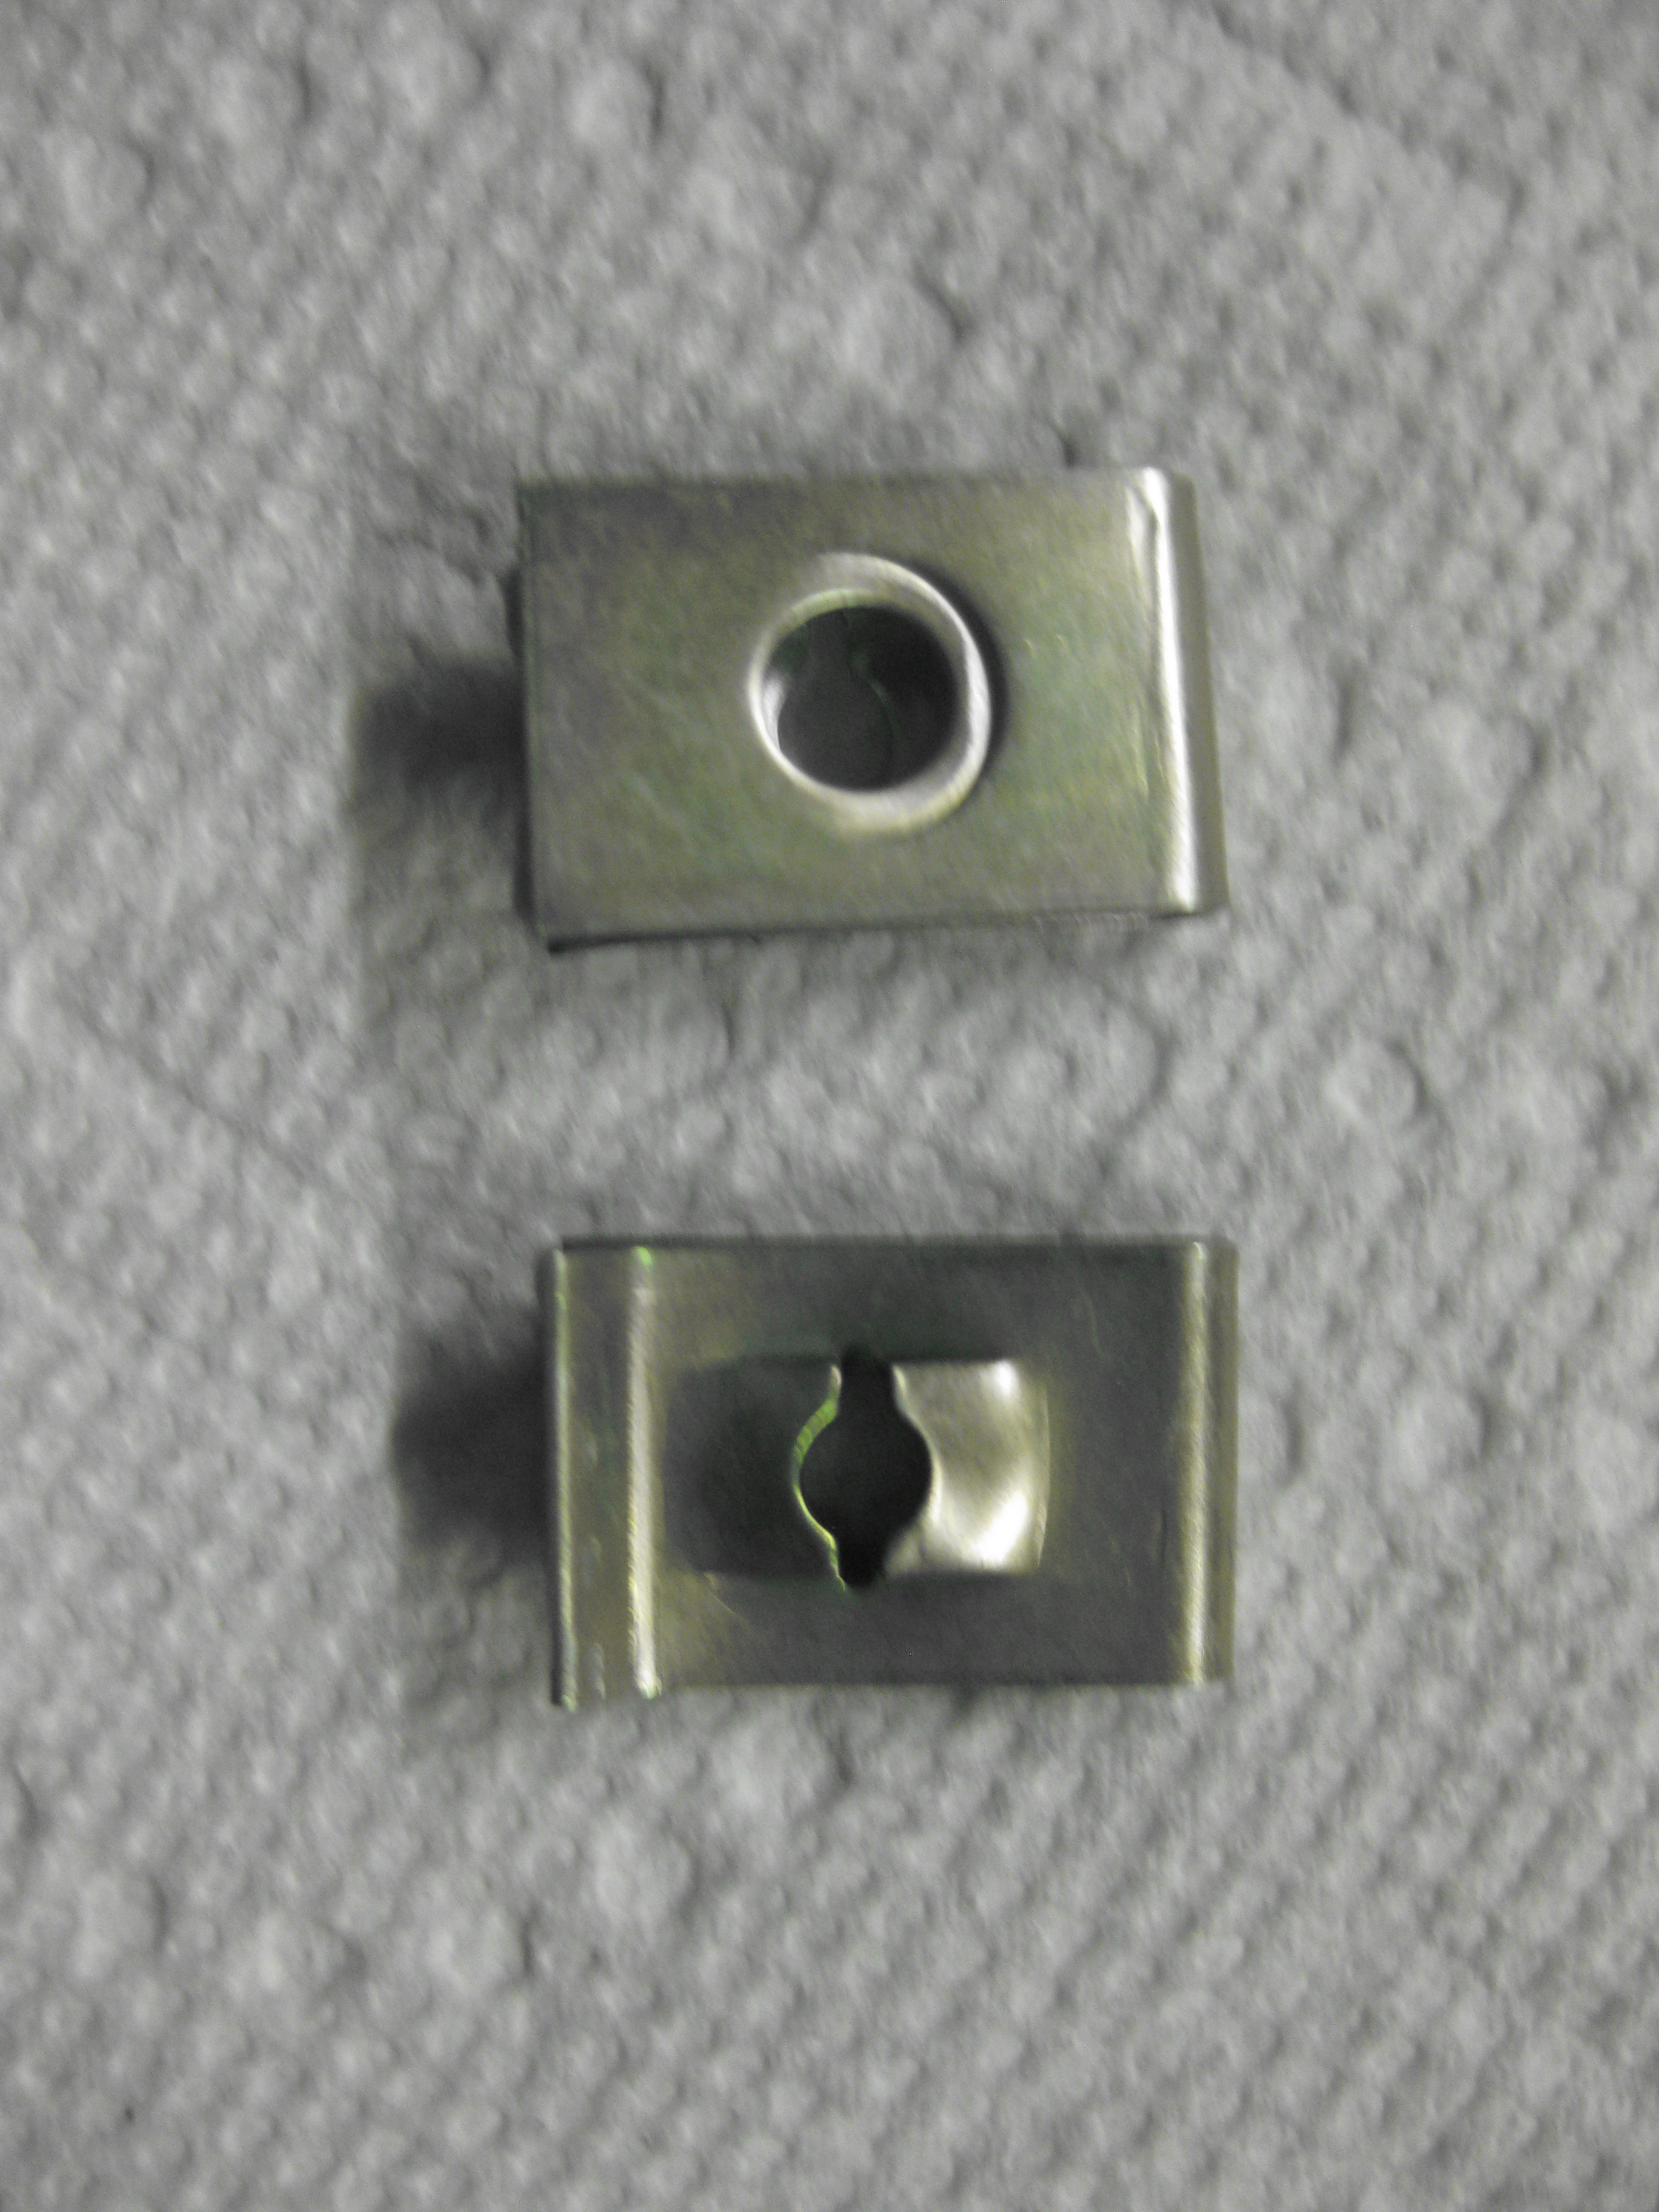
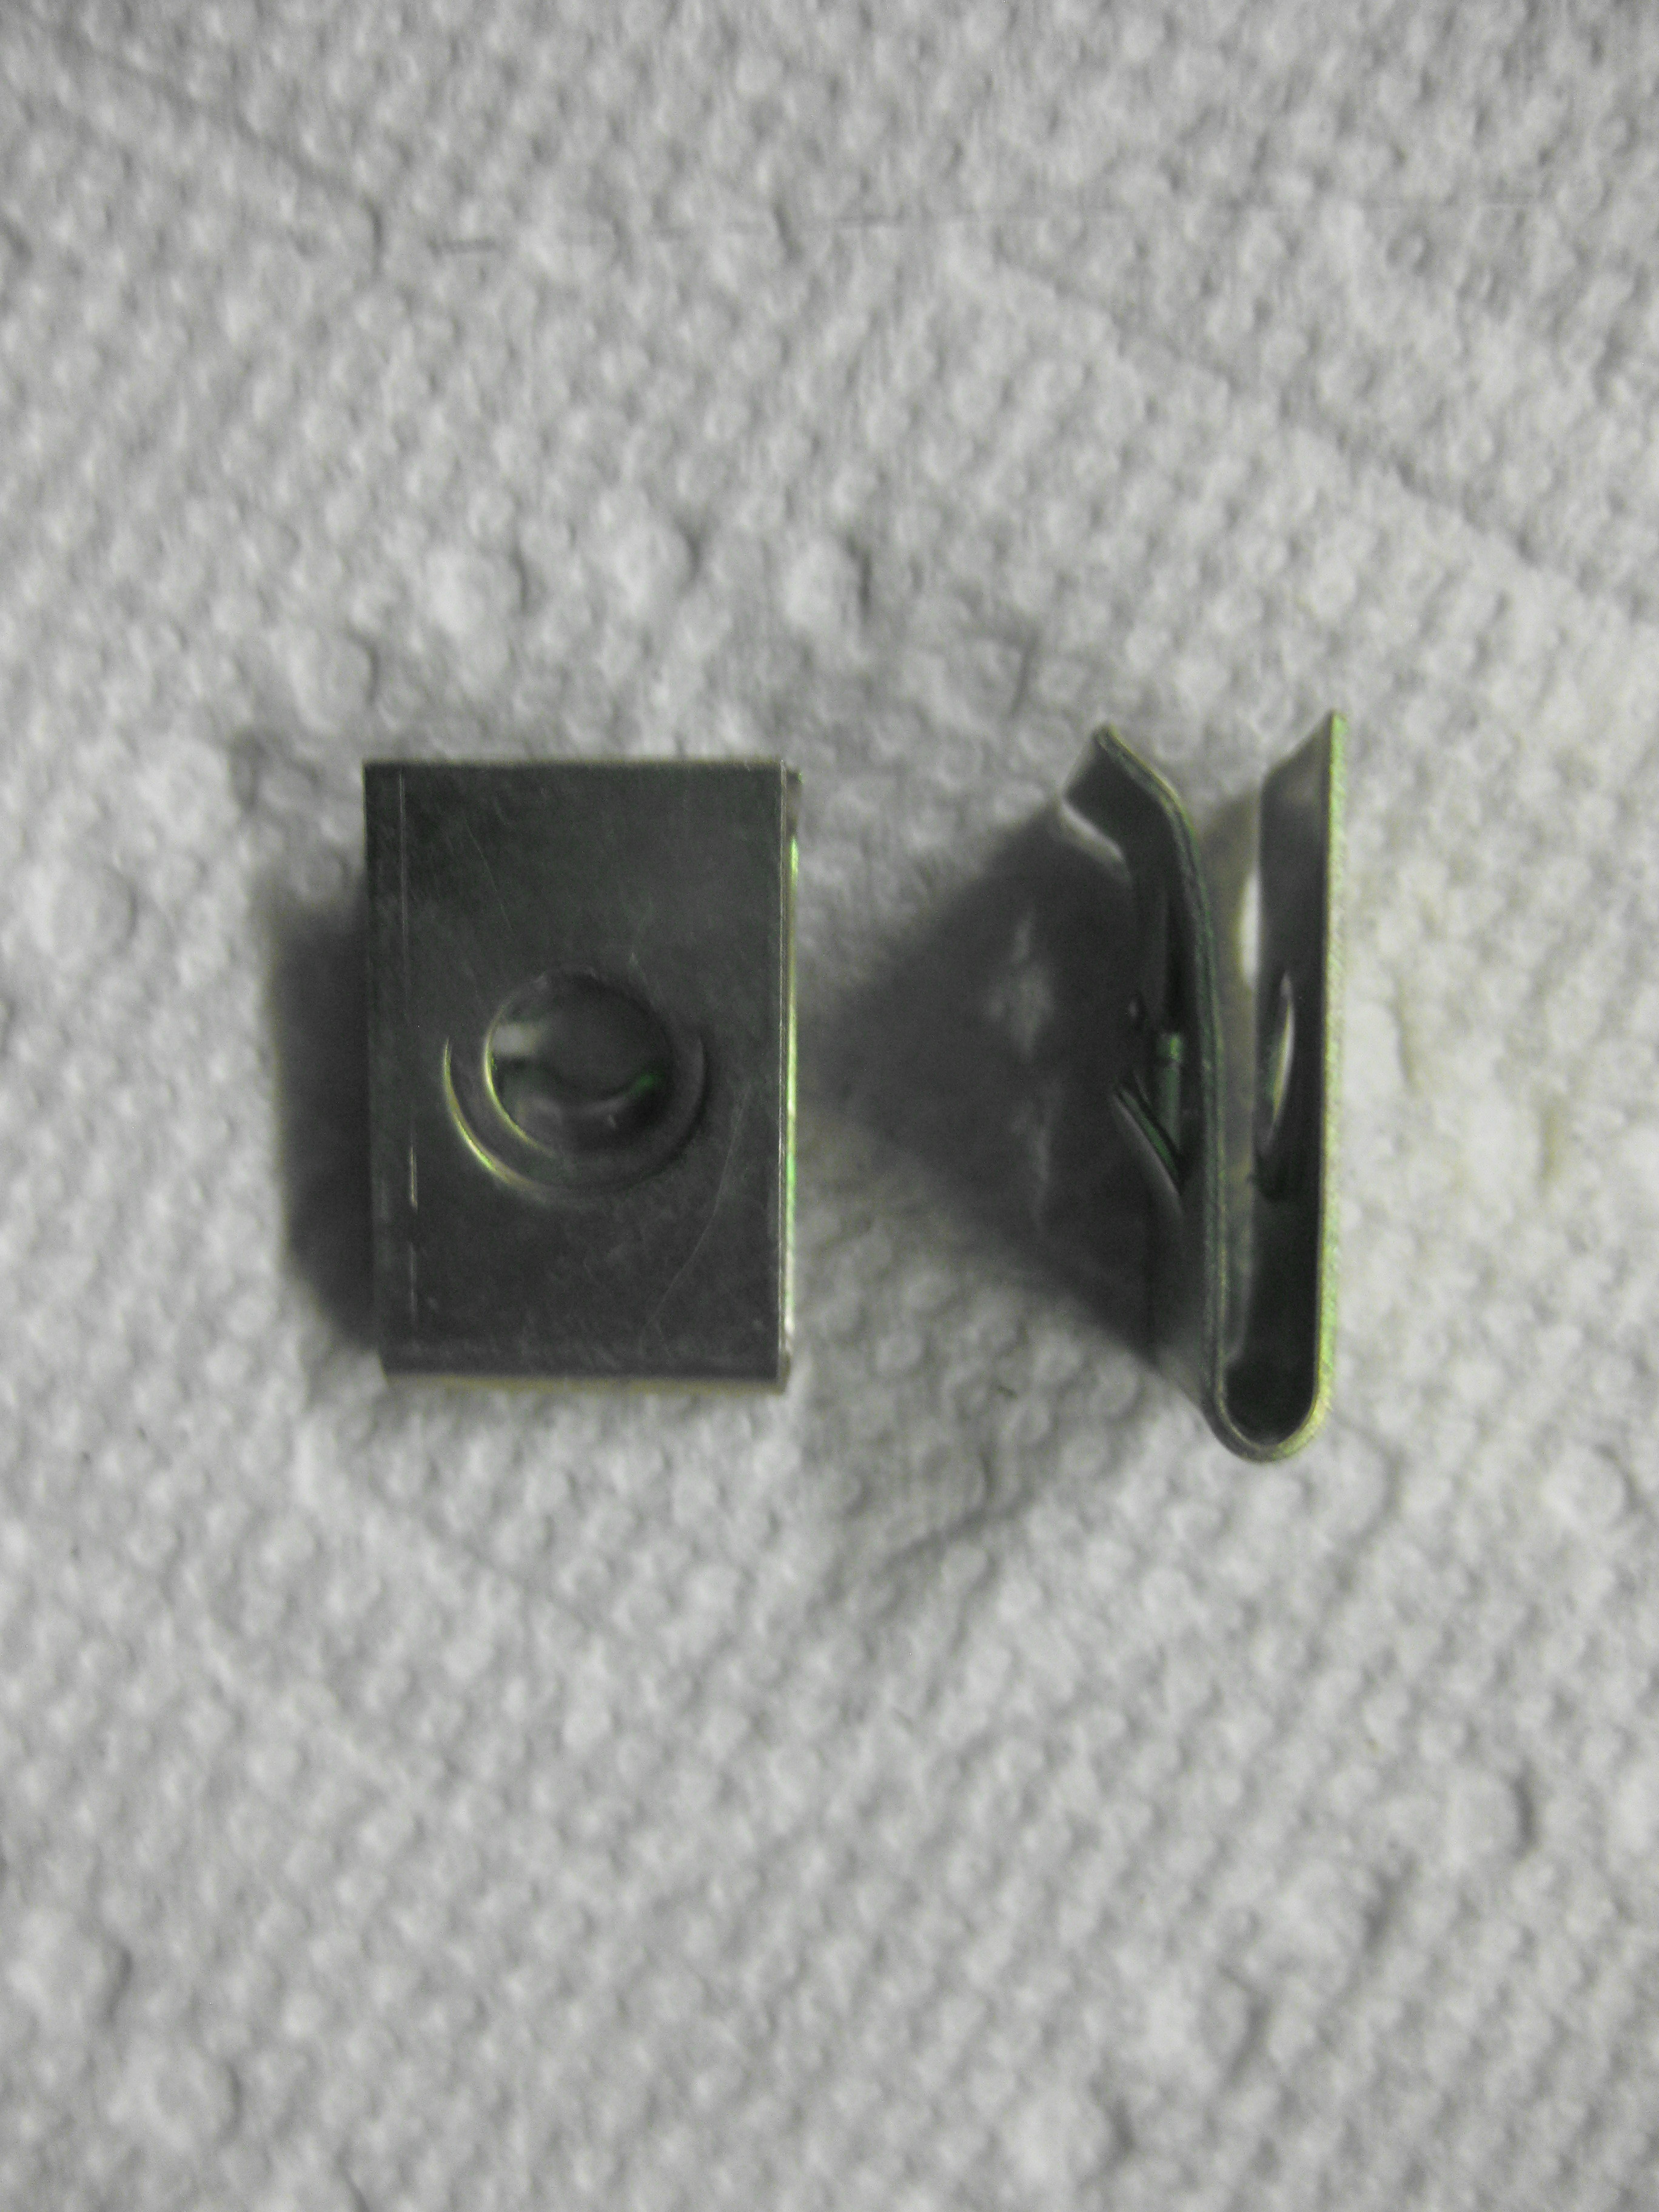
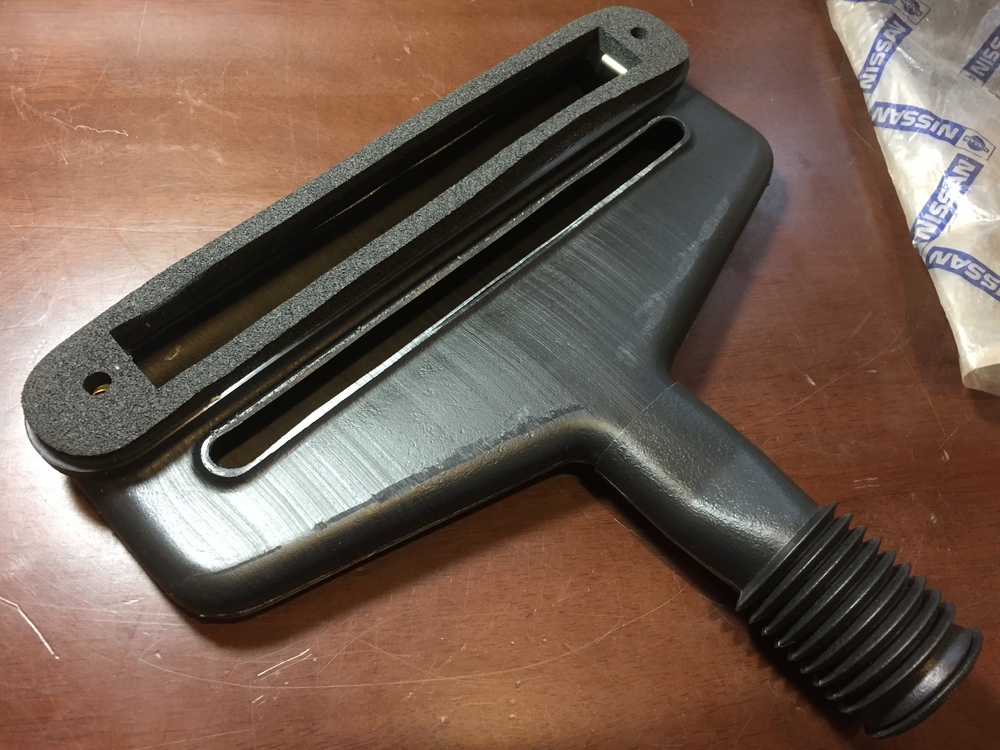
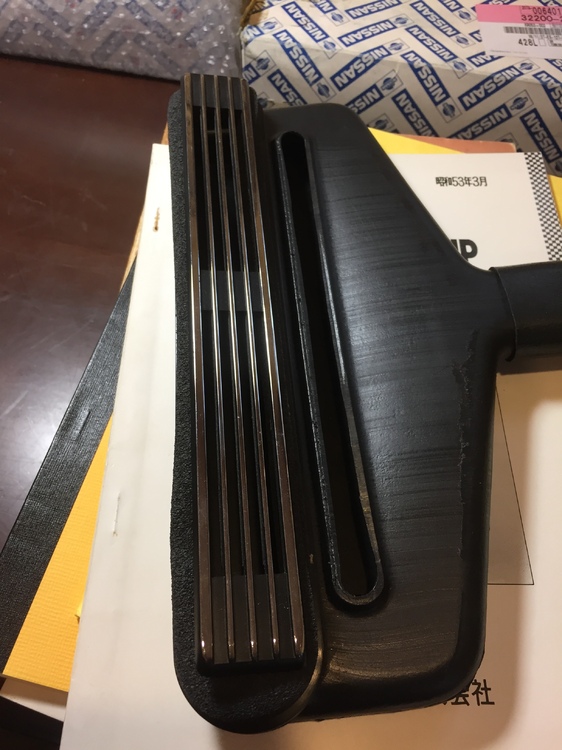
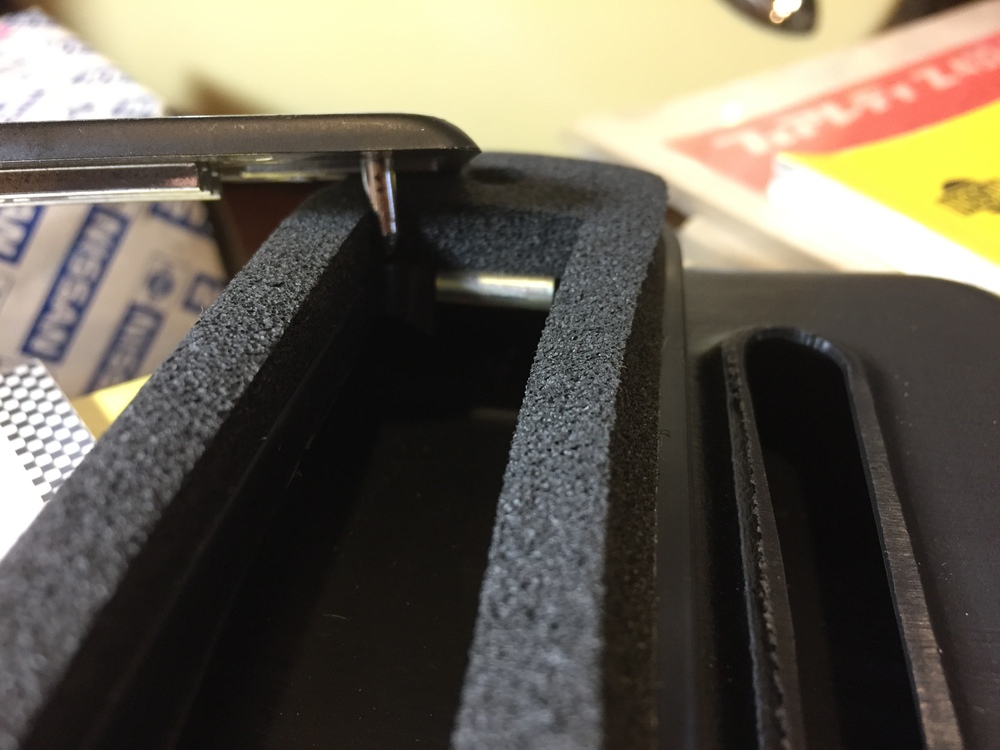
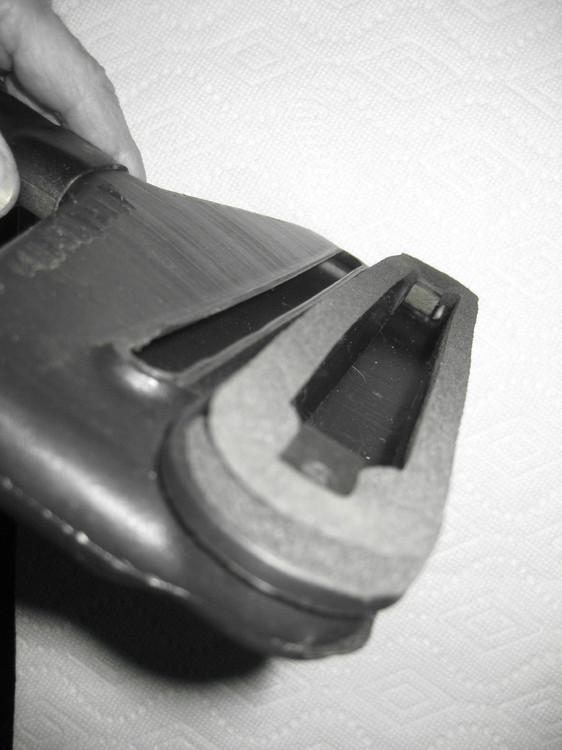
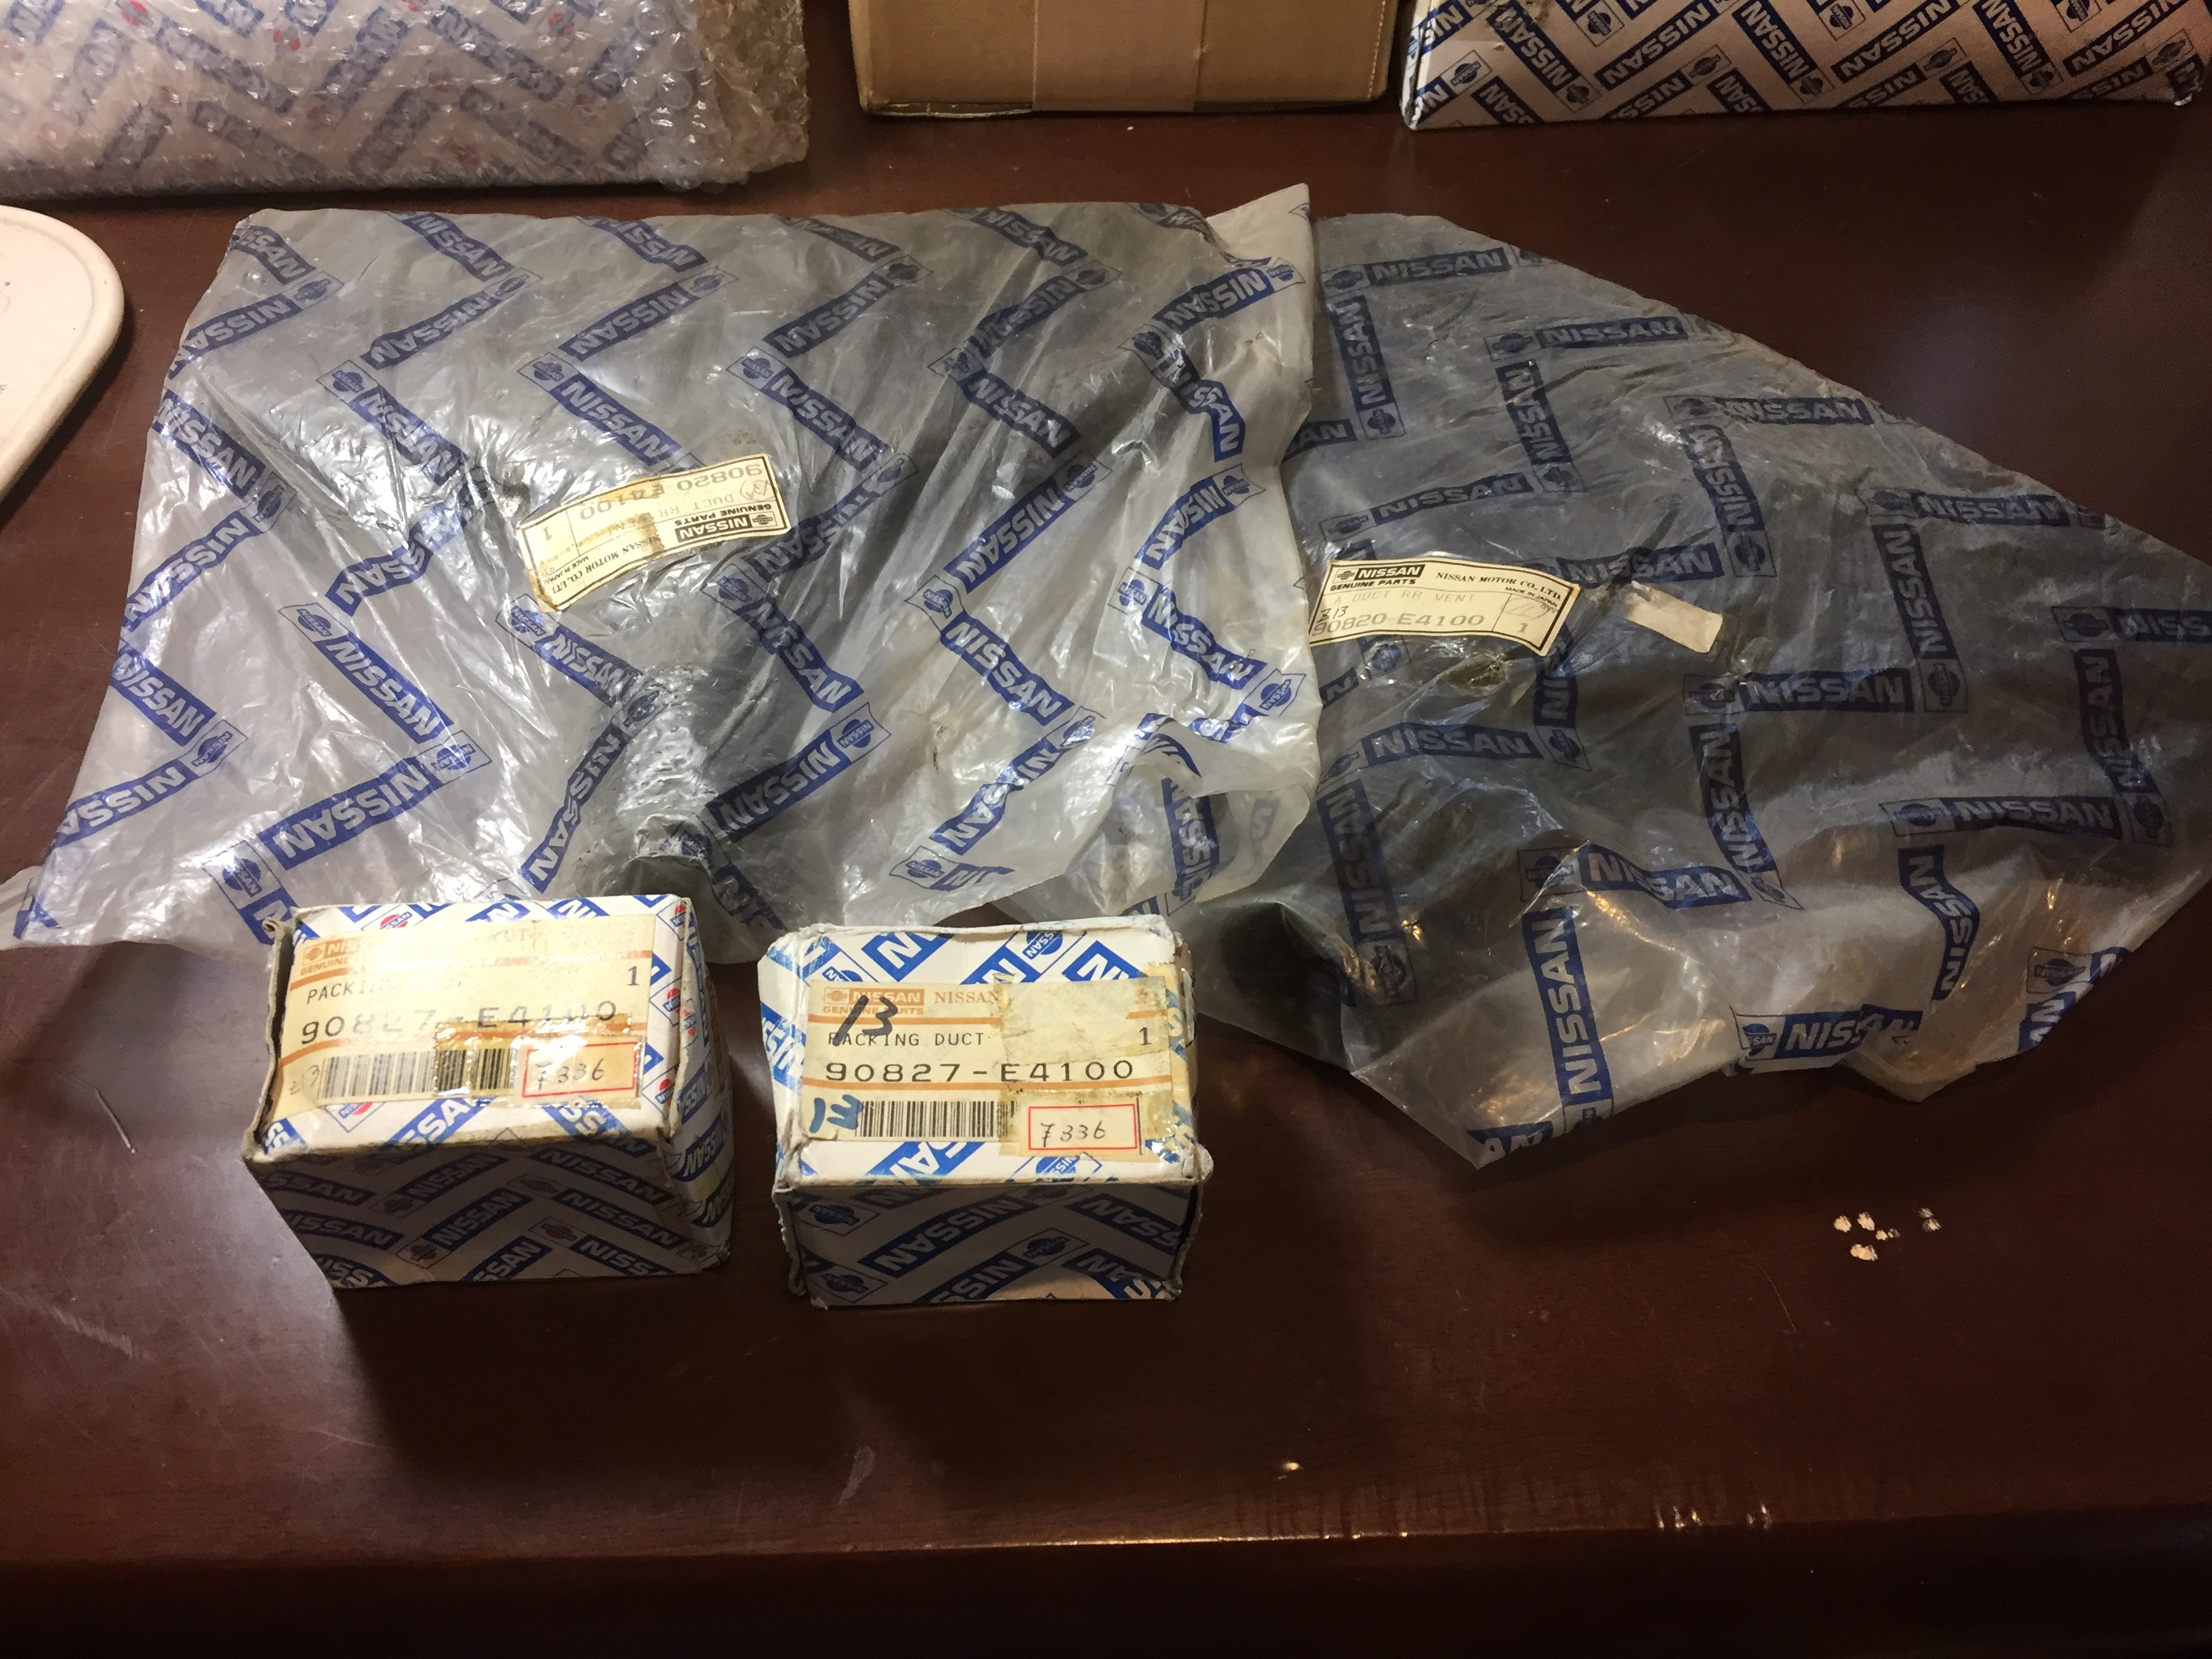
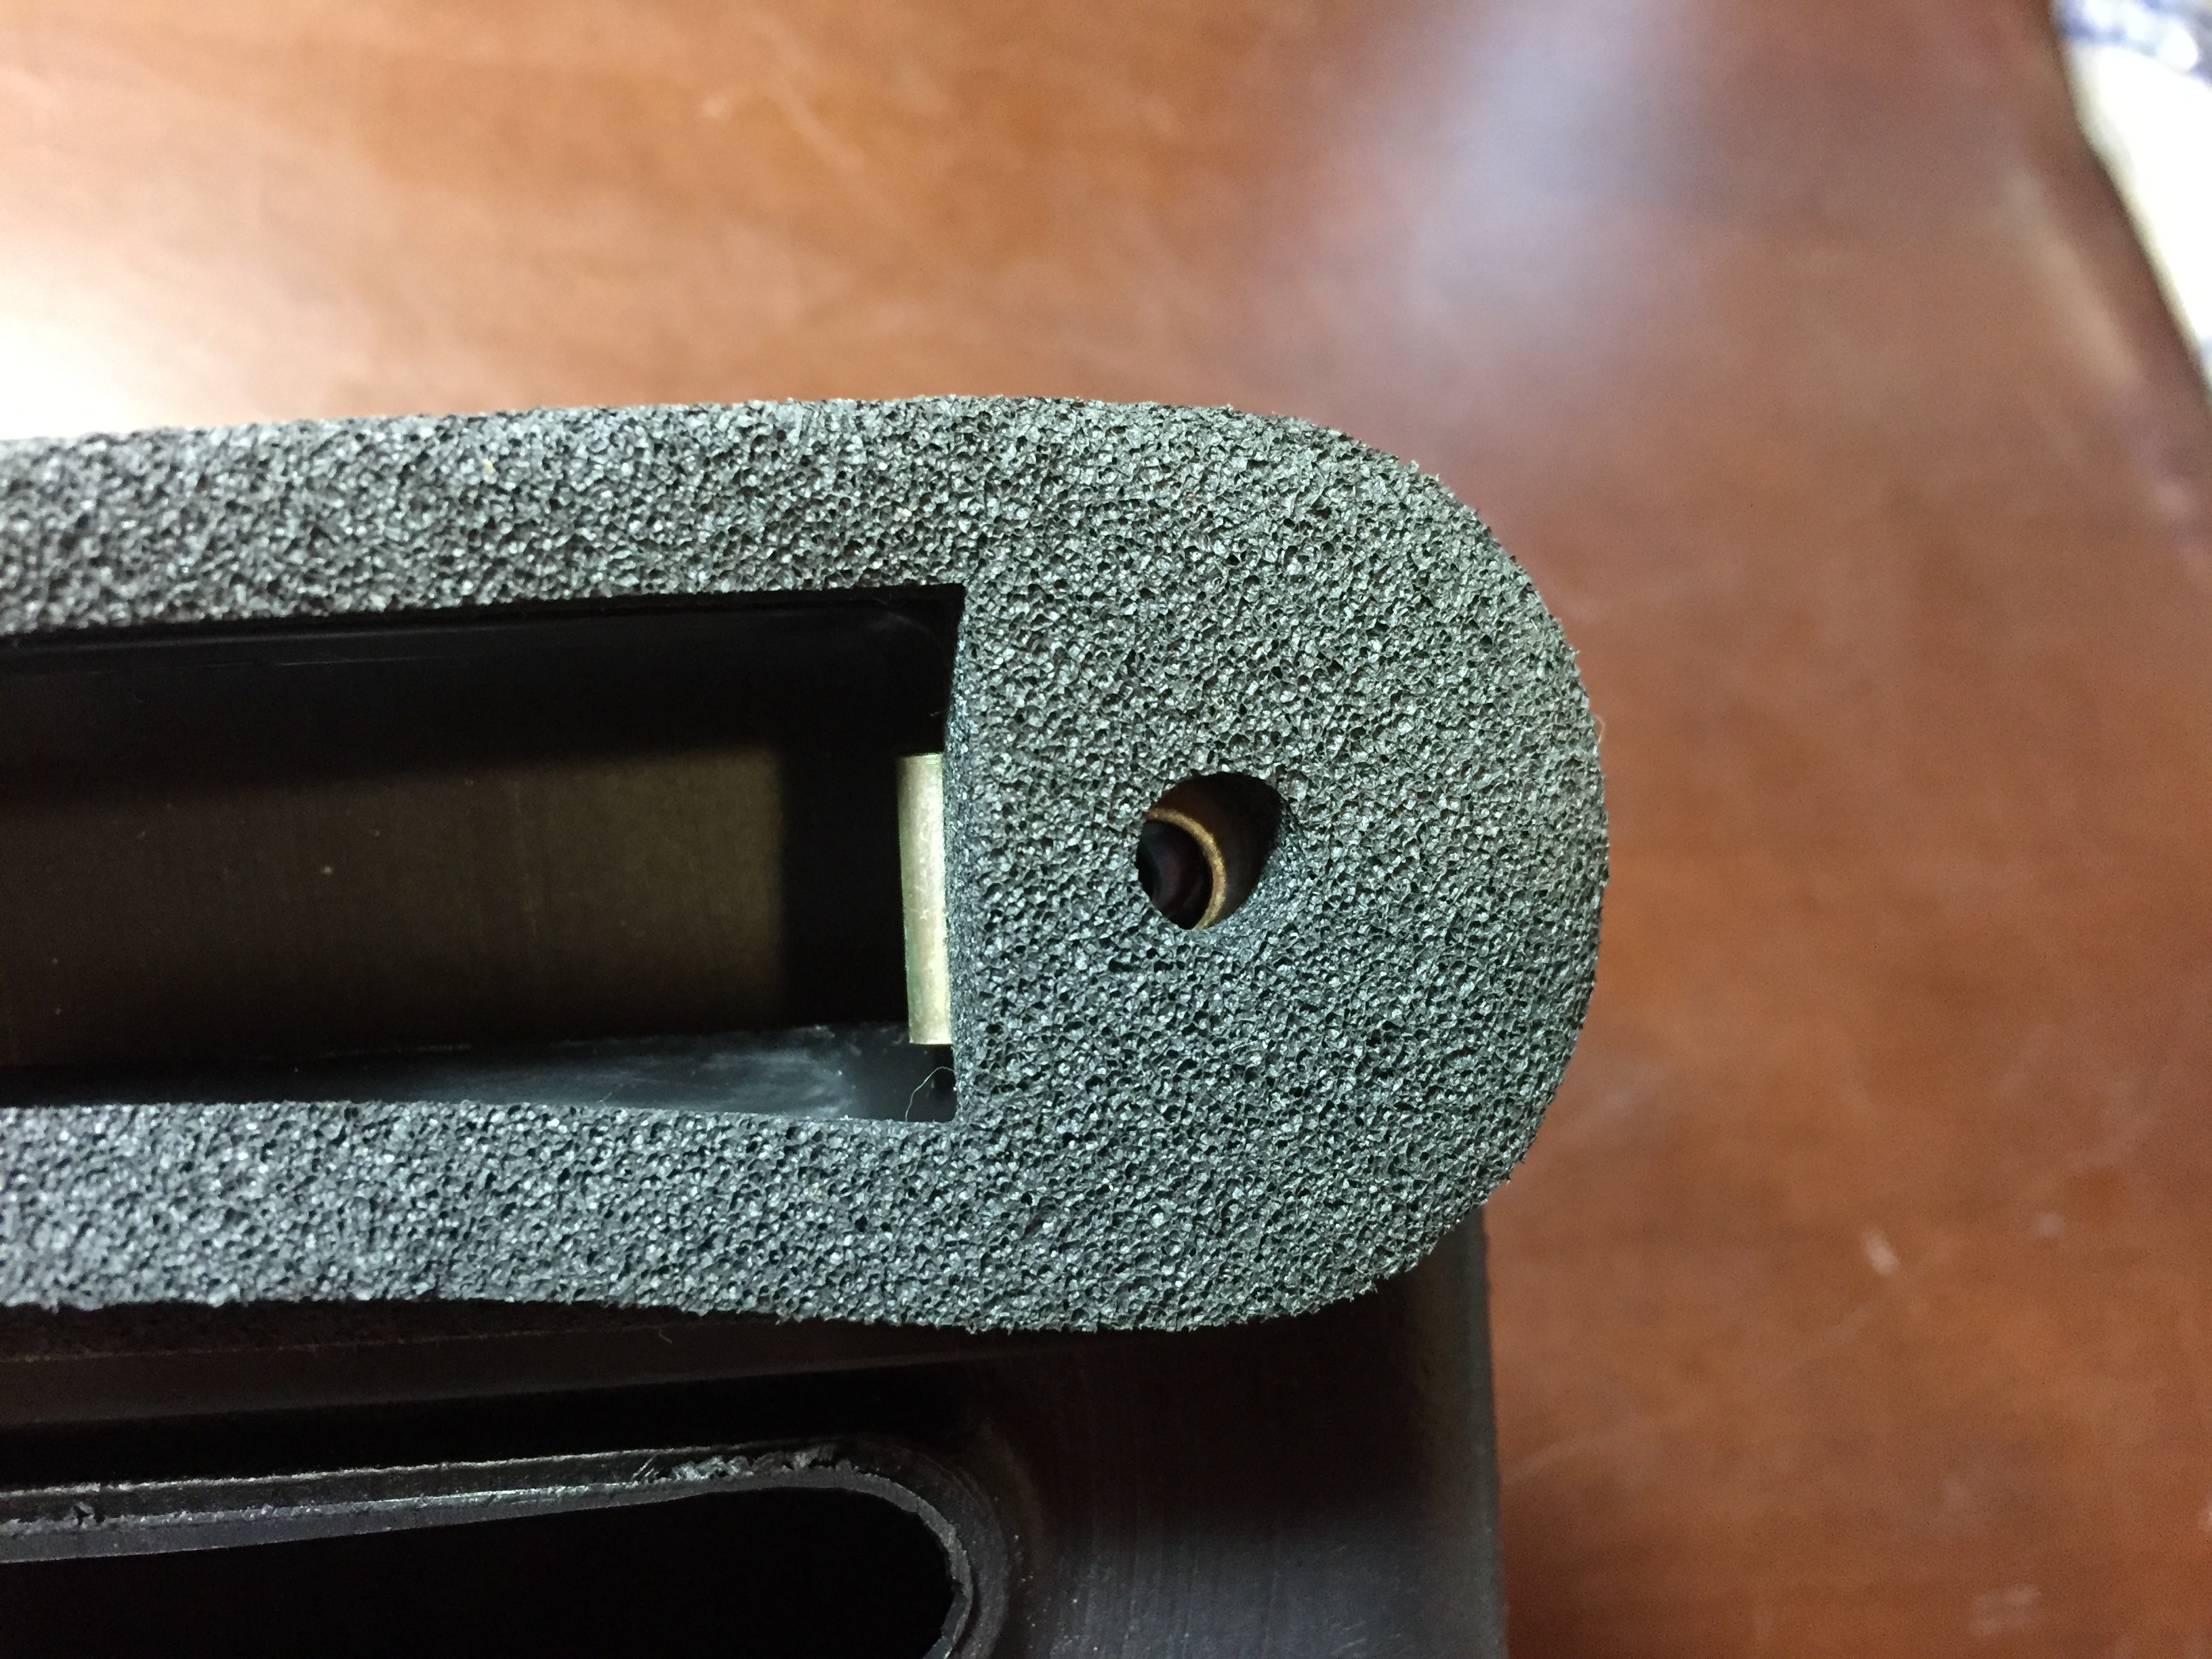
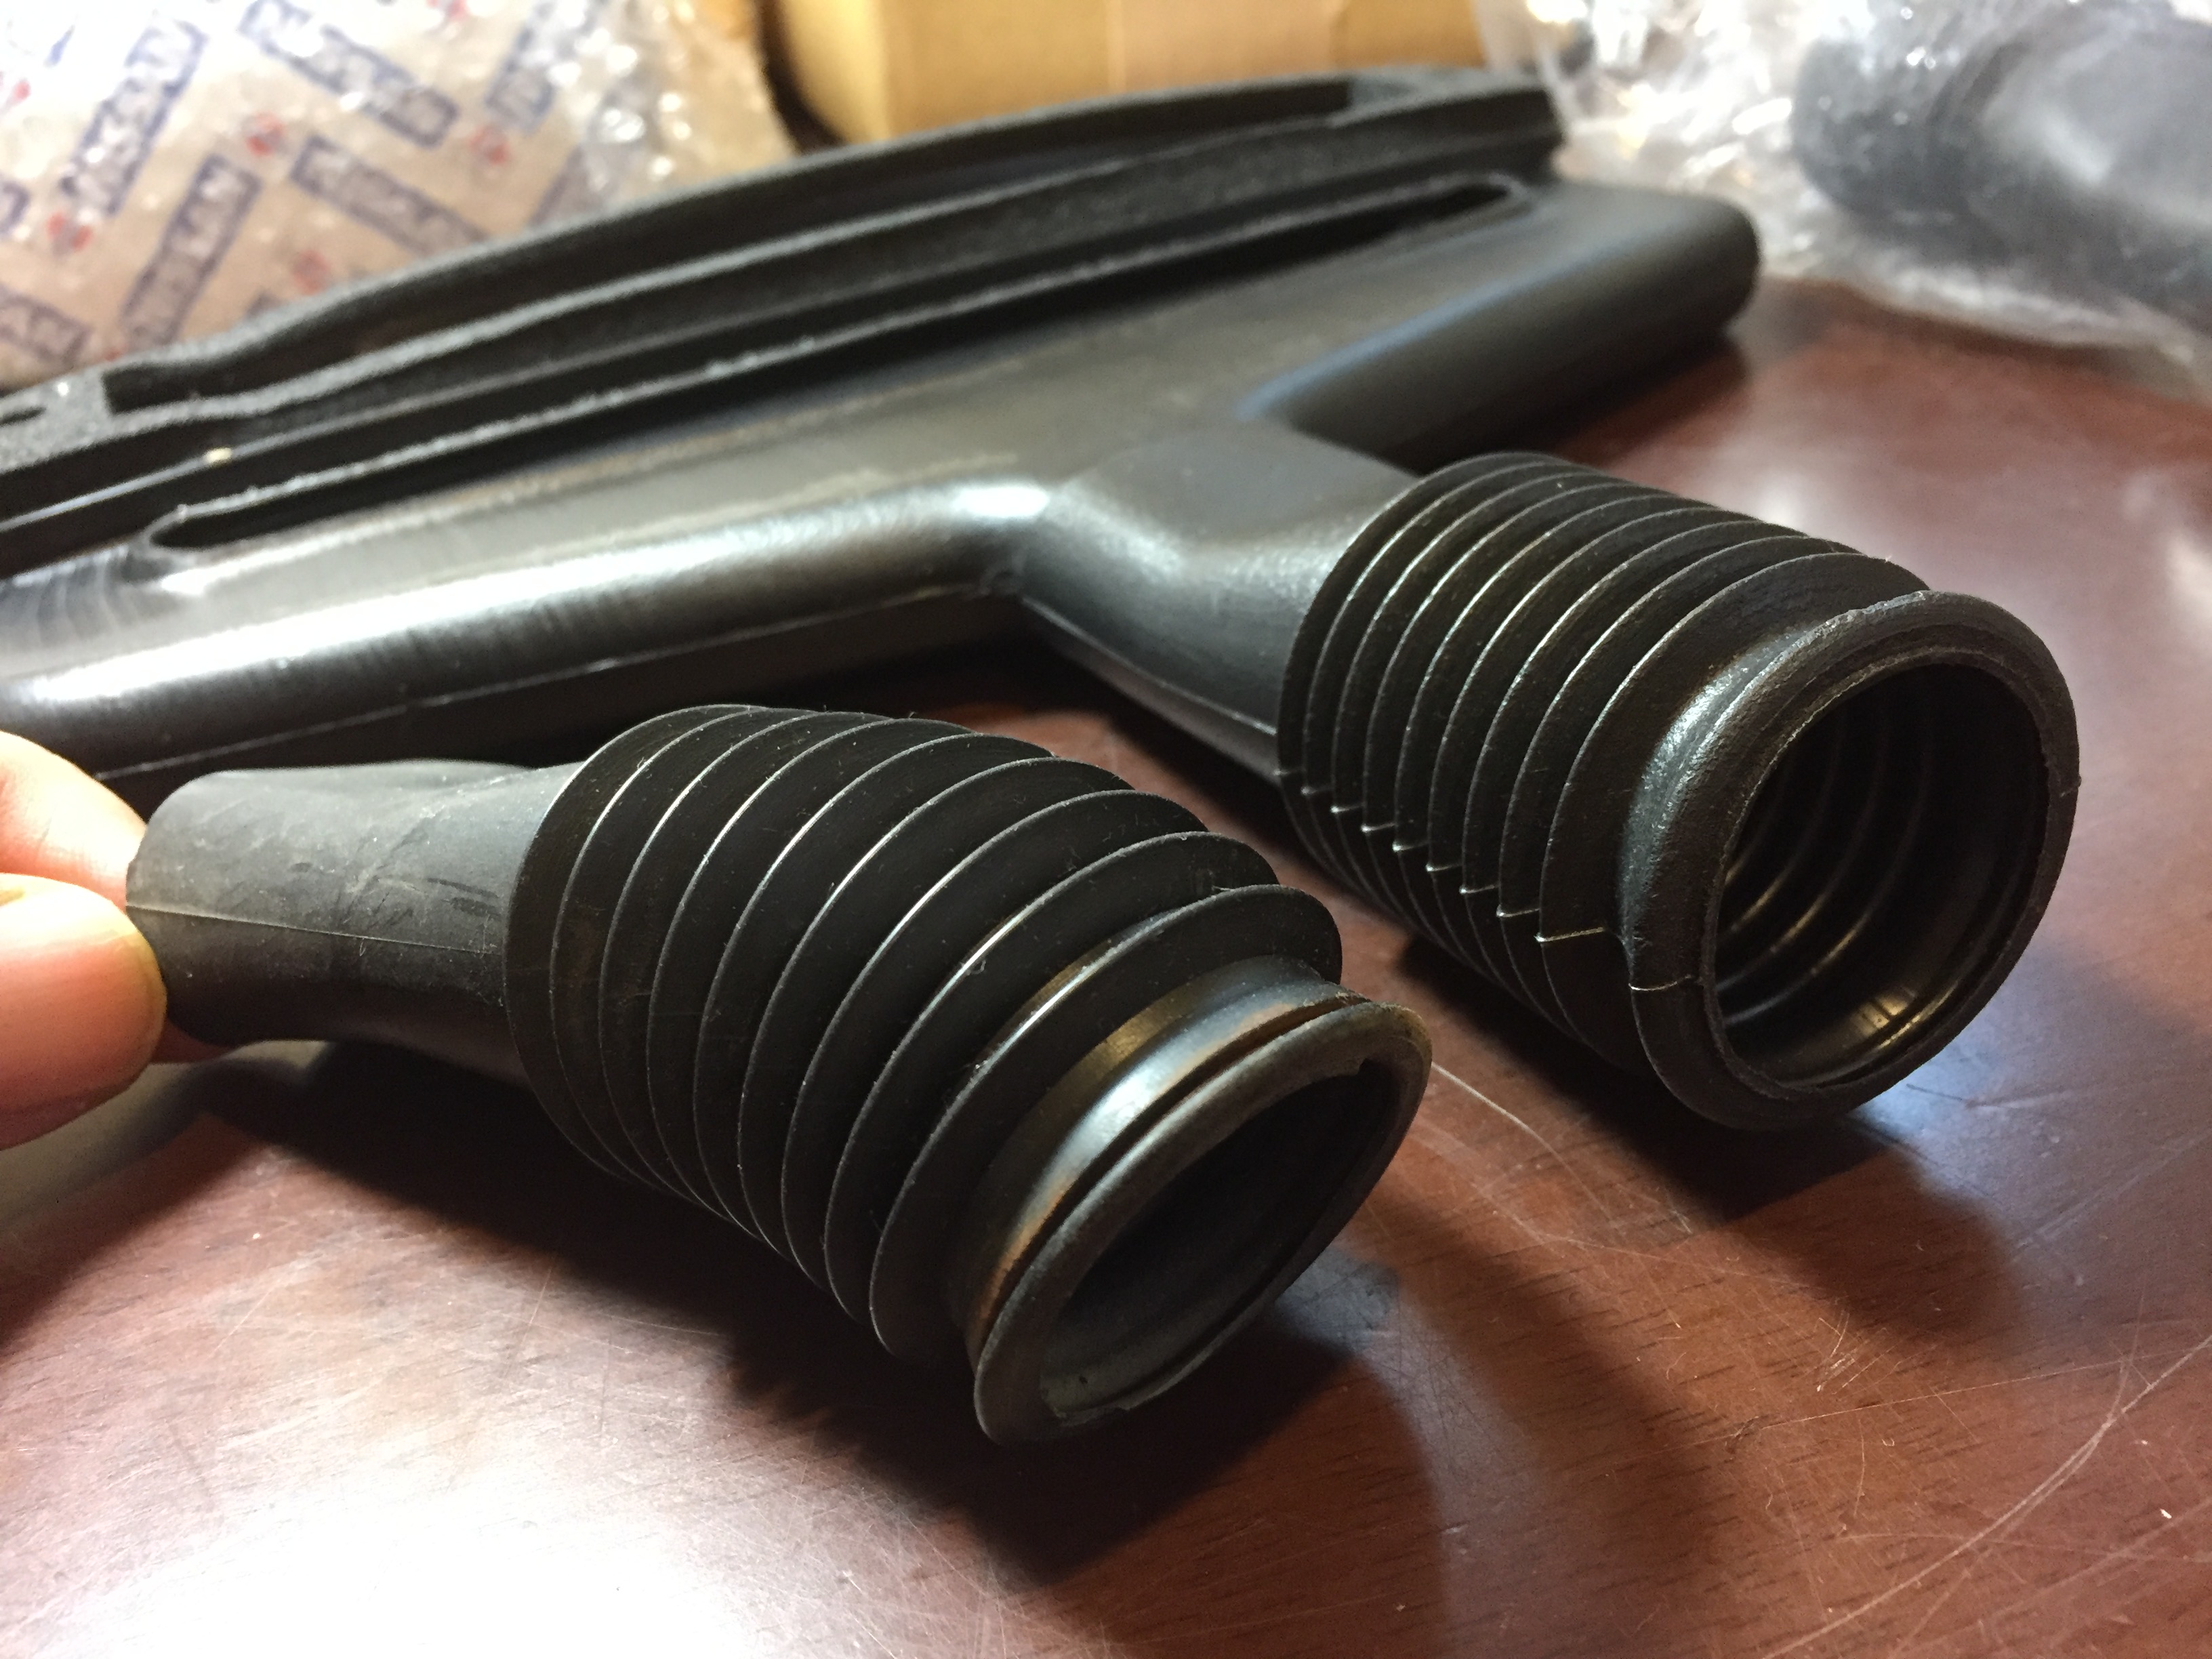
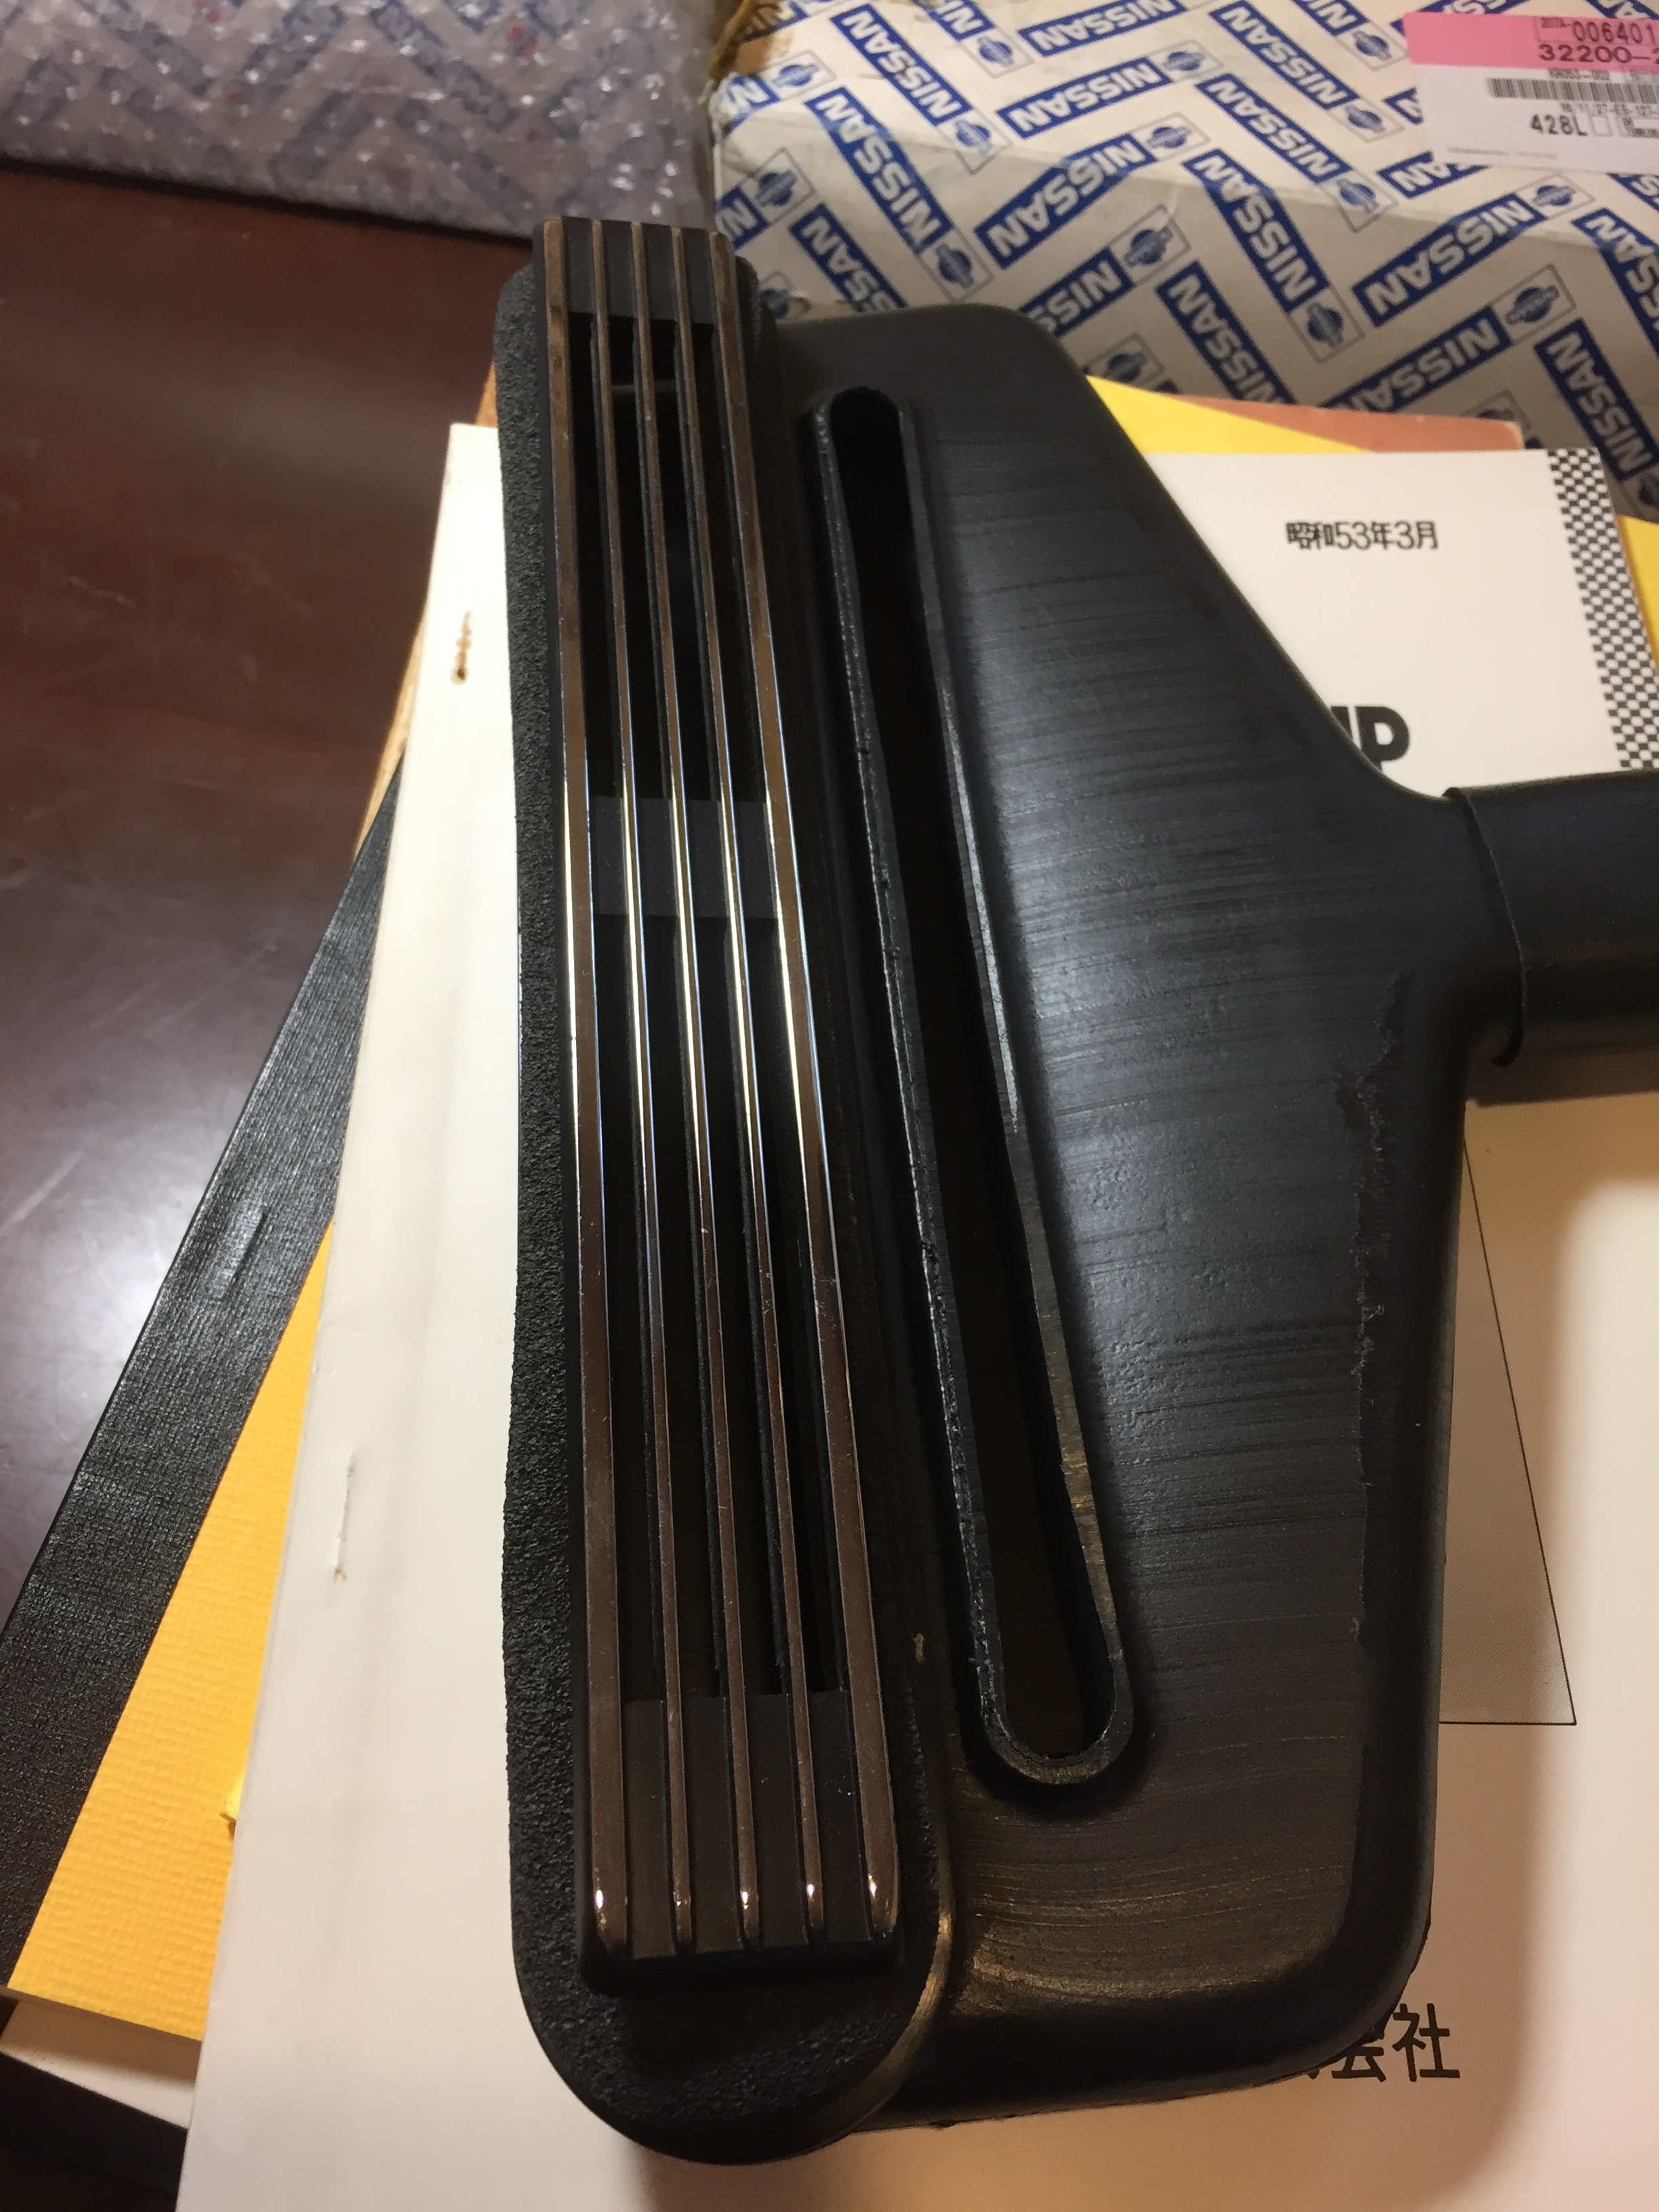
Hello Cpt'n! -- Permission to Board!--- Some observations on the NOS hatch vent duct assembly shown below--- The clips that were loose in the sealed bag are completely different from those Jim Arnett @jfa.series1 has shown and that Blue @240260280 and I have shown. They are nothing more than a cad plated speed nut and would be totally useless as a means of attaching the ductwork. The space between the leaves of the clip is far to narrow in dimension for mounting the combined thickness of the assembly and the thickness of the hatch sheet metal---believe me I tried and it will not work. I don't know what Nissan was thinking by the time this particular batch of replacement parts was produced but actually mounting them wasn't a part of it! The original clips are shown as used in the photos. They fit easily and well and I have a high degree of confidence that they will mount properly onto the hatch opening and function as intended. The diverter and plenum are identical to those I have gleaned from several sources and match Jim A. and Blue's photos. The diverter has a factory applied 8mm layer of open cell foam attached to the top using contact adhesive film (adhesive---film---adhesive---foam). While the foam is 8mm it is extremely soft in density and compresses to about 2mm upon full compression. (hence my thoughts to use 2mm closed cell foam in my replacement---I am not as concerned about the compress-ability as I am about the foam soaking and retaining water) A similar story to that of the NOS clips is the NOS factory duct tubes that I acquired from Courtesy Nissan some years back that are made of an almost rigid plastic and the accordion portion of them does not flex well. It is not made of the rubber material used originally which, even though 46+ years old, is still as soft and pliable as new and flexes easily. They attach to the bottom surface of the hatch to empty water out at the tailgate latch surface. If you are restoring your ductwork use the old tubes! On to a salvo of photos-- Hoping this helps in the future--- I think reproduction clips made correctly will offer the best chances of a satisfactory solution for anyone trying to restore this aspect of the early hatch. (now that is real news, ----) Jim D. "Zup"


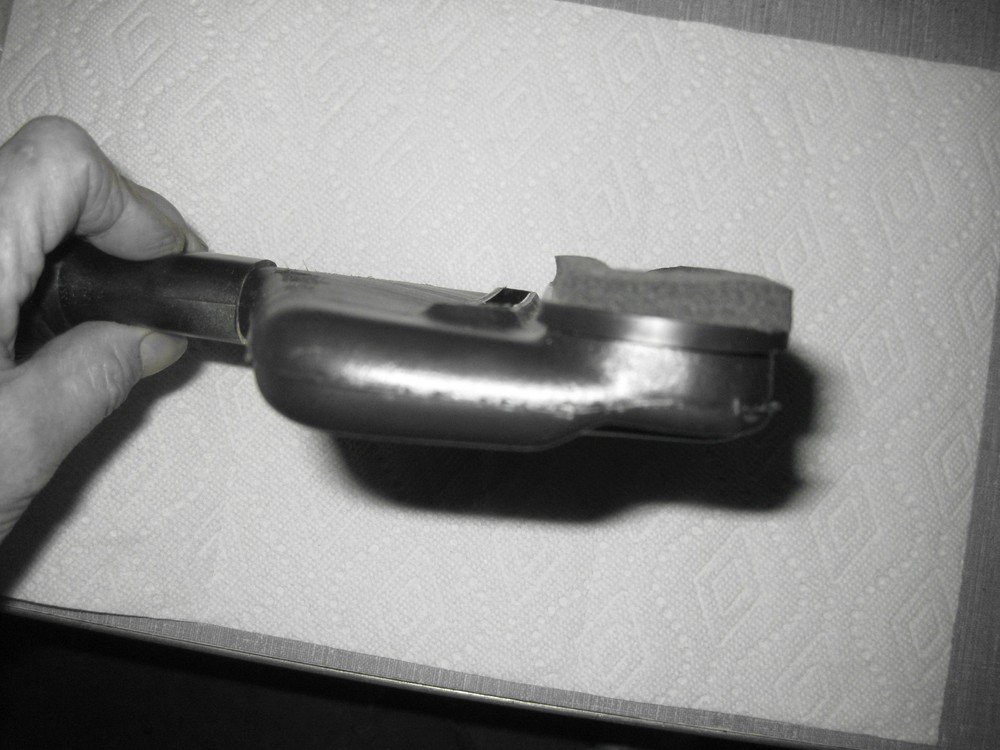
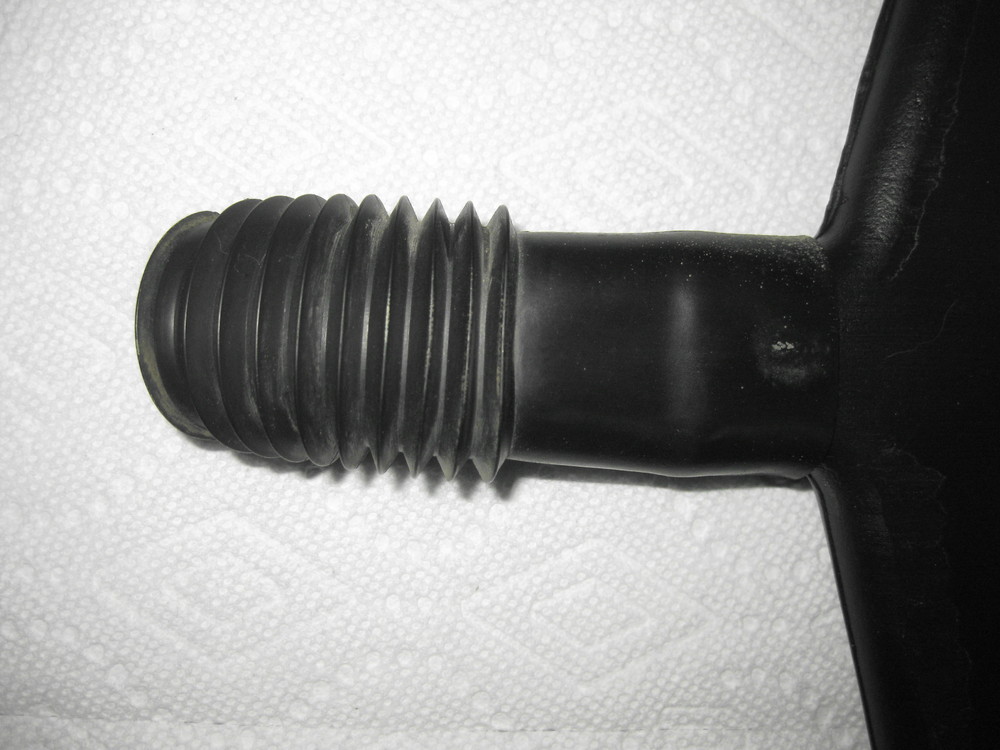
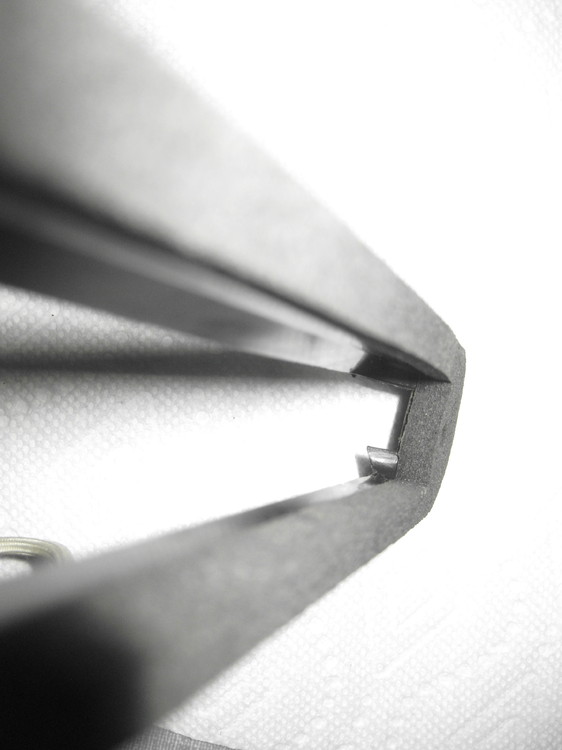


 1 point
 -
1 point
-
As for parts for old Nissan's. There is a surprising amount still available for them. Drive-train parts are usually no issue at all. Trim and interior parts are the things that are hard to find. BTW, a little tip from your friends up North. Check out Canadian Nissan Dealerships. Our dealership Parts departments can still order direct from Japan. As I understand, USA dealerships cannot order direct from Japan. A lot of parts NLA in the USA and Canada are still available in Japan. BTW, I just ordered a lower thermostat housing for a 1971 240Z. Took my local dealer only 1 week to get it from Japan ( Metro Vancouver Dealer ). 11061-P0300 housing $35.05 CDN retail. My cost $28.04 CDN... from Japan!! The Metro Vancouver area is a hot bed for Datsun fanatics. Lots of 510's up here and Z cars are making a big come back. Many Of the Dealer ship Parts departments are run by enthusiasts, some who raced Datsun's back in the 70's and 80's. Several of the old farts are still involved in Motorsport as well as the new guys. Most of us are starting to retire now. but we're trying to pass the history and enthusiasm on to the next generation of Partsman . Southside Nissan and Coquitlam Infinity still have some of the old time Nissan guru's employed there. I'm a ex-Nissan Partsman. 18 years at Nissan Dealerships till 1993 I worked at New West Datsun, Coquitlam Nissan ( 2 different stores ) and Southside Nissan ( Part Time ) .1 point
-
1 point
-
1 pointLes Canaday (Classic Datsun Motorspors) now owns it. It has been a race car most of it's life. I owned it for 31 years.1 point
-
I run MK63-20S vented type calipers on all my cars. I have a spare NOS pair new in their boxes, but don't really want to sell. I might - however - be tempted by an interesting trade. Have you got anything that you think I'd be interested in...?1 point
-
For the pragmatist, there’s not really a reason anymore to wrap a bundle of wires with tape. Just go to your local hardware store and buy some of that split, corrugated plastic sheathing. The ‘woven plastic’ sleeve is another contemporary alternative to tape. Re-taping a wiring harness with tape is for purists only. Decide which camp you belong to and proceed accordingly. Adhesive-backed electrical tape doesn't really belong in the engine compartment of a car. Sure, it'll look good after you've finished. And it will probably continue to look good for a few months afterwards. Over time, though, it's said that the temps under the hood will cause the adhesive to begin to weep out of the seams, after which the harness becomes a grime magnet and a gooey mess (won't be easy to clean either, I expect). In hotter climates, this may even be a problem for the under-dash wiring harness. I recommend that you look into using 'loom tape'. ‘Loom tape’ is just wider-than-normal pvc electrical tape that uses no adhesive. Back ‘in the day’, this is what vehicle manufacturers (including Nissan) used. Loom tape is more expensive than high-end electrical tape, but it’s still relatively inexpensive in the grand scheme of ‘things automotive’. I bought mine from a muscle car restoration parts supplier located north of Toronto. You should have no difficulty finding a comparable supplier in your own area. A 100’ roll sells for about US$13.00. Find vendors by searching on, ‘automotive loom tape’. Loom tape is typically 1.25” wide. Other commonly-available widths are ¾” and 1”. The loom tape that Nissan used on the S30 appears to be metric-spec -- on my 70 Z’s Engine Harness, it measures as 30mm wide (1.18”). That’s only 5% narrower than 1.25” tape, so they’re essentially the same. Metric-spec loom tape is available from vendors in the UK, apparently sold only in a maximum width of 25mm. Also offered are 15mm and 9mm widths. Loom tape is typically wrapped with a 50% overlap. To create this, the tape needs to be wrapped at about 30 degrees off perpendicular. Or, at least, that’s a good guide for getting started. After that, you can just adjust on the fly so that you get and maintain the 50% overlap. The S30’s Engine Harness measures about 0.70” in diameter at its fattest part (i.e. about 2.2” in circumference). When I stripped my 70 Z's engine harness (damaged and also covered with paint overspray) , I found that Nissan used the equivalent of 22 wraps per foot over the fat part of the Engine Harness. Long story short, that means that a 100-ft roll of 1-1/4’’-width loom tape will be good for the equivalent of 26 ft. of the fat part of the Engine Harness. Of course, the S30’s Engine Harness only runs at its fattest diameter for about 2 feet. Conclusion: A 50-ft roll should be all you need. A 100-ft roll will leave you with lots left over for other places. For the skinny parts of the harness, I laid a 6-ft length of tape out on my workbench and then slit it down the middle with a razor to create two lengths 5/8" wide. Wrapping with loom tape is a two-handed affair. You cannot wrap the tape around the harness using just one hand! You have to pass the tape roll from one hand to the other on every single wrap, while also maintaining a bit of tension during the transfer (warning: over-tensioning the tape serves no useful purpose and may, in fact, cause problems). No amount of words can explain the actual wrapping process, but it’s not rocket science either and you’ll quickly figure out your own routine. Probably impossible to do with the harness still in the car, though. Tape all of the branches of the harness first. Start about 3" from the 'device end' of the branch, wrapping towards the end. When you get there, turn around and wrap back towards the harness trunk. When you get to the trunk, do a couple of figure 8's, then wrap down the trunk for about 3". Cut off the tape, and use a bit of regular electrical tape to hold down the loose end (you'll be wrapping over top of this when you're doing the main trunk). Do all the branches first. Then finish up by wrapping the main trunk. I recommend starting at the firewall end and working towards the front of the car. Once again, use figure 8's at each of the branch junctions. When you get to the skinny part of trunk that goes across the front of the car, switch over to the 5/8" wide tape. There's a very elegant technique for finishing a wrap. It involves pulling the loose end of the tape back under the end of the wrap. Too complicated to explain here (although I found it easy to perform after a couple of practice attempts). Most people, I think, just tie off the loose end. If you do all of this properly, you should only have one end where you need to tie things off. I think you'll be pleased with the results. Bonus of using loom tape: If you make a mistake, just unwrap the tape and try it again. Good luck!1 point
-
1 pointI had the same thought after my resto project - stock 2.4 with a 3-row radiator, stock fan & clutch, new 160 thermostat. The car would not get up to a proper operating temp so I swapped out to a 180 and all is well. No A/C on the car, limited summer driving but it handled the heat and downtown driving at Memphis ZCON with no issues.1 point
-
1 point


.thumb.JPG.21f1724e227b22b6d5306af2d3267f40.JPG)