Topics Last 30 Days
Showing topics, images, events and files posted in for the last 28 days.
- Past hour
-
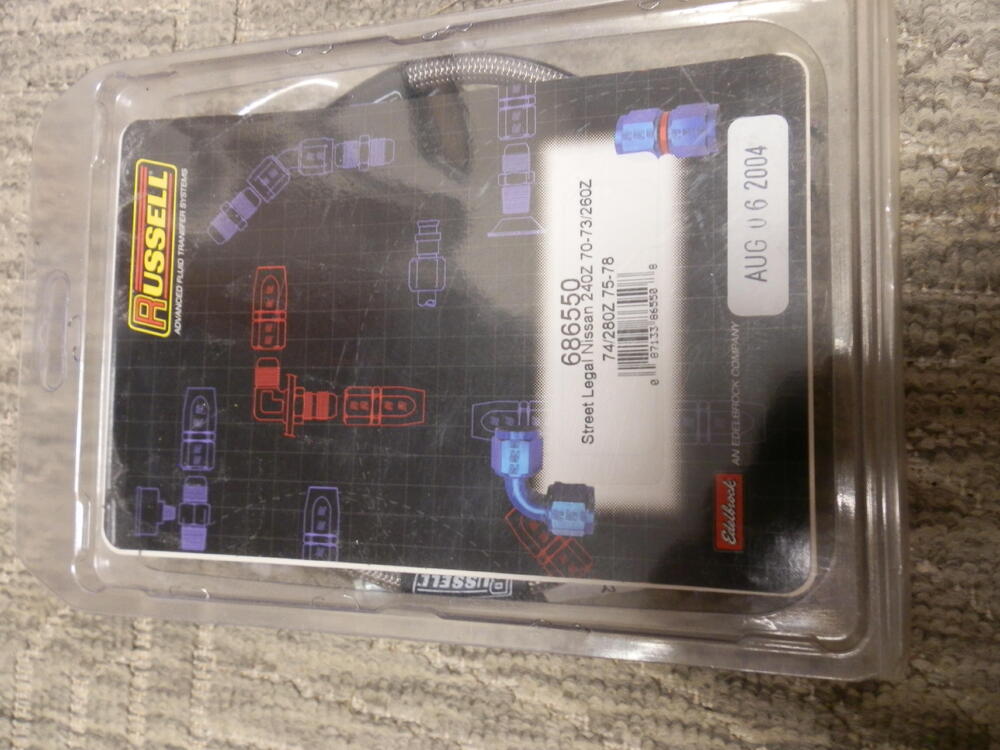
 Still in original packaging, braided steel brake lines. $100 retail - I'll sell at $50 U.S.
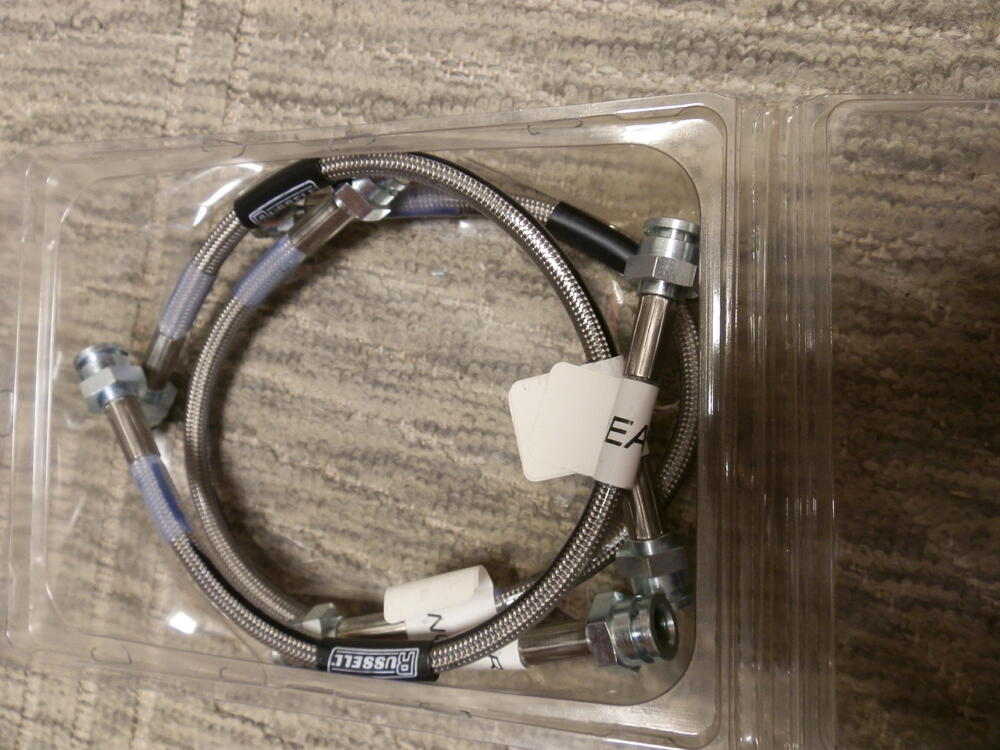
- Today
-
 Don't forget about the bronze valve seats that came OE in the E31. They're not good with the gas we use now but you can have them updated to steel for not much money if you're not currently running the head.
 -
 Looks like they are also for sale for $1000 BIN with free shipping. eBayAuthentic OEM Nissan Fairlady Z/Euro 70-78 Datsun 240z S3...A once in a lifetime find here! Original OEM Nissan headlight covers originally designed for JDM/Euro Fairlady Z cars. The OEM trim here looks 100 times better than the flat bar $800 reproduction trim
 -
 @Captain Obvious Just had a look on my October 1970 240Z that hasn't been touched since built. It has the flat side up.
 -
 Edited after coffee kicked in...strikethrough does not show in the snippet. The idle air screw only adjusts idle RPM, not the fuel-air ratio. It's difficult to lean out the mixture on the EFI engines. Hope that you find something wrong somewhere. Edit - sorry, just looked at your picture and see that you meant the AFM screw. One possible reason for a rich mixture is a leaking fuel pressure regulator. The diaphragm can crack and let fuel directly in to the intake manifold through the vacuum reference hose. Another possibility is a lack of the vacuum on the FPR vacuum port. A disconnected or cracked hose or a connection to the wrong vacuum port. The FPR reduces fuel pressure in proportion to intake vacuum. Check the hose for fuel to see if the FPR is leaking, and make sure it's connected directly to an intake vacuum source. Sticking injectors is a possibilty. A maladjusted AFM is a possibilty. Generally, the AFM spring should not be messed with. But sometimes it's too tempting. See if the glue blob on the adjustment wheel is intact. I had also found that my aftermarket AFM was set to run rich. I had to use an old original AFM to pass emissions inspection in Oregon.
 -
 Try Amayama in Japan
 -
 1970-73 Datsun 240z Round Top SU Carburetor Kit 4 Screw + NOS Nissan Screws $0.99 starting bid No reserve https://ebay.us/m/cMVFUh Ebay Listing Here
 - Yesterday
-
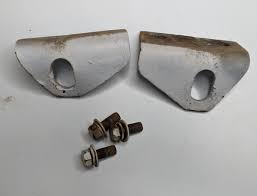
Not the shipping tie downs but the ones that attach to frame maybe? Googled showed some similar when I searched... https://www.google.com/search?q=240z+tie+down+points&sca_esv=06dd4c047f376356&rlz=1C1VDKB_enUS1121US1121&udm=2&biw=1229&bih=556&ei=F8a0aJ7AG4b-p84Pzf-V8Qc&ved=0ahUKEwjep42dhraPAxUG_8kDHc1_JX4Q4dUDCBE&uact=5&oq=240z+tie+down+points&gs_lp=EgNpbWciFDI0MHogdGllIGRvd24gcG9pbnRzSP4gUKwHWIYccAF4AJABAJgBS6AB5QOqAQE3uAEDyAEA-AEBmAICoAJLwgIGEAAYCBgemAMAiAYBkgcBMqAH-QKyBwExuAdJwgcDMC4yyAcC&sclient=img
-
 http://www.zcarblog.com/wp-content/uploads/2018/07/IMG_2471-1024x768.jpg The ZONC Annual Car Show will be held Sunday September 7 in Brisbane, CA. This a fun event in a great location so bring out your Z, G, Datsun or GT-R! Pictures from previous shows can be seen HERE with more details below. Z you at the show! http://www.zcarblog.com/wp-content/uploads/2025/09/540959607_24489751663968460_5939933431851389576_n.jpg Enjoy these photos from previous ZONC annual Car Shows: http://www.zcarblog.com/wp-content/uploads/2017/07/IMG_4083-1024x768.jpghttp://www.zcarblog.com/wp-content/uploads/2018/07/IMG_2507-1024x768.jpg http://www.zcarblog.com/wp-content/uploads/2018/07/IMG_2537-1024x768.jpghttp://www.zcarblog.com/wp-content/uploads/2018/07/IMG_2511-1024x768.jpghttp://www.zcarblog.com/wp-content/uploads/2018/07/IMG_2513-e1533073973161-1024x629.jpghttp://www.zcarblog.com/wp-content/uploads/2018/07/IMG_2423-e1532979419824-768x1024.jpg http://www.zcarblog.com/wp-content/uploads/2018/07/IMG_2430-1024x768.jpghttp://www.zcarblog.com/wp-content/uploads/2018/07/IMG_2548-1024x768.jpg View the full article
 -
A good one. And you can't even here the Beatles.
-
 How is that any more than just a guess - like the "I'm turning down the knob 2 1/16 turns"? Don't you need to know the AFR created by adjusting the jet position? And isn't the position different for varying temperatures and elevations?
 -
 @smdvr67 I would delete your personal contact info. Bots crawl the web looking for info like this! Only share personal info through Private Messaging / PM's
 -
Right now it's on the motor, but I was surprised at how the empty cavities will flash rust in high humidity. I'm sure I will always have the obligatory rust. Hopefully some small bolt somewhere,. A speck is a sufficient qualifier... ;)
-
 Recently swapped my 1.5 ohm Petronix Coil and 3.0 0hm resistor with a MSD Blast coil with no coil. Car runs much more better and does not hesitate on traffic jams. Problem is tachometer is not working. How can i fix this?
 -
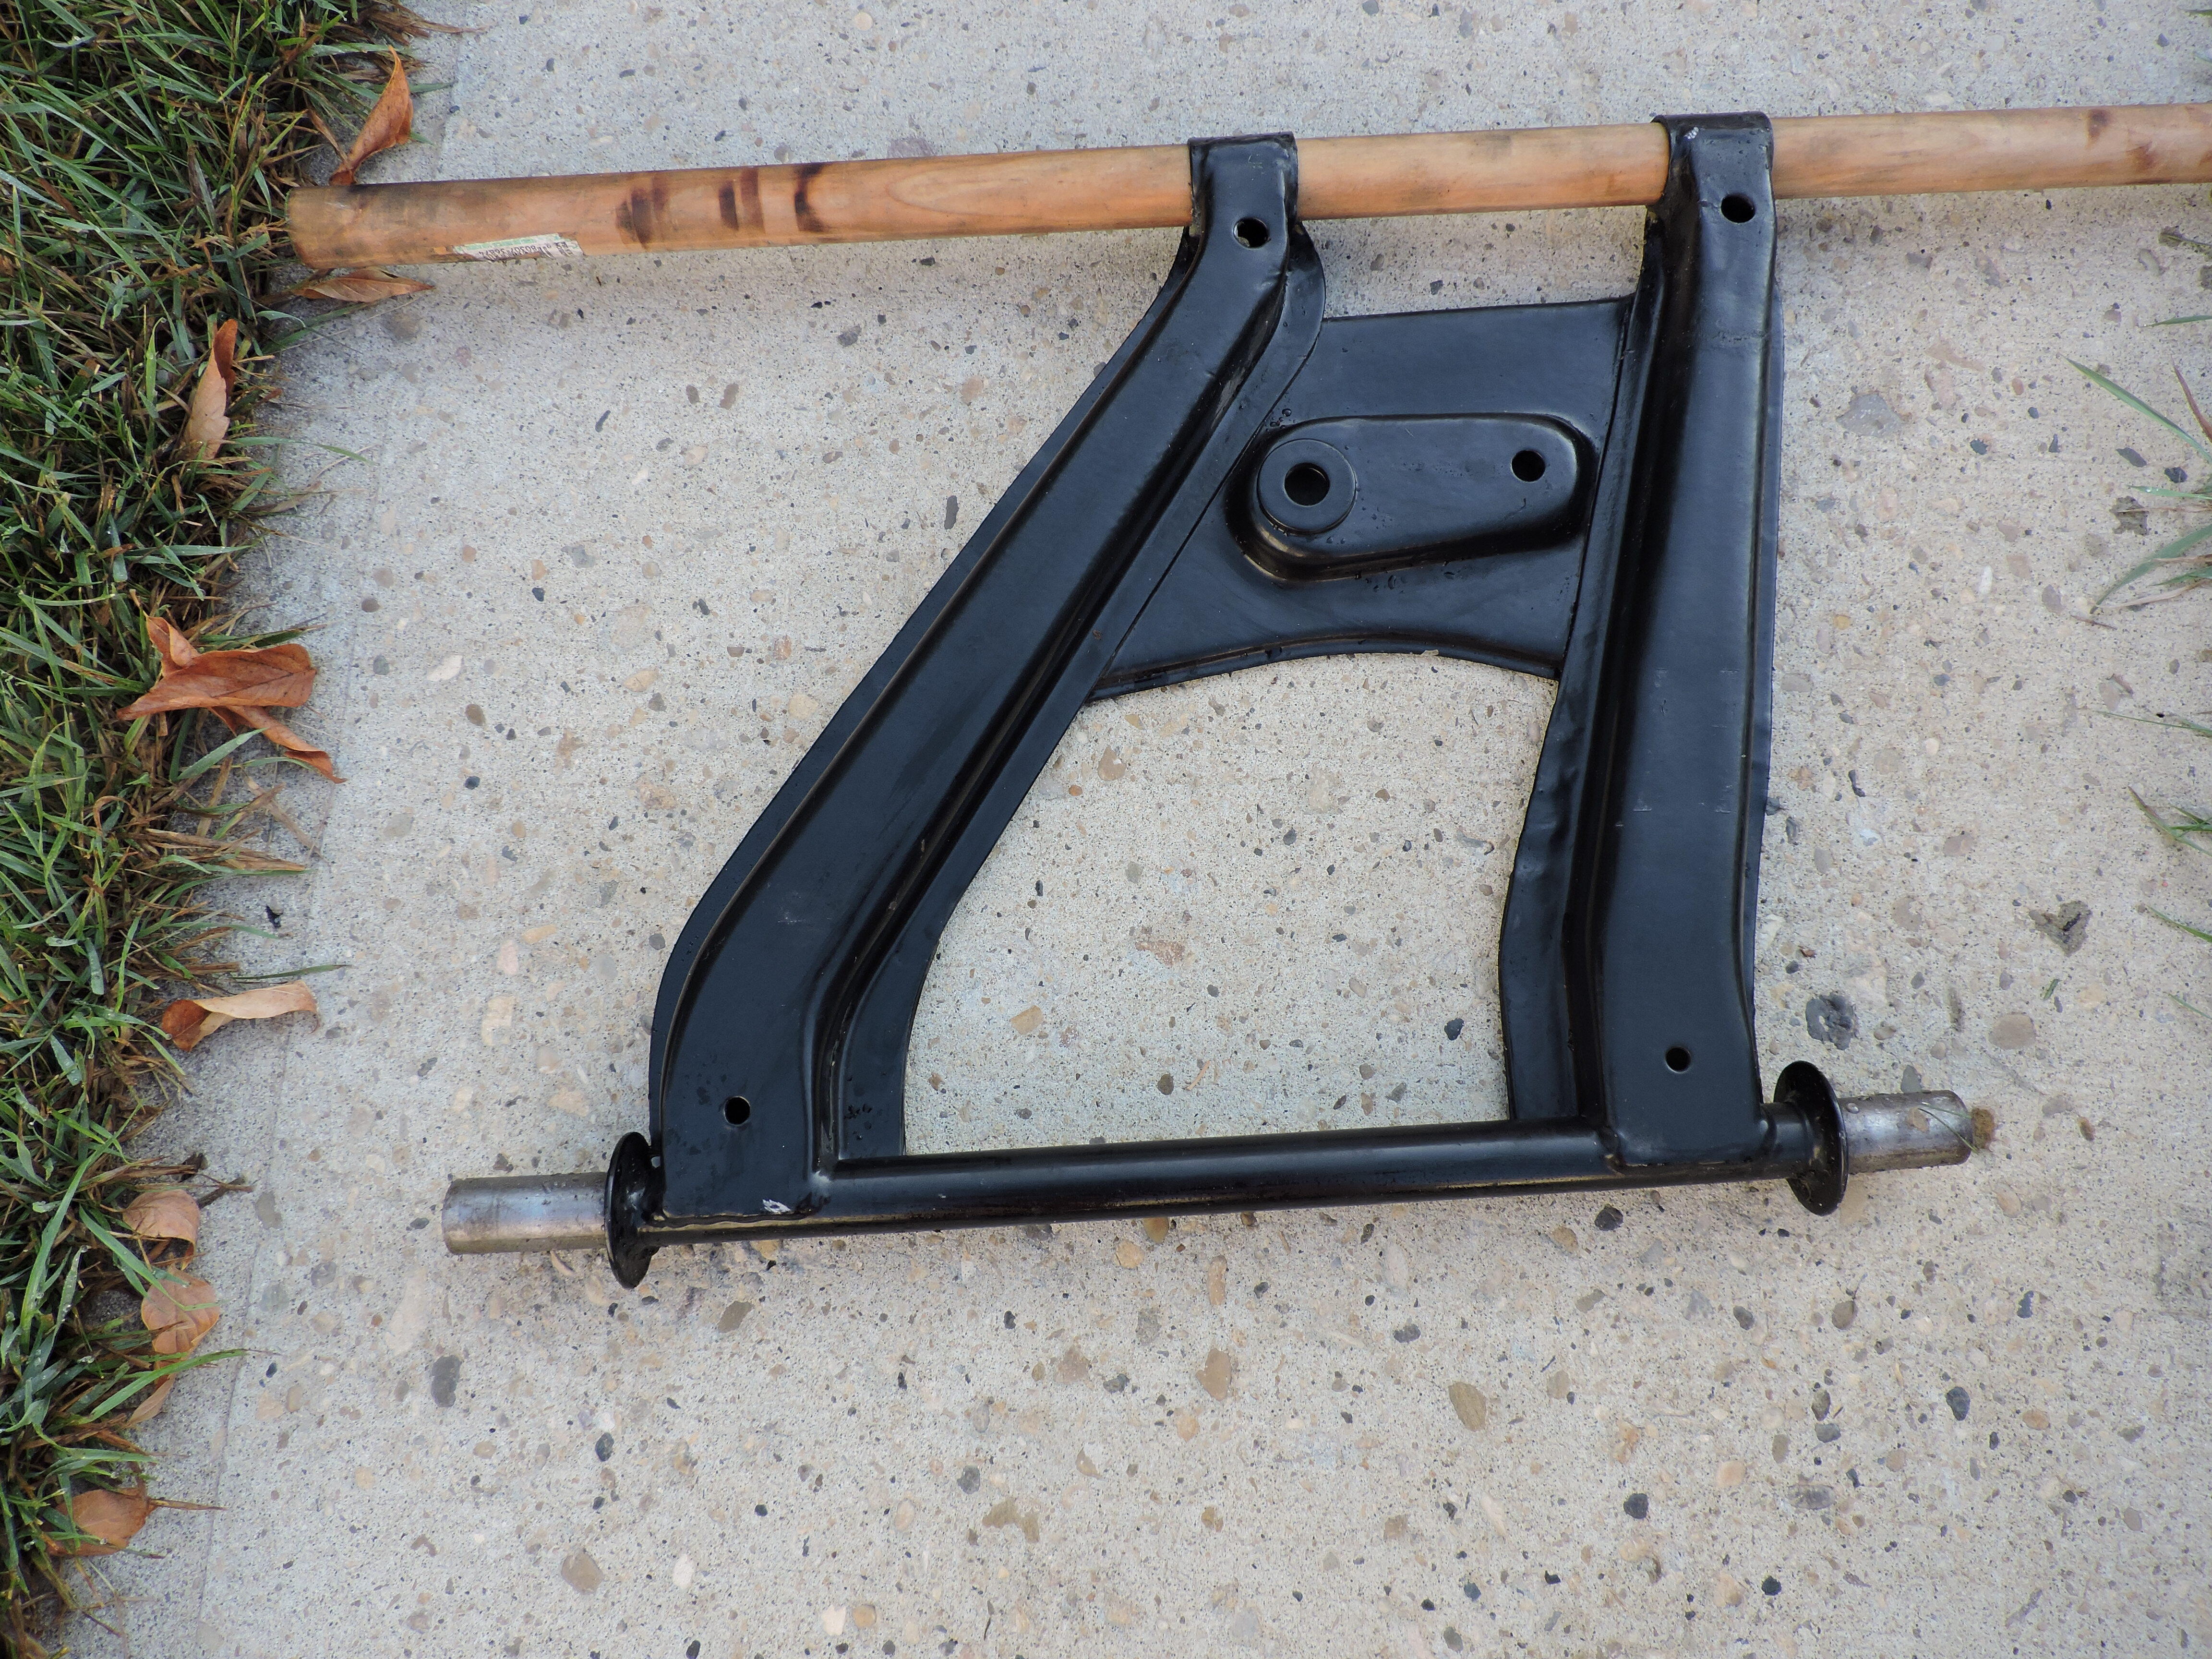
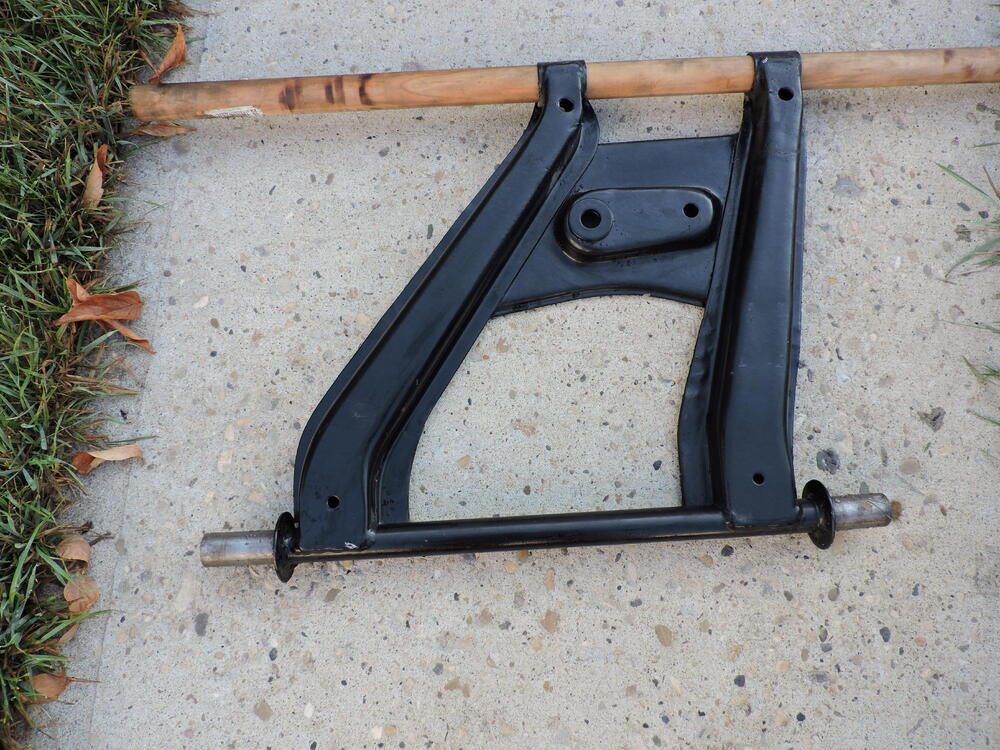
240Z rear control arm. Powder coated black. Straight. $25 ps Trying to get my garage and desk organized, I plan to list one part, with photo, every day. In the meantime here's a list, minus photos - if any one catches your attention, just write and I'll send photo. All parts are 240Z Two drive axles Two diff mounting springs Brake master cylinder Left headlight bucket pair of the battery and brake cylinder covers horn button heater - water connection New lowering coil spring set clutch and brake pedal assembly :
-
 @Mike , There has been more spam added to the post by the bot.
 - Last week
-
My mechanic replaced a pertronix 1.5 0hms coil and 1.5 resistor coil with an MSD Blaster 2, 3 ohms coil. He got a better spark at idle and car runs much better. The thing is the stock 72 240z tachometer doesnt work any longer. Can someone give us directions on how to connect this correctly so it works as it did?
-
 😎
😎
-
@Patcon the exterior will print smooth, it's a graphics display issue and how SolidWorks saves the .stl file. When you slice it for printing the surface is rendered smoothly. Will post a picture of the first sample print when it's done, I'll do a trial piece in laser sintered nylon first. This is a sample off the Prusa 3D printer in SLA, much smoother than the graphic rendering. With laser sintering it uses powder to print the object so the layer lines and polygons are smoothed out. These are for my own use, I have no plans to sell them.
-
I think we always lose control of it. All we can hope for is that science fiction is just that.... fiction. Star Trek ("The Ultimate Computer" for example) Matrix Terminator I Robot Ex Machina
-
-
I've already expressed that in posts above.
-
Ah yes Jim, that one is a bit more tricky. One of the short wire switches I have is already broken.
-
 Time for another update: I spent the last couple of days in the Workshop and installed all the hood alignment parts, so the body shop can properly align the hood. I also put back all bolts to the body panels, since they were missing after I had to remove a lot of things for alignment and rework. Not much to see, but all panels are now secured for transport. Slowly, but steady, t starts to look like a complete car again. Well - there is still a lot of work. Next, i decided to test fit the side markers, just to be sure the holes are still correct. I assembled to mock-ups from various used and NOS parts which I had. And installed: (Note plastic wrap on the NOS lens, to protect it) Now the big project. The rear spoiler. As you can see, the inner bolts are missing (compare holes with the missing bolt, left): I thought it had probably rotted away in the past, so they just removed it. That made me want to drill back a hole to install a new one, but it seems the previous owner just cut off the previous bolts and the metal part was still inside the spoiler mounting position. Luckily, I was able to drill out the remains of the old studs by starting with a very thin drill and then working the size up until the original 4mm: I made myself some new bolts from some M4 screws: While sanding off the area to glue back in the new bolts, I found a crack underneath the various layers of bondo, primer and paint, which the spoiler has collected over the years: Now also that glue-remains on the inside made sense:, which chipped off like nothing, once hammered: I was able to clean the whole area And then glue both the crack and the bolts back in with some two-component epoxy glue: The result is not bad, if you ask me. It appears to be quite strong, too: Next, I wanted to get back the holes for the original emblems. After sanding the areas, I finally found some black dots, which is probably black filler, which they used to fill the original holes: While trying to tap-mark the holes for drilling, the black filler bits just popped out. So I only used the drill to clean the holes to correct size. Lucky me :-) And the Emblems can go back again, as intended from the factory: Last but not least, I spent quite some hours today to sand off those dozens (!!) of layers of filler, primer and paint from all the years. You might wonder why? Because in some areas the paint and filler is so thick, that the spoiler almost has a different shape. I'm almost done, but still need to spend a few hours. But it appears I was able to save another Original part for the car, and I hope I can install it back soon...
 -
 Bring a Trailer1972 Datsun 240ZBid for the chance to own a 1972 Datsun 240Z at auction with Bring a Trailer, the home of the best vintage and classic cars online. Lot #208,164.